Design a Neon Sign Restaurant Menu on a Brick Wall
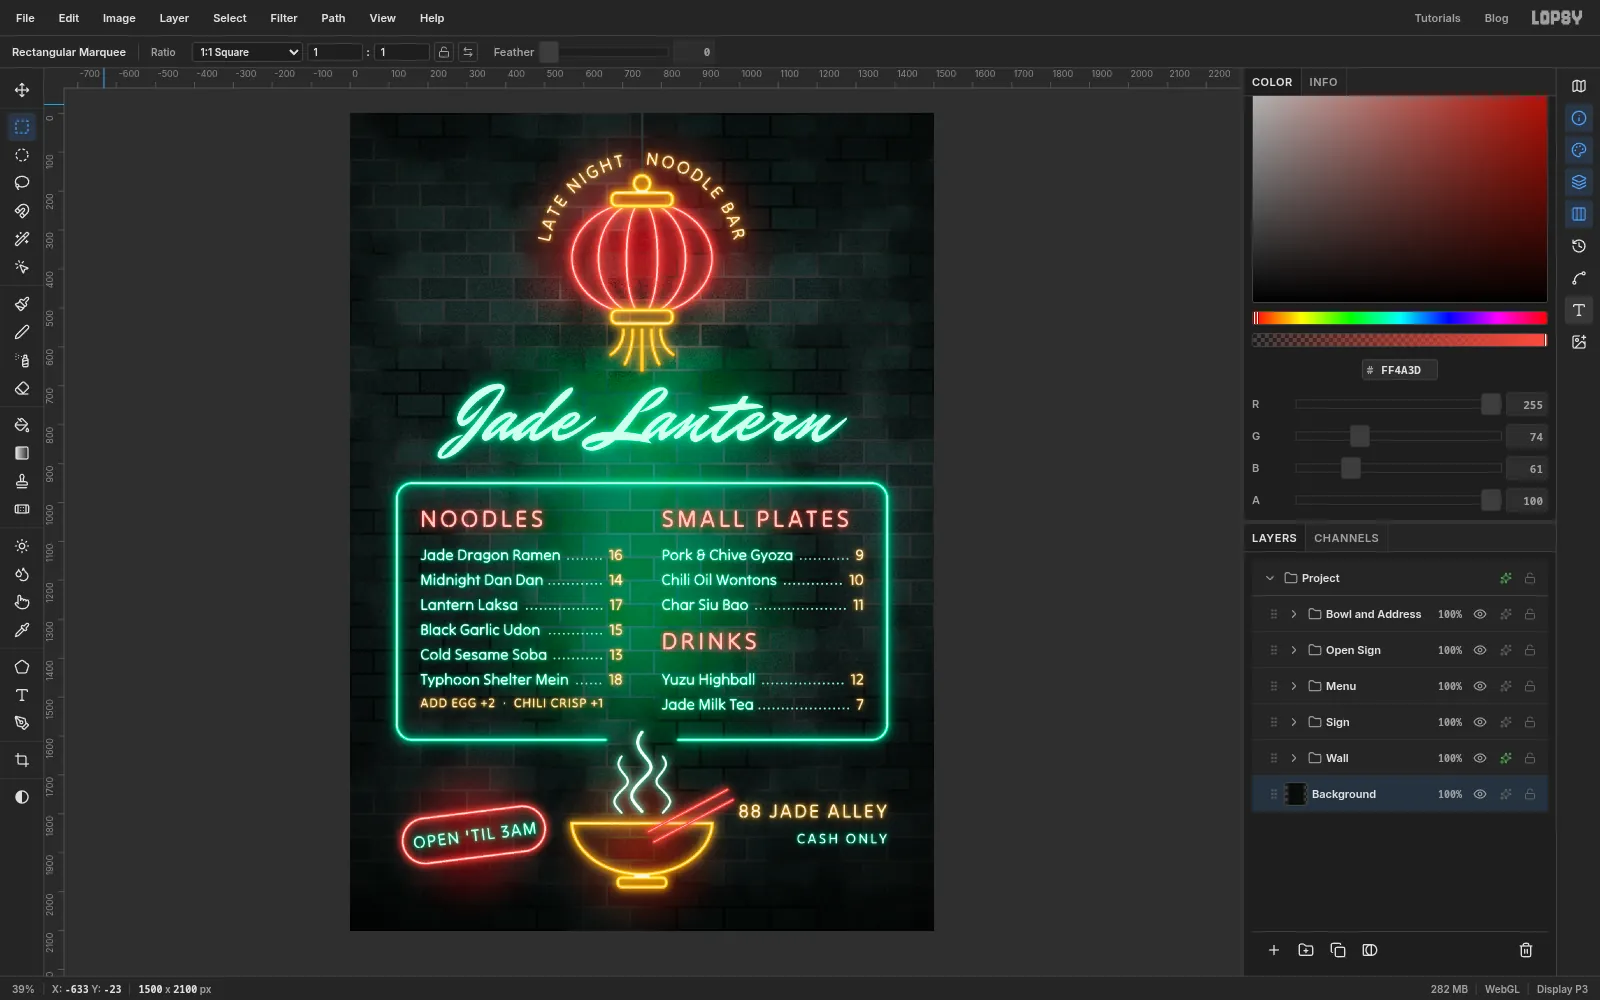
Draw a glowing neon noodle bar menu in Lopsy with a tiled brick wall, shape and pen tubes, a three-layer glow, text on a path and light spilling onto the wall.
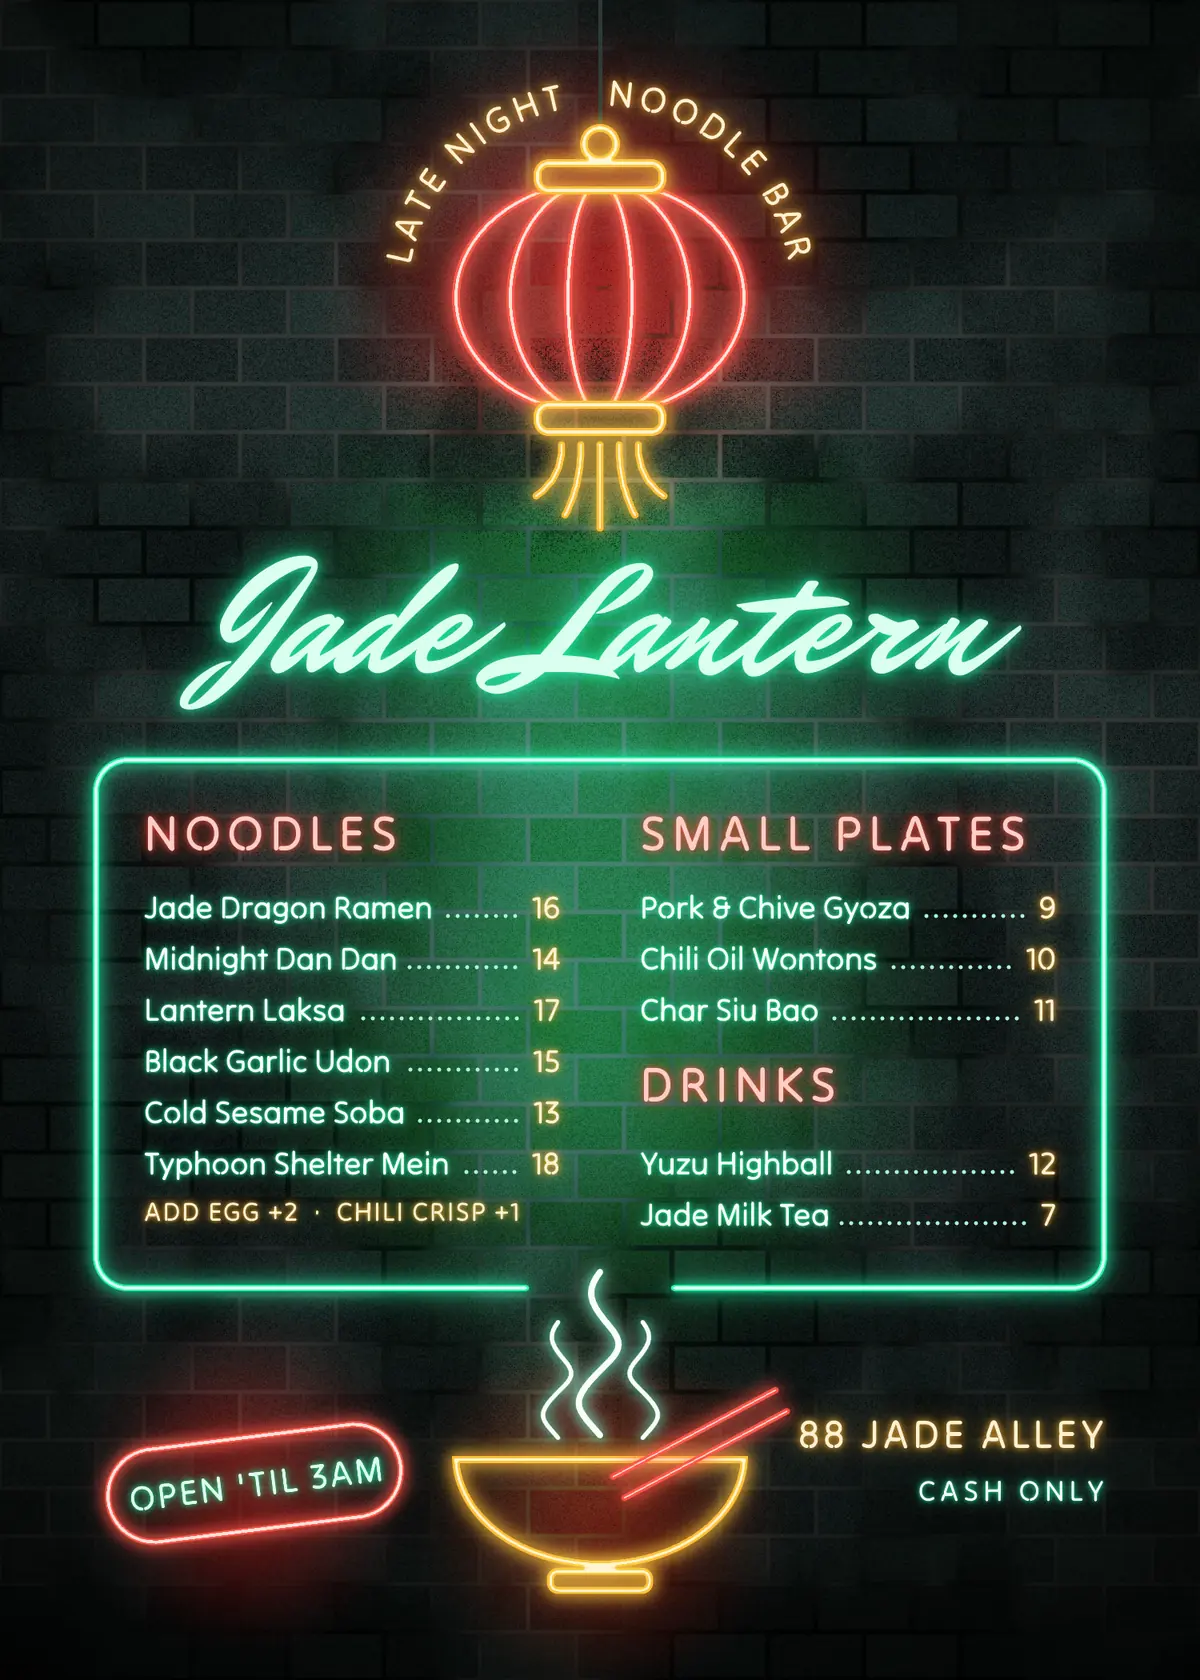
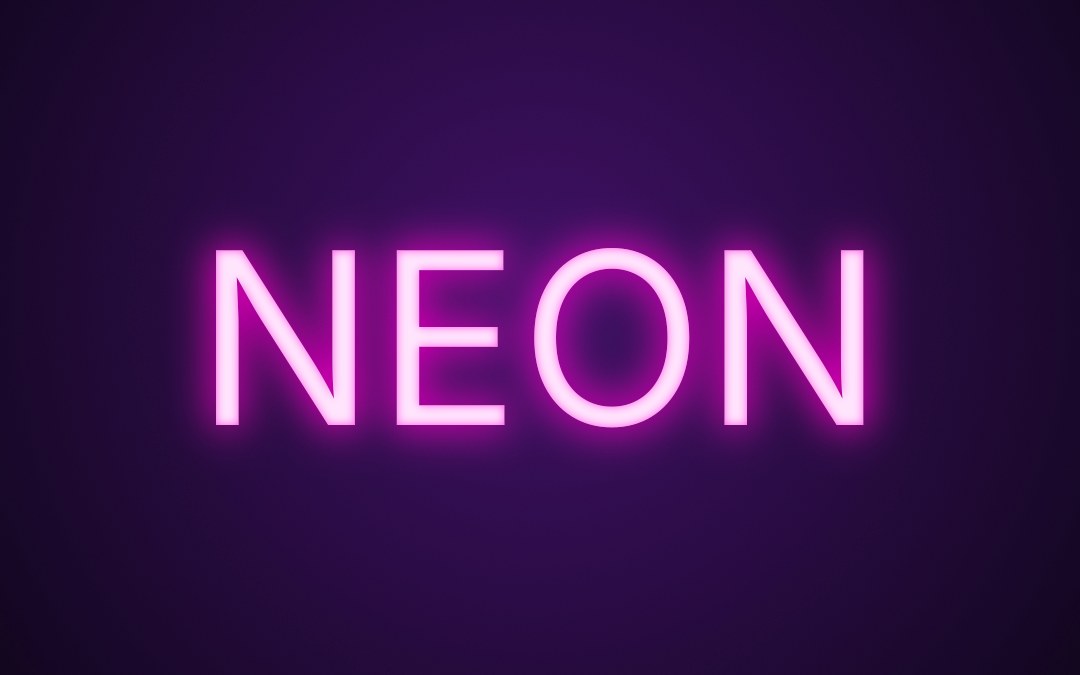
Neon is three things stacked up: a thin, almost white tube, a tight band of saturated colour around it, and a wide soft wash on whatever is behind. Get those three right and anything you draw looks like bent glass. This tutorial uses them on a menu for a made-up late-night noodle bar, Jade Lantern.
The whole thing is drawn in Lopsy. There are no photos: the wall is a brick you draw once and tile, and the sign is shapes, pen curves and live text.
Along the way you'll use:
- Define Pattern and Fill with Pattern for the wall, with the Texture and Clouds filters
- the Shape tool with a stroke and no fill, and the Pen tool, to draw tubes
- brush symmetry, Shift-click lines and a wide-spaced brush for dotted leaders
- Gaussian Blur, the Screen blend mode, Outer Glow and Select → Shrink for the glow
- text on a path, multi-line point text and right-aligned prices
- selections that add and subtract, Copy and Paste, and the Move tool's scale, flip and rotate handles
- a Color Dodge layer for light on the bricks, groups, and a group adjustment
The palette is three tube colours on a dark wall. Each tube colour has a pale "core" version for the hot centre of the glass:
-
Mortar
-
Bricks
-
Jade
-
jade core
-
Coral
-
coral core
-
Amber
-
amber core
-
Warm white
-
header pink
-
Leader dots
-
cord
New layers appear above whichever layer is selected, so each step says which layer to select first. It matters at the end, when the layers are grouped.
-
Fill the canvas with mortar
Open Lopsy. In the New Document dialog set Width to
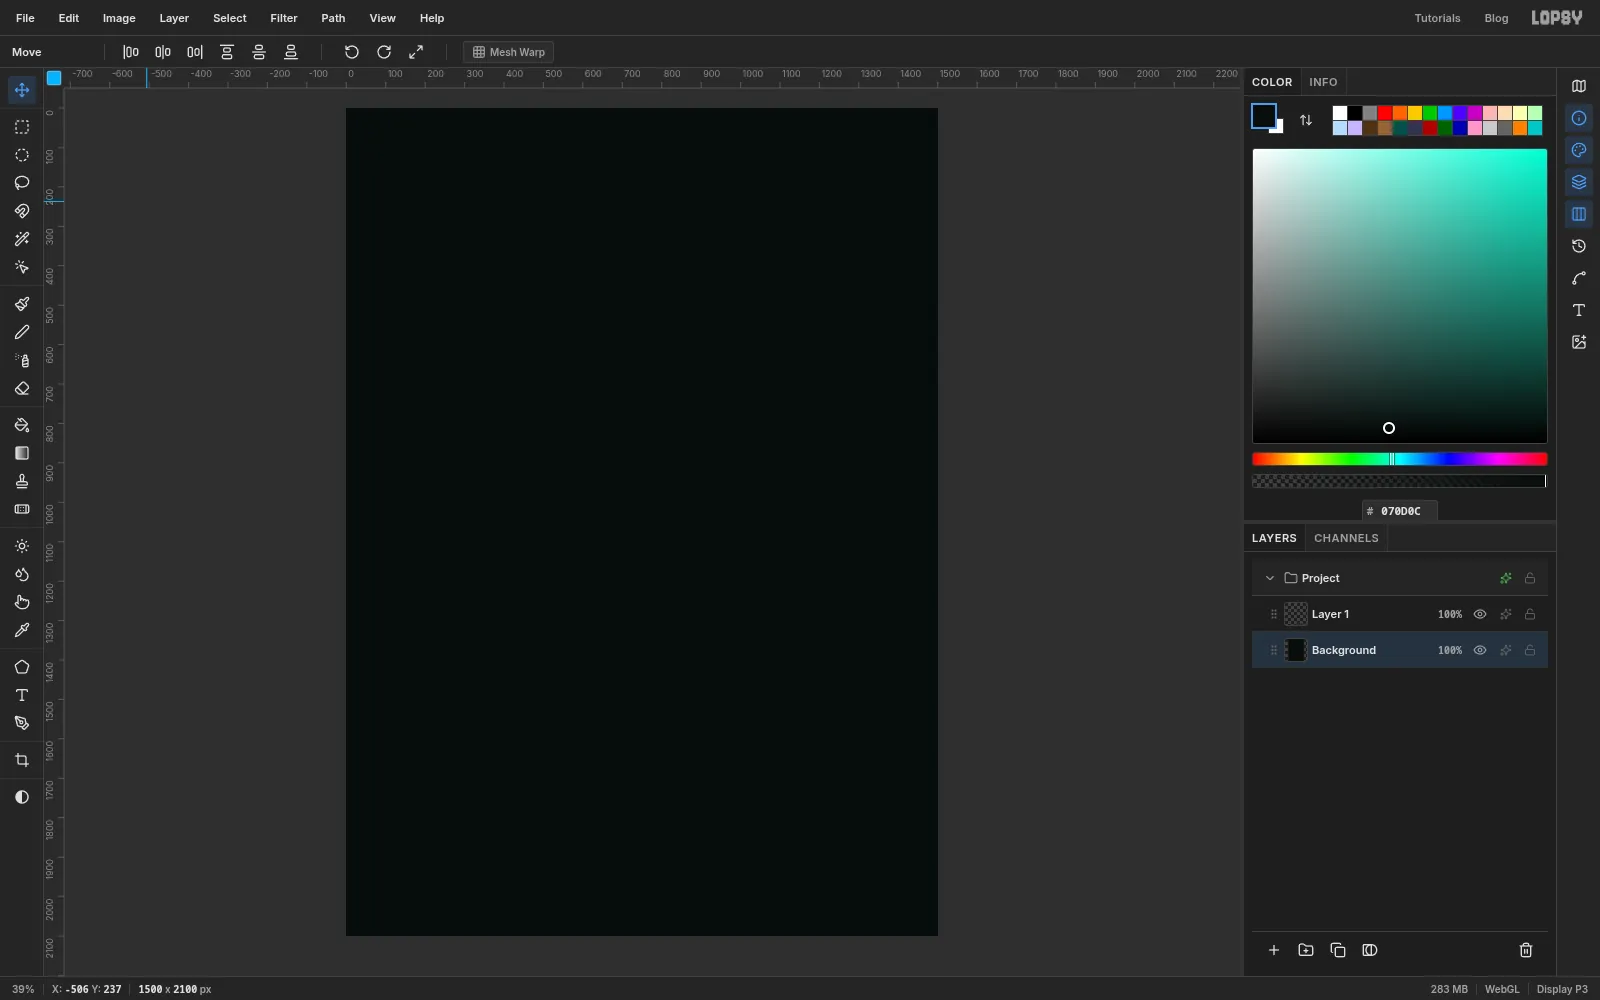
1500and Height to2100, then click Create.Select the Background layer, set the foreground colour to and choose Edit → Fill. This is the mortar. The bricks go on a layer above it, so the gaps between them show this colour through.
-
Draw one repeat of the brickwork
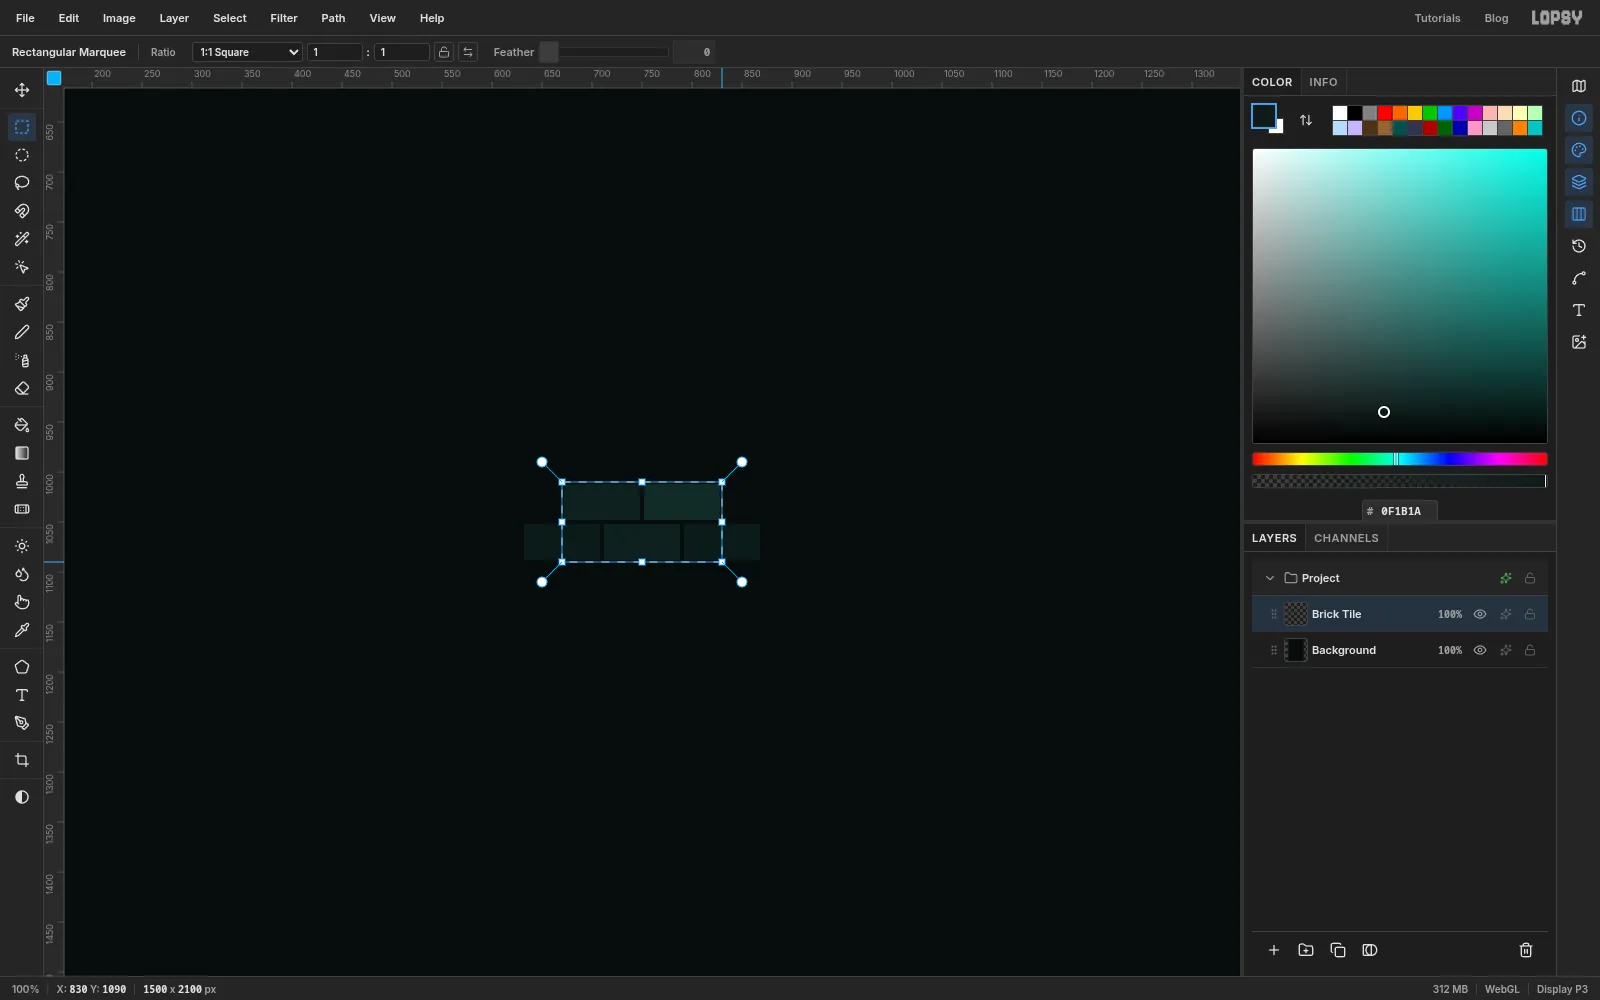
You only need to draw five bricks. Select Layer 1 and rename it Brick Tile, then choose View → Actual Size. Zoom in further if you like: the status bar shows the pointer's position, and here the sizes need to be right to the pixel or the wall will show seams.
- With the Rectangular Marquee, drag a box 76 px wide and 36 px tall near the middle of the canvas. Set the foreground to and choose Edit → Fill.
- Make a second box the same size, starting 4 px to the right of the first, and fill it with . That's the top course.
- For the course below, leave a 4 px gap and shift everything half a brick (40 px) to the left. Fill three bricks: , , . The two outer ones stick out past the top course, and they must be the same colour because they're the two halves of one brick.
- Drag a marquee 160 px wide and 80 px tall that starts 2 px left of and 2 px above the first brick. It cuts the outer bricks of the lower course in half.
- Choose Edit → Define Pattern, then press Cmd+D.
-
Tile the wall
The tile has done its job. Click Delete Layer to remove Brick Tile and choose View → Fit to Screen.
- Select Background, click Add Layer and name the new layer Bricks.
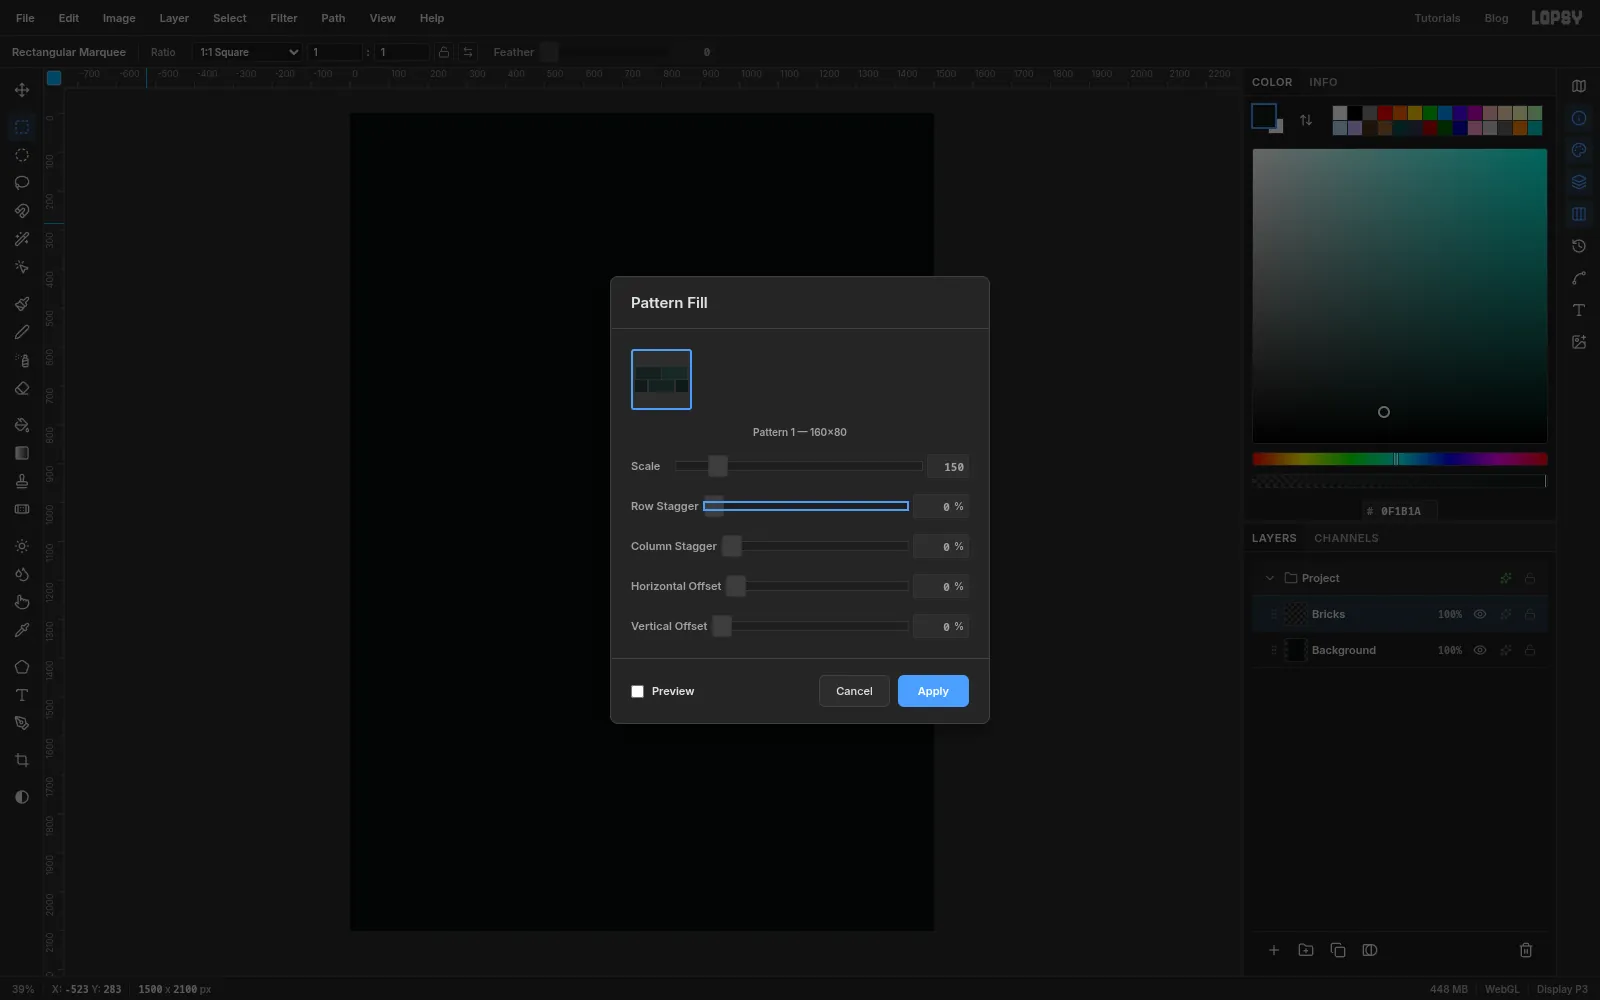
- Choose Edit → Fill with Pattern....
- Set Scale to
150so the bricks are a comfortable size for a wall this big, and click Apply.
-
Roughen the bricks and add grime
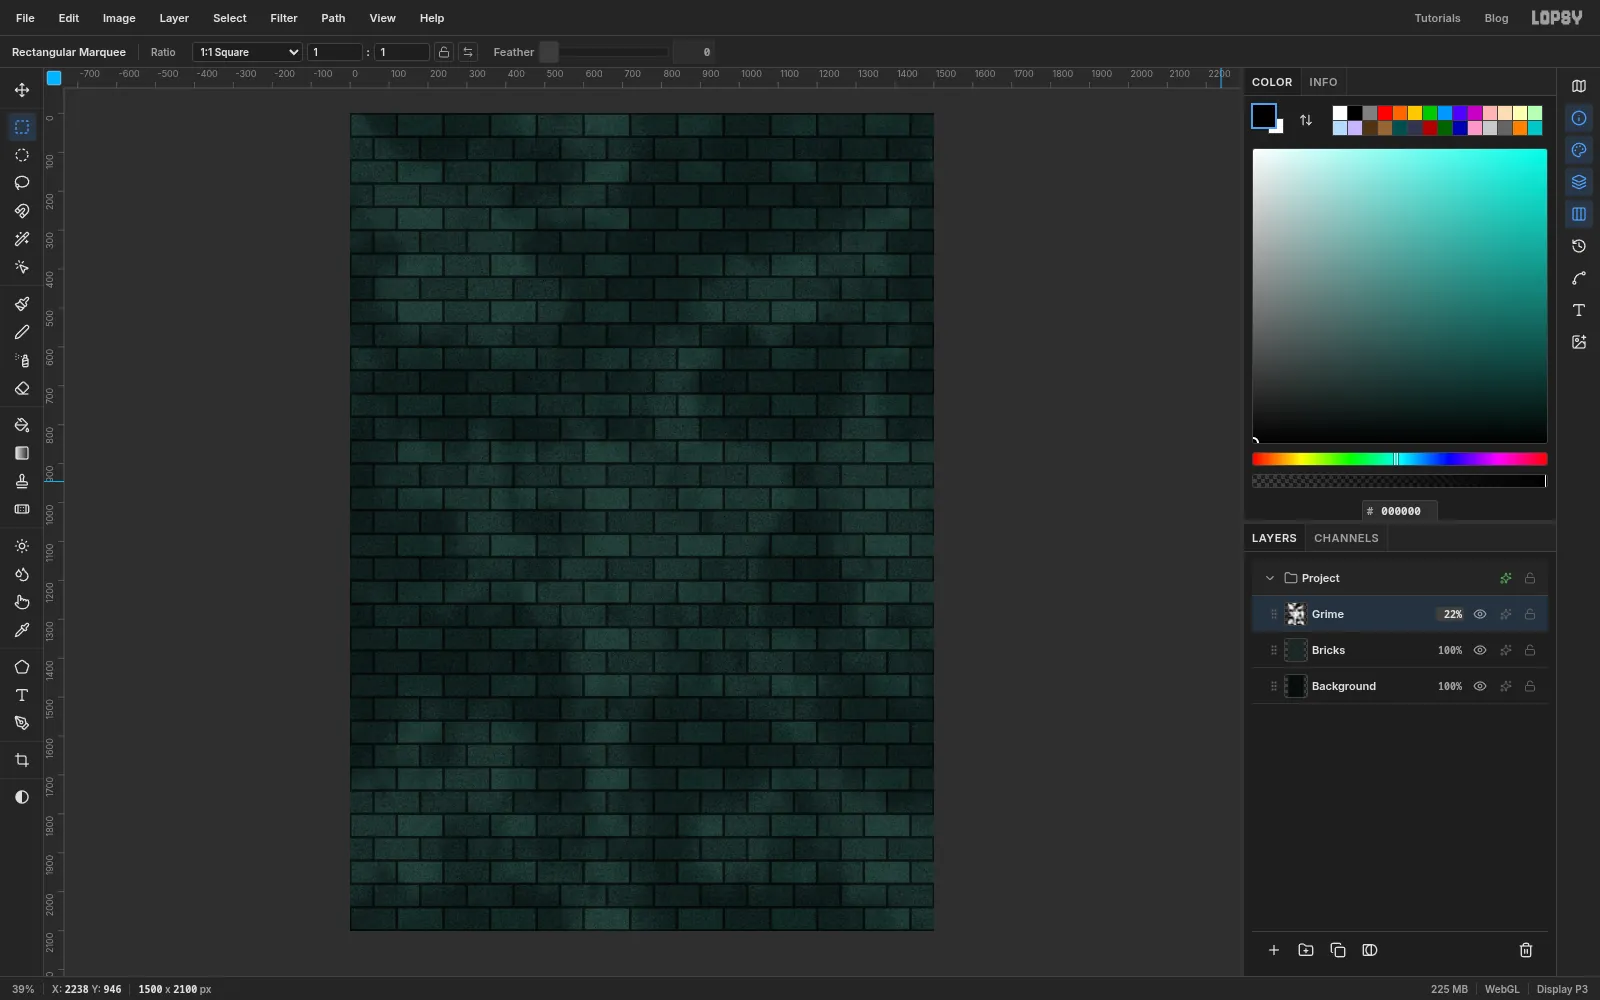
Flat bricks look like wallpaper. Two filters fix that.
- With Bricks selected, choose Filter → Texture.... Click Rough, set Amount to
12and Size to3, and click Apply. - Add a layer named Grime. Set the foreground colour to black and choose Filter → Clouds... with Scale at
9. - Open the layer's effects (the sparkle button on its row) and set the blend mode to Soft Light. Close the drawer and lower the layer's opacity to 22%.
Keep the grime faint. If you can see cloud shapes, it will read as smoke later, when the neon is on.
- With Bricks selected, choose Filter → Texture.... Click Rough, set Amount to
-
Darken the edges
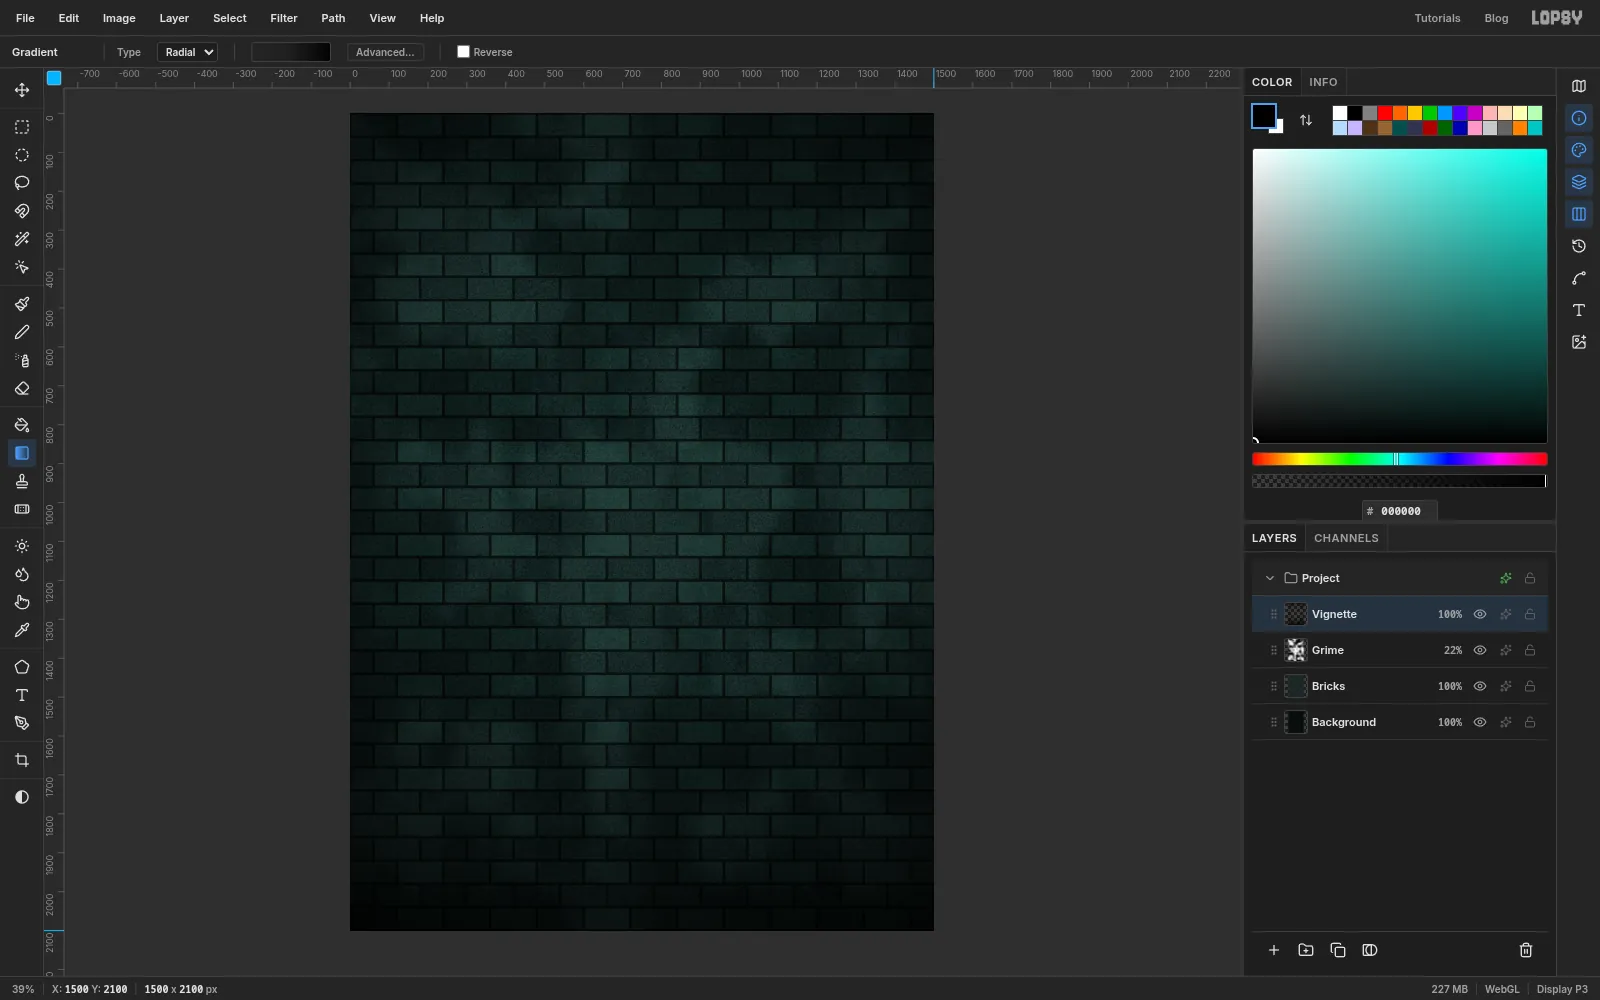
A sign is brightest in the middle of a dark wall. Add a layer named Vignette and choose the Gradient tool.
- Set Type to Radial and click Advanced... to open the Gradient Editor.
- Click the left stop under the bar. Type
000000in the hex field and click the far left of the opacity strip, so the stop is fully transparent. - Click the right stop, set it to
000000too, and leave its opacity nearly full, at about 90%. - Click the bar a little left of its middle to add a third stop. Make it
000000at about 15% opacity. Click Done. - Drag from a little above the middle of the canvas to the bottom-right corner.
The centre of the gradient is clear, so only the edges of the wall darken.
-
Drop the guides
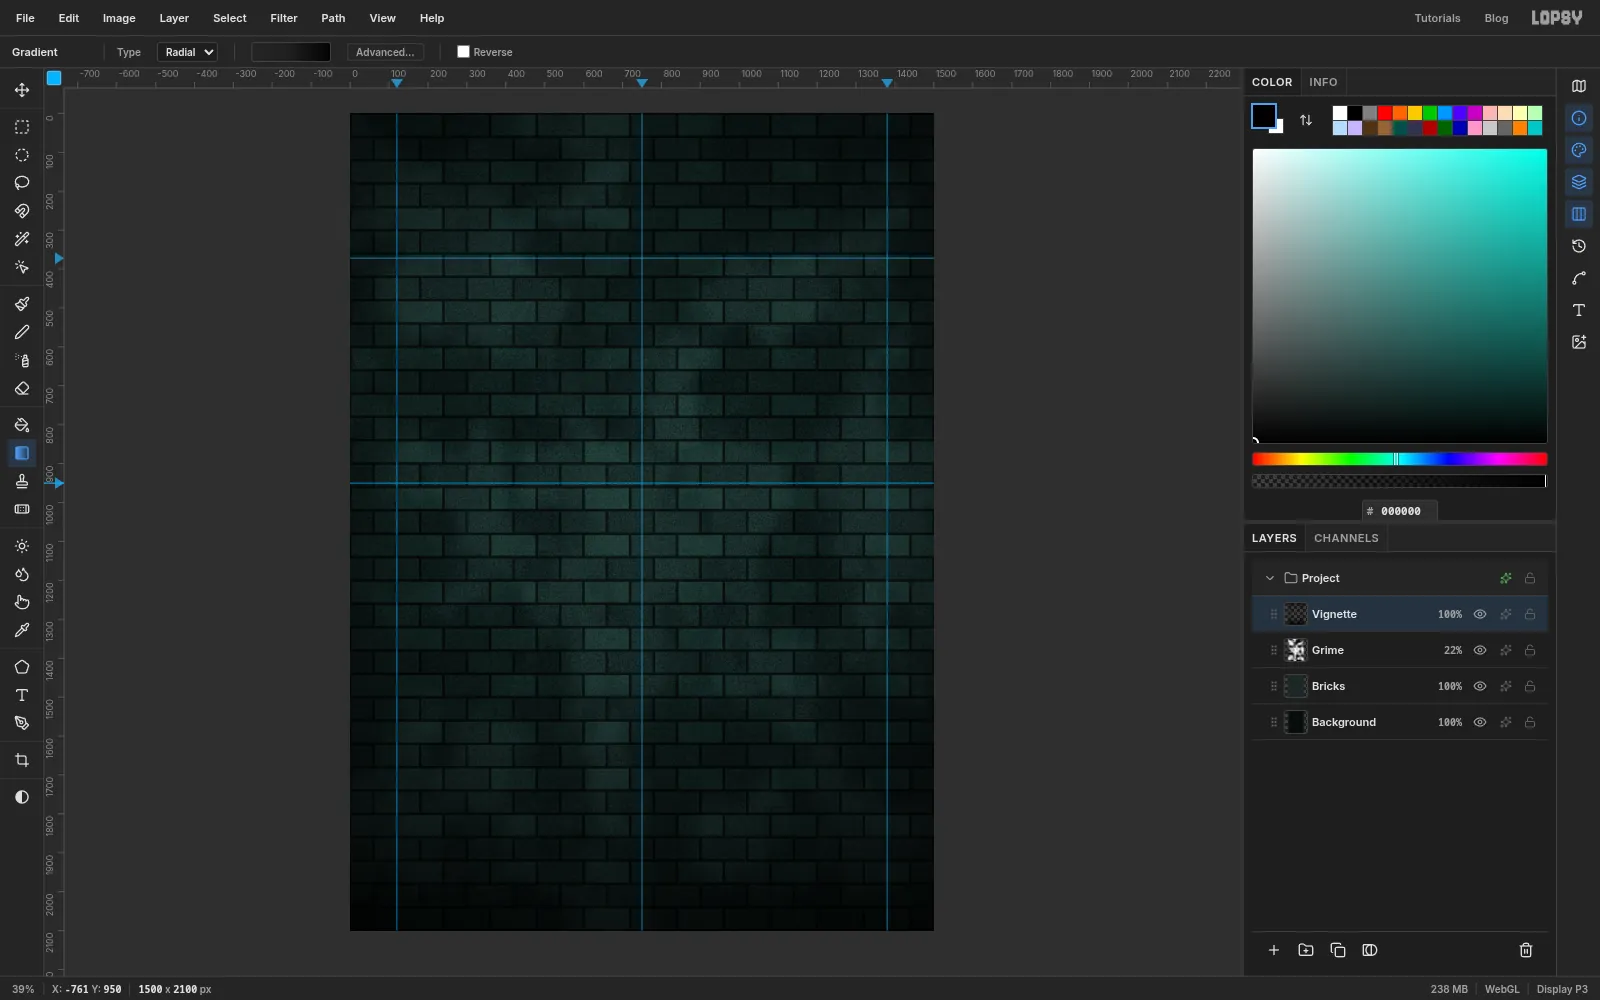
Click the top ruler at 120, 750 and 1380 for the two margins and the centre line. Click the left ruler at 372 and 950. The lantern hangs where the centre line crosses 372, and the menu frame starts at 950.
A label follows the pointer along the ruler, so you can see the position before you click.
-
Draw the lantern from three ellipses
Add a layer named Lantern Tubes and choose the Shape tool.
- Set Shape to Ellipse. Click the Fill swatch and choose Remove fill. Click the Stroke button and set the colour to , then set Width to
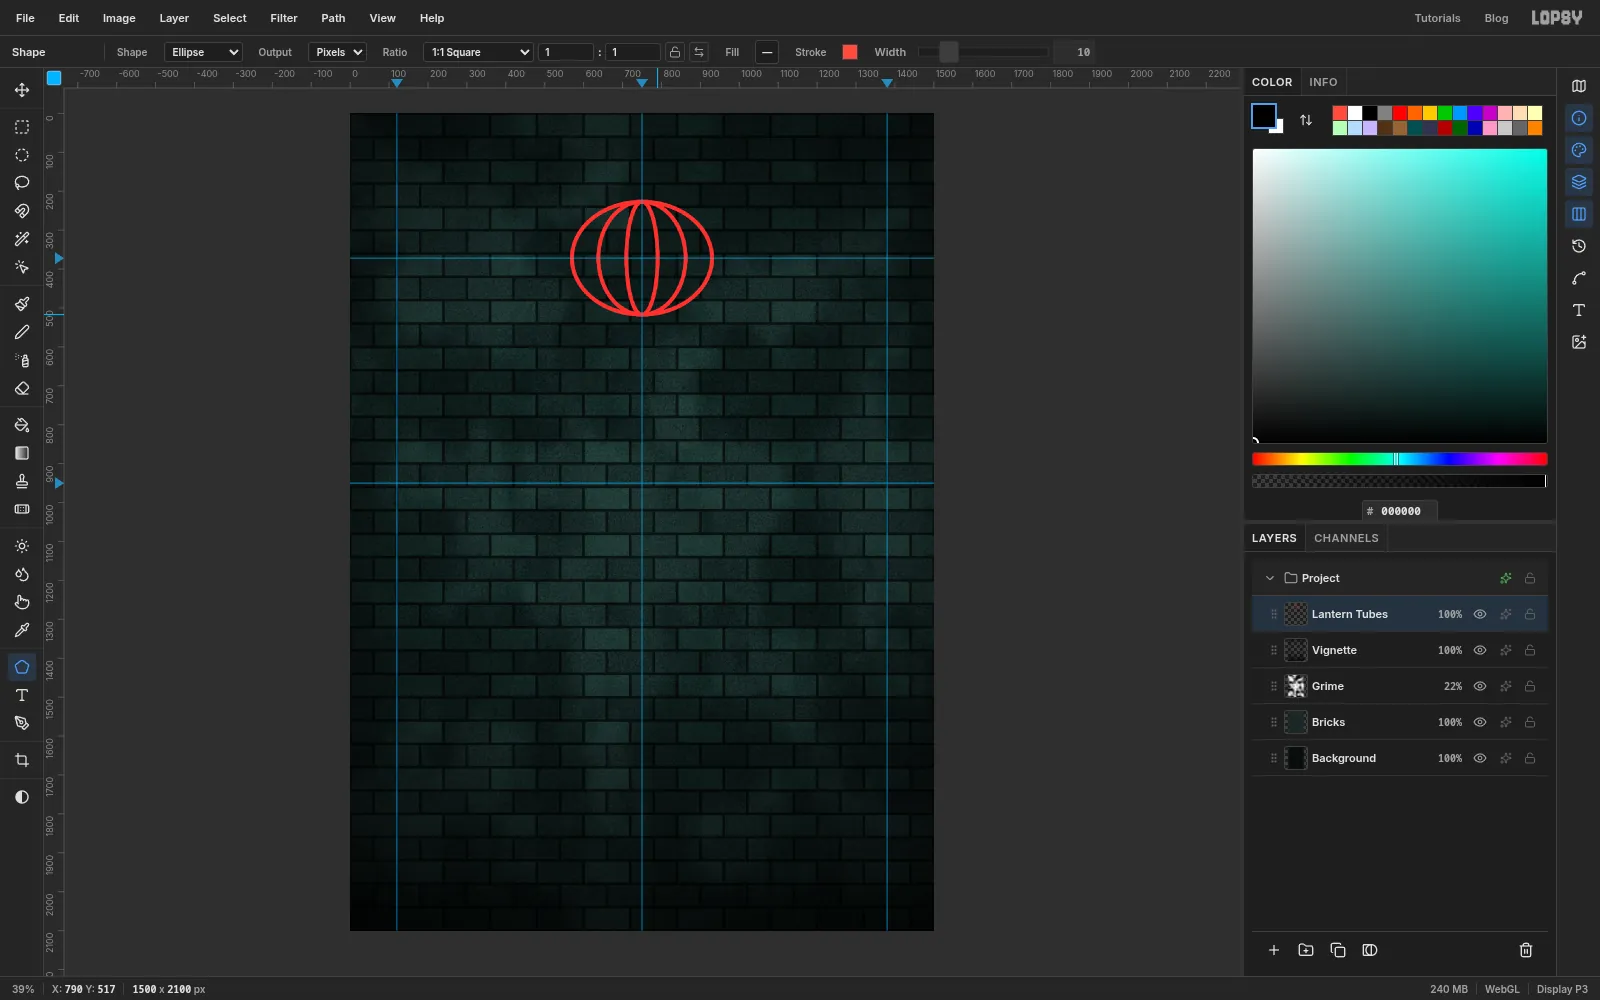
10. - Shapes grow from their centre. Press on the crossing of the centre guide and the 372 guide and drag down and to the right until the ellipse is about 360 px wide and 290 px tall.
- Press on the same crossing and drag out a narrower ellipse of the same height, about 225 px wide. Then a third, about 80 px wide.
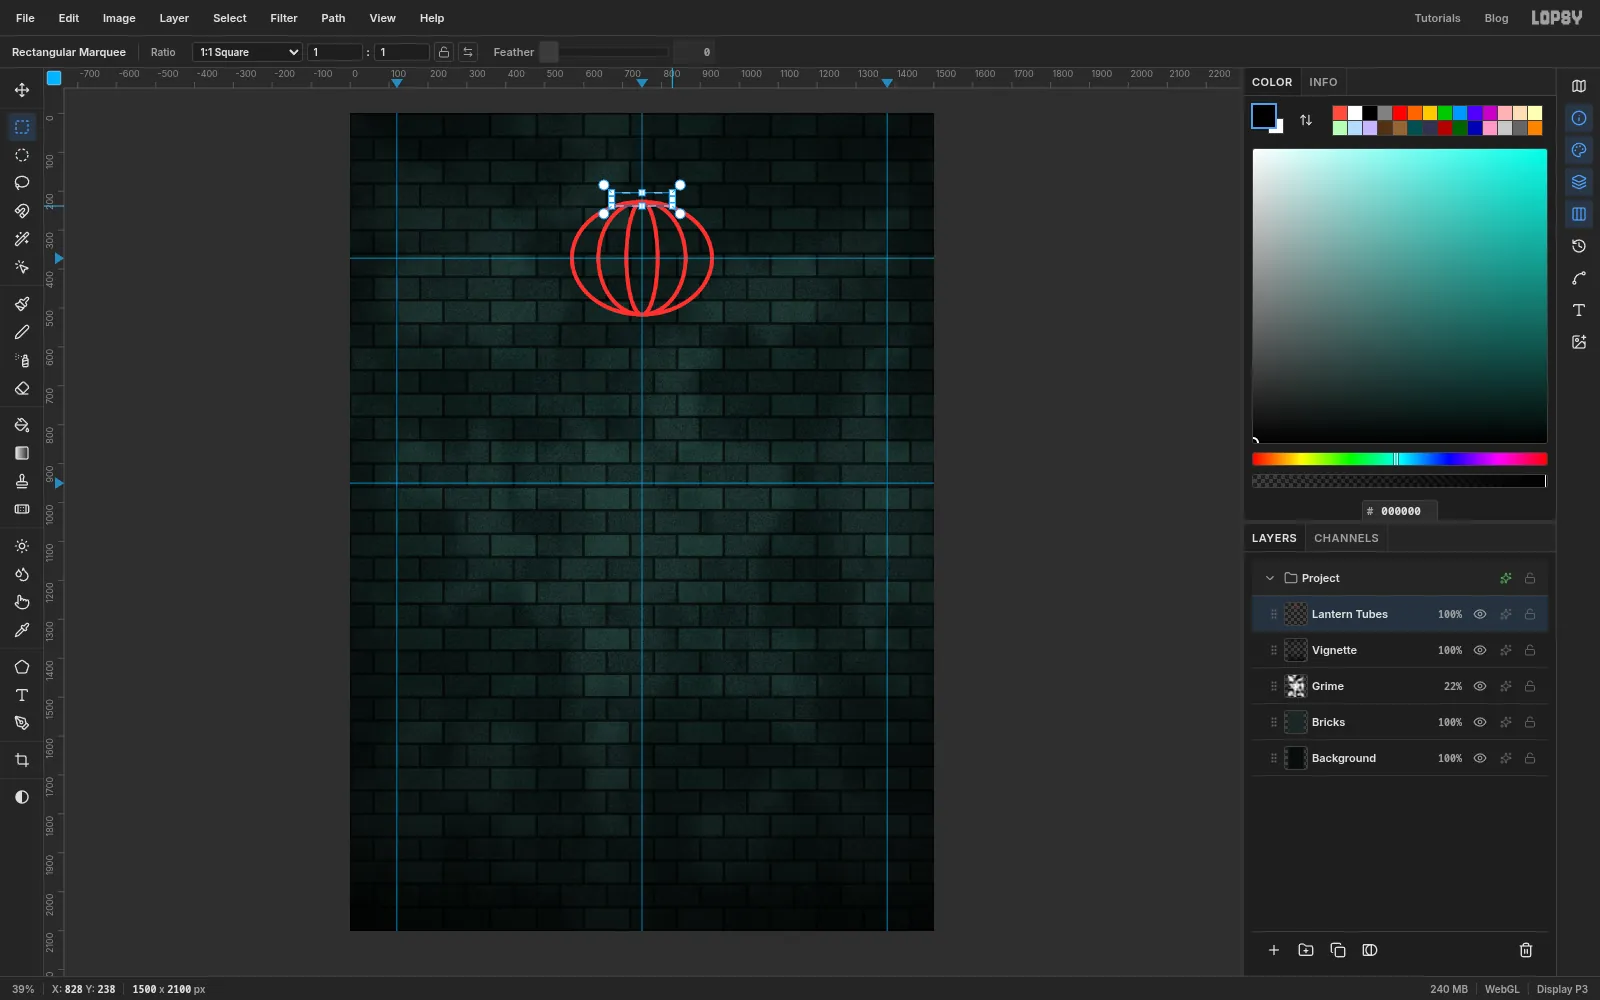
Three ellipses with one centre and one height read as the ribs of a round paper lantern.
- Set Shape to Ellipse. Click the Fill swatch and choose Remove fill. Click the Stroke button and set the colour to , then set Width to
-
Clear room for the collars
The ribs all meet at the top and bottom. A real lantern hides that under a collar, so cut the crossings away first.
- With the Rectangular Marquee, drag a box about 155 px wide and 35 px tall over the very top of the lantern, centred on the guide.
- Press Delete.
- Do the same at the bottom, then press Cmd+D.
-
Add the collars, the hook and the cord
Add a layer named Lantern Collars.
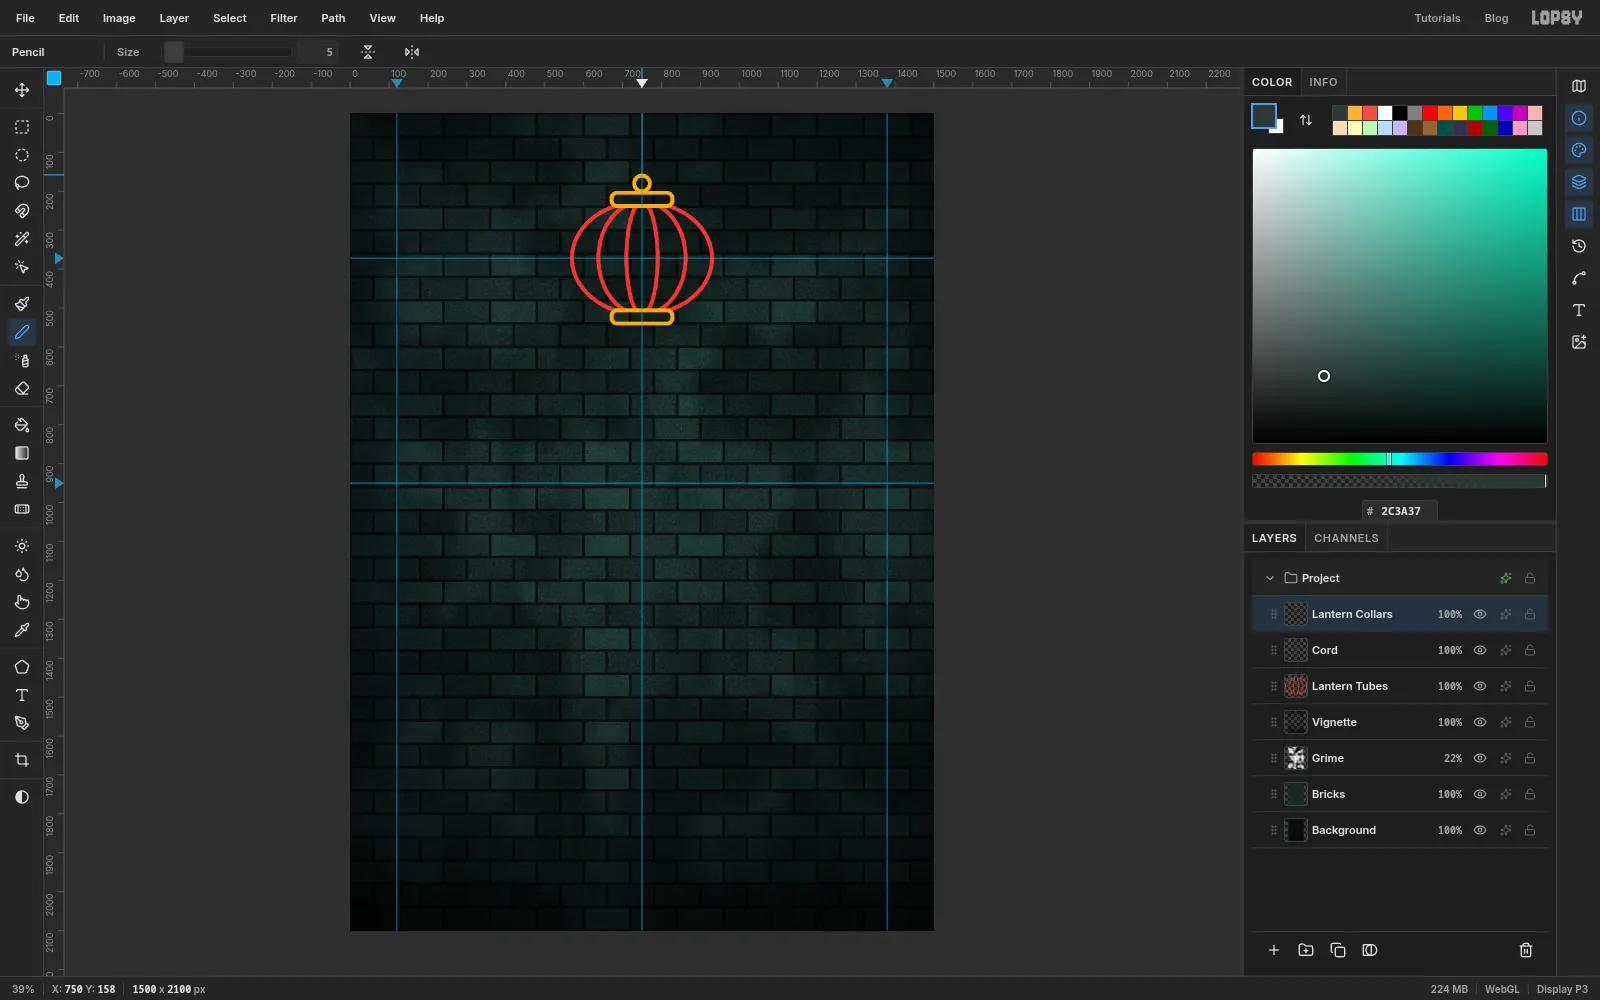
- In the Shape tool set Shape to Rectangle, Corner Radius to
14and the stroke colour to . - Drag from the middle of the top gap until the rounded box covers it. Repeat on the bottom gap.
- Switch Shape back to Ellipse. Hold Cmd and drag a small ring, about 40 px across, sitting just above the top collar.
- Select Lantern Tubes and add a layer named Cord. Choose the Pencil, set Size to
5and the colour to . Click the centre guide at the top edge of the canvas, then Shift-click at the top of the ring.
The cord runs along the centre guide, so you won't see much of it until the guides are hidden. It stays unlit: it's the one thing on the wall that isn't glass.
- In the Shape tool set Shape to Rectangle, Corner Radius to
-
Paint the tassel with symmetry
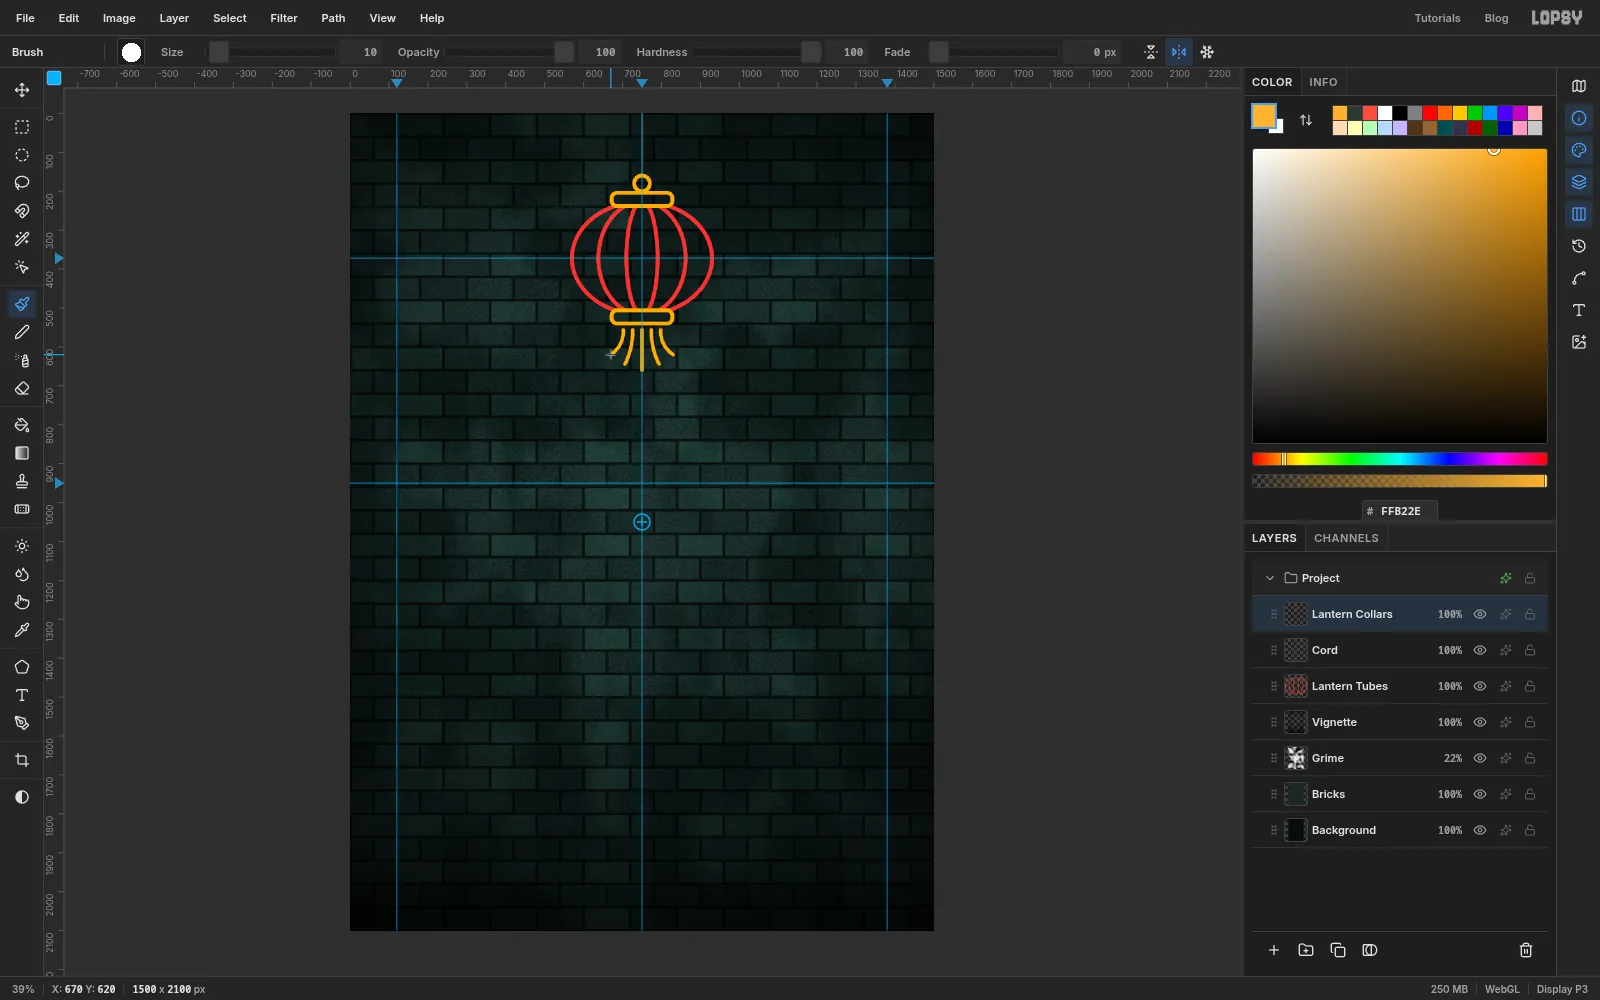
Select Lantern Collars again and choose the Brush. Click Open brush presets and set Size to
10, Hardness to100and Spacing to5, then close the window. Set the colour to .- Click on the centre guide just under the bottom collar, then Shift-click about 100 px below it. That's the middle strand.
- Turn on Symmetry Vertical in the options bar.
- Starting a little left of the middle strand, paint a strand that drops straight and then curls outwards. Its mirror image appears on the right as you paint.
- Paint a shorter one further out, then turn symmetry off again.
-
Start the glow with a blurred copy
Now the neon. Every tube in this piece gets the same three steps, so it's worth doing slowly once.
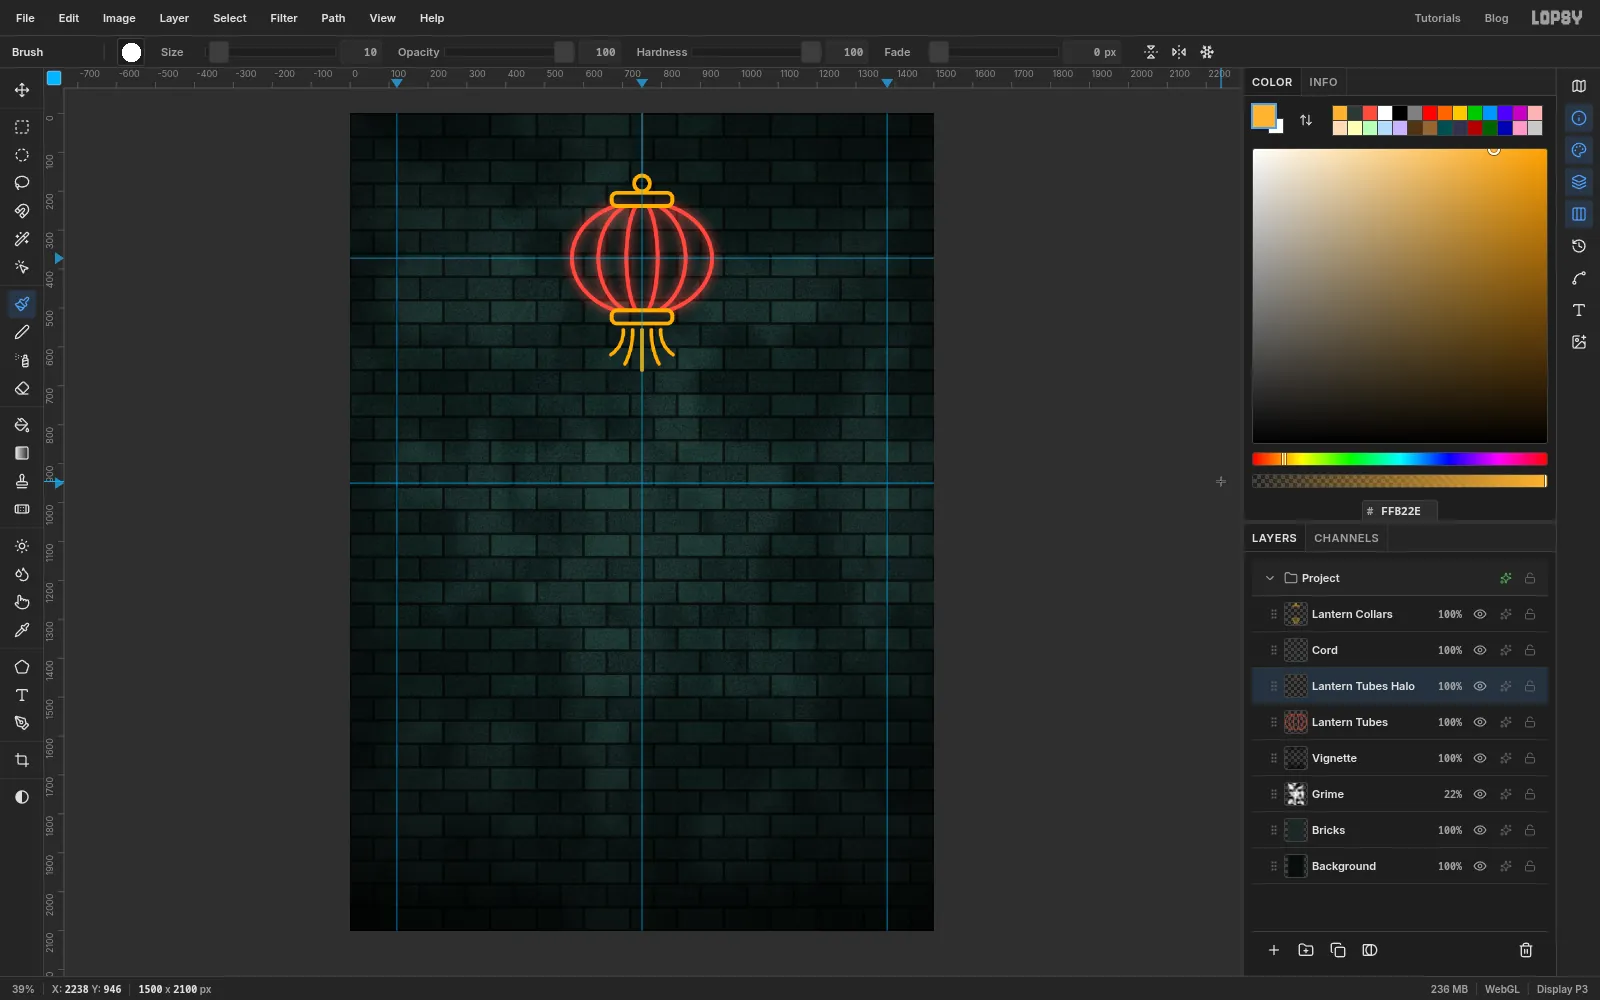
- Select Lantern Tubes and choose Layer → Duplicate Layer. Rename the copy Lantern Tubes Halo.
- Choose Filter → Gaussian Blur..., set Radius to
40and click Apply. - Open the layer's effects and set the blend mode to Screen.
This is the wide wash, the light that reaches the wall.
-
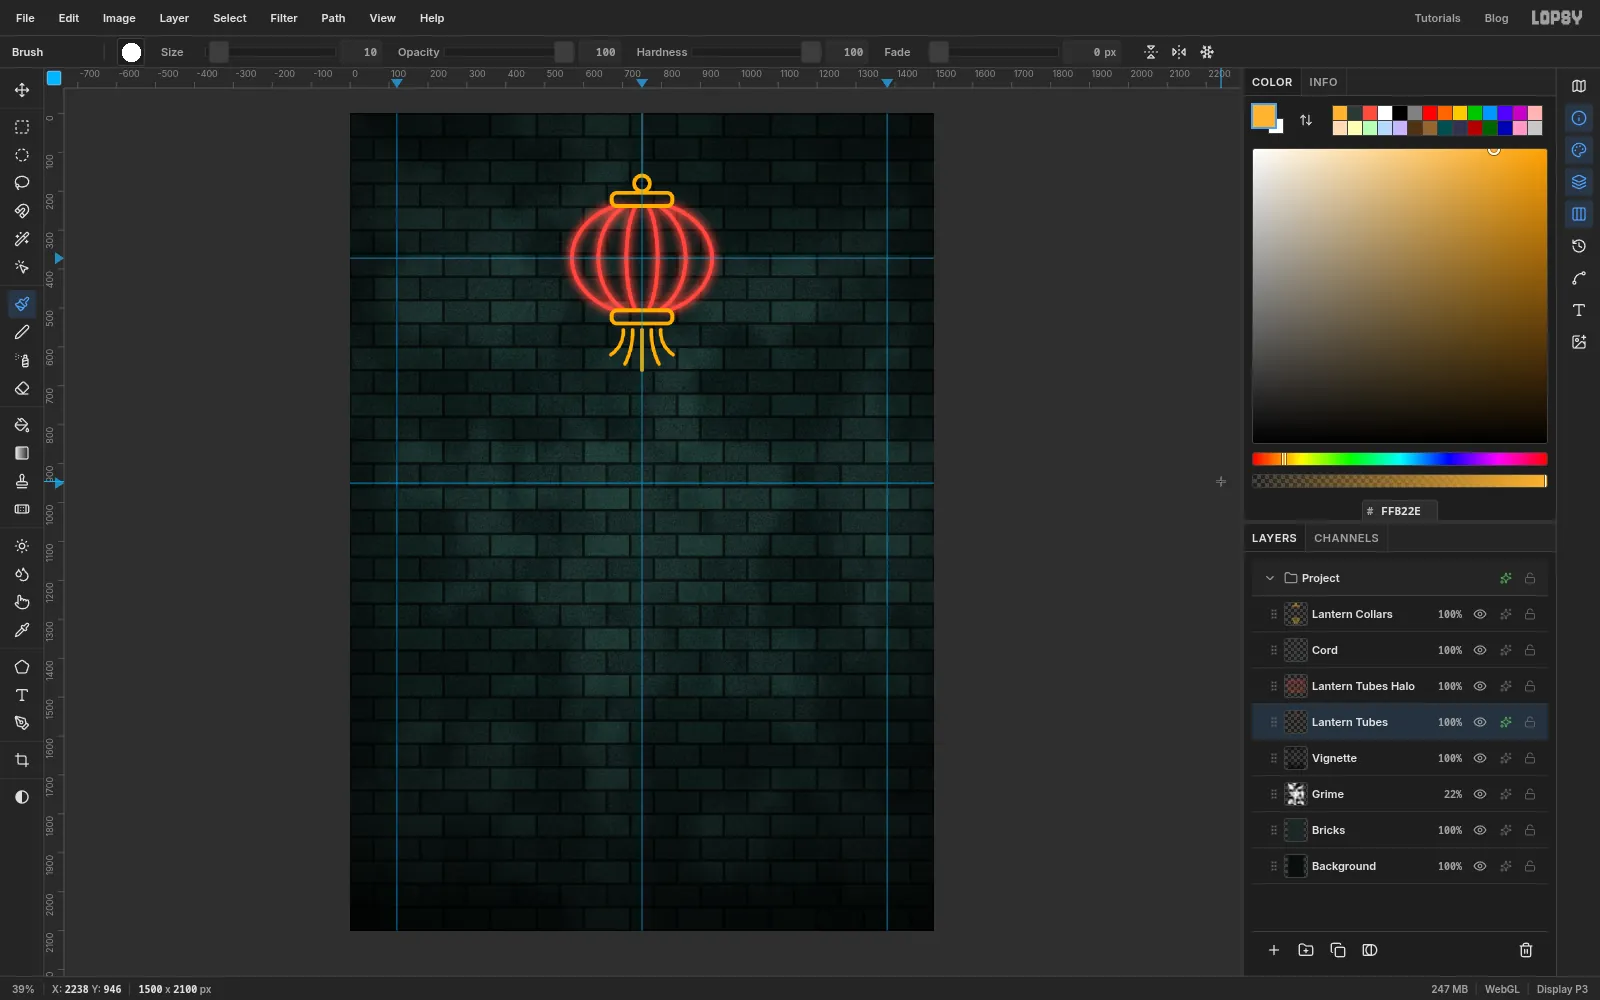
Add the tight glow
Select Lantern Tubes itself and open its effects.
- Tick Outer Glow.
- Set the glow colour to , Size to
26, Spread to6and Opacity to90.
Close the drawer. This is the band of pure colour right next to the glass.
-
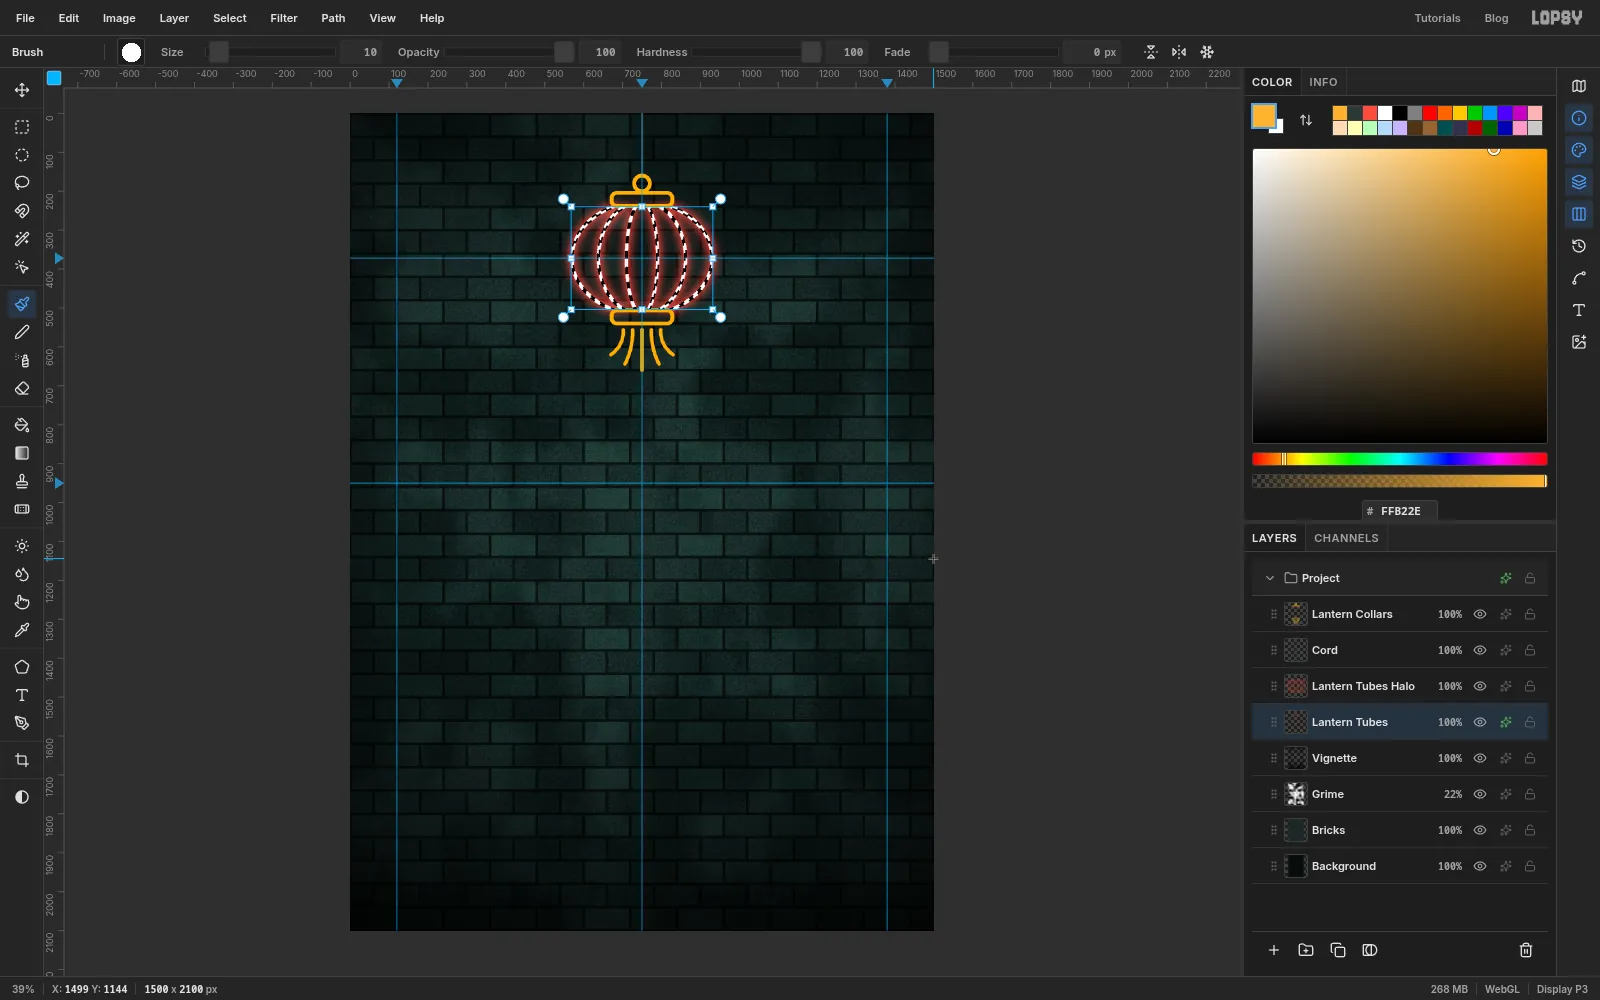
Put a hot core down the middle
The centre of a lit tube is nearly white.
- Hold Cmd and click the Lantern Tubes thumbnail to select its pixels.
- Choose Select → Shrink…, set the amount to
3and click Apply. The selection is now a thin line down the middle of each tube. - Add a layer named Lantern Tubes Core, set the foreground to and choose Edit → Fill.
- Press Cmd+D.
-
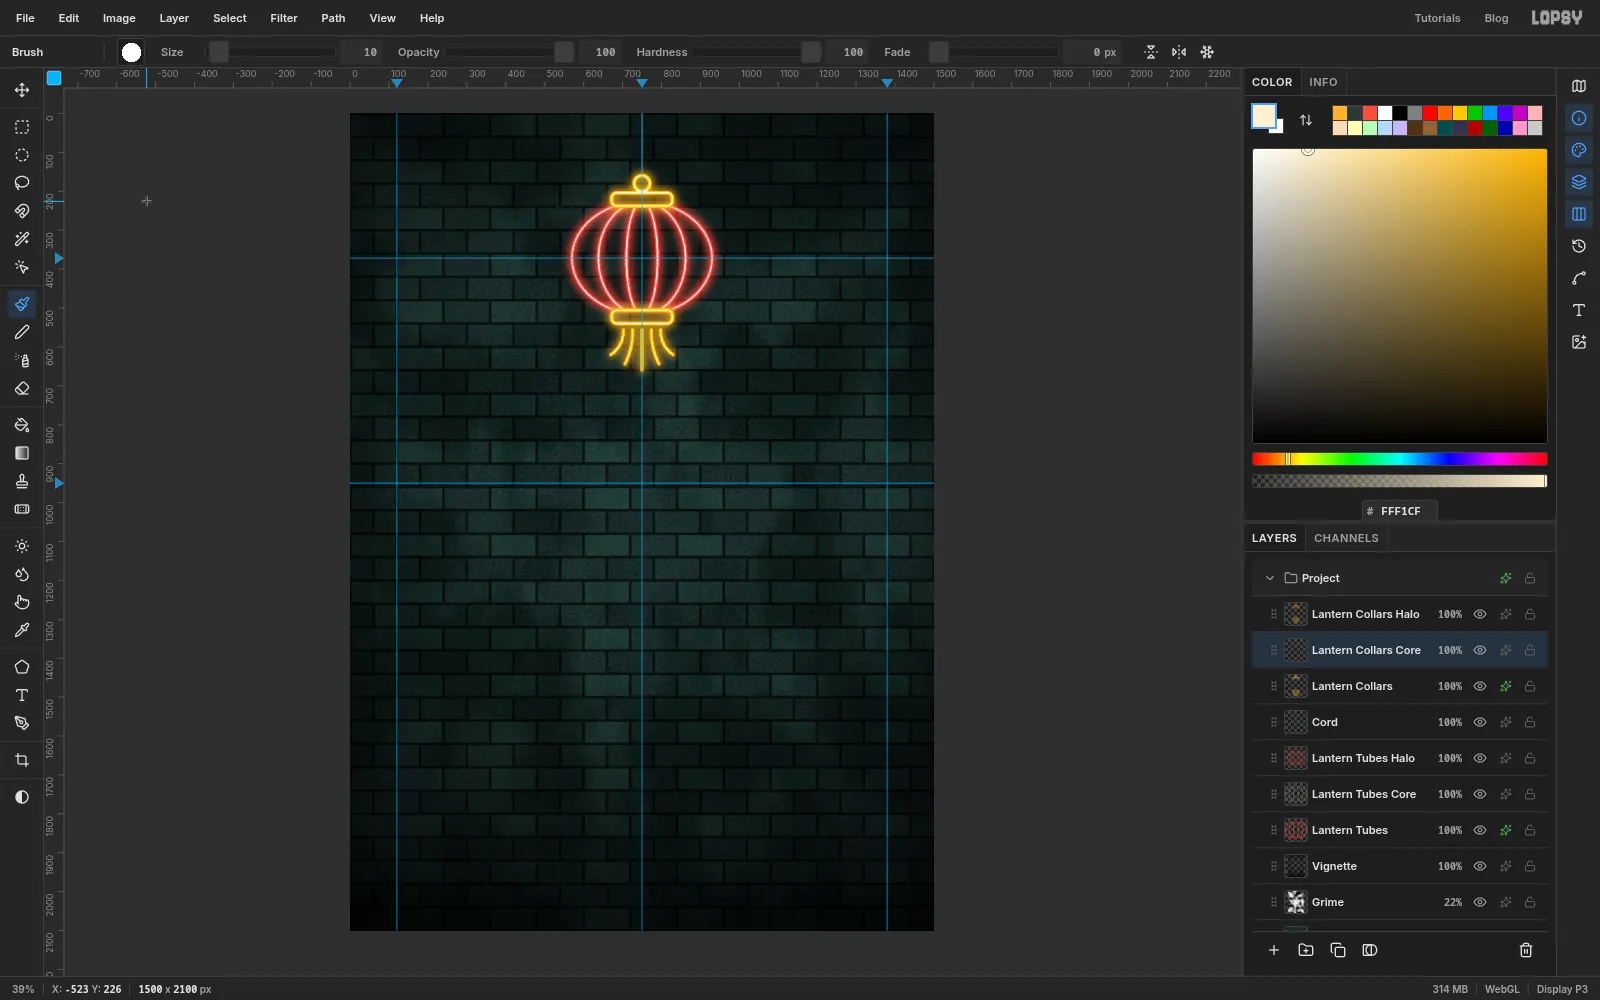
Light the collars the same way
Repeat the three steps on Lantern Collars, in the same order:
- Duplicate it, rename the copy Lantern Collars Halo, blur it by
40and set it to Screen. - On Lantern Collars, tick Outer Glow with the colour , Size
26, Spread6and Opacity90. - Cmd-click its thumbnail, shrink the selection by
3, add a layer named Lantern Collars Core and fill it with .
Make the copy before you add the Outer Glow, so the halo is a plain blur of the bare tube.
- Duplicate it, rename the copy Lantern Collars Halo, blur it by
-
Draw an arch with the Pen tool
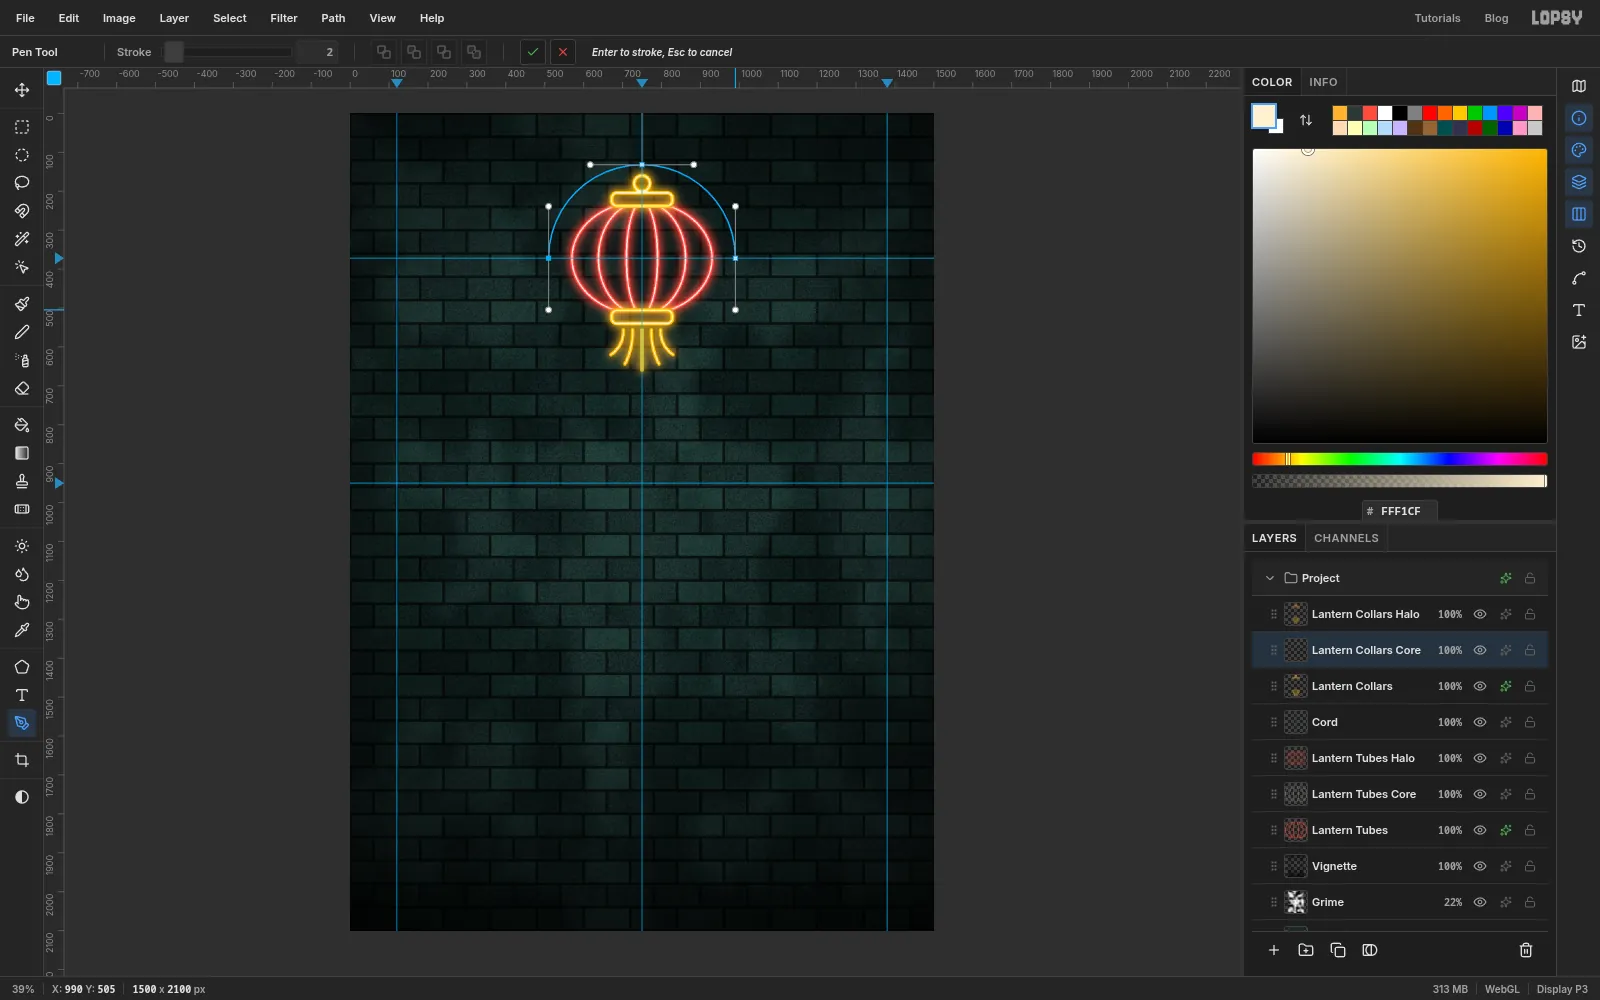
The tagline will curve over the lantern, so it needs a path to sit on: half a circle with the lantern at its centre. Choose the Pen tool.
- Press on the 372 guide a little outside the lantern's left edge, about a third of the lantern's width away from it. Drag straight up until the pointer is level with the top collar, then let go. Dragging pulls out curve handles.
- Press on the centre guide above the ring, leaving about as much room over the ring as you left beside the lantern. Drag to the right by the same amount you dragged up.
- Press on the 372 guide to the right of the lantern, mirroring the first anchor, and drag straight down.
- Click the ✓ Commit path button in the options bar.
Don't press Enter here. With the Pen tool that strokes the path with paint, and this path is only a guide for the text.
The blue outline stays on screen while the path is selected. It never exports. To hide it, open the Paths panel and click the path's row.
-
Set the tagline on the arch
Select Lantern Collars Halo, the top layer, then choose the Text tool.
- Set Size to
46, pick Tilt Neon in the font list and set the colour to . - Click anywhere on an empty bit of wall and type
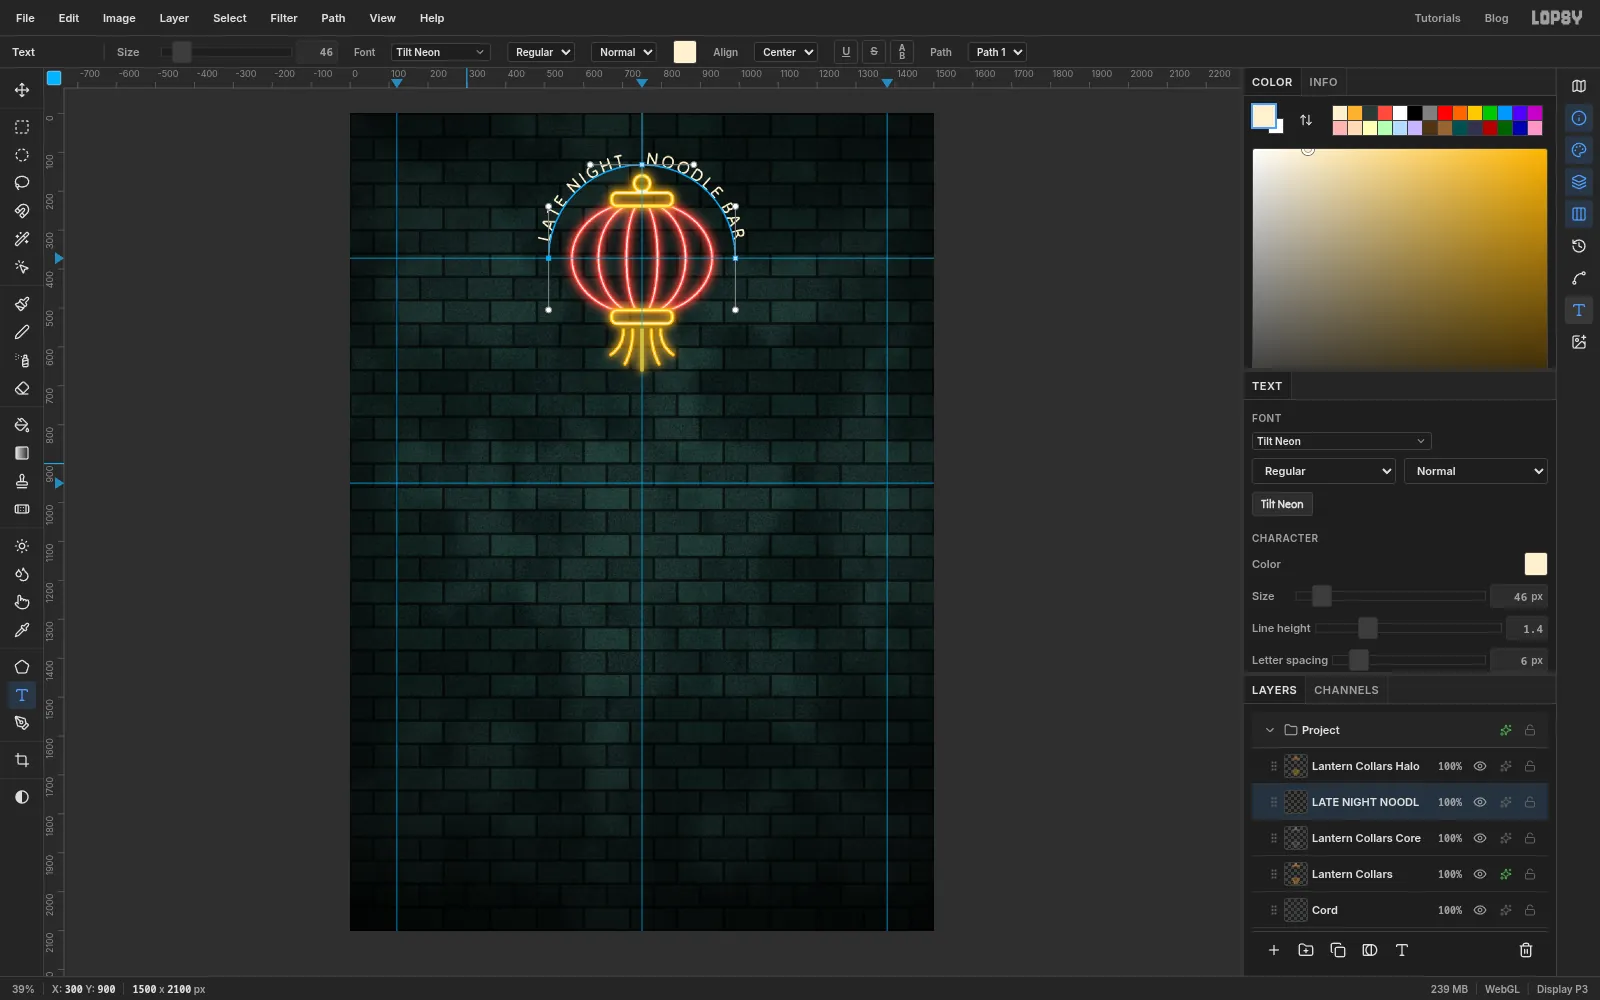
LATE NIGHT NOODLE BAR, with three spaces in the middle. - In the options bar set Path to Path 1 and Align to Center. The text jumps onto the arch.
- Press Tab to commit, then open the Text panel and set Letter spacing to
6. Rename the layer Tagline.
The three spaces leave a gap at the top of the arch for the cord.
- Set Size to
-
Light the tagline
Text stays editable, so it gets its glow from two effects instead of extra layers. Open the Tagline layer's effects:
- Tick Outer Glow: colour , Size
14, Spread4, Opacity95. - Tick Drop Shadow: colour , Offset X and Offset Y
0, Blur46, Opacity80.
A shadow with no offset is just a second, wider glow. The pale text colour is the core.
Every piece of type from here on gets this same pair. Only the colour and two numbers change, so the steps give them as "glow
14/46": the Outer Glow Size first, then the Drop Shadow Blur. Keep Spread at4, the Outer Glow's Opacity at95, both offsets at0and the shadow's Opacity at80.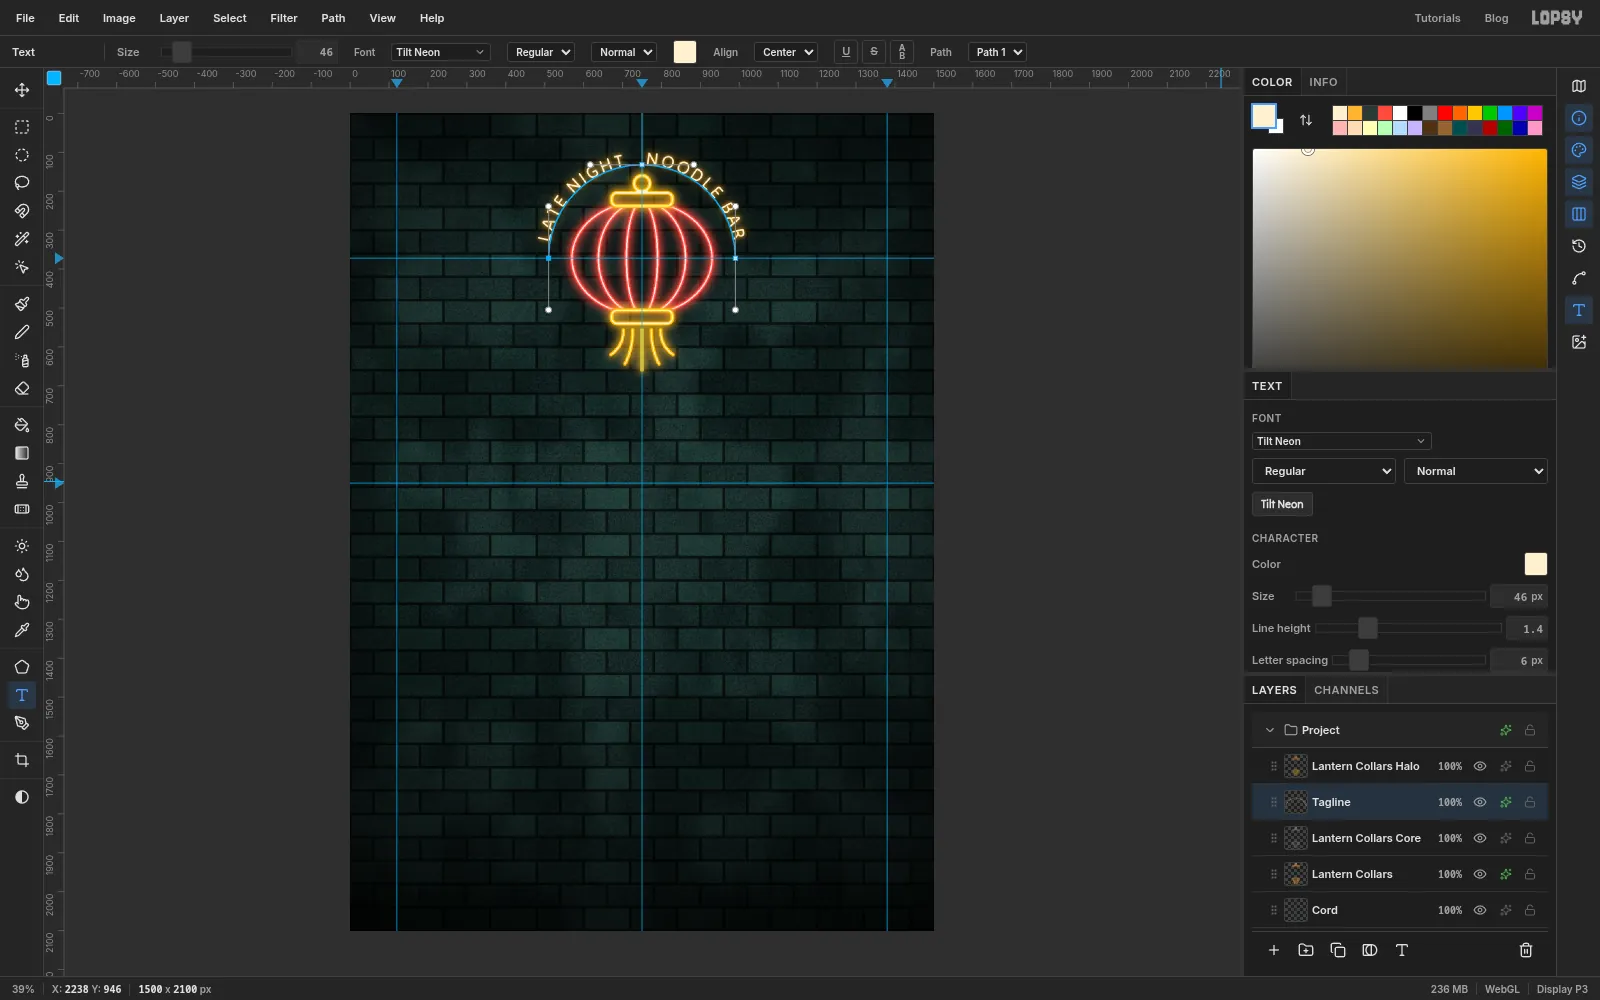
- Tick Outer Glow: colour , Size
-
Type the name
Select Lantern Collars Halo again before you pick up the Text tool.
- In the Text tool set Size to
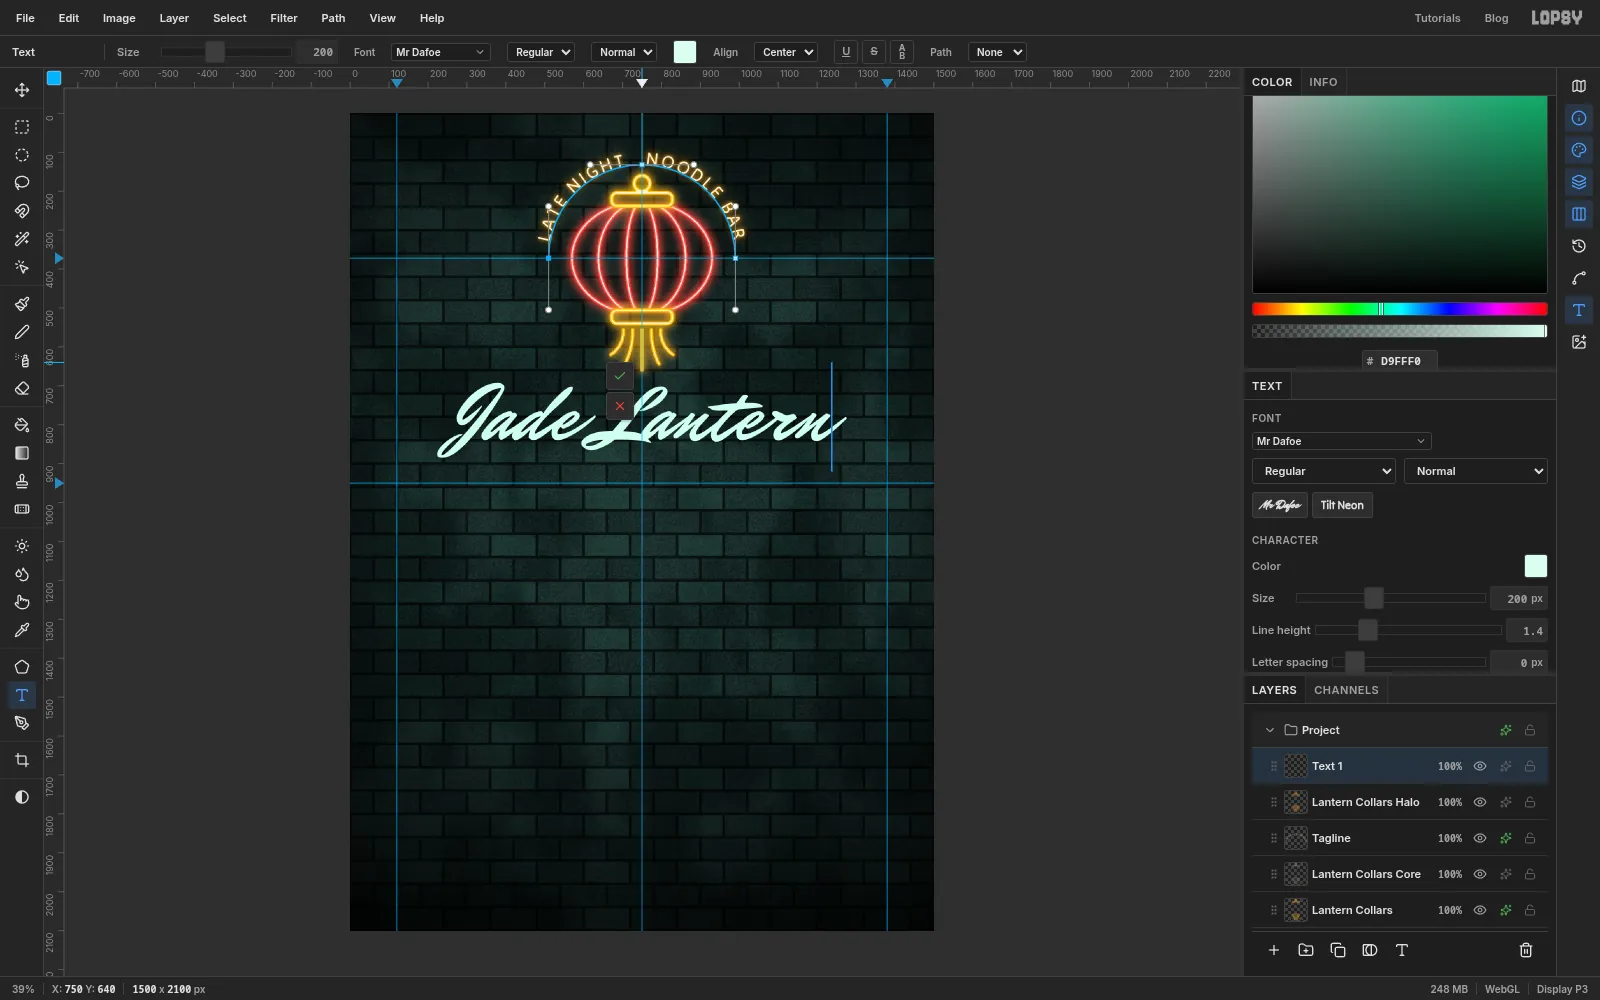
200, the font to Mr Dafoe and the colour to . In the Text panel set Letter spacing back to0, or the script's letters won't join. - Align is still Center. Click on the centre guide a little below the tassel and type
Jade Lantern. - Press Tab and rename the layer Title.
- In the Text tool set Size to
-
Centre and light the title
The script has a long swash on the J, so the text box is centred but the ink isn't. Choose the Move tool and tap the arrow keys until the lettering looks even either side of the centre guide.
Then light it in with glow
20/80. It's bigger than the tagline's because this is the brightest thing on the wall.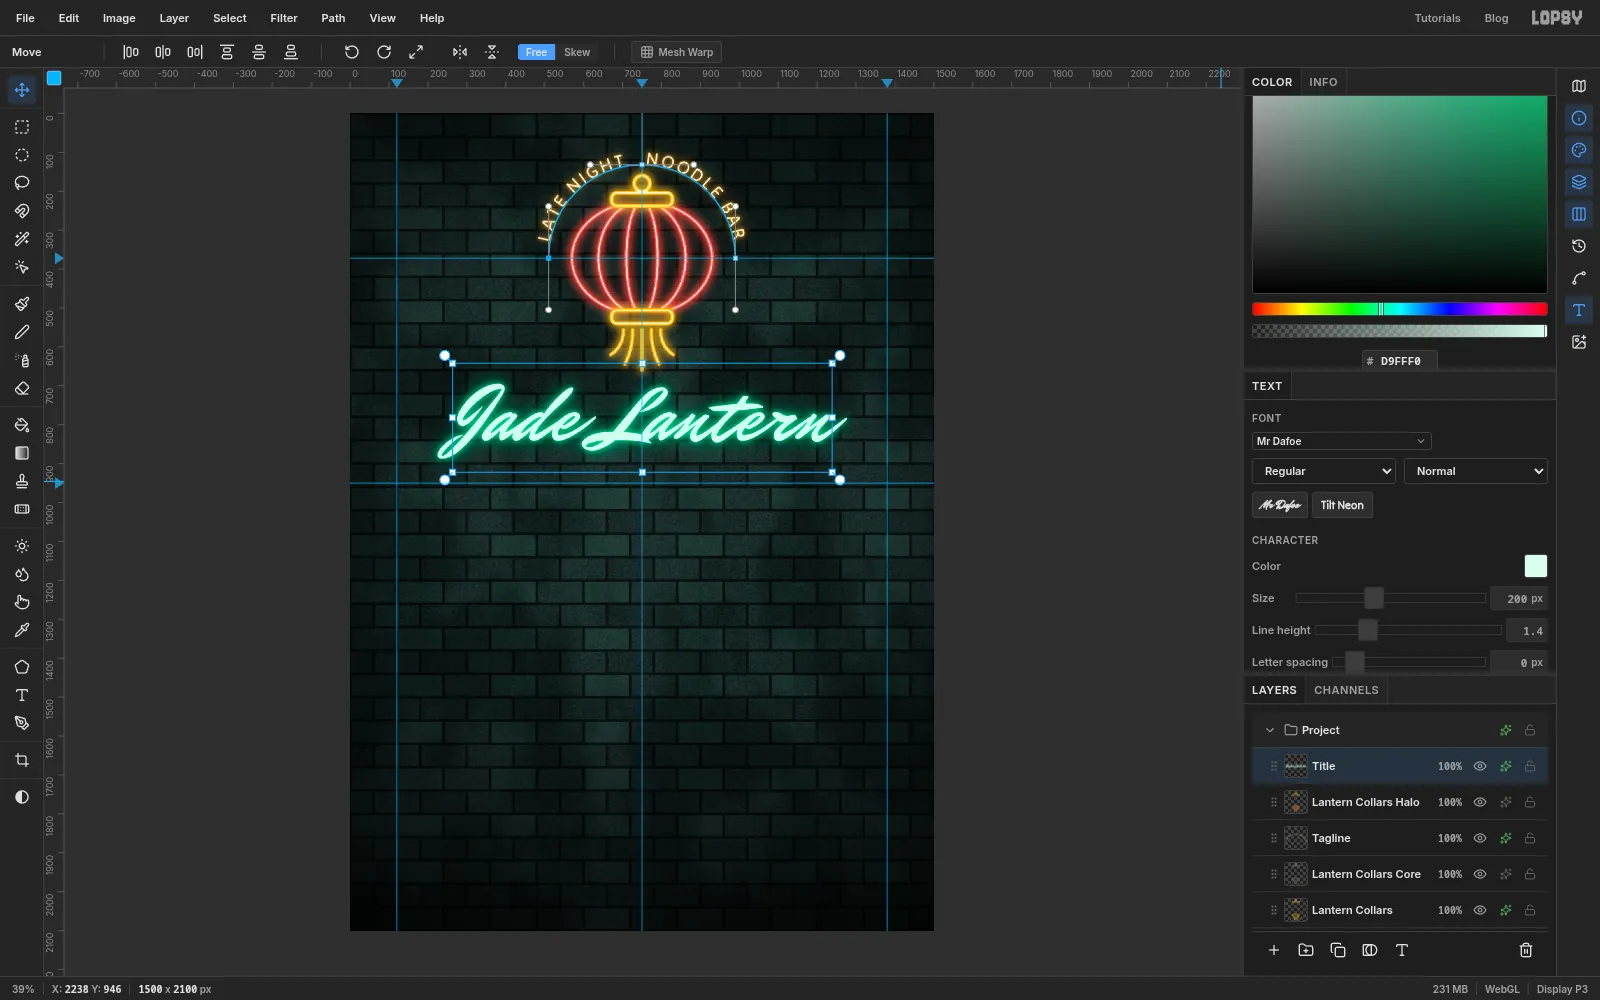
-
Draw the menu frame and cut a gap
Select Title and add a layer named Frame.
- In the Shape tool choose Rectangle, set Corner Radius to
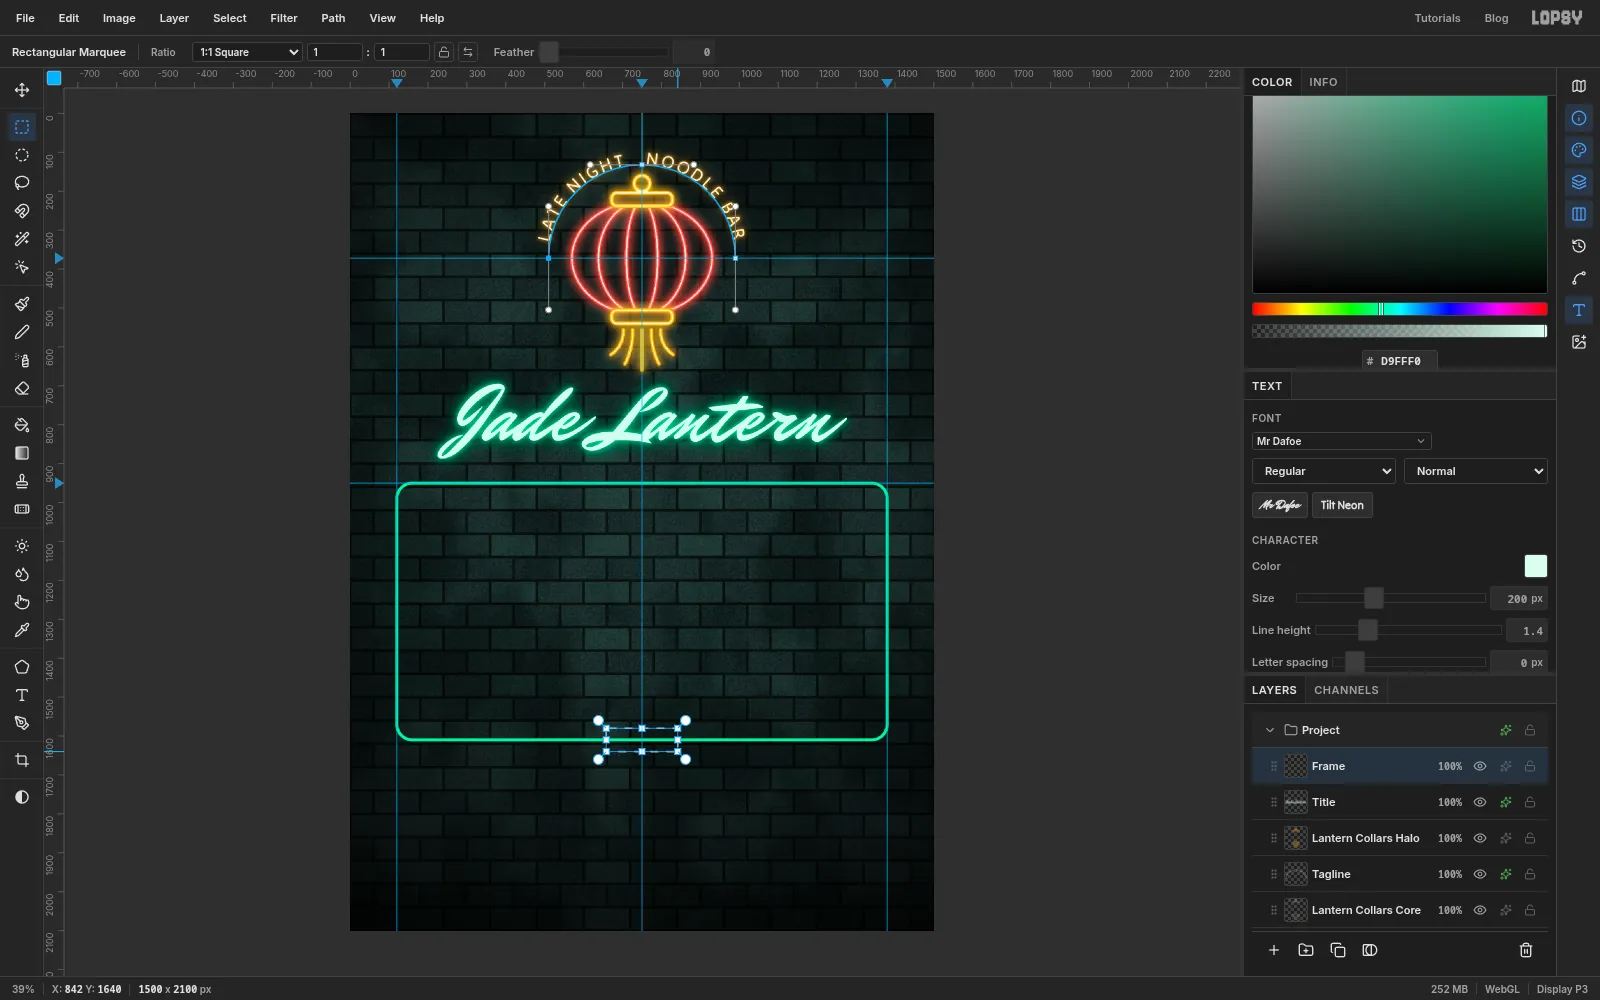
40, the stroke colour to and Width to8. - Press on the centre guide about a third of the way up from the bottom of the canvas and drag out until the right edge snaps to the right margin guide and the top edge reaches the 950 guide.
- With the Rectangular Marquee, drag a box about 185 px wide across the middle of the bottom edge and press Delete, then Cmd+D.
The gap is where the steam will come up from the bowl.
- In the Shape tool choose Rectangle, set Corner Radius to
-
Cap the ends and light the frame
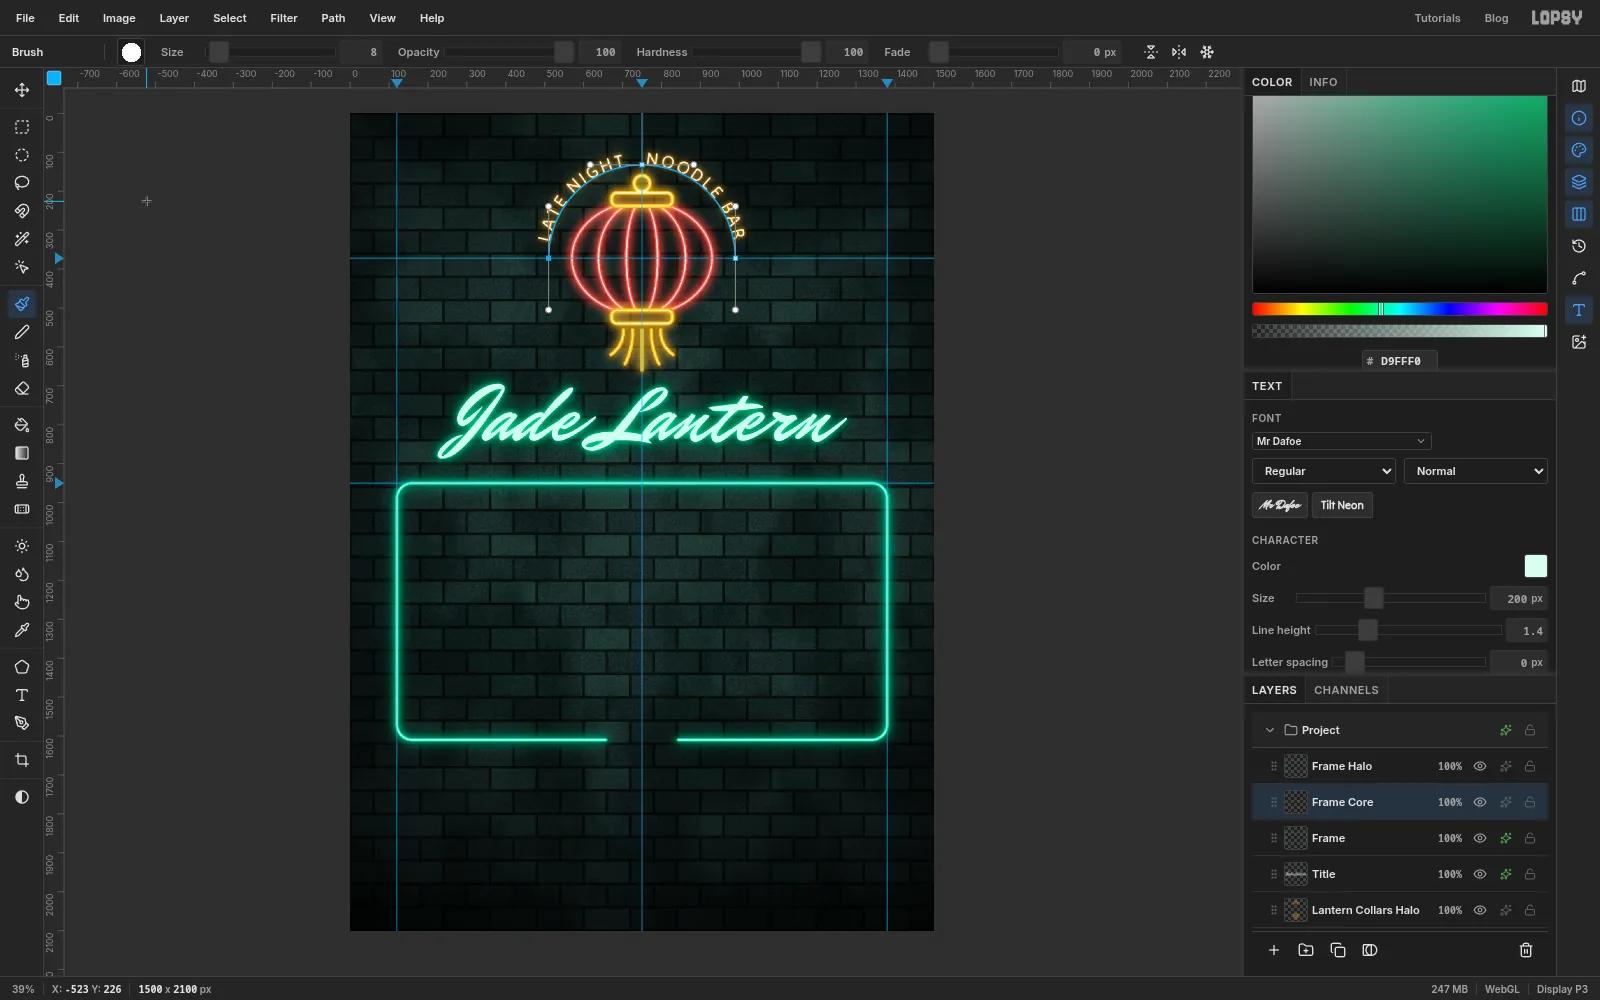
A cut tube has square ends, and glass doesn't. Choose the Brush at Size
8with the colour and click once on each cut end to round it off.Then light the frame like the lantern:
- Duplicate Frame, name the copy Frame Halo, blur it by
50and set it to Screen. - On Frame, add an Outer Glow in : Size
22, Spread6, Opacity90. - Cmd-click the Frame thumbnail, shrink the selection by
2, add a layer named Frame Core and fill it with .
- Duplicate Frame, name the copy Frame Halo, blur it by
-
Type the first section
All the menu text sits above Frame Halo. Select that layer before each new piece of text, and rename each text layer as you finish it.
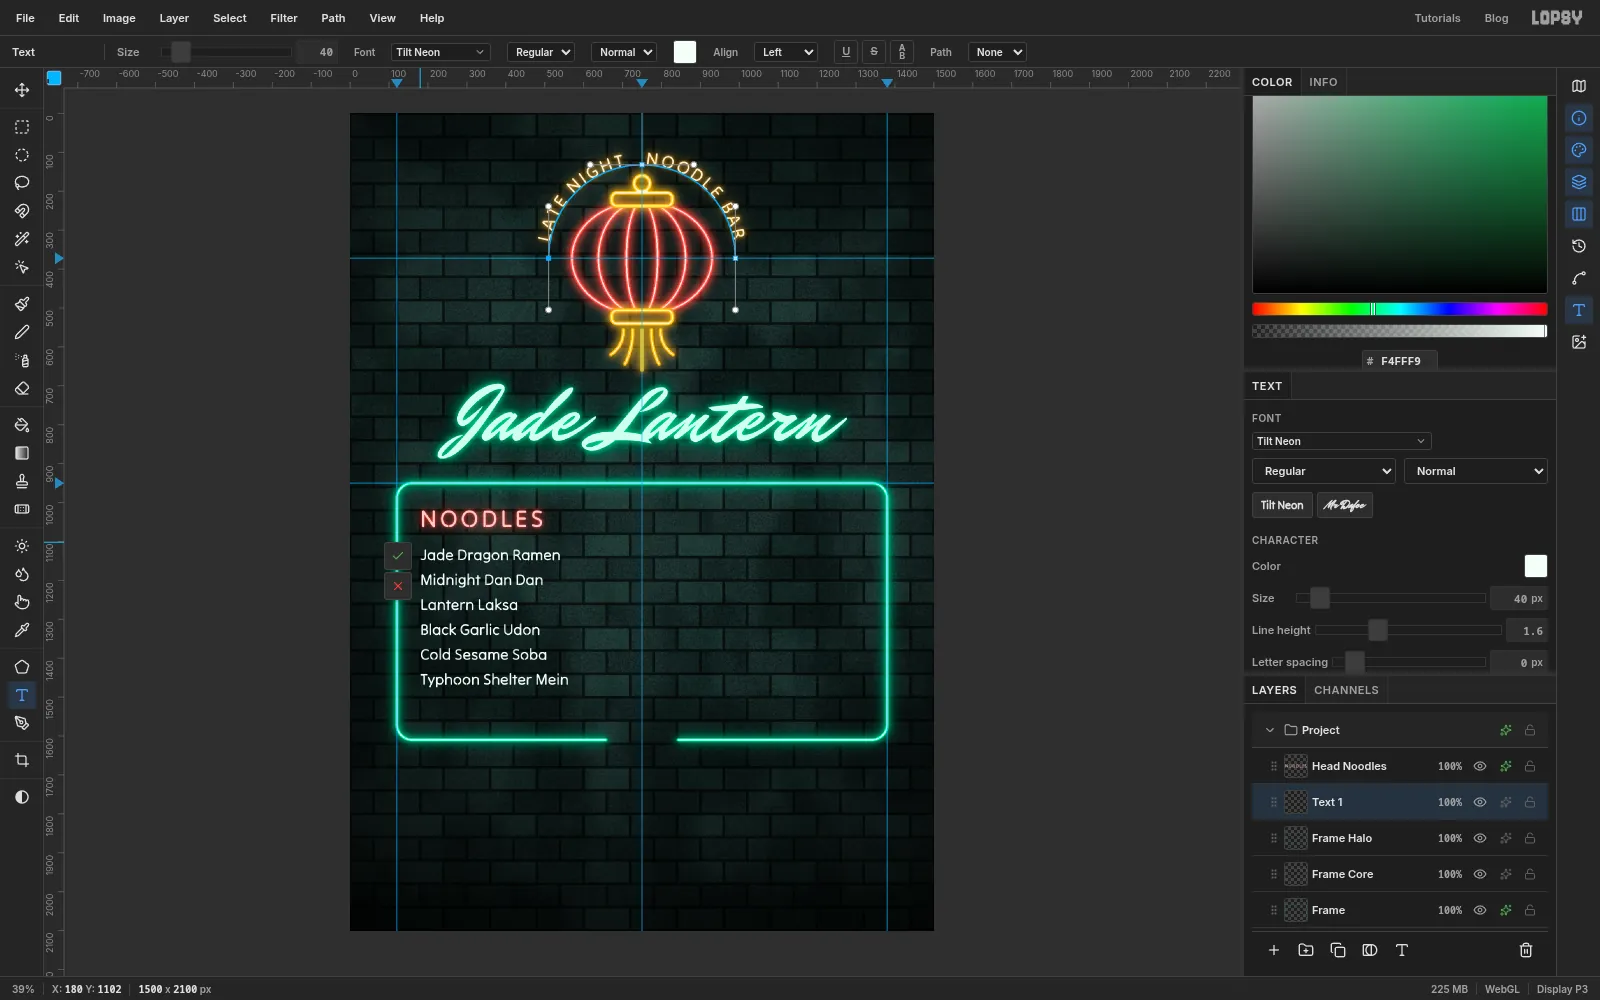
- For the header, set Size
62, Align Left, colour and, in the Text panel, Letter spacing8. Click inside the frame near its top-left corner, leaving a generous margin, and typeNOODLES. Press Tab and name the layer Head Noodles. - Light it in with glow
12/44. - Select Frame Halo. For the dishes, set Size
40, colour , Letter spacing0and Line height1.6. Click under the header, level with its left edge, and type the six dishes, pressing Enter after each: Jade Dragon Ramen, Midnight Dan Dan, Lantern Laksa, Black Garlic Udon, Cold Sesame Soba, Typhoon Shelter Mein. Press Tab and name the layer Noodles. - Light the dishes more gently, so they stay easy to read: with glow
6/24.
- For the header, set Size
-
Add the prices
Prices go in their own text layer so they can line up on the right.
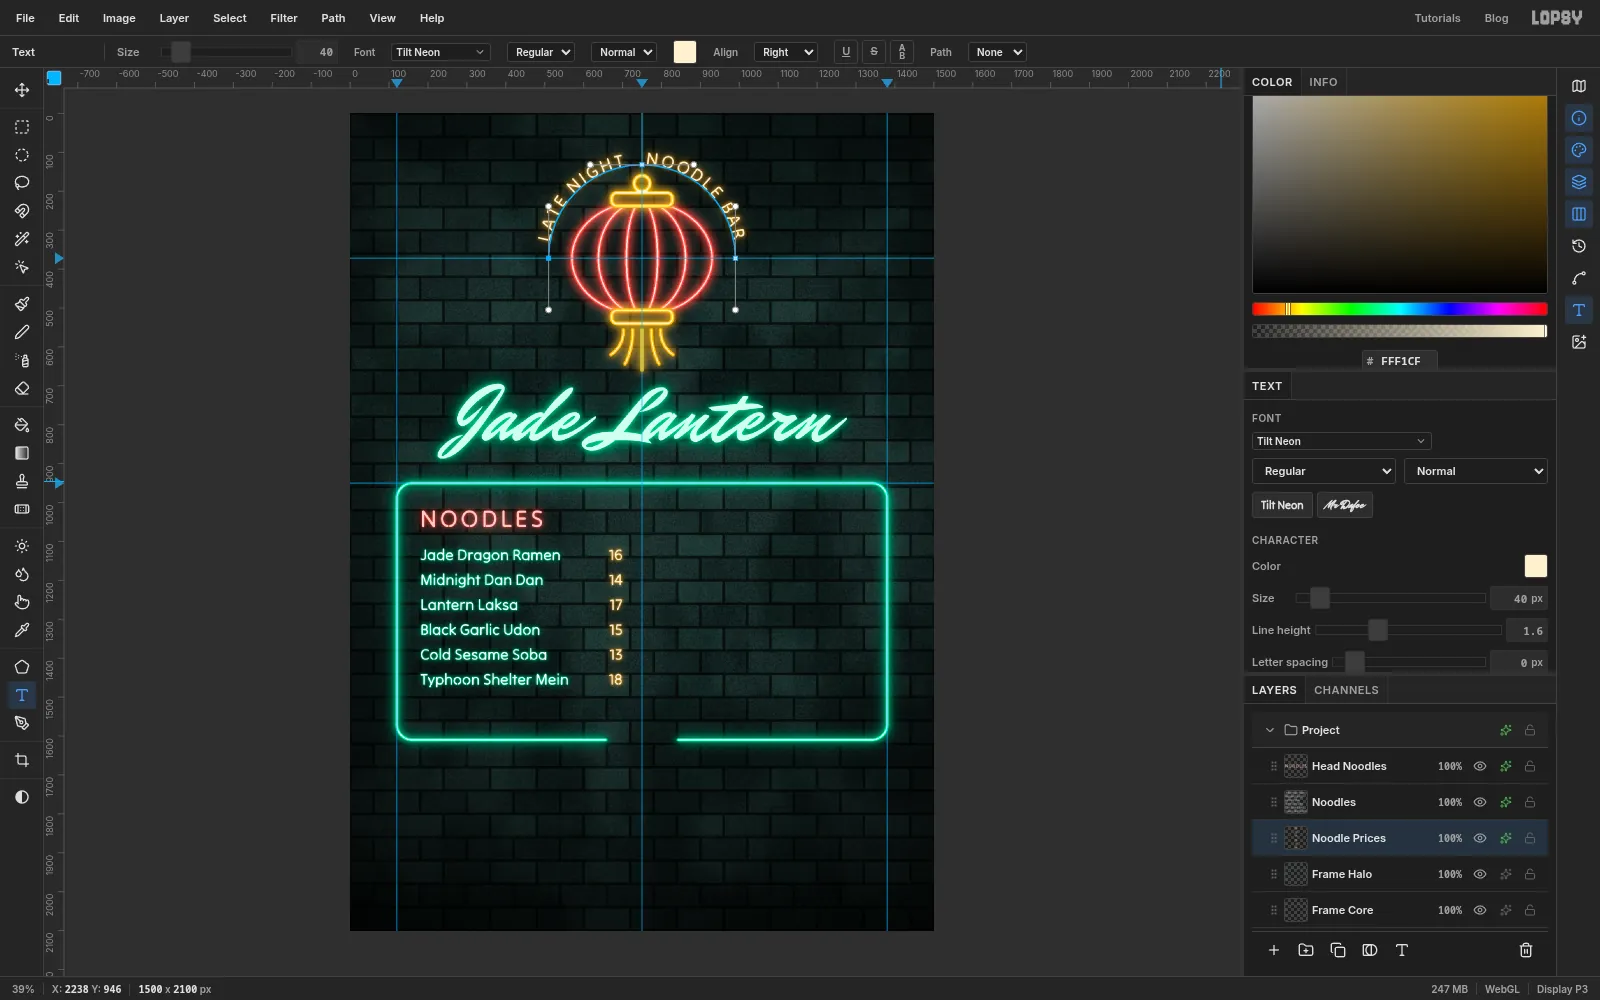
- Select Frame Halo. In the Text tool set Align to Right and the colour to . Keep the size and line height from the dishes.
- Click level with the first dish, just left of the centre guide, and type
16,14,17,15,13,18with Enter between them. Press Tab and name the layer Noodle Prices. - Light them in with glow
8/28.
Both layers use the same size and line height. If the rows don't match, the two clicks were at different heights: nudge the prices up or down with the Move tool and the arrow keys.
-
Fill the second column
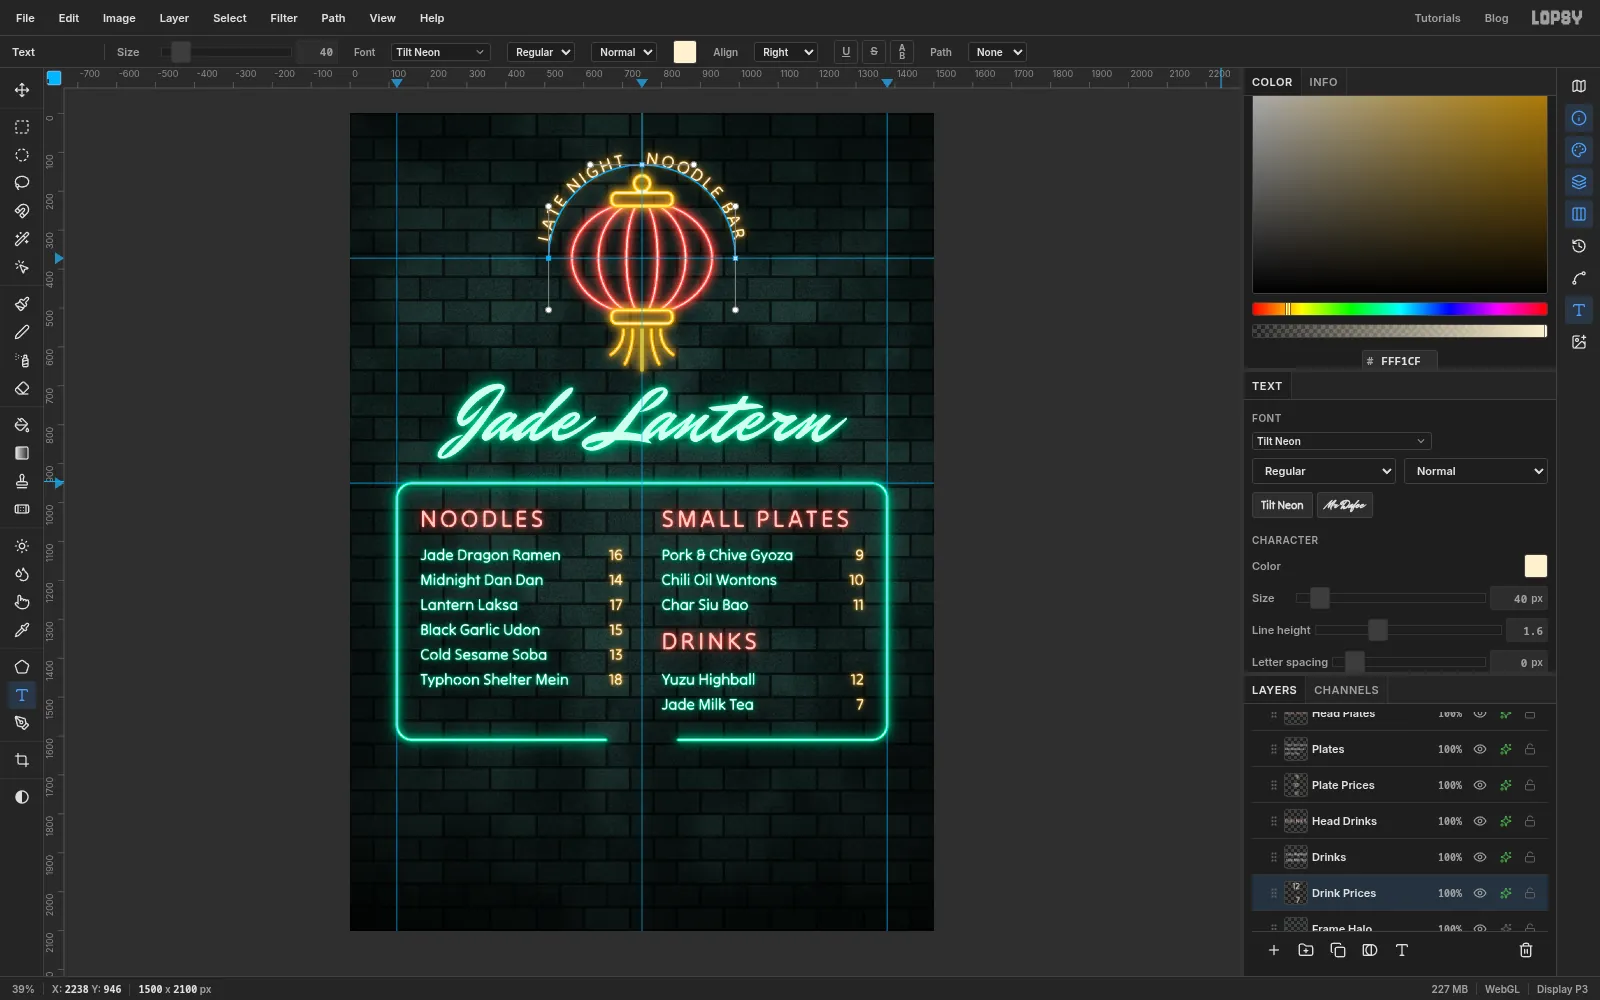
The right column repeats the last two steps: a header, a block of names and a block of prices for the plates, then the same for the drinks. That's six more text layers, each started from Frame Halo and each with the settings and glow of its twin on the left. Mirror the left column's margins: names start just right of the centre guide, and prices end as far inside the frame's right edge as NOODLES starts inside its left.
- Type the header
SMALL PLATESlevel with NOODLES. Name it Head Plates. - Type three dishes under it, level with the first three noodles: Pork & Chive Gyoza, Chili Oil Wontons, Char Siu Bao. Name the layer Plates.
- Add their prices, right-aligned:
9,10,11. Name the layer Plate Prices. - Skip two rows. Type the two drinks, Yuzu Highball and Jade Milk Tea, starting on the sixth row, level with Typhoon Shelter Mein. Name the layer Drinks, and add Drink Prices:
12and7. - Type the header
DRINKSin the space you skipped, closer to the drinks than to the plates. Name it Head Drinks.
Lining the drinks up with row six keeps both columns on the same baselines.
- Type the header
-
Draw the dotted leaders
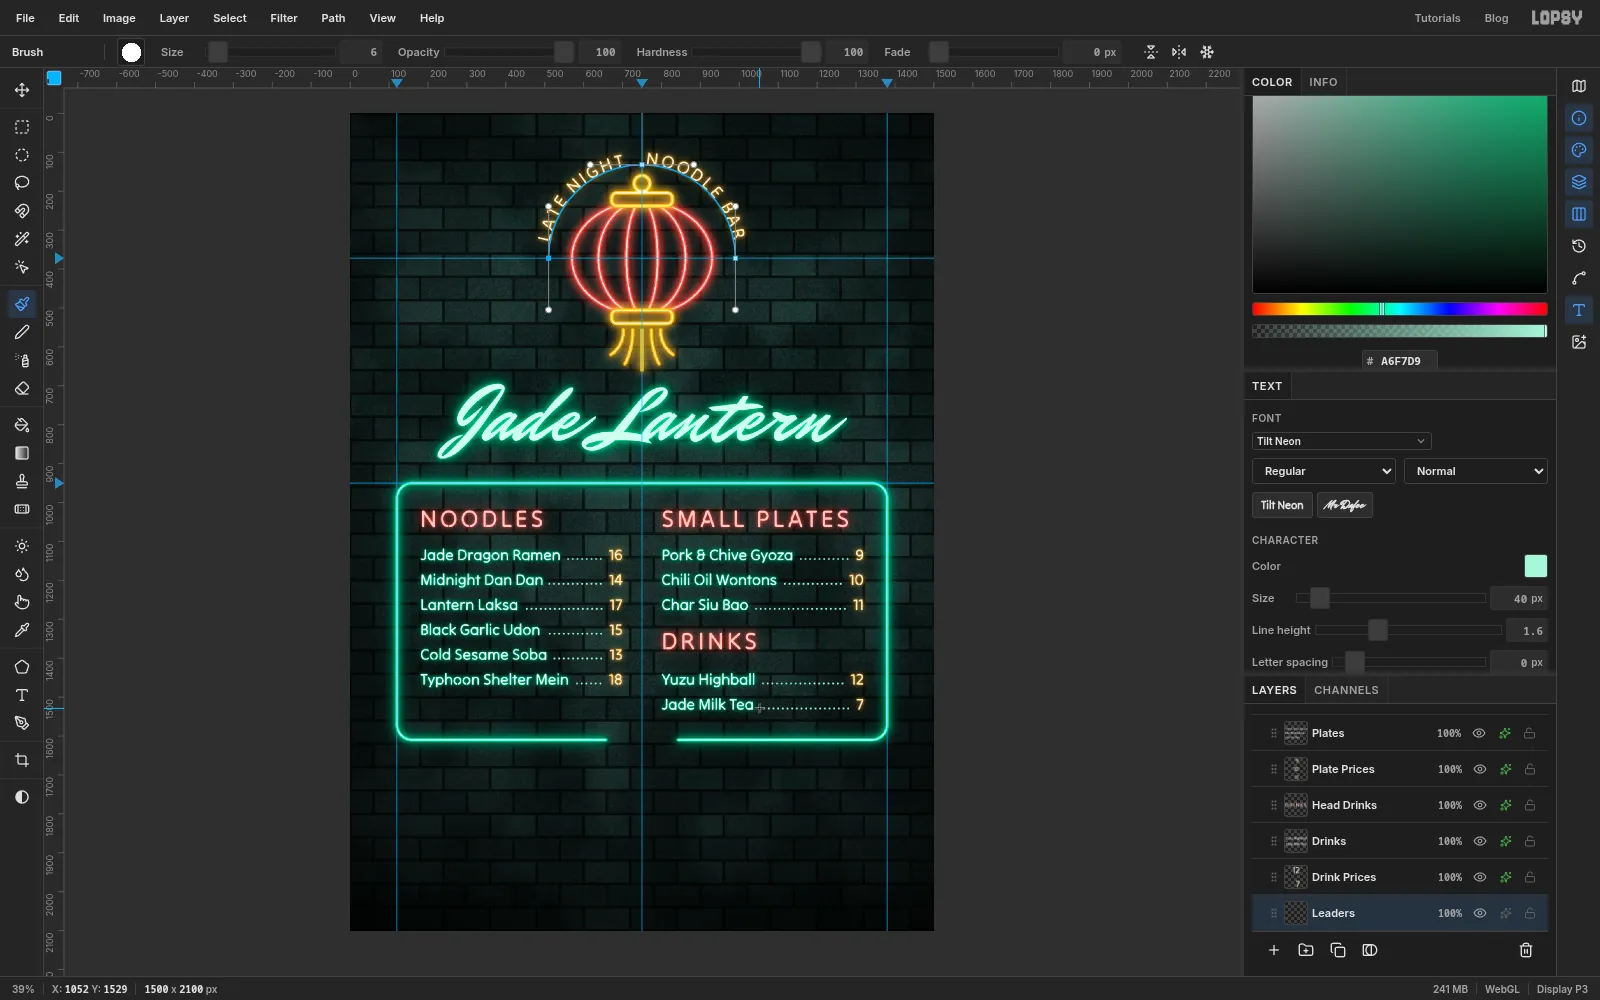
Leaders are just a brush with its spacing opened up. Select Frame Halo and add a layer named Leaders.
- Choose the Brush and open the presets window. Set Size
6, Hardness100and Spacing200, the maximum, then close it. Set the colour to . - On the first row, click just left of the price, level with the middle of the lowercase letters.
- Shift-click just right of the dish name. A row of evenly spaced dots joins the two.
- Repeat for each row.
Start at the price every time. The dots are spaced from the first click, so the gap before each price comes out the same.
- Choose the Brush and open the presets window. Set Size
-
Select half an ellipse for the bowl
Select Head Noodles, the top layer, and add one named Bowl.
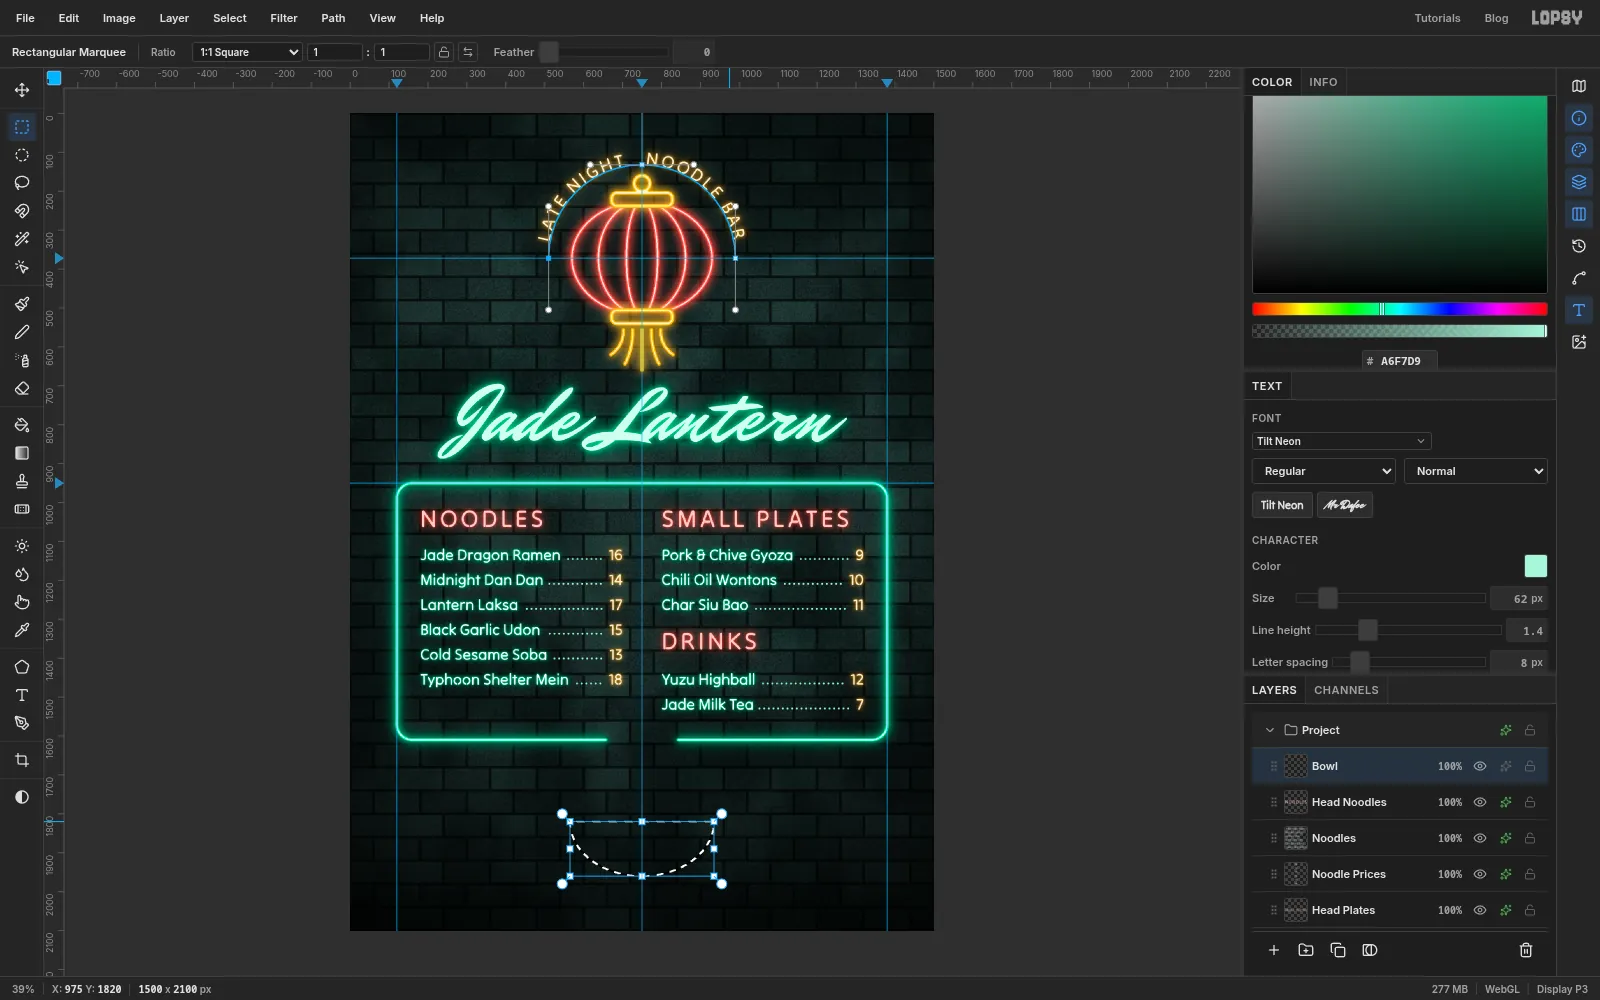
- With the Elliptical Marquee, drag an ellipse about 370 px wide and 280 px tall, centred on the guide, in the space under the frame.
- Switch to the Rectangular Marquee, hold Alt and drag a box over the top half of the ellipse. Alt subtracts, and a half-moon is left.
-
Hollow the bowl and give it a foot
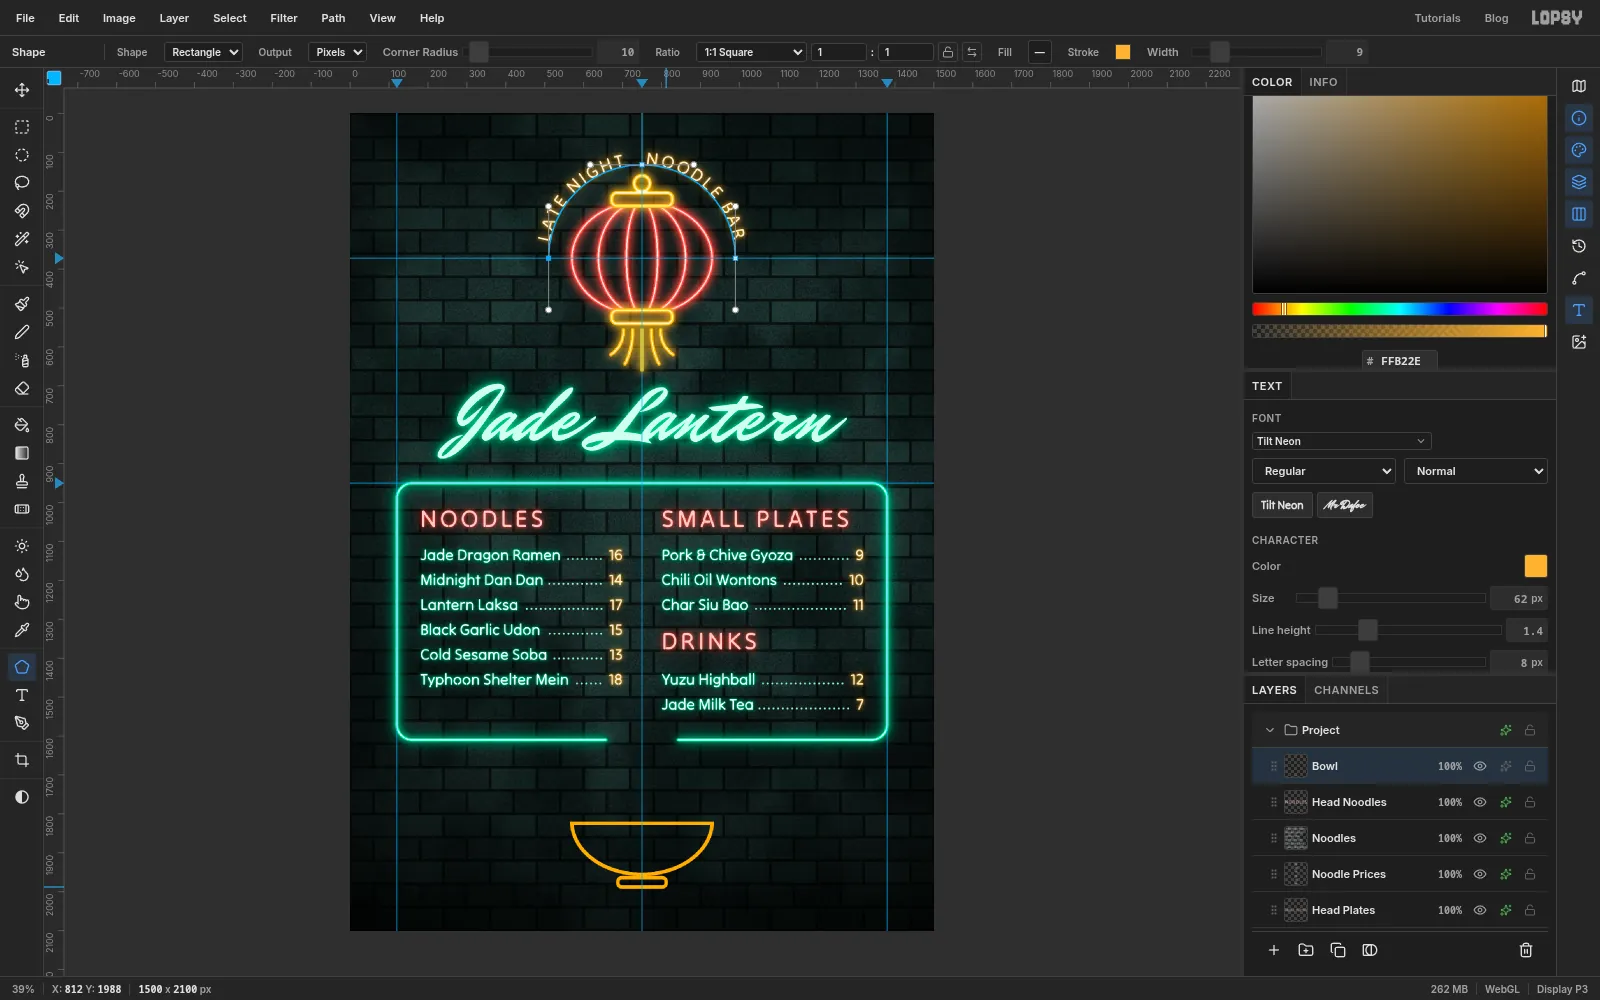
- Set the foreground to and choose Edit → Fill.
- Choose Select → Shrink… with the amount at
9, click Apply and press Delete. What's left is a 9 px outline: fill, shrink and delete is a quick way to stroke any selection. - Press Cmd+D.
- With the Shape tool (Rectangle, Corner Radius
10, stroke , Width9) drag a small flat foot under the bowl.
-
Rotate a pair of chopsticks
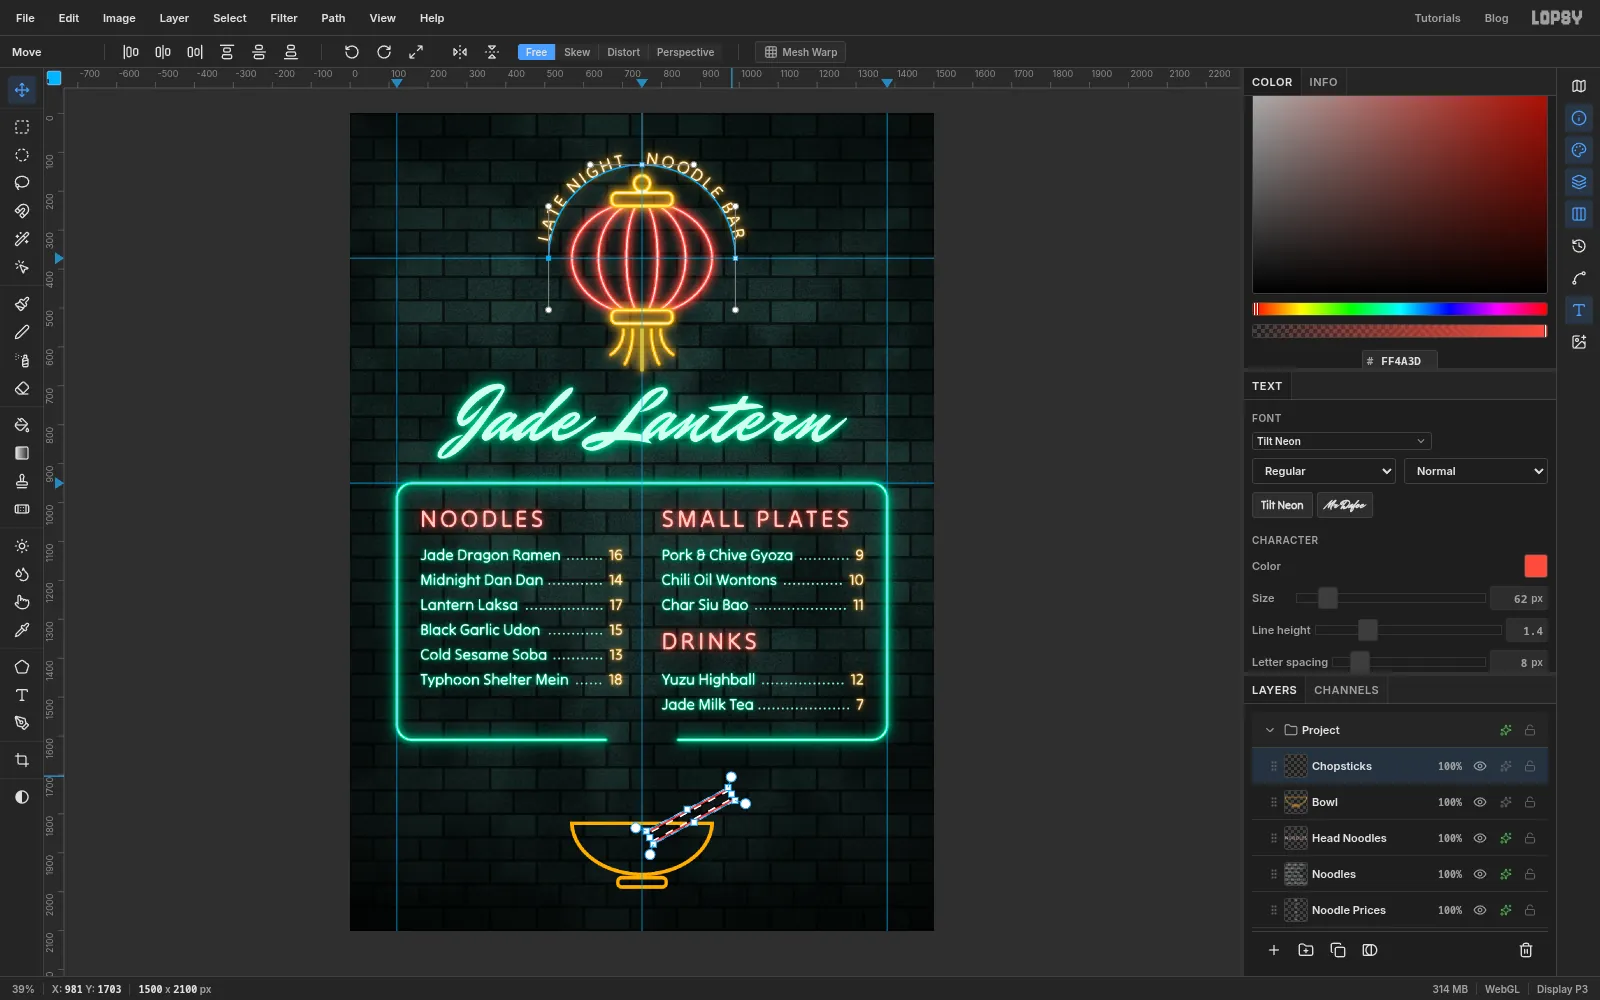
With Bowl selected, add a layer named Chopsticks. With the Brush at Size
9, Spacing5and the colour , click and Shift-click two level lines about 230 px long and 30 px apart, to the right of the centre guide.- Hold Cmd and click the layer's thumbnail to select the lines.
- Choose the Move tool. Handles appear around the selection.
- Move the pointer just outside a corner until it turns into the rotate cursor, and drag anticlockwise by about 30°, until the low ends dip into the bowl.
- Press Cmd+D.
-
Draw a wisp of steam with the Pen tool
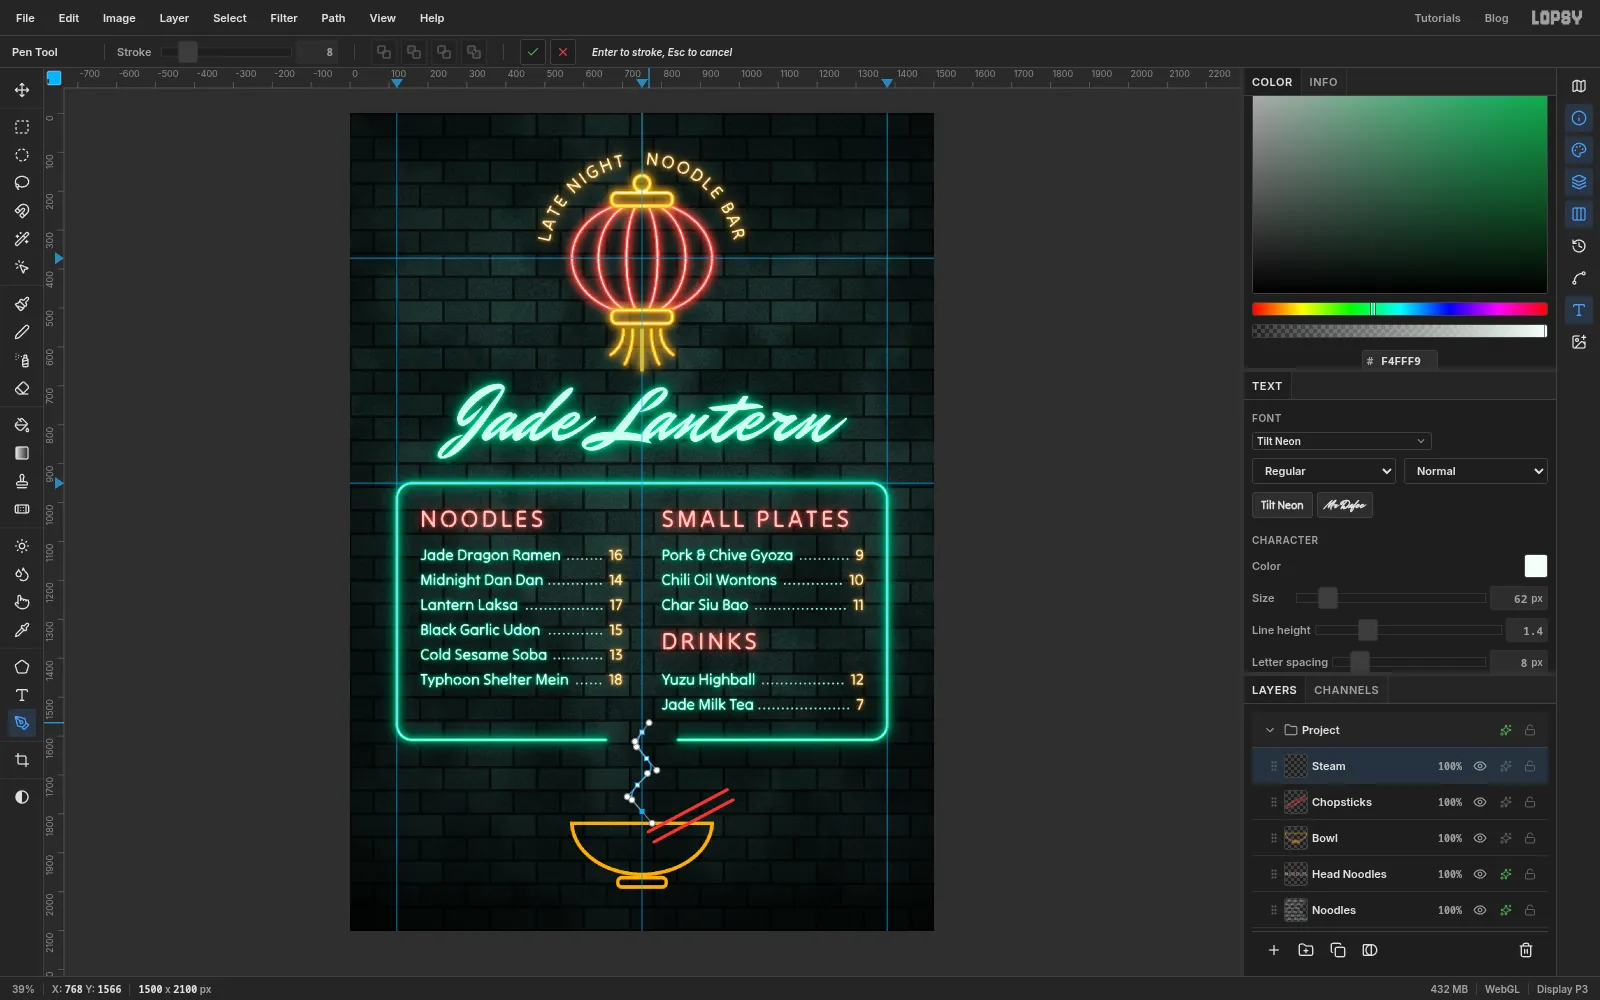
Add a layer named Steam above Chopsticks. Choose the Pen tool, set Stroke to
8and the foreground to .The wisp is four anchors spaced evenly between the bowl and the gap in the frame. Each one is a press and a short drag, and the drags alternate so the line snakes.
- Press just above the bowl's rim on the centre guide and drag up and a little to the left.
- Press a third of the way up, slightly left of the guide, and drag up and to the right.
- Press two thirds of the way up, slightly right of the guide, and drag up and to the left.
- Press on the guide level with the gap in the frame and drag up and a little to the right.
- Press Enter. This time you do want the paint.
-
Copy, shrink and flip the steam
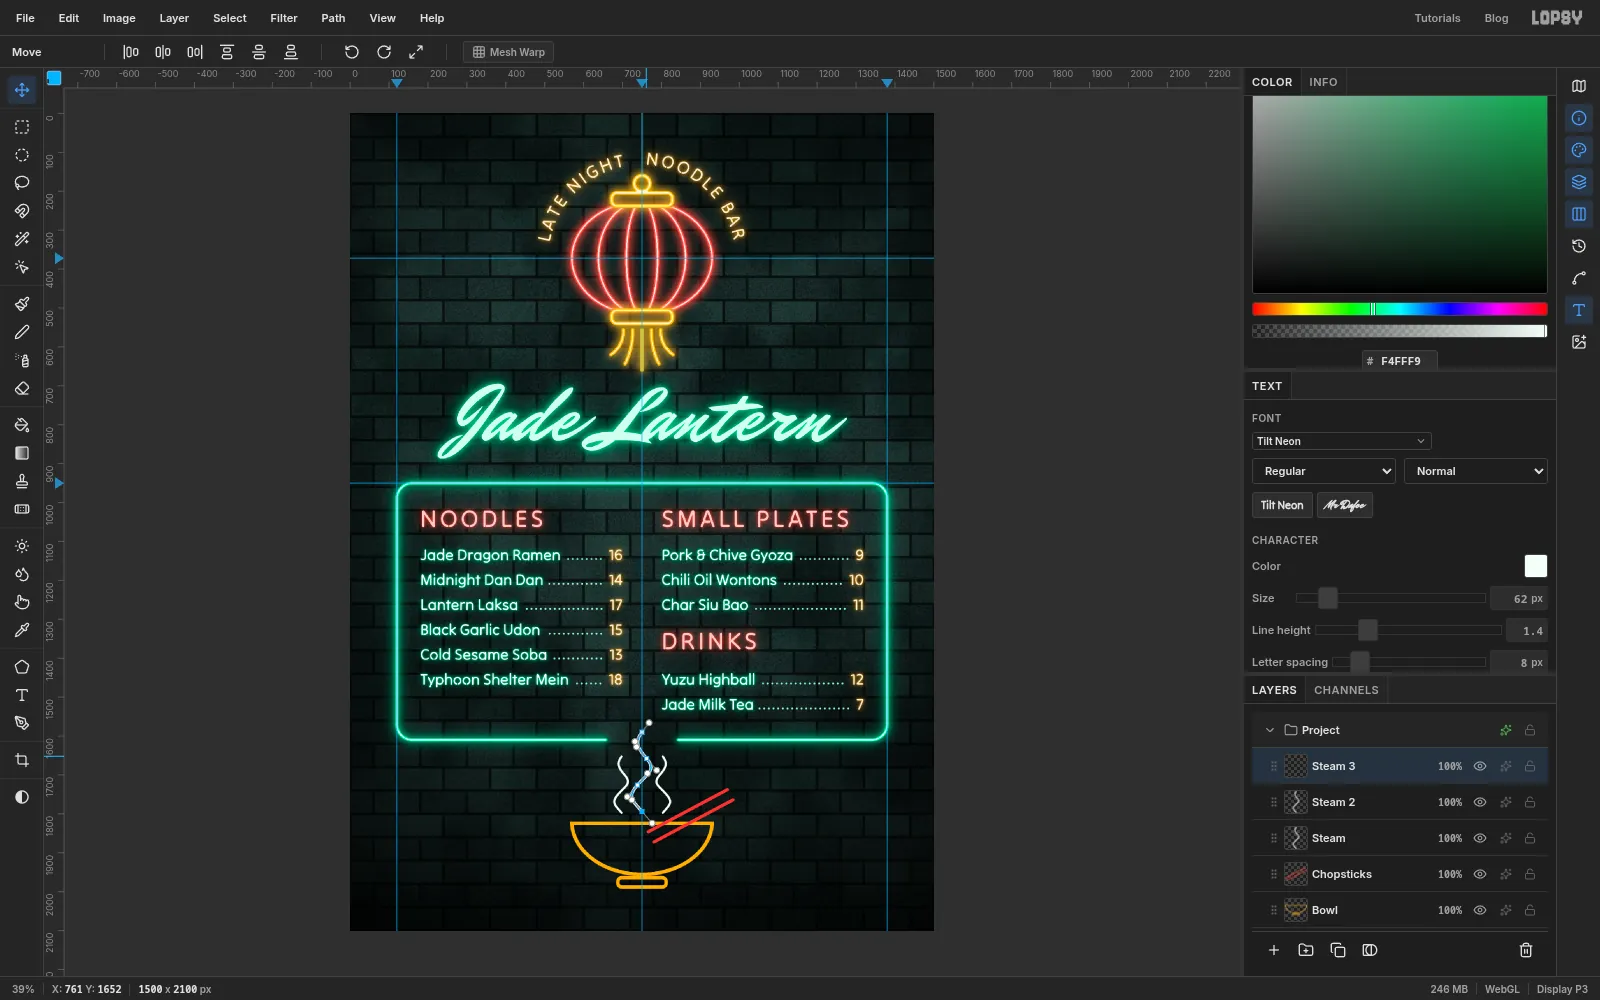
One wisp is drawn. The other two are copies.
- Drag a marquee around the wisp and press Cmd+C.
- Press Cmd+V. The copy arrives on its own layer, already selected, with the Move tool active and handles around it.
- Hold Cmd and drag the top-right handle down and in until the copy is about three-quarters of its size. Holding Cmd keeps its proportions, and the bottom stays put. Press Cmd+D.
- Tap the left arrow key until the copy clears the first wisp.
- Paste again. This time click Flip Horizontal in the options bar first, then shrink it the same way and move it to the right by the same amount.
- Select the top copy and choose Layer → Merge Down twice, so the three wisps are one layer again. Rename it Steam.
-
Light the bowl, the chopsticks and the steam
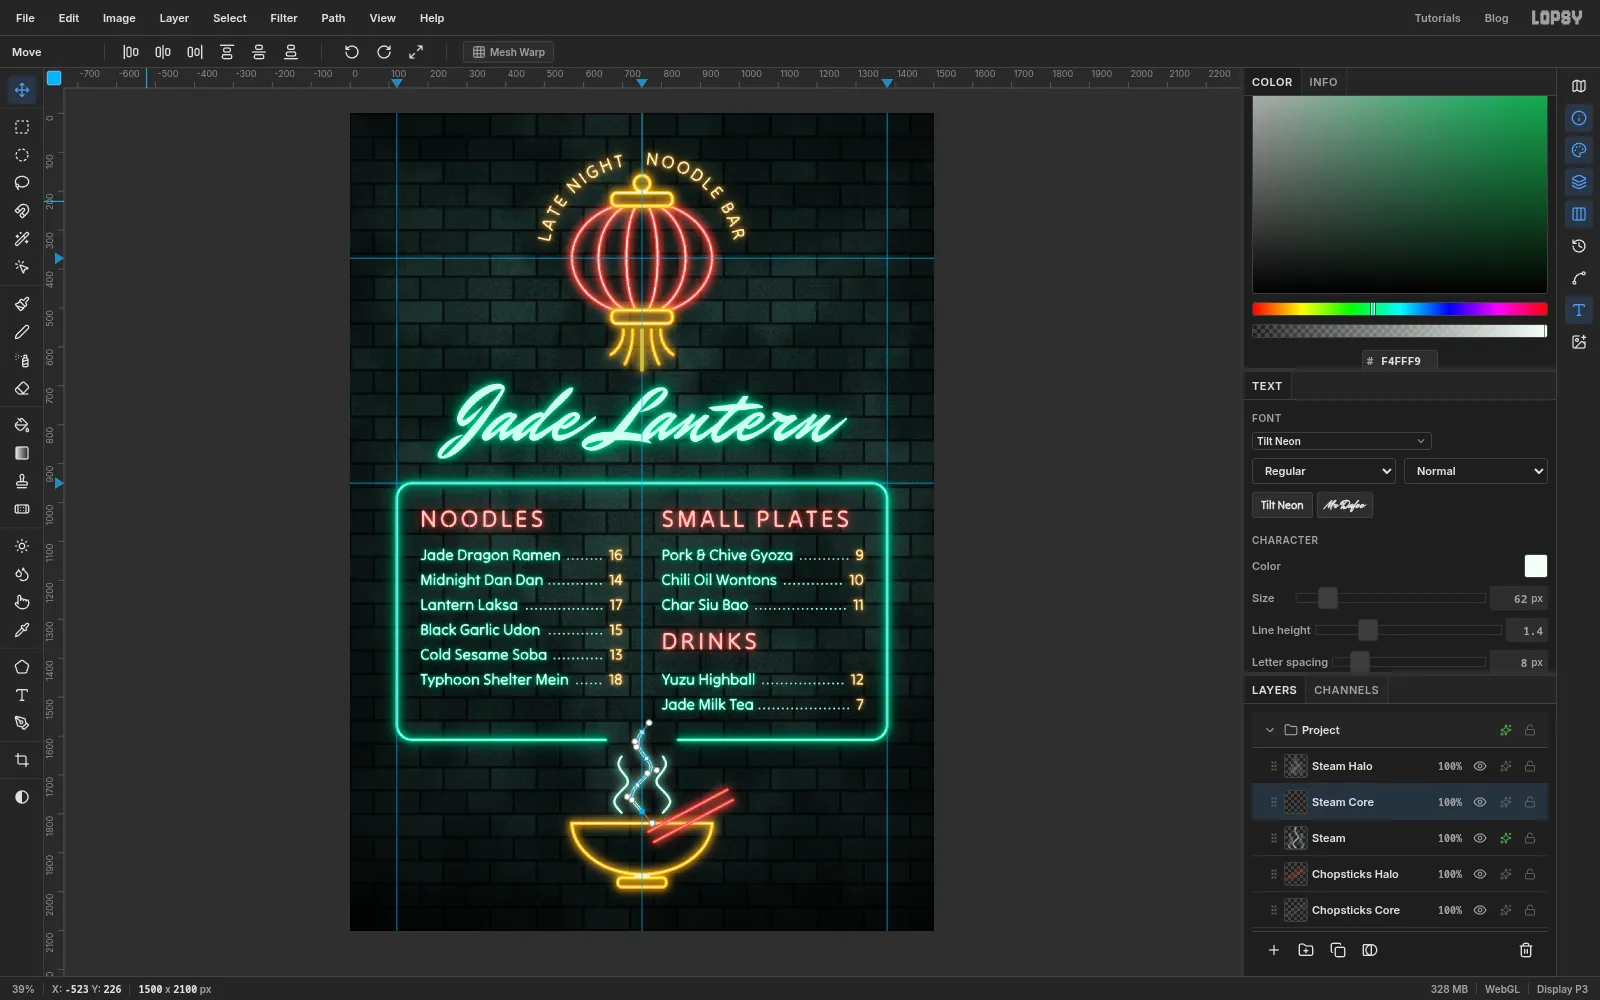
Three more rounds of the lantern's recipe. For each layer: duplicate it and name the copy with Halo on the end, blur the copy by
40and set it to Screen; add an Outer Glow to the original with Spread6and Opacity90; then Cmd-click its thumbnail, shrink, and fill a new Core layer.- Bowl: glow at Size
26, shrink by3, core - Chopsticks: glow at Size
26, shrink by3, core - Steam: glow at Size
20, shrink by2, core
The steam's core is the colour it was stroked in, so it changes nothing you can see. It's there so every tube is built the same way and you can warm or cool the steam later by refilling one layer.
Work up the stack in that order and Steam Halo ends up as the top layer.
- Bowl: glow at Size
-
Build the OPEN sign and tilt it
Select Head Noodles and add a layer named Open Pill. That puts the sign just above the menu text and under the bowl's layers.
- With the Shape tool (Rectangle, Corner Radius
58, stroke , Width8) drag a pill about 370 px wide and 115 px tall, left of the bowl. - With Open Pill still selected, choose the Text tool: Size
44, Align Center, colour , Letter spacing3. Click in the middle of the pill, typeOPEN 'TIL 3AMand press Tab. Rename the layer Open Text and light it in with glow10/36. - With the Move tool and the arrow keys, seat the text in the middle of the pill: the same space left and right, and the same above the capitals as below them.
- Click Open Pill, then Cmd-click Open Text so both are selected. With no marquee, the Move tool frames them together.
- Drag just outside a corner to rotate the pair about 7° anticlockwise.
Now light the pill: an Open Pill Halo copy blurred by
34on Screen, an Outer Glow in (Size22, Spread6, Opacity90), and an Open Pill Core layer filled with after shrinking the selection by2. Doing this after the rotation means the glow is made from the tilted pixels.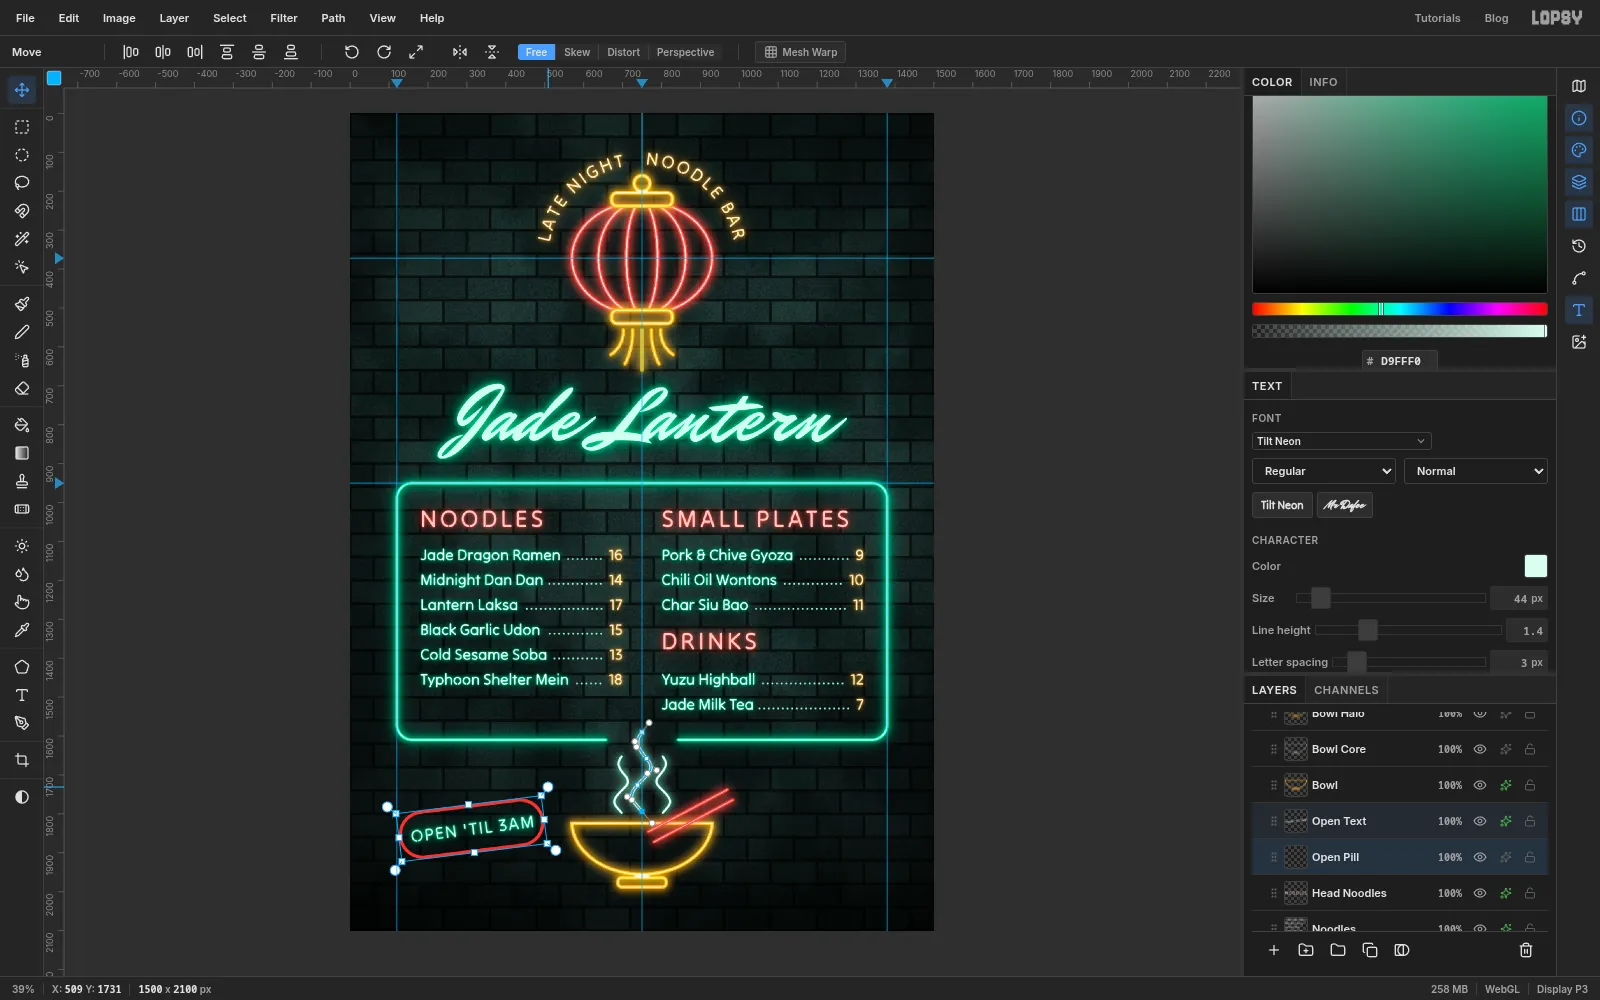
- With the Shape tool (Rectangle, Corner Radius
-
Add the address and the add-ons
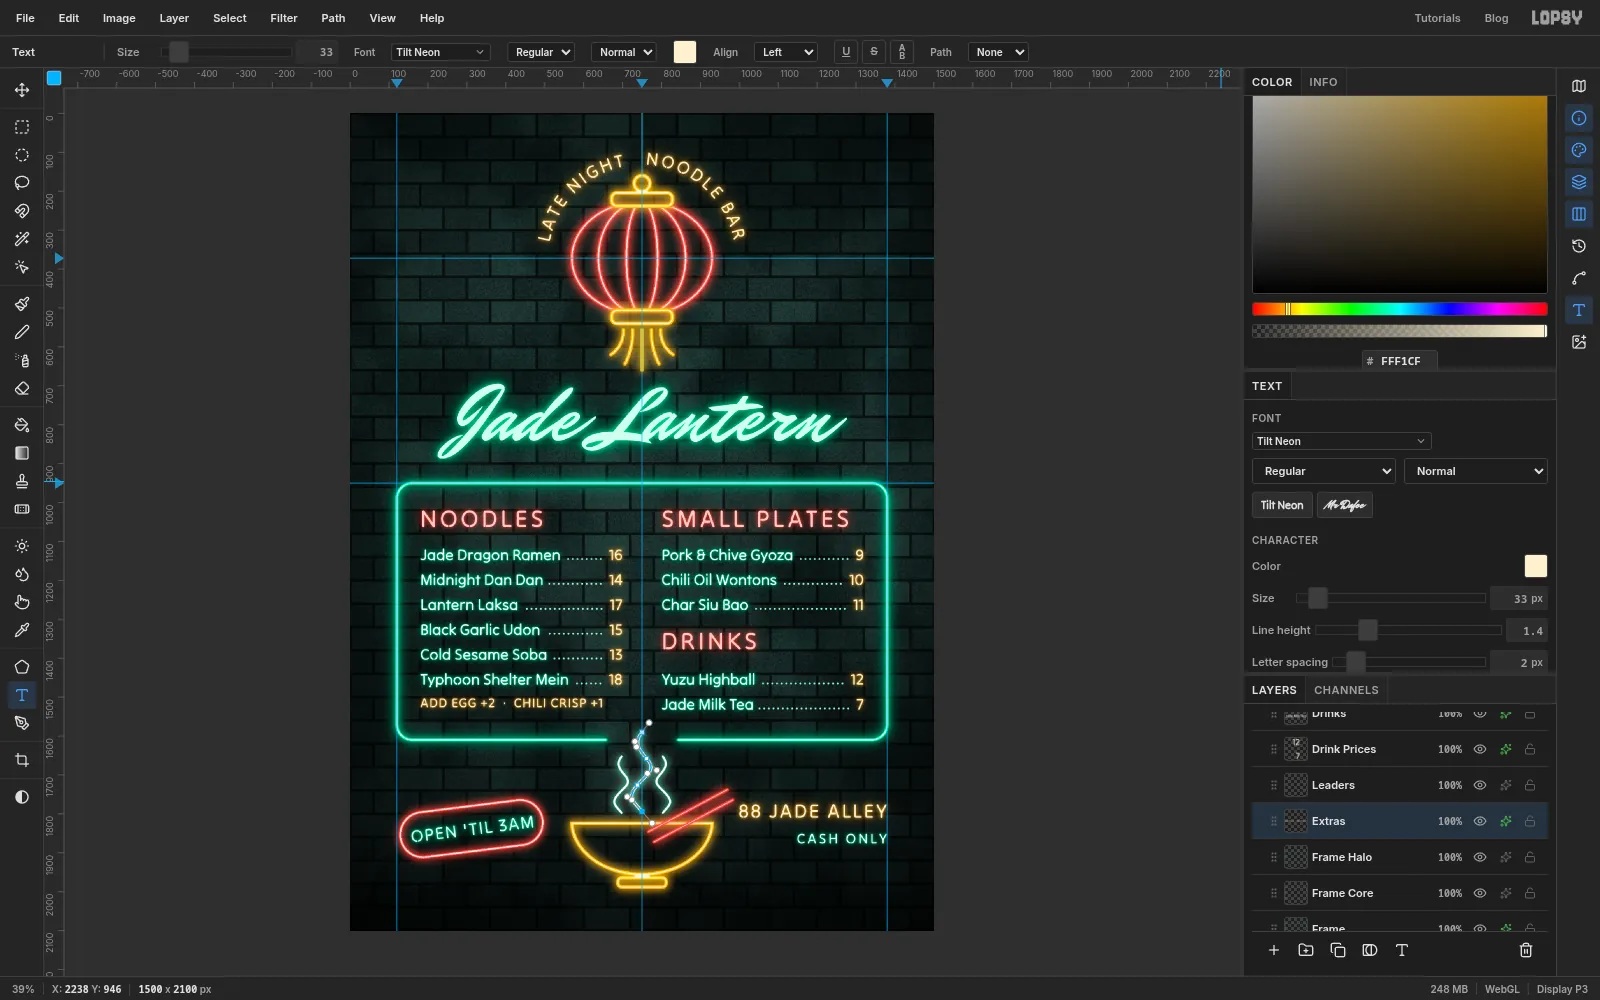
Three short lines finish the type.
- Select Steam Halo, the top layer. In the Text tool set Align Right, Size
50, Letter spacing5and the colour . Click on the right margin guide, level with the top of the bowl, and type88 JADE ALLEY. Name the layer Address and light it in with glow12/40. - Select Steam Halo again. At Size
36with Letter spacing6and the colour , click on the same guide a line lower and typeCASH ONLY. Name it Small Print and light it in with glow8/26. - Select Frame Halo. Set Align Left, Size
33, Letter spacing2and the colour . Click under the last noodle dish, level with Jade Milk Tea, and typeADD EGG +2 · CHILI CRISP +1. Name it Extras and light it in with glow7/24.
Both columns now end on the same row.
- Select Steam Halo, the top layer. In the Text tool set Align Right, Size
-
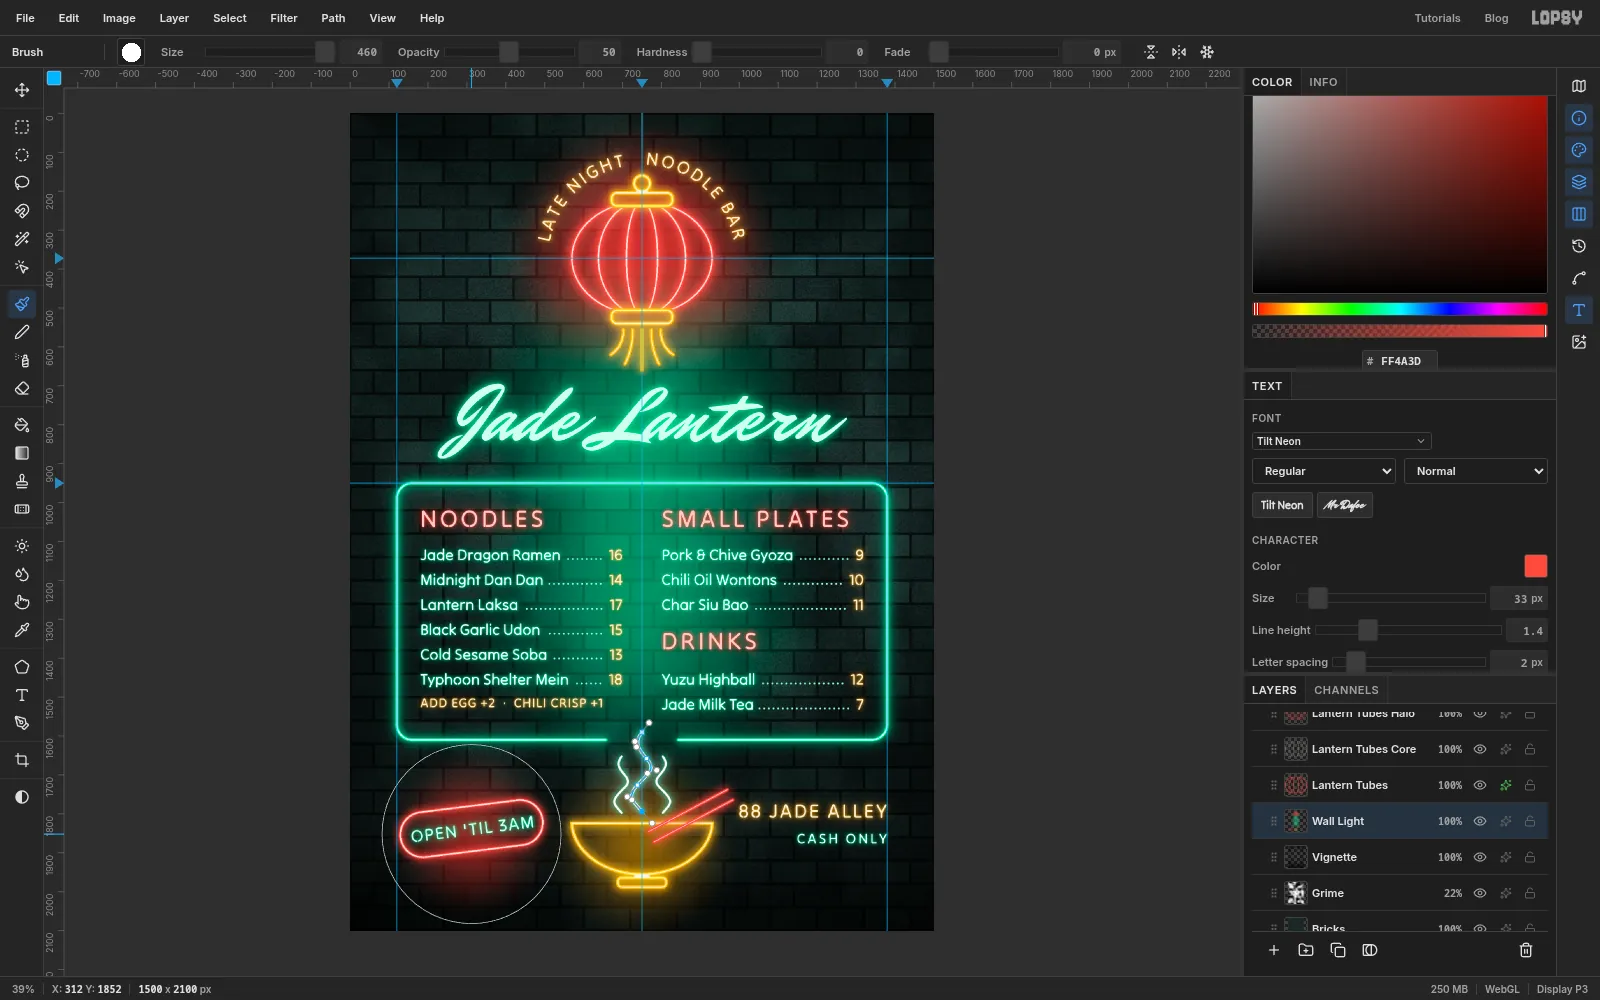
Dab light onto the wall
The tubes glow, but the bricks behind them are still unlit. Select Vignette and add a layer named Wall Light, so it sits under the sign.
Choose the Brush, open the presets window and set Hardness to
0and Opacity to50. Then click once or twice with a big brush behind each part of the sign, in its own colour:- Size
760, : two clicks on the middle of the lantern. - Size
1000, : one click on the title and one on the middle of the menu. - Size
520, : one click on the bowl. - Size
460, : one click on the OPEN sign.
It looks like fog at this point. That's fine.
- Size
-
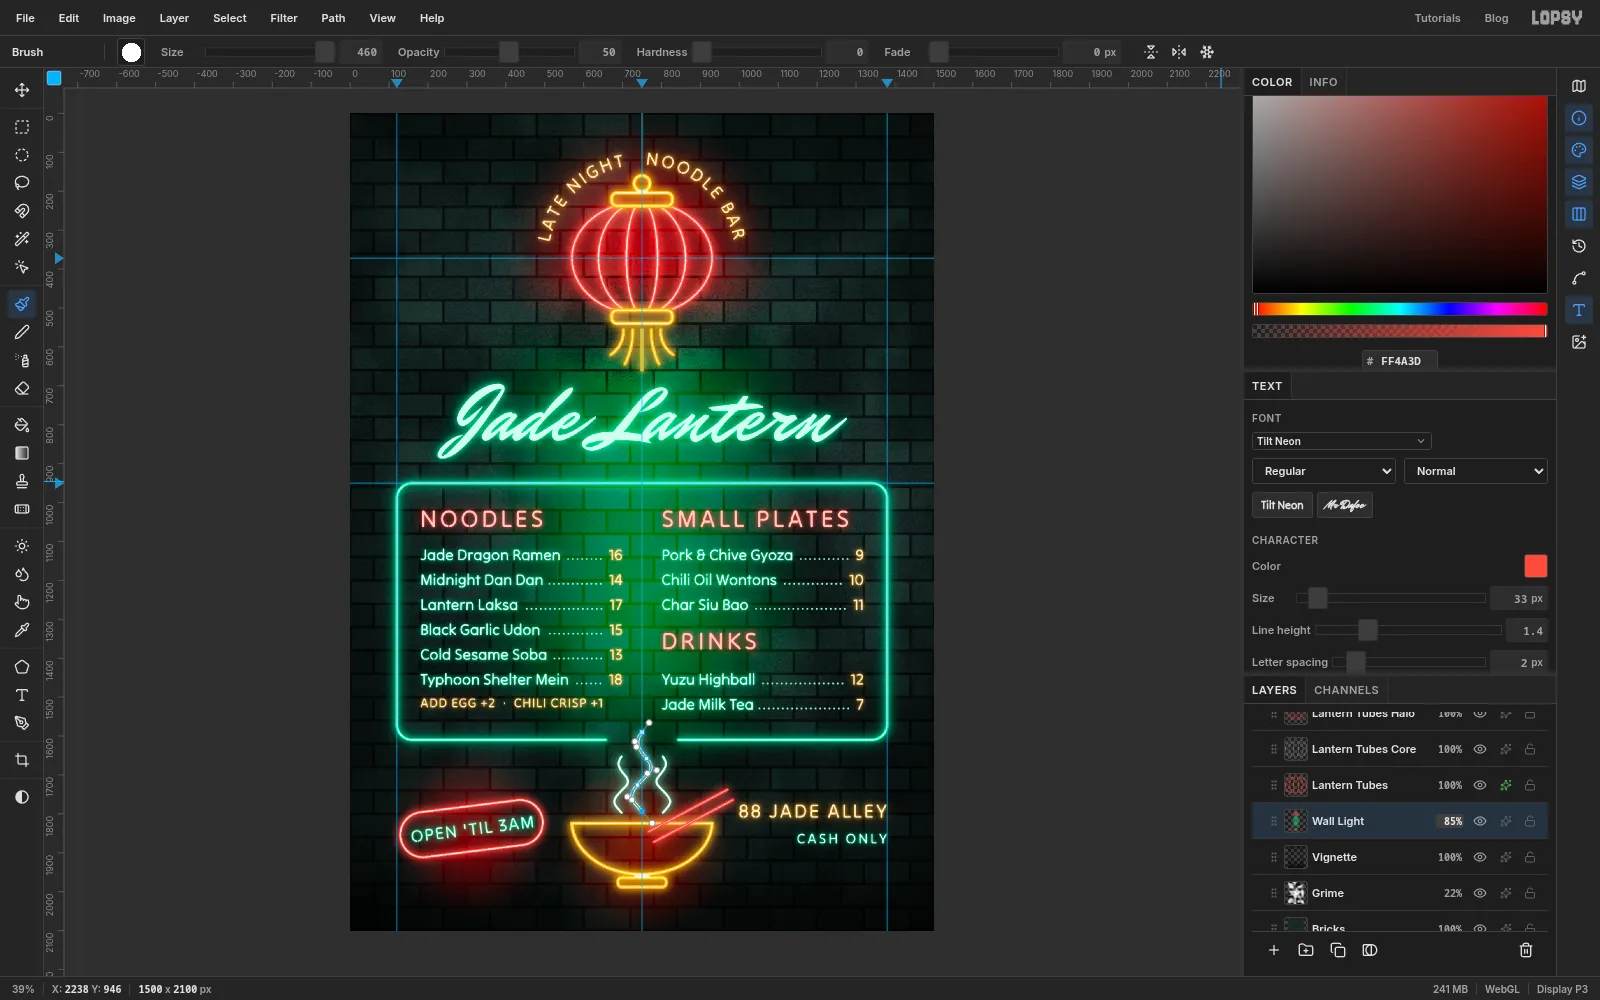
Blend the light into the bricks
Open the layer's effects, set the blend mode to Color Dodge and lower the opacity to 85%.
Color Dodge brightens what's underneath in proportion to how bright it already is. The brick faces pick up the colour and the dark mortar stays dark, which is what light raking across a real wall does.
-
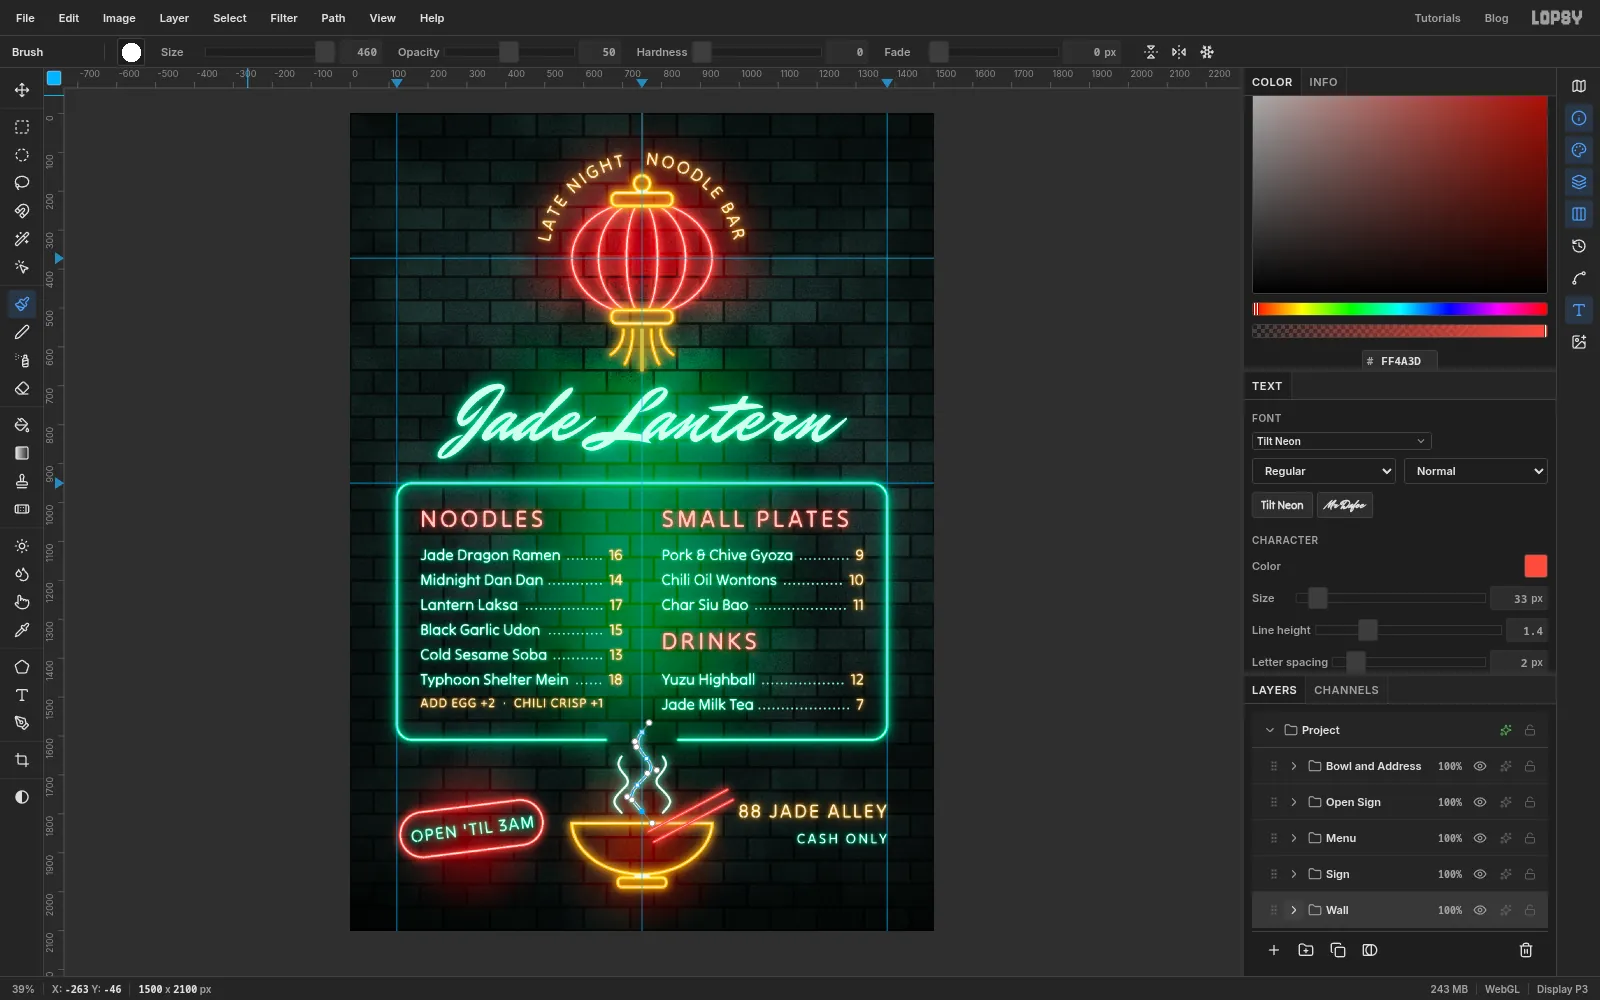
Group the layers
There are more than forty layers now. Tidy them into five groups. For each one, click the first layer, Shift-click the last, choose Layer → Group Layers and rename the group. Working from the bottom of the panel up:
- Wall: from Bricks up to Wall Light
- Sign: from Lantern Tubes up to Title
- Menu: from Frame up to Head Noodles
- Open Sign: from Open Pill up to Open Text
- Bowl and Address: from Bowl up to Address
Click the arrow beside each group's name to collapse it. If a layer has ended up in the wrong place, drag it into its group by the grip at the left of its row.
-
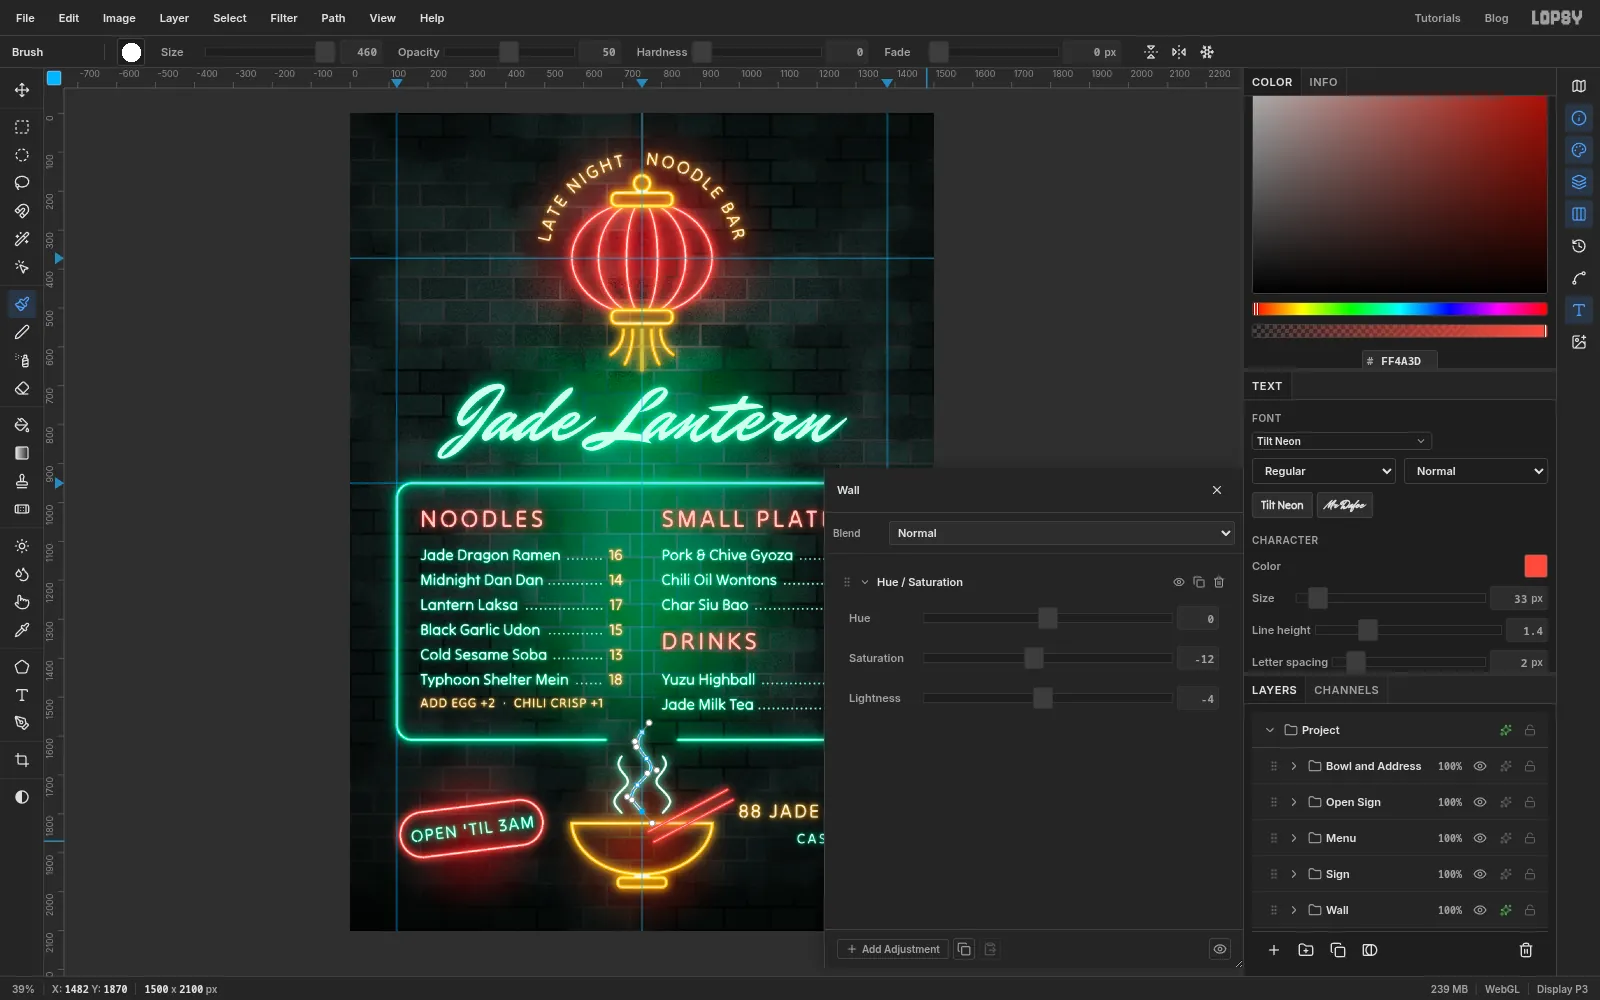
Knock the wall back with a group adjustment
The wall is a little too colourful for a backdrop. Rather than repaint it, adjust the whole group.
- Click the effects button on the Wall group's row.
- Click Add Adjustment and choose Hue / Saturation.
- Set Saturation to
-12and Lightness to-4, then close the drawer.
The adjustment sits on the group, so the layers inside are untouched and you can change your mind later.
-
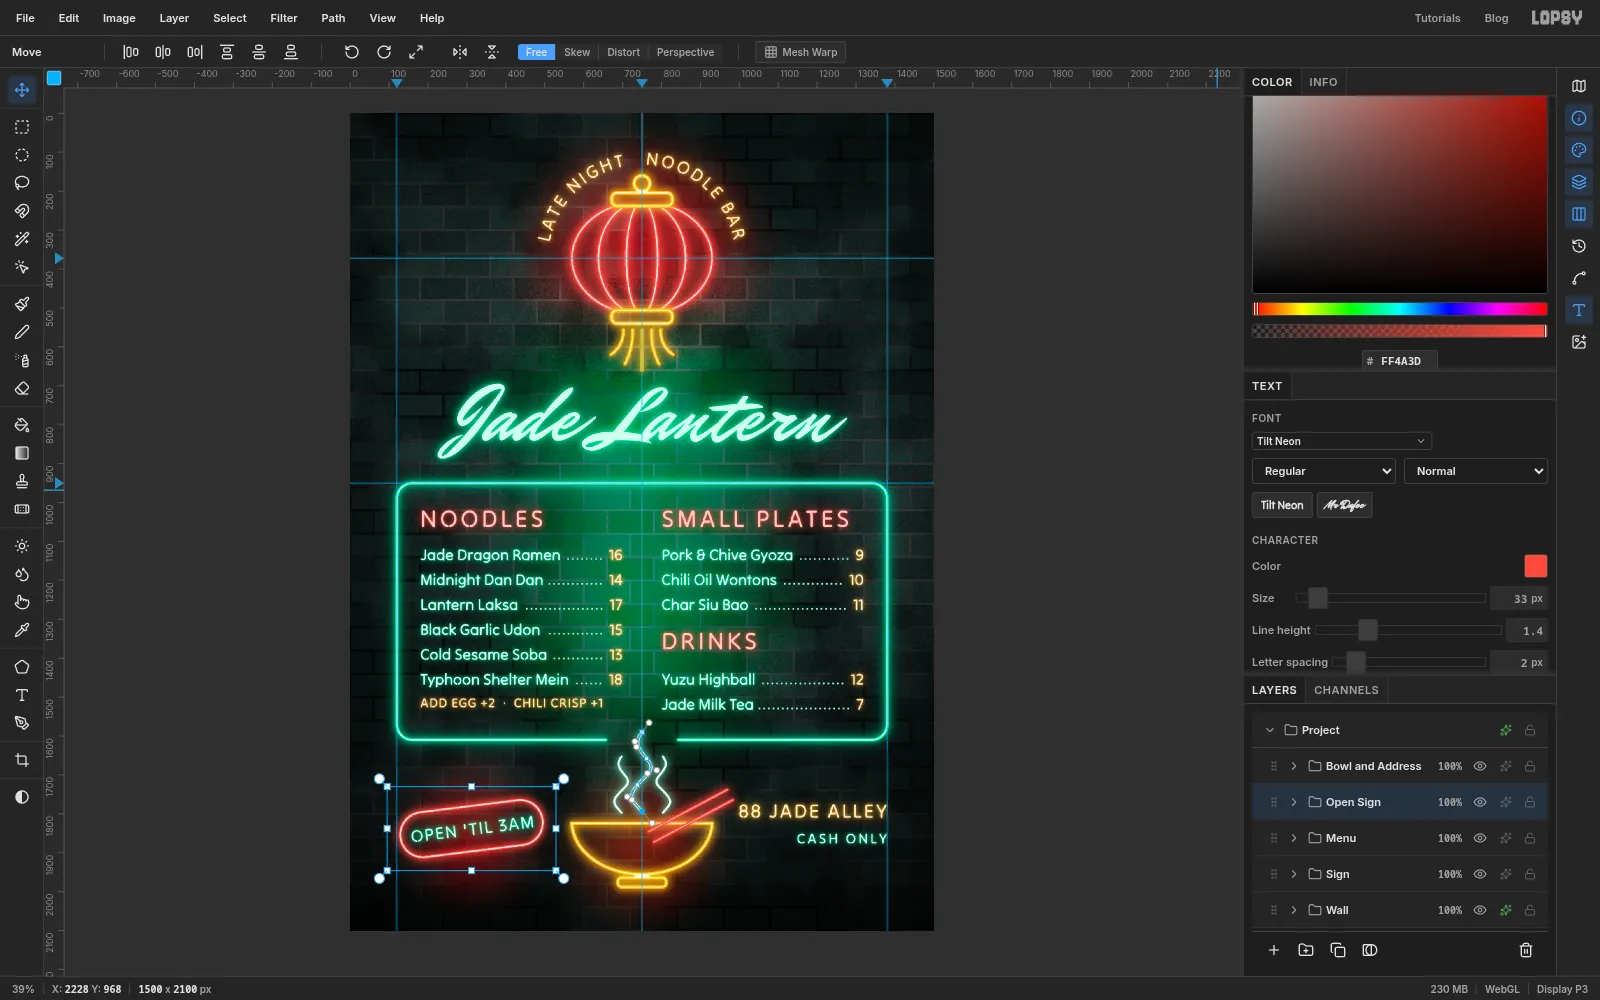
Nudge the OPEN sign as a group
Click the Open Sign group's row and choose the Move tool. One box frames everything in the group. Drag it down a few pixels until the sign sits level with the middle of the bowl. The pill, its core, its halo and the live text all move together.
-
Hide the guides and export
Choose View → Show Guides to hide the guides and look at the wall as a whole. Squint: the name should be the brightest thing, then the lantern, then the frame. If a path outline is still showing over the steam, click its row in the Paths panel to deselect it. Paths never appear in an export either way.
Choose File → Quick Export PNG for the menu, and File → Save Project to keep the layers.