Design a Neubrutalist Data Visualization Poster
Chart a day of caffeine in Lopsy as a neubrutalist poster, with hard shadows, tilted letter tiles, an hourly step chart and a coffee cup donut chart.
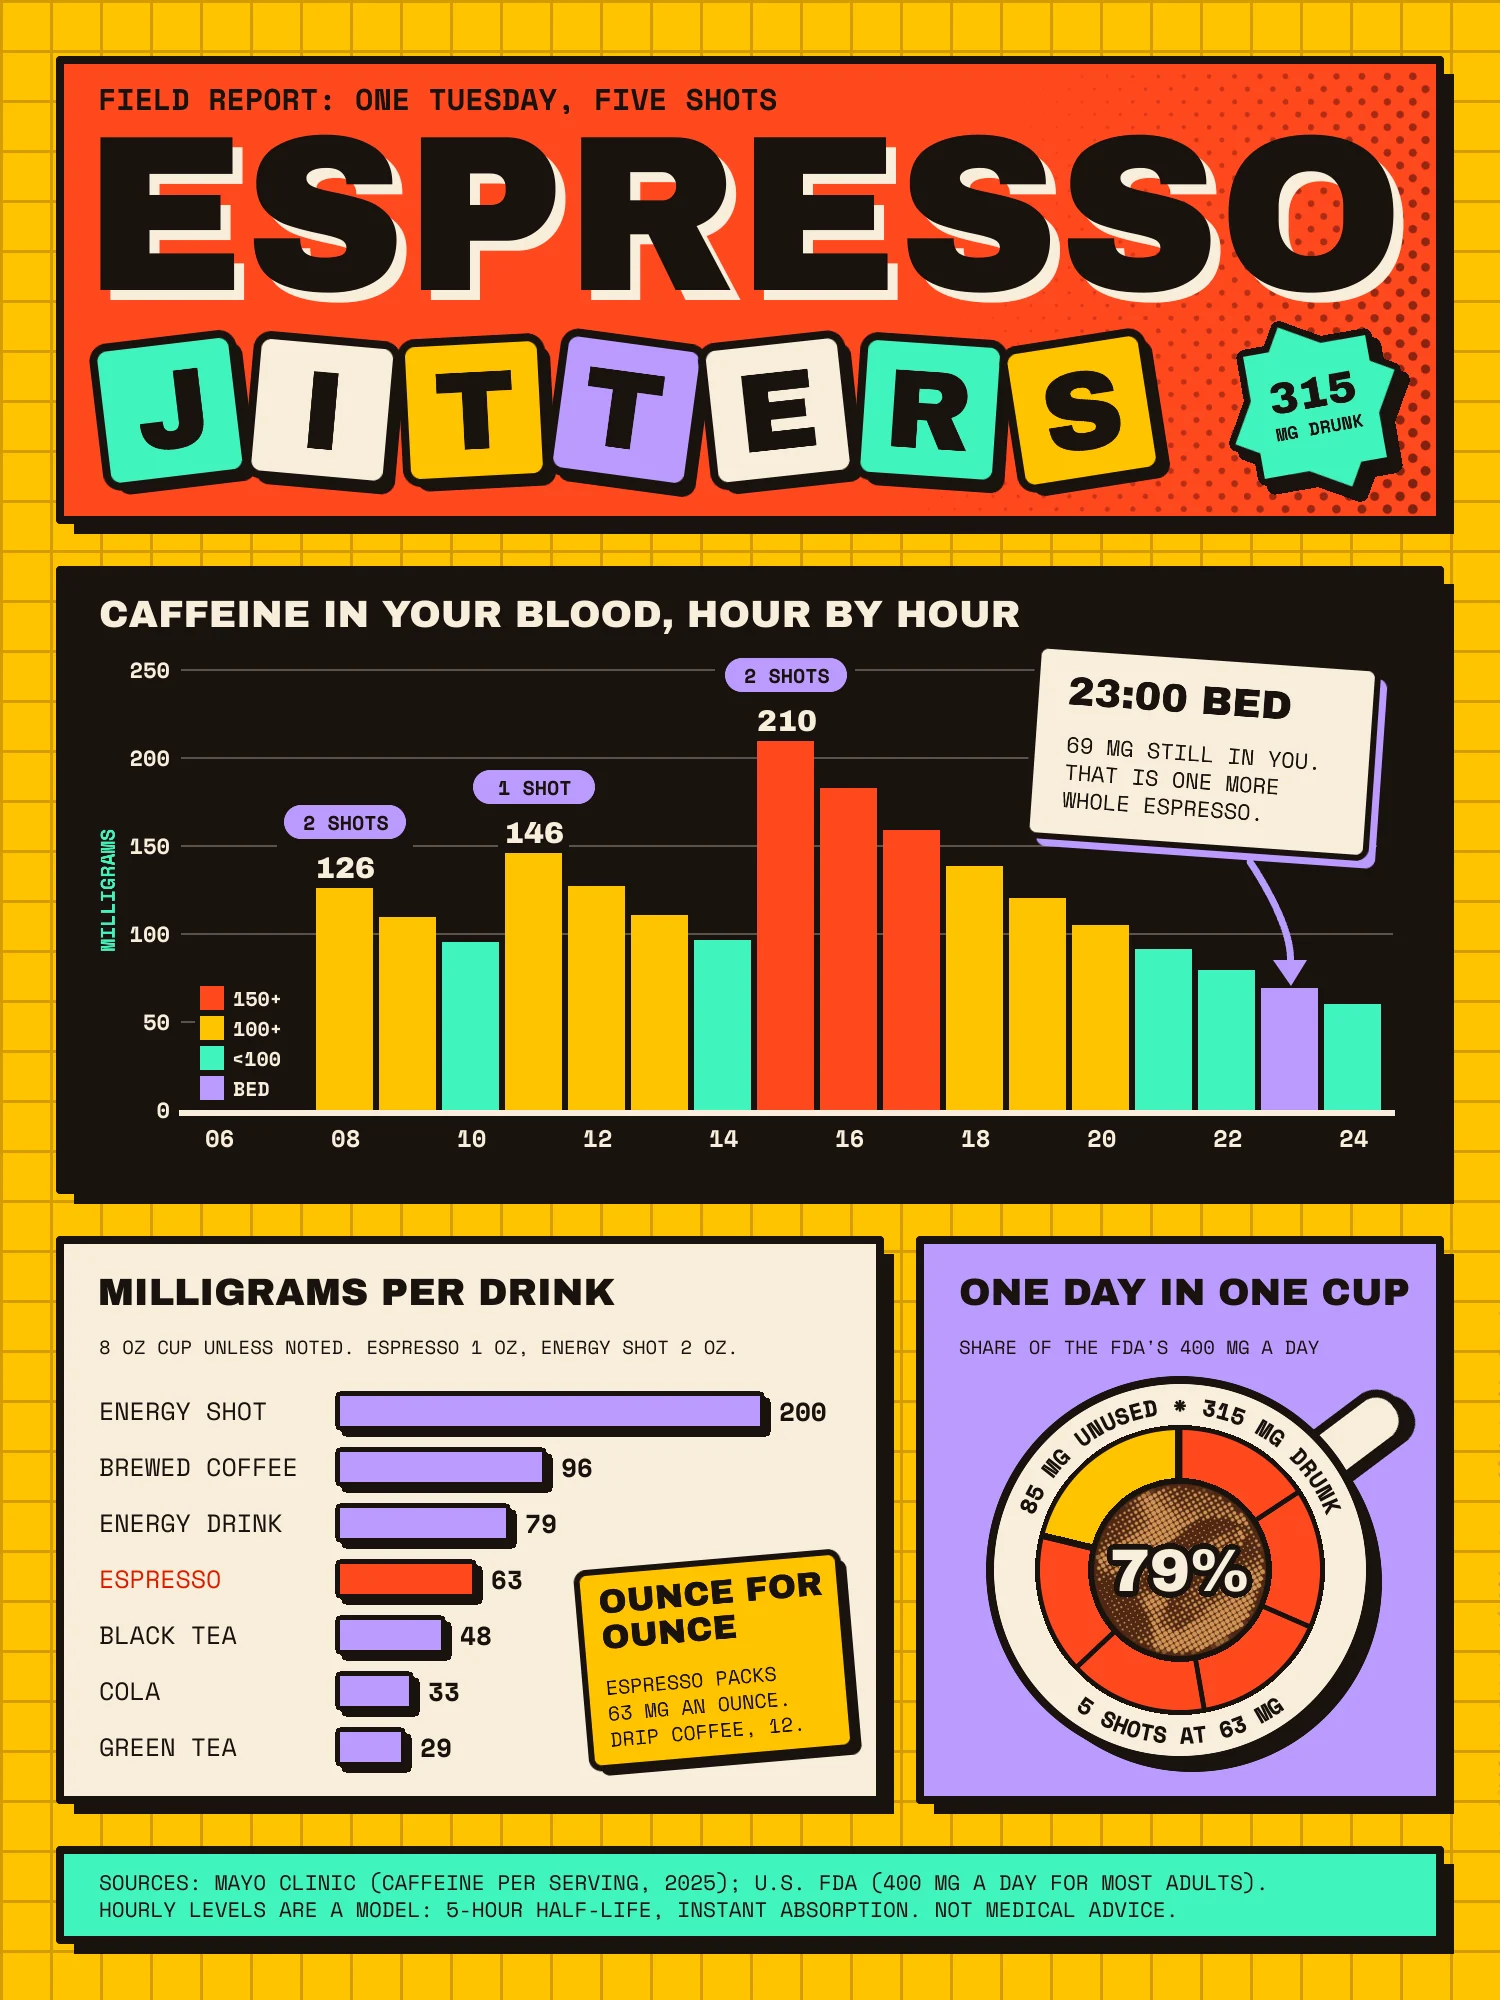
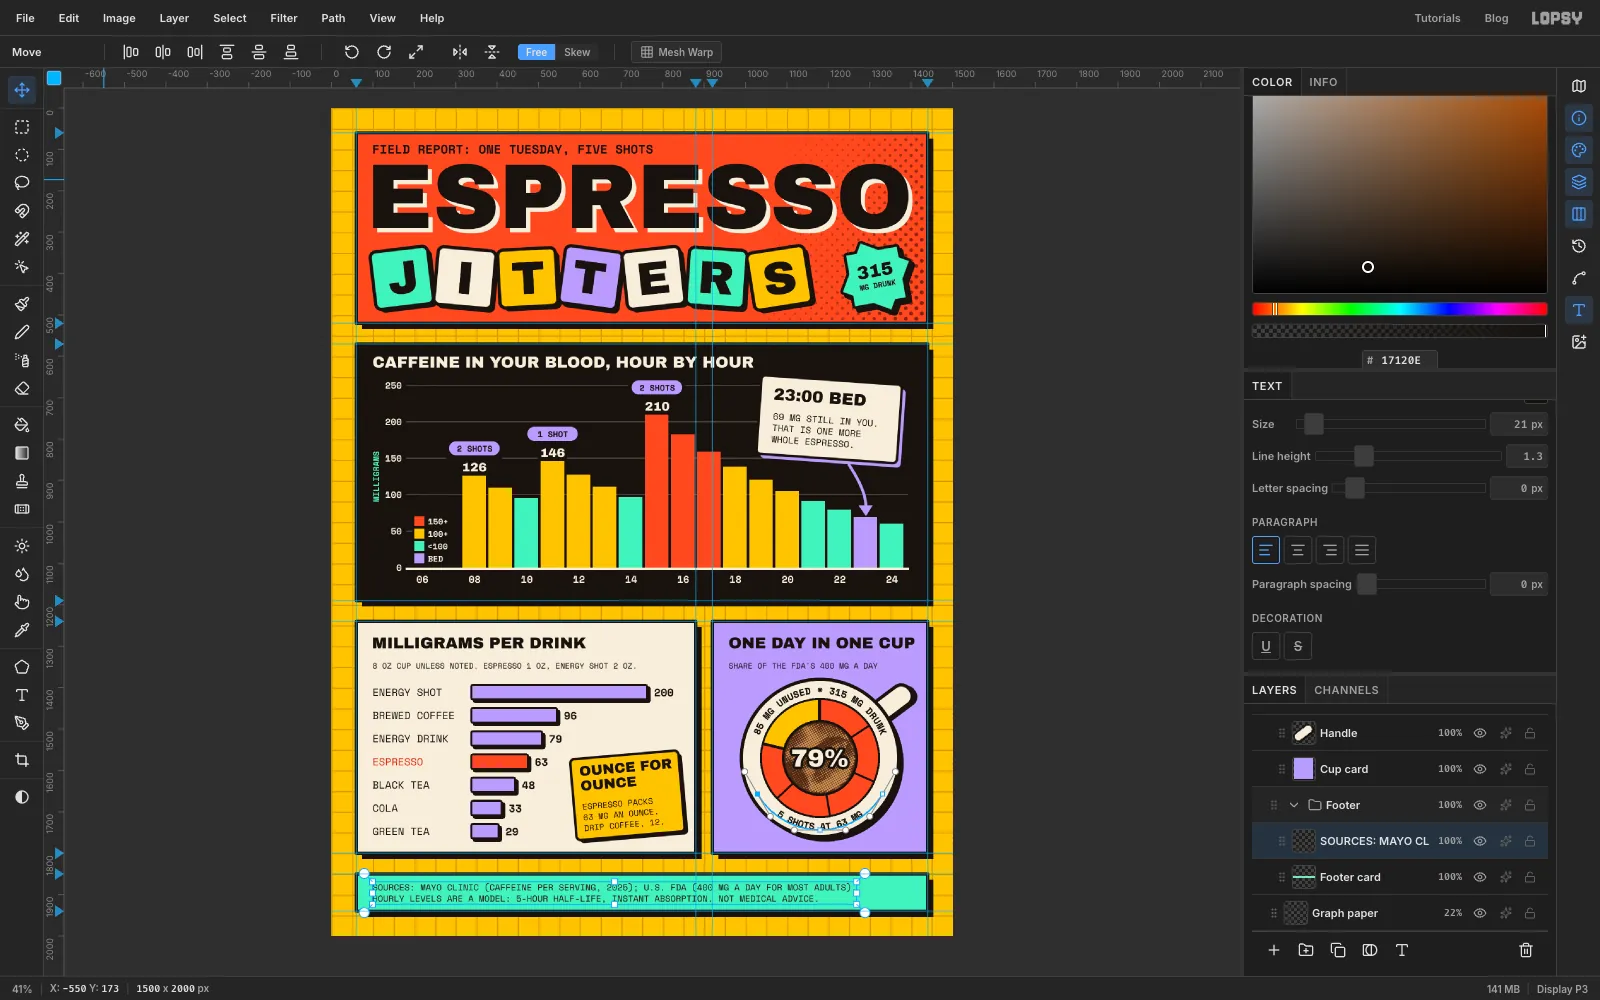
Neubrutalism suits data better than you might expect. Its thick outlines, flat colour and blocky shapes push you towards charts that say one thing loudly. In this tutorial you'll build Espresso Jitters, a 1500 × 2000 poster about what five espresso shots do to one Tuesday. It has three charts in a bento grid: hourly caffeine in the blood, milligrams per drink, and a coffee cup seen from above whose rim works as a donut chart.
You'll use pattern fills, guides, the Shape tool, layer effects, groups, multi-layer rotation, the Halftone filter, a photo and text on a path.
Every colour is flat:
-
Ink
-
Bone
-
Tomato
-
Mint
-
Lilac
-
Mustard
-
Coffee
-
bean dots
The numbers. Caffeine per drink comes from Mayo Clinic's table (2025 version). The 400 mg a day is the figure the U.S. FDA cites for most adults. The hourly levels are a simple model: caffeine halves every 5 hours and each dose arrives instantly. The 5-hour half-life is a common estimate, not an FDA figure. Doses are two shots at 08:00, one at 11:00 and two at 15:00, with 63 mg in a shot.
The photo. You'll need Roasted coffee beans by MarkSweep on Wikimedia Commons, released into the public domain. Download the 1600 × 1200 original.
Five habits to use throughout.
- Exact selections. With nothing selected, a single click with a Marquee opens a dialog where you type From and To corners. Use it whenever a step gives coordinates. The status bar shows the cursor position as you move.
- Exact shapes. With the Shape tool set to Pixels, a single click opens a dialog for Width and Height, and the shape is centred on your click. Cards use two shapes on one layer, and the gap between your two clicks sets the shadow, so zoom in (hold Cmd and scroll) if you need to be accurate. Set Stroke before each shape, because it carries over: every shadow has no stroke.
- New text. Before you set up new text, click a raster layer's row, so the options don't restyle the last text layer. Open the Text panel from the T icon on the right-hand rail. Set Line height
1, Letter spacing0and Align left unless a step says otherwise, because these carry over. Press Tab to commit text. If your click lands inside existing text, it edits that text instead, so start new text in empty space and move it afterwards. - Moving and turning. Rotation handles and arrow-key nudges only work with the Move tool, so press V first after typing text or making a marquee. Hold Shift to nudge 10 px at a time.
- Effects. Close the Layer effects drawer with its X when you've finished with it. It floats over the canvas and catches clicks meant for the picture.
-
Set up the mustard ground
Choose File → New, set Width
1500and Height2000in pixels, and click Create.Click the Background row, set the foreground to Mustard and choose Edit → Fill. Leave
Layer 1for the next step.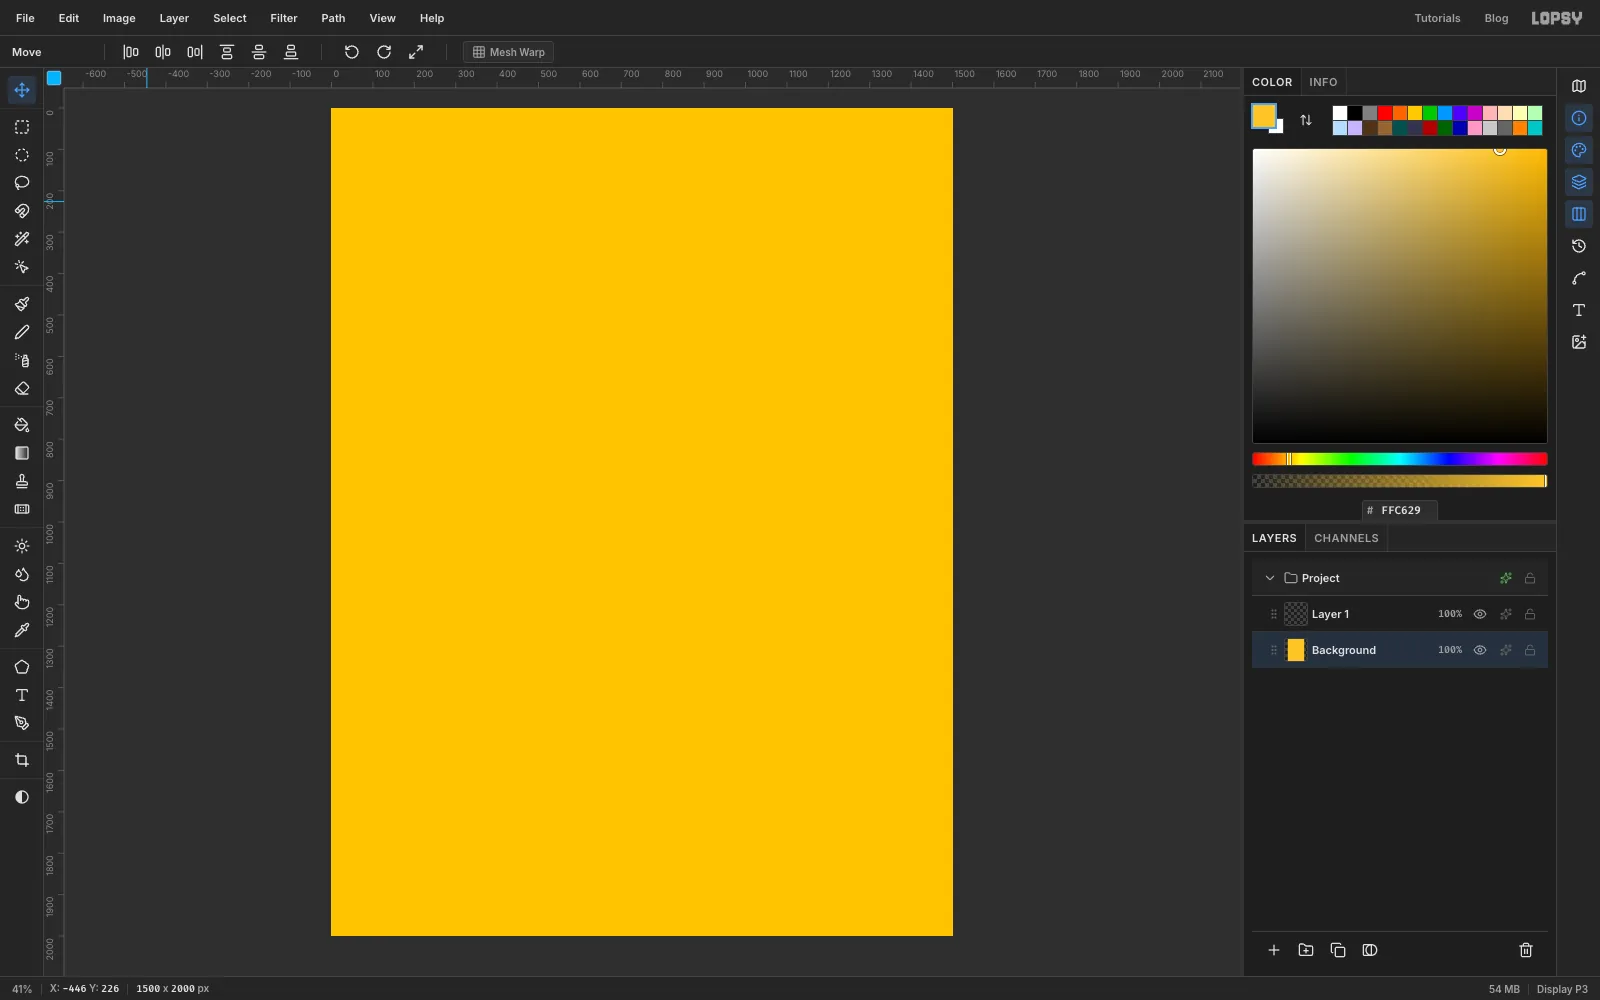
-
Draw a graph-paper tile
Click
Layer 1and rename itTile. Pick the Pencil (N) at Size3and set the foreground to Ink .This step needs exact pixels, so zoom in on the middle of the canvas to at least 200% and watch the status bar. Draw an L: click at
701, 951, then Shift-click at750, 951for the top line. Click at701, 951again and Shift-click at701, 1000for the side.Use an exact Rectangular Marquee from
700, 950to750, 1000, then choose Edit → Define Pattern. Press Cmd+D to deselect, delete the layer with the bin icon under the Layers panel, and zoom back out to fit the page.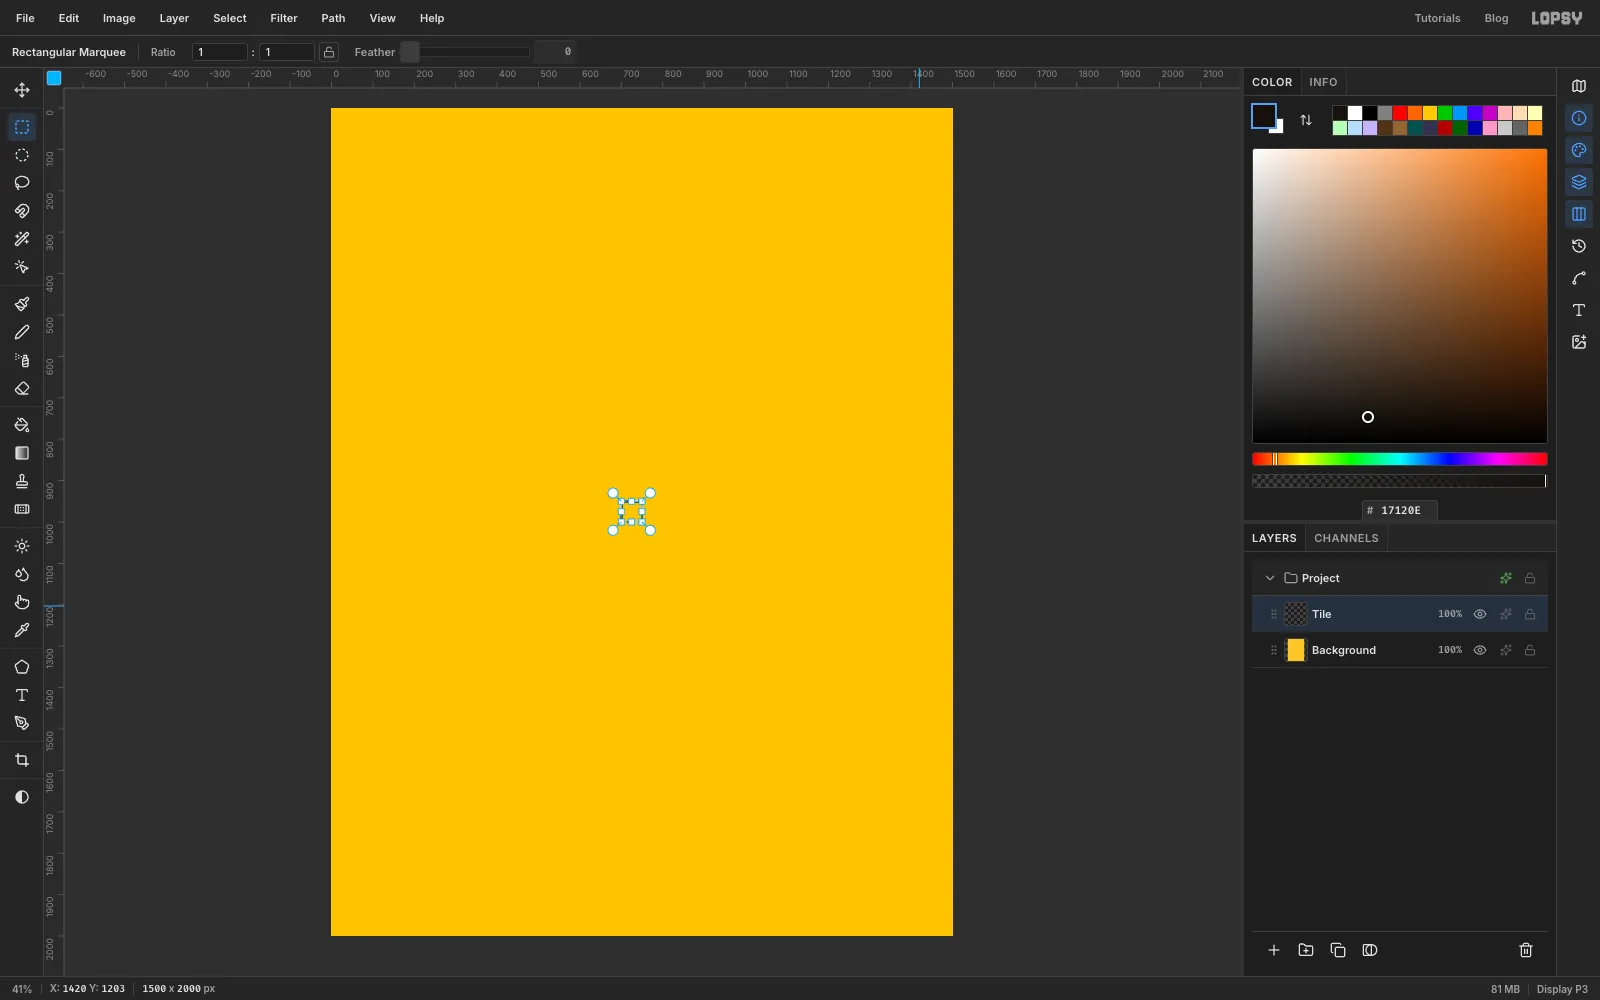
-
Fill the page with the pattern
Click Add Layer (the + under the Layers panel) and double-click the new row to rename it
Graph paper. Choose Edit → Fill with Pattern…, make sure your new tile is selected and click Apply.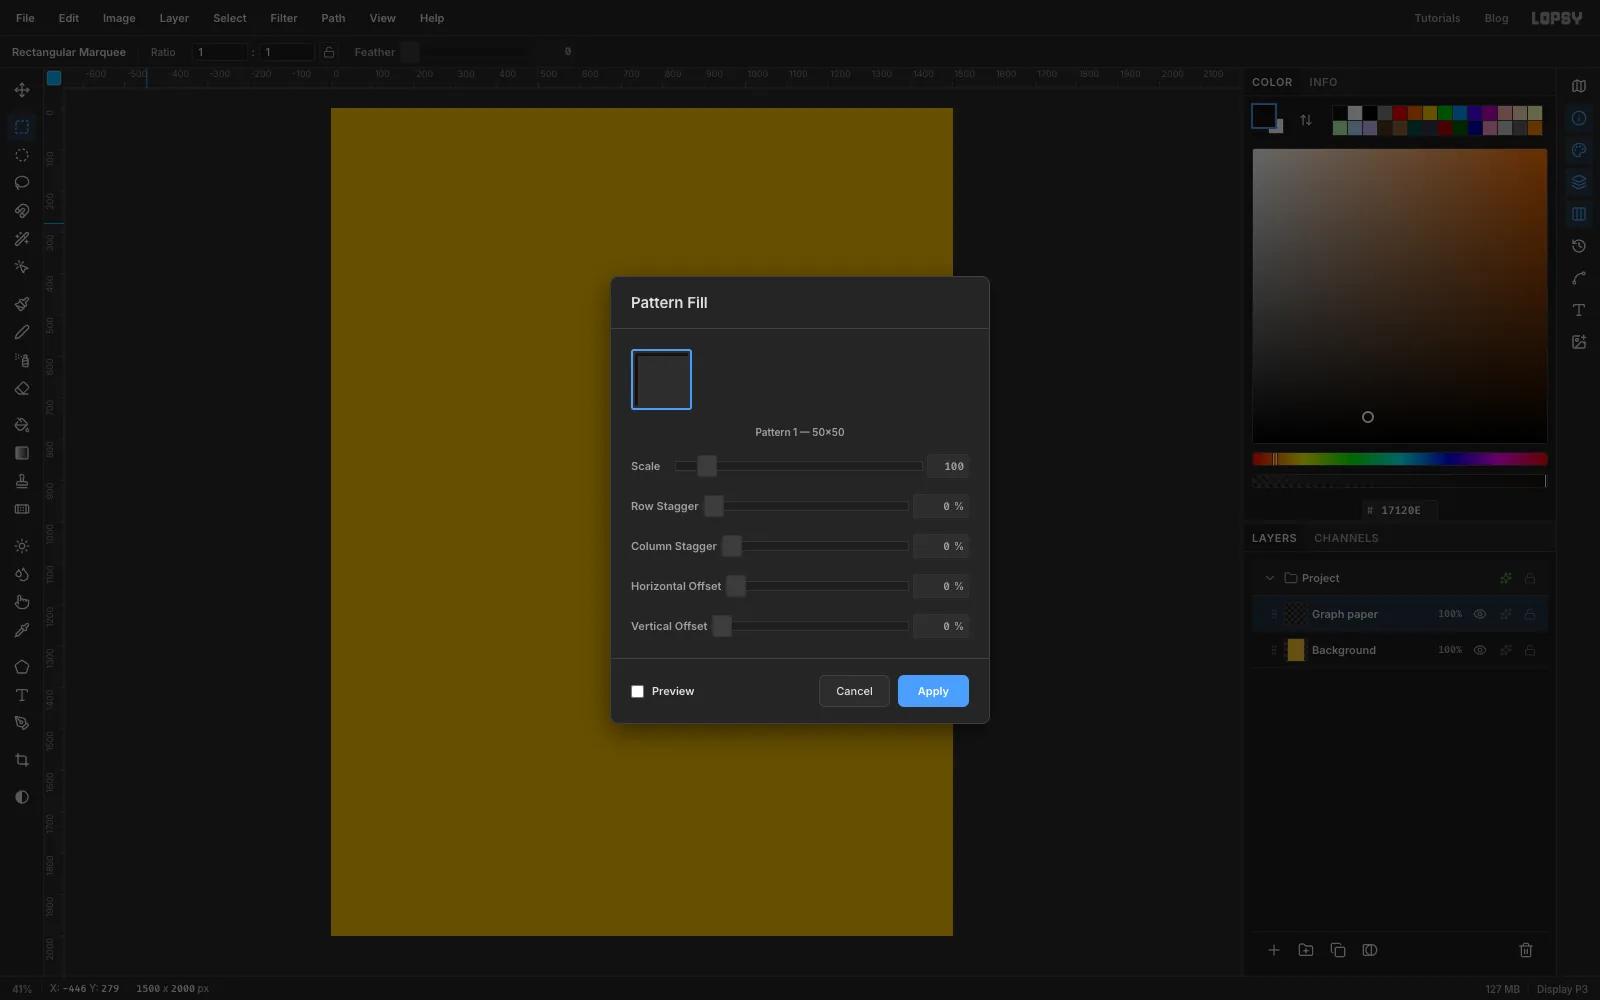
-
Fade the grid back
Click the
100%on the Graph paper row and set the opacity to22%. The grid should sit quietly behind everything, as a nod to chart paper.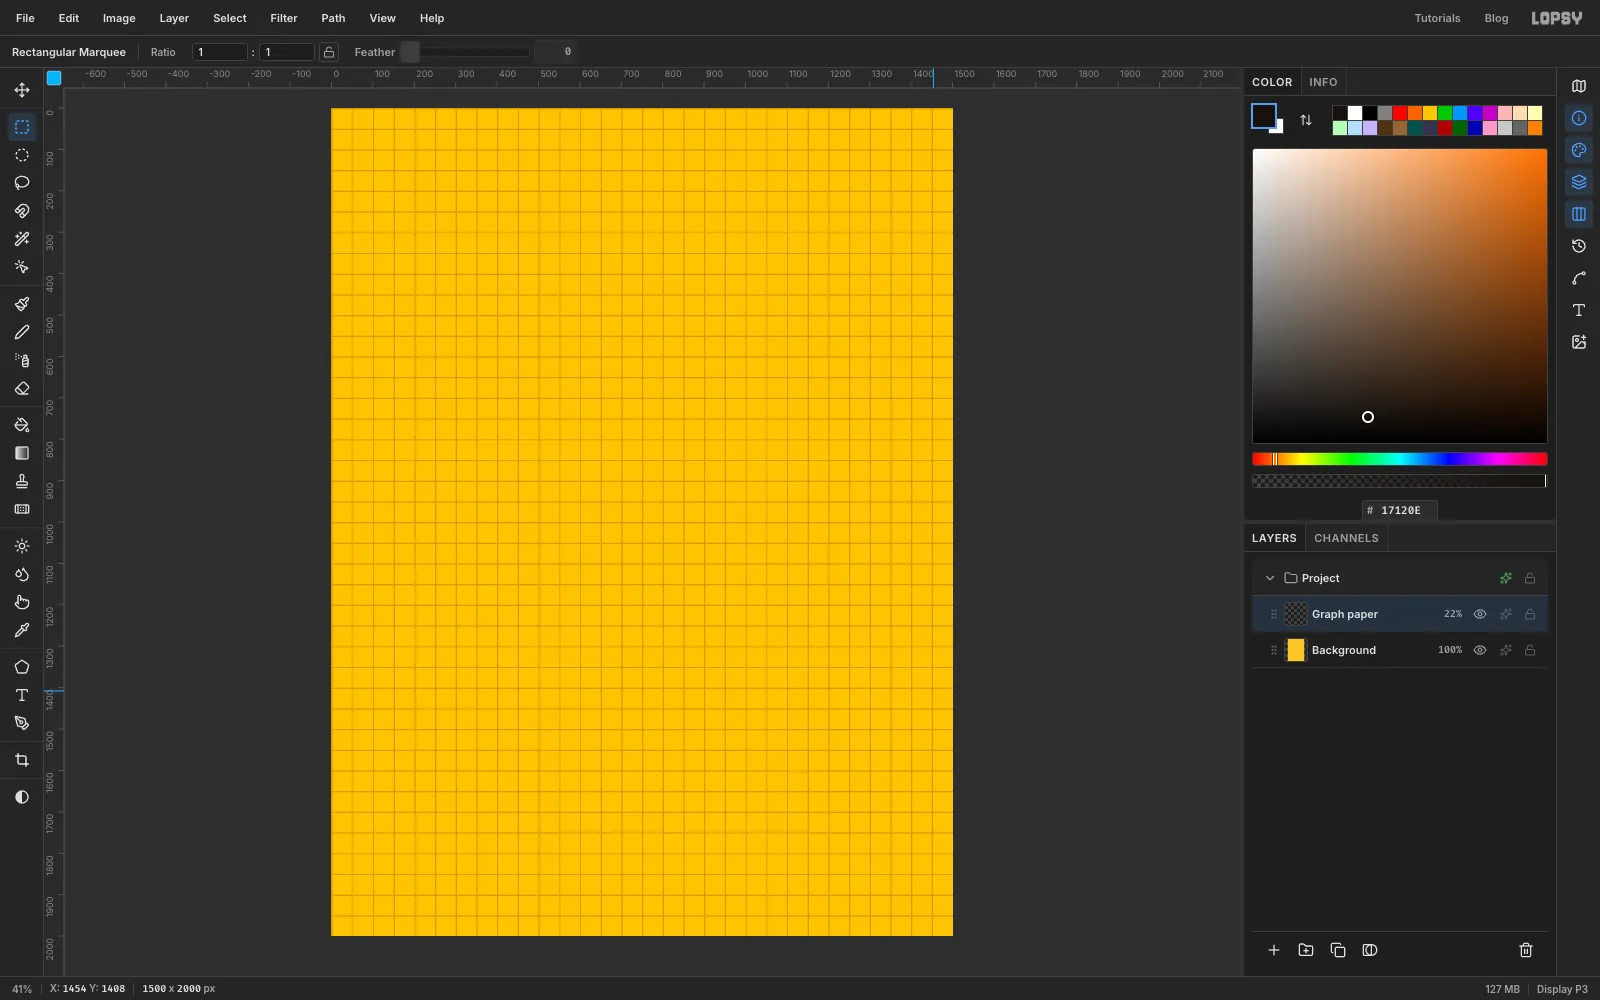
-
Lay out the bento grid with guides
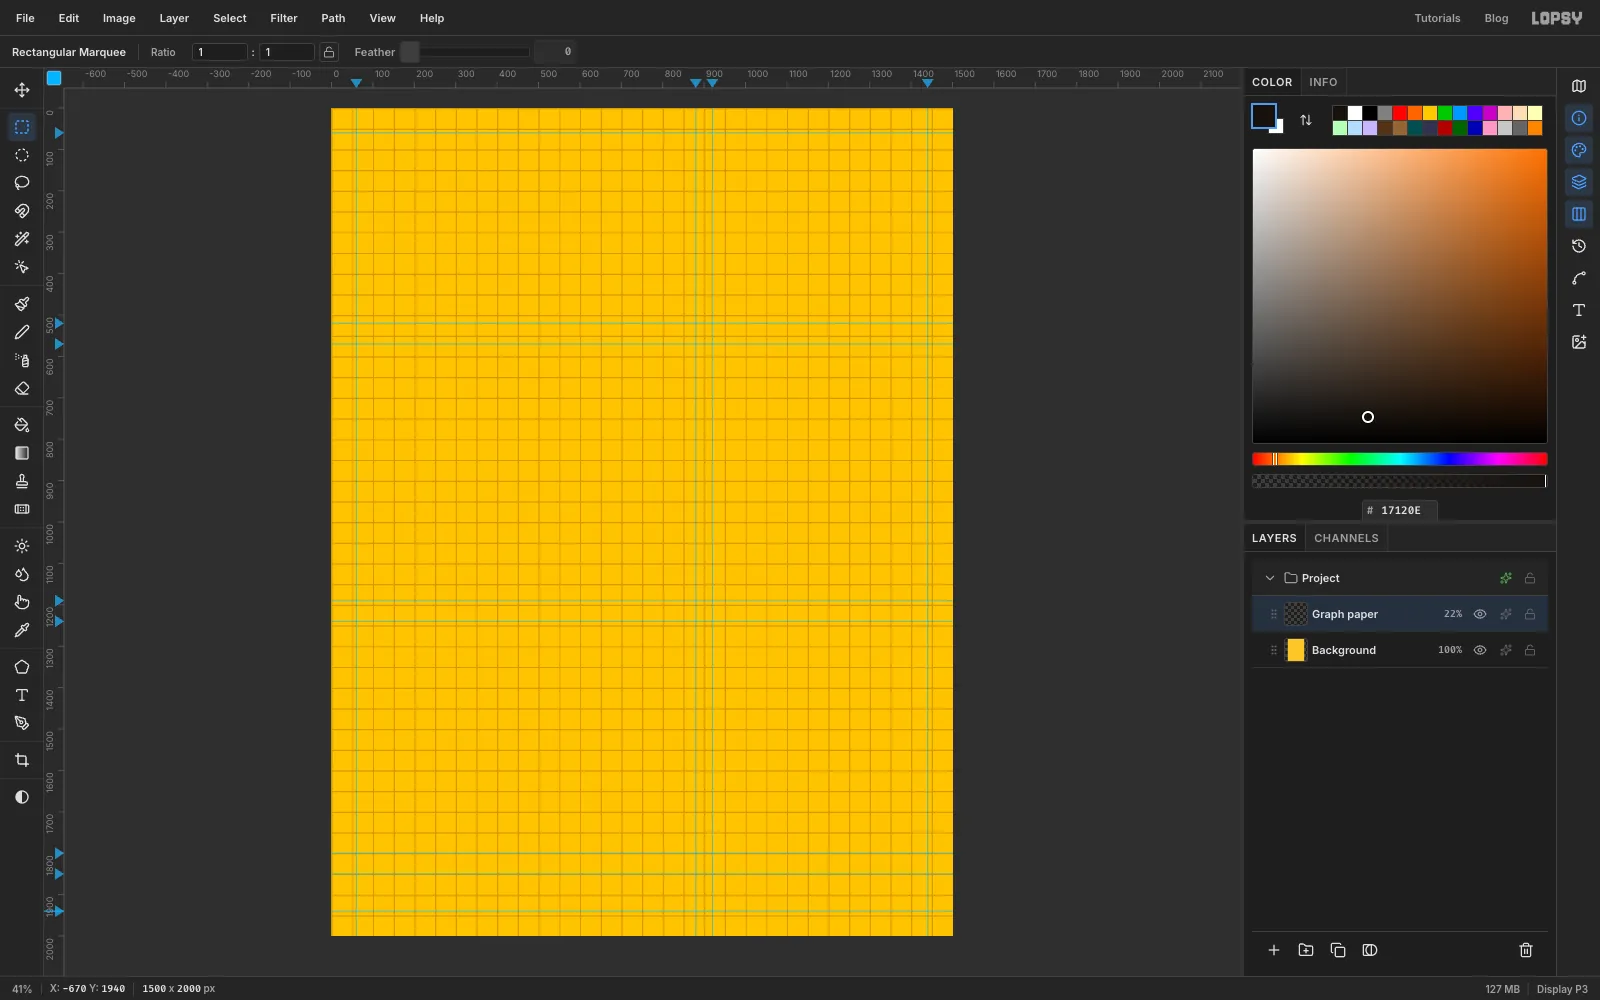
Click a ruler to drop a guide. Clicking the top ruler makes a vertical guide, and the left ruler a horizontal one. Add these:
- Vertical at
60,880,920and1440 - Horizontal at
60,520,570,1190,1240,1800,1850and1940
That gives a full-width title, a full-width chart, two panels side by side and a footer strip.
- Vertical at
-
Build the first card
Every panel gets its own group. With Graph paper active, click New Group (the folder with a + under the Layers panel) and rename it
Title. Click Add Layer and rename the new layerTitle card. It should sit inside the group.Pick the Shape tool (U). Set Shape to Rectangle, Output to Pixels and Corner Radius to
0. Click the Fill swatch and type Ink into its hex field, and use Remove stroke if there's a stroke. Close the popover by clicking the swatch again.Click at
764, 304and enter Width1380, Height460. That's the hard shadow. Now change Fill to Tomato, add a Stroke in Ink at Width8, then click at750, 290and enter the same size. Both shapes stay on one layer, and the 14 px offset between them is the shadow.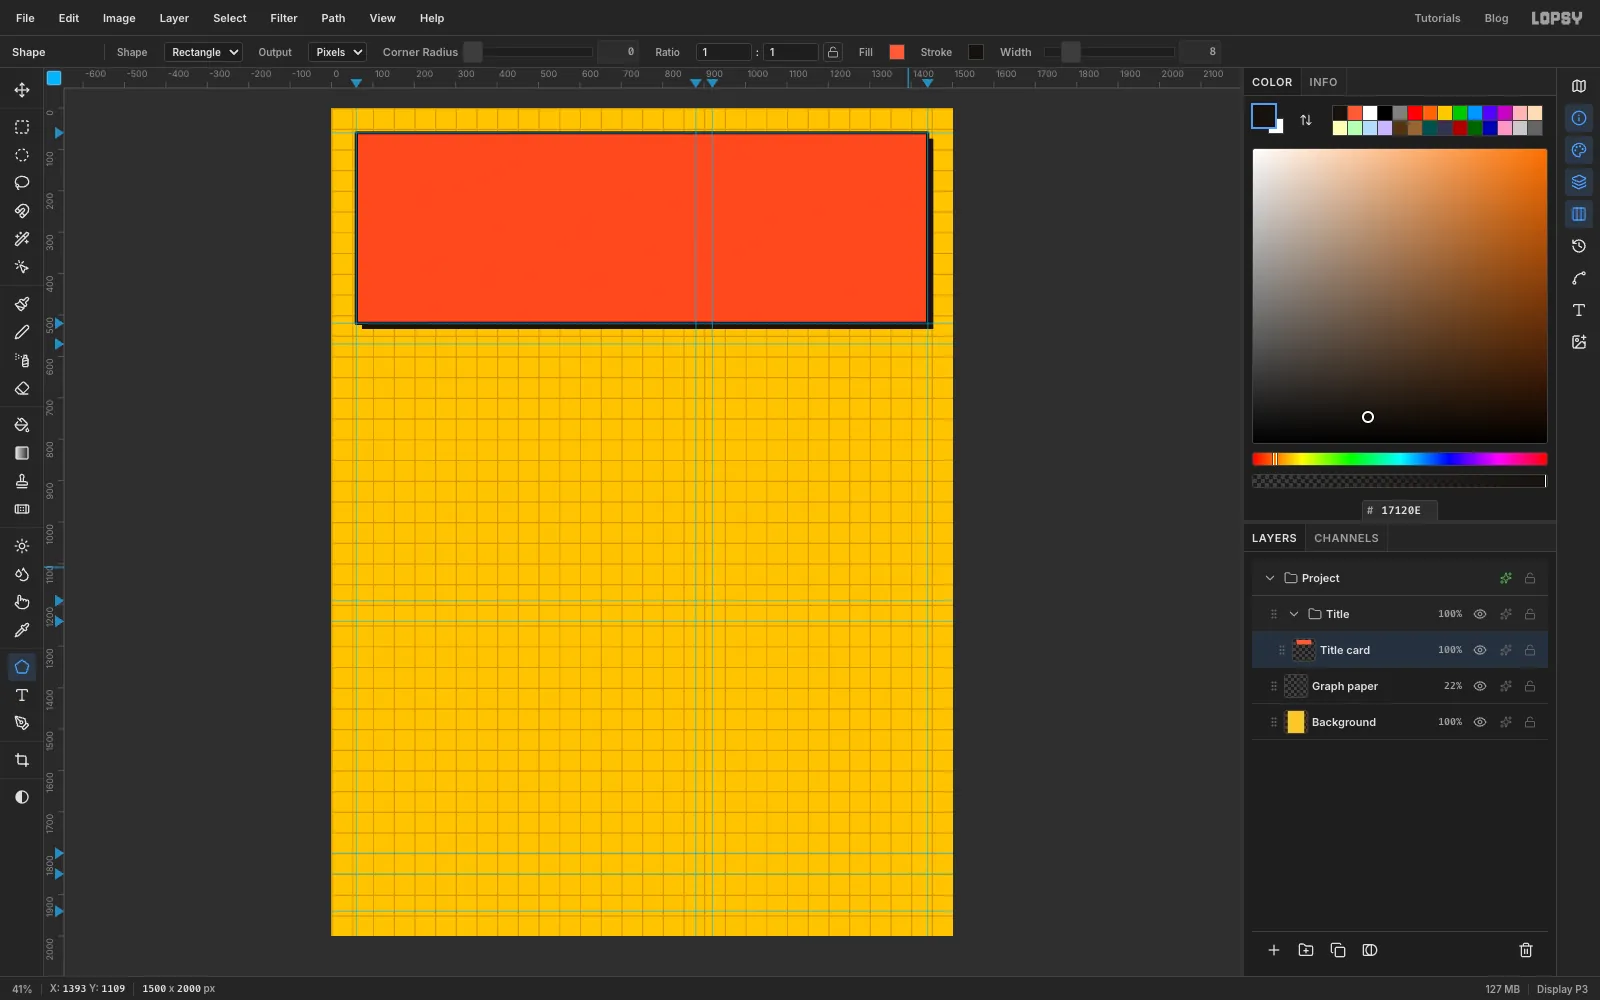
-
Add the other four cards
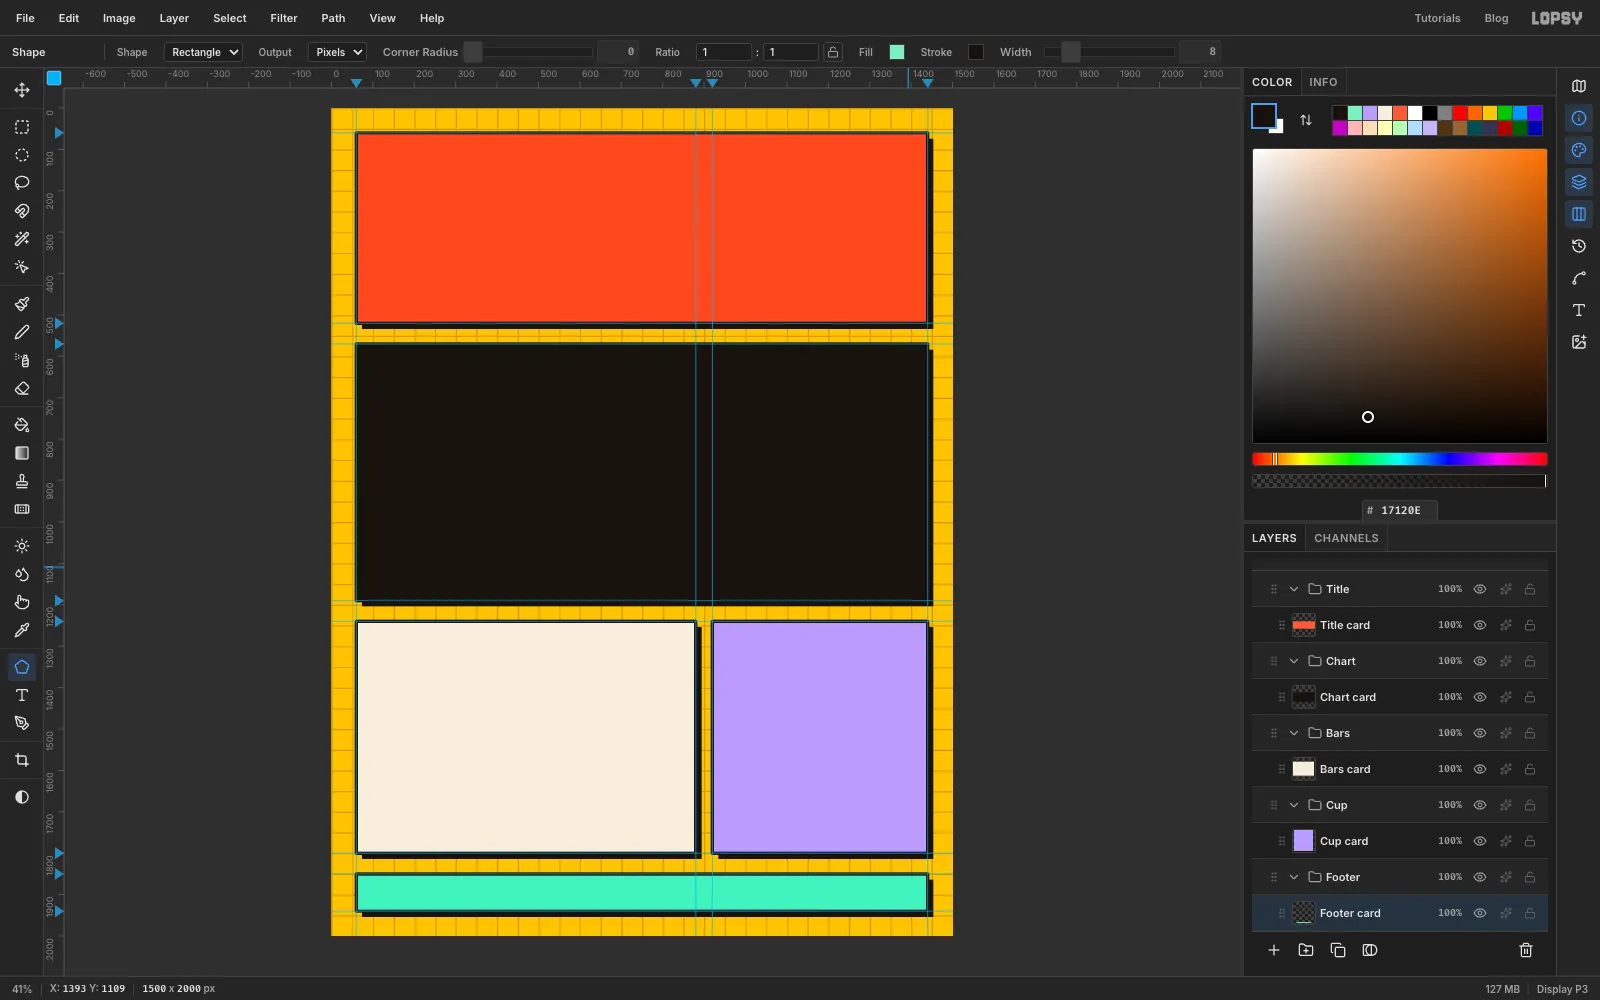
Repeat that for each card below. Each time, click the Graph paper row first, then New Group, then Add Layer. A new group lands directly above the active layer, so the Title group stays on top and its stickers can overlap what's below.
Each shadow is an Ink shape 14 px down and to the right, with no stroke. Each card is the fill colour with an 8 px Ink stroke.
- Chart /
Chart card: Ink, centre750, 880, size 1380 × 620 - Bars /
Bars card: Bone, centre470, 1520, size 820 × 560 - Cup /
Cup card: Lilac, centre1180, 1520, size 520 × 560 - Footer /
Footer card: Mint, centre750, 1895, size 1380 × 90
- Chart /
-
Start the comic dots
Click the Title card row. Make an exact Rectangular Marquee from
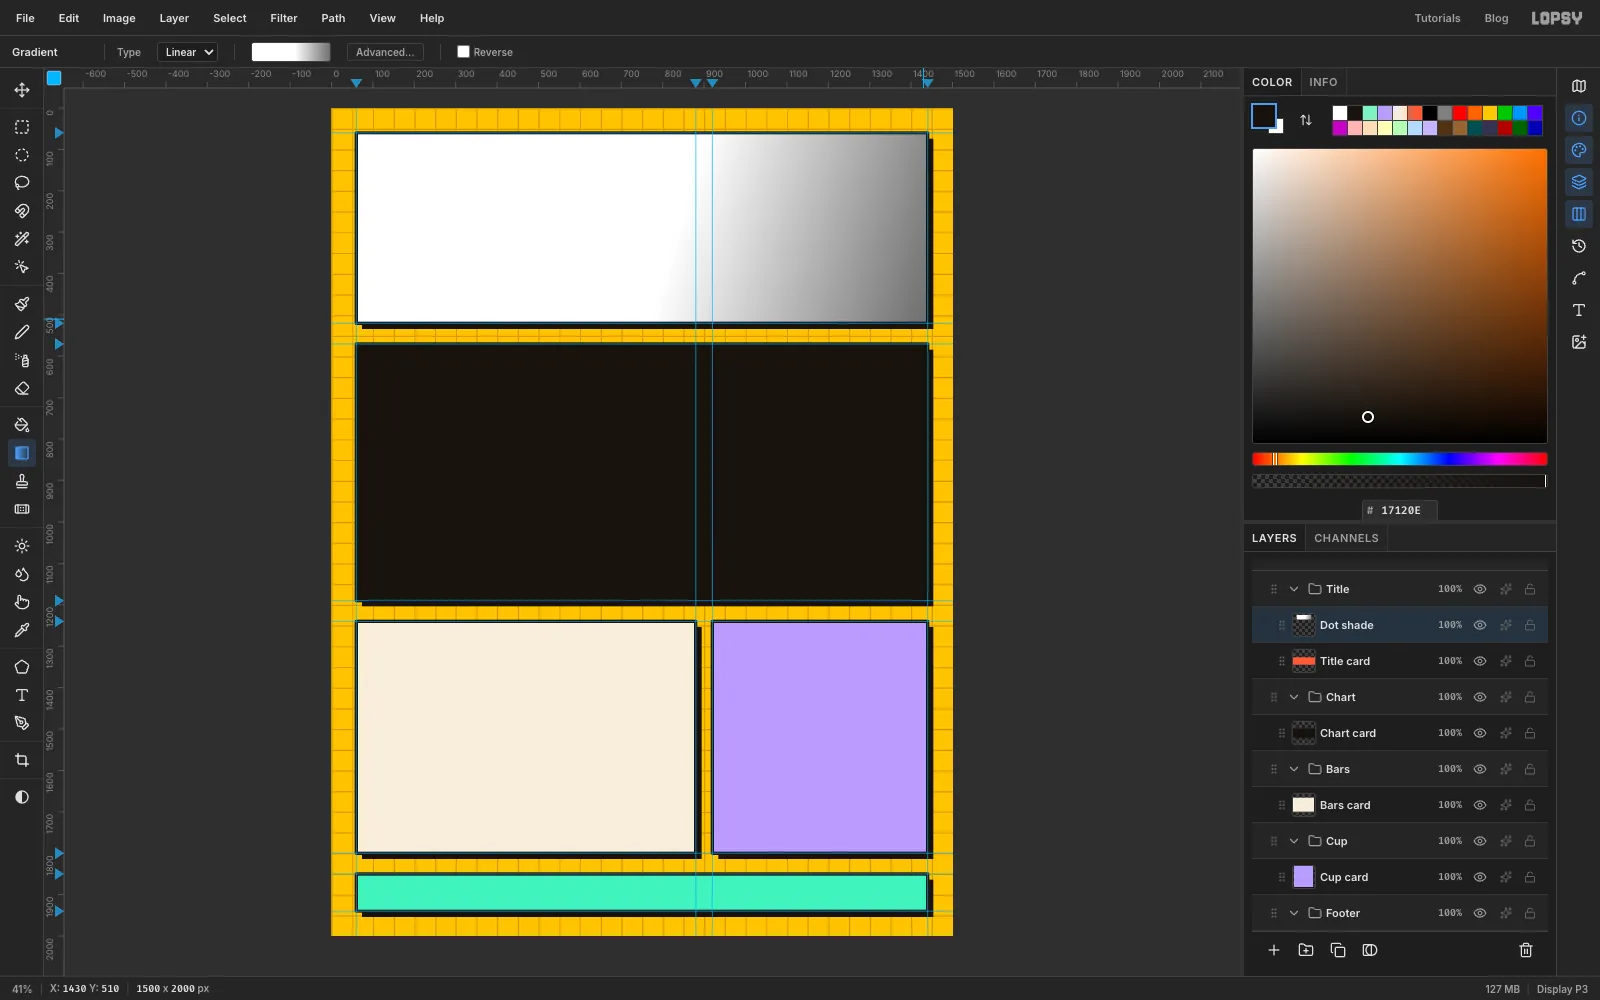
64, 64to1436, 516, just inside the outline. Add Layer and rename itDot shade.Pick the Gradient tool, keep Type on Linear and click Advanced…. The end stops are already there, so click each one and type its colour into the Hex field: white on the left and grey on the right. Click the empty row beside the bar at about 55% to add a middle stop, and make that white too. Click Done.
Drag from the top-left corner of the card to the bottom-right corner, then press Cmd+D. The tomato disappears for now. The blend mode in the next step brings it back.
-
Turn the gradient into halftone dots
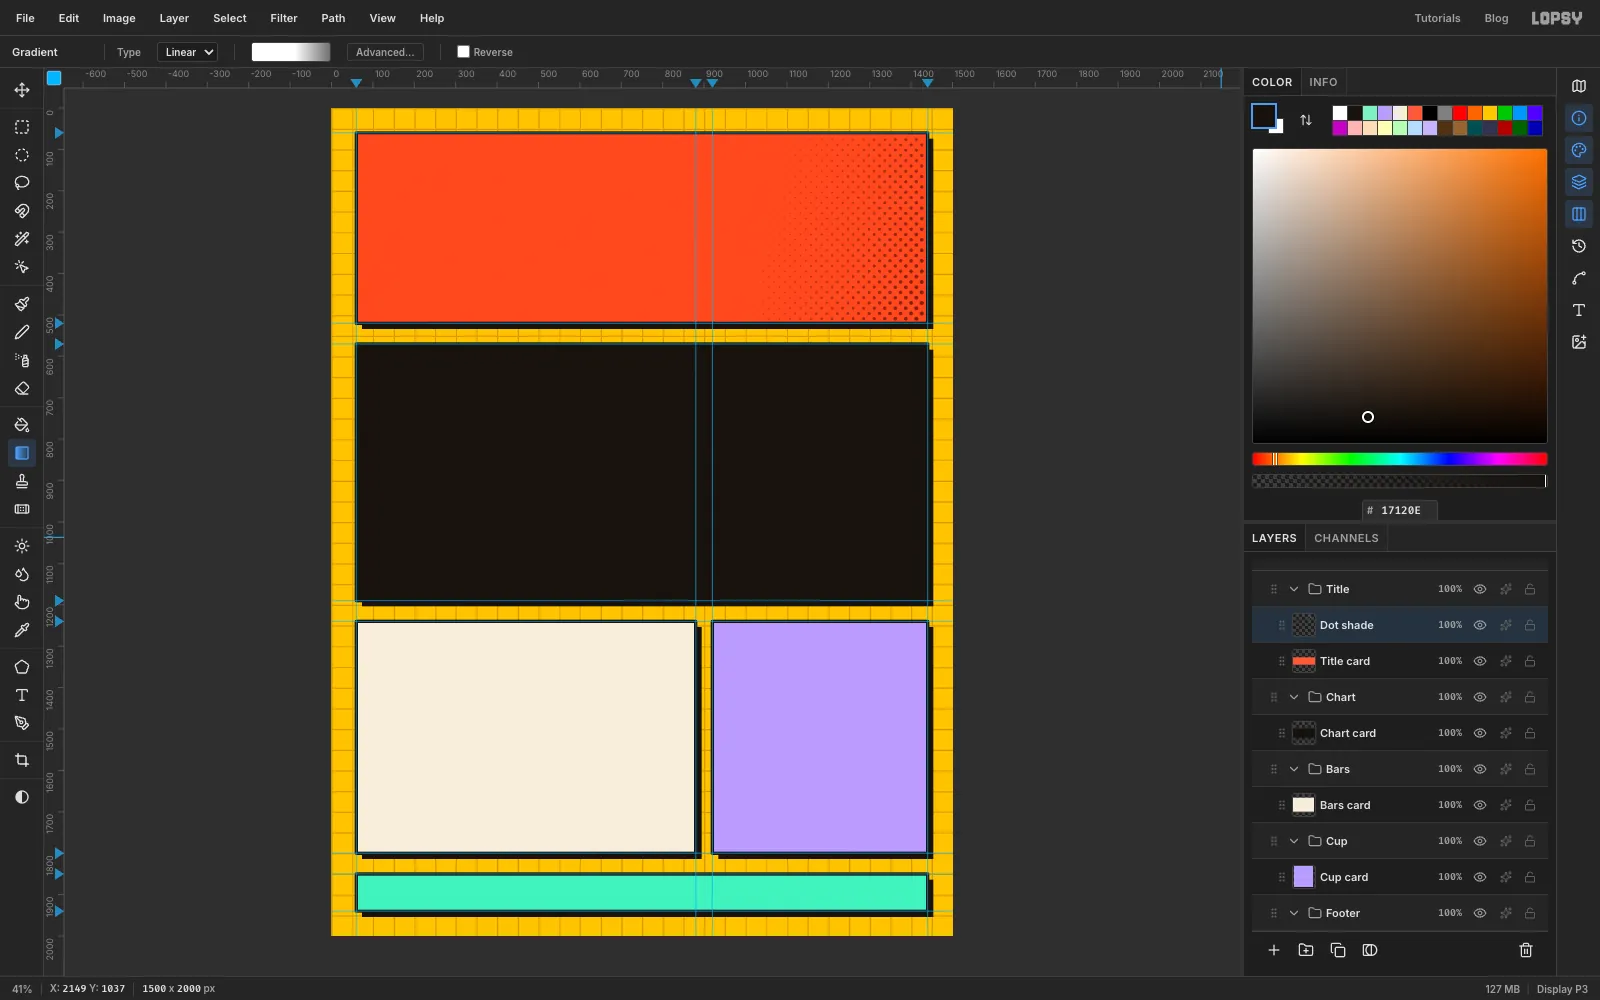
Choose Filter → Halftone and set Dot Size
18, Density1, Angle45, Softness1. Click Apply. White prints no dot, so the left side stays clean while the dots grow towards the corner.Click the row's Layer effects icon and set the blend mode to Multiply, so the dots darken the tomato instead of covering it in grey. Close the drawer with its X.
-
Set the headline
Click the Dot shade row. Pick the Text tool (T), set the font to Space Mono, weight Bold, Size
30and the foreground to Ink. Click near the top-left of the card and type:FIELD REPORT: ONE TUESDAY, FIVE SHOTSPress Tab. Click Dot shade again, set the font to Archivo Black at Size
222, click just below the first line and typeESPRESSO, then press Tab.Press V and use the arrow keys to line both up, with their left edges at about
x = 100, the small line's top at abouty = 88and ESPRESSO's top at abouty = 134.With ESPRESSO active, open its Layer effects and turn on Drop Shadow: colour Bone, Offset X and Offset Y
10, Blur0, Spread0, Opacity100. Close the drawer.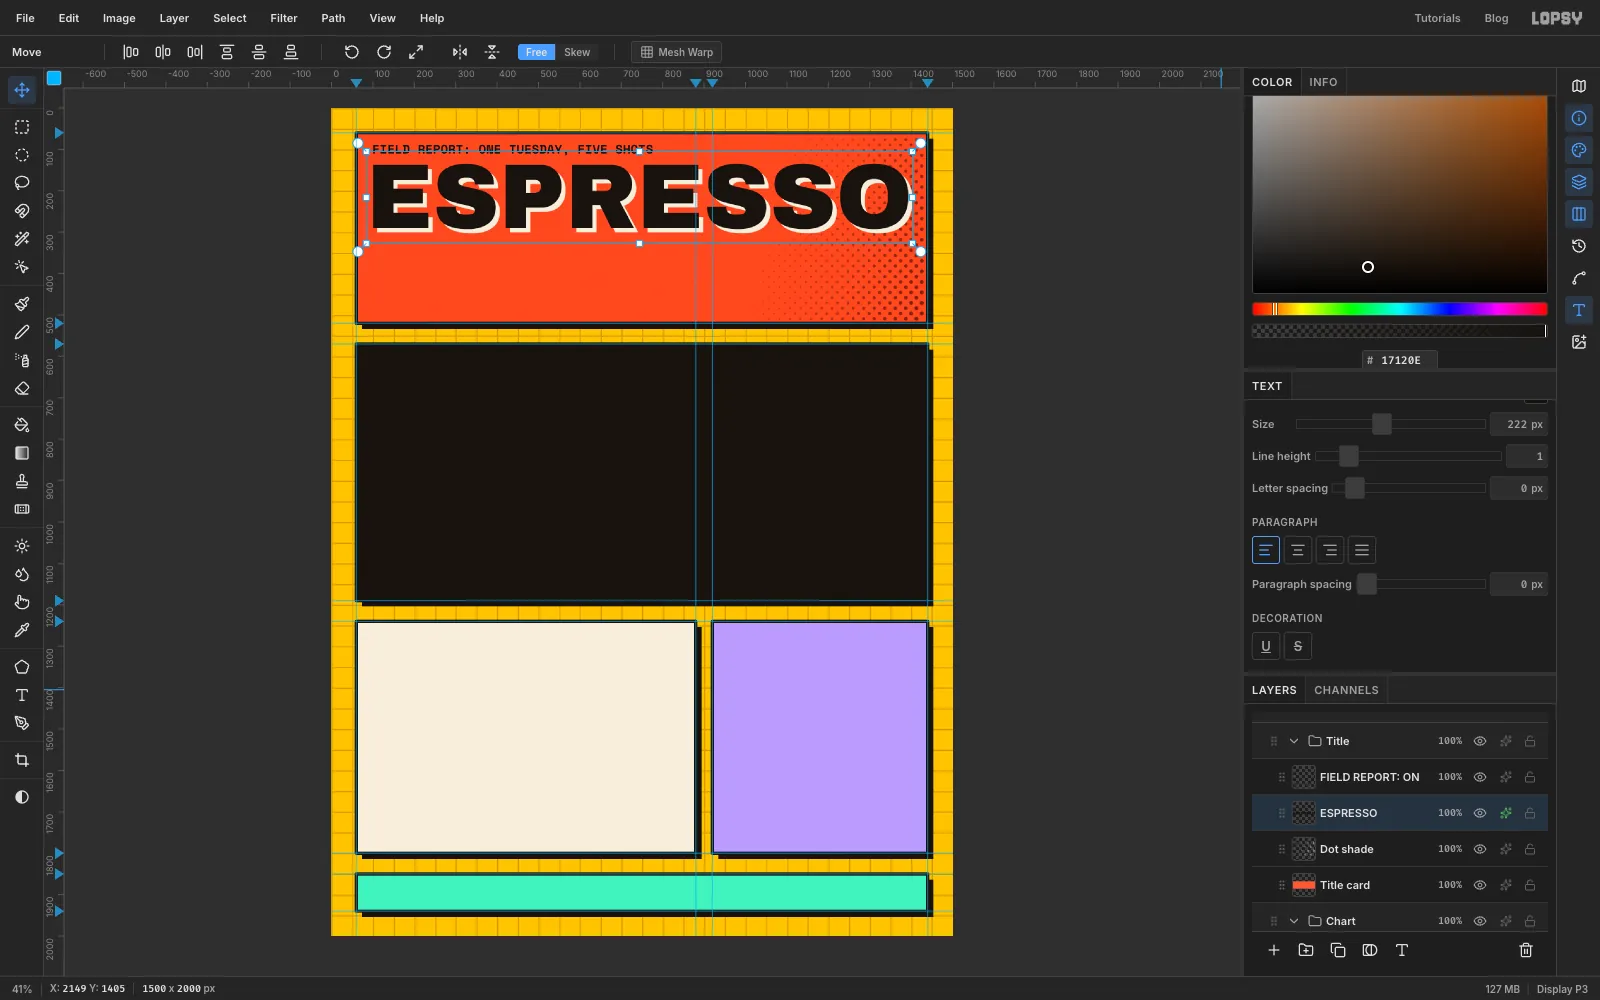
-
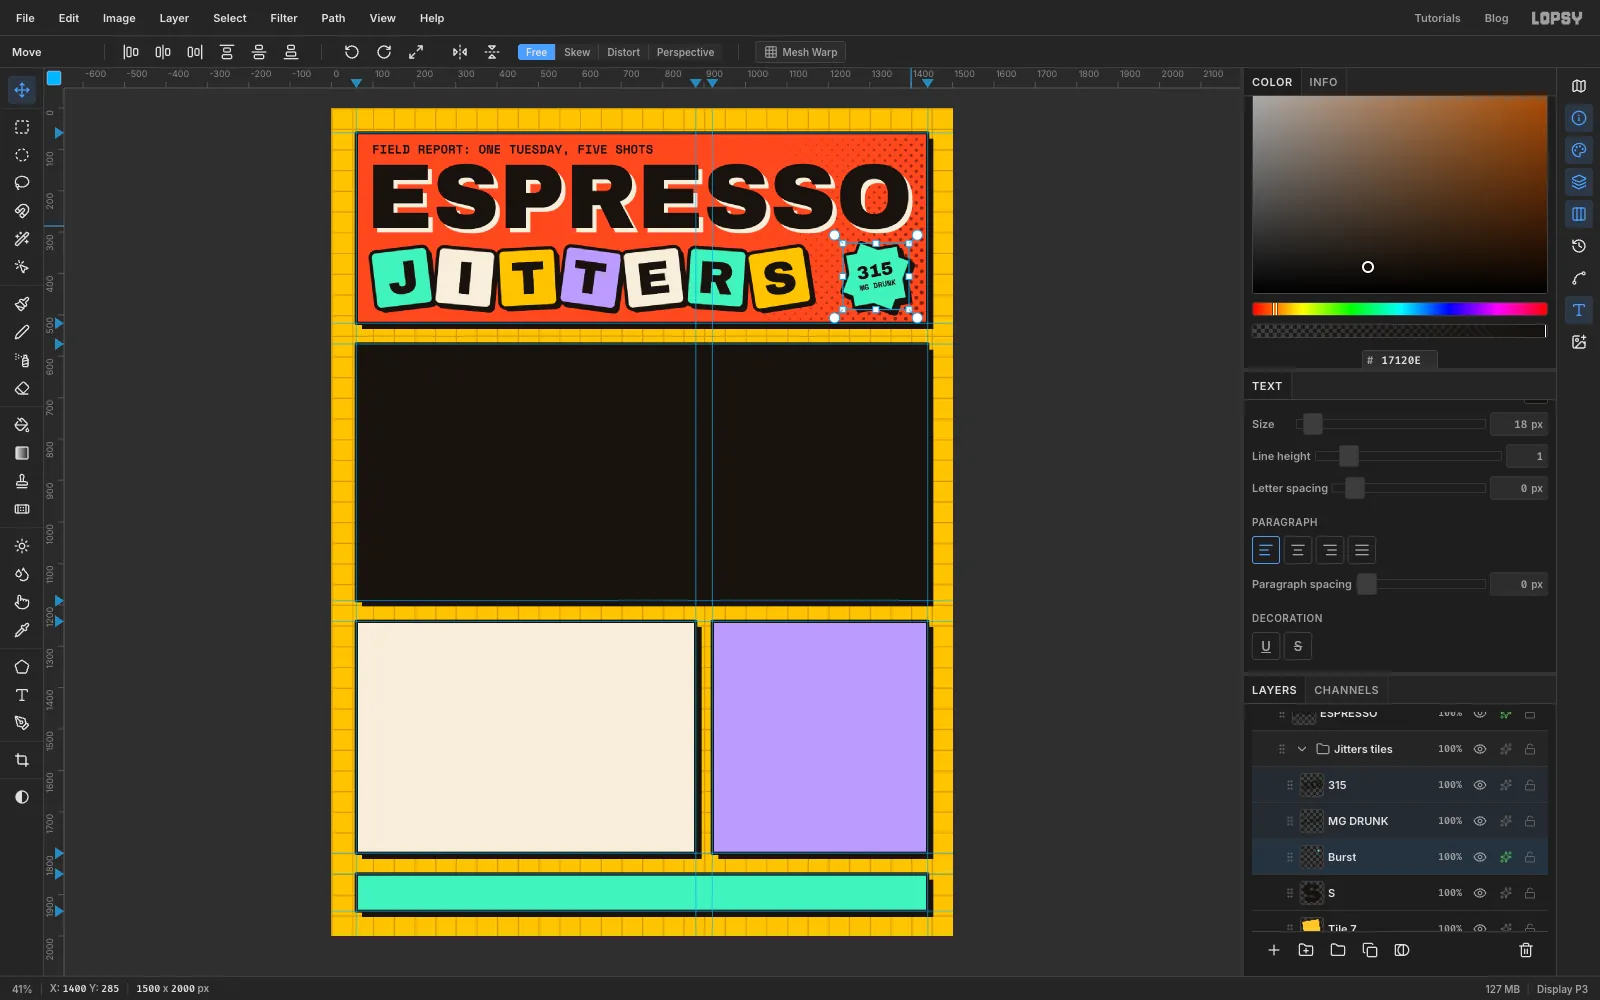
Make the seven letter tiles
Click Dot shade, click New Group and rename it
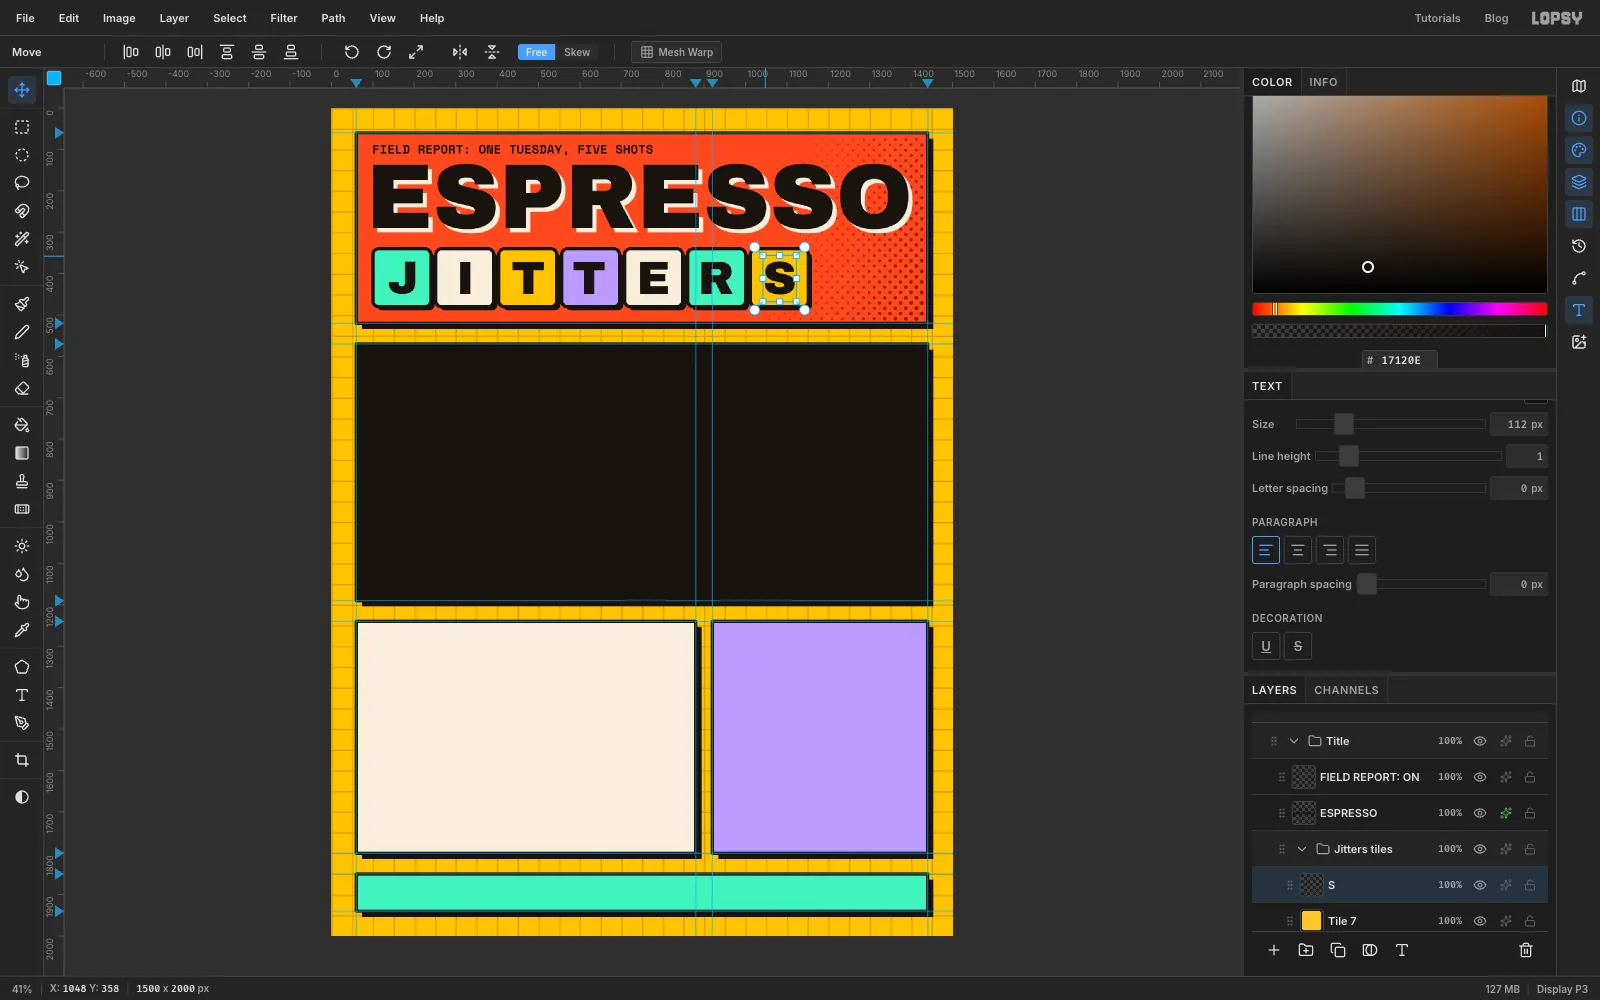
Jitters tiles. For each tile, Add Layer, then use the Shape tool with Corner Radius14:- Ink, no stroke, size 140 × 140, centred 9 px down and right of the tile's spot.
- The tile's colour with an 8 px Ink stroke, size 140 × 140, on the spot itself.
- With that tile active, add the letter in Archivo Black, Size
112, Ink. Press V and nudge it to the middle of the tile.
All seven centre on
y = 410:- J, Mint,
x = 170 - I, Bone,
x = 322 - T, Mustard,
x = 474 - T, Lilac,
x = 626(put this letter 5 px left of centre, because the tilt pushes it right) - E, Bone,
x = 778 - R, Mint,
x = 930 - S, Mustard,
x = 1082
Click the last letter's row before each Add Layer, so the tiles stack in order.
-
Tilt each tile with its letter
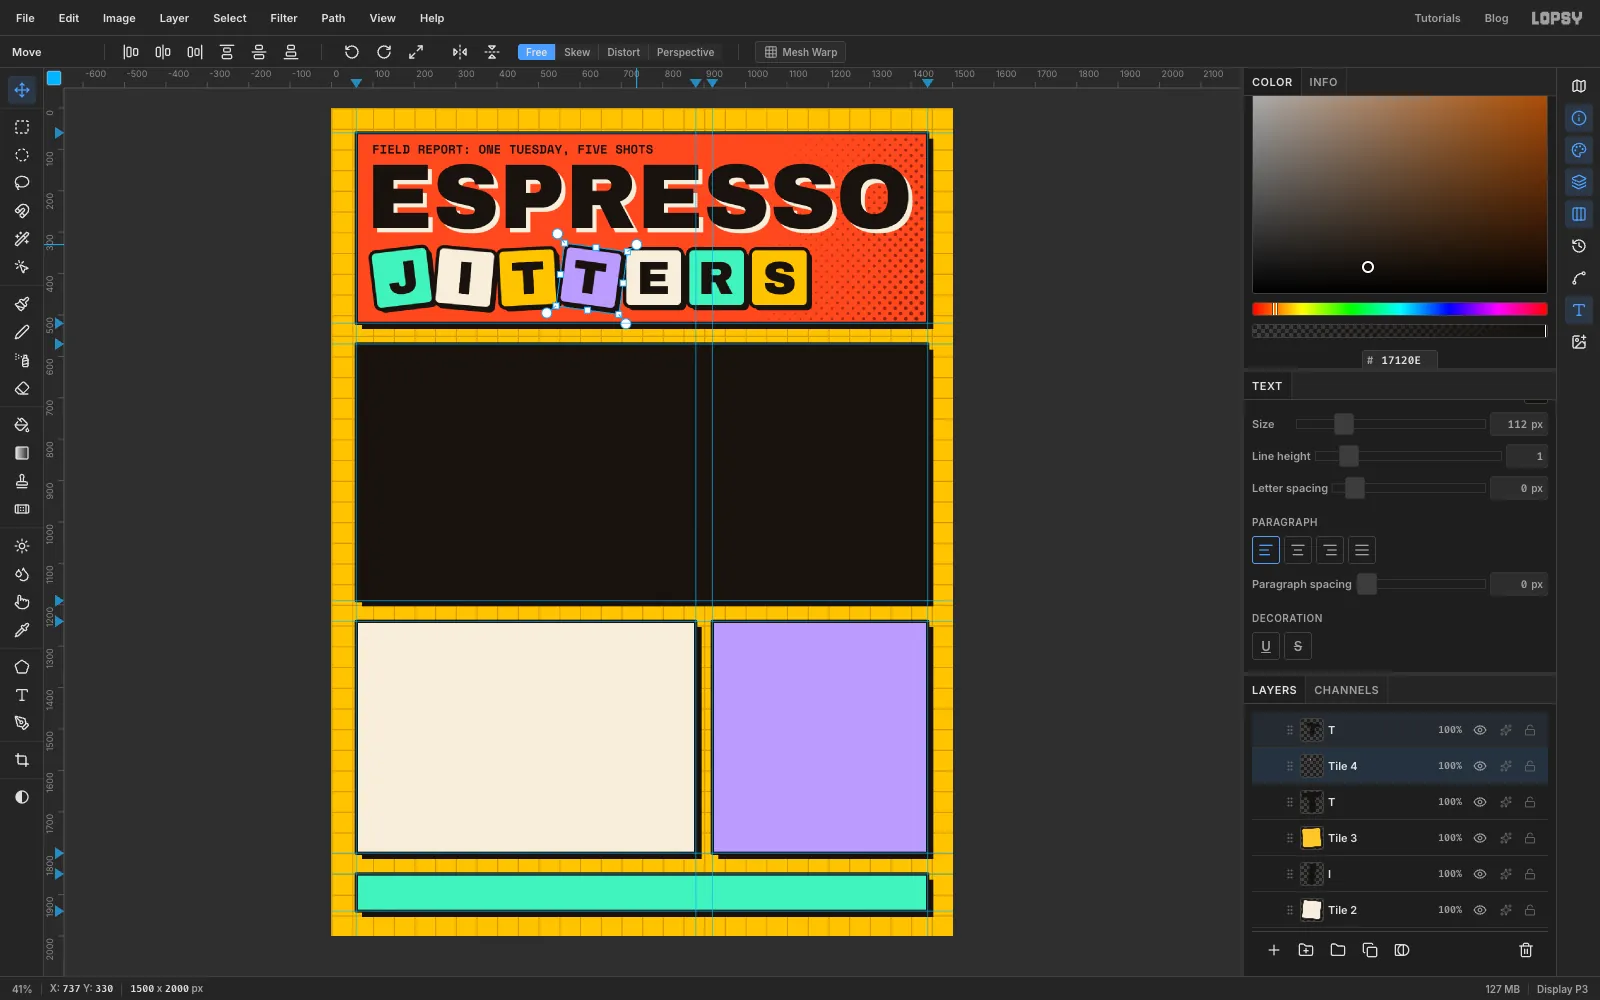
This is where the jitters come in. Click a tile's row, then Cmd-click its letter's row. With the Move tool active and no marquee, handles frame both layers. Hover just outside the top-right corner until you see the round rotation handle, and drag to turn them together.
Press Cmd+D to commit before moving on. Start with the J, then work along the row.
-
Vary the angles
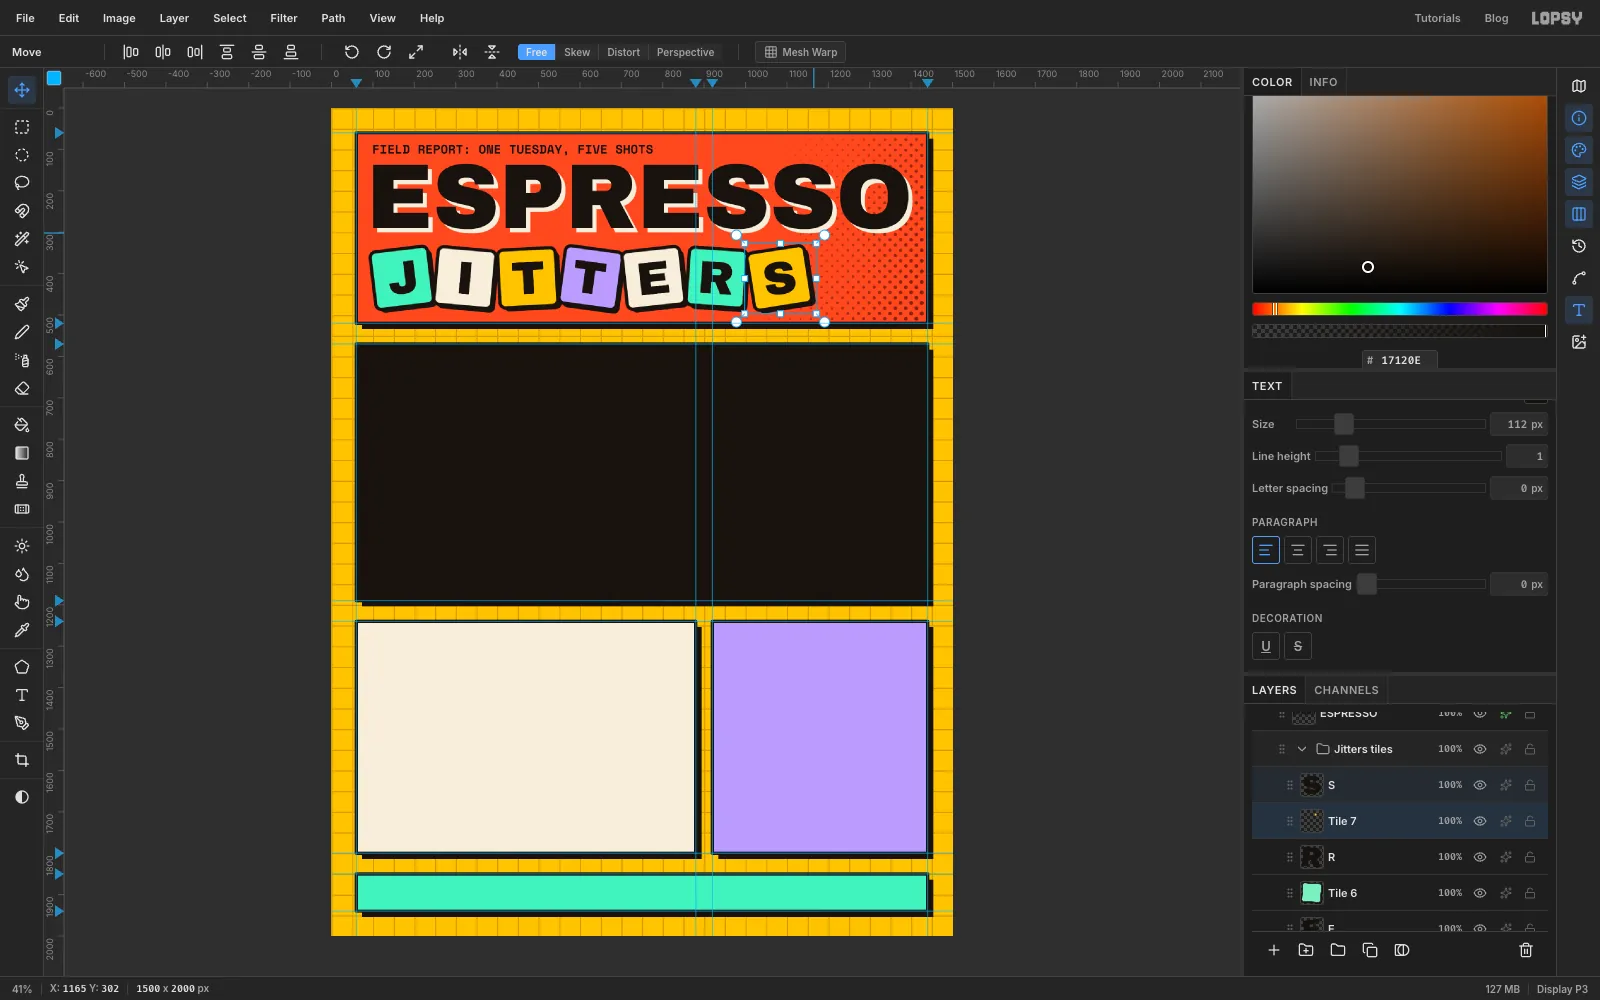
Give each tile its own tilt, alternating directions so the row looks unsteady. These angles are rough, so judge them by eye:
- J: 7° anticlockwise
- I: 5° clockwise
- First T: 3° anticlockwise
- Second T: 8° clockwise
- E: 6° anticlockwise
- R: 4° clockwise
- S: 9° anticlockwise
Press Cmd+Z and redo if an angle overshoots. To shift the whole row later, click the Jitters tiles group row and nudge it with the arrow keys.
-
Start the starburst
Click the last letter's row, Add Layer and rename it
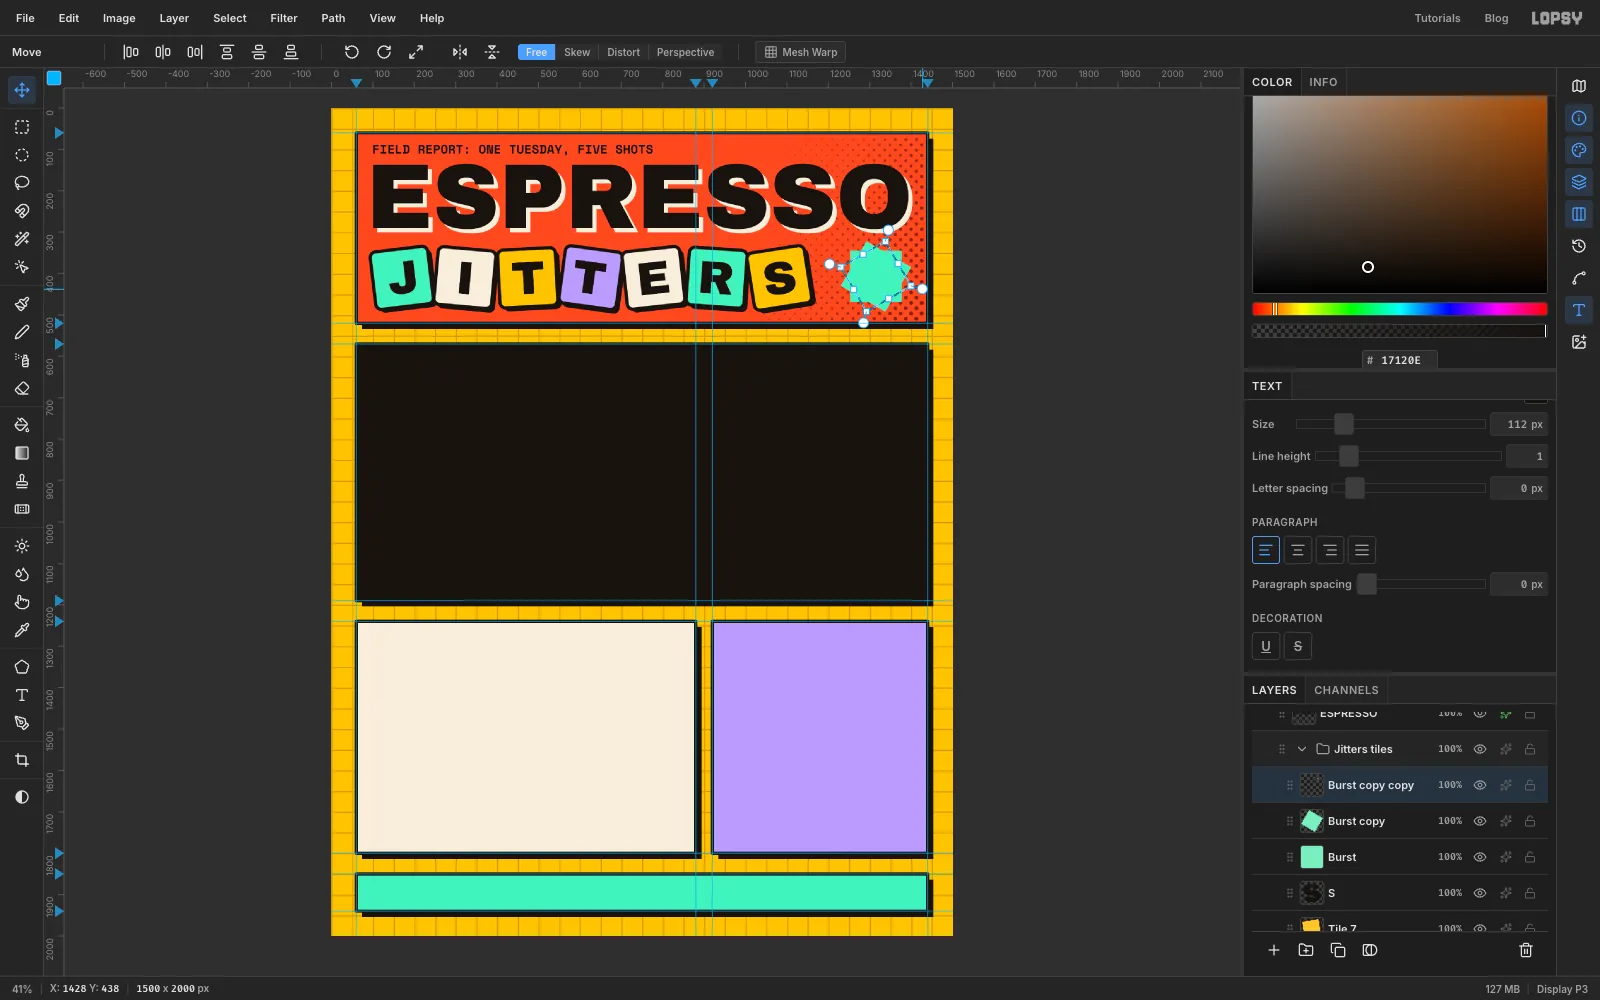
Burst. Draw a square with the Shape tool: Mint, no stroke, Corner Radius0, 124 × 124, centred on1315, 407.- Choose Layer → Duplicate Layer and click the copy's row.
- Make an exact Rectangular Marquee from
1253, 345to1377, 469, around the square. Press V, hold Cmd and drag the rotation handle to turn it 30° (Cmd snaps to 15° steps). Press Cmd+D. - Duplicate that copy, click its row, draw the same marquee, press V and Cmd-rotate 60°. Press Cmd+D.
The second marquee clips the first copy's corners, which gives the star its uneven points.
-
Merge and outline the burst
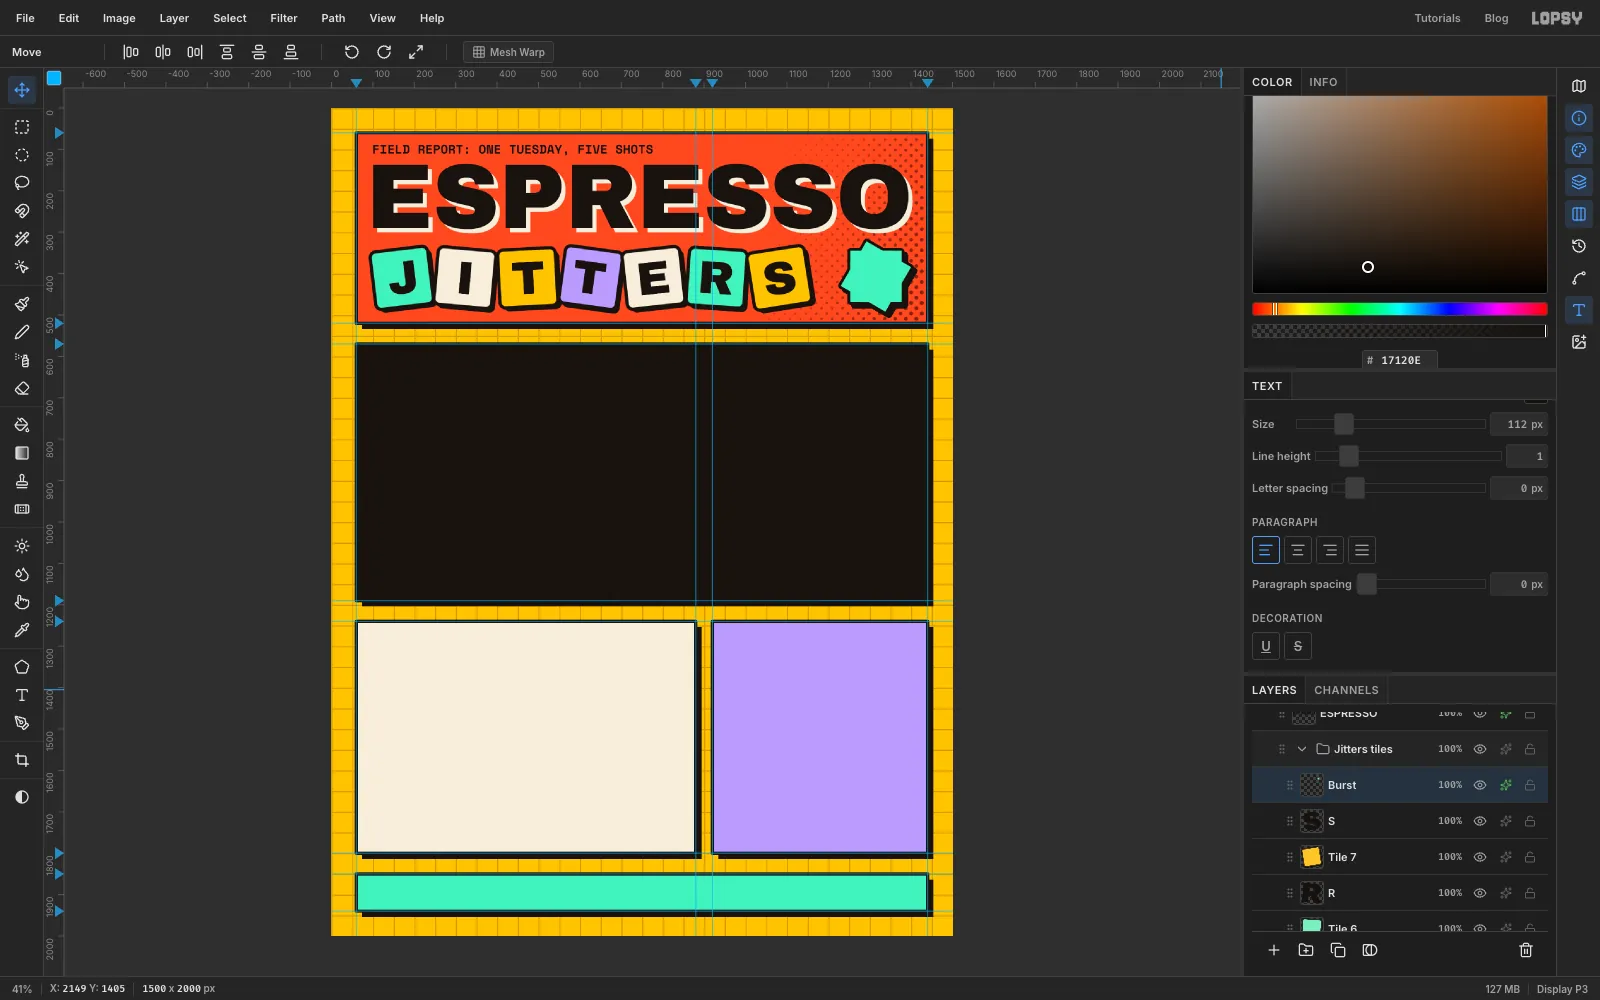
With the top copy active, choose Layer → Merge Down twice, so the copies and the square become one layer. Then click its row and open Layer effects:
- Stroke: Ink, Width
7 - Drop Shadow: Ink, Offset X and Y
9, Blur0, Spread0, Opacity100
The effects follow the merged outline, which is why you merge first. Close the drawer.
- Stroke: Ink, Width
-
Label the burst and tilt it
With the burst row active, add
315in Archivo Black, Size44, Ink. Click the burst row again and addMG DRUNKin Space Mono Bold, Size18. Press V and nudge them to the middle of the star, with315aboveMG DRUNK.Click the burst row, Cmd-click both text rows, and rotate all three about 10° anticlockwise. Press Cmd+D. That finishes the title panel.
-
Rule the gridlines and start the bars
Now for the main chart. Its scale is
y = 1110 − 1.76 × milligrams, so 50 mg is 88 px tall.Click Chart card, Add Layer, rename it
Gridlines. Pick the Pencil at Size2in Bone, and draw each line by clicking one end and Shift-clicking the other. The gaps leave room for labels and the sticker you'll add later:y = 670(250 mg):x182 to 714, and 856 to 1100y = 758(200 mg):x182 to 1100y = 846(150 mg):x182 to 276, 414 to 497, and 570 to 1376y = 934(100 mg):x182 to 1392y = 1022(50 mg): a short tick fromx182 to 194
Set the layer's opacity to
30%.Add Layer again and rename it
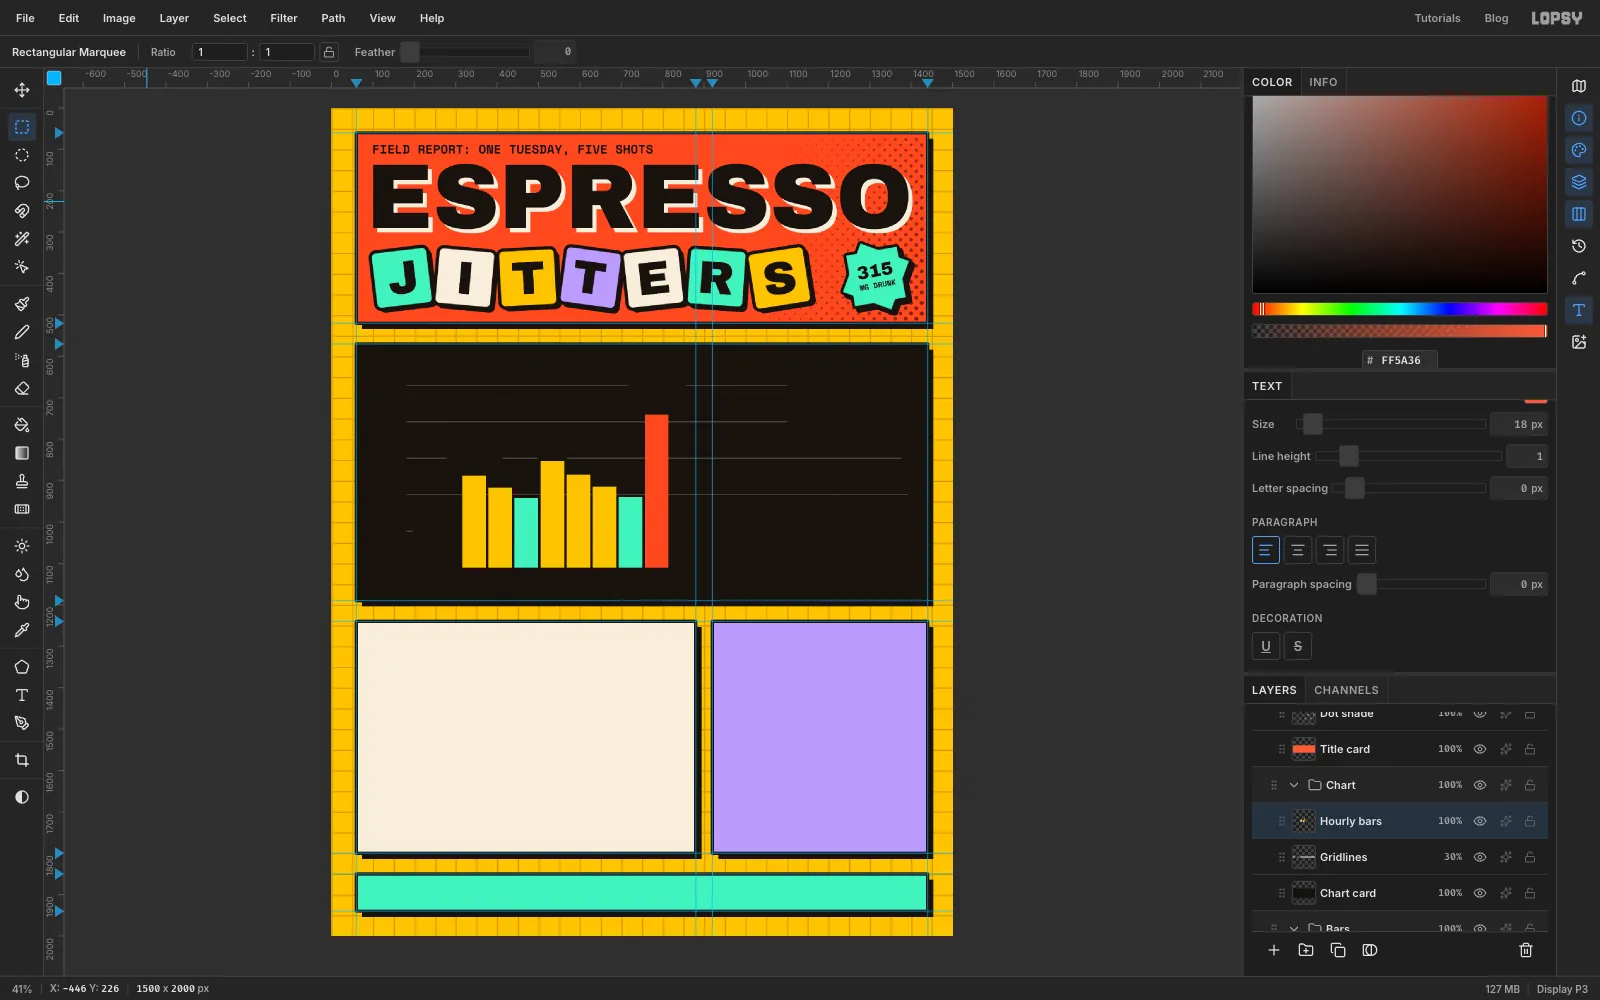
Hourly bars. Each bar is 57 px wide and ends aty = 1110, so use an exact Rectangular Marquee fromx, toptox + 57, 1110, then set the foreground, choose Edit → Fill and press Cmd+D. Start with these bars:- 08:00:
x 316, top888, Mustard - 09:00:
x 379, top917, Mustard - 10:00:
x 442, top942, Mint - 11:00:
x 505, top853, Mustard - 12:00:
x 568, top886, Mustard - 13:00:
x 631, top915, Mustard - 14:00:
x 694, top940, Mint - 15:00:
x 757, top741, Tomato
Colour shows the level: Tomato for 150 mg and up, Mustard for 100 and up, Mint below that. The 06:00 and 07:00 columns stay empty because nothing's been drunk yet.
-
Finish the bars
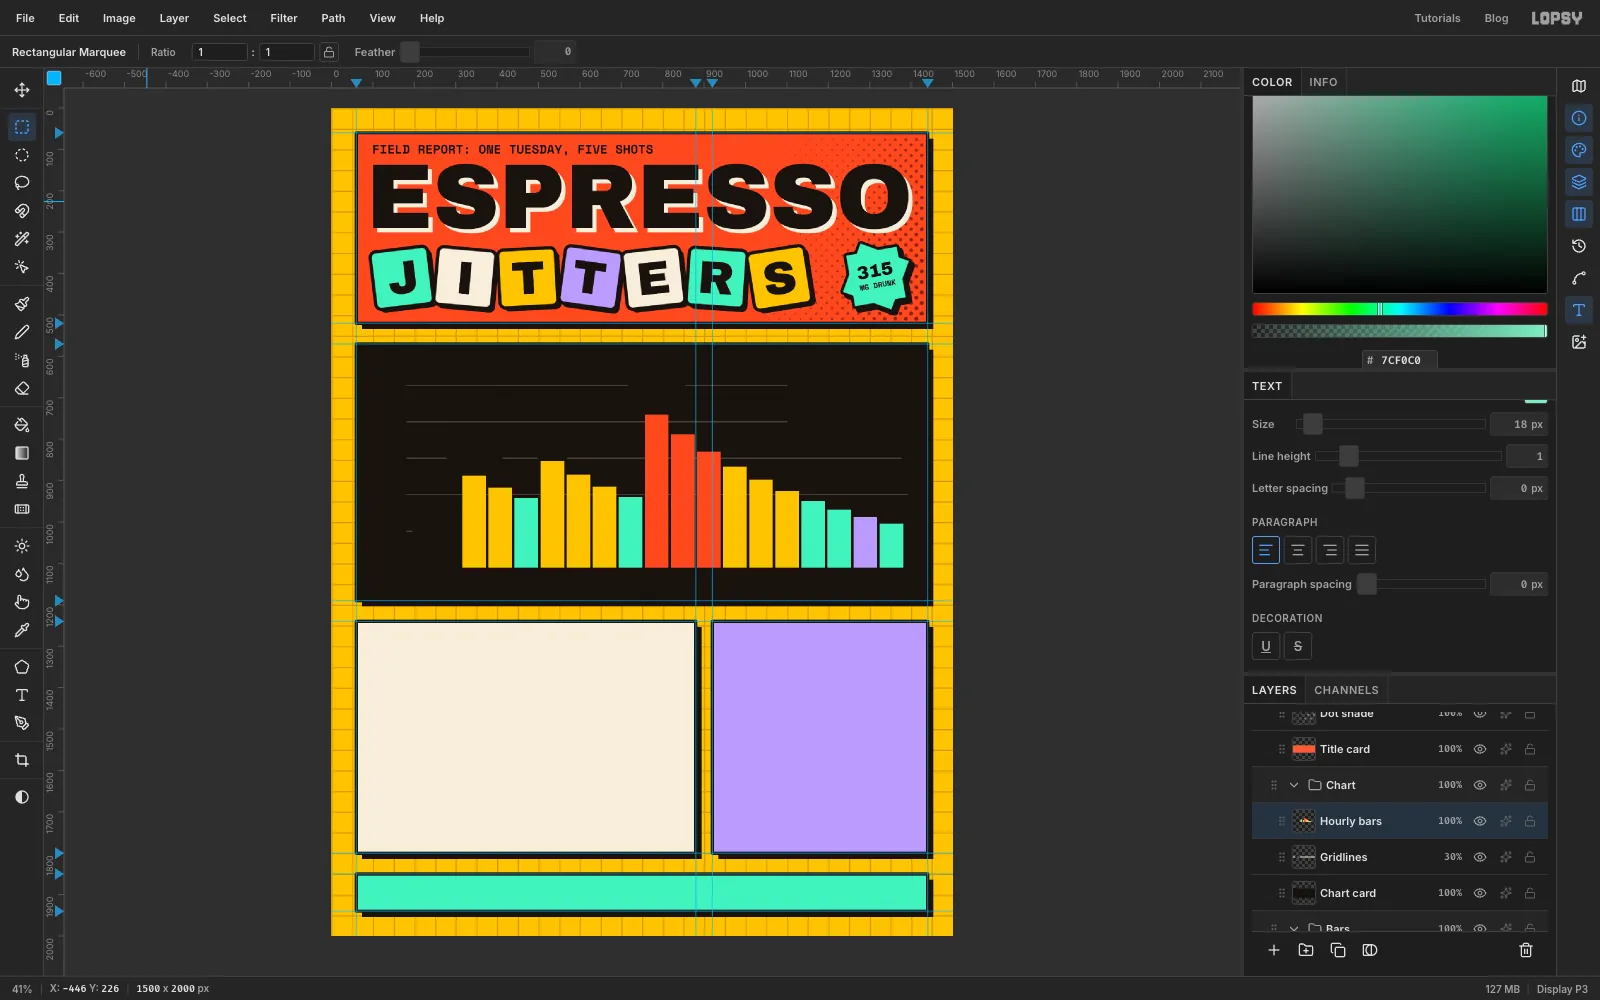
Add the rest the same way:
- 16:00:
x 820, top788, Tomato - 17:00:
x 883, top830, Tomato - 18:00:
x 946, top866, Mustard - 19:00:
x 1009, top898, Mustard - 20:00:
x 1072, top925, Mustard - 21:00:
x 1135, top949, Mint - 22:00:
x 1198, top970, Mint - 23:00:
x 1261, top988, Lilac - 24:00:
x 1324, top1004, Mint
The stepped blocks suit the style better than a smooth curve, and the sawtooth shape shows each dose landing on what's left of the last one.
- 16:00:
-
Label the axes and the doses
Baseline. Add Layer, rename it
Baseline. With the Pencil at Size6in Bone, click182, 1113and Shift-click1392, 1113.Hours. With Baseline active, add each label in Space Mono Bold, Size
24, Bone, clicking the Baseline row before each one. Add every second hour,06to24, and centre each under its column. The columns are 63 px apart, and the 06:00 column's centre is atx = 218. Keep the tops at abouty = 1130. Working from right to left stops your clicks landing in earlier text.Milligrams. One text layer does all six labels. Click Baseline, keep Space Mono Bold in Bone, set Size
22, Line height4and Align right, and type each value on its own line:250,200,150,100,50,0. At Size 22, Line height 4 gives exactly the chart's 88 px spacing. Press Tab, press V and nudge the block until its right edge is atx = 168and250sits on its gridline. Click the Baseline row before you set Align left again, or the labels will change too.Doses. Above each dose bar add a value in Archivo Black, Size
30, Bone, about 10 px above the bar:126,146and210, on the 08:00, 11:00 and 15:00 bars. Above each value, click the Baseline row, Add Layer and draw a pill with the Shape tool: Lilac fill, Ink stroke Width4, Corner Radius20, size 126 × 38, centred on its bar 66 px above the bar's top. That puts them at345, 822,534, 787and786, 675. Add each pill's label in Space Mono Bold, Size20, Ink:2 SHOTS,1 SHOT,2 SHOTS.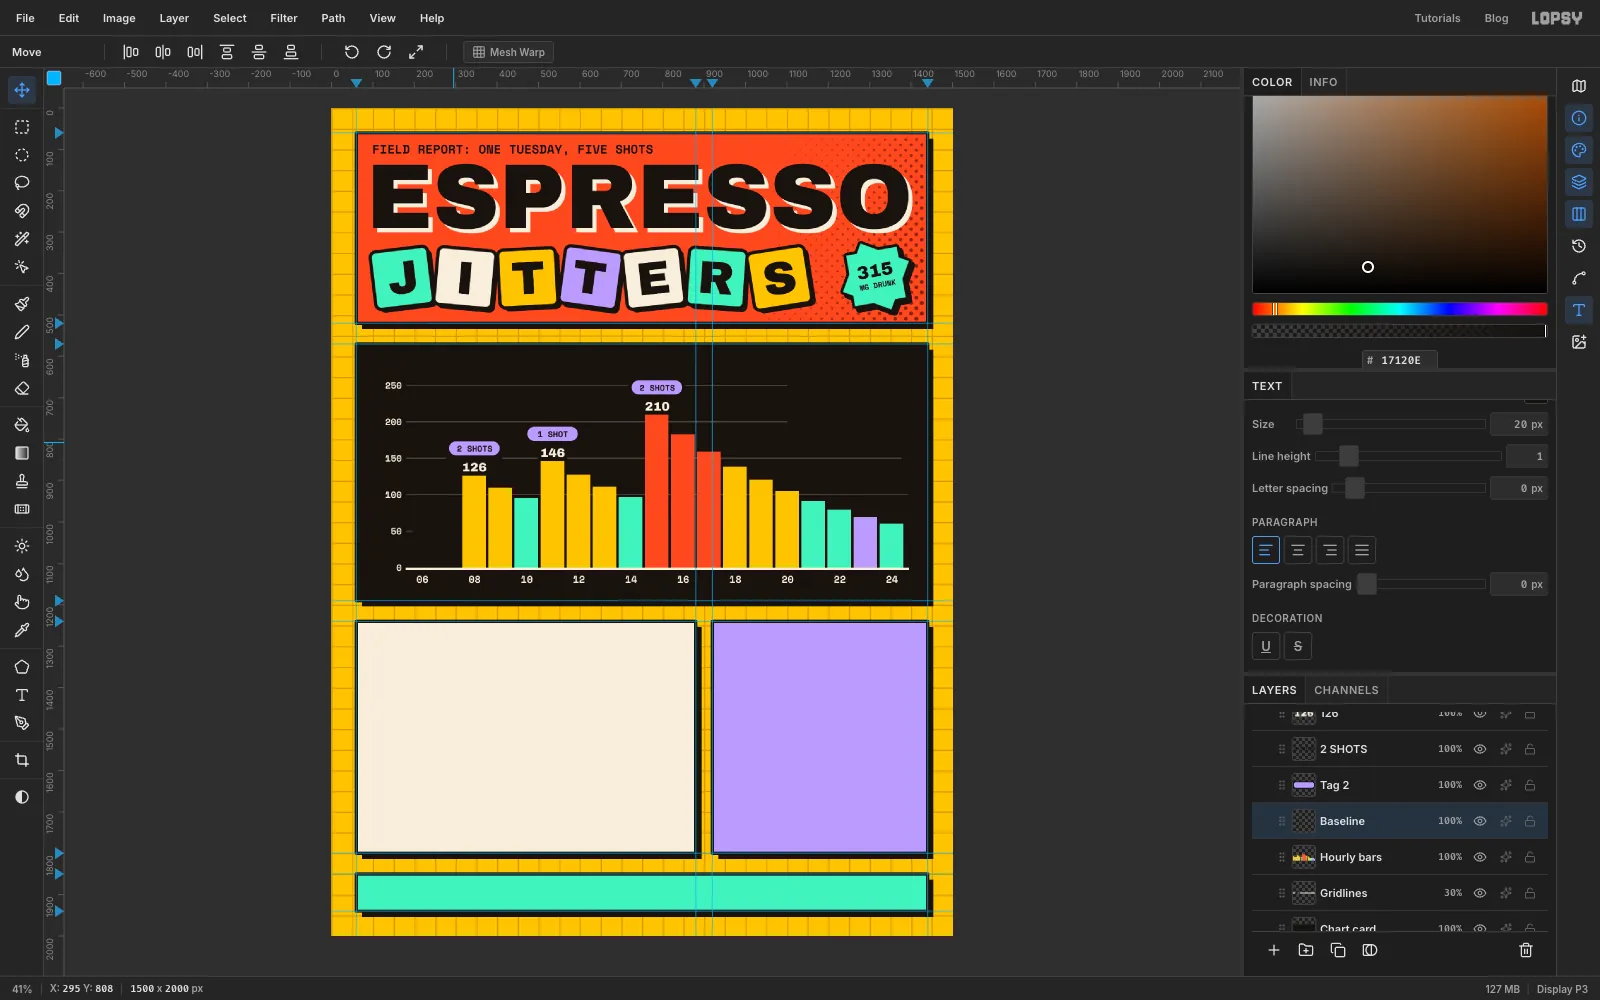
-
Title the chart
Click Baseline and add
CAFFEINE IN YOUR BLOOD, HOUR BY HOURin Archivo Black, Size38, Bone. Nudge its left edge tox = 100and its top to abouty = 600.Click Baseline again and add
MILLIGRAMSin Space Mono Bold, Size20, Mint. Press V, hold Cmd and rotate it 90° anticlockwise with the rotation handle, then press Cmd+D. Nudge it to the left of the axis labels, with its left edge atx = 100, centred beside the bars.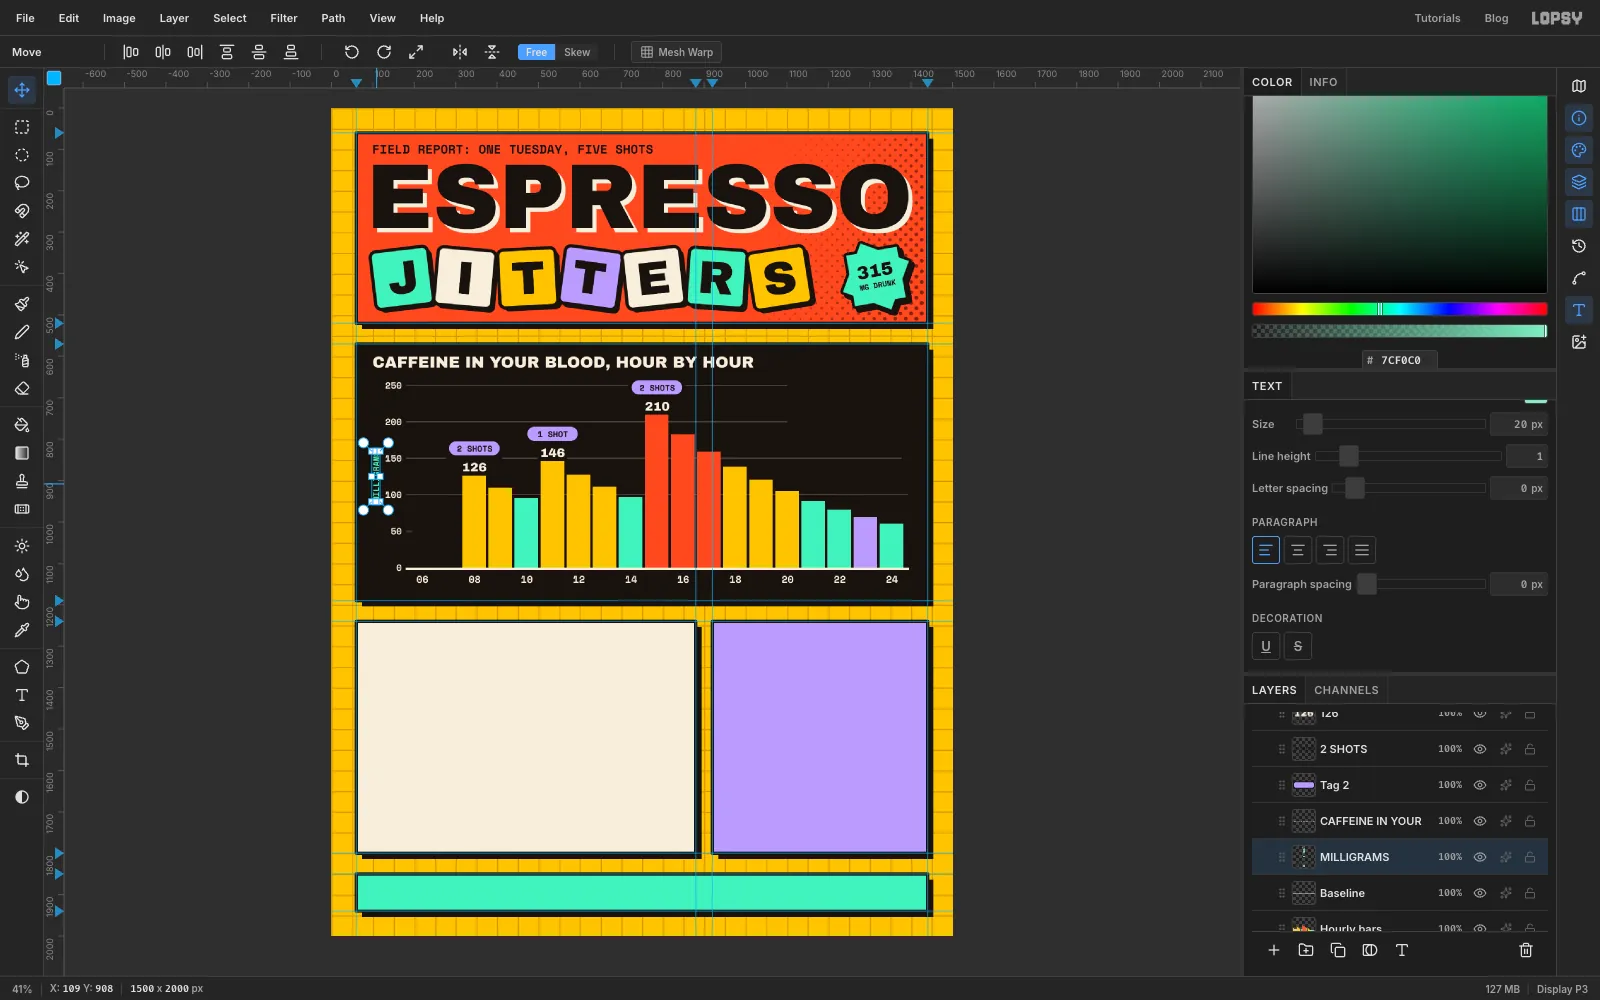
-
Add the key and the bedtime card
Key. Click Baseline, Add Layer, rename it
Key swatches. Fill four 24 × 24 squares fromx = 200, aty986,1016,1046and1076, in Tomato, Mustard, Mint and Lilac. Beside them atx = 234, add150+,100+,<100andBEDin Space Mono Bold, Size20, Bone.Card. Click Baseline, click New Group, rename it
Bedtime. Add Layer, rename itBedtime card. With the Shape tool, Corner Radius10, draw a 340 × 190 Lilac shape with no stroke, centred on1212, 762. Then draw a Bone one with a 6 px Ink stroke, the same size, centred on1202, 752.Add
23:00 BEDin Archivo Black, Size40, Ink. Click the card's row and add this in Space Mono Regular, Size22, Line height1.25:69 MG STILL IN YOU.THAT IS ONE MOREWHOLE ESPRESSO.Press Enter between lines. Press V and nudge both blocks so their left edges sit at
x = 1066, with the heading's top aty = 686and the small text's aty = 746.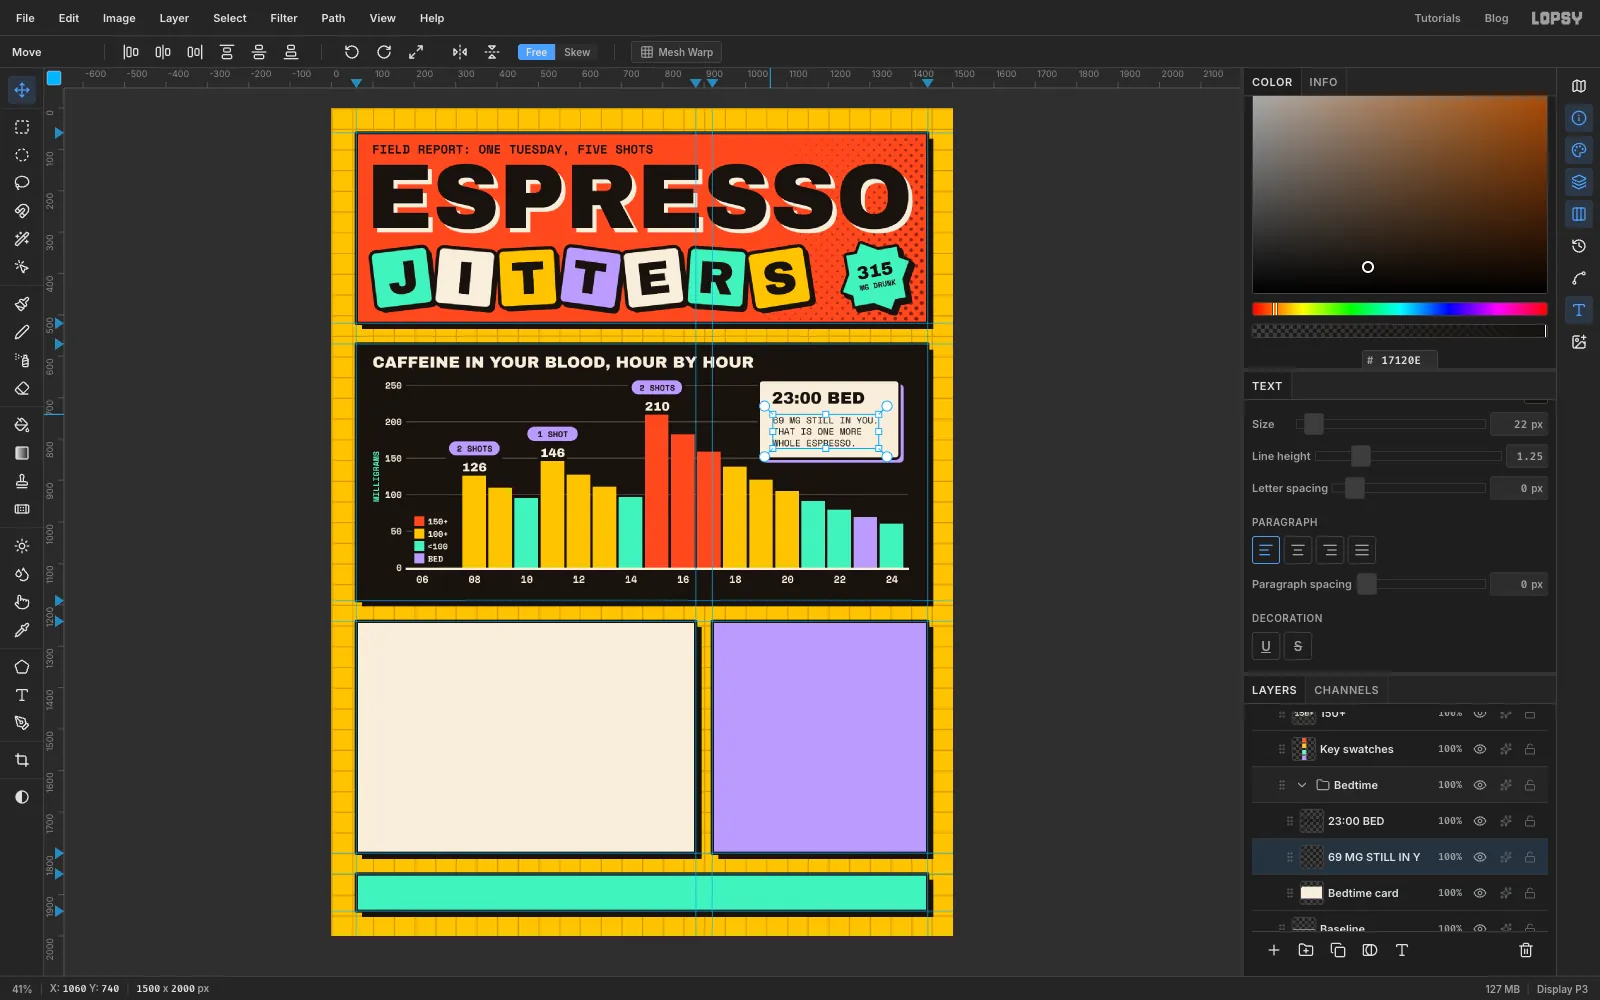
-
Tilt the card and draw its arrow
Click the card's row, Cmd-click both text rows, press V and rotate them about 4° clockwise. Press Cmd+D.
Click the card's row, Add Layer, rename it
Arrowand set the foreground to Lilac. Pick the Pen (P), set Stroke to7, and click once under the card at about1250, 862. Then press at the top of the 23:00 bar, about 20 px above it, and drag a little downwards to curve the line.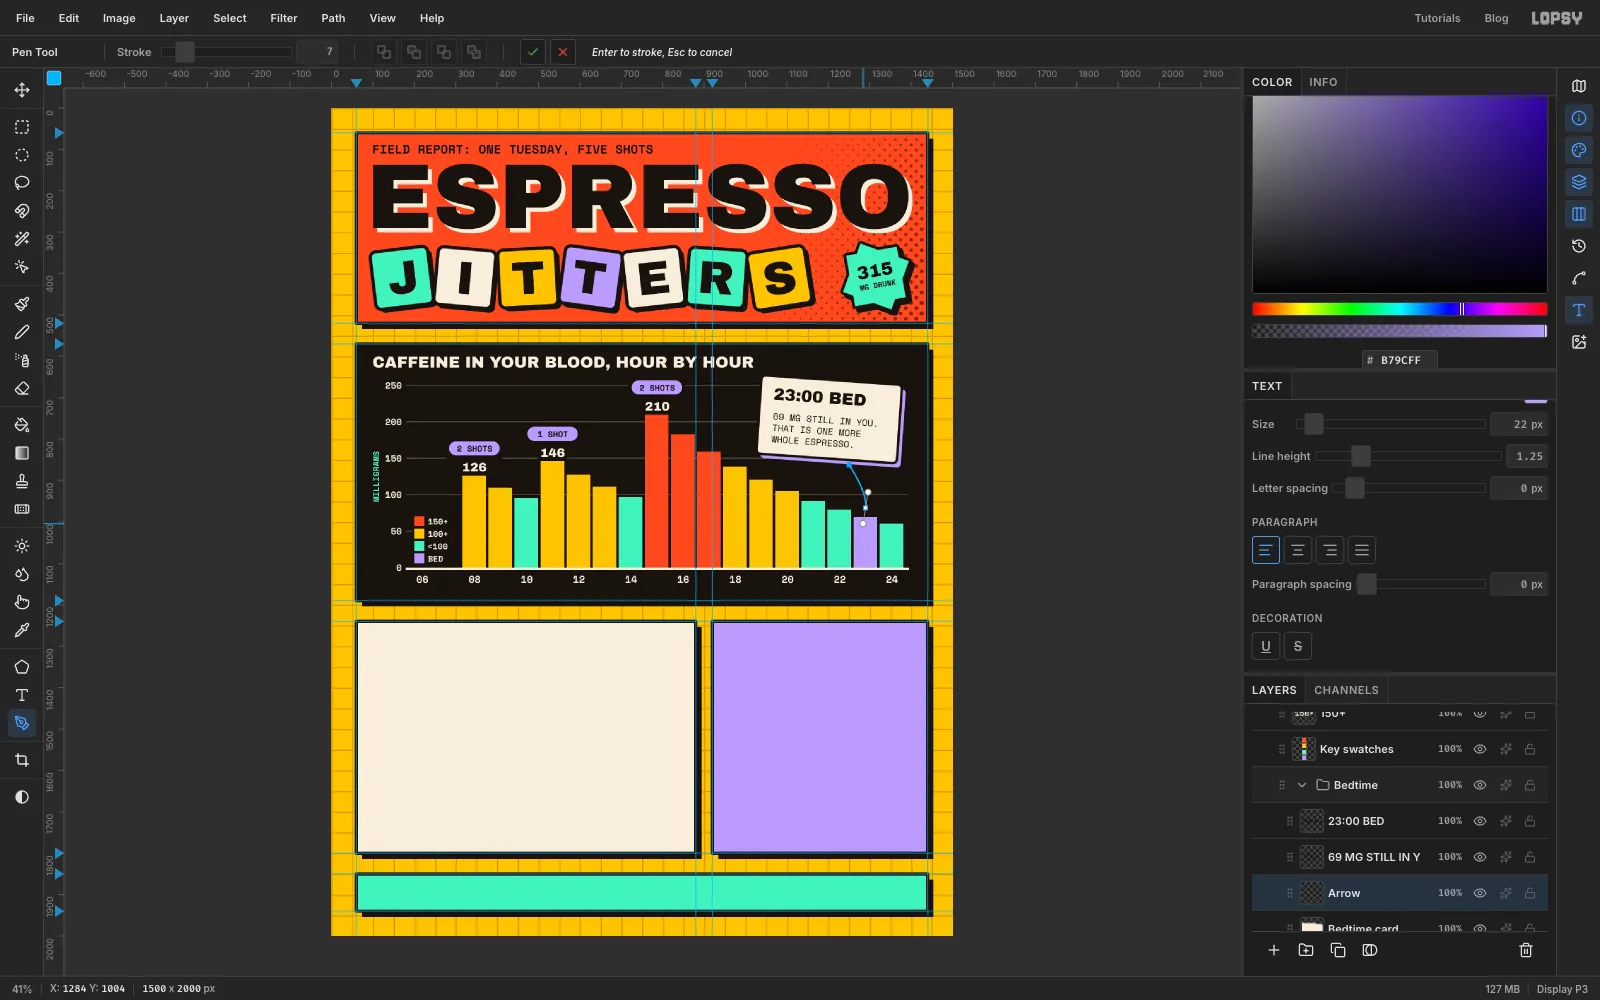
-
Finish the arrow
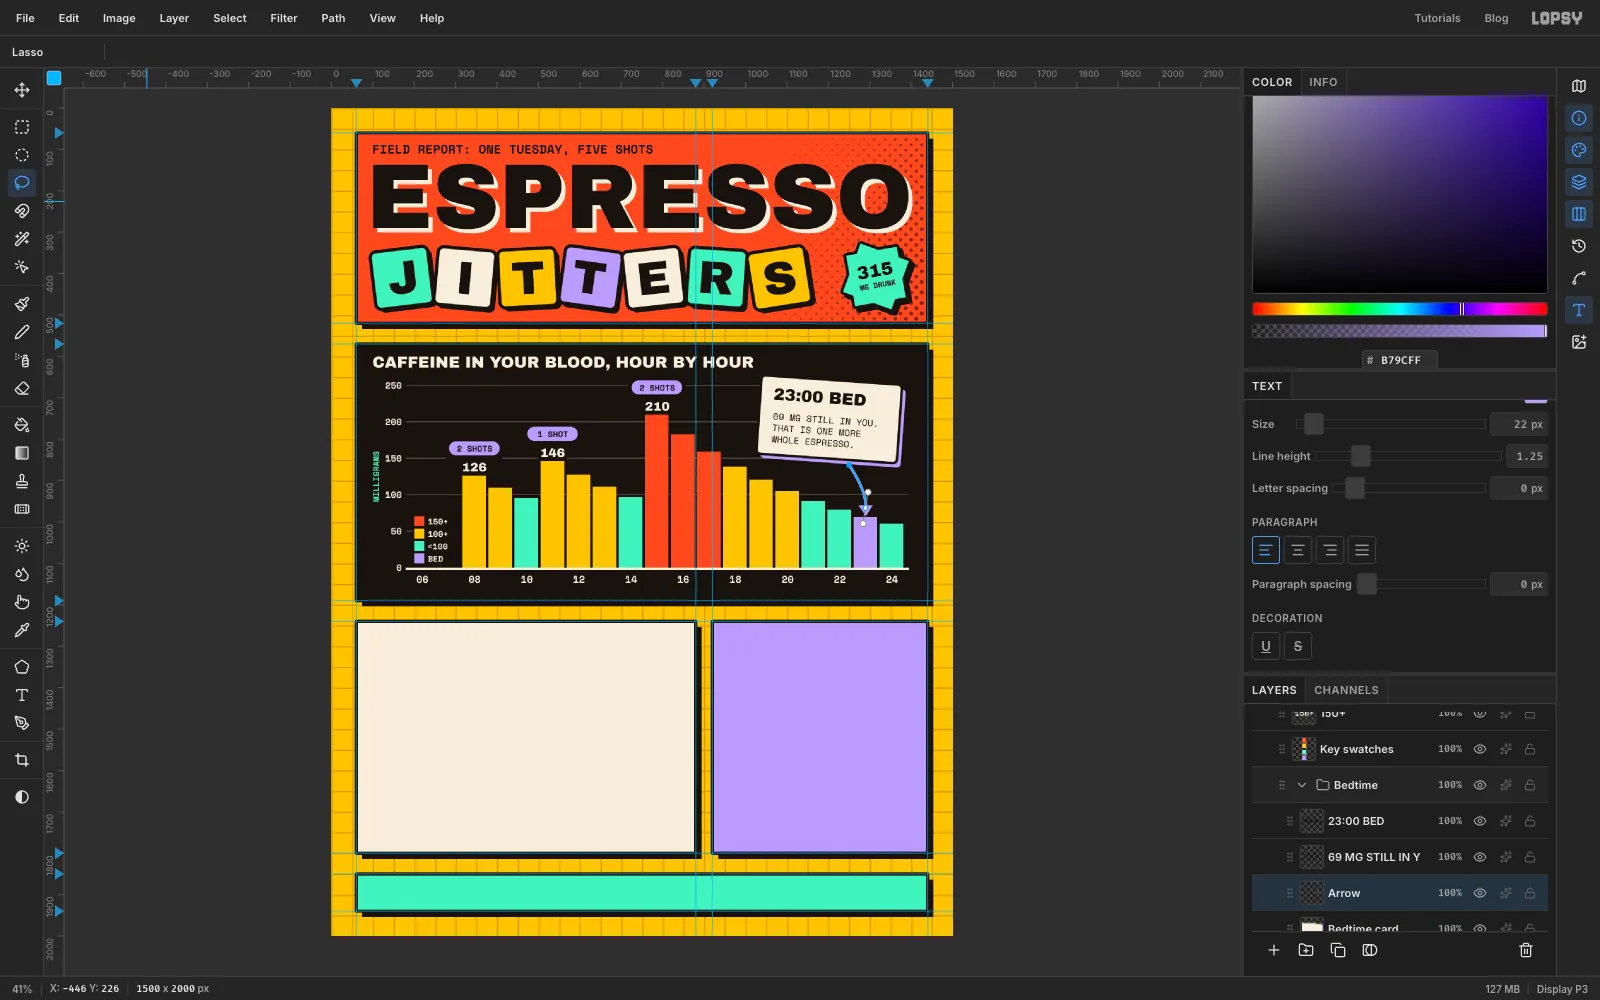
Press Enter to stroke the path. Then pick the Lasso (L), drag a small downward triangle at the end of the line, choose Edit → Fill and press Cmd+D. Lilac ties the arrow, the card's shadow, the bar and the key together.
-
Draw the drink bars
Click Bars card, Add Layer, rename it
Serving bars. All bars start atx = 340and are 30 px tall, with 56 px from one row to the next, starting aty = 1396. The width is milligrams × 2.1. Marquee and fill each one in Lilac on this one layer, leaving row 4 empty for now:- Row 1,
y 1396: Energy shot, 200 mg, width420 - Row 2,
y 1452: Brewed coffee, 96 mg, width202 - Row 3,
y 1508: Energy drink, 79 mg, width166 - Row 5,
y 1620: Black tea, 48 mg, width101 - Row 6,
y 1676: Cola, 33 mg, width69 - Row 7,
y 1732: Green tea, 29 mg, width61
Open Layer effects and add a Stroke in Ink, Width
5, and a Drop Shadow in Ink with both offsets6, Blur0, Spread0, Opacity100. Close the drawer.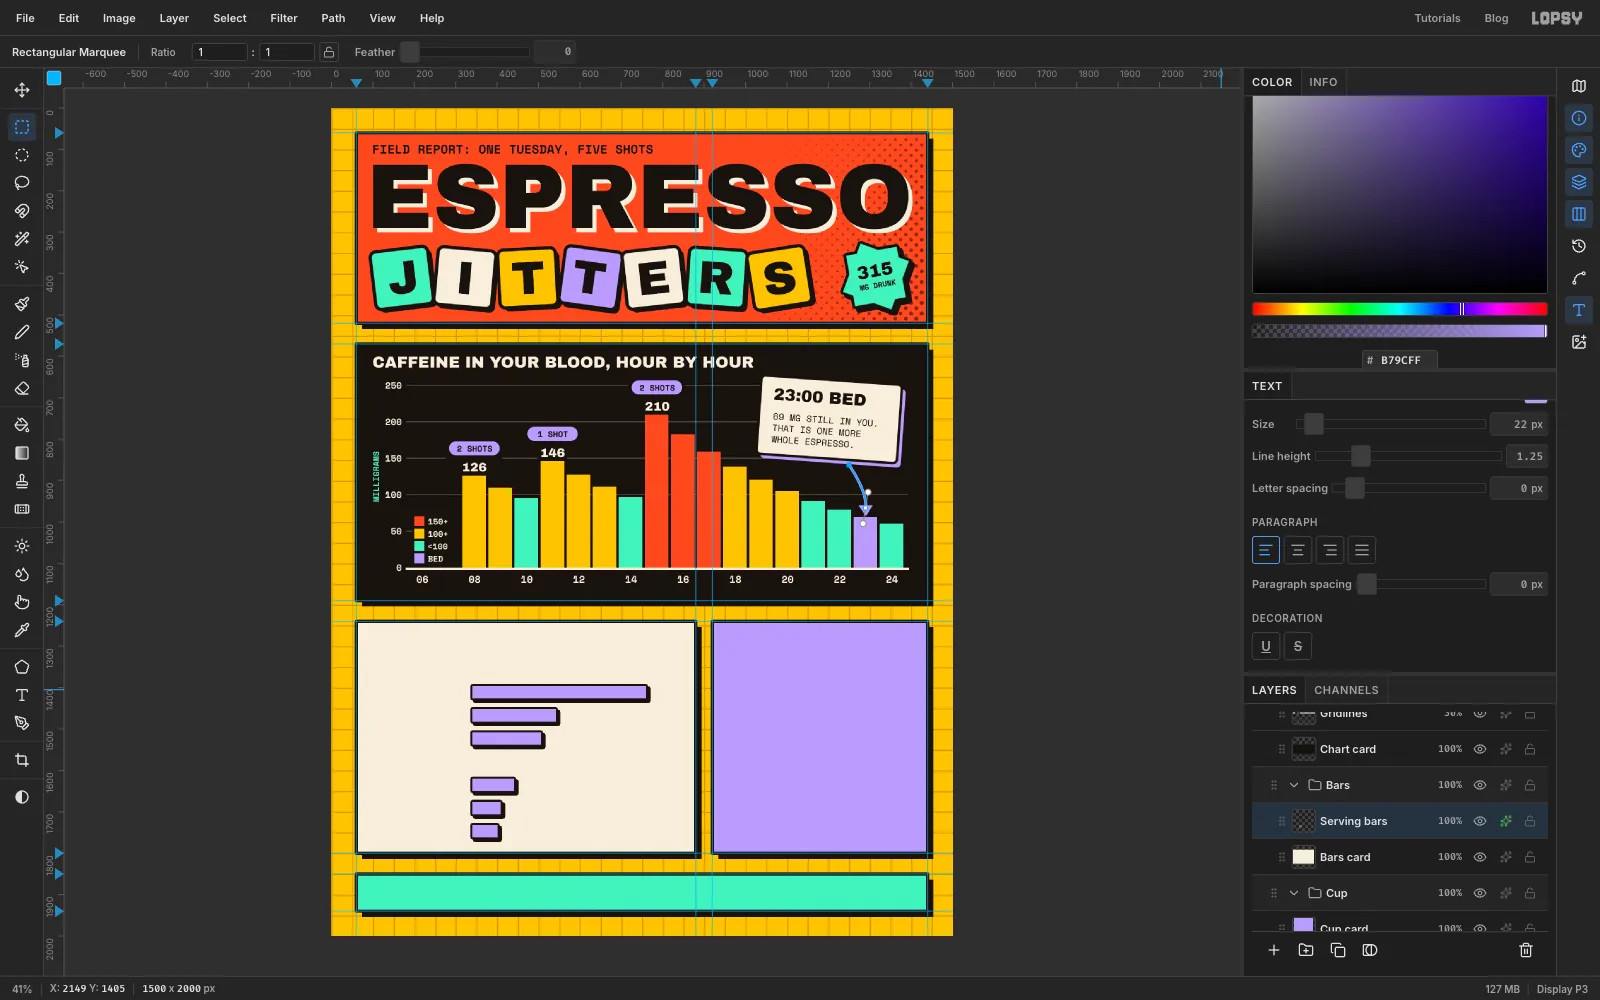
- Row 1,
-
Highlight espresso and add the values
Add Layer, rename it
Espresso bar. Fill the row 4 bar in Tomato:y 1564, width132. Give it the same two effects, and close the drawer.With the Espresso bar row active, add each value in Space Mono Bold, Size
26, Ink, 20 px past the end of its bar, starting from the bottom row and clicking the row again each time.Then add the row labels as one text layer in Space Mono Regular, Size
25, Line height2.24, which gives the 56 px spacing, with each label on its own line:ENERGY SHOT,BREWED COFFEE,ENERGY DRINK,ESPRESSO,BLACK TEA,COLA,GREEN TEA. Press Tab, and nudge the block so each label lines up with its bar and the left edge is atx = 100. Press V before nudging.To recolour one word, click once on the labels with the Text tool to edit them, then double-click
ESPRESSO.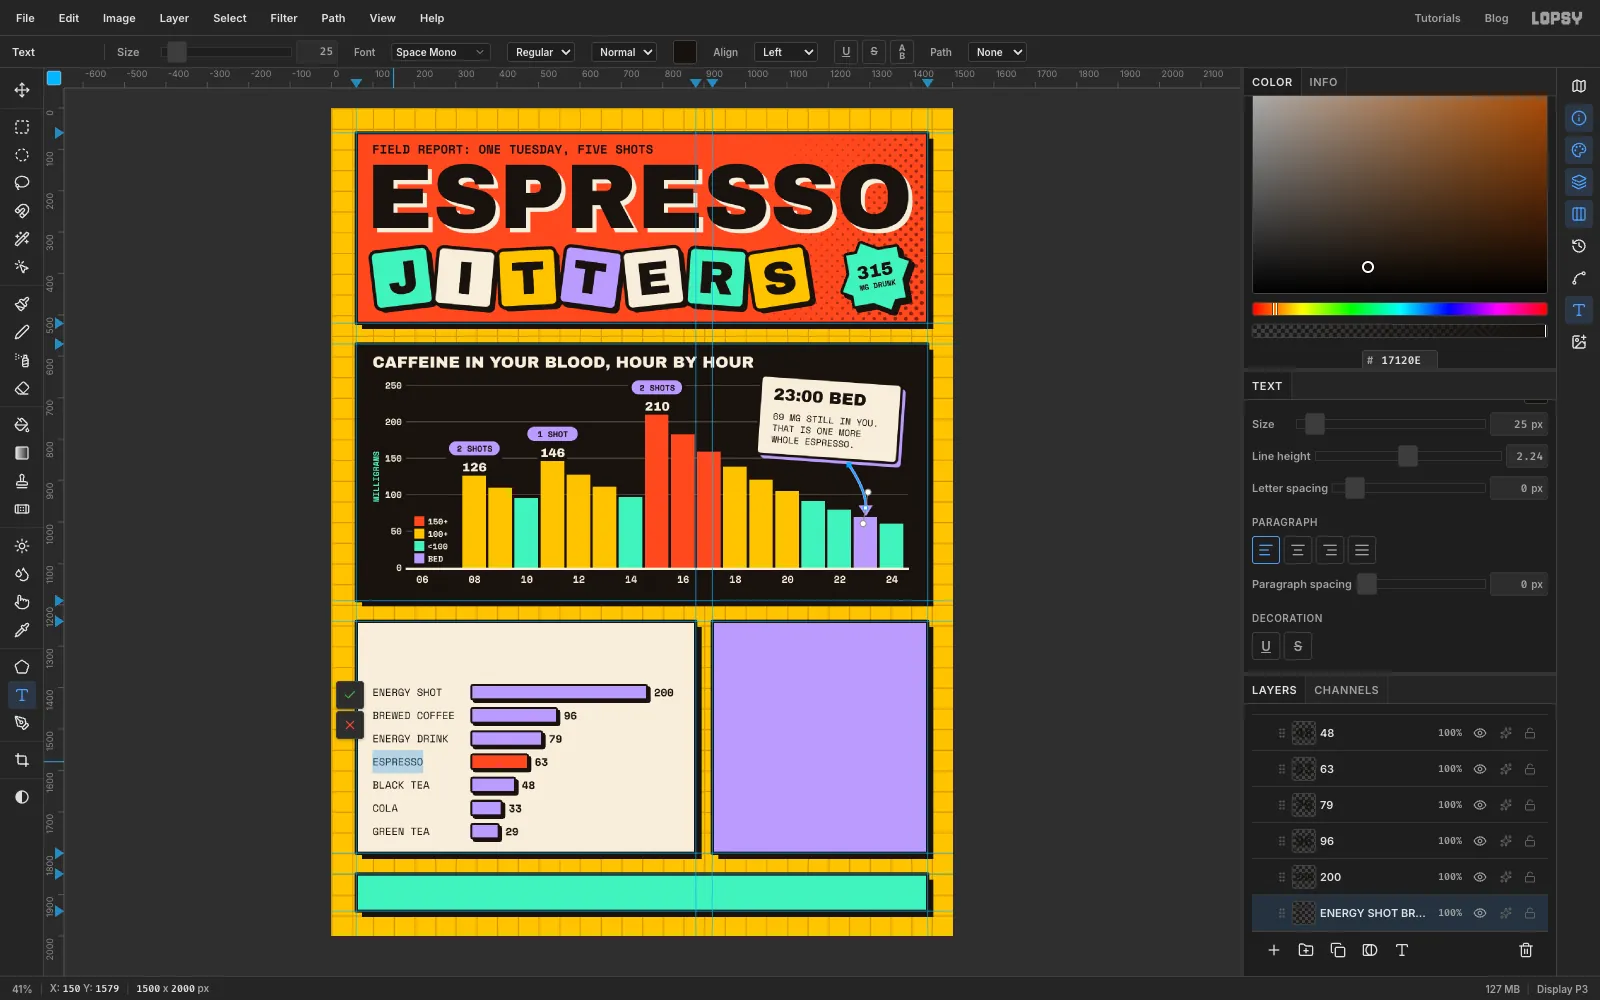
-
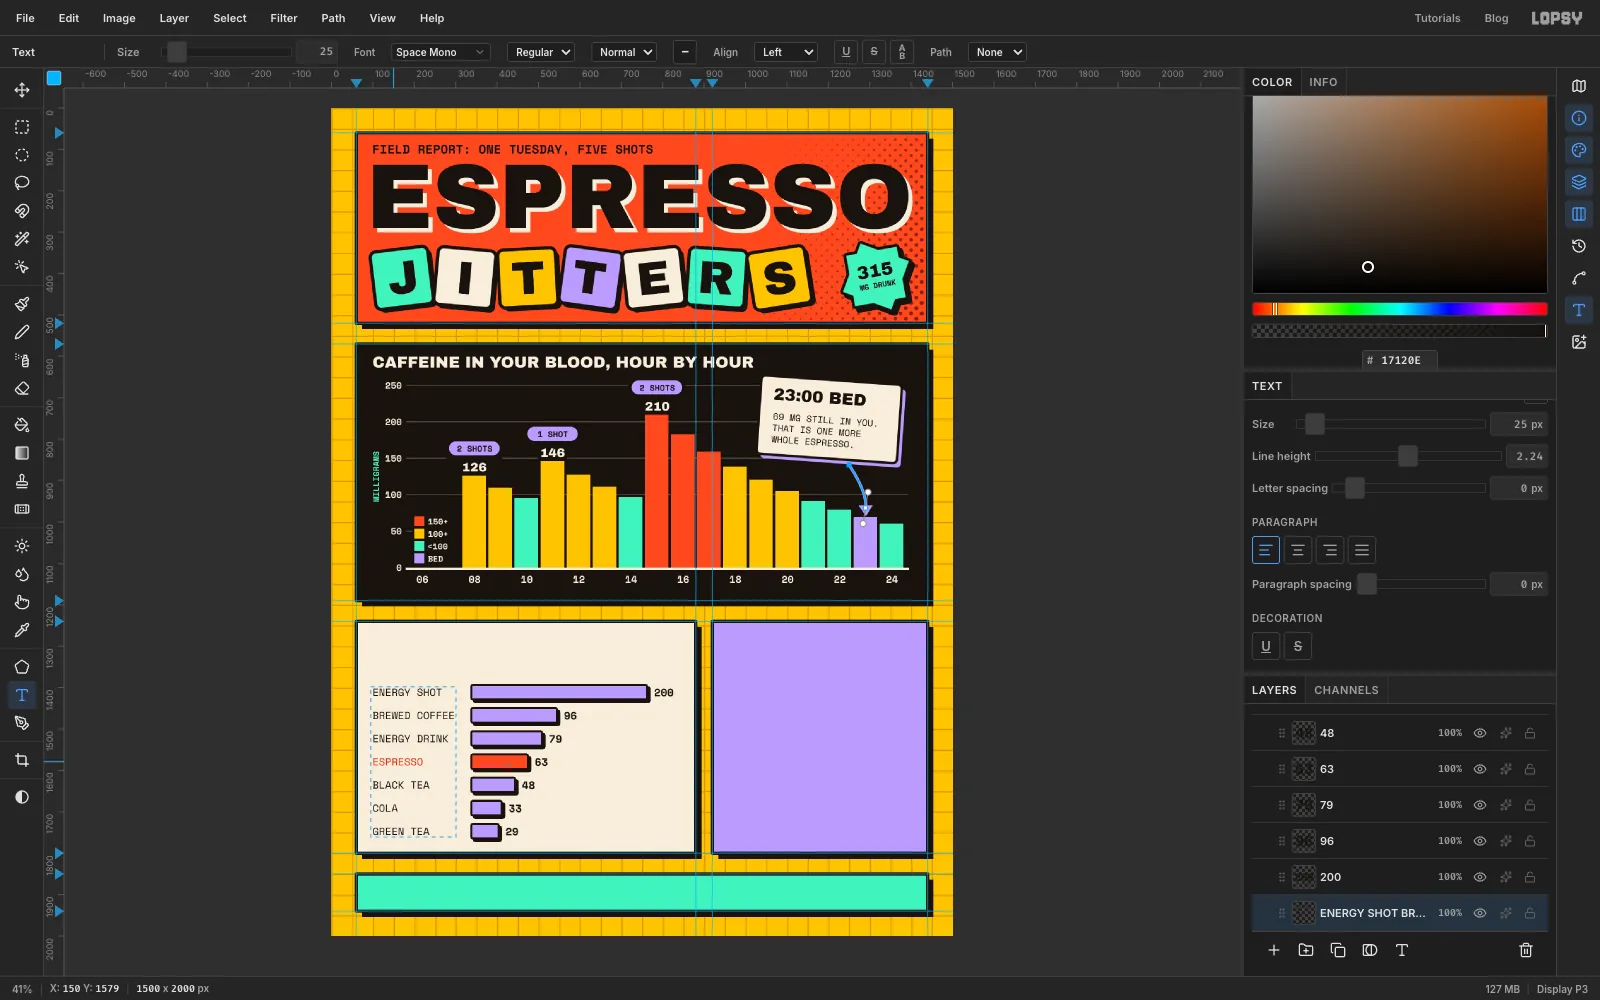
Recolour one word
With the word selected, click the Text color swatch in the options bar, type into the hex field and click the swatch to close it. Press Tab. Only the selected word changes. It's slightly darker than the bar so it stays legible on Bone.
-
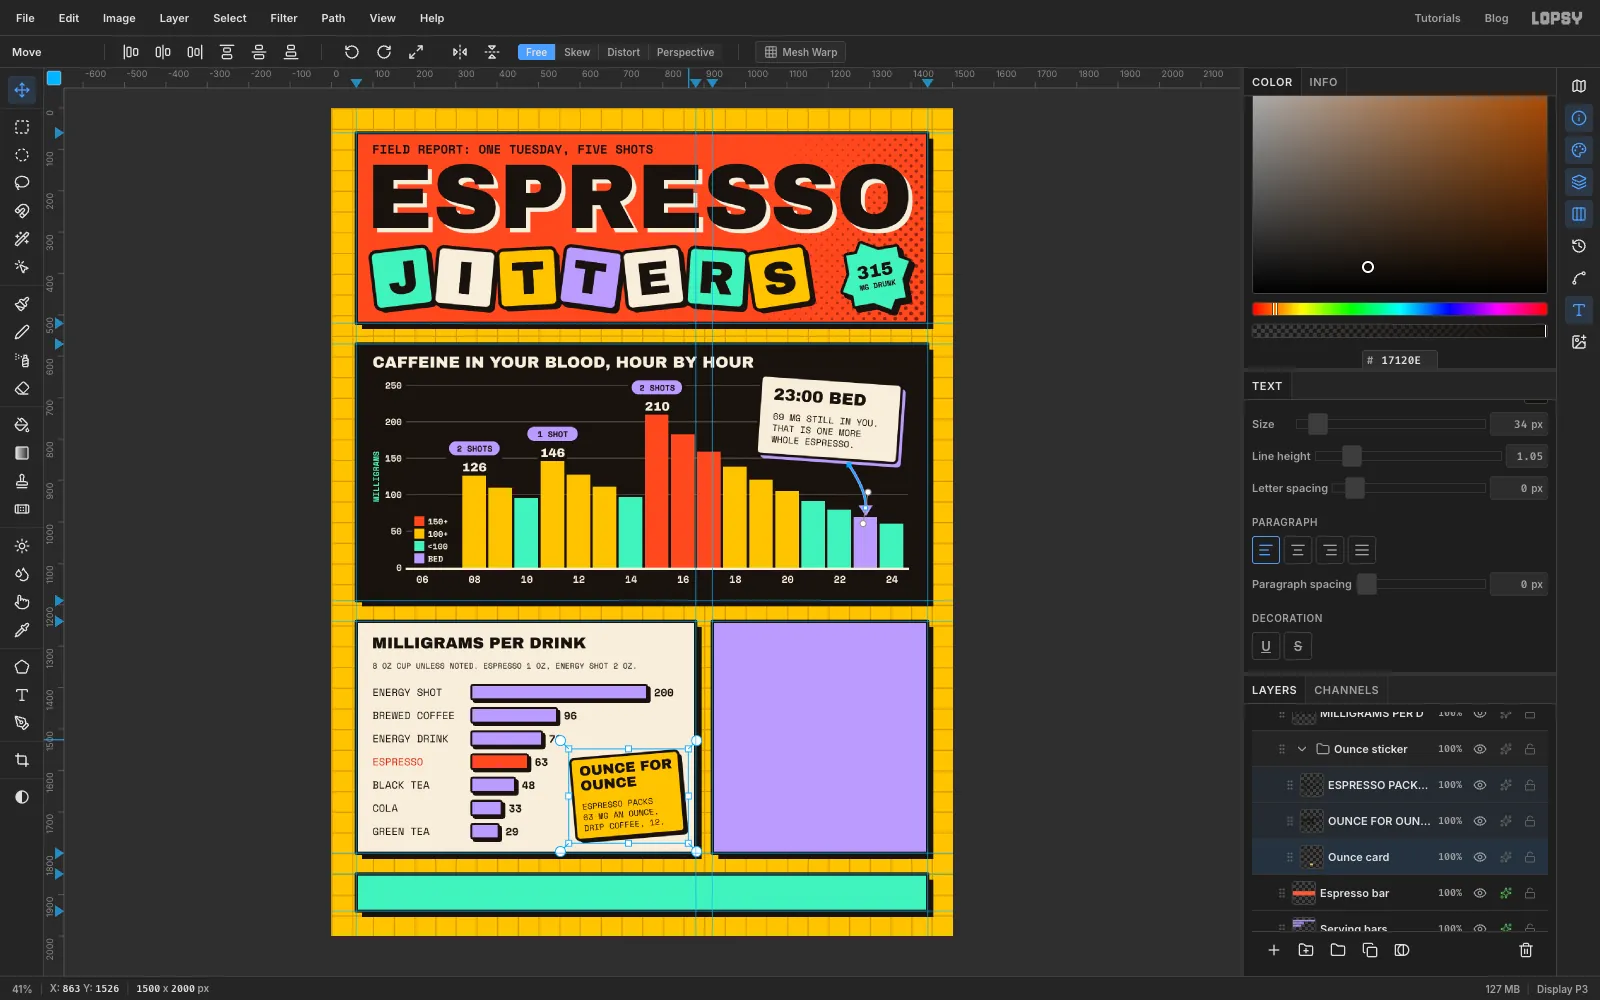
Head the panel and add the sticker
Click the Espresso bar row and add this note in Space Mono Regular, Size
19, Ink, with its top at abouty = 1340and left edge atx = 100:8 OZ CUP UNLESS NOTED. ESPRESSO 1 OZ, ENERGY SHOT 2 OZ.Click the row again and add
MILLIGRAMS PER DRINKin Archivo Black, Size38, with its baseline at abouty = 1305.Sticker. Click the Espresso bar row, New Group, rename it
Ounce sticker. Add Layer, rename itOunce card, then draw a 262 × 196 Ink shape with no stroke, Corner Radius10, centred on723, 1668, and a Mustard one with a 6 px Ink stroke centred on715, 1660. AddOUNCE FORandOUNCEon two lines in Archivo Black, Size34, Line height1.05, with the top-left at about605, 1580. Click the Ounce card row and add this in Space Mono Regular, Size20, Line height1.3, with its top-left at about605, 1670:ESPRESSO PACKS63 MG AN OUNCE.DRIP COFFEE, 12.Click the Ounce card row, Cmd-click both text rows, press V and rotate about 5° anticlockwise. Press Cmd+D.
-
Draw the cup handle
Now the cup. Its centre is at
1180, 1570. Draw the handle first so the saucer covers its root. The next few images are close-ups, so zoom in if you like: hold Cmd and scroll over the cup.Click Cup card, Add Layer, rename it
Handle. With the Shape tool, Corner Radius24, draw a 124 × 52 Ink shape with no stroke, centred on1189, 1579. Then draw a Bone one with an 8 px Ink stroke, centred on the cup's centre.Make an exact Rectangular Marquee around it, from
1112, 1538to1258, 1612. Press V and drag the rotation handle anticlockwise about 37°, then press Cmd+D. Nudge the bar about 170 px right and 130 px up, so its middle is at the cup's upper right.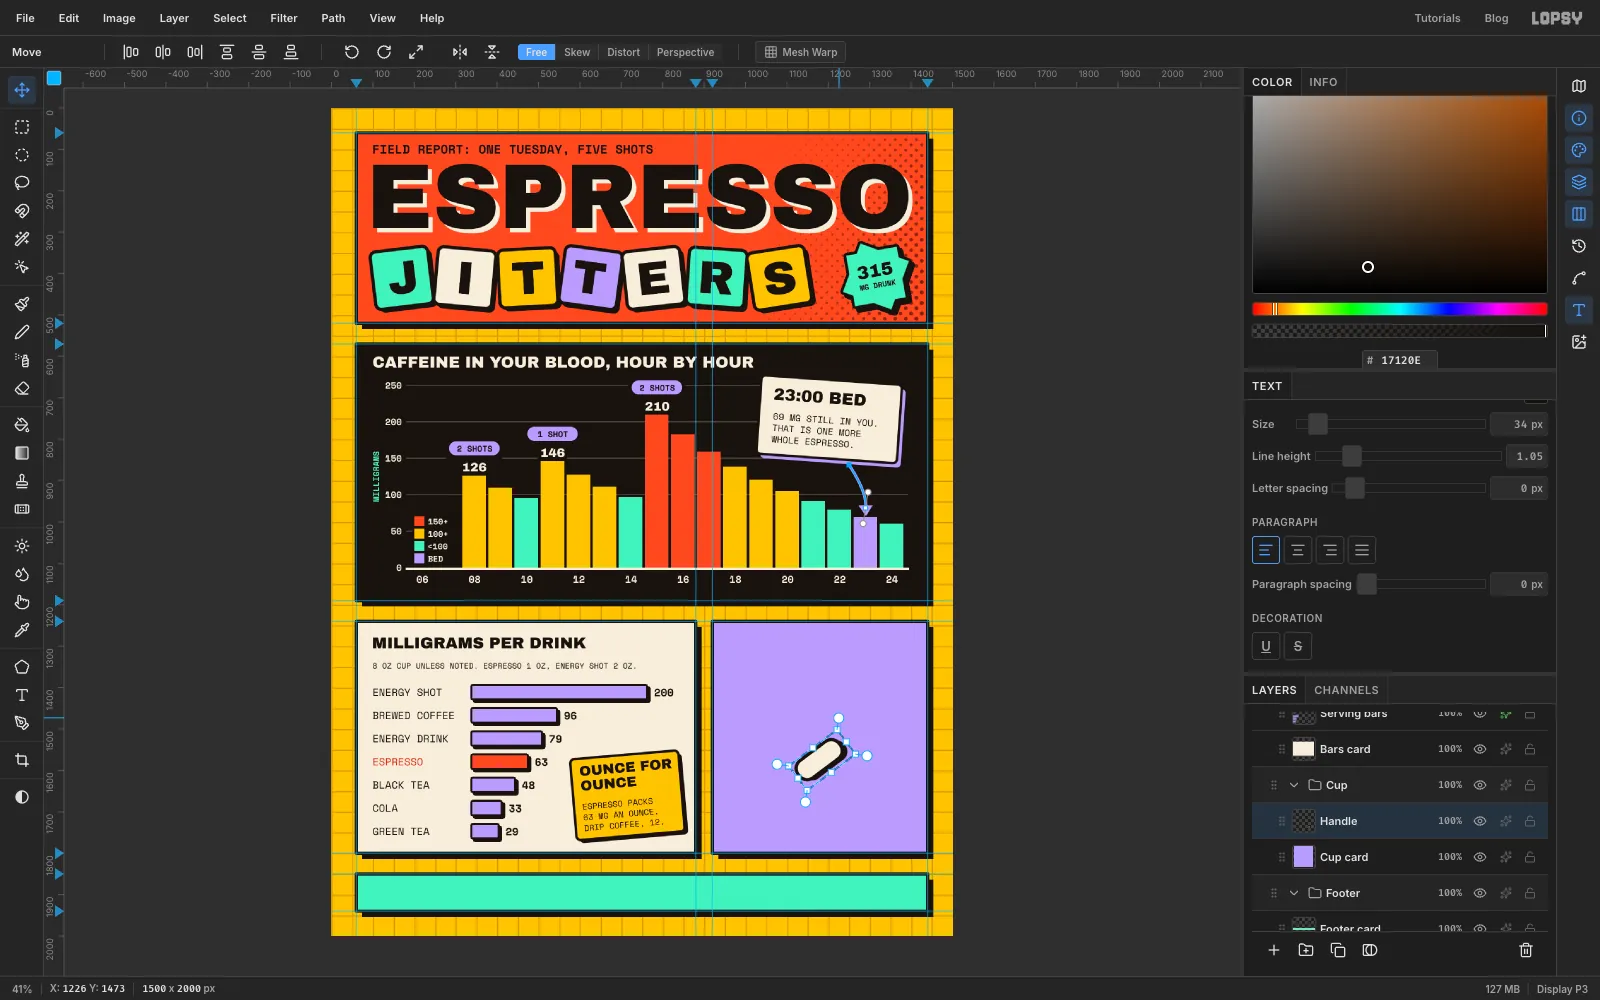
-
Add the saucer
Add Layer, rename it
Saucer. Set the Shape tool to Ellipse. Draw a 380 × 380 Ink circle centred on1192, 1582with no stroke, then a Bone one with an 8 px Ink stroke centred on1180, 1570. The offset makes the same hard shadow as the cards.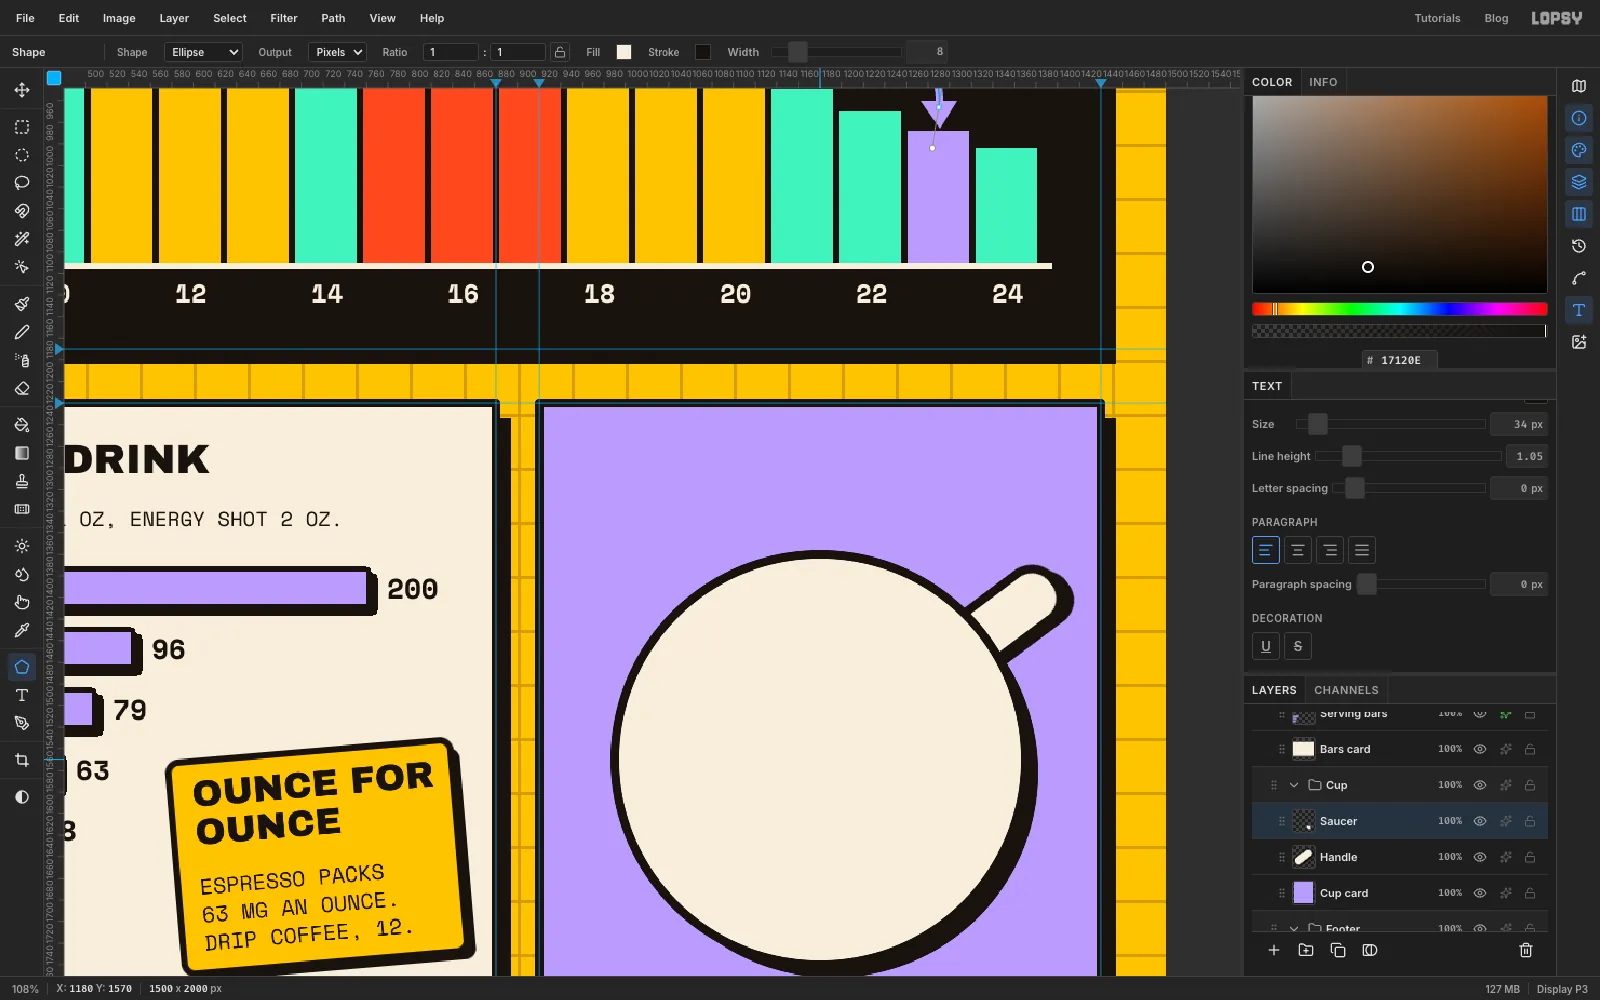
-
Cut the unused wedge
This is the donut. Five shots are 315 mg, which is 79% of 400 mg, so 21% of the ring stays empty.
Add Layer, rename it
Cup empty. Make an exact Elliptical Marquee from1040, 1430to1320, 1710, fill it with Mustard, press Cmd+D, and add a Stroke effect in Ink, Width5. Close the drawer.Add Layer, rename it
Cup used, and set the foreground to Tomato. Make the same Elliptical Marquee. Pick the Lasso, hold Alt and drag a wedge to subtract it. Start at the centre and go out past the rim through1044, 1537, round past the top, and come back to the centre straight down from1180, 1430. Keep the two straight edges as clean as you can. The divider lines will cover small wobbles.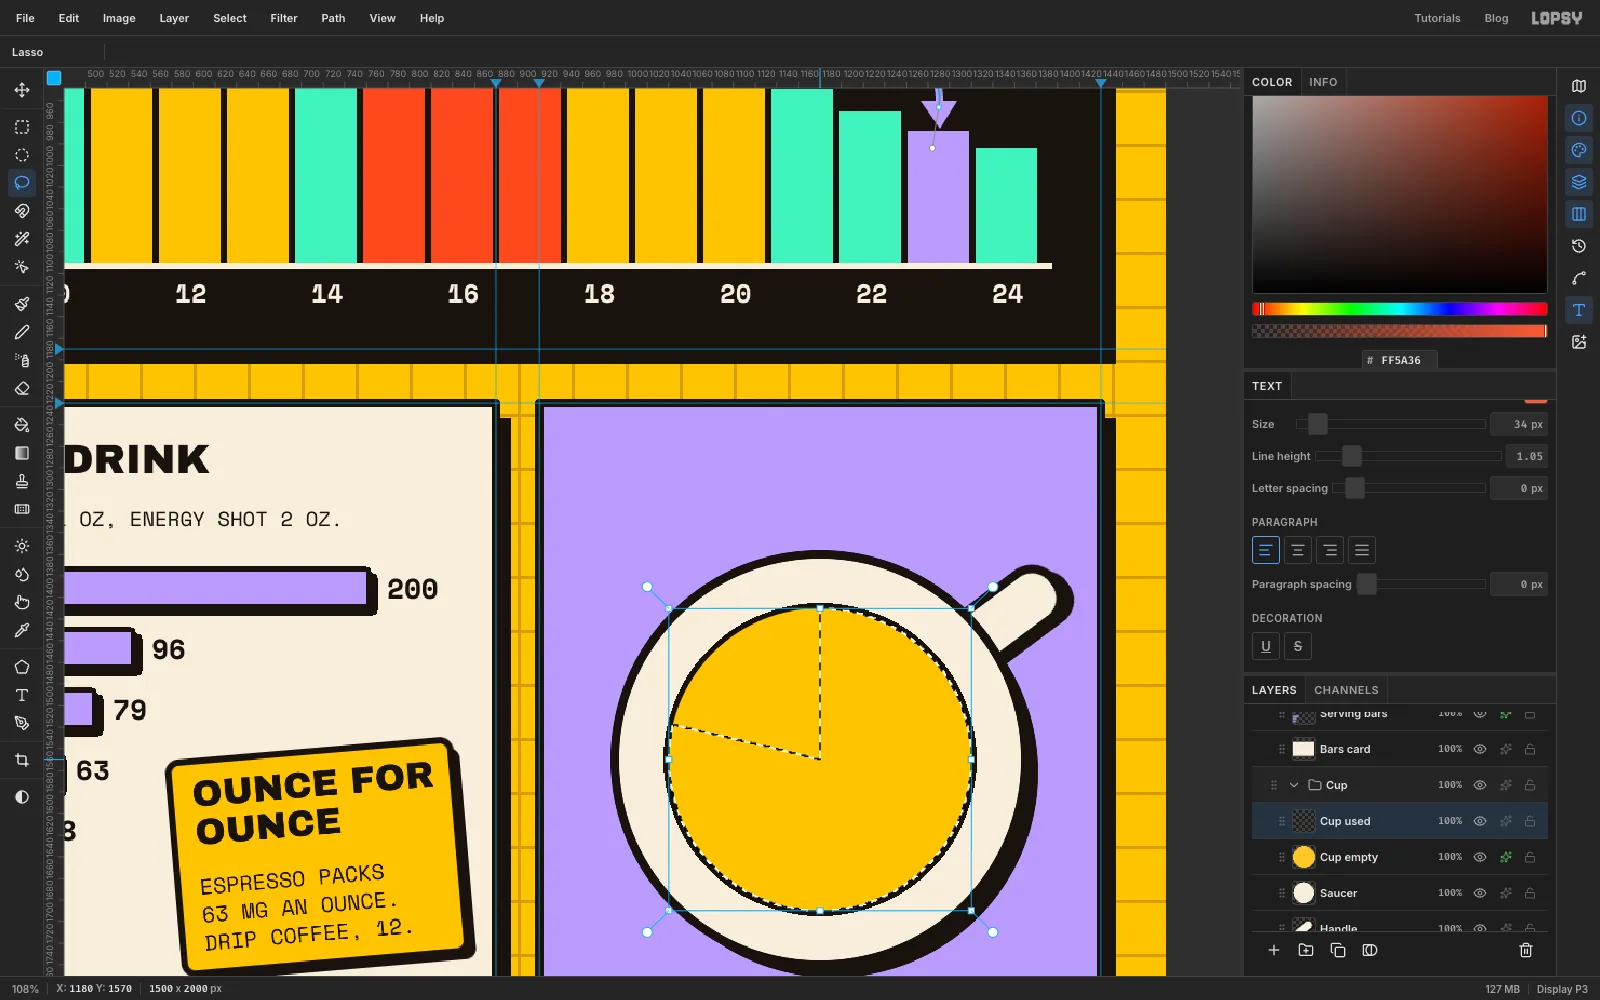
-
Fill the ring
Choose Edit → Fill, press Cmd+D and add a Stroke effect in Ink, Width
5, to match the mustard disc. Close the drawer, because the next clicks land right where it floats.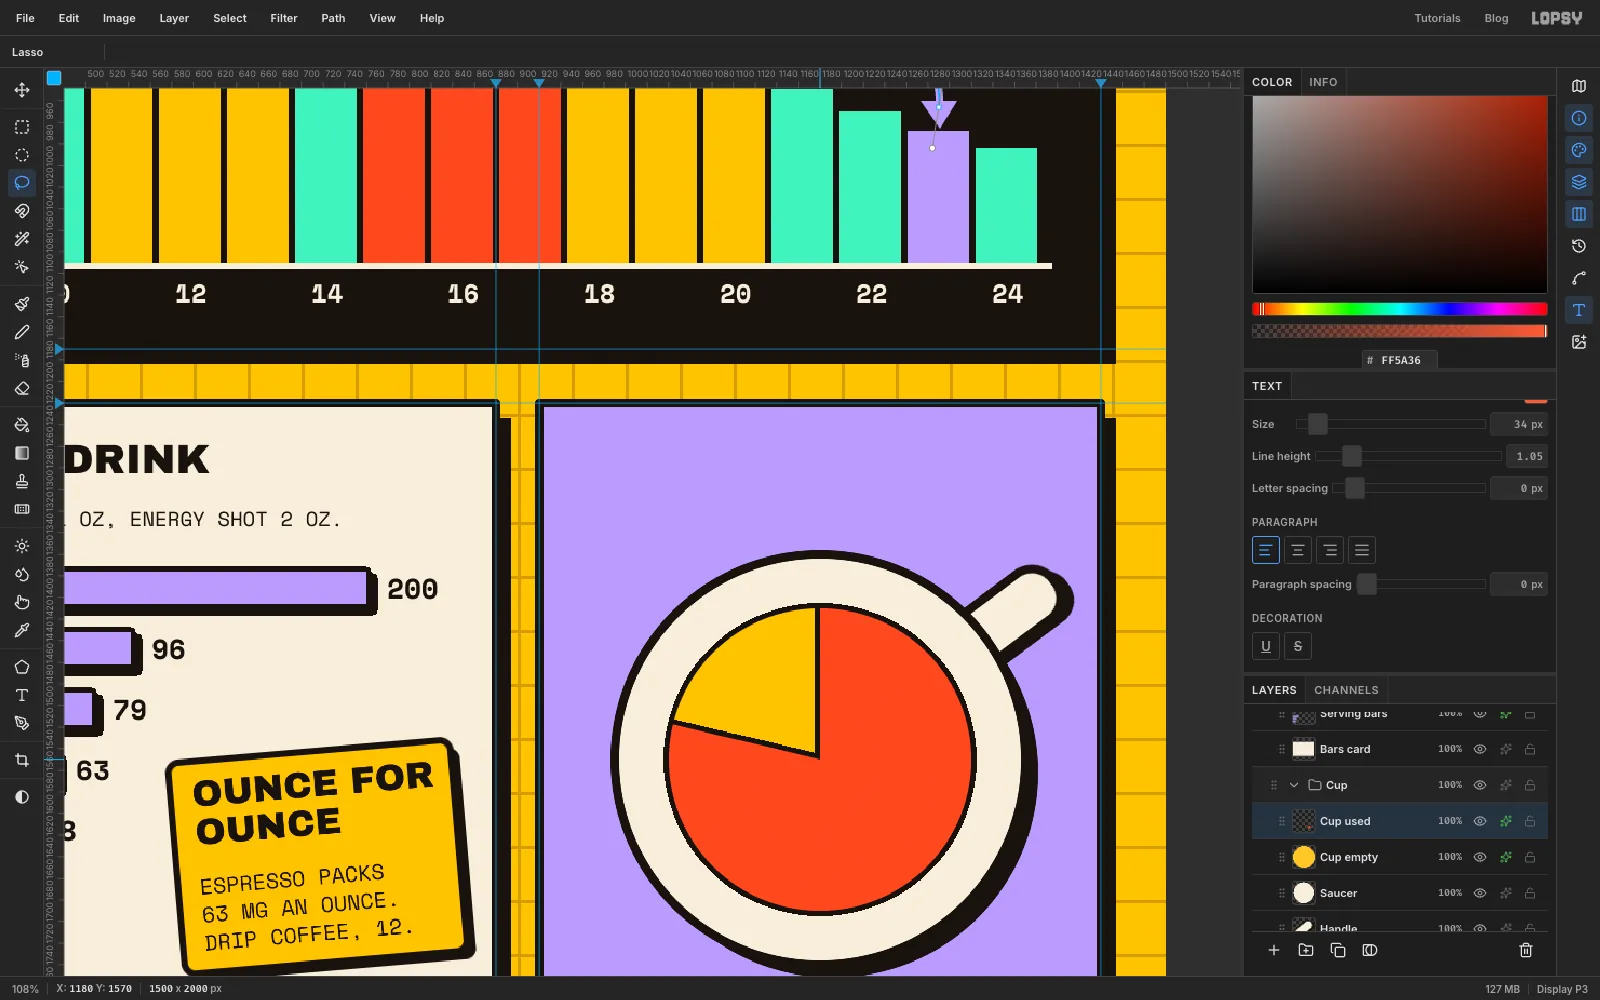
-
Divide it into five shots
Add Layer, rename it
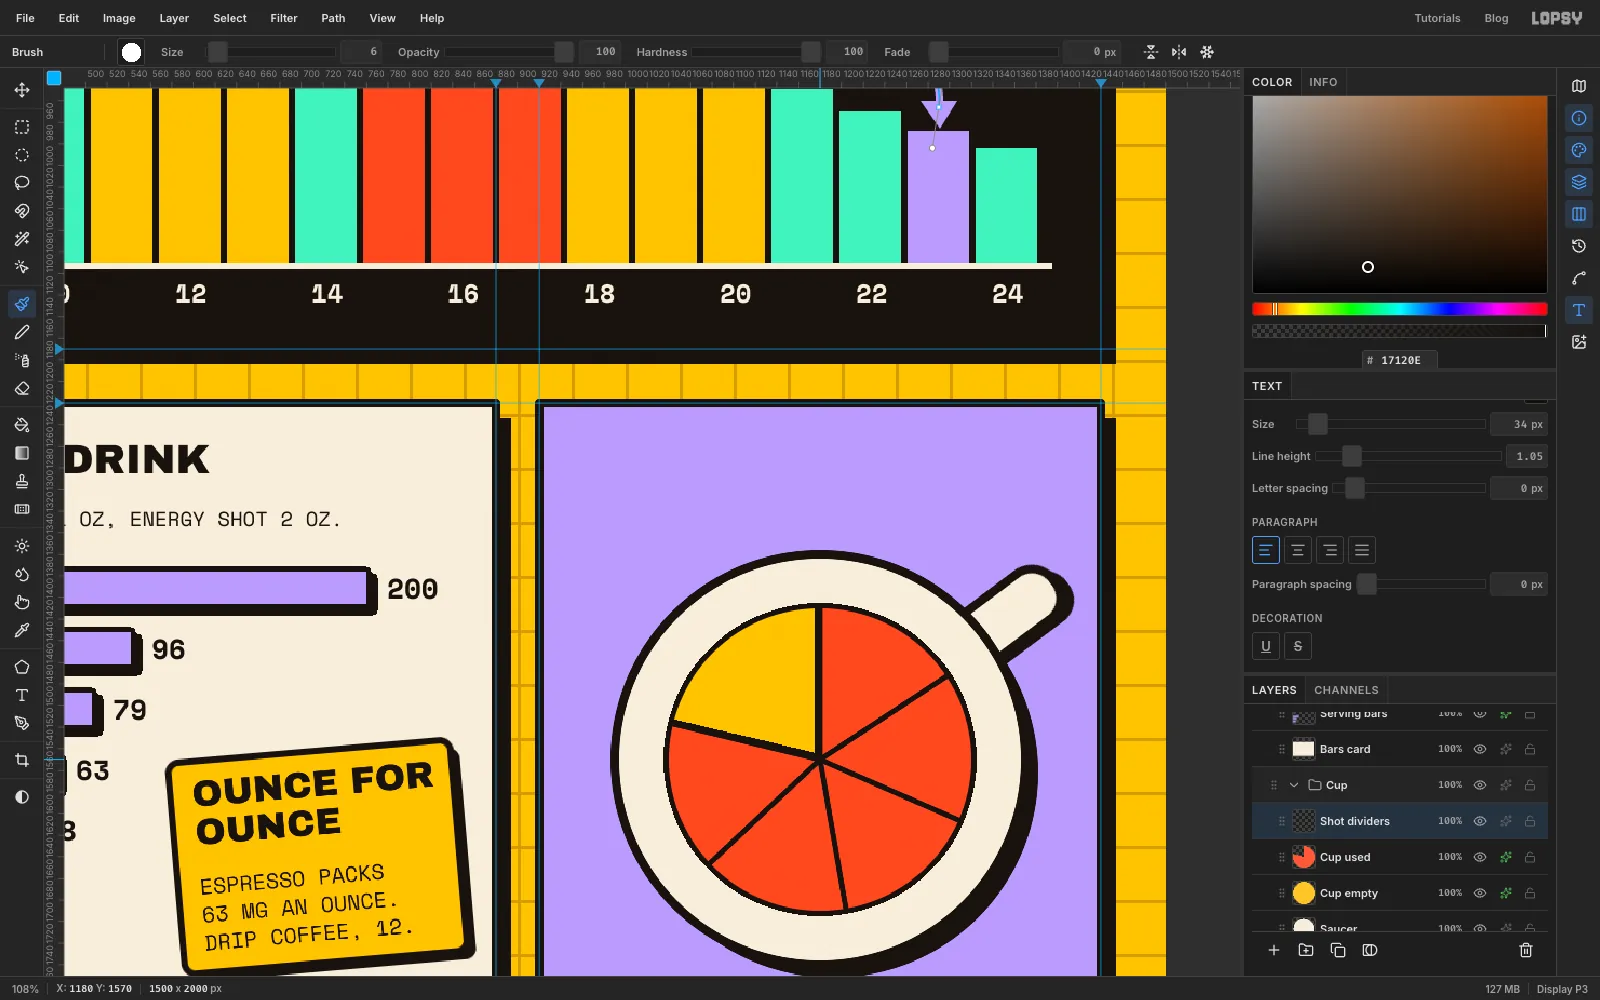
Shot dividers. Pick the Brush (B). Check it's the plain round tip, set Size6, Hardness100, Opacity100, and set the foreground to Ink.Each shot takes up 56.7° of the circle. Going clockwise from 12 o'clock, draw a line at each angle below. Click the centre,
1180, 1570, then Shift-click the point on the rim:- 0°:
1180, 1430 - 56.7°:
1297, 1493 - 113.4°:
1308, 1626 - 170.1°:
1204, 1708 - 226.8°:
1078, 1666 - 283.5°:
1044, 1537
The first and last lines cover the wedge's edges.
- 0°:
-
Drop in the bean photo
Add Layer, rename it
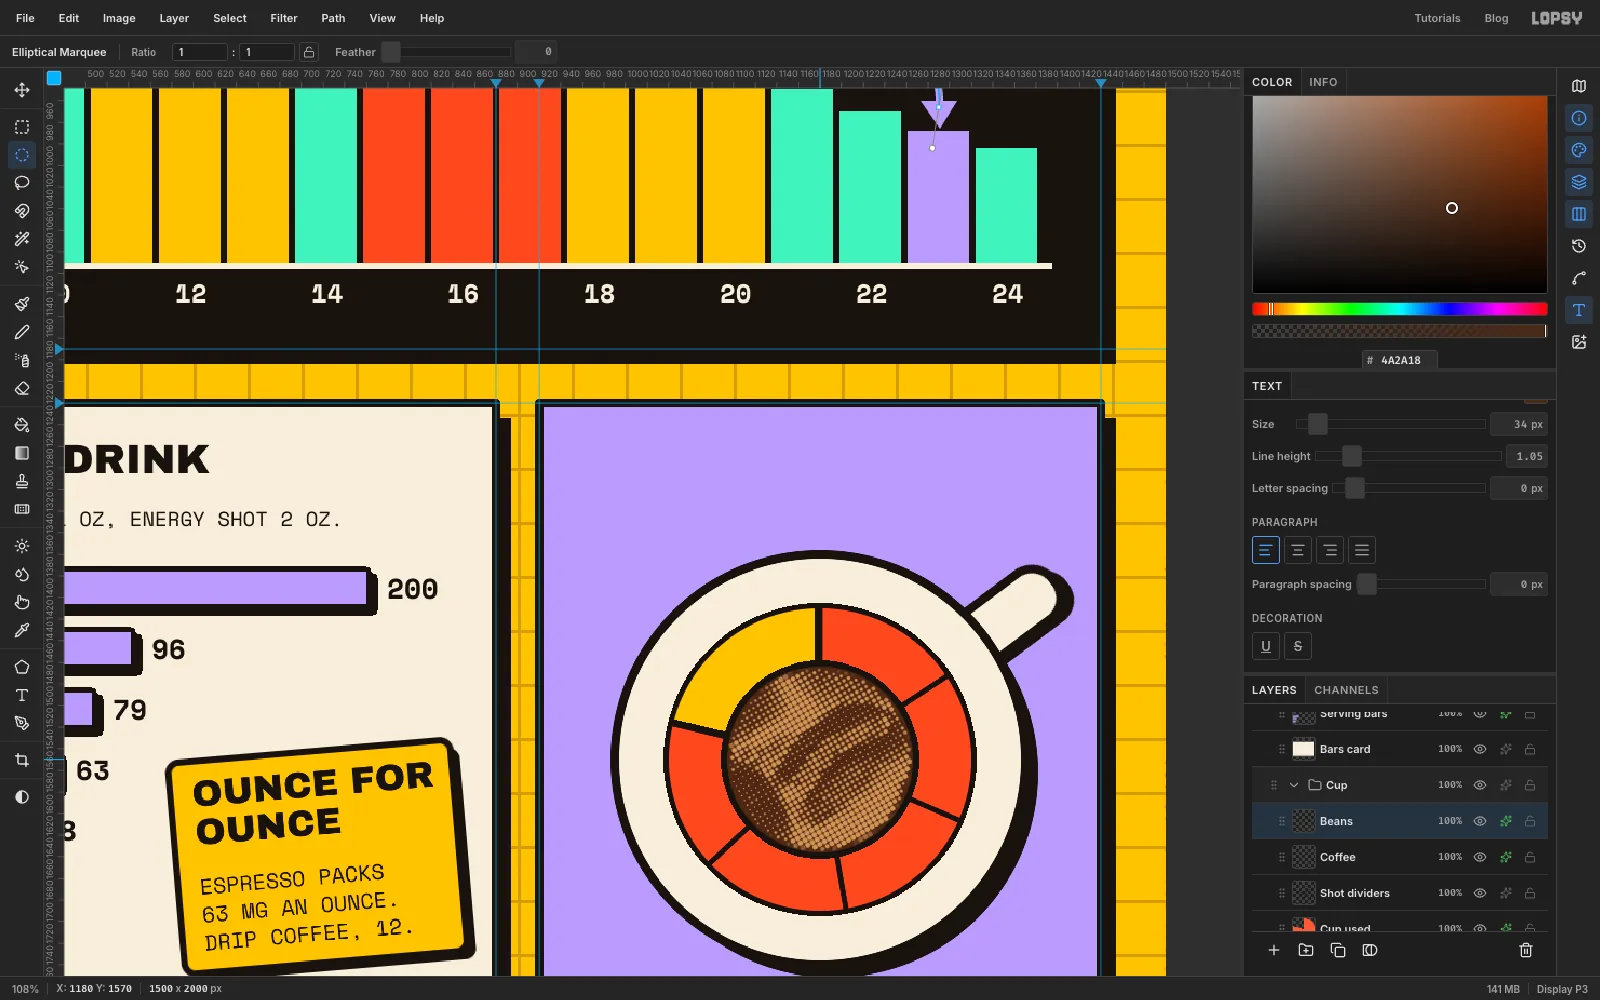
Coffee. Make an exact Elliptical Marquee from1094, 1484to1266, 1656, fill with Coffee , press Cmd+D, and add a Stroke effect in Ink, Width6. Close the drawer. This is the coffee surface and also the donut's hole.Drag
Roasted_coffee_beans.jpgfrom your computer onto the canvas. It lands as a newPasted Layerfitted to the document's width. Rename itBeans.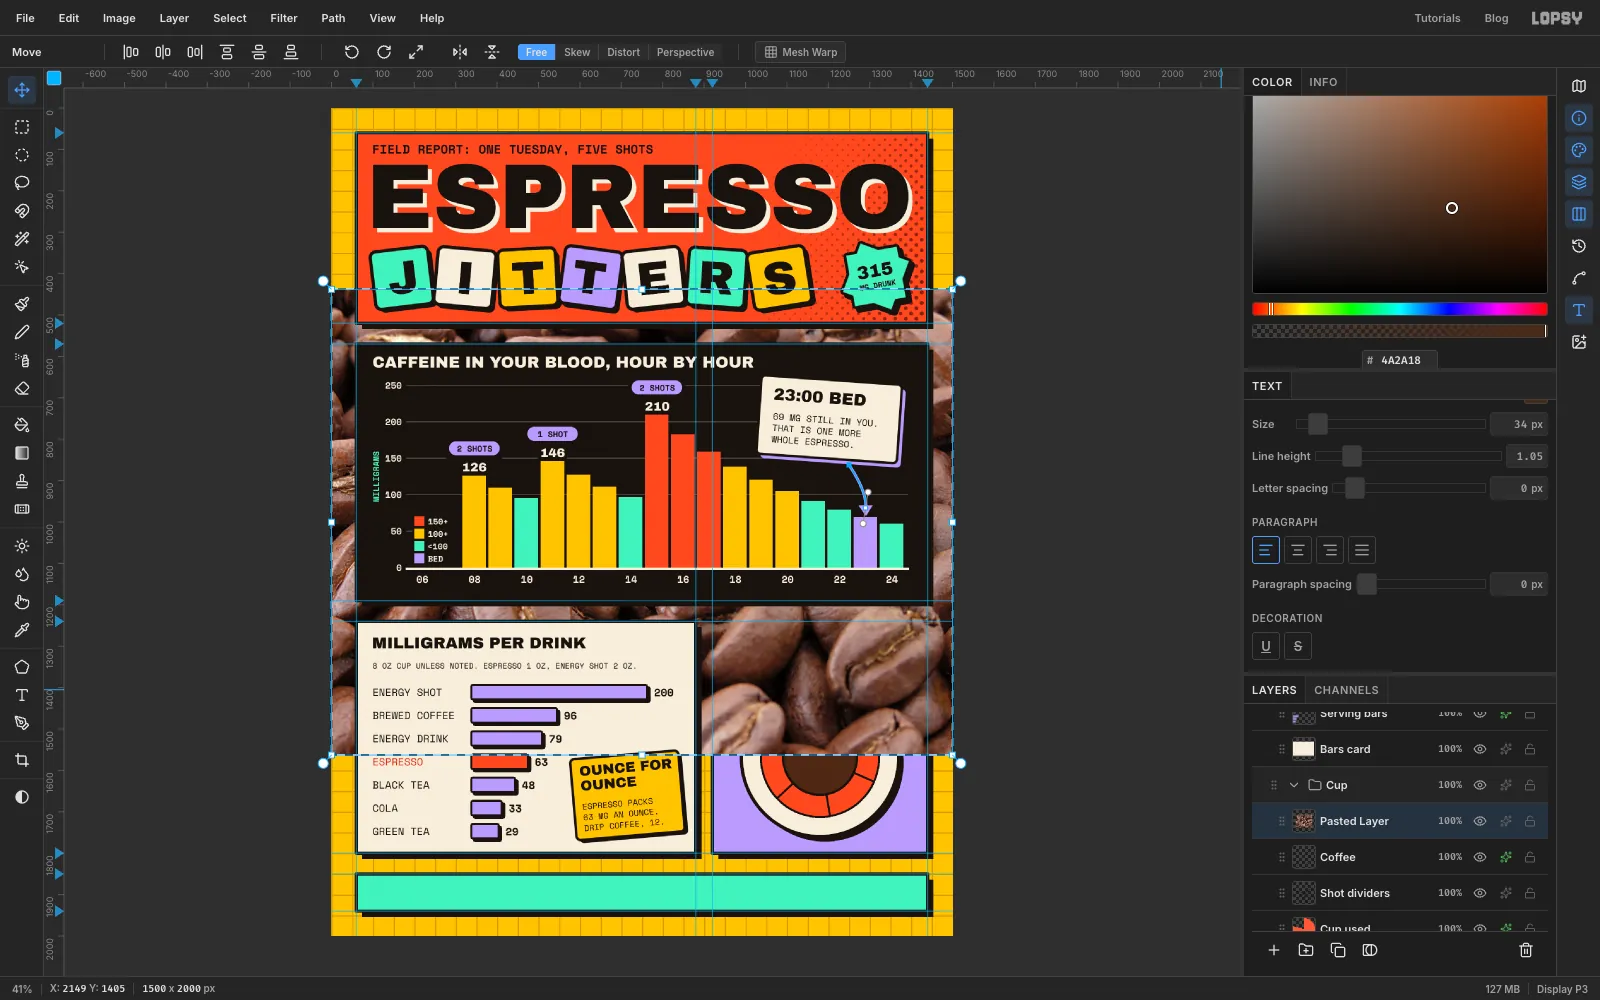
-
Shrink the photo
Press Cmd+D, then make an exact Rectangular Marquee around the photo, from
0, 438to1500, 1563. Press V, hold Cmd and drag the bottom-right corner handle in to about750, 1000, half the size. Press Cmd+D to commit. You'll mostly see the photo's frame, because the panels above it cover the rest.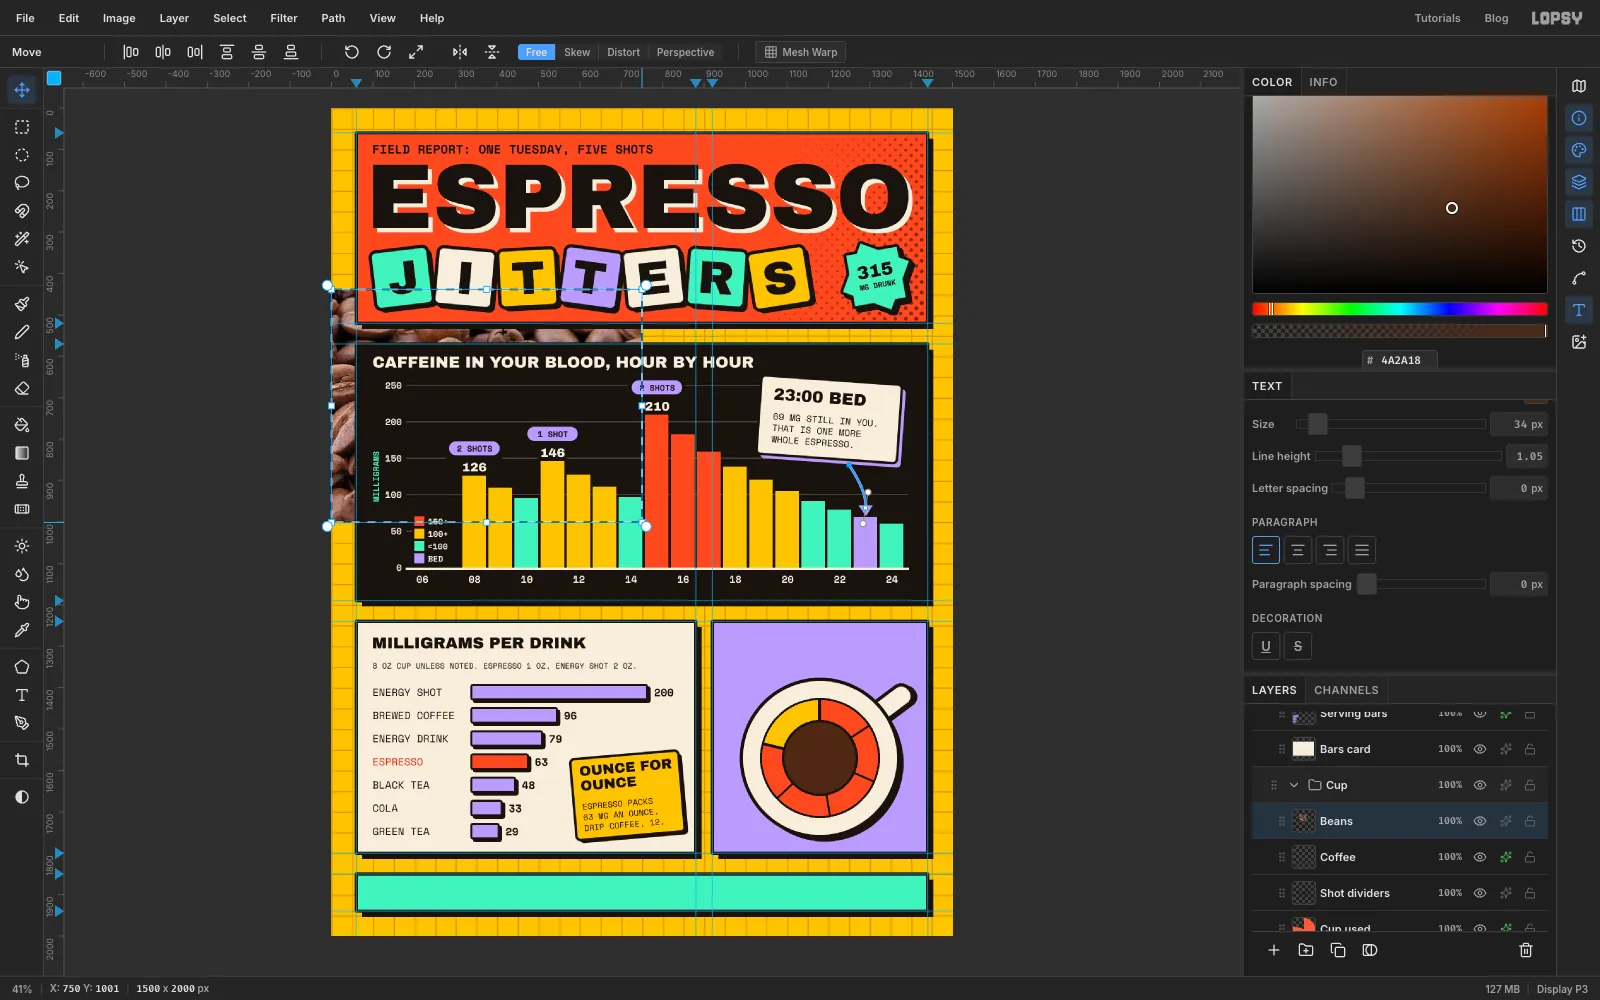
-
Clip the photo to the coffee
With the Move tool, drag from the middle of the photo to the middle of the cup. Make an exact Elliptical Marquee from
1097, 1487to1263, 1653, just inside the coffee circle, and choose Select → Inverse. Check the Beans row is active, so you trim the photo and not another layer, then press Delete and Cmd+D.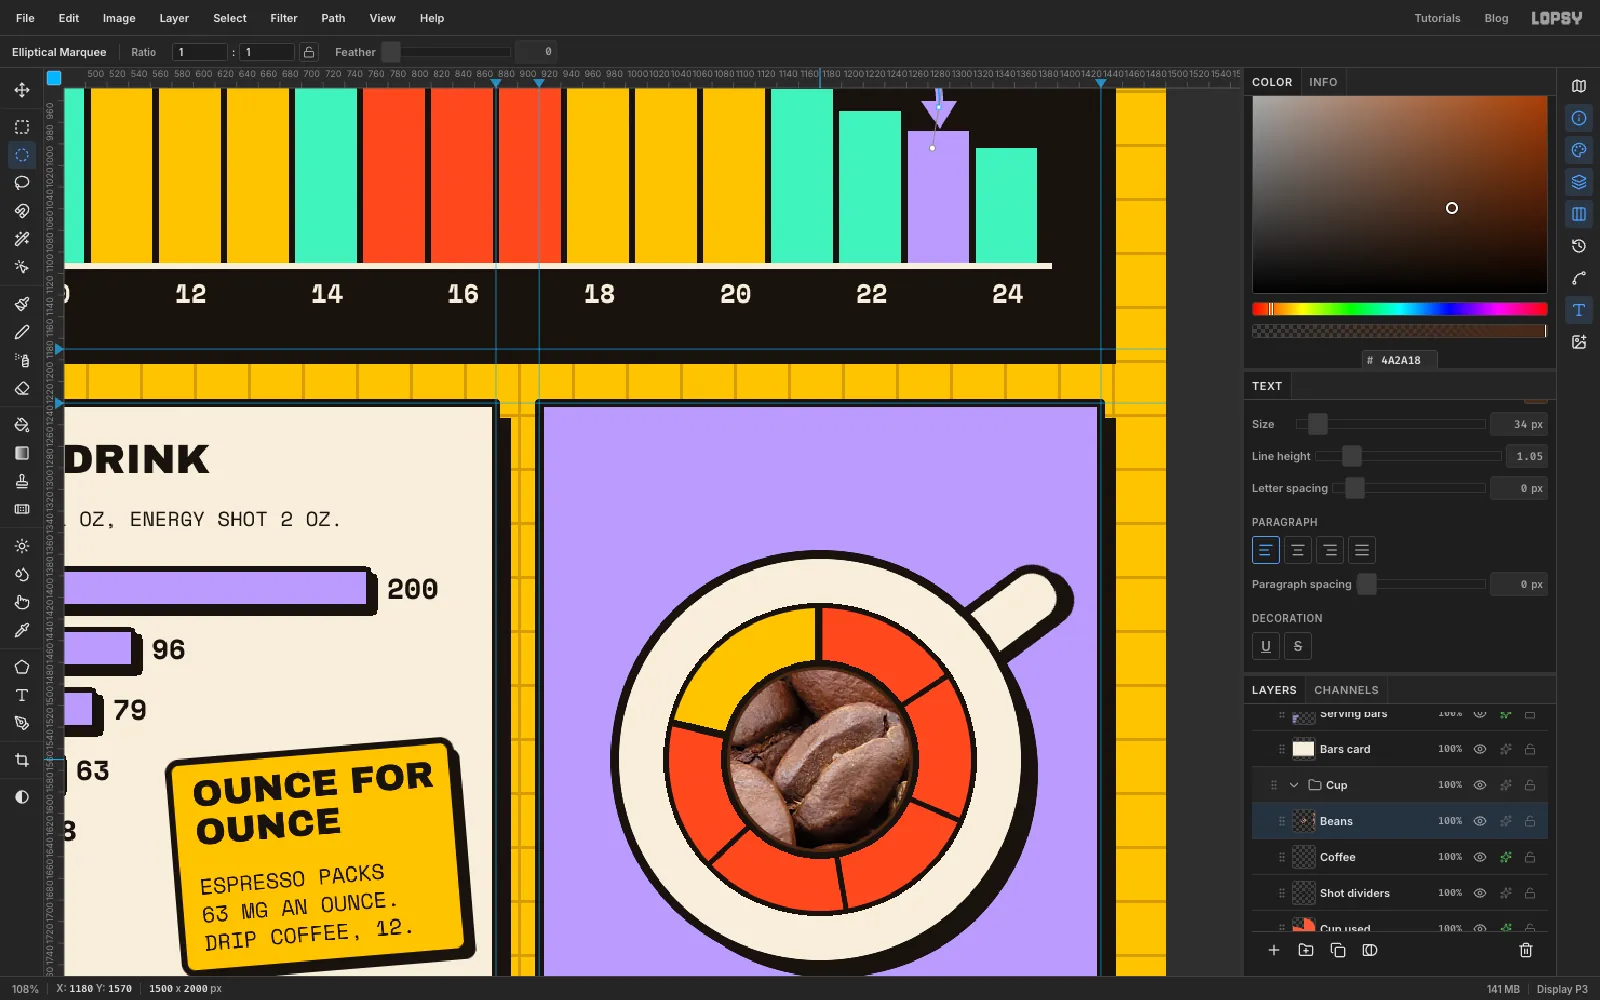
-
Turn the beans into dots
Run these on the Beans layer, in order:
- Filter → Desaturate.
- Filter → Brightness/Contrast…, Contrast
45. - Filter → Halftone, Dot Size
5, Density1, Angle30, Softness1.
Halftone leaves transparent gaps, so the Coffee disc shows through. Open Layer effects and turn on Color Overlay in so all the dots become tan and tie in with the print-style dots in the header. Close the drawer.
-
Put the headline number on top
Add
79%in Archivo Black, Size60, Bone. Press V and nudge it to the centre of the cup. Add a Stroke effect in Ink, Width6, and close the drawer.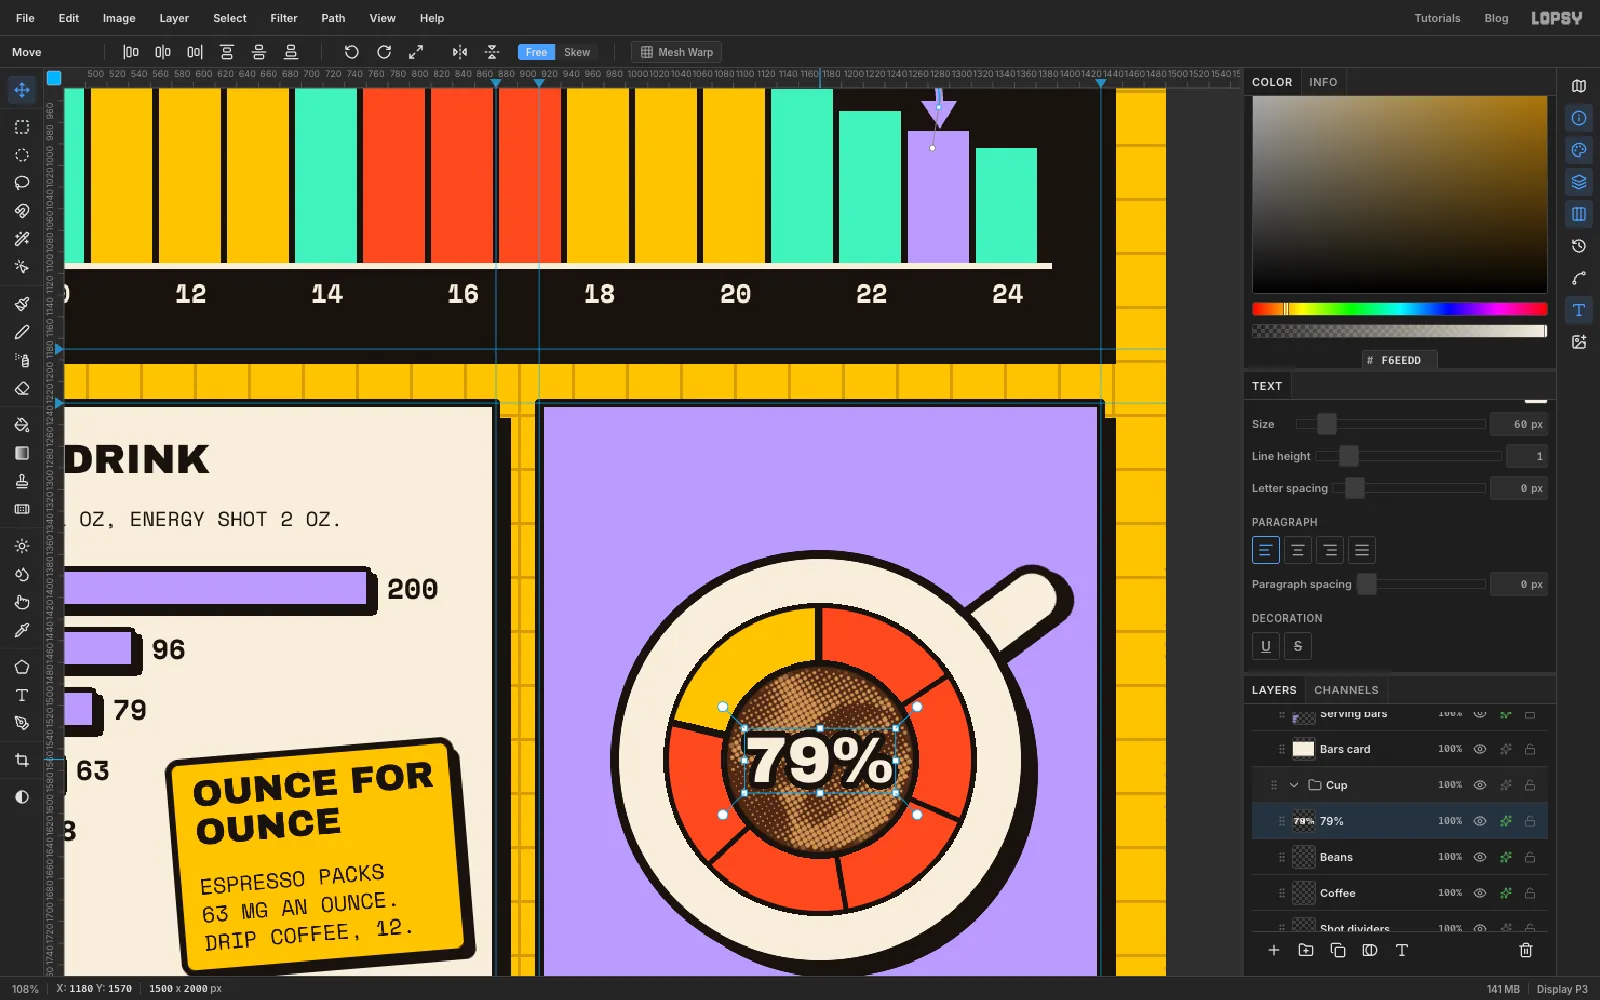
-
Draw the rim arcs
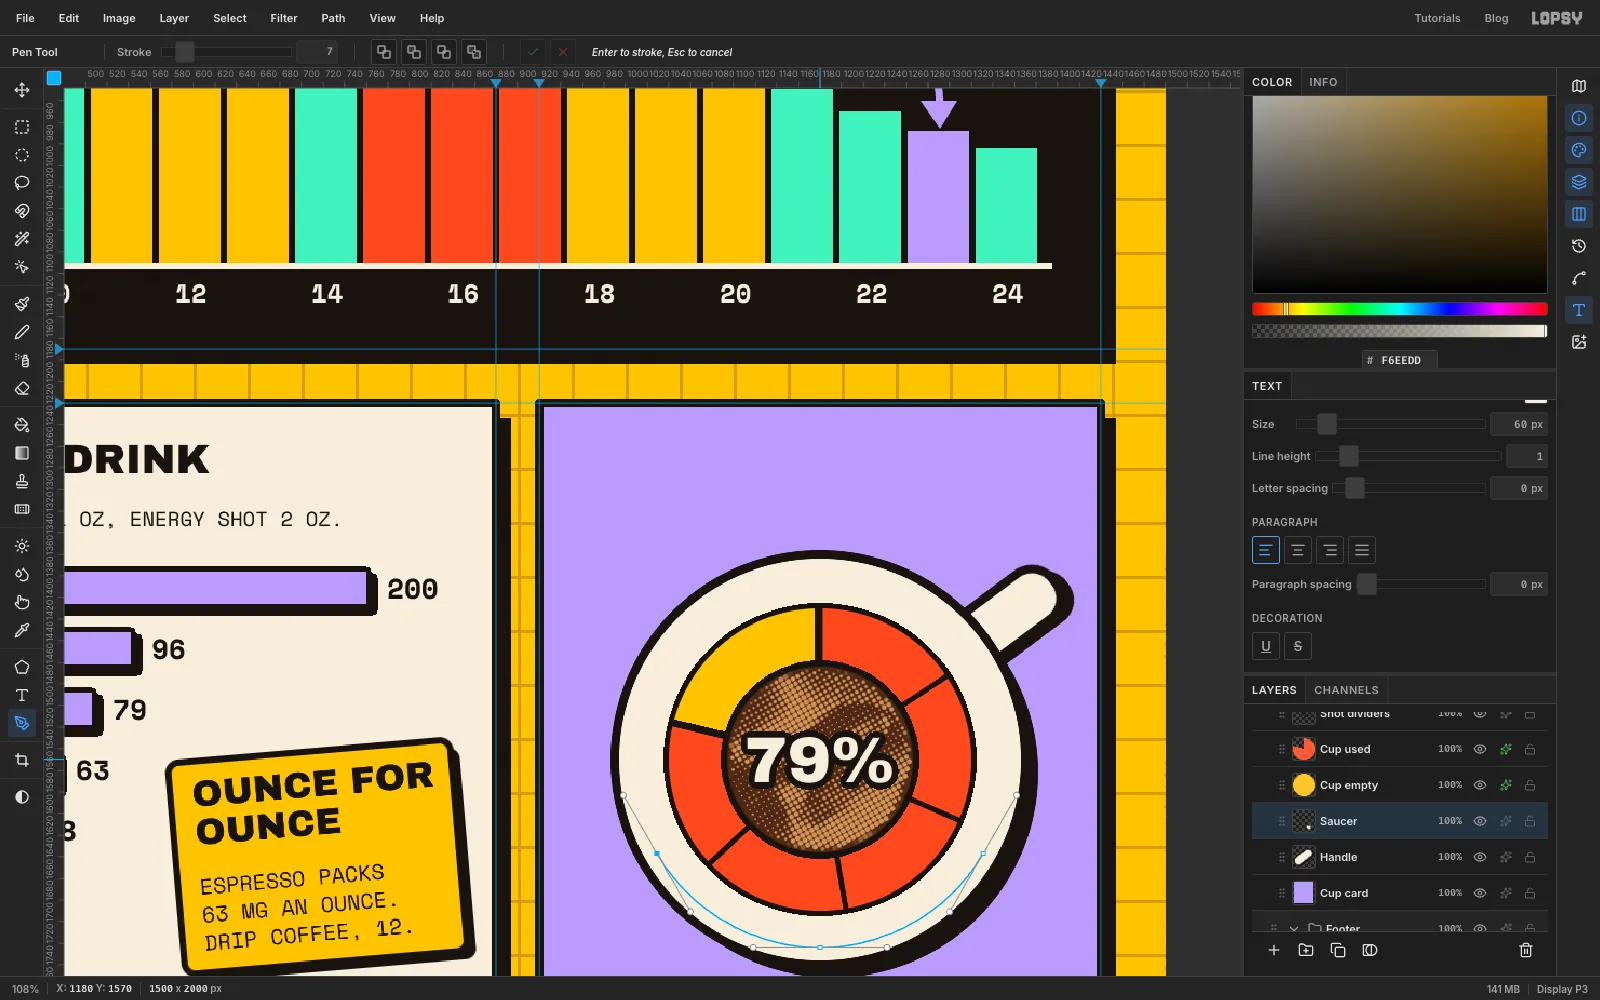
The saucer band is where the labels go. If one circle of text ran all the way round, the bottom half would be upside down, so use two arcs.
Click the Saucer row and pick the Pen (P). Press at each anchor and drag along the curve's direction to pull out its handles:
- Top arc, drawn left to right over the top. Drag about 75 px at each anchor. Start on the left at
1026, 1543and drag upwards. At the top, press at1180, 1414and drag right. Finish on the right at1334, 1543and drag downwards. Click Commit path (✓). - Bottom arc, also drawn left to right. Drag about 60 px at each anchor. Start at
1029, 1657and drag down and to the right, steeply. At the bottom, press at1180, 1744and drag right. Finish at1331, 1657and drag up and to the right, steeply. Click ✓.
The first arc disappears from view once you start the second, but it's saved in the Paths panel. Text follows a path's direction, so the left-to-right bottom arc keeps its letters upright.
- Top arc, drawn left to right over the top. Drag about 75 px at each anchor. Start on the left at
-
Put the labels on the arcs
Click the Saucer row. Pick the Text tool and set Space Mono Bold, Size
23, Ink, Align center. Click in the empty lilac area below the saucer, type this and press Tab:85 MG UNUSED * 315 MG DRUNKWith that text selected, set Path in the options bar to the top arc (
Path 2). Centring on the path puts85 MG UNUSEDover the mustard wedge.Click Saucer again and repeat in the same spot with
5 SHOTS AT 63 MG, choosing the bottom arc (Path 3). The arrow you drew earlier isPath 1.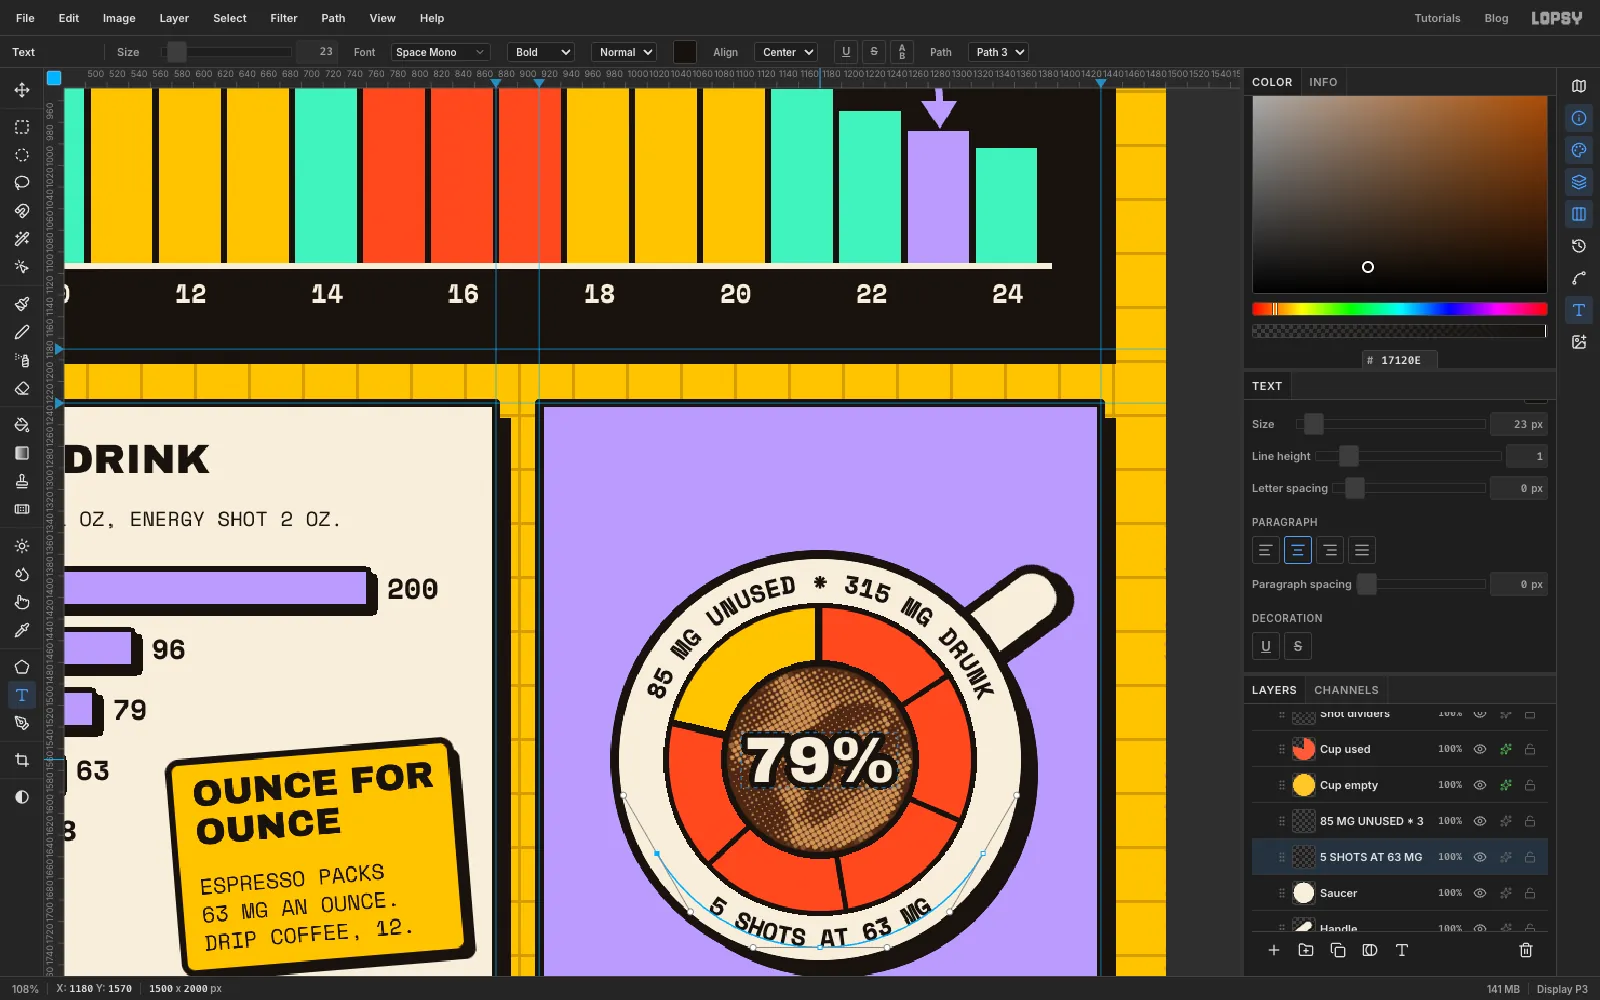
-
Head the cup panel
Click Saucer and add this in Space Mono Regular, Size
19, Ink, Align left, with its top at abouty = 1340and left edge atx = 960:SHARE OF THE FDA'S 400 MG A DAYClick Saucer again and add
ONE DAY IN ONE CUPin Archivo Black, Size38, with its baseline at abouty = 1305, level with the heading beside it.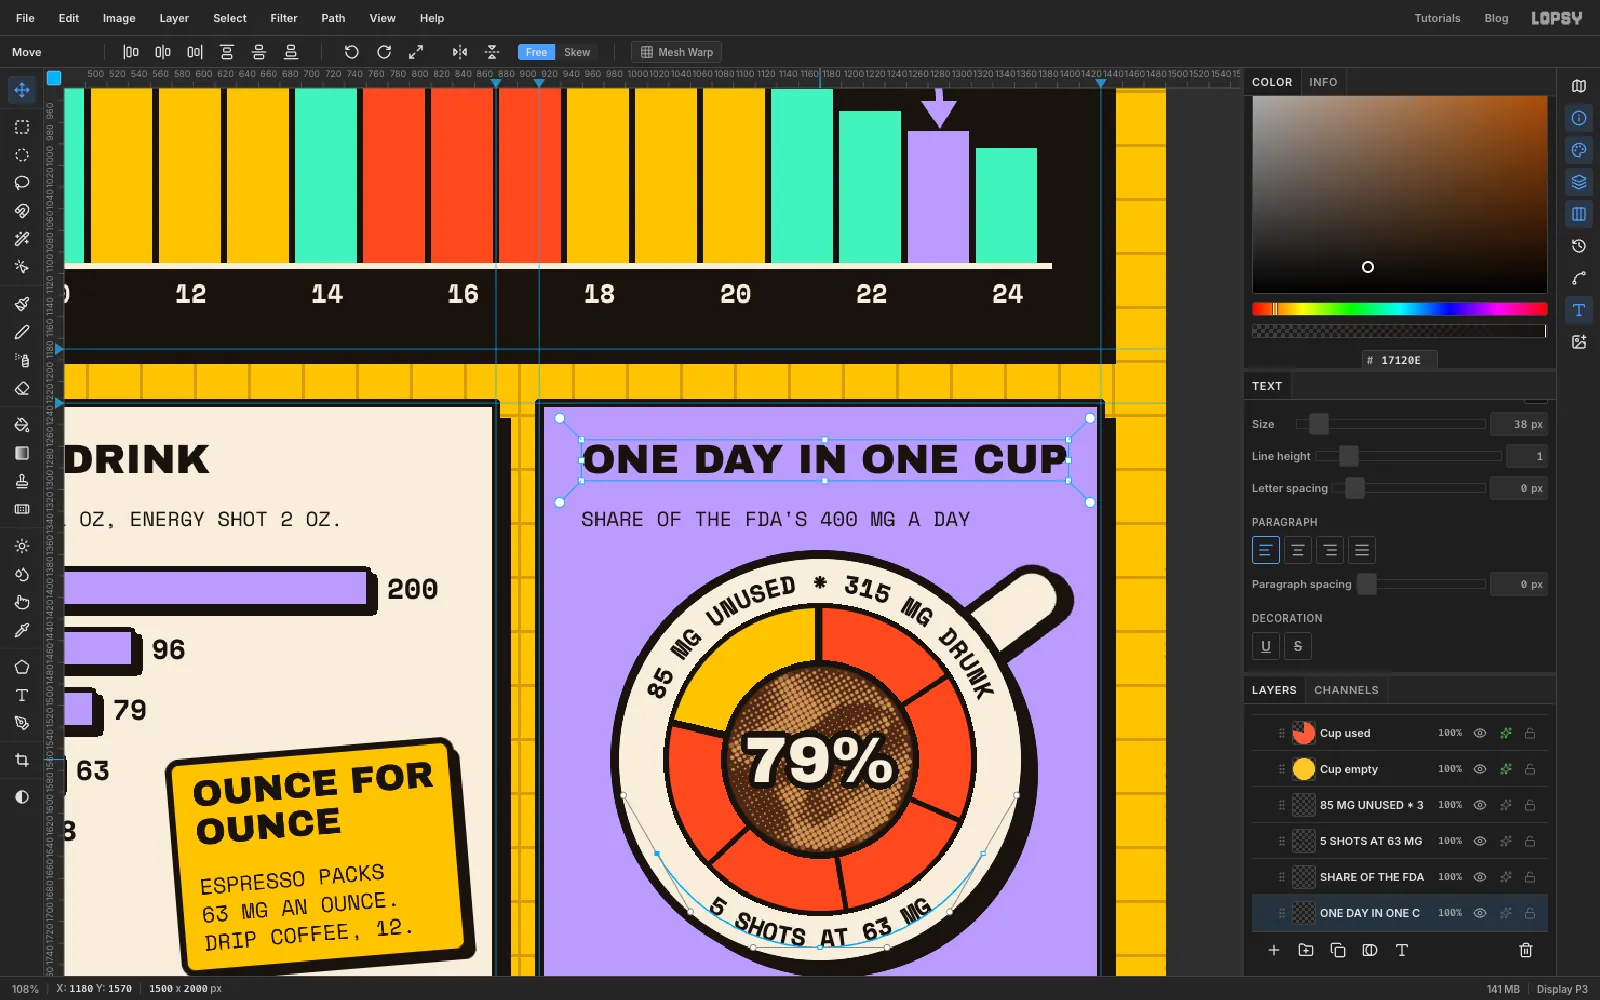
-
Credit your sources
Click Footer card and add these two lines in Space Mono Regular, Size
21, Line height1.3, Ink, with a left edge atx = 100, centred vertically in the strip:SOURCES: MAYO CLINIC (CAFFEINE PER SERVING, 2025); U.S. FDA (400 MG A DAY FOR MOST ADULTS).HOURLY LEVELS ARE A MODEL: 5-HOUR HALF-LIFE, INSTANT ABSORPTION. NOT MEDICAL ADVICE.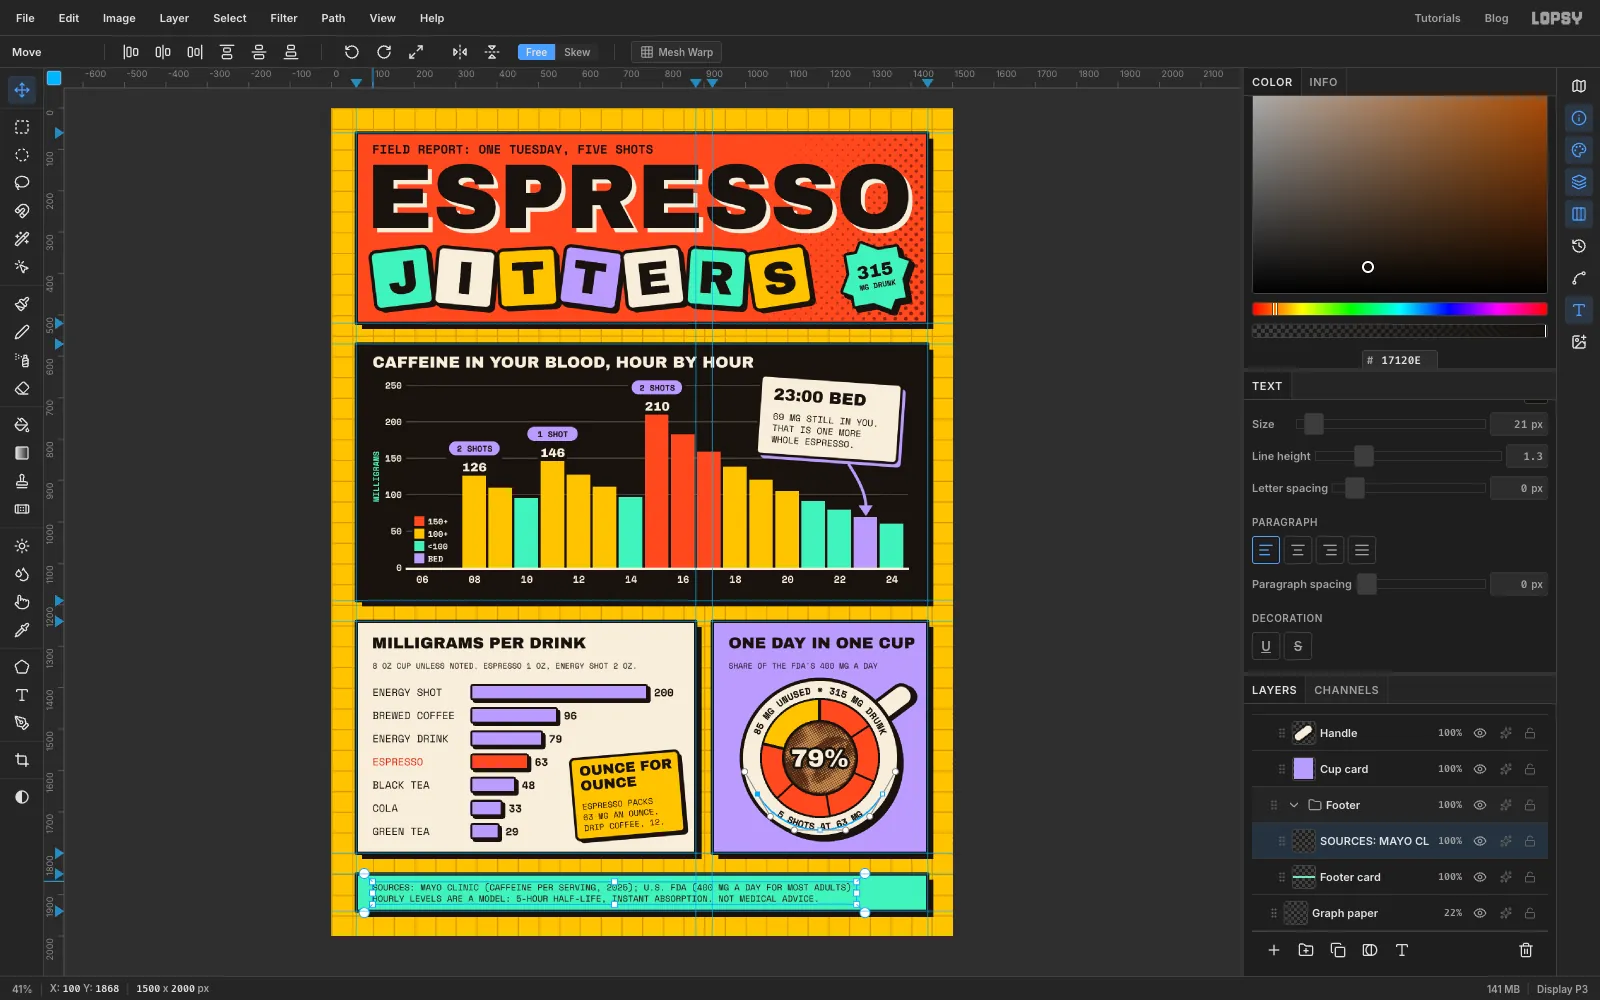
-
Save and export
Choose File → Save Project to keep an editable
.lopsy, then File → Quick Export PNG.To make your own version, swap the doses or the drink list. The chart's maths stays the same: multiply the previous hour by about
0.87, add any new dose, and multiply by1.76for the bar height. Then the bar's top is1110minus that height.