Make an Op-Art Kudu Iron-On Patch in Lopsy
Build a Bridget Riley-style embroidered patch for a trail race in Lopsy, with a kudu made only of stripes, bowed stripe fields, arched type and a stitched edge.
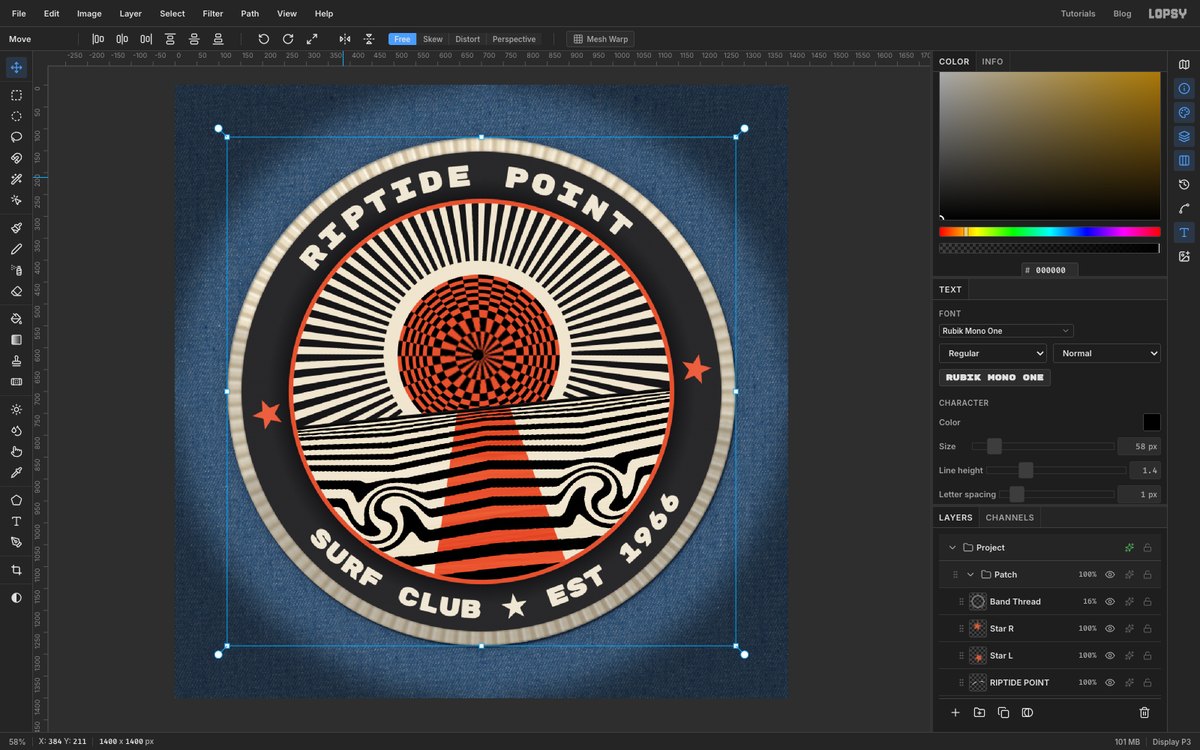
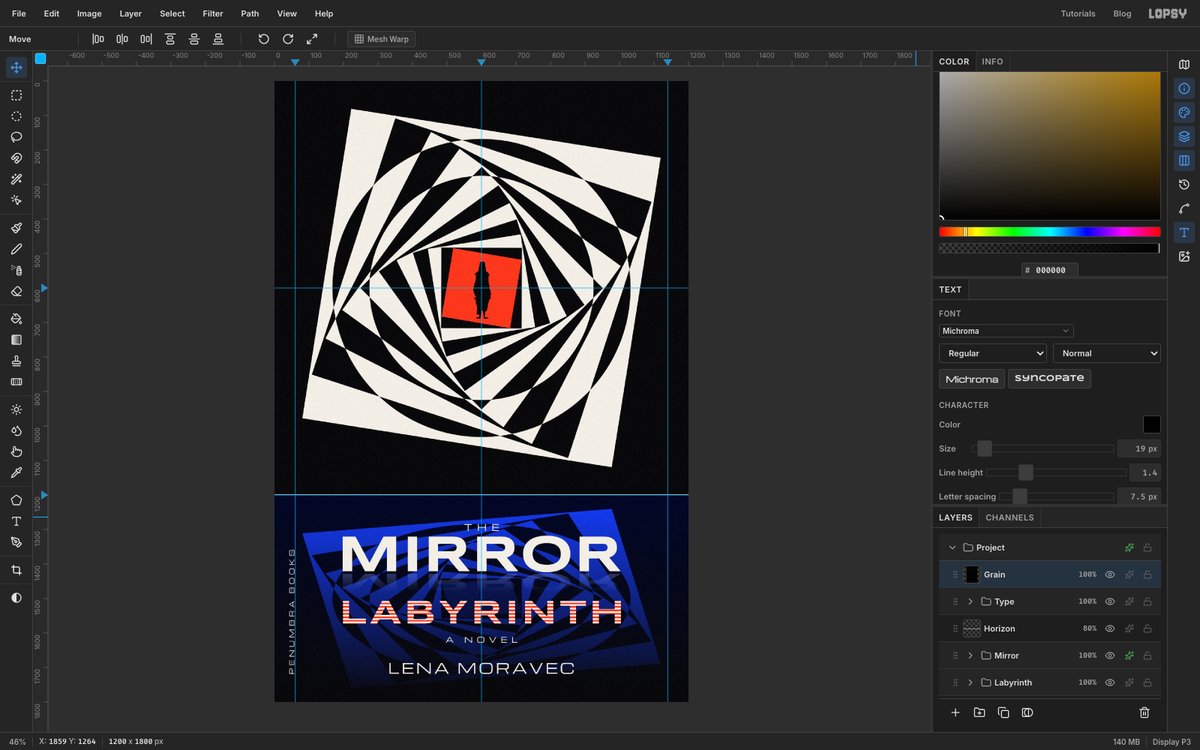
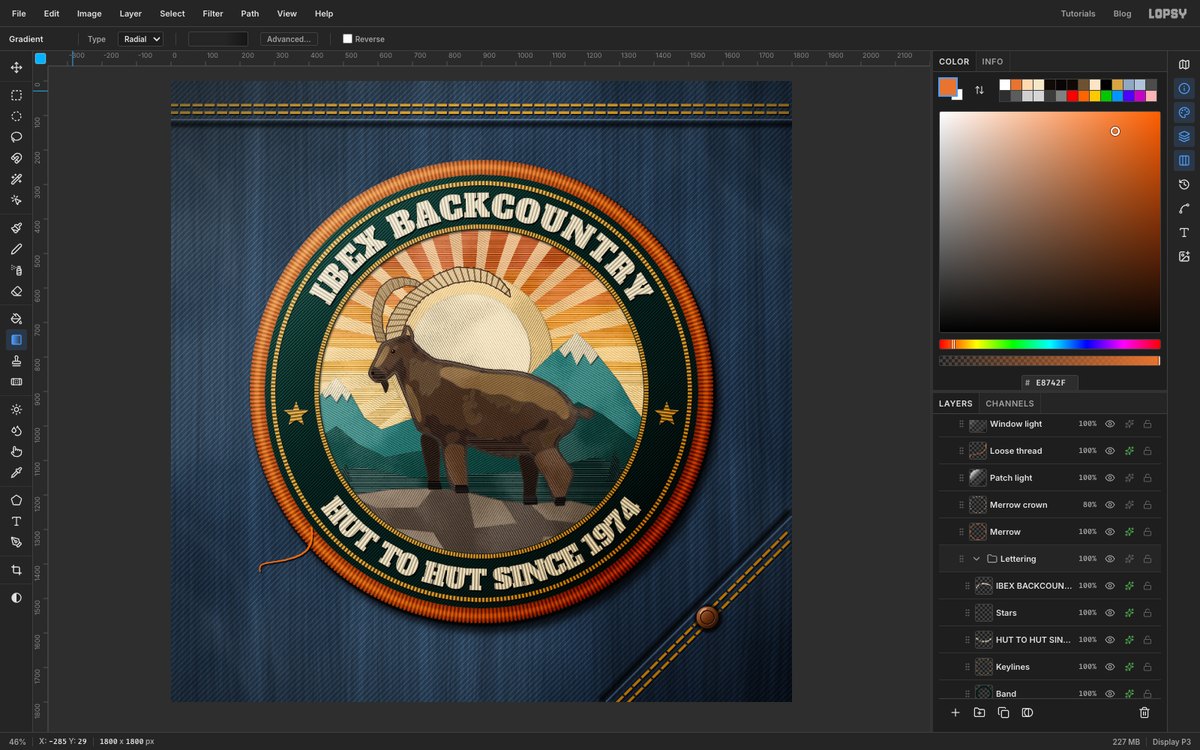
Op art (short for optical art) uses nothing but stripes, rings and hard edges to make a flat picture seem to bulge, shimmer or move. Bridget Riley and Victor Vasarely made it famous in the 1960s. Vasarely's Zebras draws two animals with no outlines at all: you only see them because their stripes turn a different way from the stripes around them.
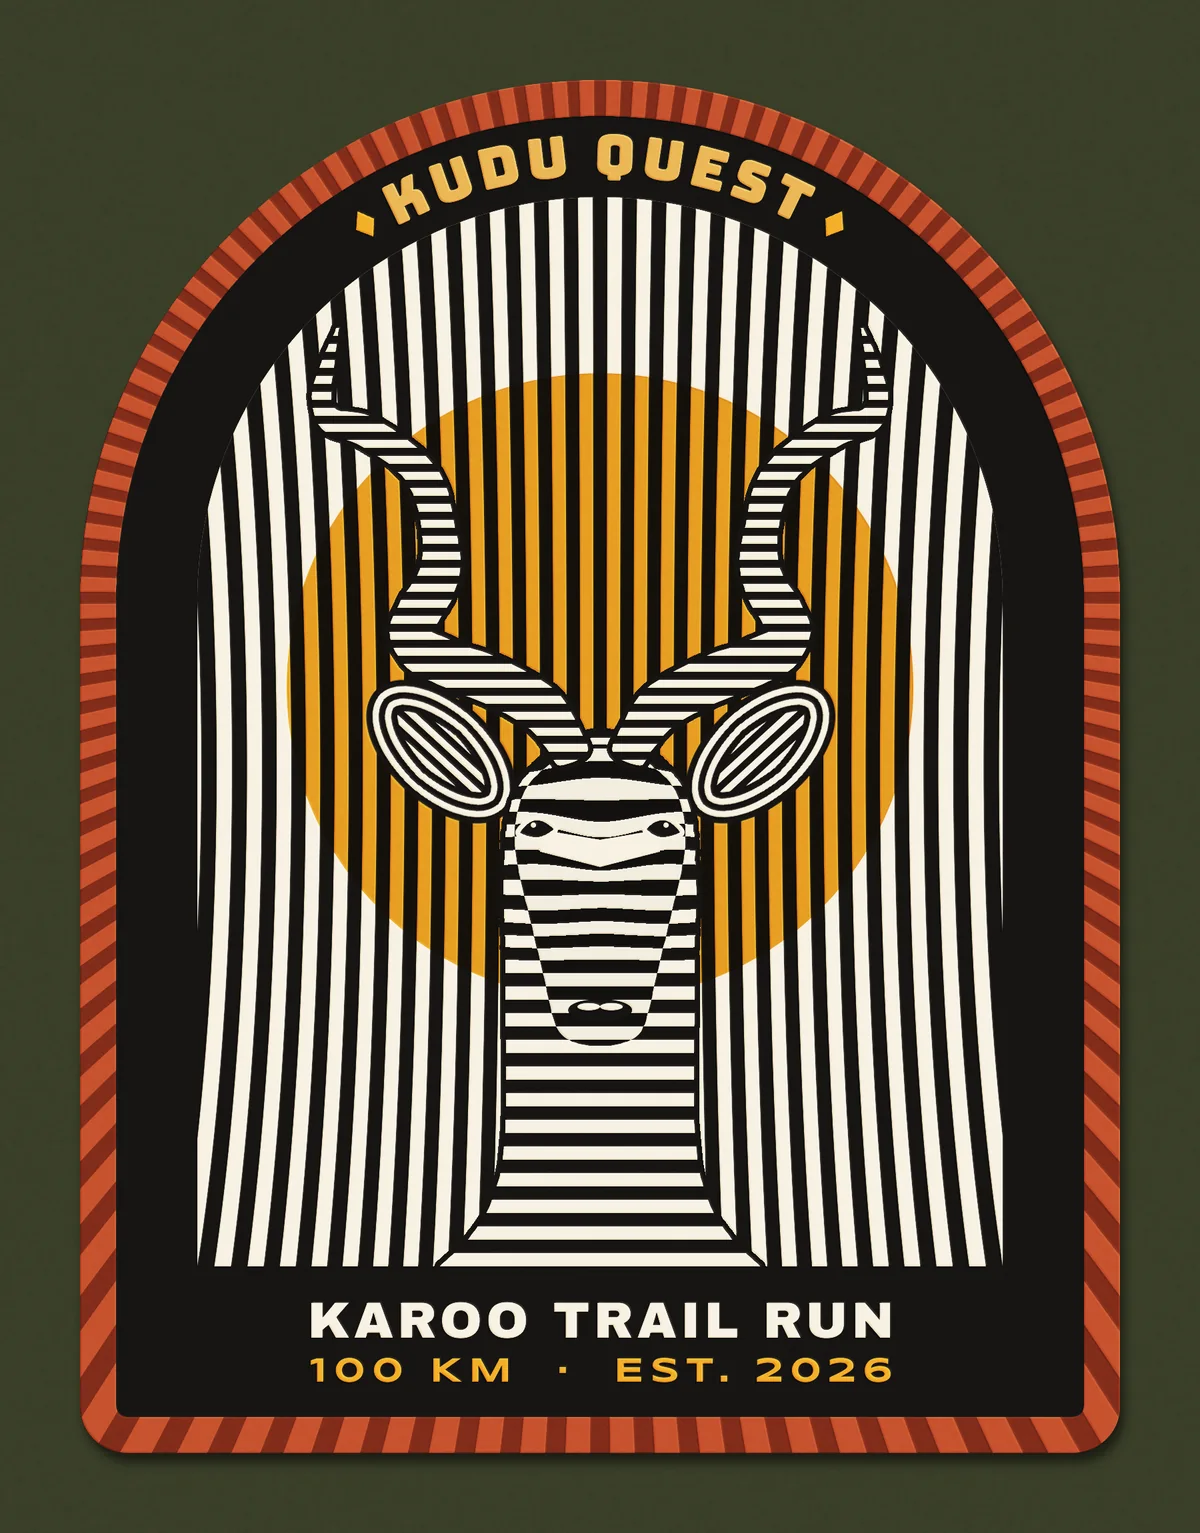
This tutorial uses the same trick on a back patch for a made-up race, the Kudu Quest 100 km trail run in South Africa's Karoo. A greater kudu head is built only from horizontal stripes, set against vertical ones. Then the patch gets an embroidered finish: a stitched merrow edge (the thick overlocked border on real patches), thread texture and a slight raised relief.
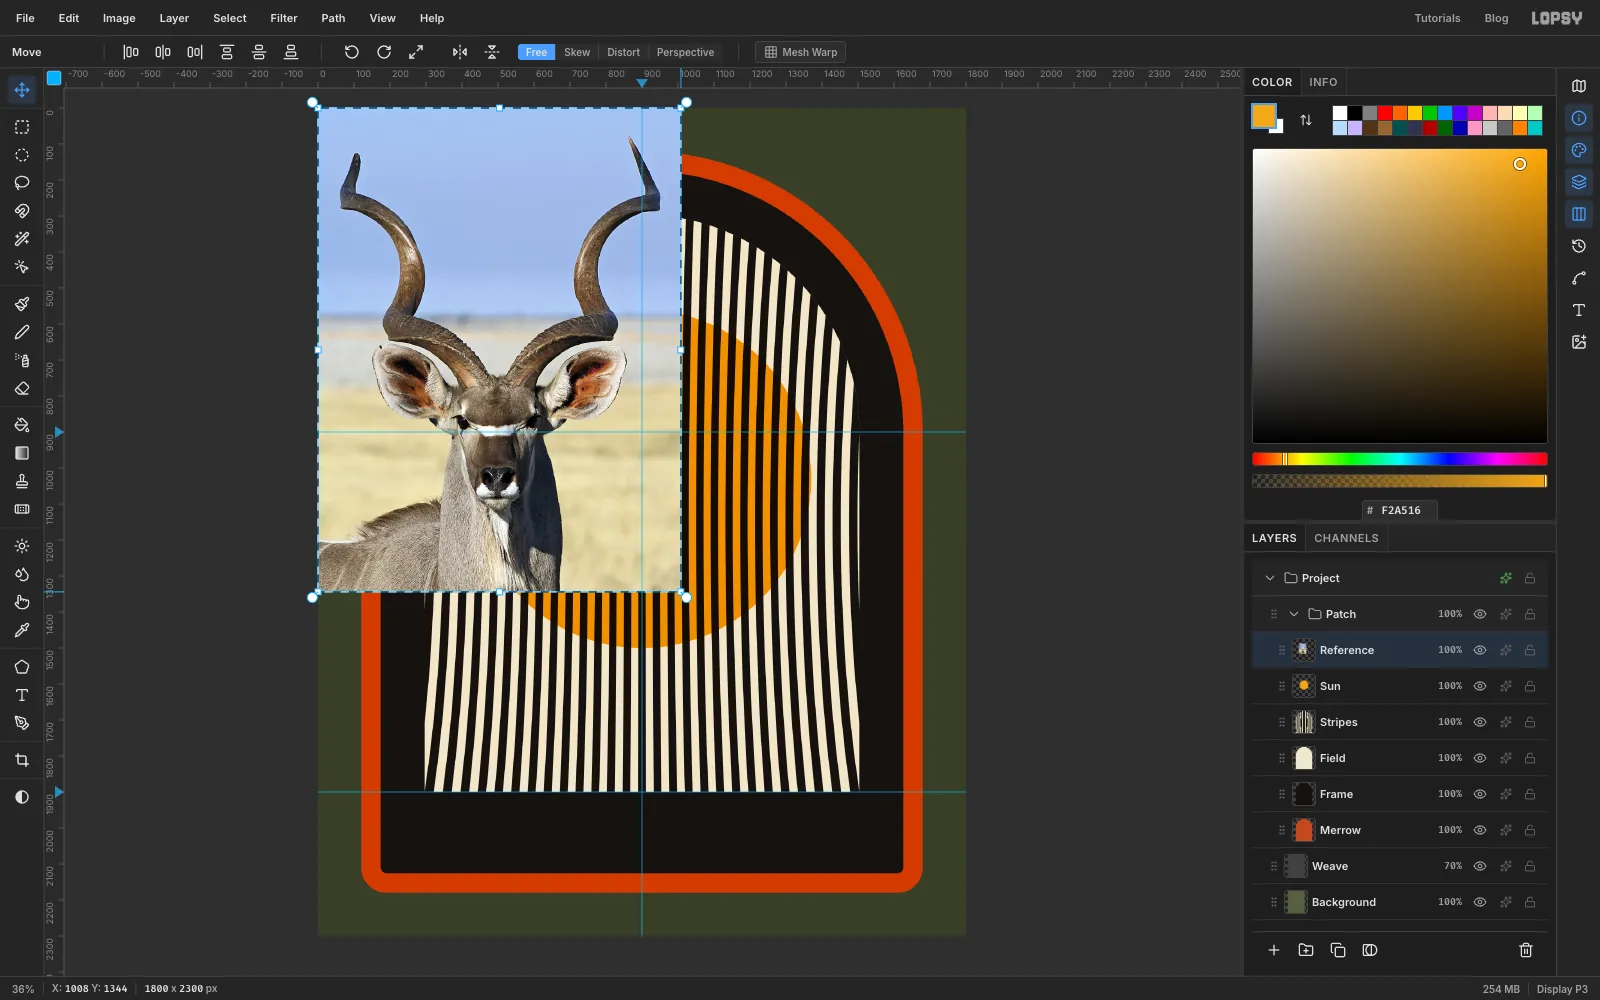
The kudu is traced from a reference photo, "Tragelaphus strepsiceros ♂ (head)" by Hans Hillewaert, via Wikimedia Commons.jpg), used under CC BY-SA 4.0. Any front-on photo of an antelope with its horns in view will do.
The canvas is 1800 × 2300 px. Positions are document coordinates. Watch X and Y in the status bar at the bottom of the window while you move the pointer. The patch is centred on x 900.
Along the way you'll use:
- ruler guides, New Group, Duplicate Layer, Merge Down and dragging layers in the Layers panel
- the Elliptical and Rectangular Marquee with add and subtract, the Lasso, Select → Shrink, Grow and Inverse, and ⌘-clicking a thumbnail to select a layer's pixels
- Define Pattern and Fill with Pattern
- Add Noise, Motion Blur, Lens Distortion, Liquify, Sunburst, Emboss and Desaturate
- the Multiply, Difference, Overlay and Screen blend modes, and the Stroke and Drop Shadow effects
- the Move tool to scale, rotate and flip, plus copy, paste and Copy Merged
- the Pen tool, Path to Selection and text on a path, in Bungee, Archivo Black and Syncopate
The palette:
-
Ink
-
bone
-
Saffron
-
terracotta
-
stitch shadow
-
Canvas olive
-
Swap
for the Difference trick
-
Thread grey
texture layers only
Blend modes live in each layer's effects drawer. Click the ✦ button on the layer's row and use the Blend dropdown at the top. A layer's opacity is the percentage button on its row.
-
Set up the canvas and weave the backdrop
The patch will sit on olive canvas fabric, like the flap of a backpack.
- Choose File → New, set Width to
1800and Height to2300, and click Create. - Select the
Backgroundlayer, press Cmd+A, set the foreground colour to and choose Edit → Fill. - Rename the empty
Layer 1toWeave(double-click its name). The whole canvas is still selected, so Edit → Fill it with , then press Cmd+D. - Choose Filter → Add Noise…, set Amount to
60, click Mono and Gaussian, and click Apply. - Choose Layer → Duplicate Layer and name the copy
Weave V. Run Filter → Motion Blur… on it with Angle90and Distance14. - Select
Weaveand run Motion Blur again, this time with Angle0and Distance14. - Select
Weave Vagain, set it to Multiply and choose Layer → Merge Down. Set the mergedWeaveto Overlay at70%.
The horizontal and vertical streaks cross like the threads of a woven cloth.
- Choose File → New, set Width to
-
Draw the arch-shaped patch outline
- Click the top ruler at
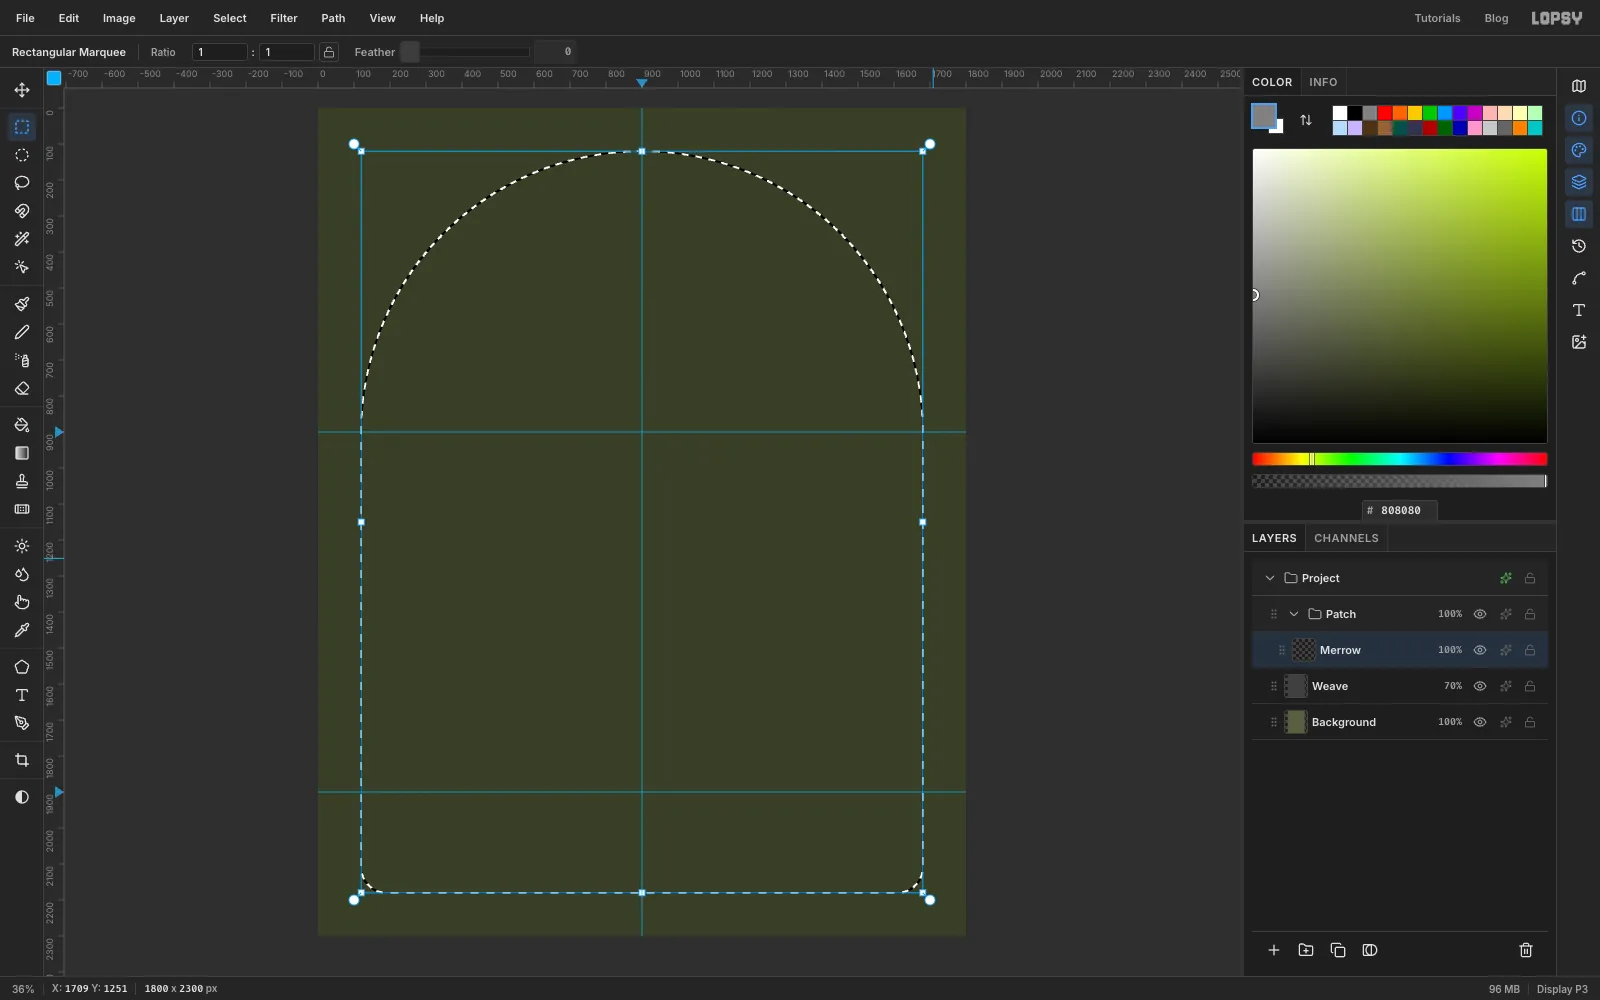
x 900to drop a vertical guide down the centre. Click the left ruler aty 900and again aty 1900. The first marks the centre of the arch. The second marks where the picture ends and the bottom text band starts. - With
Weaveselected, click New Group at the bottom of the Layers panel and name itPatch. Everything else goes inside this group. - Click Add Layer and name it
Merrow. - Pick the Elliptical Marquee and drag a circle from
120, 120to1680, 1680. - Pick the Rectangular Marquee, hold Shift and drag from
120, 900to1680, 2180. The rectangle's sides line up with the edges of the circle, so the two join into an arch. - Choose Select → Shrink…
70, then Select → Grow…70. Growing a selection always rounds its corners, so this softens the two bottom corners and leaves the arch alone.
- Click the top ruler at
-
Fill the merrow, frame and field
- With the arch still selected, fill the
Merrowlayer with terracotta . - Choose Select → Shrink…
54. Add a layer calledFrameand fill it with ink . Press Cmd+D to deselect. - Add a layer called
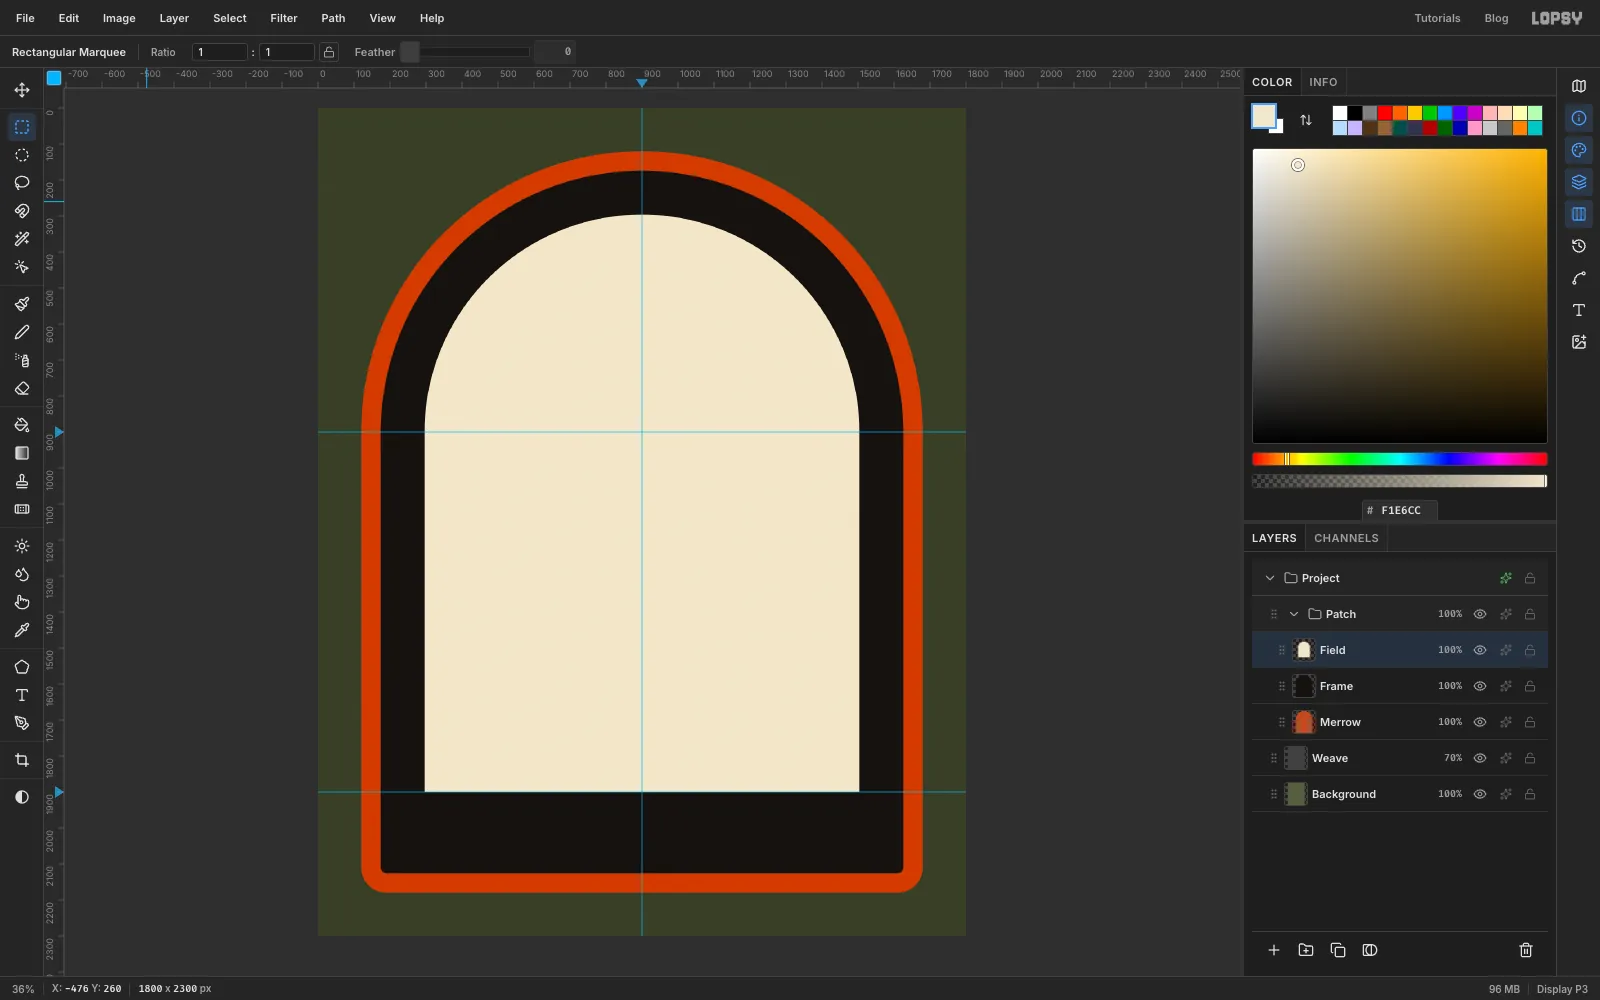
Field. With the Elliptical Marquee, drag a circle from296, 296to1504, 1504. Hold Shift and add a rectangle with the Rectangular Marquee from296, 900down to1504, 1900, on the lower guide. - Fill with bone and deselect.
That leaves a 54 px terracotta merrow, a 122 px black frame around the arch for the title, and a deeper black band at the bottom for the race details.
- With the arch still selected, fill the
-
Paint two stripe tiles
Every stripe in the design comes from two 40 px tiles.
- Add a layer called
Tiles. - With the Rectangular Marquee, select from
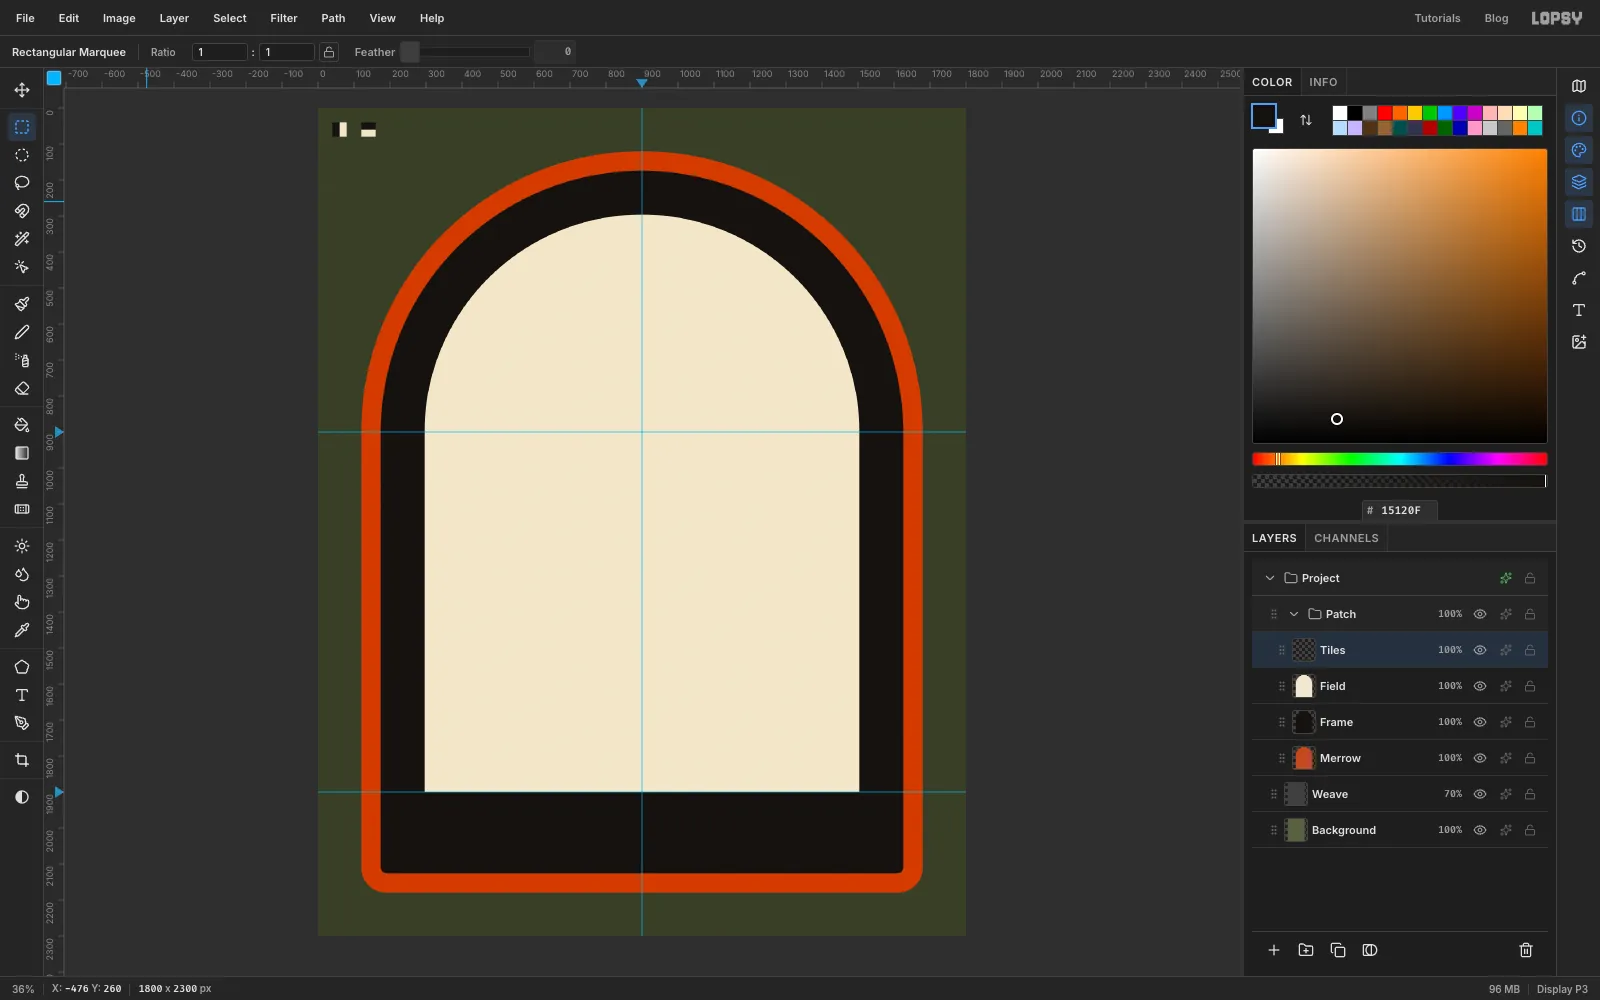
40, 40to80, 80and fill it with bone. Then select from40, 40to60, 80and fill it with ink. That makes a tile with an ink stripe on the left half and bone on the right half. - Select from
120, 40to160, 80and fill it with bone. Then select from120, 40to160, 60and fill it with ink. This is the same tile turned on its side. - Select the first tile again (
40, 40to80, 80) and choose Edit → Define Pattern. Do the same for the second tile. - Deselect and delete the
Tileslayer. The patterns stay saved.
- Add a layer called
-
Fill a layer with vertical stripes
- Select
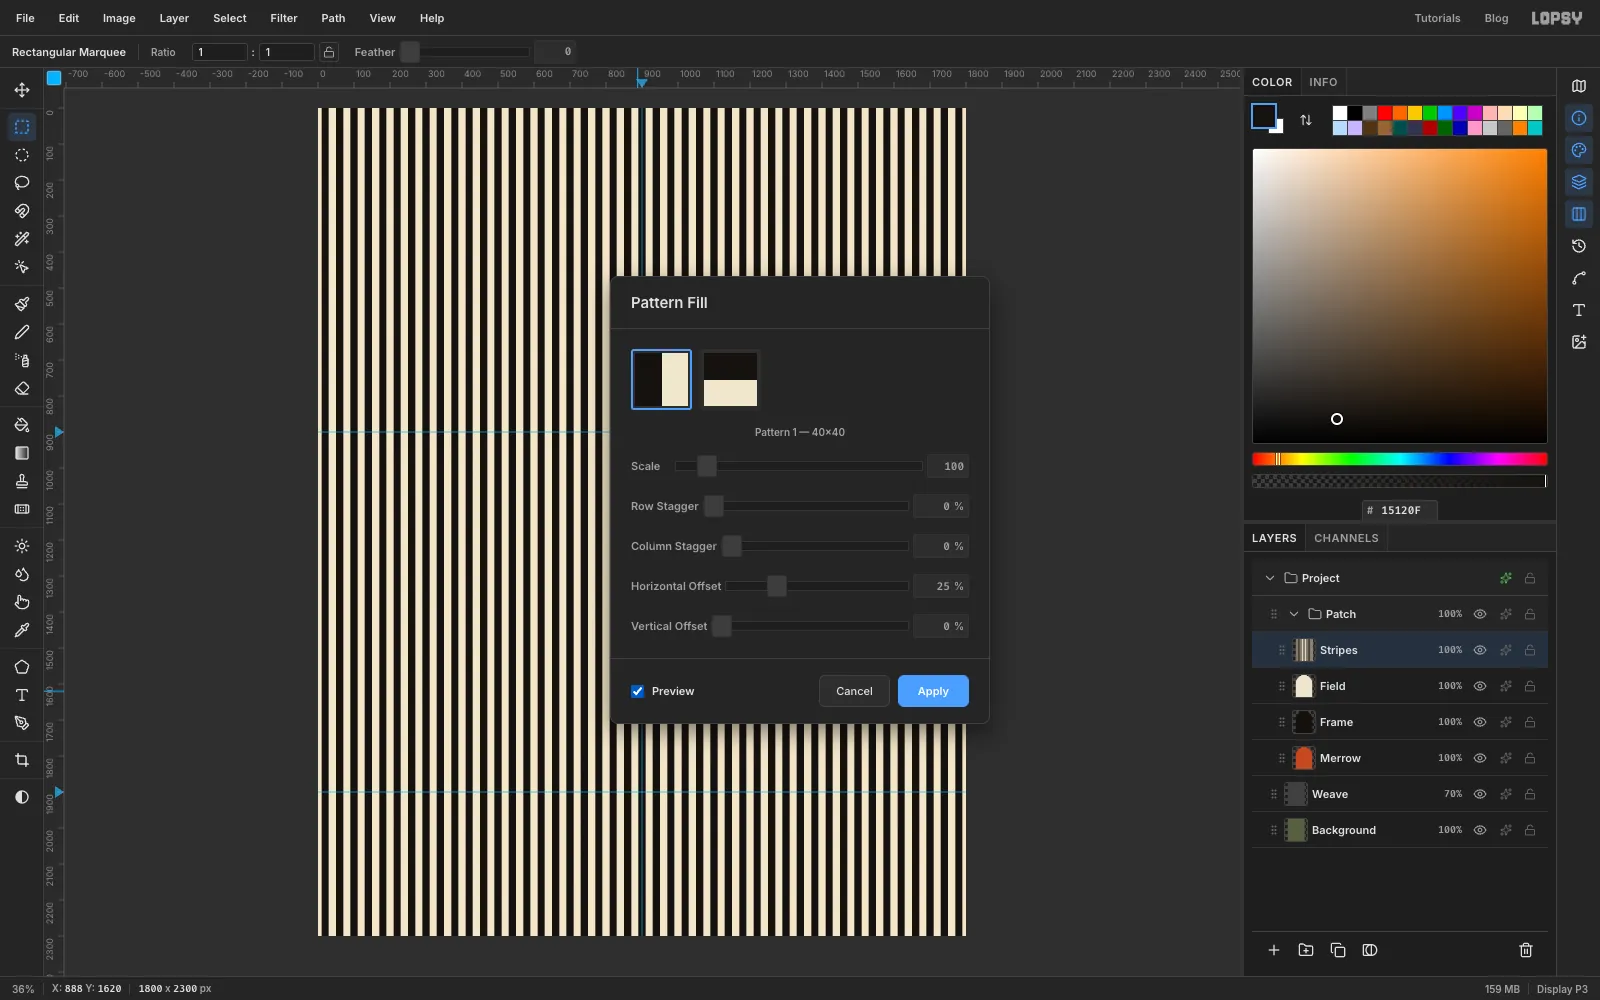
Fieldand add a layer above it calledStripes. - Choose Edit → Fill with Pattern… and click the first (vertical) tile.
- Set Horizontal Offset to
25%. That shifts the stripes 10 px so one sits right on the centre guide, which keeps the left and right halves mirror images. - Click Apply.
The stripes cover the whole canvas for now. That gives the next filter room to work.
- Select
-
Bow the stripes with Lens Distortion
- With
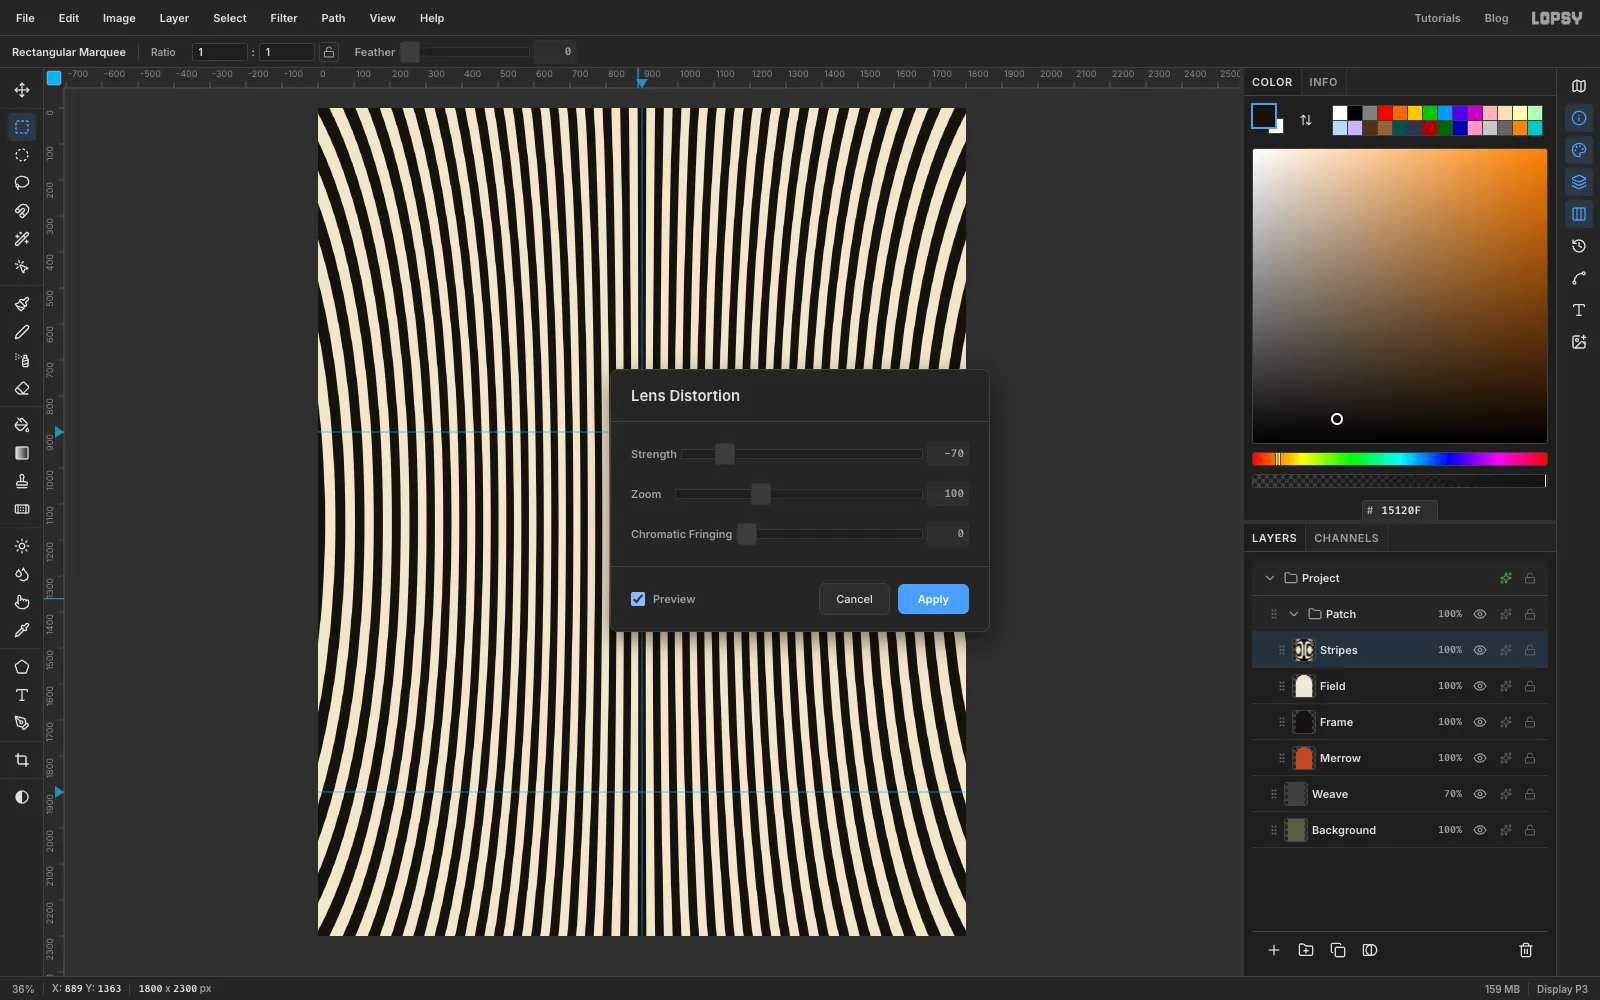
Stripesselected, choose Filter → Lens Distortion…. - Set Strength to
-70and leave Zoom at100. Negative strength is pincushion: lines near the middle stay straight and the ones near the edges bend outward. - Click Apply.
- With
-
Clip the stripes to the field
- Hold Cmd and click the
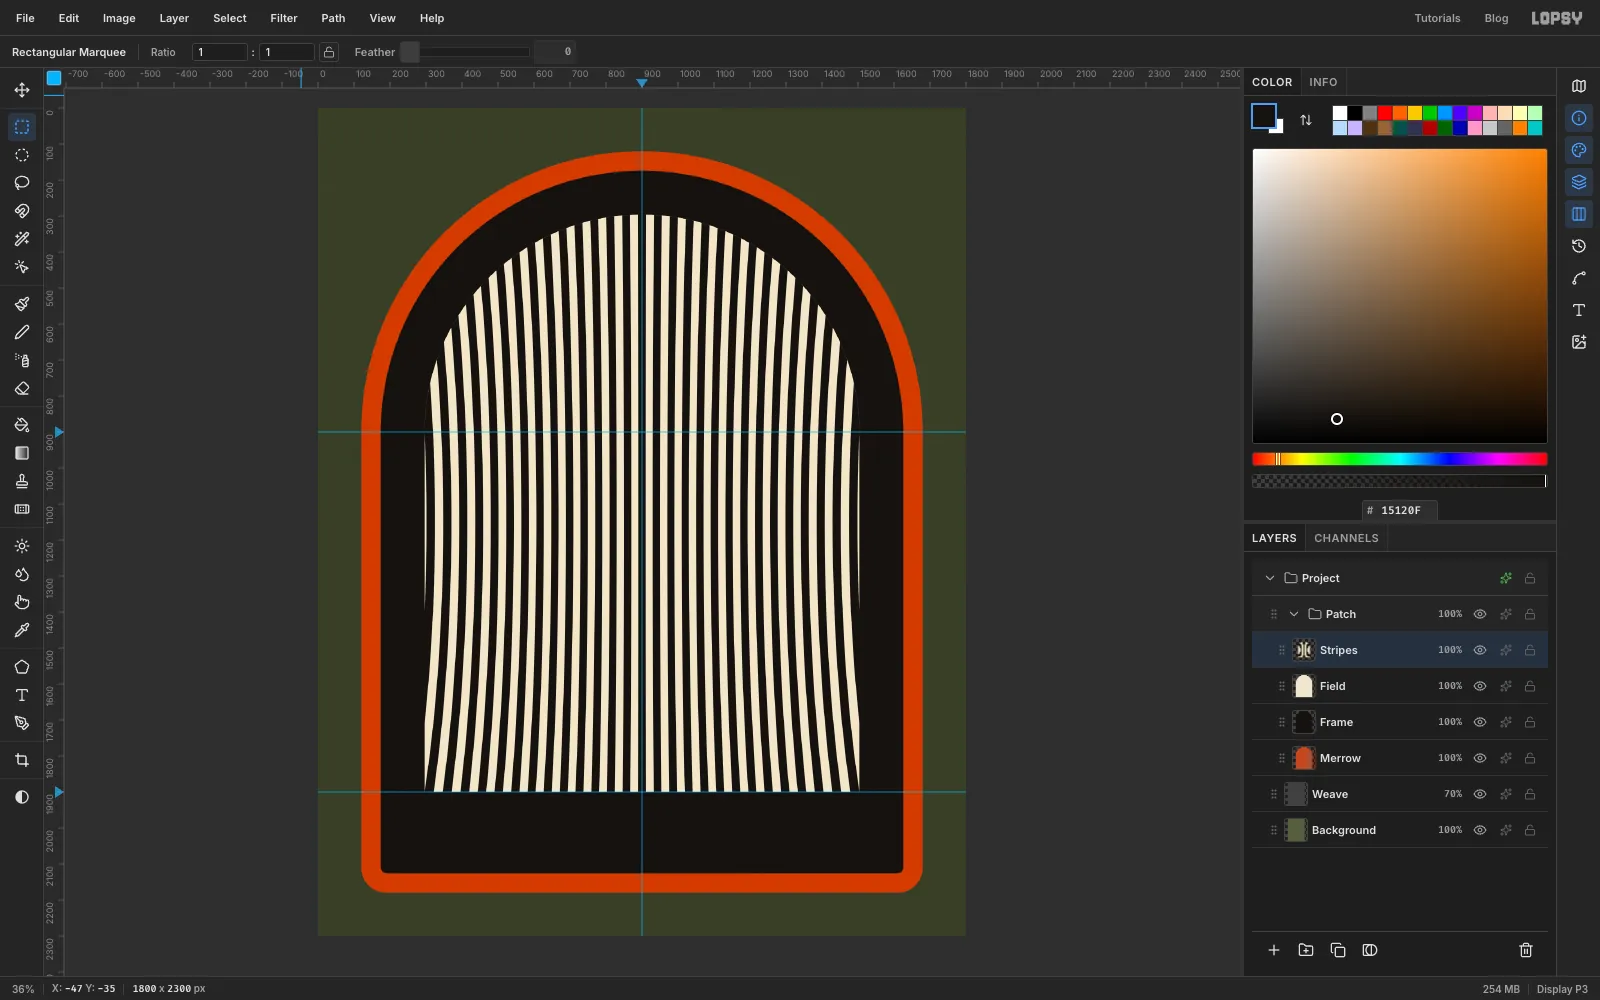
Fieldthumbnail to select its pixels. - Choose Select → Inverse, press Delete and deselect.
Only the arch is striped now. The stripes lean out toward the frame, so the middle of the patch seems to come forward.
- Hold Cmd and click the
-
Add the saffron sun
- Add a layer above
StripescalledSun. - With the Elliptical Marquee, drag a circle from
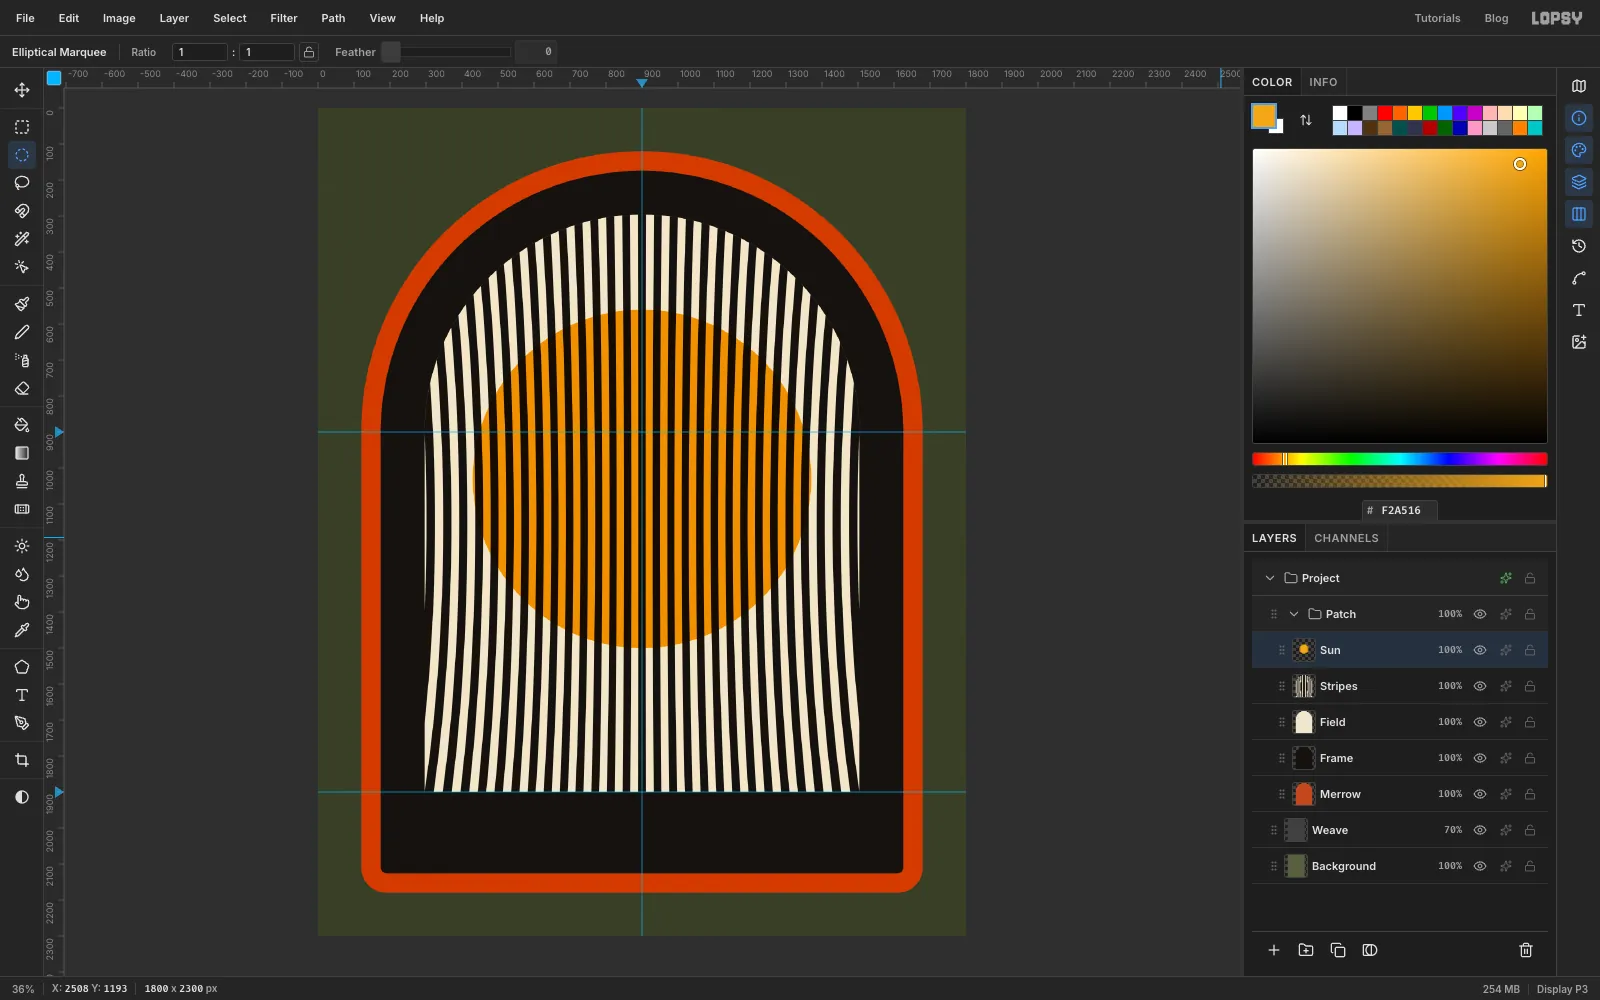
430, 560to1370, 1500. - Fill it with saffron and deselect.
- Set
Sunto Multiply.
Multiply leaves black as black and tints cream to saffron, so the sun only shows between the black stripes.
- Add a layer above
-
Drop in the reference photo
- With
Sunselected, drag your kudu photo from your desktop onto the canvas. It lands in the top-left corner at its own size, on a new layer. Name the layerReference. - The photo's pixels are already selected, so the Move tool shows handles around it. Hold Cmd (to keep the proportions) and drag the bottom-right handle up and in until the photo's right edge is near
x 1000. Press Enter.
- With
-
Line the kudu up on the centre guide
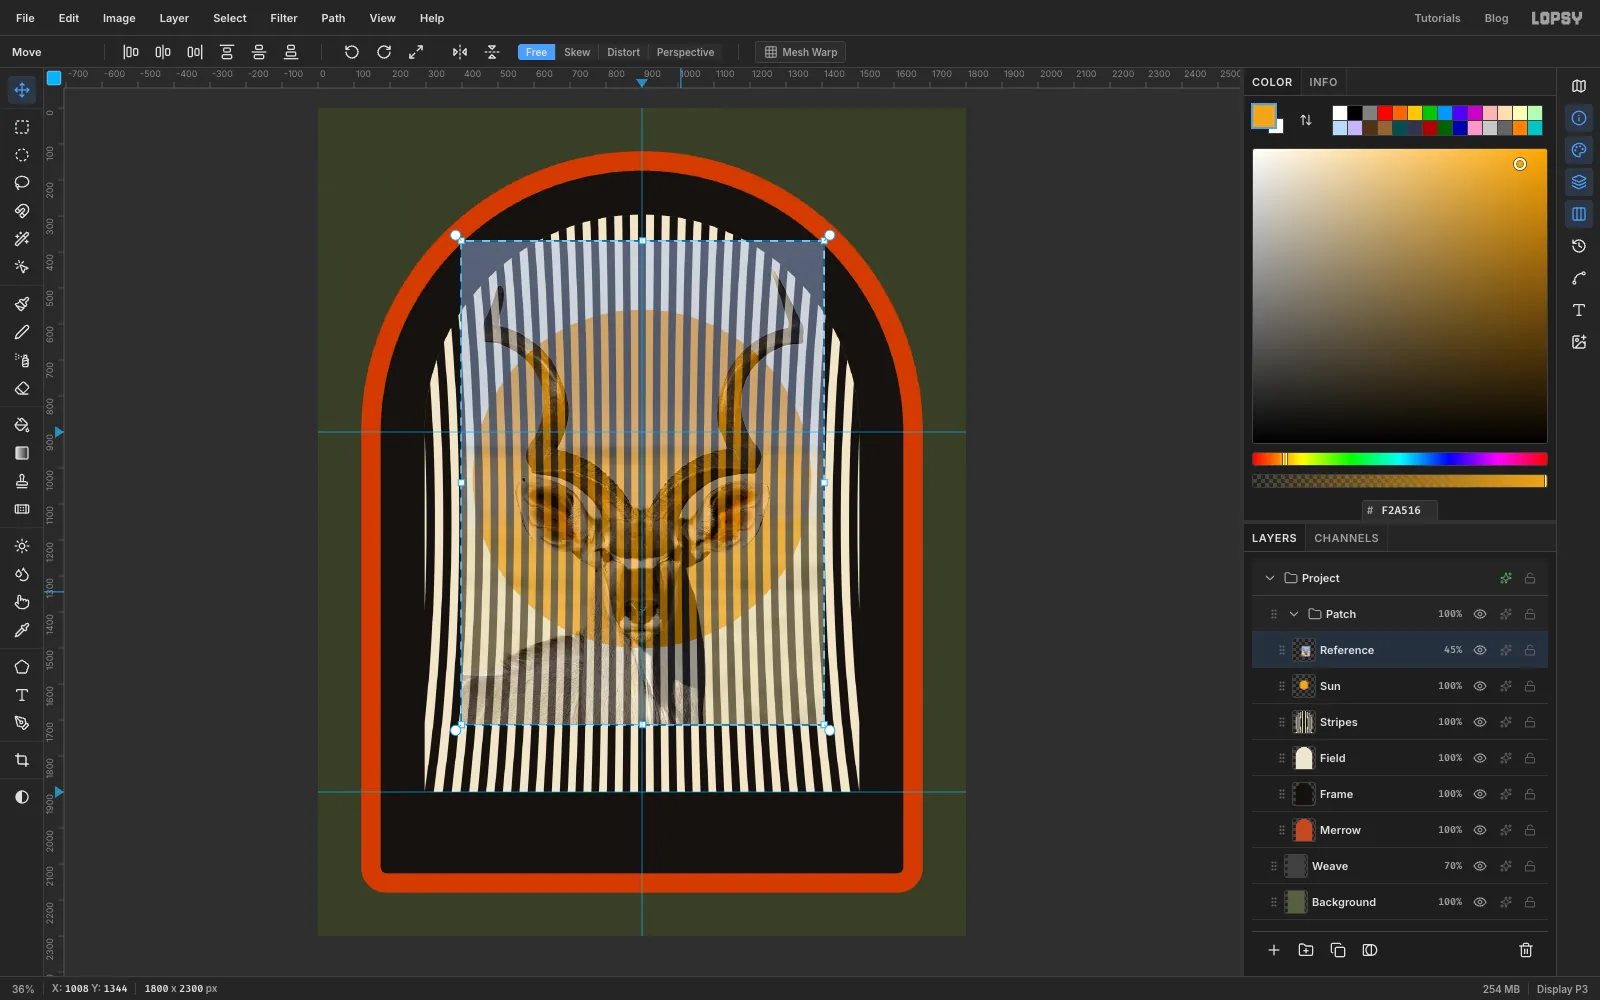
- With the Move tool, drag the photo until the animal's nose sits on the centre guide and its horn tips sit about 50 px below the top of the striped field. Fine-tune with the arrow keys.
- Set the layer's opacity to
45%so you can see the stripes through it.
The kudu's head should overlap the top half of the sun.
-
Trace the head and neck
- With
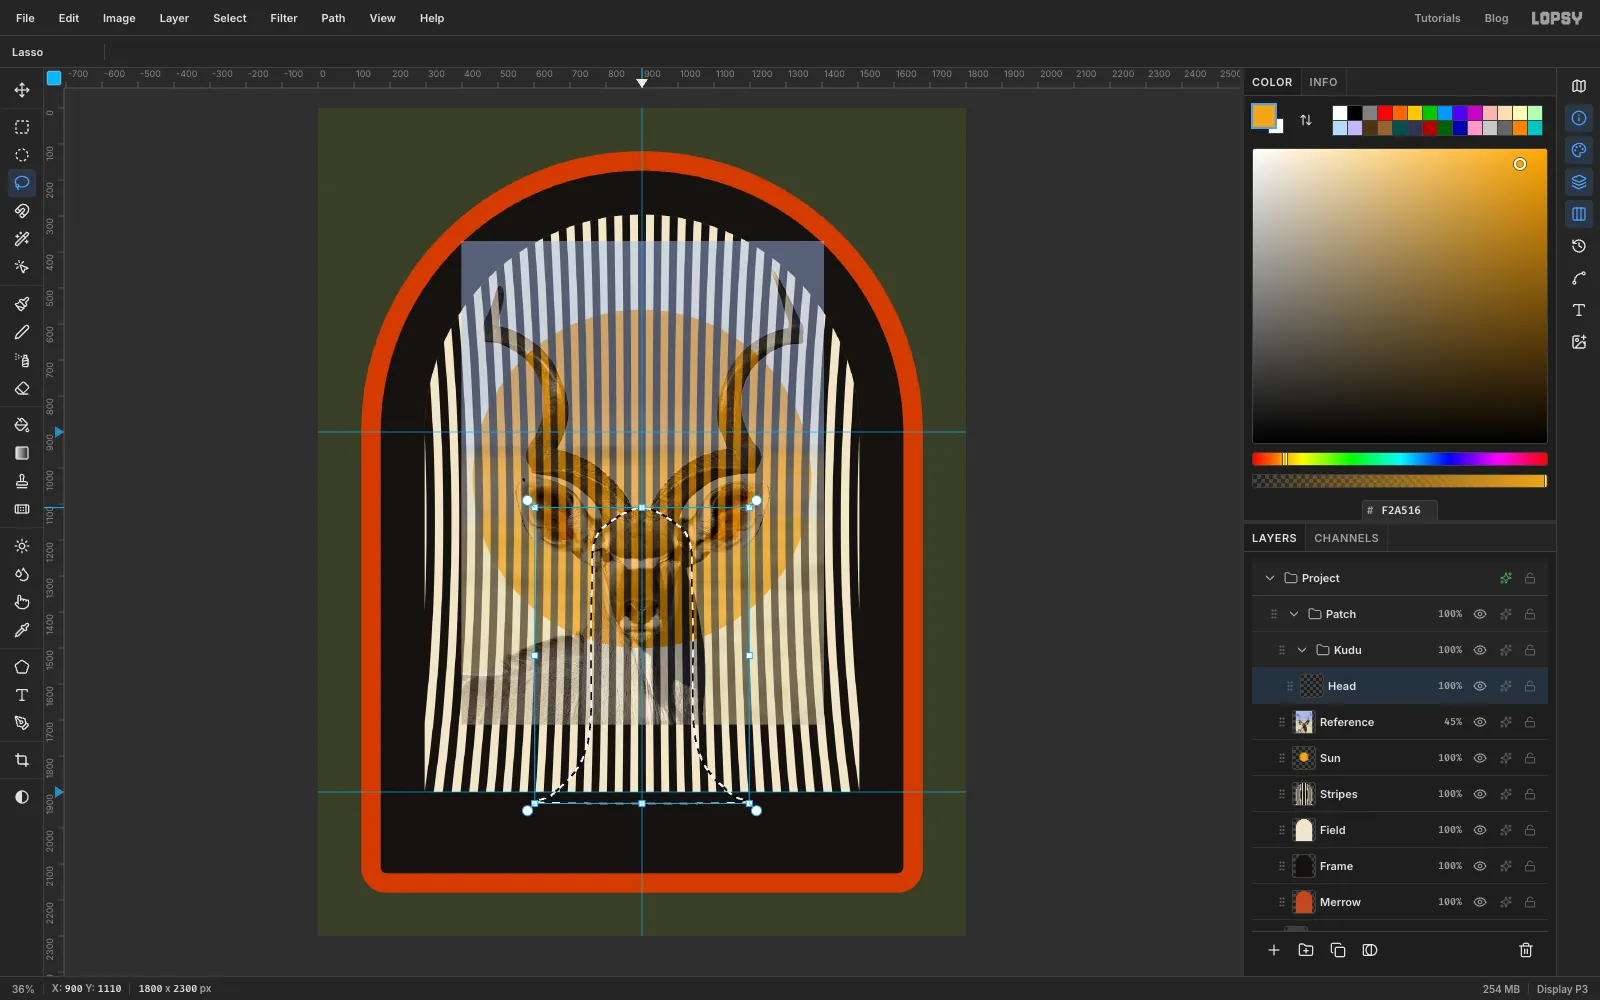
Referenceselected, click New Group and name itKudu. Inside it, add a layer calledHead. - Pick the Lasso. Start at the top of the head between the horns, at about
900, 1110. Trace a rounded dome over the forehead and down the left side of the face, just inside where the ear joins the head. Keep the head and neck about 280 px wide all the way down to aroundy 1740. Then let the neck flare out into the shoulders, so it meets they 1900guide at aboutx 600. Come back up the right side as a mirror of the left, and close the shape where you started.
Don't trace the ears or horns, and don't follow every bump in the photo. The ears and horns get their own layers, and a simple, symmetrical head reads better as a badge.
- With
-
Fill the head with horizontal stripes
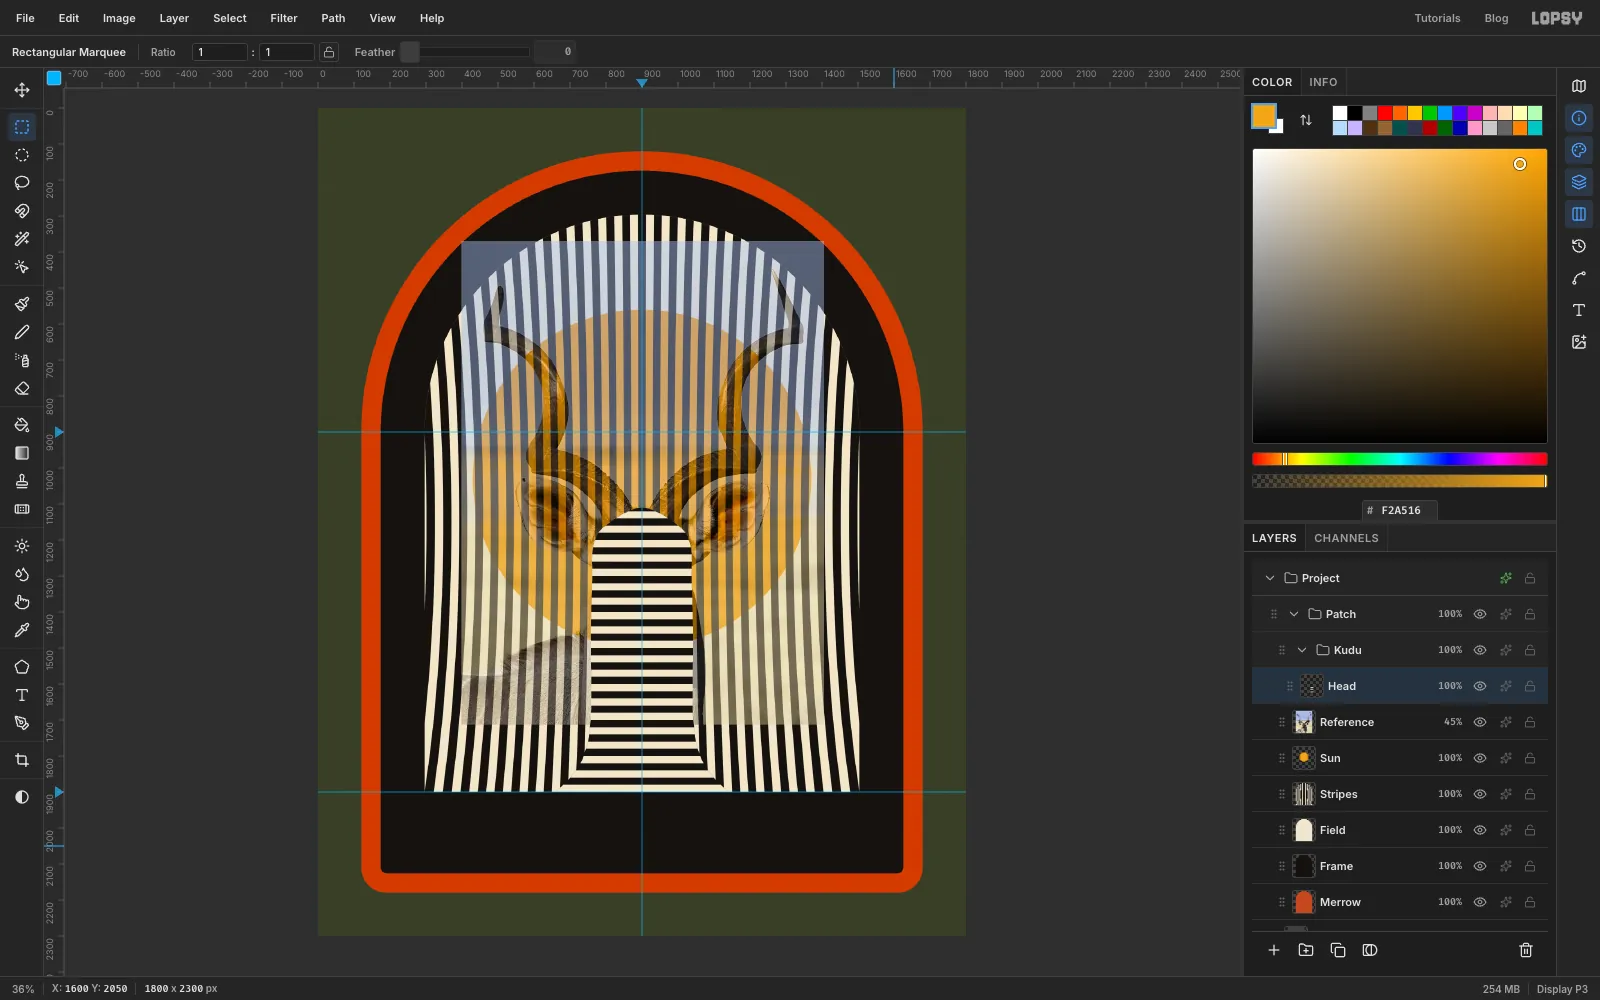
- Choose Edit → Fill with Pattern…, click the second (horizontal) tile, set Vertical Offset to
50%and click Apply. - With the Rectangular Marquee, select everything below the
y 1900guide and press Delete. That trims the neck flush with the bottom band. - Deselect.
You can already read the shape. Nothing outlines it: the stripes just change direction.
- Choose Edit → Fill with Pattern…, click the second (horizontal) tile, set Vertical Offset to
-
Give the face some volume with Liquify
- Choose Filter → Liquify…. Set Mode to Bloat, Brush Size to
300and Pressure to35%. - Press on the middle of the forehead (about
900, 1198), give the mouse two or three tiny wiggles without letting go, then release. - Give each cheek a single tiny wiggle, at about
810, 1319and990, 1319. - Click Apply.
Go easy here. Bloat builds up with every bit of movement, so a long scrub blows the stripes into blobs. Stop as soon as the stripes start to curve around the brow.
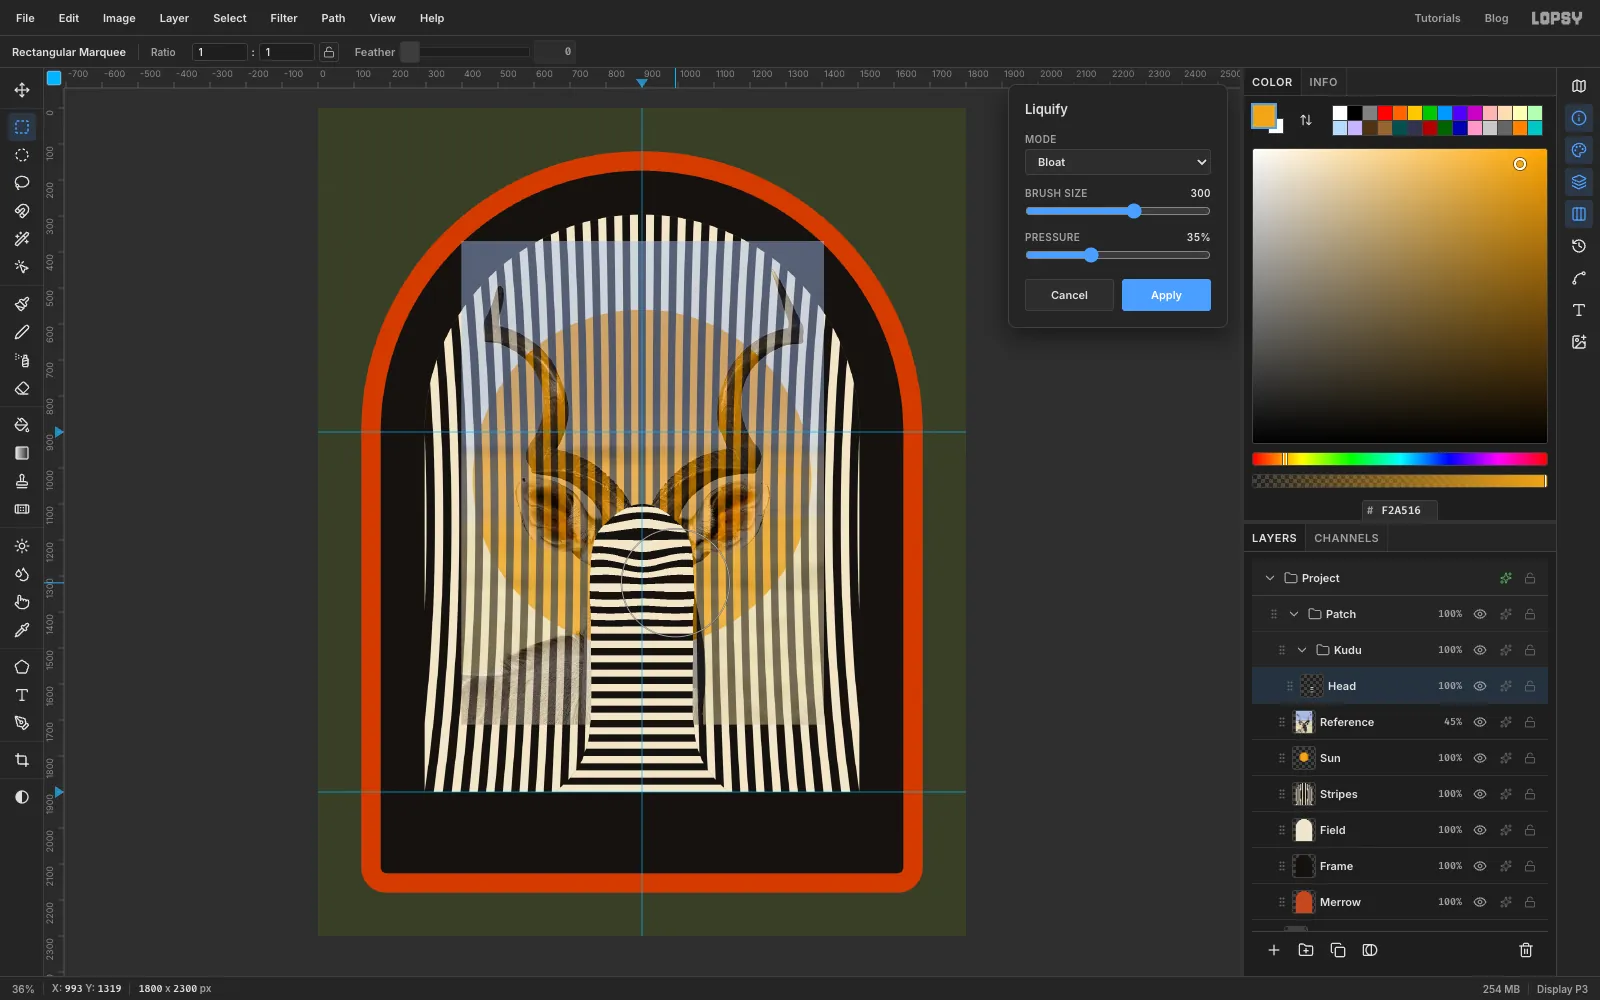
- Choose Filter → Liquify…. Set Mode to Bloat, Brush Size to
-
Shift the face half a stripe with Difference
- Add a layer above
HeadcalledFace. - With the Lasso, trace the face only: across the forehead, down past the eyes and in to a narrow muzzle at the chin.
- Fill it with . That warm near-white is roughly ink plus bone, so in Difference mode it turns ink stripes into bone and bone stripes into ink.
- Hold Cmd and click the
Headthumbnail, choose Select → Inverse, press Delete and deselect. That trims away any of the face that hangs past the head. - Set
Faceto Difference. - Select
Head, open its effects drawer and turn on Stroke. Set Width8, the colour to ink and Position to outside.
Where the face meets the neck, the stripes jump half a step, and that jump draws the jawline. The ink stroke keeps the head from blending into the background stripes.
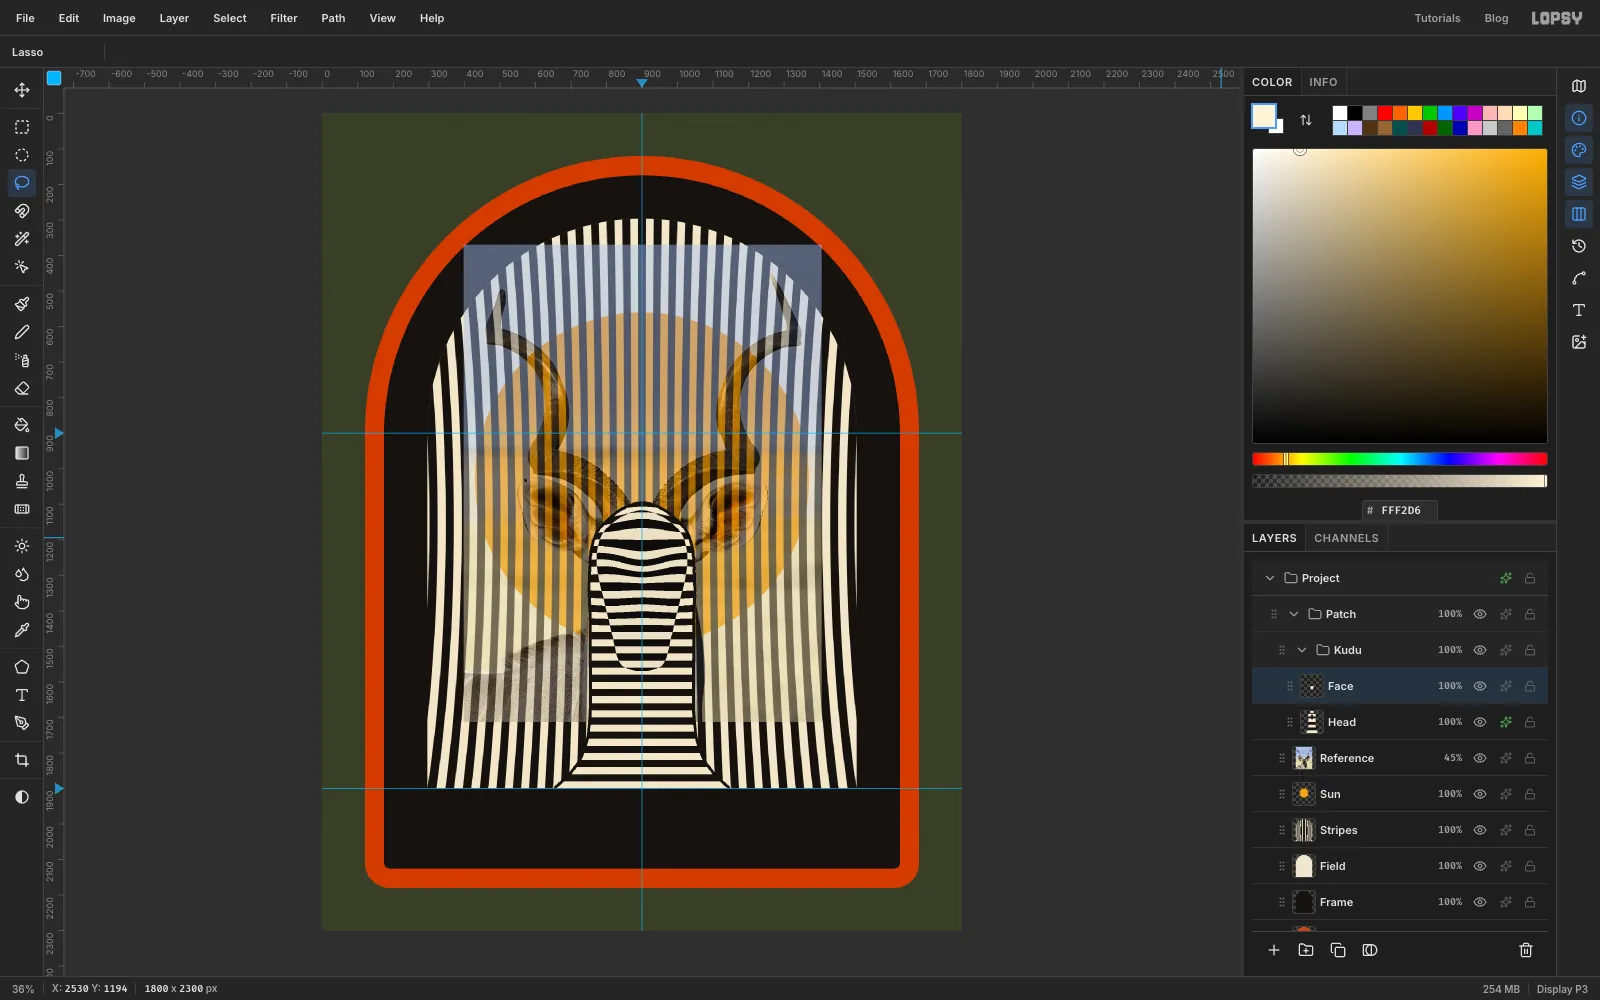
- Add a layer above
-
Trace both horns
- Select
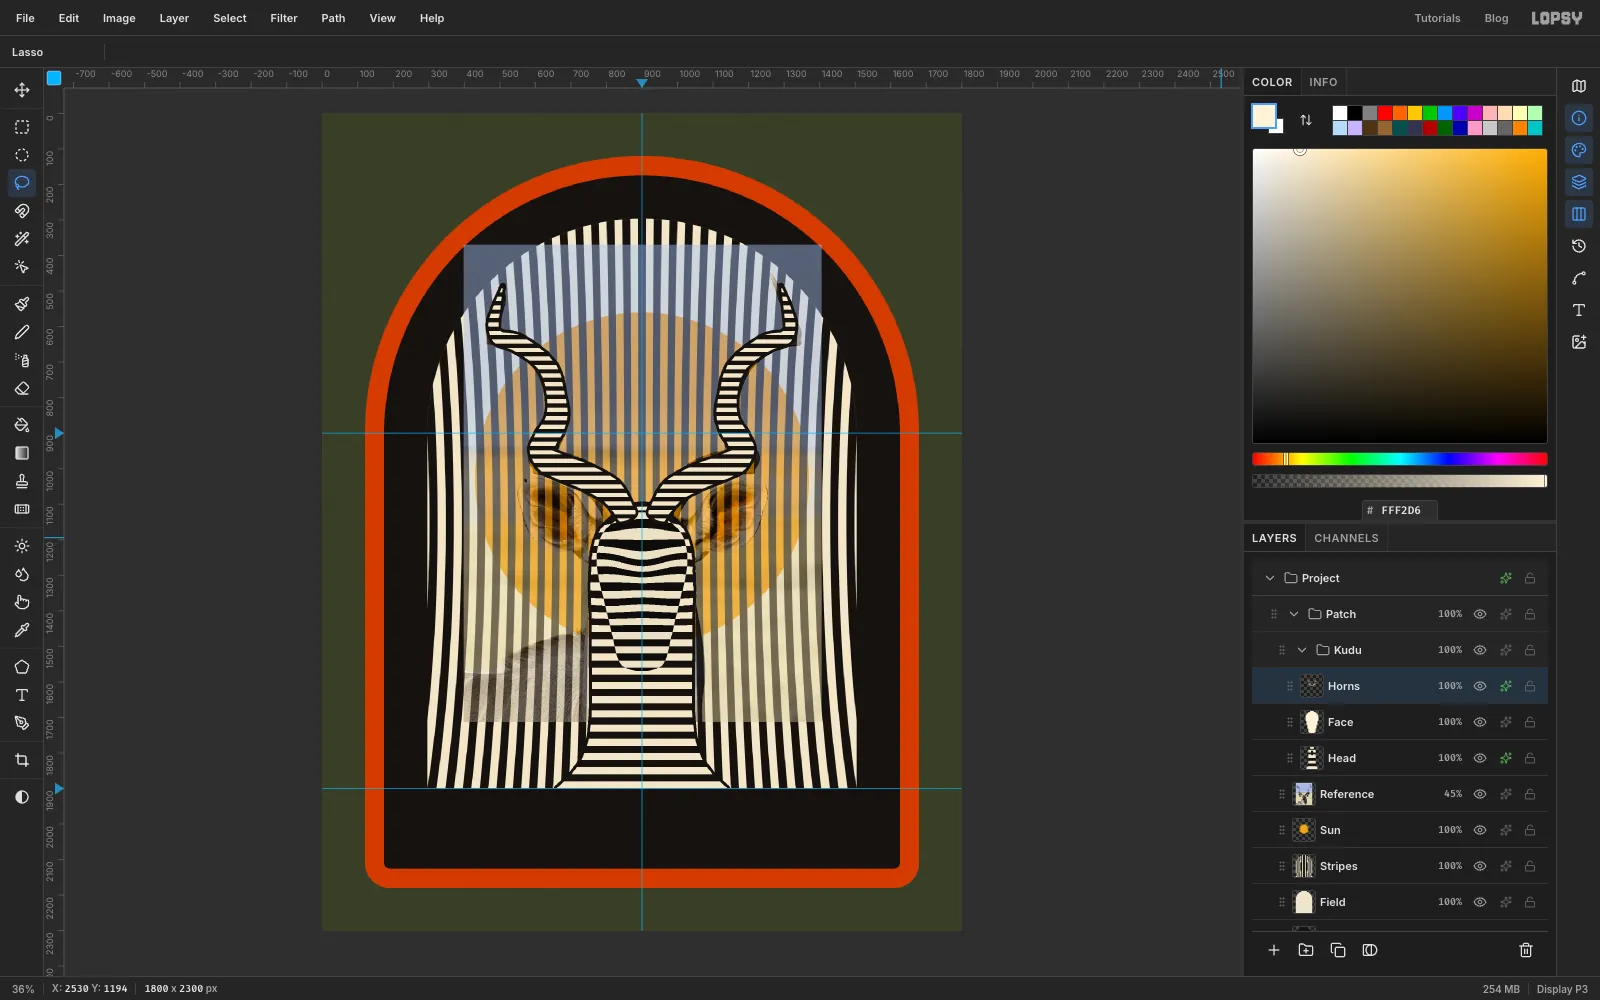
Faceand add a layer calledHorns. - With the Lasso, trace the left horn from its base on the head, out and up through each bend, to a sharp point at the tip.
- Hold Shift and trace the right horn the same way, as a mirror image of the left one.
Leave a small gap between the two horn bases at the top of the head so they don't knot together.
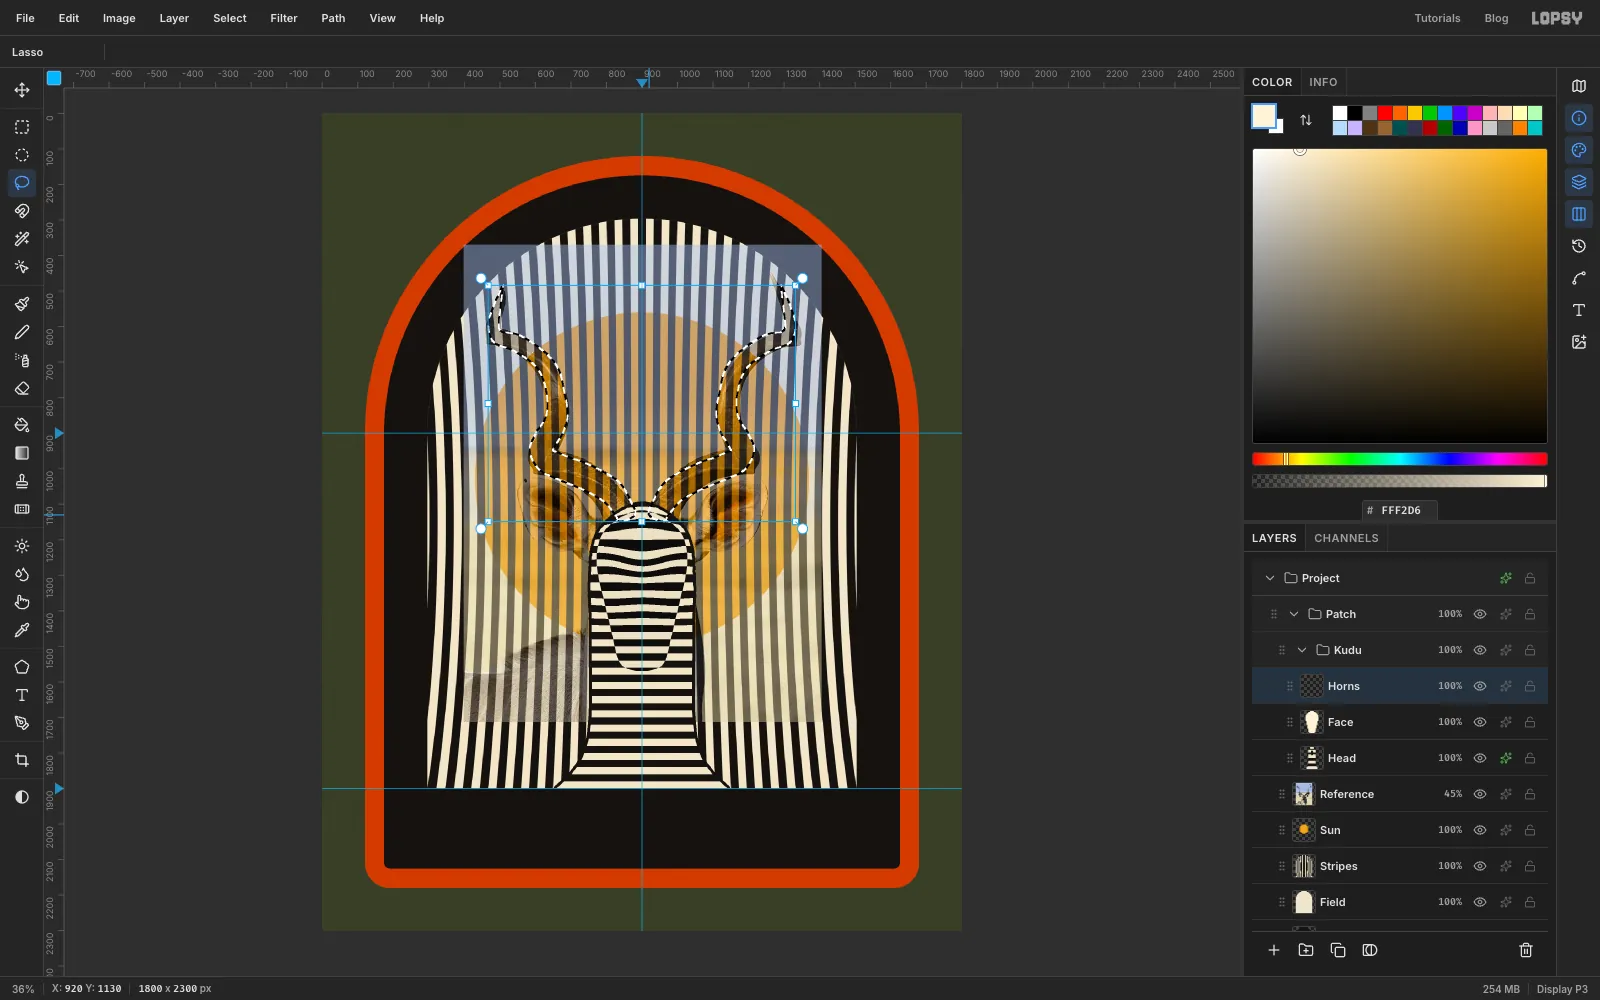
- Select
-
Fill the horns with fine ridges
- Choose Edit → Fill with Pattern…, pick the horizontal tile and set Scale to
60%. - Click Apply and deselect.
The smaller stripes look like the ridges on a real horn. Where the horn twists, the ridges cross it at an angle, and that sells the spiral.
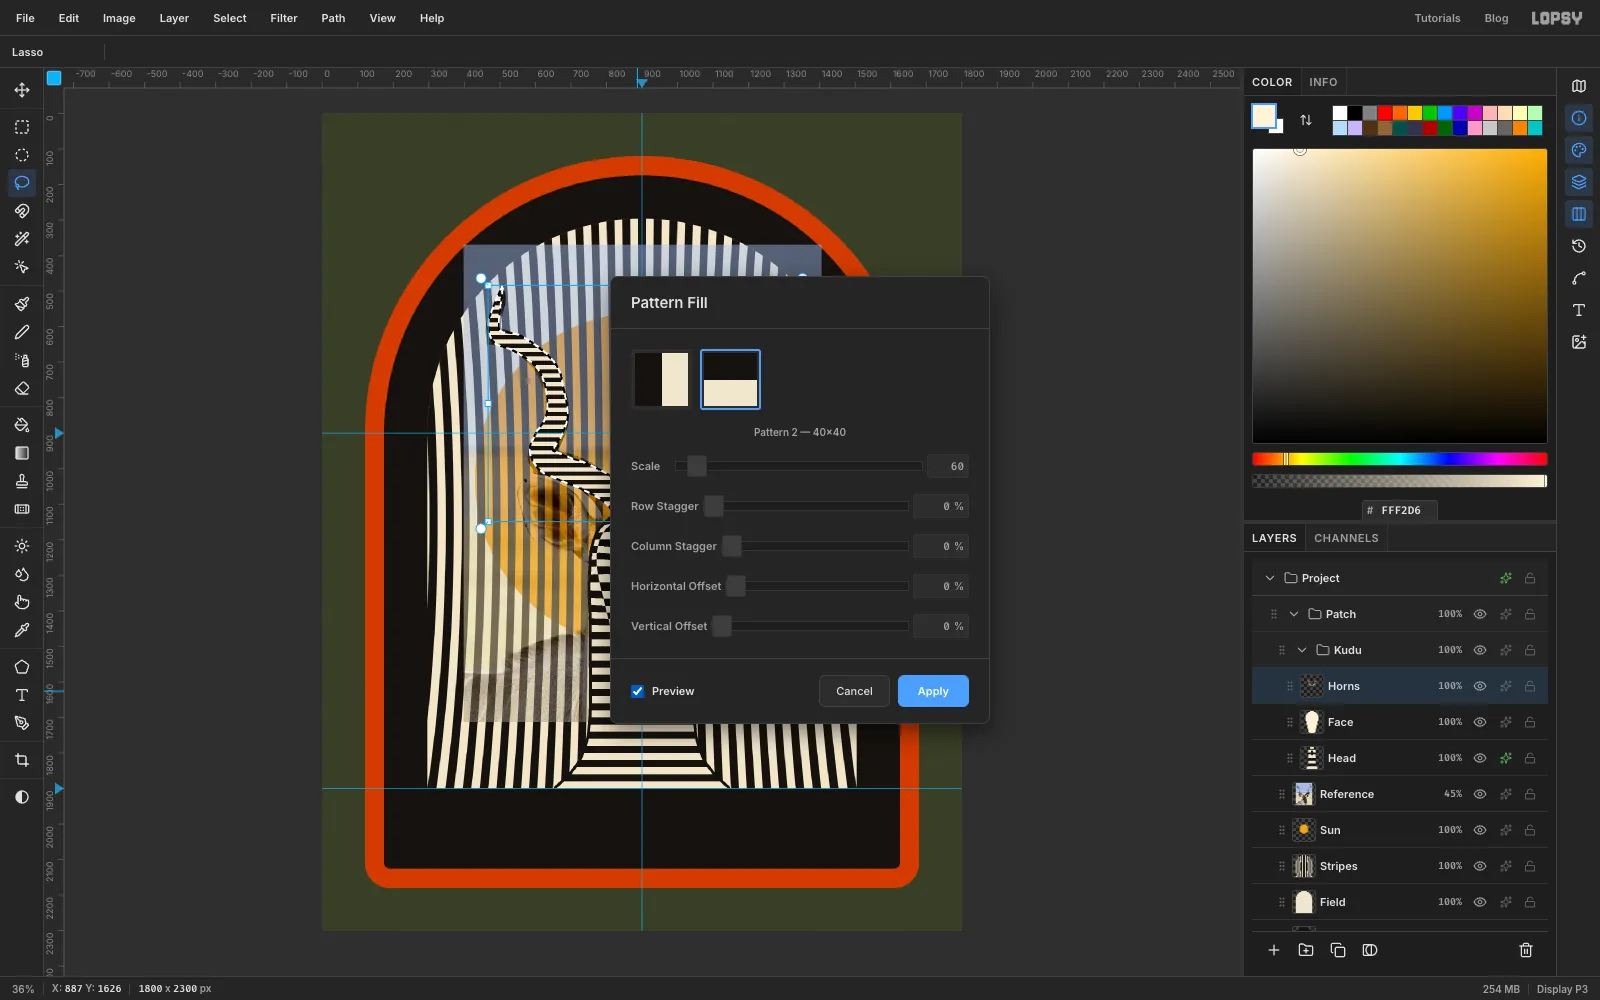
- Choose Edit → Fill with Pattern…, pick the horizontal tile and set Scale to
-
Outline the horns
Open the effects drawer on
Hornsand turn on Stroke: Width8, ink , outside.Without the outline, the thin horn tips get lost among the vertical stripes.
-
Draw an ear as a ring target
- Select
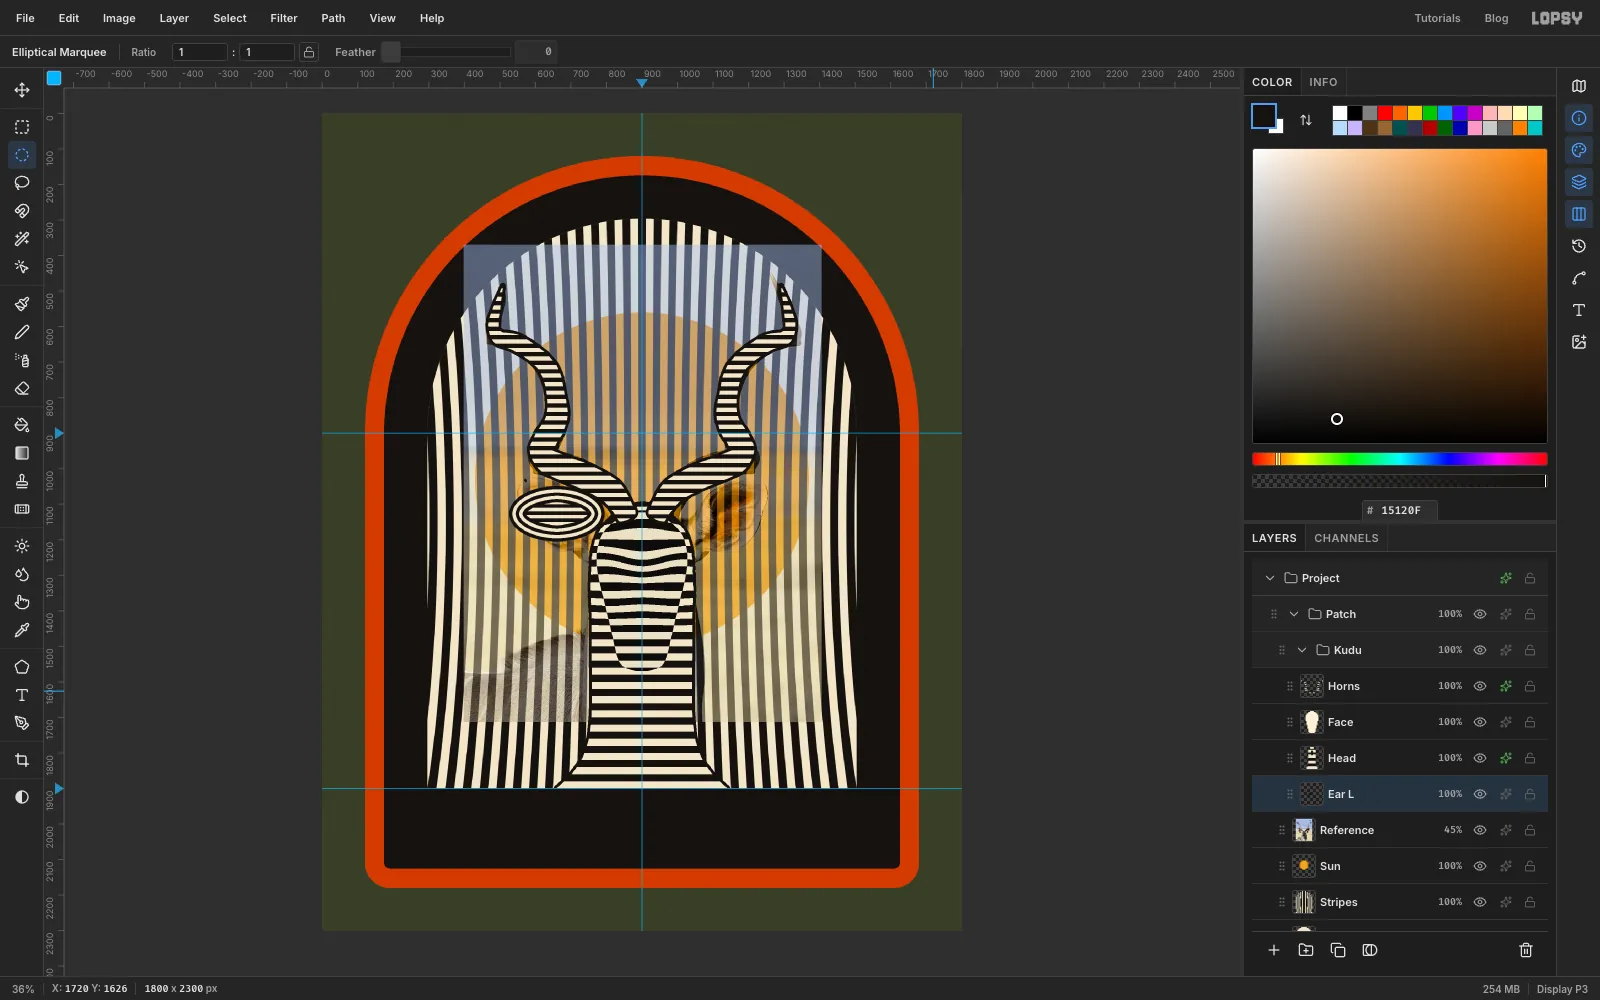
Headand add a layer calledEar L. In the Layers panel, dragEar Lby its grip so it sits just belowHead. Ears go behind the head. - With the Elliptical Marquee, drag a level oval from
526, 1049to795, 1205. That's centred on the left ear in the photo. - Fill it with ink. Choose Select → Shrink…
9and fill with bone. Repeat the shrink-and-fill three more times, alternating ink and bone, so you end on ink. - Shrink by
9once more and choose Edit → Fill with Pattern… with the horizontal tile at Scale50%. - Deselect.
- Select
-
Rotate the ear into place
- Hold Cmd and click the
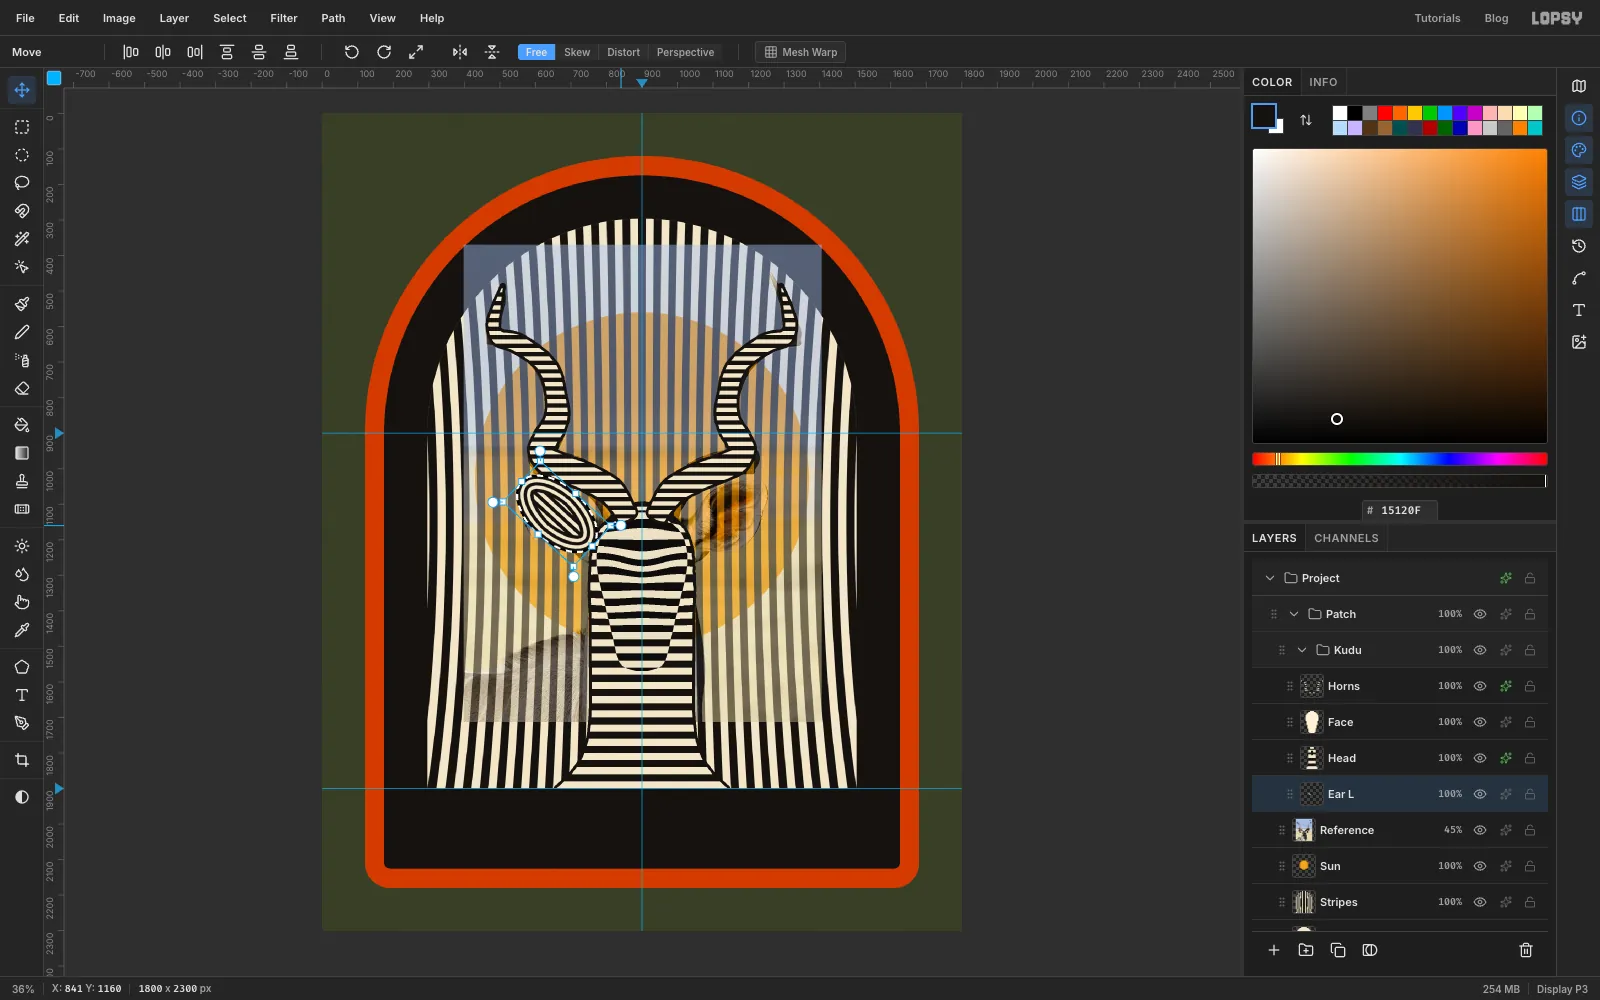
Ear Lthumbnail to select the ear. - With the Move tool, drag the round rotation handle at the top-right corner clockwise, about 42°, until the oval points up and out like the ear in the photo.
- Press Enter and deselect. If the ear has drifted, nudge it back over the photo's ear with the arrow keys.
The stripes in the middle turn with the ear, so they now run on a diagonal.
- Hold Cmd and click the
-
Mirror it for the right ear
- Choose Layer → Duplicate Layer and name the copy
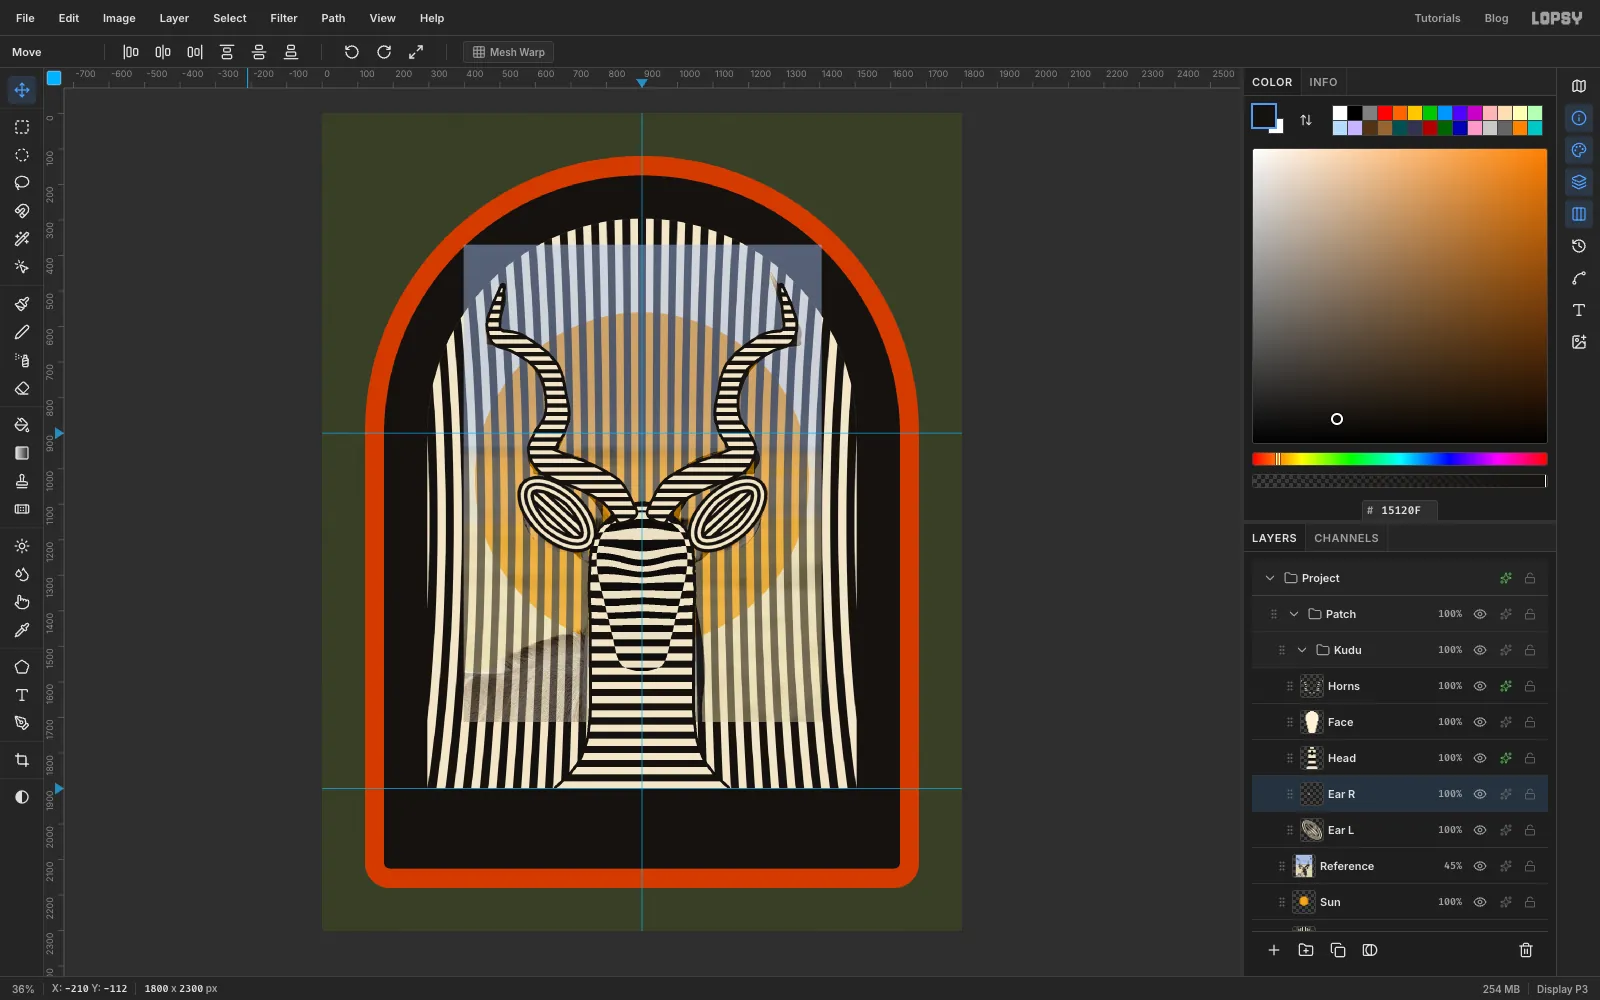
Ear R. - Hold Cmd and click its thumbnail. With the Move tool, click Flip Horizontal in the options bar and press Enter.
- Deselect, then drag the copy across the centre guide until it covers the photo's right ear. Its centre should sit at about
1139, 1127.
- Choose Layer → Duplicate Layer and name the copy
-
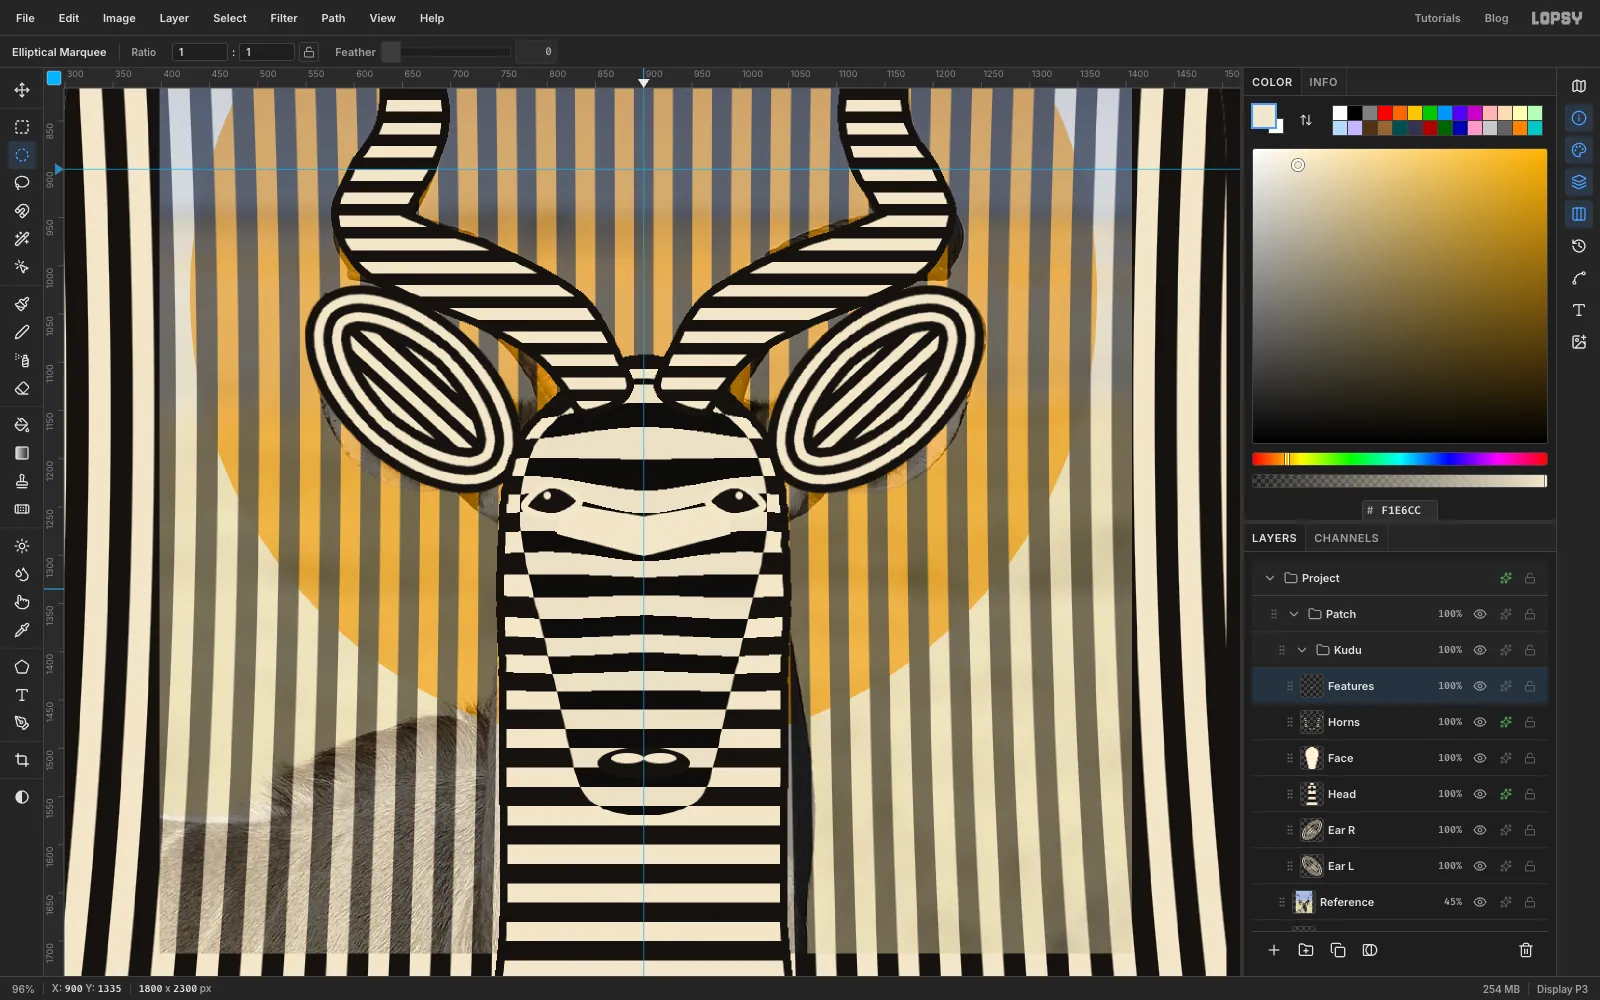
Draw the chevron, eyes and nose
Zoom in on the face for this step (Cmd+= a few times, with the pointer over the eyes).
- Select
Hornsand add a layer calledFeatures. - Chevron: with the Pen tool, click six corners for a cream V just under the eyes:
812, 1245,900, 1260,988, 1245,990, 1278,900, 1301,810, 1278. Click the first point again to close it. In the Paths panel, click Path to Selection, then Delete Path. Fill with bone. - Left eye: with the Pen, click the inner corner at
830, 1244. Press at the top-middle point806, 1231and drag a little to the left to curve it. Click the outer corner at780, 1249. Press at the bottom-middle point806, 1256and drag a little to the right. Close the path and turn it into a selection. - Choose Select → Grow…
7and fill with bone, then Shrink…7and fill with ink. For a catchlight, use the Elliptical Marquee to draw a tiny 8 px circle near the top of the eye and fill it with bone. - Repeat for the right eye, mirrored across the guide (inner corner
970, 1244, outer corner1020, 1249). - Nose: with the Elliptical Marquee, draw an oval from
852, 1498to948, 1532and fill it with ink. Then draw a small oval from866, 1505to886, 1515, hold Shift to add a matching one from914, 1505to934, 1515, and fill both with bone. - Deselect.
Keep the eyes inside the head outline. If an eye crosses the edge, the head stops reading as one shape.
- Select
-
Draw the arch for the title
- Hide
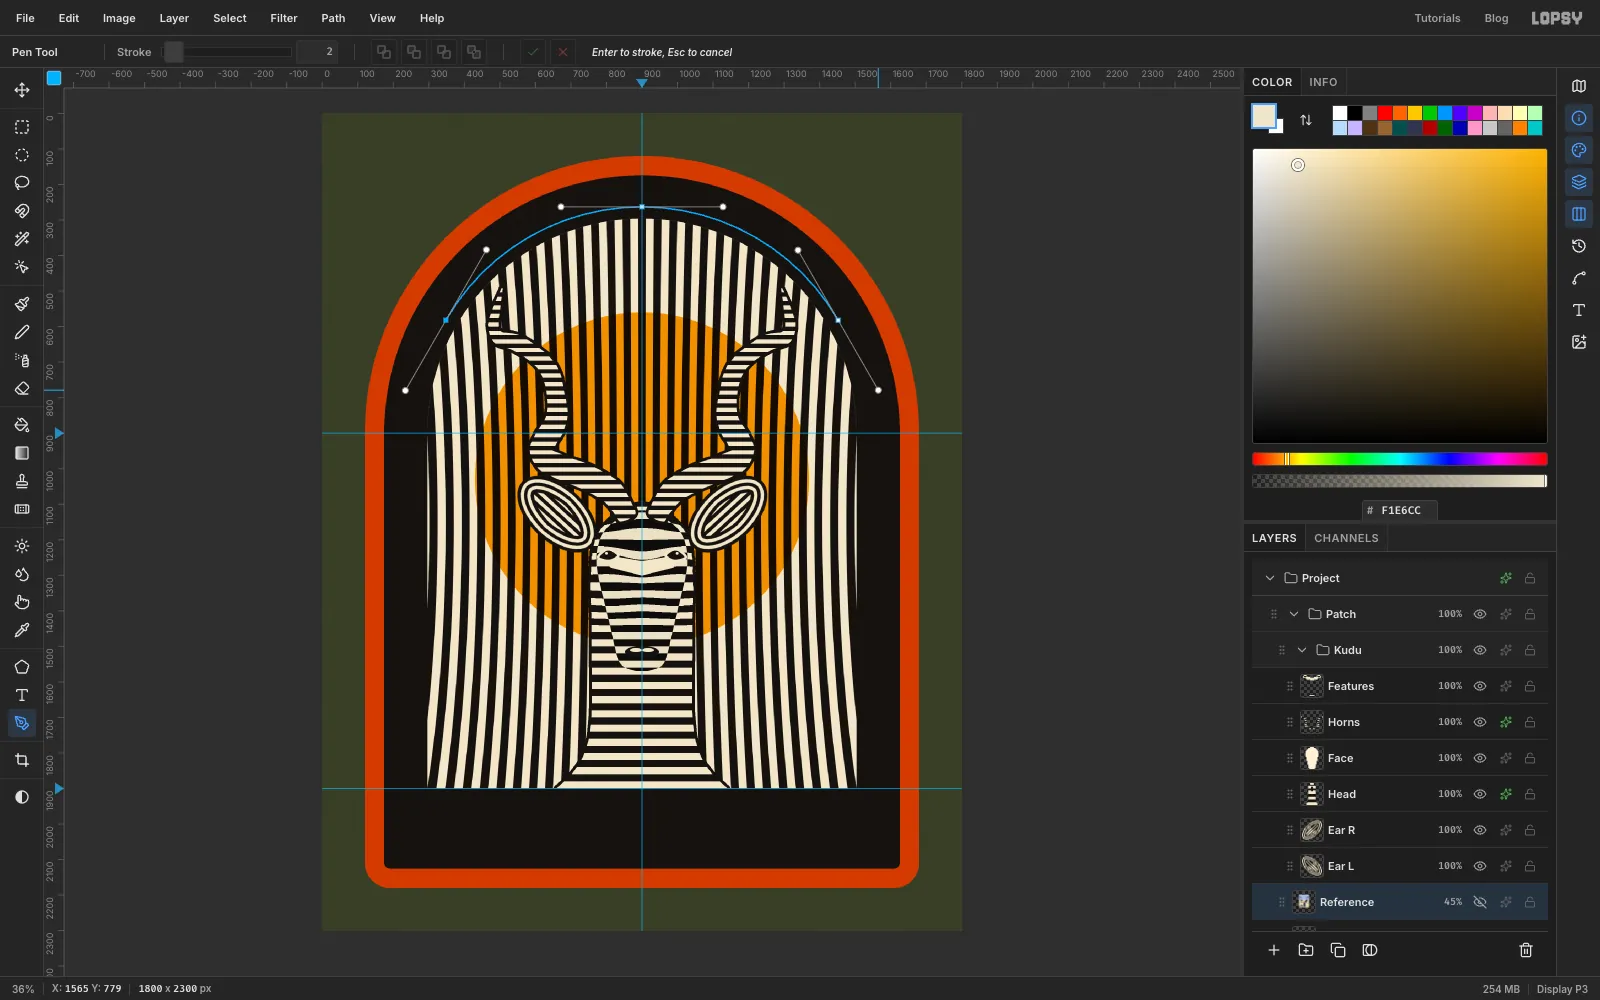
Referencewith the eye button on its row, then click the row to select it. The text you add next will sit just above it. Press Cmd+D. - With the Pen, press at
348, 582and drag up and to the right about 230 px to pull out a handle. Press at the top,900, 263, and drag about 230 px to the right. Press at1452, 582and drag about 230 px down and to the right. - Click ✓ Commit path in the options bar.
The curve should run round the black frame a little inside its middle. The letters will stand on it.
- Hide
-
Type the title
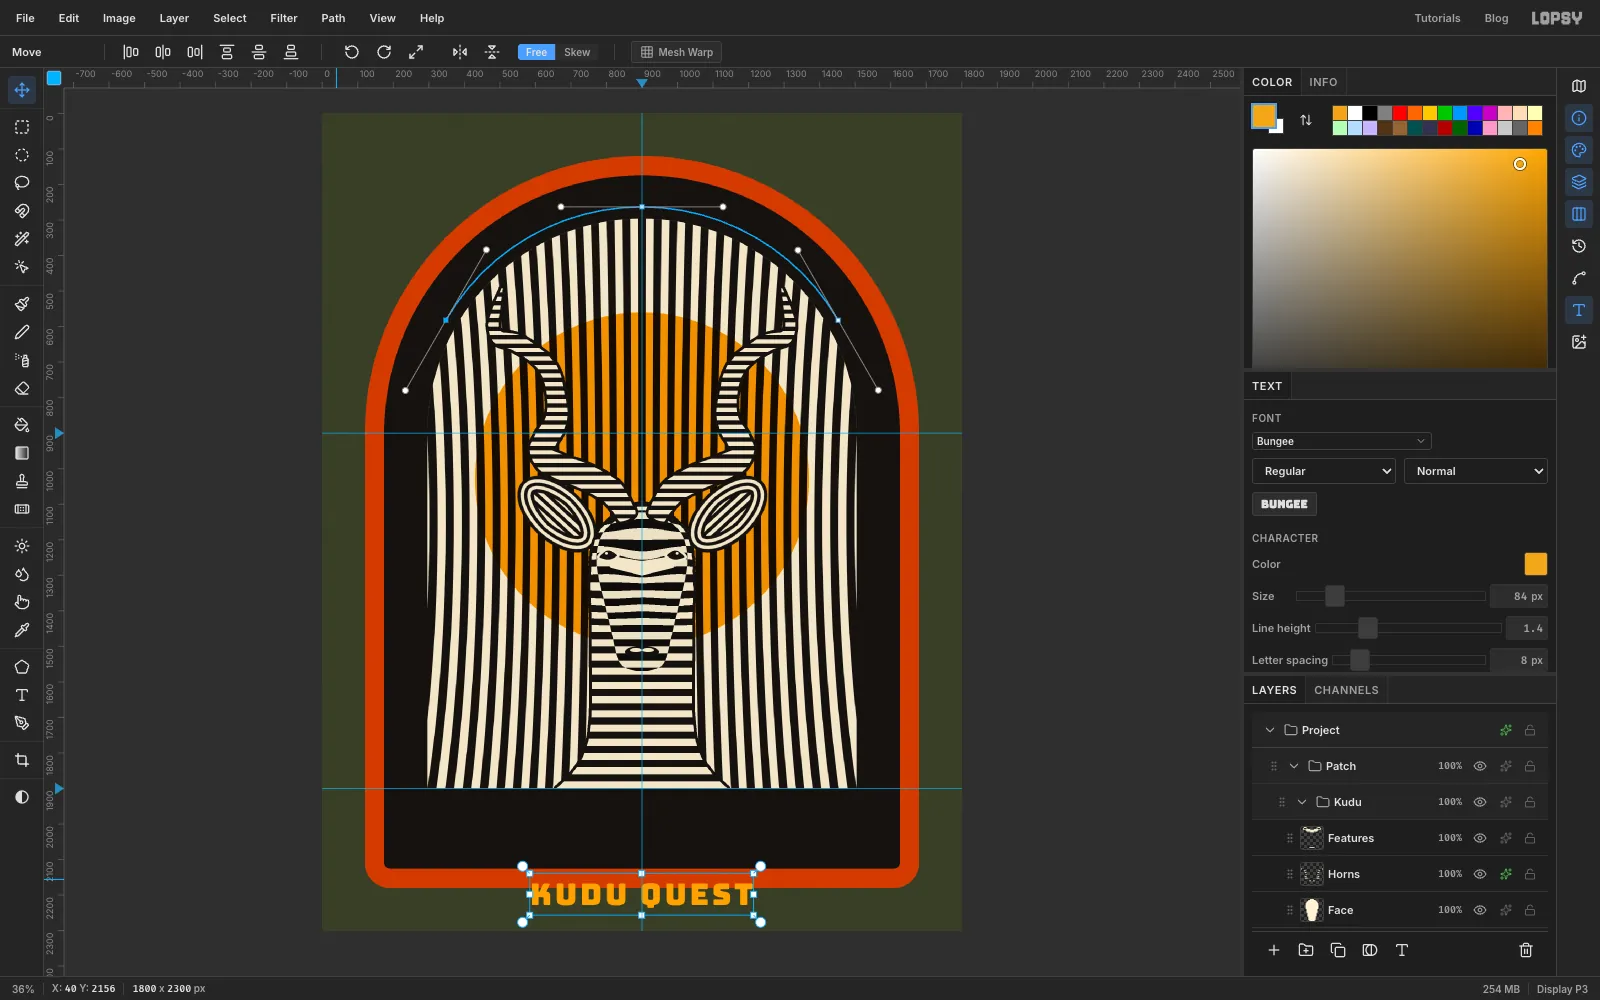
- Pick the Text tool. In the options bar, set the font to Bungee and the size to
84, and set the foreground colour to saffron. - Click an empty spot near the bottom-left of the canvas, type
KUDU QUESTand press Tab to finish editing. - Rename the new text layer
Title. In the Text panel, set Letter spacing to8.
Bungee is a solid, chunky face. Fine hairline fonts like Monoton look great on screen, but they're too thin to embroider at patch size.
- Pick the Text tool. In the options bar, set the font to Bungee and the size to
-
Set the title on the arch
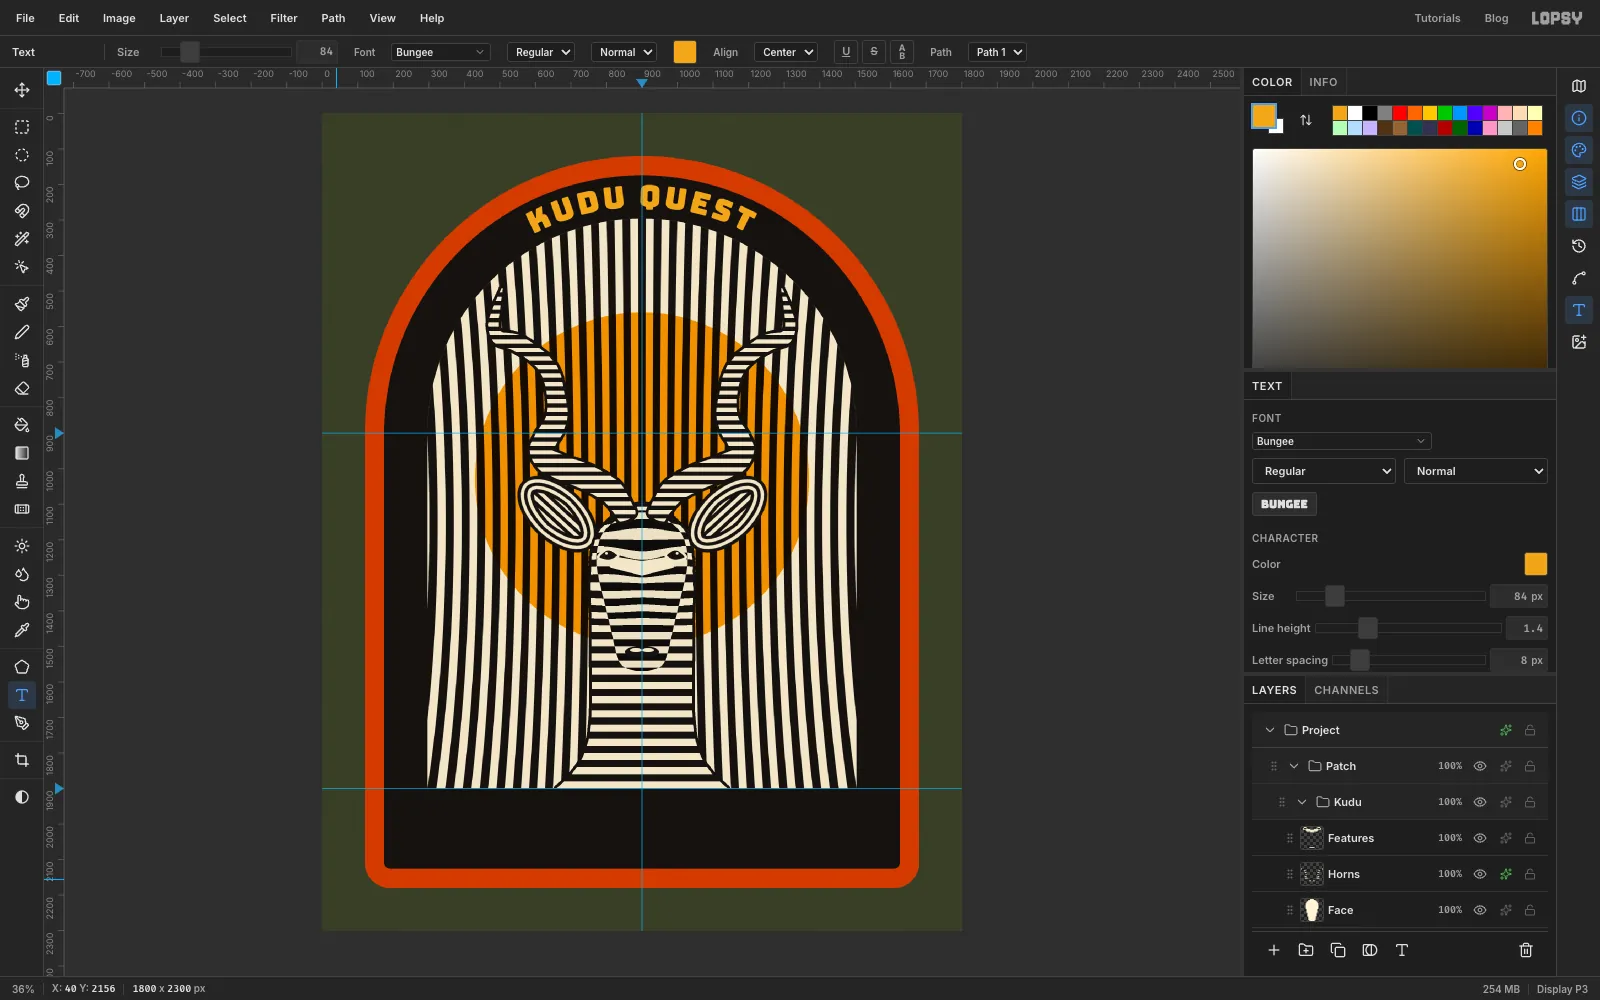
- With the title layer still active, set Align to Center in the options bar.
- Open the Path dropdown and choose Path 1. The words jump onto the curve and centre themselves on it.
- Click the path in the Paths panel to deselect it so its outline goes away.
Check the gap: the letters should have about the same space above them (to the merrow) as below them (to the stripes).
-
Set the race details in the bottom band
- Select
Referenceagain. With the Text tool, set Archivo Black, size76and bone, click an empty spot, typeKAROO TRAIL RUNand press Tab. Name the layerBand Line 1and set Letter spacing to6. - Select
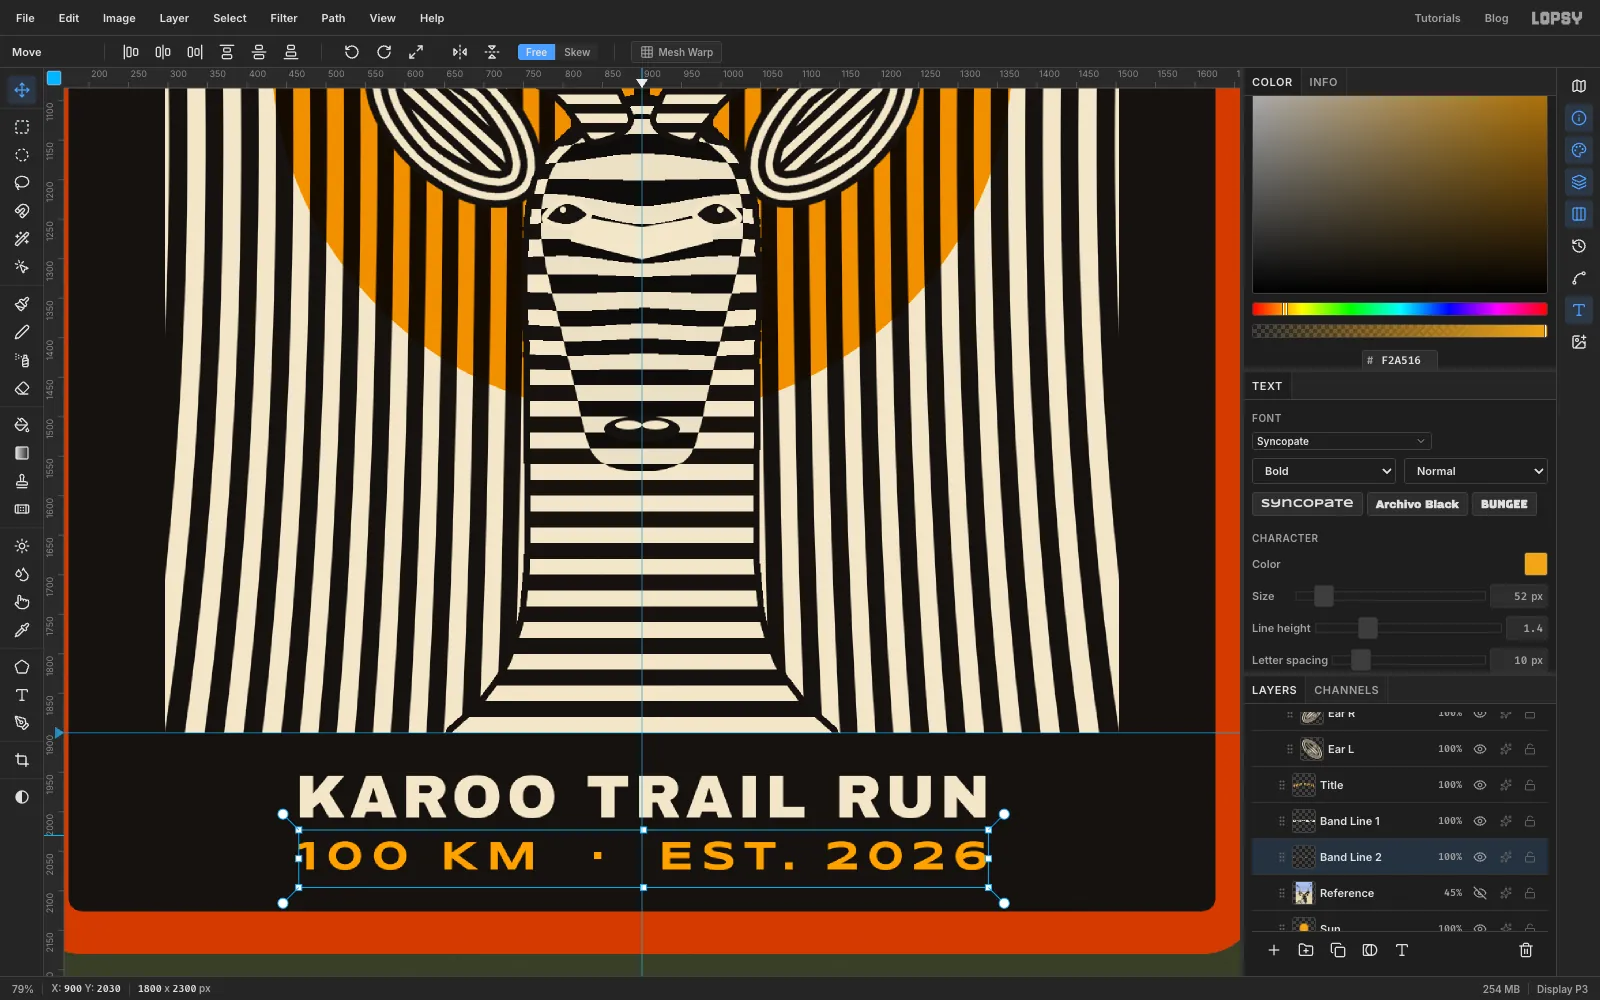
Referenceonce more and do the same for100 KM · EST. 2026in Syncopate, Bold, size52, saffron, with Letter spacing10. Put two spaces on each side of the middle dot. Name itBand Line 2. - With the Move tool, drag both lines into the bottom band and centre them on the guide. Treat them as one block: about 30 px between the lines, and the same black margin above the block as below it.
- Select
-
Add diamonds at the ends of the title
- Add a layer above
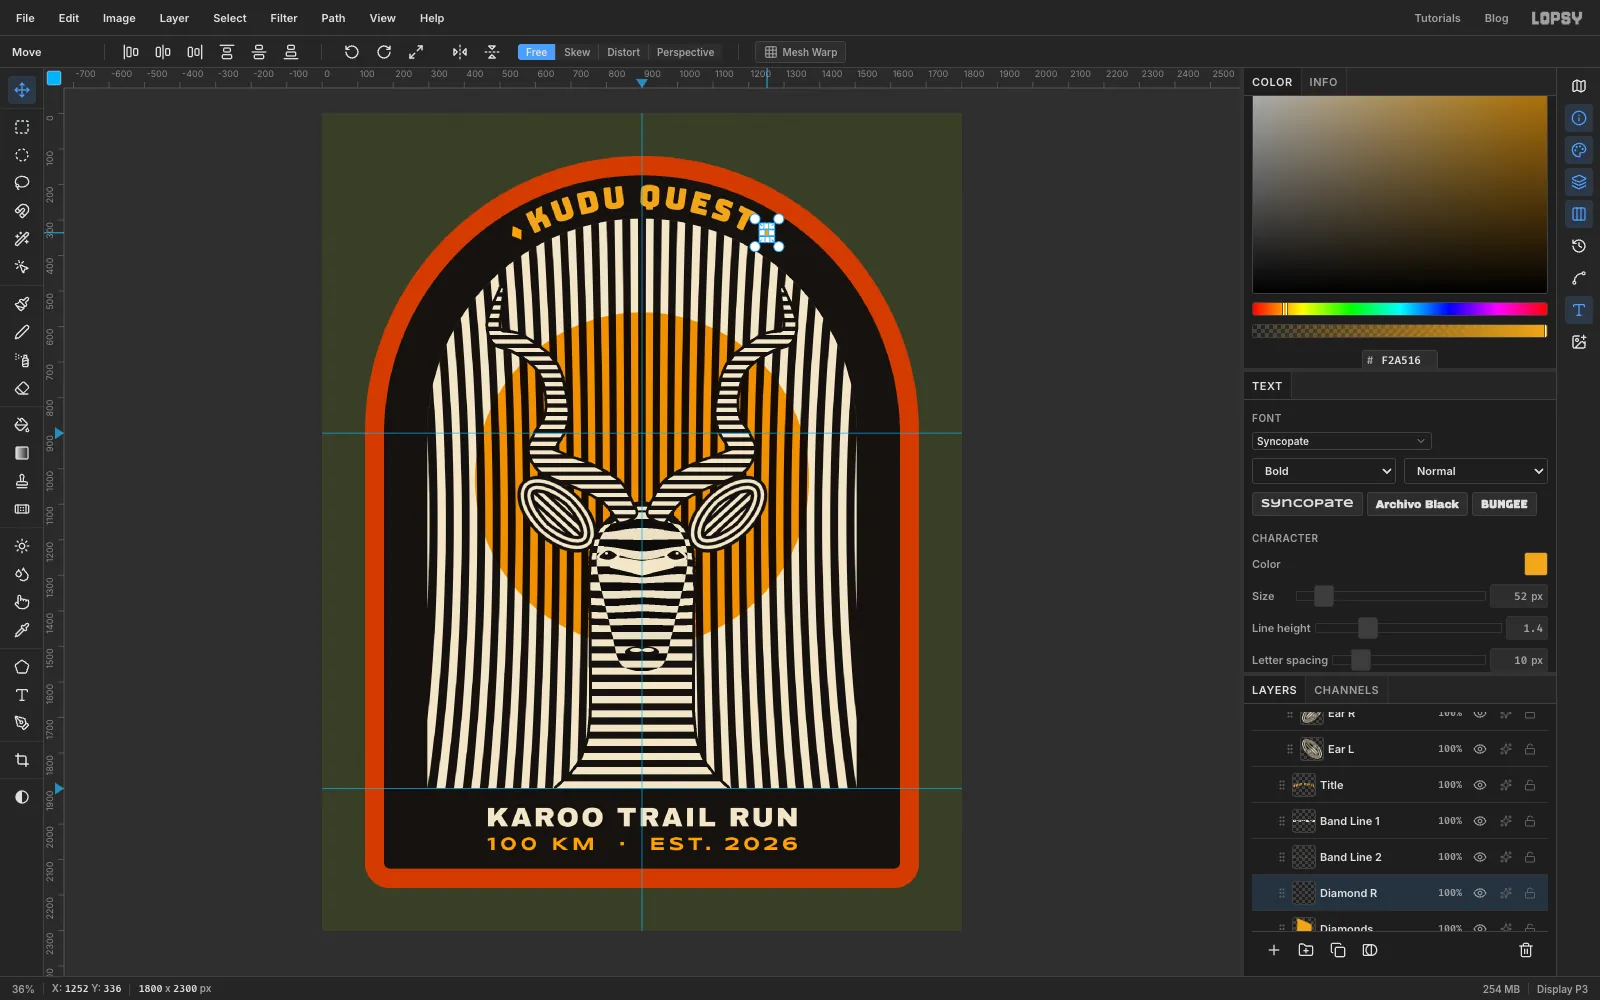
ReferencecalledDiamonds. - With the Pen, click four corners for a small diamond about 28 px before the K, at the height of the middle of the letters. Make it about 32 px wide and 45 px long, with the long points aimed out from the centre of the arch, like the letters. Click Path to Selection in the Paths panel and fill with saffron.
- Press Cmd+C and then Cmd+V. The copy pastes in place on its own layer, already selected, and Lopsy switches to the Move tool. Name it
Diamond R. - Click Flip Horizontal in the Move options bar and drag the copy to the matching spot after the T. Press Enter.
- Deselect and choose Layer → Merge Down to merge it into
Diamonds.
Flipping the copy keeps it tilted to follow the arch on the right side.
- Add a layer above
-
Stitch the merrow edge with Sunburst
- Select
Merrowand add a layer above it calledStitches. - Set the foreground colour to .
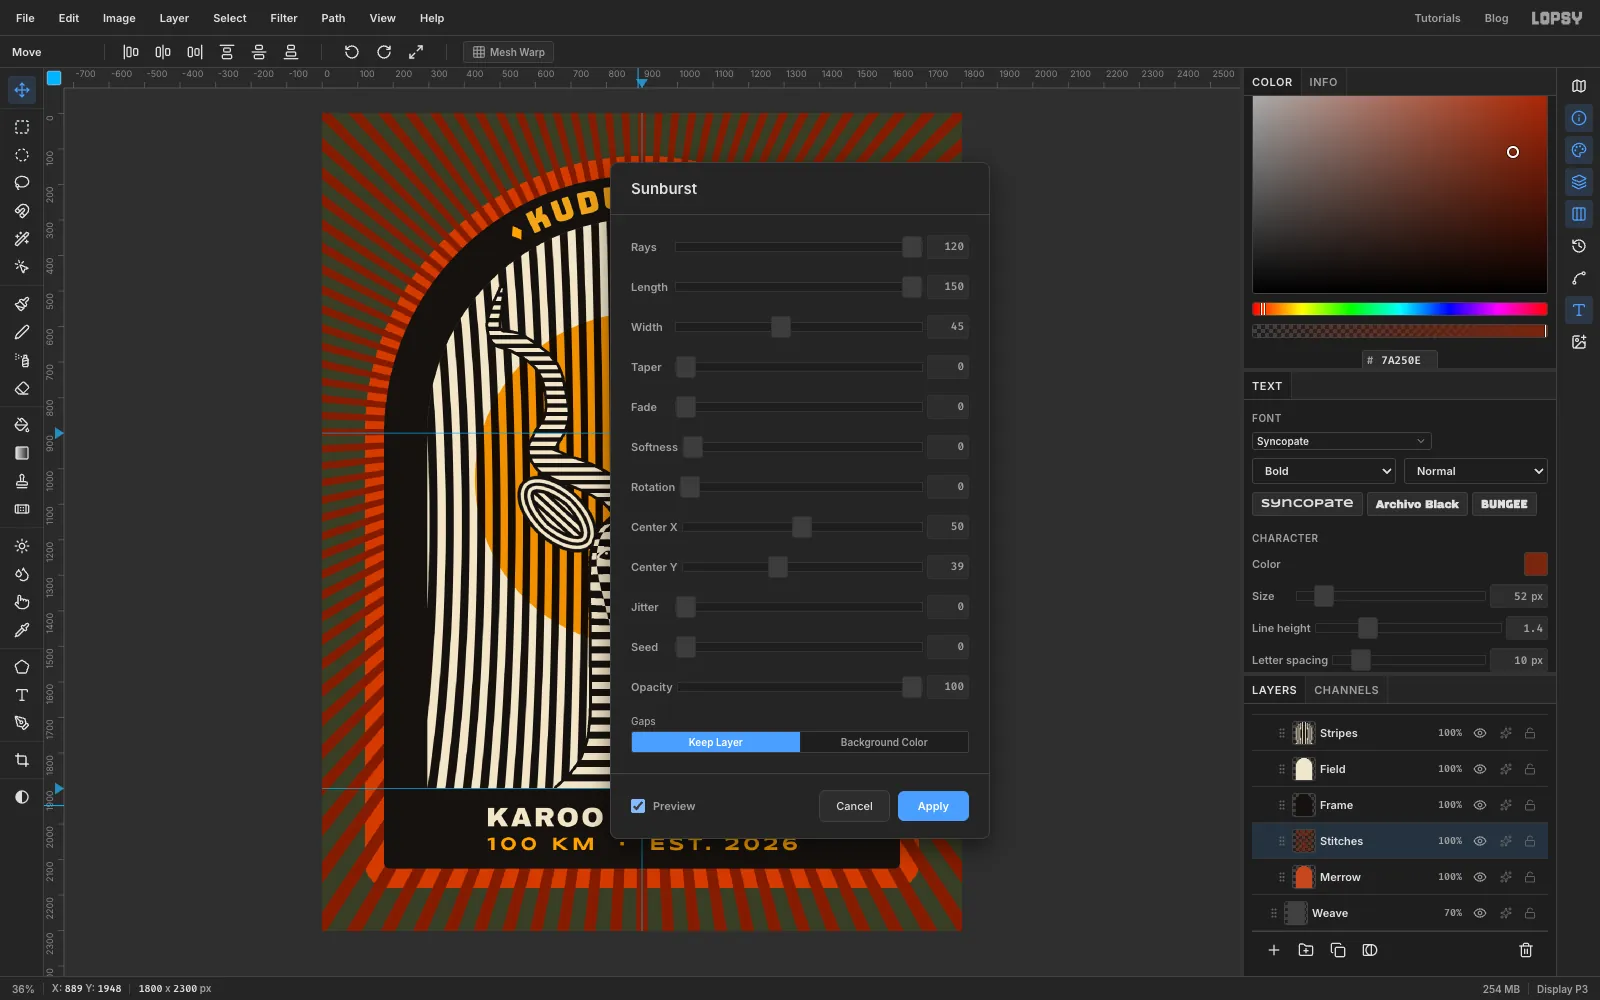
- Choose Filter → Sunburst… and set Rays
120, Length150, Width45, Center X50%and Center Y39%. 39% of 2300 is about 900, so the burst is centred on the arch's centre at900, 900. - Click Apply.
- Select
-
Clip the stitches to the edge
- Hold Cmd and click the
Merrowthumbnail, choose Select → Inverse, press Delete and deselect. - Set
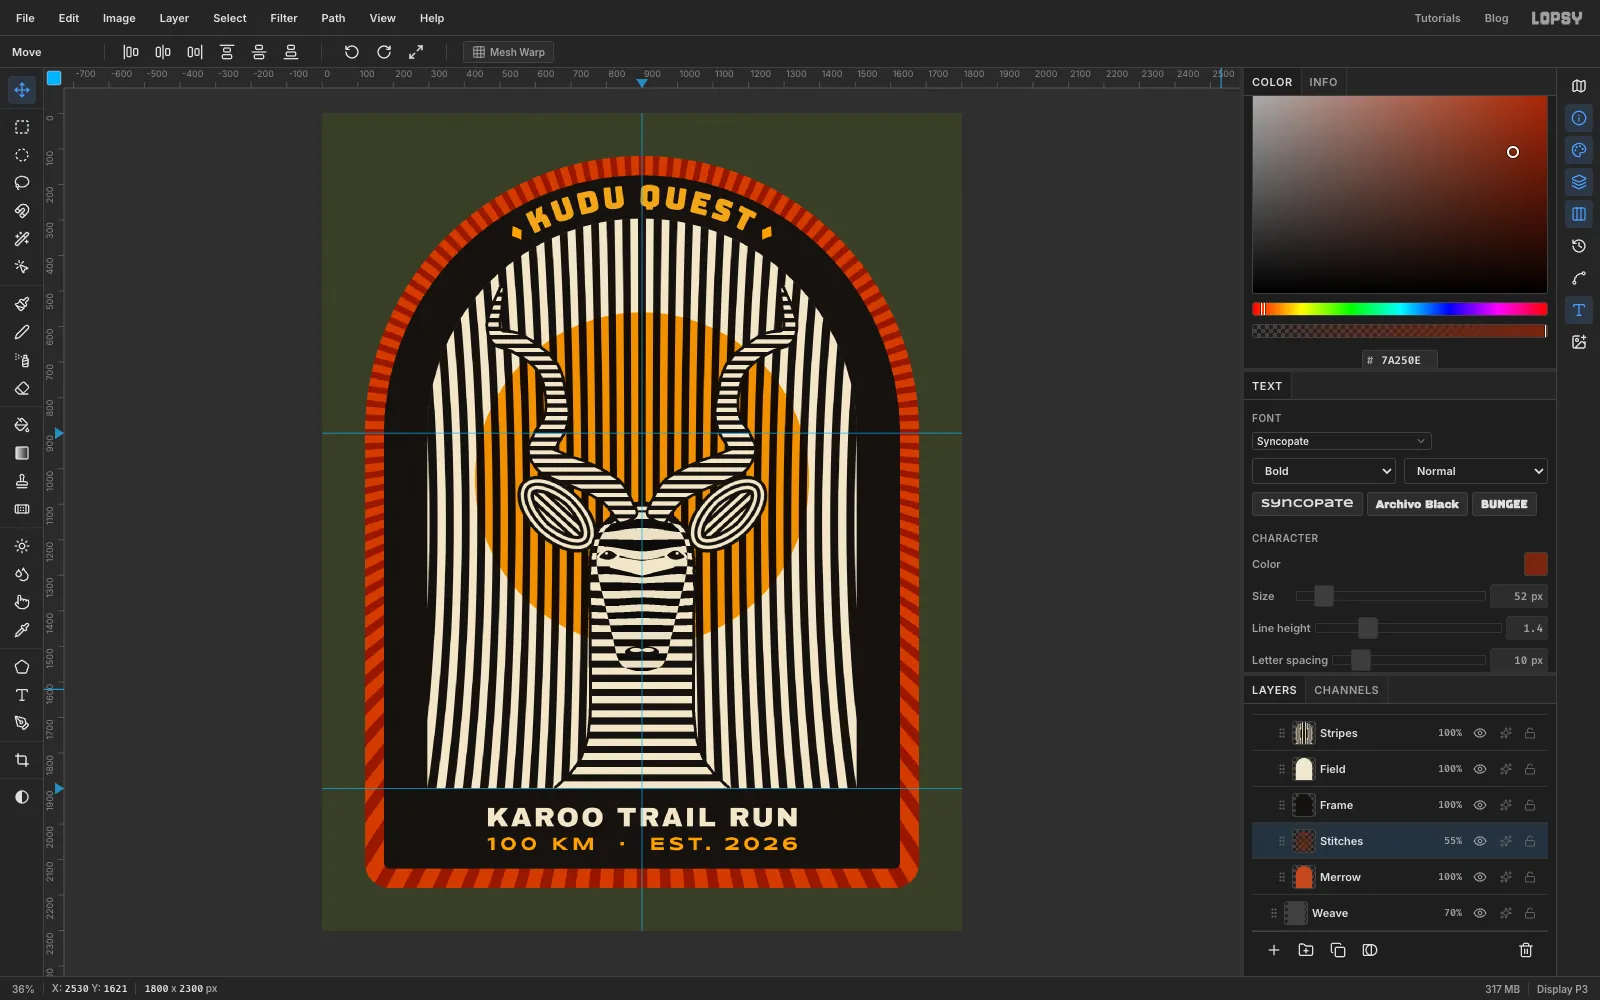
Stitchesto Multiply at55%.
Round the arch, the rays cross the edge straight on. Down the sides they hit it at a slant, just like real overlocked stitches.
- Hold Cmd and click the
-
Add a thread texture
- Select the
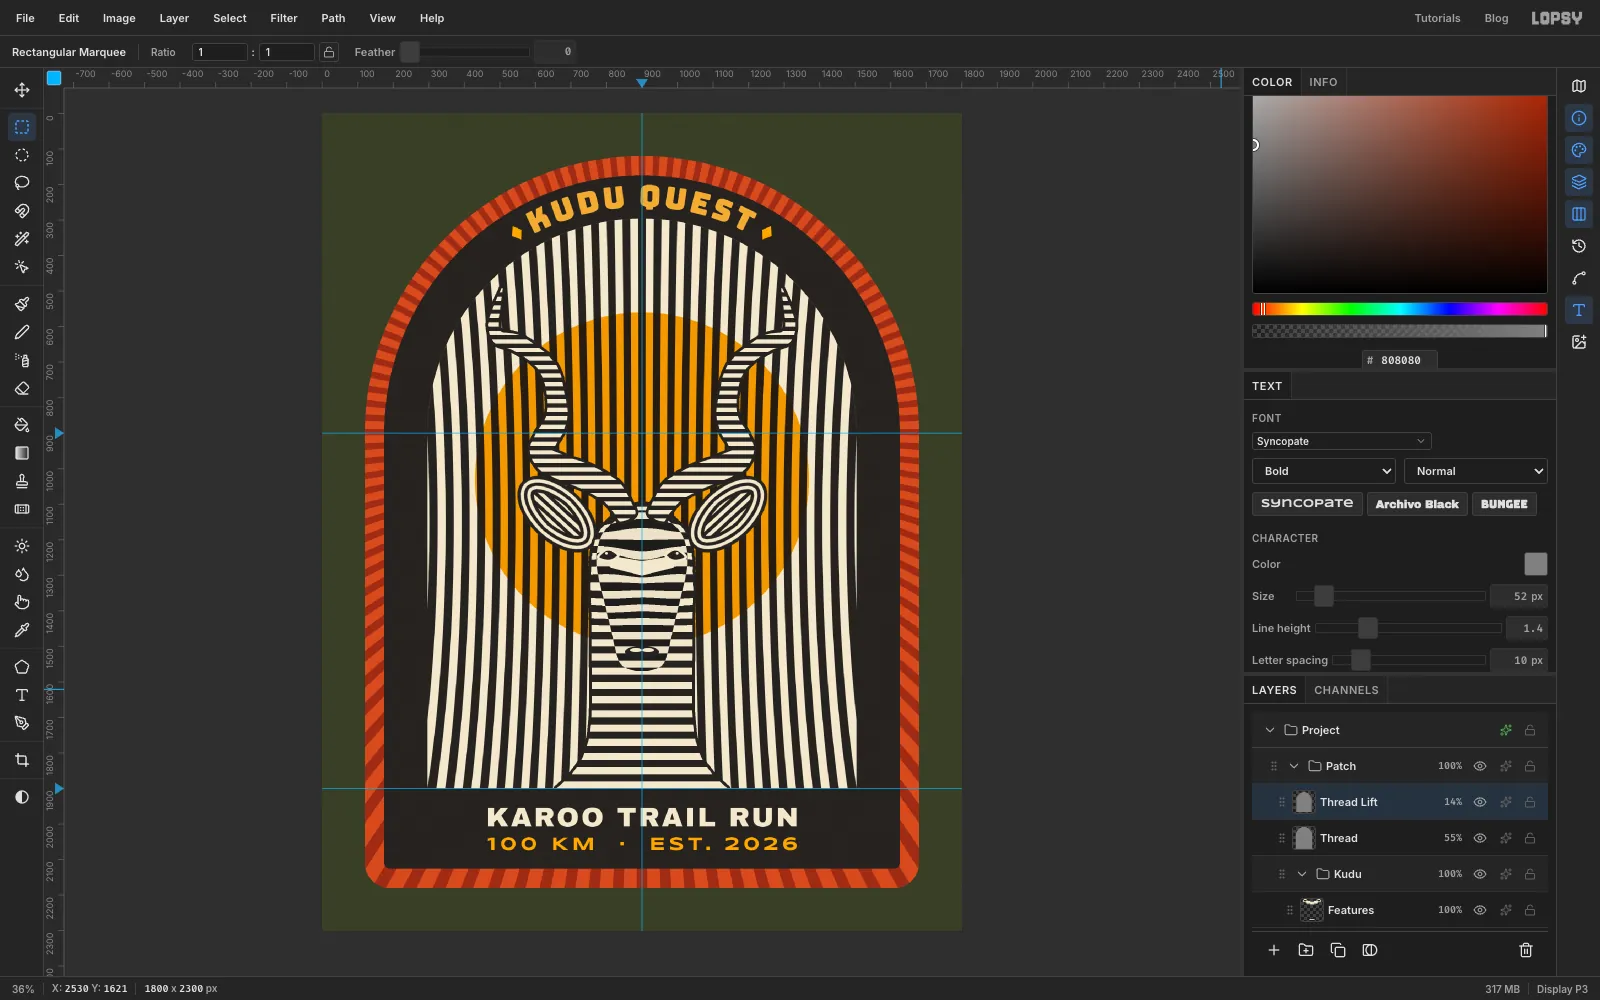
Patchgroup and click Add Layer. Name itThread. It goes at the top of the group. - Fill the whole layer with . Run Add Noise (Amount
70, Mono, Gaussian) and then Motion Blur (Angle45, Distance8). - Hold Cmd, click the
Merrowthumbnail, choose Select → Inverse, press Delete and deselect. - Set
Threadto Overlay at55%. - Overlay can't change pure black. Duplicate the layer, name it
Thread Lift, and set it to Screen at14%so the grain shows on the black frame too.
- Select the
-
Raise the stitching with Emboss
- Select
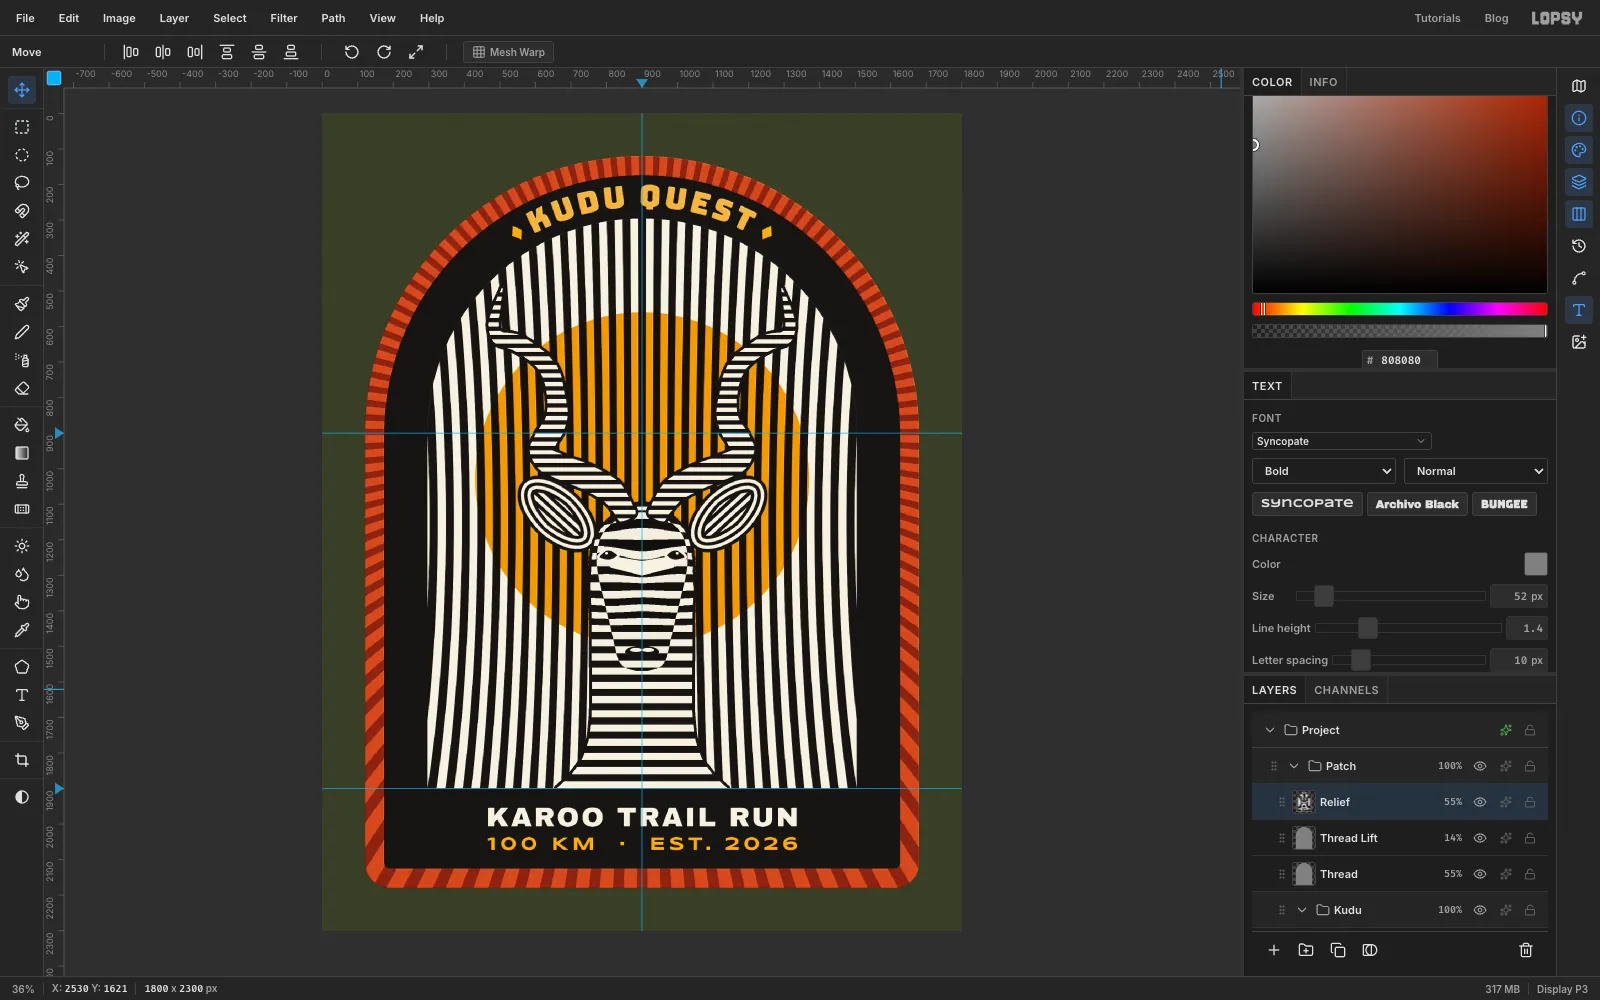
Thread Lift. Hold Cmd and click theMerrowthumbnail. - Choose Edit → Copy Merged (Cmd+Shift+C), then press Cmd+V. The flattened copy of the patch lands on a new layer above. Name it
Reliefand deselect. - Run Filter → Emboss… with Angle
135and Strength35, then Filter → Desaturate. - Set
Reliefto Overlay at55%.
Emboss turns flat areas mid-grey, and Overlay ignores mid-grey. Only the edges between colours show, as a soft highlight and shadow.
- Select
-
Lift the patch off the cloth
- Select
Merrow, open its effects drawer and turn on Drop Shadow. Set Offset X6, Offset Y14, Blur24and Opacity55. - Hide the guides (Cmd+;), save the project with File → Save Project, and choose File → Quick Export PNG.
Lopsy doesn't draw effects on groups, so put the shadow on
Merrow, the patch's outermost layer.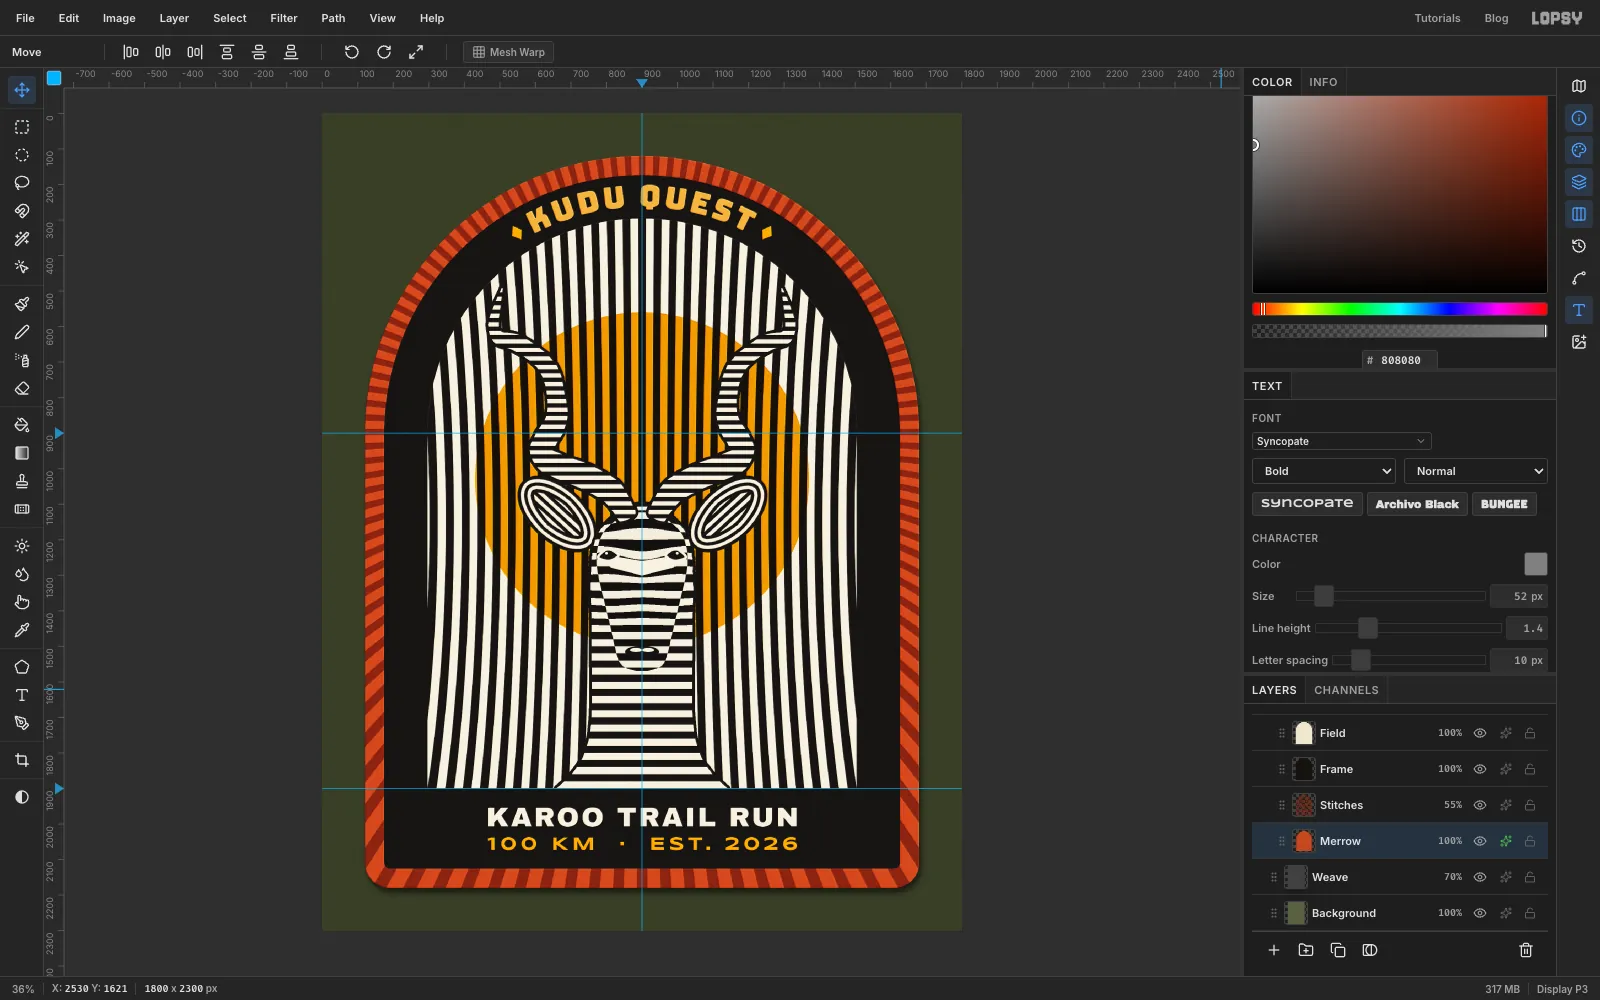
- Select