Make Outsider Art Movie Concept Art: The Hermit's Quarry
Paint key art for an imaginary film in crayon and collage. Rhythmic rings, sermon text on paths and a repeated 1896 photo cut-out, all in Lopsy.
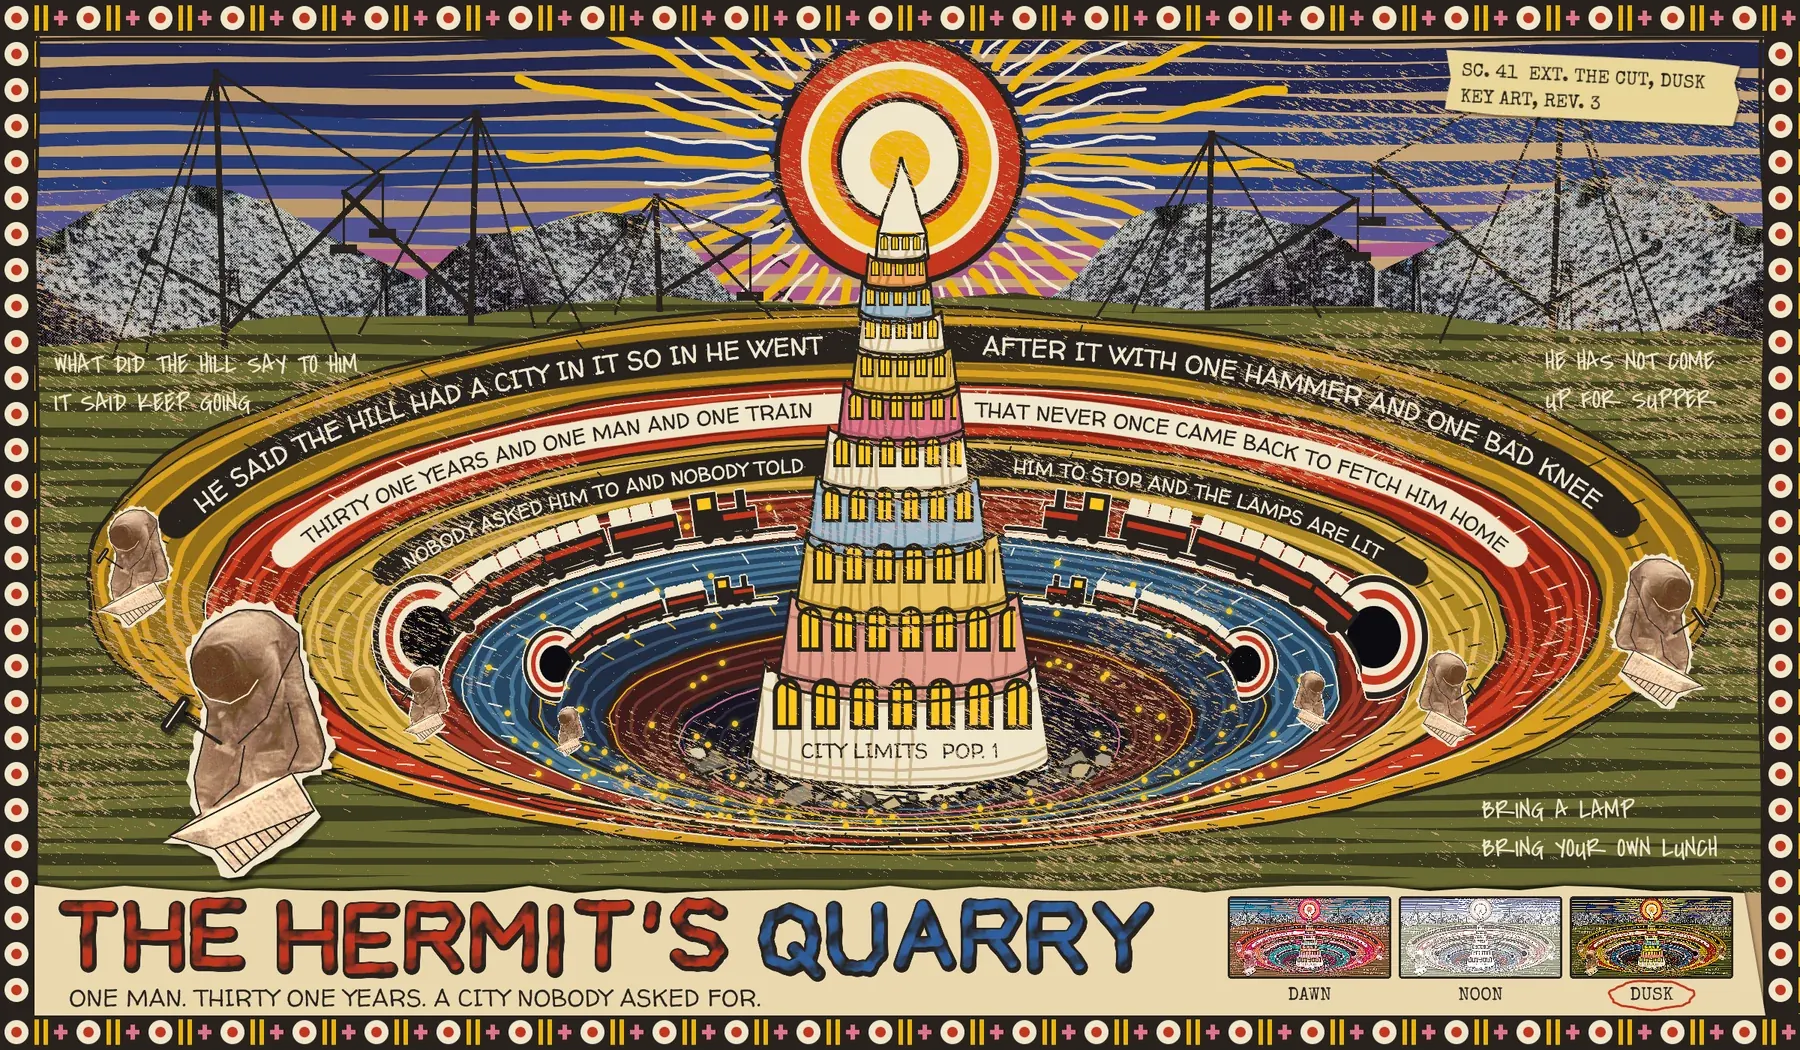
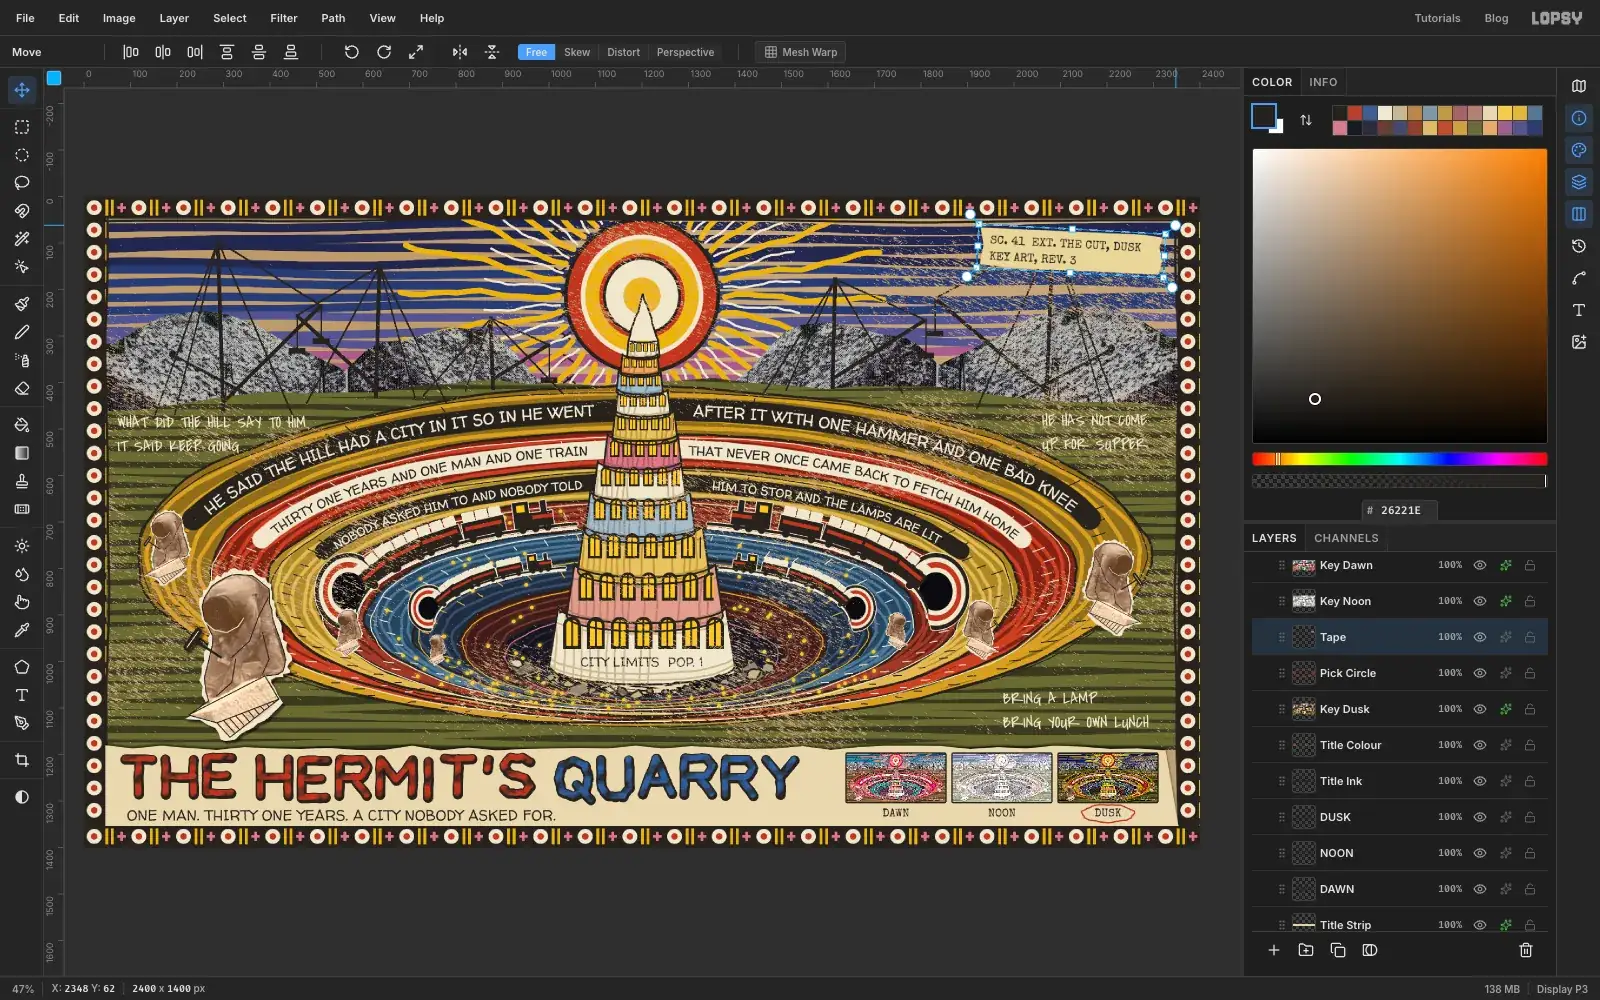
The Hermit's Quarry doesn't exist. It's an imaginary film about one man who spends thirty-one years carving a city out of a hill. Concept art is what a production designer paints to show everyone what a film will look like before a single set gets built. This piece imagines the production hired an outsider artist to do it.
Outsider art is work by people with no art training, who often make it obsessively and for no audience. Three artists shaped this picture:
- Martín Ramírez drew tunnels and trains in rhythmic parallel lines, on scraps of paper he glued together, and he pasted in figures cut from magazines
- Adolf Wölfli packed his sheets with dense bands of repeating ornament
- Howard Finster covered his paintings with sermons in his own hand
So everything here is lines on scrap card, and every figure in the quarry is the same photograph. There's only one man, after all. The slate label and the three colour keys are what make it concept art rather than a painting.
The document is 2400 × 1400 px. You don't need to match any position exactly, and wobble is the whole point. Where this tutorial gives coordinates, read them off the rulers as rough targets.
You'll need two public domain images from Wikimedia Commons. Download the 1920 px version of each:
- World's largest granite quarries, Barre, Vt, a linen postcard published by Tichnor Quality Views around 1930–45. Save it as
barre.jpg - Steinhauer bei der Arbeit, a photograph of a stonecutter by Robert Breitinger, 1896, from the Zentralbibliothek Zürich. Save it as
steinhauer.jpg
The tools you'll use:
- the Brush set up as a crayon, its Radial Symmetry, and the Pencil for straight lines
- the Lasso, and the Elliptical and Rectangular Marquee with their exact-size dialogs
- the Pen tool, with text on a path
- Define Pattern and Fill with Pattern
- photos dropped on the canvas, Select → Inverse, Copy, Paste, Copy Merged and Flip Horizontal
- the Move tool's rotate and scale handles
- Hue/Saturation, Brightness/Contrast, Add Noise, Motion Blur, Gaussian Blur, Clouds, Threshold and Unsharp Mask
- the Multiply and Lighten blend modes, Merge Down and groups
- layer effects: Drop Shadow, Outer Glow and Stroke
- text in Walter Turncoat, Covered By Your Grace and Special Elite
The palette is scrap card and a cheap box of crayons:
-
Card
-
scraps
-
tooth
-
Graphite
-
chalk cream
-
strip cream
-
Dusk sky
-
Brick
-
mustard
-
lamp yellow
-
cobalt
-
Land
-
tape
-
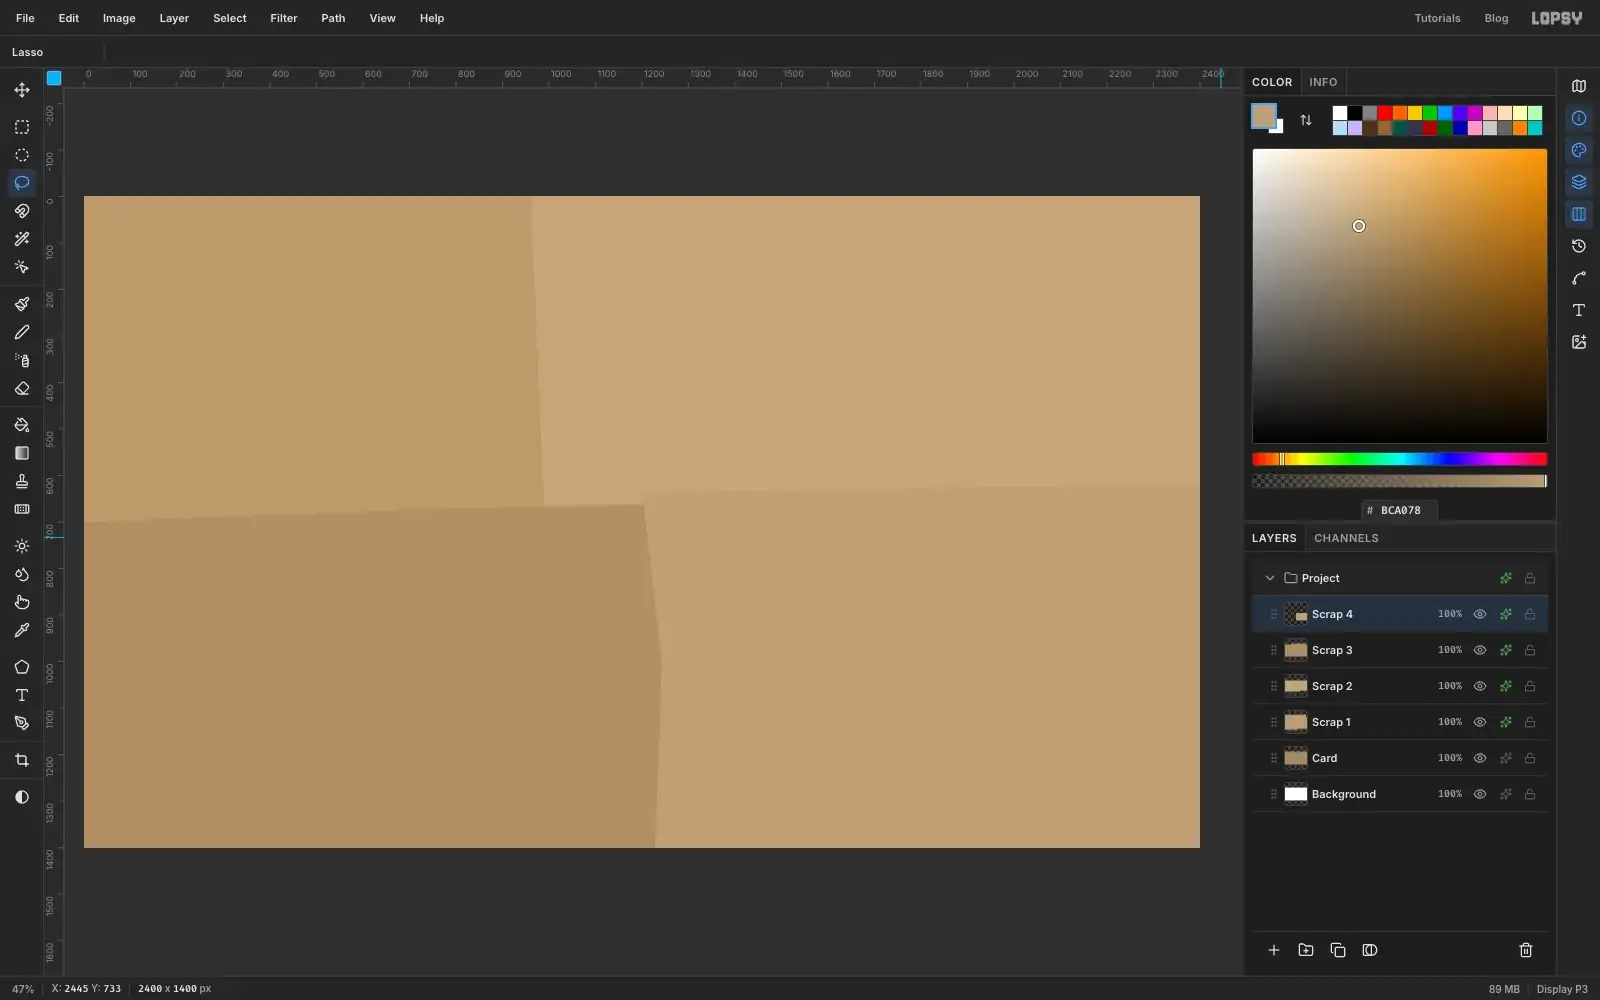
Glue four scraps of card together
Choose File → New, keep the units on Pixels, and make the document 2400 wide and 1400 high.
Rename Layer 1 to Card, set the foreground to and choose Edit → Fill.
Now add the scraps. For each one, click Add Layer (the + under the Layers panel), rename it, set the foreground, press L for the Lasso, and draw a rough quarter of the card. Choose Edit → Fill and press Cmd+D:
- Scrap 1, : top left, ending a little left of the middle and about halfway down
- Scrap 2, : top right, overlapping Scrap 1 by about 50 px
- Scrap 3, : bottom left, overlapping the two above
- Scrap 4, : bottom right, overlapping everything it touches
Take each lasso past the edge of the canvas where it meets one, and keep the inner edges slightly crooked.
On each scrap, click the row's effects button, tick Drop Shadow, and set Offset X to 2, Offset Y to 3, Blur to 6 and Opacity to 45. Close the drawer. Those thin shadows are what make it look glued.
-
Draw the sky in rows of crayon, then stitch the seam
First set up the crayon, which you'll use for most of this picture. Press B for the Brush, click the brush-tip thumbnail at the left of the options bar to open the Brushes window, pick Hard Round on the Presets tab, then on the Shape tab set Hardness to 90 and Spacing to 6. Close the window. From now on, "the crayon" means this brush, and you only change its Size in the options bar.
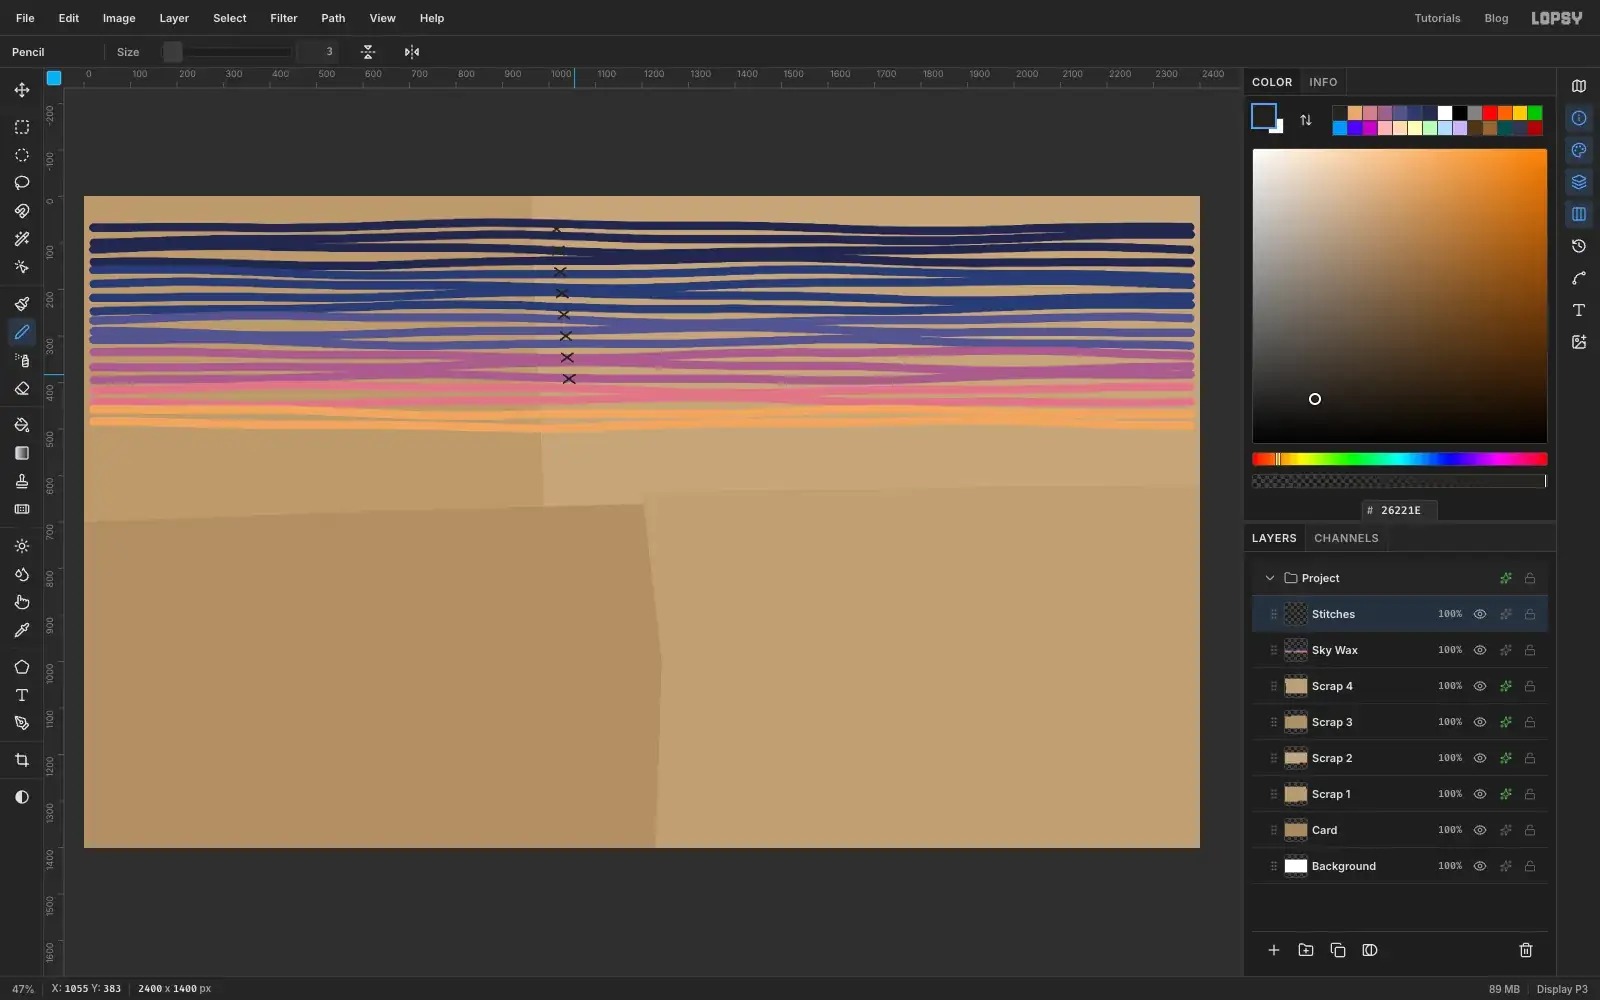
Add a layer called Sky Wax and set the Size to 19. Draw long horizontal rows, freehand and slightly wavy, starting at about y 60 and working down to y 500, with about 25 px from one row to the next. Take each row from just inside one edge of the canvas to just inside the other. The border will hide the ends later. Don't fill the gaps: the card showing between the rows is the look.
Change colour as you go down, so you get about 18 rows in all:
- down to y 150
- down to y 250
- down to y 330
- down to y 395
- down to y 450
- for the last rows
Add a layer called Stitches. Press N for the Pencil, set its Size to 3 and the foreground to . Where the two top scraps meet (around x 1020), make a column of small crosses from y 70 to y 400, one every 45 px or so. For each stroke of a cross, click one end, then hold Shift and click the other.
-
Throw the sun's rays with Radial Symmetry
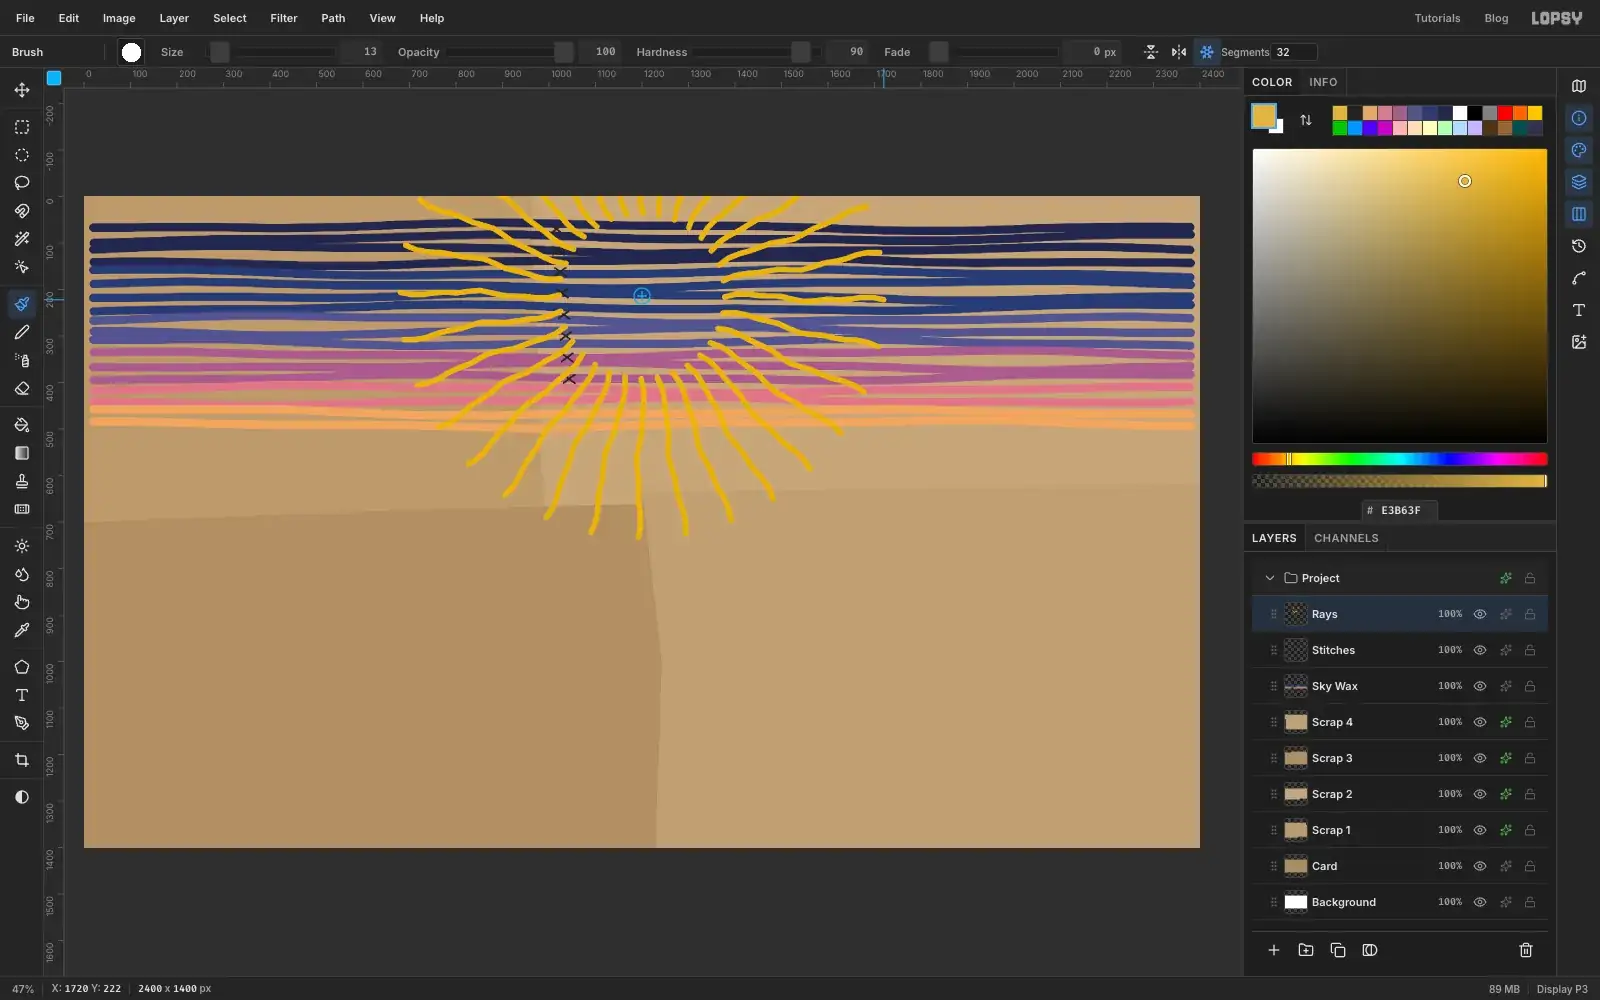
Add a layer called Rays and go back to the crayon (B), Size 13, foreground .
Click Radial Symmetry in the options bar and set Segments to 32. Then Cmd-click at about x 1200, y 214. That click moves the centre of the symmetry and paints nothing.
Now drag one wobbly stroke outward, starting about 180 px right of the centre and ending about 520 px from it. All thirty-two rays appear at once.
Set the Size to 6 and the foreground to , and draw a shorter wobbly stroke halfway between the first ray and the next, from 180 to 340 px out. That adds thirty-two cream rays between the mustard ones.
Click Radial Symmetry again to turn it off. If you leave it on, every crayon stroke from here comes out thirty-two times.
-
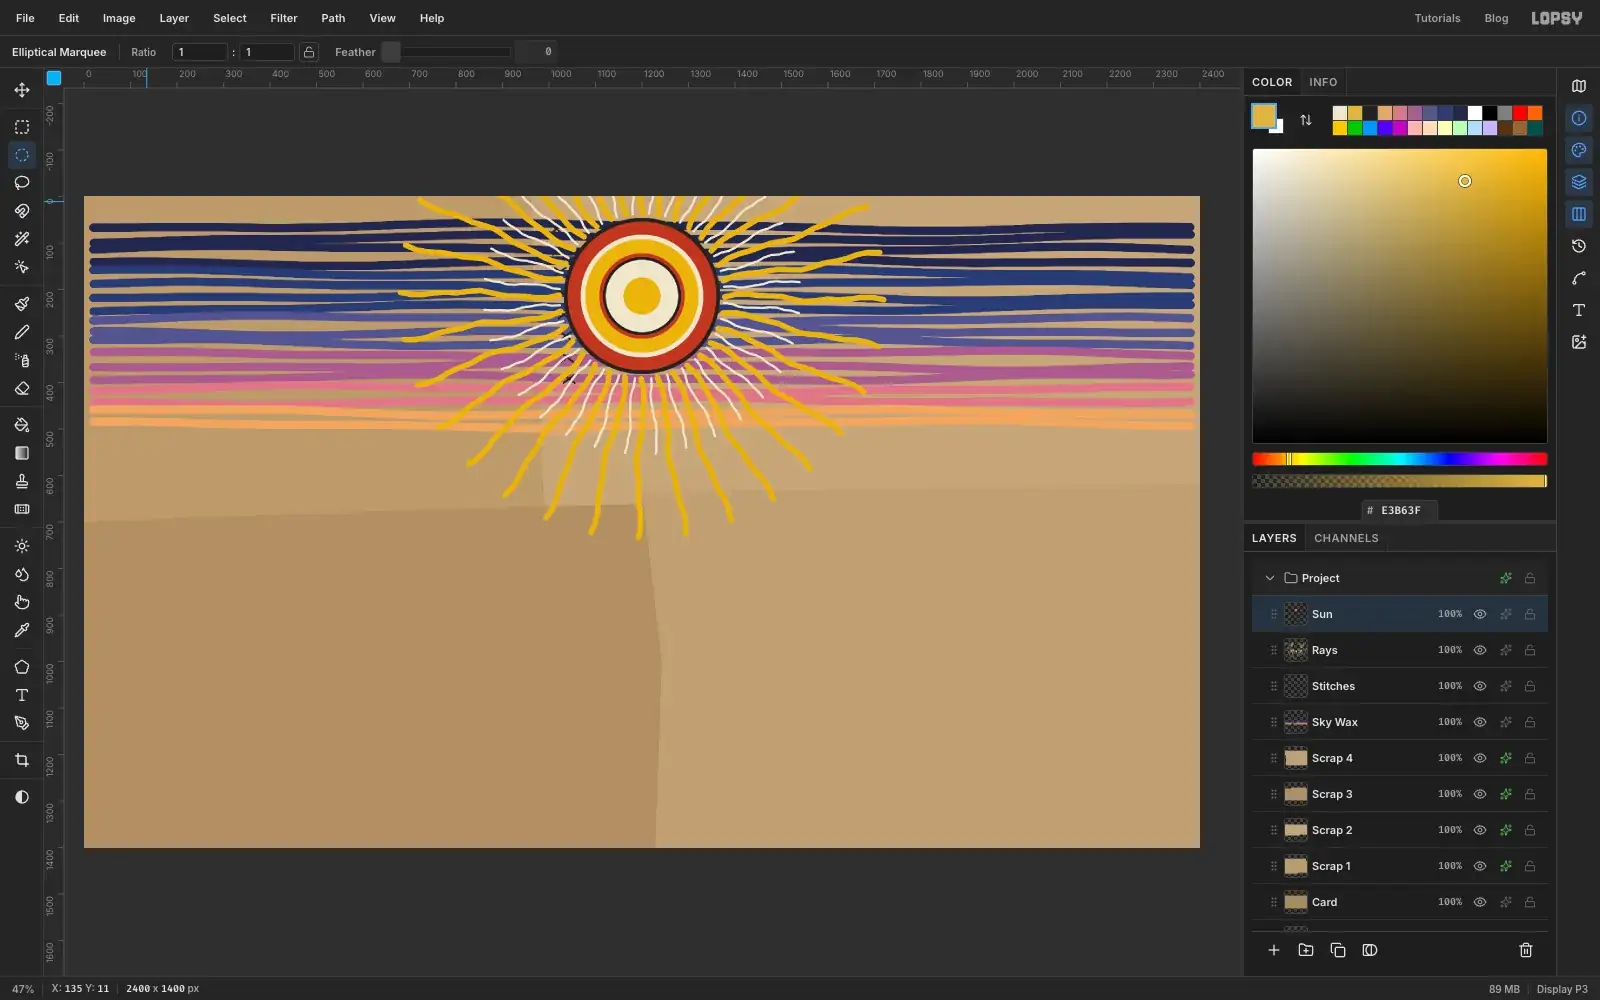
Stack the sun out of rings
Add a layer called Sun. Press Cmd+D to make sure nothing is selected, pick the Elliptical Marquee, and click once on the canvas (a click, not a drag). A dialog asks for exact corners. For the first ring, enter From 1032, 46 and To 1368, 382, press Enter, and choose Edit → Fill with the foreground set to the ring's colour.
Repeat for each ring, biggest first, all centred on 1200, 214. Press Cmd+D before each click, or the dialog won't open:
- radius 168:
- radius 160:
- radius 132:
- radius 122:
- radius 92:
- radius 84:
- radius 78:
- radius 40:
For radius 160, for example, that's From 1040, 54 and To 1360, 374. Press Cmd+D when you're done.
-
Cut the spoil heaps out of the postcard
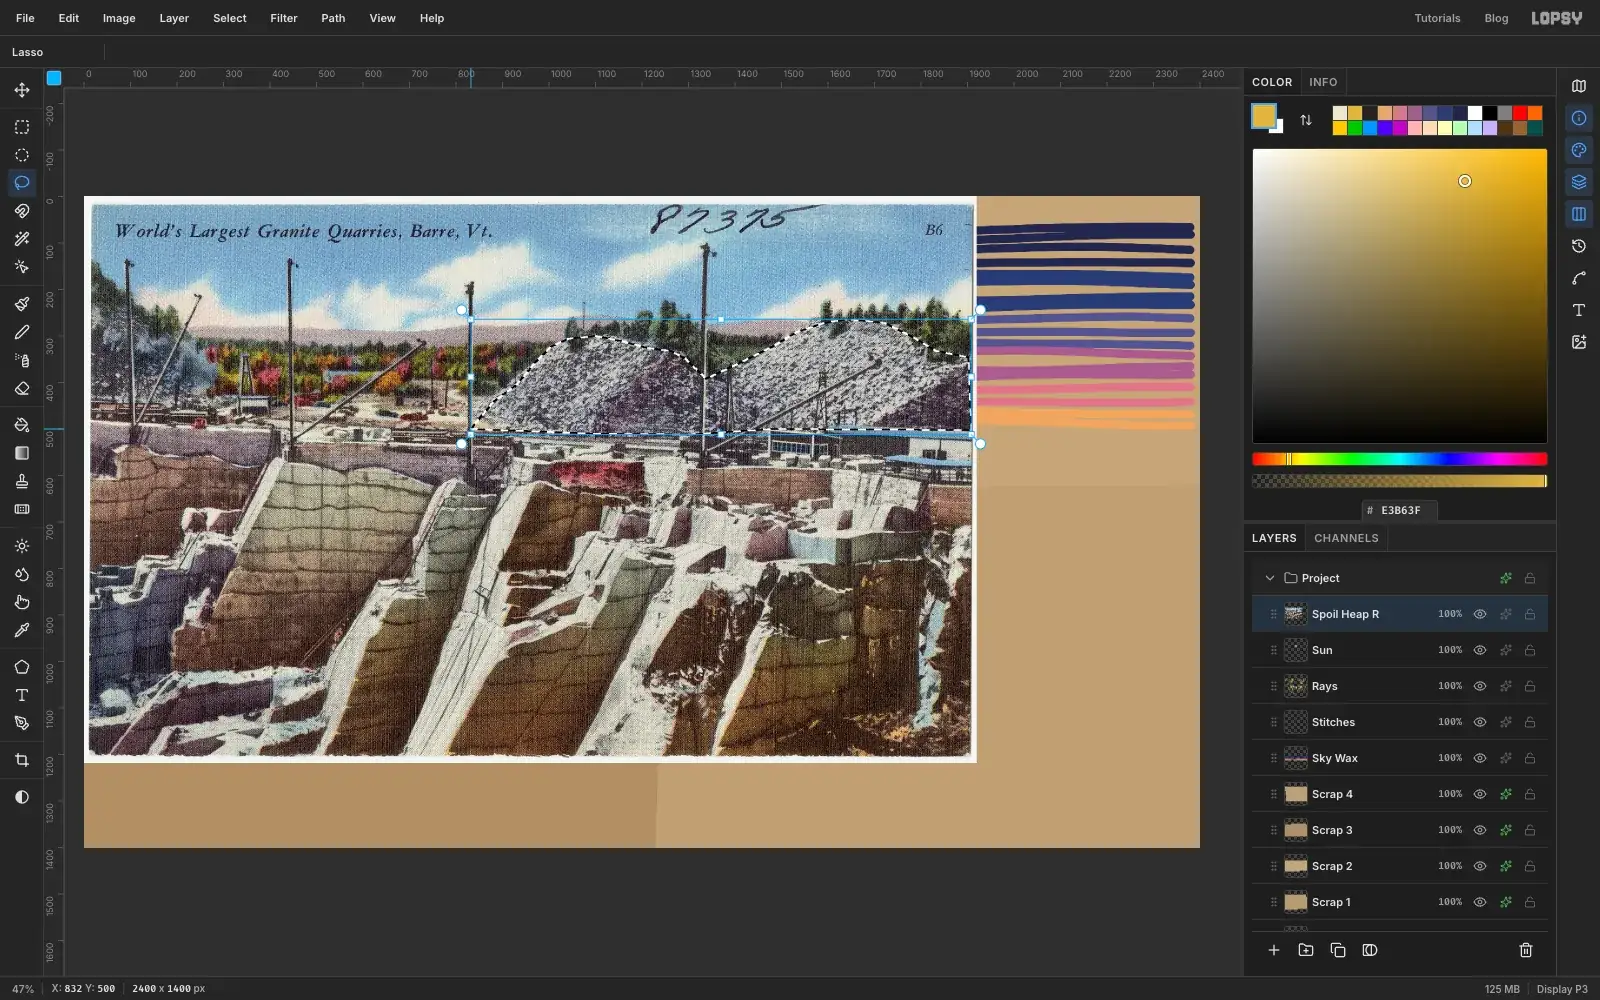
Real quarries pile their waste rock into huge grey heaps. This postcard has two good ones, and a printed halftone texture you'd never get with a crayon.
Drag barre.jpg from your computer onto the canvas. It arrives as a new layer at the top left and switches you to the Move tool, with its pixels selected. Press Cmd+D and rename the layer Spoil Heap R.
Press L for the Lasso and trace the two rock heaps on the right of the postcard. Start at the foot of the left heap, go up and over both, following the rocky outline and leaving out the trees, then come back along a straight line under them, just above the buildings.
Choose Select → Inverse, press Delete, then Cmd+D. Only the heaps are left.
-
Place a heap on each side of the sun
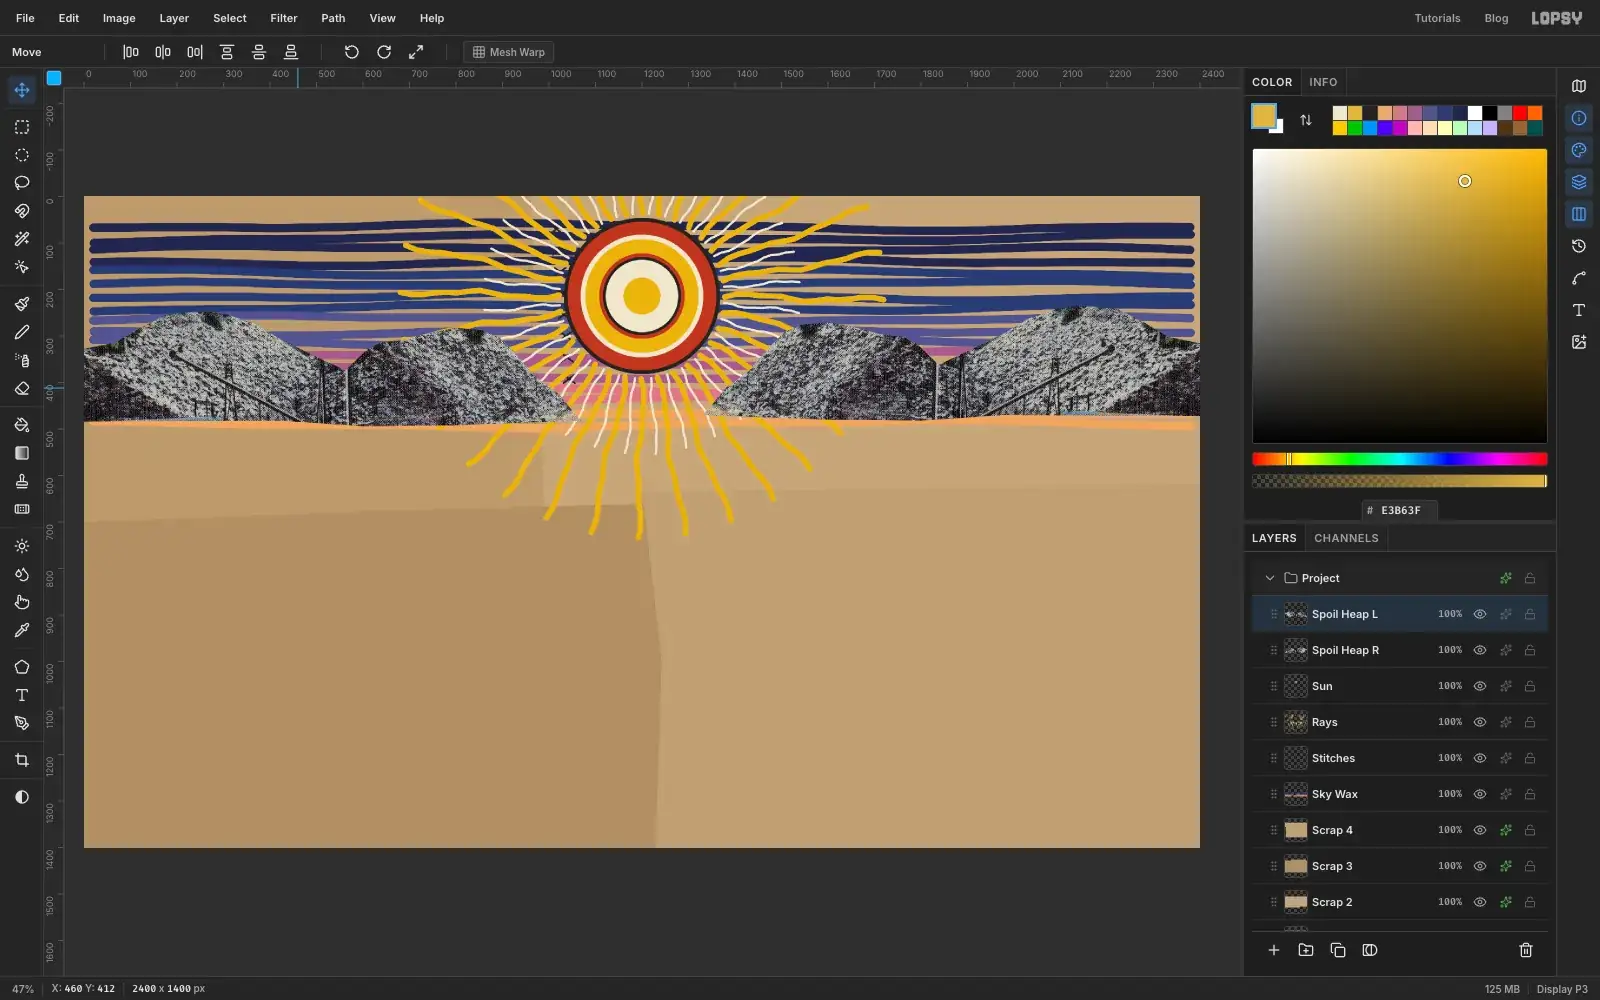
Choose Filter → Hue/Saturation..., set Saturation to -28 and Lightness to -8, and click Apply. That takes the blue out of the rocks so they sit with the crayon.
Press V for the Move tool and drag the heaps about 500 px to the right and 30 px up, so their right edge hangs off the canvas.
Choose Layer → Duplicate Layer and rename the copy Spoil Heap L. Choose Image → Flip Horizontal, which mirrors the copy where it stands, then drag it about 1340 px to the left so it hangs off the left edge instead. The gap between the two should frame the sun.
-
Lay in the land
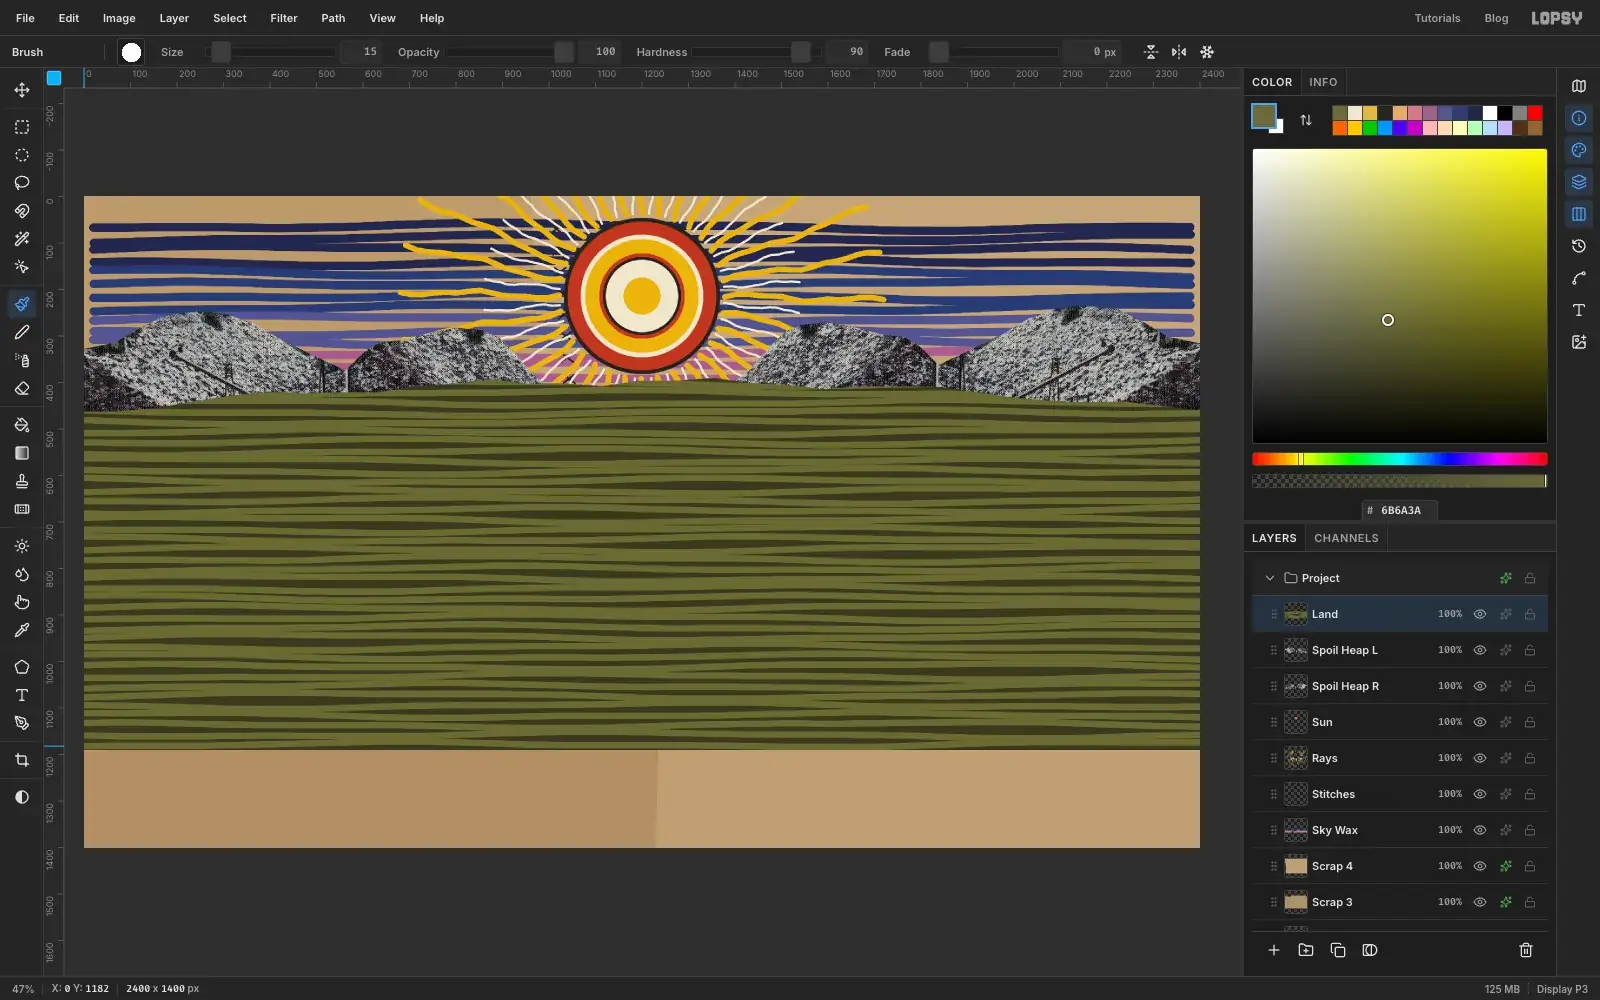
Add a layer called Land and set the foreground to .
With the Lasso, draw a low hill: a wavy horizon that sits at about y 400 in the middle and droops to about y 460 at both sides, then down past the canvas edges to y 1190, and across the bottom. Choose Edit → Fill, and keep the selection.
Switch to the crayon, Size 15, foreground . Draw horizontal rows about 21 px apart, from the horizon to the bottom. The live selection keeps them inside the hill, and the dark fill shows between them. Press Cmd+D.
-
Dig the quarry with nine ovals
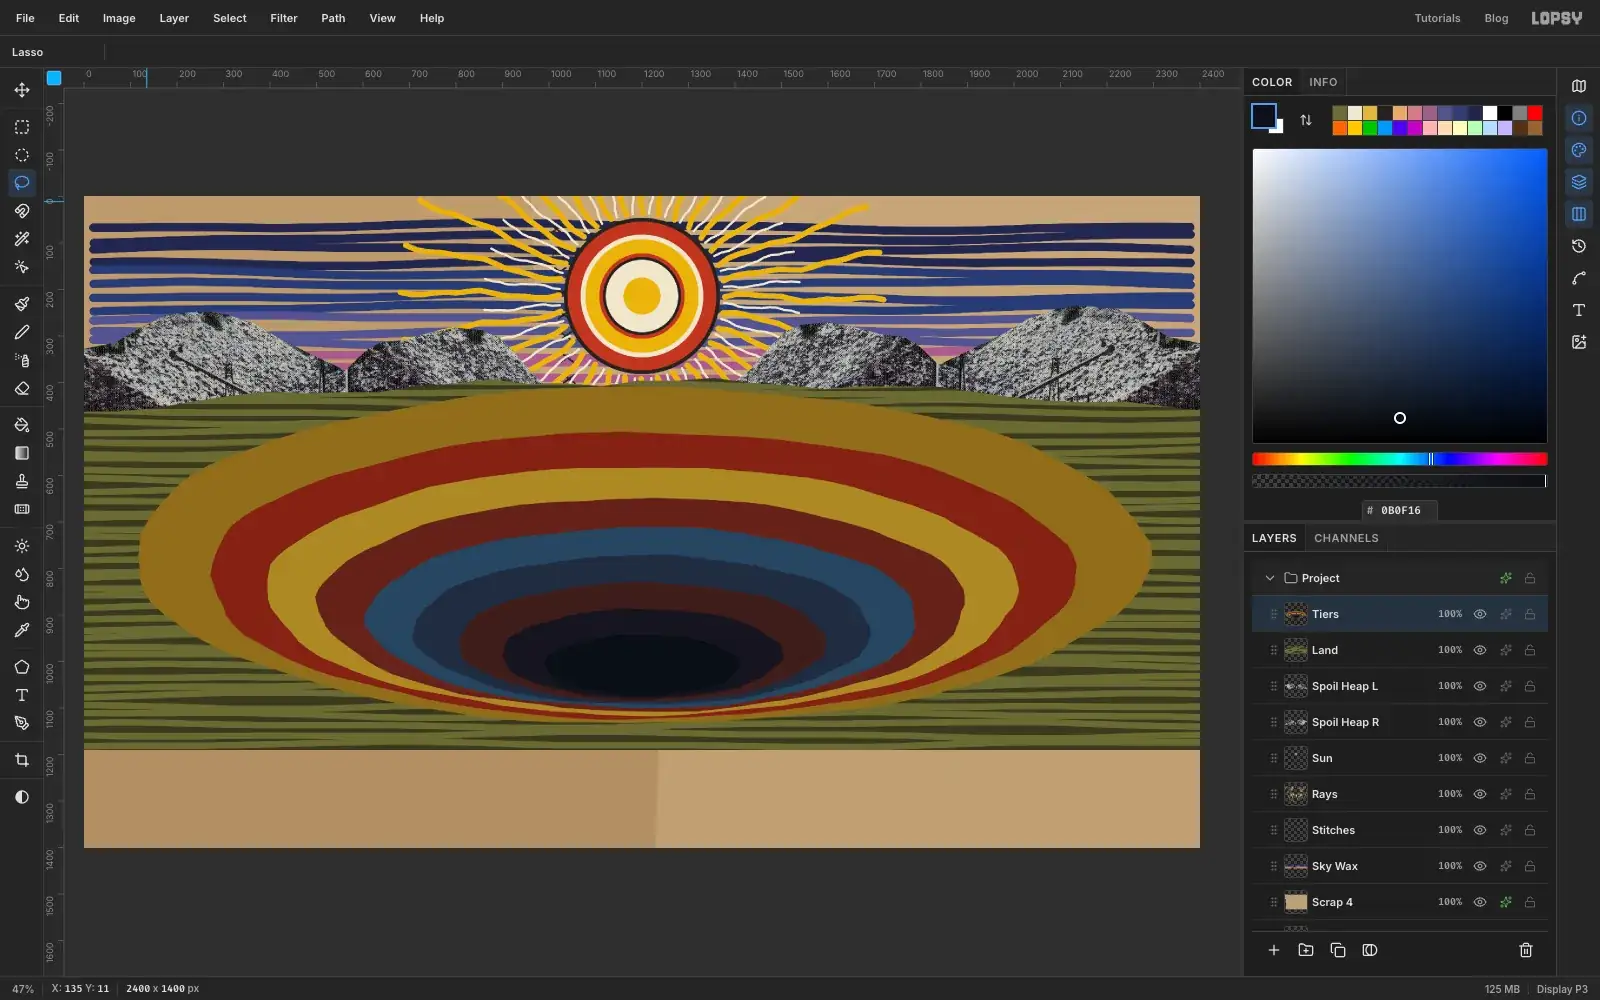
Add a layer called Tiers. Here's the trick that makes it read as a pit: each oval is smaller than the last, but their centres slide down. The rings stay wide at the far side of the quarry and bunch up at the near side.
For each oval, biggest first, set the foreground, draw it freehand with the Lasso, choose Edit → Fill, and press Cmd+D. The numbers are the oval's left and right edges, then its top and bottom:
- 1, : x 110–2290, y 410–1134
- 2, : x 270–2130, y 507–1123
- 3, : x 392–2008, y 581–1115
- 4, : x 504–1896, y 648–1107
- 5, : x 608–1792, y 711–1100
- 6, : x 709–1691, y 772–1093
- 7, : x 805–1595, y 830–1087
- 8, : x 899–1501, y 887–1080
- 9, : x 990–1410, y 942–1074
Don't try for perfect ovals. A slightly lumpy edge is much more convincing here.
-
Wax the first two bands
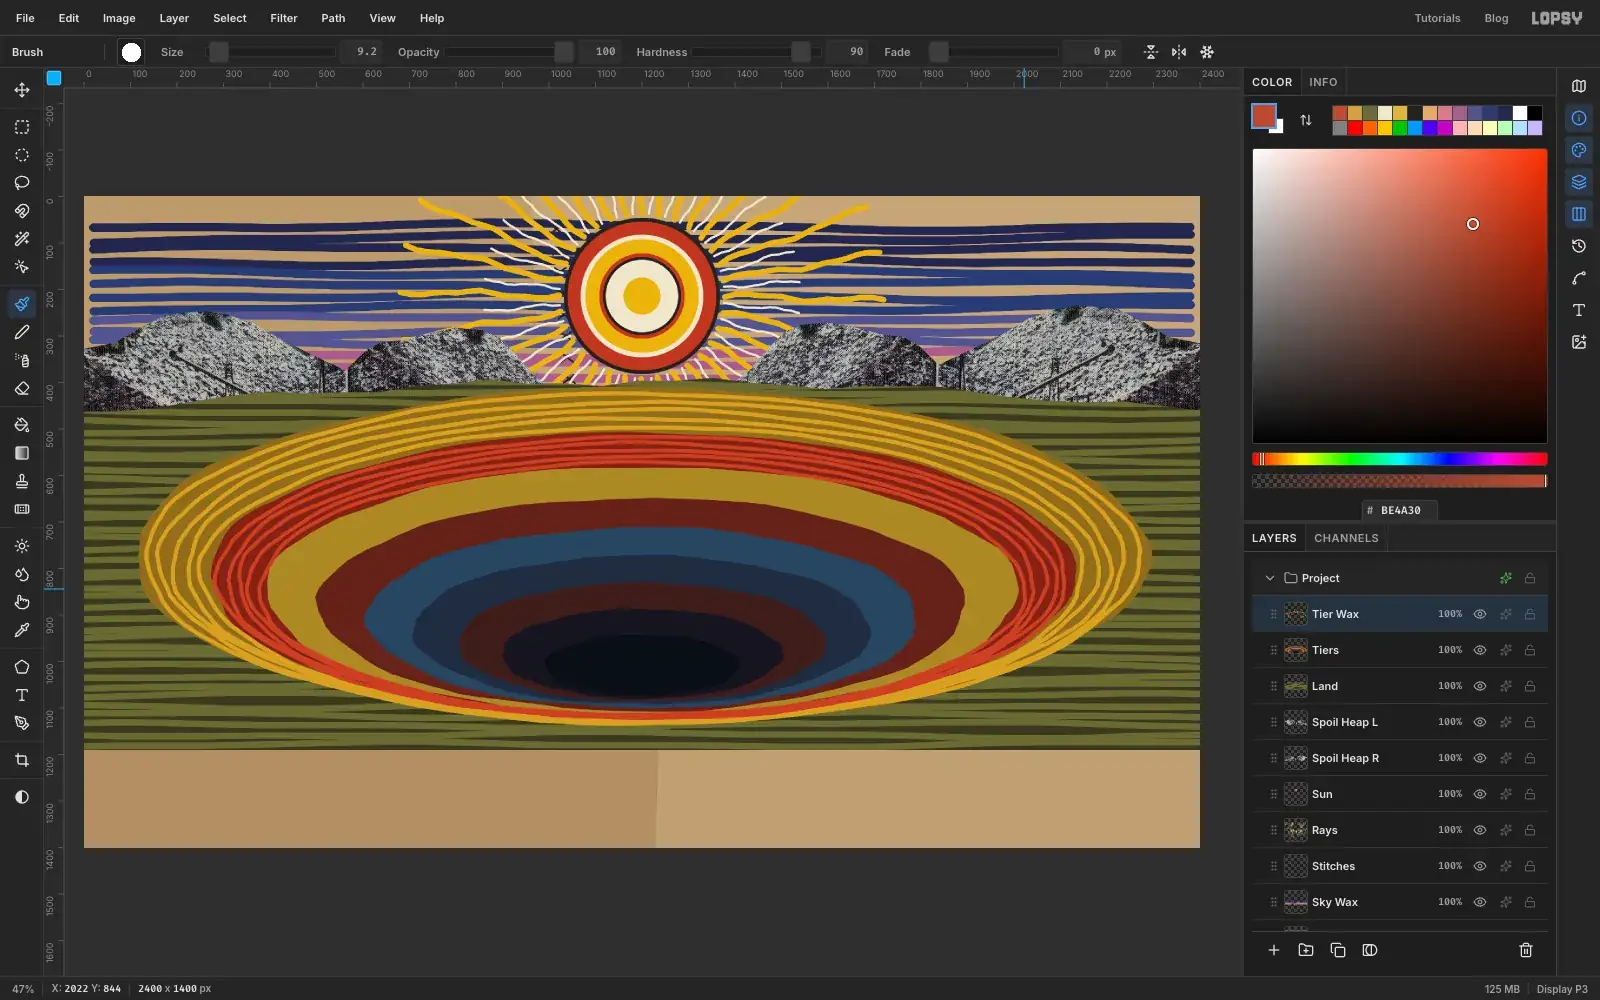
This is where Ramírez comes in. A band is the ring of colour between one oval and the next. Each one gets filled with loops of crayon that follow its curve.
Add a layer called Tier Wax and pick up the crayon. For band 1, set the Size to 10 and the foreground to . Draw five complete loops around the quarry, spaced evenly across the band, each in one long movement. Because the ovals bunch at the bottom, your loops will crowd together there too.
For band 2, set the Size to 9 and the foreground to and do the same.
-
Wax the rest of the bands
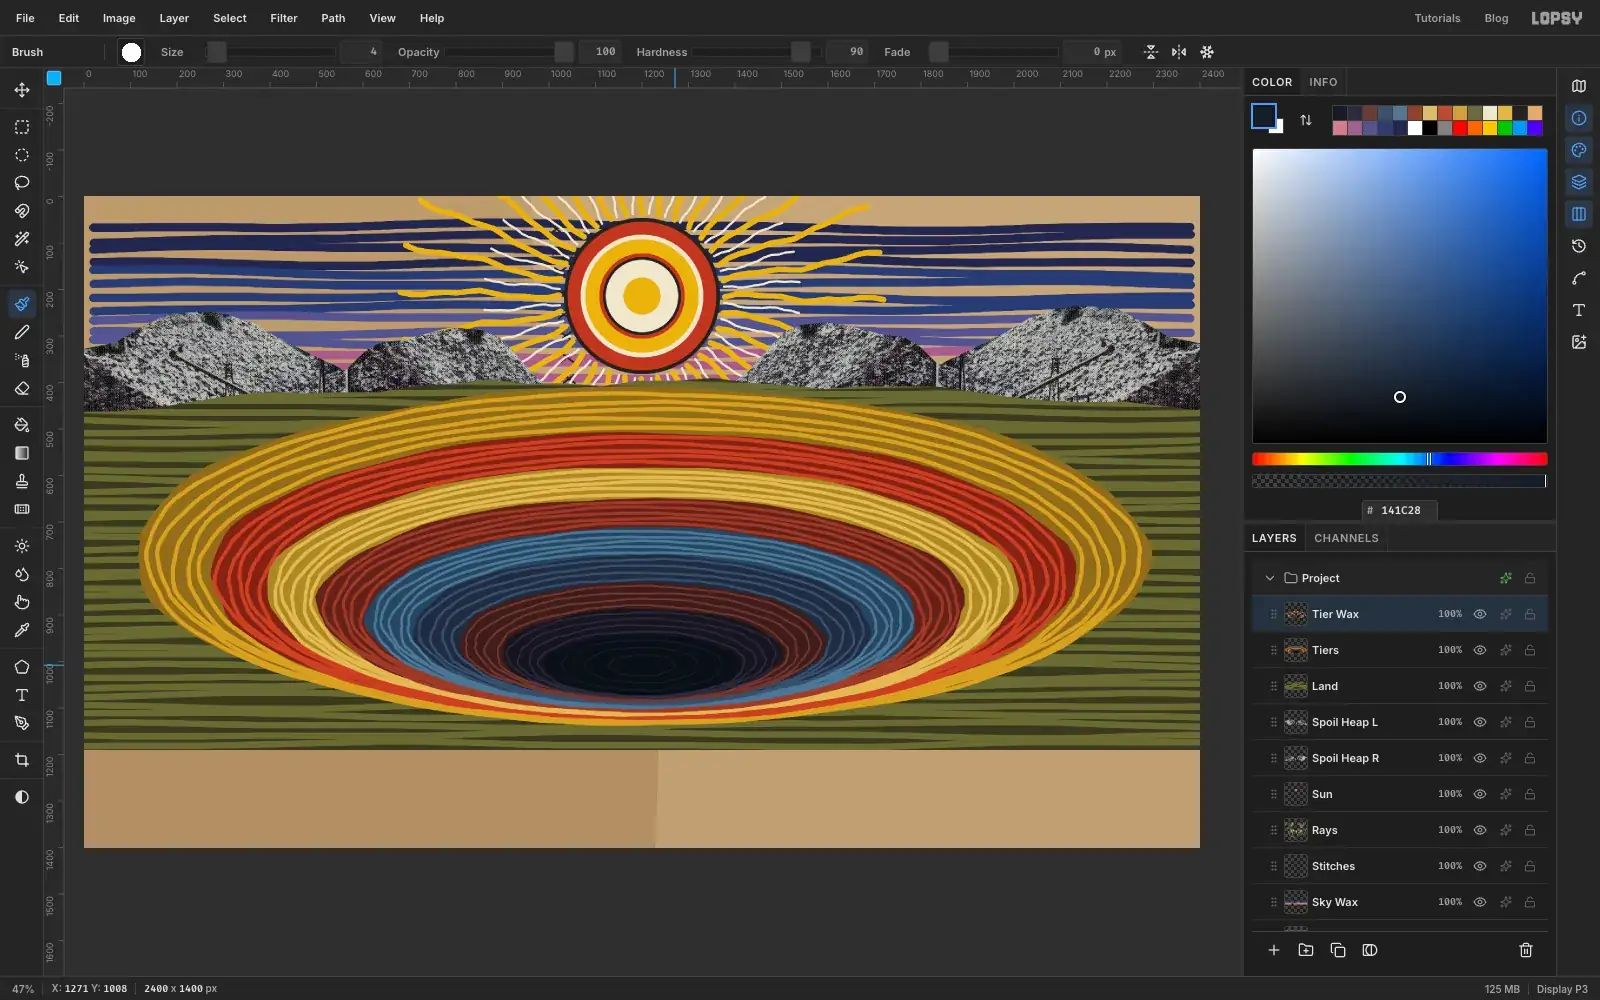
Carry on down the quarry, dropping the Size by about 1 each time:
- band 3: , Size 8, five loops
- band 4: , Size 8, five loops
- band 5: , Size 7, five loops
- band 6: , Size 6, four loops
- band 7: , Size 5, four loops
- band 8: , Size 4, four loops
Finish with three small loops of at Size 4 in the pool at the bottom.
-
Draw the lips of the rings and the courses of stone
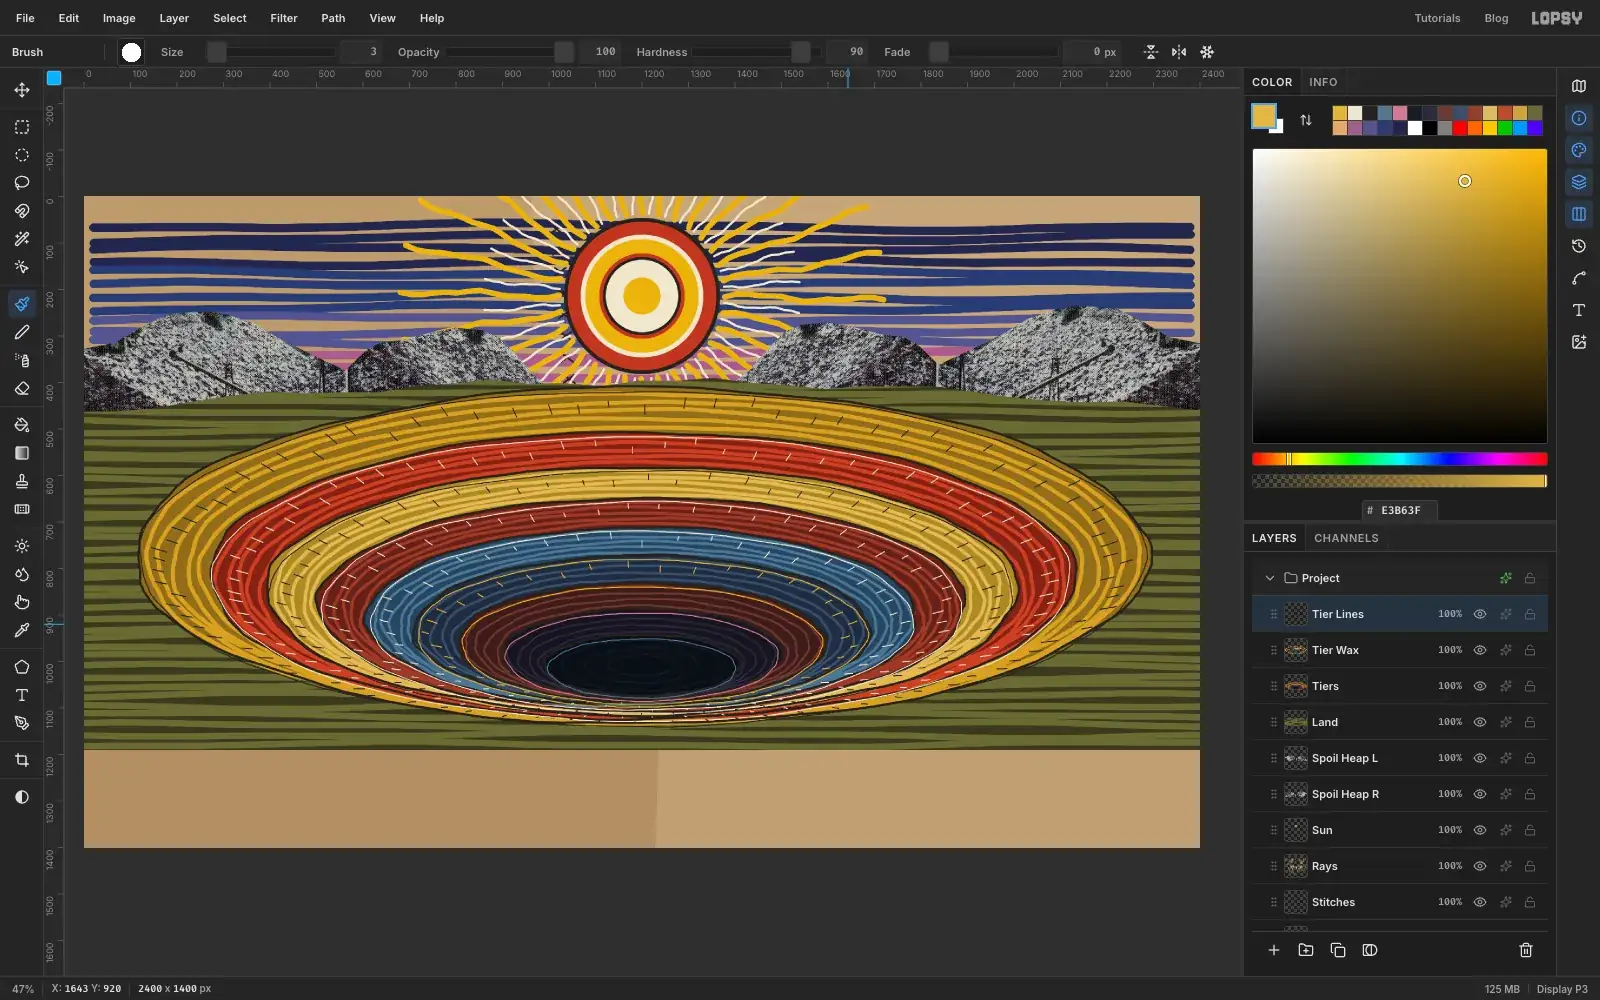
Add a layer called Tier Lines. For every oval, trace its edge in crayon at Size 6 in . Then draw a second, thinner line at Size 3, about 8 px inside it, in the colour that stands out on that band:
- ovals 1 and 3:
- ovals 2, 4 and 5:
- ovals 6 and 7:
- oval 8:
- oval 9:
Now add the courses of stone. At Size 3, draw short ticks across bands 1 to 6, each pointing from the outer edge of its band towards the inner edge and covering about a quarter of the band's width. Use graphite on the yellow bands, mustard on band 6 and cream on the others. Space them all the way round: about 90 on band 1, thinning to about 40 on band 6. This is meant to be tedious. That's the obsessive part of the picture.
-
Run three ribbons over the far wall
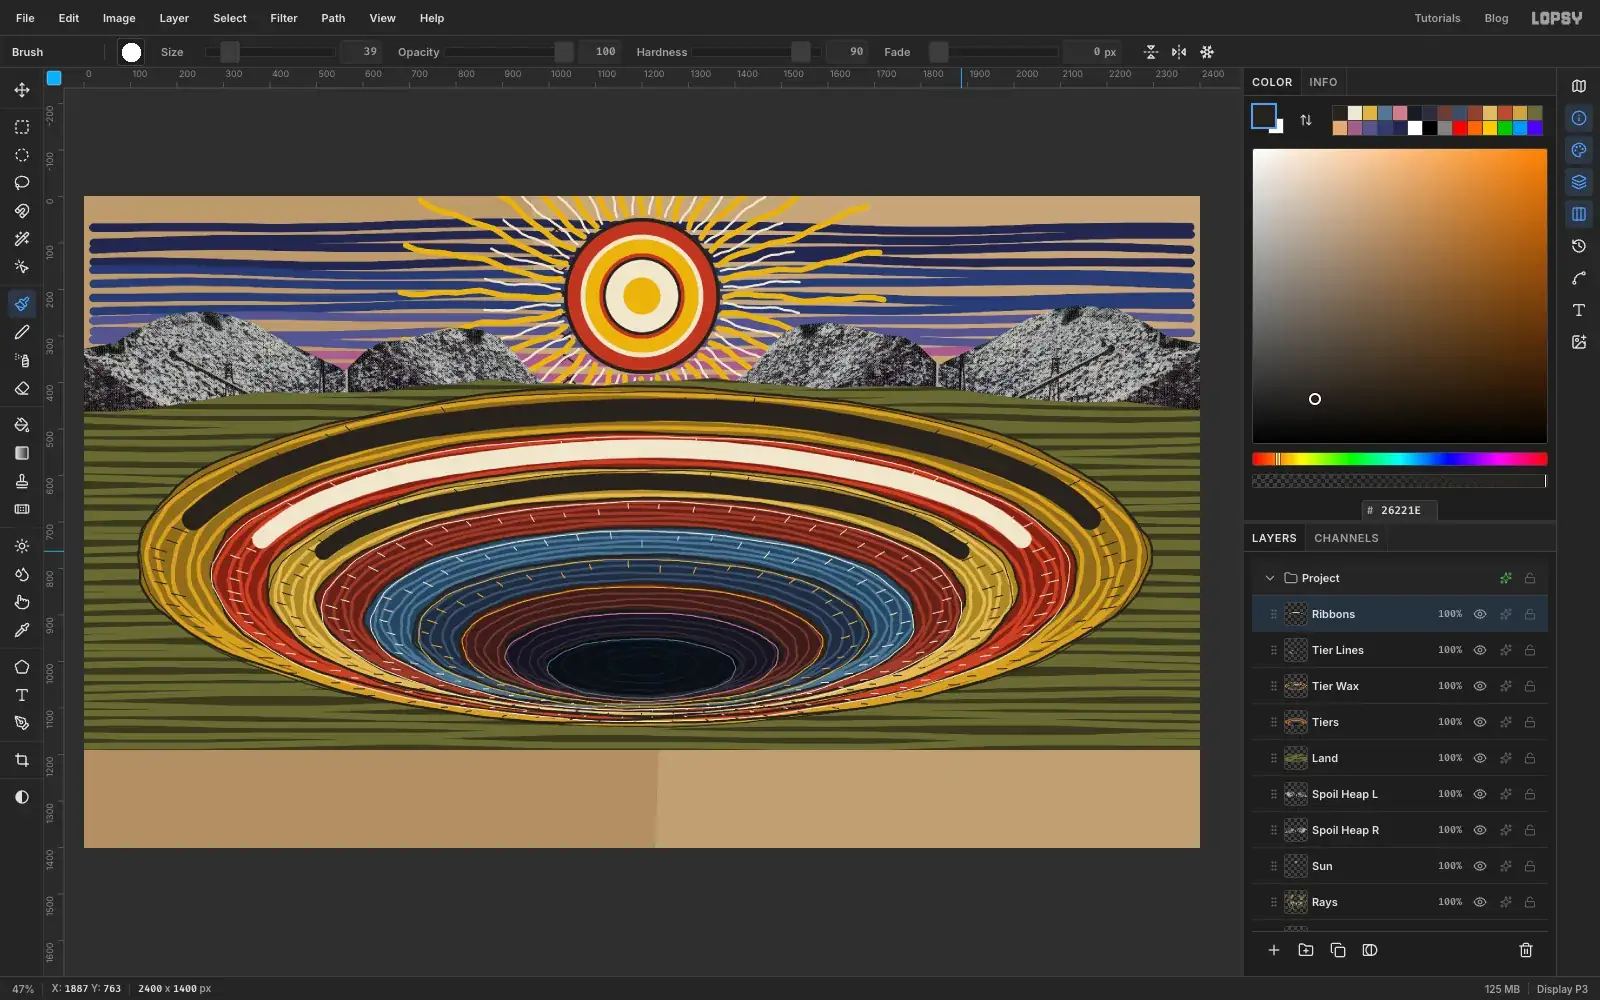
Add a layer called Ribbons. Draw one thick stroke along the top half of each of the first three bands, going through the middle of the band, in one movement:
- ribbon 1, Size 51, : band 1, from about x 235, y 694, up and over to x 2165, y 694
- ribbon 2, Size 42, : band 2, from about x 381, y 735, over to x 2019, y 735
- ribbon 3, Size 39, : band 3, from about x 513, y 761, over to x 1887, y 761
-
Preach along the ribbons with text on a path
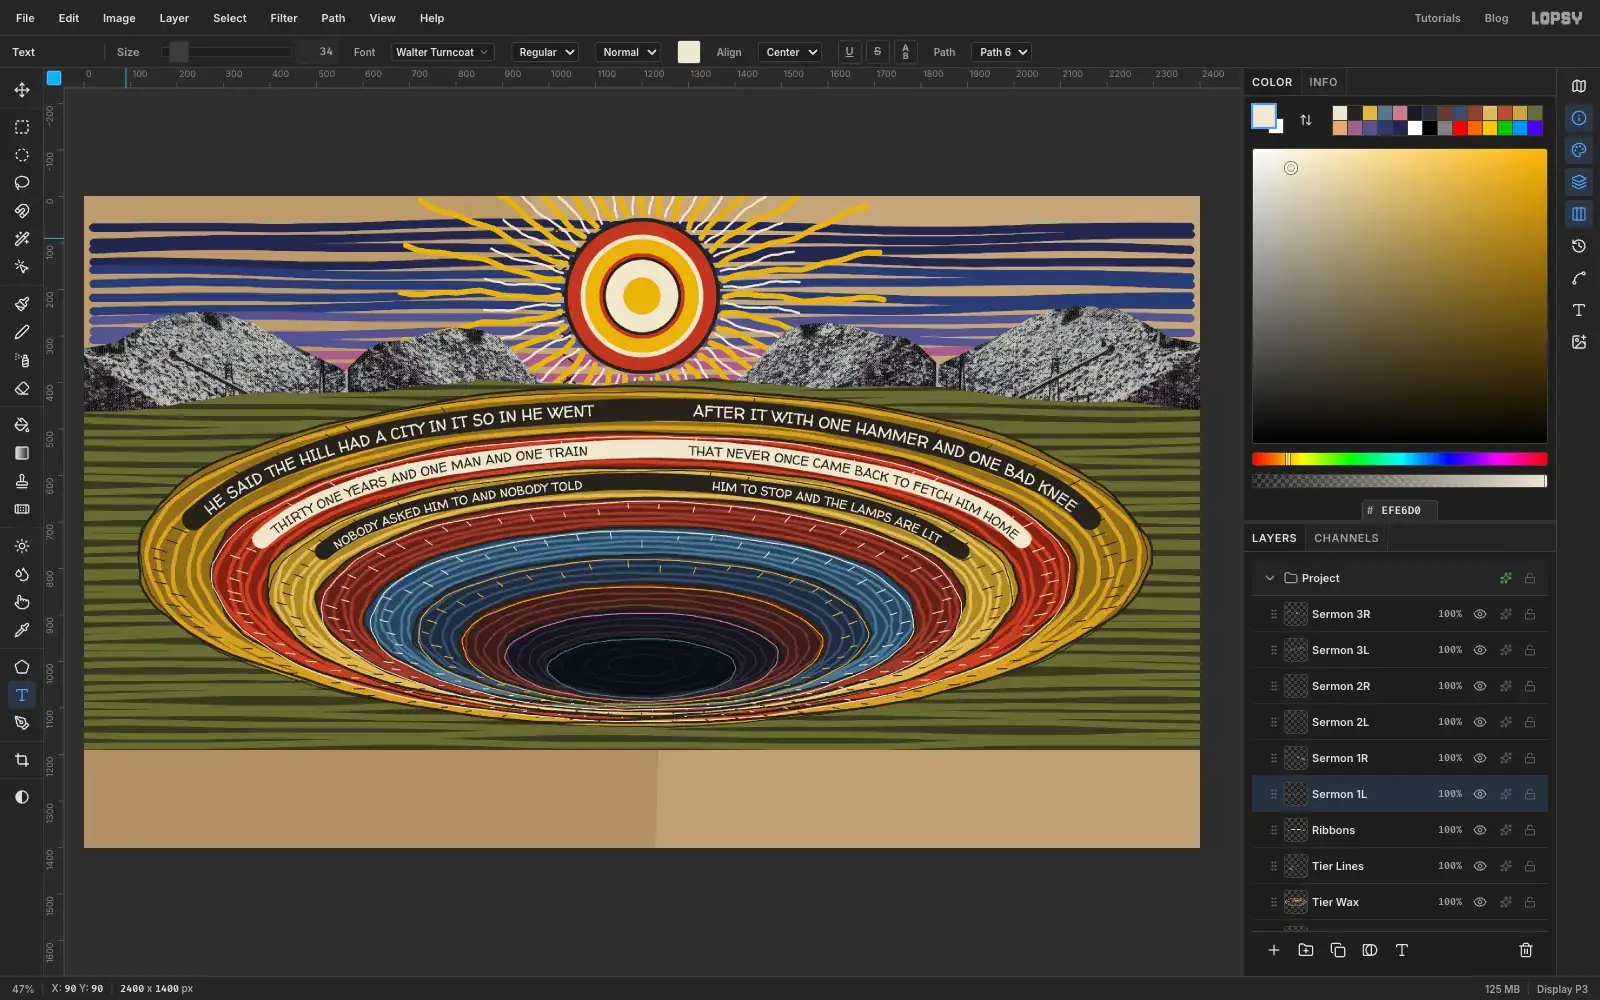
Each ribbon gets two runs of text, one each side of the middle, because a tower is going to stand in the gap. Every run needs its own path.
Start with the right-hand run of ribbon 3. Click the Ribbons row and press P for the Pen. Text starts at a path's first anchor, so always draw left to right. For a right-hand run, start at the gap beside the canvas centre and finish at the ribbon's end. For a left-hand run, start at the ribbon's left end and stop at the gap. Follow the ribbon about 11 px below its centre so the capitals sit in the middle of it. Press and drag at each of four anchors, pulling each handle along the curve. Click the ✓ in the options bar to commit the path. Don't press Enter, because that would stroke it with the foreground colour.
Click Ribbons again, press T for the Text tool, and set Font to Walter Turncoat, the Size, the text colour, and Align to Left. Click in the empty sky near the top left, type the run, and press Tab to commit. Rename the layer as shown below.
With the new text layer still active, choose the newest path in the Path dropdown in the options bar, then set Align to Center. The text jumps onto the curve. Click the Paths icon in the strip at the far right, then click the selected path's row to hide its overlay. Don't delete it, since the text depends on it.
Repeat for each run. The gap is measured from the canvas centre, x 1200:
- Sermon 3R, Size 26, , gap 112 px:
HIM TO STOP AND THE LAMPS ARE LIT - Sermon 3L, Size 26, , gap 112 px:
NOBODY ASKED HIM TO AND NOBODY TOLD - Sermon 2R, Size 28, , gap 96 px:
THAT NEVER ONCE CAME BACK TO FETCH HIM HOME - Sermon 2L, Size 28, , gap 96 px:
THIRTY ONE YEARS AND ONE MAN AND ONE TRAIN - Sermon 1R, Size 34, , gap 80 px:
AFTER IT WITH ONE HAMMER AND ONE BAD KNEE - Sermon 1L, Size 34, , gap 80 px:
HE SAID THE HILL HAD A CITY IN IT SO IN HE WENT
Text that's longer than its path gets cut off at the end, so if the last letters go missing, make the path longer or the text shorter.
- Sermon 3R, Size 26, , gap 112 px:
-
Scatter the lamps
Click the Sermon 1L row (the last one you made), then add a layer called Lamps. The rest of the sermon stays above the layers from here on, which is fine because nothing else overlaps it.
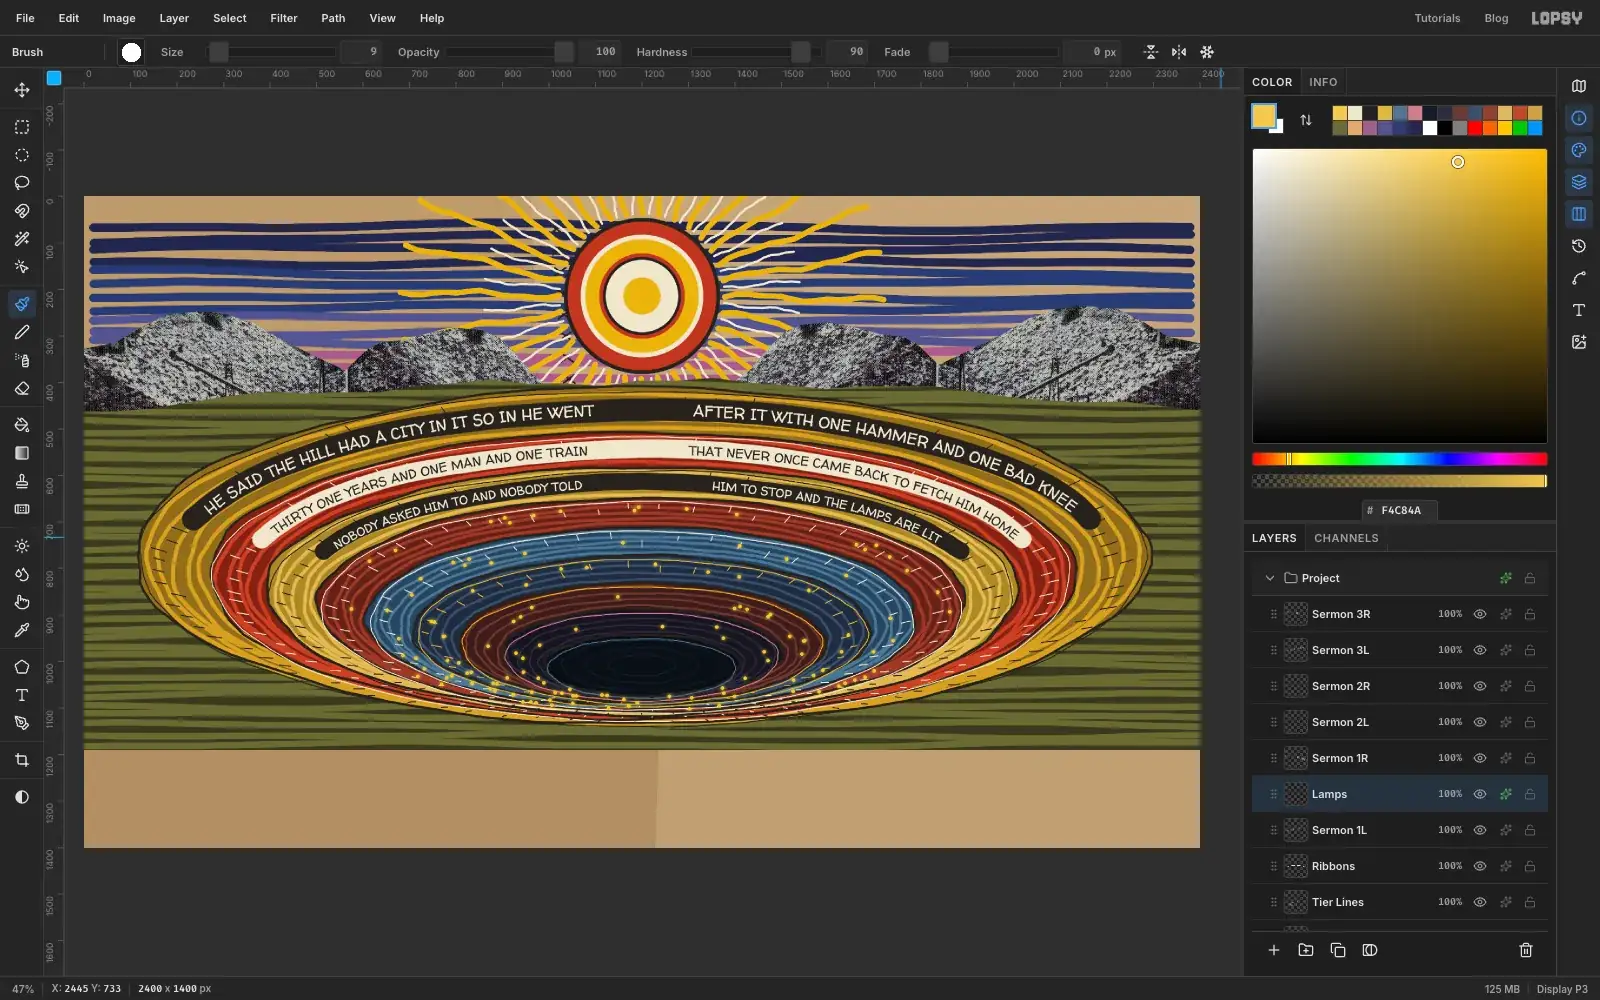
Pick up the crayon at Size 9 in and click, without dragging, to drop single dots across bands 4 to 8. Use about 34 on band 4 and fewer as you go down, around 120 in all. Let them cluster here and there: someone lives down there.
Open the row's effects, tick Outer Glow, and set Size to 12 and Opacity to 85. Close the drawer.
-
Stand derricks along the rim
Use the postcard as your reference: quarries are ringed by tall masts with long booms, held up by wires.
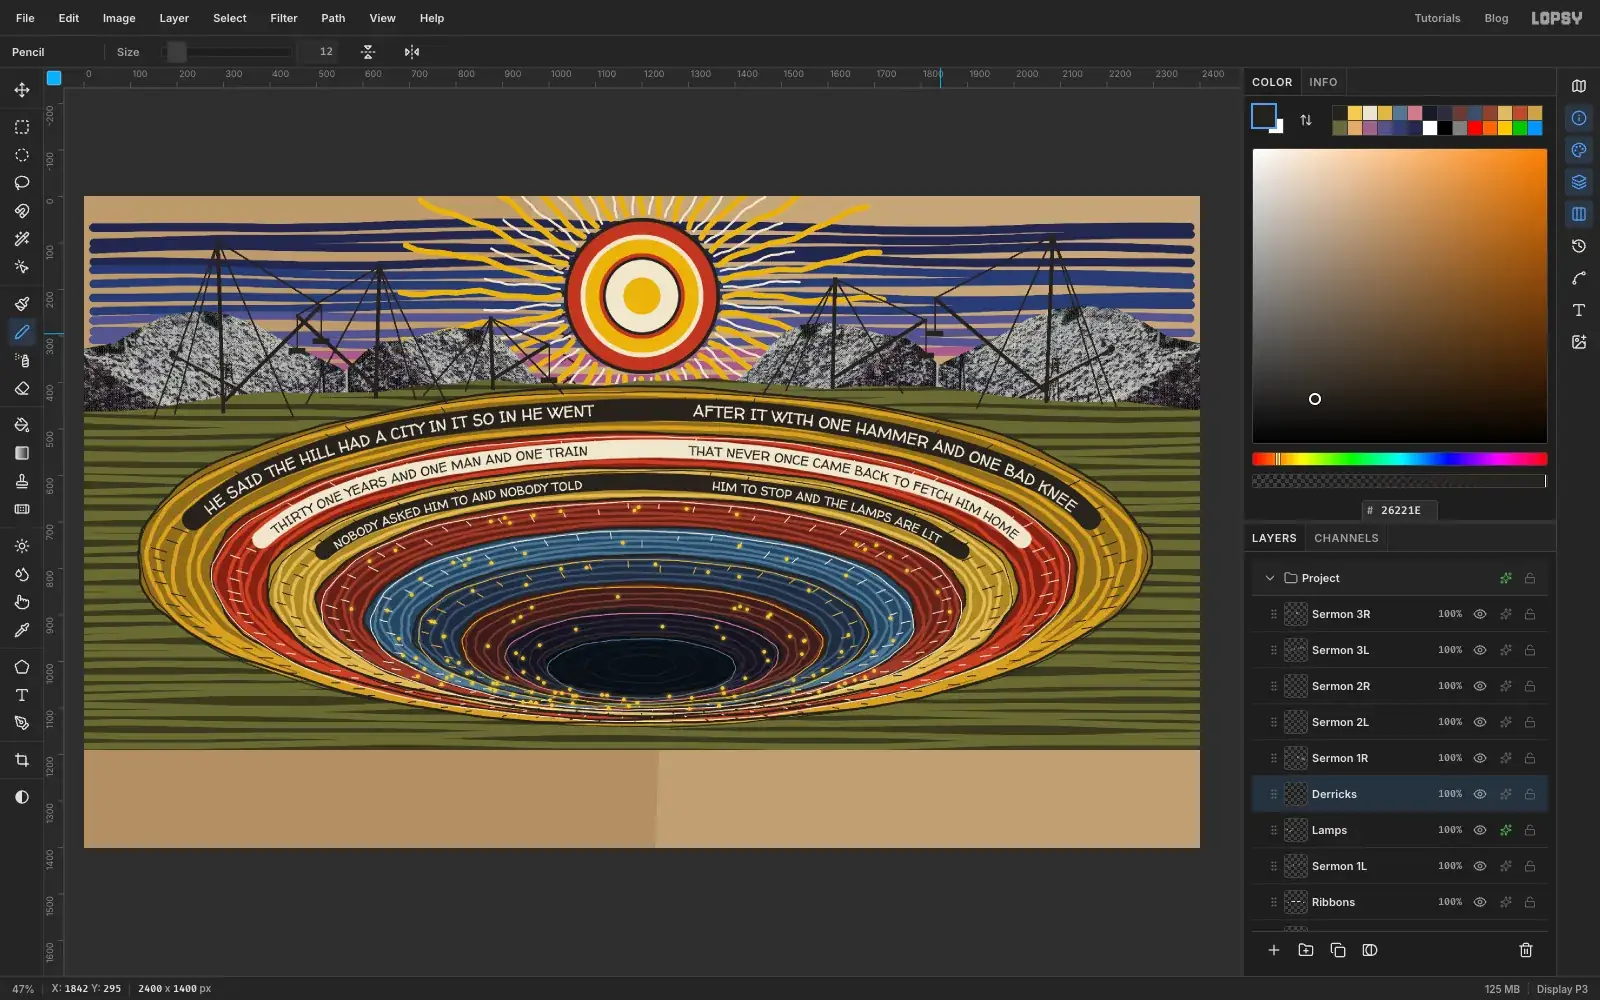
Add a layer called Derricks. Press N for the Pencil, foreground . You'll draw each line by clicking one end, then holding Shift and clicking the other.
Put five derricks along the horizon, with their feet at about x 300, 630, 880, 1610 and 2070. Vary the height: the tops reach about y 100, 150, 260, 180 and 85. For each one:
- Mast, Size 8: from the foot straight up, with a slight lean.
- Boom, Size 6: from just above the foot, out to one side at a steep angle, ending about 60% of the way up the mast. Point booms in different directions.
- Wires, Size 3: from the mast top to the boom tip, then straight down 70 px from the boom tip. Add three more wires from the mast top to the ground, spread out about 150 px each side.
- Load, Size 12: a short horizontal bar hanging on the end of that dropped wire.
-
Bore a tunnel and lay the rail
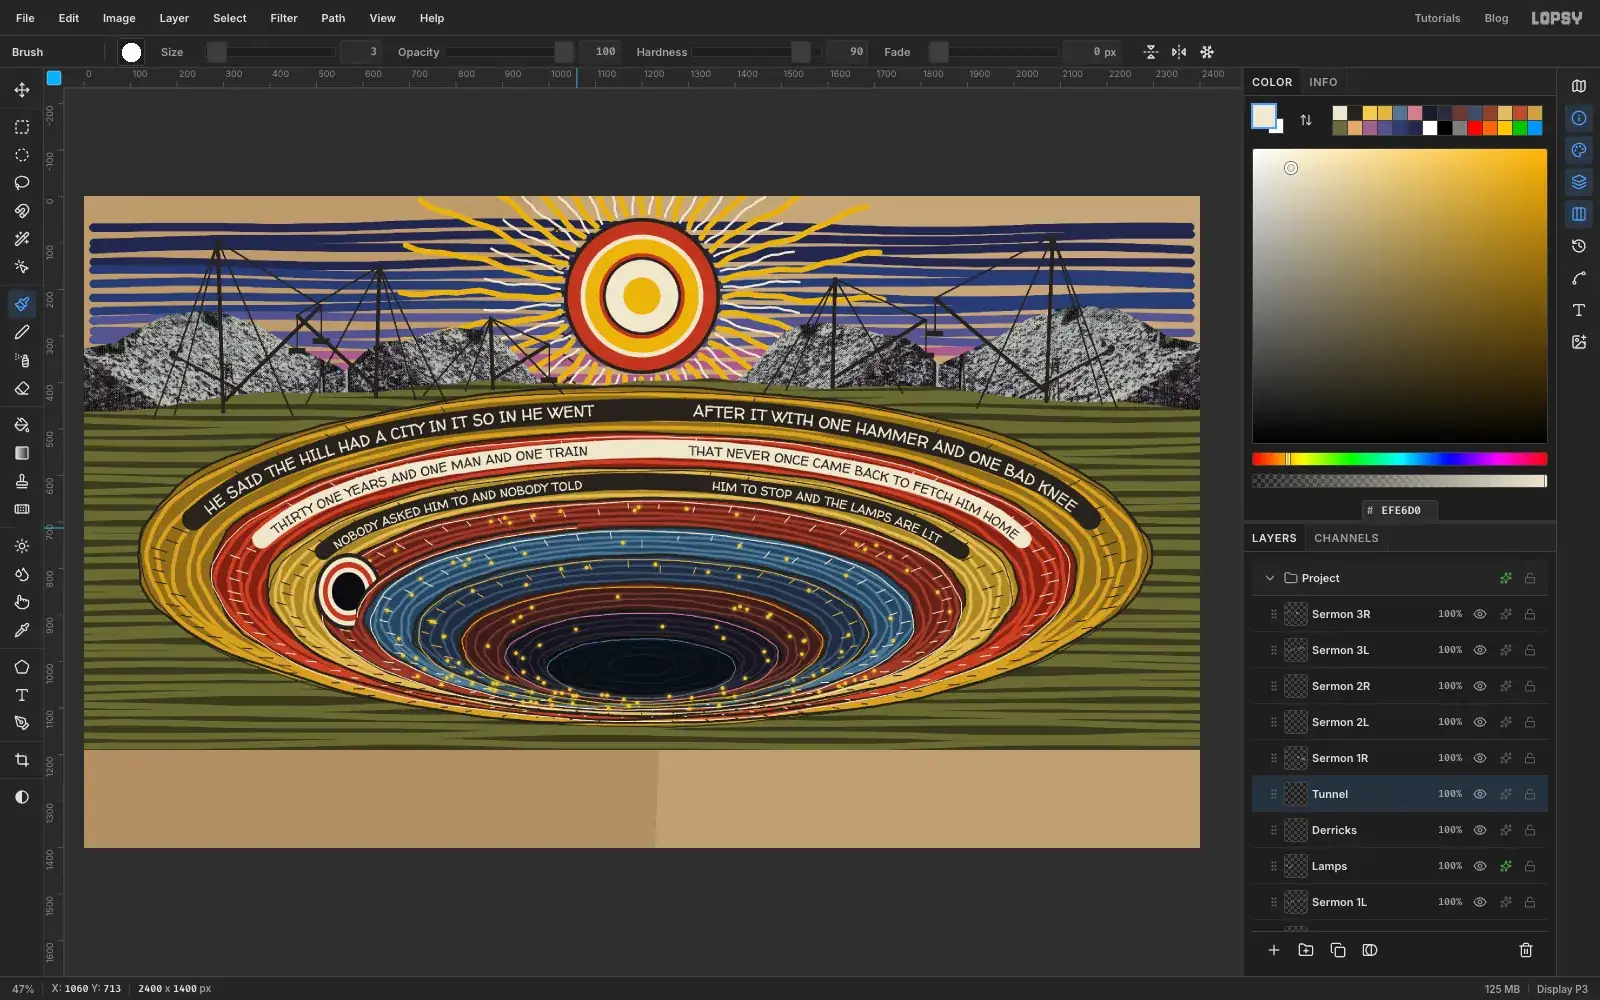
Add a layer called Tunnel. Centre the tunnel on band 4 at about x 569, y 850. With the Elliptical Marquee (press Cmd+D first each time), draw and fill five slightly tall ovals, biggest first. These are half-widths; the half-height is about 15% more:
- 72 px:
- 64 px:
- 55 px:
- 45 px:
- 36 px:
With the Lasso, select the part of the tunnel that falls below the curve of the band, then press Delete and Cmd+D. Following the curve means it won't leave a straight cut across the rings.
Now draw the rail in crayon, starting at the tunnel and running up the band to about x 950, y 690. Use Size 7 in , then repeat the same line 9 px lower at Size 3 in .
-
Build one wagon
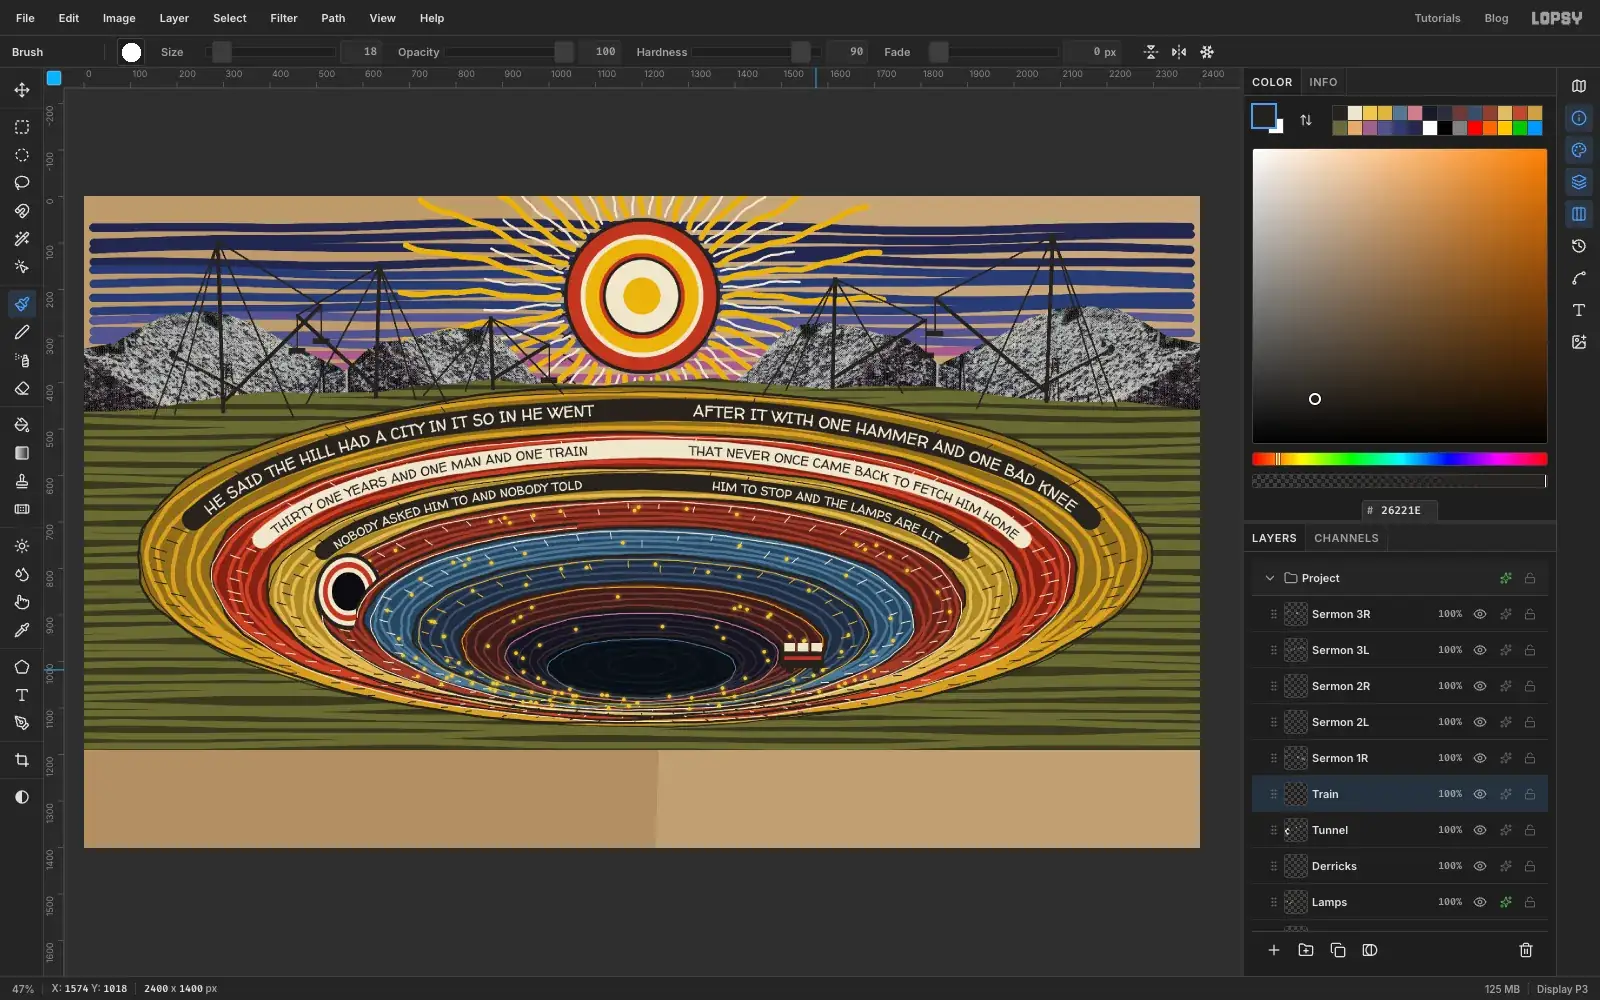
Add a layer called Train and build a wagon somewhere out of the way, down near the pool. You can use the marquee's exact-size dialog for each piece:
- body, : From 1500, 980 to 1592, 1014
- three blocks of stone, : 23 px wide and 18 px tall, sitting on top of the body
- a stripe along the body, : From 1506, 989 to 1586, 997
Press Cmd+D, pick up the crayon at Size 18 in , and click two wheels under the body, at about x 1518 and x 1574, y 1018.
-
Copy the wagon and rotate each one onto the rail
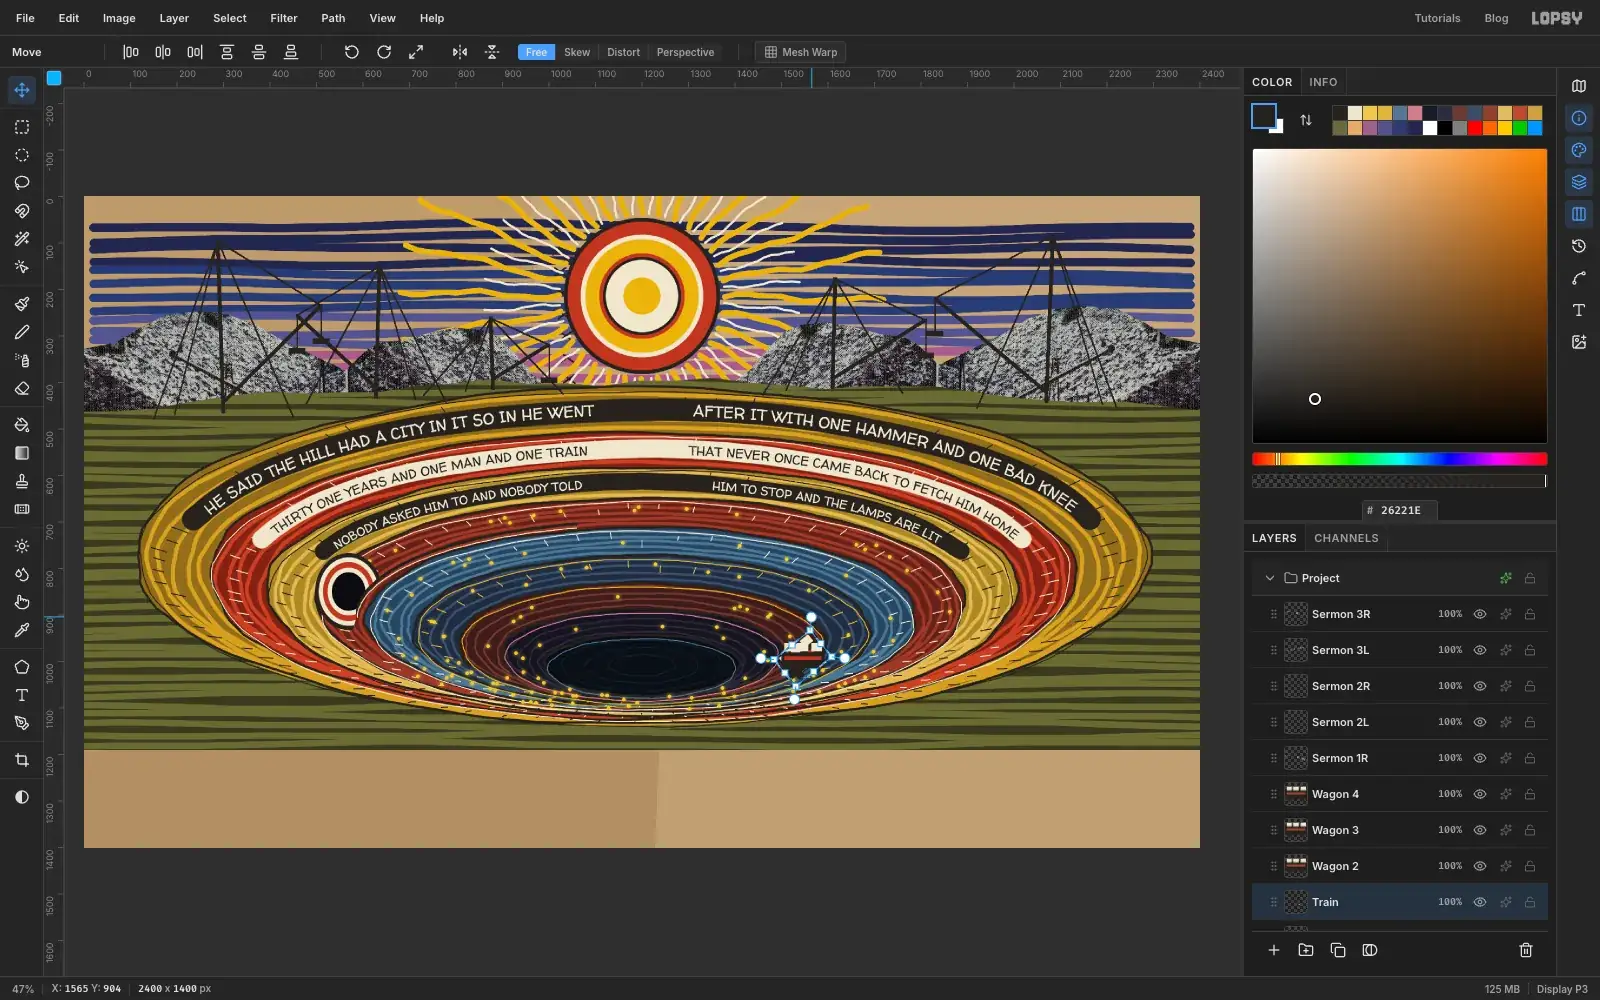
Press M for the Rectangular Marquee and drag around the whole wagon, wheels included. Choose Edit → Copy, then Edit → Paste three times. Each paste lands on its own new layer, exactly on top of the original. Rename them Wagon 2, Wagon 3 and Wagon 4. Press Cmd+D.
For each wagon, starting with Train:
- Click its row.
- Press M and drag a marquee around the wagon.
- Press V for the Move tool and drag the small circle just outside a corner to tilt the wagon until it matches the rail where it's going.
- Press Cmd+D to commit the rotation.
- Drag the wagon onto the rail.
Rotate before you move. Space the wagons evenly up the rail, each one a little more level than the last as the curve flattens towards the top.
-
Add the engine and merge the train
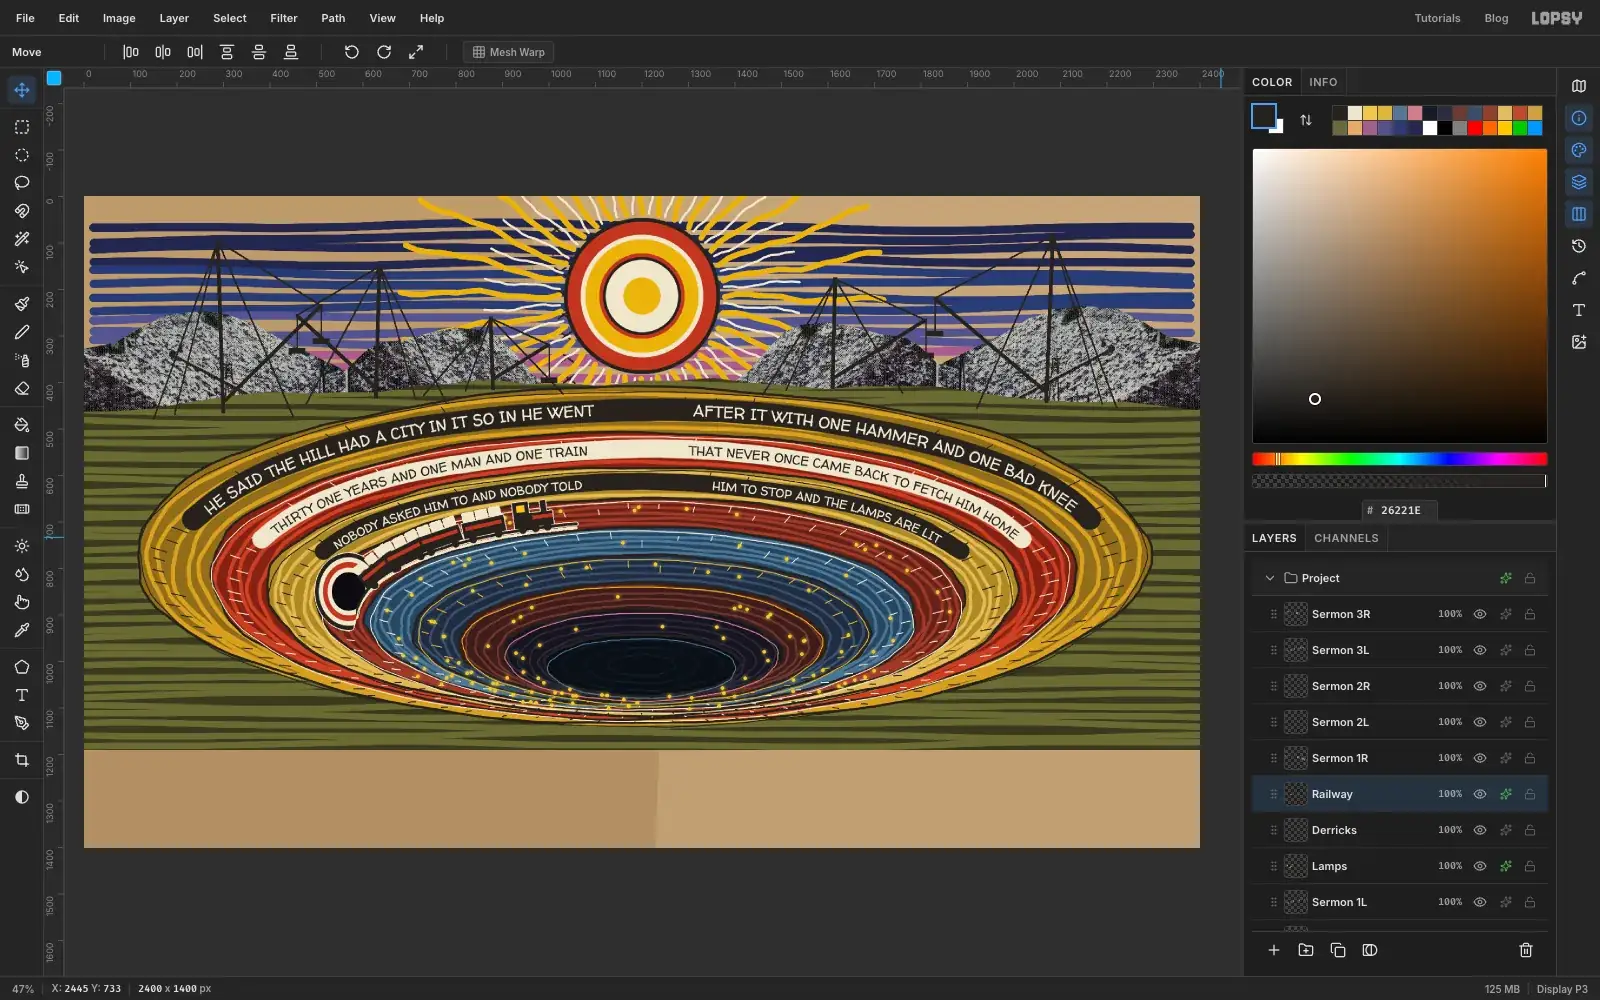
With Wagon 4 active, add a layer called Engine. Near the pool, build it from filled marquee rectangles:
- boiler, , 84 × 30 px
- cab, , 34 × 28 px, on the left end of the boiler
- funnel, , 12 × 26 px, towards the right end of the boiler
- cab window, , 18 × 15 px
- stripe, , 44 × 8 px along the boiler
Add three wheels with the crayon at Size 18 in . Marquee the engine, rotate it, press Cmd+D and drag it to the head of the train, as you did with the wagons.
Choose Layer → Merge Down four times, until the engine and all the wagons are one layer, and rename it Train. Merge Down once more to drop it onto the tunnel, and rename the result Railway. Open its effects and tick Stroke, with Width 2 and the colour . That thin line stops the black engine vanishing against the dark bands.
-
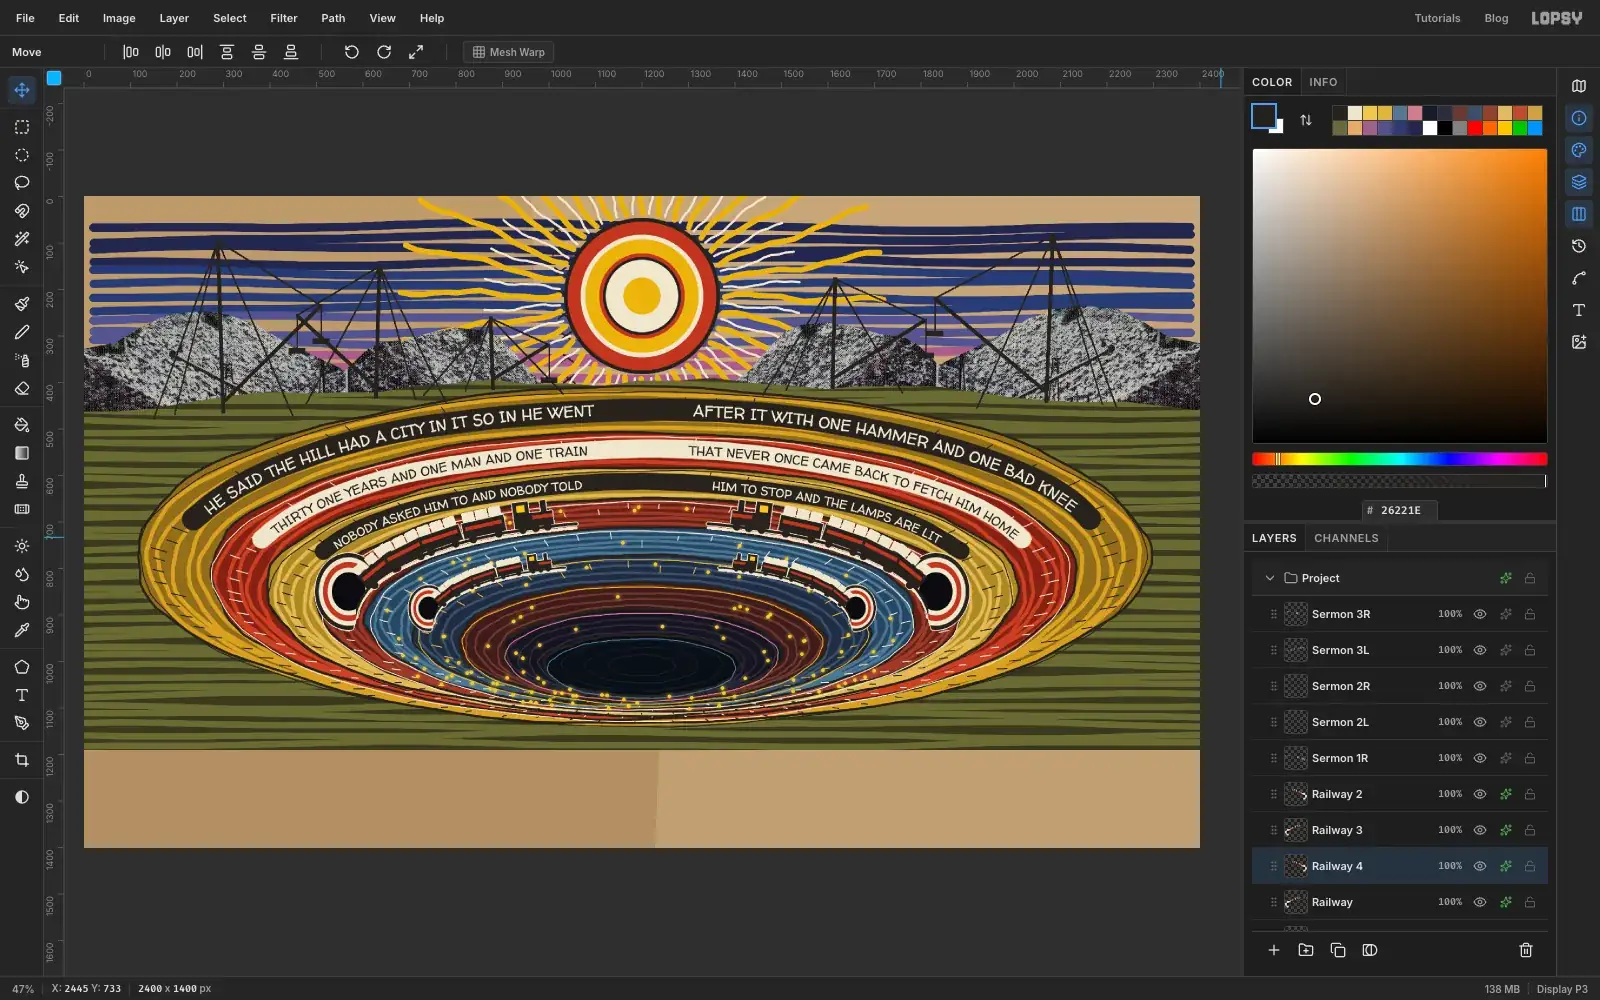
Spread railways around the quarry
One train isn't obsessive enough. Marquee the whole Railway layer, leaving a little room around it, and choose Edit → Copy. For each copy below, click the Railway row, choose Edit → Paste, rename it, then:
- Railway 2: choose Image → Flip Horizontal, press Cmd+D, and press V to drag it to the mirrored spot on the right of band 4. Its tunnel should end up as a mirror image of the first one.
- Railway 3: press Cmd+D, marquee it, press V, hold Cmd and drag its bottom-right corner handle inward until it's about 60% of the original size, judging against the first railway. Press Cmd+D, then drag it onto the left of band 6, around 870, 850.
- Railway 4: flip it, then scale it the same way, and drag it onto the right of band 6, around 1530, 850.
Give each copy the same cream Stroke at Width 2, since pasted layers don't bring their effects with them.
-
Draw the reflection and an arch tile
Click Railway 4 and add a layer called Reflection. With the crayon at Size 6 in , draw nine short wobbly lines across the pool, starting at about y 1016, 6 px apart. Make the first about 340 px wide and shorten each one by about 28 px.
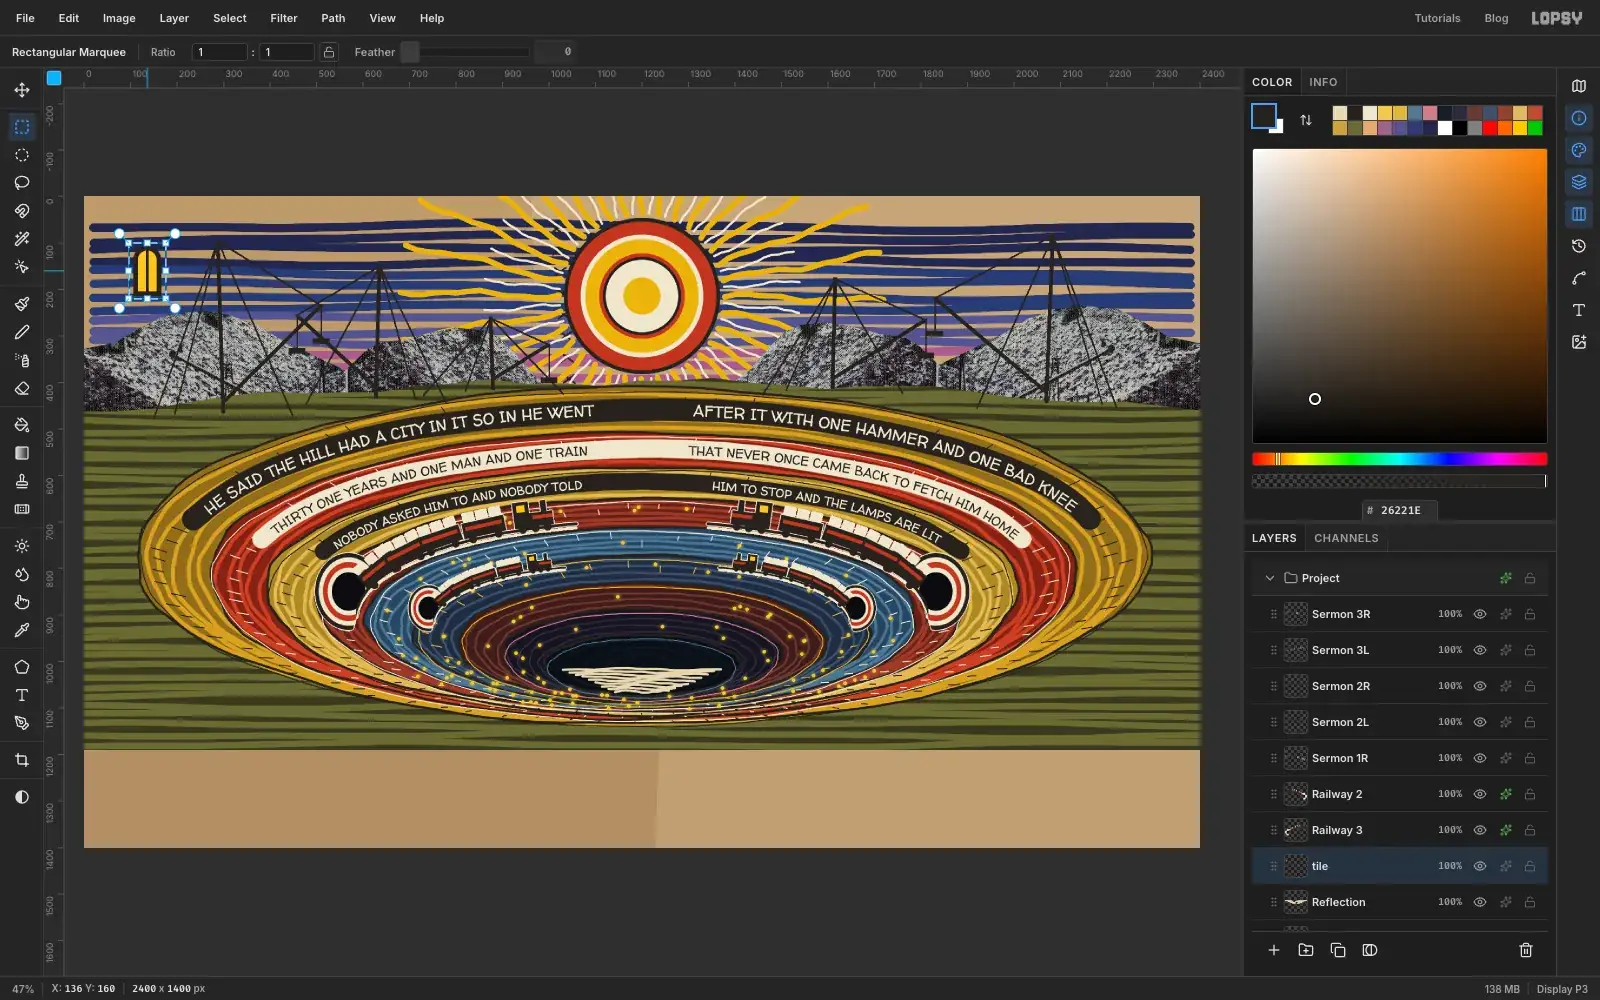
Next comes a window for the tower. Add a temporary layer called tile, and build one arched window near the top left with the exact-size dialogs, pressing Cmd+D before each one:
- frame, : an ellipse From 106, 106 to 166, 166, and a rectangle From 106, 136 to 166, 214
- pane, : an ellipse From 116, 116 to 156, 156, and a rectangle From 116, 136 to 156, 204
- glazing bar, : a rectangle From 133, 116 to 139, 204
Now select the tile with its margin: a rectangle From 96, 100 to 176, 220. Choose Edit → Define Pattern, press Cmd+D, and click Delete Layer. The pattern stays available after the layer is gone.
-
Stack the tower floors
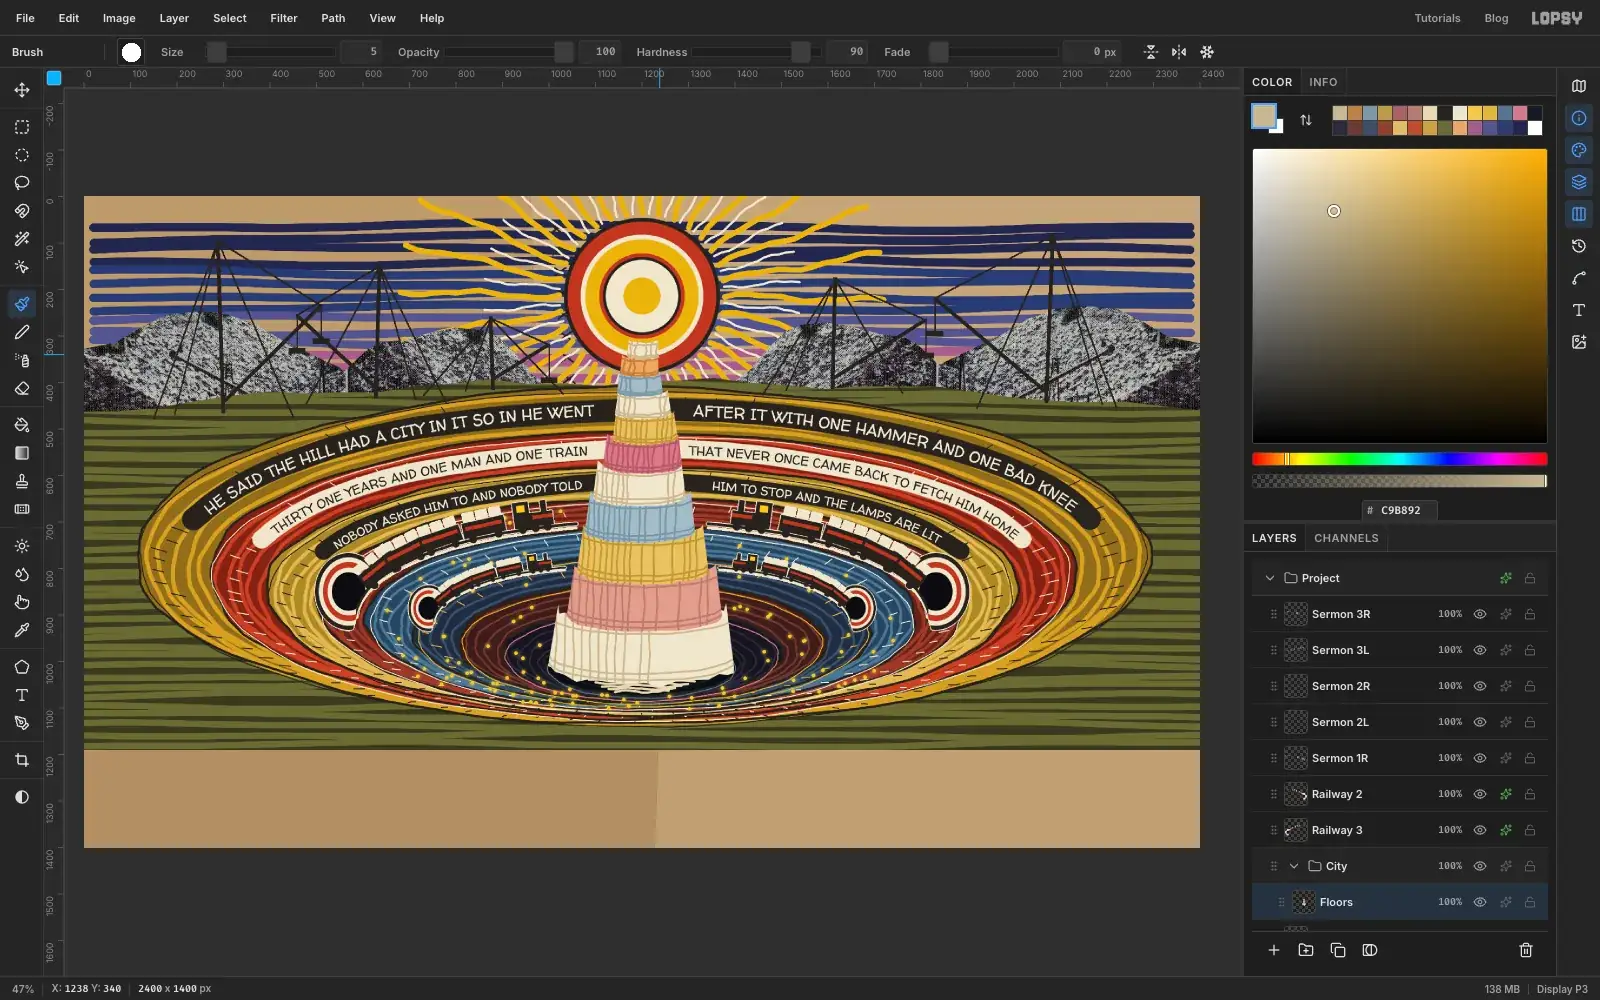
Click the Reflection row and click New Group. Rename it City. Add a layer inside it called Floors.
The tower is eleven drum-shaped floors, built from the bottom. Centre the tower on x 1200. Floor 1 is about 400 px wide and 128 px tall, with its bottom edge bulging down to about y 1050. Each floor above is about 84% as wide and 88% as tall, and overlaps the one below by a little. Lean them very slightly left and right as you go up, because nobody measured this tower. The top floor ends near y 310.
For each floor, set the foreground to the first colour, lasso the shape with a curved top and bottom edge (make floor 1's bottom edge rough), and choose Edit → Fill. Keep the selection, pick up the crayon at Size 5, and switch to the second colour. Hatch down the left side of the floor with short vertical strokes, thinning out towards the right, then add three lines following the floor's curve. The selection keeps everything inside. Press Cmd+D before you start the next floor.
Colours from the bottom up, fill then hatch:
- floors 1, 5 and 8: ,
- floor 2: ,
- floors 3 and 7: ,
- floors 4 and 9: ,
- floor 6: ,
- floor 10: ,
- floor 11: ,
-
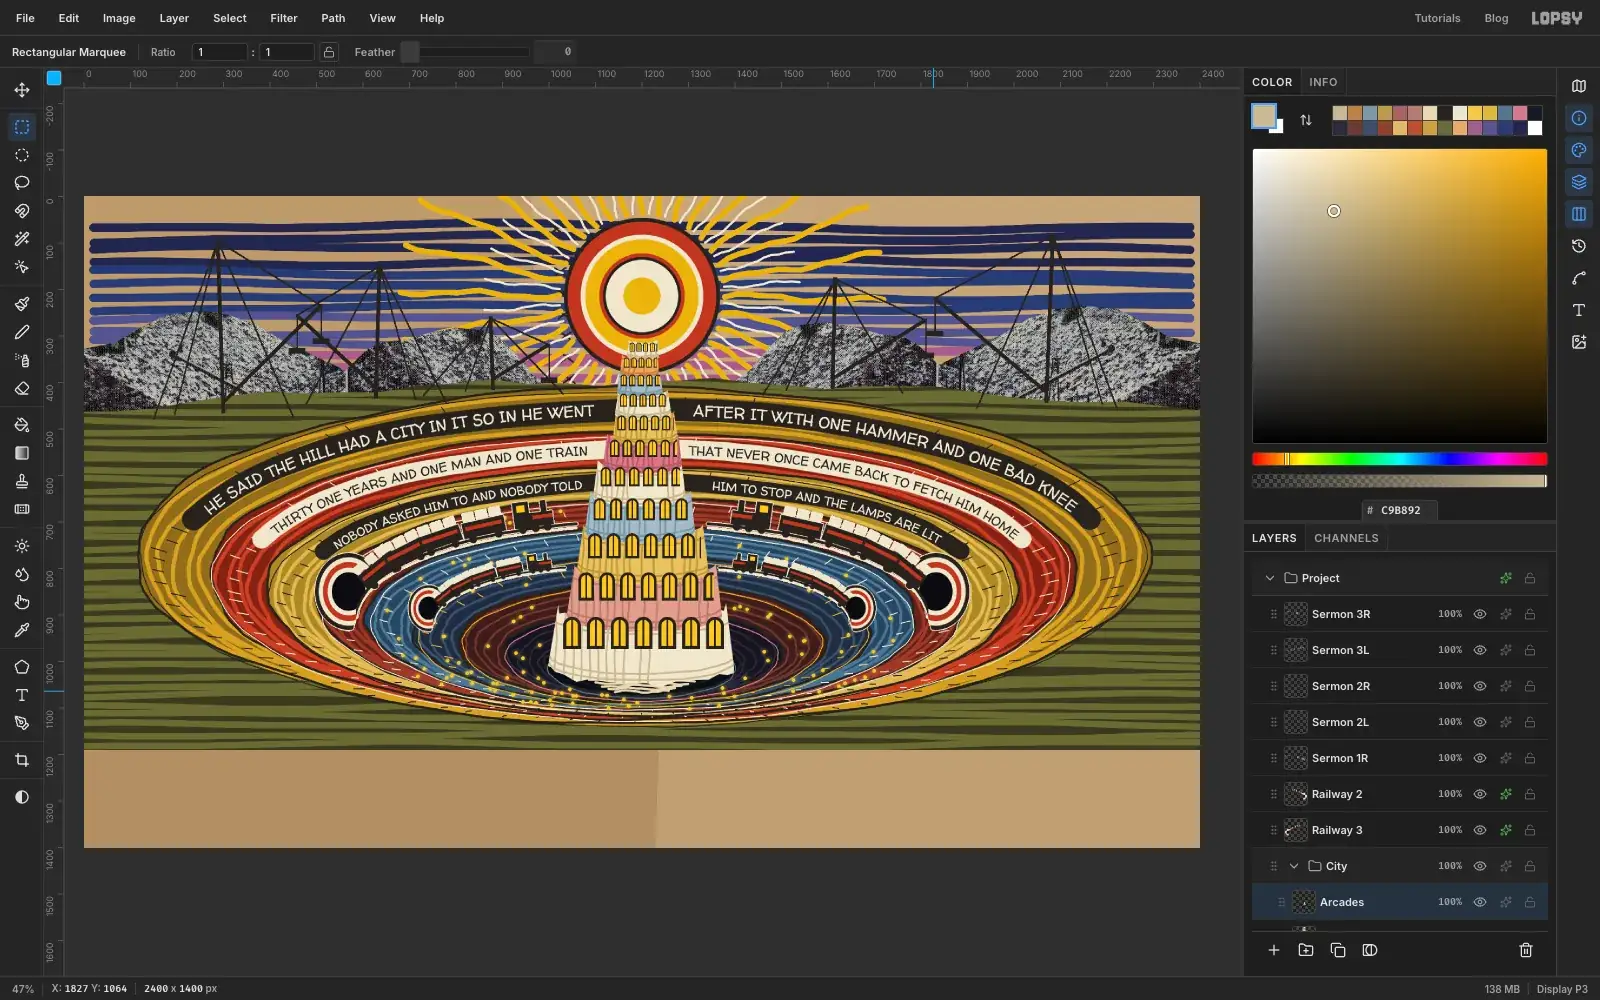
Fill the first row of windows
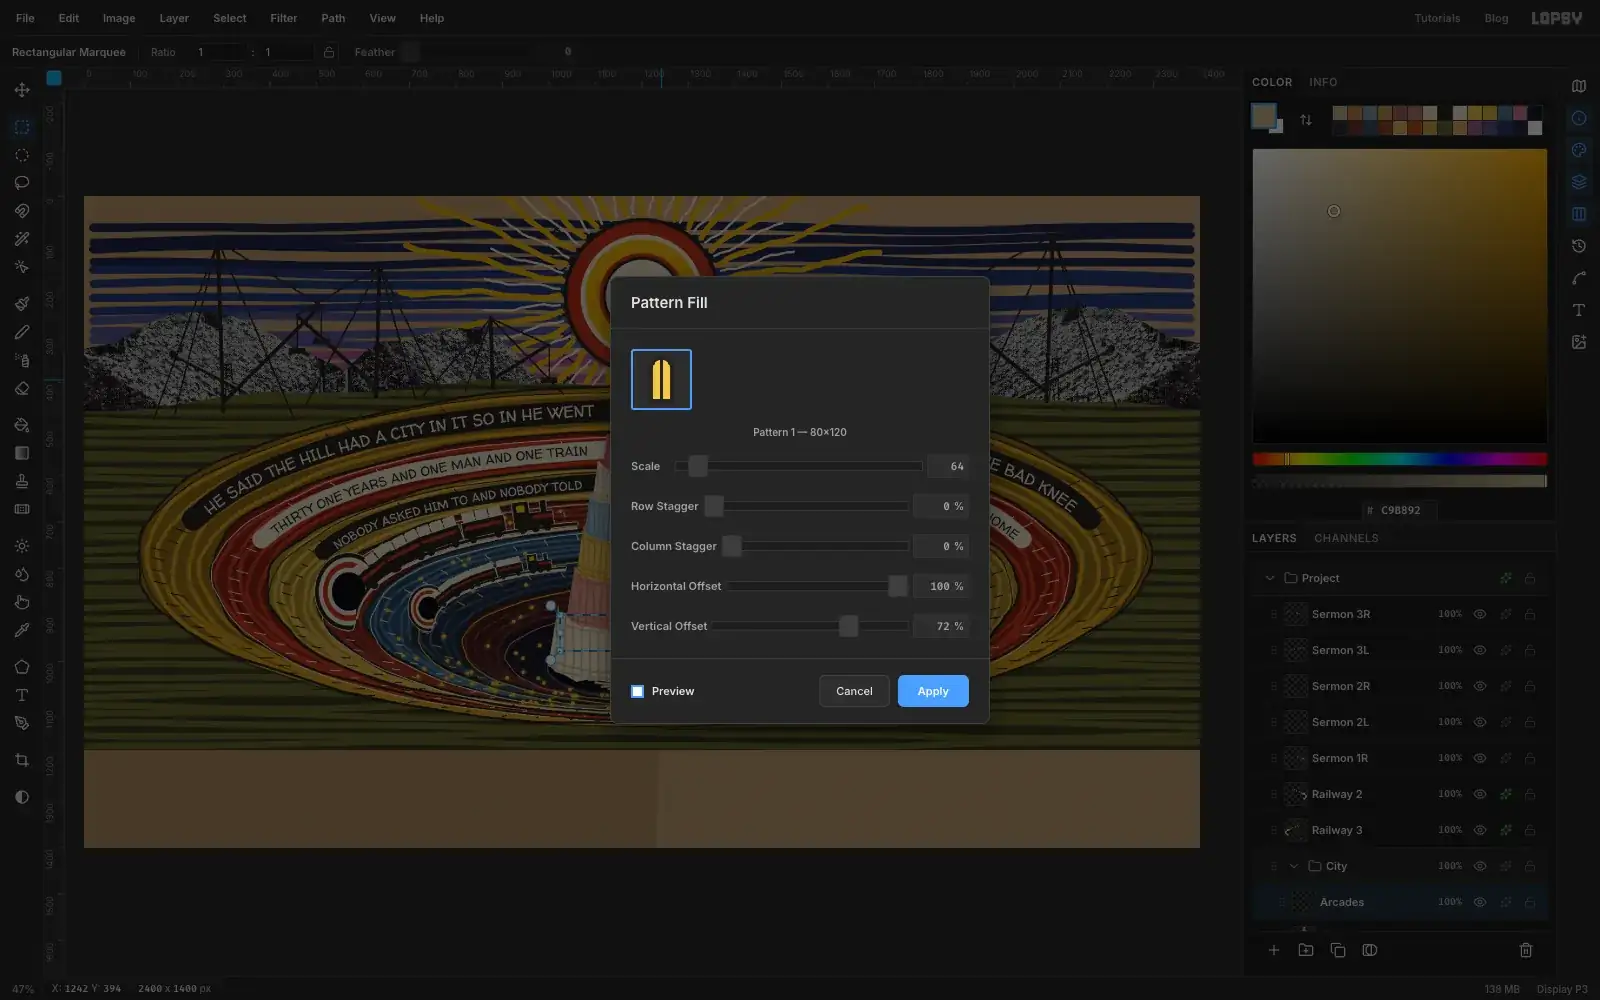
Add a layer called Arcades. Press M and drag a rectangle across floor 1, leaving a small margin at each side. Make it about 60% of the floor's height, starting just below its top edge.
Choose Edit → Fill with Pattern... and click your arch tile. Set Scale to 64. Then nudge Horizontal Offset and Vertical Offset until a clean row of whole arches sits in the rectangle, ticking Preview so you can see it. Click Apply.
-
Repeat the windows up the tower
Repeat for every floor: draw the rectangle, choose Edit → Fill with Pattern..., click the tile, tick Preview, set the Scale, adjust the offsets and Apply. The arches shrink as the floors do. From floor 1 to floor 11, use a Scale of:
64, 56, 50, 44, 38, 34, 30, 26, 23, 20, 18
Press Cmd+D when you've finished.
-
Ink the tower and add the spire
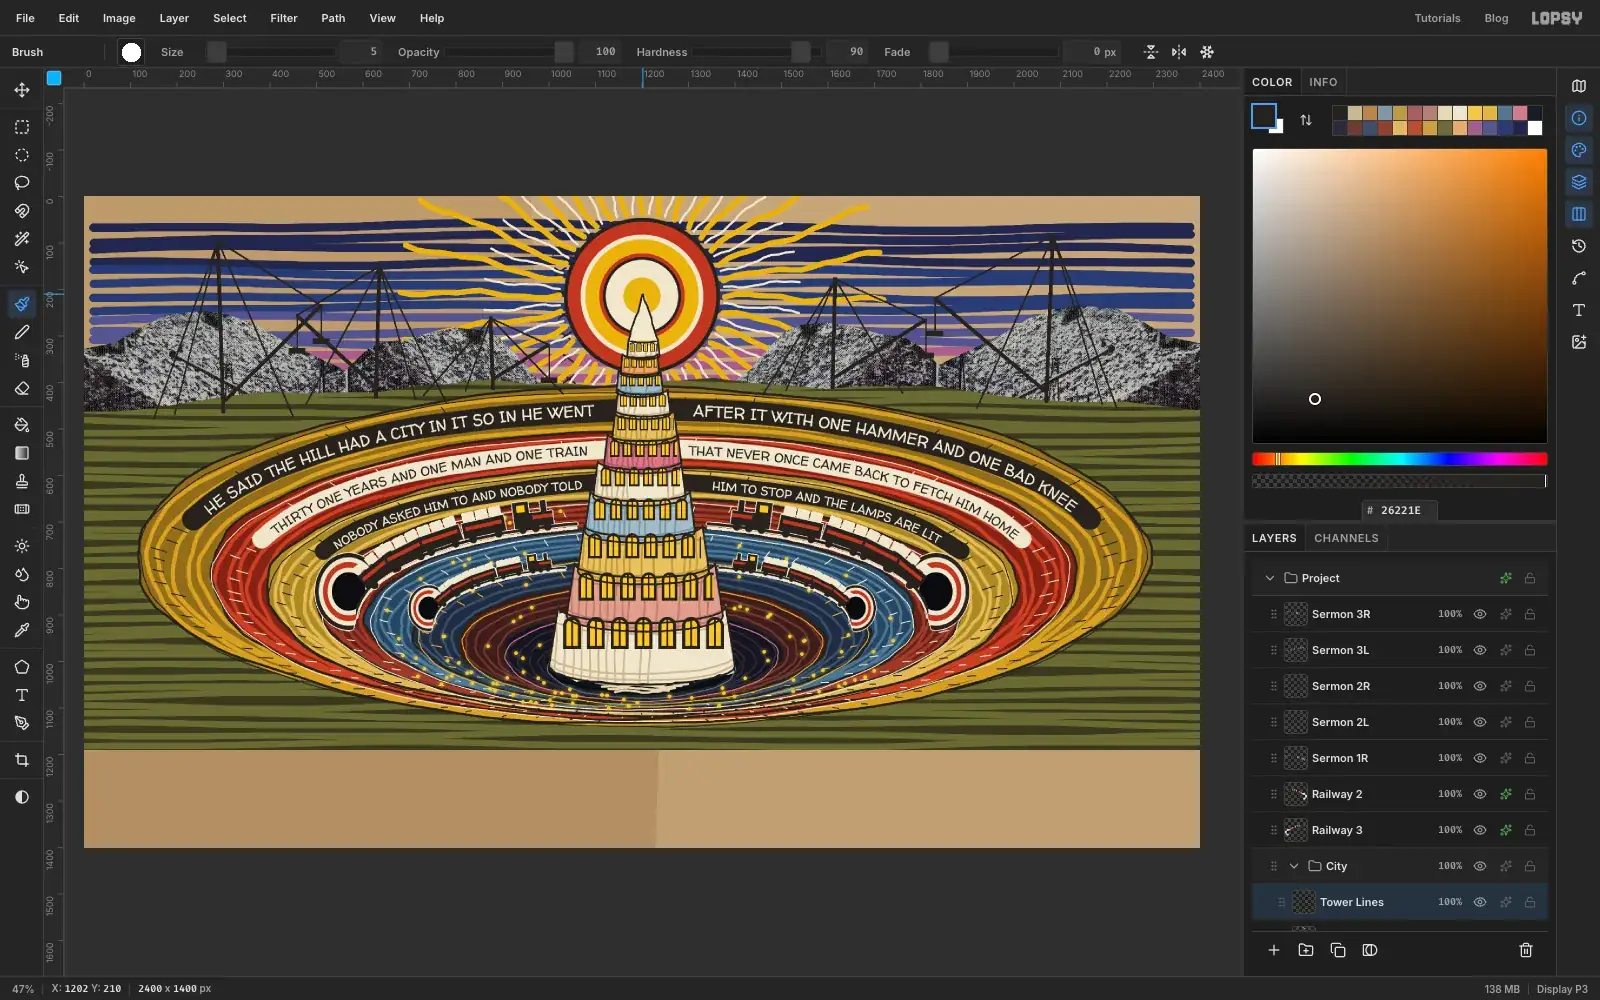
Add a layer called Tower Lines. With the crayon at Size 5 in , trace around the top and bottom curves of every floor, and let the outlines sag a little.
For the spire, set the foreground to , and with the Lasso draw a tall narrow triangle from the top floor up to about x 1200, y 212, right in the middle of the sun. Choose Edit → Fill and press Cmd+D. Press B and draw its two long edges in graphite.
-
Pile up the rubble and put up the town sign
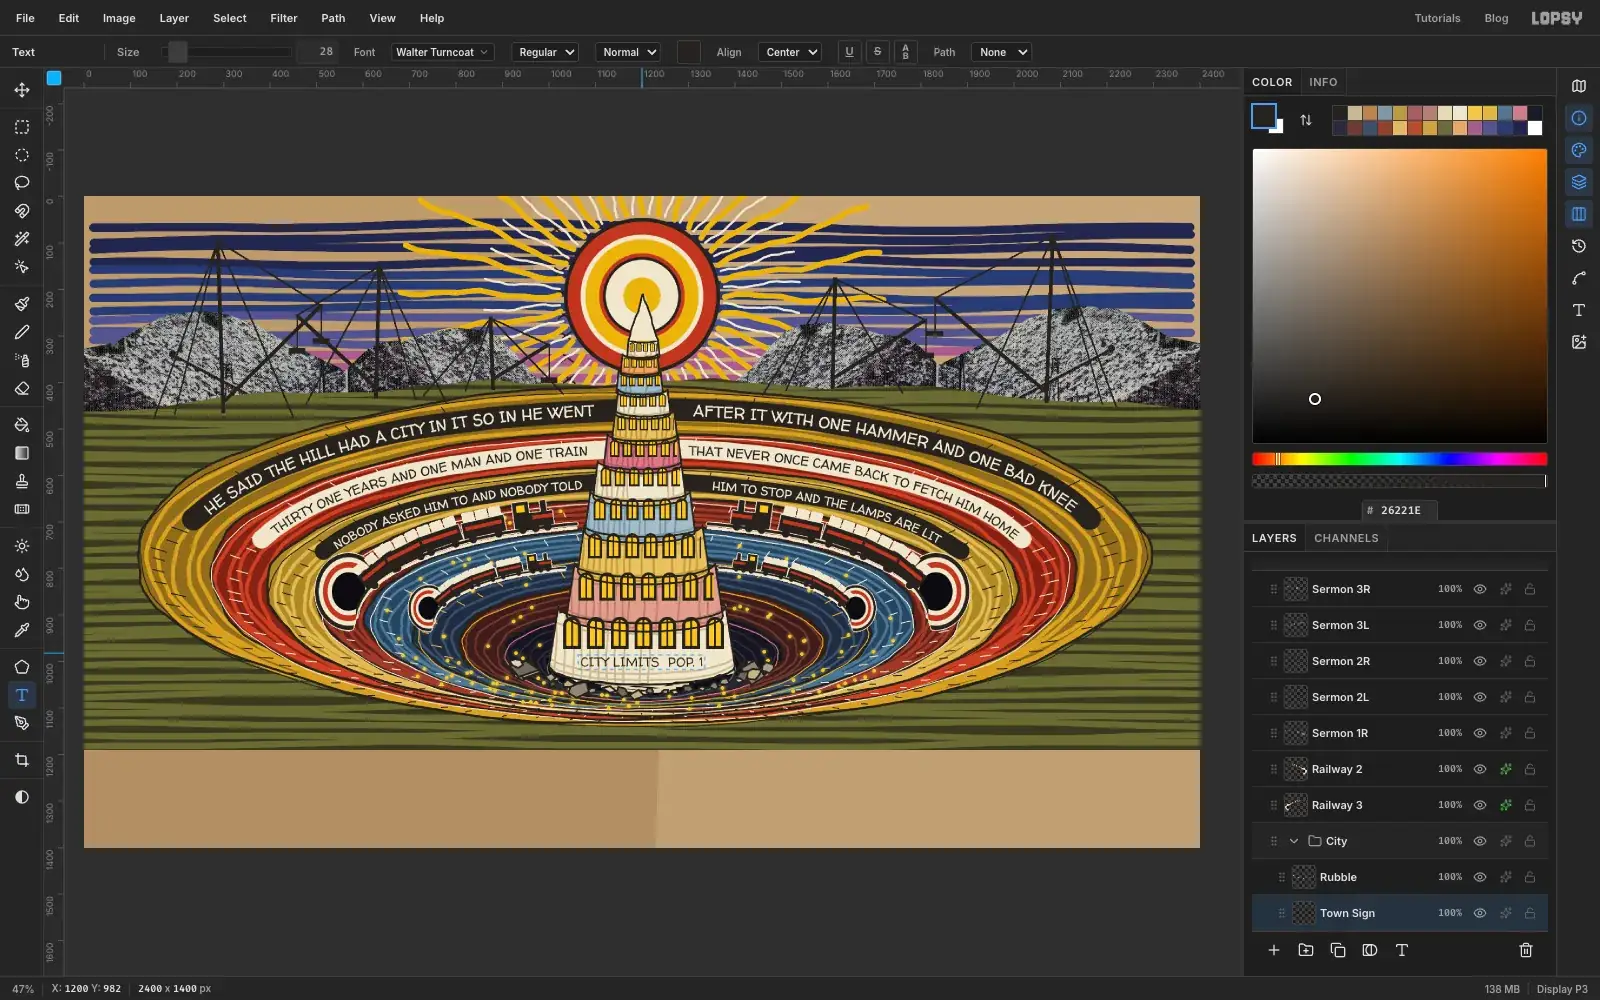
A city carved from a hill leaves mess behind. Add a layer called Rubble. For each of about 26 stones around the front of the base, lasso a small uneven shape with four to six sides, mostly small with a few large ones. Fill it with one of , , , or , press Cmd+D, then outline it with the crayon at Size 5 in .
Click the Tower Lines row. Press T, set the font to Walter Turncoat, Size to 28, Align to Center and the colour to . Click on the cream base, below the first row of windows and at the centre of the tower, at about x 1200, y 982. Type
CITY LIMITS POP. 1and press Tab.It's the best joke in the picture, and it says the whole film.
-
Make a grain from noise and clouds
The crayon so far looks too clean. Real wax skips over the rough surface of card, leaving flecks of bare card behind. We'll build that as one layer.
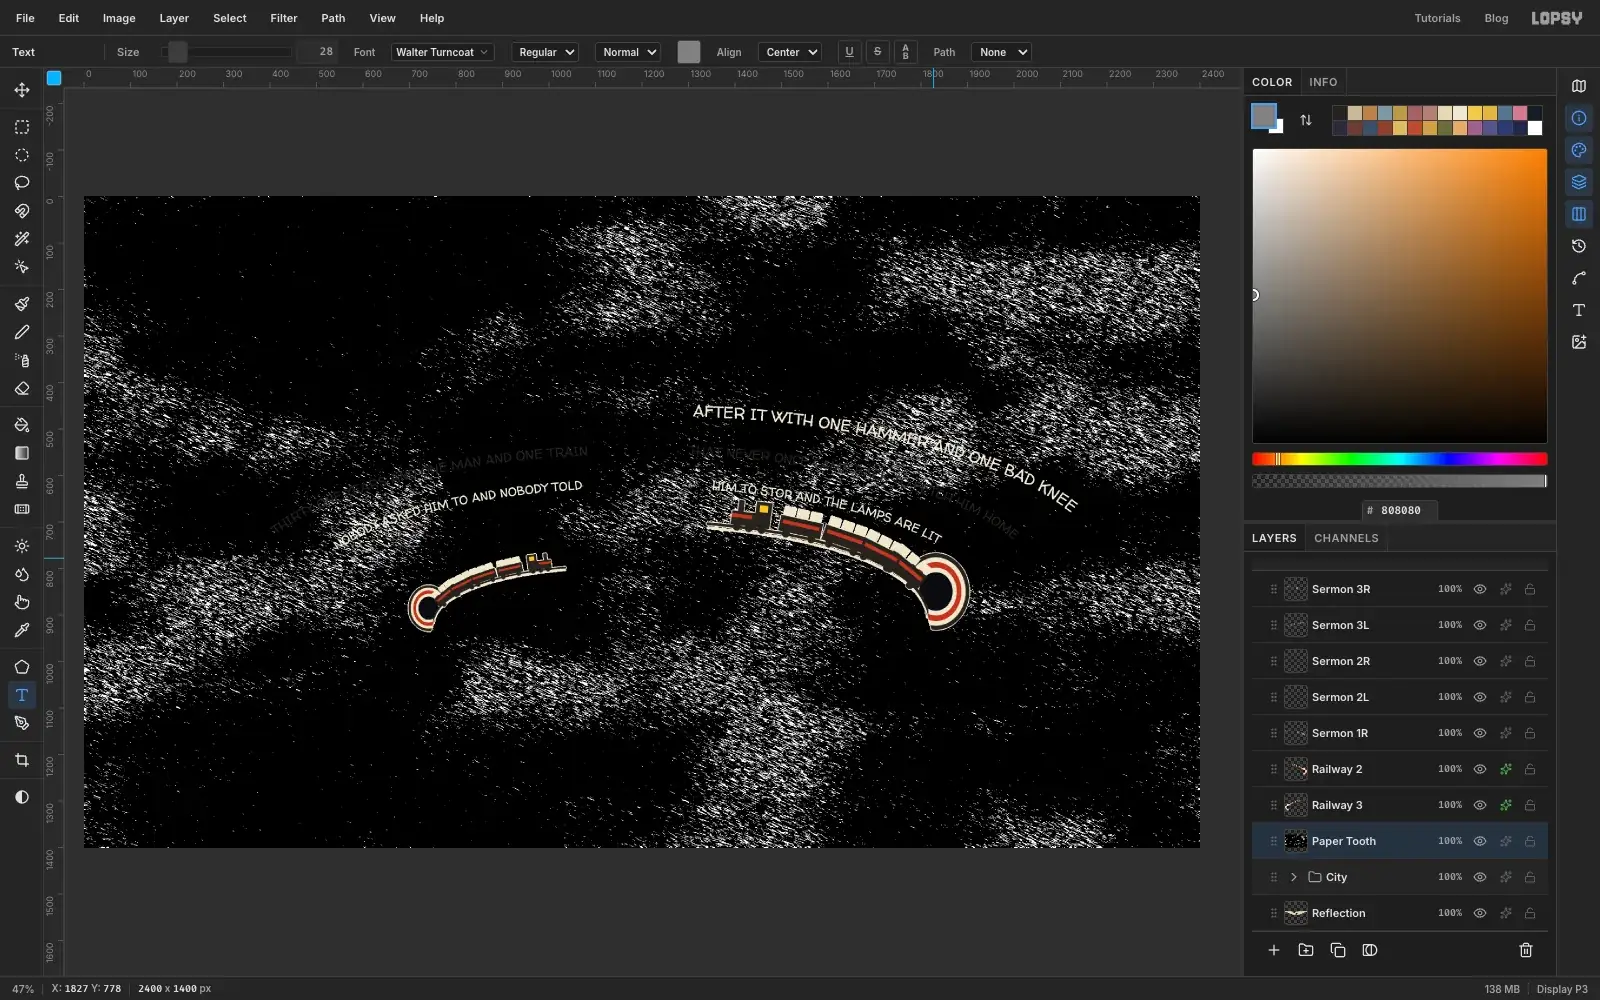
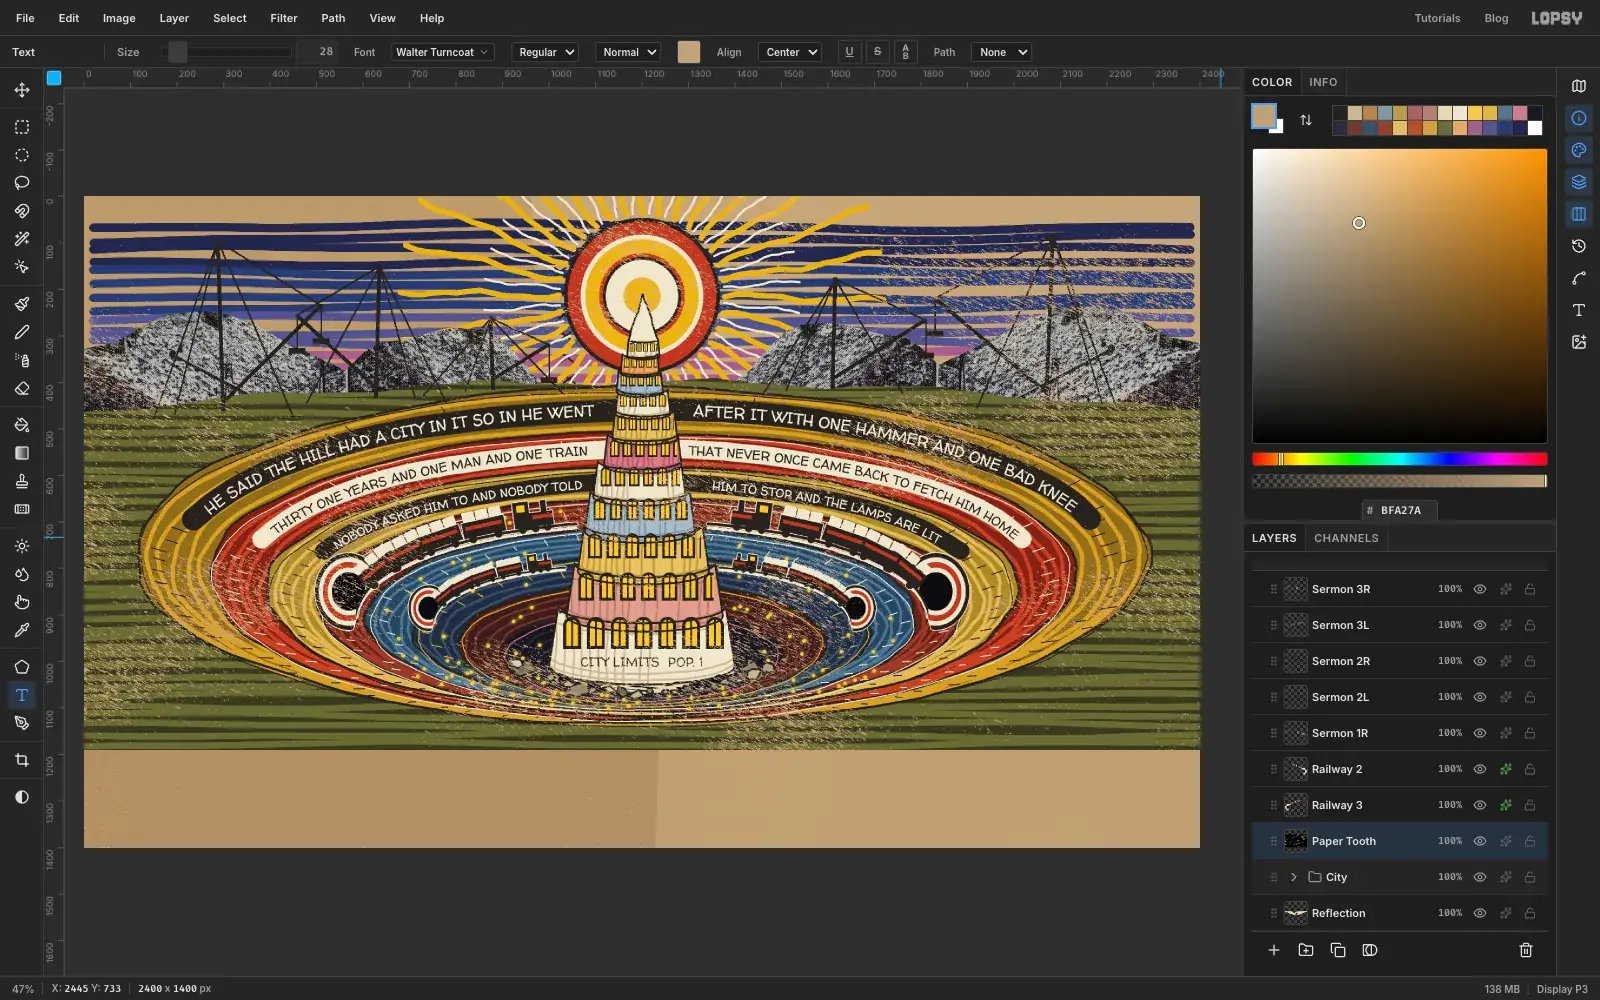
Click the arrow on the City group to collapse it, then click its row. Add a layer called Paper Tooth. Press Cmd+D, set the foreground to and choose Edit → Fill. Then apply:
- Filter → Add Noise... with Amount 100.
- Filter → Motion Blur... with Angle 24 and Distance 10. That stretches the noise into short strokes.
- Filter → Gaussian Blur... with Radius 1.
An even dusting looks like a filter, so bunch it into patches. Add a layer called Patches, fill it with , and apply Filter → Clouds... with Scale 8. Set this layer's Opacity to 5% using the percentage in its row. Choose Layer → Merge Down, and rename the result Paper Tooth if it needs it.
Finally apply Filter → Threshold... with Level 137. The layer turns black with patches of fine white flecks. Don't worry that it hides your picture.
-
Turn the flecks into bare card
The white flecks need to be card-coloured, and the black needs to disappear.
Add a layer called Tan, fill it with , open its effects drawer and set Blend Mode to Multiply. Close the drawer and choose Layer → Merge Down. White has become tan, and black stays black.
Now open the merged layer's drawer and set its Blend Mode to Lighten. Black vanishes, because Lighten keeps whichever is lighter, and nothing underneath is darker than black. The tan flecks only show where the crayon underneath is darker than the card, which is exactly how bare card looks through wax.
-
Scrawl in the field
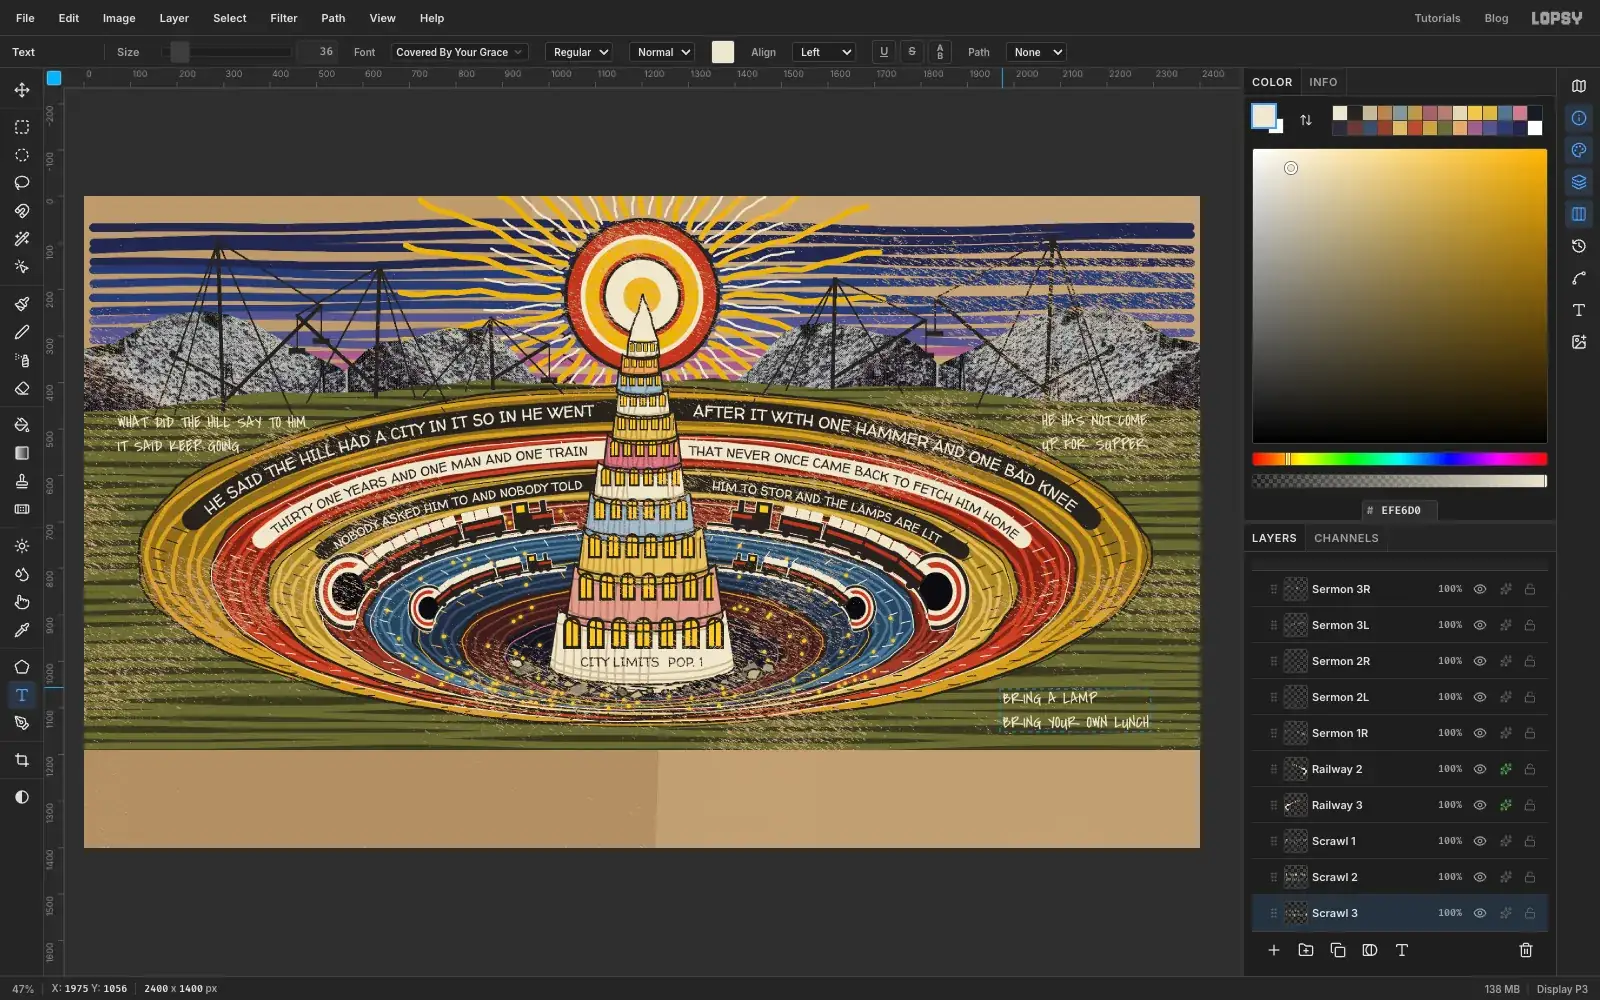
Finster couldn't leave an empty space alone. With Paper Tooth active, press T, set the font to Covered By Your Grace, Size to 36, Align to Left and the colour to .
Make three text layers in the green corners, pressing Enter for the line breaks and Tab to finish. Click the Paper Tooth row before starting each one:
- top left, starting at about x 72, y 462:
WHAT DID THE HILL SAY TO HIM/IT SAID KEEP GOING - top right, starting at about x 2060, y 458:
HE HAS NOT COME/UP FOR SUPPER - bottom right, starting at about x 1975, y 1056:
BRING A LAMP/BRING YOUR OWN LUNCH
Check that the lines stay clear of the gold rim and the edge of the canvas.
- top left, starting at about x 72, y 462:
-
Cut out the stonecutter
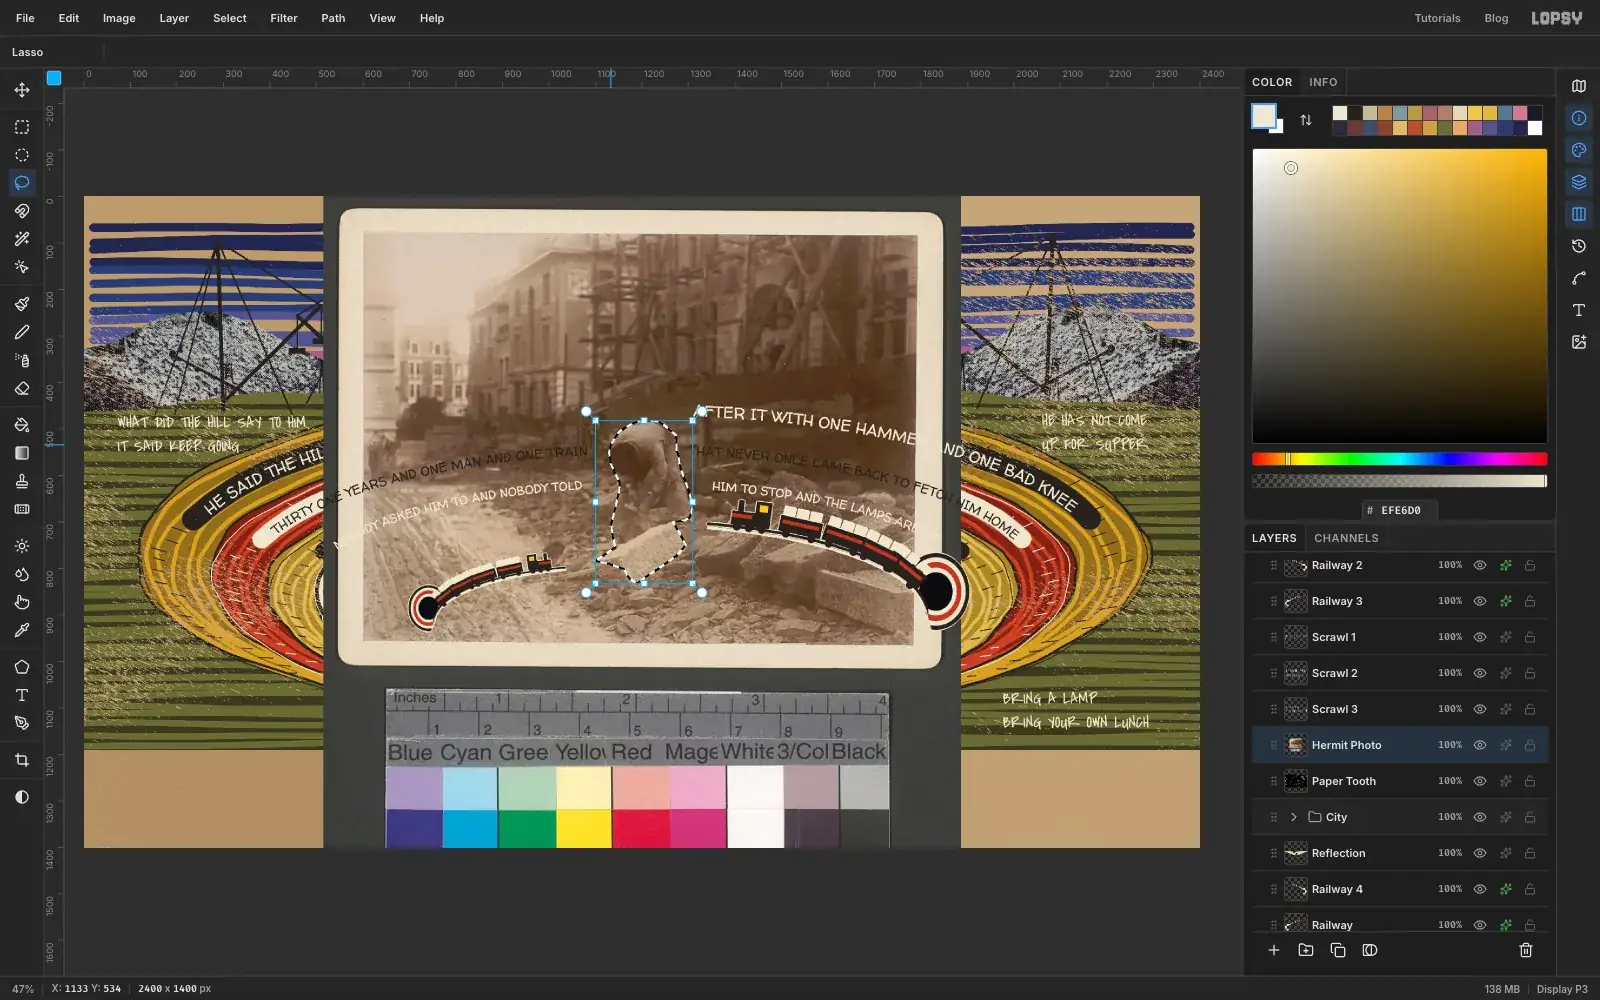
Click the Paper Tooth row, then drag steinhauer.jpg onto the canvas. It's taller than the document, so it's scaled to fit and centred. Press Cmd+D and rename the layer Hermit Photo.
Press L and trace the stonecutter closely: over his cap and rounded back, down his hip and rear leg, then around the cut stone block at his feet, and up his front leg and arm to the cap again. Zooming in makes this easier.
Choose Select → Inverse, press Delete, then Cmd+D. Then apply Filter → Brightness/Contrast... with Brightness 14 and Contrast 24 to lift him out of the murk.
-
Give him a torn paper edge
An outline from a layer effect looks too even for a scrap torn out of an old magazine, so tear it for real.
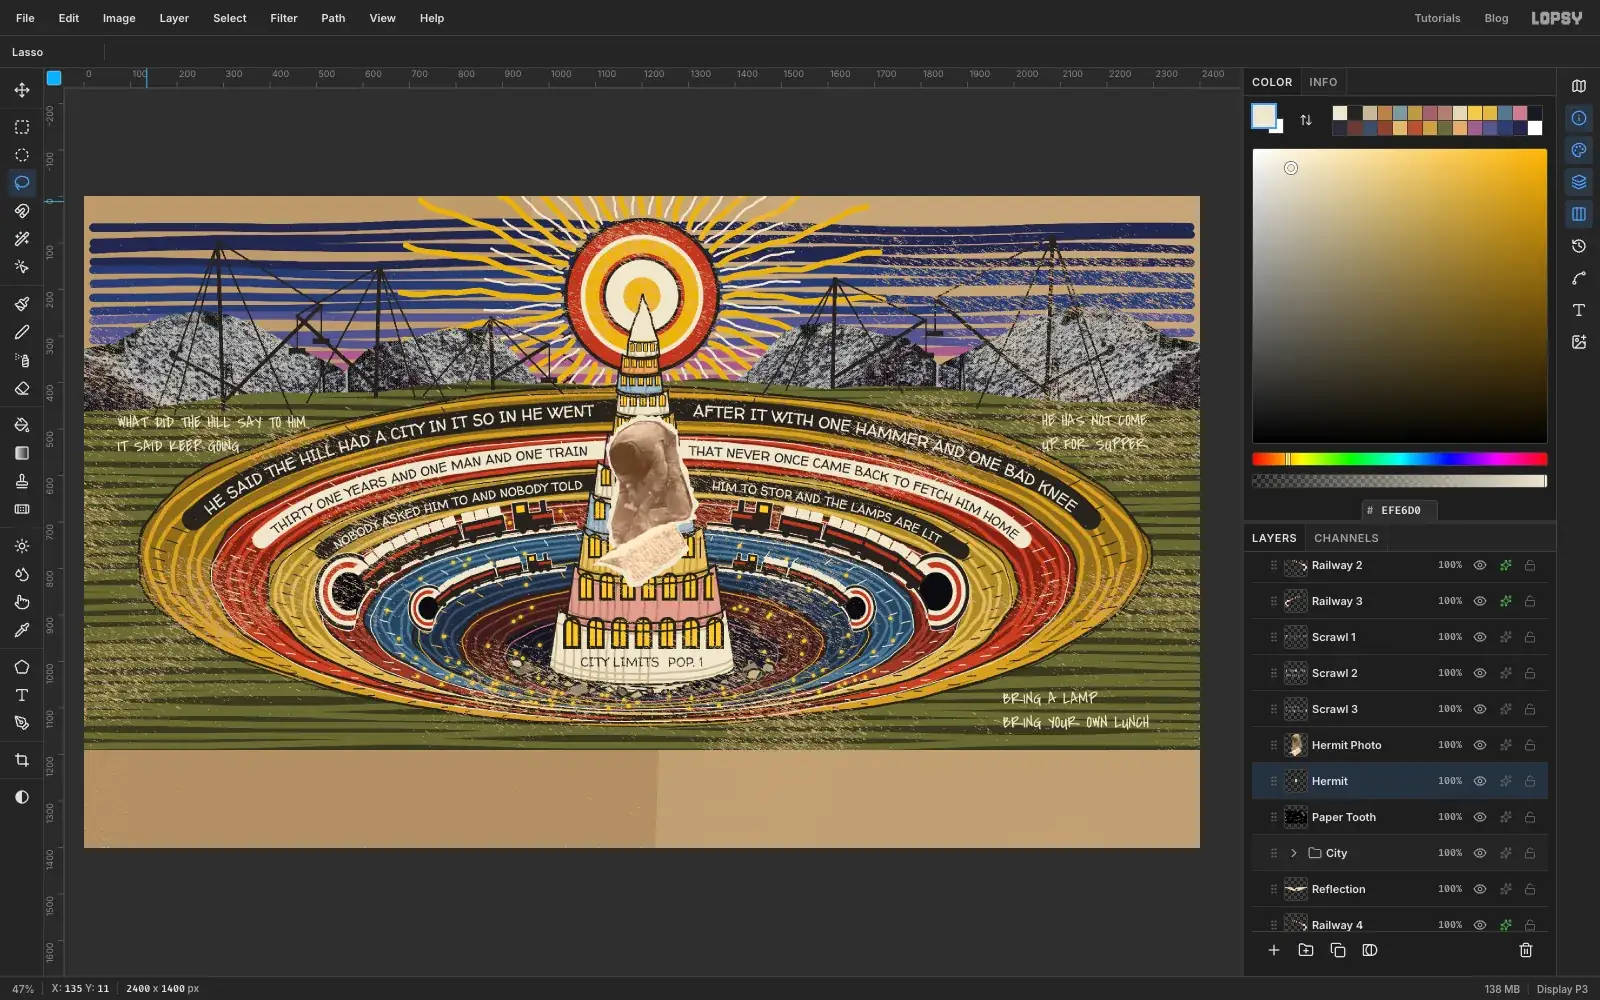
Click the Paper Tooth row and add a layer called Hermit. It sits below the photo. Set the foreground to , and with the Lasso go all the way around the man, between 6 and 15 px outside him, in short jagged moves. Choose Edit → Fill and press Cmd+D.
Click the Hermit Photo row and choose Layer → Merge Down. Rename the merged layer Hermit.
-
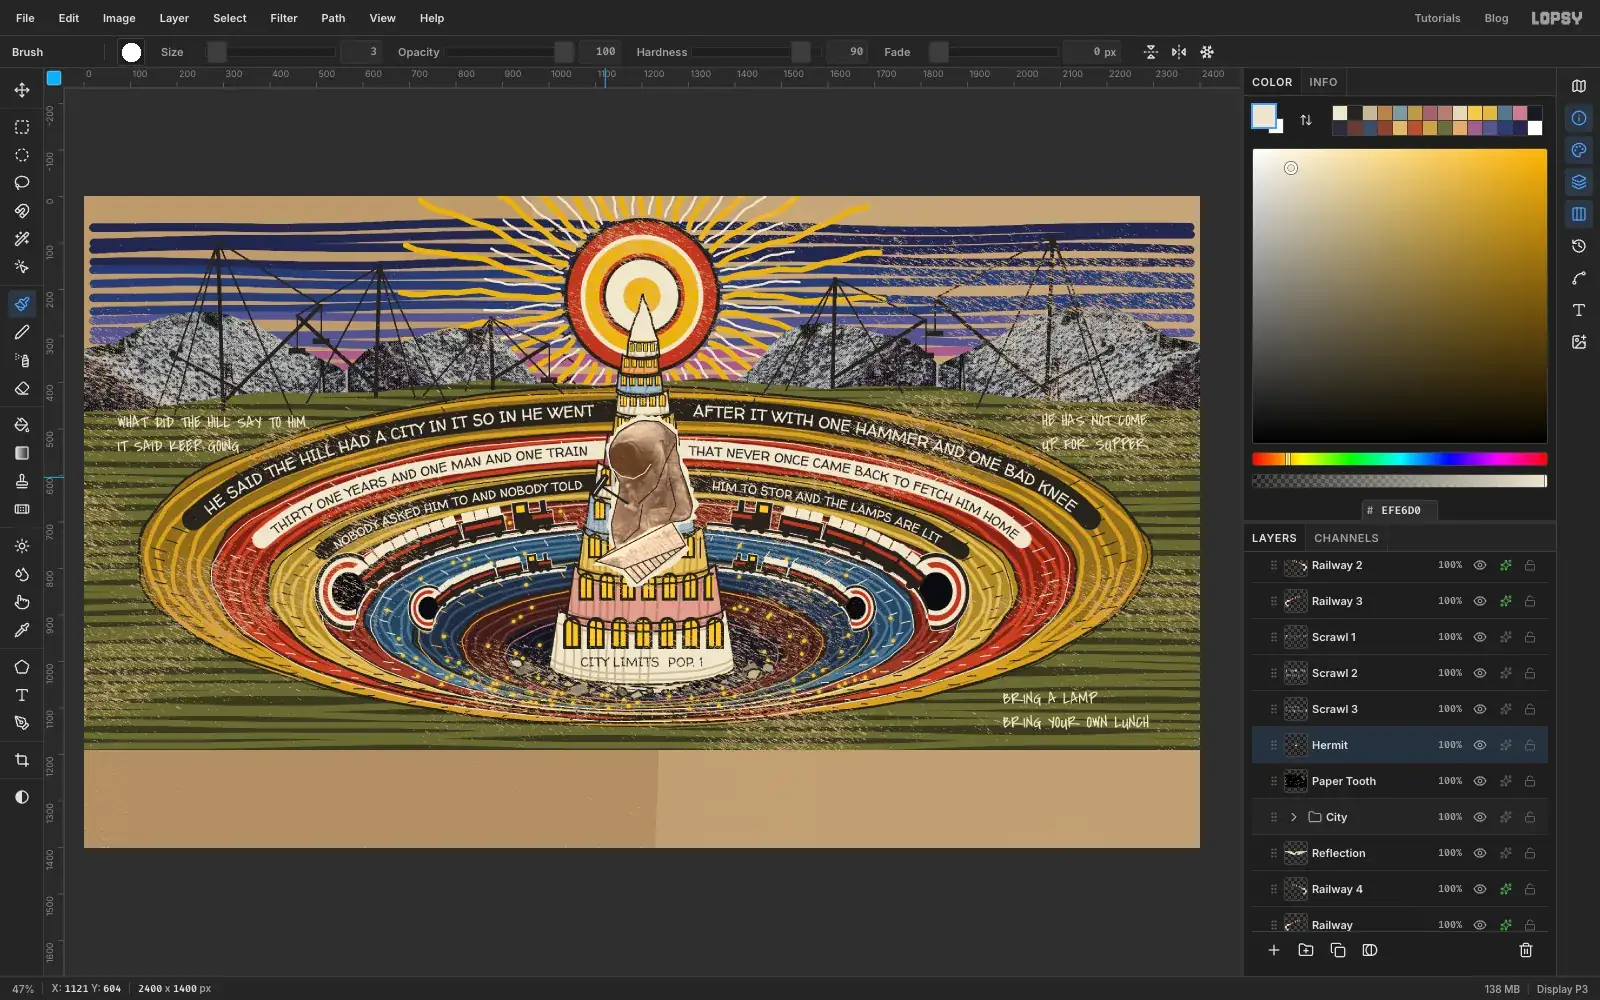
Draw on the photo
The photo is murky, and at small sizes he'd turn into a lump. Ramírez drew straight onto his collage pieces, so you can too.
Pick up the crayon at Size 3, foreground , with Hermit active:
- trace the outline of the man, just inside the photo's edge
- draw a line down his arm from the shoulder to the hands, and one down each leg
- outline the stone block, add a line for the ridge between its two faces, and hatch the lower face with about nine short strokes
Set the foreground to and draw one curved line under his cap, to mark the brim.
Finally, give him a proper hammer. Set the foreground back to . At Size 6, draw a handle from his hands out to the left, about 60 px long, past the torn edge. At Size 17, make one short stroke across its end for the head. Add a thin Size 3 cream line down the head so that it stands out.
-
Shrink copies of him down the quarry
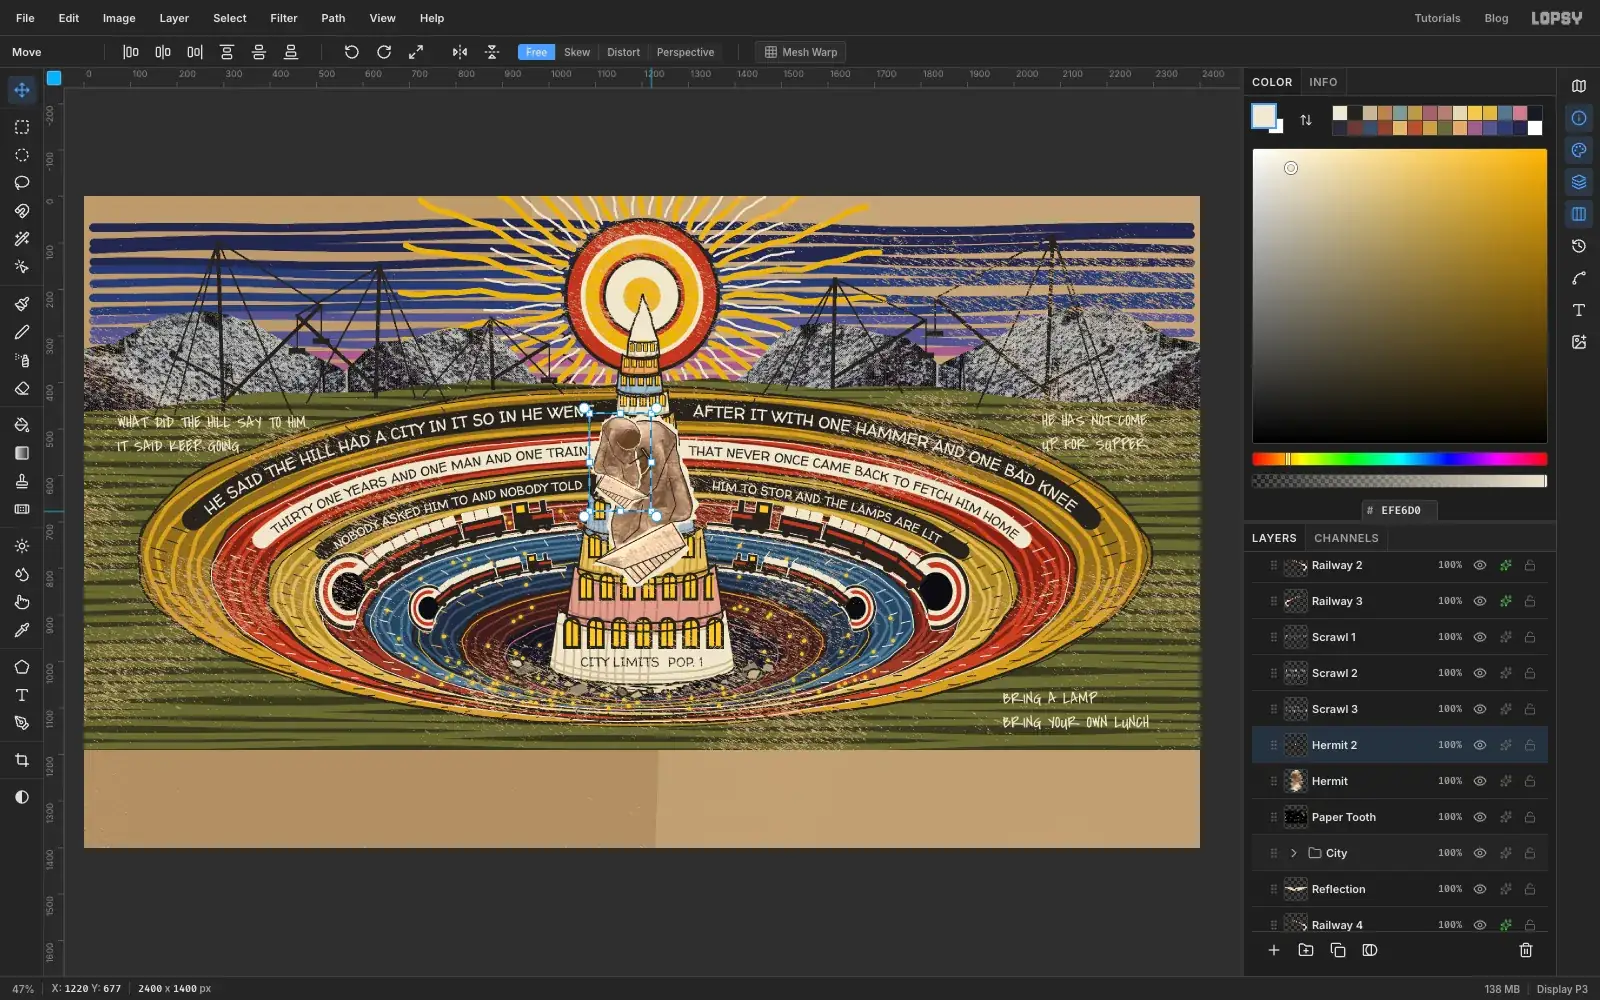
Now make the idea visible: every figure down there is the same man.
Press M and drag a marquee around the whole cut-out, hammer included. Choose Edit → Copy, then Edit → Paste. Rename the copy, and if the list below says so, choose Image → Flip Horizontal. Press Cmd+D, marquee it again, press V, hold Cmd, and drag the bottom-right corner handle inward to the listed height (the full-size cut-out is about 375 px tall). Press Cmd+D, then drag the copy into place. Click the Hermit row before starting the next one.
- Hermit 2, flipped, about 210 px tall: on the right of band 1, around 2200, 840
- Hermit 3, about 165 px tall: on the left of band 1, around 180, 750
- Hermit 4, flipped, about 130 px tall: on the right of band 3, around 1930, 930
- Hermit 5, about 105 px tall: on the left of band 4, just under the tunnel, around 570, 940
- Hermit 6, flipped, about 80 px tall: on the right of band 5, around 1750, 930
- Hermit 7, about 68 px tall: on the left of band 6, around 760, 975
-
Put the hermit himself in the foreground
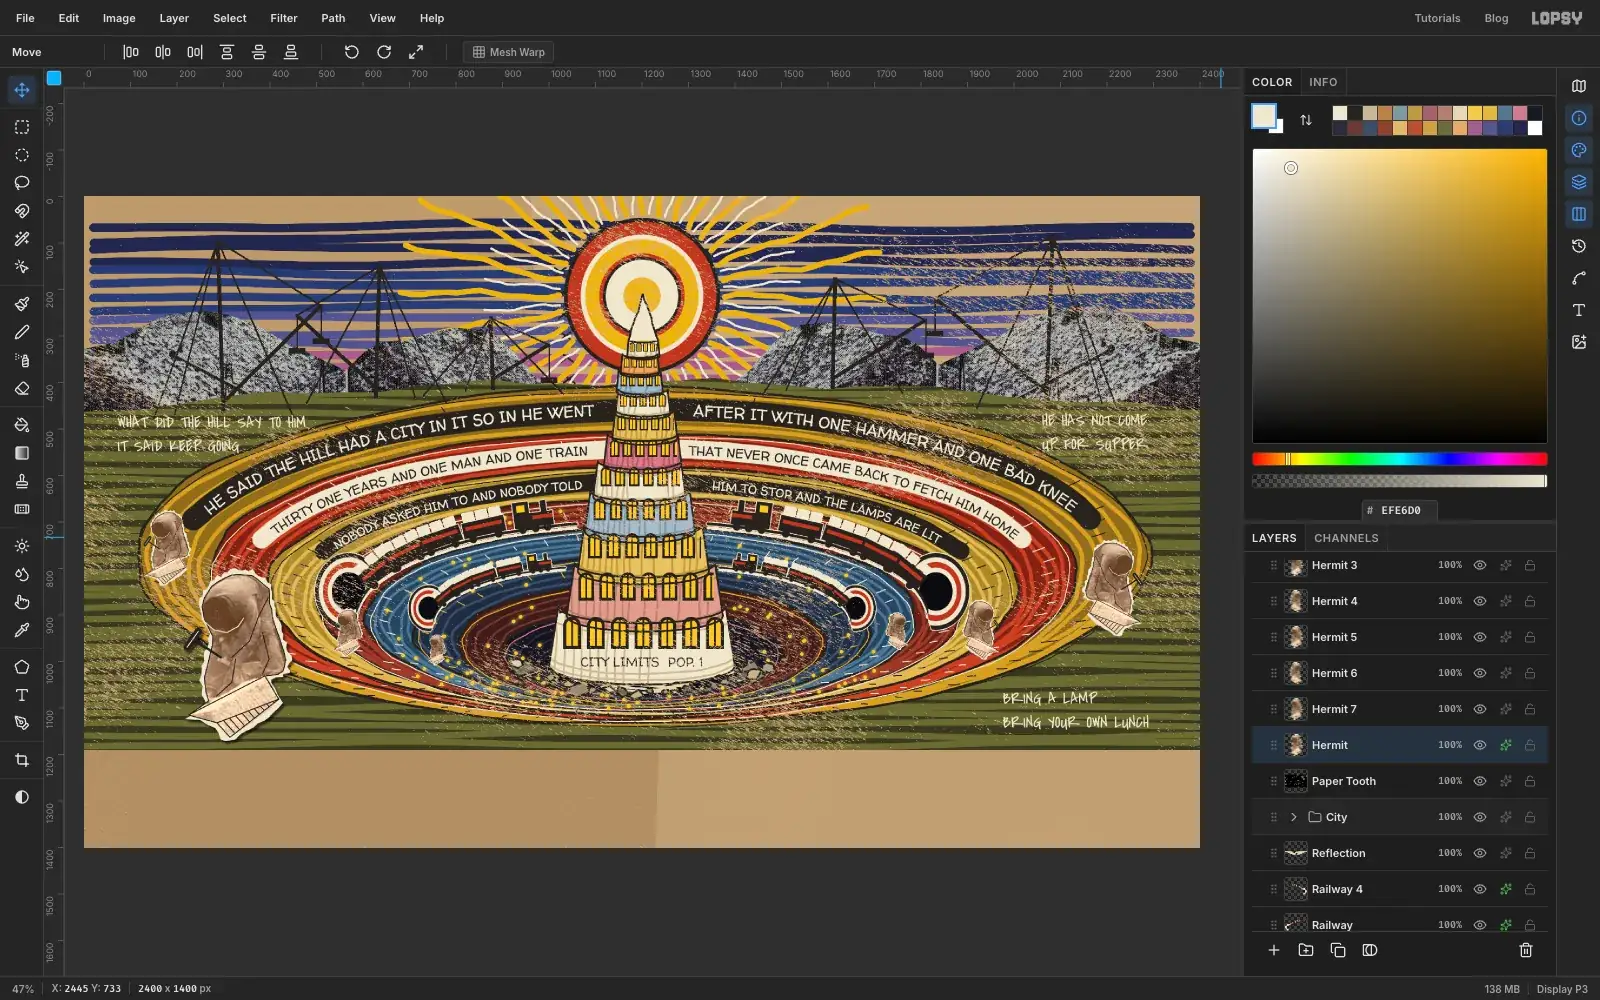
Click the Hermit row, press V and drag the full-size cut-out down to the bottom left, centred at about x 330, y 985, so that the block almost reaches the bottom of the land.
Open its effects, tick Drop Shadow, and set Offset X to 5, Offset Y to 6, Blur to 5 and Opacity to 55. Having the shadow on him alone lifts him off the page, and keeps the small ones part of the drawing.
-
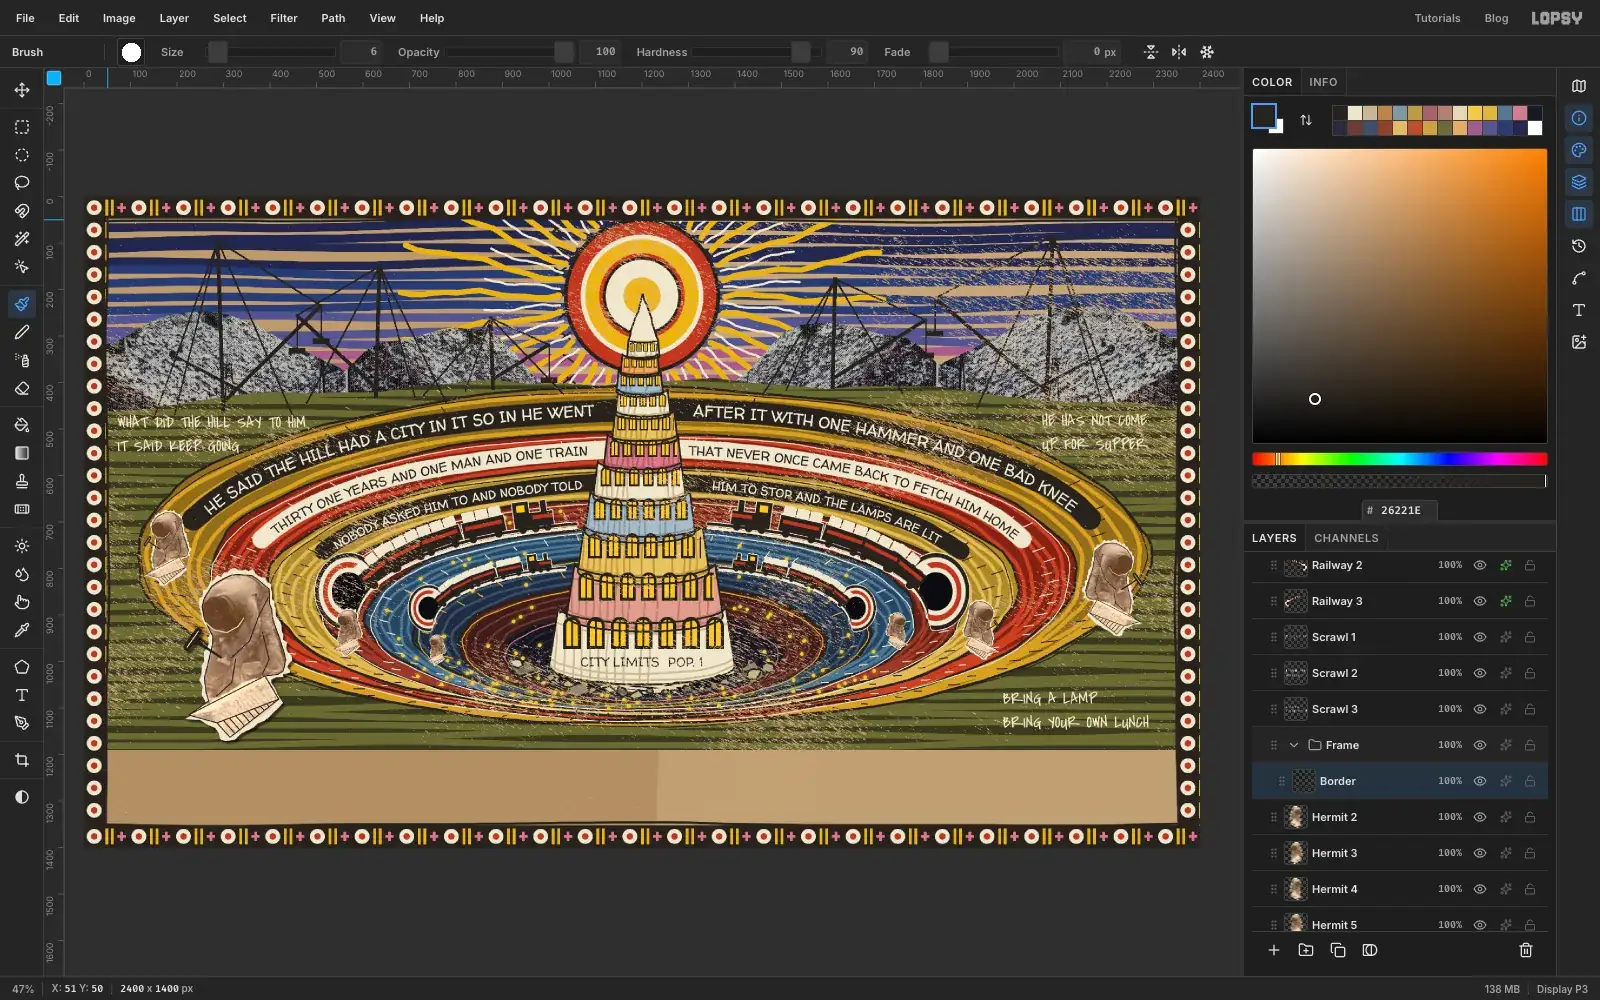
Make a border tile
Wölfli framed his sheets in bands of repeating marks, and he drew every one by hand. You'll draw one tile and repeat it.
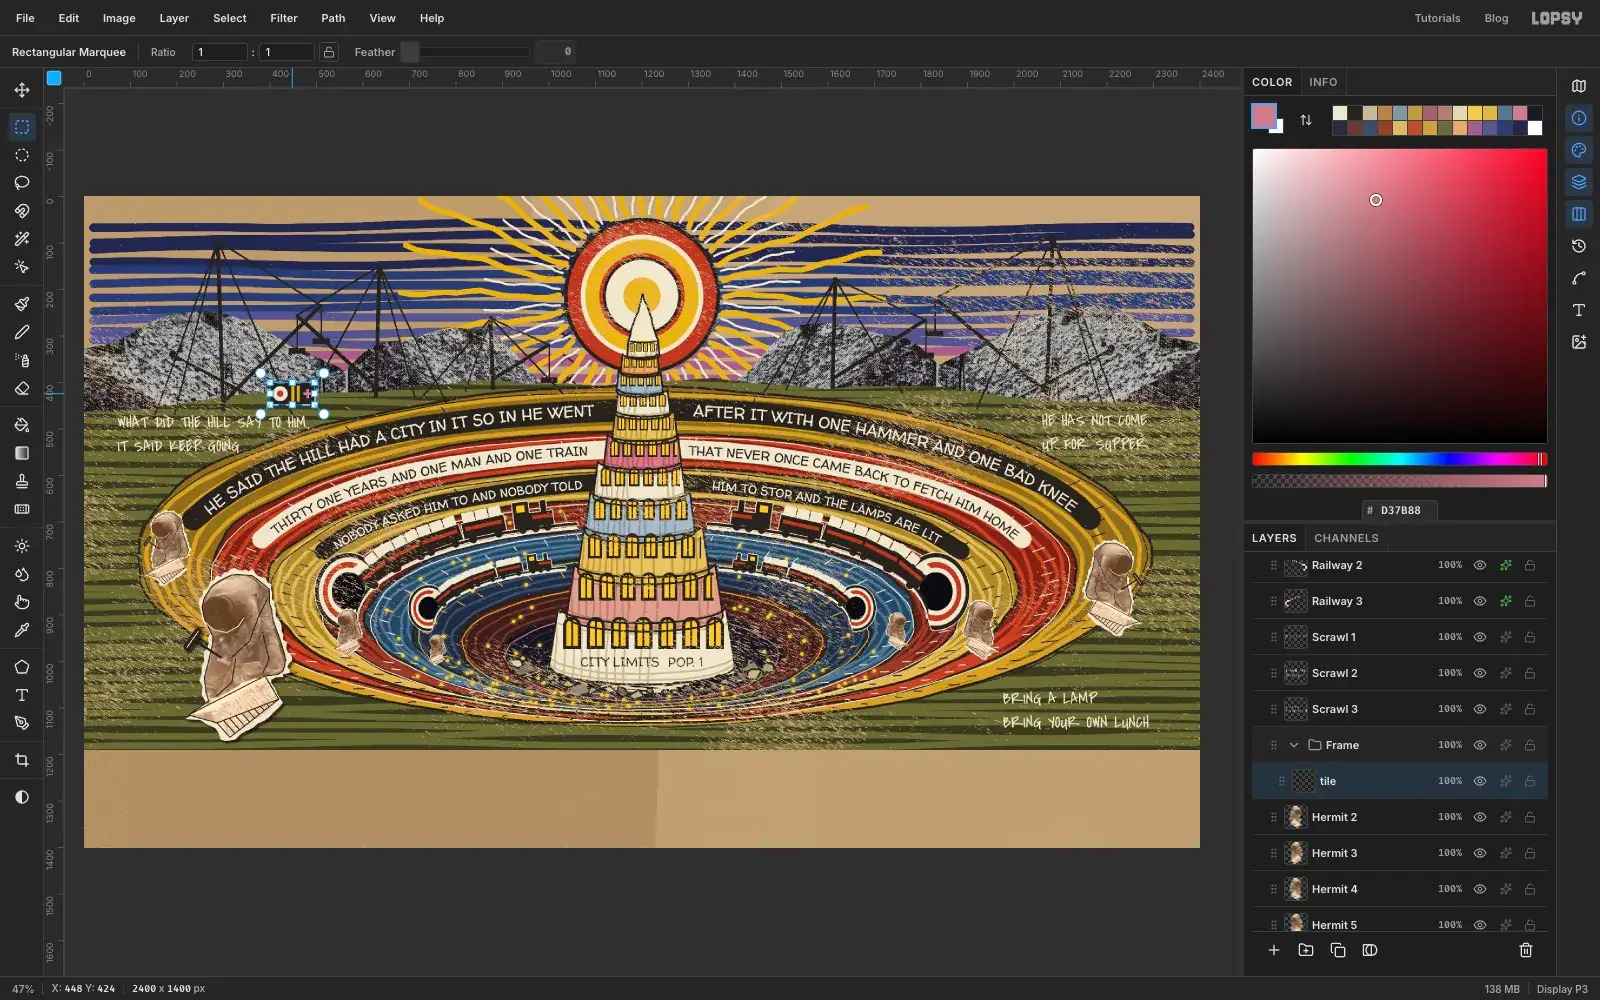
Click the Hermit 2 row, which is the top one of the cut-outs. Click New Group and rename it Frame. Add a temporary layer called tile. Build the tile with the exact-size dialogs. You can do this anywhere, since the layer is temporary; here it starts at 400, 400:
- background, : rectangle, 96 × 48 px, From 400, 400 to 496, 448
- bullseye, : ellipse From 406, 408 to 438, 440
- centre, : ellipse From 415, 417 to 429, 431
- two bars, : rectangles From 446, 407 to 452, 441, and From 458, 407 to 464, 441
- cross, : rectangles From 472, 421 to 490, 427, and From 478, 414 to 484, 434
Select the whole tile (From 400, 400 to 496, 448), choose Edit → Define Pattern, press Cmd+D, and click Delete Layer.
-
Fill the border
Add a layer called Border. For each side, use the exact-size dialog to select the band, then choose Edit → Fill with Pattern..., click the new tile, set Scale to 100 and the offsets below, and click Apply:
- top: From 0, 0 to 2400, 48, offsets 0
- bottom: From 0, 1352 to 2400, 1400, Vertical Offset 17 so a whole row of tiles fits
- left: From 0, 48 to 48, 1352, offsets 0
- right: From 2352, 48 to 2400, 1352, Horizontal Offset 50 so the bullseyes match the left side
Press Cmd+D. Pick up the crayon at Size 6 in and draw a wobbly line right round the inside of the border.
-
Paste down the title strip
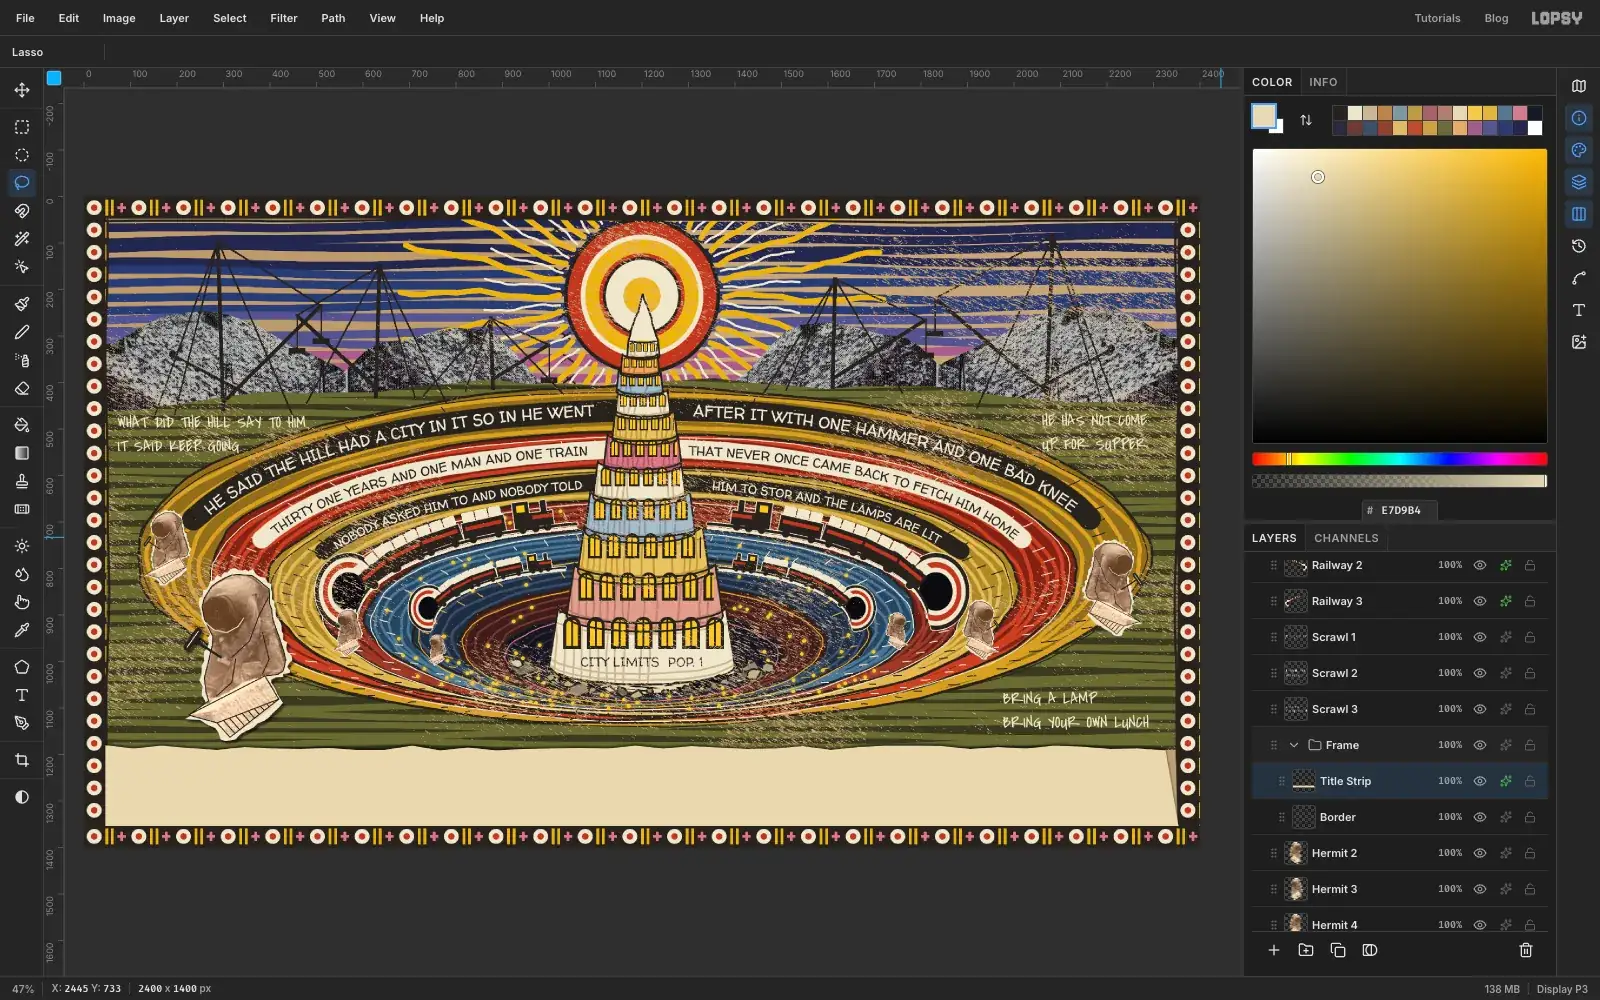
Add a layer called Title Strip. Set the foreground to and press L. Start at the inner edge of the left border and draw a jagged top edge at about y 1186, wandering by 5 px or so, across to the inner edge of the right border. Drop to the top of the bottom border and come back along it. Choose Edit → Fill and press Cmd+D.
Open its effects, tick Drop Shadow, and set Offset X to 0, Offset Y to -4, Blur to 7 and Opacity to 60. The negative offset throws the shadow upward onto the picture.
-
Letter the title by hand
Start with the subtitle, along the bottom of the strip. With Title Strip active, press T, set the font to Walter Turncoat, Size to 32, Align to Left and the colour to . Click at about x 92, y 1308, type
ONE MAN. THIRTY ONE YEARS. A CITY NOBODY ASKED FOR.and press Tab.Click Title Strip again and add a layer called Title Ink. A font would look too neat here, so paint the letters yourself. Pick up the crayon at Size 23 in and letter
THE HERMIT'S QUARRYfrom about x 86, y 1209. Make the capitals about 78 px tall and 60 px wide, with about 28 px between letters and a bit more between words, one stroke at a time. A slightly wandering baseline and letters that don't quite match are good. Just keep a clear gap between them, and check that the Q's tail stays above the subtitle.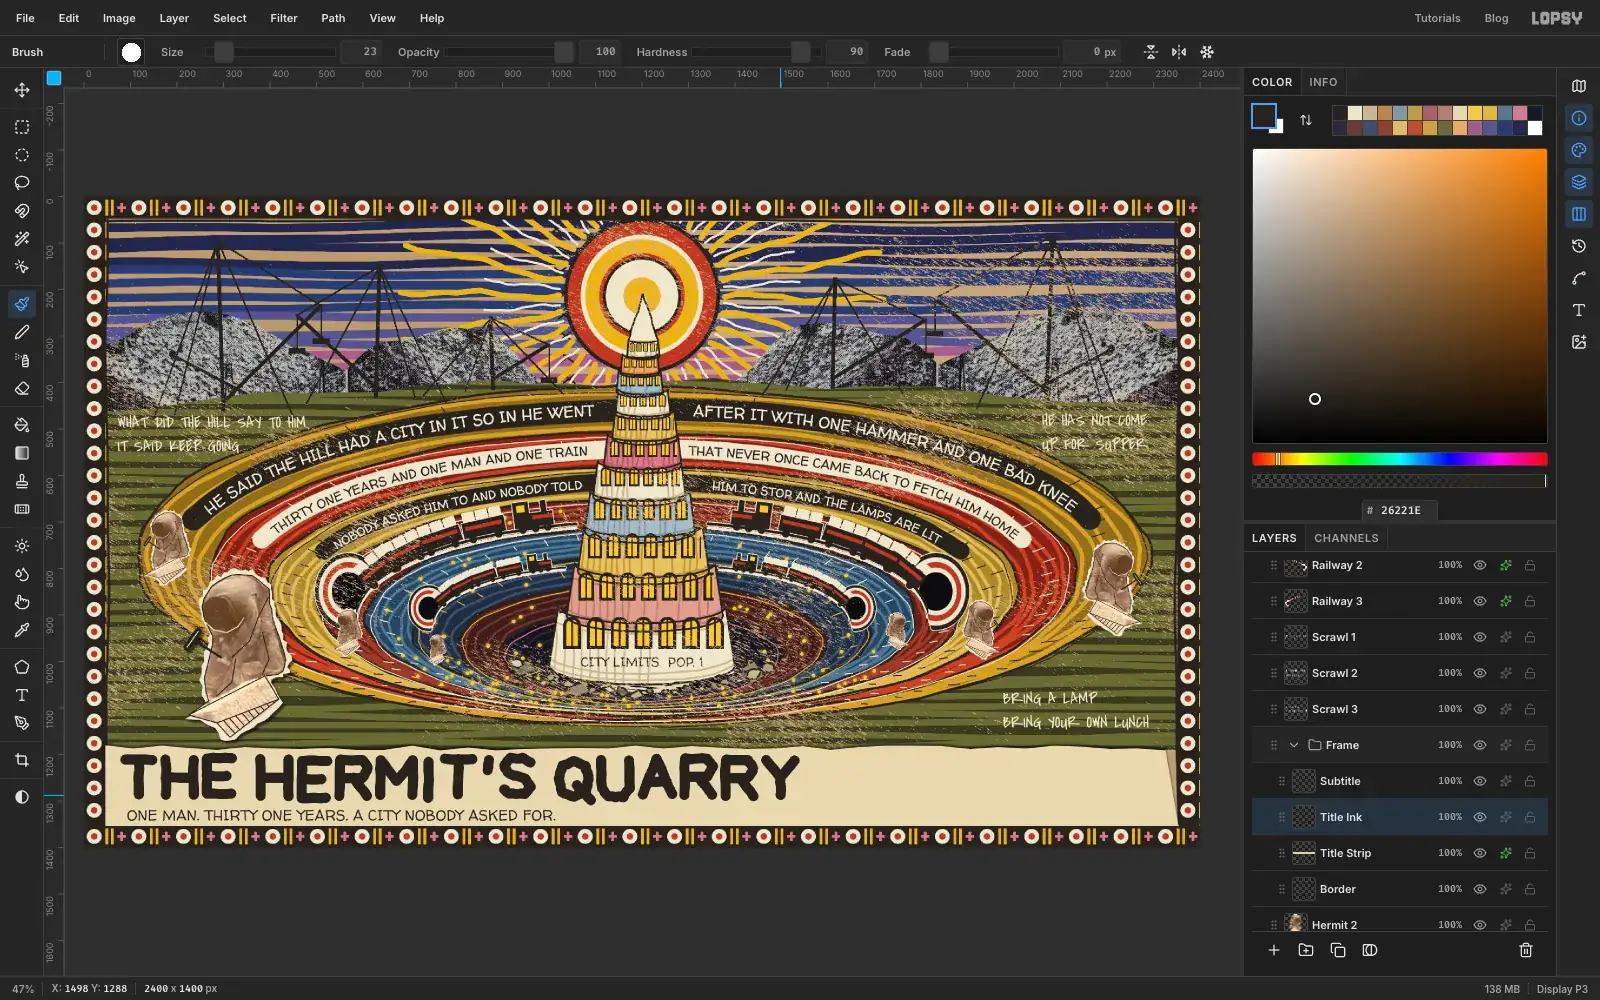
-
Colour the letters in wax
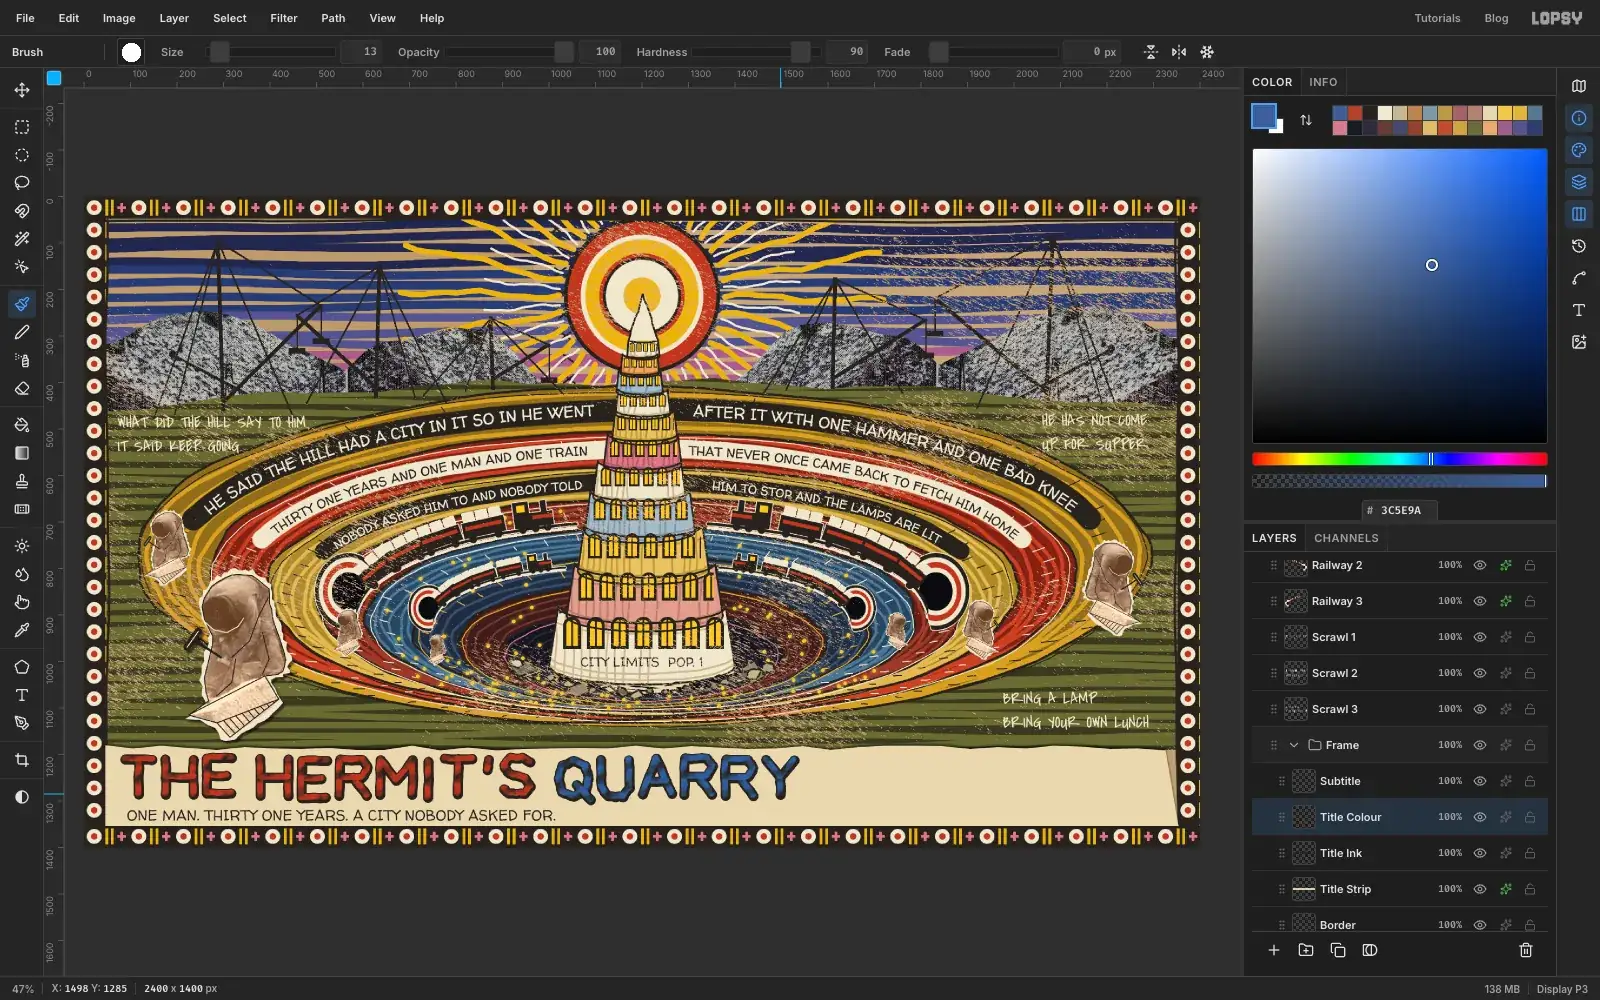
Add a layer called Title Colour. Open the Brushes window and pick Hard Round on the Presets tab. On the Shape tab set Size to 13, Hardness to 90 and Spacing to 6. On the Texture tab, choose Noise, set the blend mode to Subtract and Scale to 30. Close the window.
Now go along each letter again, down the middle of each graphite stroke, twice, with the second pass a pixel or two off the first. Use for THE HERMIT'S and for QUARRY. The texture leaves the mottled look of crayon, and the graphite shows round the edges as an outline.
-
Make a colour key from the picture
Concept artists test a scene at different times of day in tiny thumbnails called colour keys. Yours come straight from the picture.
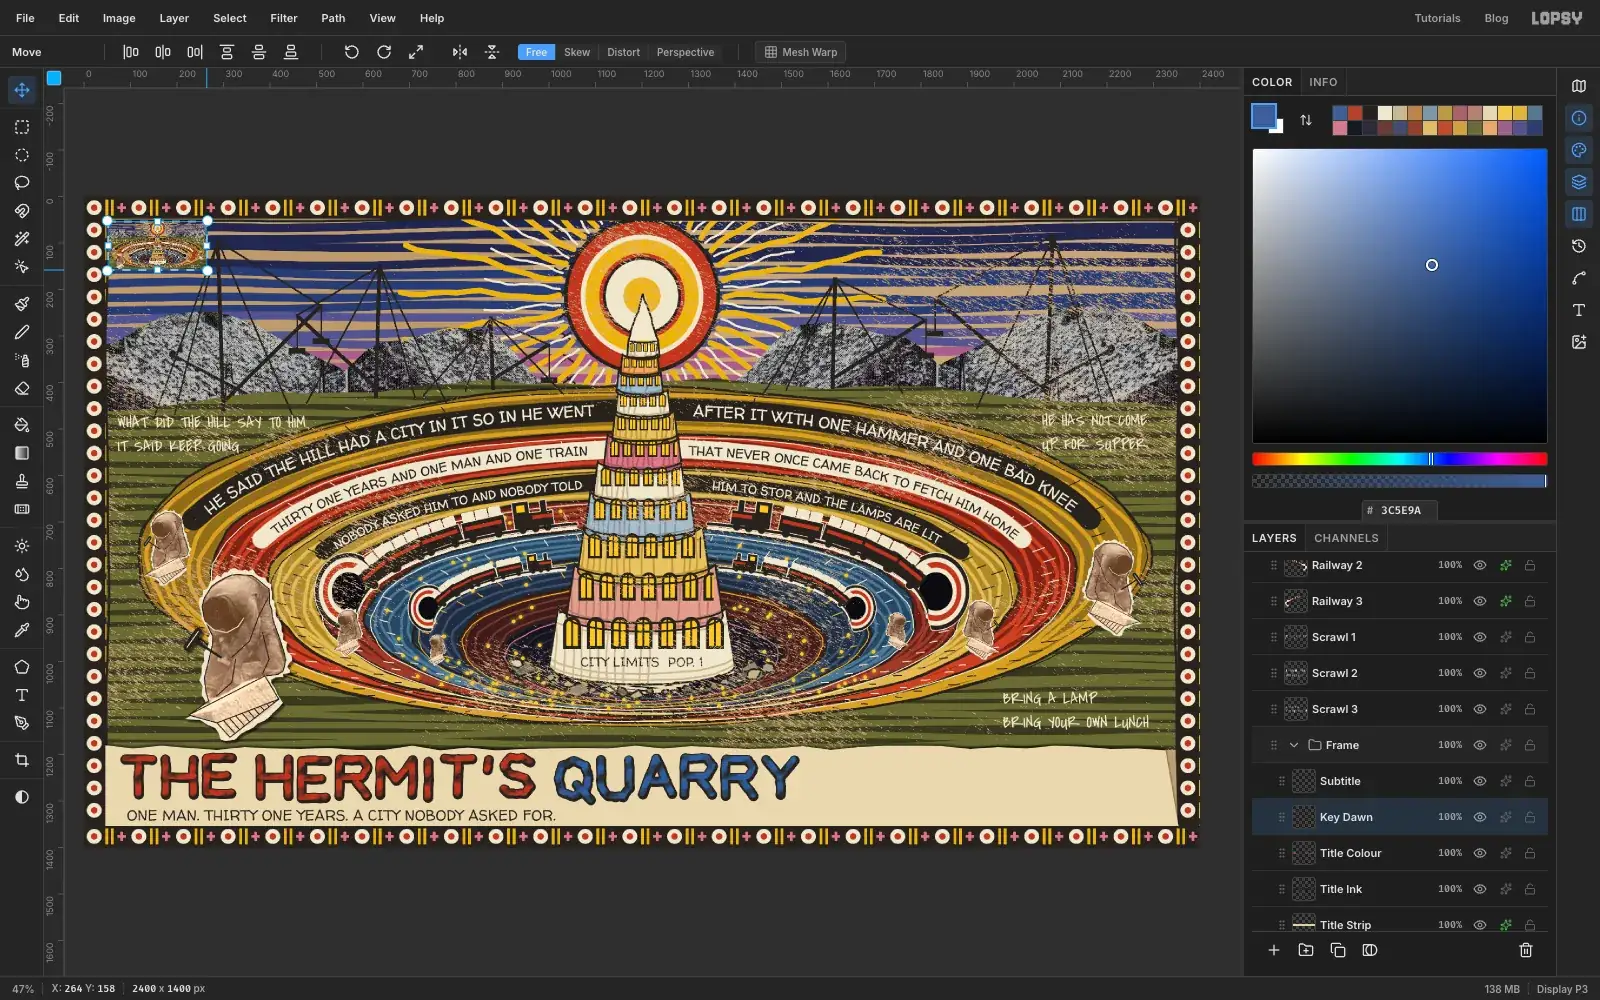
With Title Colour active, press Cmd+D and use the marquee's exact-size dialog to select From 52, 54 to 2348, 1180, which is the whole picture inside the border. Choose Edit → Copy Merged, then Edit → Paste. It lands exactly in place on its own layer. Rename it Key Dawn.
With the Move tool active, hold Cmd and drag the bottom-right corner handle up and to the left, until the copy is about 212 px wide. Press Cmd+D.
-
Grade the keys for three times of day
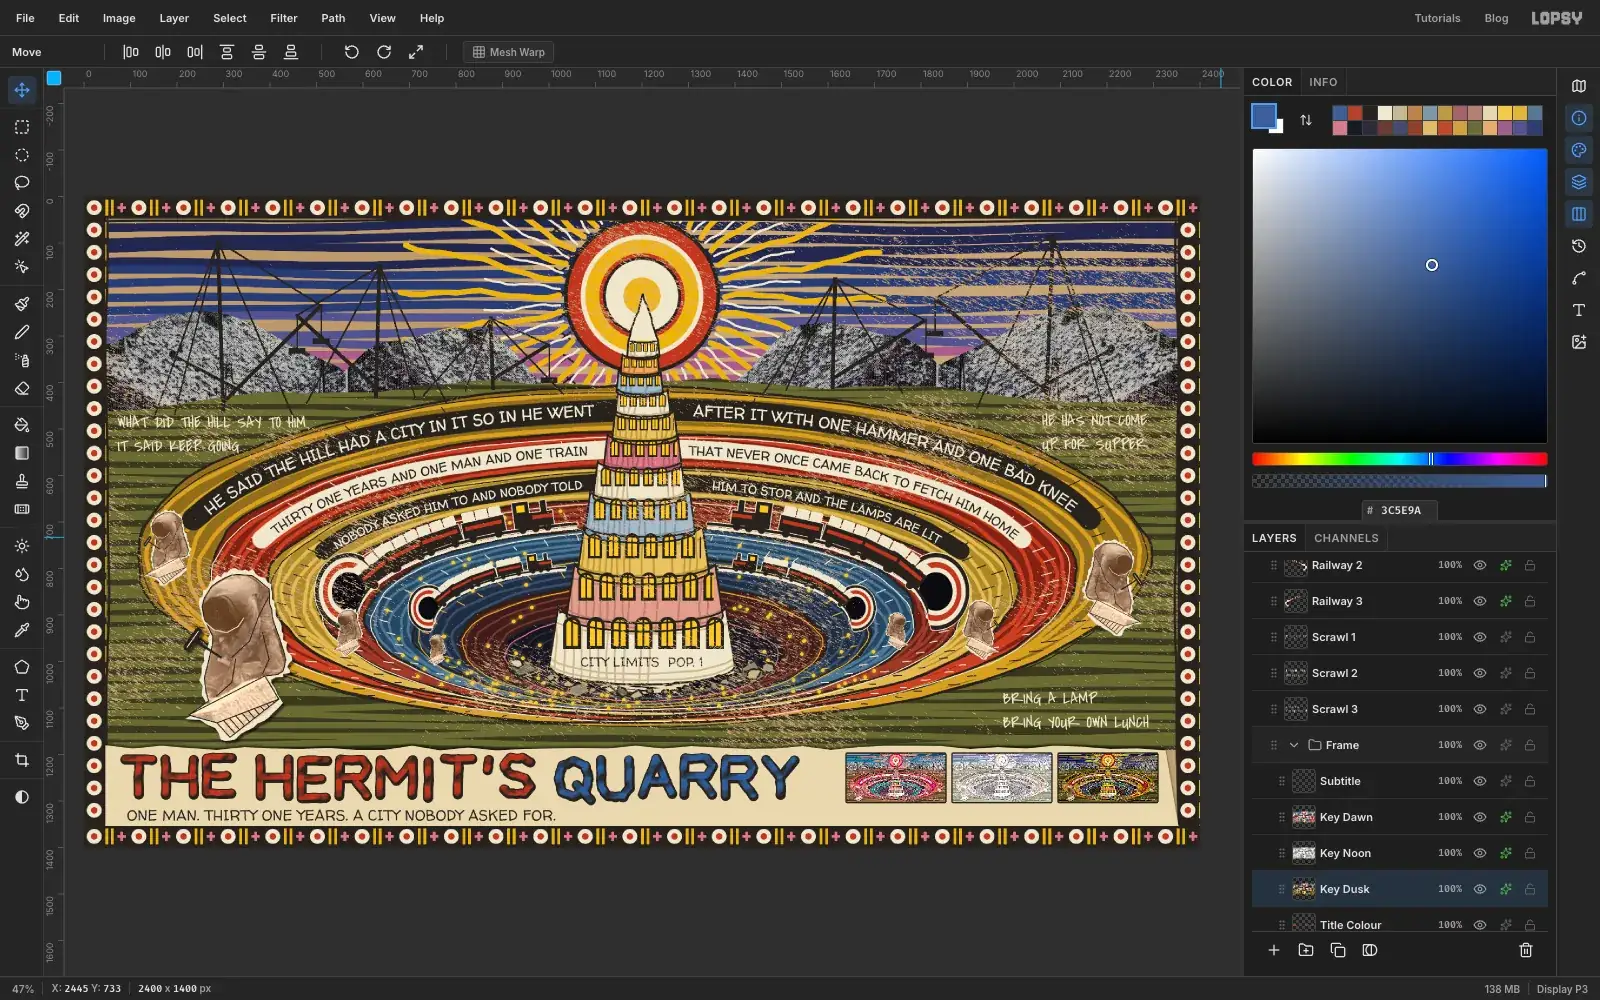
With Key Dawn active, apply Filter → Hue/Saturation... with Hue -30, Saturation 10 and Lightness 10. Apply Filter → Unsharp Mask... with Amount 1 and Radius 1 to crisp up the tiny picture. Press V and drag it into the title strip, with its left edge at about x 1640 and its top at about y 1200. Open its effects, tick Stroke, and set Width to 3 and the colour to .
Make two more keys the same way: click Title Colour, select the same region, Copy Merged, Paste, rename, scale down, filter, Unsharp Mask, drag into place and add the Stroke. Space them 228 px apart:
- Key Noon, left edge at x 1868: Hue 0, Saturation -62, Lightness 36
- Key Dusk, left edge at x 2096: Hue 0, Saturation 16, Lightness -6
-
Label the keys and circle the winner
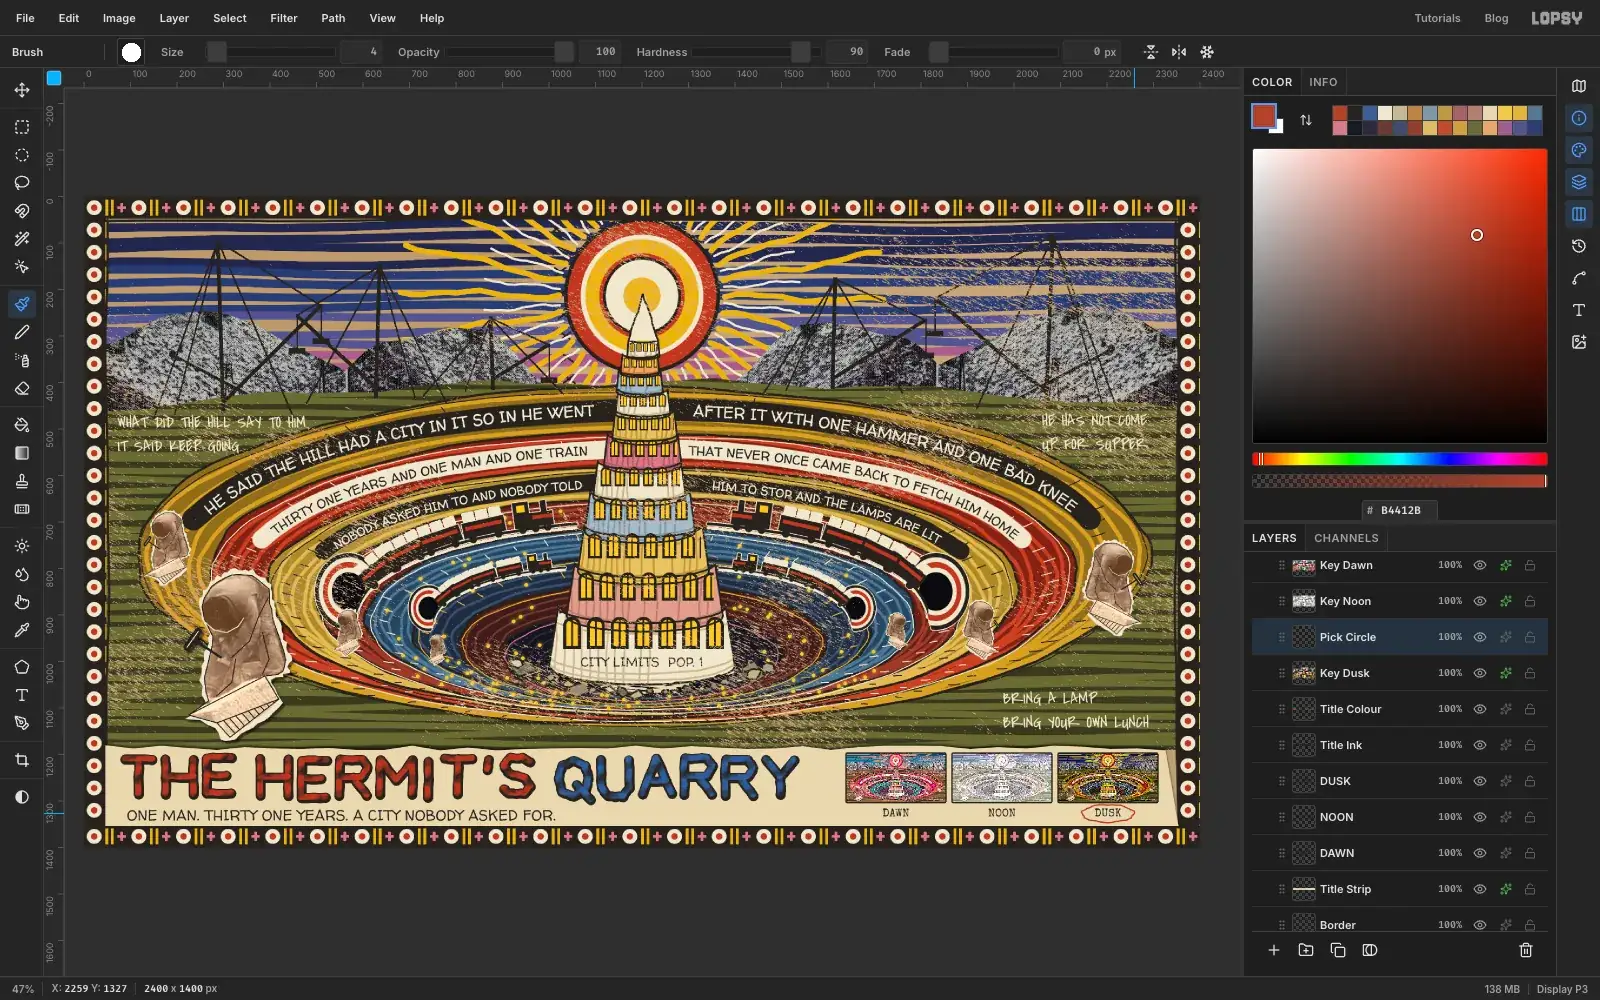
Click the Title Strip row and press T. Set the font to Special Elite, Size to 24, Align to Center and the colour to . Click under the middle of the first key, at about x 1746, y 1312, type
DAWNand press Tab. Click Title Strip again, and do the same forNOONat x 1974 andDUSKat x 2202.Click the Key Dusk row and add a layer called Pick Circle. Open the Brushes window and pick Hard Round on the Presets tab to clear the texture, then set Hardness to 90 and Spacing to 6 on the Shape tab. Use Size 4 in to draw one loose loop around DUSK, about 110 px wide and 38 px tall, keeping it clear of the thumbnail above and the border below. Somebody has made a decision.
-
Tape on the slate
Click the Pick Circle row and add a layer called Tape. Set the foreground to . With the Lasso, draw a strip with slightly torn ends across the top right, from about x 1926, y 74 to x 2318, y 158. Choose Edit → Fill and press Cmd+D.
With Tape still active, press T, set Special Elite, Size 25, Align Left and the colour . Click about 20 px in from the tape's top-left corner and type
SC. 41 EXT. THE CUT, DUSK. Press Enter, typeKEY ART, REV. 3, and press Tab.Click Rasterize Layer at the bottom of the Layers panel, then choose Layer → Merge Down, and rename the layer Tape. Press M and marquee the strip, leaving a few pixels spare. Press V and drag the small circle outside a corner to tilt the tape by about 3° clockwise. Press Cmd+D.
Open its effects, tick Drop Shadow, and set Offset X to 2, Offset Y to 3, Blur to 4 and Opacity to 45.
Save with File → Save Project, and export the finished piece with File → Quick Export PNG. And if anyone asks who designed the production: the hill did.