Design a Post-Modern 1980s Logo Identity Sheet
Build an 80s post-modern logo sheet in Lopsy with a column and pediment mark, airbrushed gradients, a halftone dot grid, tilted type and a monogram.
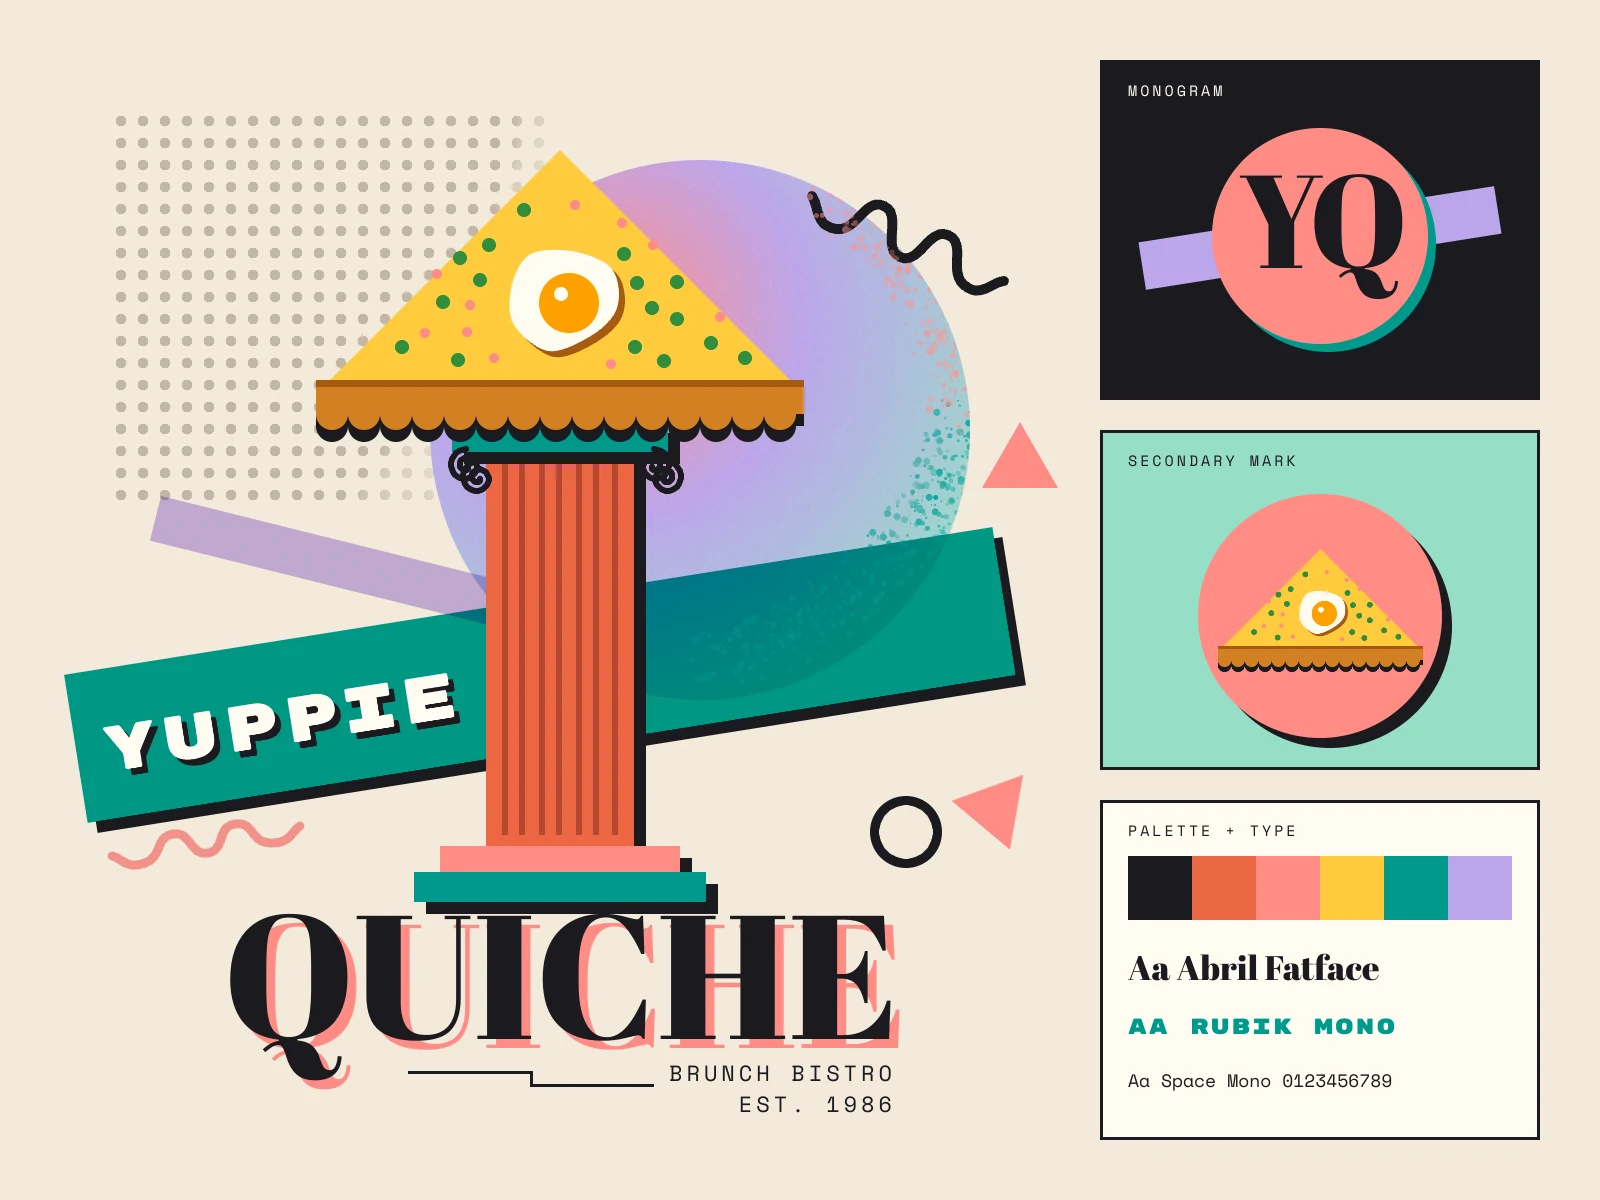
Post-modern design arrived in the late 1970s and 1980s as a reaction against the clean Swiss grid. Architects like Michael Graves put cartoon columns and pediments on office blocks. The Memphis group covered furniture in squiggles and confetti. Designers like April Greiman and Wolfgang Weingart layered type on tilted planes, airbrushed soft gradients and let early computer dot patterns show. It was playful, a bit ironic and very colourful.
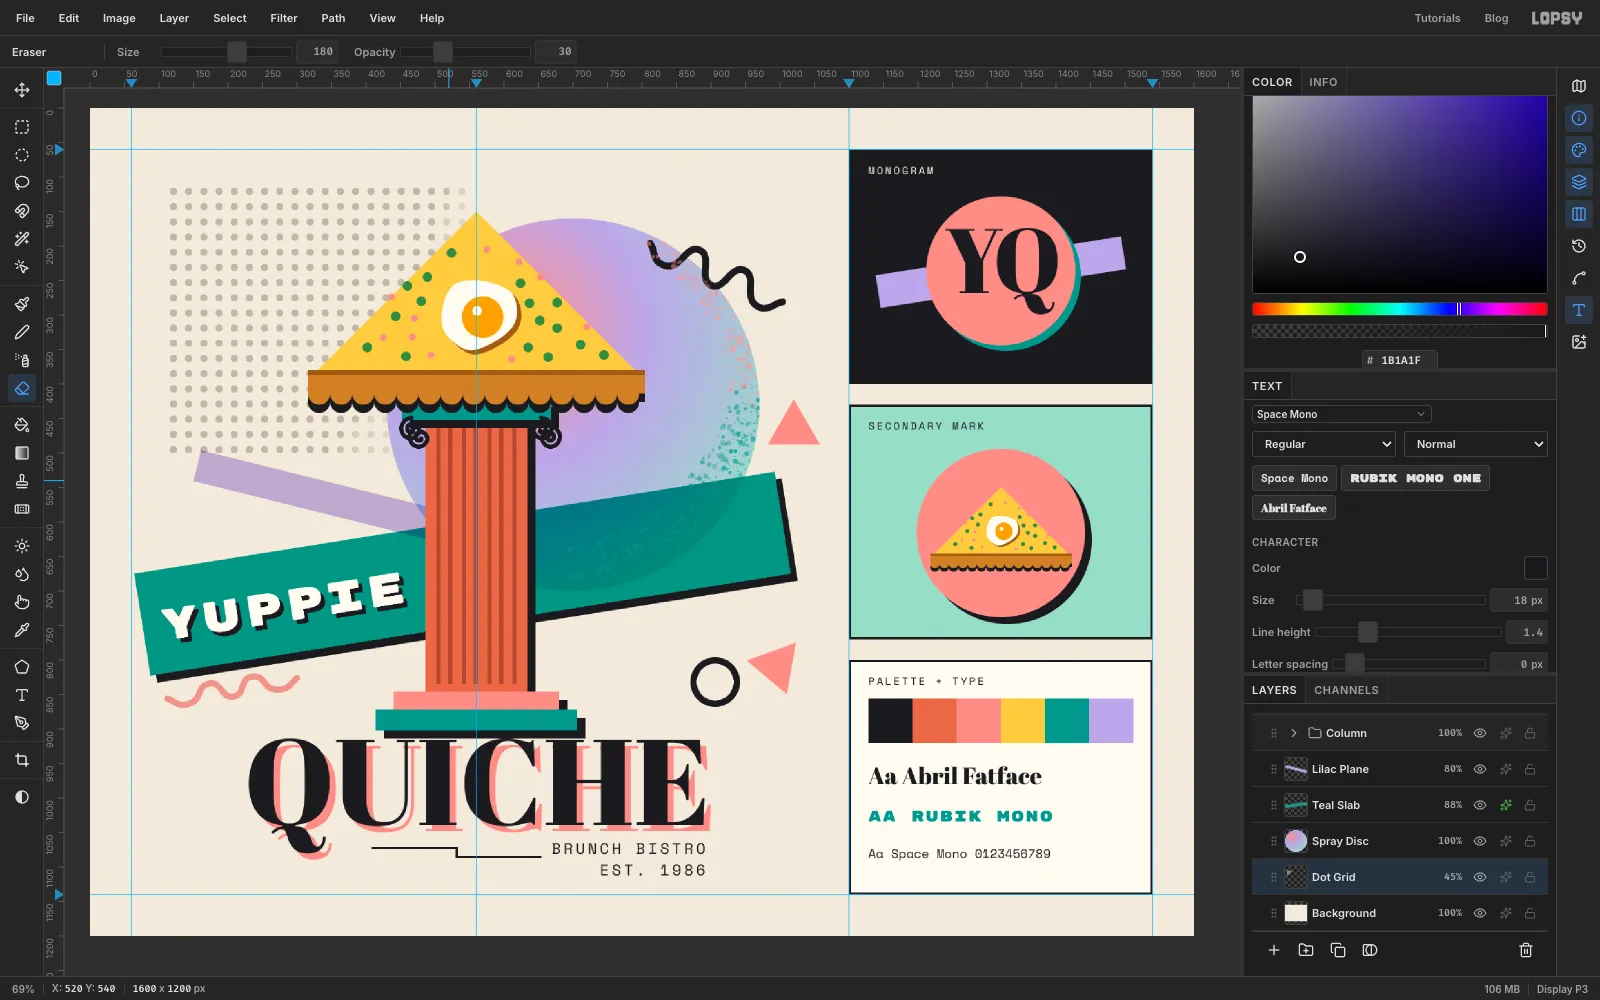
In this tutorial you'll use that language to build a logo identity sheet for Yuppie Quiche, a made-up 1980s brunch bistro. The joke at the heart of the mark is architectural. A slice of quiche becomes a classical pediment, a fried egg becomes its round window, and the whole thing stands on a column that rests on the word QUICHE. The sheet is 1600 × 1200 px. The primary logo is on the left. On the right are three cards for the monogram, a secondary mark and the palette.
The tools you'll use:
- guides, the Rectangular and Elliptical Marquee (including their exact-corner dialog), and the grid with Snap
- the Halftone and Add Noise filters and a radial Gradient
- the Pen tool, Path to Selection and Enter-to-stroke
- the Pencil, Brush, Spray, Eraser and Shape tools
- Select → Shrink, and Cmd-clicking a thumbnail to load a layer's shape
- Copy, Copy Merged, Paste, and the Move tool's rotate and scale handles, on pixels and on live text
- the Multiply blend mode, groups, and the Drop Shadow and Stroke layer effects
- live text in Abril Fatface, Rubik Mono One and Space Mono
The palette:
-
Paper
-
cream
-
ink
-
Dot grid grey
-
Airbrush
-
Teal
-
lilac
-
mint
-
Coral pink
-
Column vermilion
-
Custard
-
crust
-
spinach
-
Yolk
-
Set up the sheet and block in the dot grid
Choose File → New, keep the units on Pixels, and make the document 1600 wide and 1200 high.
Click the top ruler to drop vertical guides at 60, 560, 1100 and 1540. Then click the left ruler at 60 and 1140. The outer guides are the sheet's margins. The guide at 560 is the centre line of the logo, and 1100 is where the cards start.
Click Background, set the foreground colour to and choose Edit → Fill.
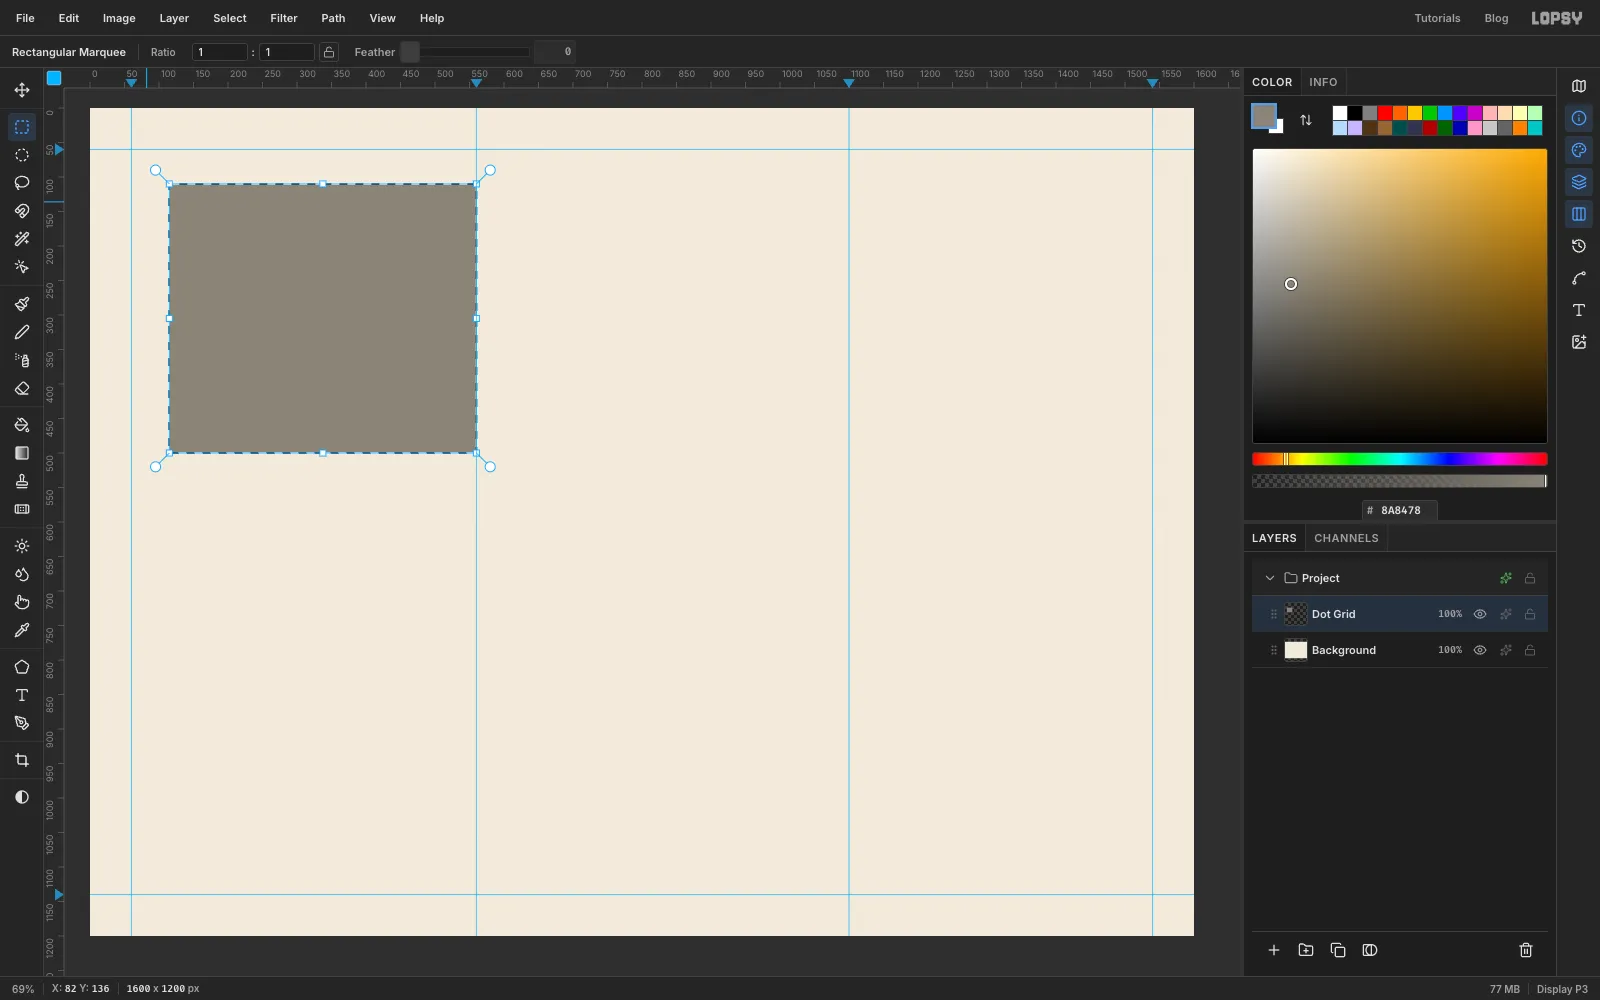
Click Layer 1 and rename it Dot Grid. Pick the Rectangular Marquee and click once on the canvas without dragging. That opens a small dialog where you can type exact corners. Enter From 115, 110 and To 560, 500, then fill the selection with .
-
Turn the block into a halftone dot grid
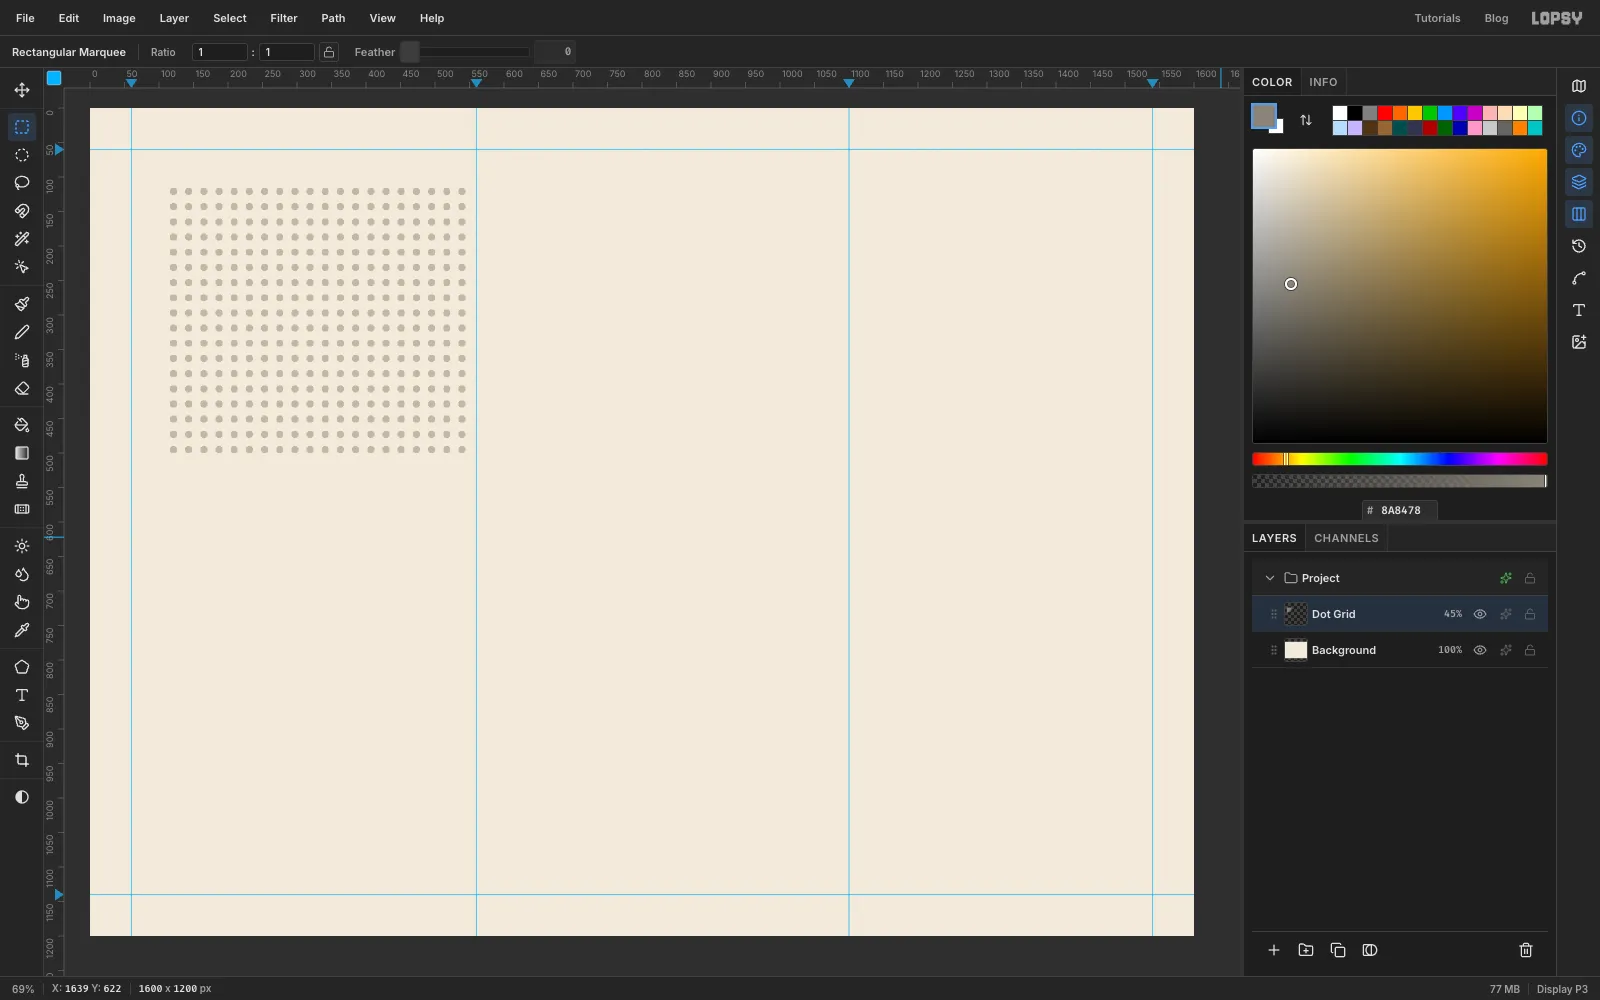
Keep the selection and choose Filter → Halftone…. Set Dot Size 22, Density 1, Angle 0 and Softness 0.4, then click Apply. A flat mid-grey turns into an even grid of round dots, a nod to the bitmap patterns of the first Macintosh.
Press Cmd+D to deselect. Open the layer's effects (the ✦ button on its row), set Blend to Multiply, and lower the layer's opacity to 45% so the dots print softly on the paper.
-
Airbrush a gradient disc
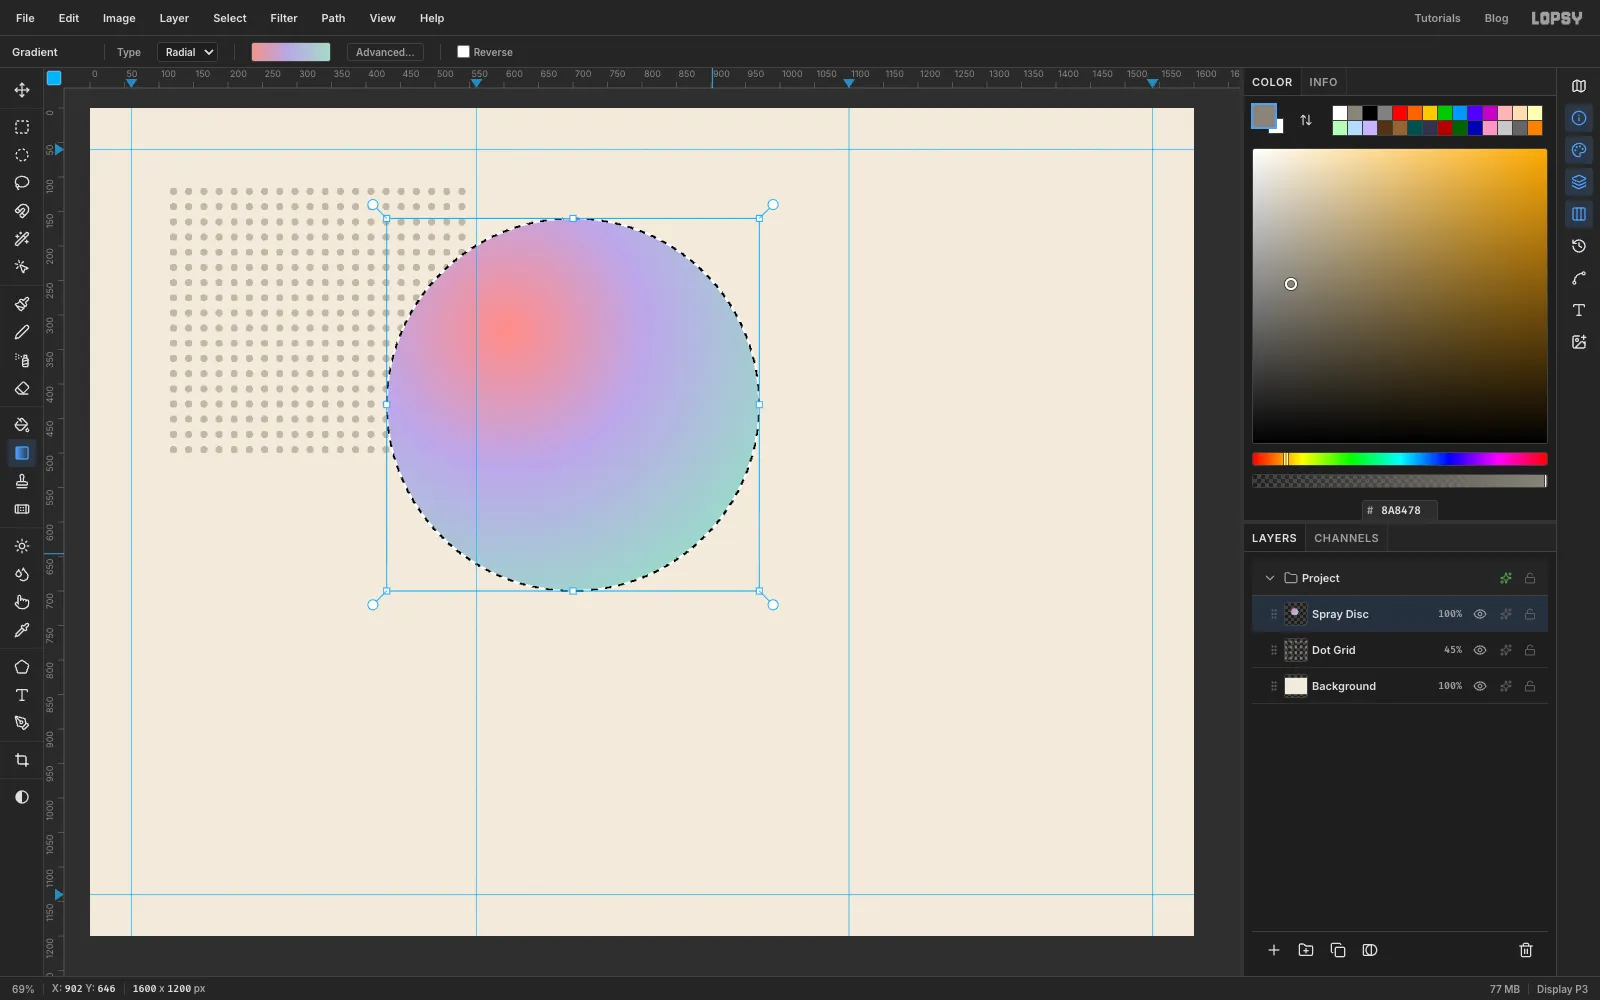
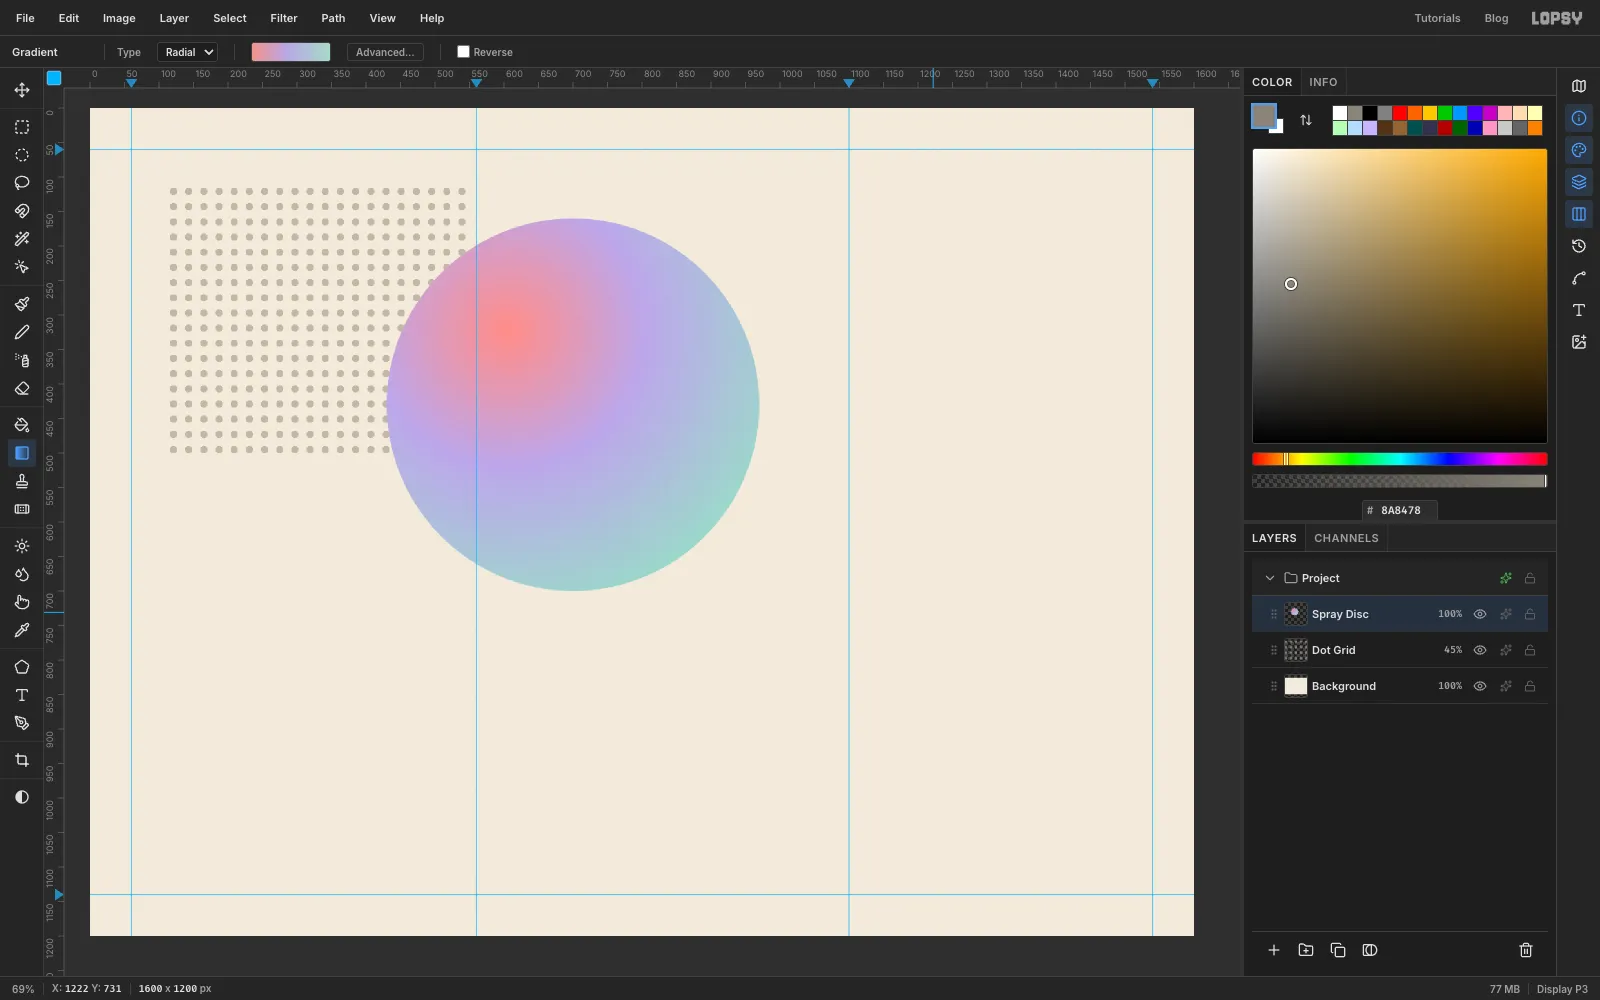
Click Add Layer and name it Spray Disc. Pick the Elliptical Marquee, click once to open its dialog and enter From 430, 160 To 970, 700. That's a 540 px circle that overlaps the right side of the dot grid.
Pick the Gradient tool, set it to Radial and open Advanced…. Make three stops: at the left end, at 45% and at the right end. Click Done.
Drag from a point inside the upper-left part of the disc, about a third of the way in from its edge, to just outside its lower-right edge. The coral hot spot sits off-centre, like an airbrushed highlight.
-
Add airbrush grain
Real airbrush work is never perfectly smooth. With the selection still active, choose Filter → Add Noise…, set Amount 10, click Mono and Gaussian, and apply. Press Cmd+D.
-
Tilt a teal slab across the composition
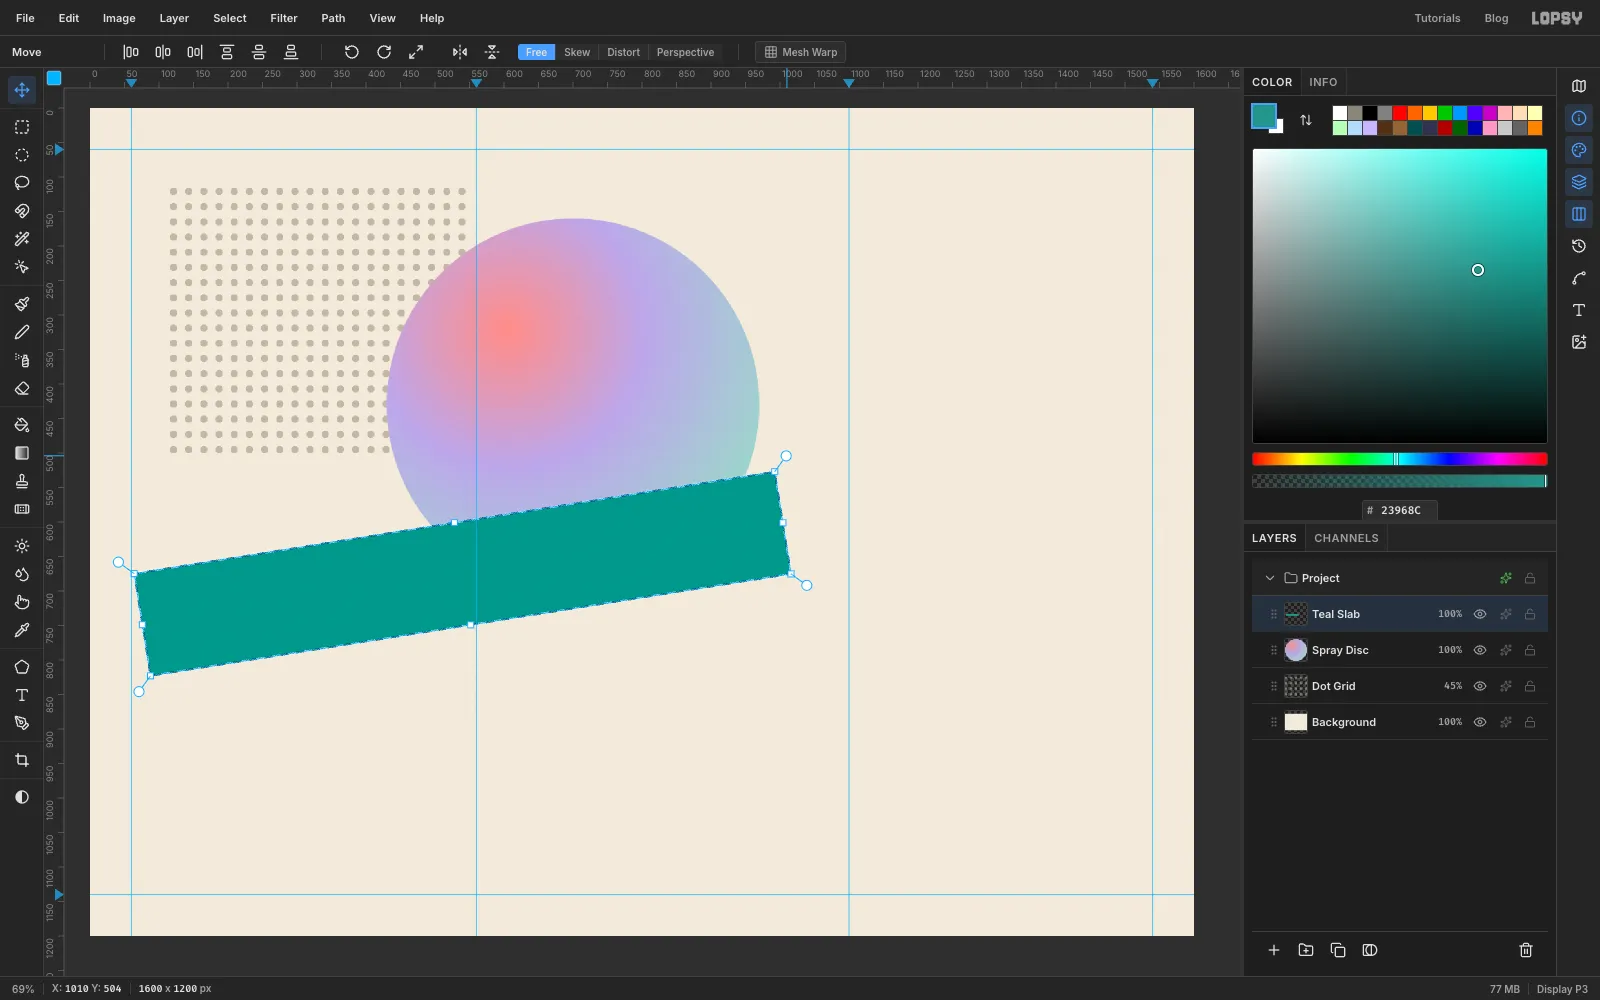
Click Add Layer and name it Teal Slab. Use the Rectangular Marquee dialog for From 70, 600 To 1010, 750 and fill it with .
Press V for the Move tool. Grab the round rotation handle just outside the top-right corner of the selection and drag it upward, turning the slab about 9° anticlockwise, until its right end sits roughly 150 px higher than its left. Release, press Enter to commit the rotation, and press Cmd+D.
Tilted planes are the signature of New Wave typography, and this slab will carry the word YUPPIE.
-
Cross it with a second translucent plane
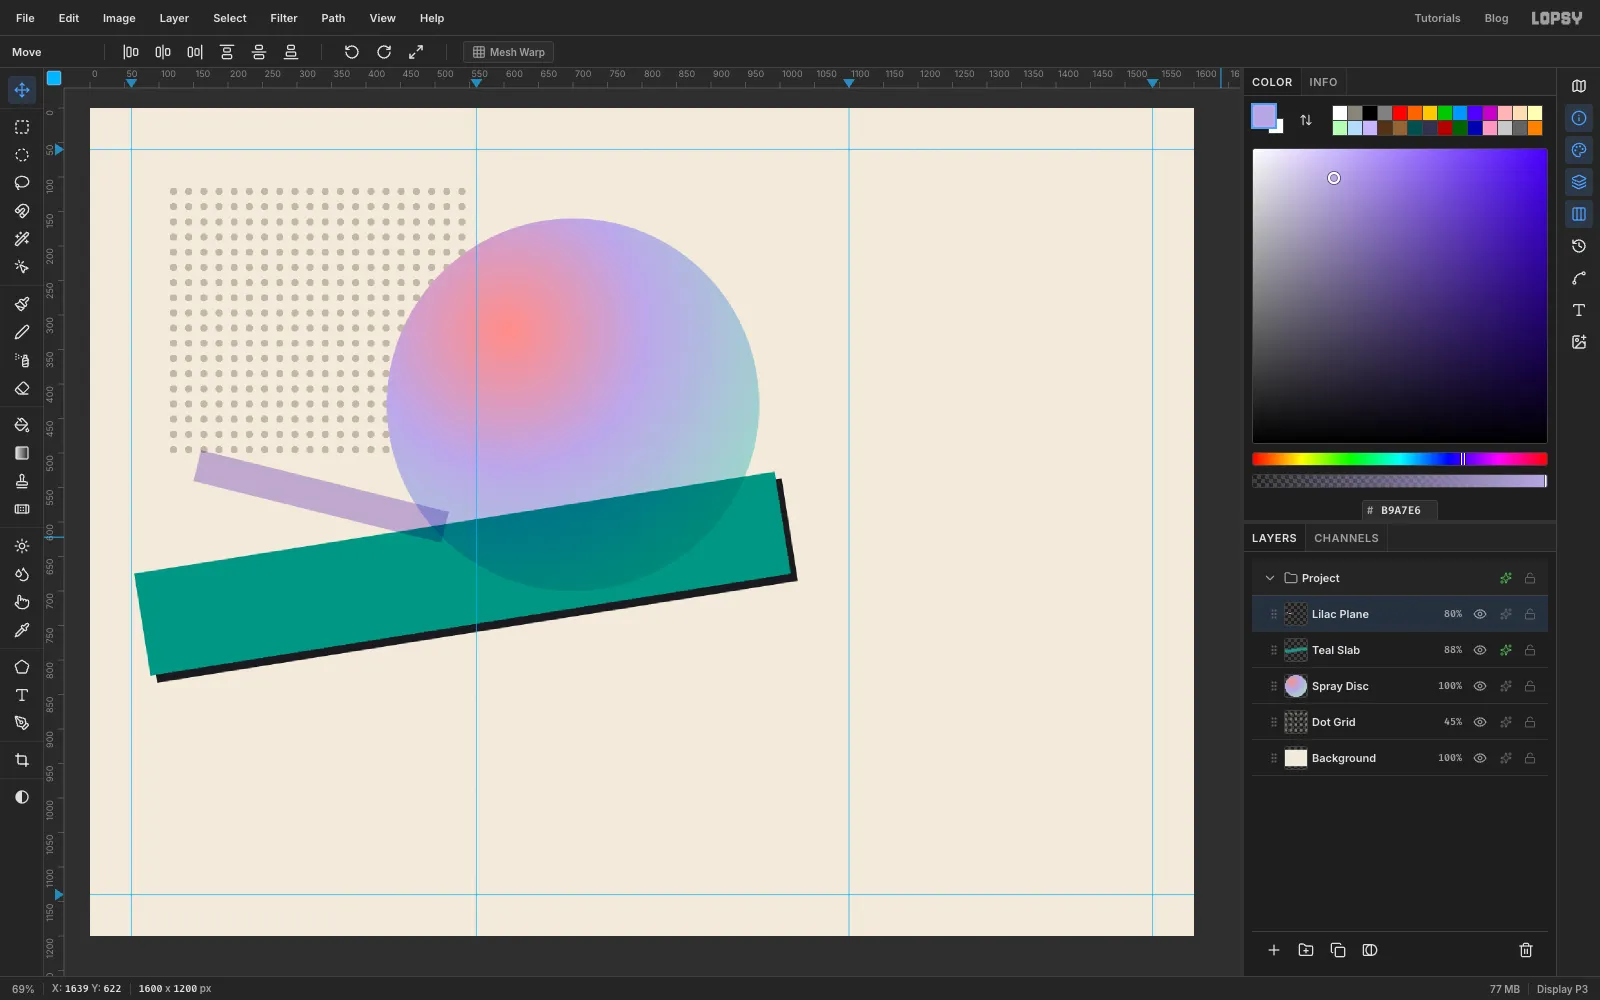
With Teal Slab active, open its effects. Set Blend to Multiply and the opacity to 88%, so the disc shows through where they overlap. Tick Drop Shadow and set Offset X 10, Offset Y 10, Blur 0, Spread 0, Opacity 100, with the colour . A blur of 0 gives the flat, offset shadow that runs through the whole sheet. From here on, a shadow written as 6 / 6 means Offset X 6 and Offset Y 6, with Spread left at 0.
Click Add Layer and name it Lilac Plane. Select From 150, 540 To 520, 586, fill with , and press V. This time drag the top-right rotation handle downward to turn the bar 14° clockwise. Press Enter, then Cmd+D. Set its Blend to Multiply and opacity to 80%.
-
Build a fluted column
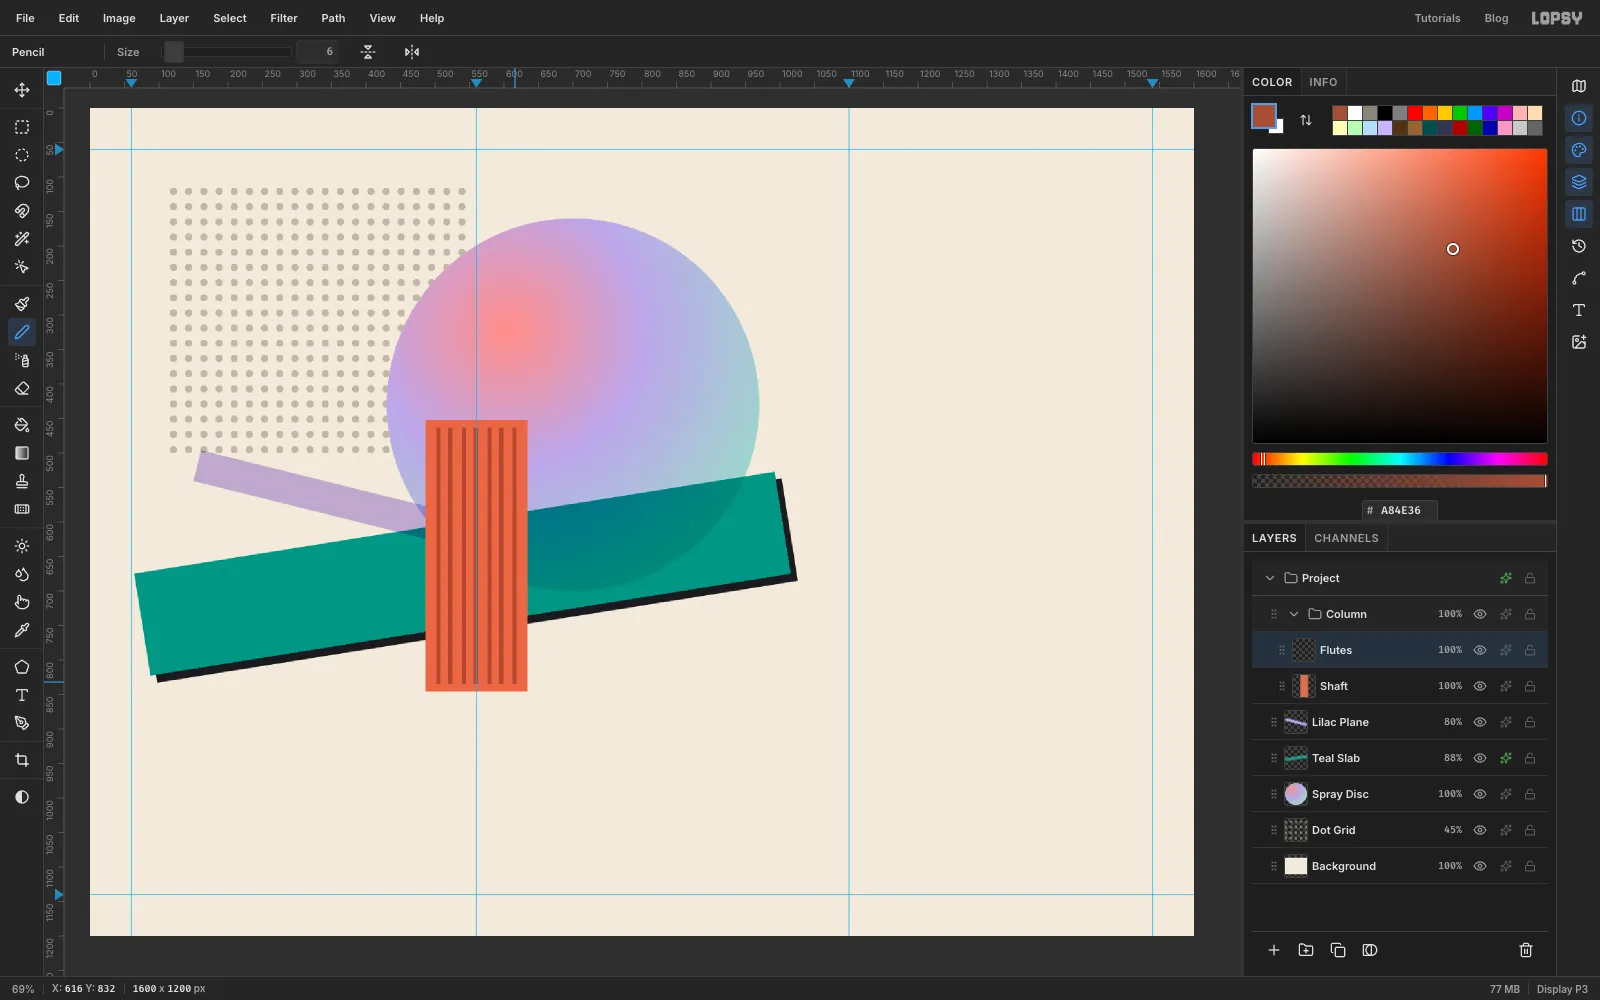
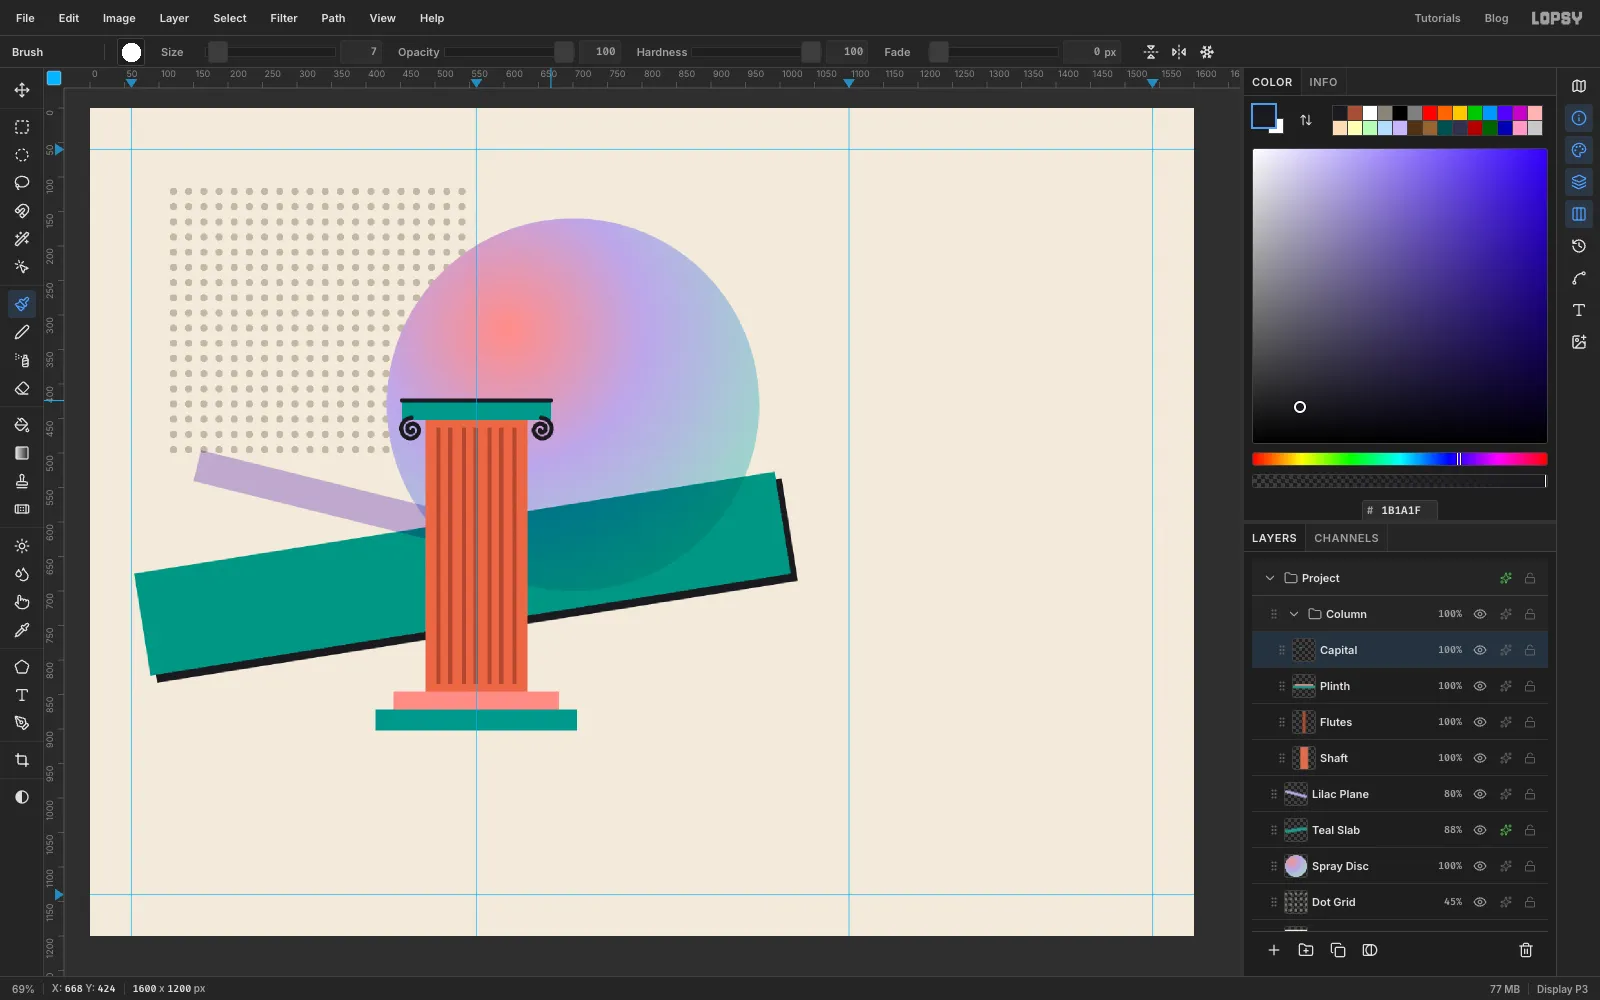
Click New Group in the Layers panel and name the group Column. With the group selected, click Add Layer so the new layer goes inside it, and name it Shaft. Select From 486, 452 To 634, 846 and fill with . Deselect.
Add another layer called Flutes. Pick the Pencil, set Size 6 and the colour to . For each flute, click near the top of the shaft, hold Shift and click near the bottom. That draws a perfectly straight vertical line. Put the middle flute on the centre guide, then three more on each side about 18 px apart, so the outer ones land near X 505 and 615. Stop each line about 14 px short of the top and bottom of the shaft.
-
Add the plinth, capital and volutes
Add a layer called Plinth. Select From 440, 846 To 680, 872 and fill with . Then select From 414, 872 To 706, 902 and fill with . That gives you a stepped base, pink over teal.
Add a layer called Capital. Select From 452, 424 To 668, 452 and fill with . Deselect.
The Ionic volutes are two hand-drawn spirals. Pick the Brush with Size 7 and Hardness 100, and set the colour to . At each end of the capital, start a stroke at the capital's bottom edge and wind it inward, about one and three-quarter turns, ending near the middle of a spiral roughly 35 px across. Curl the left one anticlockwise and the right one clockwise so they mirror each other. Finish with a crisp line along the top of the capital: click its top-left corner, then Shift-click its top-right corner.
-
Give the column a hard shadow
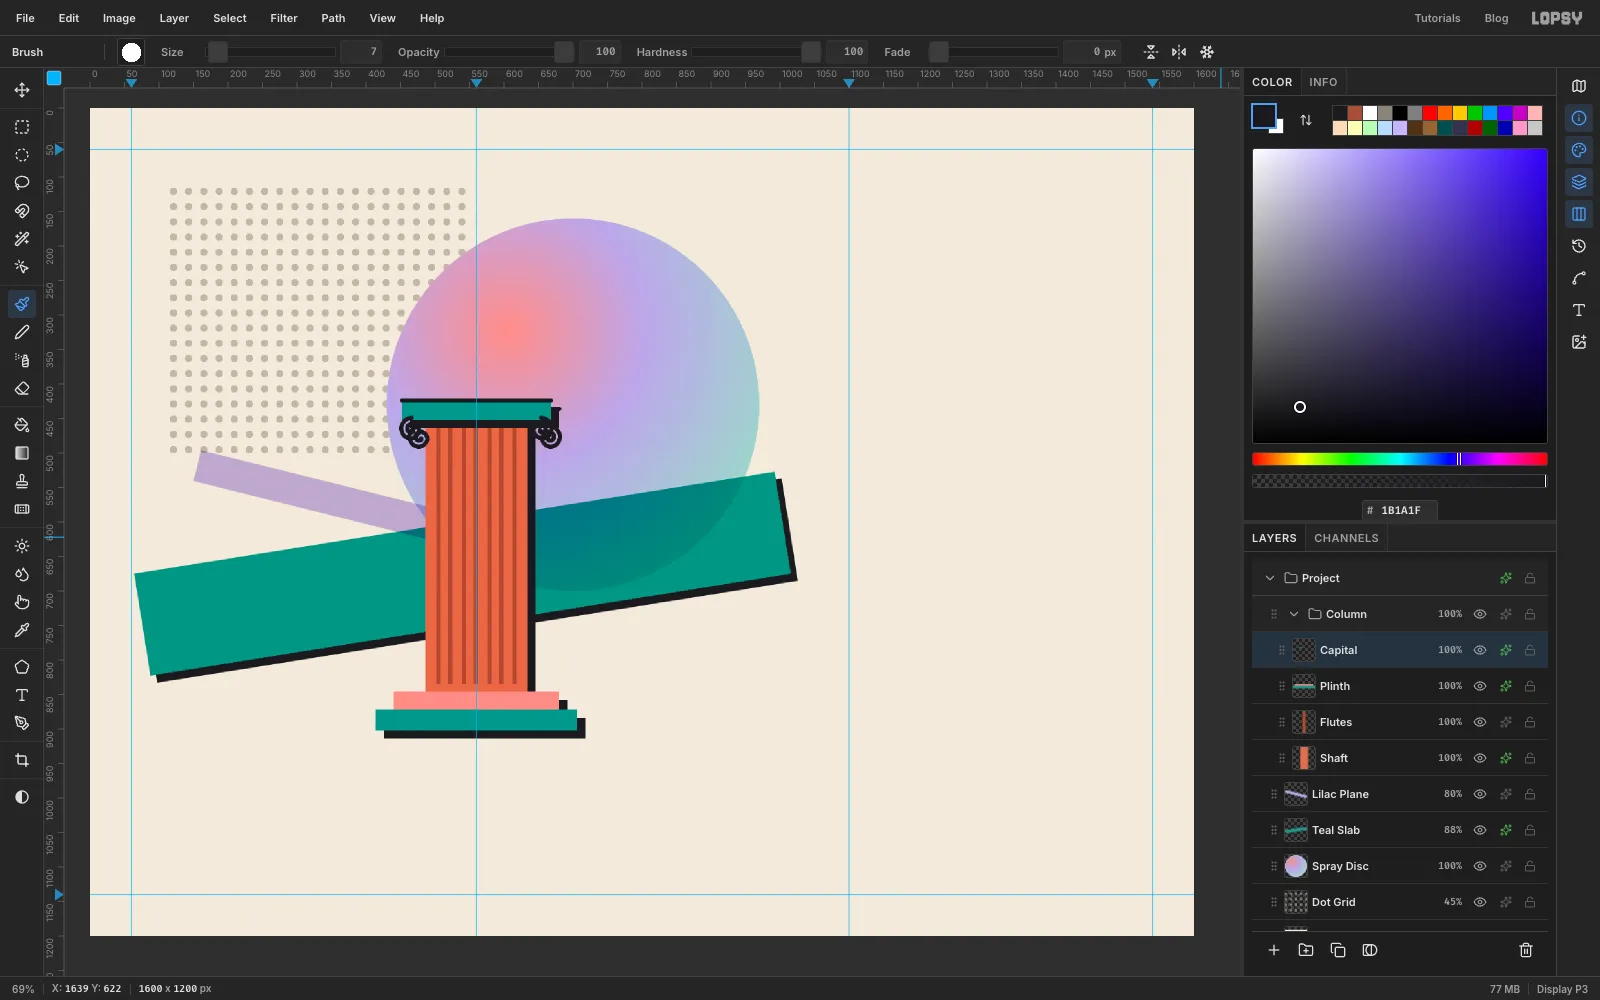
Layer effects go on layers, not on groups, so give each of the three solid parts its own shadow. Click Shaft, open its effects and tick Drop Shadow with Offset X 12, Offset Y 12, Blur 0, Spread 0, Opacity 100 and colour . Do the same for Plinth and Capital. Leave Flutes without one.
-
Draw the quiche pediment with the Pen
Click the Column group's arrow to collapse it. With the group row selected, click New Group and name it Pediment. Then Add Layer inside it and name it Custard.
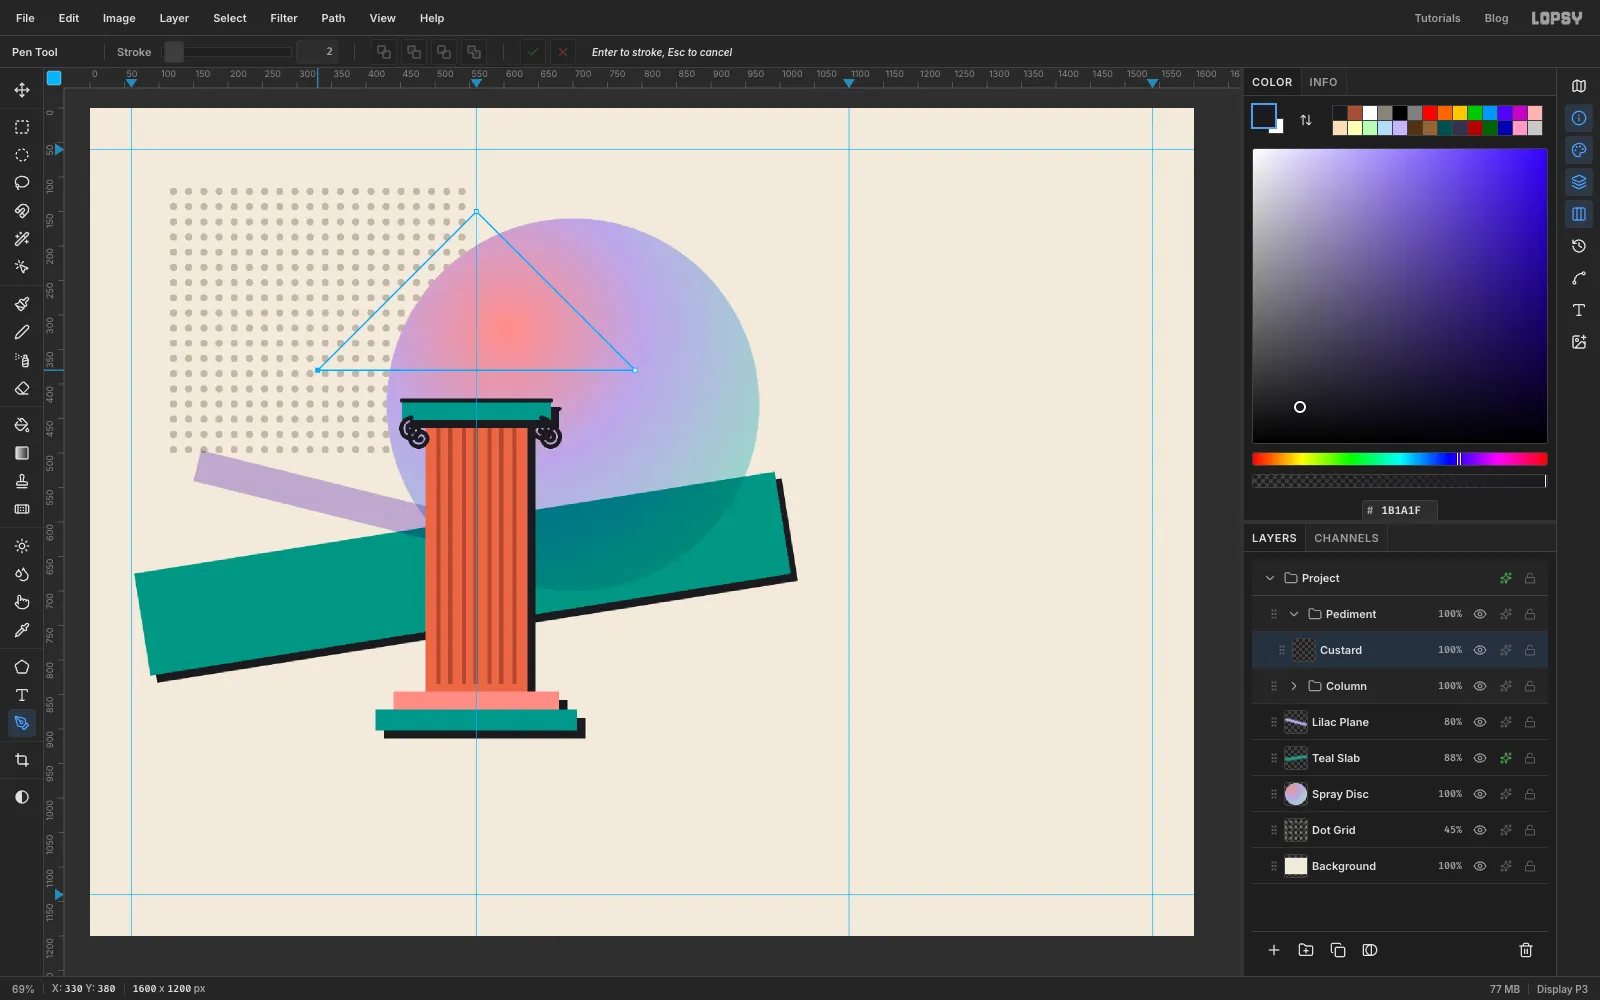
Pick the Pen tool. Click once at about (330, 380) for the left corner, just above the capital and well to its left. Click once on the centre guide at (560, 150) for the apex, a little below the top of the dot grid. Click once at (790, 380) for the right corner, level with the first, and click the first point again to close the triangle. Single clicks give sharp corners, and the two slopes come out at 45°.
-
Fill the custard and dot in the filling
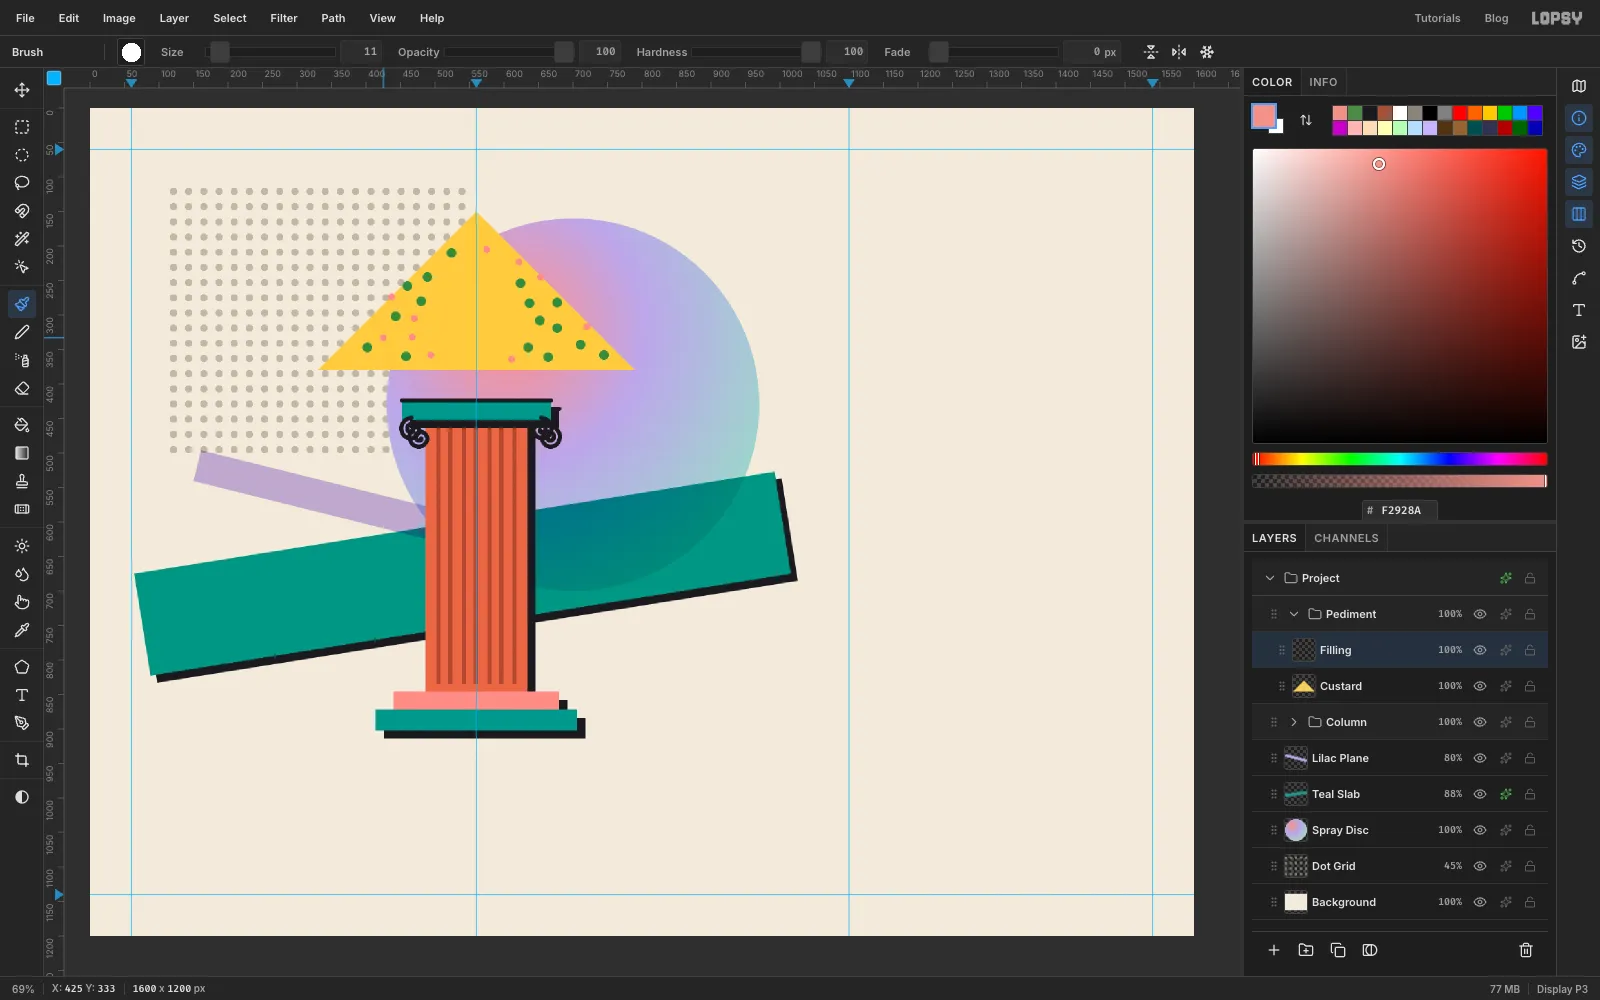
Open the Paths panel and click Path to Selection, then Delete Path. Fill the selection with and deselect.
Add a layer called Filling. Pick the Brush with Size 15 and colour , and click about sixteen spinach flecks around the triangle. Switch to Size 11 and and click about ten pinker flecks of ham in the gaps. Keep the flecks off the middle, where the egg will go, and away from the edges.
-
Make the scalloped crust
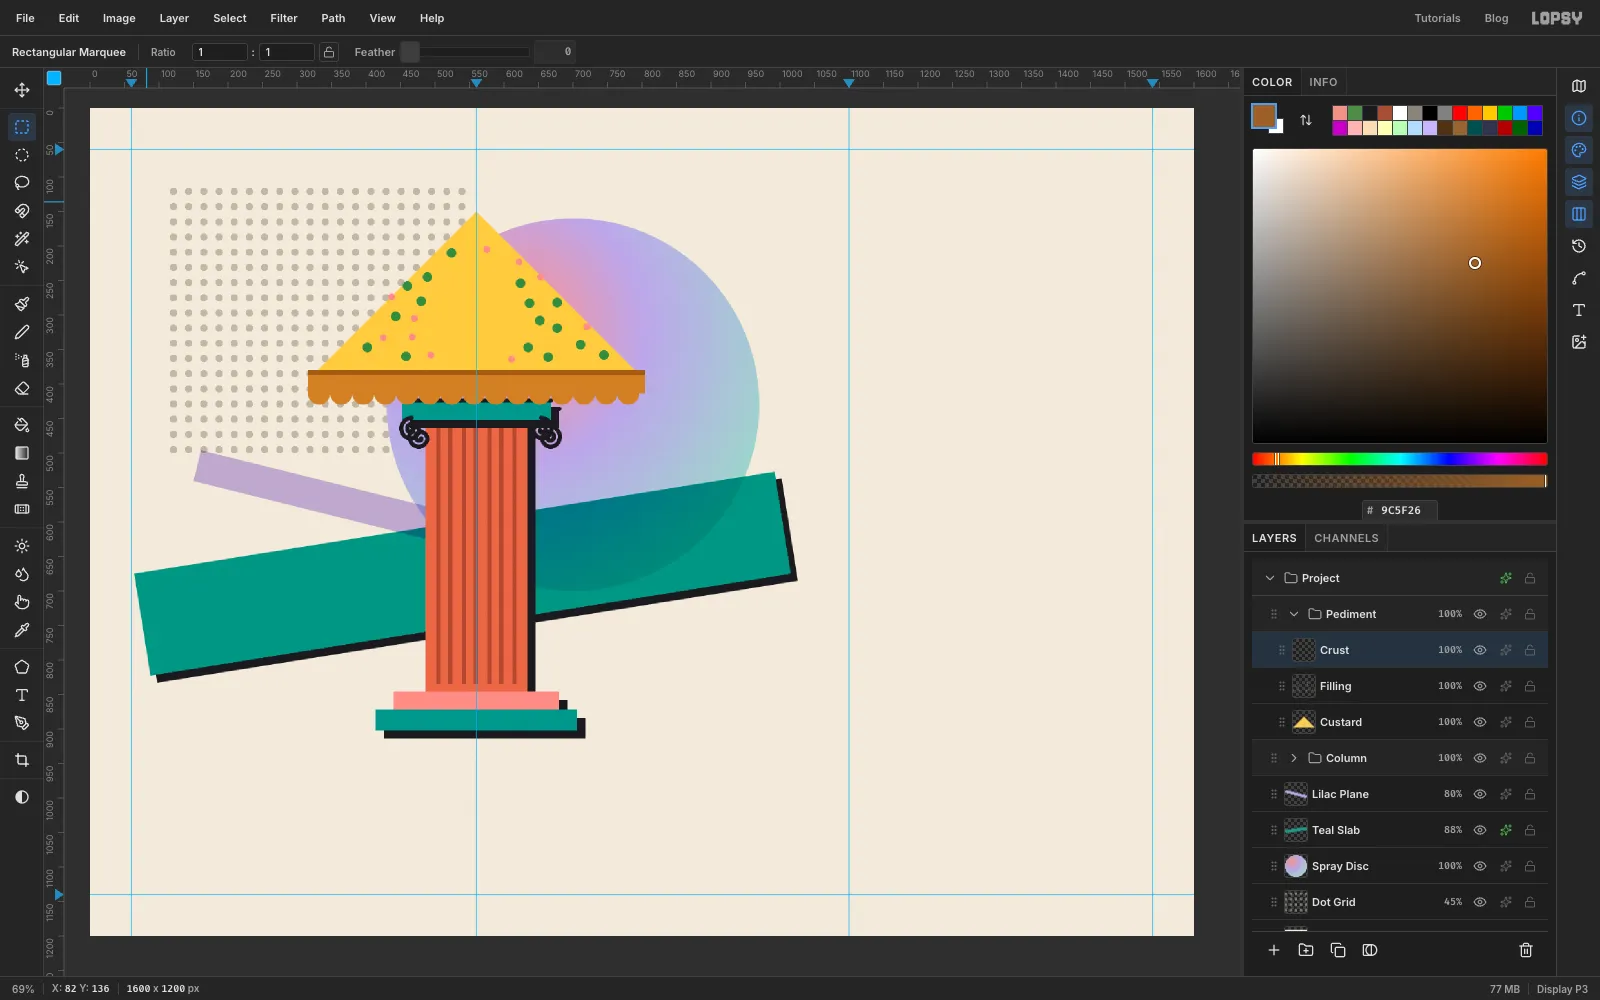
Add a layer called Crust. Select From 316, 380 To 804, 414 and fill with .
Now the scallops. Use the Elliptical Marquee dialog to make a small circle, 32 px across, centred on the bottom edge of the crust at its left end: From 316, 398 To 348, 430. Fill it with . Then repeat along the edge, moving both X values right by 32 each time. The From X values run 316, 348, 380 and so on up to 764, and each To X is 32 more. That's fifteen circles. The last one stops 8 px short of the band's right end, which is fine.
Finally, select a thin strip along the top of the crust, From 316, 380 To 804, 387, and fill it with the darker for a toasted edge. Deselect.
-
Trace a wobbly fried egg
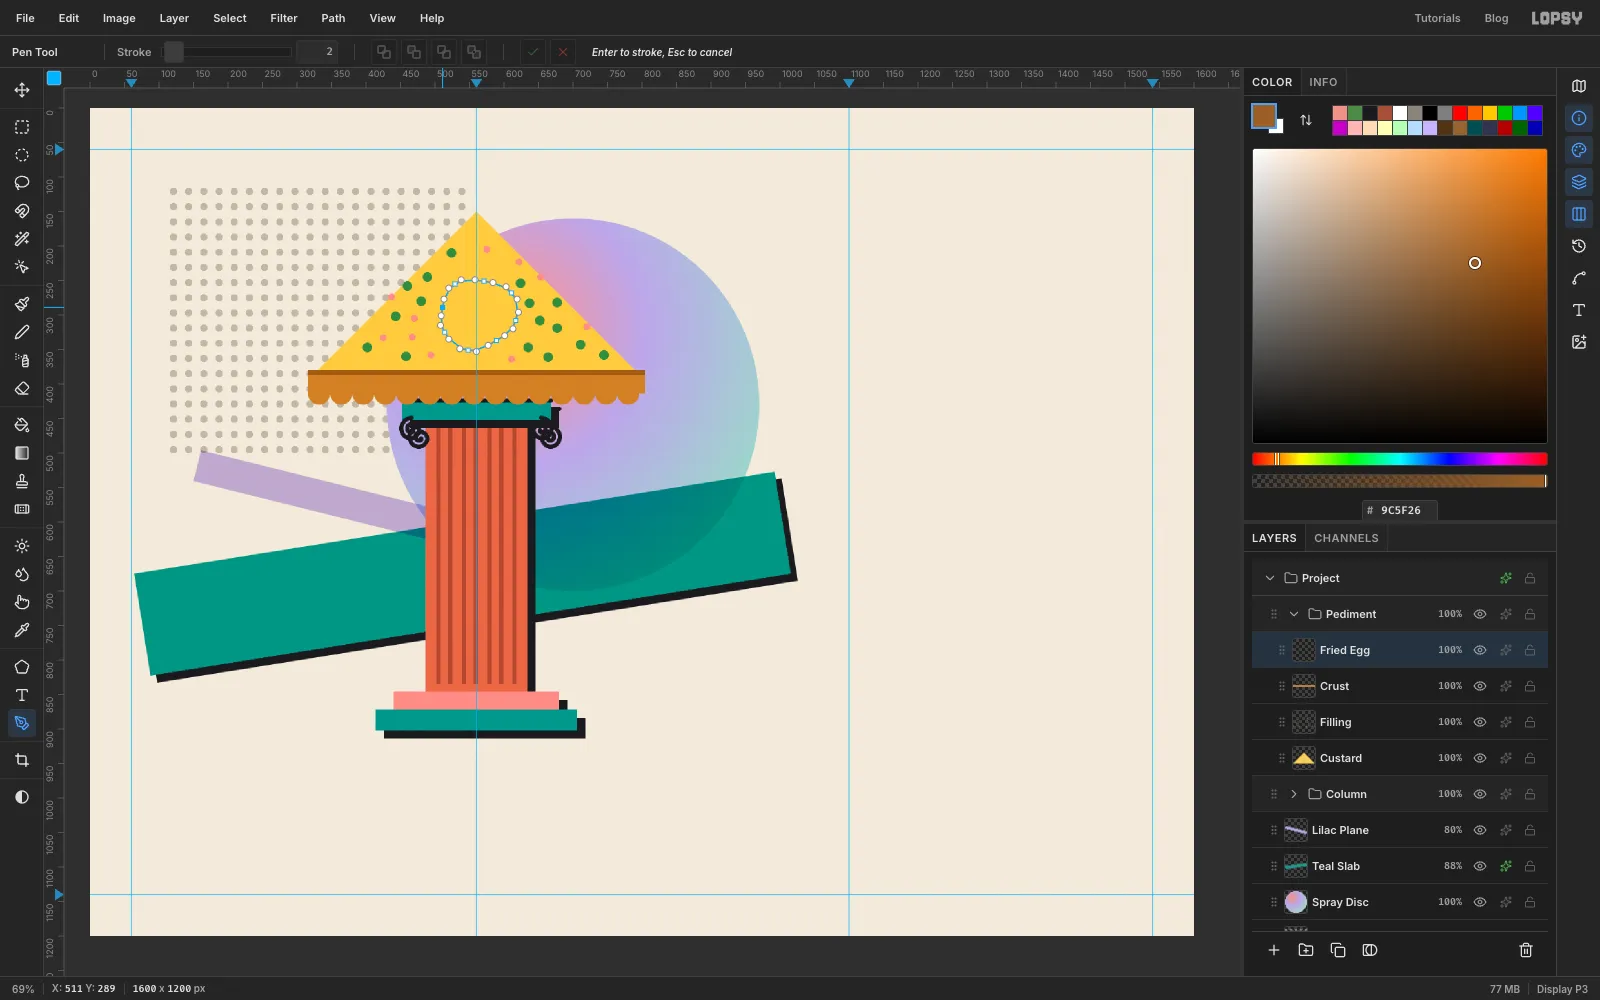
A perfect circle here reads as an eye. A fried egg needs a lumpy edge. Add a layer called Fried Egg and pick the Pen.
Work your way around the middle of the triangle, on the centre guide about 150 px below the apex. Press and drag at each of eight points to pull out smooth handles, making a shape about 110 px across and a little wider than it is tall. Then nudge two or three of the points in or out by 5–10 px so the edge wobbles. Close the path on the first point.
-
Fill the egg and add the yolk
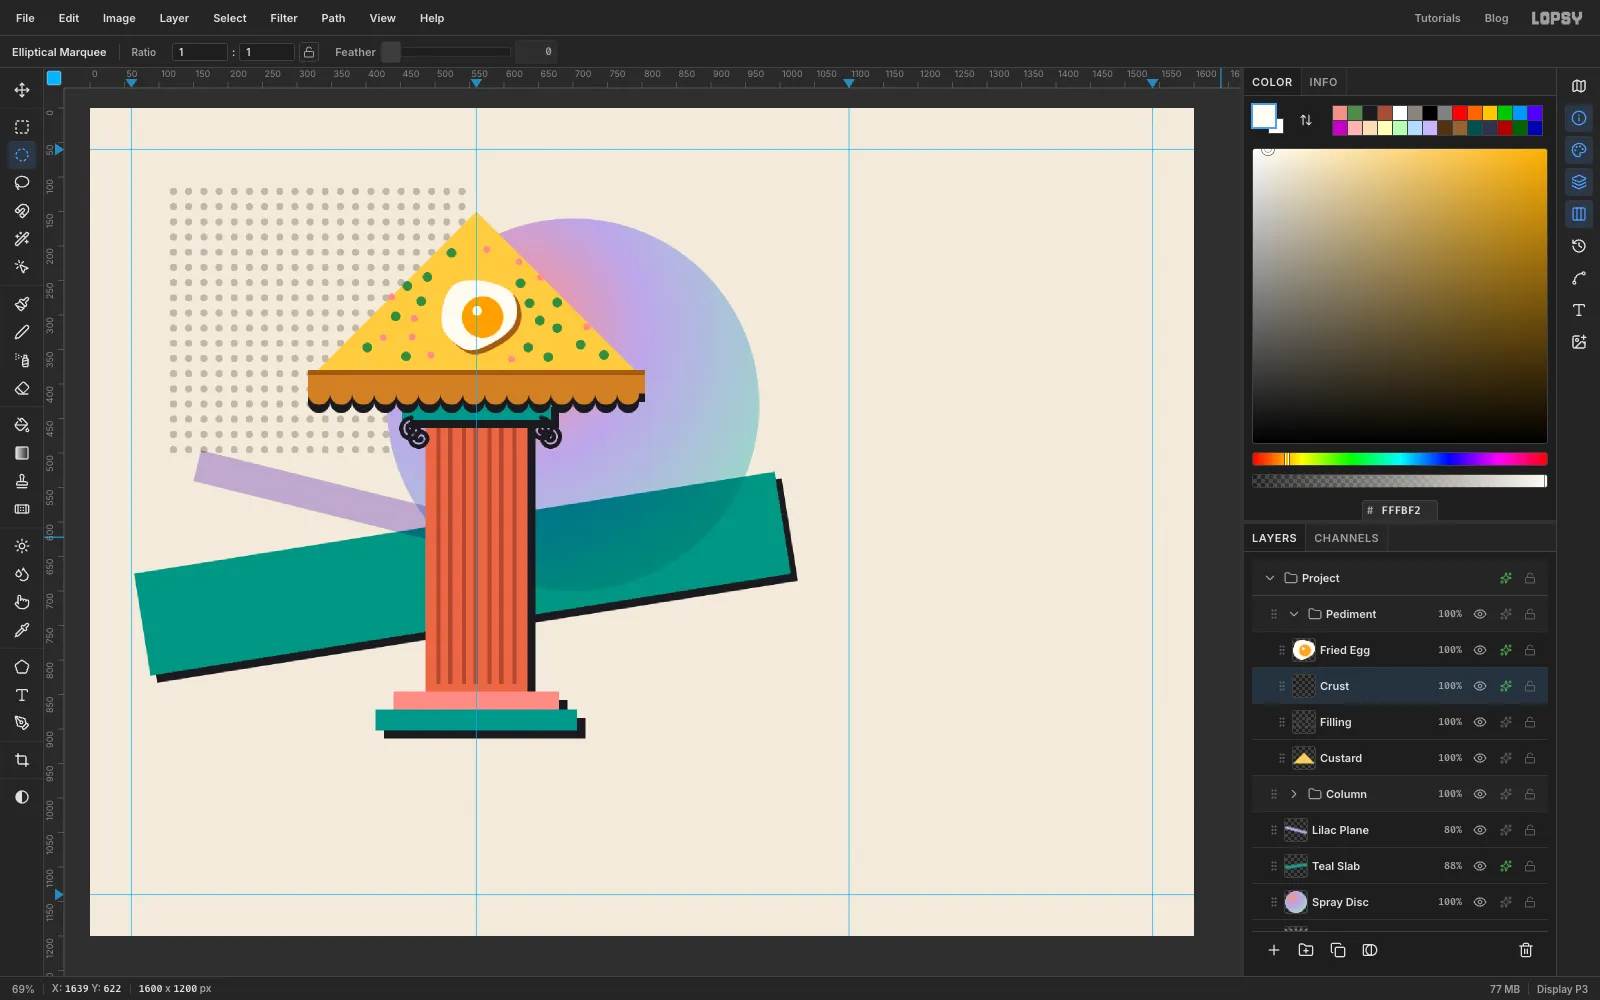
Click Path to Selection and Delete Path in the Paths panel, and fill with .
Make the yolk a little off-centre. Use the Elliptical Marquee dialog for From 539, 273 To 599, 333 and fill with . Add a tiny highlight near its upper left, From 554, 287 To 568, 301, filled with . Deselect.
Give Fried Egg a Drop Shadow of 6 / 6, Blur 0, Opacity 100, in the crust brown , so it sits on the custard.
Then click Crust and give it a Drop Shadow with Offset X 0 and Offset Y 12, Blur 0, Opacity 100, in . Dropping it straight down turns the scallops' shadow into a second row of black dentils.
-
Stroke two Memphis squiggles
Collapse Pediment, select its row and click New Group. Name it Memphis Bits and add a layer inside it called Squiggle Ink.
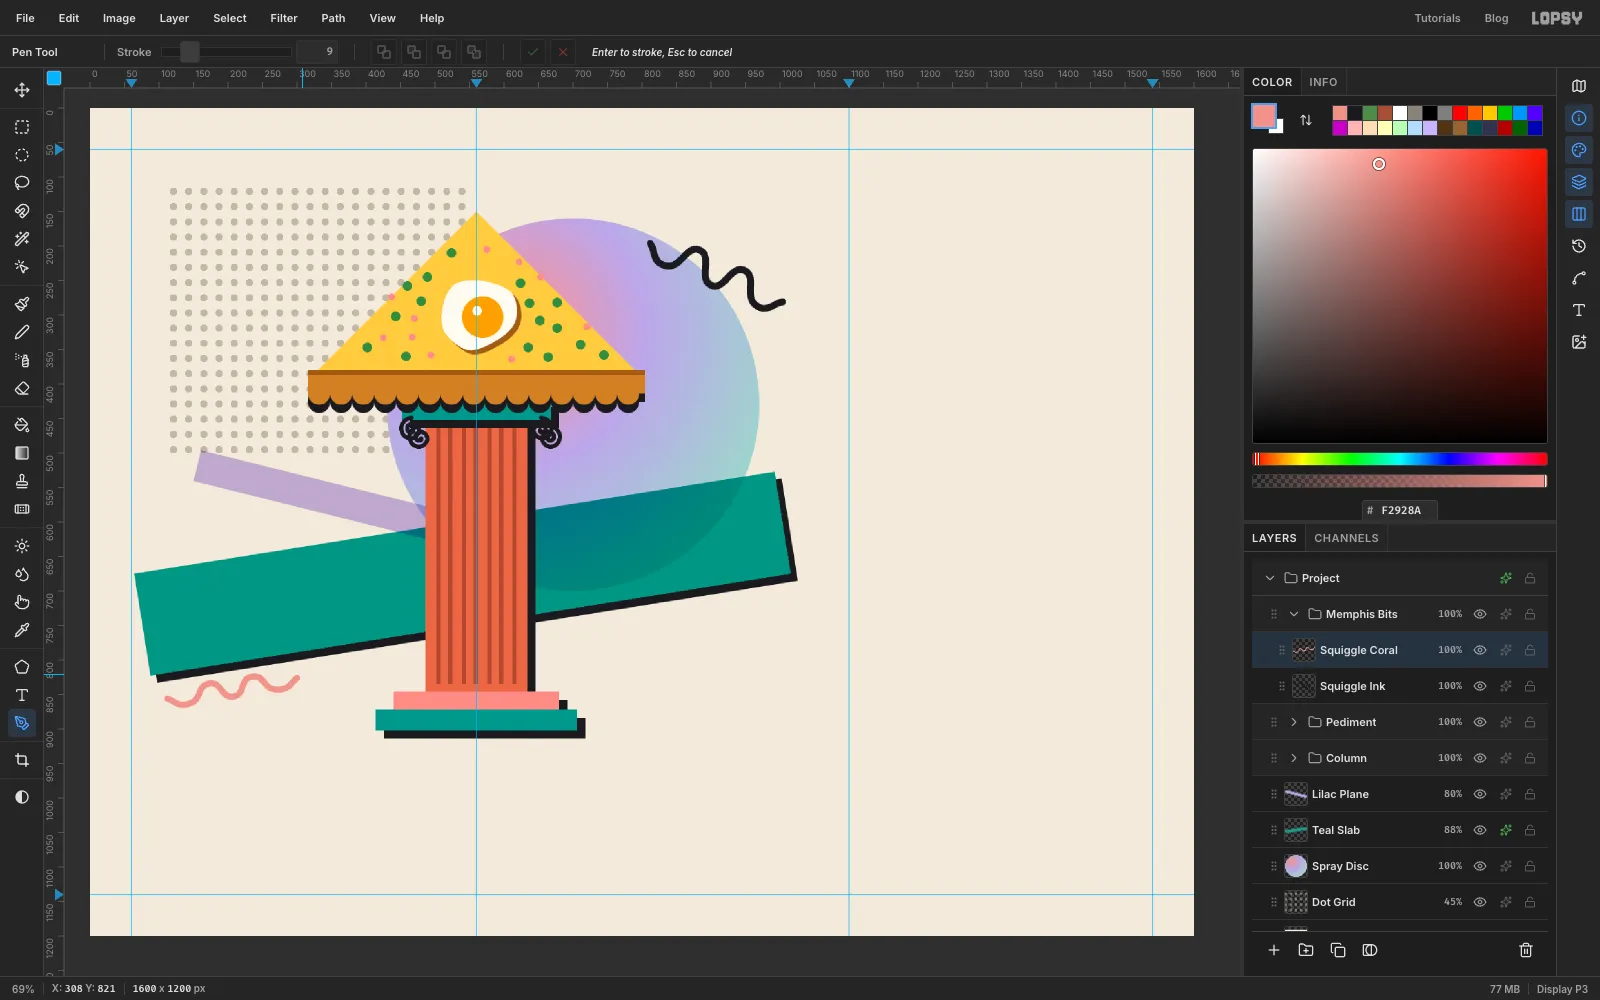
Pick the Pen, set its Stroke to 10 in the options bar, and set the foreground colour to . Start just above the upper-right edge of the disc, around (812, 196), and make a wave of three humps heading down and to the right, about 210 px long. Use seven points about 35 px apart along that line: the start, then crests and troughs alternating about 20 px either side of it, and the end back on it. Press and drag at each point, pulling the handles along the direction of the wave so the curves stay round. Press Enter to stroke the path in the foreground colour, then delete the path in the Paths panel.
Add a layer called Squiggle Coral, set Stroke 9 and , and draw a smaller wave in the gap under the left end of the teal slab. Make it about 190 px long, running parallel to the slab. Stroke it with Enter and delete the path.
-
Copy and spin a triangle of confetti
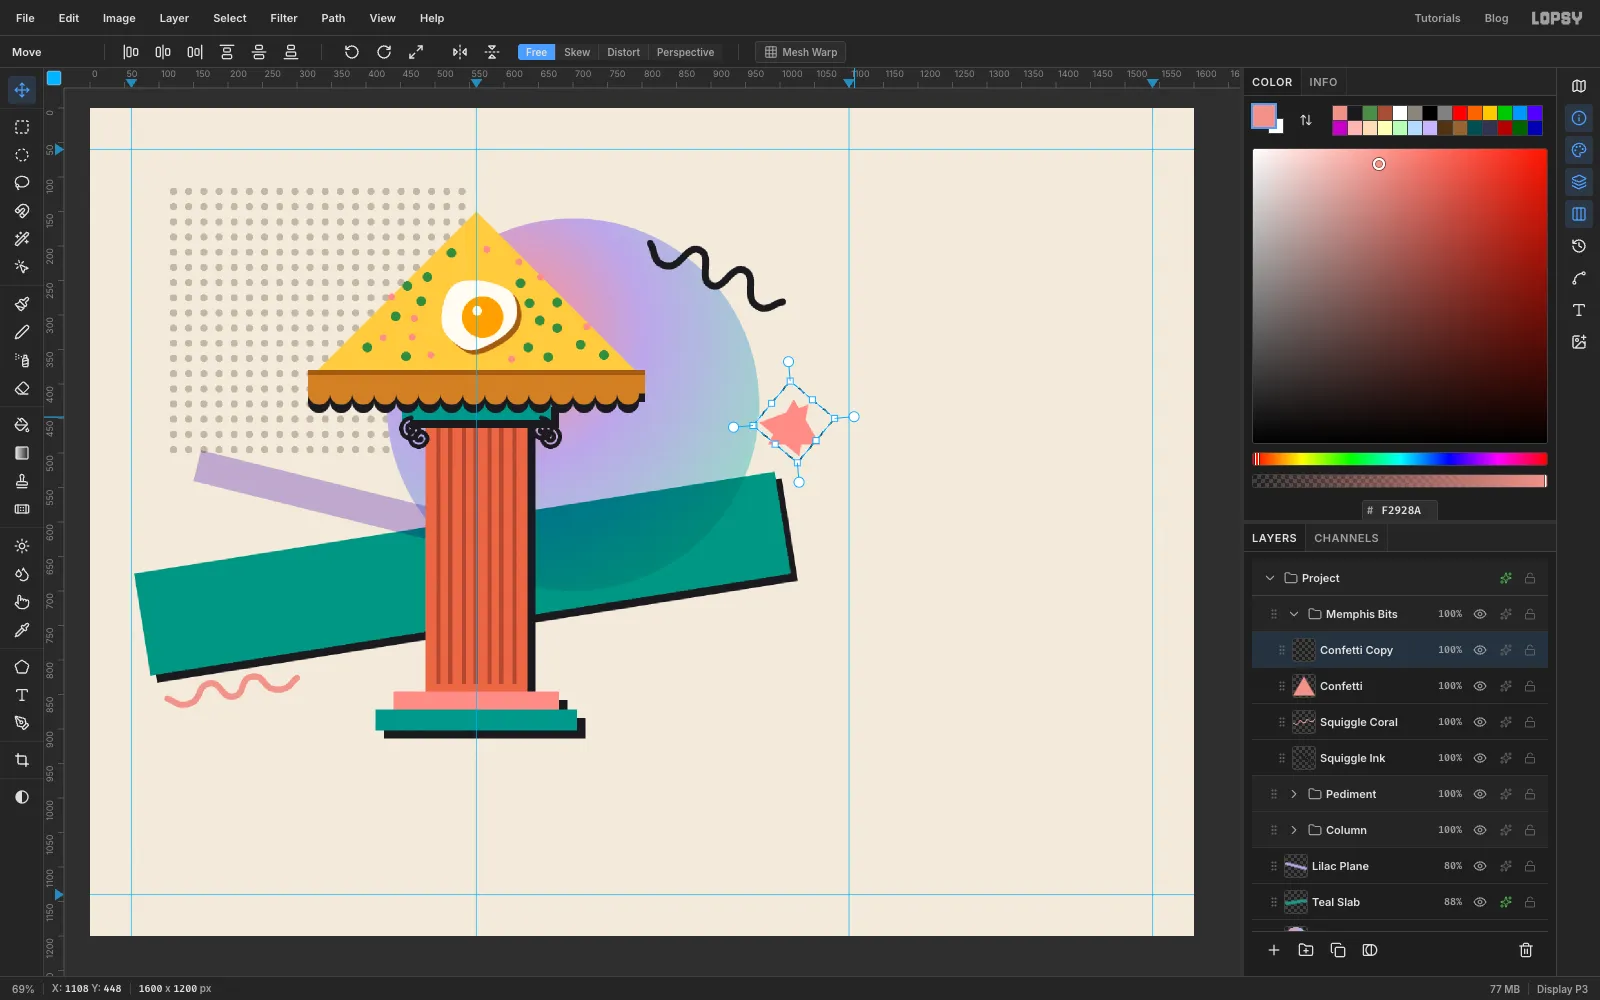
Add a layer called Confetti. Pick the Shape tool, choose Polygon with Sides 3 and Output: Pixels, set the fill to and remove any stroke. Shapes grow from the centre, so press at about (1020, 455), just above the slab's raised right corner and overlapping the edge of the disc, and drag out about 38 px.
Draw a marquee around the triangle with a little room to spare and press Cmd+C, then Cmd+V. The copy pastes in place on a new layer. Rename it Confetti Copy.
A paste selects what it pasted and switches to the Move tool, so the copy already has handles. Drag the top-right rotation handle clockwise about 40°, press Enter, and press Cmd+D.
-
Move the copy into a confetti cluster
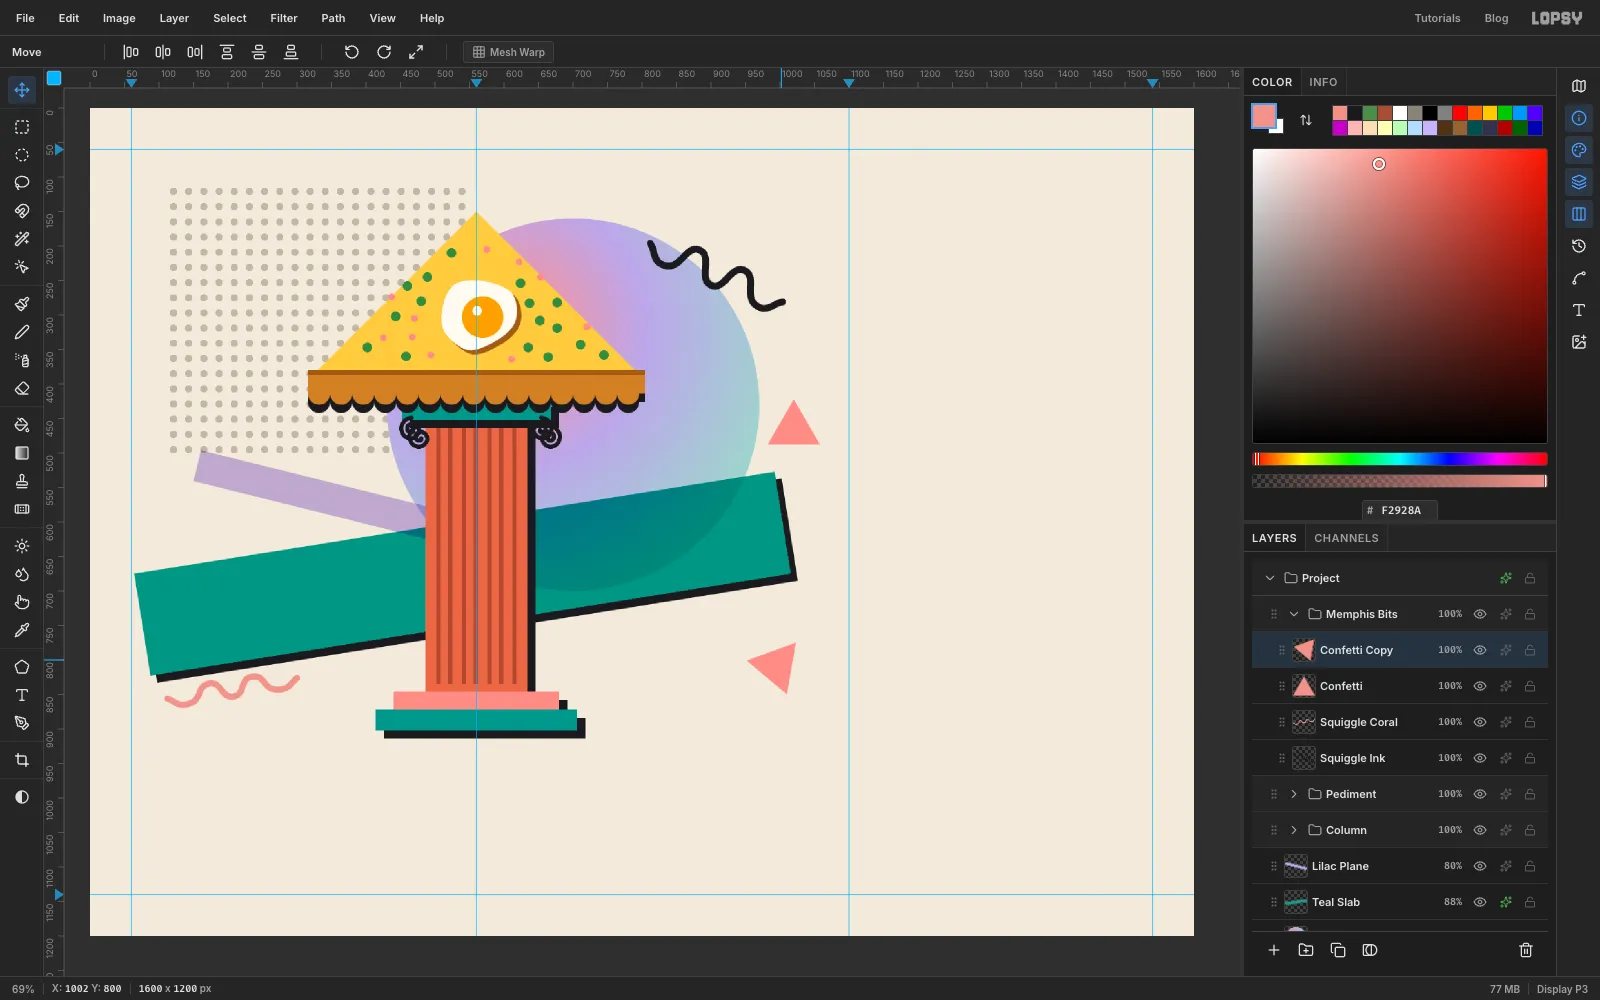
With the Move tool still active, drag the rotated copy down below the right end of the teal slab, to about (1000, 800). The two triangles now bracket the slab's right end instead of floating at random.
-
Cut a ring with Shrink
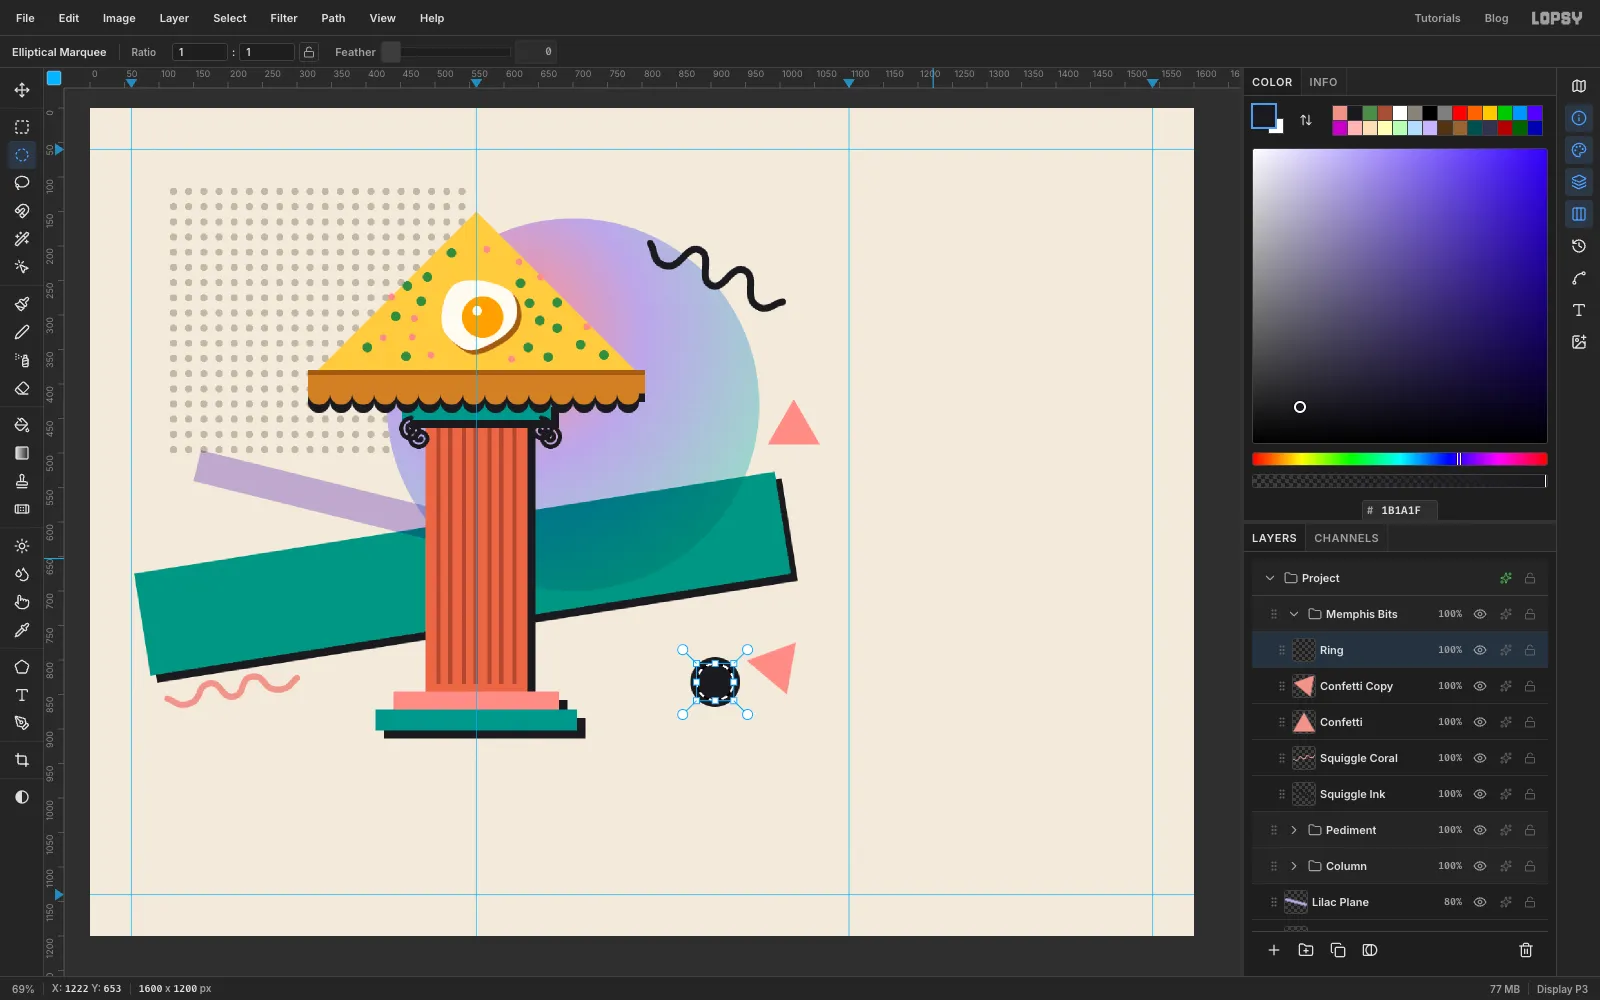
Add a layer called Ring. Use the Elliptical Marquee dialog for From 870, 796 To 942, 868, just left of the lower triangle, and fill with .
Choose Select → Shrink… and shrink by 9 px. Press Delete to clear the middle, which leaves a 9 px black ring. Deselect.
-
Spray speckle inside the disc
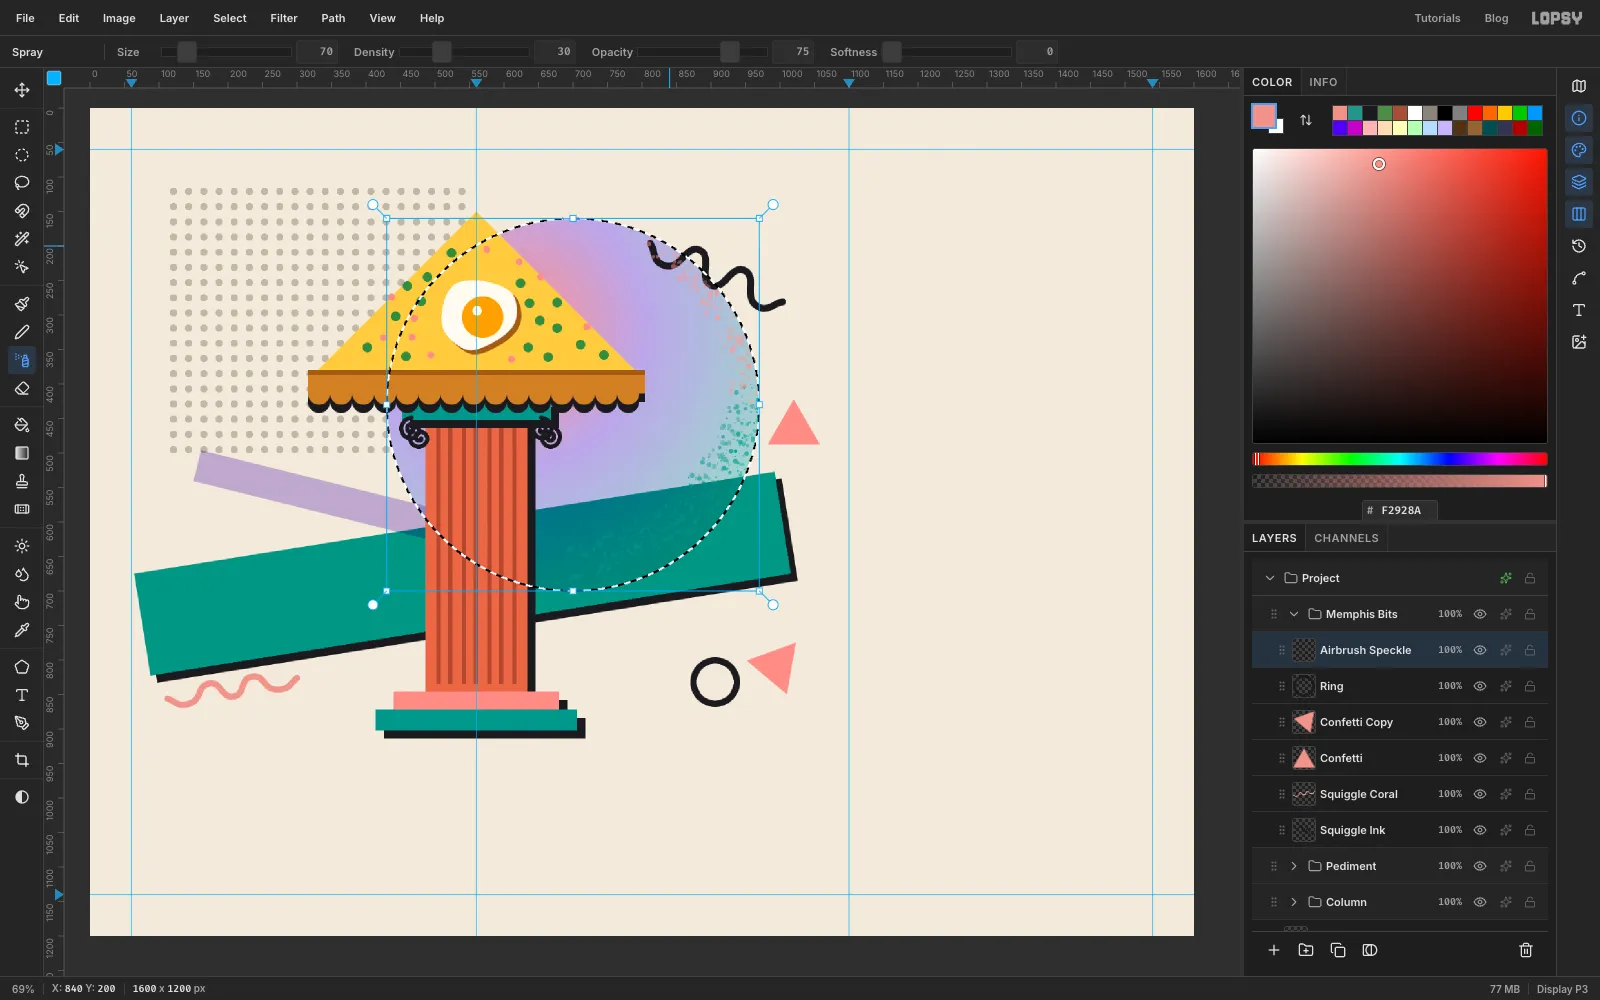
Add a layer called Airbrush Speckle. Cmd-click the Spray Disc thumbnail in the Layers panel to load the disc as a selection, then click the Airbrush Speckle row again so you paint on the new layer.
Pick the Spray tool and set Size 70, Density 30, Opacity 75 and Softness 0. With , spray in one slow sweep up the lower-right edge of the disc. Switch to and continue up the upper-right edge. The selection keeps every dot inside the disc. Deselect.
-
Set the QUICHE wordmark
Collapse Memphis Bits, select its row and click New Group. Name it Type and add a plain layer inside it called Rules. You'll draw a rule on it later, and it gives new text a raster layer to start from.
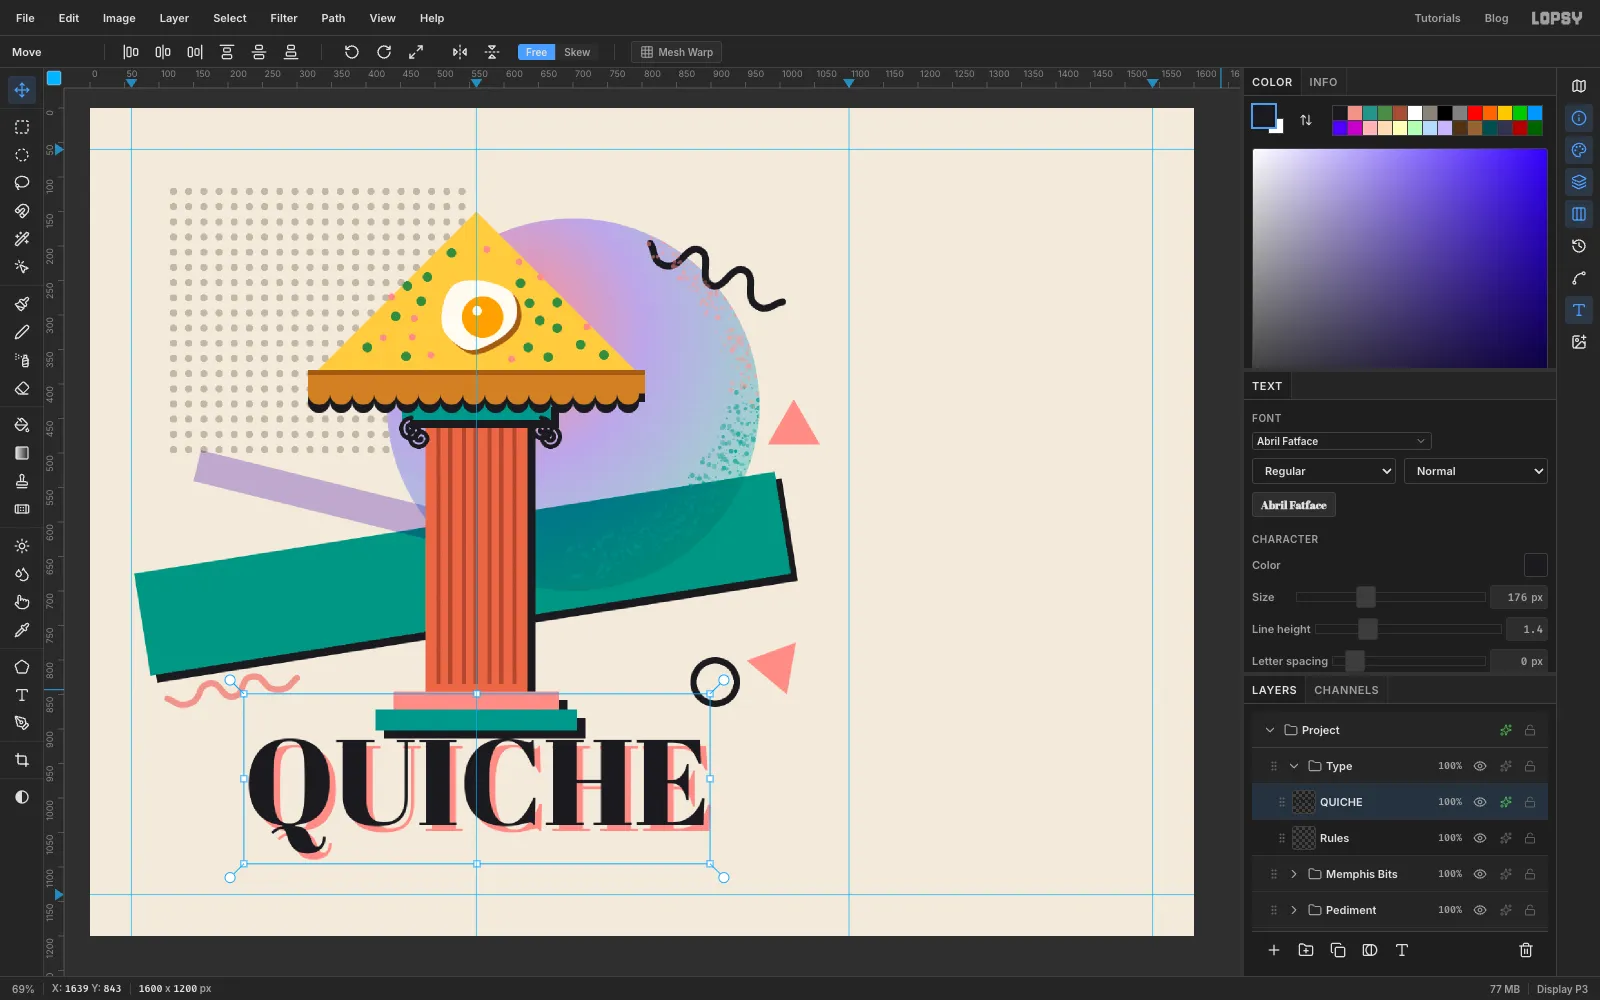
Pick the Text tool, set Align to Left, choose Abril Fatface at size 176, and set the colour to . Click in the empty space below the plinth, type QUICHE and press Tab to commit.
Switch to the Move tool and nudge the word with the arrow keys (Shift moves 10 px) until it's centred on the centre guide and the tops of the flat capitals sit right on the bottom of the plinth's shadow. The column now stands on the wordmark.
Open its effects and add a Drop Shadow of 9 / 9, Blur 0, Opacity 100, in . It reads like a print misregistration, and the text stays live and editable.
-
Rotate YUPPIE onto the slab
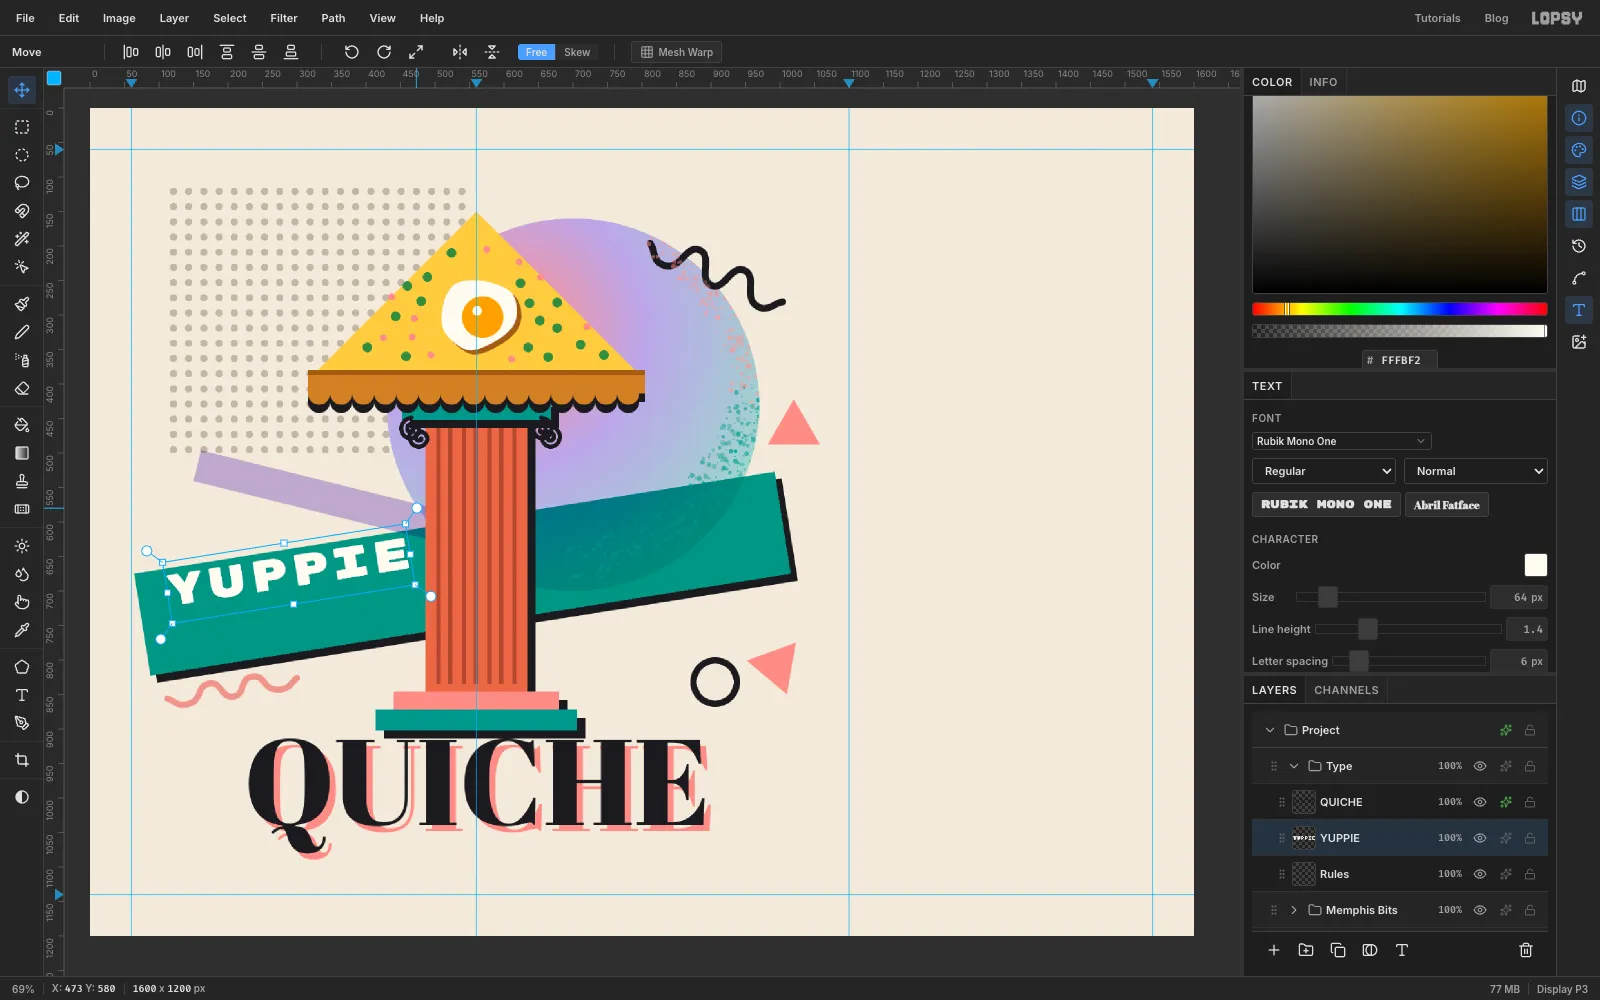
Click Rules first, so the next text doesn't restyle QUICHE. Choose Rubik Mono One at size 64 in . Click in empty space on the left, type YUPPIE and press Tab. In the Text panel, set Letter spacing to 6.
Press V. Live text gets its own transform handles, no selection needed. Drag the top-right rotation handle upward until the word turns about 9° anticlockwise and its baseline runs parallel to the slab's edges. Release. The text is still editable.
-
Seat YUPPIE and give it a shadow
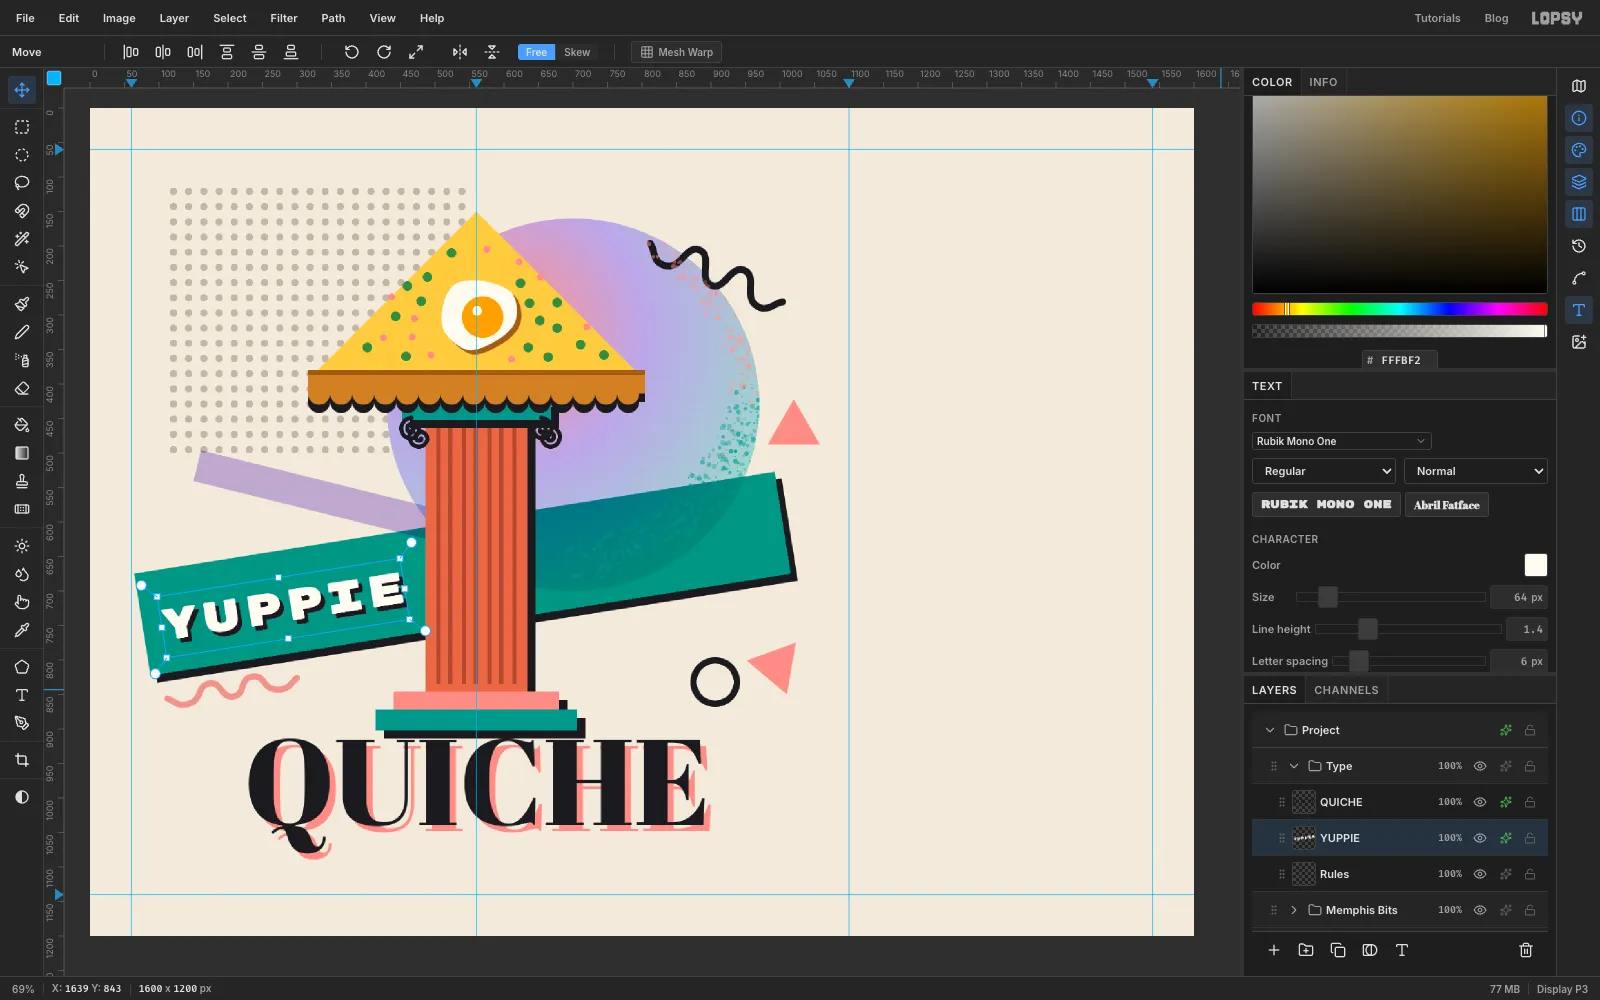
Nudge YUPPIE with the arrow keys until it sits in the middle of the slab's left end, with about the same gap (roughly 30 px) to the slab's end and to the column. Then give it a Drop Shadow of 6 / 6, Blur 0, Opacity 100, in .
-
Add the tagline and a stair-step rule
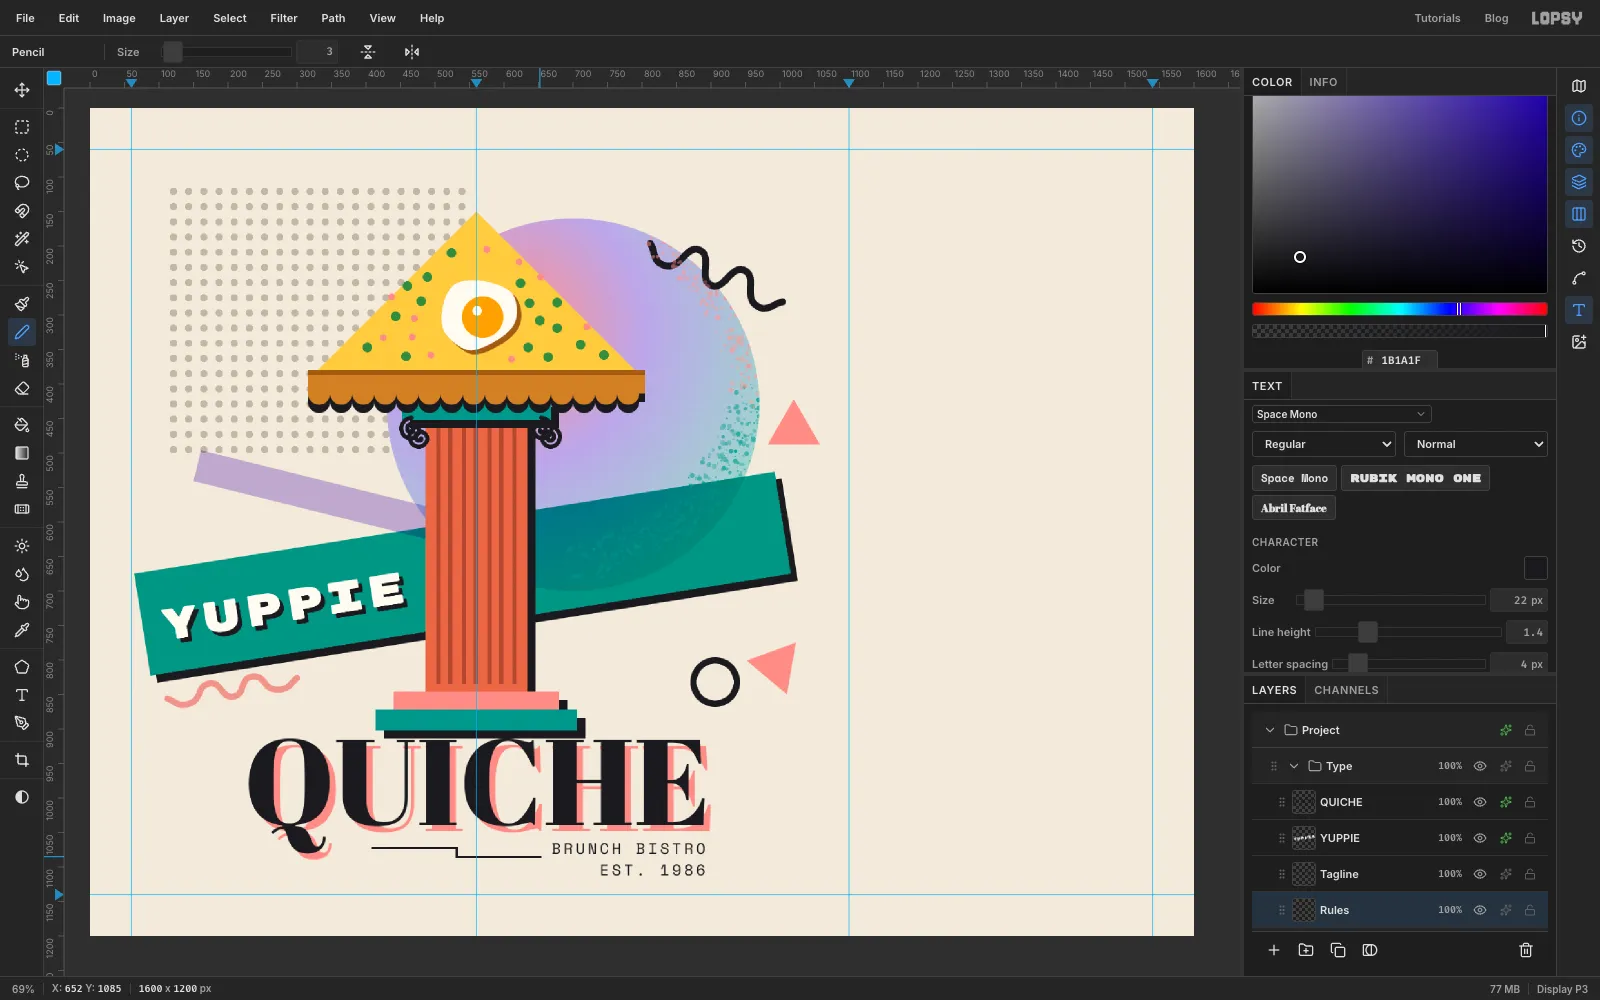
Click Rules again. With the Text tool, set Align to Right, choose Space Mono at size 22 in , and click in empty space below the wordmark. Type BRUNCH BISTRO, press Return, type EST. 1986 and press Tab. Rename the layer Tagline and set Letter spacing to 4. Nudge the block so its right edge lines up with the right edge of the E, and its top sits just below the baseline of QUICHE.
The Text tool will keep Right for the next text you type. Click Rules and set Align back to Left now. Do it with Rules selected, not the tagline: changing Align while a text layer is selected restyles that layer.
Weingart loved stepped rules. Pick the Pencil at Size 3. Click under the U, level with the middle of BRUNCH BISTRO, then Shift-click halfway to the tagline. Shift-click 12 px straight down, then Shift-click just short of the tagline's left edge.
-
Lay out the three cards
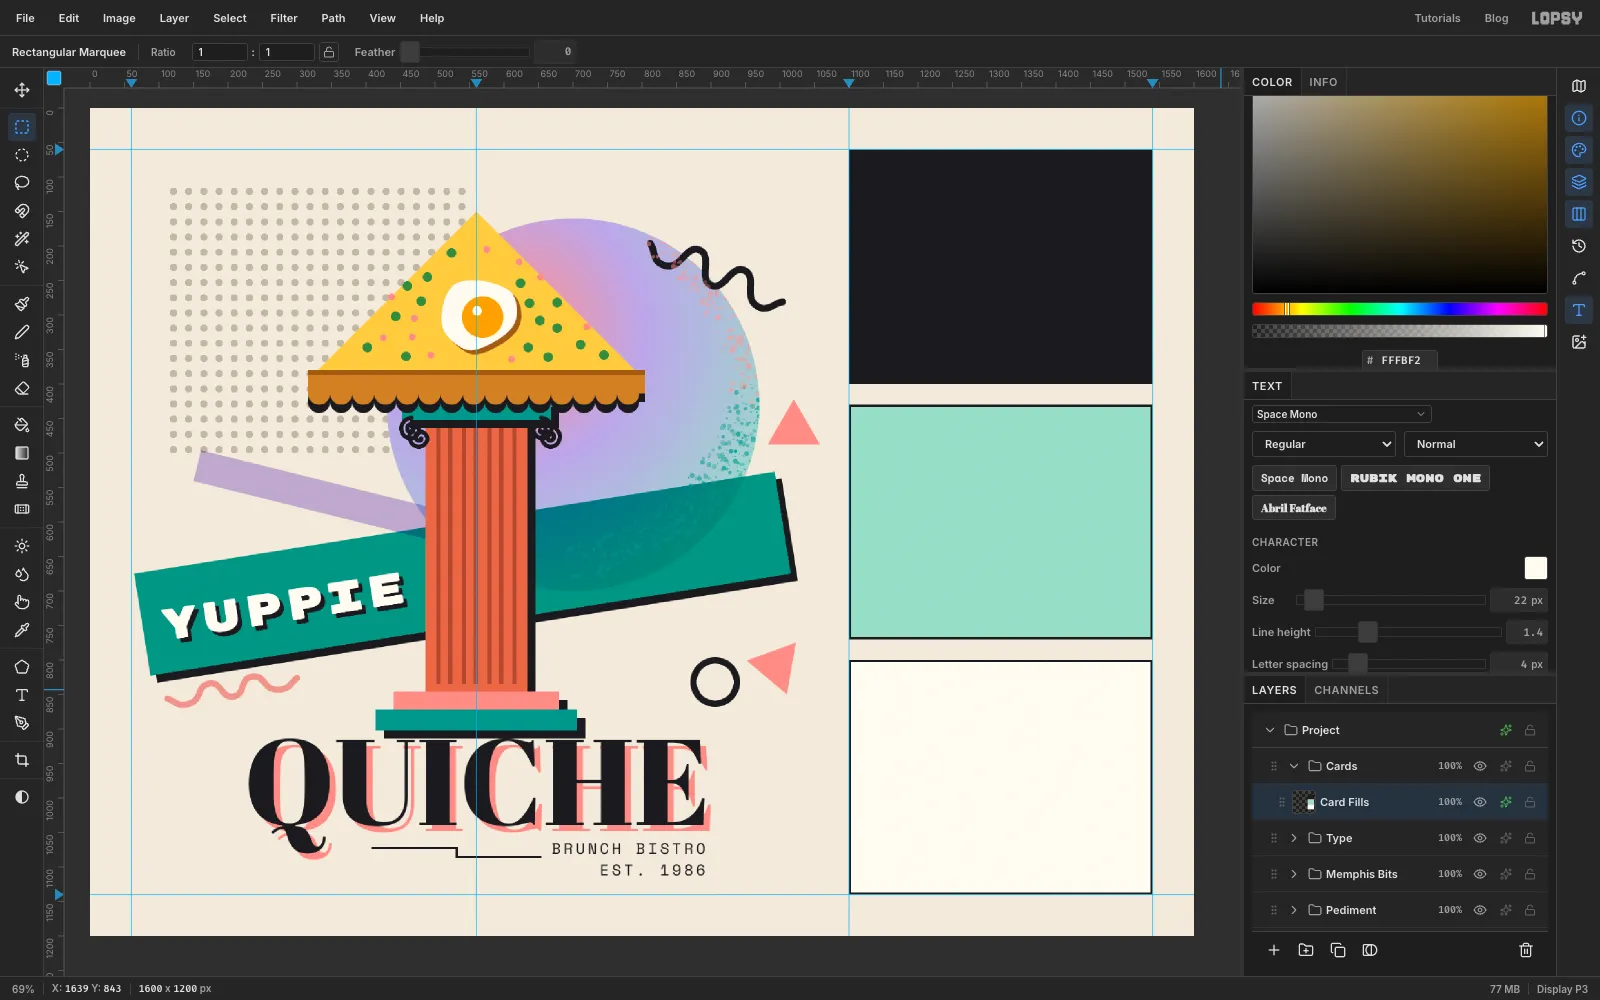
Collapse Type, select its row and click New Group. Name it Cards and add a layer called Card Fills.
Using the Rectangular Marquee dialog, fill From 1100, 60 To 1540, 400 with , From 1100, 430 To 1540, 770 with , and From 1100, 800 To 1540, 1140 with . Deselect.
Open the layer's effects, tick Stroke, set Width 3 and the colour , and choose inside. Every card now has a crisp keyline that doesn't spill past the margins.
-
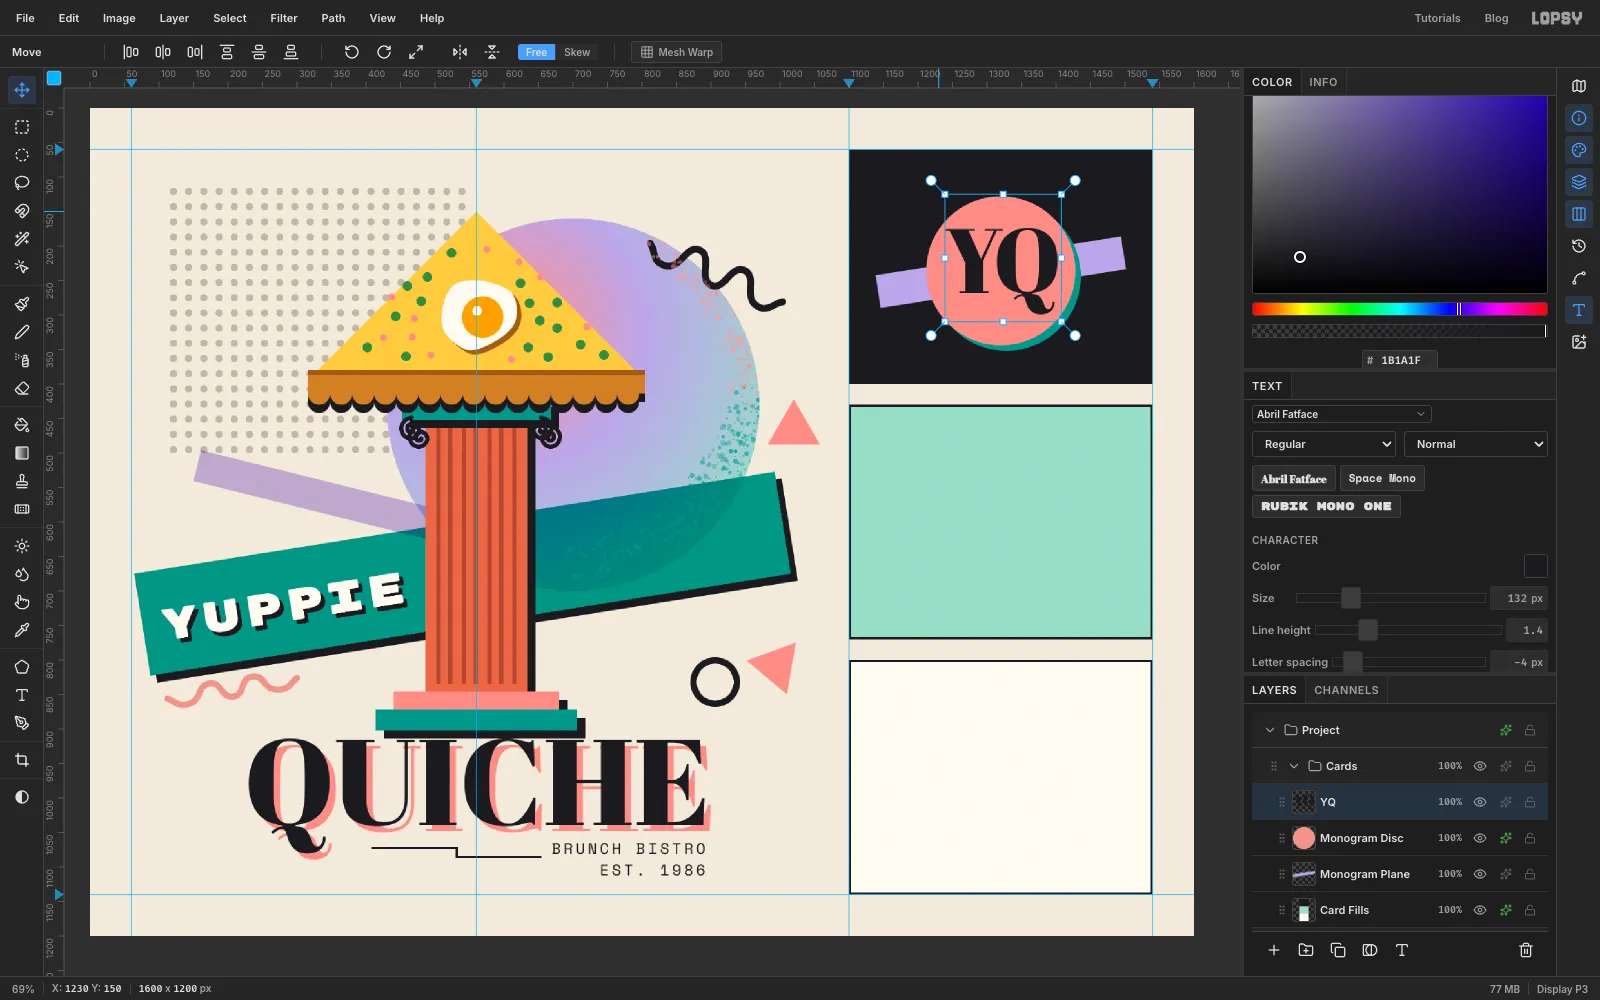
Build the monogram
Add a layer called Monogram Plane. Select From 1140, 214 To 1500, 262, fill with , press V and rotate it 9° anticlockwise, like the slab. Press Enter and deselect.
Add a layer called Monogram Disc. Use the Elliptical Marquee dialog for From 1212, 128 To 1428, 344, fill with and deselect. Give it a Drop Shadow of 8 / 8, Blur 0, Opacity 100, in teal .
With the Text tool on Align: Left, choose Abril Fatface at 132 in and type YQ in the empty part of the card. Set Letter spacing to −4 to pull the letters together, then nudge the pair until it's centred on the disc. Let the tail of the Q drop out of the circle.
-
Copy Merged just the pediment
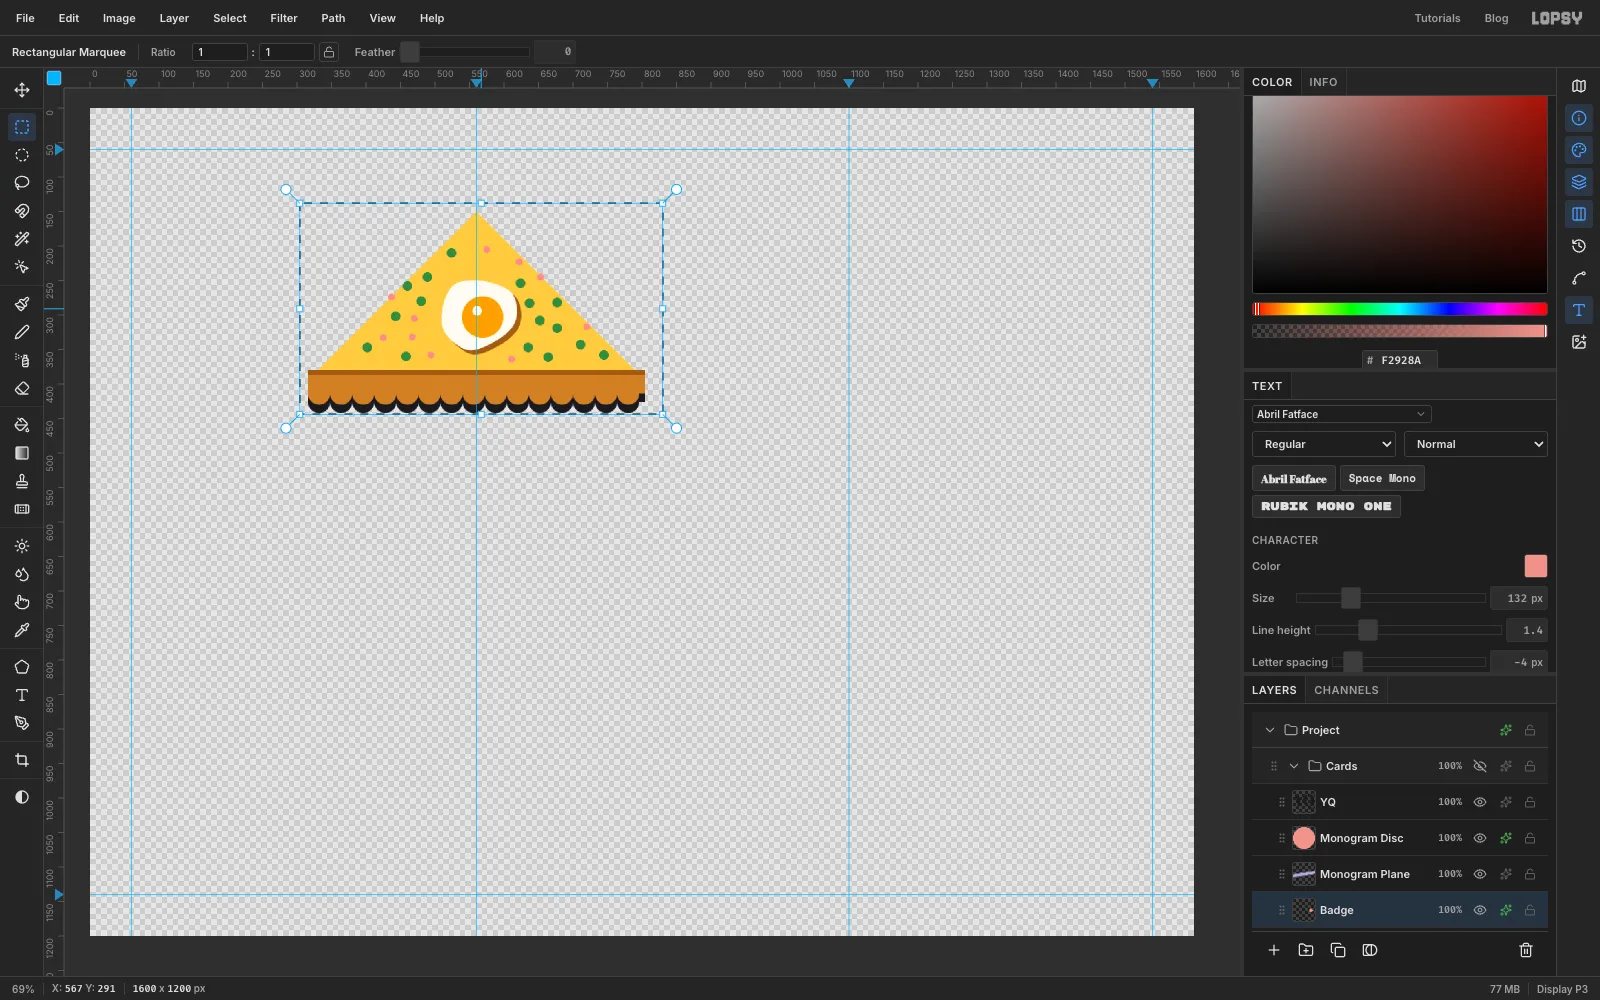
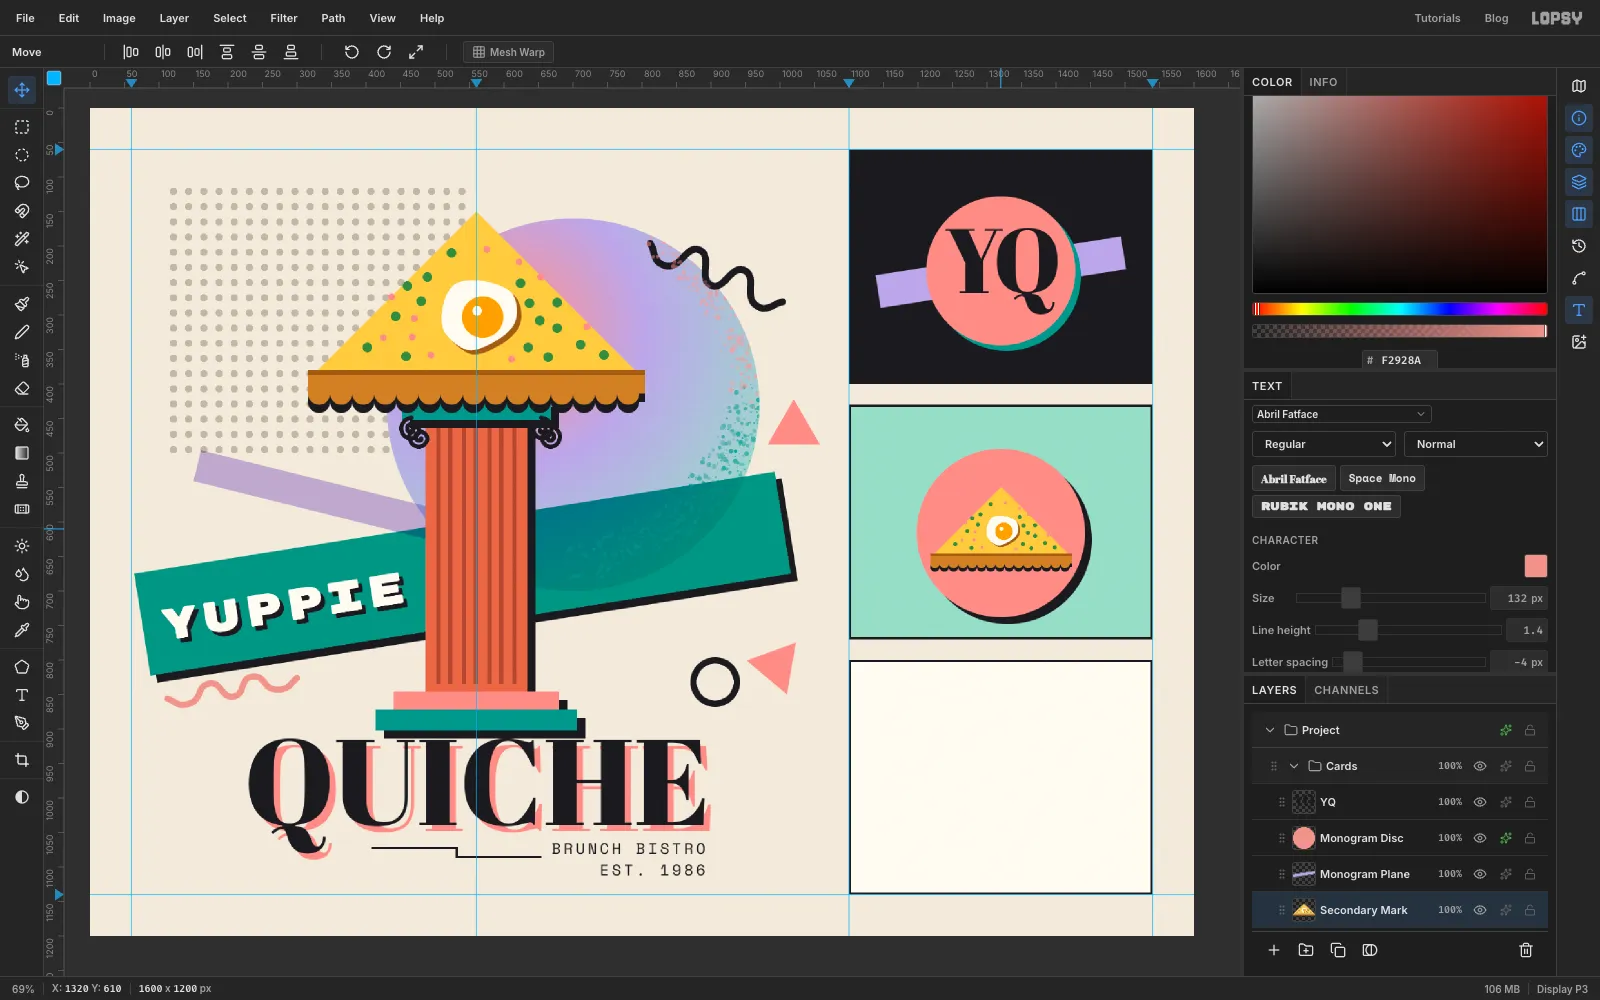
The secondary mark is a simplified version of the logo: the pediment alone.
First make the badge it will sit on, so the pasted copy lands above it. Click Card Fills and add a layer called Badge. Make a circle From 1198, 494 To 1442, 738 in the mint card, fill it with , deselect, and give it a Drop Shadow of 10 / 10, Blur 0, Opacity 100, in .
Now hide everything except the pediment: click the eye icons of Background, Dot Grid, Spray Disc, Teal Slab, Lilac Plane, and the Column, Memphis Bits, Type and Cards groups. The badge disappears too, because it's inside Cards. Draw a marquee From 304, 138 To 830, 444 around the pediment and its shadows, and choose Edit → Copy Merged. Then turn all the eyes back on and deselect.
-
Paste and scale the mark
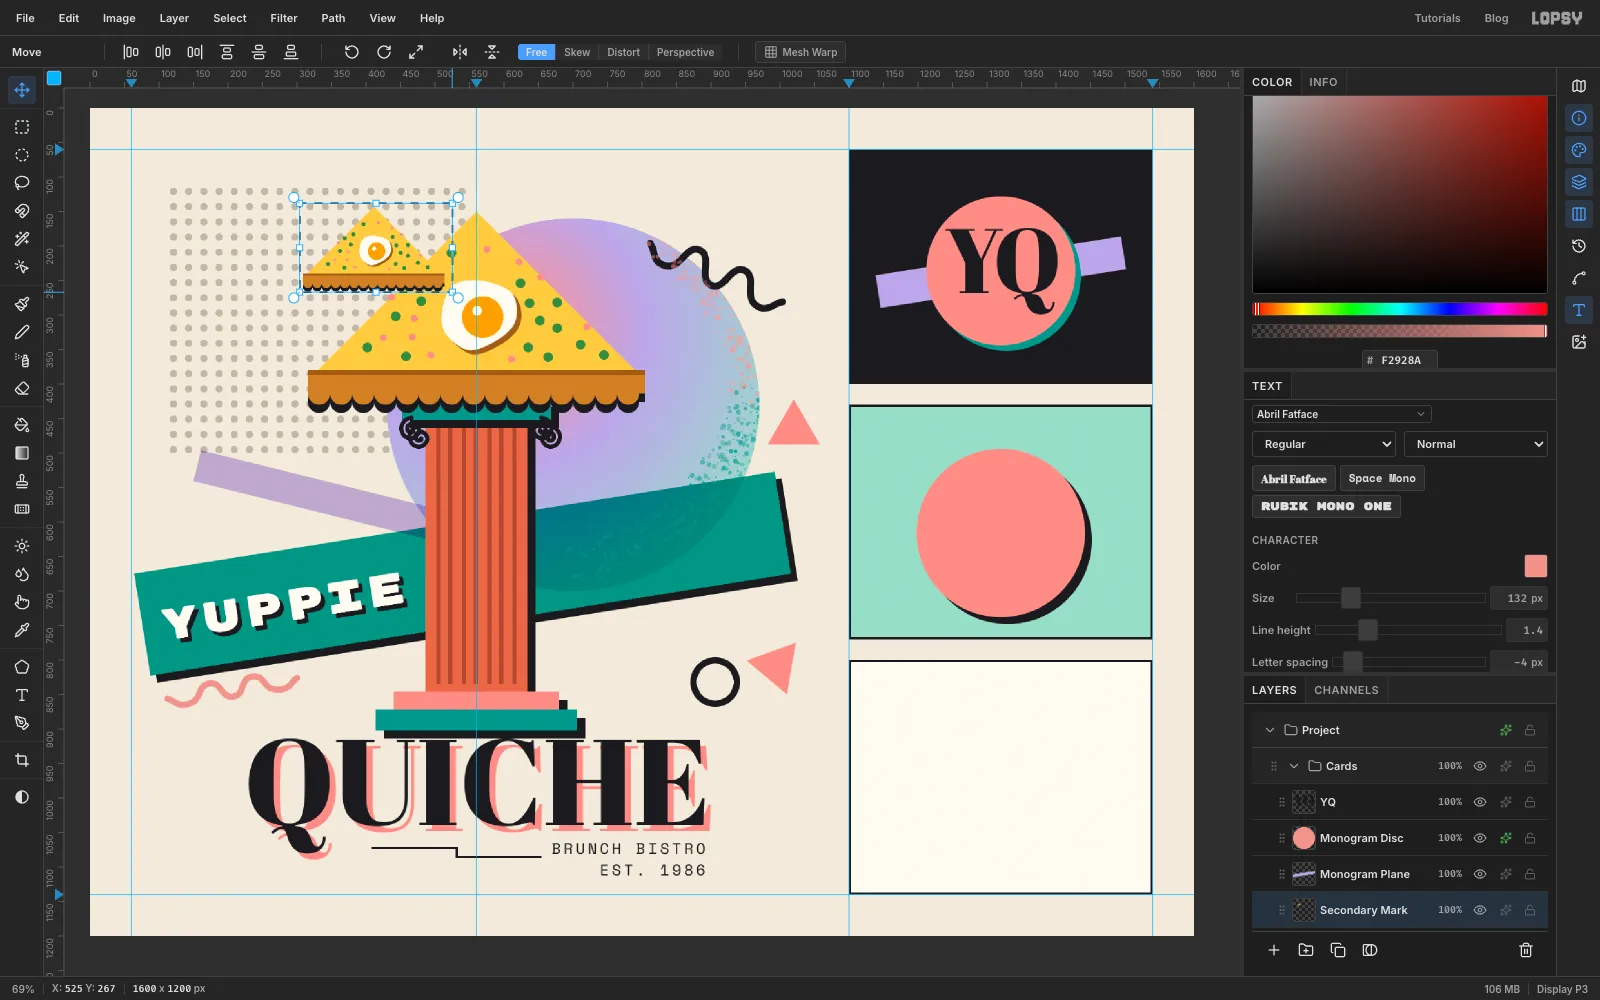
Click Badge and press Cmd+V. The merged copy pastes in place on a new layer. Rename it Secondary Mark.
Like every paste, it arrives selected with the Move tool active and handles around it. Hold Cmd to keep the proportions, then drag the bottom-right corner handle up and to the left until the copy is about 42% of its size, around 220 px wide. Press Enter and deselect.
-
Centre the mark on its badge
Drag the small pediment onto the coral badge and centre it, a few pixels above the middle so the crust's dentils have room. At this size the egg and flecks still read, which is the test of a good secondary mark.
-
Snap a palette strip to the grid
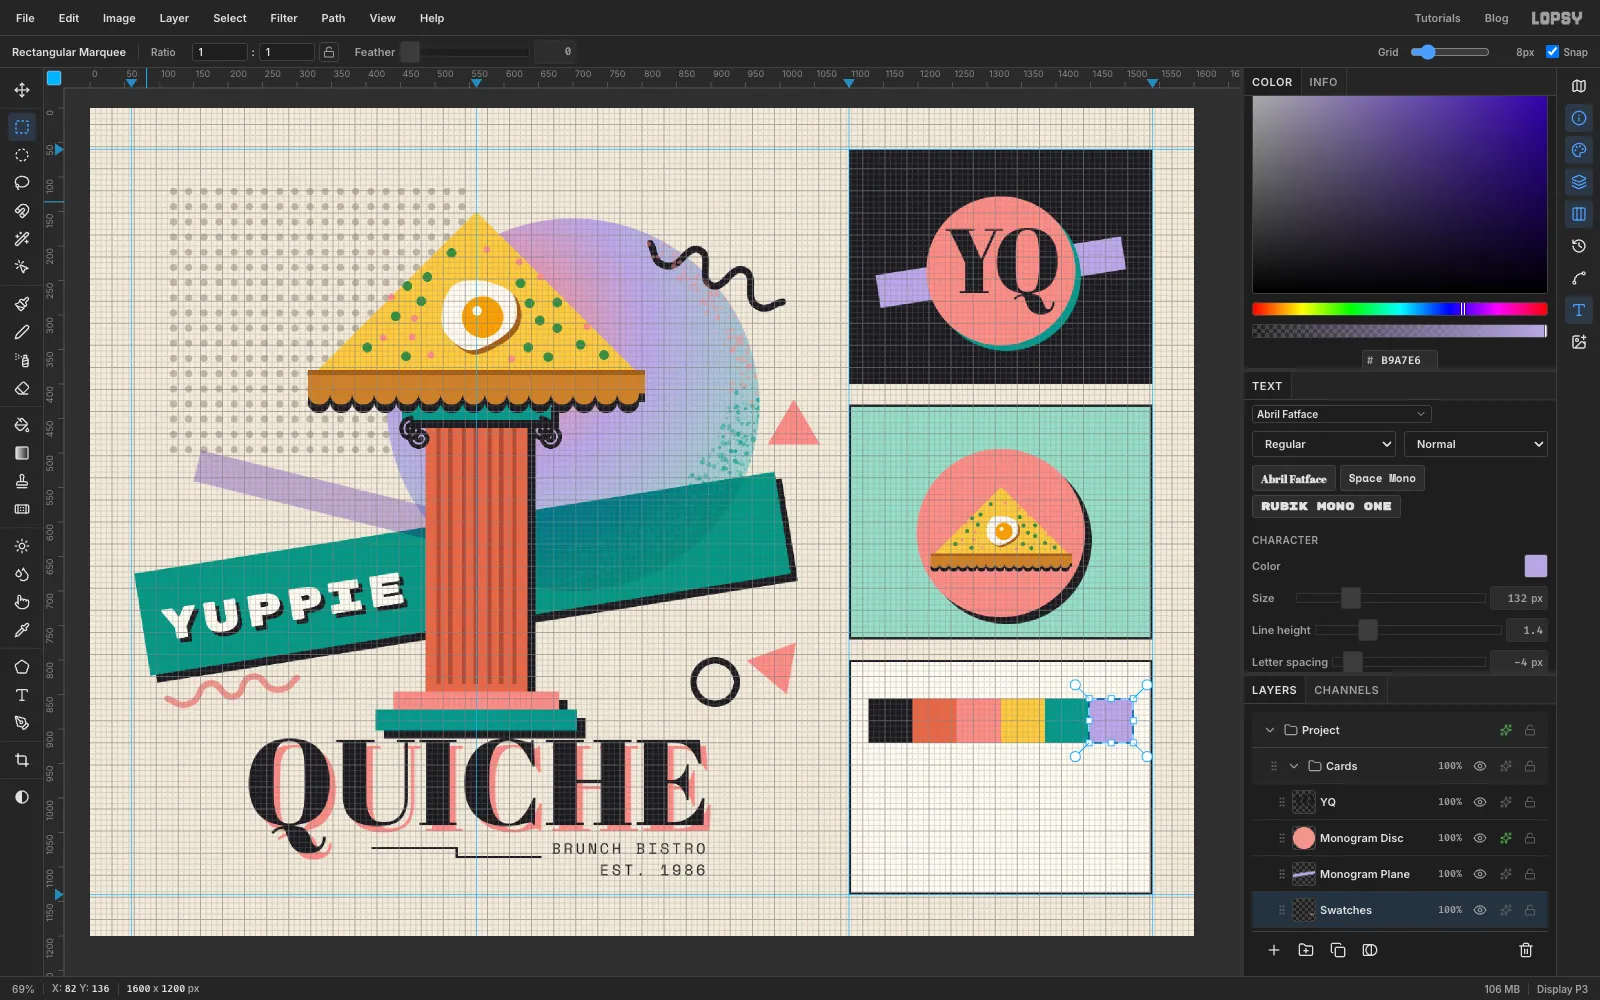
Add a layer called Swatches. Choose View → Show Grid, set the grid size to 8 px in the options bar, and make sure Snap is ticked.
With the Rectangular Marquee, drag six squares edge to edge across the cream card. Each one is 64 px, eight grid cells. Start the row 28 px in from the card's left edge, so both ends have the same margin, and 56 px below its top, which leaves room for the label. Fill them in turn with , , , , and . The grid snap makes each square land exactly against the last. Deselect and turn the grid off again with View → Show Grid.
-
Label the cards and set the type specimens
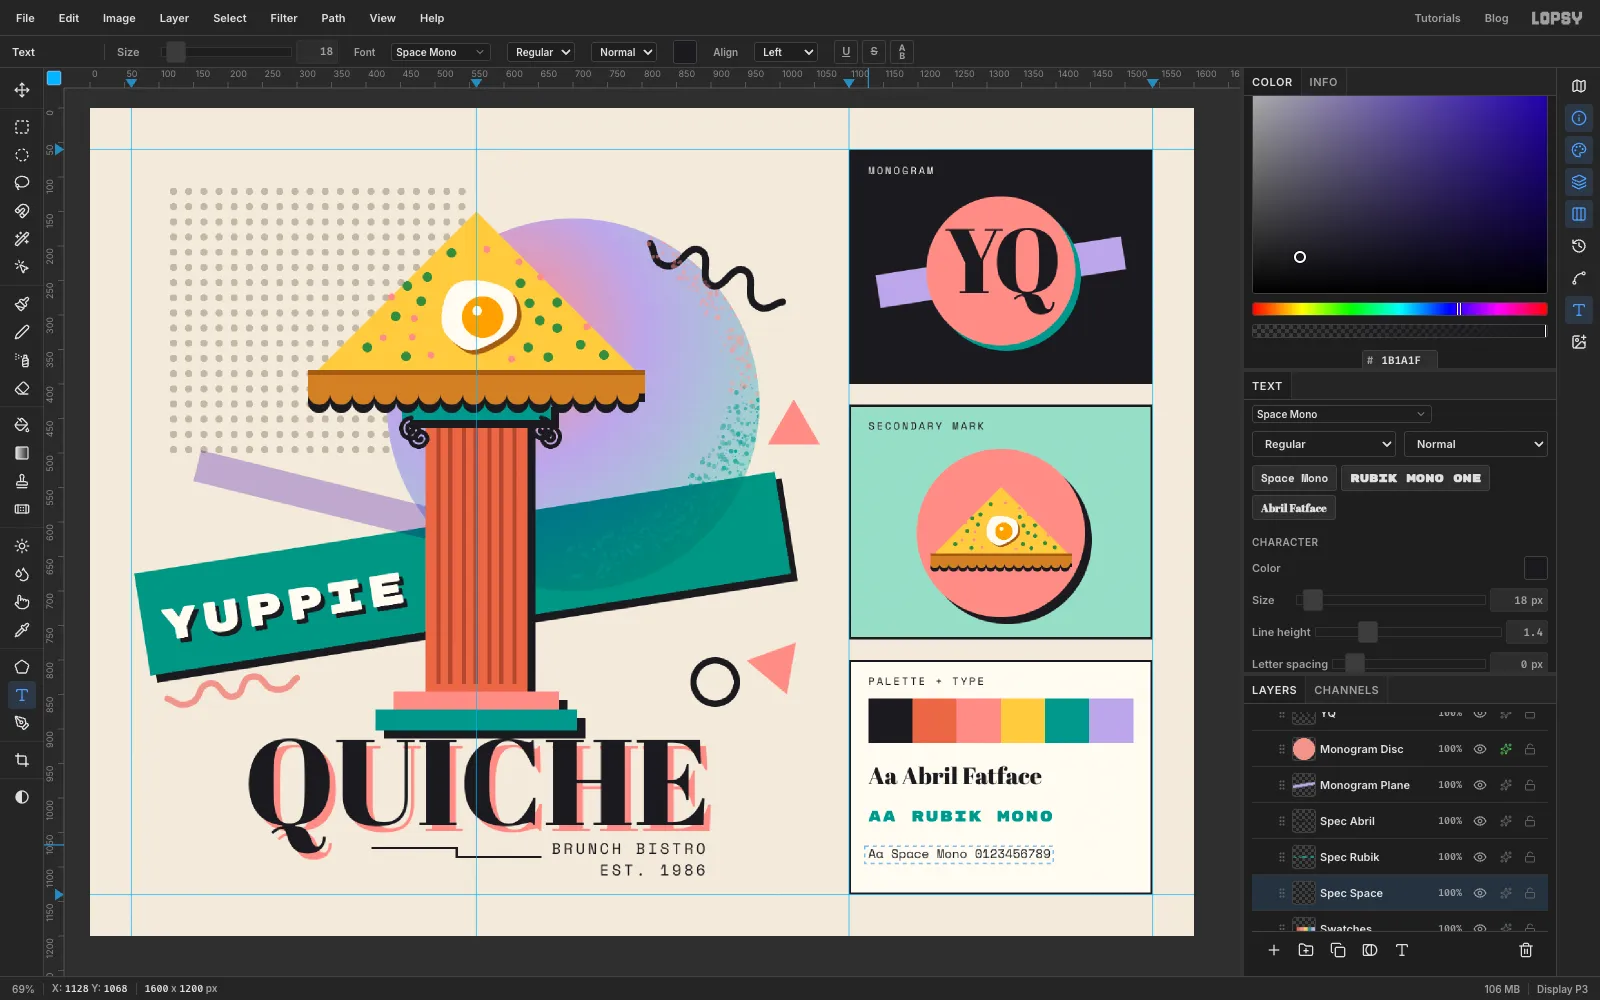
Click Card Fills. With the Text tool on Align: Left, choose Space Mono at 15. Type MONOGRAM in near the top-left corner of the black card, 28 px in from its left edge, and set Letter spacing to 3. Click Card Fills again before each new label. Add SECONDARY MARK and PALETTE + TYPE in at the same spot on the other two cards.
Under the swatches, click Swatches before each line and set one specimen per font, all aligned to the same 28 px margin. Rename them Spec Abril, Spec Rubik and Spec Space as you go:
- Aa Abril Fatface in Abril Fatface, size 34,
- AA RUBIK MONO in Rubik Mono One, size 22, , letter spacing 2
- Aa Space Mono 0123456789 in Space Mono, size 18,
-
Fade the dot grid and add paper grain
Click Dot Grid and pick the Eraser with Size 180 and Opacity 30. Make a slow pass down the grid's right edge, where it meets the disc, then a short pass across its lower-right corner, and one more right in that corner. The passes overlap, so the dots thin out toward the disc instead of stopping in a hard line.
Finally, click Background and run Filter → Add Noise… at Amount 4, Mono, Gaussian for a faint paper grain.
Choose File → Save Project to keep every layer and the live text, then File → Export… for a PNG to send to the client.