Design a Psychedelic Fuzz Pedal Website Landing Page
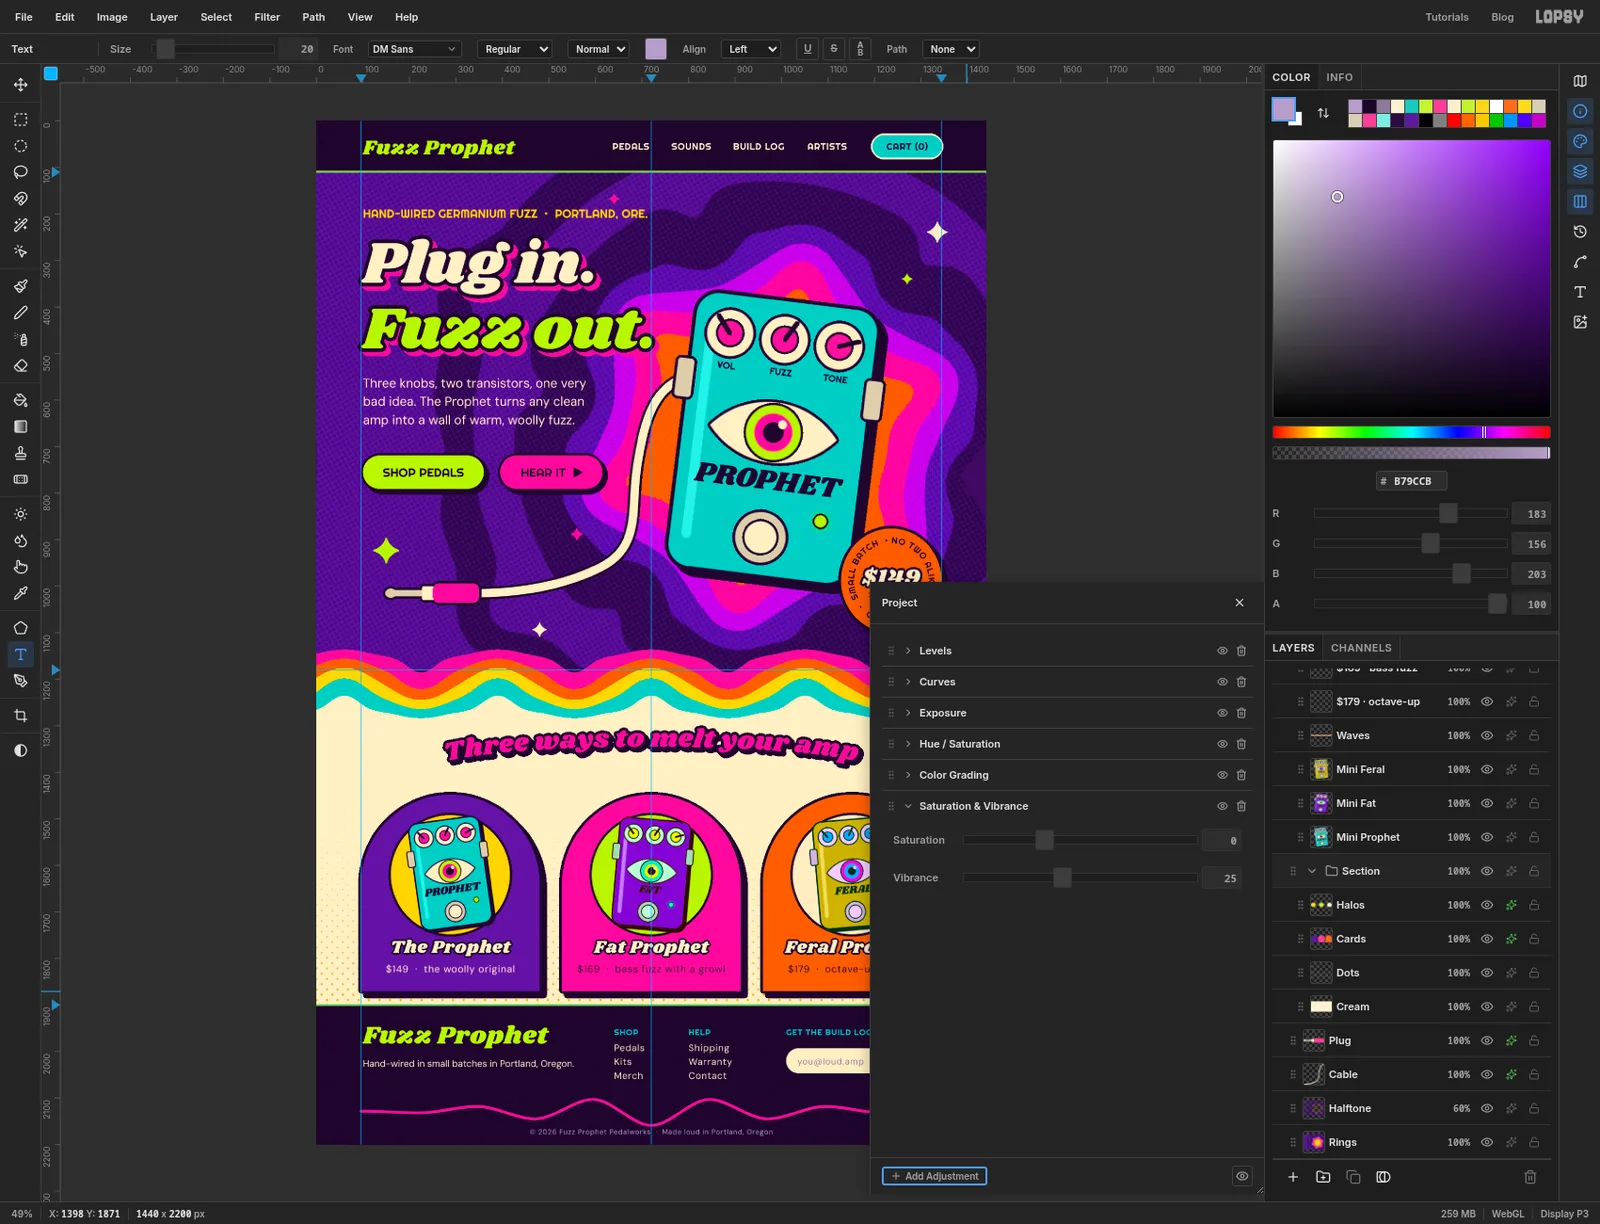
Design a 60s psychedelic landing page for a fuzz pedal maker in Lopsy, with Liquify-melted rings, a hand-built pedal, text on a path and wavy rainbow stripes.
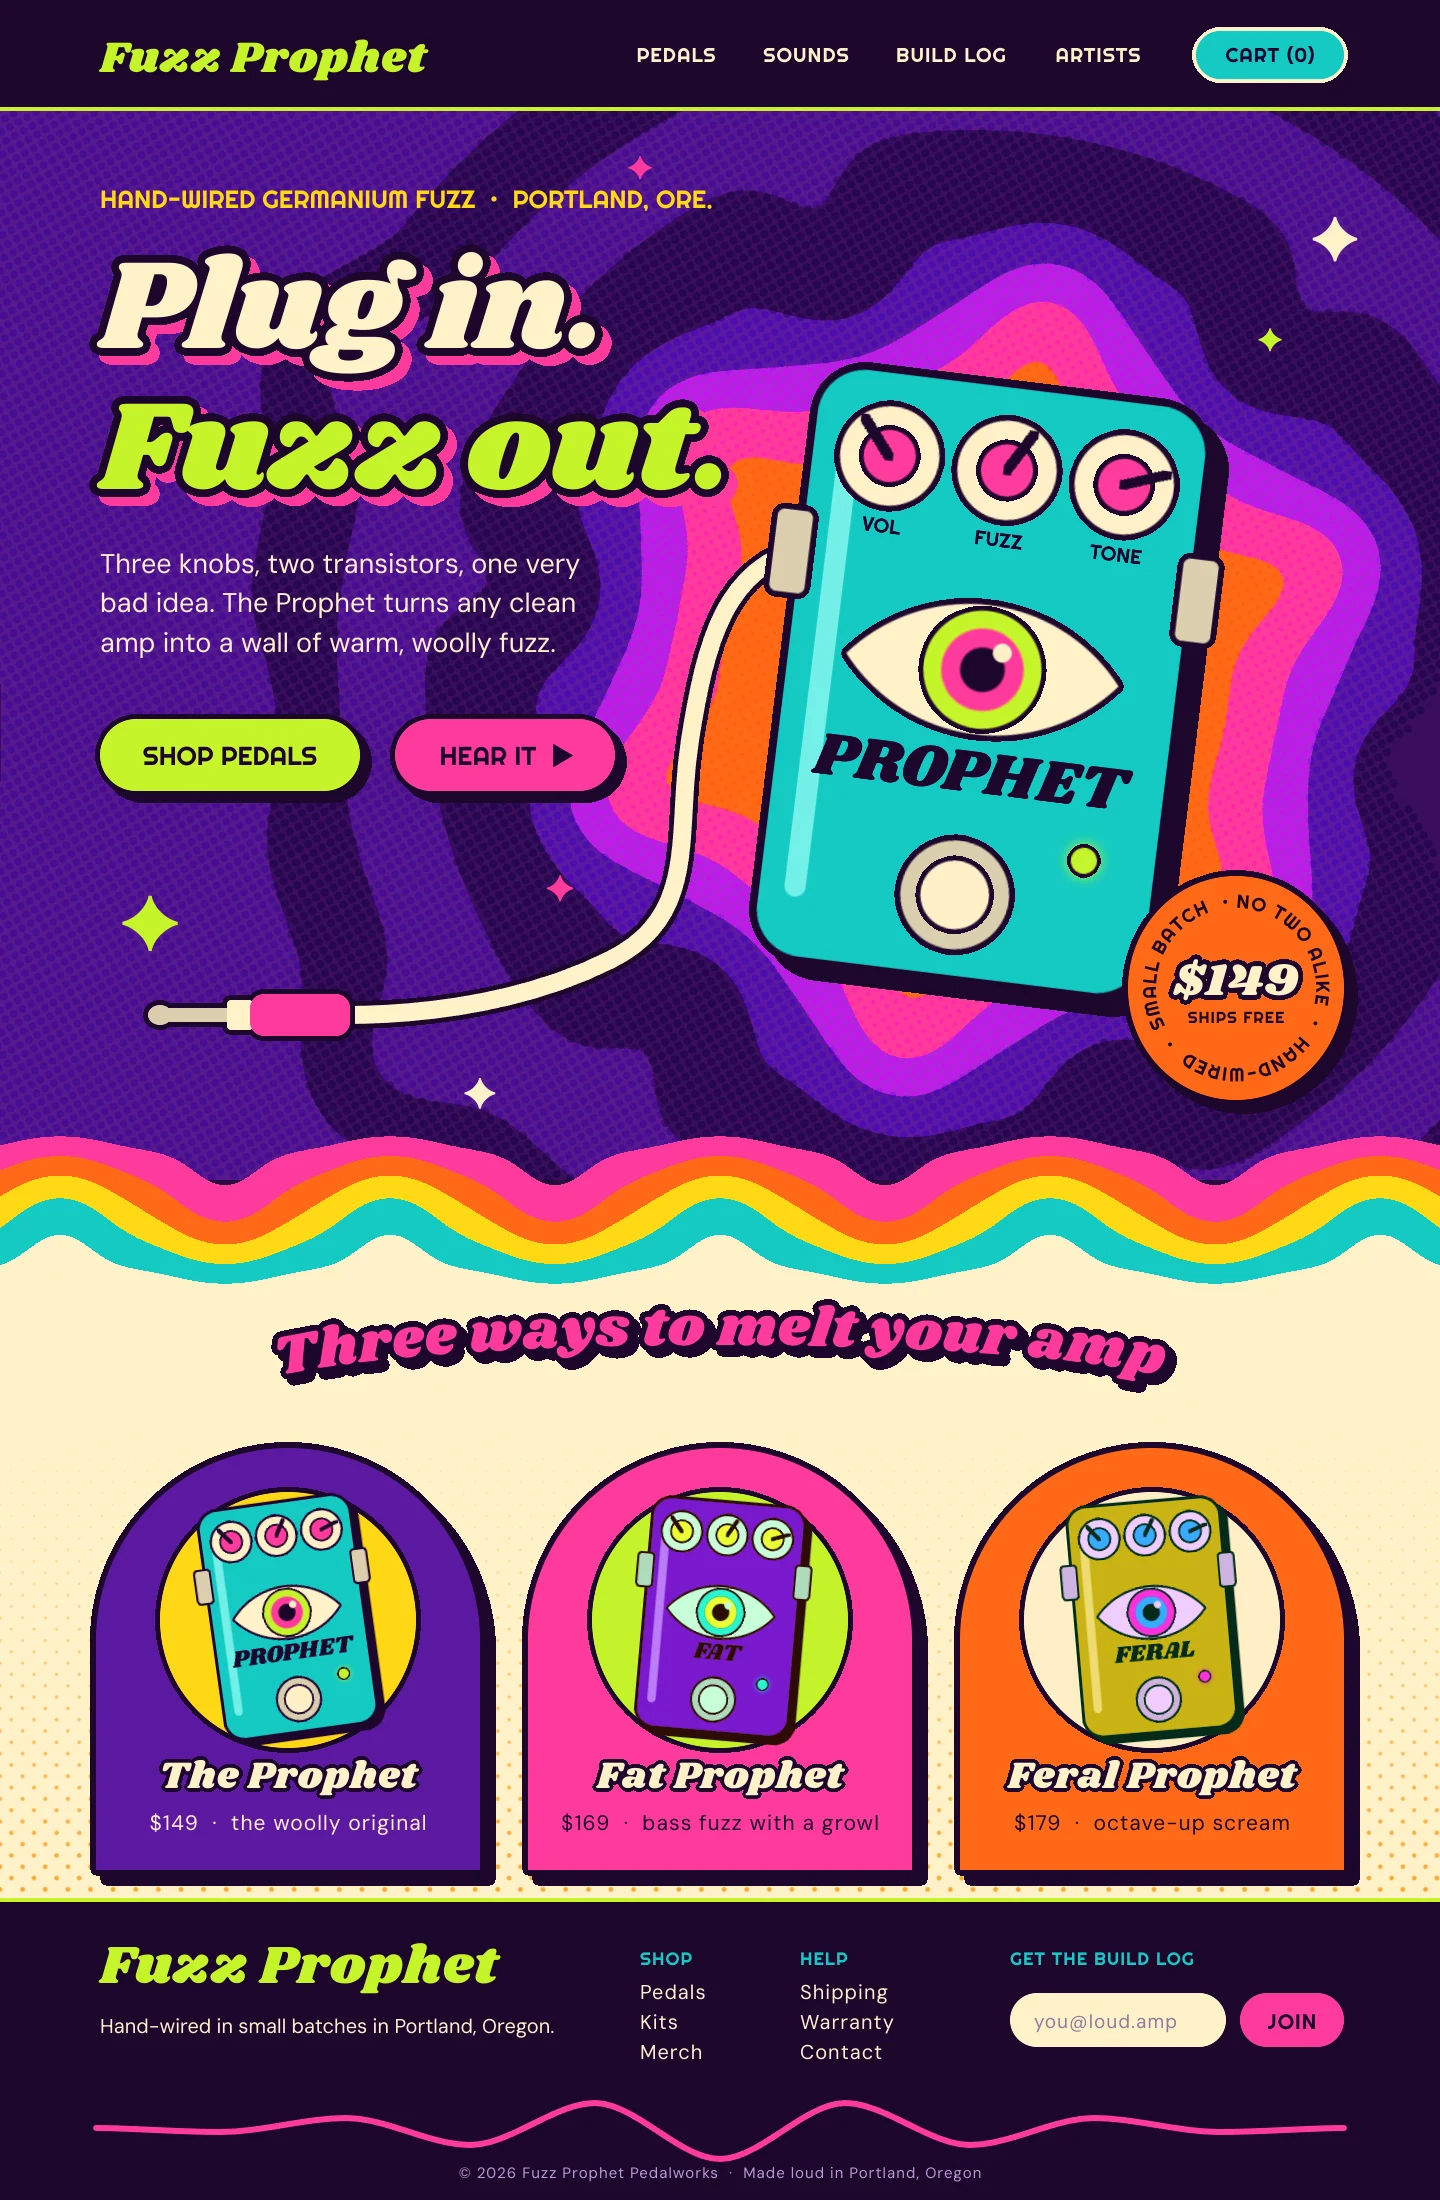
The San Francisco concert posters of 1966 and 1967 broke every rule of legible design on purpose. Colours from opposite sides of the wheel sat side by side so the edges seemed to vibrate, shapes melted, and lettering bent to fill whatever space was left. It's a great fit for a company that sells distortion. In this tutorial you'll design the landing page for Fuzz Prophet, a made-up maker of hand-wired fuzz pedals, as a 1440 × 2200 px desktop comp.
The page has four parts, top to bottom: a dark nav bar, a purple hero with the pedal on a stack of melting rings, a cream product section under a band of wavy stripes, and a dark footer. You'll draw the pedal from simple shapes, then reuse it three times for the product cards.
Along the way you'll use:
- guides, the Elliptical Marquee with Edit → Fill, and marquees combined with Shift and Shift+Alt
- Filter → Liquify to melt circles into wobbly rings and straight stripes into waves
- the Shape tool for the pedal, buttons and cards, and its Path output for a circle of text
- the Pen tool for a cable, a signal wave and an arc, and text on a path
- a two-colour headline, the Text panel's line height and letter spacing
- groups, scaling and rotating a whole group, Copy Merged, and rotating a selection
- Filter → Hue/Saturation and Filter → Halftone, the Overlay blend mode and a Saturation & Vibrance adjustment
- Stroke, Drop Shadow and Outer Glow effects
- text in Shrikhand, Righteous and DM Sans
The palette:
-
Aubergine
-
ink
-
Ring purples
-
Violet
-
magenta
-
Hot pink
-
tangerine
-
sun yellow
-
Turquoise
-
shine
-
Acid lime
-
cream
-
Metal
-
dot orange
-
Footer greys
-
Set up the page and start the rings
Choose File → New, set the size to 1440 × 2200 px and click Create. Click the
Backgroundrow, set the foreground colour to aubergine and choose Edit → Fill.Drop the guides. Click the top ruler at 96, 720 and 1344: the two outer ones are the page margins and the middle one is the centre line. Then click the left ruler at 110 (bottom of the nav bar), 1180 (bottom of the hero) and 1900 (top of the footer).
Still on
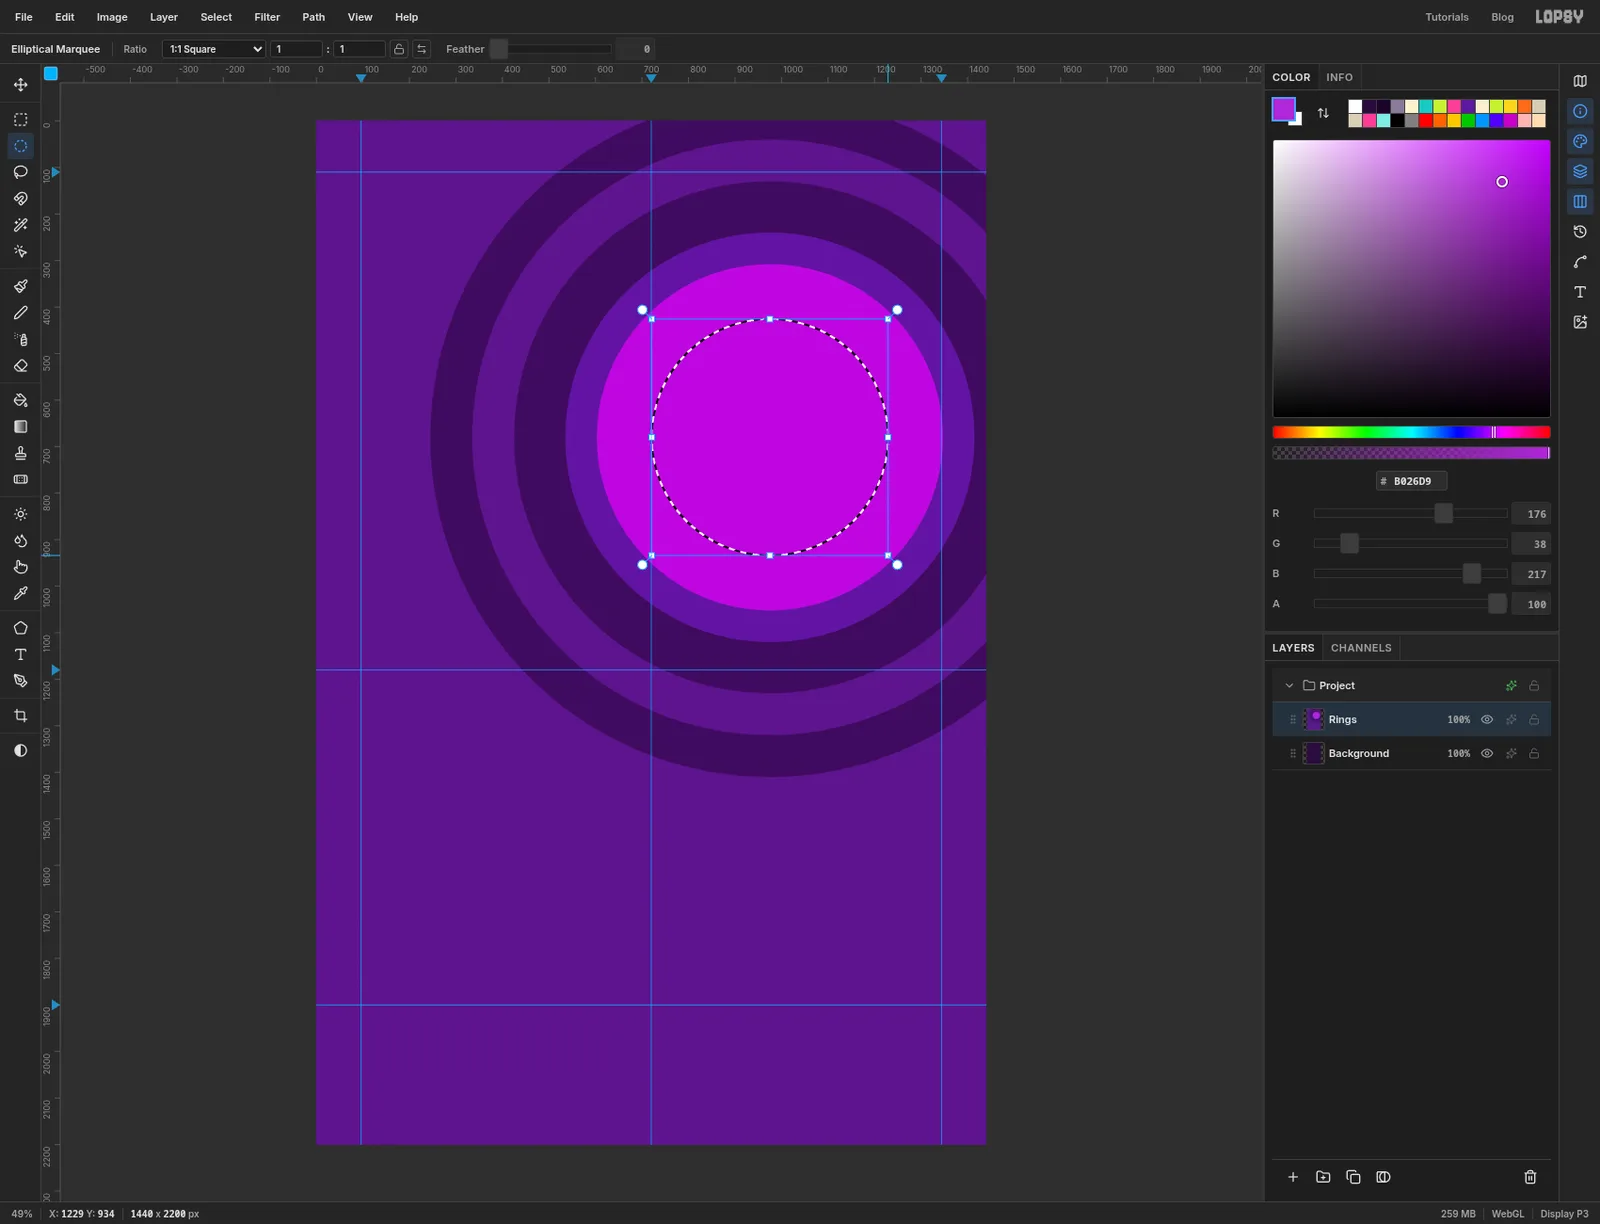
Background, pick the Rectangular Marquee (M) and drag from just off the left edge on the 110 guide to just off the right edge on the 1180 guide. Fill it with and press Cmd+D. That's the hero's base colour.Now the rings. They are just circles, filled from the biggest to the smallest, all centred on 975, 680. Double-click
Layer 1's name and rename itRings. With nothing selected, choose Edit → Fill to flood the whole layer with the same . That's the outermost ring.Pick the Elliptical Marquee and click once on the canvas without dragging. A small dialog asks for two corners, which is easier than dragging a circle this big. Type From
-25, -320to1975, 1680and press Enter. That's a circle with a radius of 1000 px. Fill it with .Carry on inwards. Press Cmd+D before each one, because the dialog only opens when nothing is selected:
65, -230to1885, 1590, filled155, -140to1795, 1500, filled245, -50to1705, 1410, filled335, 40to1615, 1320, filled425, 130to1525, 1230, filled535, 240to1415, 1120, filled violet603, 308to1347, 1052, filled magenta
The outer circles are far bigger than the hero, and the purple covers the whole page for now. That's fine. You'll trim it soon.
-
Finish the bright rings
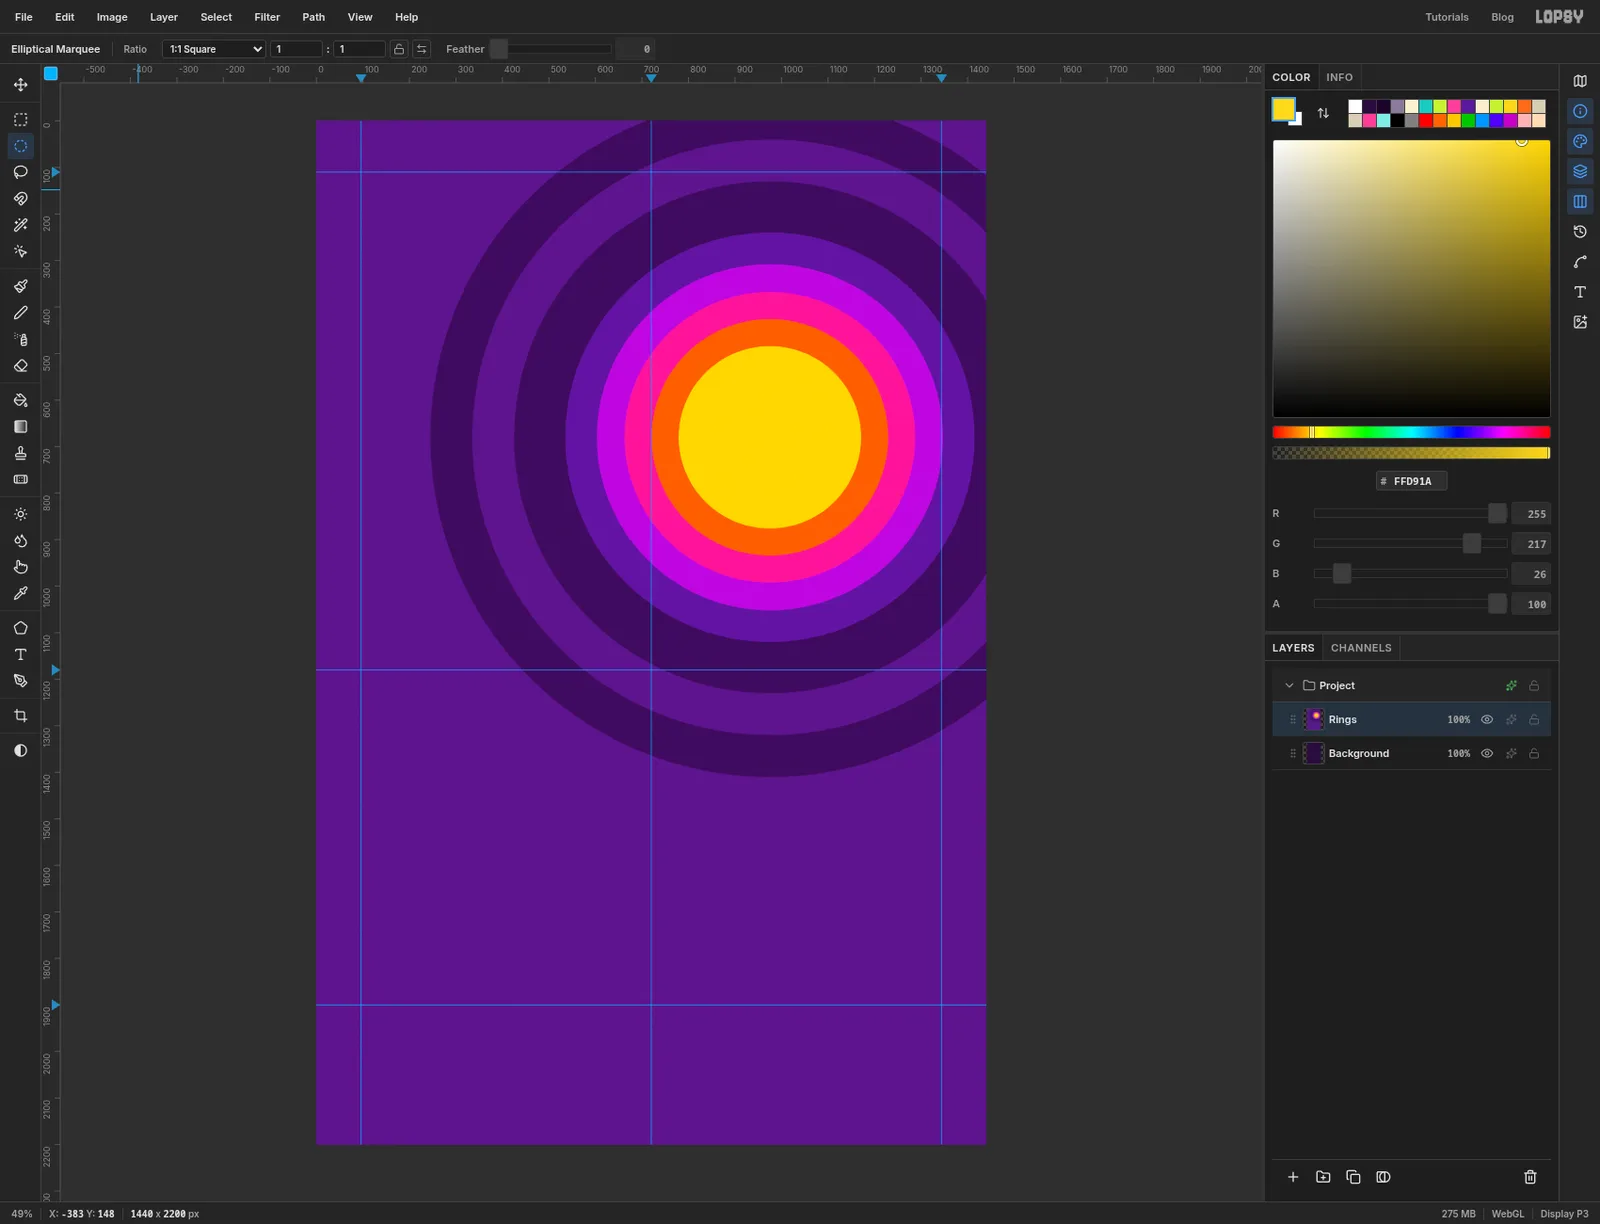
Three more circles finish the stack:
663, 368to1287, 992, filled hot pink721, 426to1229, 934, filled tangerine779, 484to1171, 876, filled sun yellow
Press Cmd+D.
The two quiet purples keep the left half of the hero calm enough to read text on, while the hot colours pile up where the pedal will sit.
-
Melt the rings with Liquify
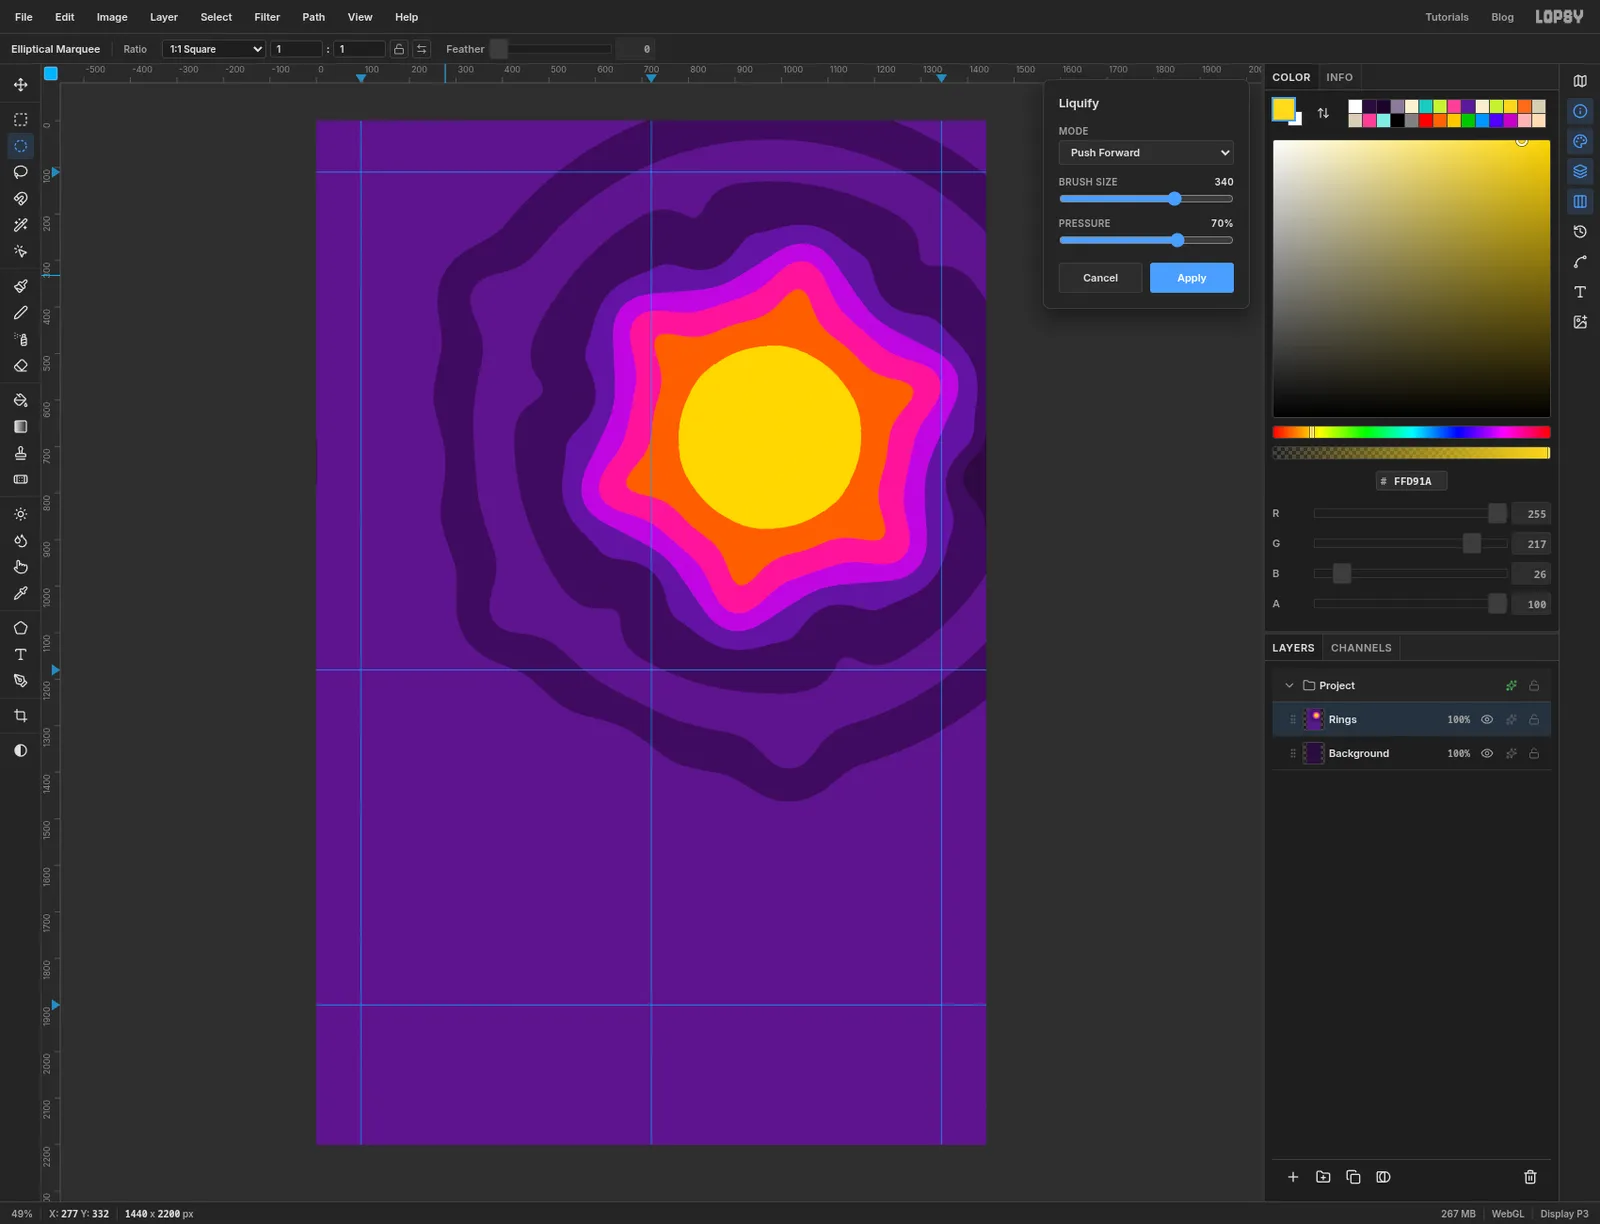
Choose Filter → Liquify…. Leave Mode on Push Forward and set Brush Size to
260and Pressure to70.Work your way around the bright rings like the numbers on a clock. At the first spot, start just outside the violet ring and drag about 150 px towards the centre. At the next, start on the orange ring and drag about 150 px outwards. Keep alternating in and out, twelve short drags in all, and the circles turn into a wobbly flower.
Then raise Brush Size to
340and do the same to the big purple rings, a little further out. Stay on the canvas while you drag, because a press on a ruler drops a guide instead. Click Apply.Now trim the overflow. With the Rectangular Marquee, drag from the 110 guide to the 1180 guide across the full width again, choose Select → Inverse, press Delete and then Cmd+D.
-
Set up the layer stack
This page ends up with about seventy layers, so make the groups first. A new group always lands directly above the selected layer, so the trick is to create them from the top down.
Click the
Ringsrow, click New Group at the bottom of the Layers panel and name itNav. ClickRingsagain, make another group and name itSeal. Carry on the same way withPedal,Hero Copy,FooterandLower Page, clickingRingsbefore each one. The stack should read, from the top:Nav,Seal,Pedal,Hero Copy,Footer,Lower Page,Rings,Background.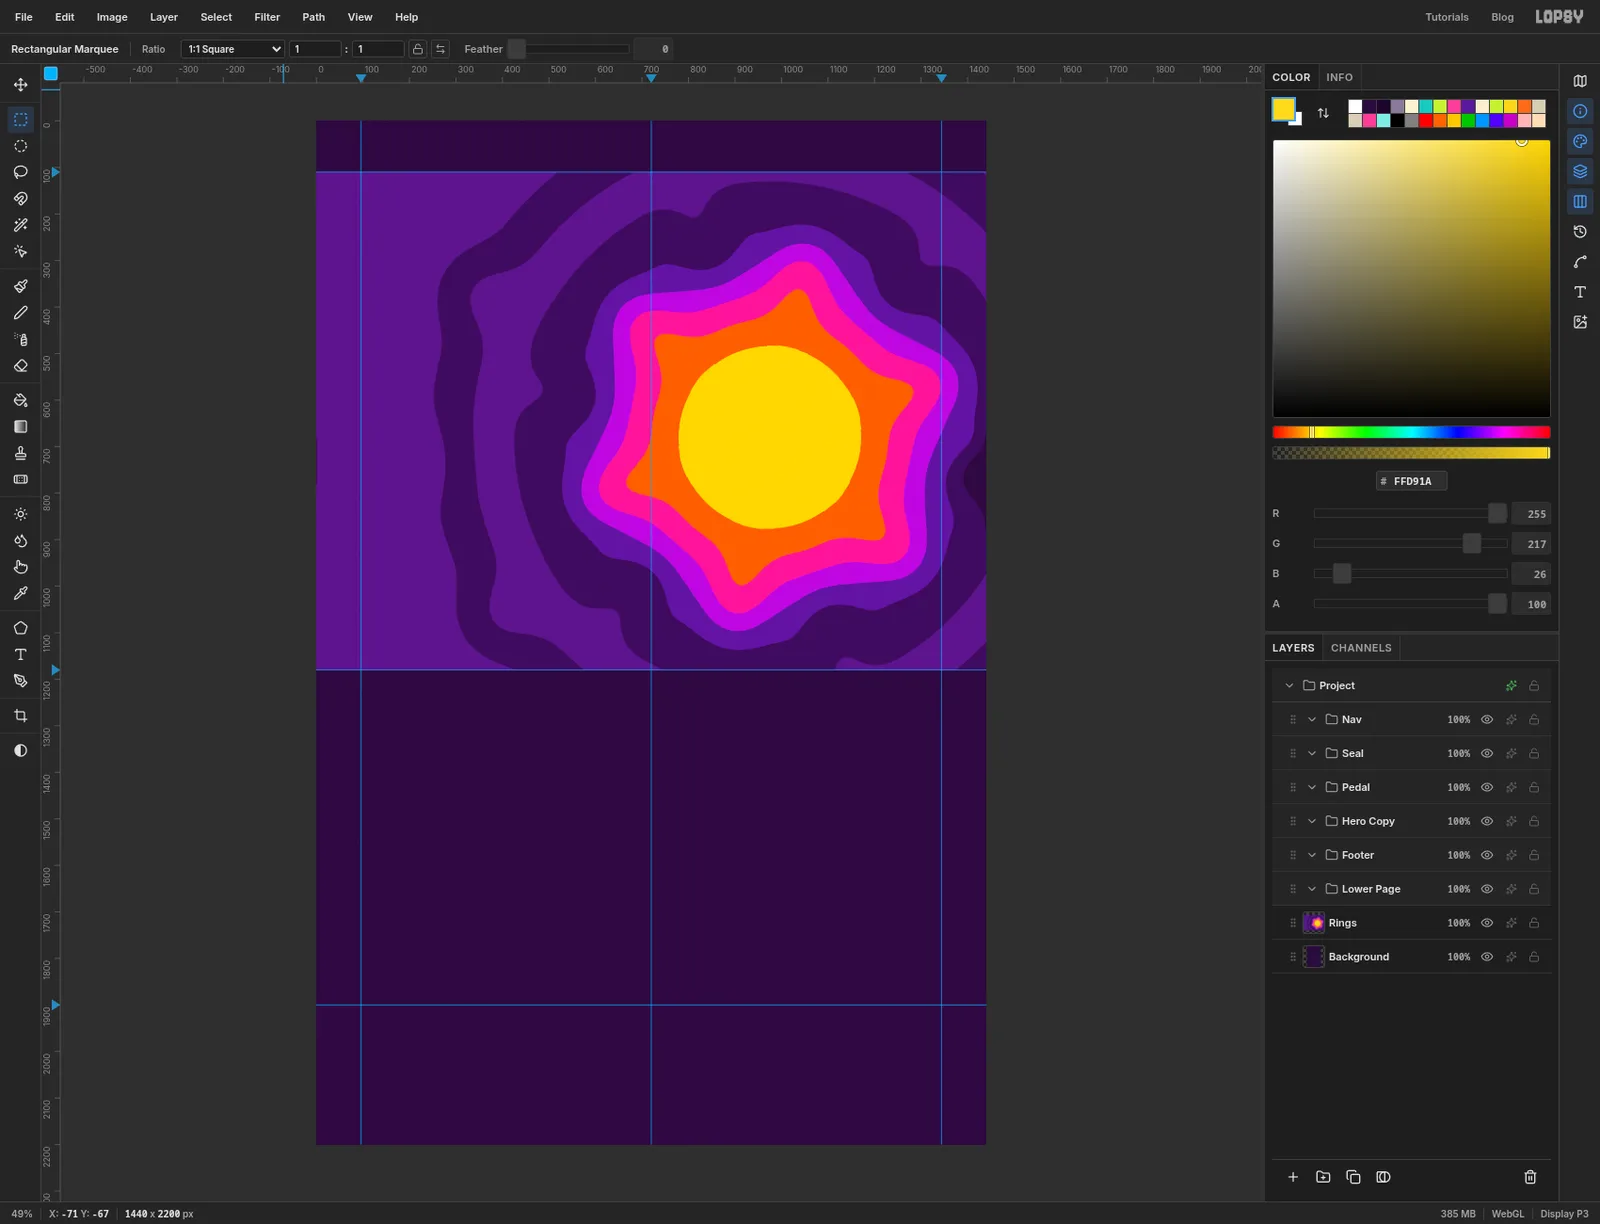
-
Draw the pedal body
Open the View menu and untick Snap to Guides, so shapes don't jump to the centre line.
Click the
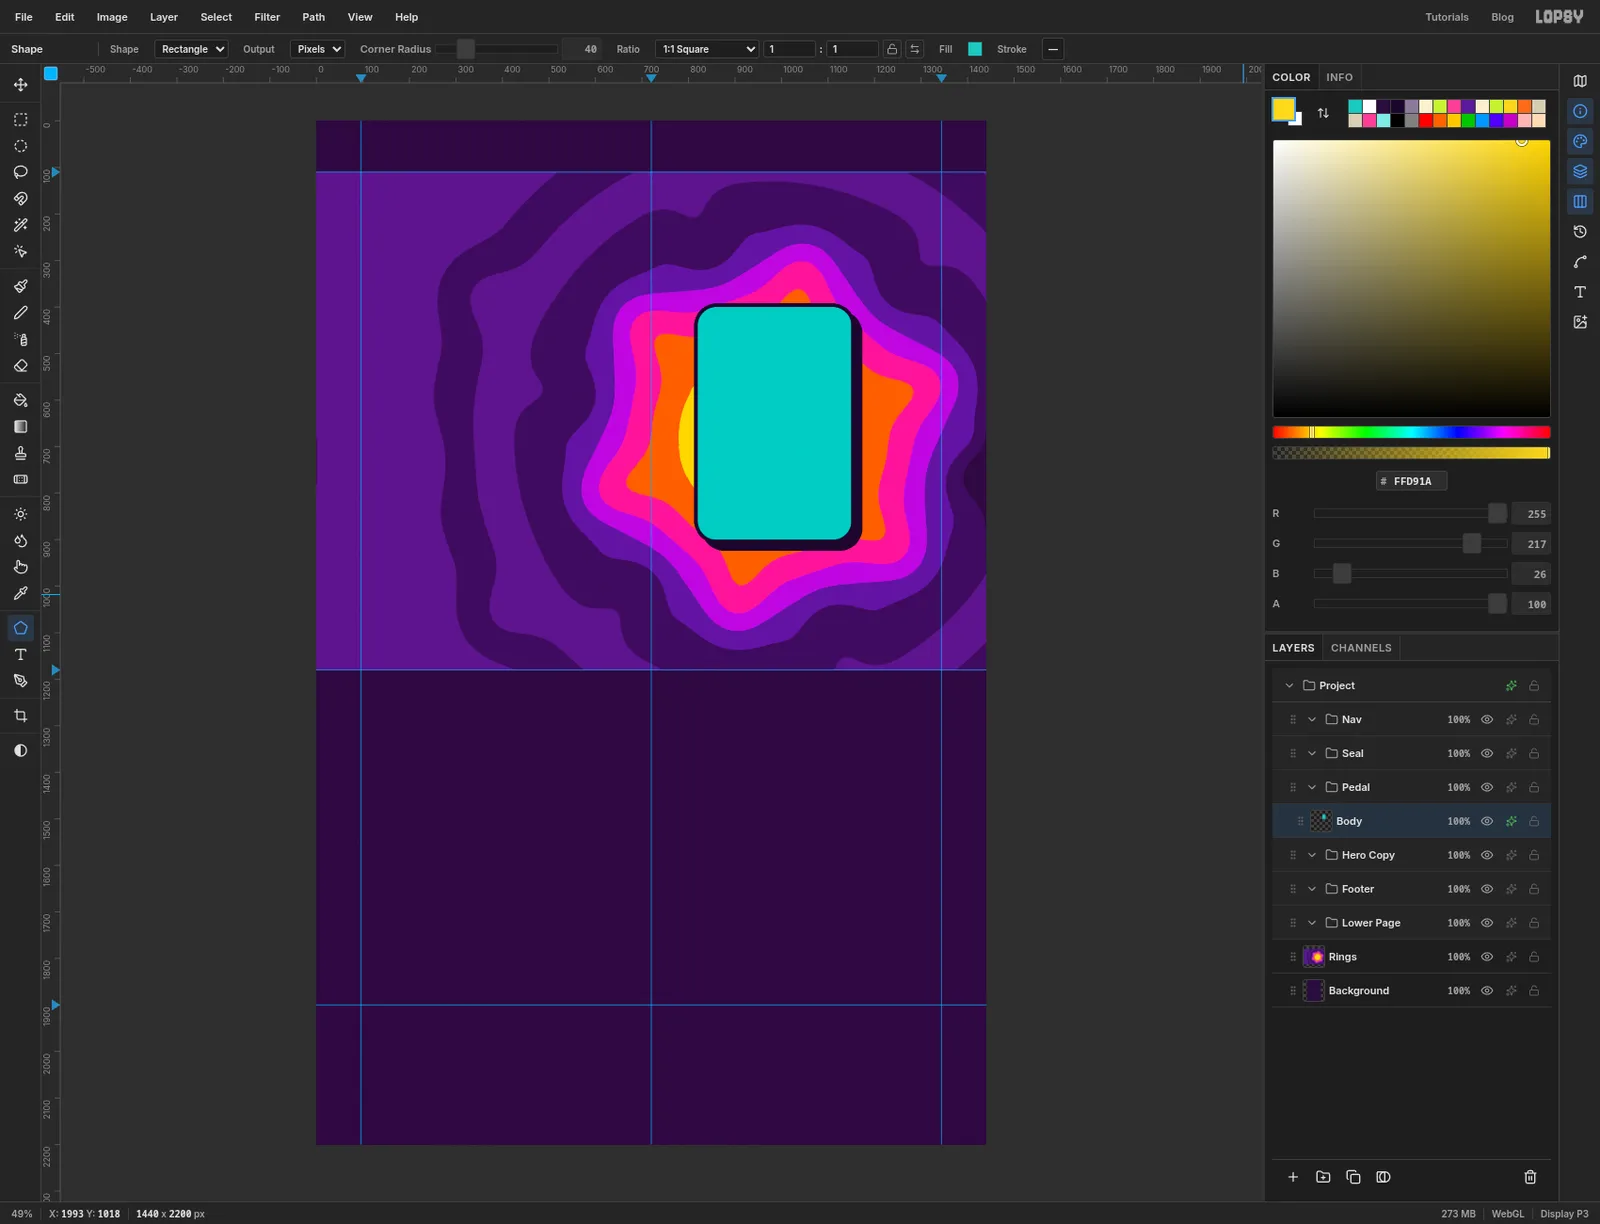
Pedalgroup, click Add Layer and name the layerBody. Pick the Shape tool (U) and set Shape to Rectangle, Corner Radius to40and the Fill to turquoise . The Shape tool draws outwards from where you press, so press at 985, 650 and drag to 1150, 900 for a body 330 px wide and 500 px tall.Click the ✦ button on the
Bodyrow to open the effects drawer. Tick Stroke and set Width to8and the colour to ink . Tick Drop Shadow and set Offset X16, Offset Y16, Blur0and Opacity100in ink. A shadow with no blur is a flat-colour poster shadow, and you'll use it all over this page. Close the drawer.You'll build the pedal upright and tilt it at the end.
-
Add the shine and three knobs
Each part gets its own layer inside
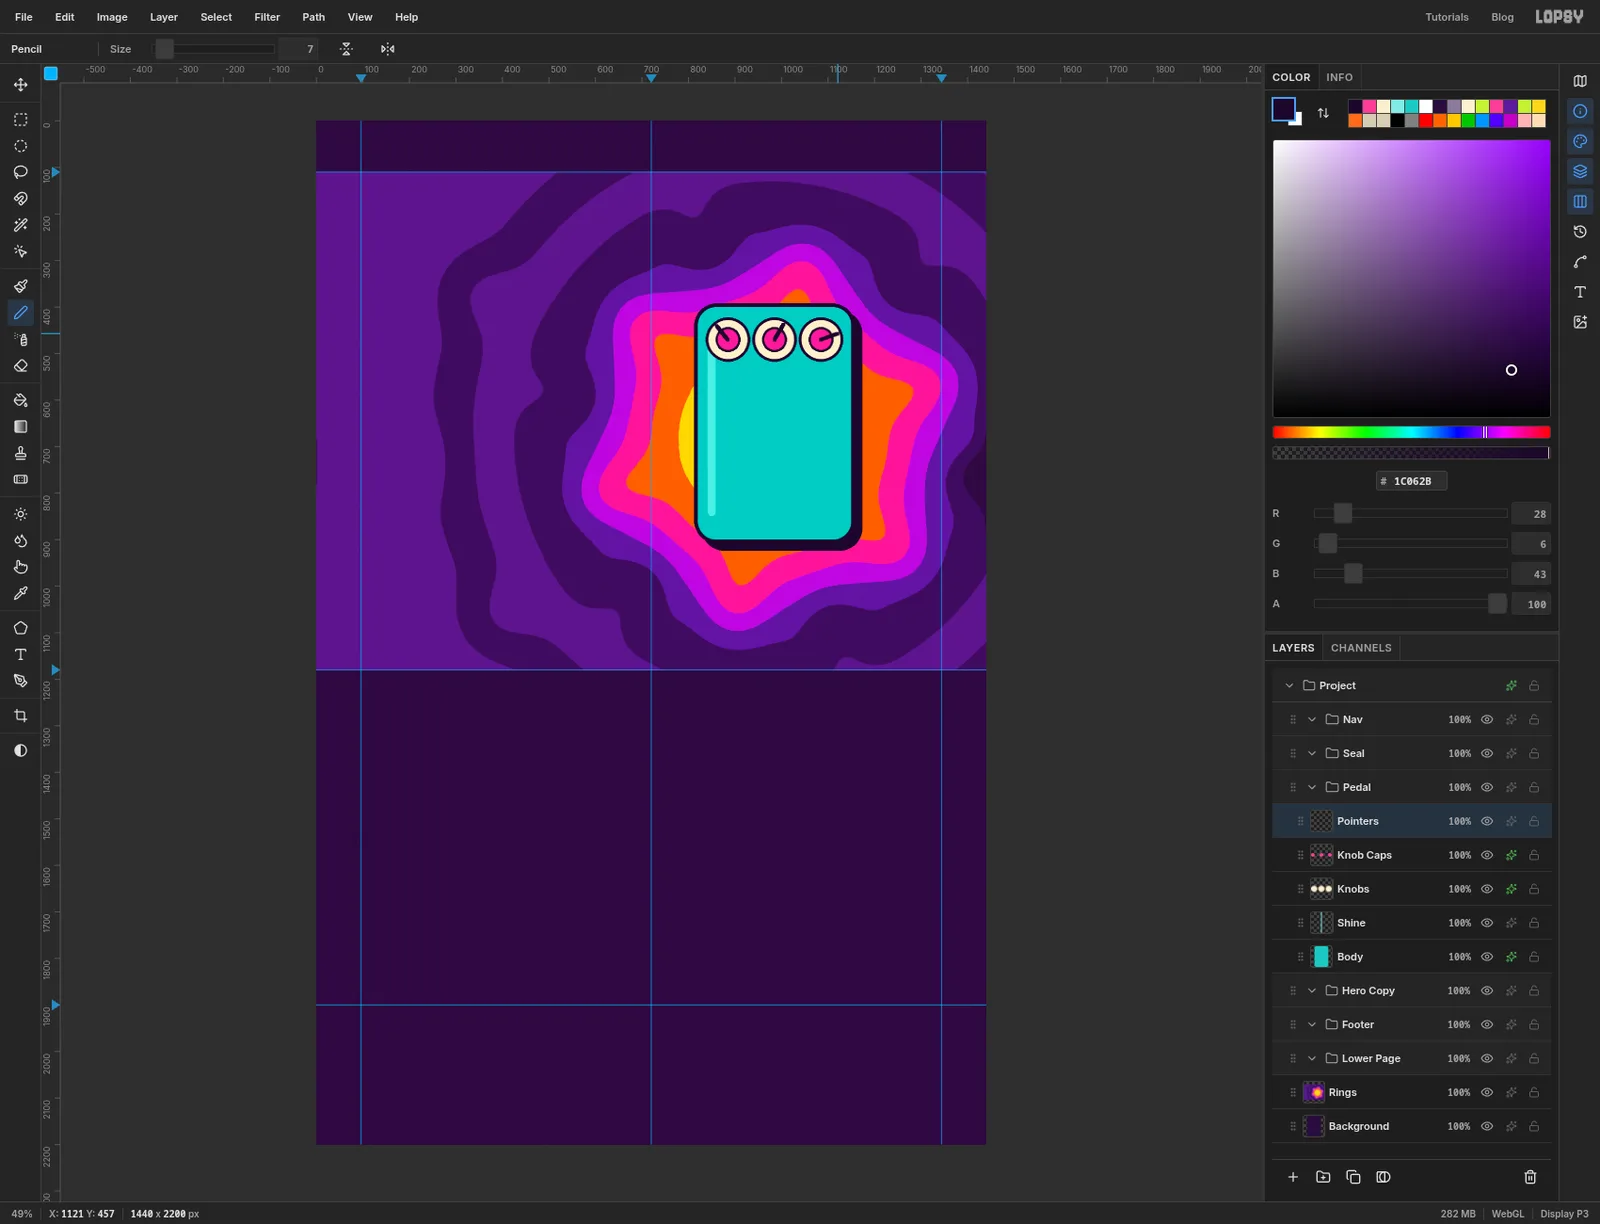
Pedal. Click Add Layer before each one.Shine: a rectangle with Corner Radius9in , drawn from 850, 650 out to 859, 850. It's a thin highlight strip down the left side.Knobs: switch Shape to Ellipse and the fill to cream . Draw three circles in a row across the top of the body, centred on 885, 470, 985, 470 and 1085, 470. Press on the centre and drag out about 42 px for a knob 84 px across, holding Cmd to keep it a perfect circle. Give the layer a Stroke of Width6.Knob Caps: three hot pink circles 44 px across on the same centres, with a Stroke of5.Pointers: pick the Pencil (N) at Size7in ink. Click the centre of a knob, then Shift-click a point on its rim to draw a straight pointer line. Aim each one a different way, as if someone had been twiddling them.
-
Shape the eye from two circles
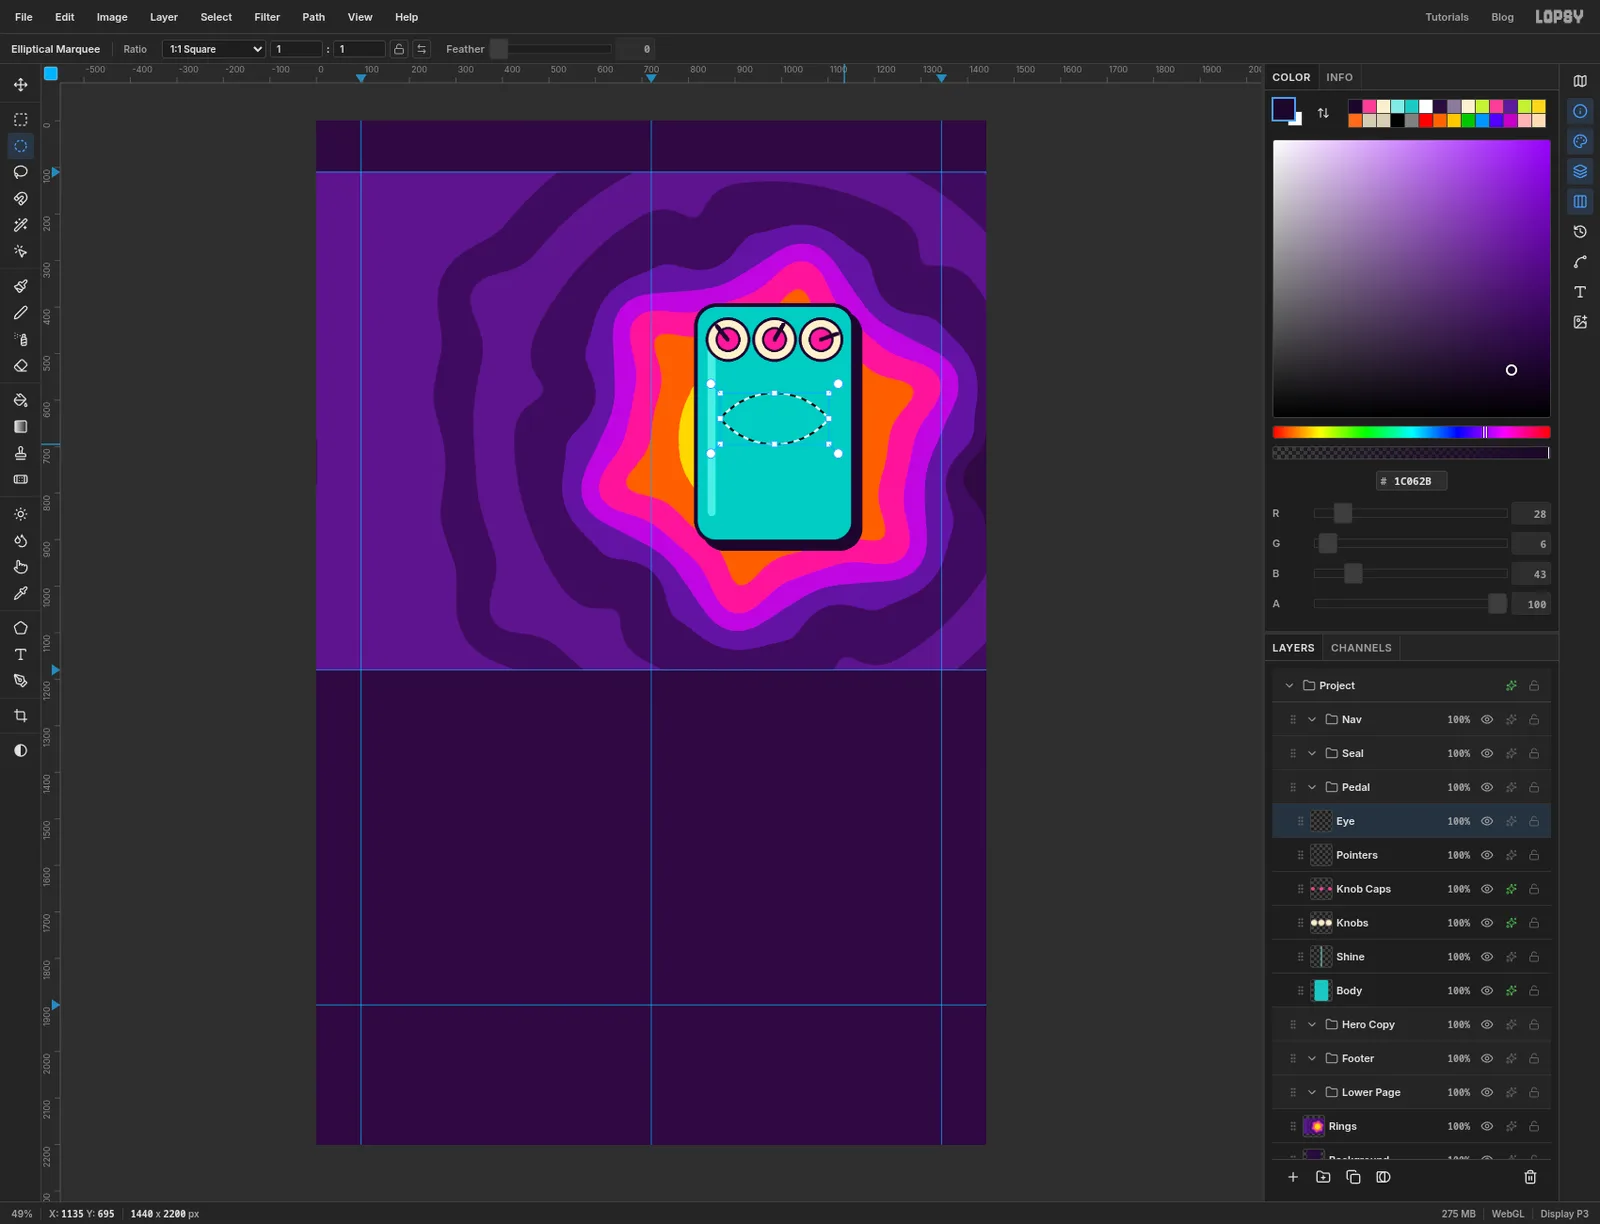
The third eye is an almond, and an almond is where two circles overlap.
Click Add Layer and name it
Eye. Pick the Elliptical Marquee and drag a circle from 835, 585 to 1135, 885. Now hold Shift+Alt and drag a second circle from 835, 395 to 1135, 695. Holding both keys keeps only the part the two selections share, which is an almond 232 px wide centred on the pedal.Fill it with cream , press Cmd+D and give the layer a Stroke of
6.
-
Fill the iris with a banded gradient
Click Add Layer and name it
Iris. Pick the Gradient tool from the toolbox, set Type to Radial and click Advanced…. Click the bar to add stops until you have six, and set them up in pairs so each colour holds flat and then changes abruptly:- ink at 0% and 36%
- hot pink at 40% and 68%
- lime at 72% and 100%
Click Done. With the Elliptical Marquee, drag a circle from 935, 590 to 1035, 690. Switch back to the Gradient tool and drag from the centre of the circle to its edge. Press Cmd+D and add a Stroke of
5.Add one more layer,
Glint, and use the Shape tool to draw a small cream circle 16 px across at 1000, 624, on the upper right of the pupil.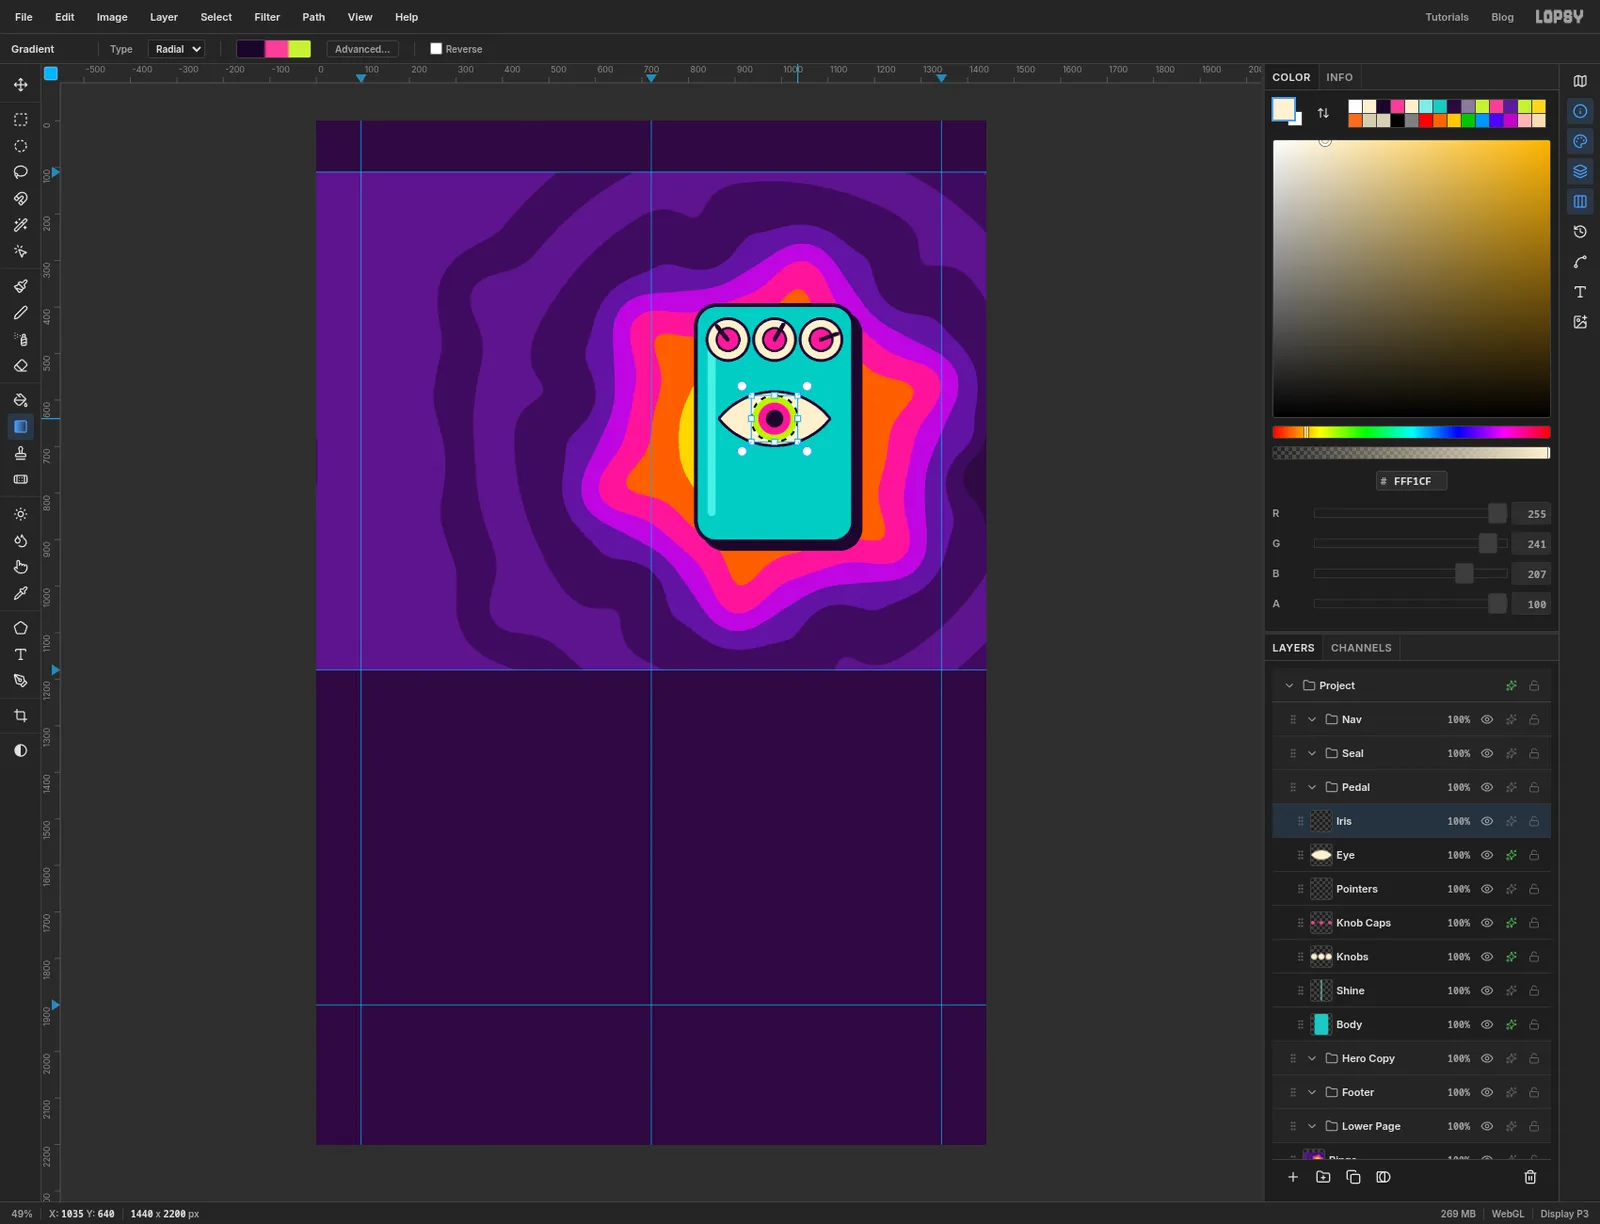
-
Finish the pedal
Four more shape layers finish the hardware:
Jacks: two rectangles with Corner Radius6in metal , each 30 × 70 px, centred on 812, 560 and 1158, 560 so they straddle the body's edges. Stroke6.Footswitch: a metal circle 92 px across centred on 985, 832. Stroke6.Switch Cap: a cream circle 58 px across on the same centre. Stroke5.LED: a lime circle 22 px across at 1090, 790. Stroke4, plus an Outer Glow with Size18and Opacity90in the same lime.
Now the lettering. Set the foreground to ink and pick the Text tool (T). Choose Righteous, Size
17and Align Center. Click at 885, 520, typeVOLand press Tab to commit. AddFUZZat 985, 520 andTONEat 1085, 520. Then switch the font to Shrikhand at Size52, click at 985, 700 and typePROPHET.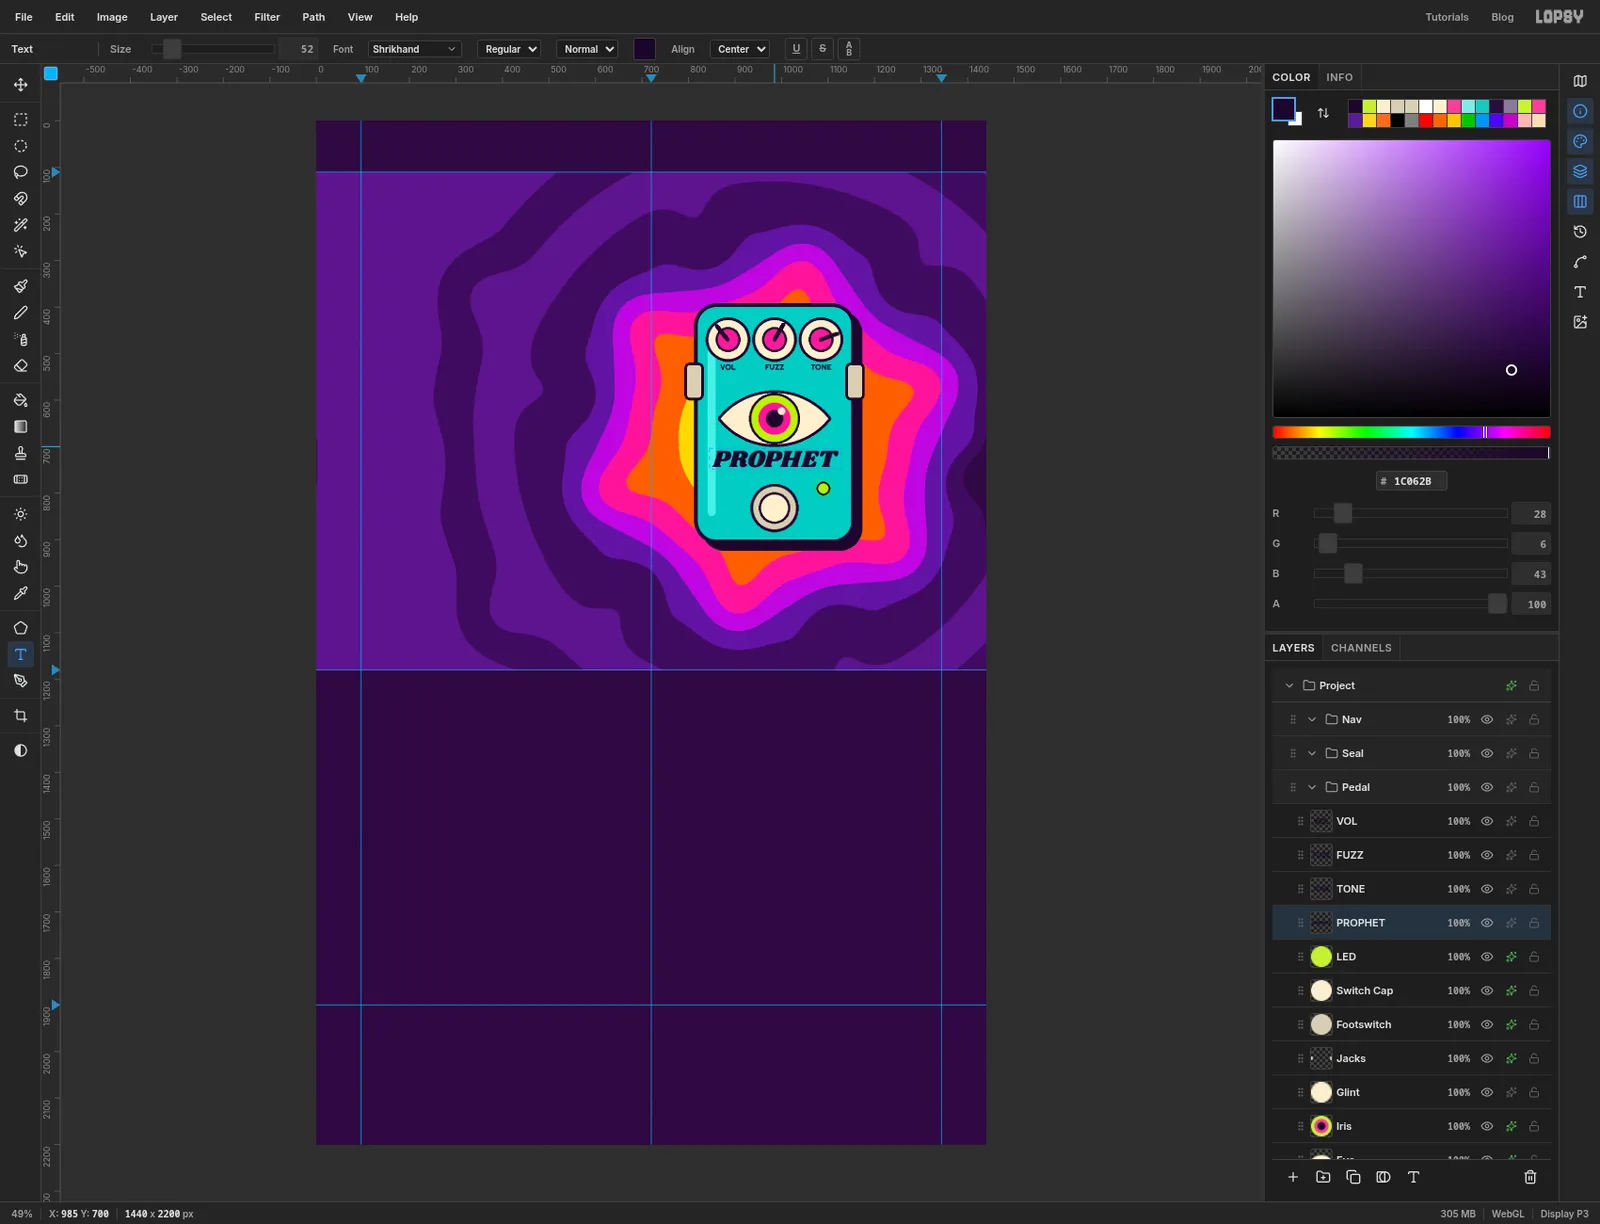
-
Scale the whole group
Click the
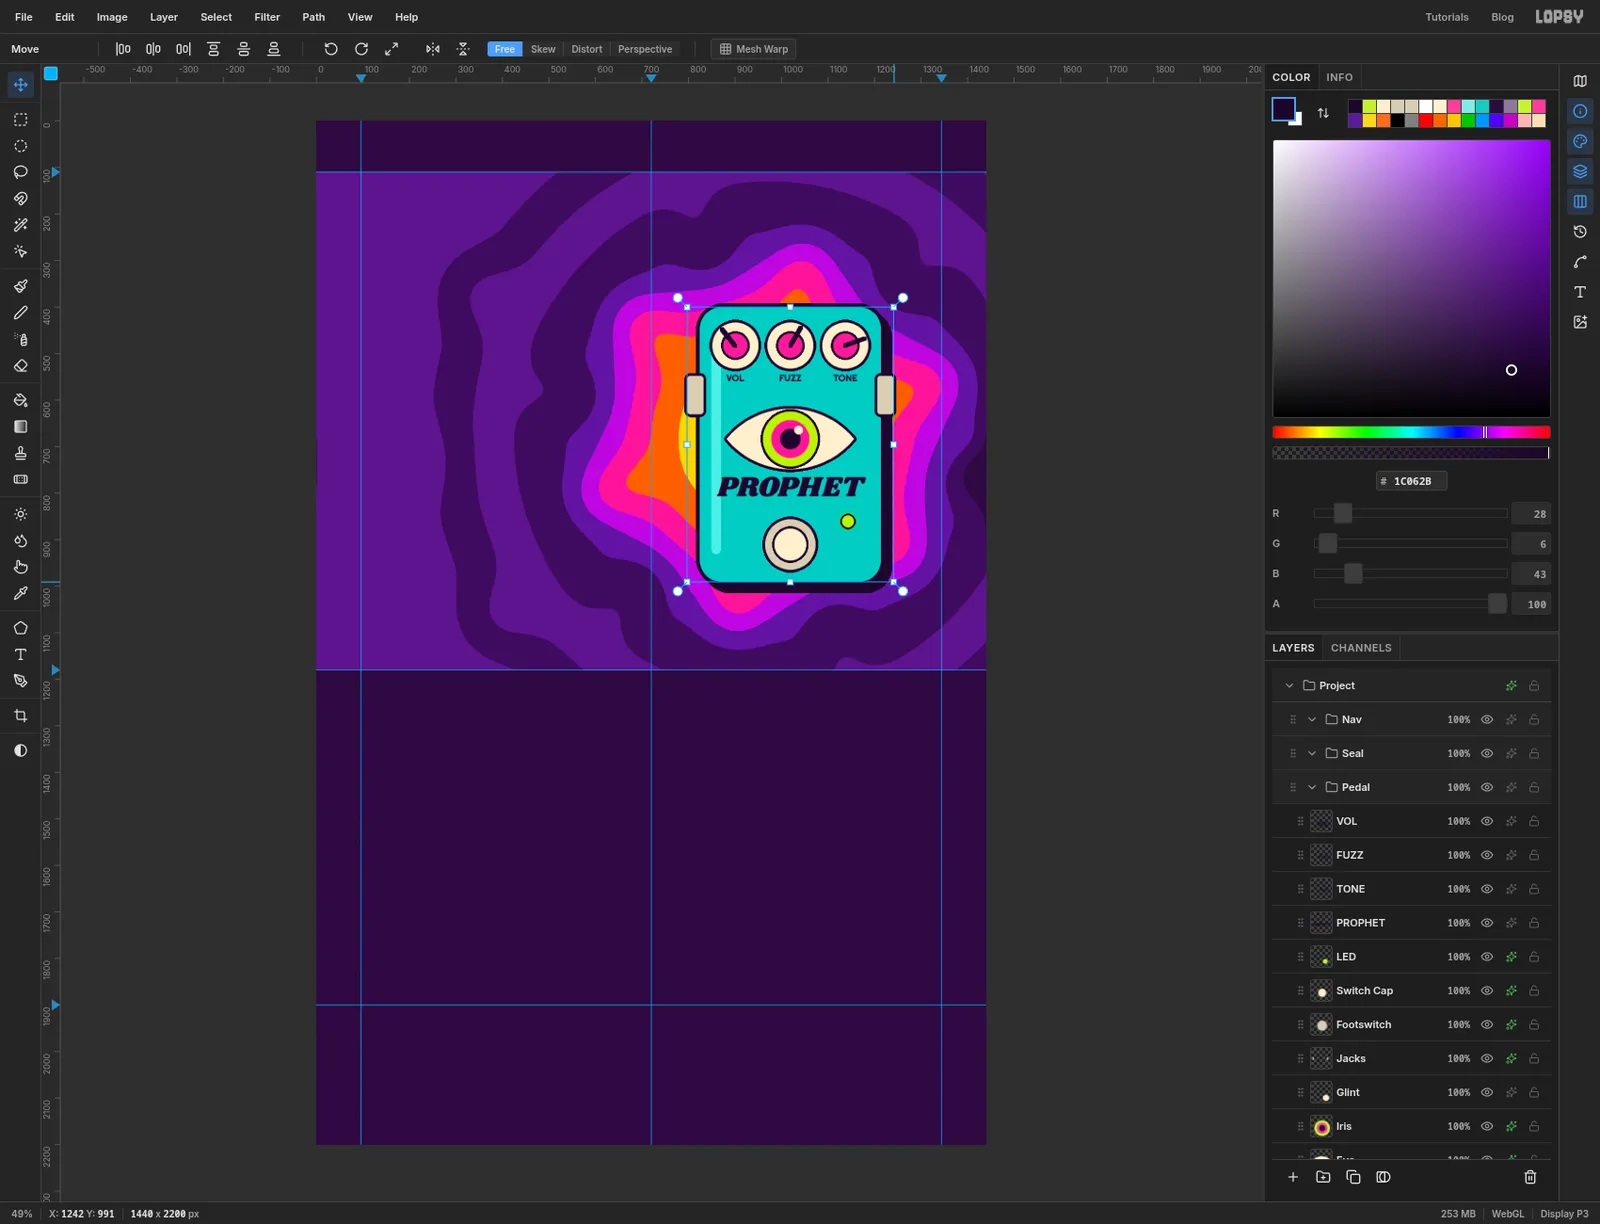
Pedalgroup's row and pick the Move tool (V). With a group selected, the handles frame everything inside it.Hold Cmd to keep the proportions and drag the bottom-right handle about 70 px to the right and 90 px down. That makes the pedal a little under a fifth bigger. Everything scales together, and the text layers stay editable. Press Cmd+D to commit.
-
Copy the pedal as a single layer
The product cards need three small pedals. Rather than rebuild the pedal, flatten a copy of it.
Hide everything that isn't the pedal: click the eye icons on
BackgroundandRings. Hide theVOL,FUZZandTONElayers too, because that lettering turns to mush when it's shrunk. With the Rectangular Marquee, drag a box around the pedal, leaving room for its shadow. Choose Edit → Copy Merged, which copies what you see rather than one layer, and press Cmd+D.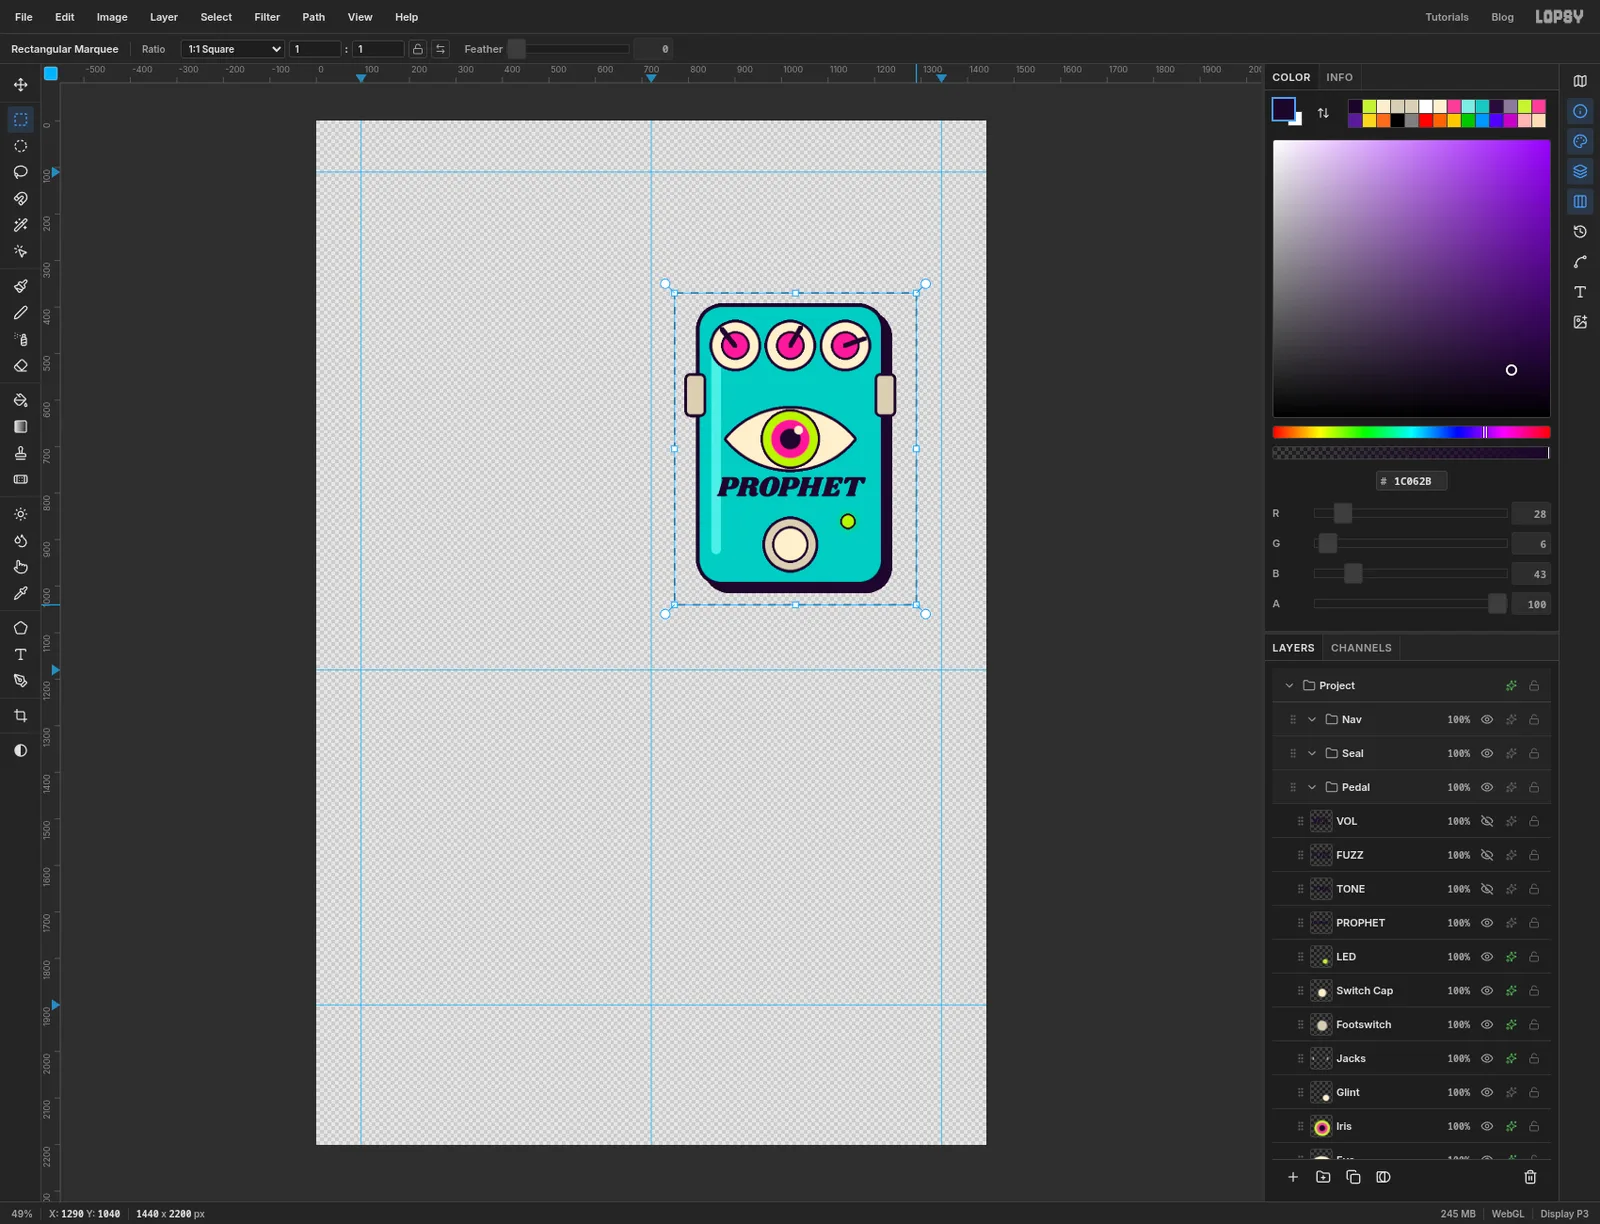
-
Paste, shrink and place the first mini pedal
Click the
Lower Pagegroup and choose Edit → Paste. The copy lands exactly on top of the original as aPasted Layer, already selected, with Move handles around it.Hold Cmd and drag the bottom-right handle up and to the left until that corner is near 967, 632. The copy is now a little under 40% of its size. Use the same spot for the other two copies so all three come out the same. Then drag from inside the box to move it down to the first card's spot, centred near 288, 1620. Press Cmd+D and rename the layer
Mini Prophet.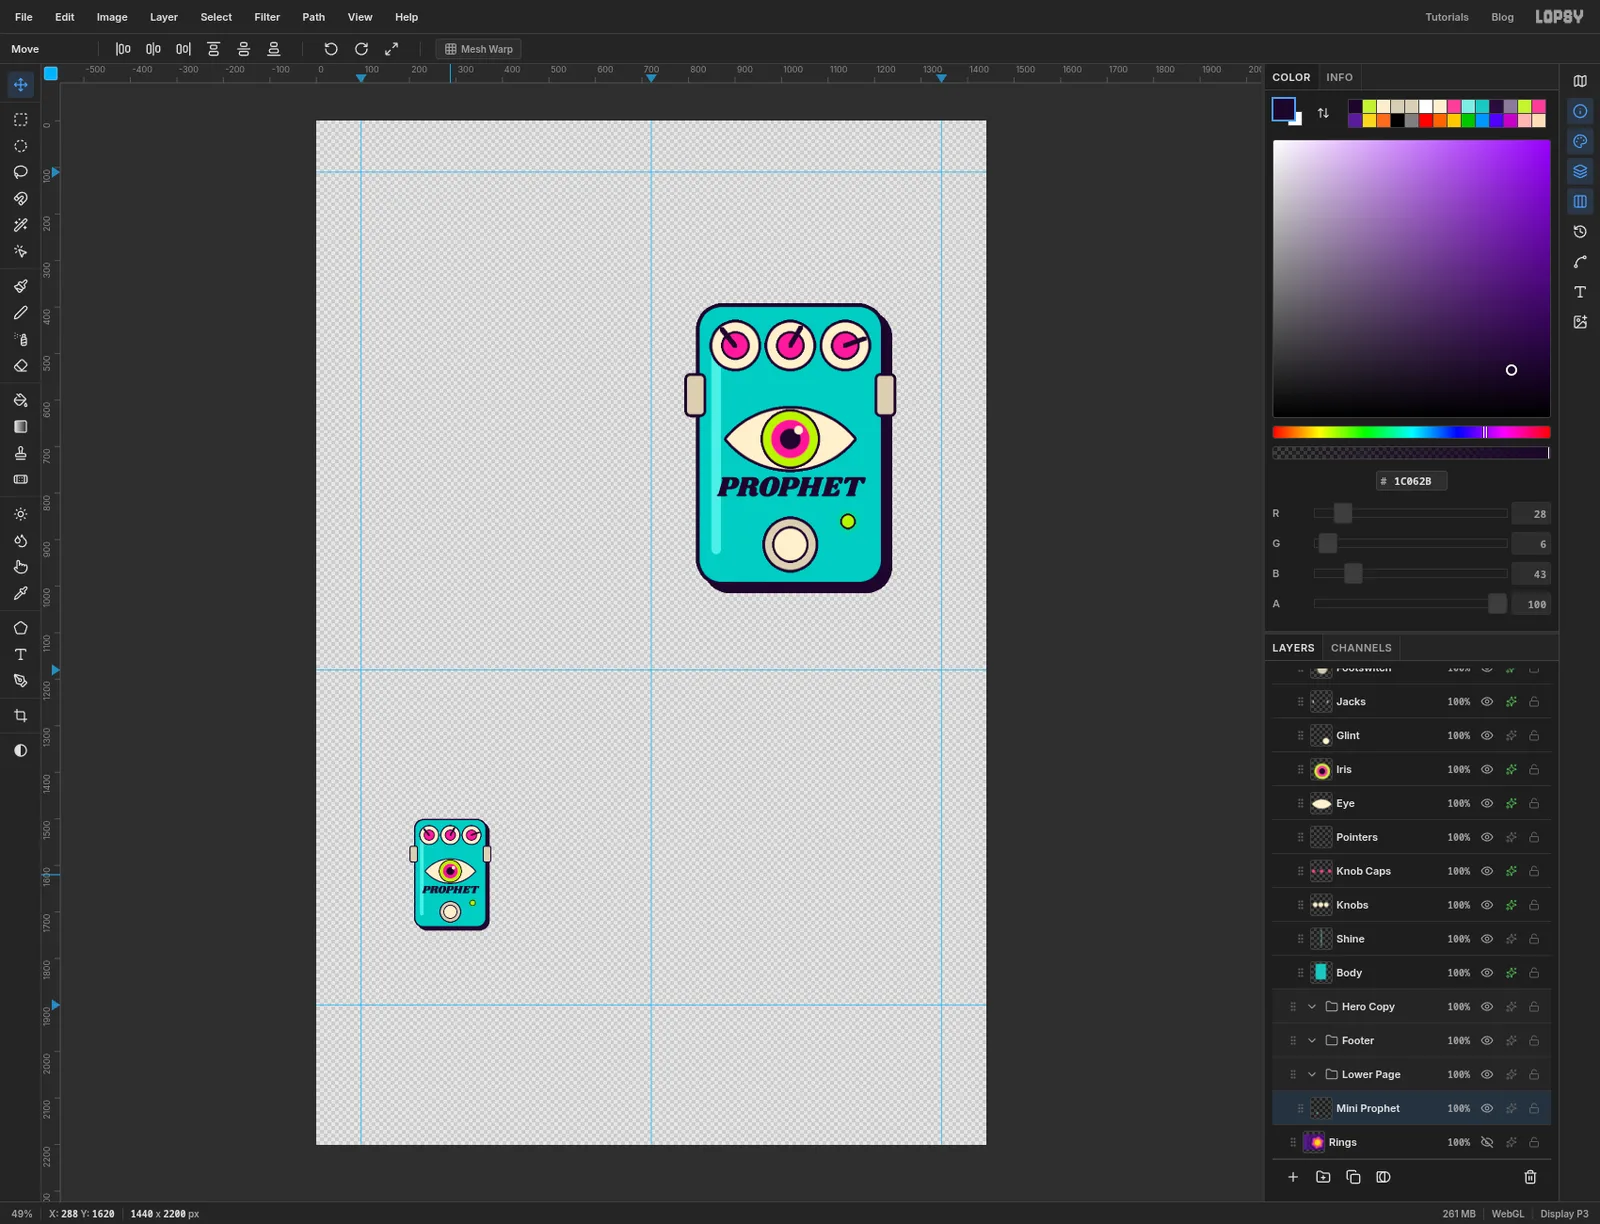
-
Rename the pedal for two more copies
Because the big pedal's name is still live text, each copy can carry a different one.
Click the
PROPHETlayer, pick the Text tool and click on the word. Press Cmd+A, typeFATand press Tab. Drag the marquee around the pedal again, choose Edit → Copy Merged, press Cmd+D, clickLower Pageand paste. Shrink and move this copy the same way, to 720, 1620, and name itMini Fat.Do it once more with
FERAL, placing the copy at 1152, 1620 asMini Feral.Then type
PROPHETback into the big pedal and click the eye icons to showBackground,Rings,VOL,FUZZandTONEagain.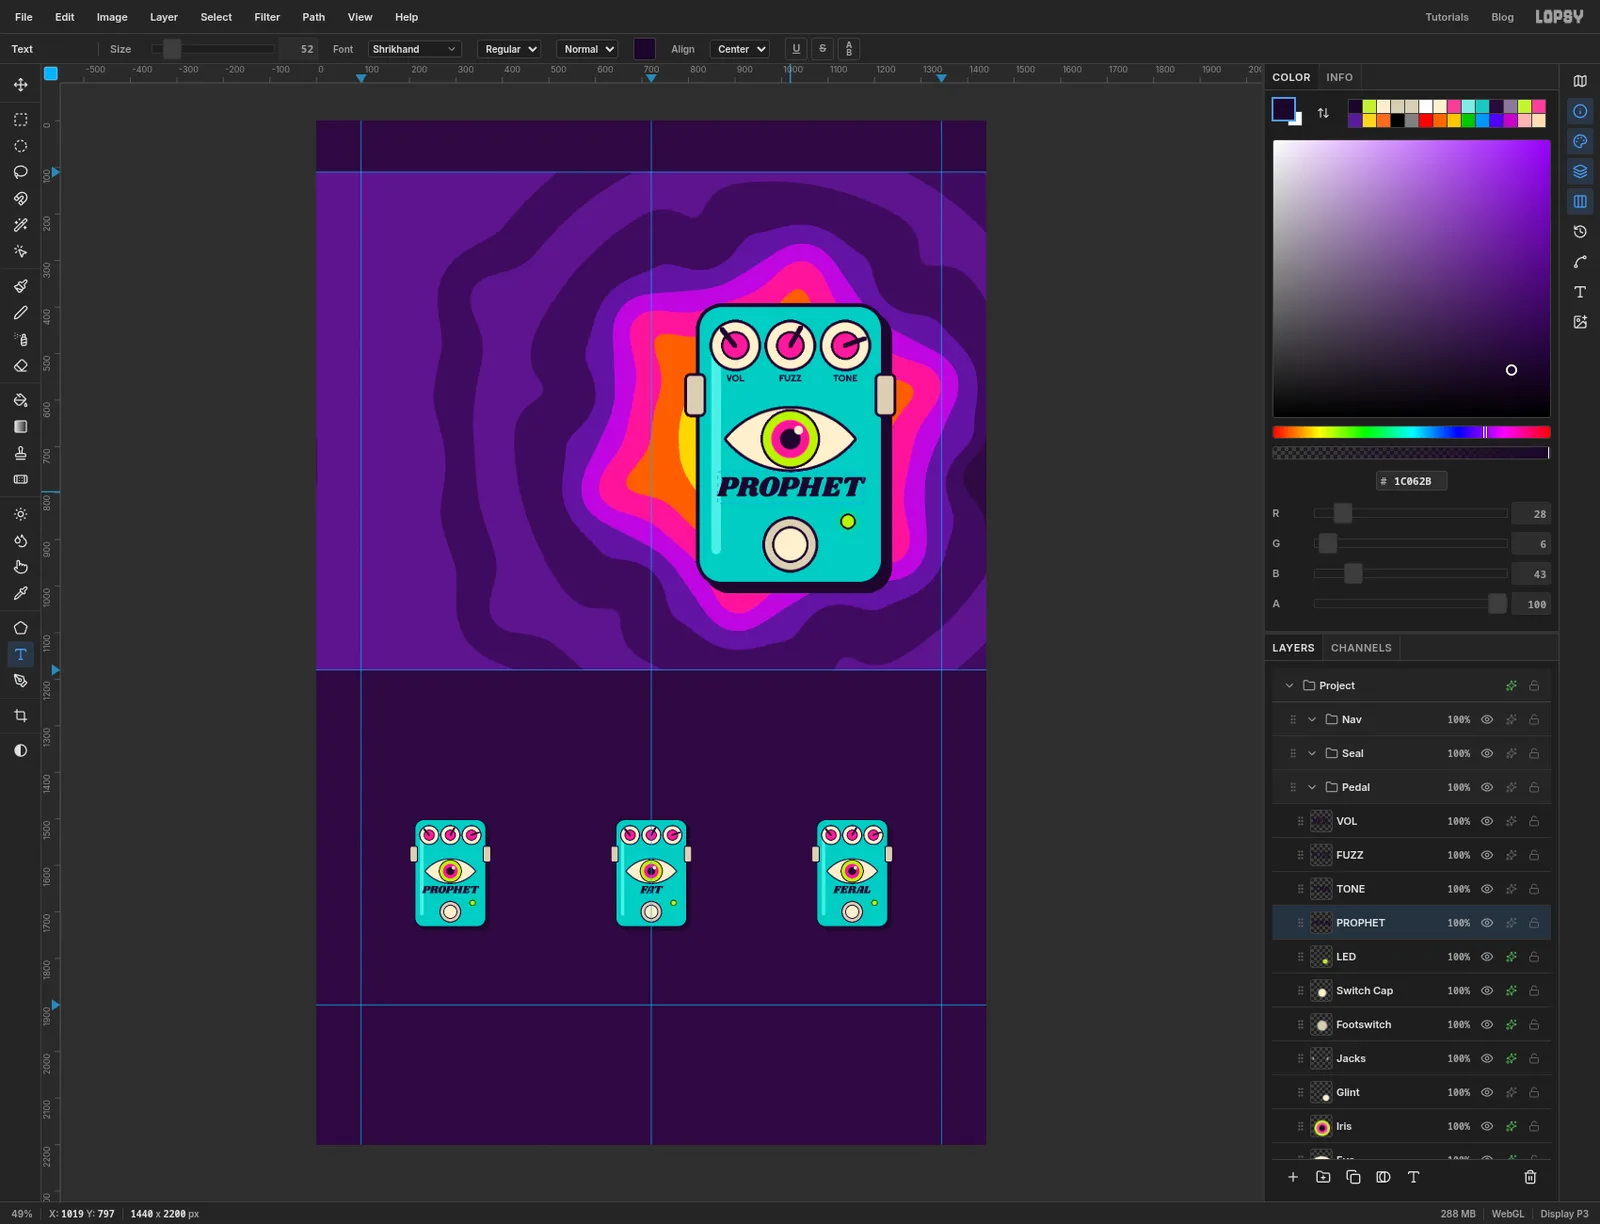
-
Tilt the pedal
Click the
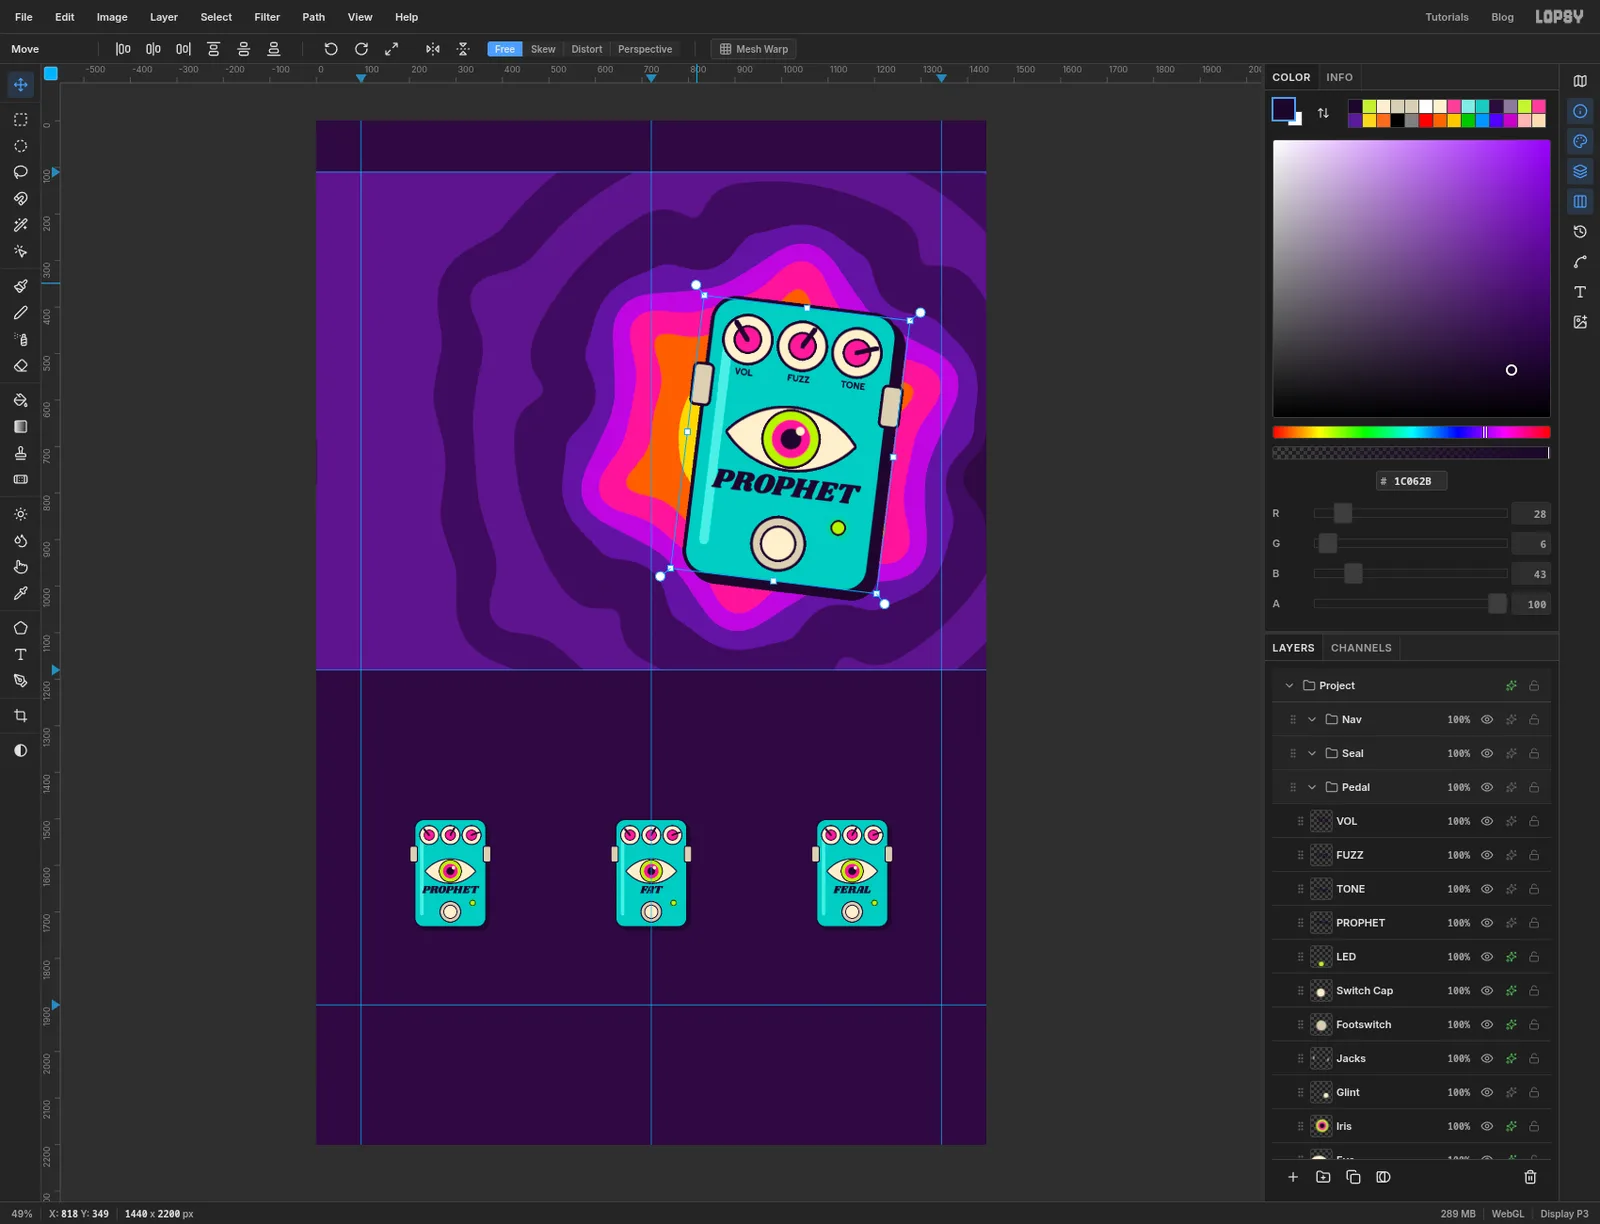
Pedalgroup and pick the Move tool. Move the pointer just outside a corner of the box, onto the round rotation handle, and drag clockwise. You want a small tilt of about 7°, which is when the box's top-right corner has dropped roughly 55 px. Press Cmd+D.With the group still selected, drag the pedal about 40 px left and 15 px up so it sits squarely over the yellow sun.
-
Draw the cable with the Pen
Click the
Ringsrow and click Add Layer. Name the layerCable. It lands above the rings and below every group, so the pedal will cover the cable's end.Set the foreground to cream . Pick the Pen tool (P) and set Stroke to
18. Each anchor is a press and a drag: where you press sets the point, and the direction you drag sets which way the curve leaves it.- Press on the pedal's left jack, near 793, 551, and drag a short way left and slightly down.
- Press at 690, 740 and drag straight down about 95 px.
- Press at 610, 960 and drag left and down.
- Press at 345, 1015 and drag straight left about 70 px.
Press Enter to stroke the path in the foreground colour. Then open the effects drawer for
Cableand add a Stroke of Width5in ink, so the cable gets the same outline as everything else.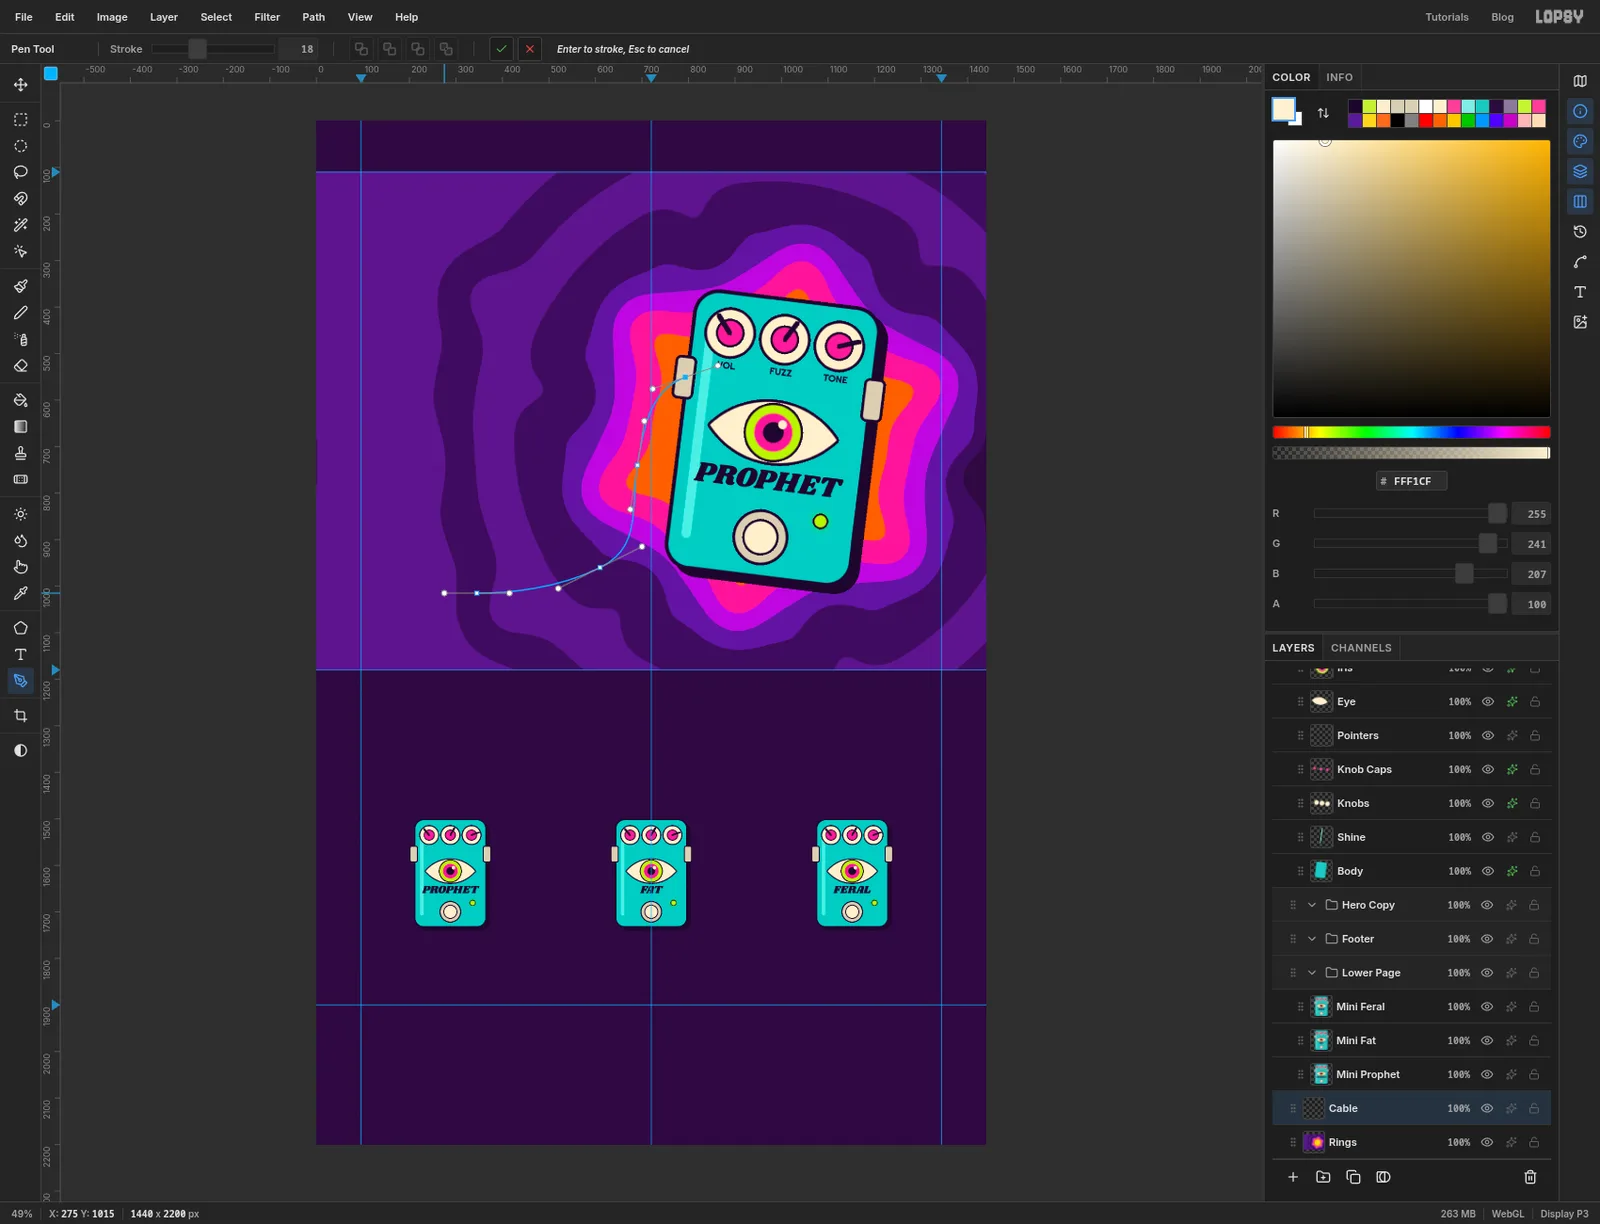
-
Add the jack plug
A cable that just stops looks unfinished, so give it a plug. Click Add Layer and name it
Plug. With the Shape tool, draw four pieces along the line y 1015, from the tip inwards:- the tip: an ellipse in metal , 24 × 20 px, centred on 160, 1015
- the shaft: a rectangle with Corner Radius
0in the same metal, 70 × 14 px, centred on 195, 1015 - the collar: a cream rectangle with Corner Radius
4, 26 × 30 px, centred on 240, 1015 - the barrel: a hot pink rectangle with Corner Radius
14, 100 × 42 px, centred on 300, 1015, covering the end of the cable
Add a Stroke of
5in ink.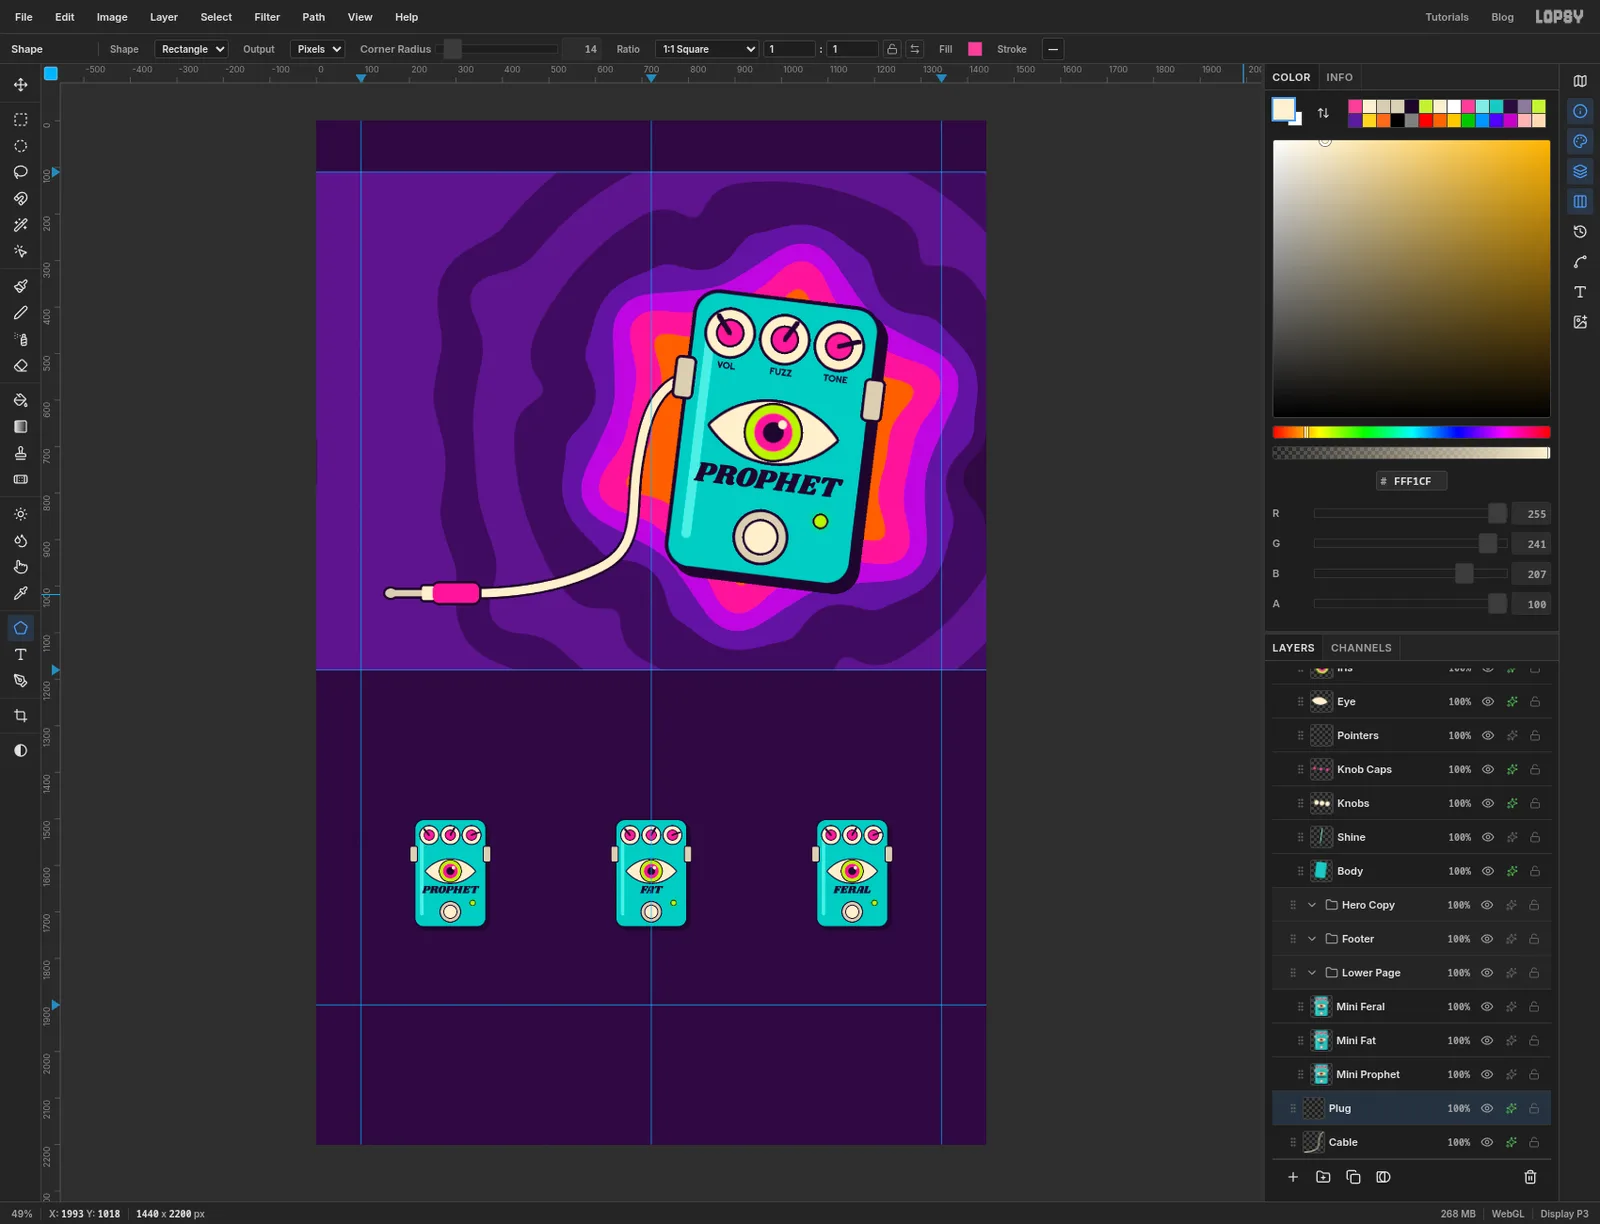
-
Draw the buttons and set a two-colour headline
Click the
Hero Copygroup, click Add Layer and name the layerButtons. With the Shape tool, draw two pills with Corner Radius36: a lime one 260 × 72 px centred on 230, 755, and a hot pink one 220 × 72 px centred on 505, 755. Give the layer a Stroke of5and a Drop Shadow with Offset X7, Offset Y7, Blur0and Opacity100, both in ink.Now the headline. Set the foreground to cream, pick the Text tool and choose Shrikhand at Size
128with Align Left. Click at 100, 240, typePlug in., press Enter for a new line and typeFuzz out.Before you commit, hold Shift and press the left arrow nine times to select the second line. Click the Text color swatch in the options bar, type
C6F432and press Enter. Only the selected letters change. Press Escape to close the picker and Tab to commit.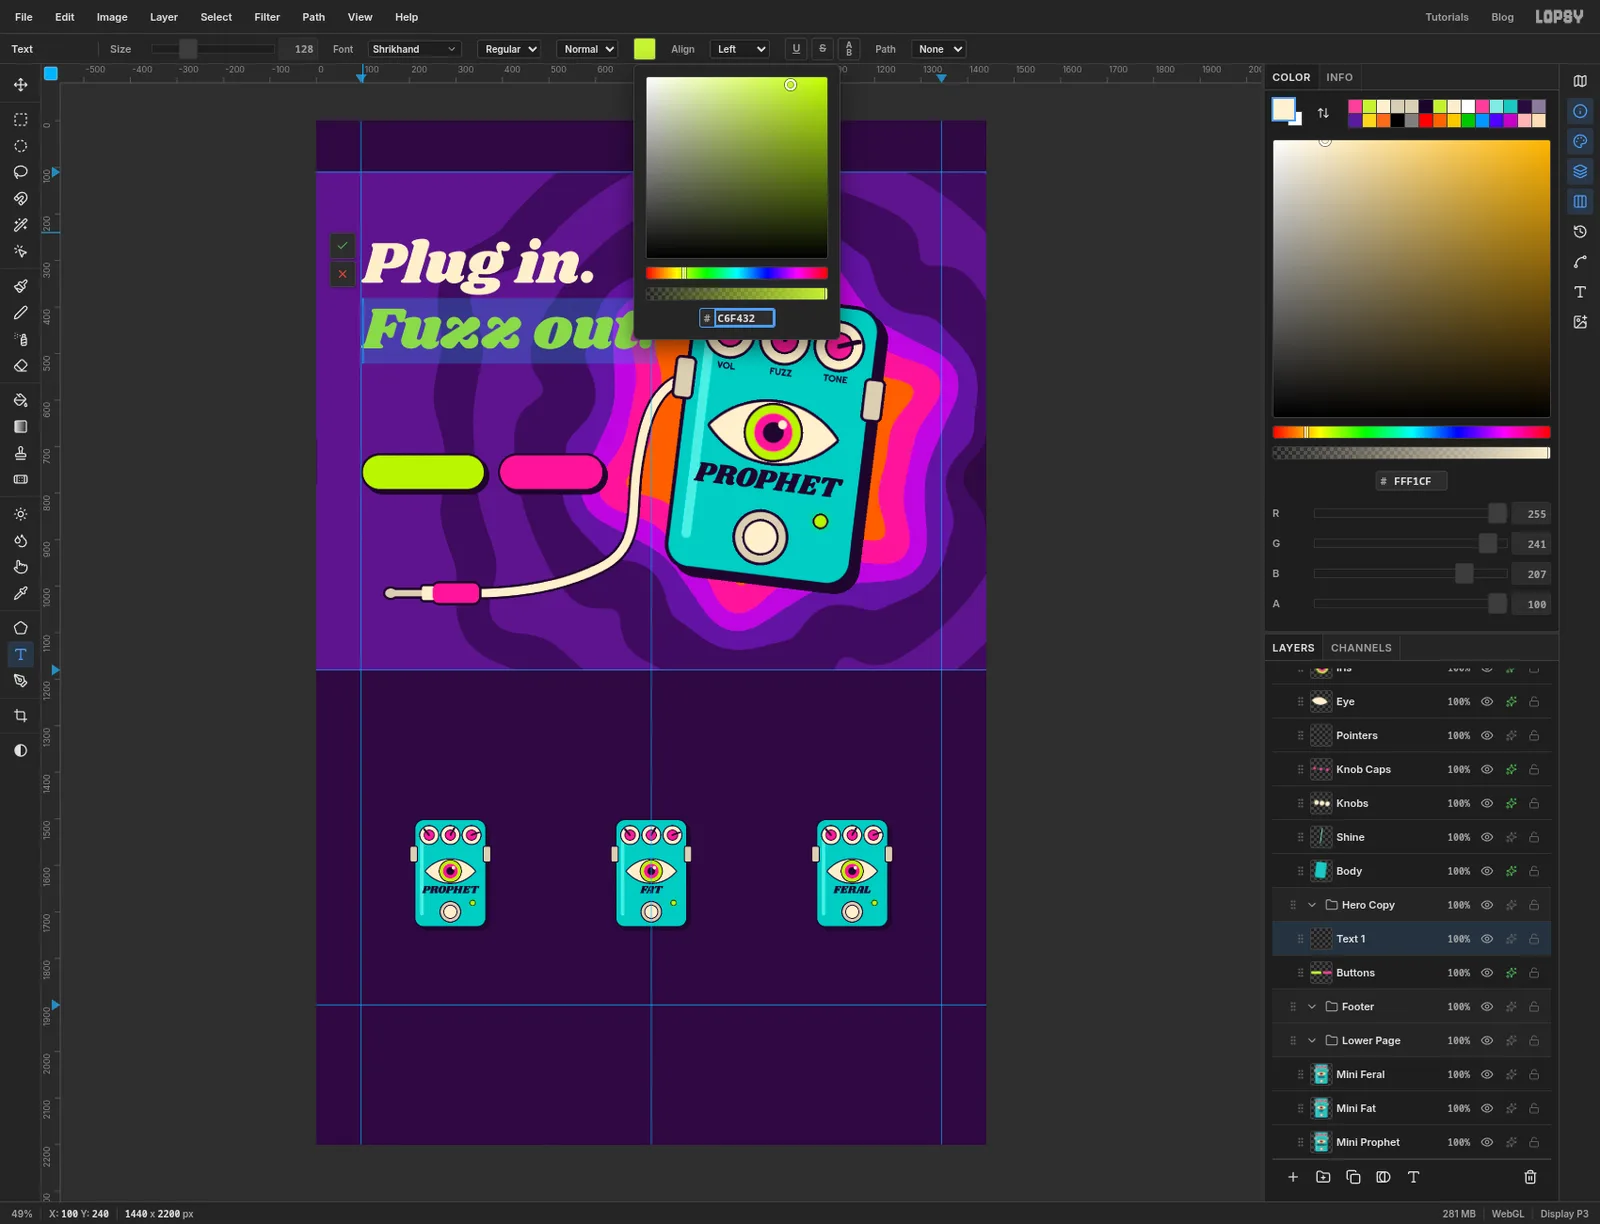
-
Give the headline an outline and a shadow
Rename the text layer
Headline. Open the Text panel from the panel buttons on the right edge and set Line height to1.1to pull the two lines together.Open the effects drawer and add a Stroke of Width
8in ink, then a Drop Shadow with Offset X9, Offset Y9, Blur0and Opacity100in hot pink . Pink against lime is the vibrating colour clash that makes the style.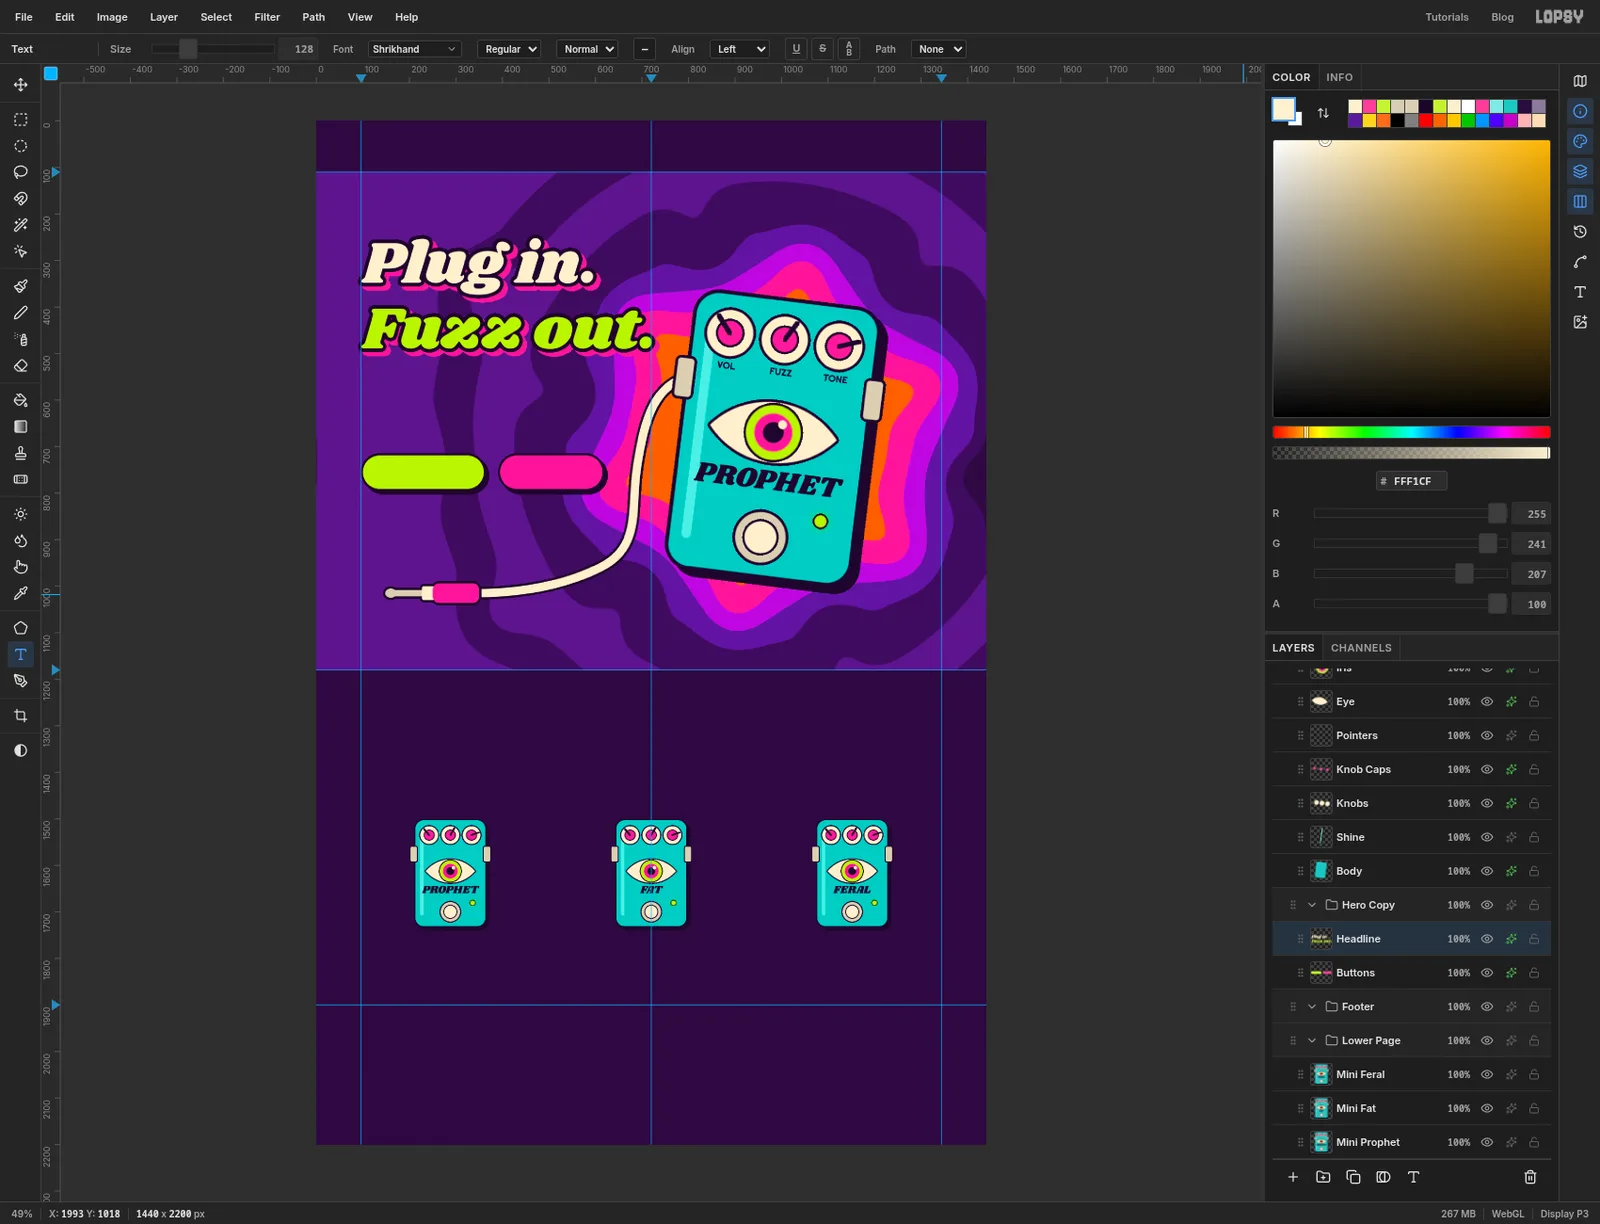
-
Add the hero copy and sparkles
Click the
Buttonsrow before each new piece of text, so new layers land in this group and don't restyle the last one.- The eyebrow: Righteous, Size
25, sun yellow , at 100, 186:HAND-WIRED GERMANIUM FUZZ • PORTLAND, ORE. - The paragraph: DM Sans, Size
27, cream, at 100, 545, on three lines:Three knobs, two transistors, one very/bad idea. The Prophet turns any clean/amp into a wall of warm, woolly fuzz.Set its Line height to1.45in the Text panel. - The button labels: Righteous, Size
26, ink, Align Center. Click at 230, 737 and typeSHOP PEDALS, then at 507, 737 and typeHEAR IT ▶. Your keyboard has no ▶ key, so copy it from this page and paste it. Check that each label sits in the middle of its pill and nudge it with the arrow keys if it doesn't.
The sparkles are text too. Copy the character
✦from this page. With DM Sans and Align Center, paste it six times as six separate text layers: a big lime one (Size72) at 150, 880, cream ones at 480, 1070 (40) and 1335, 205 (58), pink ones at 560, 868 (34) and 640, 150 (30), and a small lime one (30) at 1270, 322. They fill the quiet corners without competing with the pedal.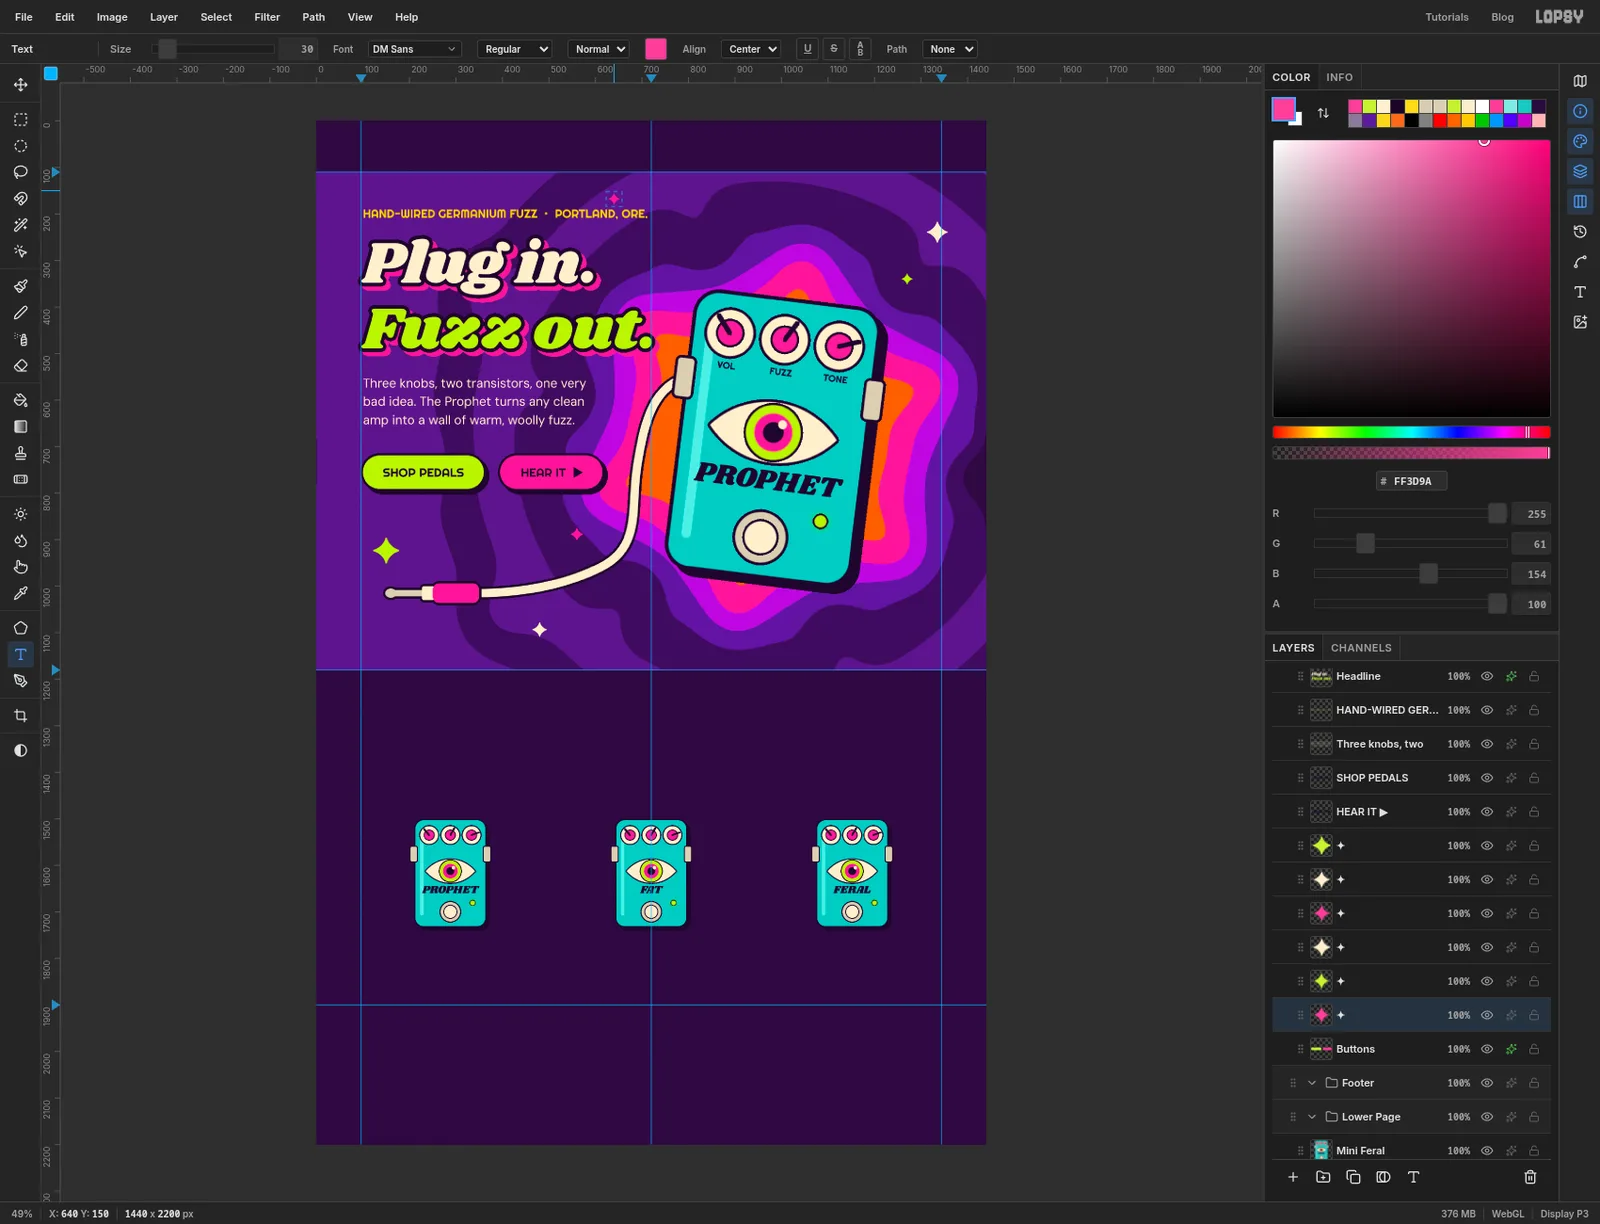
- The eyebrow: Righteous, Size
-
Start the price seal with a circular path
Click the
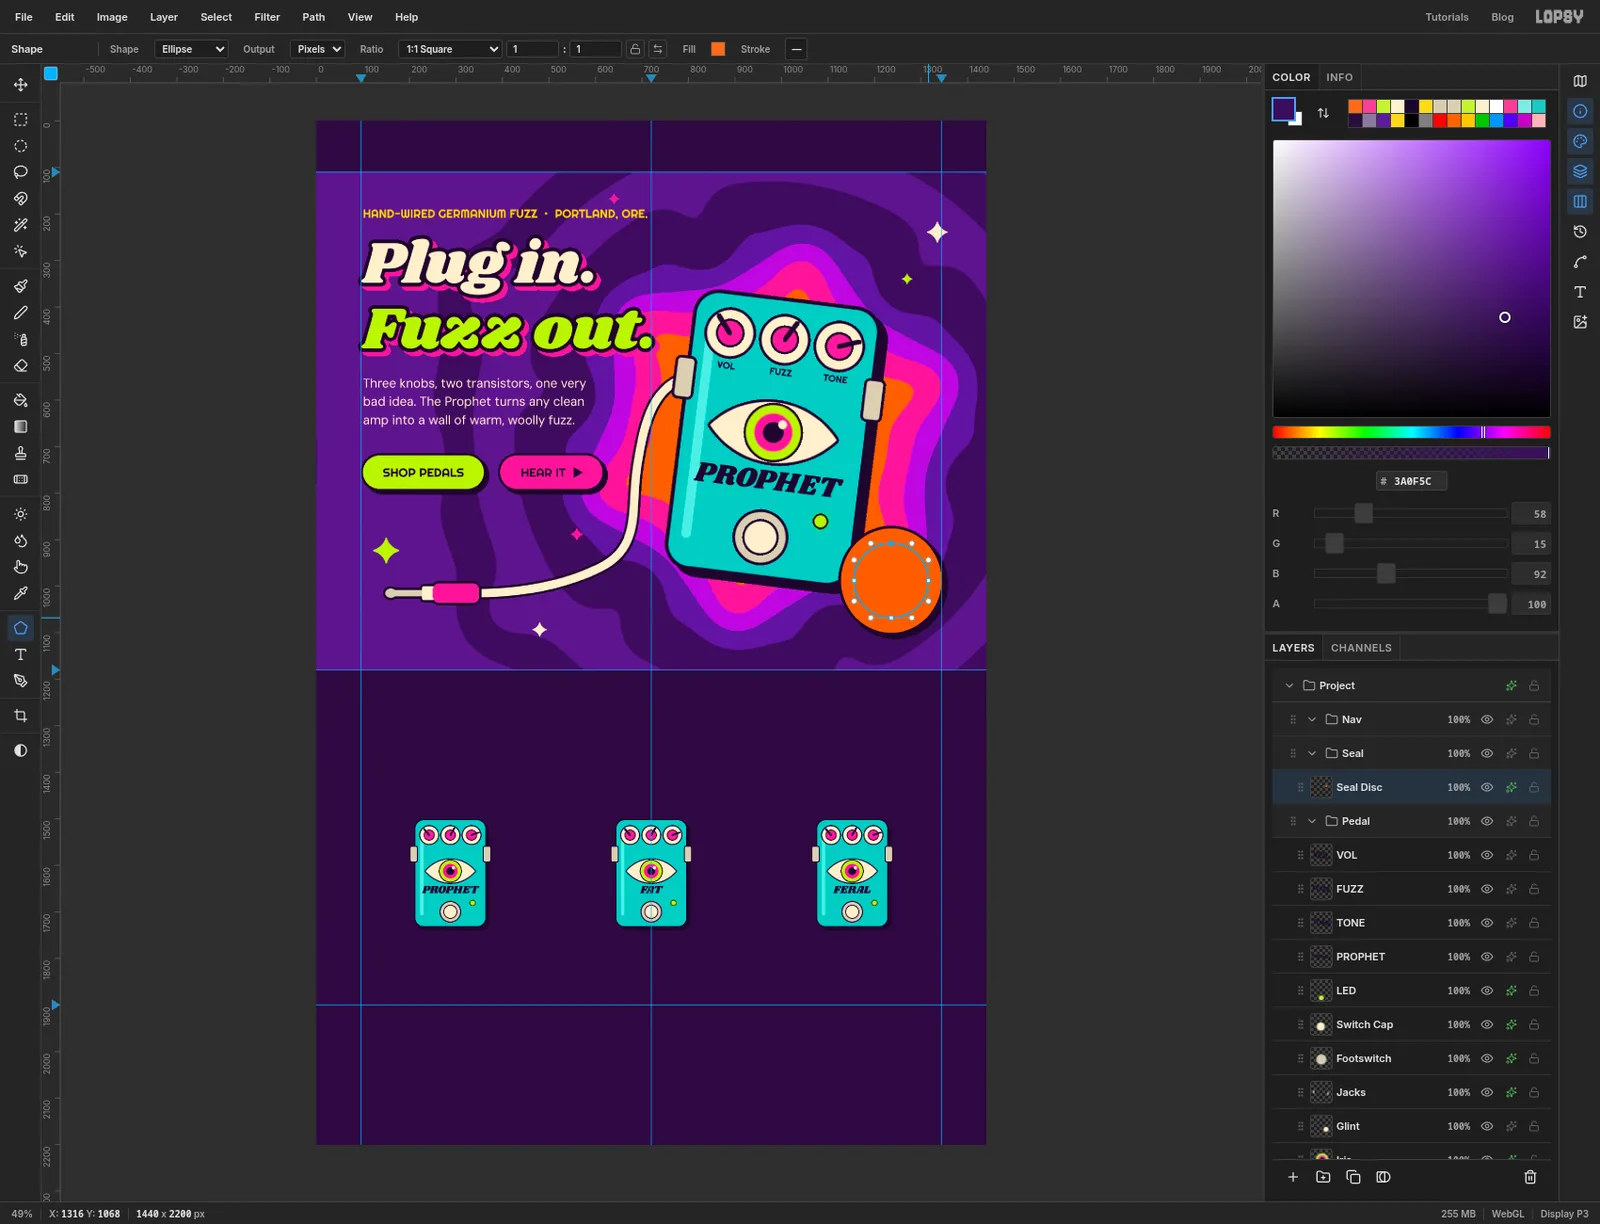
Sealgroup, click Add Layer and name the layerSeal Disc. With the Shape tool set to Ellipse, draw a tangerine circle 224 px across centred on 1236, 988, so it overlaps the pedal's lower right corner. Add a Stroke of6and a Drop Shadow of 8, 8, Blur0, Opacity100, both in ink.The lettering needs a circle to run along. In the Shape tool's options bar, change Output from Pixels to Path, then press at the same centre and drag out to 1316, 1068 for a circle with an 80 px radius. This draws a path, not pixels. Set Output back to Pixels straight away.
-
Run text around the seal
Click
Seal Disc. Set the foreground to ink and pick the Text tool with Righteous at Size19and Align Left. Click on an empty part of the canvas, well below the hero, typeNO TWO ALIKE • HAND-WIRED • SMALL BATCH •with two spaces either side of each bullet, and press Tab.With that text layer selected, find the Path dropdown at the right of the Text tool's options bar and choose the circle (the newest path in the list). The text jumps onto the circle and follows it round. Rename the layer
Seal Ring Text.It won't quite meet itself. Open the Text panel and raise Letter spacing to
1, which spreads the letters until the last bullet sits evenly betweenBATCHandNO.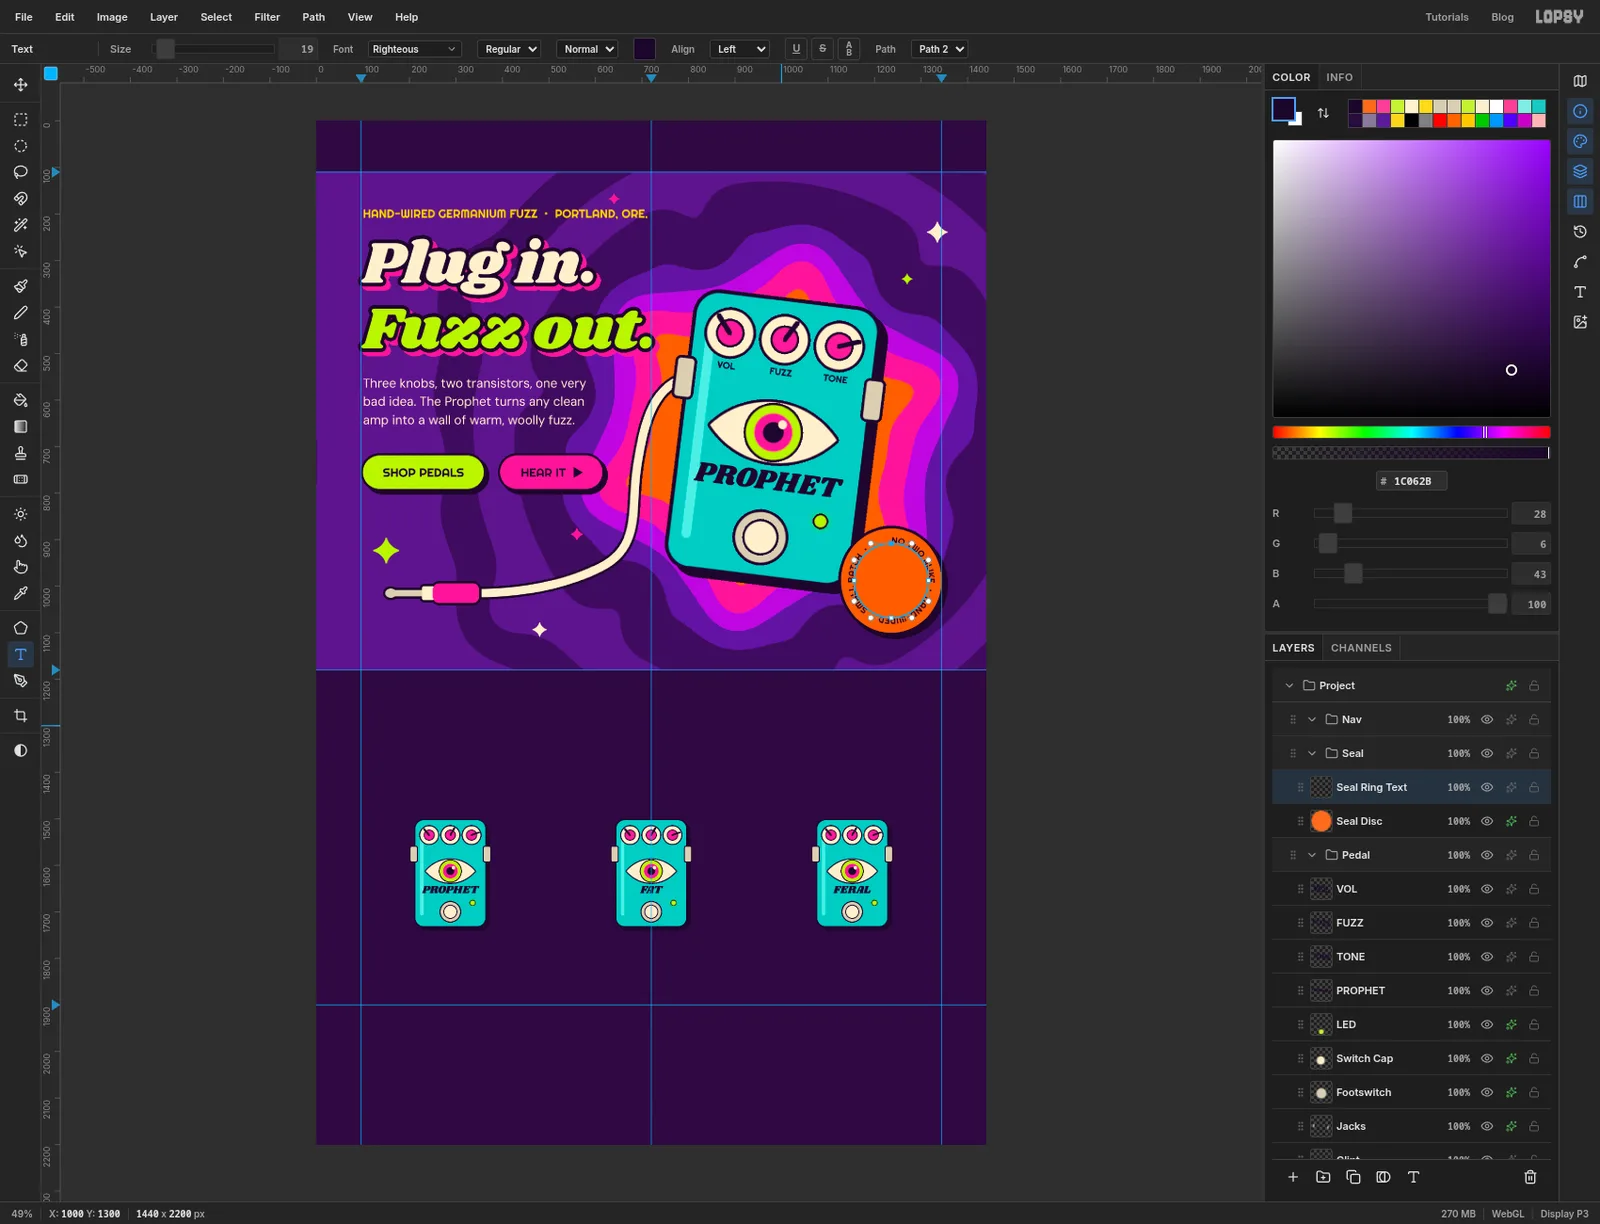
-
Add the price
Click
Seal Disc, then with Shrikhand at Size46, cream and Align Center, click at 1236, 948 and type$149. Give it a Stroke of5in ink.For the small line, switch to Righteous at Size
16in ink. A click inside an existing text layer's box edits that layer, so click just below the price, at 1236, 1014, and typeSHIPS FREE. Then pick the Move tool and tap the up arrow about eight times until the two lines sit together in the middle of the disc.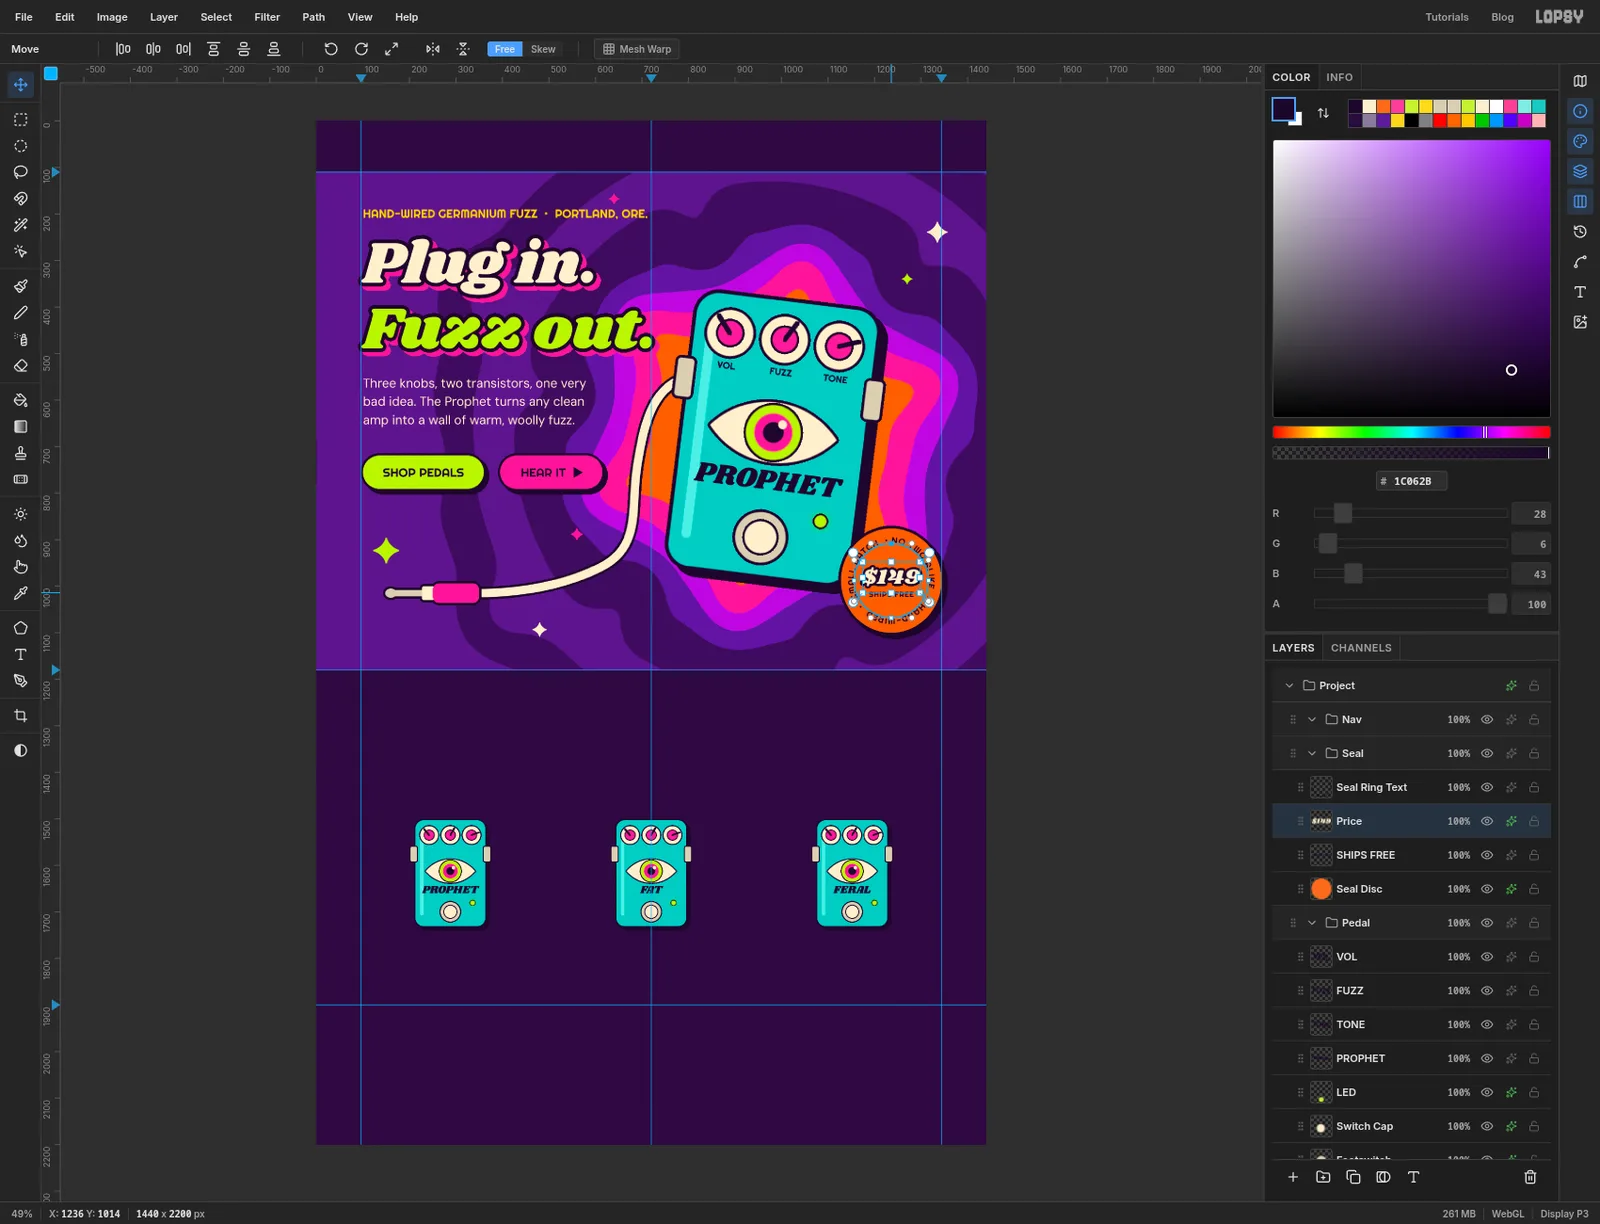
-
Build the nav bar
Click the
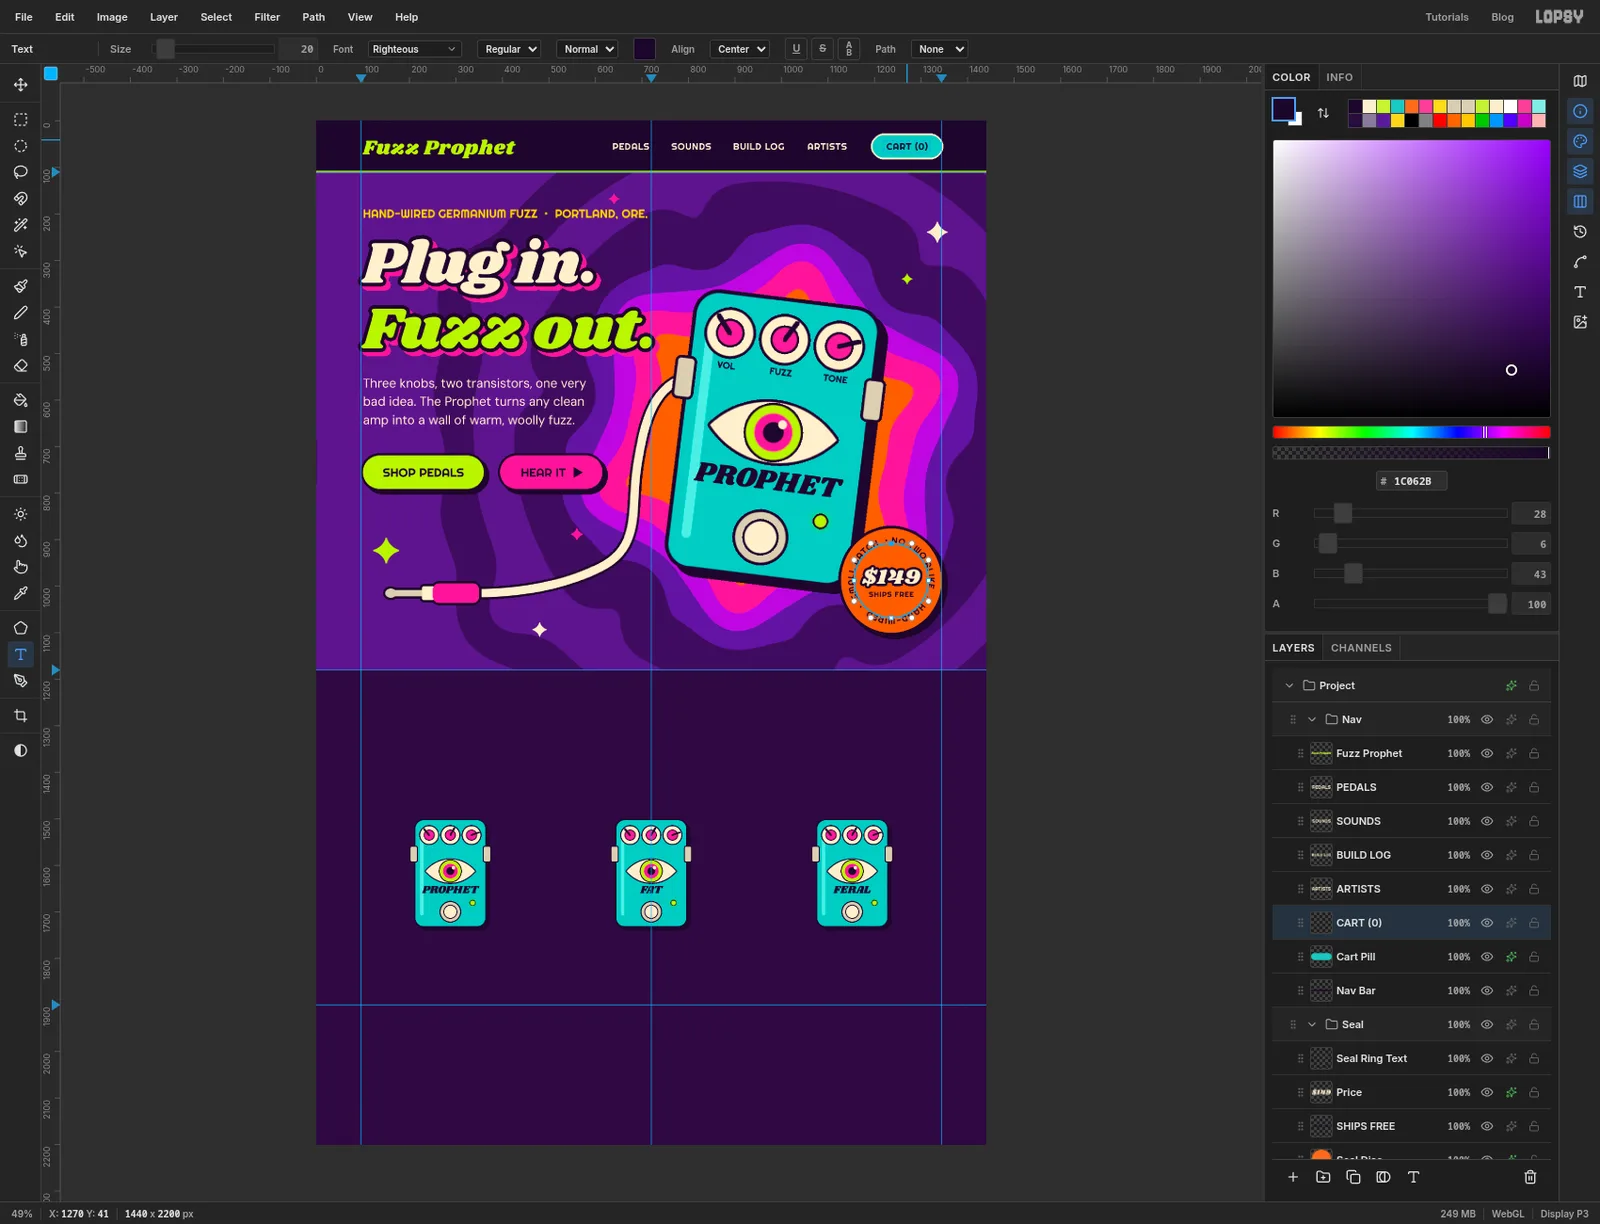
Navgroup, click Add Layer and name the layerNav Bar. Drag a marquee across the top of the page down to the 110 guide (snapping is still off, so stop on the guide by eye) and fill it with ink . Press Cmd+D. Pick the Pencil at Size4in lime, click the left edge on the 110 guide and Shift-click the right edge for a thin rule.Add a layer called
Cart Pilland draw a turquoise rectangle with Corner Radius24, 148 × 48 px, centred on 1270, 55. Give it a Stroke of4in cream.Click
Cart Pillbefore each piece of text:- the logo: Shrikhand, Size
44, lime, Align Left, at 100, 28:Fuzz Prophet - the links: Righteous, Size
20, cream, Align Center:PEDALSat 676, 41,SOUNDSat 806, 41,BUILD LOGat 951, 41 andARTISTSat 1098, 41 - the cart label: the same type in ink,
CART (0)at 1270, 41
- the logo: Shrikhand, Size
-
Lay down the cream section
Click the
Plugrow, click New Group and name the groupSection. It lands just belowLower Page, so the mini pedals will sit on top of whatever you put in it.Inside it, add a layer called
Cream. Drag a marquee across the full width from y 1212 to y 1920 and fill it with cream . The top edge will be hidden behind the stripes and the bottom edge behind the footer, so neither has to be exact. Press Cmd+D.Add a layer called
Dots. Pick the Gradient tool, set Type to Linear and open Advanced…. The iris stops are still there: click each of the four middle stops in turn and click Delete, so only two are left. Set them to cream and dot orange . Drag a marquee across the full width from y 1300 to y 1920, then drag the gradient straight down from 720, 1380 to 720, 1900. Press Cmd+D.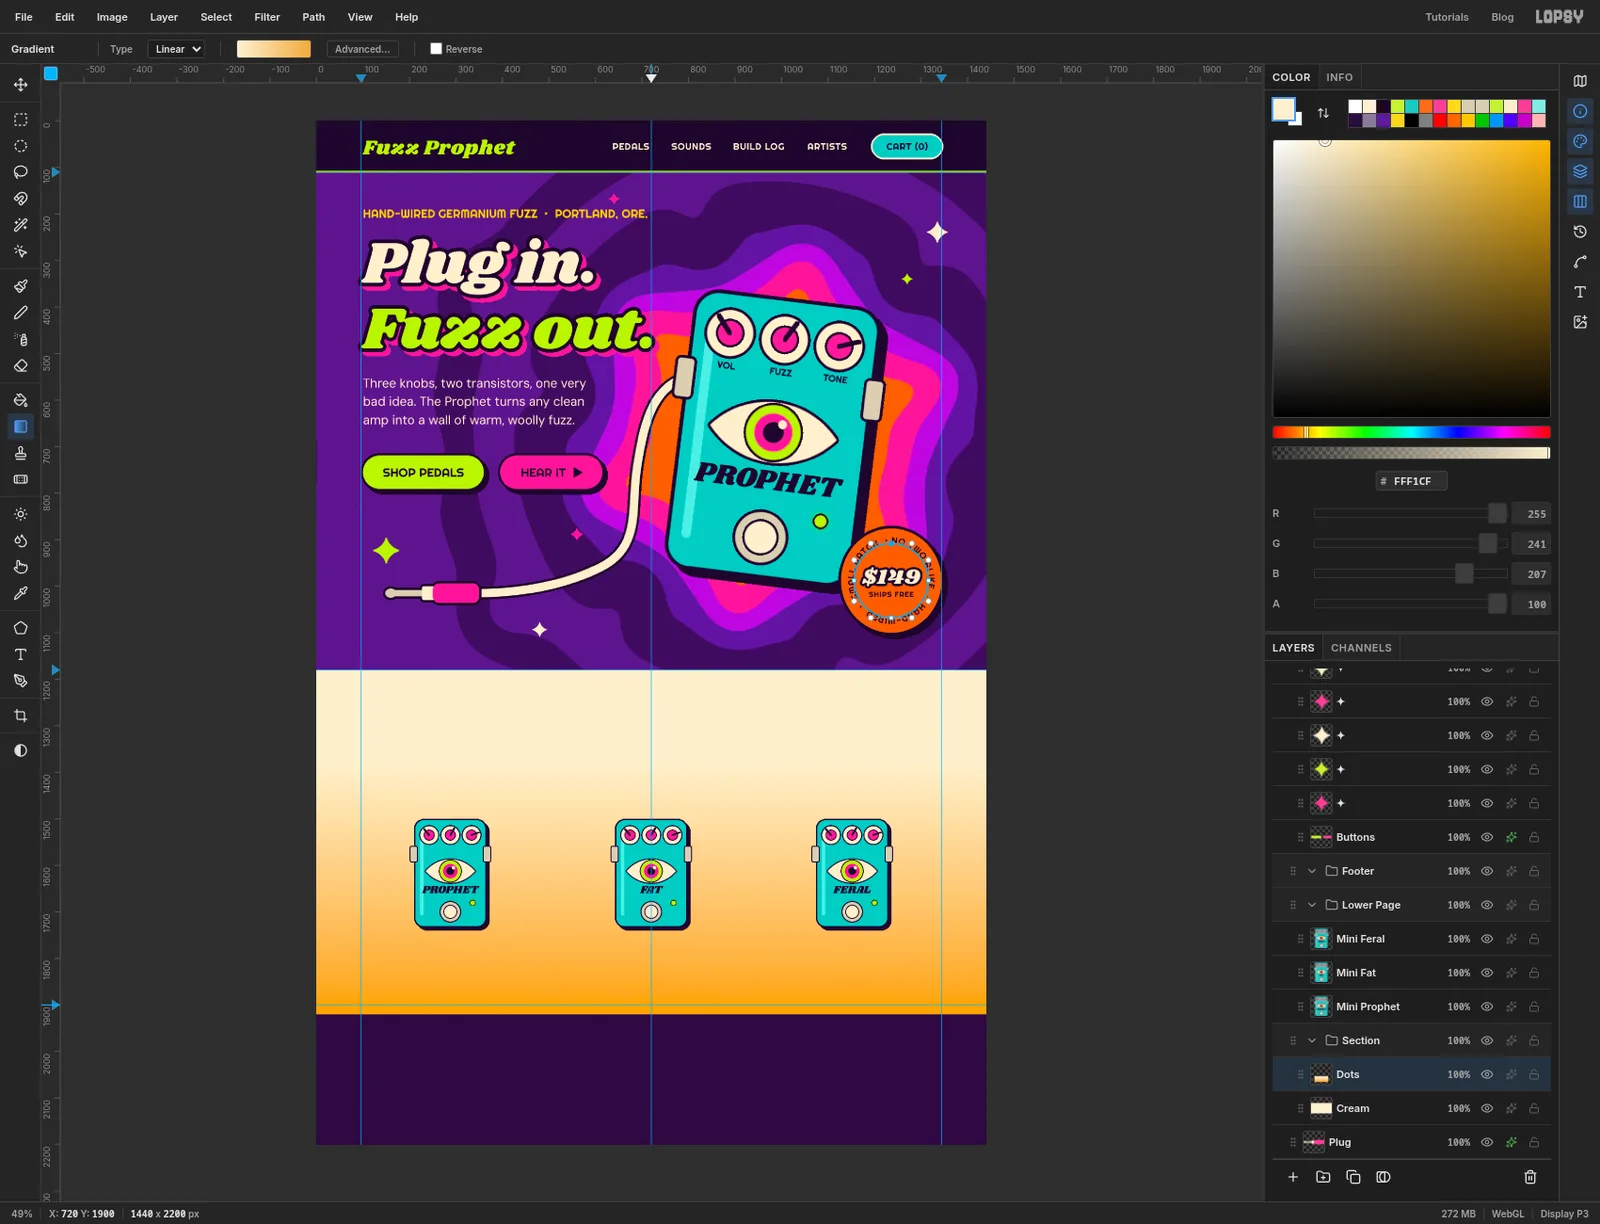
-
Turn the fade into halftone dots
With
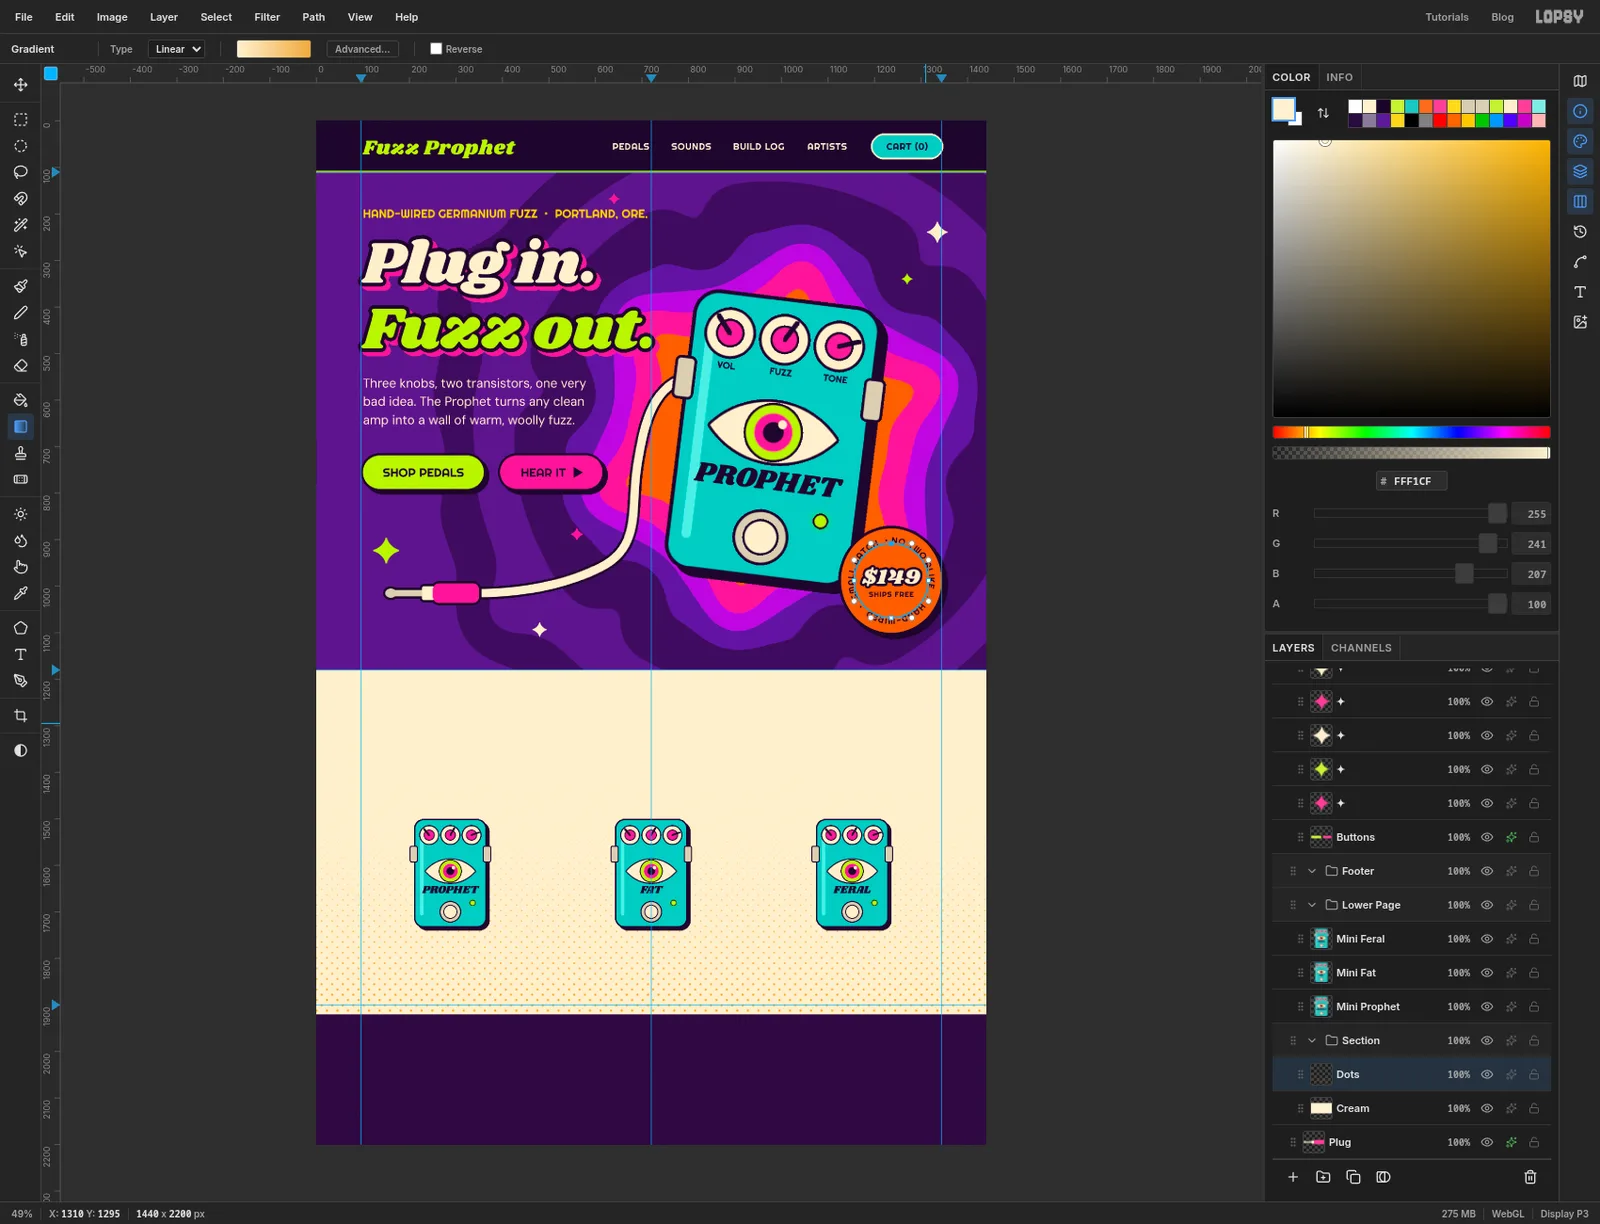
Dotsselected, choose Filter → Halftone… and set Dot Size16, Angle45and Softness1. Click Apply.Halftone turns tone into dot size, so the smooth fade becomes a field of dots that start as pinpricks and swell towards the footer. It's the cheapest way there is to make a flat area look printed.
-
Select an arch for the first card
Click the
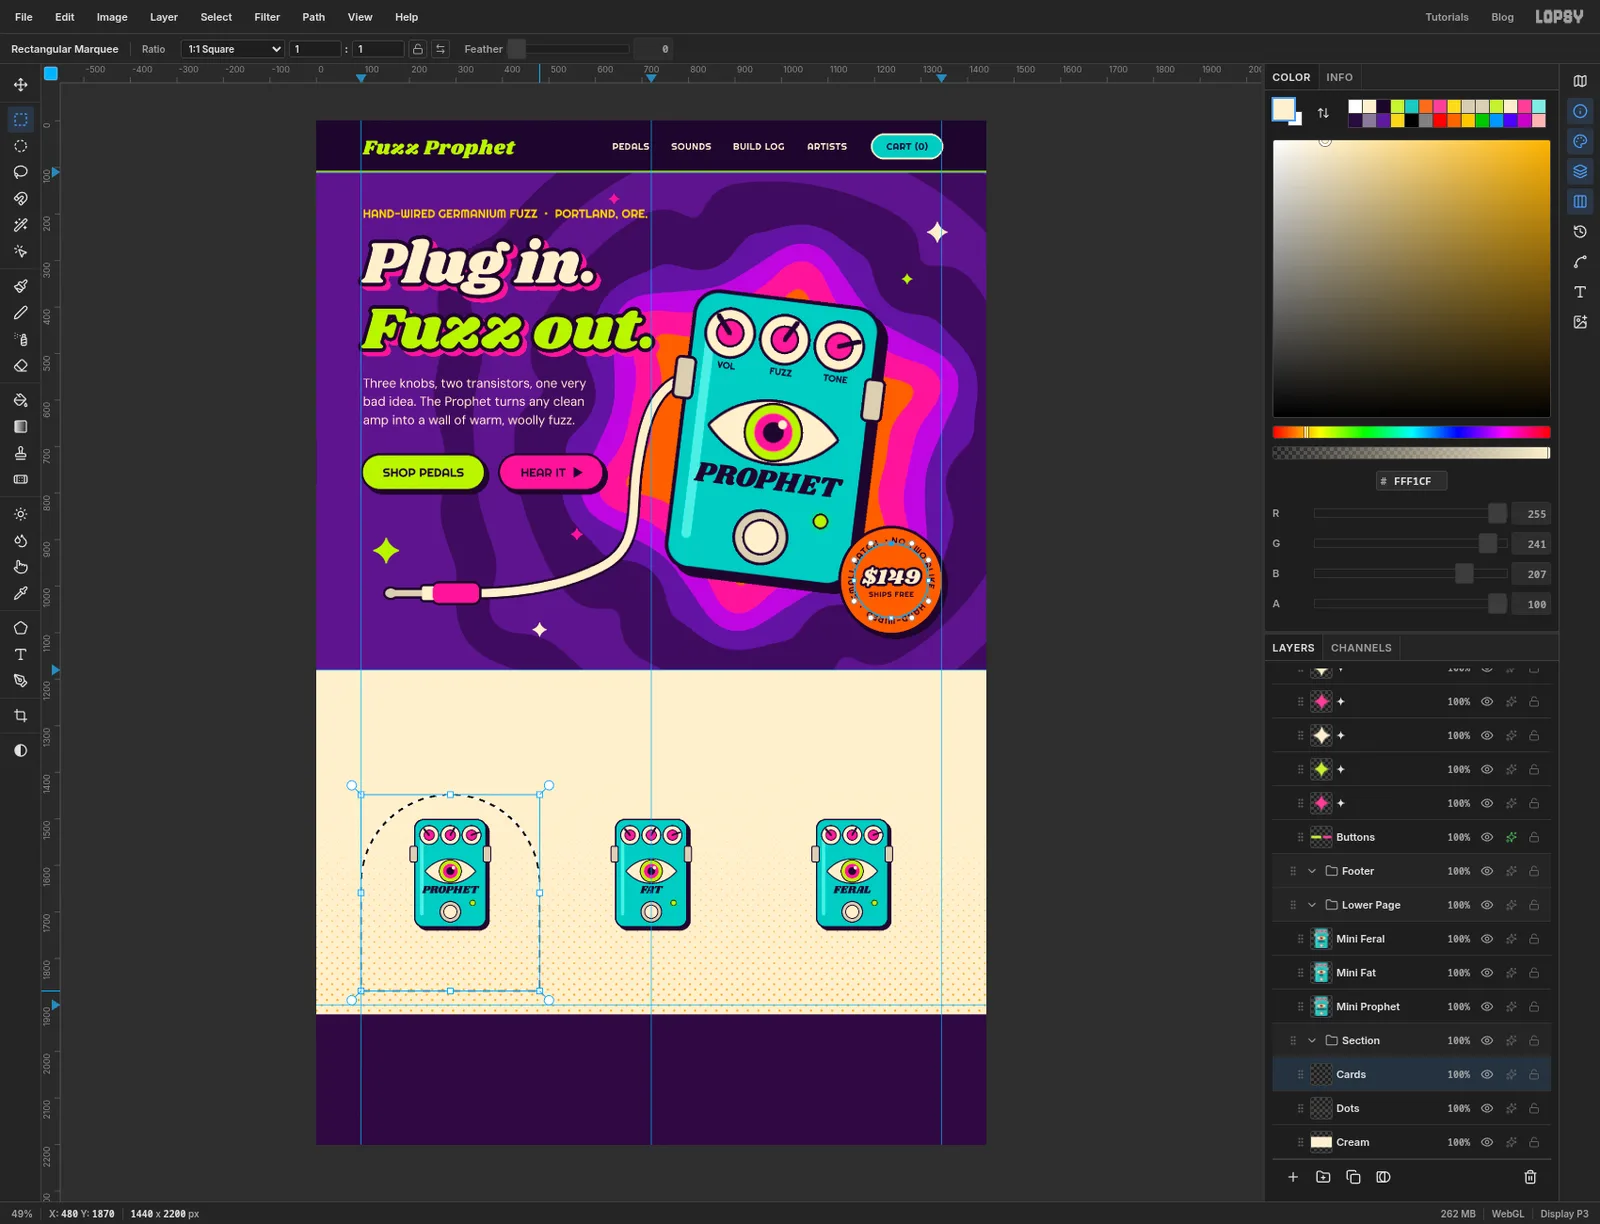
Dotsrow, click Add Layer and name the layerCards.Each card is an arch: a circle with a rectangle hanging off its lower half. With the Elliptical Marquee, drag a circle from 96, 1448 to 480, 1832. Then pick the Rectangular Marquee, hold Shift to add to the selection, and drag from 96, 1640 to 480, 1870. Fill the arch with violet .
-
Fill three cards and their halos
Make two more arches the same way, 432 px further right each time: one from 528 to 912 filled with hot pink , and one from 960 to 1344 filled with tangerine . Press Cmd+D. Give
Cardsa Stroke of6and a Drop Shadow of 10, 10, Blur0, Opacity100, both in ink.Add a layer called
Halosand use the Shape tool to draw a circle 256 px across behind each pedal, centred on 288, 1620, 720, 1620 and 1152, 1620. Fill them sun yellow, lime and cream in that order, and add a Stroke of5.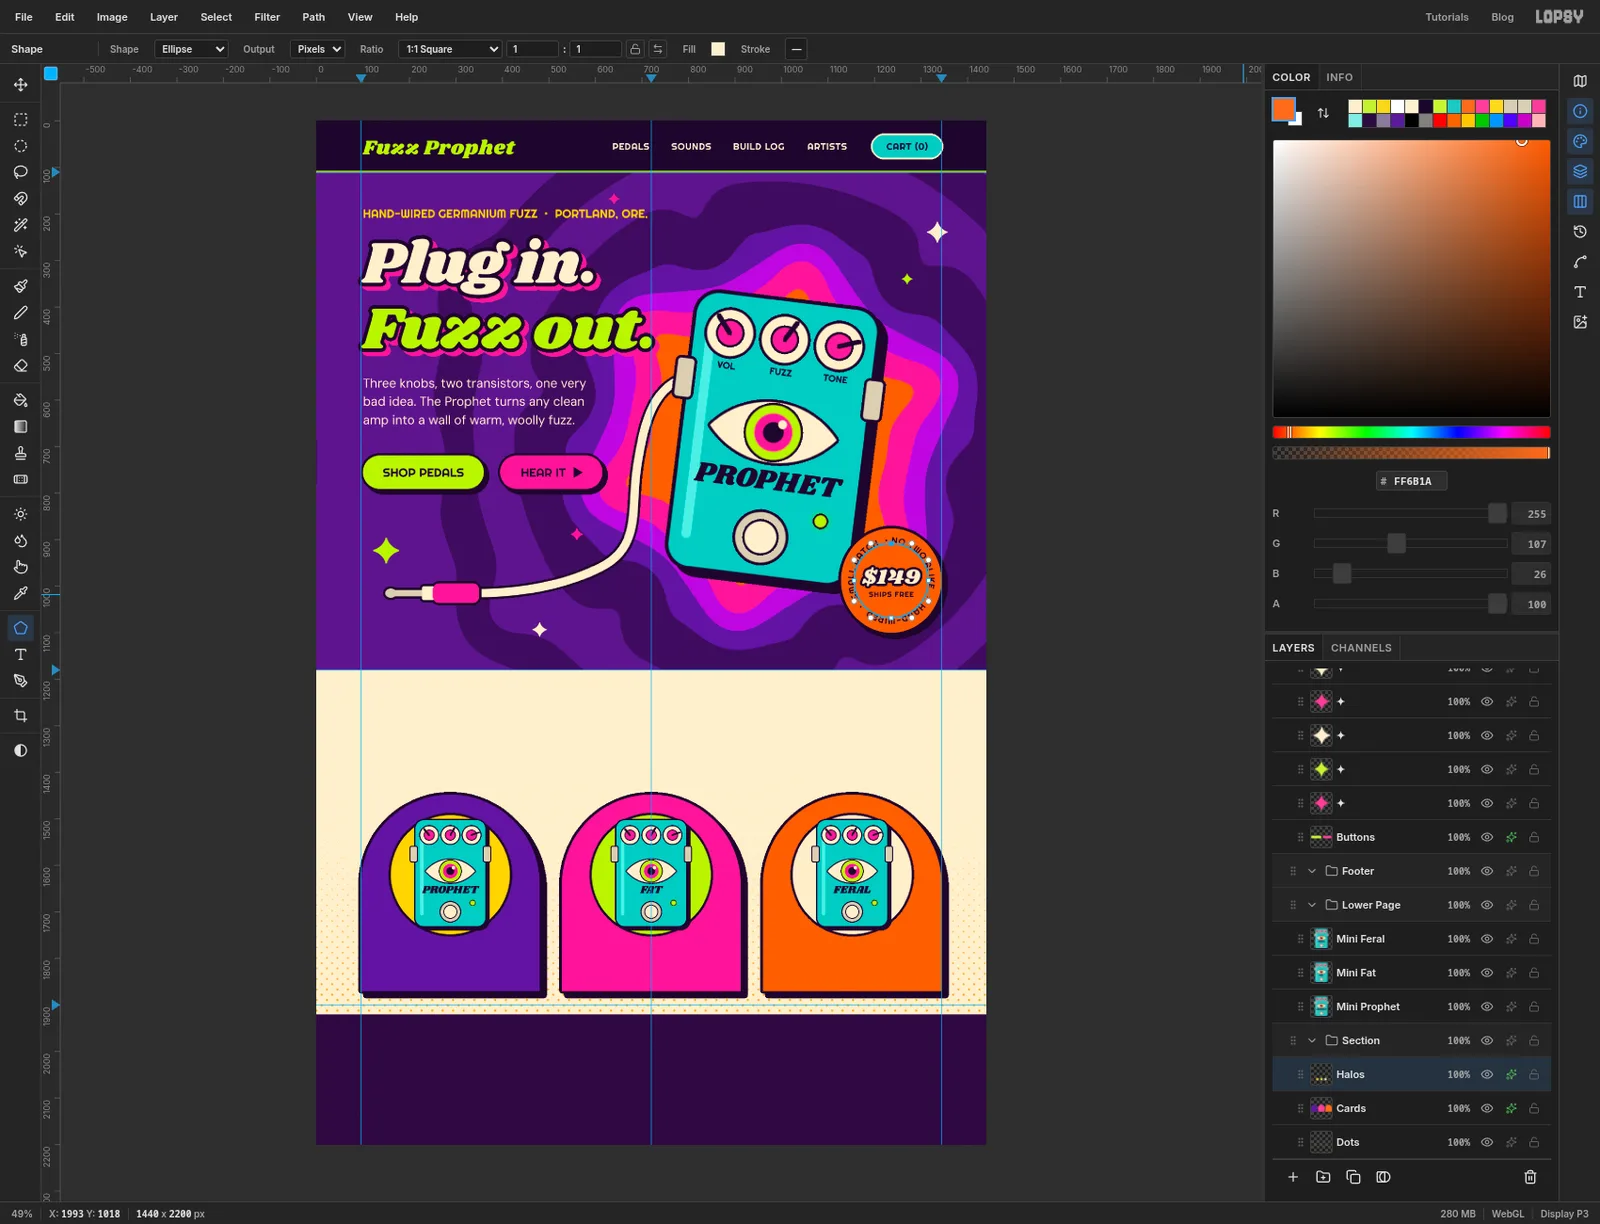
-
Tilt the mini pedals
A single pixel layer is rotated through a selection. Click
Mini Prophet, drag a marquee around the little pedal, pick the Move tool and drag a rotation handle anticlockwise until the pedal leans a little to the left, about 8°. Press Cmd+D.Do the same for
Mini Fat, turning it about 5° clockwise, andMini Feral, about 5° anticlockwise. Three different angles keep the row from looking stamped out.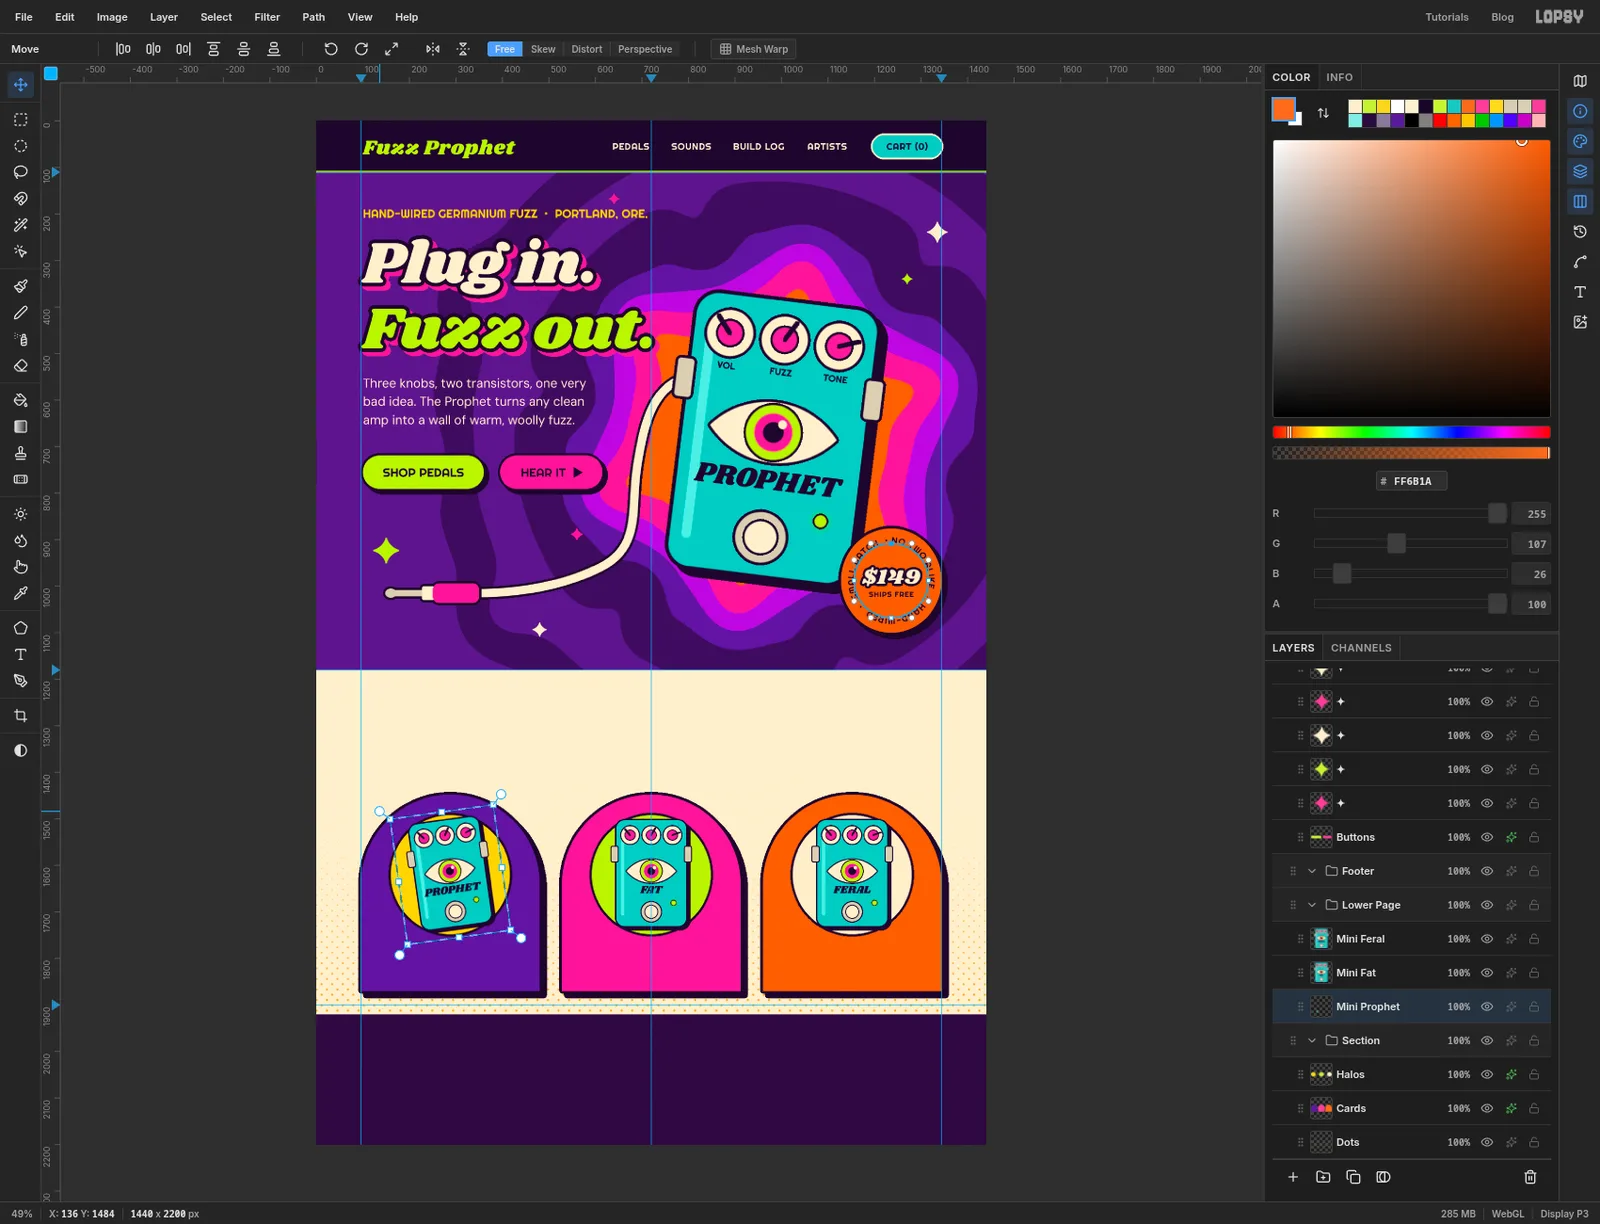
-
Recolour two of them
Click
Mini Fatand choose Filter → Hue/Saturation…. Set Hue to95and click Apply. The turquoise body swings round to violet, and the pink knobs and the eye come along for the ride, landing on colours that still clash nicely.Click
Mini Feral, open the filter again and set Hue to-125for a mustard body with blue knobs.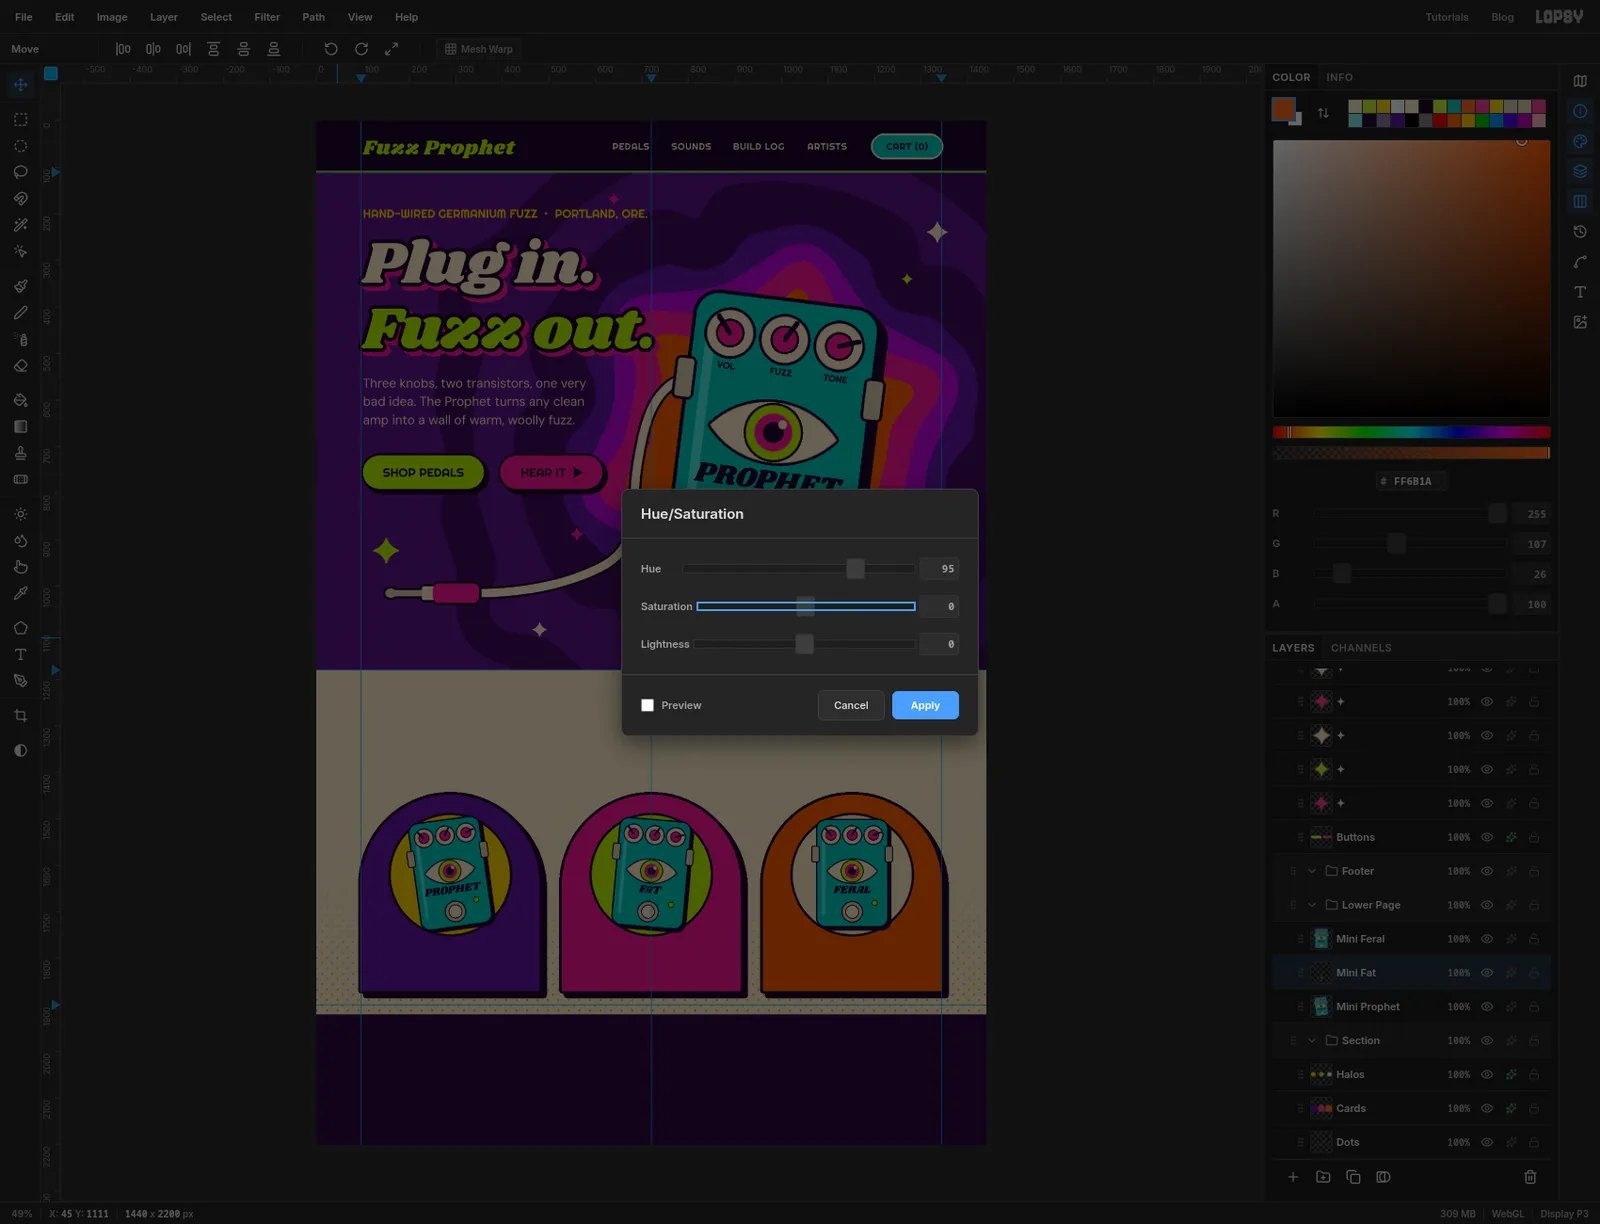
-
Stack four stripes for the divider
Click the
Lower Pagegroup, click Add Layer and name the layerWaves. With the Rectangular Marquee, fill four bands across the full width, each 30 px tall, starting at y 1150: hot pink, tangerine, sun yellow and turquoise. The last one ends at y 1270. Press Cmd+D.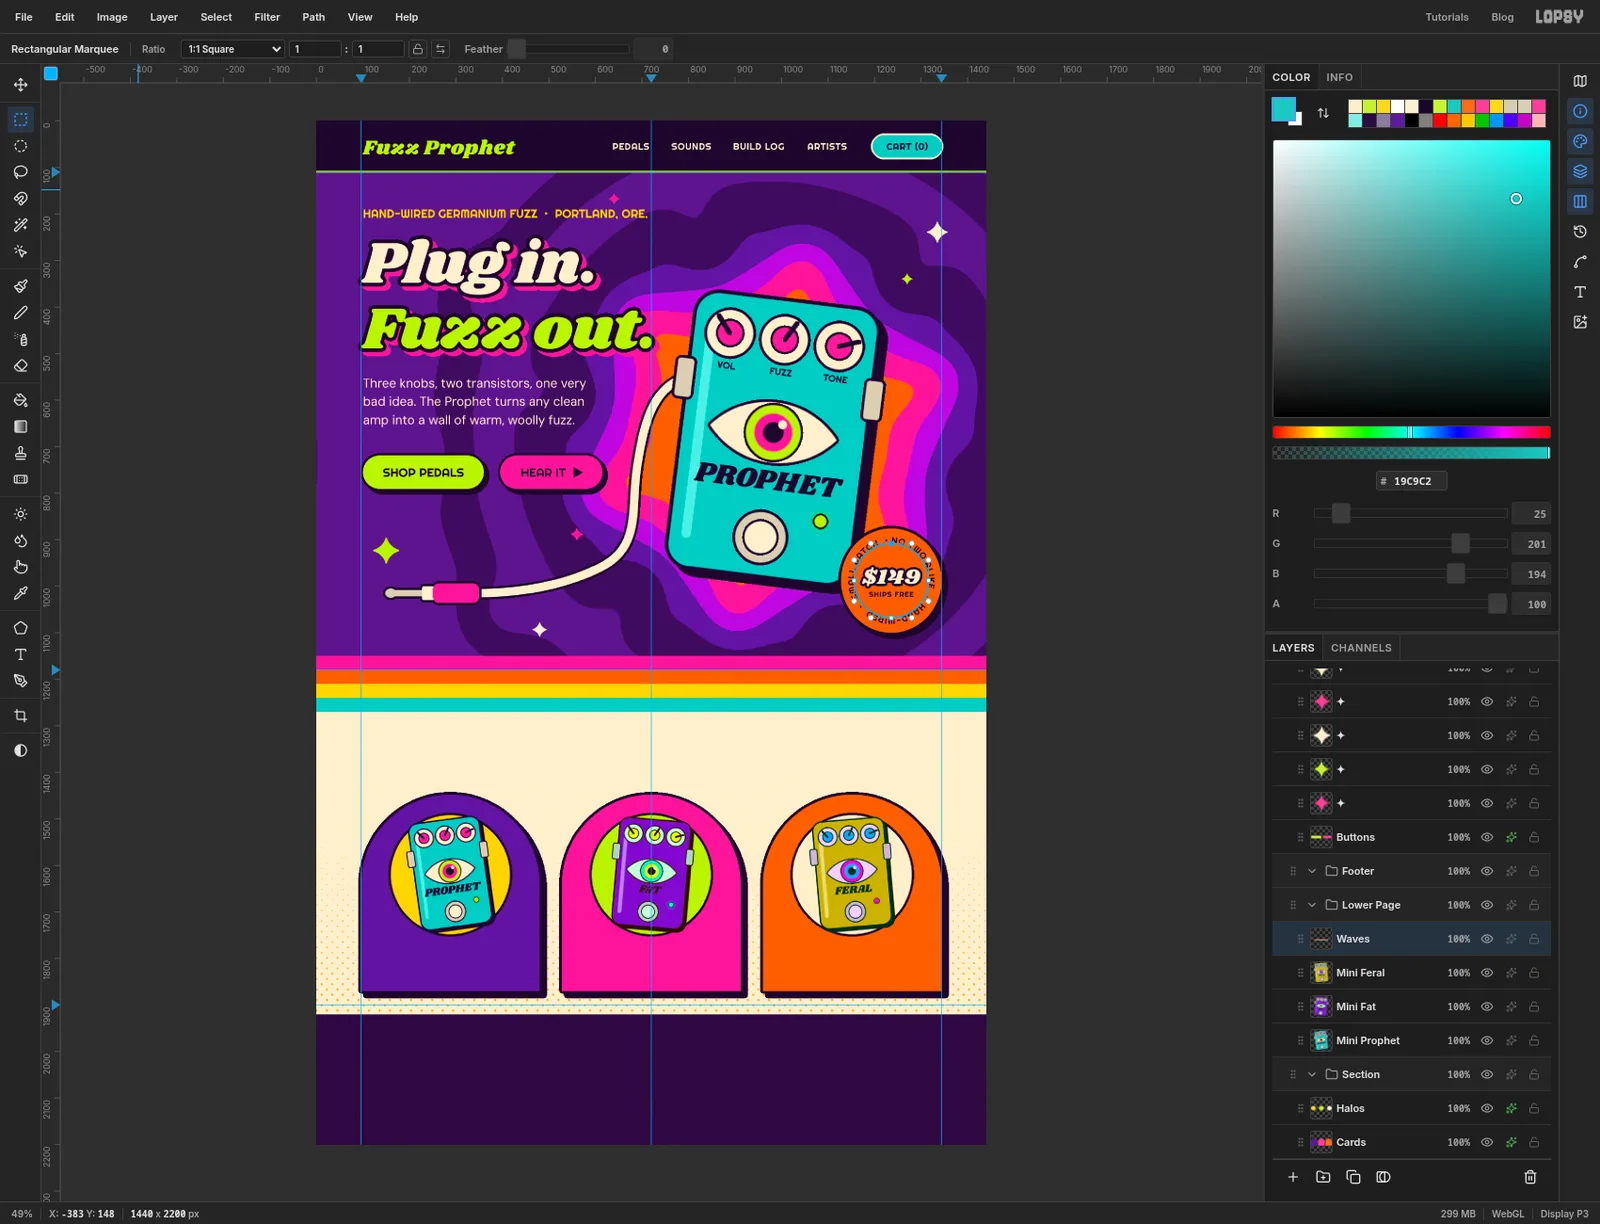
-
Push the stripes into waves
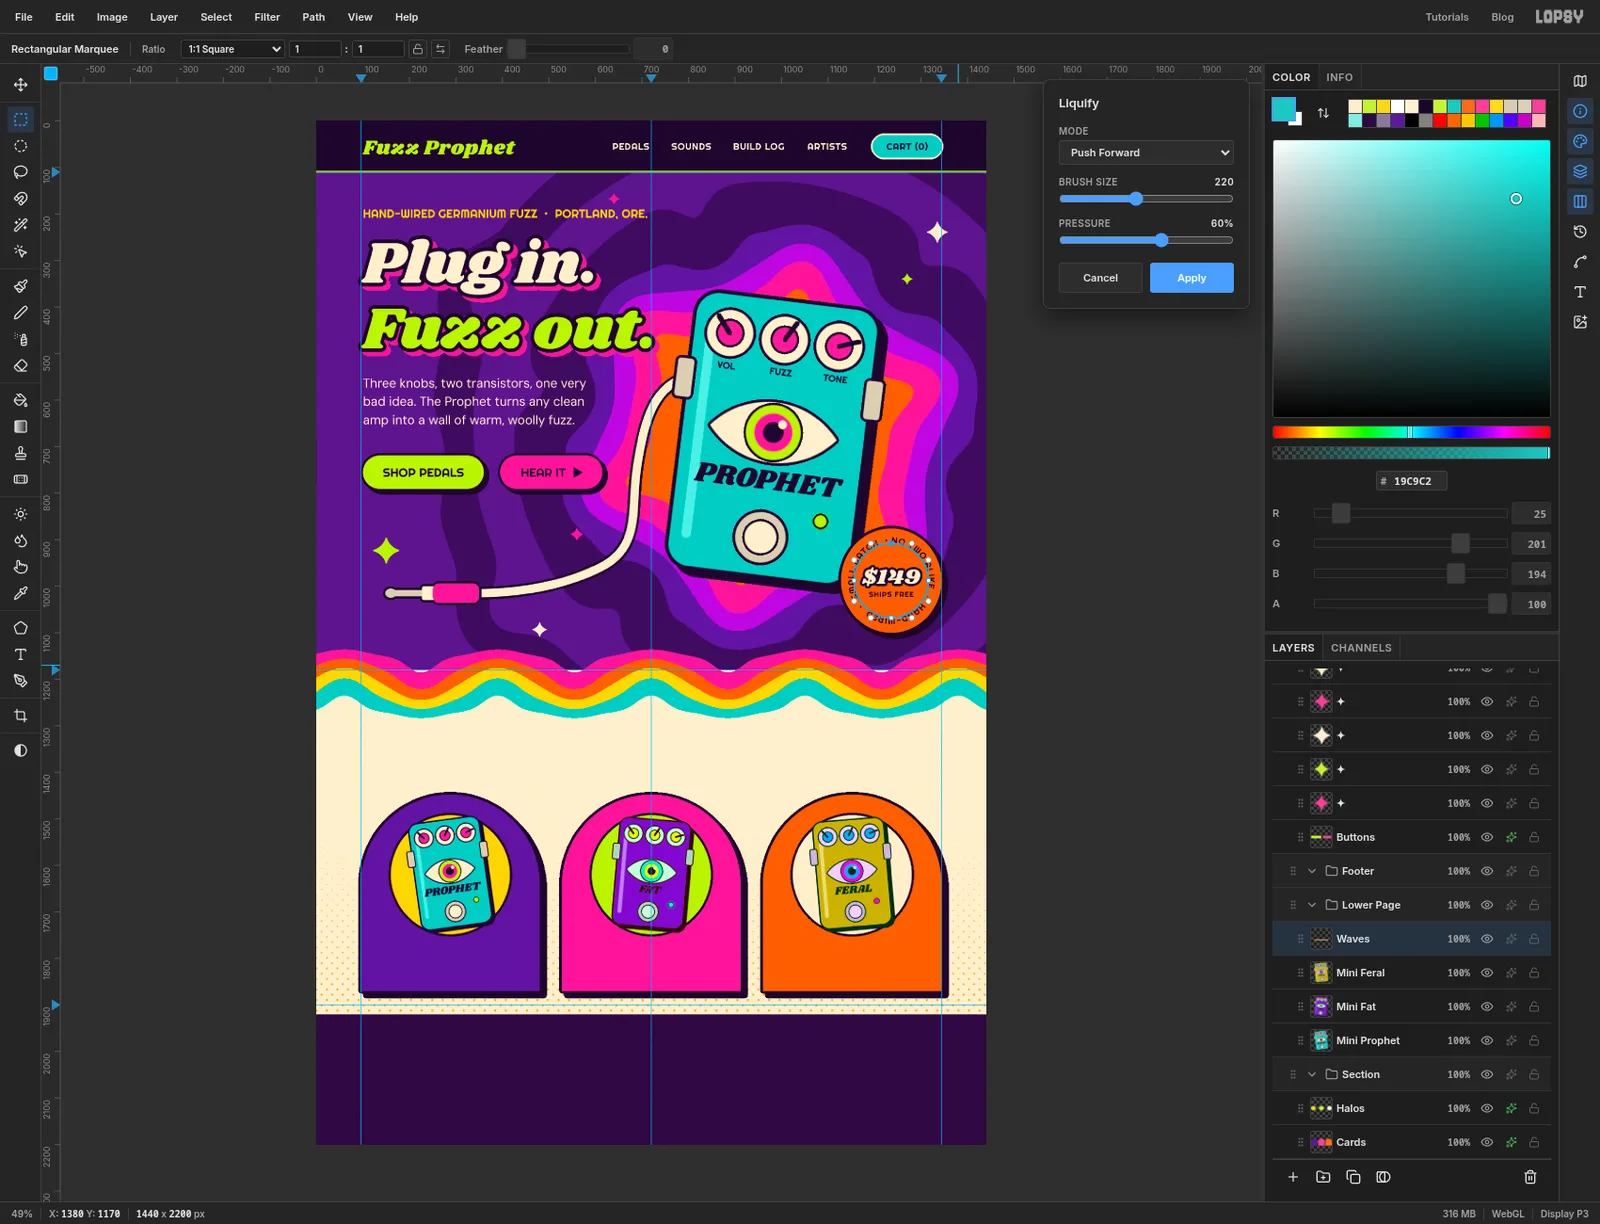
Choose Filter → Liquify… again, with Push Forward, Brush Size
220and Pressure60.Starting near the left edge, drag straight up through the stripes, from about y 1250 to y 1170. Move about 165 px to the right and drag straight down the same distance. Keep going across the page, up then down. Click Apply.
Because all four stripes are on one layer, they bend together and stay parallel.
-
Draw an arc for the section title
Text on a path isn't only for circles. Pick the Pen tool. Press at 250, 1404 and drag up and to the right, about 150 px across and 50 px up. Then press at 1190, 1404 and drag down and to the right by the same amount. You get a shallow arch.
Click the ✓ Commit path button in the options bar. Don't press Enter this time, because that would stroke the arc with paint.
Click the
Wavesrow. Set the foreground to hot pink and pick the Text tool with Shrikhand at Size56and Align Center. Click an empty spot, typeThree ways to melt your ampand press Tab. Choose the arc from the Path dropdown. With Center alignment the title sits in the middle of the arc. If the last letters go missing, the text is longer than the path, so lower the size a little.Rename the layer
Section Title. Give it a Stroke of6and a Drop Shadow of 6, 6, Blur0, Opacity100, both in ink, so it matches the hero headline. With the Move tool, press Shift+Up twice to lift it 20 px clear of the cards.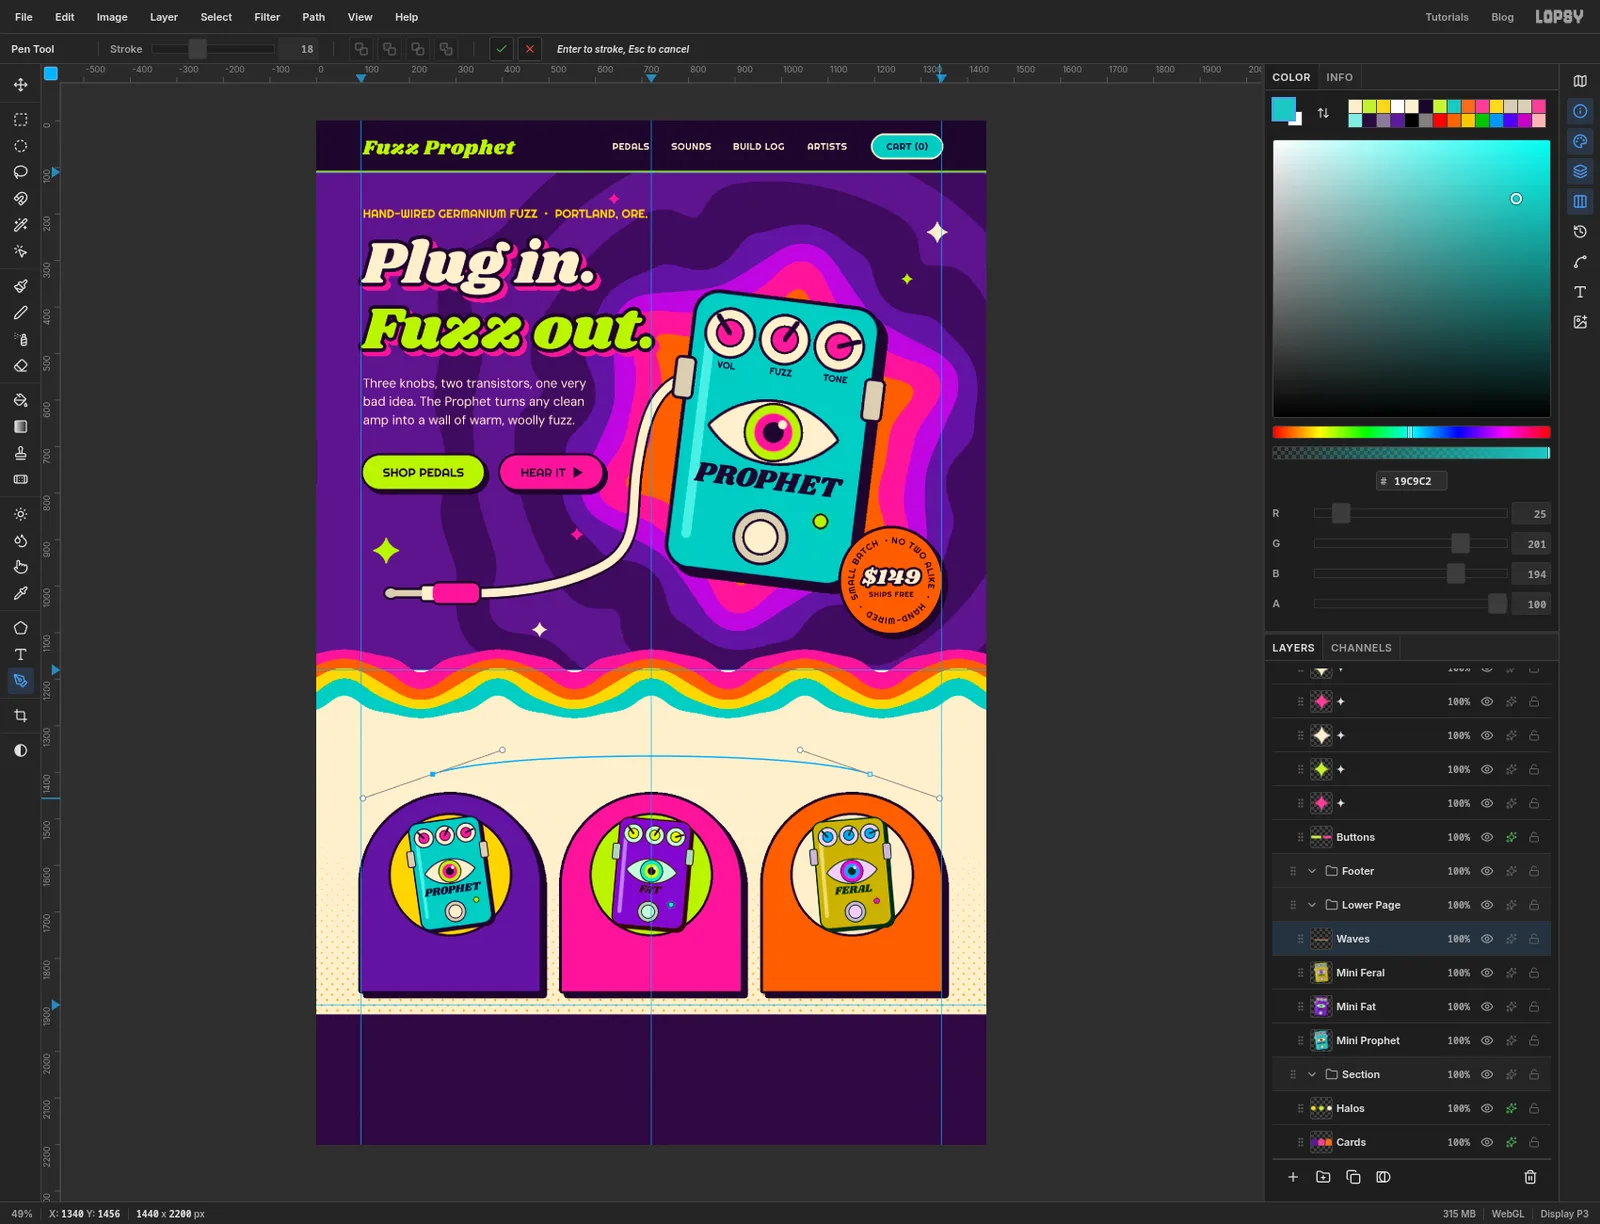
-
Label the cards
Click
Wavesbefore each new piece of text.With Shrikhand at Size
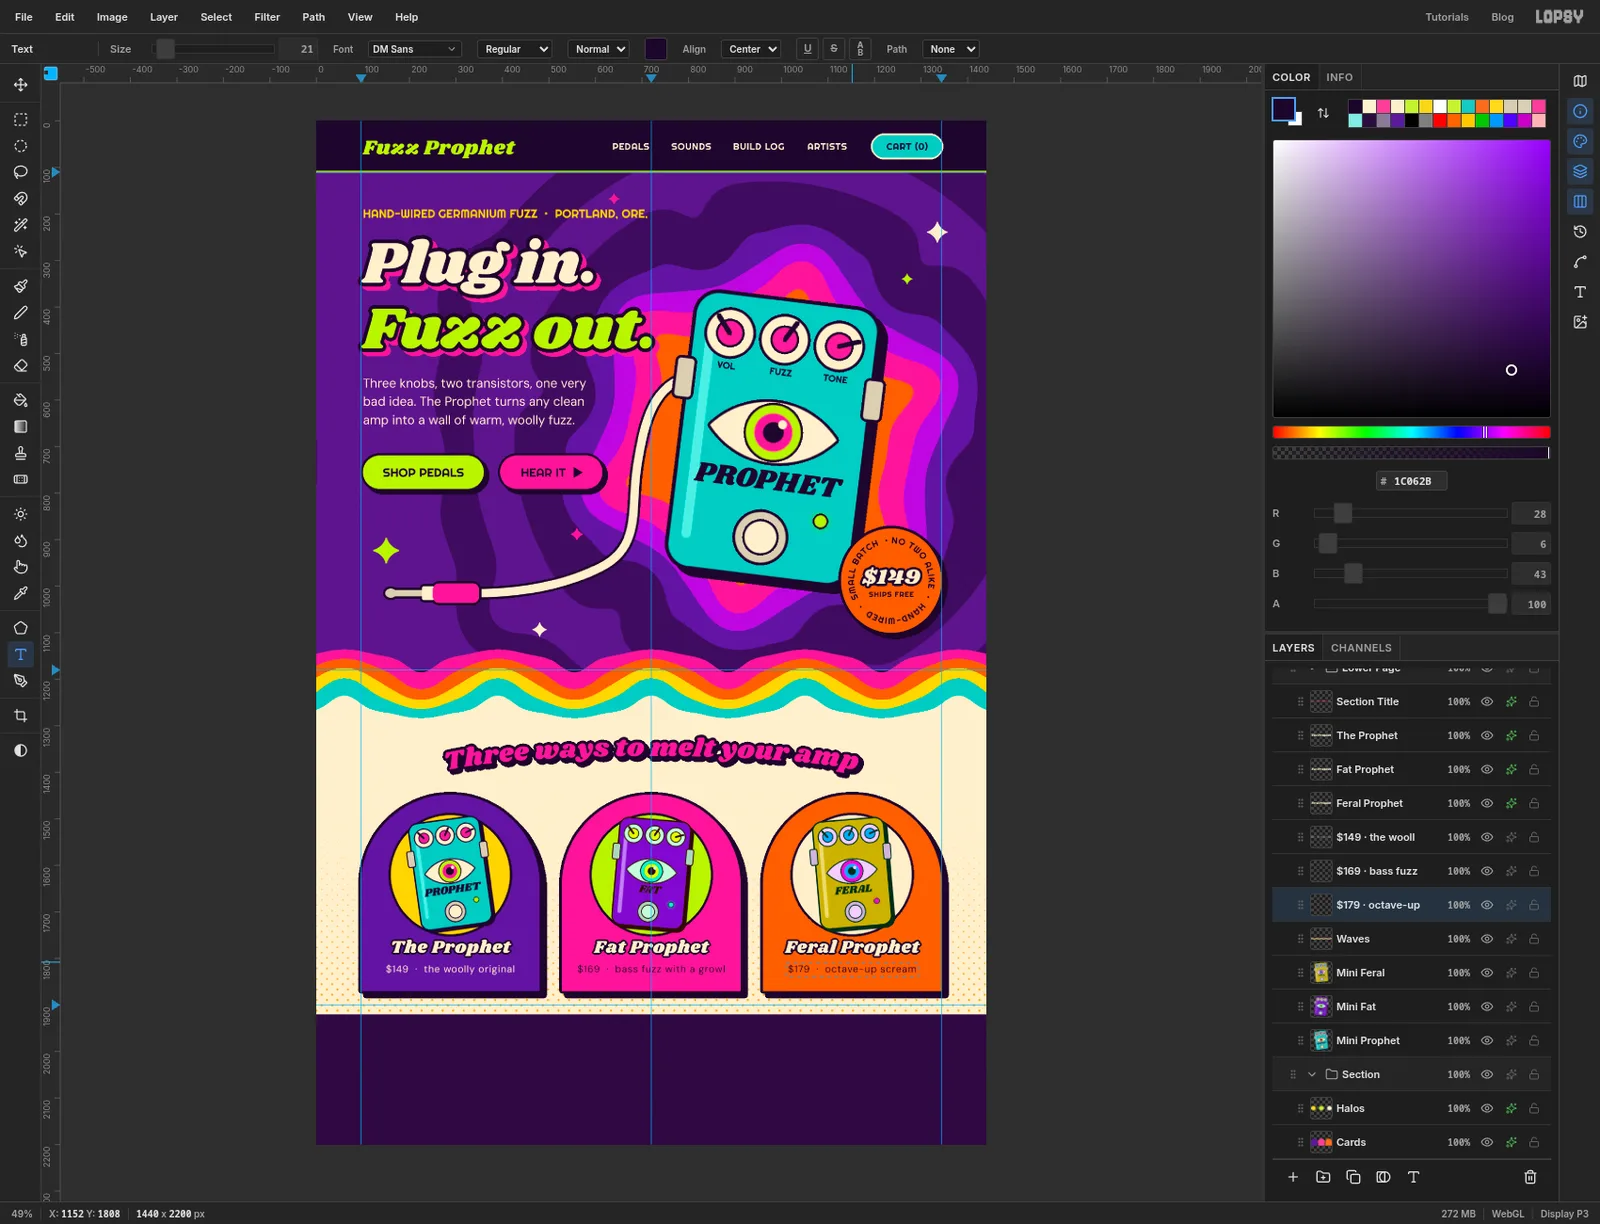
38, cream and Align Center, click at 288, 1750 and typeThe Prophet. AddFat Prophetat 720, 1750 andFeral Prophetat 1152, 1750. Give each one a Stroke of4in ink.Then with DM Sans at Size
21, add a price line at y 1808 under each:$149 · the woolly original,$169 · bass fuzz with a growland$179 · octave-up scream. Use cream on the violet card and ink on the pink and orange ones, where cream wouldn't have enough contrast.Check each card: the name should clear the bottom of the pedal, and the price line should sit well inside the card's bottom edge.
-
Draw a signal wave in the footer
Click the
Footergroup, click Add Layer and name itFooter Bar. Drag a marquee from the 1900 guide to the bottom of the page, fill it with ink and press Cmd+D. Draw a lime Pencil rule along the 1900 guide, as you did under the nav.Add a layer called
Signal. Set the foreground to hot pink and pick the Pen tool with Stroke6. You're drawing a burst of signal along the line y 2128, from the left margin to the right one. Start on the line at 96, 2128, then work across, placing an anchor every 125 px or so. Dip below the line, rise above it, dip again, keeping the ripples tiny at the ends and swelling to about 30 px either side in the middle. End back on the line at 1344, 2128. On every anchor, drag a short way to the right before letting go, which keeps the wave smooth. Press Enter to stroke it.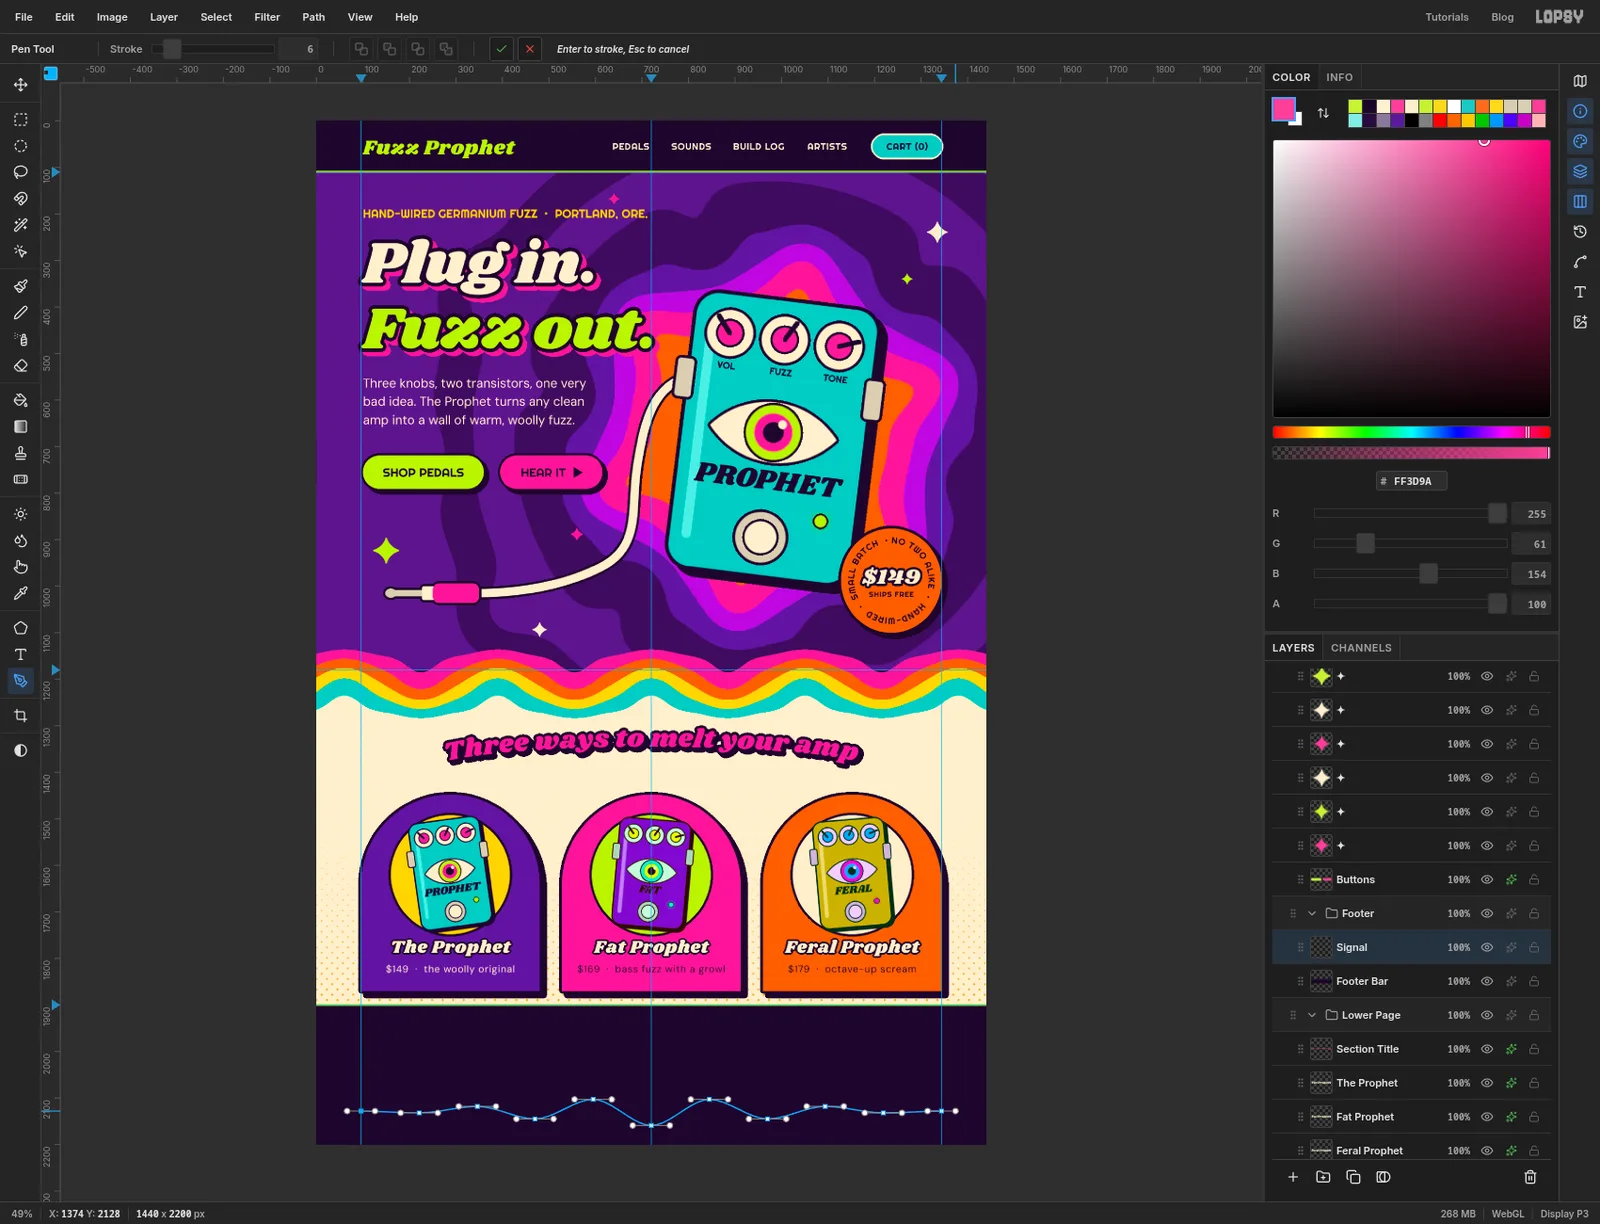
-
Fill in the footer
Add a layer called
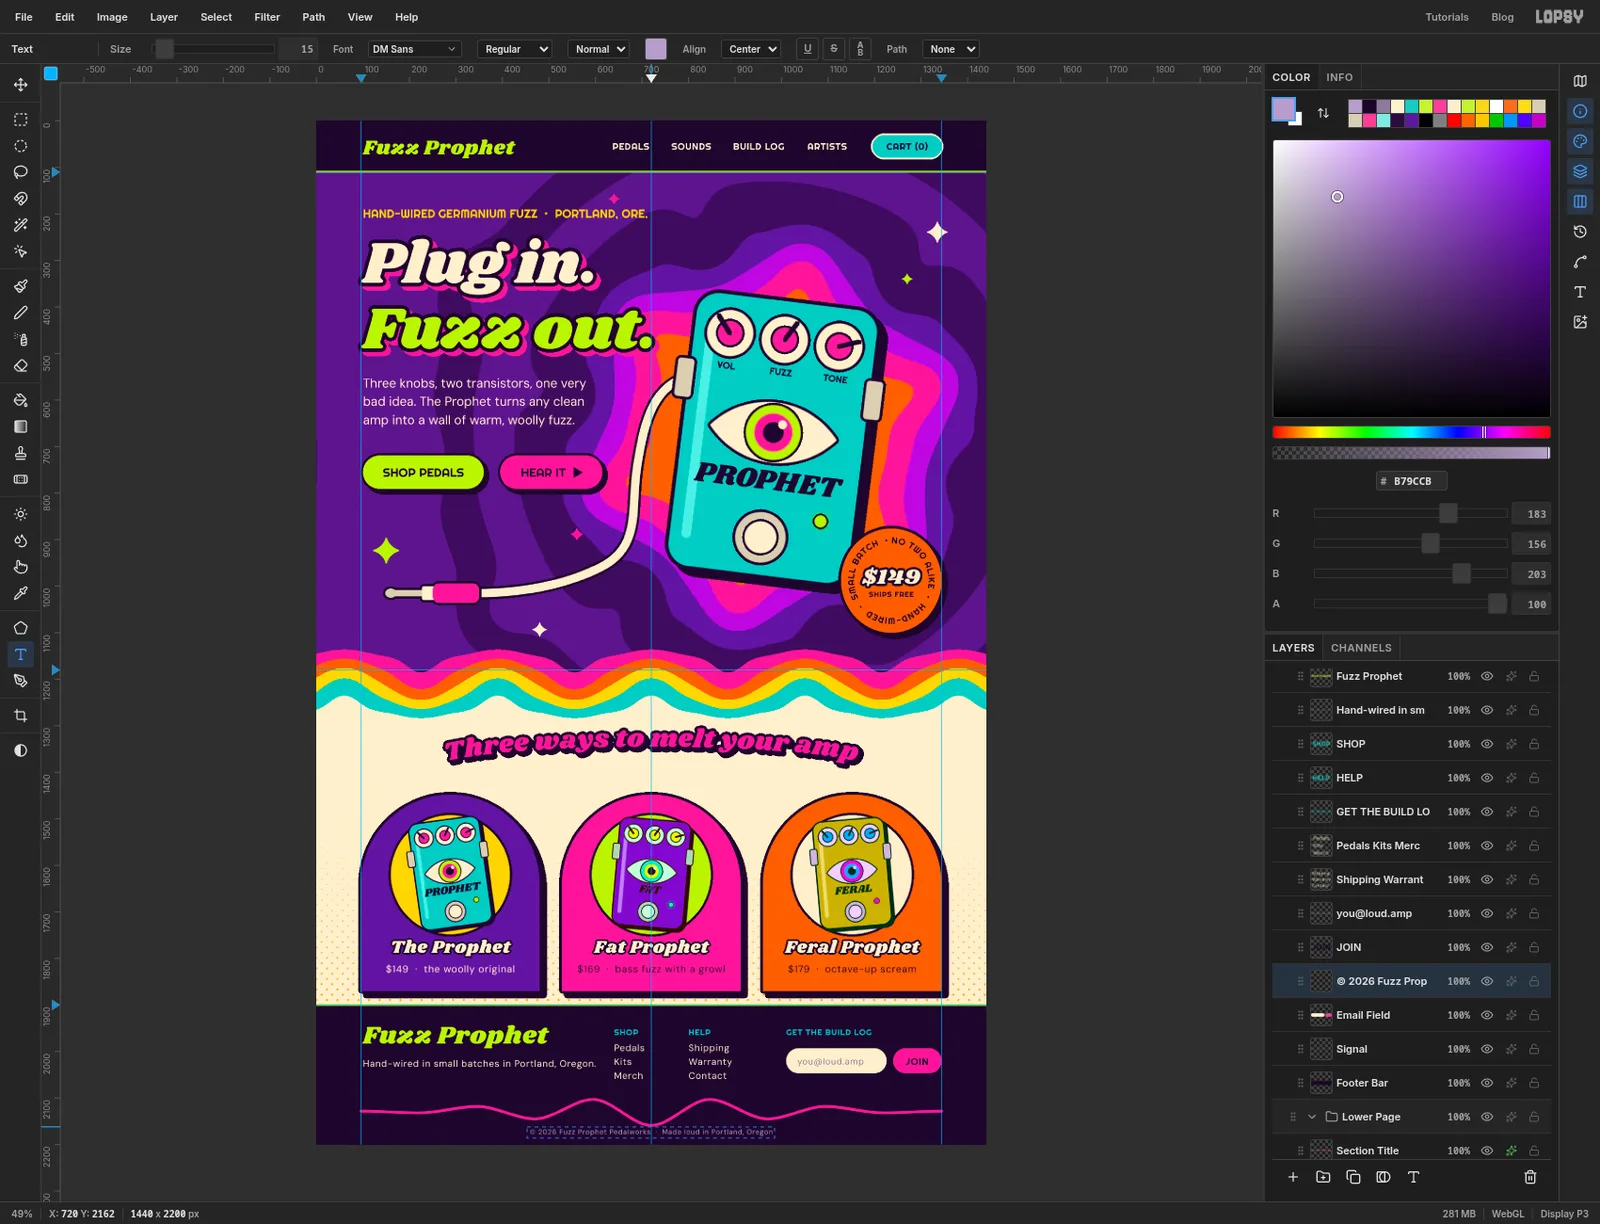
Email Field. With the Shape tool, draw a cream rectangle with Corner Radius27, 216 × 54 px, centred on 1118, 2020, and a hot pink one 104 × 54 px centred on 1292, 2020.Click
Email Fieldbefore each piece of text, and set Align back to Left for everything except the last two:- the logo: Shrikhand, Size
54, lime, at 100, 1928:Fuzz Prophet - the tagline: DM Sans, Size
20, cream, at 100, 2012:Hand-wired in small batches in Portland, Oregon.Set its Letter spacing back to0so it doesn't run into the links. - column headings: Righteous, Size
18, turquoise:SHOPat 640, 1946,HELPat 800, 1946 andGET THE BUILD LOGat 1010, 1946 - the links: DM Sans, Size
20, cream, three lines each, at 640, 1978 (Pedals,Kits,Merch) and 800, 1978 (Shipping,Warranty,Contact). Set Line height to1.5. - the placeholder: DM Sans, Size
19, in a muted , at 1034, 2008:[email protected] - the button: Righteous, Size
21, ink, Align Center, at 1292, 2006:JOIN - the legal line: DM Sans, Size
15, in , Align Center, at 720, 2162:© 2026 Fuzz Prophet Pedalworks · Made loud in Portland, Oregon
- the logo: Shrikhand, Size
-
Print the rings with a halftone screen
The rings are still perfectly flat, and a poster should look printed. Click the
Ringsrow and choose Layer → Duplicate Layer. Rename the copyHalftone.Choose Filter → Halftone… and set Dot Size
10, Angle30and Softness1. Click Apply.Open the effects drawer for
Halftoneand set its blend mode to Overlay. Then click the layer's opacity and lower it to 60%. The dots now tint the rings underneath rather than replacing them, like a screen of ink over flat colour.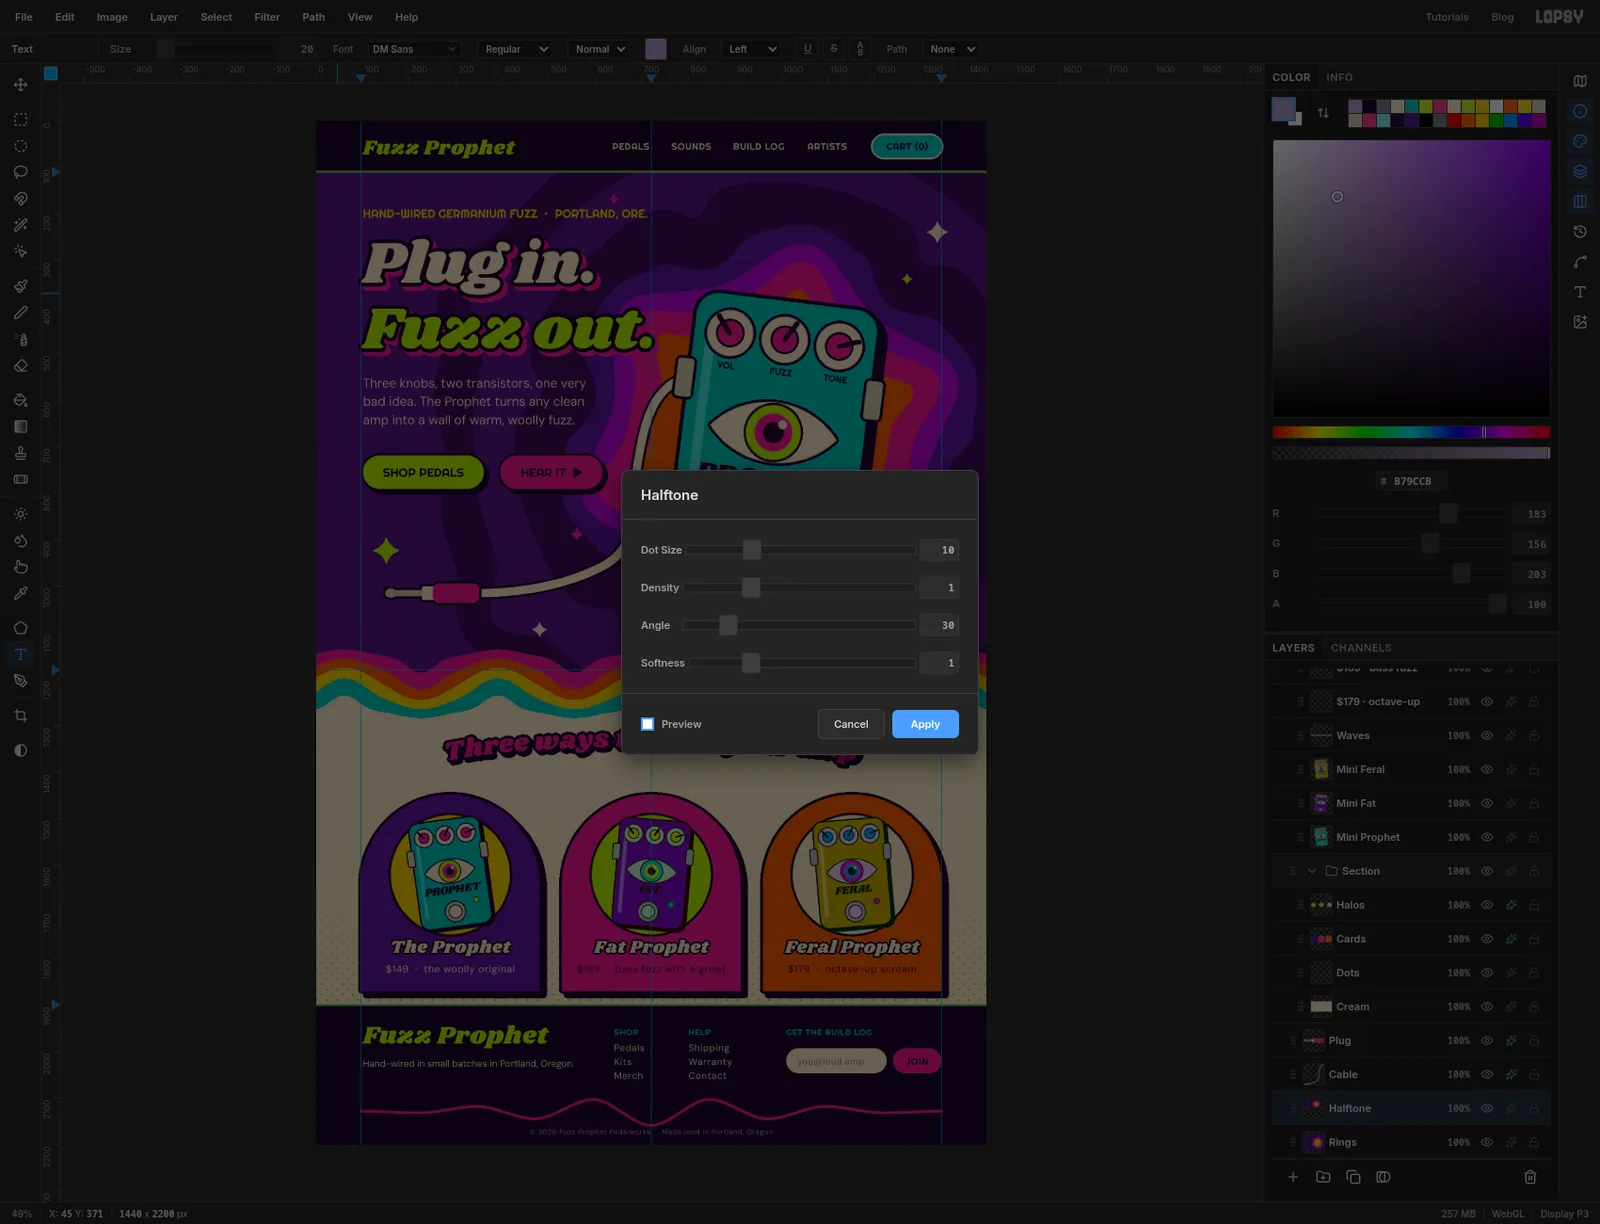
-
Add a final vibrance boost
Choose Layer → Adjustment Layer… and click Got it. The drawer opens on the adjustments for the whole project. Leave the five nodes that are already listed alone. Click Add Adjustment, choose Saturation & Vibrance and set Vibrance to
25. Vibrance lifts the duller colours more than the ones that are already loud, so the purples catch up with the pinks. Close the drawer.Open the View menu and untick Show Guides to see the page clean, then choose File → Quick Export PNG to save it.