Make a Pulp Magazine Cover Flier for a Curiosity Shop
Design a 1930s pulp-cover flier in Lopsy. A public-domain octopus lithograph rises from a stormy sea, under an extruded masthead, a starburst and aged paper.
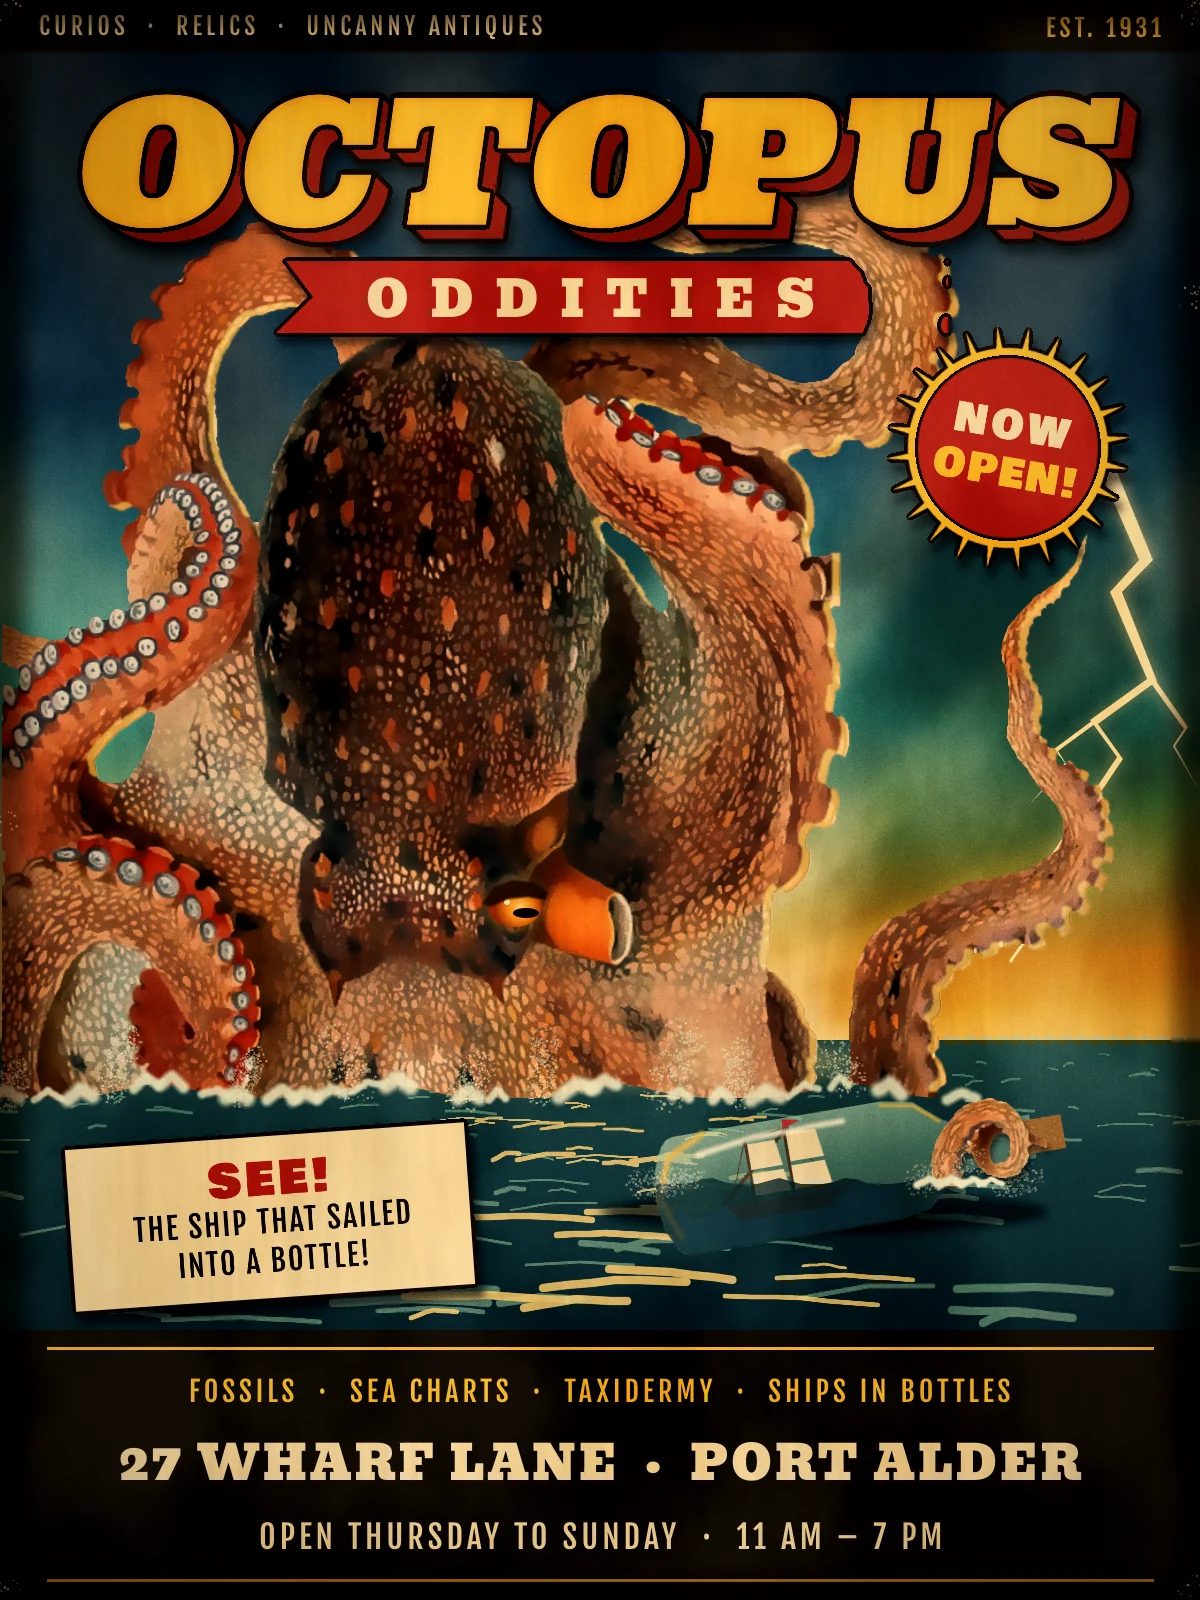
From the 1920s to the early 1950s, pulp magazines like Weird Tales, Adventure and Amazing Stories sold on their covers. A painted monster loomed over a helpless victim, a fat masthead in yellow or red shouted the title, and starbursts and teaser boxes crowded the corners. The covers were lurid on purpose, with hot oranges against deep teals and night blues. Cheap pulp paper yellowed fast, and the presses rarely lined up their colour plates.
In this tutorial you'll borrow that look for a small business: a grand opening flier for Octopus Oddities, an imaginary harbourside curiosity shop. The monster is a real octopus, cut out of an 1896 natural-history lithograph and repainted. It rises out of a stormy sea and reaches for the shop's prize exhibit, a ship in a bottle. The flier is 1200 × 1600 px.
Along the way you'll use:
- multi-stop Gradients, Sunburst, Clouds and a layer mask for a stormy sunset sky
- the Brush and Spray for painted water, glints and white water
- a dropped photo, the Magic Wand with Shift-click, Grow, Shrink and Inverse to cut out the octopus
- Hue/Saturation and Surface Blur to turn a lithograph into paint
- Flip, scale, rotate and Rotate 90°, on layers, a pasted copy and whole groups
- Copy and Paste to borrow a tentacle tip
- Group Layers, Duplicate Layer, Merge Down and Rasterize Layer
- live text in Ultra, Bevan, Bowlby One SC and Fjalla One, with the text Skew mode
- Stroke, Drop Shadow, Inner Glow, Outer Glow and Color Overlay
- Multiply, Screen, Overlay and Soft Light blend modes, Fibers, Add Noise and an adjustment stack for the aged-paper finish
The palette:
-
Night sky
-
Sea
-
Chop
-
glints
-
white water
-
Masthead yellow
-
extrusion
-
keyline
-
Ribbon red
-
cream
-
card
-
Rim light
-
eye
-
Bottle glass
-
putty
-
cork
-
Lightning
-
glow
-
Ink black
-
edge burn
-
yellowing
You'll also need the octopus. Download Octopus vulgaris by Comingio Merculiano, a public-domain plate from 1896, from Wikimedia Commons.
-
Set up the canvas and guides
Choose File → New, enter 1200 × 1600 and click Create. Click the Background row, set the foreground to night navy and choose Edit → Fill.
Click the left ruler at
1040to drop the horizon guide, and again at1330, where the info band will start. Click the top ruler at600for a centre line.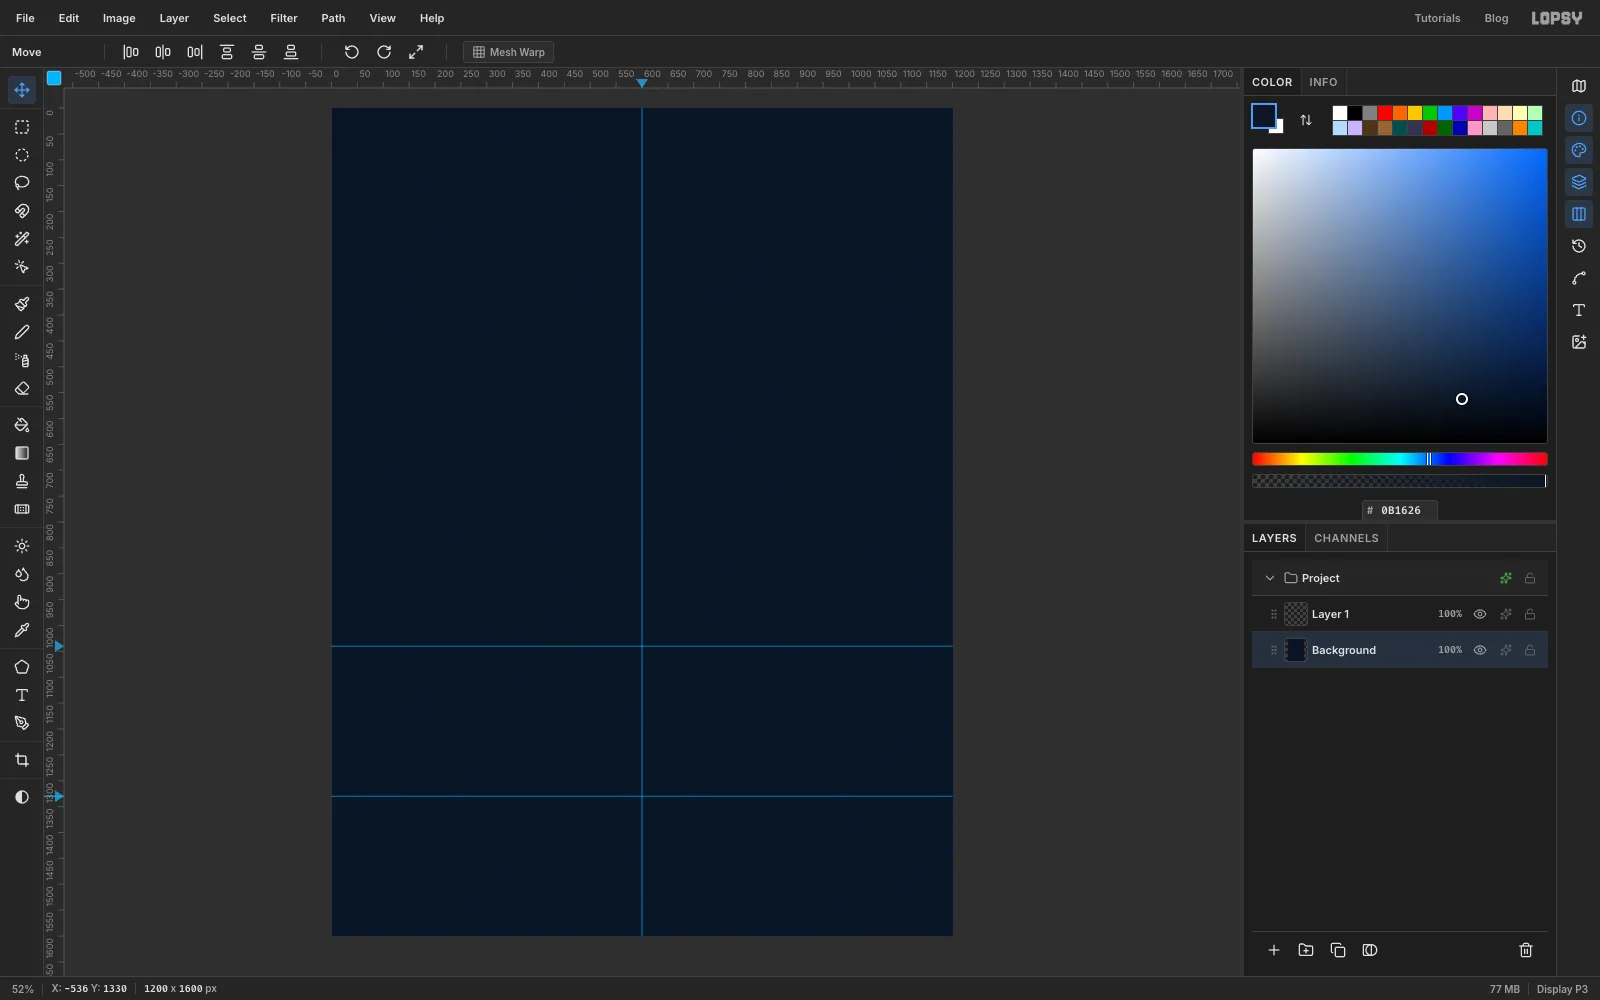
-
Paint the night-to-sulphur sky
Click Layer 1 and rename it Sky. Pick the Gradient tool, set it to Linear and click Advanced…. Make five stops: at 0%, at 38%, at 70%, at 92% and at 100%. Click a stop and type its hex code into the editor's colour field. Click the bar to add a stop.
Select from
0, 0to1200, 1040so the gradient stops at the horizon. Drag from the top of the page straight down to the horizon guide.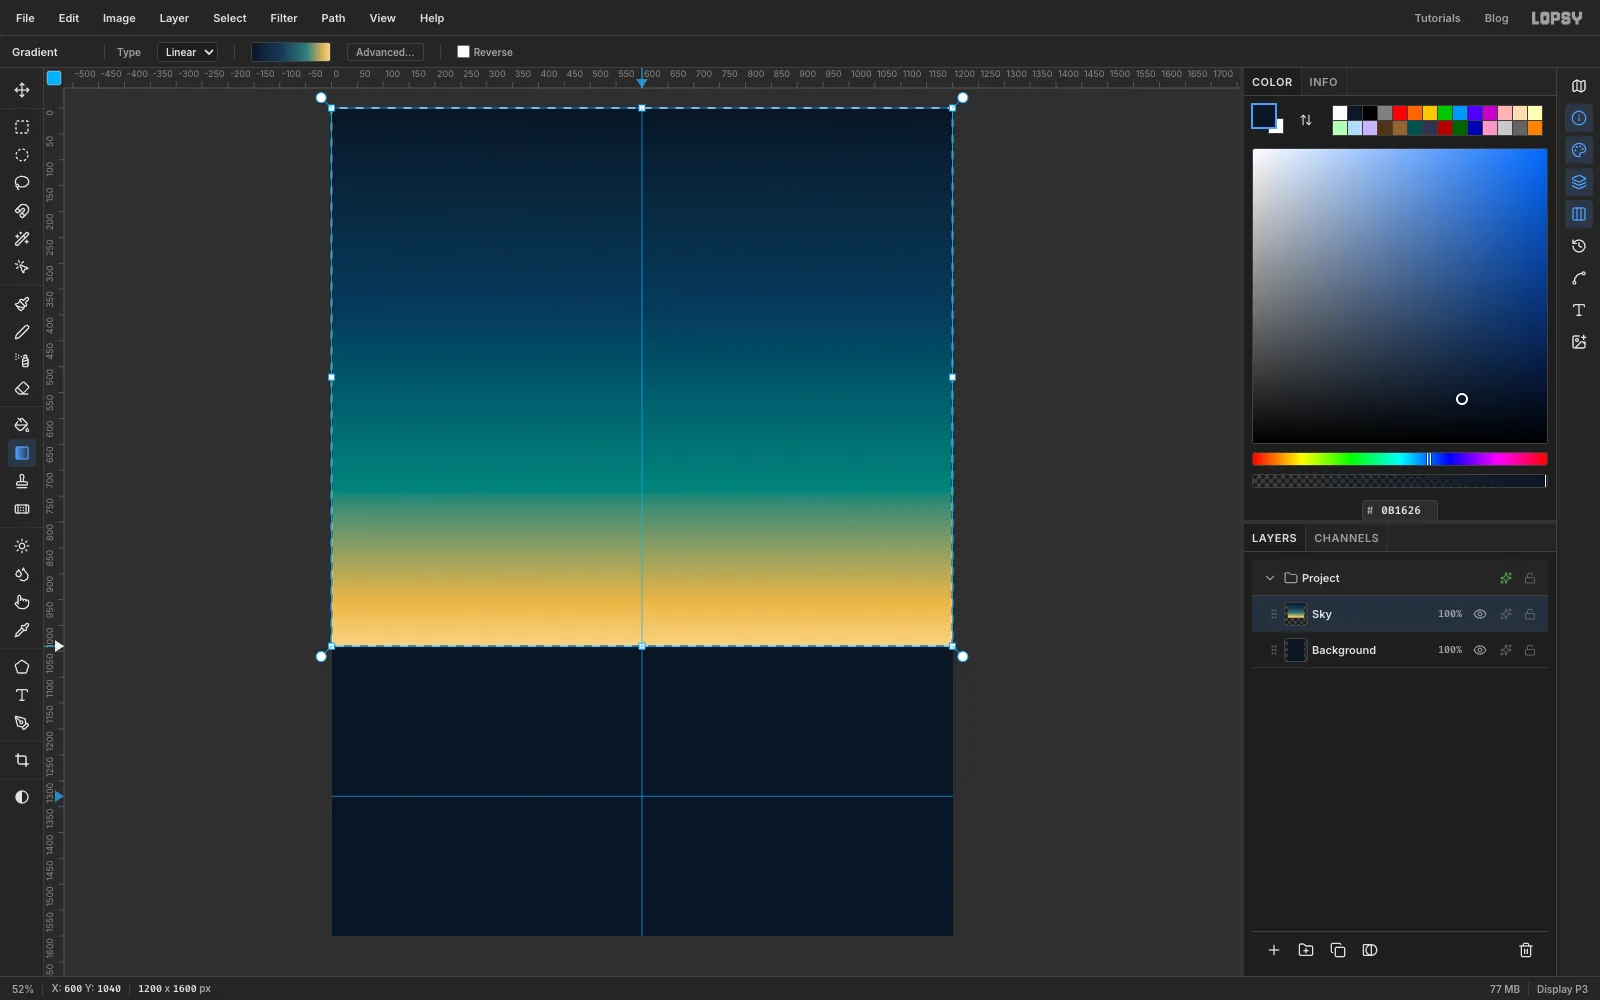
-
Fan out sunburst rays
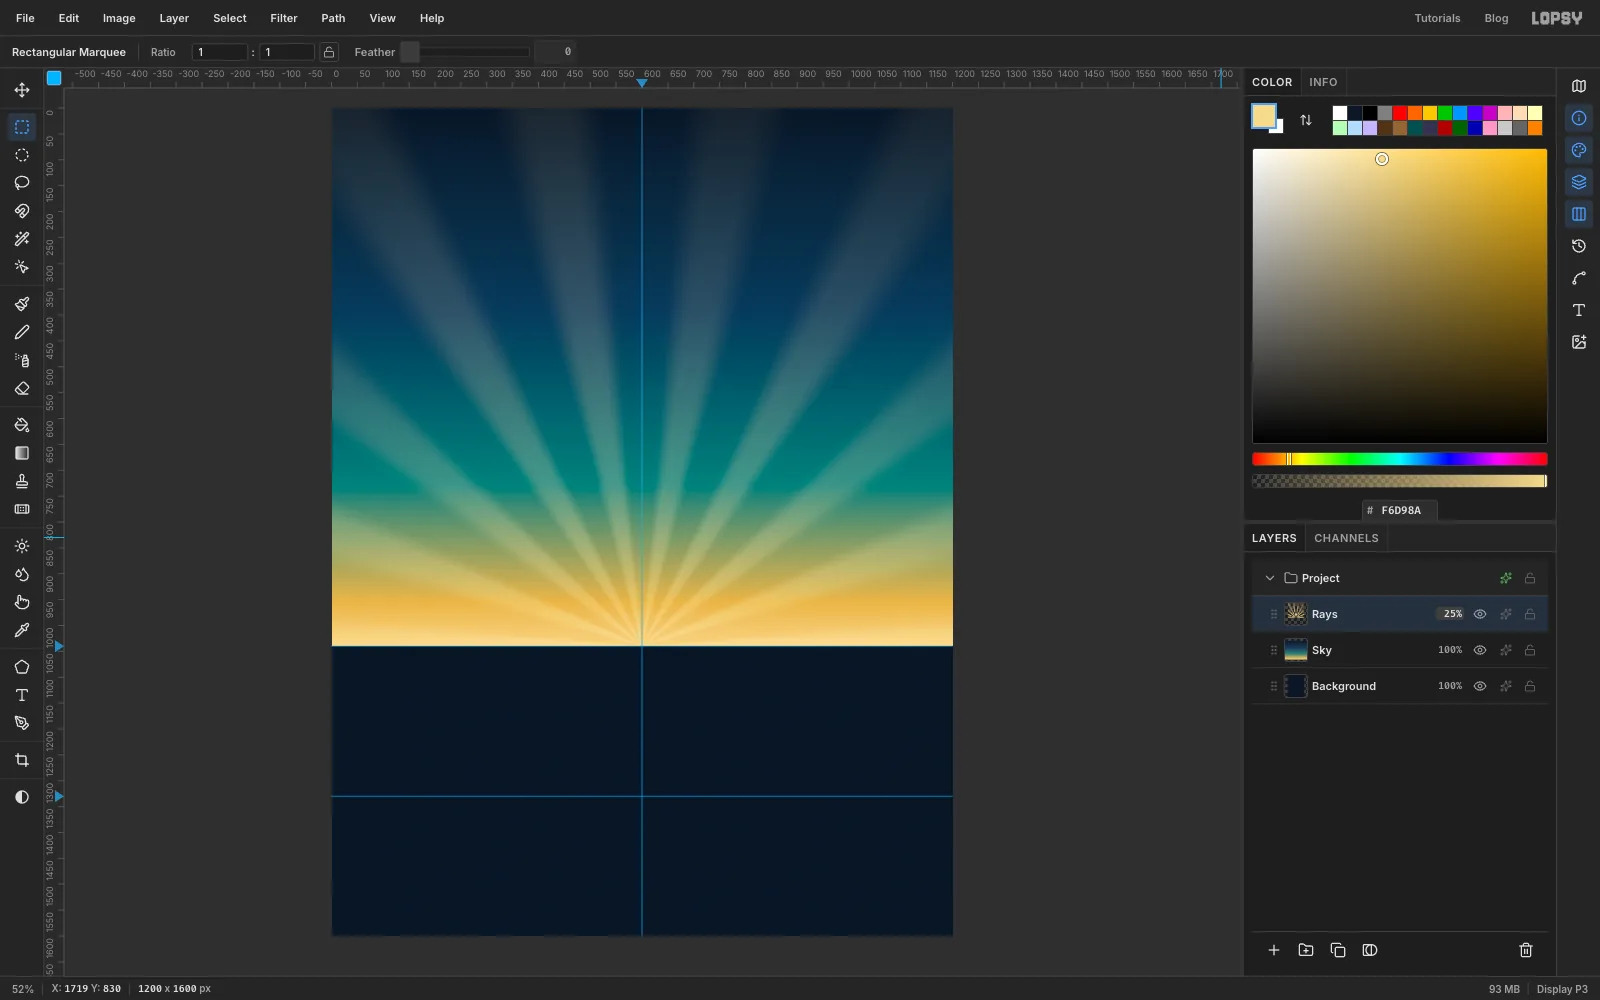
Add a layer named Rays and set the foreground to pale sulphur . Select the sky again,
0, 0to1200, 1040, and choose Filter → Sunburst…:- Rays
18, Length120, Width40 - Fade
75, Softness60, Jitter35, Seed7 - Center X
50, Center Y65, which puts the origin on the horizon
Click Apply and deselect. Set the layer's Blend to Screen and its opacity to 25%. The rays now glow faintly instead of striping the sky.
- Rays
-
Stir in storm clouds near the horizon
Add a layer named Storm, select the sky again and choose Filter → Clouds… with Scale
5. Deselect. Set the Blend to Overlay and the opacity to 55%.The clouds should hang low over the sunset, so mask the top away. Click Add Mask at the bottom of the Layers panel, then click the mask thumbnail to edit it. Open the Gradient tool's Advanced… editor, delete the three middle stops (click a stop, then Delete stop), and set the left stop to and the right one to . Drag from
600, 250down to600, 900. Black hides, so the clouds fade out above. Click the Storm row to stop editing the mask.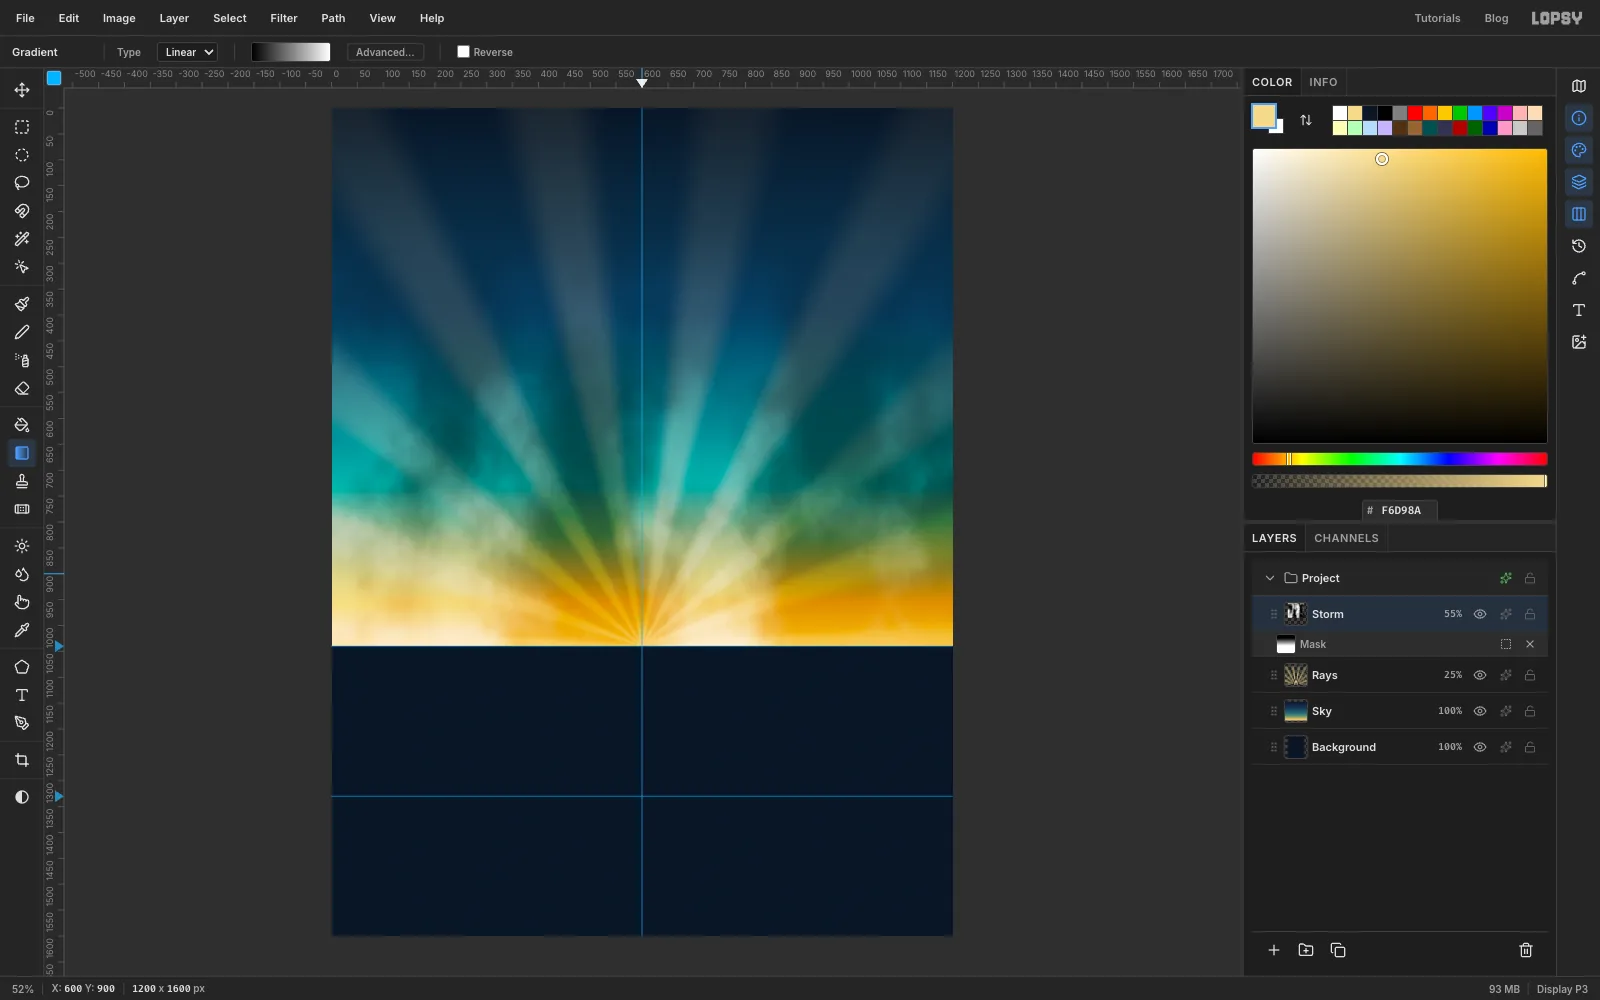
-
Lay down the sea
Add a layer named Sea. Give the gradient four stops: at 0%, at 20%, at 65% and at 100%. Select from
0, 1040to1200, 1600and drag from the horizon guide down to the bottom edge. Deselect.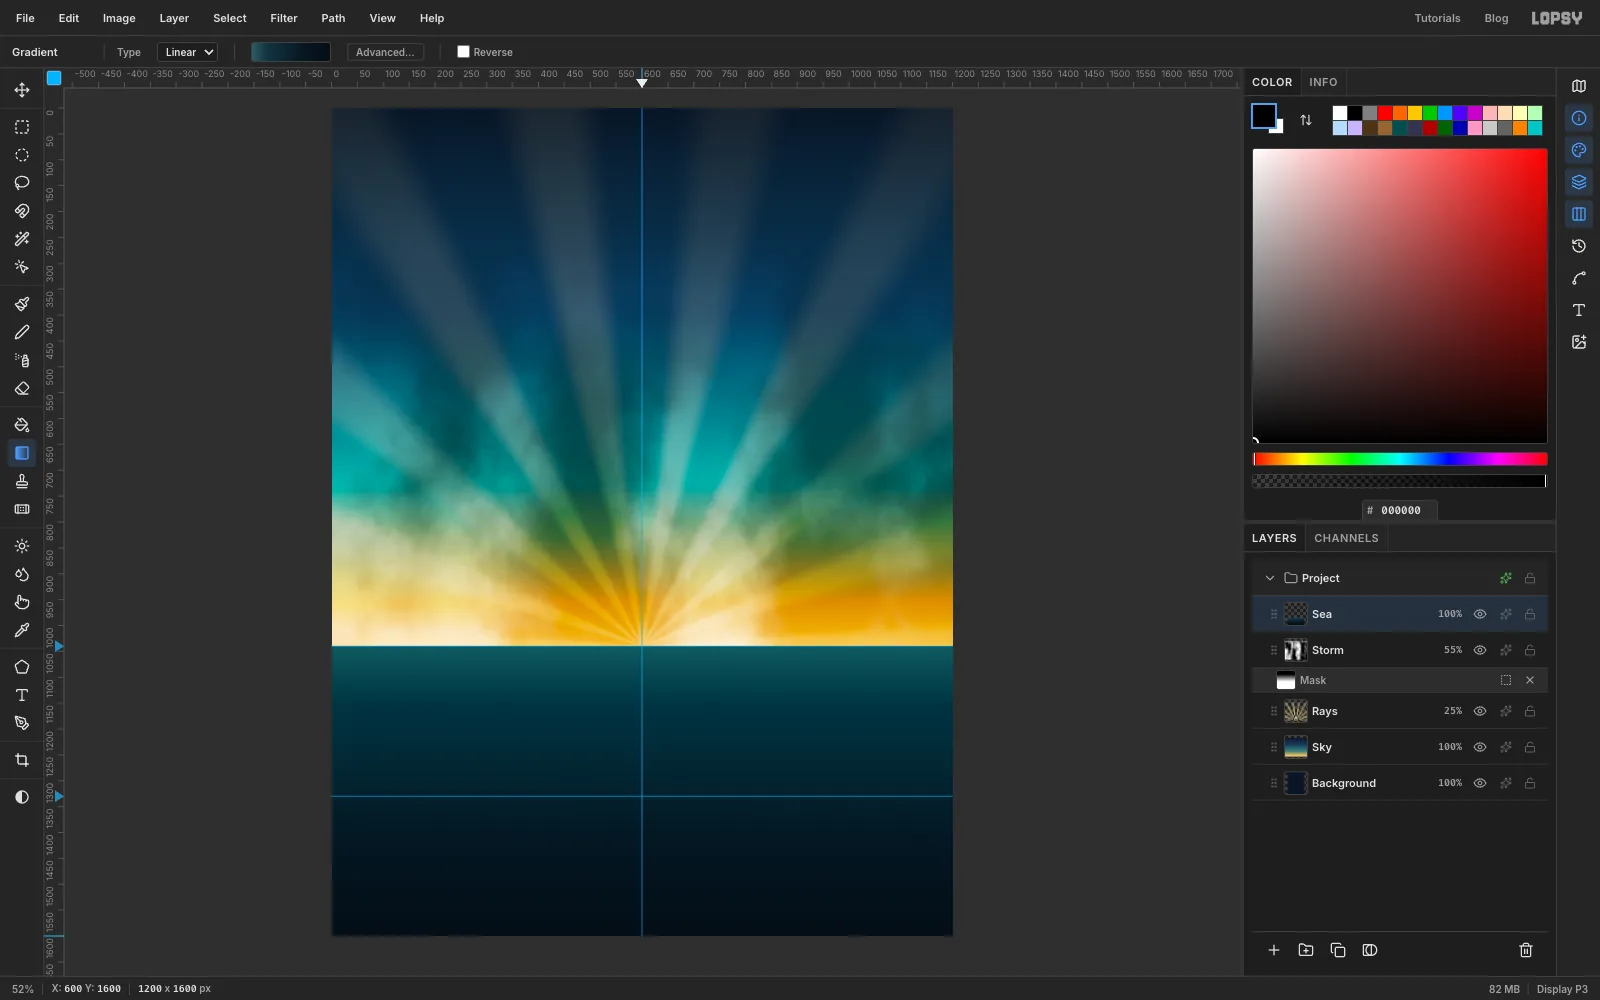
-
Reflect the sunset on the water
Add a layer named Glow Path and set the foreground to . With the Elliptical Marquee, select from
330, 1040to870, 1084, a flat oval just under the horizon. Choose Select → Feather…18, fill, and deselect.Choose Filter → Motion Blur… with Angle
0and Distance90to smear it sideways like a reflection. Set the Blend to Screen and the opacity to 50%.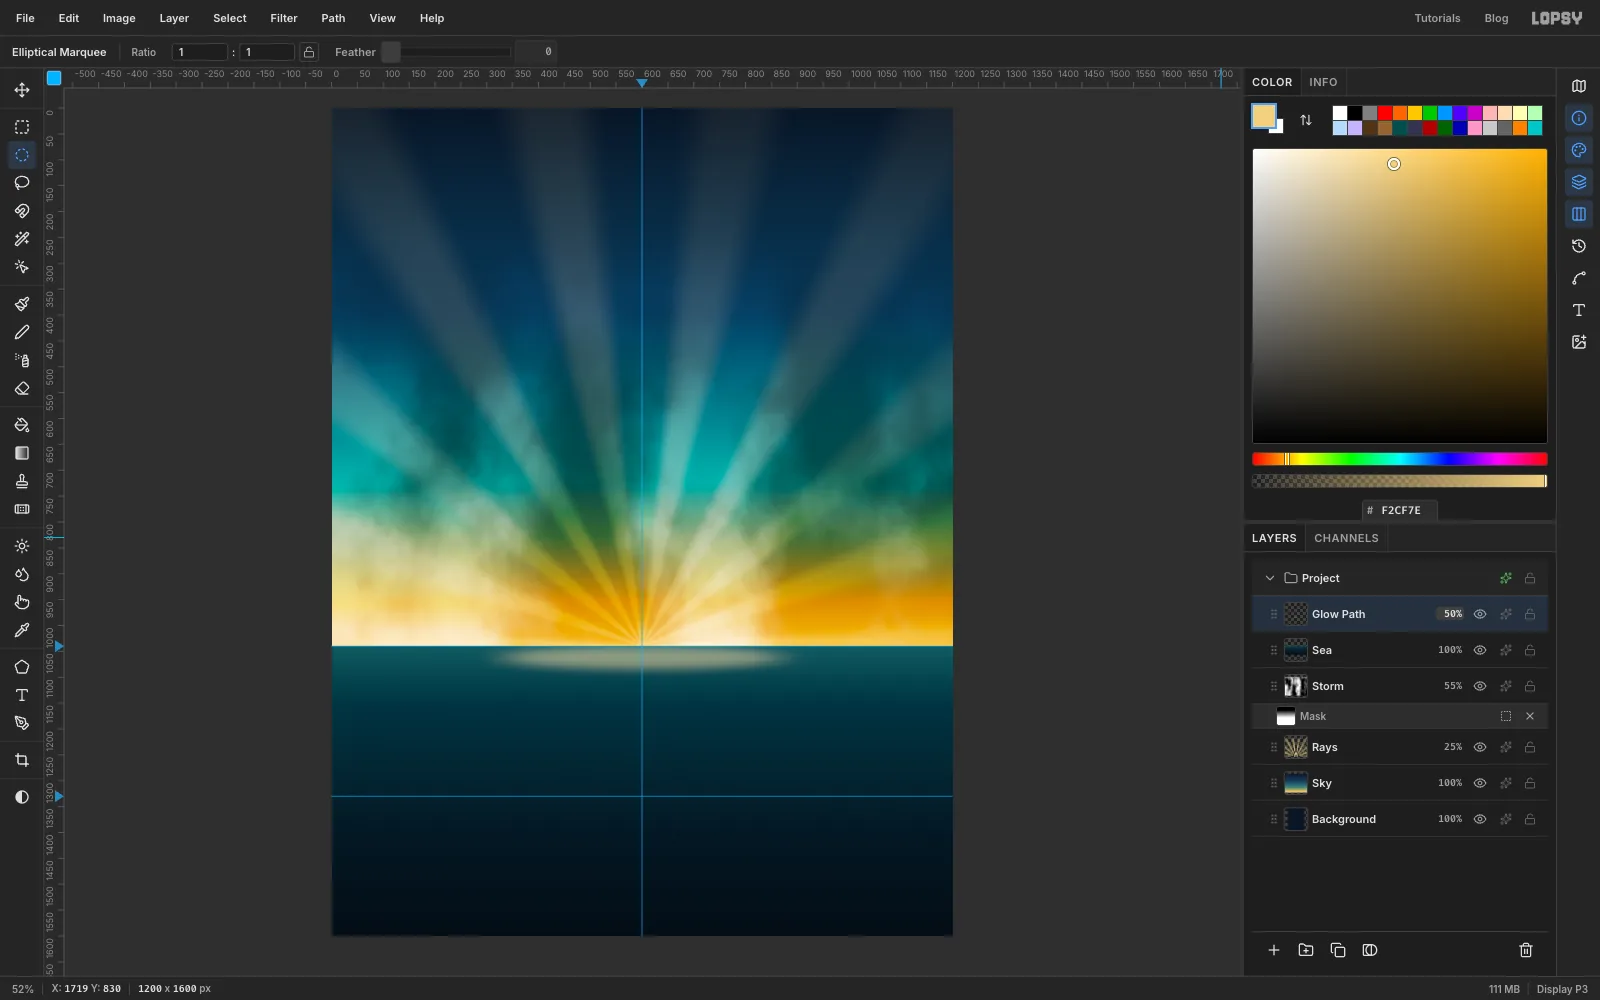
-
Paint the chop
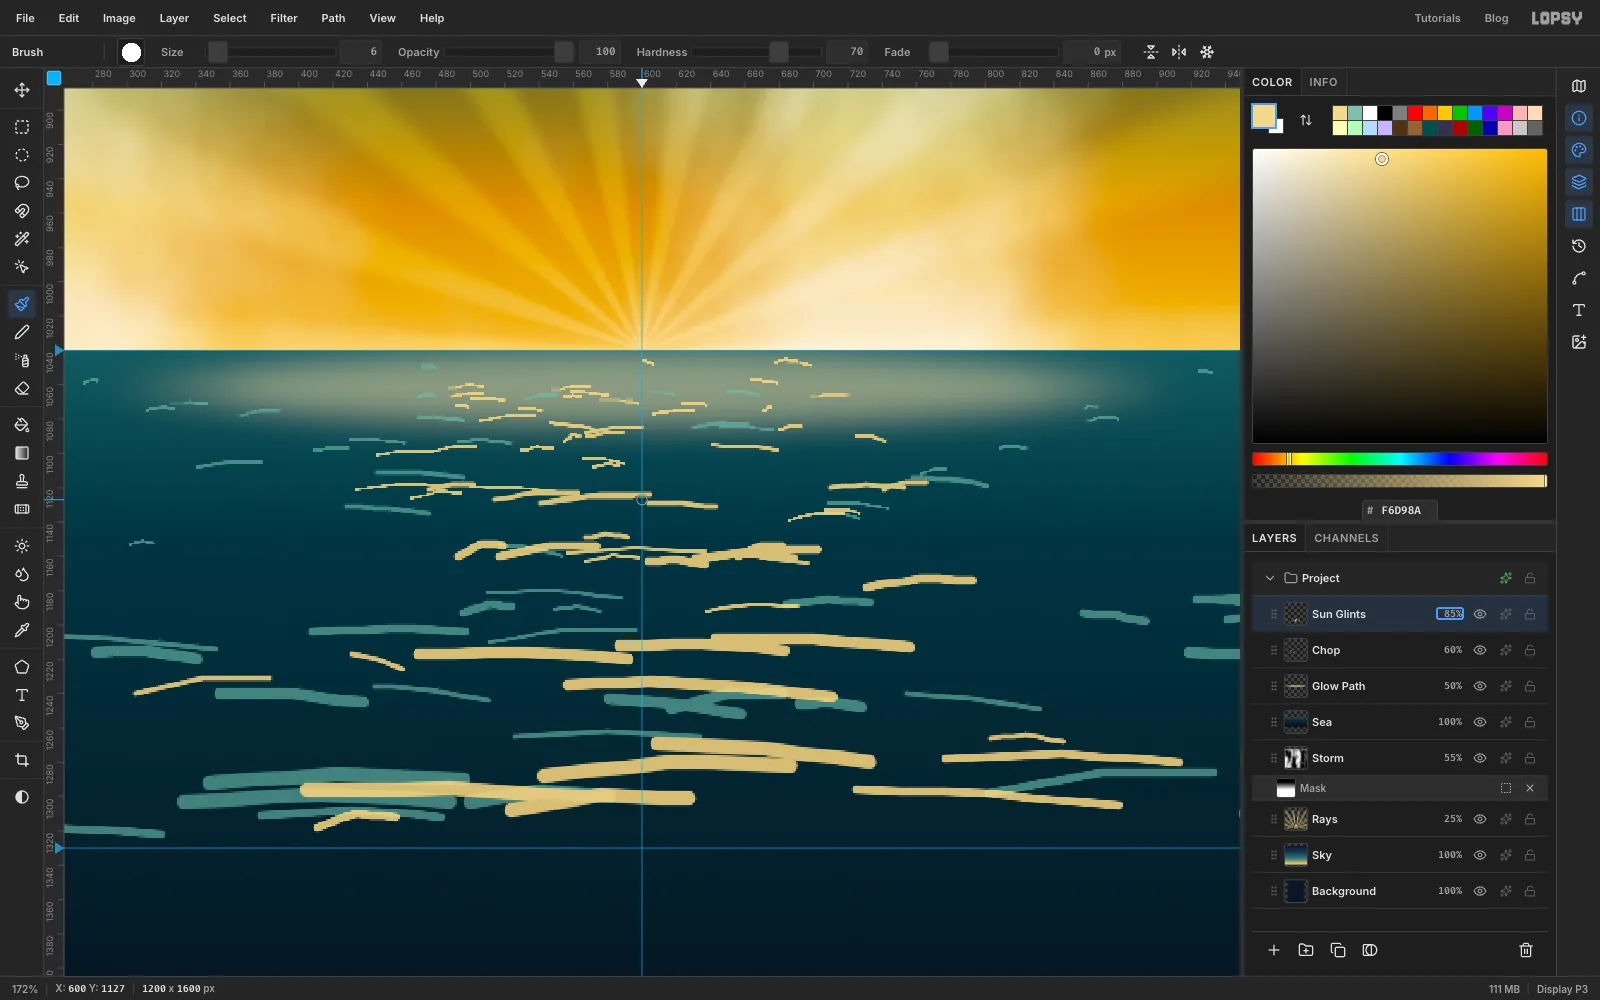
Pulp painters suggested water with short horizontal strokes, so do the same. Add a layer named Chop, pick the Brush and set Hardness to
70, Opacity to100and the foreground to .Paint short horizontal dashes across the whole sea, each with a slight sag in the middle. Work down in bands, making the dashes bigger as they come toward you:
- just below the horizon: Size
2, about 15 px long - then Size
3,4,6and8 - in the last band, from
1270to the info band guide: Size10, about 100 px long
In each band, drop the size to about half for a few of the dashes and vary their lengths a lot, so no two rows repeat. When you're done, set the layer opacity to 60%.
- just below the horizon: Size
-
Scatter sun glints
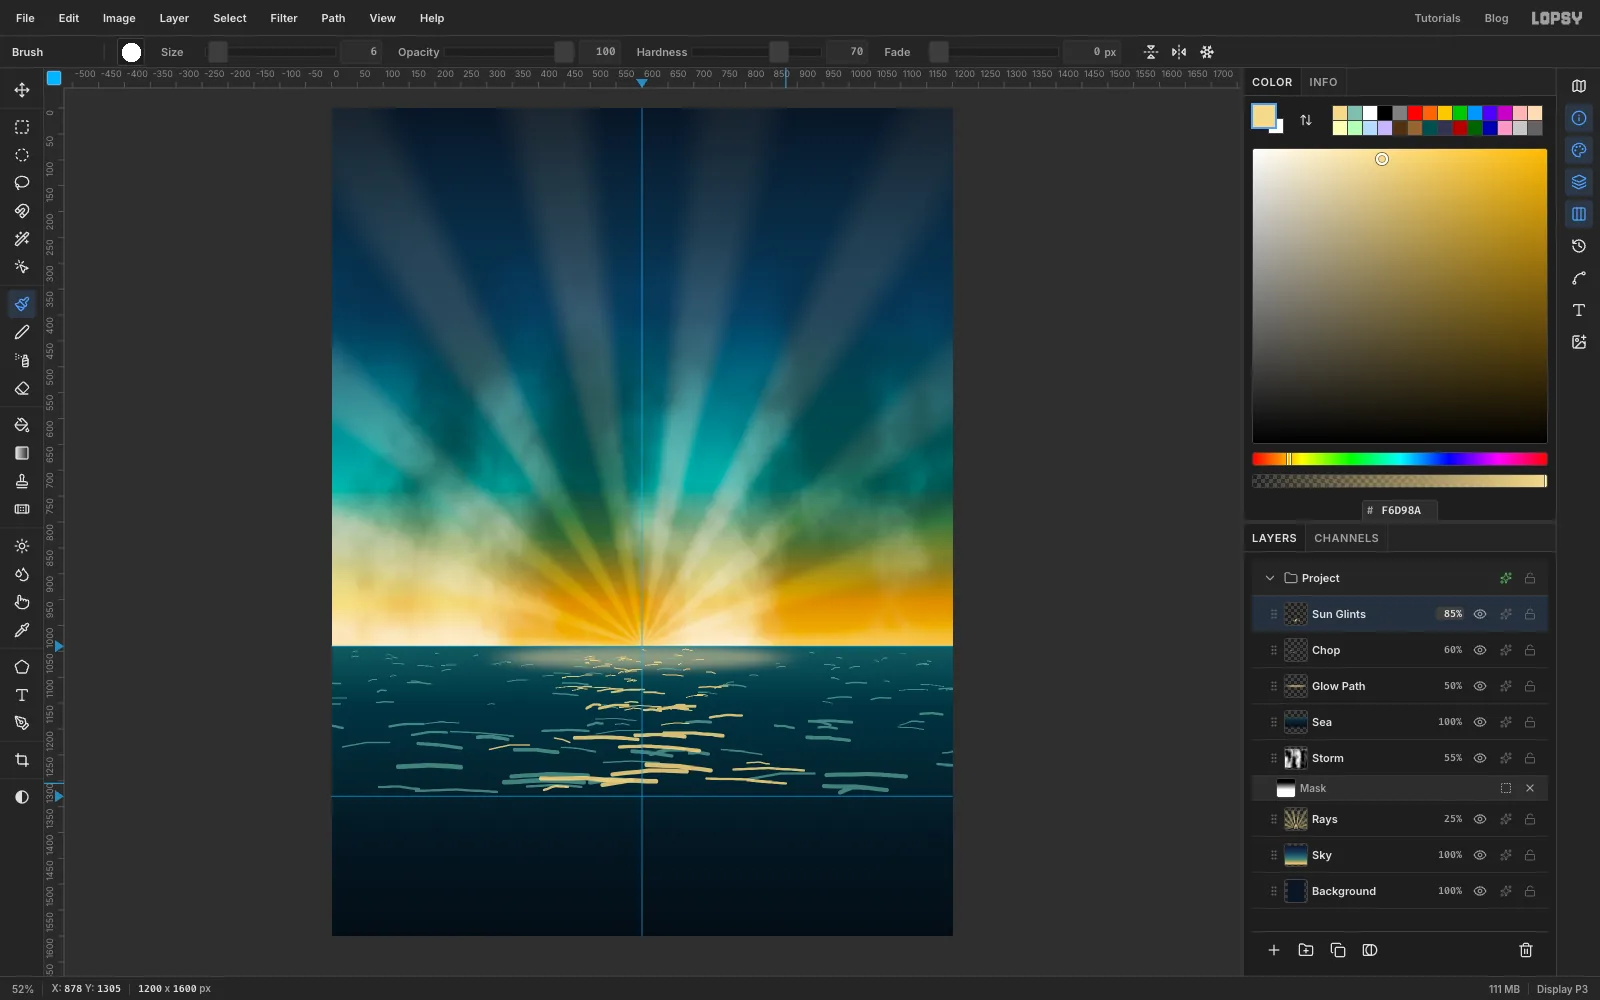
Add a layer named Sun Glints and switch the foreground to . Paint the same kind of dashes, but fewer, and only in a column under the sun. It starts about 180 px wide at the horizon and spreads to about 700 px at the info band guide. Set the layer opacity to 85%.
-
Drop in the octopus lithograph
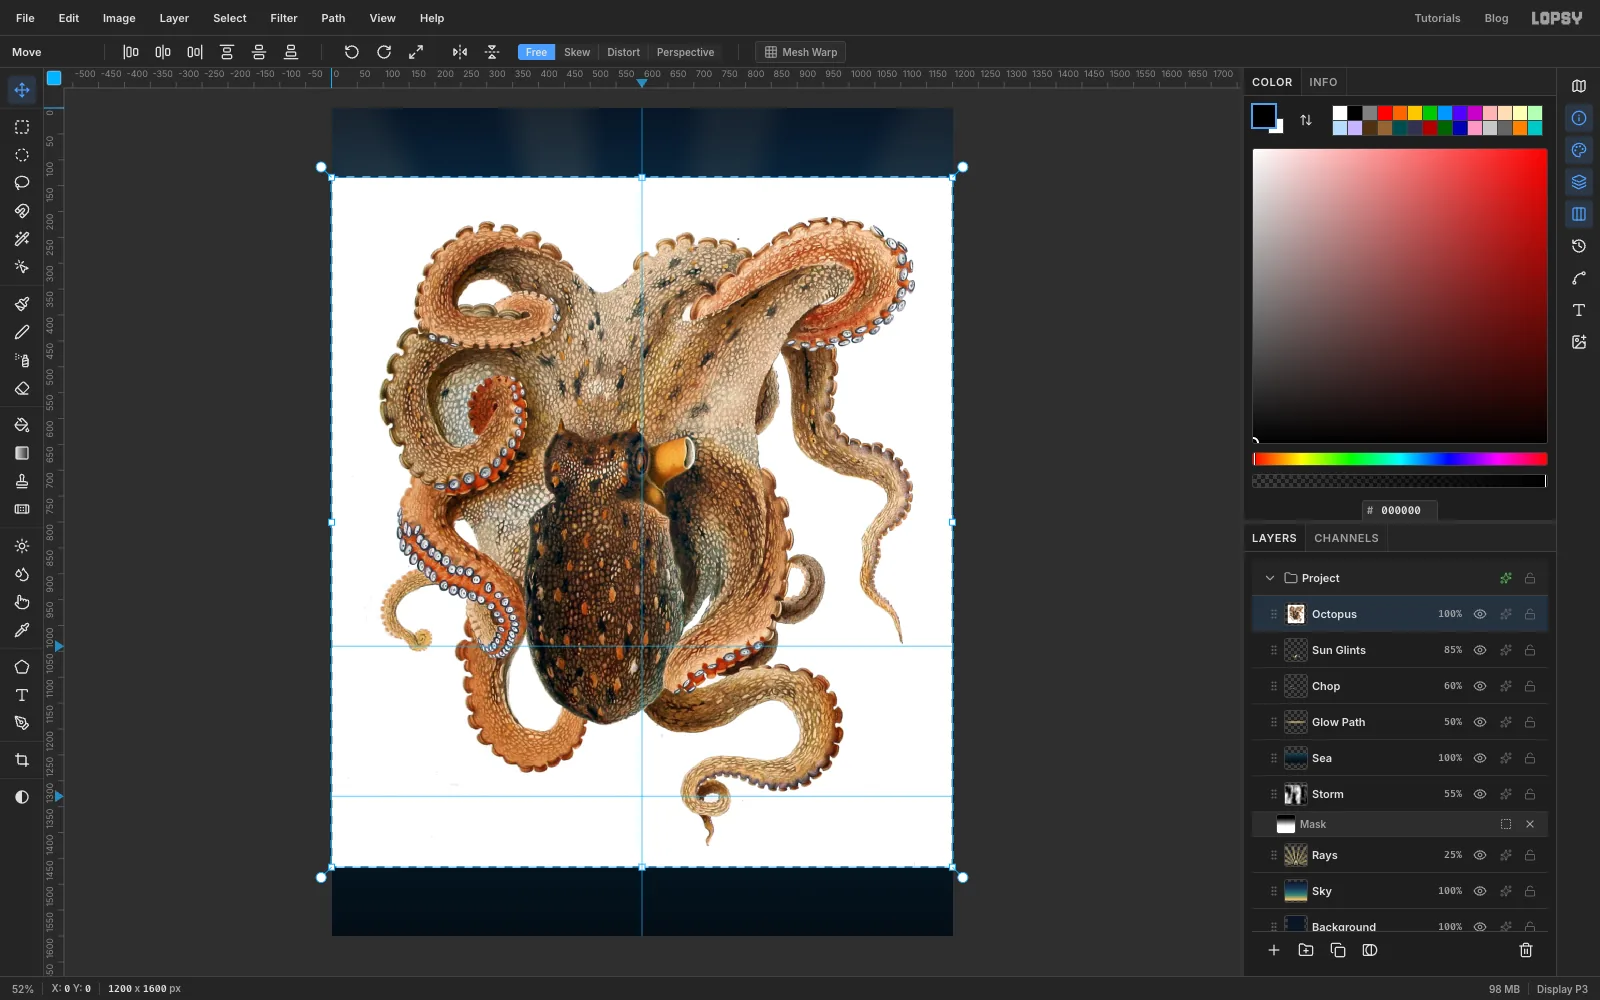
Click Sun Glints, then drag the downloaded octopus image from your file browser onto the canvas. It arrives as Pasted Layer, scaled to the page width. Rename it Octopus.
-
Cut the octopus out of its paper
Pick the Magic Wand, turn Contiguous on and set Tolerance to
20. Click the white paper near a corner. The wand can't reach the pockets of paper trapped between the curled arms, so Shift-click inside each one to add it. There are eight, the biggest between the lower-left arms.Choose Select → Grow…
2so the selection eats the pale fringe, press Delete and deselect.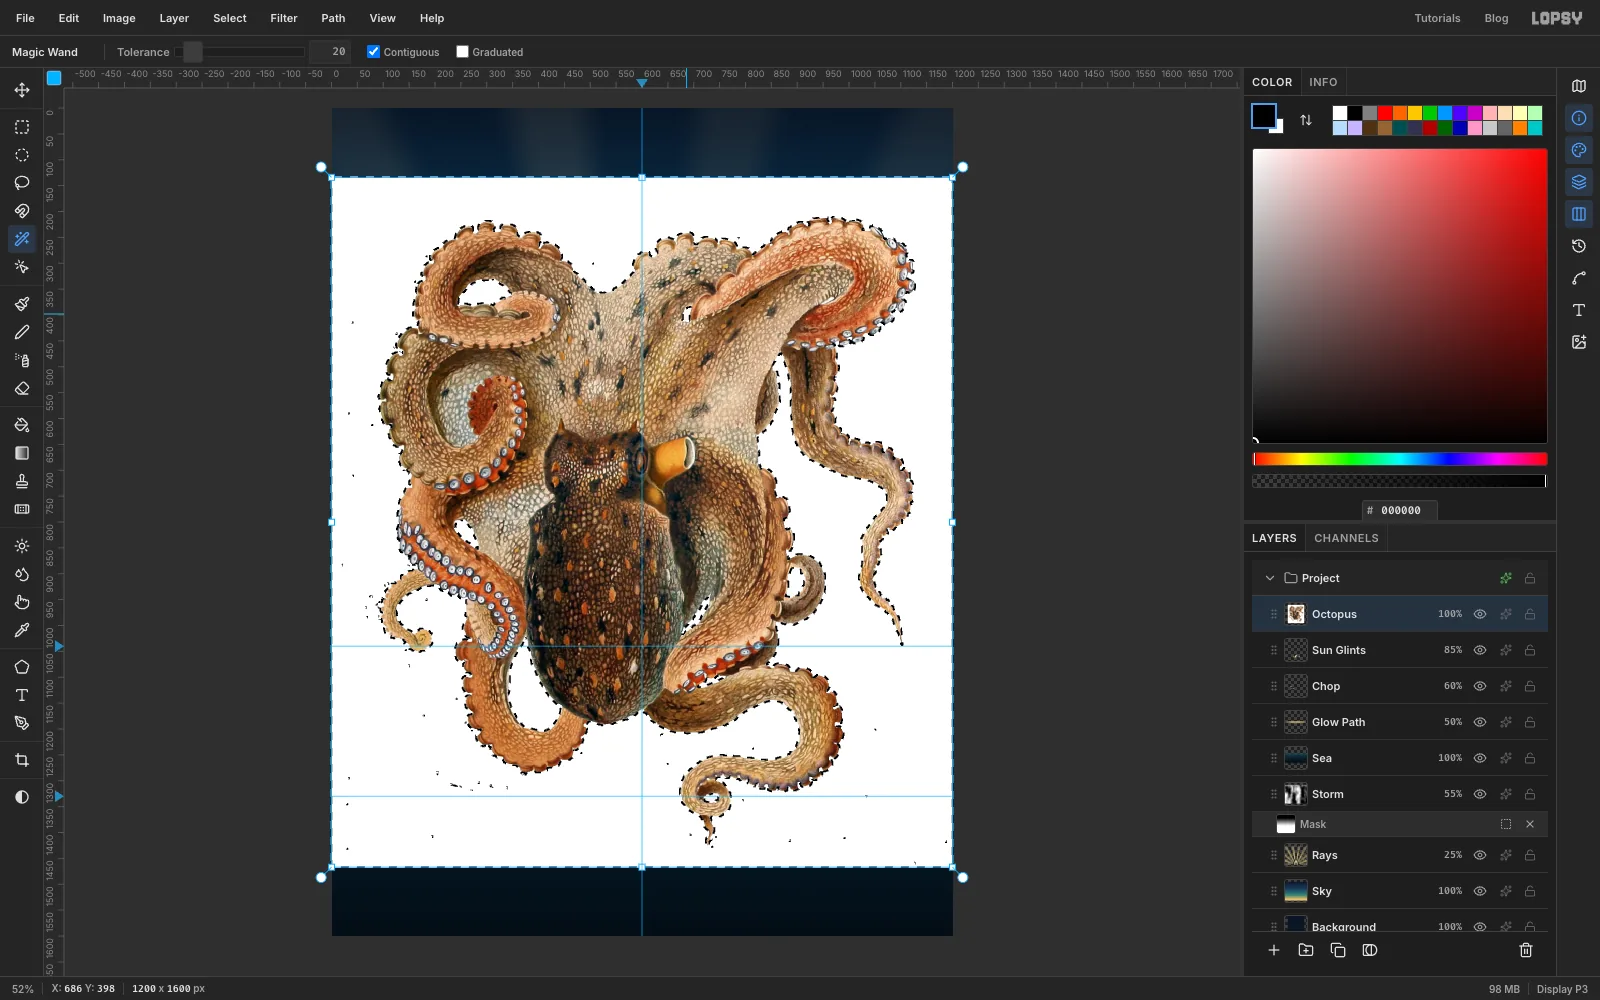
-
Turn the lithograph into paint
Choose Filter → Hue/Saturation… with Hue
-8, Saturation30and Lightness-4. The octopus turns from a museum brown to a pulp orange.Then choose Filter → Surface Blur… with Radius
6and Threshold40. Surface Blur smooths flat areas but stops at strong edges, so the engraver's stipple melts into patches of paint while the outline stays crisp.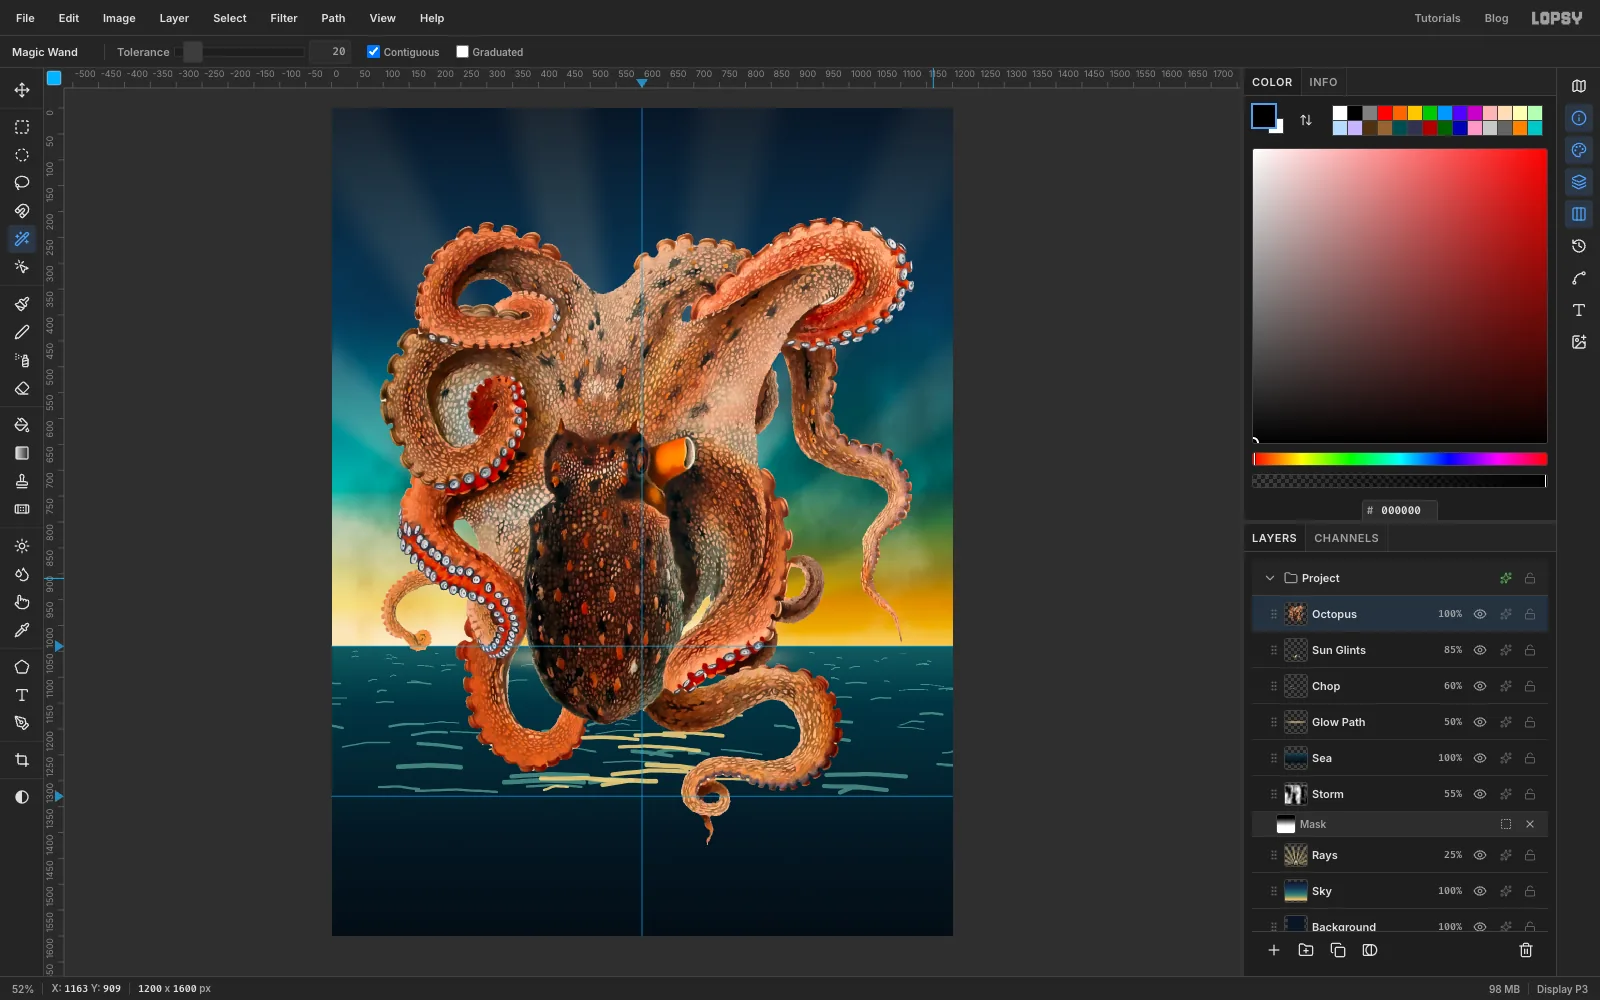
-
Flip it so the mantle rises
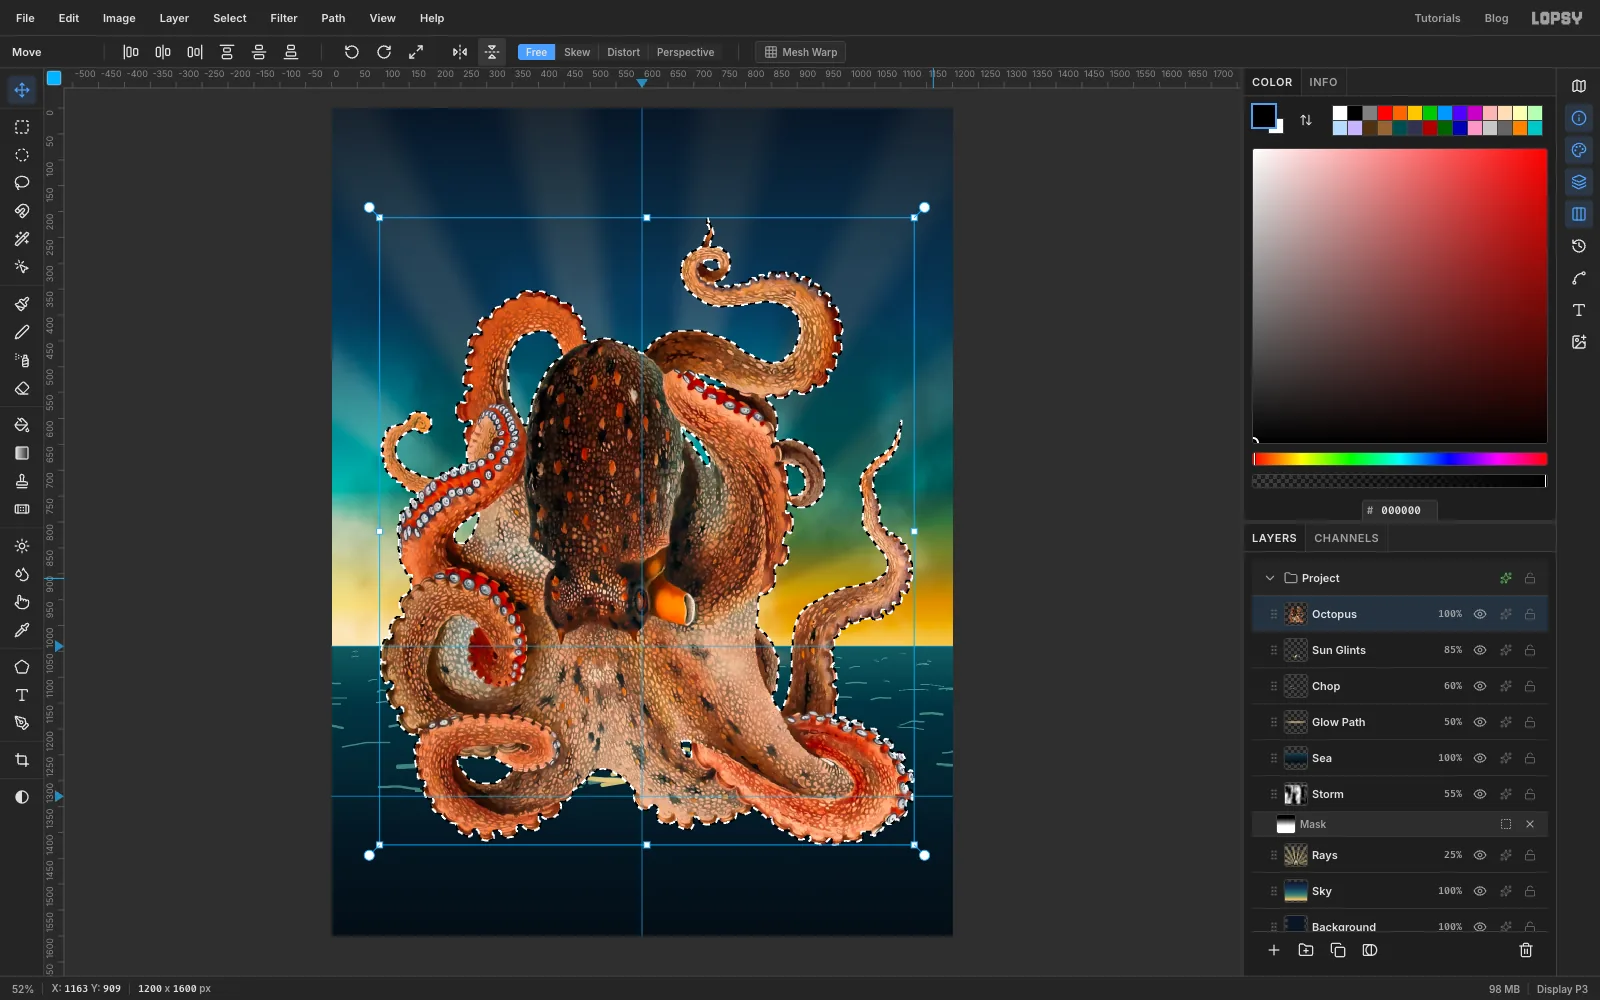
In the lithograph the octopus is seen from above with its mantle pointing down. Cmd-click the Octopus thumbnail to load its shape as a selection, pick the Move tool and click Flip Vertical in the options bar. Now the mantle rears up and the arms reach down toward the water.
-
Scale it up
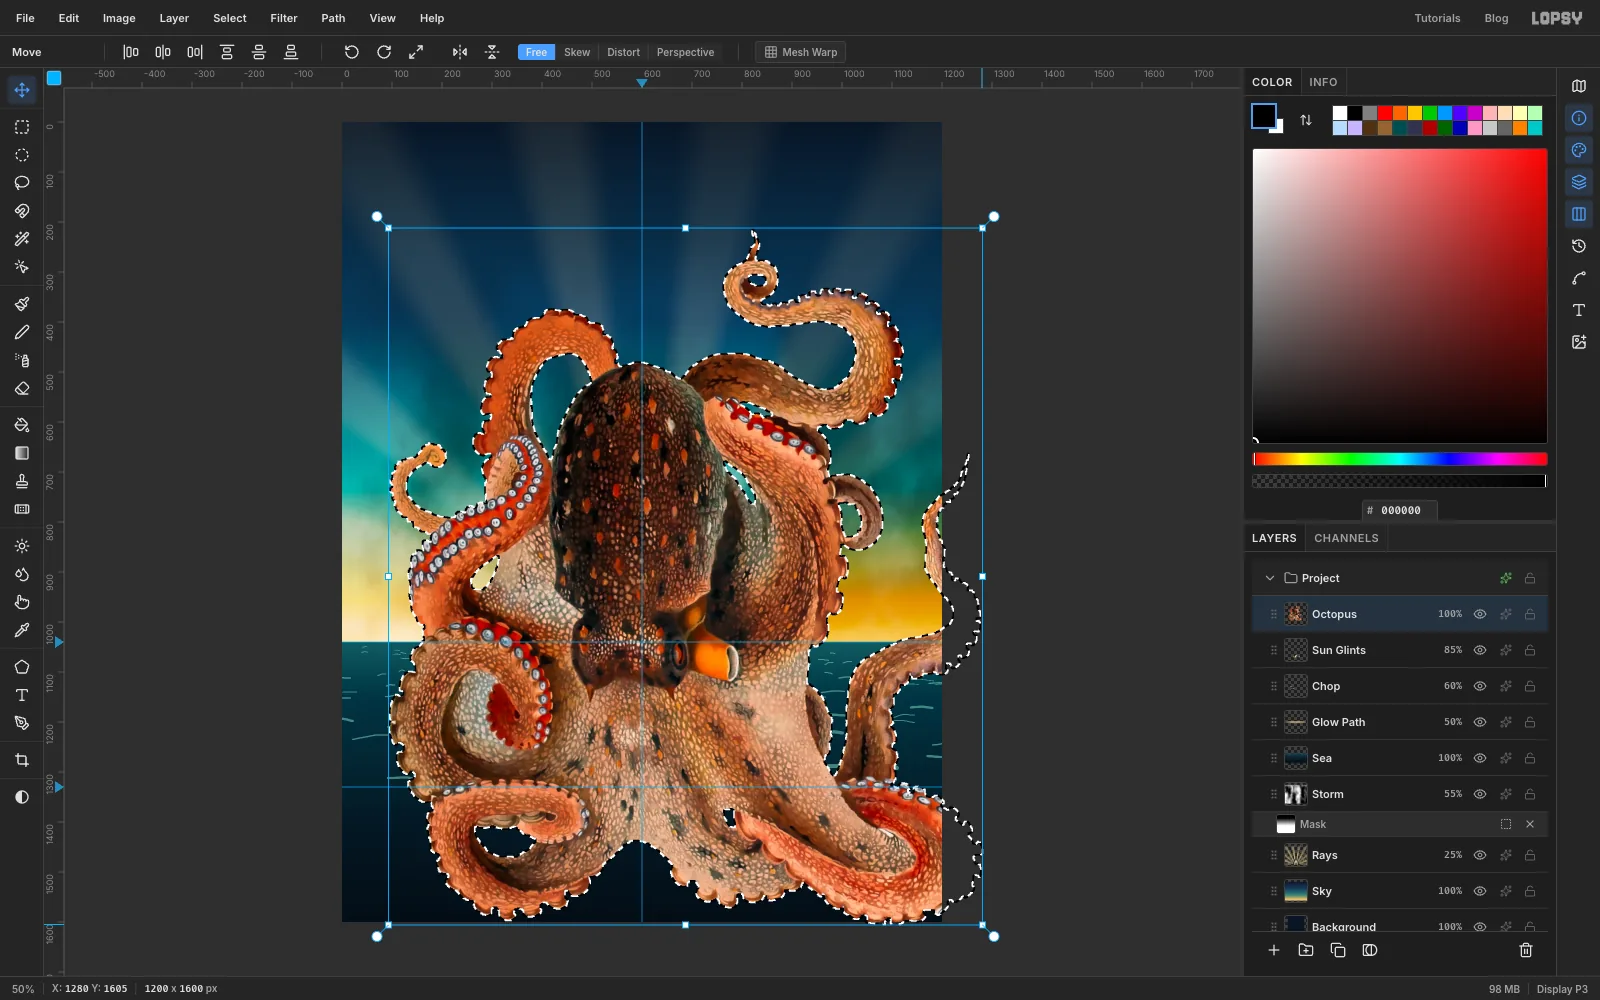
Choose View → Zoom Out so you can see the bottom-right handle. Hold Cmd to keep the proportions and drag that handle down and right until the octopus is about 15% bigger, roughly 1190 px across.
-
Drag it into place
Drag inside the selection to move the octopus up and left. Its left arms should hang about 70 px off the left edge and its highest tip should reach
y 58. Low on the mantle, just left of the big orange siphon, is the octopus's real eye, a small dark ring. It should land at about515, 906, with the siphon just left of the centre guide. Press Cmd+D to commit, then choose View → Fit to Screen.Scaling up brought back a little of the engraver's stipple, so run Filter → Surface Blur… once more, this time with Radius
8and Threshold30.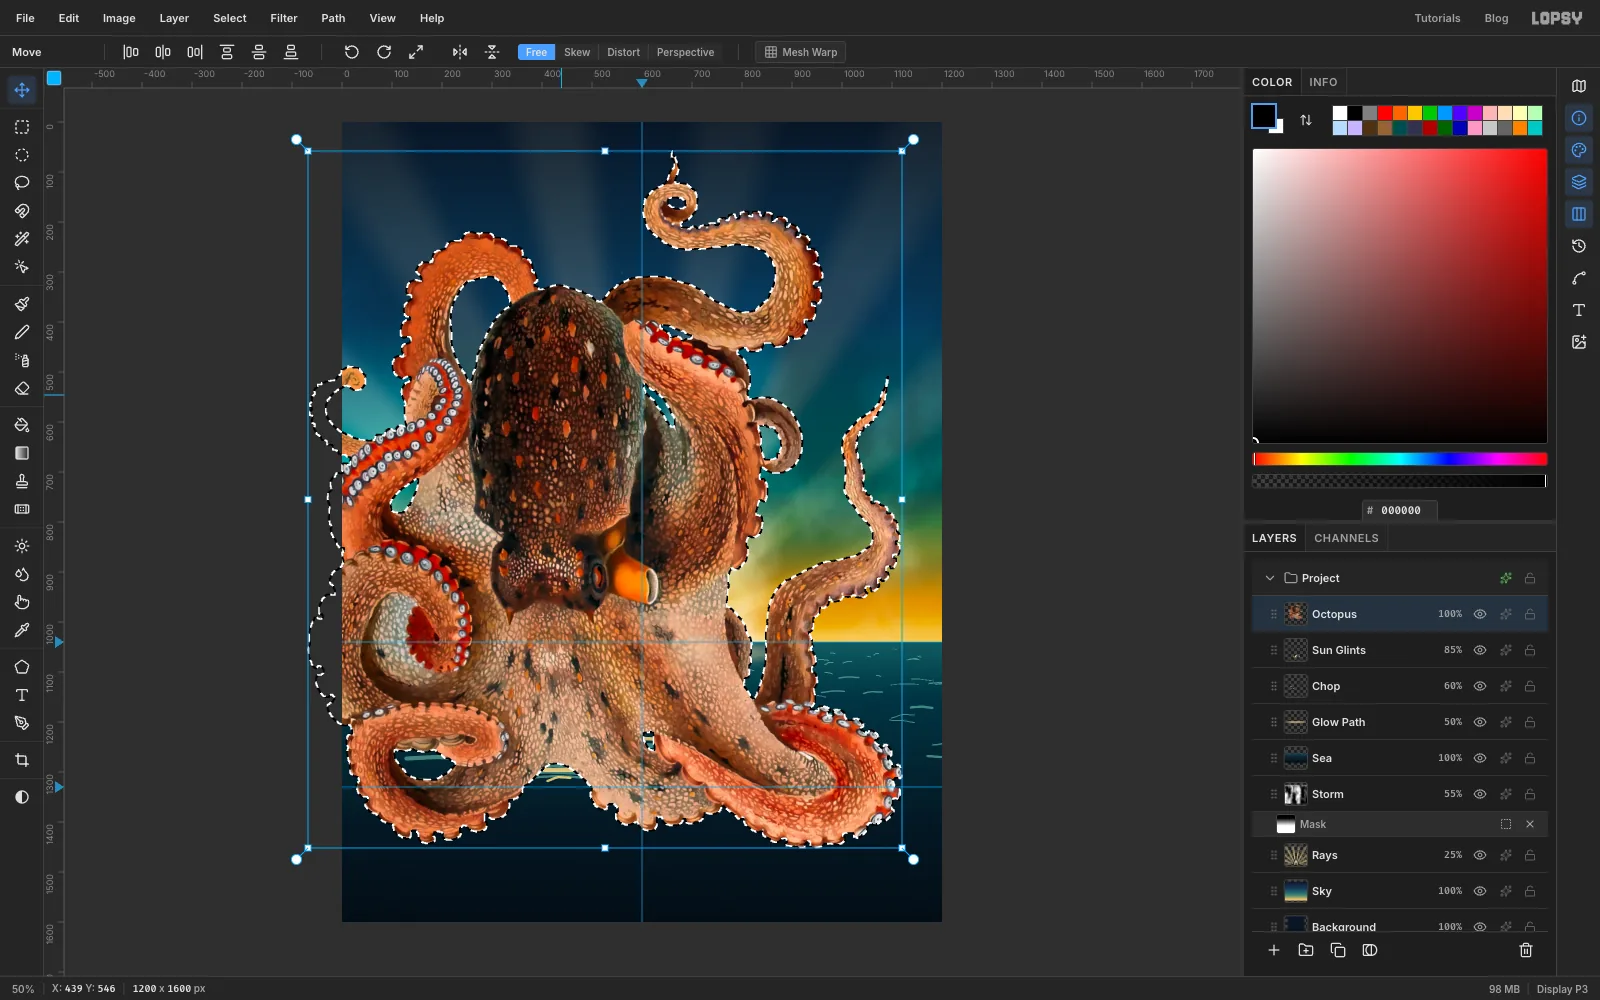
-
Trim the stray tips
Three bits of arm would fight the type and the frame. Select each with the Rectangular Marquee and press Delete:
- the thin tip poking up where the masthead goes:
626, 20to726, 98 - the tip cut off by the left edge:
0, 462to70, 568 - the lone curl beside the mantle, which looks like a teapot handle:
842, 548to930, 712
Last, shave off the pale outline the lithograph left behind. Cmd-click the thumbnail, choose Select → Shrink…
2, then Select → Inverse, and press Delete. Deselect.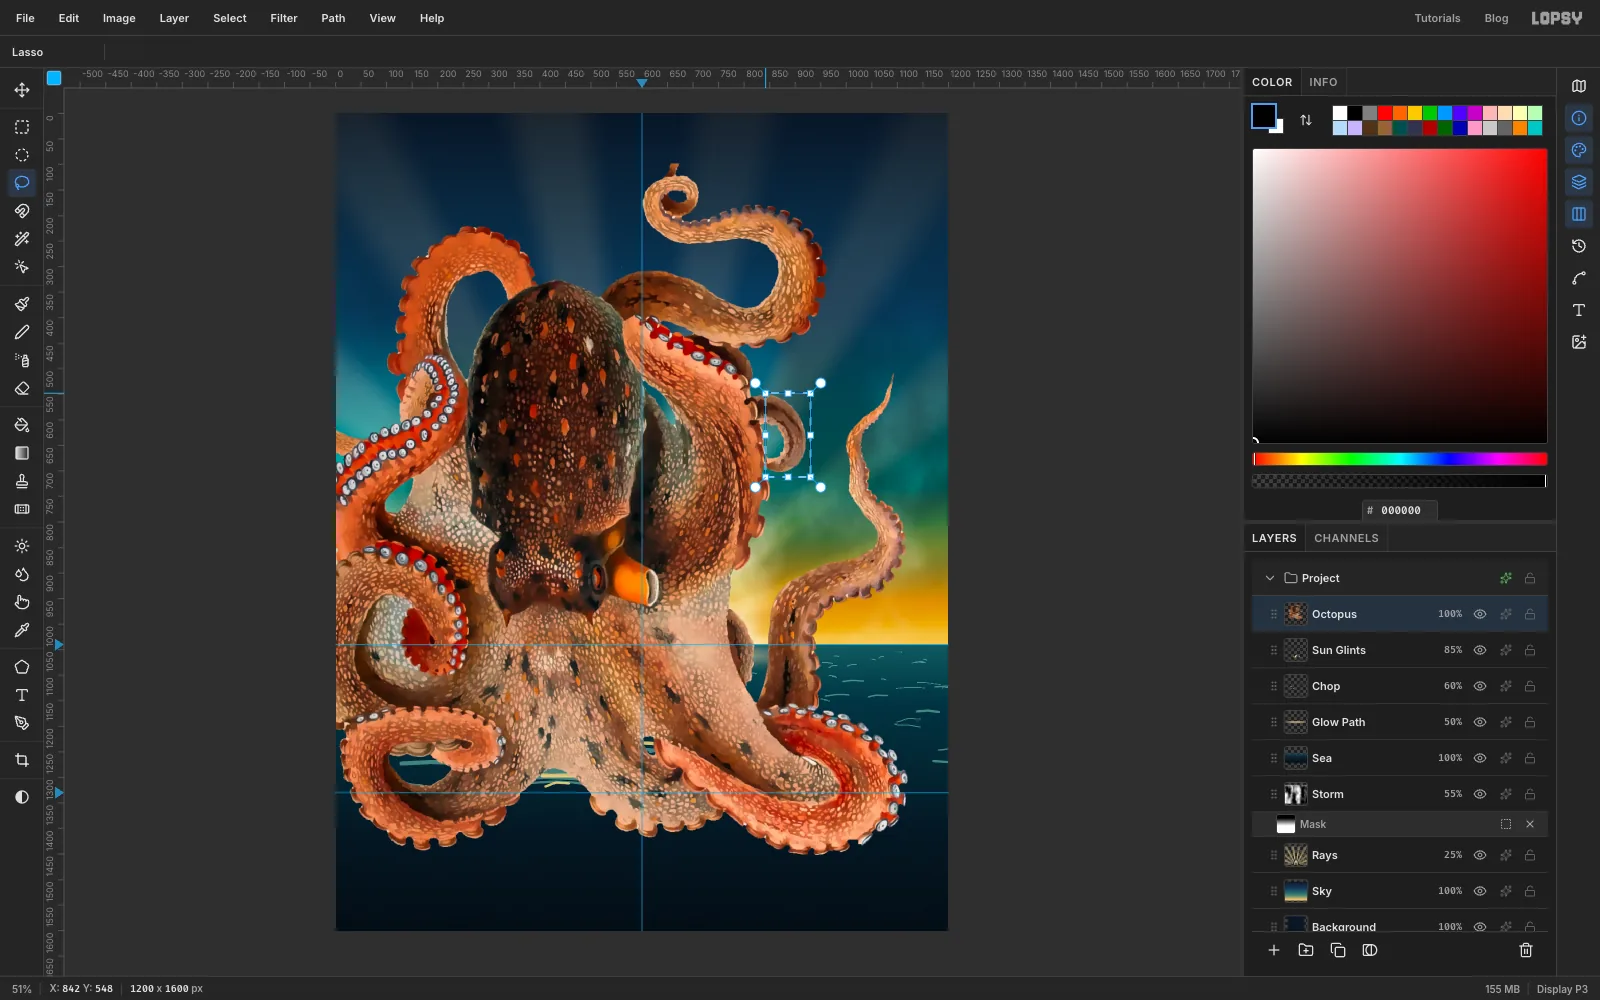
- the thin tip poking up where the masthead goes:
-
Stand the octopus in the sea
If the octopus ends exactly on the horizon it looks miles away. It should stand in the water in front of it. With the Lasso, start off the left edge at about
y 1098and drag a gentle, wavy line right across the page. Let it rise and fall by about 14 px, with five or six crests across the width. Carry on off the right edge, then down and back along the bottom of the canvas, and let go to close the shape. Press Delete and deselect.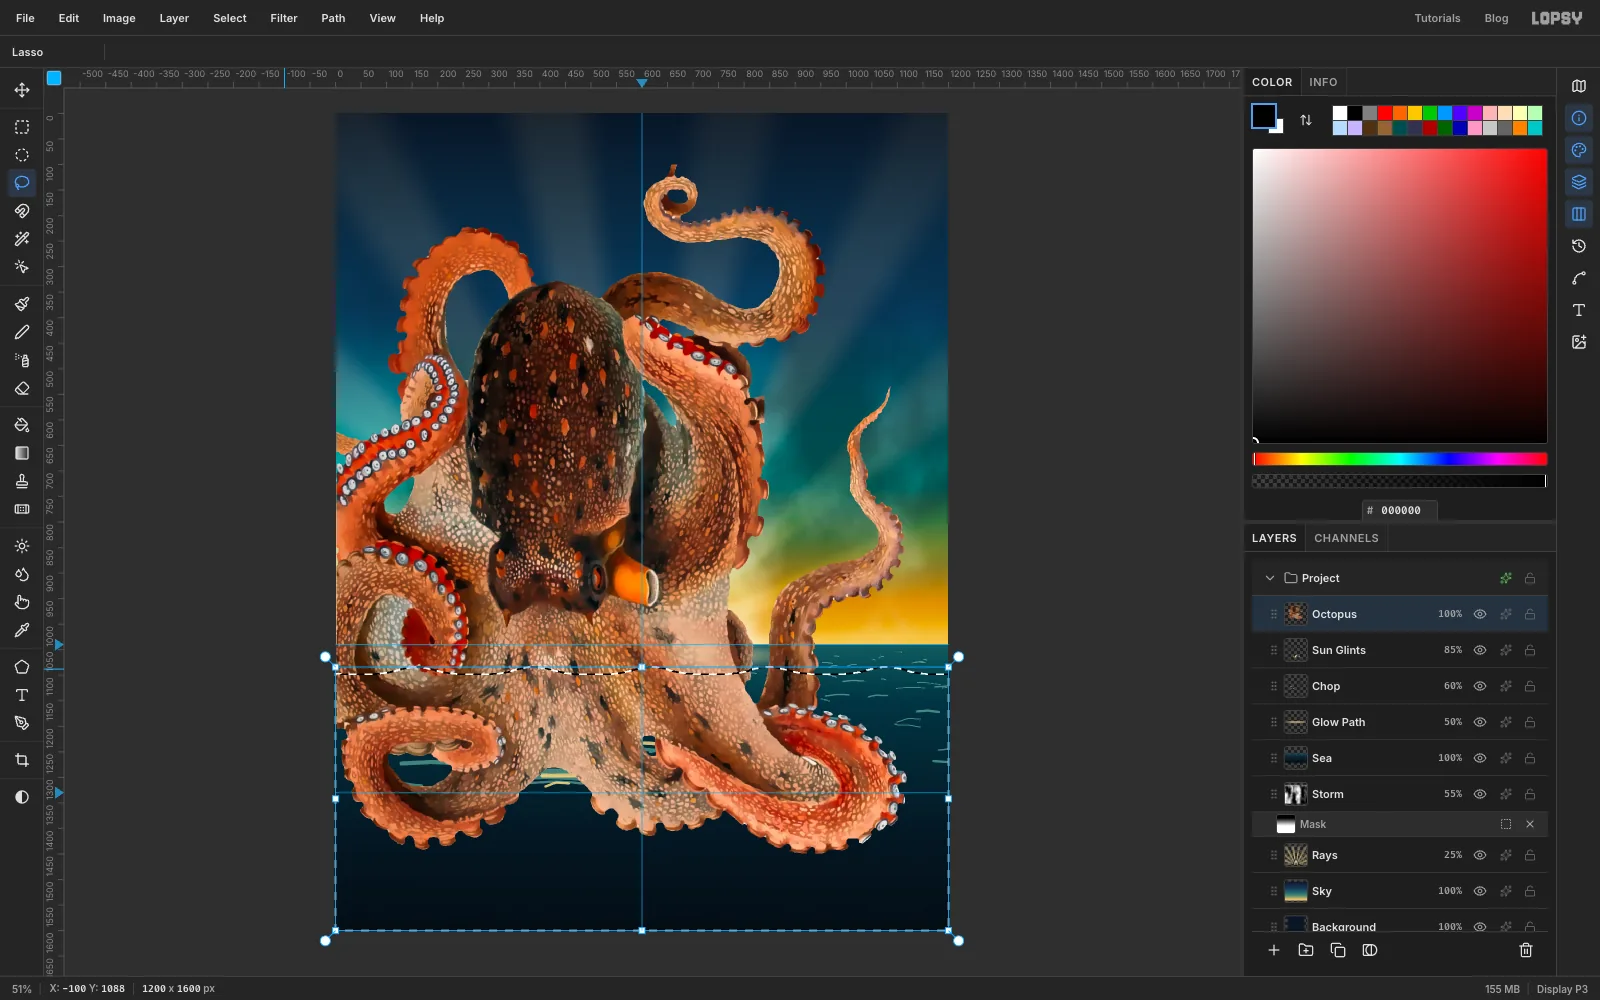
-
Add a rim of sunset light
The sunset is low behind the octopus, so its light should catch only the edges that face right and down. Click Octopus and add a layer named Rim Light. Cmd-click the Octopus thumbnail, fill the shape with and deselect.
Click Duplicate Layer and rename the copy Rim Cutter. With the Move tool, press Left 8 times and Up 5 times. Cmd-click the Rim Cutter thumbnail, click the Rim Light row and press Delete. Only a thin crescent is left on each right and lower edge. Deselect and delete Rim Cutter.
Lasso a wavy line just above the one you used for the octopus, and delete everything below it so no rim shows under the water. Choose Filter → Gaussian Blur…
3, set the Blend to Screen and the opacity to 80%.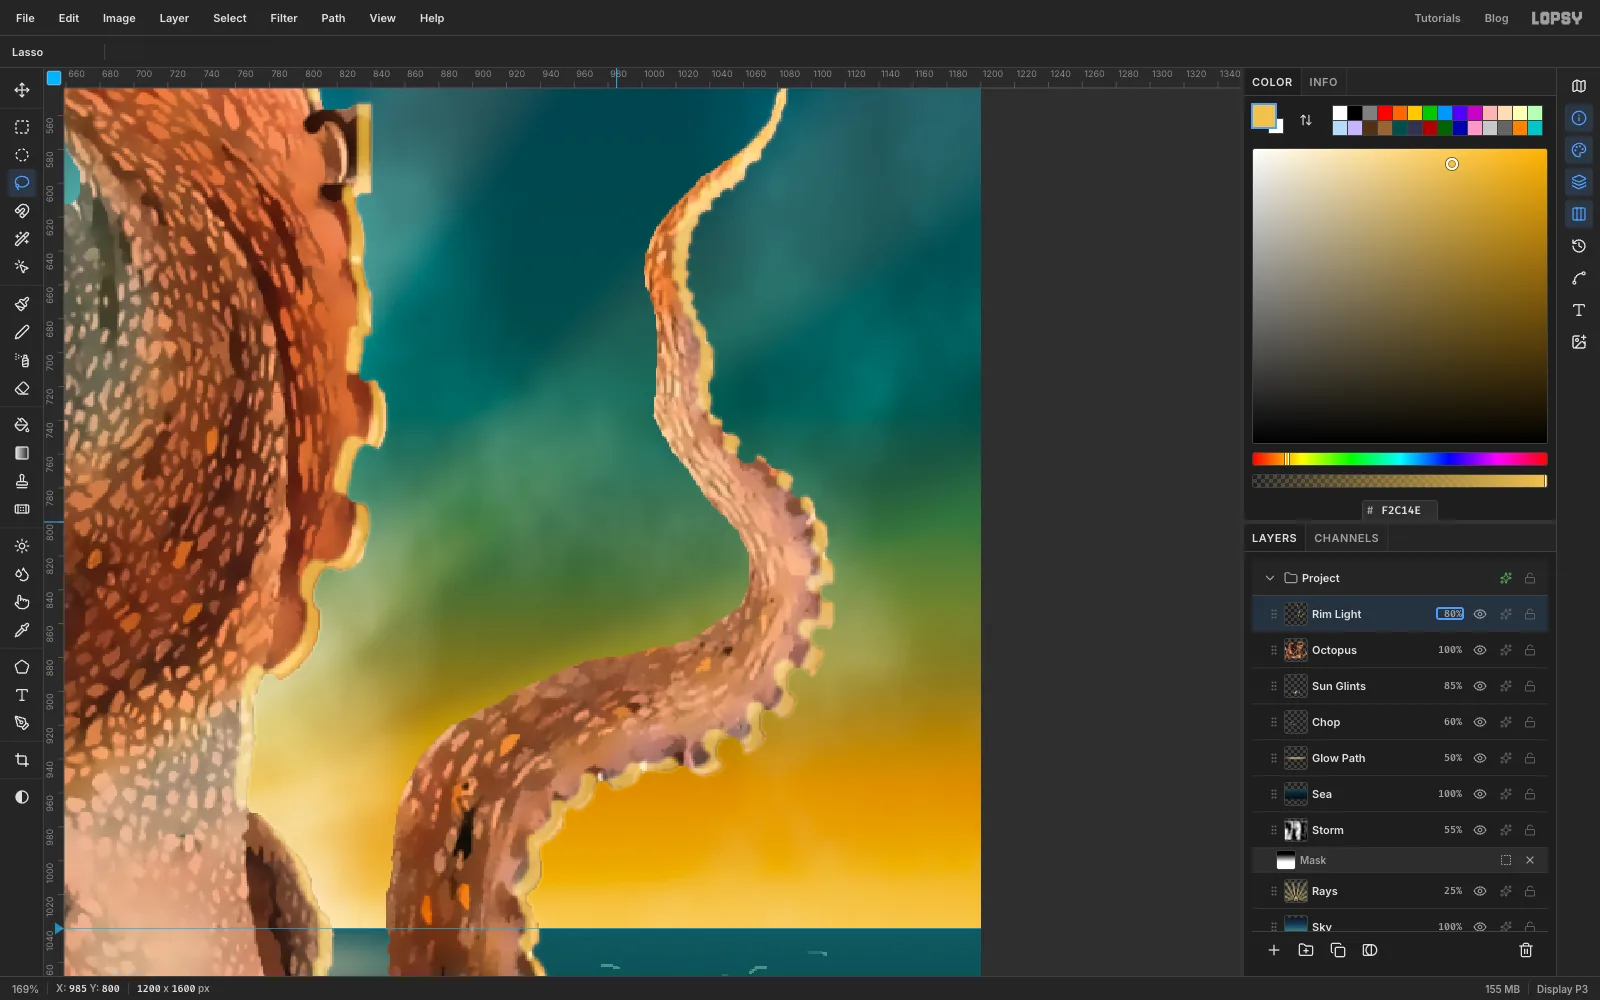
-
Paint a glowing eye
Every pulp monster needs a menacing eye. Paint it over the lithograph's small eye ring in three layers:
- Eye. Add a layer named Eye and select an ellipse from
488, 885to542, 927. Set a Radial gradient with stops , at 55% and , and drag from the middle of the ellipse about 25 px to the right. Deselect and add an Outer Glow in , Size24, Opacity70. - Pupil. Add a layer named Pupil and fill a flat ellipse from
513, 908to539, 918with . Placing it right of centre and low makes the octopus look toward the bottle you'll add later. Fill a tiny circle near the top left of the eye with for a catchlight. - Lid. Add a layer named Eyelid. With the Lasso, draw a heavy crescent over the top third of the eye, a little wider than the eye itself. Choose Select → Feather…
2and fill it with .
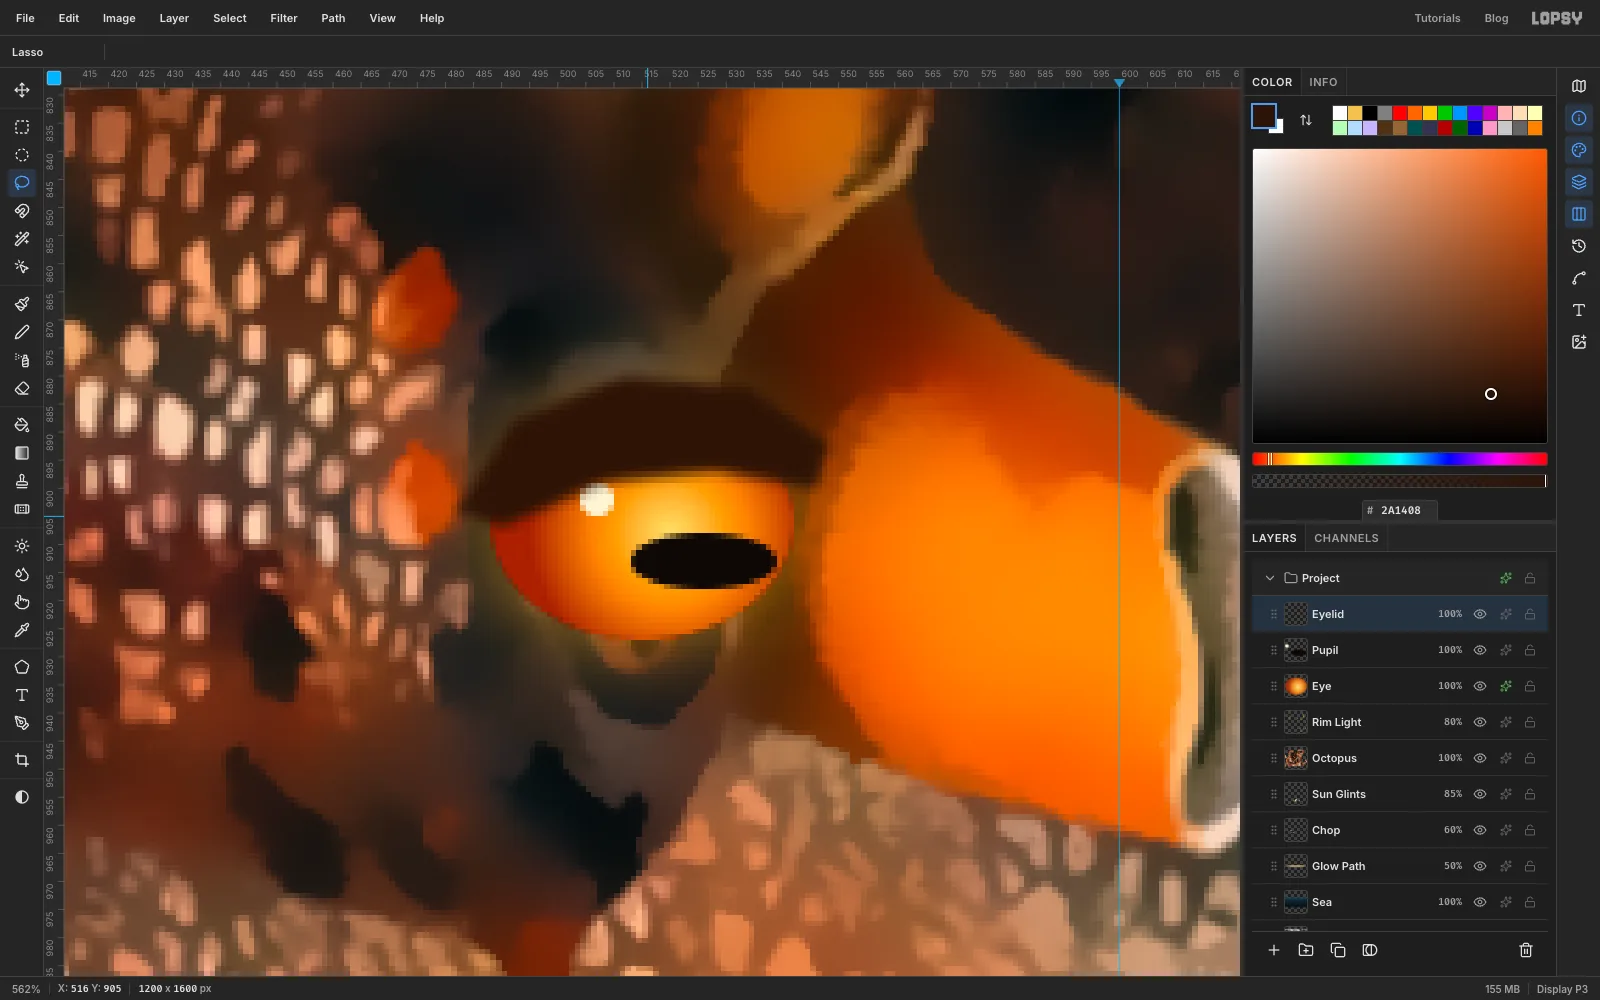
- Eye. Add a layer named Eye and select an ellipse from
-
Strike the lightning
Click Storm and add a layer named Lightning, so the bolt sits behind the octopus and the sea. Set the foreground to .
With the Lasso, draw a zigzag bolt with four sharp kinks. Start at about
1108, 470, where the badge will later cover the top, and come down to a point at about1010, 962. Make it about 16 px wide at the top and let it narrow steadily to the point. Draw down one side and back up the other, keeping each run as straight as you can.Hold Shift and lasso two thin forks branching off the middle kinks, each 60 to 110 px long and narrowing to a point. Fill, deselect, and add an Outer Glow in , Size
22, Opacity70.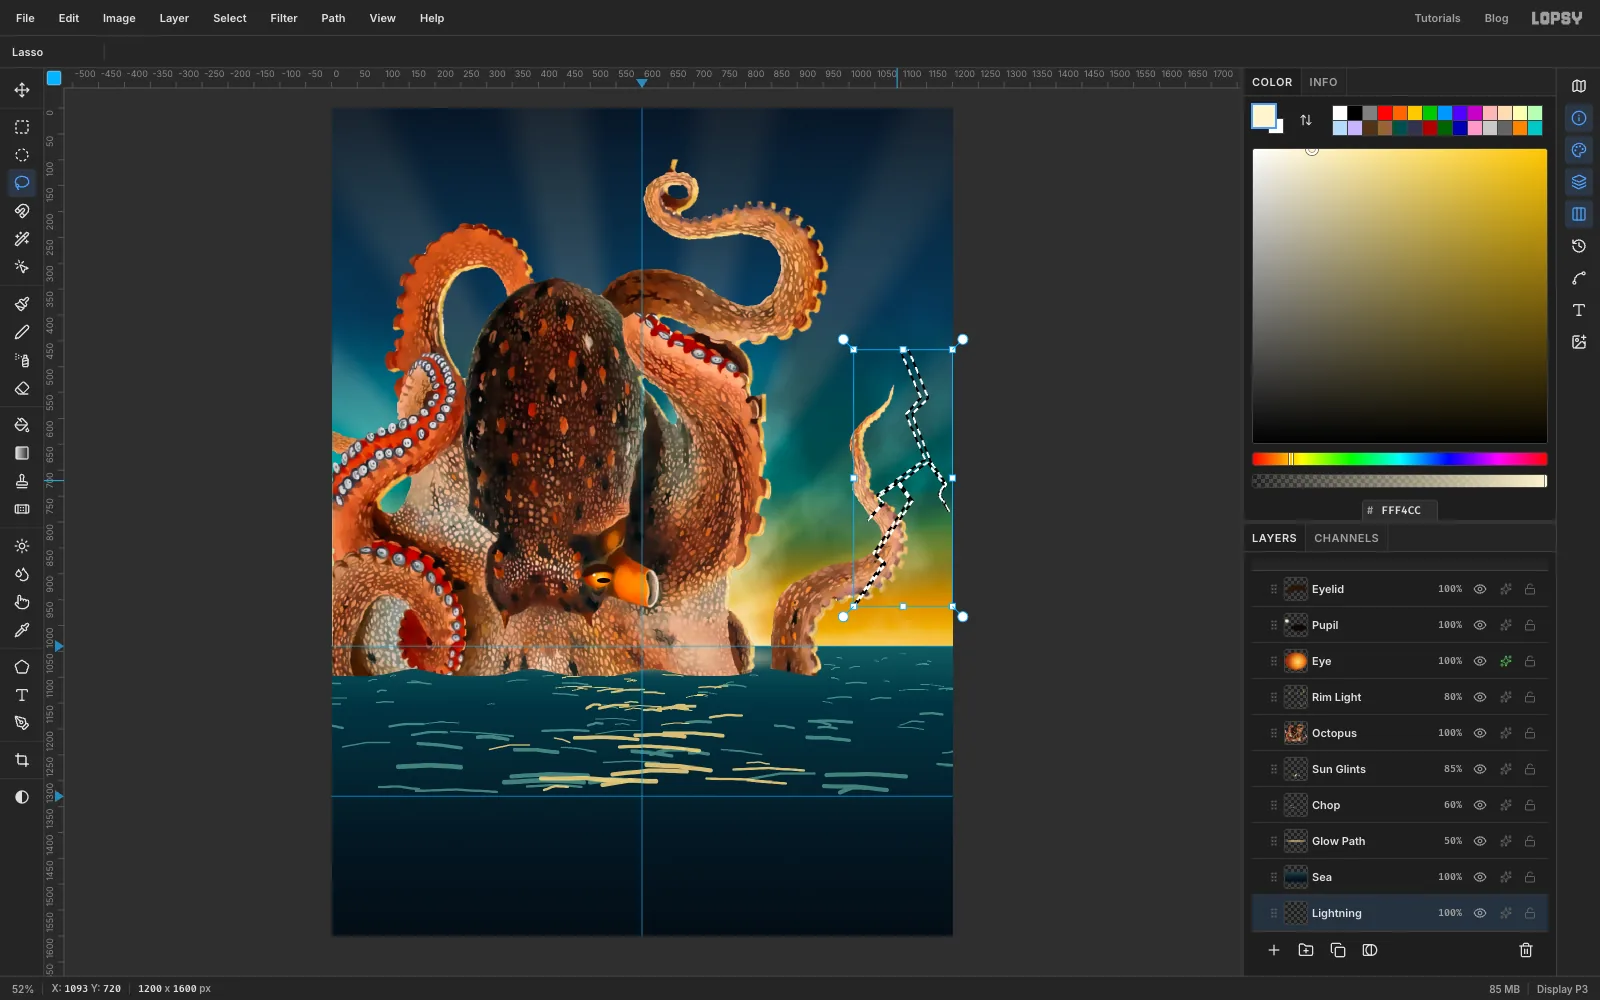
-
Churn white water around the arms
Click Rim Light and add a layer named Foam. Set the foreground to .
Pick the Brush with Hardness
25and Opacity90. Paint short humped strokes along the swell line wherever an arm meets the water. Vary the Size between10and24and leave a few gaps, so the churn breaks up instead of running in a line.Then pick the Spray, set Opacity
90and Density70, and flick short upward strokes, 25 to 60 px tall, off the churn with Size between28and50.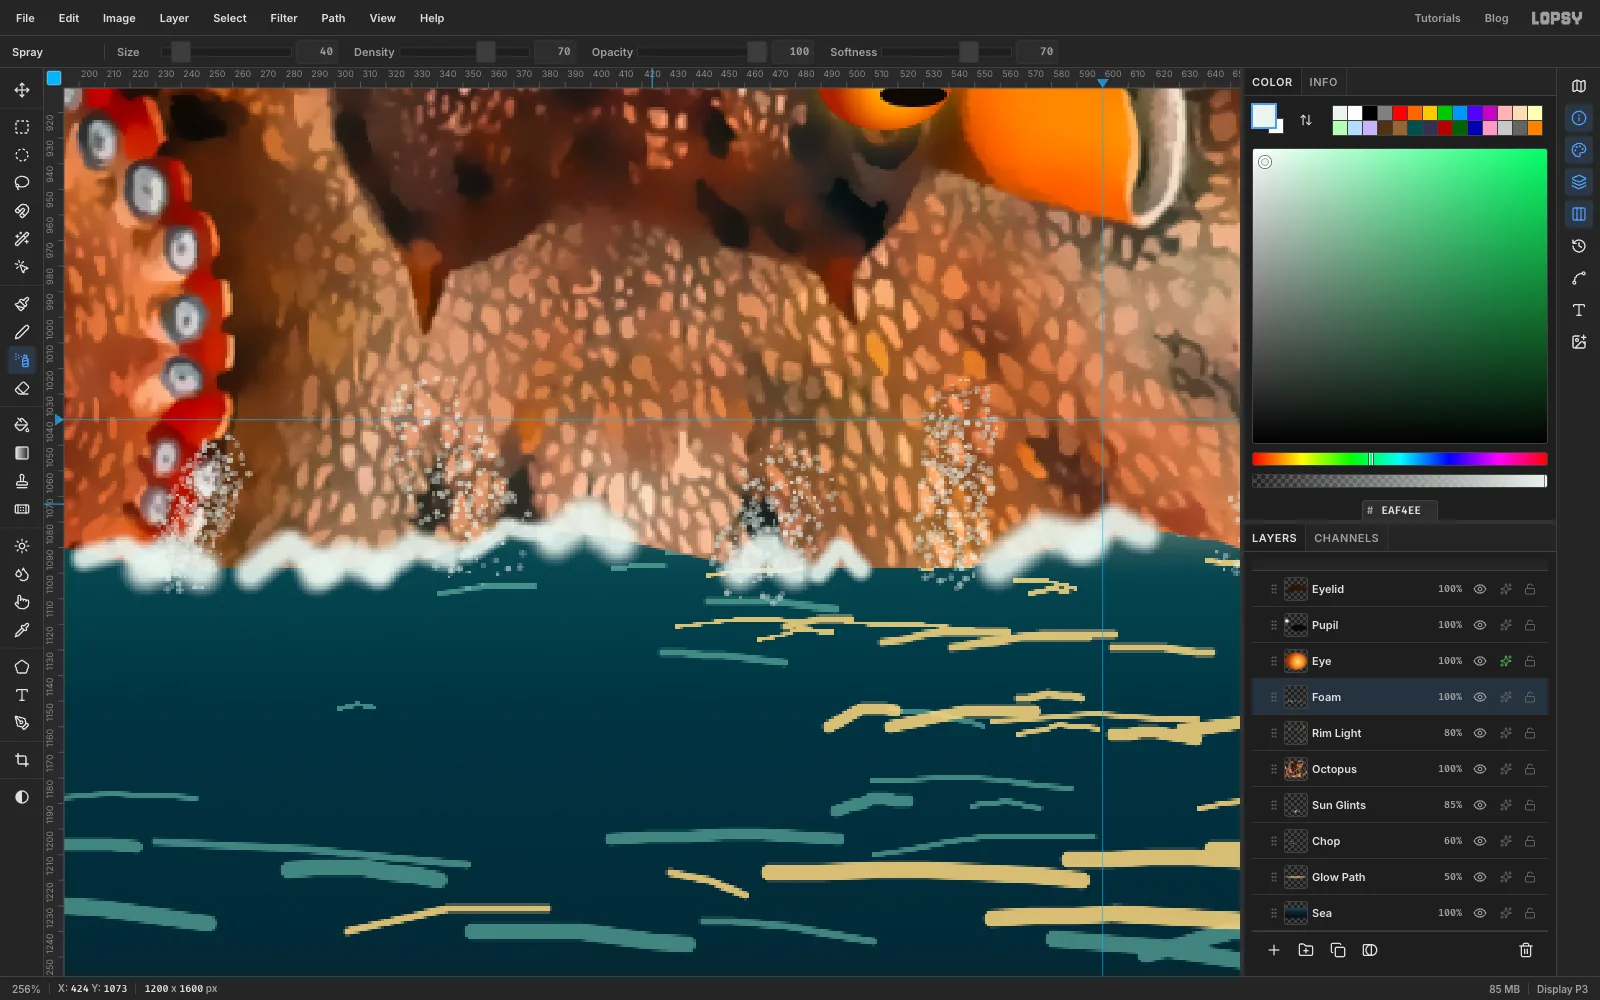
-
Start the ship in a bottle
The bottle is built lying on its side, centred on
830, 1166, and tipped later.- Shadow. Click Foam and add a layer named Bottle Shadow. Select an ellipse from
590, 1190to1050, 1234, feather it10and fill with . Set the Blend to Multiply and the opacity to 80%. - Glass. Add a layer named Glass Back. With the Lasso, draw the bottle lying on its side: a rounded left end at
x 654, a body 120 px tall (y 1106to1226) running tox 890, a sloping shoulder, and a 44 px neck fromx 966tox 1035. Set a Linear gradient with at 0%, at 45% and at 100%, and drag it from the top of the bottle to the bottom. Deselect and set the opacity to 60%. - Putty sea. Add a layer named Putty Sea. Lasso a wavy band across the bottom third of the body, letting it spill past the glass, and fill it with . Cmd-click the Glass Back thumbnail, choose Select → Inverse and press Delete to trim the putty to the glass.
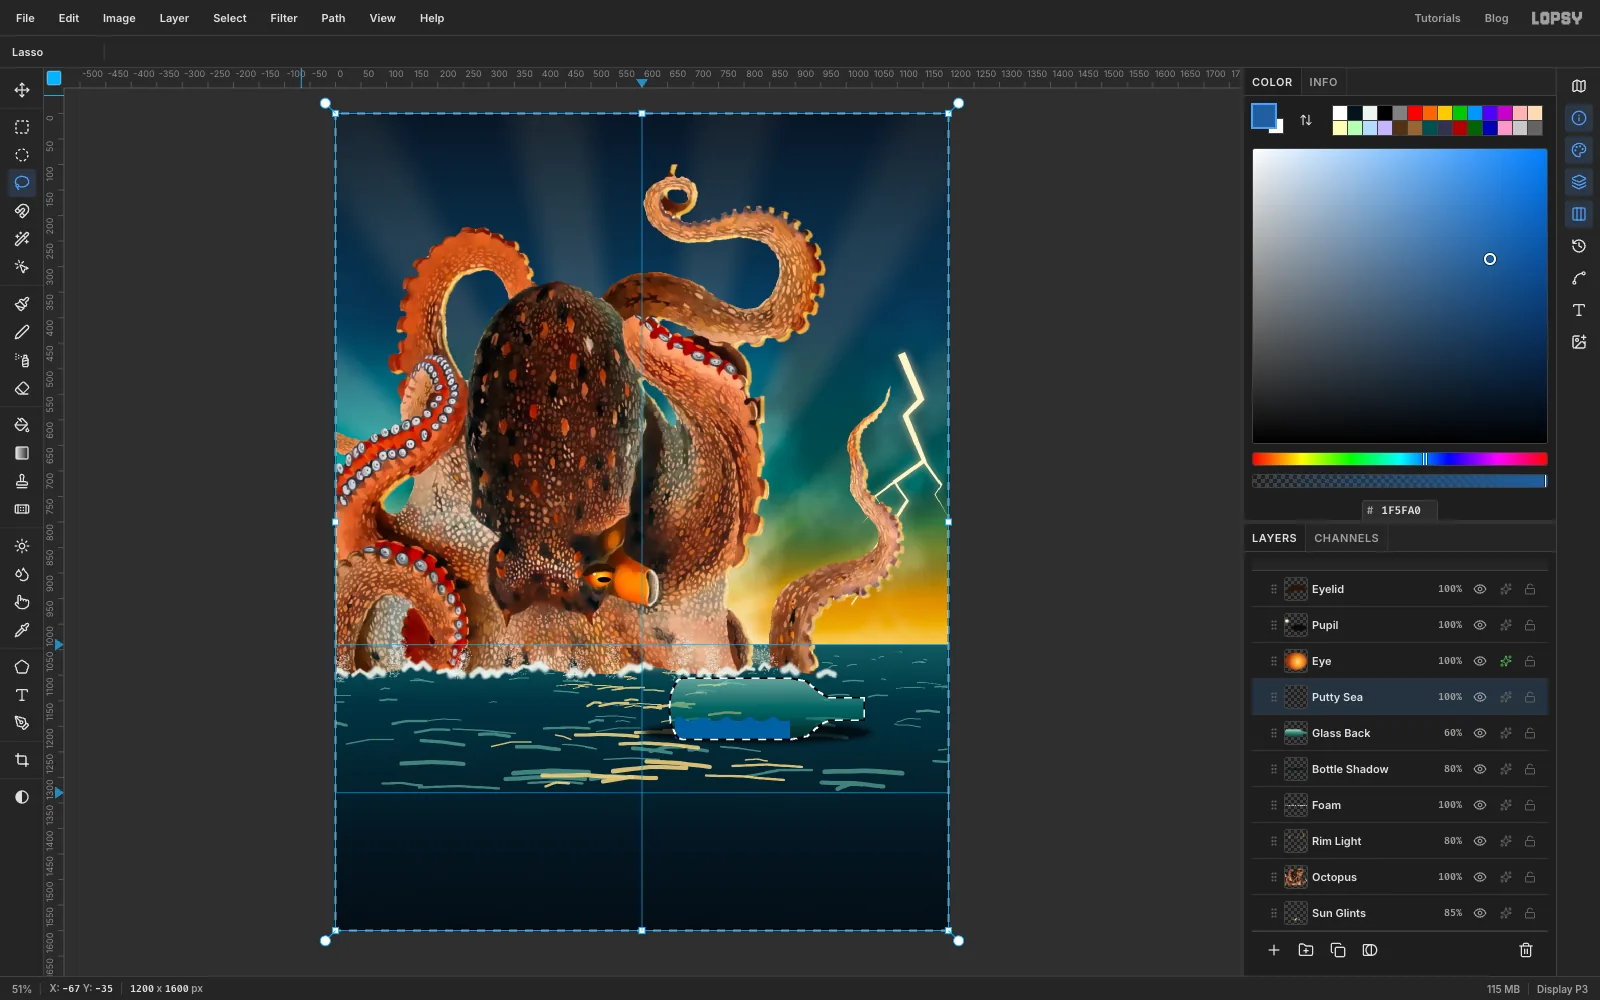
- Shadow. Click Foam and add a layer named Bottle Shadow. Select an ellipse from
-
Rig the little ship
Add a layer named Ship. Lasso a small hull, 120 px long at the deck (
720to840ony 1184) and narrower at the keel (734to824ony 1200), and fill it with .Pick the Pencil, Size
3, colour . Click the foot of each mast and Shift-click its top to draw a straight line: the first from750, 1184to750, 1122, the second from790, 1184to790, 1116. Draw a bowsprit from718, 1182to the top of the second mast. Drop to Size1for two rigging lines from the mast tops down to the bow and the stern.Lasso four cream sails, two on each mast, and a tiny red pennant at the top of the second mast.
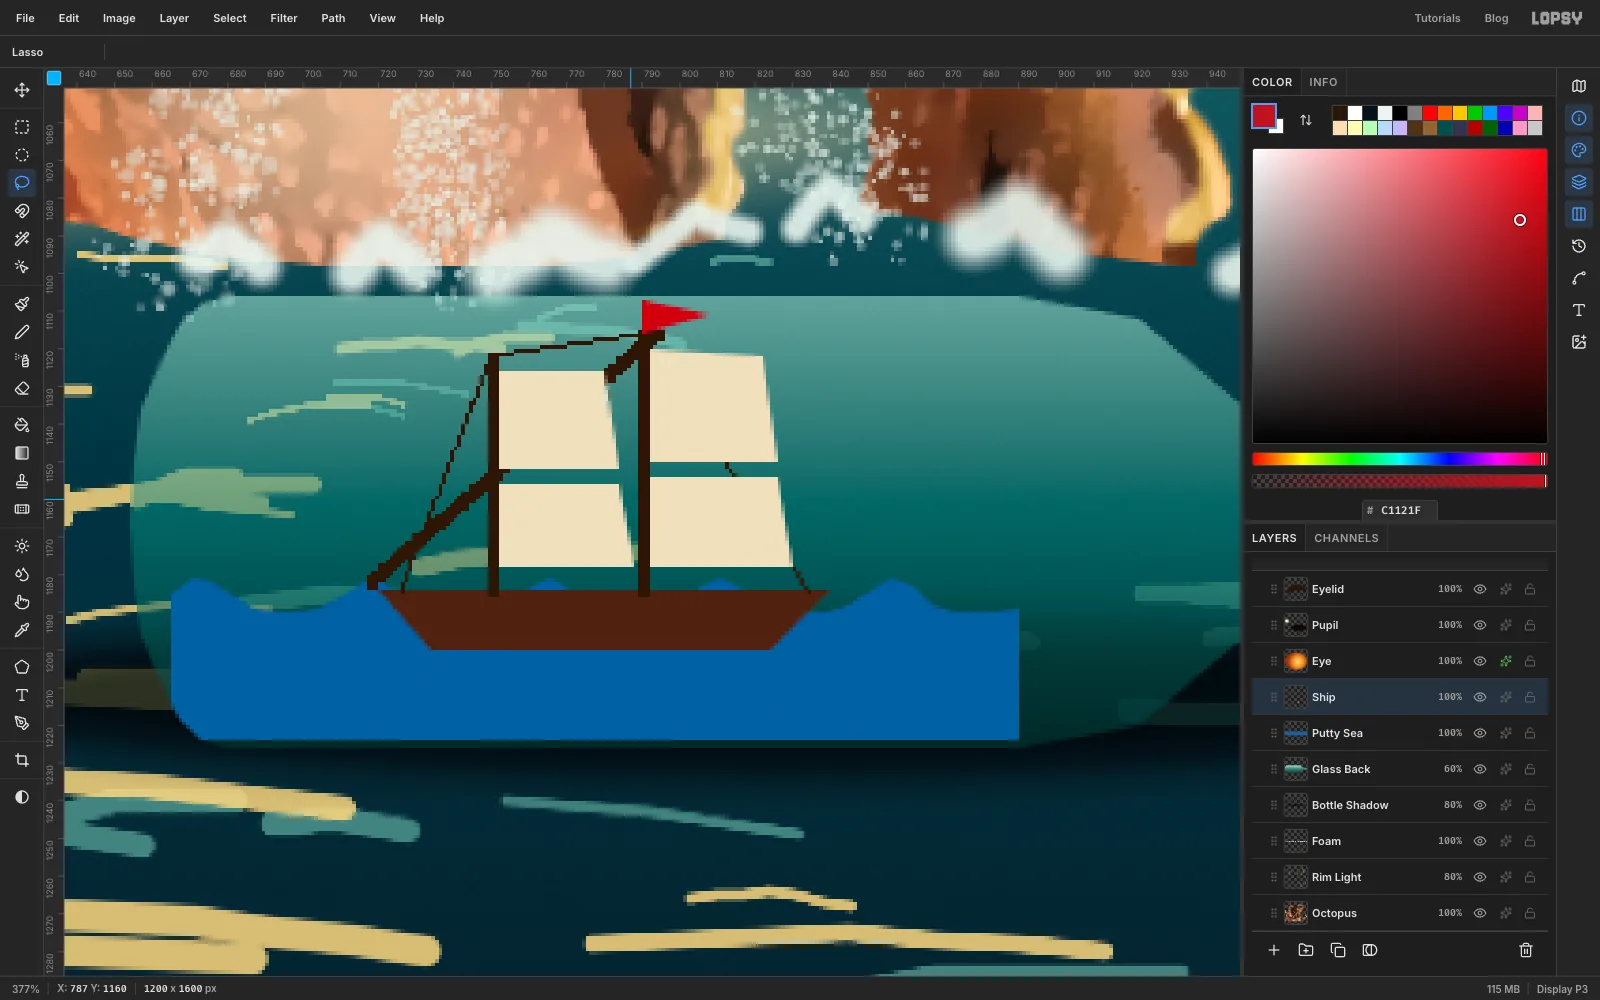
-
Finish the glass
- Glass. Add a layer named Glass. In the Color panel, set white with A (alpha) at
12. Cmd-click the Glass Back thumbnail to load the bottle shape and fill. Set the colour back to full opacity. Give the layer a Stroke of Width3in and an Inner Glow in , Size12, Opacity60. - Cork. On a layer named Cork, fill a rectangle from
1026, 1149to1066, 1183with . Add Filter → Add Noise…30, Mono, for grain. - Glints. On a layer named Glints, take the Brush at Hardness
0, Opacity80: - a white Size
12streak along the top of the body, and a Size6one on the neck - a sulphur Size
12curve around the left end, and a Size6one along the shoulder, where the sunset hits it
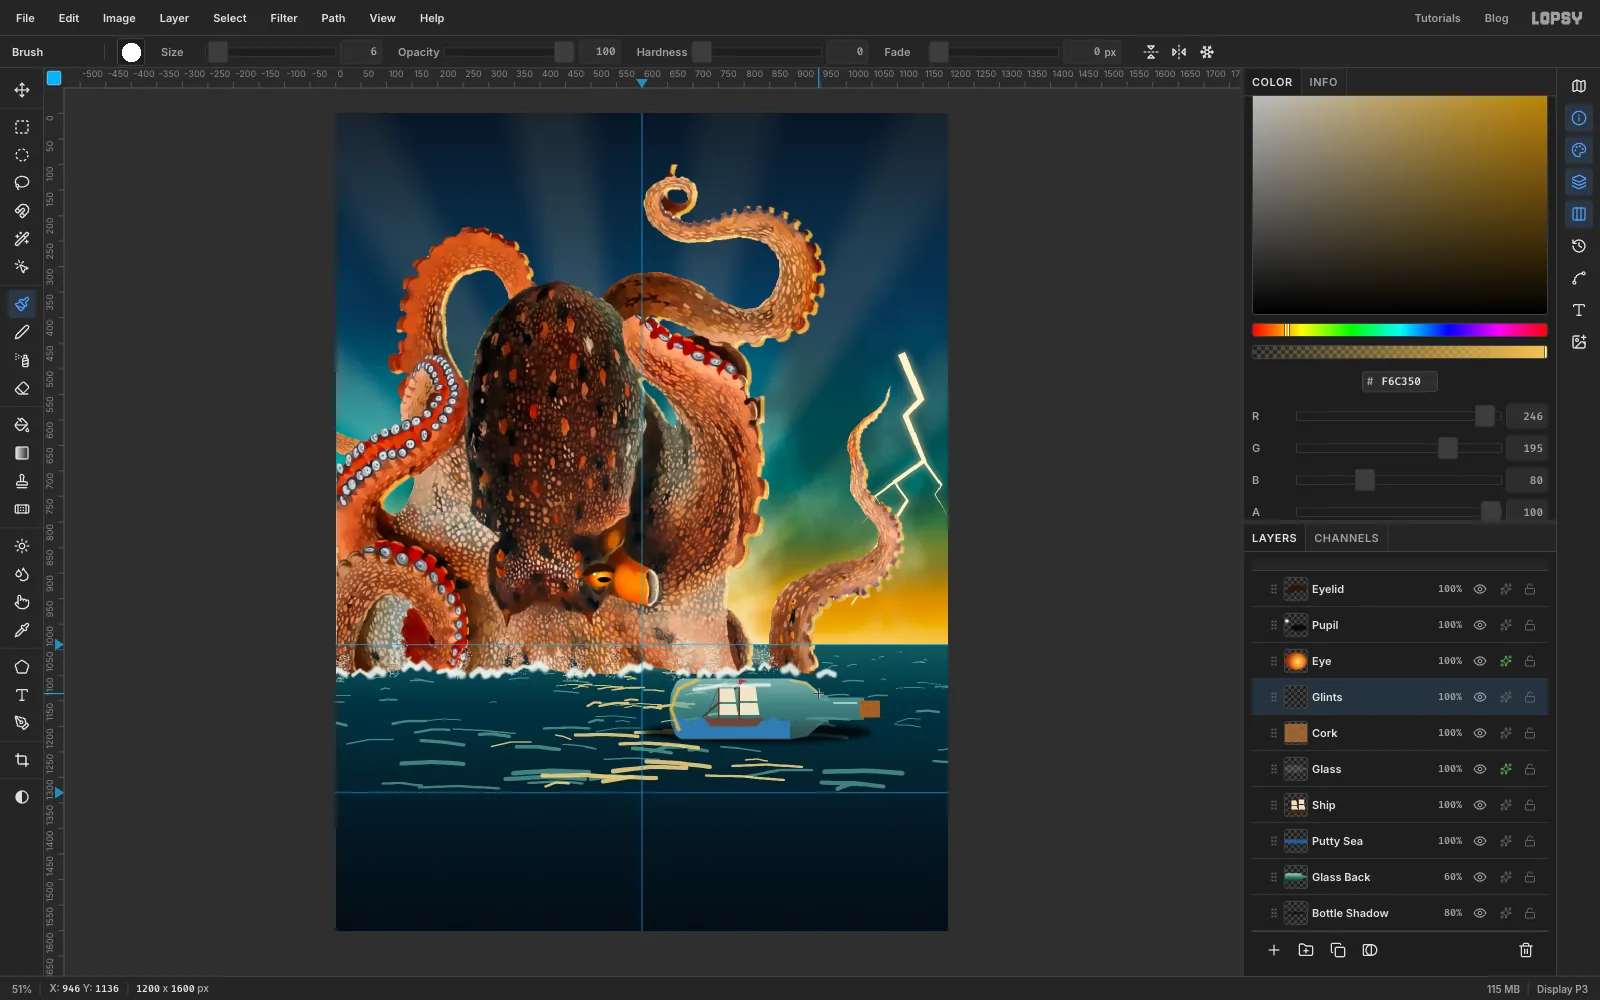
- Glass. Add a layer named Glass. In the Color panel, set white with A (alpha) at
-
Group the bottle and tip it
Click Glass Back, Shift-click Glints, and choose Layer → Group Layers. Name the group Bottle.
With the group selected and the Move tool active, drag the top-right rotate handle up about 9° so the neck lifts, as if a swell is rolling under it. Press Cmd+D to commit.
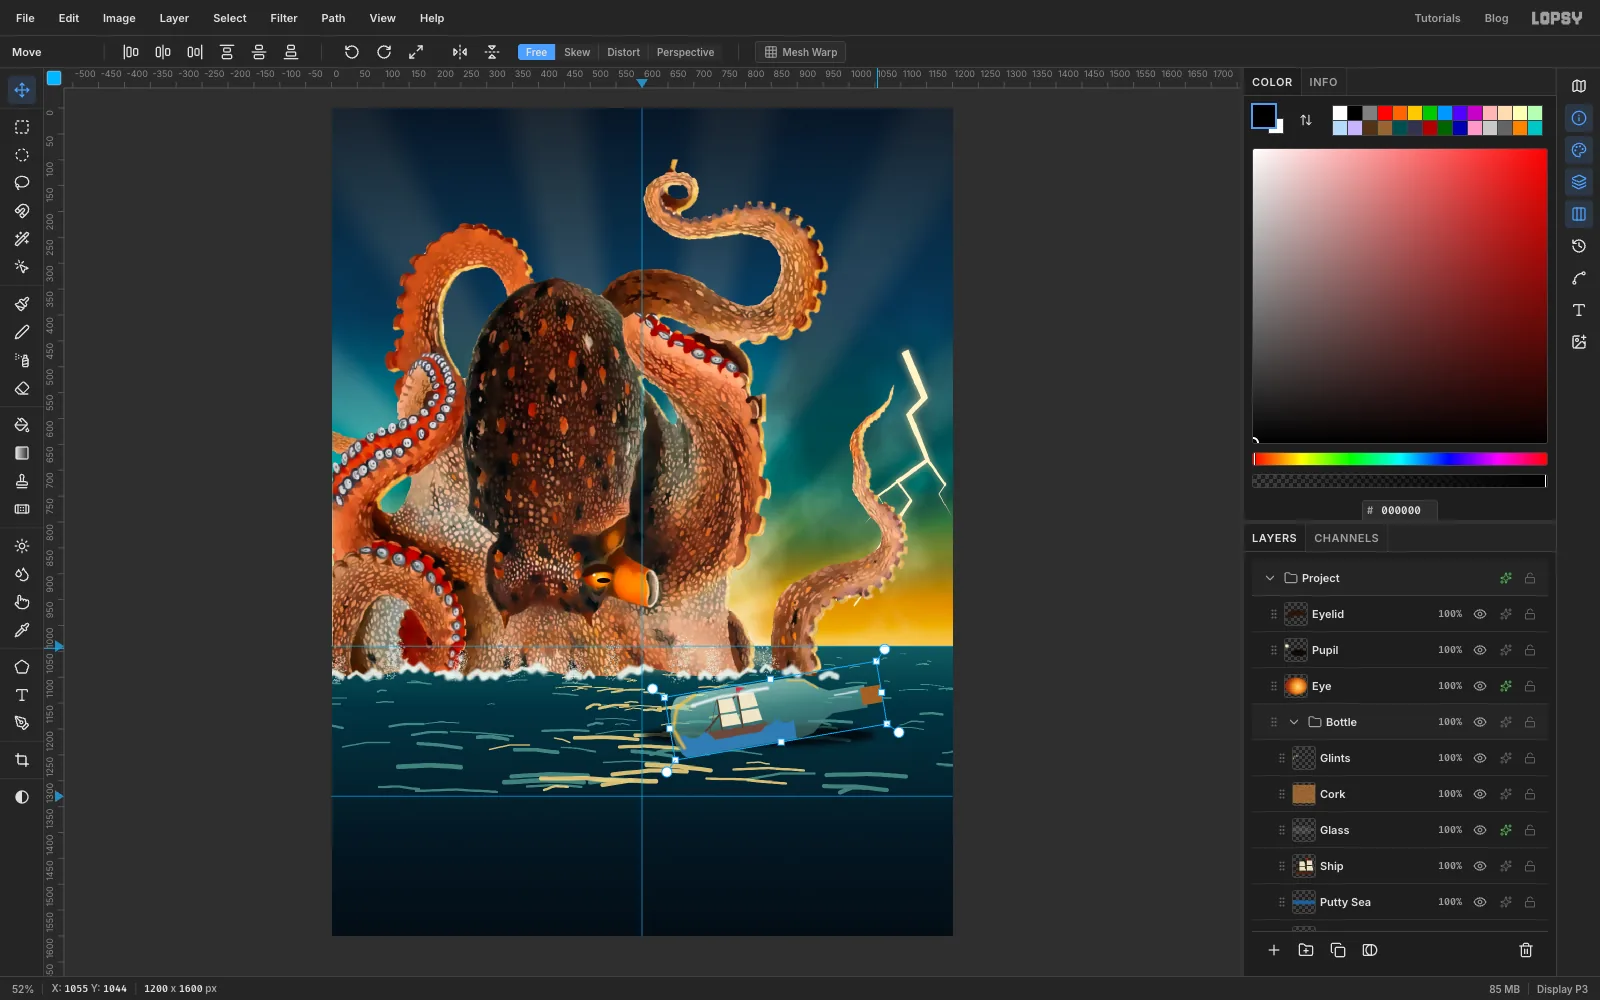
-
Sink the bottle into the water
Collapse the Bottle group, click it, and add a layer named Bottle Water above it. Lasso a shape from just left of the bottle along a small swell at about
y 1184, past its right end, and down below it. Fill it with and deselect.Expand the group and Cmd-click the Glass Back thumbnail. Check that Bottle Water is still the selected row, choose Select → Inverse and press Delete. The water now darkens only the glass below the waterline. Set the opacity to 80%.
Add a layer named Bottle Foam and set the foreground to white water . Give each end of the bottle a short flick of the Spray, Size
30, Density60.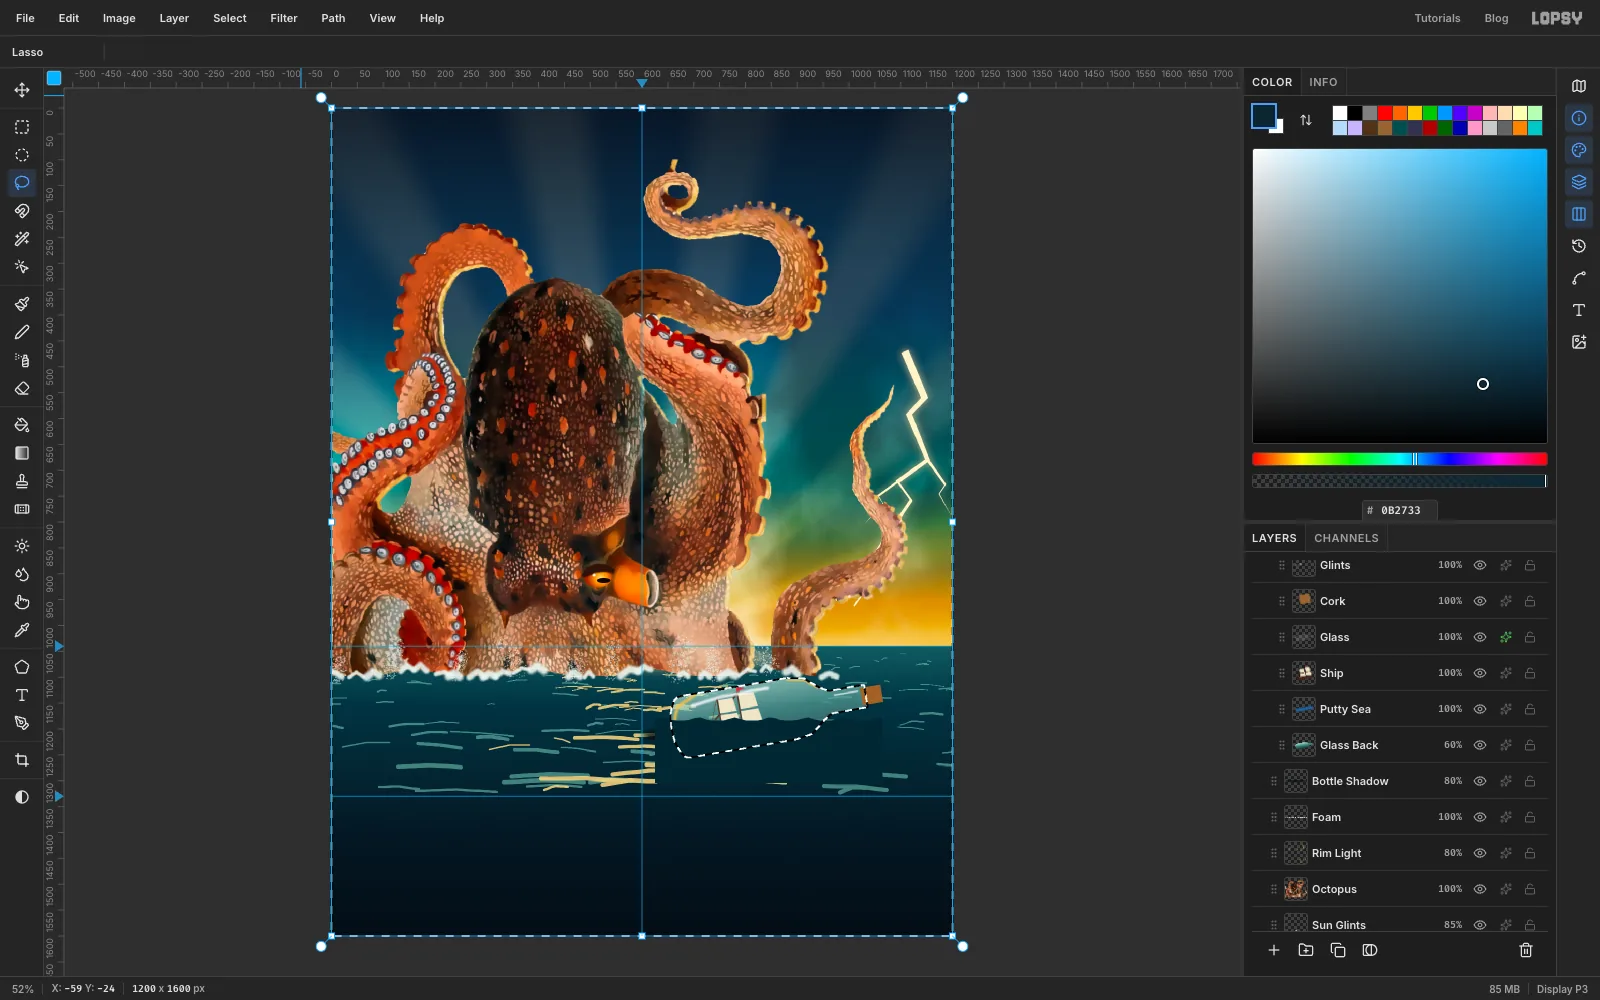
-
Borrow a tentacle tip to grab the bottle
The victim needs a monster. Click Octopus and select from
590, 96to722, 262, around the curl at the end of the top arm. Choose Edit → Copy, click Bottle Foam, and choose Edit → Paste. Rename the new layer Coil and deselect.With the Move tool, click Rotate 90° CW in the options bar so the curl's arm points down. Cmd-click its thumbnail. Hold Cmd and drag the bottom-right handle in to shrink it by a quarter. Then drag it so the curl hooks over the bottle's neck at about
1000, 1138, and press Cmd+D.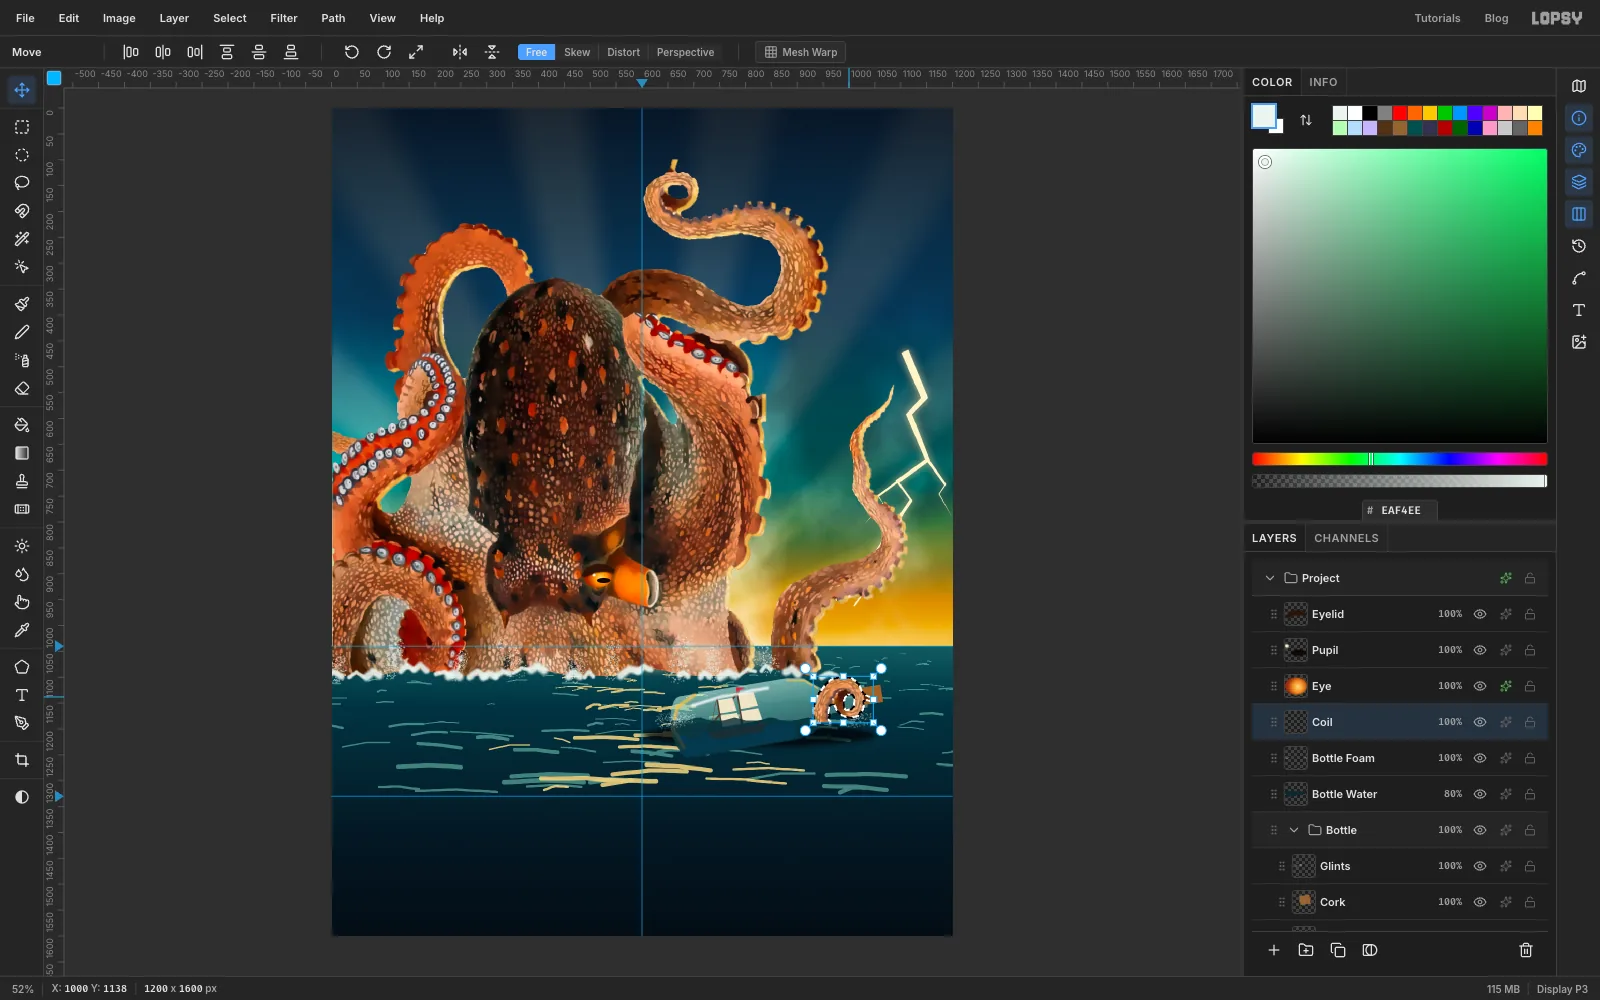
-
Hide the cut and set the coil in light
With Coil selected, use the Rectangular Marquee to select from
900, 1186to1160, 1390and press Delete, so the coil's cut end sinks below the waterline. Give Coil the octopus's light: an Inner Glow in , Size10, Opacity35, and a Drop Shadow at3, 6, Blur8, Opacity60, so it sits on the glass.Add a layer named Coil Foam and paint four little white clots at the foot of the coil with the Brush (Size
8–14). Add one Spray flick above them.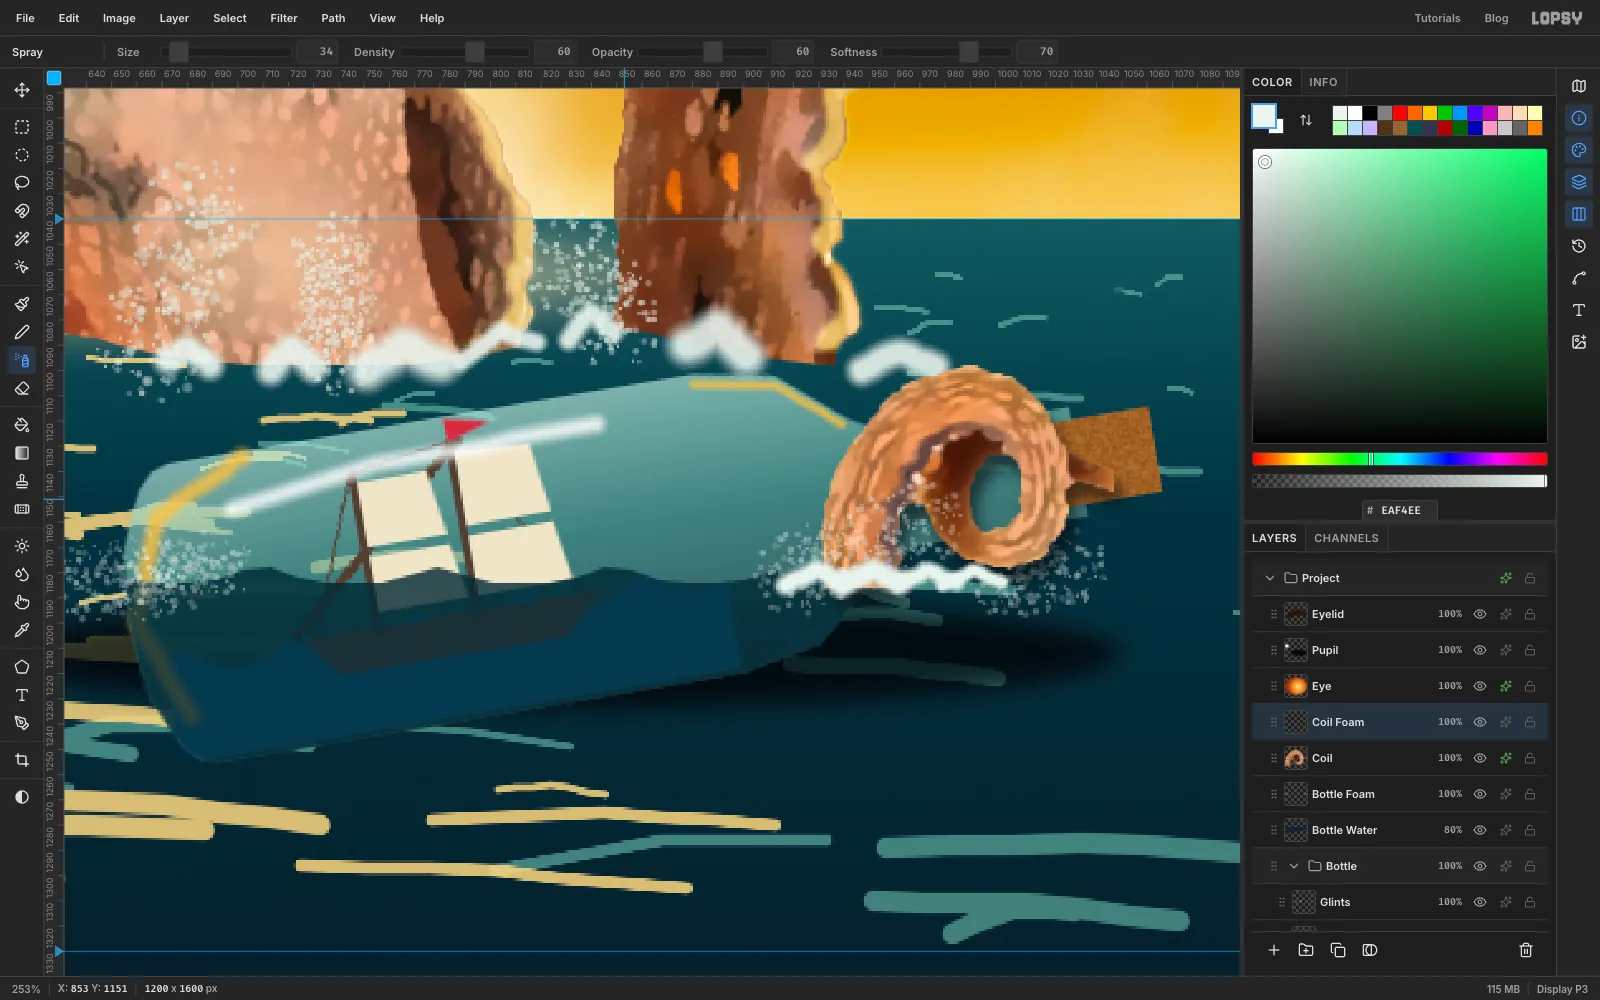
-
Set the issue strip
Click Bottle Foam and add a layer named Issue Strip. Fill a rectangle from
0, 0to1200, 52with .Pick the Text tool, choose Fjalla One at 24 px in , and click near
40, 10. TypeCURIOS · RELICS · UNCANNY ANTIQUESwith two spaces around each dot, and press Tab to commit. In the Text panel, set Letter spacing to4. Nudge it so the line's middle sits ony 26and its left edge onx 40.Click Issue Strip again, so the next text doesn't restyle this one. Type
EST. 1931in , with the same font, size and spacing. Line its right edge up atx 1160.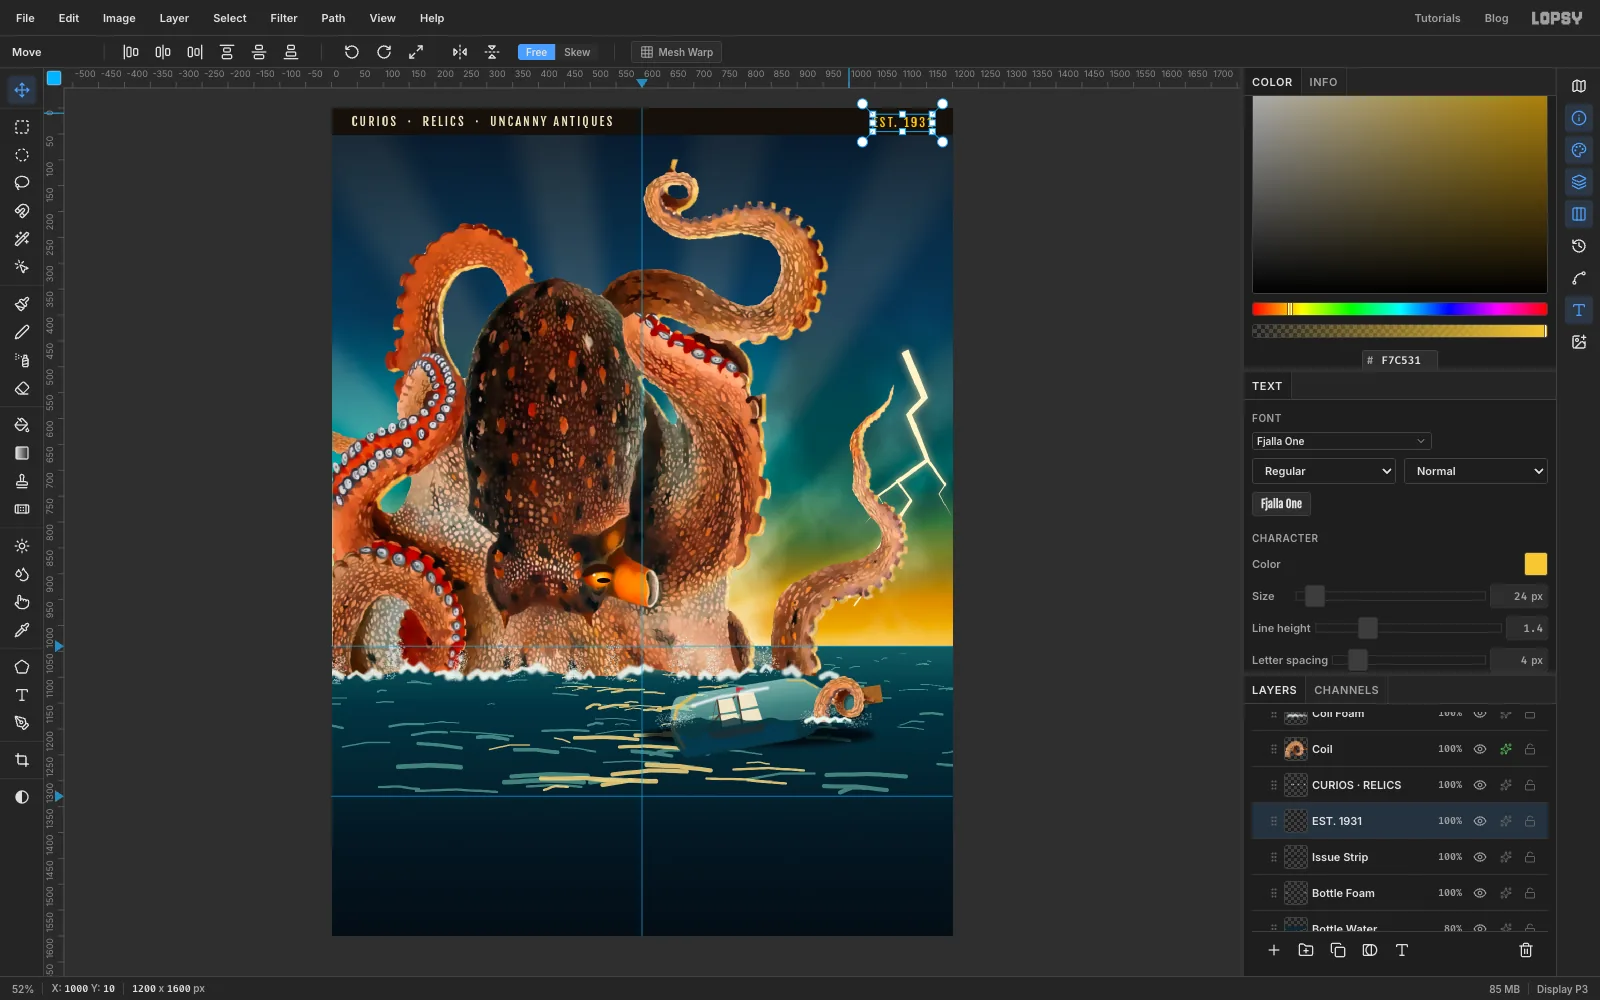
-
Type the masthead
Click Issue Strip again. Choose Ultra in masthead yellow and leave Letter spacing at
4from the strip. Ultra is very wide, so start at 176 px. Click at about80, 60, typeOCTOPUSand press Tab. The word should span roughly85to1115. With the Move tool, centre it on the600guide with its middle at abouty 160.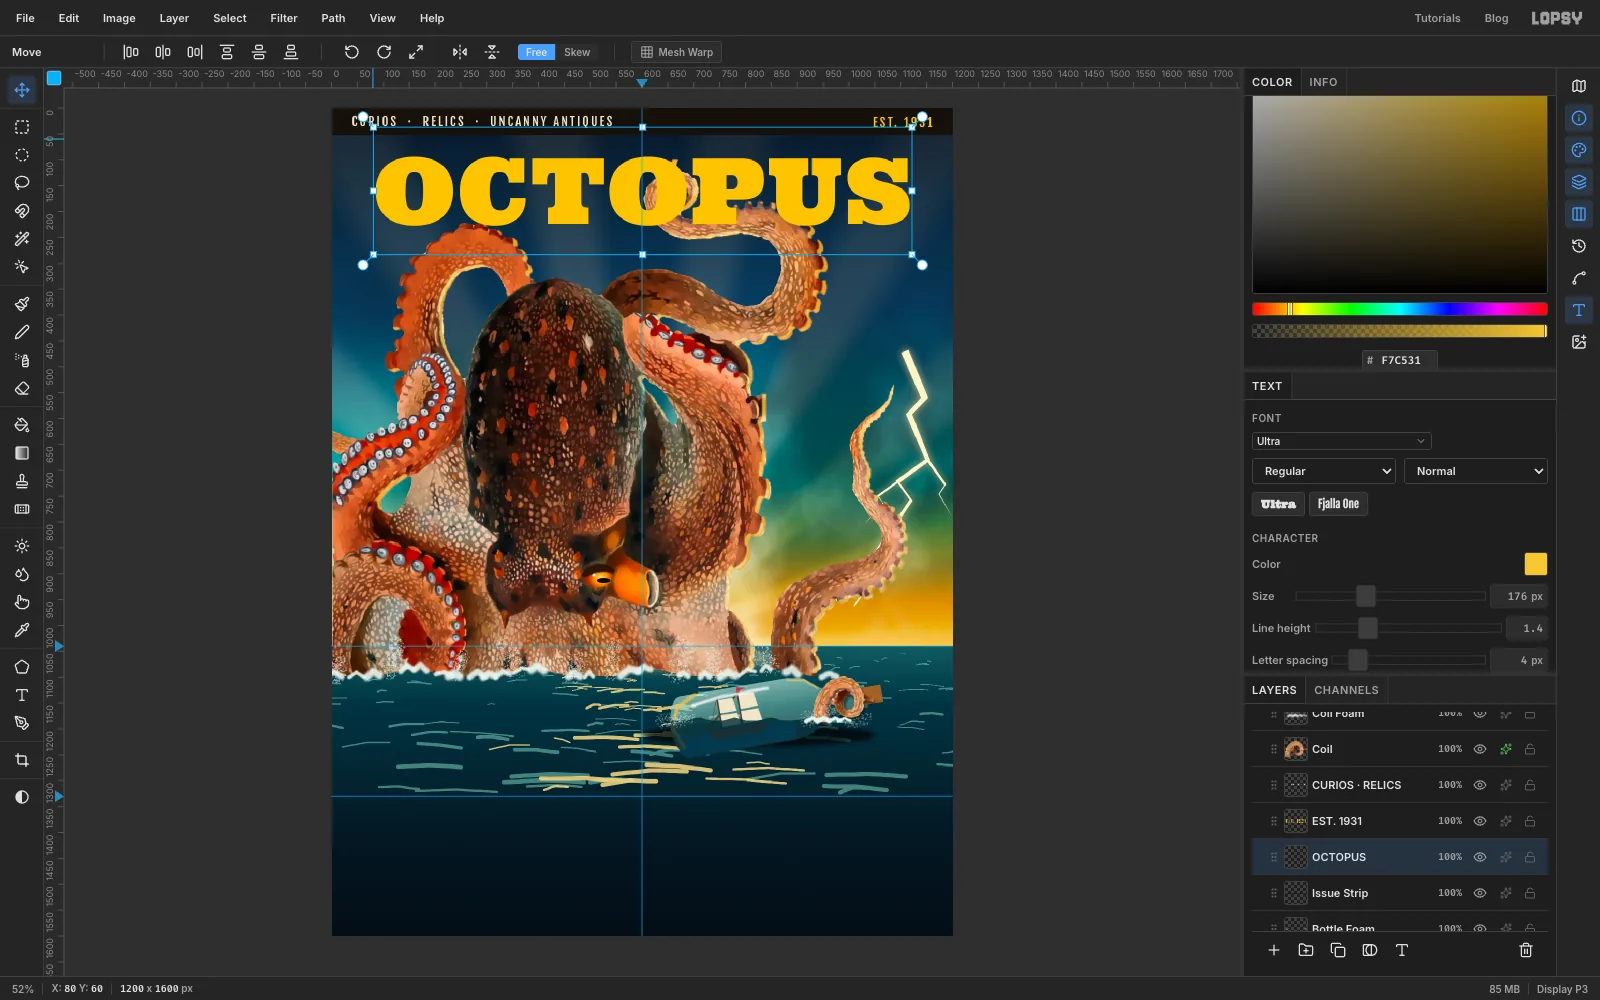
-
Lean it forward
Pulp mastheads often lean forward as if they're moving. Pick the Move tool and click Skew in the options bar. Drag the handle in the middle of the top edge 34 px to the right. The letters slant and the text stays editable. Click Free again and re-centre the word on
600, 160.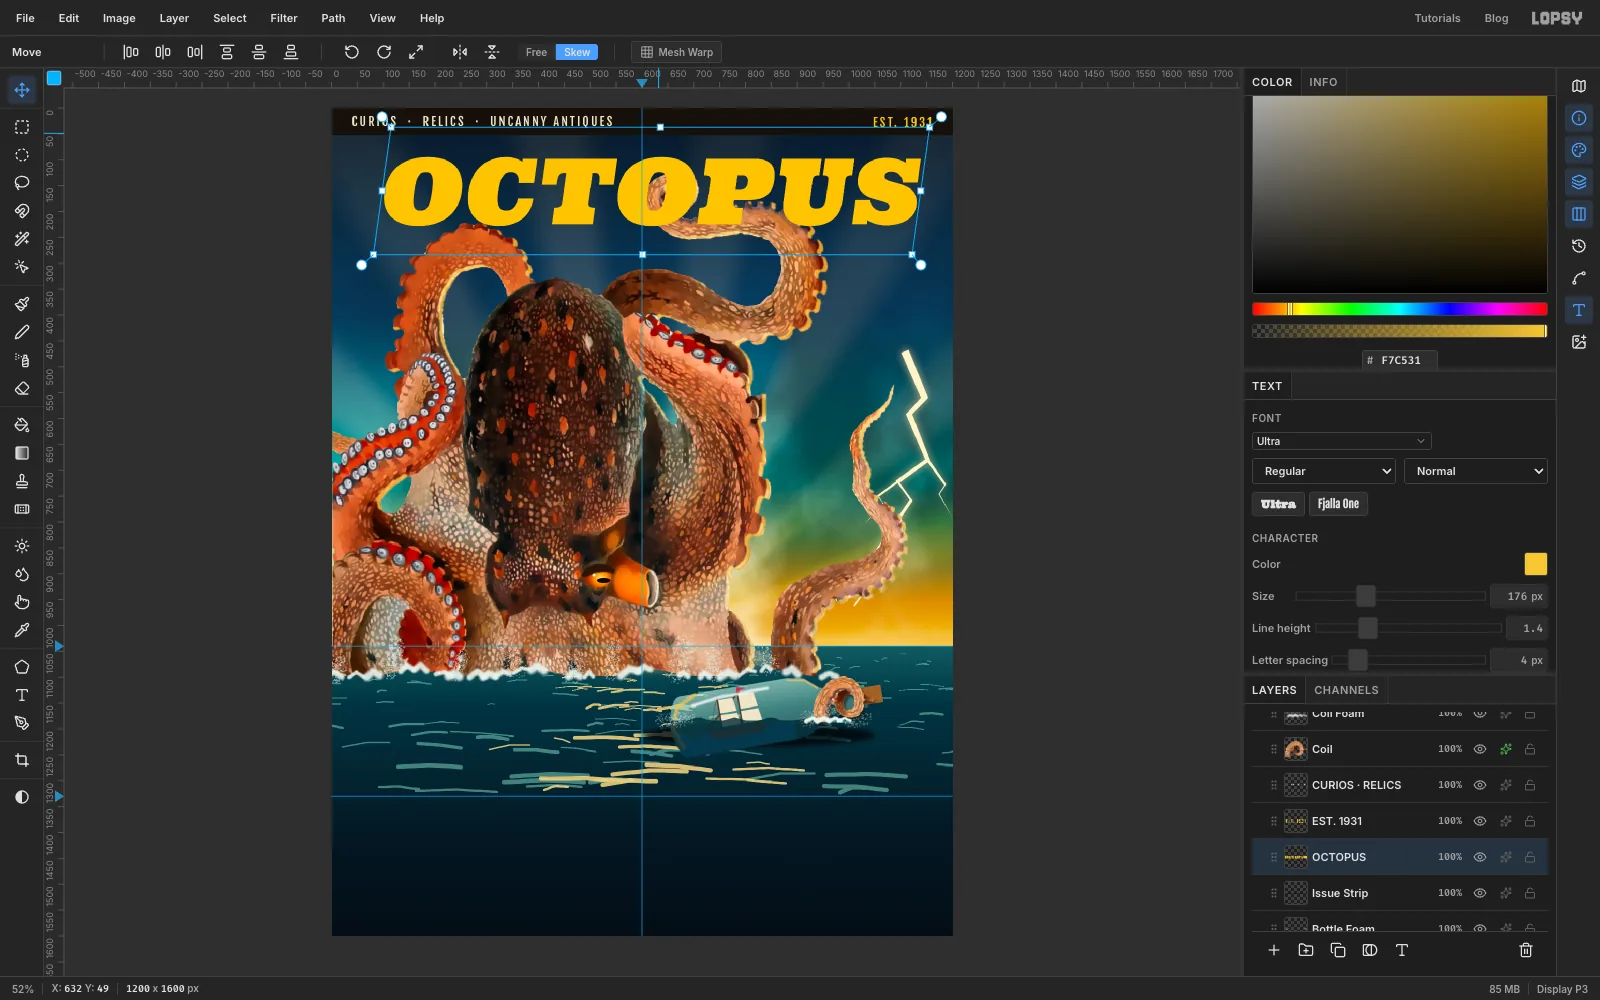
-
Build the 3D extrusion
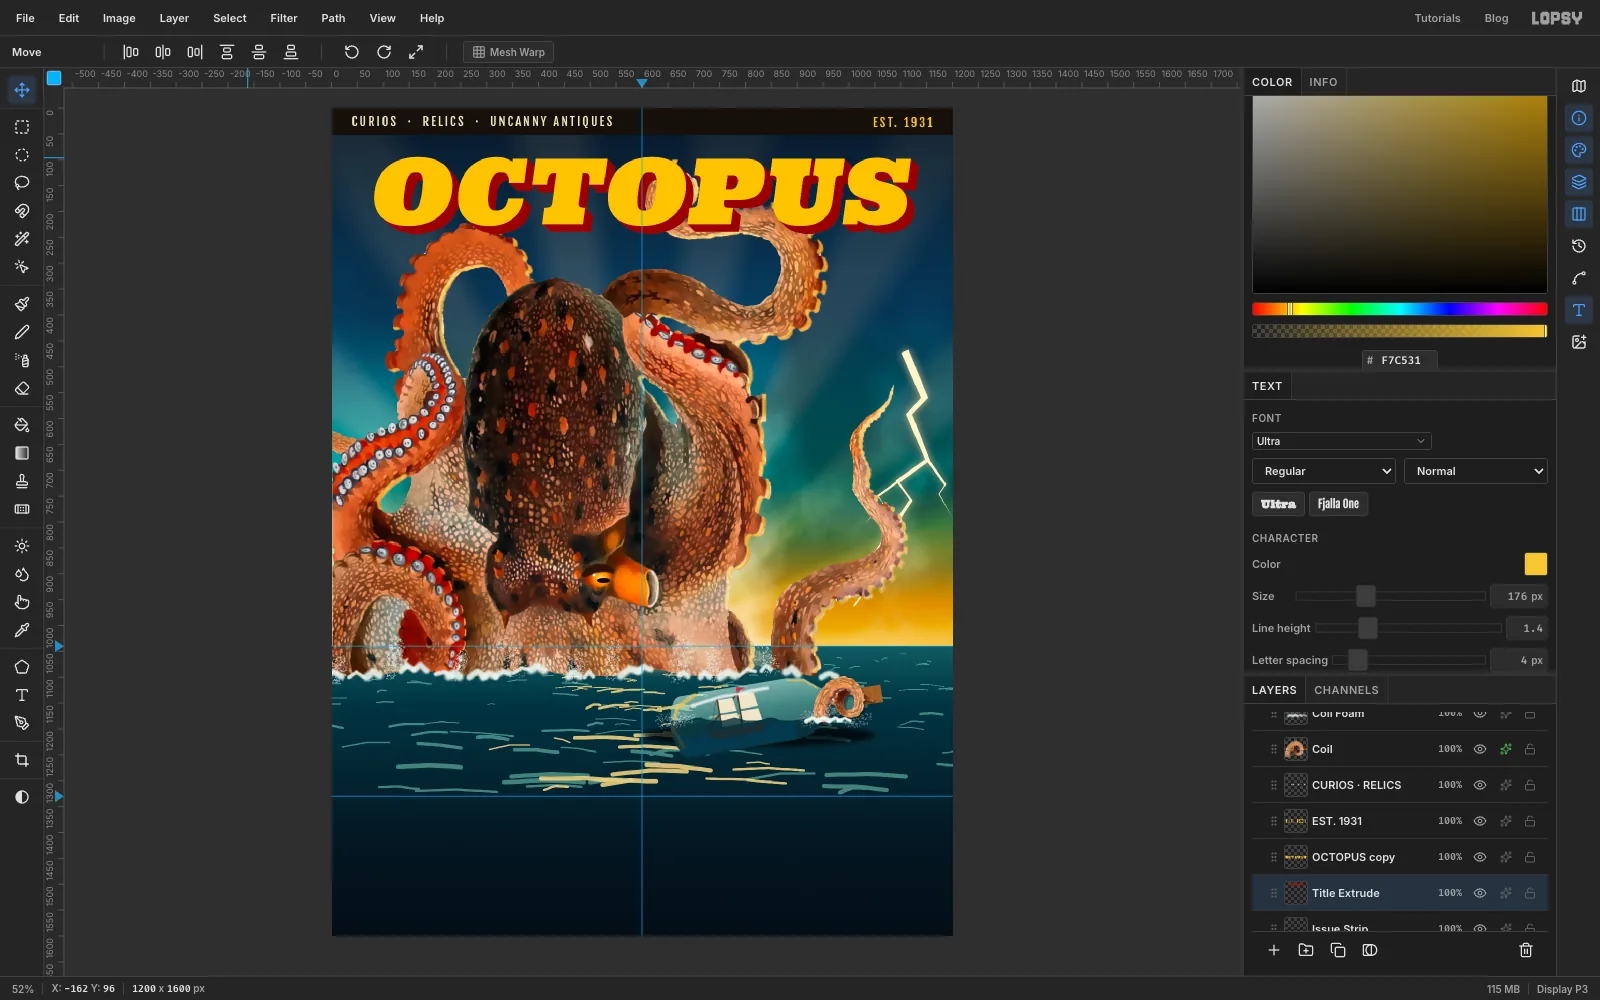
Click Duplicate Layer. Click the lower of the two OCTOPUS layers, click Rasterize Layer at the bottom of the Layers panel, and rename it Title Extrude. Give it a Color Overlay in , then click Rasterize Layer Style in its drawer to bake the colour in.
Now thicken it by doubling, with the Move tool selected:
- Click Duplicate Layer, press Right once and Down once, and choose Layer → Merge Down.
- Repeat, nudging 2 px each way, then 4, then 8.
Four merges give a solid 15 px extrusion.
-
Ink the masthead
Give Title Extrude a Stroke of Width
5in and a Drop Shadow at4, 10, Blur18, Opacity70. Old presses never lined up their plates, so nudge the extrusion 2 px right and 1 px up for a slightly off-register look.Click the upper OCTOPUS layer and rename it Title Face. Give it the same Stroke and an Inner Glow in , Size
14, Opacity55, which warms the edges of each letter.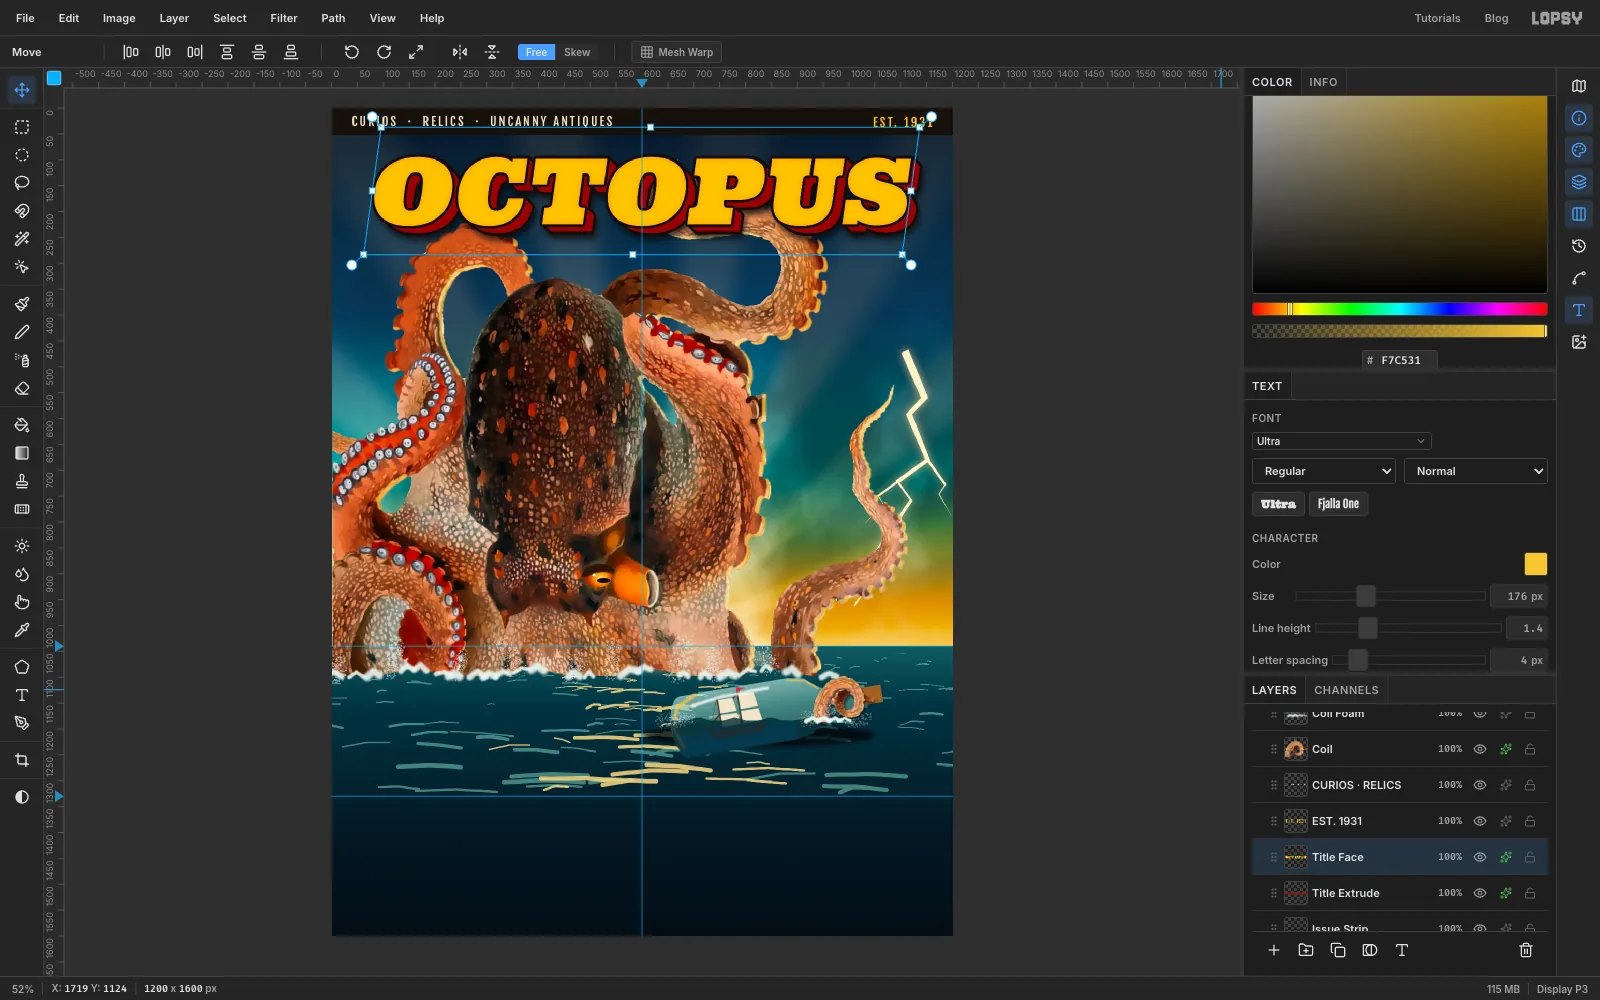
-
Draw the swallowtail ribbon
Click Bottle Foam and add a layer named Ribbon, so it sits under the masthead. With the Lasso, draw a long banner, keeping each edge as straight as you can. Its corners and notches are at about:
- top edge from
286, 261to1014, 261 - in to a notch at
972, 297, out to the bottom corner at1004, 333 - bottom edge back to
276, 333 - in to the left notch at
313, 297
The top corners are 10 px right of the bottom ones, matching the masthead's lean. Fill with and deselect. Add a Stroke of Width
4in and a Drop Shadow at3, 8, Blur12, Opacity65.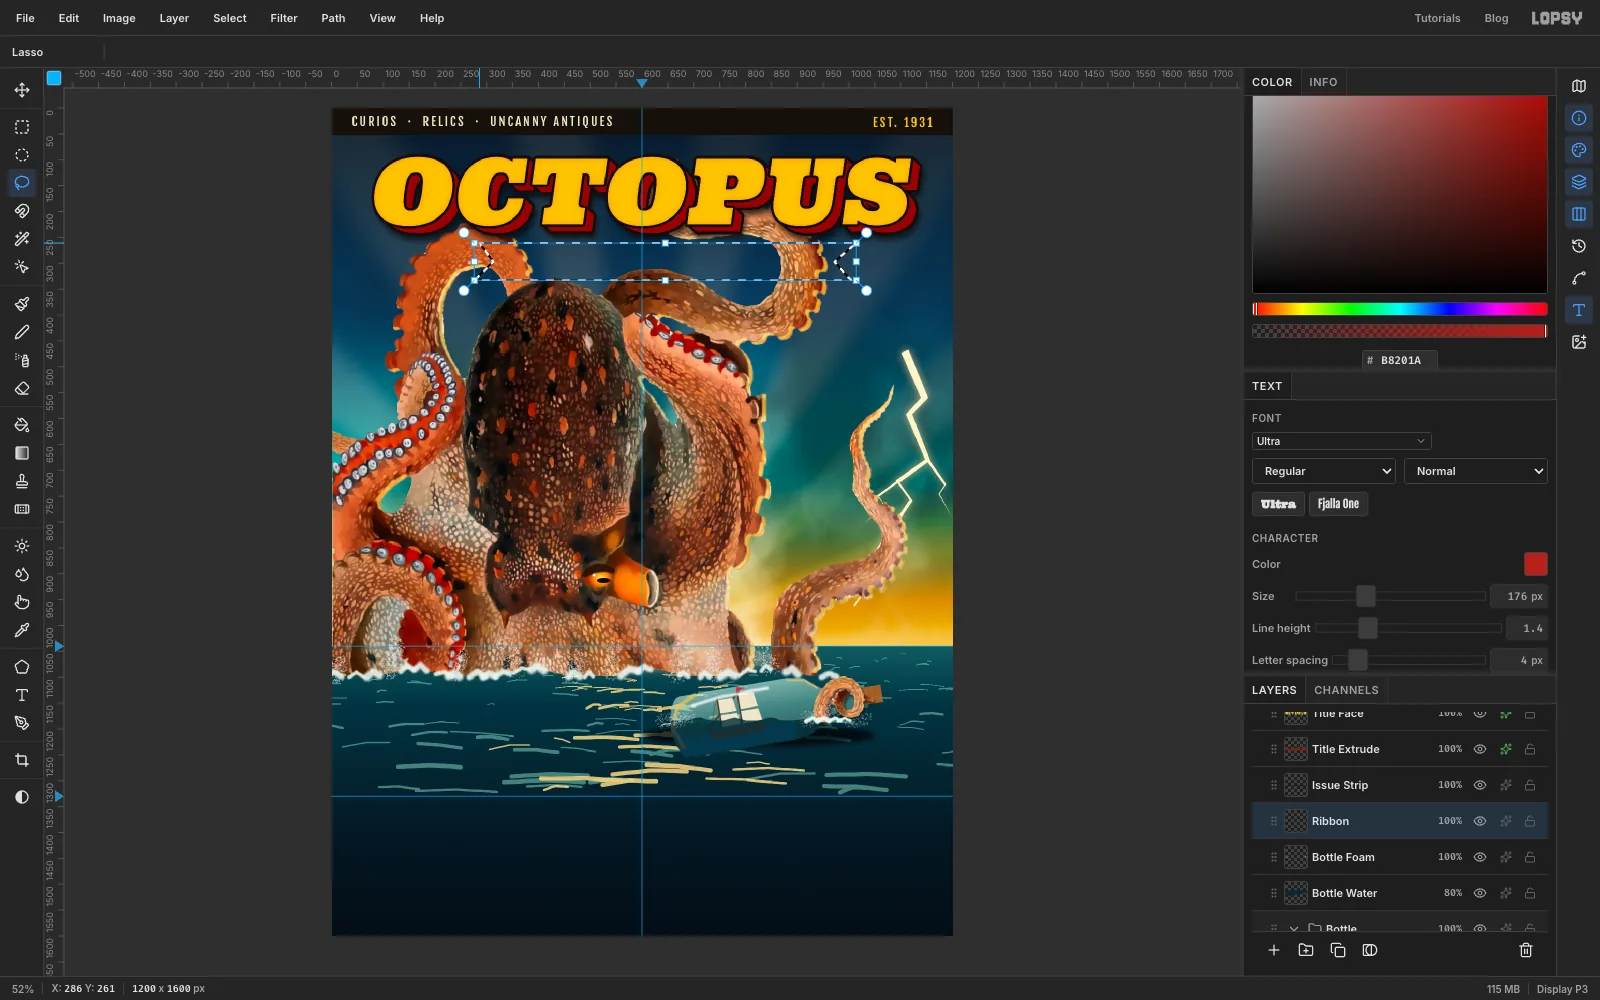
- top edge from
-
Set ODDITIES on the ribbon
Clicking near the masthead would edit it, because its text box reaches below the letters. So type this word out in the open water first. With Ribbon selected, choose Bevan at 50 px in , click at about
380, 1420, typeODDITIESand press Tab. Set Letter spacing to22.With the Move tool, drag it up onto the ribbon and nudge it until it's centred on
590, 297, the middle of the part of the ribbon you'll see.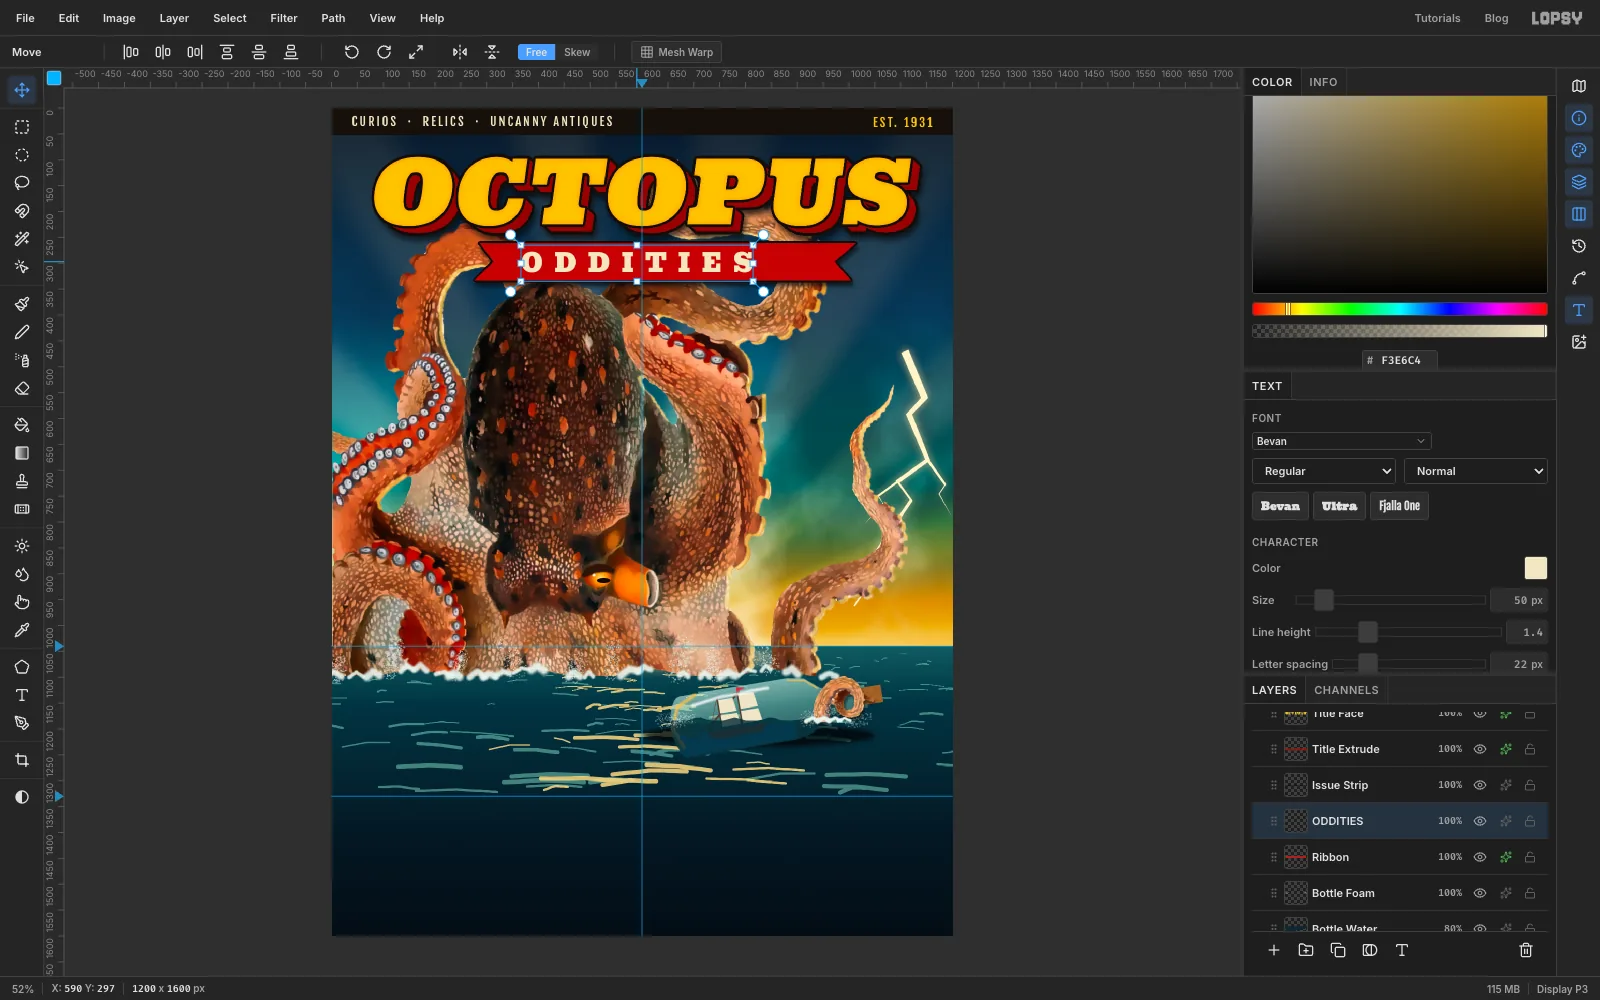
-
Let an arm grab the ribbon
One of the arms runs behind the ribbon's right end. Bring it in front by cutting the ribbon away where the arm is.
Click Ribbon and Cmd-click the Octopus thumbnail. Pick the Rectangular Marquee, hold Shift and Option, and drag from
846, 246to1000, 352. Shift+Option keeps only the overlap, so you're left with the arm's shape across the ribbon tail. Press Delete.The ribbon's Stroke now inks a keyline along the arm. Select from
948, 240to1038, 350and press Delete again to clear the scraps of tail beyond the arm.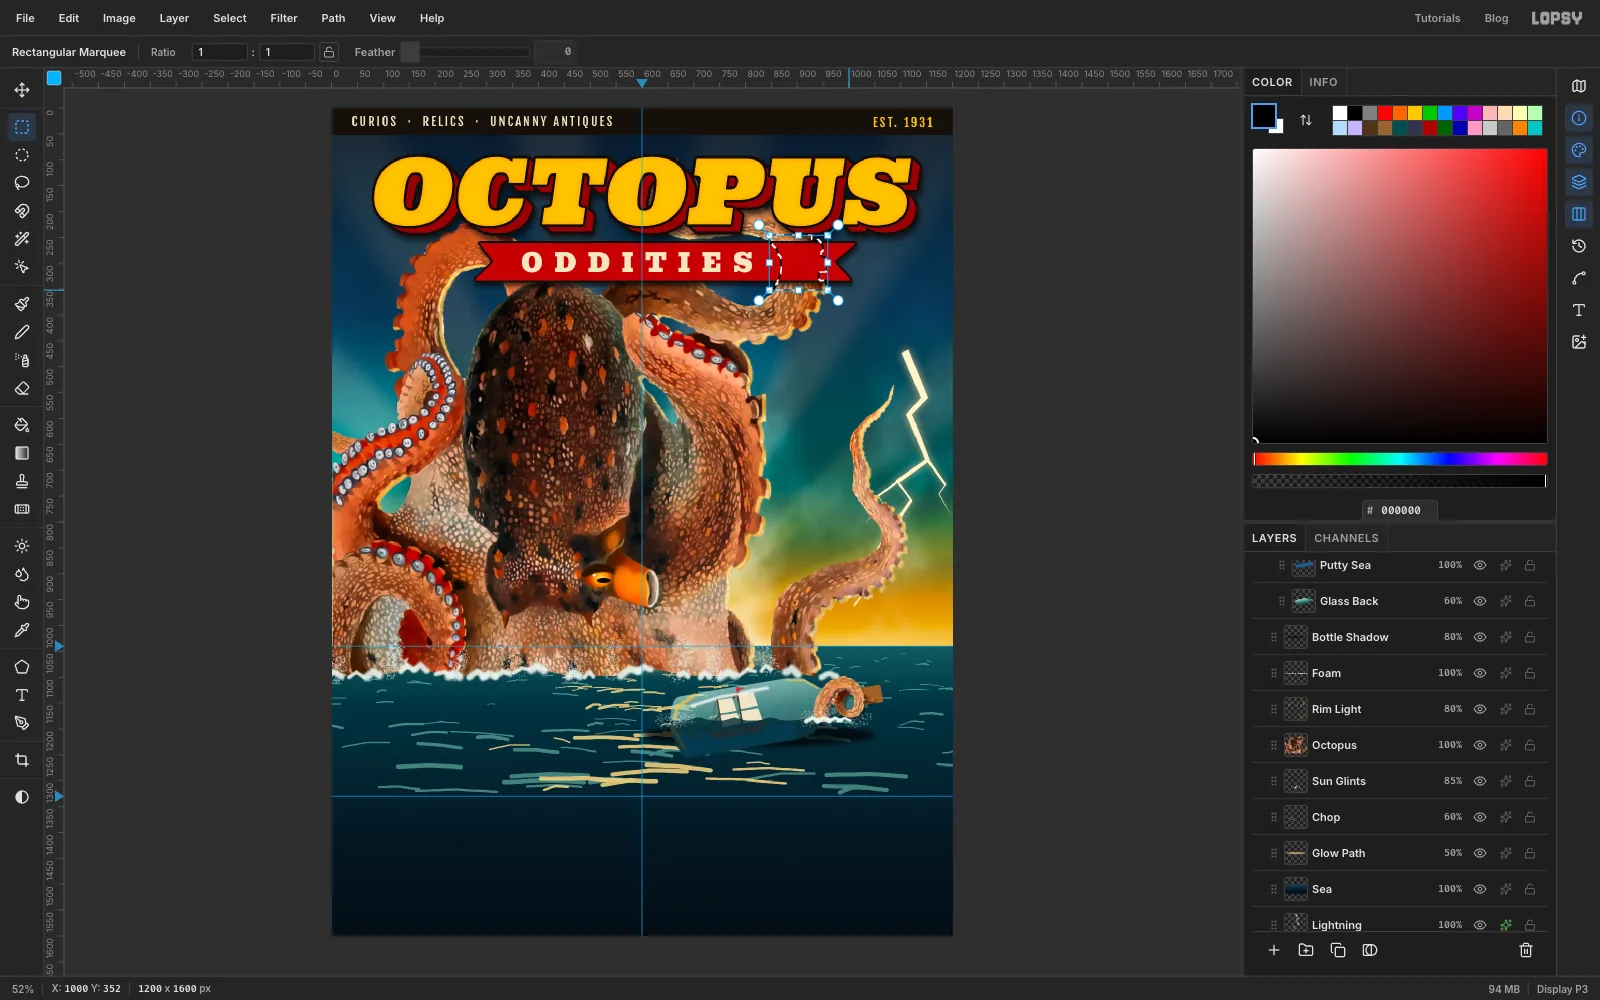
-
Make the starburst
Click Bottle Foam and add a layer named Burst. Set the foreground to and choose Filter → Sunburst…:
- Rays
24, Width100 - Taper
100, so each ray is a spike that comes to a point - Length
8. Length is a percentage of the distance from the centre to the farthest corner of the page, so8ends the tips about 122 px out - Center X
84and Center Y28, which is1008, 448 - Fade, Softness and Jitter at
0
Click Apply. Fill a circle from
908, 348to1108, 548with the same yellow to fill between the roots of the spikes, and deselect. Add a Stroke of Width4in and a Drop Shadow at4, 10, Blur14, Opacity70.On a layer named Burst Disc, fill a circle from
918, 358to1098, 538with ribbon red and give it a Stroke of Width3in .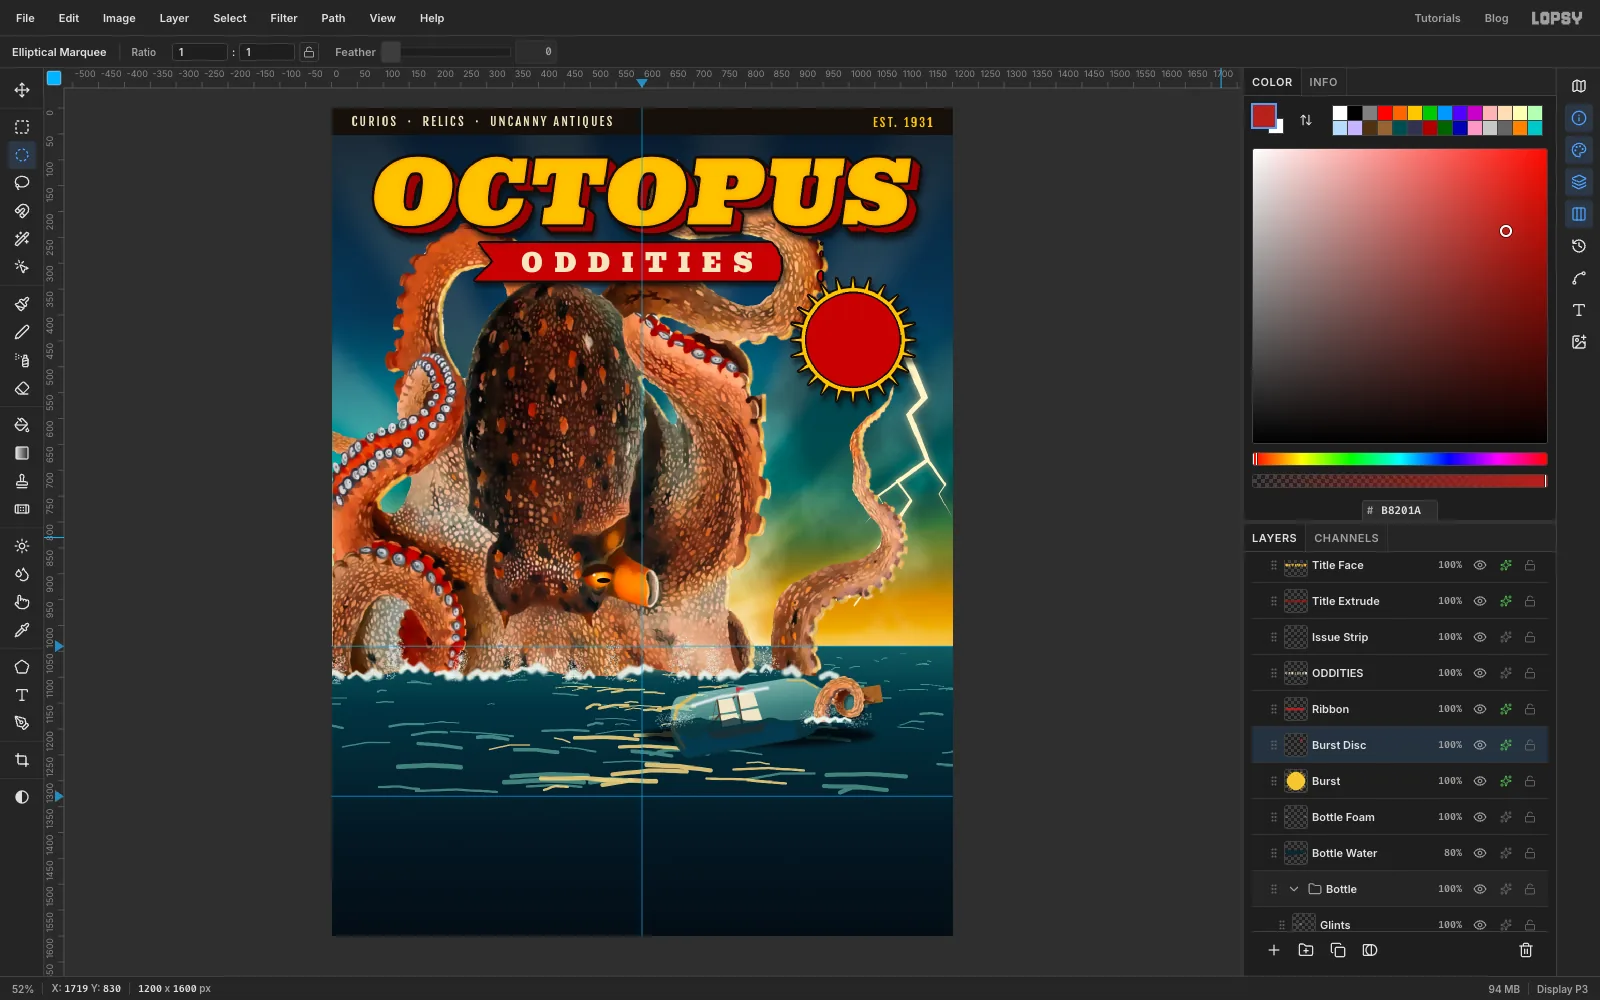
- Rays
-
Letter and tilt the badge
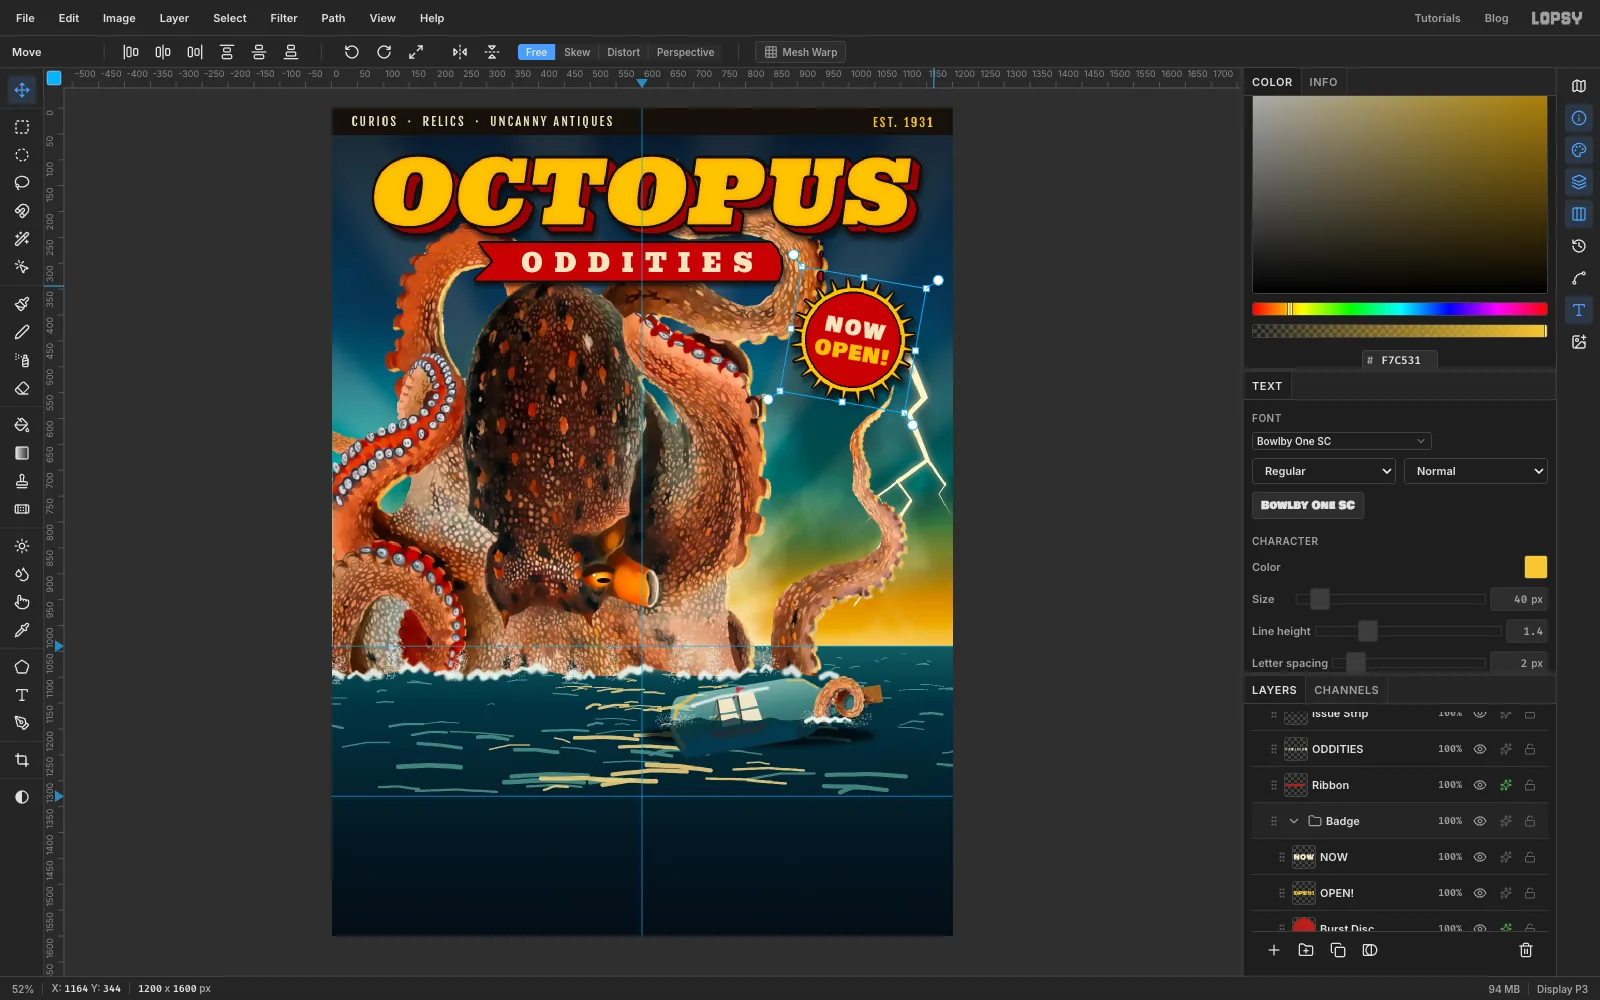
With Burst Disc selected, set Bowlby One SC at 40 px, cream , letter spacing
4. Click in open water, around120, 1440, typeNOWand press Tab. Then drag it into the disc with the Move tool so its middle sits at1008, 424. Click Burst Disc again and typeOPEN!in yellow , spacing2. Centre it on1008, 471. Leave at least 10 px between the exclamation mark and the edge of the disc.Click Burst and Shift-click NOW to select the four badge layers. Choose Layer → Group Layers and name the group Badge. With the Move tool, drag its top-right rotate handle clockwise about 10°, and press Cmd+D.
-
Write the teaser card
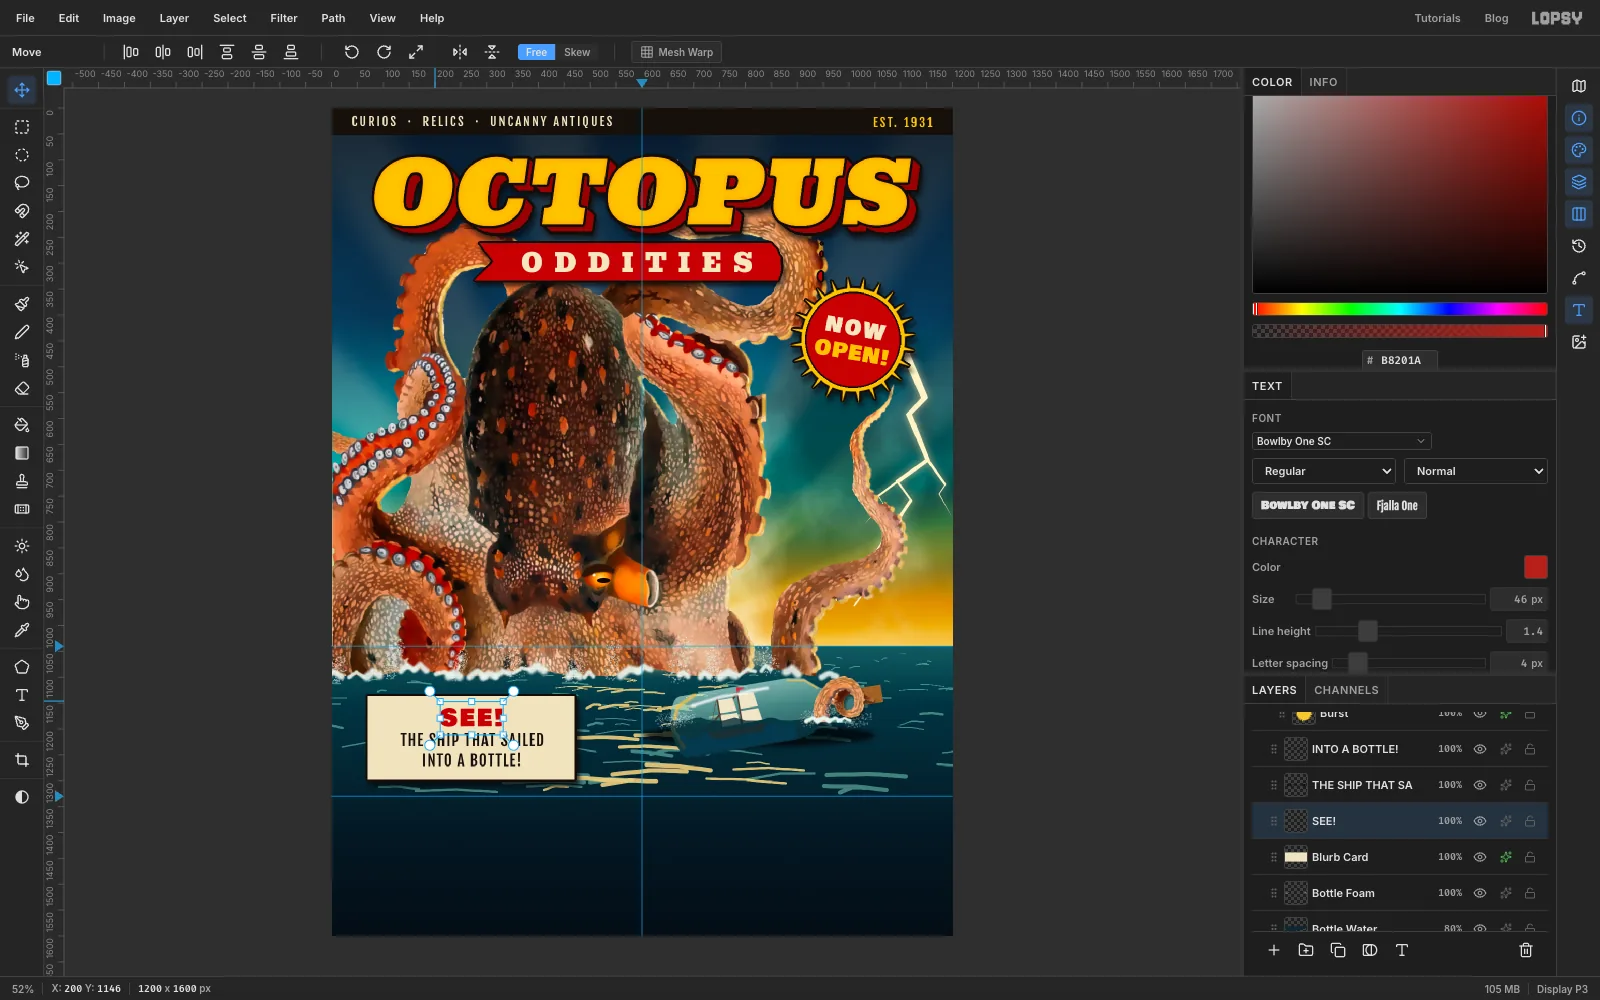
Click Bottle Foam and add a layer named Blurb Card. Fill a rectangle from
70, 1136to470, 1298with . Give it a Stroke of Width4in and a Drop Shadow at6, 10, Blur12, Opacity70.Type the three lines from the bottom up, clicking Blurb Card before each one, so a click never lands in a line you've already set:
INTO A BOTTLE!in Fjalla One 30 px, , spacing2, centred on270, 1258THE SHIP THAT SAILEDthe same way, centred on270, 1220SEE!in Bowlby One SC 46 px, red , spacing4, centred on270, 1176
-
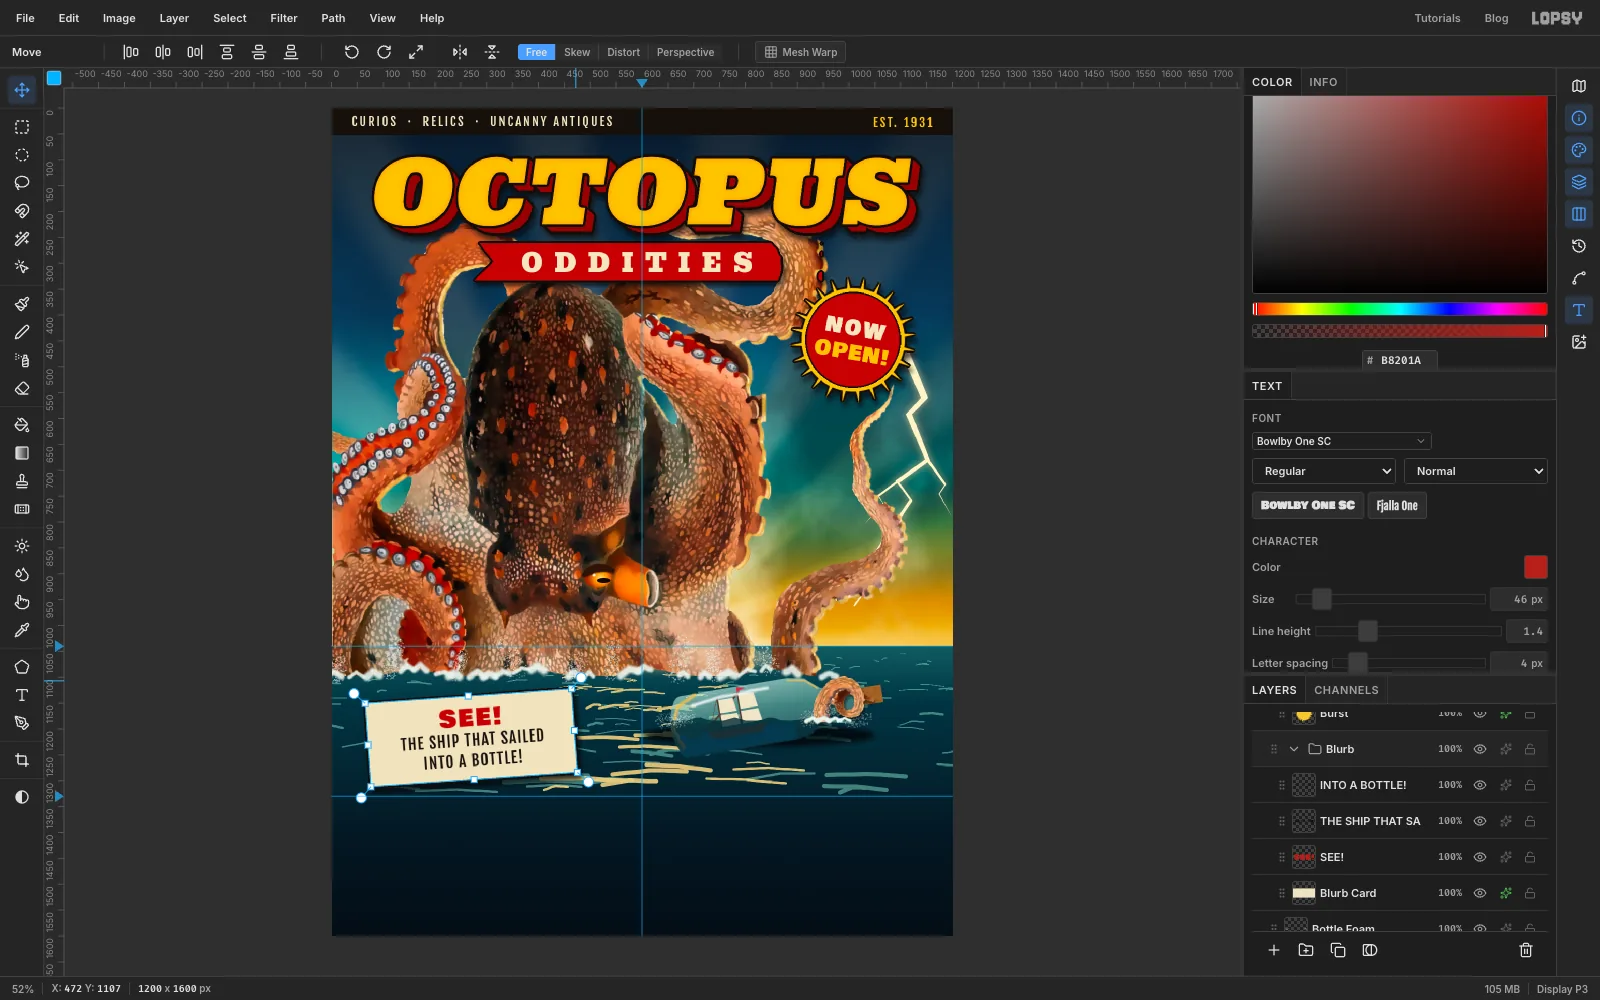
Tilt the card
Click Blurb Card and Shift-click INTO A BOTTLE!, the topmost of the three lines. Choose Layer → Group Layers and name the group Blurb. With the Move tool, drag the top-right rotate handle up about 4° counter-clockwise, and press Cmd+D. A slight tilt reads as a pasted-on teaser, the way pulp covers stuck their blurbs at an angle.
-
Draw the info band on the grid
Collapse Blurb, click it, and choose View → Show Grid. The grid is 16 px and Snap turns on with it. Add a layer named Info Band. With the Rectangular Marquee, drag from off the left edge, just below the
1330guide, to past the bottom-right corner. The top edge snaps to the nearest grid line,1328. Fill it with , deselect, and turn the grid off again with View → Show Grid.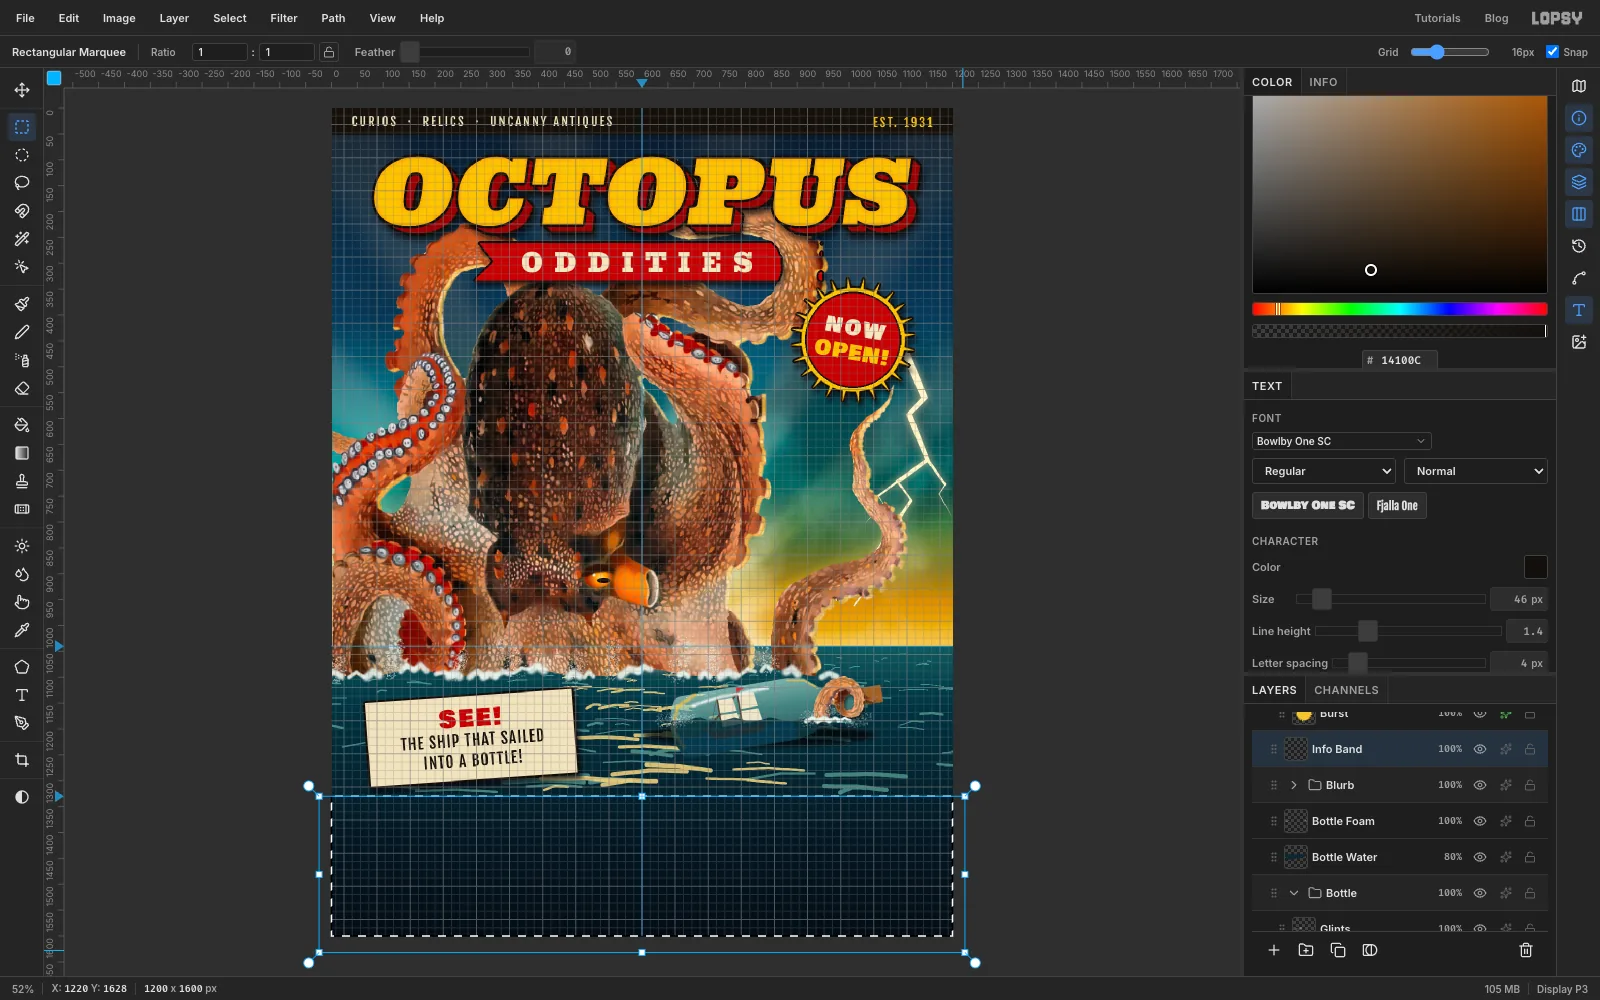
-
Rule the band
Add a layer named Info Rules. Pick the Pencil at Size
3with foreground . Click at48, 1348, then Shift-click at1152, 1348for a straight rule. Draw the second rule from48, 1580to1152, 1580the same way.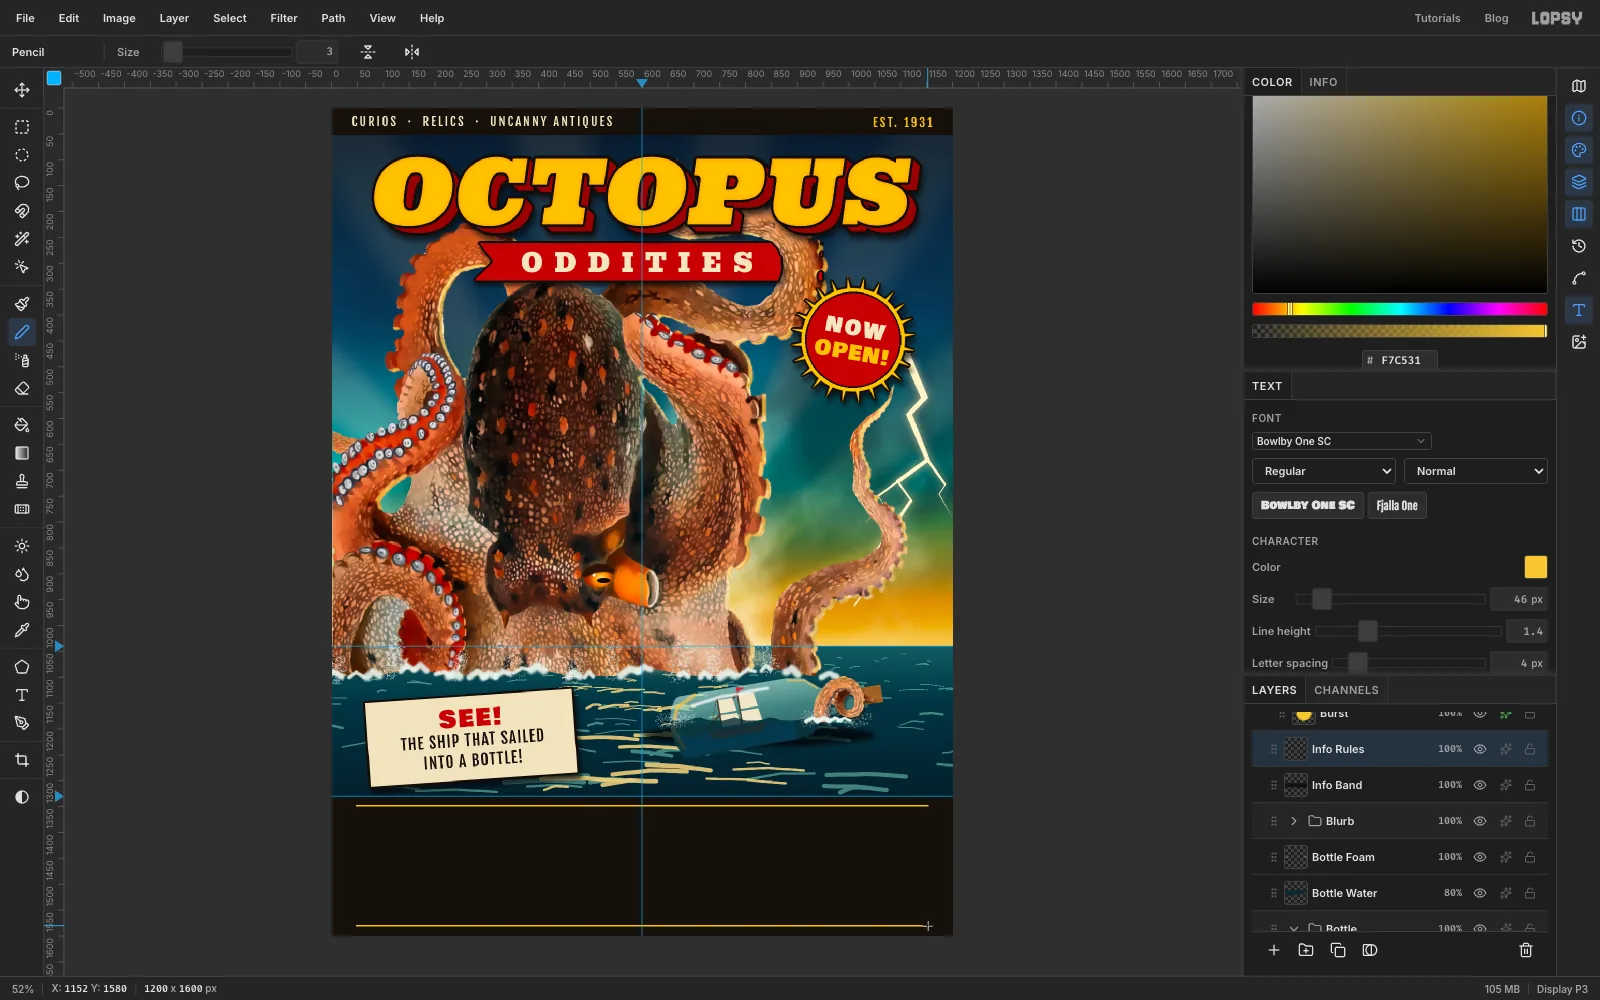
-
Set the shop's details
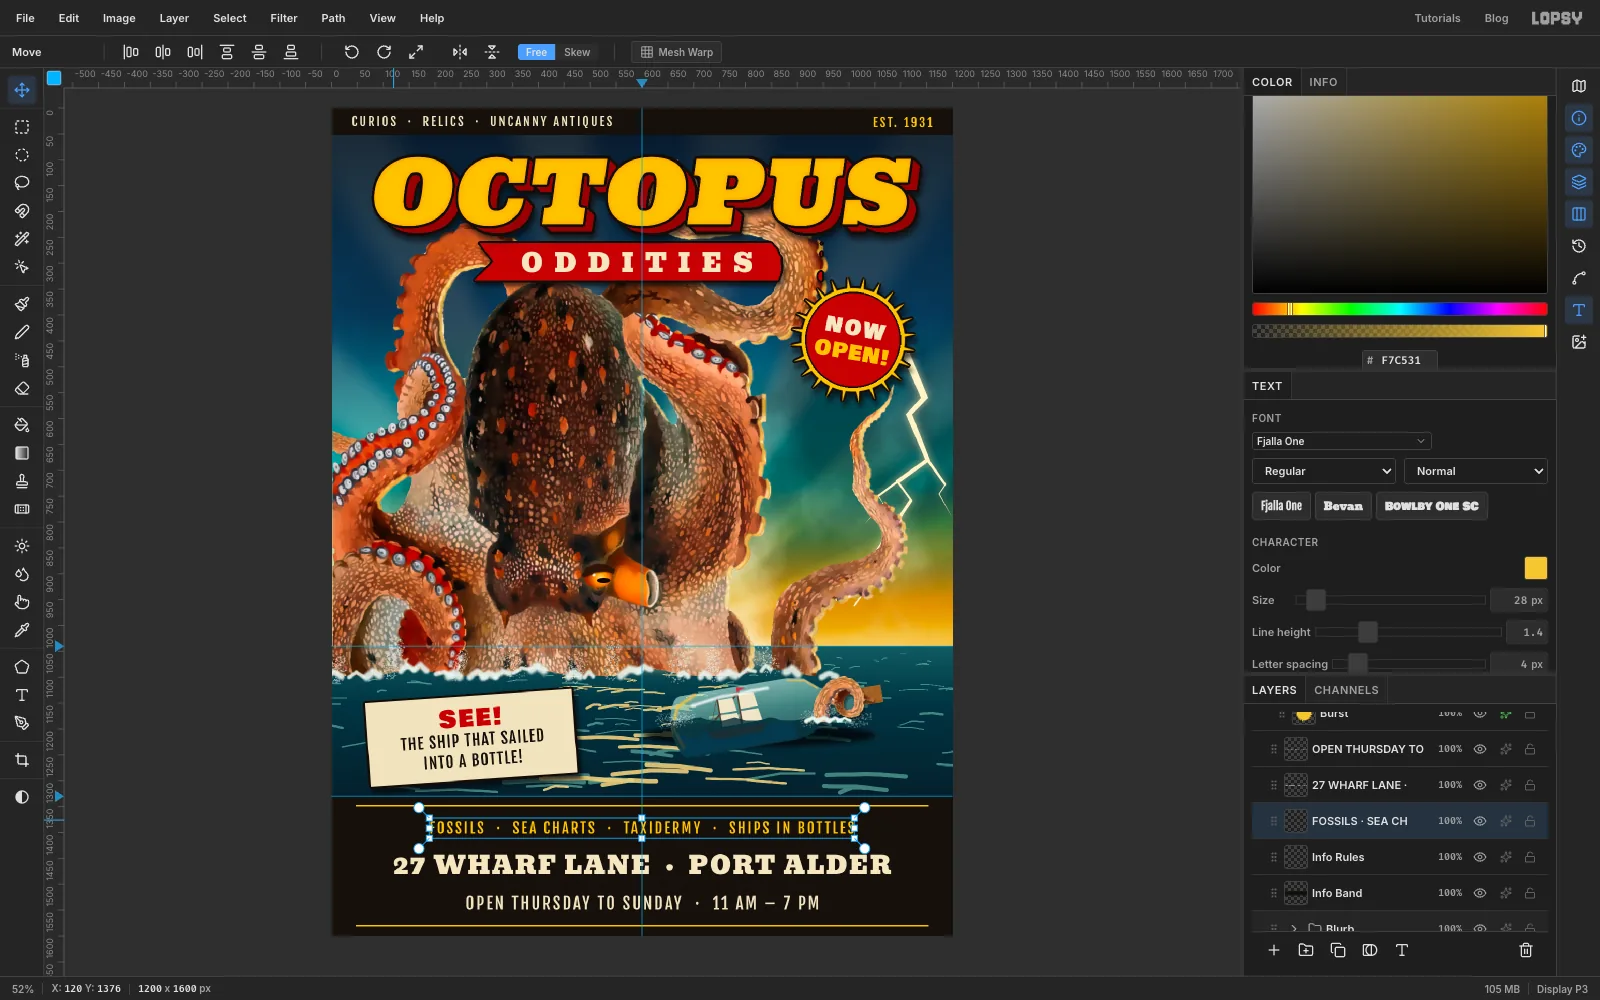
Again working from the bottom up, with Info Rules selected before each line:
OPEN THURSDAY TO SUNDAY · 11 AM – 7 PMin Fjalla One 32 px, , spacing4, centred on600, 153527 WHARF LANE · PORT ALDERin Bevan 48 px, , spacing3, centred on600, 1461FOSSILS · SEA CHARTS · TAXIDERMY · SHIPS IN BOTTLESin Fjalla One 28 px, , spacing4, centred on600, 1389
Put two spaces either side of each dot. Leave about the same gap above the first line as below the last, about 30 px from each rule.
Click Info Band and Shift-click OPEN THURSDAY TO, the topmost of the three text rows in the Layers panel. Choose Layer → Group Layers and name the group Info.
-
Yellow the paper
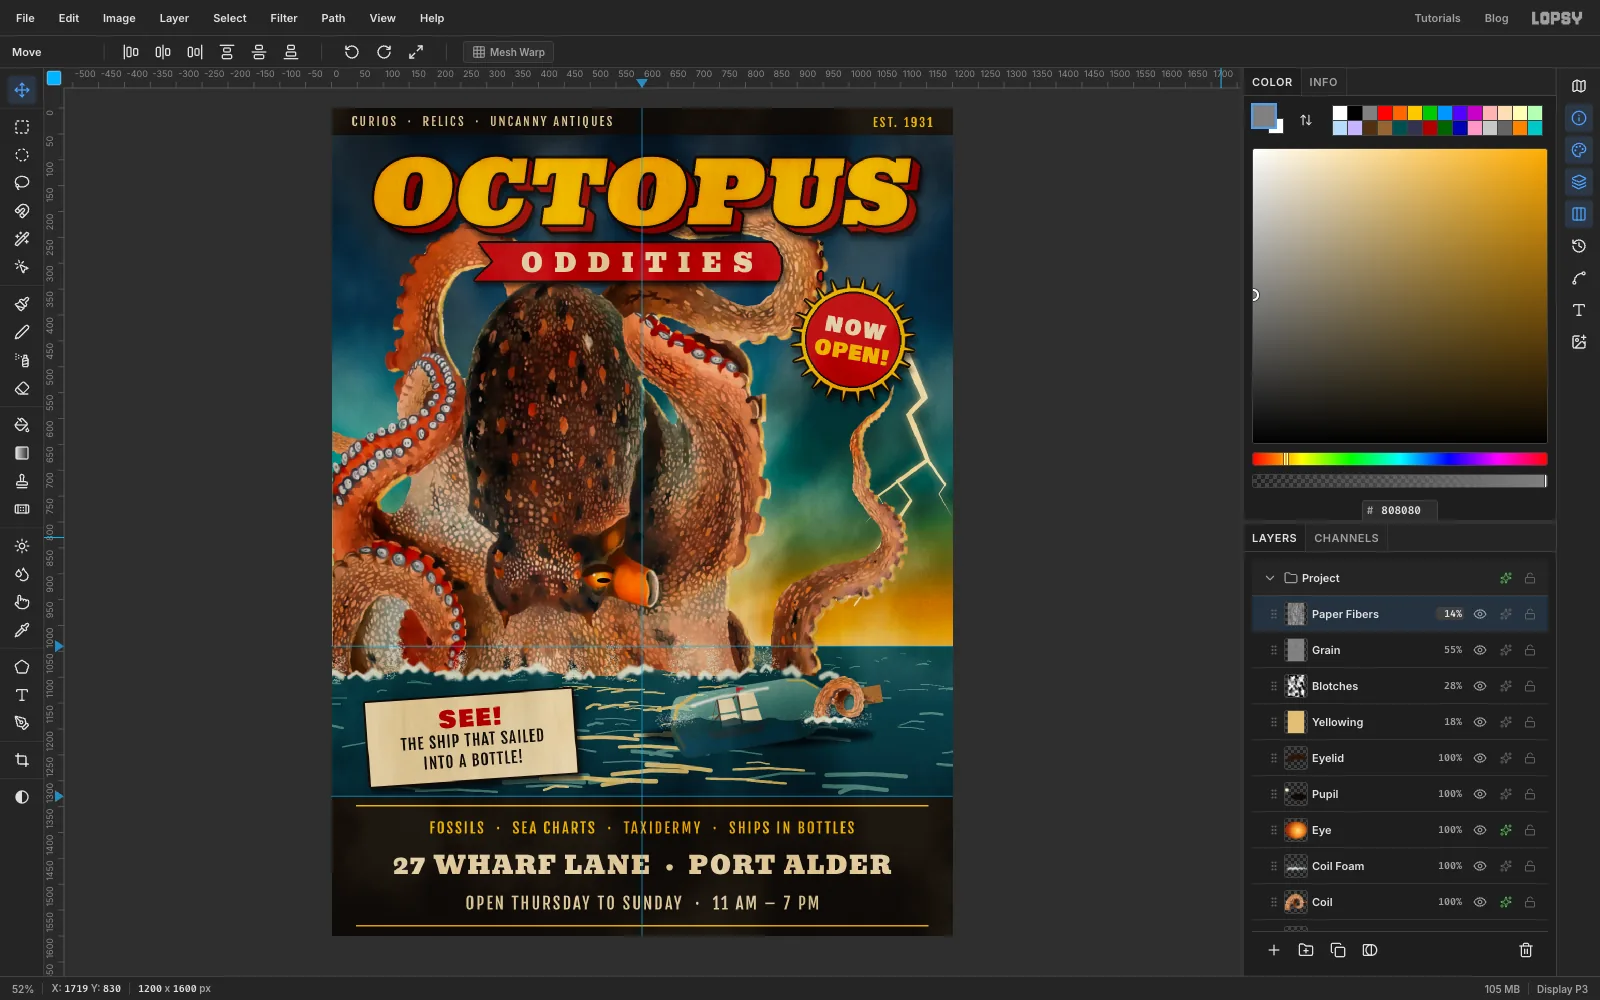
Collapse your groups and click the top layer. Then add four layers for the pulp paper:
- Yellowing. Fill the whole layer with . Blend Multiply, opacity 18%.
- Blotches. Filter → Clouds… Scale
8. Blend Soft Light, opacity 28%. - Grain. Fill with , then Filter → Add Noise… Amount
60, Mono, Gaussian. Blend Overlay, opacity 55%. - Paper Fibers. Filter → Fibers… Variance
16, Strength8. Blend Multiply, opacity 14%.
-
Burn the edges
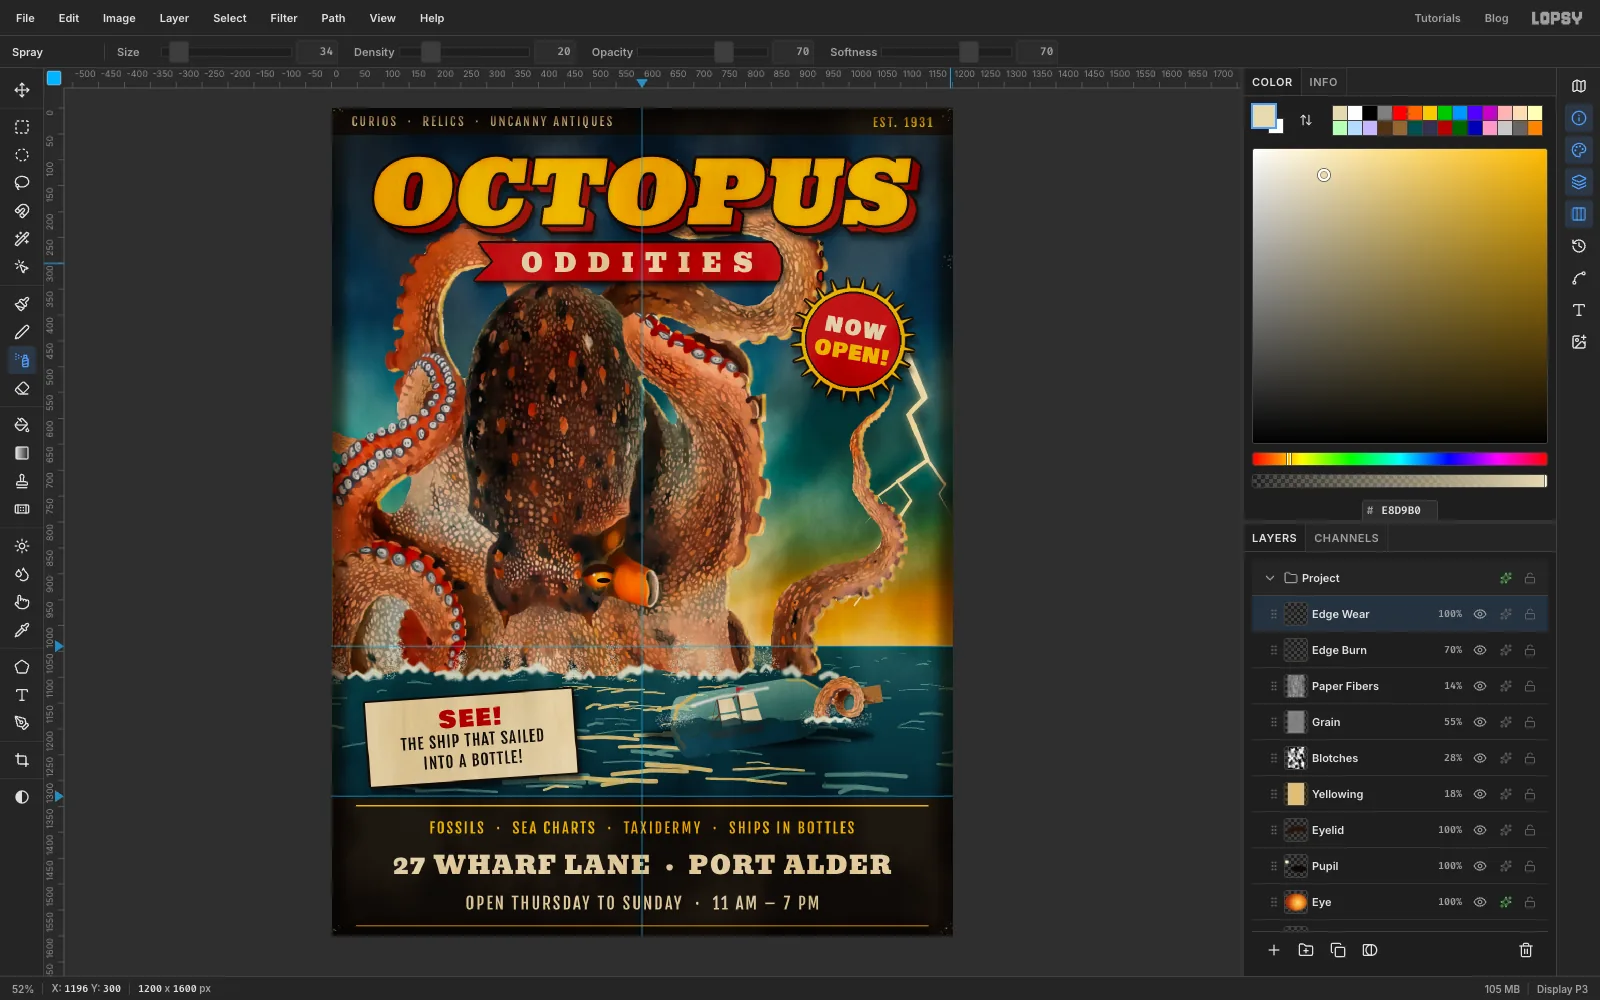
Add a layer named Edge Burn. Select from
26, 26to1174, 1574, choose Select → Inverse and Select → Feather…22, and fill with . Deselect, set the Blend to Multiply and the opacity to 70%. The page edges brown like old newsprint.On a layer named Edge Wear, click a few times with the Spray at Size
34, Density20, colour , right on the corners and two points on the edges. These are scuffs where the paper rubbed.The grain is too fine to judge at fit-to-screen zoom, so choose View → Actual Size and look at the teaser card. You should see a speckle over the cream and the black type, as if it were printed on rough paper.
-
Grade the whole flier
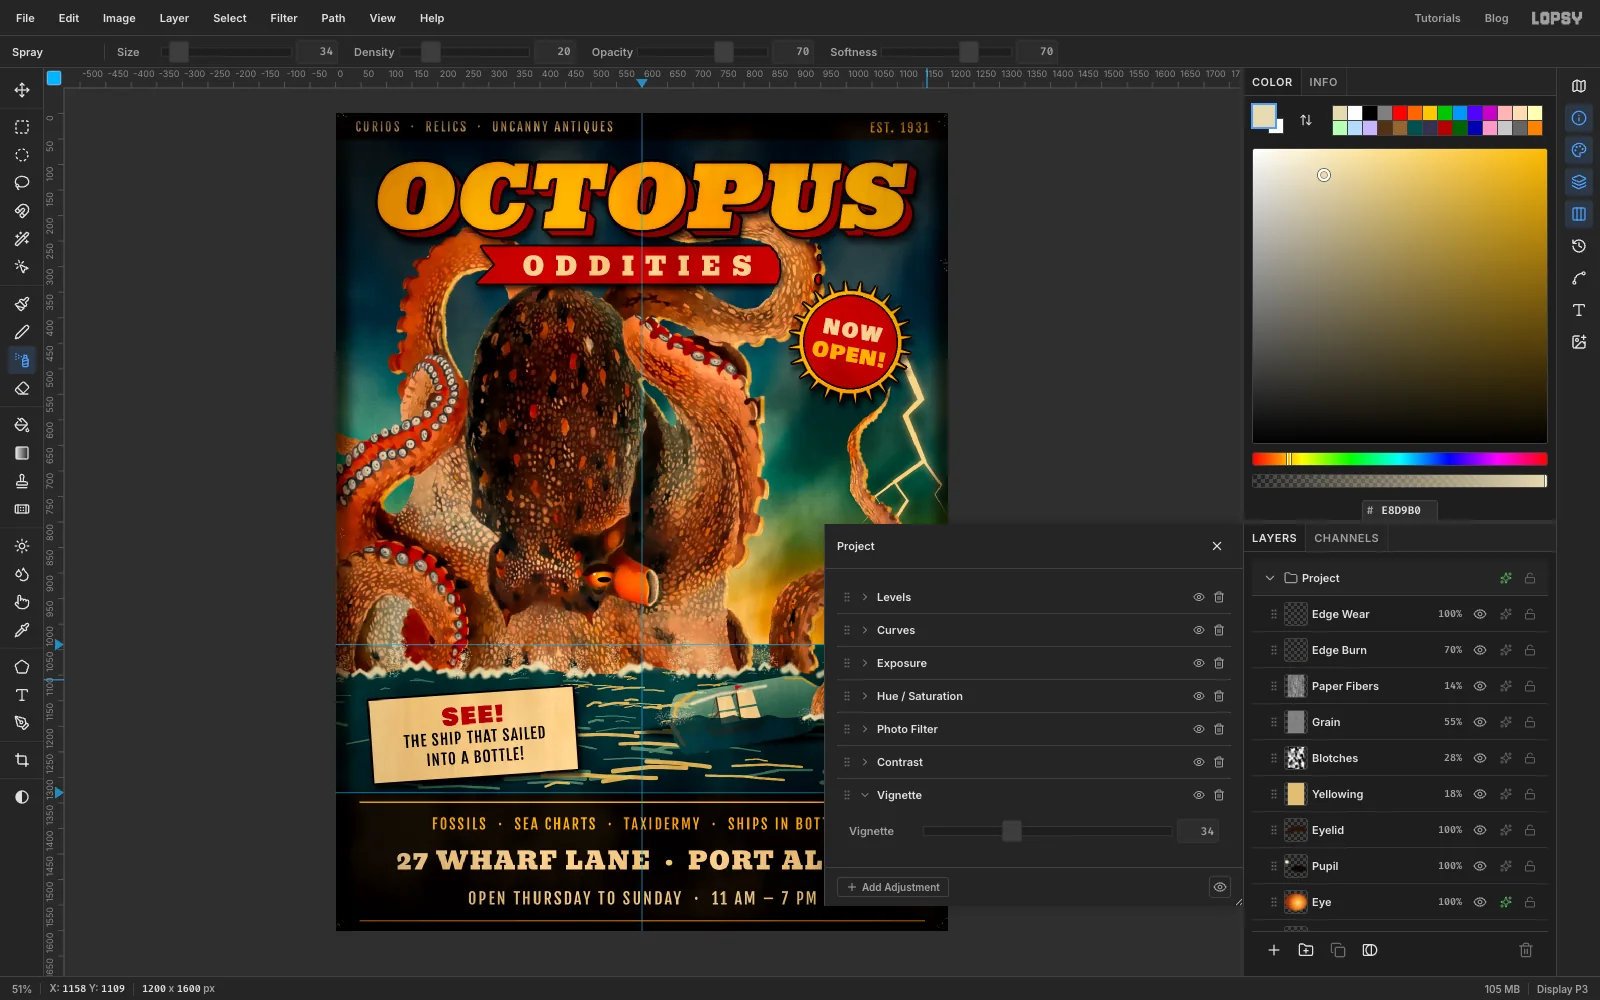
Choose Layer → Adjustment Layer… to open the adjustment stack for the whole document. The stack already holds neutral Levels, Curves, Exposure and Hue/Saturation nodes, so leave those alone. Click Add Adjustment three times:
- Photo Filter, Density
18, to warm everything - Contrast
10 - Vignette
34, to pull the eye into the middle
Close the drawer. Export with File → Quick Export PNG and save the project with File → Save Project.
- Photo Filter, Density