Cut a Skate Shark Stencil Kit from a Photo
Turn a mako shark photo into a four-plate spray-paint stencil kit in Lopsy, with cut chipboard cards, overspray, a sprayed skate deck and grease pencil.
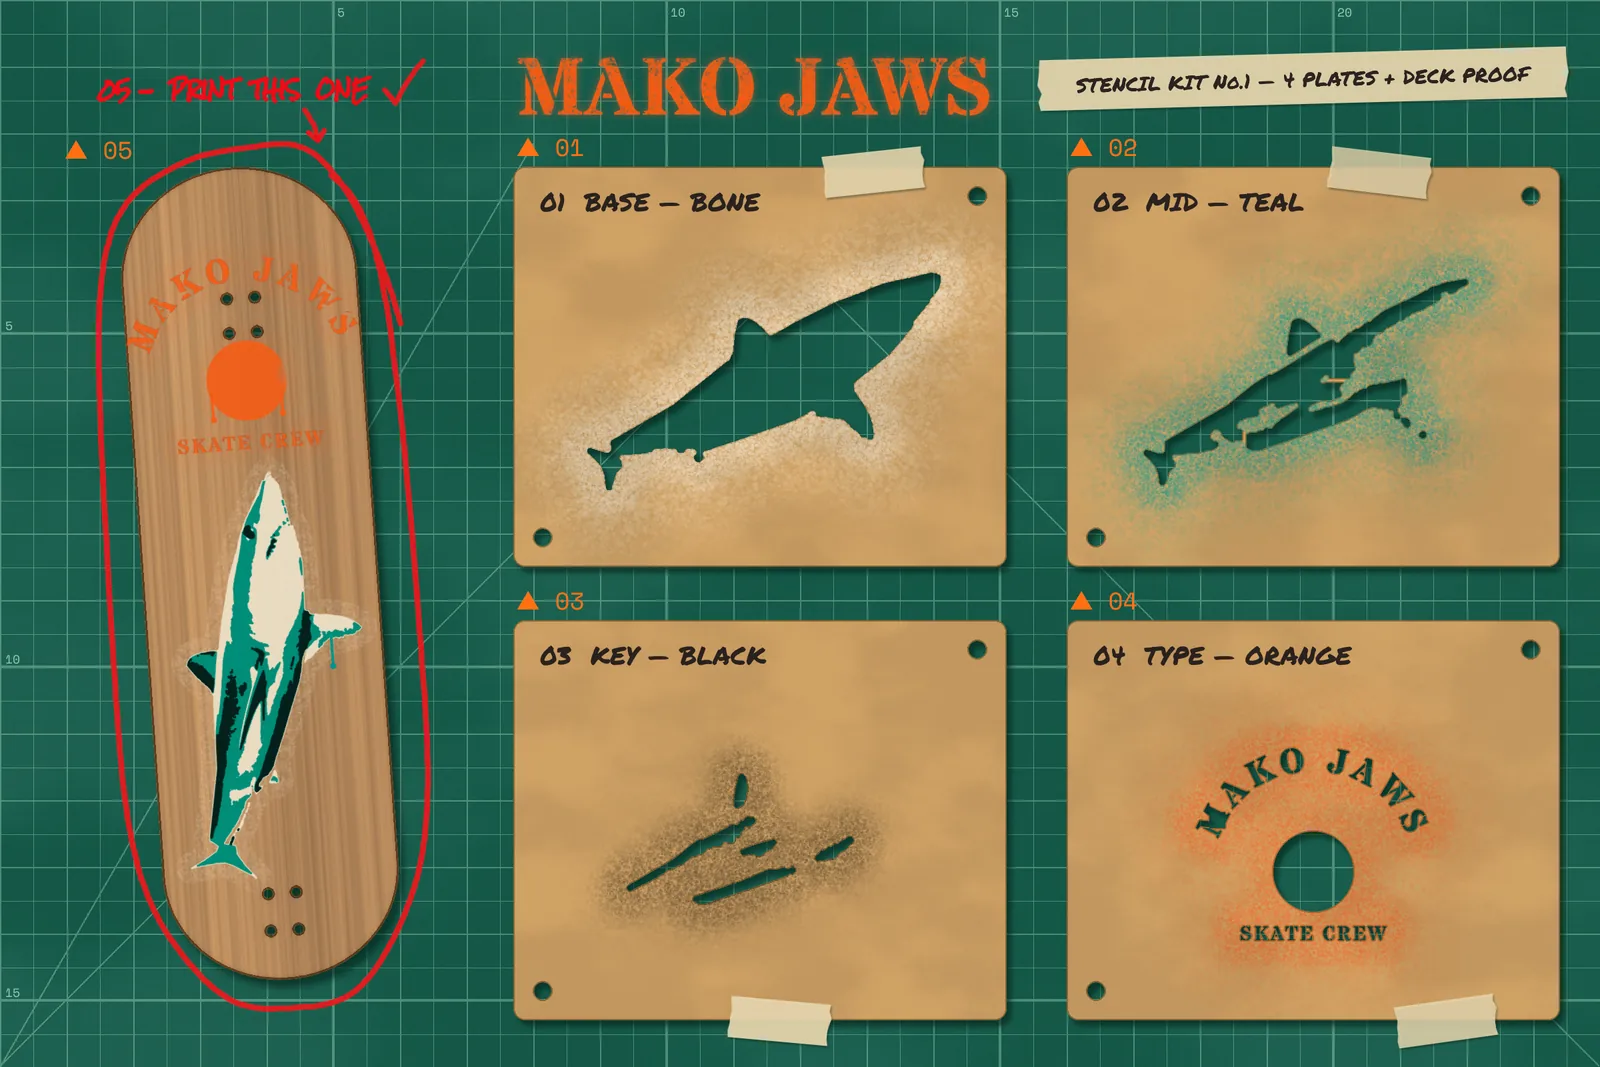
Multi-layer spray stencils are how a lot of skateboard graphics start. You split a picture into a few flat tones, cut one card for each tone, and spray them one after another onto the board, lightest first. Each card is called a plate. Holes in the corners line the plates up, so the colours land "in register".
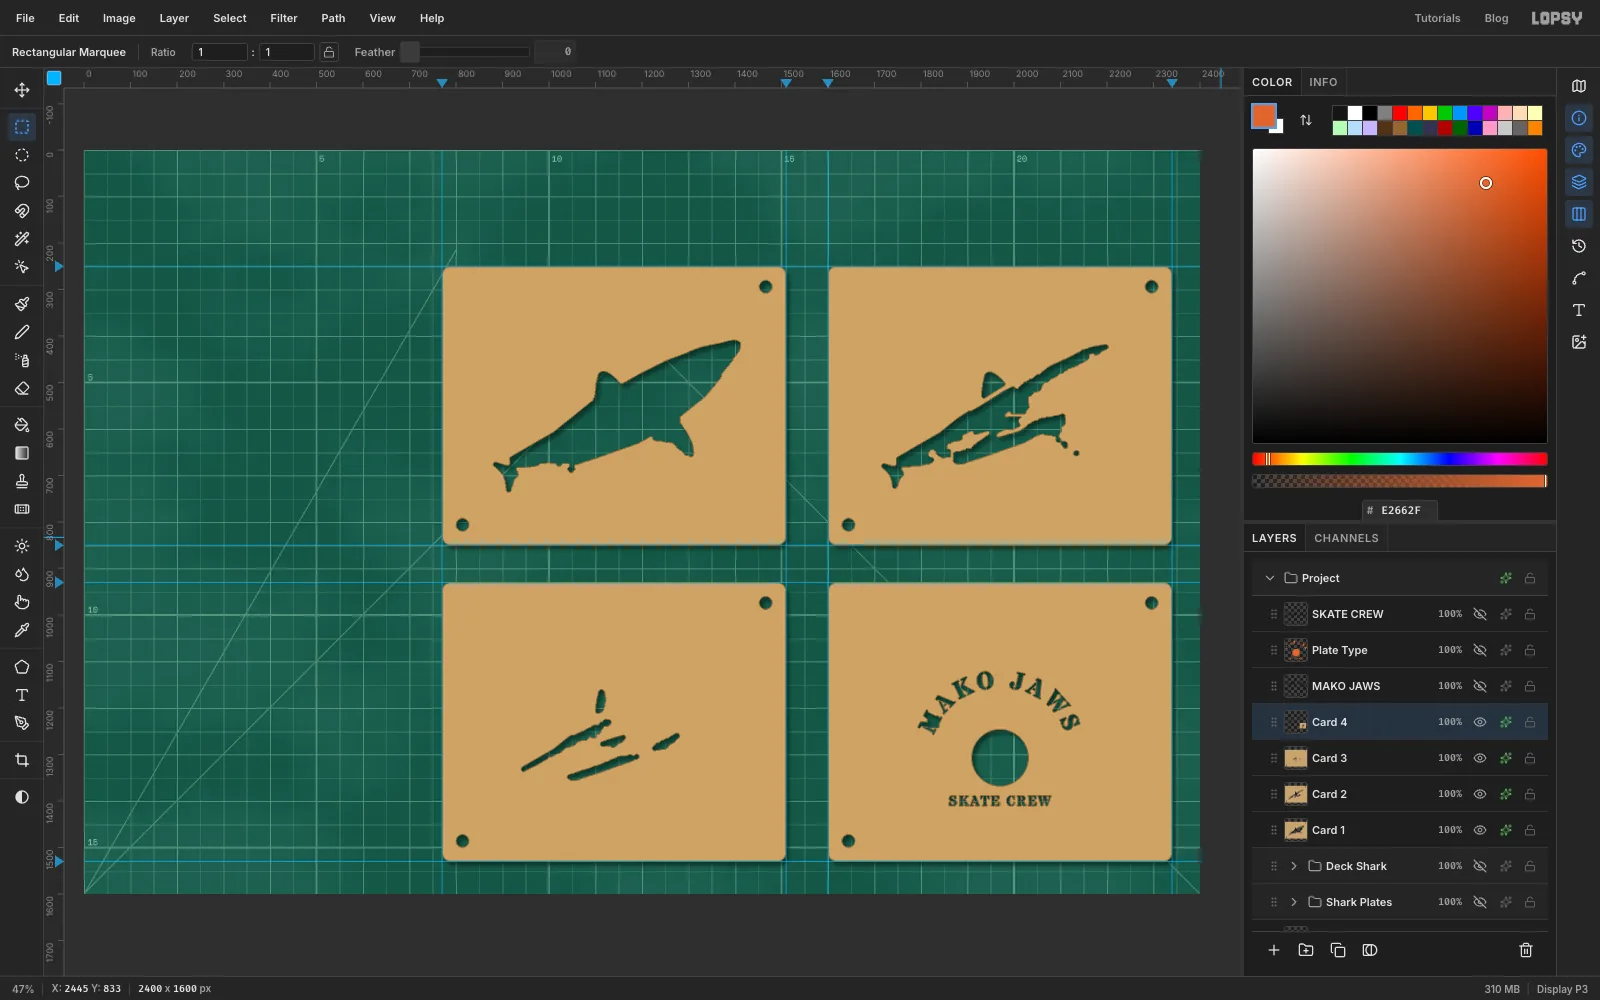
In this tutorial you'll make Mako Jaws, a 2400 × 1600 px stencil kit for an invented skate crew. It's laid out like a contact sheet. Four cut chipboard cards sit on a cutting mat: a bone base, a teal mid tone, a black key and an orange lettering plate. Next to them is the sprayed deck proof, circled in grease pencil as the pick.
The shark comes from a photo: Isurus oxyrinchus by Mark Conlin, taken for NOAA's Southwest Fisheries Science Center and in the public domain. Download the full 1130 × 753 px version from its Commons page. Any side-on shark or fish photo against open water works the same way.
Along the way you'll use:
- Define Pattern and Fill with Pattern for the mat grid, the Pencil with Shift-click straight lines, Add Noise and Clouds
- pasting a photo, the Magic Wand with Shift-click seeds, an Option-drag Lasso to subtract, and Select → Inverse
- Desaturate, Gaussian Blur, Brightness/Contrast and Posterize to split the photo into tones
- Grow, Shrink and Feather, and Cmd-clicking layer thumbnails to cut one layer with another
- groups, Duplicate Layer, and scaling and rotating several layers at once with the Move tool
- ruler guides with snapping marquees
- the Pen tool, text on a path, letter spacing, Rasterize Layer and Merge Down
- the Spray tool, the Brush, Fibers, a layer mask, and the Multiply and Soft Light blend modes
- the Drop Shadow, Stroke, Inner Glow and Outer Glow effects
- copy and paste, dragging layers in the Layers panel, and undo and redo
The palette:
-
Cutting mat
-
mat lines
-
Chipboard
-
cut edge
-
card shadow
-
Maple
-
ply edge
-
deck glow
-
Bone
-
teal
-
key black
-
orange
-
Redrawn tail
-
Masking tape
-
marker
-
Grease pencil
-
frame numbers
-
Fill the cutting mat
- Create a new document 2400 × 1600 px.
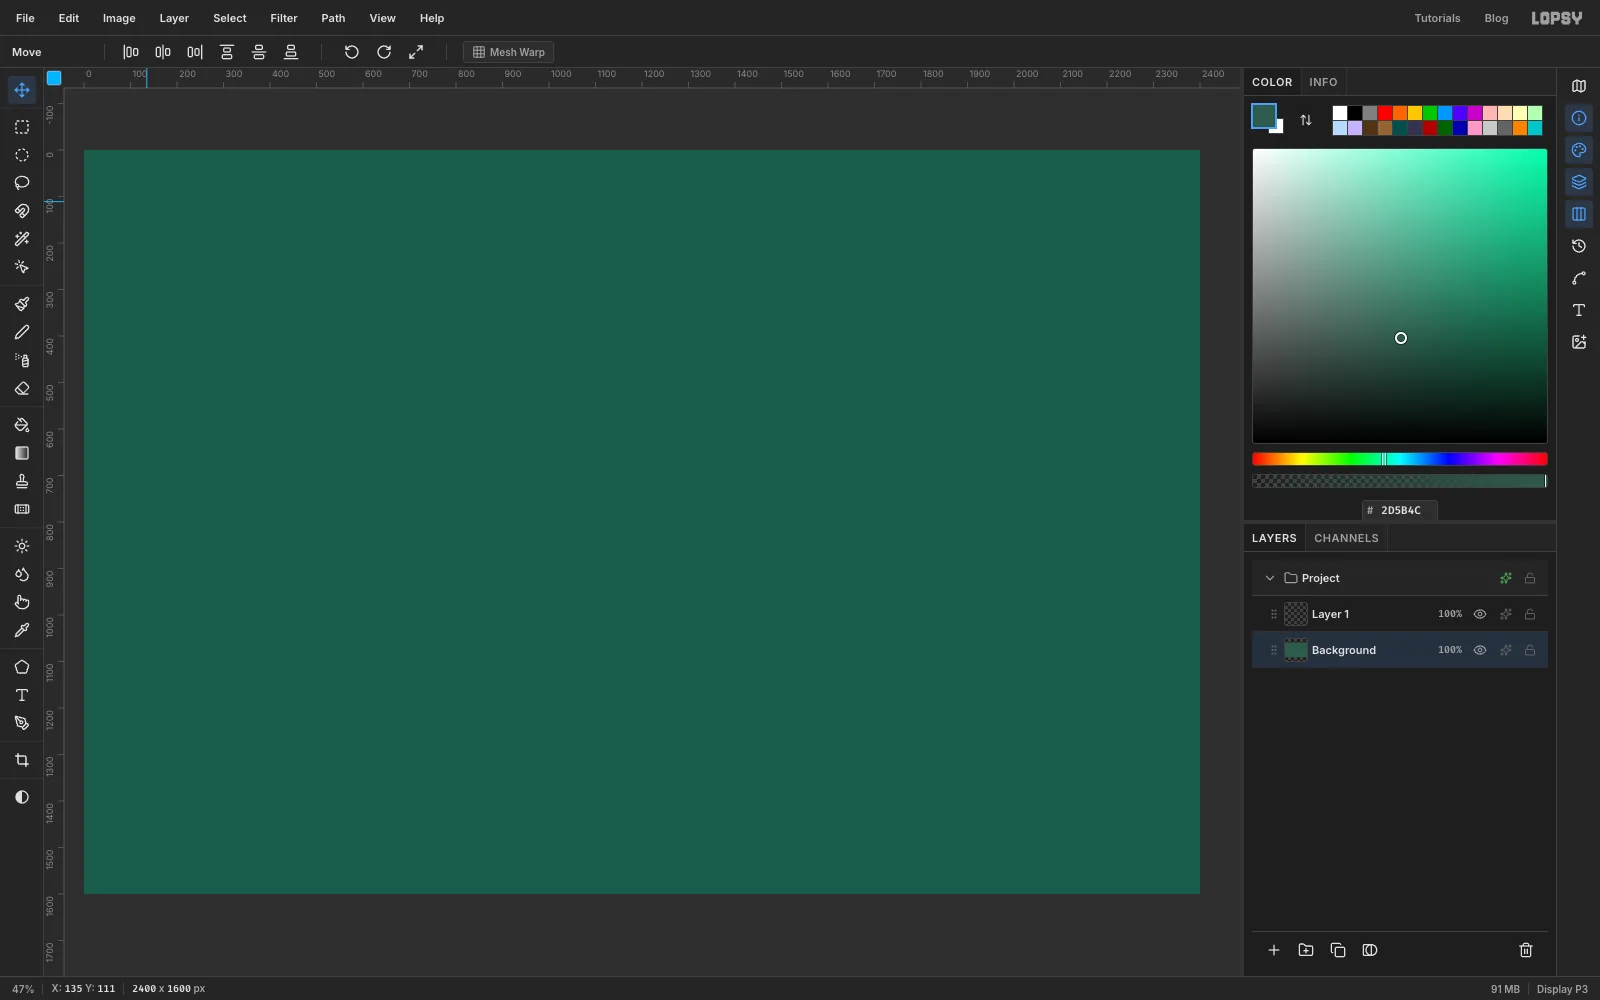
- Click Background in the Layers panel, set the foreground colour to and choose Edit → Fill.
This green is a self-healing cutting mat, the board the stencils are cut on.
-
Draw one grid tile
A cutting mat has a printed grid. You'll draw one square of it and repeat it.
- Click Layer 1 and rename it
Grid Tile. - Pick the Pencil, set Size to
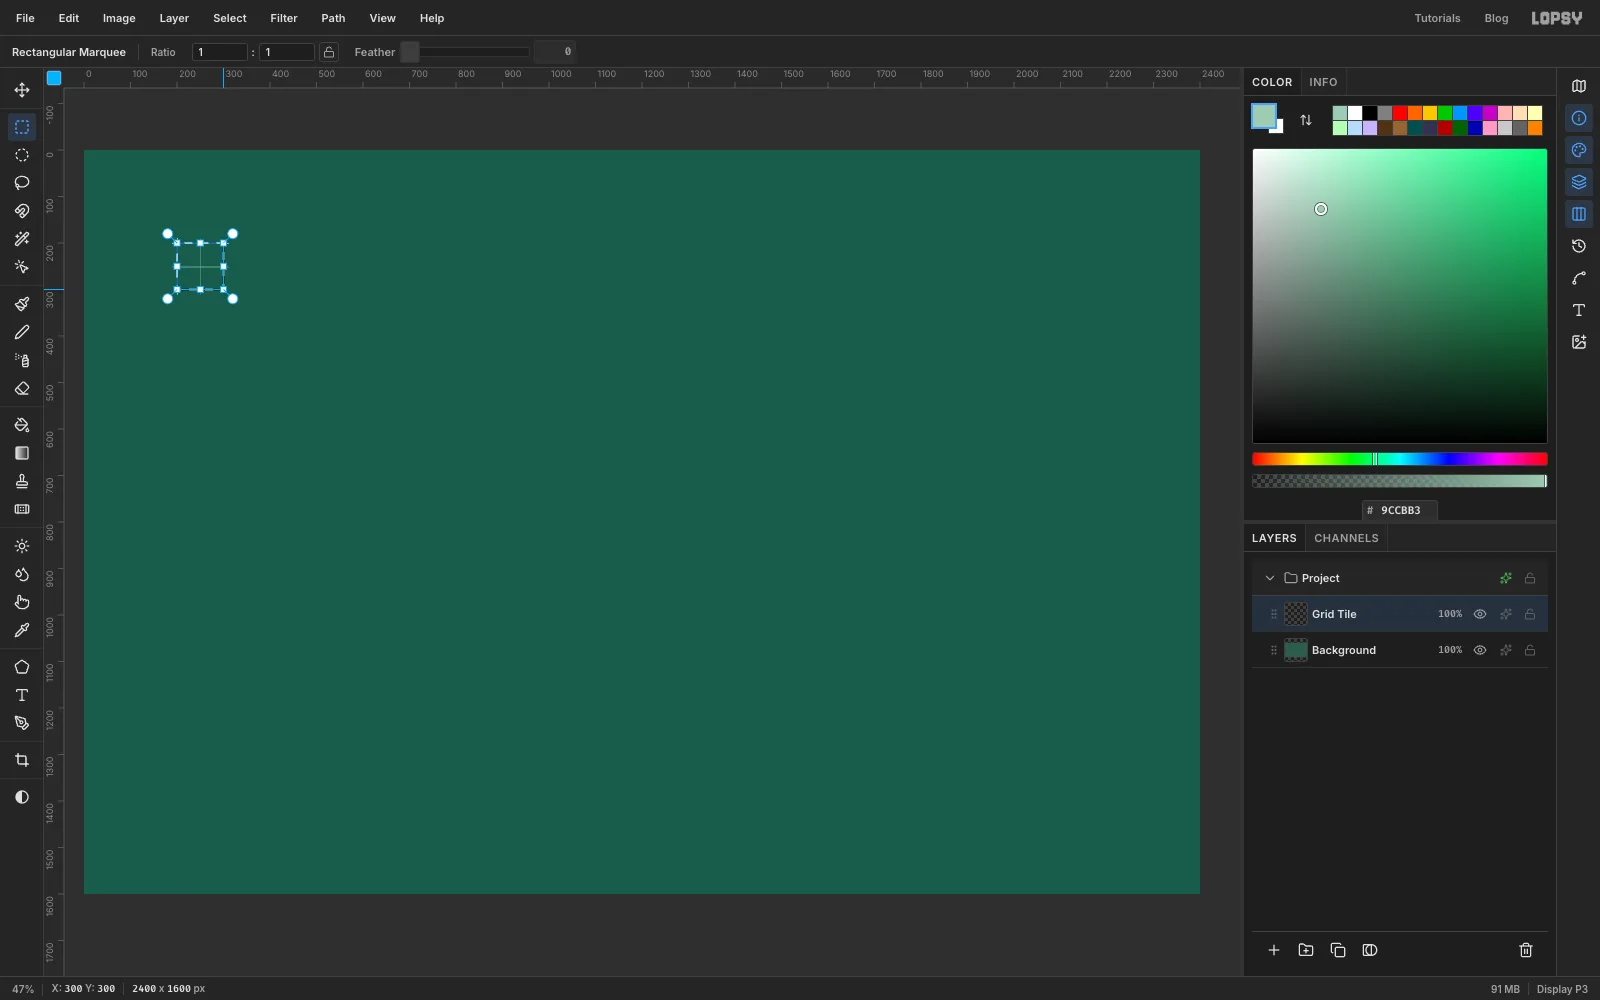
2and the colour to . - In an empty area near the top left, draw a horizontal line and a vertical line that cross, each about 120 px long. Click to start a line, then hold Shift and click to finish it.
- Set Size to
1and draw a second, thinner pair 50 px further right and 50 px further down. These are the half-way lines. - Pick the Rectangular Marquee and, with nothing selected, click once (don't drag) on the point where the thick lines cross. A Rectangular Selection dialog opens. Type the crossing point into From X / Y and add 100 to each for To X / Y, so you get an exact 100 × 100 px square, and apply it.
- Choose Edit → Define Pattern, deselect with Cmd+D, and delete the
Grid Tilelayer.
- Click Layer 1 and rename it
-
Fill the mat with the grid
- Click Add Layer and name it
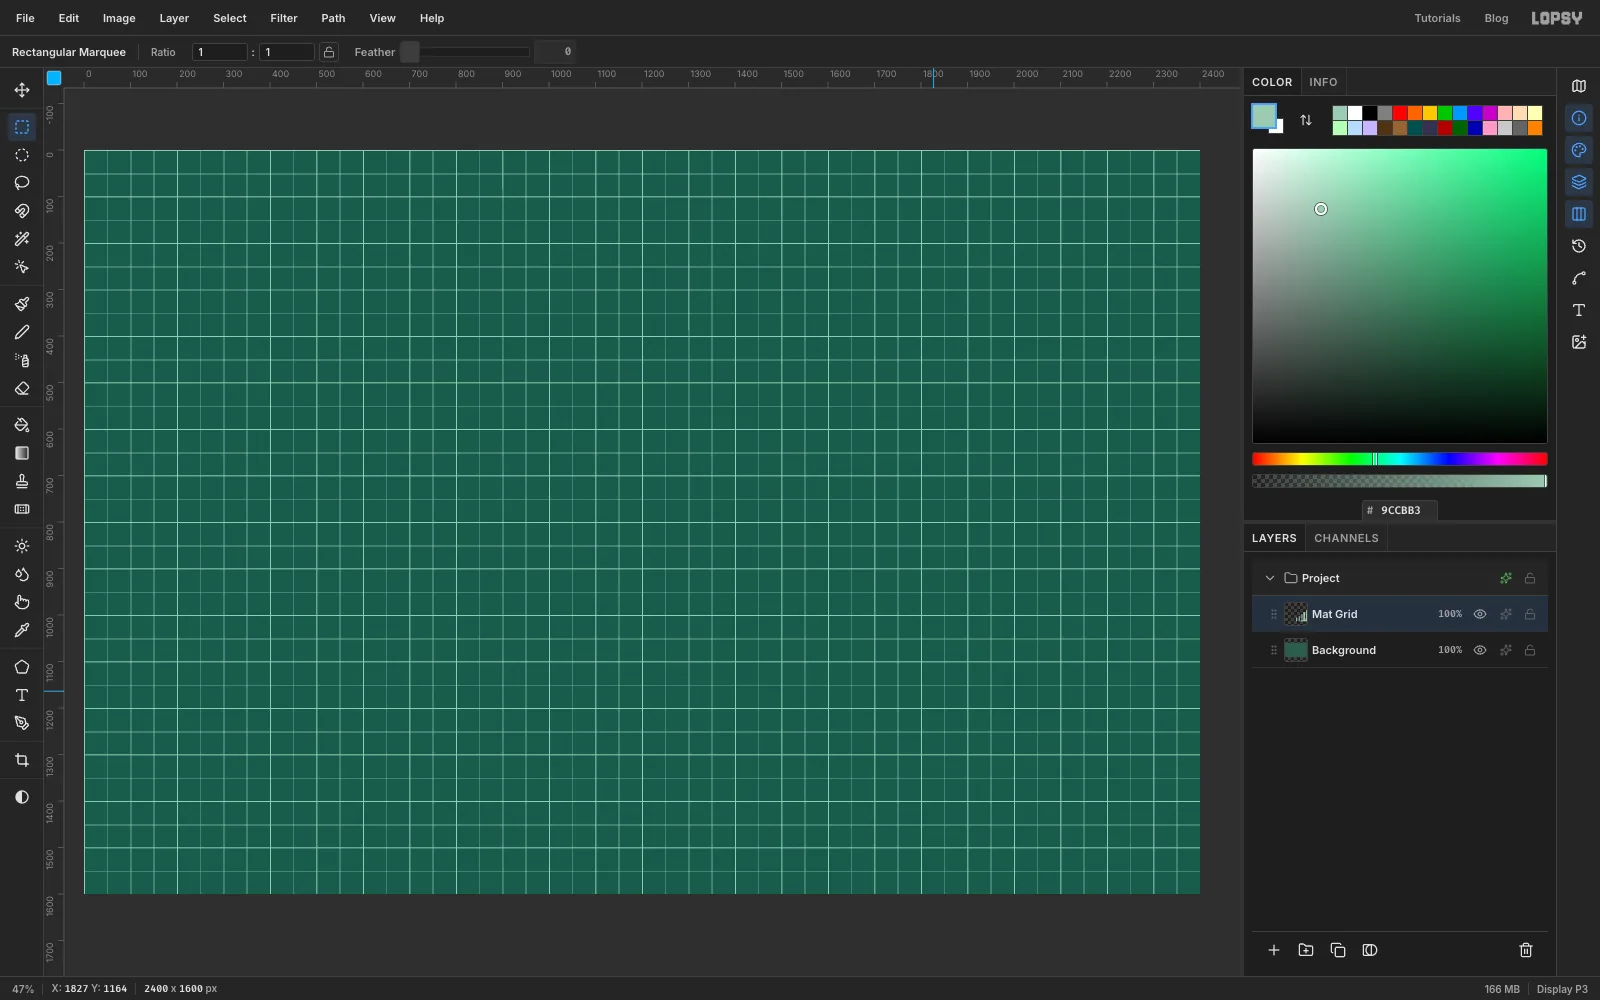
Mat Grid. - Choose Edit → Fill with Pattern…, pick the tile you just made and click Apply. With nothing selected, the pattern fills the whole canvas.
- Set the layer's opacity to
45%so the grid sits back.
- Click Add Layer and name it
-
Add the angle lines and heavy lines
Cutting mats also print angle guides and heavier lines every few squares.
- Still on
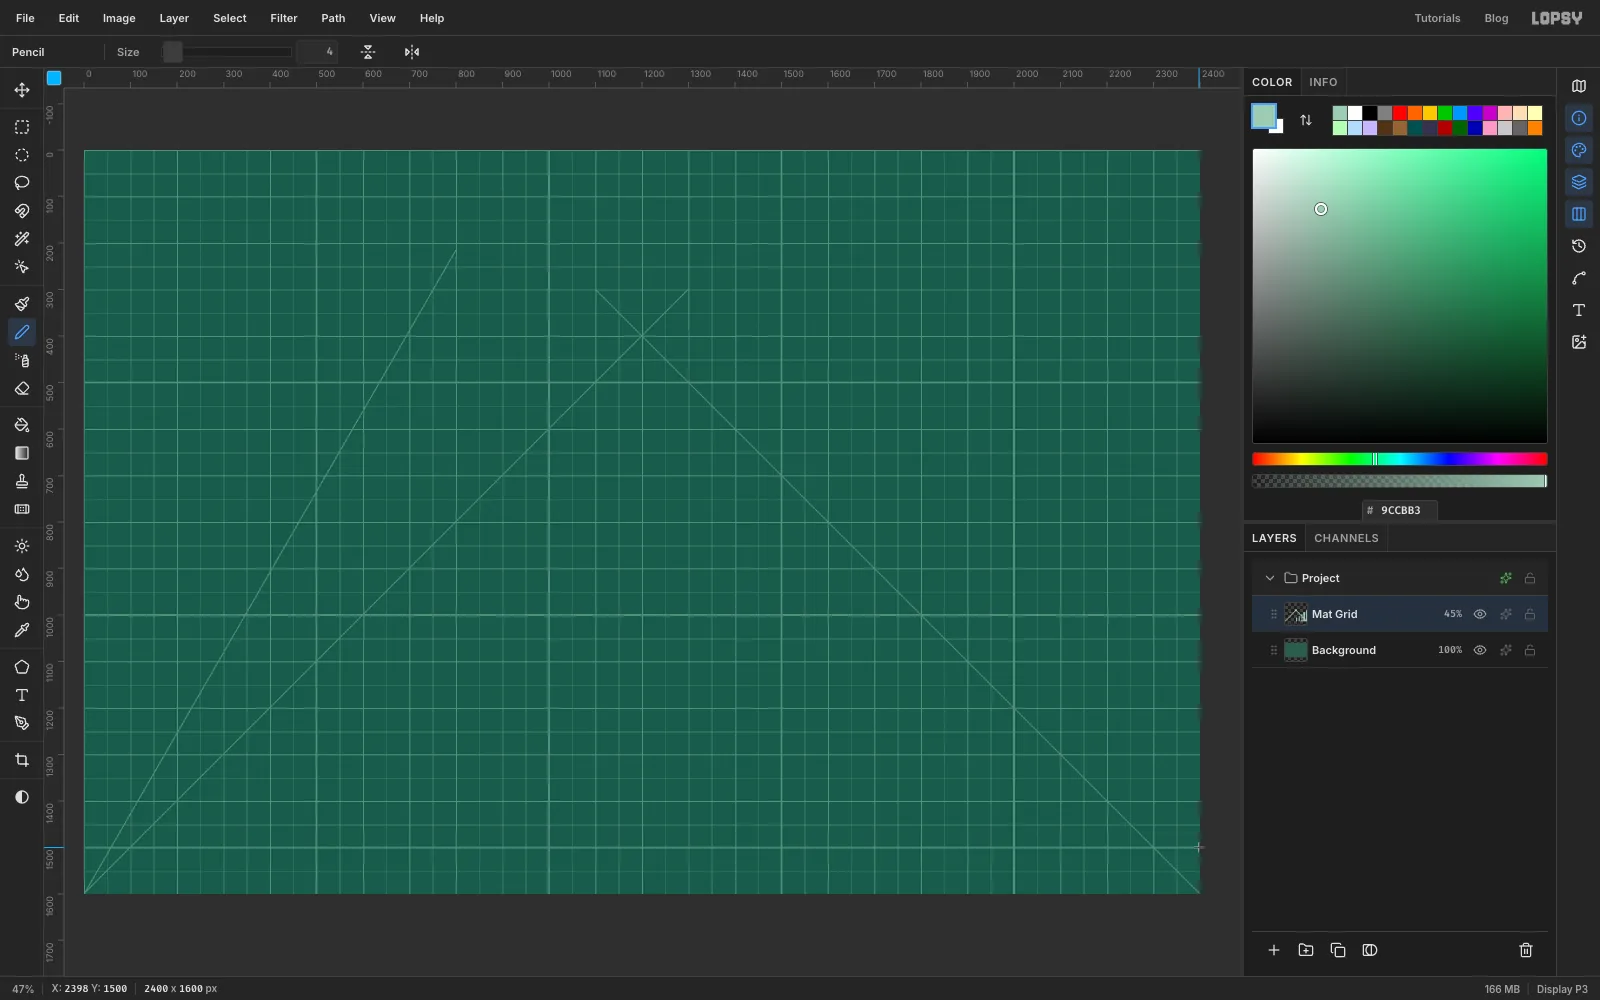
Mat Grid, use the Pencil at size2in . - Click in the bottom-left corner, then hold Cmd+Shift and click about four fifths of the way up. Holding Cmd snaps the line to 15° steps, so you get an exact 45°. Draw a steeper 60° line from the same corner, and another 45° line from the bottom-right corner.
- Set Size to
4and draw full-length lines on every fifth grid line: down the canvas atx 500,1000,1500and2000, and across aty 500,1000and1500. Watch X and Y in the status bar to land on them.
- Still on
-
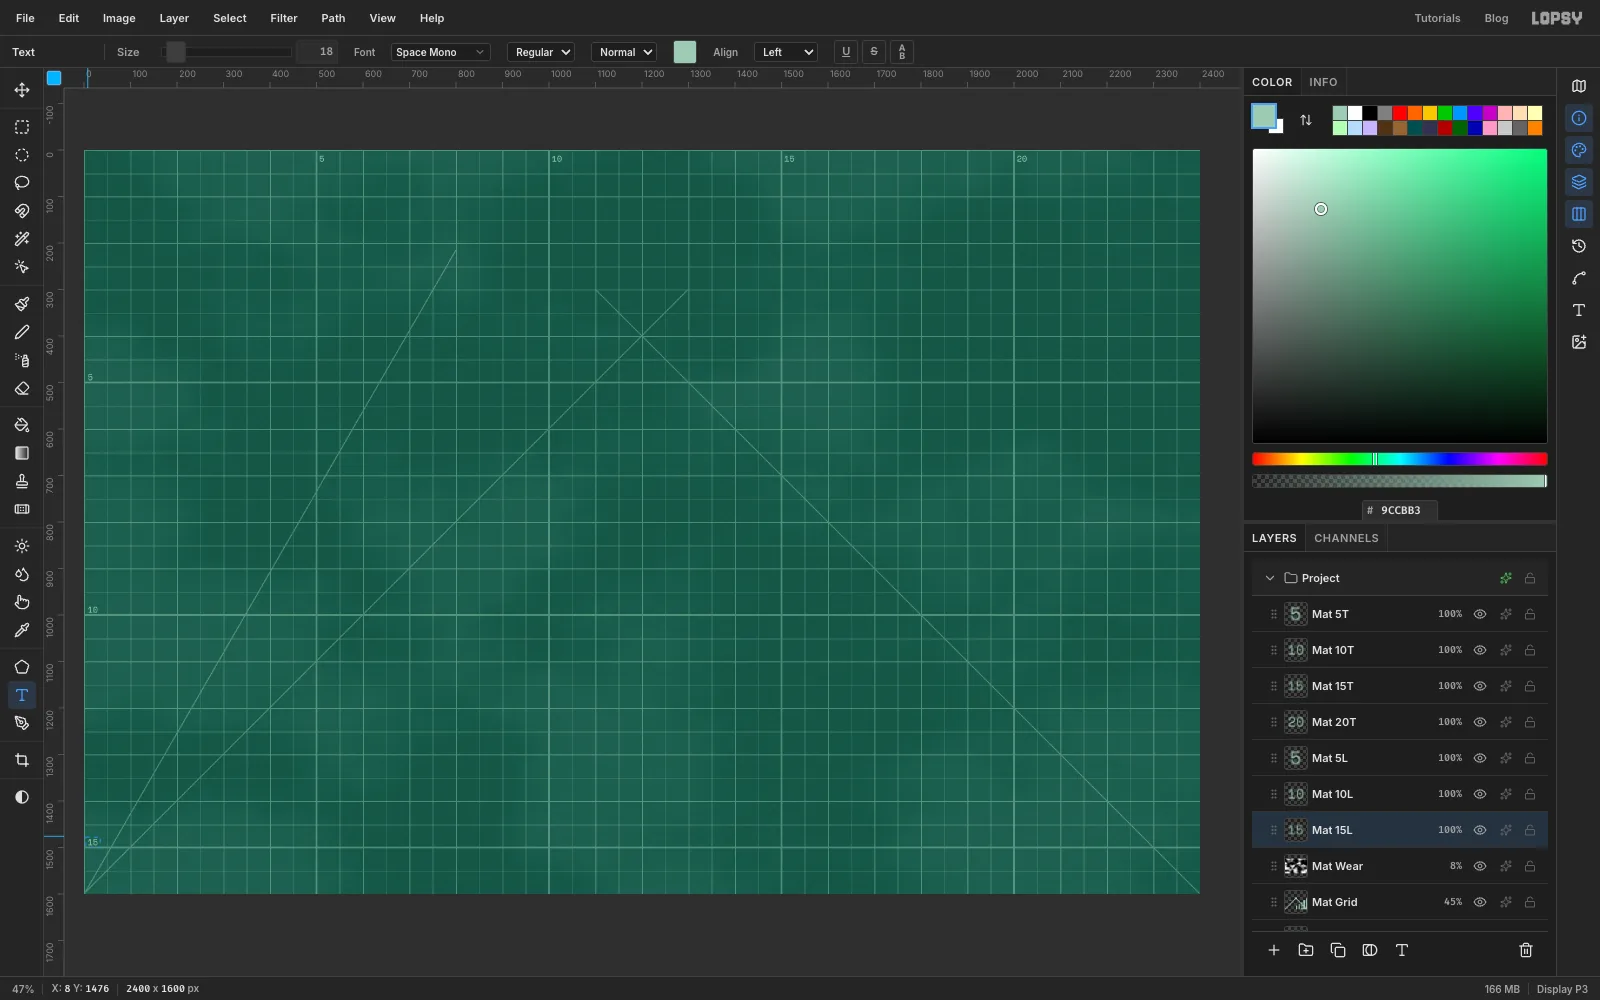
Texture the mat and number the edges
- Click Background and run Filter → Add Noise… with Amount
10, Mono and Gaussian. - Click
Mat Grid, add a layer calledMat Wearand fill it with black. Run Filter → Clouds… with Scale6. - Open the layer's effects drawer, set the blend mode to Soft Light, and set the opacity to
8%. Any stronger and the mat looks like smoke. - With
Mat Wearactive, pick the Text tool and set Space Mono, Size18, colour . Click just right of each heavy line along the top edge and type5,10,15and20, pressing Tab after each one. Do the same with5,10and15down the left edge. - Click
Mat Grid, Shift-click the top number, choose Layer → Group Layers and name the groupCutting Mat. Click its arrow to collapse it.
- Click Background and run Filter → Add Noise… with Amount
-
Paste the shark photo
Keep
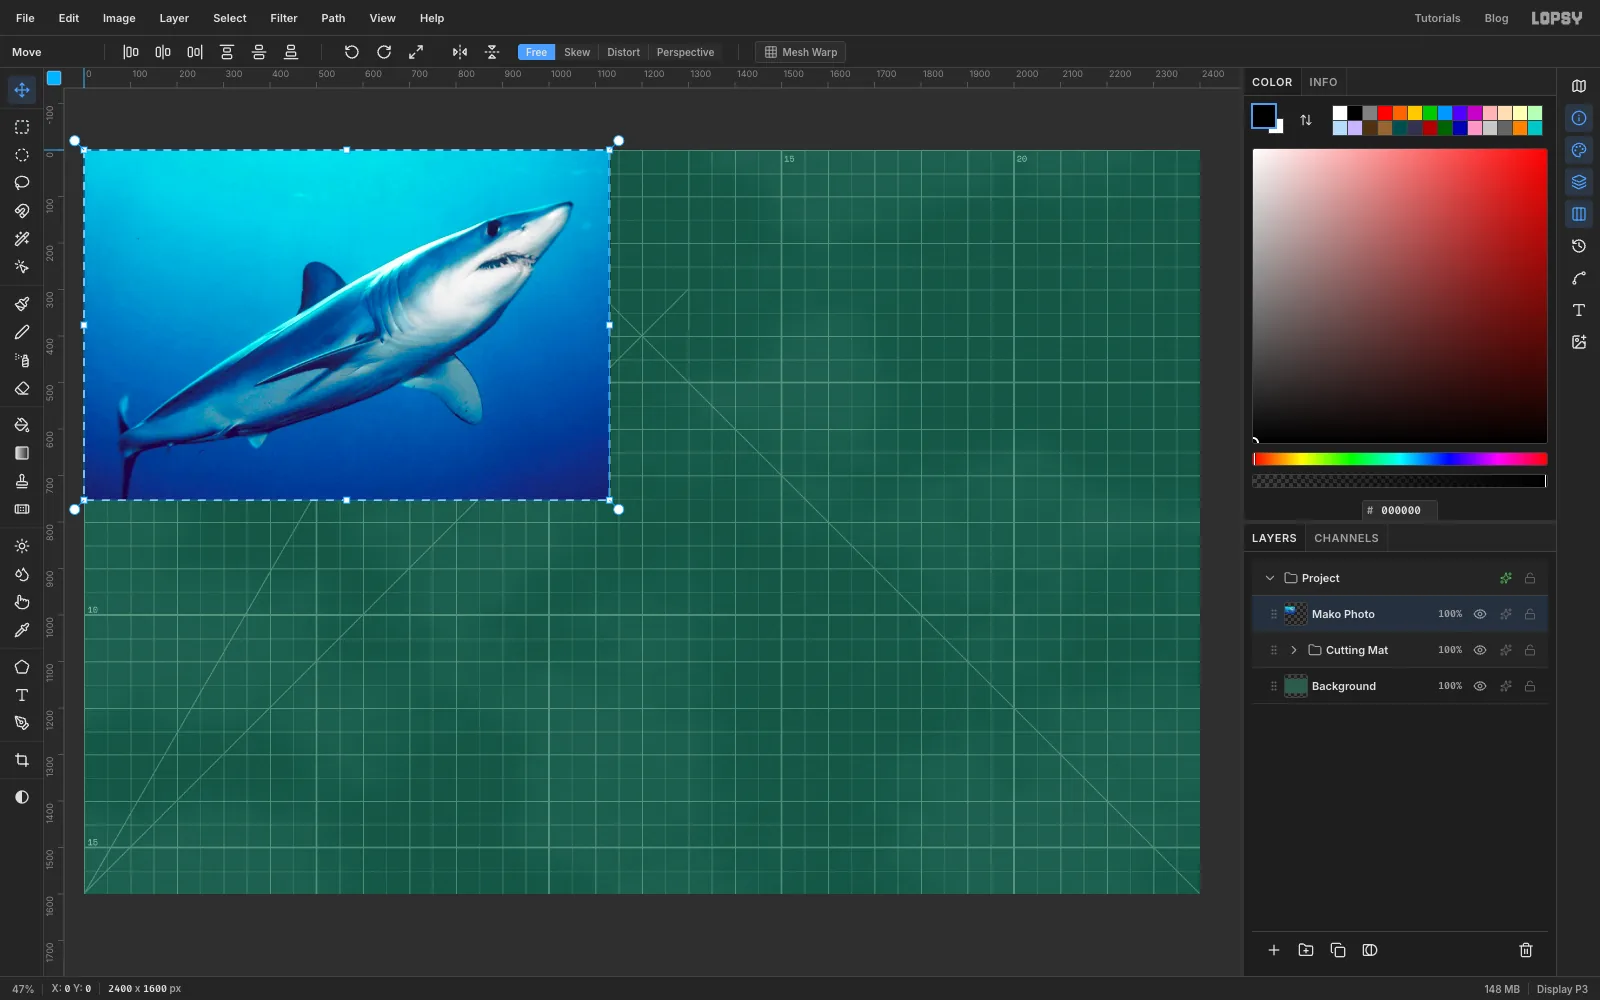
Cutting Matselected, open the photo in your browser or image viewer, copy it and press Cmd+V in Lopsy. It arrives at its full size in the top-left corner on a new layer. Rename the layerMako Photoand deselect.The photo stays at this size. You'll cut the plates from it here and scale them down later.
-
Select the water with the Magic Wand
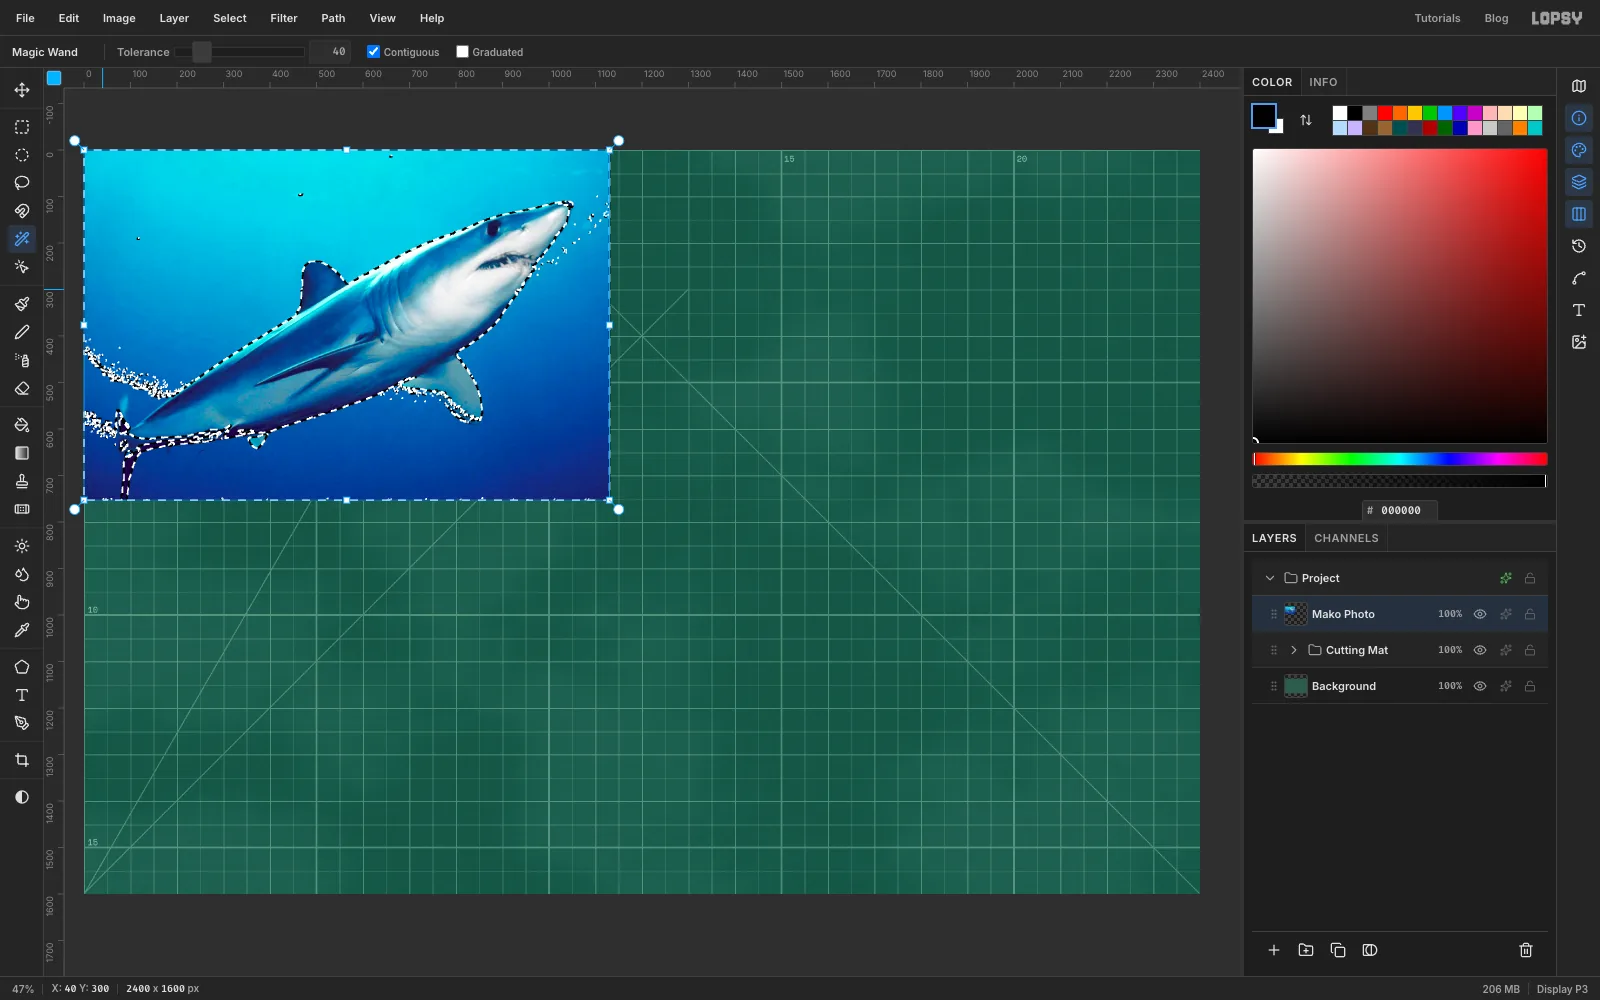
- Pick the Magic Wand, set Tolerance to
40and tick Contiguous. - Click the bright water near the top left.
- Hold Shift and click the water in seven or eight more places, from the bright cyan at the top to the deep blue at the bottom and right. Each click adds to the selection.
Zoom in and look closely at the ants round the dorsal fin and the tail. They are dark navy, close to the deep blue water, so the wand can easily take part of them too.
- Pick the Magic Wand, set Tolerance to
-
Take the fins back with the Lasso
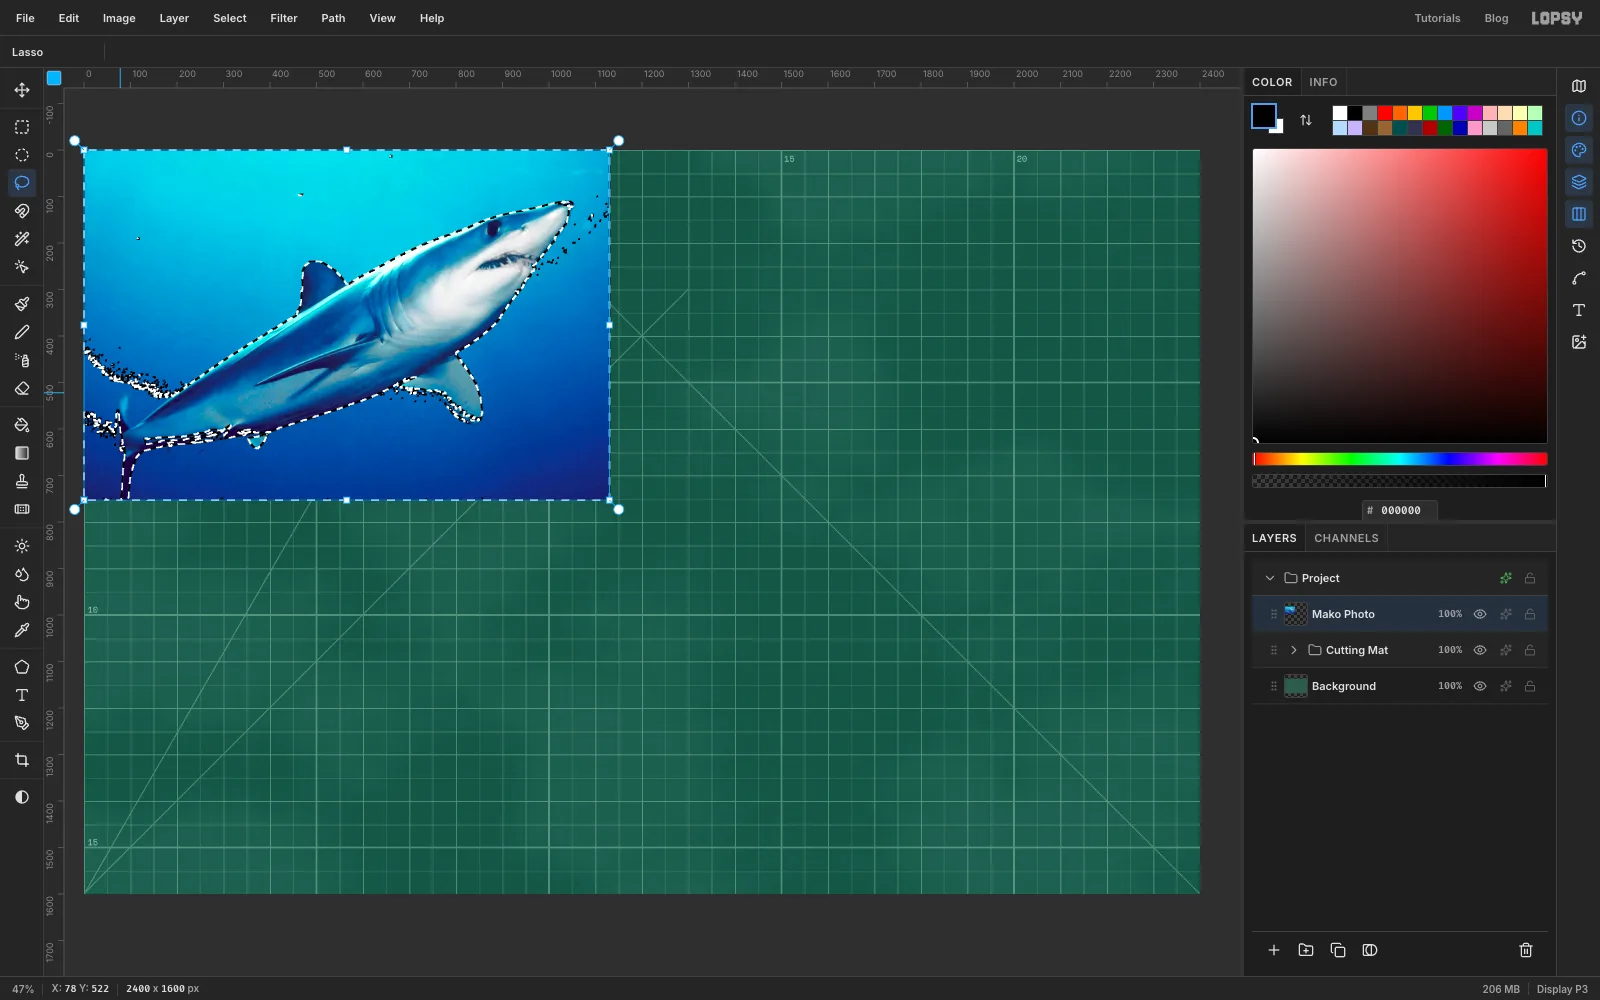
If the ants cut across the base of the dorsal fin or the tail, take them back:
- Pick the Lasso.
- Hold Option and drag a tight loop around the dorsal fin. Option-drag subtracts from the selection.
- Do the same around the tail.
-
Delete the water and the specks
- Press Delete to clear the water, then deselect.
- Bubbles and specks are left floating in the water. Lasso a loose outline around the whole shark, choose Select → Inverse, and press Delete again.
- Deselect and rename the layer
Mako Cutout.
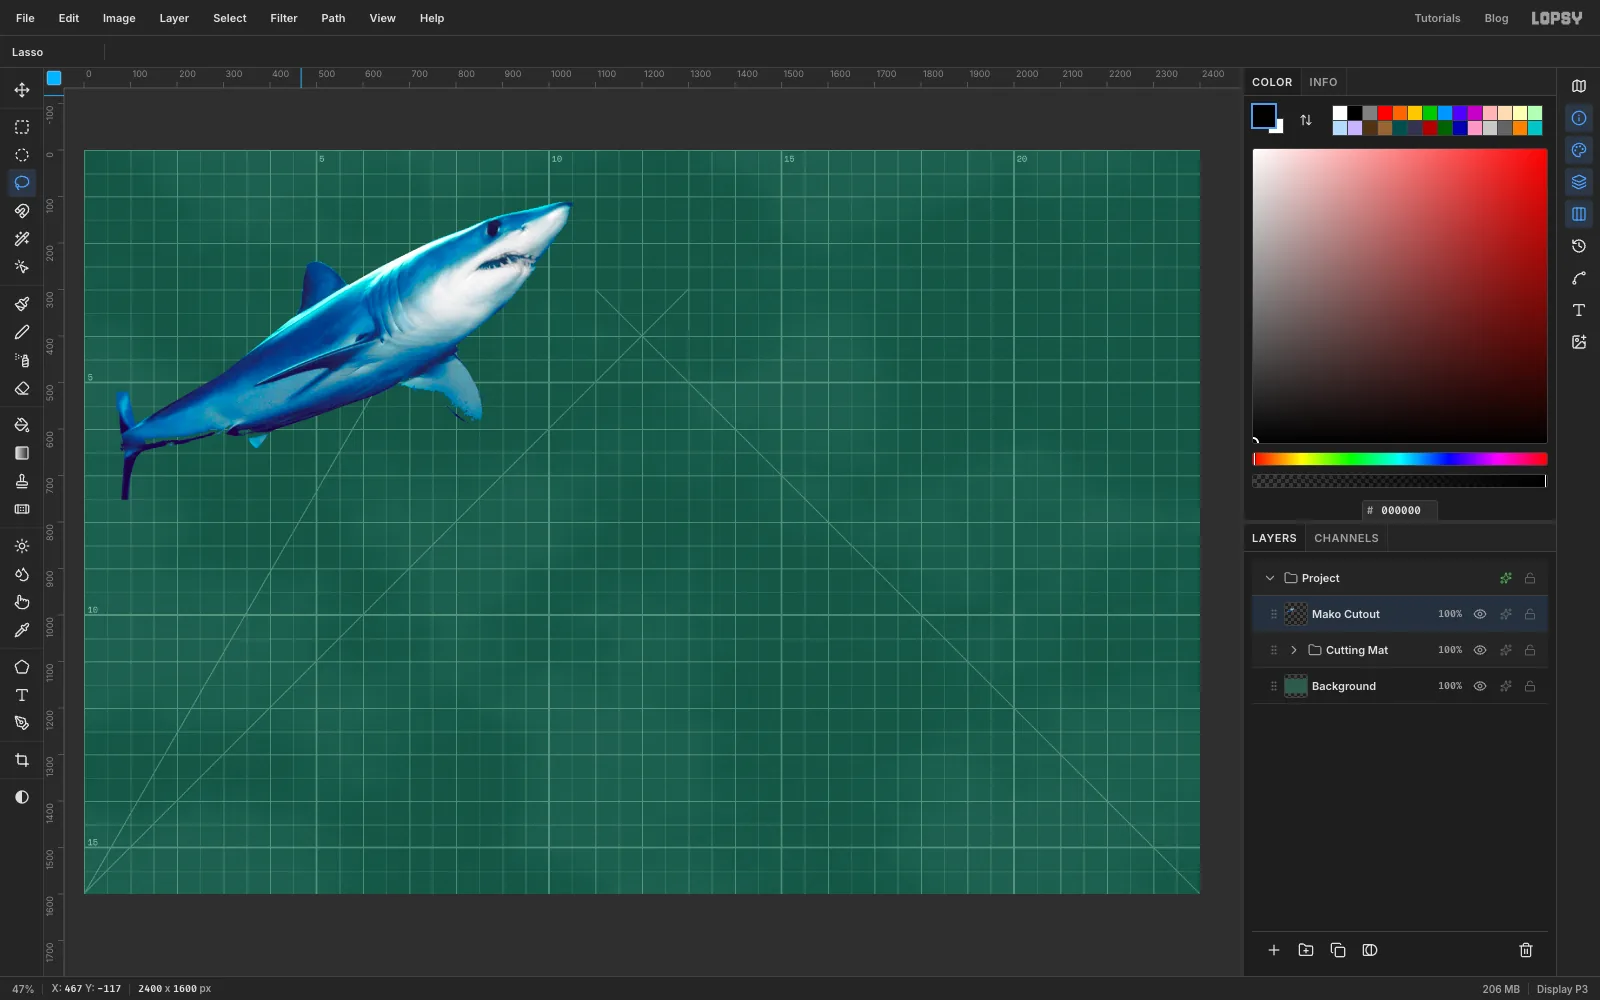
-
Redraw the tail as a crescent
The photo cuts off the bottom of the tail. Cut as it is, that would make a straight bar on the stencil instead of a fin.
- With the Lasso, loop around the tail from the narrow point where it joins the body, and press Delete.
- Draw the new tail as a lasso shape. Start at the narrow stalk, sweep out to a pointed tip above the body line, curve back in to a notch in the middle, then out to a matching tip below and back to the stalk. A mako's tail is almost symmetrical, like a crescent moon.
- Fill it with , a mid blue that will posterize into the dark plates, and deselect.
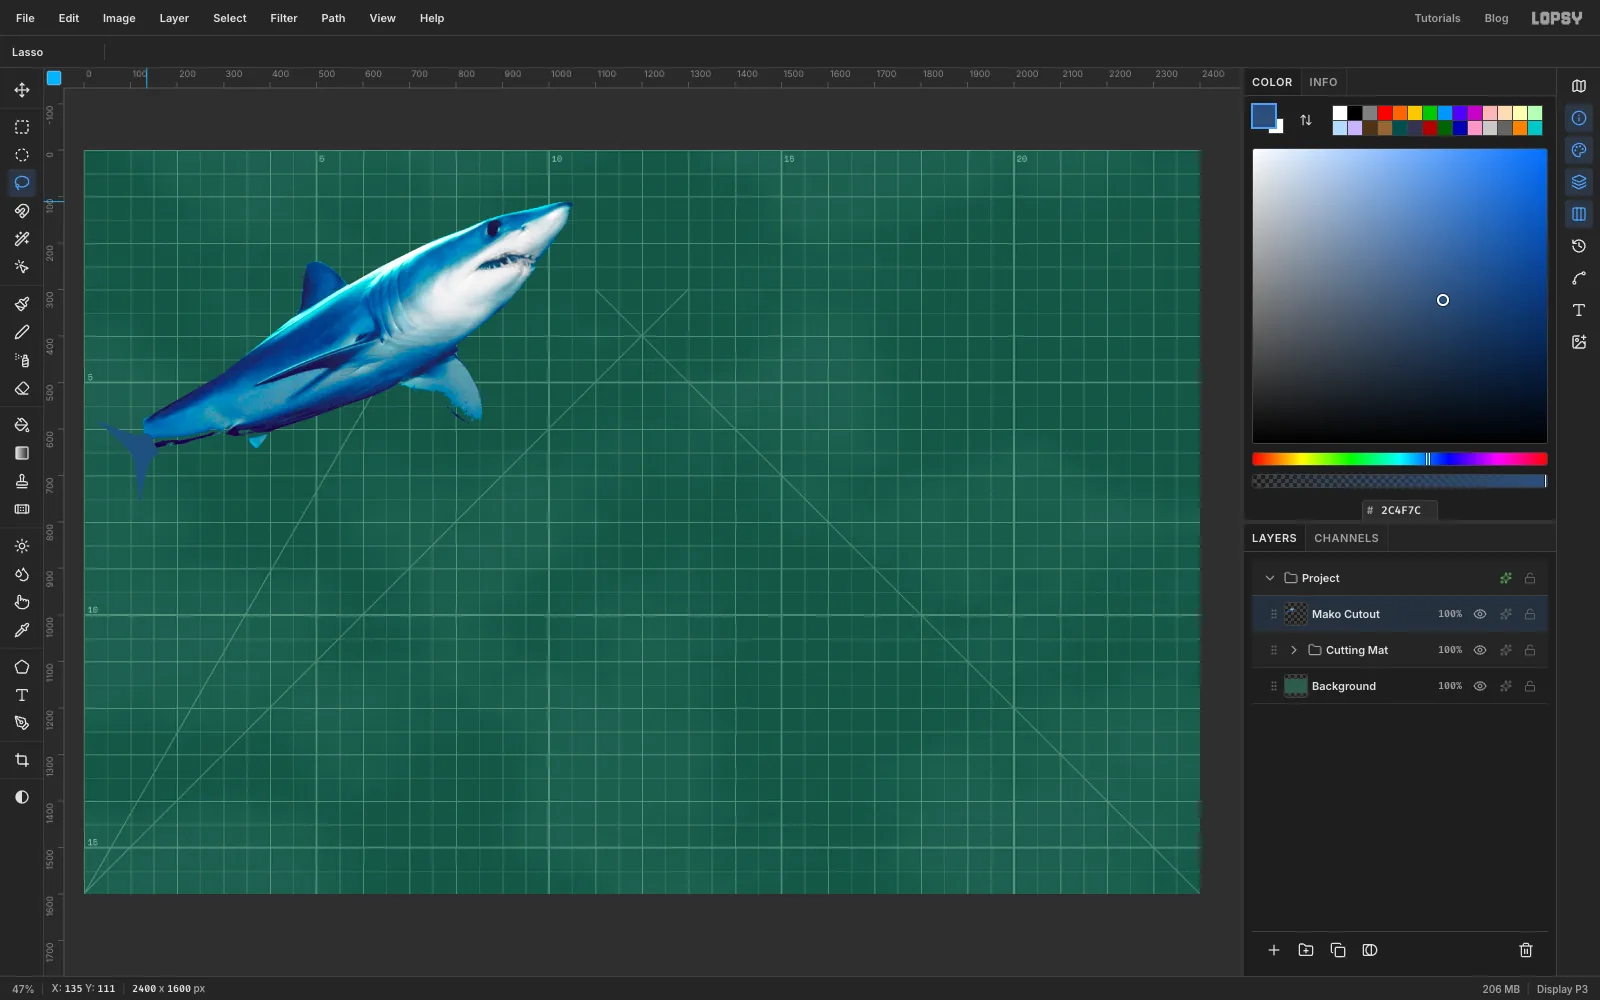
-
Posterize a tone map
- Click Duplicate Layer and rename the copy
Tone Map. - Run Filter → Desaturate.
- Run Filter → Gaussian Blur… with Radius
4. This smooths the photo detail into shapes you could actually cut. - Run Filter → Brightness/Contrast… with Brightness
4and Contrast100. - Run Filter → Posterize… with Levels
4.
Black is the shadows, dark grey the mid tones, light grey and white the highlights. The plates come from the two darker tones.
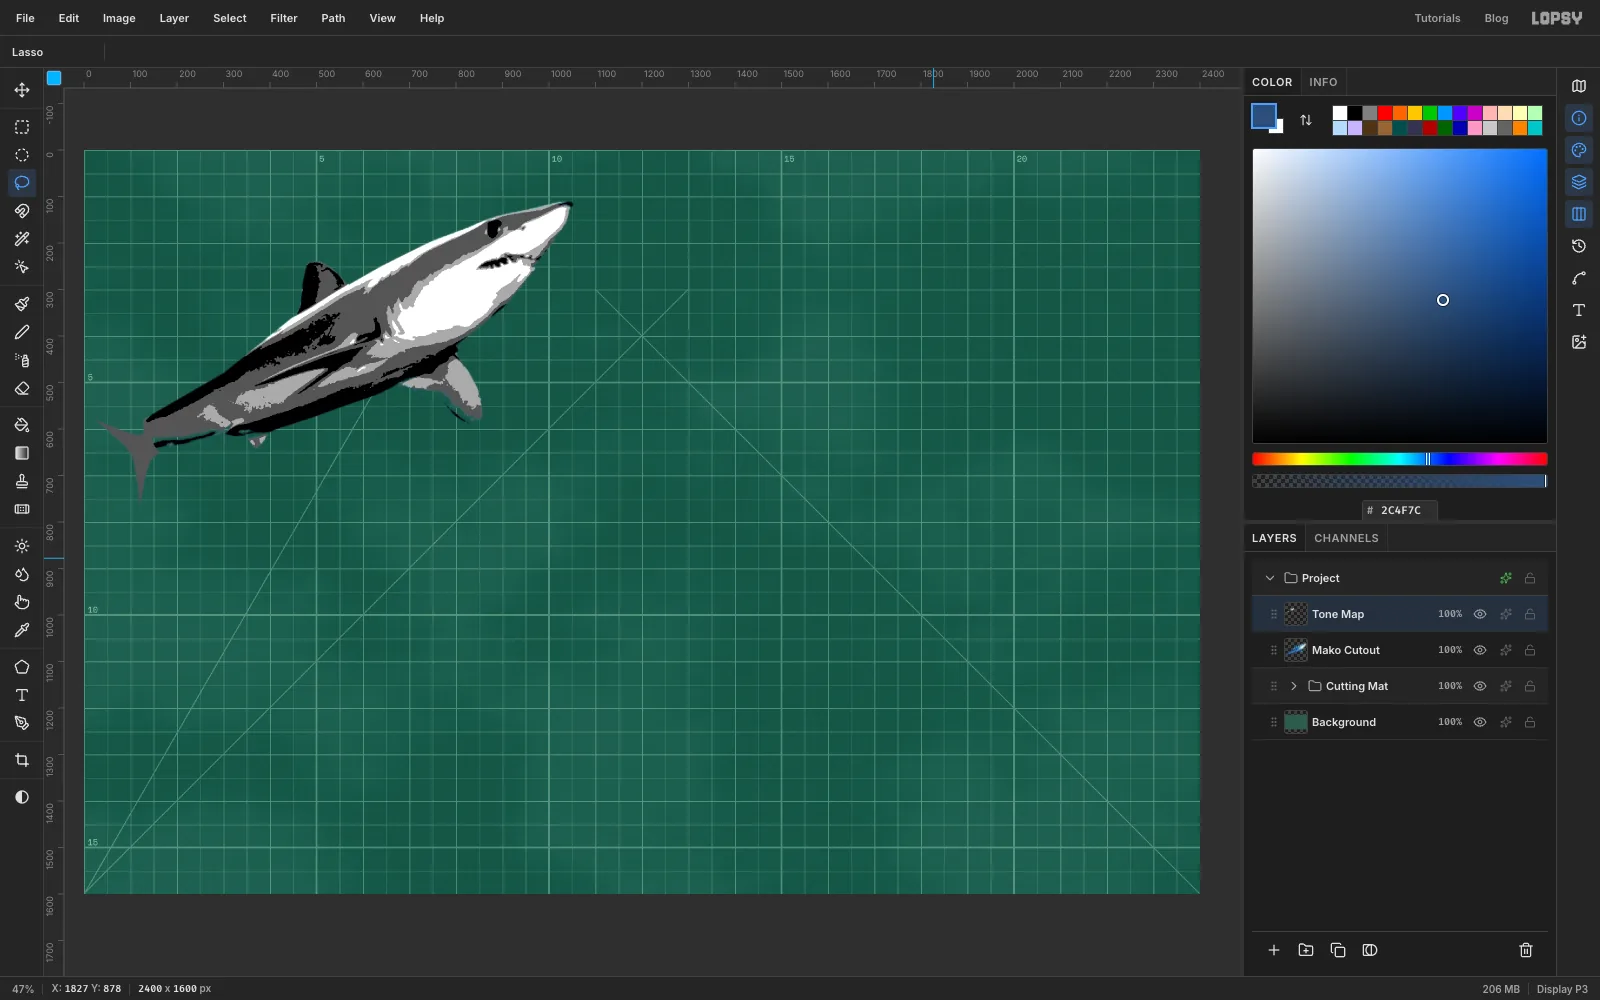
- Click Duplicate Layer and rename the copy
-
Separate the three shark plates
First the base plate, the whole silhouette:
- Hide
Mako Cutout. Cmd-click its thumbnail to load its outline as a selection. - Run Select → Shrink…
2, then Select → Grow…2. Shrinking then growing removes specks smaller than the shrink. - Click
Tone Map, add a layer calledPlate Baseand fill it with bone . Deselect.
Then the mid plate, everything darker than the light grey:
- Hide
Plate Baseso you can see the tone map, and clickTone Map. Pick the Magic Wand, set Tolerance to12and untick Contiguous. - Click a dark grey area, then Shift-click a black area.
- Shrink
2, Grow2, clickPlate Base, add a layer calledPlate Midand fill it with teal .
Then the key plate, just the black. Hide
Plate Midtoo, wand only a black area onTone Map, shrink and grow2, clickPlate Mid, and fill a newPlate Keylayer with . Deselect and show all three plates again.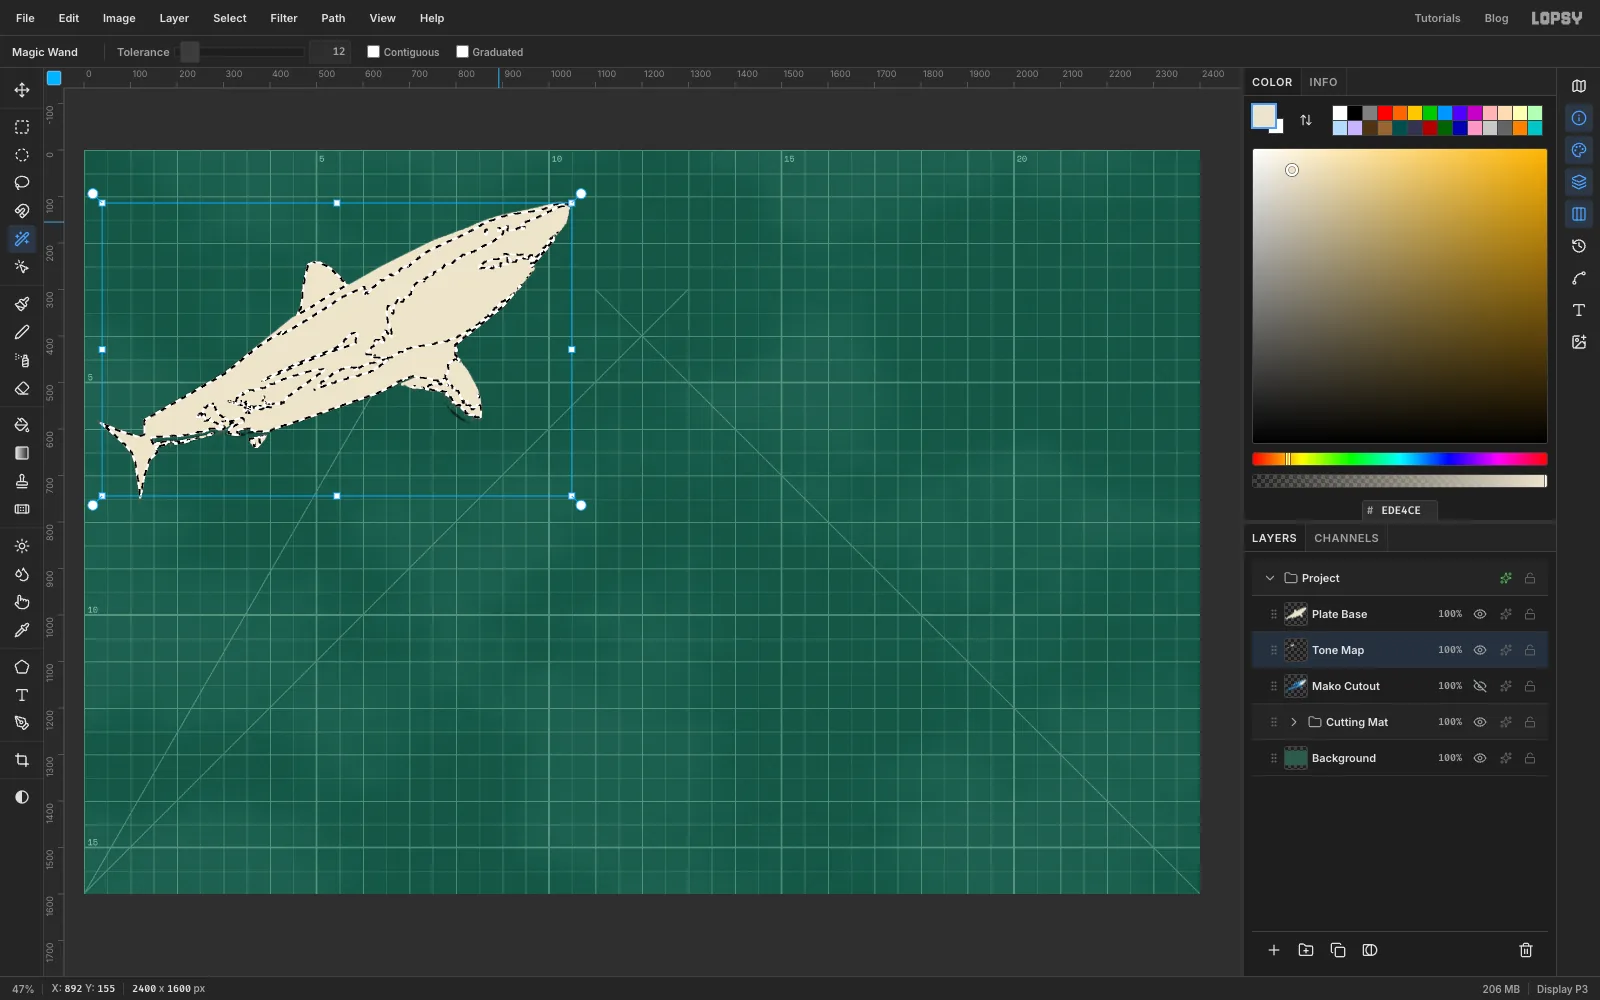
- Hide
-
Check the plates in register
Hide
Tone Map. The three plates now stack into the stencil look you're aiming for: bone underneath, teal over it, black on top.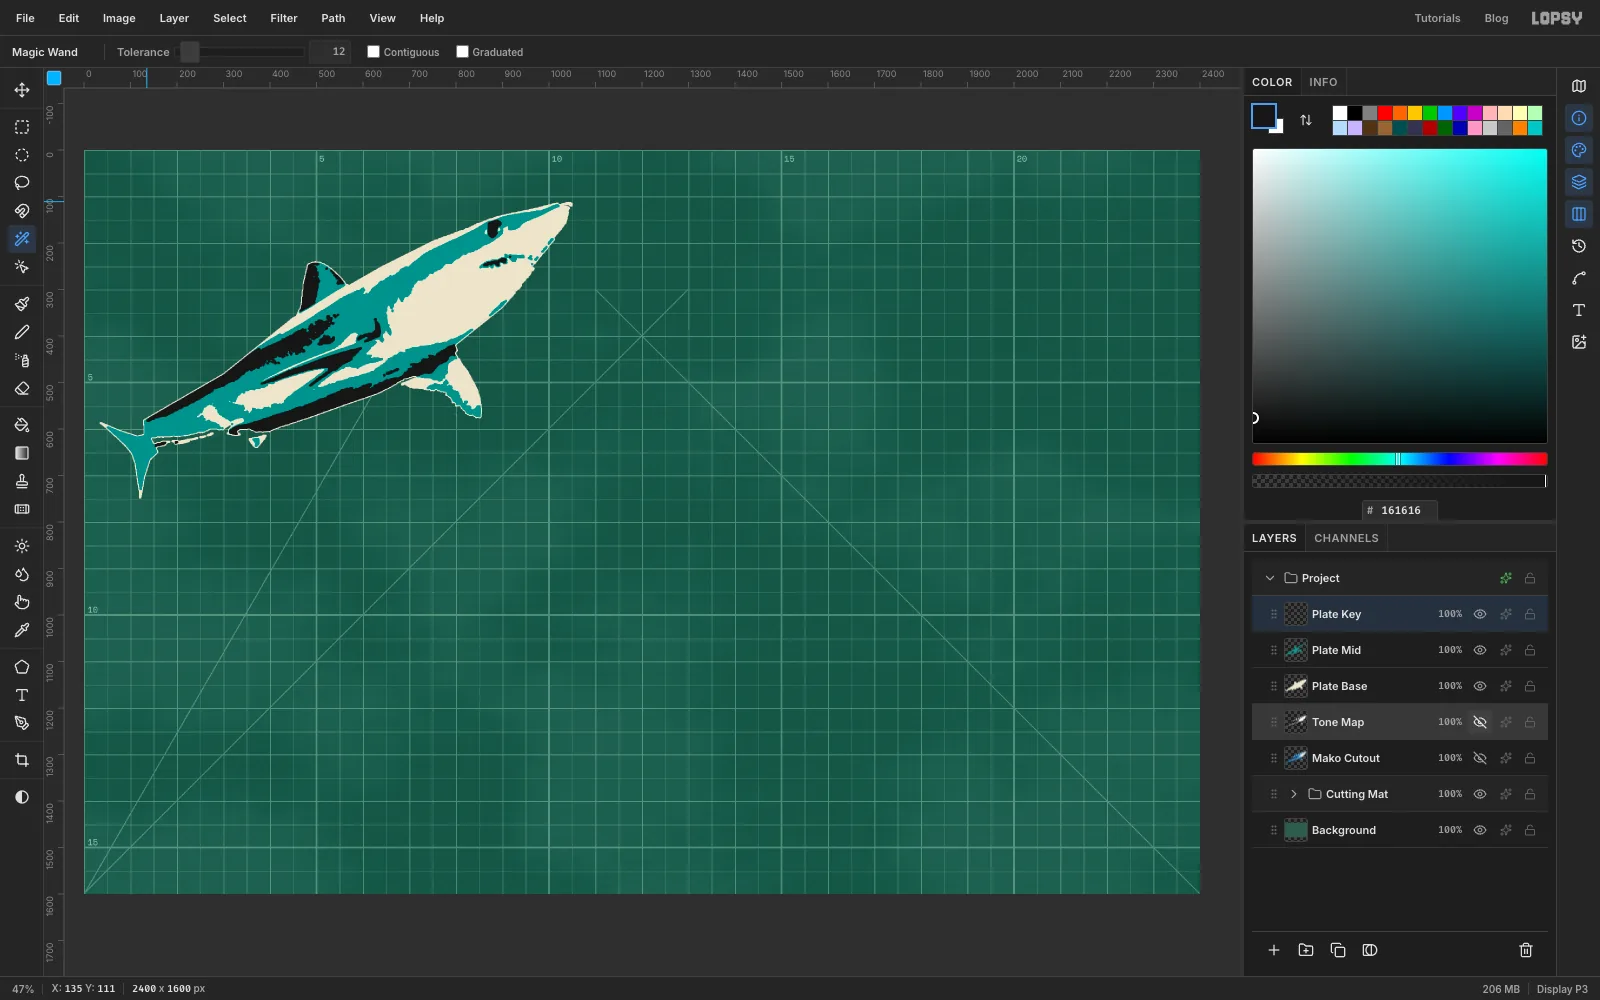
-
Group and duplicate the plates
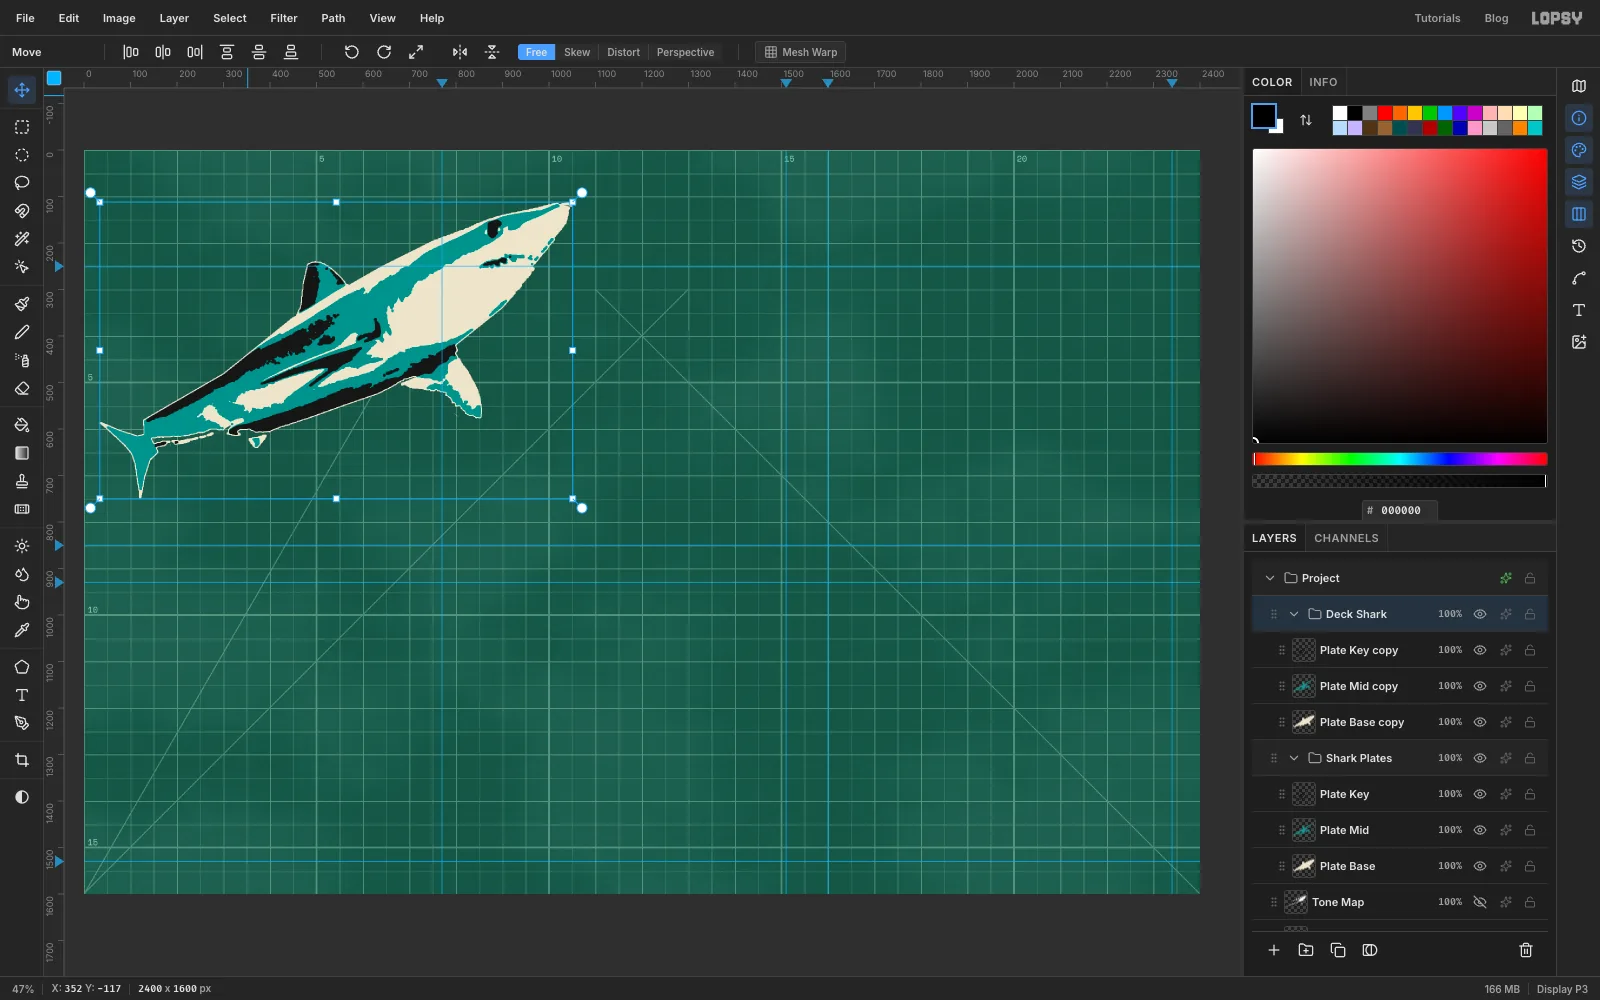
First add guides for the card layout: two 740 × 600 px card spaces across and two down, with gutters between them, leaving a column on the left for the deck. Click the top ruler at
770,1510,1600and2340, and the left ruler at250,850,930and1530. Each click drops a guide.You need the plates twice: once to cut the cards and once for the sprayed deck.
- Click
Plate Key, Shift-clickPlate Baseand choose Layer → Group Layers. Name the groupShark Plates. - Click Duplicate Layer. Name the copy group
Deck Shark, then hide it for now.
- Click
-
Scale the plates to stencil size
- Click the
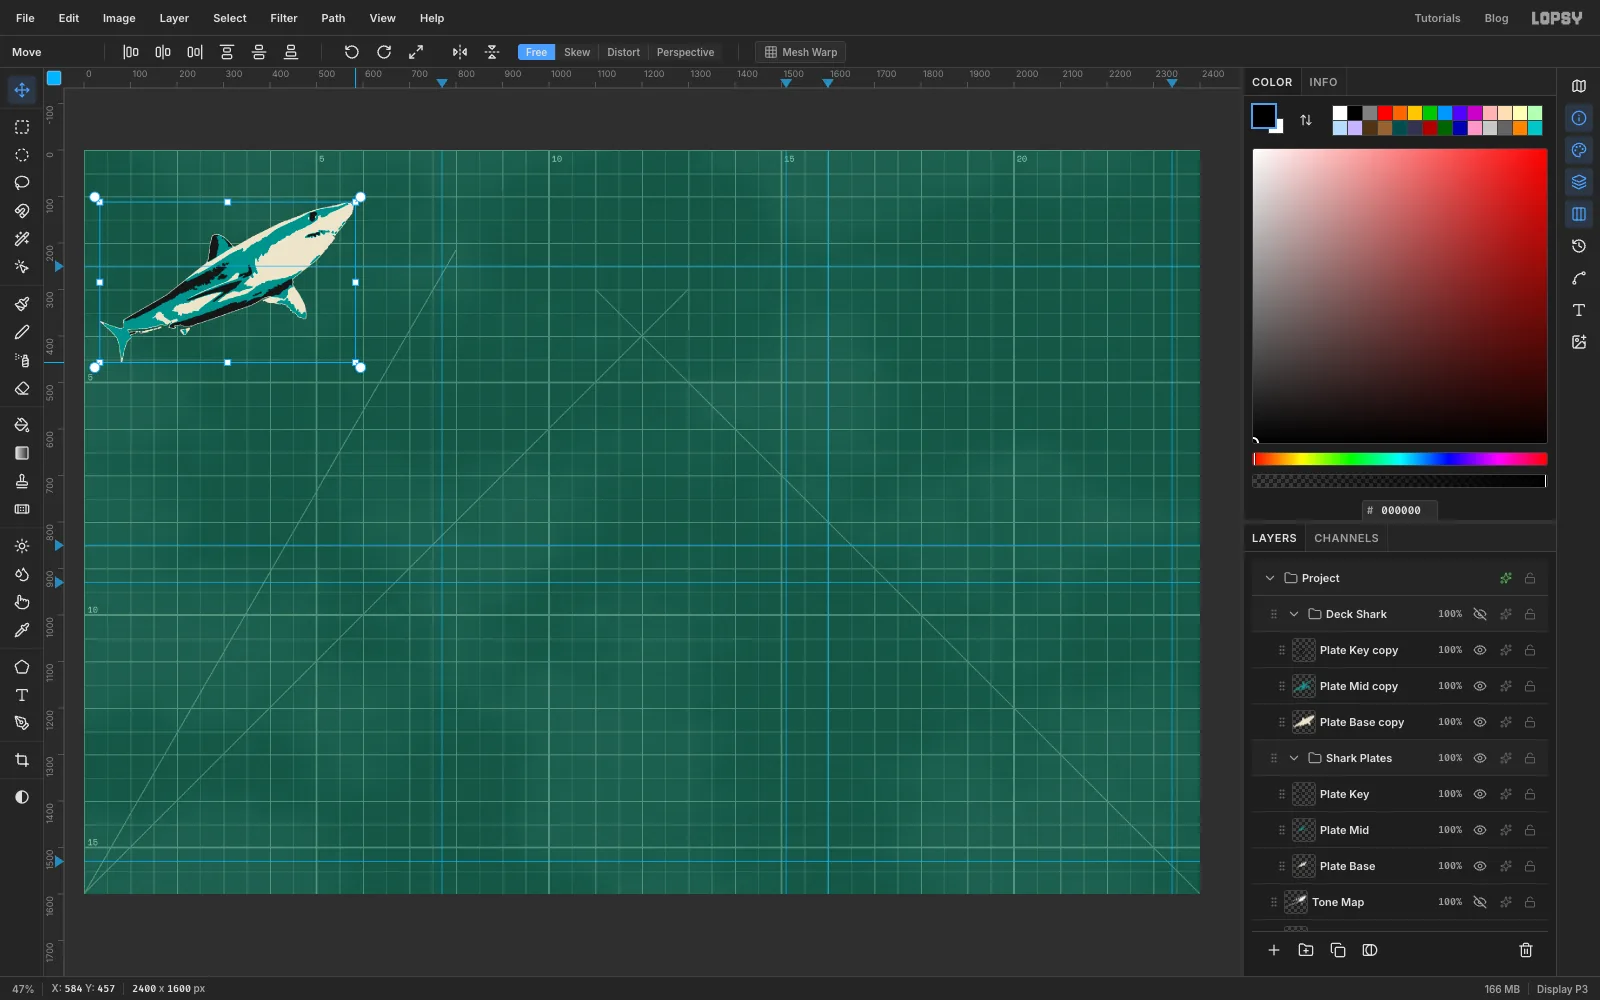
Shark Platesgroup, pick the Move tool and make sure nothing is selected. The Move tool frames all three plates with one transform box. - Hold Cmd and drag the bottom-right corner handle up and left until the box's right edge reaches about
600on the top ruler. The shark is then about 530 px long, 54% of its photo size, which fits a card with room to spare. Cmd keeps the proportions. - Press Cmd+D to finish the transform.
- Click the
-
Deal one plate onto each card space
The guides mark four card spaces: two across and two down, to the right of a column left free for the deck.
- Click
Plate Baseand drag it with the Move tool into the middle of the top-left space, a little below centre to leave room for a label. - Drag
Plate Midinto the top-right space andPlate Keyinto the bottom-left space.
The plates have to stay in register, so move each one by exactly the same amount relative to its space. The spaces are 830 px apart across and 680 px down. Hover the shark's nose tip on
Plate Baseand note its X and Y in the status bar. The same point onPlate Midshould end up 830 px further right, and onPlate Key680 px further down. Drag close, then switch to the Move tool's arrow keys for the last few pixels (Shift moves 10 px).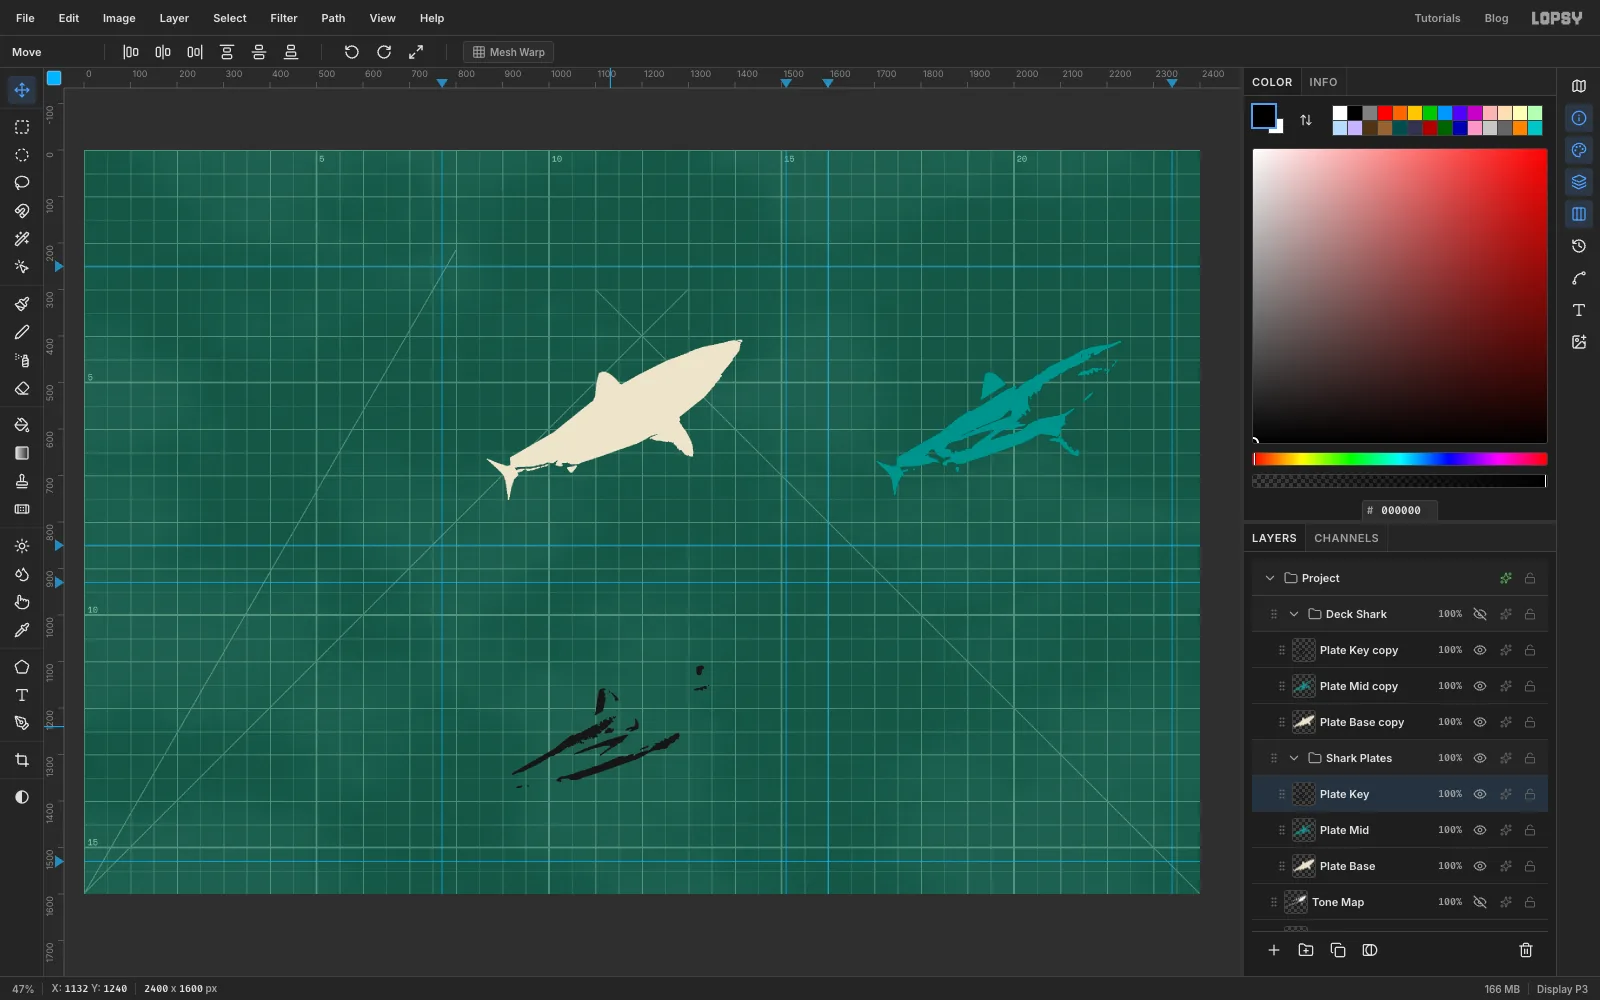
- Click
-
Smooth the plate edges
Real stencils are cut with a knife, so the wand's ragged edges have to go.
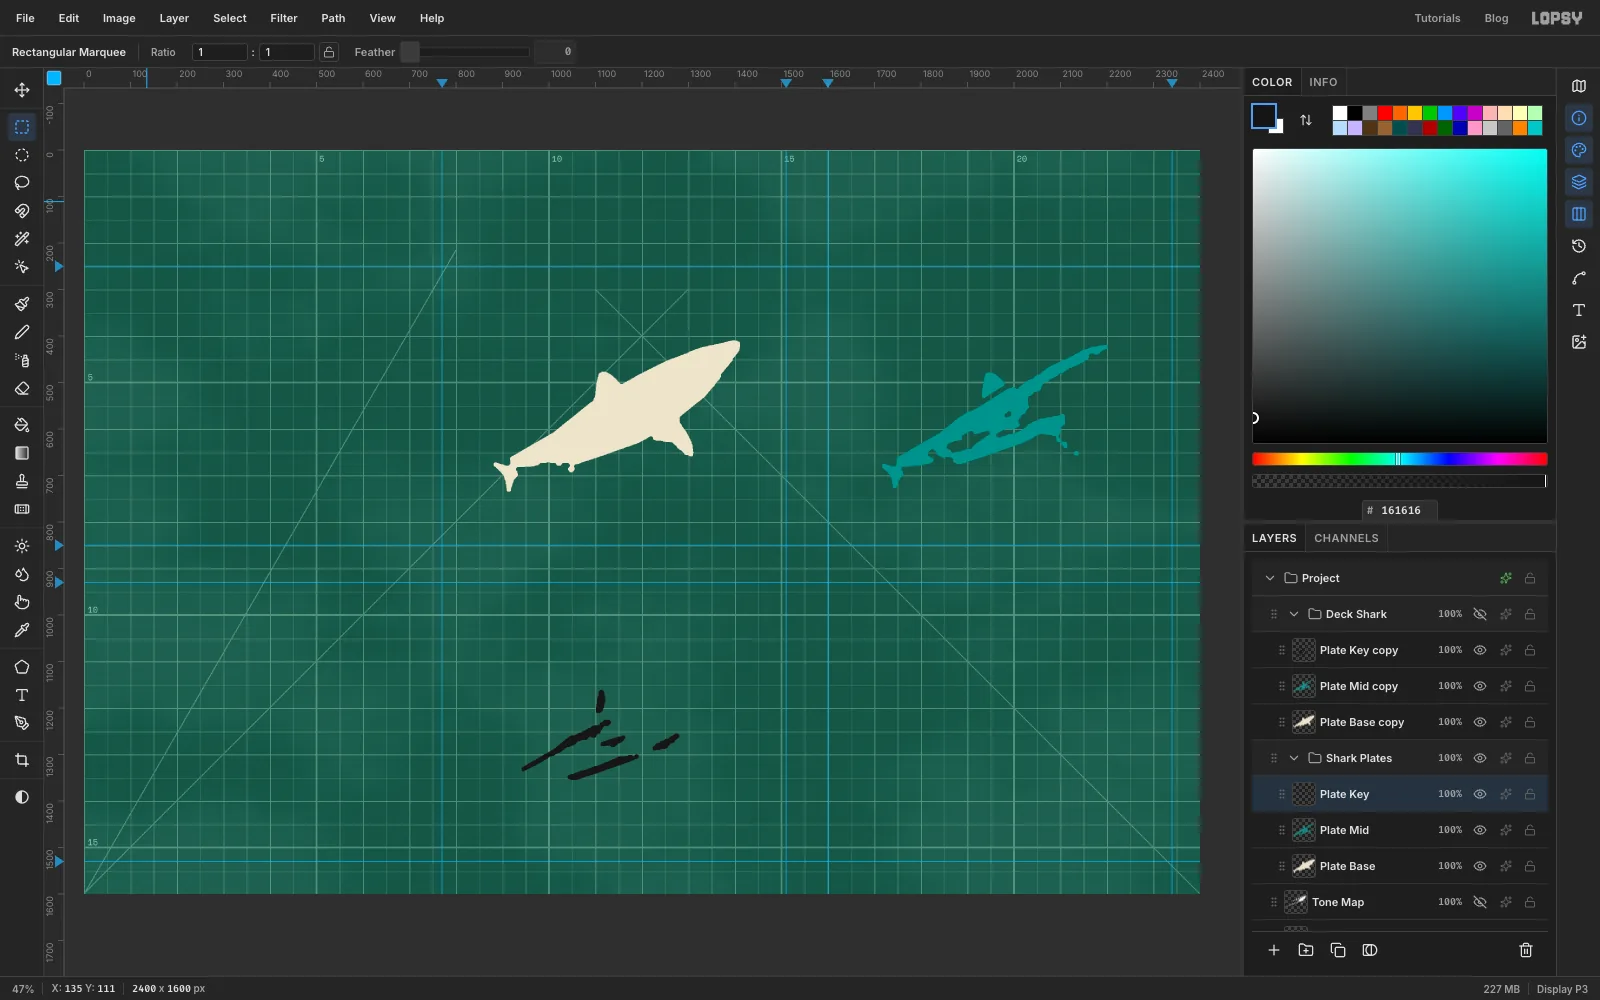
- Zoom in on each plate. Box any tiny floating speck with the Rectangular Marquee and press Delete. Delete the eye and the little gill slits on the key plate too, because they're too small to cut.
- On each plate, Cmd-click its own thumbnail, run Shrink
4then Grow4, choose Select → Inverse and press Delete. This trims the thin, ragged bits. - Cmd-click the thumbnail again and run Grow
4then Shrink4. Set the foreground to that plate's colour (bone, teal or black) and fill. This fills in the little nicks.
-
Lay out the first card
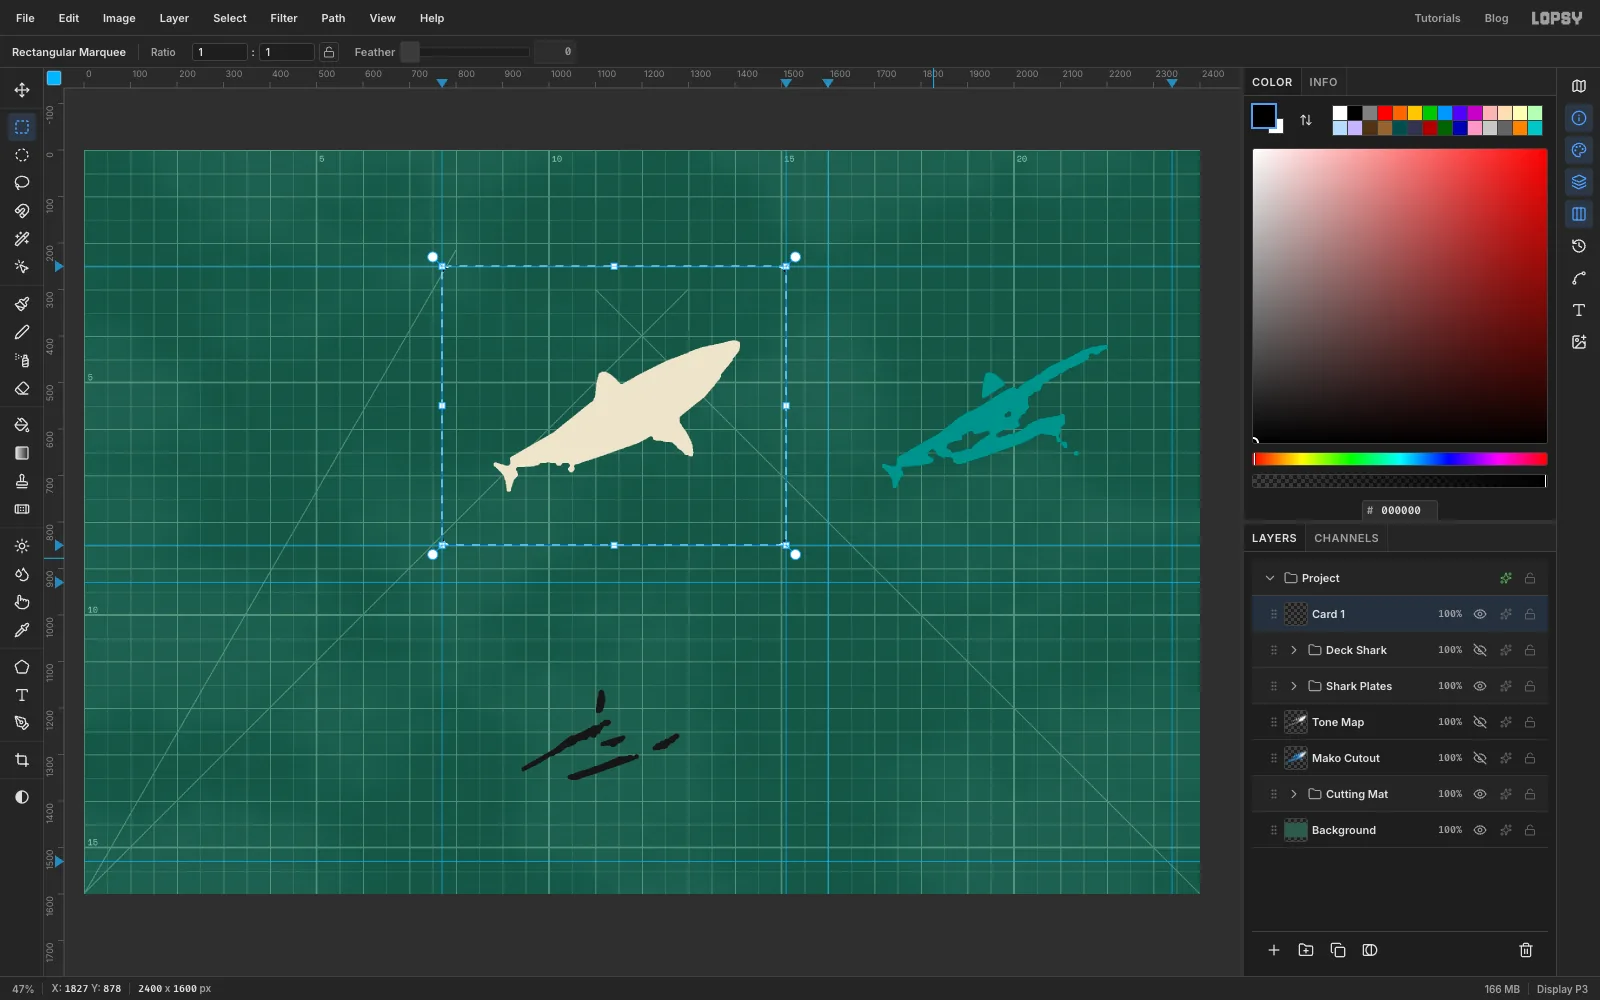
- Collapse both groups. Click
Deck Sharkand add a layer calledCard 1. It goes above the groups, not inside them. - Drag the Rectangular Marquee from the top-left guide corner of the first space to its bottom-right corner. The marquee snaps to the guides.
- Run Shrink
18and then Grow18. Growing a shrunken rectangle gives it round corners. - Fill with chipboard and deselect.
- Collapse both groups. Click
-
Cut the first card
- Expand
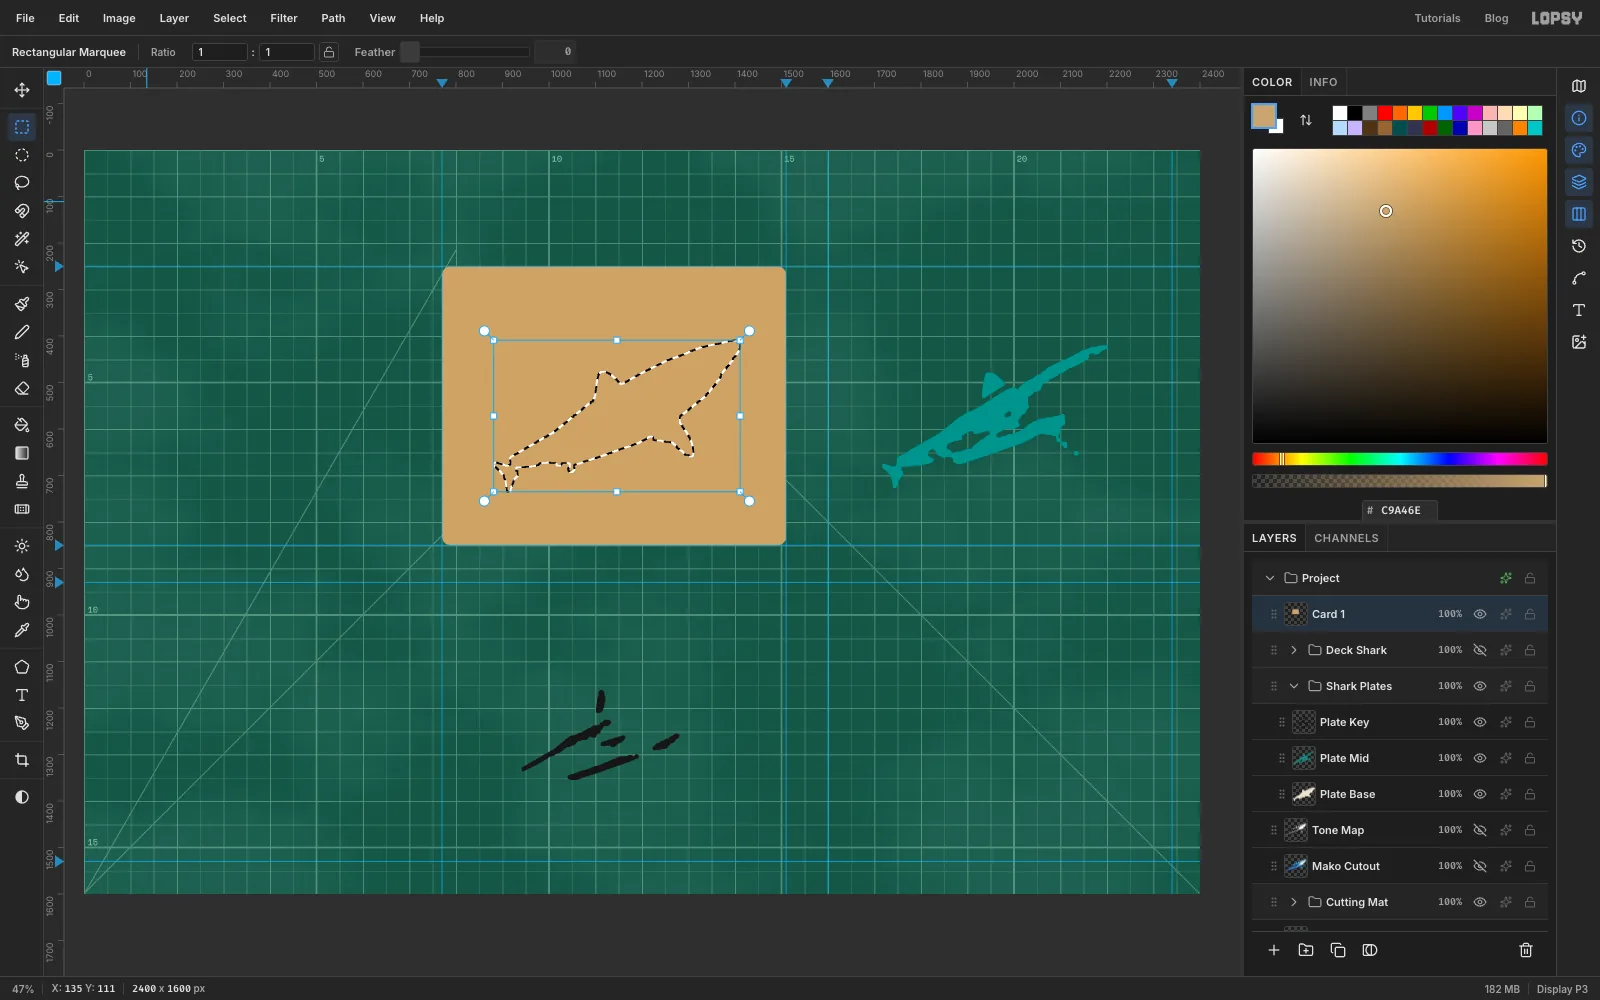
Shark Platesand Cmd-click thePlate Basethumbnail. - Click the
Card 1row and press Delete. The shark becomes a hole, and the mat shows through. - Punch two registration holes. Every card gets them in the same two spots, so the plates line up when you spray. Pick the Elliptical Marquee and, with nothing selected, click once near the bottom-left corner. An Elliptical Selection dialog opens. For card 1 type From
801, 793and To827, 819, a 26 px circle centred 44 px in from the corner, apply it and press Delete. Do the same 44 px in from the top-right corner (From1453, 281, To1479, 307). On the other cards, add the same offsets to the card's corners. - Deselect and hide
Shark Plates. - Finish the card. Run Add Noise at Amount
9, Mono and Gaussian, for a little grain. Open the effects drawer and tick Drop Shadow: Offset X7, Offset Y9, Blur12, Opacity60, colour . Then tick Stroke: Width2, colour , position Inside. The shadow falls into the cut, so the holes look real, and the stroke darkens every cut edge like a knife cut.
- Expand
-
Bridge the islands
Repeat Lay out the first card and Cut the first card for
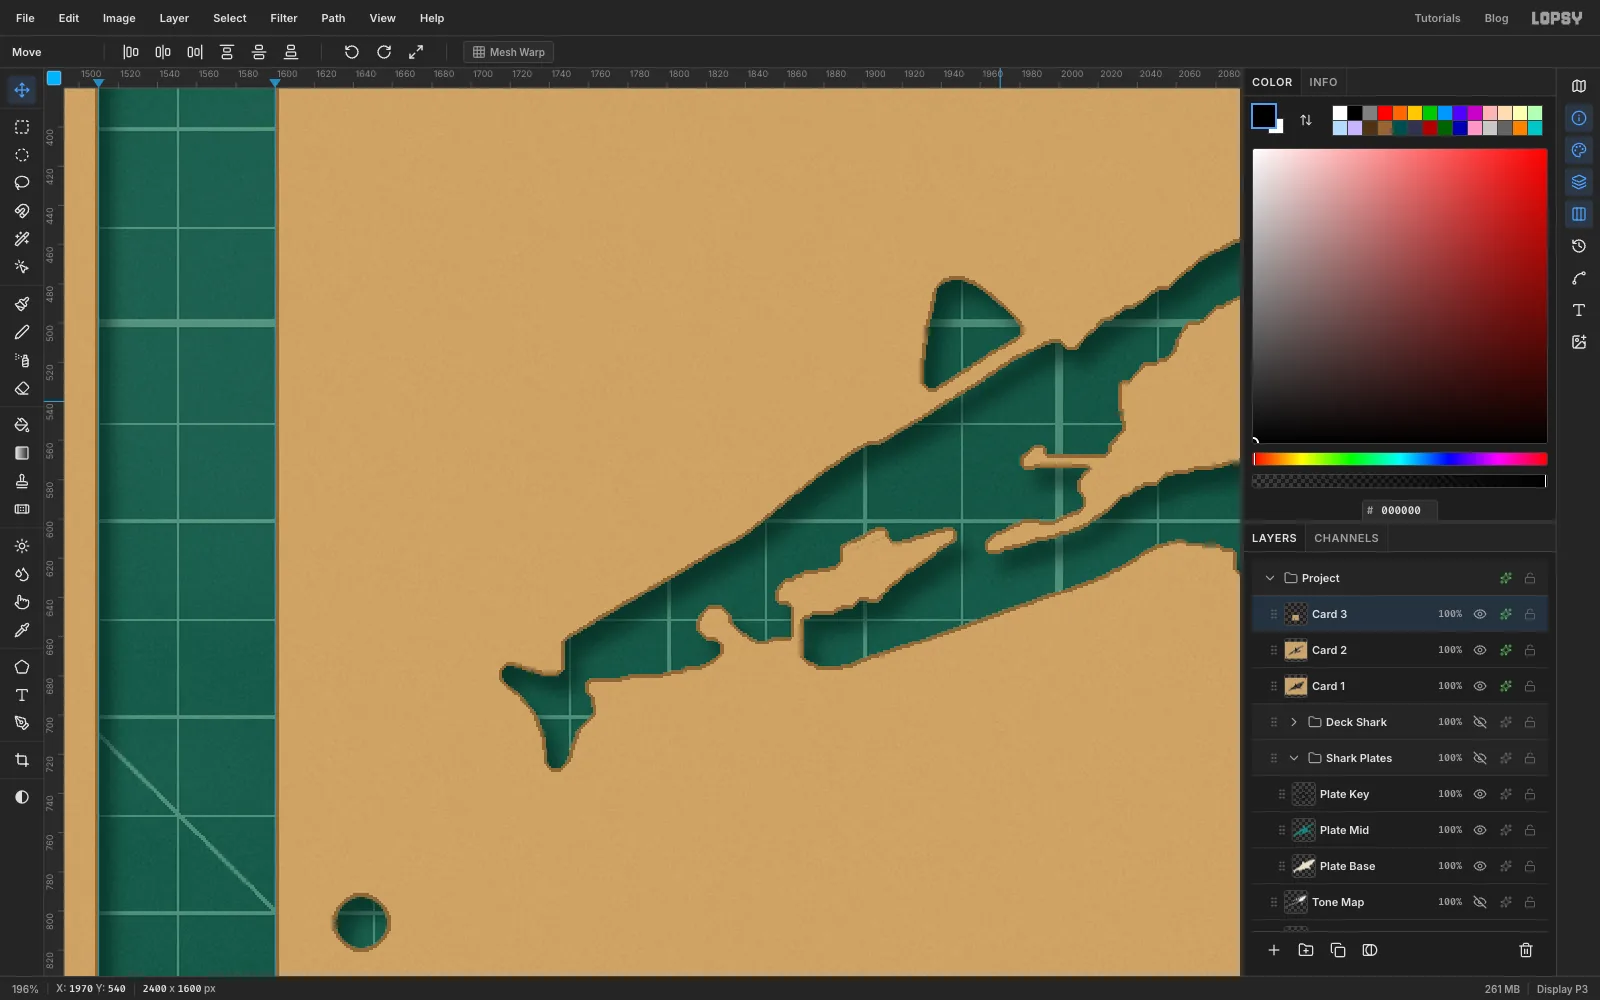
Card 2in the top-right space, cut withPlate Mid, andCard 3in the bottom-left space, cut withPlate Key. Click the previous card's row before adding each new card layer.Before you finish each card, zoom in and look for islands: pieces of card that the cut has separated from the rest. In a real stencil they would fall out. Stencil cutters leave thin straps called bridges to hold them.
- Pick the Pencil, set Size
7and the colour . - For each loose piece, click on it, then Shift-click on the nearest solid card across the gap to draw a straight strap.
- Slivers too small to bridge would fall out anyway. Box them with the marquee and delete them so they become part of the hole.
Then give the card the same grain, drop shadow and stroke as card 1.
- Pick the Pencil, set Size
-
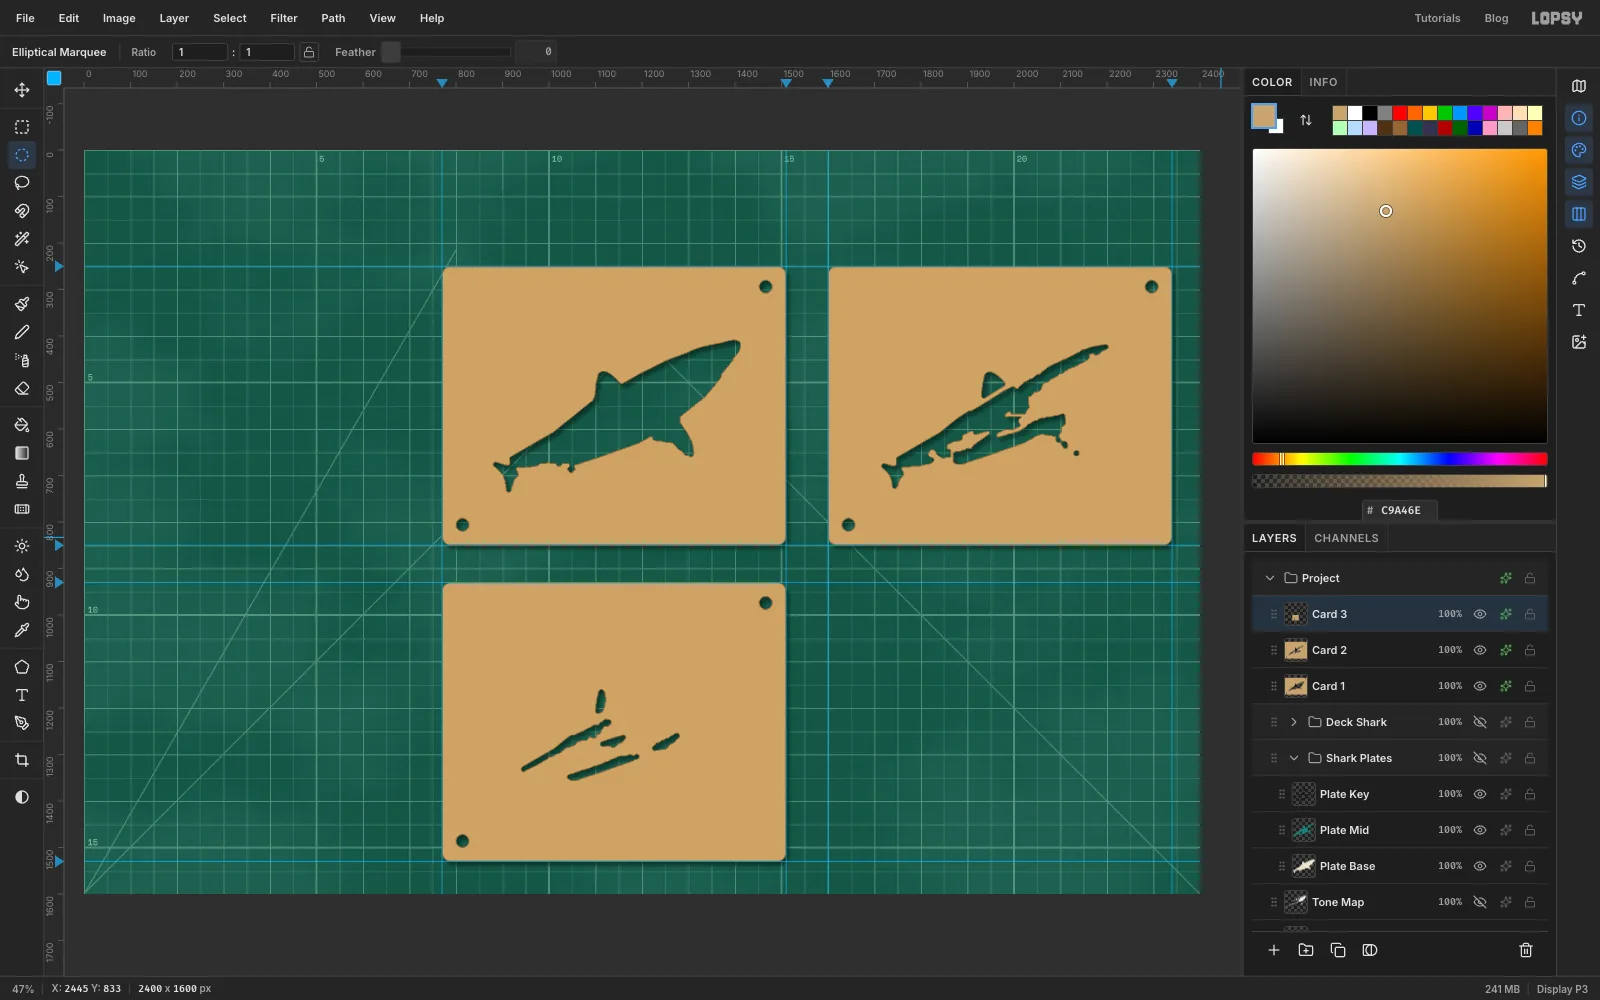
Check the three shark cards
Zoom out. You have three cards: the whole silhouette, the teal mid tones and the black shadows. The registration holes sit in the same corners on each, and every hole shows the mat with a soft shadow inside.
-
Draw the lettering arc with the Pen
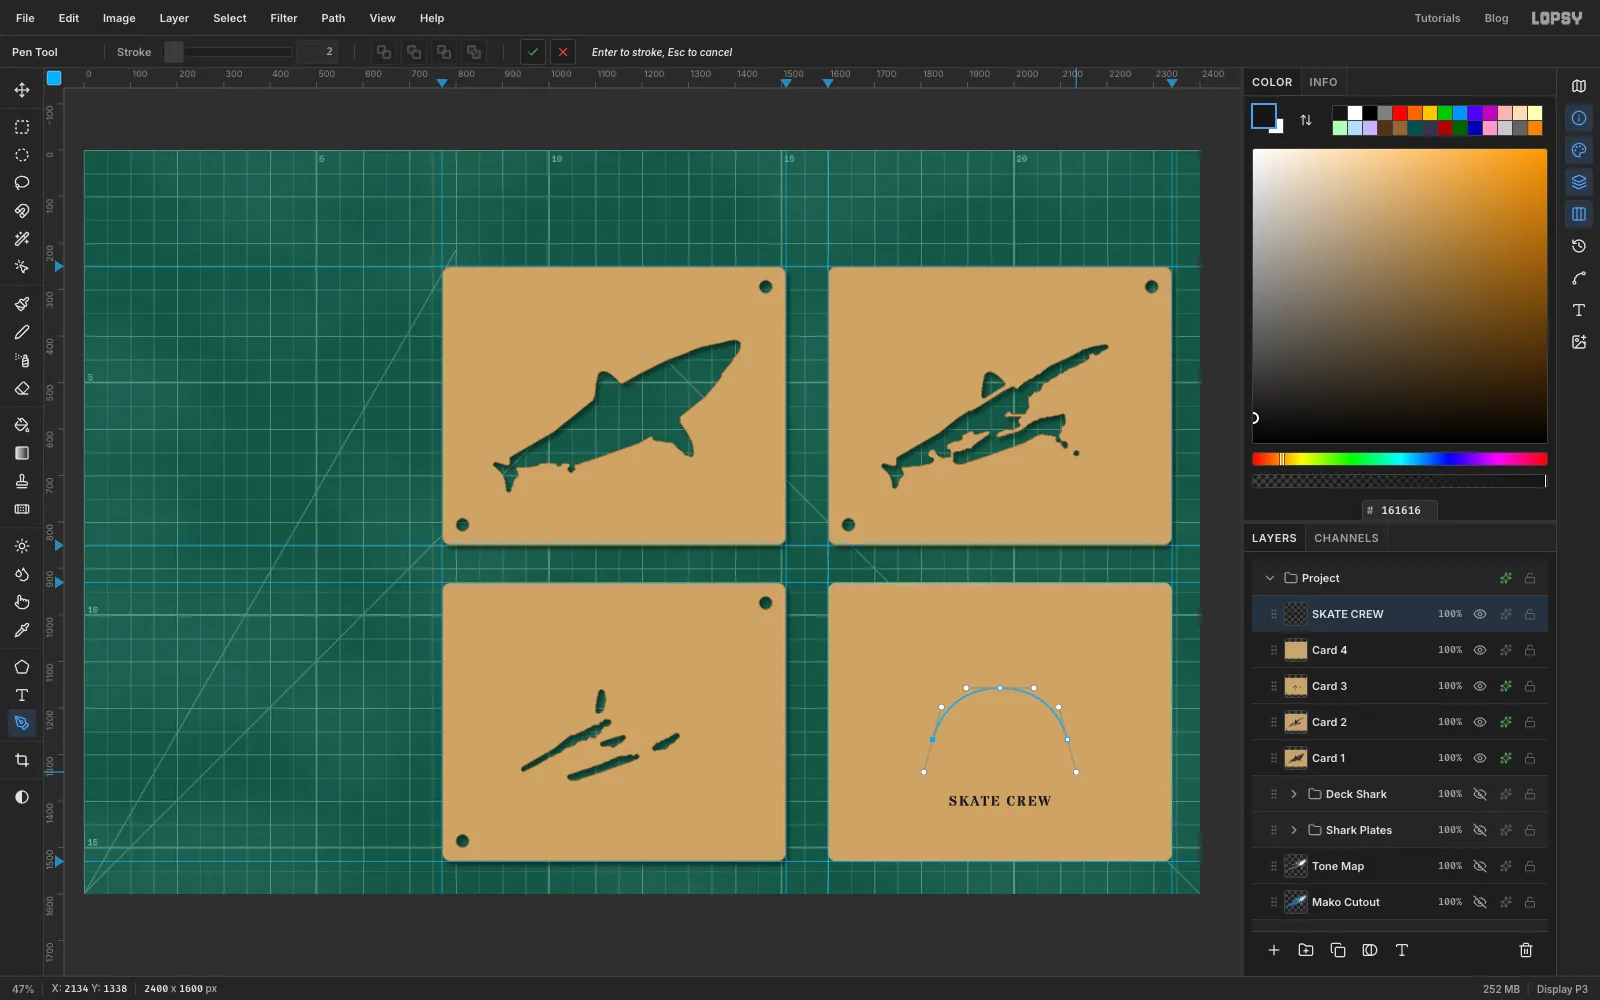
Make
Card 4aboveCard 3the same way, but don't cut it yet. This card holds the lettering plate: an arched MAKO JAWS, a sun disc and SKATE CREW.- First set the bottom line, because a click near existing text edits it. Pick the Text tool, choose Stardos Stencil, Bold, size
30, colour , and typeSKATE CREWlow on the card. Press Tab. In the Text panel set Letter spacing to3. Switch to the Move tool and nudge it with the arrow keys until it's centred across the card, about 90 px below the card's middle. - Pick the Pen tool. The arc is part of a circle with a 150 px radius, centred on the card's middle (1970, 1307 here). That centre is also where the sun disc will go.
- Press on the left end of the arc, about 145 px left of the centre and 40 px above it, and drag up and to the right along the curve. Press at the top, 150 px straight above the centre, and drag straight right. Press at the right end, mirroring the left one, and drag down and to the right. Dragging pulls out smooth curve handles.
- Click the ✓ Commit path button in the options bar. It adds the path without painting a stroke.
- First set the bottom line, because a click near existing text edits it. Pick the Text tool, choose Stardos Stencil, Bold, size
-
Set MAKO JAWS on the arc
- Click the
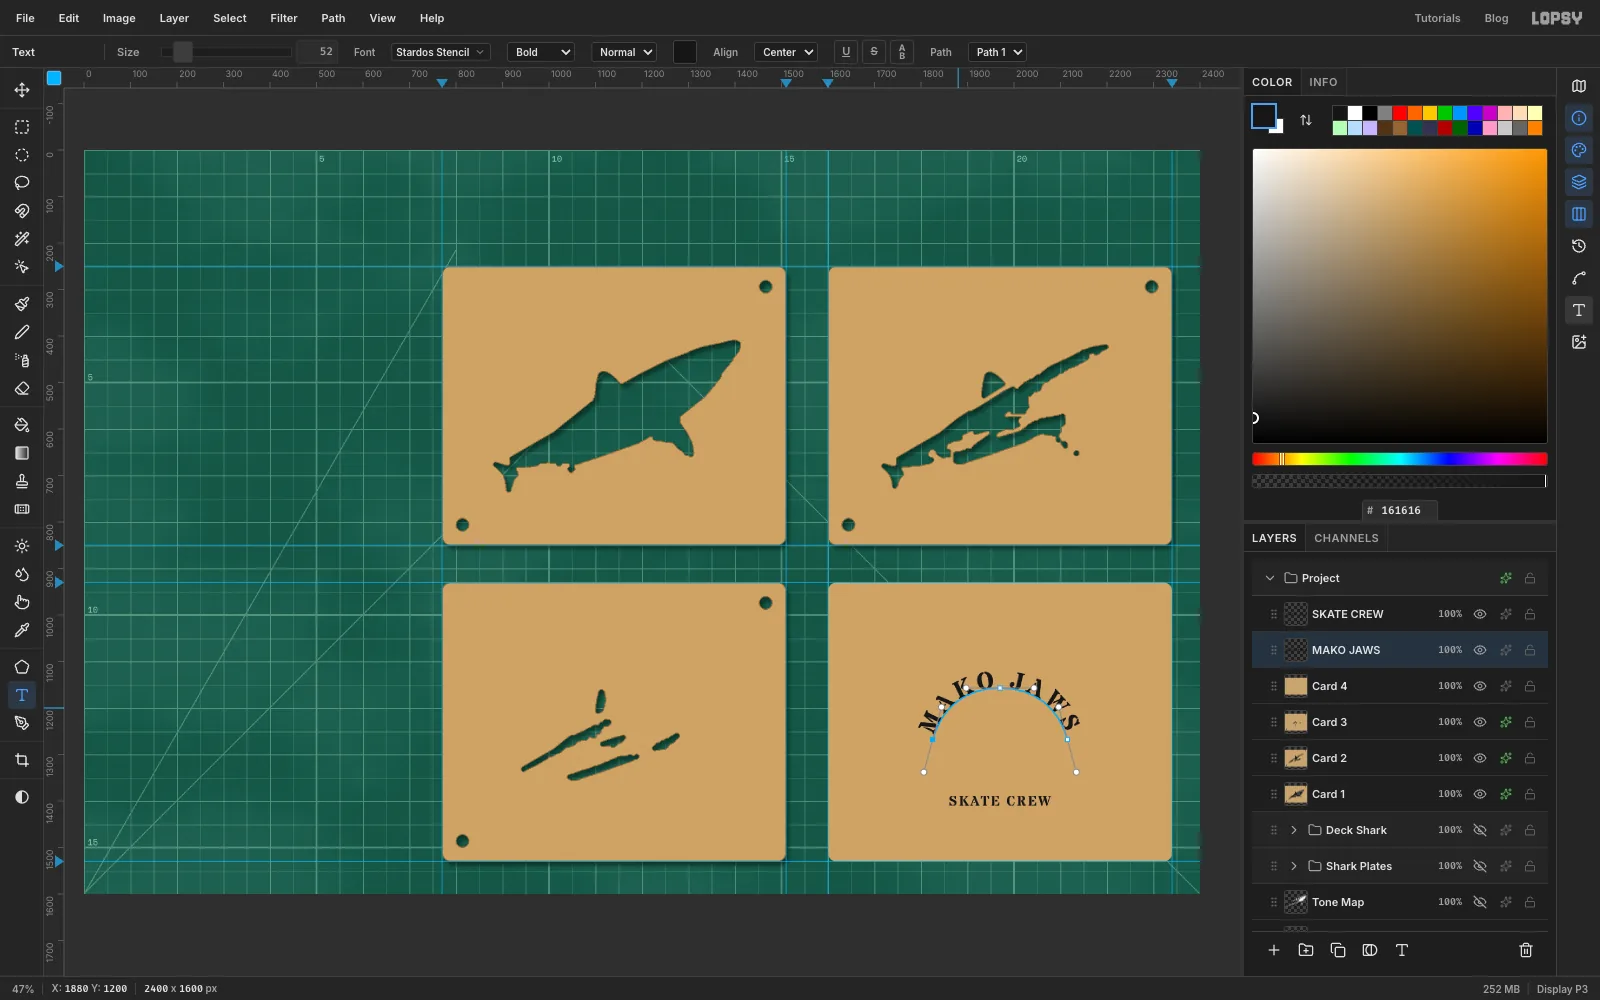
Card 4row so the next settings don't restyleSKATE CREW. - With the Text tool, choose Stardos Stencil, Bold, size
52, click inside the arc and typeMAKO JAWS. Press Tab to finish. - Set Align to Center, then pick Path 1 in the Path menu of the options bar. The letters jump onto the arc, centred.
- In the Text panel set Letter spacing to
8so no letters touch. - Open the Paths panel and click Path 1 again to deselect it, so its outline stops drawing over the card.
- Click the
-
Build the lettering plate
To cut the letters and the disc in one go, they need to be on one pixel layer.
- Click
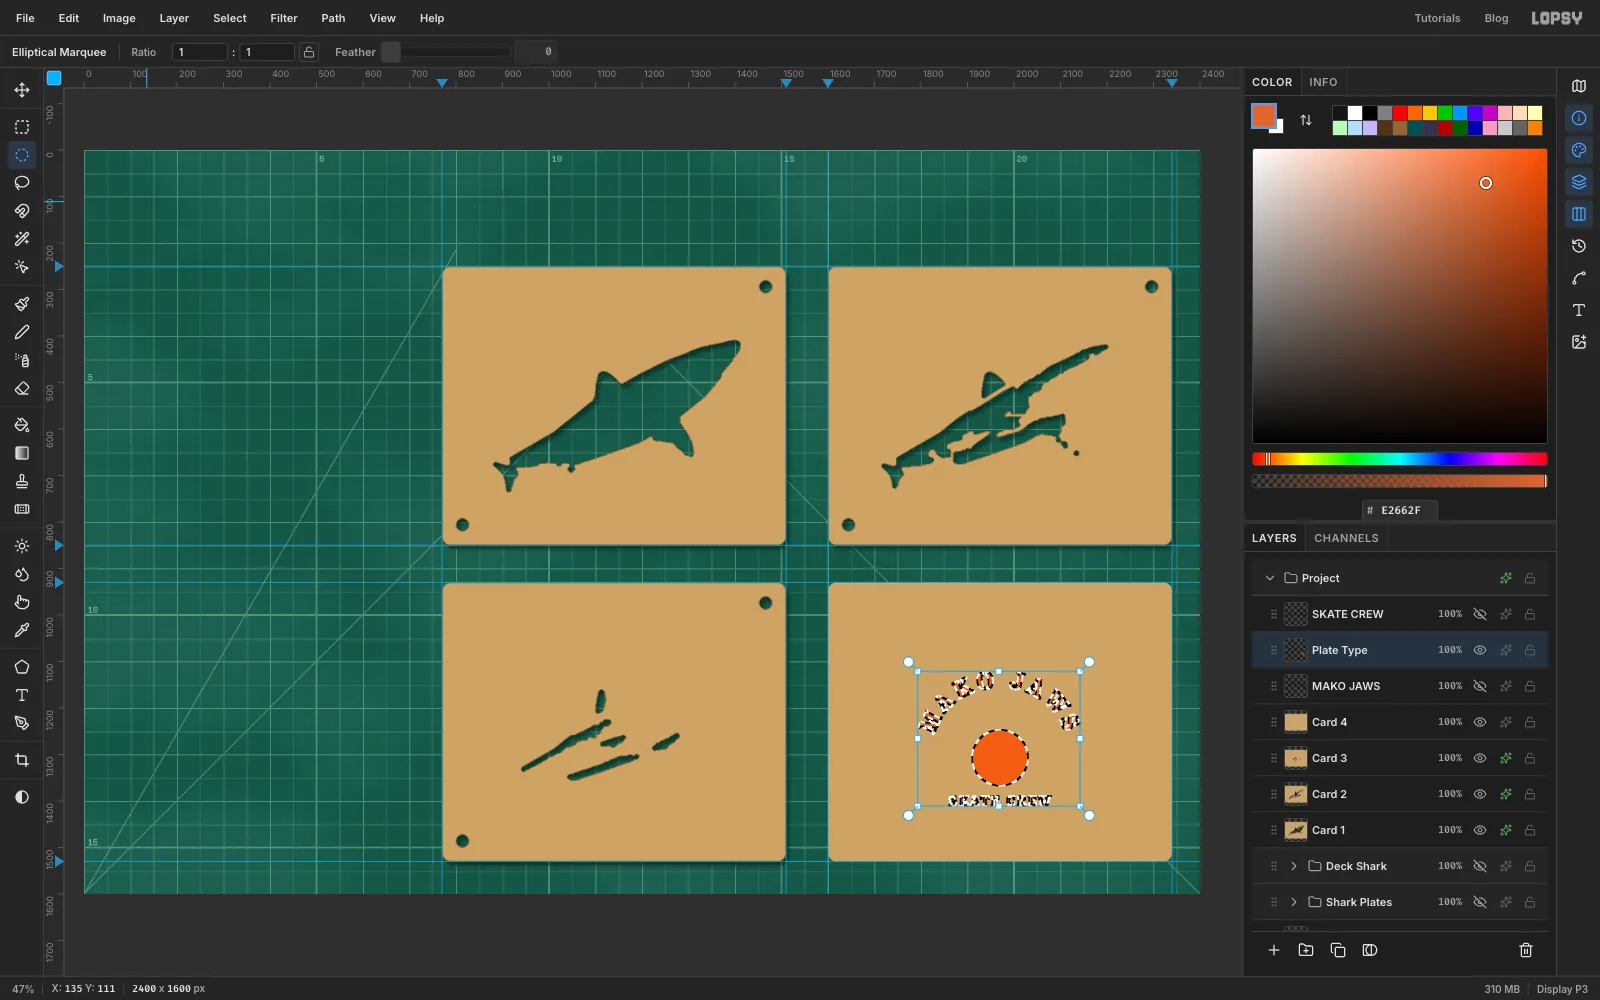
MAKO JAWSand add a layer calledPlate Type. With the Elliptical Marquee, Cmd-drag a 120 px circle centred on the arc's centre point, fill it with orange and deselect. Cmd keeps it round. - Click
MAKO JAWS, click Duplicate Layer, then the Rasterize Layer button in the Layers panel toolbar. The copy lands belowPlate Type, so drag it by its grip until it sits right abovePlate Type, then choose Layer → Merge Down. - Do the same with
SKATE CREW. - Hide the two live text layers. Cmd-click
Plate Typeand fill it with orange, so the letters match the disc.
- Click
-
Cut the lettering card
- Cmd-click the
Plate Typethumbnail, clickCard 4and press Delete. - Hide
Plate Type, punch the two registration holes, and finish the card with grain, a drop shadow and a stroke as before.
The kit is cut. Now spray a proof.
- Cmd-click the
-
Shape the deck
- Click
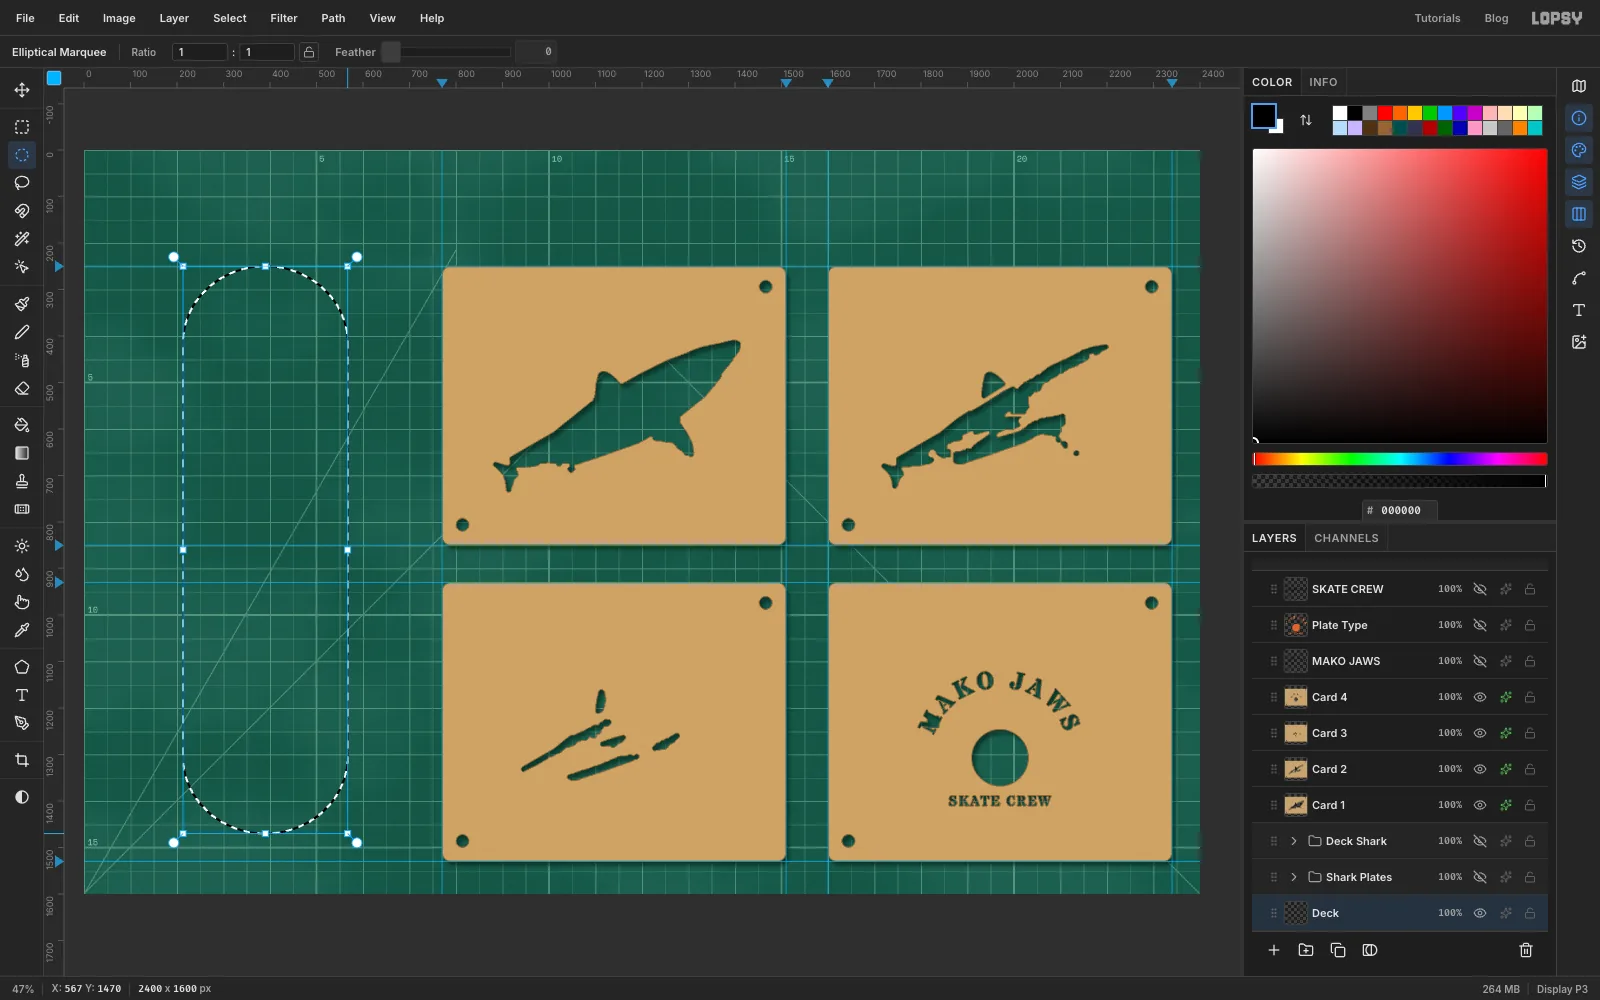
Tone Mapand add a layer calledDeck. - With the Elliptical Marquee and nothing selected, click once in the left column. In the dialog type From
213, 250and To567, 580for the nose: an oval 355 px wide and 330 px tall, its top on the first guide. - Pick the Rectangular Marquee, hold Shift and drag a rectangle from the left end of the oval's middle (
213, 415) to567, 1305. Shift adds to the selection. - Switch back to the Elliptical Marquee and Shift-drag a matching oval for the tail, from
213, 1140to567, 1470. The deck is 355 × 1220 px, close to a real board's shape.
- Click
-
Make it maple
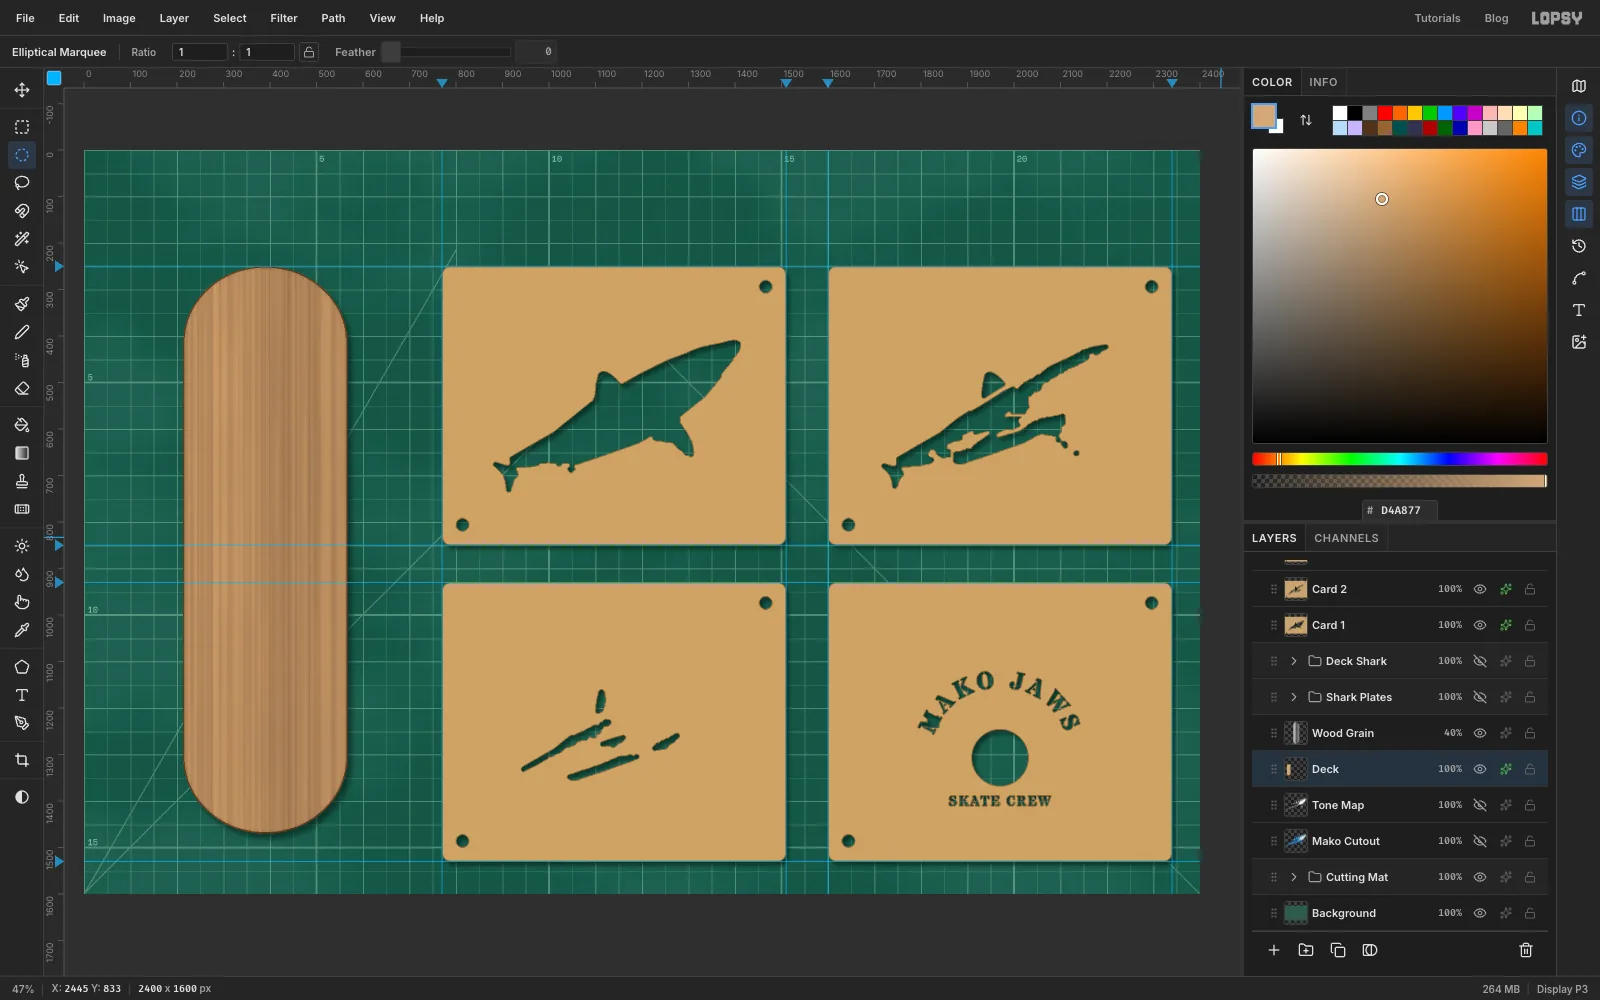
- Fill the selection with maple .
- Add a layer called
Wood Grainand run Filter → Fibers… with Variance30and Strength64. The fibres stay inside the selection and run along the board. - Deselect, set
Wood Grainto Multiply at40%. - On
Deck, add Inner Glow (Size14, Opacity45, ), a Stroke (Width3, , Inside) for the ply edge, and a Drop Shadow (Offset X9, Offset Y12, Blur16, Opacity60, ).
-
Spray the lettering onto the deck
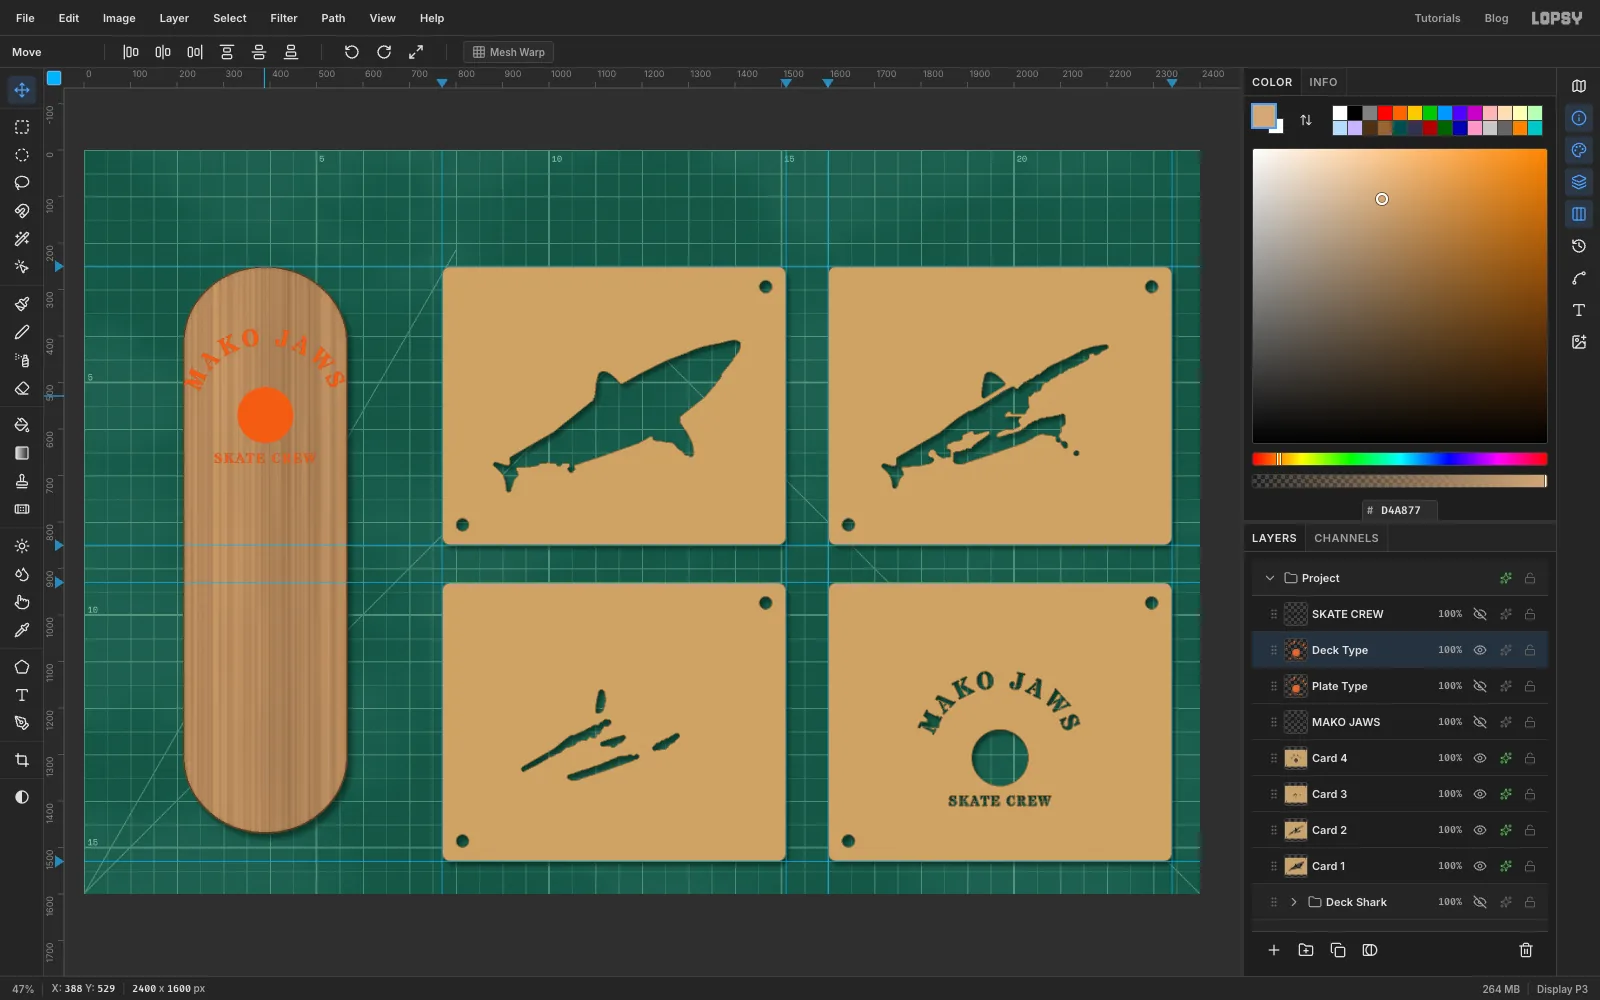
The deck uses the same plates as the cards, at the same size, so the proof shows exactly what the stencils would print.
- Click
Plate Type, click Duplicate Layer, rename the copyDeck Typeand show it. - With the Move tool, drag it onto the nose of the deck, centred across the width, with the top of the arch about 130 px below the tip.
- Click
-
Turn the shark to run up the deck
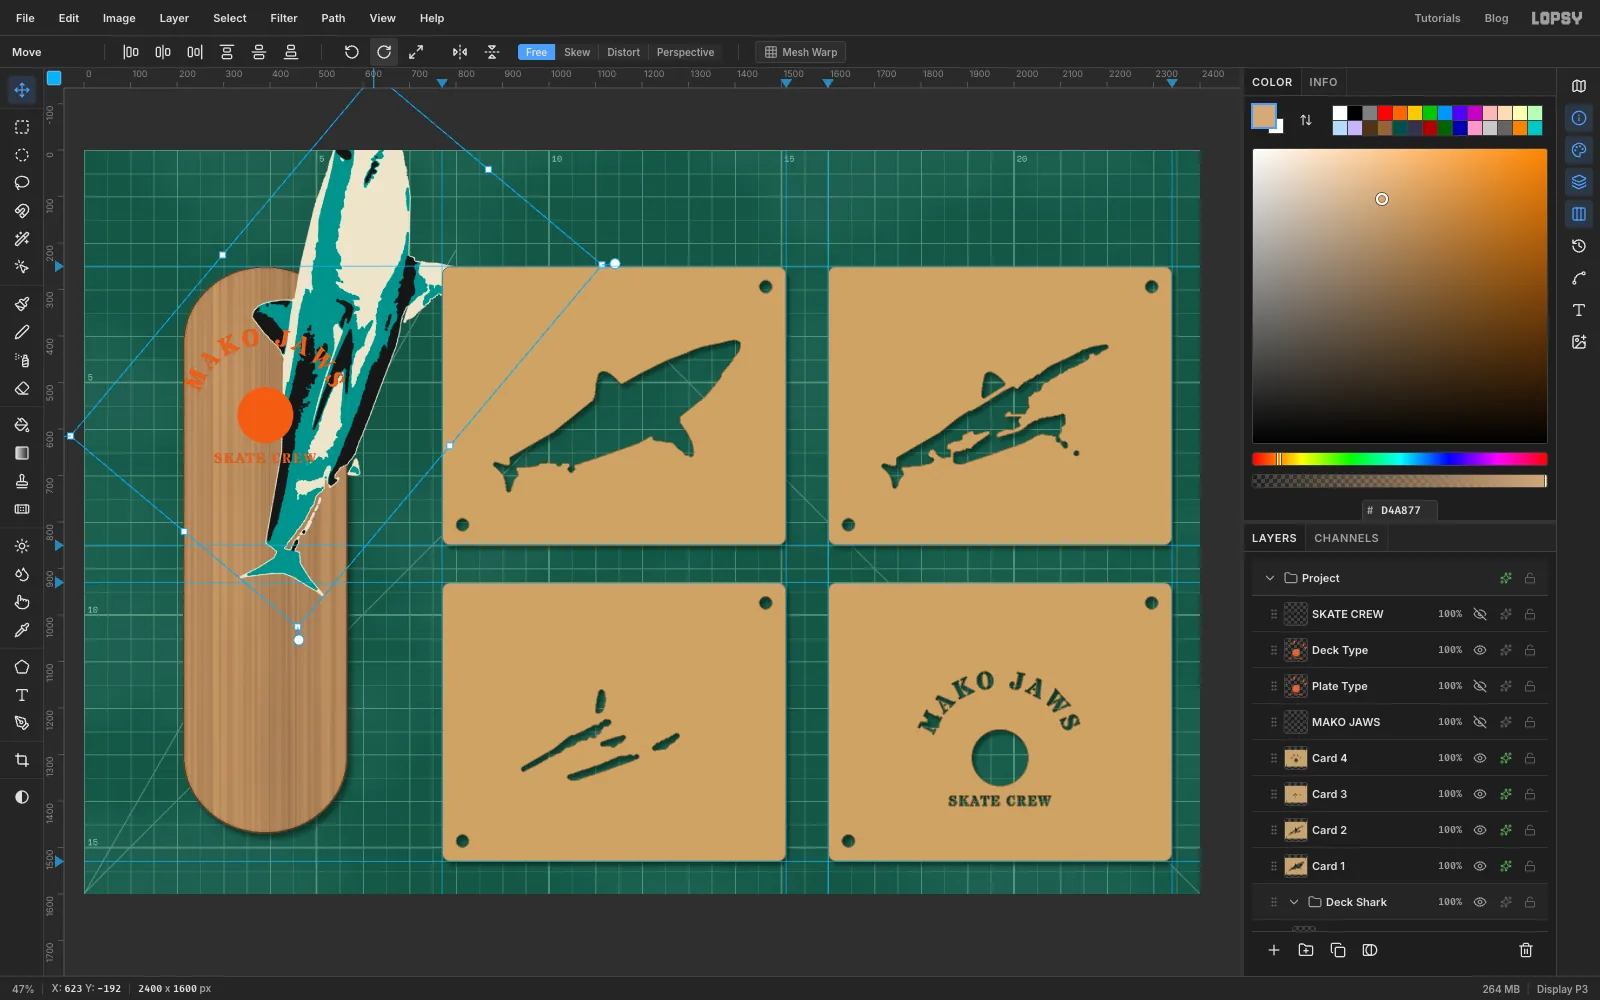
The stencils can be held at any angle when you spray, so the deck shark is turned to swim up the board.
- Show the
Deck Sharkgroup and click it. With the Move tool and nothing selected, a box frames all three plates. - Drag a round rotation handle just outside a corner so the shark turns about 50° anticlockwise, nose up.
- Show the
-
Scale the deck shark to match the cards
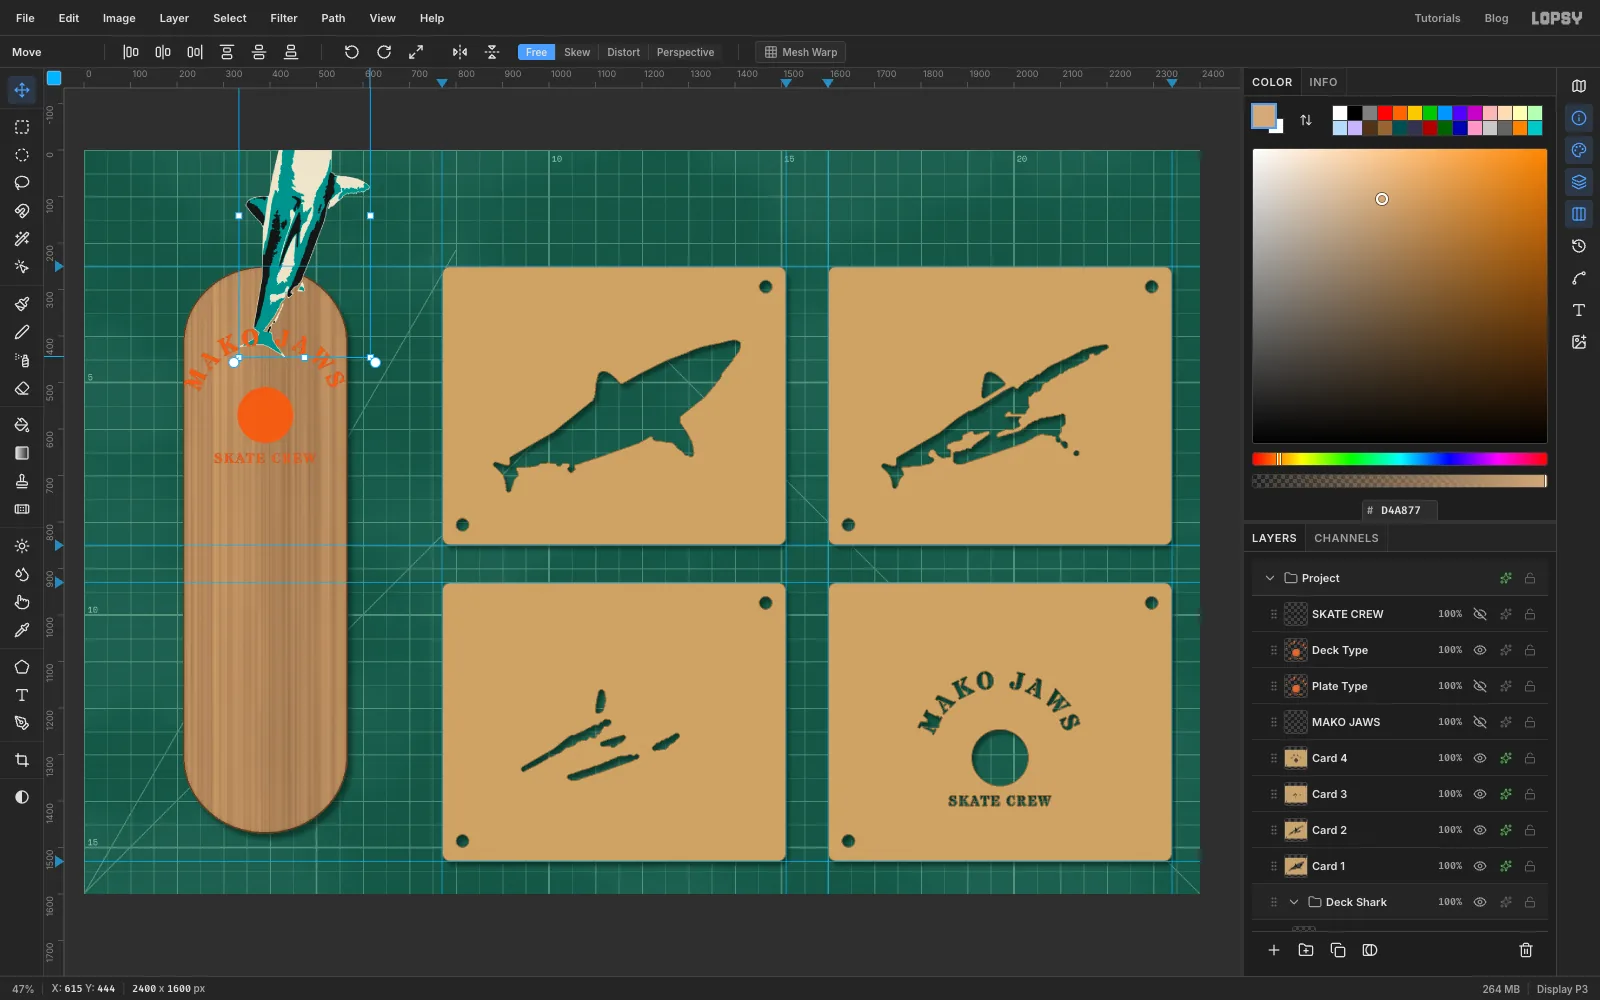
- Press Cmd+D to finish the rotation.
- Cmd-drag the bottom-right corner handle in until the box is about 285 × 610 px. That's 54%, the same size as the shark on the cards. Press Cmd+D.
-
Place the shark on the deck
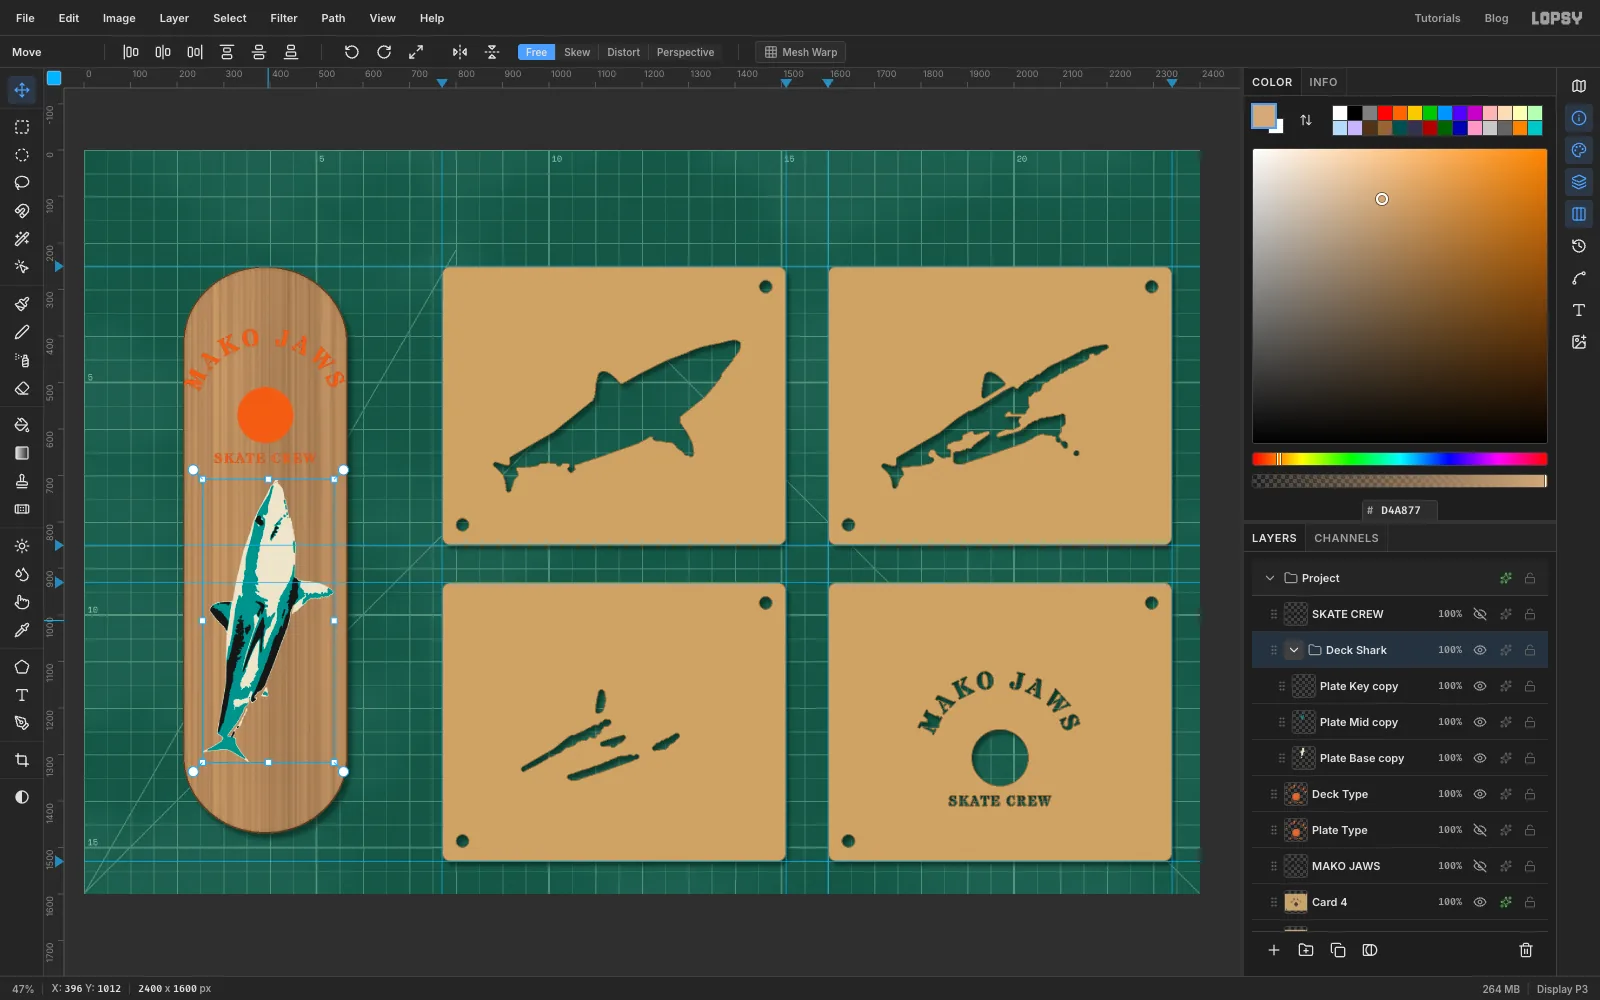
- With the group still selected, drag the shark onto the deck so its nose sits just below SKATE CREW and its tail ends above the tail of the board.
- In the Layers panel, drag the
Deck Sharkrow by its grip aboveDeck Type. - Trim the paint to the board. Cmd-click the
Deckthumbnail, choose Select → Inverse, then click each plate copy andDeck Typein turn and press Delete.
-
Make the paint look sprayed
Flat fills look printed, not sprayed. On each paint layer (the three plate copies and
Deck Type):- Run Gaussian Blur with Radius
1and Add Noise at14, Mono, Gaussian. - Set the bone and orange coats to
90%. Set the teal and black coats to Multiply at85%so the grain shows through.
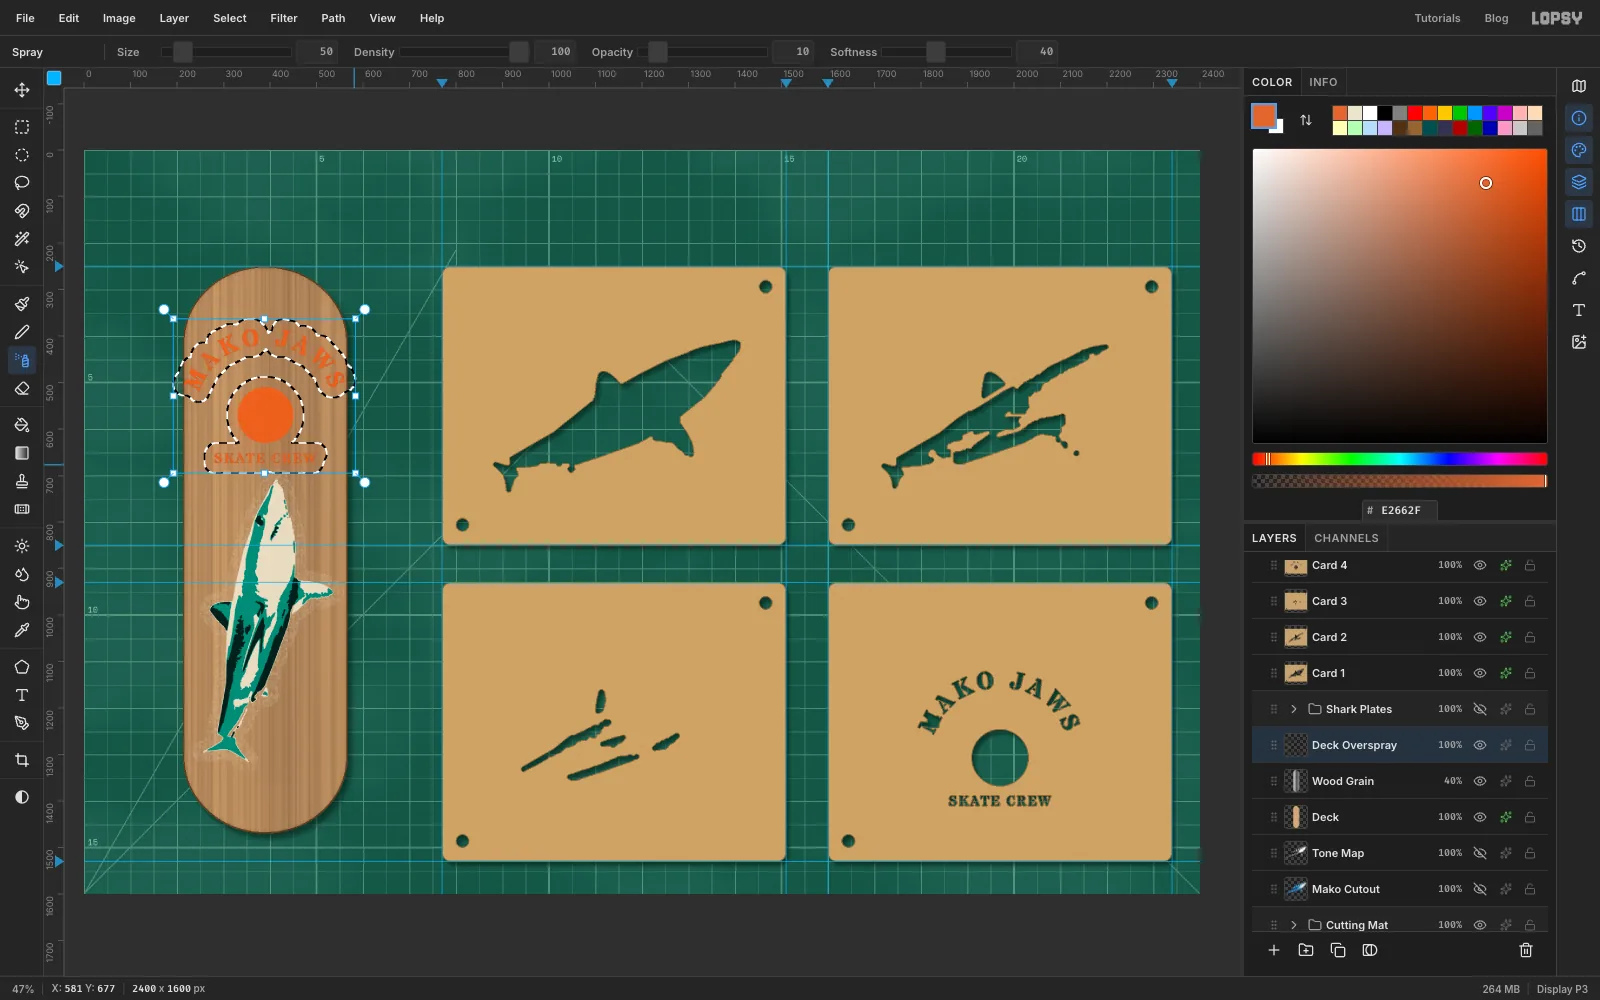
Then add the overspray. Spray paint drifts a little past the stencil's edge.
- Click
Wood Grainand add a layer calledDeck Oversprayunder the paint. - Pick the Spray tool: Size
50, Density100, Opacity18, Softness40. - Cmd-click the bone plate copy, run Grow
22, clickDeck Overspray, set the colour to bone and spray back and forth over the shark. - Do the same around
Deck Typein orange at Opacity10. - Cmd-click
Deck, choose Select → Inverse and delete the overspray that landed on the mat.
- Run Gaussian Blur with Radius
-
Add paint drips
- Add a layer called
Dripsand drag it aboveDeck Shark. - Pick the Brush with Hardness
90and Opacity100. - Set Size
5and orange. Click on the bottom edge of the sun and Shift-click 25–45 px straight below. Set Size10and click once at the end for the bead of paint. - Add one more orange drip and one teal drip from the bottom of the shark's pectoral fin.
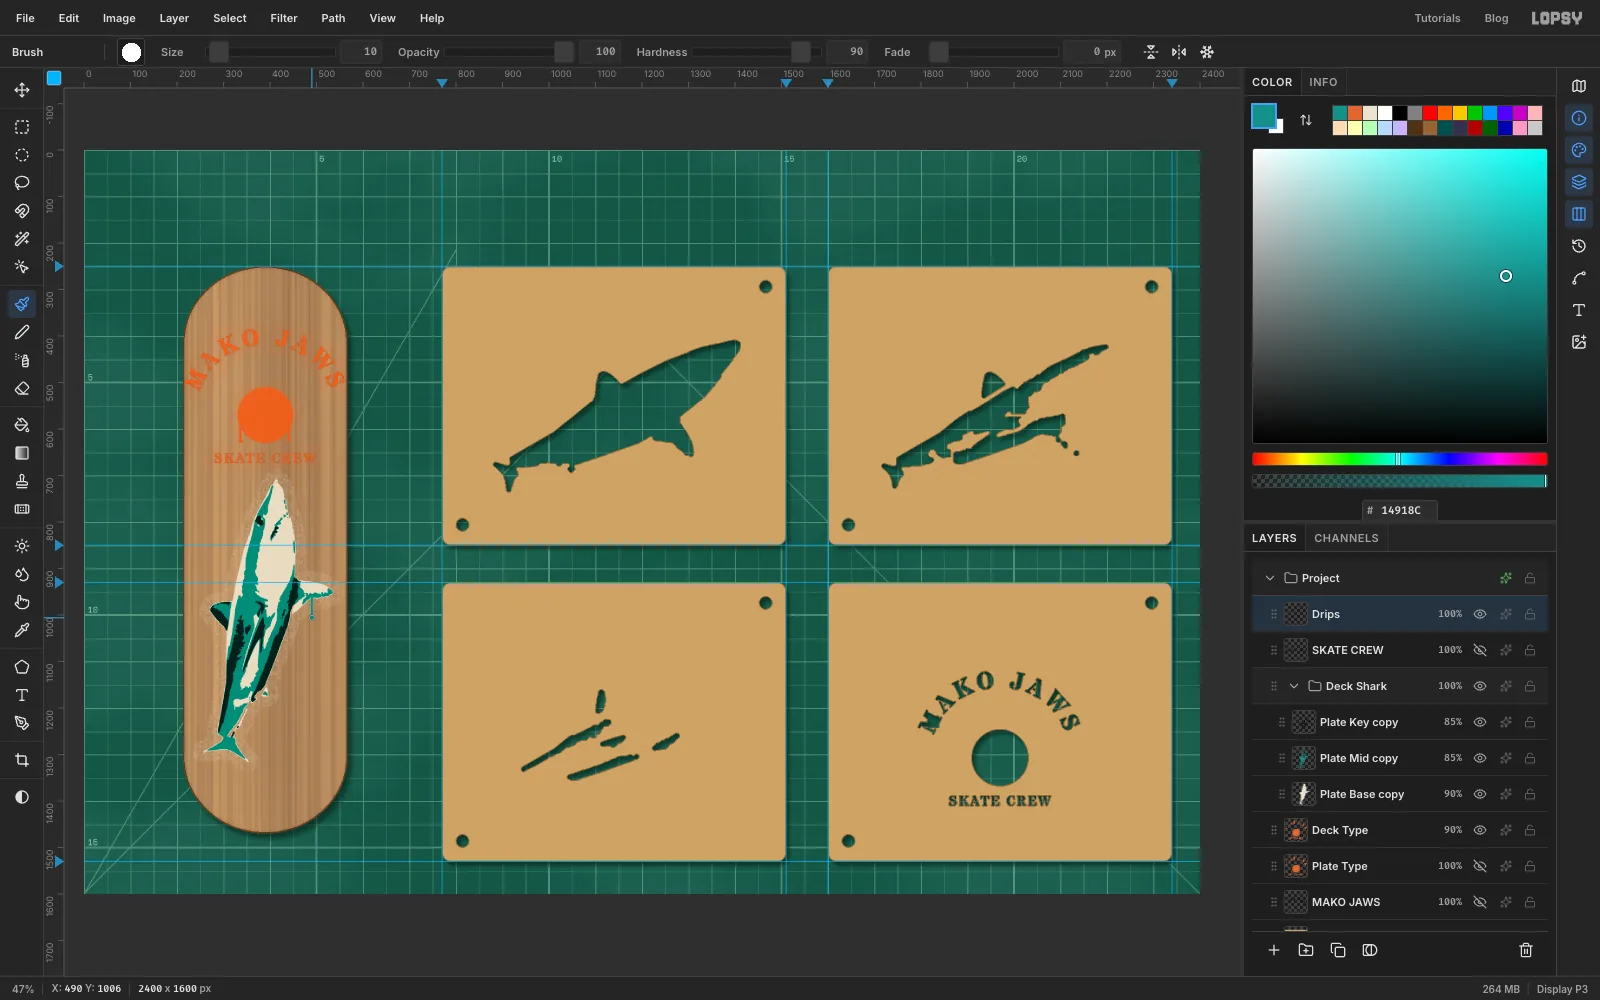
- Add a layer called
-
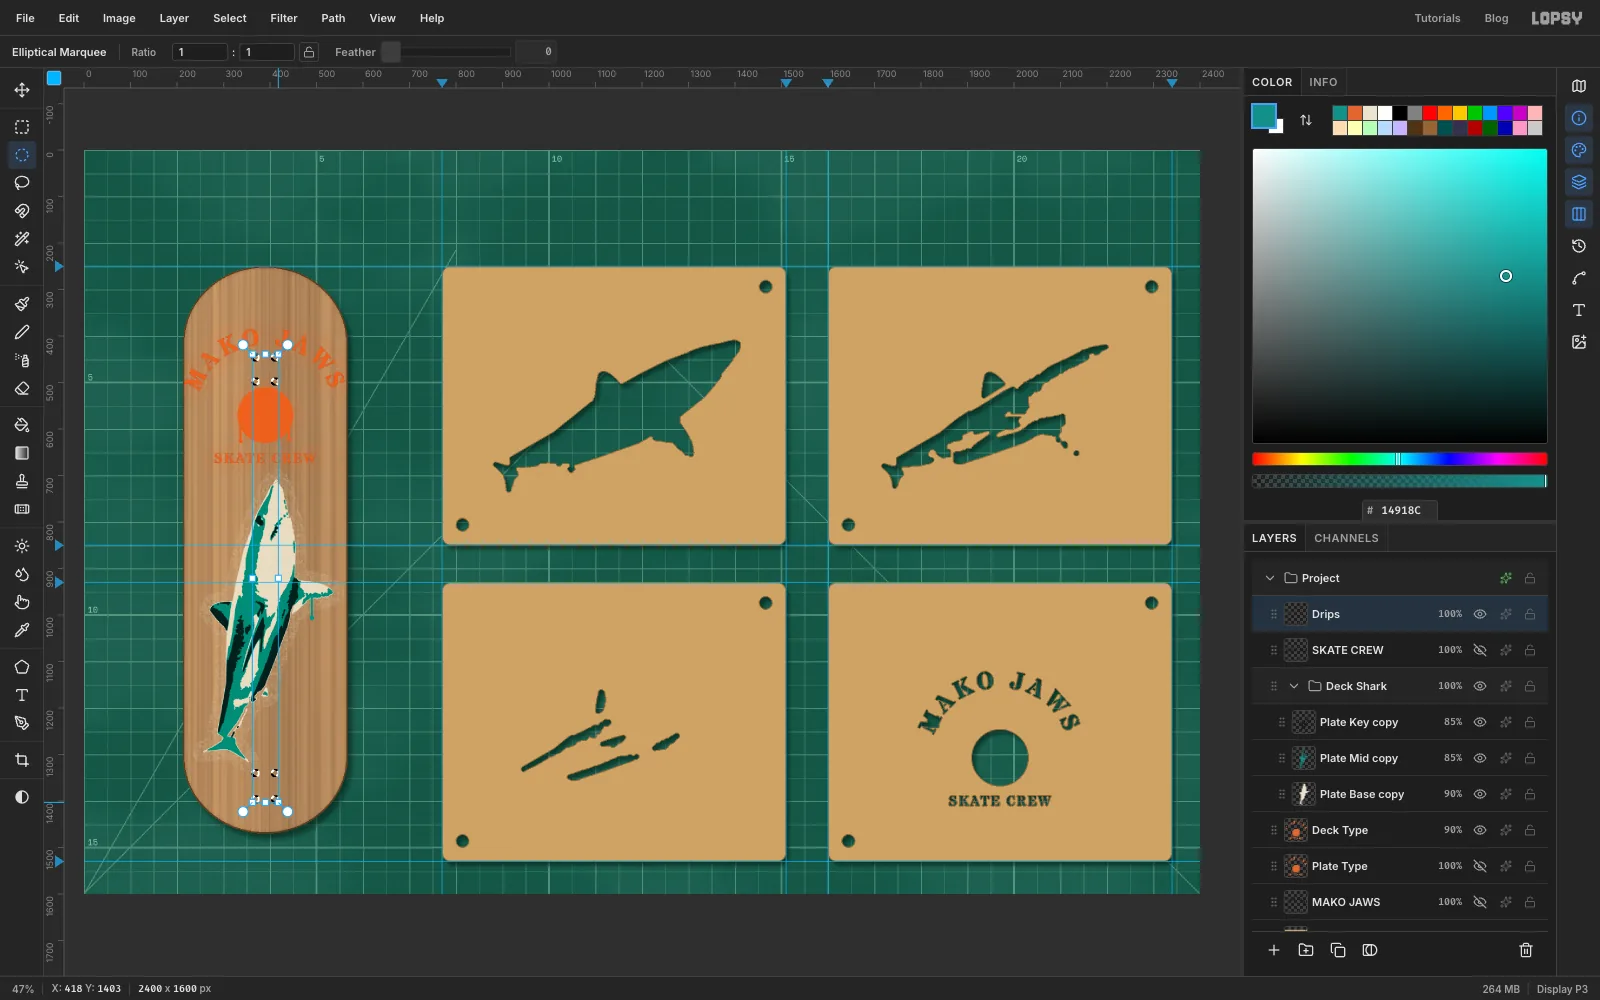
Drill the truck bolt holes
- With the Elliptical Marquee, drag a 14 px circle where the first front bolt goes, in the gap between the arch and the sun.
- Shift-drag three more to make a square about 42 px wide and 52 px tall. Make a second square of four near the tail, below the shark.
- Click
Deck,Wood Grain,Deck Overspray, the three plate copies andDeck Typein turn and press Delete on each, so the holes go through the board and every coat of paint.
-
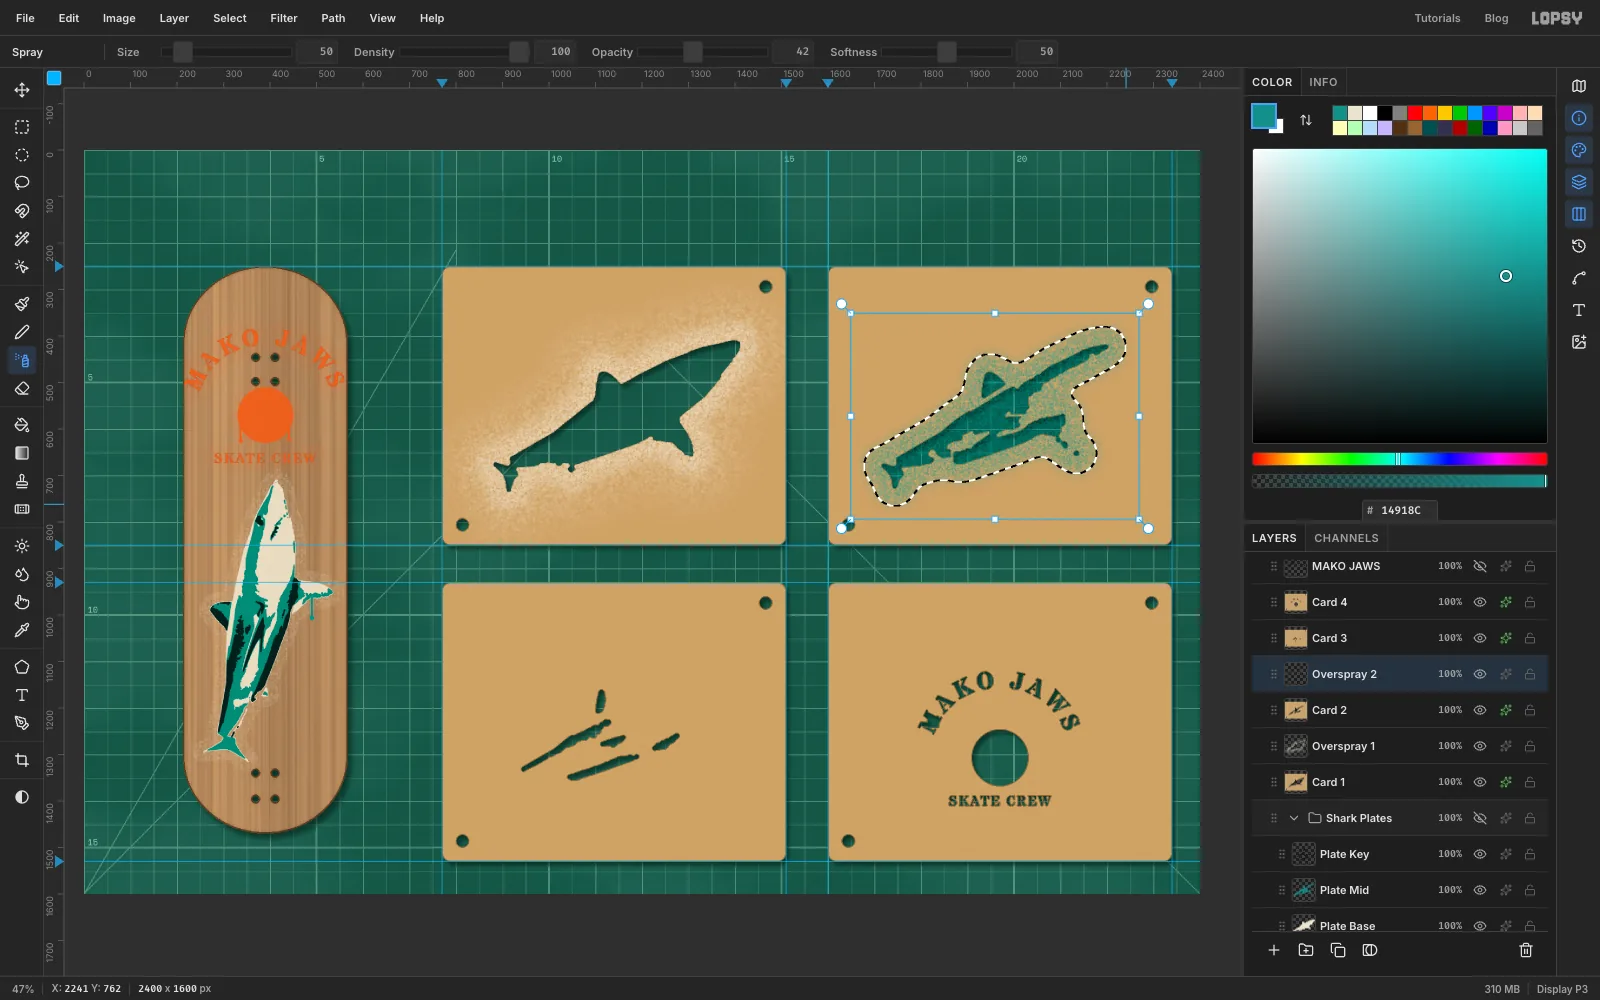
Spray overspray on the cards
Used stencils are covered in paint, heaviest right at the cut edge.
- Click
Card 1and add a layer calledOverspray 1. - Cmd-click
Plate Base, run Grow40and then Select → Feather…28. - Pick the Spray tool: Size
50, Density100, Opacity60, Softness50, in bone. Spray back and forth over the whole shape. - Cmd-click
Plate Baseagain, Grow130, Feather70, and spray once more at Size90, Opacity26. This is the faint outer mist. - Clean up: Cmd-click
Plate Baseand press Delete to clear paint from the hole. Then Cmd-clickCard 1, choose Select → Inverse and press Delete to clear paint from the mat.
Repeat for the other cards. Expand
Shark Platesso you can reach the plate thumbnails. Each card's overspray layer goes directly above it:- Card 2:
Plate Mid, teal. Pass 1 Grow40, Feather28, Opacity42; pass 2 Grow130, Feather70, Opacity14. - Card 3:
Plate Key, black . Pass 1 the same as card 2; pass 2 Grow70, Feather40, Opacity10. Then setOverspray 3to Multiply at65%. - Card 4:
Plate Type, orange. The same passes as card 2.
- Click
-
Label each plate in marker
Pick the Text tool, choose Permanent Marker at size
38in , and write a label 40 px in from the top-left corner of each card:01 BASE — BONE,02 MID — TEAL,03 KEY — BLACKand04 TYPE — ORANGE. Click the card's overspray layer before each one, so the new label lands above it and no earlier label gets restyled. Rename the four text layersLabel 1toLabel 4.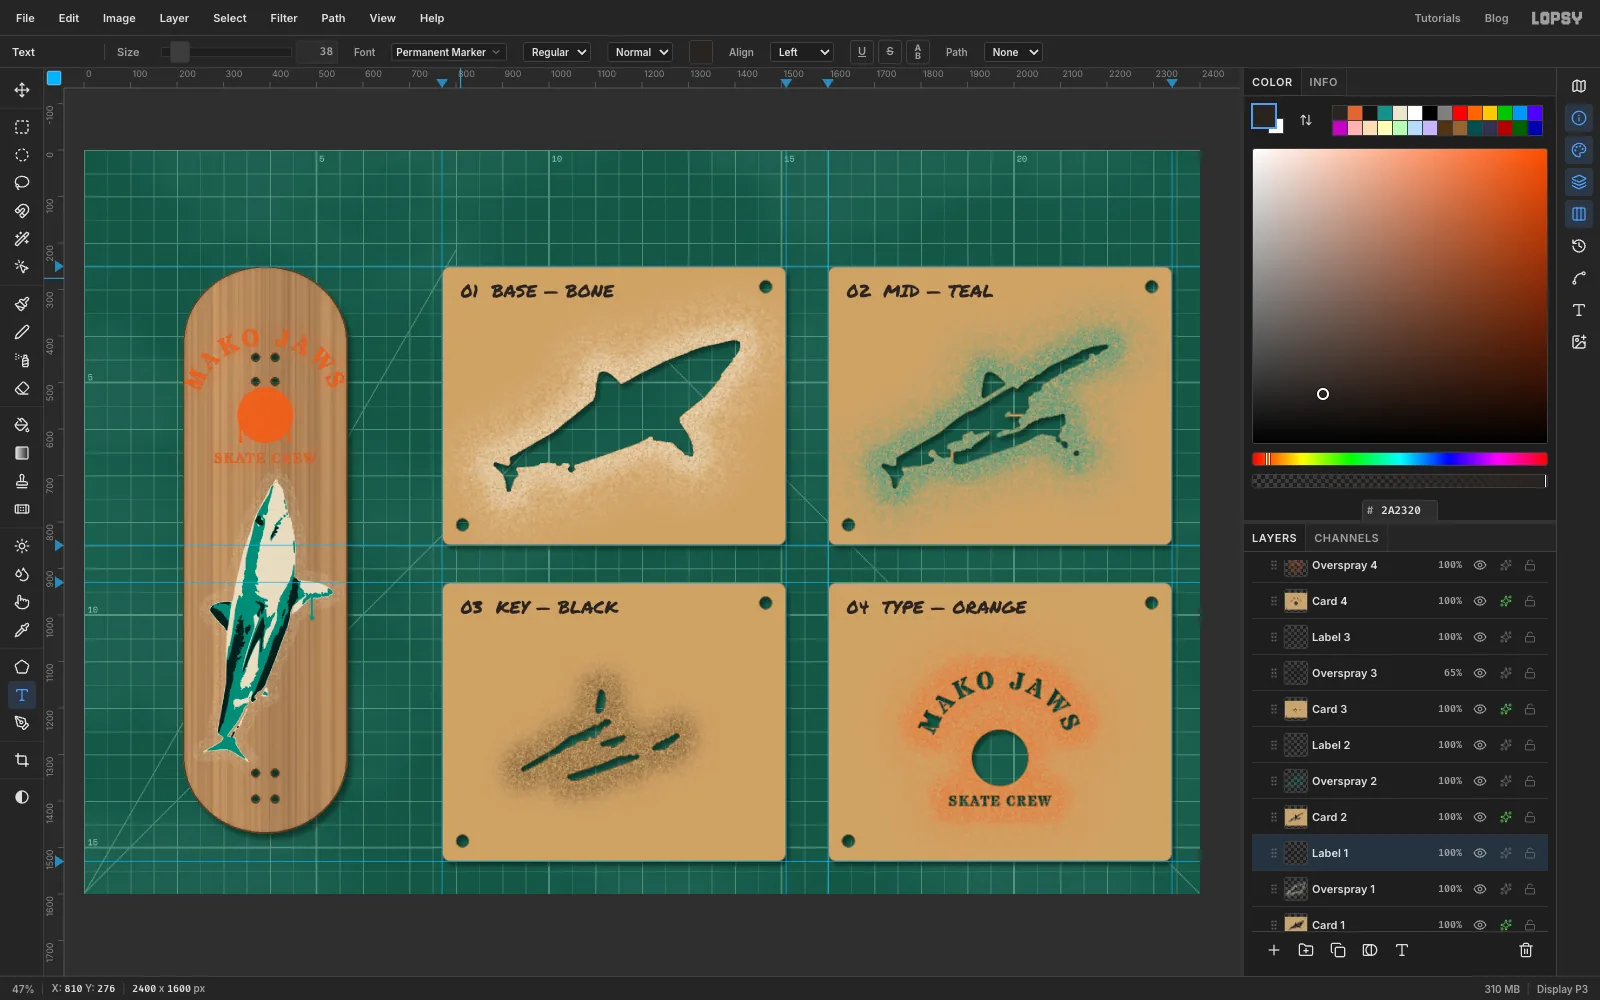
-
Scuff the deck with a mask
- Click
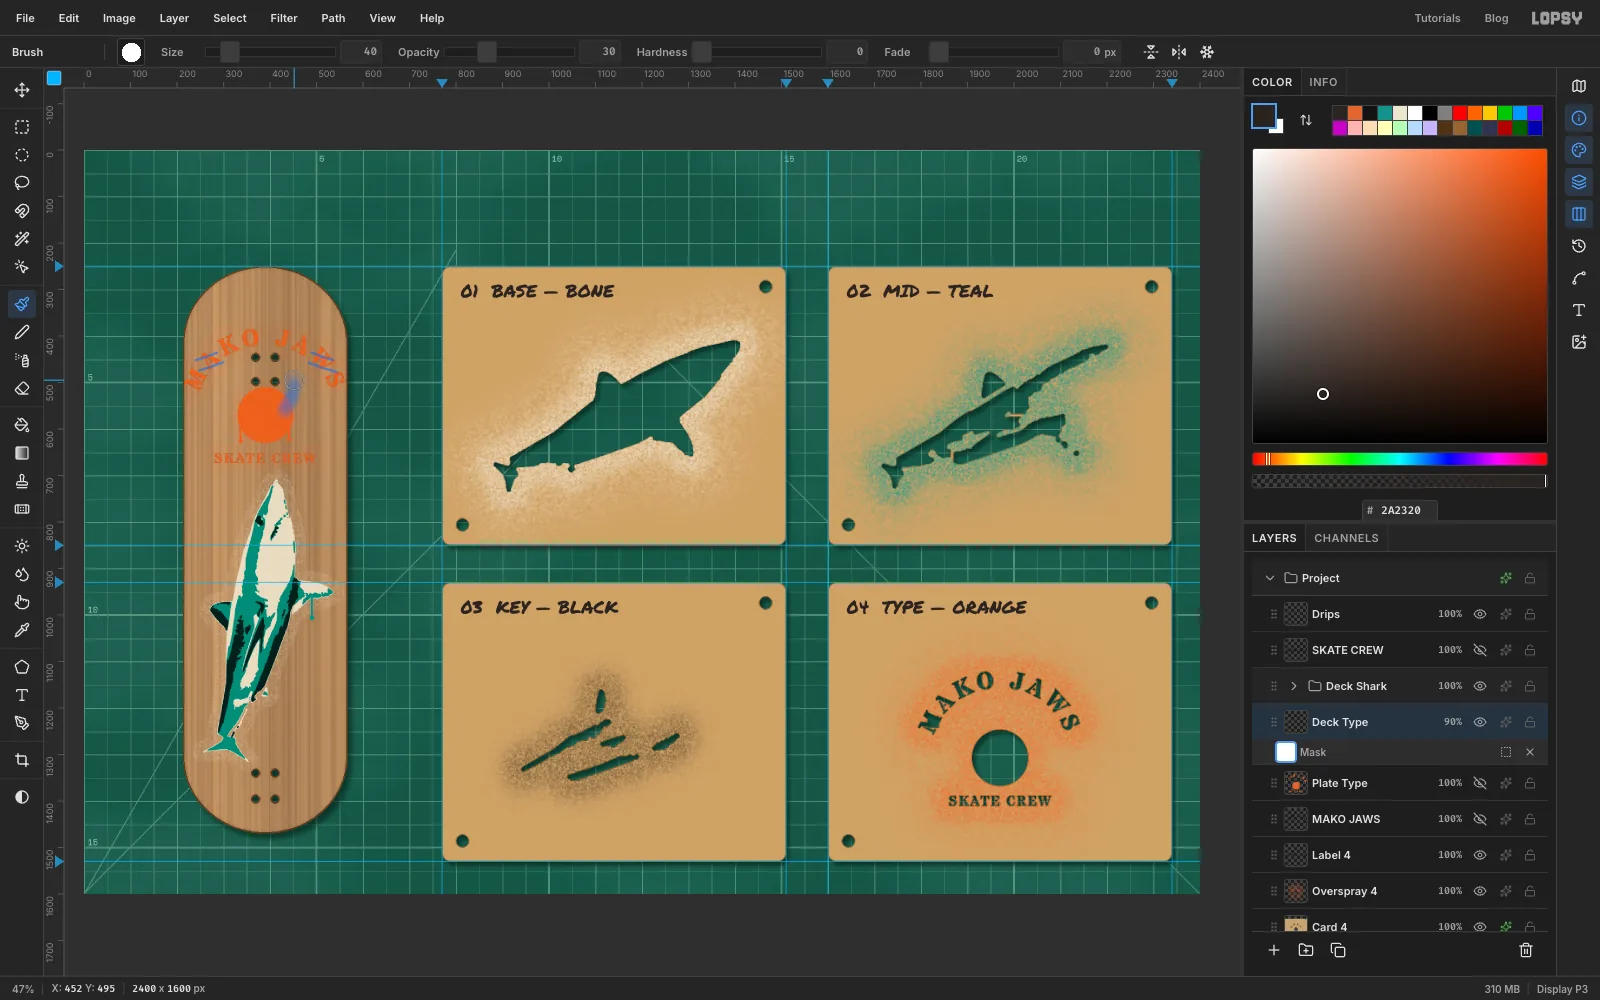
Deck Typeand click Add Mask in the Layers panel toolbar. - Click the white mask thumbnail on the Mask row under
Deck Typeto paint on the mask. In mask editing, the Brush always hides. - With the Brush at Size
6, Opacity85, Hardness70, drag a few short scrapes over the outer letters near the rails, where a board gets scuffed. - Set Size
40, Opacity30, Hardness0and brush once down the right edge of the sun. - Click the
Deck Typerow to leave mask editing.
- Click
-
Tilt the deck
- Click
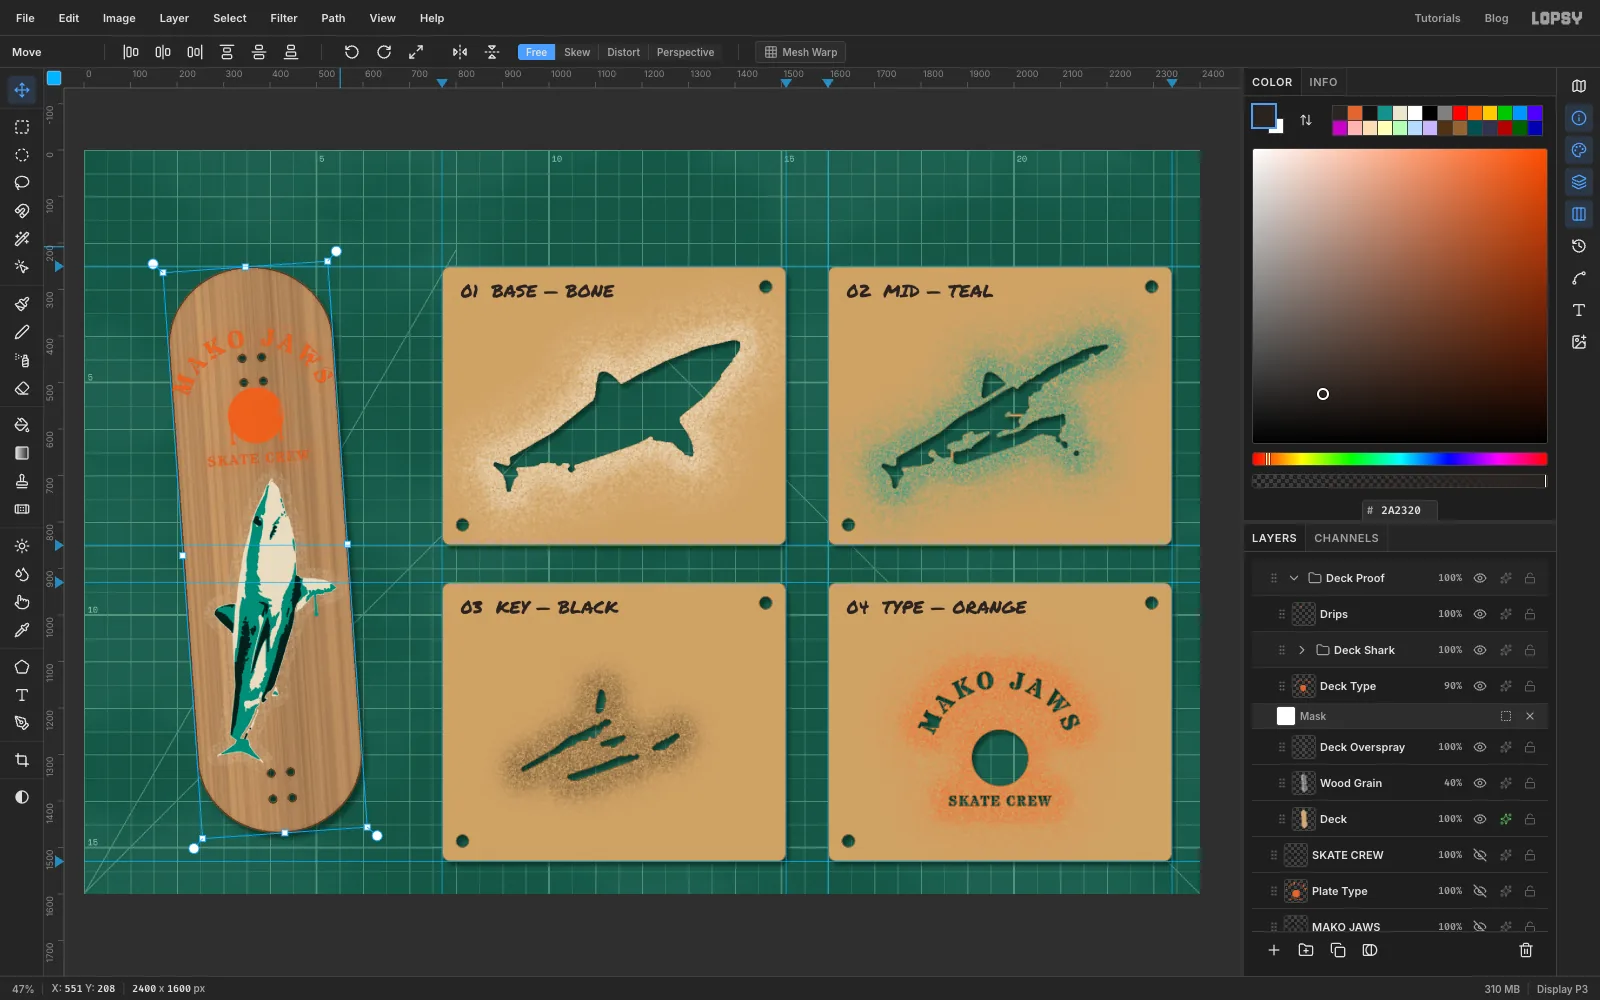
Deck Shark, then Cmd-clickDrips,Deck Type,Deck Overspray,Wood GrainandDeck. - Choose Layer → Group Layers and name the group
Deck Proof. - With the Move tool and nothing selected, drag a rotation handle to turn the whole deck about 4° anticlockwise, then press Cmd+D and collapse the group.
- Click
-
Give the chipboard some texture
- Click
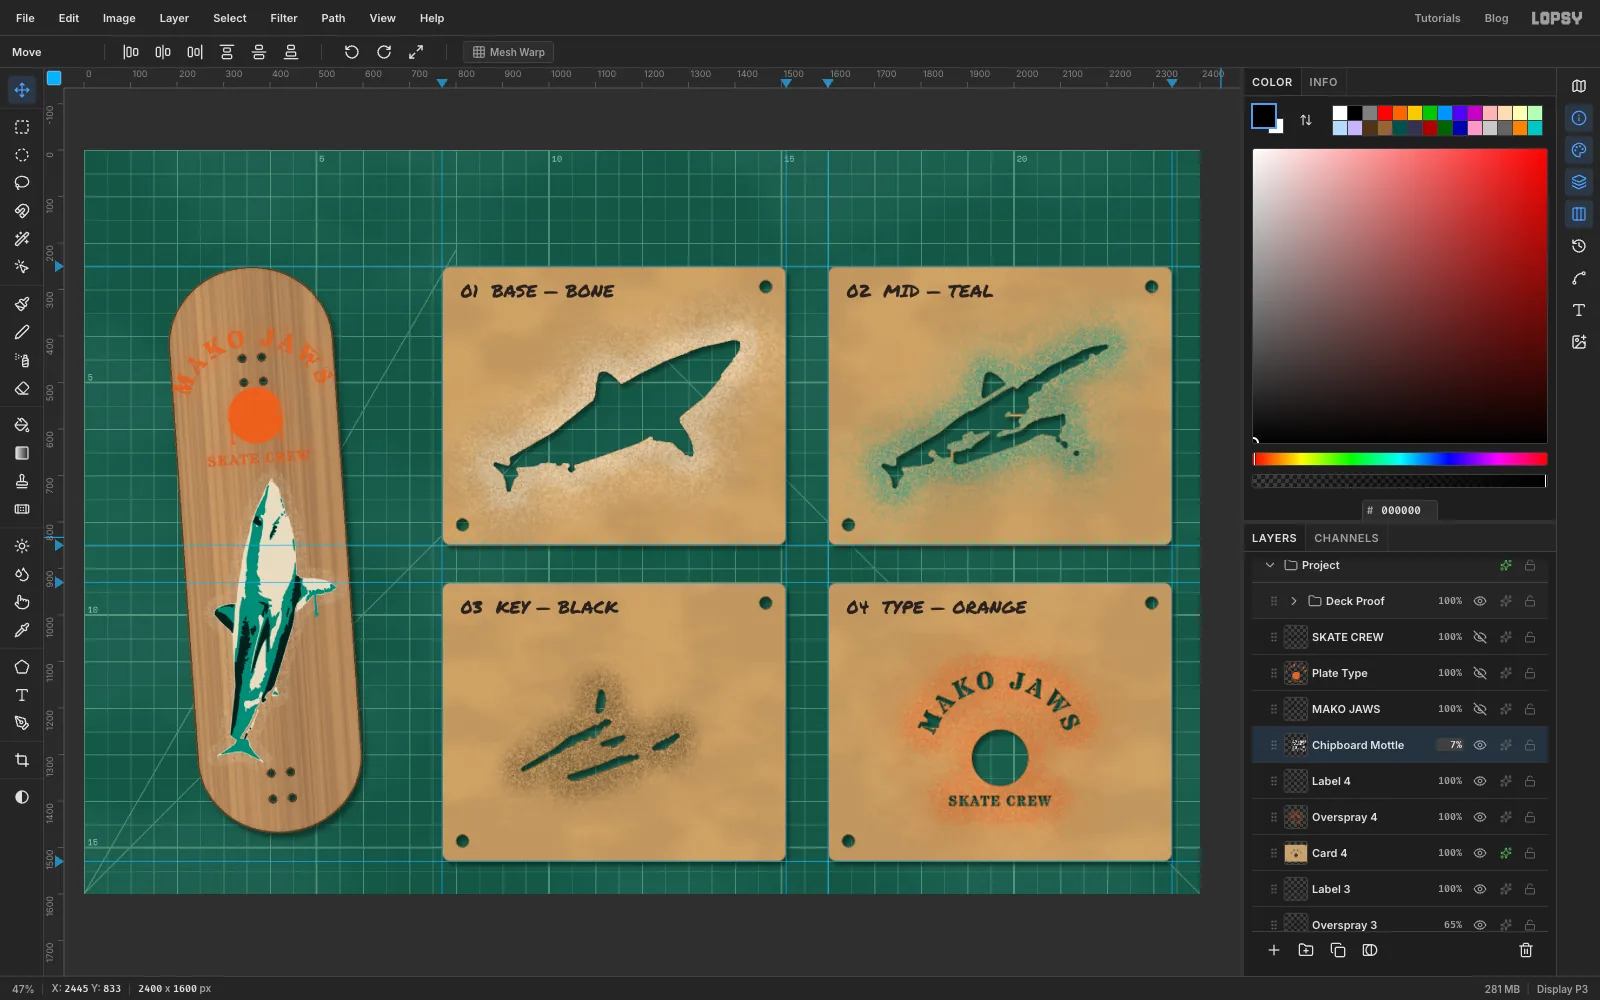
Label 4and add a layer calledChipboard Mottle. - Cmd-click
Card 1, clickChipboard Mottleand run Filter → Clouds… with Scale18. Repeat for the other three cards, so the clouds fill only the cards. - Deselect, run Add Noise at
30, Mono, Gaussian, and set the layer to Multiply at7%.
- Click
-
Tape the cards down
- Add a layer called
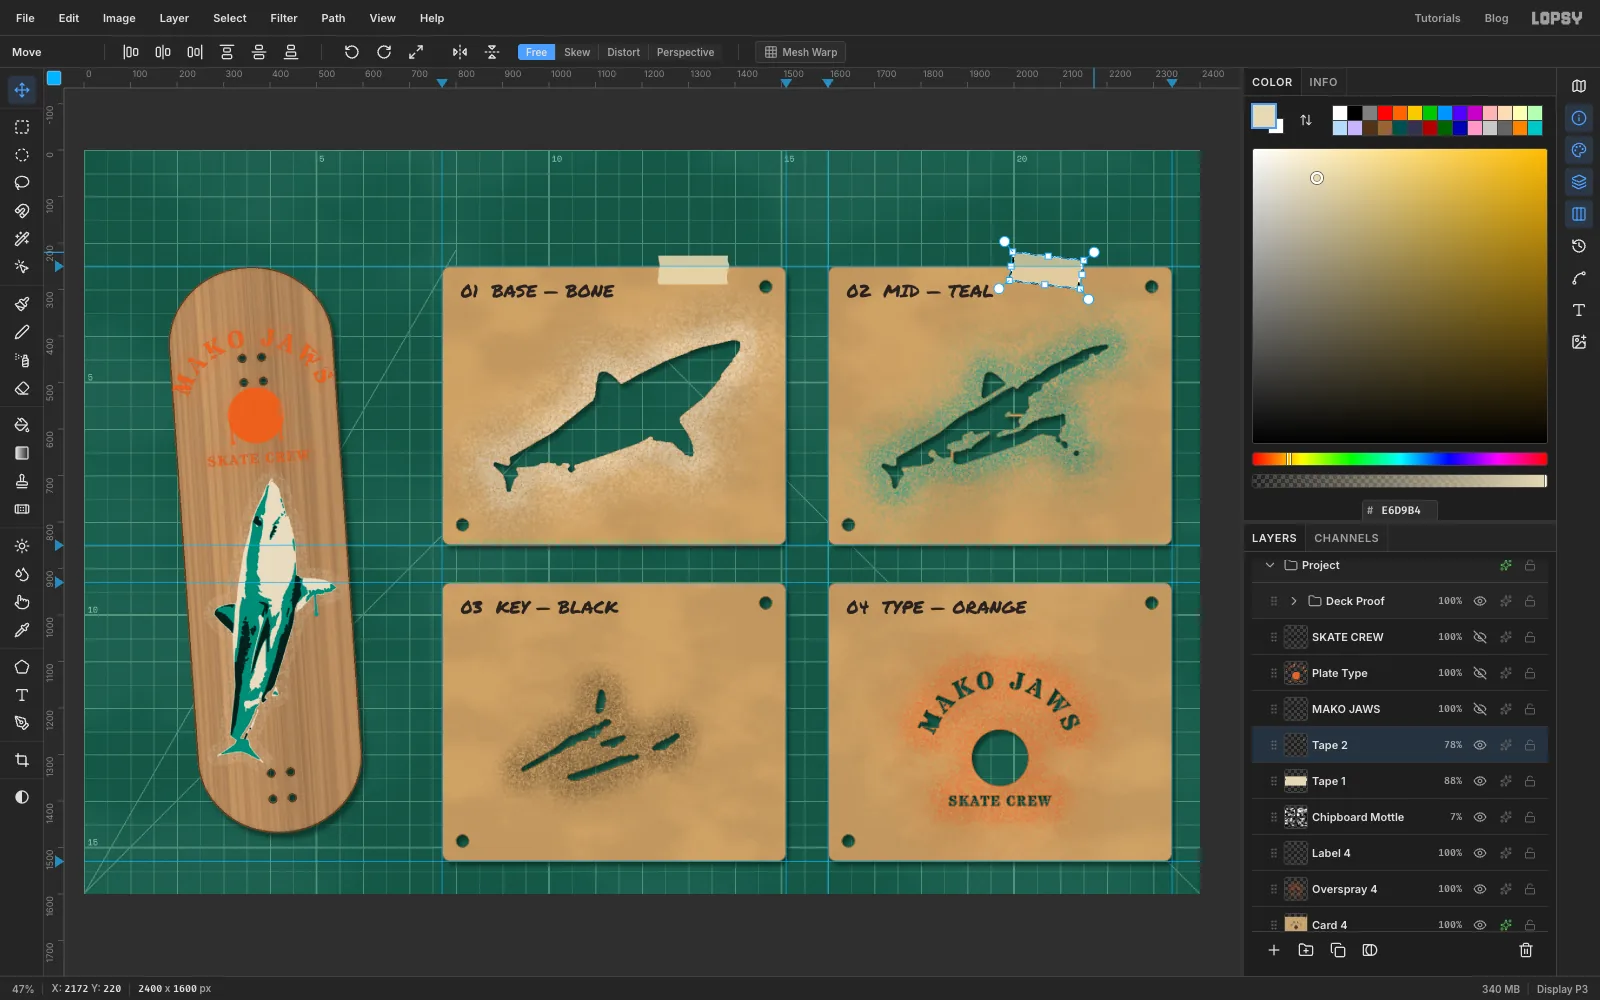
Tape 1. Lasso a strip about 150 × 62 px across the top edge of the first card, with short zigzag ends like torn tape. - Fill it with , add noise at
6and set the layer to88%. - Cmd-click
Tape 1and press Cmd+C. Press Cmd+V: the paste lands in place on a new layer. Name itTape 2and drag it to the top edge of card 2. Paste twice more forTape 3andTape 4, on the bottom edges of cards 3 and 4. - Turn each tape a few degrees with its rotation handle, some one way and some the other, and give each a slightly different opacity (78–92%).
- Give every tape a small Drop Shadow: Offset X
2, Offset Y3, Blur4, Opacity35.
- Add a layer called
-
Spray the title through a selection
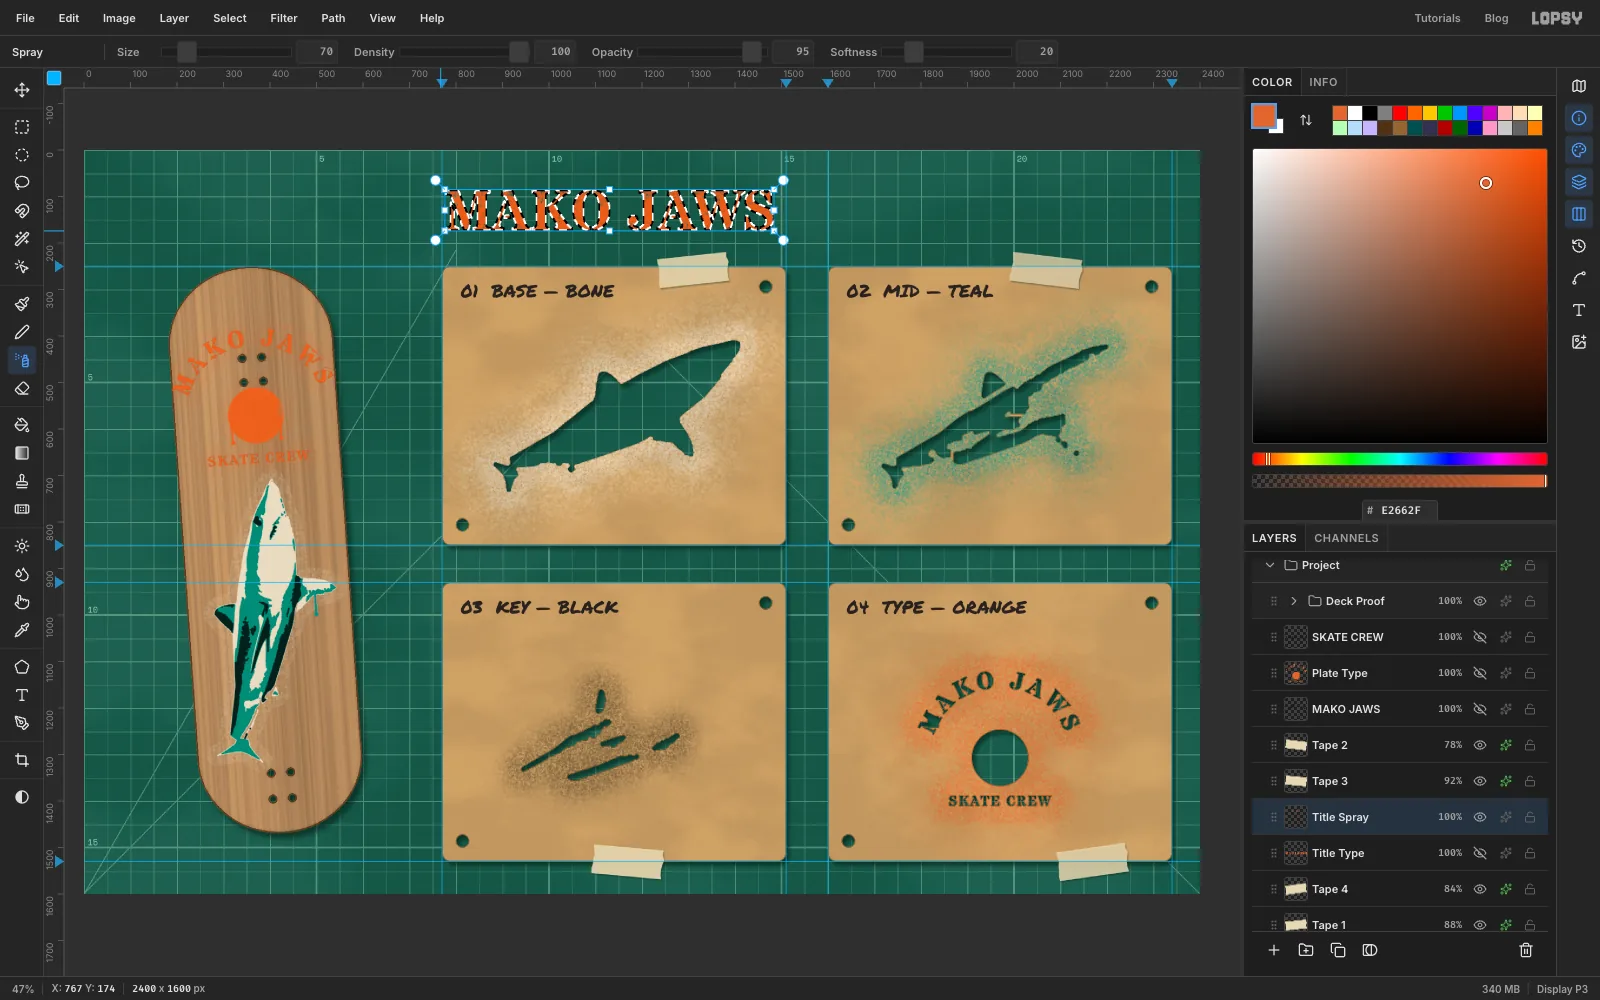
- Type
MAKO JAWSin Stardos Stencil, Bold, size122, along the top, starting above the first card. Name the layerTitle Type. - Cmd-click the text's thumbnail, hide the text and add a layer called
Title Spray. - Pick the Spray tool: Size
70, Density100, Opacity95, Softness20, in orange. Spray back and forth across the selection until the letters are solid but still speckled at the edges. - Deselect and add an Outer Glow in orange (Size
16, Spread0, Opacity40) for the mist.
- Type
-
Add the kit label
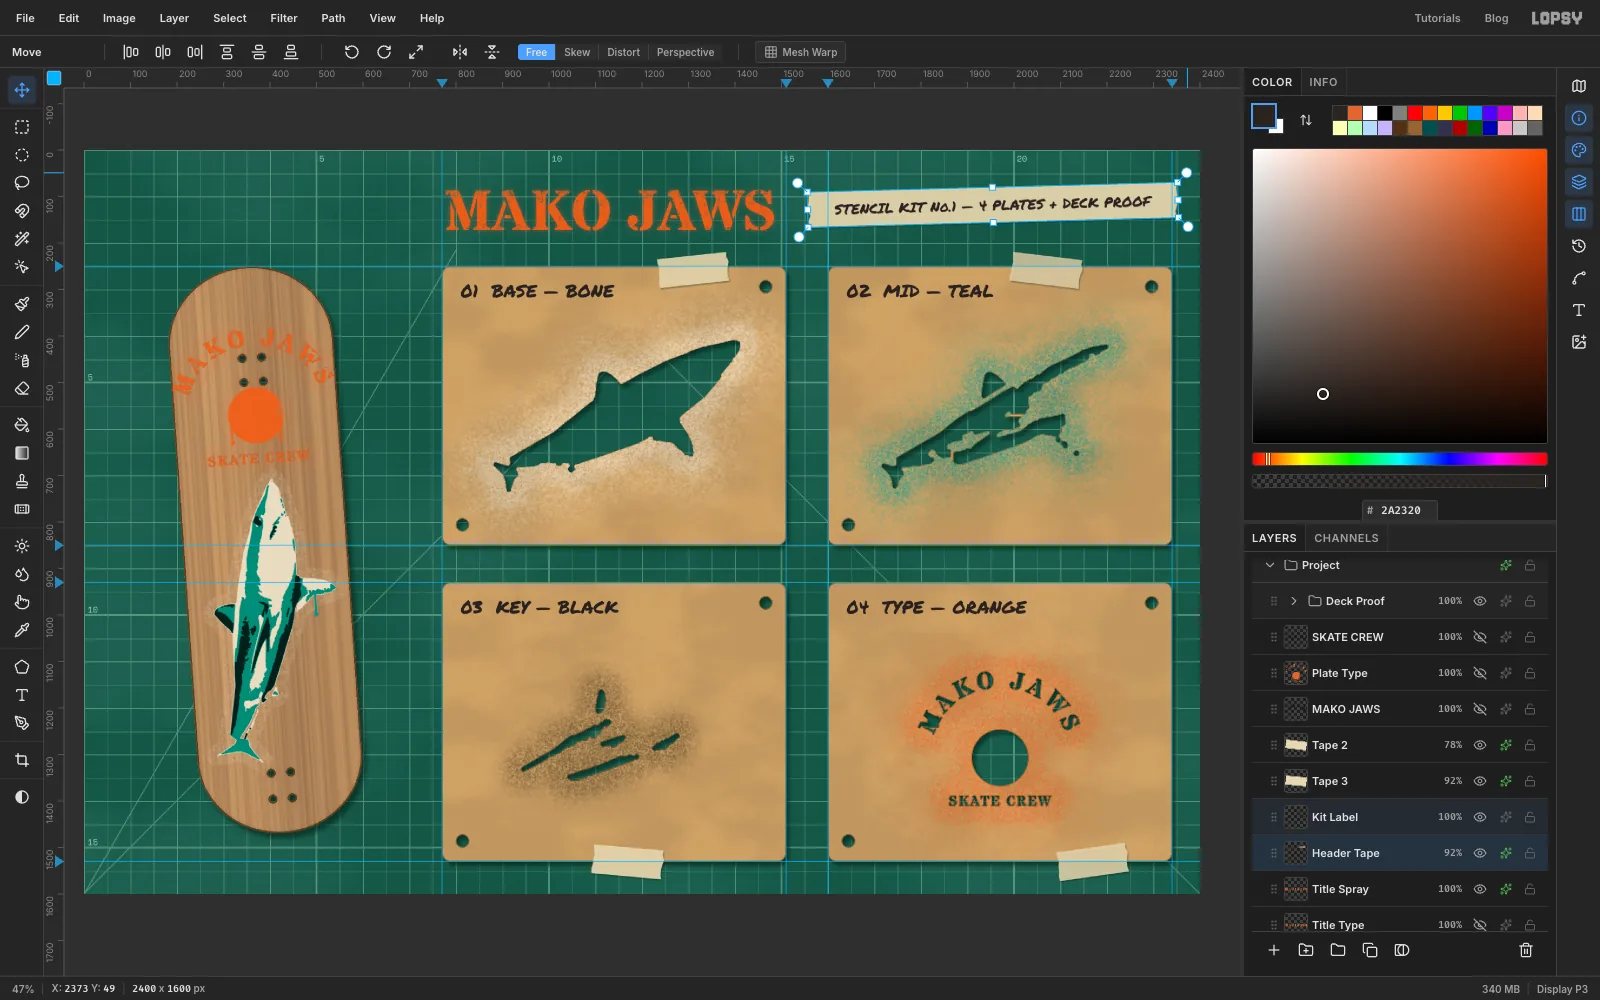
- Add a layer called
Header Tapeand lasso a long tape strip, about 790 × 76 px, to the right of the title. Fill it with tape colour, add noise and a small shadow. - Write
STENCIL KIT No.1 — 4 PLATES + DECK PROOFon it in Permanent Marker, size30, and name the layerKit Label. Switch to the Move tool and centre it on the tape with the arrow keys. - Click
Header Tape, Shift-click the label text, and rotate both together by about 1.5° with the Move tool.
- Add a layer called
-
Number the frames
Contact sheets number every frame. With Space Mono at size
36in , type▲ 01to▲ 04just above the top-left corner of each card. There's no key for ▲, so copy it from this page and paste it into the text.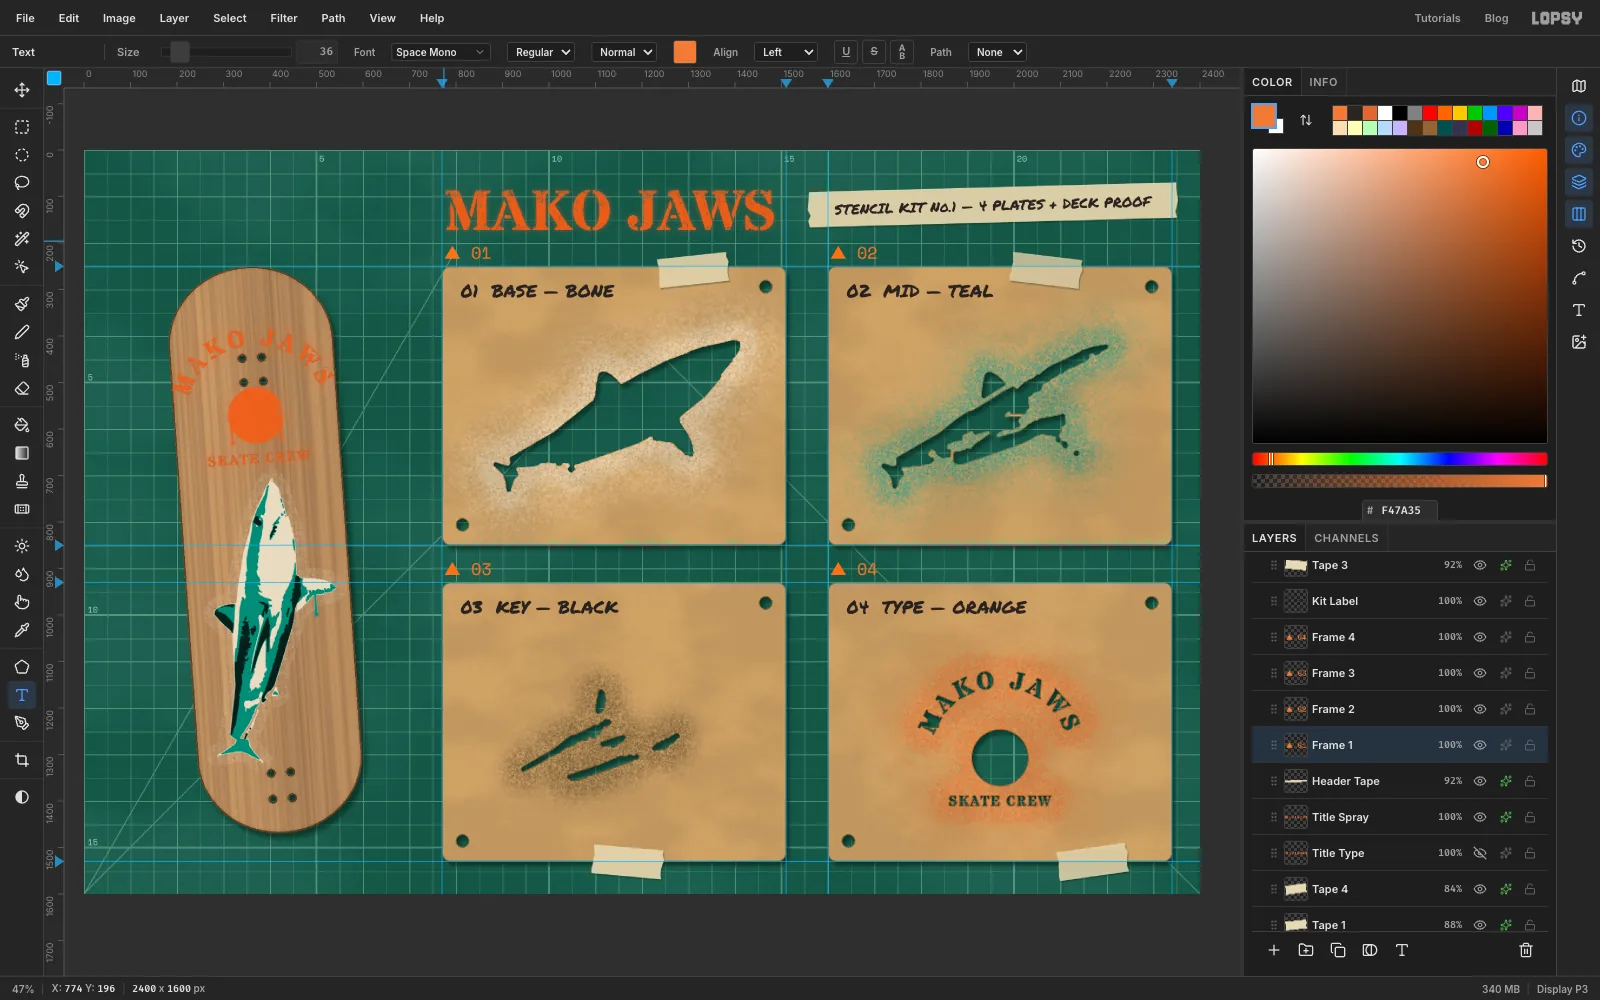
-
Mark the pick in grease pencil
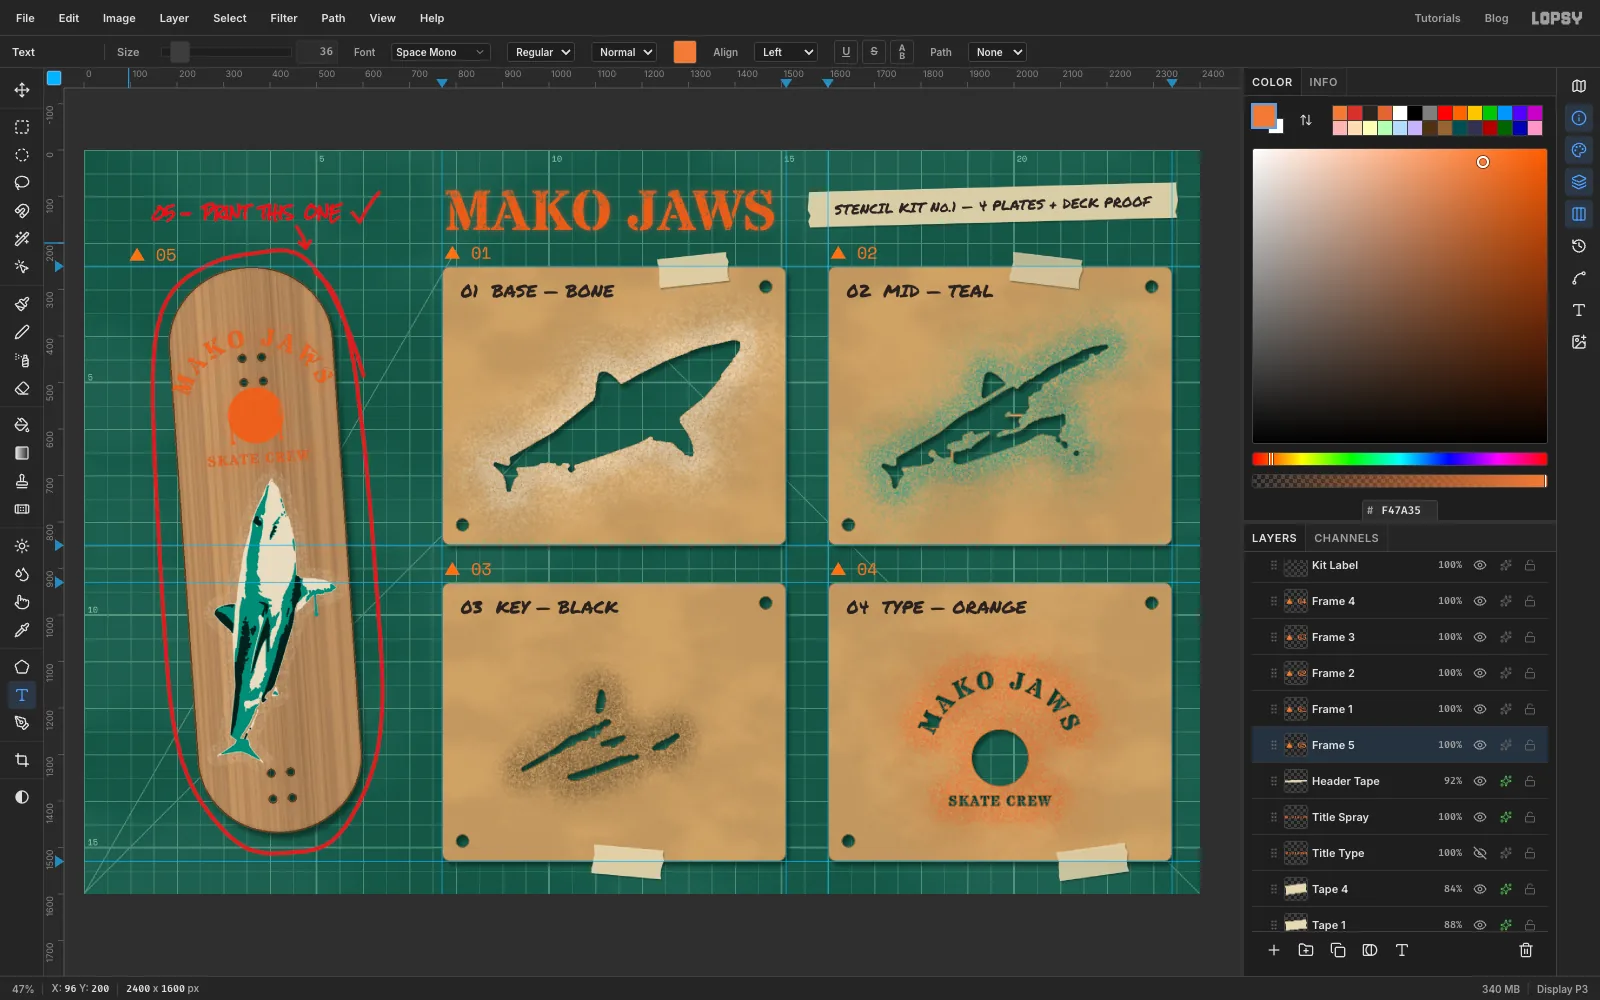
- Click the collapsed
Deck Proofgroup and add a layer calledGrease Pencil, so it sits on top of everything. - Pick the Brush: Size
10, Opacity92, Hardness80, colour . In one stroke, draw a loose loop around the deck, starting near the top right and overshooting past where you started. - Write
05 — PRINT THIS ONEabove the loop in Rock Salt, size27, in the same red, with two spaces between words. Give it a 2 px Stroke in the same red so it has the weight of a wax pencil. - Back on
Grease Pencil, draw a tick after the note and a short arrow down into the loop. Then run Add Noise at18on the layer for a waxy texture. - Type
▲ 05above the deck in the frame-number style.
Choose Edit → Clear Guides, then File → Quick Export PNG for the finished sheet, and File → Save Project to keep the layers.
- Click the collapsed