Design a Solarpunk Sea Otter Iron-On Patch in Lopsy
Turn a public-domain photo into an embroidered solarpunk patch in Lopsy, with thread textures, a solar halo, ruffled kelp, garden towers and arched lettering.
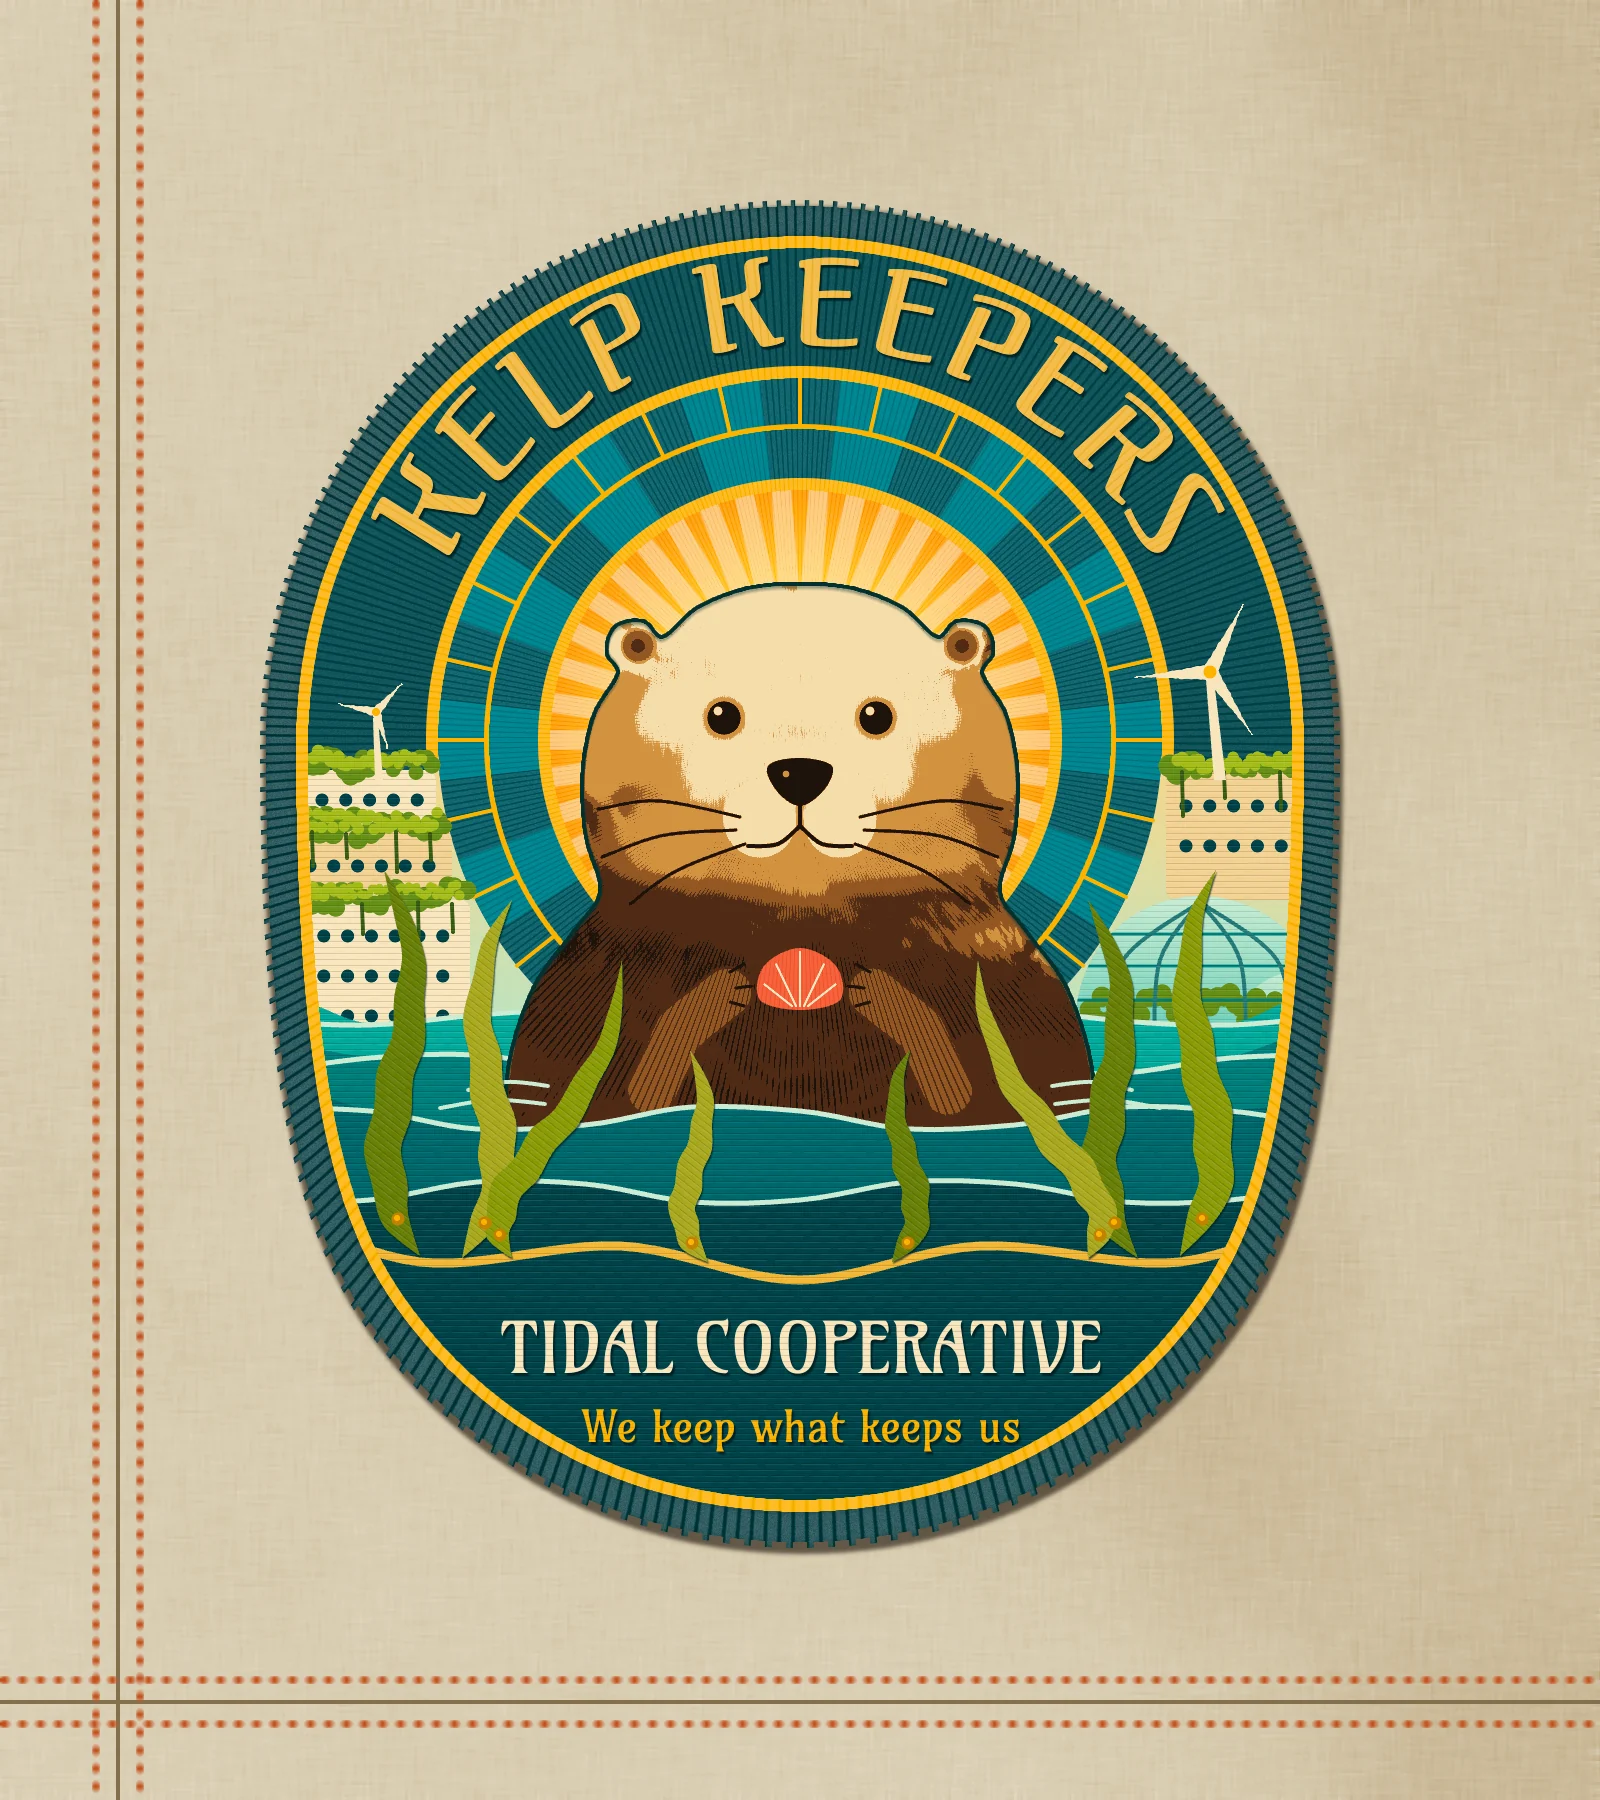
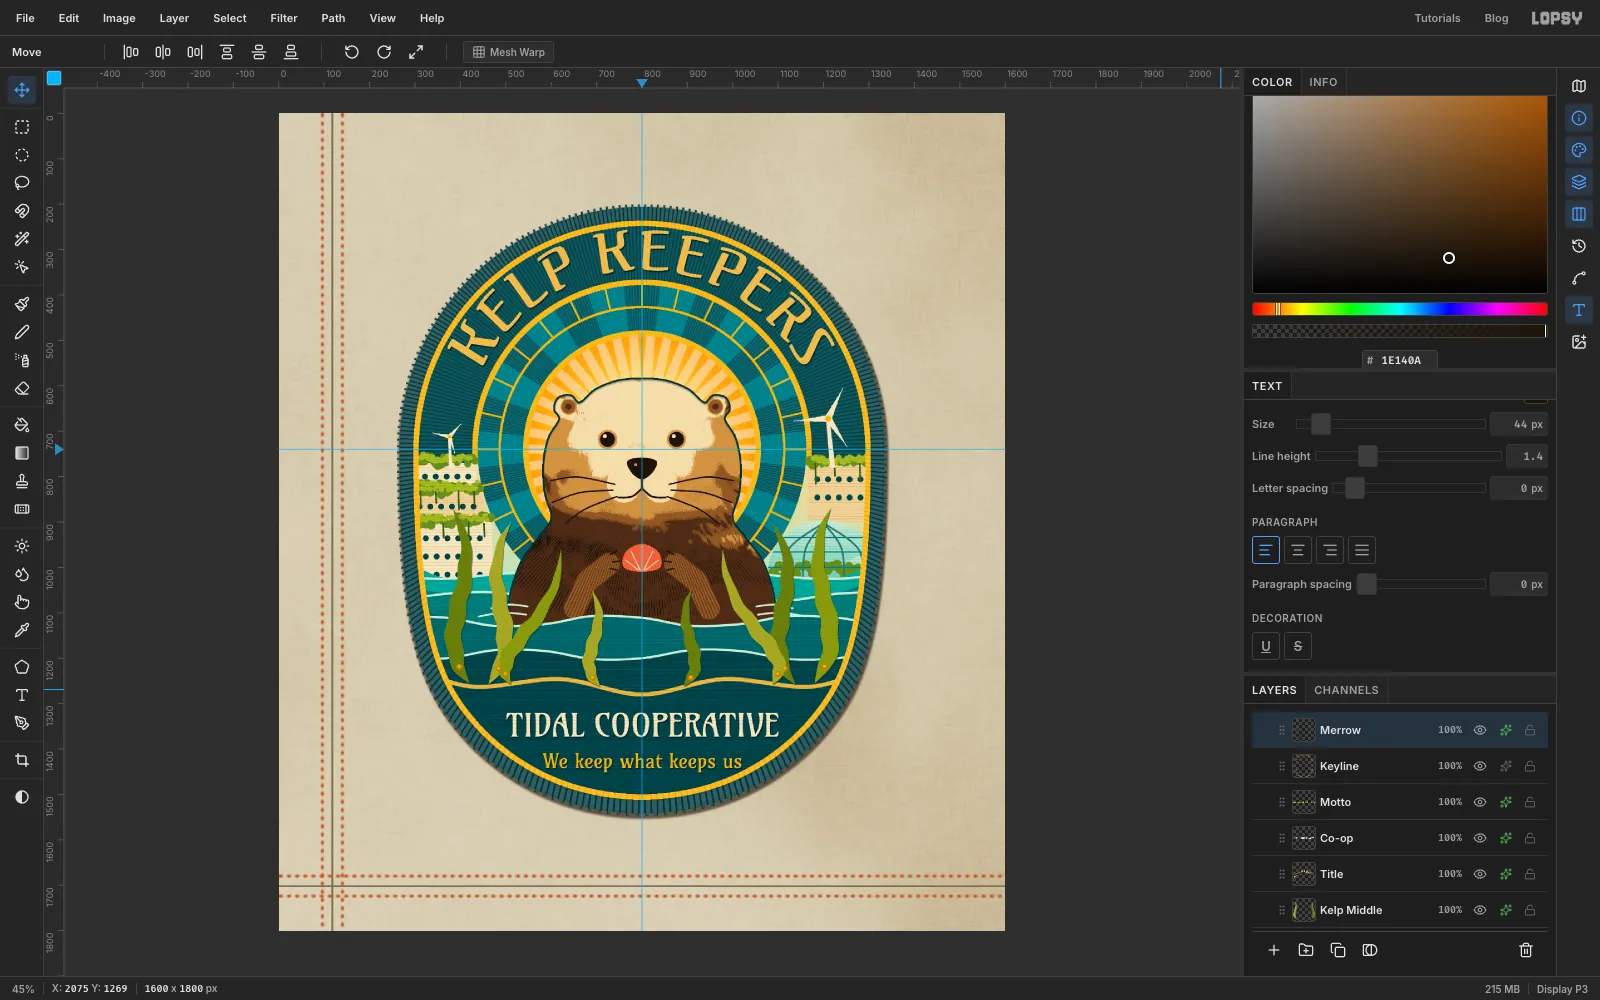
Solarpunk imagines a future that went right: warm light, clean energy and plants growing over everything. It borrows curves from Art Nouveau and adds solar panels, wind turbines and rooftop gardens. In this tutorial you'll put that on a souvenir patch for Kelp Keepers, a made-up cooperative that farms seaweed on the tide, and show it ironed onto a hemp work jacket.
The star is a sea otter, because otters really do keep kelp forests alive by eating the urchins that graze them. You'll start from a photo, Sea Otter Ready for a Nap by Lilian Carswell of the U.S. Fish and Wildlife Service, which is in the public domain. Download it before you start. It's 1280 × 828 px. The photo gives you the fur texture, and you paint a friendlier, front-on face over it.
The whole patch rests on two small recipes, which I'll explain once and then refer to by name:
- Stitch a layer. This clips a sheet of grey thread texture to a shape and blends it in. It's the move that makes flat colour read as embroidery.
- Trim to the patch. This cuts away anything that hangs past the patch's edge.
Three habits will save you some trouble:
- For exact shapes, click instead of dragging. With nothing selected, a single click on the canvas with either marquee tool opens a small dialog where you can type the corners. If something is selected, the click only clears it, so press Cmd+D first. Everything round is centred on 800, 740, so a circle of radius 362 runs from 438, 378 to 1162, 1102.
- Deselect with Cmd+D when you finish with a selection. A live selection limits the next fill or filter.
- Delete each Pen path when you've used it, with the Delete Path button in the Paths panel. The next Pen click near a selected path edits that path instead of starting a new one.
Along the way you'll use:
- Add Noise, Pixelate, Motion Blur, Gaussian Blur, Clouds, Surface Blur, Desaturate, Brightness/Contrast and Sunburst
- the Pencil, Define Pattern and Fill with Pattern
- the Brush with Radial Symmetry, Spacing, Scatter, Size Jitter and Taper
- the Pen, with Path to Selection and strokes
- a group Gradient Map with hard stops, which turns a grey photo into thread colours
- Shrink, Grow, Inverse, Cmd-clicking thumbnails, and copy and paste in place
- text on a path, Rasterize Layer and Merge Down
- Drop Shadow and Inner Glow
- Hard Light, Overlay, Soft Light and Multiply
The palette:
-
Canvas
-
seam
-
topstitch
-
Sea
-
foam
-
Sun
-
gold
-
cream
-
Solar cells
-
sky
-
Thread browns
-
Kelp
-
bead
-
shell
-
Weave the hemp canvas
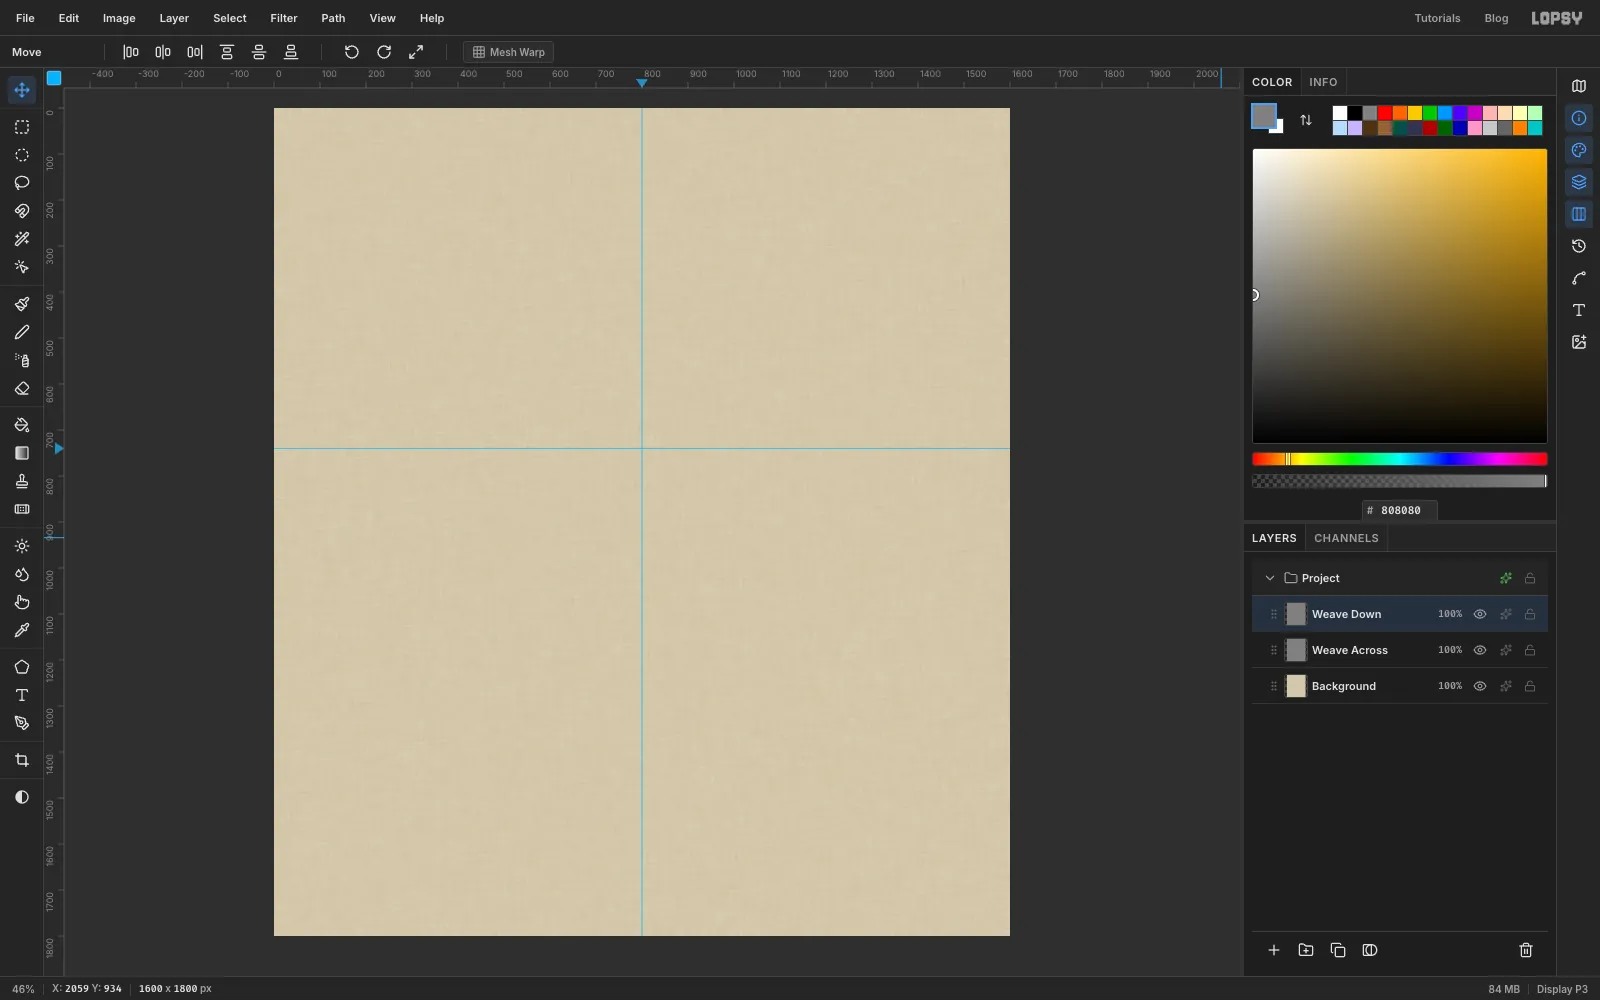
Choose File → New and make a document of 1600 × 1800 px. Click once on the top ruler at 800 and once on the left ruler at 740 to place two guides. All the round parts of the patch are centred where they cross.
Click the Background layer. Type
D2C7ACinto the Hex field in the Color panel to set the foreground colour, then choose Edit → Fill. Fill always uses the foreground colour, with no dialog, and it stays within any selection. Every "fill it with" in this tutorial means those two steps.Click Layer 1 and rename it Weave Across by double-clicking its name. Fill it with mid-grey , then:
- Filter → Add Noise… with Amount 100 and Mono on
- Filter → Pixelate… with Block Size 3
- Filter → Motion Blur… with Angle 0 and Distance 26
Open the effects drawer with the ✦ button on the layer's row and set the blend mode to Overlay. Close the drawer. Grey disappears in Overlay, leaving only the lighter and darker threads.
Add a new layer called Weave Down and repeat all of that with Angle 90. The two together cross like woven cloth.
-
Add folds and seams
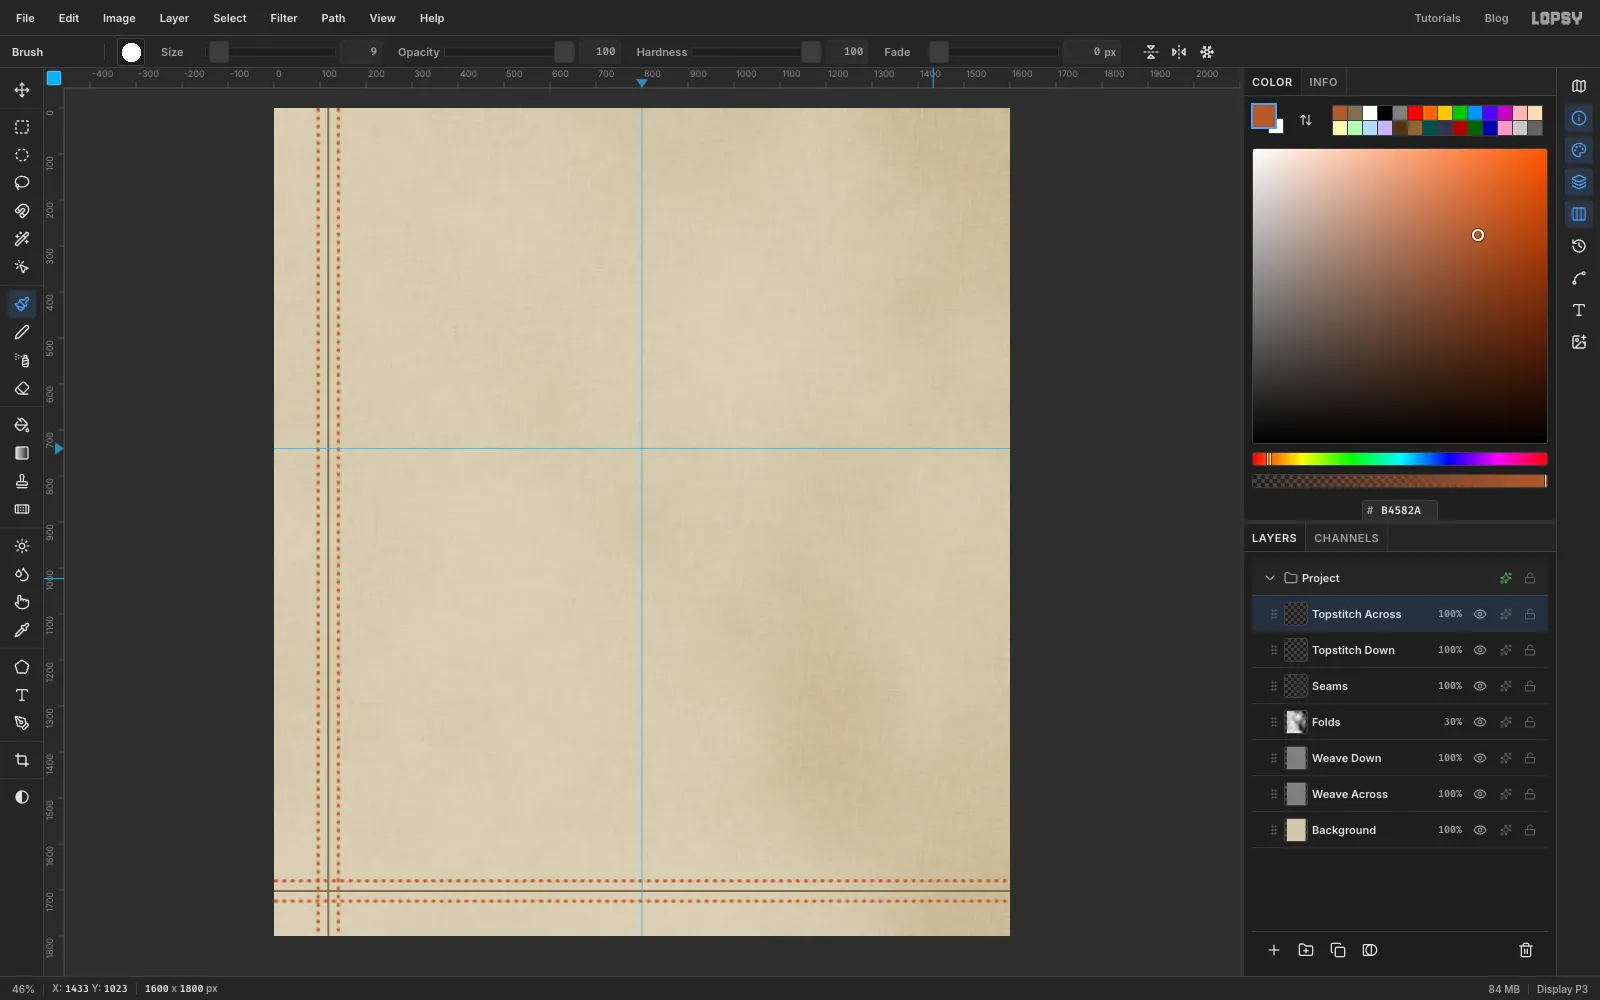
Add a layer called Folds. Run Filter → Clouds… with Scale 2, then Gaussian Blur at Radius 60. Set it to Soft Light and, by clicking the percentage on its row, 30% opacity.
Add a layer called Seams. Pick the Brush (B). Click its tip thumbnail in the options bar to open the Brushes panel and set Size 5, Hardness 100 and Spacing 2, then close the panel. With , draw one line down the canvas, about 120 px in from the left: click at the top, then Shift-click at the bottom. Draw another across, about 100 px up from the bottom.
Now for the dashes. Add a layer called Topstitch Down, set the Brush to Size 9 and Spacing 200, and use copper to draw two Shift-click lines down the canvas, one each side of the seam, at about x 96 and x 140. You'll see rows of dots. Motion Blur with Angle 90 and Distance 7 stretches them into thread dashes.
Do the same on a layer called Topstitch Across, with two lines either side of the bottom seam at about y 1680 and y 1724, and Motion Blur at Angle 0.
-
Draw a tile of thread
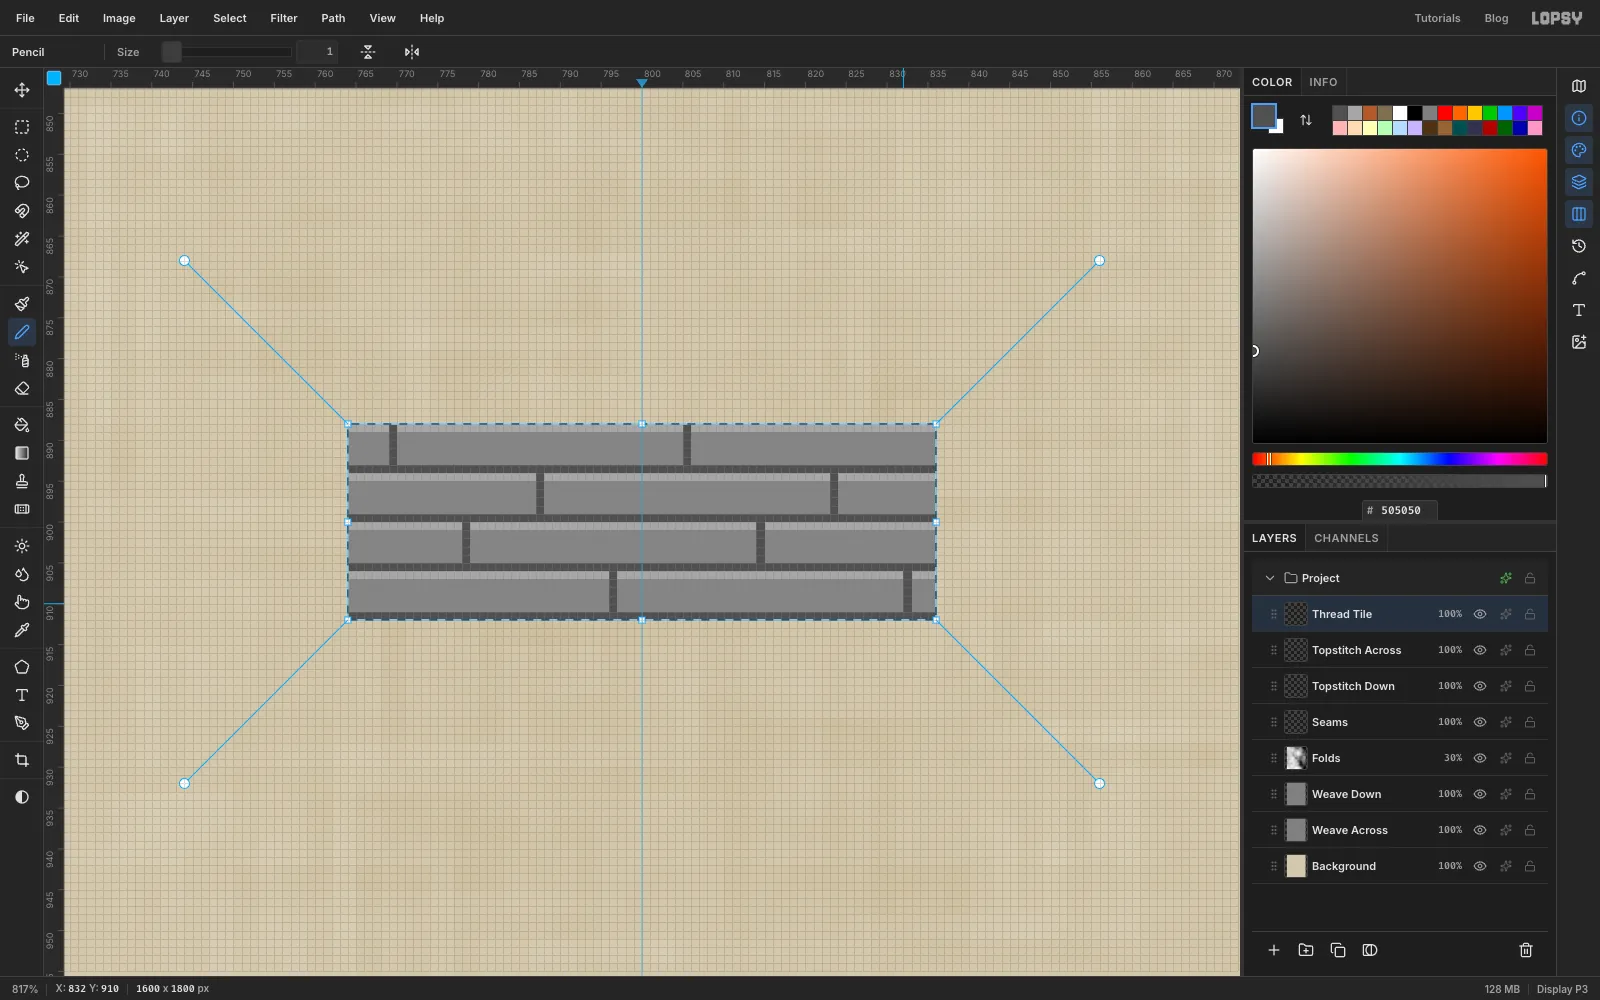
Add a layer called Thread Tile. With the Rectangular Marquee, click the canvas and enter corners 764, 888 and 836, 912 to get a 72 × 24 px rectangle in the middle. Fill it with . Leave the selection on, and zoom in to about 800% with Cmd and the scroll wheel.
The tile holds four threads, each 6 px tall. Pick the Pencil (N) at Size 1 and use a click and a Shift-click to draw straight lines across the full width:
- With , the bottom pixel of each thread: rows 6, 12, 18 and 24 of the tile.
- With , the top pixel of each thread: rows 1, 7, 13 and 19.
- With again, two short vertical needle holes in each thread, half a tile apart, and at a different place along each row so they stagger like bricks.
Choose Edit → Define Pattern. Press Cmd+0 to fit the view, press Cmd+D, then delete the Thread Tile layer.
-
Make the first thread sheet
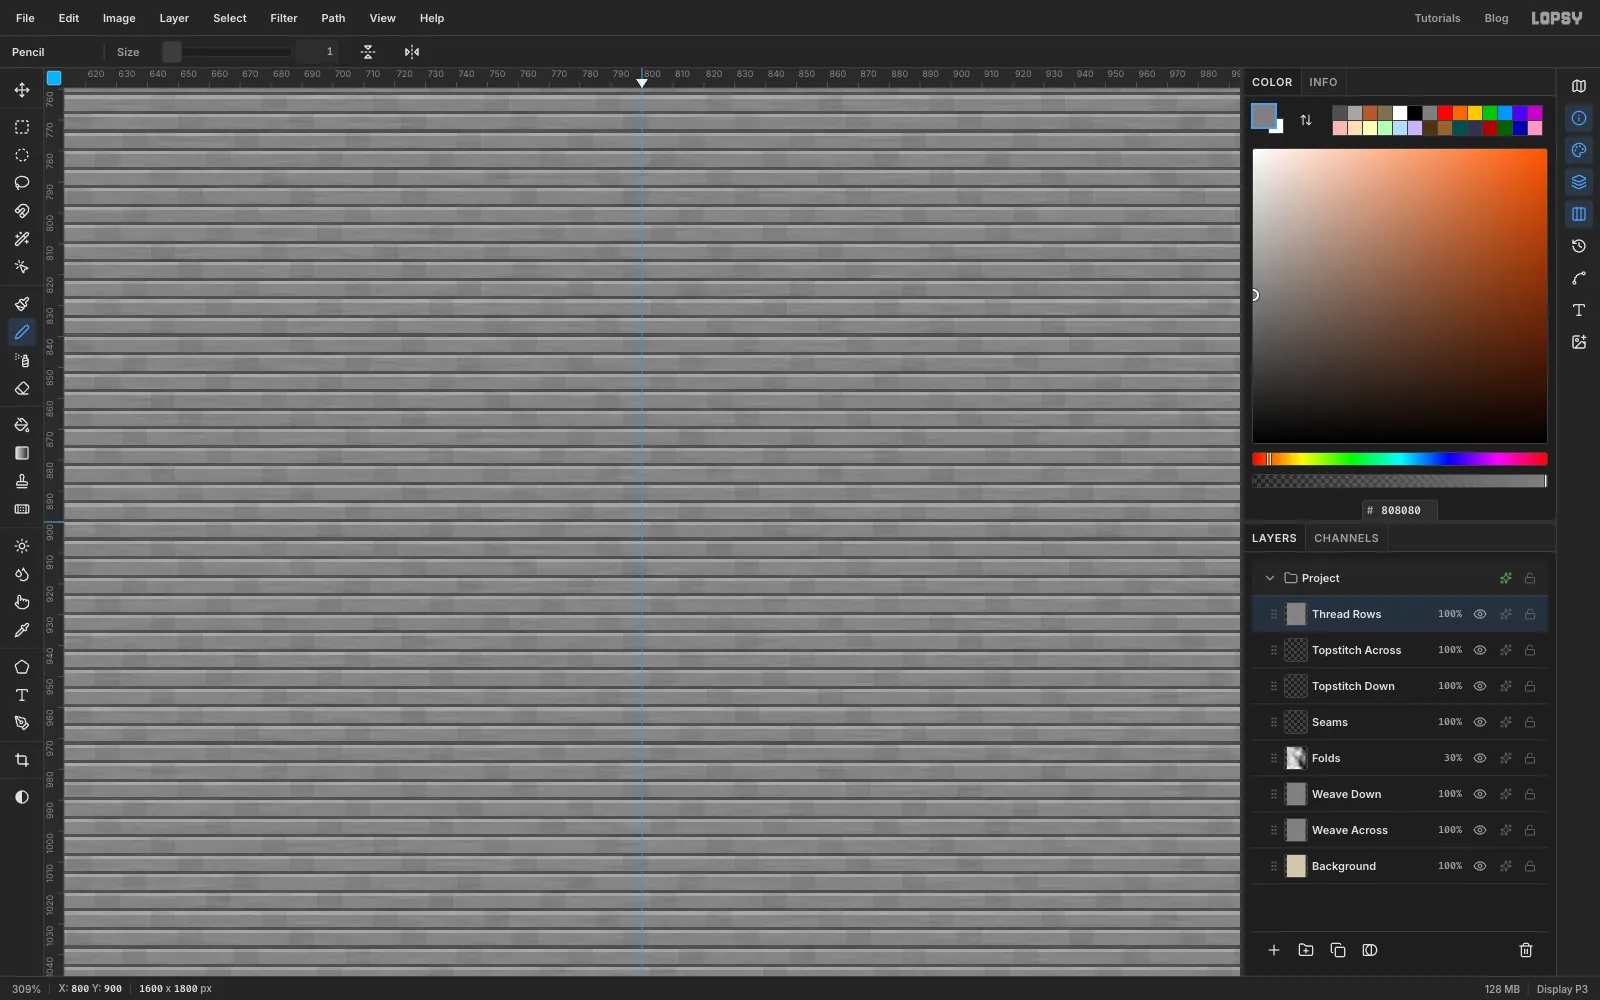
Add a layer called Thread Rows and fill it with . Choose Edit → Fill with Pattern…, pick your tile and click Apply. To roughen it up:
- Add Noise with Amount 24 and Mono on
- Motion Blur with Angle 0 and Distance 8
- Gaussian Blur with Radius 1
Hide the layer with the eye icon on its row. You'll only ever copy from it. This sheet does the water and the panel, where stitches run sideways.
-
Make a sheet of radiating thread
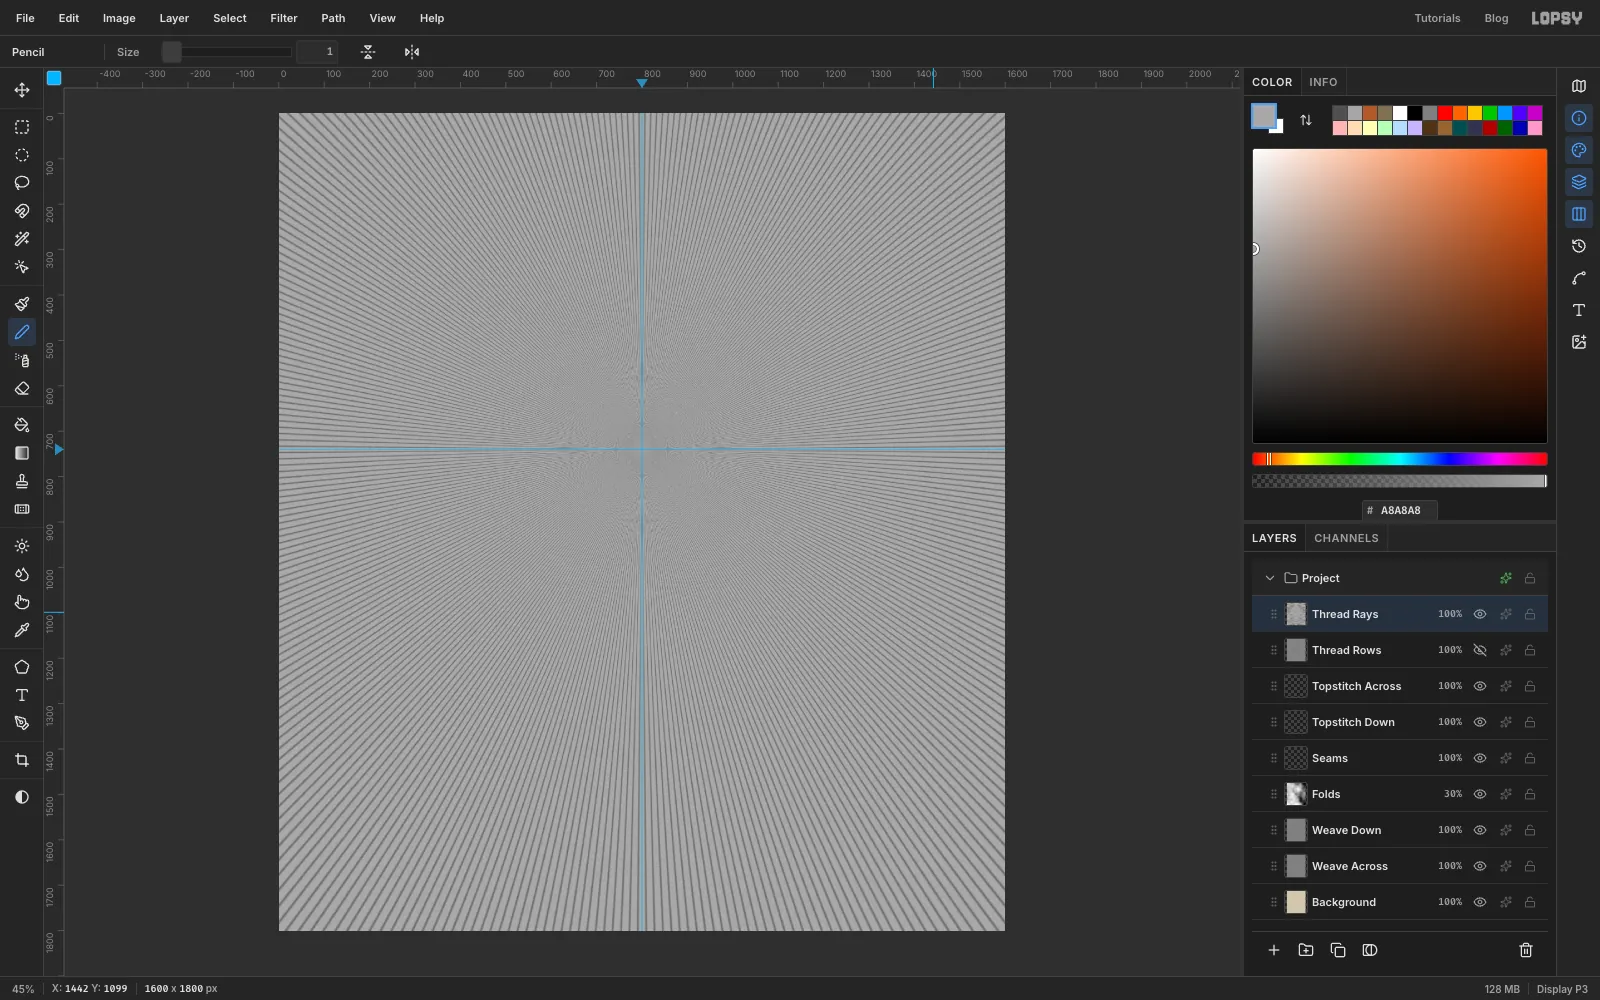
The sun and the ring need stitches that radiate from the centre. Add a layer called Thread Rays and fill it with . Set the foreground to and run Filter → Sunburst… three times, with these settings each time:
- Rays 120, Length 100, Width 26, Softness 30, Opacity 100
- Center X 50, Center Y 41, which puts the middle at your guides
- Rotation 0 the first time, then 1, then 2
Finish with Add Noise at Amount 16, Mono. Hide this layer too.
-
Make a slanted thread sheet
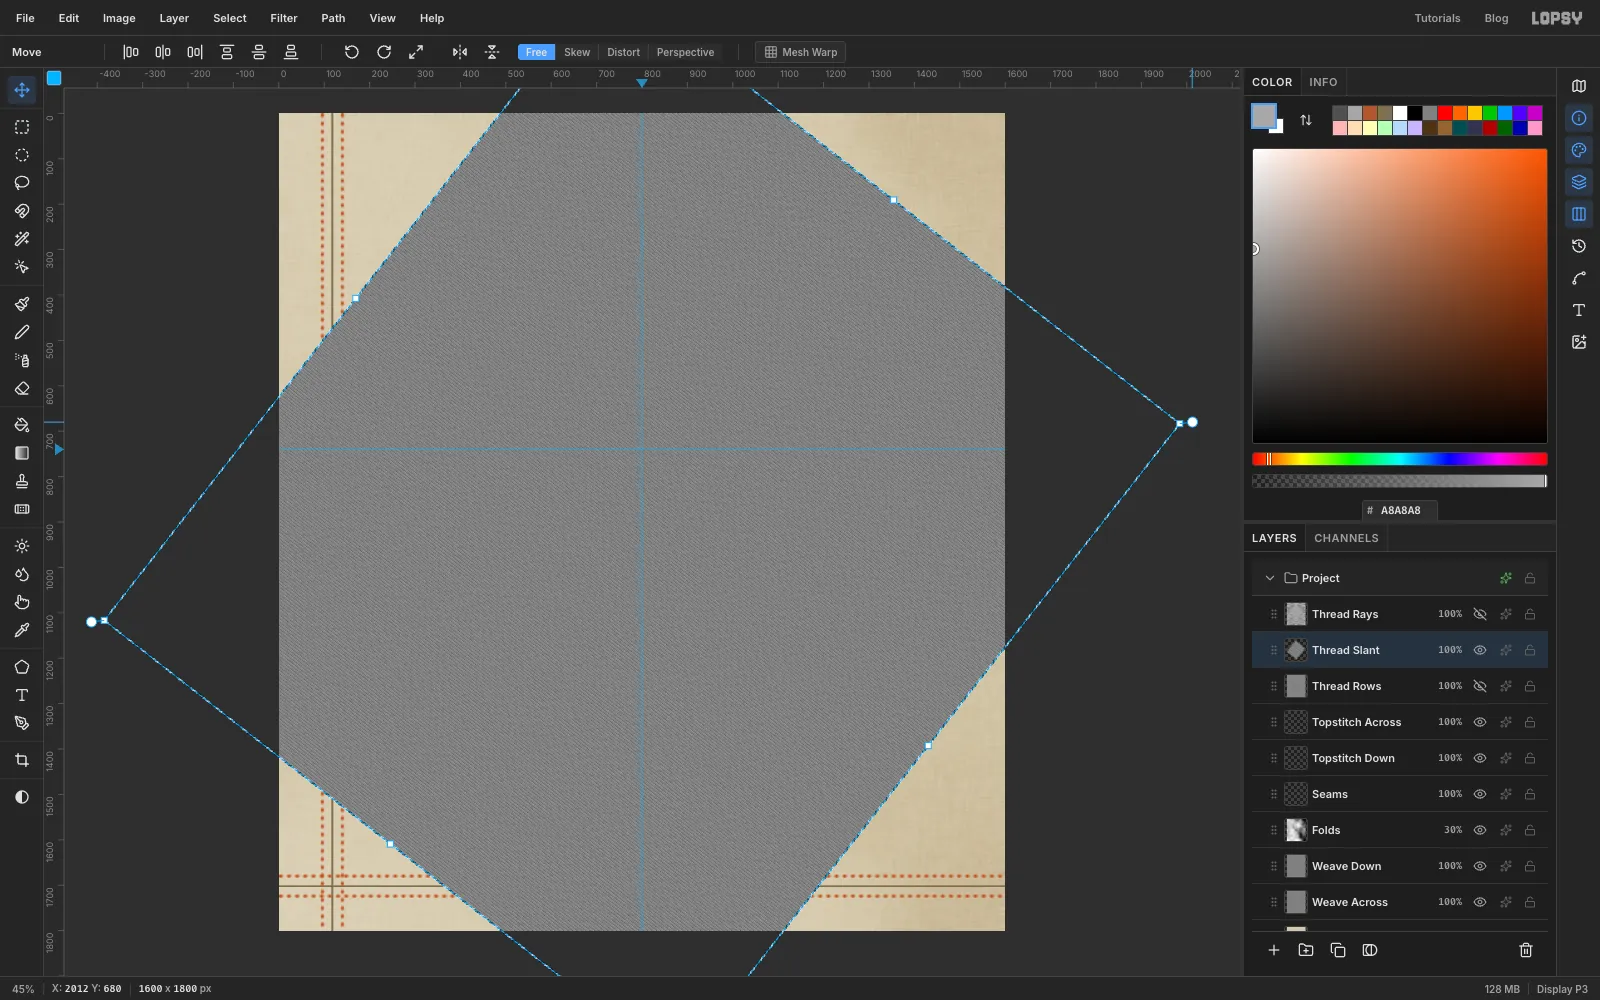
Kelp looks best with diagonal stitches. Click the Thread Rows row and click Duplicate Layer. Rename the copy Thread Slant and show it with its eye icon.
Choose Select → All, press V for the Move tool, and drag the small round handle outside the top-right corner of the box to turn the sheet by roughly 38°. The corners swing off the canvas, which is fine because the patch sits in the middle. Press Cmd+D, then hide the layer.
-
Draw the patch shape
Click Topstitch Across, then click New Group in the Layers panel and rename the group Patch. Everything from here on goes inside it. Add two layers inside it, Patch Shadow first, then Base.
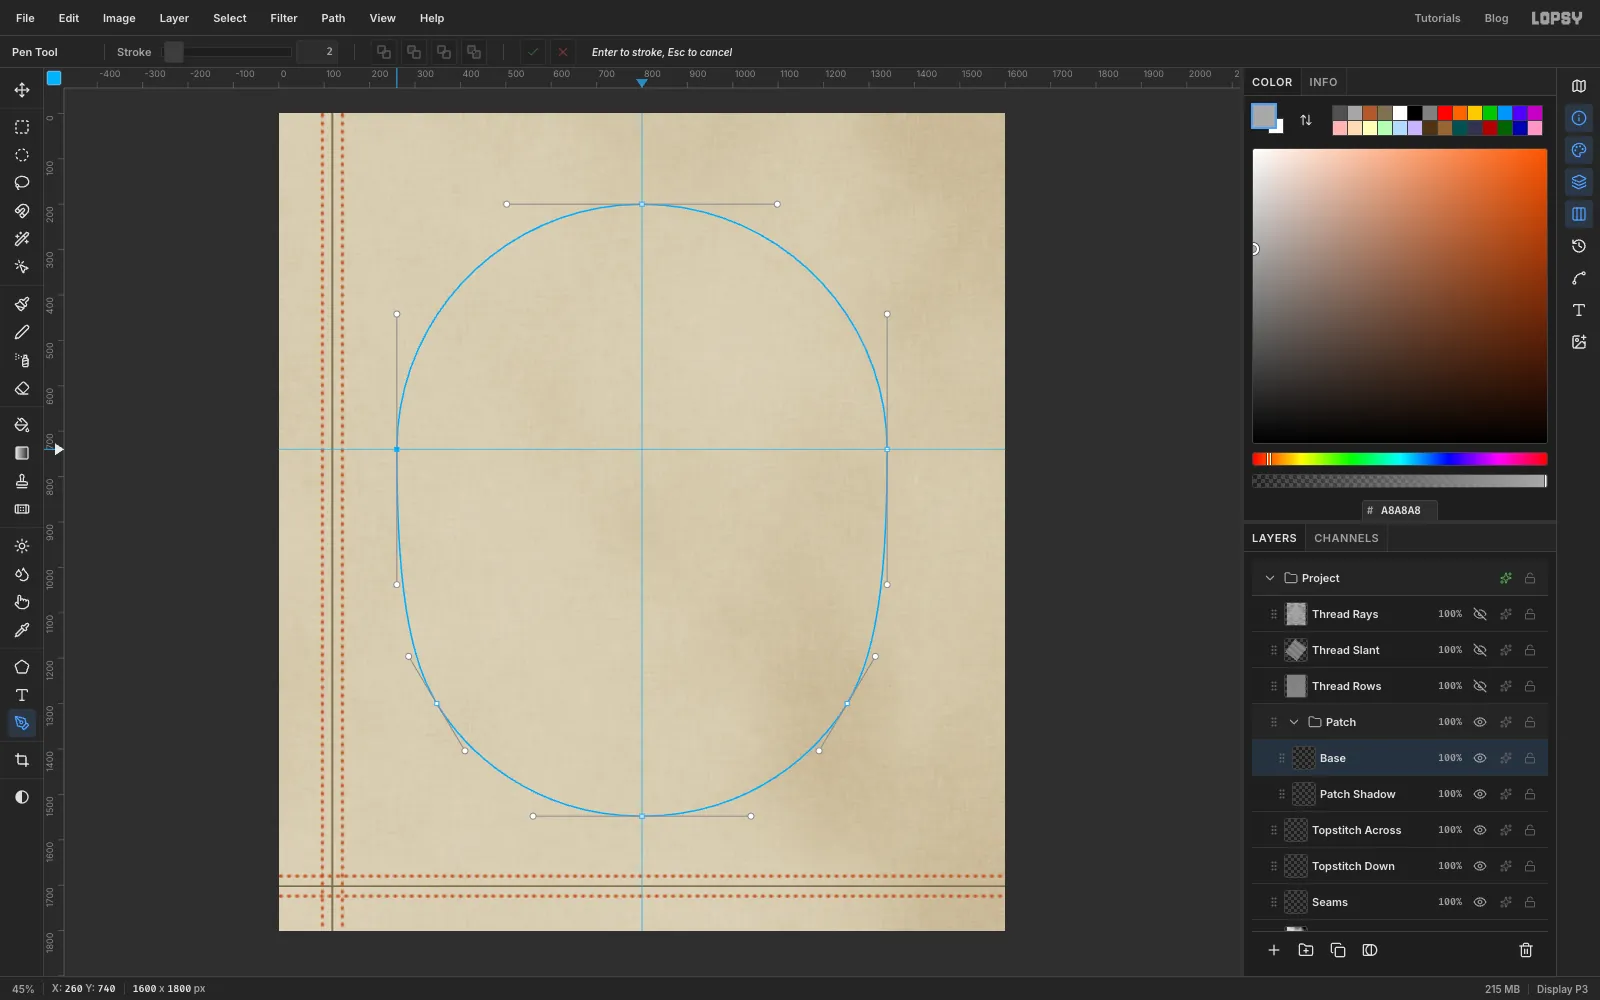
Press P for the Pen. A press and drag sets an anchor and pulls out its curve handles. Draw the patch clockwise, starting from the left:
- Press at 260, 740 and drag straight up about 300 px.
- Press at 800, 200, the top, and drag right about 300 px.
- Press at 1340, 740 and drag straight down about 300 px.
- Press at 1252, 1300 and drag down and to the left, toward 1190, 1404.
- Press at 800, 1548, the bottom, and drag left about 240 px.
- Press at 348, 1300 and drag up and to the left, toward 286, 1196.
- Click the first anchor to close the path.
The top should be a clean half circle centred on your guides.
-
Fill the patch
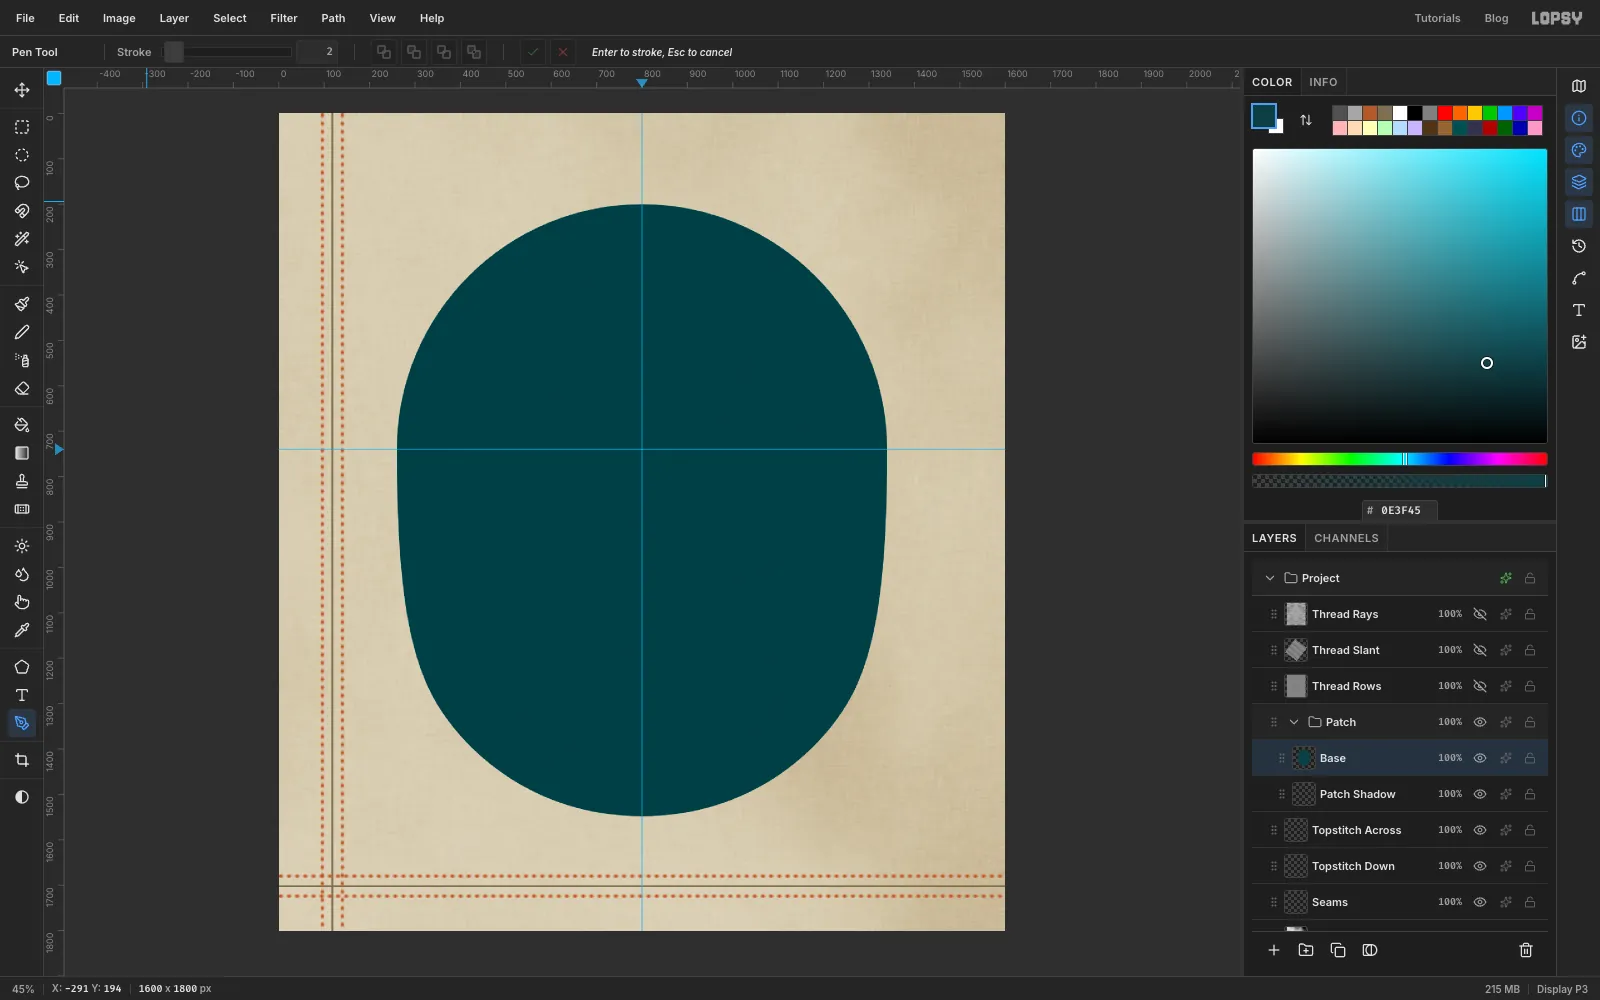
Open the Paths panel with its icon on the right-hand strip, then click Path to Selection and Delete Path. Close the panel. Fill the selection on Base with deep teal and press Cmd+D.
-
Lay in the sky and the solar ring
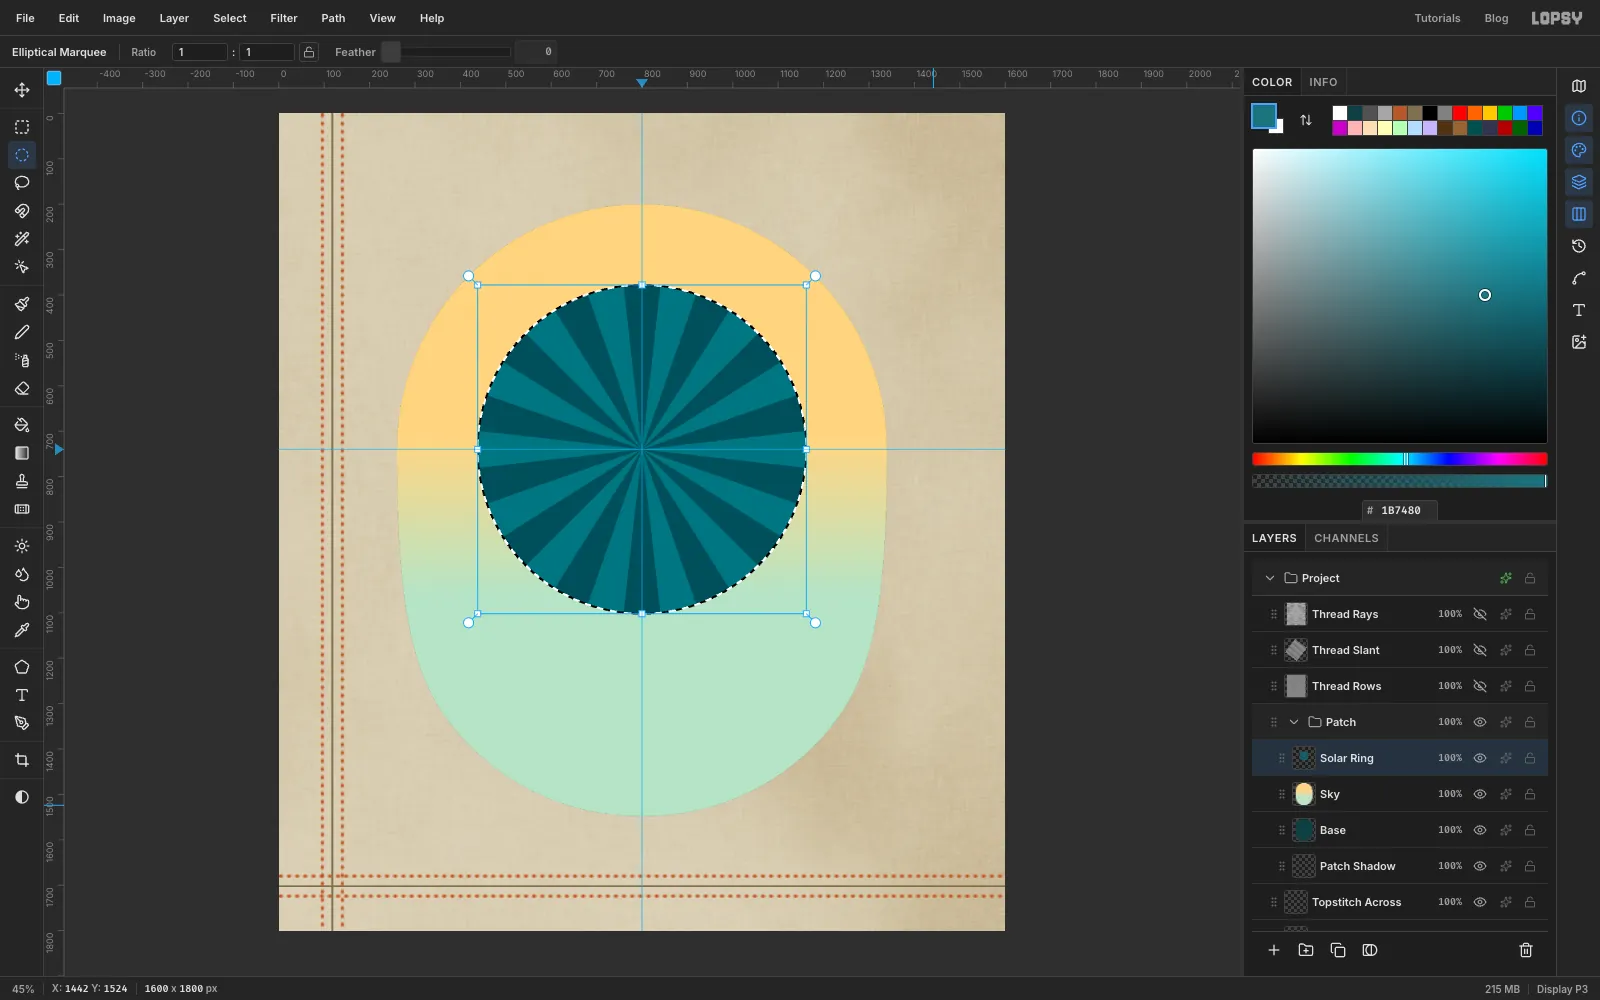
Add a layer called Sky. Cmd-click the Base thumbnail to select the patch. Pick the Gradient tool (linear), click Advanced…, and set two stops, and . Drag from 800, 700 straight down to 800, 1060. Press Cmd+D.
Add a layer called Solar Ring. With the Elliptical Marquee, click the canvas and enter 438, 378 and 1162, 1102, a circle of radius 362. Fill it with . Set the foreground to and run Sunburst with Rays 14, Length 100, Width 50, Taper 0, Softness 0, Rotation 0, Center X 50, Center Y 41 and Opacity 100. The rays stay inside the selection, so you get a wheel of light and dark cells. Press Cmd+D.
-
Draw the solar grid with Radial Symmetry
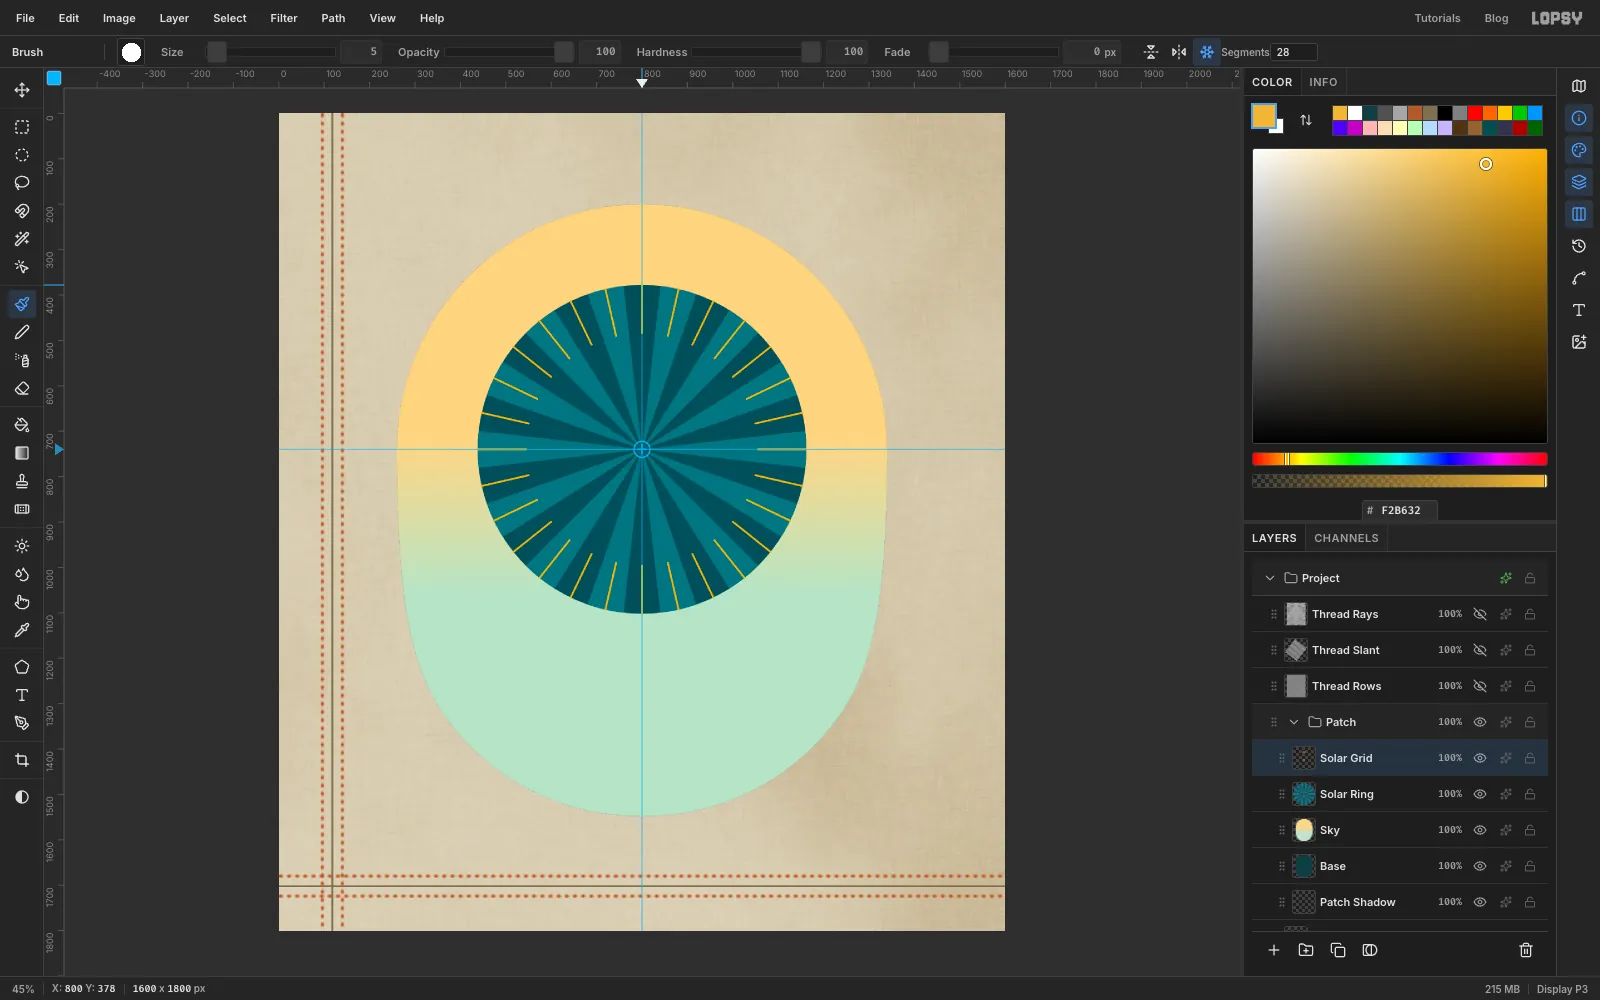
Add a layer called Solar Grid. Pick the Brush at Size 5, Hardness 100, Spacing 2, with gold . In the options bar, click Radial Symmetry and set Segments to 28.
Cmd-click the point where your guides cross. That moves the symmetry centre without painting. Now click at 800, 484, then Shift-click at 800, 378. One line becomes 28 spokes.
Click Radial Symmetry again to turn it off, otherwise it keeps taking your Cmd-clicks.
Next, add a ring. Marquee a circle of radius 316 (484, 424 to 1116, 1056) and fill it with the same gold. Choose Select → Shrink with 5 and press Delete. Press Cmd+D.
-
Add the sun
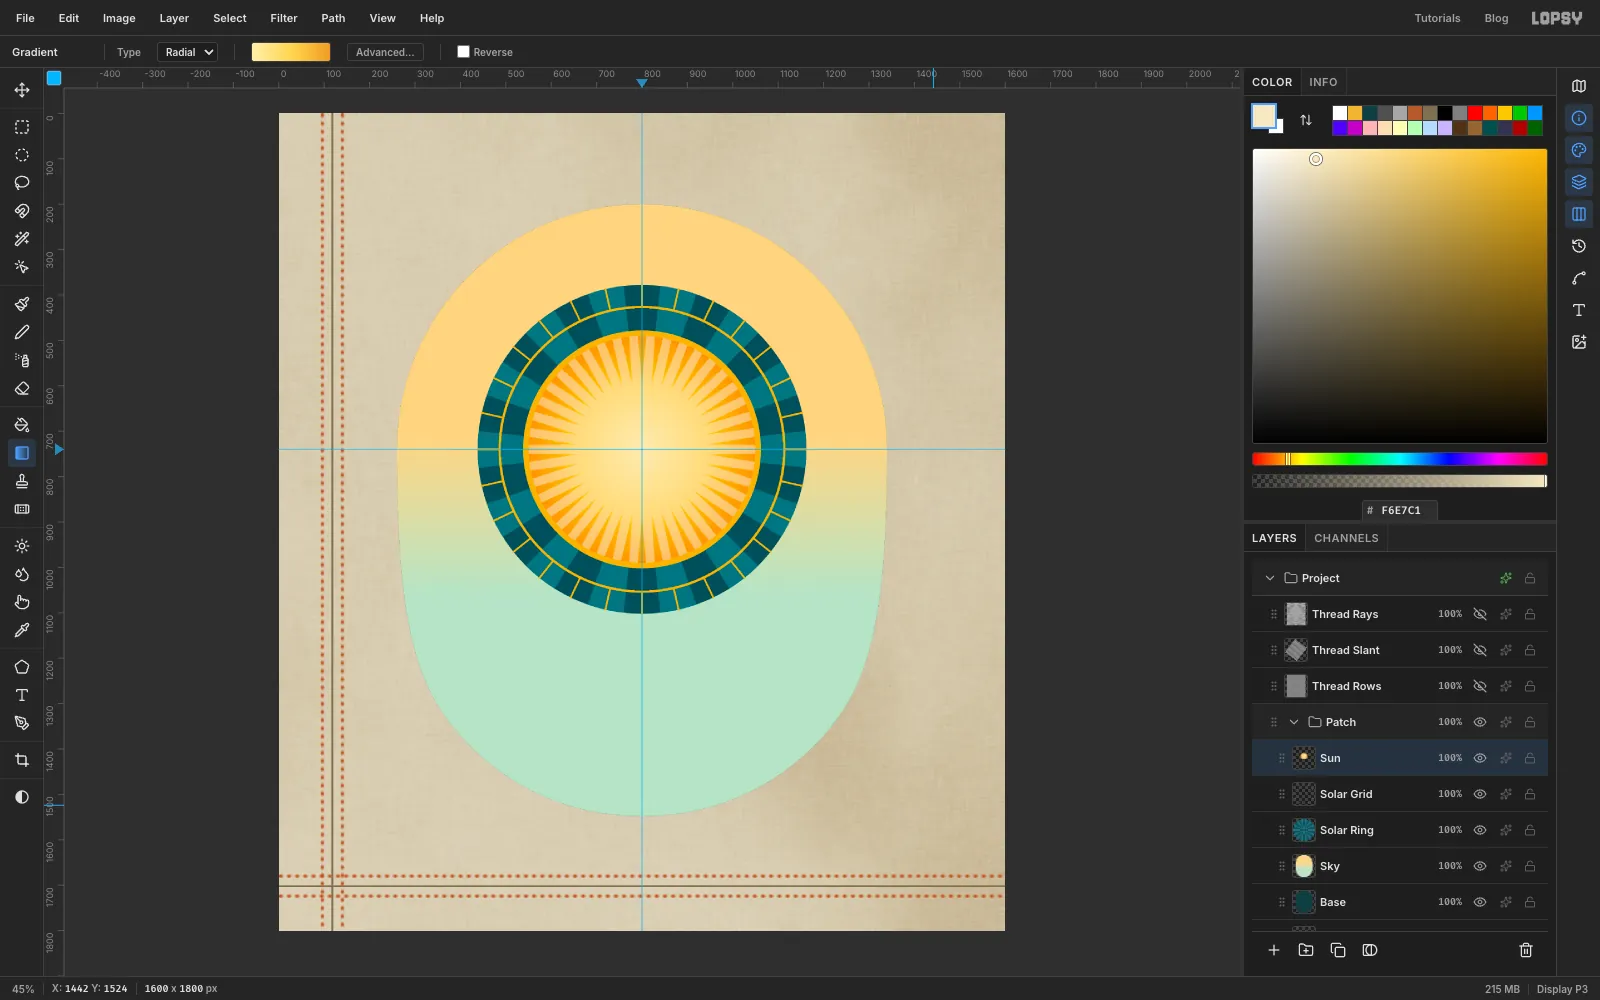
Add a layer called Sun. Marquee a circle of radius 262 (538, 478 to 1062, 1002) and fill it with gold . Shrink the selection by 12, leaving a gold rim.
Pick the Gradient tool, switch it to radial, and in Advanced… set three stops: at the start, just past the middle and at the end. Drag from the centre, 800, 740, to the right edge, 1050, 740.
Set the foreground to cream and run Sunburst with Rays 42, Width 12, Taper 100, Softness 10, Fade 30, Center X 50, Center Y 41 and Opacity 55. Press Cmd+D.
-
Add the lettering band
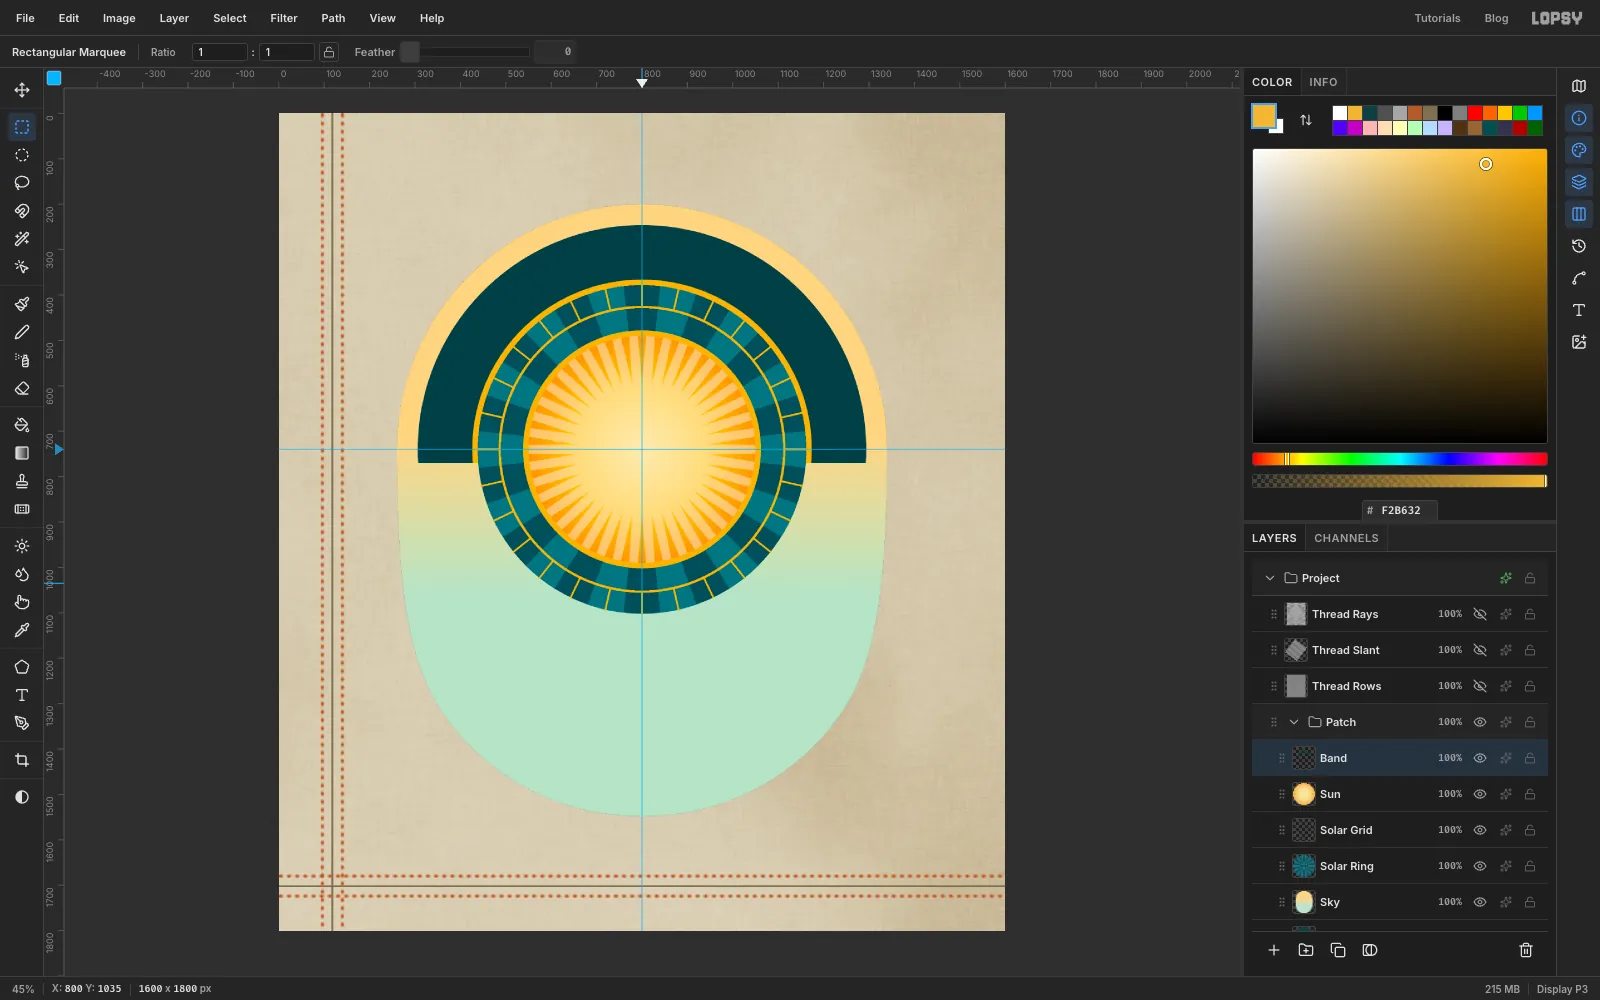
Add a layer called Band. Marquee a circle of radius 494 (306, 246 to 1294, 1234) and fill it with .
Press Cmd+D. Marquee radius 374 (426, 366 to 1174, 1114) and fill it with gold. Shrink by 12 and press Delete, which punches a hole down to the sun and leaves a gold edge.
Only the top half should stay. Press Cmd+D and marquee a rectangle from 200, 770 to 1400, 1300 and press Delete. Press Cmd+D. The two flat ends will rest on rooftops.
-
Build the garden towers
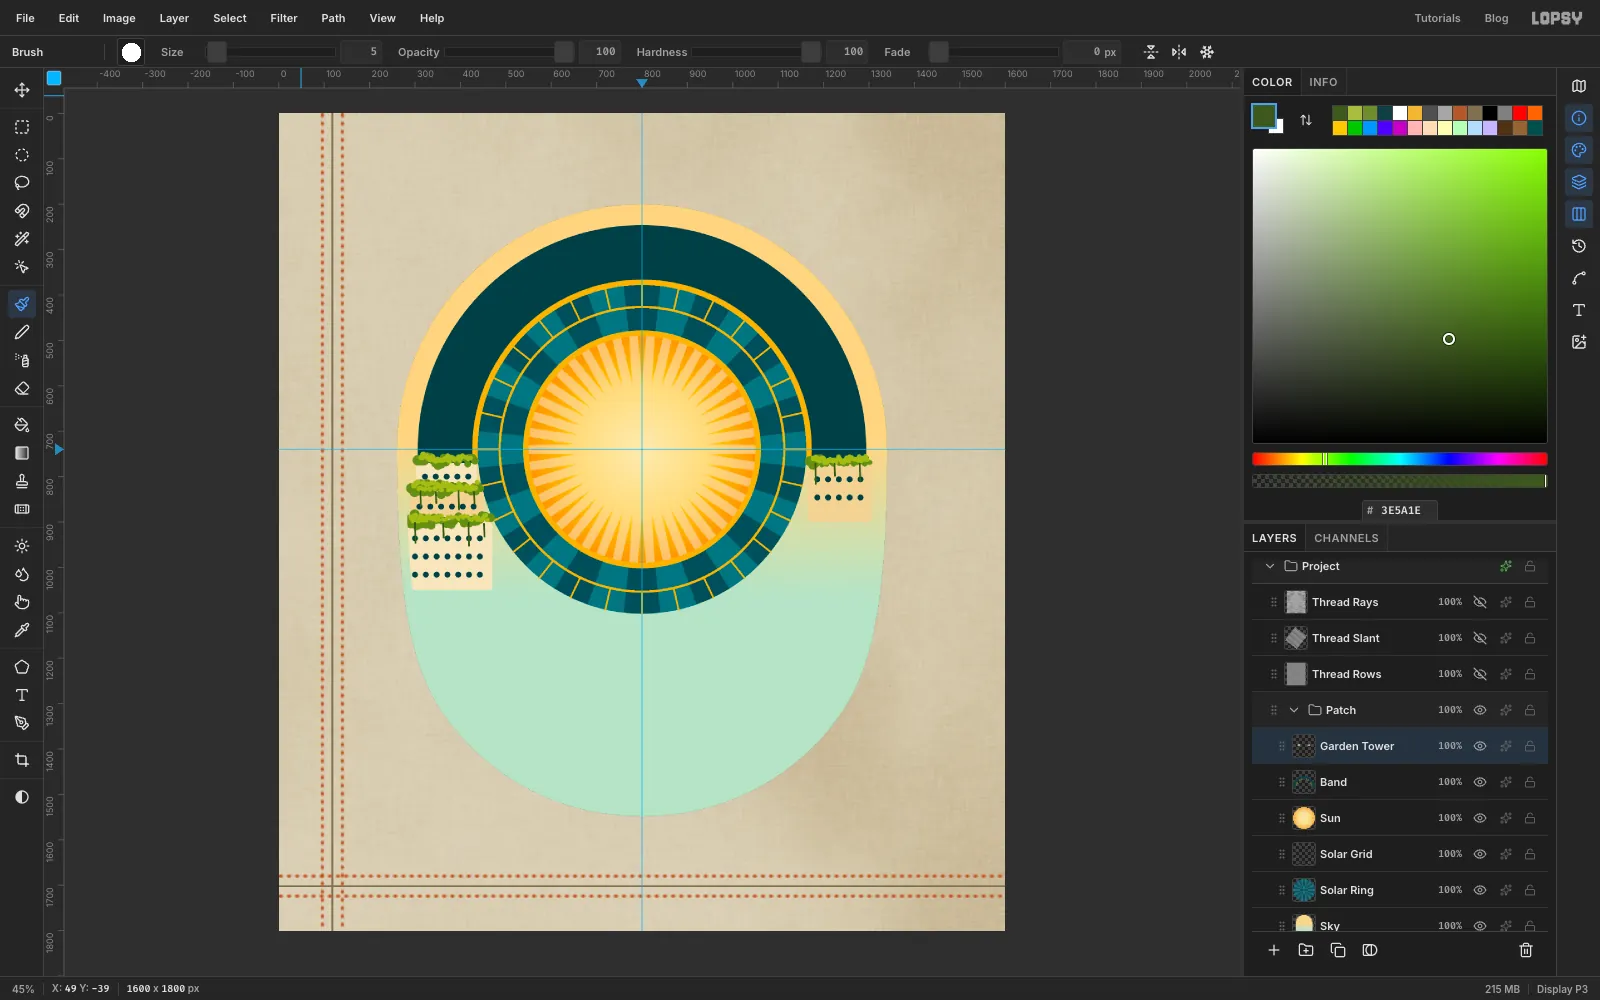
Add a layer called Garden Tower. These terraces have slightly rounded corners, and this is an easy way to get them: marquee the rectangle, Shrink by the radius, Grow by the same amount, fill, and press Cmd+D. Use these corners and colours:
- 280, 900 to 470, 1050, radius 8,
- 290, 830 to 452, 900, radius 10,
- 302, 770 to 436, 830, radius 10,
- 1166, 770 to 1306, 900, radius 10, , the right-hand building
Windows: set the Brush to Size 14 and Spacing 170. With , use a click and Shift-click to draw rows of dots across each terrace.
Planting: set the Brush to Size 24, Spacing 30, Scatter 28 and Size Jitter 55 (Scatter and Size Jitter are on the Dynamics tab). With , drag along the top edge of each terrace. Then, at Size 14 with , go over them again a little higher for sunlit leaves.
Vines: set Scatter and Size Jitter back to 0, set Size 5 and Spacing 2, and with draw short lines hanging down from the planting.
-
Trim to the patch
Here's the first of the two recipes. To trim a layer to the patch:
- Cmd-click the Base thumbnail.
- Select → Shrink with 20, which keeps the art under the edge you'll stitch later.
- Select → Inverse.
- Click the row of the layer you're trimming, press Delete, then Cmd+D.
Trim Garden Tower. Then add a layer called Greenhouses for some glass:
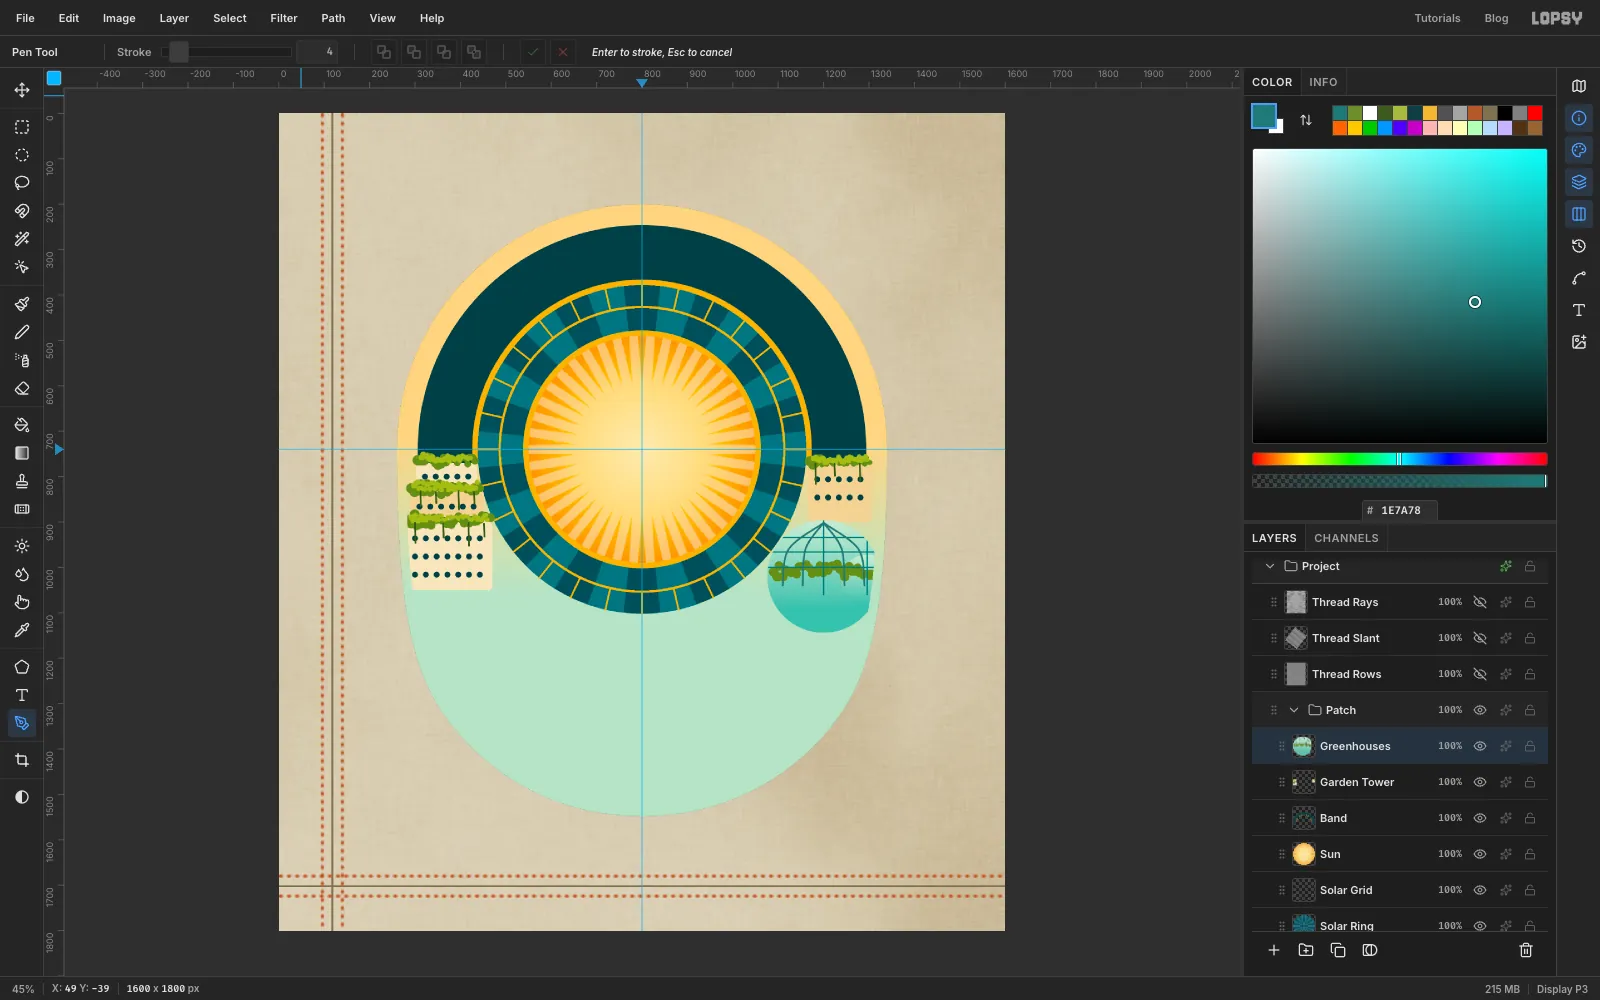
- Marquee a circle of radius 124 around 1200, 1020. Pick the Gradient tool and switch it back to linear. In Advanced…, select the middle stop left over from the sun and delete it, then set the ends to and . Drag from the top of the circle to the bottom. Press Cmd+D.
- Do the same with a circle of radius 58 around 1296, 1030, and press Cmd+D.
- Cmd-click the Greenhouses thumbnail. Brush a row of planting inside the domes with , using the leafy settings from before at Size 22.
- Still selected, set the Brush to Size 4, Spacing 2, with Scatter and Size Jitter at 0, and use to draw the glazing bars: three level lines and an upright down each dome. For the curved ribs on the big dome, use the Pen with Stroke 4. Draw four ribs, two each side of the upright: place three anchors from the top of the dome curving down to its base, and press Enter to stroke. Delete each path.
- Press Cmd+D and trim to the patch.
-
Raise the wind turbines
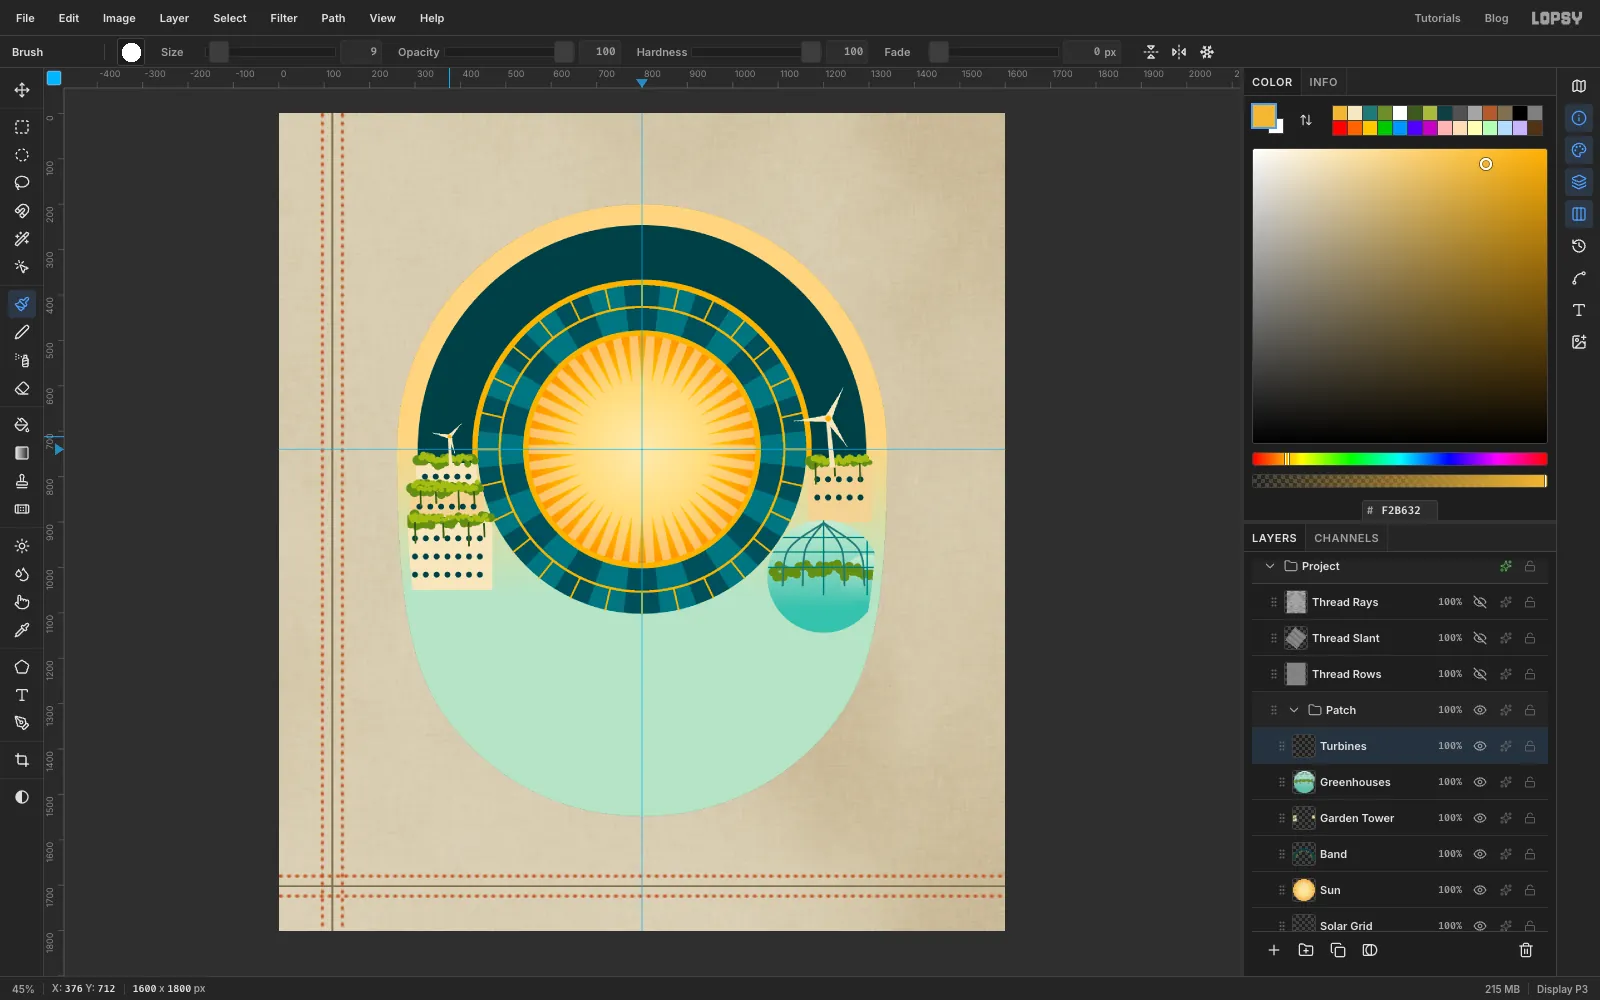
Add a layer called Turbines. With the Pen, click four corners for each mast, closing on the first. In the Paths panel click Path to Selection and Delete Path, fill with cream , and press Cmd+D. Make the left mast 62 px tall on the left-hand tower and the right mast 100 px tall on the right-hand building, each narrower at the top. The right one tops out at about 1210, 680 and the left at about 376, 718.
The blades are the fun part. Pick the Brush, turn on Radial Symmetry with Segments 3, and in the Brushes panel set Size 16, Spacing 1 and Taper 76. Taper shrinks the dab along the stroke, so a stroke comes out as a blade. Cmd-click the top of the right mast to centre the symmetry there, then drag one blade outward, up and to the right, about 76 px. Three identical blades appear.
For the small turbine, use Size 10 and Taper 40, Cmd-click the top of its mast, and drag a 40 px blade.
Turn Radial Symmetry off, and in the Brushes panel set Taper back to 0. Add a gold hub to each turbine with one Brush click, Size 14 and Size 9.
-
Paint the far water
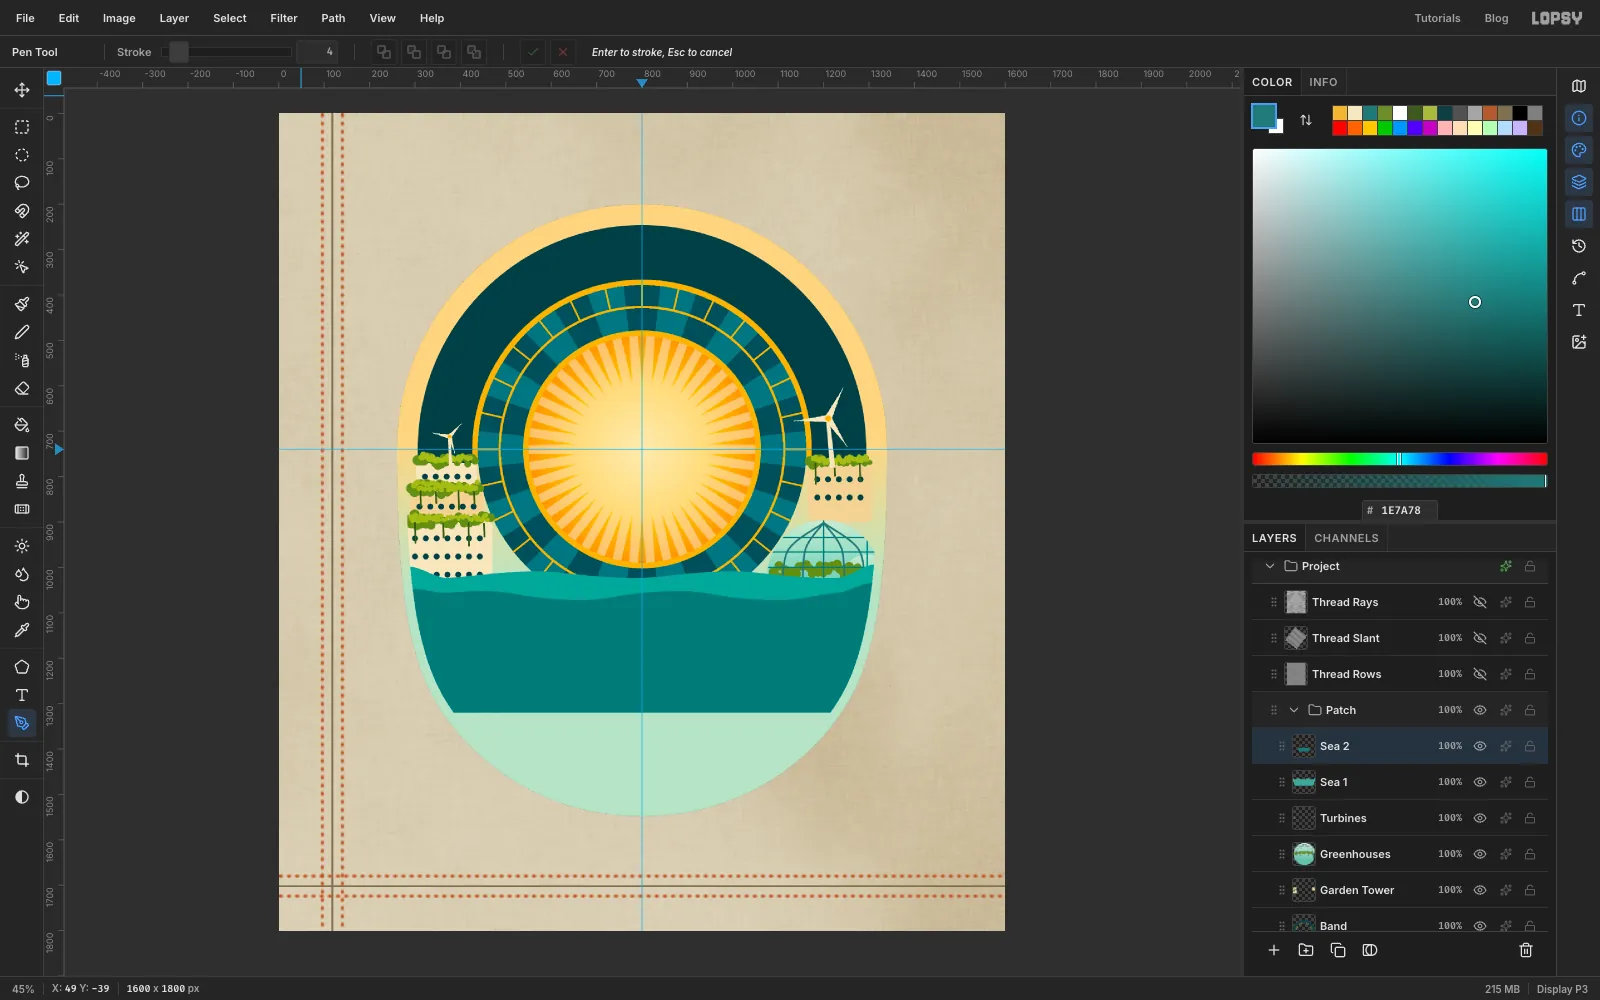
Add a layer called Sea 1. With the Pen, draw a long closed shape: start at the left edge of the patch at about y 1016, press and drag across in about ten anchors so the top rolls gently up and down by about 8 px, click a corner down at 1338, 1320, click another at 262, 1320, and close the path on the first anchor. Use Path to Selection, Delete Path, and fill with . Press Cmd+D and trim to the patch.
Add Sea 2 the same way, with its crest about 46 px lower, near y 1062, and filled with . Make the waves out of step with the first band so the crests don't sit parallel.
-
Stitch everything so far
Here's the second recipe, and the one that makes it all look sewn. To stitch a layer:
- Click the row of the thread sheet you want.
- Cmd-click the thumbnail of the layer you're stitching. The outline of that layer is now selected, but the sheet is still the active layer.
- Press Cmd+C to copy that shape out of the sheet.
- Click the row of the layer you're stitching and press Cmd+V. The copy lands right on top of it, in place.
- Press Cmd+D. Open the effects drawer and set the copy to Hard Light, then close the drawer.
- Set the copy's opacity on its row.
- Choose Layer → Merge Down.
Do that for each of these:
- Sea 1 and Sea 2: Thread Rows at 40%
- Greenhouses: Thread Rows at 30%
- Garden Tower: Thread Rows at 35%
- Band: Thread Rays at 35%
- Sun: Thread Rays at 40%
- Solar Ring: Thread Rays at 40%
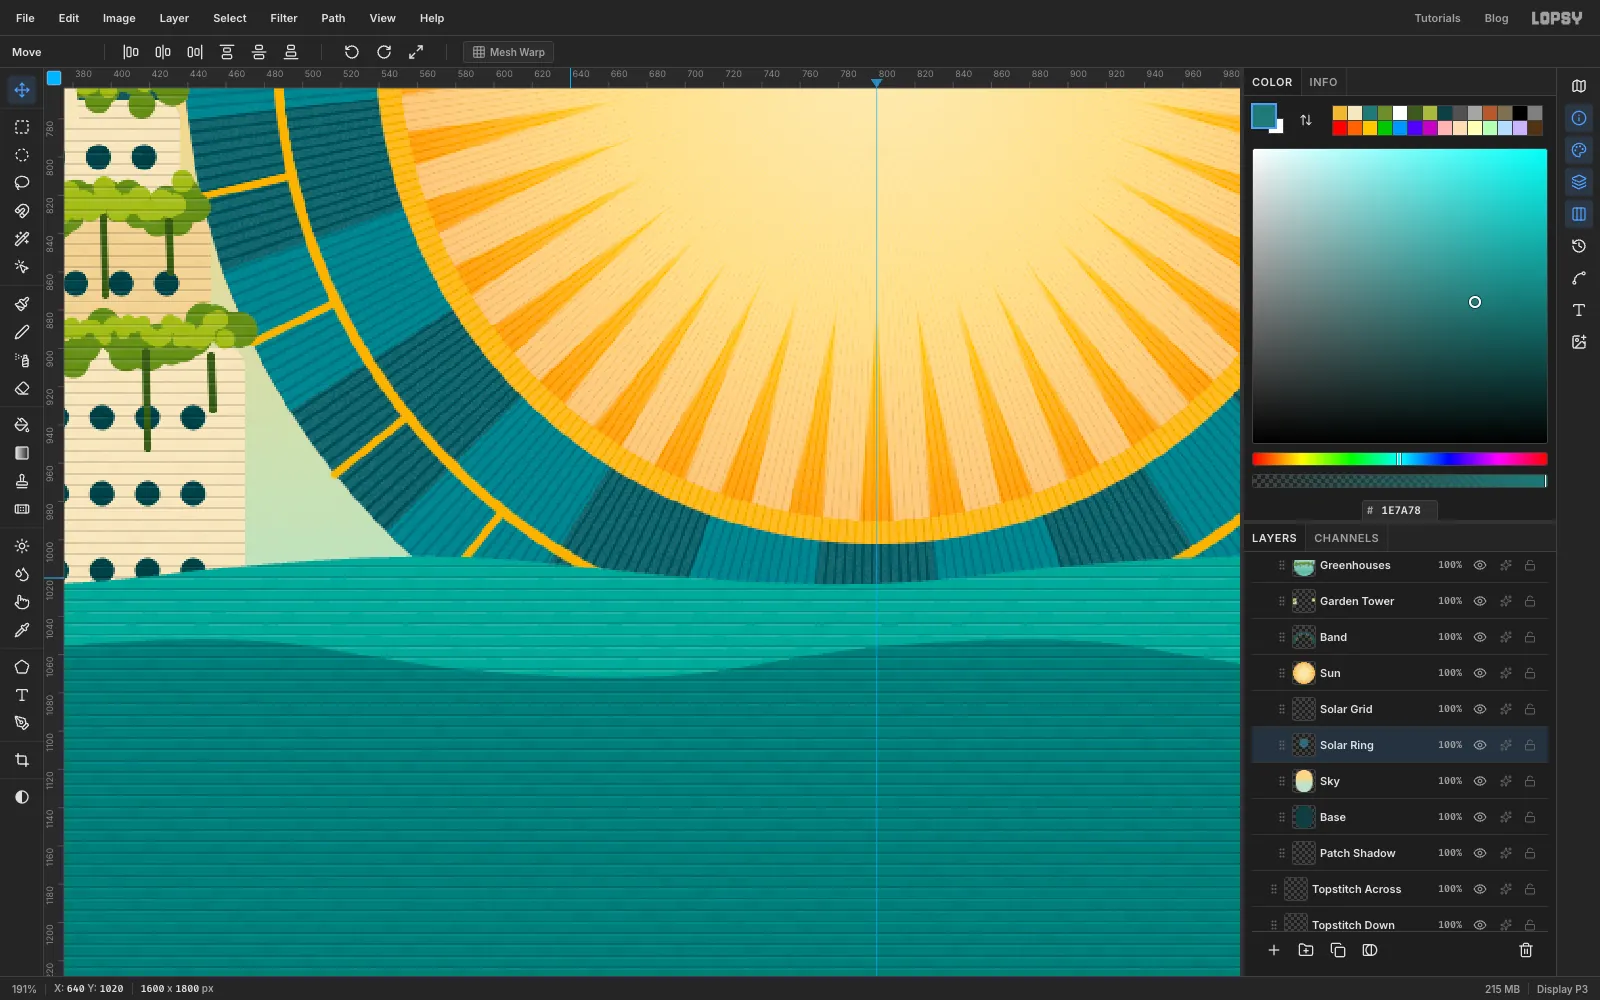
Zoom in to see it. At 100% opacity, Hard Light looks engraved, so keep it low.
-
Bring in the otter photo
Click Sea 2 and click New Group. Rename the group Otter, and add a temporary layer inside it so the photo lands in the group. Drag the photo file onto the canvas. It arrives at the top left of the canvas with a selection. Press Cmd+D, rename it Otter Photo, delete the temporary layer, and click the Otter Photo row again.
Prepare it while it's still a full rectangle:
- Filter → Surface Blur… with Radius 8 and Threshold 40, which merges the fur into simple shapes
- Gaussian Blur with Radius 2
- Filter → Desaturate
- Brightness/Contrast with Brightness 22 and Contrast 30
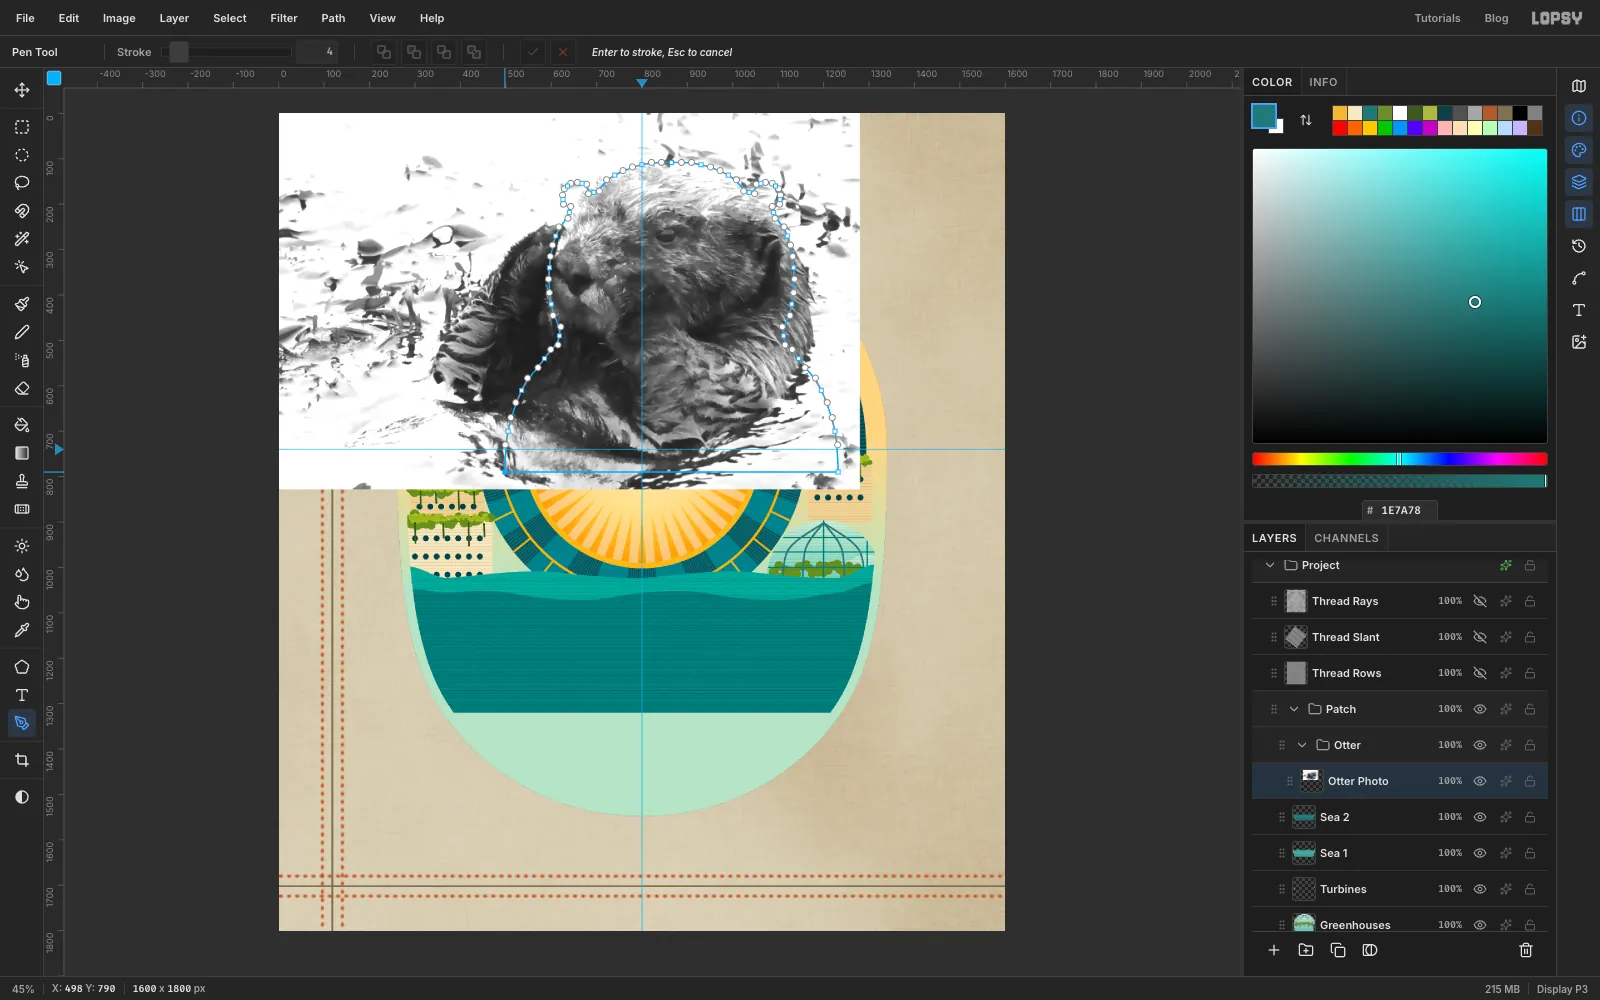
Press P for the Pen and trace a simplified otter in about 30 anchors, pressing and dragging slightly for smooth curves. You're drawing the bust you want, not the exact outline in the photo, and you'll paint over the raised paws. Keep it symmetrical about a vertical line at x 865, so the anchors on the left mirror the ones on the right:
- Start at the lower left, around 498, 790, and go up a sloping shoulder to a neck at about 618, 490.
- Take a rounded head from there: left side at about x 596, top at about 865, 108, right side at about x 1134.
- Add a small round ear bump either side of the crown, near 650, 170 and 1078, 170.
- Come down from the neck at about 1112, 490, along a shoulder to 1232, 790.
- Click the first anchor to close, making the two bottom anchors plain corners.
-
Cut out the otter
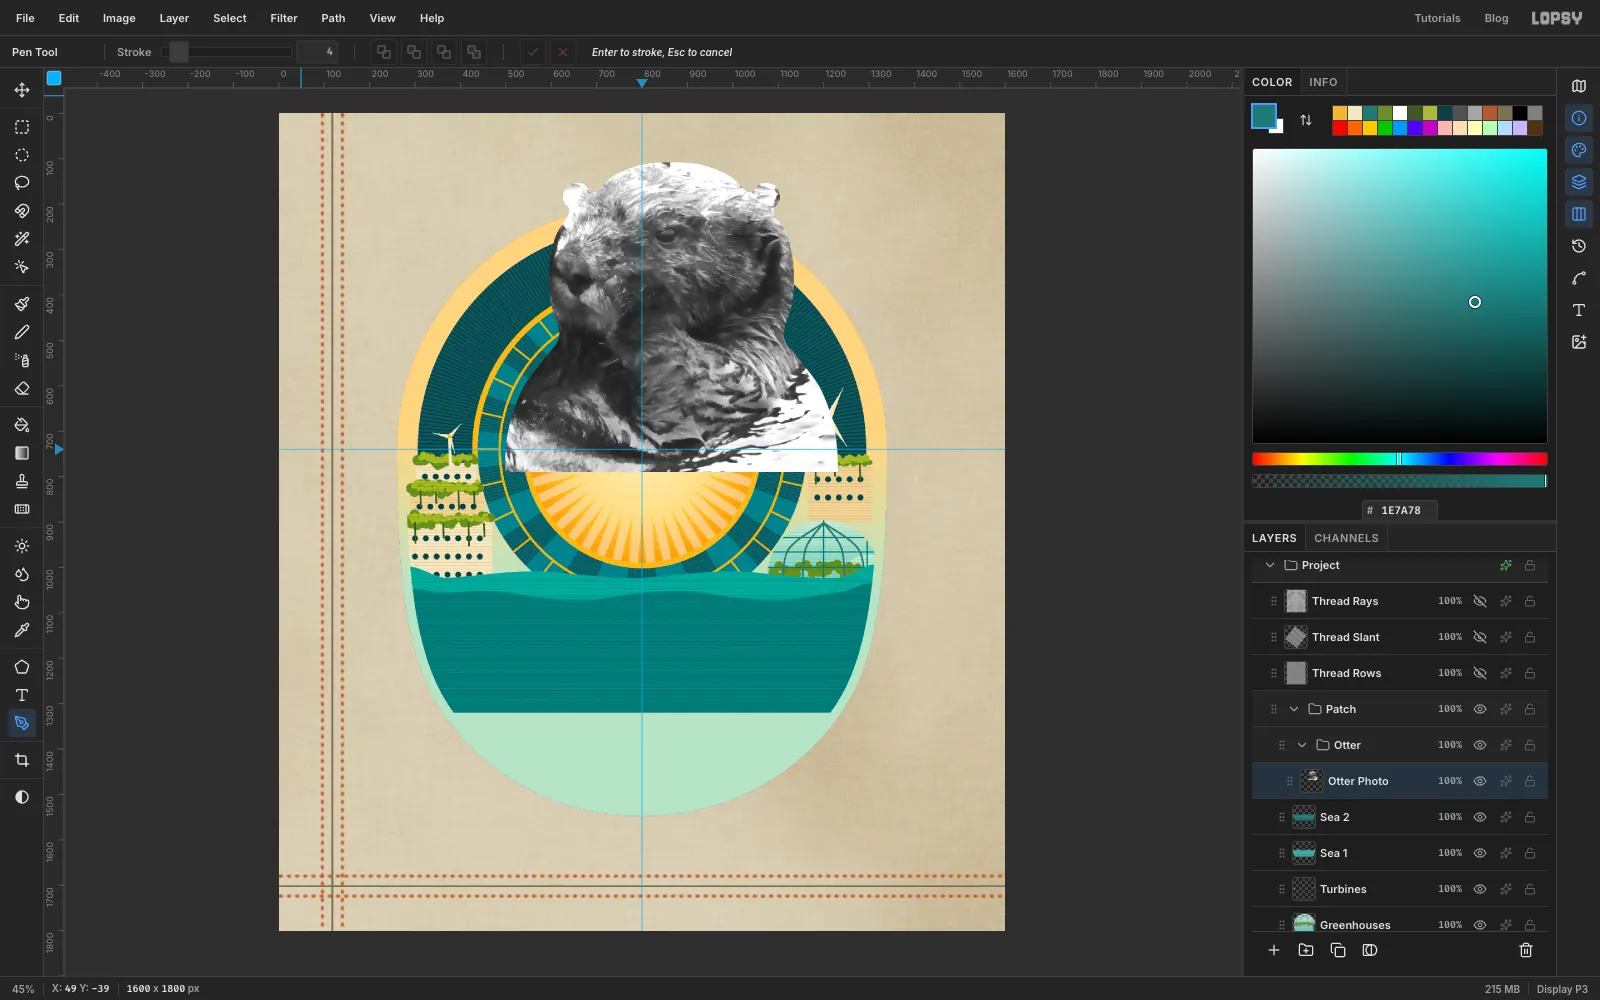
In the Paths panel, click Path to Selection and Delete Path. Choose Select → Inverse, press Delete, then press Cmd+D.
The bottom of the cut-out is a straight line, but the water will hide it.
-
Scale the otter
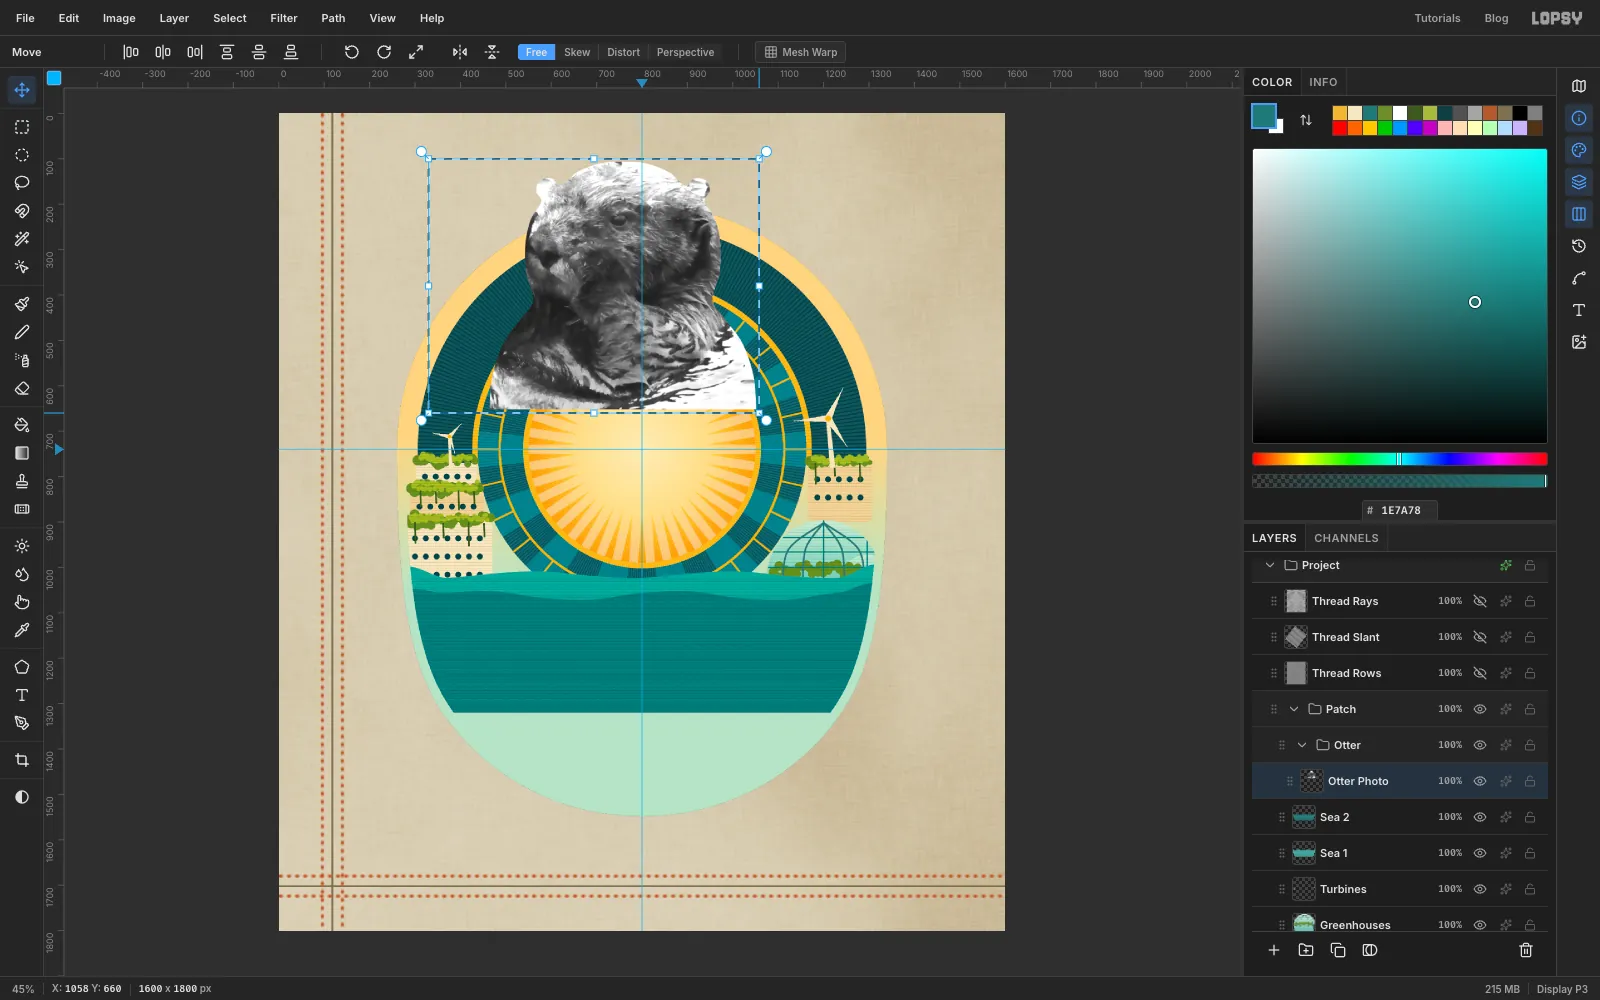
With the Rectangular Marquee, click the canvas and enter 330, 100 and 1240, 800, a box a little larger than the otter. Press V for the Move tool. Hold Cmd to keep the proportions and drag the bottom-right corner handle up and to the left to about 1058, 660, which is 80% of the original size. Press Cmd+D to commit it.
-
Seat the otter in the sun
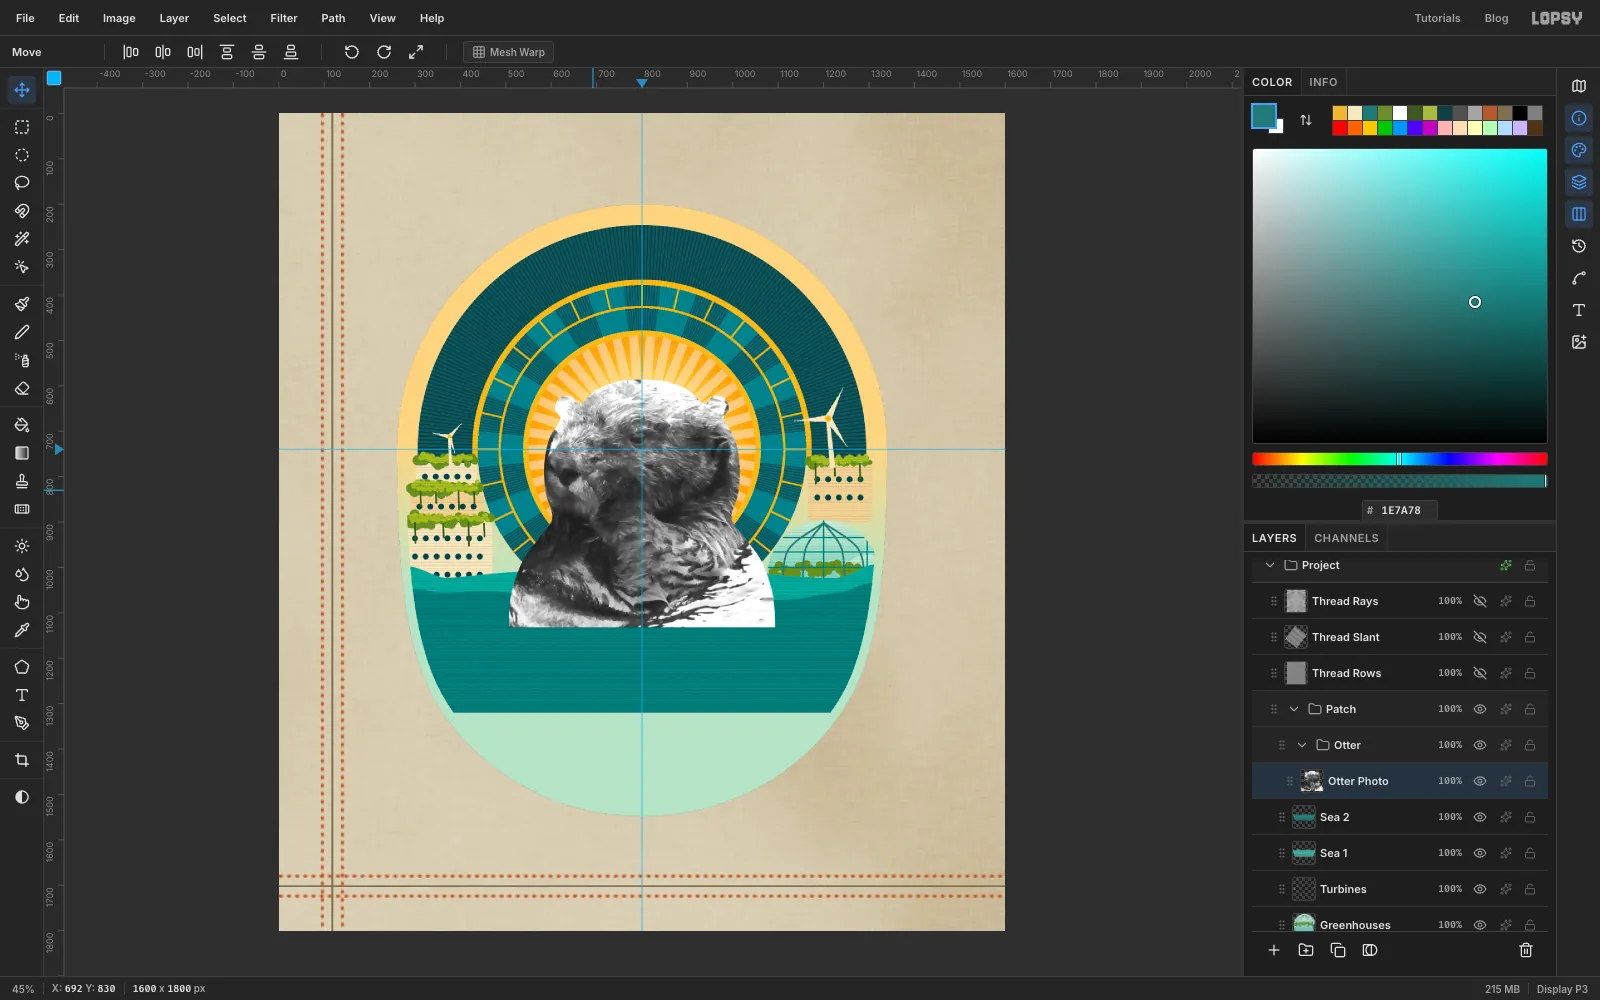
With nothing selected, drag the otter into place with the Move tool. Its head should be centred on your vertical guide, with its crown about 110 px below the top of the sun, at y 590 or so. The bottom edge should sit around y 1130.
-
Map the photo to thread colours
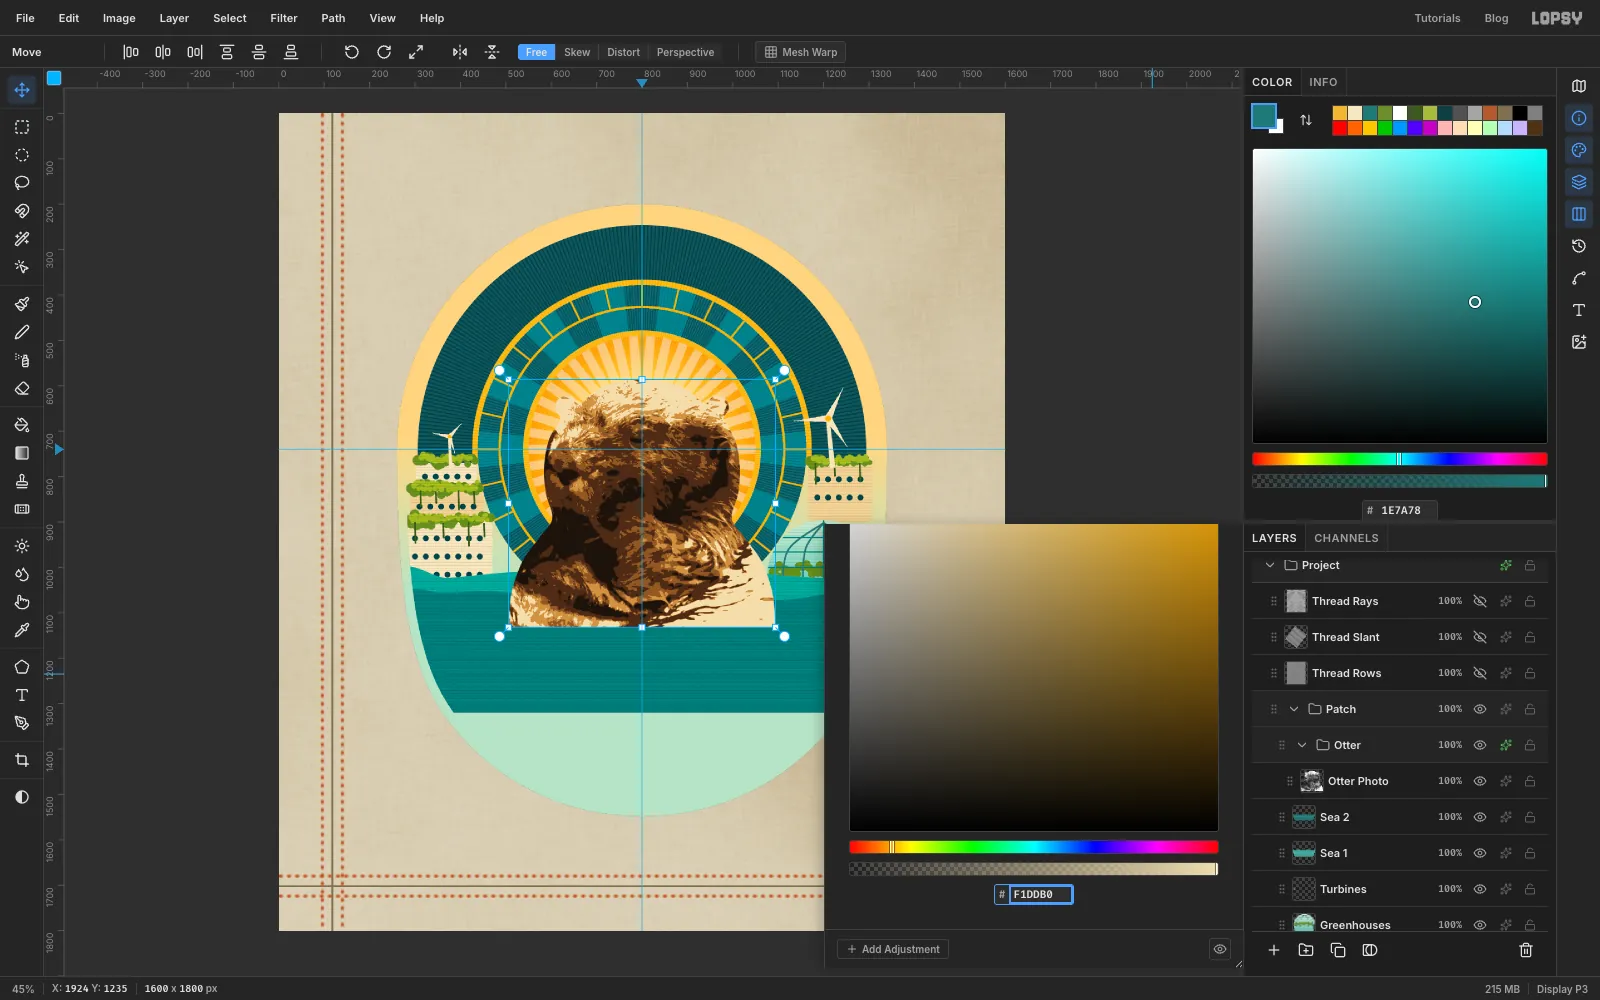
On the row of the Otter group, click the ✦ button, then Add Adjustment → Gradient Map. If a Group Adjustments message appears, click Got it.
The trick is to set pairs of stops close together, so each brown is a flat band with a hard step to the next, just like separate spools of thread. The bar starts with one stop at each end. Click each end stop and type
1B120CandF1DDB0into the Hex field. Then click the bar to add each of the other stops, typing its colour straight away. You can drag a stop's handle to fine-tune it, and it's fine to be a percent or so out, but don't let two stops land on the same spot.- 0% and 20%:
- 22% and 40%:
- 42% and 60%:
- 62% and 80%:
- 82% and 100%:
Close the drawer. From now on, anything you paint on Otter Photo in grey shows up in these browns, and light greys come out cream.
-
Paint a pale head and dark body
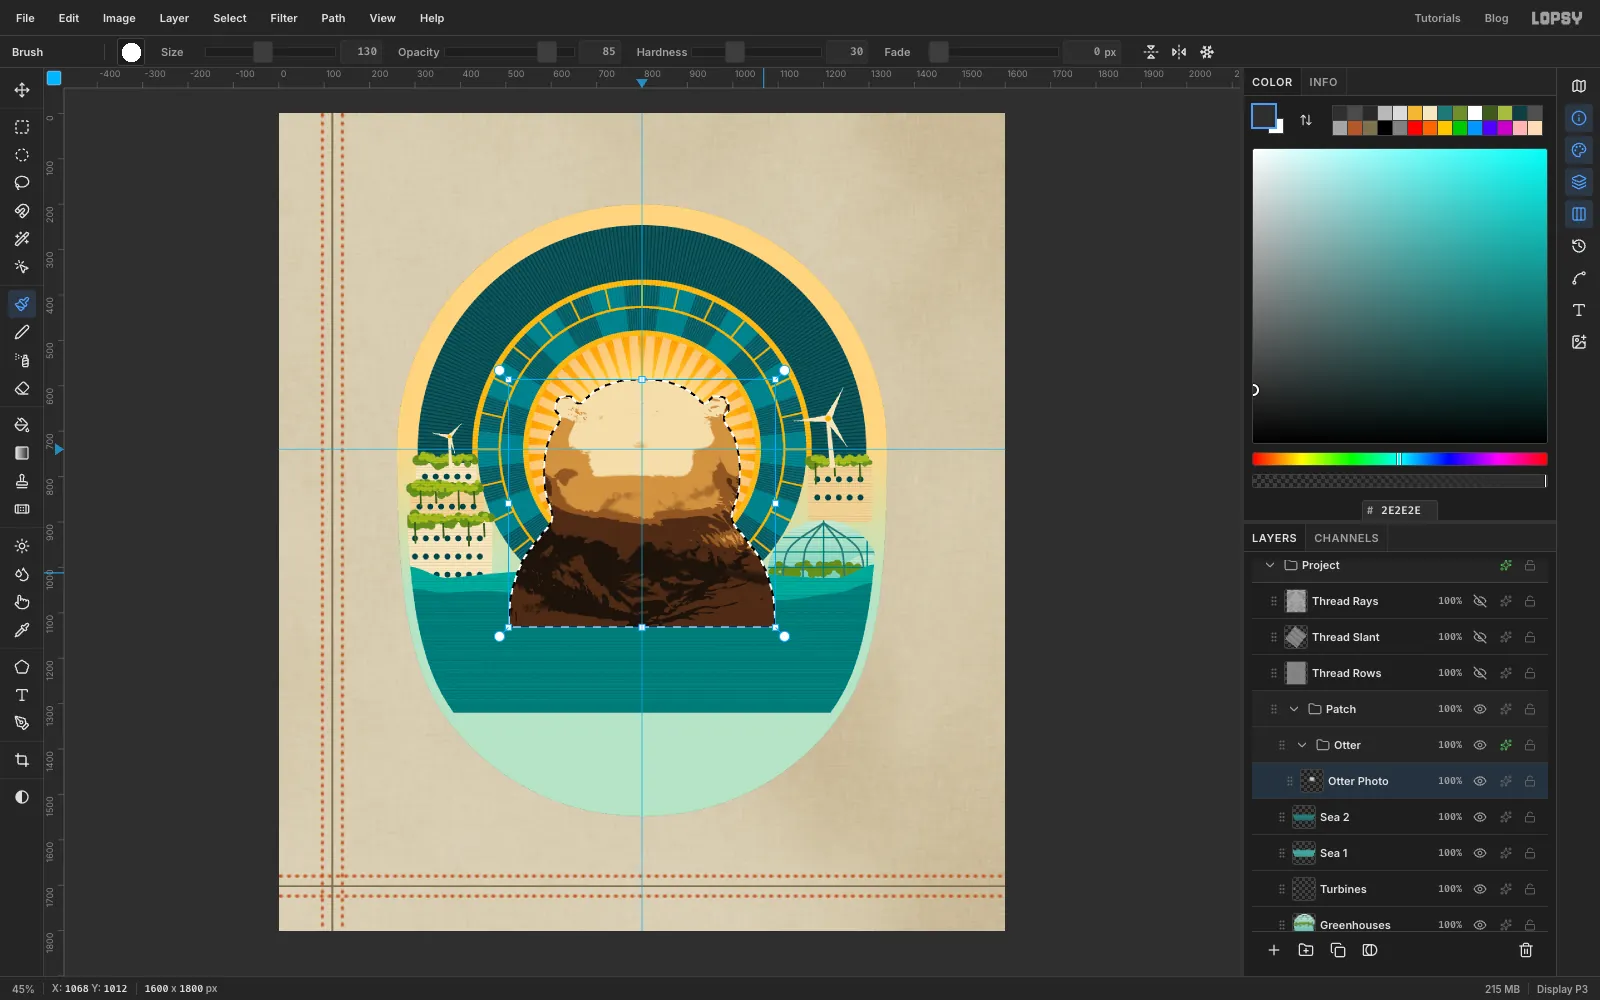
Sea otters have frosted pale heads on dark bodies, and that split is what makes one recognisable. Click Otter Photo and Cmd-click its thumbnail, so the paint can't stray outside the outline.
Pick the Brush. In the Brushes panel set Hardness to about 30, Spacing to 2, and Taper to 0. Use Opacity to control how much photo shows through. Drag each of these strokes from one side of the otter to the other:
- Size 170, Opacity 80, : two sweeps across the head, at about y 720 and y 840. These become the tan cheeks.
- Size 130, Opacity 90, : three shorter sweeps at about y 610, y 690 and y 770, leaving the outer cheeks tan. This is the cream face.
- Size 60, Opacity 90, : one stroke down each side of the head to clean the edge.
- Size 190, Opacity 80, : two wide sweeps across the body, at about y 1050 and y 1130.
- Size 80, Opacity 70, : one sweep under the chin, at about y 905, for the neck.
- Size 130, Opacity 85, : one sweep across the right of the chest, where the photo's bright fur stands out.
-
Break up the tones into fur
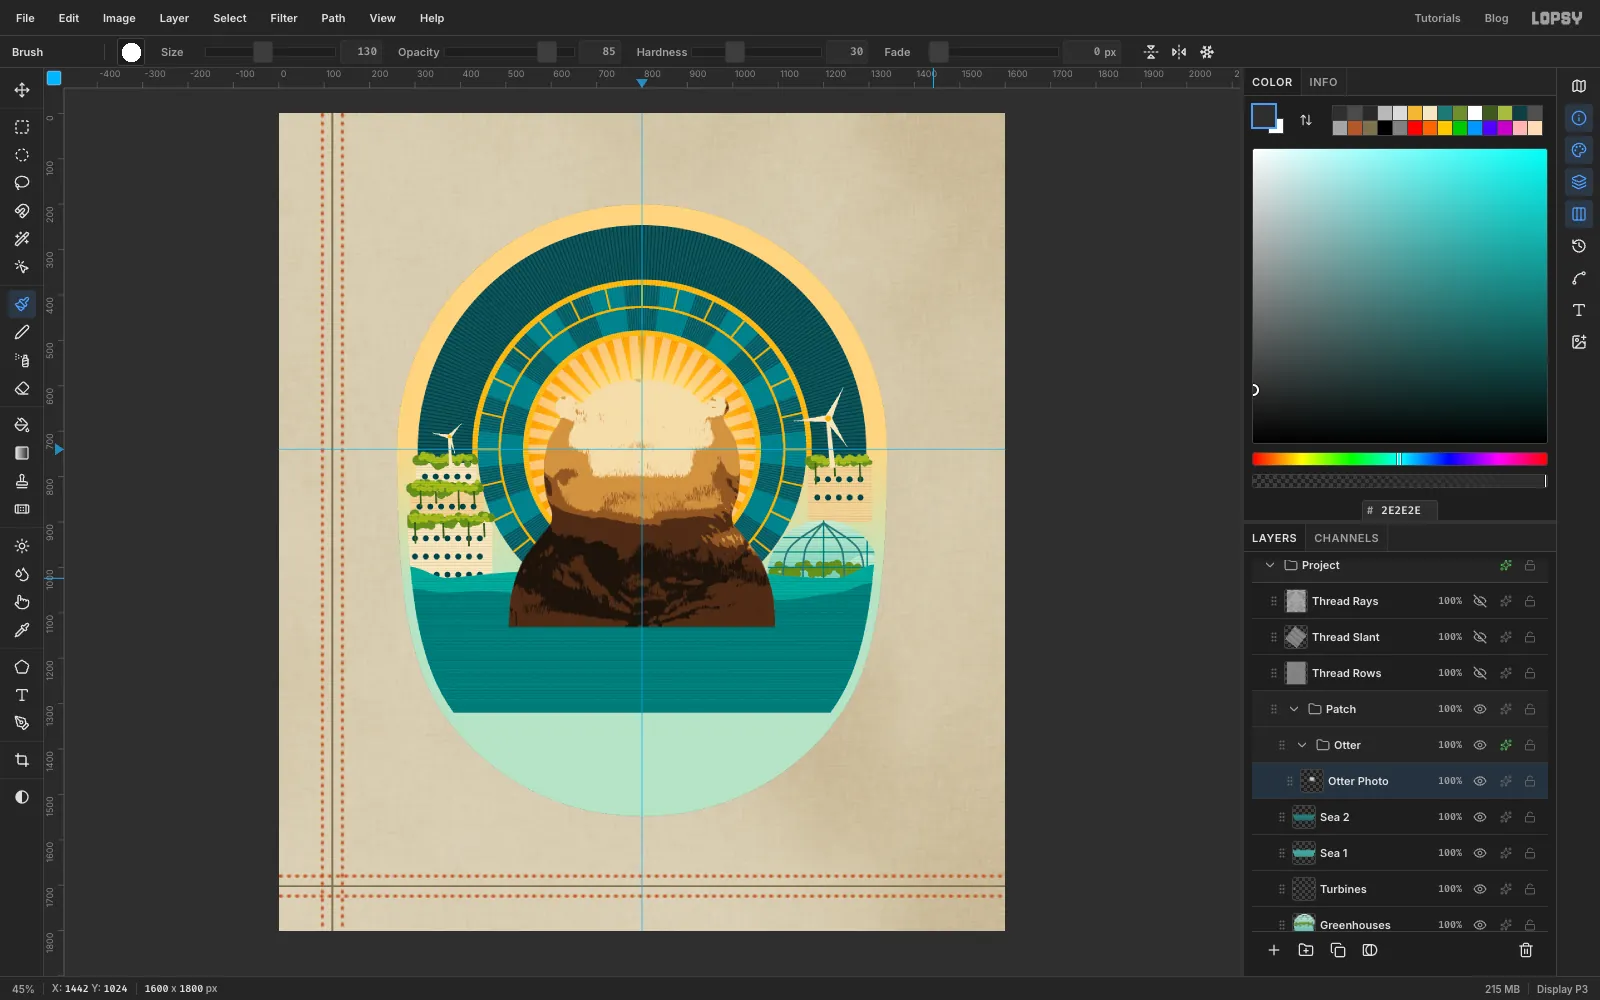
Leave the selection on. Run Add Noise with Amount 22 and Mono on, then Motion Blur with Angle 90 and Distance 8.
Because the Gradient Map has hard steps, these tiny grey changes tip pixels from one brown to the next, and each soft edge turns into a jagged row of stitches. Press Cmd+D.
-
Paint the face
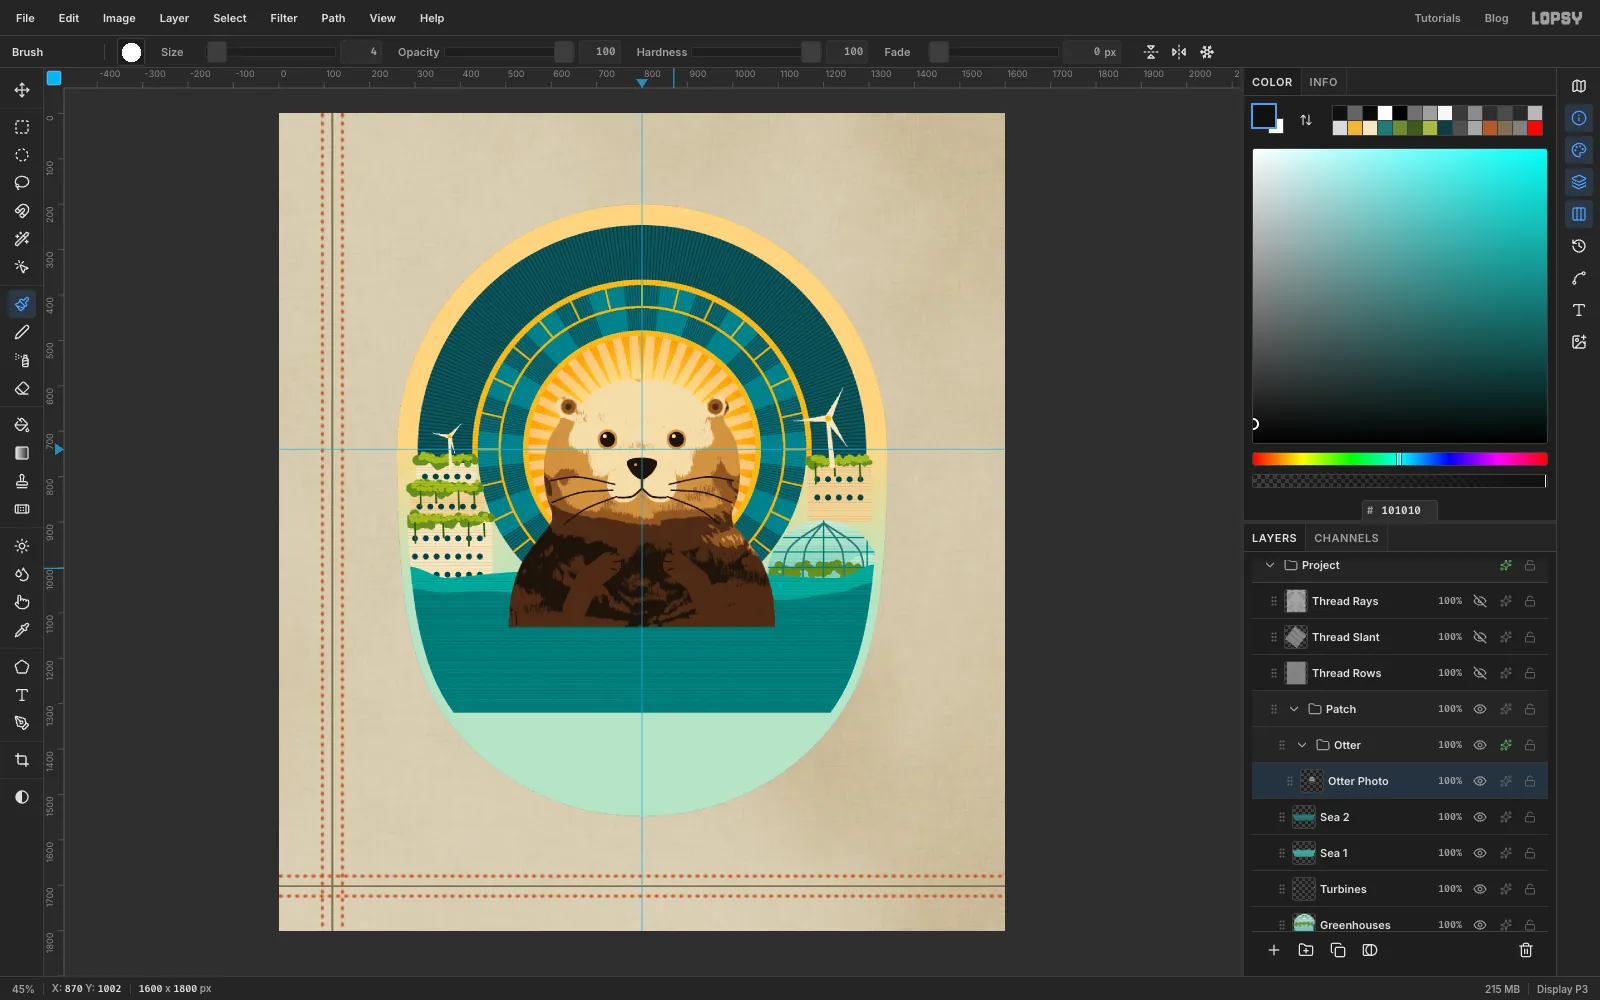
Still on Otter Photo, build the face from the centre out. All of this sits on the vertical guide, so keep it symmetrical. Use Hardness 100 unless noted, Opacity 100, and a single click for each dab.
- Ears: Cmd-click the thumbnail again so the paint stays inside. Click once in each ear bump with Size 40, Hardness 70, , then again with Size 20, Opacity 80, Hardness 50, . Press Cmd+D.
- Whisker pads: two clicks at Size 84, Hardness 70, , side by side, about 80 px apart at 760, 822 and 840, 822.
- Nose: with the Pen, draw a rounded triangle about 64 px wide just above the pads, centred on the guide at about y 776. Use Path to Selection and Delete Path, fill with , and press Cmd+D. Add one small highlight with the Brush at Size 8.
- Mouth: with the Pen at Stroke 4 in black, stroke a short line down from the nose, then a curve out to each side along the bottom of the pads. Press Enter after each, and delete each path.
- Eyes: about 150 px apart at 724, 718 and 876, 718, with the nose between them: first Size 50, Opacity 60, Hardness 40, for a soft socket, then Size 34, black, then Size 10, white, placed up and to the left.
- Whiskers: three Pen curves fanning out from each pad at Stroke 3 in , running out past the cheeks. Delete each path.
- Forearms: set the Brush to Size 56, Hardness 80, , and drag one stroke from about 652, 1090 up to 728, 992, and a mirrored one from 948, 1090 up to 872, 992. Add three short toe lines to each paw with Size 4 in .
-
Stitch the otter and give it a shell
Stitch Otter Photo with Thread Rays at 24%. Its centre is near the nose, so the fur appears to grow outward from the face.
Now the foam behind it. Click Sea 2, add a layer called Foam Back, and use the Pen at Stroke 5 in to stroke a line along the crest of Sea 1 and another along the crest of Sea 2. Delete each path, then trim to the patch.
Next, the outline. Cmd-click the Otter Photo thumbnail, add a new layer called Otter Outline (it lands just above Foam Back, under the Otter group), choose Select → Grow with 4, fill with , and press Cmd+D.
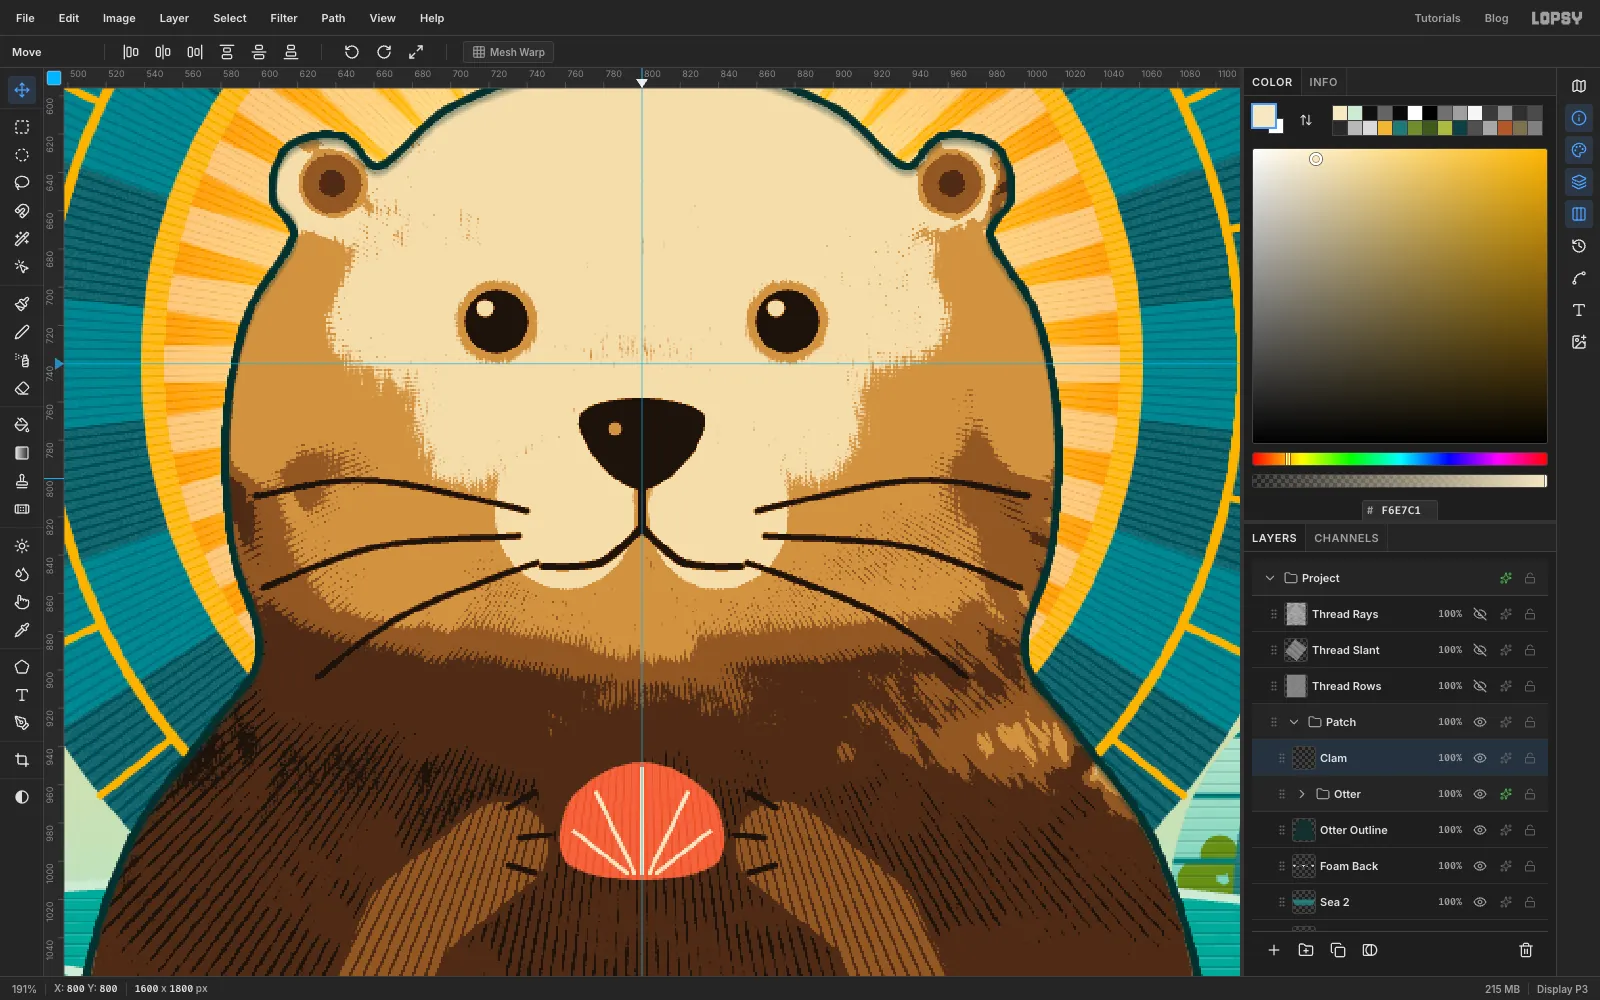
Collapse the Otter group with its arrow and click its row. Add a layer called Clam. With the Pen, draw a fan-shaped shell between the paws, about 80 px wide, centred at 800, 980, and fill it with coral . This is the only coral on the patch, so your eye goes straight to it. Add five cream ridges fanning up from its base with a Size 3 Brush, then stitch Clam with Thread Rays at 25%.
-
Add the near water
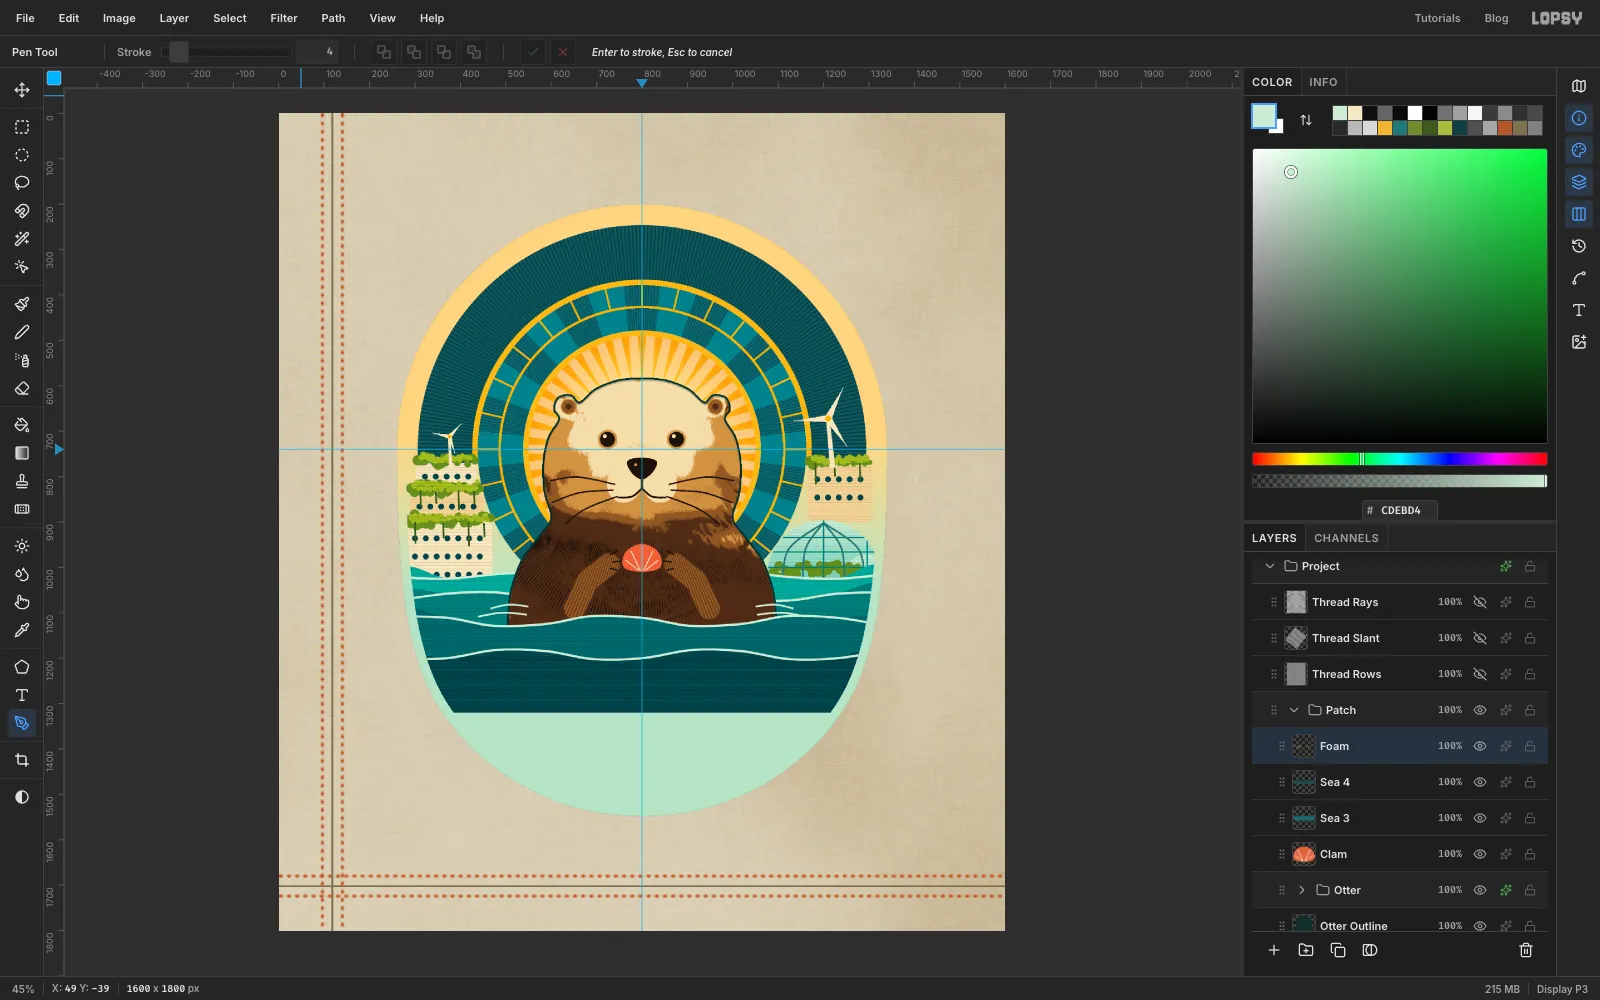
Add Sea 3 above Clam using the same closed Pen shape as before, with its crest near y 1116 and . Add Sea 4 with its crest near y 1190 and . Trim each to the patch, then stitch each with Thread Rows at 40%. The crest of Sea 3 needs to cross the otter just above the cut-off line at y 1130, so the otter looks like it's floating in the water.
Add a layer called Foam. With the Pen at Stroke 5, in , stroke along both crests. Switch to Stroke 4 and add two short curved ripples beside each shoulder, at about y 1085 and y 1105. These show where the body meets the water. Delete each path, and trim to the patch.
-
Add the text panel
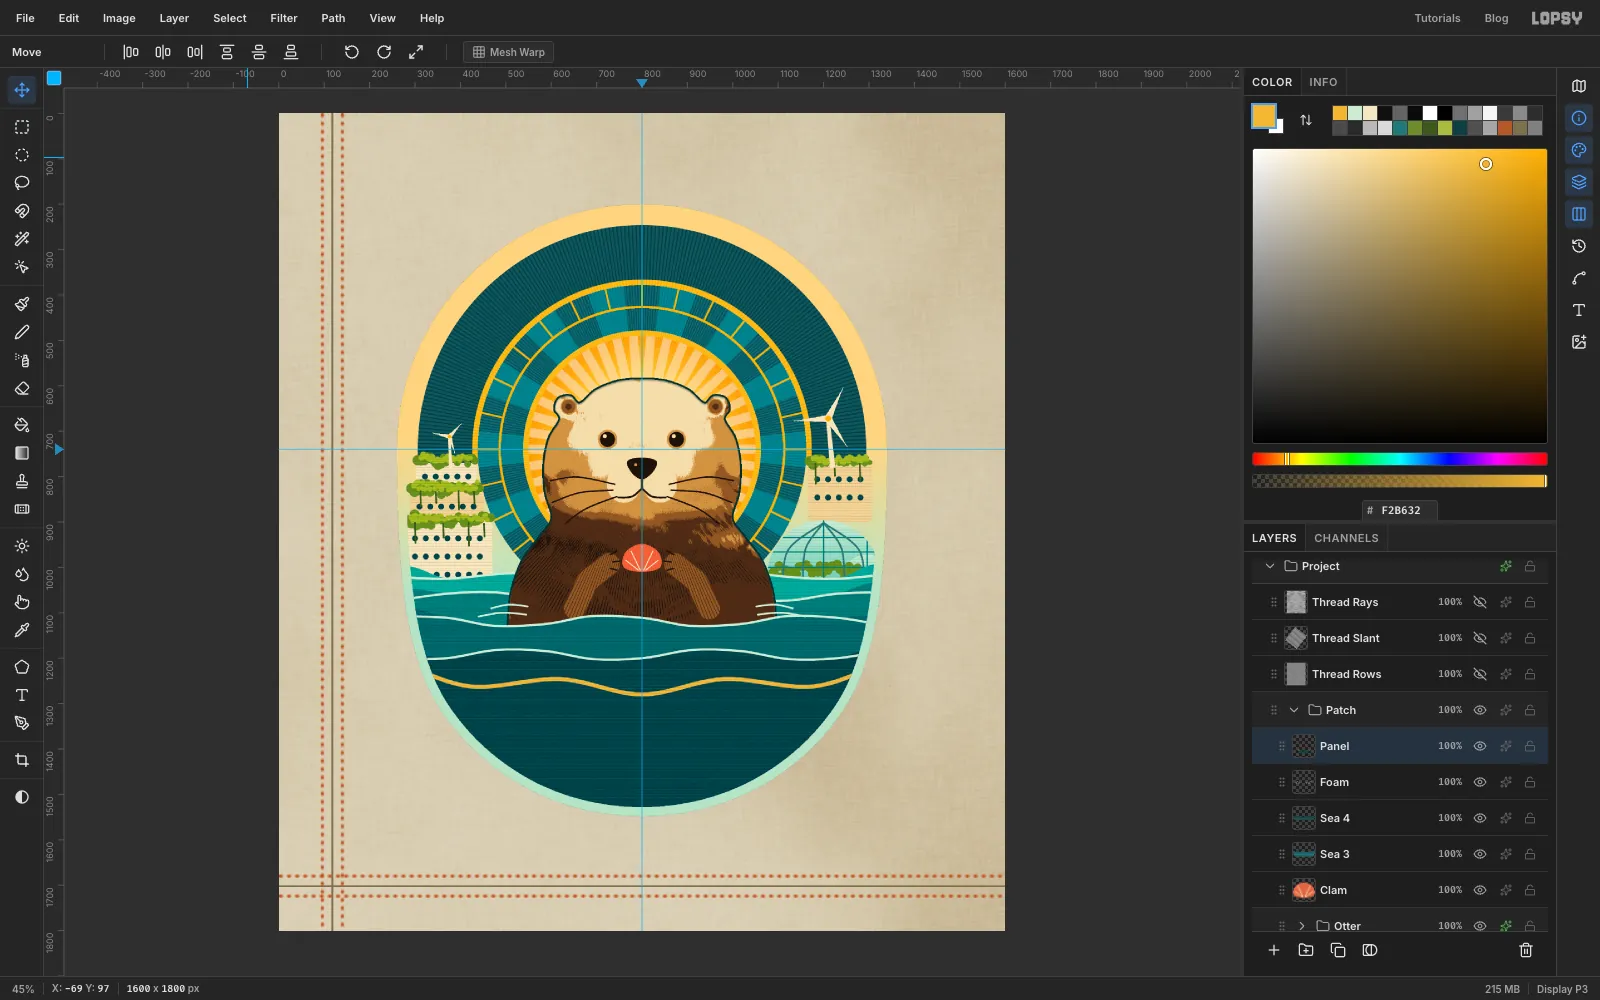
Add a layer called Panel. With the Pen, draw the top of the panel as a whiplash curve, an Art Nouveau favourite, through these points: 262, 1205, 420, 1262, 620, 1246, 800, 1280, 980, 1246, 1180, 1262, 1338, 1205. Click corners at 1338, 1600 and 262, 1600 and close on the first anchor. Click Path to Selection and Delete Path, fill with , and press Cmd+D.
Draw the same curve again as an open path, set Stroke 9 with gold , and press Enter. Delete the path. Trim to the patch, then stitch Panel with Thread Rows at 35%.
-
Grow the left-hand kelp
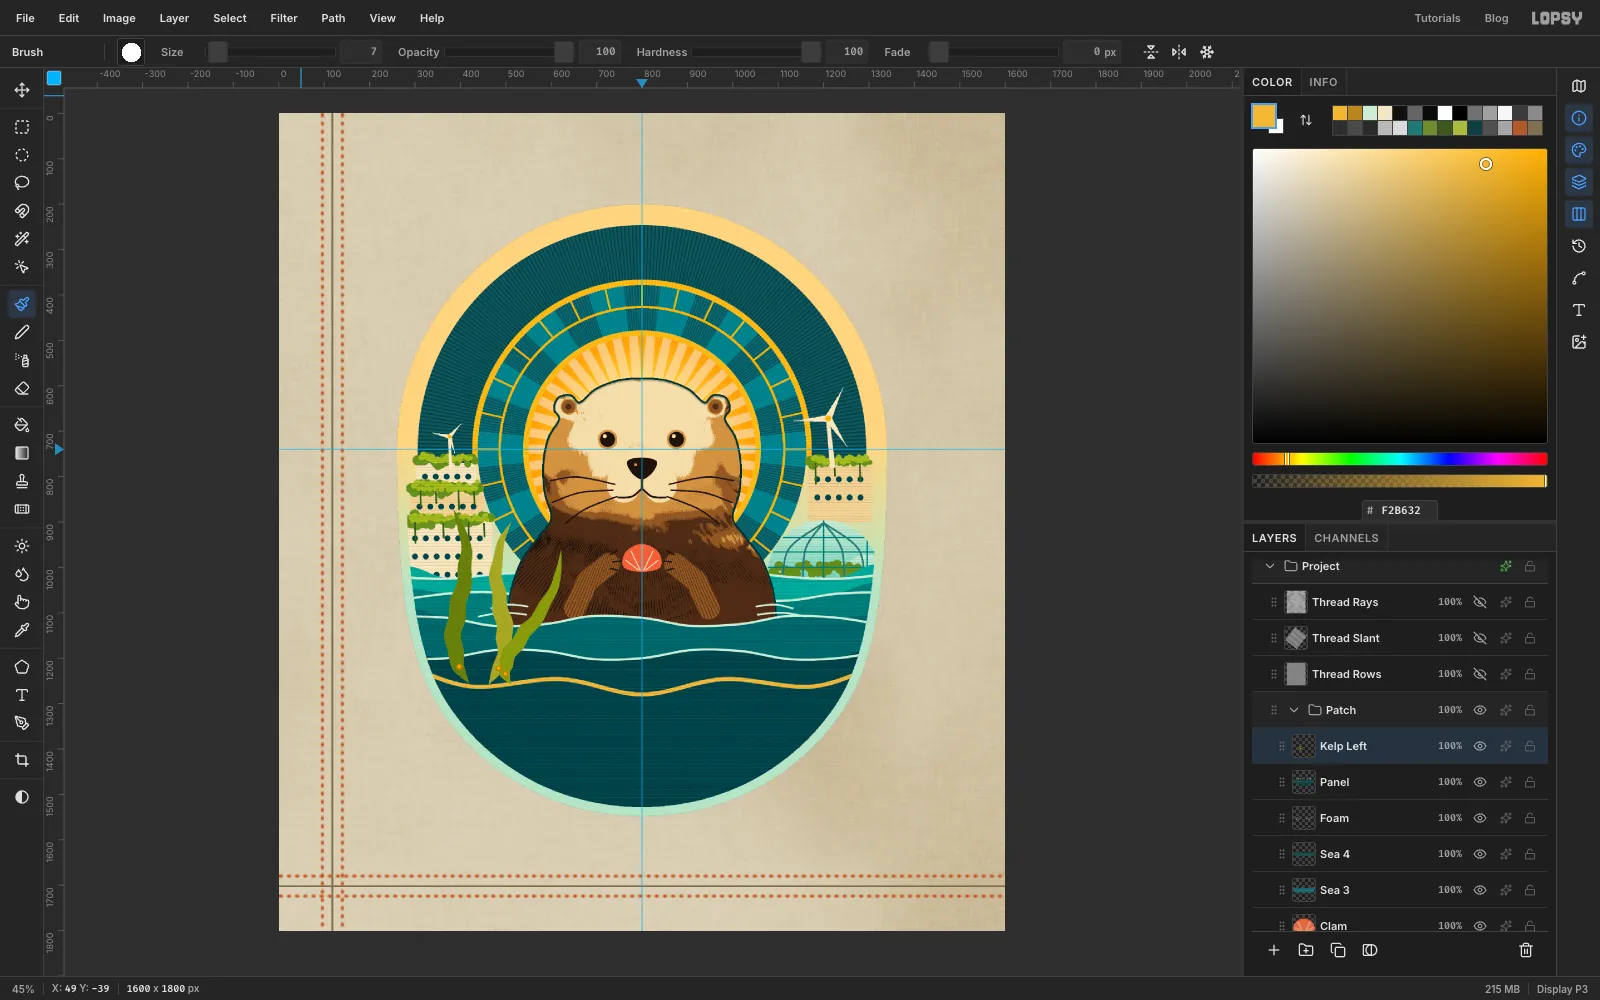
Kelp isn't a leafy plant. It grows as long, narrow, wavy ribbons, with a little gas-filled bead at the base of each one to float it upward. Add a layer called Kelp Left.
With the Pen, draw each ribbon as a closed shape. Start at the base with a plain click, press and drag up one side in about nine anchors, moving slightly in and out to make a ruffled edge, click a sharp point at the tip, and come back down the other side the same way. Close on the first anchor, use Path to Selection and Delete Path, and fill. Press Cmd+D after each.
- Ribbon 1, , about 36 px wide: from 420, 1256, curving left and then right as it climbs, to a tip at 384, 870
- Ribbon 2, , about 34 px wide: from 462, 1258, curving right and then left, to 512, 900
- Ribbon 3, , about 30 px wide: from 512, 1258, sweeping across the otter's shoulder to 622, 960
Stitch Kelp Left with Thread Slant at 40%.
For the beads, set the Brush to Size 14, Spacing 2 with and click once on each ribbon a little above its base. Click again with Size 7 in gold , just up and to the left of centre. Trim to the patch.
-
Grow the rest of the kelp
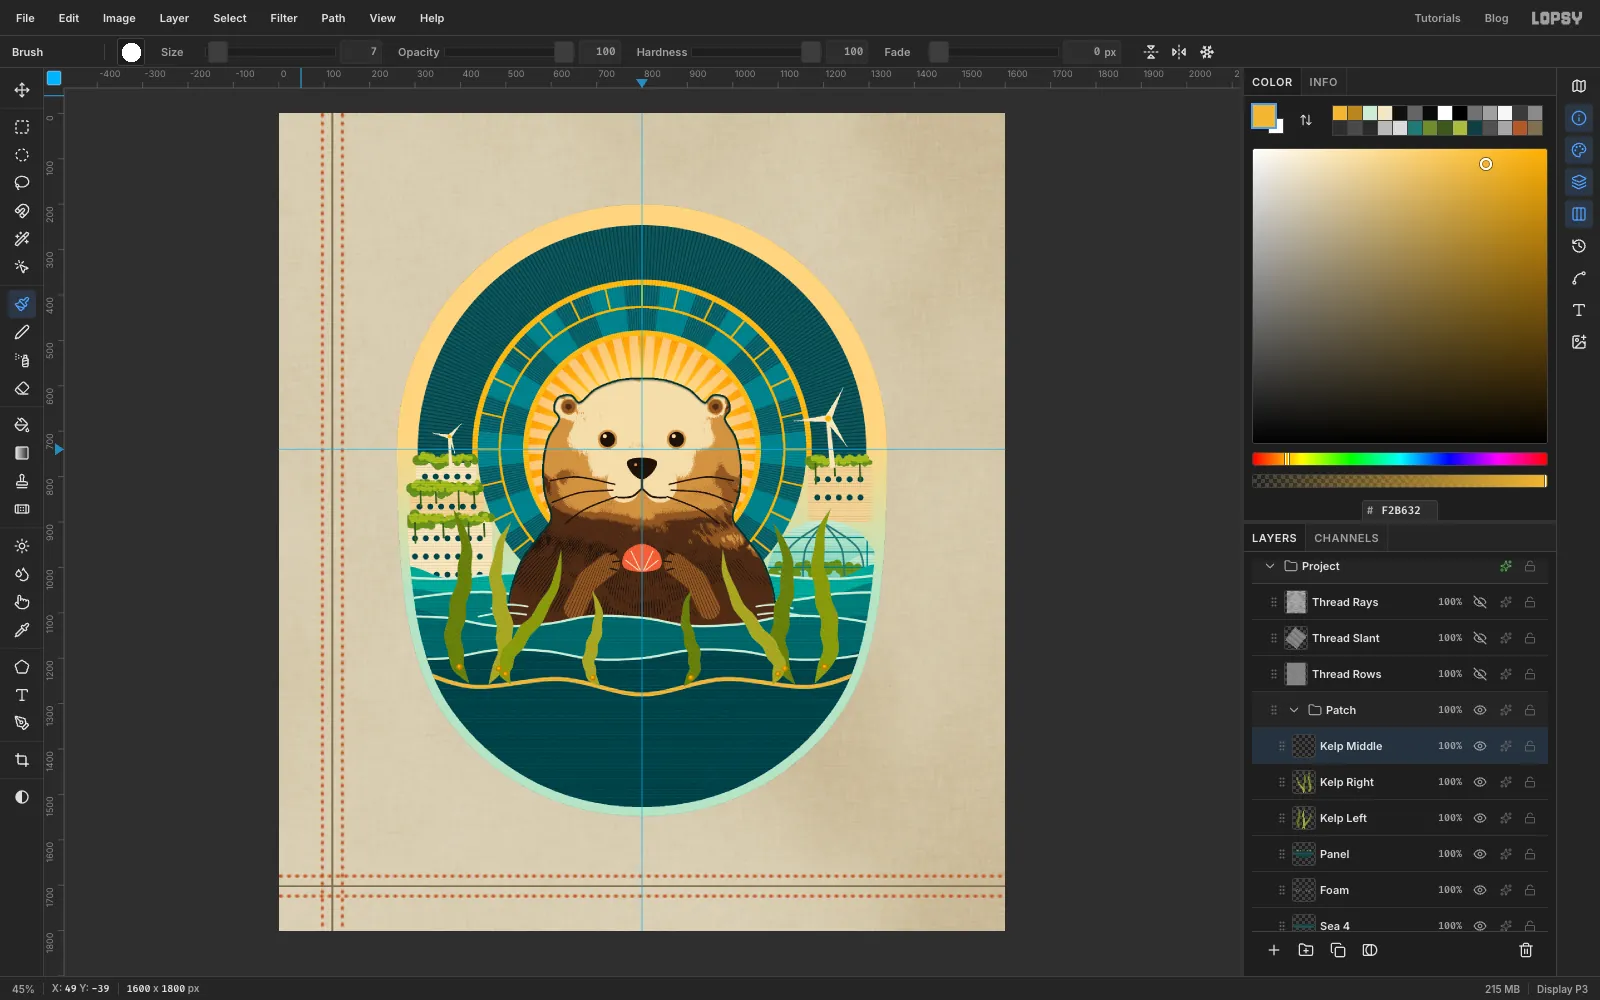
Add Kelp Right and mirror the same three ribbons across the guide, so 420, 1256 becomes 1180, 1256. Change the colours around: , and . Stitch it, add beads and trim to the patch, the same way.
Add Kelp Middle with two short ribbons about 26 px wide, one from 708, 1262 to 690, 1050 in , and one from 892, 1262 to 910, 1050 in . Stitch it, add beads and trim to the patch again.
-
Set the arched title
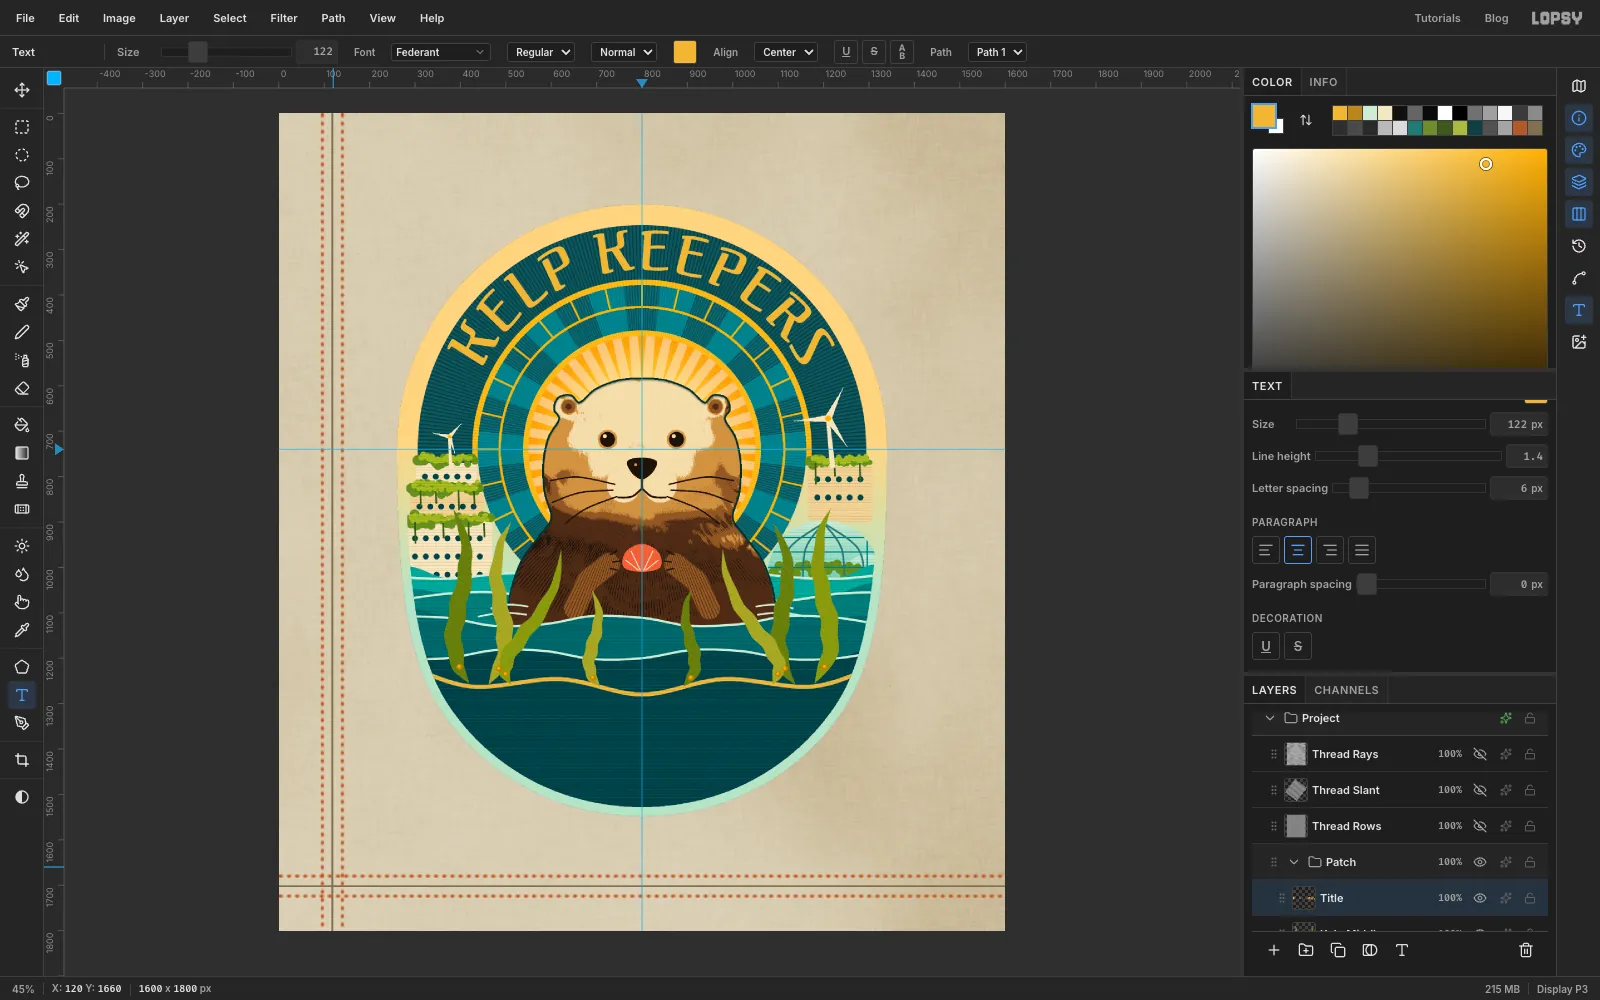
Press P for the Pen and draw the baseline, a half circle of radius 396. Press at 404, 740 and drag up about 219 px, press at 800, 344 and drag right about 219 px, then press at 1196, 740 and drag down about 219 px. Click the ✓ Commit path button in the options bar. Don't press Enter, because that would stroke the path.
Make sure the Kelp Middle row is active, so the title lands at the top of the stack. Press T for the Text tool. Set Size 122, font Federant and colour . Click in an empty part of the canvas below the patch, and type KELP KEEPERS. Press Tab to finish, and rename the layer Title.
Open the Text panel if it's closed. With the layer still active, choose your path in the Path dropdown of the options bar. The text jumps onto the arc. In the Text panel, click Align center and set Letter spacing to 6. Check the title has about the same gap above and below it in the band.
In the Paths panel, click the selected path's row to deselect it and hide the outline. Keep the path until the next step, because the text is bound to it.
-
Stitch the title and set the panel text
Click Rasterize Layer at the bottom of the Layers panel. Now Title is ordinary pixels, so you can delete its path in the Paths panel. Stitch it with Thread Rays at 35%.
In the Text panel, put Letter spacing back to 0 and click Align left, because both settings carry over to the next text.
Now make the panel text, one layer at a time. Finish the first completely before you start the second, because changing the font or size while a text layer is active restyles that layer.
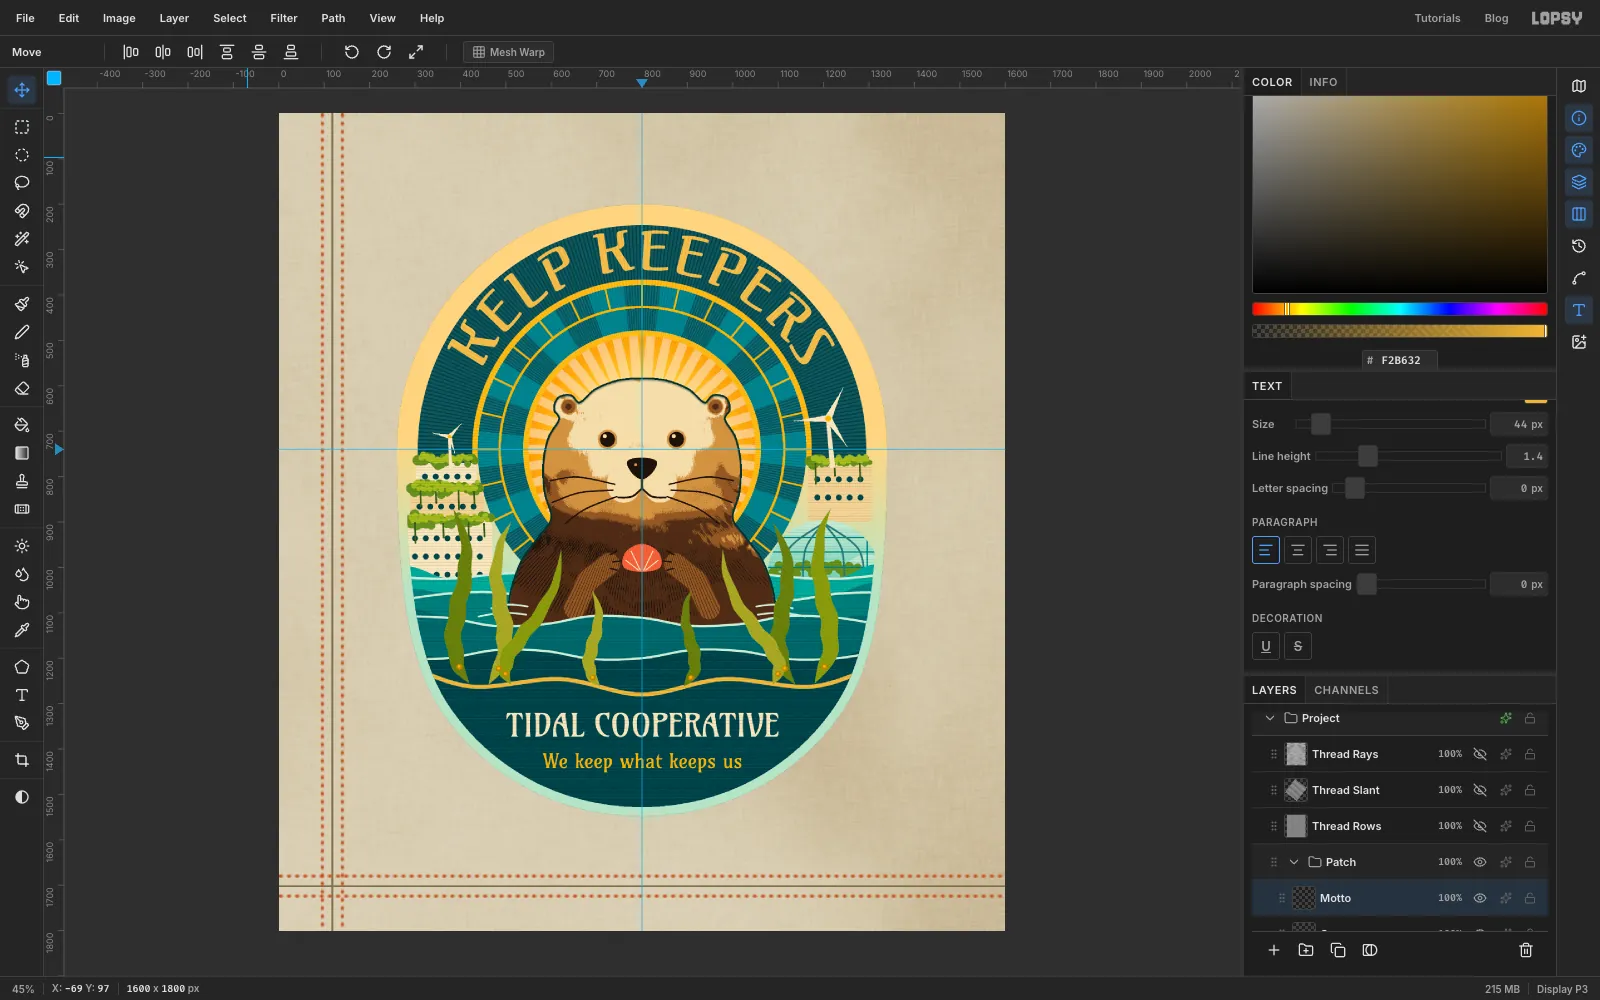
Press T, set font Amarante, Size 70 and colour . Click in the panel and type TIDAL COOPERATIVE. Press Tab and rename the layer Co-op. Press V and drag it so it's centred on the guide at about y 1346, using the arrow keys to finish. Keep at least 40 px between the ends of the line and the curved edge. Click Rasterize Layer and stitch it with Thread Rows at 35%.
Do the same with We keep what keeps us in Amarante, Size 44, , named Motto, centred at about y 1430. Stitch it with Thread Rows at 30%.
-
Stitch the edge
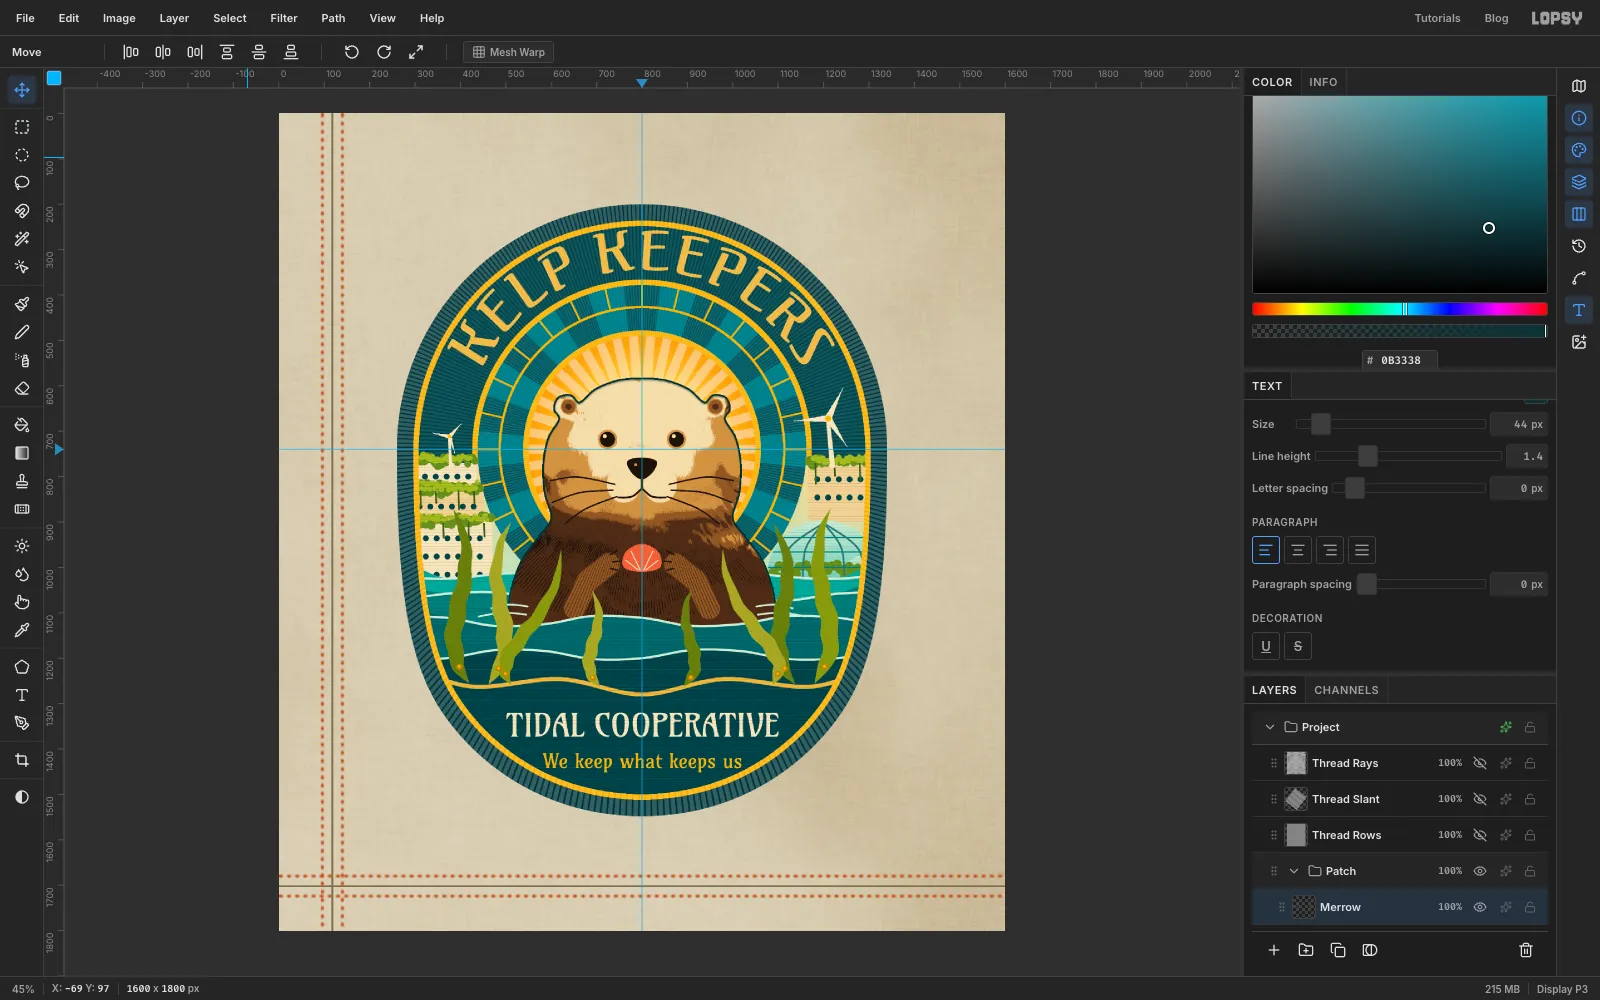
Real patches have an overlocked edge, called a merrow, of thick thread wrapped around the cloth. Add a layer called Keyline. Cmd-click the Base thumbnail, Shrink by 36, and fill with gold . Shrink by 12, press Delete, and press Cmd+D. Stitch Keyline with Thread Rays at 40%.
Add a layer called Merrow. Cmd-click Base again and fill with . Shrink by 36, press Delete, and press Cmd+D. Stitch it with Thread Rays at 65%. The radial threads now run across the border, just like wrapped thread.
-
Make a notch cutter
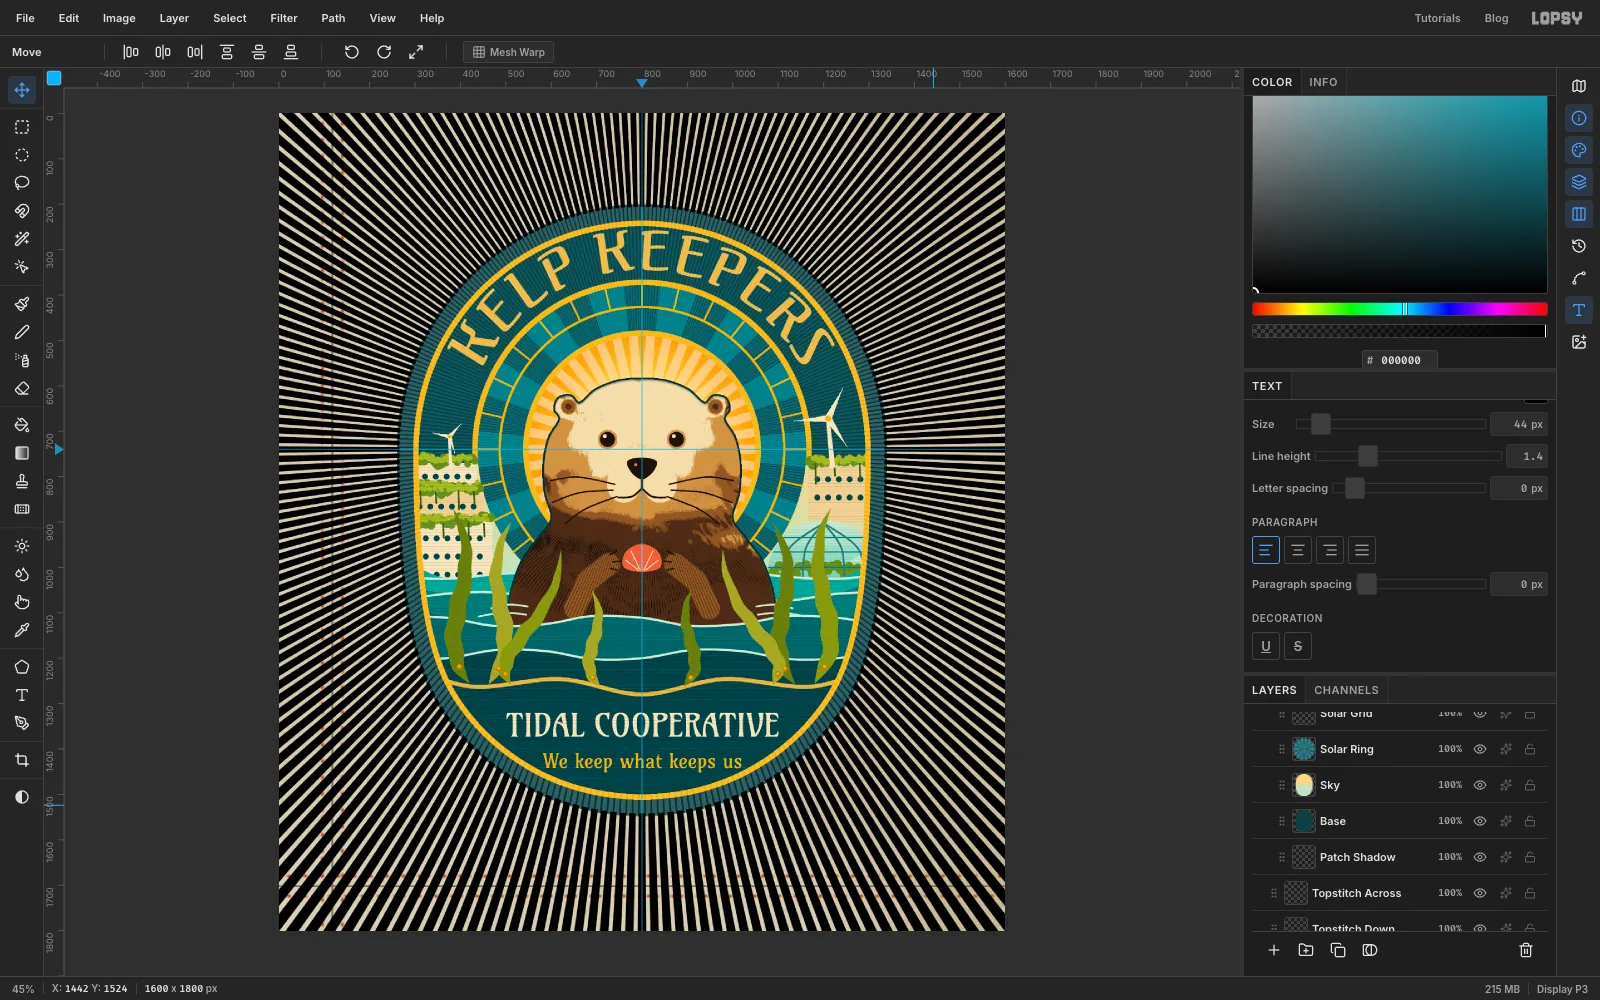
A real merrowed edge isn't a clean line. It has a tiny bump for every stitch. To get that, add a layer called Notch Cutter. Cmd-click Base, Shrink by 6, and choose Select → Inverse. Now only the outer 6 px of the patch and the canvas around it are selected.
Set the foreground to black and run Sunburst with Rays 120, Length 100, Width 34, Taper 0, Softness 10, Rotation 0, Center X 50, Center Y 41 and Opacity 100. Run it again with Rotation 1.5 to double the count. It looks alarming, but it's only a stencil. Press Cmd+D.
-
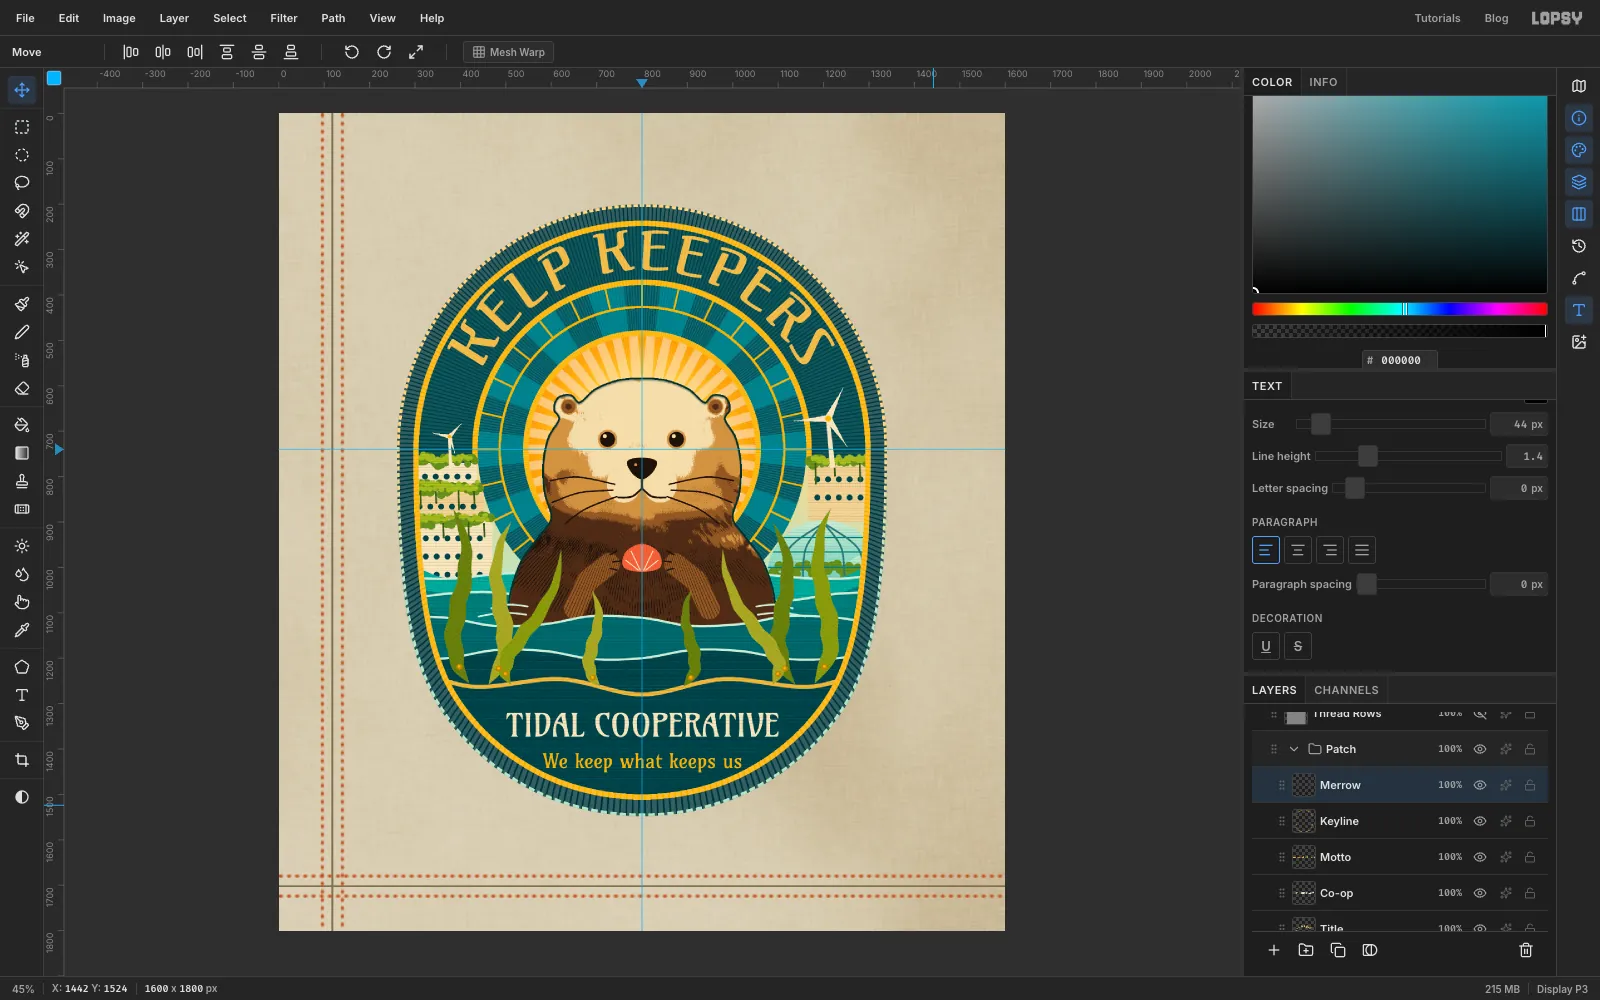
Cut the notches
Click the Merrow row, Cmd-click the Notch Cutter thumbnail and press Delete. Press Cmd+D, click the Notch Cutter row and delete the layer.
-
Press it onto the cloth
Click the Patch Shadow row. Cmd-click the Base thumbnail to select the patch's outer shape, then fill with . Press Cmd+D. Run Gaussian Blur with Radius 6, press V and nudge it 3 px right and 6 px down with the arrow keys. Set it to Multiply at 62%. A tight shadow makes the patch look pressed on, not floating.
Base and Sky still reach the old edge, and they'd show through the notches you just cut. Cmd-click Base, Shrink by 20 and choose Select → Inverse. Keep the selection, click the Base row and press Delete, then click the Sky row and press Delete. Press Cmd+D.
Finally, give the raised parts some height. Open the effects drawer for each layer, tick the effect, and click its name to see the settings:
- Kelp Left, Kelp Right and Kelp Middle: Drop Shadow with Offset X 1, Offset Y 2, Blur 2, Opacity 70 and colour
- Title, Co-op and Motto: Drop Shadow with Offset X 2, Offset Y 3, Blur 2, Opacity 80 and colour
- Merrow: Inner Glow with Size 10, Opacity 45 and colour , which rounds the edge
Save your work with File → Save Project, and export it with File → Quick Export PNG. To make a real patch from this design, send the art without the canvas layers to a patch maker, and they'll turn each colour area into thread.