Make a Spray Stencil Flier from a Vintage Portrait
Turn a 1910s portrait into a four-colour spray stencil and build a punk knife-sharpening flier around it, with a blade crown, misregistered type and drips.
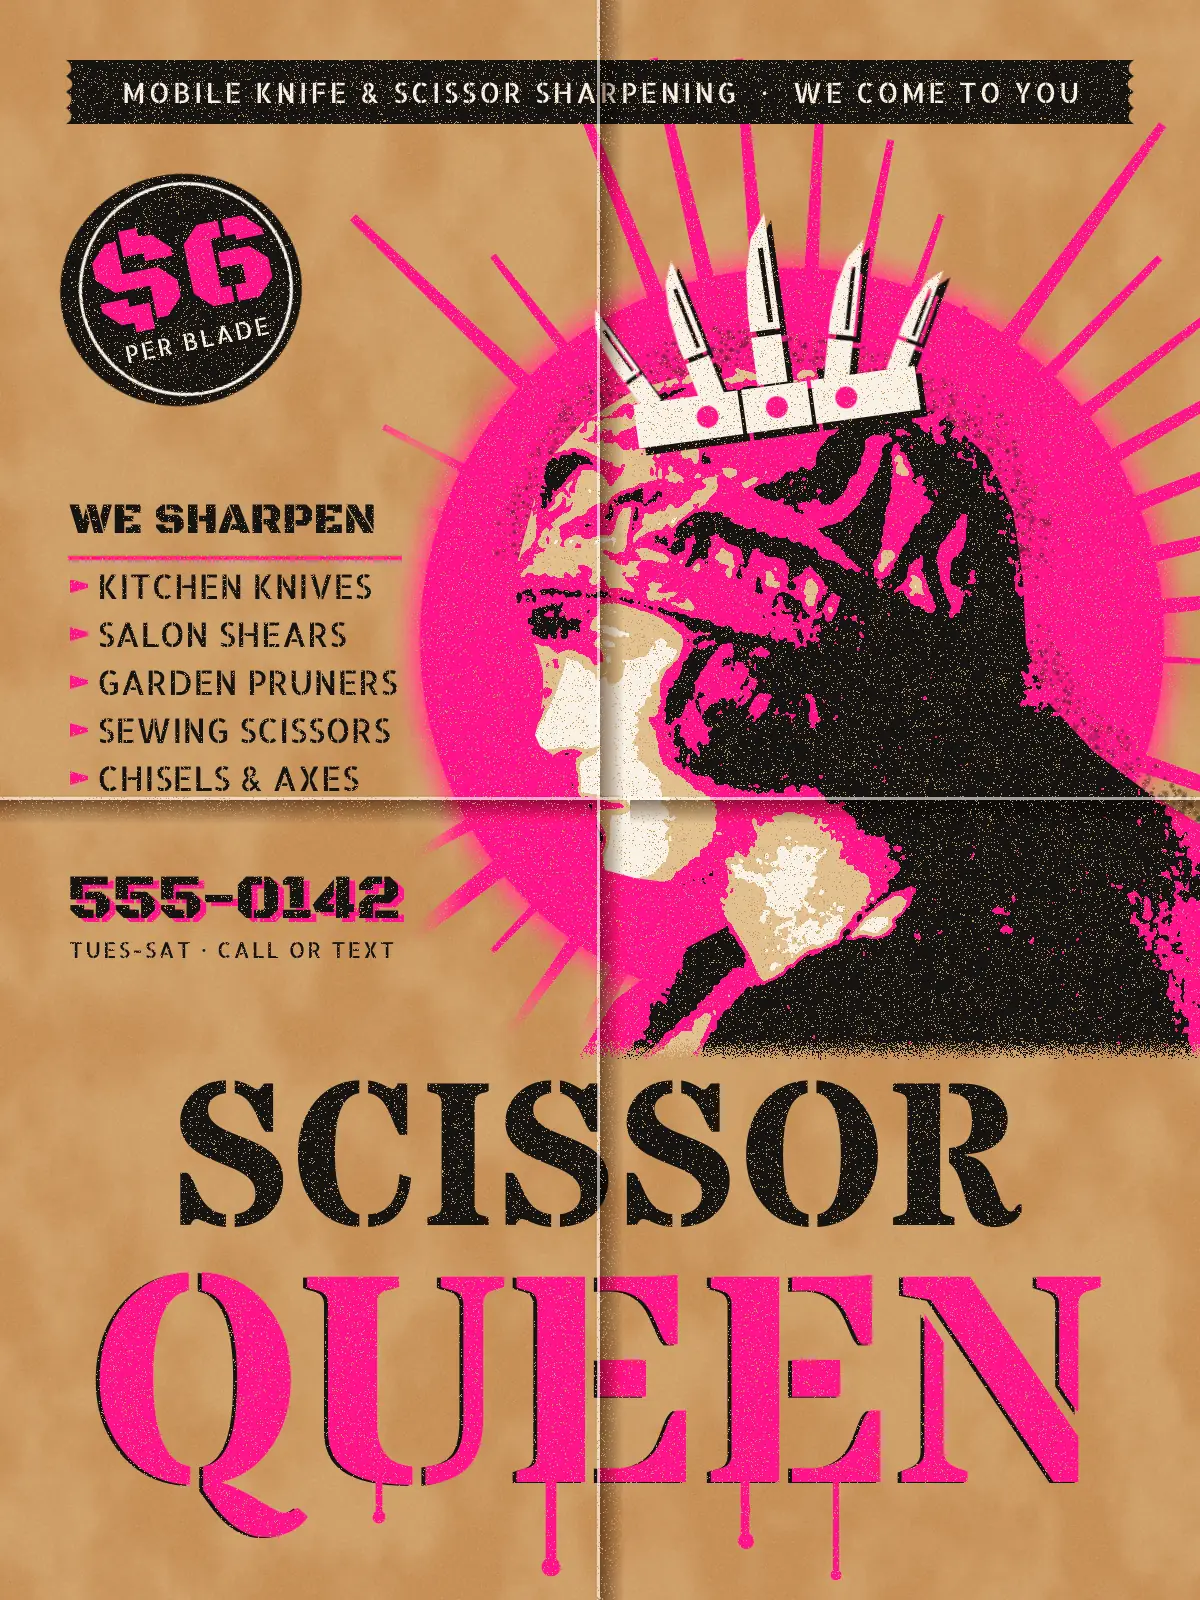
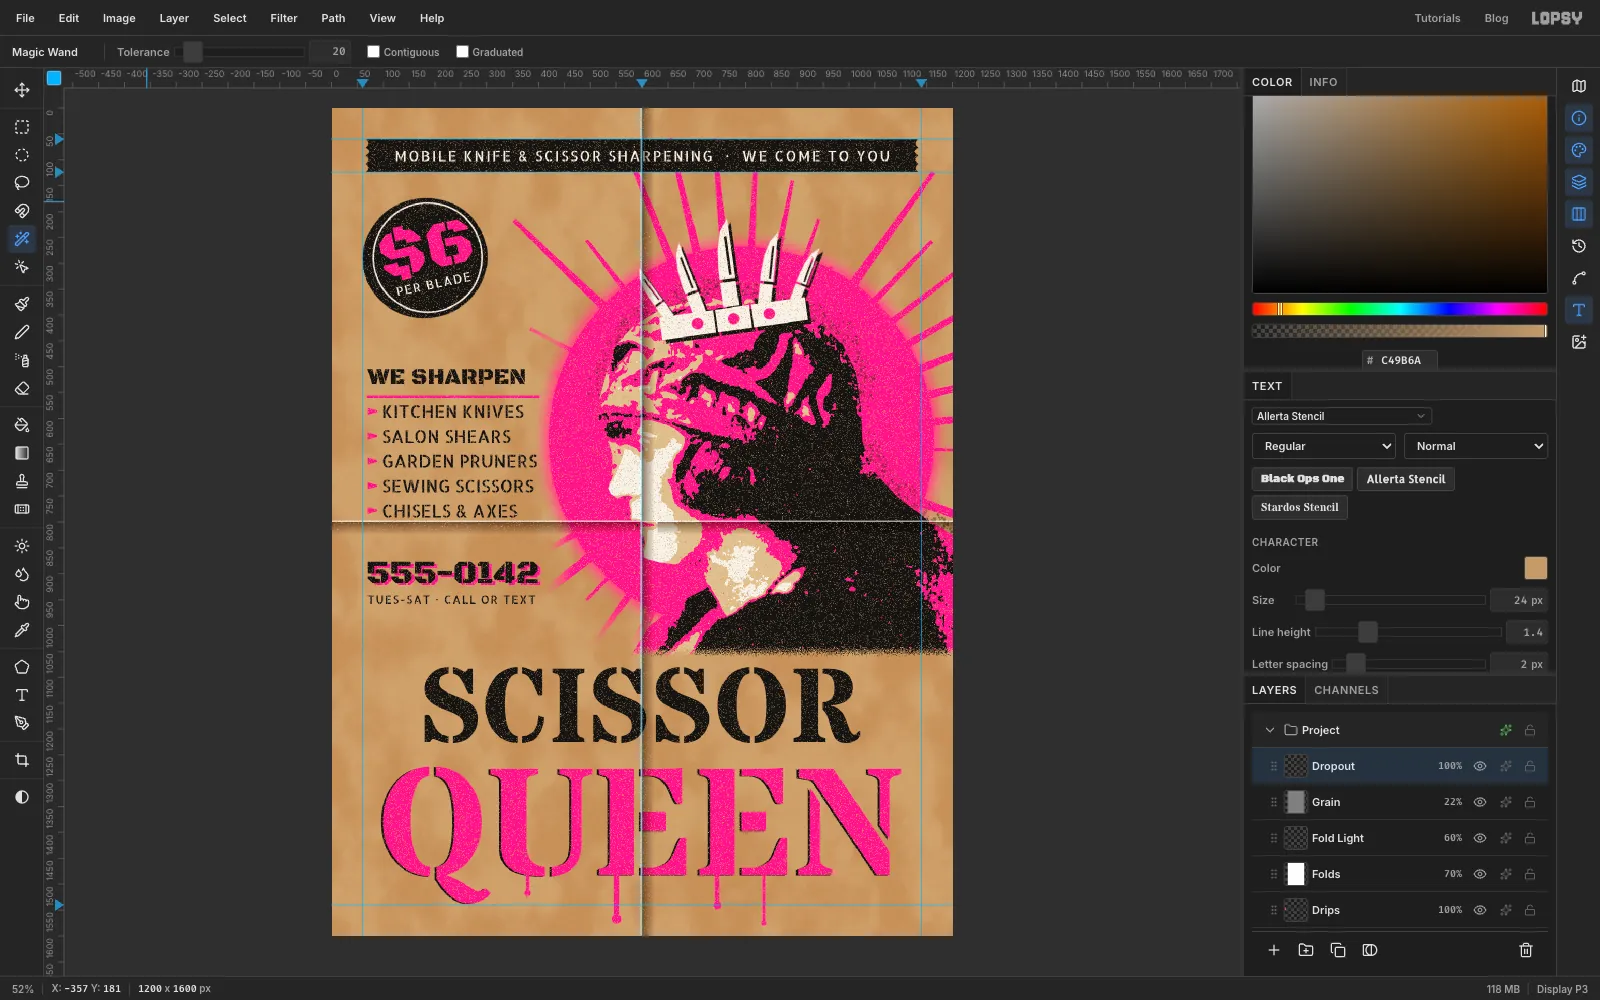
This tutorial makes a street-poster flier for an imaginary mobile sharpening service, Scissor Queen. It's 1200 × 1600 px, sprayed through cut stencils onto brown kraft paper in four inks: black, fluorescent pink, cream and off-white.
The centrepiece is a real photograph turned into a stencil. It's a portrait of the Australian writer Dulcie Deamer, the self-styled "Queen of Bohemia", taken around 1915: Dulcie (Mary Elizabeth Kathleen Dulcie) Deamer, writer and Queen of Bohemia_Deamer,_writer_and_Queen_of_Bohemia_(7947285230).jpg) from the State Library of Queensland, on Wikimedia Commons with no known copyright restrictions. Download the full-size file (698 × 1000).
A spray stencil can only print flat colours, so the photo is split into tone bands with the Threshold filter: one layer for the darkest tones, one for the dark-to-mid tones, one for the brightest highlights, and a cream base under everything. Each band gets its own ink. The silhouette is cut once, in a group mask, so all four layers share one clean edge.
Along the way you'll use:
- ruler guides and snapping a marquee to them
- Add Noise, Gaussian Blur, Clouds, Sunburst, Desaturate and Threshold
- feathered Elliptical Marquee selections
- the Move tool's scale and rotate handles, with Cmd to keep proportions
- Duplicate Layer, the Magic Wand with Contiguous off, and Cmd-clicking a thumbnail to select a layer's pixels
- Group Layers, a group mask, the Lasso, Select → Inverse, and filters run on a mask
- the Spray tool, the Brush, the Pencil with Shift-click lines and the Eraser
- the Pen tool and Path to Selection
- copy and paste, Merge Down, and rotating a whole group
- Drop Shadow and Color Overlay layer effects
- Text in Stardos Stencil, Allerta Stencil and Black Ops One
- the Gradient tool and the Multiply, Overlay and Screen blend modes
The palette:
-
Kraft paper
-
Fluoro pink
-
Black ink
-
Off-white ink
-
Cream base
-
Fold shadow
Multiply
-
Make the kraft paper
Open Lopsy. In the New Document dialog, set Width to
1200and Height to1600and click Create. You get aBackgroundand an emptyLayer 1.- Click
Backgroundand fill it with . - Choose Filter → Add Noise…, set Amount to
8, click Mono and Apply. Then Filter → Gaussian Blur… with Radius1. This takes the flat digital edge off the colour. - Click the top ruler at 60, 600 and 1140 for three vertical guides, and the left ruler at 60 and 1540 for two horizontal ones. They mark a 60 px margin and the centre line.
- Click
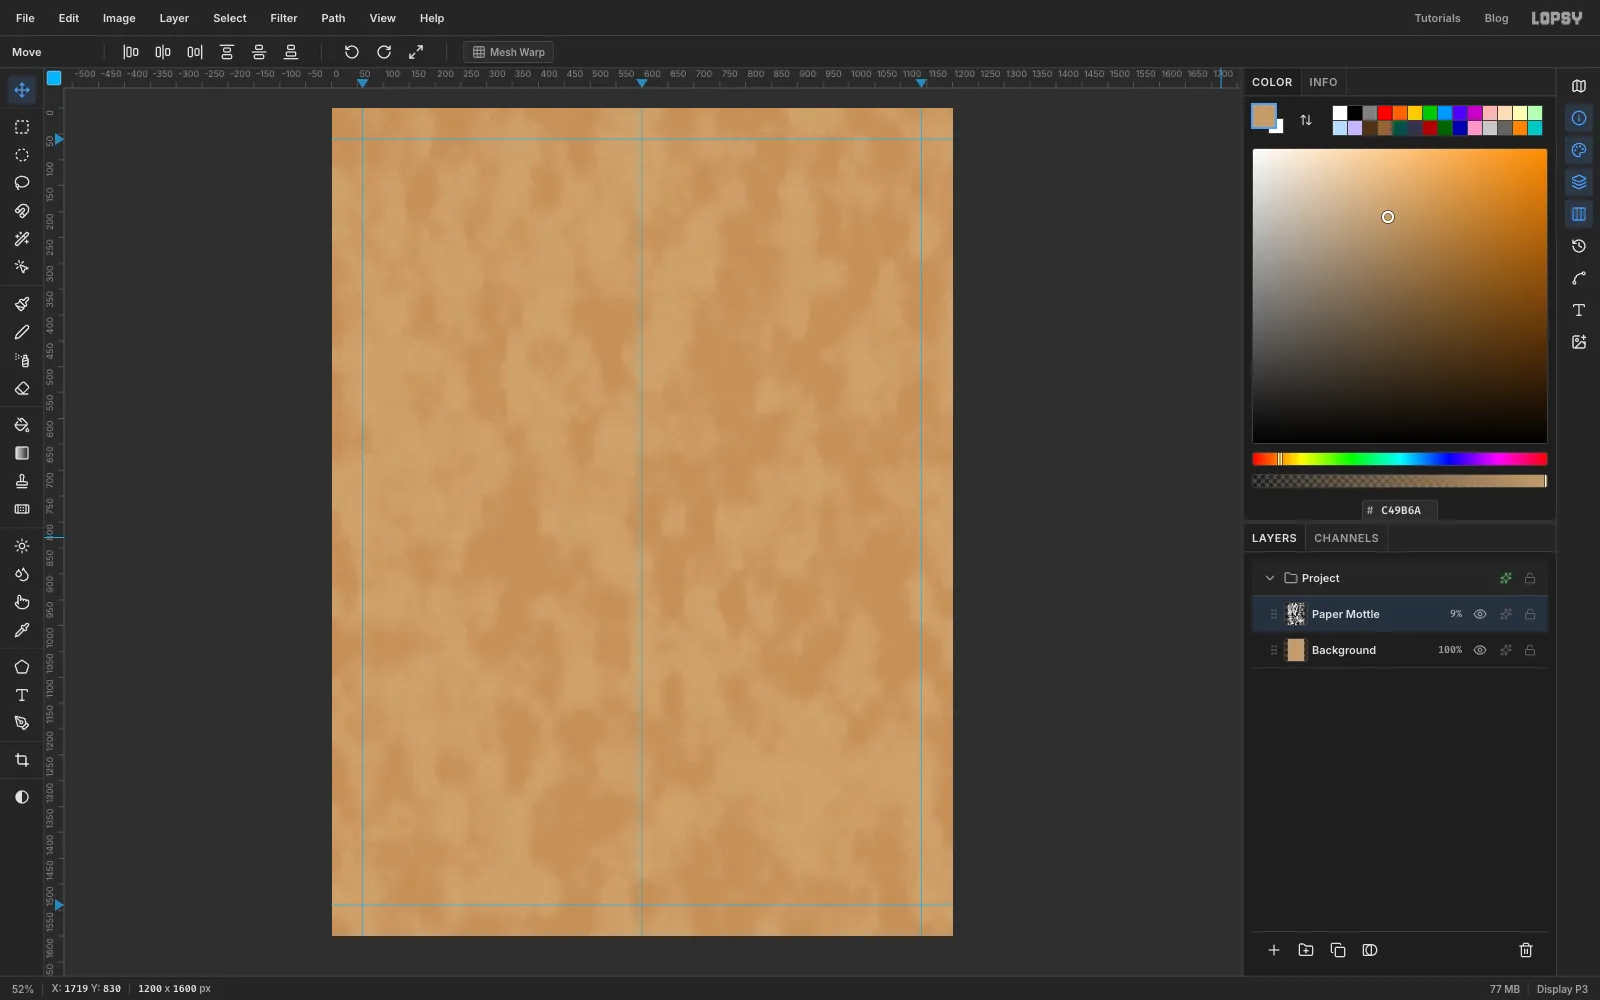
Layer 1, double-click its name and rename itPaper Mottle. Run Filter → Clouds… with Scale20. Set its blend mode to Overlay and its opacity to 9%.
Kraft paper is blotchy, but only slightly. Keep the clouds faint, or the paper starts to look like leather.
- Click
-
Spray the sunburst
- Click Add Layer at the bottom of the Layers panel and rename the new layer
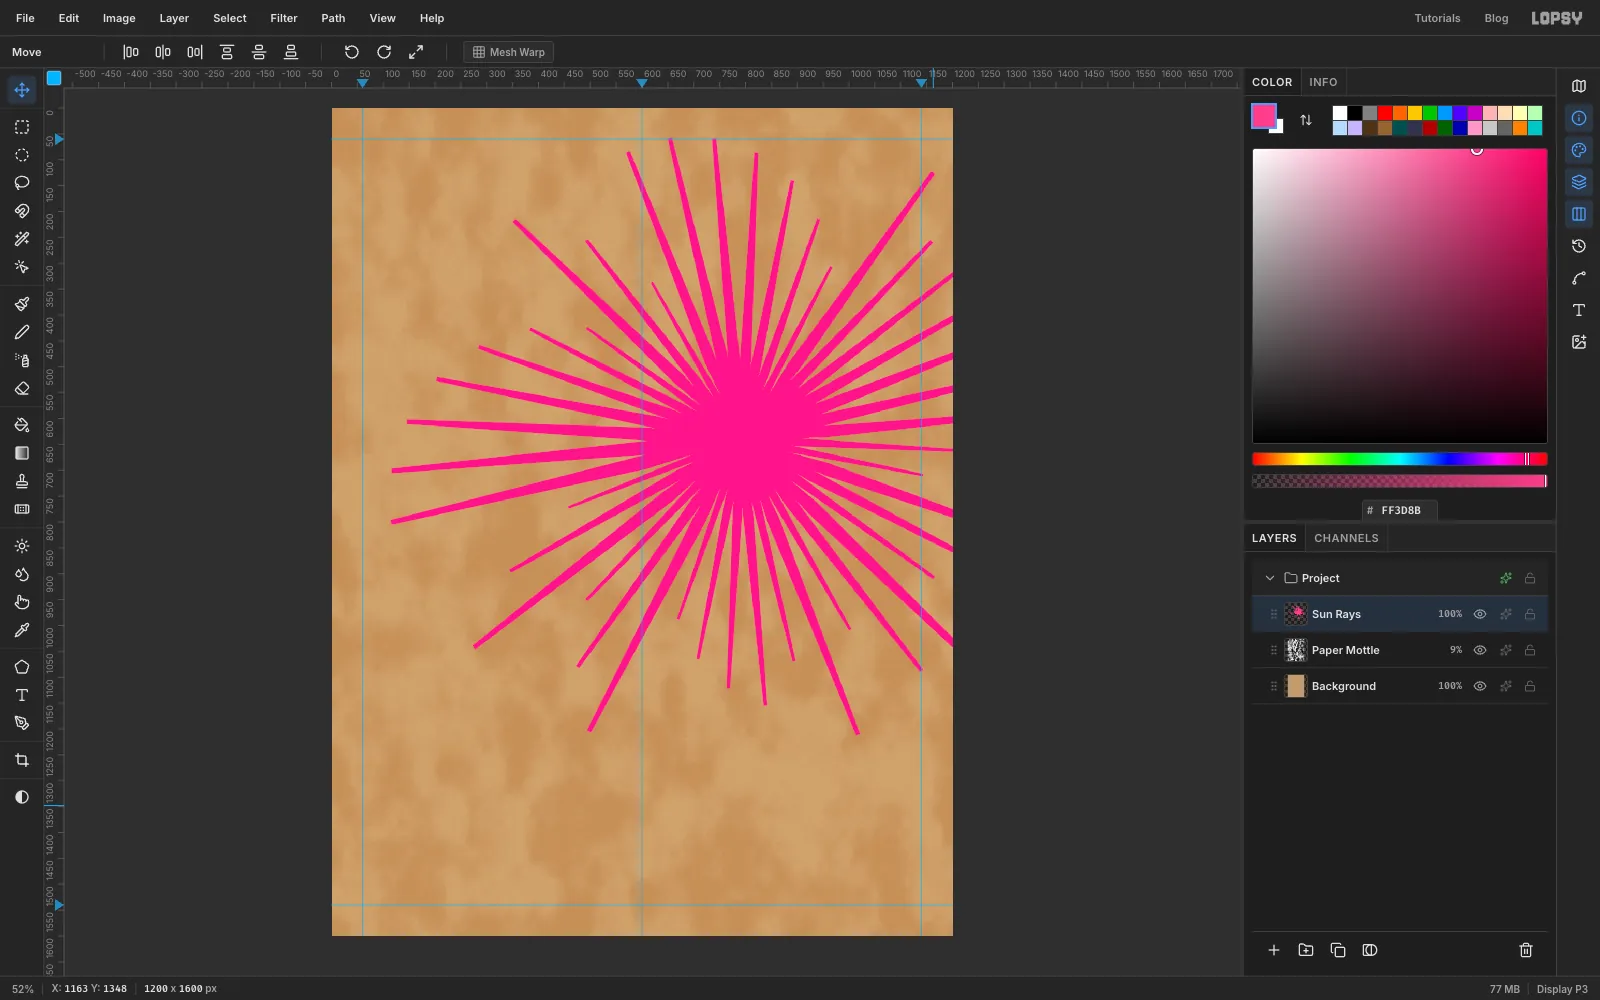
Sun Rays. - Set the foreground colour to pink . The Sunburst filter paints in the foreground colour.
- Choose Filter → Sunburst… and set Rays
44, Length56, Width44, Taper78, Jitter50, Seed11, Rotation3, Center X66and Center Y40. Leave the rest at their defaults and click Apply.
Center 66% and 40% puts the burst at 792, 640, behind where the head will go. A high Taper turns the wedges into sharp sparks, like a grinding wheel throws. Jitter gives them uneven lengths, as if they were cut by hand.
- Click Add Layer at the bottom of the Layers panel and rename the new layer
-
Feather the halo's overspray
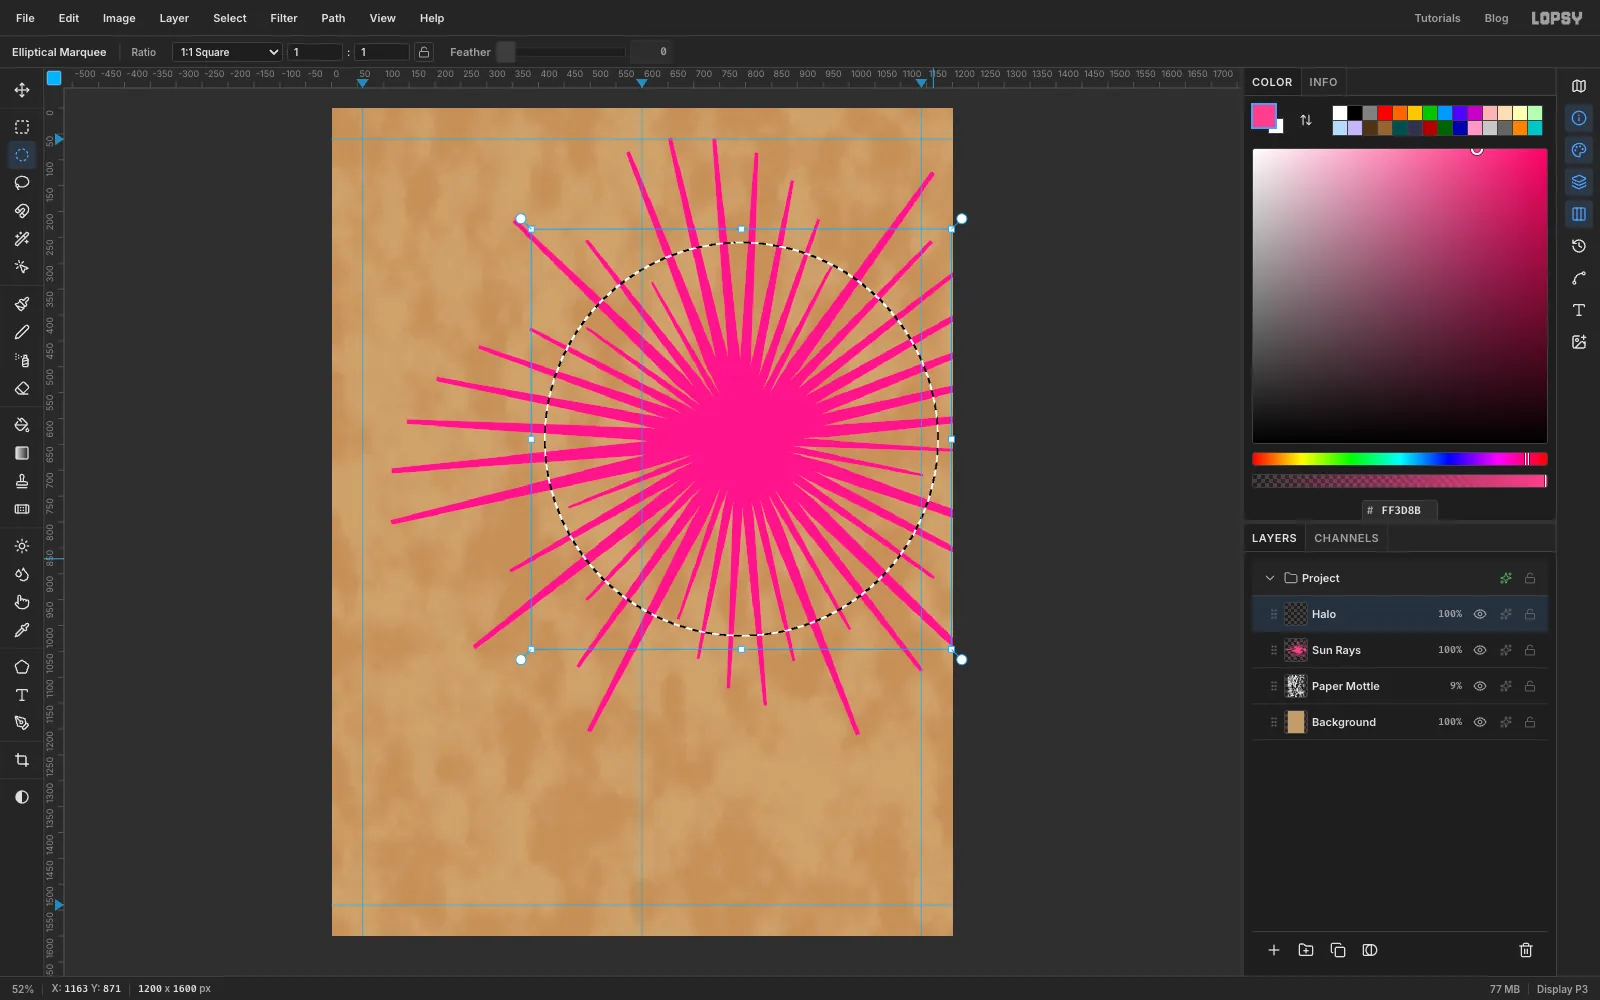
A sprayed disc has a hard edge where the stencil was, plus a soft mist just outside it. Build the mist first.
- Add a layer and name it
Halo. - Pick the Elliptical Marquee and Select From
412, 260To1172, 1020. That's a circle of radius 380 around the sunburst's centre. - Choose Select → Feather…, set it to
26and click Apply. - Fill with pink .
- Add a layer and name it
-
Spray the halo's hard core
- Still on
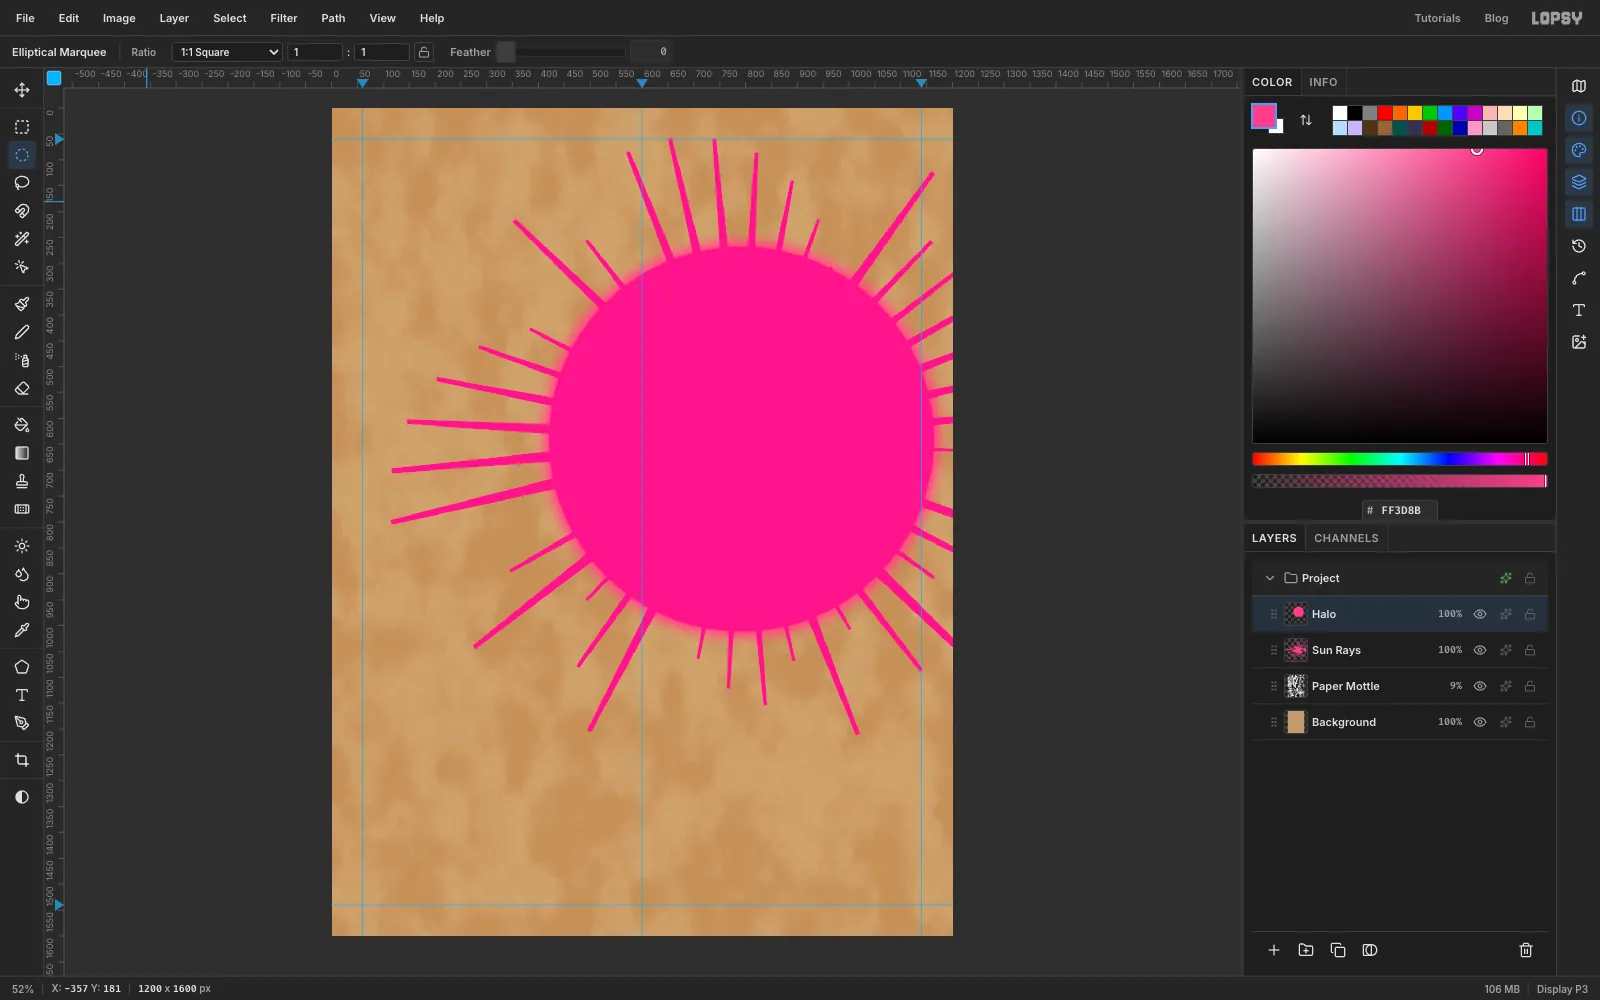
Halo, press Cmd+D, then Select From420, 268To1164, 1012with the Elliptical Marquee. That's radius 372, slightly smaller. - Fill with pink again and press Cmd+D.
The soft fringe now sits just outside a crisp edge, like real overspray.
- Still on
-
Drop in the portrait
Click the
Halorow so the photo lands above it. Drag the downloaded JPEG from your file browser onto the canvas. It arrives as a new layer at its own size, 698 × 1000, in the top-left corner, already selected with transform handles. Rename the layerPortrait.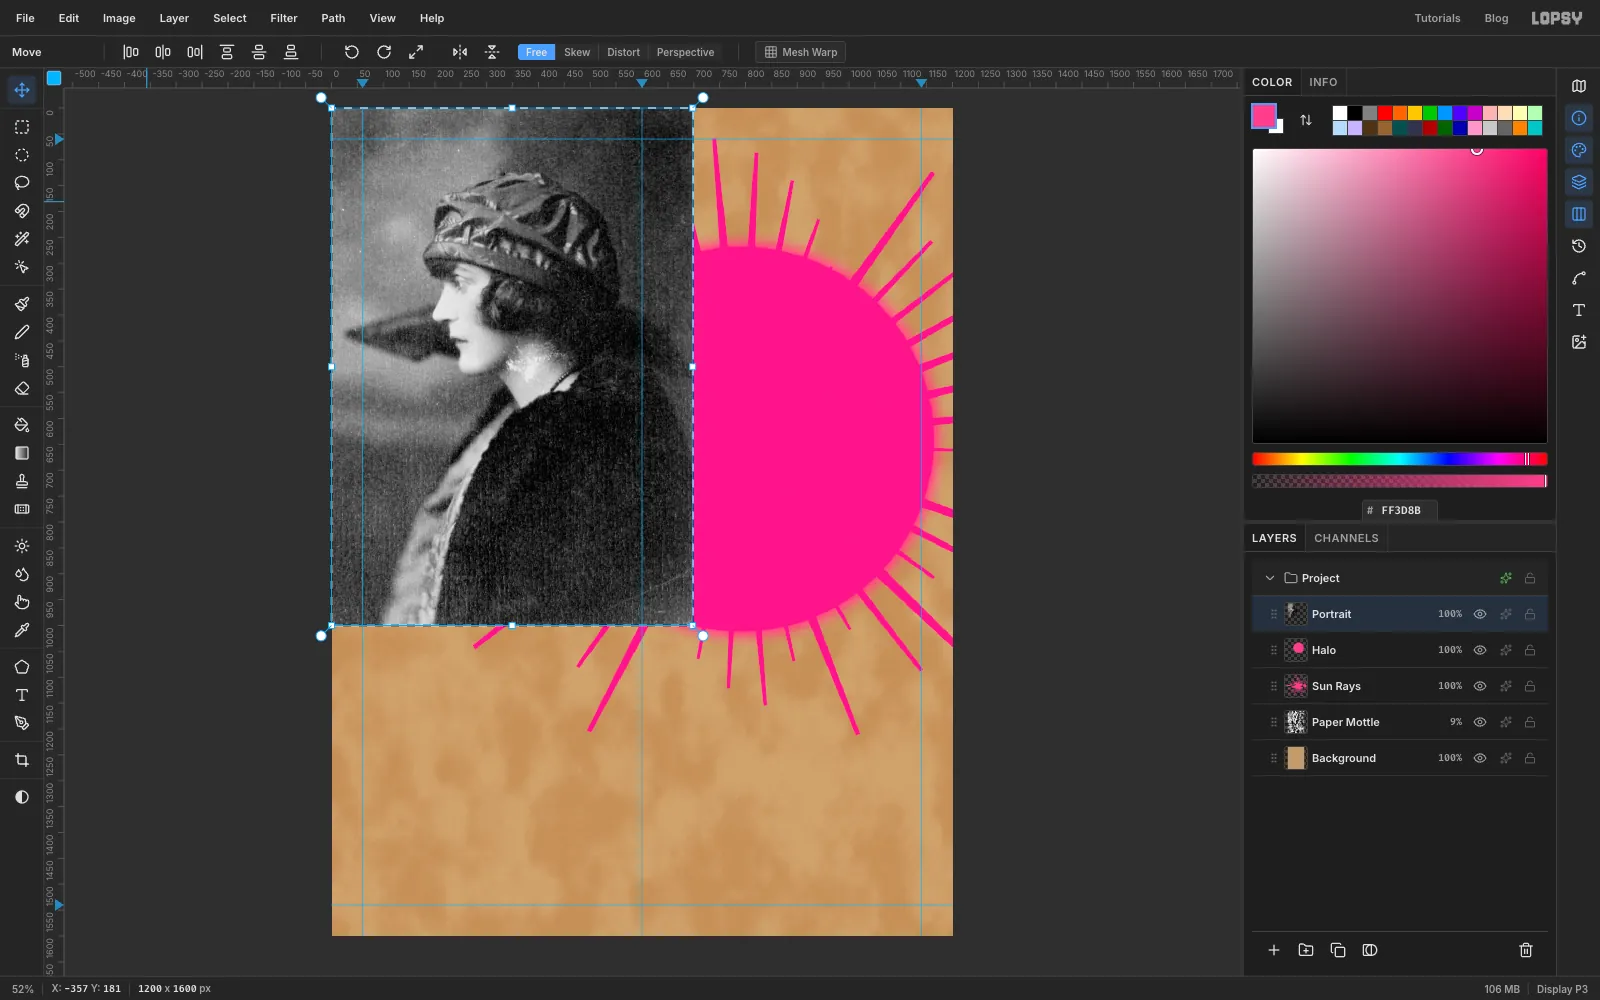
-
Scale and place the photo
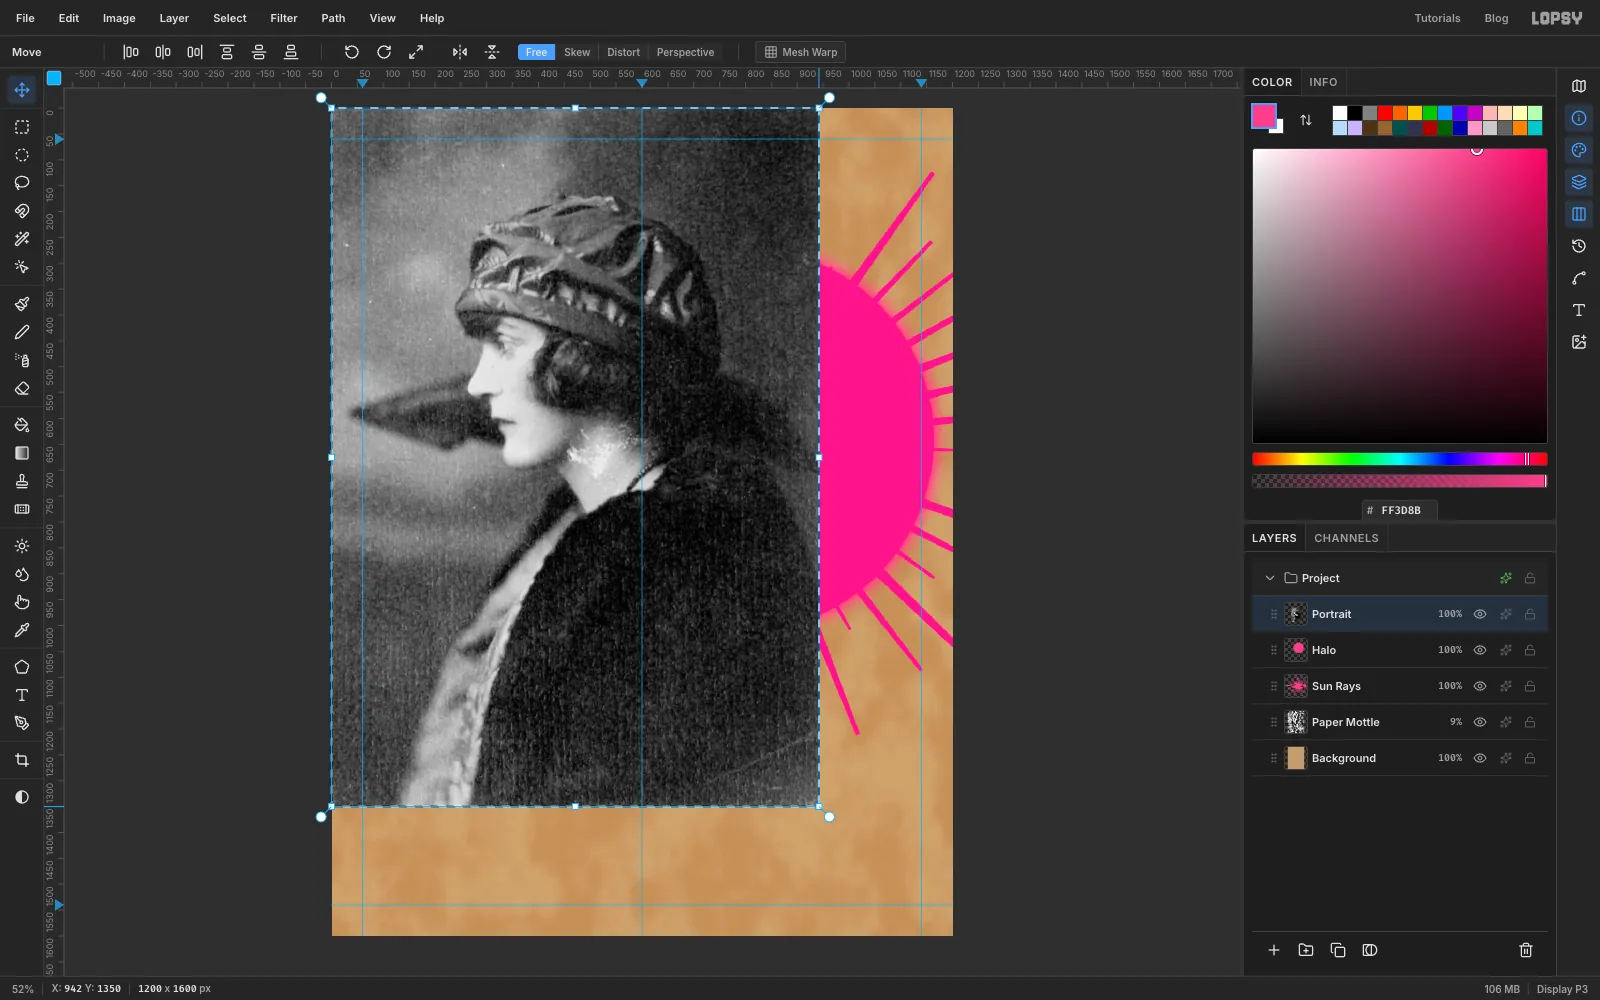
- With the Move tool, hold Cmd and drag the bottom-right corner handle down and right until the status bar reads about 942, 1350. That's 135% of the original size. Cmd keeps the proportions.
- Press Cmd+D to commit the scale.
- Drag the photo until its top-left corner sits at 270, 198. Use the arrow keys for the last few pixels.
Her nose should now sit at about 535, 735, just inside the left edge of the halo, and the turban's crown at about 783, 360. The photo runs a little off the right edge. That's fine.
-
Flatten the photo's grain
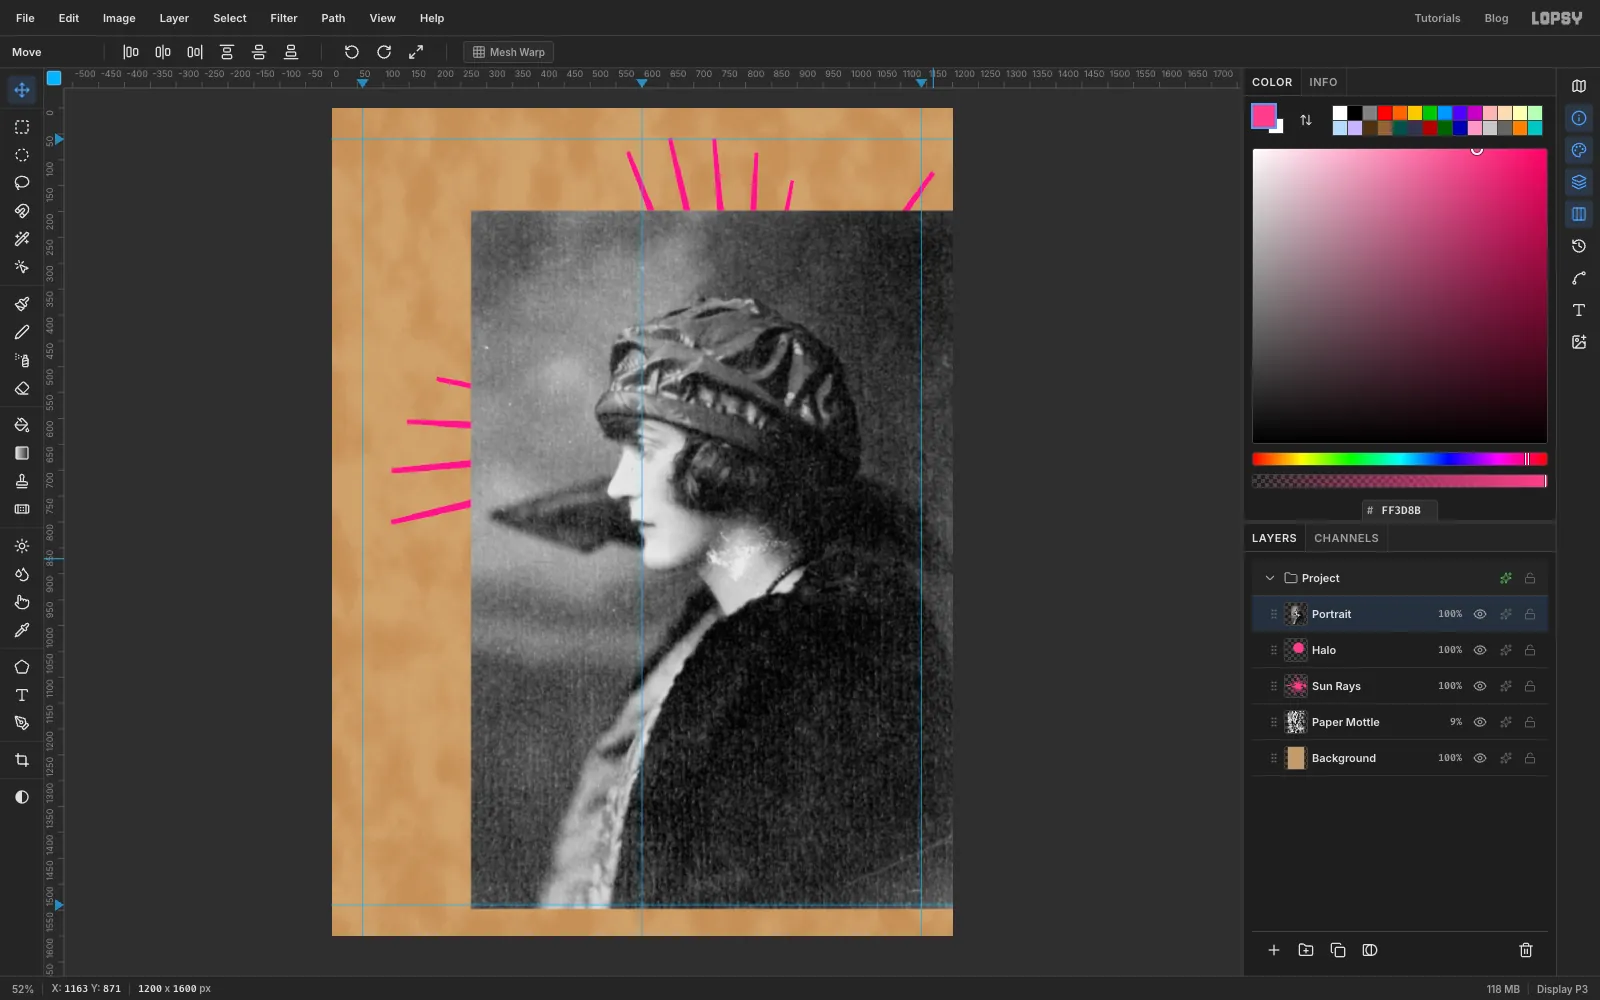
- Choose Filter → Desaturate. The photo is already black and white, but this removes the faint sepia tint.
- Choose Filter → Gaussian Blur… with Radius
3.
Threshold reacts to every speck of film grain. Blurring first gives you smooth shapes that look like they were cut with a knife.
-
Make three copies for the tone bands
- With
Portraitselected, choose Layer → Duplicate Layer and rename the copyShadows. - Click
Portraitagain, duplicate it, and rename that copyPink. - Click
Shadows, duplicate it, and rename the copyHighlights.
From top to bottom the stack is now
Highlights,Shadows,Pink,Portrait. Each copy lands exactly on top of its original.- Click
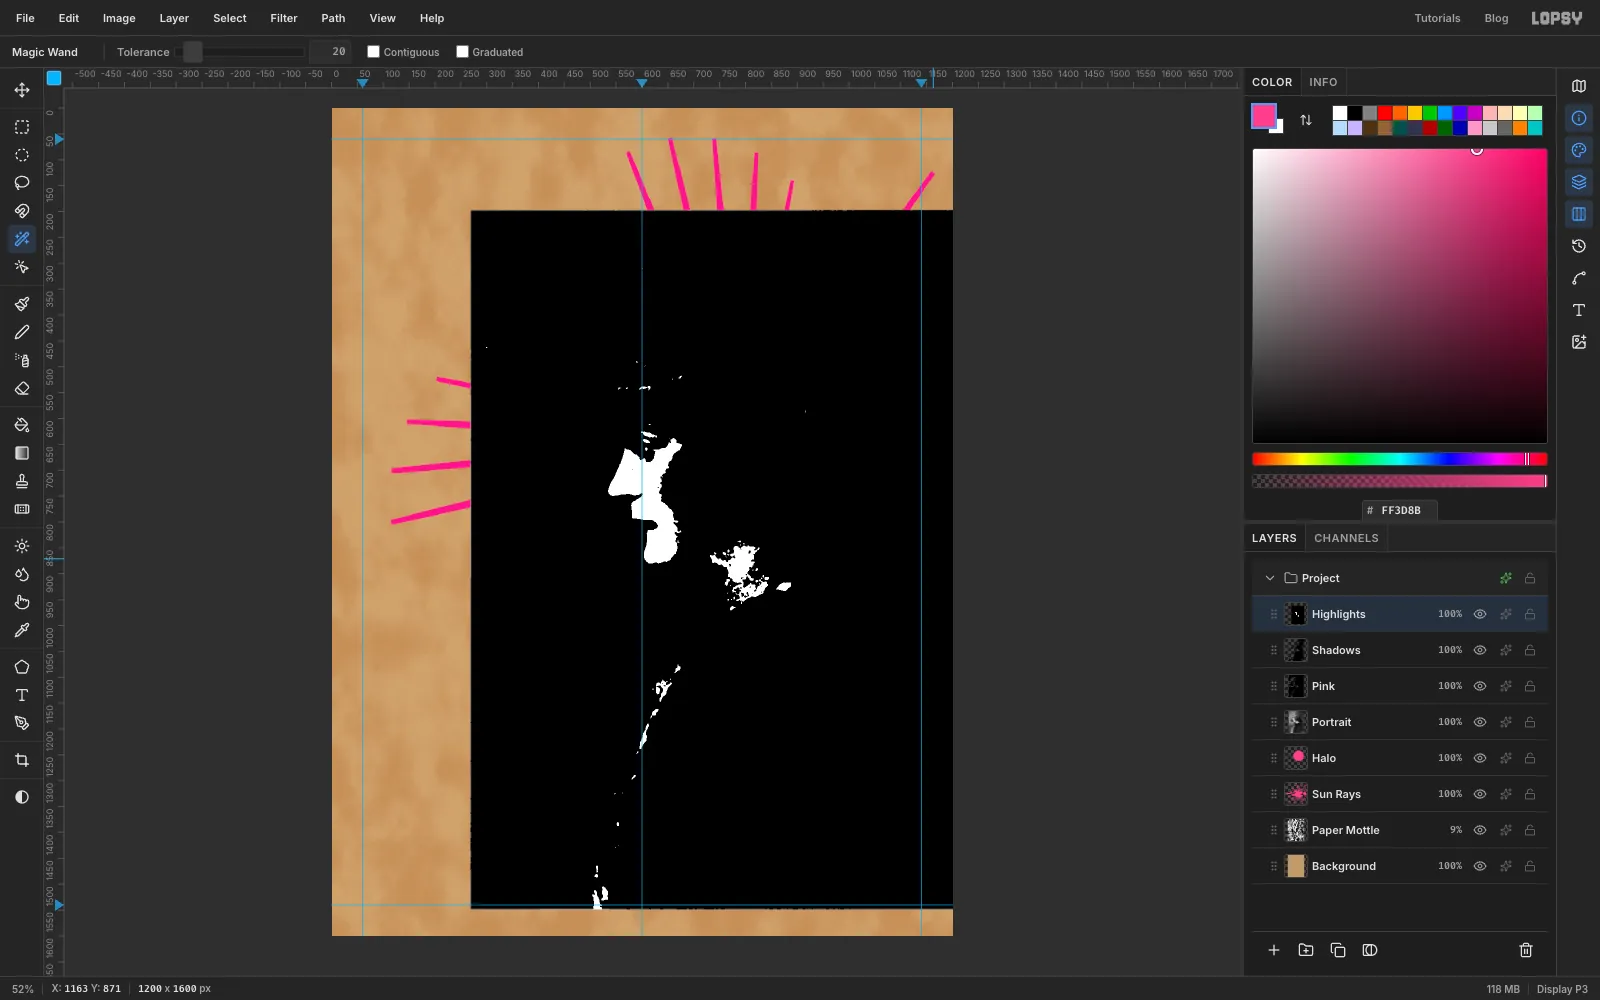
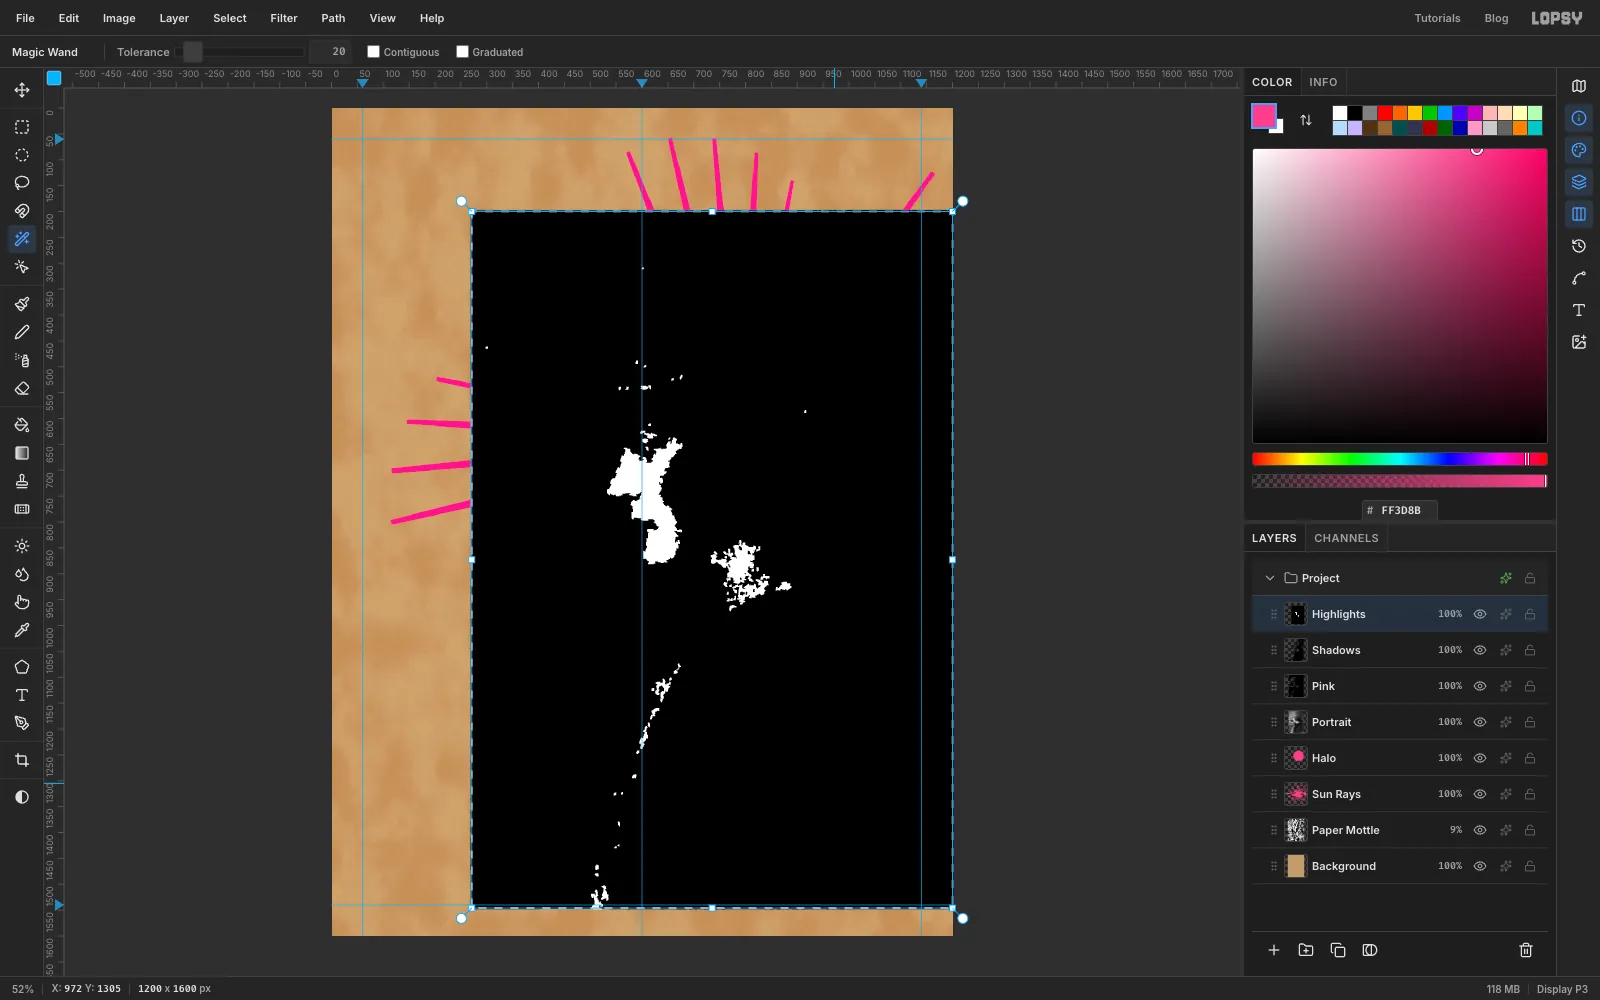
Highlightsand run Filter → Threshold… with Level205. Only the very brightest areas stay white: her cheek, neck and the lit edge of the collar.
- With
-
Keep only the highlights
- Pick the Magic Wand. In the options bar set Tolerance to
20and untick Contiguous, so one click selects that colour everywhere. - Click anywhere on the black coat, for example 972, 1305.
- Press Delete, then Cmd+D.
Only the white highlight shapes are left. Now do the same for the other two copies, keeping the dark side each time:
- Click
Shadows, run Threshold at Level60, then wand-click a white area such as her cheek (624, 792), press Delete and Cmd+D. - Click
Pink, run Threshold at Level140, then wand-click the cheek again, press Delete and Cmd+D.
- Pick the Magic Wand. In the options bar set Tolerance to
-
Ink each band
Each layer is still black or white. Give each one its ink:
- Click the
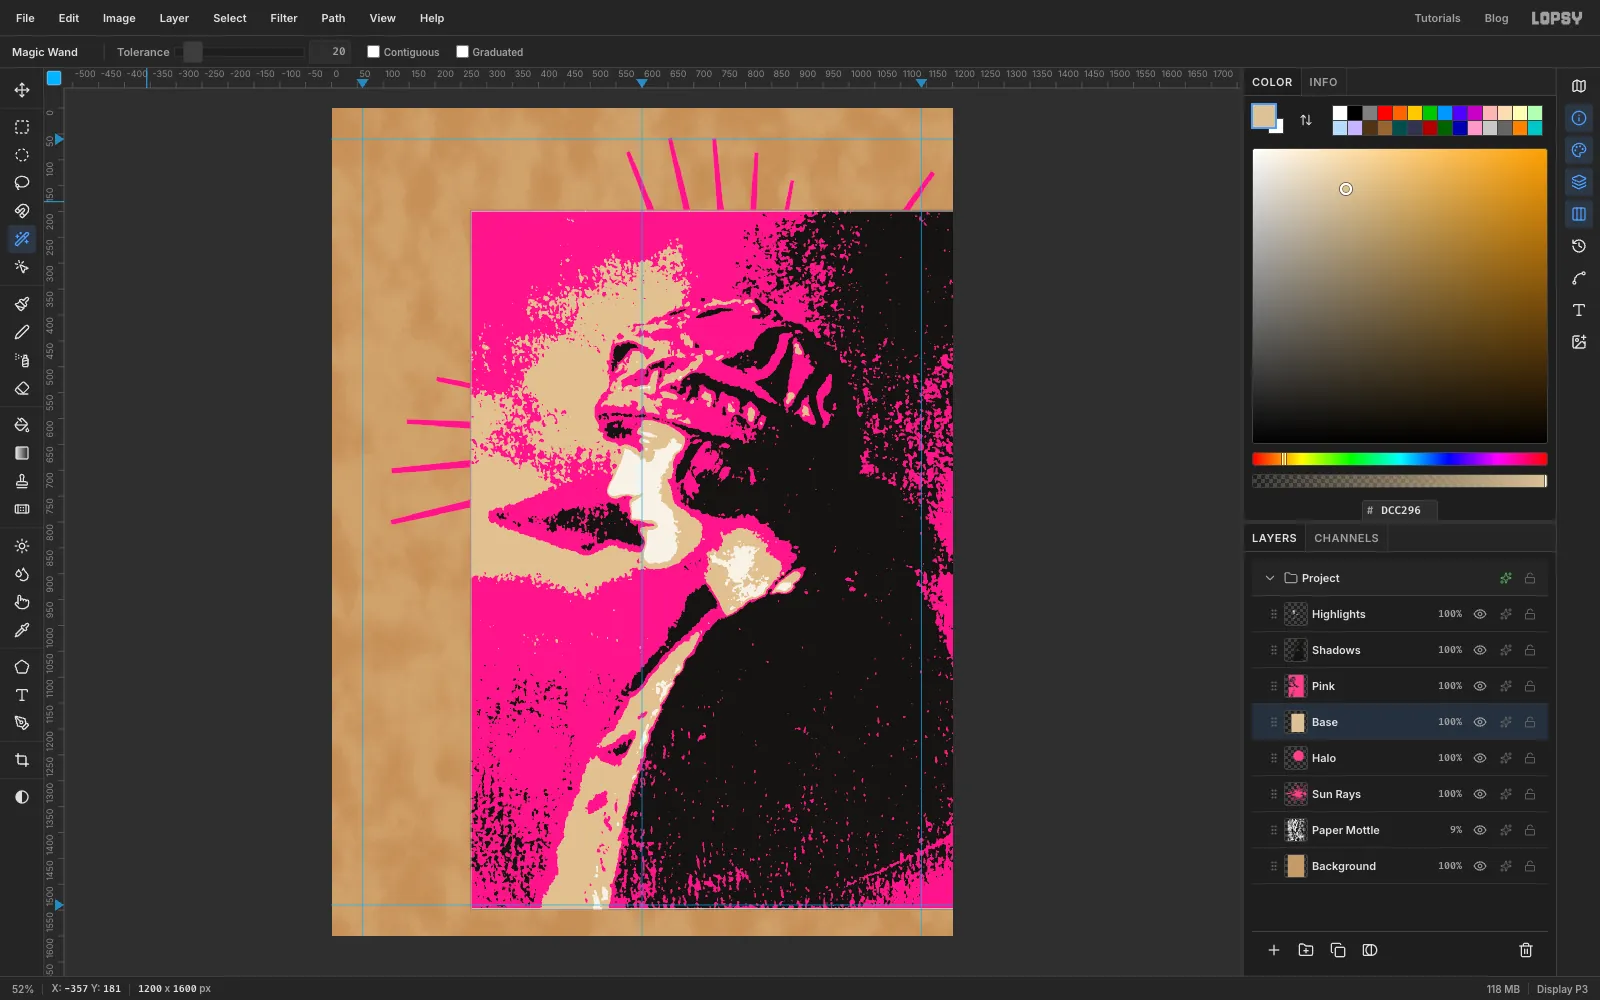
Pinkrow, then Cmd-click its thumbnail to select its pixels. Fill with and press Cmd+D. The fill always goes to the active layer, so click the row first each time. - Do the same for
Shadowswith and forHighlightswith . - Click
Portrait, rename itBase, Cmd-click its thumbnail and fill it with cream .
The whole photo rectangle is now a four-colour stencil, background and all. You'll cut out the figure next.
- Click the
-
Mask the figure in one go
If you cut each layer separately, their soft edges stack up and leave a pale halo around the figure. A group mask cuts all four layers along one edge.
- Click
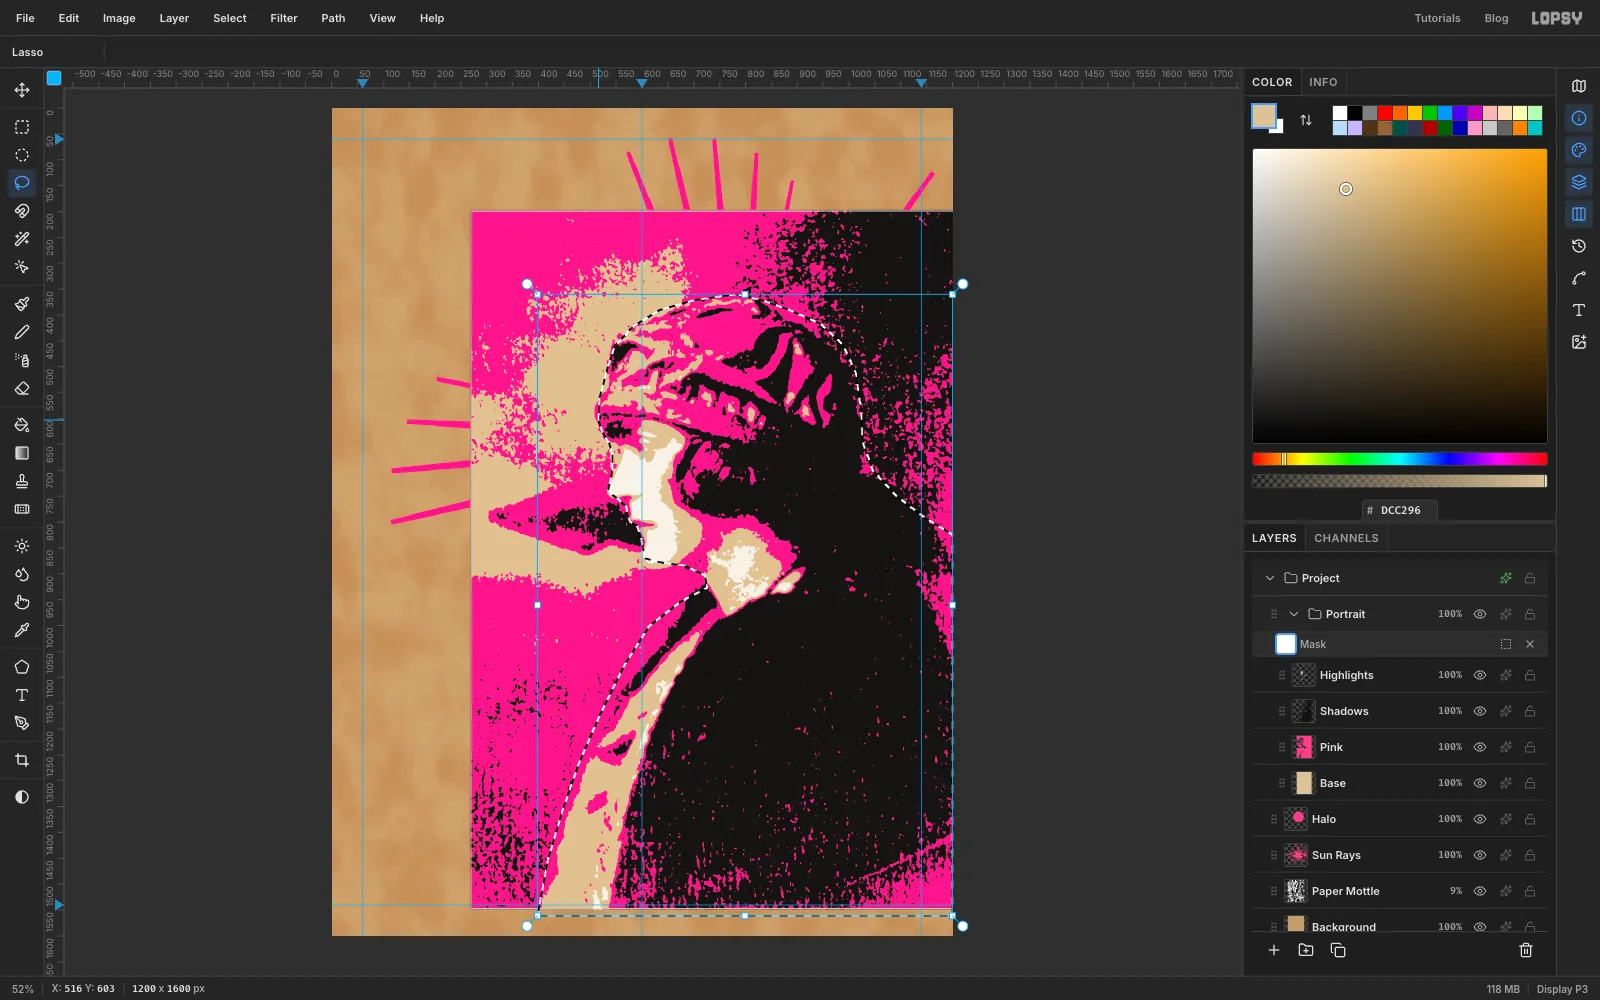
Base, then Shift-clickHighlights, and choose Layer → Group Layers. Rename the groupPortrait. - Click Add Mask at the bottom of the Layers panel, then click the mask's white thumbnail so you're editing the mask.
- Pick the Lasso and trace around her. Start at the front of the turban (about 516, 603). Go up over the top of the turban (783, 360) and down the back of her head to the canvas's right edge at about y 833. Continue down the right edge, across the bottom of the canvas, and up the left edge of her fur collar to the corner of her jaw (726, 927). Then trace her chin (605, 870), lips, nose tip (535, 735) and forehead back to where you started.
Leave out the dark fan-shaped shadow in front of her mouth. As a stencil it would turn into a black blob.
- Click
-
Fill outside the figure with black
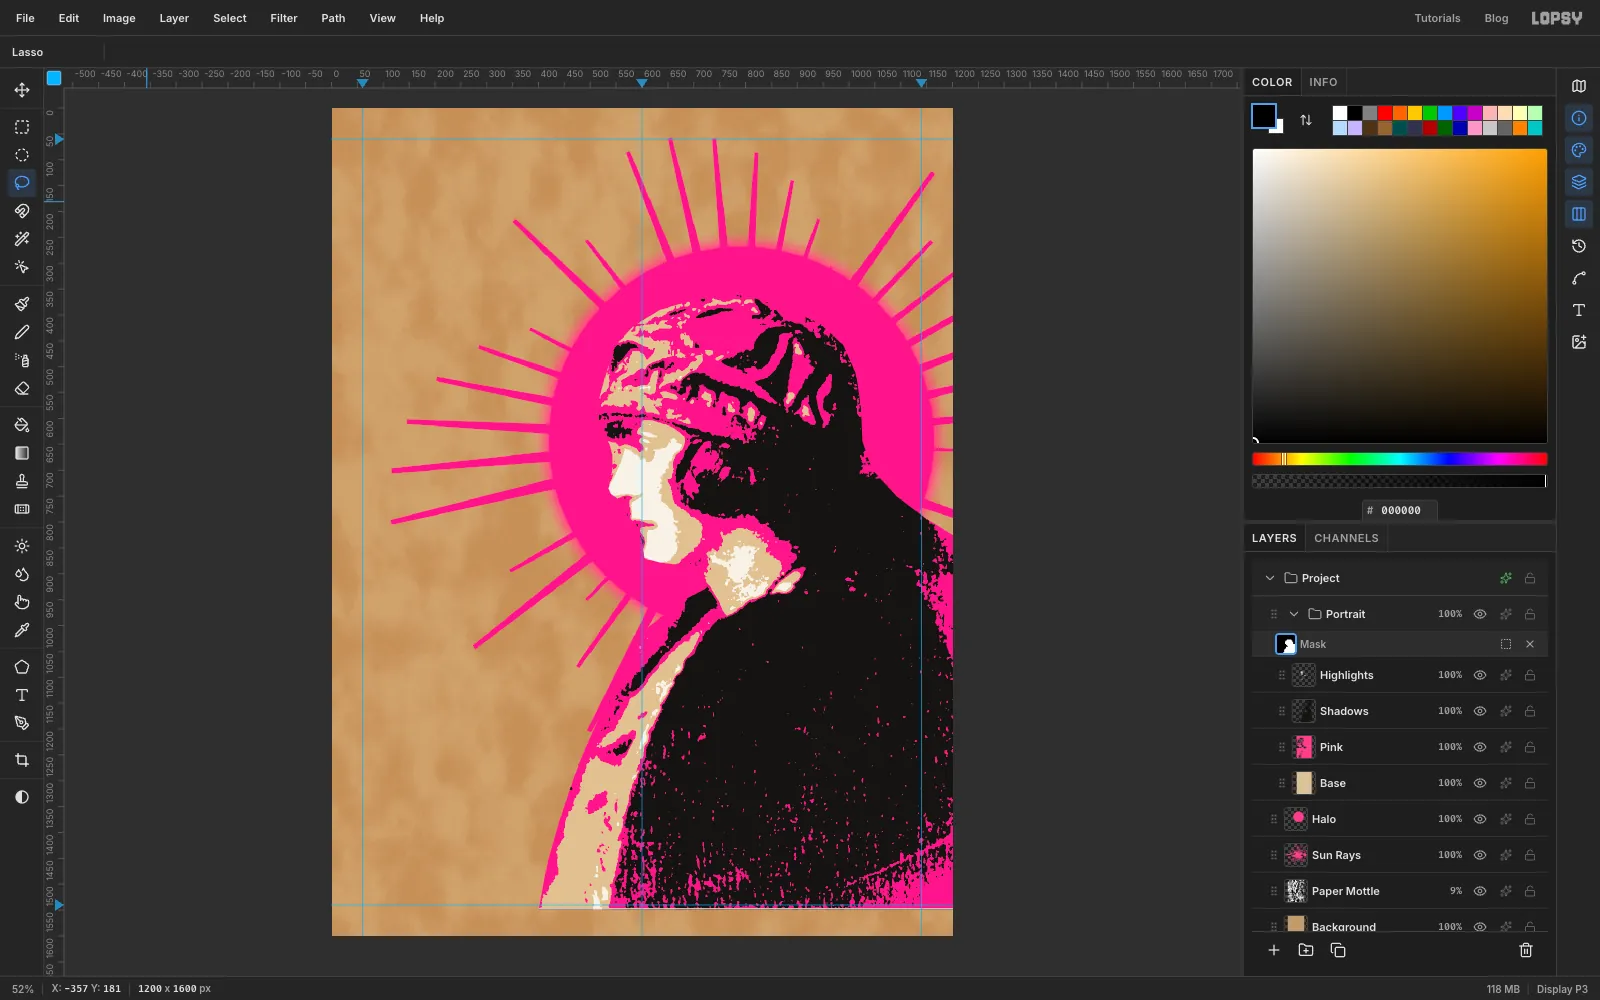
- Choose Select → Inverse.
- Set the foreground colour to pure black and choose Edit → Fill. On a mask, black hides.
- Press Cmd+D.
Use pure black, not the ink colour. A near-black like hides only 92%, and the photo would ghost through.
-
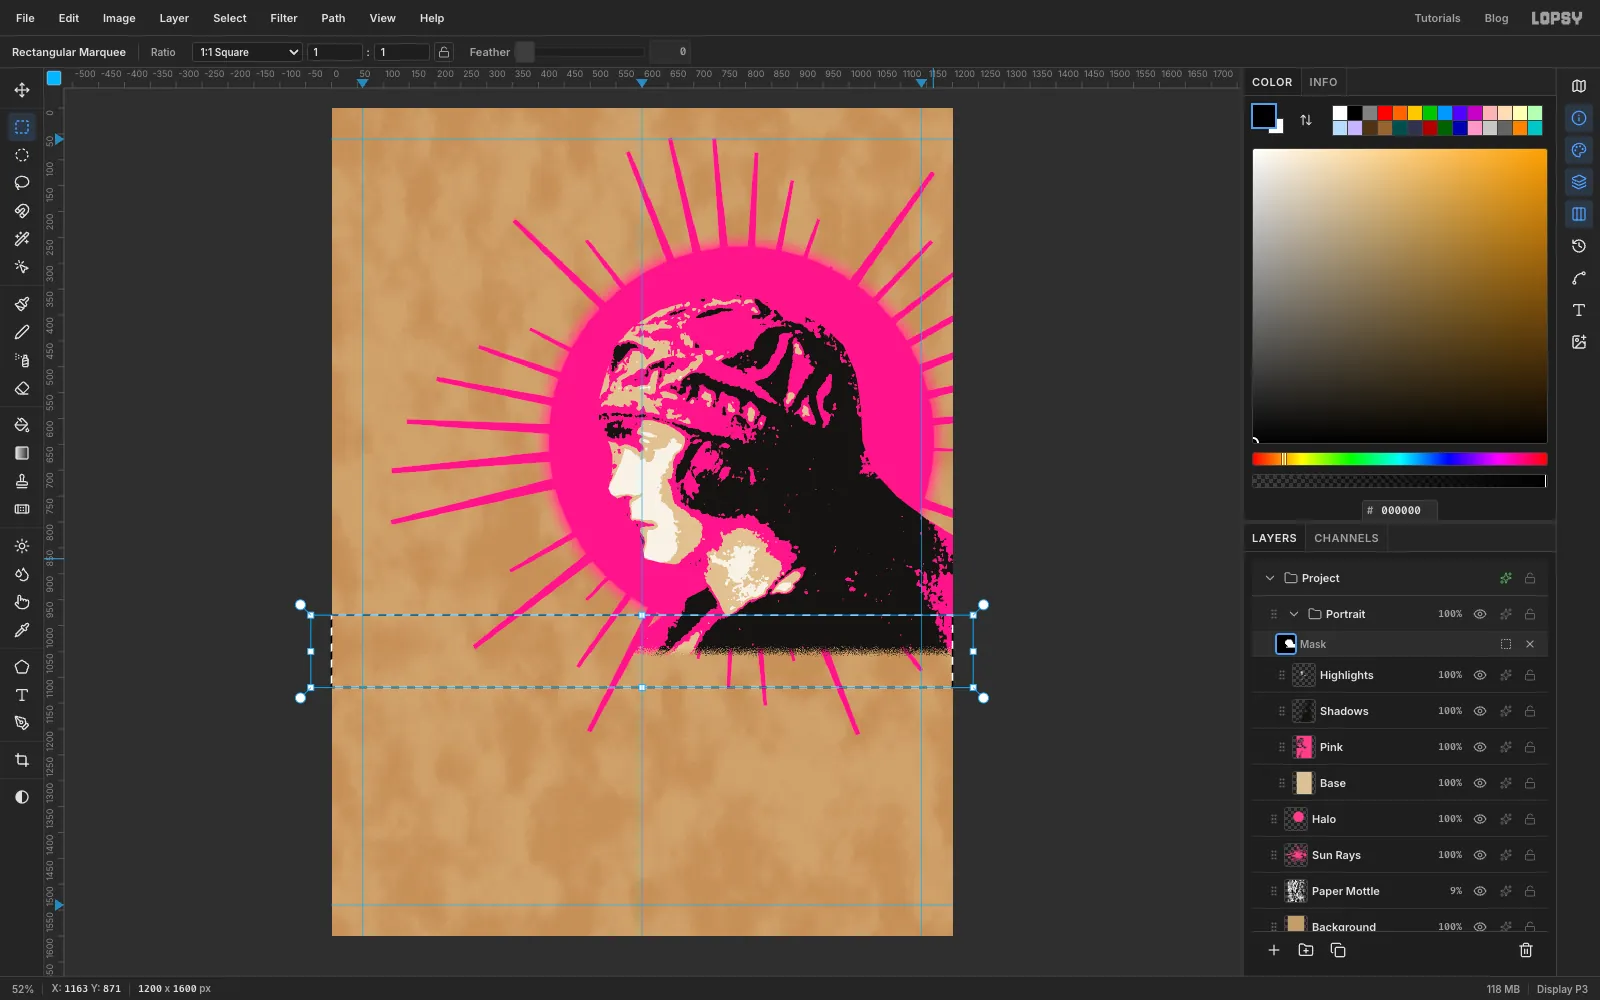
Cut a ragged edge across the chest
A soft gradient fade looks digital. A spray stencil ends in a hard cut with a speckled edge, where paint misted past the card.
- Still editing the mask, pick the Rectangular Marquee and drag from left of the canvas at y 1050 to past the bottom-right corner.
- Select → Feather…
40, then fill with black. The coat now fades out softly. - Press Cmd+D, then drag a new marquee across the full width from y 980 to 1120, covering just that soft band.
- Run Filter → Add Noise… with Amount
100and Mono, then Filter → Threshold… at128. Filters run on the mask, so the soft fade breaks up into hard speckles. - Press Cmd+D and click the
Halolayer's name to leave mask editing.
-
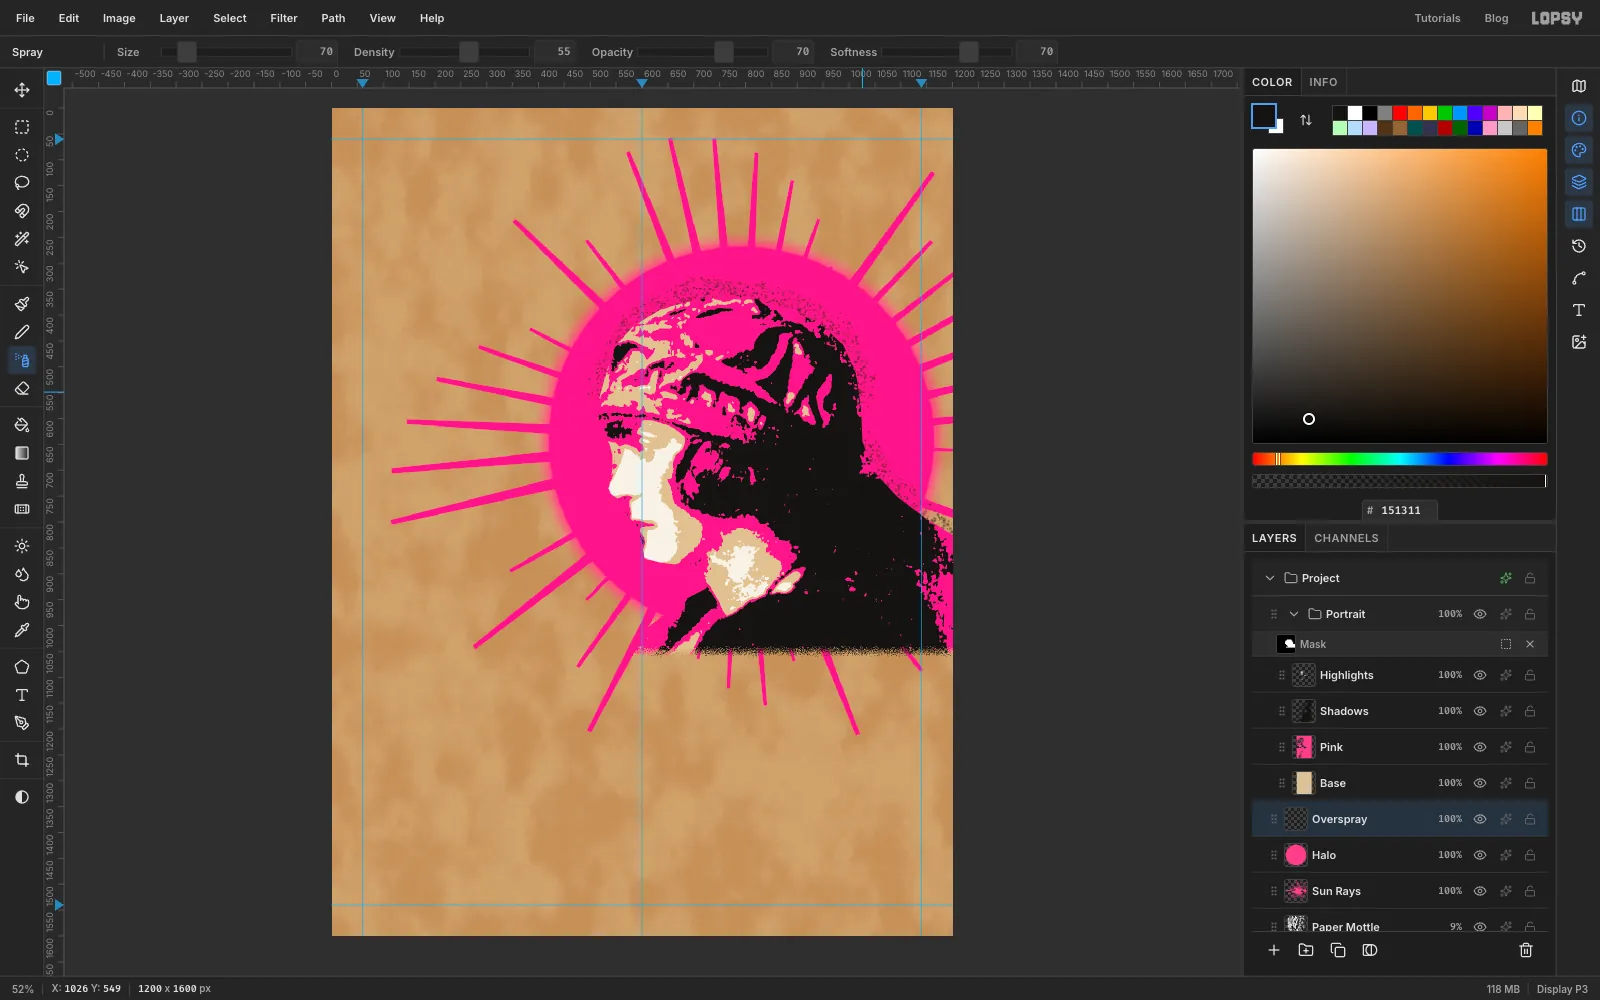
Mist the stencil's edges
- With
Haloselected, click Add Layer and rename itOverspray. It sits above the halo and below thePortraitgroup, so the mask doesn't hide it. - Pick the Spray tool and set Size
70, Density55and Opacity70. Set the foreground colour to . - Drag in big, quick sweeps just outside the back of her head and coat, then over the top of the turban.
Small, slow drags only spray at the start, so move the mouse in long strokes.
- With
-
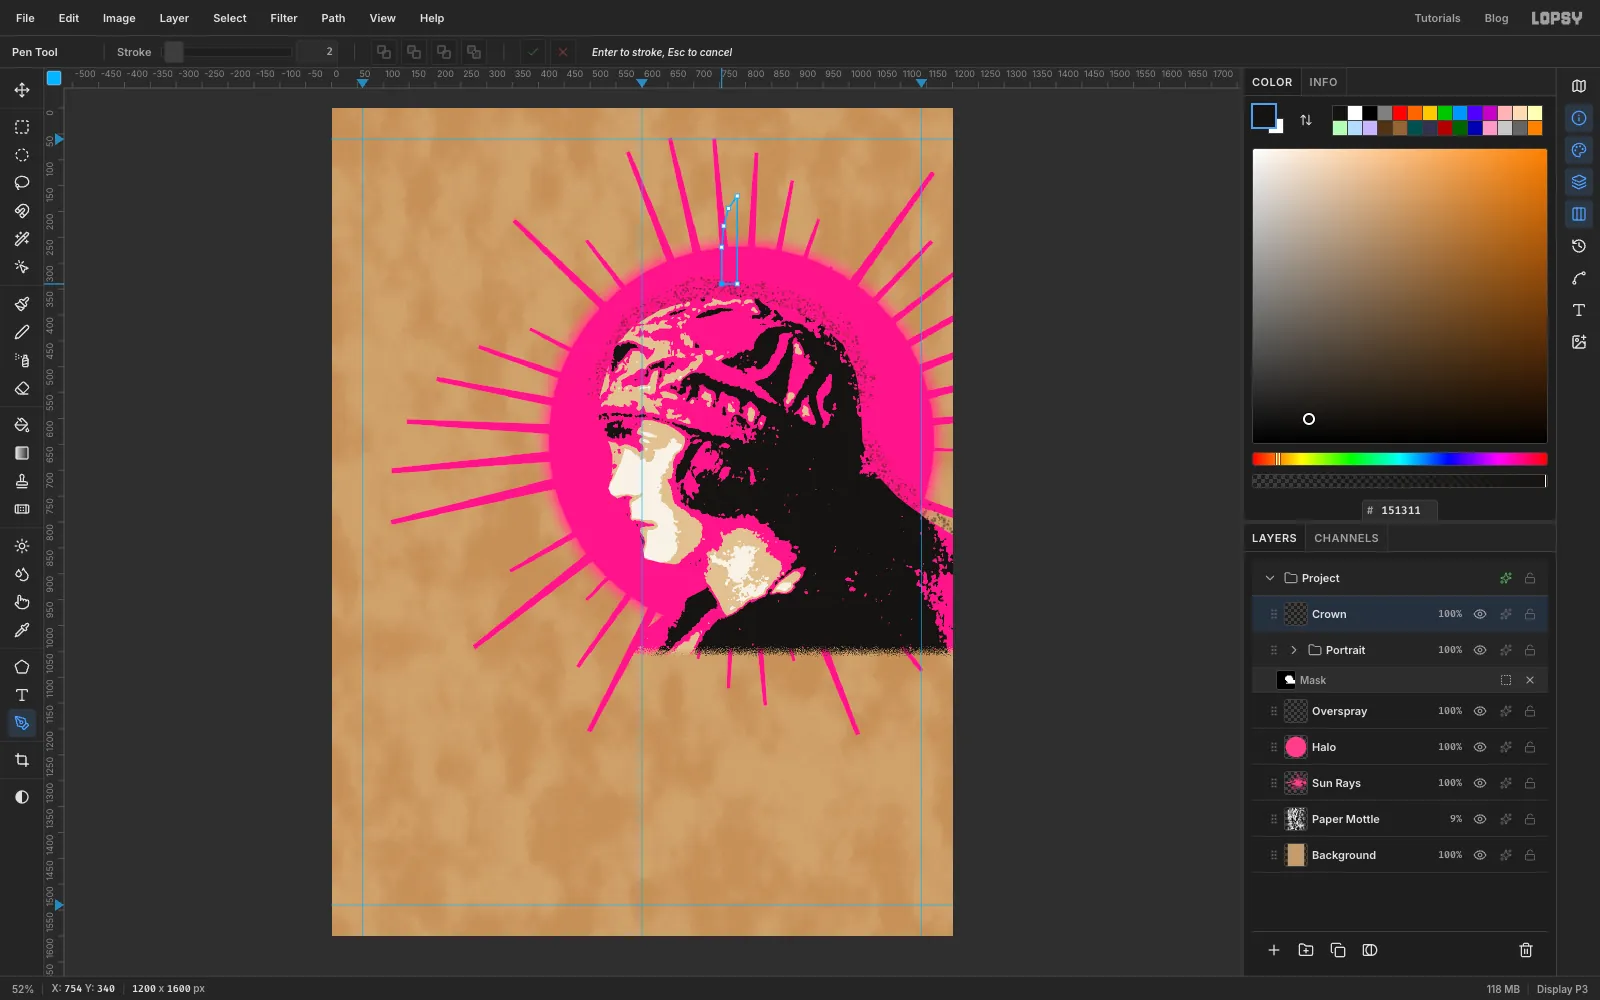
Draw one knife blade with the Pen
The crown is made of five blades. You draw one, then copy it.
- Click the arrow on the
Portraitgroup to collapse it, then click the group's row and click Add Layer. Rename the new layerCrown. It sits above the group. - Pick the Pen tool. Click these corners in order, then click the first one again to close the path: 754, 340 → 754, 269 → 758, 228 → 767, 194 → 784, 170 → 784, 340.
The right side is the straight spine, and the left side curves up to the point like the edge of a craft-knife blade.
- Click the arrow on the
-
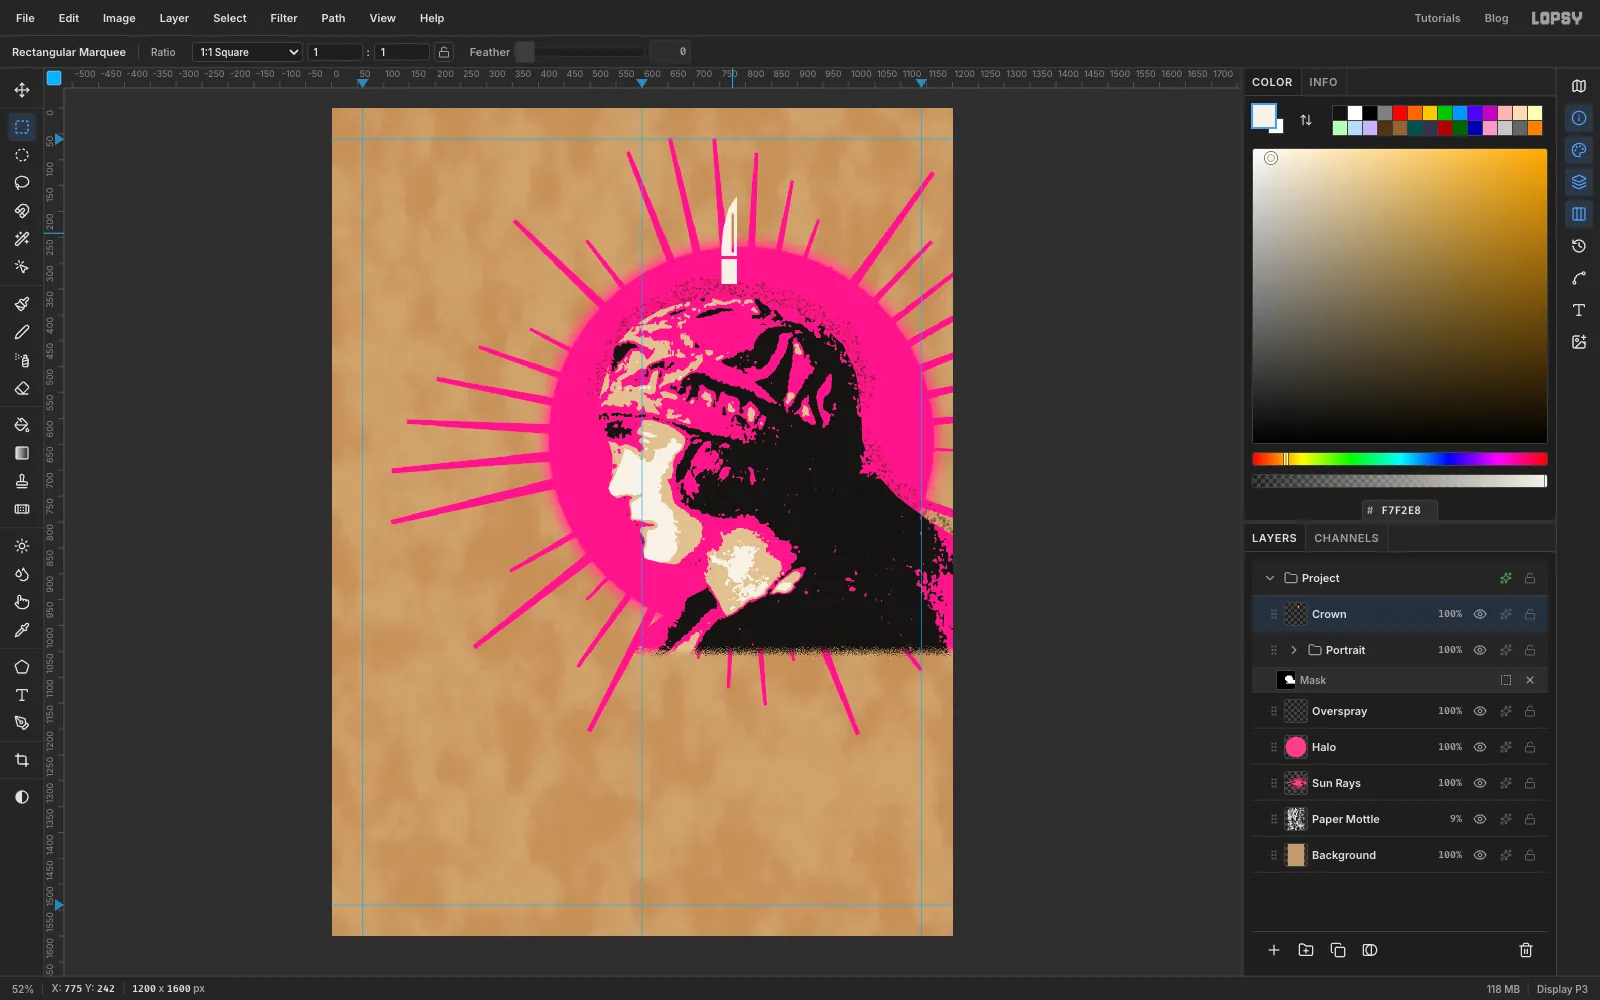
Fill the blade and cut its bridges
- In the Paths panel, click Path to Selection, then Delete Path.
- Fill with off-white and press Cmd+D.
- Real stencils need bridges, thin strips that hold the cut-out pieces in place. Pick the Rectangular Marquee, Select From
750, 286To790, 292, then press Delete and Cmd+D. That's a tie across the hilt. - Select From
773, 204To778, 279, then press Delete and Cmd+D. That's a slot up the middle of the blade.
-
Copy and shrink a blade
- Draw a marquee around the blade with a couple of pixels to spare and press Cmd+C, then Cmd+V. The copy pastes in place on a new layer above
Crown, already selected, and Lopsy switches to the Move tool. Rename the layerBlade R1. - Hold Cmd and drag the bottom-right handle up and left until the status bar reads about 779, 313. The blade is now about 84% of its size, roughly 143 px tall.
- Press Cmd+D.
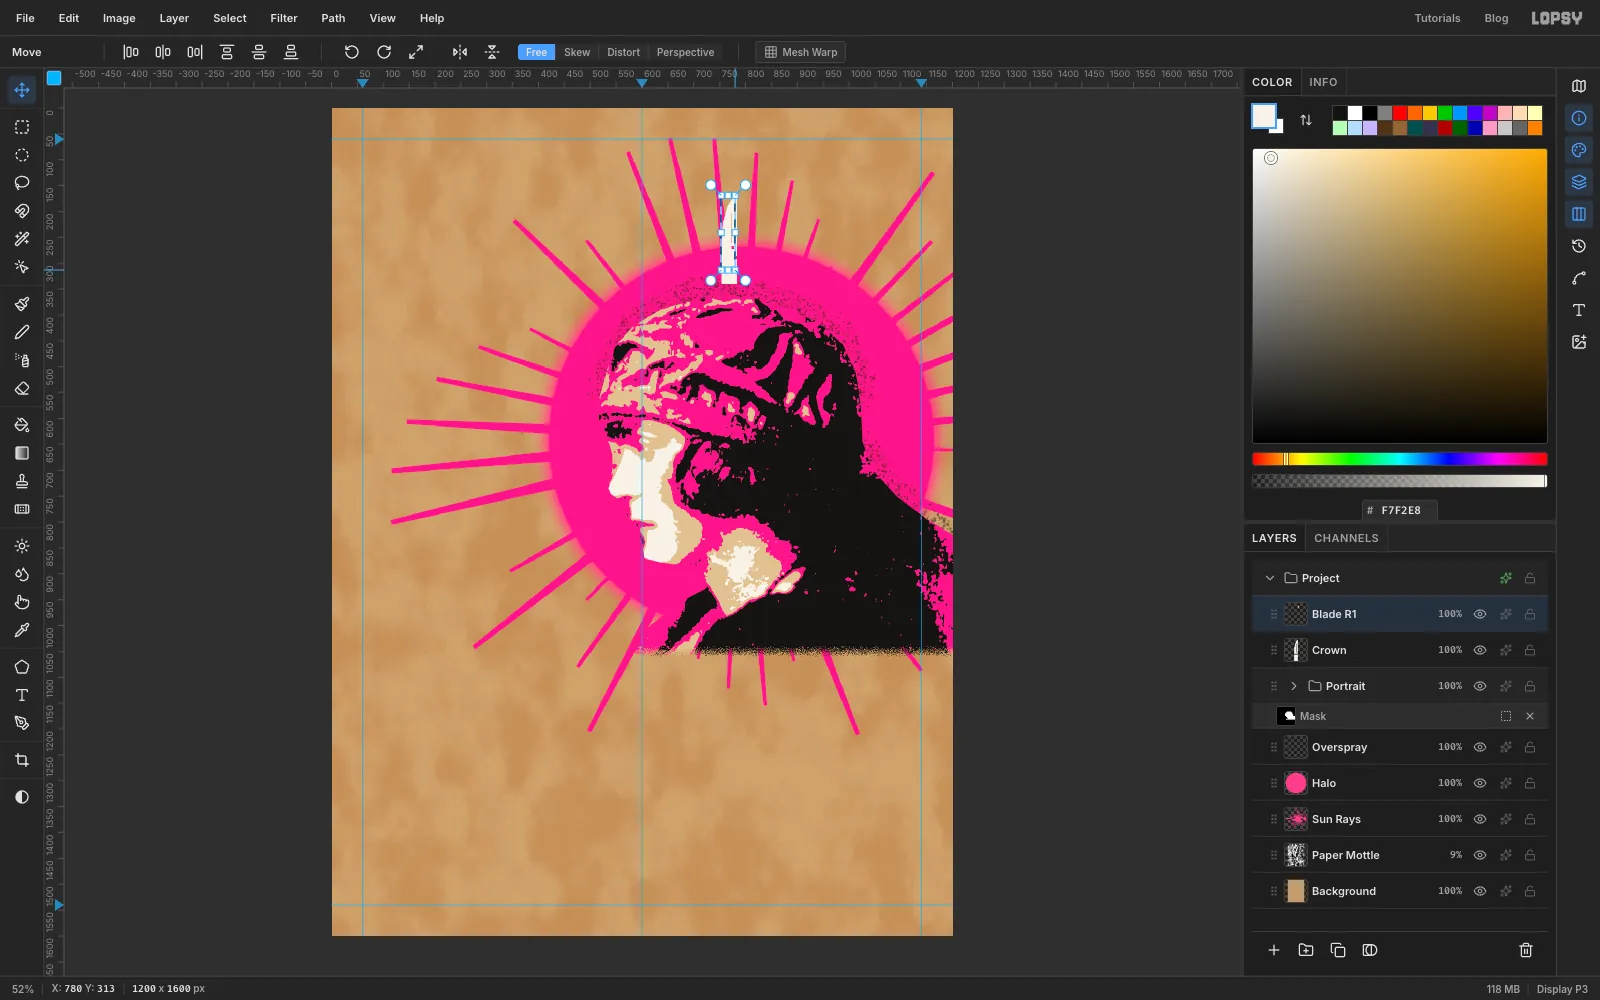
- Draw a marquee around the blade with a couple of pixels to spare and press Cmd+C, then Cmd+V. The copy pastes in place on a new layer above
-
Fan the blade out
- With the Rectangular Marquee, draw a marquee around
Blade R1again. Switch to the Move tool, hold Cmd and drag the round rotation handle outside a corner one snap clockwise. That's 15°. Press Cmd+D. - Drag the blade so the middle of its base sits at 832, 346, just right of the first blade.
Now make the other three the same way. Each time, click
Crown, draw a marquee around its blade, press Cmd+C and Cmd+V, rename the copy, then shrink it, turn it and move it:Blade L1: shrink to about 84%, turn one snap anticlockwise, base at 708, 346Blade R2: shrink to about 66% (corner at about 775, 285), turn two snaps (30°) clockwise, base at 892, 346Blade L2: shrink to about 66%, turn two snaps anticlockwise, base at 648, 346
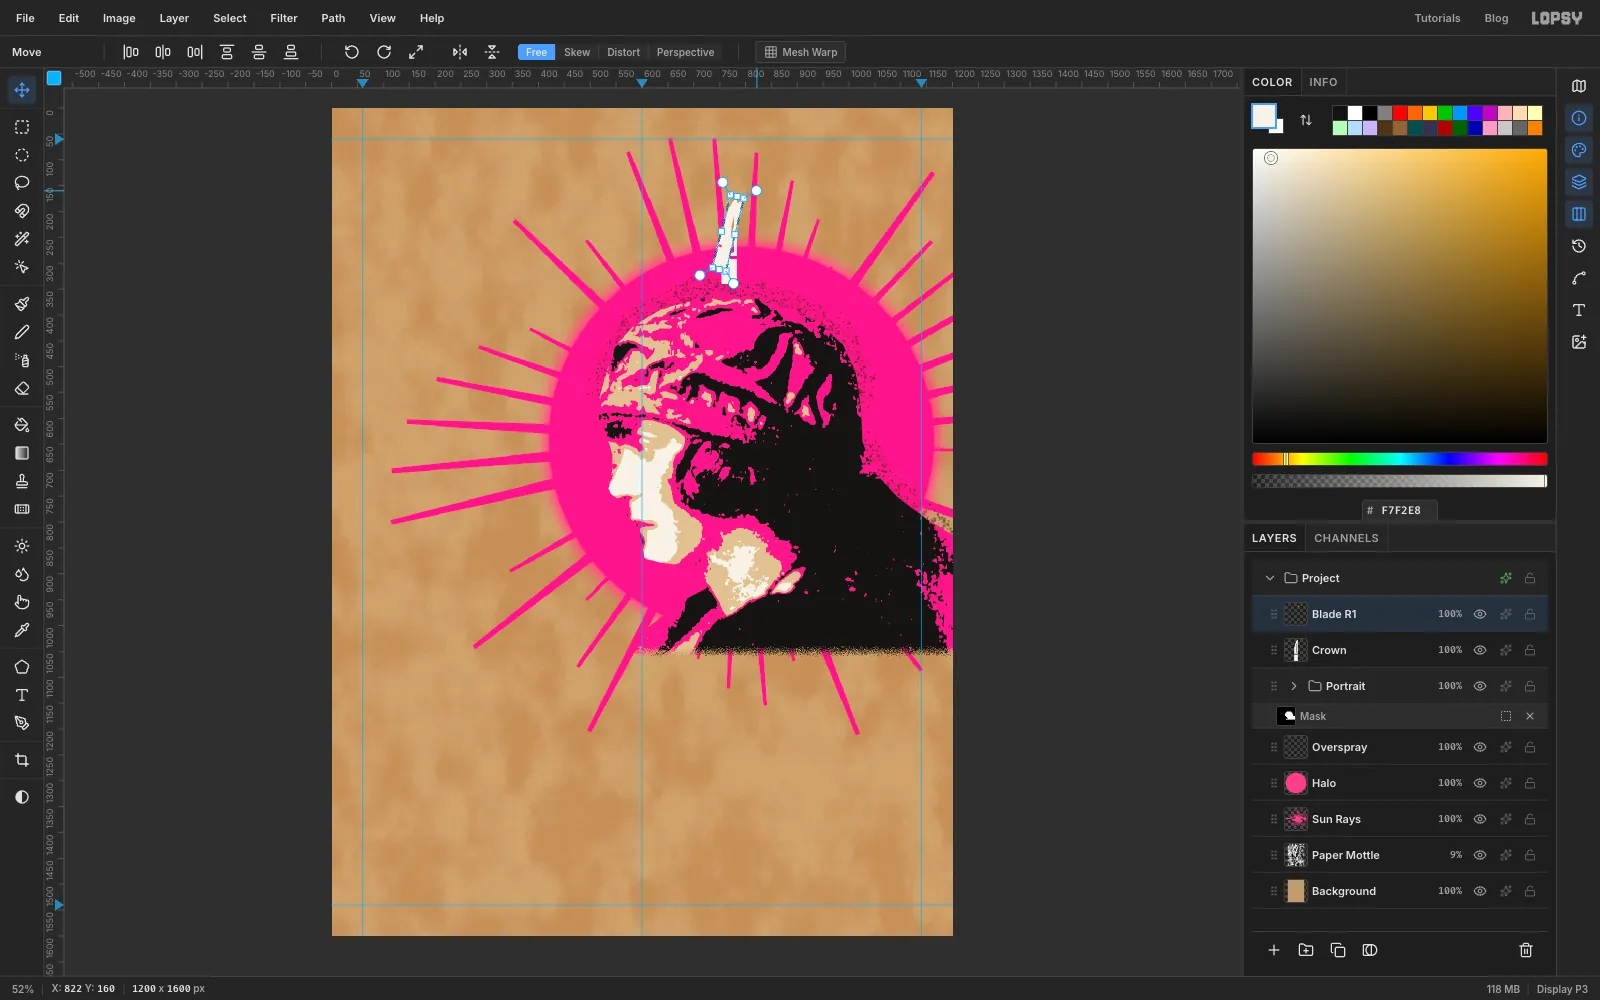
- With the Rectangular Marquee, draw a marquee around
-
Check the fan of blades
The blades should spread like the points of a crown, with their bases along y 346, the tallest in the middle and the shortest at the ends. If one is off, click its layer and nudge it with the arrow keys before you merge them.
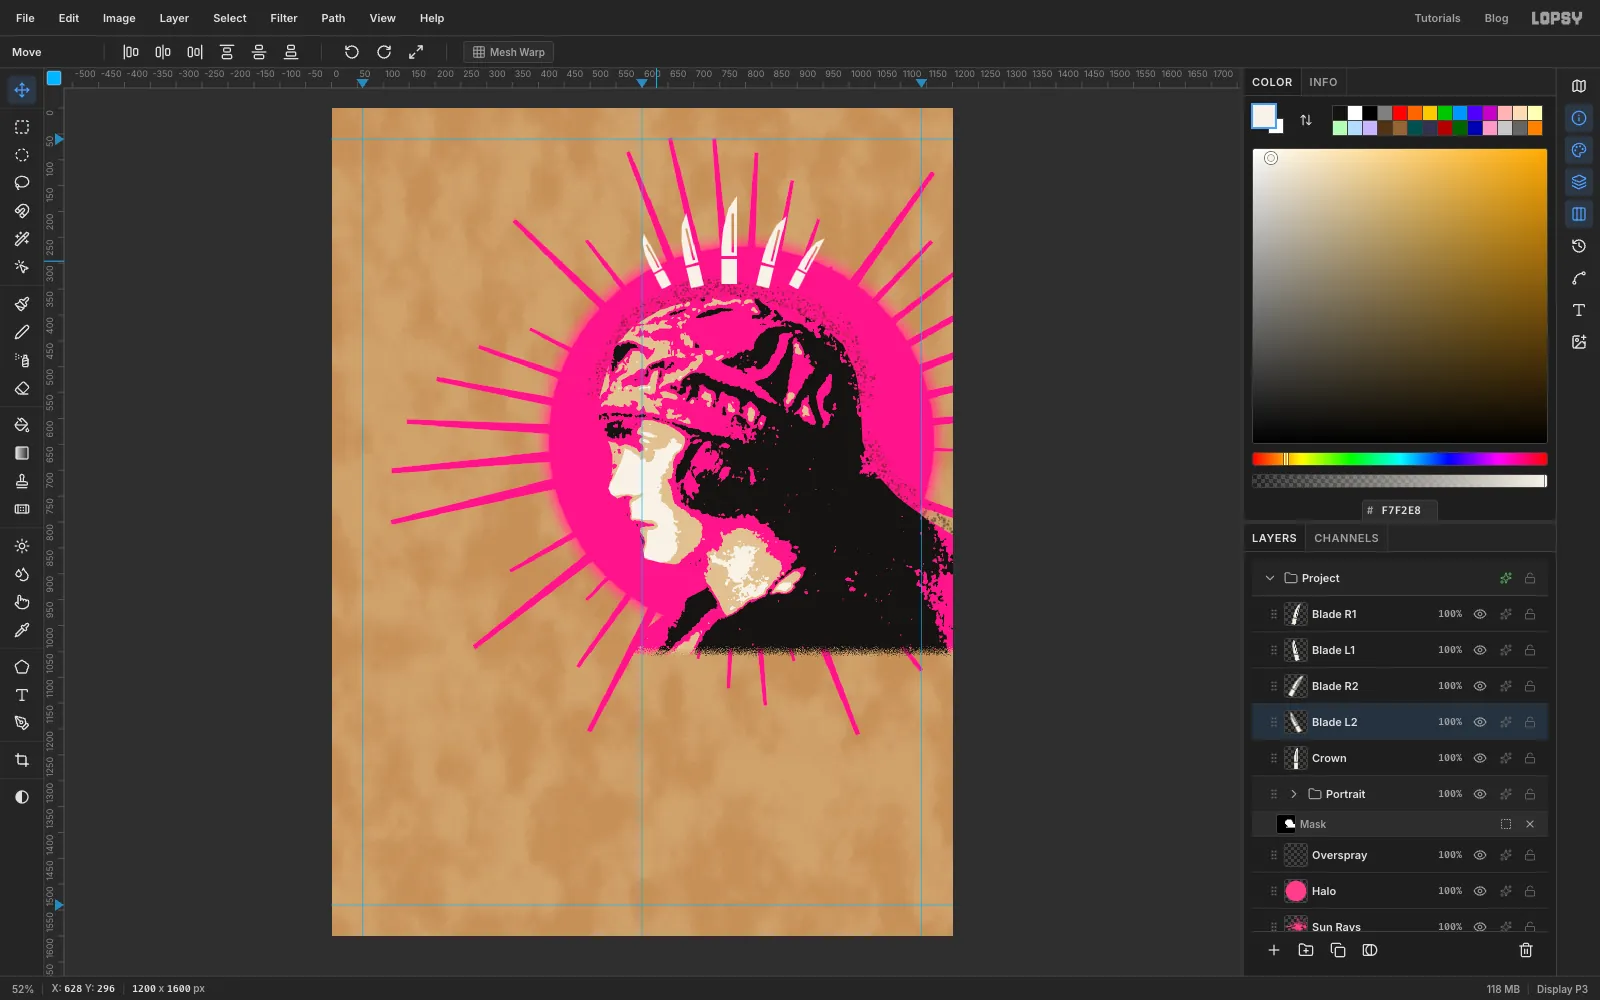
-
Add the crown band
- Click
Blade L2, add a layer and name itBand. - Pick the Rectangular Marquee, Select From
628, 342To912, 386, fill with and press Cmd+D. - Set the foreground to pink. With the Elliptical Marquee, Select From
689, 353To711, 375and choose Edit → Fill, then press Cmd+D. Do the same for759, 353to781, 375and829, 353to851, 375. - Switch back to the Rectangular Marquee to cut two ties. Select From
733, 342To737, 386and press Delete and Cmd+D, then do the same from803, 342to807, 386.
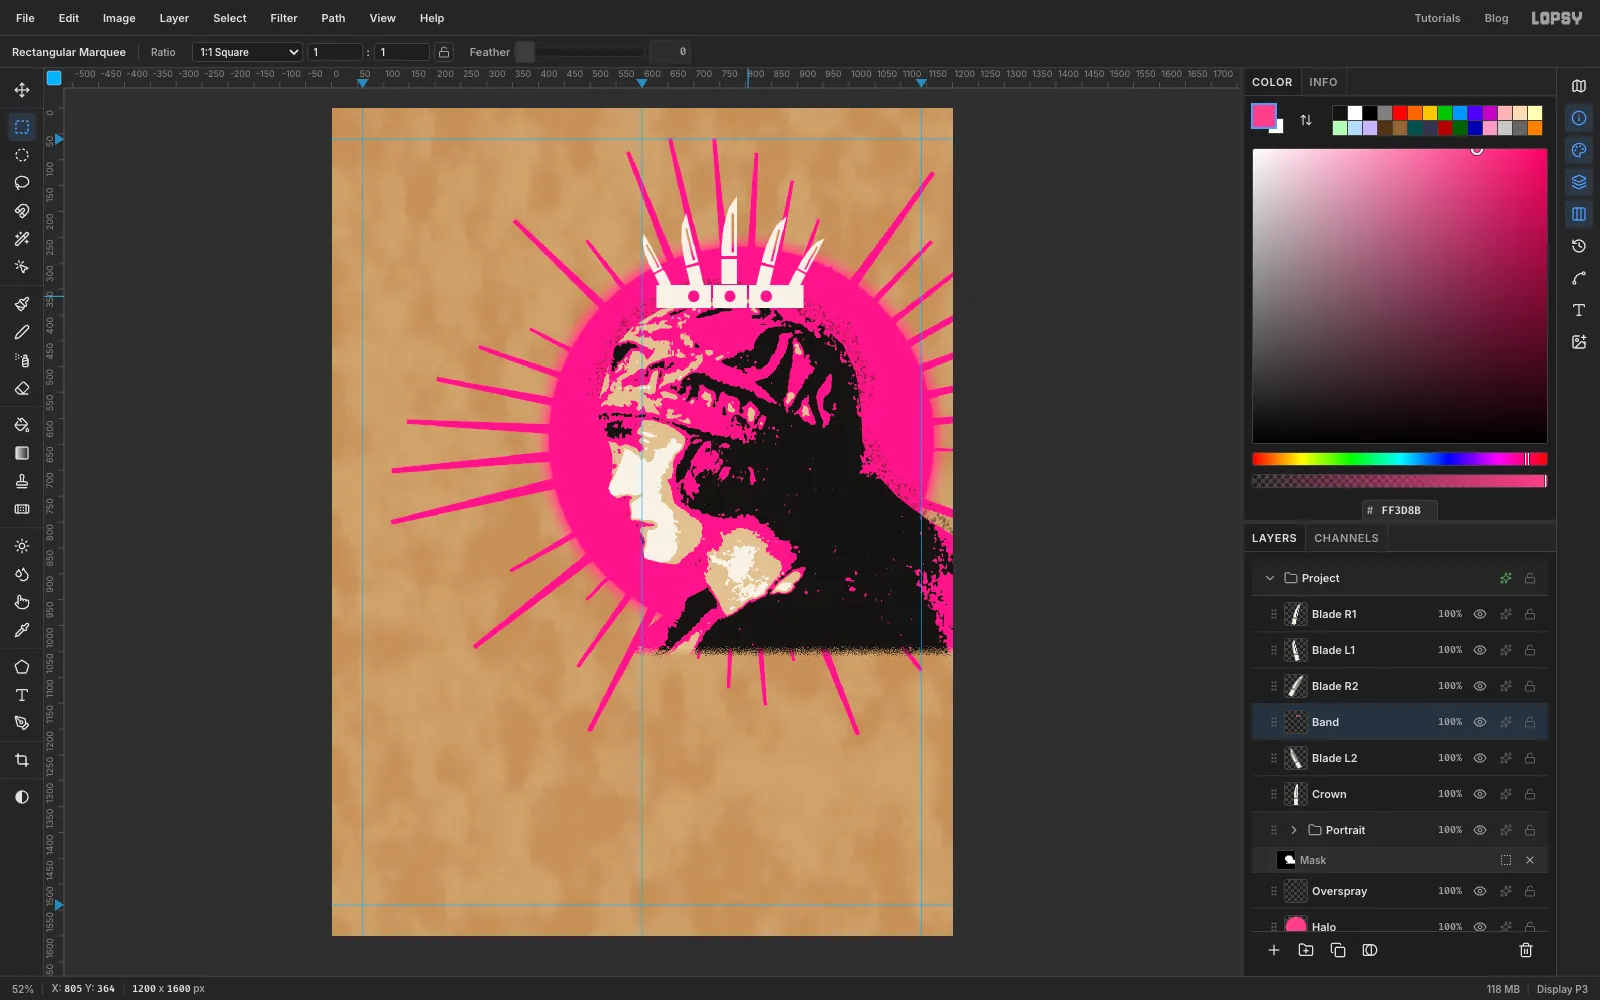
- Click
-
Merge and tilt the crown
- Click
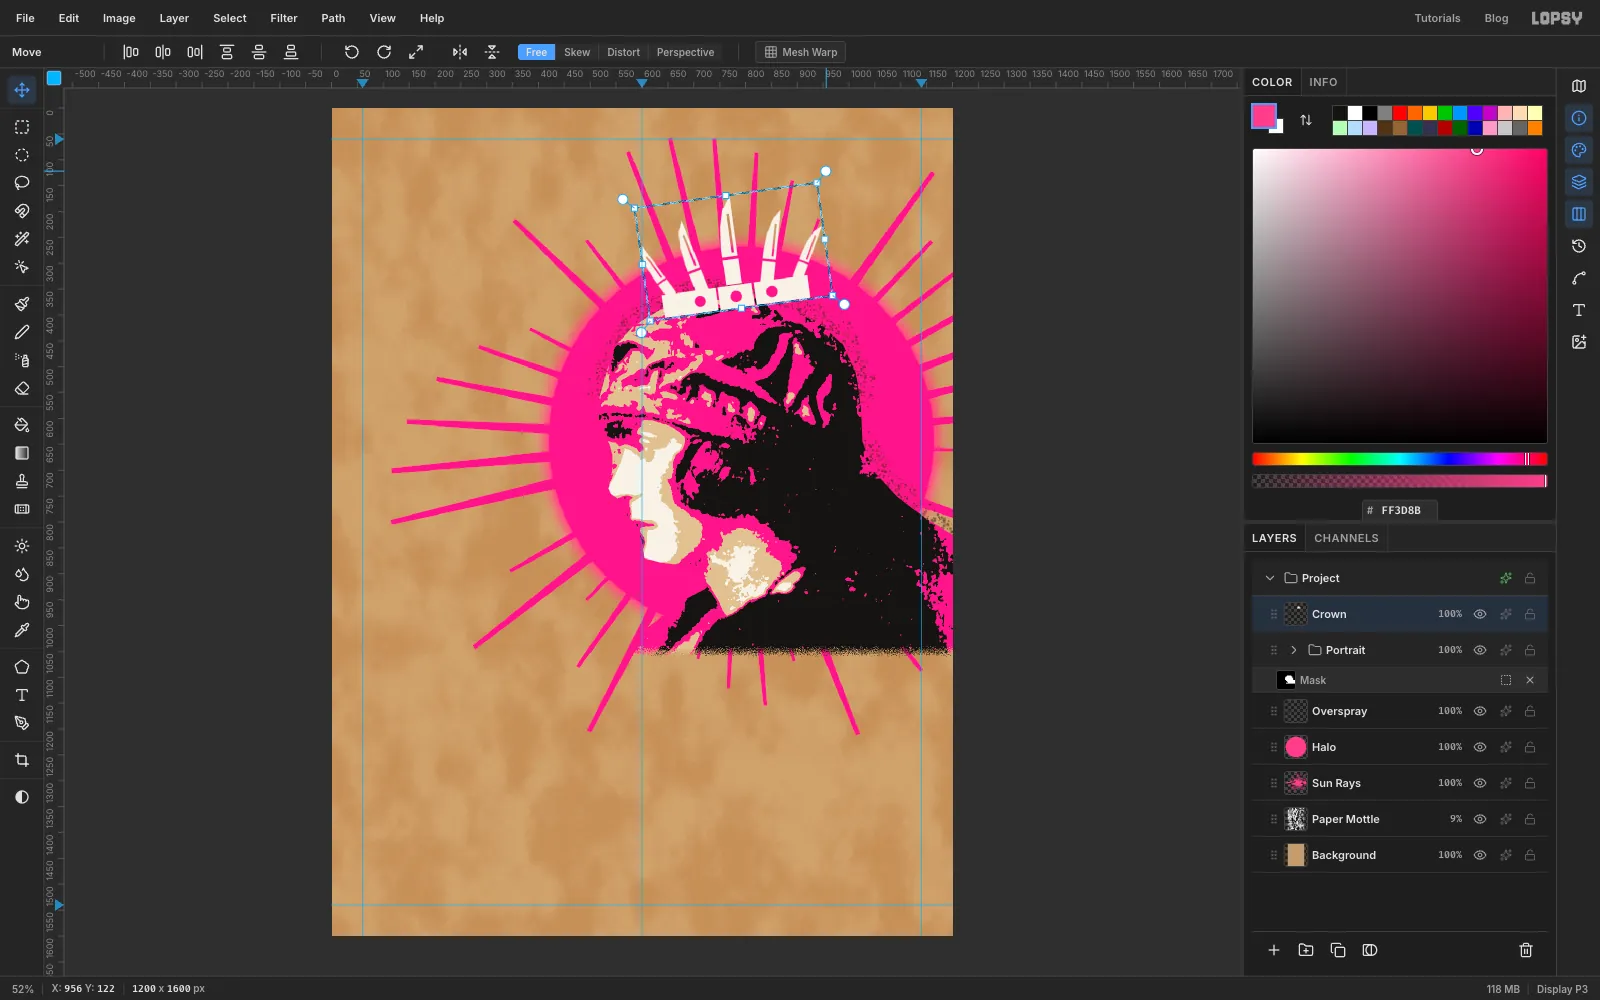
Blade R1, the top blade layer. Choose Layer → Merge Down five times, until everything is merged intoCrown. - Draw a marquee around the whole crown. With the Move tool, drag the rotation handle anticlockwise without Cmd, about half of one 15° snap, until the band runs parallel to the top of the turban. The turban tilts down to the left, so the crown should too. Press Cmd+D.
- Click
-
Seat the crown and give it a stencil shadow
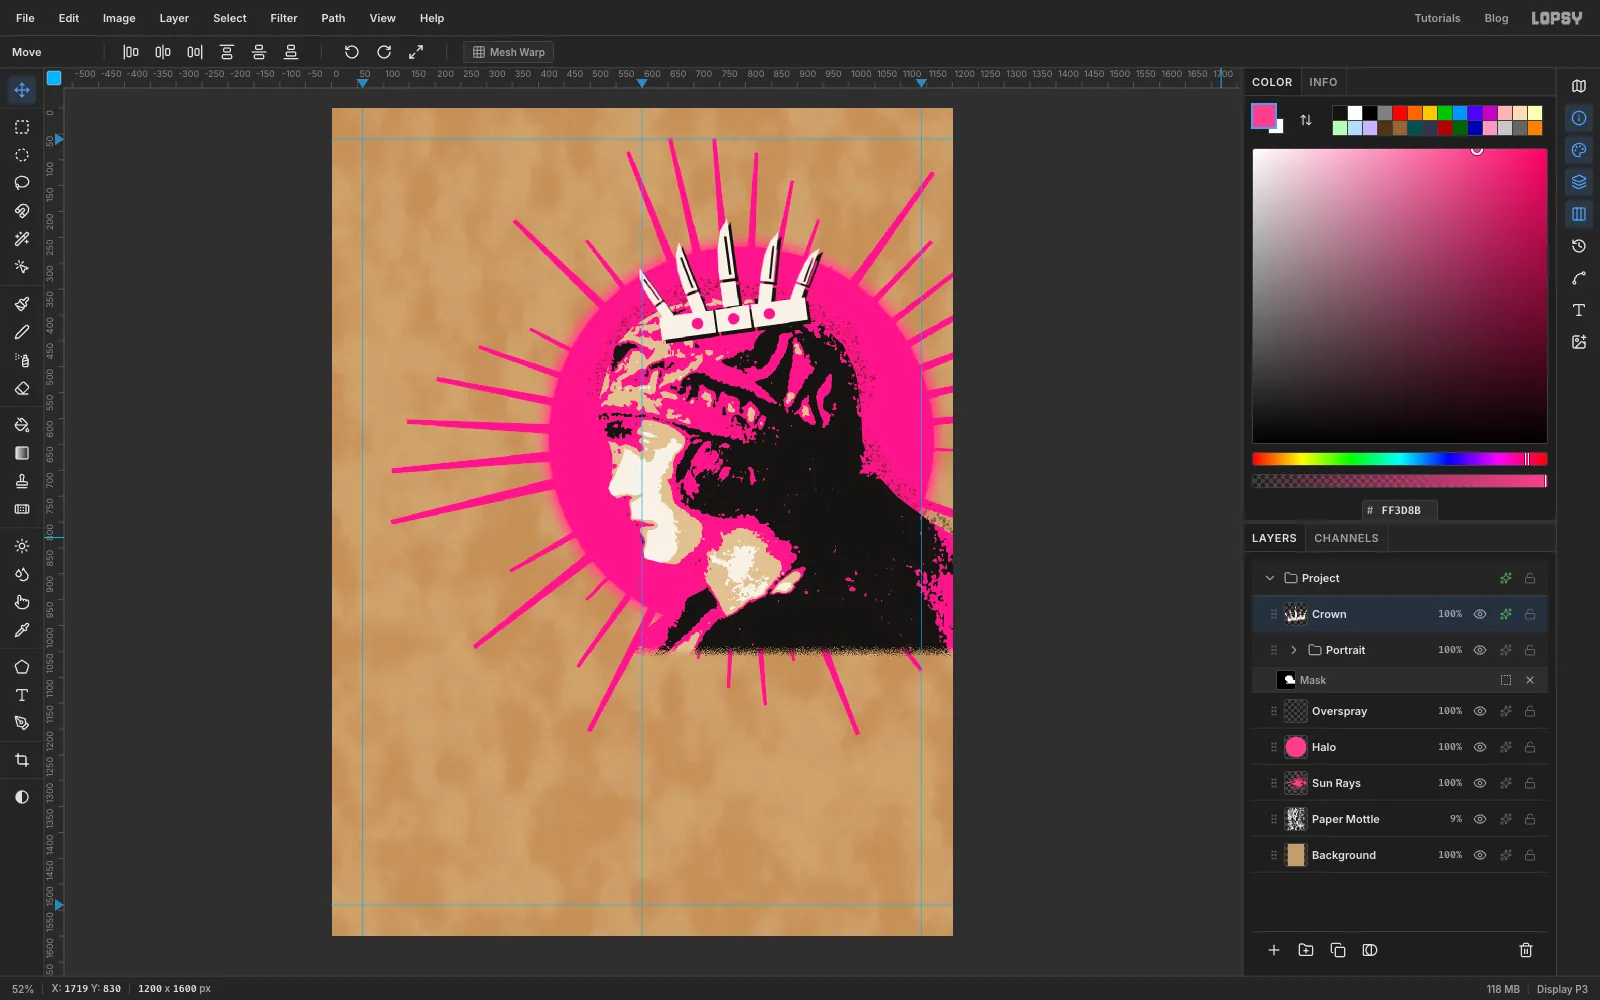
- Drag the crown about 44 px down and 4 px left, so the band overlaps the top of the turban instead of floating above it.
- Open the crown's layer effects, enable Drop Shadow and set the colour to , Offset X
7, Offset Y7, Blur0, Spread0and Opacity100.
With no blur, the shadow looks like a second sprayed colour, a little off register.
-
Snap the top banner to the guides
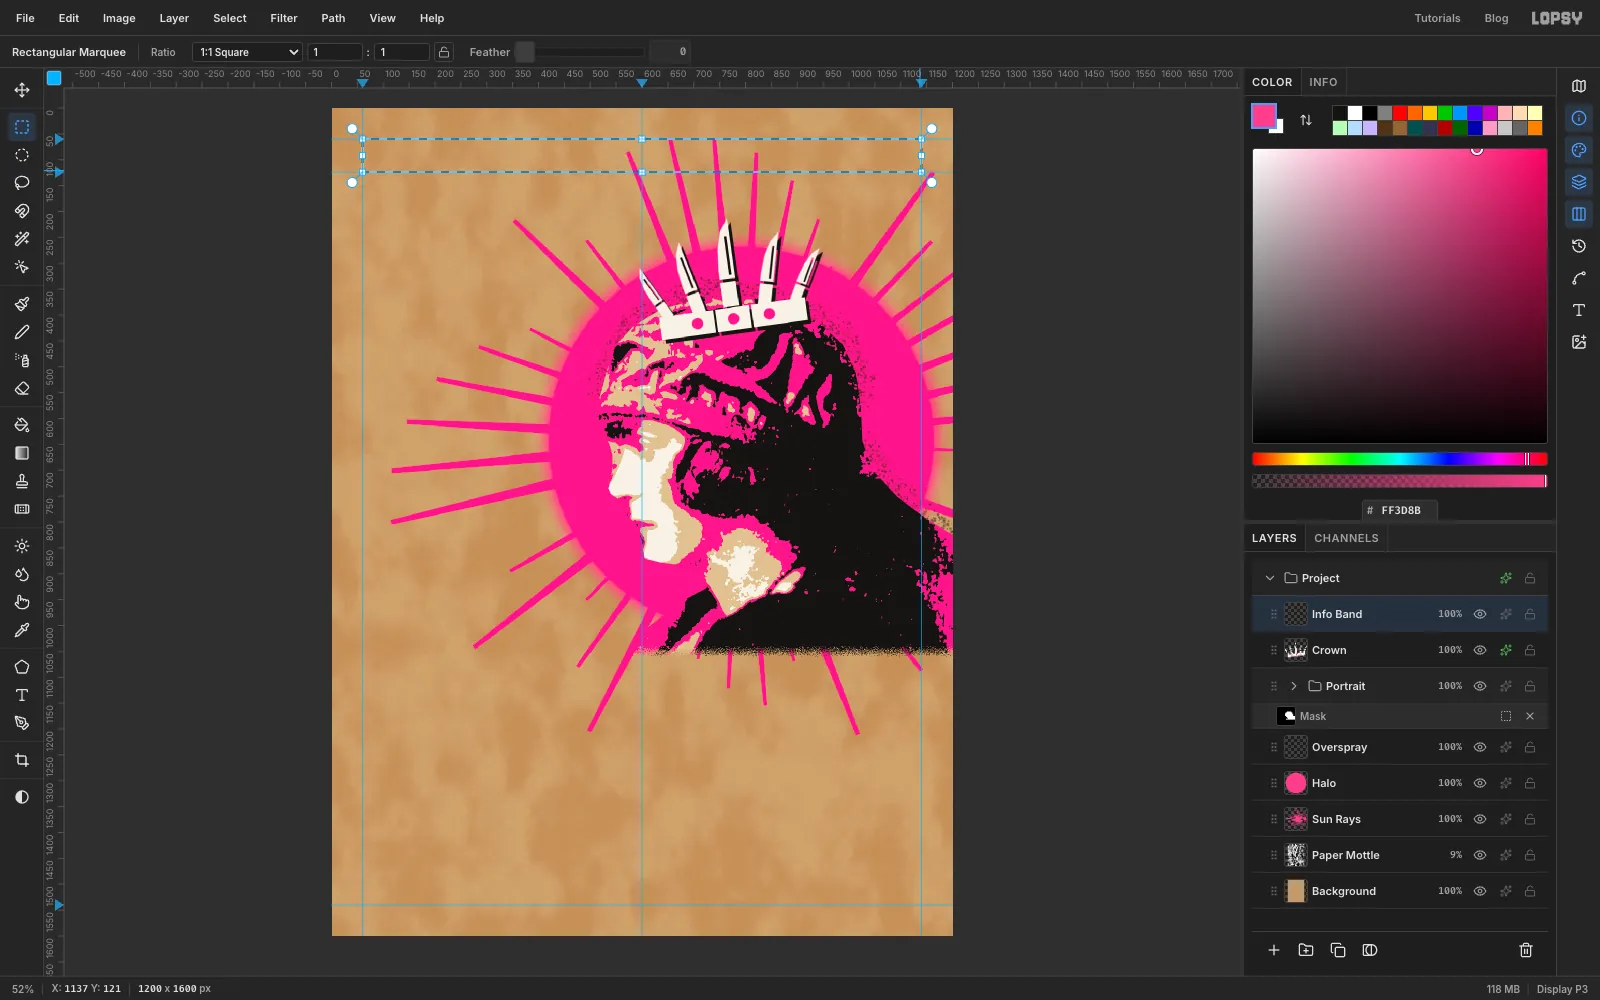
- Click
Crown, add a layer and name itInfo Band. - Click the left ruler at 124 for one more horizontal guide.
- With the Rectangular Marquee, drag from just inside the top-left guide crossing (60, 60) to just inside 1140, 124. The marquee snaps to the guides. Click the Info tab: the selection should read 1080 × 64.
- Fill with and press Cmd+D.
- Click
-
Fray the banner's ends
Pick the Eraser, set Size to
14, and drag a short zigzag down each end of the banner. Small bites out of the corners make it look like a strip of tape sprayed through a worn stencil.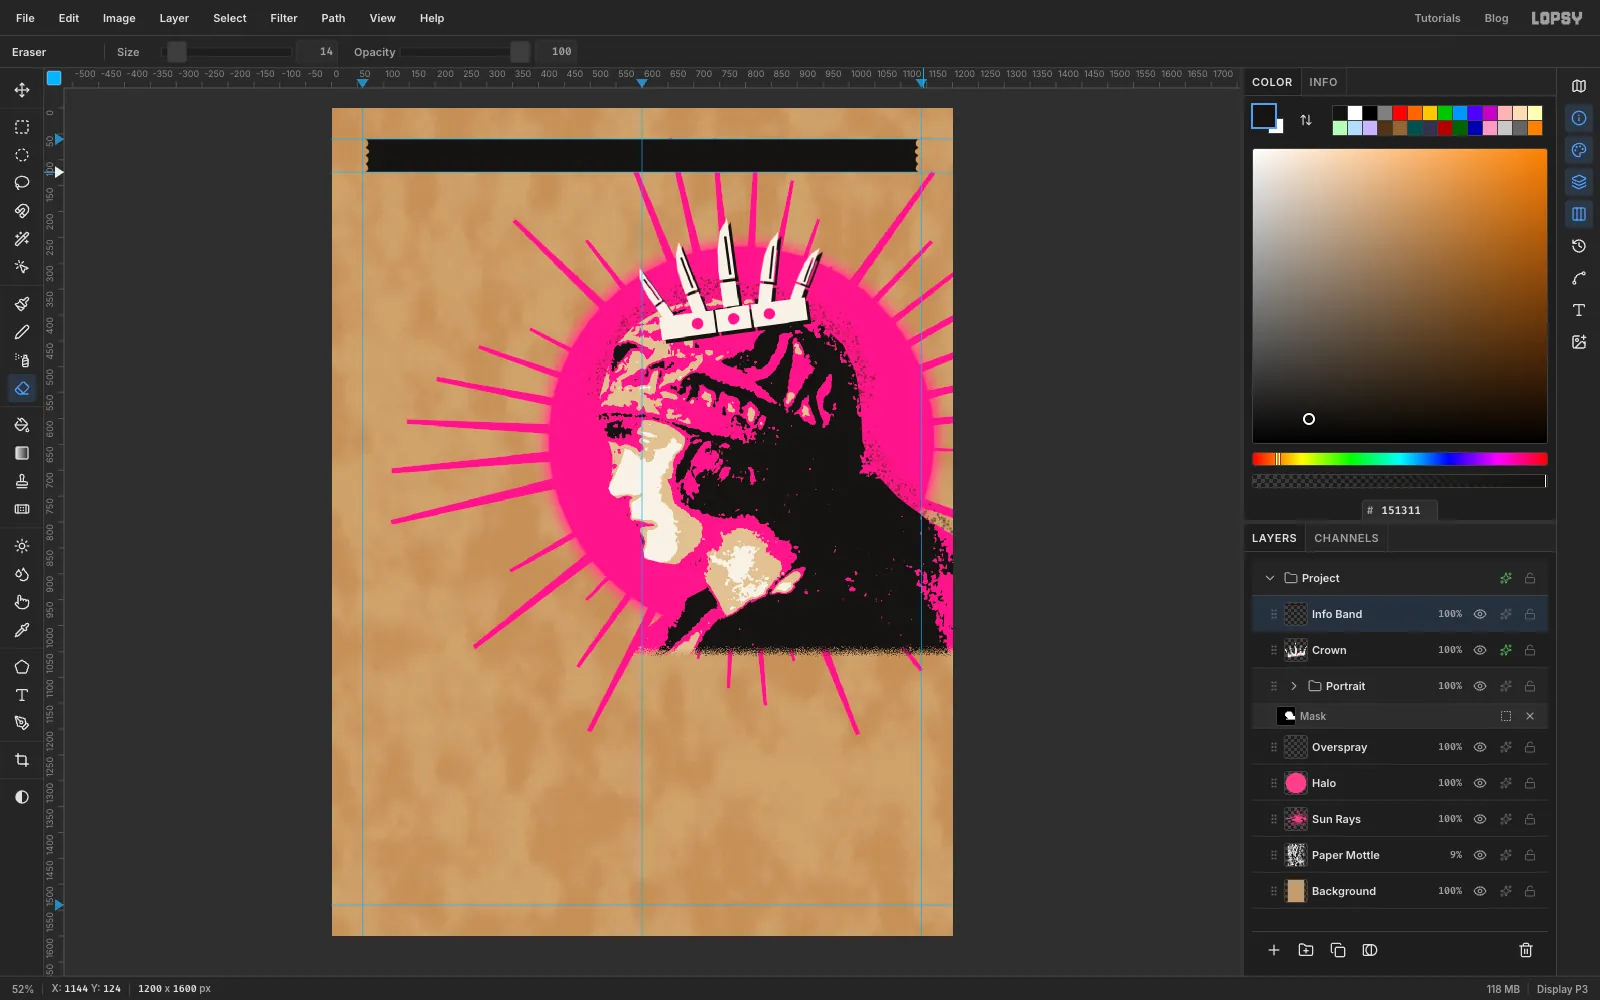
-
Set the headline
Make the bottom line first, so you never click inside an existing text box.
- Click
Info Bandso the text lands above it. Pick the Text tool and choose Stardos Stencil, weight Bold, size 296, colour pink . Click in an empty area, typeQUEENand press Tab. The layer is named after its text,QUEEN. - Click
Info Bandagain. Set Stardos Stencil Bold, size 204, colour , click in an empty area above QUEEN and typeSCISSOR, then Tab. - With the Move tool and the arrow keys, centre both words. SCISSOR's letters should run from about x 180 to 1021, with their tops at 1080. QUEEN's should run from about 100 to 1100, with their tops at 1272, which leaves a 46 px gap between the lines.
- Click
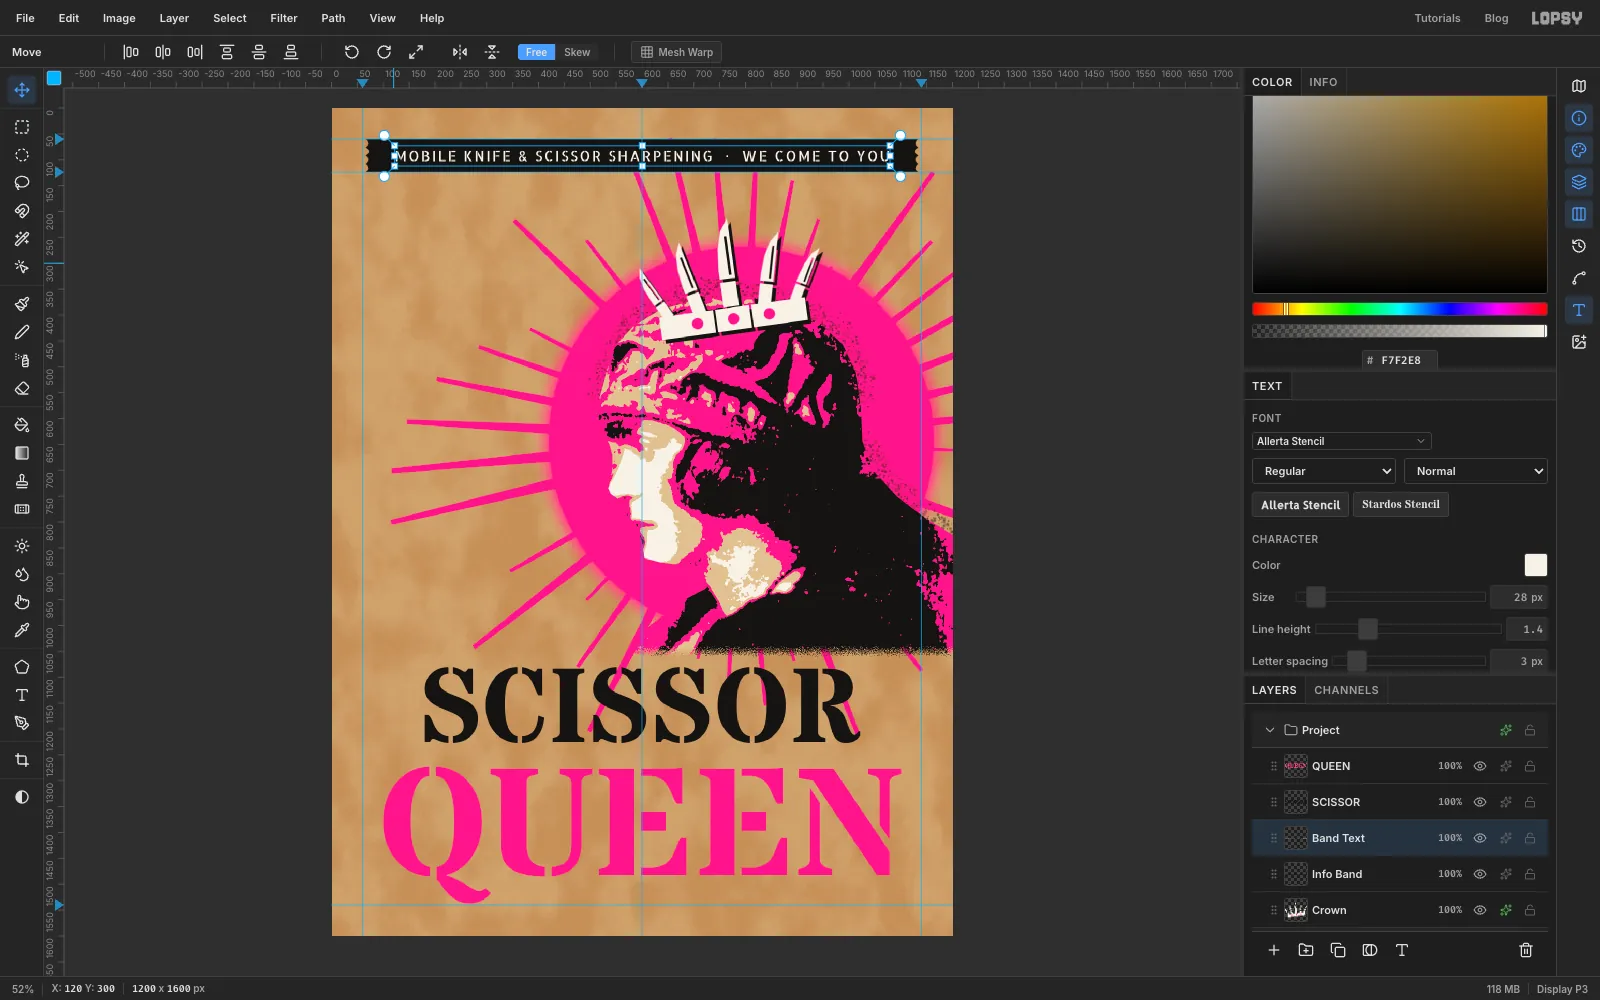
Info Bandonce more. In Allerta Stencil, size 28, letter spacing 3, colour , typeMOBILE KNIFE & SCISSOR SHARPENING · WE COME TO YOUand centre it in the banner. The letters should run from about x 124 to 1076 and y 82 to 102. Rename this layerBand Text.
- Click
-
Knock QUEEN off register
Two-colour stencils never line up perfectly. Fake a black pass that slipped.
- Click
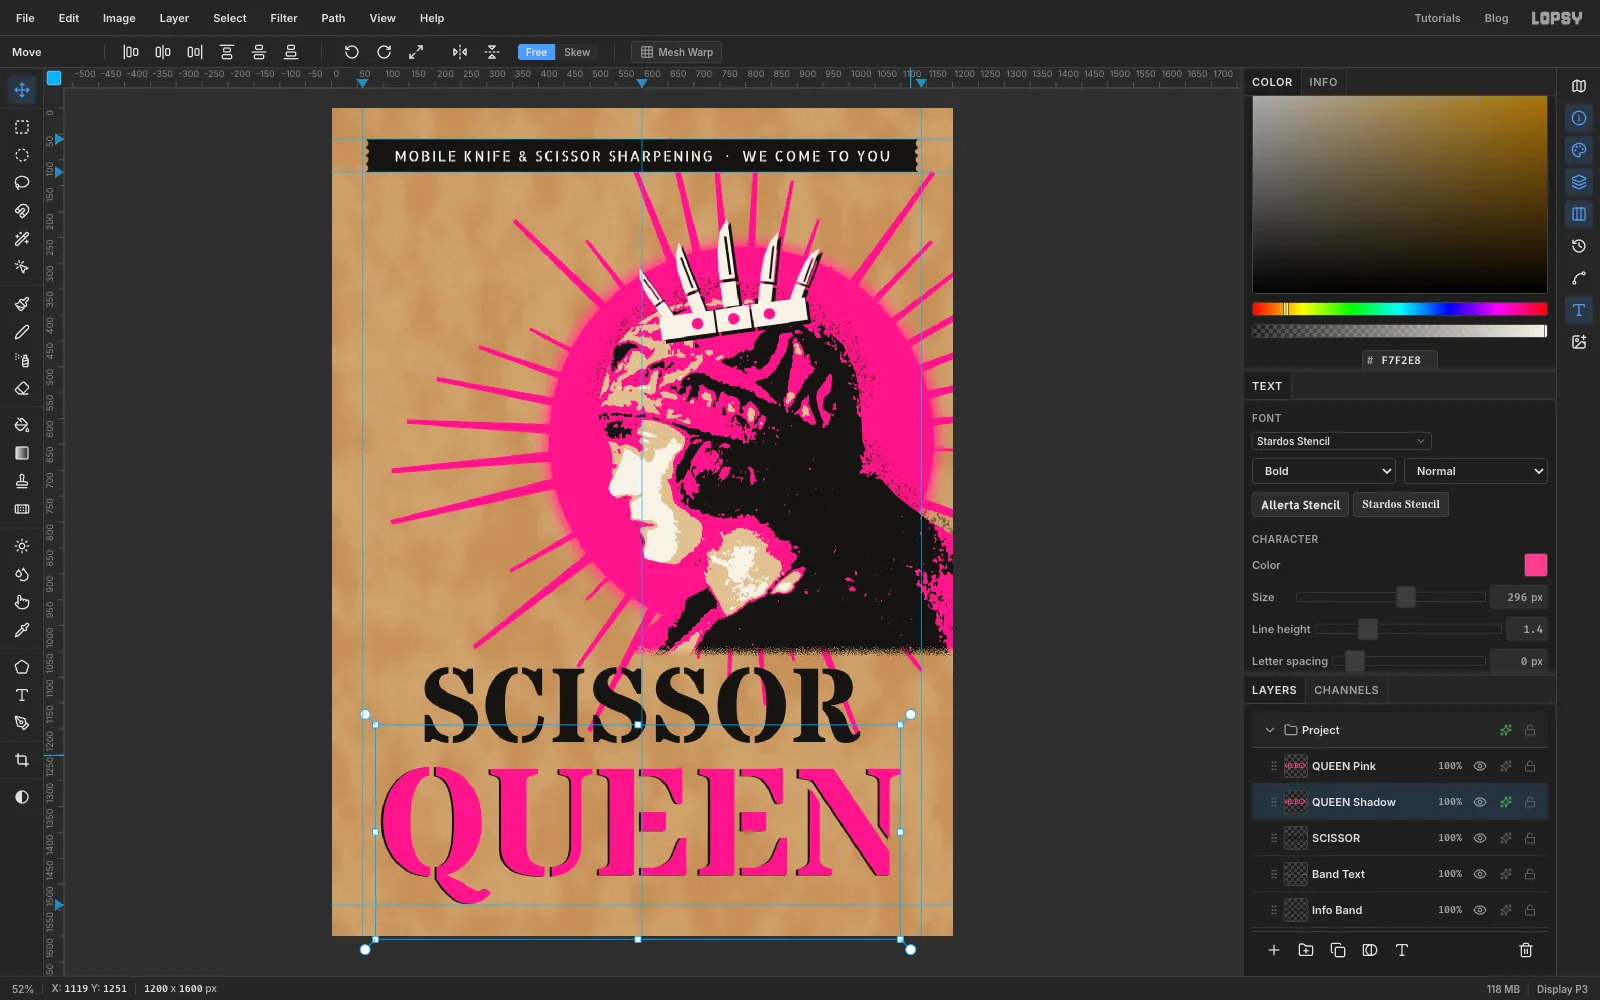
QUEENand choose Layer → Duplicate Layer. The copy lands exactly on top. Rename itQUEEN Pink. - Click the original
QUEENand rename itQUEEN Shadow. Open its effects, enable Color Overlay and set it to . - With the Move tool, nudge it 6 px left and 4 px up with the arrow keys.
- Press Cmd+D so nothing is selected. With the Move tool, drag its corner rotation handle clockwise by a hair, until the black shows about 5 px more at the right end of the word than at the left. That's well under 1°.
The tiny rotation makes the black peek out by different amounts along the word, so it reads as a slipped stencil rather than a drop shadow.
- Click
-
Drip the pink
- Click
QUEEN Pink, add a layer and name itDrips. - Set the foreground colour to pink . Pick the Brush and set Hardness to
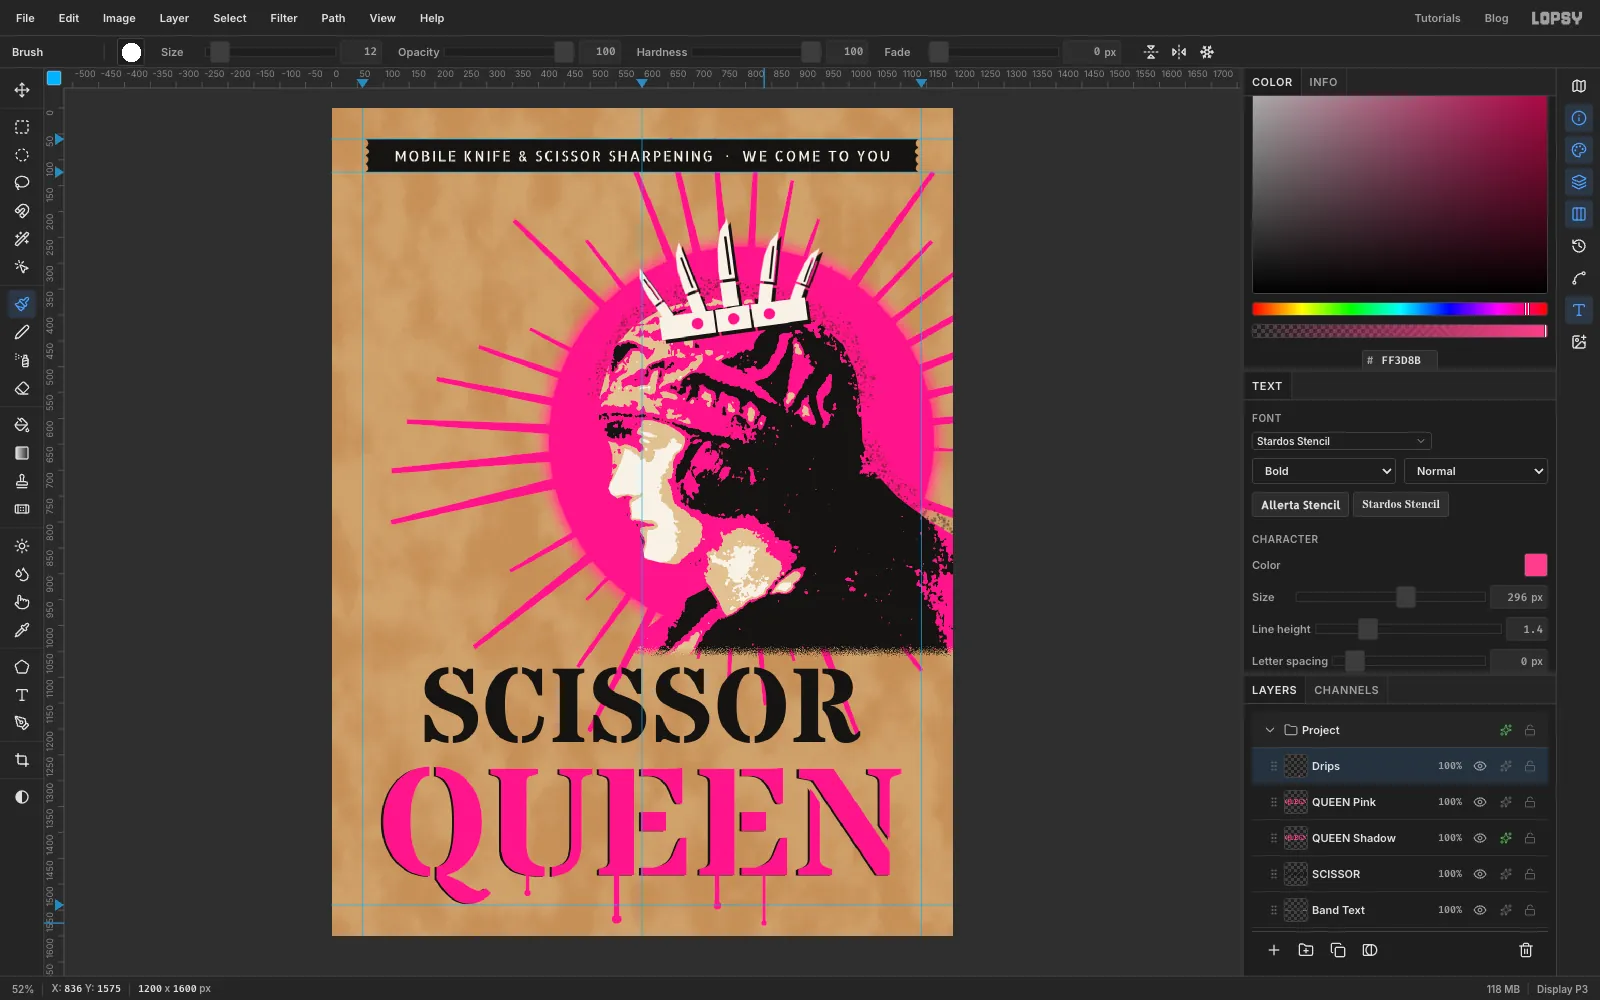
100in the options bar. Open the brush settings with the brush preview at the left of the options bar and check that Spacing is10. - For each drip, click just inside a flat letter foot on the baseline (about y 1460), then Shift-click straight below it to draw the run. Then raise the size and click once at the bottom for the round blob a real drip leaves:
- x 379: size 8, 34 px long, blob size 14
- x 551: size 12, 84 px long, blob size 20
- x 745: size 10, 58 px long, blob size 17
- x 836: size 7, 92 px long, blob size 12
Keep every drip above about y 1560, so nothing runs off the page.
- Click
-
Set the phone number and services
Work up the left column from the bottom.
- Click
Crown, add a layer and name itServices Anchor. Click this layer before each new piece of text, so the type never restyles an earlier text layer. - Pick the Text tool. In Allerta Stencil size 22, letter spacing 2, colour , click in empty space at the lower left and type
TUES-SAT · CALL OR TEXT, then Tab. With the Move tool and the arrow keys, nudge it so its letters start at 70, 942. - Click
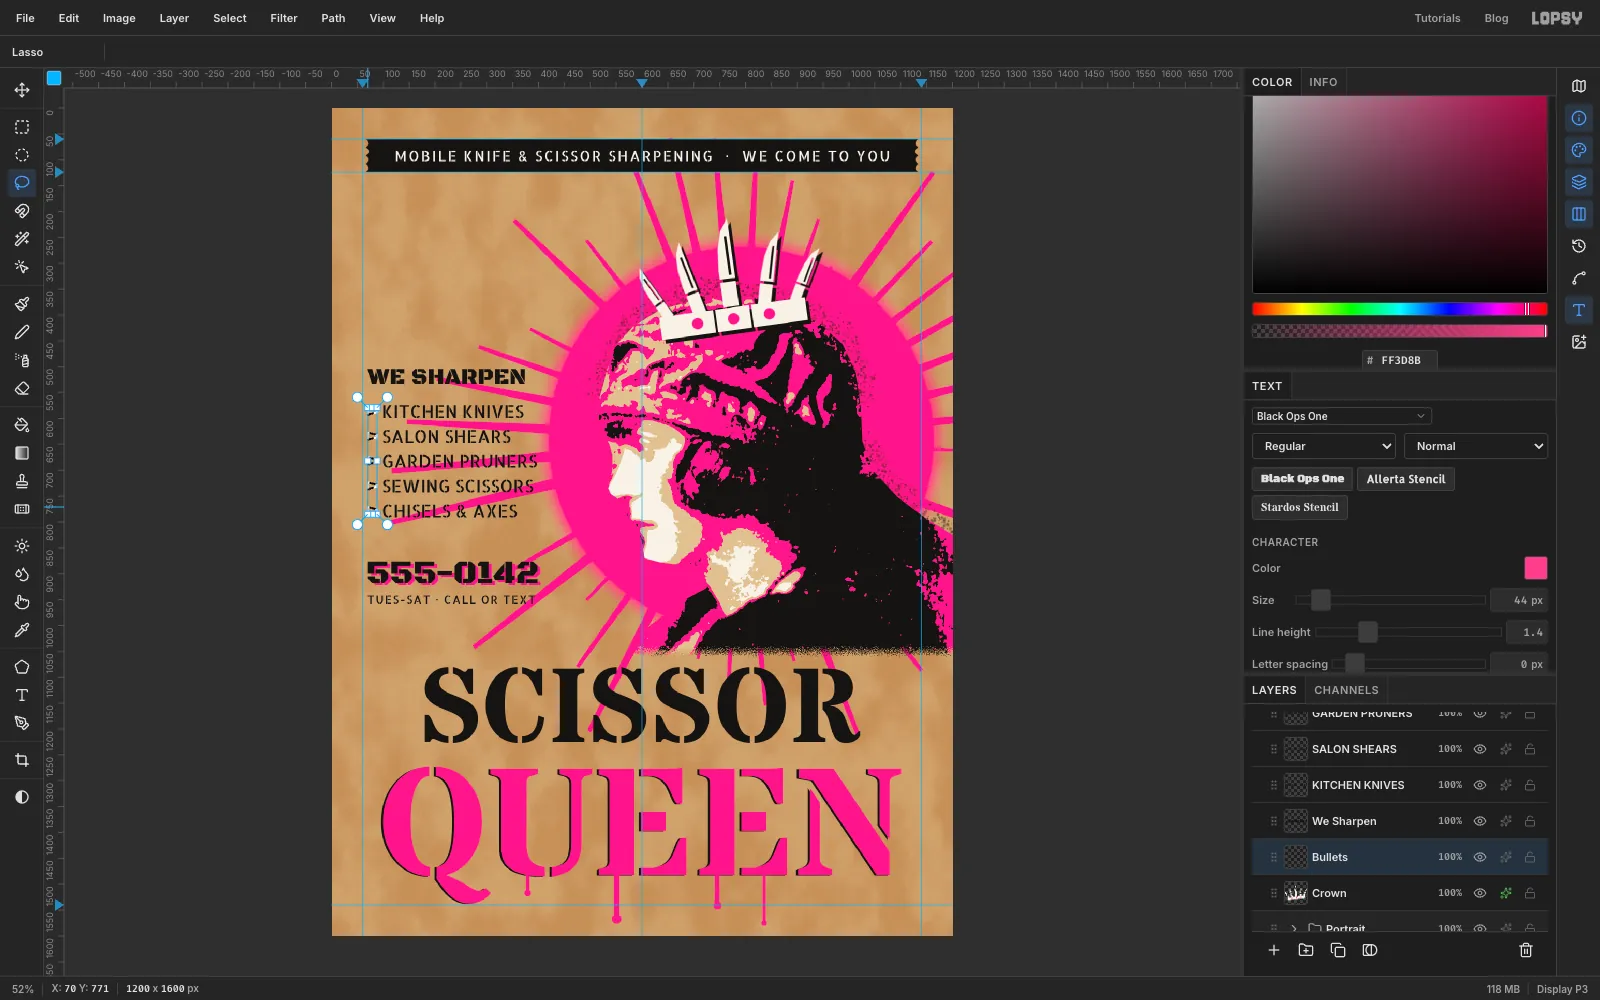
Services Anchor. In Black Ops One size 64, colour , type555-0142and nudge it to 70, 876. Duplicate it and rename the copyPhone Black. Rename the originalPhone Pink, give it a pink Color Overlay, and nudge it 6 px right and 4 px down. The ink slips the same way here as on the headline: pink sits down and right of black. - In Allerta Stencil size 34, colour , type each service on its own layer, from the bottom up, and nudge its letters to start at x 100:
CHISELS & AXESat y 766,SEWING SCISSORSat 718,GARDEN PRUNERSat 670,SALON SHEARSat 622 andKITCHEN KNIVESat 574. - In Black Ops One size 44, type
WE SHARPENand nudge it to 70, 504. - Rename
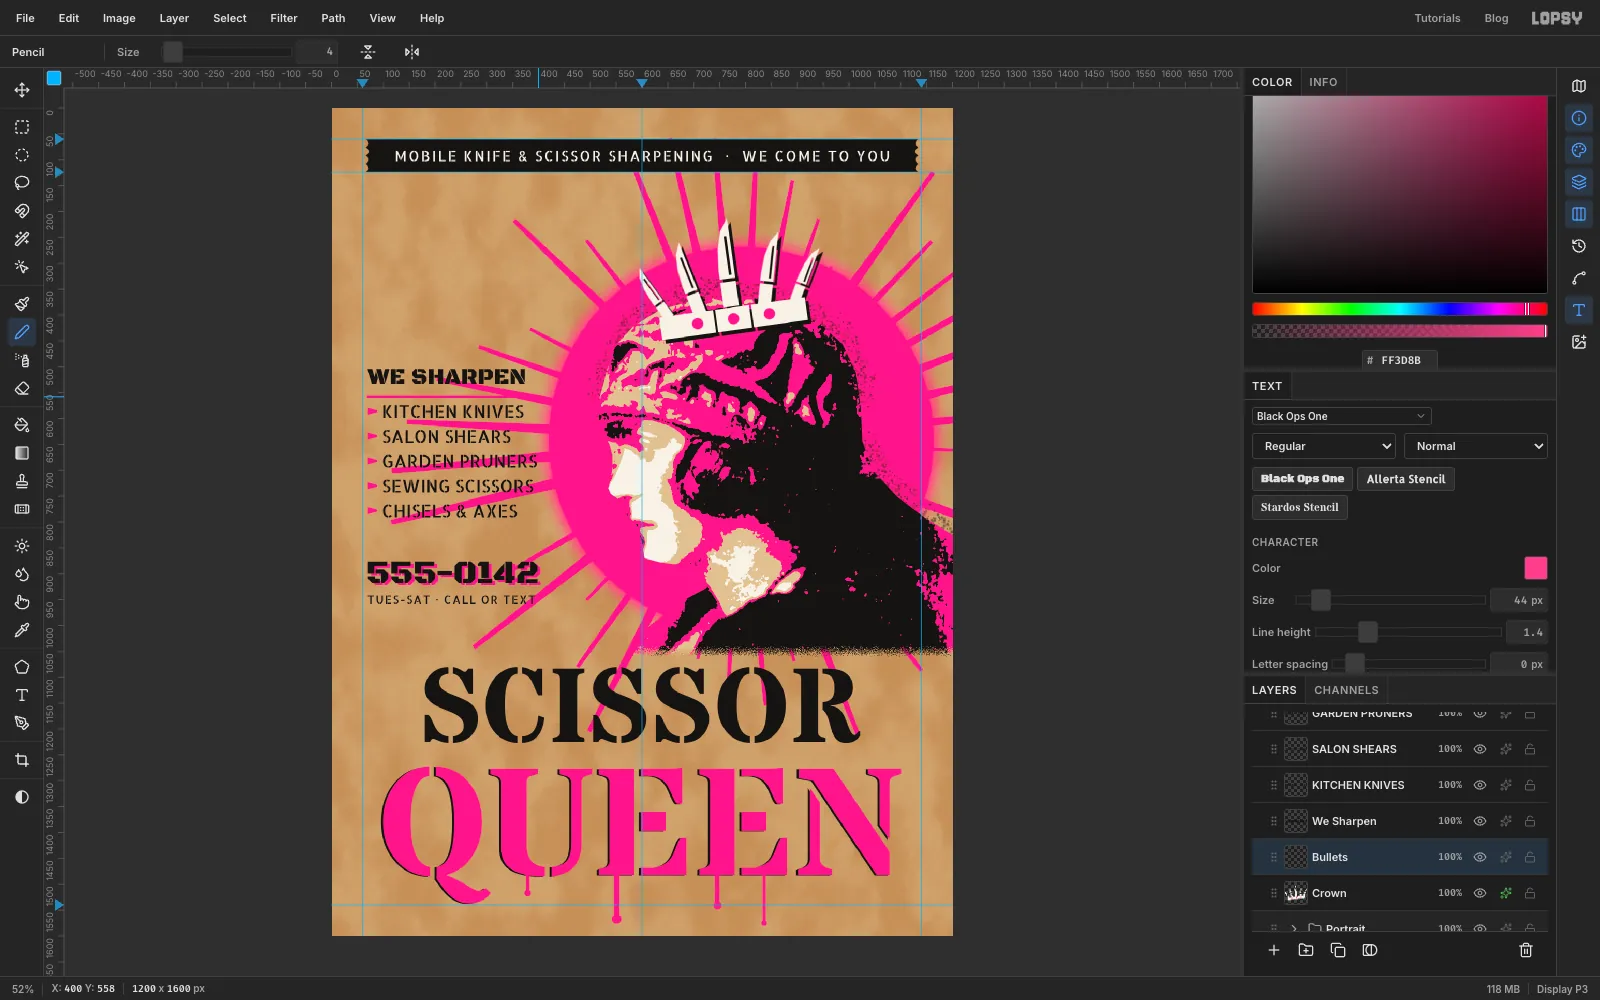
Services AnchortoBullets. With the Lasso, drag a small wedge pointing right, about 18 px long, just left of each service (from x 70). Hold Shift for every wedge after the first, to add it to the selection.
- Click
-
Fill the bullets and rule the heading
- Fill the wedges with pink and press Cmd+D.
- Pick the Pencil, set Size to
4, click at 70, 558, then Shift-click at 400, 558. That draws a straight rule under the heading.
-
Build the price badge
- Click
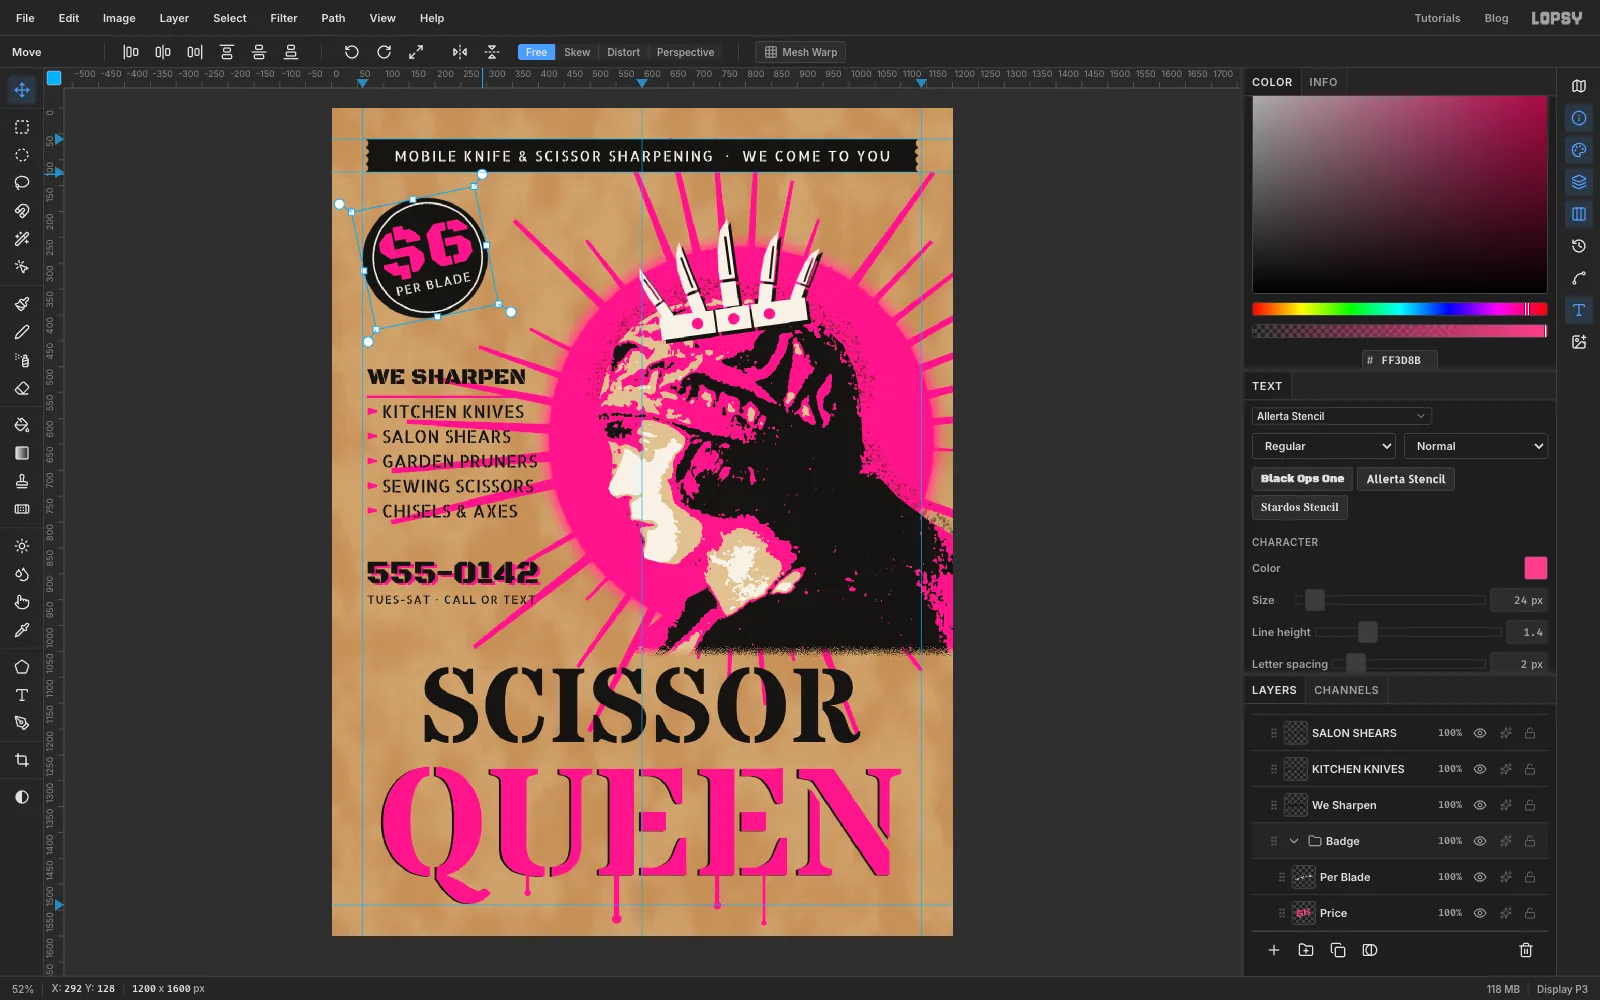
Bullets, add a layer and name itBadge Disc. - With the Elliptical Marquee, Select From
70, 174To302, 406, fill with and press Cmd+D. Its left edge lines up with the text below it. - Select From
79, 183To293, 397, fill with , then choose Select → Shrink…3and fill with . That leaves a thin off-white ring. Press Cmd+D. - Click
Badge Disc. With the Text tool in Allerta Stencil size 24, letter spacing 2, colour , typePER BLADE, rename the layerPer Blade, and nudge it so it's centred on x 186 with its top at y 334. ClickBadge Discagain, type$6in Black Ops One size 128, pink, rename itPrice, and centre it on x 186 with its top at 220. - Click
Per Bladeand Shift-clickBadge Disc, then choose Layer → Group Layers and name the groupBadge. - Press Cmd+D. With the group selected and the Move tool, a box frames the whole badge. Drag its rotation handle anticlockwise, a little less than one 15° snap. The type turns with the disc and stays editable.
- Click
-
Clear the rays from the type
- Click
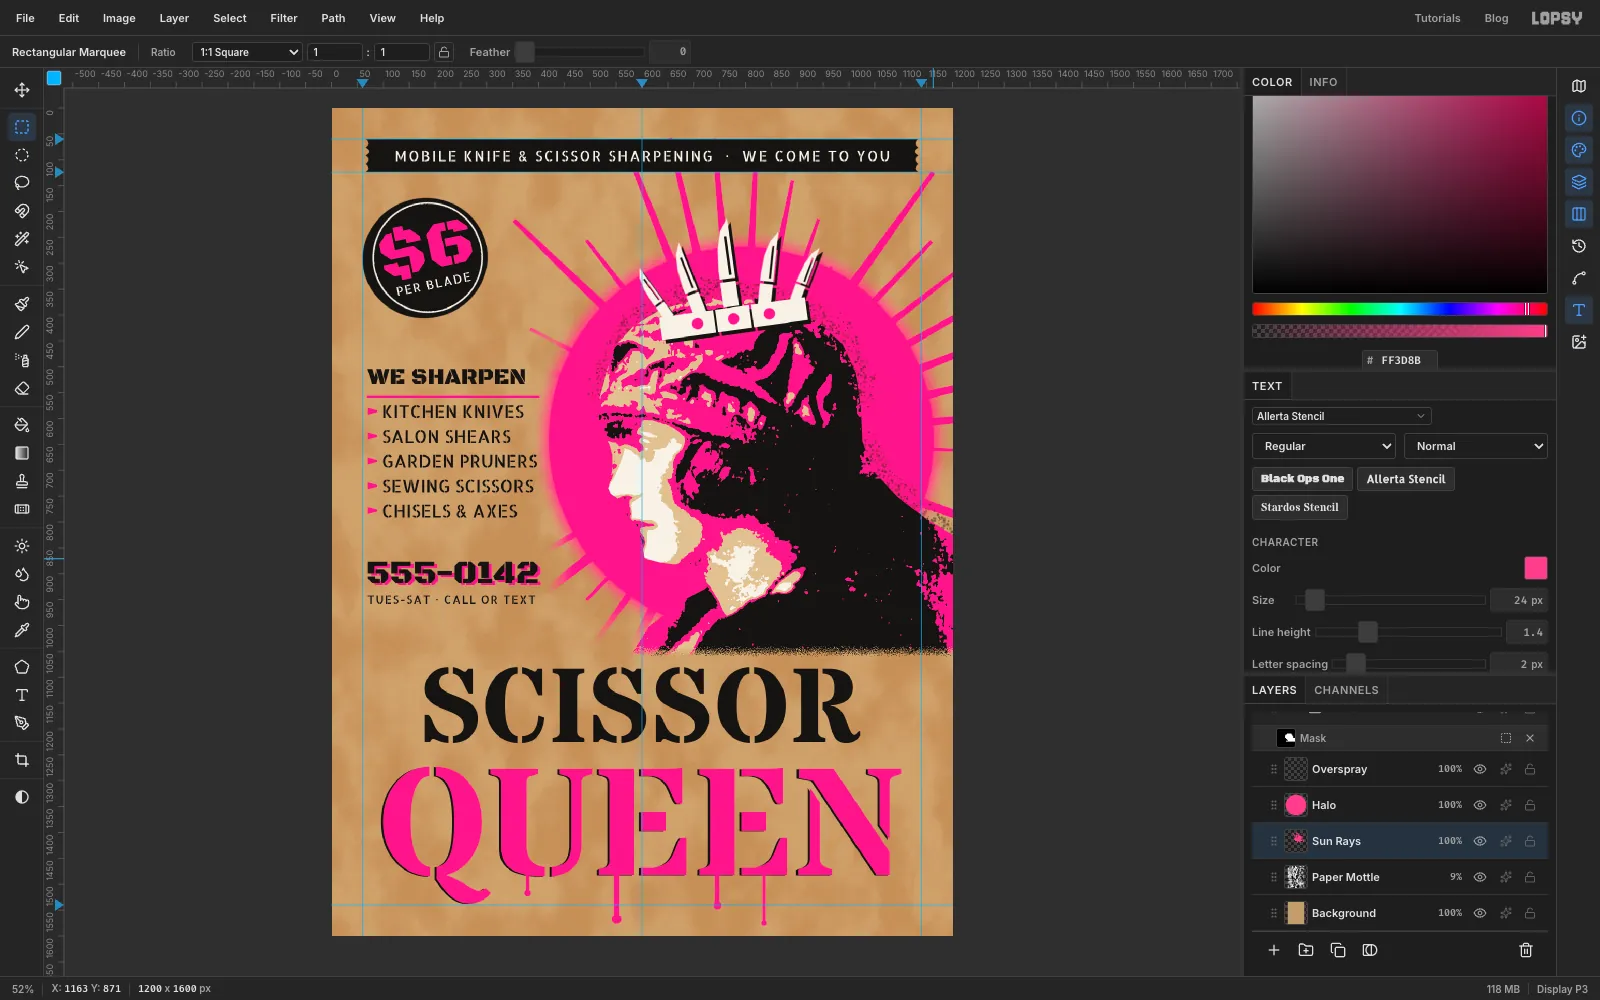
Sun Rays. With the Rectangular Marquee, drag from left of the canvas at y 1000 to past the bottom-right corner, then Select → Feather…50and press Delete. - Press Cmd+D. Drag another marquee from left of the canvas at y 440 to 440, 1060, feather it
30and press Delete. Press Cmd+D.
The rays now stop short of the headline and leave the services list clean, but still fan out around the head and the badge.
- Click
-
Fold the flier
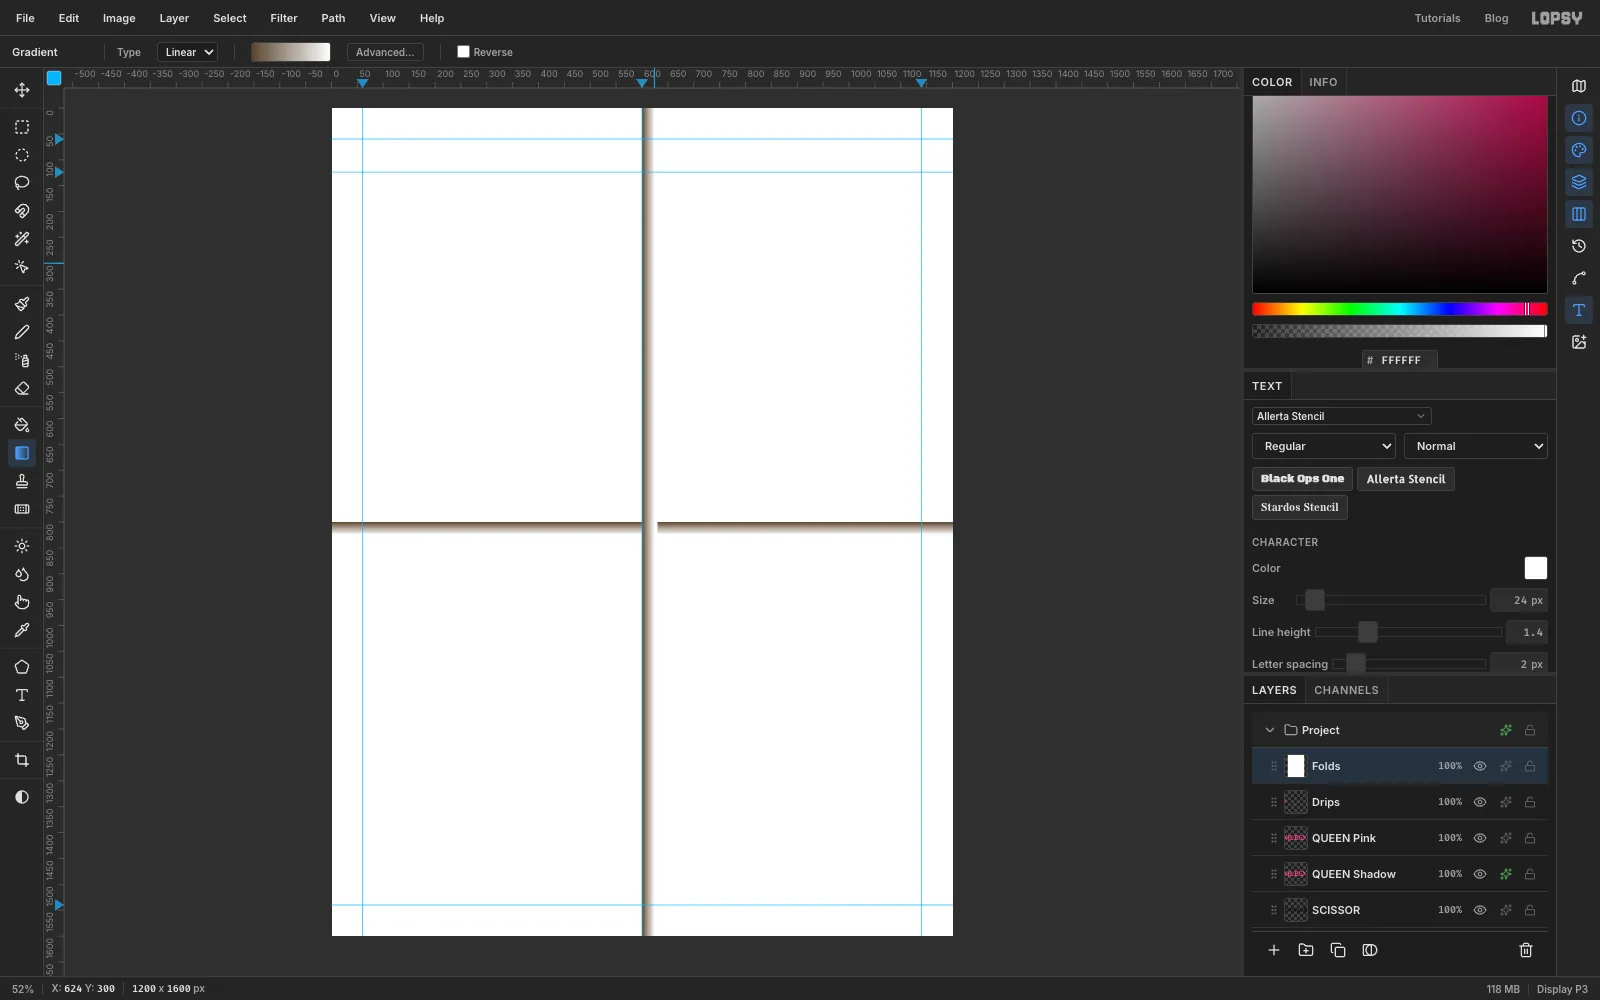
A flier that's been folded into quarters for a pocket has a soft shadow on one side of each crease and a bright edge on the other.
- Click
Drips, add a layer and name itFolds. Fill it with white. - Pick the Rectangular Marquee and Select From
0, 800To1200, 830. Pick the Gradient tool, set Type to Linear, click Advanced… and set the stops to and . Drag from 600, 800 down to 600, 824. - Press Cmd+D. With the Rectangular Marquee, Select From
600, 0To630, 1600. Switch back to the Gradient tool and drag from 600, 300 to 624, 300. Press Cmd+D. Where the two folds cross, the vertical shadow paints over the horizontal one. - Set the layer to Multiply at 70%. White disappears in Multiply, so only the shadows show.
- Add a layer named
Fold Light. With the Pencil at size 3 in white, click 0, 798 and Shift-click 1199, 798, then click 598, 0 and Shift-click 598, 1599. Set it to Screen at 60%.
- Click
-
Add grain and paper dropout
Real spray paint never covers perfectly. Tiny gaps let the paper show through.
- Add a layer named
Grain, fill it with , run Add Noise at28Mono, and set it to Overlay at 22%. - Add a layer named
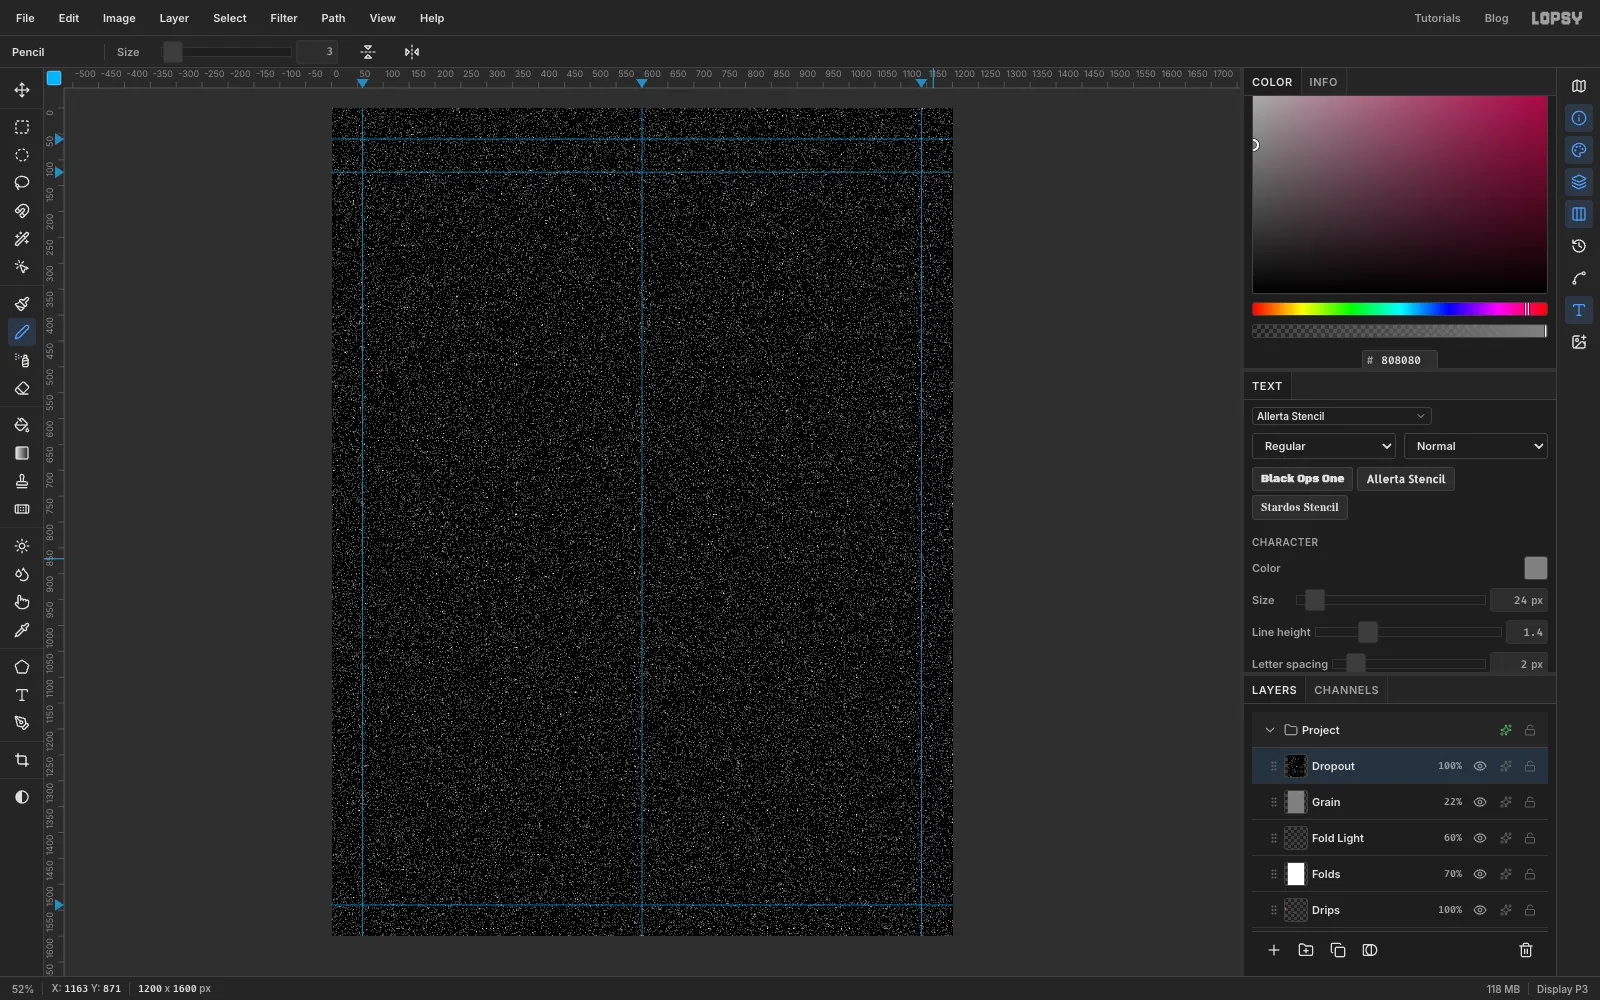
Dropoutand fill it with . Run Add Noise at100Mono, then Threshold at172. Only about 4% of the pixels come out white.
- Add a layer named
-
Let the paper show through
- Pick the Magic Wand (Tolerance
20, Contiguous off) and click a black area ofDropout. Press Delete, then Cmd+D. - Cmd-click the
Dropoutthumbnail and fill the specks with the paper colour . Press Cmd+D.
Kraft-coloured specks disappear on the paper itself but break up every ink above it, like paint that didn't quite cover. Save the project with File → Save Project and export it with File → Quick Export PNG.
- Pick the Magic Wand (Tolerance