Design a Spray-Stencil Dog Walking Flier on Kraft Paper
Make a stencil dog walking flier in Lopsy. Cut a three-plate whippet stencil from an old photo, then add overspray, stencil type and pull-off tabs.
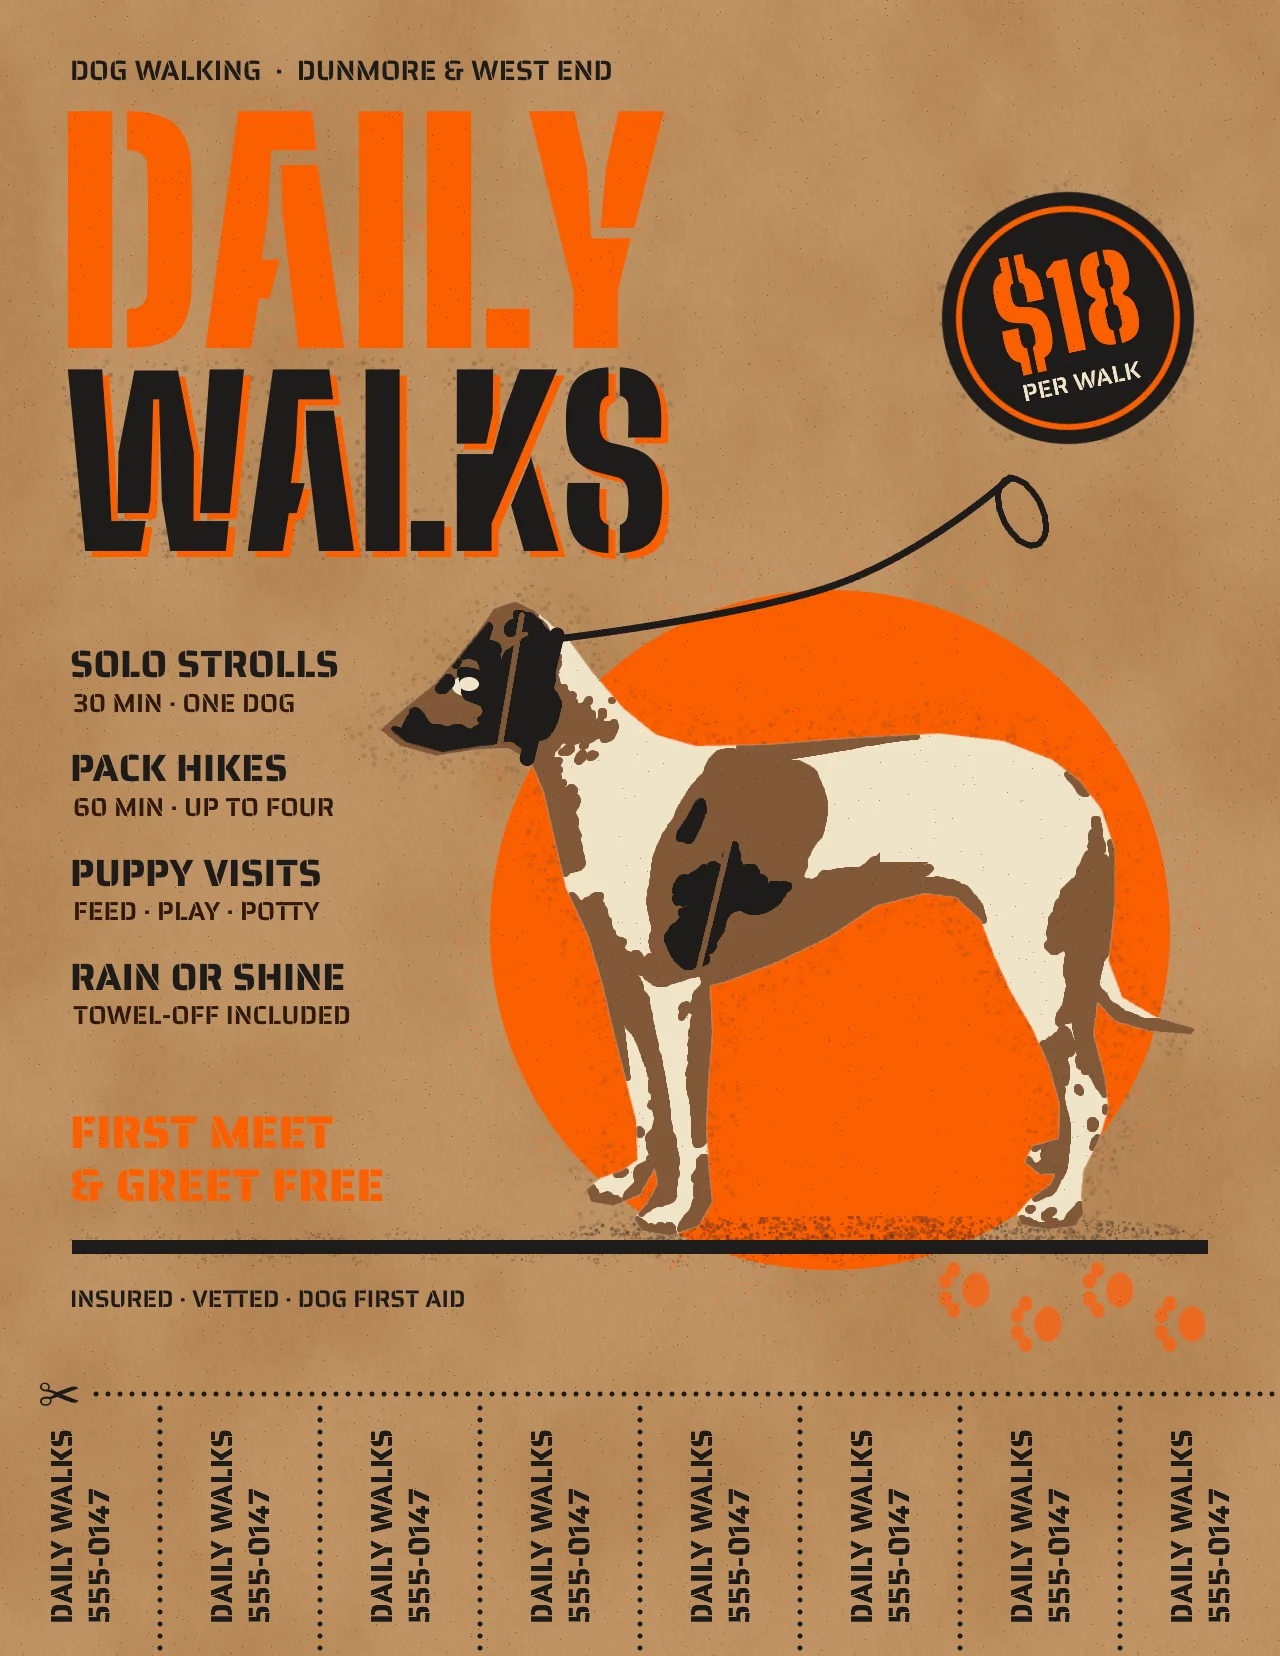
A spray-paint stencil is cut from card. Anything that floats inside a cut hole, such as the middle of an O or a dog's eye patch, has to be held in place by thin strips of card called bridges. When you spray, the paint drifts past the edges and leaves a soft speckle called overspray. Two-colour stencils almost never line up exactly. Those three marks, plus porous paper, are what make a stencil look made by hand.
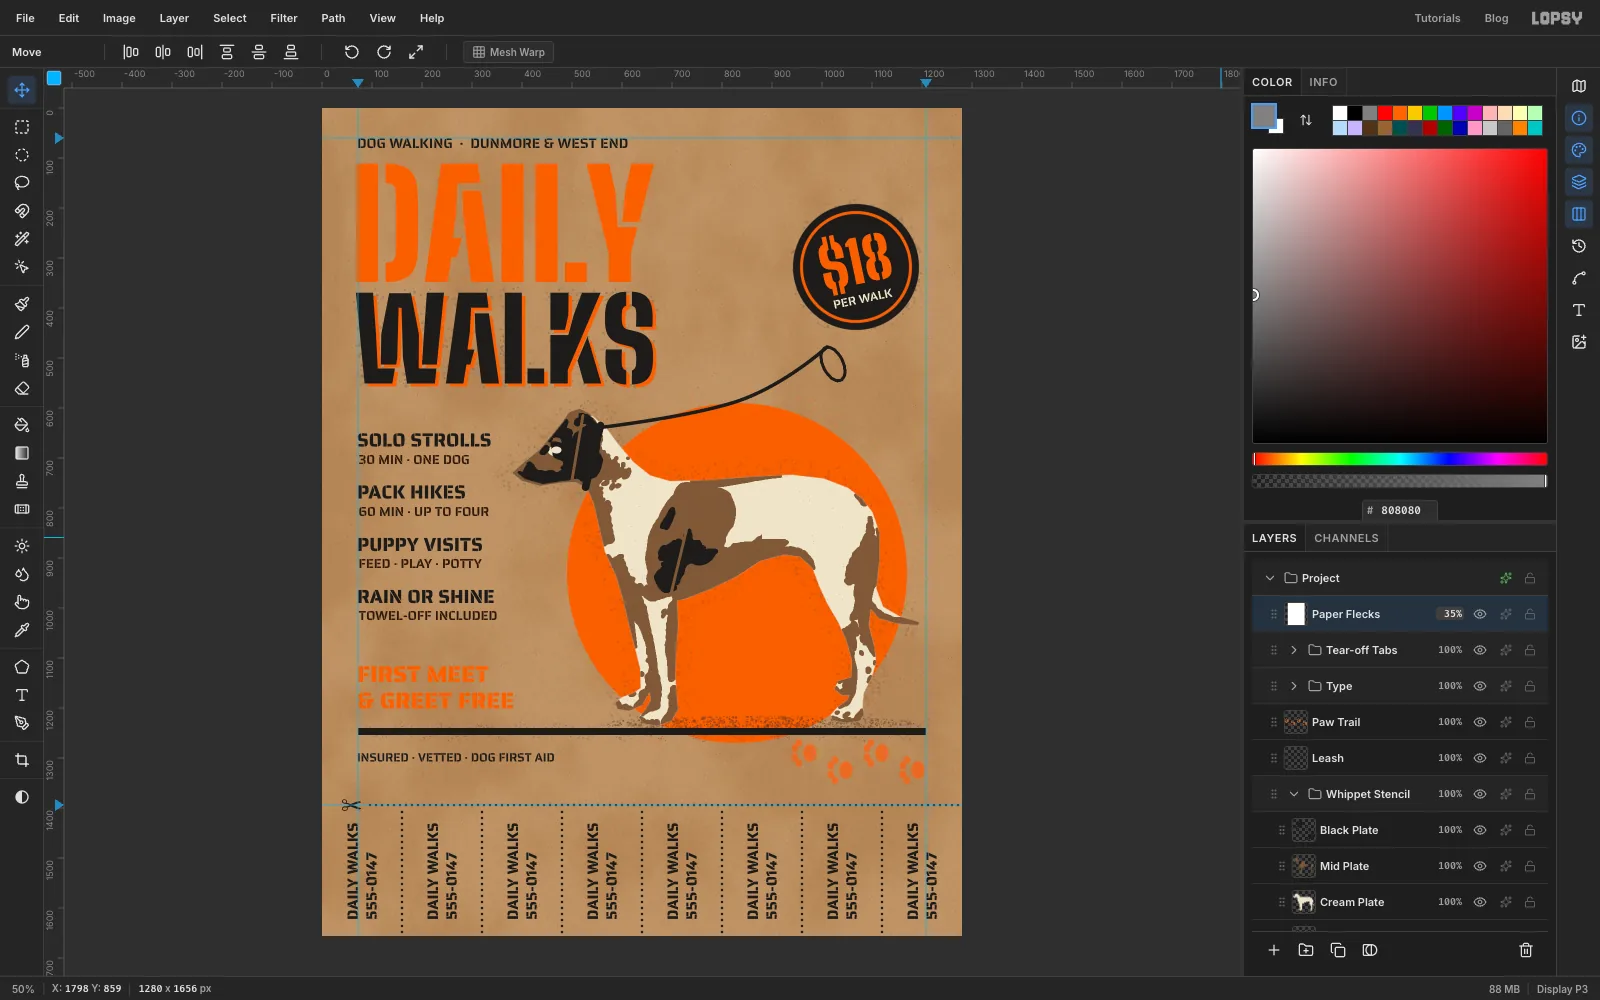
In this tutorial you'll use them on a small-business flier for Daily Walks, an imaginary dog walker. A whippet from a 1900s lantern-slide photograph becomes a three-plate stencil, sprayed onto kraft paper with a safety-orange sun behind it. A row of pull-off phone-number tabs runs along the bottom. The flier is 1280 × 1656 px, US-letter proportions.
Along the way you'll use:
- Add Noise, Motion Blur, Clouds and Threshold to make kraft paper, with the Overlay, Soft Light and Multiply blend modes
- a dropped-in photo, the Pen tool, Path to Selection, and copy and paste
- ⌘-dragging a corner handle to scale, and arrow-key nudges to place things
- Desaturate, Gaussian Blur and Posterize to make a tone study
- the Magic Wand with Contiguous off, Grow, and ⌘⇧⌥-click to intersect with a layer's shape
- the Eraser for stencil bridges and the Spray tool for overspray, inside and outside selections
- exact-corner marquees for circles and bars
- Big Shoulders Stencil and Saira Stencil type, Line height and Letter spacing, and a Color Overlay effect
- Define Brush for a paw-print stamp, and Spacing for a dotted cut line
- rotating several layers at once, Duplicate Layer, groups, guides and the grid
- undo and redo, to check work before moving on
The palette:
-
Kraft
-
mottle
-
Ink
-
safety orange
-
Cream plate
-
brown plate
-
Overspray
-
detail brown
-
grey
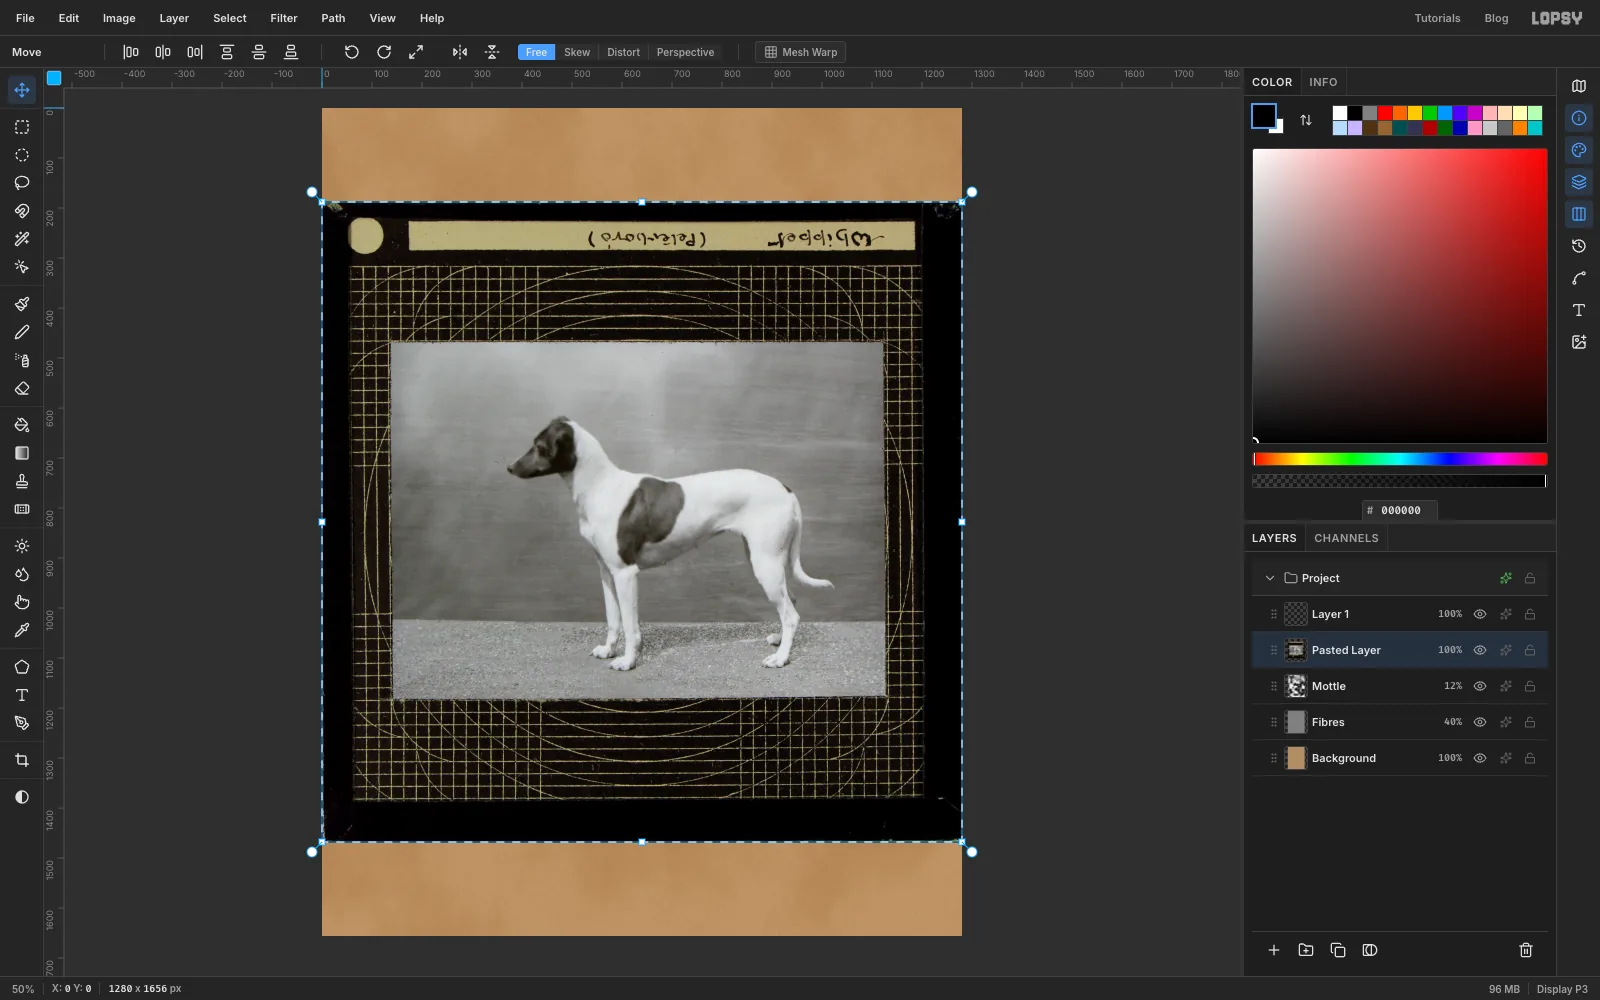
The photo is Whippet (Peterborough) by William Weaver Baker, a glass lantern slide in the Royal Albert Memorial Museum, Exeter. It's in the public domain and on Wikimedia Commons. Any side-on photo of a dog against a plain background will work.
-
Lay down the kraft colour
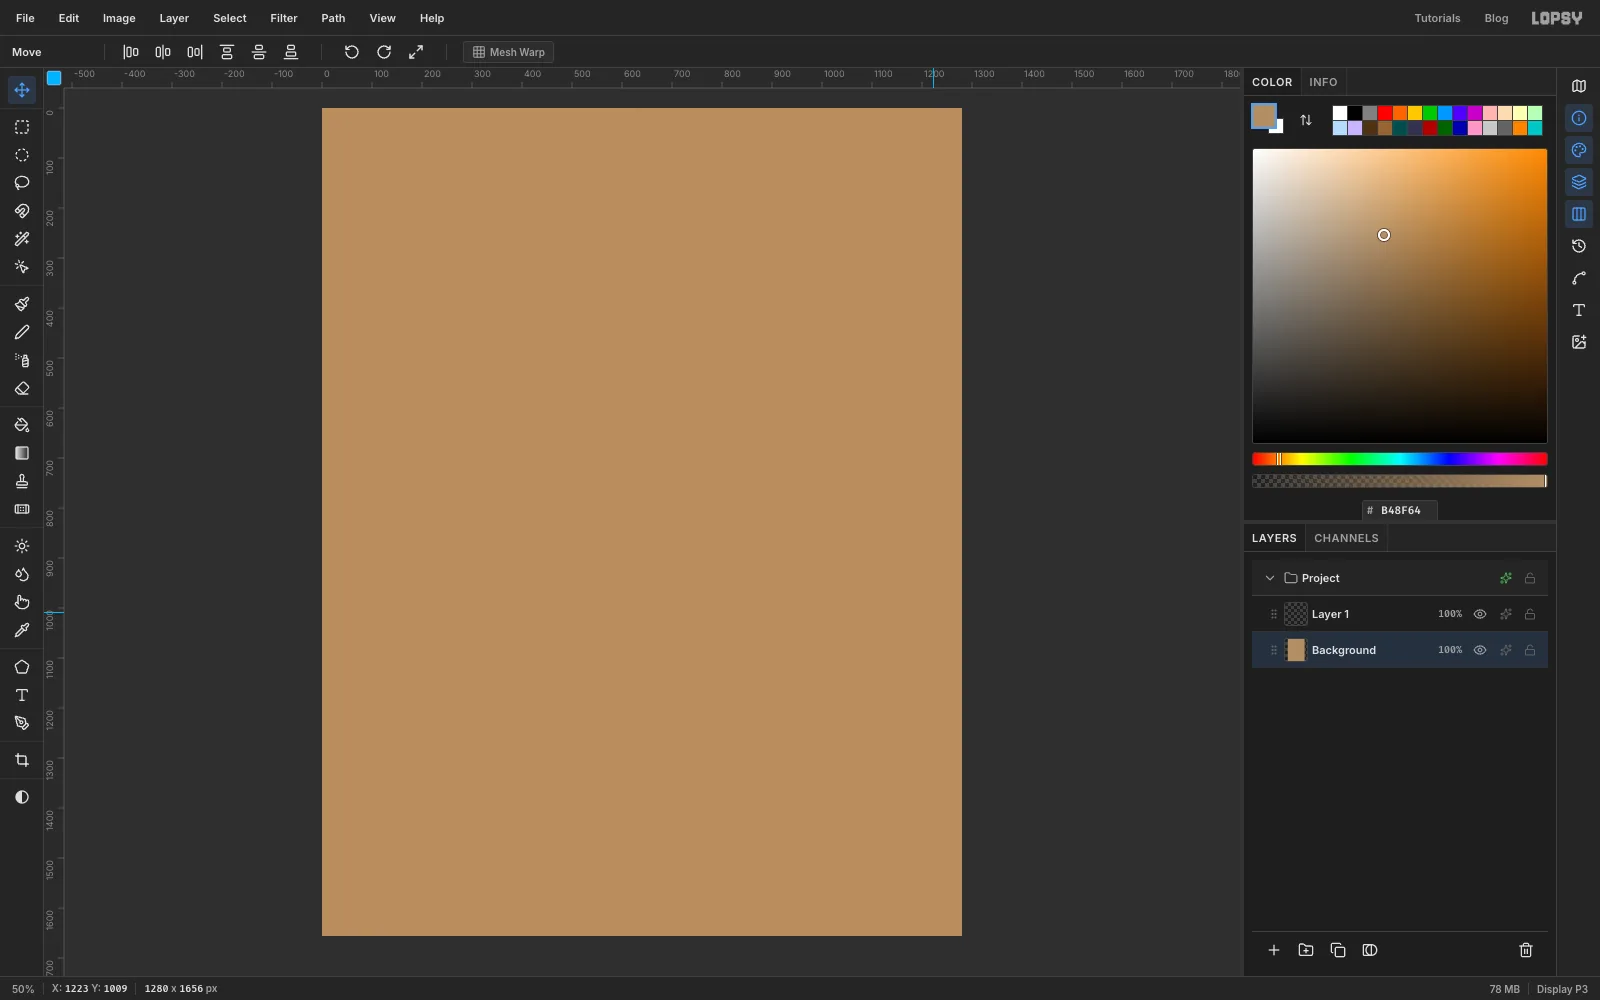
Choose File → New, enter 1280 × 1656 and click Create. Click the Background row, set the foreground to kraft and choose Edit → Fill.
Choose Filter → Add Noise…. Set Amount to
9, Mode to Mono and Distribution to Gaussian, then click Apply. This adds a fine, even grain.New documents also come with an empty Layer 1 at the top. Leave it there; it becomes the leash later.
-
Make short paper fibres
Add a layer and name it Fibres. Fill it with grey , then run Filter → Add Noise… with Amount
100, Mono and Gaussian.Choose Filter → Motion Blur… and set Angle to
70and Distance to9. Each speck smears into a short streak, like the fibres in brown paper. Open the layer's effects drawer, set Blend to Overlay, and drop the layer's opacity to 40%. Overlay hides the mid grey, so only the streaks show.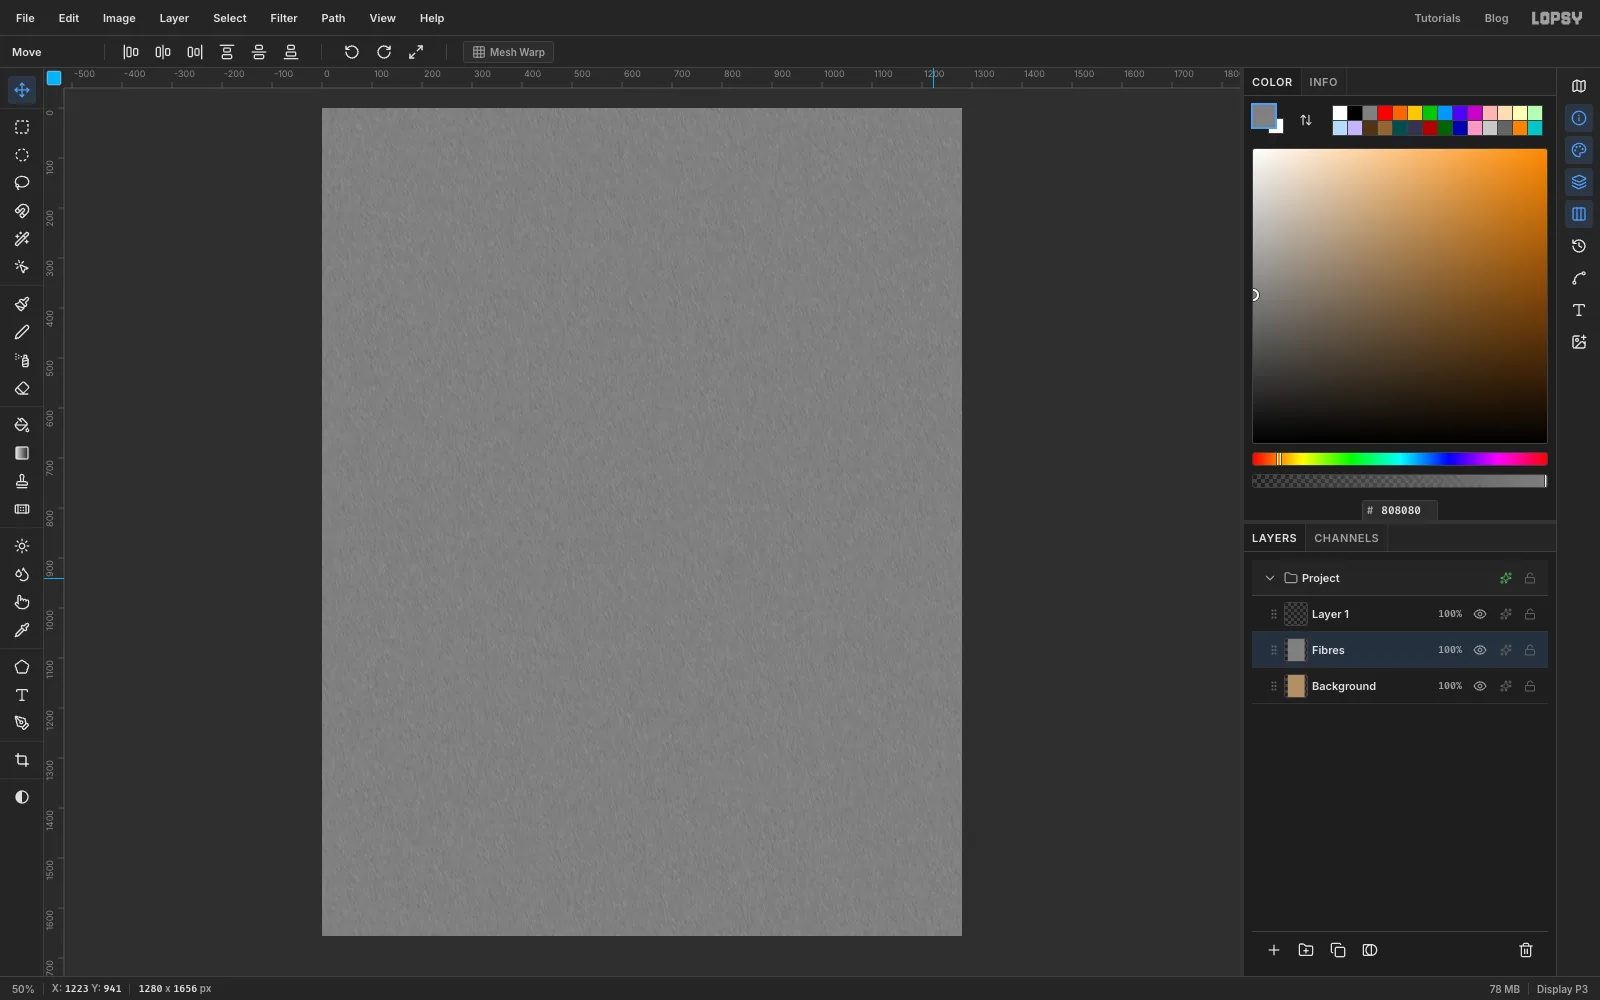
-
Mottle the paper
Kraft paper is never one flat colour. Add a layer named Mottle. Set the foreground to light kraft , press X to swap it into the background colour, then set the foreground to dark brown .
Choose Filter → Clouds…, set Scale to
9and click Apply. Set the layer's Blend to Soft Light and its opacity to 12%. Keep it low; at 30% it starts to look like leather.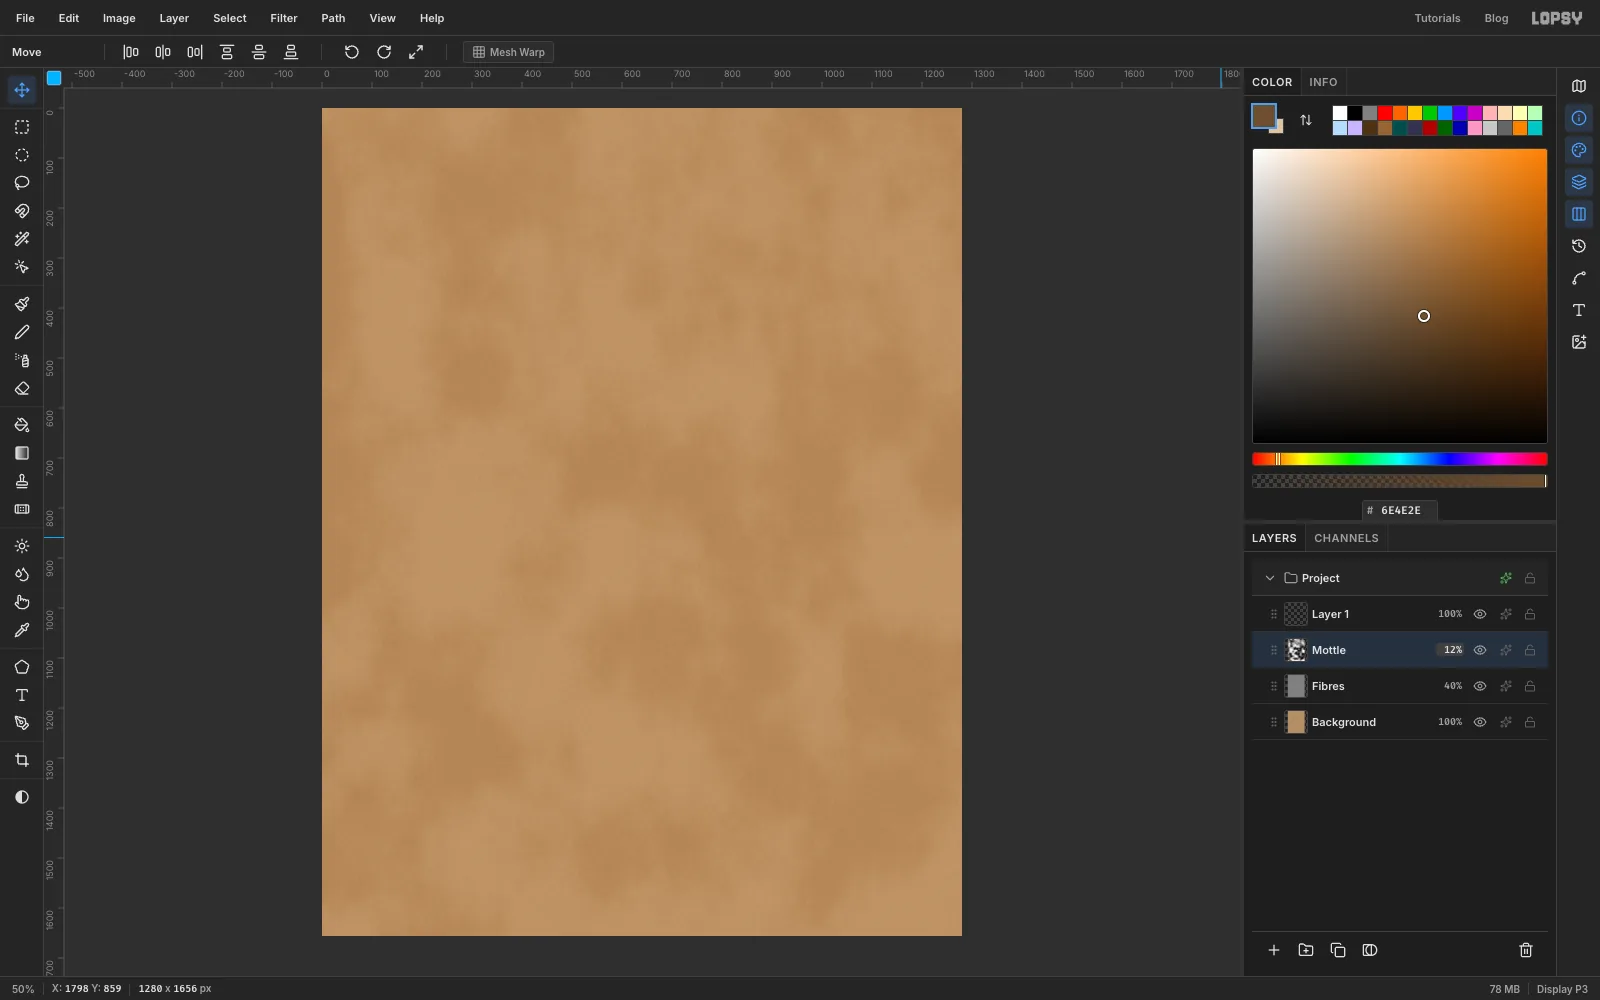
-
Drop in the photo
Click the Mottle row so the photo lands above it. Drag the photo file from your computer onto the canvas. Lopsy makes a new layer called Pasted Layer and shrinks the photo to fit the page. Double-click the name, rename it Lantern Slide, and press Cmd+D.
-
Trace the dog with the Pen
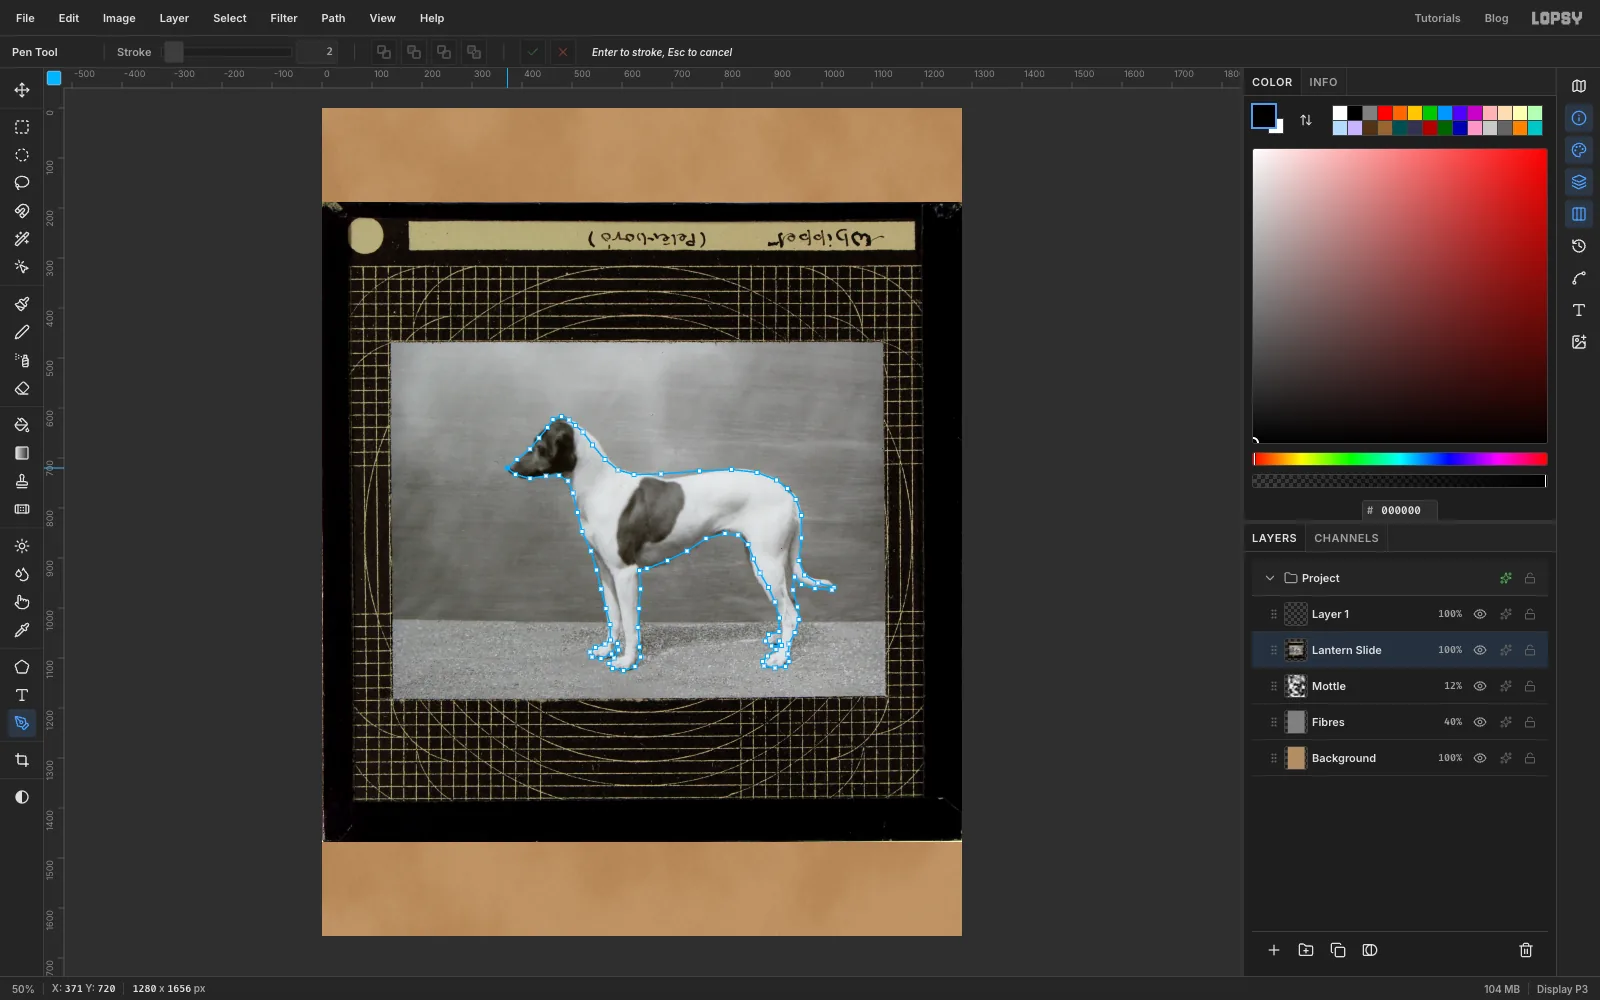
Pick the Pen tool. Click anchor points all the way round the dog: up the muzzle, over the ear and down the back of the neck, along the back, round the tail, down the back leg, round each foot, up between the legs, along the belly and up the chest to the throat. Put an anchor wherever the outline changes direction. You'll need about 90 of them. Tight spots like the toes need anchors close together.
Zoom in with Cmd+= for the feet and hold Space and drag to pan; the path stays open while you move around. If you misplace an anchor, press Cmd+Z to take it back. Click the first anchor again to close the path.
-
Turn the path into a selection
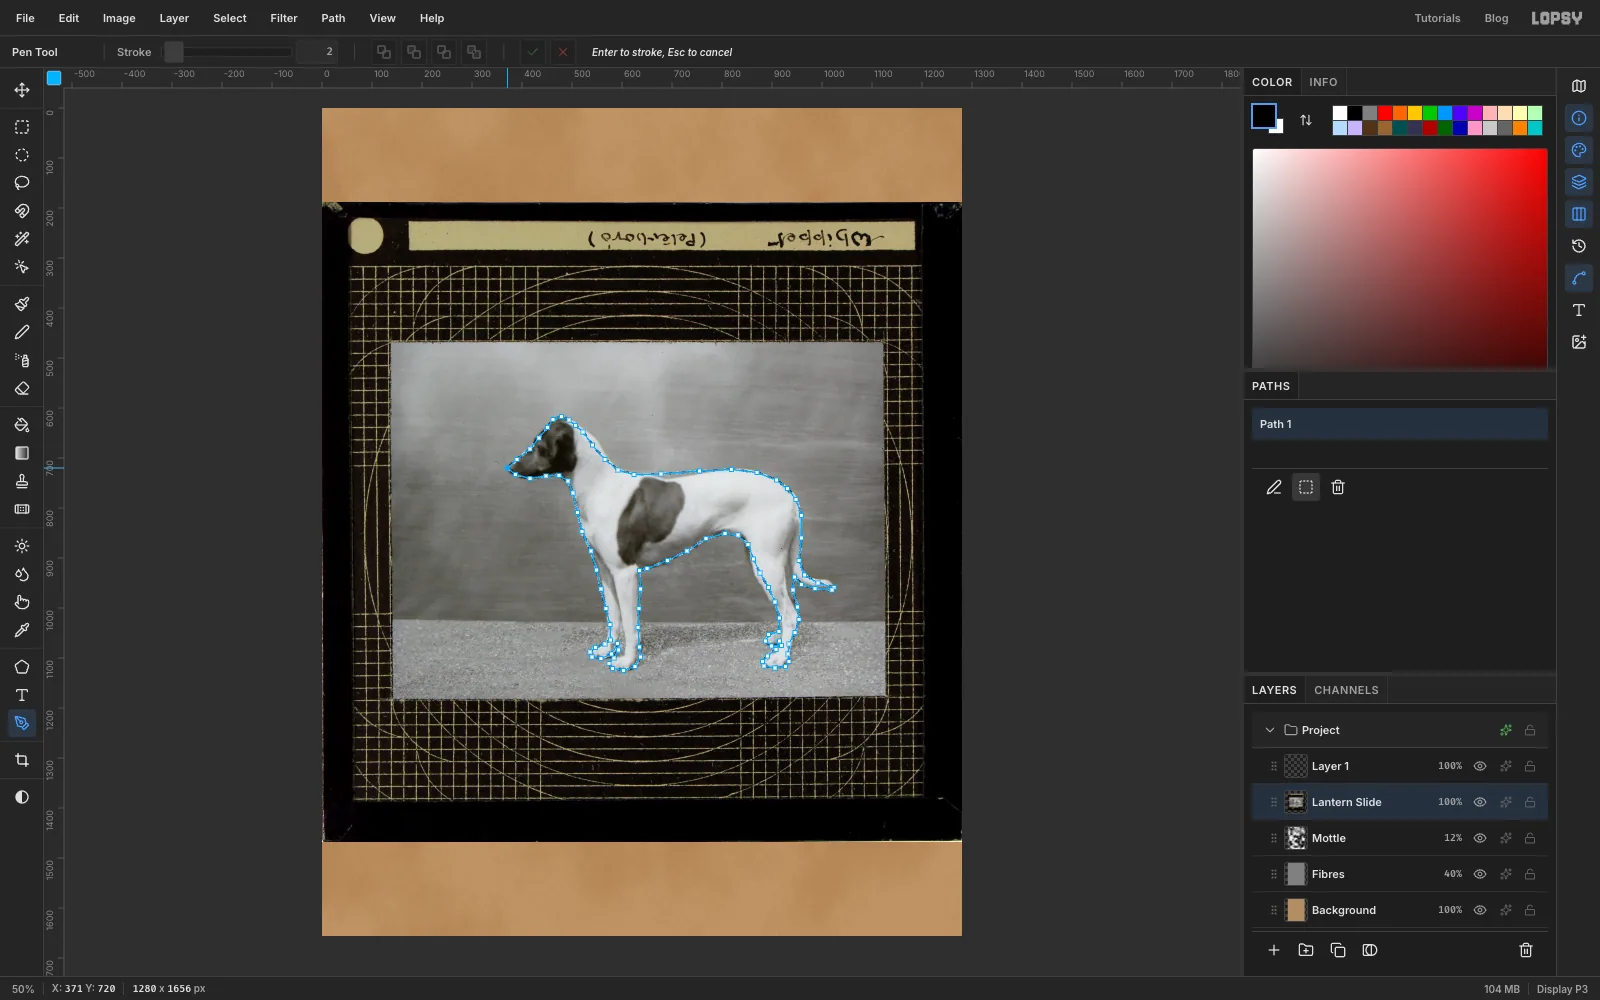
Open the Paths panel from the right-hand toolbar. Path 1 is selected. Click the Path to Selection button (the dotted square) under the list. Marching ants now follow your outline.
-
Lift the dog onto its own layer
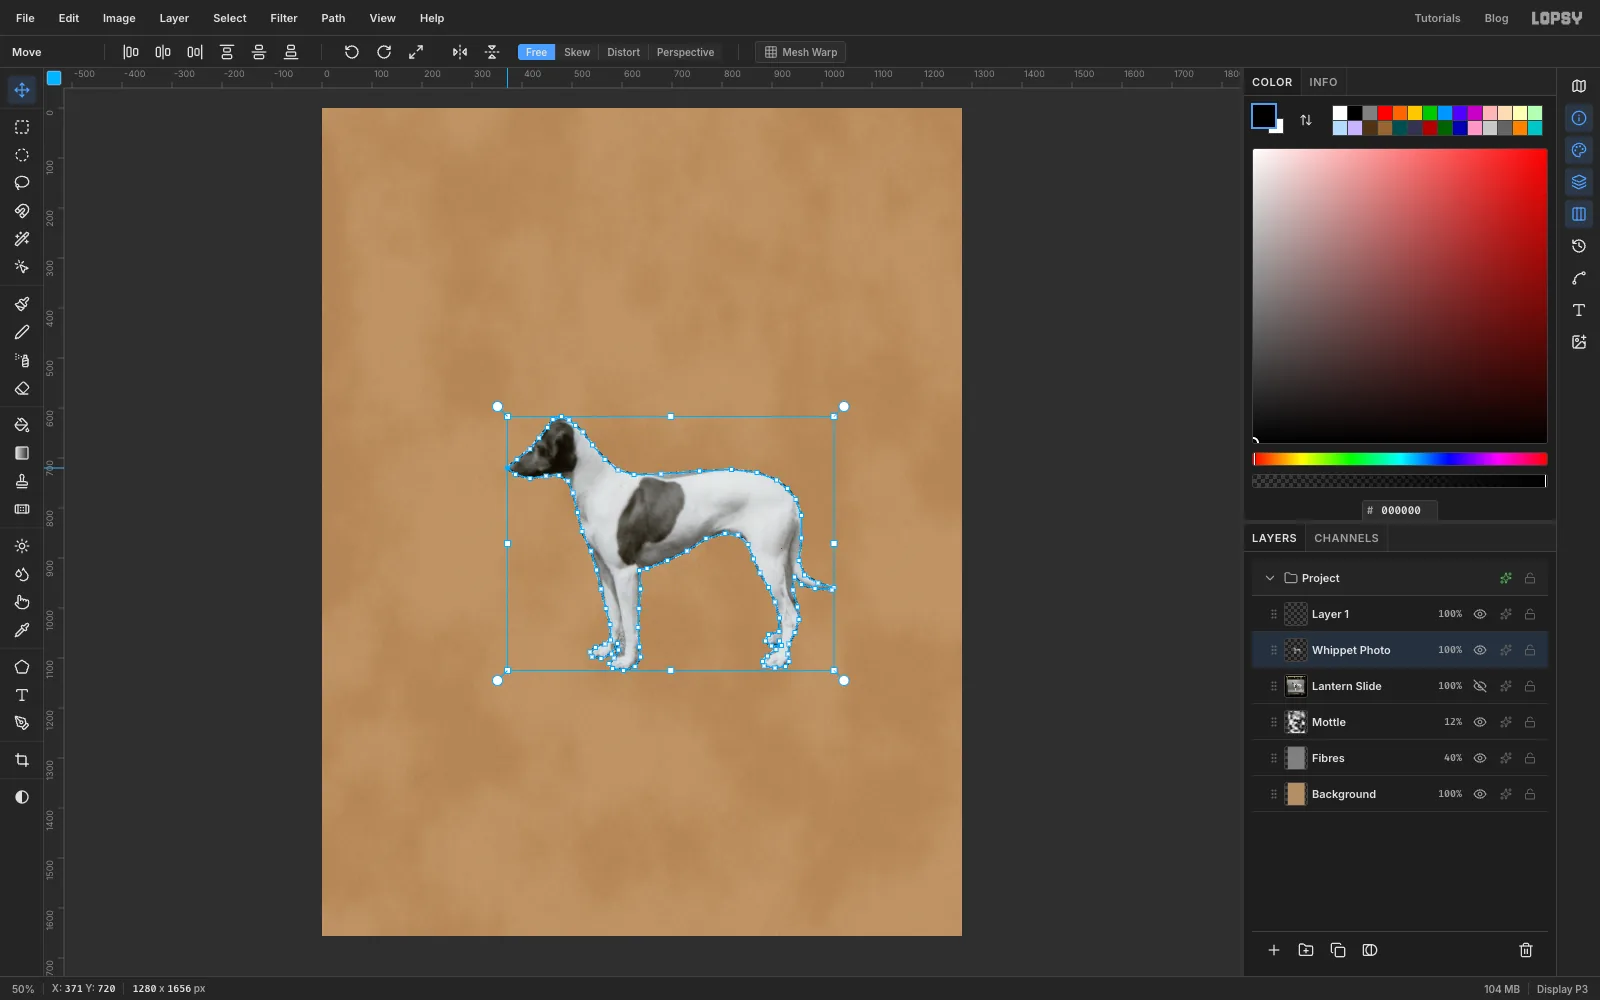
With Lantern Slide still selected, press Cmd+C then Cmd+V. The paste lands in exactly the same place on a new layer. Name it Whippet Photo.
Close the Paths panel, then click the eye on Lantern Slide to hide it. Keep it hidden rather than deleting it, in case you want to retrace.
-
Scale the dog up
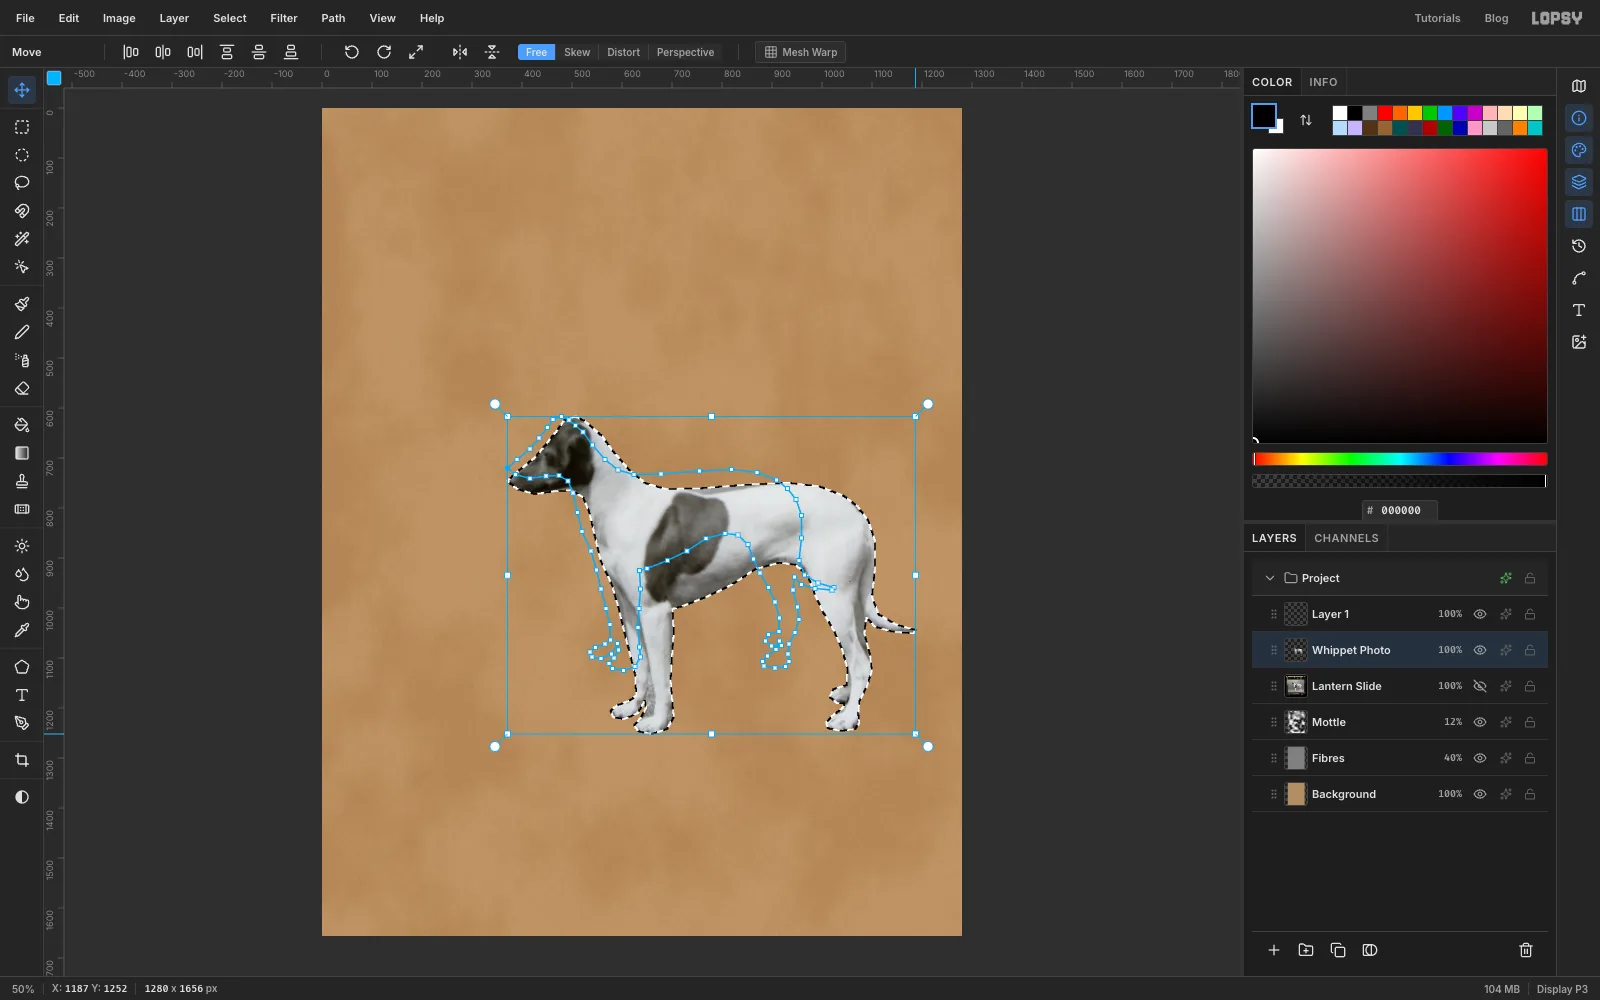
⌘-click the Whippet Photo thumbnail to select its pixels, and pick the Move tool. Hold Cmd and drag the bottom-right corner handle down and to the right until the dog is about a quarter bigger, roughly 815 px from nose to tail. Holding ⌘ keeps the proportions. Press Cmd+D.
-
Stand the dog on its ground line
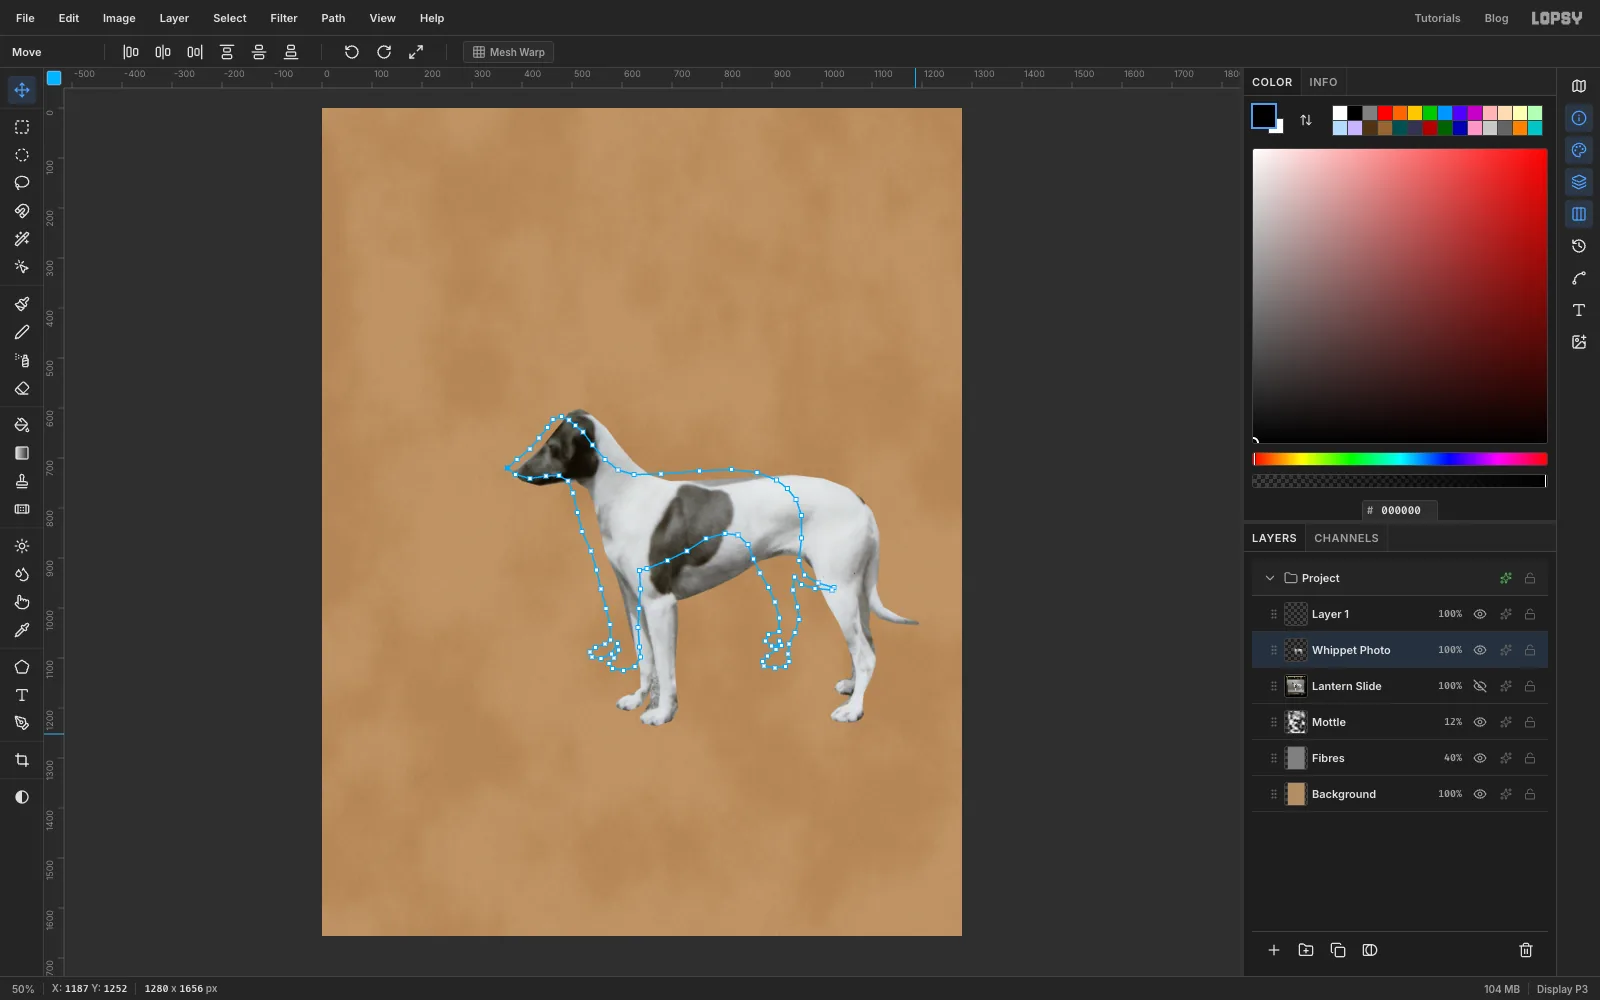
With the Move tool still active, use the arrow keys to nudge the dog until the tip of its nose is at about
x 380and its front feet touchy 1235. Shift+arrow moves 10 px at a time. The ground line will go at 1240.Back in the Paths panel, click Path 1 and then the trash-can Delete Path button under the list; you won't need the outline again.
-
Make a tone study
Click Whippet Photo and click Duplicate Layer at the bottom of the Layers panel. Name the copy Tone Study.
Run Filter → Desaturate, then Filter → Gaussian Blur… with Radius
3, then Filter → Posterize… with Levels3. The blur smooths the photo first, so posterizing gives smooth shapes instead of noise. You now have three flat tones: black for the head and patch, grey for the shading, and white for the coat. Each tone becomes one stencil plate.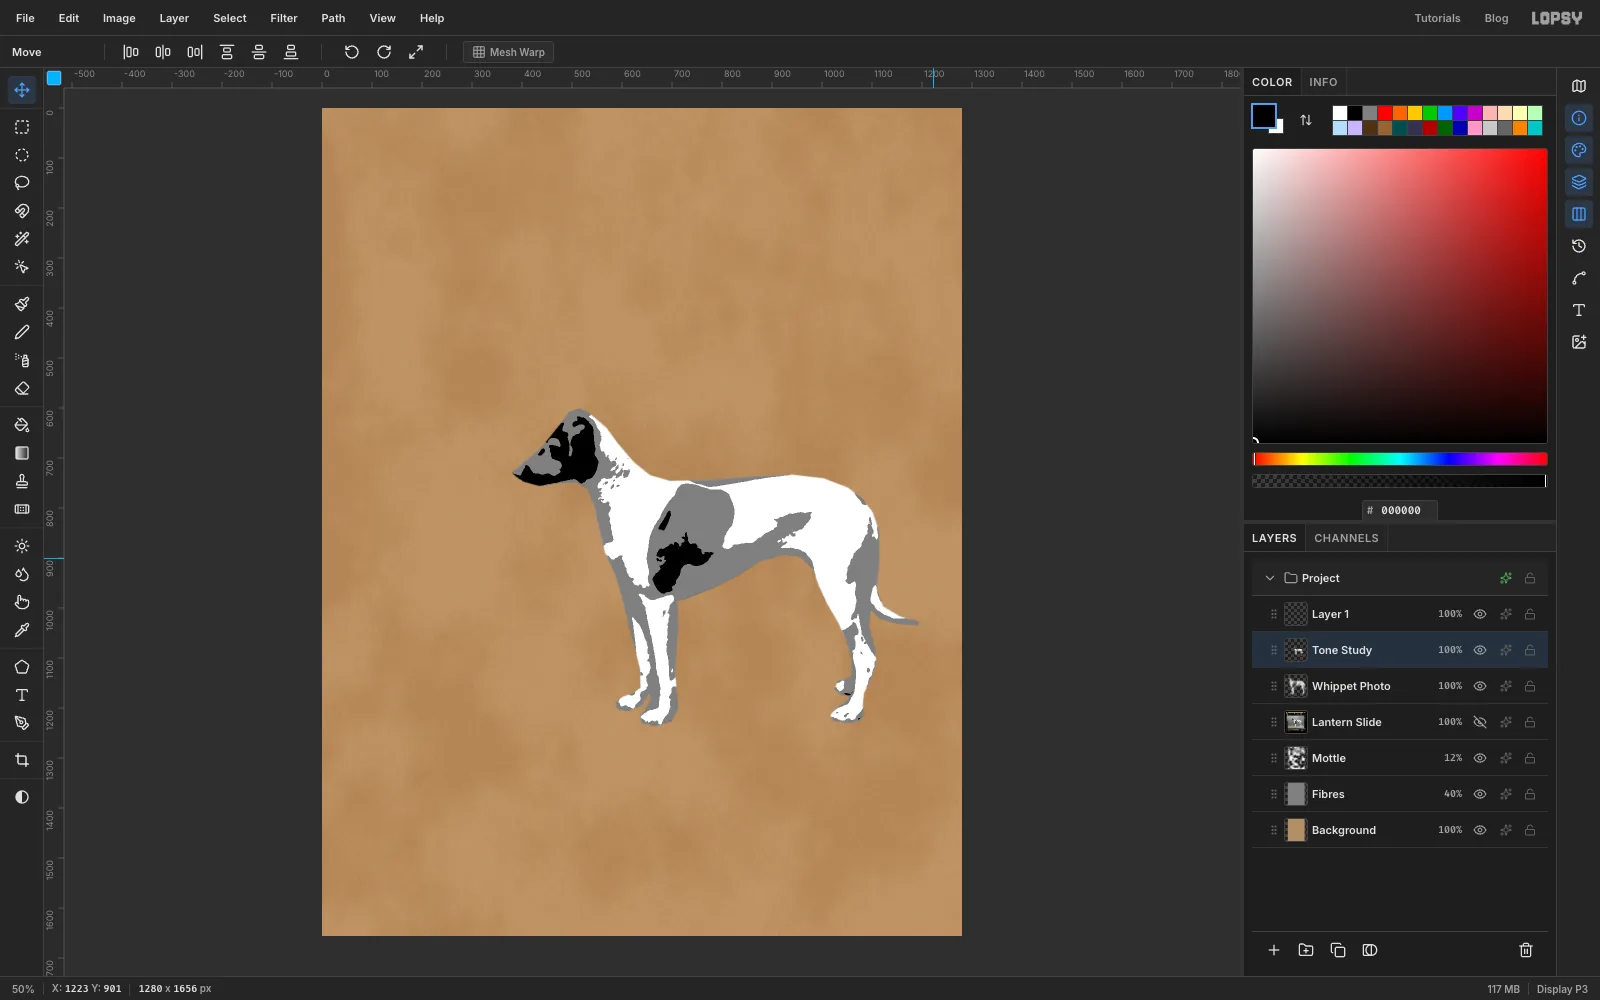
-
Fill the cream base plate
With Tone Study selected, click New Group and name it Whippet Stencil. Inside it, add a layer named Overspray. Leave it empty for now.
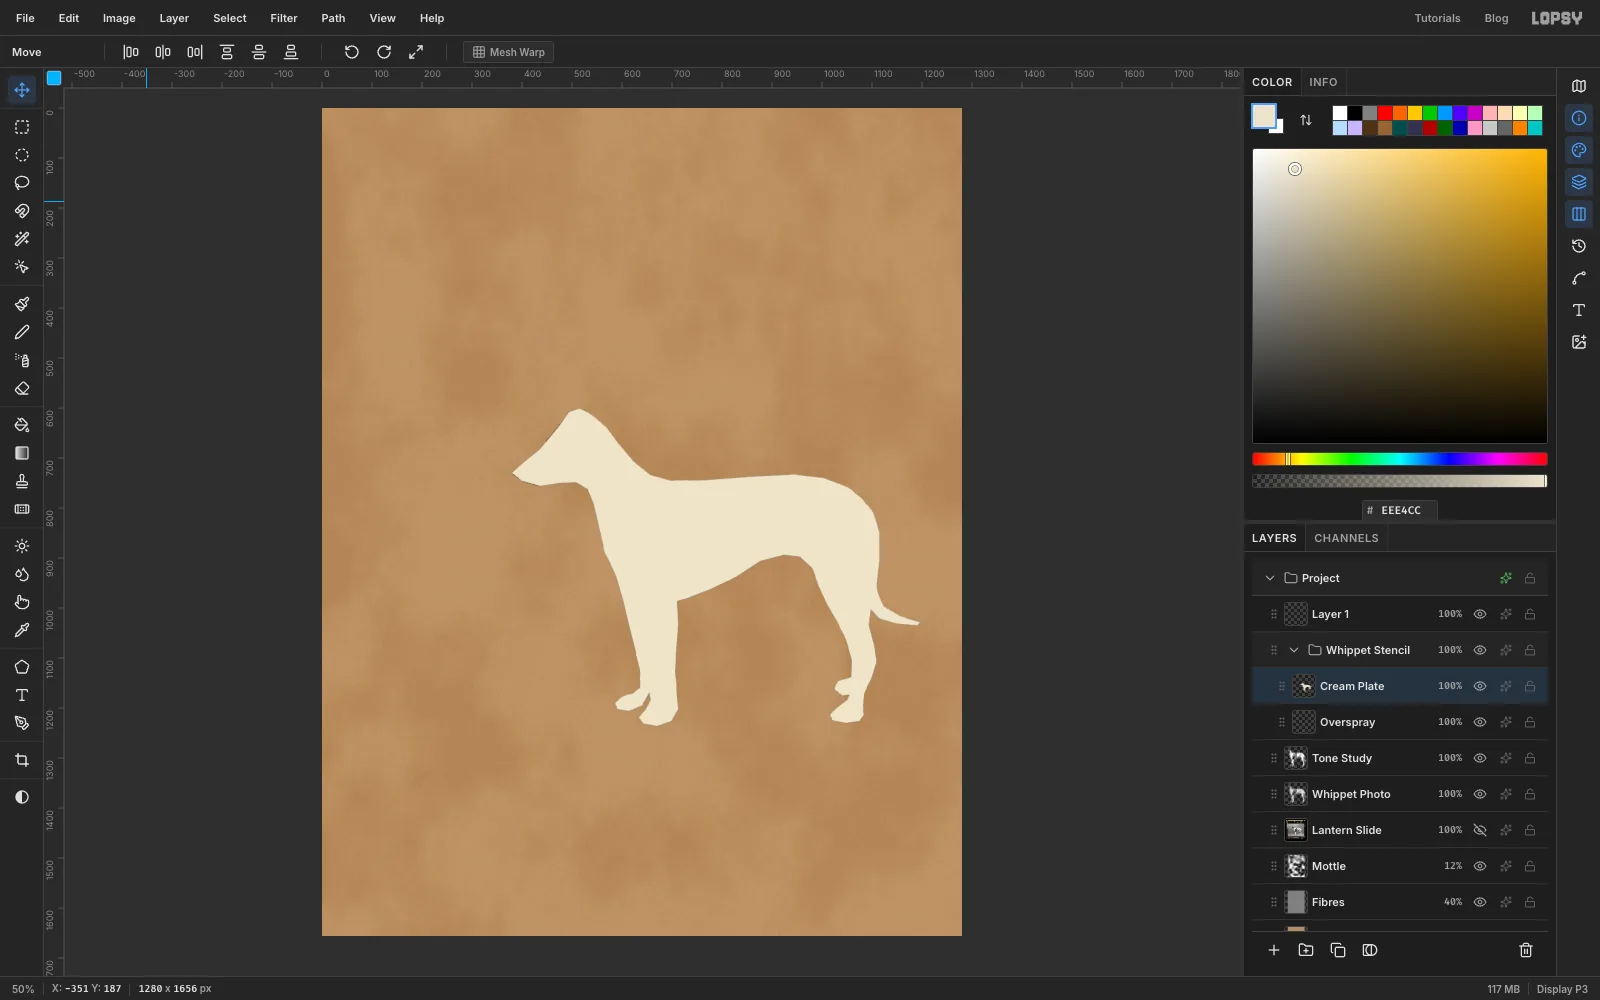
⌘-click the Whippet Photo thumbnail, add a layer named Cream Plate, and fill the selection with cream . Deselect.
-
Select the brown plate
Click Tone Study, then pick the Magic Wand. Set Tolerance to
12and uncheck Contiguous, so one click picks up every patch of that tone.Click inside the black of the head, then Shift-click a grey area of the body to add every grey patch. The brown plate covers both the grey and the black areas, and the black plate is sprayed on top of it.
Choose Select → Grow…
3, then Cmd+Shift+Option-click the Whippet Photo thumbnail. That keeps only the part of the selection that overlaps the dog. Growing first pushes the plate right out to the dog's edge, so no thin cream rim shows round the outline.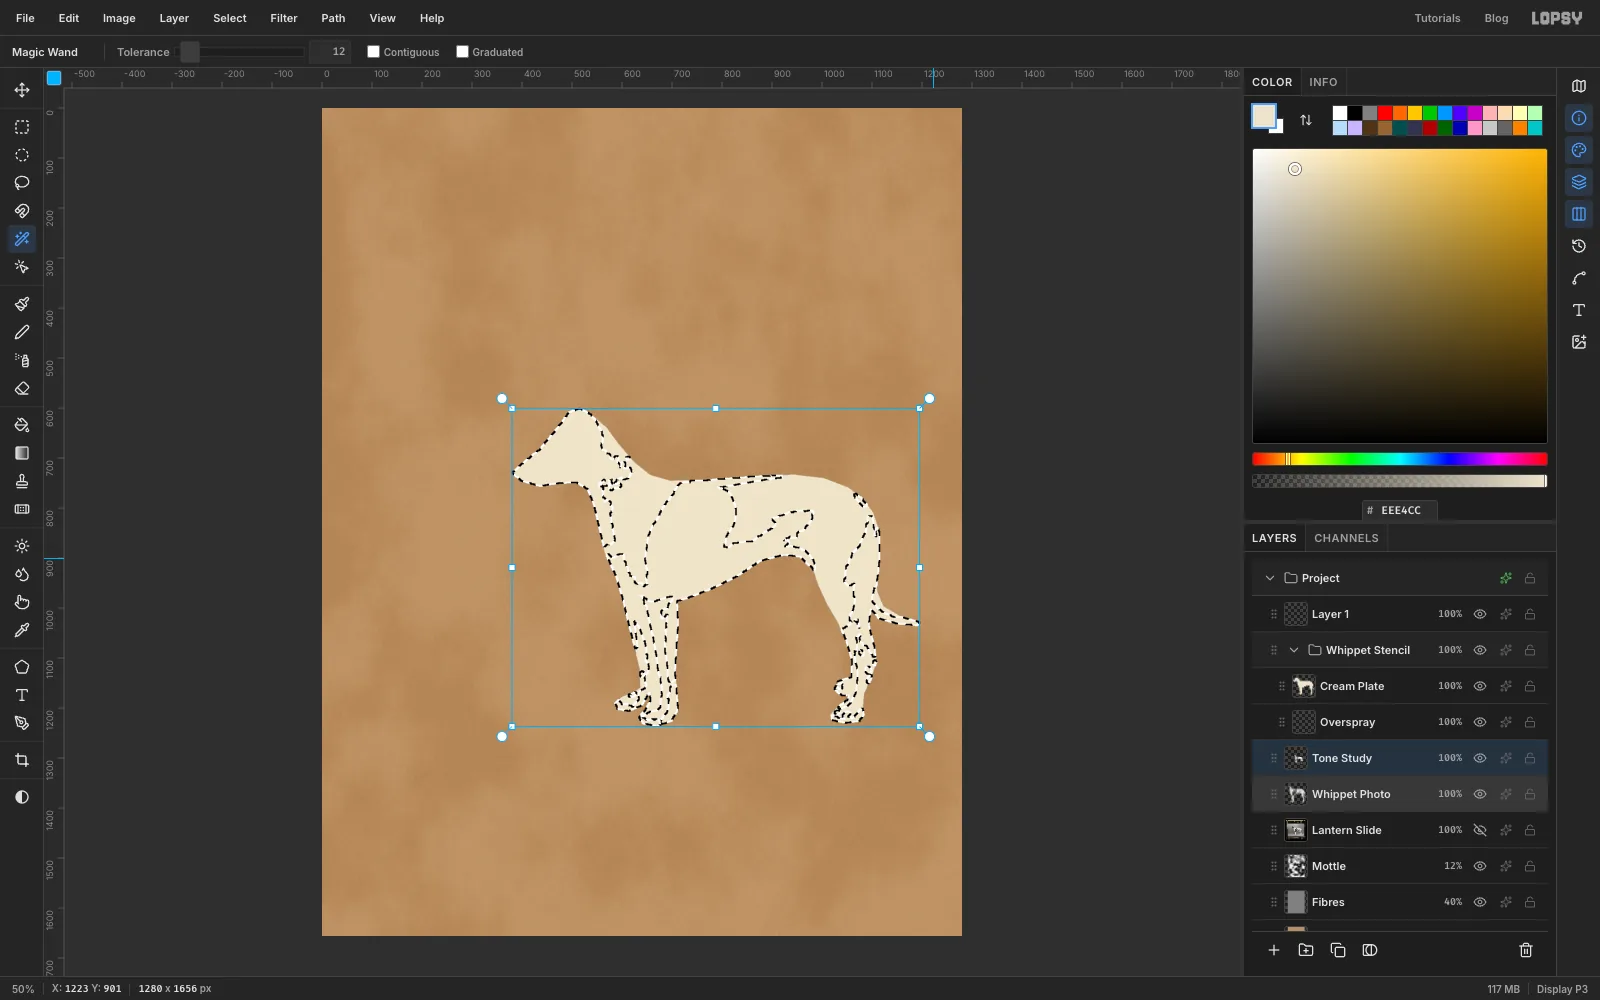
-
Spray the brown and black plates
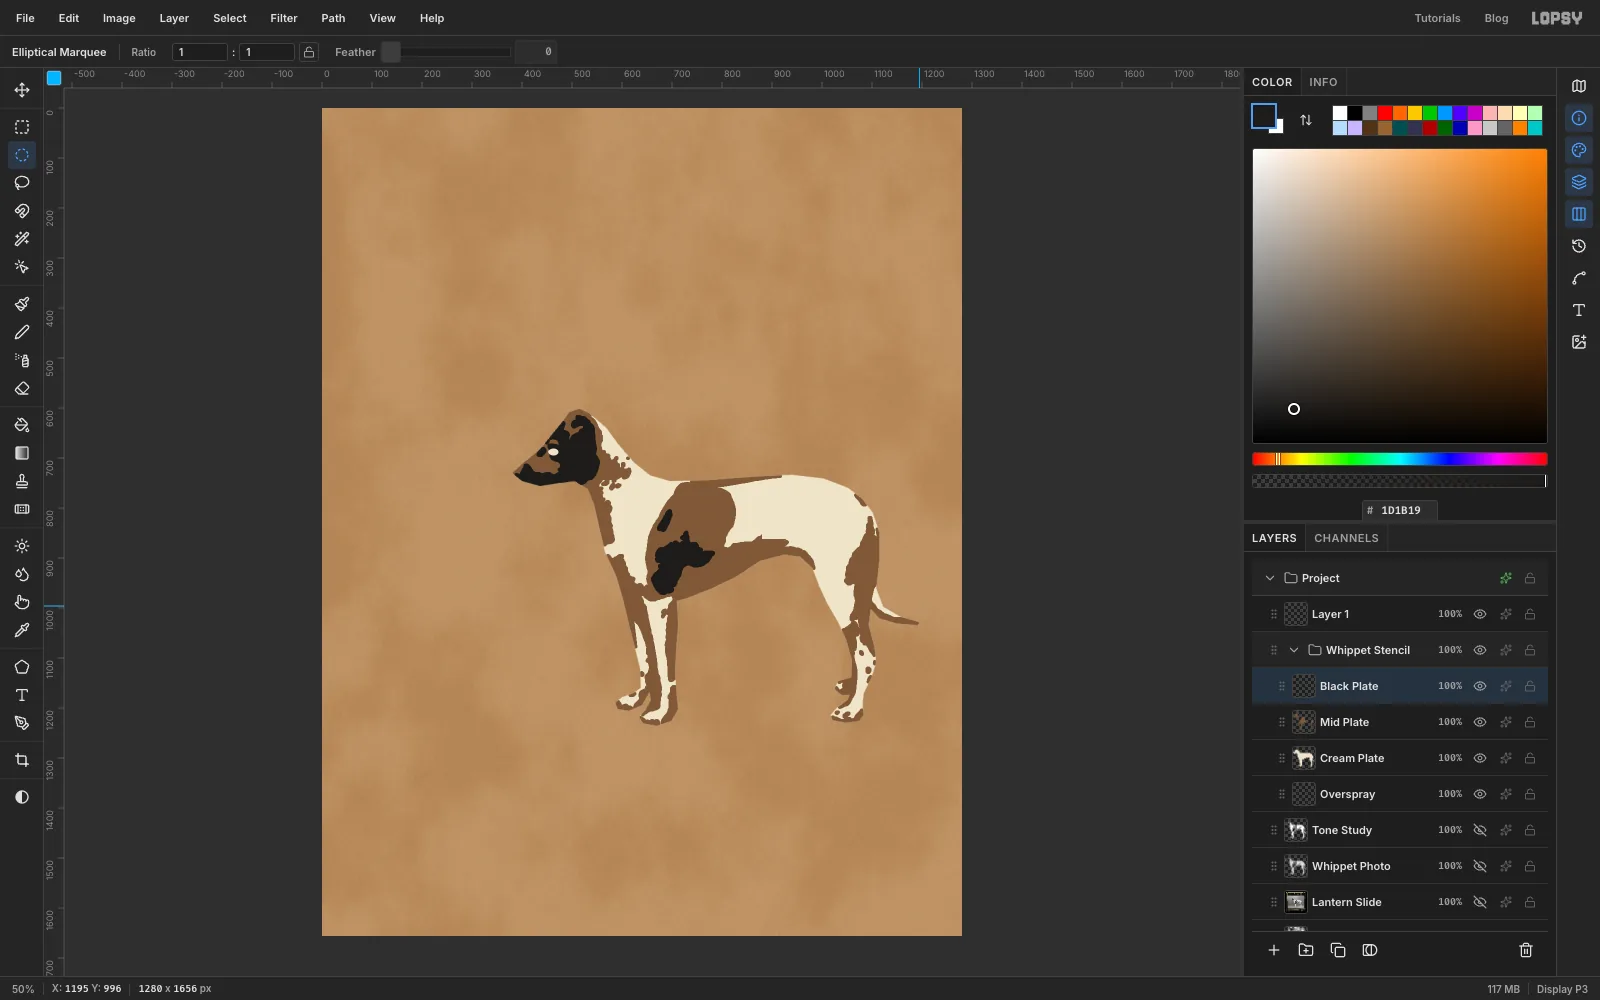
Click Cream Plate and add a layer named Mid Plate. Fill the selection with brown and press Cmd+D. Then clean it up while the layer is selected:
- a flank shadow above the back leg looks like a floating extra leg. With the Rectangular Marquee, select from
880, 795to992, 862and press Delete. - open the eye: deselect, then with the Elliptical Marquee select from
452, 676to480, 696and press Delete.
Deselect. Click Tone Study again and use the wand to click only the black of the head. Grow by
3and ⌘⇧⌥-click the Whippet Photo thumbnail as before. Click Mid Plate, add a layer named Black Plate, and fill it with ink and deselect. Then, deselecting before each one:- delete two stray specks by the back foot: with the Rectangular Marquee, select from
1034, 1156to1074, 1188and press Delete, then do the same from1060, 1208to1088, 1236. - with the Elliptical Marquee, select from
453, 681to473, 695and press Delete. This makes the eye hole in the black plate.
Deselect, then hide Tone Study and Whippet Photo.
- a flank shadow above the back leg looks like a floating extra leg. With the Rectangular Marquee, select from
-
Cut the stencil bridges
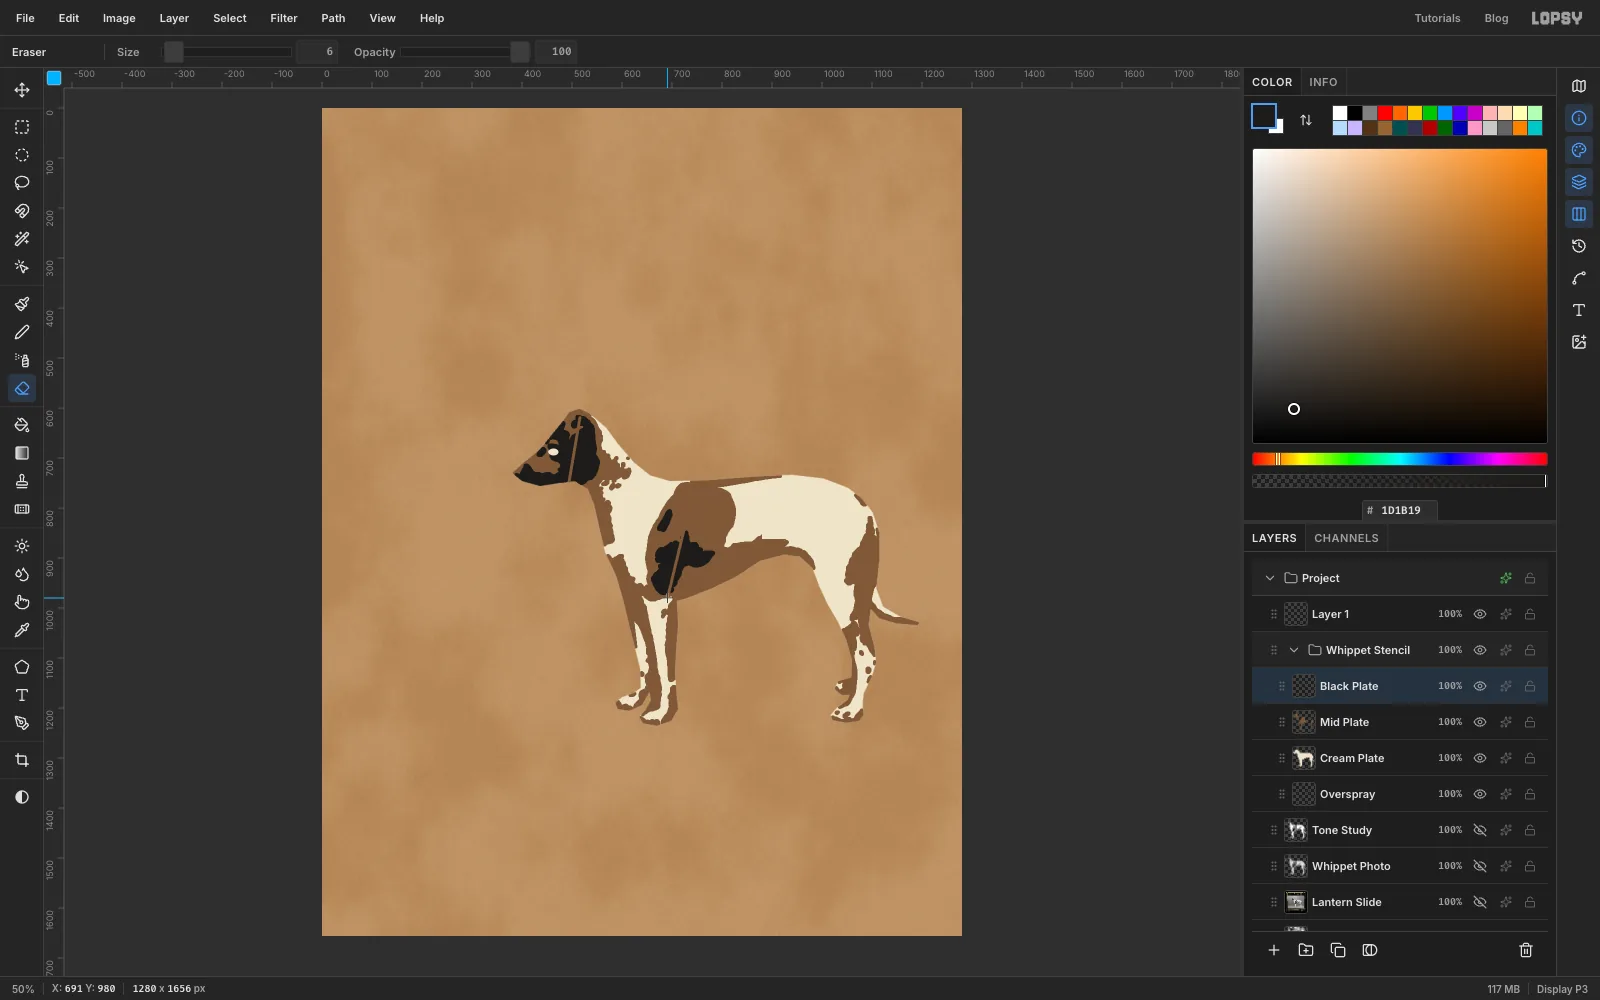
The black head patch and the body patch would fall out of a real stencil, so give them bridges. Click Black Plate, pick the Eraser and set Size to
6.Click at
516, 619near the top of the ear, then Shift-click at493, 754below the jaw. This erases a straight line through the head. Click at747, 749on the top edge of the body patch and Shift-click at691, 980below it.Press Cmd+Z four times to watch the bridges disappear, then Cmd+Shift+Z four times to bring them back. Each line is two history steps: the click and the Shift-click.
-
Knock the black plate out of register
With Black Plate selected and the Move tool active, press the right arrow
6times and the up arrow4times. A sliver of brown now shows along one side of every black shape, as if the second stencil went down a little crooked.Now the overspray. Click the empty Overspray layer and pick the Spray tool. Set Size
70, Density22, Opacity30and Softness90, and set the foreground to . In one long, loose stroke, trace round the dog's outline. The half of each dab that lands on the dog is hidden under the plates, so only a soft speckled halo shows outside.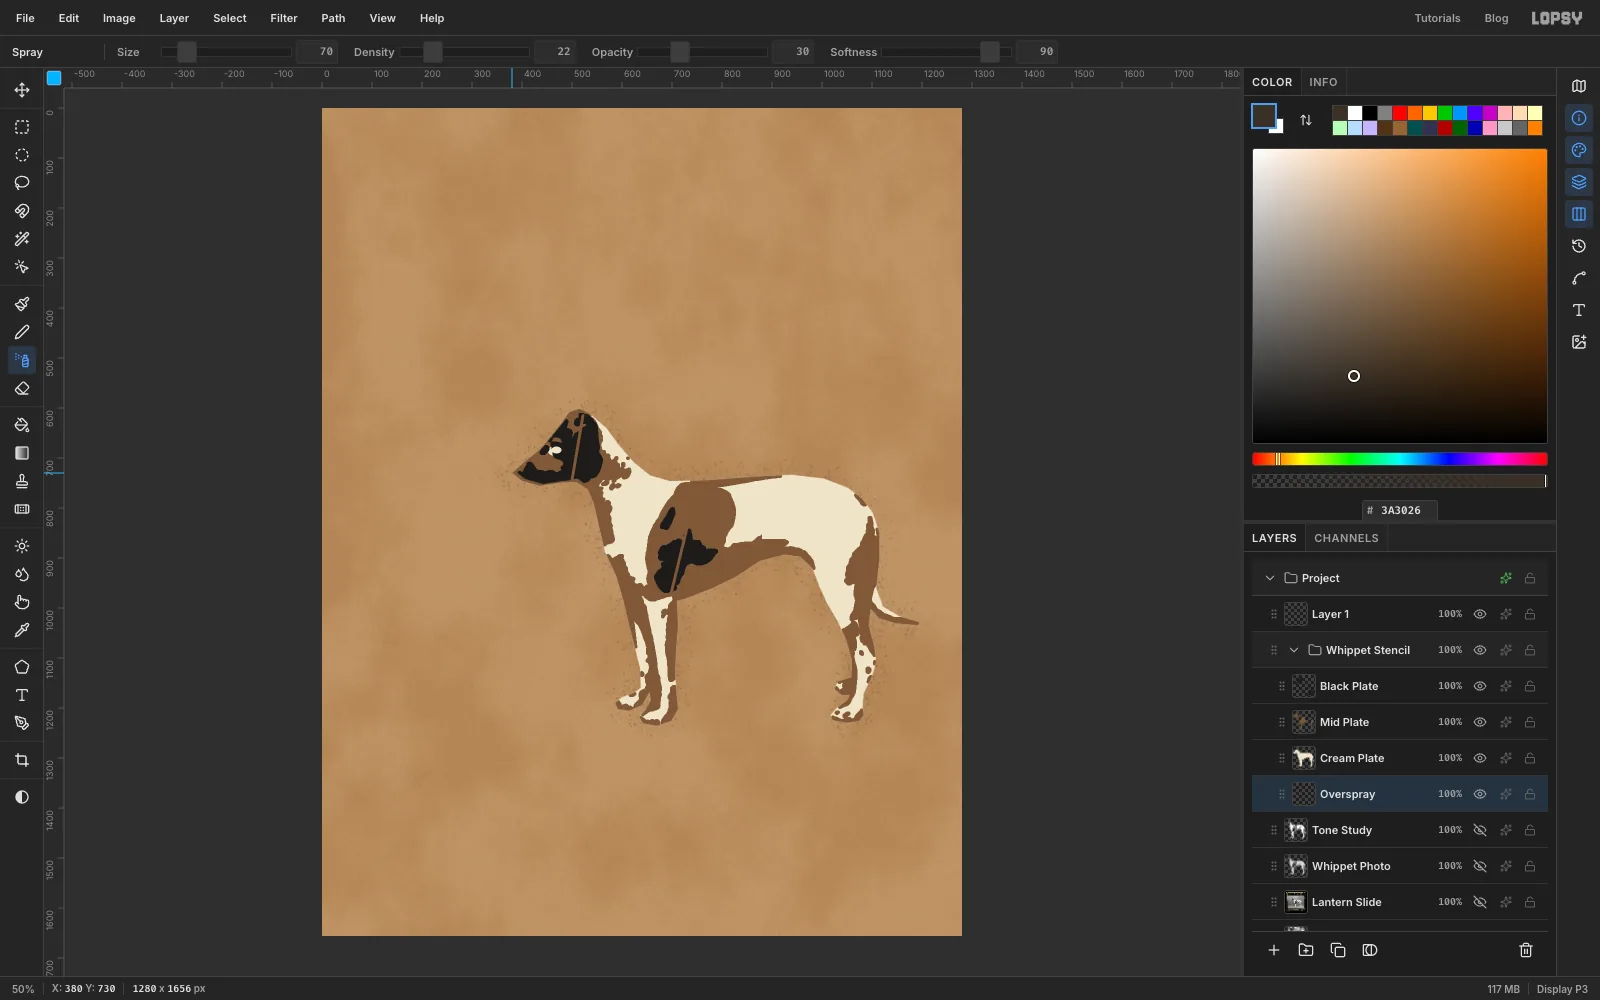
-
Fill the sun disc
Click Lantern Slide (the disc goes below the stencil group) and add a layer named Sun Disc. With the Elliptical Marquee, select from
490, 590to1170, 1270. That's a circle with a radius of 340 px, centred on830, 930. Fill it with orange , deselect, and run Filter → Add Noise… with Amount7, Mono, Gaussian for some spray grain.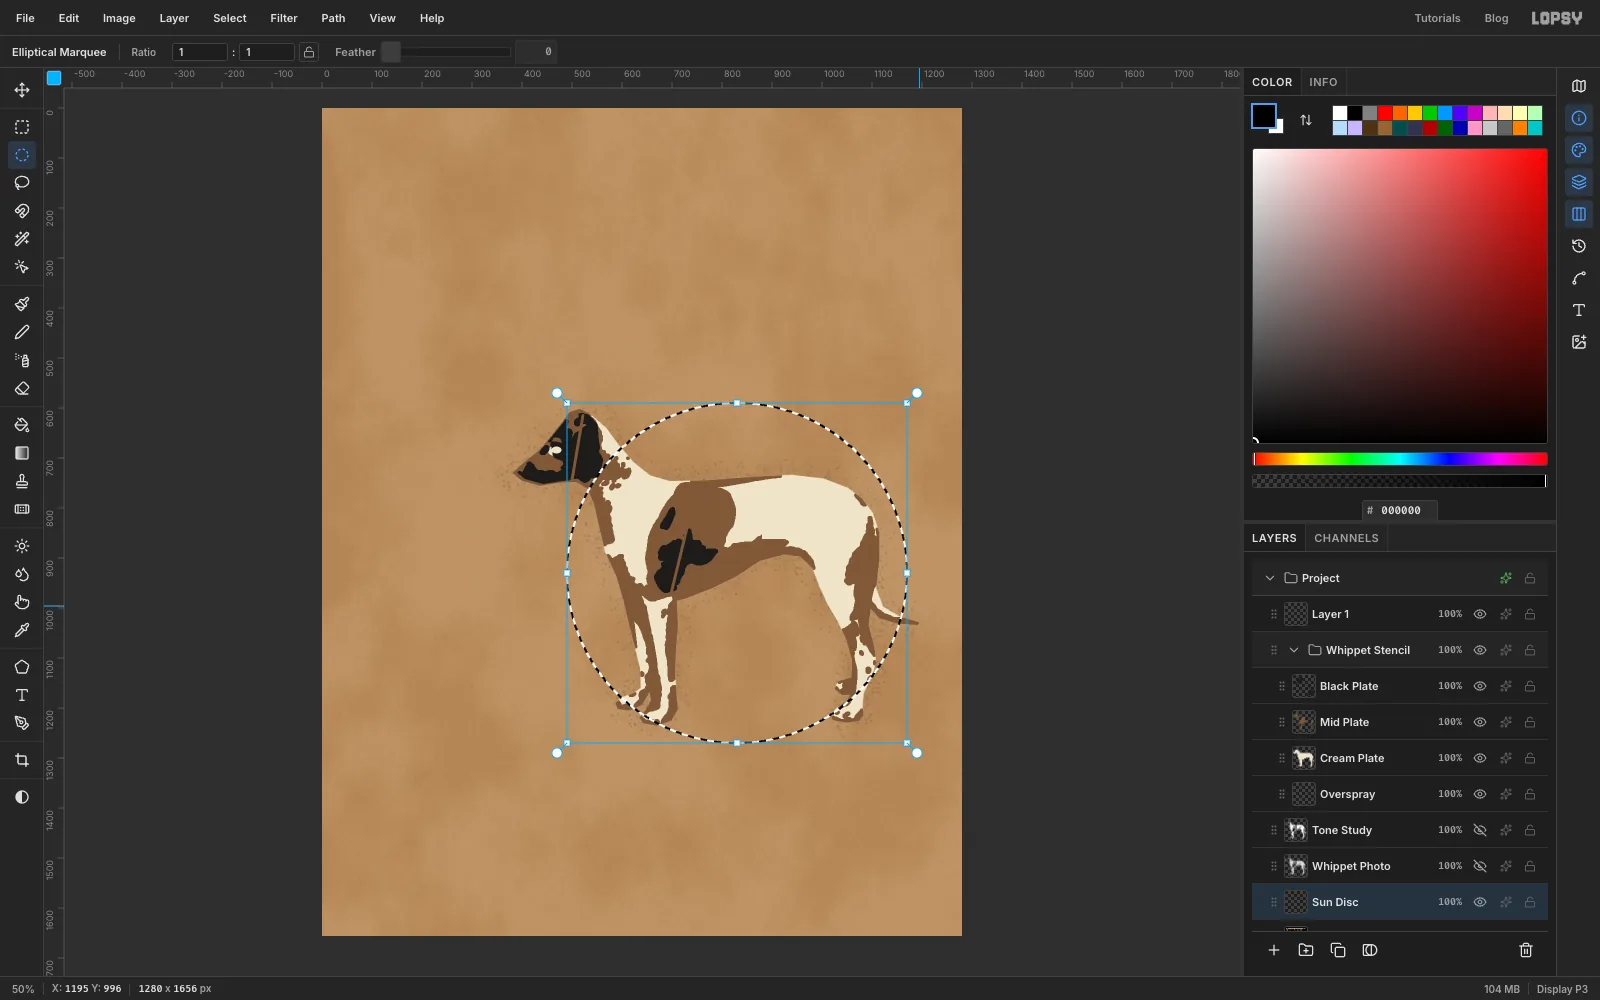
-
Add overspray round the disc
Click Lantern Slide again and add a layer named Disc Overspray, just under the disc. Pick the Spray tool with Size
90, Density18, Opacity35, Softness90and the foreground set to orange. Drag right round the rim of the disc in one circle.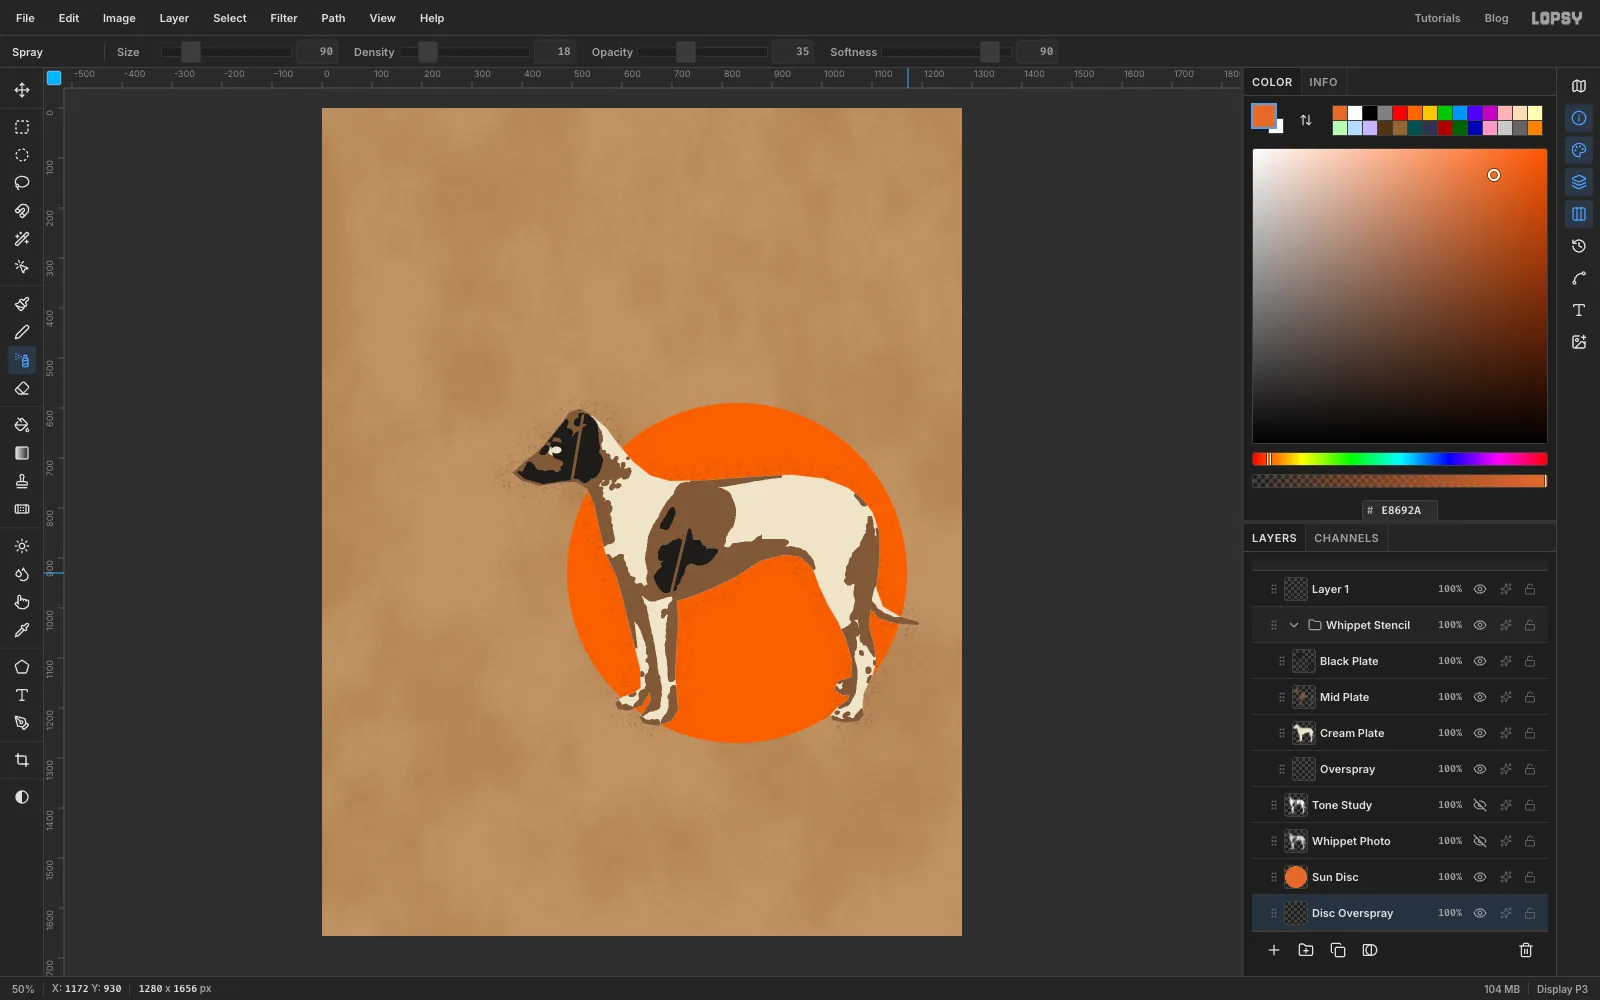
-
Paint the ground and a sprayed shadow
Click Sun Disc and add a layer named Ground. Select from
72, 1240to1208, 1254with the Rectangular Marquee, fill it with ink, and deselect. The bar crosses the disc about 30 px above its bottom edge. Don't line the bar up with the disc's lowest point; the two edges would just touch and look like an accident.For the cast shadow, use the Elliptical Marquee to select from
560, 1216to1190, 1244. With the Spray tool at Size60, Density45, Opacity55and Softness70, zigzag back and forth inside the selection. The spray can't leave it, so the shadow gets a clean oval outer shape with a grainy inside. Deselect.Finally, set Size to
26, Density20and Opacity35, and zigzag lightly along the top and bottom edges of the bar to roughen it.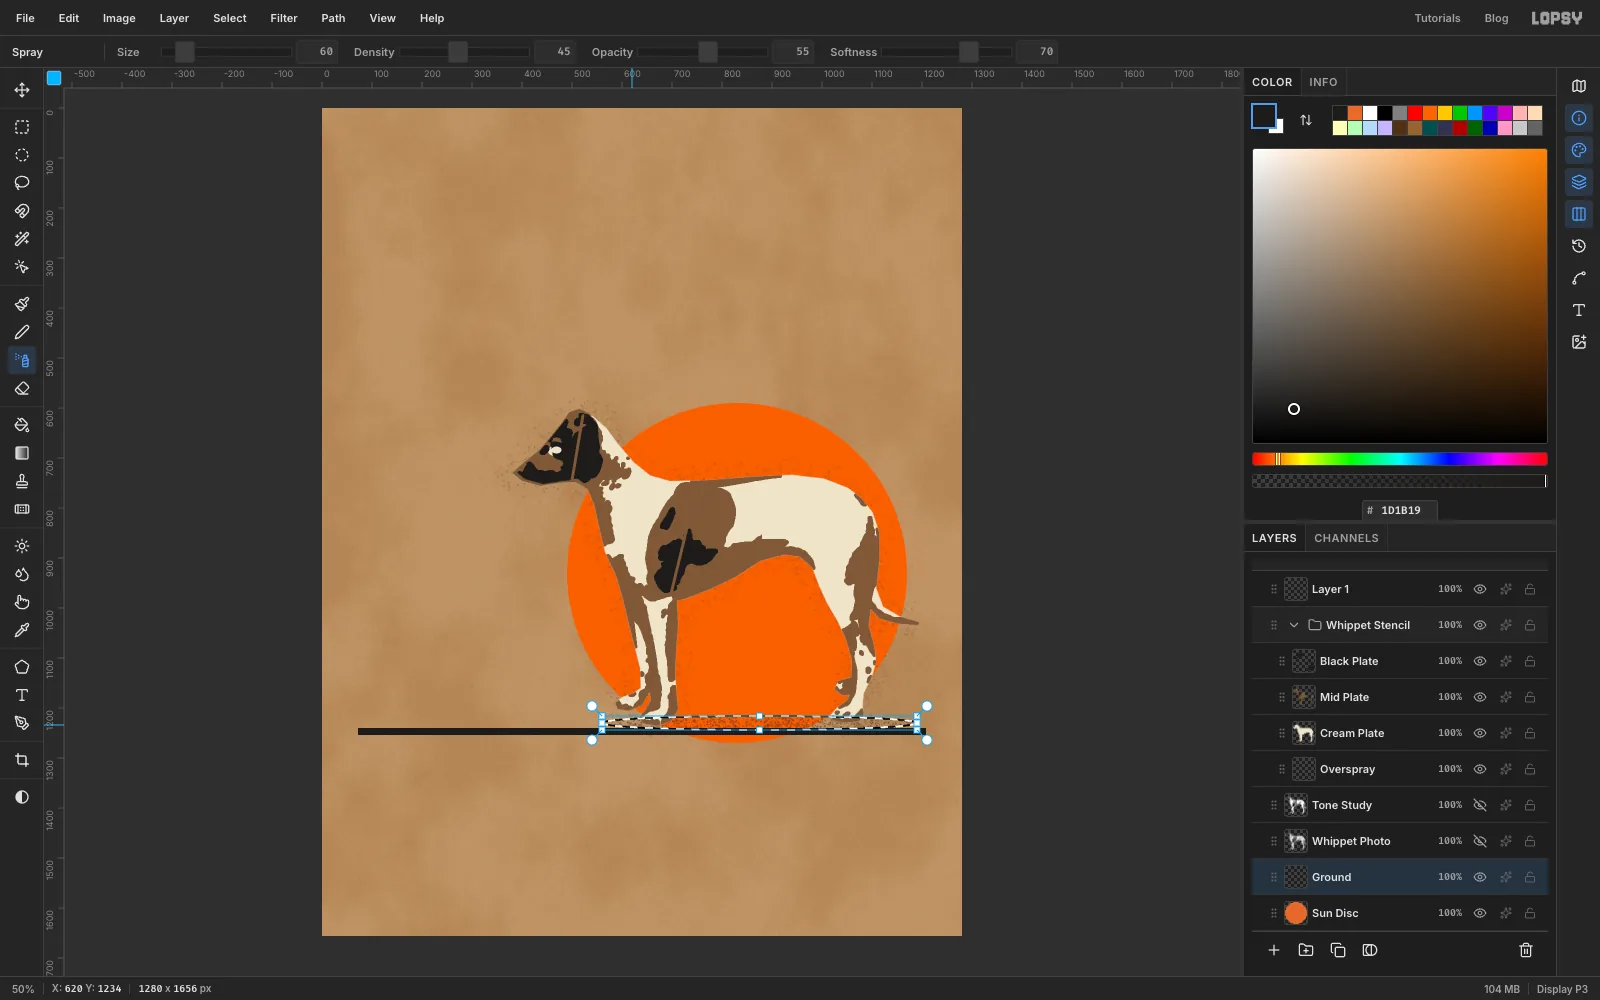
-
Draw the collar and leash
Click Layer 1 (still empty, at the top) and rename it Leash. Pick the Brush, set Size
16, Hardness100and Opacity100with ink as the foreground. Click at557, 635behind the ear and Shift-click at527, 759under the jaw to paint the collar.Pick the Pen. Click at
556, 639on the collar. Then press at820, 590and drag towards920, 560; dragging pulls out curve handles, so the leash sags. Click at1010, 478for the end. Set Stroke to7in the options bar and press Enter. The path is stroked in the foreground colour.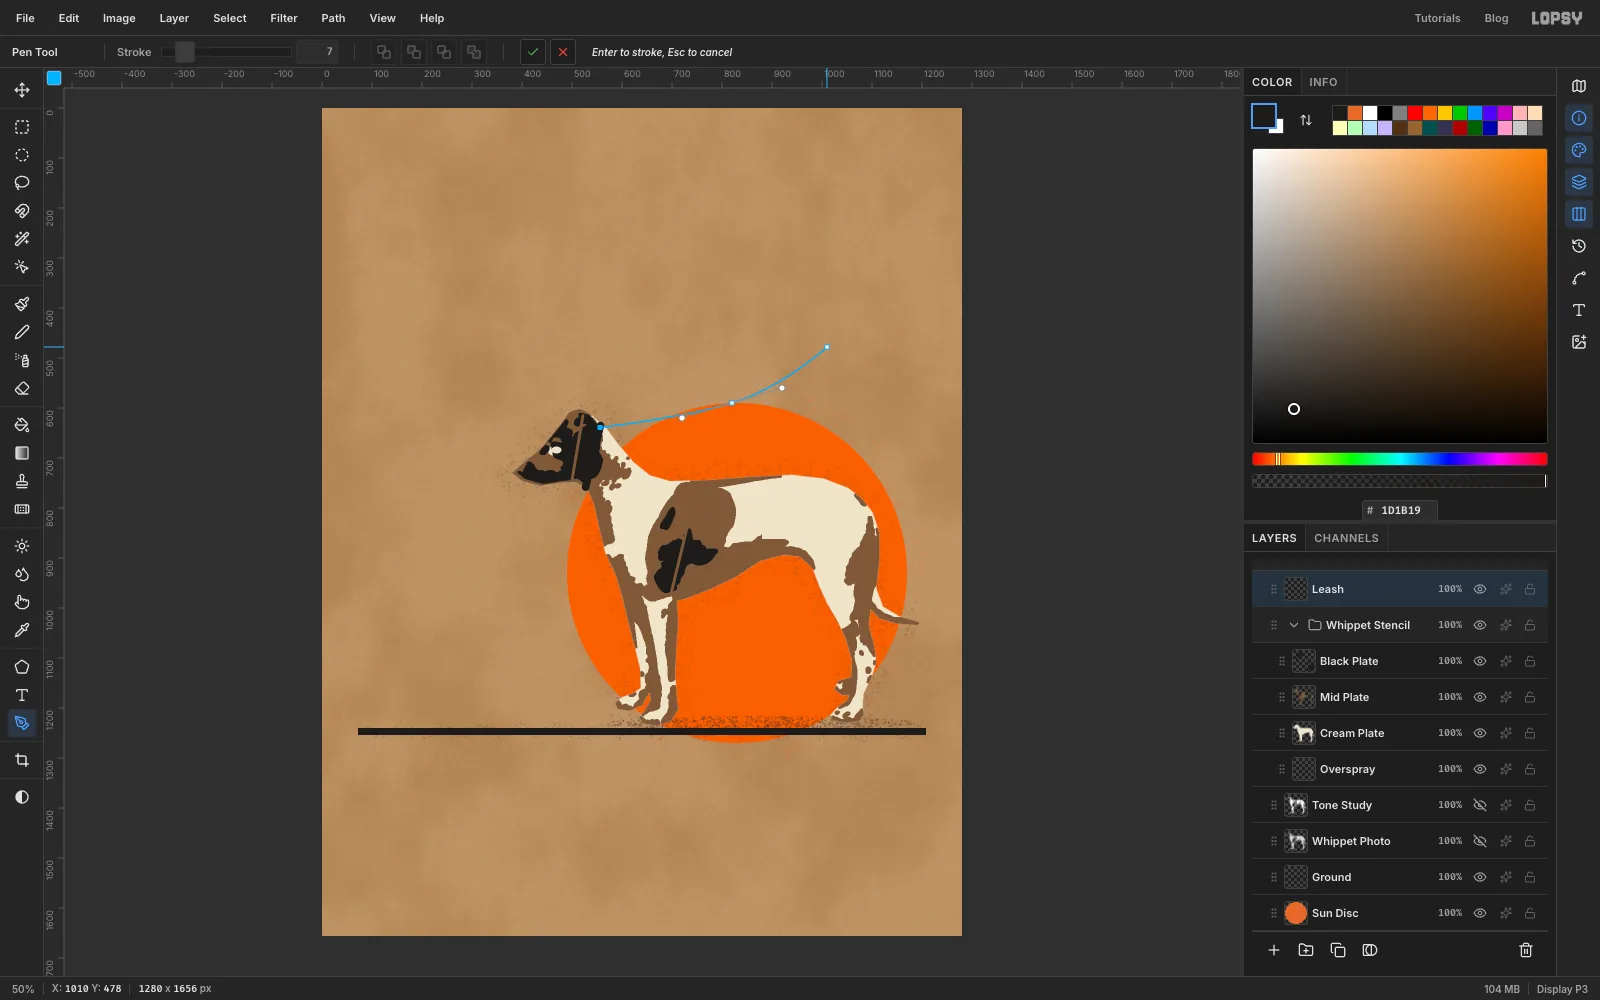
-
Add a hand loop
A leash that runs off the page leads the eye out of the flier. End it with a loop instead, waiting for someone to pick it up. Pick the Brush, set Size to
7, and draw a small oval, about 40 × 70 px and tilted to the left. Start its top at the leash end,1010, 478, so the loop hangs below it with its centre at about1022, 512.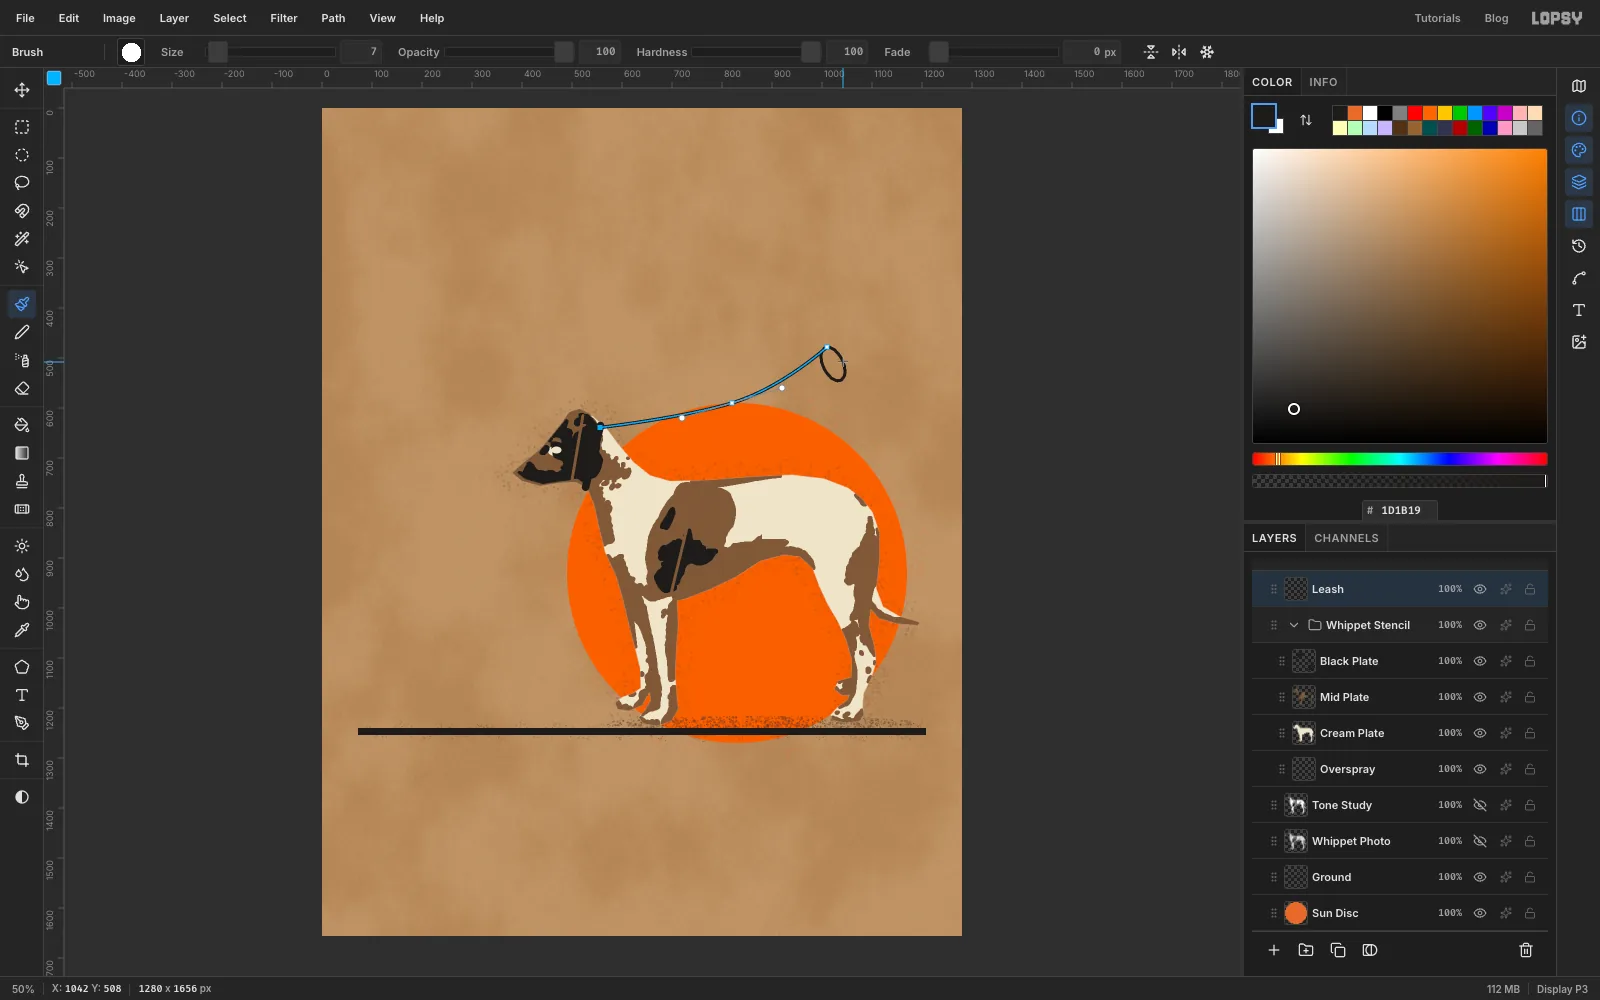
-
Set the stencil headline
Click the top ruler at
72and1208and the left ruler at60for margin guides. Click Leash, click New Group, and name it Type. Inside it, add an empty layer named Type Overspray.With the Type group selected and ink as the foreground, pick the Text tool and choose Saira Stencil, SemiBold, size
28. Open the Text panel and set Letter spacing to6. Click in an empty part of the canvas and typeDOG WALKING · DUNMORE & WEST END, then press Tab to commit it. Set the letter spacing back to0. With the Move tool, nudge the line until its left edge is on the72guide and its top is on60.Click the Type group again, set the foreground to orange and the font to Big Shoulders Stencil, Black, size
296. TypeDAILYand move it so its top sits 32 px under the kicker, abouty 112, with its left edge at68. Click the group, switch to ink and size227, and typeWALKS. Place it 20 px under DAILY. At these two sizes both words are the same width, so they make a flush block.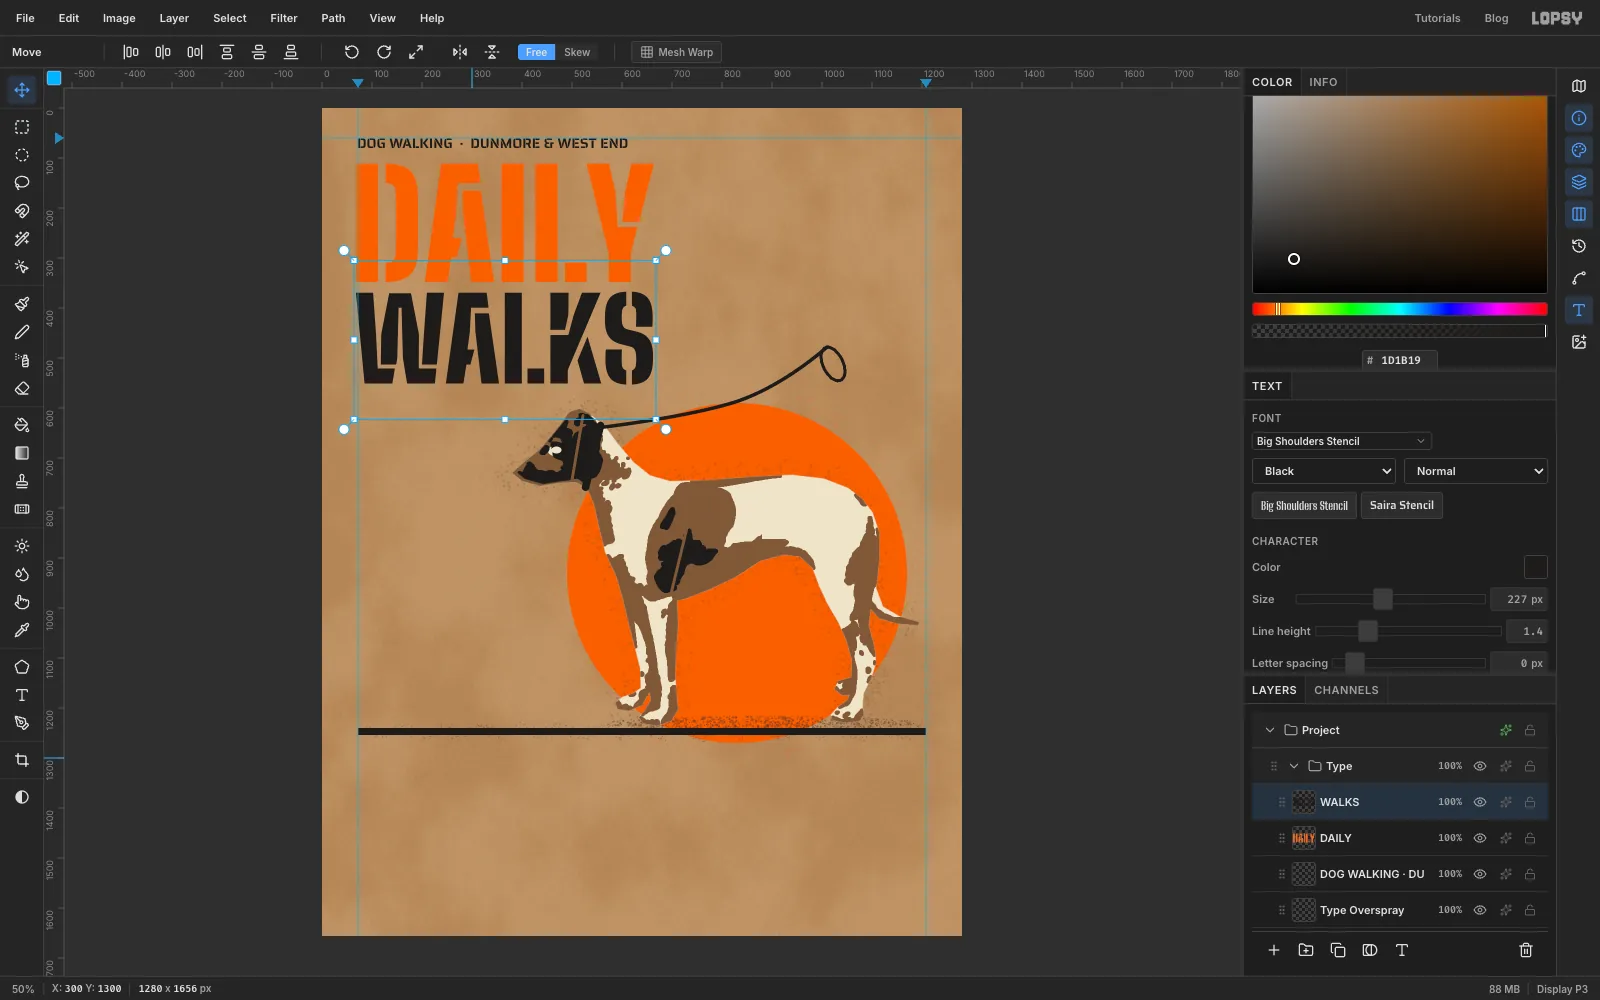
-
Misregister the second word
Click WALKS and click Duplicate Layer. Select the original WALKS (the lower one), open its effects drawer, tick Color Overlay and set the colour to orange . With the Move tool, nudge it
7px right and6px down. The black copy on top hides most of it, so only an orange edge shows along two sides of each letter.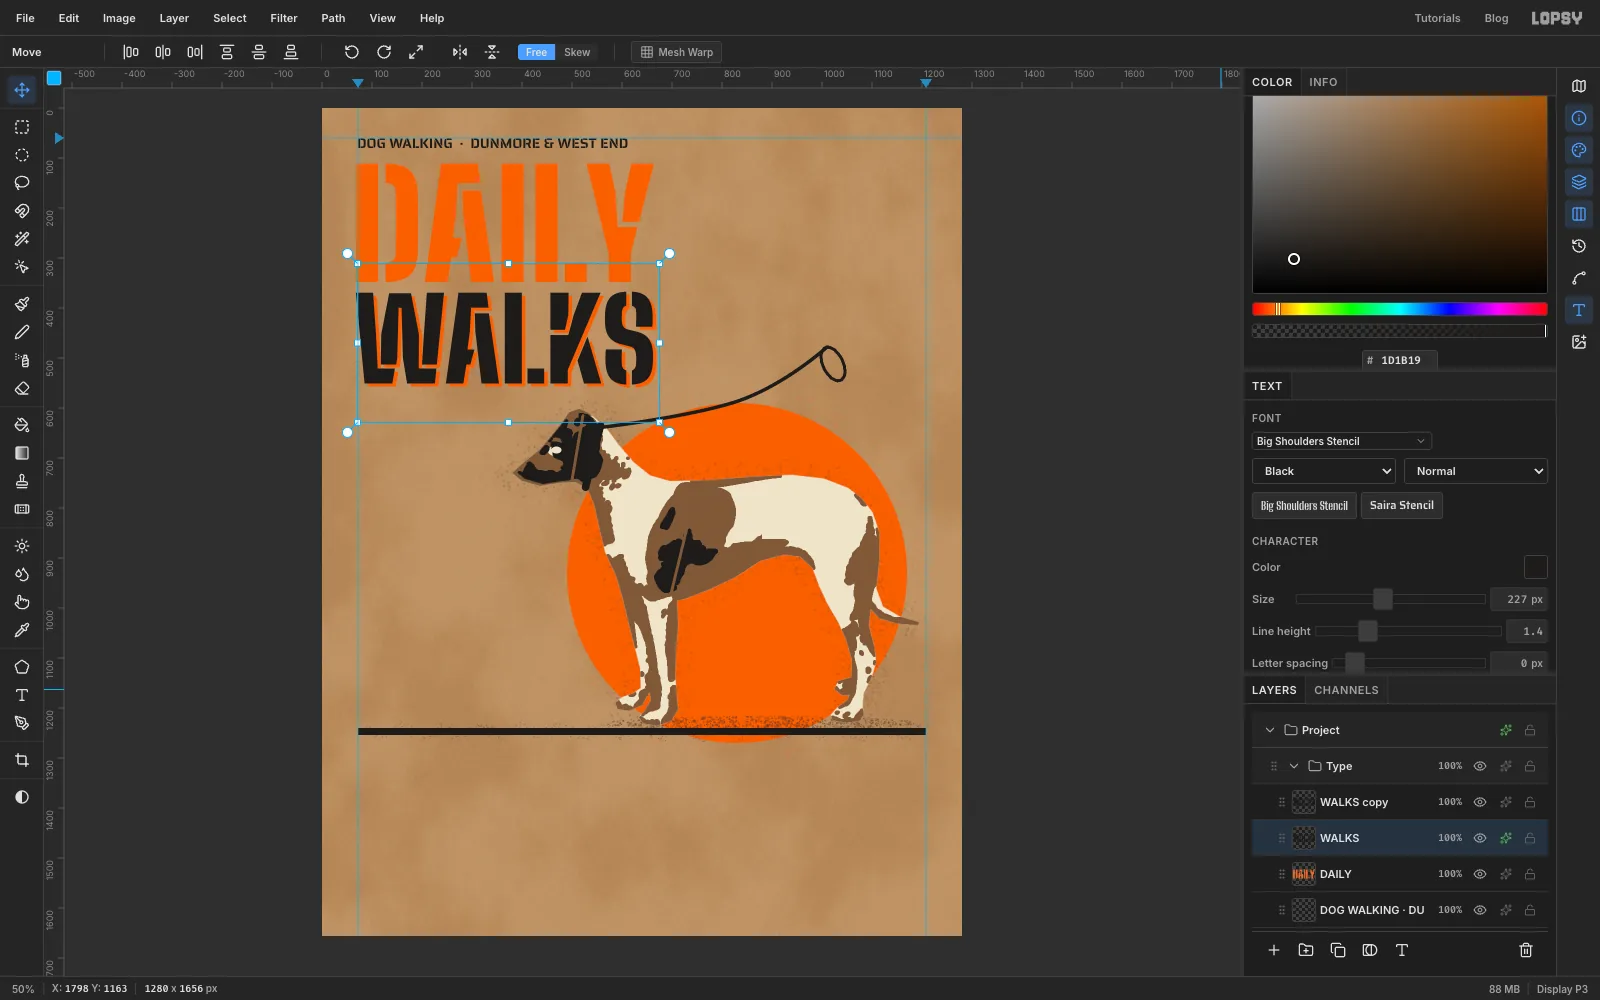
-
Make the price badge
Click the Type group and add a layer named Badge. With the Elliptical Marquee, select a circle from
942, 192to1194, 444and fill it with ink. Deselect before each new circle: select from956, 206to1180, 430and fill it with orange, then select from962, 212to1174, 424and fill it with ink again. That leaves a 6 px orange ring inside the black rim. Deselect.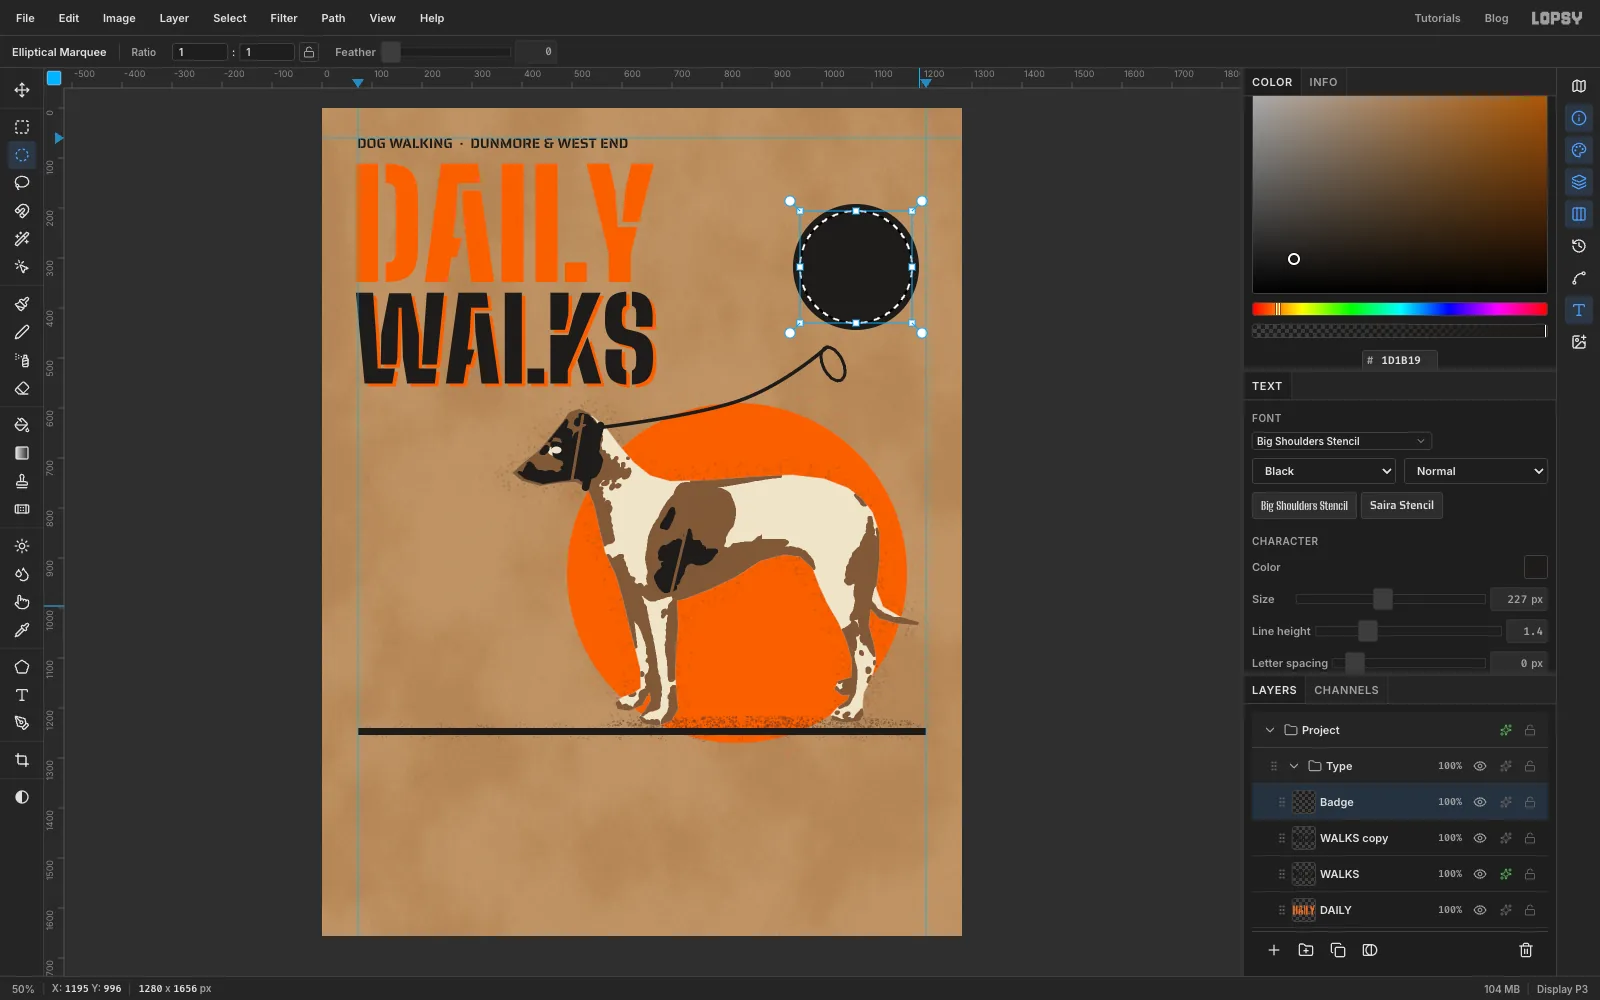
-
Seat the price inside the ring
With orange as the foreground and Badge selected, set the font to Big Shoulders Stencil Black at
116and type$18. Click Badge again, switch to cream , Saira Stencil SemiBold at24, set Letter spacing to4, and typePER WALK. Reset the letter spacing to0.Nudge
$18until it's centred on1068across and sits a little above the badge's middle, centred at abouty 304. PutPER WALK10 px below it, also centred. Check the corners of PER WALK: they should be at least 12 px clear of the orange ring.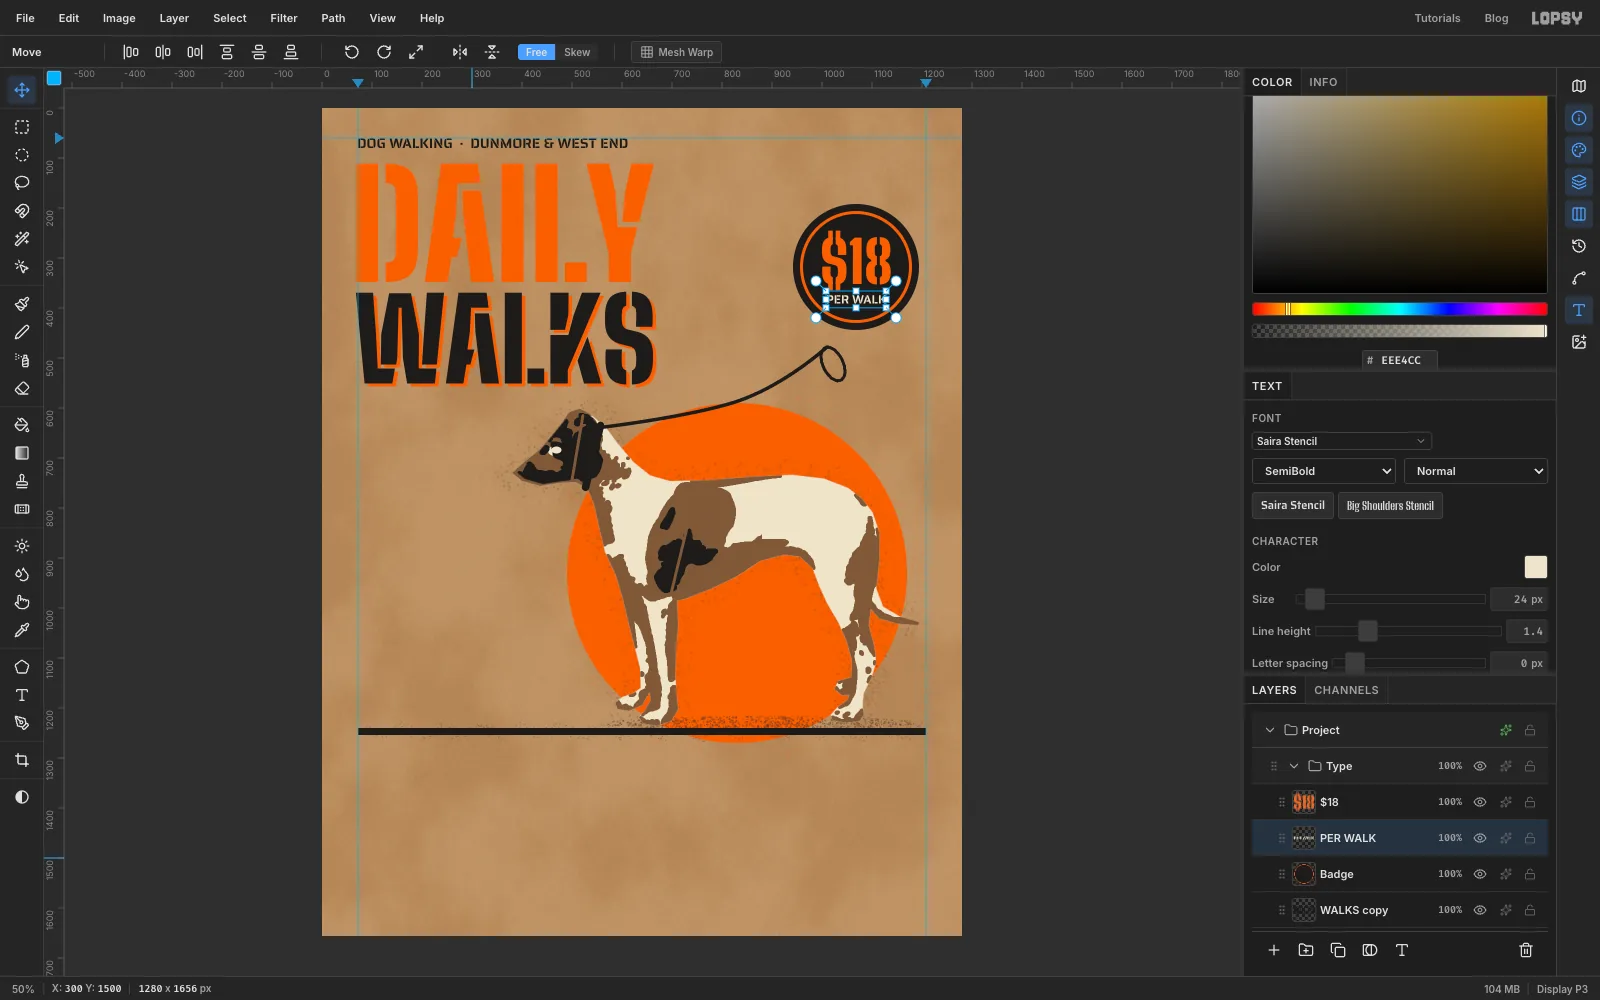
-
Add overspray round the type
So far only the dog looks sprayed. ⌘-click the DAILY thumbnail, choose Select → Grow…
14then Select → Feather…6, and click the Type Overspray layer. Pick the Spray tool with Size80, Density18, Opacity32and Softness85, set the foreground to orange, and zigzag across the word three times. The selection keeps the spray close to the letters. Deselect.Then ⌘-click the WALKS copy thumbnail, Grow
12, Feather6, click Type Overspray and spray in ink. Repeat for Badge: ⌘-click its thumbnail, Grow12, Feather6, and spray in ink.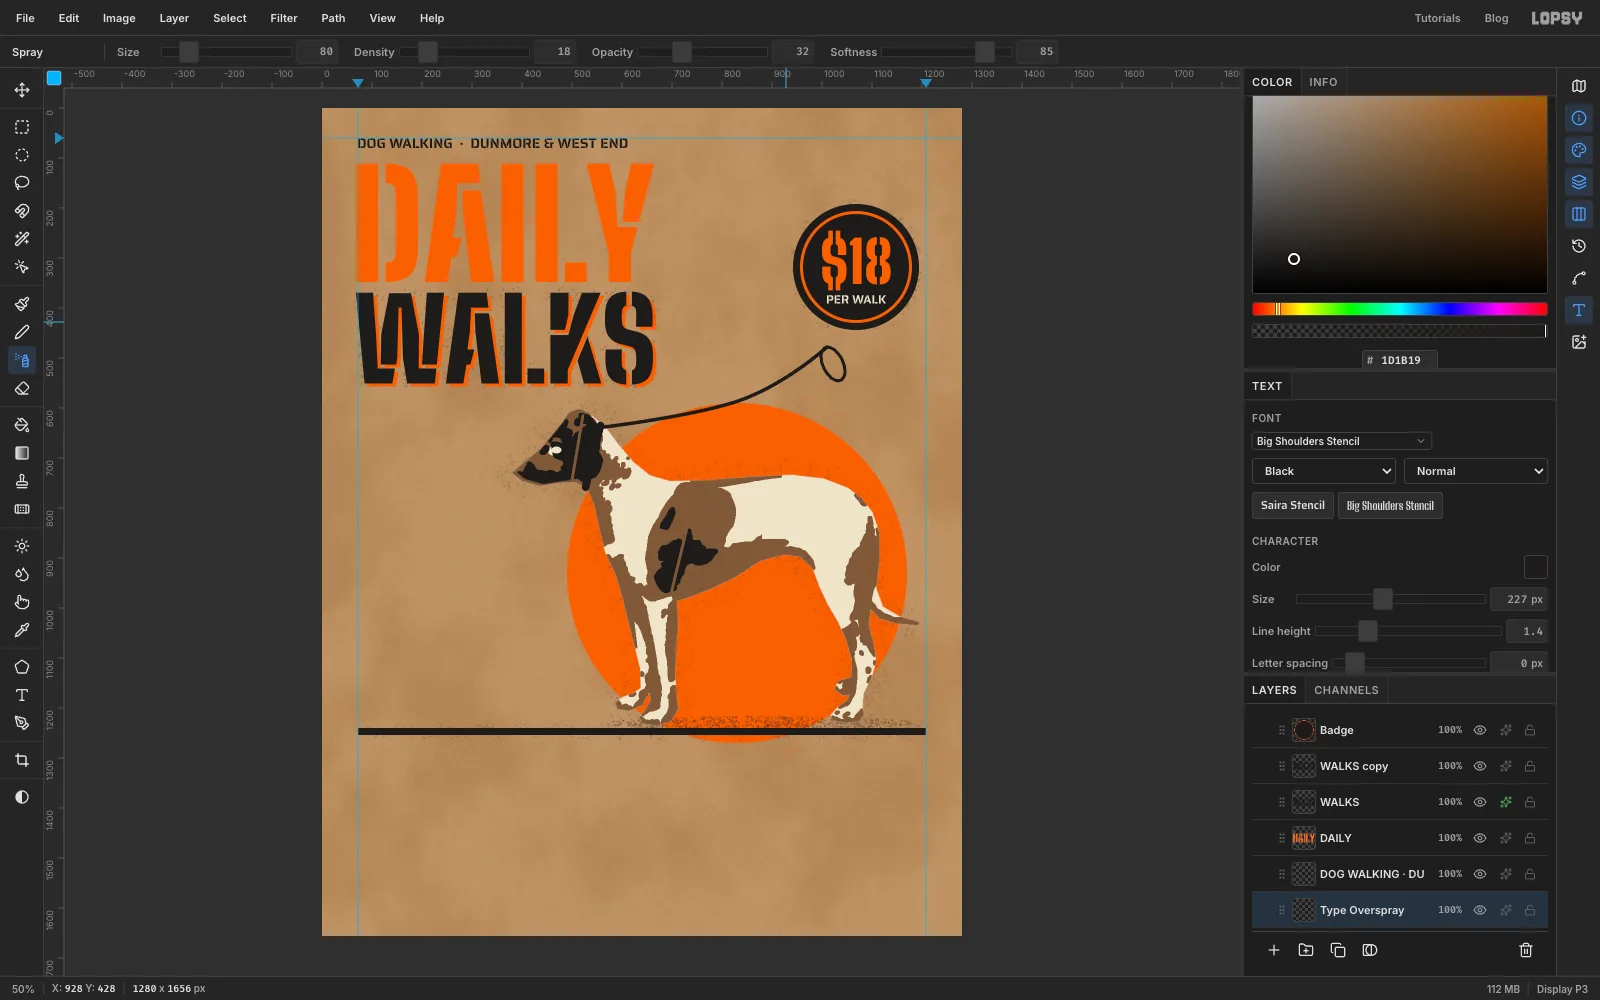
-
Tilt the badge
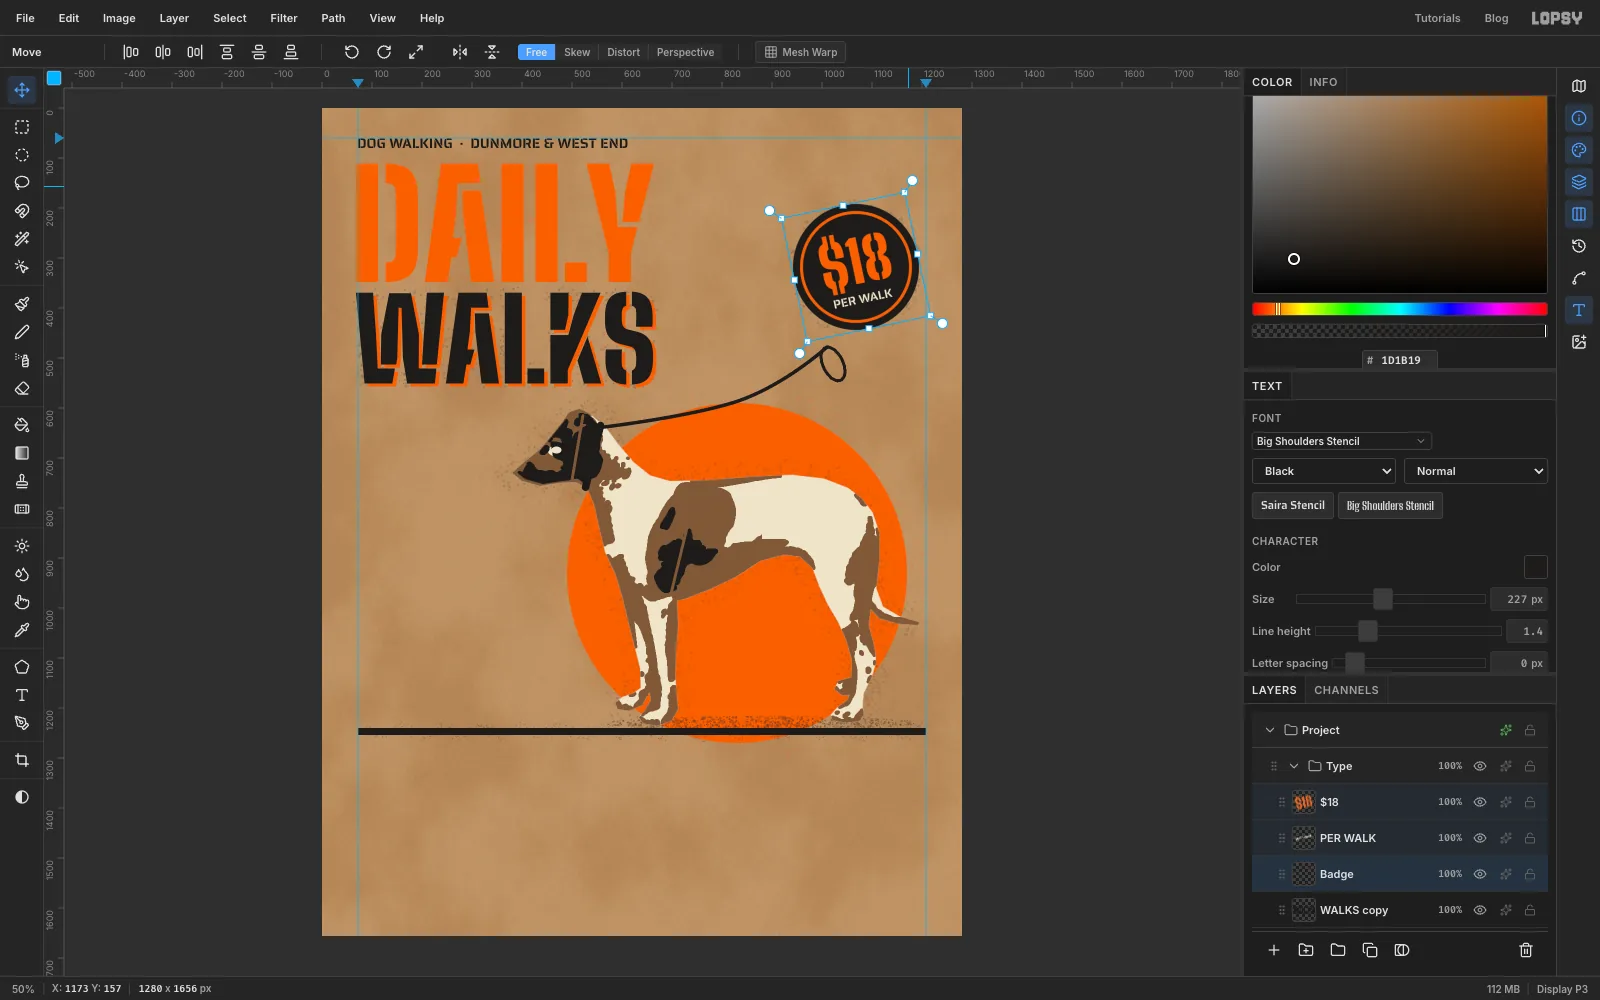
Click Badge, then Cmd-click the $18 and PER WALK rows so all three are selected. With the Move tool, drag the round rotation handle just outside the box's top-right corner anticlockwise by about 12°. All three turn together around the badge's centre. Deselect.
Press Cmd+Z and the badge stands straight again; Cmd+Shift+Z tilts it back.
-
Set the services list
The list is two text layers, one for the headings and one for the details, set on the same line pitch so they interleave.
Click the Type group. In ink, choose Saira Stencil Bold at
38and set Line height to2.75in the Text panel. Type these four lines, pressing Enter between them:SOLO STROLLS,PACK HIKES,PUPPY VISITS,RAIN OR SHINE. Click an empty area of the canvas to start each new text layer, away from existing type, then move it into place afterwards.Click the group again. Switch to detail brown , SemiBold at
26, Line height4, and type the four detail lines:30 MIN · ONE DOG,60 MIN · UP TO FOUR,FEED · PLAY · POTTY,TOWEL-OFF INCLUDED. 38 × 2.75 and 26 × 4 both come to about 104 px, so the lines stay in step.Move the headings so their left edge is on the
72guide and their top is at650. Put the details 44 px below the top of the first heading, so each detail line sits under its heading.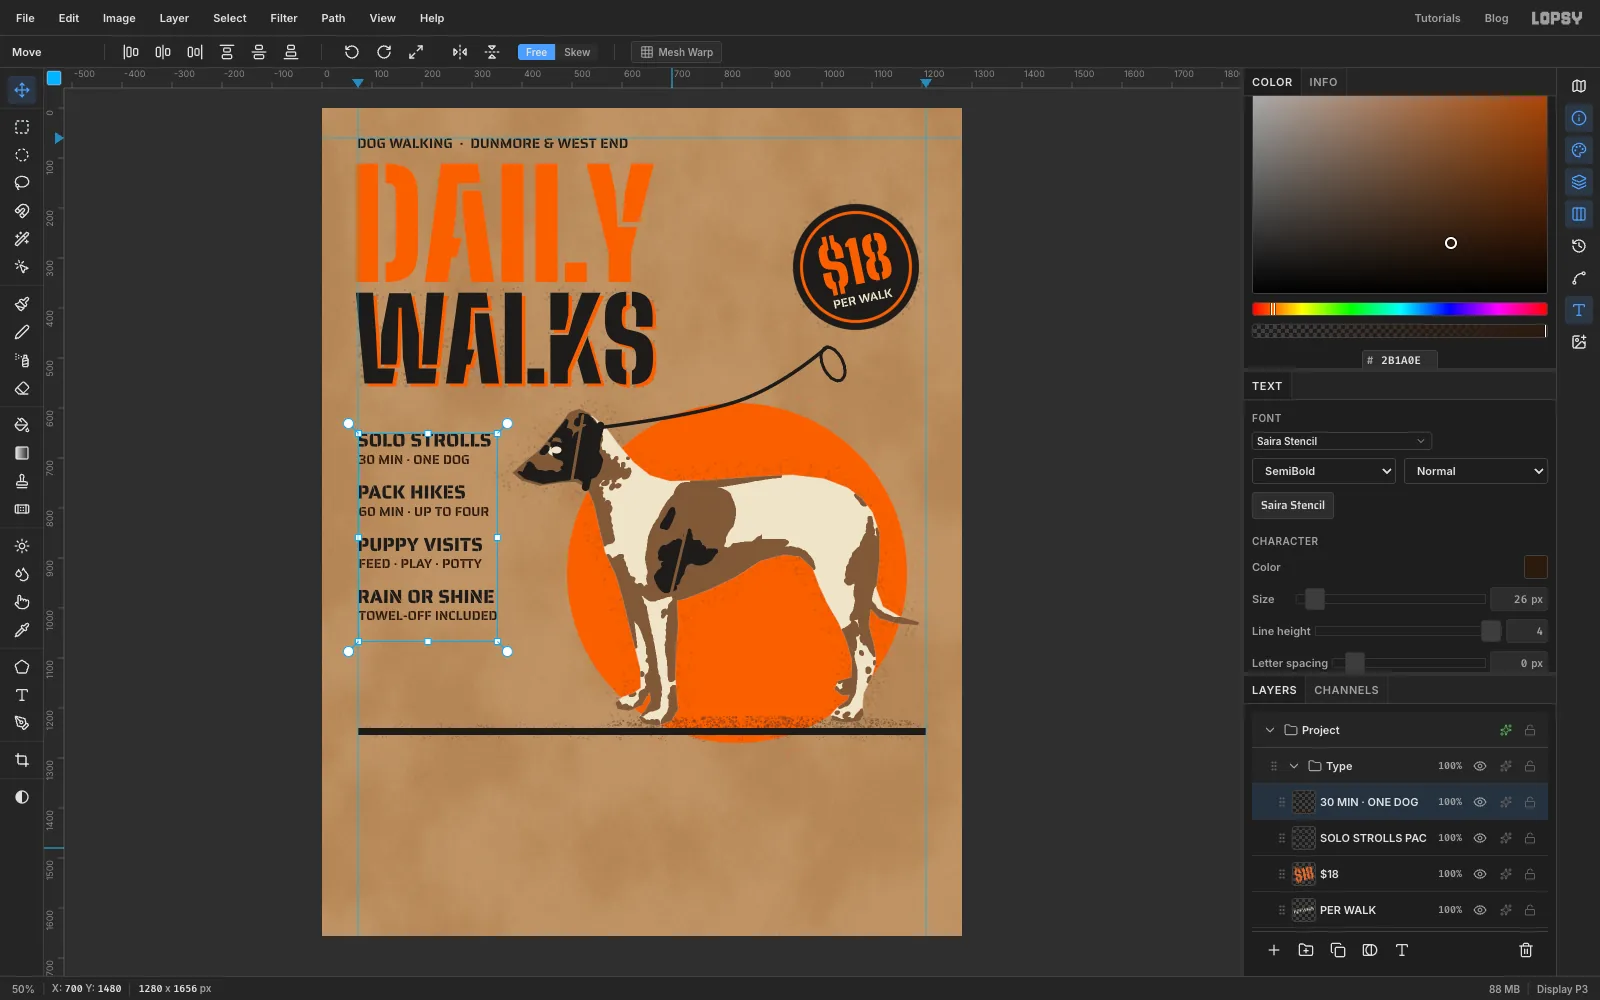
-
Add the call to action and footer
The space under the list needs a reason to call. Click the Type group, set orange, Saira Stencil ExtraBold at
46and Line height1.15, click an empty area and typeFIRST MEET, Enter,& GREET FREE. Line its left edge up with the guide and its bottom at1200, 40 px above the ground.Click the group again. In ink, choose SemiBold at
24, Line height1.4and Letter spacing2. TypeINSURED · VETTED · DOG FIRST AIDand place it at72, 1290, under the ground bar. Reset the letter spacing.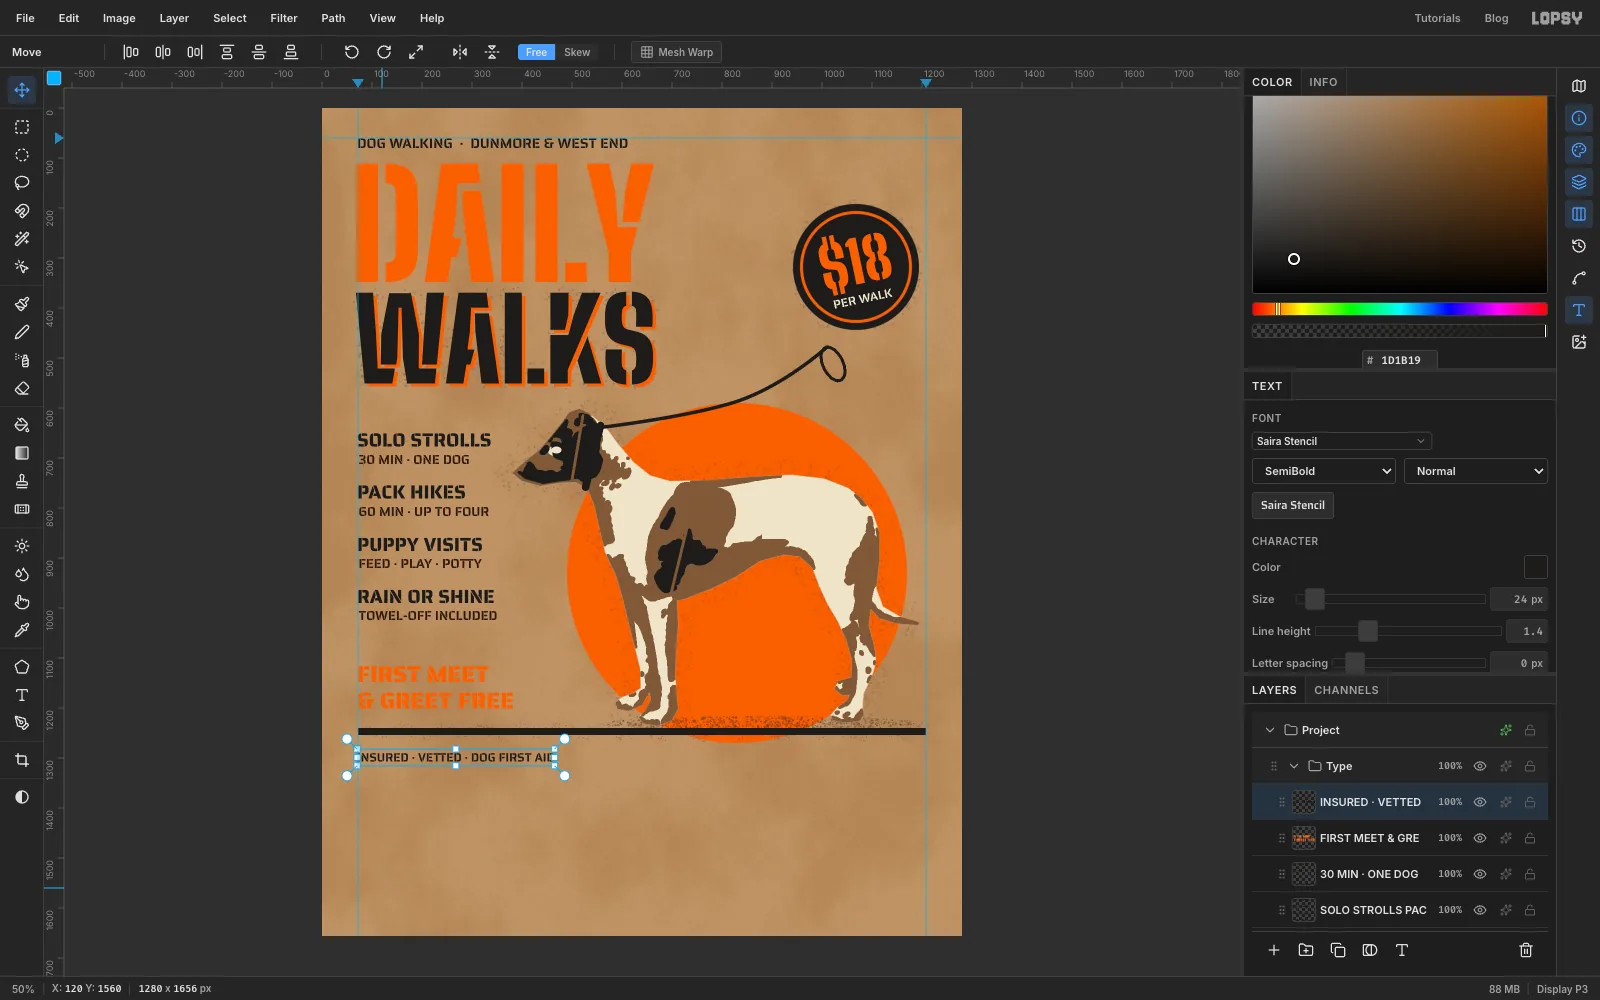
-
Make a paw-print brush
Click Leash and add a layer named Paw Sketch. Using the Elliptical Marquee and Edit → Fill in ink, deselecting between shapes, draw a paw pointing left:
- the pad:
197, 1503to223, 1537 - four toes in an arc on the pad's left:
183, 1493to196, 1508,174, 1504to187, 1519,174, 1521to187, 1536, and183, 1533to196, 1548
Select a square round it from
164, 1484to236, 1556, choose Edit → Define Brush…, and name it Paw Print. Deselect, then delete the Paw Sketch layer. The brush stays saved for this session.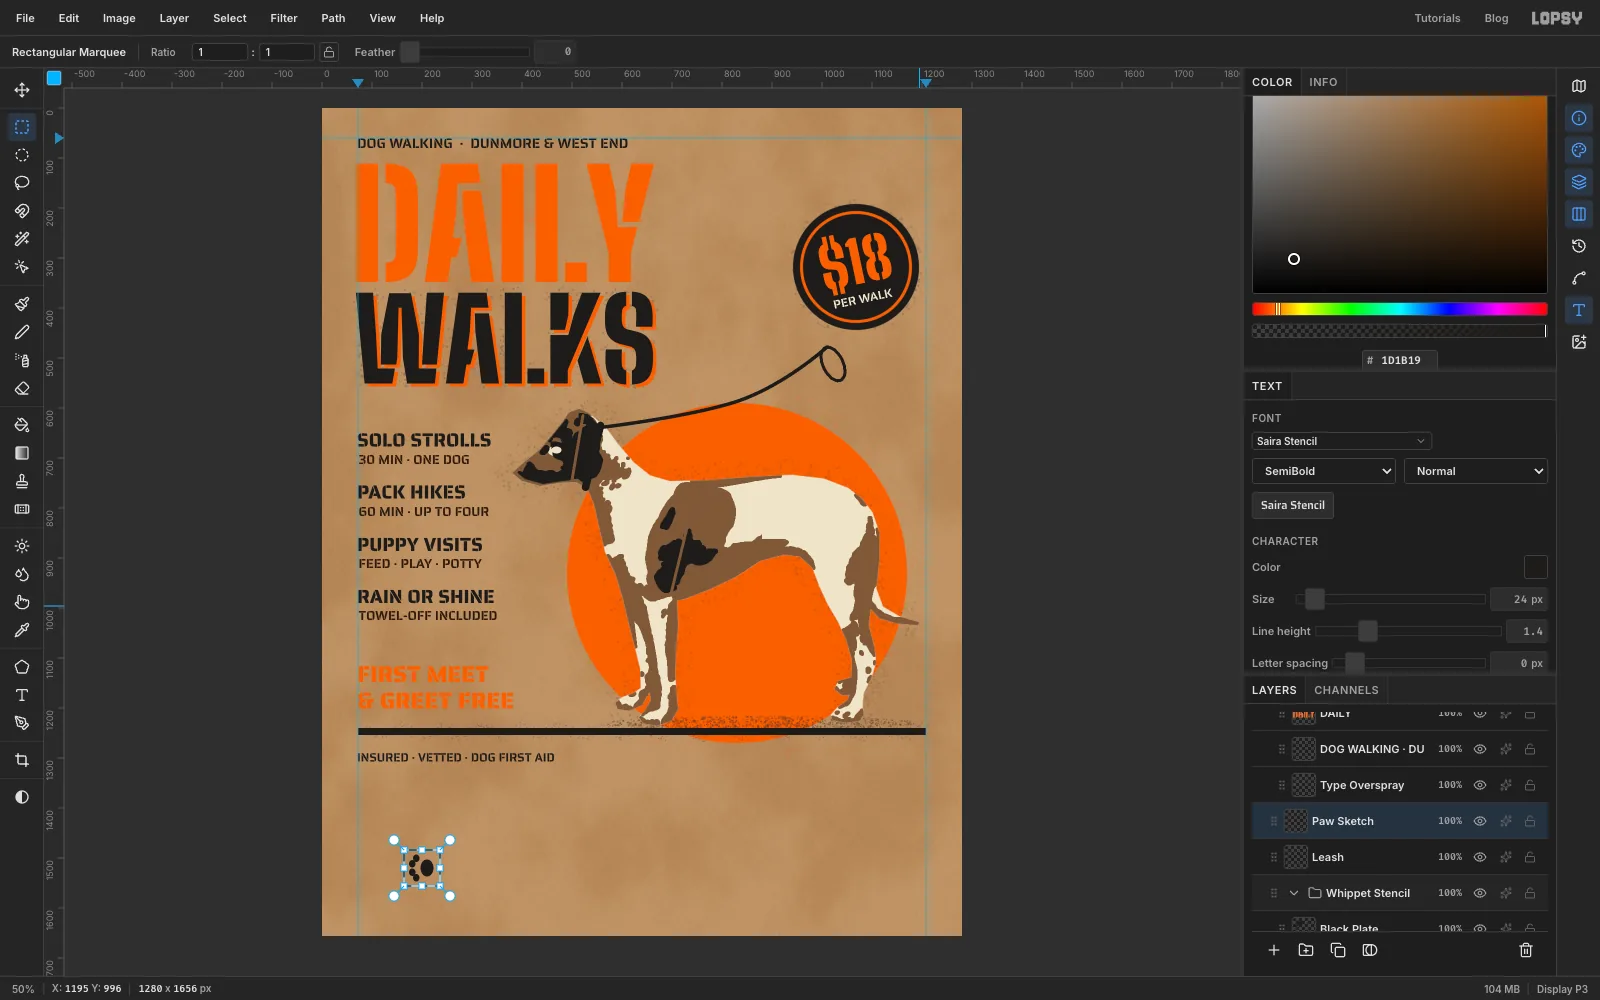
- the pad:
-
Stamp the paw trail
Click Leash, add a layer named Paw Trail, and set the foreground to orange. Pick the Brush; it's now using the paw tip. Set Size to
56and Opacity to85.Single-click four prints, one at a time:
964, 1290,1036, 1324,1108, 1290and1180, 1324. They lead in from the right edge, the way the dog came. They start right of the disc, so the orange prints don't touch the orange arc under the ground bar.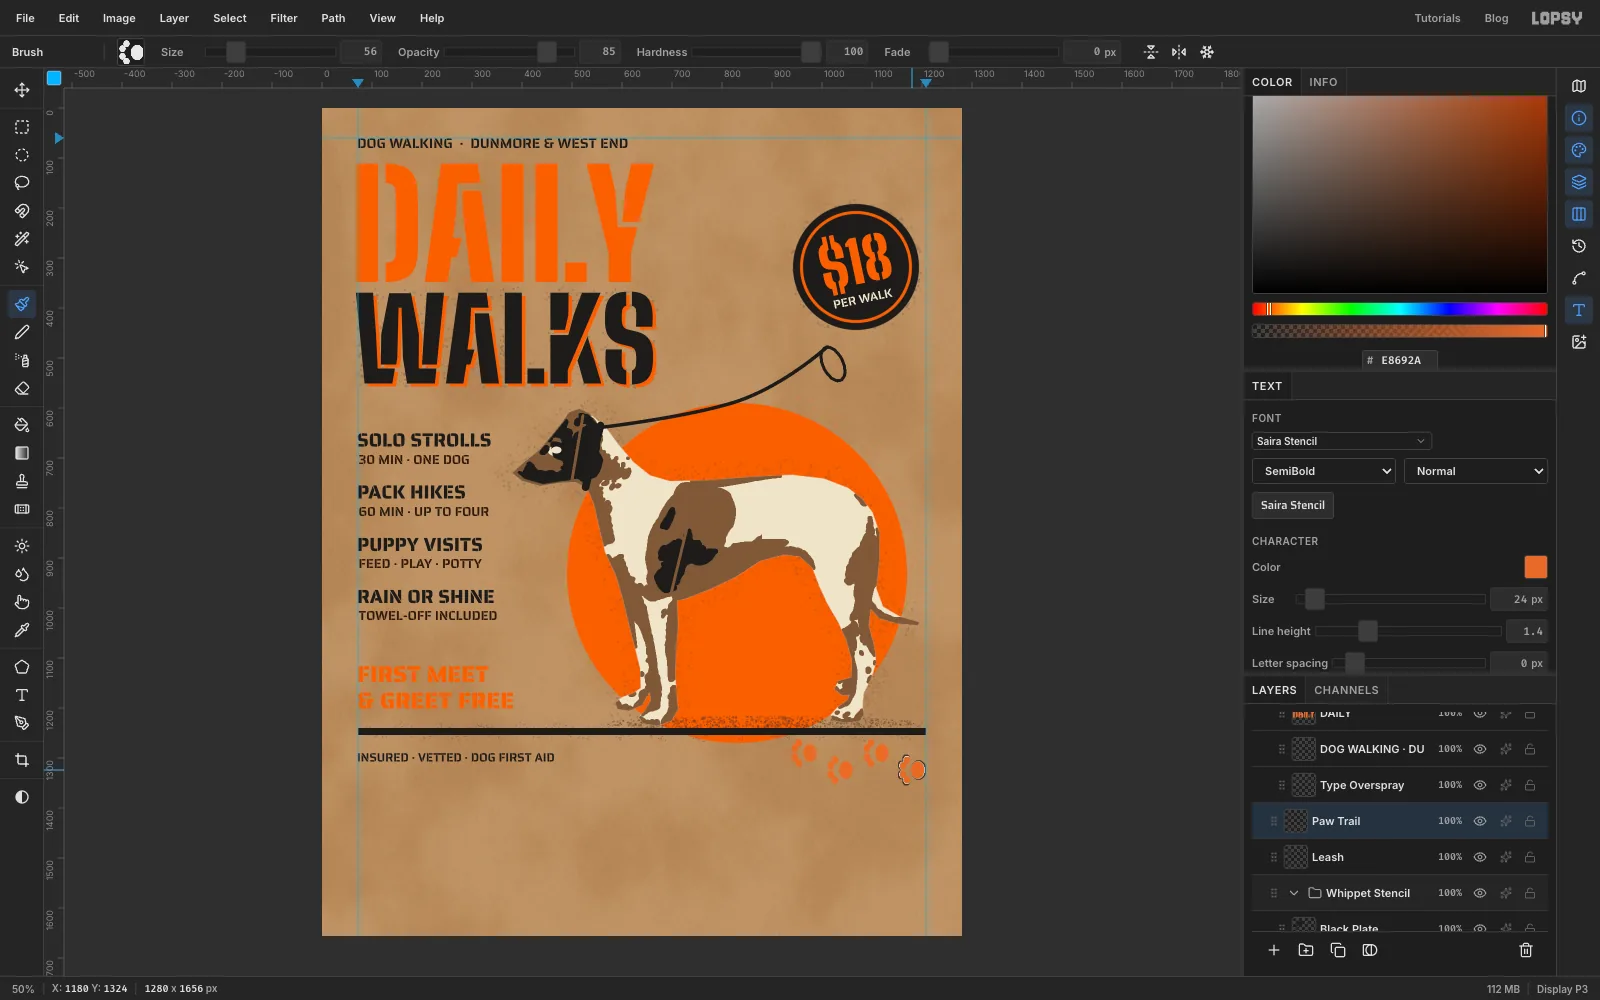
-
Set up a dotted brush
Click the left ruler at
1394to add a guide for the cut line. Collapse the Type group, click it, click New Group and name it Tear-off Tabs. Add a layer inside it named Perforations.Pick the Brush and click the brush-tip thumbnail at the left of the options bar to open the Brushes window. On the Presets tab, choose Hard Round. On the Shape tab, set Spacing to
200. Each dab now leaves a gap as wide as itself, so a stroke becomes a row of dots. Close the window.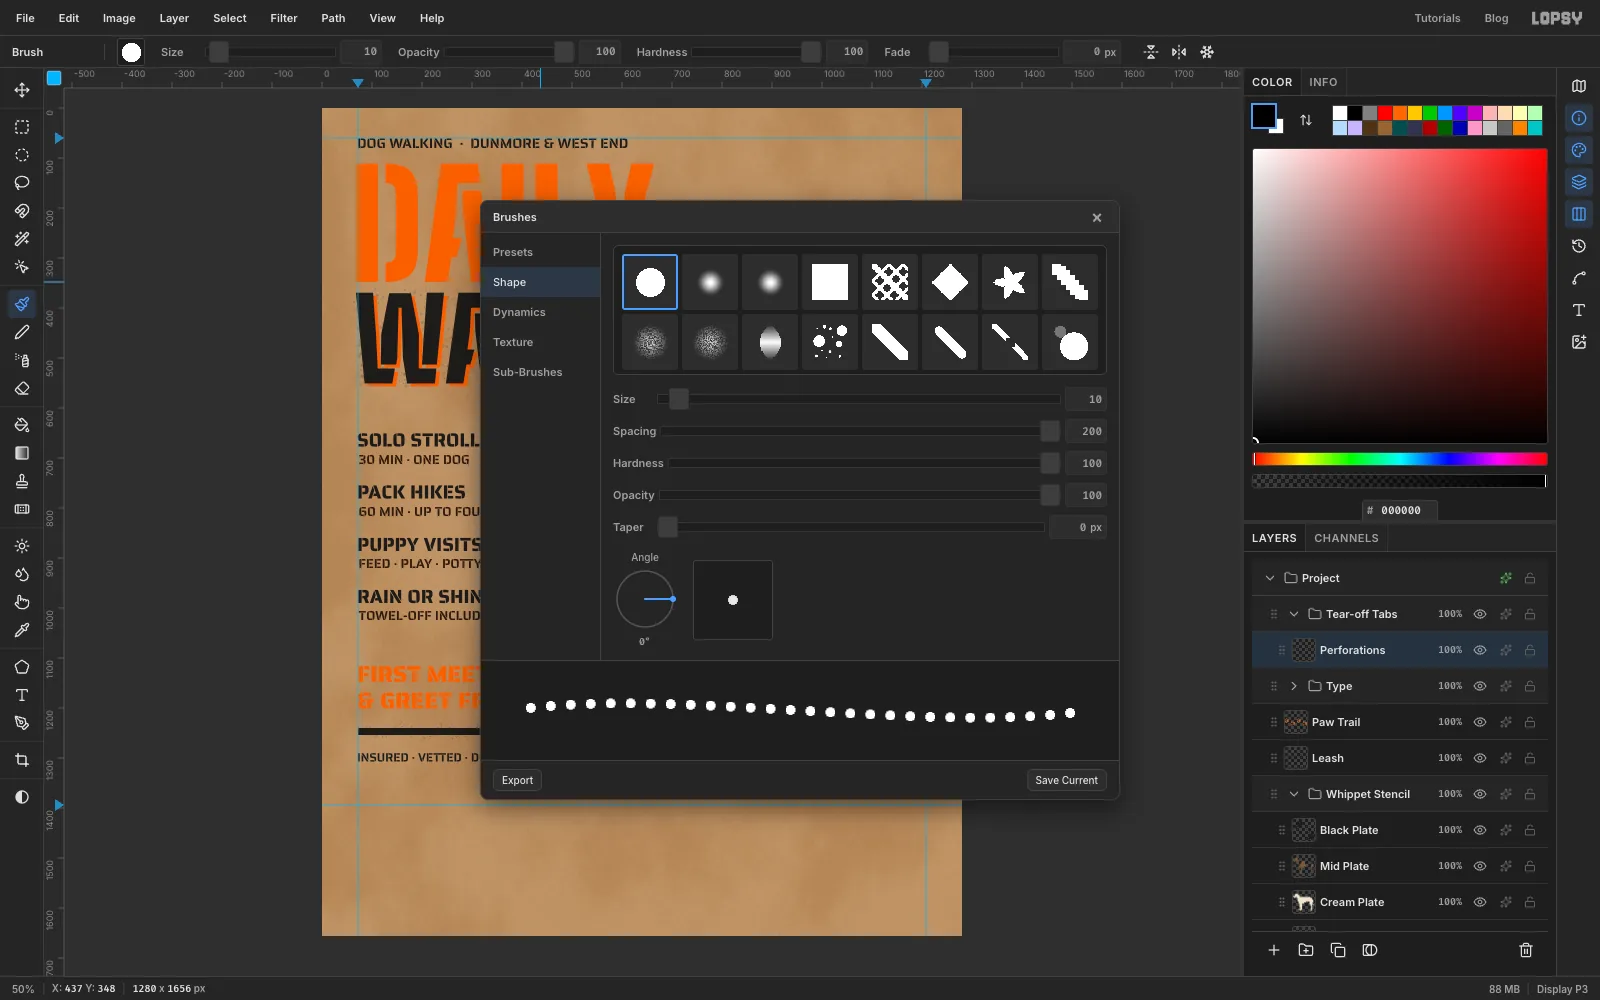
-
Draw the perforations
Set the brush Size to
6and Opacity to100, in ink. Click at96, 1394and Shift-click at1276, 1394for the cut line.The tabs are 160 px wide, so draw a vertical dotted line at every multiple of 160: click at
160, 1408and Shift-click at160, 1652, then repeat atx 320, 480, 640, 800, 960 and 1120.With the Text tool in Saira Stencil Bold at
40, click an empty spot and paste a ✂ (copy it from this page, or use the emoji picker, Ctrl+Cmd+Space). Commit it and place it at the left end of the cut line, centred on it. Lopsy draws symbols the font lacks from its own symbol face.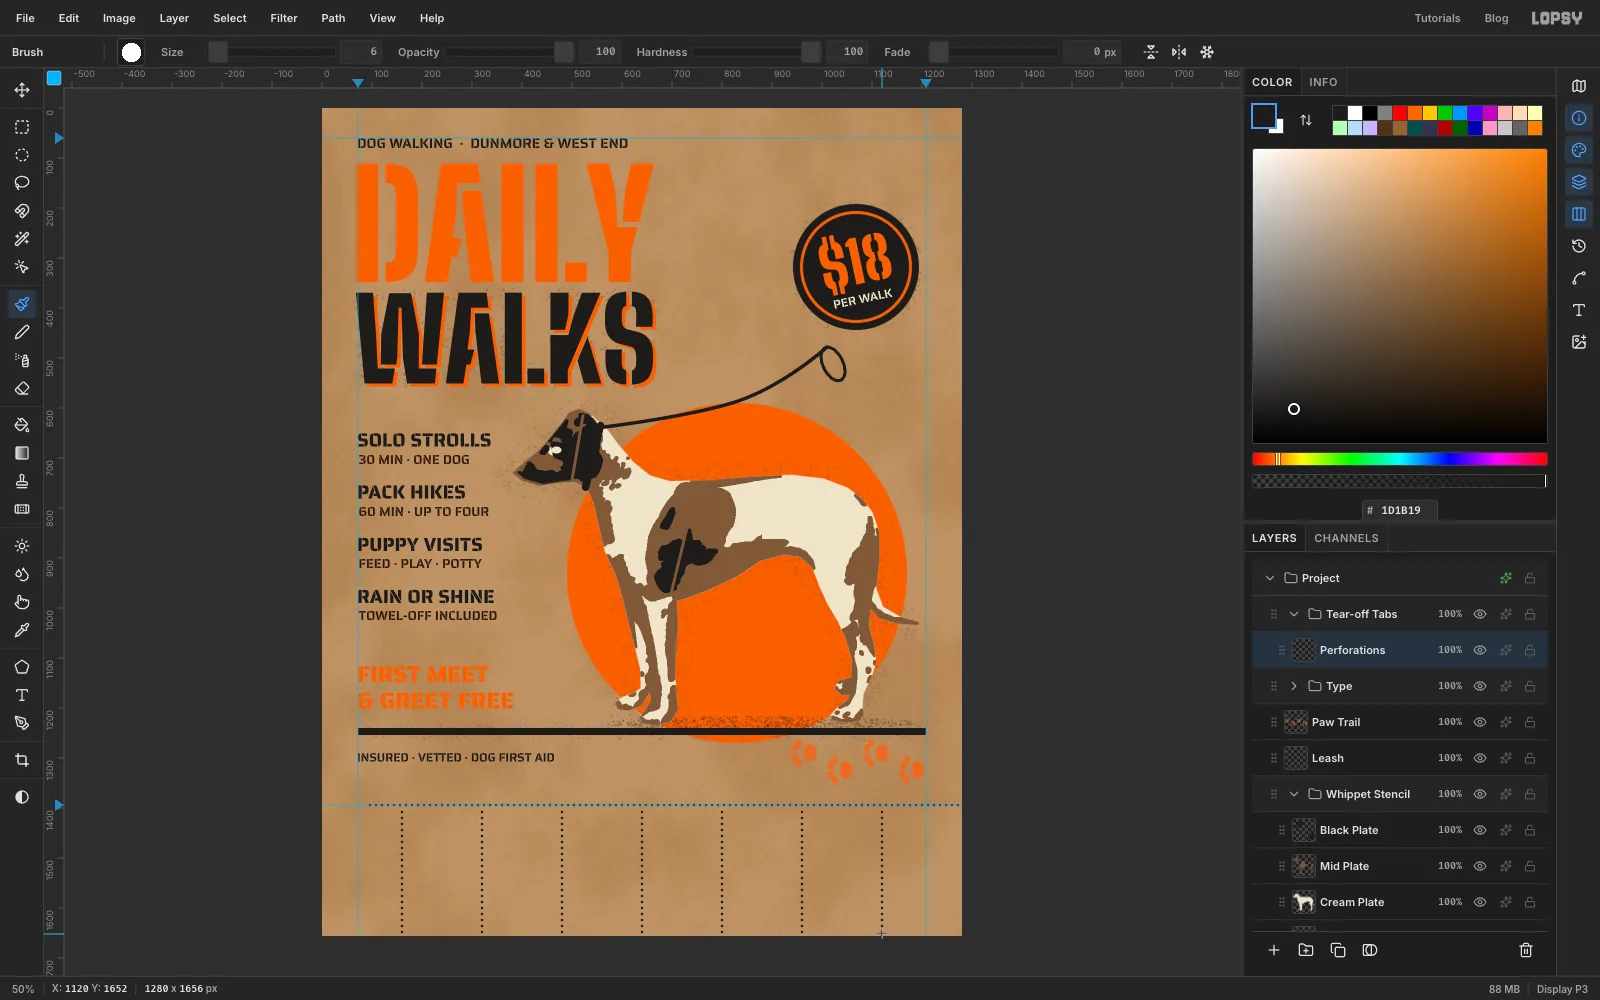
-
Turn the first tab sideways
Click Perforations. Pick the Text tool and click an empty spot below the cut line. With Saira Stencil Bold at
30and Line height1.25, typeDAILY WALKS, Enter,555-0147.With the Move tool, hold Cmd and drag the top-right rotation handle anticlockwise. Holding ⌘ snaps the turn to 15° steps, so stop at exactly 90°. The text now reads from the bottom up, like a real pull-off tab. Nudge it to the middle of the first tab, centred on
80, 1525, so it has about 36 px of paper above and below.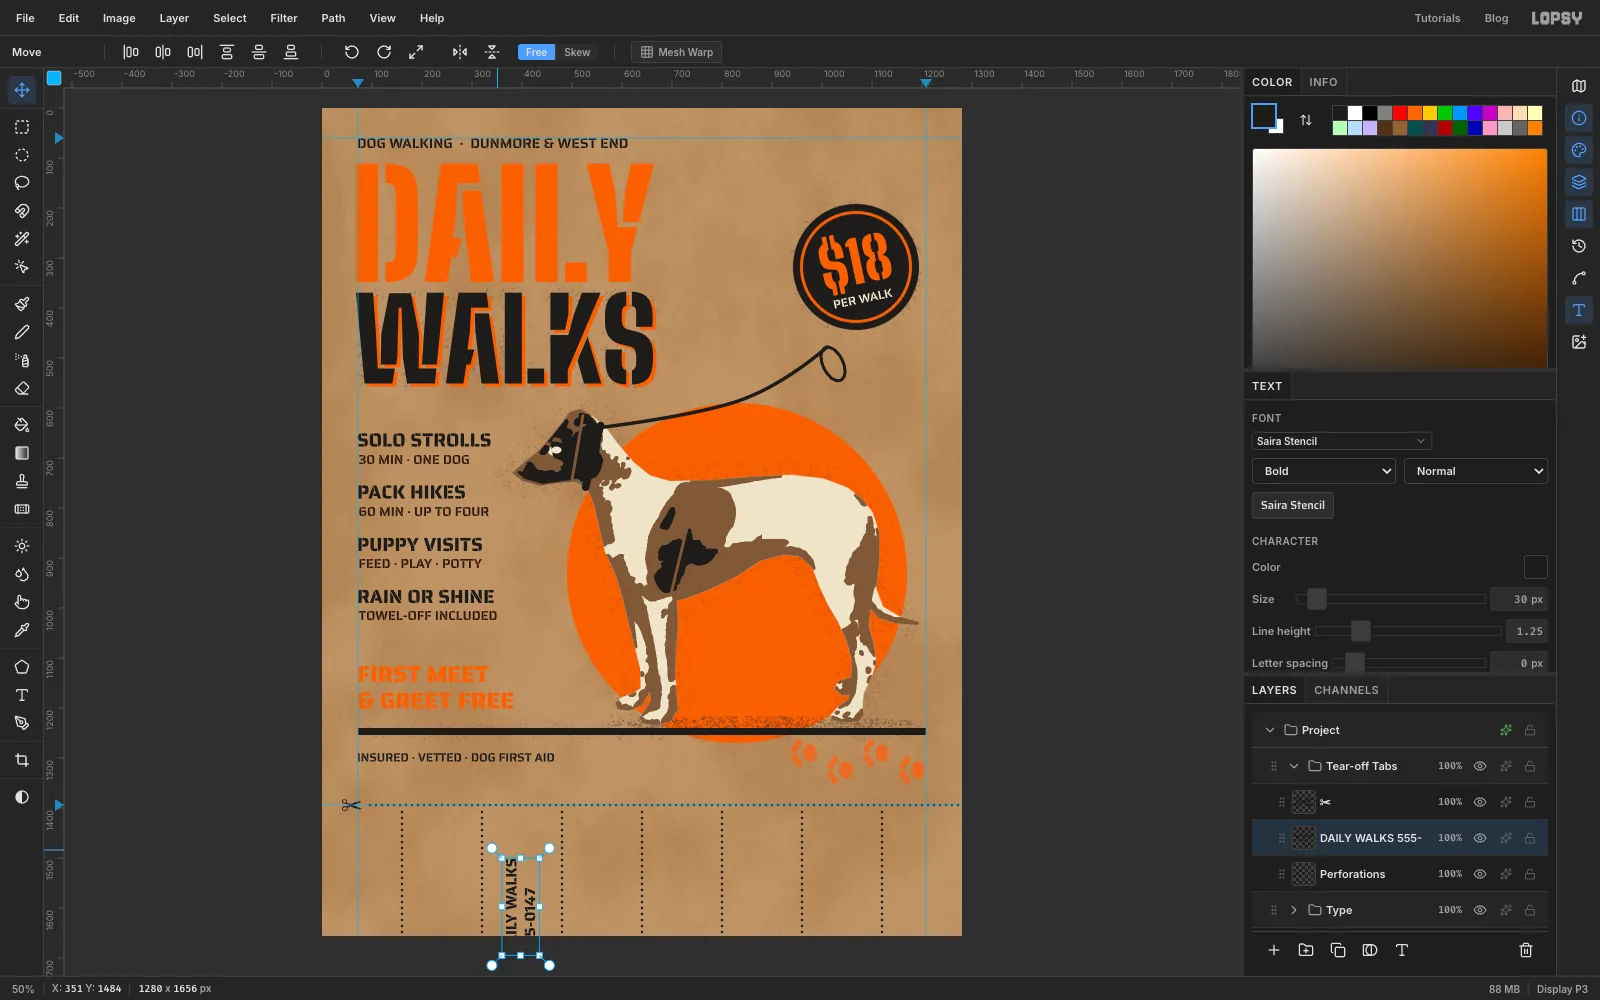
-
Make the other seven tabs
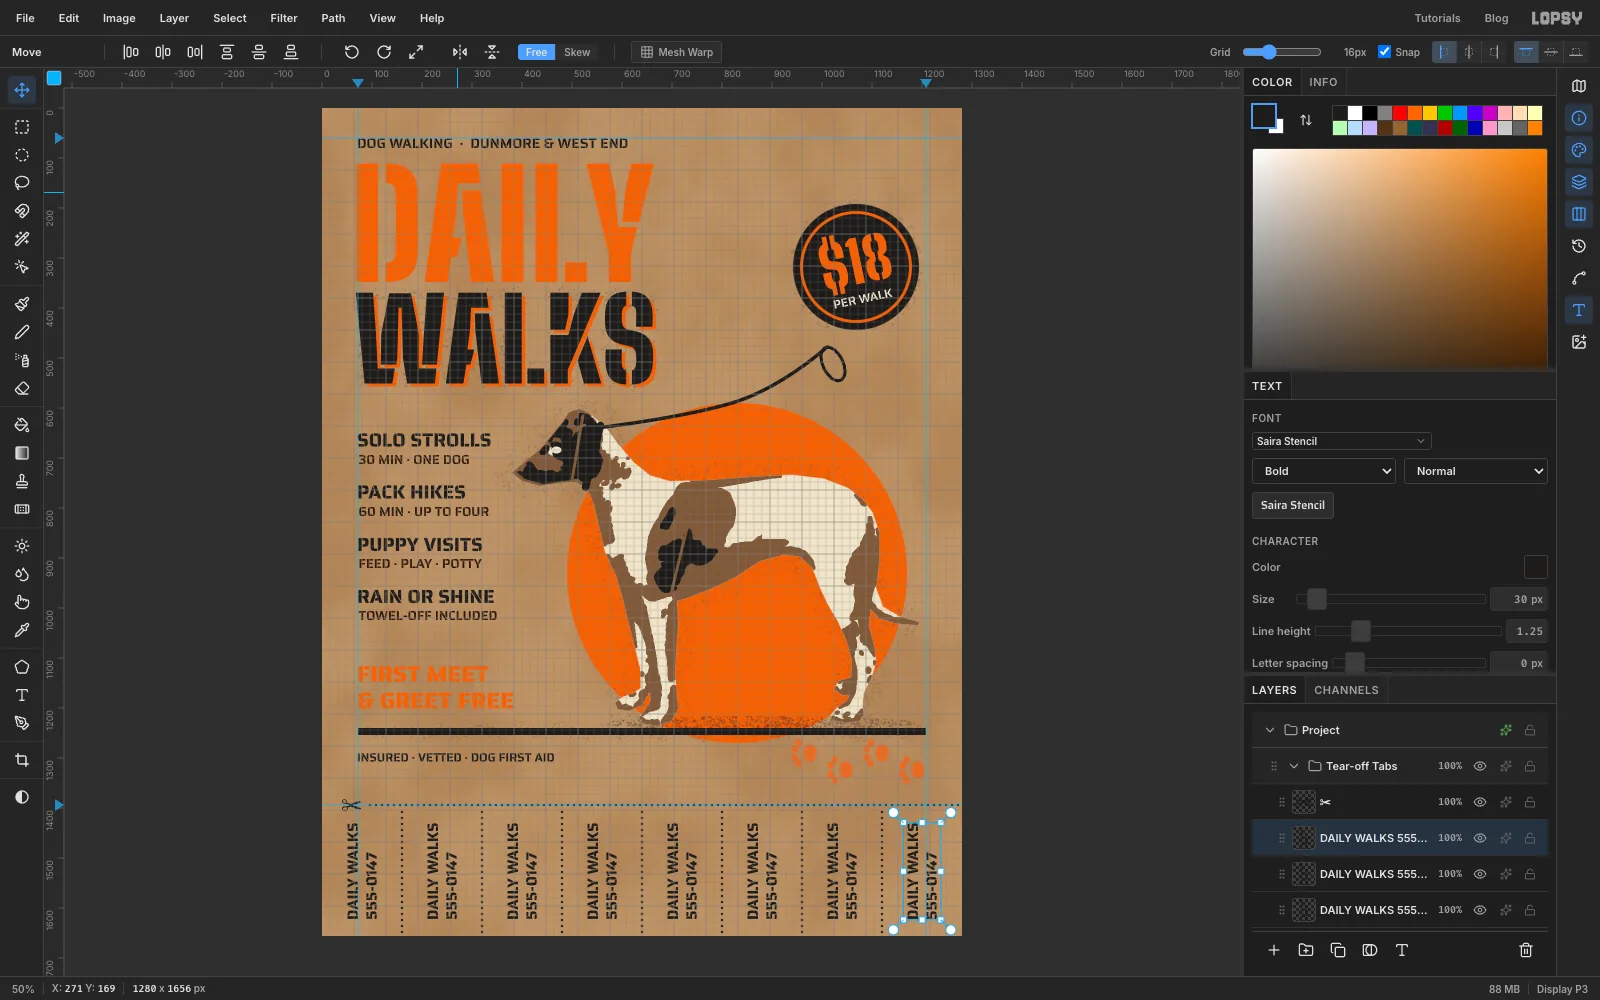
With the tab text selected, click Duplicate Layer. The copy appears in the same place. Select the copy and, with the Move tool, press Shift+Right 16 times to move it one tab (160 px) to the right. Repeat from each new copy until all eight tabs are filled.
Turn on View → Show Grid to check that every tab sits the same distance from its dotted lines, then turn the grid off again.
To check the group, click Tear-off Tabs and press the down arrow a few times: every tab and dotted line moves together. Press Cmd+Z the same number of times to put it back.
-
Add paper flecks
Collapse the groups, click Tear-off Tabs, and add a layer named Paper Flecks. It will sit above everything. Fill it with grey , run Filter → Add Noise… with Amount
100, Mono and Gaussian, then Filter → Threshold… with Level78. Everything turns white except a scatter of dark specks.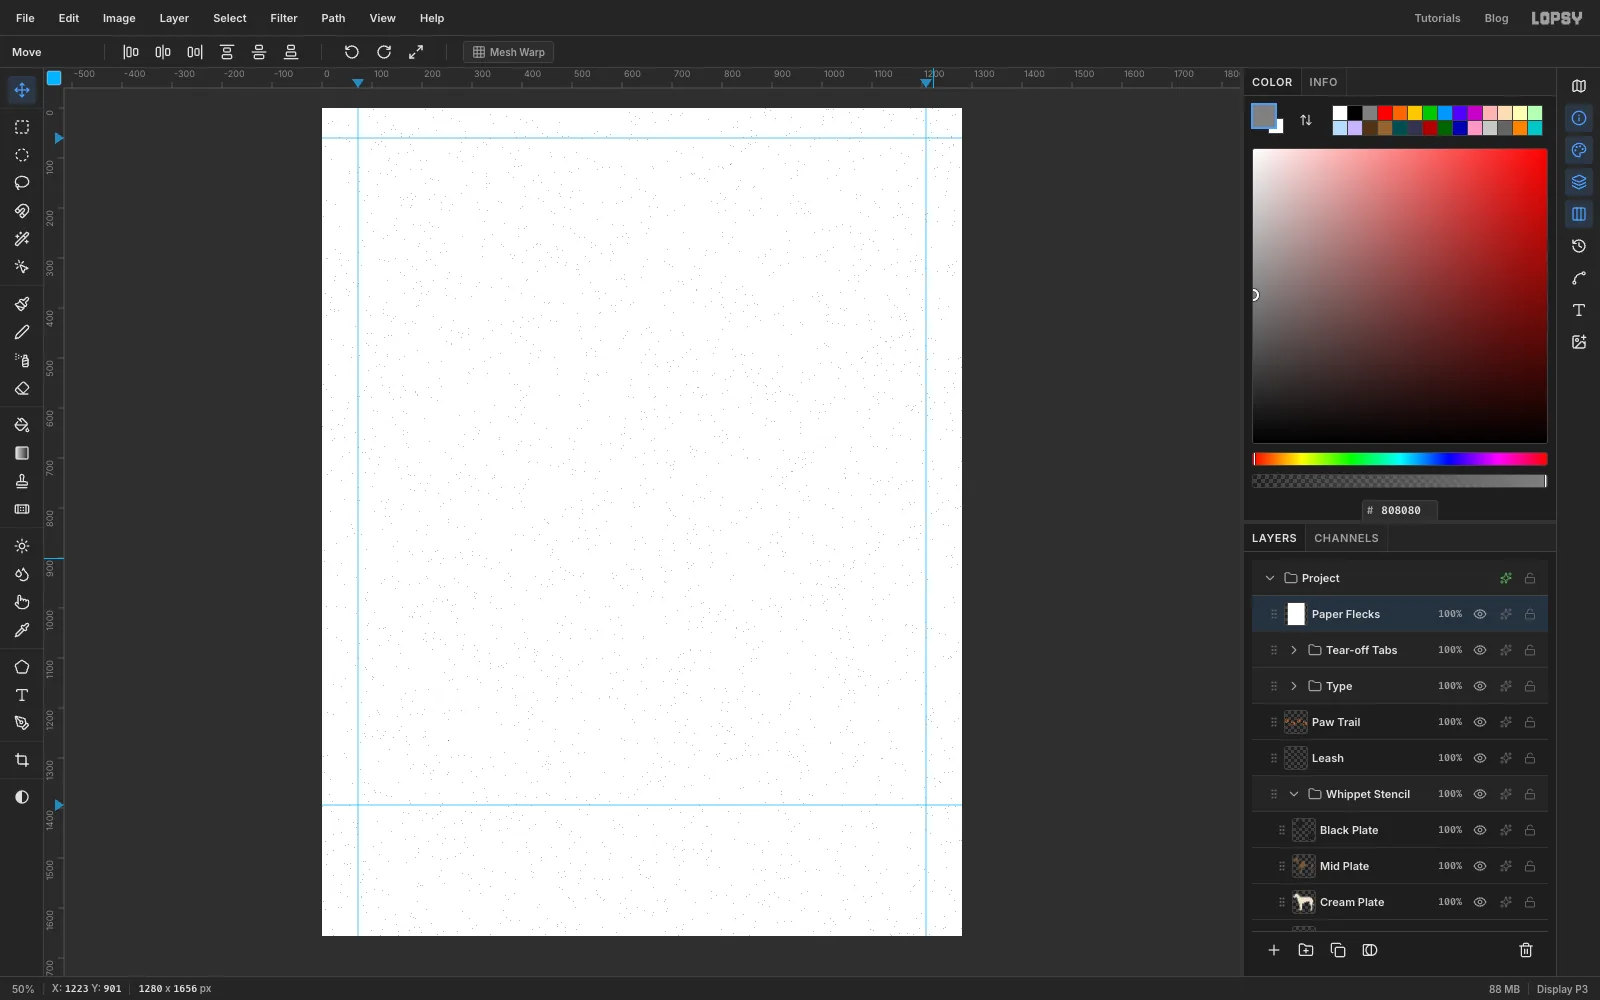
-
Finish with Multiply
Set the layer's Blend to Multiply and its opacity to 35%. In Multiply, white disappears, so only the specks show. They land on the ink as well as the paper, so the paint looks sprayed onto the kraft rather than floating above it.
Export with File → Quick Export PNG and save the project with File → Save Project, so you can change the phone number on the tabs later.