Design a Steampunk Ramen Billboard
Design a steampunk ramen billboard in Lopsy with copper pipes, a Mesh-Warped Greek-key bowl, Smoke-filter steam, arched woodtype on a path and a gas lamp.
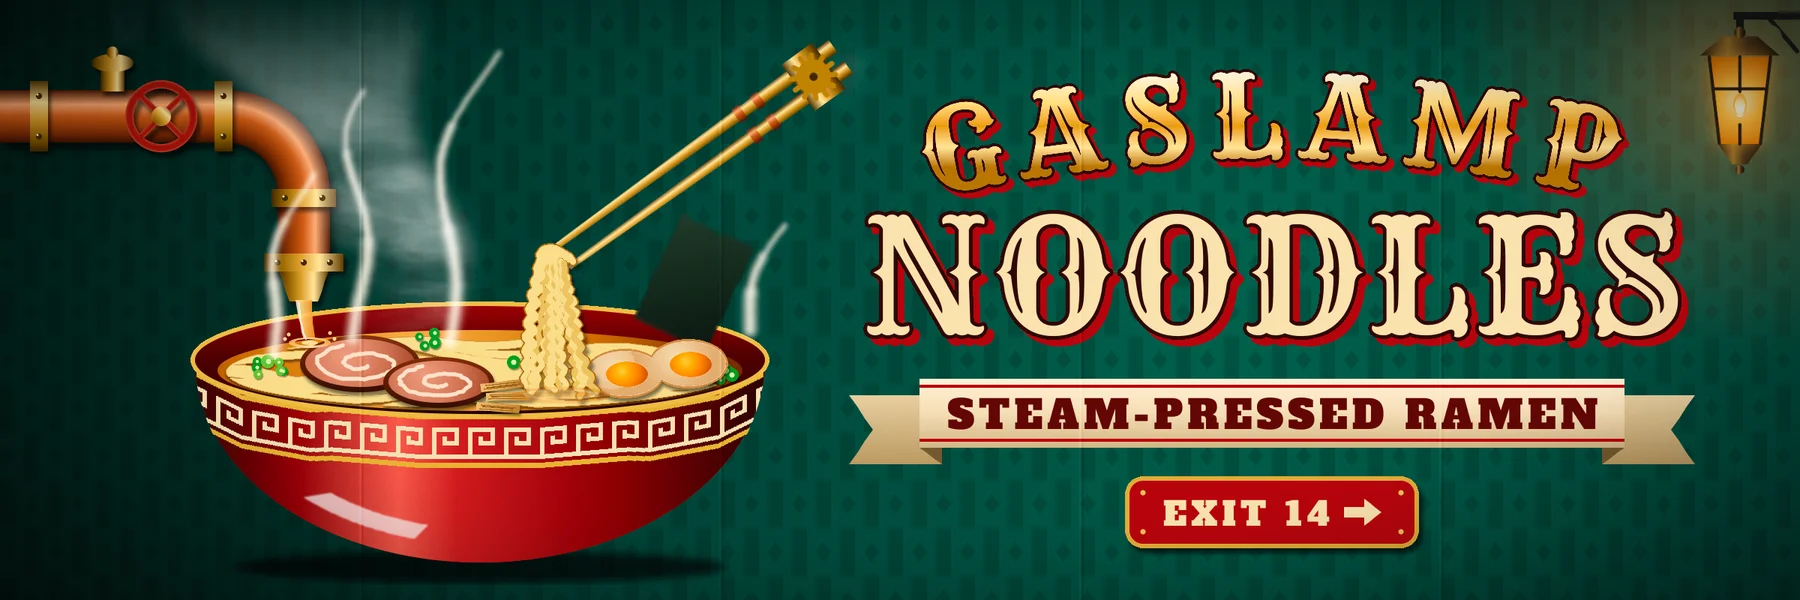
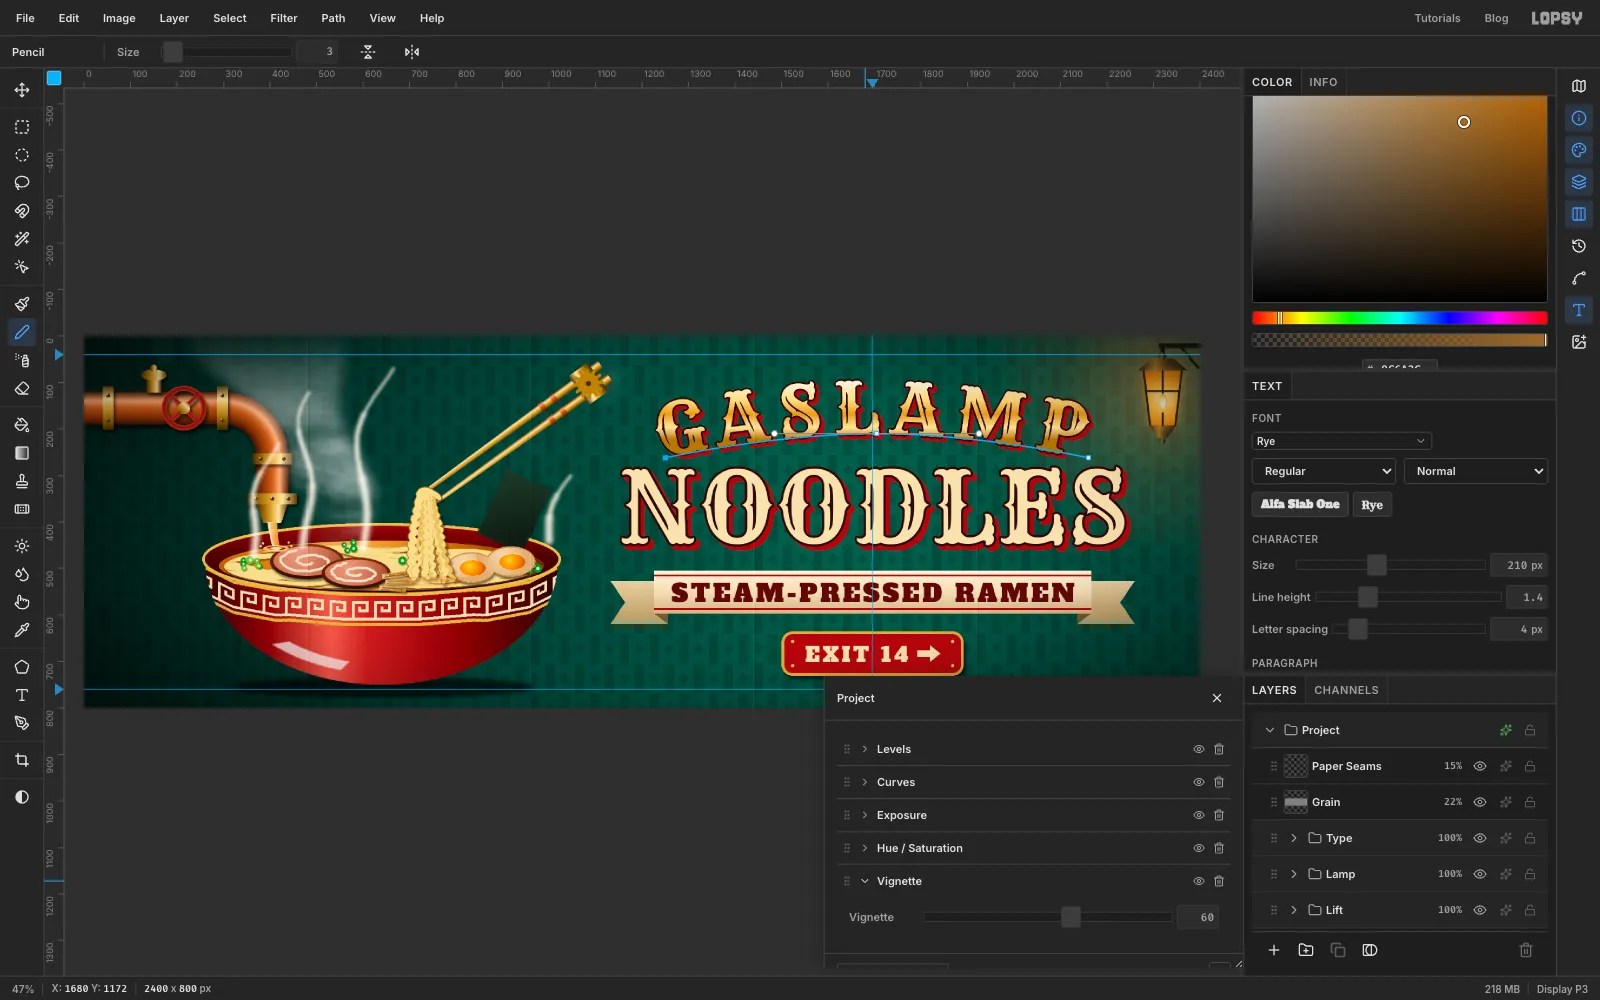
A roadside billboard gets about five seconds of a driver's attention. So the rules are strict: one bold picture, high contrast, and seven words or fewer. This tutorial fits those rules to a steampunk theme. You'll make Gaslamp Noodles, a 2400 × 800 billboard for an imaginary ramen bar where the broth arrives through copper plumbing.
Everything is drawn in Lopsy. The pieces you'll build:
- Pipe work: copper pipe shaded with gradients so it looks like a cylinder, including the bend.
- Bowl: a red lacquer bowl with a Greek-key band bent to fit by Mesh Warp.
- Steam: made with the Smoke filter and a layer mask.
- Headline: Victorian woodtype set on a curved Pen path and gilded with a gradient.
The copy is six words: Gaslamp Noodles, Steam-Pressed Ramen, Exit 14.
The palette:
-
Wall green
-
Copper
-
Brass
-
bronze
-
Lacquer red
-
valve red
-
Broth
-
noodles
-
Cream type
-
keyline
-
woodtype shadow
-
Gold type
-
Lamp glow
-
nori
-
Set up the billboard
Open Lopsy. In the New Document dialog, choose Pixels and enter
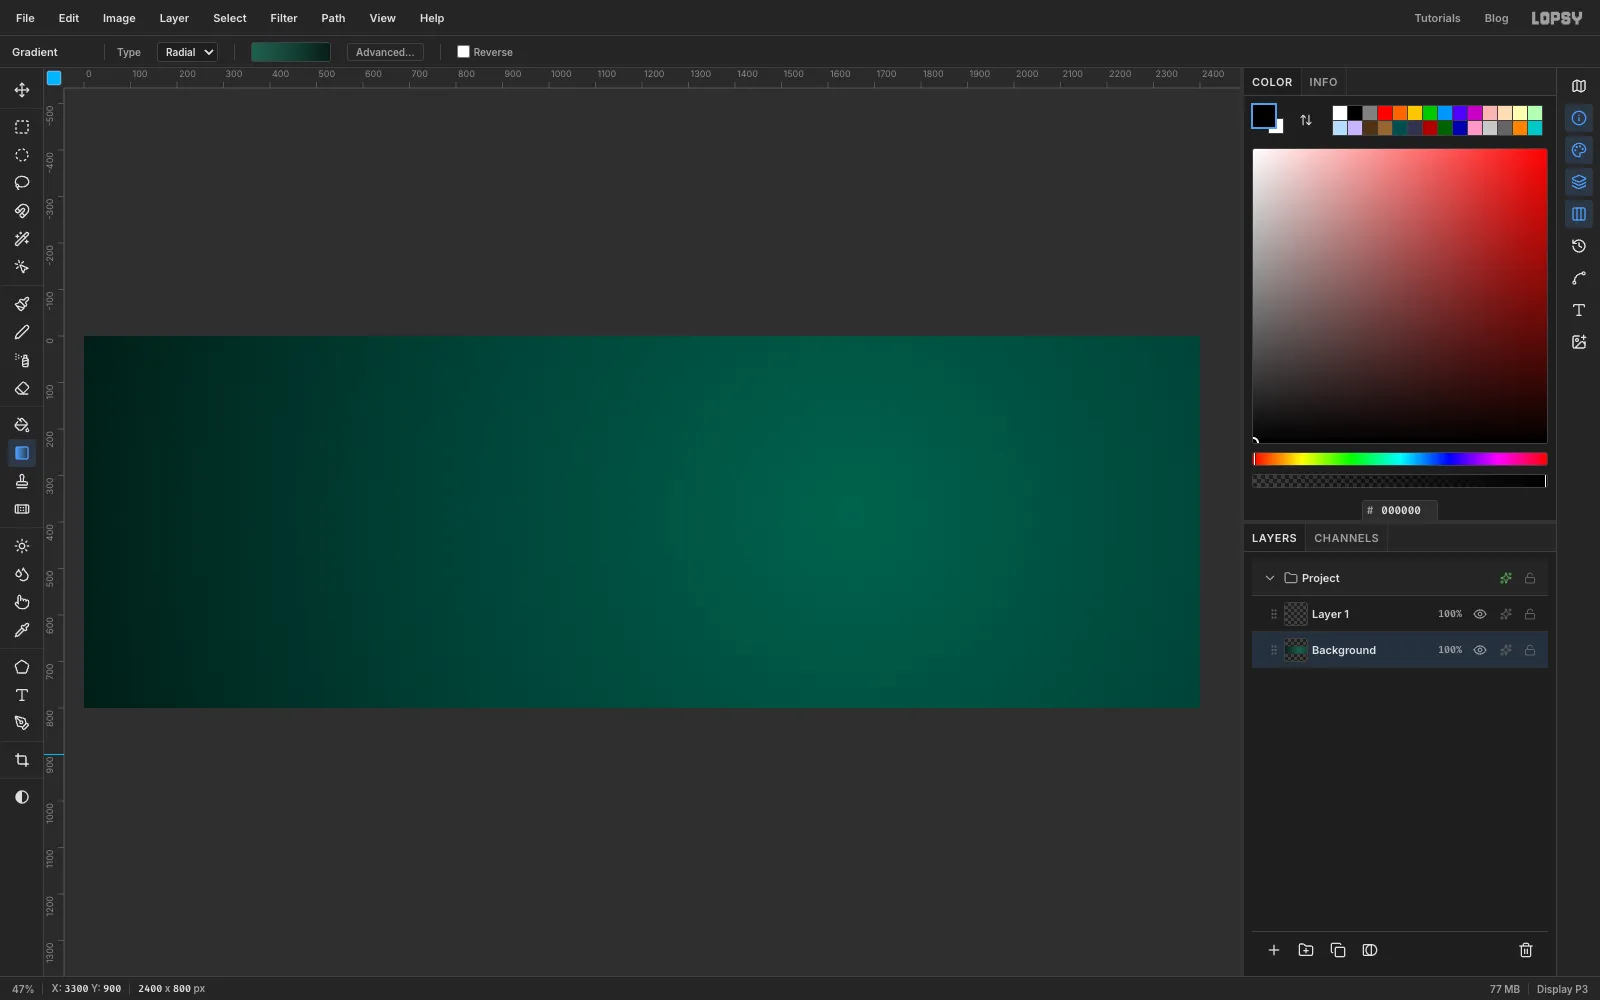
2400×800. That's a 3:1 shape, close to a standard roadside board. Choose a White background and click Create.Select the Background layer and pick the Gradient tool. Set Type to Radial and click Advanced…. Give it three stops: , at about 55% and .
Drag from just right of the canvas centre out past the bottom-right corner. The light falls on the right half, where the headline will go, and the left edge drops into shadow.
-
Paper the wall with a pattern
Rename Layer 1 to
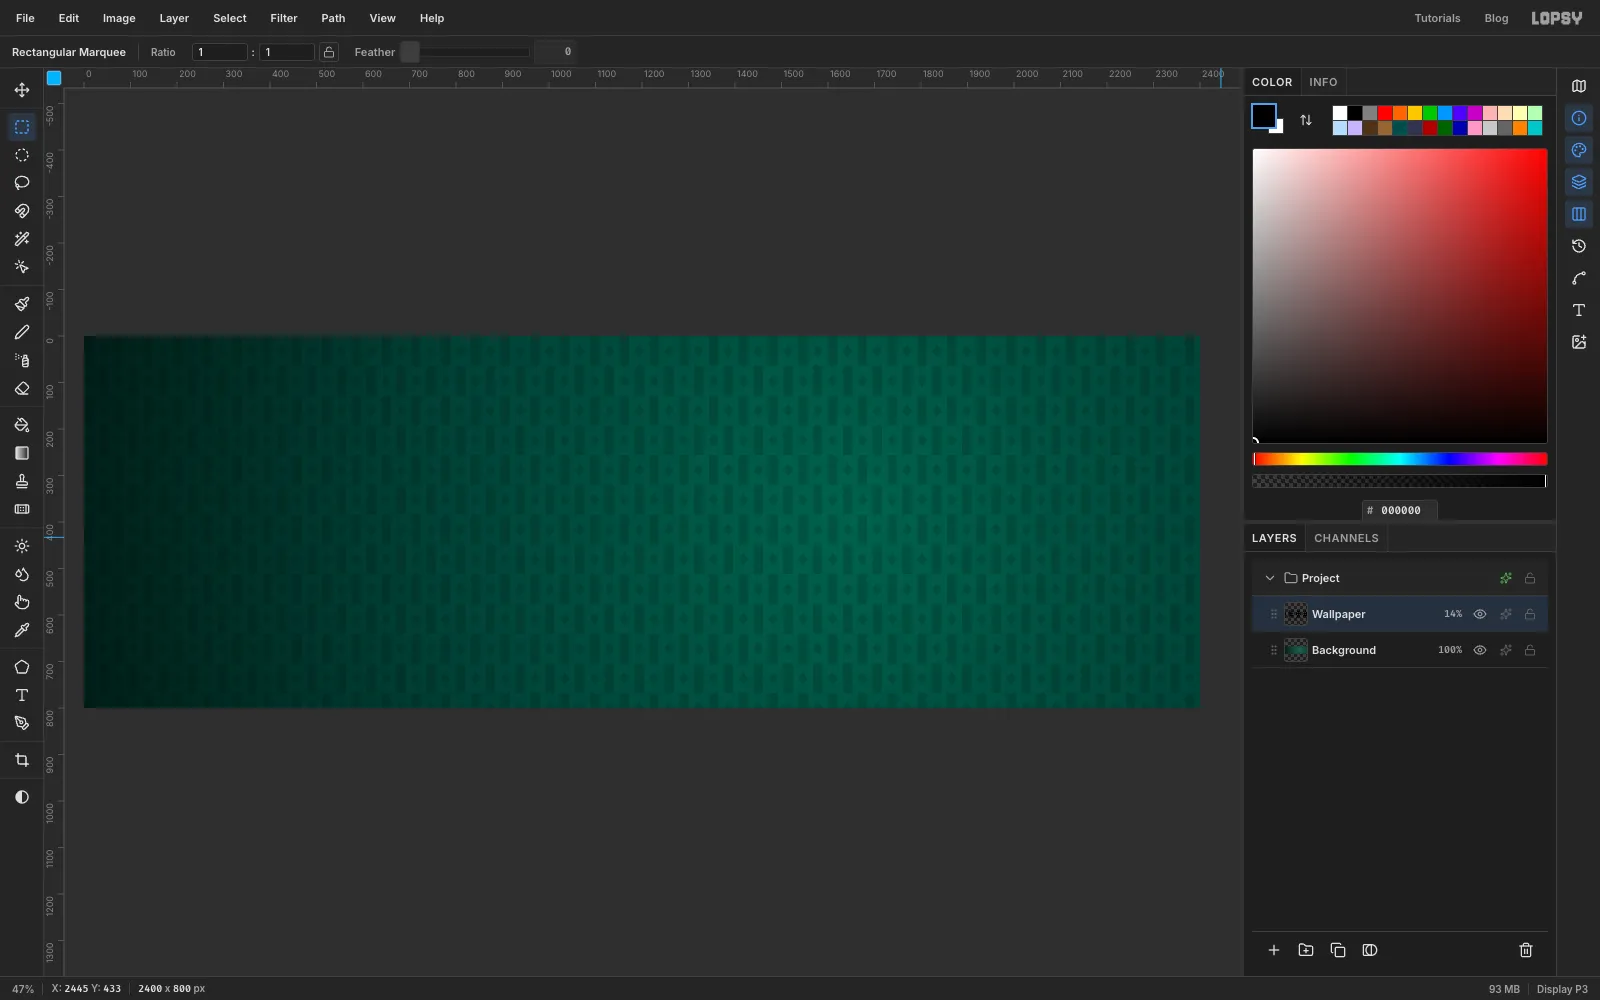
Wallpaper. You'll draw one wallpaper tile in the top-left corner, save it as a pattern, then fill the wall with it.- With black as the foreground colour, marquee a narrow strip about 20 px wide down the left side of a 64 × 64 square in the very top-left corner. Fill it with Edit → Fill.
- Lasso a small diamond in the empty half of that square and fill it too.
- Marquee the whole 64 × 64 tile and choose Edit → Define Pattern. Press Delete to clear the tile, then Cmd+D.
- Choose Edit → Fill with Pattern…, pick the tile, set Row Stagger to
50% and click Apply.
Set the layer's blend mode to Multiply and its opacity to about 15%. Wallpaper should whisper, not shout.
-
Bend a copper pipe
Click New Group and name it
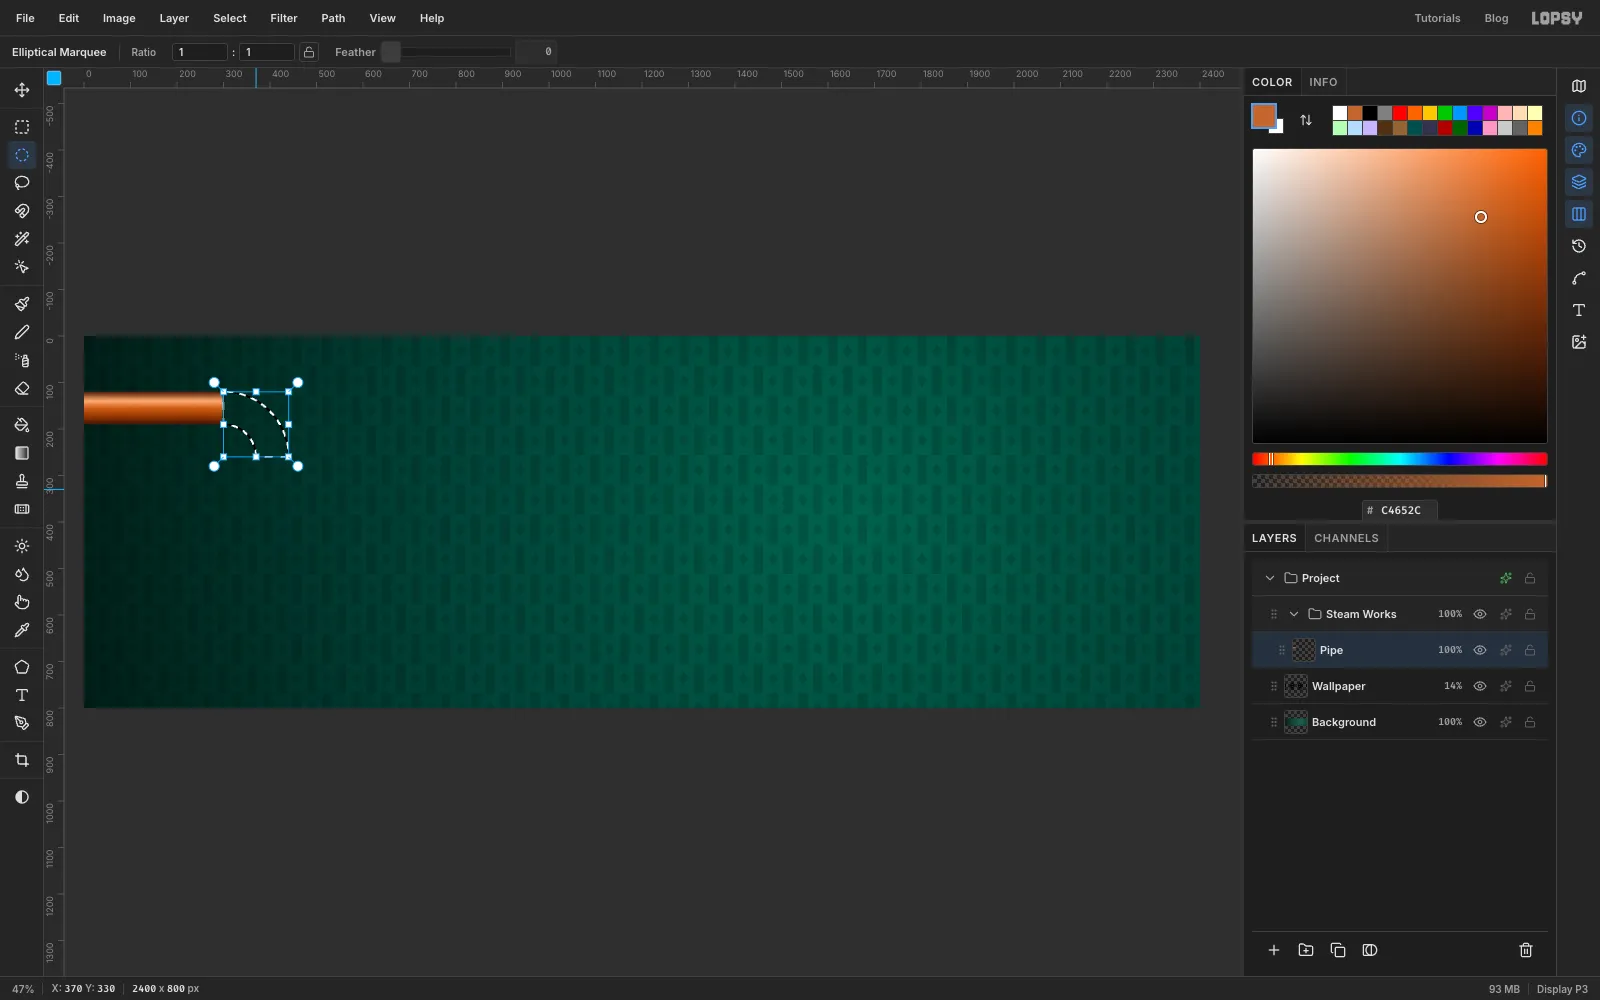
Steam Works. Add a layer inside it calledPipe.The straight run.
- Marquee a 70 px tall bar from the left edge about 300 px into the canvas, near the top.
- With the selection still live, drag a Linear gradient straight down across it. Use the copper stops , at 28%, at 50%, at 82% and . A bright band near the top and dark edges make the bar read as a round pipe.
The elbow. Click the rulers to drop two guides first: a vertical one through the pipe's right end, and a horizontal one about 70 px below the pipe's bottom edge. They cross at the centre of the bend, and marquees snap to them, which makes the next part much easier.
- With the Elliptical Marquee, drag a circle centred on that crossing point, sized so its top edge lines up with the top of the pipe.
- Hold Shift+Alt and drag a rectangle over the circle's top-right quarter to keep only that quarter.
- Hold Alt and drag a smaller circle on the same centre, with its top on the pipe's bottom edge. That cuts out the hole and leaves a quarter ring.
Now fill the ring with a Radial gradient dragged from the circle's centre out to its rim. Use the same colours, but squeeze them into the outer half of the bar: dark at 50% and 59%, mid-copper at 75%, highlight at 86%, dark again at 100%. The highlight now curves around the bend and lines up with the straight run.
Finish with a short vertical pipe dropping out of the elbow, shaded with the same linear gradient dragged sideways.
-
Add brass fittings and rivets
Add a layer called
Fittings. Every brass part is a selection filled with the brass gradient , , , and , always dragged across the part:- Collars: a collar at the pipe's left end, one where the run meets the elbow, and one partway down the drop.
- Nozzle: a wide flange at the bottom, then a lassoed trapezoid that narrows into a nozzle.
- Safety valve: a small cylinder on top of the pipe, capped with a flat ellipse and a ball.
For the rivets, use the Brush at size
9and hardness100in dark brown, and click twice on each collar. Then click again with a size4brush in pale cream, a hair up and to the left of each one, to add a highlight.Give
FittingsandPipea soft Drop Shadow in the Layer effects drawer, so the pipe stands off the wall.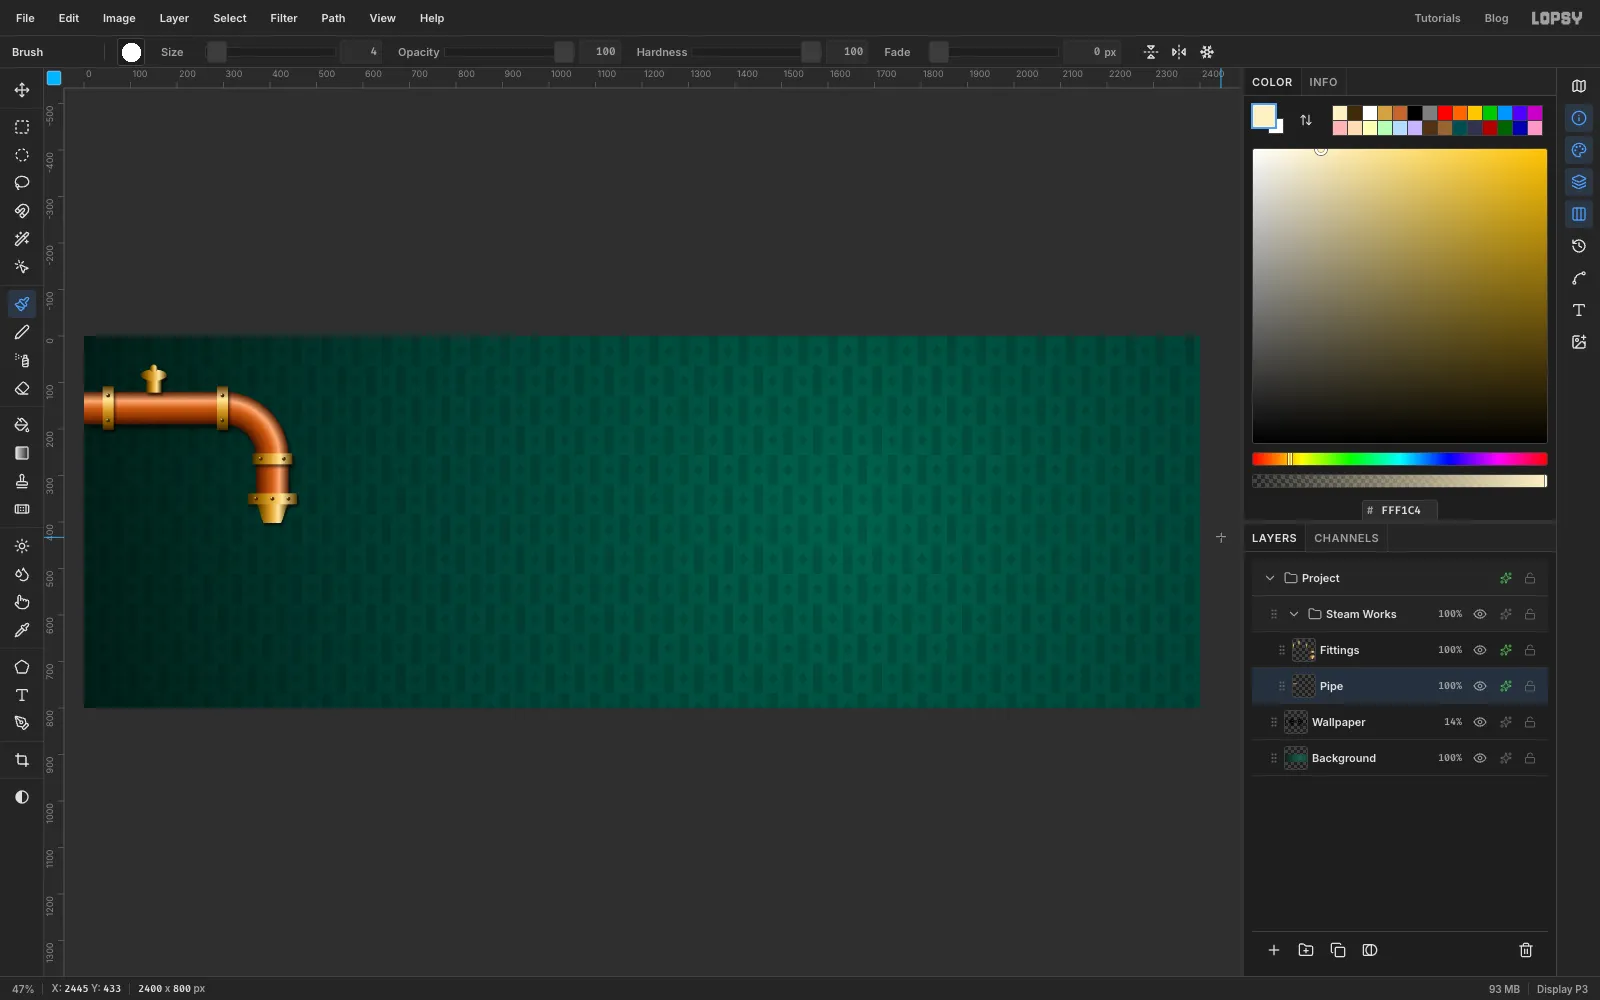
-
Bolt on a valve wheel
Add a layer called
Wheel. The wheel is a ring, an X of spokes and a hub:- Ring: set the foreground to . Draw a circle about 96 px across over the pipe, between the left collar and the elbow, and fill it. Draw a smaller circle with the same centre and press Delete to hollow it out.
- Spokes: with the Brush at size
9, click on the ring, then Shift-click directly opposite. Do this twice to make an X. - Hub: draw a small circle in the middle and fill it with the brass gradient.
Open the Layer effects drawer, tick Inner Glow and set its colour to , Size
5, Opacity70. The edge highlight makes the flat red read as painted iron. Add a Drop Shadow to match the fittings.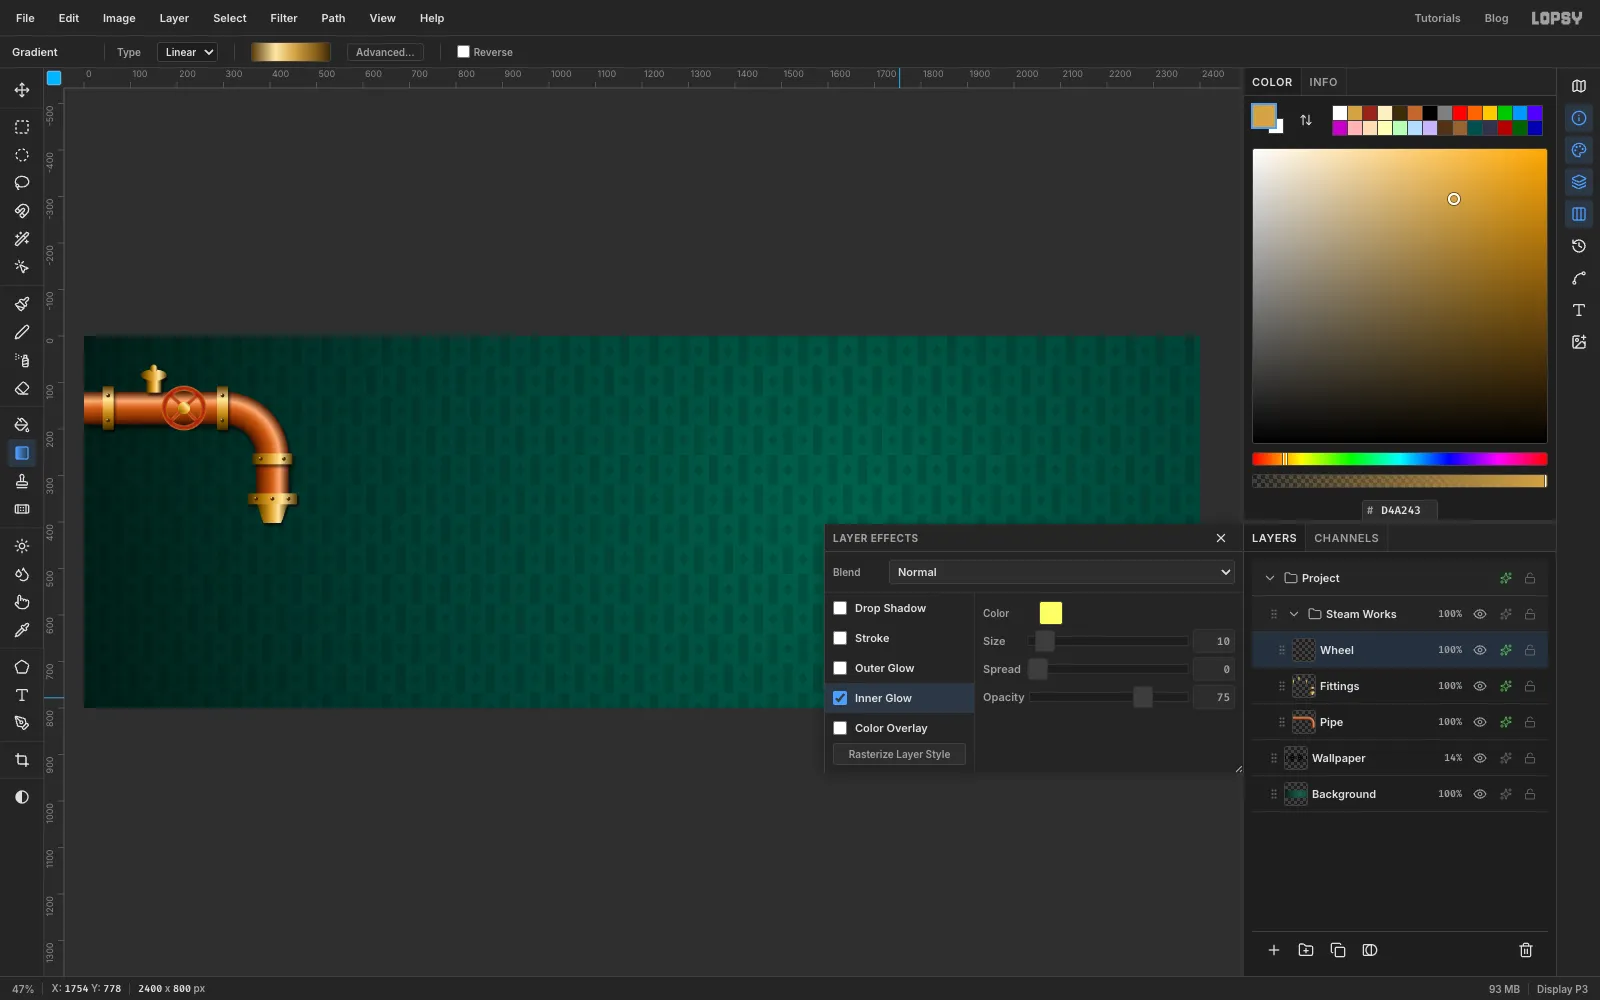
-
Shape the lacquer bowl
Click New Group, name it
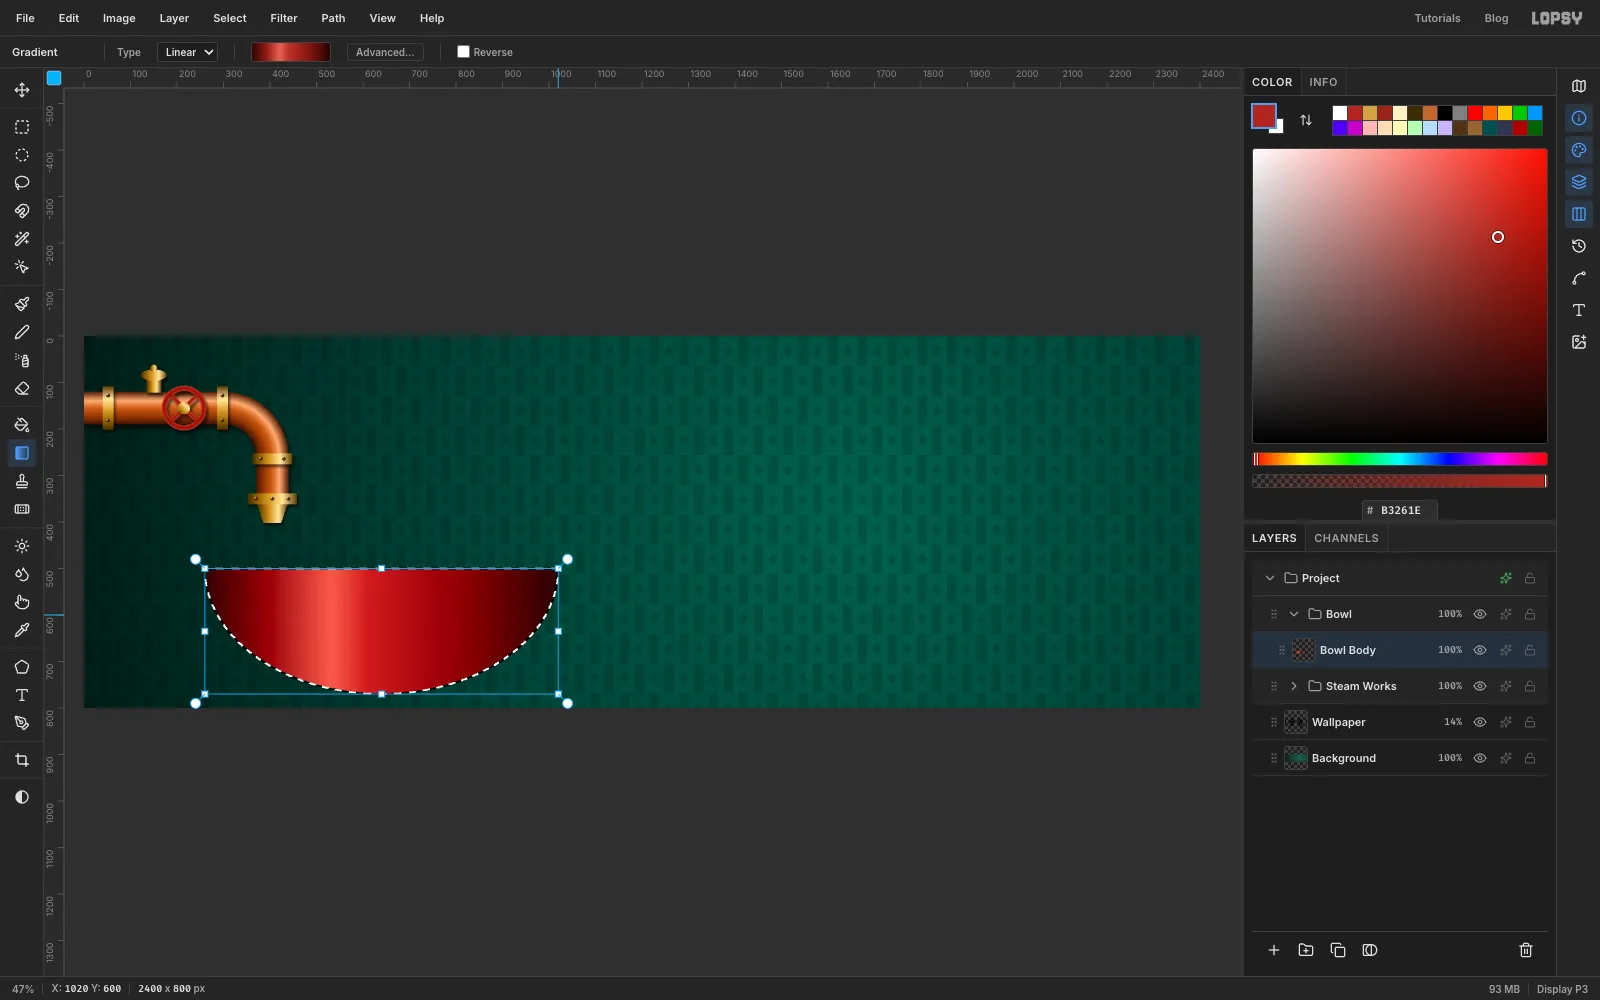
Bowl, and add a layer calledBowl Body.With the Elliptical Marquee, draw an ellipse about 760 px wide and 540 px tall, centred a little to the right of the nozzle. Then hold Shift+Alt and drag a rectangle over its lower half, so only the bottom half stays selected.
Drag a horizontal Linear gradient straight into that selection, from its left edge to its right edge, with these stops:
- at the left edge
- at about 36%
- at the right edge
The off-centre highlight is what makes it look like glossy lacquer.
-
Fill a Greek-key band
Ramen bowls often have a raimon (Greek-key) border. Add a layer called
Bowl Trim.Make the tile. In the top-left corner, build one key unit inside a 48 × 48 square from 6 px wide bars of cream , using small rectangle marquees and Edit → Fill:
- a bar along the bottom
- a post up the left side
- an arm along the top, stopping short of the right side
- a short drop down from the end of that arm
- a short arm back to the left, ending in a little hook
Marquee the 48 × 48 square and choose Edit → Define Pattern, then press Delete and Cmd+D.
Fill the band. Marquee a 48 px band from the bowl's left edge to its right edge, a little below the bowl's flat top. Choose Edit → Fill with Pattern…, pick the new tile and set Row Stagger to
0. Then fill a thin gold line just above the band and another just below it.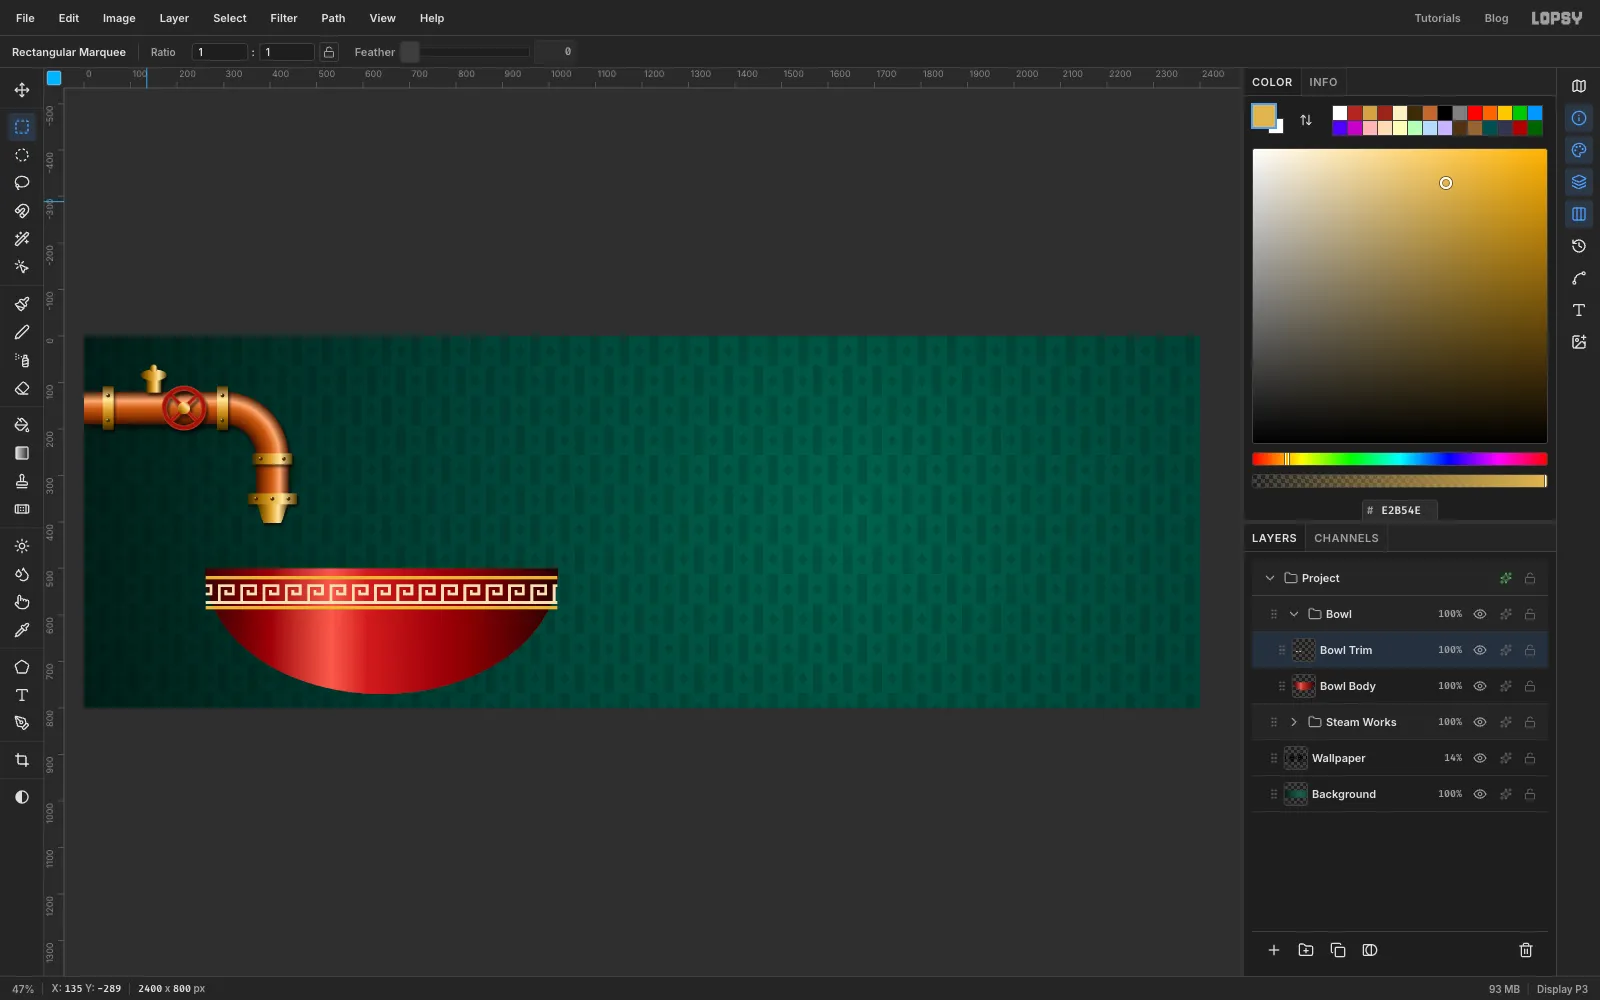
-
Bend the band with Mesh Warp
A straight band looks pasted on, so it has to follow the bowl's curve.
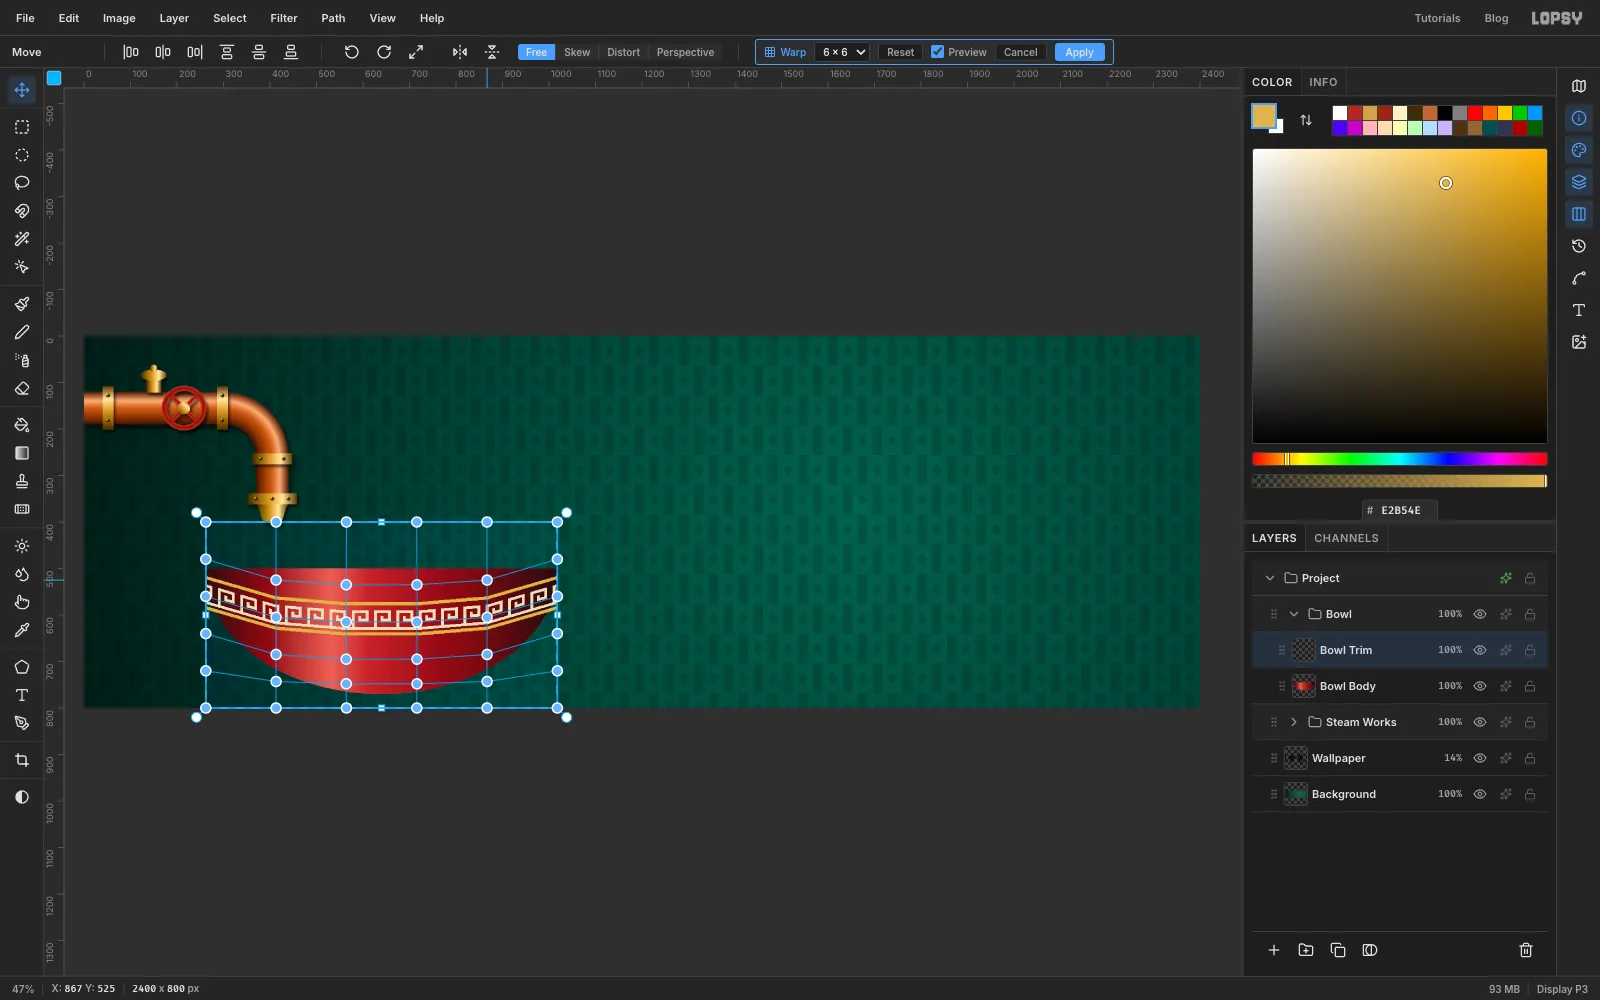
- Marquee a box around the band that is much taller than the band, reaching from a little above it down to the bottom of the bowl.
- Choose the Move tool and click Mesh Warp in the options bar. Set the grid to 6 × 6 and tick Preview.
- Leave the outer columns and the bottom row alone. Drag the inner points down so the band sags into a gentle smile: the middle columns most (roughly the depth of the band), easing off toward the sides. Pull the row of points just under the band about half as far.
- Click Apply.
The tall box matters. If the box is only as tall as the band, the grid cells under it get squashed, and thin lines break up into dashes.
If the curve still looks kinked near the ends, marquee just the left third of the band and run a second, smaller warp, nudging its inner points down a little to round the curve. Do the same on the right. Finish with a 1 px Gaussian Blur on the band to smooth any jagged edges.
-
Add the rim and the broth
Rim. Add a layer called
Rim. Draw a flat ellipse across the top of the bowl, the full width and about 144 px tall. Fill it with a vertical gradient from down to . This is the inside wall. Give the layer a 6 px Stroke in , which becomes a gold lip all the way around.Broth. Add a layer called
Broth. Draw a slightly smaller ellipse a little lower inside the rim, so a sliver of back wall still shows. Fill it with a Radial gradient of , and , starting just left of centre.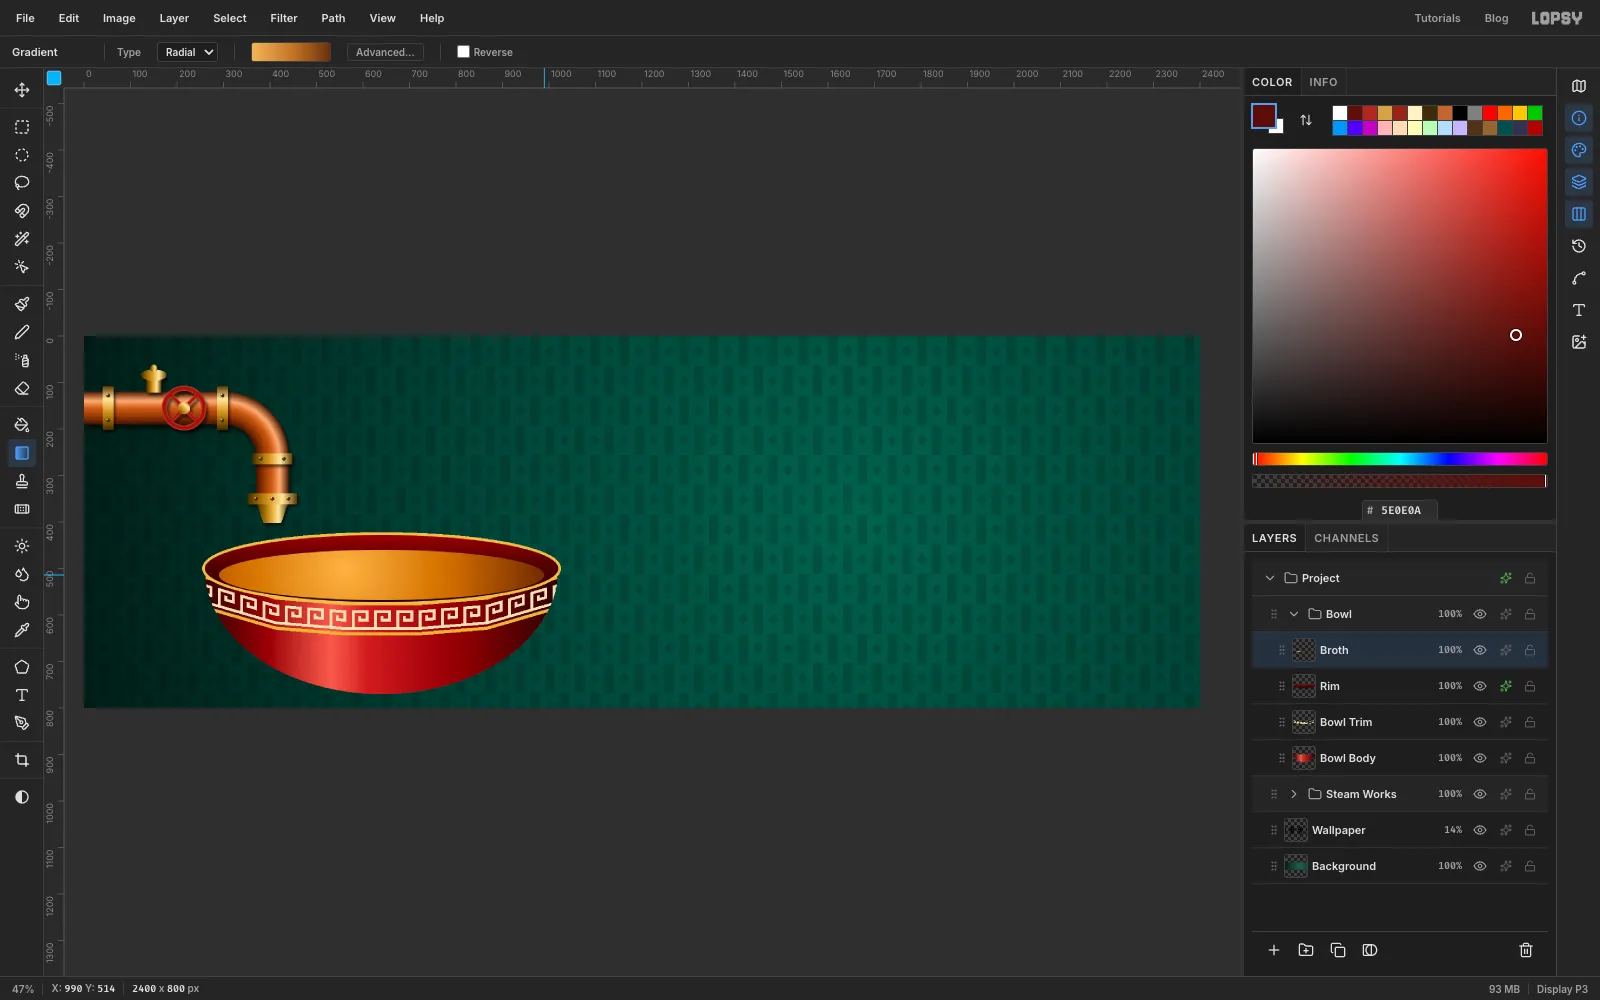
-
Fill the bowl
Put each topping on its own layer above
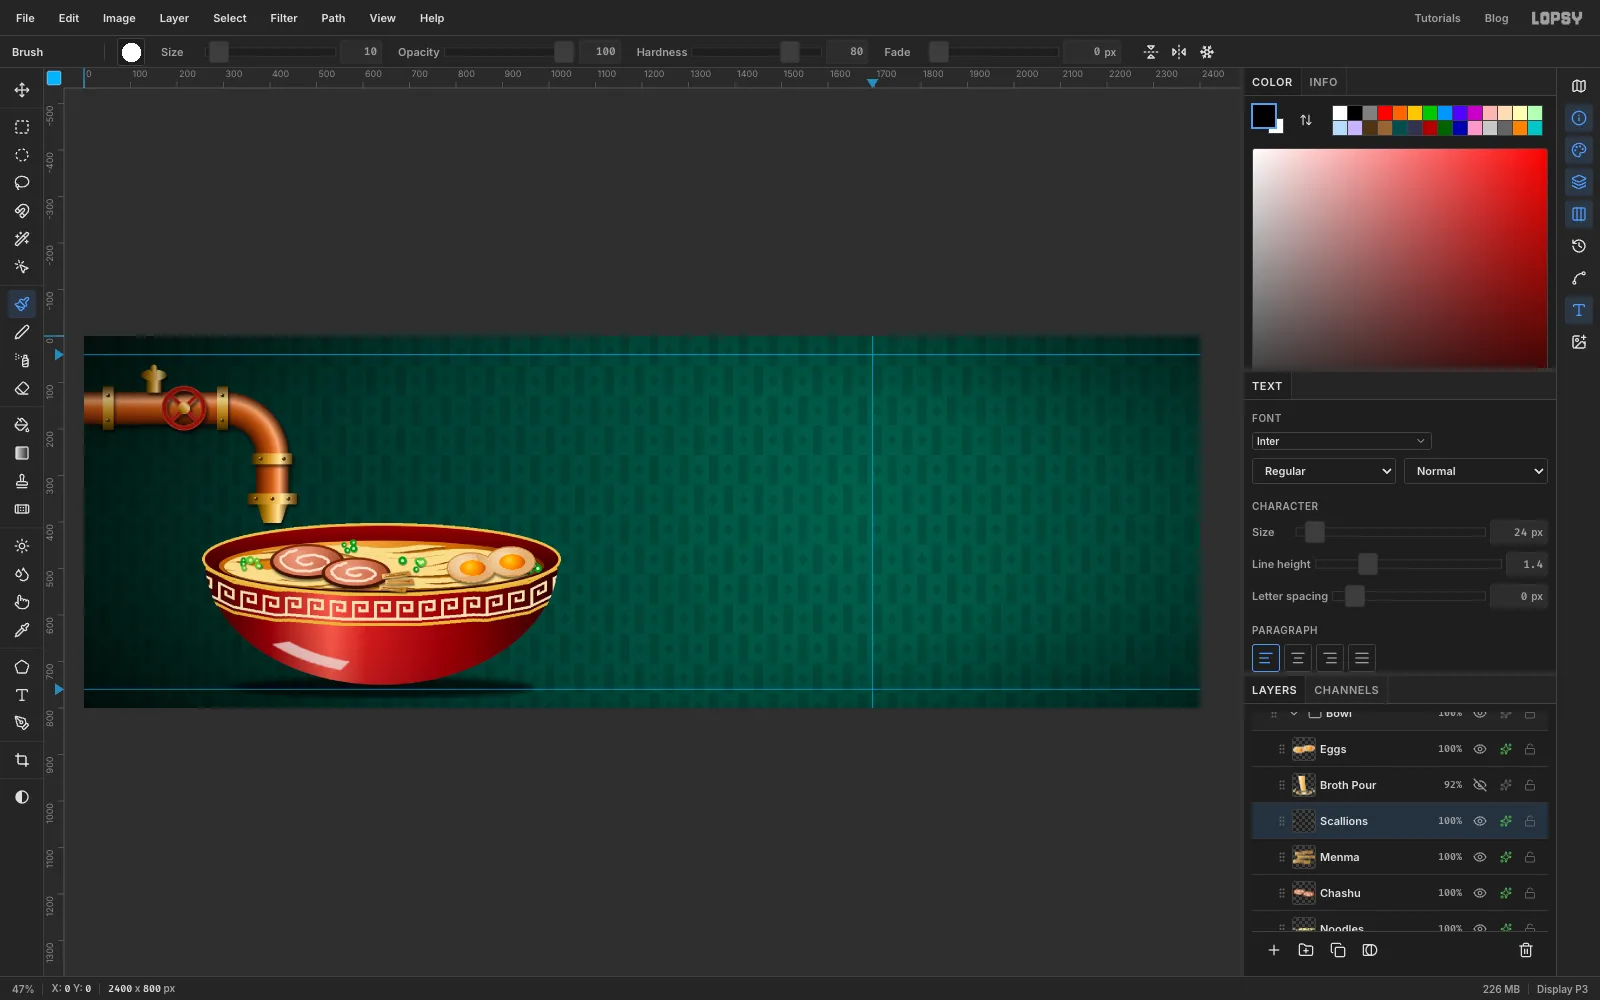
Broth, all inside the Bowl group.- Noodles: Cmd-click the
Broththumbnail to select the broth. On aNoodleslayer, drag a size11brush across it in loose wavy lines of , about a dozen rows. Add a 1 px Stroke in and a small Drop Shadow. - Chashu: make two overlapping slices on a
Chashulayer.
- For each slice, fill an ellipse with a dark brown gradient for the rind.
- Fill a slightly smaller ellipse inside it with a pink-brown radial gradient ( → ).
- Paint one wobbly spiral of fat in cream with a size
7brush. Rolled pork belly shows its fat as a spiral.
- Eggs: on an
Eggslayer, fill two white ovals and add an orange radial yolk in each. Then click the whites with the Magic Wand and fill them with a tan gradient ( → ) so they look soy-marinated. Add a thin Stroke and Drop Shadow. - Menma (bamboo shoots): lasso three short tan strips and draw thin darker lines along them for the fibres.
- Scallions: click brush dabs of 12–20 px in two greens (, ), grouped into three or four little clusters. Then click a smaller pale dab inside each one to turn them into rings.
Gloss and shadow.
- Gloss: add a
Bowl Glosslayer aboveBowl Trim. Lasso a thin crescent low on the left of the bowl that follows its curve, fill it white, blur it 3 px and set it to about 70%. - Shadow: add a
Bowl Shadowlayer underBowl Body. Fill a flat black ellipse just under the bowl, blur it about 16 px, and set it to Multiply at 70%.
Finally, select the Bowl group row and drag the bowl up about 20 px with the Move tool, so it sits at least 50 px clear of the bottom edge.
- Noodles: Cmd-click the
-
Lean a sheet of nori
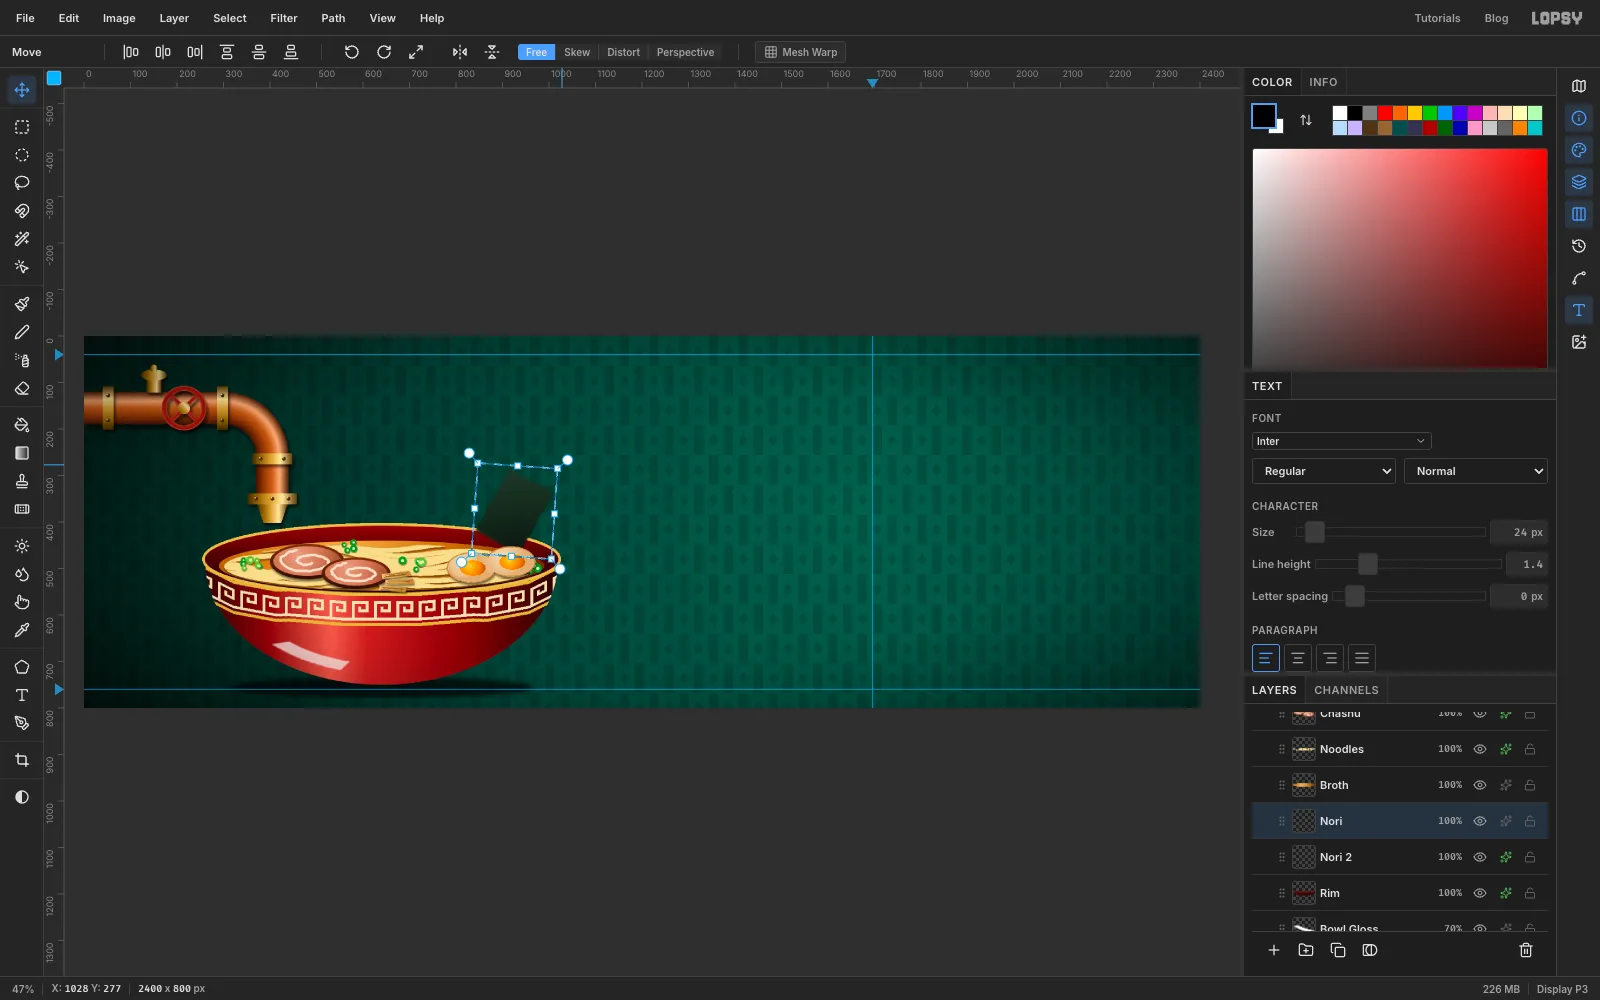
Add a layer called
NoribelowBroth, so the broth covers the sheet's bottom edge.- Lasso a sheet about 110 × 155 px with slightly wobbly edges. Fill it with a diagonal gradient from to .
- For the papery texture, run Filter → Add Noise at
12, then Filter → Motion Blur at angle60and distance16. - Marquee around the sheet and switch to the Move tool. Drag a rotation handle (just outside a corner) about 25° clockwise, so the sheet leans against the back-right rim. Press Cmd+D to commit.
-
Pour the broth
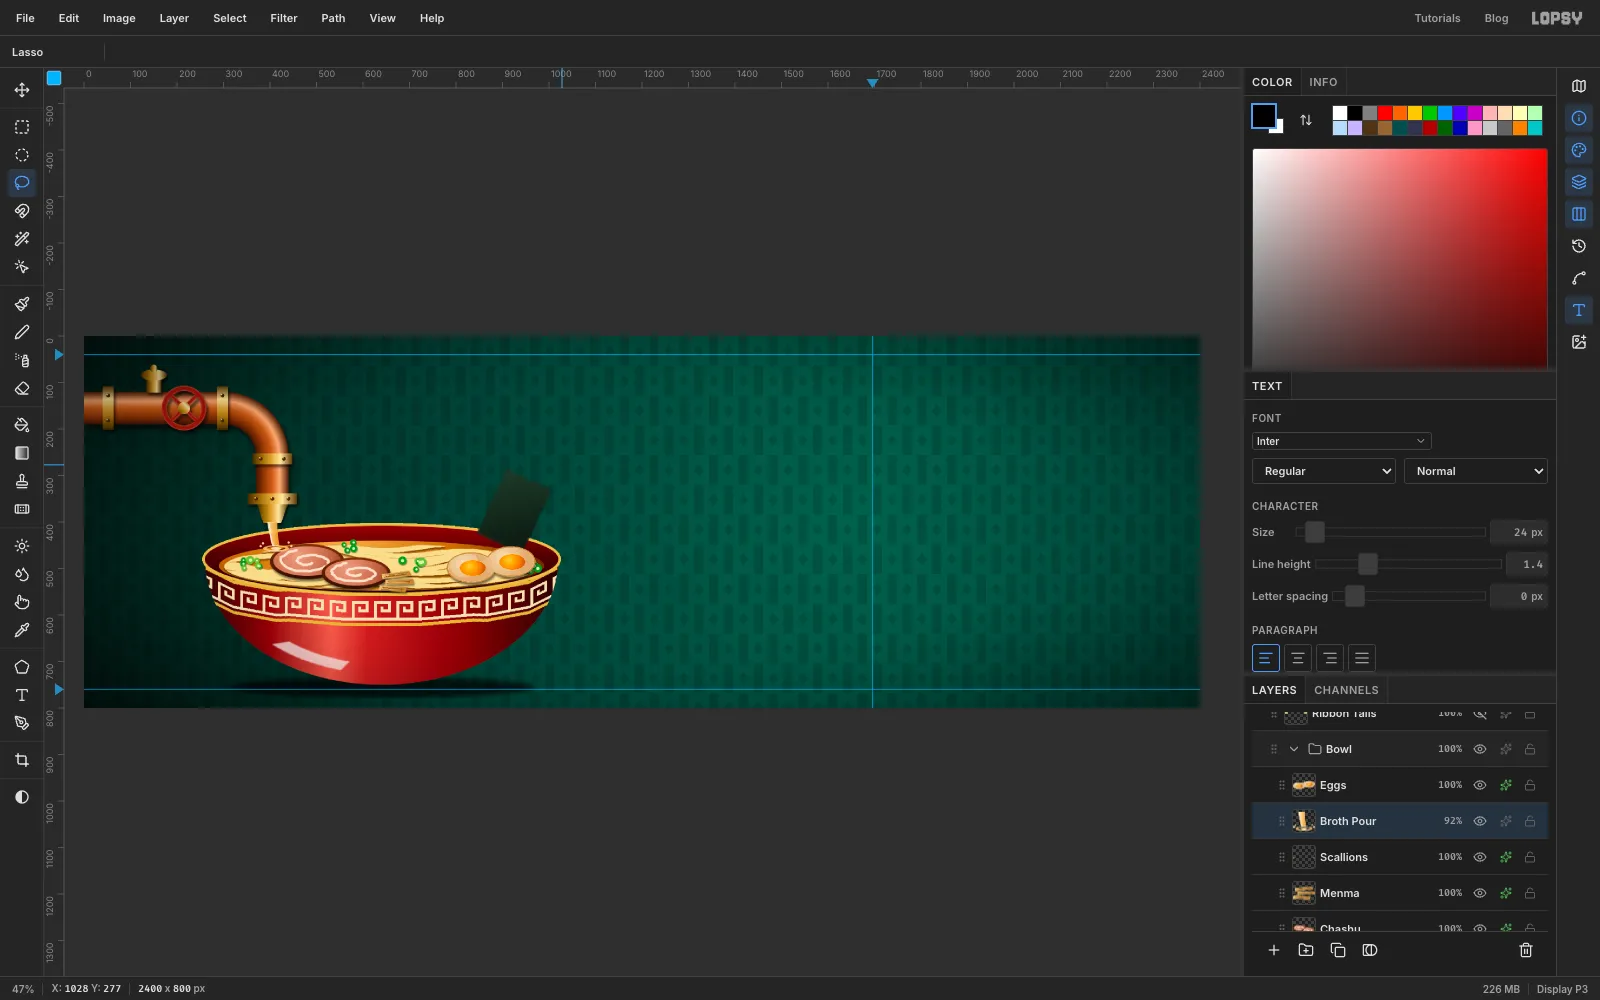
Add a
Broth Pourlayer at the top of the Bowl group.- Lasso a stream that starts at the nozzle, curves very slightly and tapers to about two-thirds of its width where it meets the broth.
- Fill it with a sideways gradient from to .
- With a size
3white brush, draw a highlight down the left side. - Where it lands, draw a flat ellipse, fill it pale gold and cut a smaller ellipse out of its middle to leave a splash ring. Click a few small droplets around it.
Make sure the stream lands on bare broth, not on a topping. If a topping is in the way, select its layer and drag it aside with the Move tool.
-
Make brass chopsticks
Add a New Group called
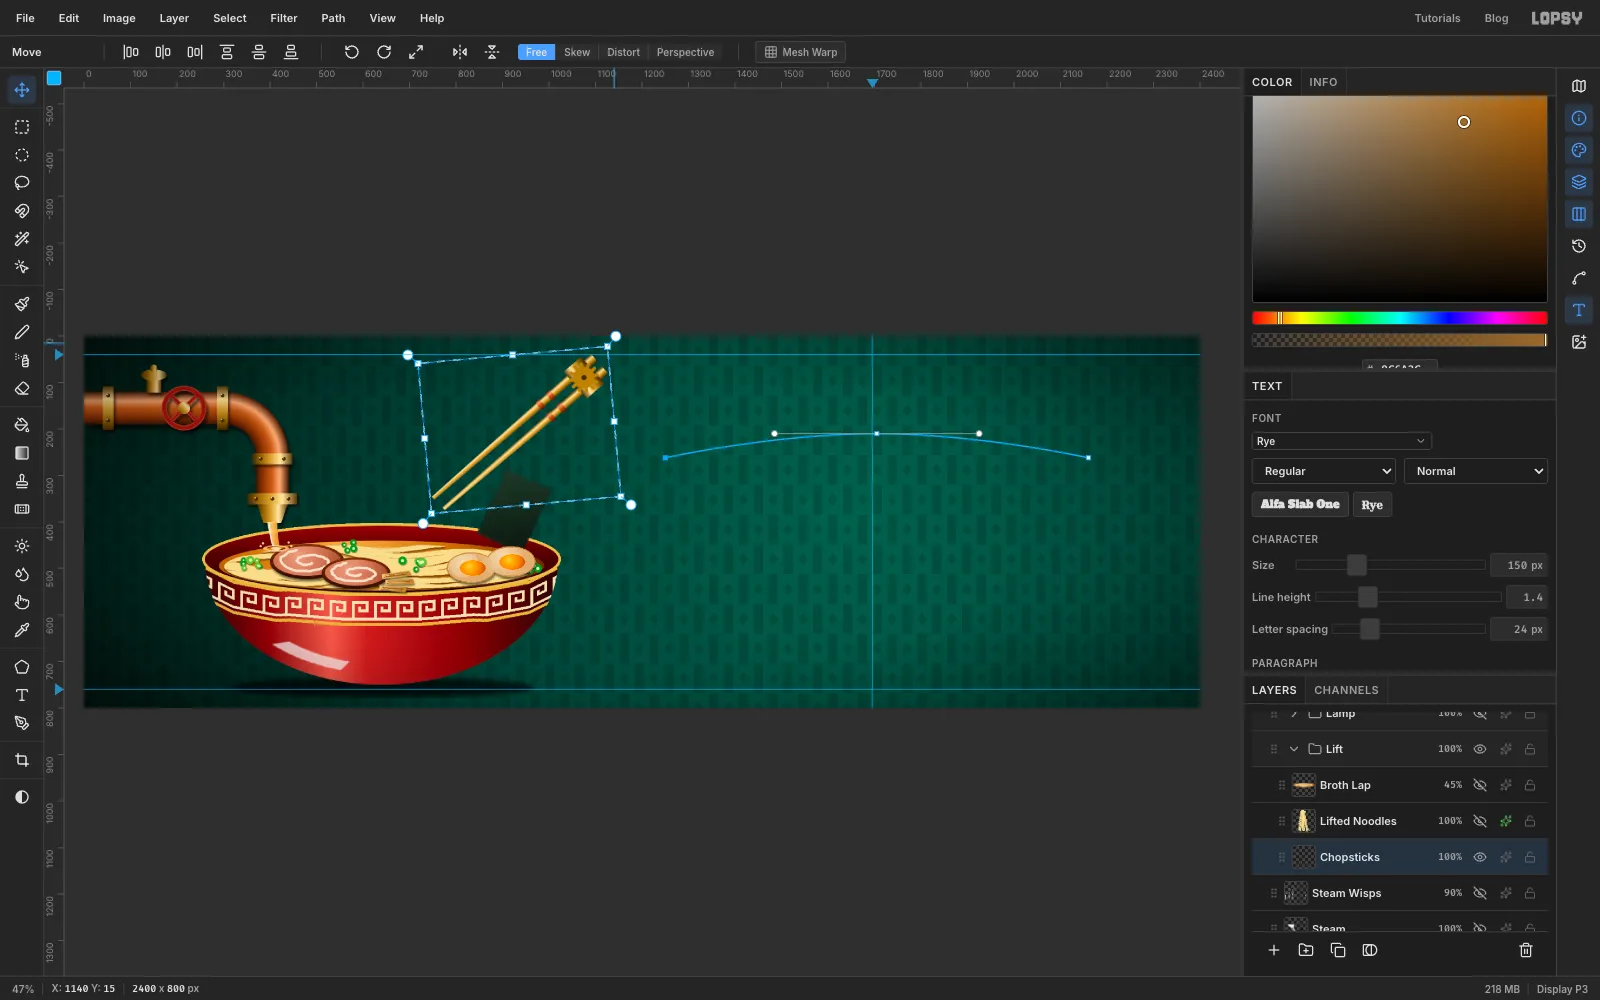
Liftabove the bowl, and a layer inside it calledChopsticks.Draw them flat. It's easier to draw the sticks lying horizontally and rotate them afterwards.
- Lasso two long sticks, one above the other, with the thin tips on the left and the thick ends on the right. Fill each with the brass gradient dragged across its width.
- Add two thin copper bands near the thick ends with small marquee fills.
- Fill a brass plate that joins the thick ends.
- The gear: choose the Shape tool, set Shape to Ellipse, and draw a small circle on the plate. Then add twelve teeth around it with Shift-click brush lines (size
8) radiating out from its edge. Click a dark dot in the middle.
Rotate them into place. Marquee around the sticks and drag a rotation handle about 36° counter-clockwise, so the tips point down into the bowl. Press Cmd+D, then drag them with the Move tool until the tips sit over the noodles. Keep the gear at least 50 px from the top edge.
-
Pull up the noodles
Add a layer called
Lifted Noodlesabove the chopsticks.The bundle. With a size
9brush, draw about fourteen strands from the chopstick tips down to the broth.- Wiggle each one with small, regular side-to-side kinks to make ramen's crinkle.
- Give each strand a slightly different sway, so the bundle doesn't look combed.
- Make every third strand a darker , for depth.
- Draw a few short arcs over the tips, so the noodles drape over the sticks.
Join it to the bowl. Add a layer called
Broth Lapabove the noodles. Fill a flat ellipse of broth colour where the bundle meets the soup, add a thin pale ripple ring, blur it 2 px and set it to 45%. The noodles now look as if they come up out of the broth rather than hovering over it.Give
Lifted Noodlesthe same Stroke and Drop Shadow as the noodles in the bowl.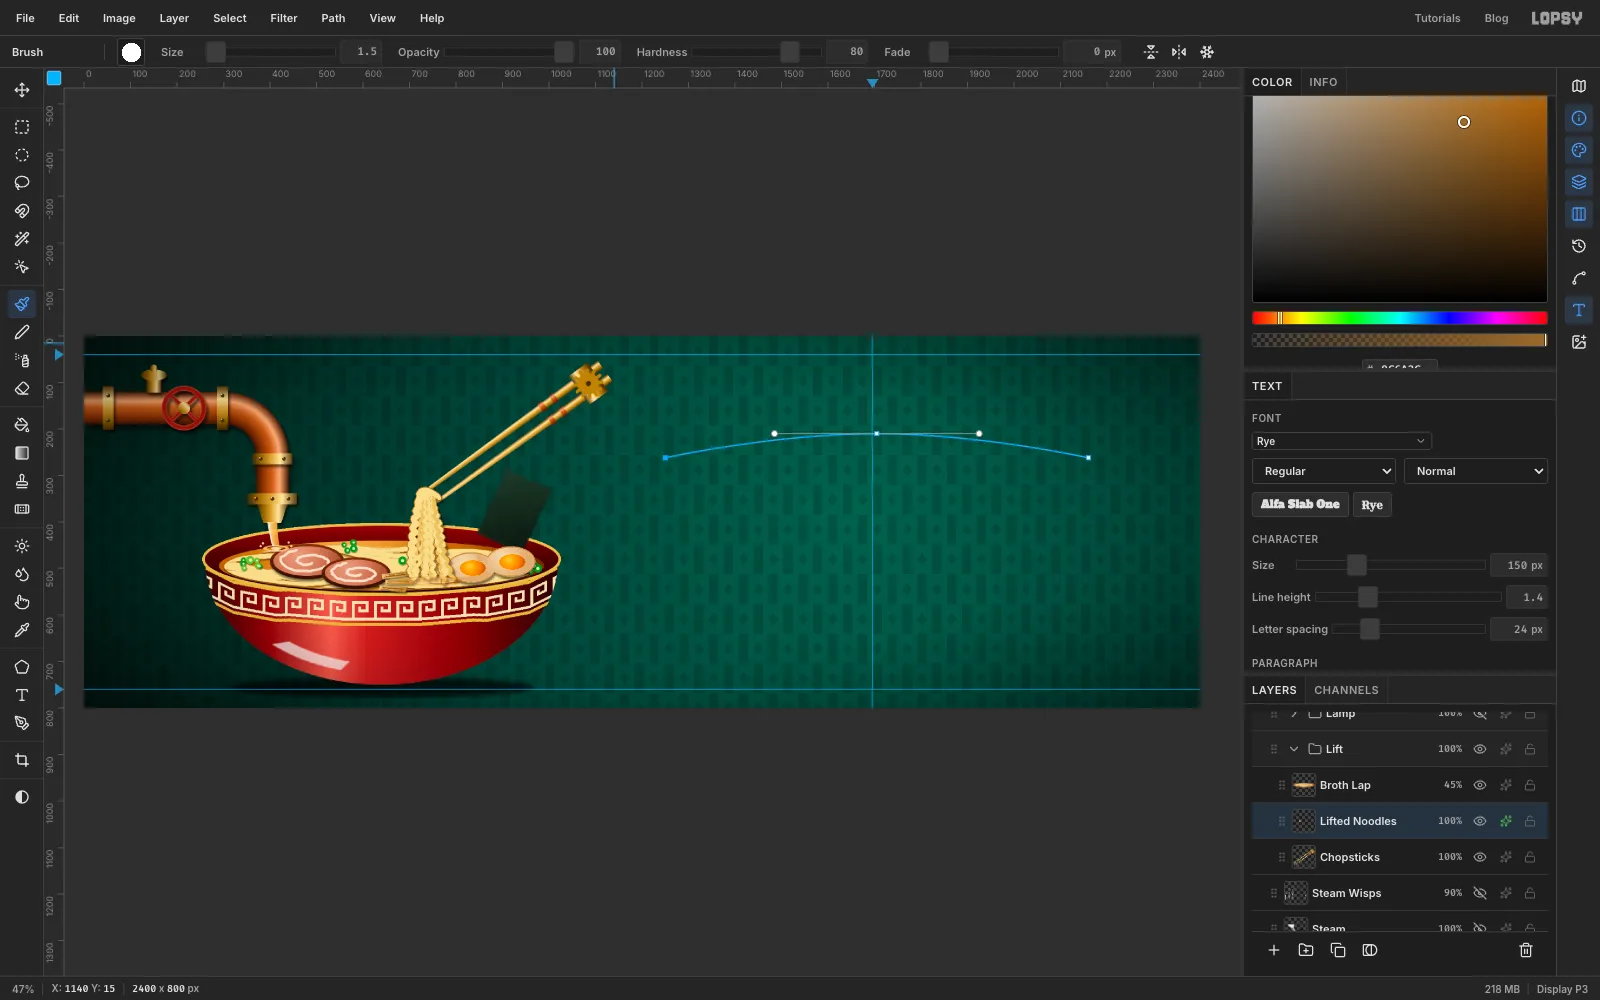
-
Raise the steam
The haze. Add a layer called
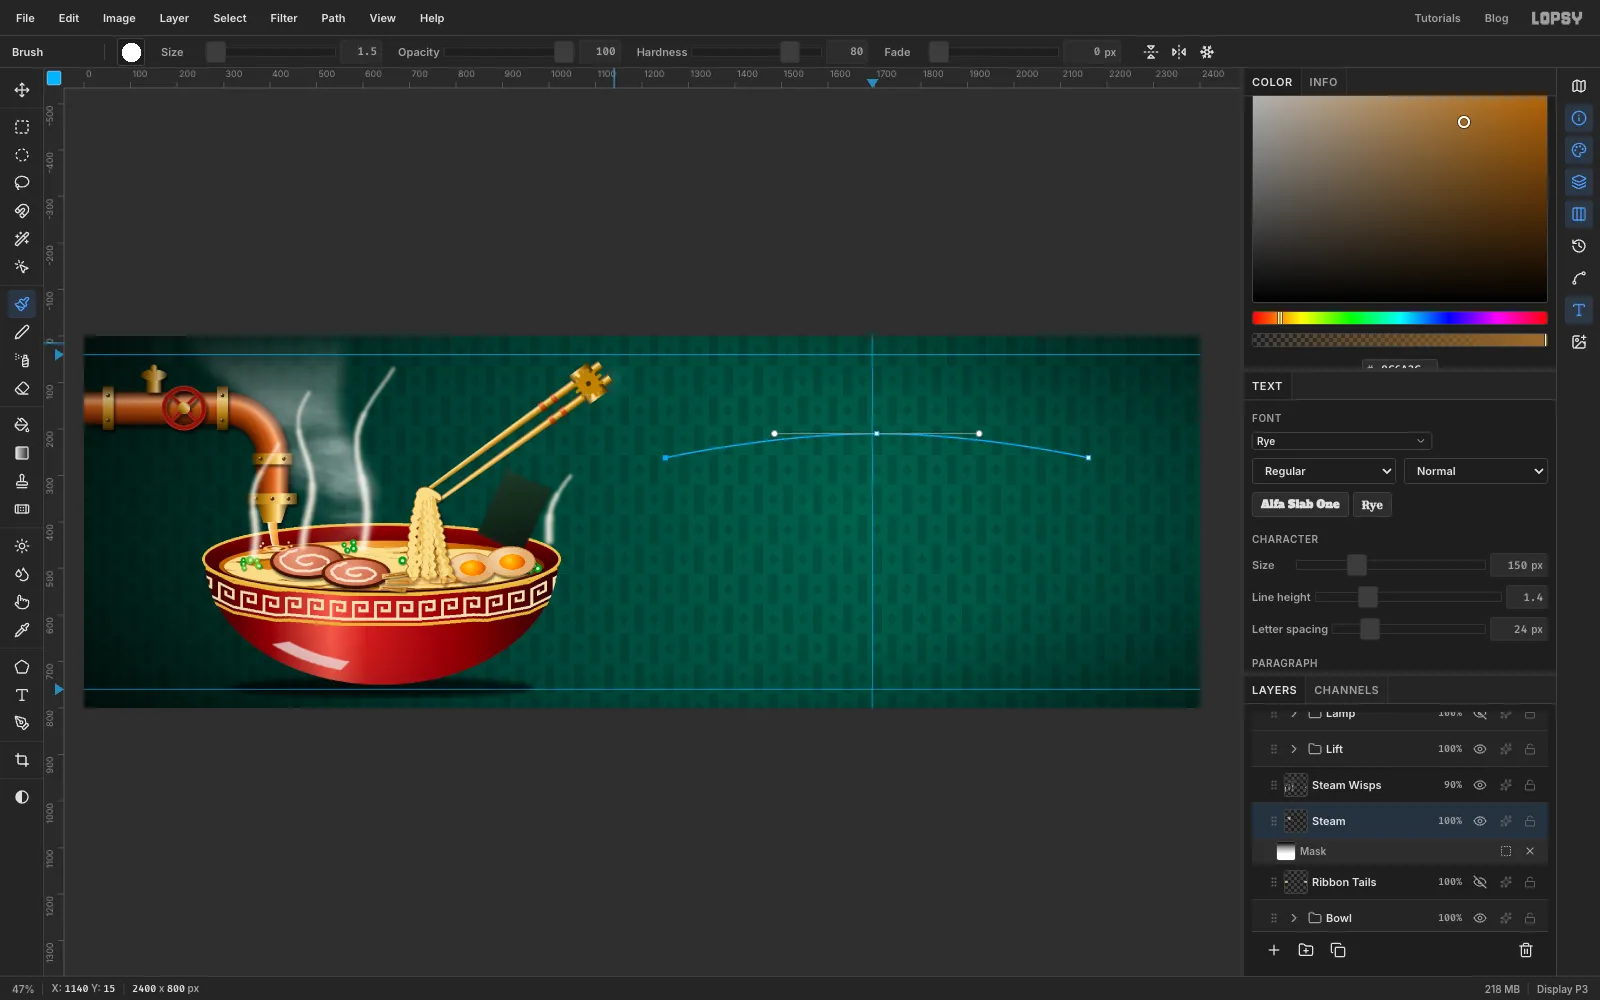
Steambetween the Bowl and Lift groups.- Lasso a tall, wavy plume rising from the bowl. Choose Select → Feather… with
34px, then Filter → Smoke… with Scale5and Turbulence60. - Repeat for a second plume on the right of the bowl, and a narrow one rising from the pipe's safety valve.
- Set the layer to Screen, so the black parts of the smoke disappear.
Fade it as it rises. Click Add Mask, then Edit mask for Steam. Open the Gradient tool's Advanced… editor and set it back to plain white → black, because it still holds the last gradient's colours. Drag from the broth straight up past the top edge. Click the layer thumbnail to leave mask editing.
The wisps. Add a layer called
Steam Wispsand choose a soft brush (hardness0). Paint each wisp as three overlapping S-strokes that get thinner as they rise: about 30 px at the broth, then 20, then 11 near the top. Blur the layer 9 px and set it to Screen at about 90%.Keep steam off the nori and away from the headline. Lasso any stray wisp, feather it and press Delete.
- Lasso a tall, wavy plume rising from the bowl. Choose Select → Feather… with
-
Hang a gas lantern
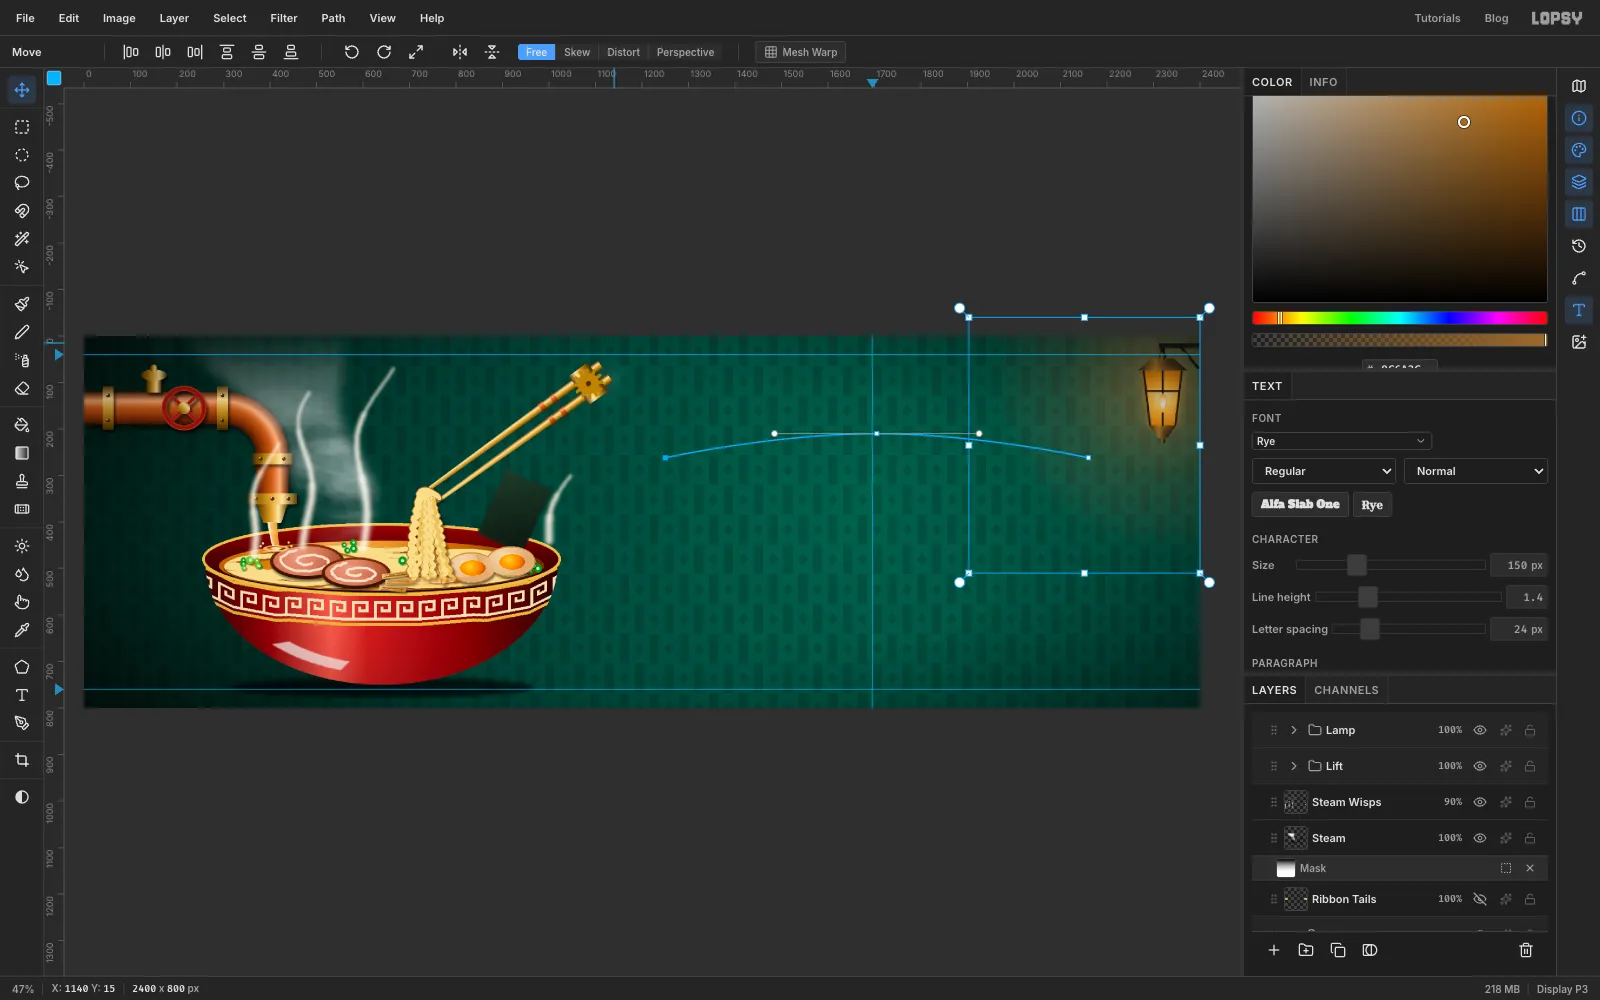
Make a Lamp group in the top-right corner. The lantern is about 120 px wide and 250 px tall, hanging from a bracket at the right edge. It has four layers:
- Lantern: the metal parts, each lassoed and filled with a bronze gradient (, , , ) dragged across it.
- A straight wall bracket and a short hanger, in near-black .
- A wide trapezoid roof with a small ball on top.
- A short cone under the glass with a little finial ball.
- Lantern Glass:
- Lasso a pane that narrows toward the bottom and fill it with a radial gradient: in the centre to at the edge.
- Lasso a teardrop flame in the middle and fill it white to .
- Add an Outer Glow in .
- Lantern Bars: dark brush lines over the glass for the frame: one down each side, one across and one down the middle.
- Lamp Glow: a Radial gradient from at about 45% opacity to fully transparent, set to Screen. Keep it tight around the lantern; a big glow turns the green muddy.
To resize all the layers at once, select the Lamp group's row and choose the Move tool without a marquee. The handles then frame the whole group. Drag the bottom-left corner in to about 85%, then drag the group up into the corner. Leave at least 40 px between the lantern and the headline.
-
Set an arched headline on a path
The arch. Add a New Group called
Type. Choose the Pen tool. Keep the arch shallow: the middle only about 50–70 px higher than the ends.- Click at the left end of where the headline will go.
- Click-and-drag at the middle, pulling the handle out sideways, to make a smooth top.
- Click at the right end, level with the first point.
- Click ✓ (Commit path) in the options bar.
The word. Pick the Text tool and choose the font Rye at size
150, colour . Click in an empty part of the canvas, typeGASLAMPand press Tab to commit. Then set Path in the options bar to Path 1, and the word jumps onto the arch.Path text always starts at the path's first point, so to centre it, open the Text panel and raise Letter spacing until the word fills the whole arch (about
24px here).To flatten the arch later, select Path 1 in the Paths panel and drag its middle point down with the Pen tool. The text reflows along it.
On the GASLAMP layer, add a 4 px Stroke in . Then add a Drop Shadow in with Offset X and Offset Y
7, Blur1and Opacity100.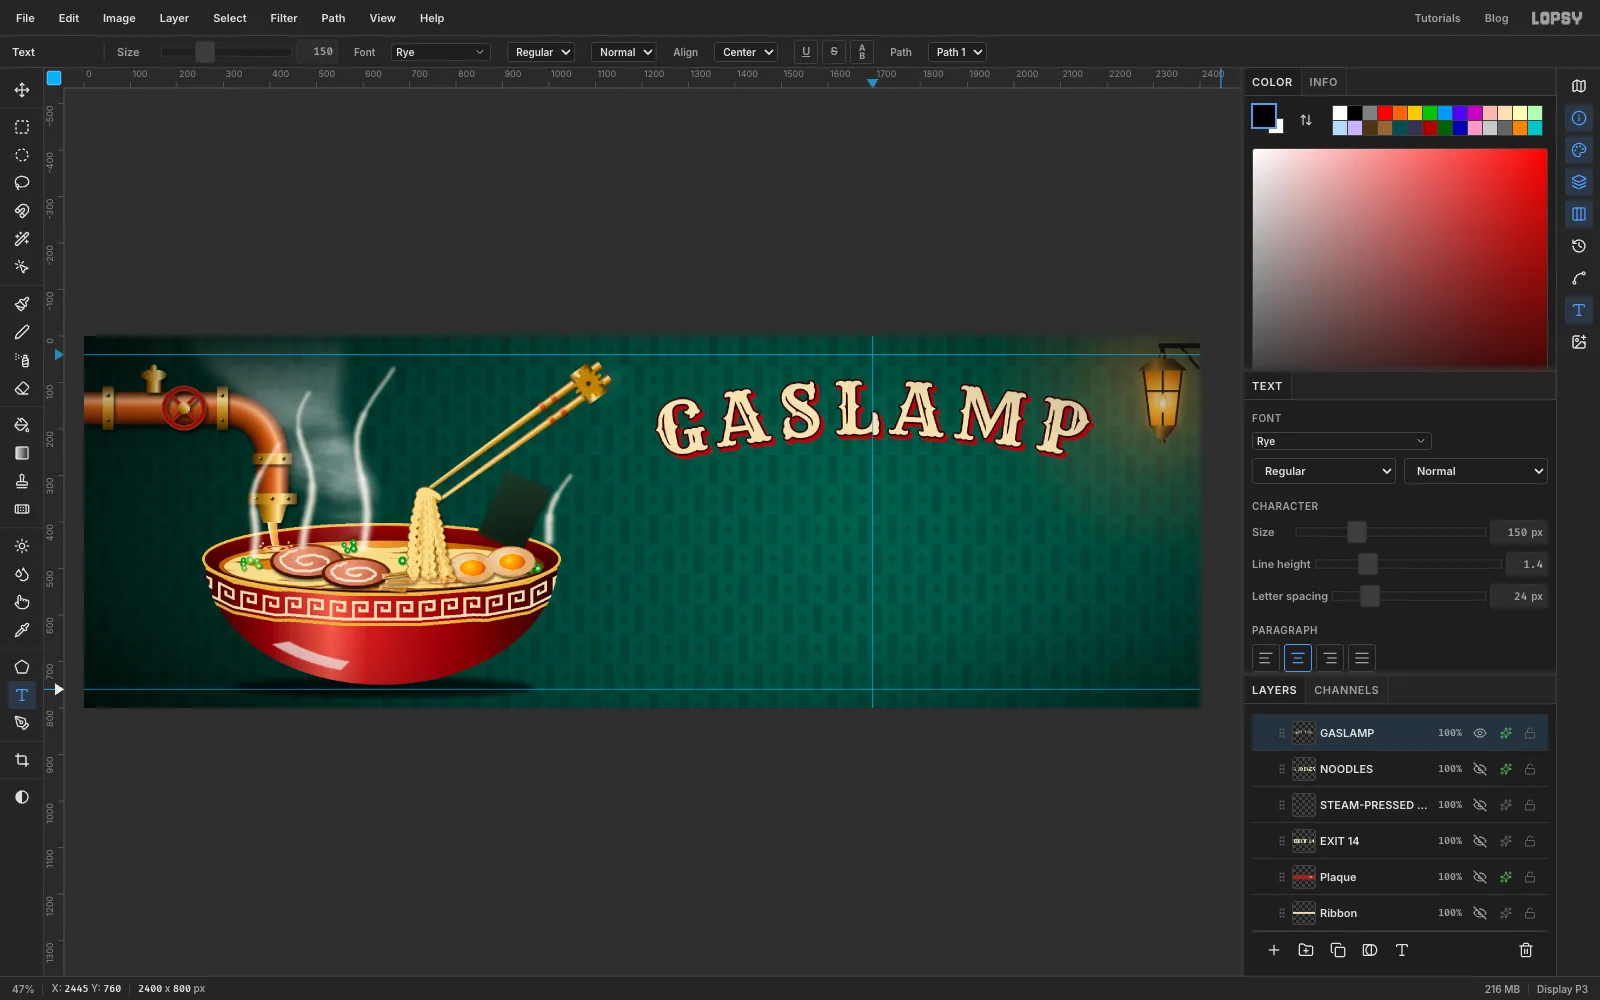
-
Gild the headline
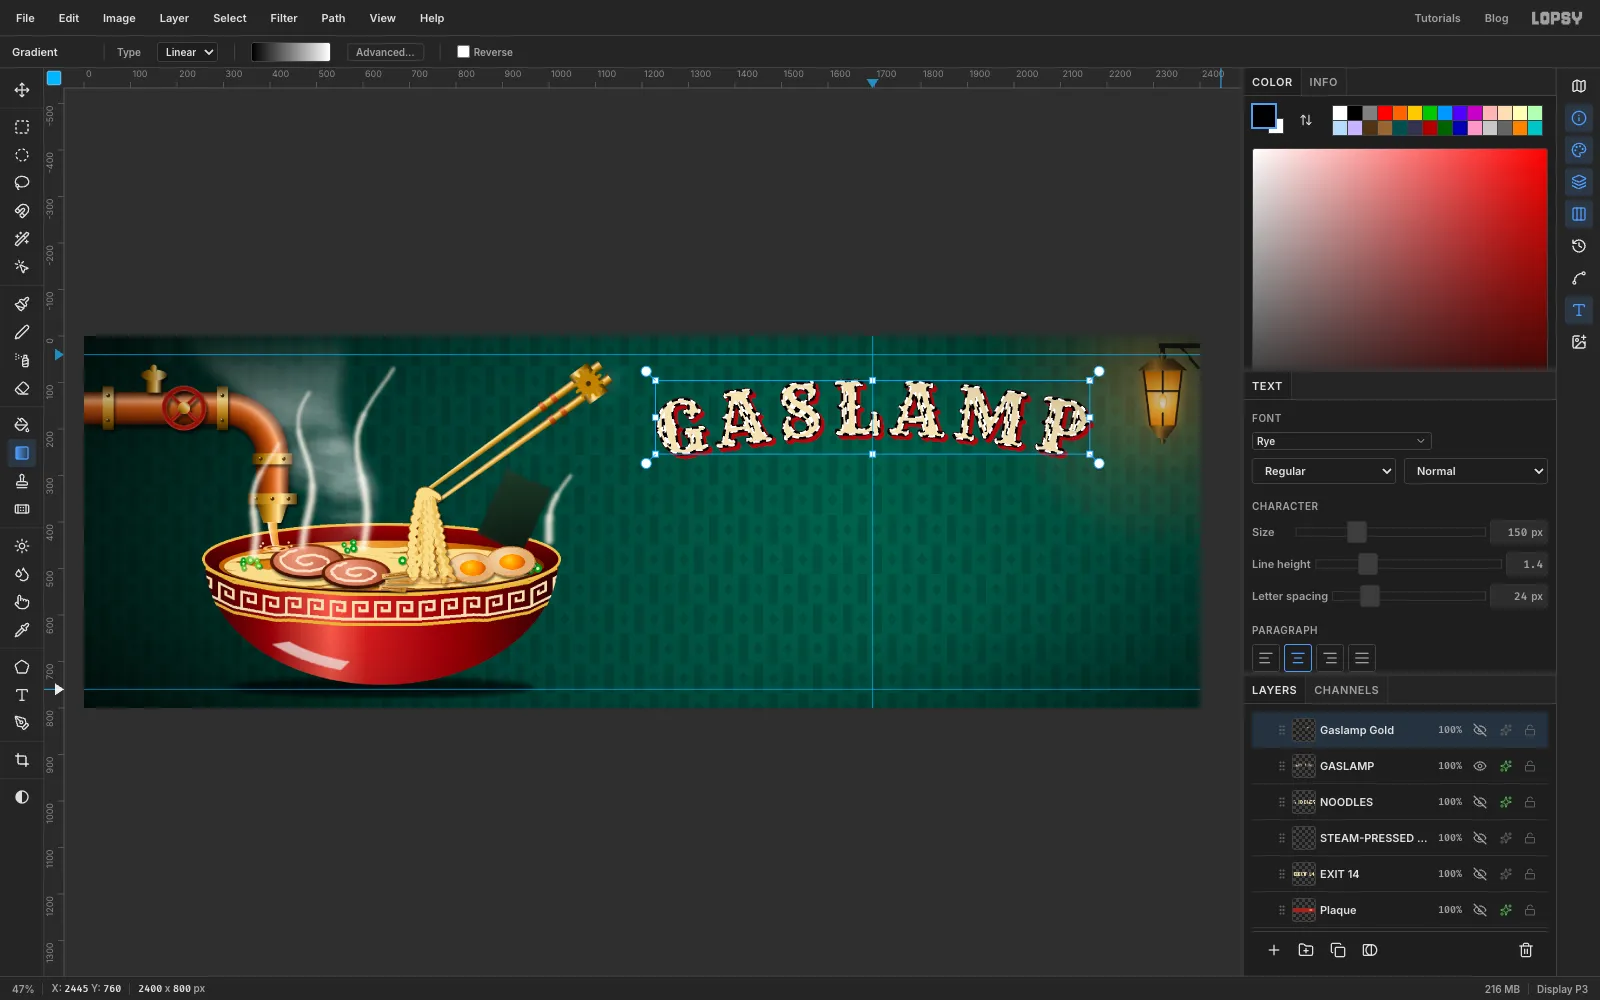
- Cmd-click the GASLAMP layer's thumbnail to select the letter shapes.
- Add a layer called
Gaslamp Goldabove it. - Drag a vertical Linear gradient over the letters with these stops:
- at the top
- near the middle
- at the bottom
- Press Cmd+D.
The text stays editable underneath the gold, and its stroke and shadow still show around the edges.
-
Set NOODLES in woodtype
Click the
Gaslamp Goldlayer first. It's an ordinary layer inside Type, so the new text lands in the group and doesn't restyle GASLAMP.Set the Text tool to Rye, size
210, letter spacing4. Click in empty canvas, typeNOODLESand press Tab to commit. With the Move tool, drag it under the arch so it's centred on the same vertical line as GASLAMP. A guide clicked onto the top ruler at the centre line helps.Give NOODLES a 5 px Stroke in . Then add a Drop Shadow in with Offset X and Offset Y
9, Blur1and Opacity100. That hard offset shadow is the classic look of a woodtype circus or theatre poster.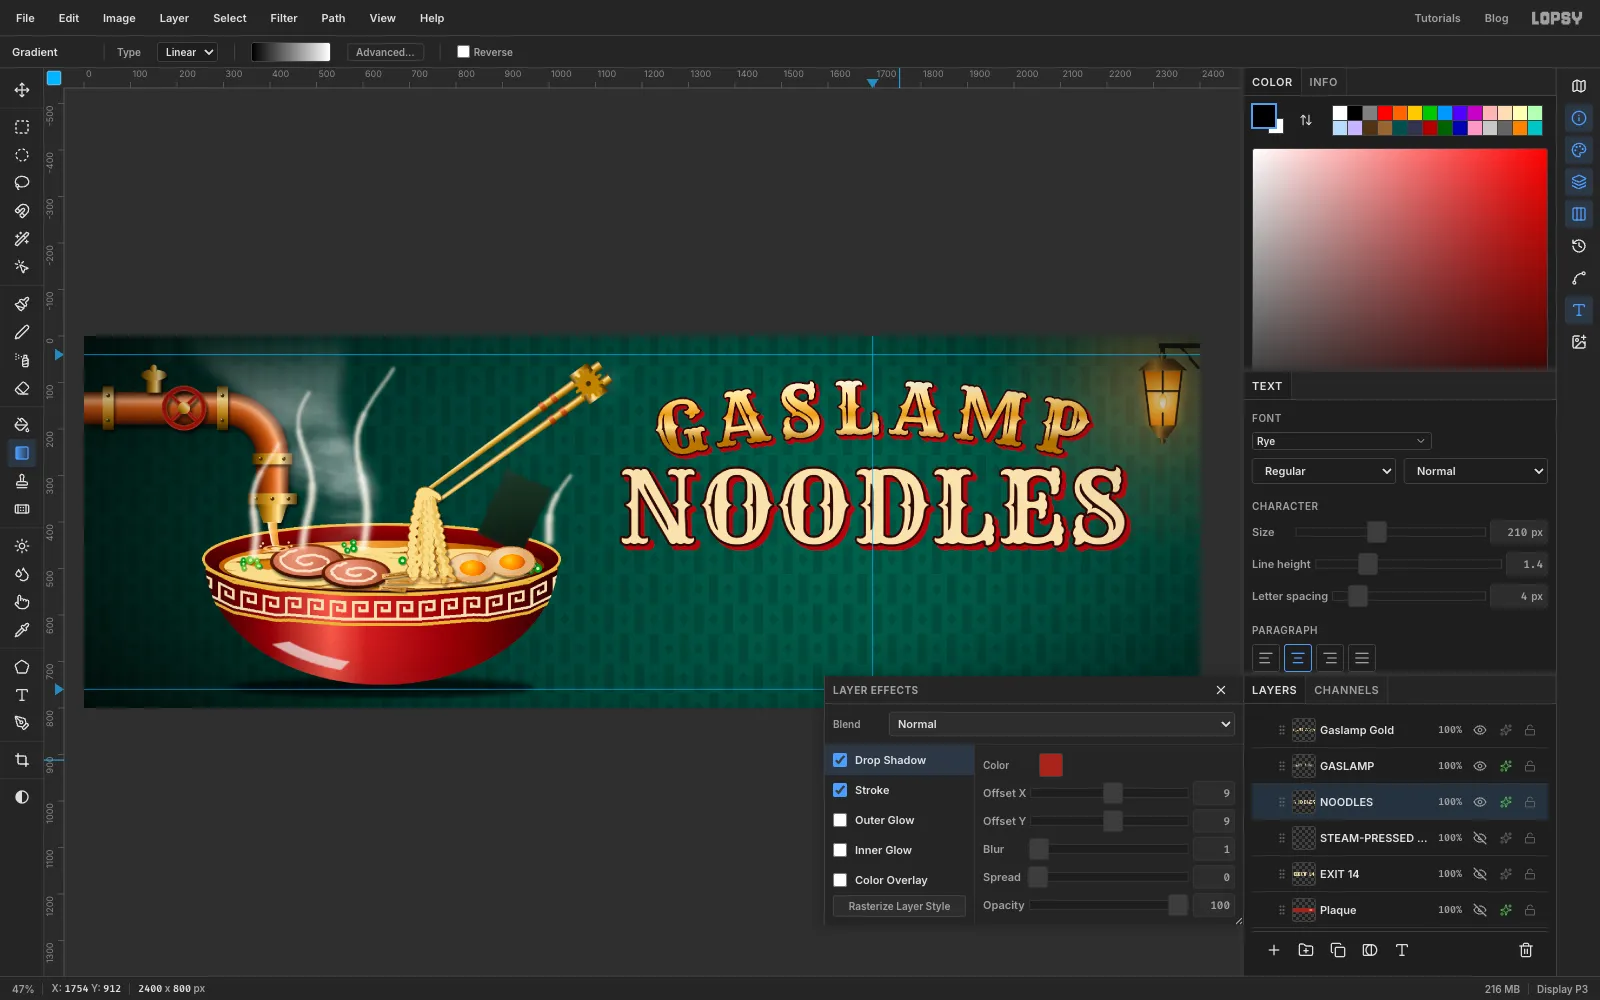
-
Add the ribbon and exit plaque
Ribbon. On a
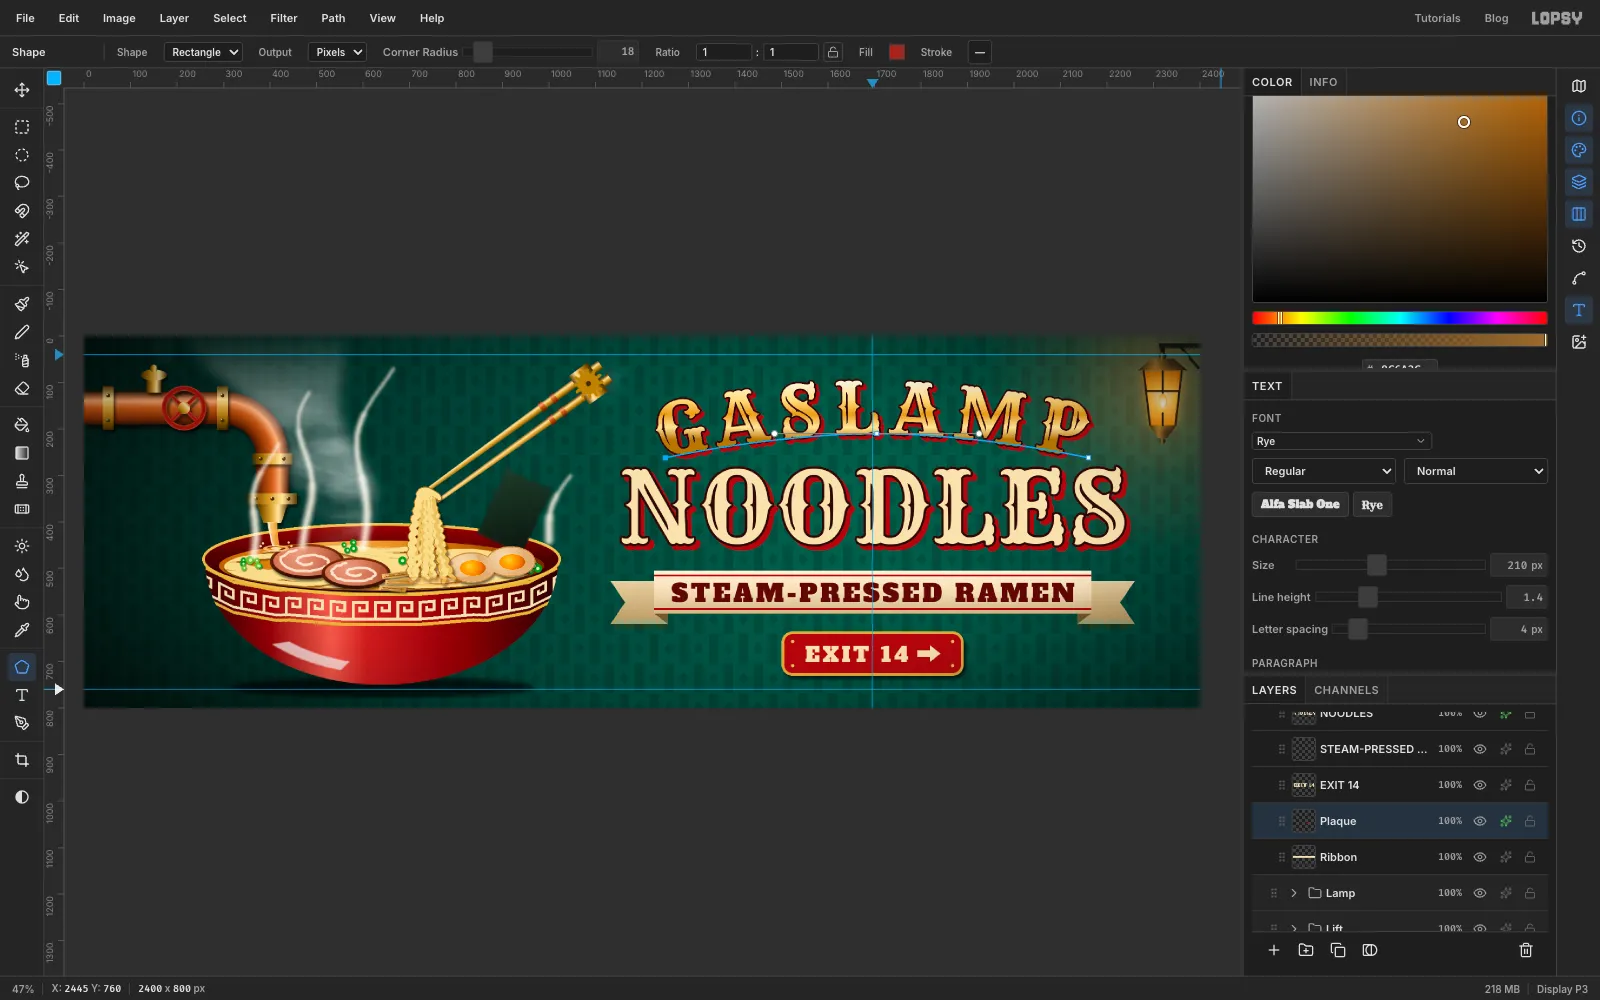
Ribbonlayer in Type, marquee a band as wide as GASLAMP and about 92 px tall. Fill it with a vertical cream gradient ( → ) and add a thin red rule just inside the top and bottom edges.On a layer under it, lasso two notched tails a little lower than the band. Fill them with a darker tan and add a small dark triangle for each fold.
Tagline. Type
STEAM-PRESSED RAMENin Alfa Slab One at about size54, colour , with letter spacing6. Move it so the space above and below the letters, between the red rules, is equal.Plaque.
- With the Shape tool set to Rectangle, a corner radius of
18and fill , drag out a plaque centred under the ribbon. - Give it a 6 px Stroke in and a soft Drop Shadow, and click a brass rivet into each corner.
- Type
EXIT 14in Alfa Slab One at44in cream. Lasso an arrow after it and fill it in the same cream. - Centre the word and arrow together on the plaque.
- With the Shape tool set to Rectangle, a corner radius of
-
Finish with grain, seams and a vignette
Real billboards are printed on paper sheets and pasted up in panels. A little texture sells it:
- Grain: add a layer called
Grainat the top and fill it with mid grey . Run Filter → Add Noise at40. Set it to Overlay at about 20%. - Paper seams: add a layer called
Paper Seams. With the Pencil at size3, click at the top edge and Shift-click at the bottom to draw a white line every 480 px. Draw a black line just to the right of each. Set the layer to Overlay at 15%, so they only just show. - Vignette: select the top-level Project group, open its Layer effects drawer, click Add Adjustment → Vignette and set it to
60.
Choose File → Save Project, then File → Quick Export PNG.
- Grain: add a layer called