Design a Stencil Book Cover with a Deep-Sea Bathysphere
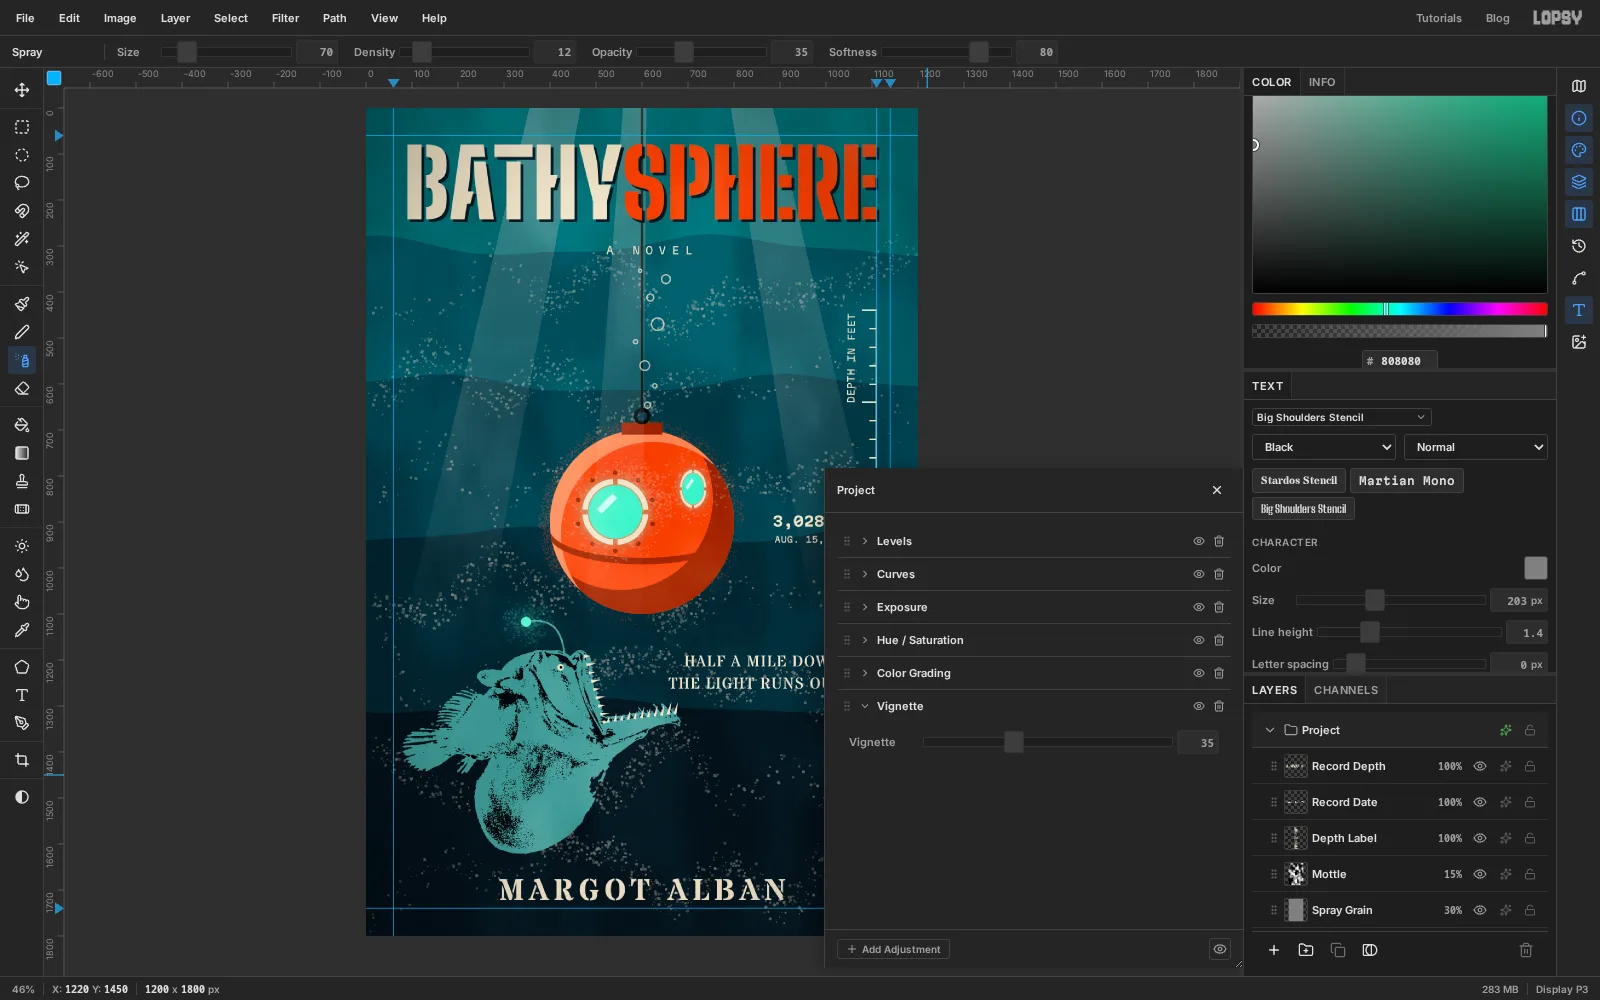
Spray a stencil novel cover in Lopsy, with an orange bathysphere on a cable, an anglerfish cut from an 1864 lithograph, cut-plate shading and a depth gauge.
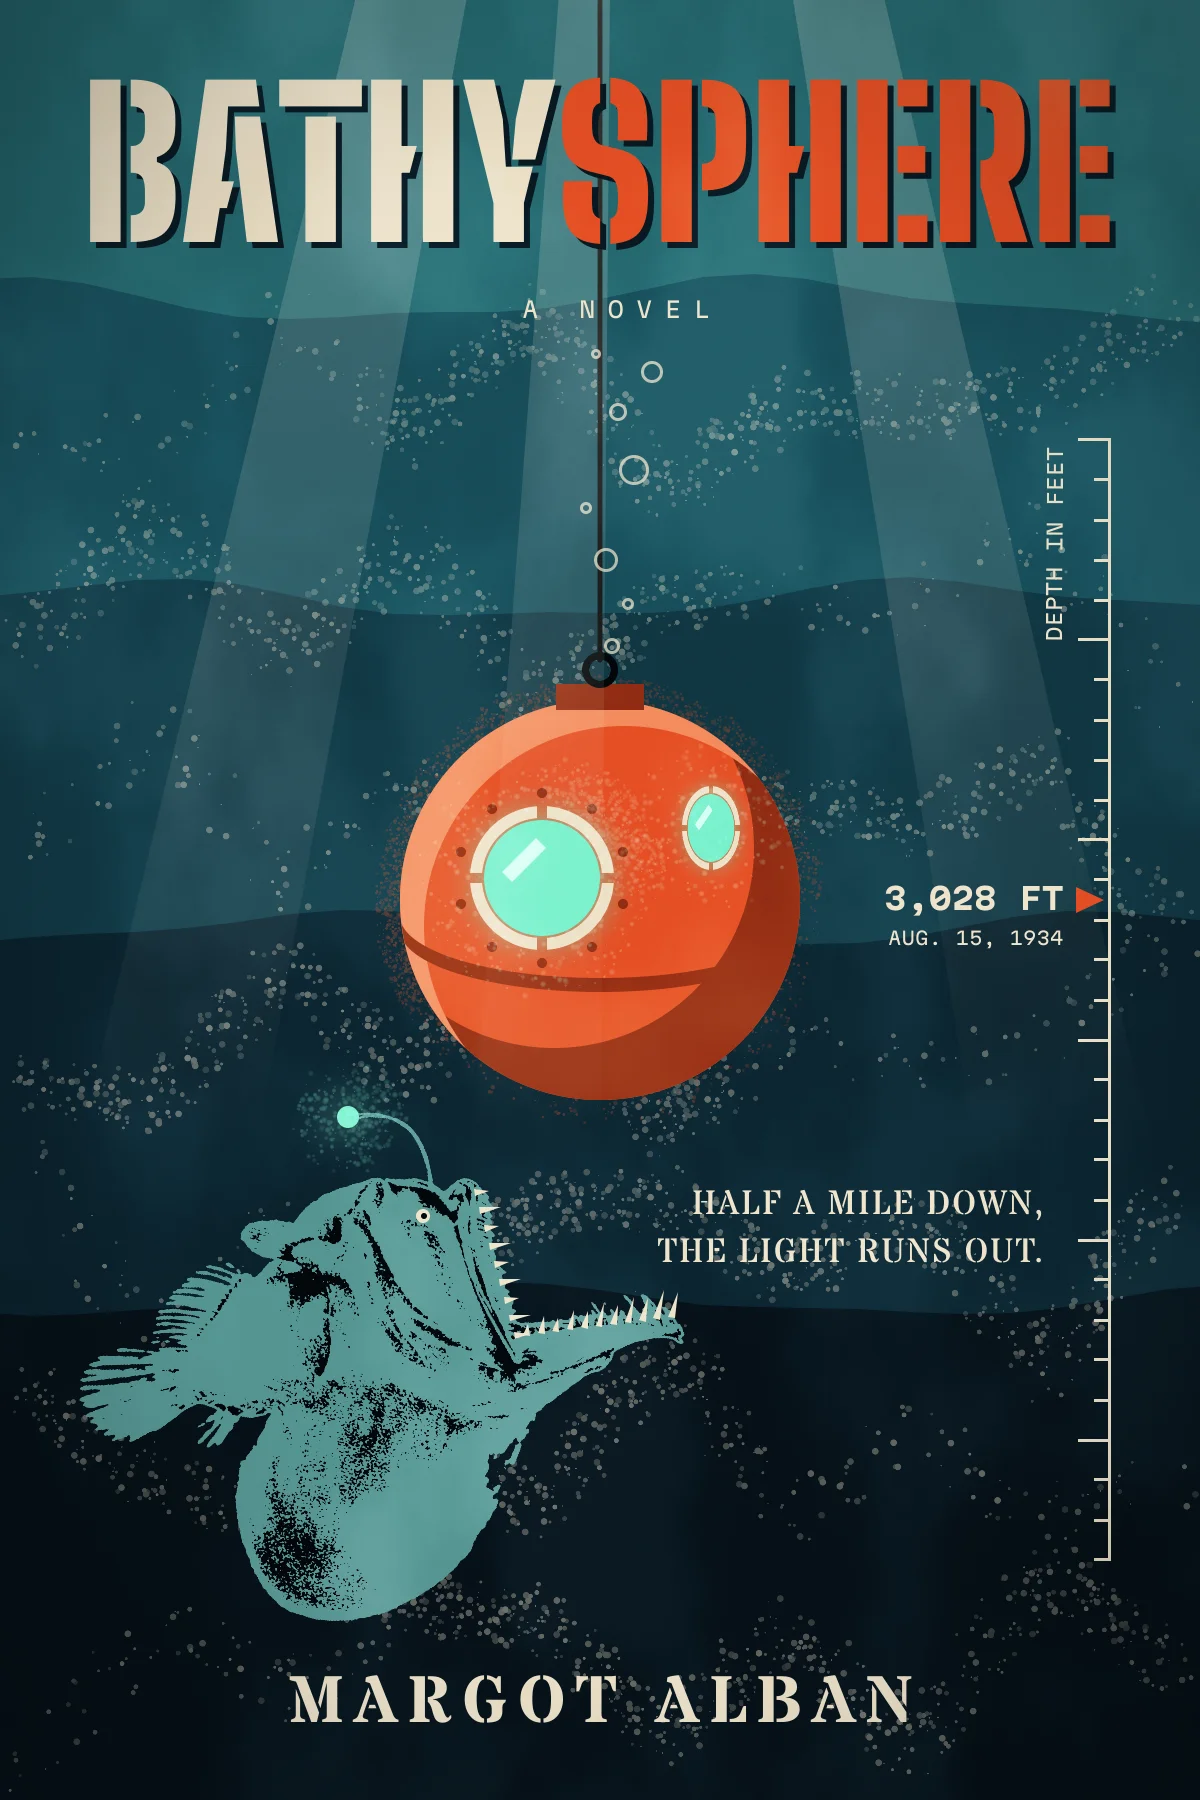
On 15 August 1934, William Beebe and Otis Barton were lowered into the Atlantic off Bermuda inside a steel ball not much wider than a bathtub. They reached 3,028 feet, deeper than anyone had been, and watched animals nobody had seen alive through a window of fused quartz. This tutorial turns that dive into the cover of an imaginary novel, Bathysphere by Margot Alban.
The cover is designed like a spray-paint stencil print. A stencil can't do smooth gradients. Every shade is a separate cut-out sheet, called a plate, sprayed in one flat colour. So the sphere gets three flat plates (base, shadow and highlight), the water is cut into flat bands that get darker with depth, and the anglerfish is cut from an old lithograph into two plates. Stencil type has bridges, the little gaps that hold the middle of an O or an A to the rest of the card. You'll copy that idea in the porthole rim. Overspray, grain and a little misregistration make it look sprayed rather than printed.
The canvas is 1200 × 1800 px, the 2:3 shape of a paperback front cover.
The anglerfish comes from G. H. Ford's 1864 lithograph of a humpback anglerfish, MelanocetusJohnsoniiFord.jpg on Wikimedia Commons. It's in the public domain. Download the 1280 px wide version.
Along the way you'll use:
- ruler guides, groups, and a whole group scaled and rotated with the Move tool's handles
- the Lasso, Rectangular and Elliptical Marquee, adding, subtracting and intersecting selections, and Cmd-clicking a layer thumbnail to load its shape
- Select → Inverse and Shrink, and the Magic Wand with Contiguous on and off
- Copy and Paste (which pastes in place), and transform handles to squash the copy
- the Brush, Pencil and Spray tools, with Shift-click for straight lines
- a layer mask faded with the Gradient tool
- Gaussian Blur, Threshold, Add Noise and Clouds
- live text in Big Shoulders Stencil, Stardos Stencil and Martian Mono, one word recoloured and one label turned on its side
- Outer Glow and Drop Shadow, Rasterize Layer Style, the Screen, Overlay and Soft Light blend modes, and a Vignette adjustment
The palette is a handful of spray colours over a navy ground:
-
Water
-
Hull orange
-
rust
-
highlight
-
Bone
-
Glow cyan
-
glass glint
-
Anglerfish teal
-
ink
cable, fish shadows, pupil
-
Title offset
-
Set up the canvas and guides
Choose File → New, set the size to
1200×1800px and click Create.Click the
Backgroundrow, set the foreground colour to and choose Edit → Fill. That's the deepest water, at the bottom of the cover.Now drop four margin guides. Click the top ruler at x
60and x1140, and the left ruler at y60and y1740. Keep titles and text inside them.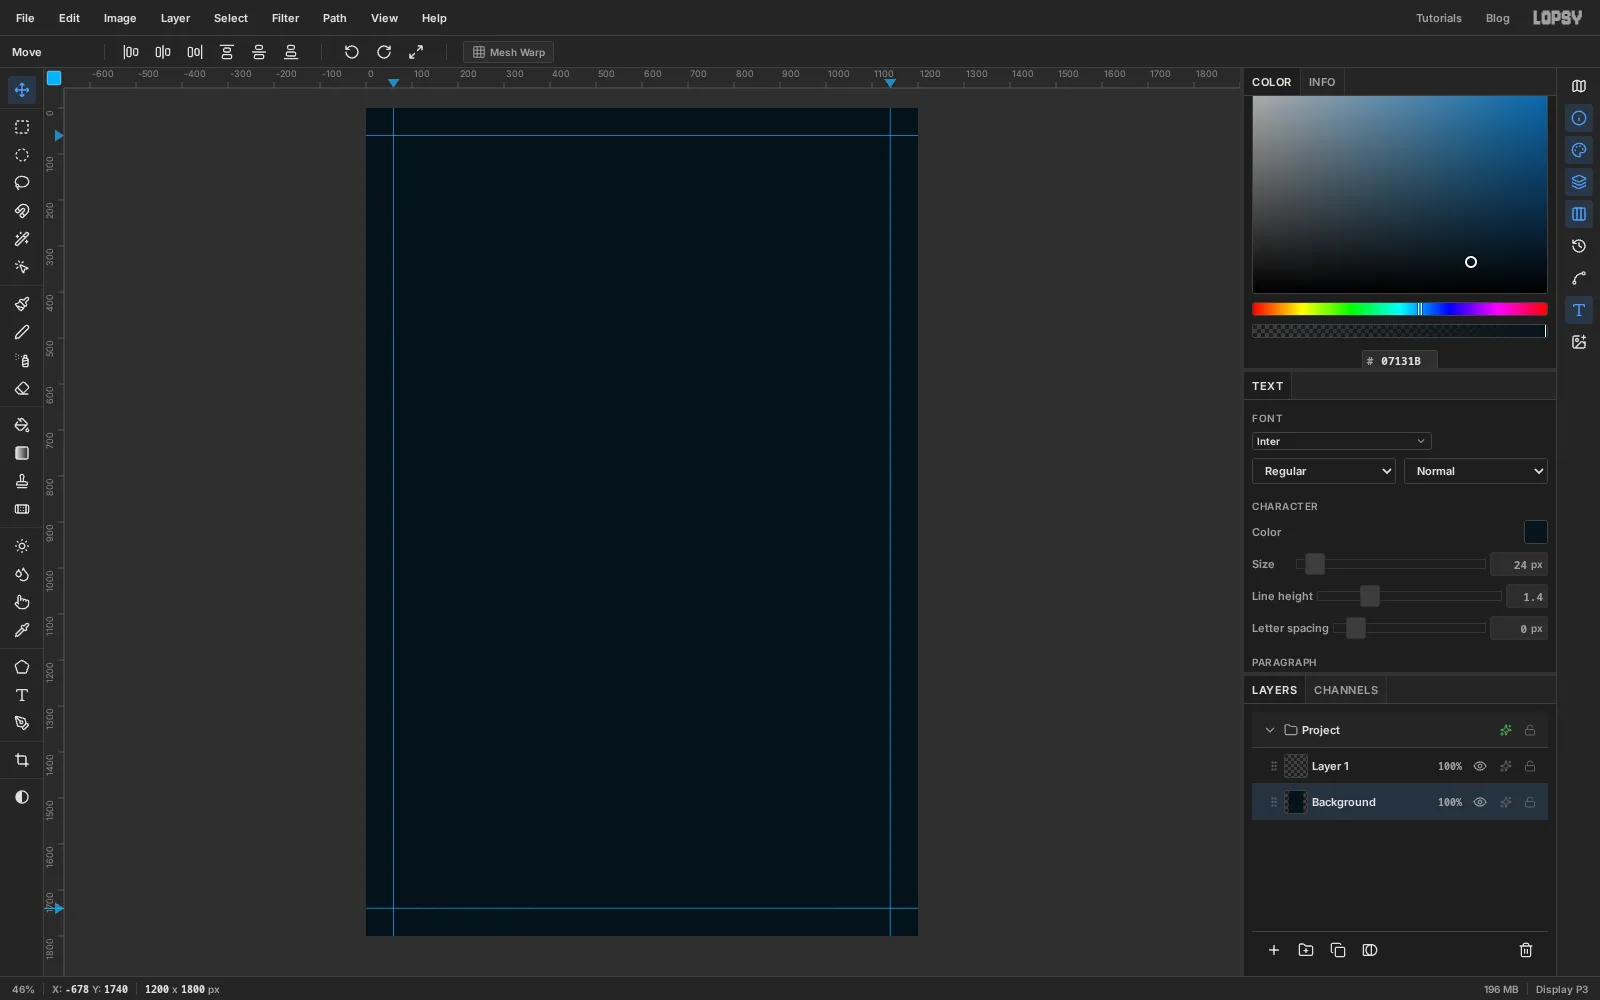
-
Cut the water into depth bands
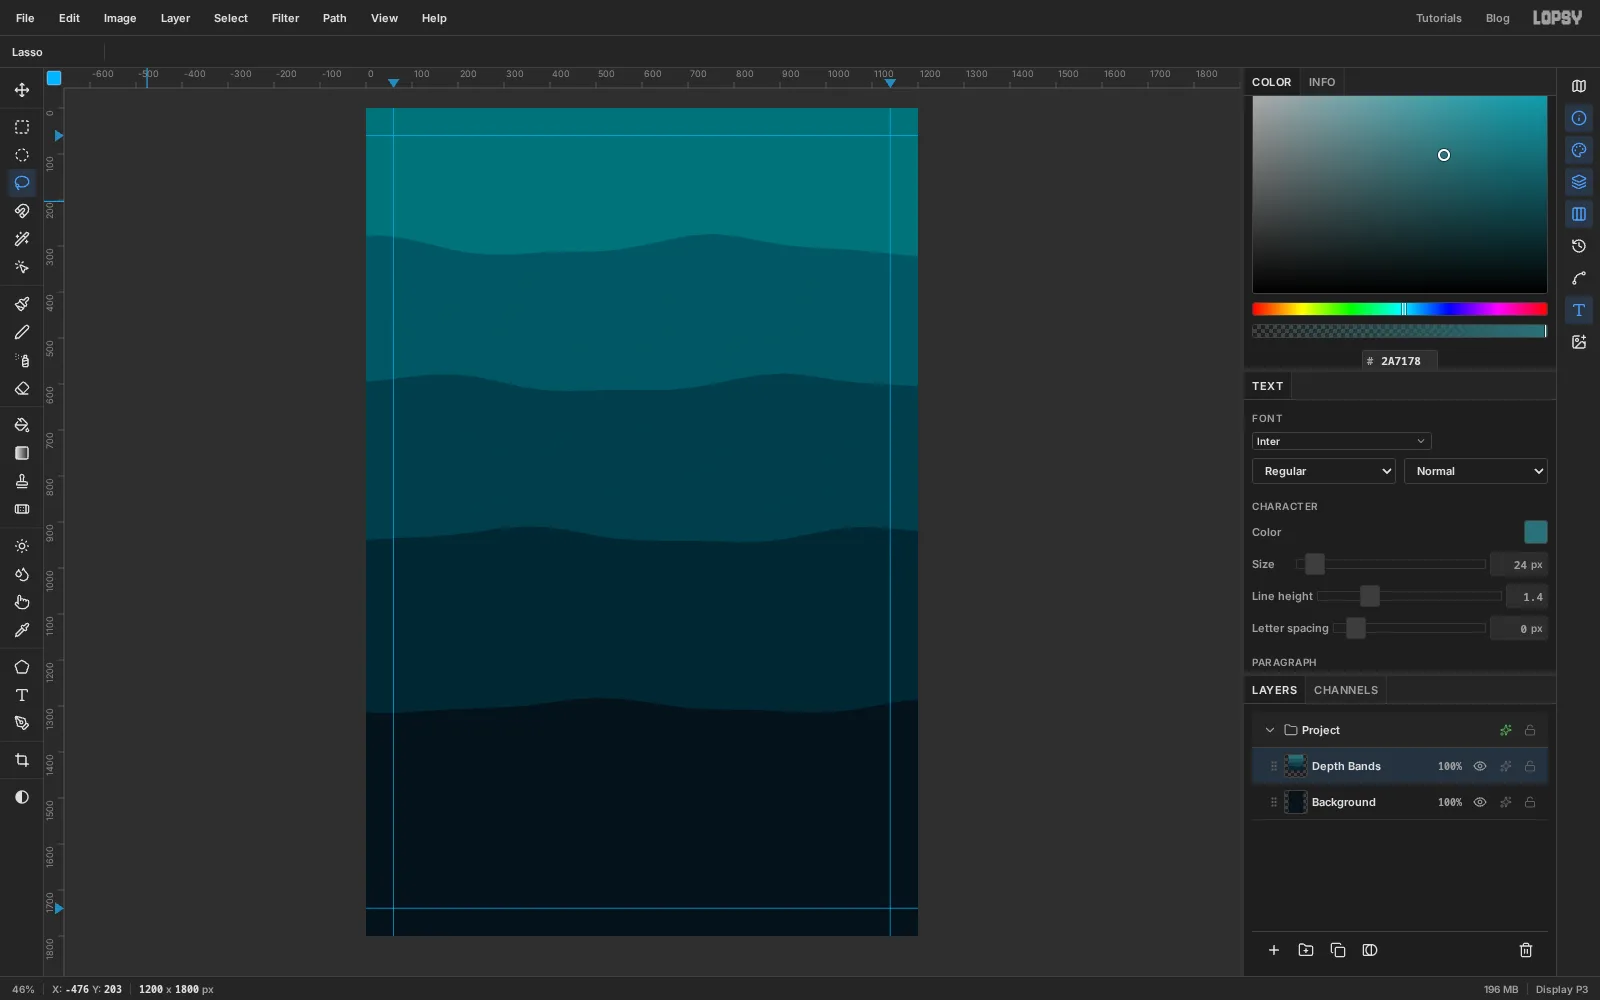
Light fades fast underwater, so the water gets darker the deeper you look. Instead of a gradient, cut it into flat bands like stencil plates.
- Double-click
Layer 1and rename itDepth Bands. - Pick the Lasso (L). Starting above the top-left corner of the canvas, drag across the top to the right, down the right edge to about y
1300, then back to the left along a slow, wavy line, and up to where you started. Fill it with . - Repeat with a slightly different wave each time, working upward. Draw to about y
930and fill with , to about y600and fill with , then to about y300and fill with .
Draw the deepest band first. Each lighter band covers the top of the one before, and the background shows through at the very bottom as the fifth band.
- Double-click
-
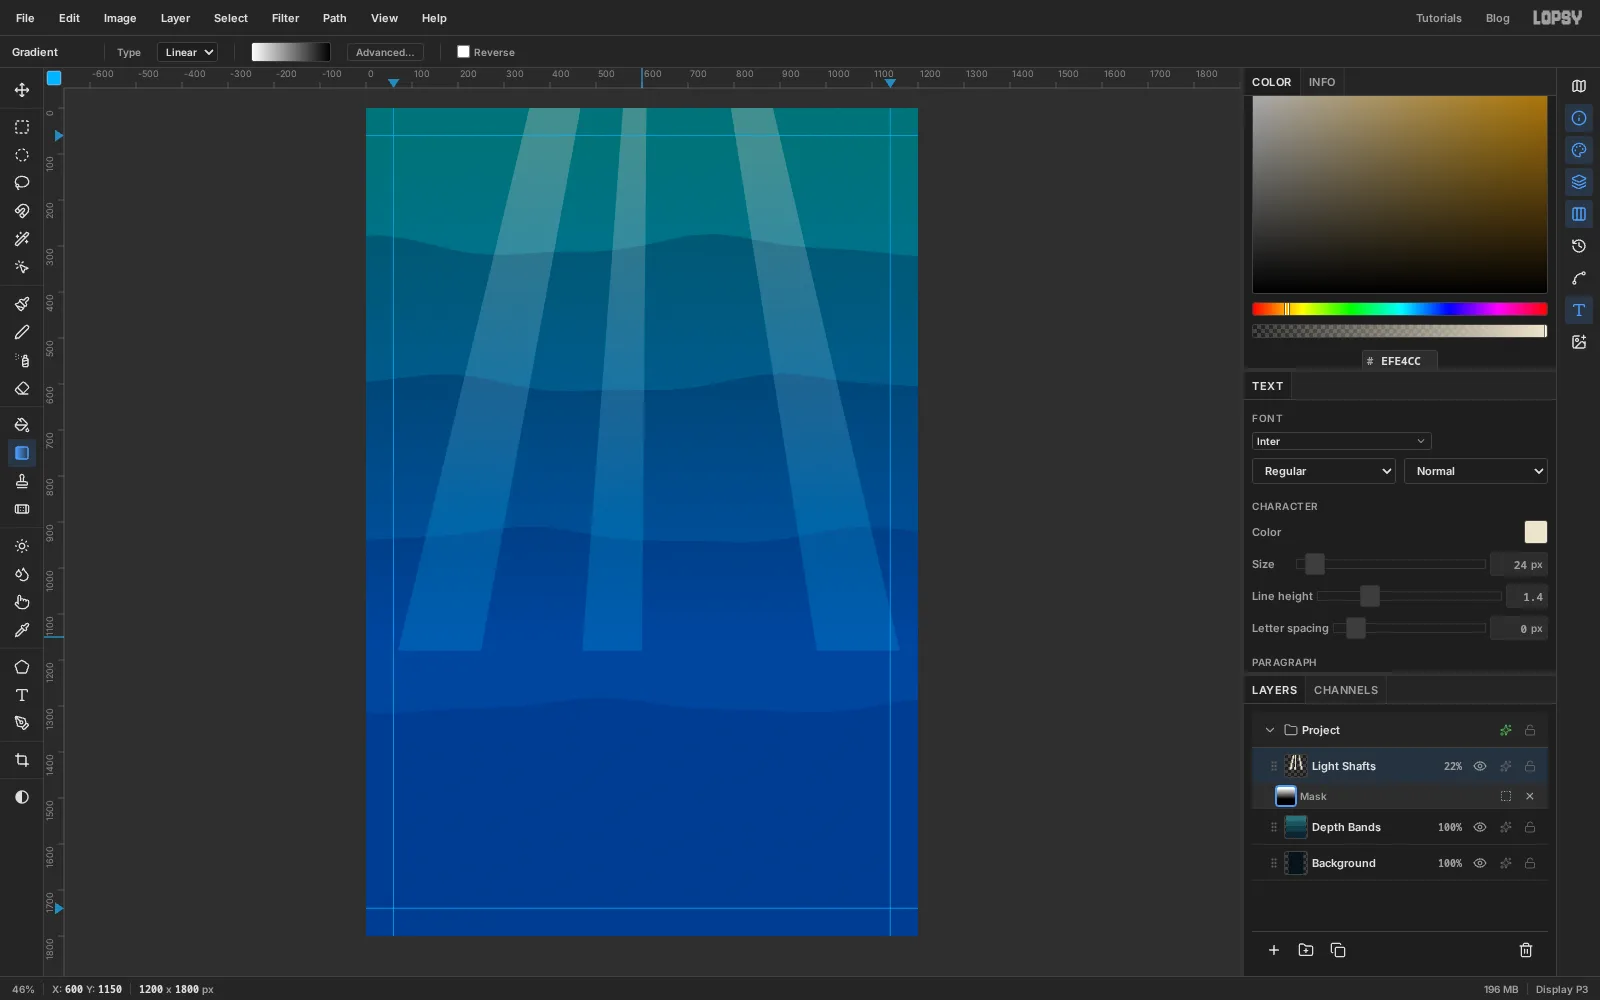
Draw the light shafts
Click Add Layer and name it
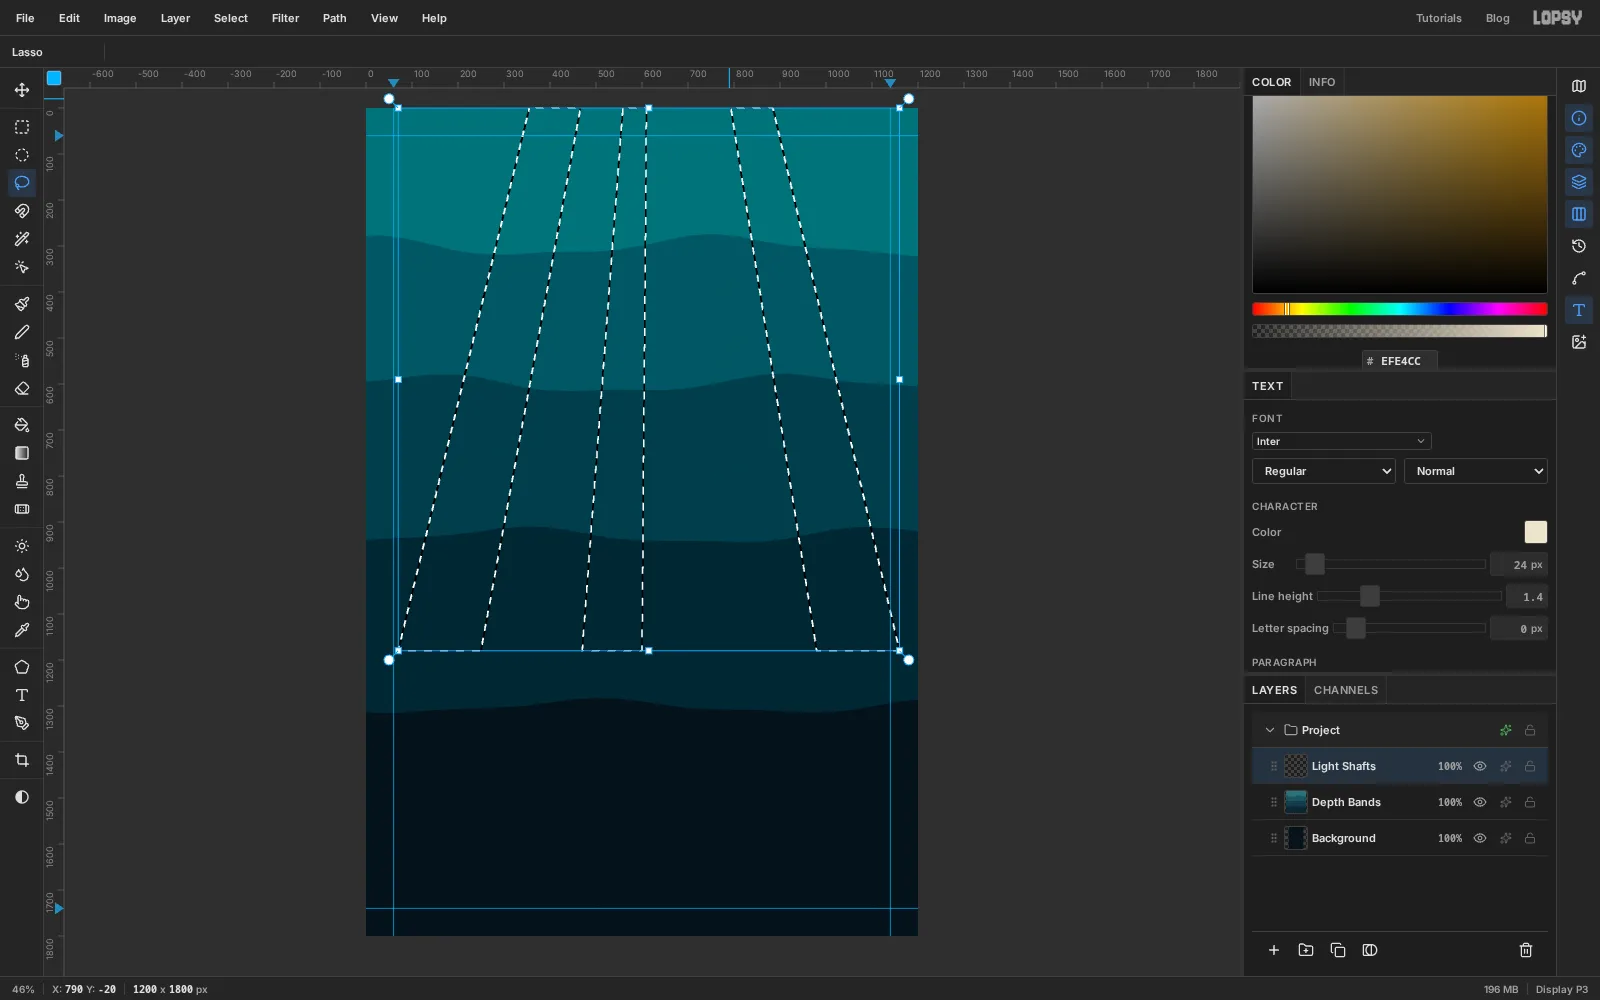
Light Shafts.With the Lasso, draw a long, thin wedge that starts narrow at the top edge, left of centre, and widens as it slants down-left to about y
1180. Hold Shift and draw two more: a thin one just left of the middle, and a wider one on the right that slants down-right. Holding Shift adds each new shape to the selection.Fill the selection with and press Cmd+D. The shafts will sit above the sphere you draw later, so a little light falls across it too.
-
Fade the shafts out with a mask
Open the layer's effects drawer, set Blend to Screen, then click the
100%on the row and drag the opacity slider down to22%.Real light shafts die out in the deep, so fade them with a mask:
- Click Add Mask, then click the new mask thumbnail under the layer so you're painting on the mask.
- Pick the Gradient tool and open Advanced…. Set the left stop to white and the right stop to black .
- Drag from near the top of the canvas (y
80) straight down to y1150.
White keeps the shafts and black hides them. The canvas turns blue while you edit a mask. That's normal and goes away when you click a different layer.
-
Spray the marine snow
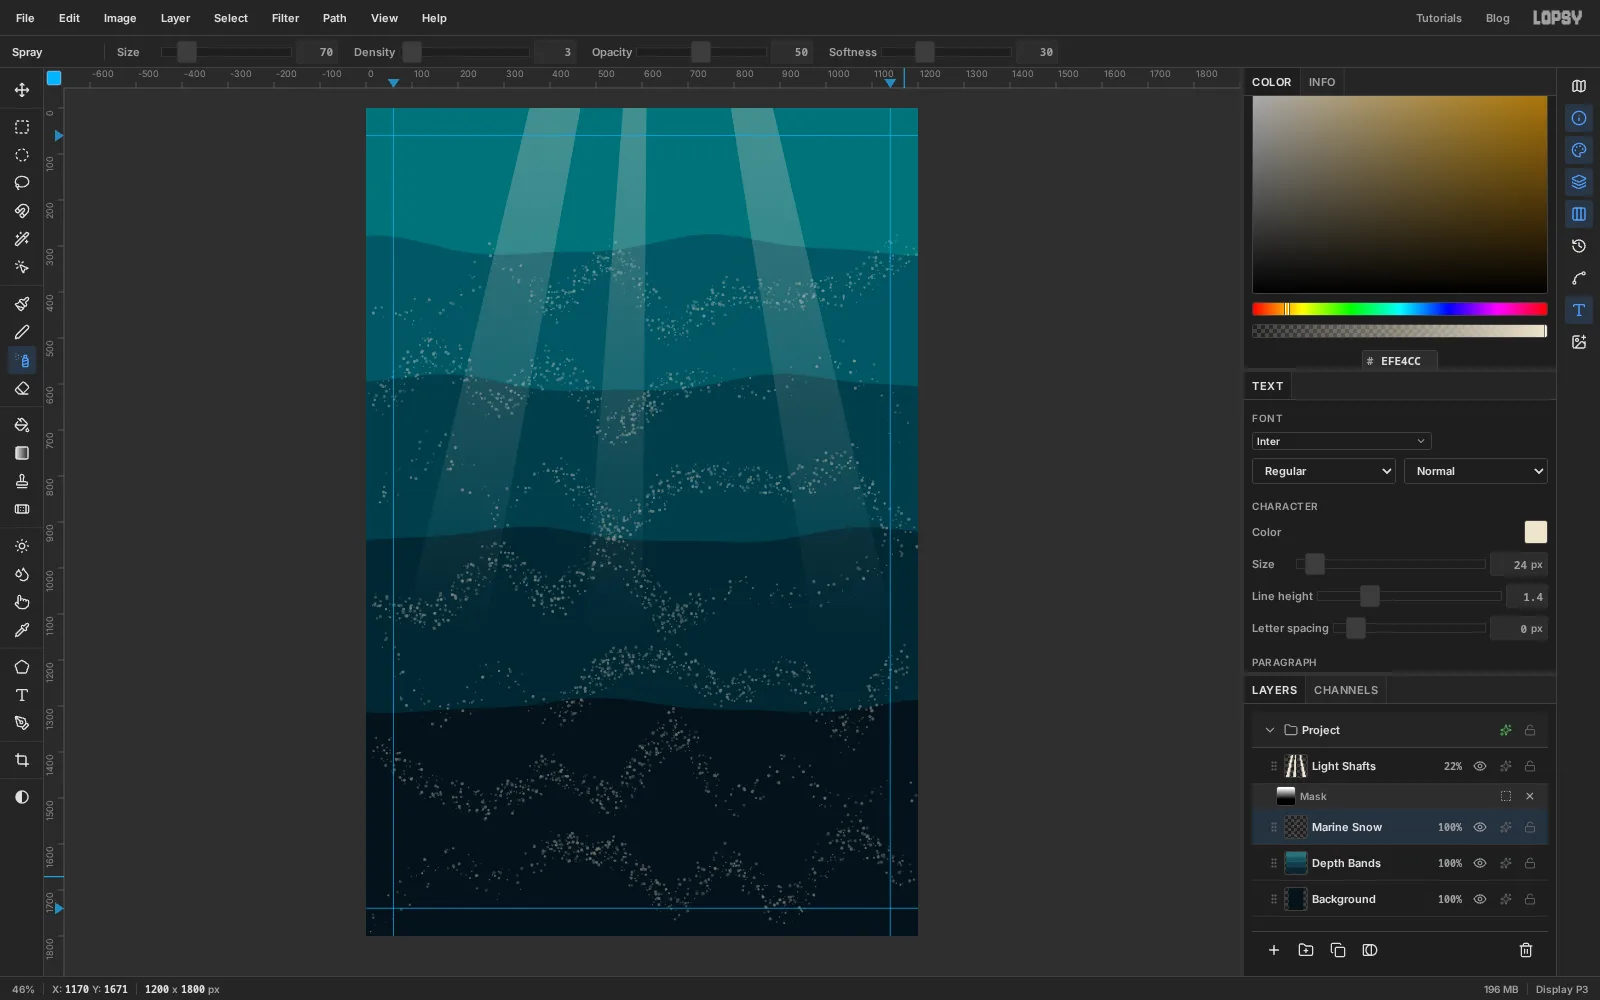
Marine snow is the drifting flakes of dead plankton that divers see in their lights.
Click the
Depth Bandsrow (this also takes you out of mask editing), click Add Layer and name itMarine Snow. Pick the Spray tool (J) and set Size70, Density3, Opacity50and Softness30. Use as the foreground colour.Drag about seven loose passes across the canvas, from y
400down to the bottom. Wander up and down as you go, and change the wave each time so the specks don't line up in stripes.Keep Size small. Spray's Size also sets how big each dot is, and at large sizes the specks turn into bubbles.
-
Hang the cable
Click Add Layer and name it
Cable. Pick the Brush (B) and set Size6, Hardness100and Opacity100, with the colour .Click once above the top edge at x
600, then hold Shift and click at600, 660. Shift-click joins the two points with a dead-straight line.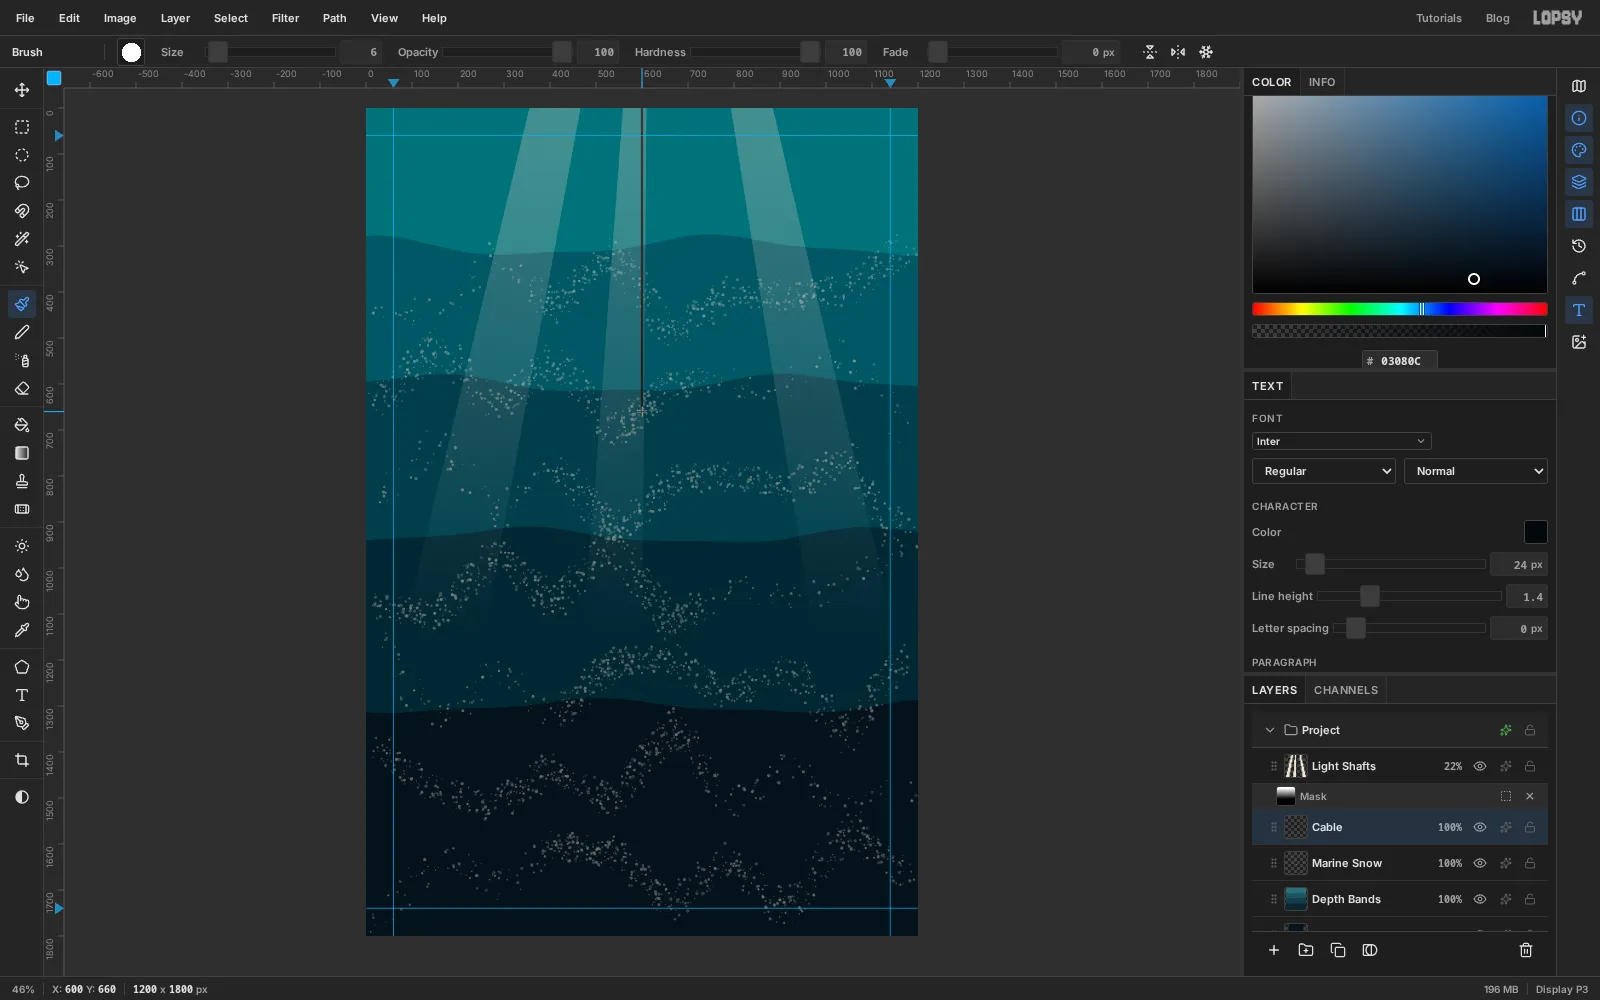
-
Spray the hull
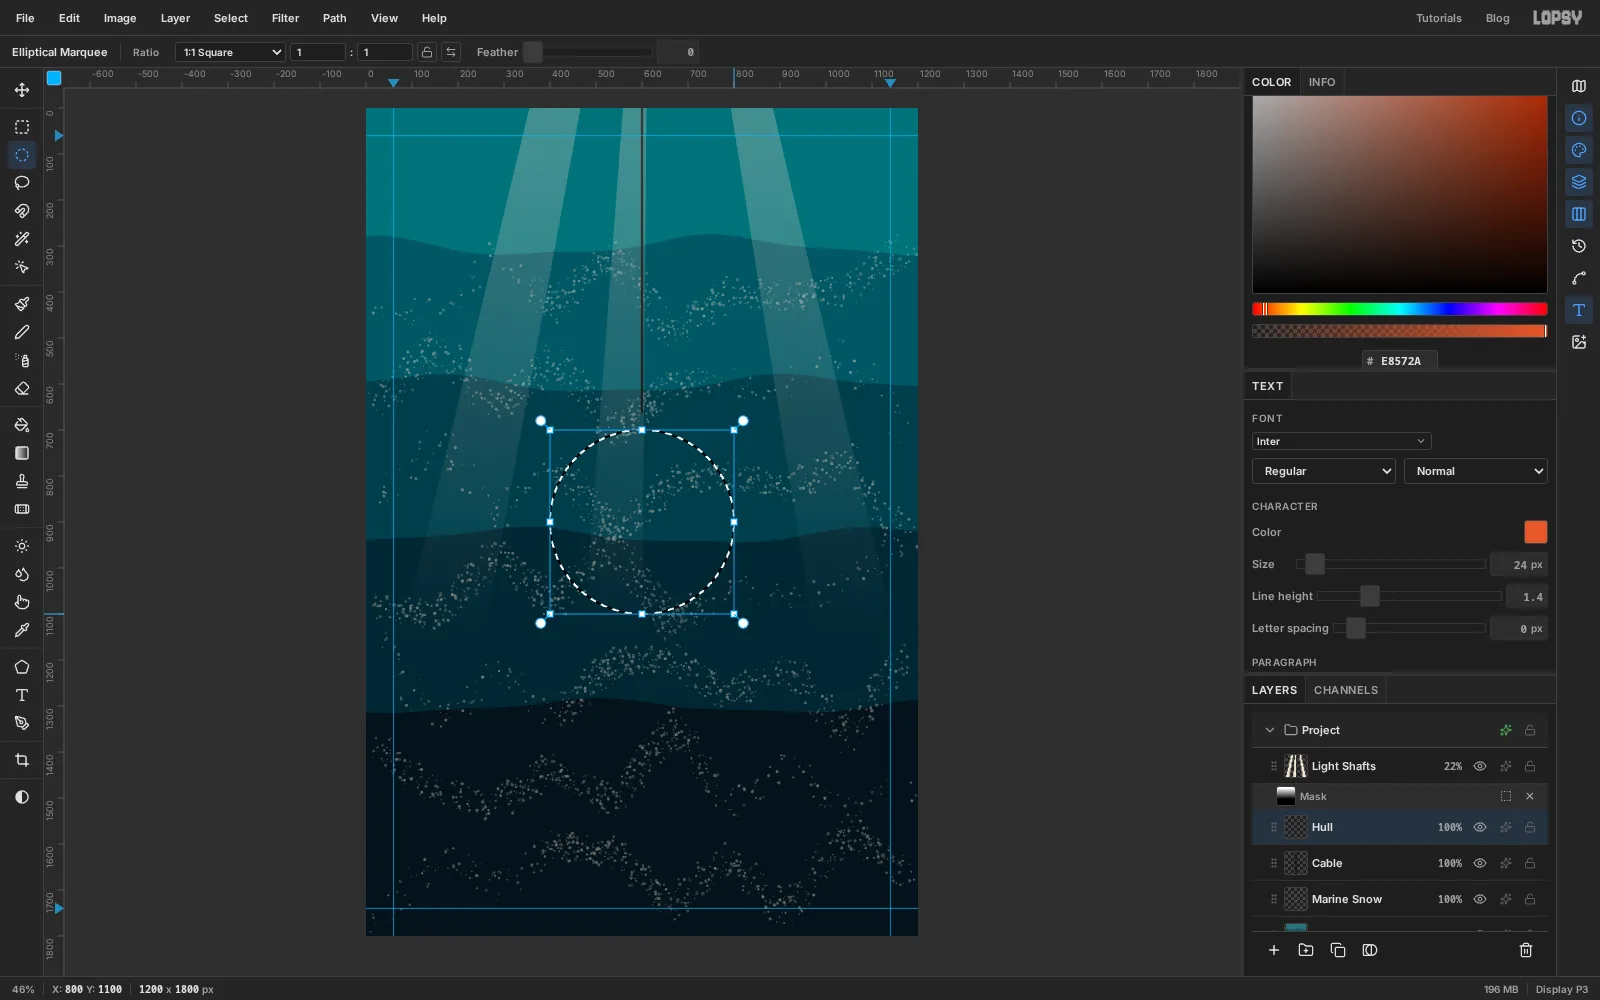
Click Add Layer and name it
Hull. Pick the Elliptical Marquee and drag from400, 700to800, 1100. That's a 400 px circle centred on600, 900, which hangs just below the end of the cable.Fill it with and press Cmd+D.
-
Cut the shadow plate
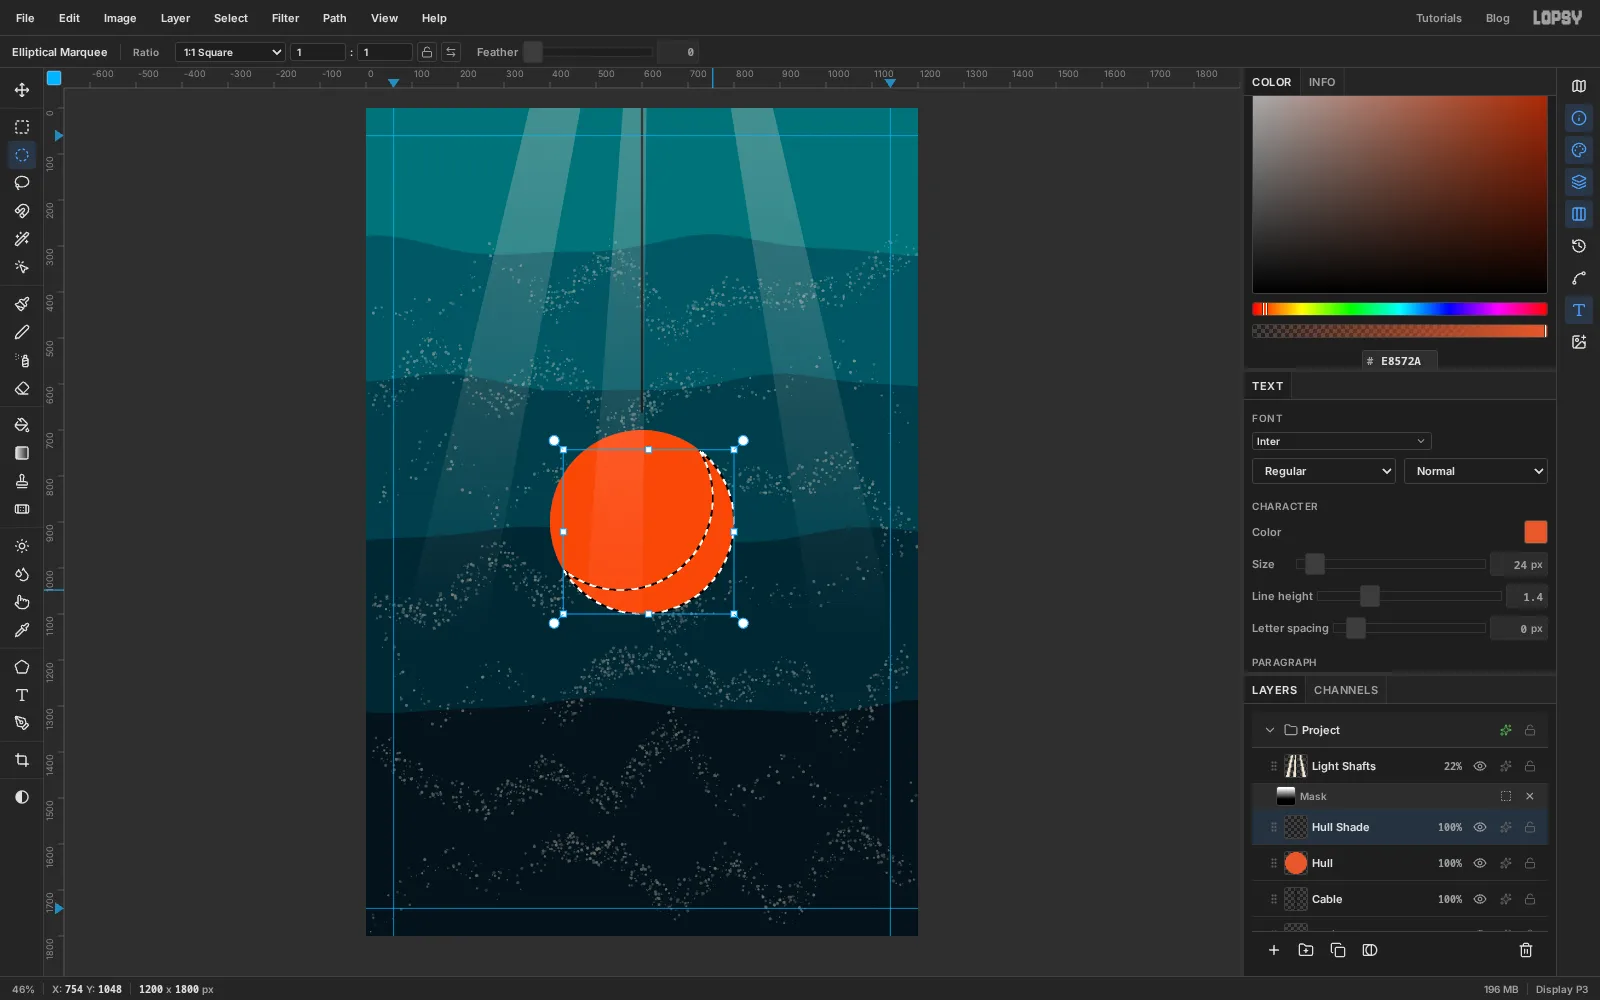
The light comes from the top-left, so the shadow is a crescent on the lower right. Instead of drawing it, cut it from the hull's own shape:
- Click Add Layer and name it
Hull Shade. - Cmd-click the
Hullthumbnail in the Layers panel. That selects the circle. - With the Elliptical Marquee, hold Option and drag a circle of the same size, shifted up and to the left by about 50 px: from about
354, 648to754, 1048. Holding Option subtracts it, which leaves a crescent. - Fill with and press Cmd+D.
- Click Add Layer and name it
-
Add the highlight plate
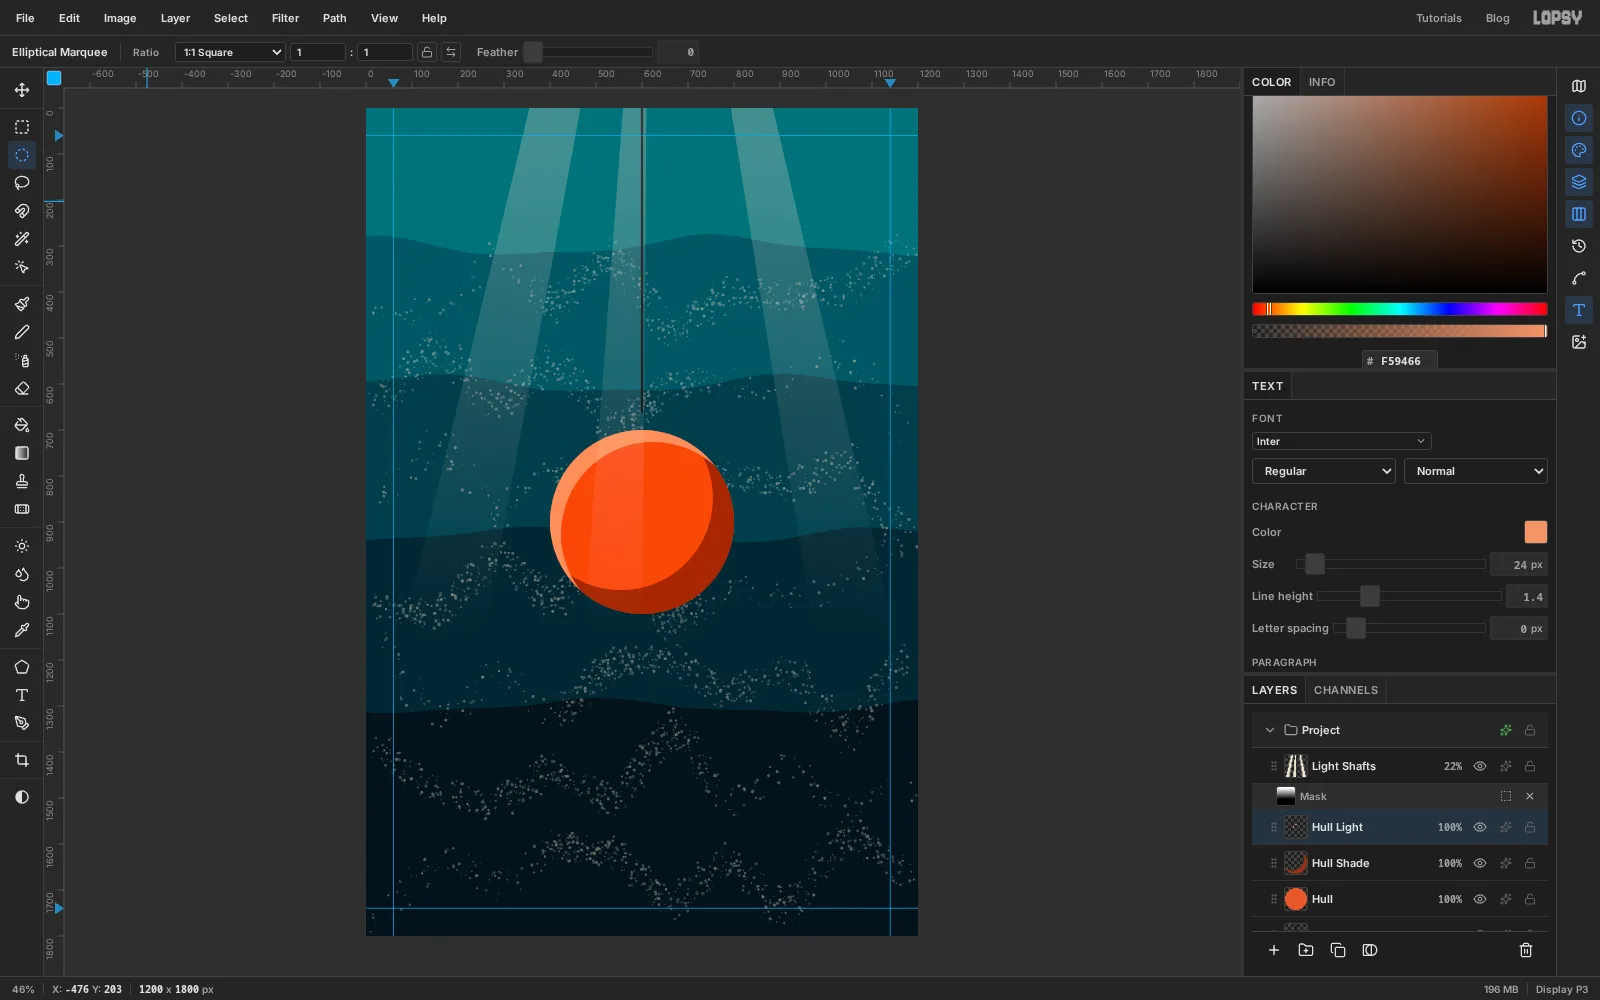
Do the same again for the highlight, but push the second circle the other way:
- Add Layer, name it
Hull Light, and Cmd-click theHullthumbnail. - Option-drag a circle from about
424, 726to824, 1126. That's the same size, nudged down and to the right by about 25 px. - Fill with and press Cmd+D.
What's left is a thin bright crescent along the upper-left edge. Three flat colours now read as a round ball.
- Add Layer, name it
-
Curve the equator seam
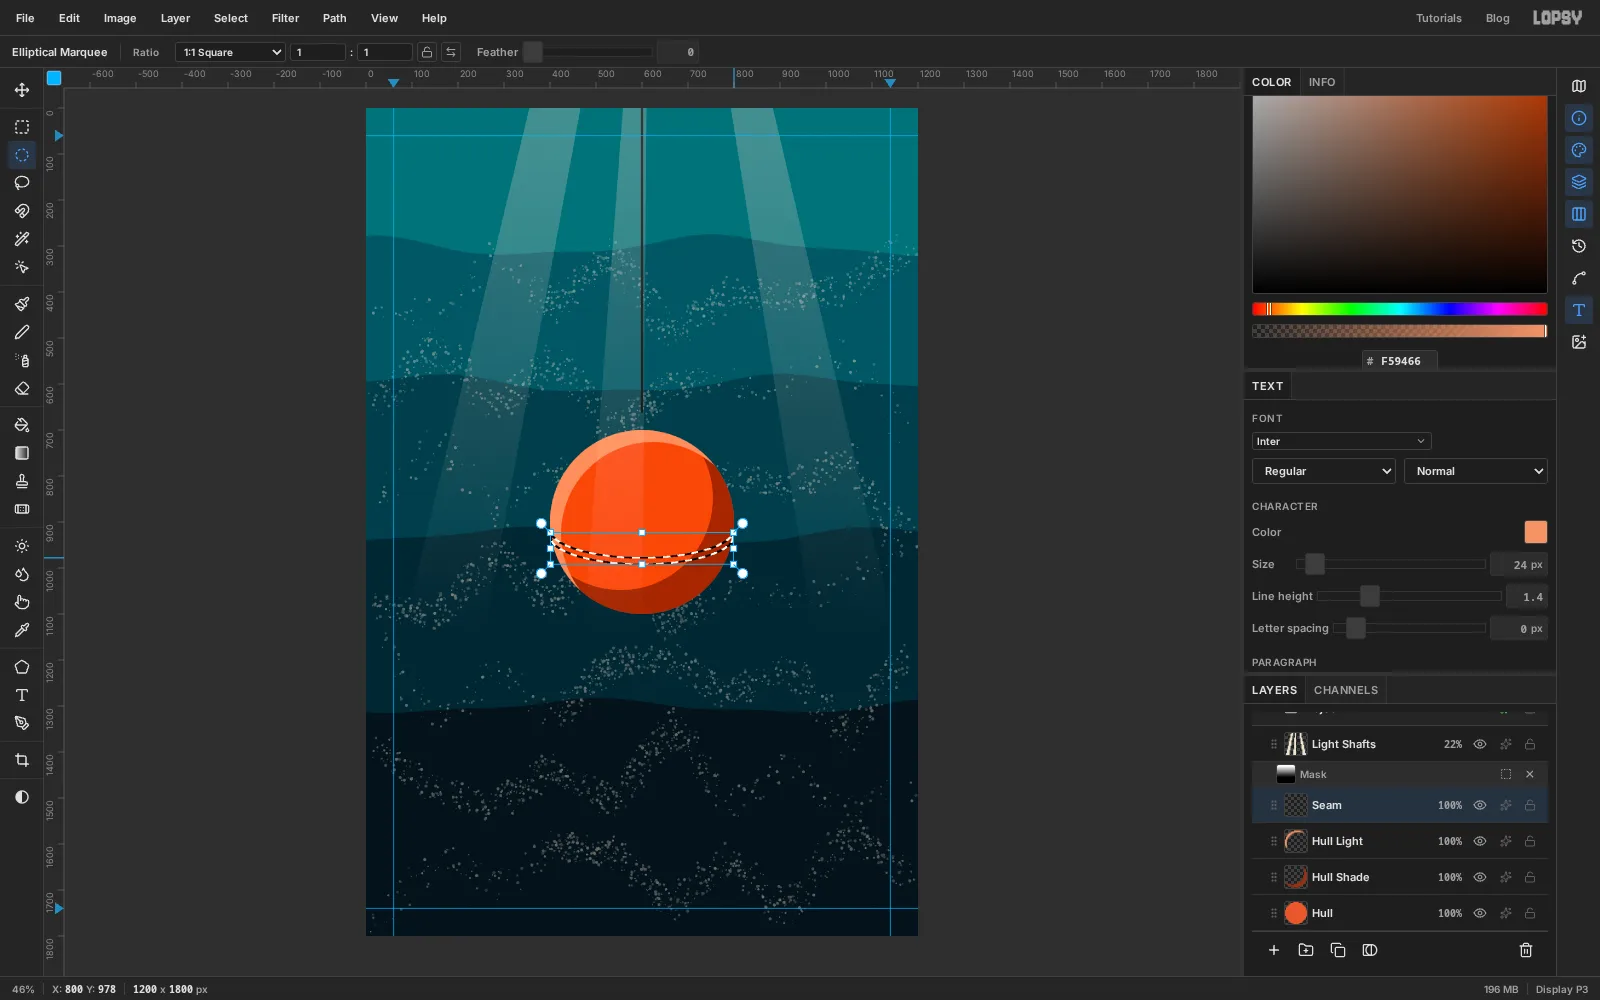
A straight line across the sphere would look flat. A seam that curves down tells you you're looking at it from slightly above.
- Add Layer, name it
Seam, and Cmd-click theHullthumbnail. - With the Elliptical Marquee, hold Shift and Option together and drag a wide, flat ellipse from
400, 868to800, 992. Shift+Option keeps only the overlap, the lower part of that ellipse inside the hull. - Hold Option alone and drag the same ellipse 14 px higher, from
400, 854to800, 978. That cuts away everything but a thin curved strip. - Fill with and press Cmd+D.
- Add Layer, name it
-
Add the hatch and lifting eye
- Add Layer and name it
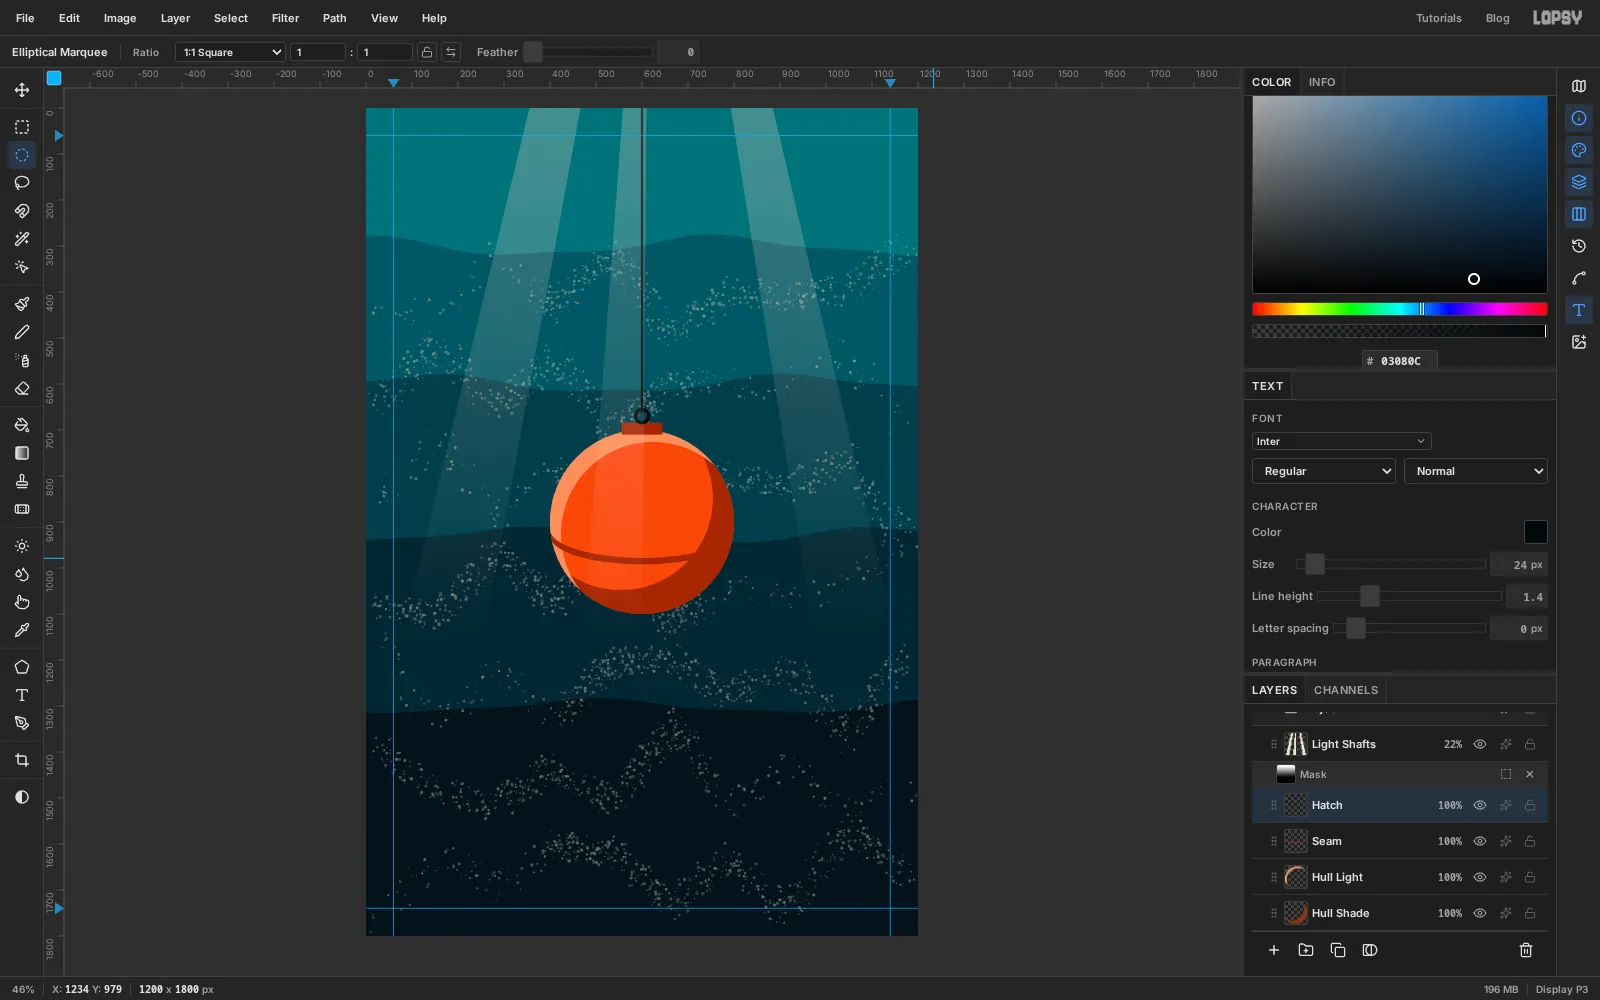
Hatch. - With the Rectangular Marquee (M), drag from
556, 684to644, 710and fill with . This is the hatch cover. - With the Elliptical Marquee, drag a small circle from
582, 652to618, 688and fill it with . - Choose Select → Shrink…, enter
7and click Apply. Press Delete to clear the middle, leaving a ring where the cable is shackled on.
- Add Layer and name it
-
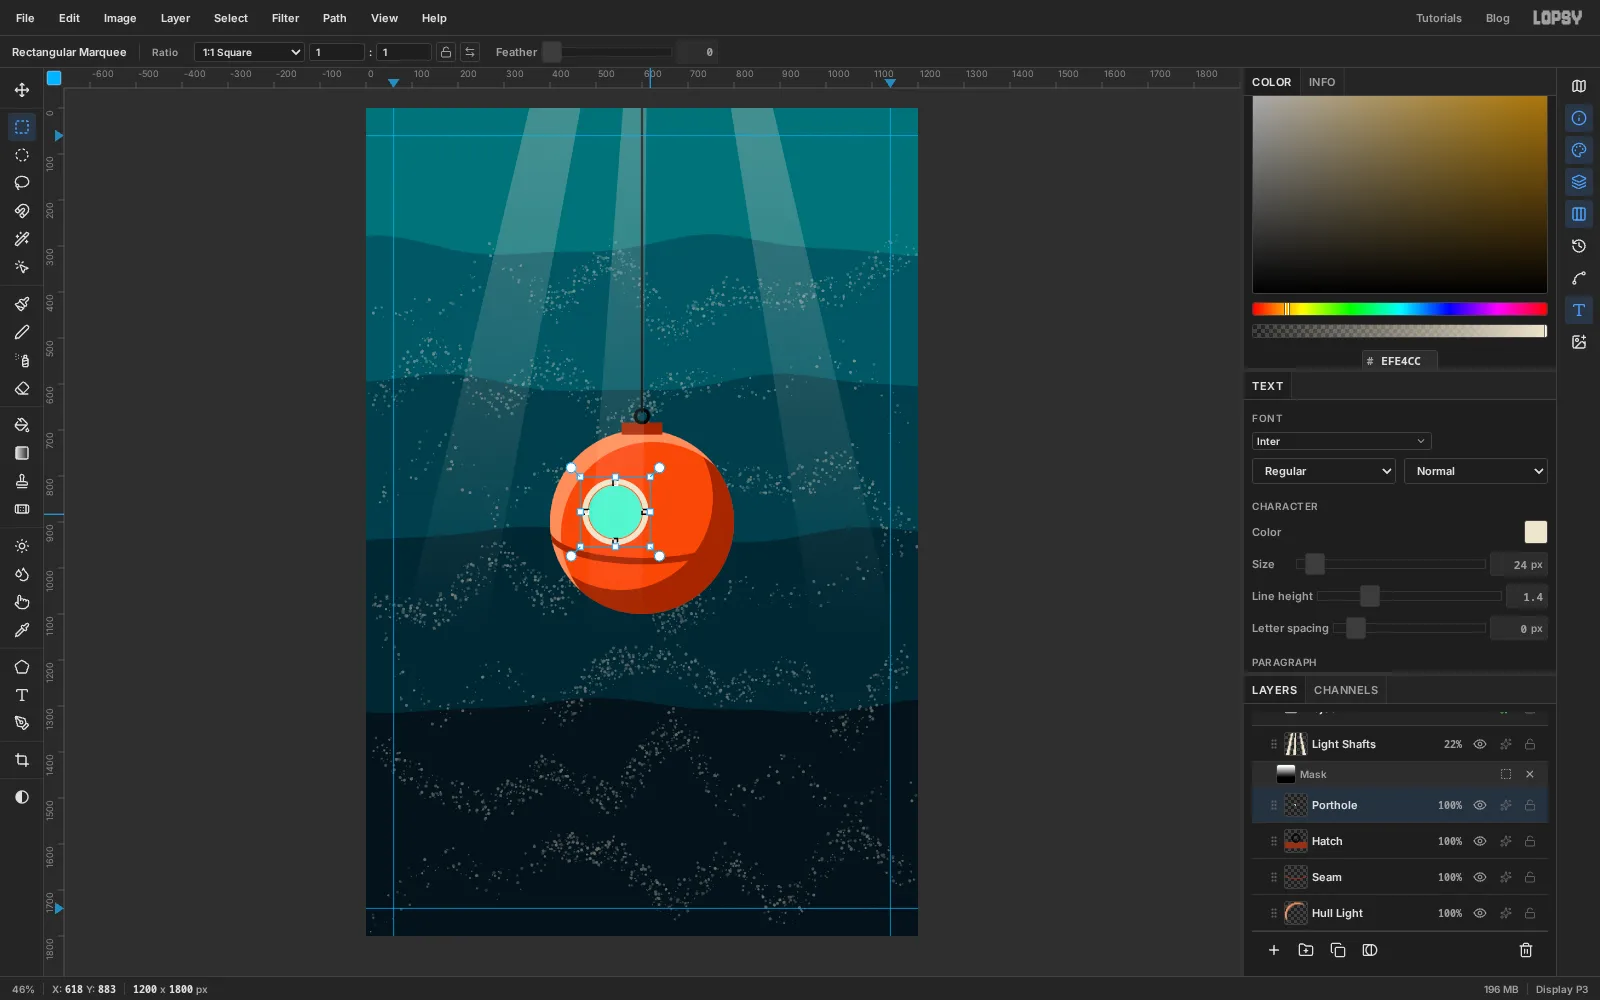
Cut the porthole with stencil bridges
- Add Layer and name it
Porthole. - With the Elliptical Marquee, drag a circle from
484, 820to600, 936and fill with . That's the glass. - Drag a bigger circle from
470, 806to614, 950, then Option-drag a circle from482, 818to602, 938to hollow it into a ring. Fill with . - With the Rectangular Marquee, drag a small 10 px wide box across the top of the ring. Hold Shift and add three more across the bottom, left and right of the ring.
- Press Delete, then Cmd+D.
Those four gaps are the stencil bridges. On a real stencil card they're what keeps the middle of the cut-out from falling away.
- Add Layer and name it
-
Add a glint to the glass
Still on
Porthole, pick the Lasso and draw a thin slash across the upper left of the glass: a narrow parallelogram about 45 px long and 12 px wide, angled up to the right. Fill with and press Cmd+D. It's the reflection of the light outside, and it's what makes the disc read as glass.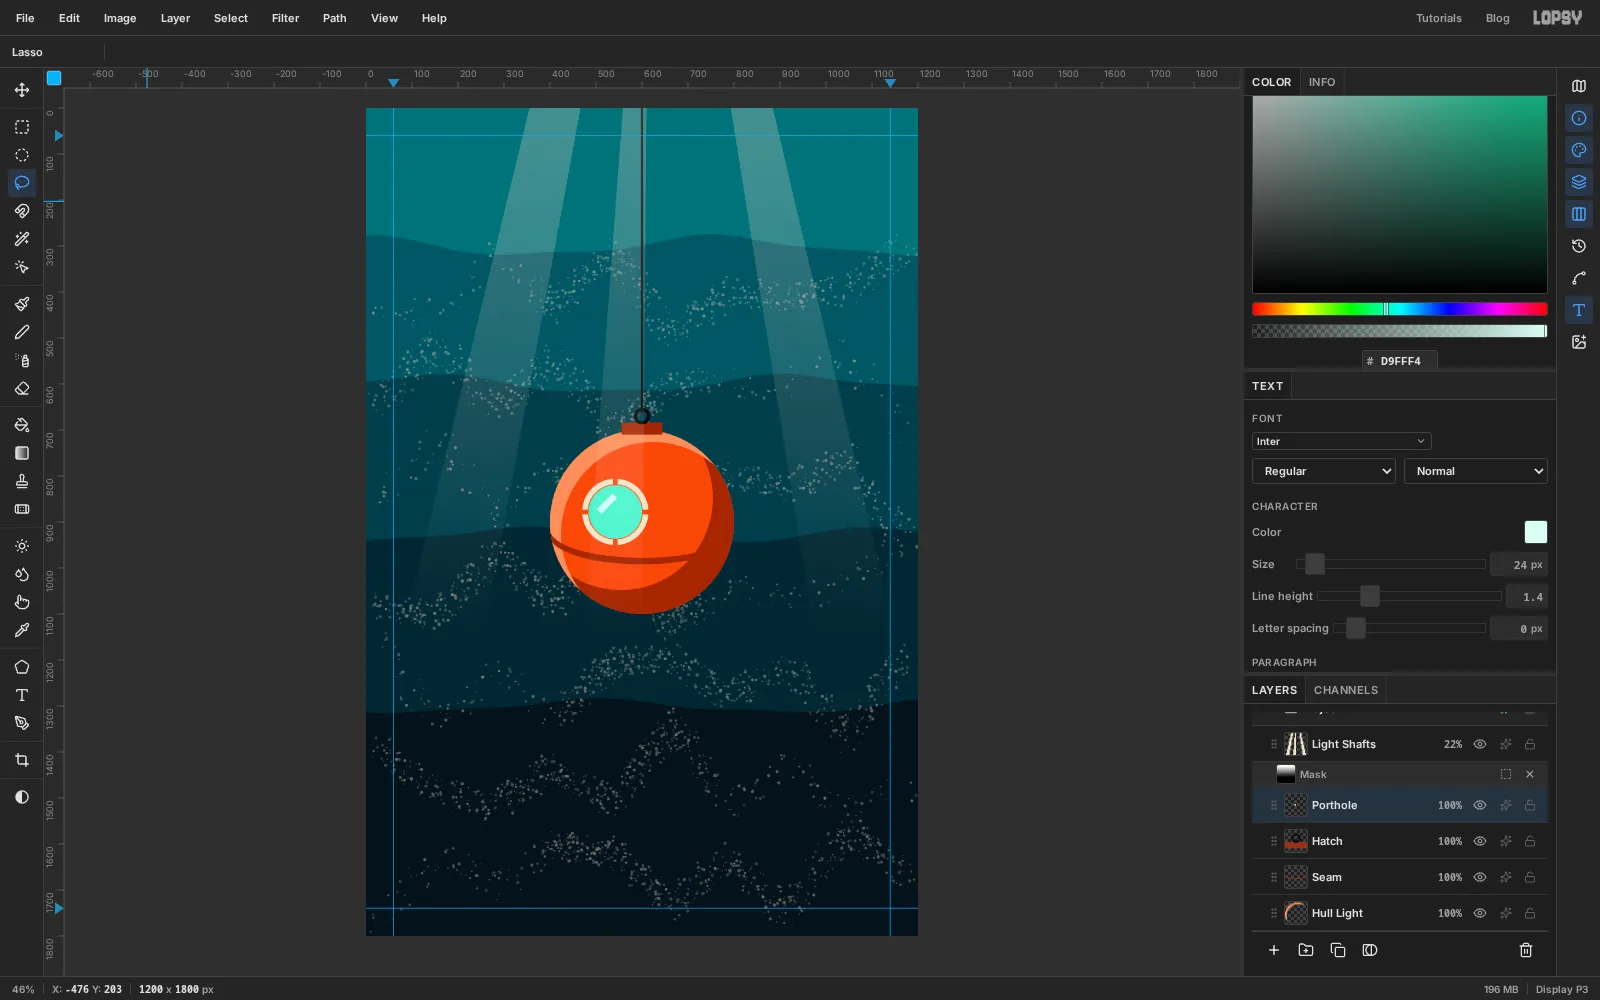
-
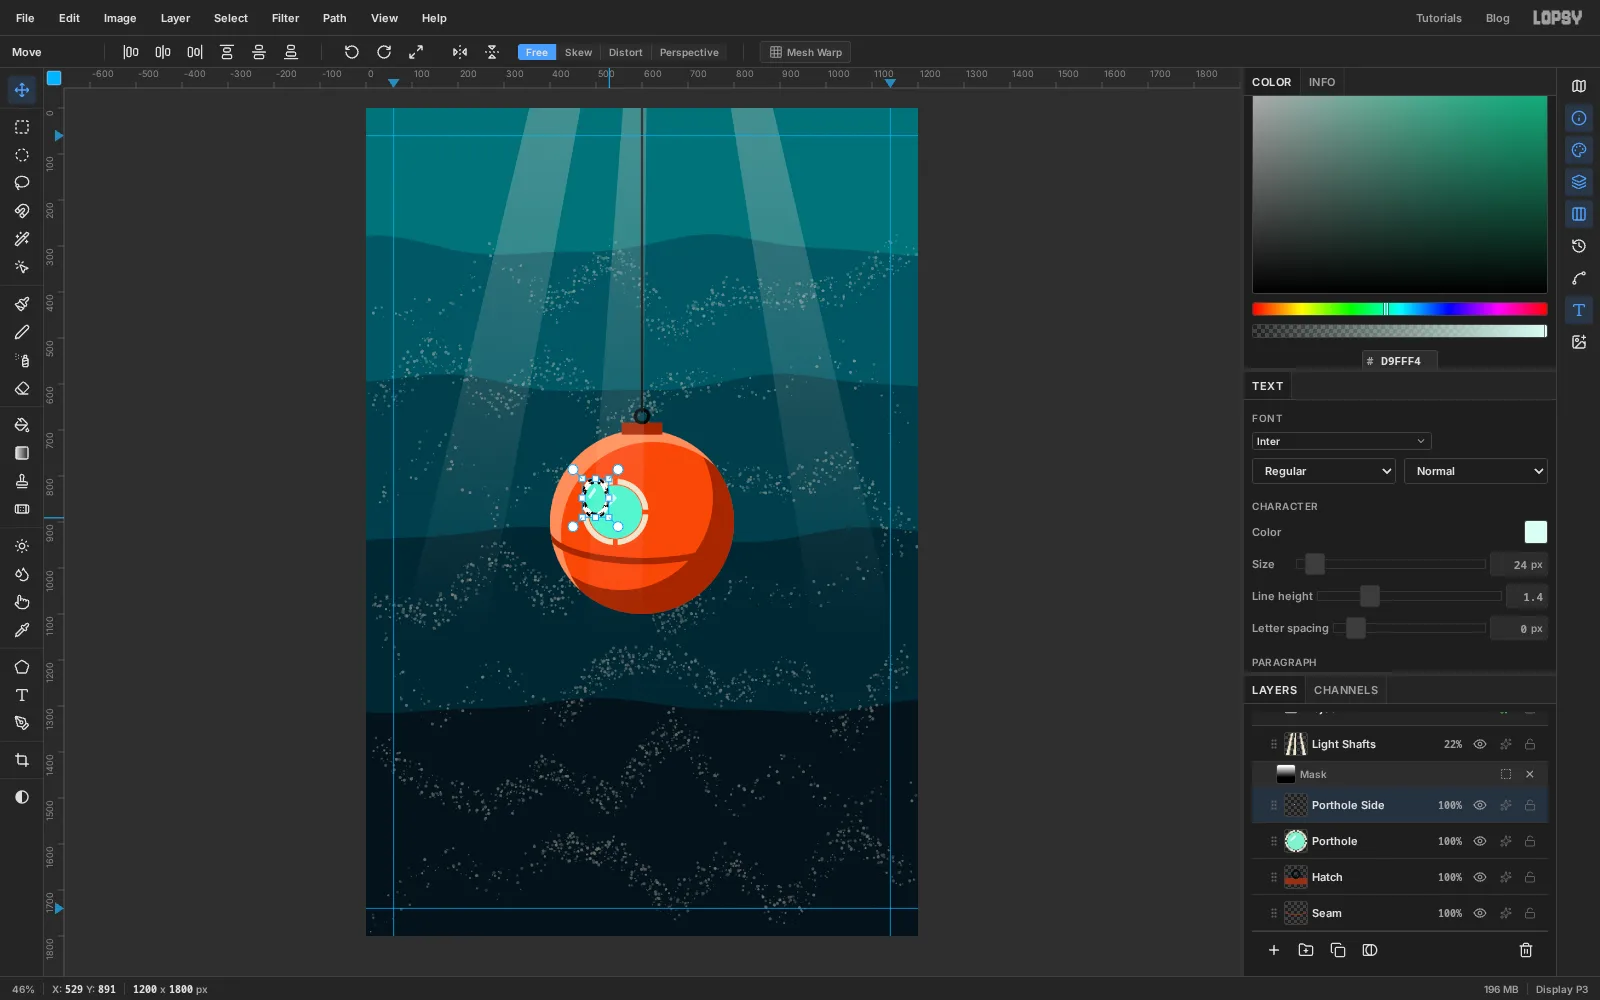
Paste a second porthole and squash it
The sphere also has a side window. It's the same porthole, foreshortened because it faces away from you.
- With the Rectangular Marquee, draw a box around the whole porthole, from
466, 802to618, 954. - Press Cmd+C, then Cmd+V. The copy pastes in place as a new layer, and Lopsy switches to the Move tool with handles around it. Rename the new layer
Porthole Side. - Drag the bottom-right corner handle up and to the left, about 85 px left and 60 px up. Without a modifier key the corner moves freely, so the copy becomes a narrow upright oval.
- With the Rectangular Marquee, draw a box around the whole porthole, from
-
Move the side porthole and add bolts
Drag the squashed copy from its middle (keep well clear of the handles) to the right shoulder of the sphere, so it's centred at about
712, 828. Press Enter to apply the transform, then Cmd+D.For the bolts, click Add Layer and name it
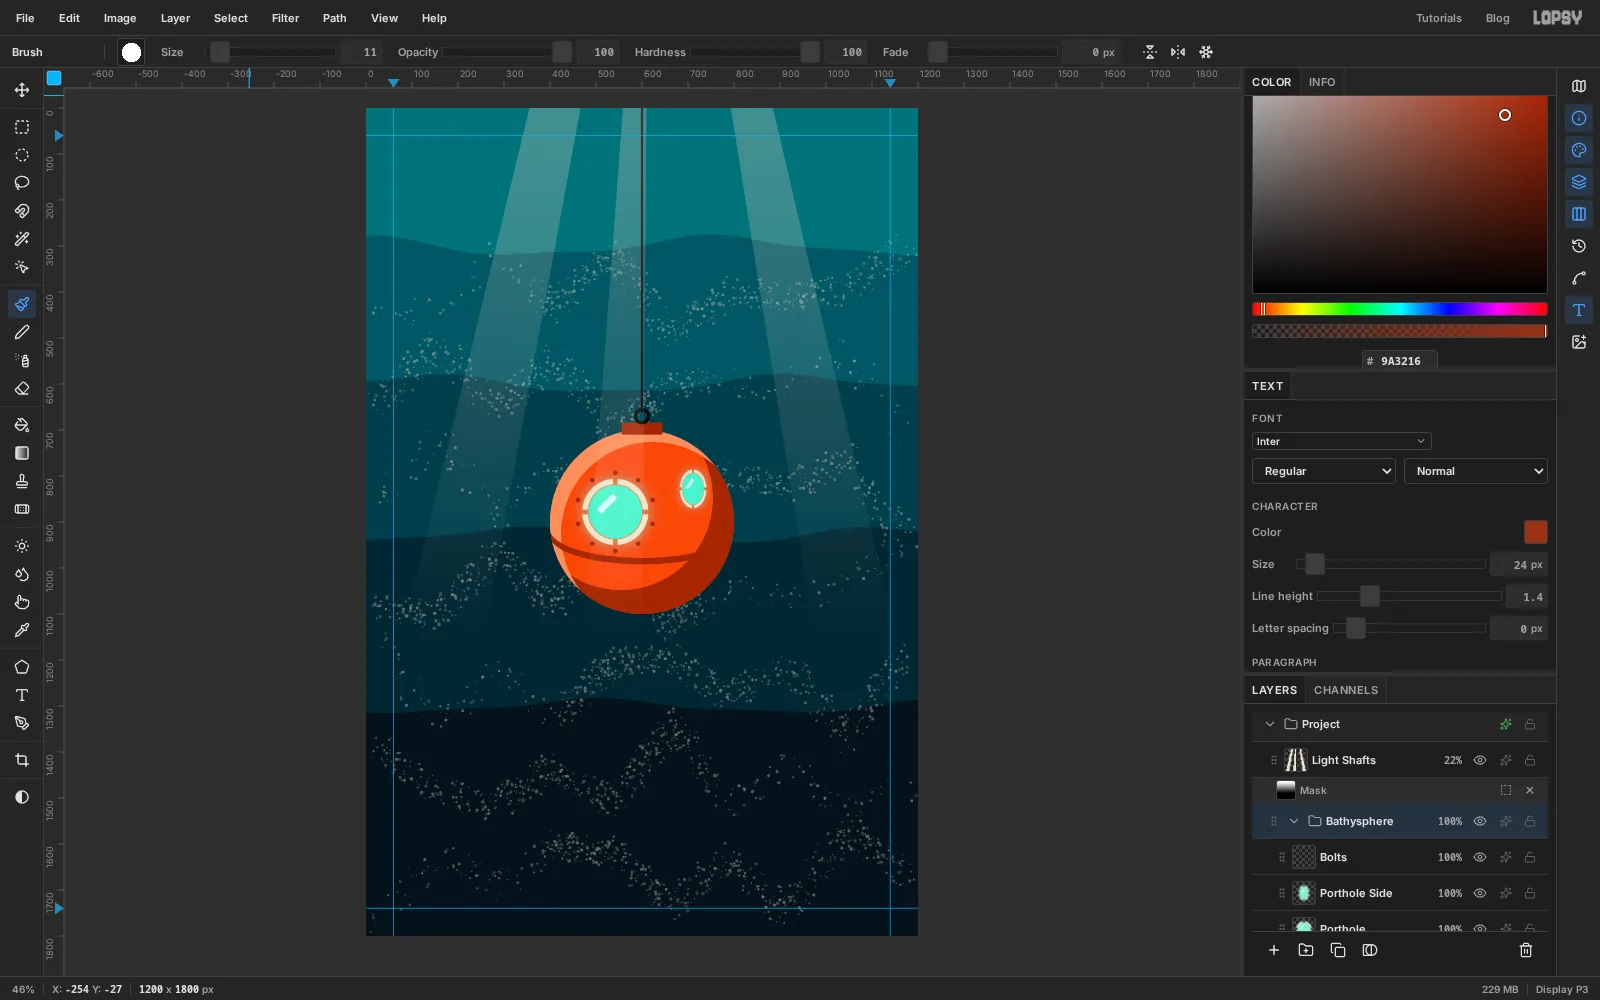
Bolts. Pick the Brush, set Size11with , and click a ring of ten bolt heads just outside the porthole rim, about 85 px from its centre. Start with four at roughly 12, 3, 6 and 9 o'clock (the 3 o'clock one lands near627, 878), then add the rest in the gaps, two in each quarter, avoiding the bridges.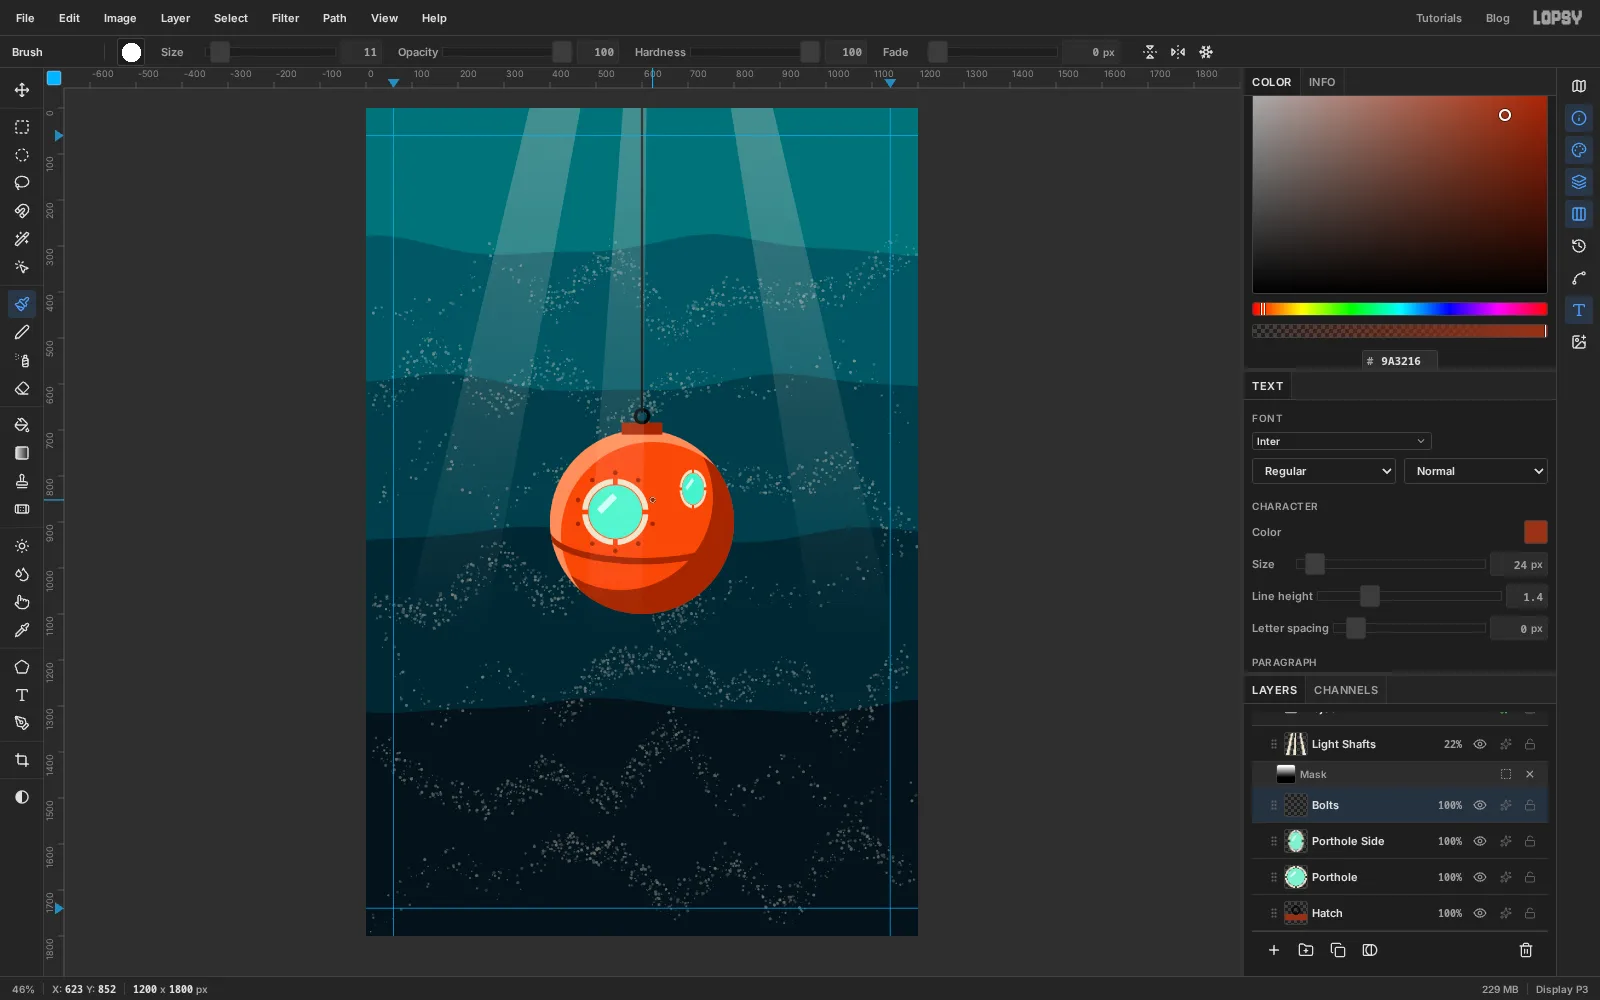
-
Light the portholes and group the sphere
Something is alive in there, so the windows should glow.
- Open the effects drawer on
Porthole, turn on Outer Glow, and set Size40, Spread0and Opacity55, with the Glow color . - Click Rasterize Layer Style to bake the glow into the pixels.
- Do the same on
Porthole Side, with Size26. - Click the
Hullrow, Shift-click theBoltsrow, and choose Layer → Group Layers. Rename the groupBathysphere.
Rasterizing as you go keeps the file quick to work with. Every live effect is redrawn whenever anything on the canvas changes.
- Open the effects drawer on
-
Blow bubbles up the cable
Click the
Cablerow, click Add Layer and name itBubbles.With the Elliptical Marquee, drag a small circle just above the hatch, about 16 px across. Hold Shift and add seven more going up the cable to about y
350. Make them between 10 and 30 px across, and zigzag them from one side of the cable to the other.Then hold Option and drag a slightly smaller circle inside each one, leaving a thin rim of 2 or 3 px. That turns every bubble into a ring. They don't need to be perfect; real bubbles wobble. Fill with , press Cmd+D, and set the layer's opacity to
75%.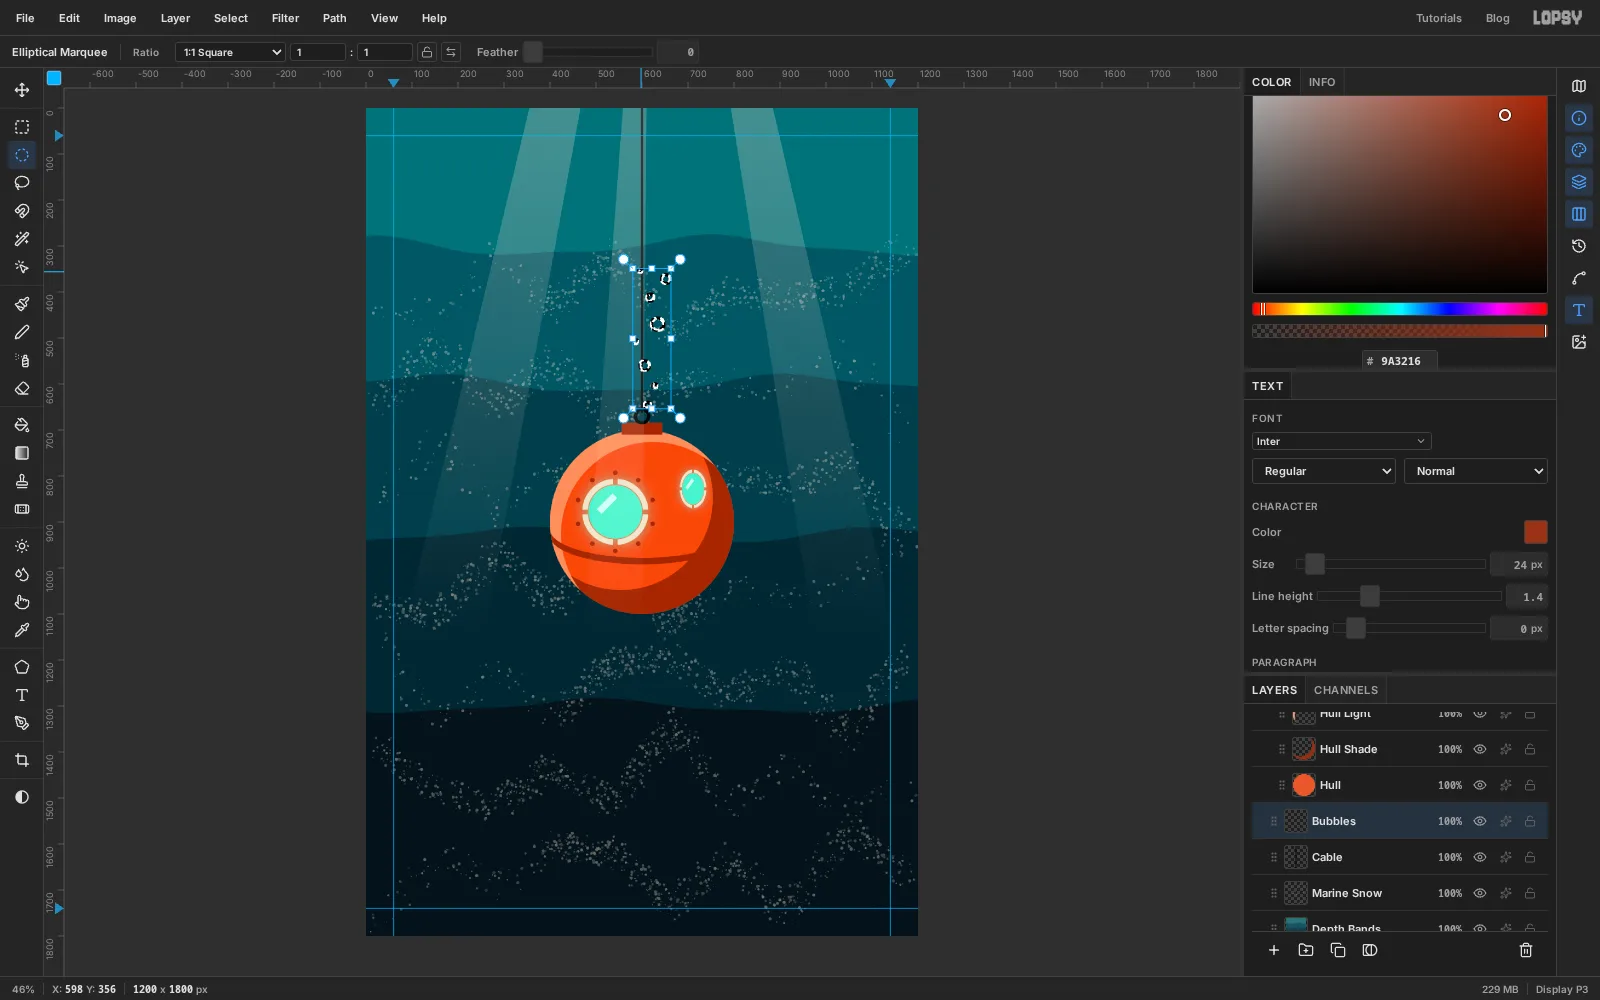
-
Bring in the anglerfish lithograph
Click the
Marine Snowrow so the picture lands low in the stack. Drag the downloadedMelanocetusJohnsoniiFord.jpgfrom your desktop onto the canvas. It's wider than the cover, so Lopsy shrinks it to fit the width and centres it. Rename the layerFord Plate.A dropped image arrives selected, with the Move tool active. Press Cmd+D to drop that selection, so the filters in the next step work on the whole layer.
Click Duplicate Layer and rename the copy
Ford Plate Shadows. Click its eye icon to hide it for now. You'll use it for the second plate.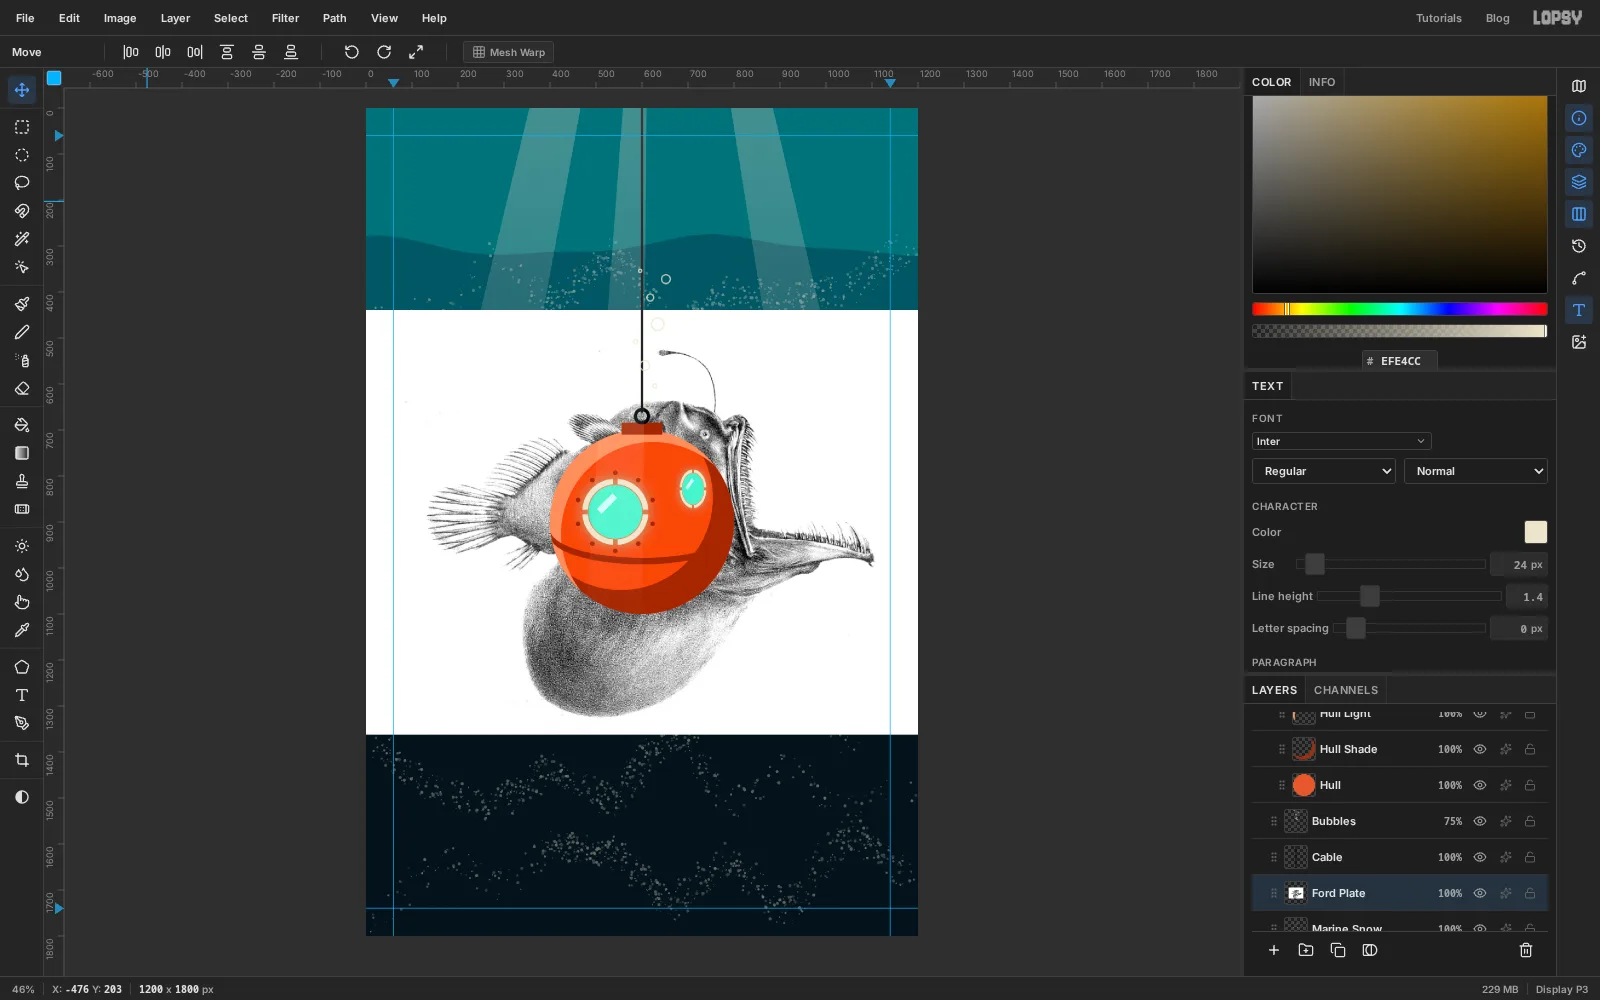
-
Blur and threshold the fish into a silhouette
Click the
Ford Platerow.A threshold on its own would turn the stippled lithograph into scattered black dots. Blur it first, so the dots melt into solid tone:
- Choose Filter → Gaussian Blur…, set Radius
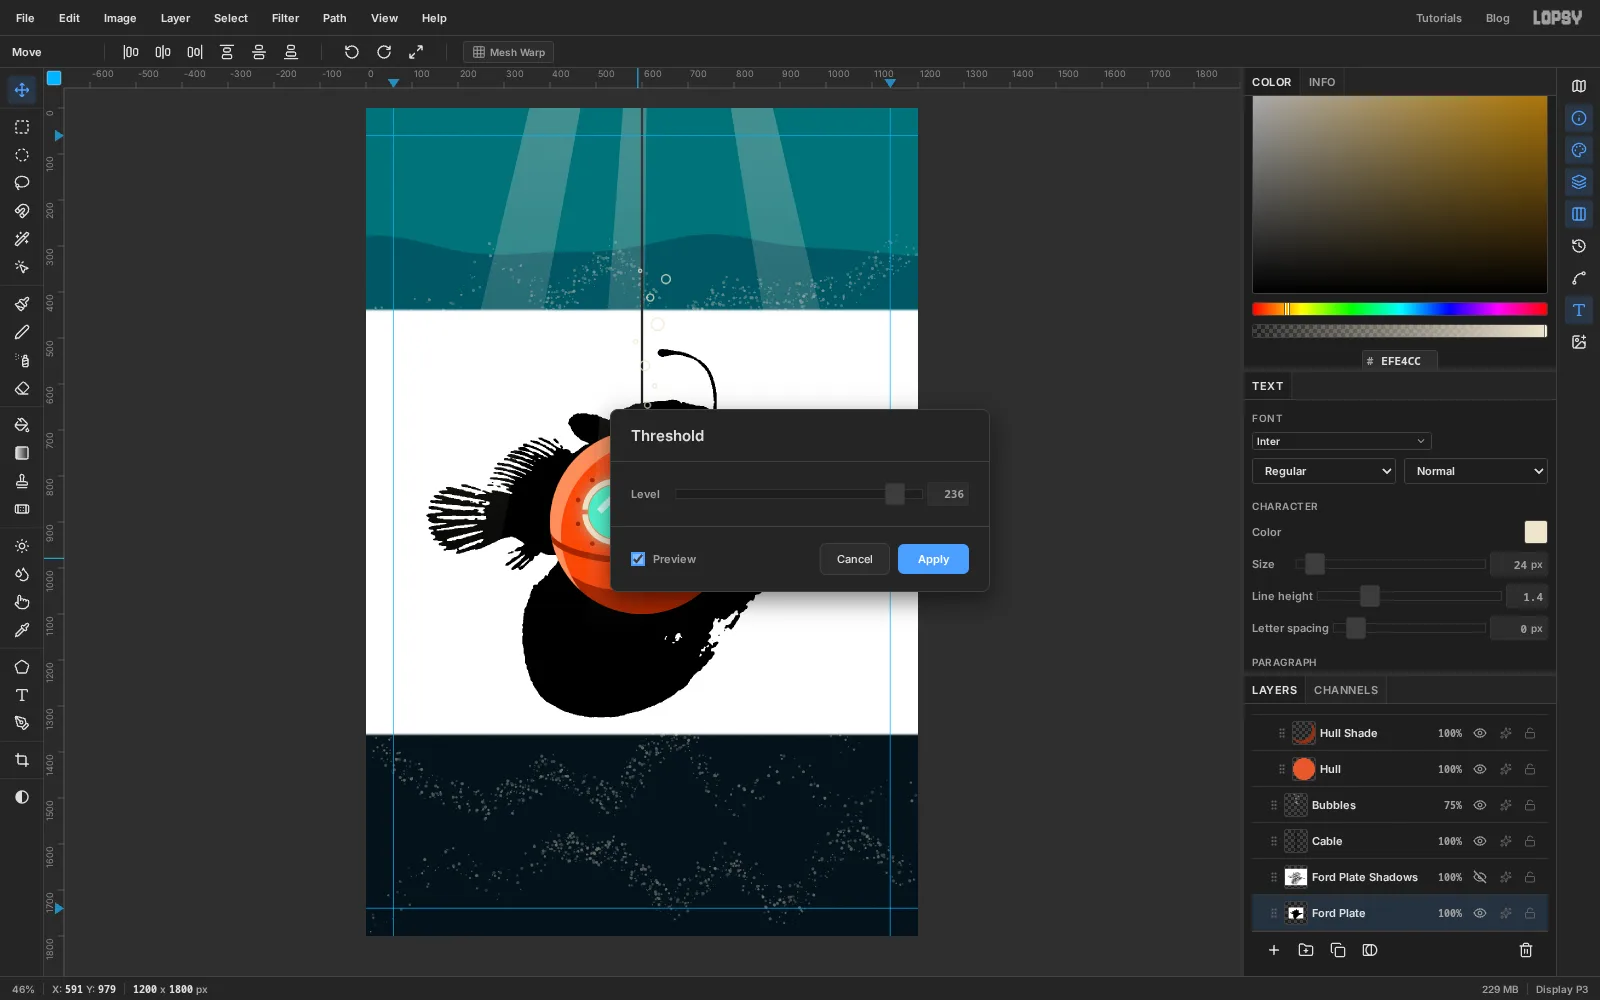
6and click Apply. - Choose Filter → Threshold…, turn Preview on, set Level
236and click Apply.
At 236 everything darker than the paper turns black. The whole fish becomes one clean shape, fins and lure included.
- Choose Filter → Gaussian Blur…, set Radius
-
Select the fish with the Magic Wand
- Pick the Magic Wand (W). Leave Tolerance at
32and make sure Contiguous is on. - Click the white paper near the top-left corner of the picture, at about
40, 500. - Press Shift+Cmd+I to invert the selection. Now everything that isn't paper is selected, including the empty strips above and below the photo.
- Pick the Rectangular Marquee, hold Shift and Option, and drag a box around the fish from
100, 480to1160, 1360. Only the overlap is kept, which is just the fish.
Click Add Layer, name it
Angler, fill with and press Cmd+D.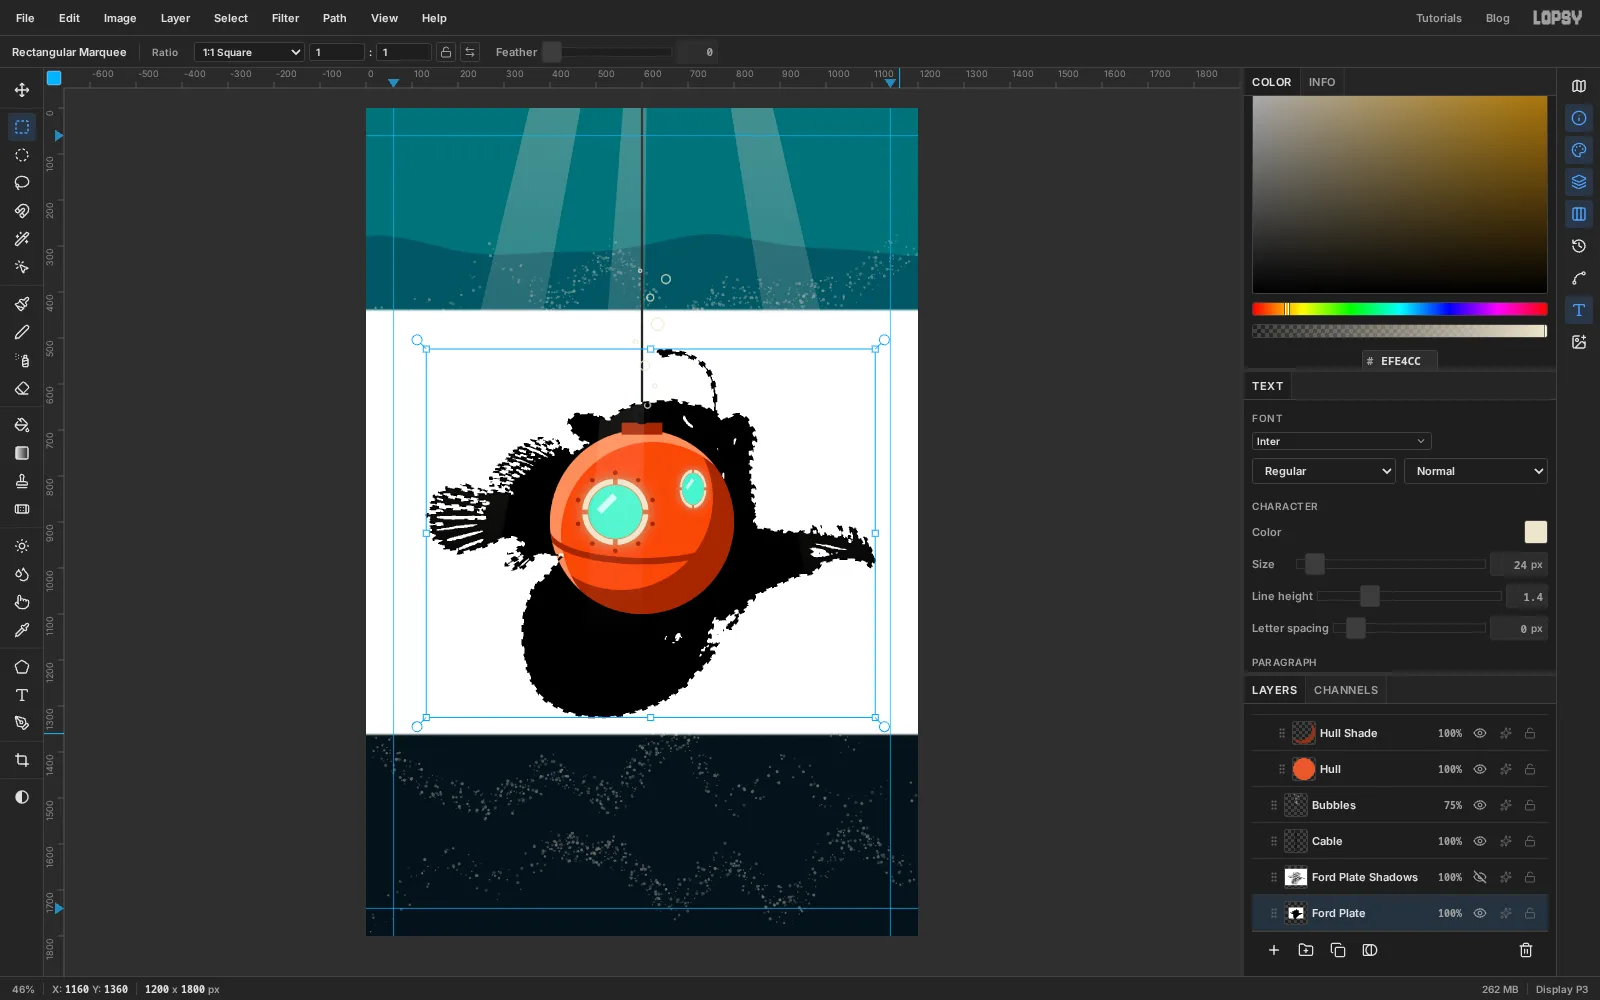
- Pick the Magic Wand (W). Leave Tolerance at
-
Cut the shadow plate from the lithograph
The second plate holds only the darkest parts of the lithograph.
- Click the
Ford Plate Shadowsrow and click its eye to show it. - Run Gaussian Blur with Radius
3, then Threshold with Level96. Only the deepest shadows stay black. - With the Magic Wand, turn Contiguous off and click the white paper. Now every white area is selected, inside the fish as well as out. Press Shift+Cmd+I to invert.
- Hold Cmd, Shift and Option and click the
Anglerthumbnail. That intersects the selection with the fish's shape, so nothing spills outside it.
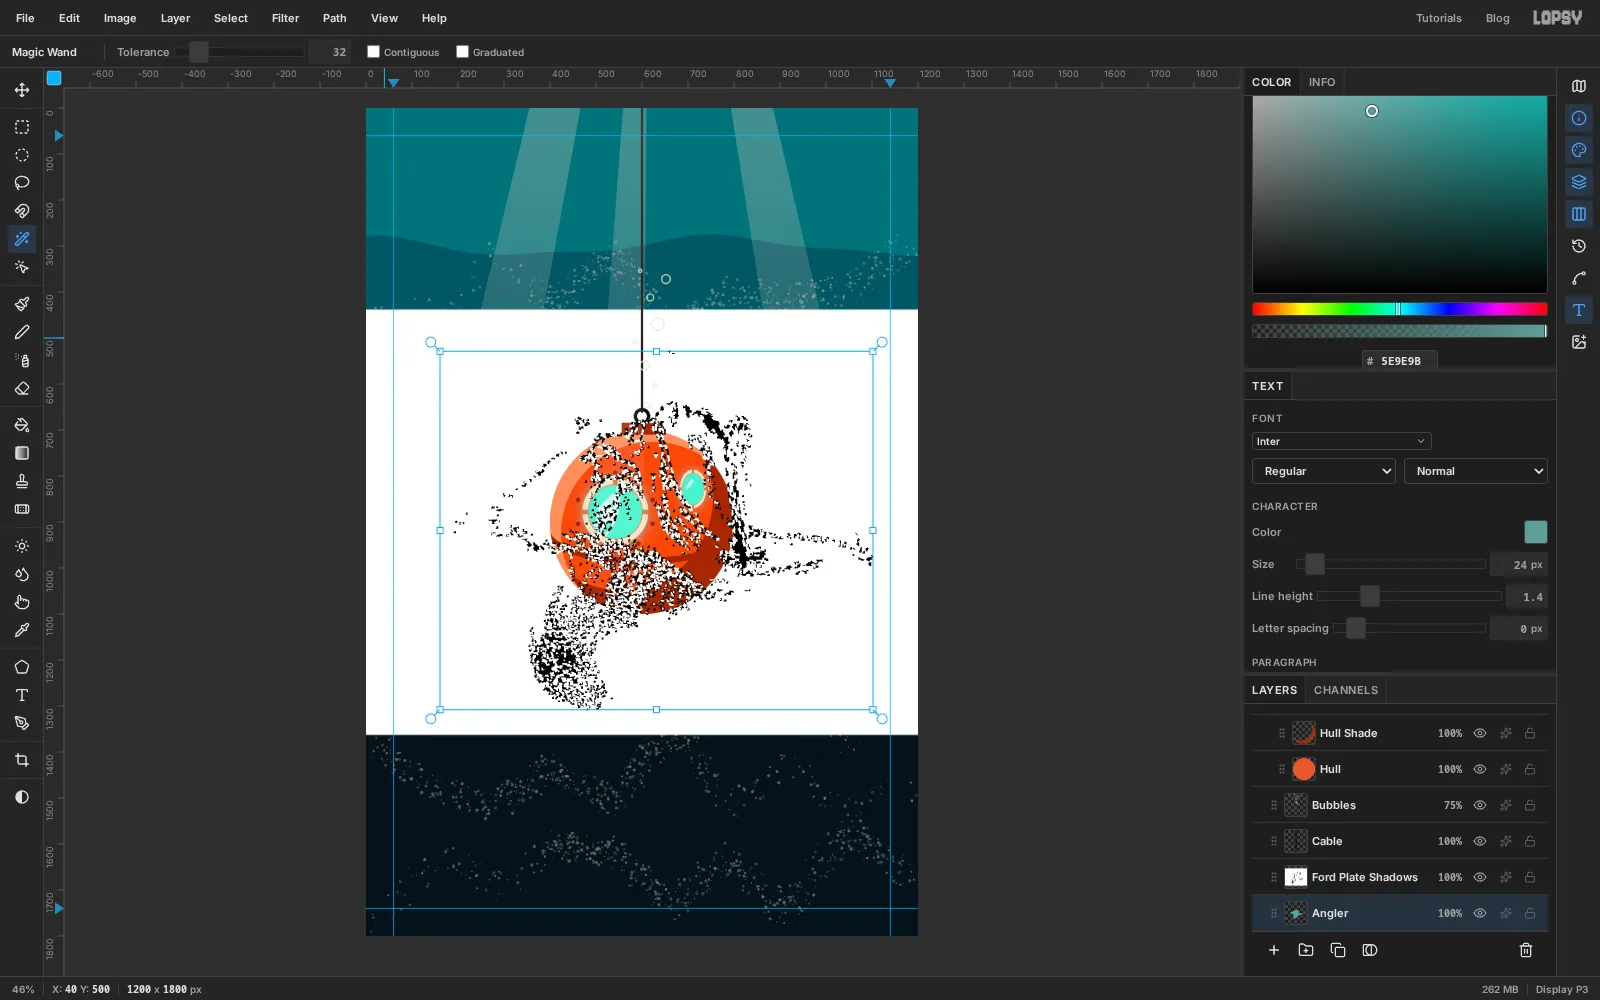
- Click the
-
Fill the shadow plate and clear the lithograph
Click Add Layer, name it
Angler Shade, fill with and press Cmd+D.You don't need the lithograph any more. Click
Ford Plate Shadowsand click Delete Layer, then do the same forFord Plate.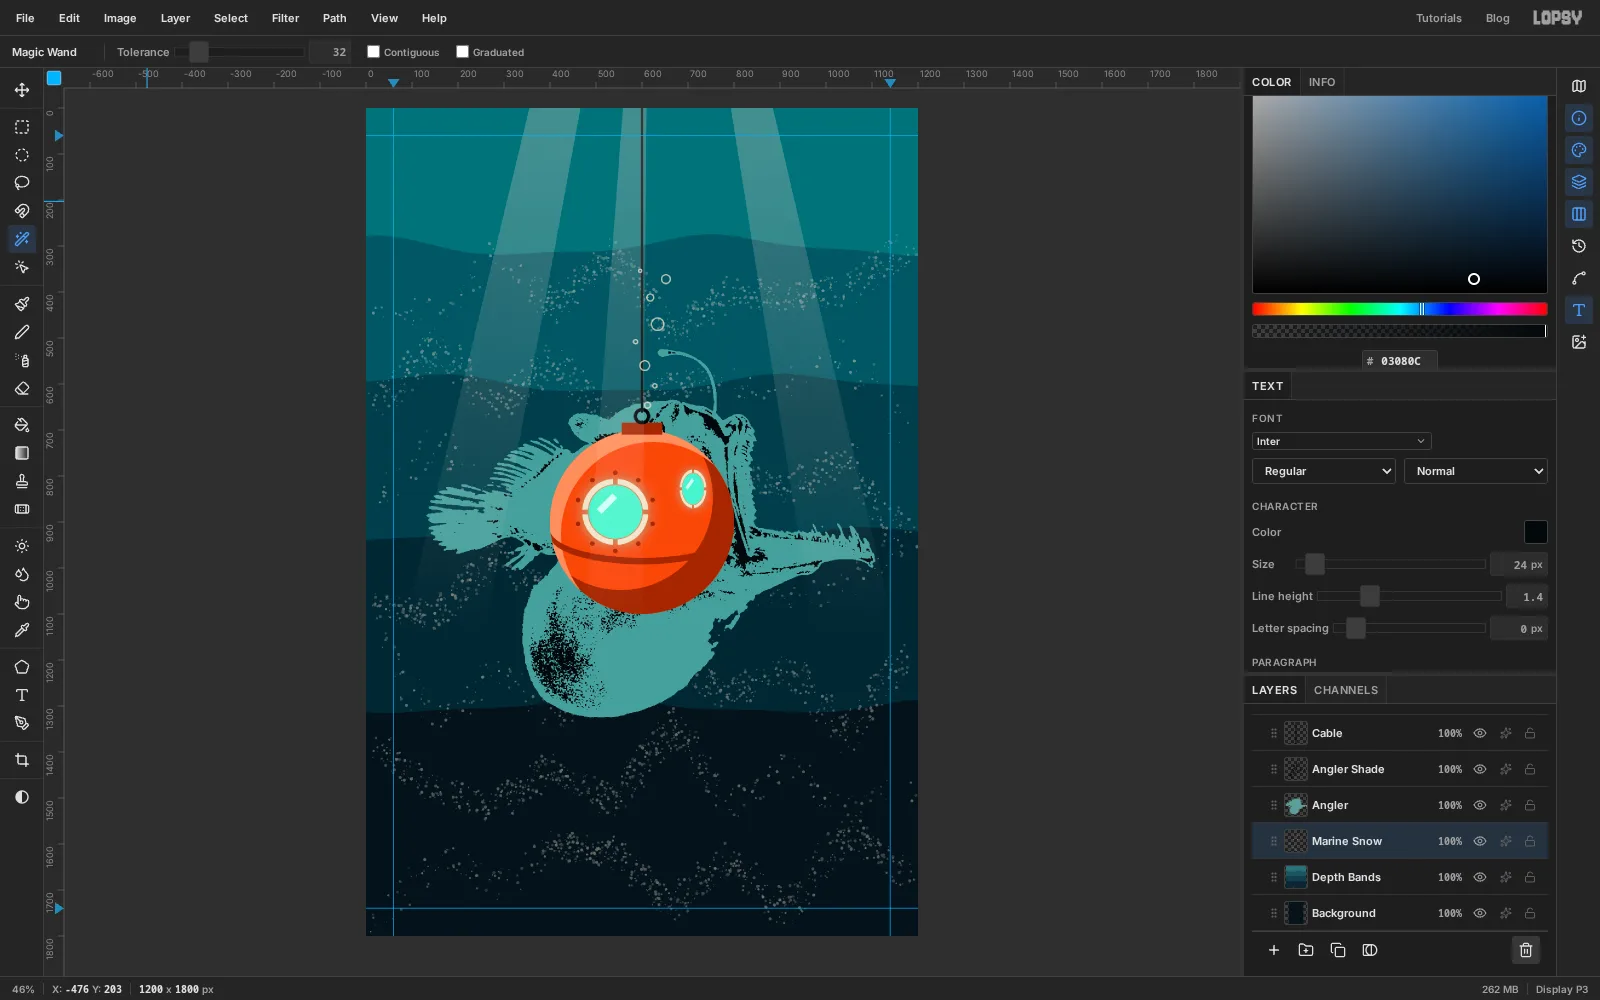
-
Group the fish and scale it down
Click the
Anglerrow, Shift-clickAngler Shade, choose Layer → Group Layers, and rename the groupAnglerfish.With the group selected and nothing else selected (press Cmd+D to make sure), pick the Move tool (V). Handles appear around both fish layers at once. Hold Cmd and drag the bottom-right corner handle up and to the left until the fish is about 60% of its size, roughly 600 px wide. Cmd keeps the proportions.
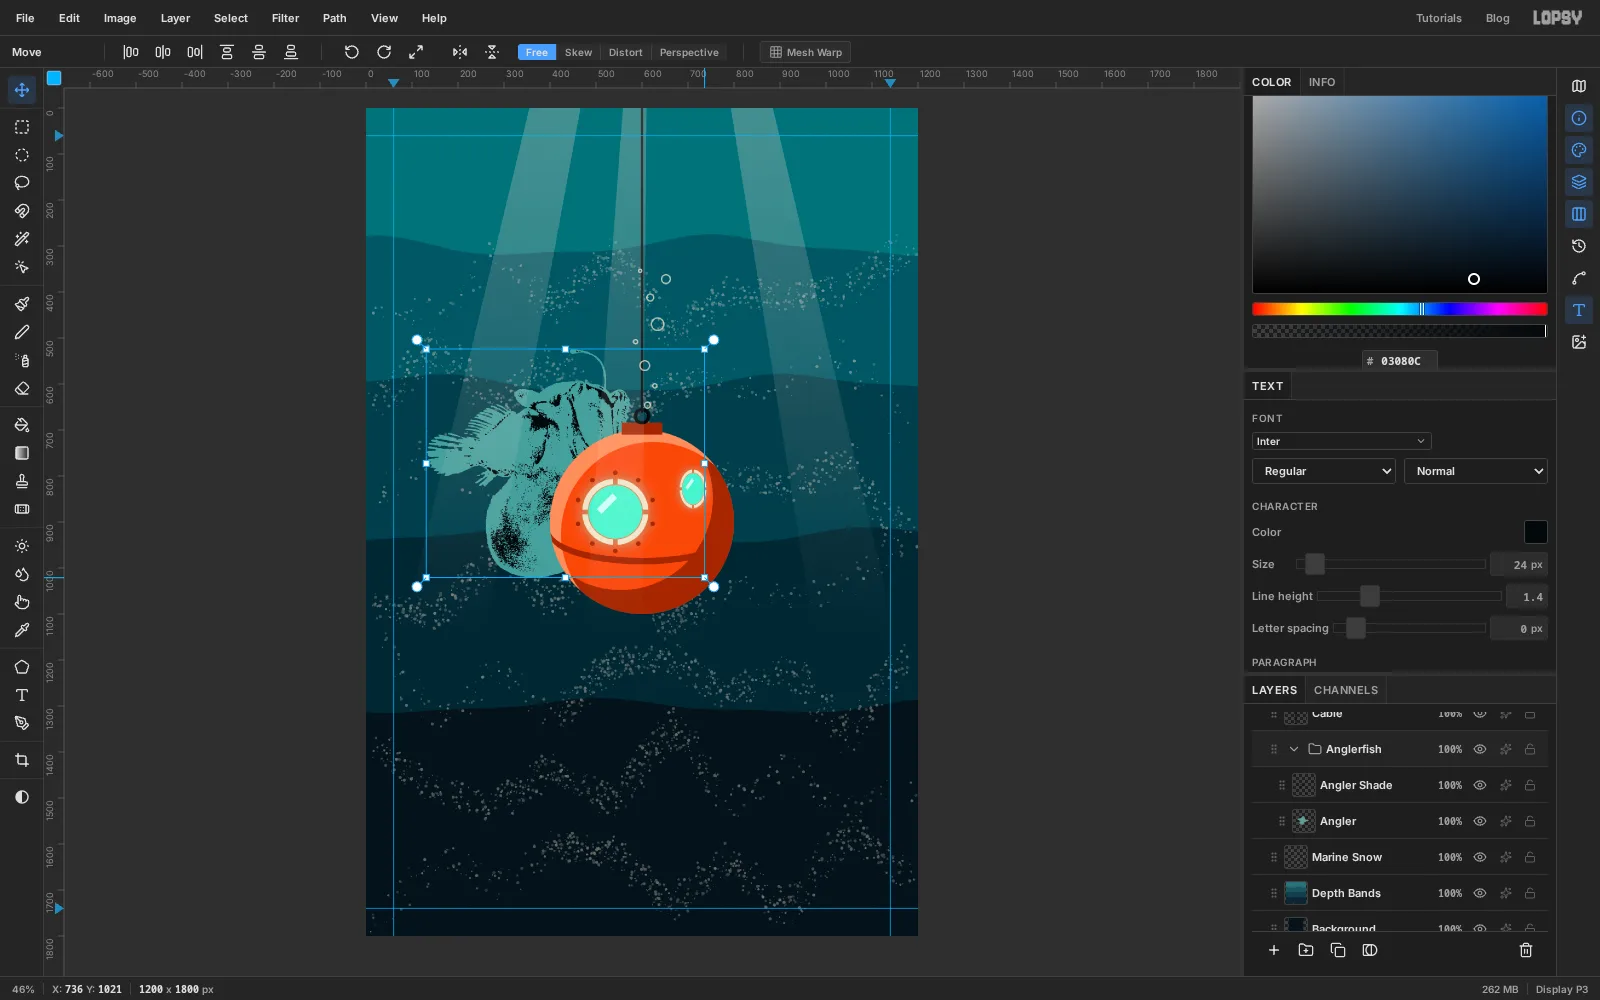
-
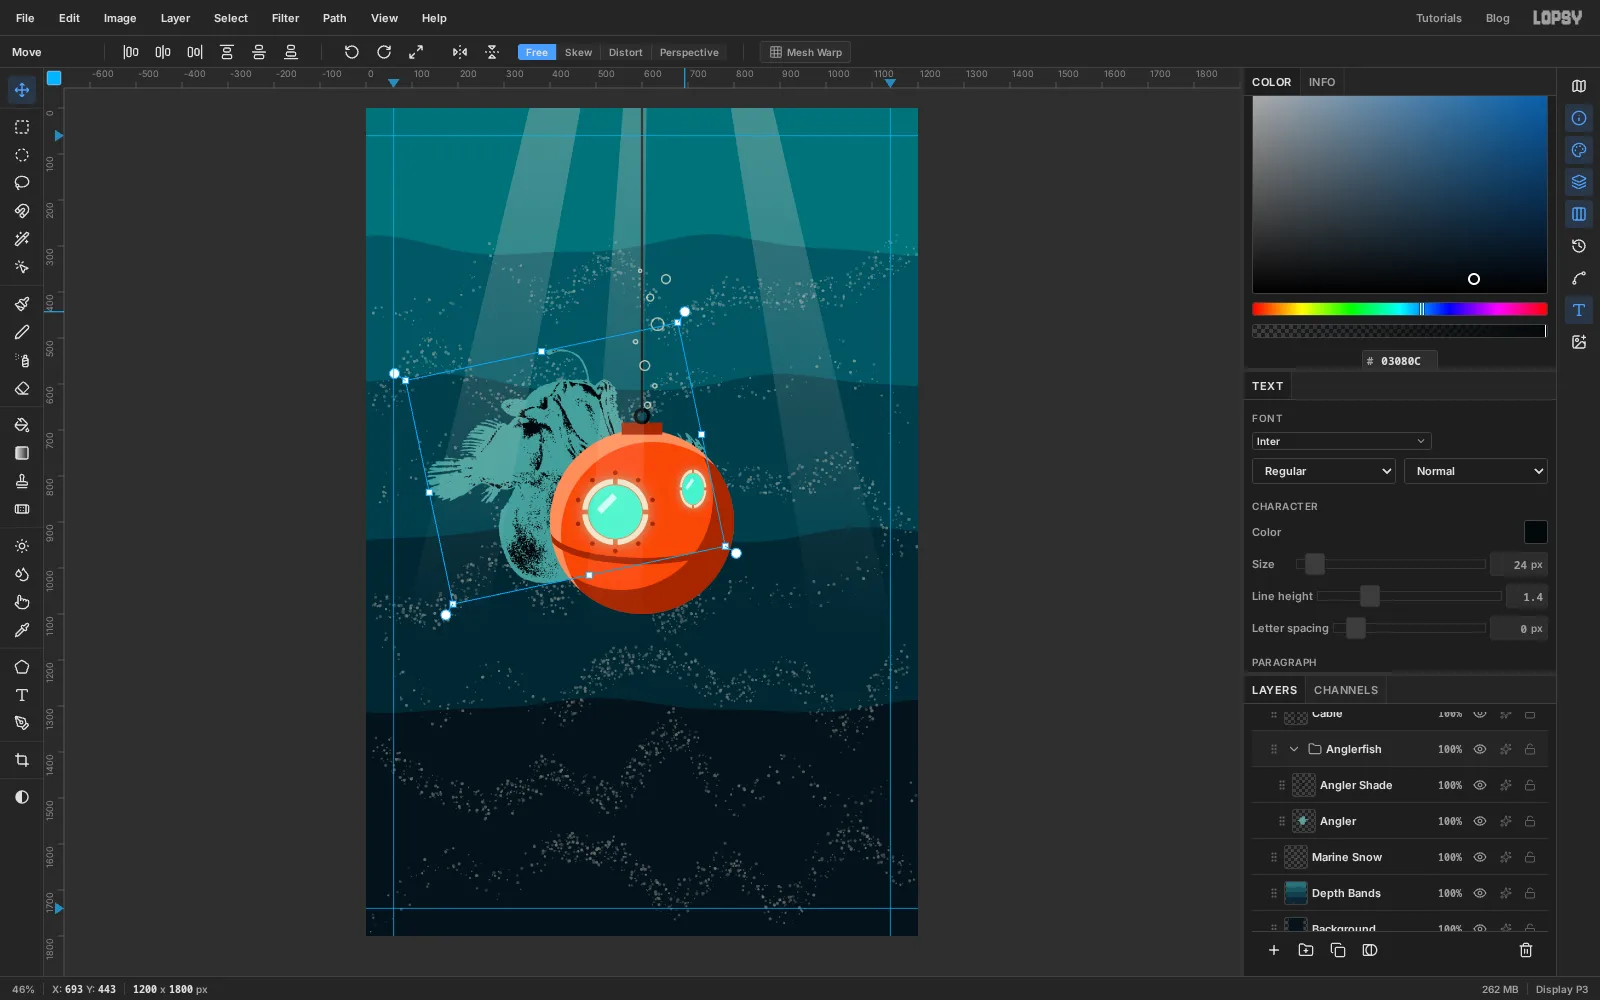
Tilt the fish toward the sphere
Move the pointer just outside the top-right corner of the box until it becomes a crosshair, then drag it anticlockwise about 12°. The open mouth now points up toward the sphere.
-
Move the fish into the deep
Drag from the middle of the fish down into the lower left of the cover, so its body is centred at about
380, 1360and the lure sits a little below and left of the sphere. Press Enter to apply.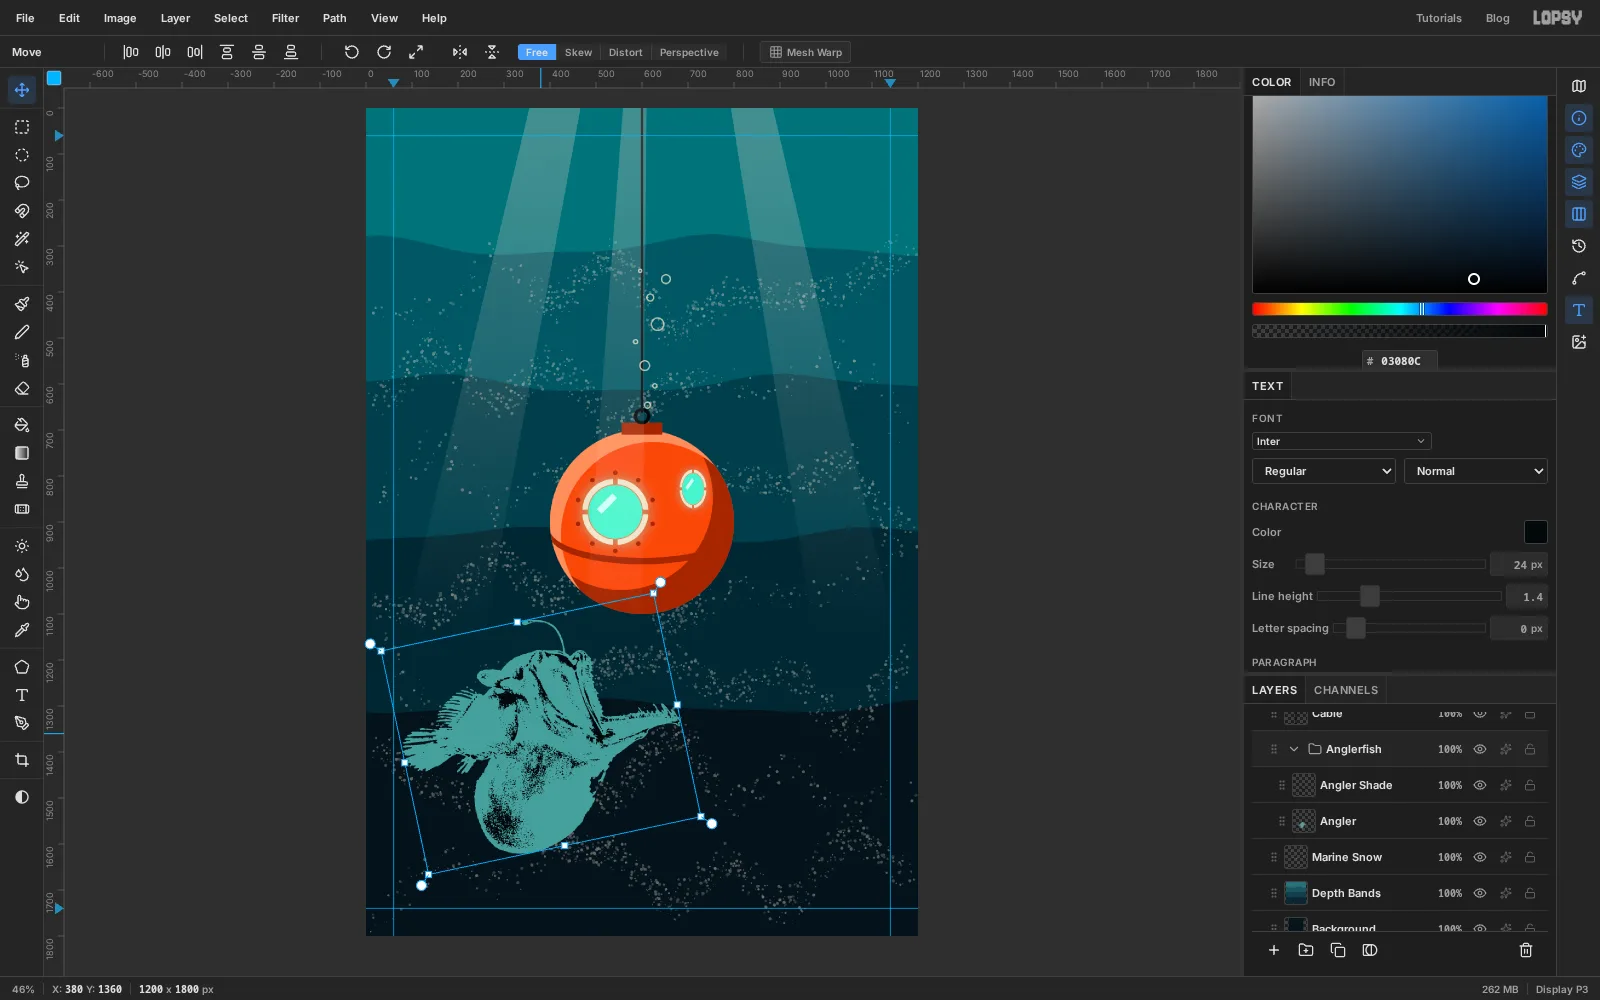
-
Add teeth and an eye
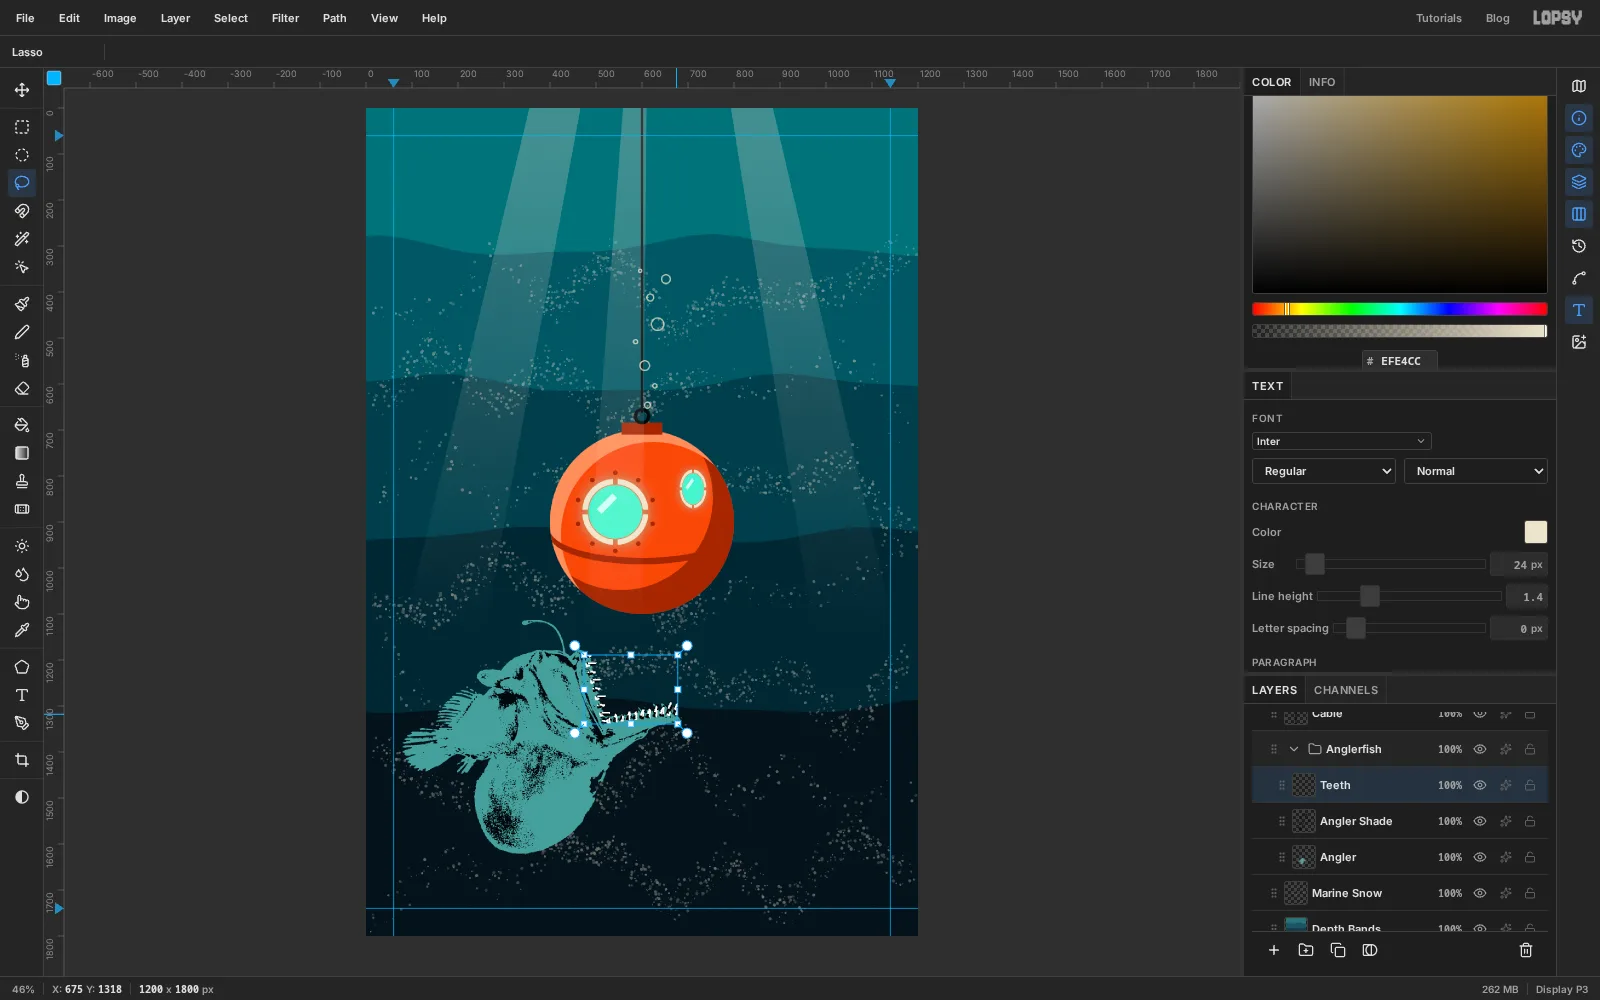
Click the
Angler Shaderow (inside the group), click Add Layer and name itTeeth.With the Lasso, draw a thin triangle along the upper jaw, pointing into the mouth. Hold Shift and add about eight more down that jaw, then about eleven along the lower jaw pointing up. Make them longer toward the tip of the lower jaw. Fill with and press Cmd+D.
For the eye, drag a 14 px circle with the Elliptical Marquee on the head behind the upper jaw and fill it with . Then fill a 6 px circle inside it with .
-
Light the lure
Click Add Layer and name it
Lure. Drag a 22 px circle over the bulb at the end of the fish's lure and fill it with .In the effects drawer turn on Outer Glow with Size
60, Spread10, Opacity80and colour . Then click Rasterize Layer Style. The sphere's windows and the fish's lure are now the same cyan, which ties the two together.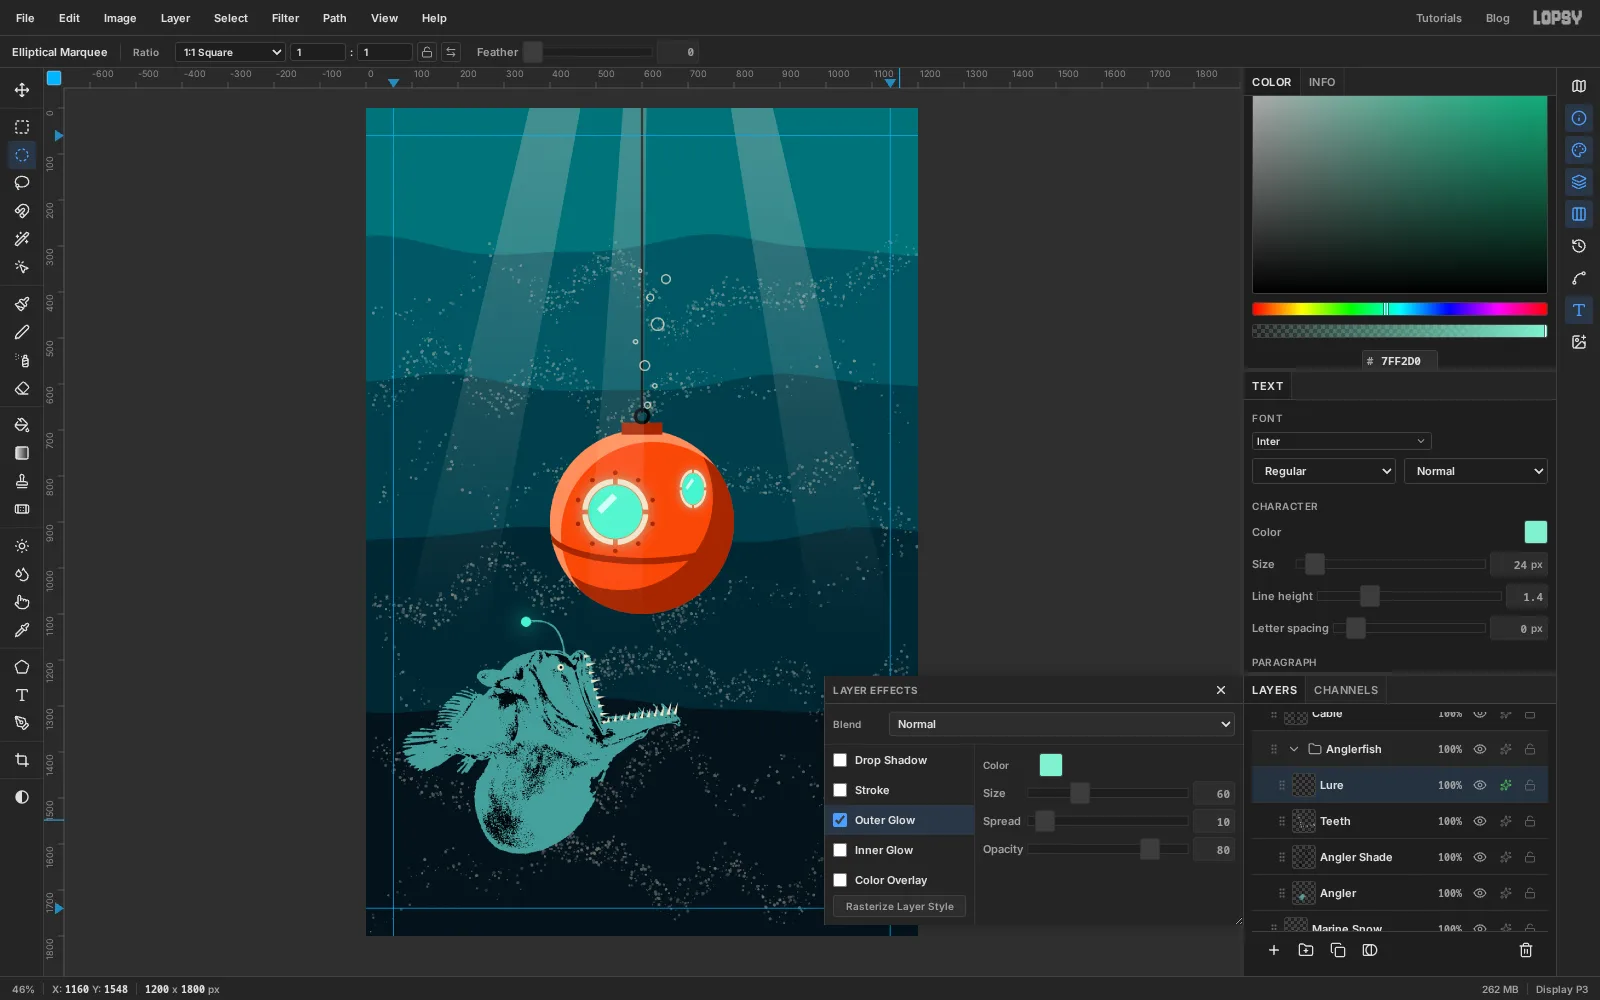
-
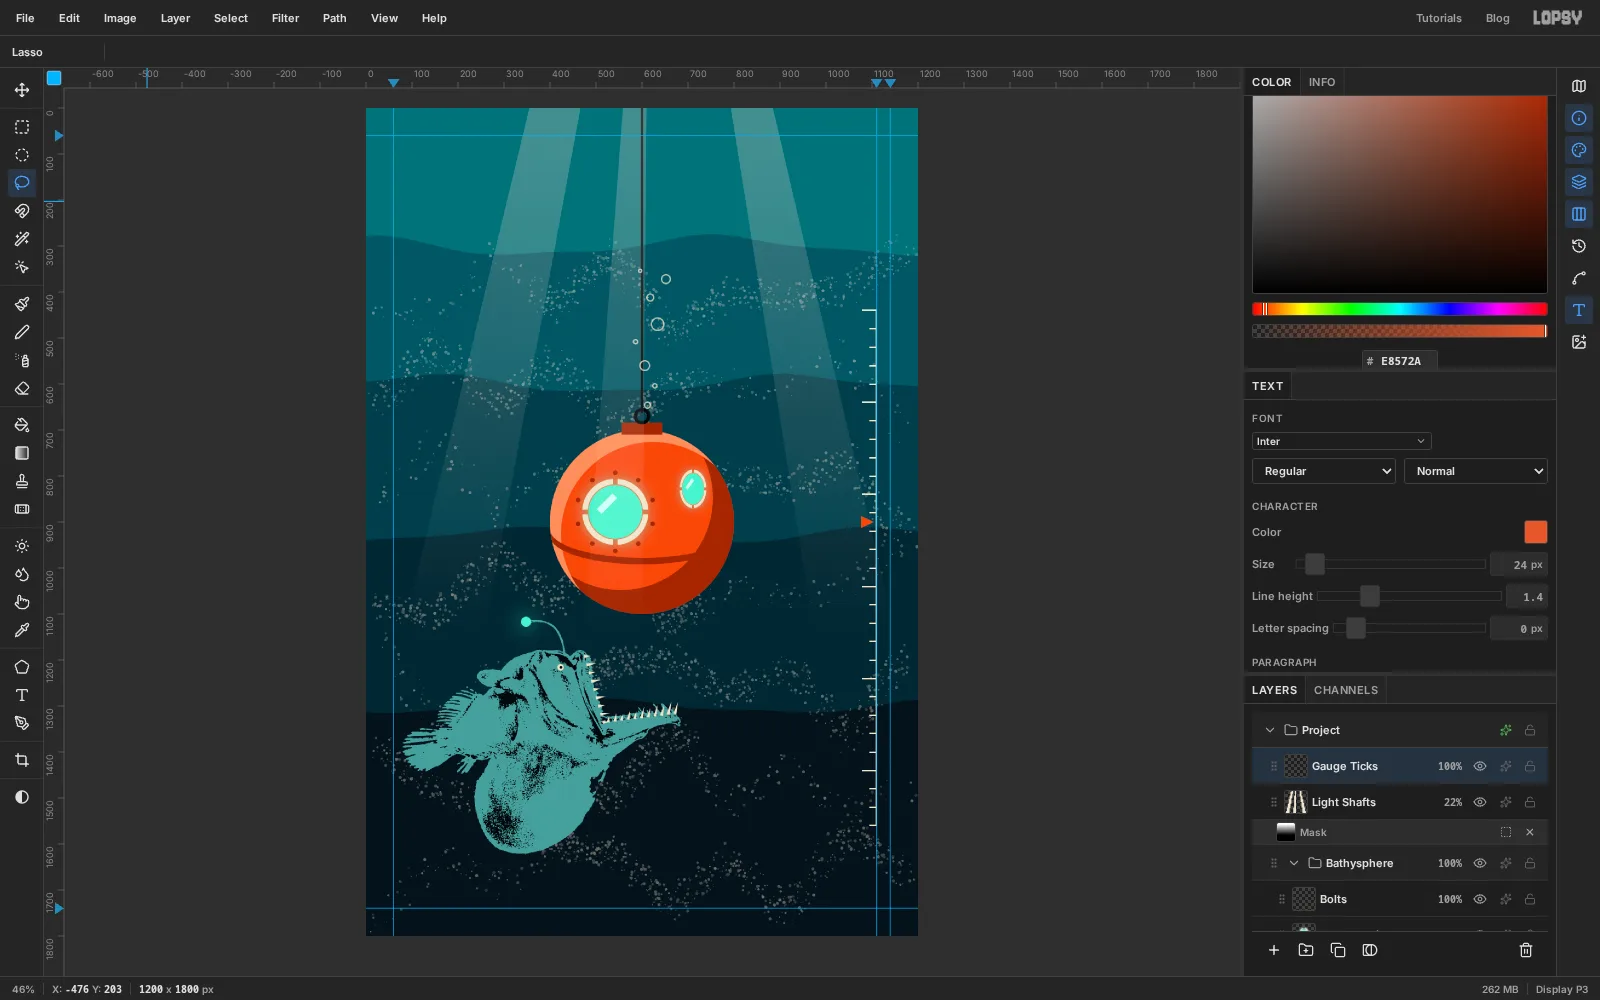
Rule the depth gauge
Click the top ruler at x
1110for a guide. Then click theLight Shaftsrow, click Add Layer and name itGauge Ticks.- Pick the Pencil (N), set Size
3, and use . - Click at
1110, 440and Shift-click at1110, 1560for the rule. - For the ticks, click on the rule and Shift-click to the left of it, every 40 px from y
440down to1560. Make most ticks 14 px long and every fifth one 30 px. - With the Lasso, draw a small triangle pointing right at the rule at y
900, the sphere's centre, and fill it with .
- Pick the Pencil (N), set Size
-
Label the gauge
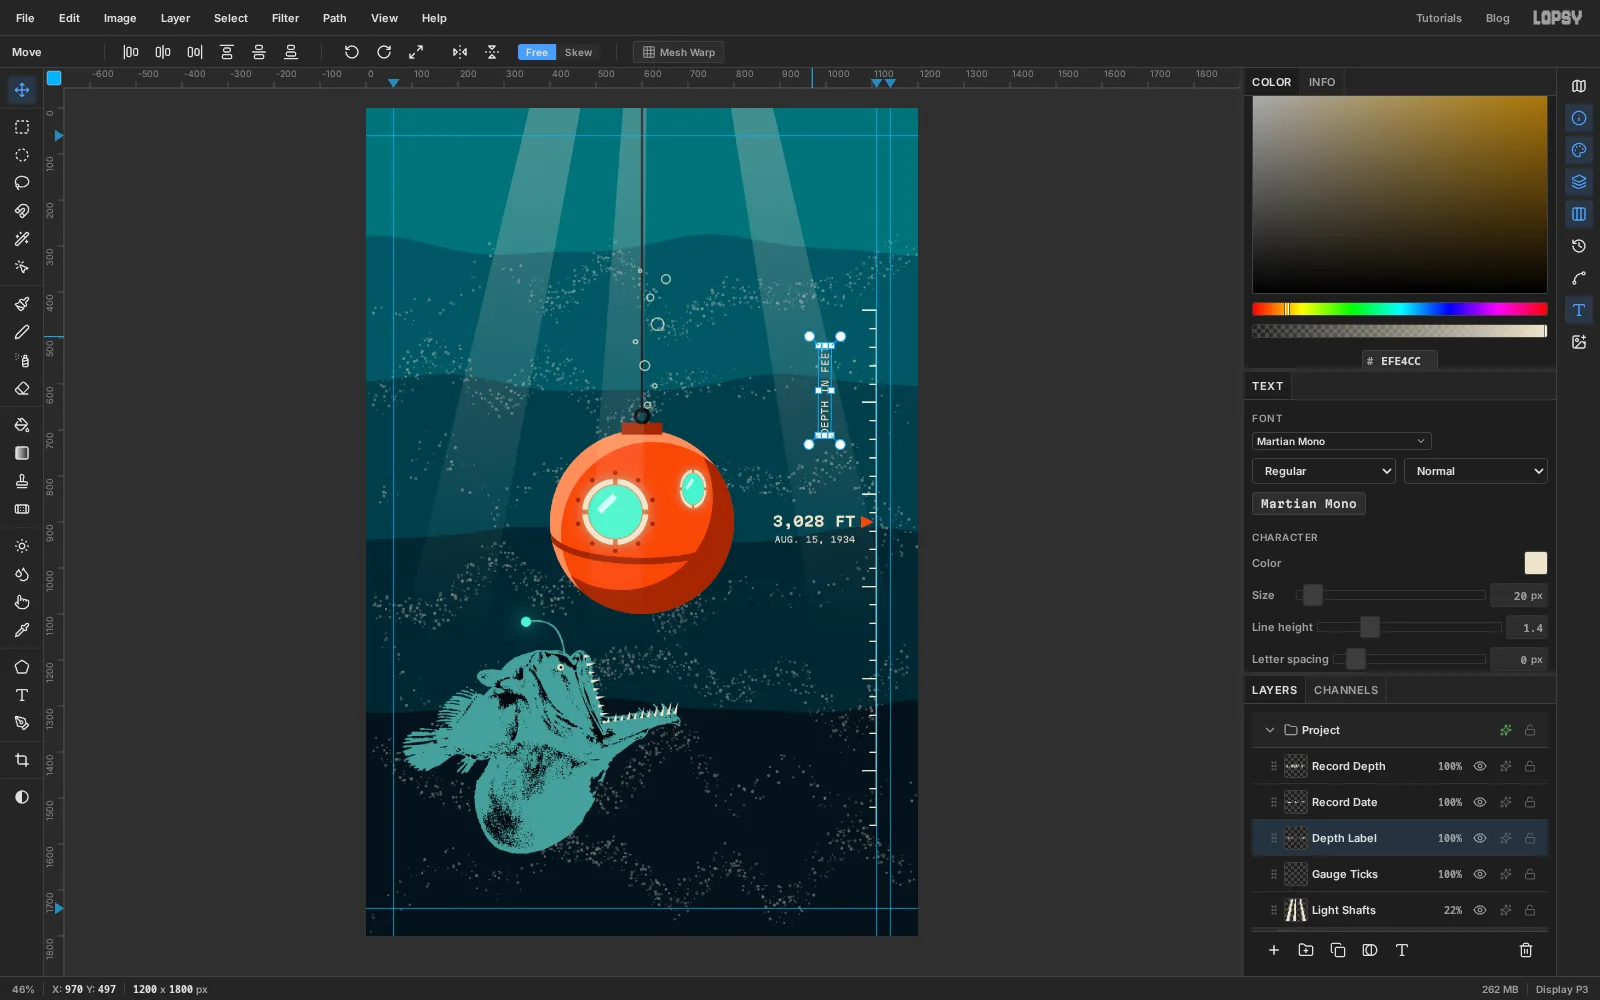
Pick the Text tool (T) and choose Martian Mono.
- At Bold
30px, click in empty water and type3,028 FT. Press Tab to finish and rename the layerRecord Depth. Switch to the Move tool and nudge it with the arrow keys (Shift moves 10 px at a time) until it sits just left of the orange pointer and lined up with it. - Click a raster layer such as
Gauge Ticksfirst, so the Text tool starts a new layer instead of editing the last one. Then set Regular18. Click in clear water about 100 px below the first label. If you click right under it, the click lands inside the3,028 FTtext box and adds to that line instead. TypeAUG. 15, 1934, press Tab, rename itRecord Date, then nudge it up under3,028 FTwith their right edges lined up. - Again from
Gauge Ticks, typeDEPTH IN FEETat20px, press Tab and rename itDepth Label. With the Move tool, drag the rotation handle at the top-right corner anticlockwise to stand it on end at -90°. Press Enter and nudge it beside the top of the rule.
- At Bold
-
Set the title
Click
Gauge Ticksagain. Pick the Text tool, choose Big Shoulders Stencil at Black, and use . Click near the top left and typeBATHYSPHERE, then press Tab. Rename the layerTitle. A text layer is named after its words until you rename it, and shorter names make the later steps easier to follow.The title should run from about x
90to1110, inside the margins. With the text layer selected, change the Size in the options bar until it fits. Here it was203px. Then nudge it with the Move tool until it's centred and its top sits at y78.To make SPHERE orange, pick the Text tool and click inside the word. Press End, then hold Shift and press Left six times to select
SPHERE.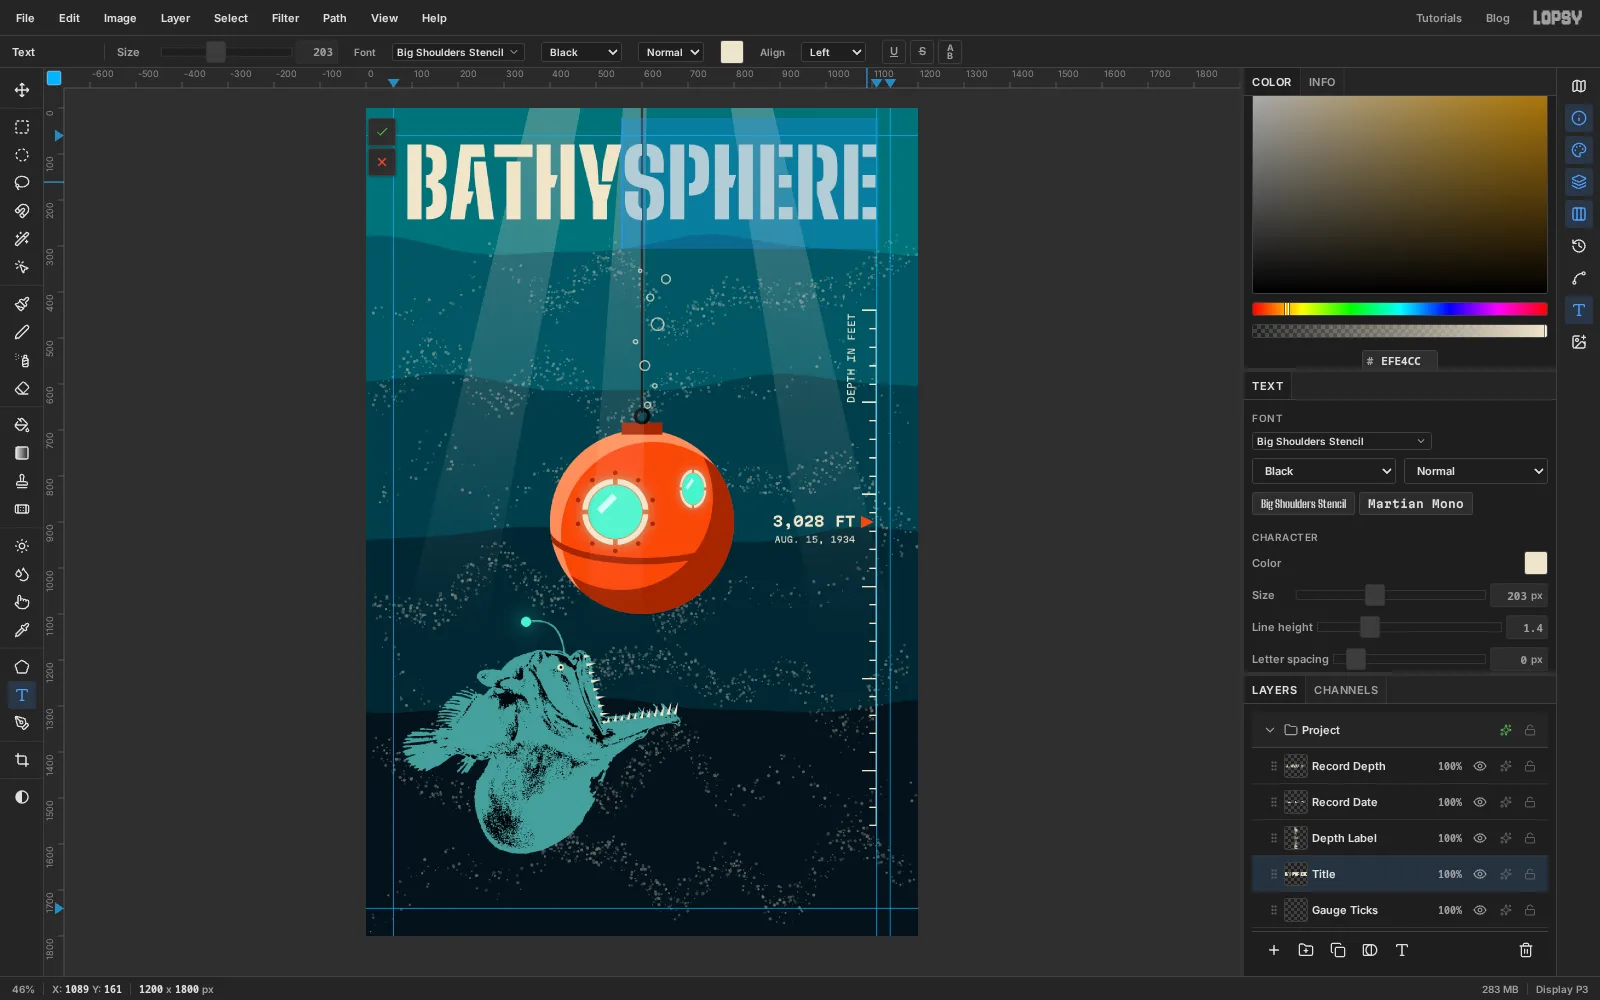
-
Recolour SPHERE and add the offset plate
With
SPHEREstill selected, click the Text color swatch in the options bar and typeE8572Ain its hex field. Only the selected letters change. Press Tab to finish.Use the Text color swatch for this, not the Color panel. While you're typing, the Color panel sets the colour of the whole text.
Open the title's effects drawer and turn on Drop Shadow: Offset X
6, Offset Y6, Blur0, Spread0, Opacity100, and colour . With no blur it reads as a second stencil plate sprayed slightly off register, not as a soft digital shadow.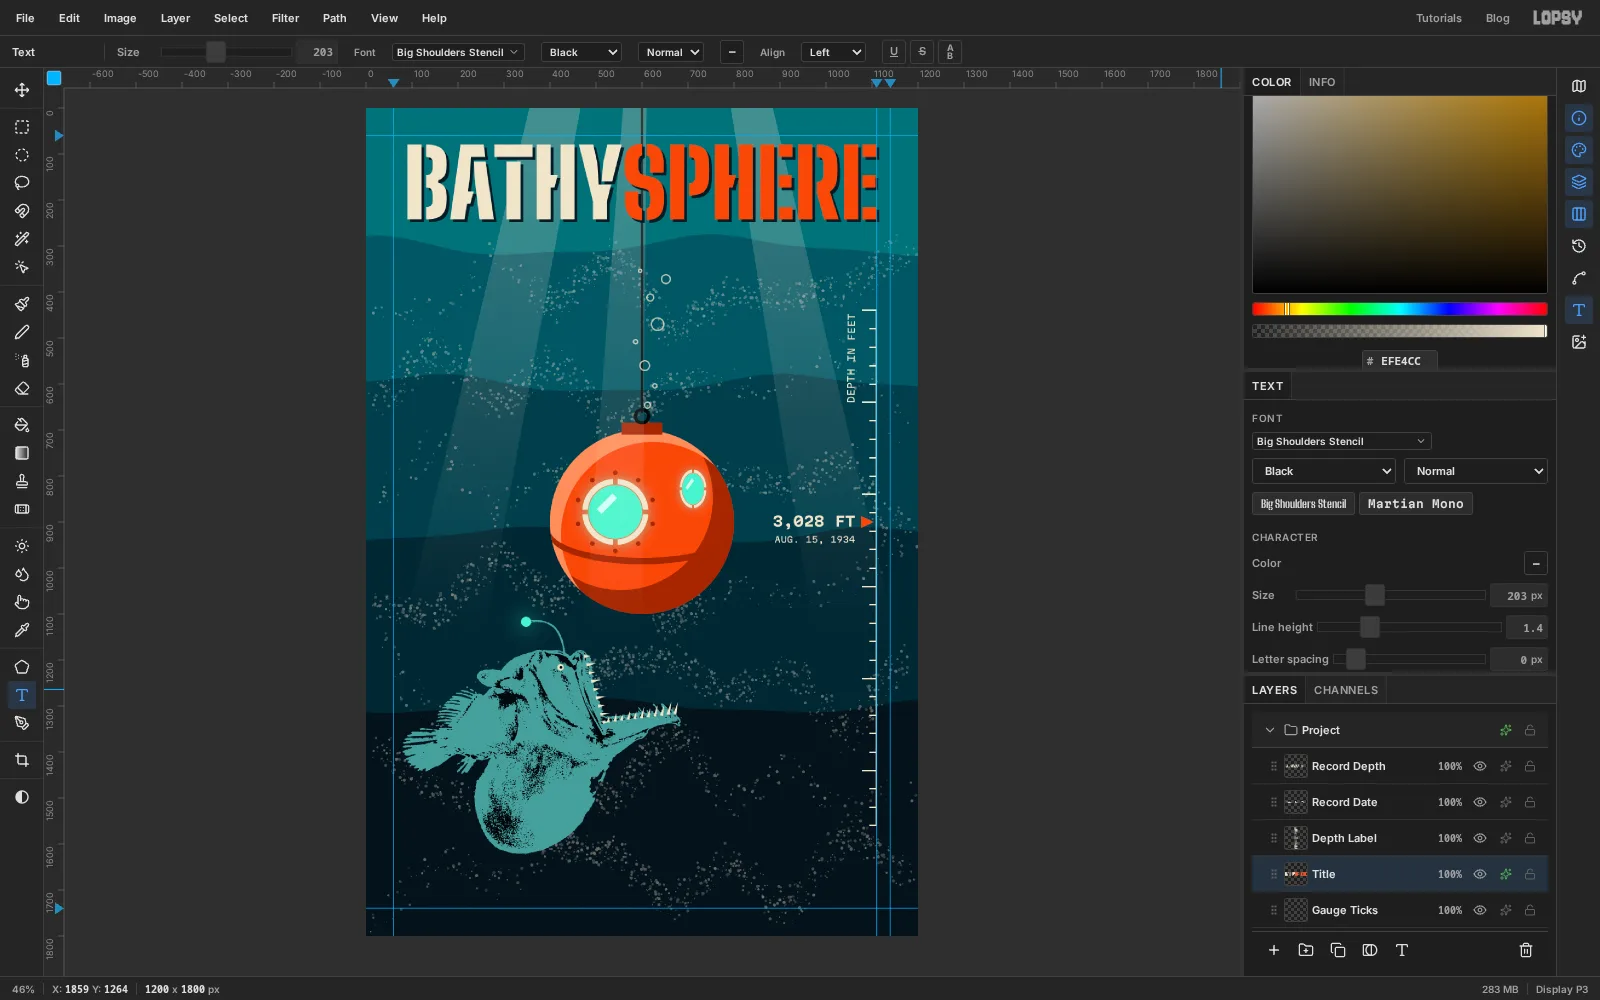
-
Set the tagline, A NOVEL and the author
Start each line from
Gauge Ticksso you get a fresh text layer each time.- Tagline. Choose Stardos Stencil Regular at
34px and set Align to Right. With right alignment the click point is the right end of each line. Click at1040, 1190and typeHALF A MILE DOWN,, press Enter, and typeTHE LIGHT RUNS OUT.. Press Tab and rename the layerTagline. In the Text panel set Letter spacing to2. That leaves a clean 40 px gap between the text and the long gauge ticks. - A NOVEL. Set Align back to Left. In Martian Mono Regular
22, click at about520, 296, just under the middle of the title, and typeA NOVEL. Press Tab, rename itA Novel, and set Letter spacing to12. Nudge it with the arrow keys until its top sits at y300and the cable drops through the gap after the A rather than through a letter. - Author. In Stardos Stencil Bold
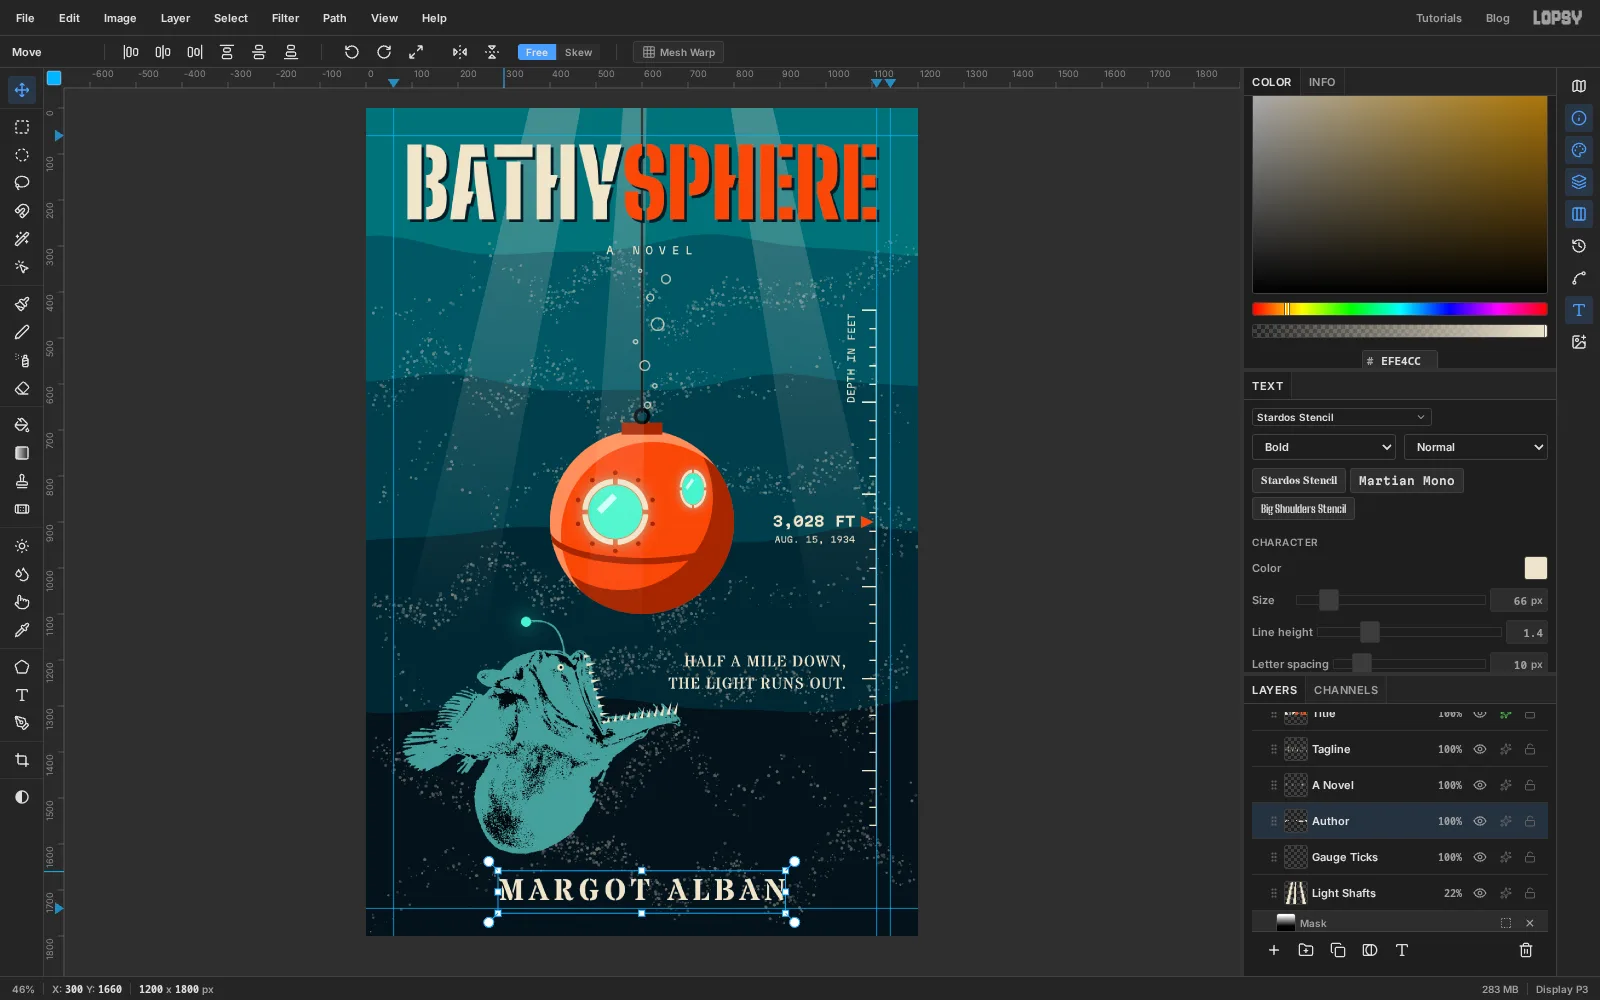
66, click near the bottom left at about300, 1660, typeMARGOT ALBAN, press Tab and rename itAuthor. Set Letter spacing to10. Then nudge it with the arrow keys until it's centred, with its left edge at about x290and its right edge at about910, and the bottom of the letters at y1722. That gives it the same 78 px margin as the title has at the top.
Letter spacing carries over to the next text you type, so set it on every line.
- Tagline. Choose Stardos Stencil Regular at
-
Spray the overspray
Overspray is the paint that mists past the edge of the stencil card. A little of it makes the art look sprayed.
- Click
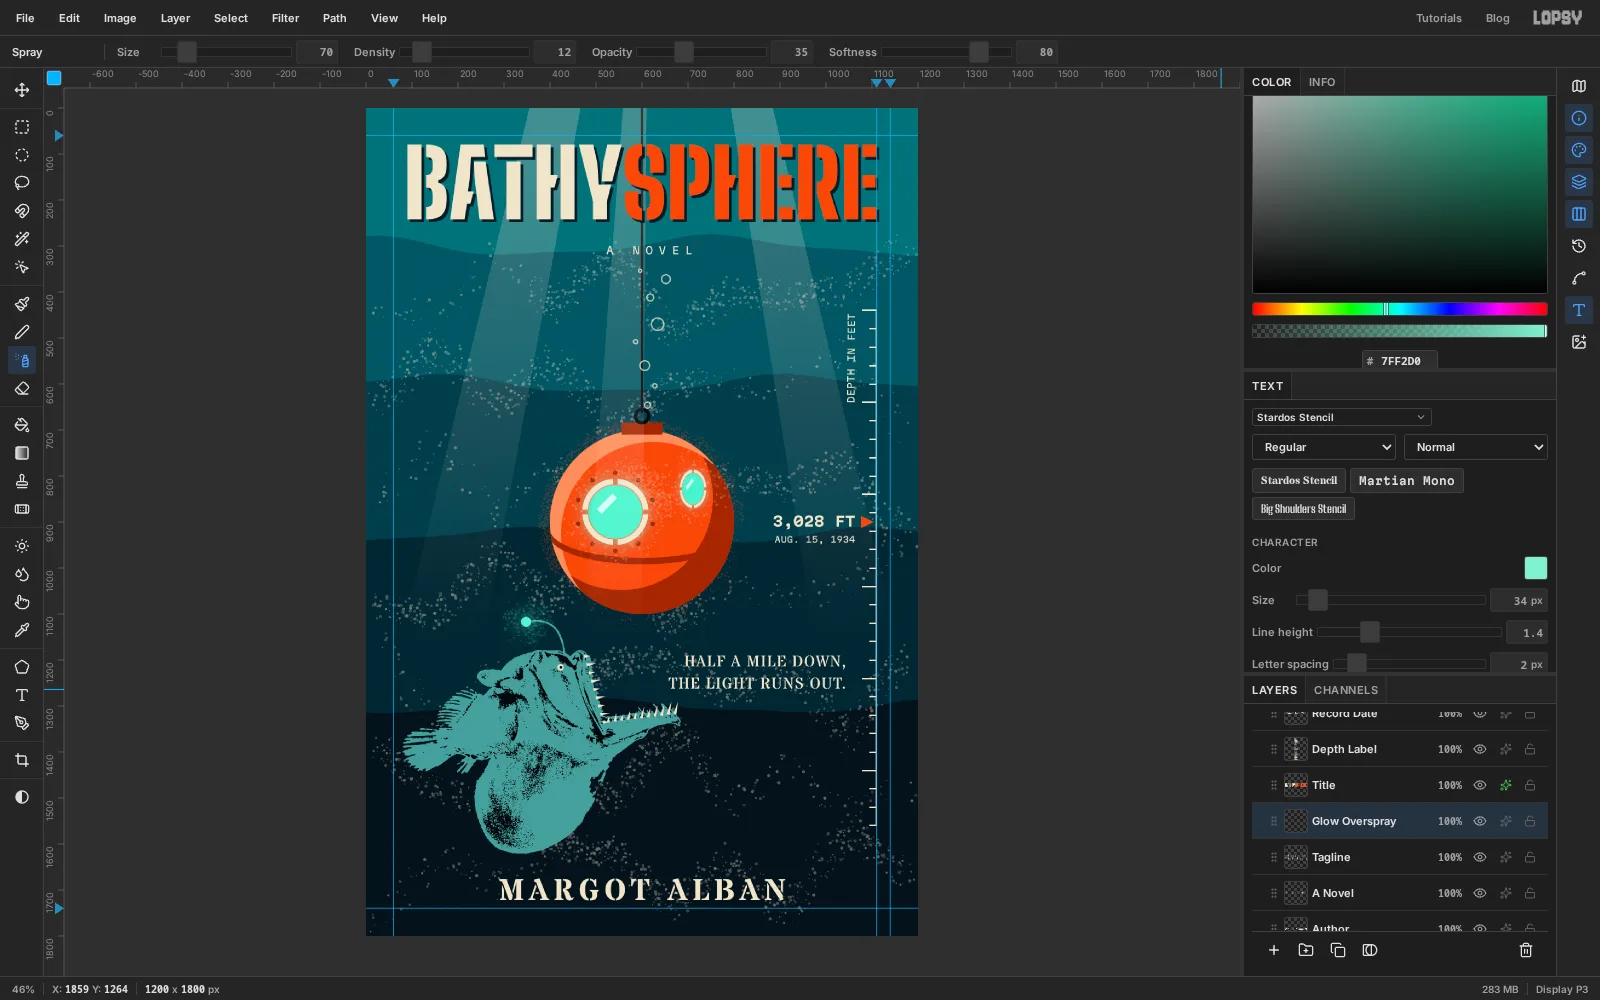
Marine Snow, click Add Layer and name itHull Overspray. Pick the Spray tool and set Size44, Density12, Opacity40and Softness60, with . Drag once all the way around the hull, just outside its edge. This layer sits under the sphere, so only the mist outside the edge shows. - Click
Tagline, click Add Layer and name itGlow Overspray. Set Size70, keep Density at12, and set Opacity35and Softness80, with . Circle the lure twice, then go once around each porthole. Set the layer's blend mode to Screen.
- Click
-
Add paper grain and spray mottle
Click the
Titlerow so the texture goes above the title and everything under it. The small gauge labels stay crisp above it, which keeps them readable.- Add Layer, name it
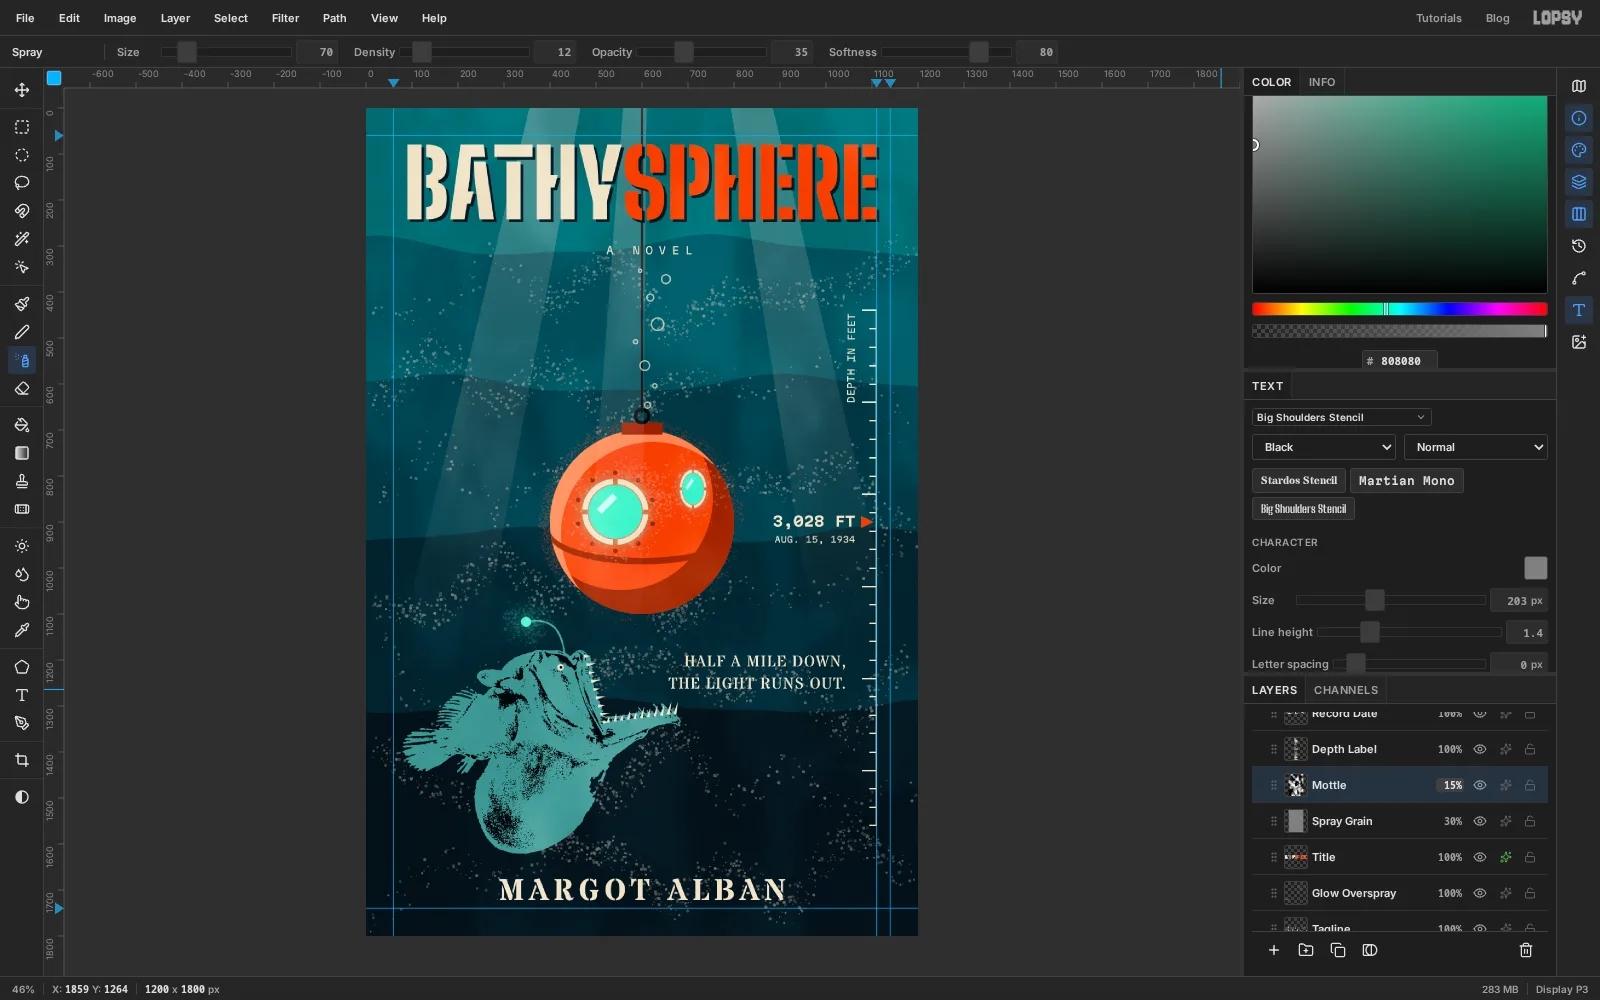
Spray Grainand fill it with . Choose Filter → Add Noise…, set Amount28, pick Mono and Gaussian, and click Apply. Set the blend mode to Overlay and the opacity to30%. Mid-grey disappears in Overlay, so only the grain shows. - Add Layer, name it
Mottle, and choose Filter → Clouds… with Scale8. Set it to Soft Light at15%. Real spray paint never goes on perfectly evenly.
Keep the mottle subtle. Much past 20% and the whole cover looks dirty.
- Add Layer, name it
-
Finish with a vignette
Click the
Projectrow at the top of the Layers panel and open its drawer. On a group it shows adjustments instead of effects. Click Add Adjustment, choose Vignette and set it to35. The corners darken a little and pull the eye in toward the sphere.Choose File → Save Project to keep the layers, and File → Quick Export PNG for the finished cover.