Make a Spray-Stencil Western Movie Poster
Turn a 1900s cowboy photo into cream, rust and ink stencil plates in Lopsy and spray a neo-western one-sheet onto corrugated tin, with drips and overspray.
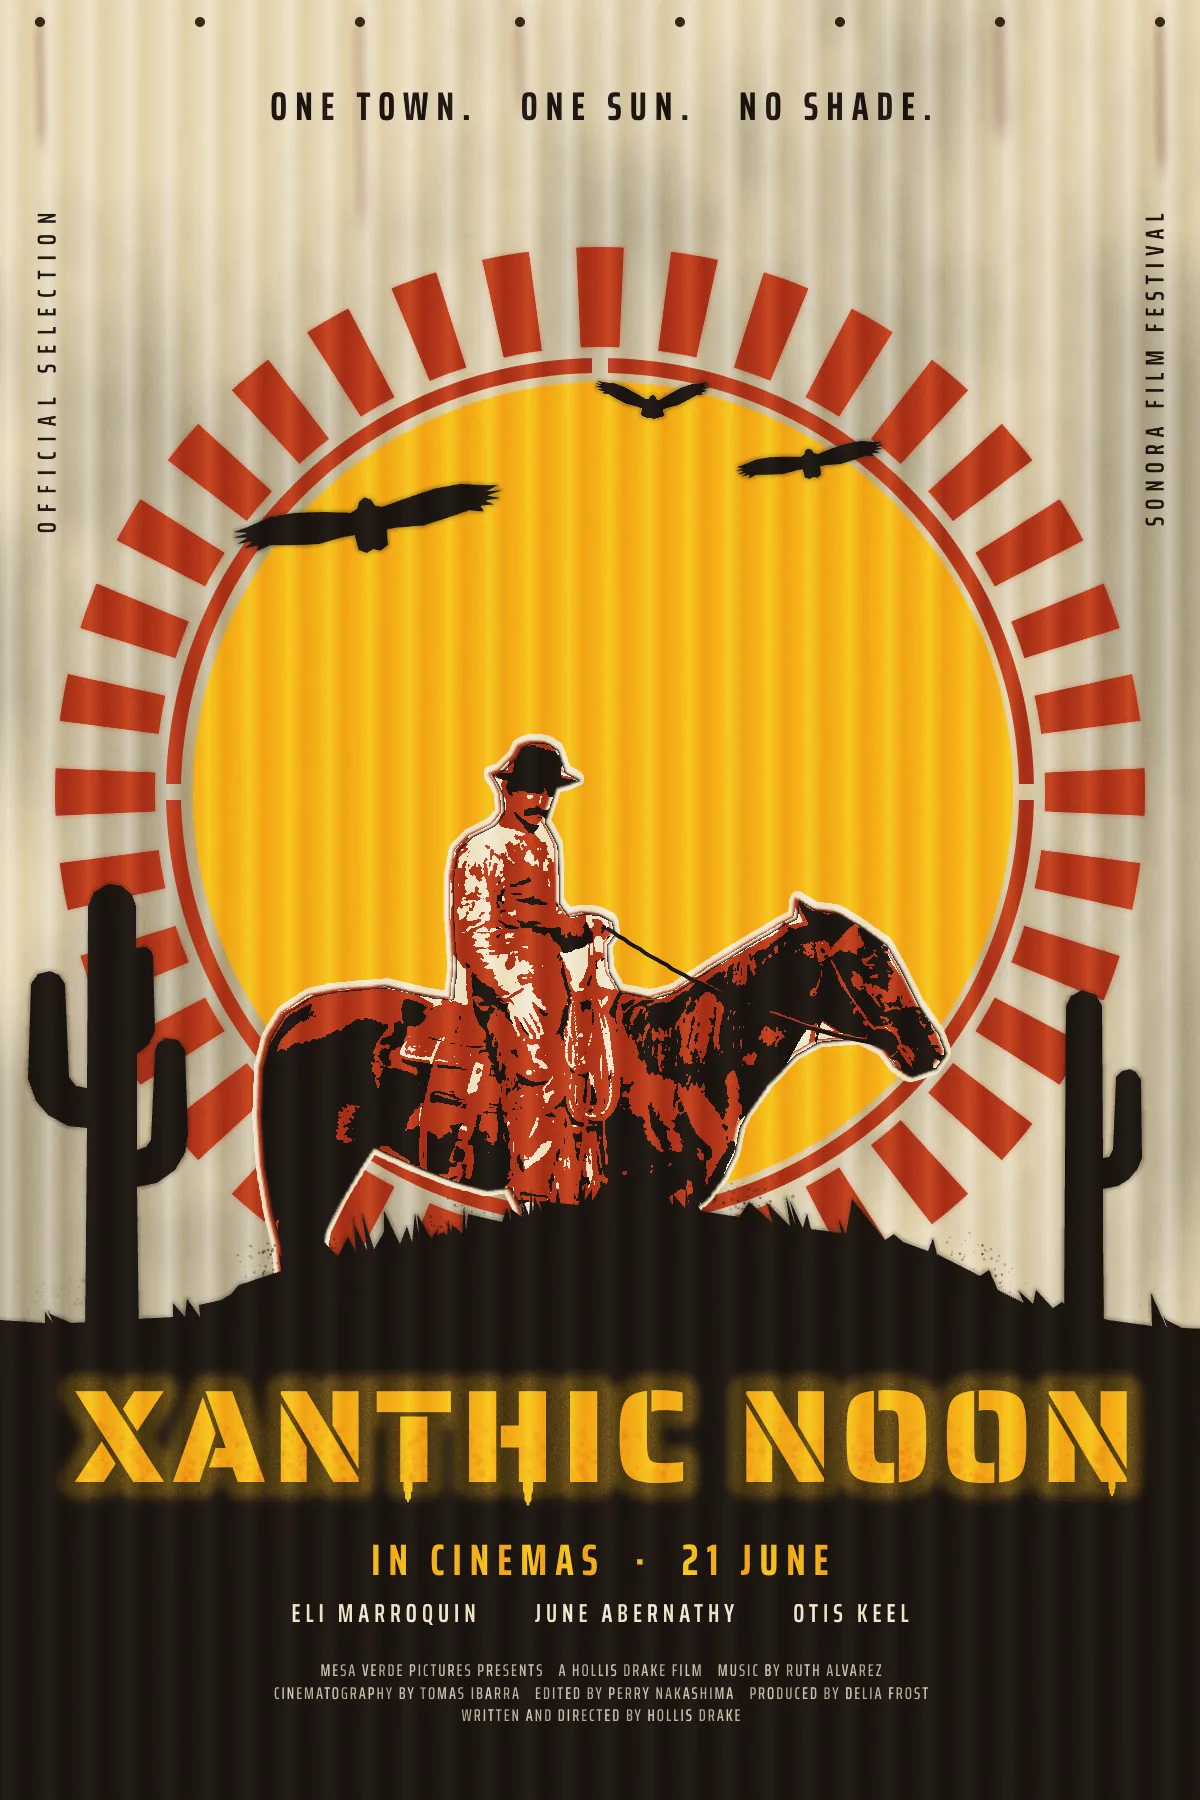
Street artists spray stencils in layers. Each colour has its own cut-out sheet, called a plate. The lightest plate goes on first and the darkest last. The plates never land in exactly the same place twice, and the paint mists past the edges of the card and runs where it pools. Those accidents make a stencil look sprayed rather than printed, so in this tutorial you'll add them on purpose.
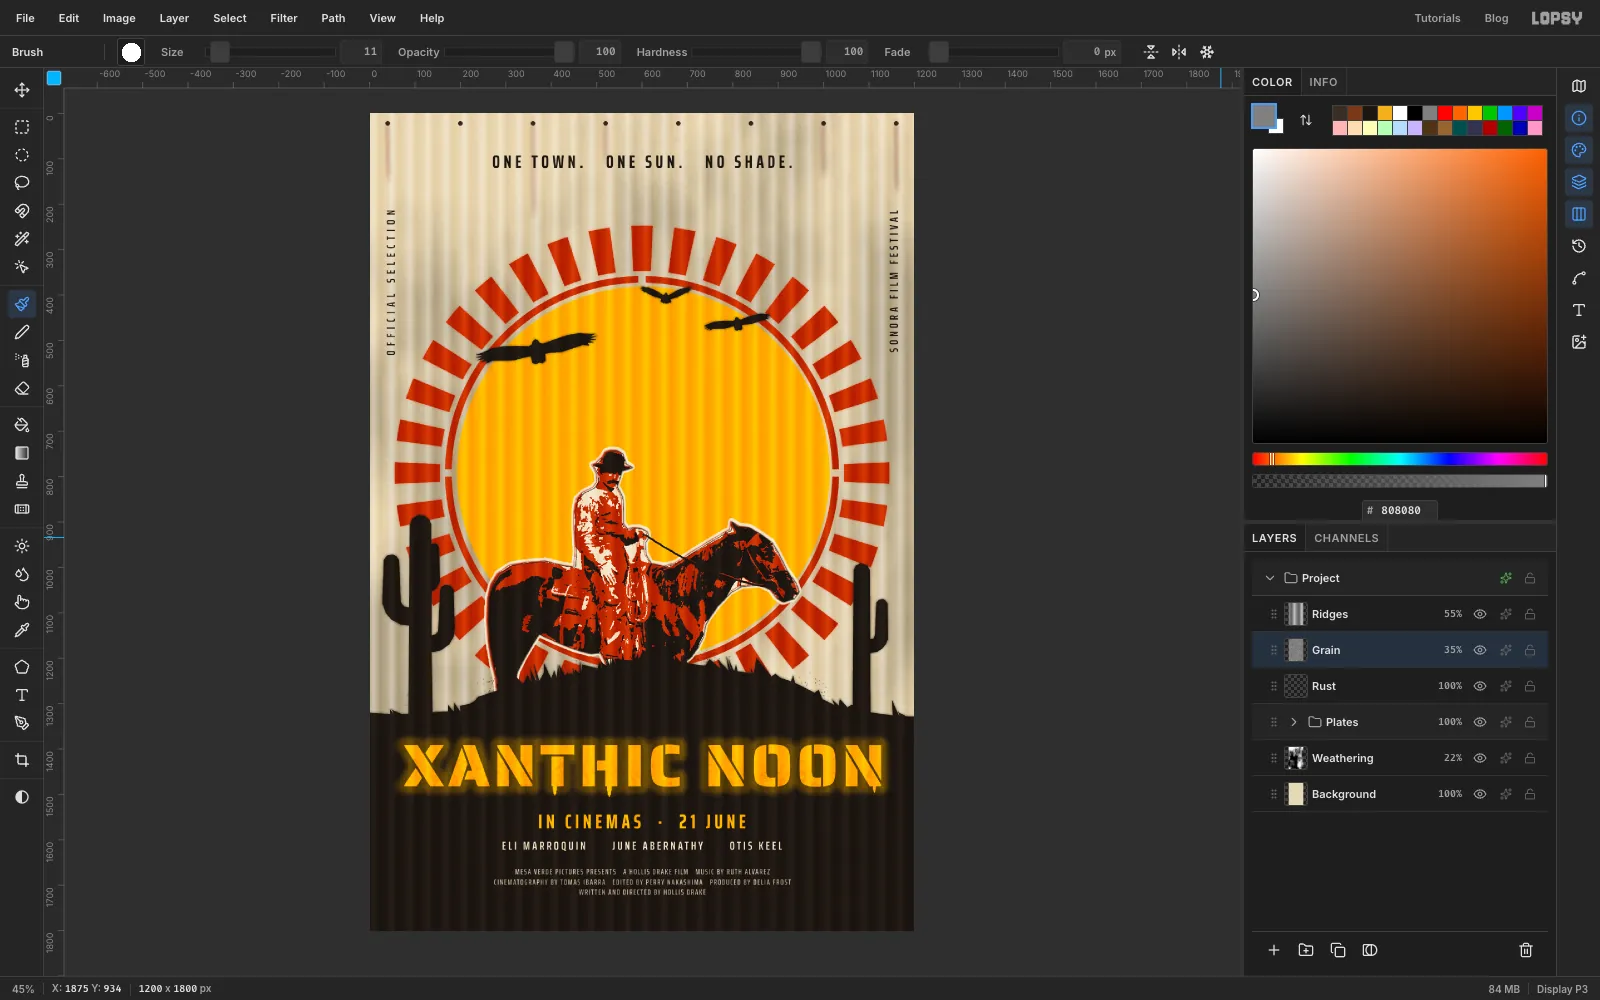
The poster is a one-sheet for Xanthic Noon, an imaginary neo-western. (Xanthic means yellowish.) It's 1200 × 1800 px, the 2:3 shape of a cinema poster. It's built from:
- a corrugated tin wall with a sun-bleached base coat, rust streaks and nail heads
- a stencilled sun: rust rays, a ring with stencil bridges, and a yellow disc
- a cowboy on horseback, cut from a real photo and split into three plates
- a black hill with grass, two saguaros and three vultures
- a stencil title with overspray and drips, plus the tagline, release line and billing block
The rider is from Cowboy on horse in Field BC.jpg on Wikimedia Commons. It's a public-domain photo from about 1900 of a man in a bowler hat on a dark horse, 733 × 566 px. Download the original size.
The tools you'll use:
- Define Pattern and Fill with Pattern, Clouds, Add Noise, Sunburst, Gaussian Blur, Motion Blur, Threshold and Desaturate
- the Pen tool with Path to Selection, the Magic Wand with Contiguous off, and the Rectangular and Elliptical Marquee's exact-corners dialog
- Select → Inverse, Grow and Feather, and Cmd-click on a layer thumbnail to load a layer's shape
- scaling, moving and rotating with the Move tool's handles, Image → Flip Horizontal, and Copy / Paste
- the Brush, Spray and Eraser, with Shift-click for straight strokes
- live text in Saira Stencil and Saira Extra Condensed, turned with the rotation handle
- Outer Glow and Color Overlay effects, and the Overlay and Multiply blend modes
- groups, which you move as one piece
The palette is four spray colours on an old base coat, plus a few accents:
-
Wall base coat
-
Xanthic yellow
-
orange spray
-
Rust
-
Ink
-
Stencil cream
-
billing grey
-
Rust streaks
-
nail heads
-
grain grey
-
Paint the base coat
Choose File → New, keep Pixels, and make the document 1200 wide and 1800 high with a white background.
Click the
Backgroundlayer, set the foreground colour to in the Color panel and choose Edit → Fill. This is the tired paint that was on the tin before anyone sprayed a stencil over it.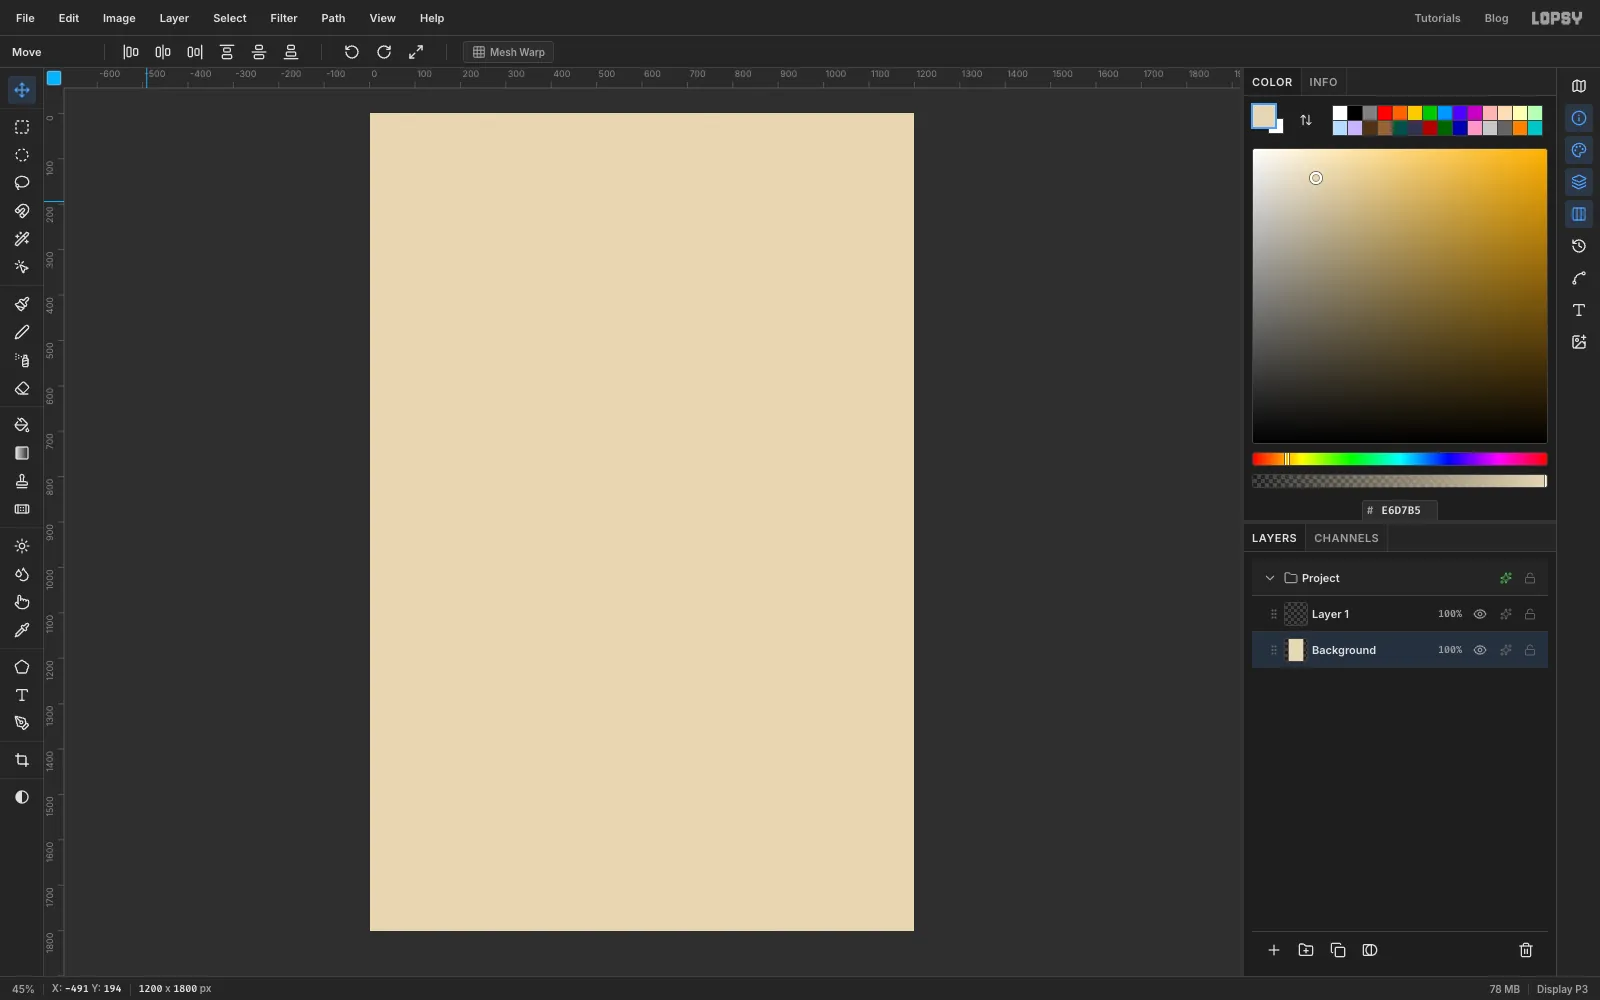
-
Make one corrugation as a tile
Corrugated tin is a row of identical ridges, so you only need to make one and repeat it.
- Click
Layer 1and rename itRidges(double-click its name). - Pick the Rectangular Marquee and click once on the canvas without dragging. In the dialog, type From
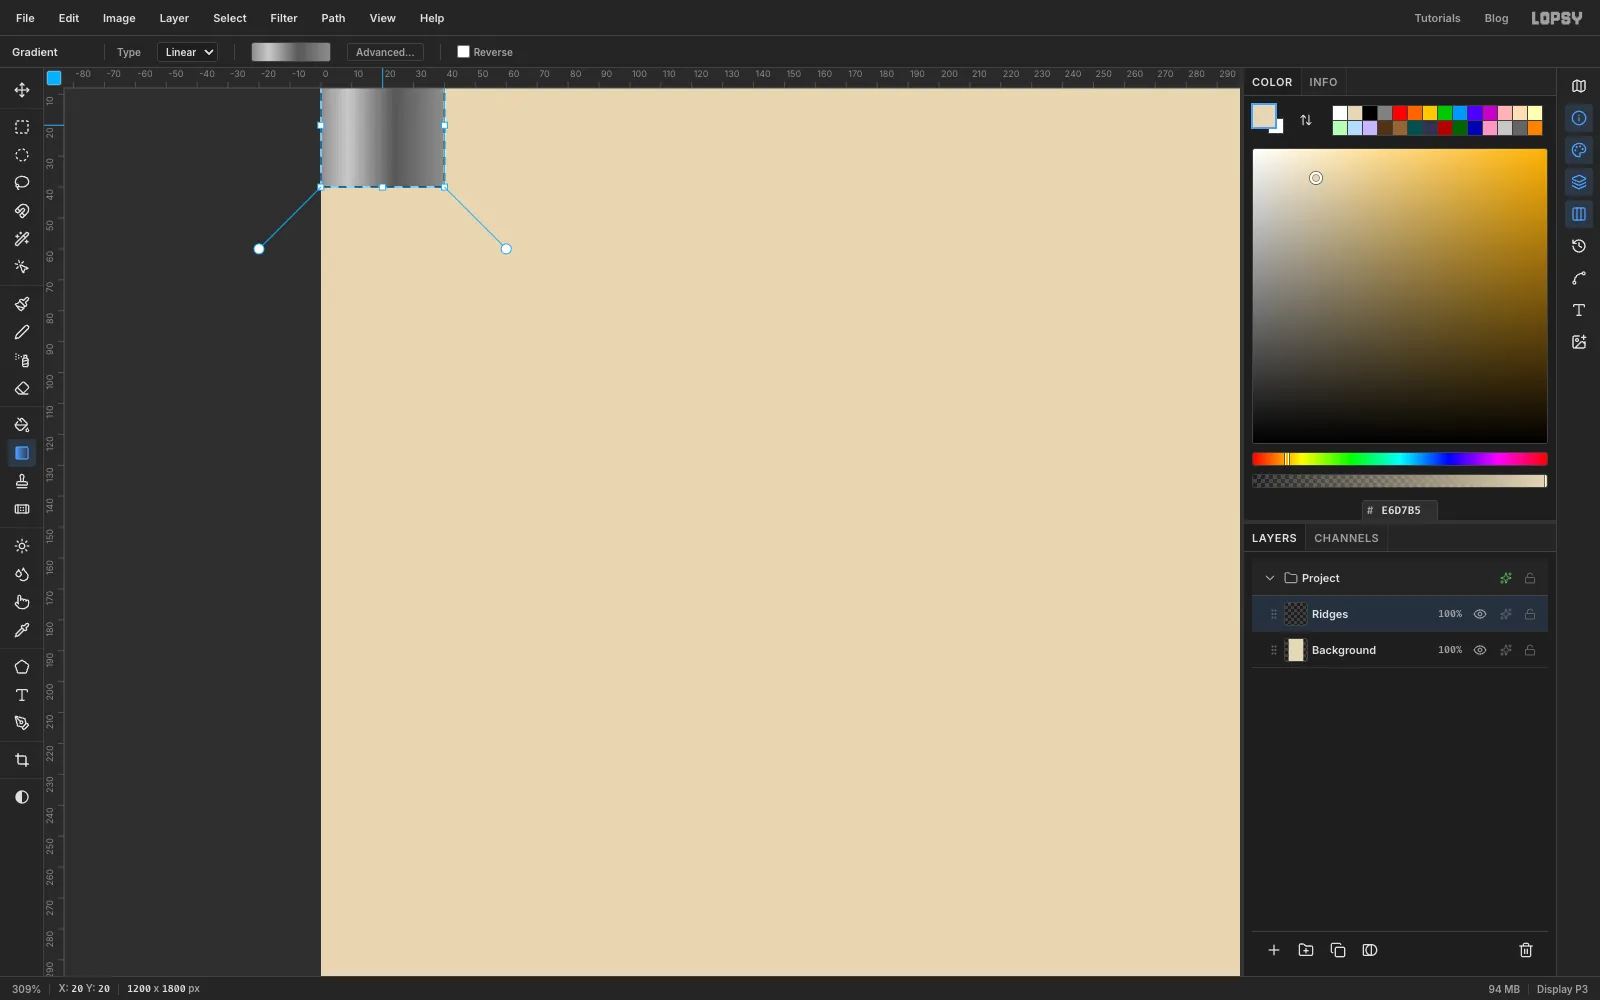
0,0and To40,40, then click Select. - Pick the Gradient tool, set Type to Linear and click Advanced…. Make four stops: at the left end, at about 22%, at about 60%, and at the right end. Click Done.
- Drag from the left edge of the square to its right edge.
The two ends share the same grey, so the tiles will join without a seam.
- Click
-
Fill the wall with ridges
- With the square still selected, choose Edit → Define Pattern, then deselect with Cmd+D.
- Choose Edit → Fill with Pattern…. Your new tile is selected in the dialog, so click Apply. It repeats across the whole layer.
- Open the layer's effects with the sparkle button on its row, set Blend to Overlay, and close the drawer. Click the
Ridgesopacity and set it to 55%.
On Overlay, the mid grey disappears and only the light and dark parts of each ridge show. Keep
Ridgesat the top of the stack for the rest of the tutorial, so every coat of paint you spray picks up the ridges too.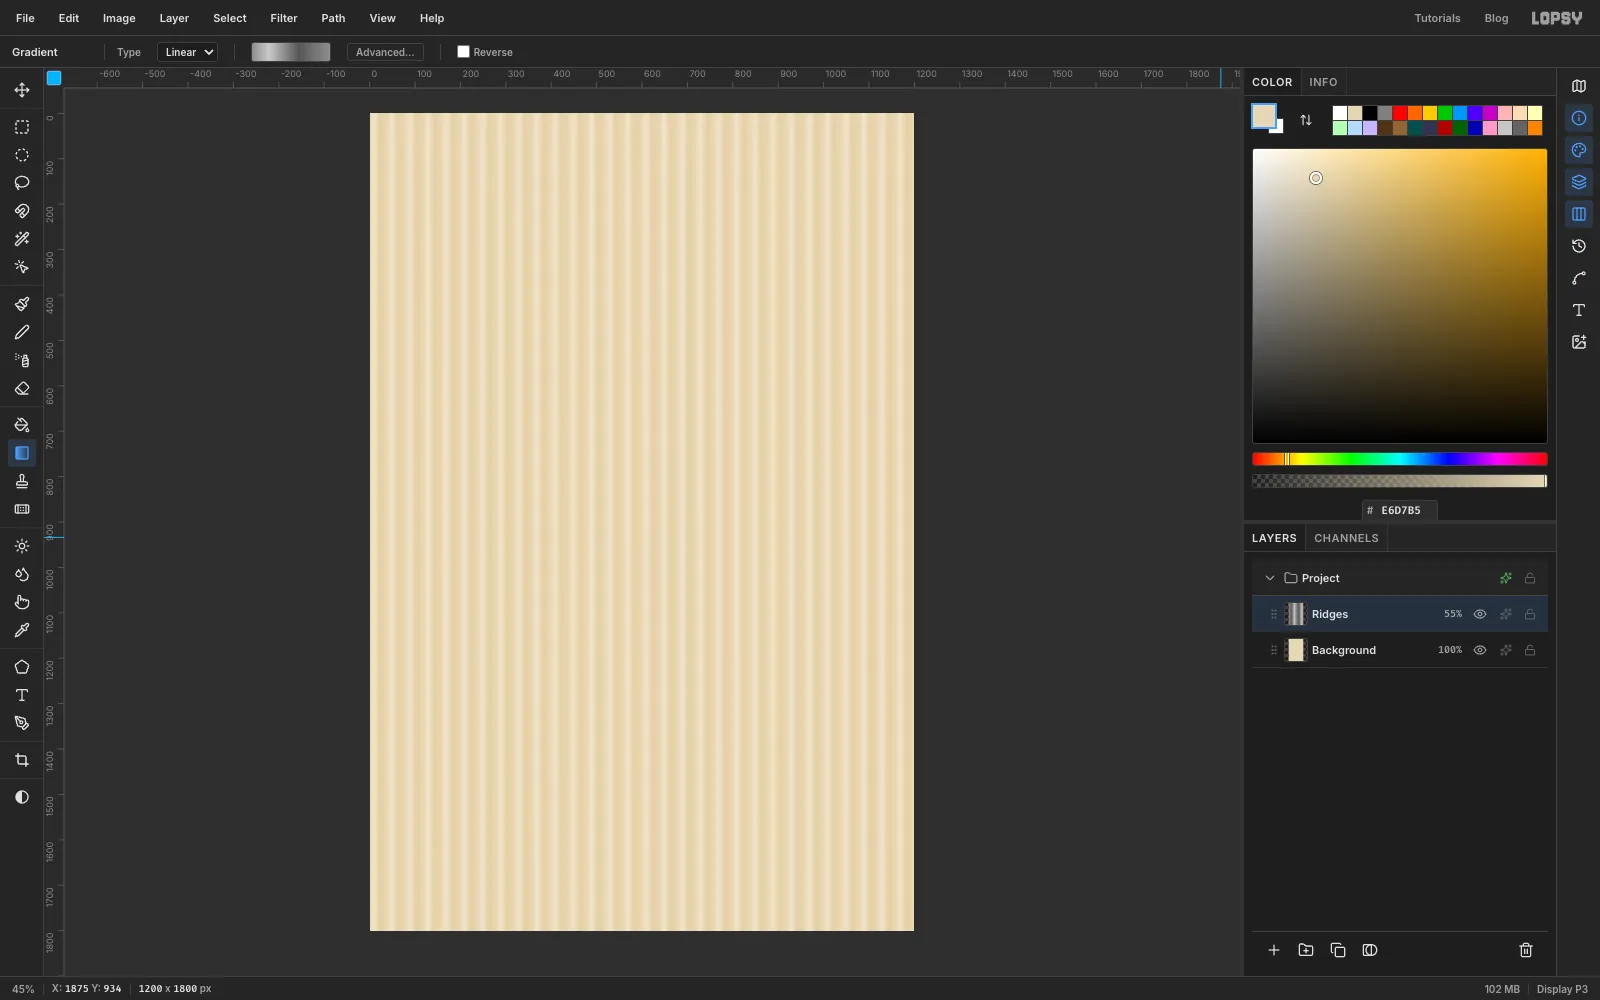
-
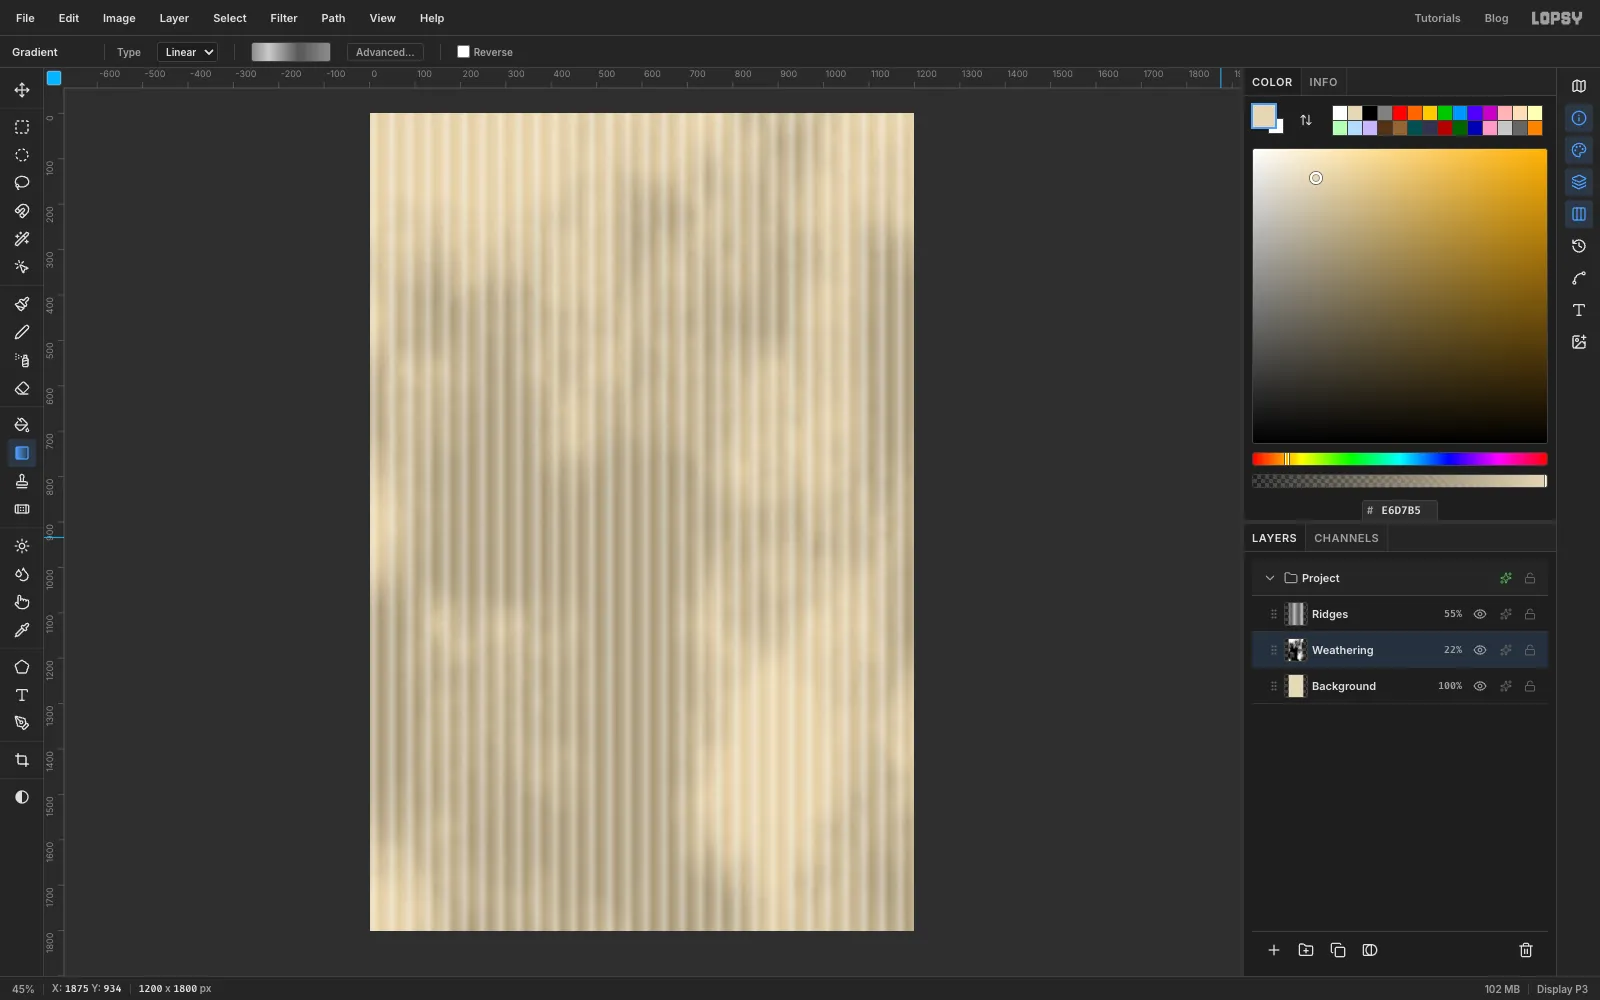
Weather the paint
Click
Backgroundand click Add Layer. Name the new layerWeathering; it sits between the paint and the ridges.- Choose Filter → Clouds… with Scale
4. - Choose Filter → Add Noise…, pick Mono, set Amount to
18, and click Apply. - Set the layer's blend to Multiply and its opacity to 22%.
- Choose Filter → Clouds… with Scale
-
Spray the sun's rays
Every stencil plate goes in one group, so it's easy to keep it under the ridges.
- Click
Weathering, then click New Group at the bottom of the Layers panel and name the groupPlates. - Click Add Layer and name it
Rays. It goes inside the group. - Set the foreground to rust .
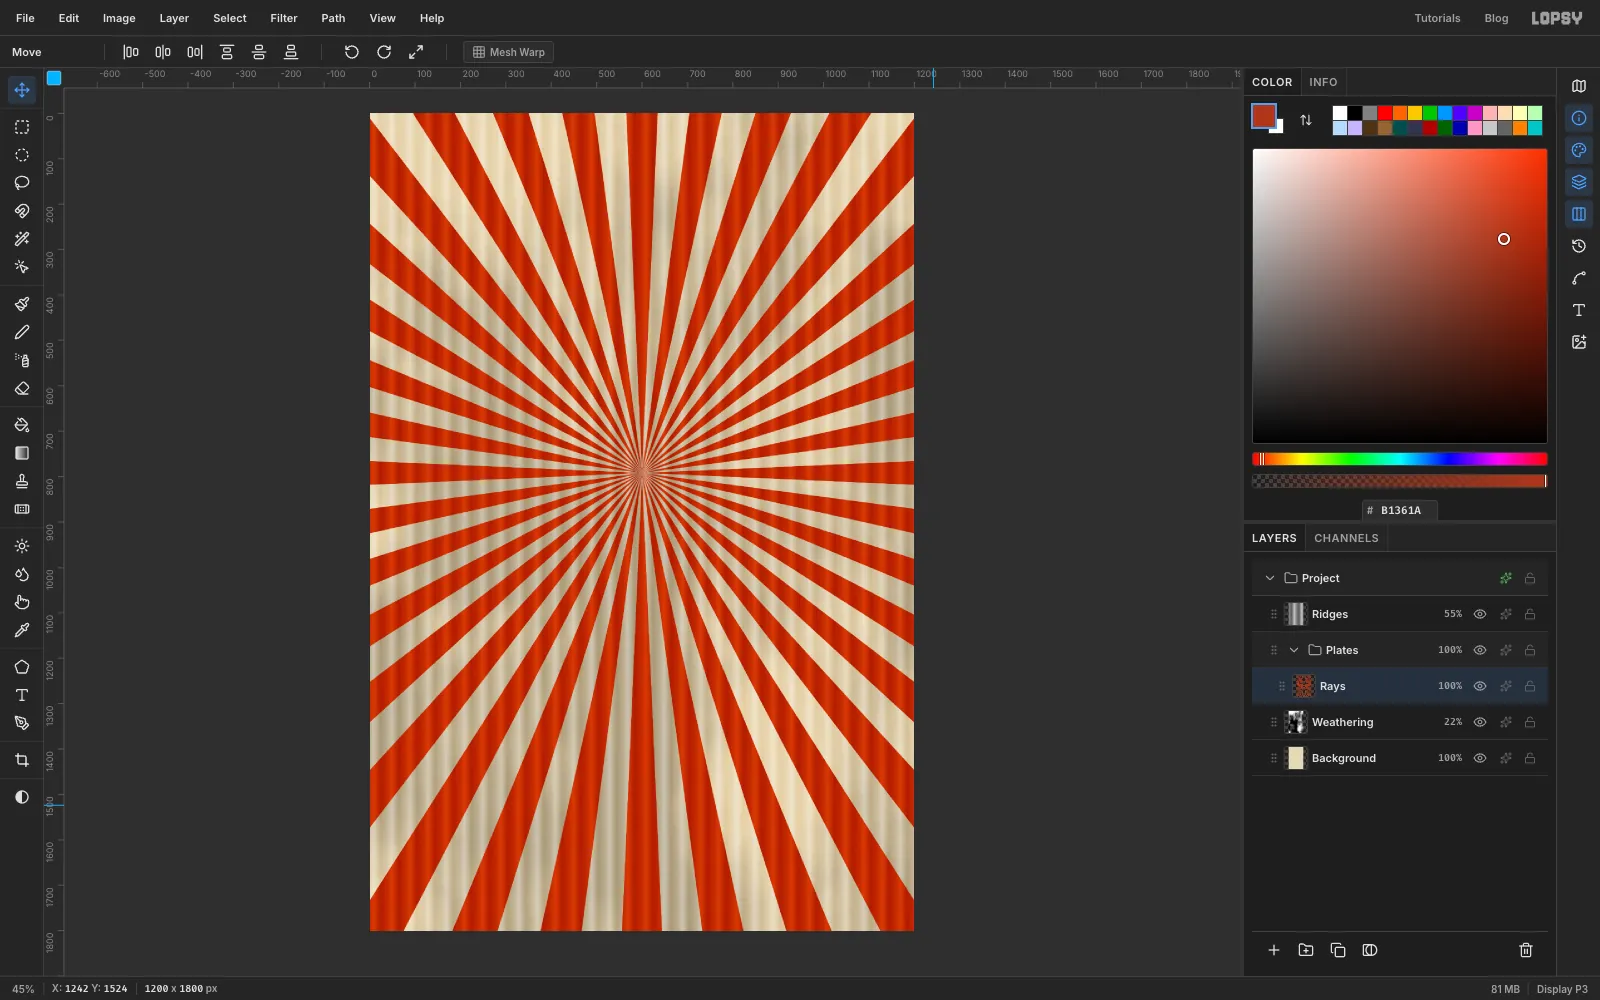
- Choose Filter → Sunburst… and set Rays
36, Length150, Width50, Center X50and Center Y44. Click Apply.
Center Y at 44% puts the middle of the sun at 792 px down, a little above the middle of the poster.
- Click
-
Trim the rays to a band
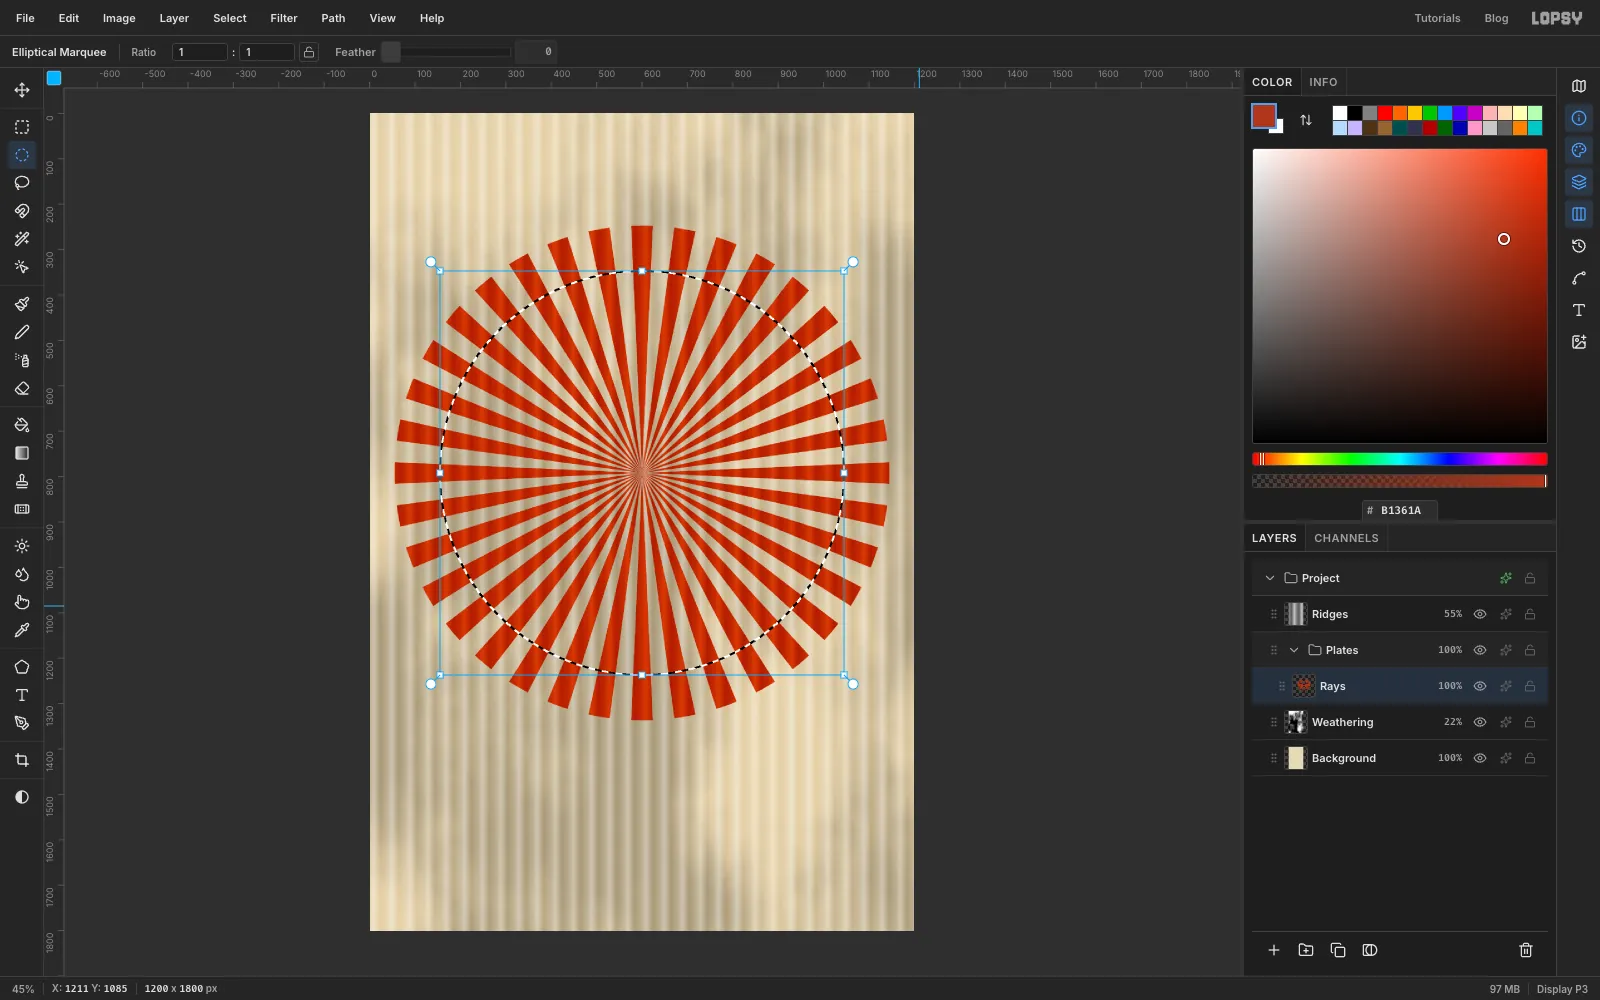
- Pick the Elliptical Marquee and click once. Enter From
55,247and To1145,1337. That's a circle 1090 px across around the sun's centre. - Choose Select → Inverse and press Delete. The ray tips outside the circle are gone.
- Click once again with the Elliptical Marquee and enter From
155,347, To1045,1237. Press Delete, then Cmd+D.
What's left is a ring of short rust bars about 55 px in from the edges of the poster.
- Pick the Elliptical Marquee and click once. Enter From
-
Cut a ring with stencil bridges
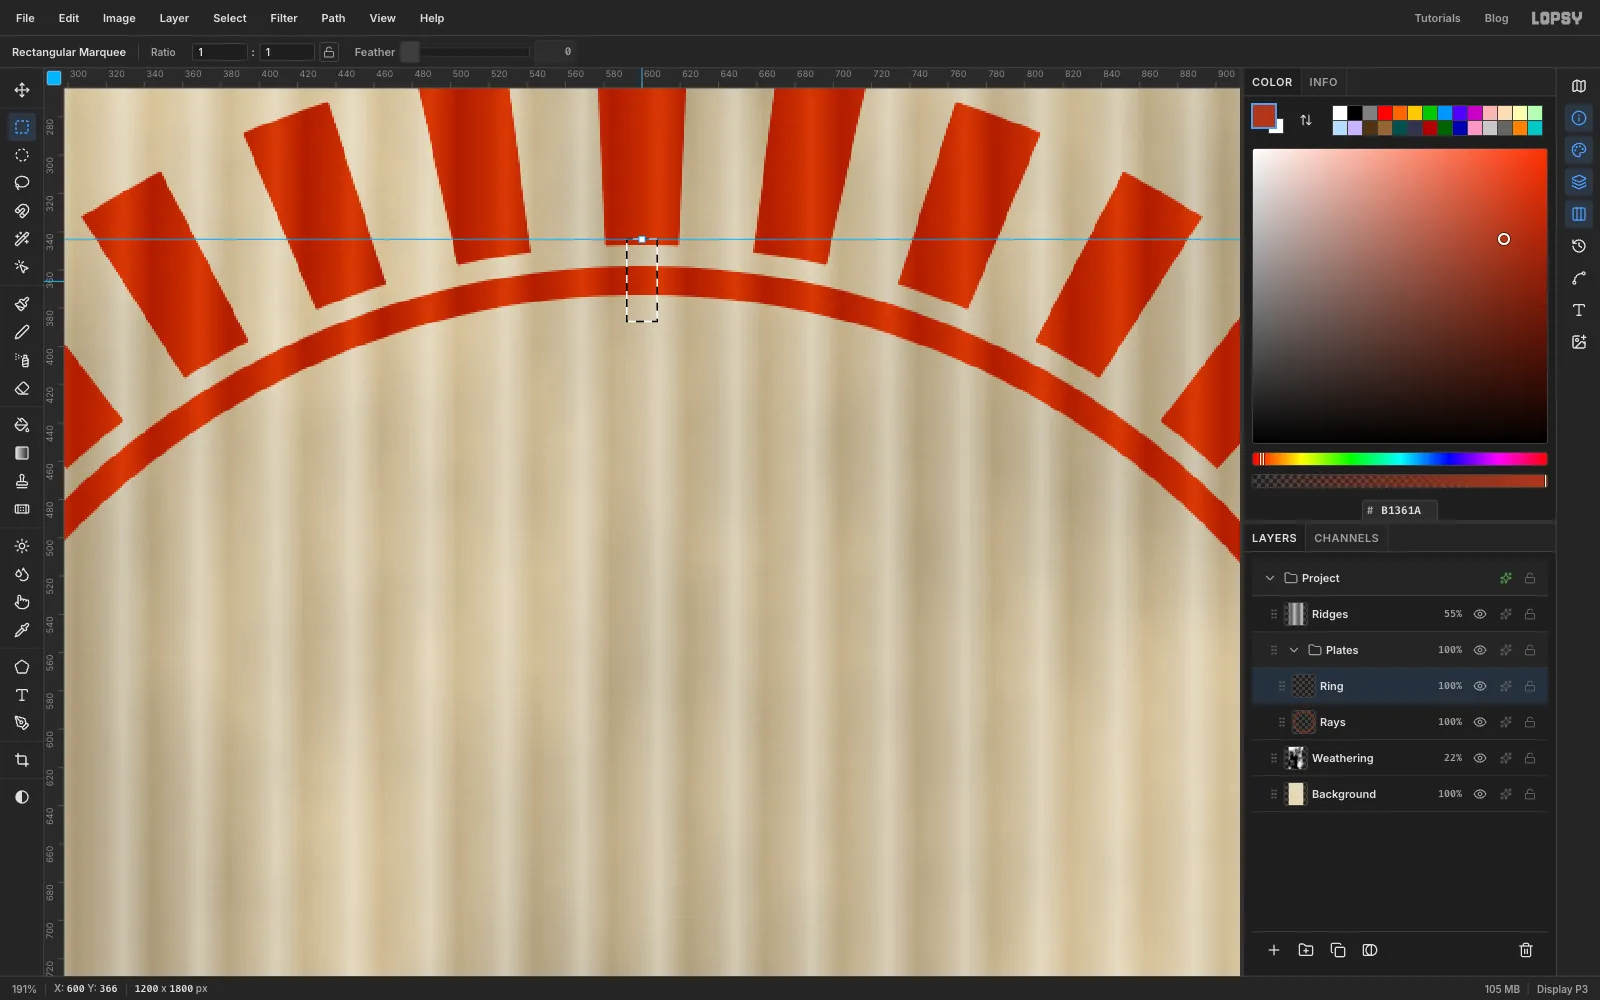
A real stencil can't have a free-floating ring: the middle would fall out of the card. Stencil cutters leave little bridges to hold it in, and you'll copy them.
- Add a layer called
Ring. Make an elliptical selection From166,358To1034,1226, fill it with rust and deselect. - Make a second one From
181,373To1019,1211and press Delete. That leaves a ring 15 px thick. - Pick the Rectangular Marquee and click once. Enter From
592,344To608,387, a small box across the top of the ring. - Zoom in so the ring is easy to see, hold Shift and drag three more boxes across the ring, each about 16 px wide: one at the bottom (592, 1197 to 608, 1240), one on the left (152, 784 to 195, 800) and one on the right (1005, 784 to 1048, 800). Shift adds each one to the selection, and the marching ants show every box.
- Press Delete and deselect.
- Add a layer called
-
Spray the yellow disc
Add a layer called
Sun. Make an elliptical selection From190,382To1010,1202, fill it with yellow and deselect.Now knock it off register: pick the Move tool and press Right three times. A hand-held stencil never lands exactly where the last one did, and this little offset gives that away.
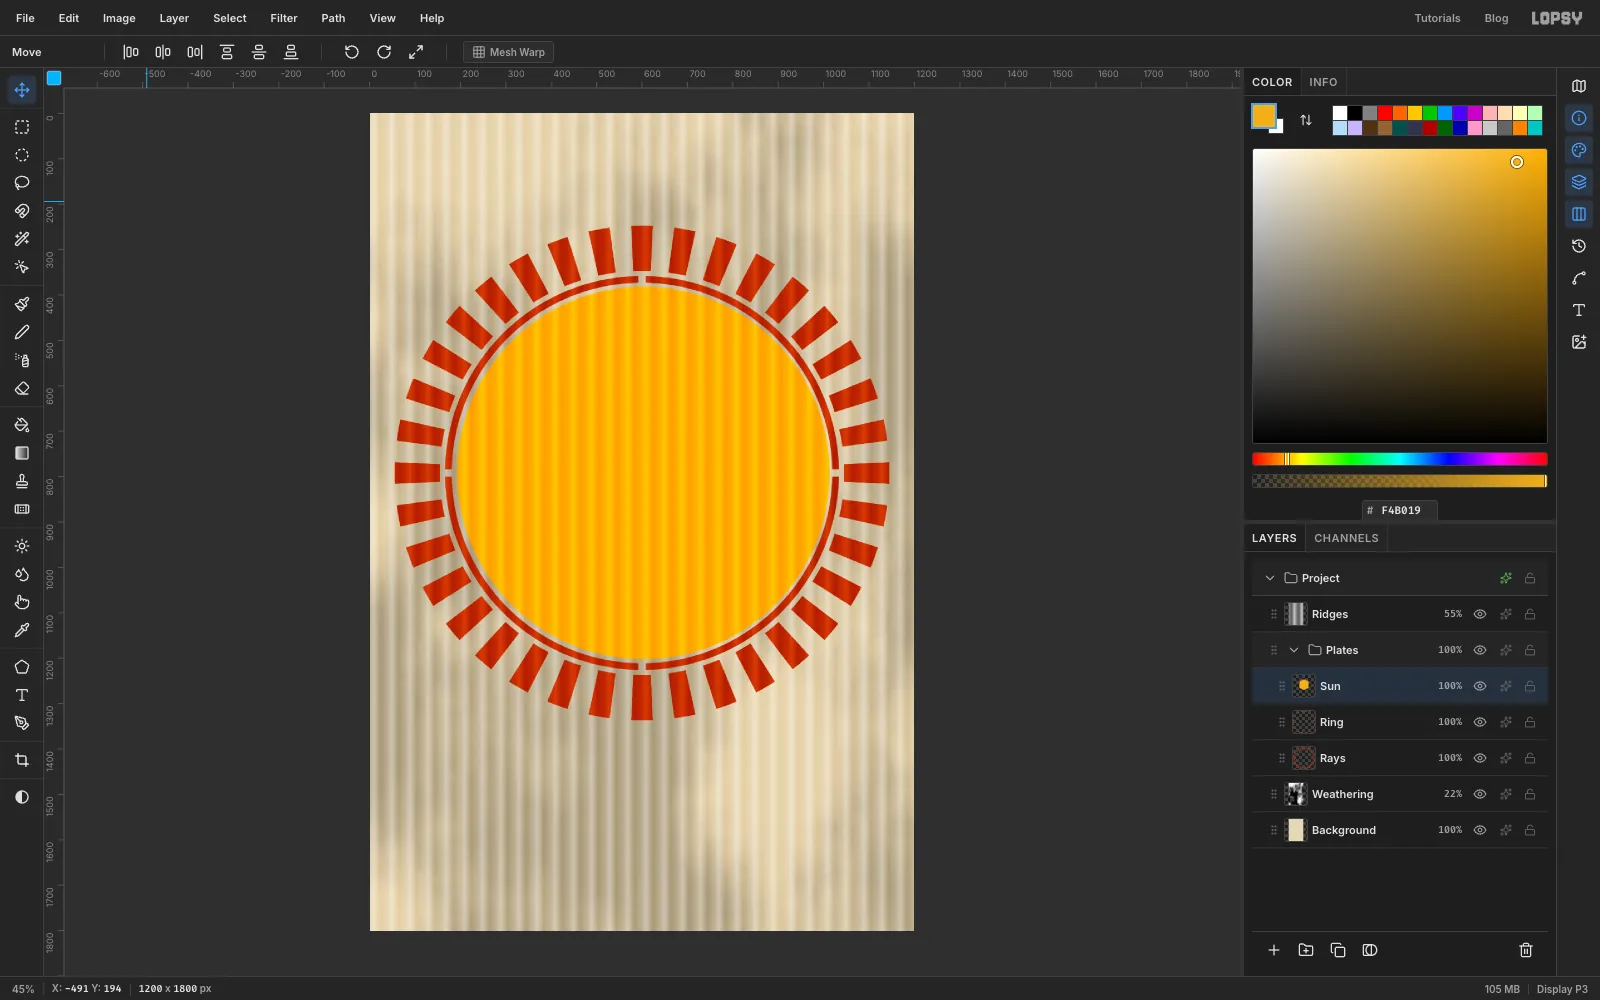
-
Add overspray to the sun
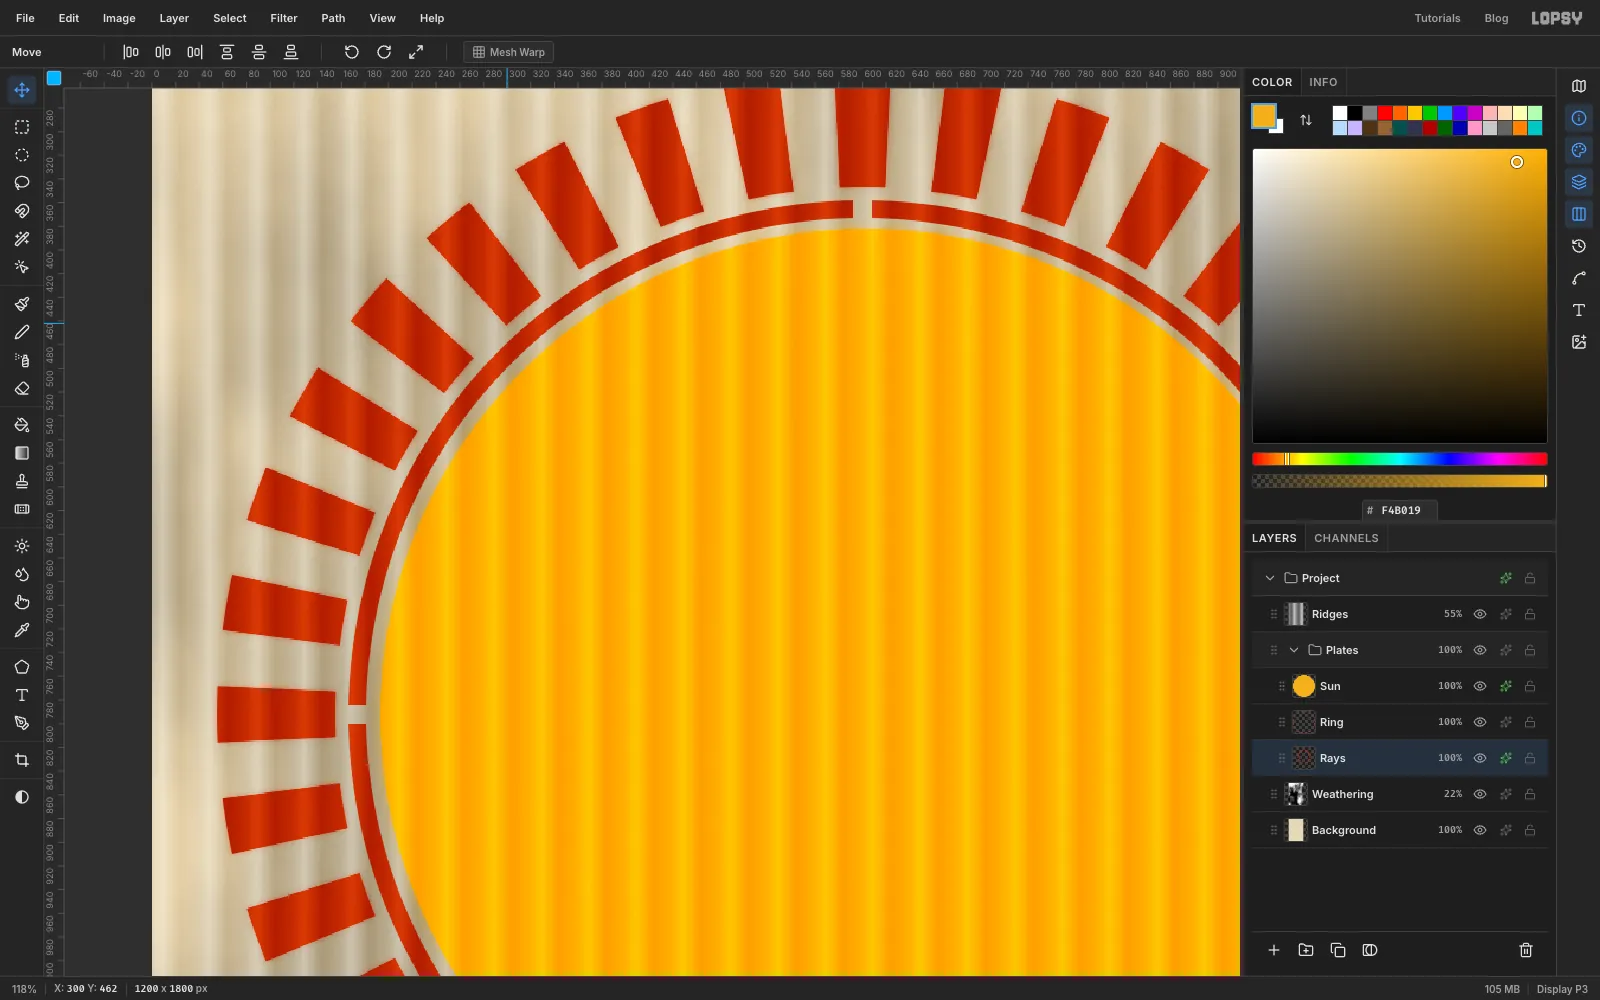
Spray paint mists past the edge of the card. An Outer Glow in the plate's own colour does the same.
- Open the effects for
Sun, tick Outer Glow and set Size16, Spread0and Opacity45. Set the glow colour to . - Do the same on
Rayswith Size8, Opacity40and the colour .
- Open the effects for
-
Drop in the reference photo
Click
Sunso the photo lands above it, then drag Cowboy on horse in Field BC.jpg from your computer onto the canvas. It drops in at its own size in the top-left corner. Rename the layerRiderand press Cmd+D to clear the selection the drop makes.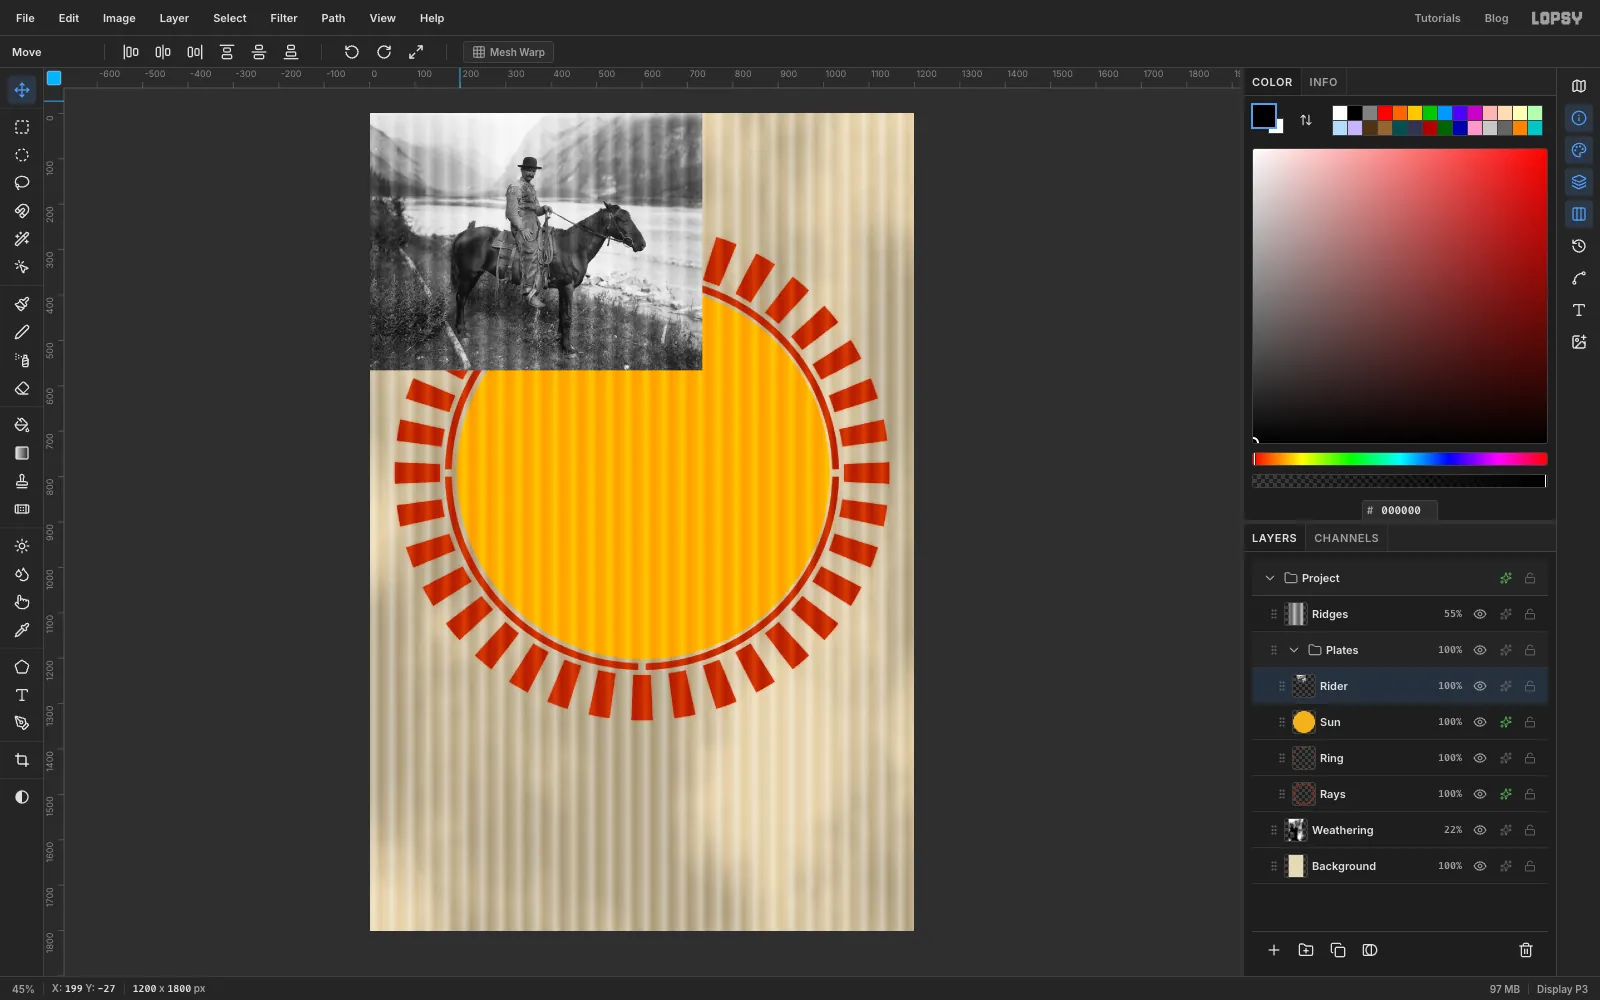
-
Trace the rider with the Pen
You'll cut the horse and rider out with a path. The Pen lets you place points precisely, and you can zoom in while you work.
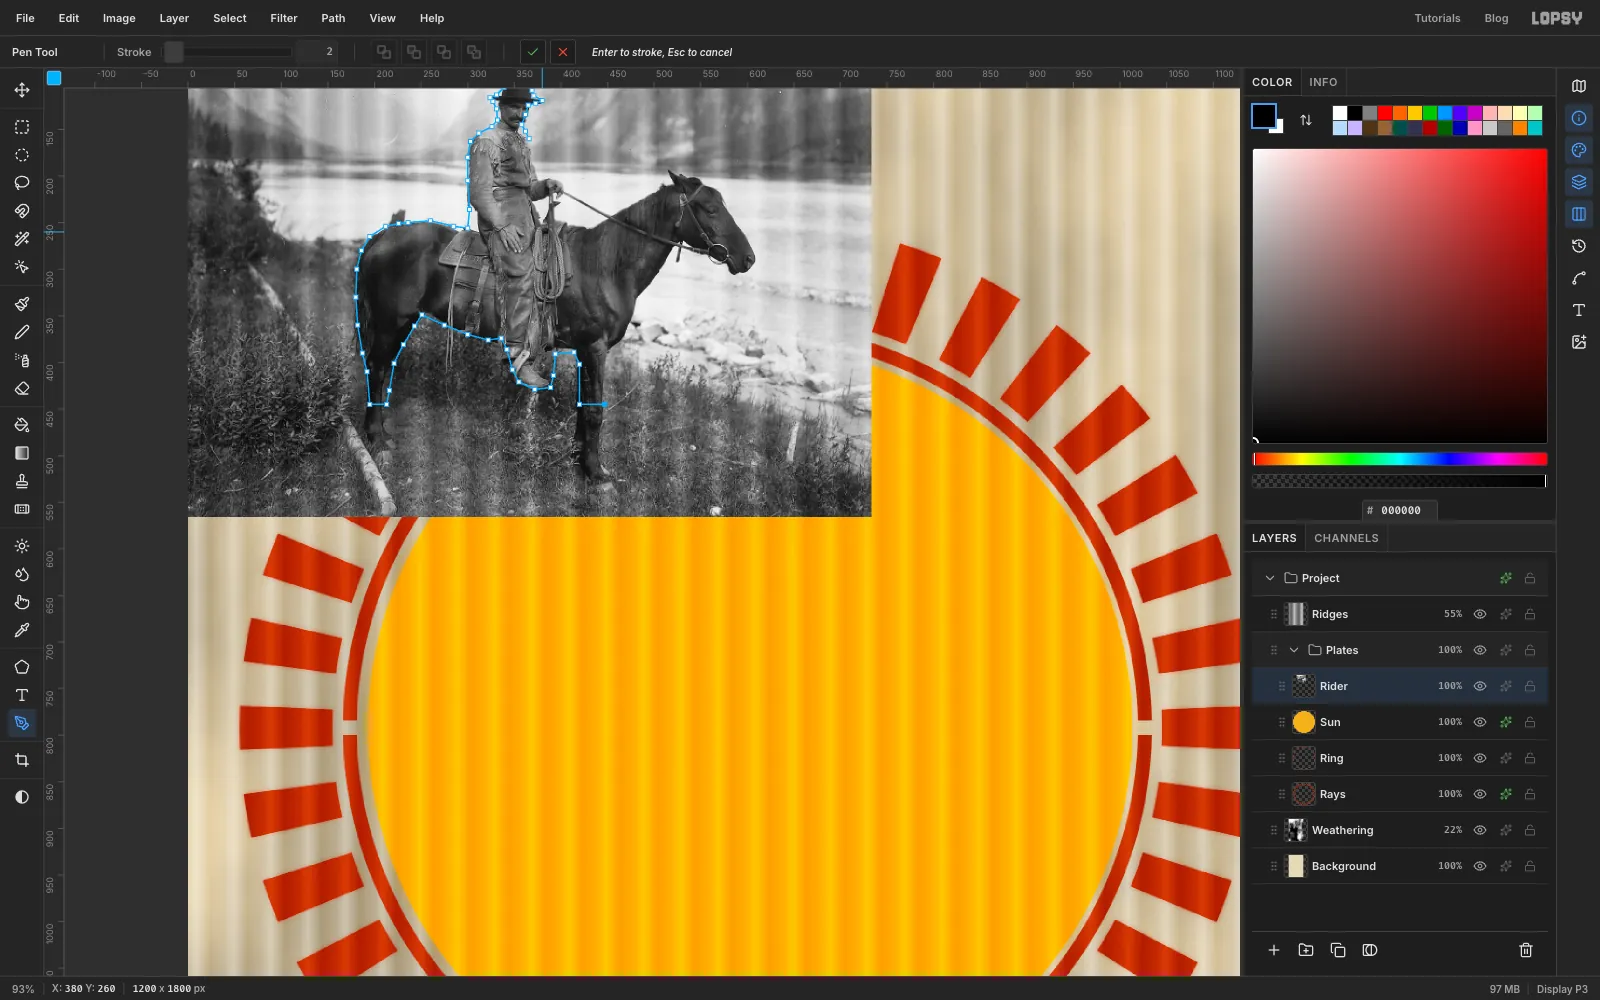
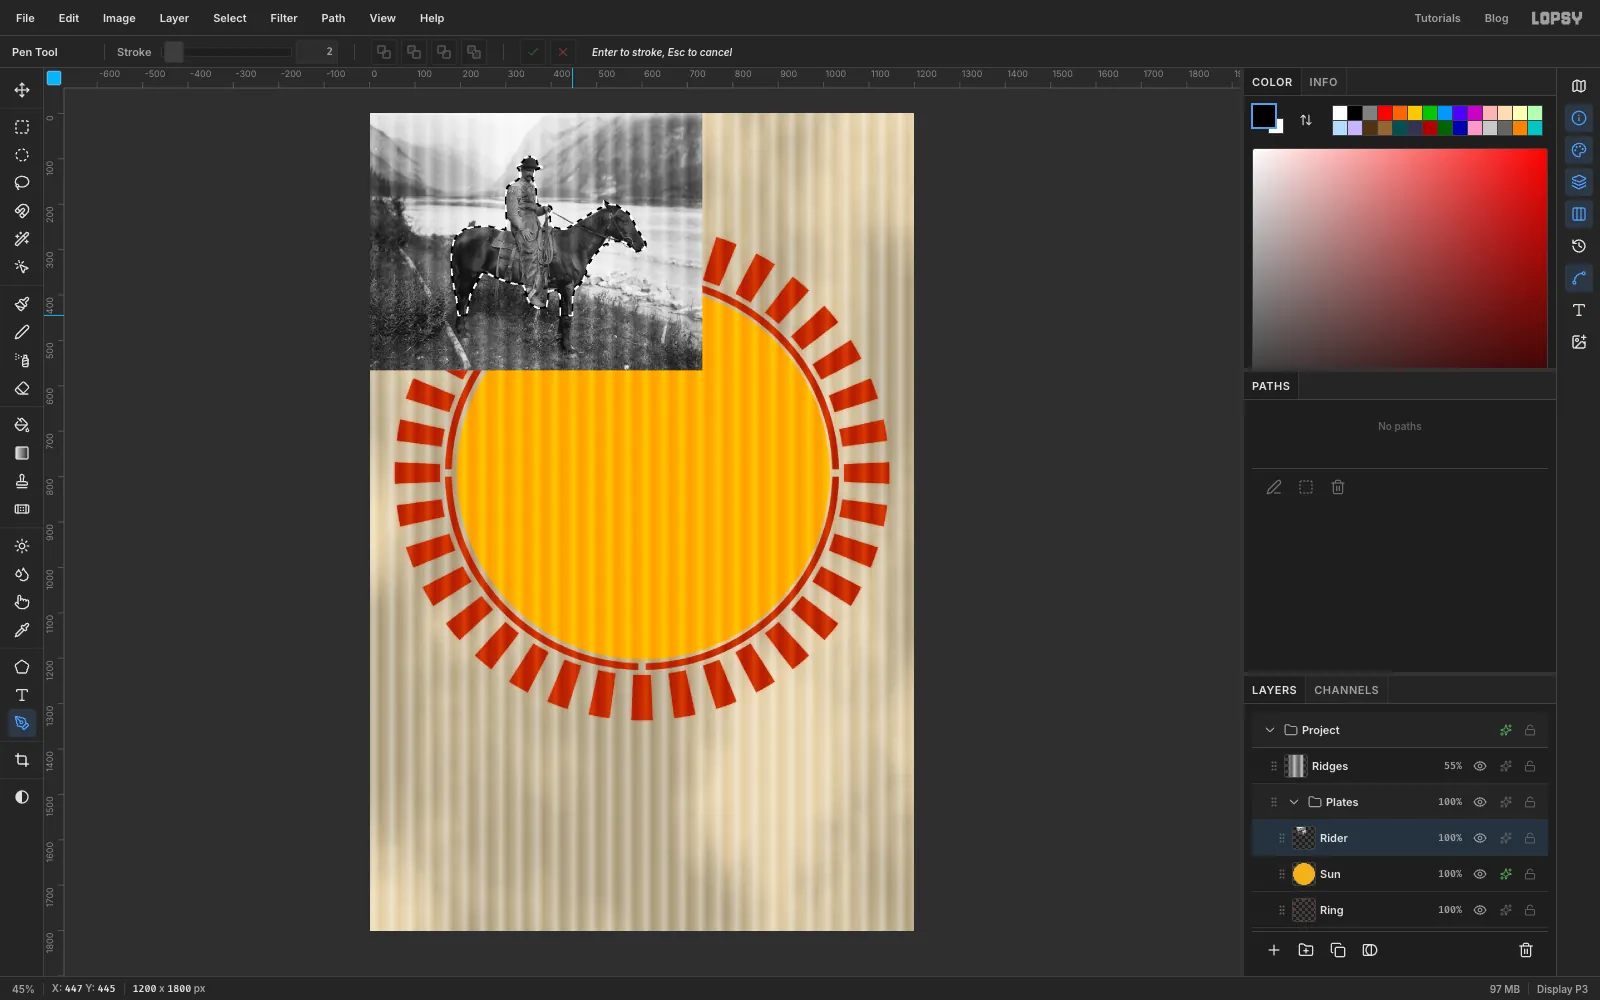
Pick the Pen tool and click your way around the silhouette. Start at the foot of the horse's front leg and work backwards along the bottom: the back of the front leg, the cowboy's boot, the belly and the hind leg. Go up the back of the hind leg and the tail, which hangs beside it, over the rump and along the back to the cantle of the saddle. Then go up the cowboy's back, round the hat brim and crown, down his face and chest, and along his arm to his hand. From the saddle horn, follow the horse's mane up the neck to the ears, then go round the forehead and muzzle, under the jaw and down the chest back to the start.
Cut straight across the legs just above the hooves, because grass will hide them. Leave out the reins where they cross open sky. You'll paint them back later.
Click about every 10–20 px, closer on the hat and the muzzle. Finish by clicking the first point to close the path.
-
Turn the path into a selection
Open the Paths panel from the right-hand toolbar. Click Path to Selection, then Delete Path (the path has done its job).
-
Cut the rider out
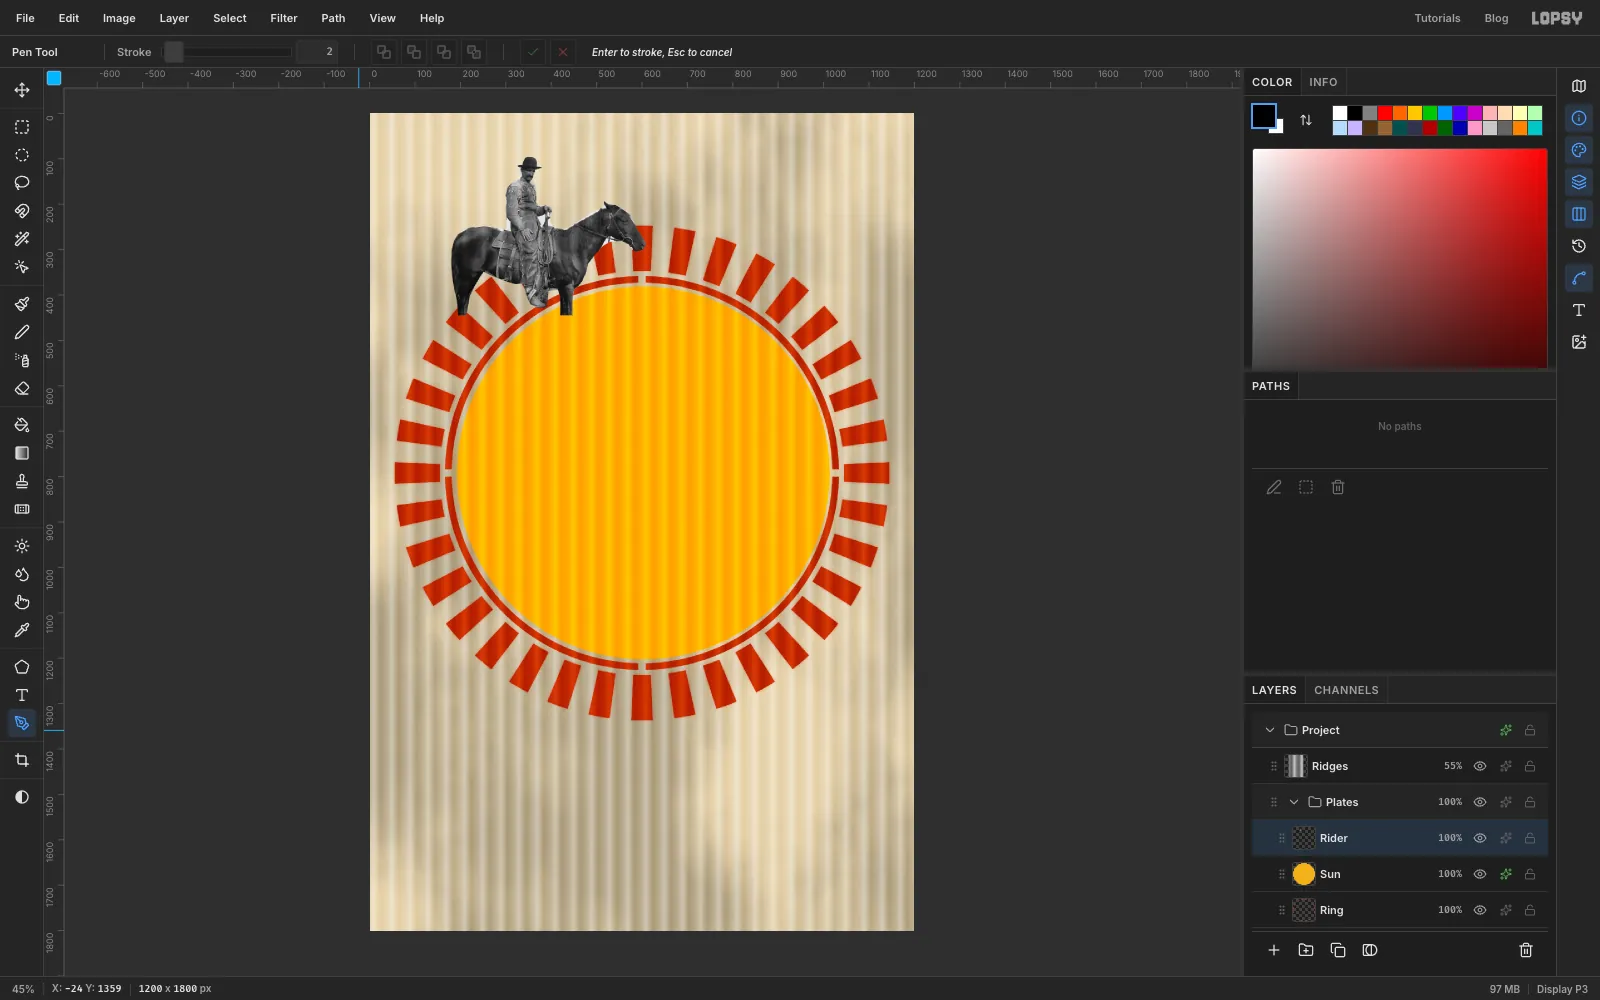
- Choose Select → Inverse and press Delete to clear everything around the rider. Deselect.
- Choose Filter → Desaturate, so the photo holds nothing but grey tones for the plates.
-
Scale the rider up
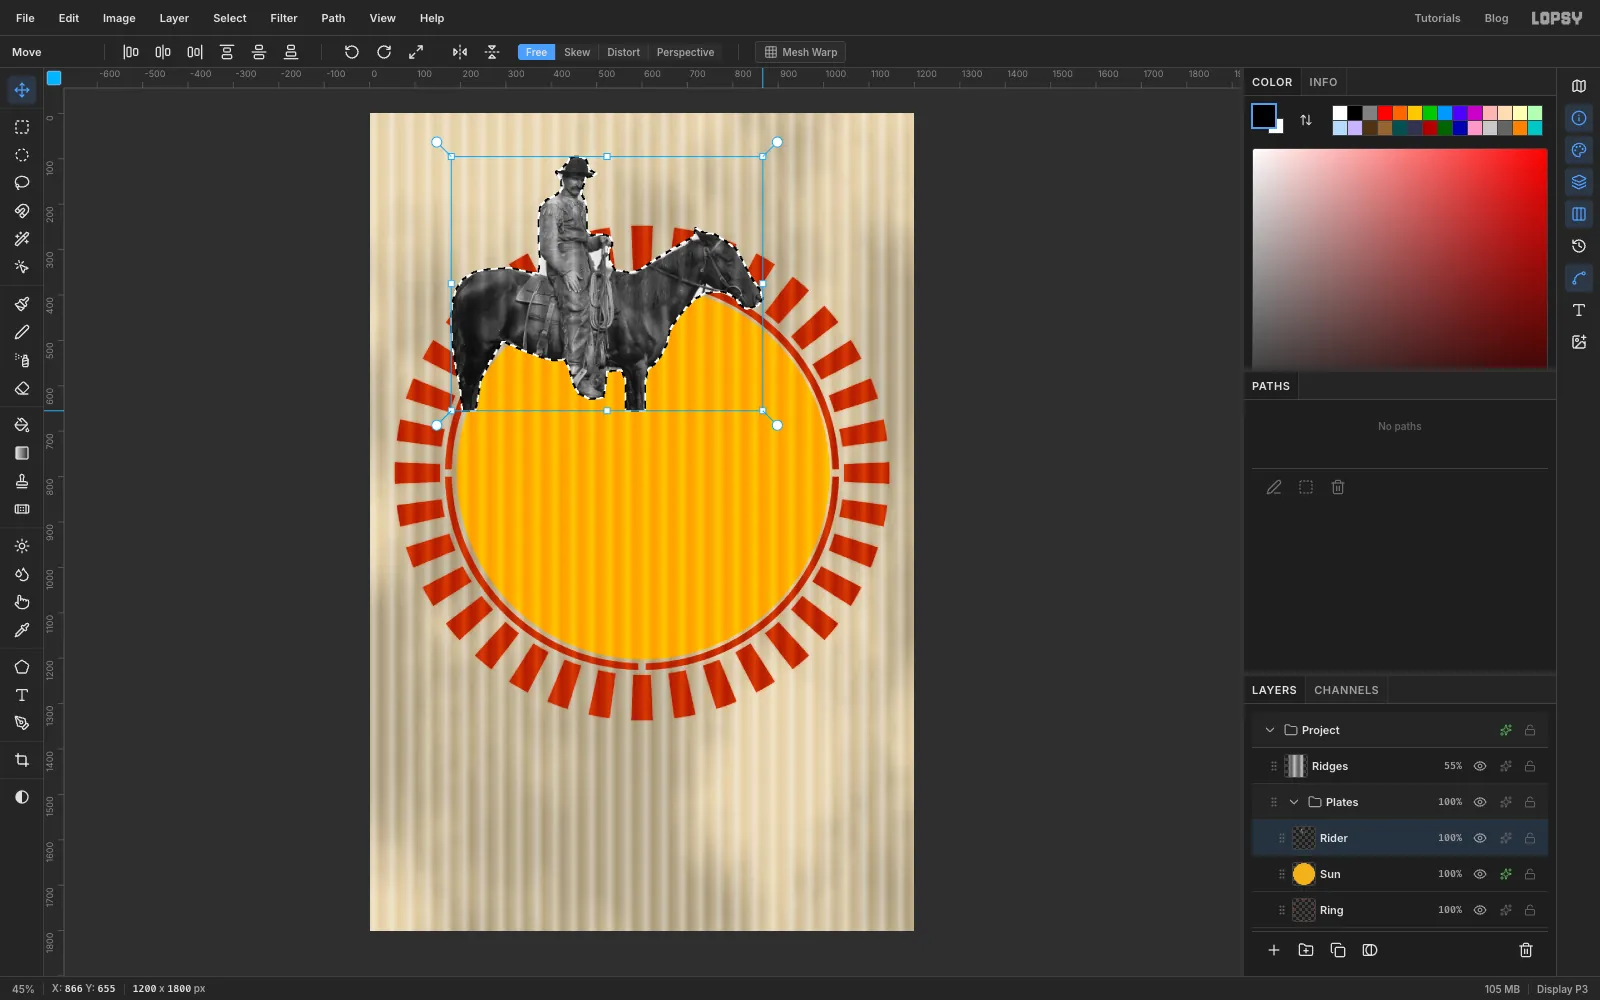
- Cmd-click the
Riderthumbnail to select his shape. - Pick the Move tool, hold Cmd, and drag the bottom-right handle down and to the right. Cmd keeps the proportions. Stop when he's about 160% of his size, roughly 690 px wide.
- Press Cmd+D to apply the scale.
- Cmd-click the
-
Stand him in front of the sun
Cmd-click the thumbnail again and drag the rider down into the sun. Line him up so the top of his hat sits just above the sun's centre, about 740 px down, and the cut across the legs sits around 1300 px. Watch the status bar's X and Y readout. The horse should span from about 260 to 945 px across, nose pointing right. Deselect.
Run Filter → Gaussian Blur… with Radius
2. A slight blur turns the enlarged photo's jagged edges into the smooth blobs a stencil knife would cut.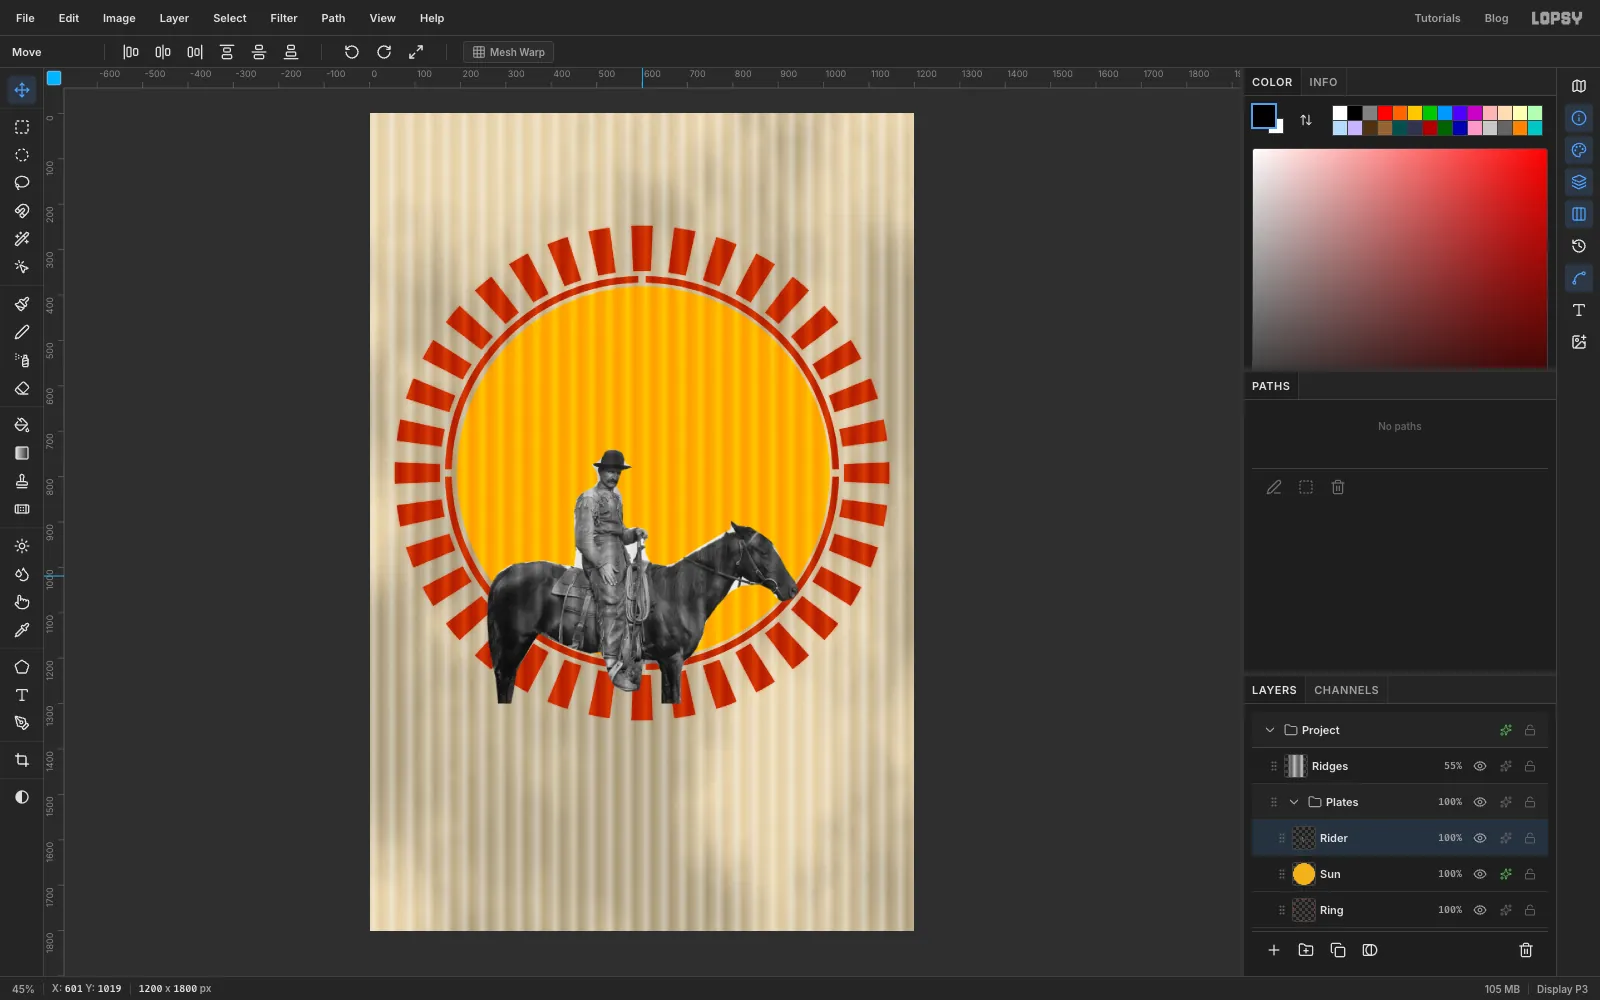
-
Threshold the middle tones
One photo makes three plates: cream for the whole silhouette, rust for the middle tones, ink for the shadows.
- With
Riderselected, click Duplicate Layer twice. Rename the top copyDark plateand the one below itMid plate. RenameRidertoBase plate. - Click
Base plate, then Cmd-click its thumbnail. Fill the selection with cream and deselect. That's the bottom plate. - Hide
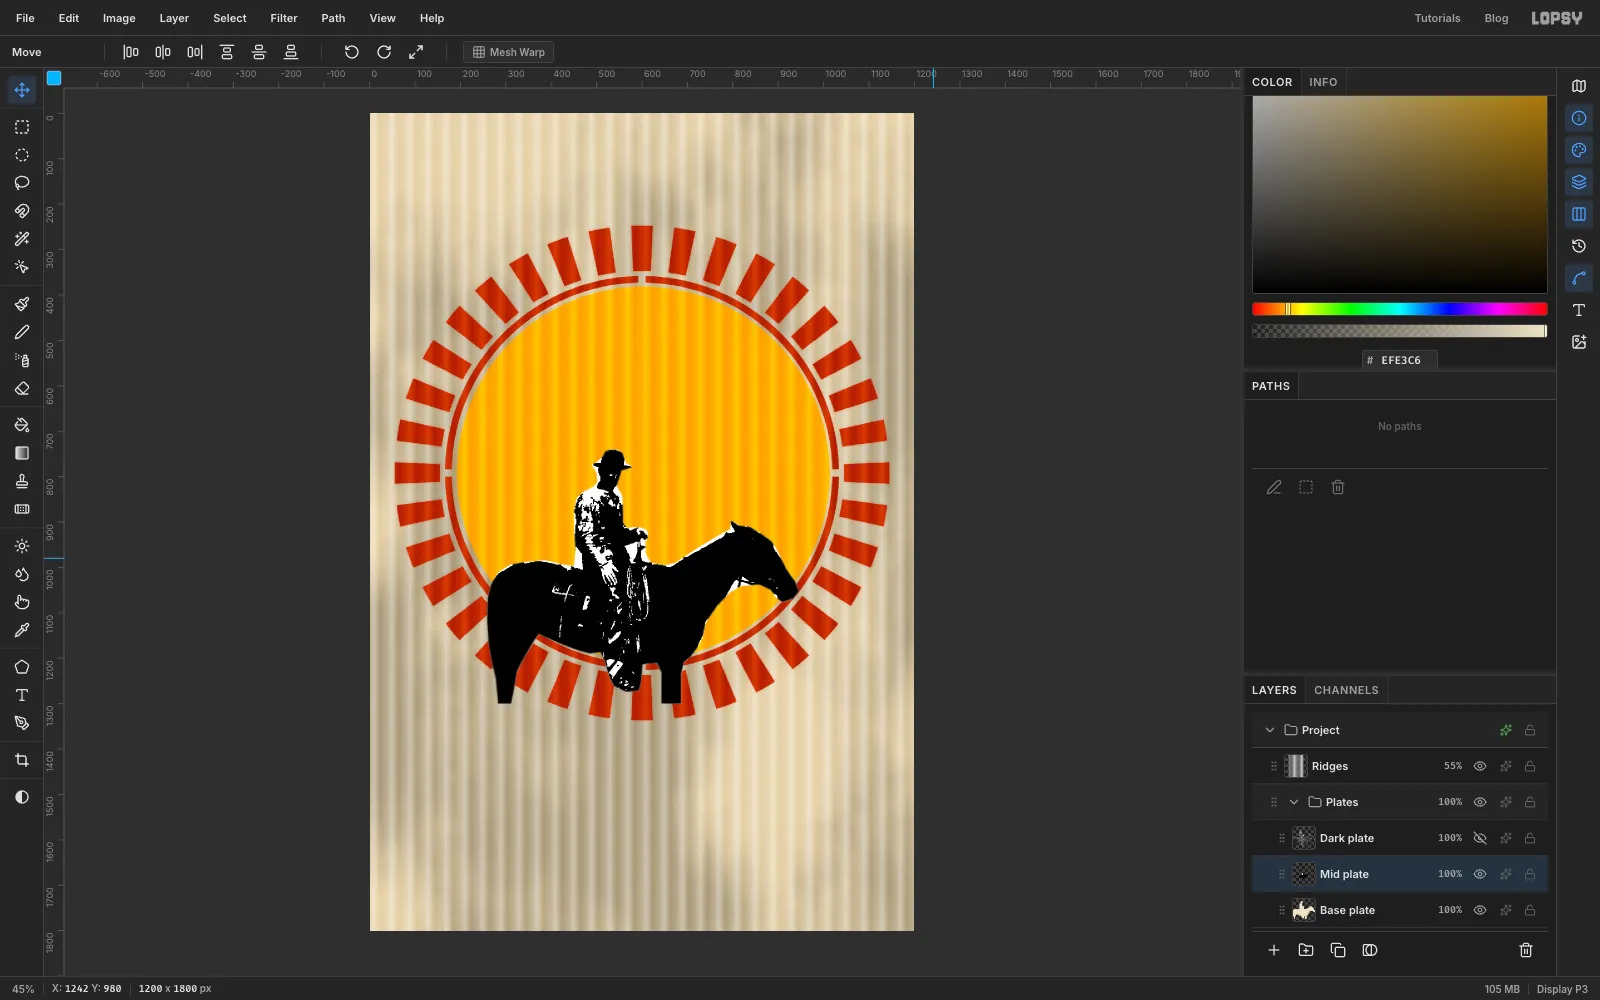
Dark platewith its eye button, clickMid plate, and run Filter → Threshold… at Level130.
- With
-
Select the white with the Magic Wand
Pick the Magic Wand, set Tolerance to
24and untick Contiguous. Click any white patch inside the rider, such as his shirt. One click selects every white pixel on the layer.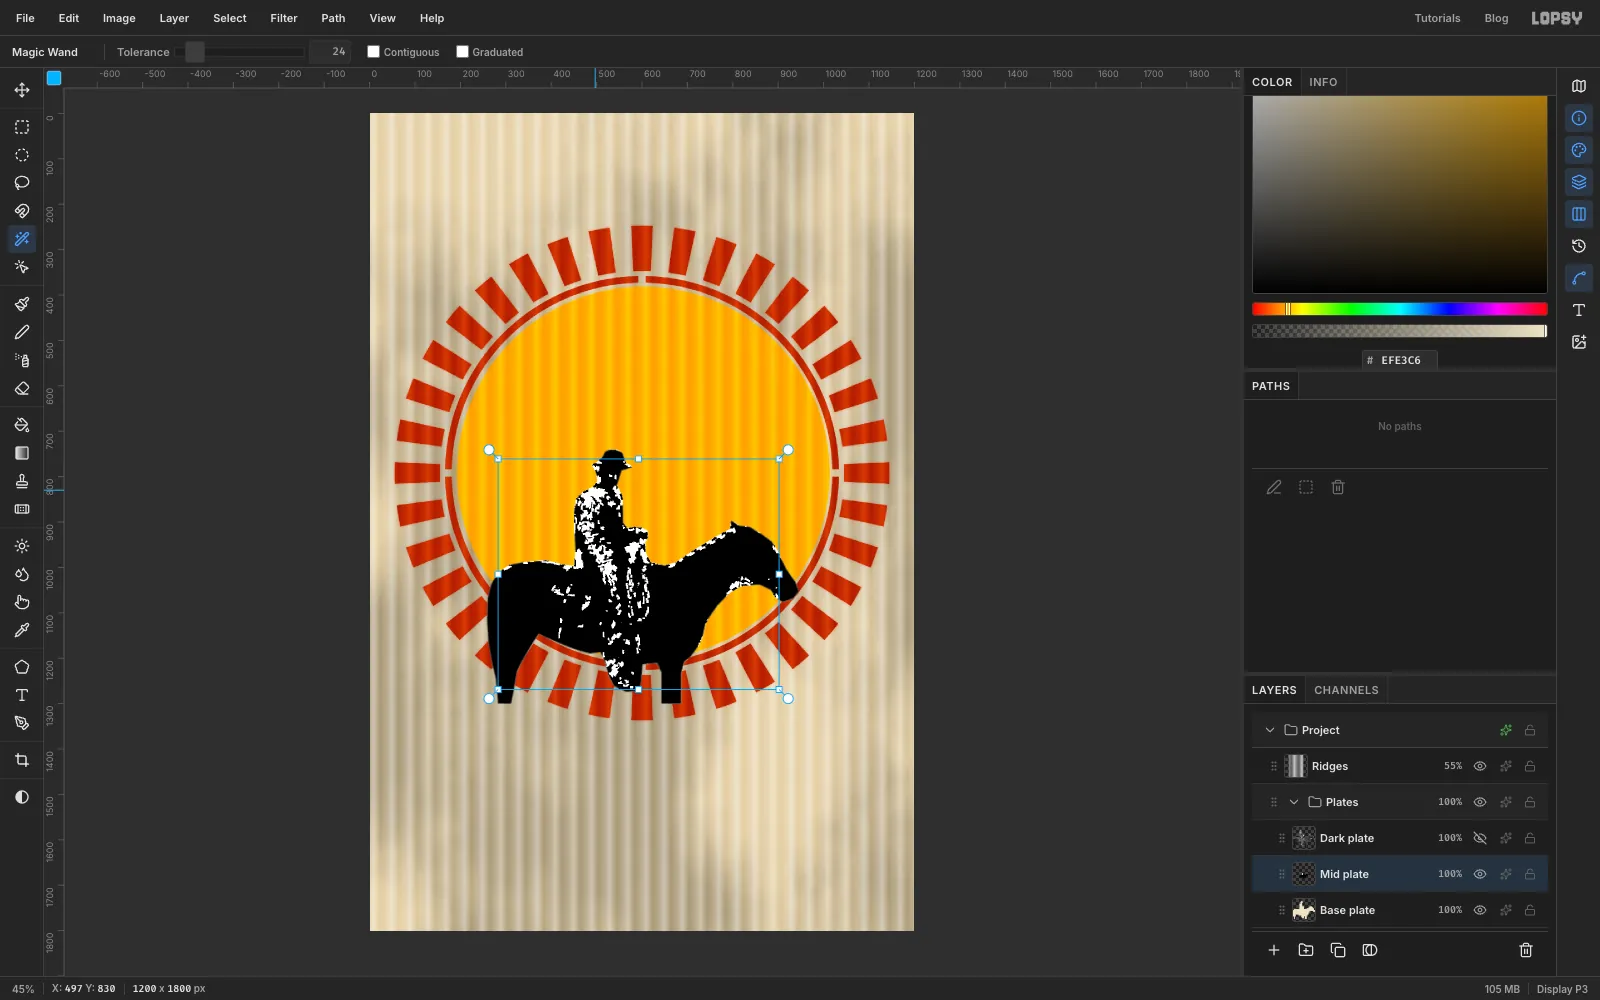
-
Turn the black into the rust plate
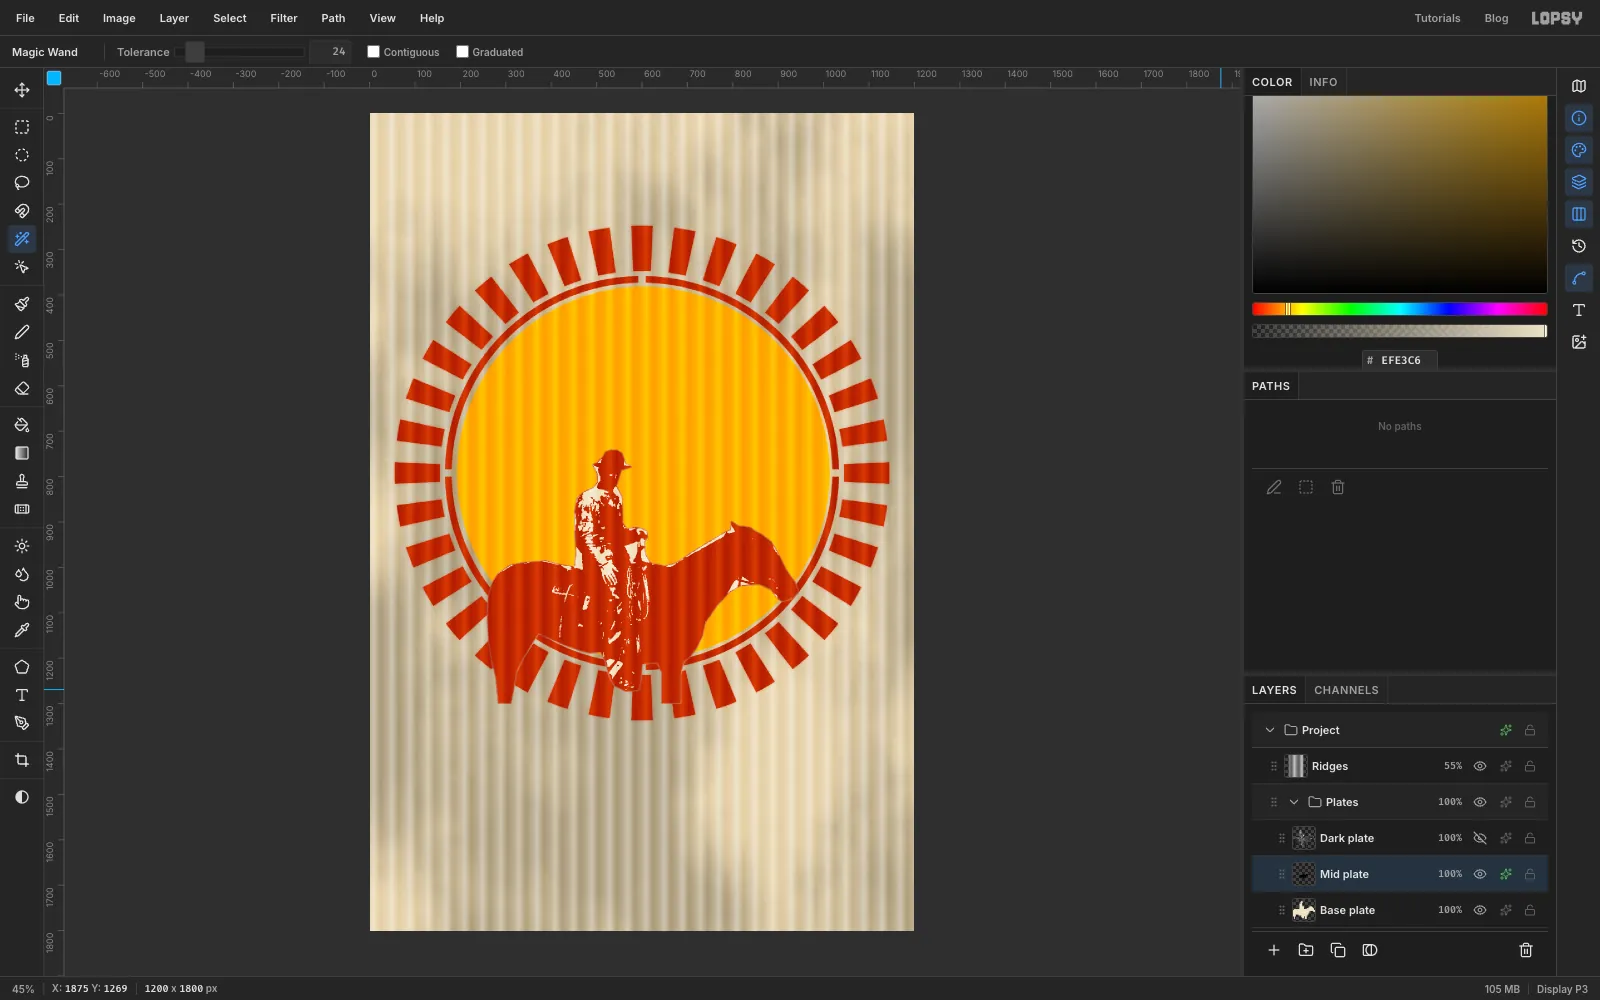
- Press Delete to throw the white away, then deselect. Only the black shapes are left.
- Open the effects for
Mid plate, tick Color Overlay and set the colour to rust .
A Color Overlay recolours the whole layer without touching its pixels, so you can still change your mind about the colour.
-
Make the ink plate
Show
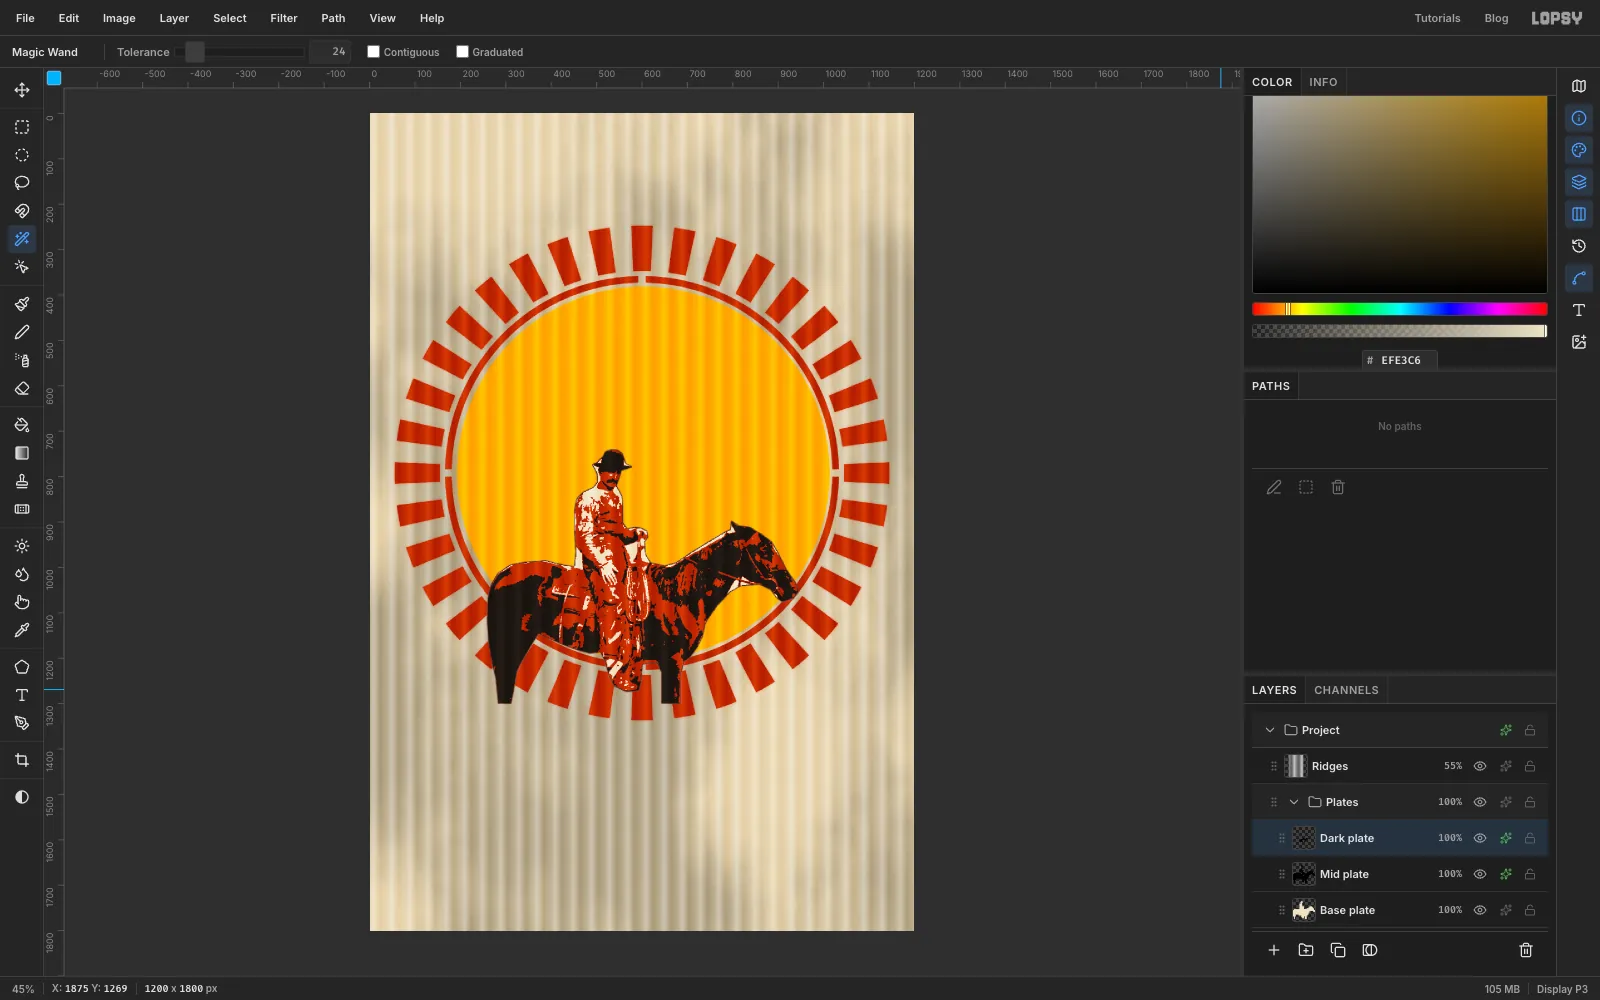
Dark plateand click it. Repeat what you did forMid plate, with a darker cut:- Run Threshold at Level
68. - Magic-wand a white area, press Delete and deselect.
- Add a Color Overlay in ink .
- Run Threshold at Level
-
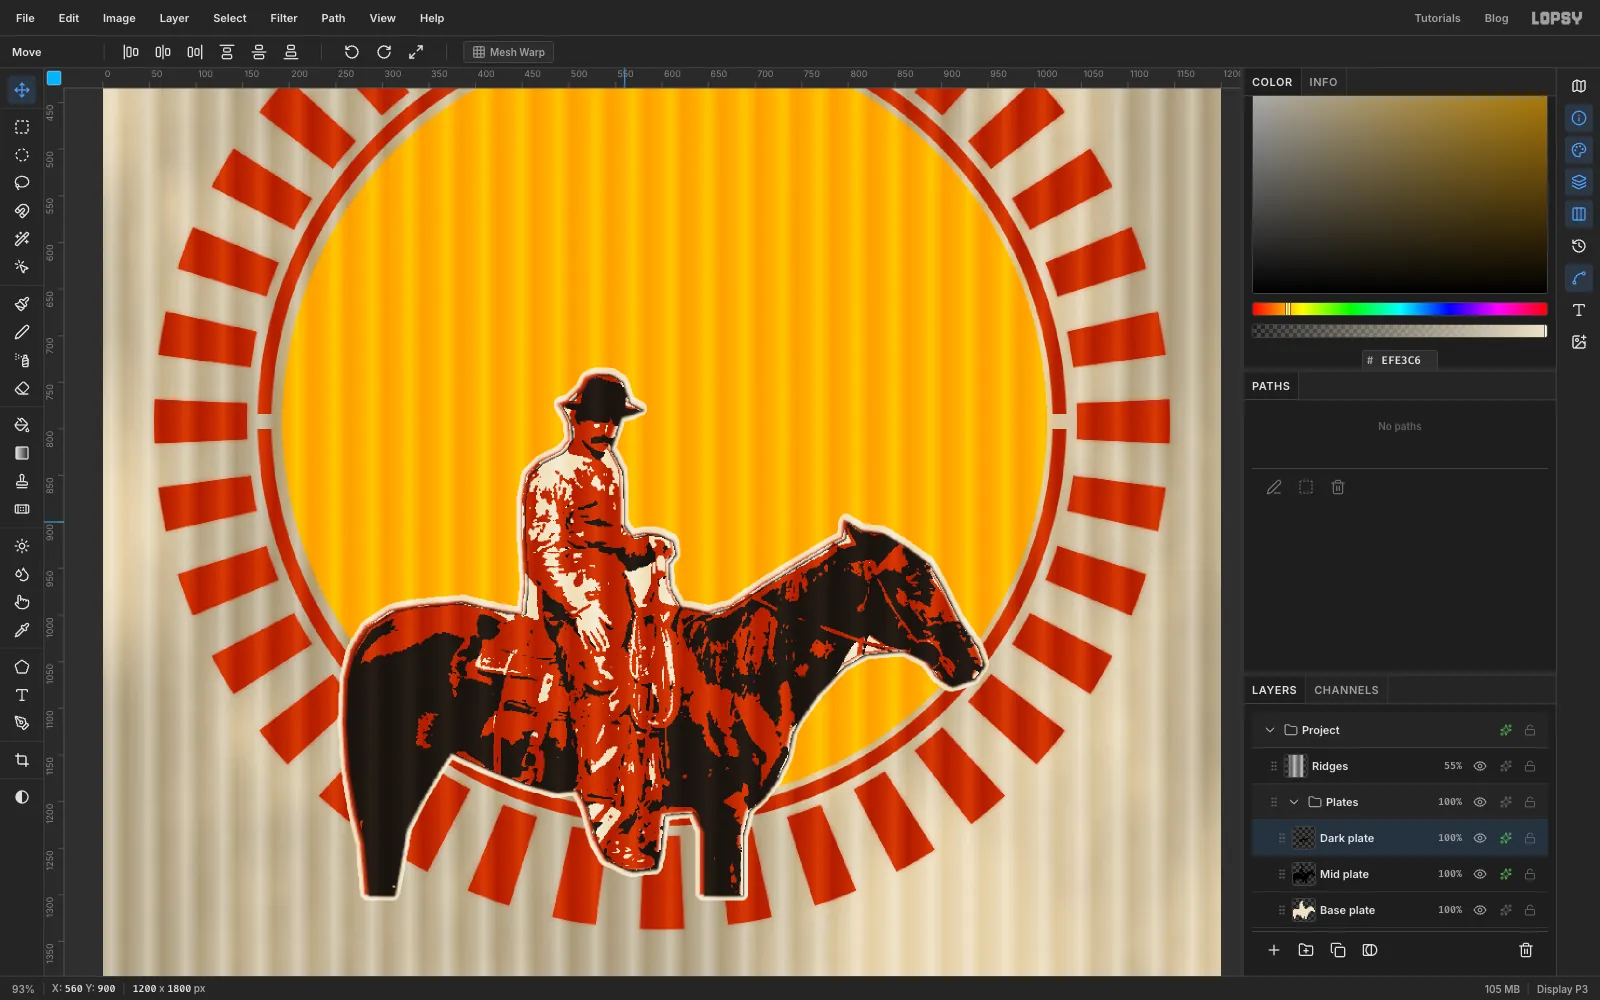
Even out the cream and knock the plates off register
- Cmd-click the
Base platethumbnail, choose Select → Grow… and grow it by6. ClickBase plate, fill with cream again and deselect. Now the cream border runs evenly all the way round, like the first coat sprayed through a slightly bigger cut. - Click
Mid plate, pick the Move tool, and press Left twice. - Click
Dark plateand press Right twice and Down twice.
- Cmd-click the
-
Brush in the rein
The Pen trace left out the rein where it crossed sky. With
Dark platestill selected, pick the Brush, set Size5, Hardness100and Opacity100. Drag one smooth stroke from the cowboy's hand to the ring of the bit beside the horse's mouth, letting it sag a little in the middle. If it wobbles, press Cmd+Z and try again, or zoom in so the stroke is longer on screen. Anything you paint on this layer turns ink because of the Color Overlay.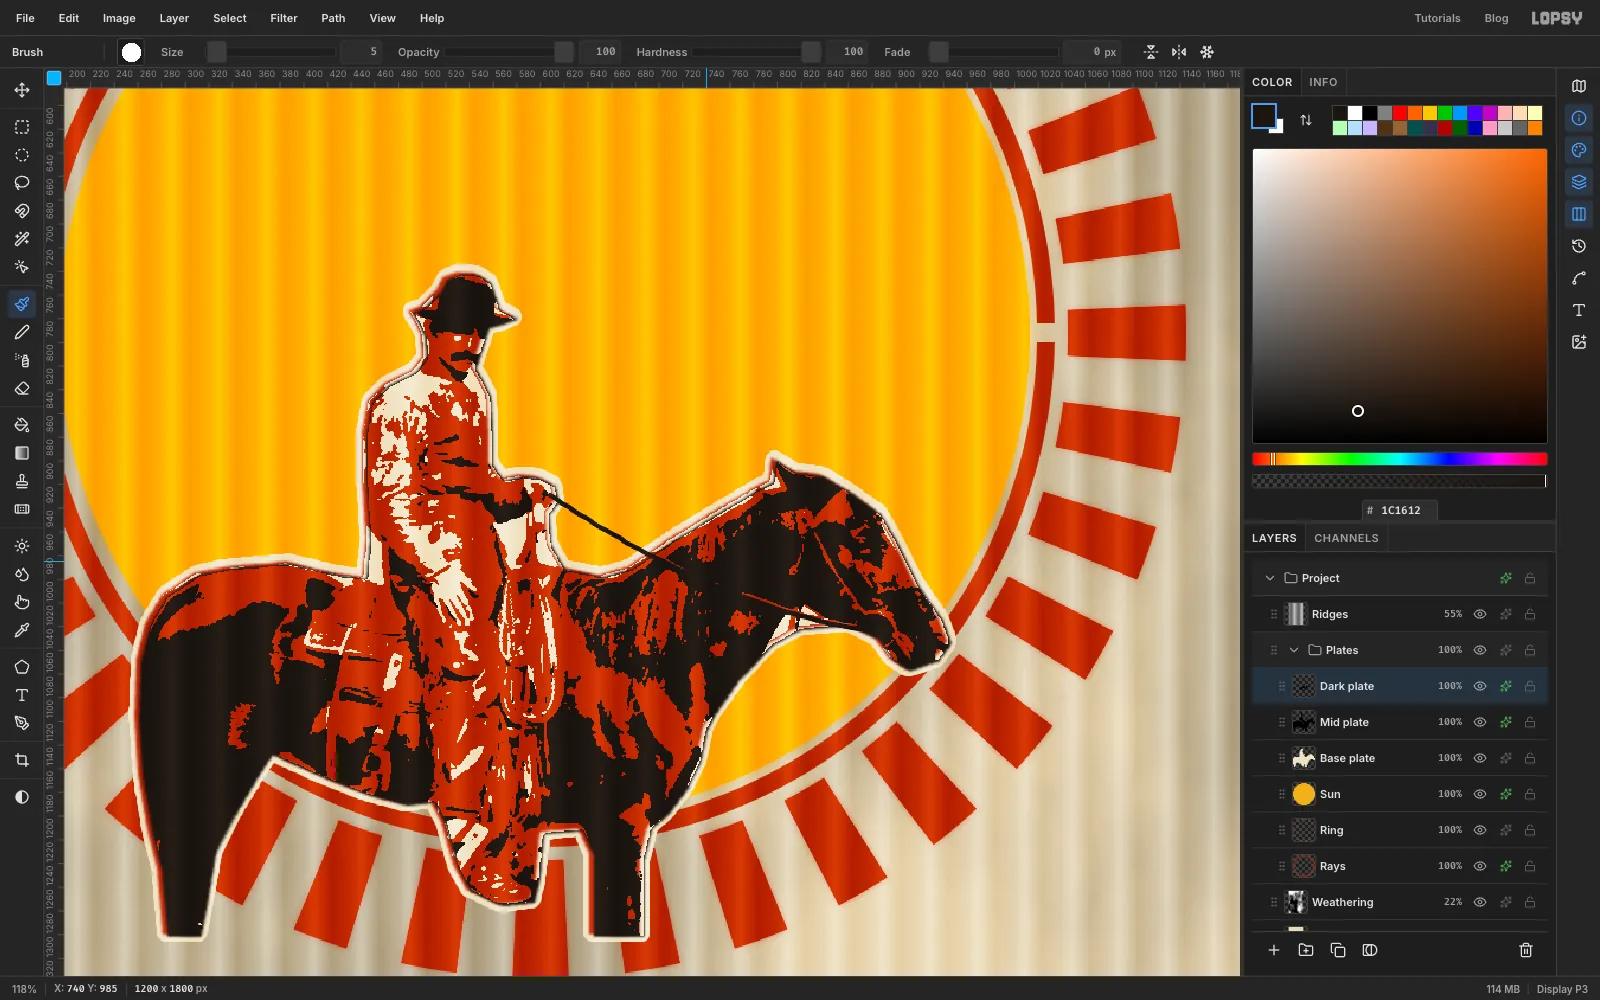
-
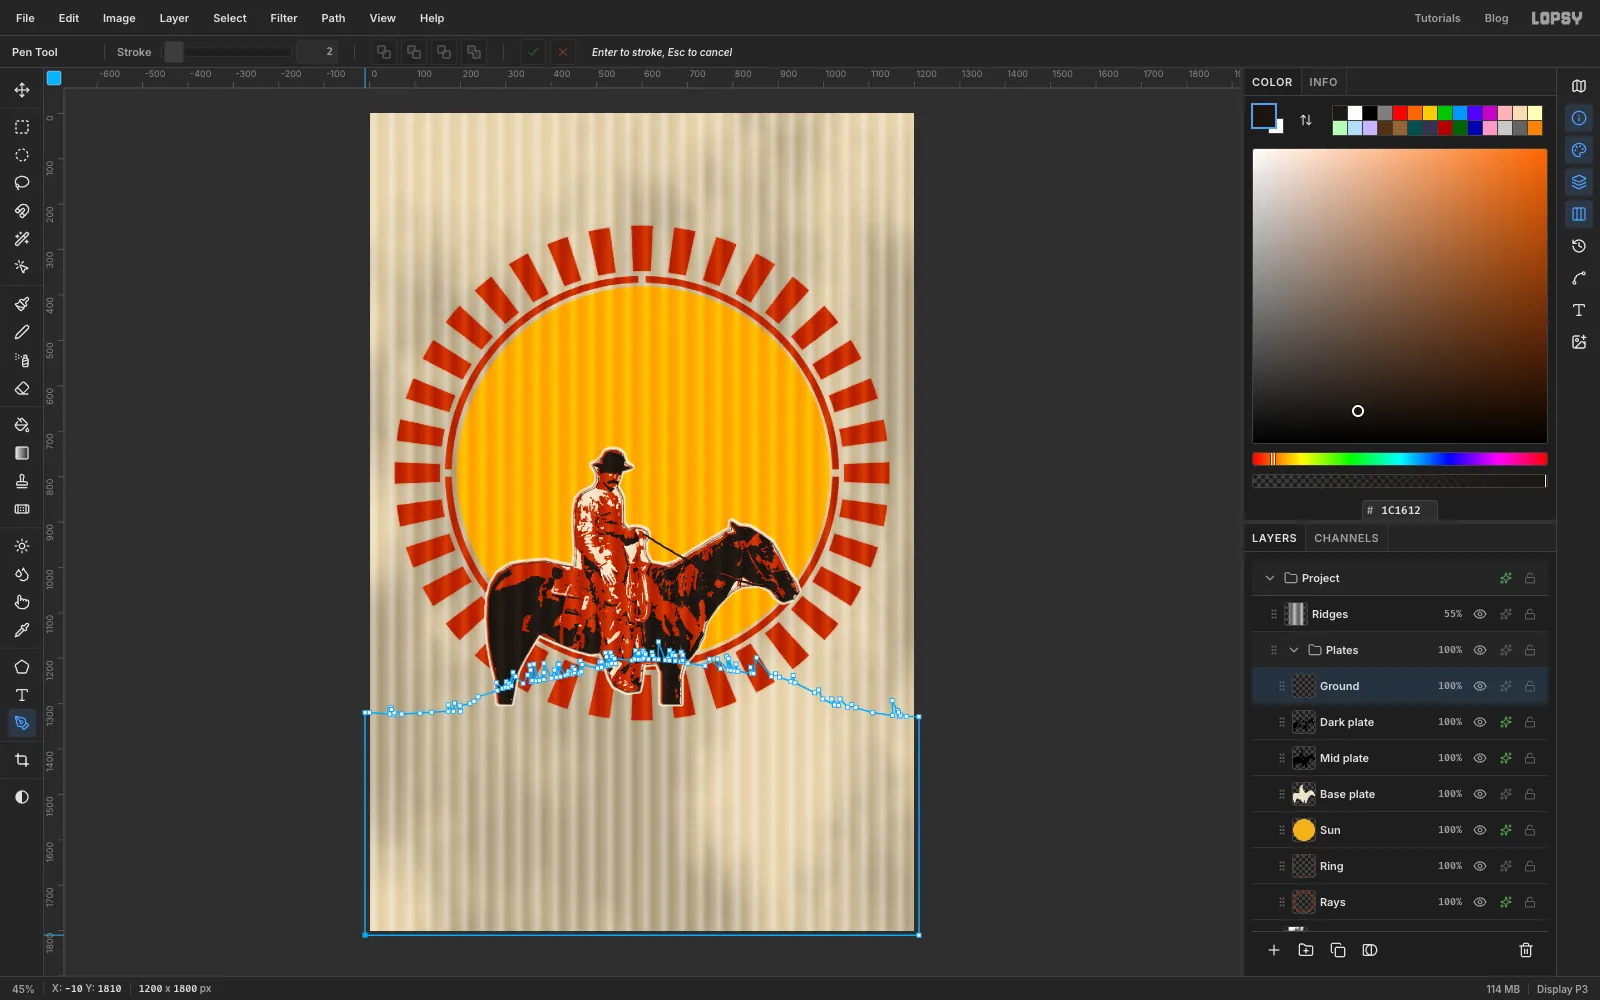
Draw the hill and grass with the Pen
Add a layer called
Ground. Pick the Pen and draw the horizon as one closed shape:- Start below the bottom-left corner, off the canvas, and click up to the left edge at about 1310 px.
- Click across the poster, rising into a low hill about 100 px higher under the horse. Come back down to about 1310 px at the right edge.
- Every so often, zig-zag up and down for a tuft of dry grass. Make the tufts uneven, some tall, some short, some leaning, with bare stretches in between. Put plenty along the top of the hill so the horse stands knee-deep in grass.
- Click below the bottom-right corner, then back to the first point to close.
-
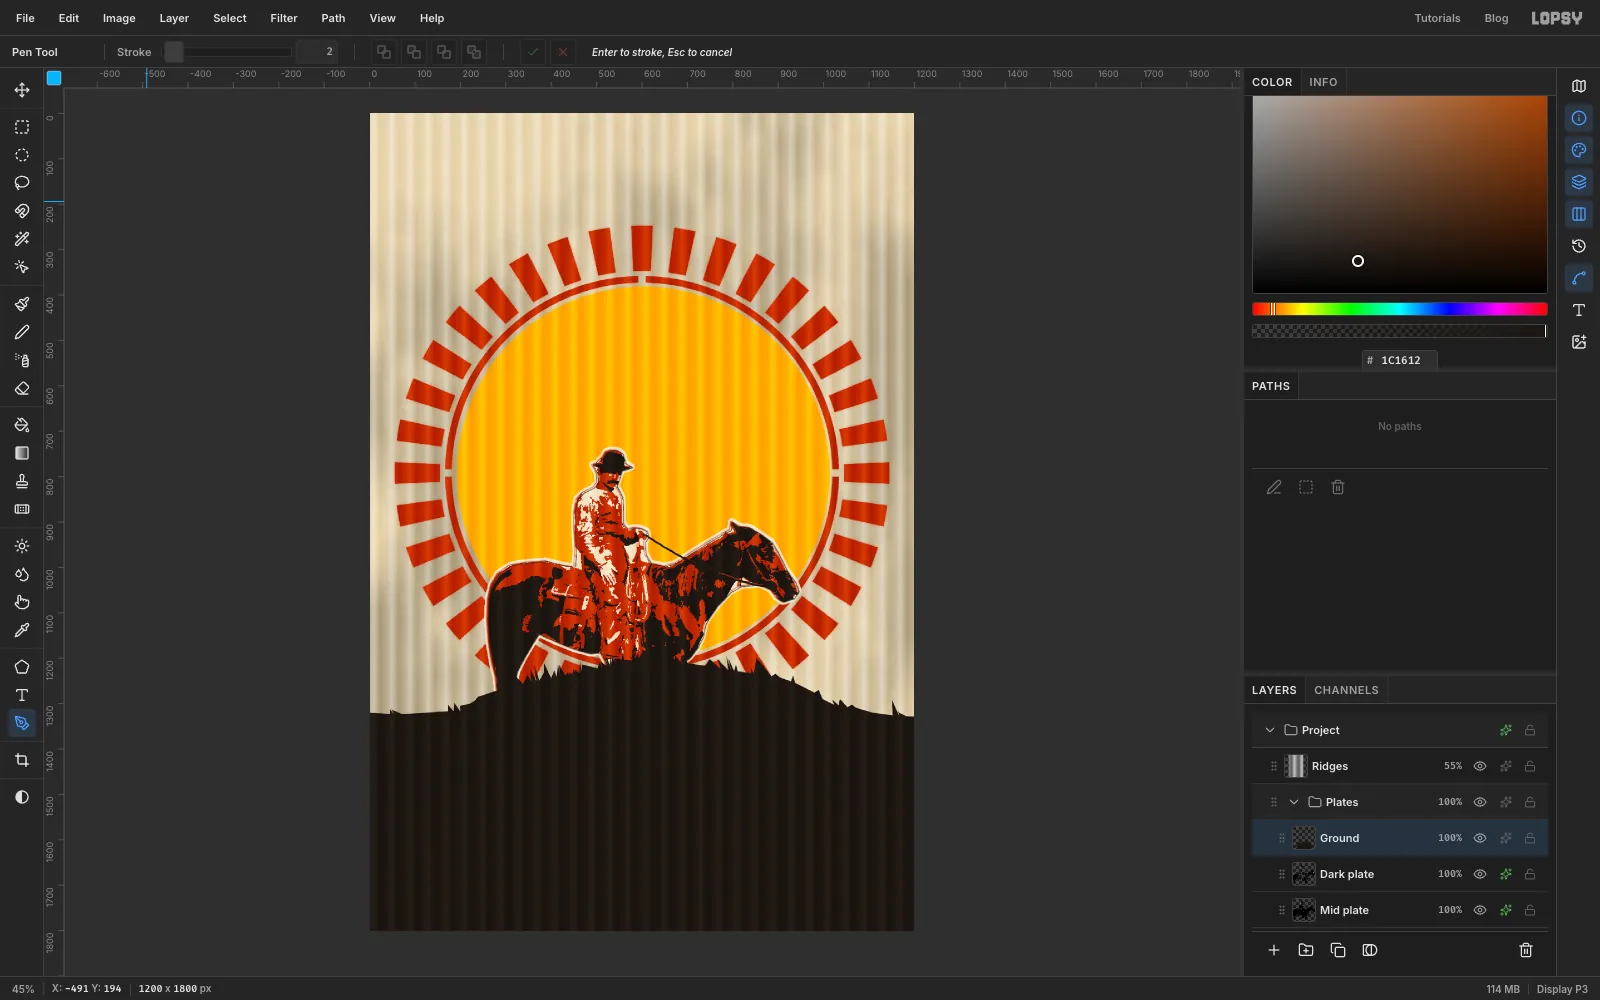
Fill the ground
In the Paths panel, click Path to Selection and then Delete Path. Fill with ink and deselect. The grass covers the straight cut across the horse's legs.
-
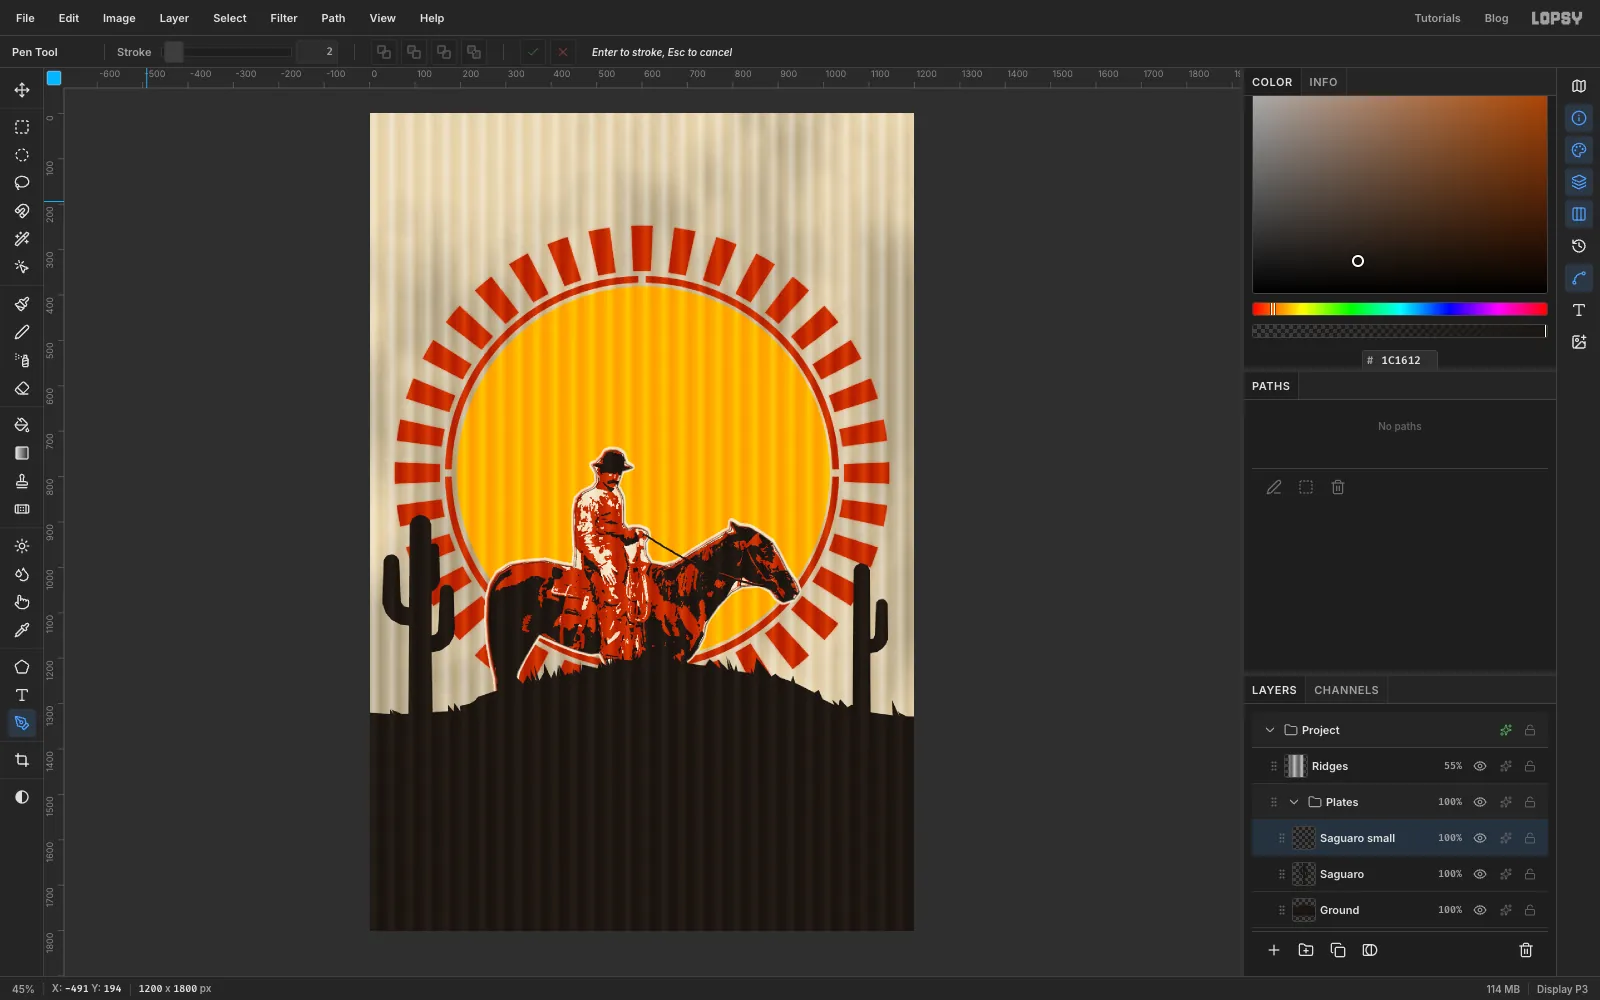
Add two saguaros
Draw each cactus the same way: add a layer, draw the outline with the Pen, then Path to Selection, Delete Path, fill with ink and deselect.
Saguaro, at the left, about 112 px in from the edge: a trunk about 54 px wide that rises from the ground to about 880 px and tapers slightly. Give it two arms, one on each side, at different heights. Each arm leaves the trunk sideways, bends upward in a curve, and rises as a column about 40 px wide; the left one starts lower and climbs higher.Saguaro small, at the right, about 1084 px across: a trunk about 40 px wide whose top is at about 1000 px, with a single arm on its right that bends up from about 1080 px.
Round the tops of the trunks and arms and the inside of each bend with short clicks 6–8 px apart. Long clicks there give you a faceted, polygonal cactus.
-
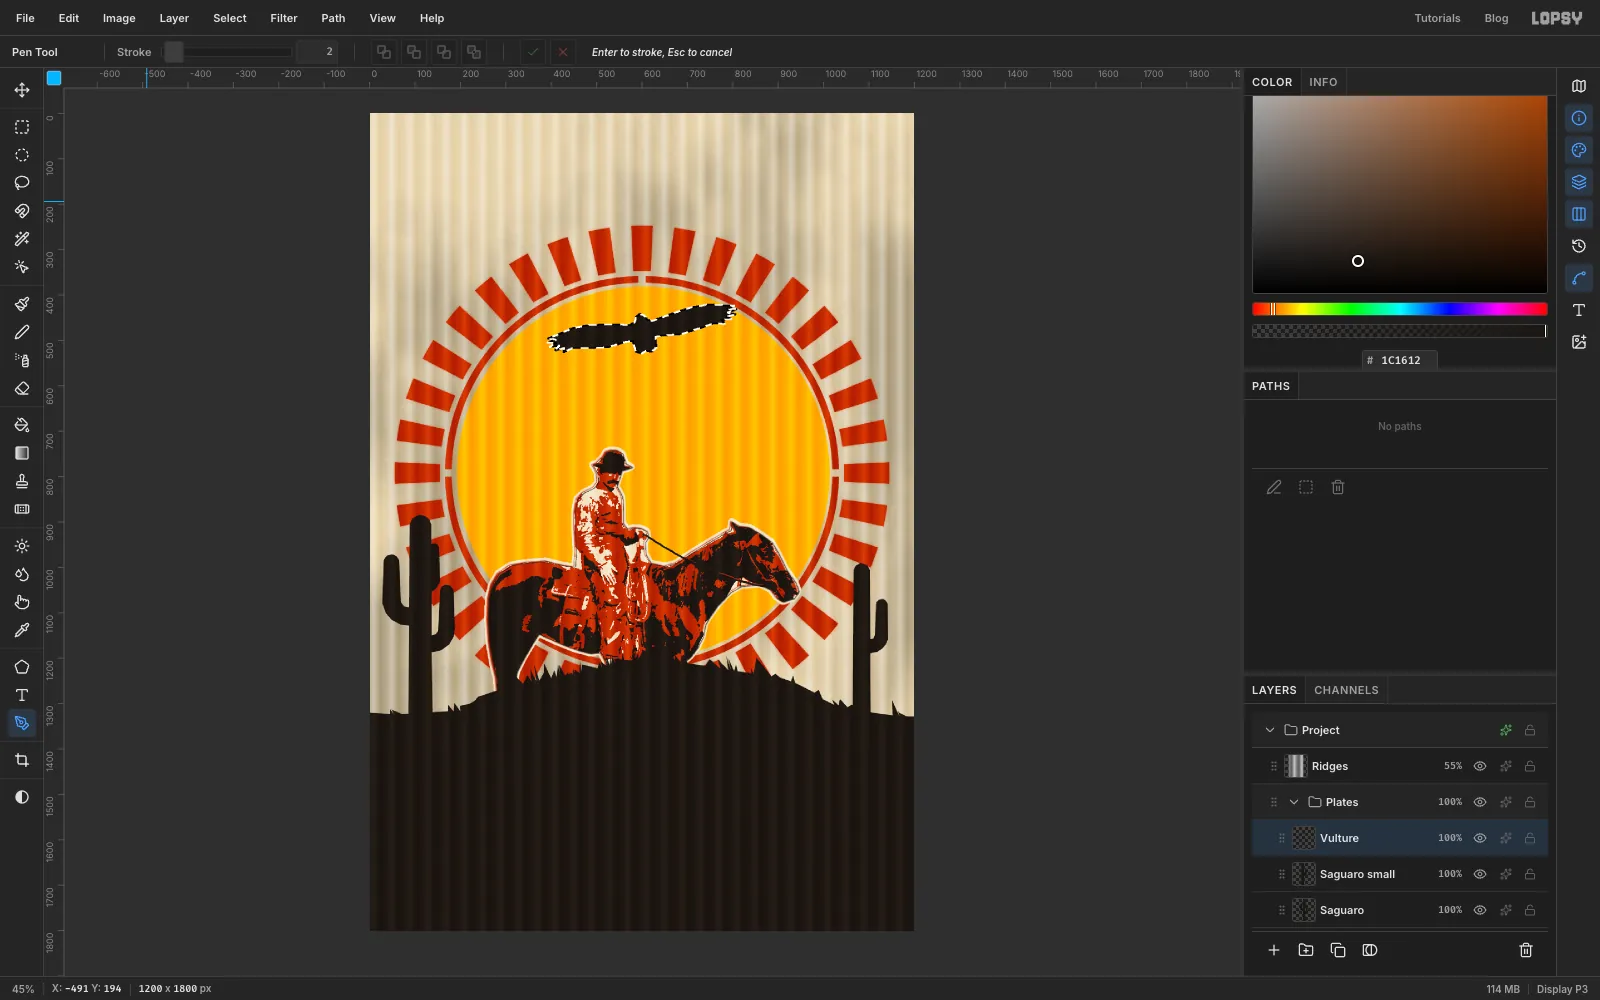
Draw a vulture large
Add a layer called
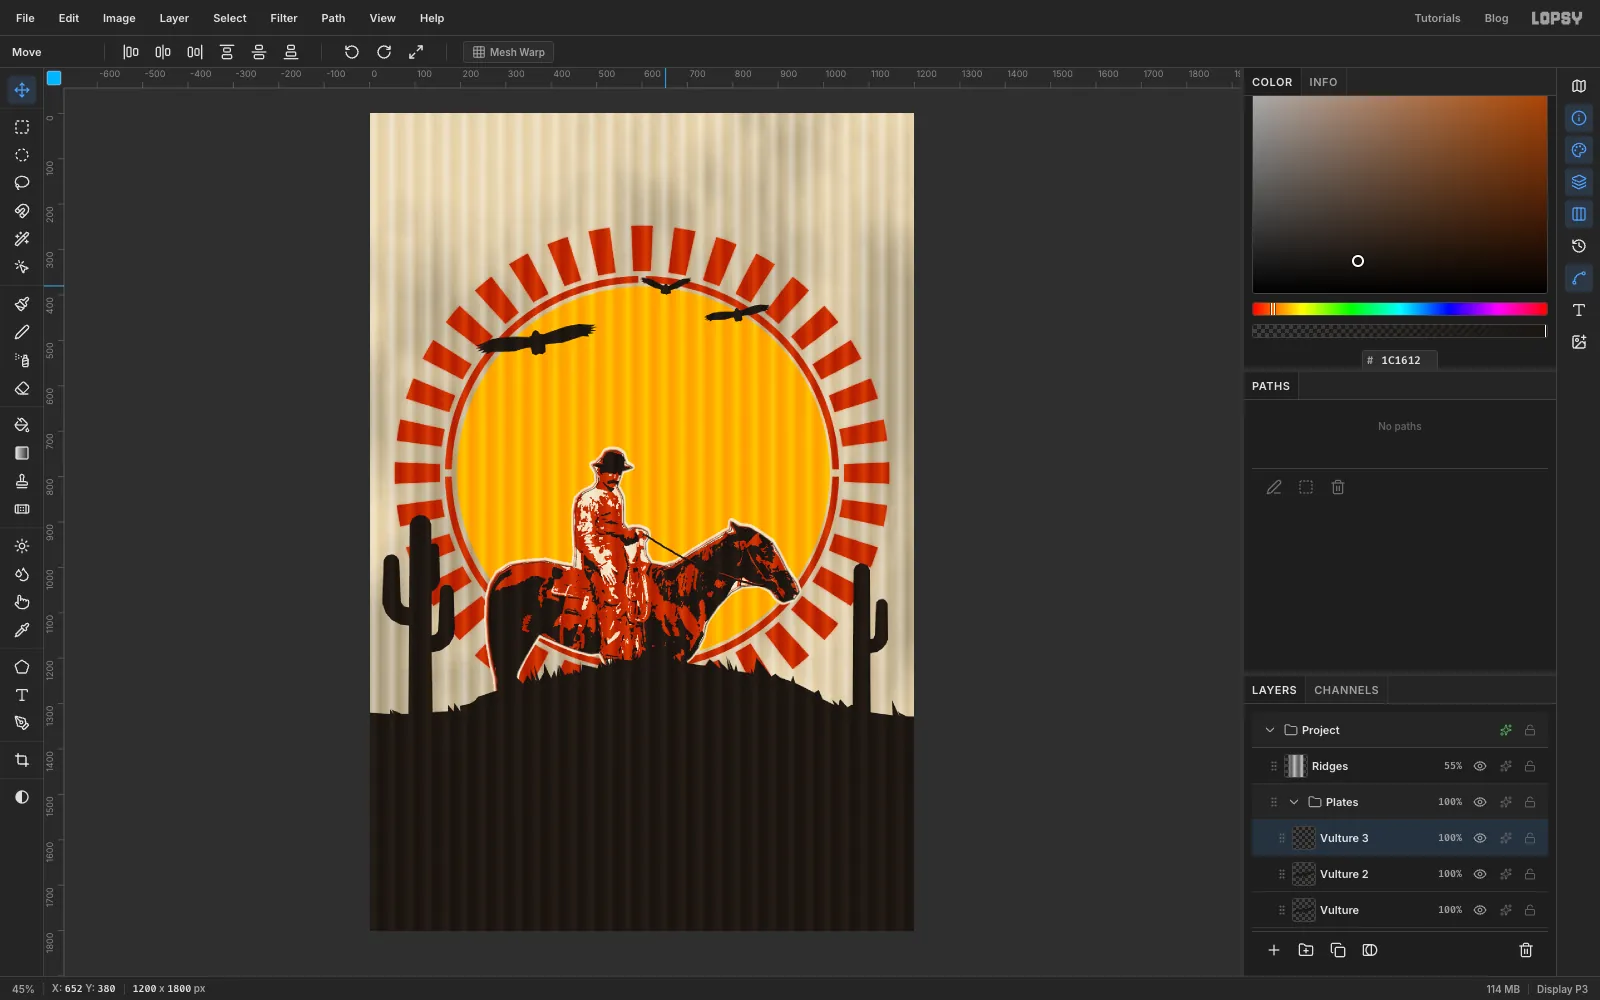
Vultureand draw a soaring vulture seen from below with the Pen, big, about 420 px from wing tip to wing tip. Start at the small head. Click along the straight front edge of one wing out to the tip, zig-zag in and out five times for the "finger" feathers, then come back along the slightly curved back edge to a short fanned tail. Mirror the other wing back to the head and close the path.In the Paths panel, click Path to Selection and Delete Path, then fill with ink.
-
Shrink it into the sky
Deselect, then Cmd-click the
Vulturethumbnail. With the Move tool, Cmd-drag the bottom-right handle in until the bird is about 270 px across. Drag it to the upper left of the sun, over the edge of the ring, and press Cmd+D.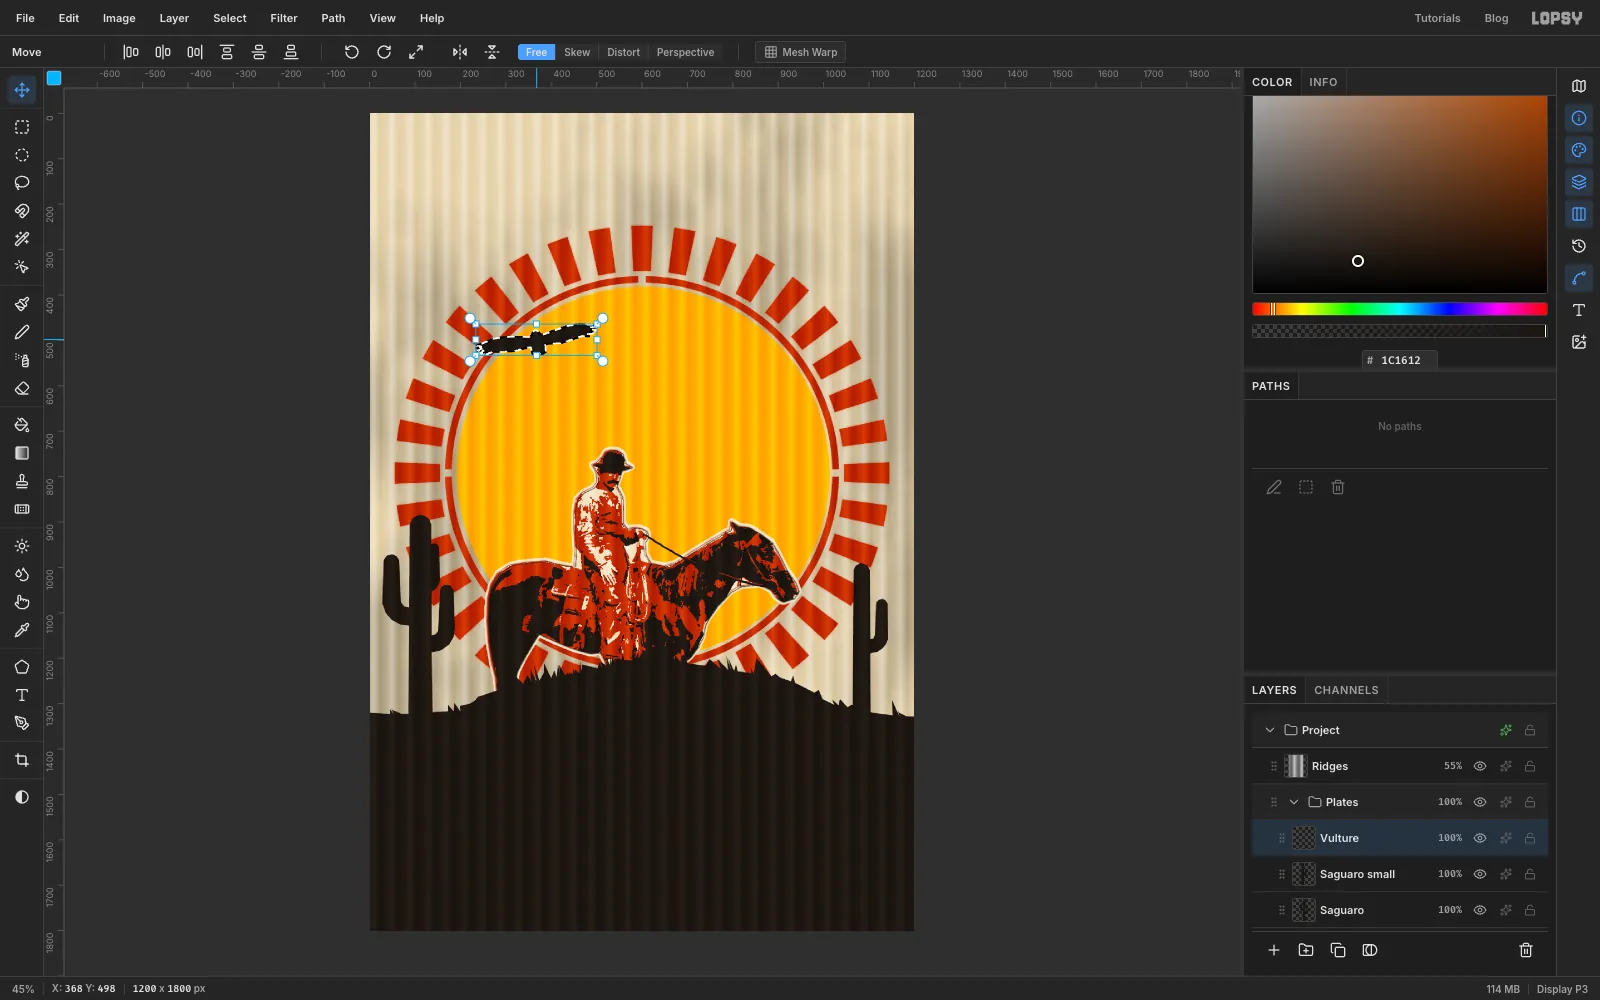
-
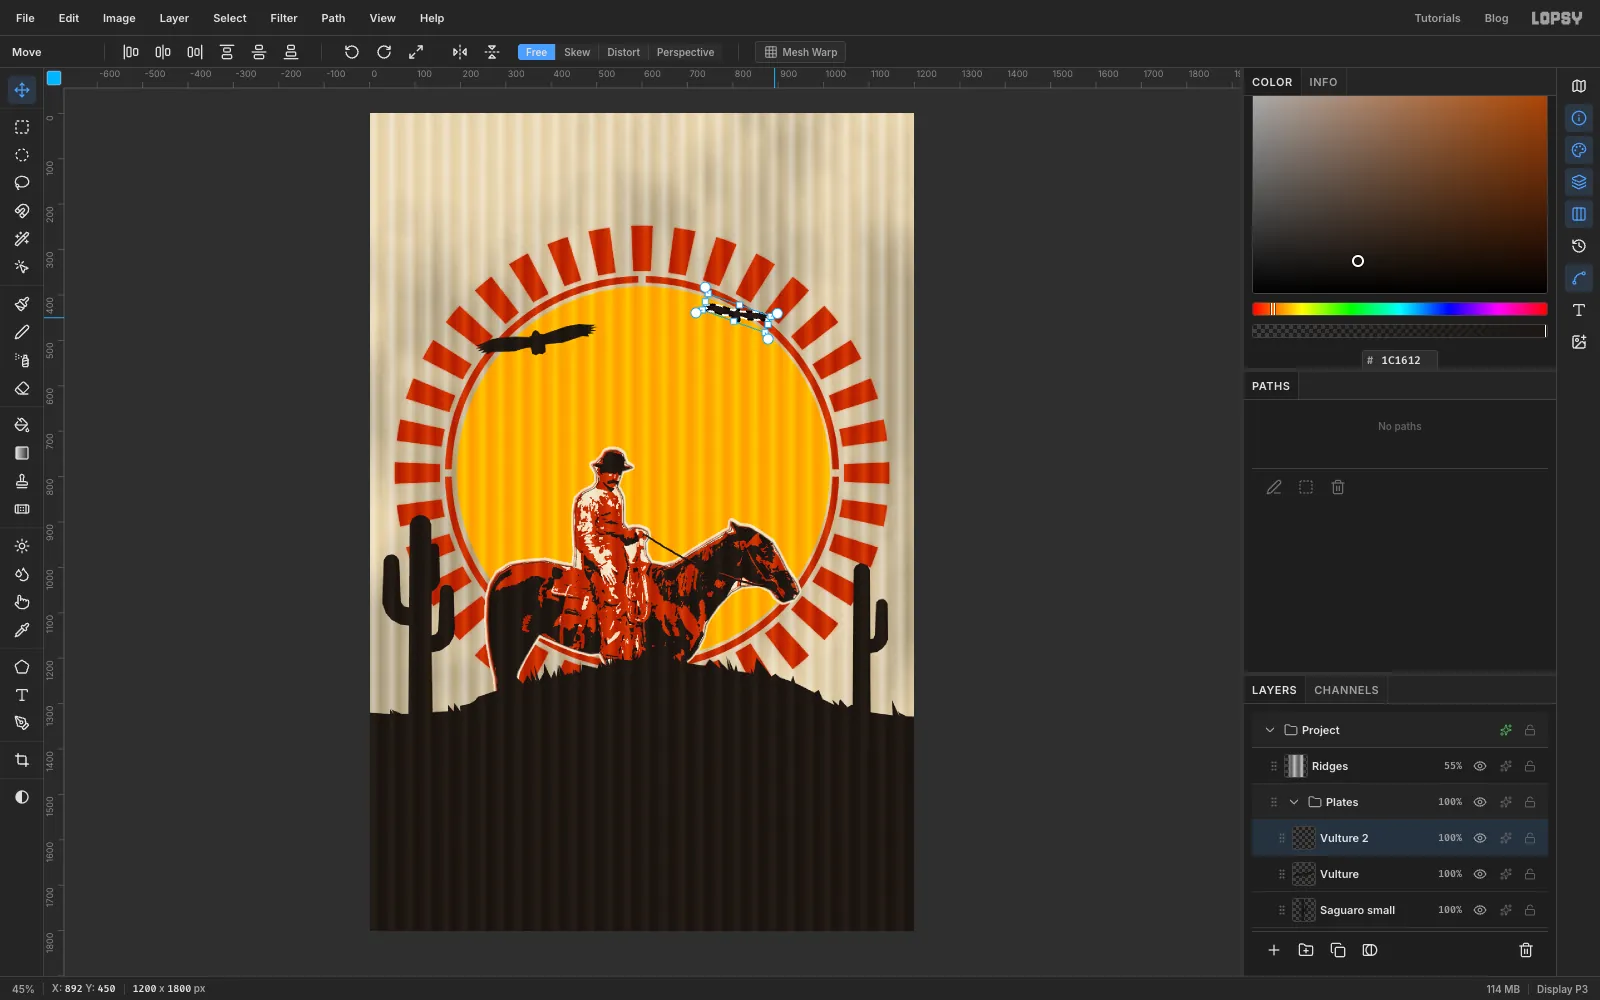
Paste a second vulture and turn it
- Cmd-click the
Vulturethumbnail, press Cmd+C, deselect, and press Cmd+V. The paste lands on its own layer in the same spot, already selected. Rename itVulture 2. - Cmd-drag the bottom-right handle in to about half the size.
- Drag it to the upper right of the sun.
- Move the pointer just outside the top-right corner until it turns into the rotate cursor. Drag down about 20° to tip it clockwise.
- Press Cmd+D, then choose Image → Flip Horizontal so it banks the other way.
- Cmd-click the
-
Draw a third bird banking
Three copies of one silhouette look like clip art, so draw the last bird in a different pose. Add a layer called
Vulture 3. Draw the same bird large, in the same order, but sweep both wings up in a shallow V and tip one wing higher than the other, as if it's banking into a turn. Turn the path into a selection and fill it with ink.Shrink it to about 130 px across, put it near the top of the sun just inside the ring, and press Cmd+D.
-
Group the flock and move it as one
Click
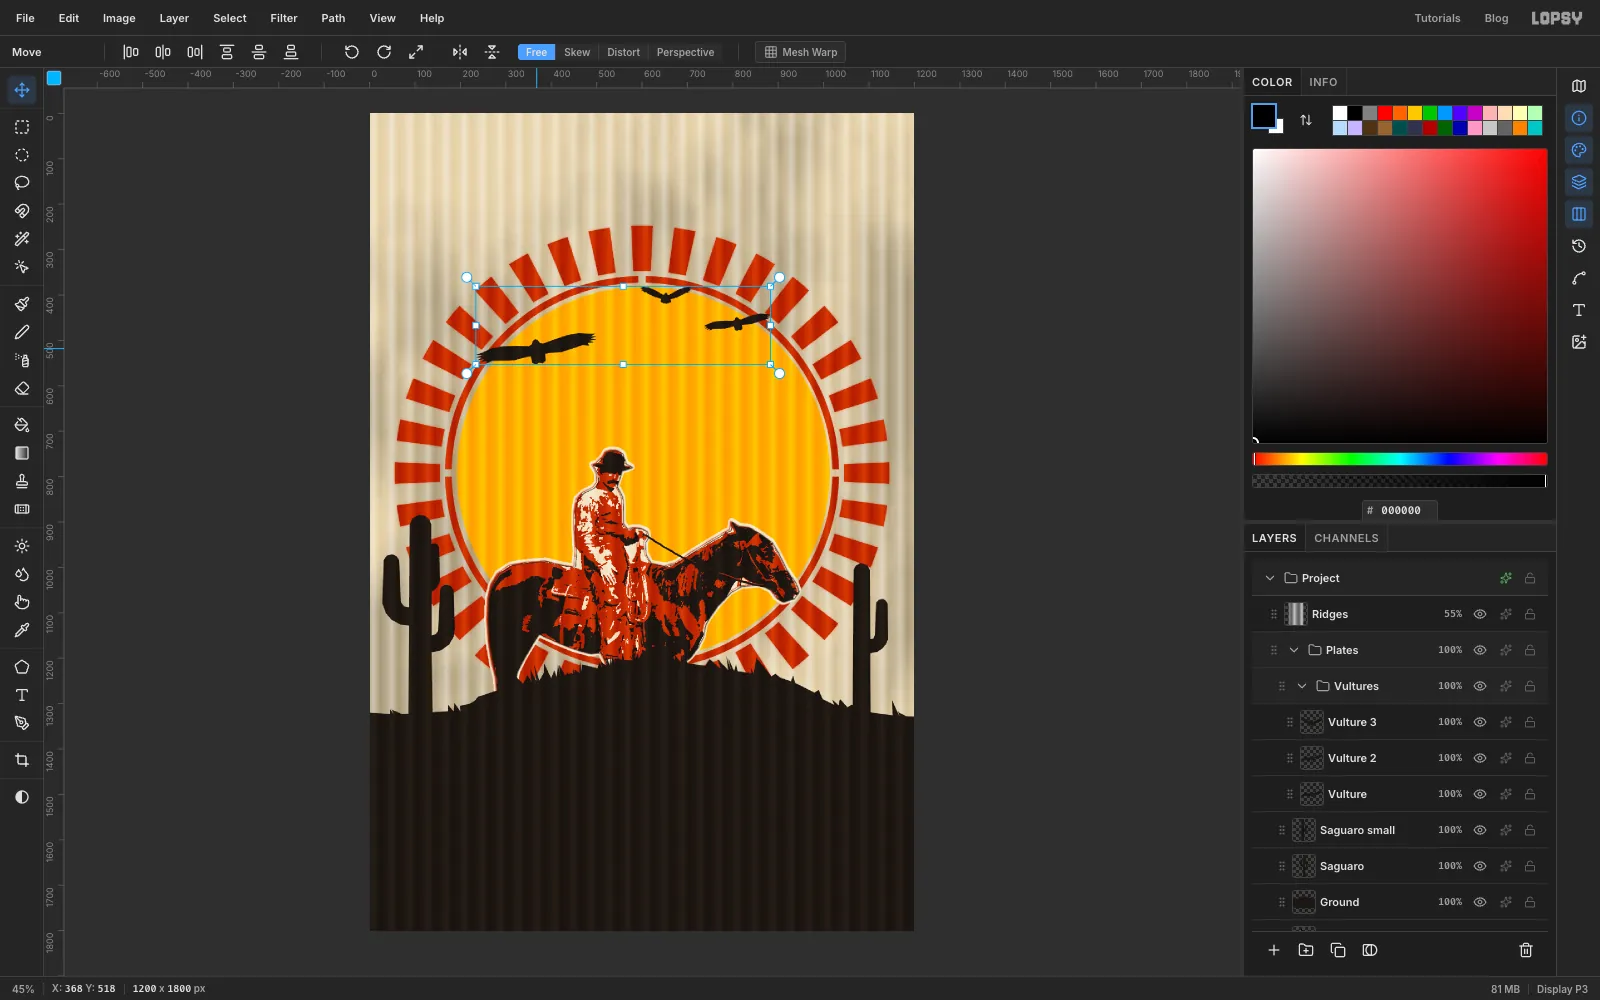
Vulture, then Shift-clickVulture 3to select all three layers. Choose Layer → Group Layers and rename the groupVultures.With the group selected, pick the Move tool and drag the flock down about 20 px. All three birds move together and keep their spacing.
-
Mist the ink plate
The black shapes need overspray too.
- Cmd-click the
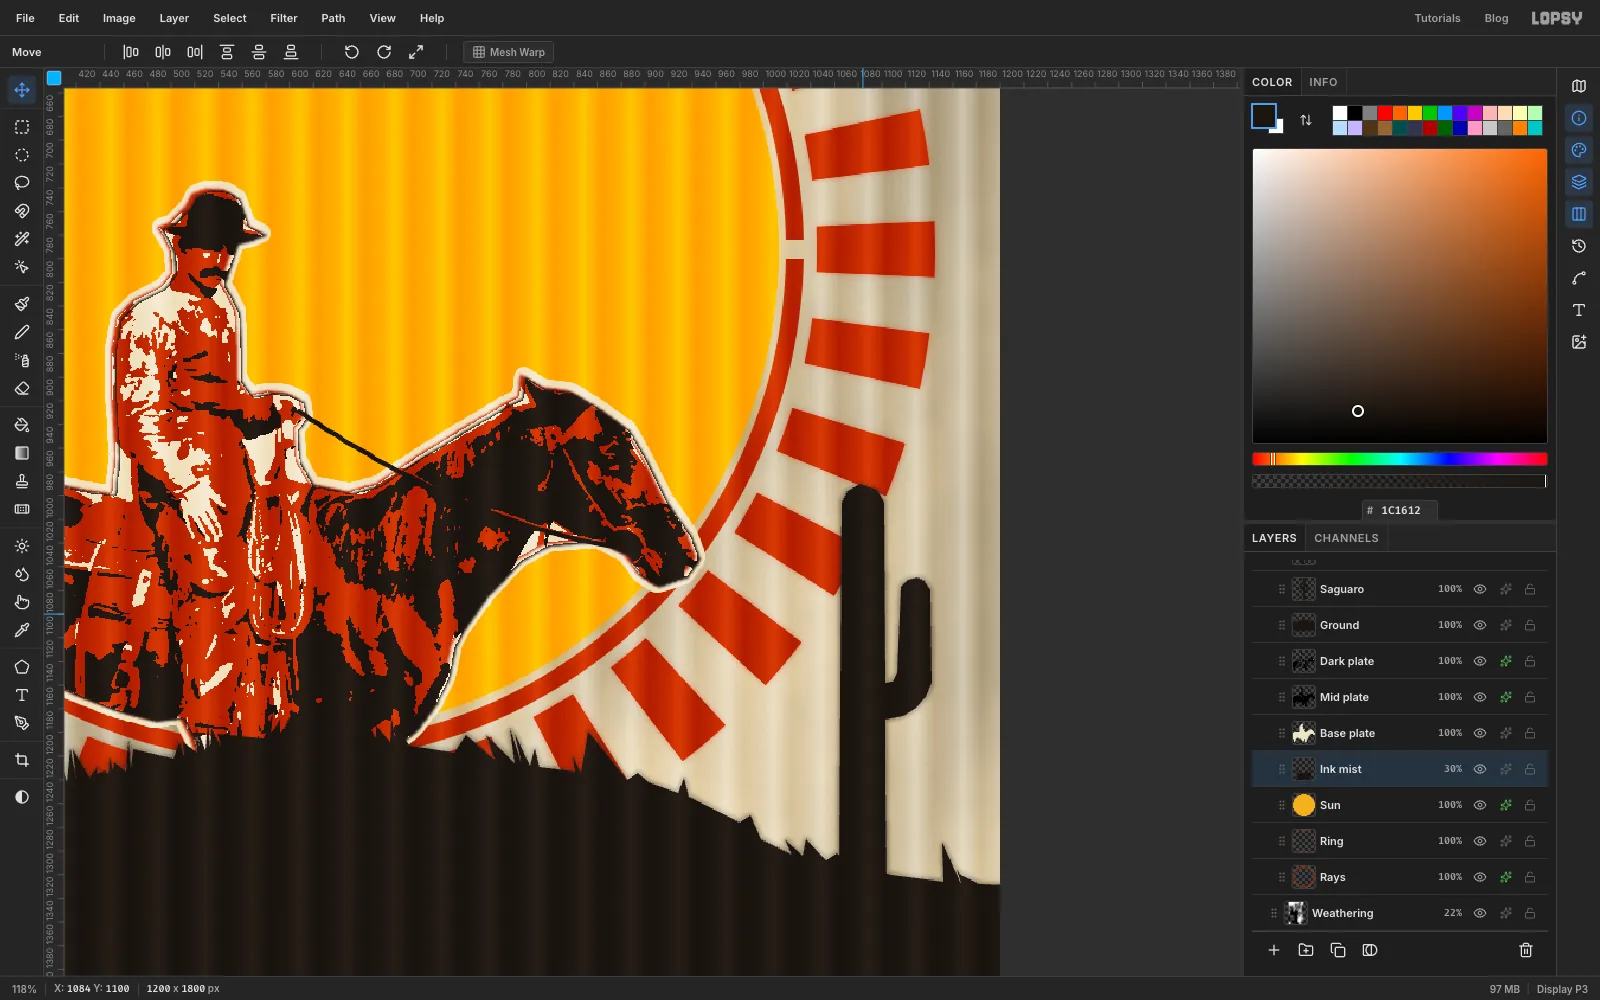
Groundthumbnail. Then Cmd+Shift-click the thumbnails of both saguaros and all three vultures to add them. - Choose Select → Grow… with
2. - Click
Sunand add a layer calledInk mist, so it sits under the rider. Fill it with ink and deselect. - Run Gaussian Blur at
5, then Add Noise at40(Mono), and set the layer's opacity to 30%.
Leave the rider out of the mist. A dark haze around him reads as a drop shadow, and that makes him look like a sticker.
- Cmd-click the
-
Set the credits block
Collapse the
Vulturesgroup, click it, and click New Group. Name the new groupType. Build the text from the bottom up. A click with the Text tool near existing text edits that text instead of making new text.- Billing block. Set the foreground to . Pick the Text tool and set Size
17, font Saira Extra Condensed, weight Medium and Align to Center. Click near the bottom middle of the poster and type three lines, pressing Enter between them:
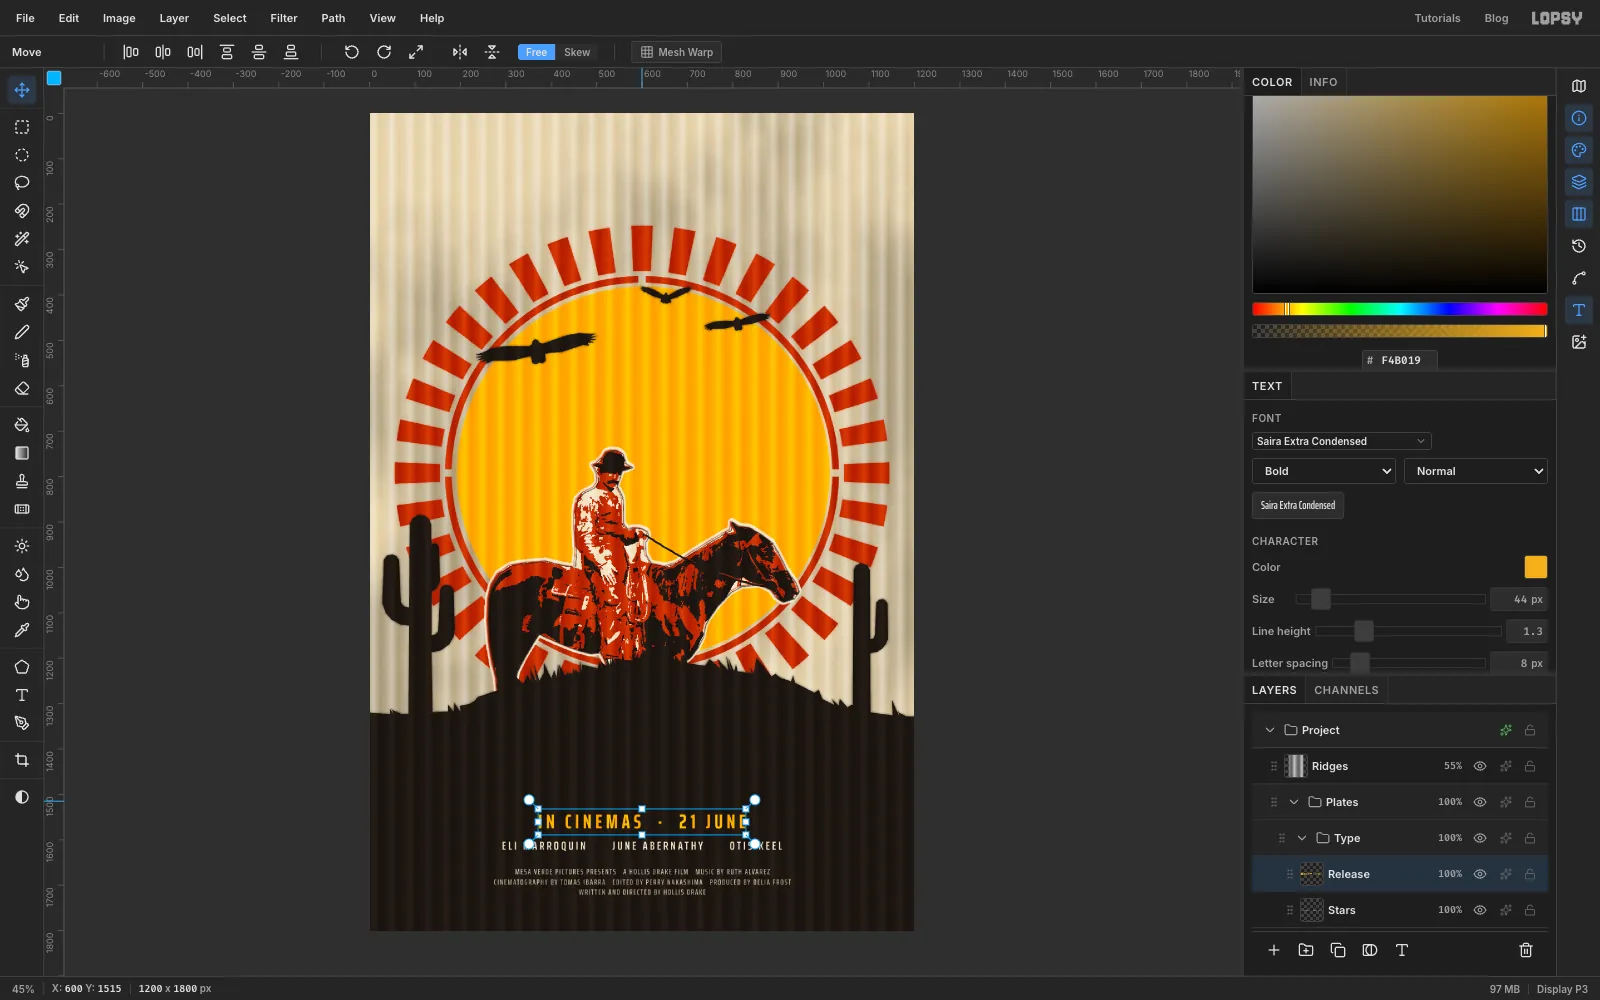
MESA VERDE PICTURES PRESENTS A HOLLIS DRAKE FILM MUSIC BY RUTH ALVAREZCINEMATOGRAPHY BY TOMAS IBARRA EDITED BY PERRY NAKASHIMA PRODUCED BY DELIA FROSTWRITTEN AND DIRECTED BY HOLLIS DRAKE
Press Tab to finish. In the Text panel, set Letter spacing to
2and Line height to1.3. Rename the layerBilling. With the Move tool, drag it so it's centred and its top sits at about 1664 px, which leaves an 80 px margin below.- Stars. Click
Typeso the next text doesn't restyle the billing. Set the colour to cream , Size26, weight SemiBold. Click above the billing and typeELI MARROQUIN JUNE ABERNATHY OTIS KEELwith six spaces between names. Set Letter spacing to5, rename itStars, and place it with its top at about 1604 px. - Release line. Click
Typeagain. Use yellow, Size44, weight Bold, and typeIN CINEMAS · 21 JUNE. Set Letter spacing to8, rename itRelease, and place its top at about 1544 px.
The sizes step down from the release line to the billing block, so the eye reads them in that order.
- Billing block. Set the foreground to . Pick the Text tool and set Size
-
Set the title in a stencil face
Click
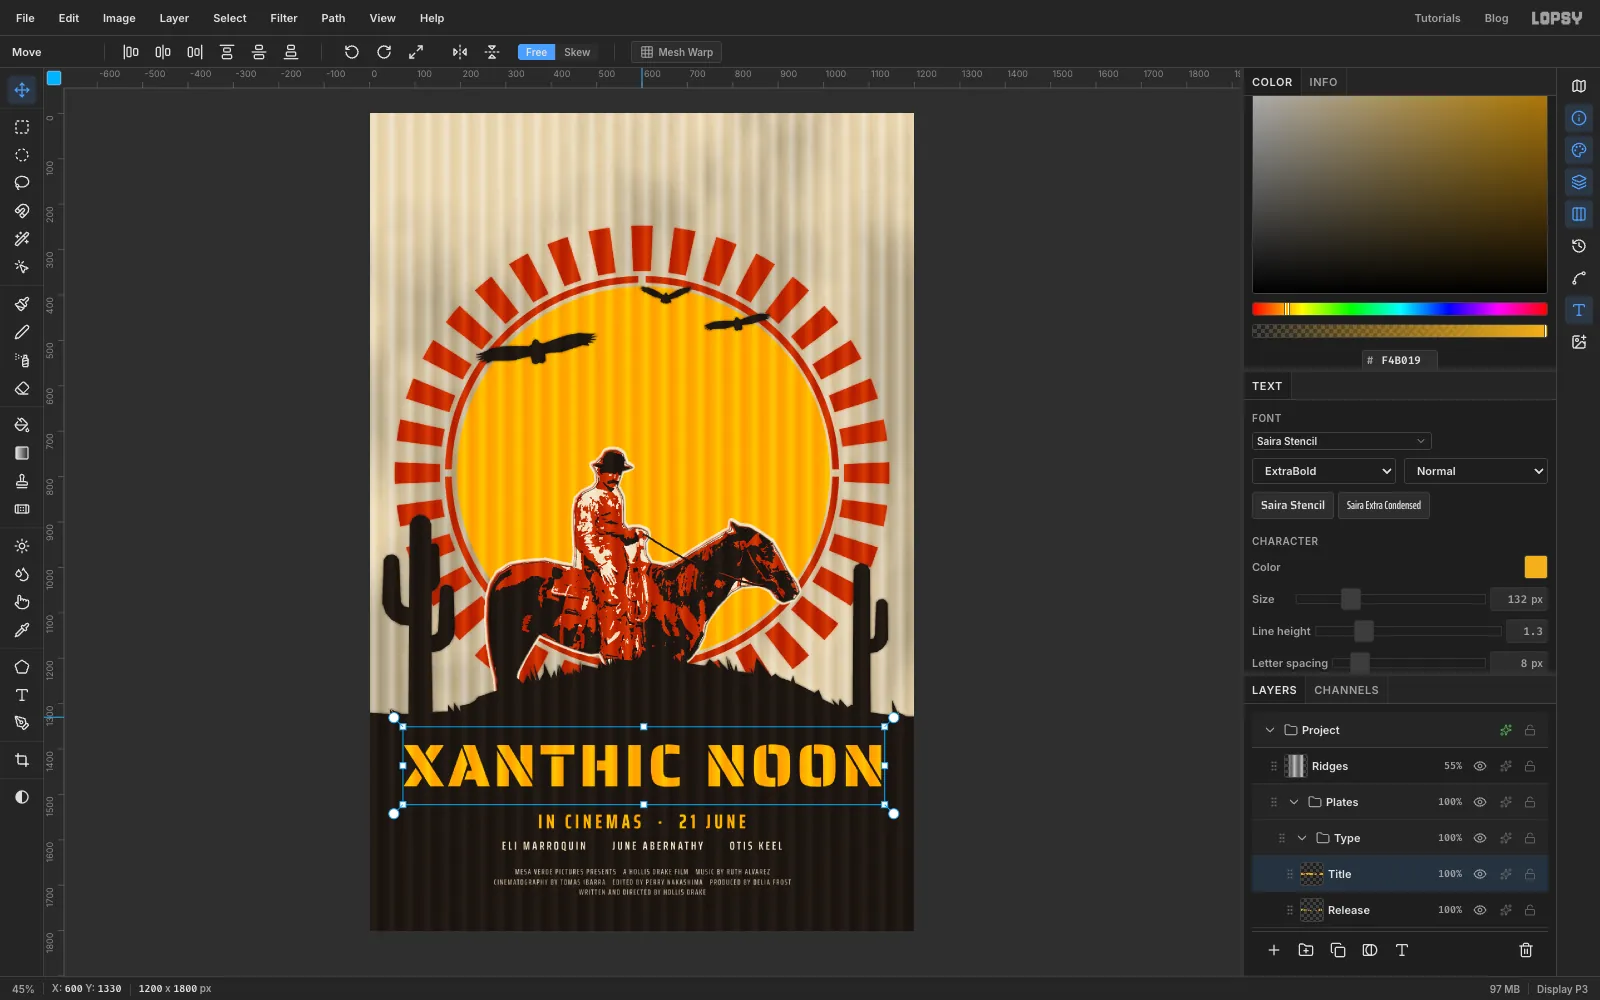
Type. Keep yellow, pick Saira Stencil at weight ExtraBold, set Size to about132, and typeXANTHIC NOONin an empty part of the ground. Press Tab and rename the layerTitle.Saira Stencil already has bridges cut through its letters. At this size the title is about 1050 px wide, which leaves a margin of about 75 px on each side. Move it so it's centred, with the tops of the capitals at about 1390 px. That's comfortably below the grass and about 55 px above the release line.
-
Spray mist around the title
- Cmd-click the
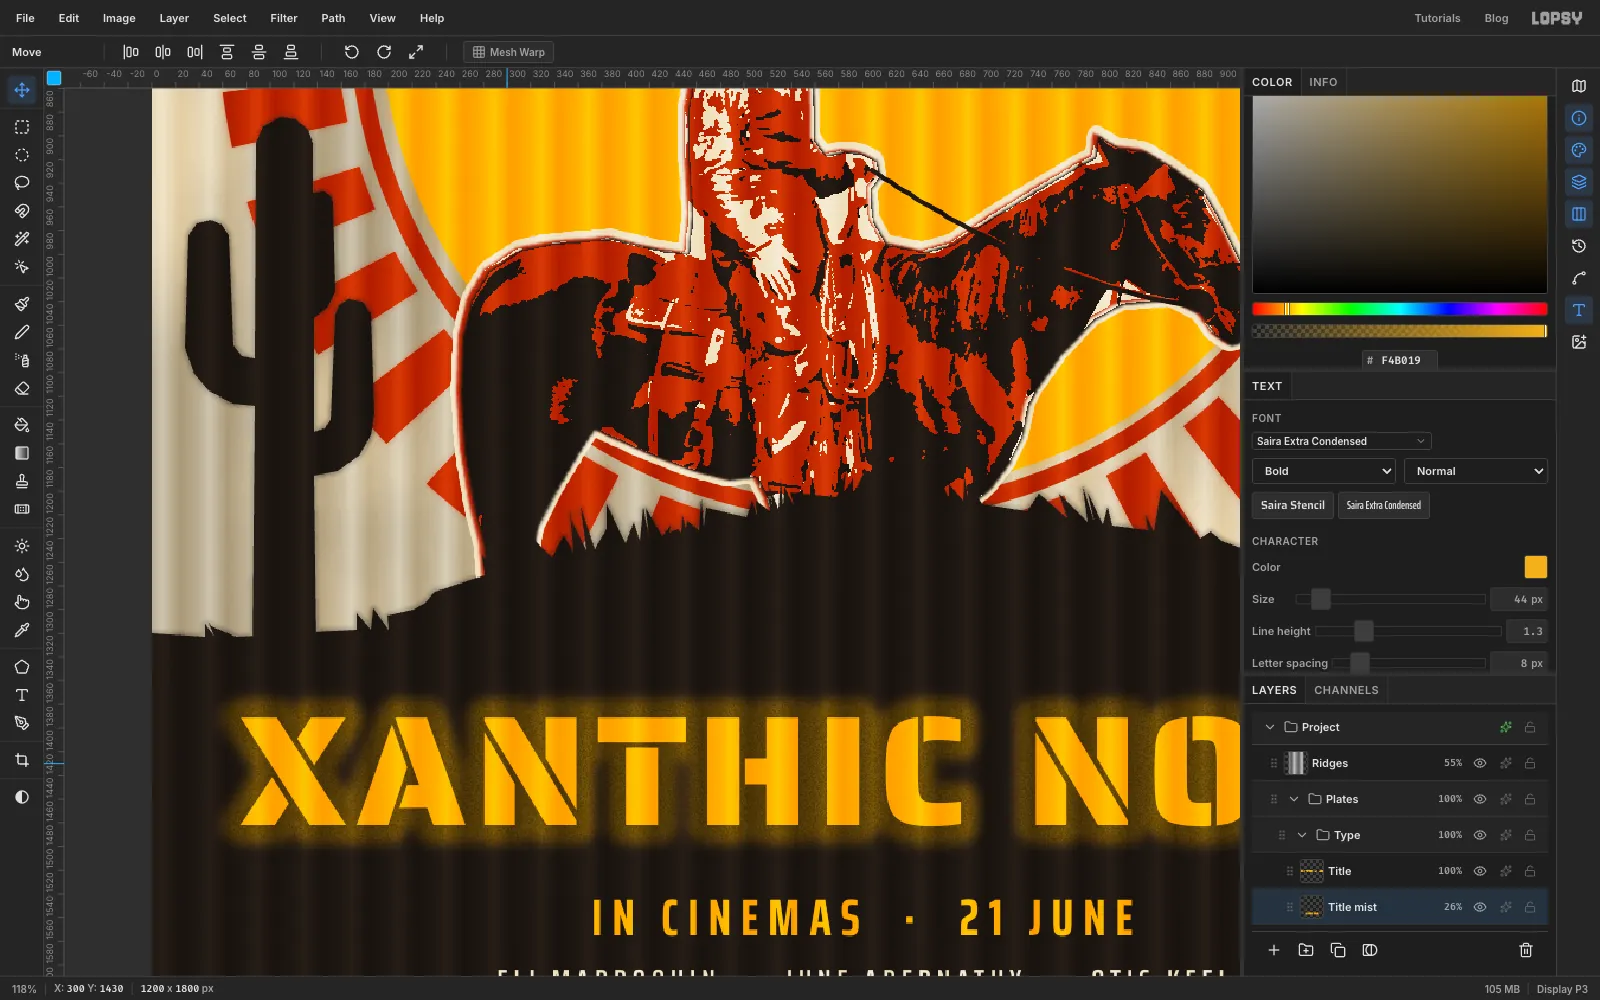
Titlethumbnail. Choose Select → Grow… with16, then Select → Feather… with10. - Click
Releaseand add a layer calledTitle mist, so it sits just under the title. - Fill it with yellow, deselect, and run Add Noise at
70(Mono). Set the layer's opacity to 26%.
The noise breaks the soft halo into grain, so it reads as paint mist rather than a glow.
- Cmd-click the
-
Fade the letters with orange spray
- Click
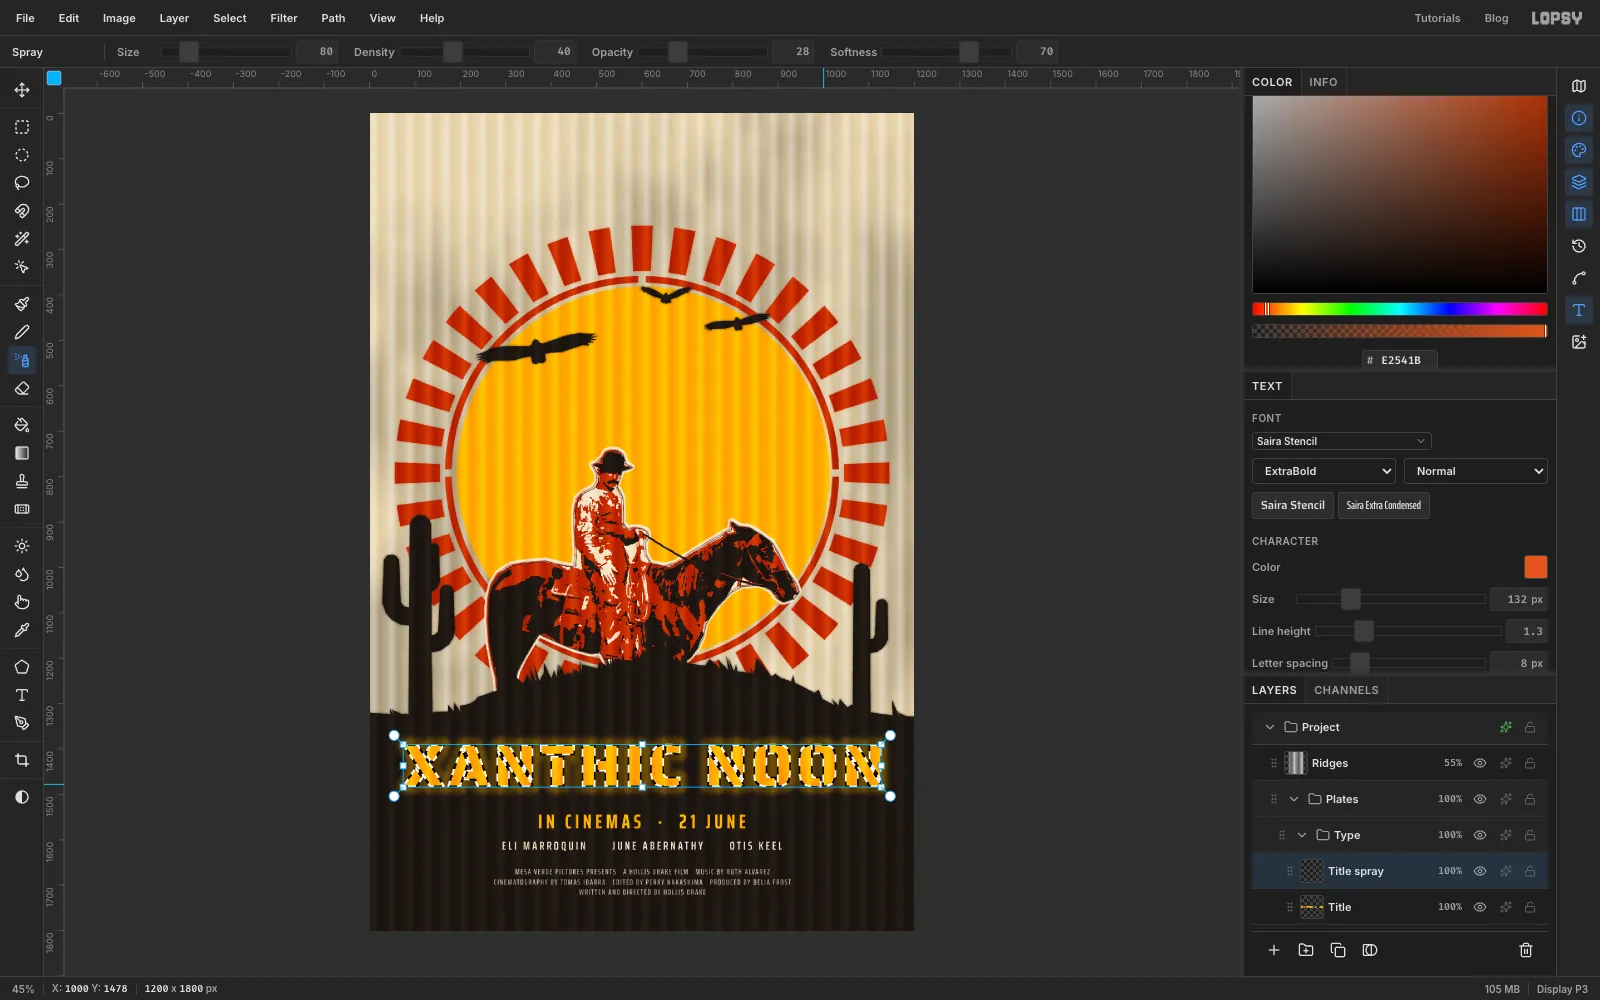
Title, then Cmd-click its thumbnail, and add a layer calledTitle sprayabove it. - Pick the Spray tool and set the foreground to . Set Size
110, Density40and Opacity28. - Drag along the feet of the letters from left to right. Make a second, smaller pass (Size
80) over the left-hand letters, and a third under the second word. The selection keeps the spray inside the letters.
Deselect when you're done.
- Click
-
Add the tagline
Click
Title spray. Set the colour to ink, Size40, Saira Extra Condensed Bold, and typeONE TOWN. ONE SUN. NO SHADE.near the top of the poster. Set Letter spacing to8, rename itTagline, and centre it with the tops of the letters about 92 px down.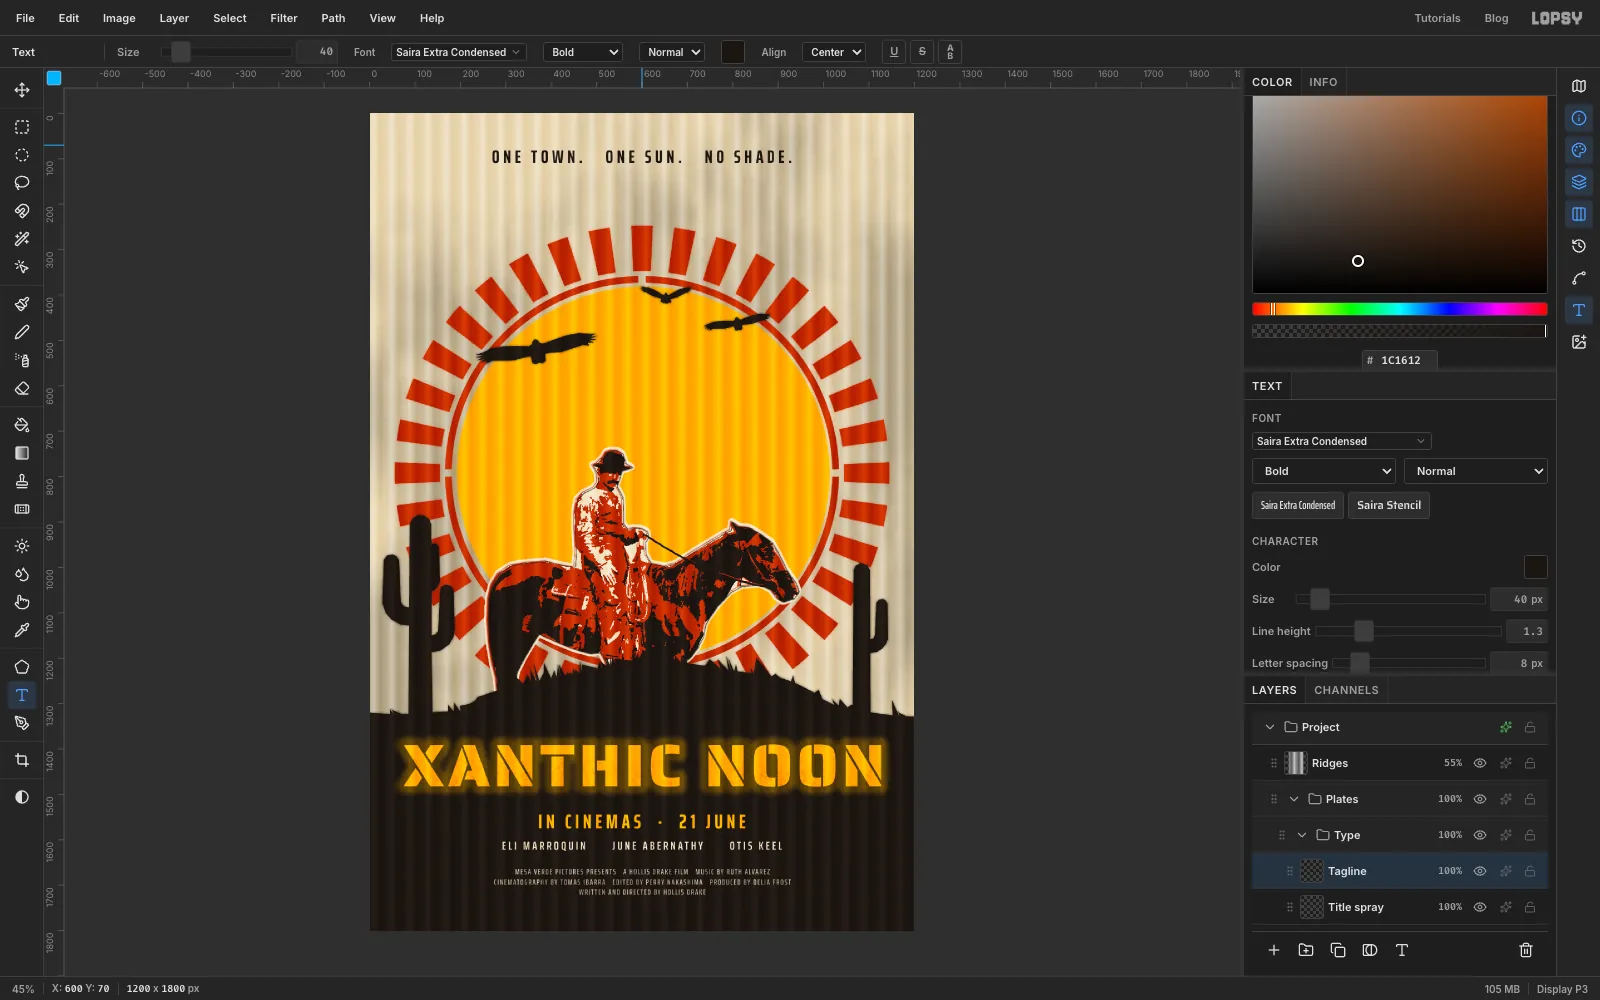
-
Turn a credit on its side
- Click
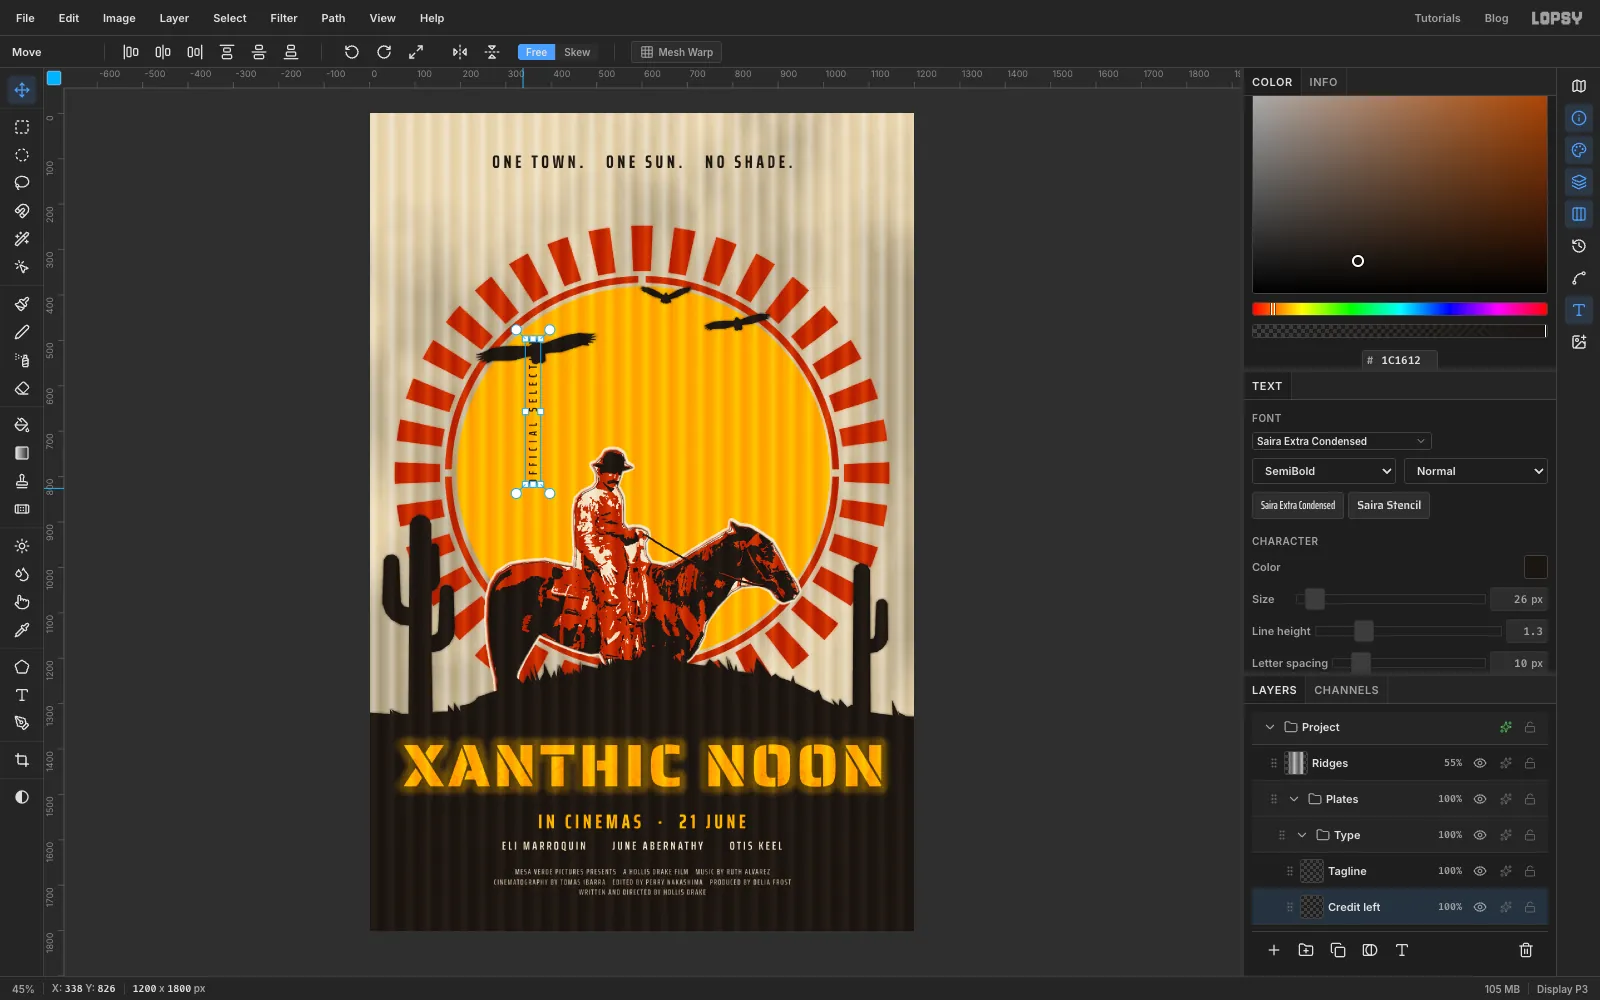
Title sprayagain. Keep ink and Saira Extra Condensed, set Size26and weight SemiBold, and typeOFFICIAL SELECTIONin an empty patch of the sun, away from other text. Set Letter spacing to10and rename itCredit left. - With the Move tool, the text shows its handles without a selection. Hold Cmd and drag from just outside a corner to turn it a quarter turn anticlockwise. Cmd snaps the angle in 15° steps, so it stops exactly at 90°. Press Cmd+D.
The text is still live, so you can fix a typo later.
- Click
-
Seat the side credits in the margins
- Drag
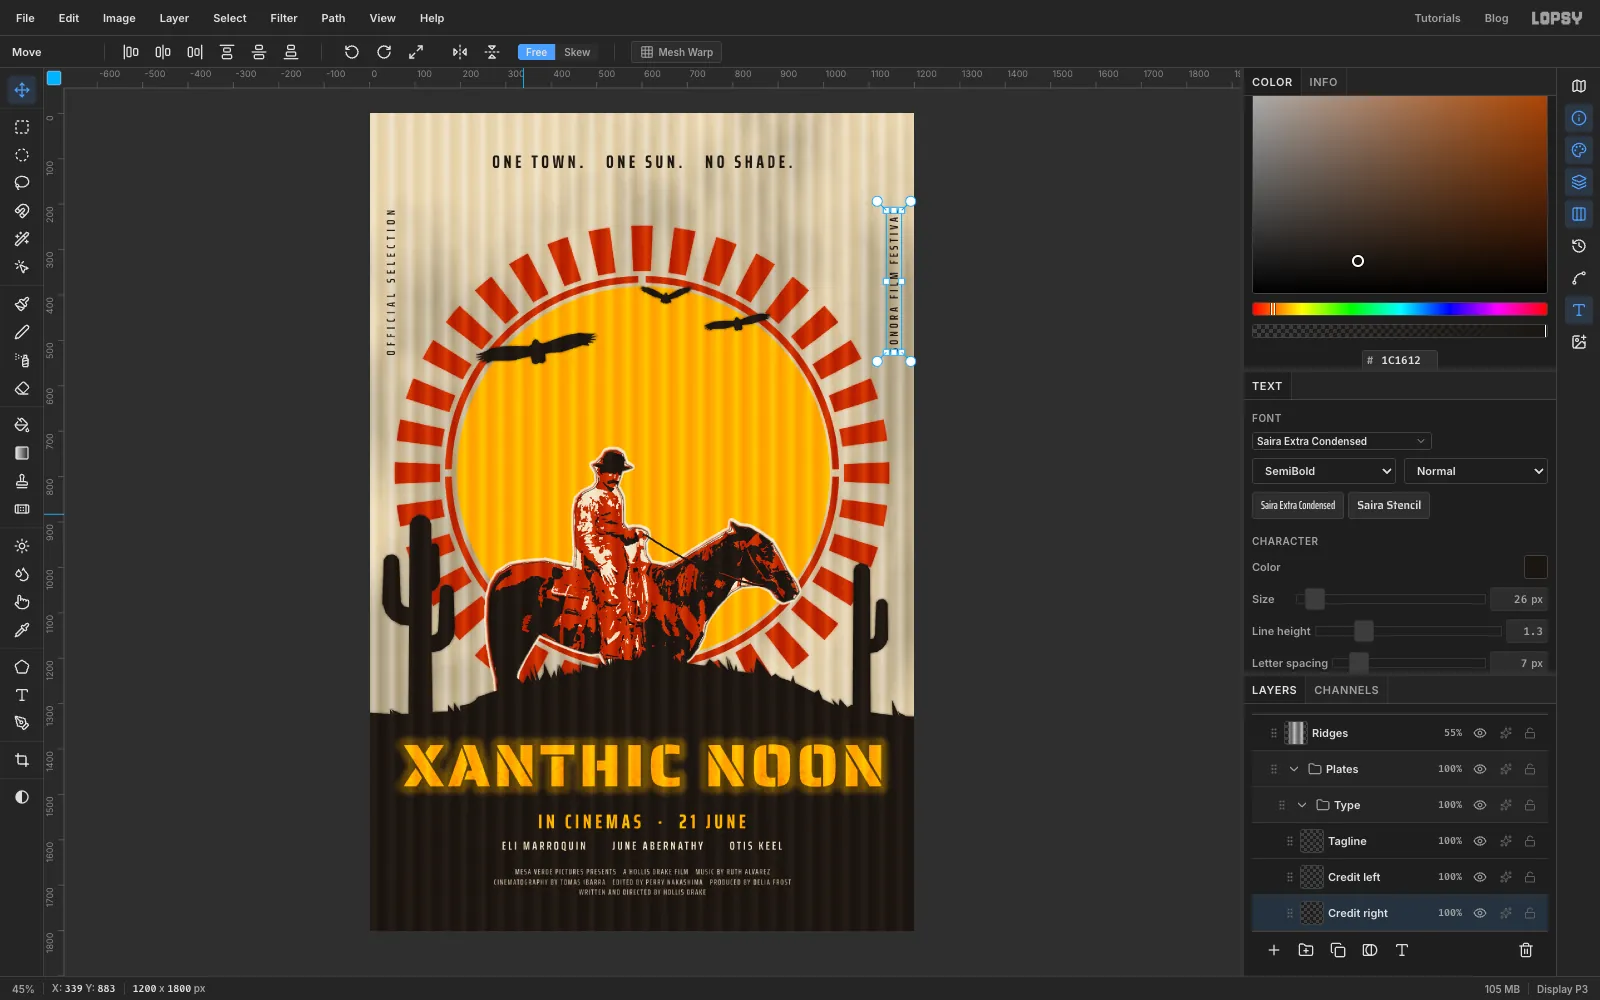
Credit leftto the left margin, about 38 px in from the edge, with its top end at about 214 px. - Make a second credit the same way:
SONORA FILM FESTIVAL, renamedCredit right. Turn it the same direction, so both read from bottom to top. - Adjust its Letter spacing until it's the same length as the left one (
7works). Then slide it into the right margin at the same height.
Matching lengths and directions makes the two credits read as a pair.
- Drag
-
Let the title drip
Expand
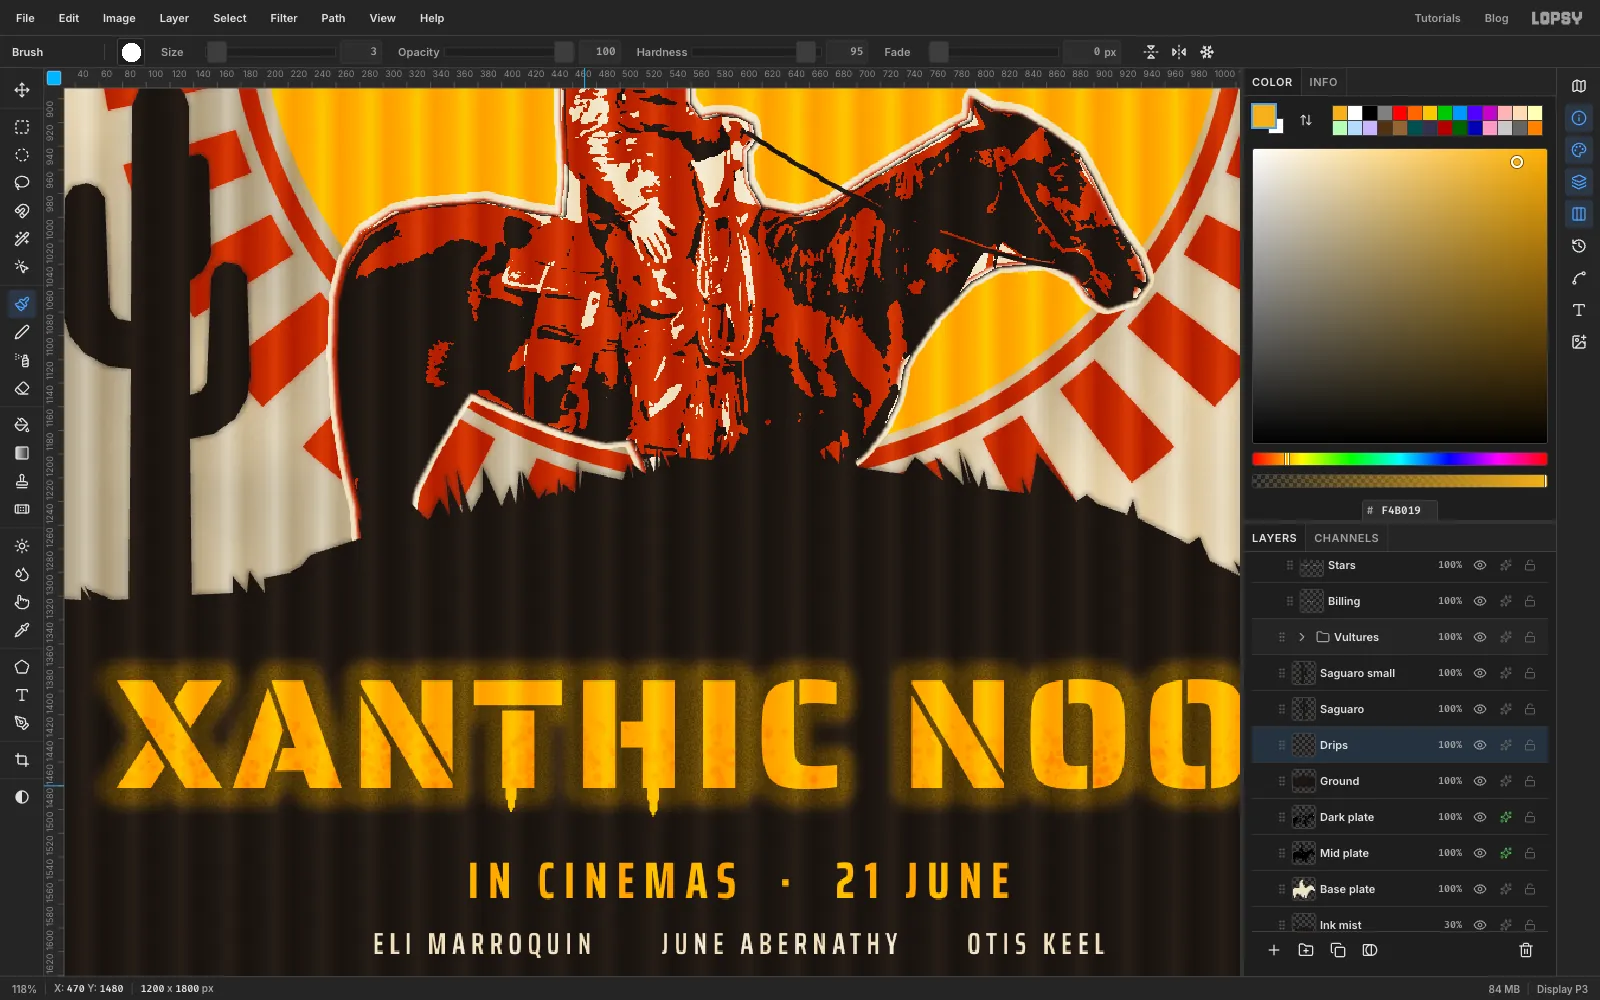
Plates, clickGroundand add a layer calledDrips. Pick the Brush with Hardness95, and set the colour to yellow , the colour of the letters.A drip is widest where it leaves the letter and thins to a point. Draw each one as three short straight strokes:
- At Size
10, click at the bottom of a letter stem, then Shift-click a few pixels lower. - Drop to Size
7and Shift-click lower again. - Finish at Size
3with the last Shift-click.
Make three drips of different lengths, between about 12 and 30 px. Hang them from straight stems like the T, the H and the final N. A drip under a curve, such as the C, looks like a cedilla. Keep every tip at least 40 px above the release line.
- At Size
-
Overspray the hilltop
With
Dripsselected, add a layer calledOversprayand pick the Spray tool with ink as the colour and Opacity70. Make short passes along the top of the hill, just above the grass, changing Size between30and56and Density between8and16. Leave gaps between them. Patches look sprayed; one long even band looks like a filter.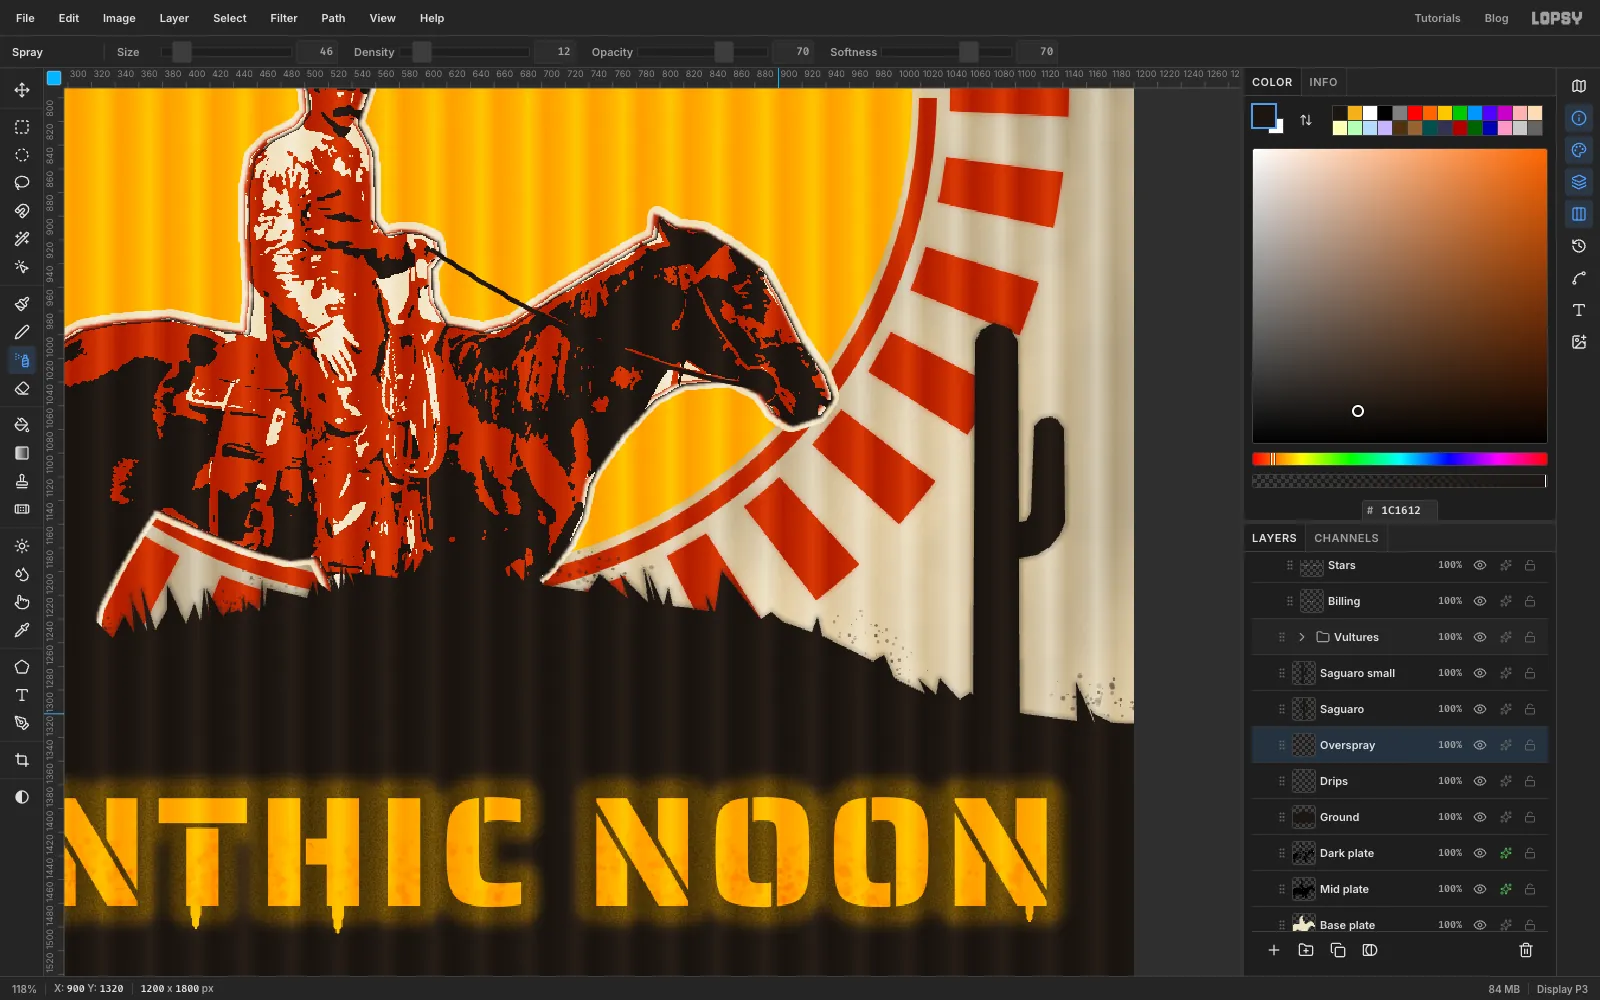
-
Fade the mist with the Eraser
Keep
Oversprayselected. Pick the Eraser, set Size160and Opacity45, and wipe once or twice over each end of the hill. The mist fades out instead of stopping at the poster edge.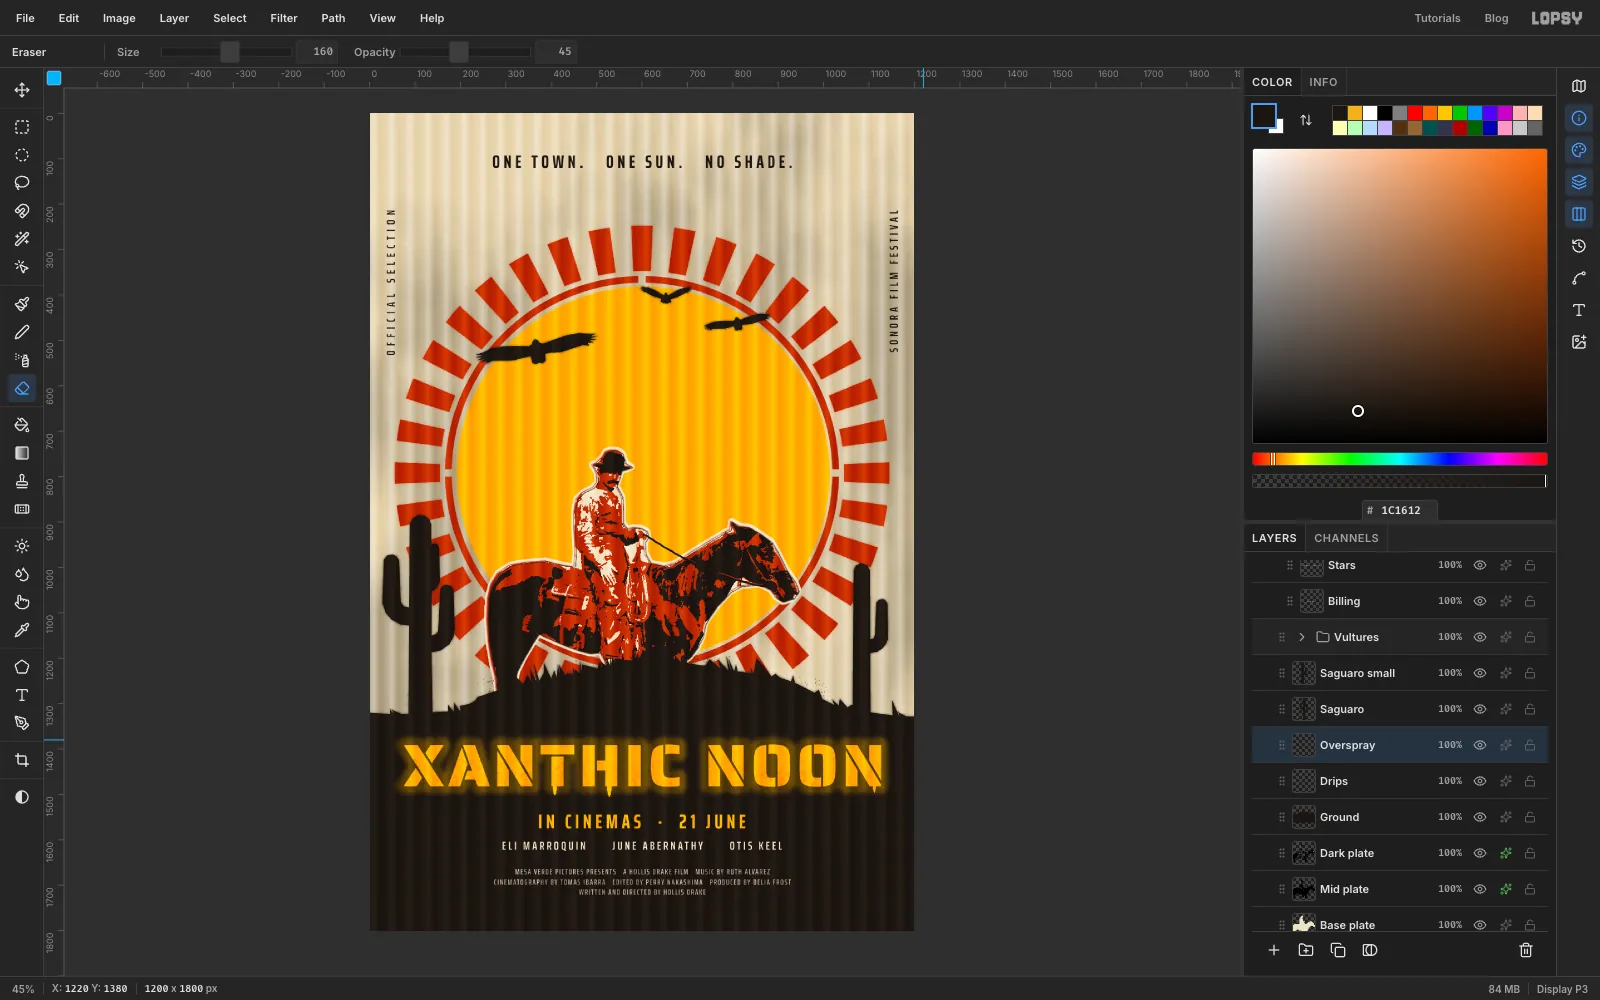
-
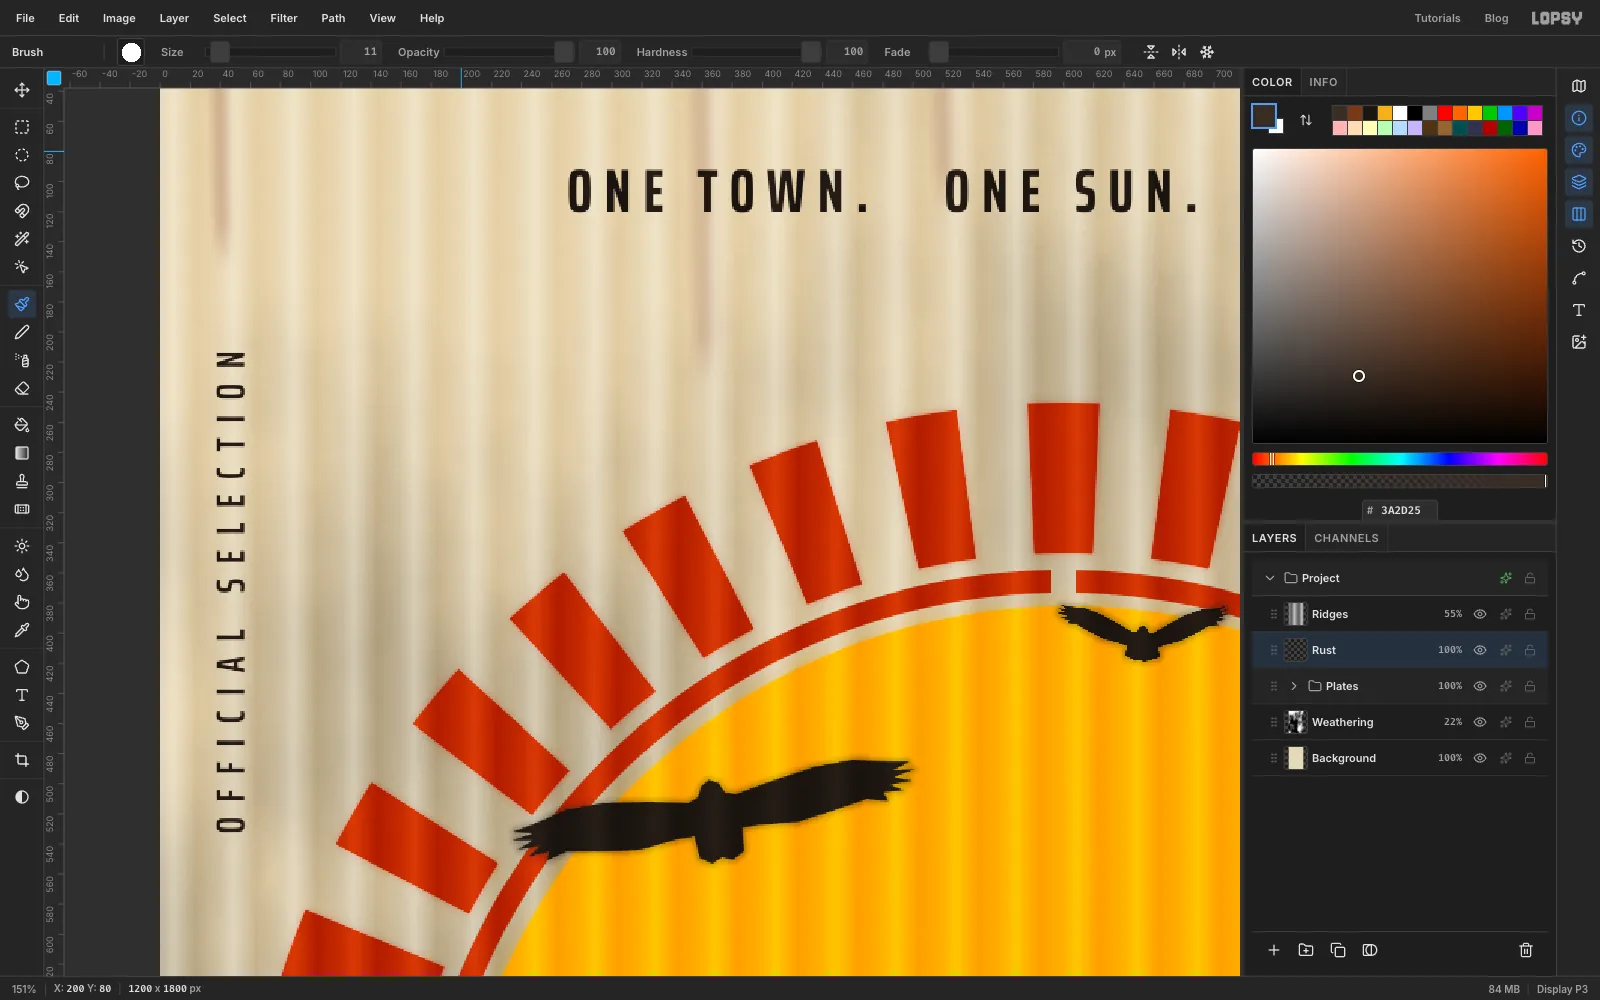
Nail the tin to the wall
- Collapse
Plates, click it, and add a layer calledRust. It lands above the plates but underRidges. - The nails go 22 px down from the top edge, starting 40 px in from the left and then every 160 px, eight in all. Rust only runs from some of them: pick the Brush with Hardness
0and the colour , and under the nails at 40, 360, 520, 1000 and 1160 px click at 24 px and Shift-click straight below. Vary the length between 60 and 210 px, the Size between 18 and 32, and the Opacity between 18 and 48. - Run Filter → Motion Blur… with Angle
90and Distance30to smear the streaks downward. - Set the brush to Hardness
100, Opacity100, Size11and colour , and click once at each of the eight nail positions. - Set the layer's blend to Multiply.
- Collapse
-
Finish with spray grain
Add a layer called
Grainand fill it with mid-grey . Run Add Noise with Amount60, Mono and Gaussian. Set its blend to Overlay and its opacity to 35%.On Overlay the grey vanishes and only the speckle stays. It gives every flat colour the slightly gritty finish of sprayed paint. Export with File → Quick Export PNG, and save the project with File → Save Project so you can come back to the live text.