Design a Sticker-Bomb Magazine Cover
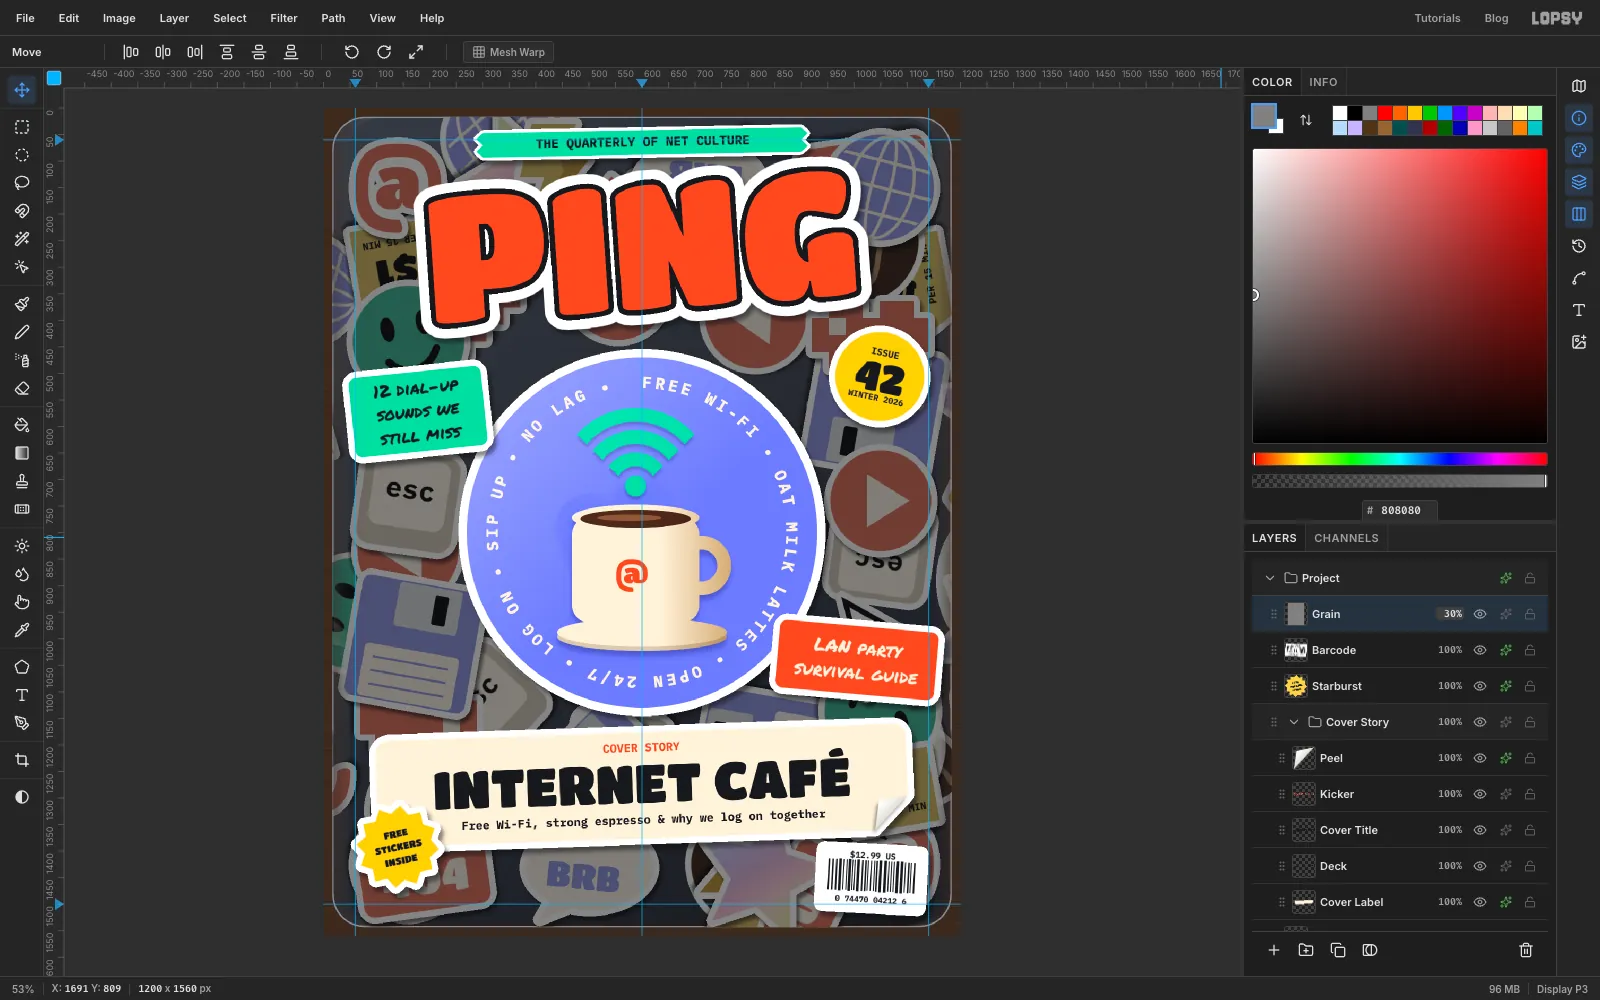
Make a sticker-bomb magazine cover in Lopsy. Die-cut stickers with Stroke and Drop Shadow, a Copy Merged backdrop, ring text on a path and a peeled label.
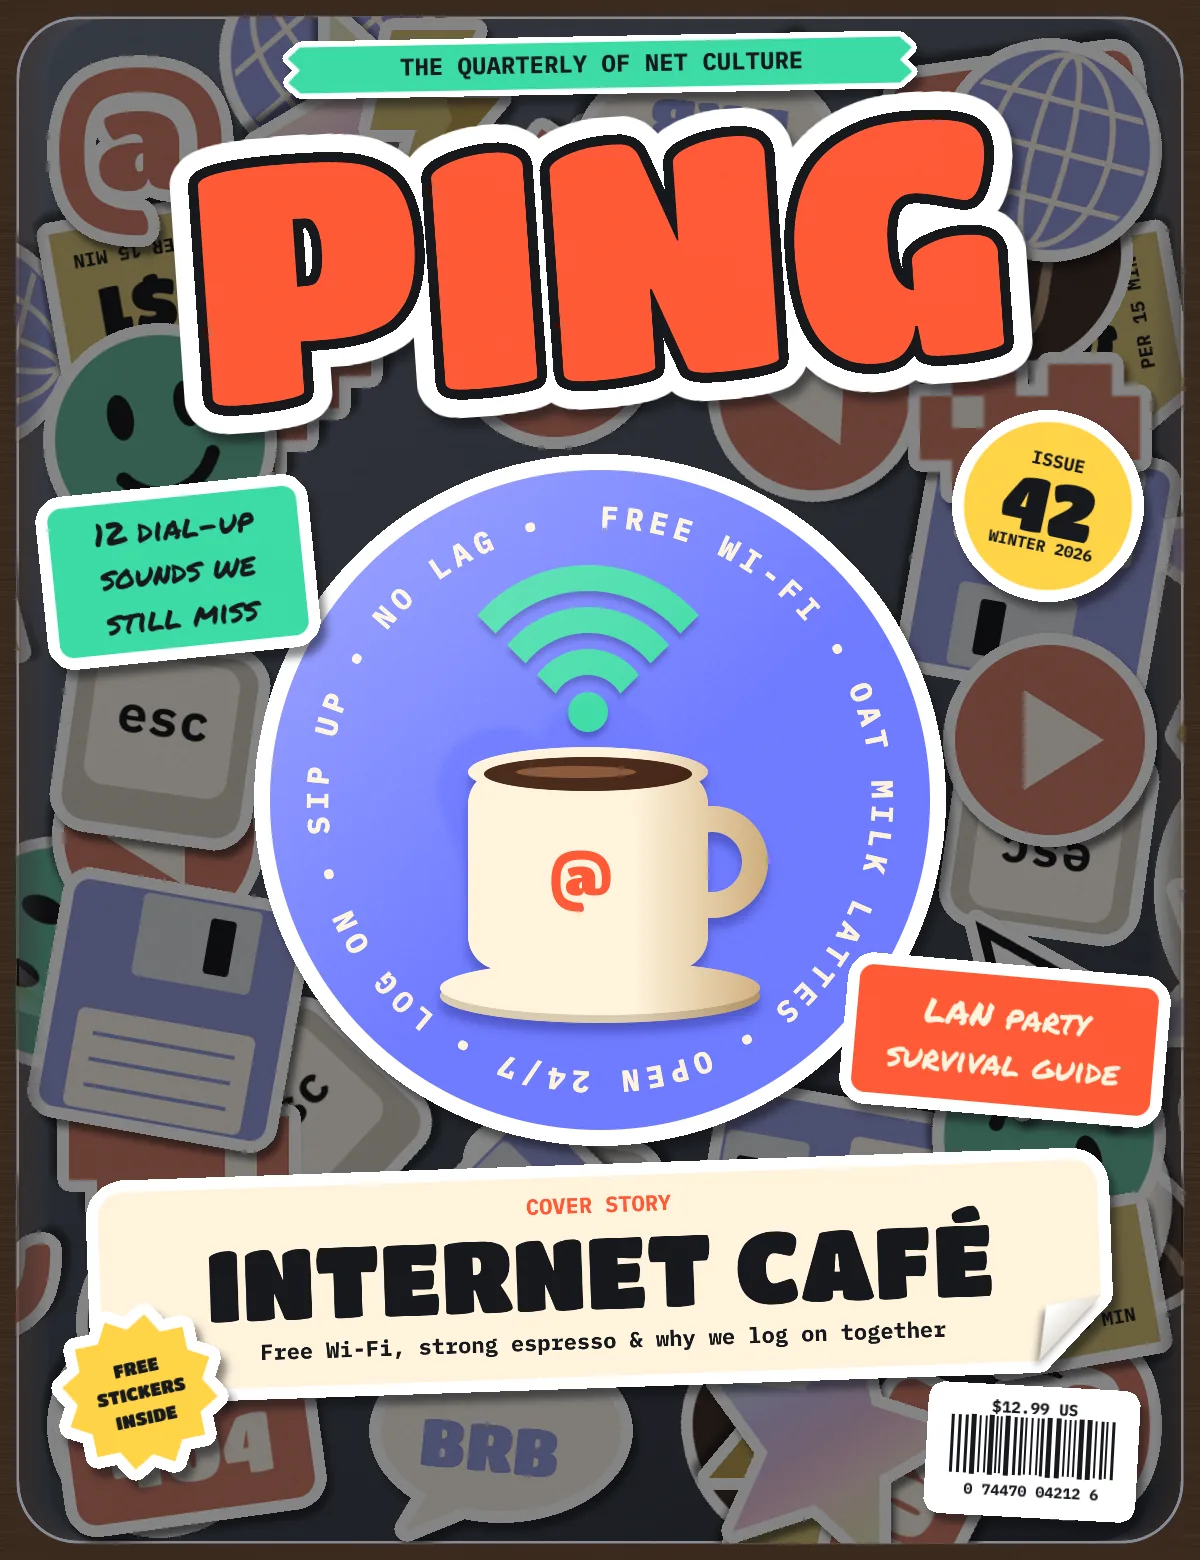
Sticker bombing grew out of skate and graffiti culture: you keep adding stickers to a surface until almost none of it shows. On a laptop lid it looks random, but the good ones are planned. They use a small palette, put big stickers down first and fill the gaps with small ones, and trim the stickers clean at the edge of the lid.
In this tutorial you'll use that look for an editorial magazine cover: issue 42 of PING, an imaginary quarterly about net culture, whose cover story is the comeback of the internet café. You'll make a pack of fourteen die-cut stickers and turn it into a dense, dimmed backdrop. On top of that go bright foreground stickers: the masthead, a coffee-mug disc whose steam is a Wi-Fi symbol, cover lines, and a label with a peeled corner. The cover is 1200 × 1560 px.
Along the way you'll use:
- the Shape tool's click-to-size dialog for most of the shapes
- the Pen tool with Path to Selection for cursors, bolts and tags
- Stroke and Drop Shadow to turn any layer into a die-cut sticker
- the grid with Snap for pixel art
- rotation handles, including on several layers at once
- Copy Merged, Duplicate Layer and Rotate 90° to multiply the sticker pack
- Hue / Saturation and Exposure adjustments on a group
- text on a circular path, in IBM Plex Mono, Titan One and Permanent Marker
- Grow, Shrink and Select → Inverse
- the Screen, Multiply and Overlay blend modes
- the Eraser, Add Noise and Motion Blur
The palette:
-
Walnut table
-
lid fill
-
lid graphite
-
lid rim
-
Tomato
-
mint
-
periwinkle
-
Butter
colour and shade
-
Cream
-
keycap
-
metal
-
Espresso
-
crema
-
bean crease
-
mug shade
-
Ink
-
sticker shadow
-
disc shadow
-
Holo foil
-
Set up the table and the laptop lid
Choose File → New, enter 1200 × 1560 and click Create. Click the top ruler at
60,600and1140for vertical guides, and the left ruler at60and1500for horizontal ones.Click Background, set the foreground to walnut and fill it. Choose Filter → Add Noise… with Amount
30, Mono and Gaussian, then Filter → Motion Blur… with Angle0and Distance90. The noise stretches into a wood grain.Rename Layer 1 to Lid. Pick the Shape tool, set Shape to Rectangle, Corner Radius to
60, Fill to graphite , Stroke to and Width to3. Click the middle of the page (600, 780) and create a 1164 × 1524 shape. That leaves an 18 px strip of table round the lid.Cmd-click the Lid thumbnail to select it, then choose Select → Shrink…
3so the rim is left out of the selection. Pick the Gradient tool, open Advanced…, set the stops to and , and drag from the top-left corner to the bottom-right one. Add noise (14, Mono, Gaussian) and a Motion Blur of60for a brushed-metal finish. Deselect.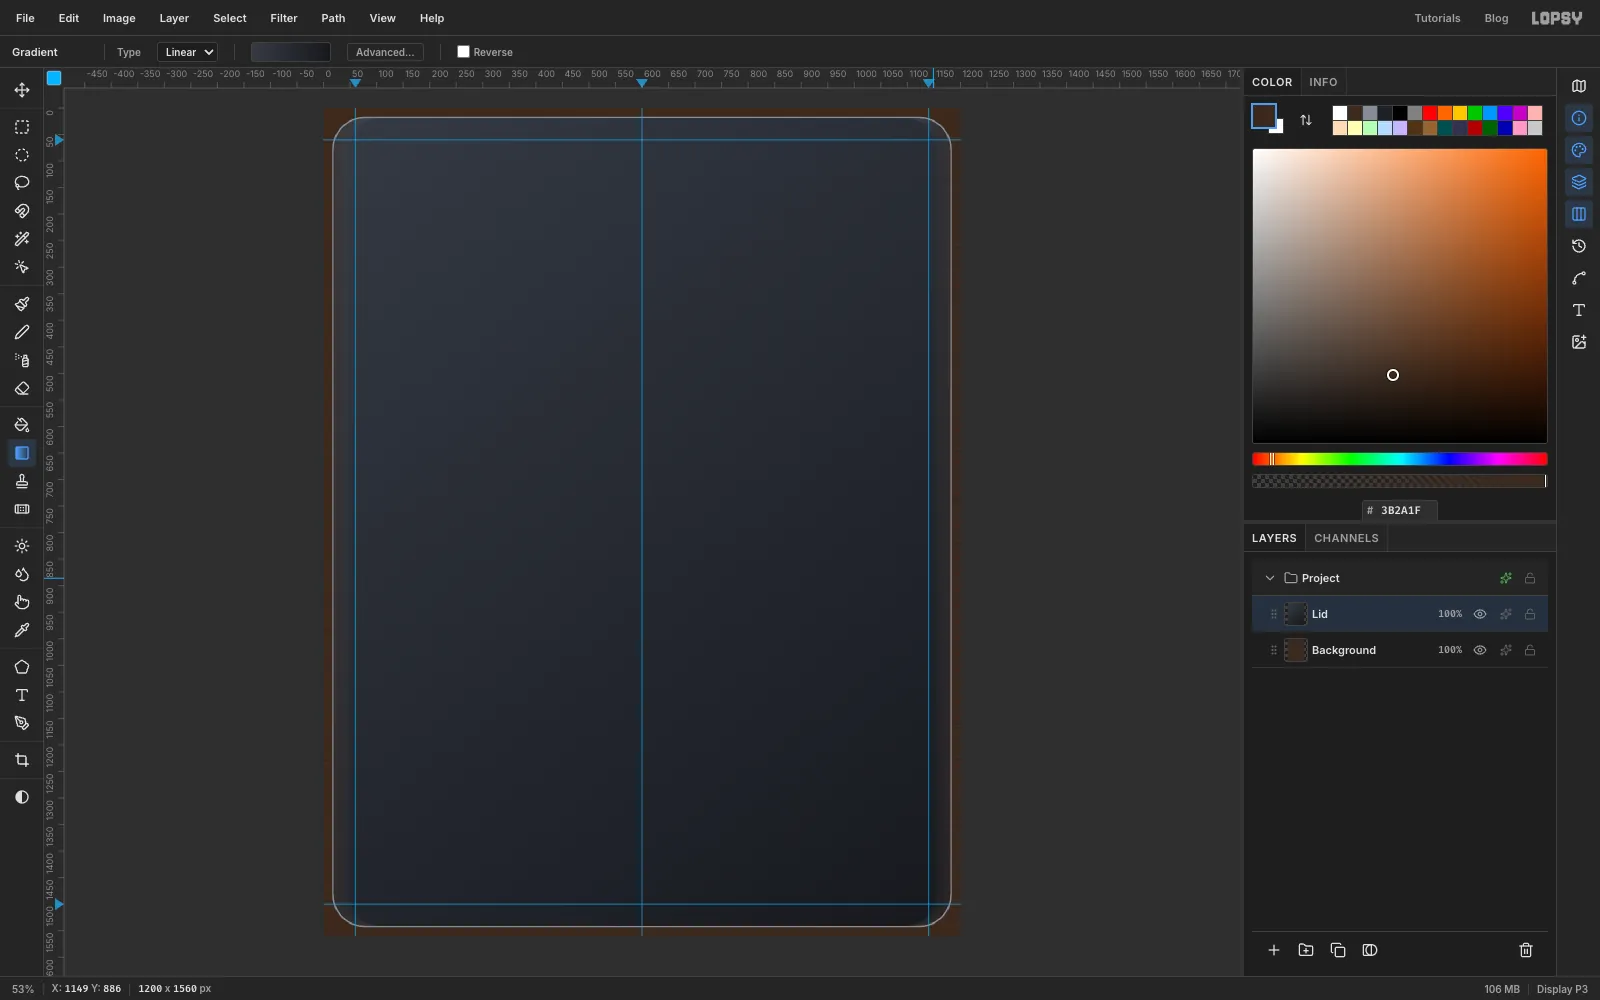
-
Draw a smiley sticker
Add a layer named Smiley. With the Shape tool set to Ellipse, mint fill and no stroke (click the stroke swatch and choose Remove stroke), click at
160, 440and create a 210 × 210 circle.Change the fill to ink and make the eyes: a 26 × 46 ellipse at
126, 410and another at194, 410. Then pick the Brush, set Size to16and the foreground to ink, and drag a smile under the eyes: a shallow arc from about209, 463down through160, 494and up to about116, 471.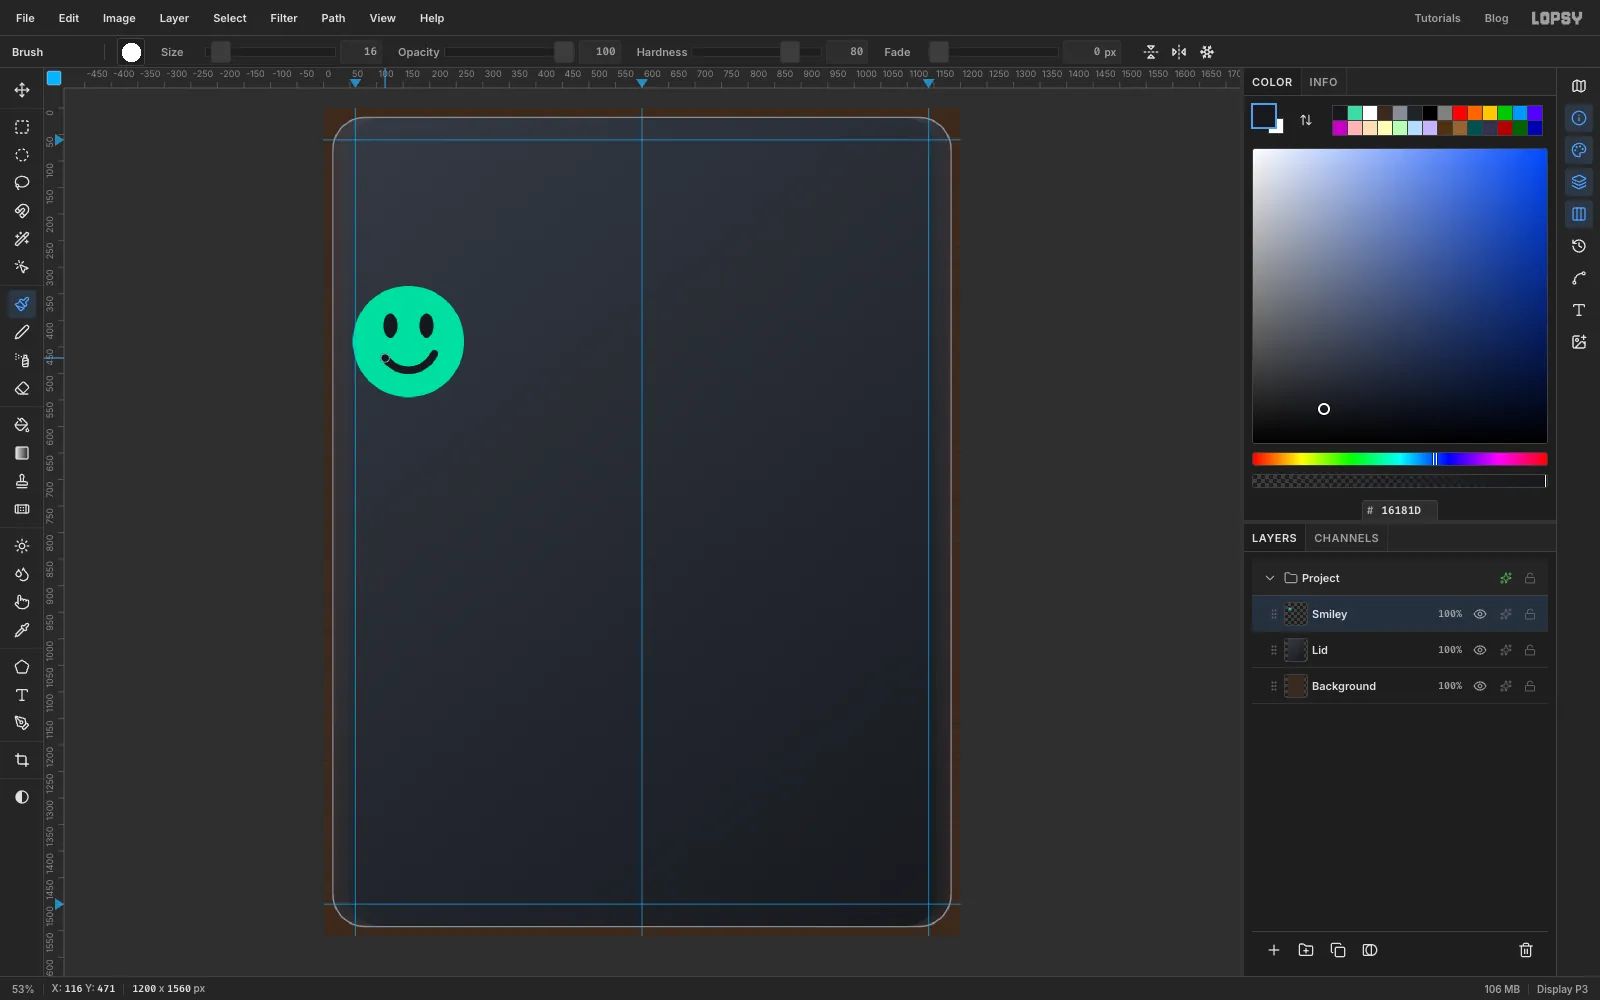
-
Make it a die-cut sticker and tilt it
This is the recipe for every sticker on the cover. Open the layer's effects drawer (the sparkle button on its row):
- Stroke: white, Width
12, Position Outside. This is the vinyl's white border. - Drop Shadow: colour , Offset X
5, Offset Y8, Blur10, Opacity55%.
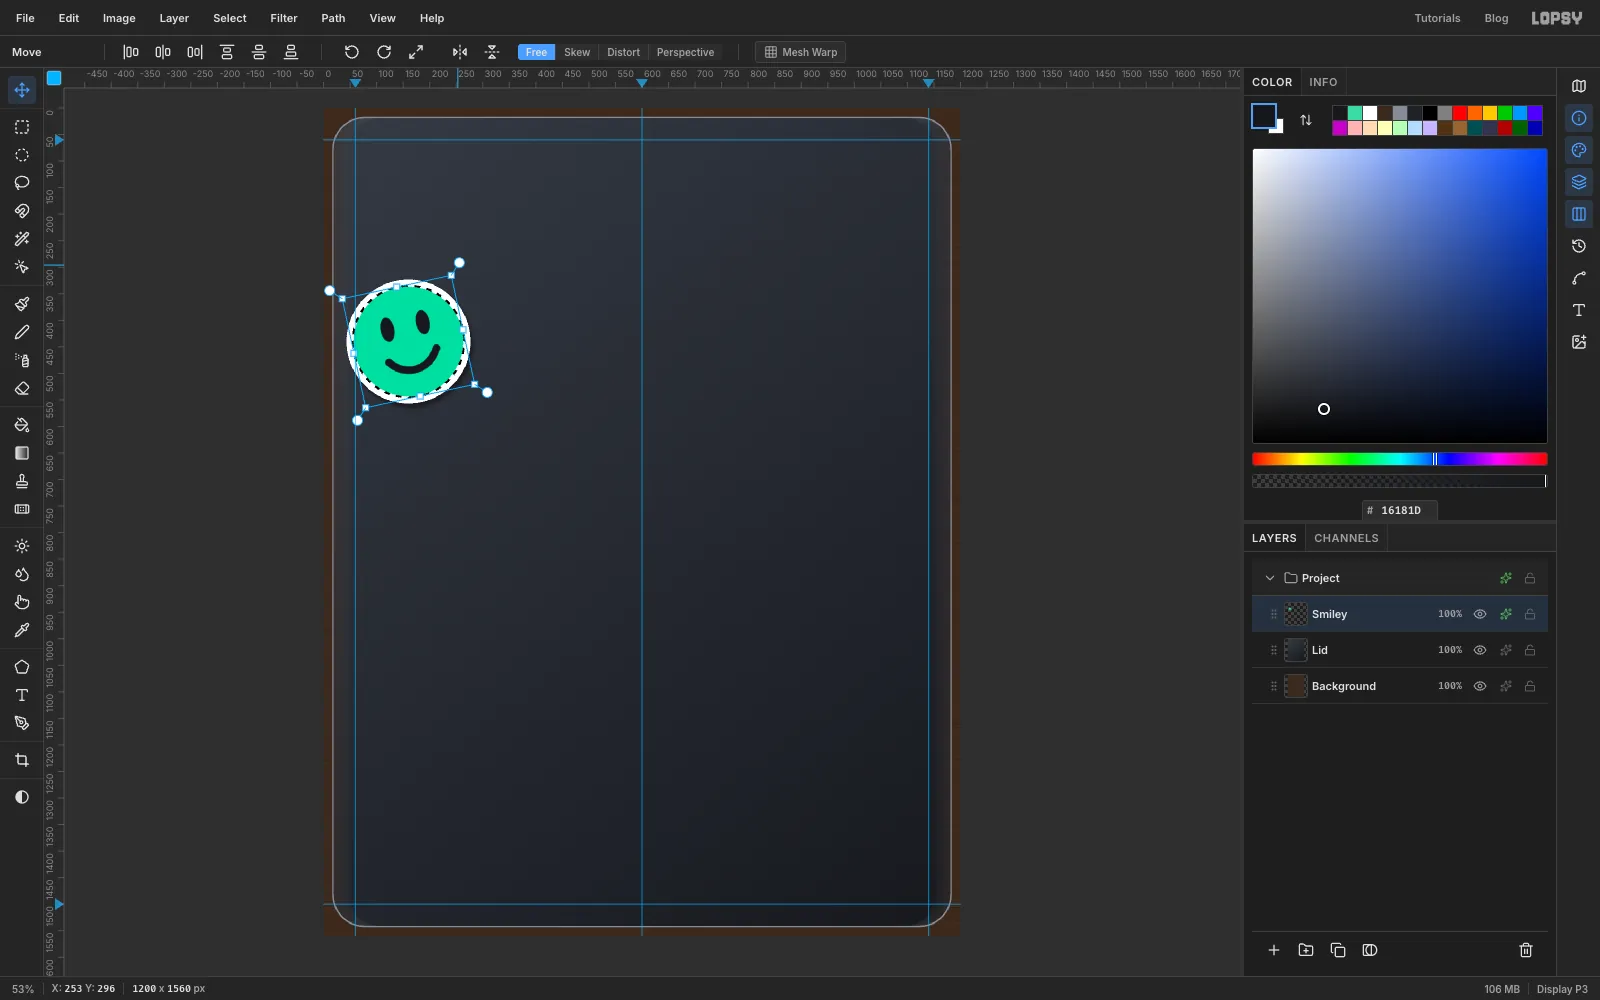
Now tilt it. Cmd-click the Smiley thumbnail, pick the Move tool and drag just outside the top-right corner handle, where the pointer turns into a curved arrow. Turn it about 12° anticlockwise and press Cmd+D to commit and deselect. Real sticker bombs never sit square, so you'll tilt most stickers by a different small amount.
- Stroke: white, Width
-
Mark out a pixel heart on the grid
Add a layer named Pixel Heart. Choose View → Show Grid and drag the Grid slider in the options bar to 32px. Snap turns on with the grid.
The grid is centred on the page, so its lines fall at
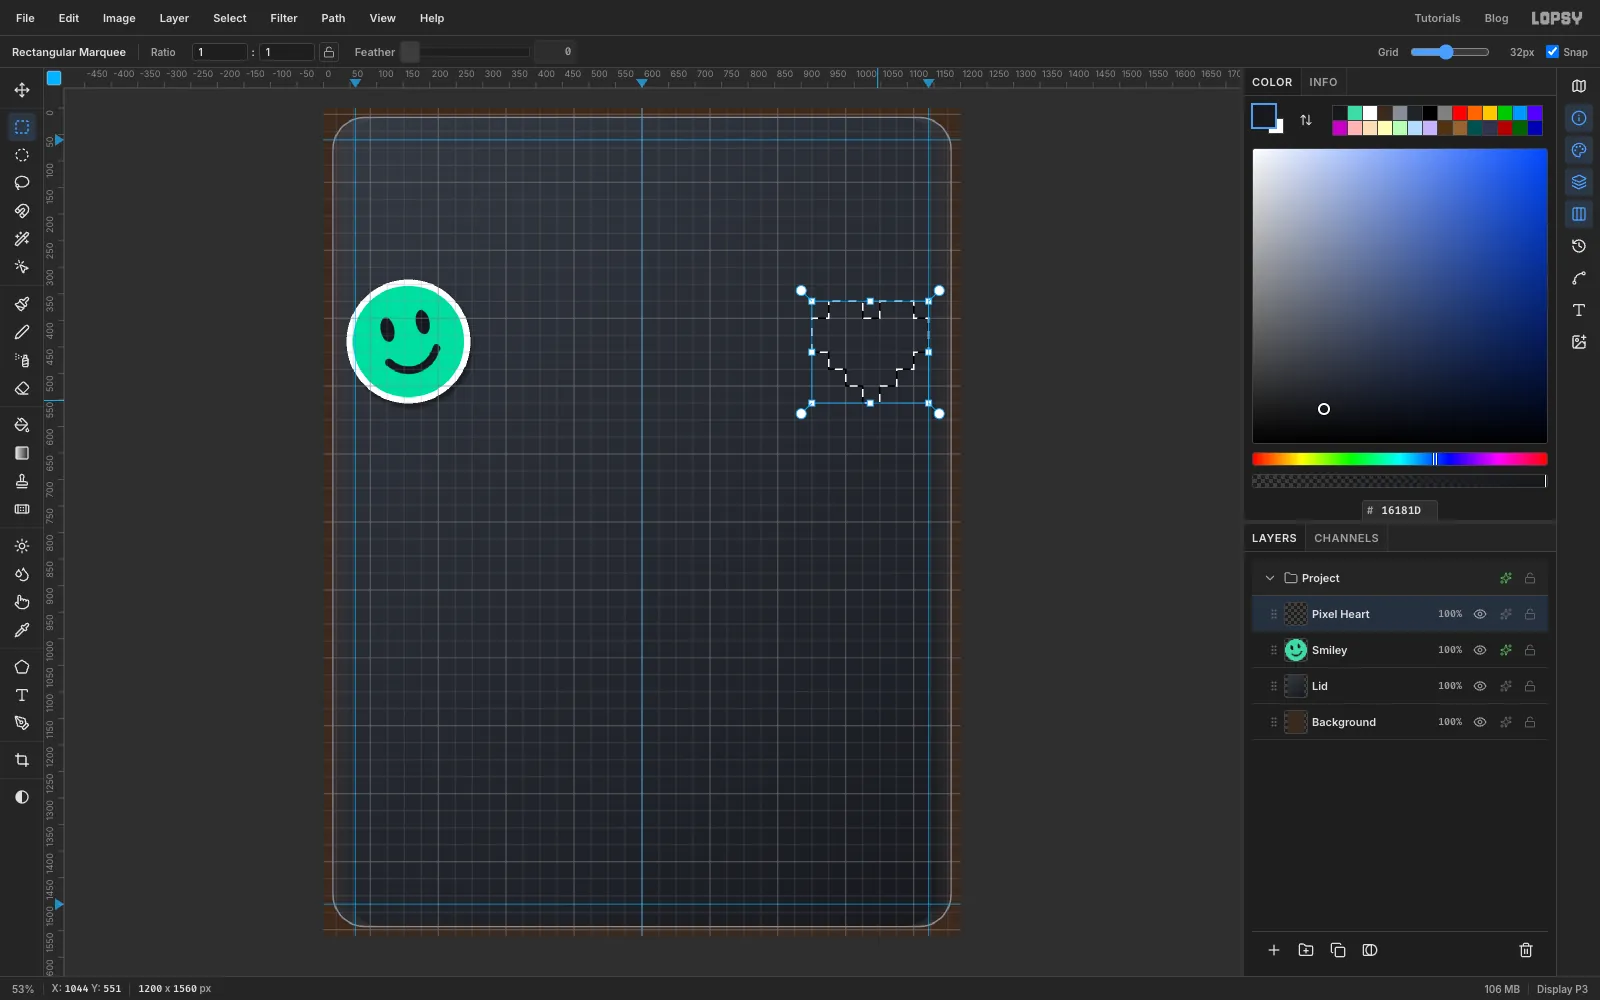
x = 920, 952, 984…andy = 364, 396, 428…. With the Rectangular Marquee, drag from920, 396to1144, 460: two full rows of seven cells. Hold Shift and add five more rectangles. Each drag snaps to the cell corners, so you only need to start inside the right cell.- the two bumps on top:
952, 364to1016, 396and1048, 364to1112, 396 - the narrowing rows:
952, 460to1112, 492,984, 492to1080, 524, and the tip1016, 524to1048, 556
- the two bumps on top:
-
Fill the heart and add a highlight
Fill the selection with tomato and deselect. Select the single cell from
952, 396to984, 428and fill it with cream for a highlight. Deselect, choose View → Show Grid again to hide the grid, and give the layer the die-cut Stroke and Drop Shadow. The white border follows the stepped edge, which is exactly how a pixel-art sticker is cut.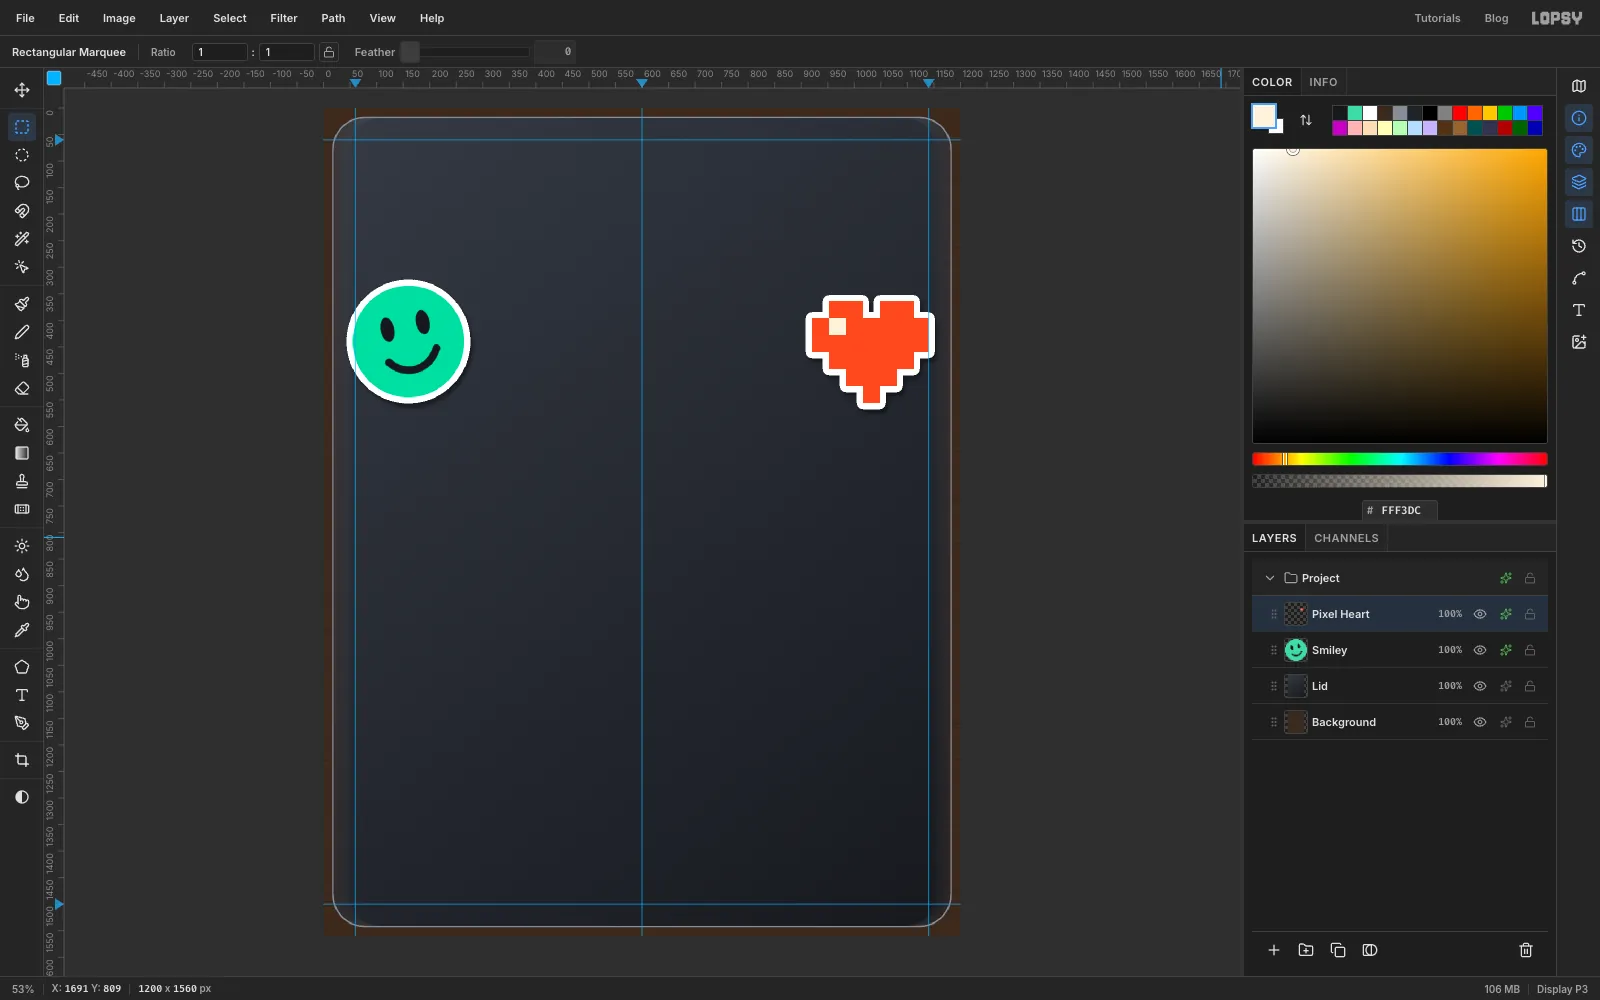
-
Build a floppy disk from shapes
Add a layer named Floppy. With the Shape tool on Rectangle:
- Corner Radius
16, fill periwinkle : 230 × 230 at170, 1010 - Corner Radius
6, fill metal : 120 × 84 at185, 940for the shutter - Corner Radius
4, fill ink: 26 × 56 at208, 940for the slot - Corner Radius
8, fill cream: 180 × 100 at170, 1072for the label
Pick the Pencil, set Size to
4and the foreground to periwinkle. Click at the left end of each label line and Shift-click the right end: three lines from100to240across, aty = 1046,1072and1098. Add the die-cut effects and tilt the disk about 10° clockwise.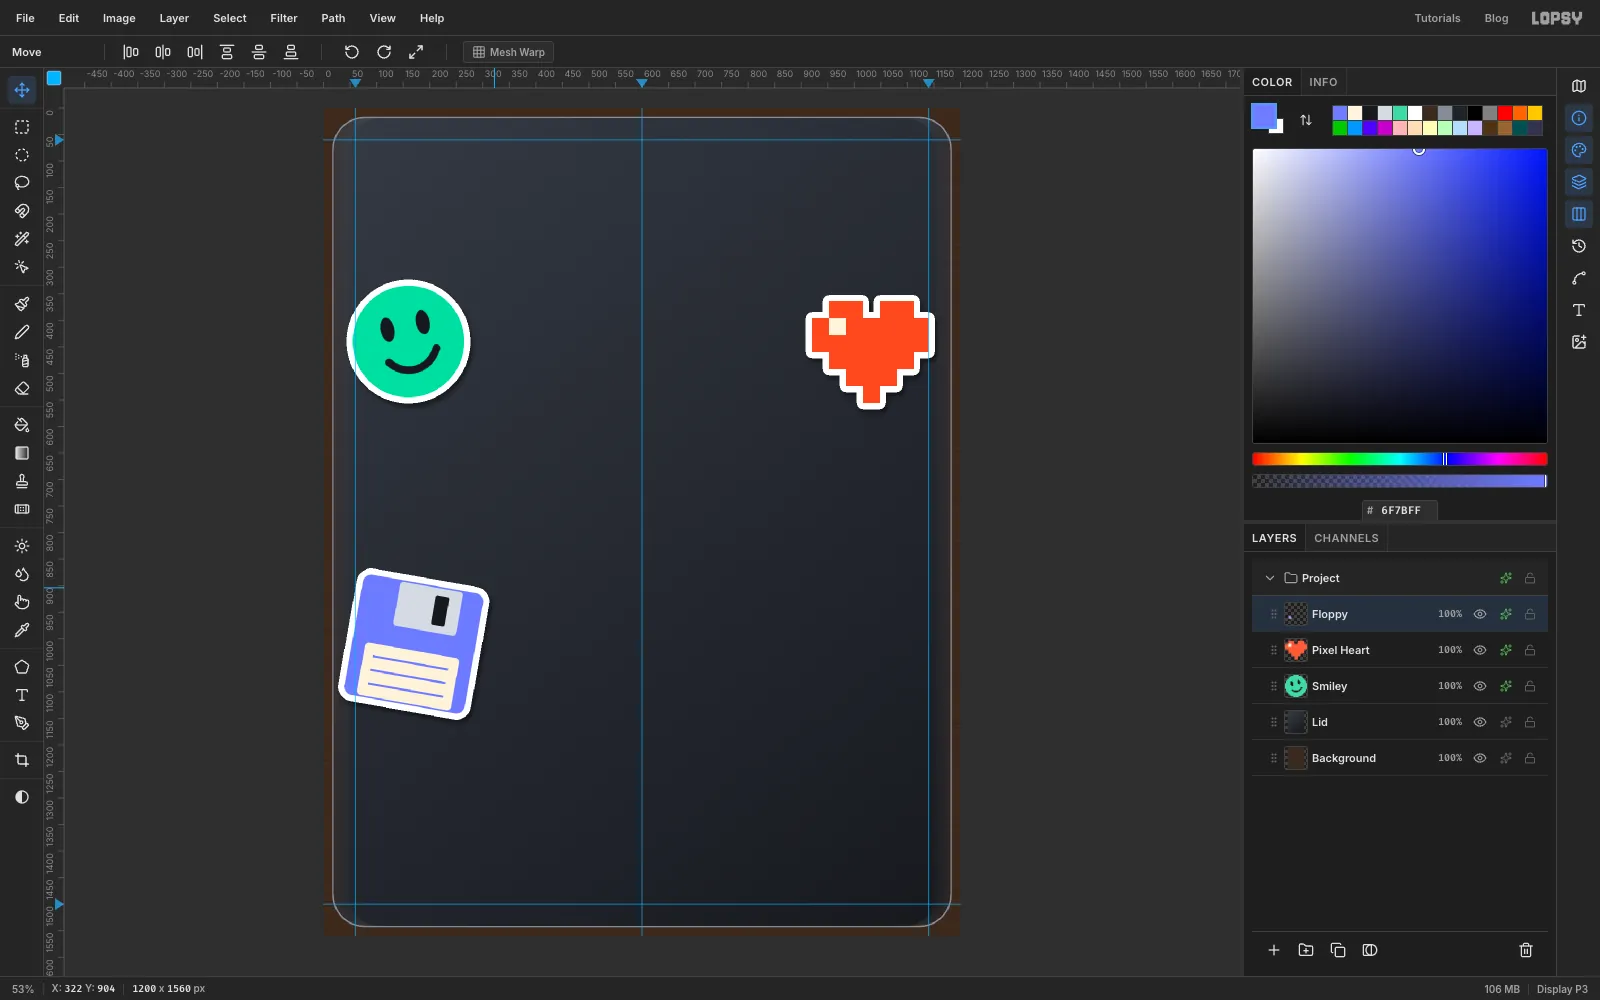
- Corner Radius
-
Click a cursor arrow with the Pen
Add a layer named Cursor. Pick the Pen tool and click these seven corners in order, then click the first one again to close the shape:
1000, 900,1000, 1096,1050, 1050,1084, 1122,1118, 1107,1085, 1037,1144, 1035. In the Paths panel, click Path to Selection, then Delete Path.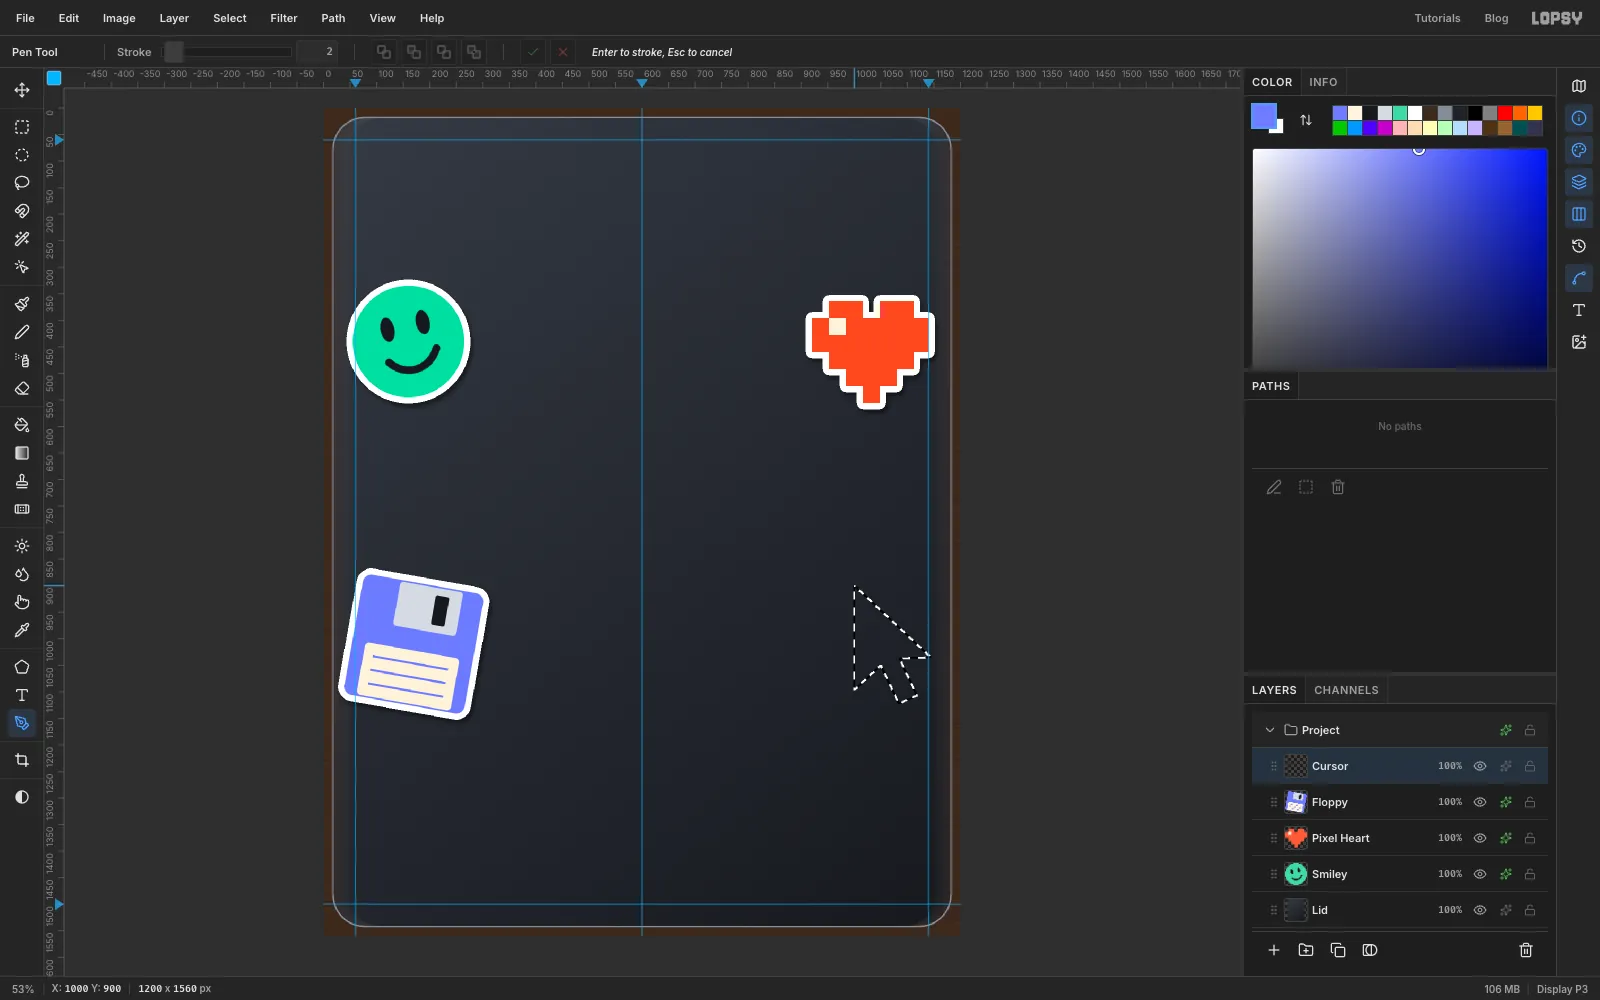
-
Turn the cursor into an outlined arrow
Fill the selection with ink. Choose Select → Shrink…
10and fill the smaller selection with white. That leaves a 10 px black outline, the classic pointer. Deselect, add the die-cut effects, and tilt the arrow about 14° anticlockwise.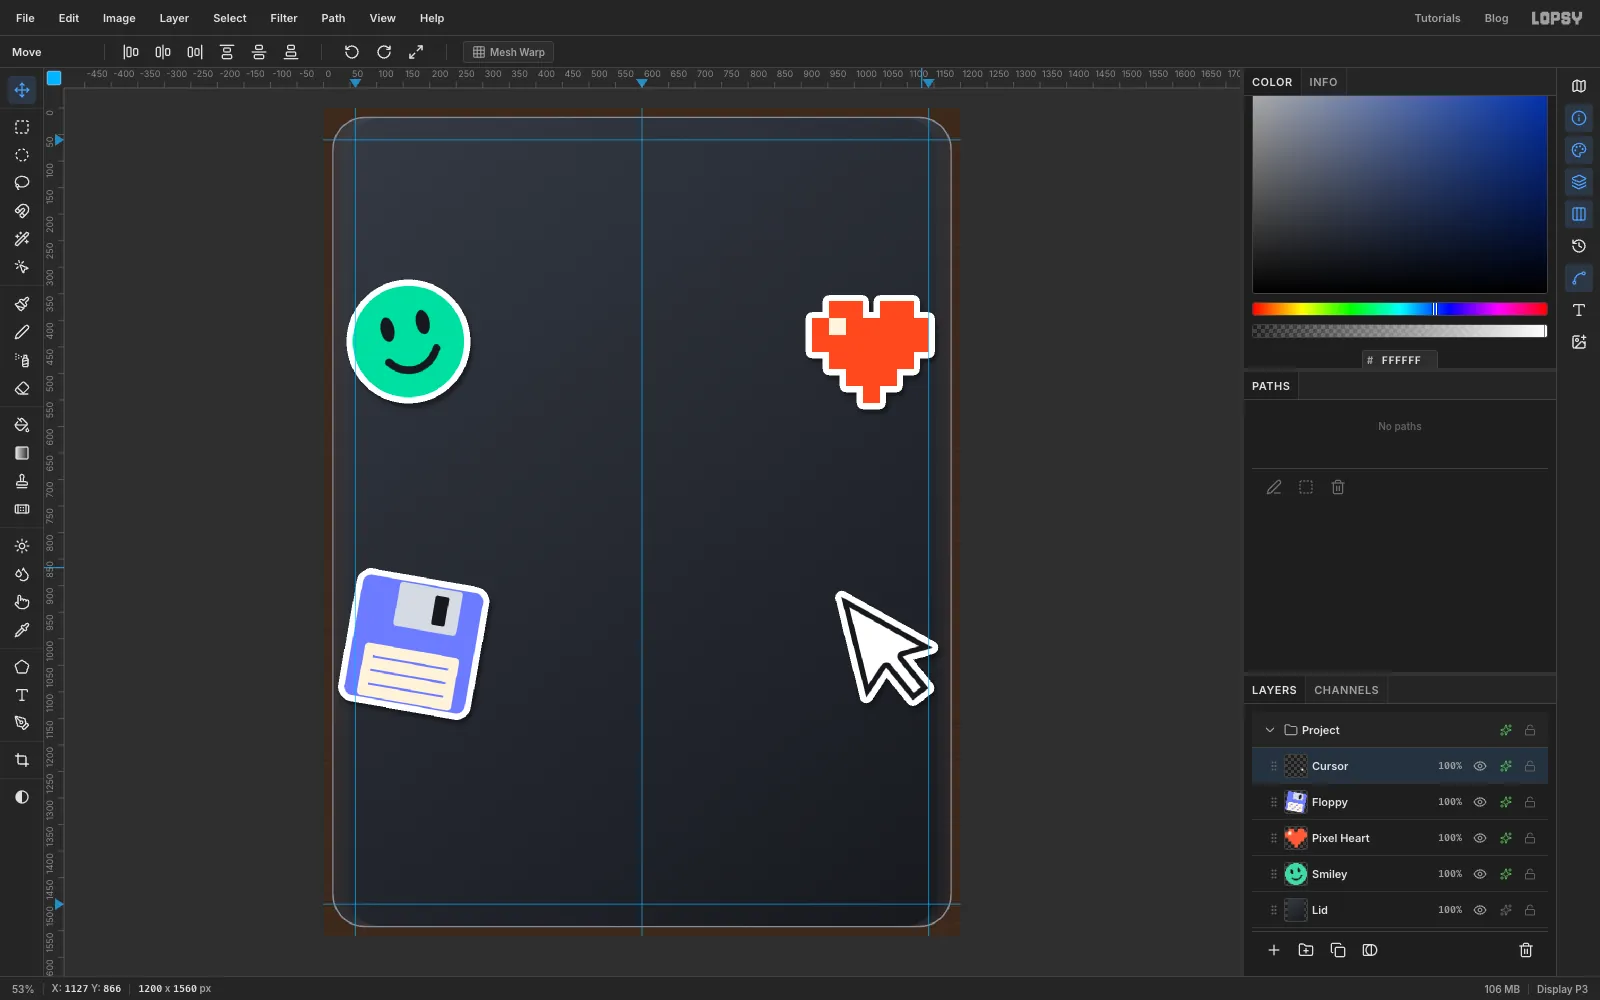
-
Draw a lightning bolt
Add a layer named Bolt. With the Pen, click
370, 130,392, 30,476, 30,446, 98,500, 98,384, 236,416, 130and close it. Choose Path to Selection and fill with butter .For the shading, click a second Pen outline over the right half:
446, 98,500, 98,384, 236,452, 120. Turn it into a selection, fill with and deselect. Add the die-cut effects.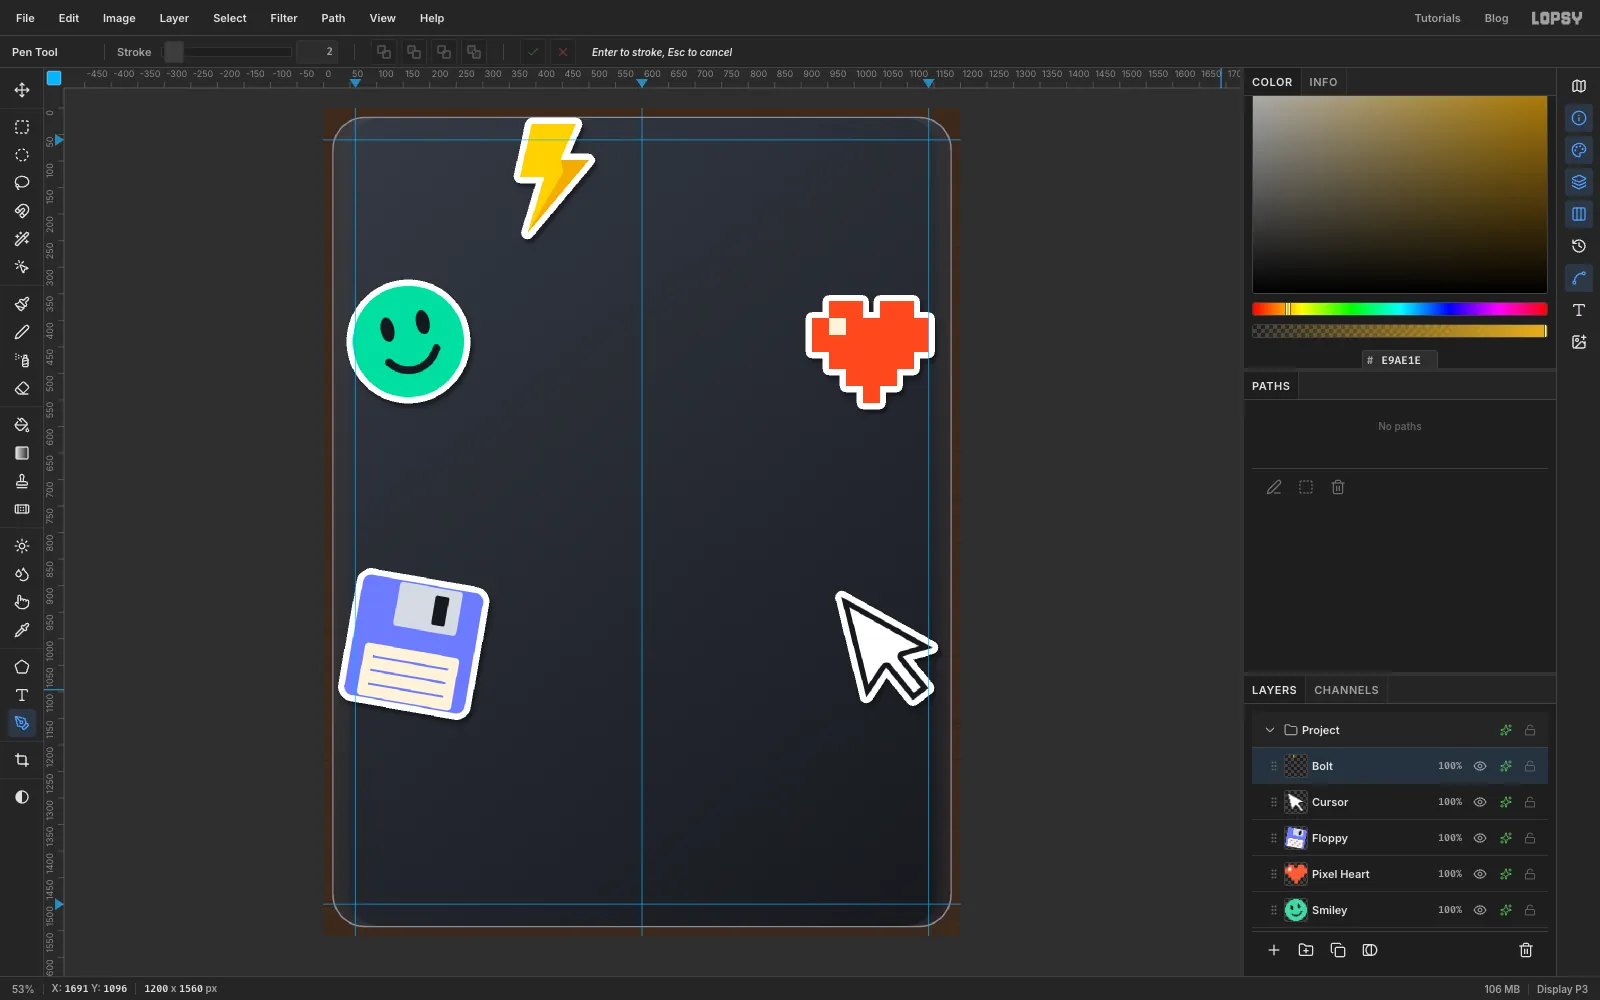
-
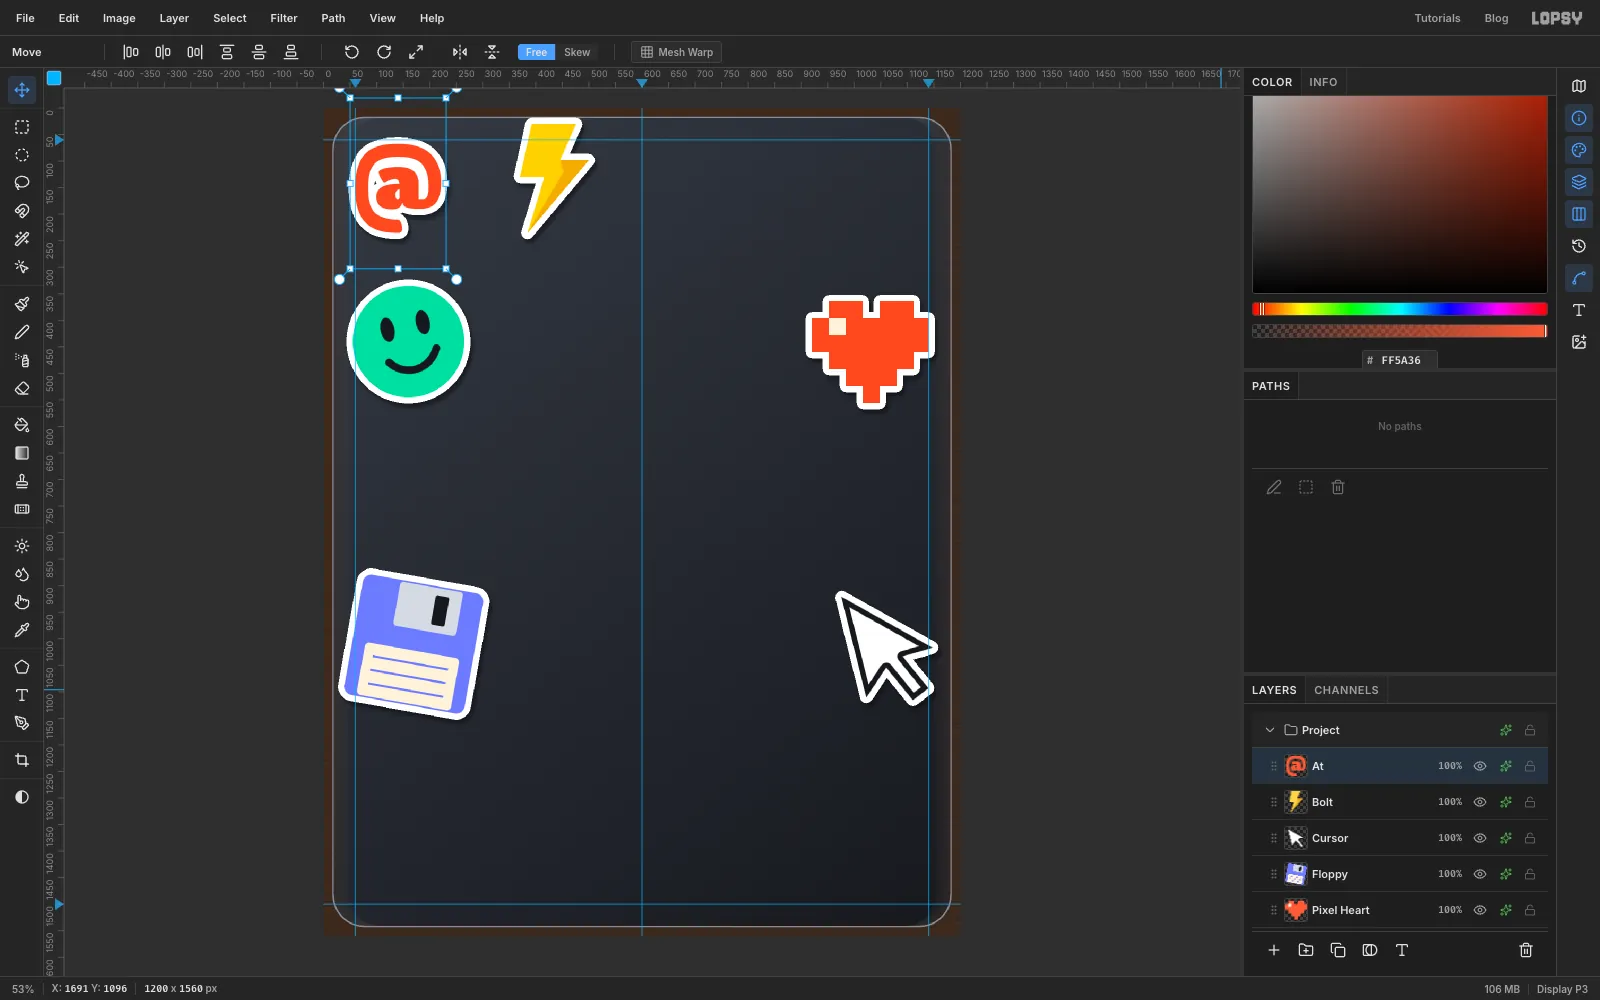
Set an @ sticker in type
Pick the Text tool. Set the font to Titan One, Size
230and the colour to tomato. Click near the top-left corner, type@, and press Tab to commit. Rename the layer At and use the arrow keys with the Move tool to centre it on about140, 150.Effects work on live text too, so add the same die-cut Stroke and Drop Shadow.
-
Add a coffee bean
Add a layer named Bean. Create an espresso ellipse, 130 × 180 at
160, 1300. Pick the Brush with Size12and the colour , and drag an S-shaped crease down the middle: from160, 1222, bowing left, then right, to160, 1378. Add the die-cut effects and tilt the bean about 30° clockwise.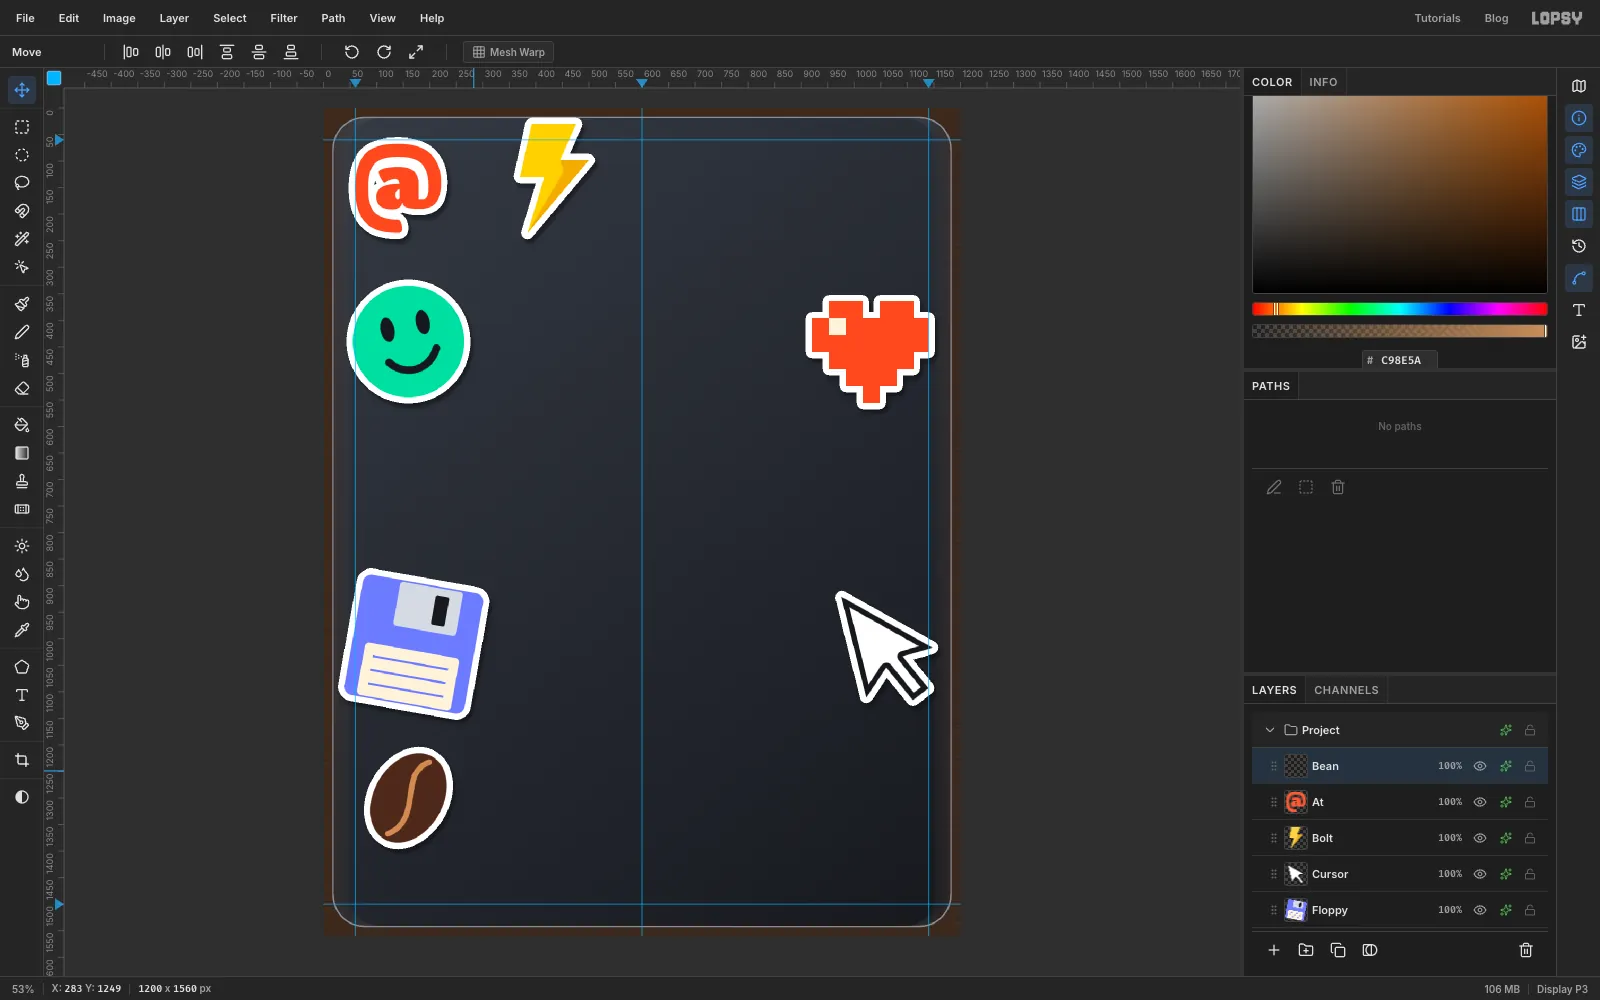
-
Draw a globe with stroke-only shapes
Add a layer named Globe. Create a periwinkle 200 × 200 ellipse at
1050, 150. Now remove the shape fill and set the Stroke to cream with Width6. Click the same centre twice more for two meridians: 120 × 194 and 36 × 194.For the latitude lines, select a circle with the exact-corners dialog from
953, 53to1147, 247. Pick the Pencil (Size6, cream) and Shift-click straight lines right across the globe aty = 100,150and200. The selection clips them to the circle. Deselect, add the die-cut effects, and tilt it about 14° clockwise.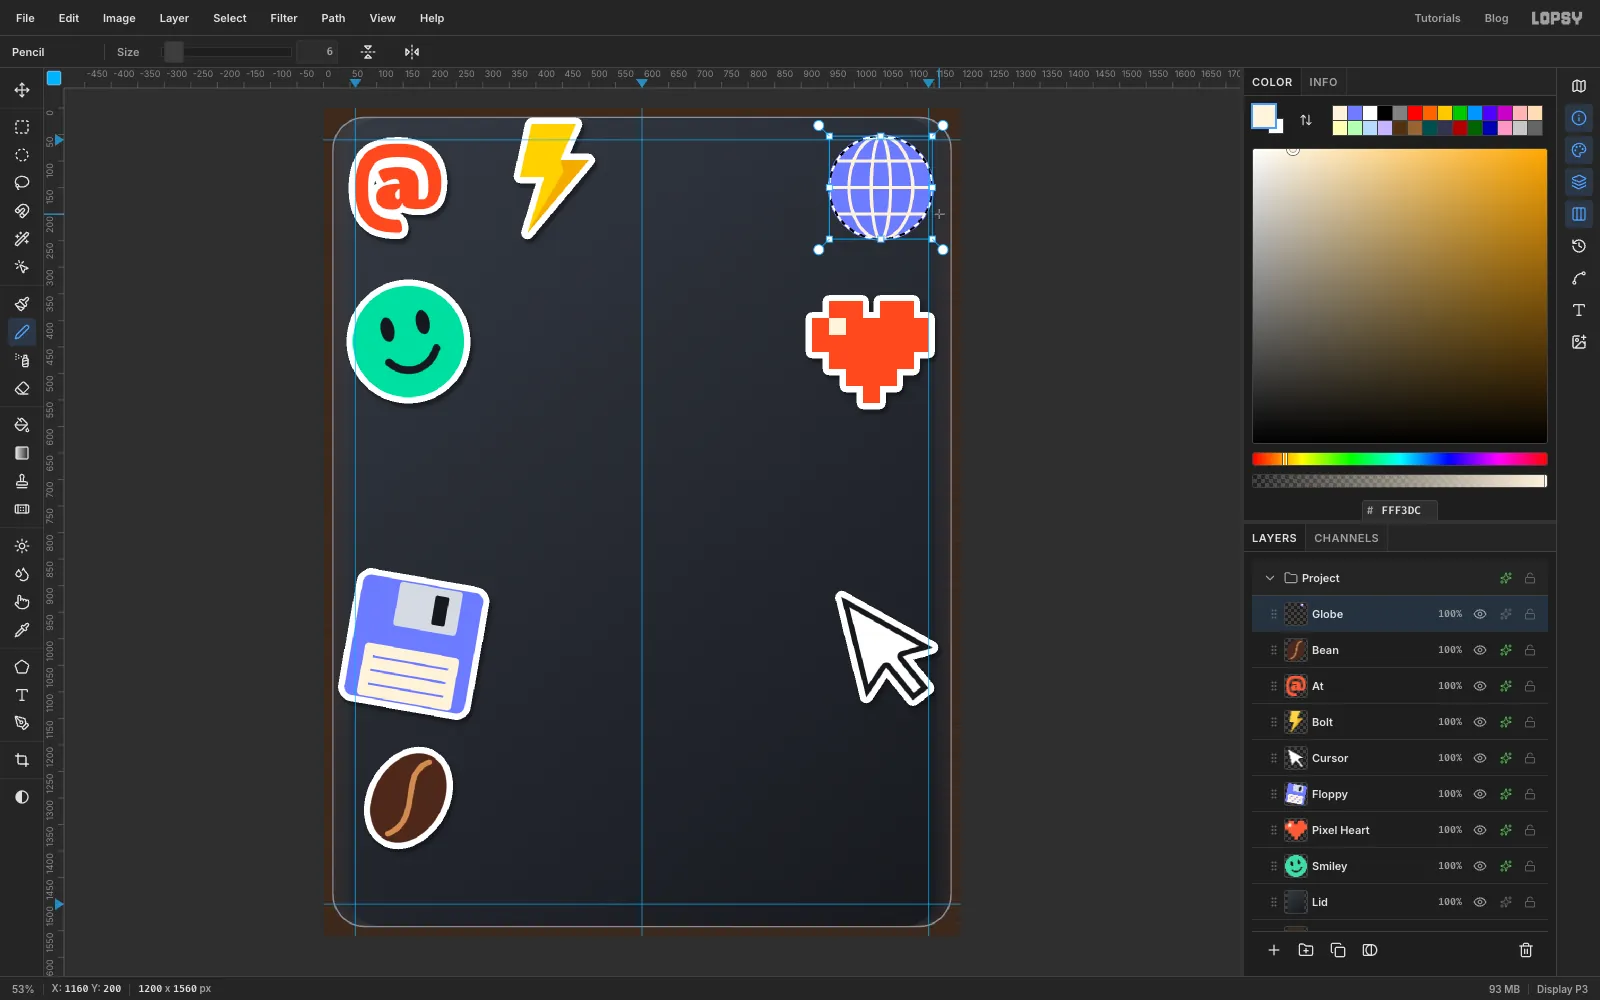
-
Make an esc keycap
Add a layer named Esc. Make two rounded rectangles: keycap , Corner Radius
26, 180 × 180 at160, 740, then cream, Corner Radius20, 144 × 132 at160, 726. The top face sits a little high, so the darker rim shows more at the bottom.With Esc selected, pick the Text tool. Set IBM Plex Mono, Bold, Size
52, ink. Click on the keycap, typeescand press Tab. Nudge it onto the top face at about160, 722. Then choose Layer → Merge Down, so the text becomes part of the sticker. Add the die-cut effects and tilt it about 8° clockwise.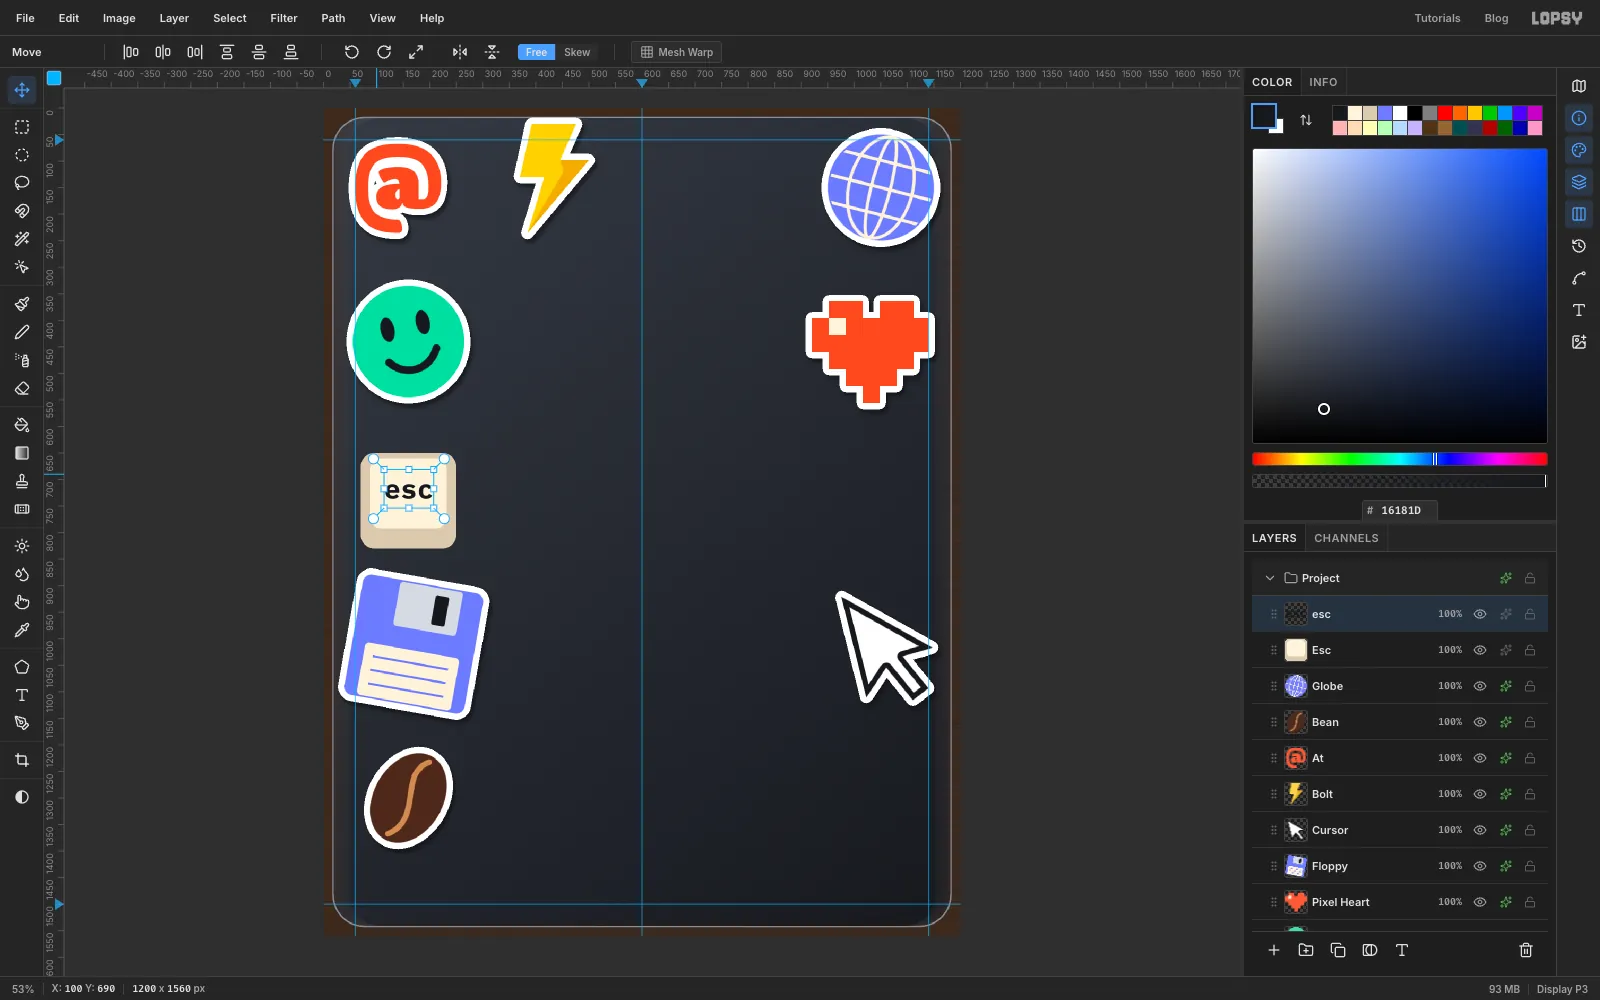
-
Add a play button and a price tag
Play button. On a new layer Play, create a 190 × 190 tomato circle at
1050, 740. Click a Pen triangle at1024, 690,1104, 740,1024, 790, turn it into a selection and fill it with cream. Add the die-cut effects.Price tag. On a new layer Tag, click a Pen pentagon pointing left:
950, 1290,990, 1220,1150, 1220,1150, 1360,990, 1360. Fill it with butter. Press Cmd+D, select a circle from976, 1278to1000, 1302and press Delete to punch the hole. Then add$1in ink Titan One72, centred on1072, 1272, andPER 15 MINin ink IBM Plex Mono Bold19, centred on1072, 1328, merging each one down. Add the die-cut effects and tilt the tag about 10° anticlockwise.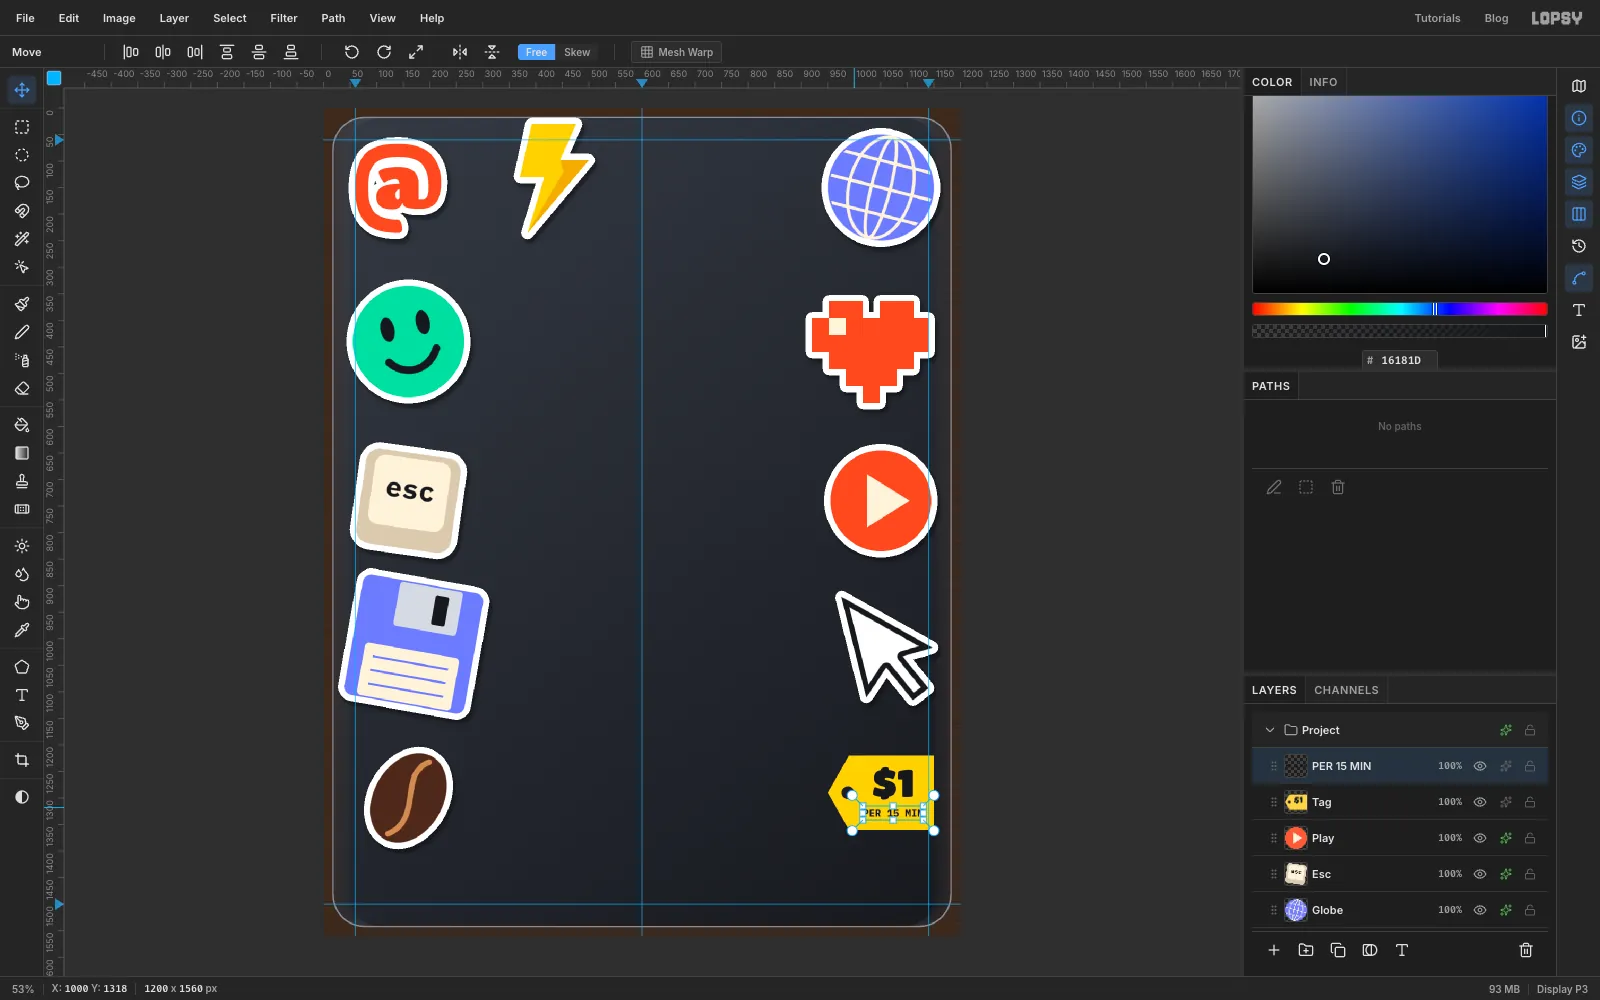
-
Finish the pack with 404, BRB and a holographic star
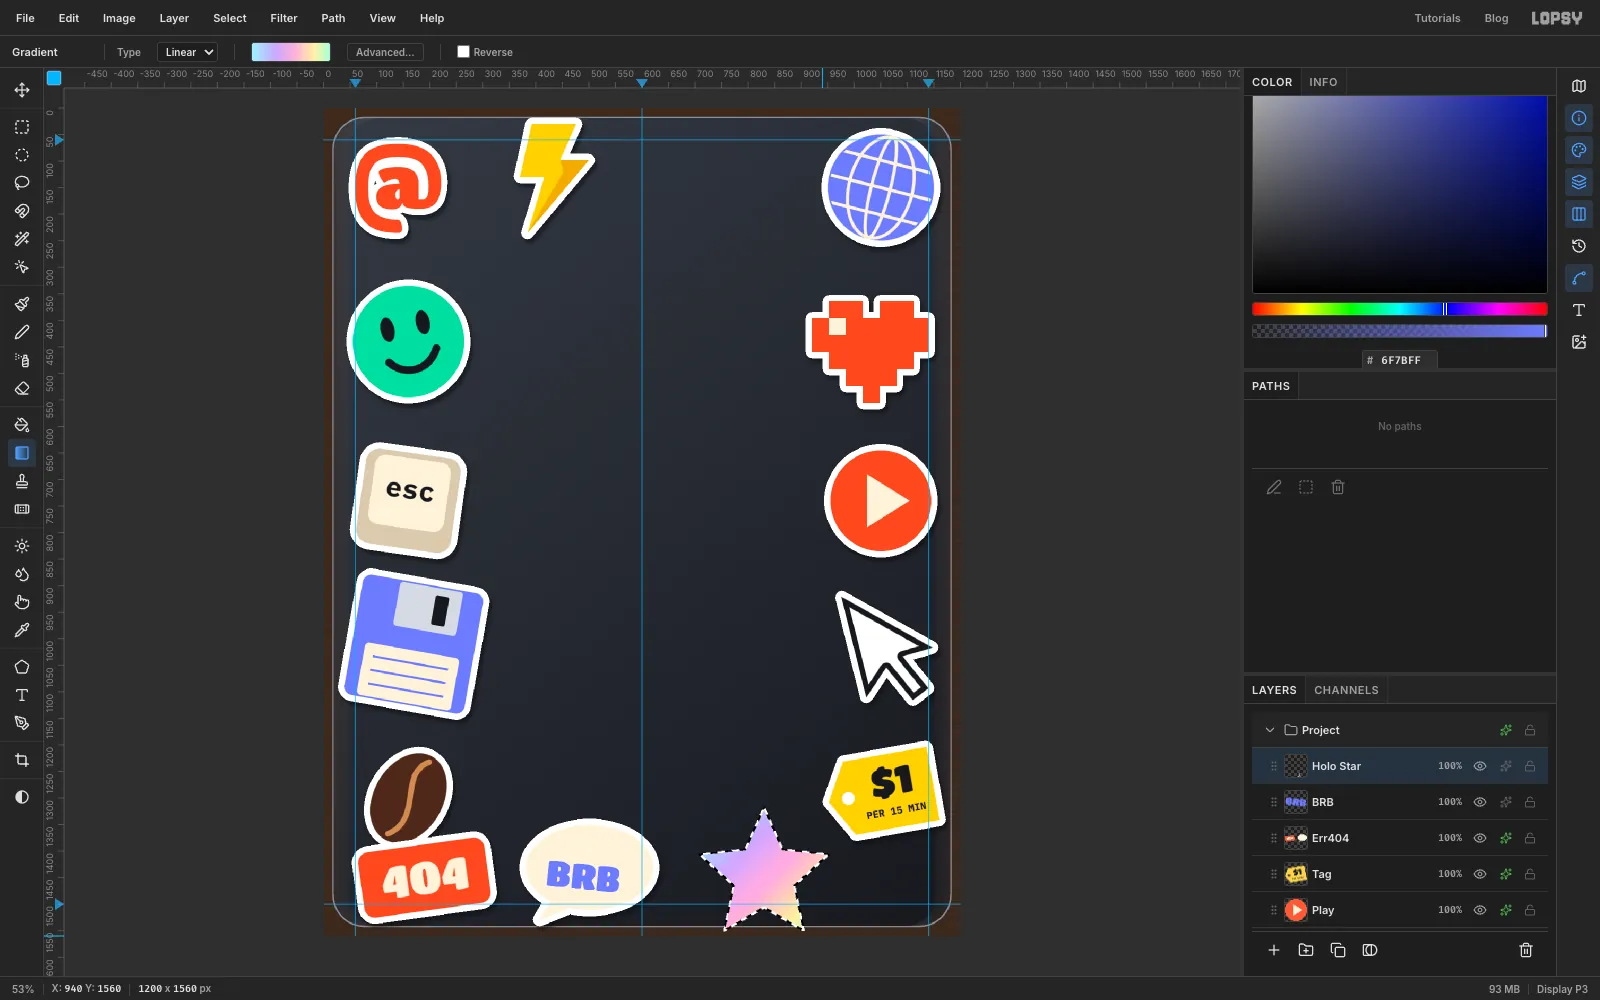
404. A tomato rounded rectangle (Corner Radius
20, 240 × 124 at190, 1450) with404in cream Titan One84, merged down. Tilt it about 8° anticlockwise.BRB. A cream 240 × 160 ellipse at
500, 1440, plus a Pen tail at404, 1540,440, 1480,490, 1505filled cream. AddBRBin periwinkle Titan One66, merge it down, and tilt it about 6° clockwise.Holo star. On a new layer Holo Star, click a five-point star with the Pen, ten clicks round from the top:
830, 1318,865, 1397,952, 1406,887, 1465,905, 1550,830, 1506,755, 1550,773, 1465,708, 1406,795, 1397, then the first point again. Turn it into a selection. In the Gradient editor, set five stops: , at 30%, at 55%, at 80% and . Drag diagonally across the star from top left to bottom right. Pastel stops next to each other look like holographic foil.Give every one of them the die-cut effects, and tilt the star about 12° clockwise.
-
Group the pack
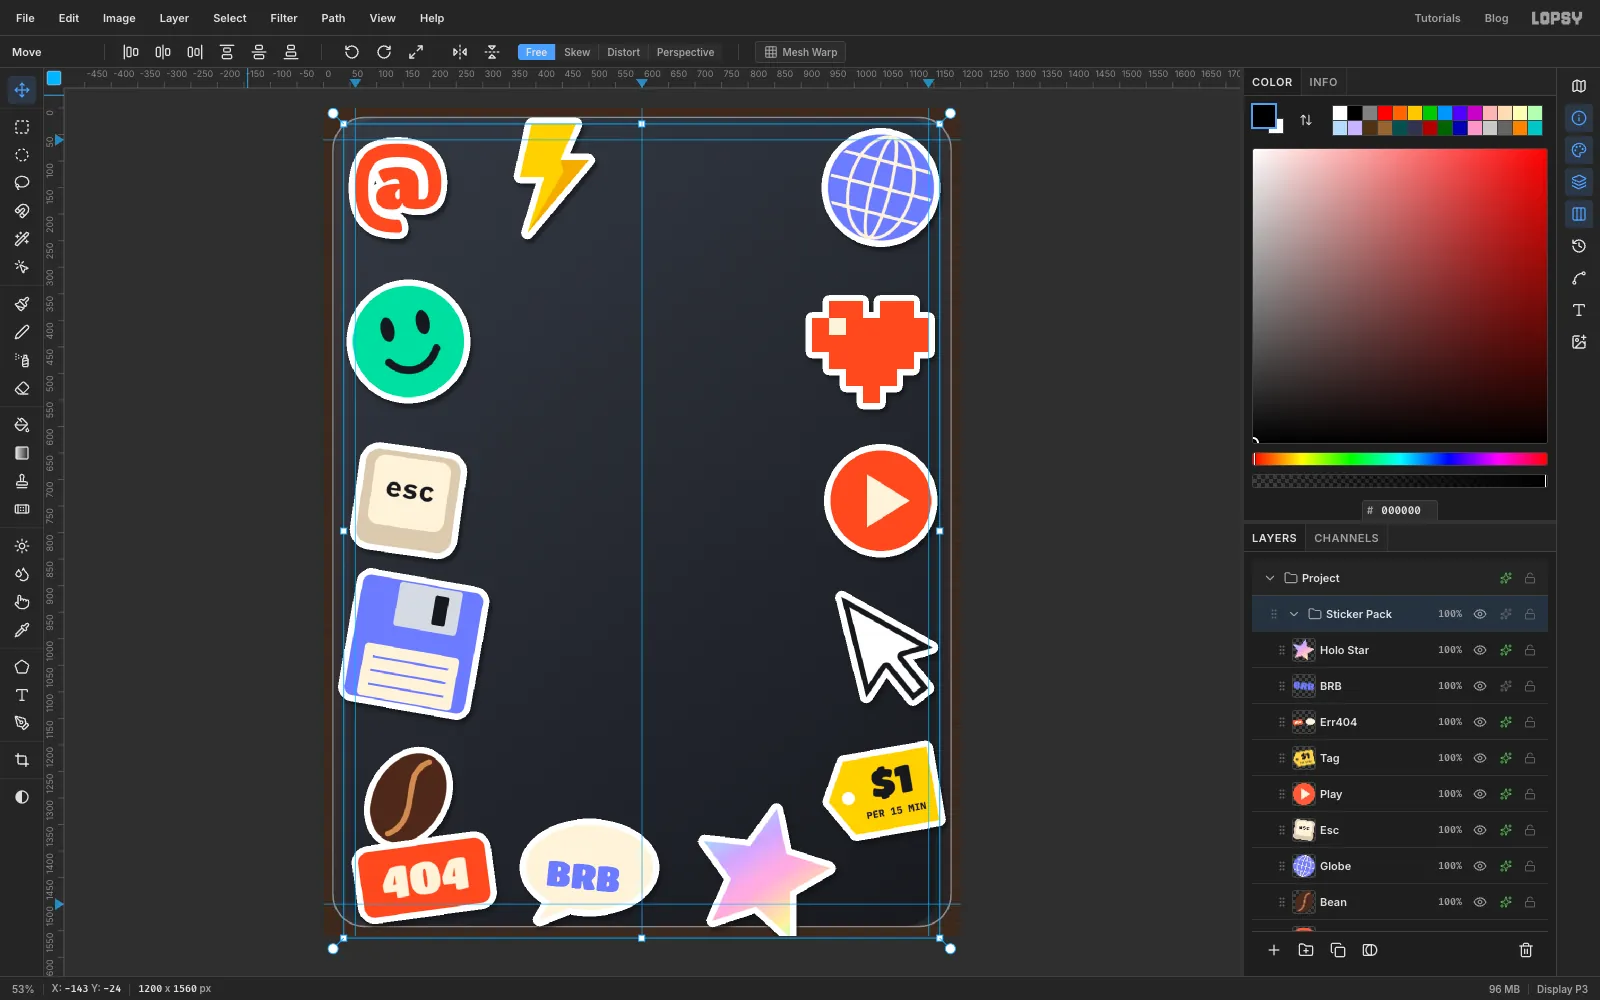
Click the top sticker layer (Holo Star), Shift-click the bottom one (Smiley) and choose Layer → Group Layers. Rename the group Sticker Pack and click its arrow to collapse it.
-
Copy the whole pack as one picture
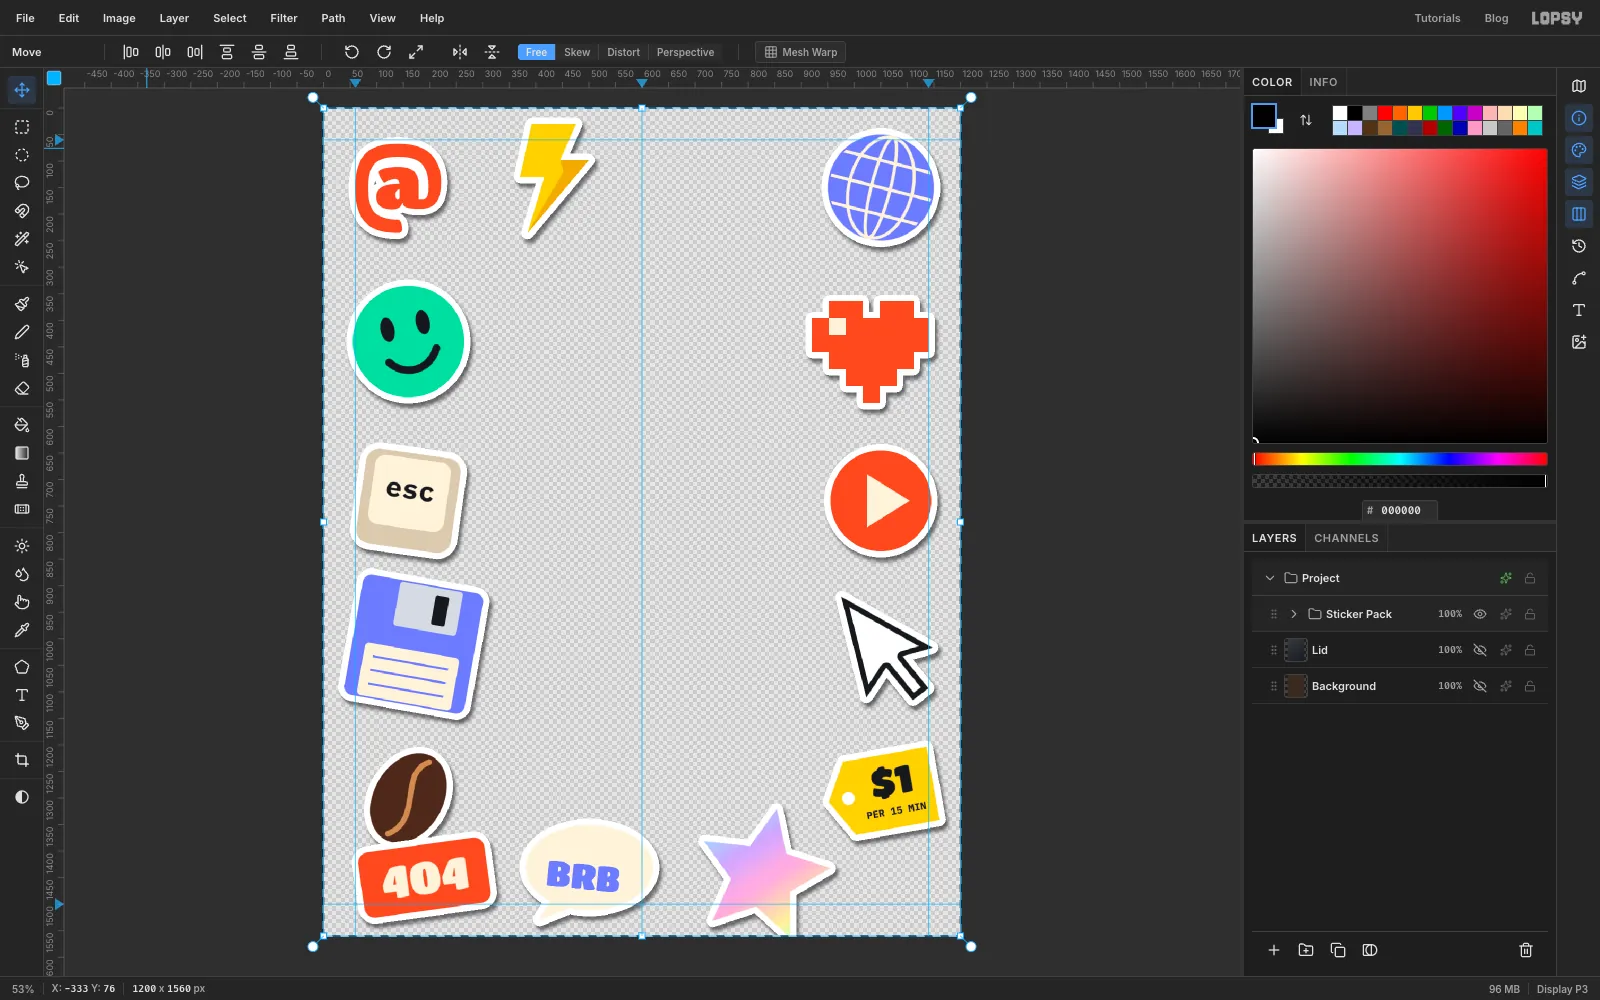
Hide Background and Lid with their eye buttons, so that only the stickers are visible. Choose Select → All, then Edit → Copy Merged. Copy Merged copies what you see, effects and all, as one flat picture.
Deselect and show Background and Lid again. Click the Lid row and choose Edit → Paste. The pasted stickers land in place above the lid. Deselect, and rename the pasted layer Pack 3.
The merged copy has everything, so delete the Sticker Pack group: select it and click the trash button.
-
Duplicate the pack and turn a copy upside down
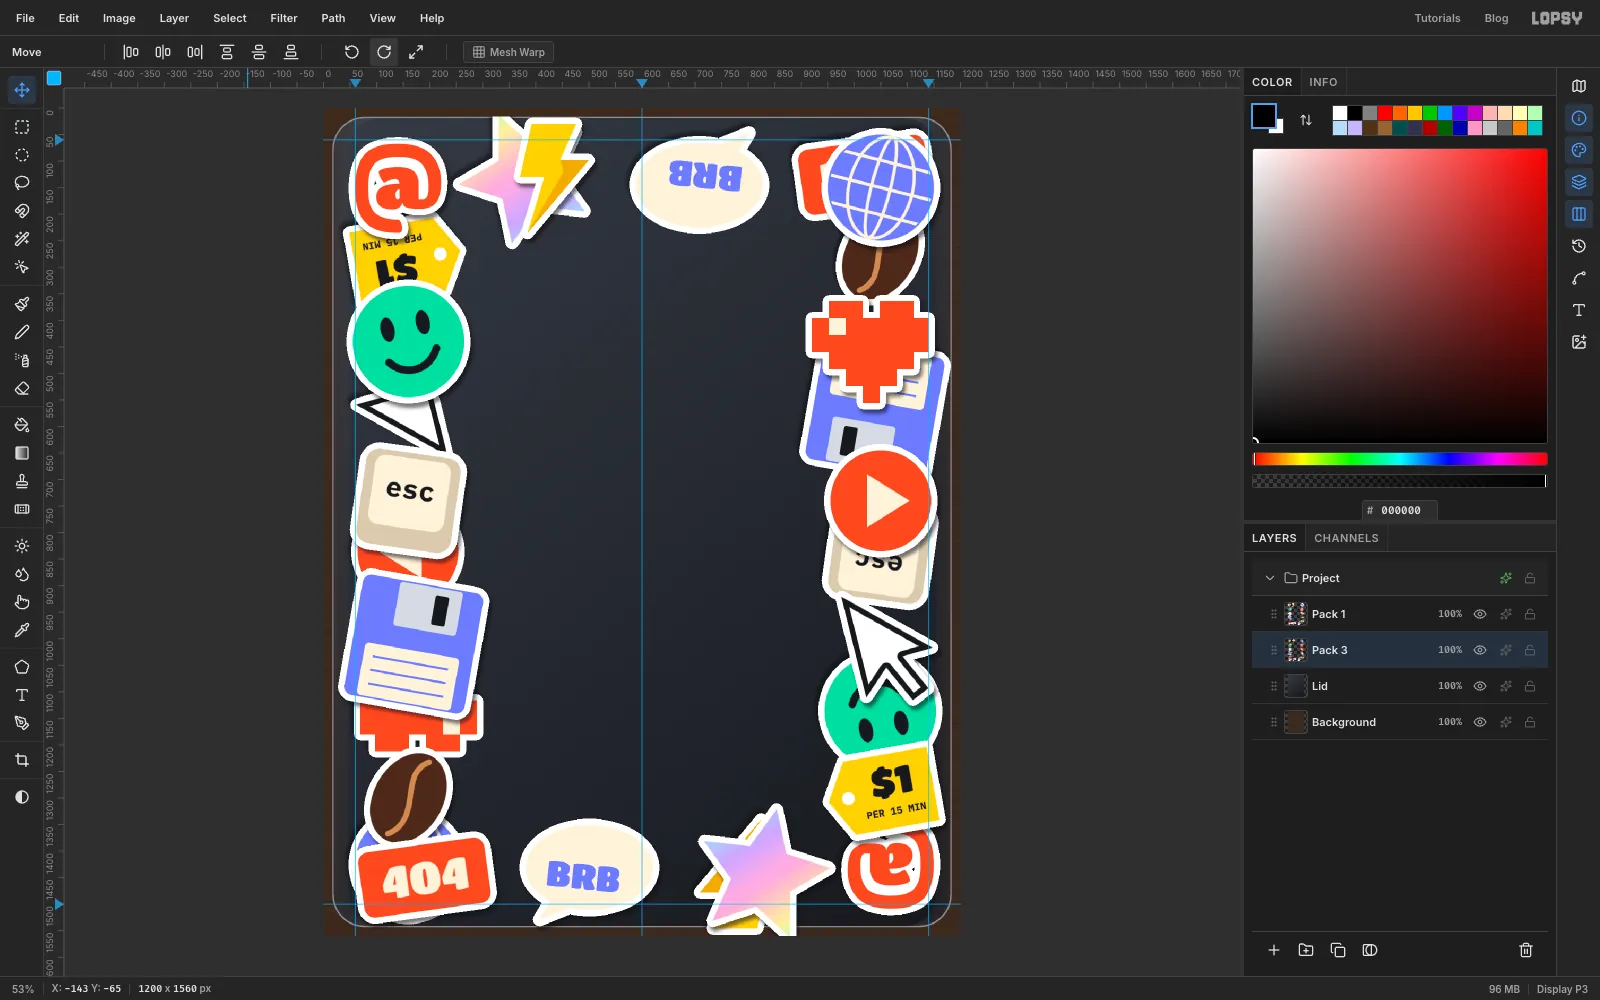
Choose Layer → Duplicate Layer and rename the copy Pack 1. It stays as it is.
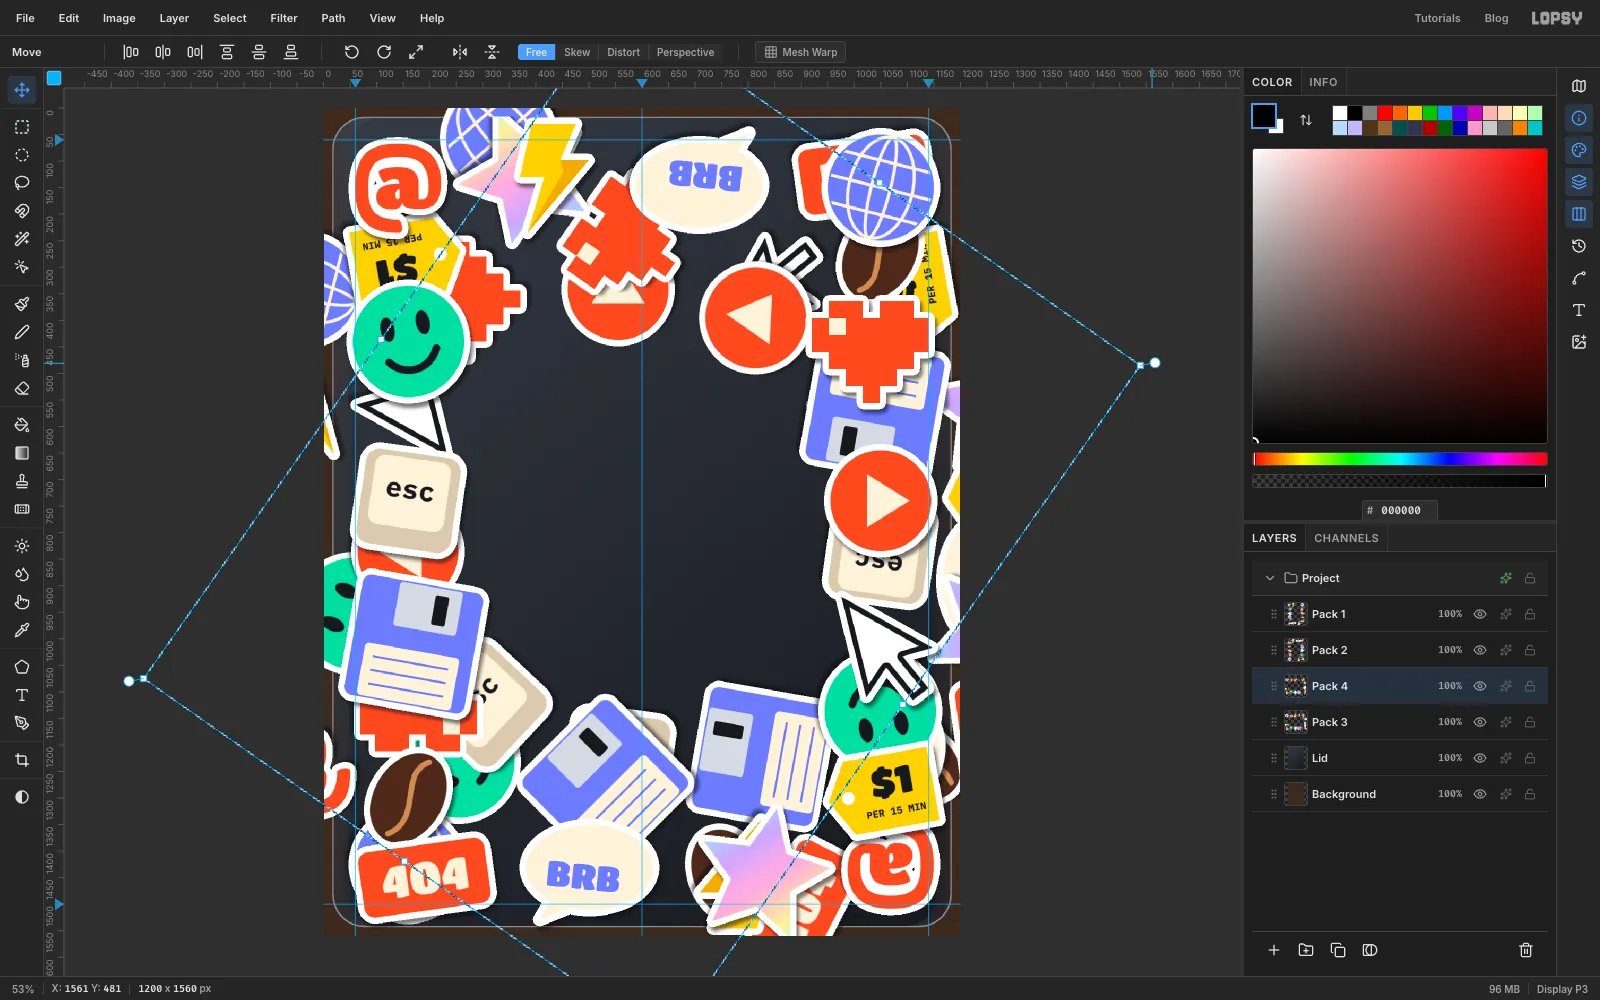
Click Pack 3, pick the Move tool and click Rotate 90° CW in the options bar twice. The lower copy turns upside down, so its stickers fall in the gaps between the ones above. Upside-down text is fine: real sticker bombs are full of it.
-
Add a third copy turned on its side
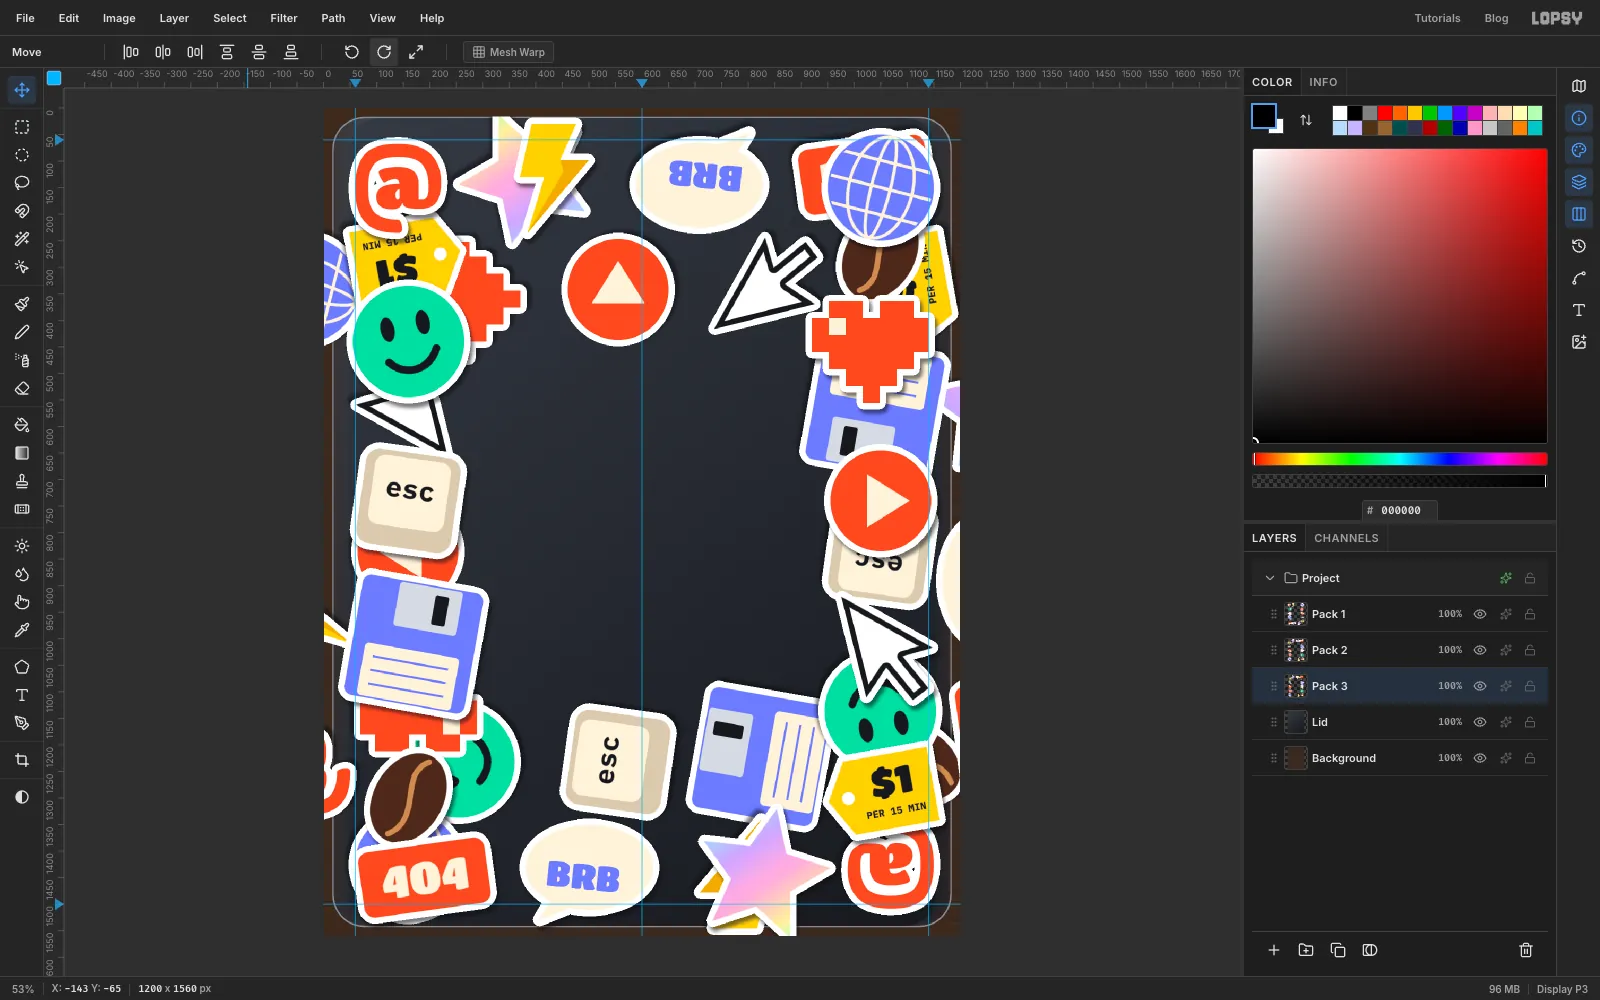
With Pack 3 still selected, duplicate it again and rename the copy Pack 2. Then click Pack 3 and click Rotate 90° CW once more. The page isn't square, so this copy pushes stickers into new spots along the top and bottom.
-
Turn a fourth copy to an odd angle
Duplicate Pack 3 one last time and name the copy Pack 4. Choose Select → All, then drag the rotation zone outside the top-right corner of the canvas about 35° clockwise. Odd angles break up the repetition. Press Cmd+D to commit.
Click Pack 1, Shift-click Pack 3 and group the four copies as Backdrop.
-
Trim the stickers at the lid edge
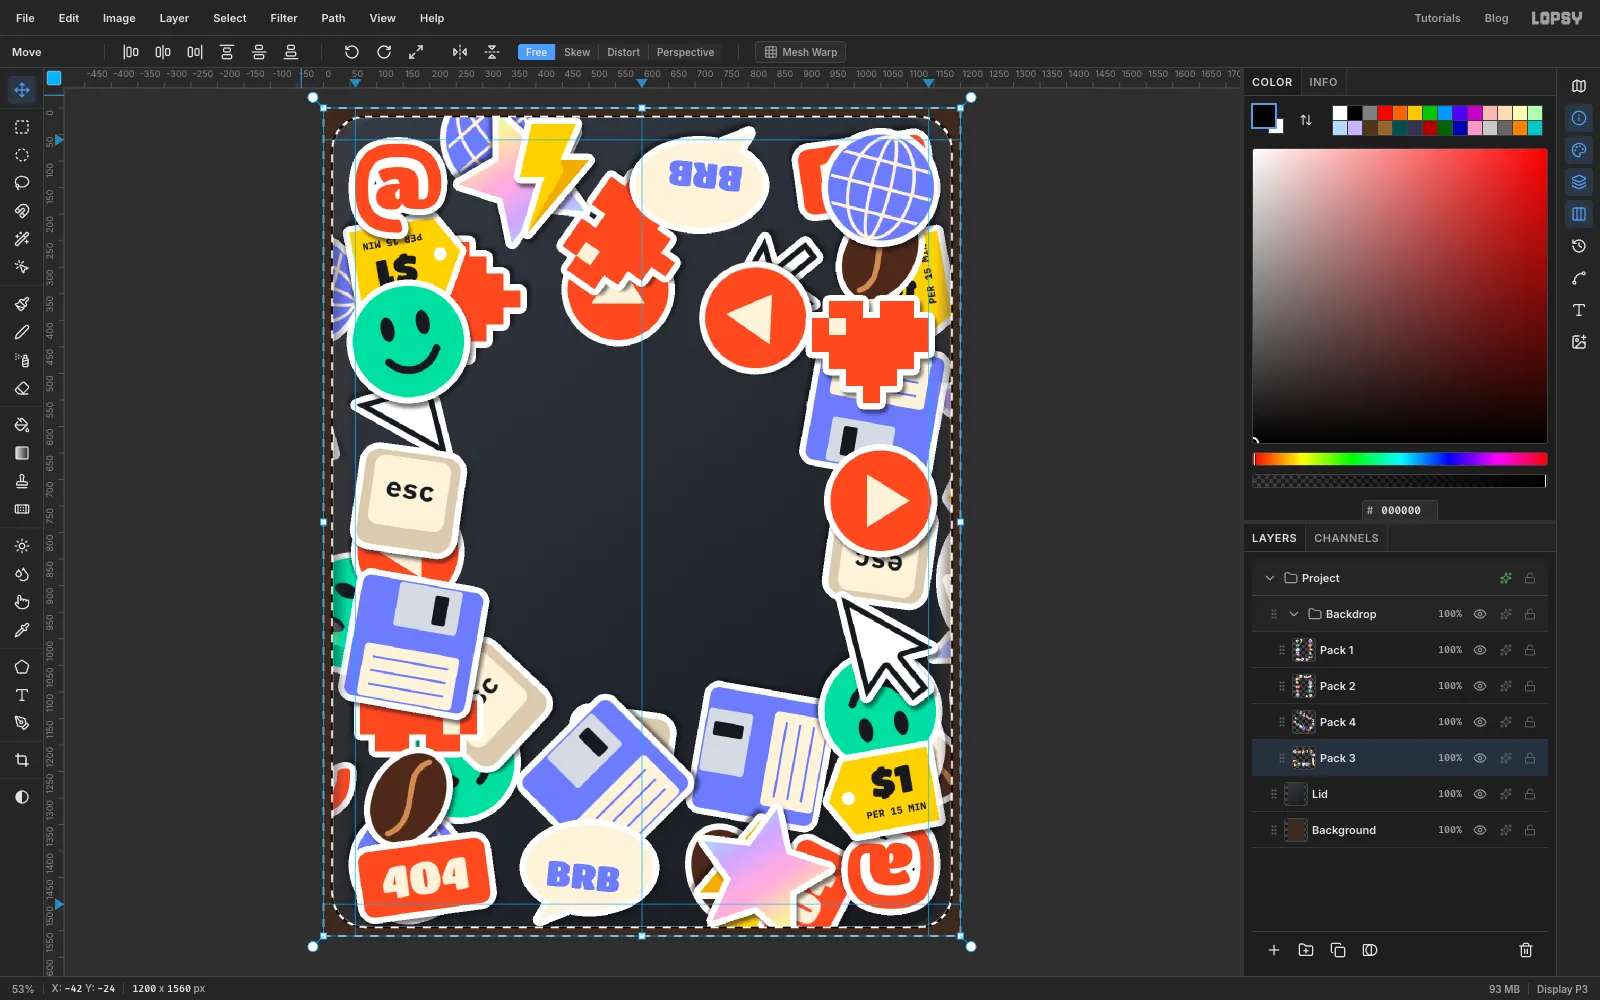
On a real laptop, you trim stickers that hang over the edge with a knife. Here, Cmd-click the Lid thumbnail, then choose Select → Inverse. Now everything except the lid is selected. Click each Pack layer in turn and press Delete. The selection stays put while you switch layers. Deselect when you're done.
-
Push the backdrop back with adjustments
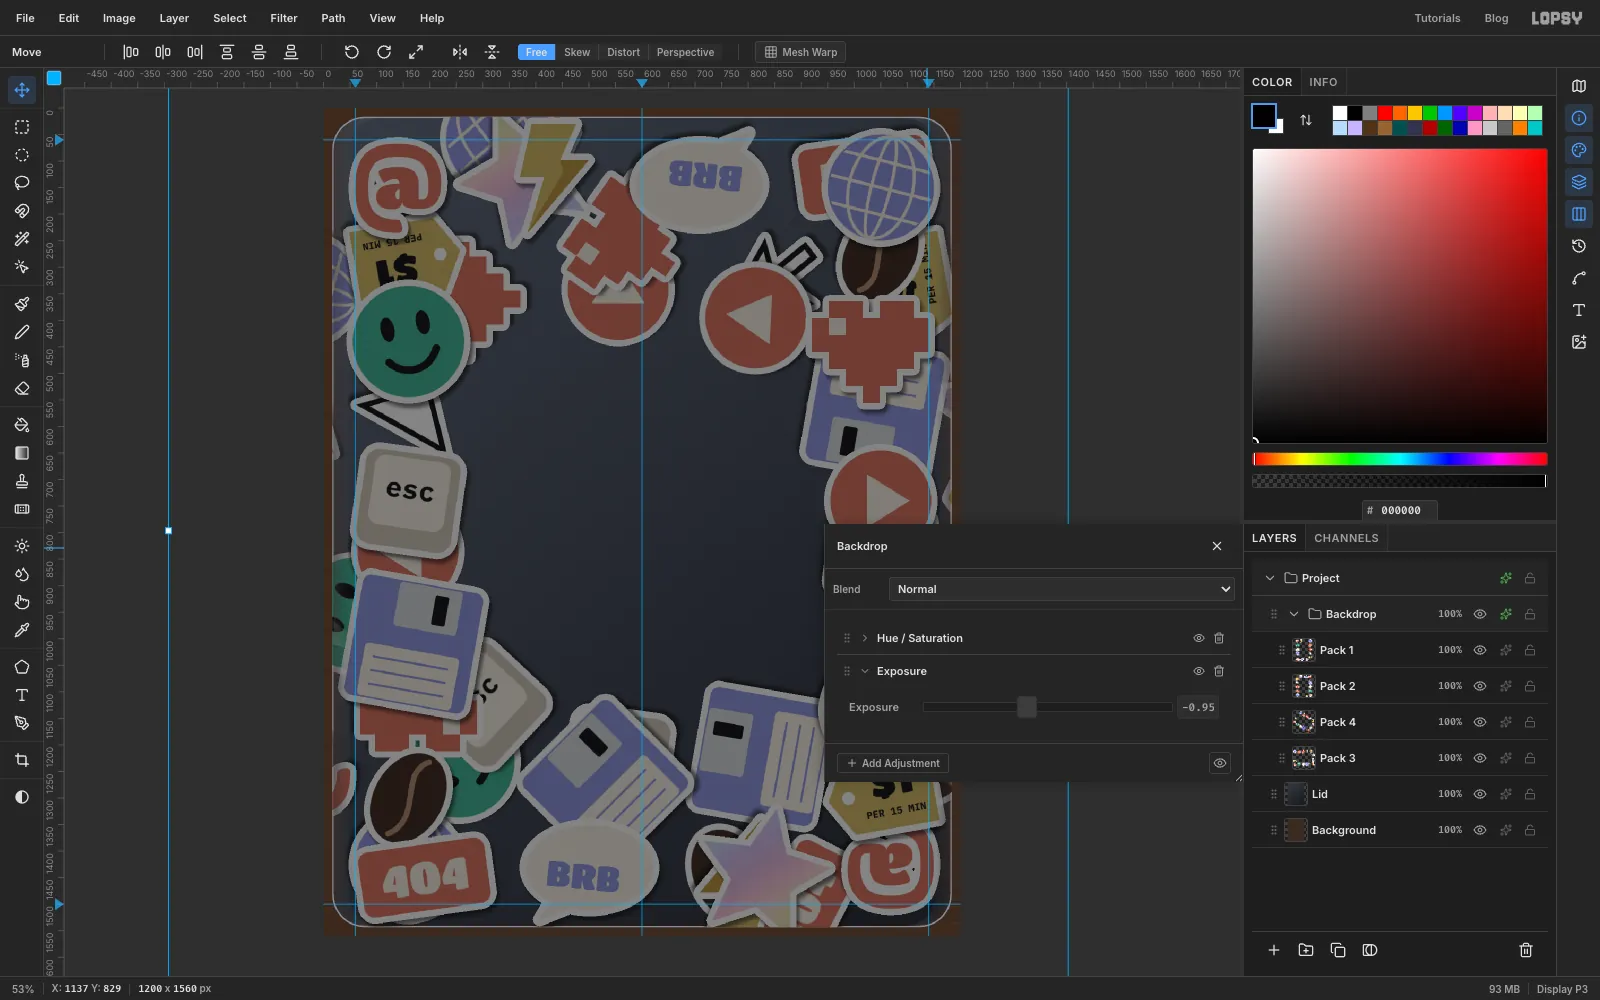
The foreground stickers need room to pop, so make the backdrop recede. Click Backdrop and open its effects drawer. For a group, the drawer shows Adjustments. Click Add Adjustment → Hue / Saturation and set Saturation to
-50. Then Add Adjustment → Exposure and set it to-0.95.The group's stickers turn dusty and dark but keep their shapes and colours. Collapse the group.
-
Cut the hero disc
Click Backdrop and add a layer named Hero Disc. With the Elliptical Marquee, select from
270, 470to930, 1130, a circle of radius 330 centred on600, 800. Fill it with periwinkle and deselect.The foreground stickers share one slightly stronger look. Give the disc a white Stroke of
16(Outside) and a Drop Shadow of Offset X6, Offset Y9, Blur12and Opacity50%. Use those shadow values for every foreground sticker from now on.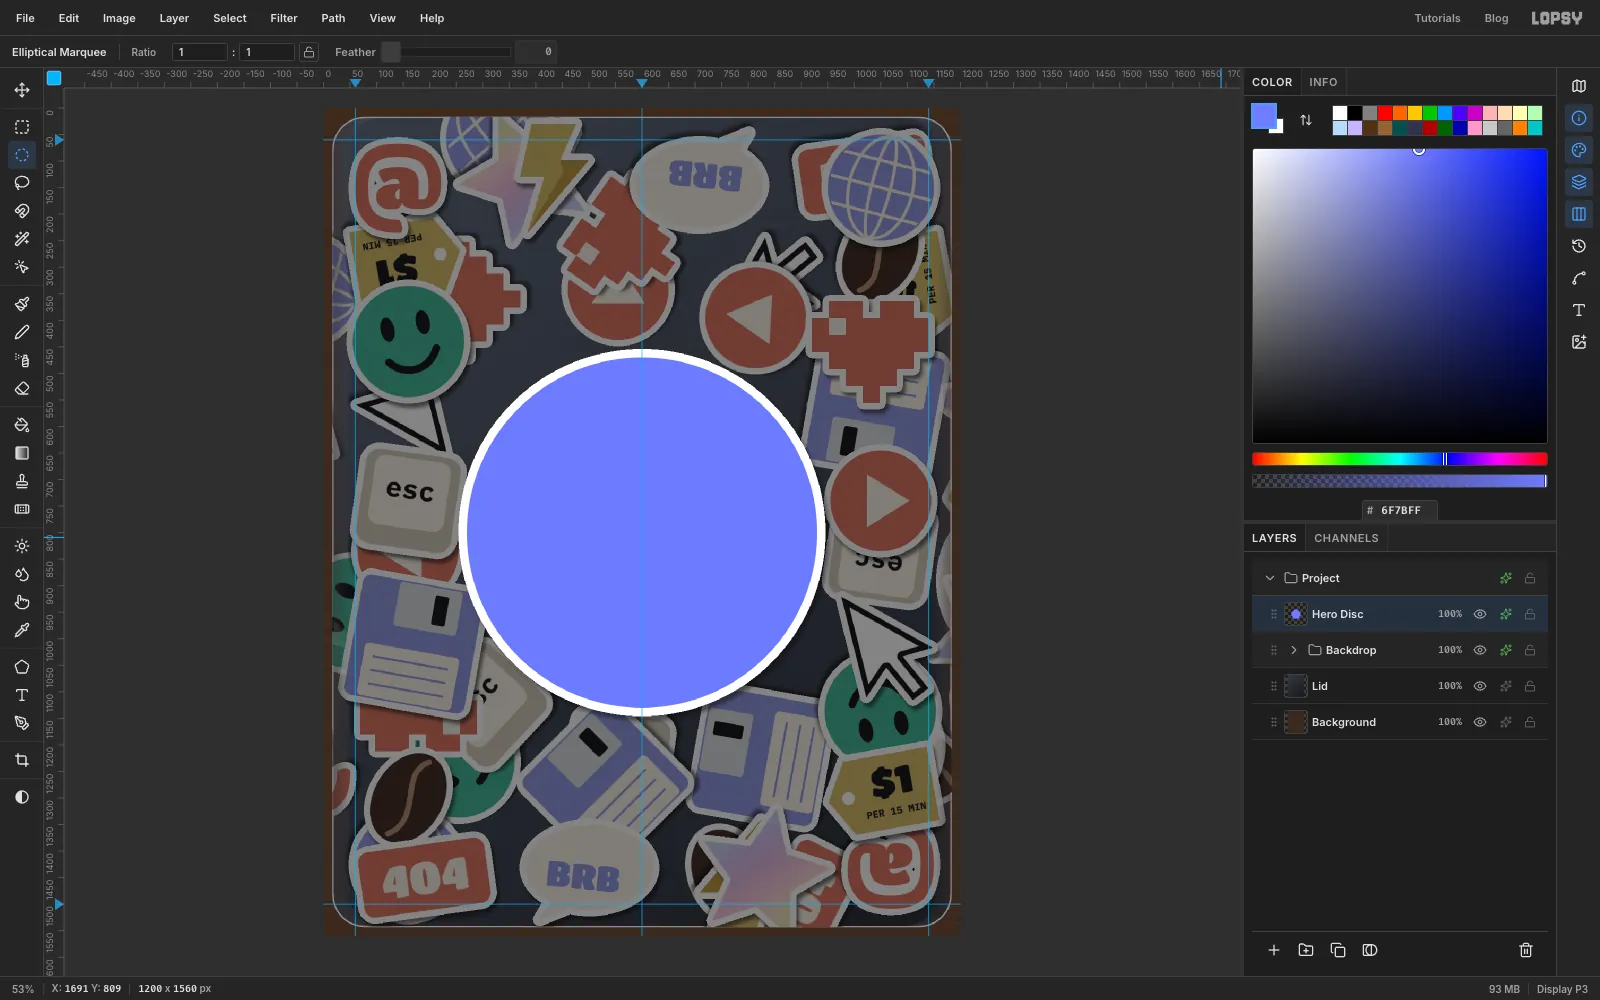
-
Build the mug from shapes
Add a layer named Mug. Start with the handle: select a circle from
656, 806to768, 918and fill it with cream. Press Cmd+D, select682, 832to742, 892and press Delete to leave a ring.Now stack these shapes with the Shape tool, in this order, so each one covers the last:
- Keycap-tone ellipse 320 × 54 at
600, 996: the saucer's shadow edge - Cream ellipse 320 × 54 at
600, 988: the saucer - Cream rectangle, Corner Radius
34, 240 × 200 at588, 870: the cup. It hides the left half of the ring. - Cream ellipse 240 × 50 at
588, 772: the rim - Espresso ellipse 208 × 34 at
588, 774: the coffee - Crema ellipse 120 × 12 at
576, 772: a highlight on the coffee
Give Mug a Drop Shadow in : Offset X
0, Offset Y10, Blur14, Opacity45%.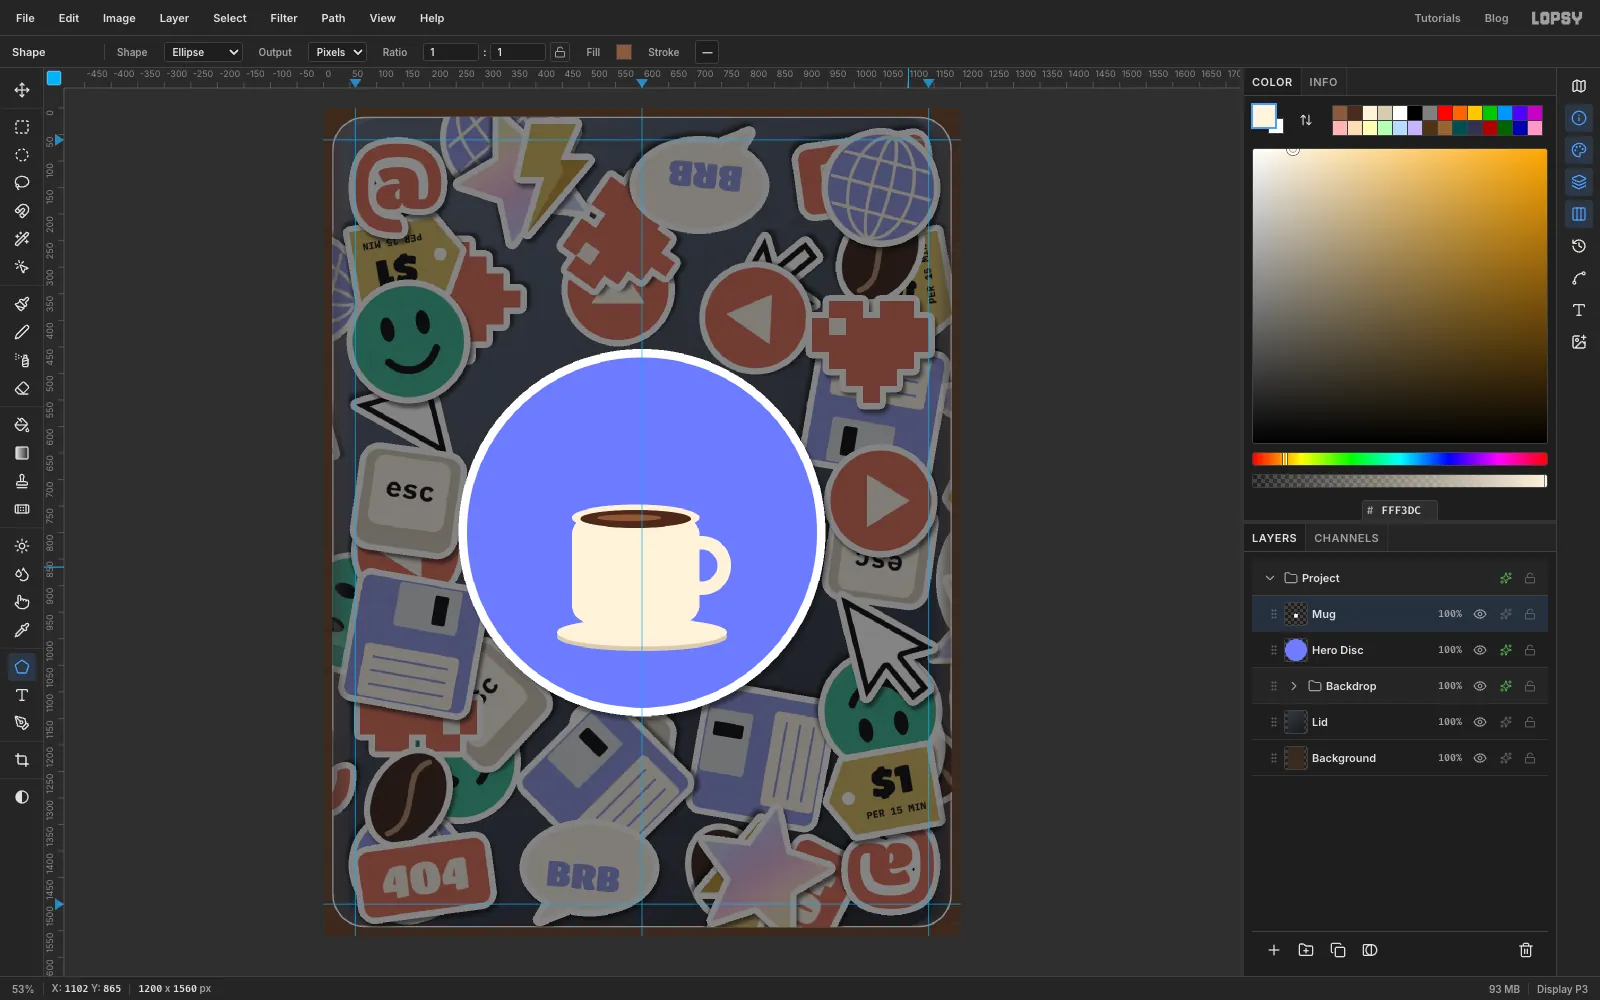
- Keycap-tone ellipse 320 × 54 at
-
Shade the mug with Multiply
Add a layer named Mug Shade and Cmd-click the Mug thumbnail. Set a gradient of white, white at 55% and tan , and drag it straight across from
470, 870to770, 870. Deselect and set the layer's Blend to Multiply. White disappears in Multiply, so only the right side of the mug darkens, as if lit from the left.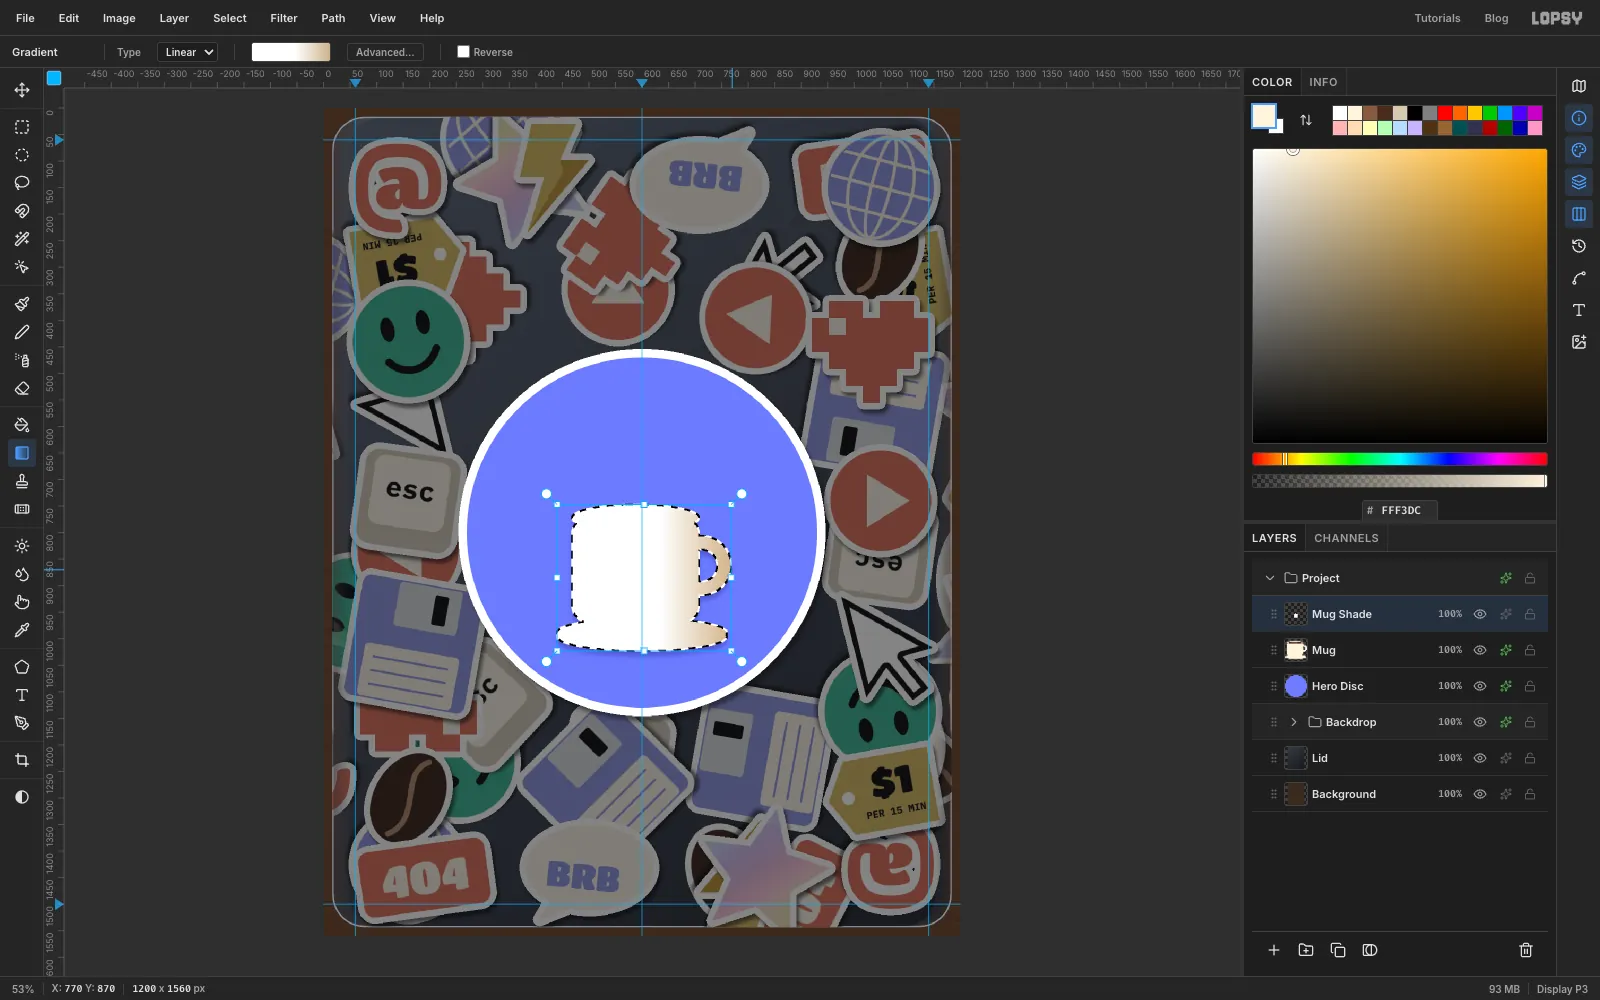
-
Put an @ on the mug
Click Mug Shade, pick the Text tool and set Titan One, Size
84, tomato. Click on the mug, type@and press Tab. Rename the layer Mug Logo and nudge it to about580, 880.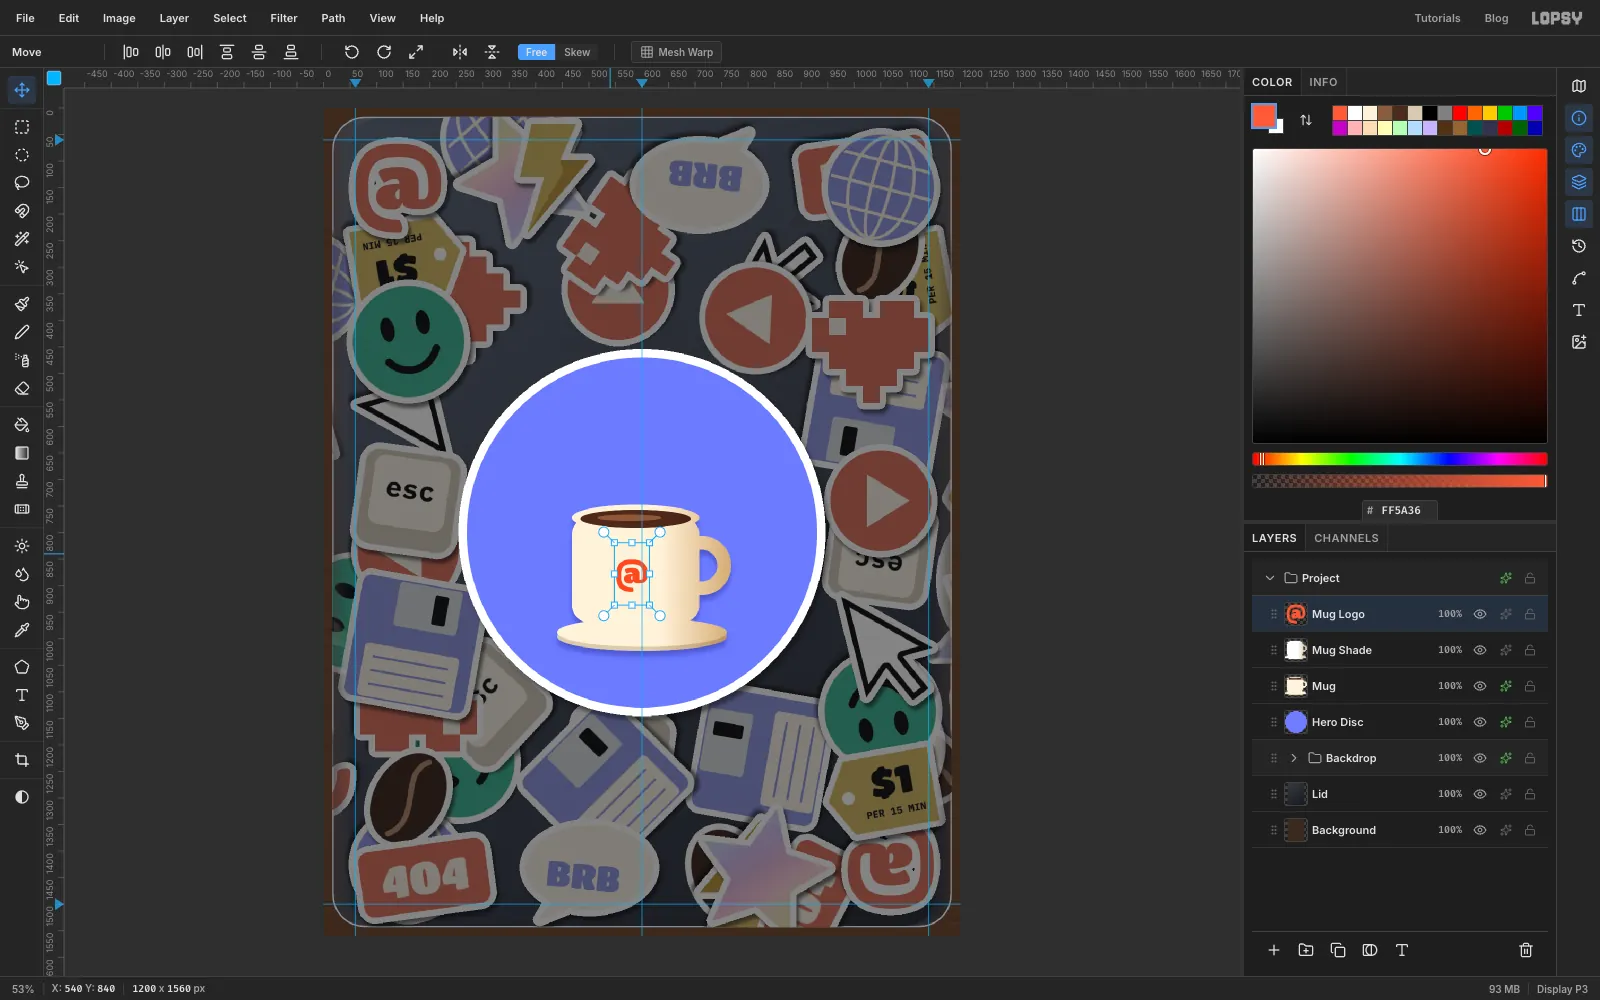
-
Draw three rings for the Wi-Fi steam
Click Mug Shade and add a layer named Wi-Fi. All the rings are centred on
588, 712. For each ring, select a circle and fill it with mint, press Cmd+D, then select a smaller circle with the same centre and press Delete. Deselect again before the next ring:- fill radius
147(441, 565to735, 859), delete radius121(467, 591to709, 833) - fill radius
105(483, 607to693, 817), delete radius79(509, 633to667, 791) - fill radius
63(525, 649to651, 775), delete radius37(551, 675to625, 749)
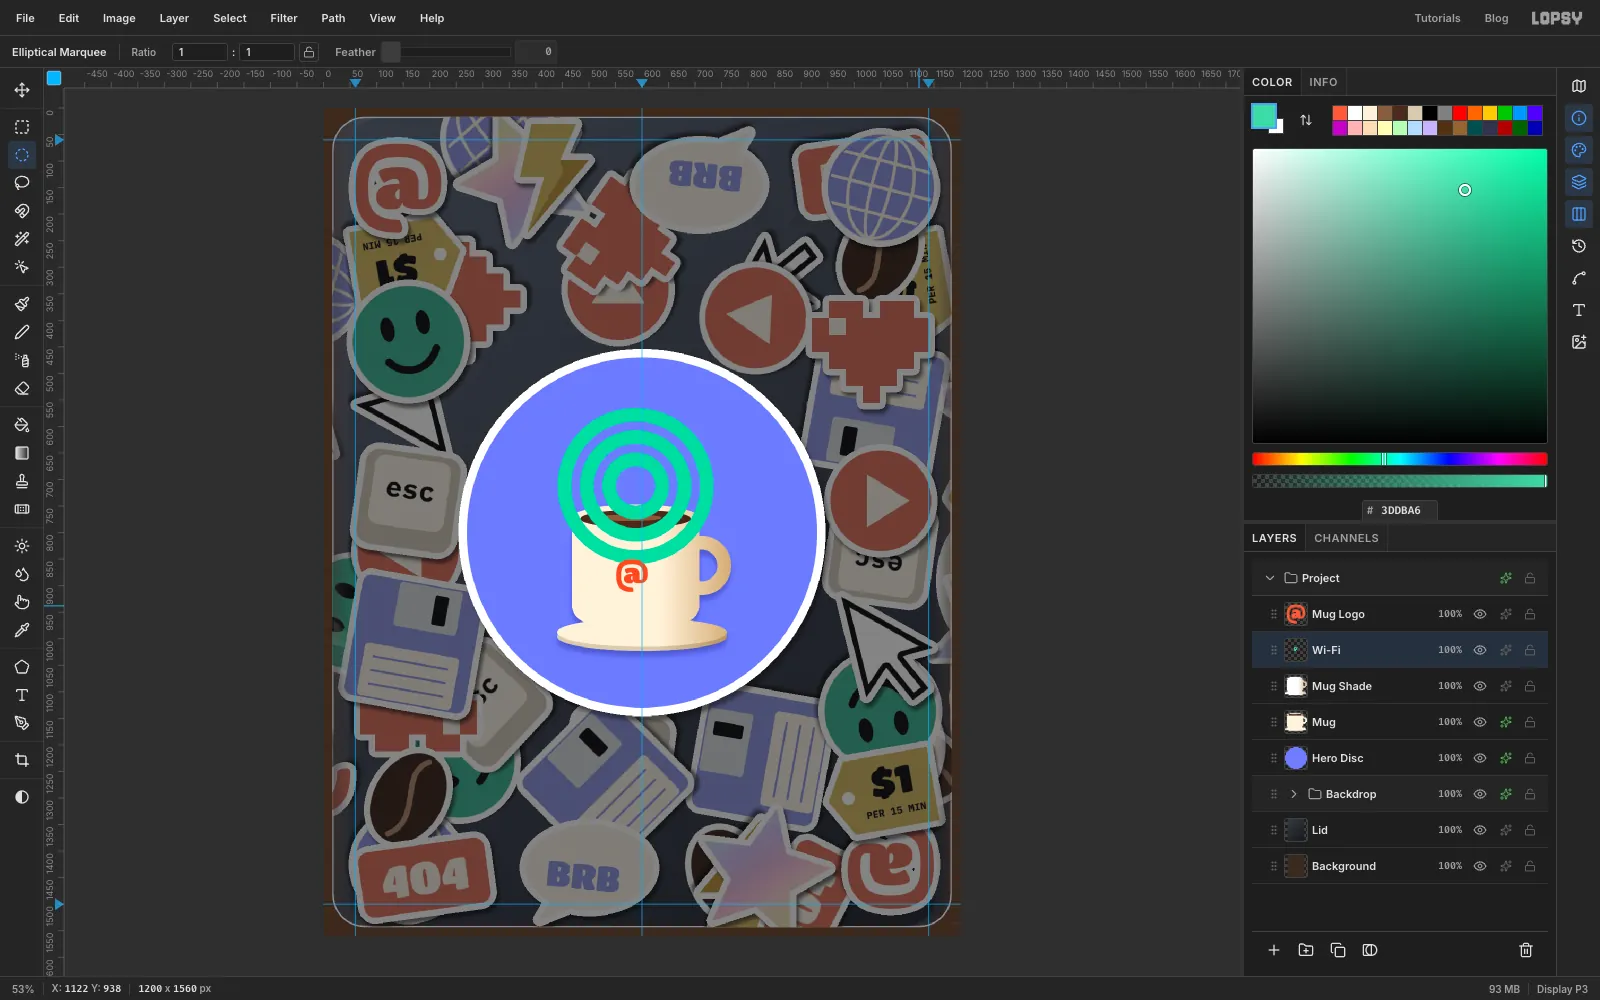
- fill radius
-
Trim the rings into a fan
With the Pen, click a wide V:
388, 526,588, 726,788, 526, and close it. Path to Selection, then Select → Inverse, and press Delete. Only the top quarter of each ring survives: the Wi-Fi fan.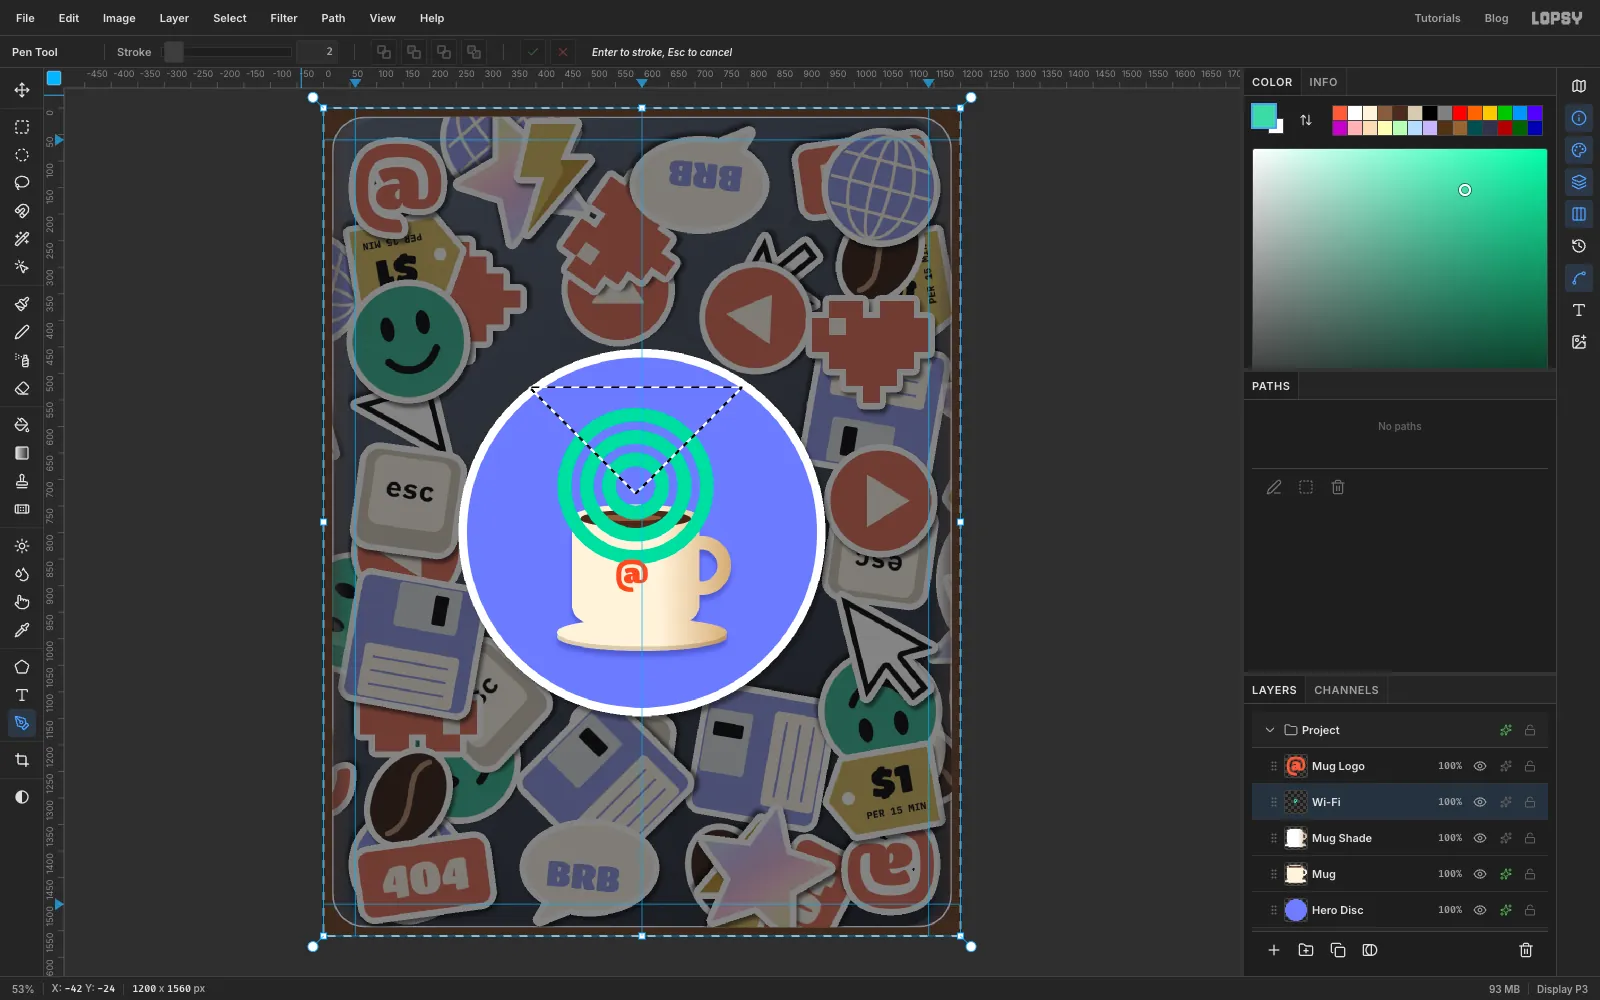
-
Add the dot
Select a small circle from
568, 692to608, 732and fill it with mint. Deselect, and give Wi-Fi the same disc-coloured Drop Shadow as the mug (Offset Y6, Blur8, Opacity45%).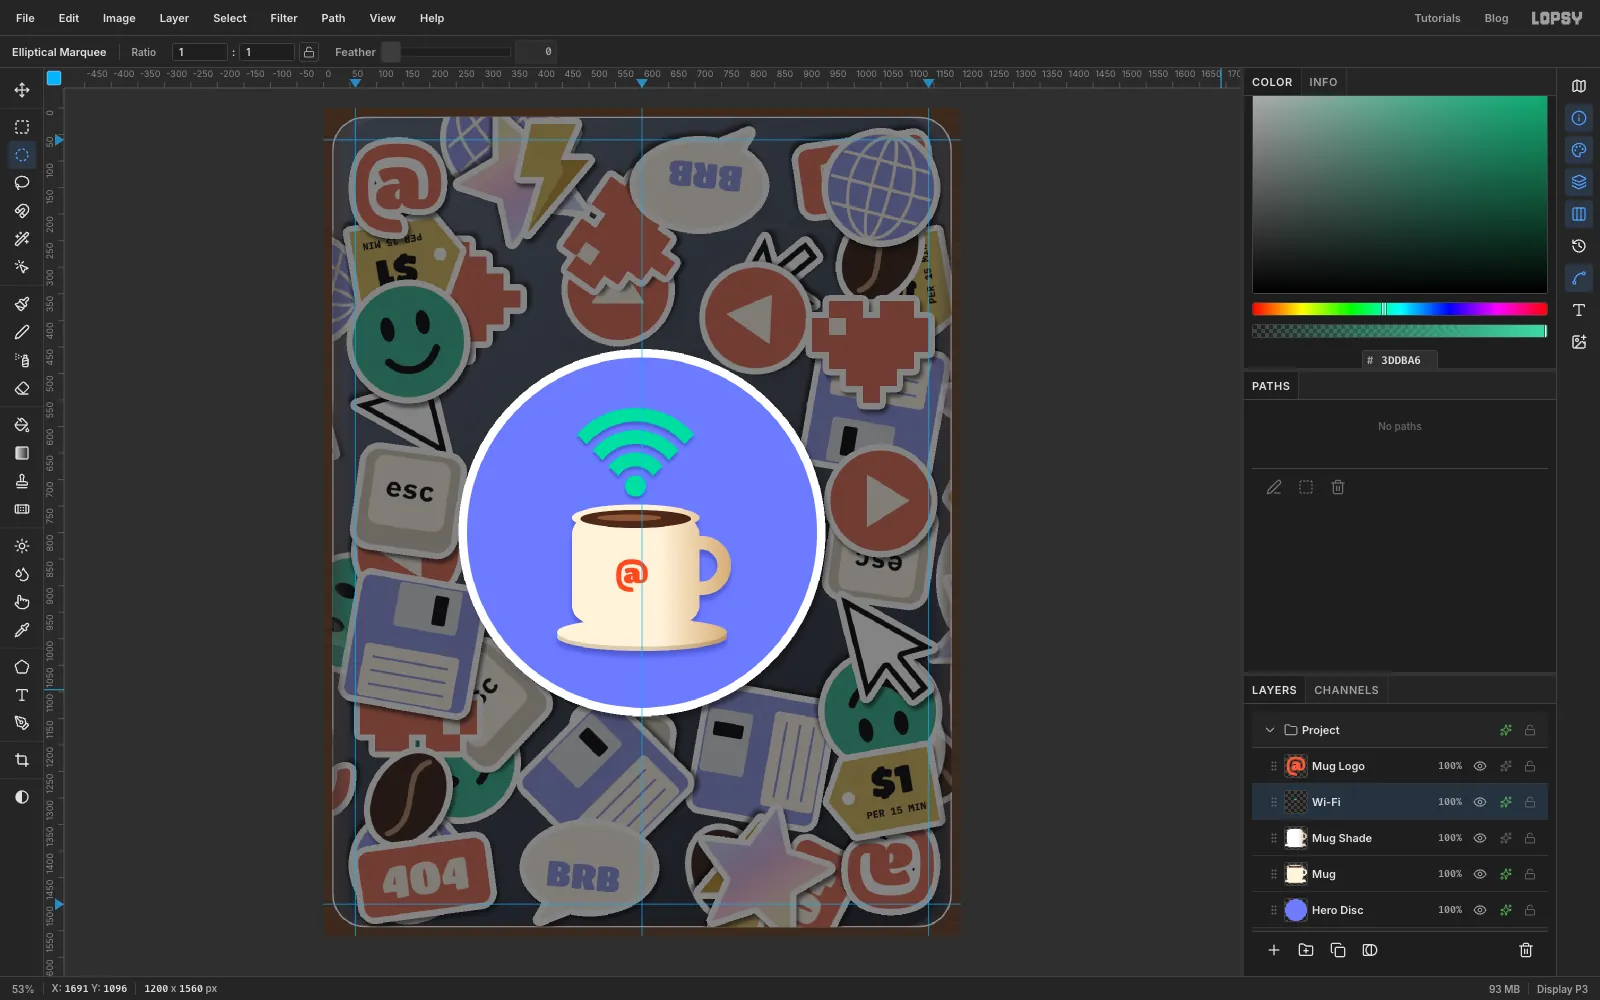
-
Make a circular path for the ring text
Pick the Shape tool, set Shape to Ellipse and Output to Path. Shape drags start from the centre, so press at the centre of the disc,
600, 800, and drag out to872, 1072. That gives a circle of radius 272, about 60 px inside the rim.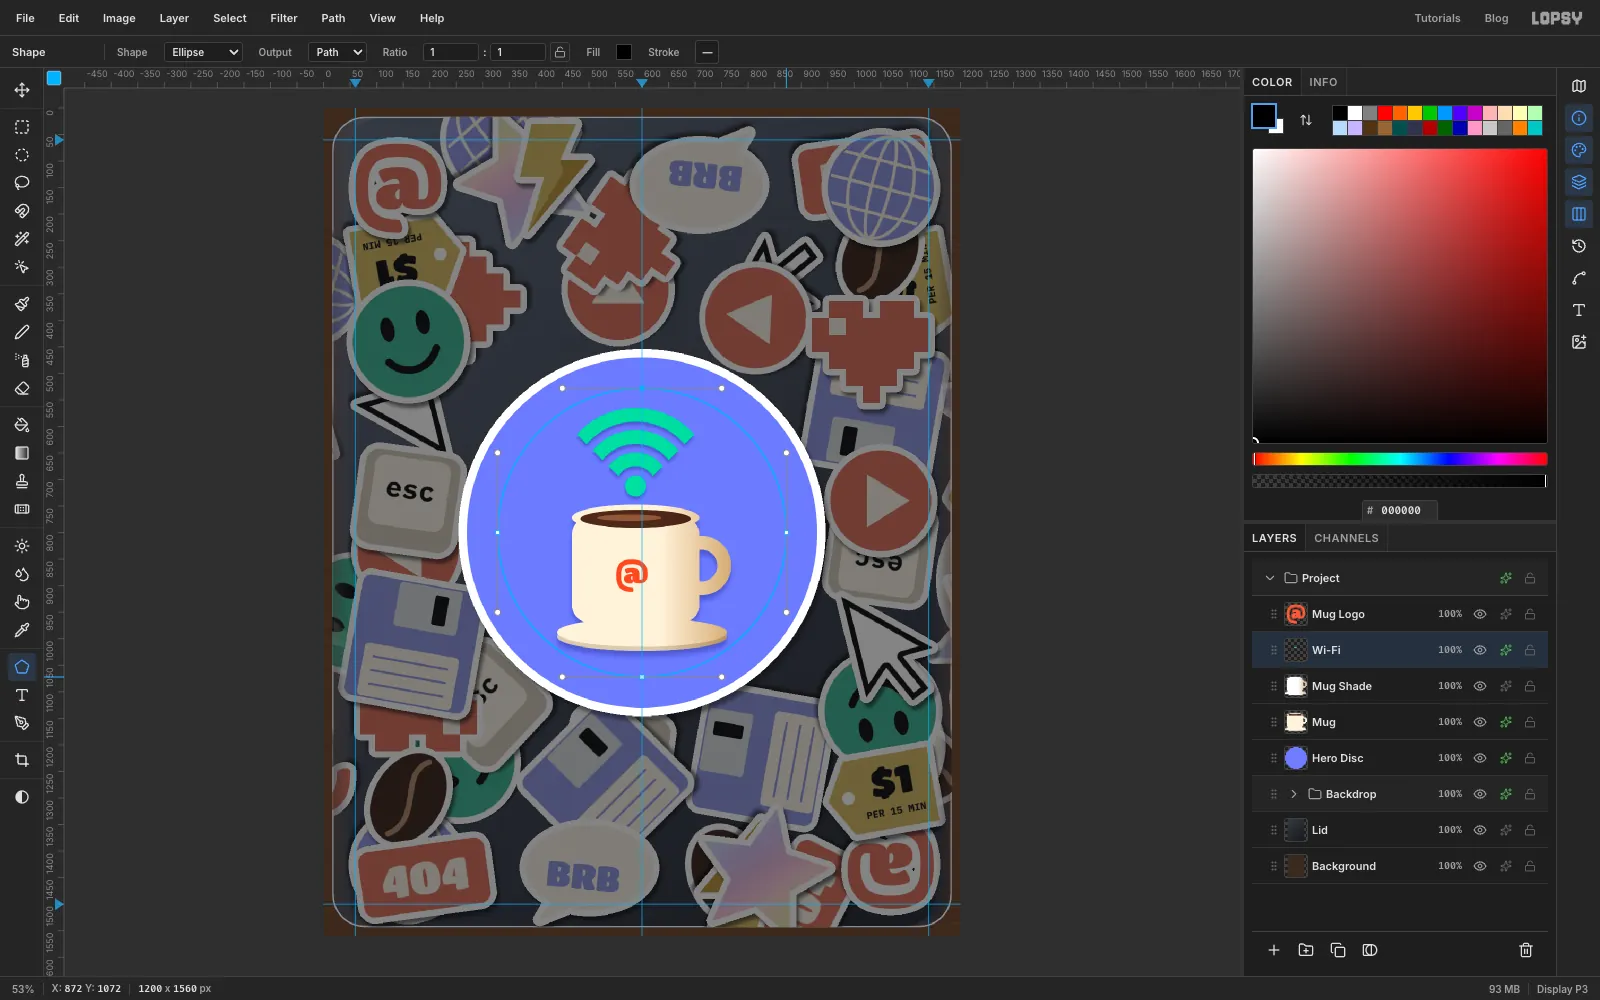
-
Run the text round the disc
Pick the Text tool and set IBM Plex Mono, Bold, Size
30, cream, Align Left. Open the Text panel and check that Letter spacing is0. Click an empty part of the disc and type:FREE WI-FI • OAT MILK LATTES • OPEN 24/7 • LOG ON • SIP UP • NO LAG •While the text is still active, choose Path 1 from the Path dropdown in the options bar. The text jumps onto the circle. Press Tab, then set Letter spacing to
6. At that spacing the line goes exactly once round, so the gap where it starts and ends looks like every other gap. Rename the layer Ring Text.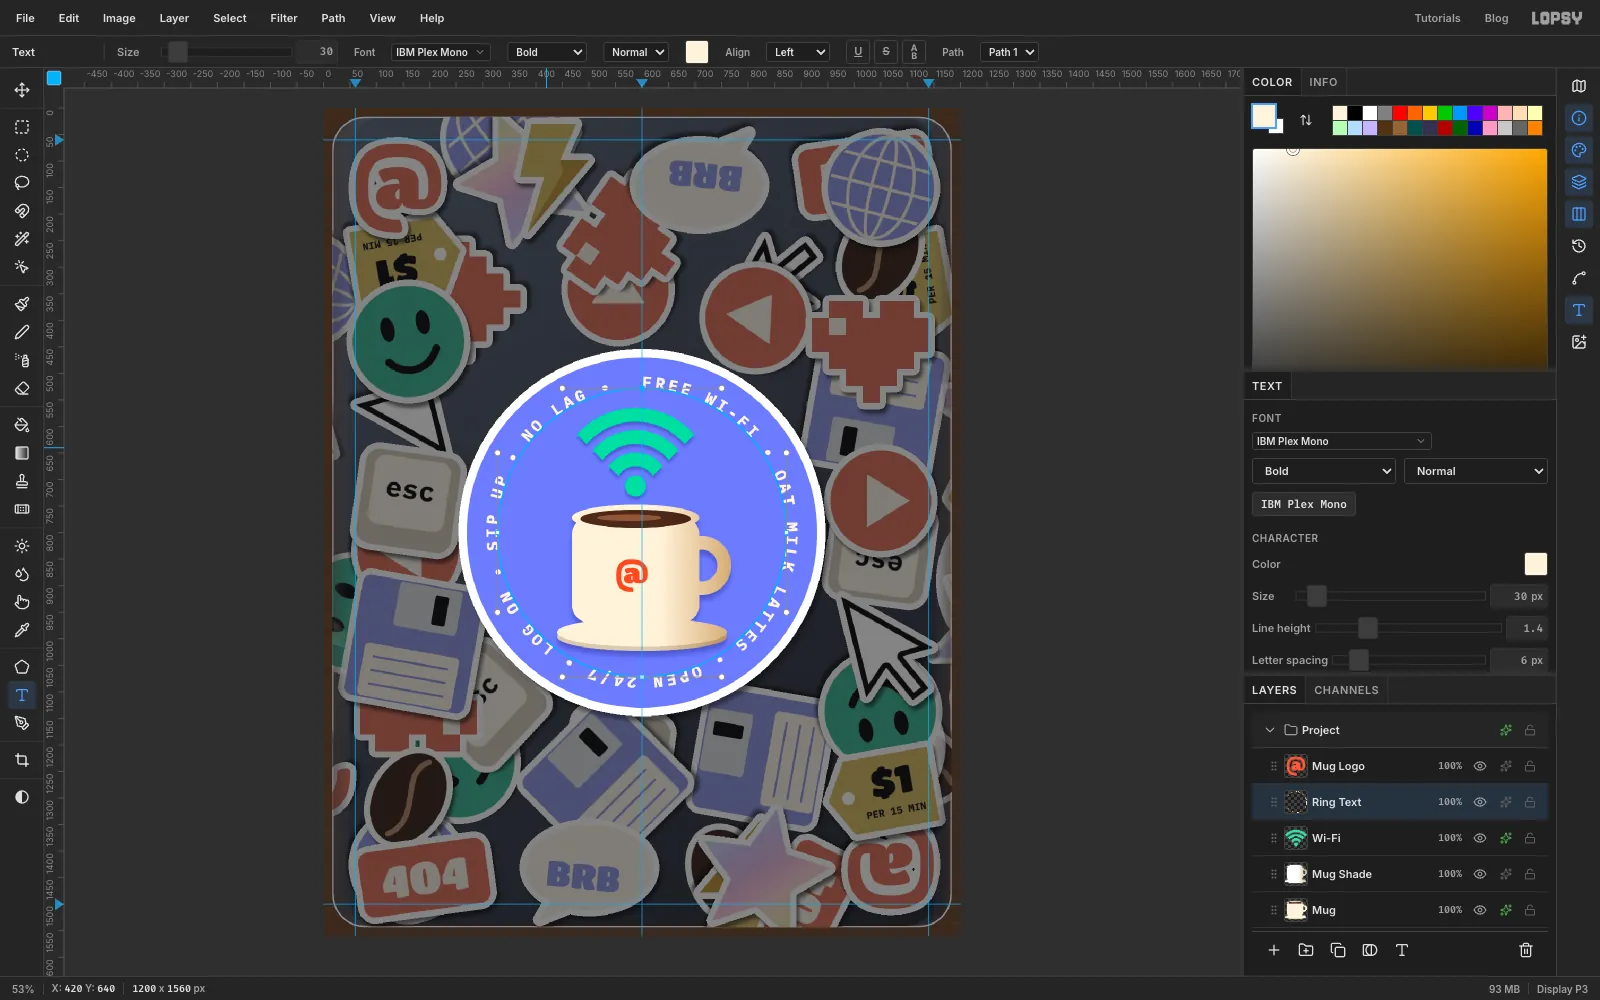
-
Add a gloss with Screen
Add a layer named Gloss and Cmd-click the Hero Disc thumbnail. Set a white-to-black gradient and drag from
330, 500to640, 820. Deselect, set Blend to Screen and the layer opacity to 30%. Black vanishes in Screen, so only a soft sheen remains on the top-left of the vinyl.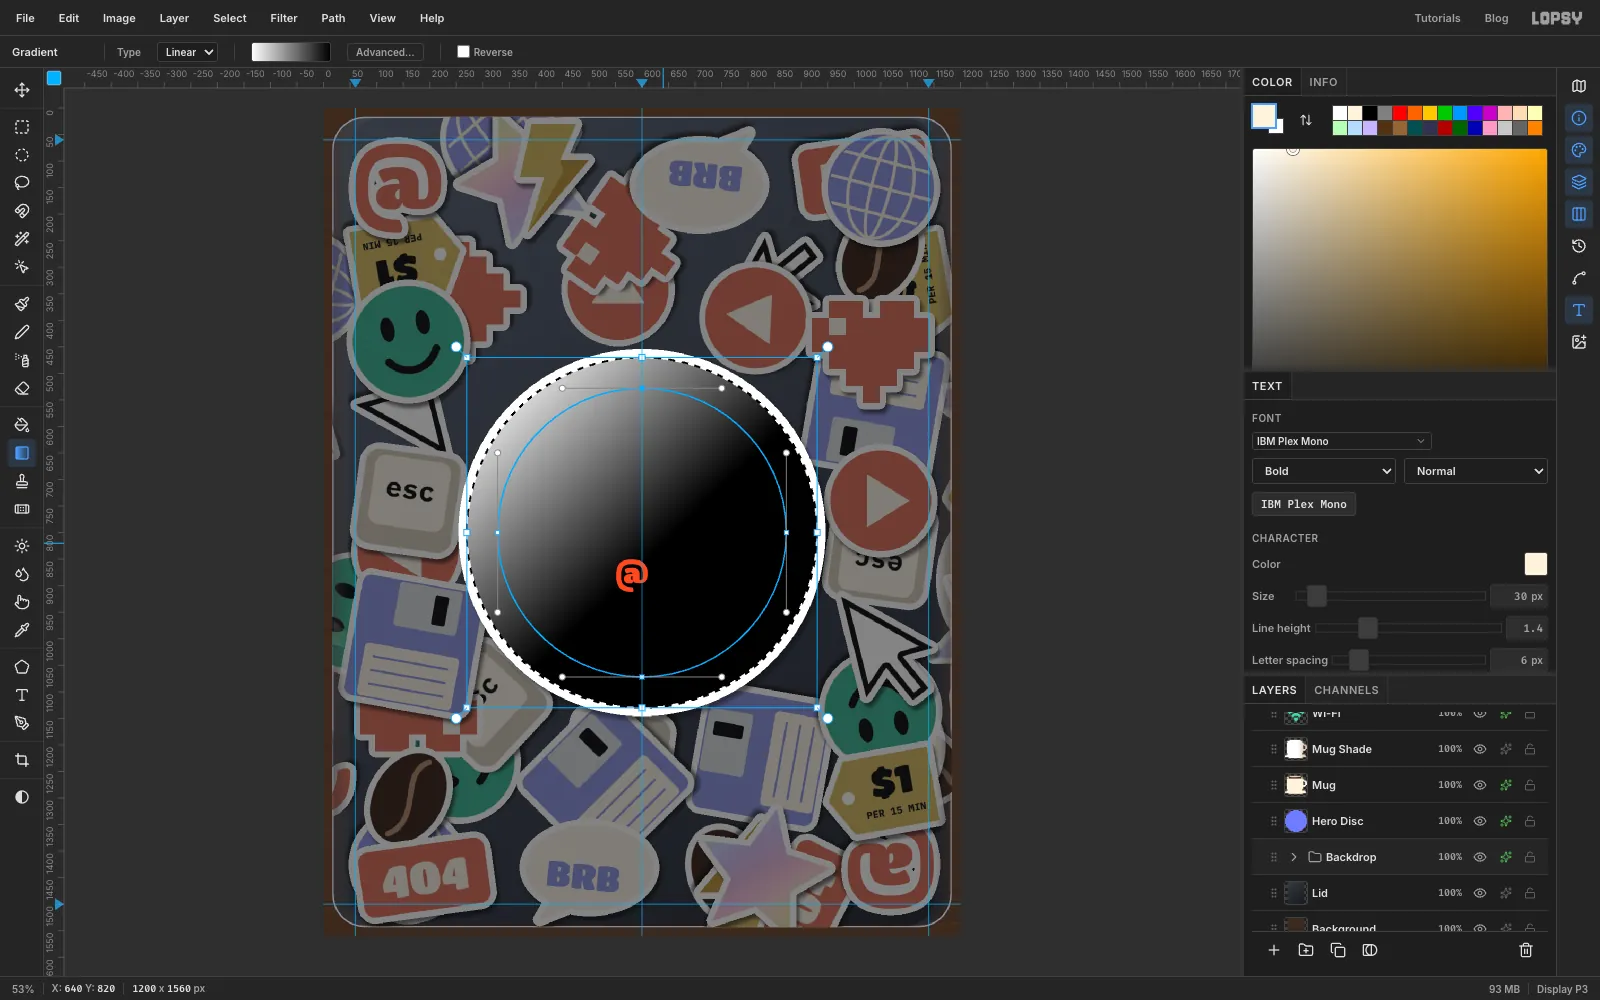
-
Erase the gloss off the mug
The sheen also washes over the mug and makes the cream look chalky. Pick the Eraser, set Size
140and Opacity70%, and brush down the left side of the mug and over the rim.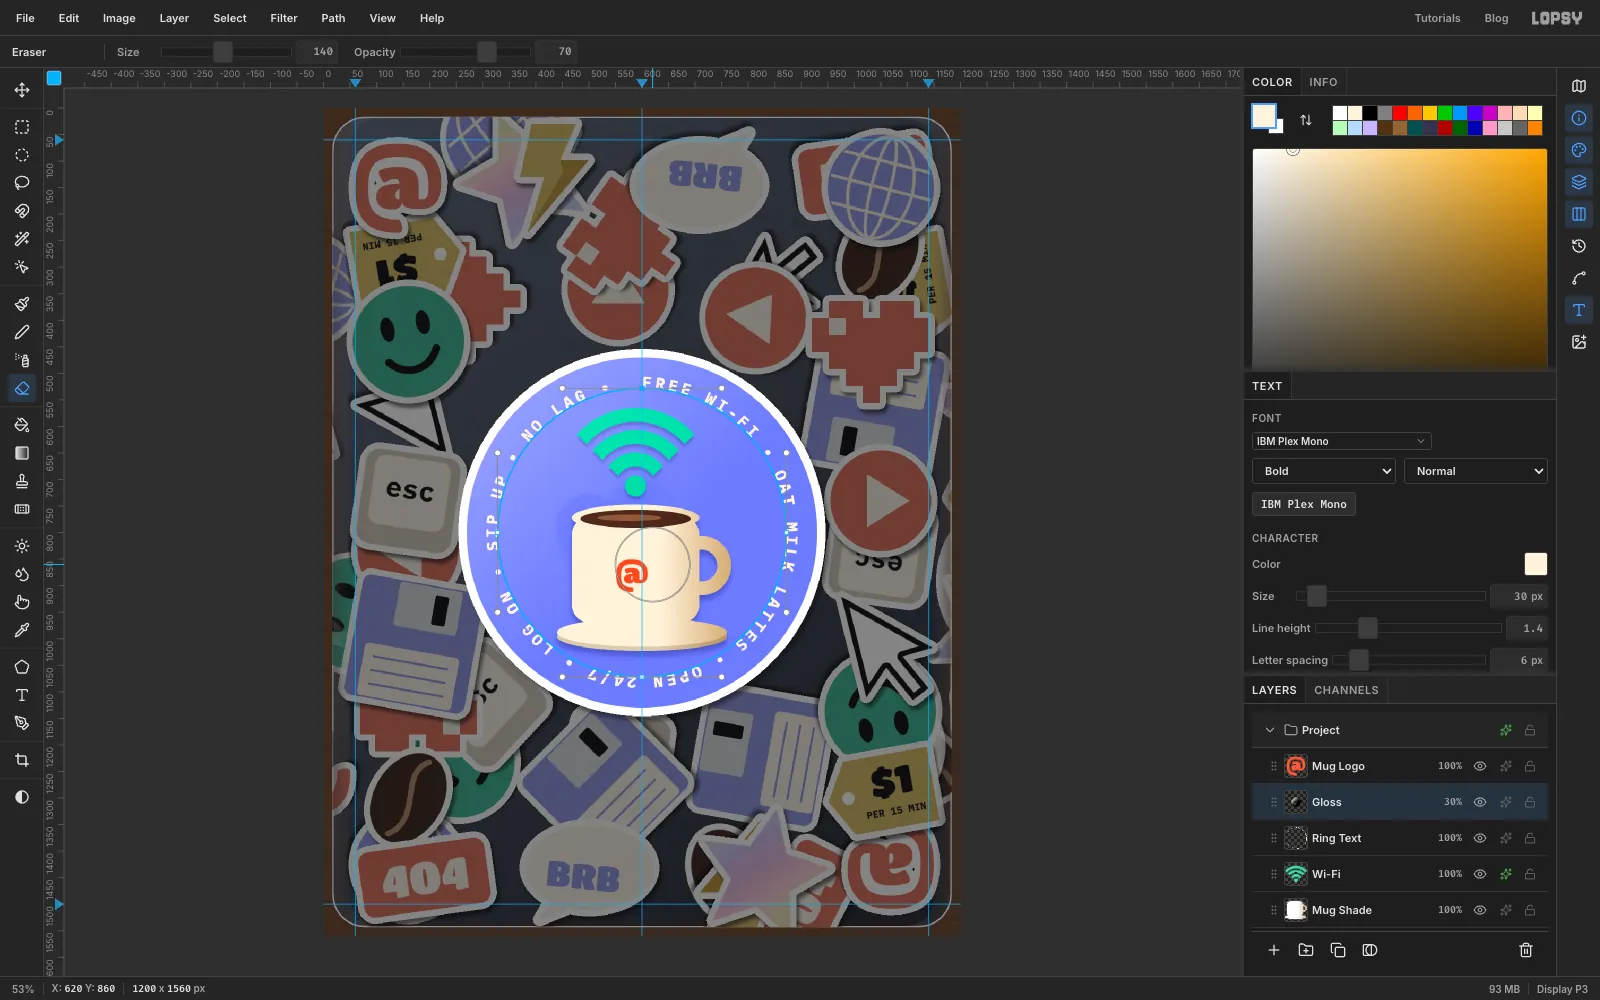
-
Group the hero
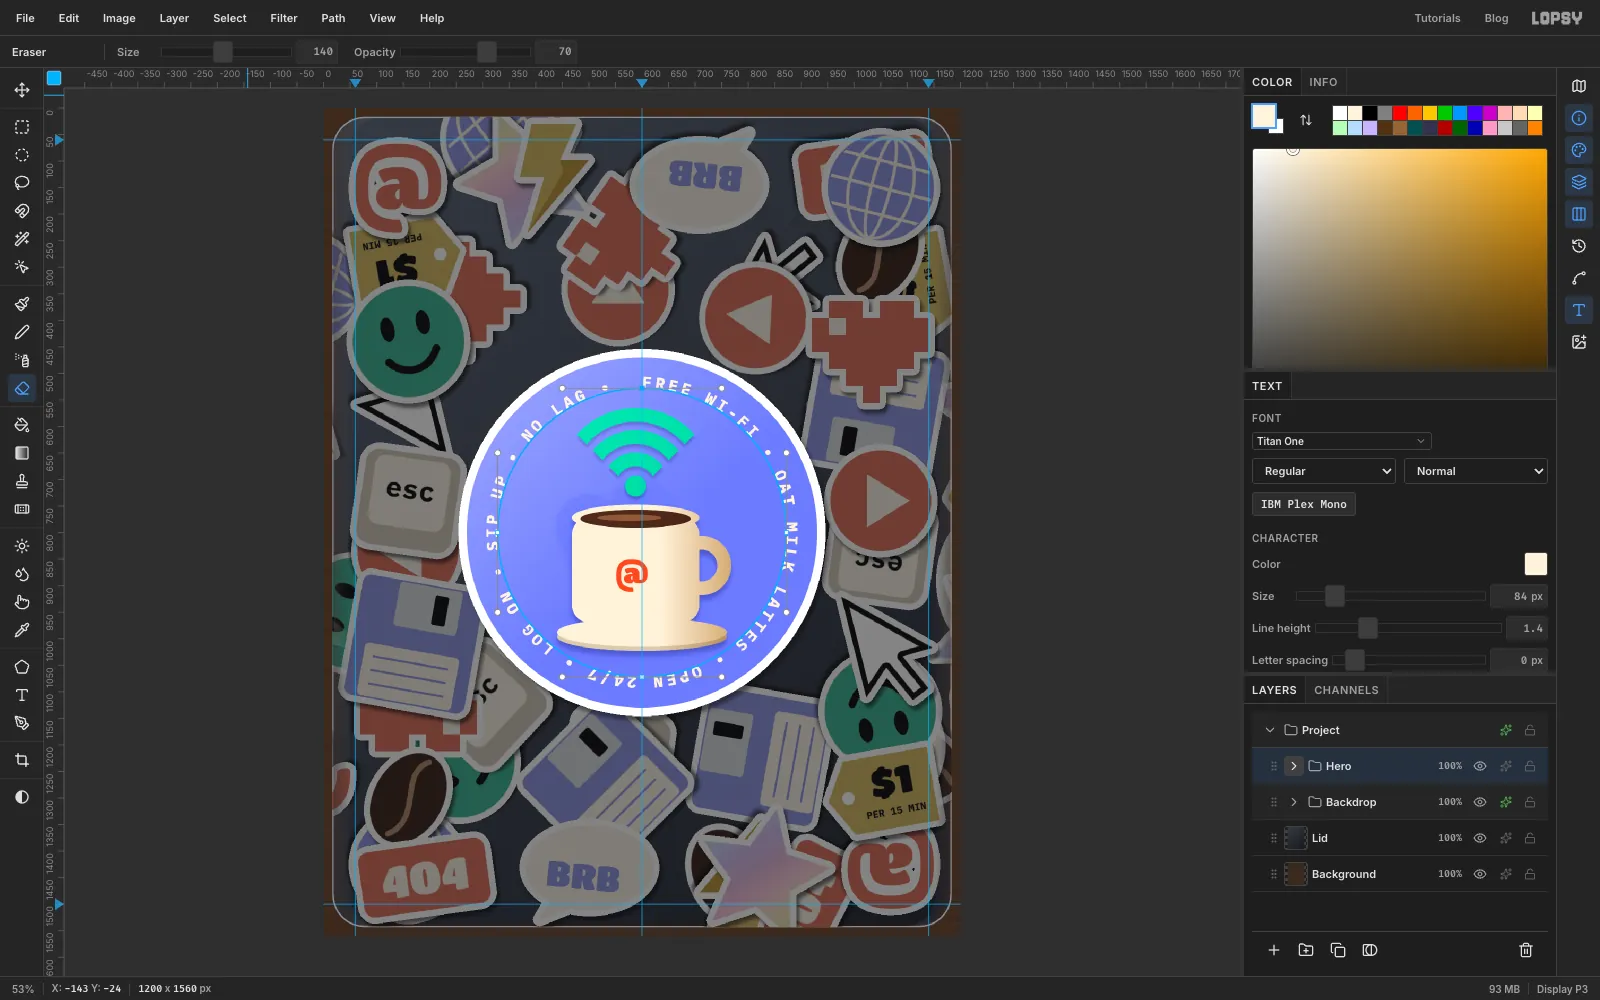
Click Mug Logo, Shift-click Hero Disc, and choose Layer → Group Layers. Name the group Hero and collapse it.
-
Print the tagline on a strip of tape
Click Hero and add a layer named Tape. With the Pen, click a strip with zigzag ends:
300, 42,288, 54,300, 65,288, 77,300, 88,900, 88,912, 77,900, 65,912, 54,900, 42, and close it. Turn it into a selection and fill it with mint.Add the text
THE QUARTERLY OF NET CULTUREin IBM Plex Mono Bold24, ink, centred on600, 65, and merge it down. Give Tape a white Stroke of6and the foreground shadow, then tilt it about 1° anticlockwise.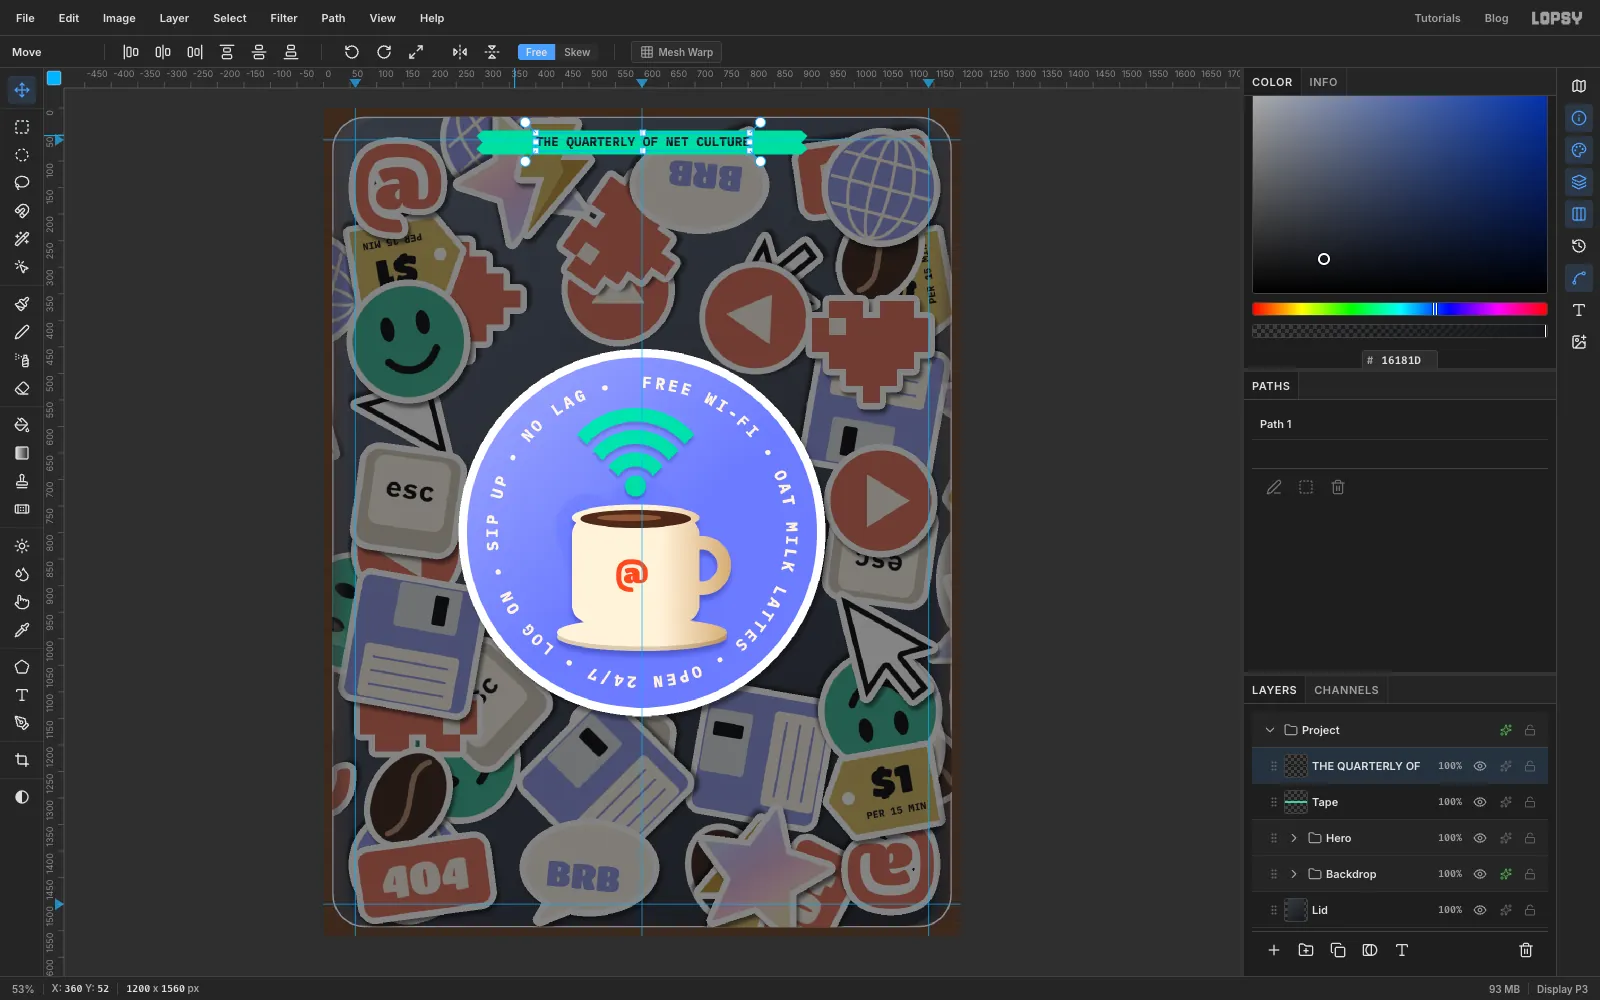
-
Set the PING masthead
With Tape selected, pick the Text tool: Titan One, Size
330, tomato. Click above the disc, typePINGand press Tab. Rename the layer Masthead and centre it on about600, 262.In its effects drawer, add a Stroke in ink, Width
10, Outside. That's the printed outline. The white die-cut border goes on its own layer.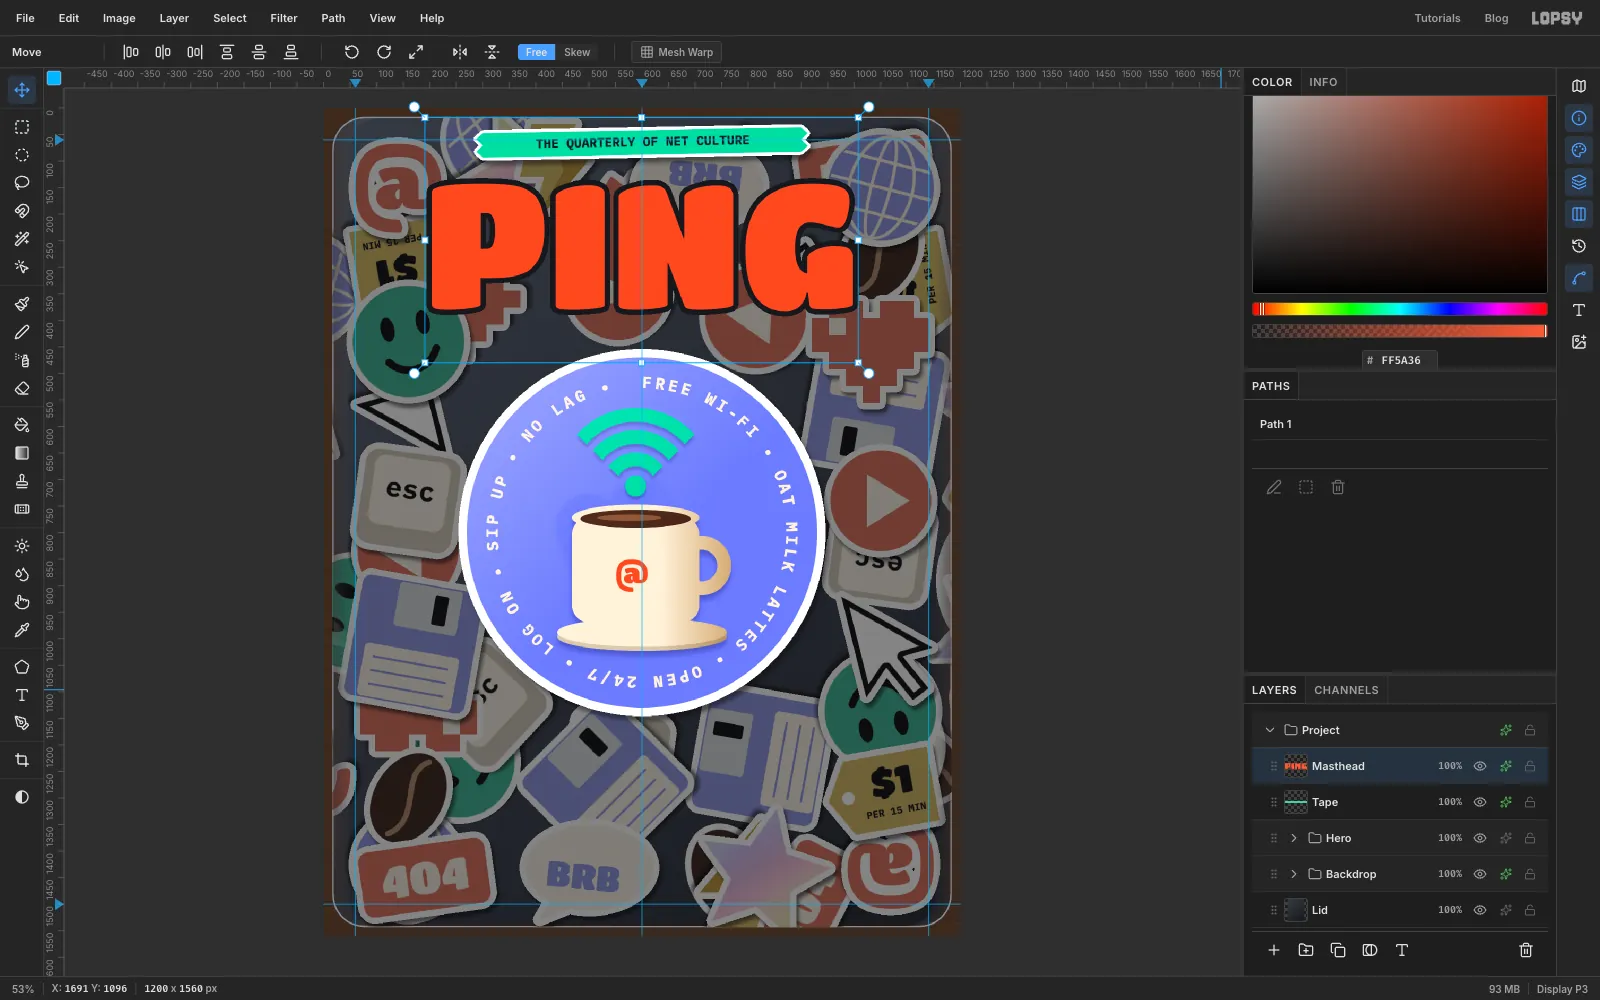
-
Grow a die-cut border round the letters
Click Tape and add a layer named Masthead Die-cut. It sits under the text. Cmd-click the Masthead thumbnail, then choose Select → Grow…
28. The letters merge into one rounded outline, like a sticker cutter would follow. Fill it with white, deselect, and give the layer the foreground Drop Shadow.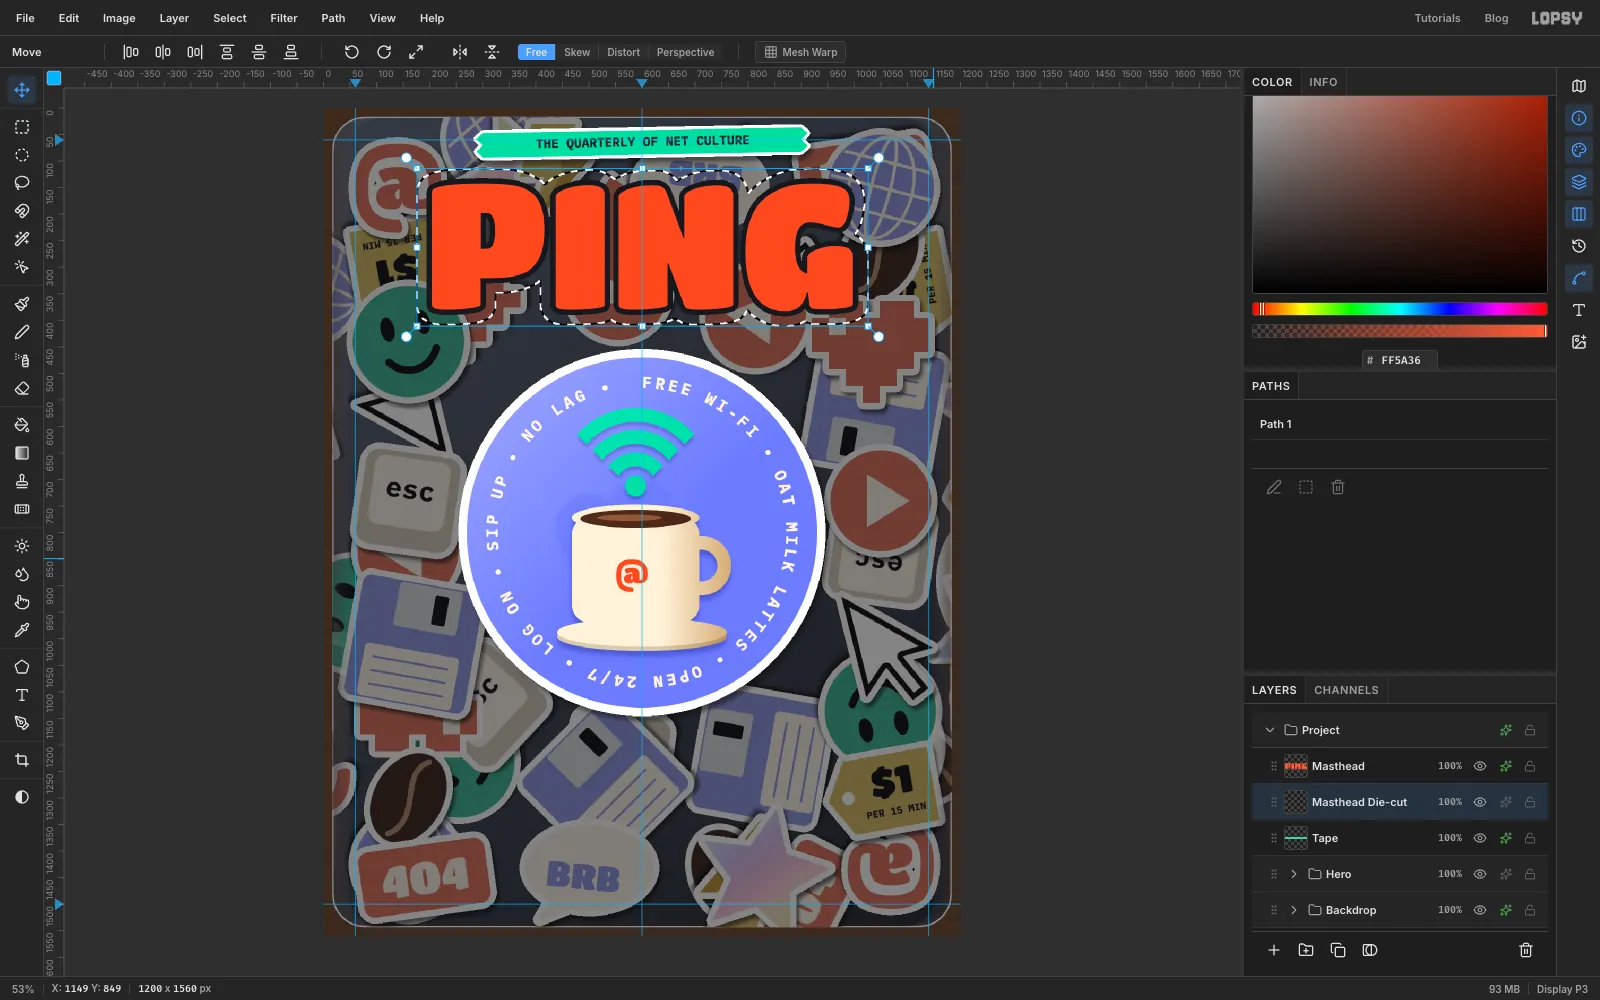
-
Tilt the masthead and its border together
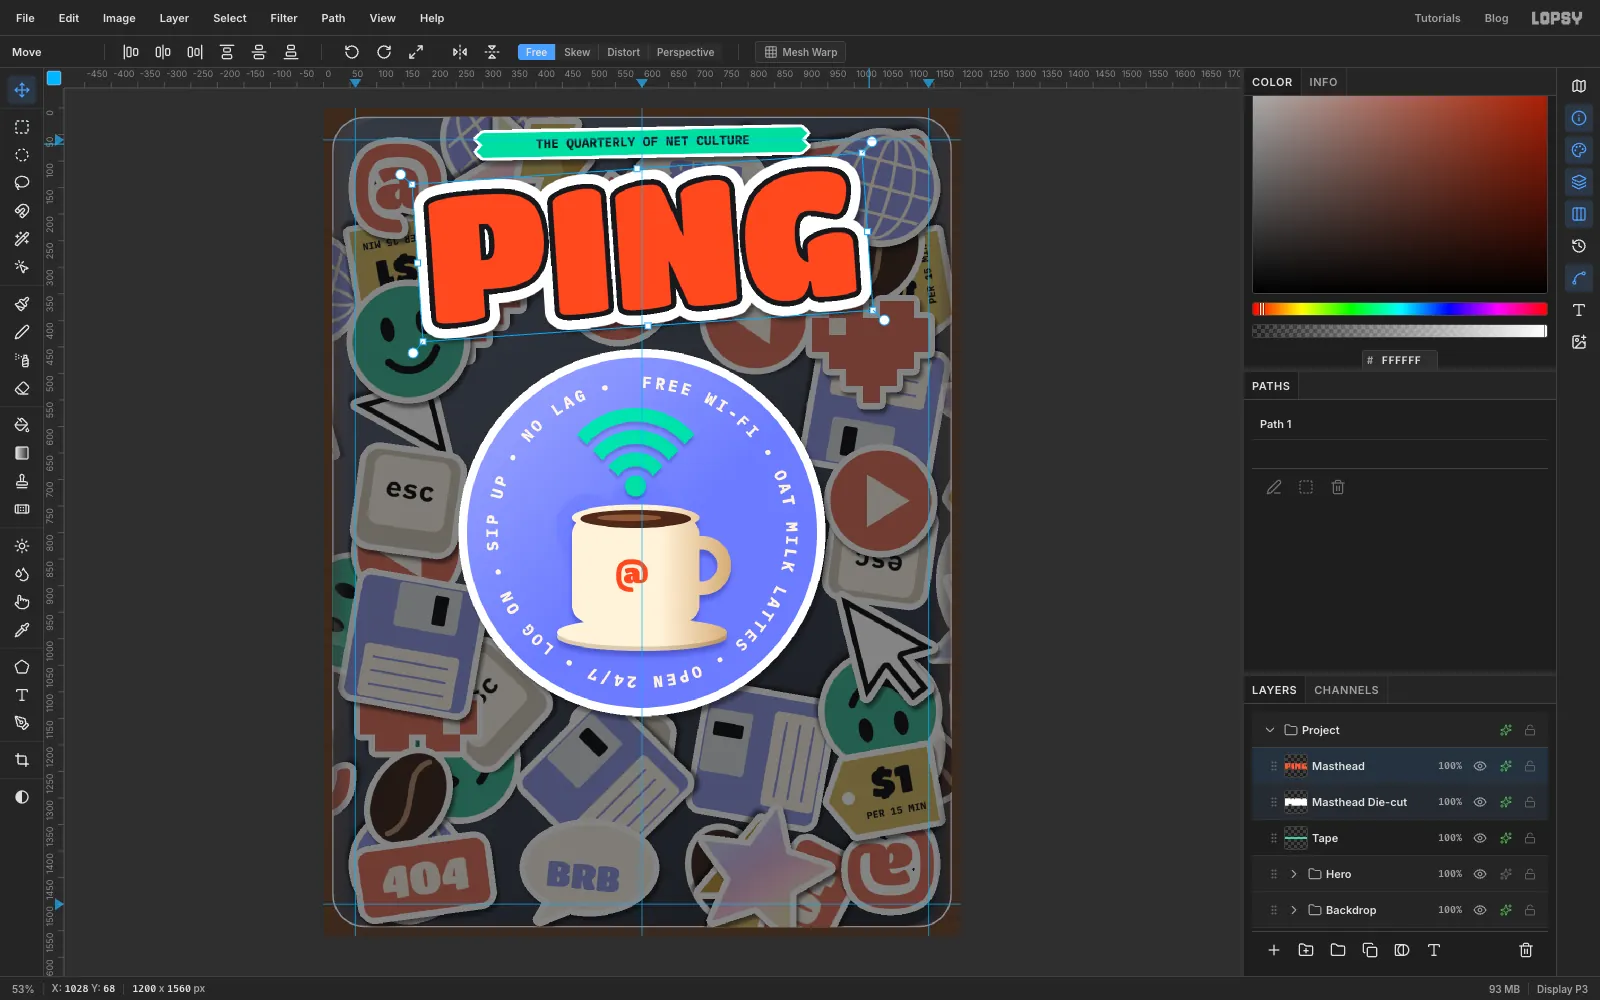
Click Masthead and Shift-click Masthead Die-cut. With the Move tool, the two layers share one transform box. Drag the rotation zone outside its top-right corner about 4° anticlockwise and press Cmd+D.
Then click Masthead and click Rasterize Layer at the bottom of the Layers panel. You won't edit PING again, and as a flat layer it can't be picked up by the Text-tool clicks for the labels that sit close to it.
-
Make the issue badge
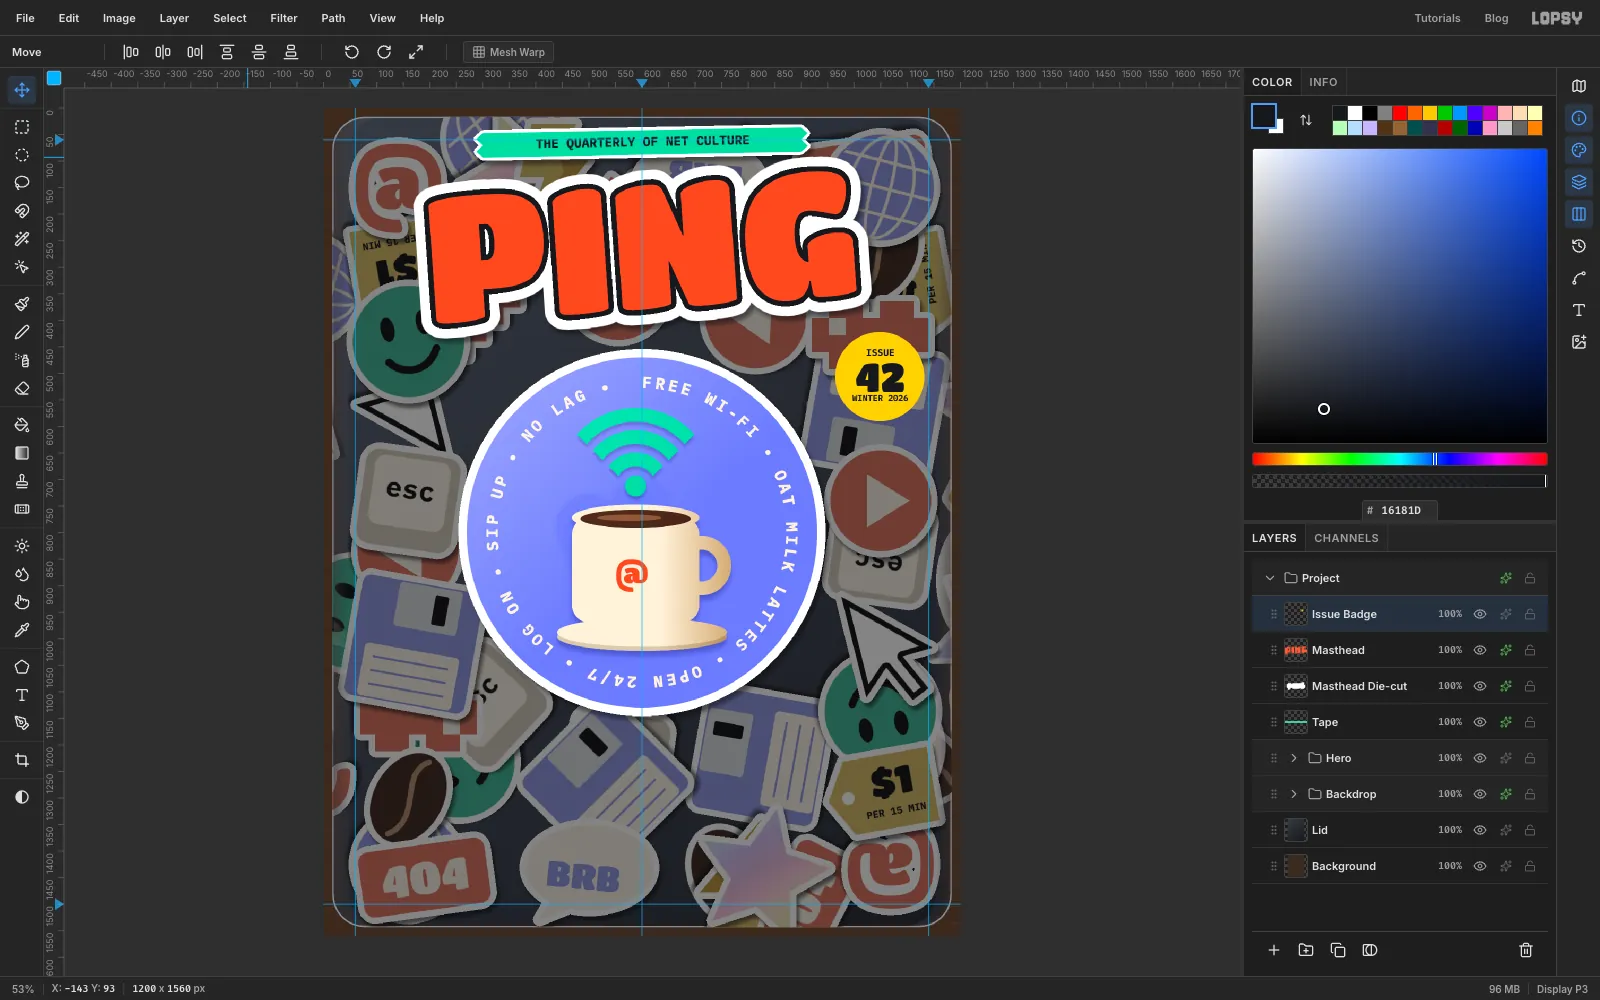
Click Masthead and add a layer named Issue Badge. Select a circle from
964, 422to1132, 590and fill it with butter. Set three lines of ink text, each centred and merged down before the next:ISSUE, IBM Plex Mono Bold18, at1048, 46042, Titan One76, at1048, 507WINTER 2026, IBM Plex Mono Bold16, at1048, 546
Add the die-cut effects with the foreground shadow and tilt the badge about 12° clockwise.
-
Write the first cover line on a slip
Add a layer named Slip Dial-up. Create a mint rectangle with Corner Radius
14, 250 × 150 at178, 572. Pick the Text tool: Permanent Marker, Size32, ink, Align Center. Click on the slip and type three lines, pressing Return between them:12 dial-up,sounds we,still miss. Commit, centre the text on the slip and merge it down. Add the die-cut effects and tilt it about 6° anticlockwise. Its corner just overlaps the disc's white border, but keeps clear of the ring text.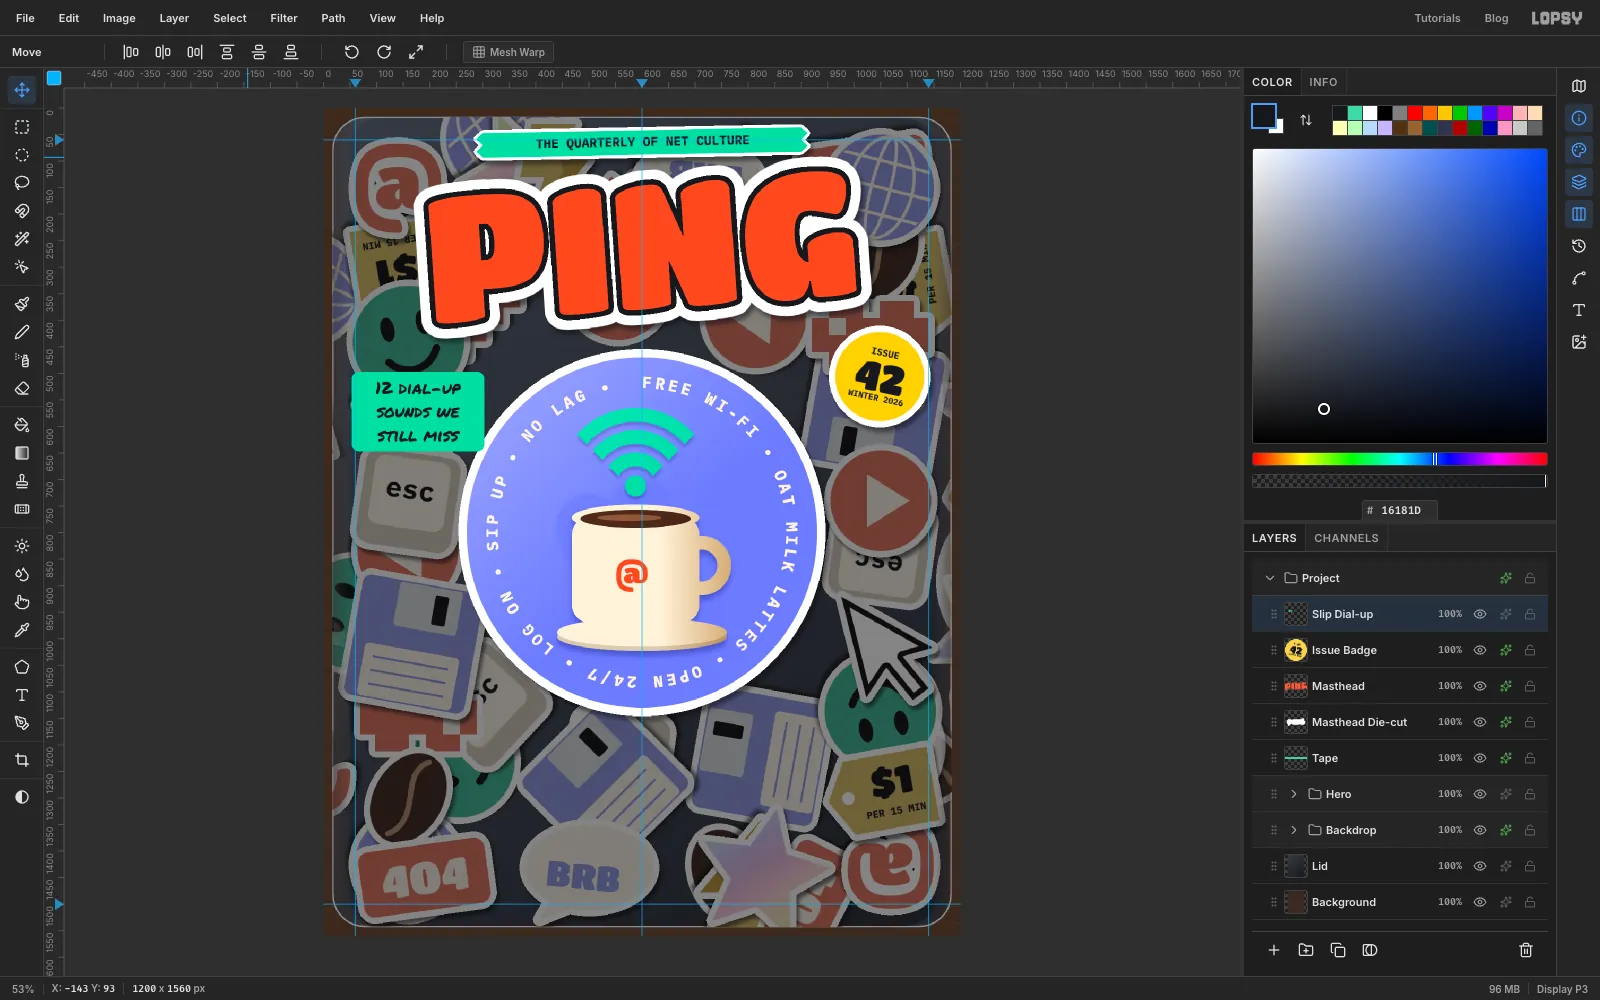
-
Add the second slip
Add Slip LAN: a tomato rectangle, Corner Radius
14, 300 × 128 at1005, 1040, withLAN partyandsurvival guidein cream Permanent Marker34. Merge, add the die-cut effects, and tilt it about 5° clockwise.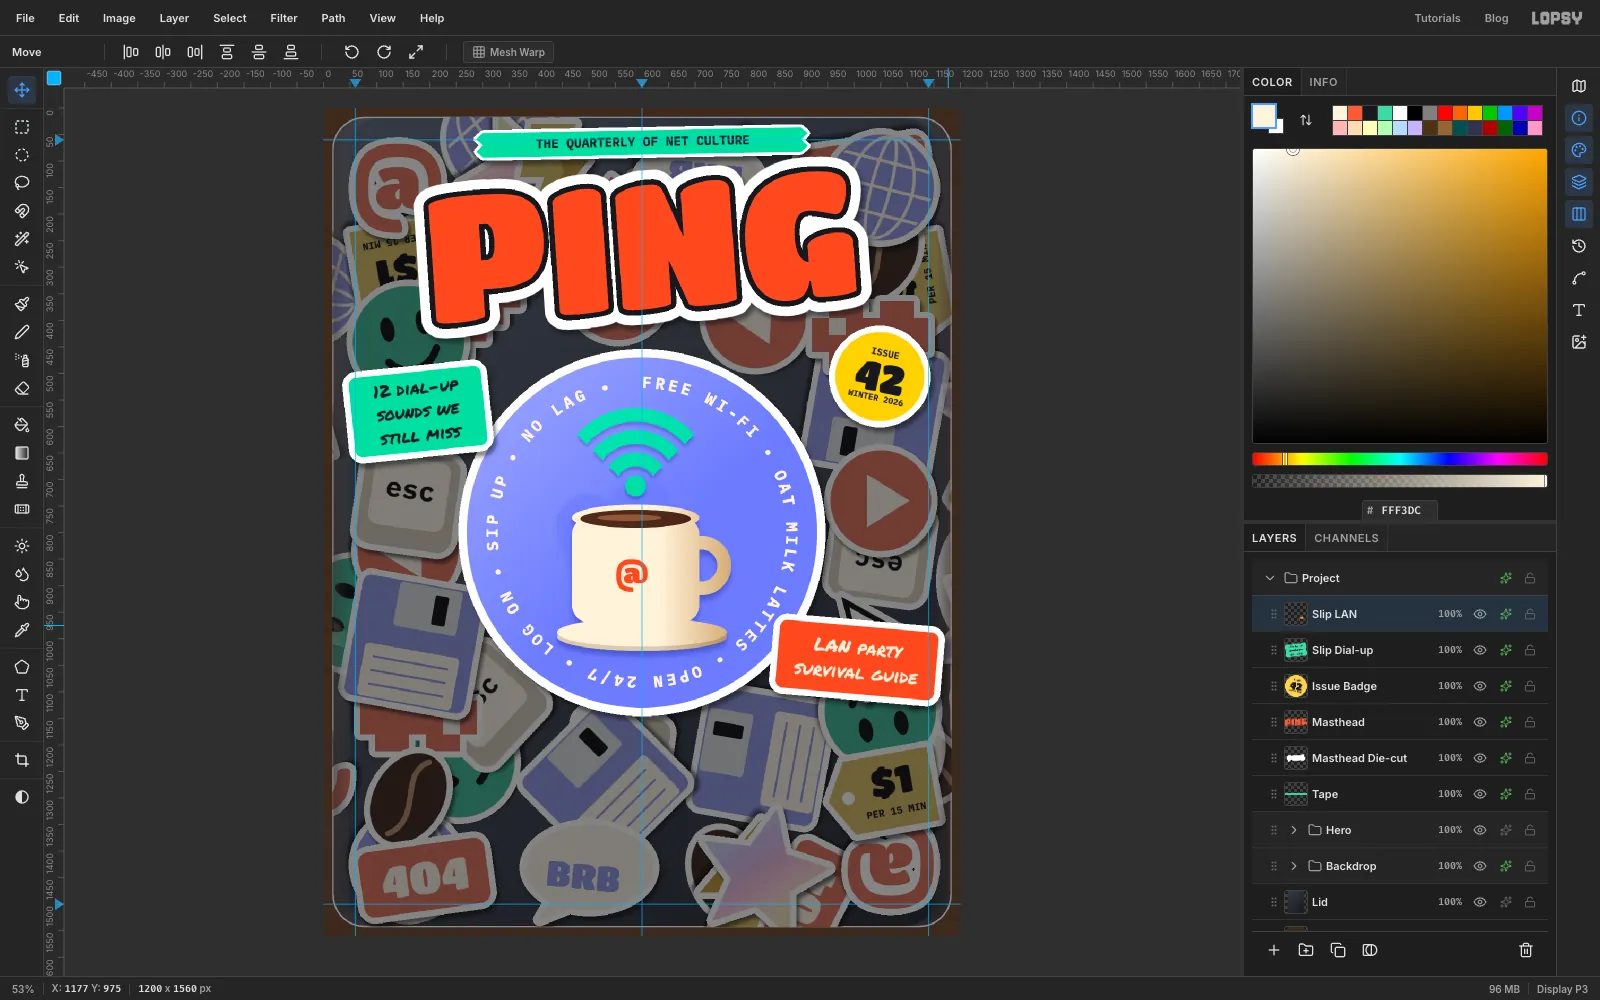
-
Set the cover-story label
Click Slip LAN and add a layer named Cover Label. Create a cream rectangle with Corner Radius
26, 1000 × 200 at600, 1276.Add three centred text layers. Click Cover Label before each, so you don't restyle the one before:
- Kicker:
COVER STORY, IBM Plex Mono Bold22, tomato, centred on600, 1203 - Cover Title:
INTERNET CAFÉ, Titan One100, ink, centred on600, 1263 - Deck:
Free Wi-Fi, strong espresso & why we log on together, IBM Plex Mono Bold22, ink, centred on600, 1341
At these sizes the title fills all but about 115 px either side, and the deck sits well clear of the bottom edge.
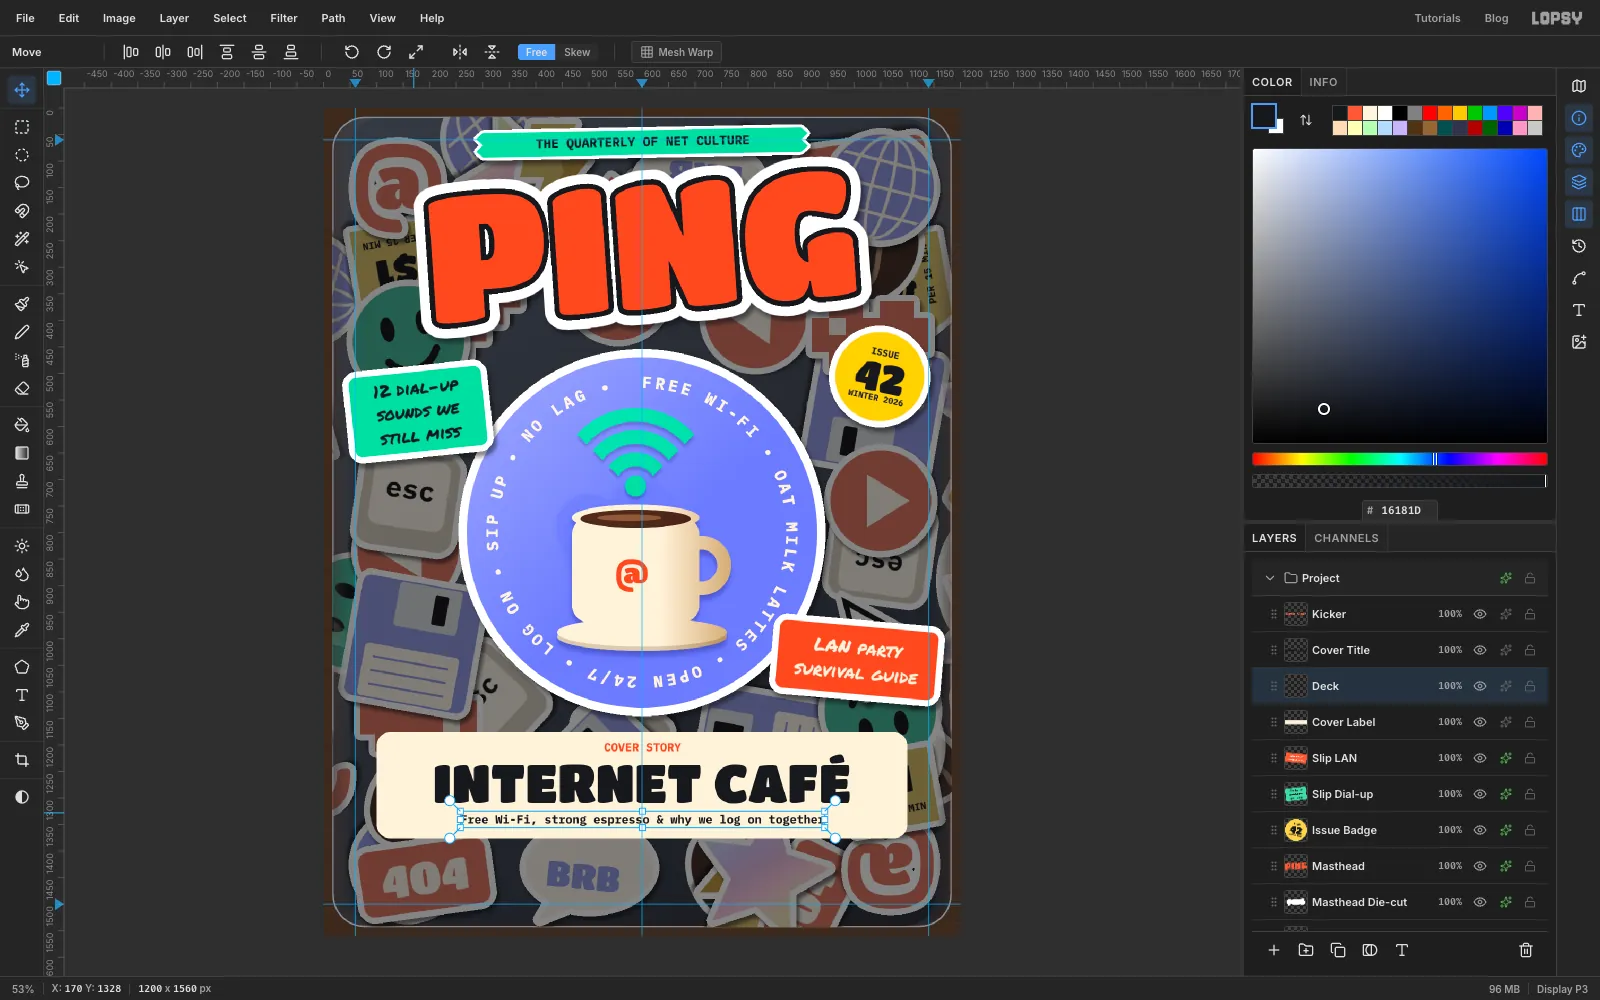
- Kicker:
-
Peel up a corner
Click Cover Label. Pen a triangle over the bottom-right corner:
1036, 1377,1101, 1377,1101, 1312. Turn it into a selection, press Delete and deselect. Now give the label the die-cut effects. The white border follows the cut, as it would on a real sticker.Click Kicker and add a layer named Peel on top. Pen the folded flap:
1036, 1376,1100, 1312,1045, 1321. Fill it with a gradient from white to , dragged from1050, 1325to1080, 1356. That's the pale backing paper. Deselect and add a small Drop Shadow in : Offset X-4, Offset Y6, Blur10, Opacity45%.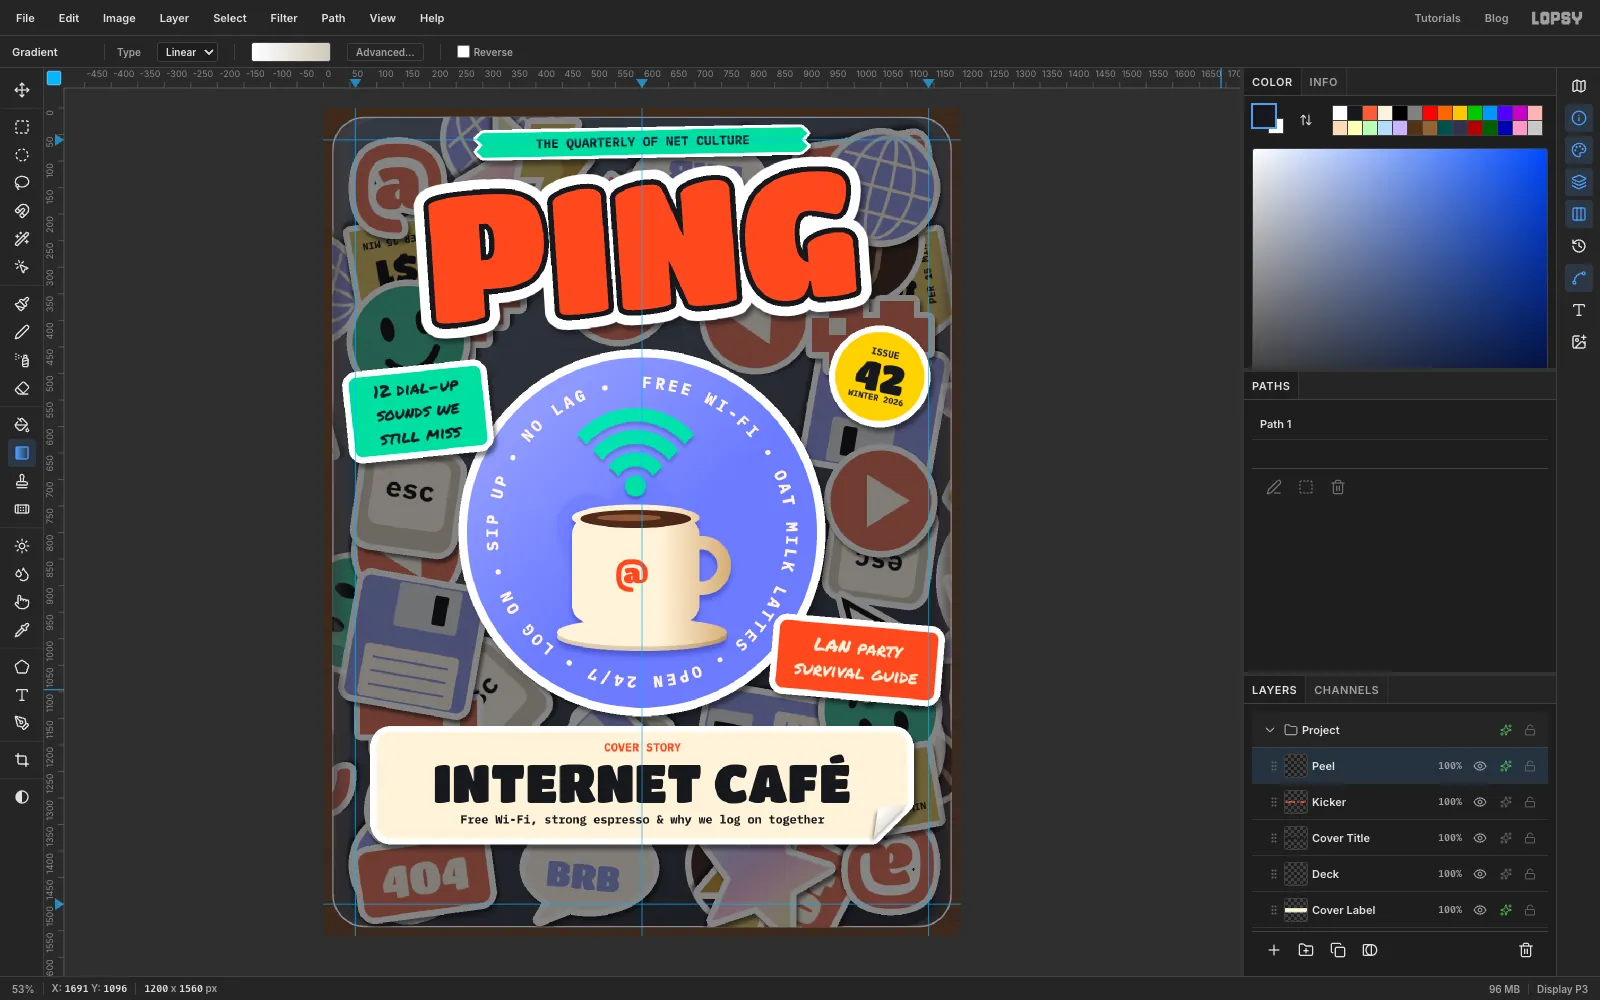
-
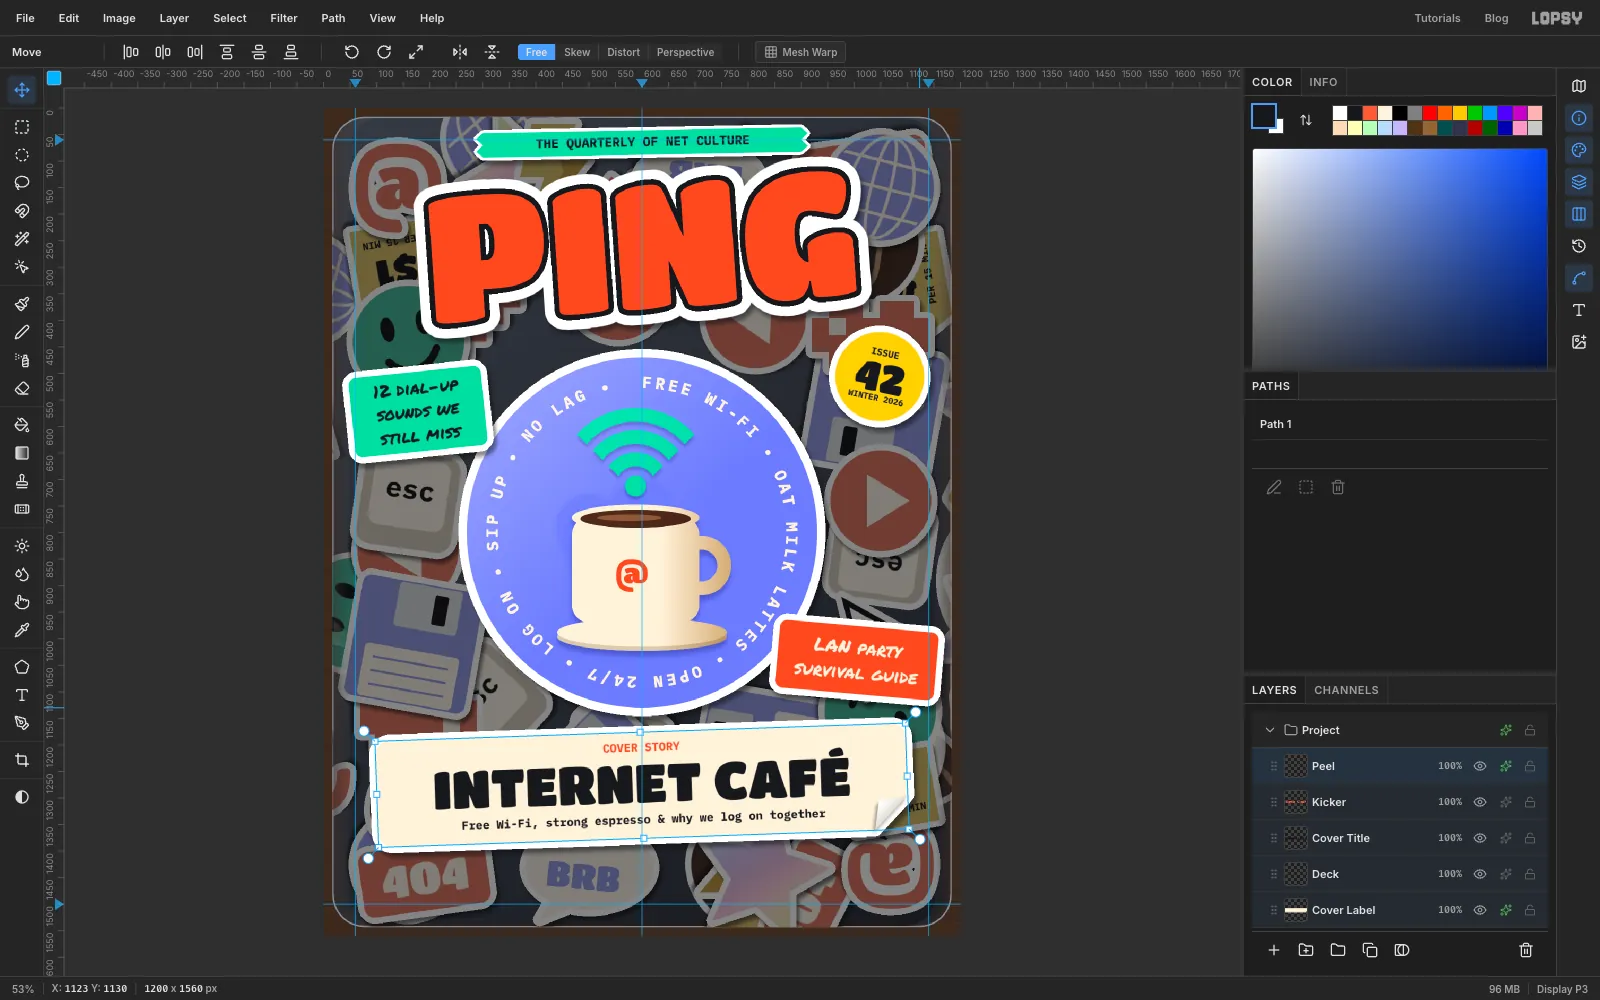
Tilt the whole label
Click Peel and Shift-click Cover Label to select all five layers. With the Move tool, drag the rotation zone at the top-right corner about 2° anticlockwise and press Cmd+D. Live text turns with the shapes and stays editable.
-
Build a starburst from three squares
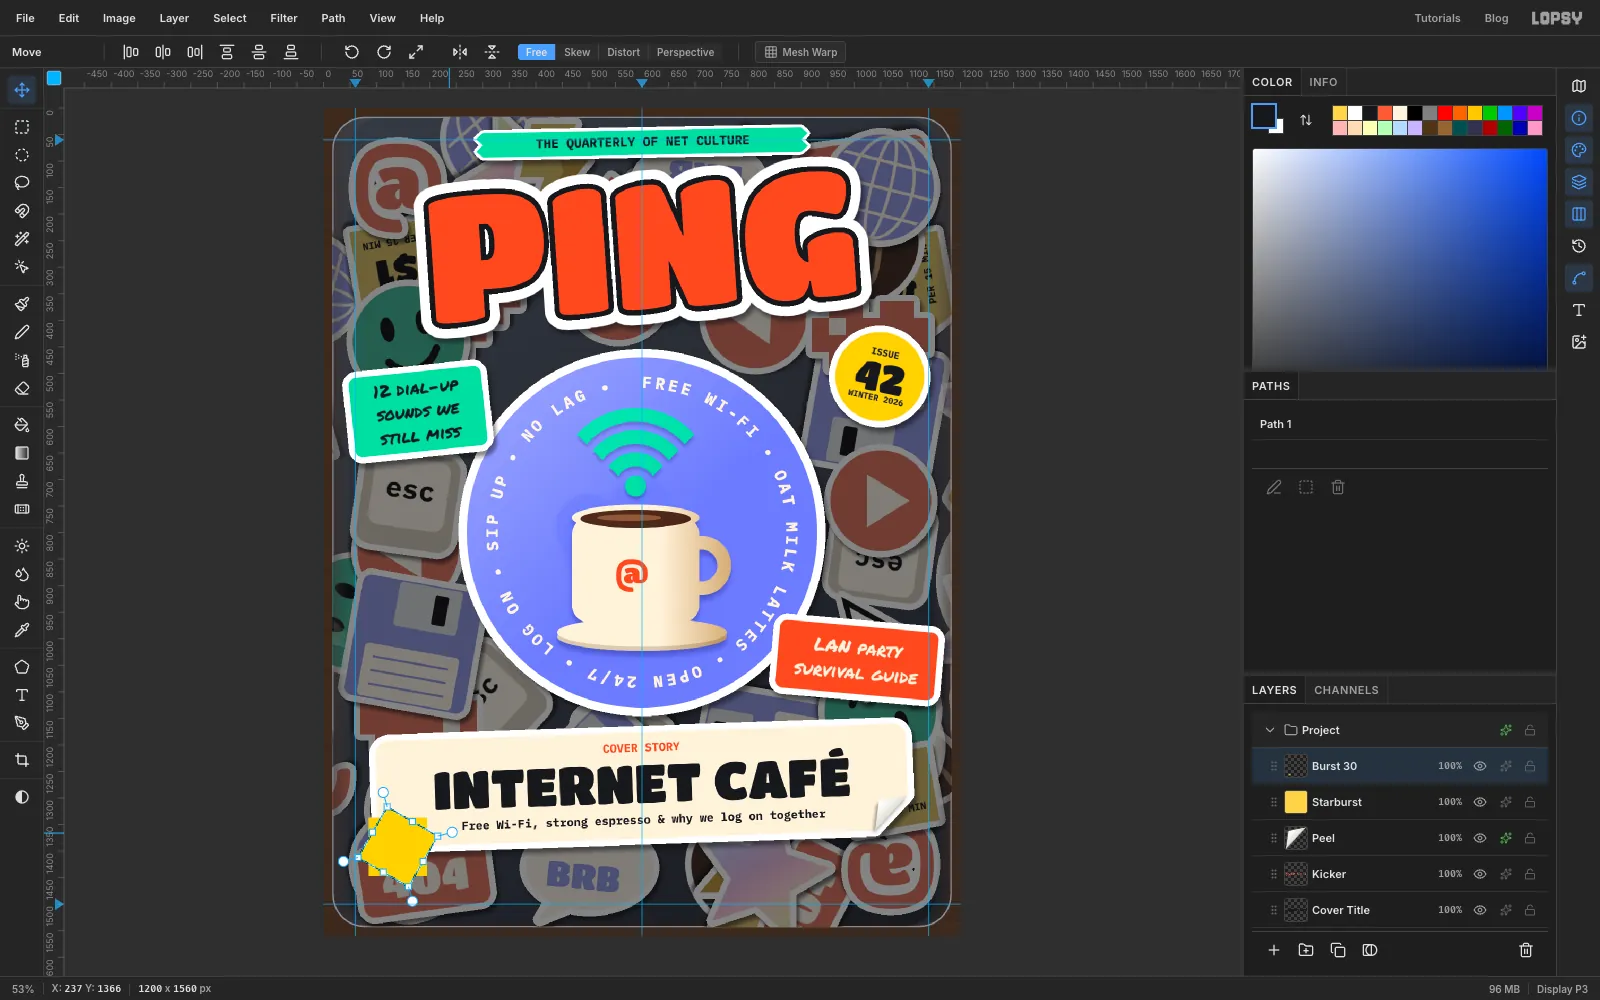
Click Peel and add a layer named Starburst. With the Shape tool on Rectangle, Corner Radius
0, butter fill and no stroke, create a 110 × 110 square at140, 1392.Choose Layer → Duplicate Layer and name the copy Burst 30. Cmd-click its thumbnail, pick the Move tool and drag the rotation zone while holding Cmd. The angle snaps in 15° steps, so stop at 30° and press Cmd+D. Duplicate Burst 30, name the copy Burst 60, and turn it another 30° the same way. Now press Layer → Merge Down twice. Three squares at 0°, 30° and 60° make a twelve-point burst.
-
Letter the starburst
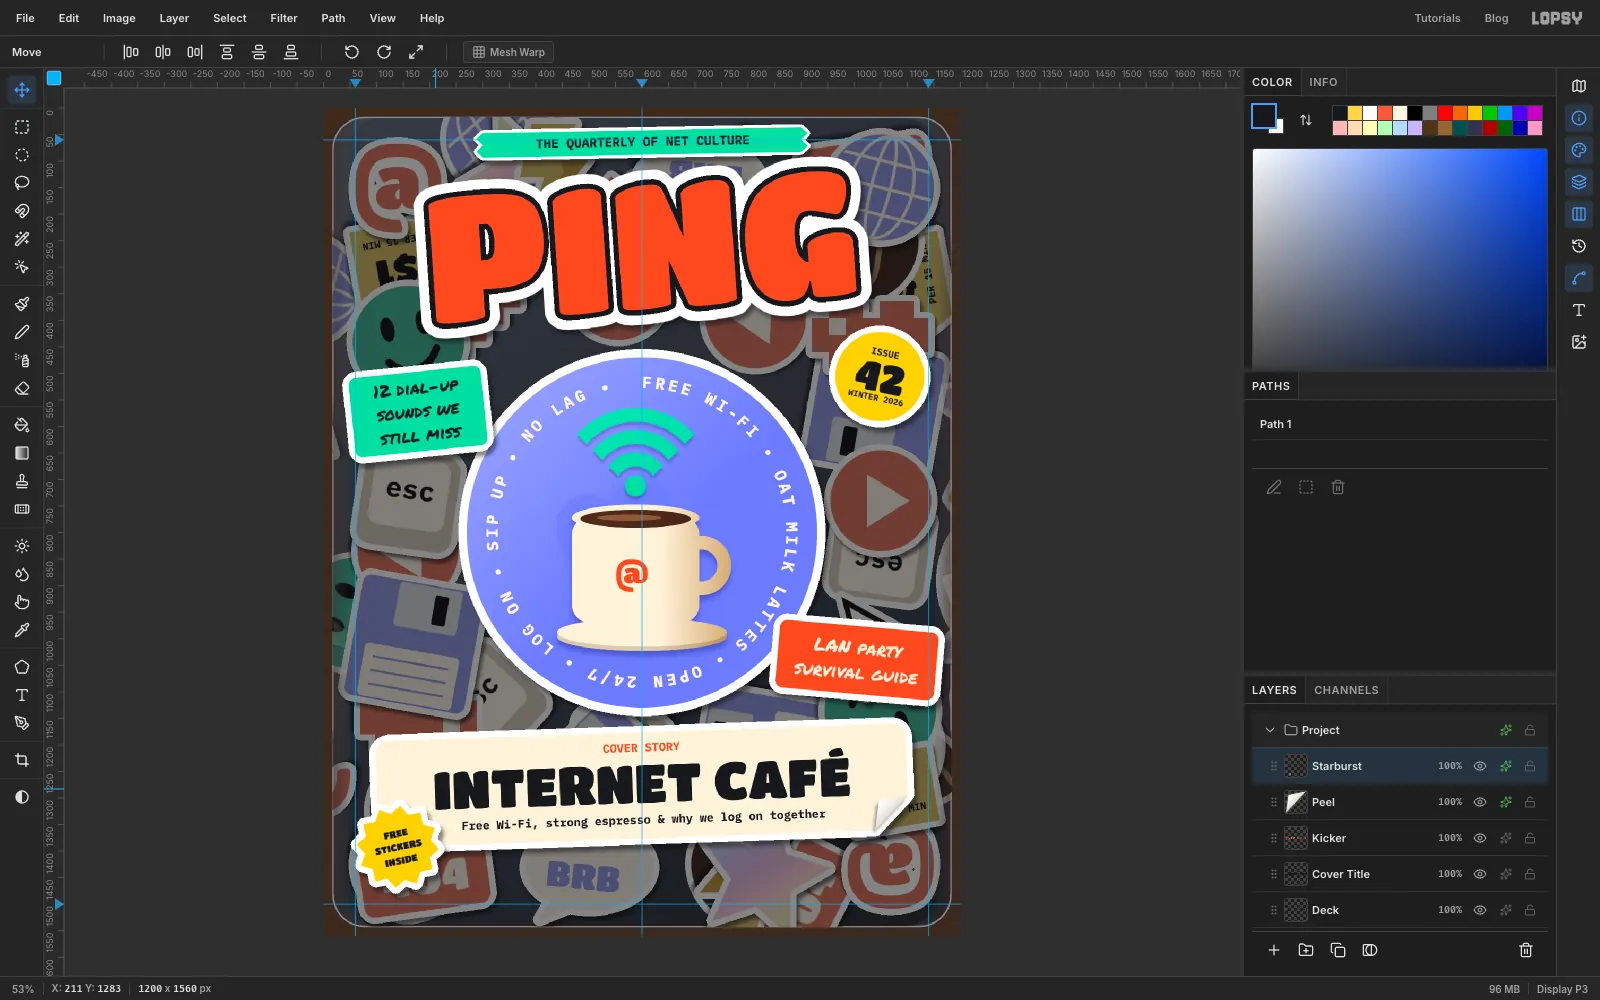
Add
FREE,STICKERS,INSIDEon three lines in Titan One18, ink, centred on the burst, and merge it down. Add the die-cut effects and tilt the starburst about 12° anticlockwise.It overlaps the label's corner by a good 60 px on purpose. A deliberate overlap reads as layering; a 5 px one looks like an accident.
-
Make the barcode sticker
Add a layer named Barcode. Create a white rectangle with Corner Radius
8, 196 × 116 at1032, 1452. Pick the Pencil with ink and draw the bars as vertical Shift-click lines fromy = 1419to1474, betweenx = 950and1112. Do three passes: Size2,3and5, with gaps of 2 to 4 px. An uneven mix looks like a real code.Add
$12.99 USin IBM Plex Mono Bold16above the bars and0 74470 04212 6in IBM Plex Mono Bold15below them, merging each down. Give it a white Stroke of8and the foreground shadow, then tilt it about 3° clockwise.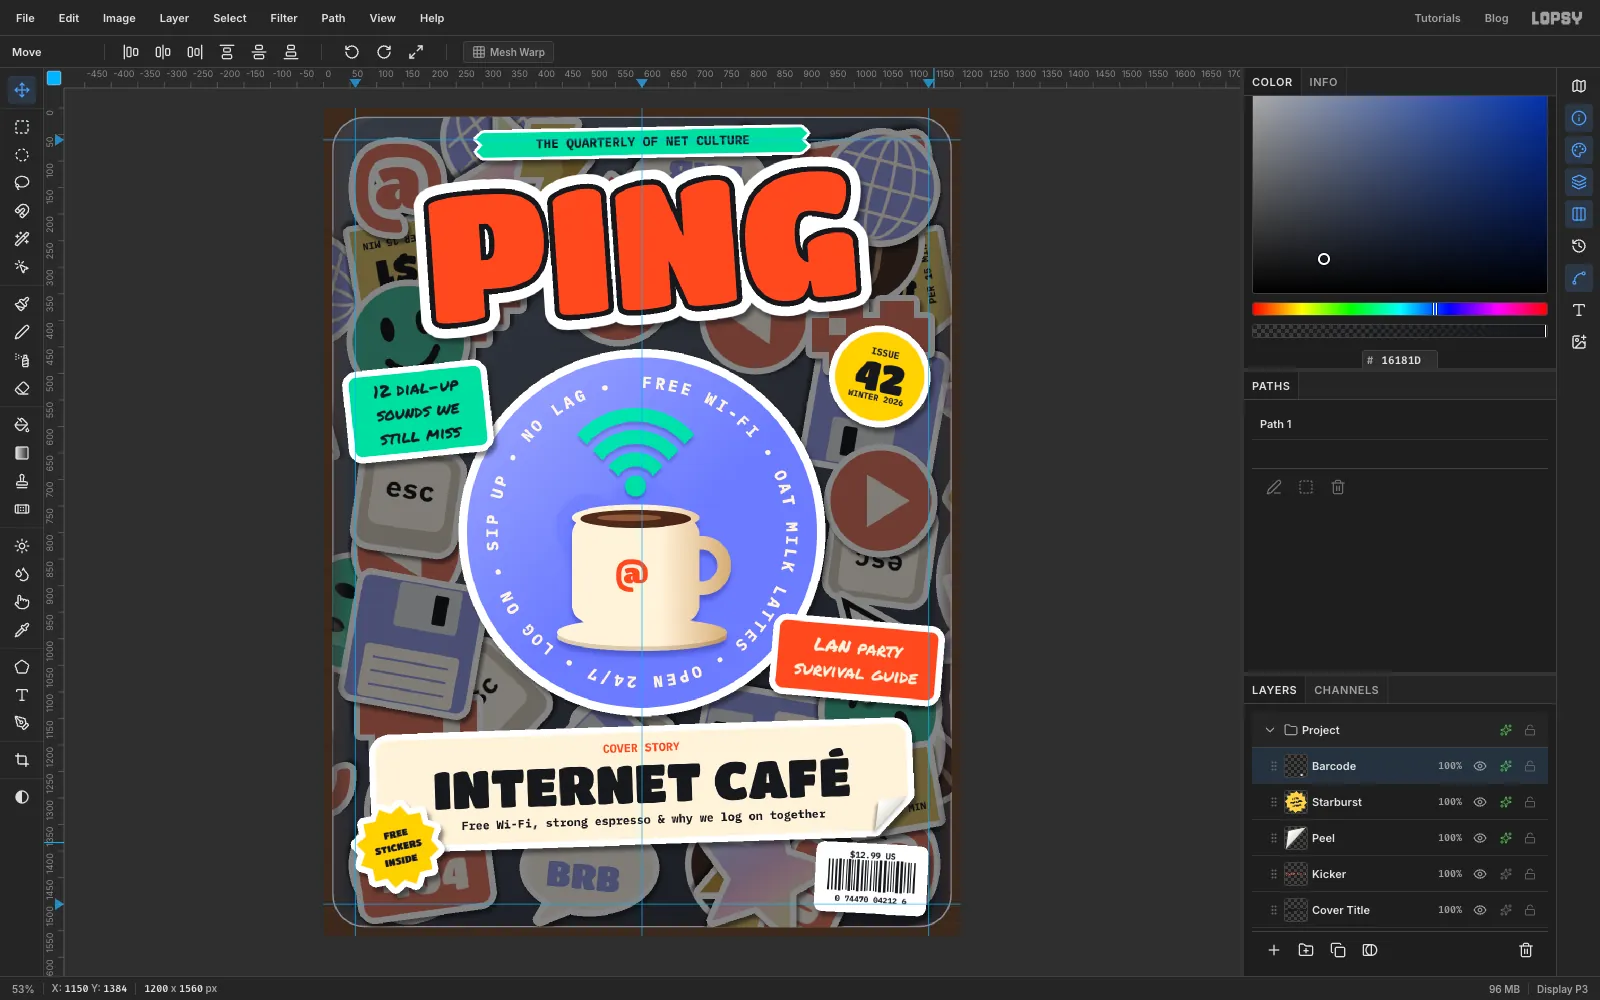
-
Add print grain
First tidy up: click Peel, Shift-click Cover Label and choose Layer → Group Layers. Name the group Cover Story.
Click Barcode and add a layer named Grain at the top. Choose Select → All, fill with grey and deselect. Choose Filter → Add Noise… with Amount
40, Mono and Gaussian. Set the layer's Blend to Overlay and its opacity to 30%. Mid grey disappears in Overlay, so only a fine print texture stays over the flat vinyl colours.Export with File → Quick Export PNG and save the project with File → Save Project.