Make a Street-Art Stencil Poster of a Crowned Pigeon
Paint a brick wall, turn a pigeon photo into a four-tone spray stencil, and add drippy graffiti type, a wheatpasted flyer and stickers in Lopsy.
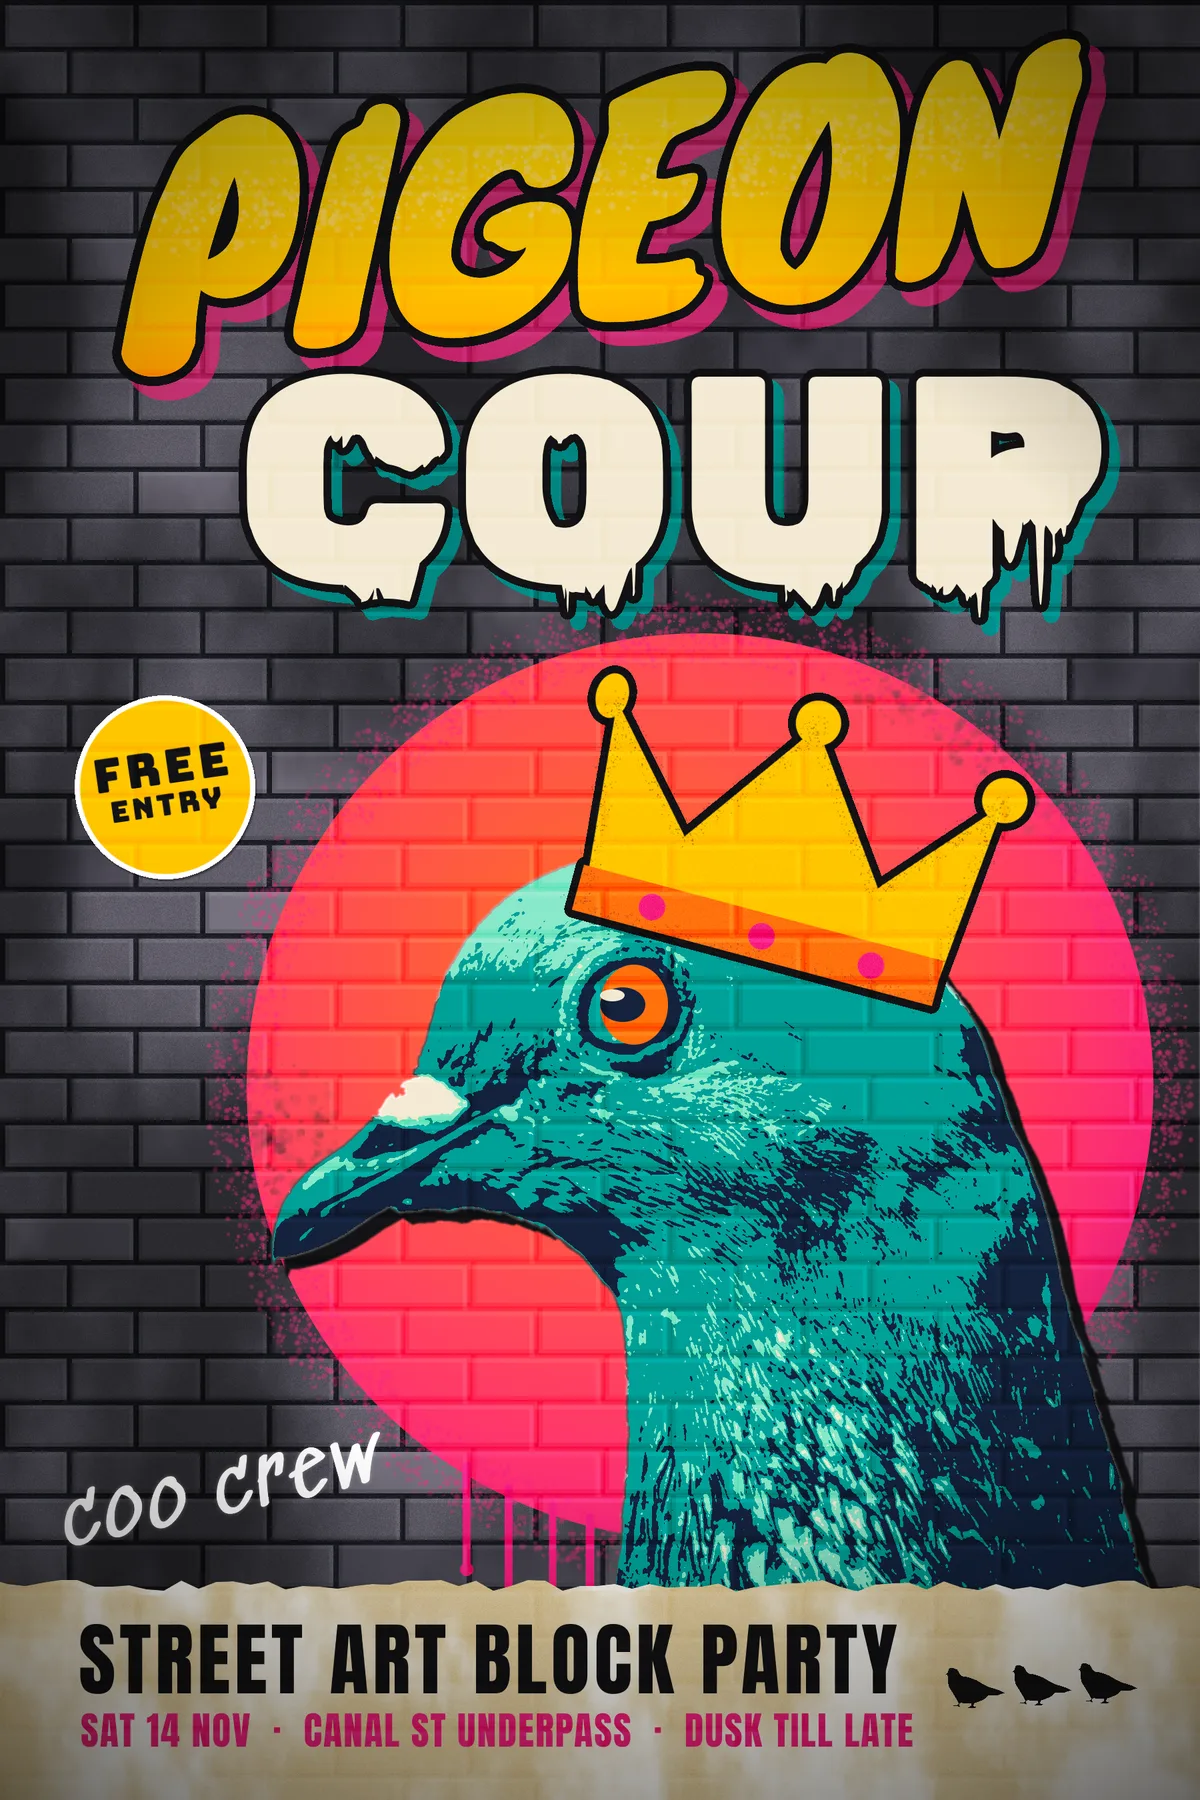
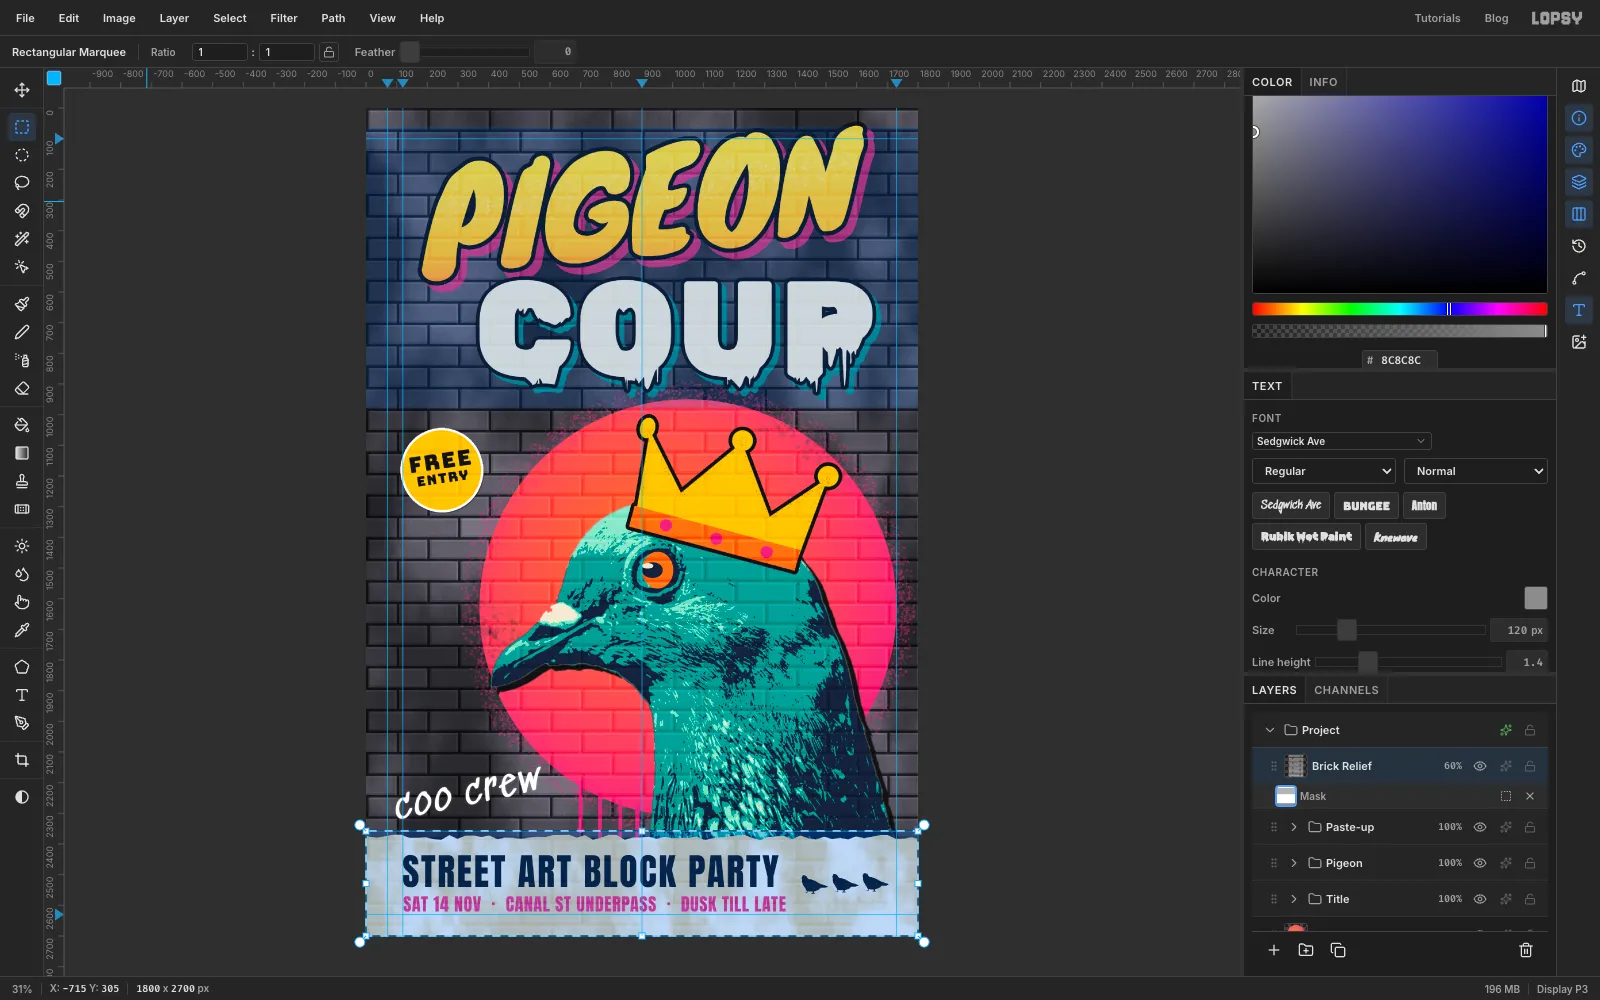
Street-art posters borrow from the wall itself. A stencil is cut from a photo, so the subject breaks down into three or four flat tones, and each tone is sprayed through its own sheet. The paint takes on the bricks underneath it, runs when it's sprayed too heavily, and drifts in a fine mist of overspray. Paper flyers are pasted over the top with wheatpaste, and stickers and tags pile up around them.
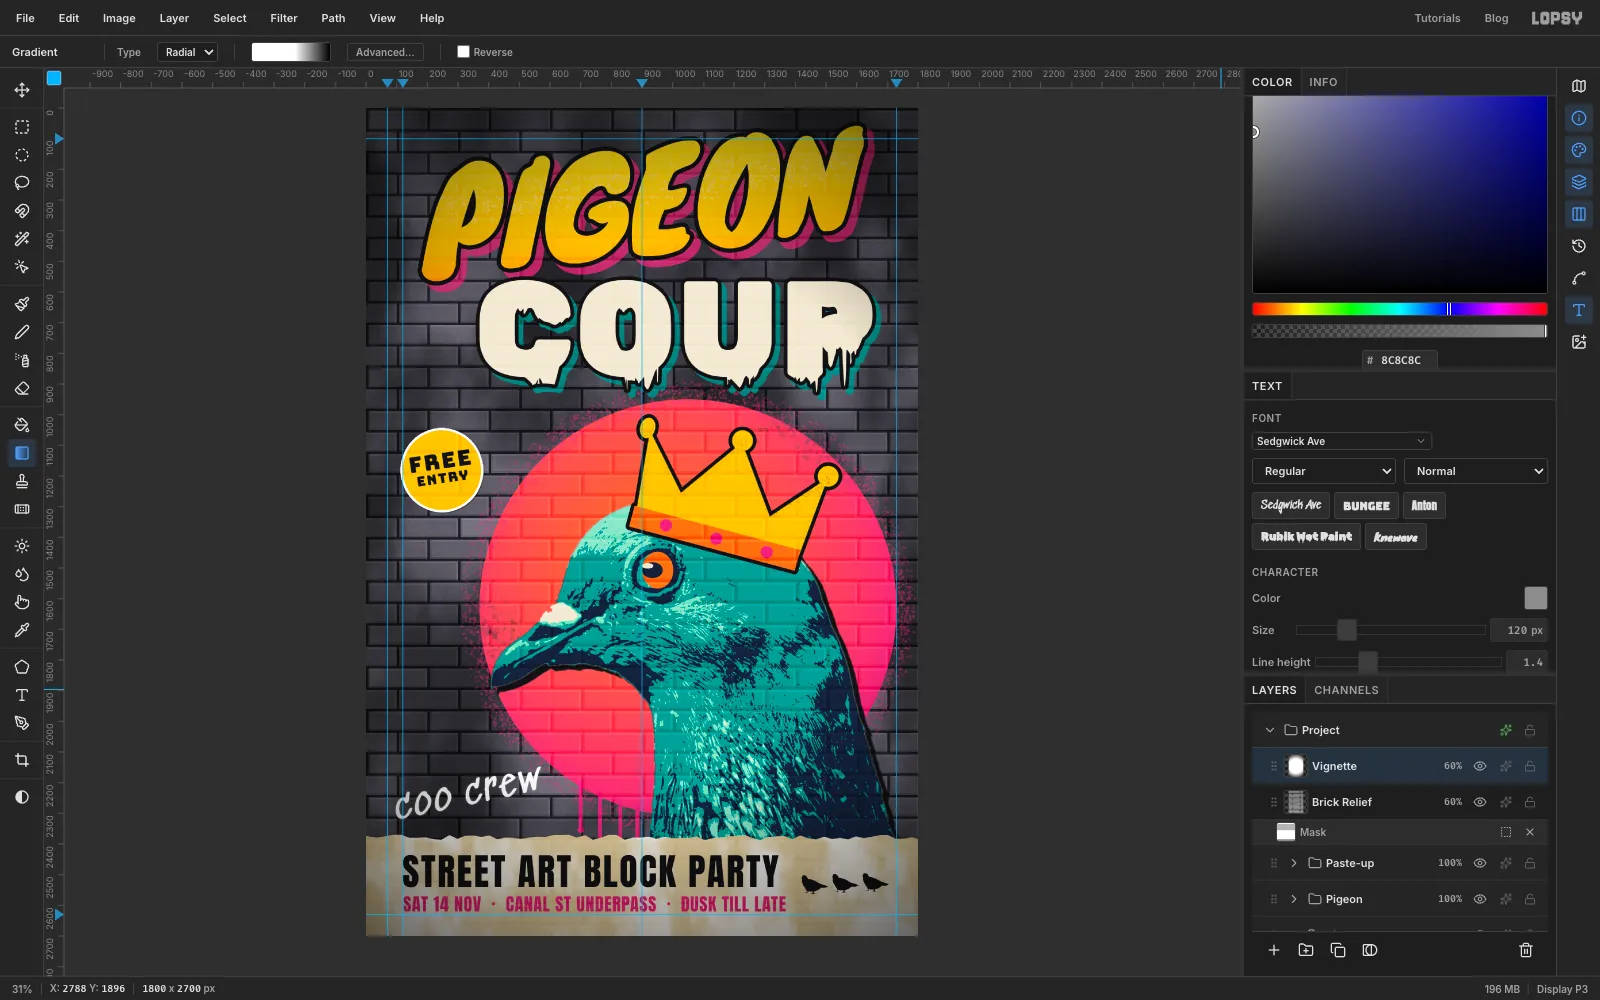
In this tutorial you'll build all of that from scratch for Pigeon Coup, an imaginary street-art block party. The poster is 1800 × 2700 px and has:
- a painted brick wall made from one hand-drawn brick
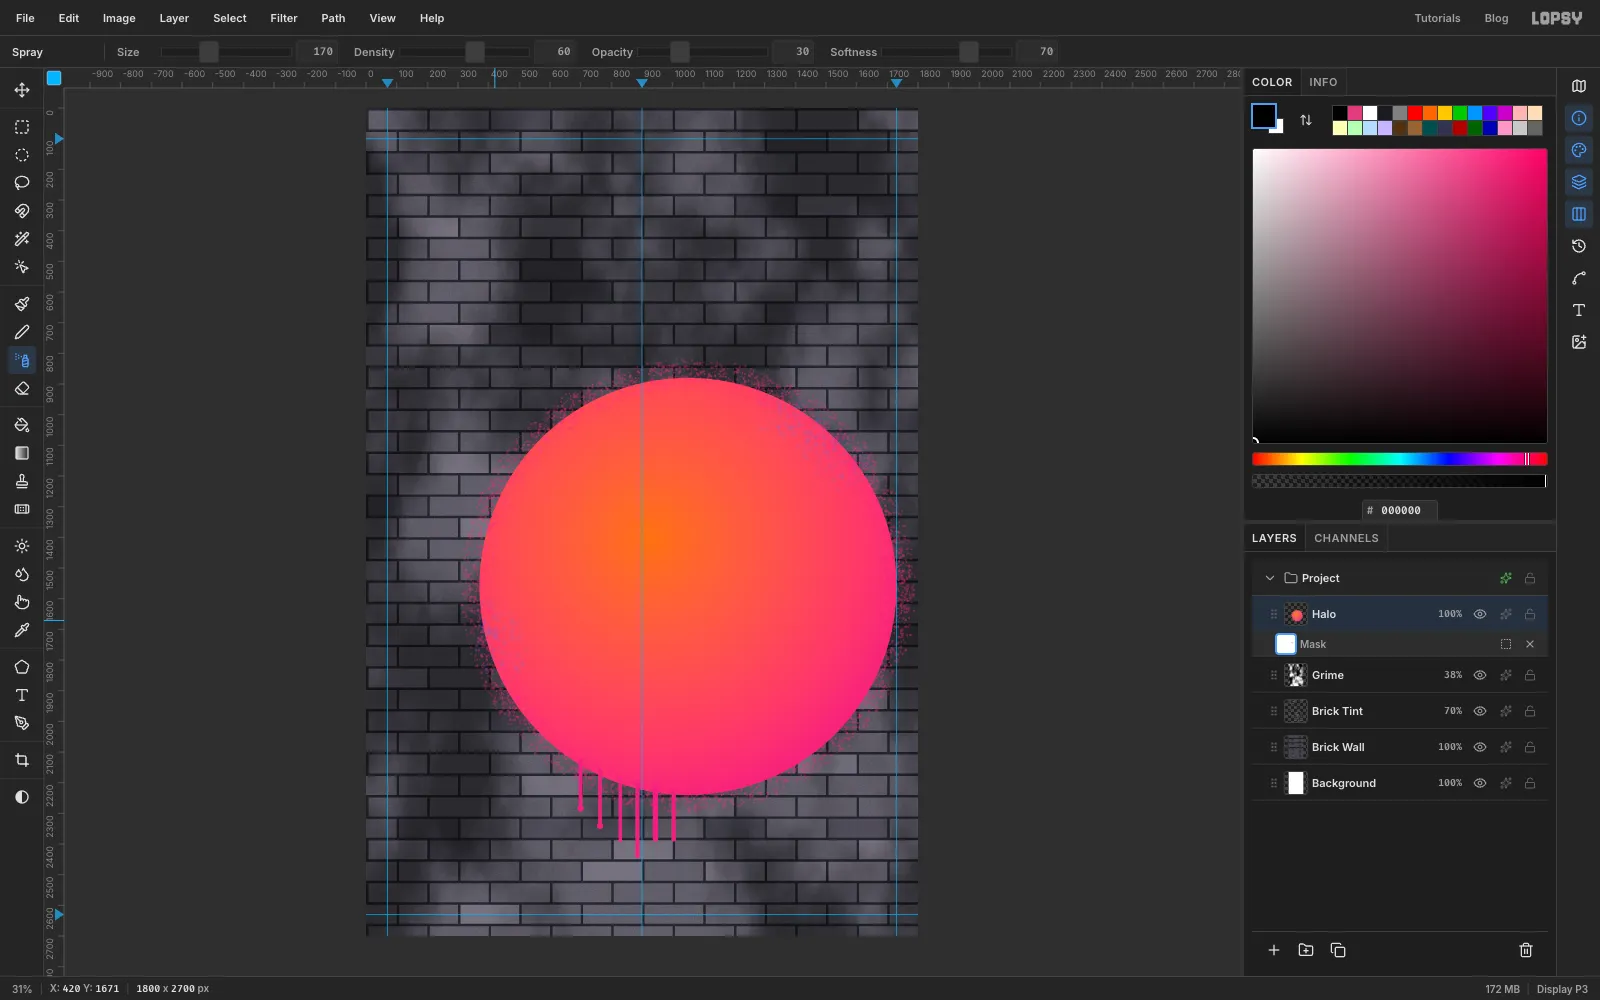
- a spray-painted sunset disc with overspray, drips and a faded edge
- a pigeon photo turned into a four-colour stencil with a second, out-of-register shadow plate
- a gold crown drawn with the Pen tool
- a two-word graffiti title, a wheatpasted info flyer, a sticker and a tag
You'll need two photos from Wikimedia Commons:
- Columba livia - 01.jpg by Carlos Delgado, a close-up of a rock pigeon's head (CC BY-SA 4.0). Download the 1920 px version.
- Feral Pigeon 2023 11 19.jpg by Alexis Lours, a pigeon walking side-on (CC BY 4.0). Again, the 1920 px version.
Both licences let you use the photos as long as you credit the photographers. The BY-SA licence also means that anything you make from the first photo should be shared under the same licence.
Along the way you'll use patterns, the Magic Wand, the marquees and Lasso, the Gradient, Spray, Brush and Pen tools, a handful of filters (Posterize does the heavy lifting), layer masks, groups, live text, and the Stroke, Drop Shadow, Outer Glow and Color Overlay effects.
The palette is a night-time wall with hot spray paint on it:
-
Wall bricks
-
mortar
-
light bricks
-
dark bricks
-
Disc
-
Stencil navy
-
teal
-
mint
-
cream
-
Crown gold
-
title gradient top
-
sprayed highlight
-
Ink
-
paper
-
Draw one brick
Choose File → New and make a 1800 × 2700 px document with a white background. Click the top ruler at 70, 900 and 1730 to drop vertical guides for the margins and the centre line. Click the left ruler at 100 and 2630 for the top and bottom margins.
Click Add Layer and name the new layer Brick Tile.
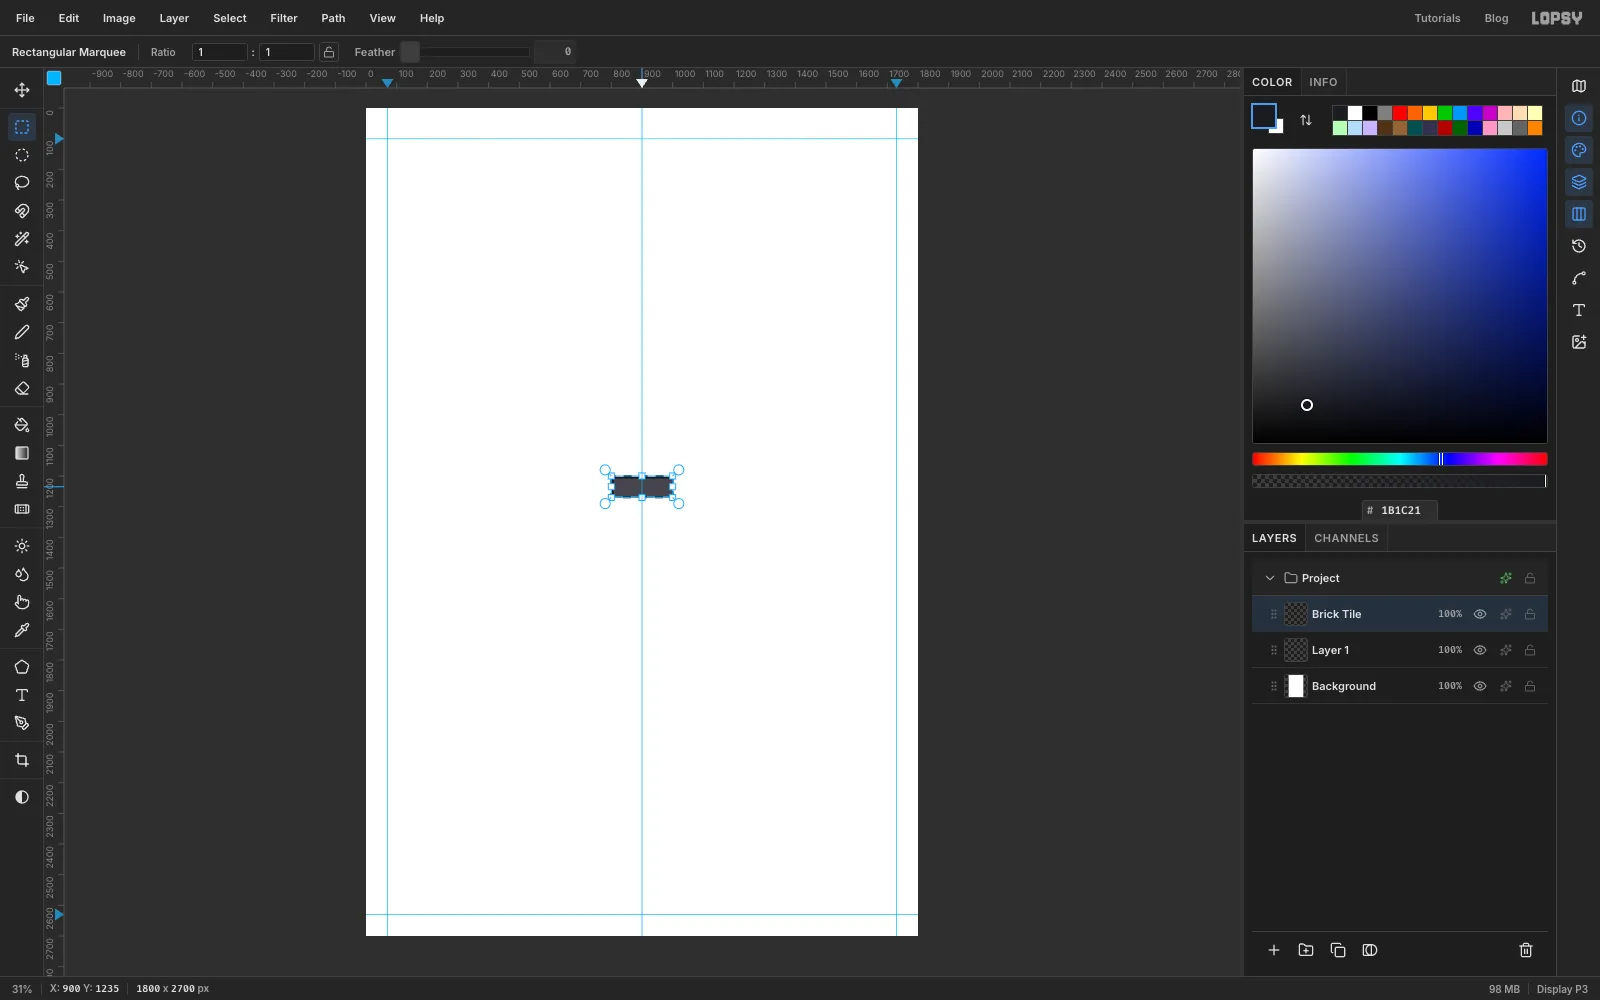
Pick the Rectangular Marquee and click once on the canvas without dragging. That opens its exact-size dialog. Enter 800, 1200 to 1000, 1270 for a brick 200 px wide and 70 px tall, set the foreground to and choose Edit → Fill.
Now add the mortar. Pick the Pencil, set Size to 8 and the foreground to . Click at the top-left corner of the brick and Shift-click at its top-right corner to draw a line along the top edge. Then click the top-left corner again and Shift-click the bottom-left corner for the left edge. The other two edges come from the neighbouring bricks once the tile repeats.
The selection is still around the brick (if you lost it, enter the same corners again). Choose Edit → Define Pattern, press Cmd+D to deselect, and delete the Brick Tile layer. It has done its job.
-
Fill the wall with bricks
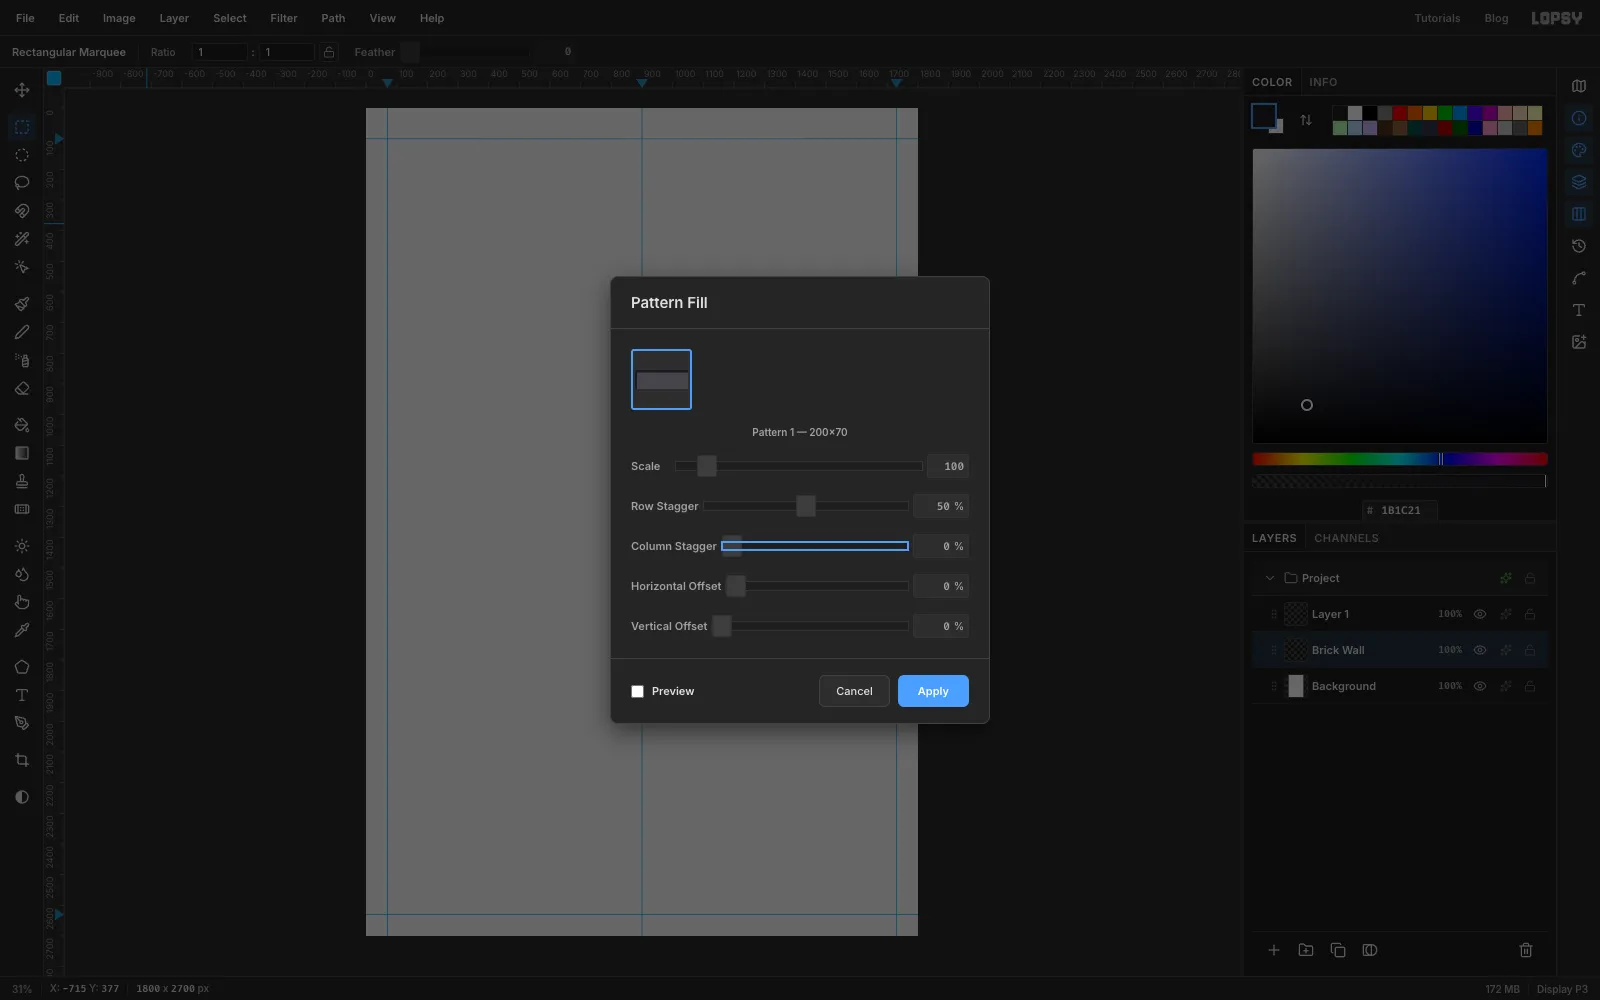
A new document comes with an empty Layer 1; you won't need it, so select it and click Delete Layer. Then click the Background layer, add a layer above it and name it Brick Wall. Choose Edit → Fill with Pattern…, pick your brick, and set Row Stagger to 50%. Each row shifts by half a brick, which gives a proper running bond. Click Apply.
-
Vary the bricks with the Magic Wand
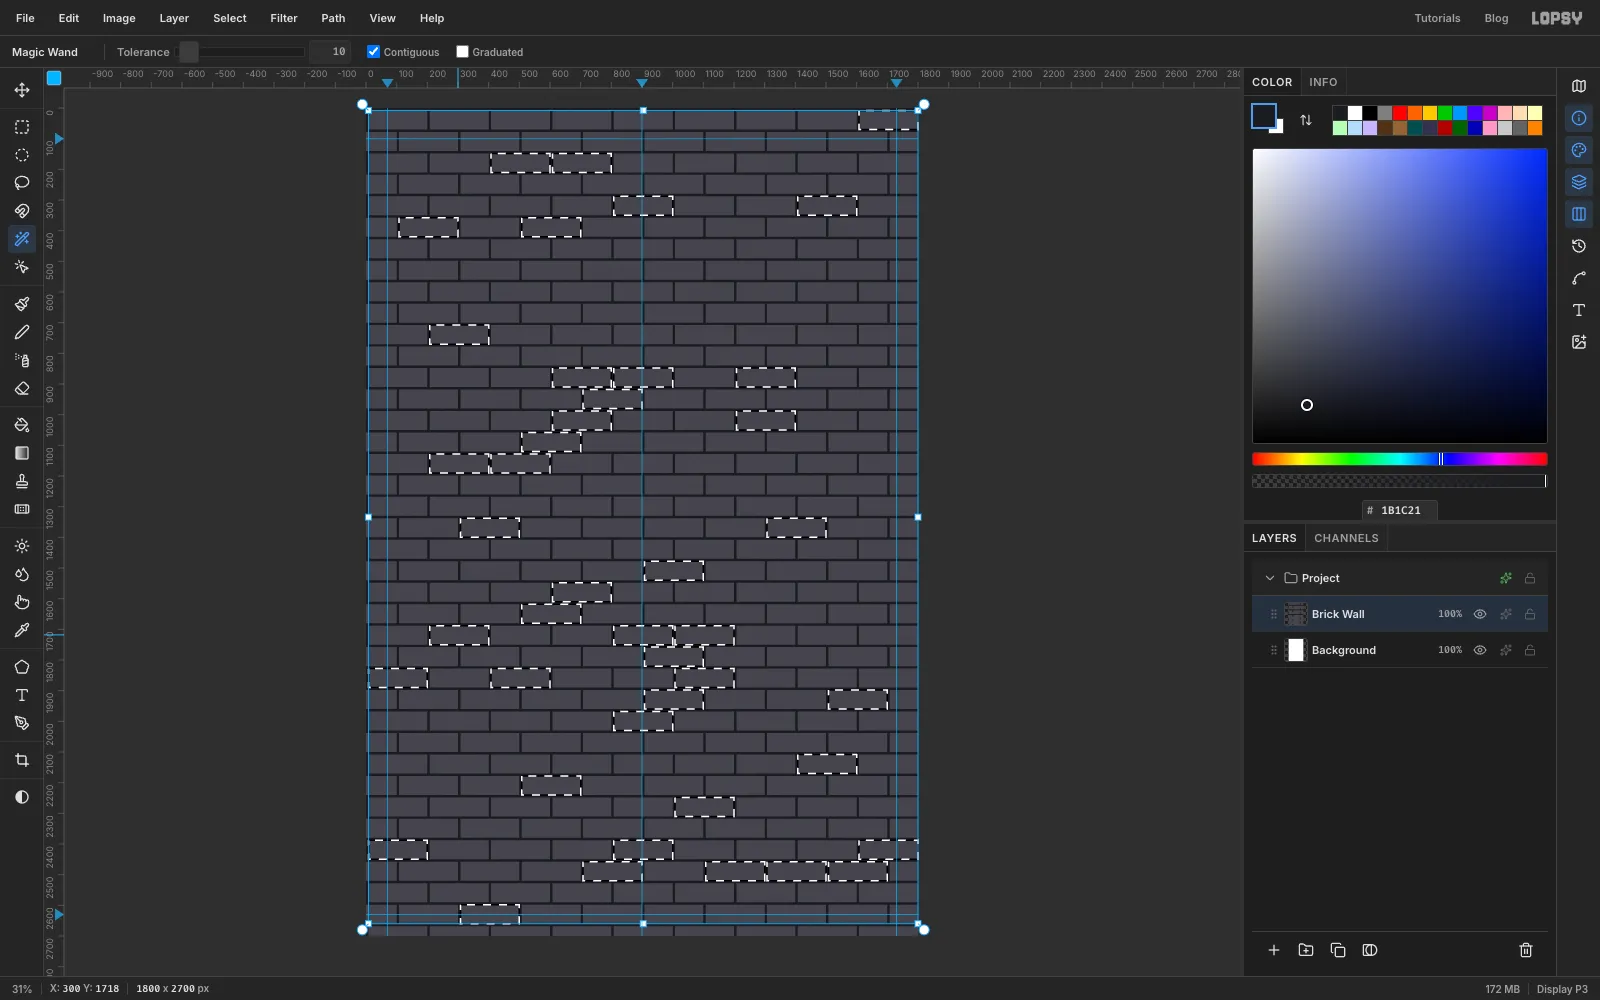
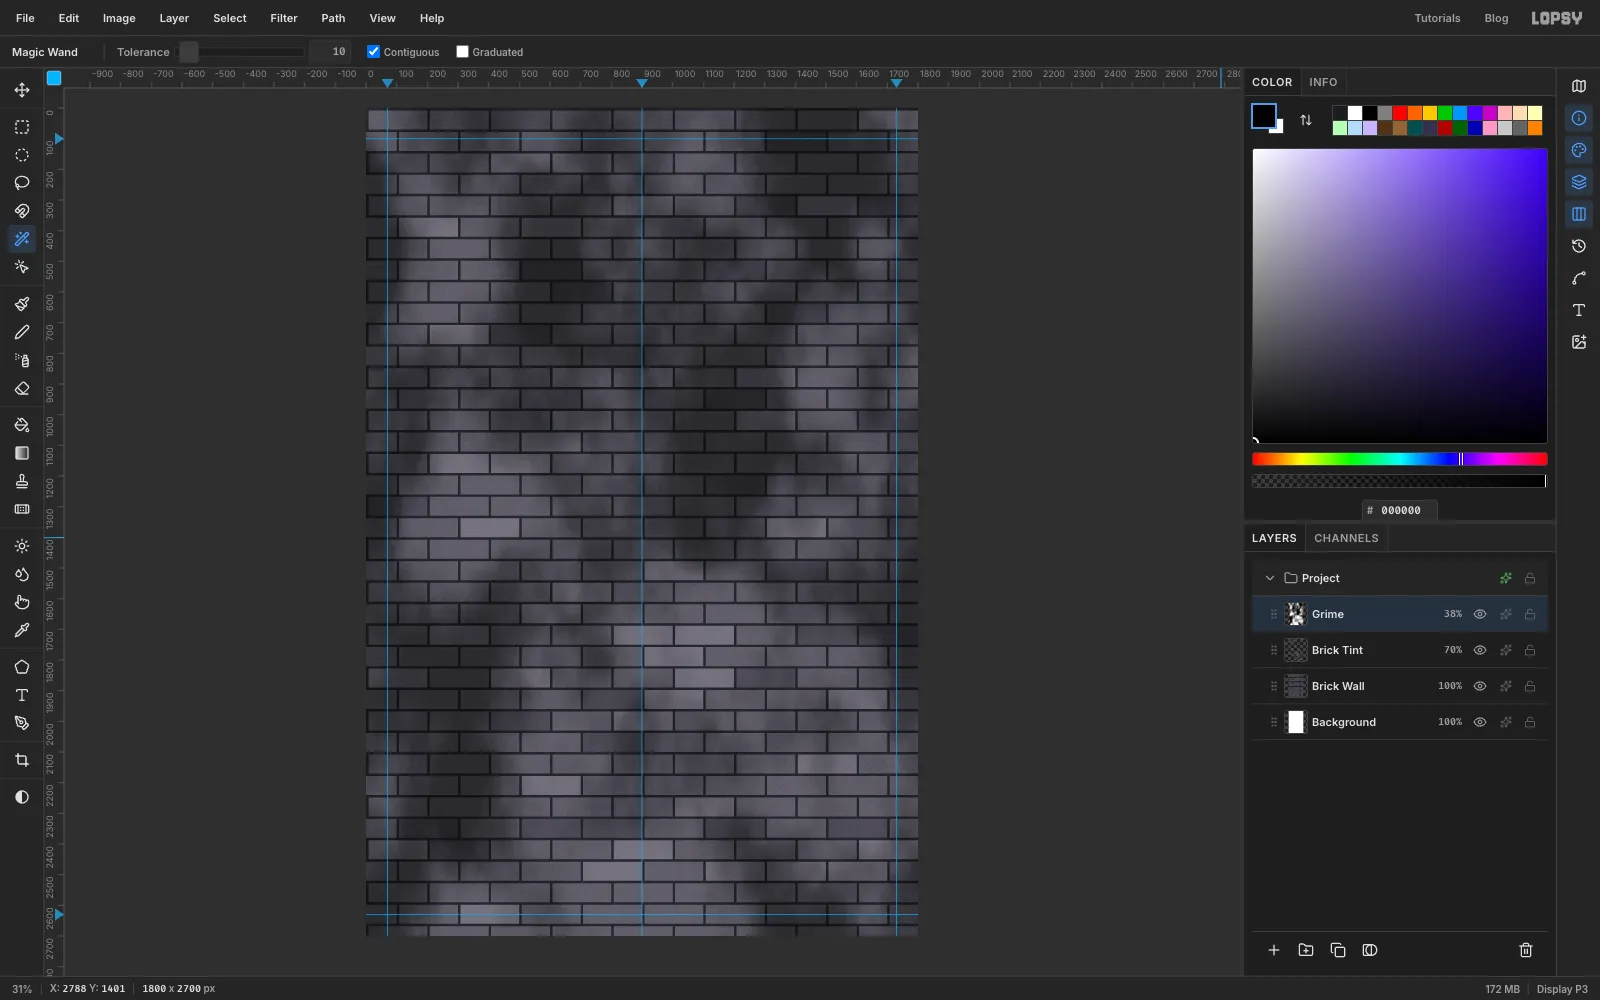
A wall where every brick is the same grey looks printed. Pick the Magic Wand, set Tolerance to 10 and tick Contiguous, so each click selects exactly one brick. Click a brick, then hold Shift and click forty or so more, scattered all over the wall. Don't make a pattern of it.
Click Add Layer, name it Brick Tint, set the foreground to the lighter and choose Edit → Fill. Press Cmd+D.
Click Brick Wall again and wand-select another scatter of bricks the same way, avoiding the ones you've already done. Click Brick Tint, fill these with the darker and deselect. Set Brick Tint to 70% opacity.
-
Add grit and grime
Click Brick Wall and choose Filter → Add Noise…. Pick Mono, set Amount to 18 and click Apply. This roughs up every brick face.
Click Brick Tint and add a layer above it called Grime. Choose Filter → Clouds… with Scale at 6. Open the layer's effects with the sparkle button on its row, set the blend mode to Overlay and close the drawer. Then set the layer's opacity to about 38%. The clouds become soft, uneven stains where rain and traffic have darkened the wall.
-
Spray the sunset disc
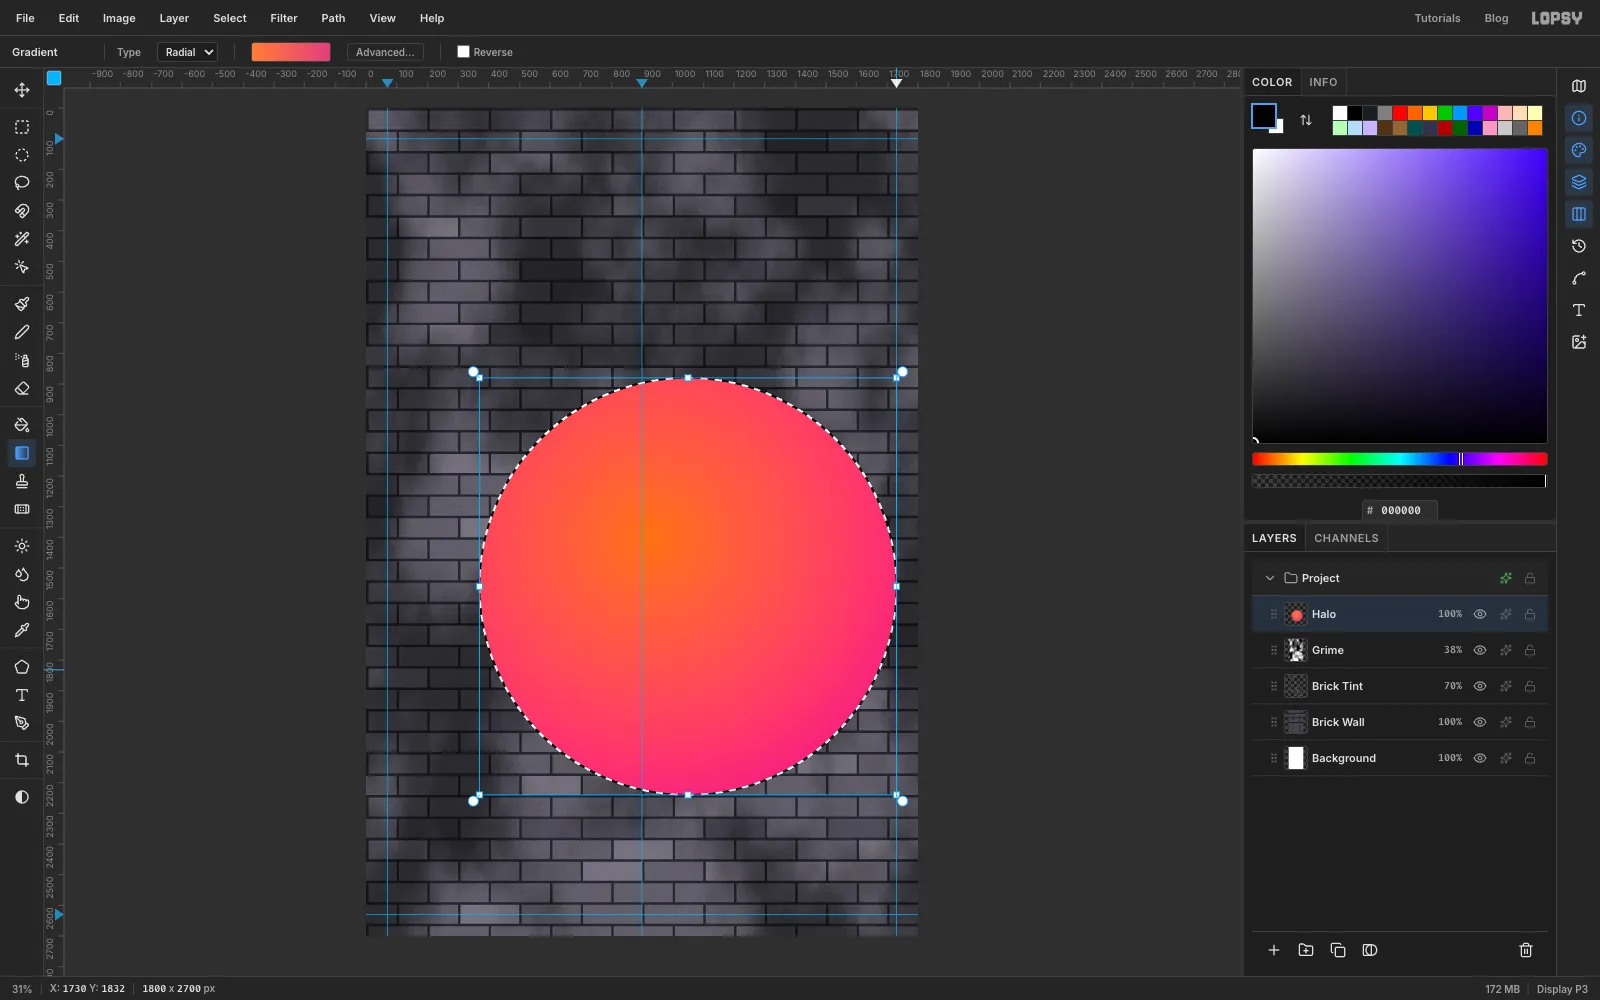
Add a layer above Grime called Halo. Click once with the Elliptical Marquee to open its exact-size dialog and enter a circle from 370, 880 to 1730, 2240. That's a 1360 px disc, a little right of centre and a little below the middle.
Pick the Gradient tool, set Type to Radial and click Advanced…. Use three stops:
- at the left end
- about halfway along
- at the right end
Click Done. Drag from a point a little up and left of the disc's centre out to its lower-right rim. The hot spot sits off-centre, like a sun low in the sky.
-
Add overspray around the rim
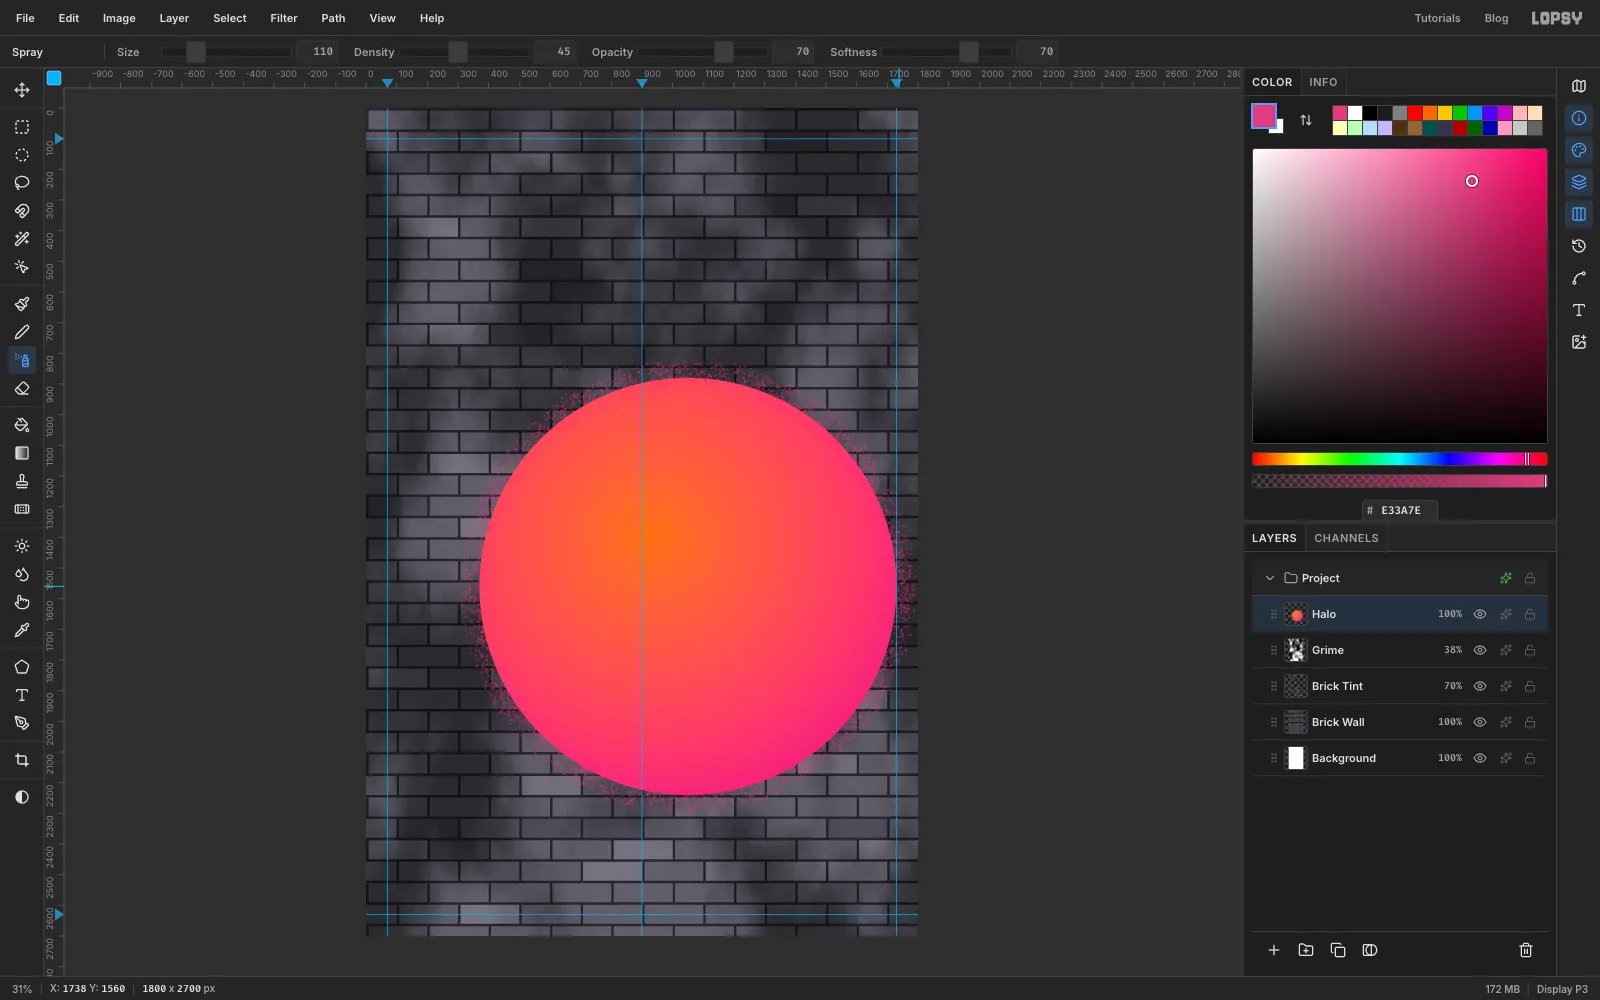
Press Cmd+D. A real stencil never has a perfectly clean edge, because some paint always mists past it.
Pick the Spray tool and set the foreground to . Set Size to 110, Density to 45 and Opacity to 70. Then drag once all the way around the disc, just on its edge. Keep moving at a steady pace. If you stop, the spray keeps building up in one spot.
-
Let some paint run
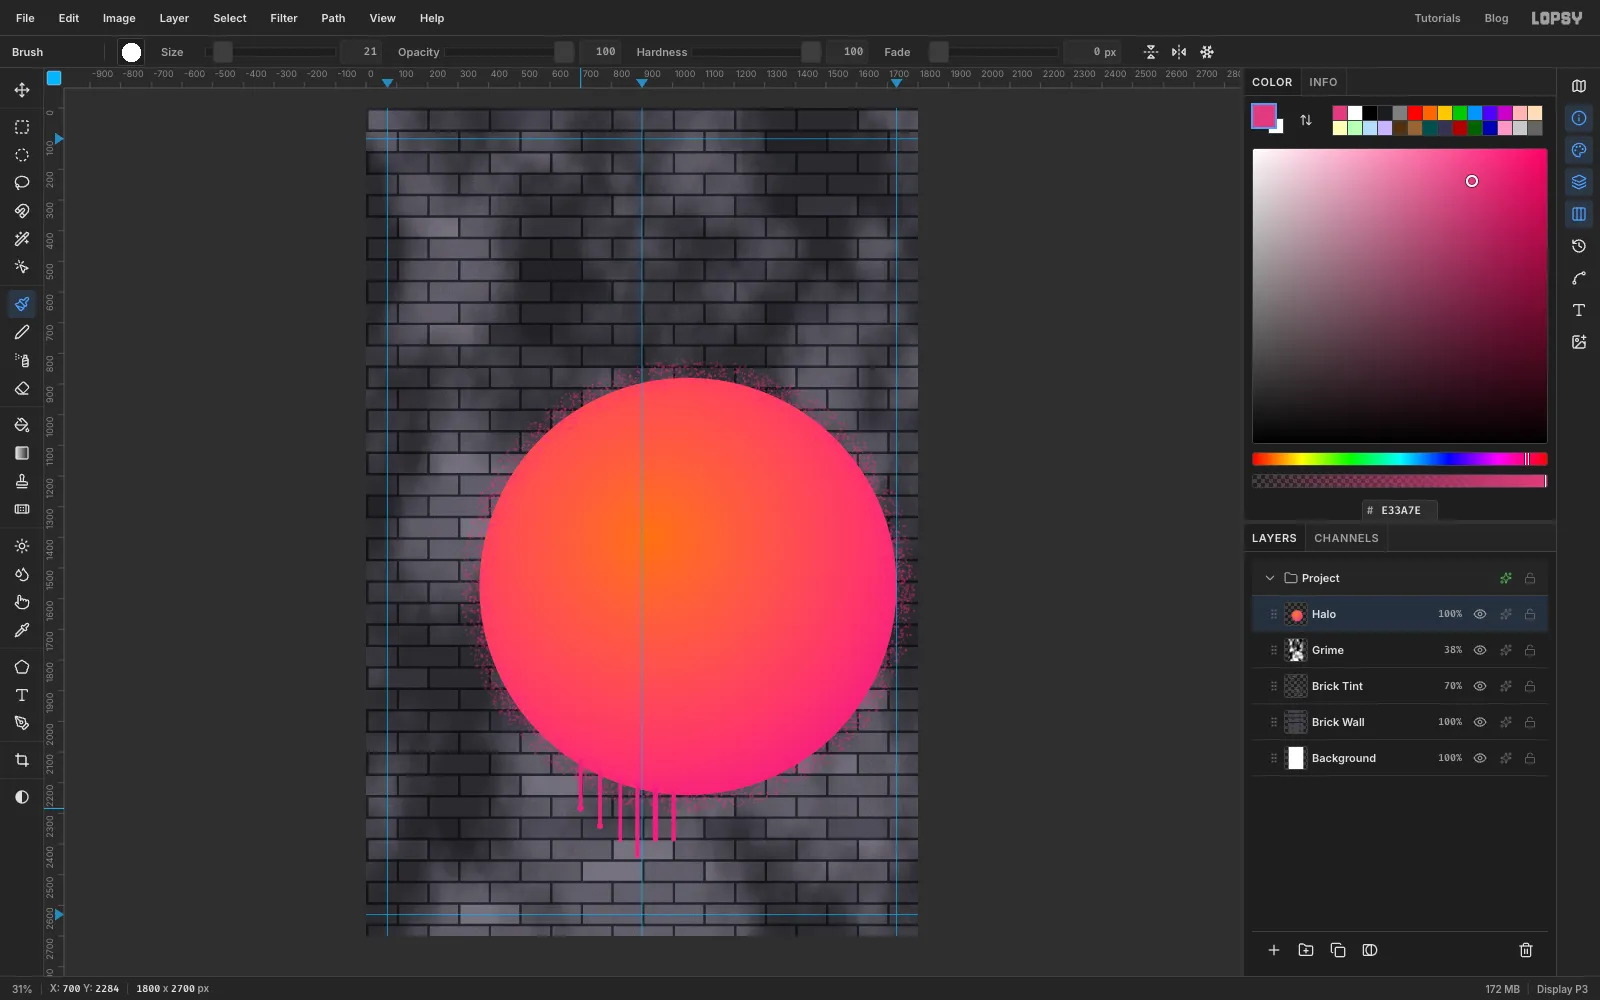
Too much paint in one place runs. Pick the Brush, set Hardness and Opacity to 100, and keep the pink foreground.
Each drip is a straight line. Set the brush Size to somewhere between 10 and 19, click on the disc's edge, then Shift-click straight below it. Make six to eight drips along the bottom-left of the disc, between about six and seven o'clock. Vary the sizes, and make the lengths anything from 40 px to about 300 px. Put the longest ones nearest the bottom.
Finish some of them, not all, with a bead. Make the brush a few pixels bigger and click once at the end of the drip.
-
Fade the rim with a layer mask
Paint wears thin at the edges first. With Halo still active, click Add Mask at the bottom of the Layers panel, then click the new mask thumbnail on the layer's row to edit the mask. The canvas tints blue while you're editing a mask.
Pick the Spray, set the foreground to black, set Size to 170 and Opacity to 30, and keep Density at about 60. Make two short passes just inside the rim: one at the upper right and one on the far left. Black on a mask hides paint, so the bricks start to show through there. Click the Halo layer's name when you're done to stop editing the mask.
-
Drop in the pigeon photo and scale it
With Halo active, click New Group at the bottom of the Layers panel and name it Pigeon. Everything for the bird goes in here.
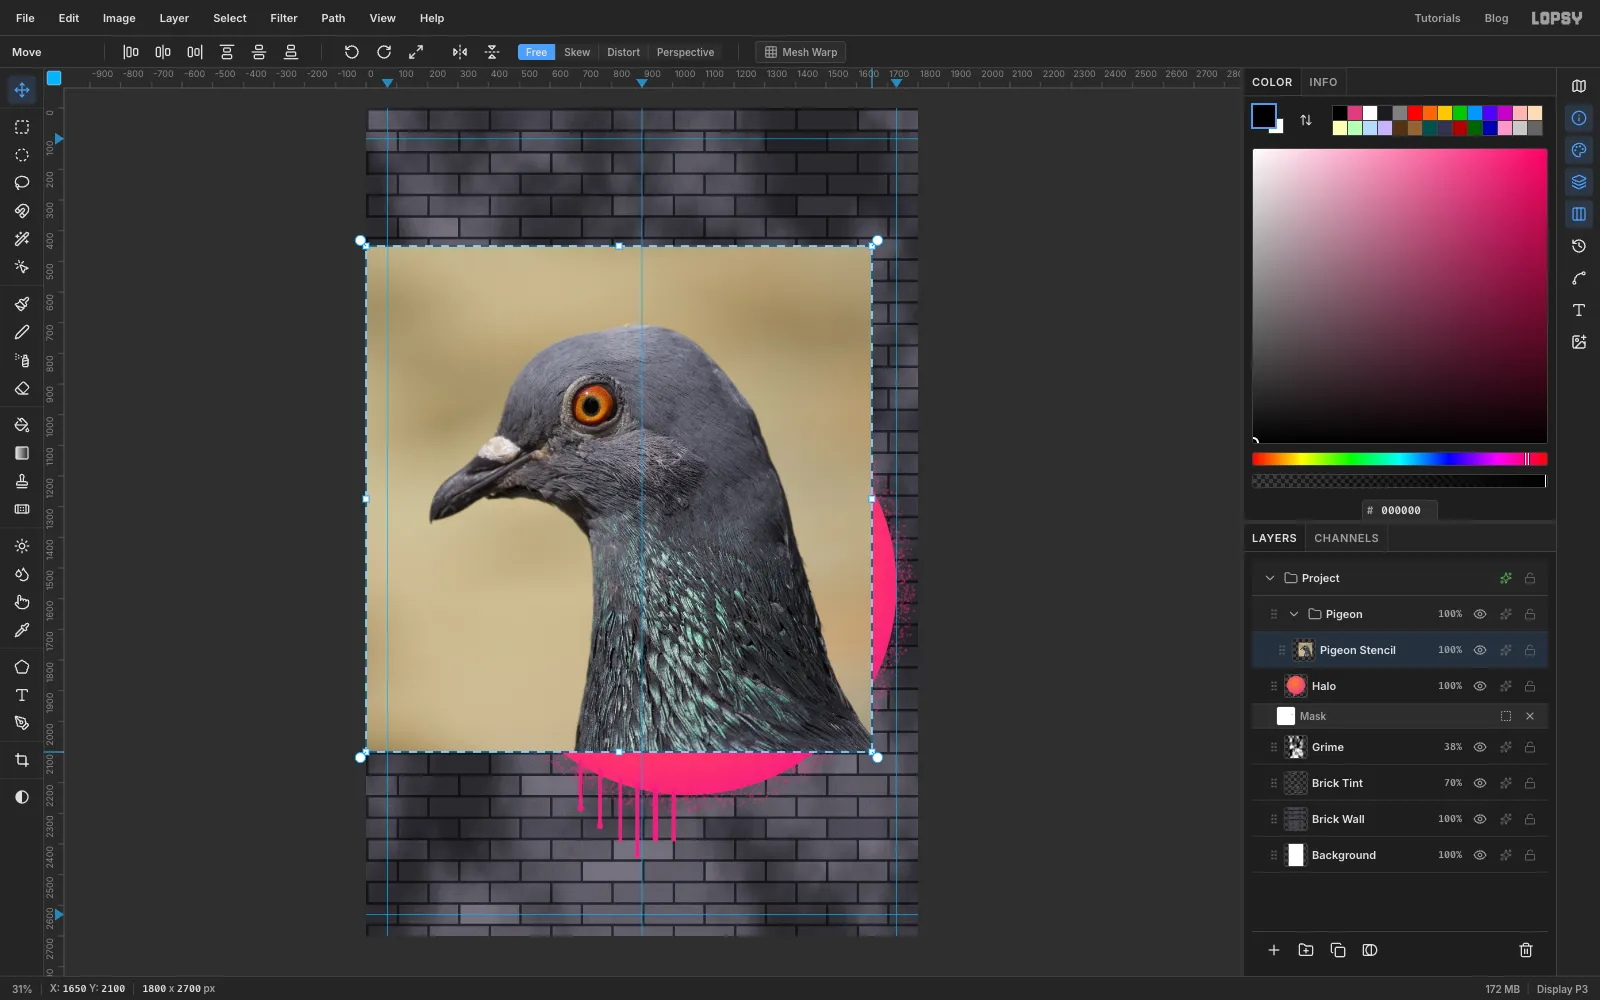
Drag the Carlos Delgado pigeon photo from your downloads folder onto the canvas. Lopsy shrinks it to fit the 1800 px width and selects it, with the Move tool already active. Rename the layer Pigeon Stencil.
The photo is still a little big. Hold Cmd and drag the bottom-right corner handle up and in until the photo is about 1650 px square. Cmd keeps it square. Press Cmd+D to commit the scale.
-
Move the bird into the disc
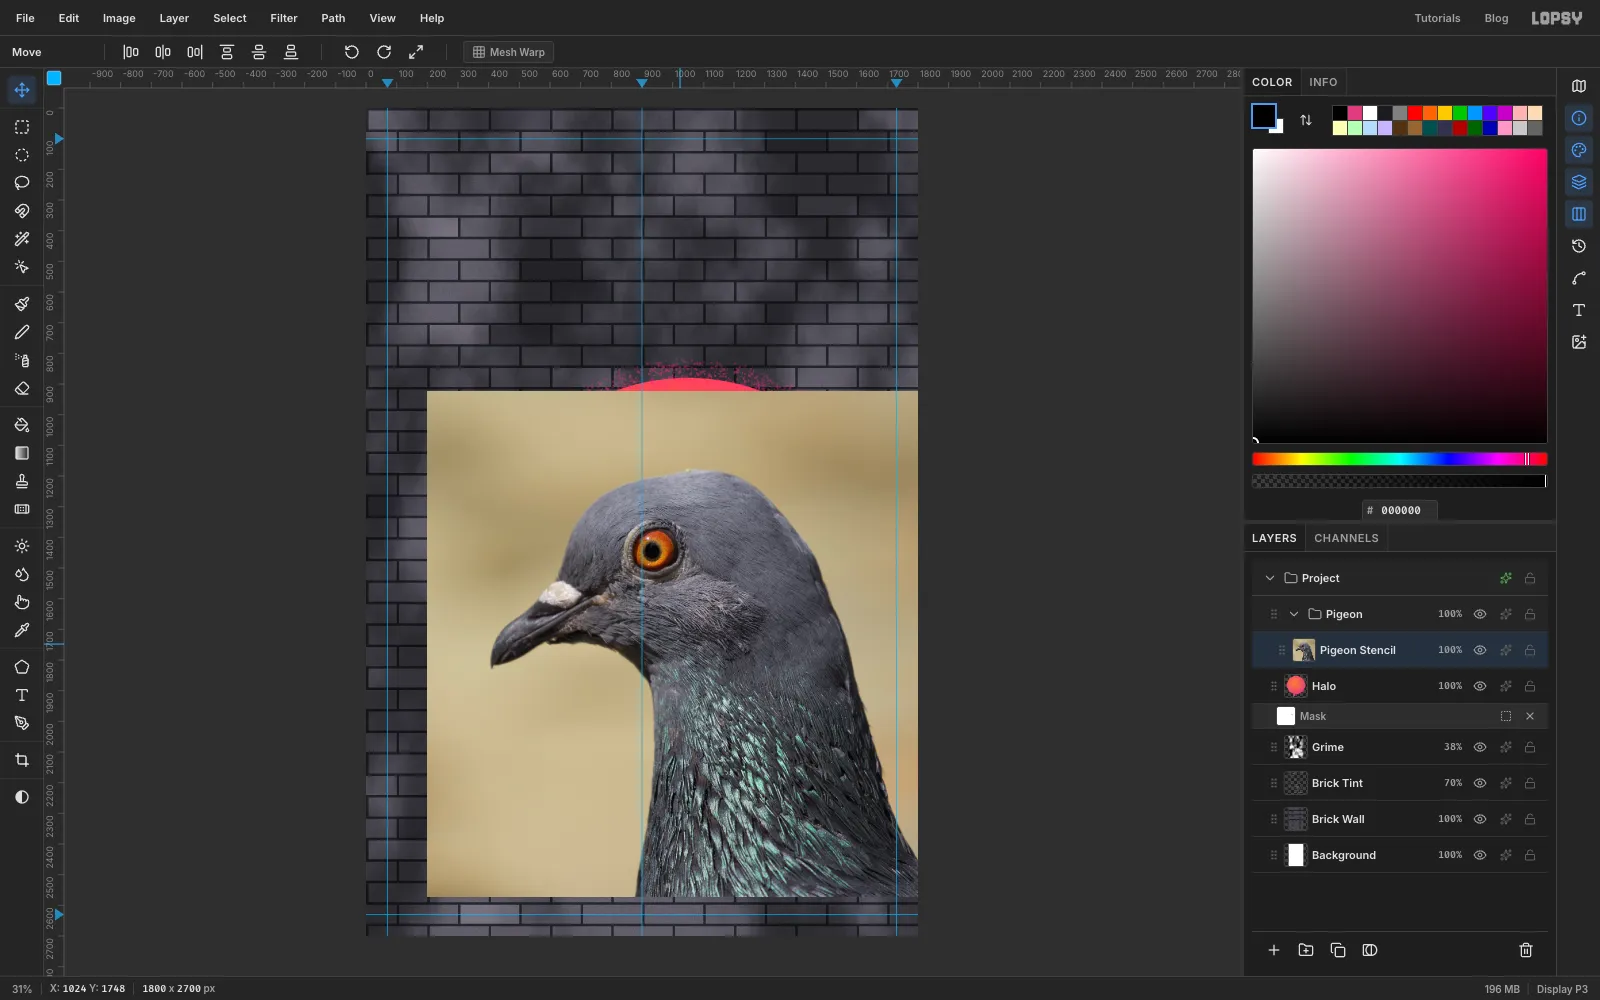
Drag the photo down and to the right until its top-left corner is at about 200, 920. The status bar's X/Y reading shows where the pointer is. The head now sits in the upper half of the disc and the beak just pokes out past the disc's left edge. The right edge of the photo hangs slightly past the edge of the canvas, which is fine. The neck stops in a flat edge near the bottom. That's expected too: the paper flyer will cover it.
-
Cut away the backdrop
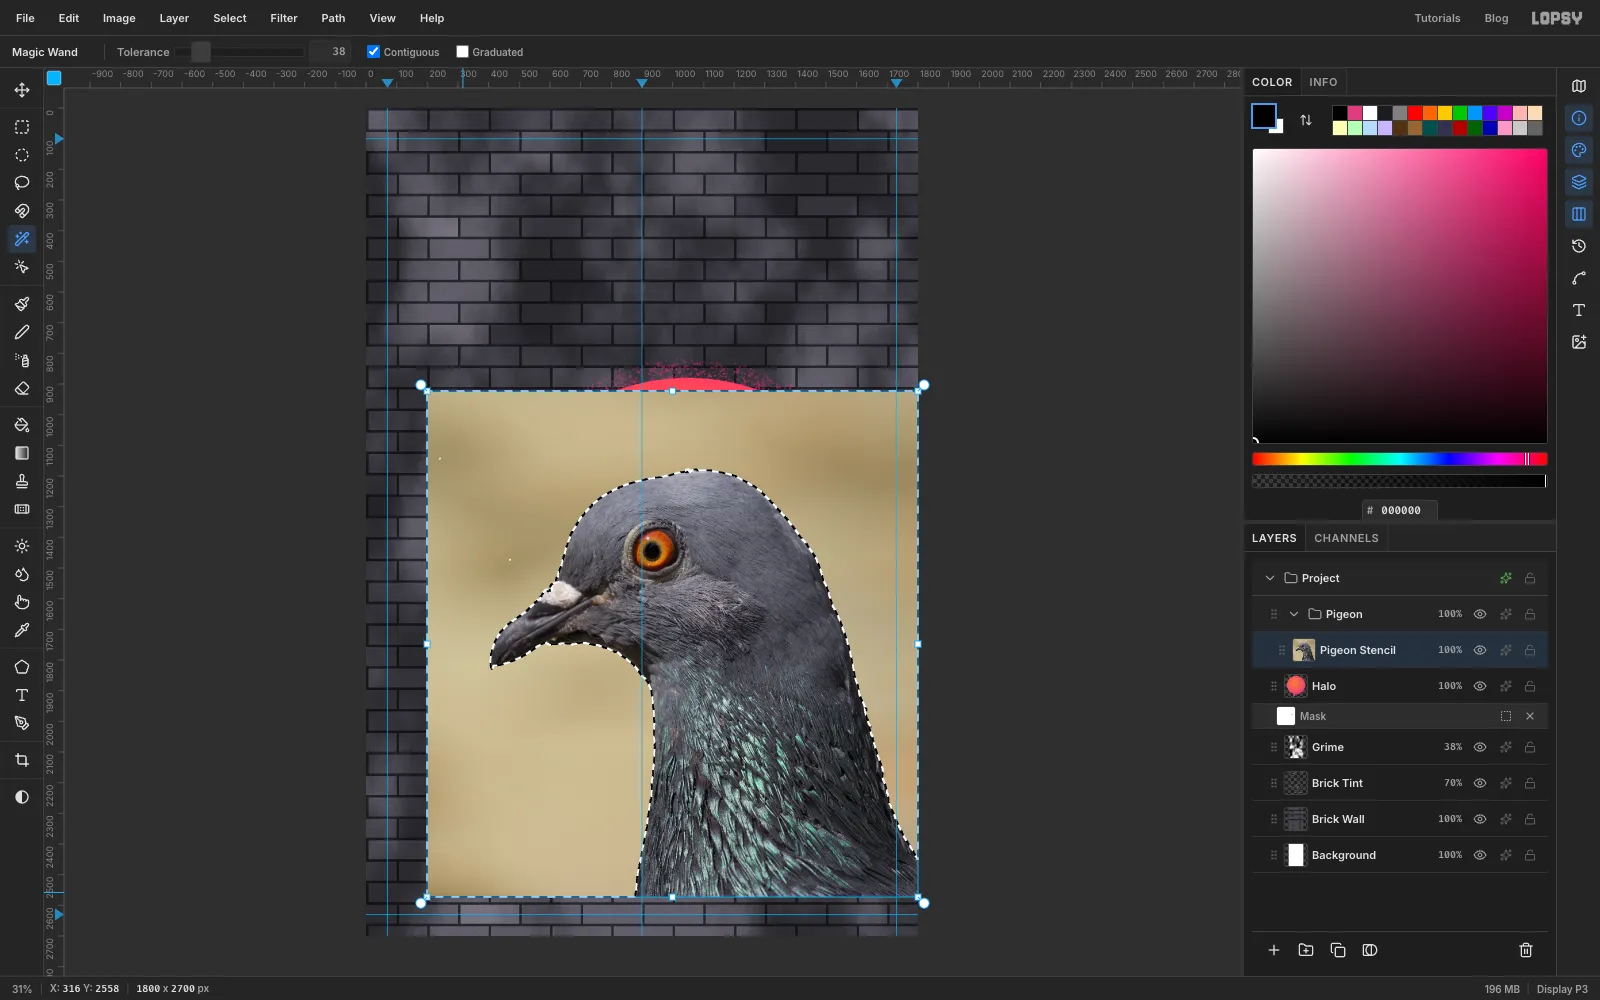
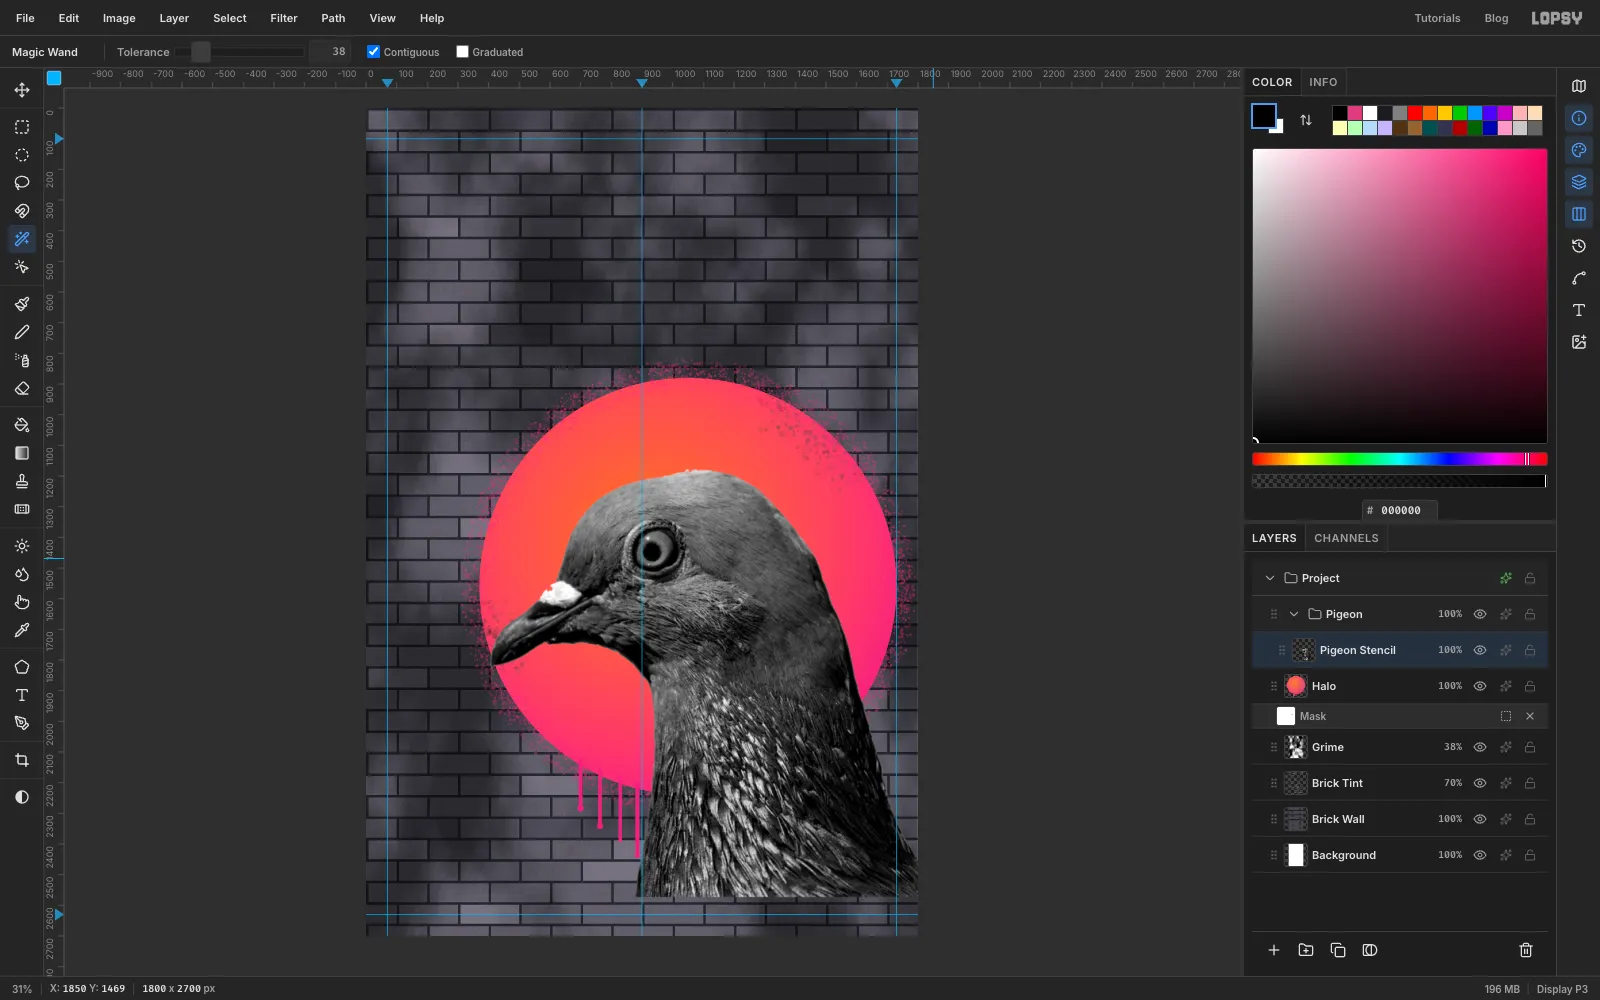
Pick the Magic Wand, set Tolerance to 38 and keep Contiguous ticked. Click the soft beige background in the top-left of the photo. Shift-click any background patches the first click missed:
- down the left side
- the gap between the beak and the neck
- across the top
- the right side
- the last sliver at the bottom-left corner
Press Delete to clear the background, then Cmd+D. The pigeon now sits directly on the pink disc.
-
Flatten the photo into stencil tones
A stencil only works with a few flat tones, so the photo has to be simplified first. Apply these one after another to Pigeon Stencil:
- Filter → Desaturate, which applies straight away.
- Filter → Brightness/Contrast… with Contrast at 40.
- Filter → Gaussian Blur… with Radius at 4. Blurring first gives the stencil smooth shapes instead of thousands of single-feather specks.
-
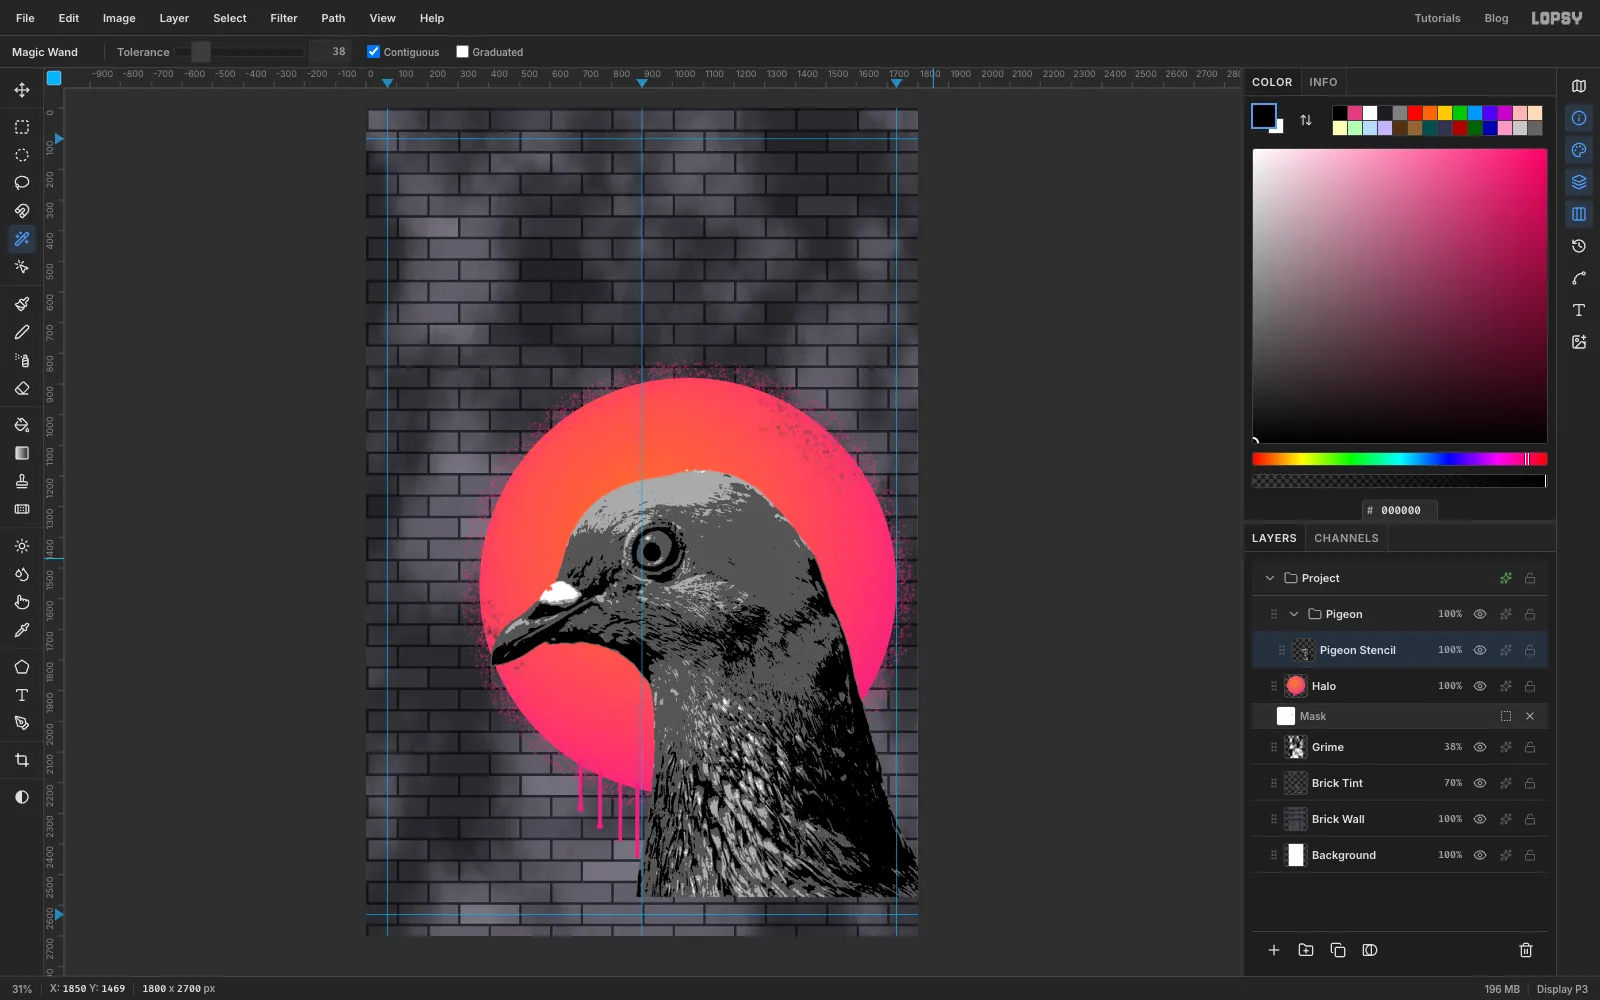
Posterize to four greys
Choose Filter → Posterize…, set Levels to 4 and click Apply. The bird snaps into four flat greys: black, a dark grey, a light grey and white. Each one will become a separate spray colour.
-
Select one grey at a time
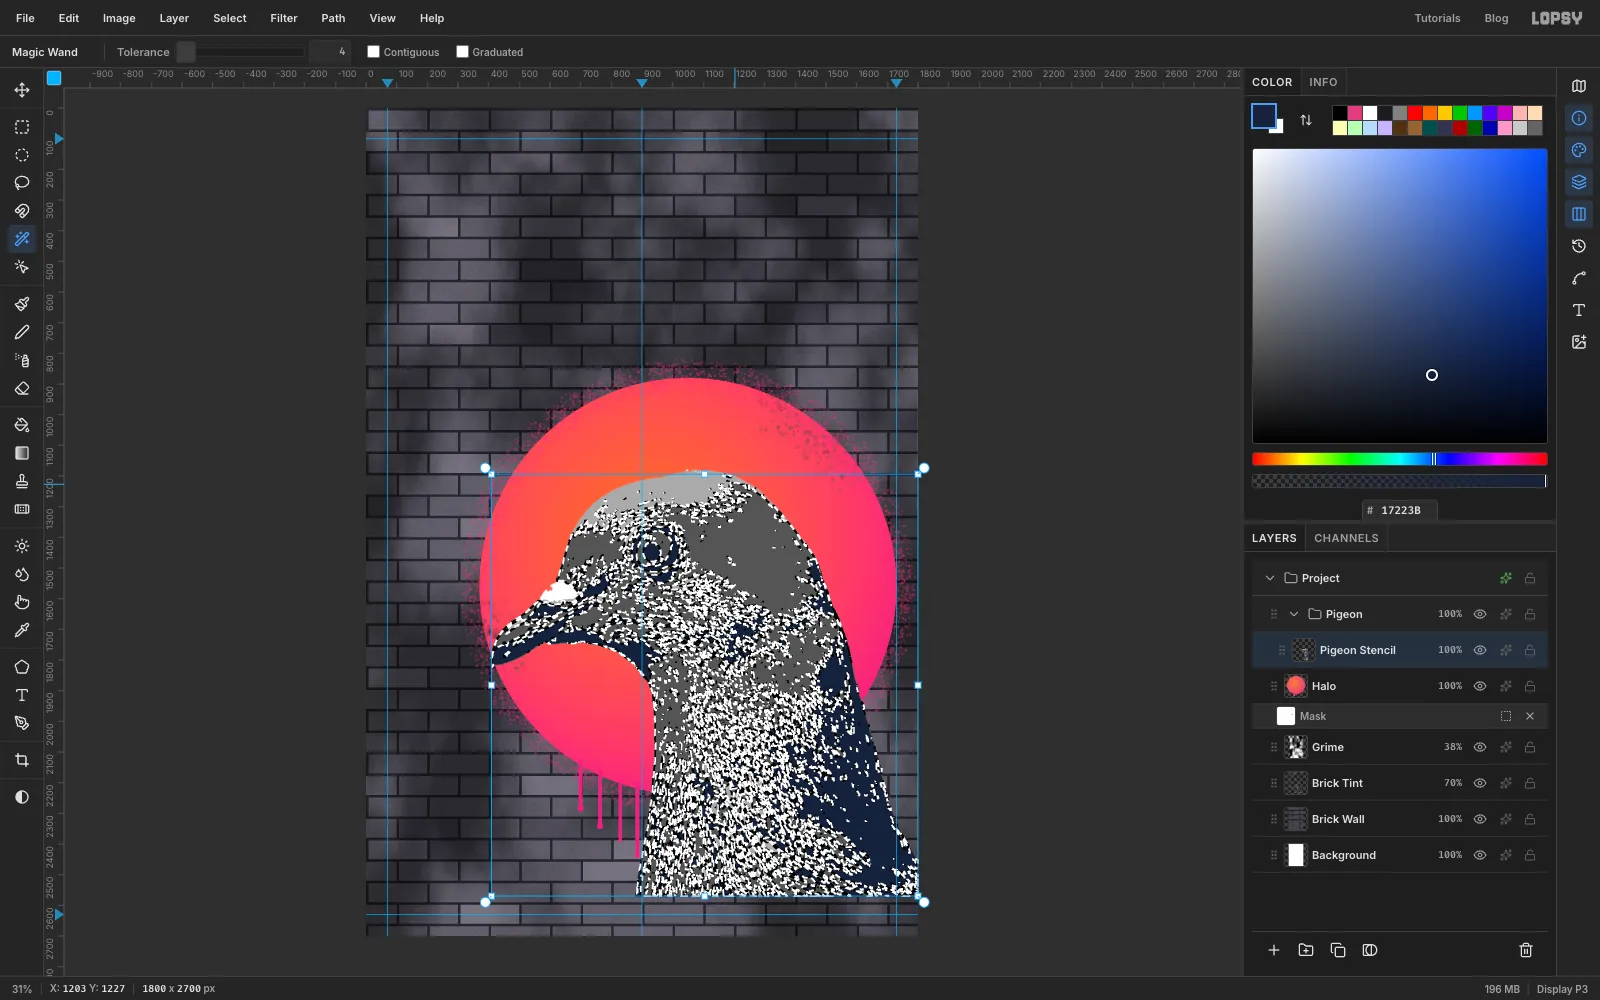
Pick the Magic Wand, set Tolerance to 4, and this time untick Contiguous. One click then selects every pixel of that exact grey, wherever it is on the bird.
Click a black area and fill it with navy . Press Cmd+D, click a dark grey area and fill it with teal . Do the same for the light grey with mint , and the white patch at the top of the beak with cream . Deselect before each new click.
The bird now reads as a stencil: a teal body, navy shadows, mint highlights on the head and neck, and a cream patch on the beak.
-
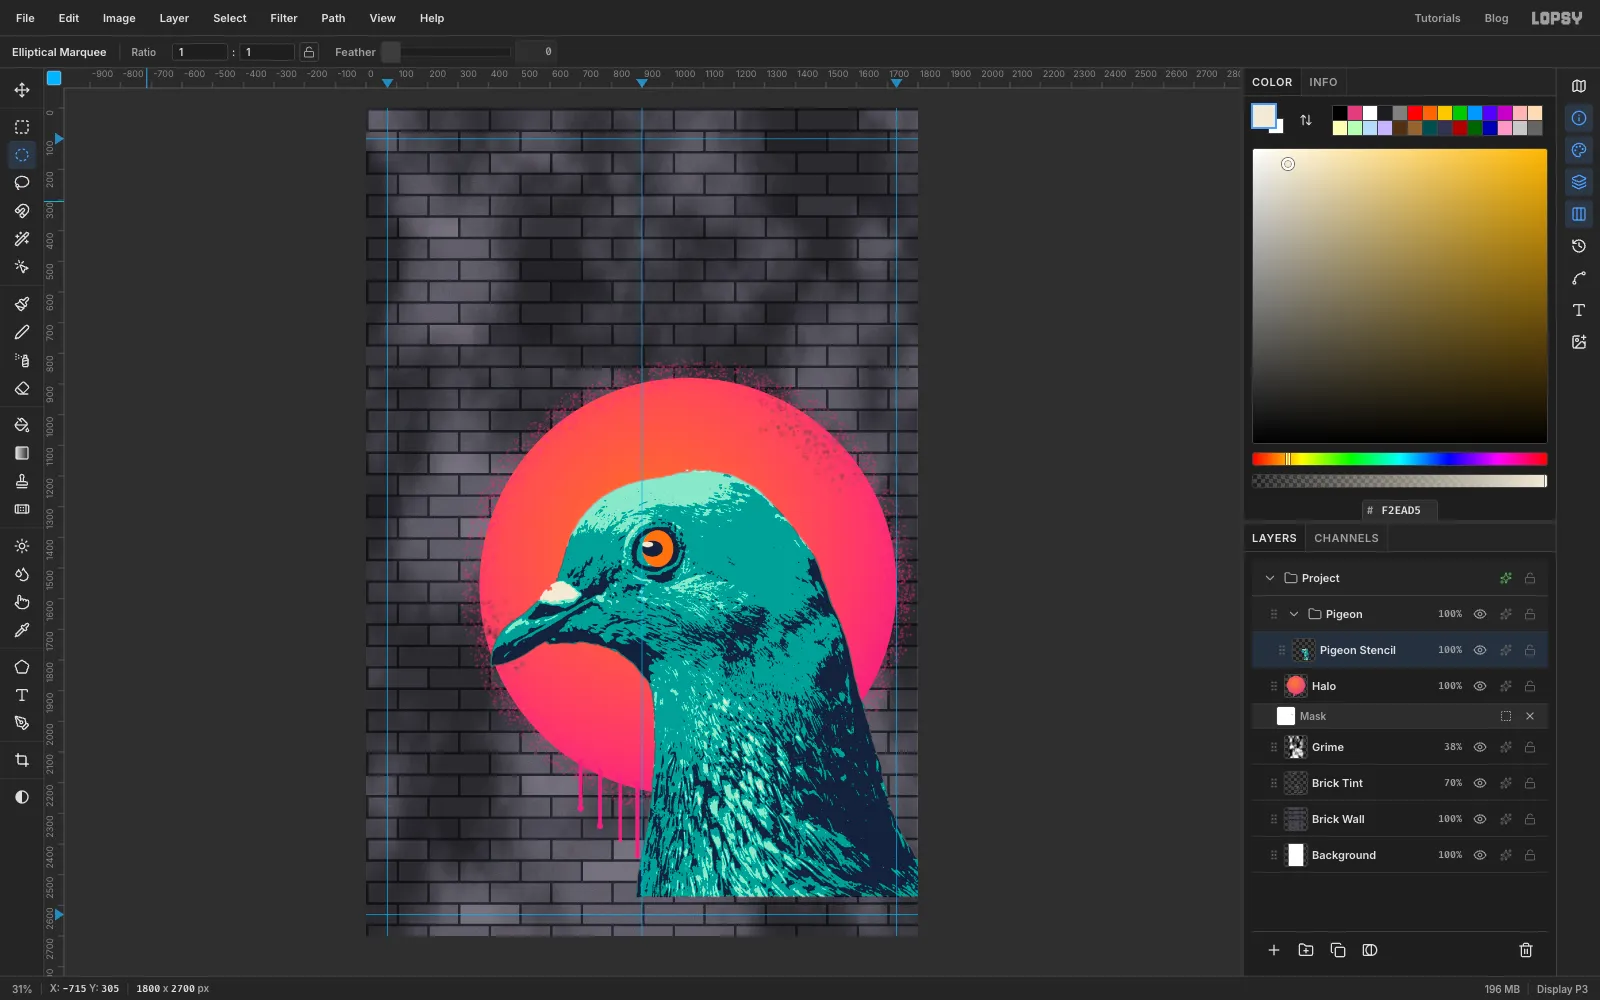
Paint the eye
The eye is the one spot of real colour on the bird. Click once with the Elliptical Marquee to open its exact-size dialog, and make three circles over the eye, filling each with Edit → Fill:
- the iris, 882, 1377 to 1002, 1497, in
- the pupil, 916, 1411 to 968, 1463, in navy
- a small glint up and to the left, 919, 1414 to 937, 1432, in cream
If your photo sits a few pixels differently, hover the middle of the eye and read its position in the status bar, then centre the circles there.
Deselect when you're done.
-
Add an out-of-register shadow plate
Multi-layer stencils are sprayed one sheet at a time and never line up perfectly. Fake a black sheet sprayed first.
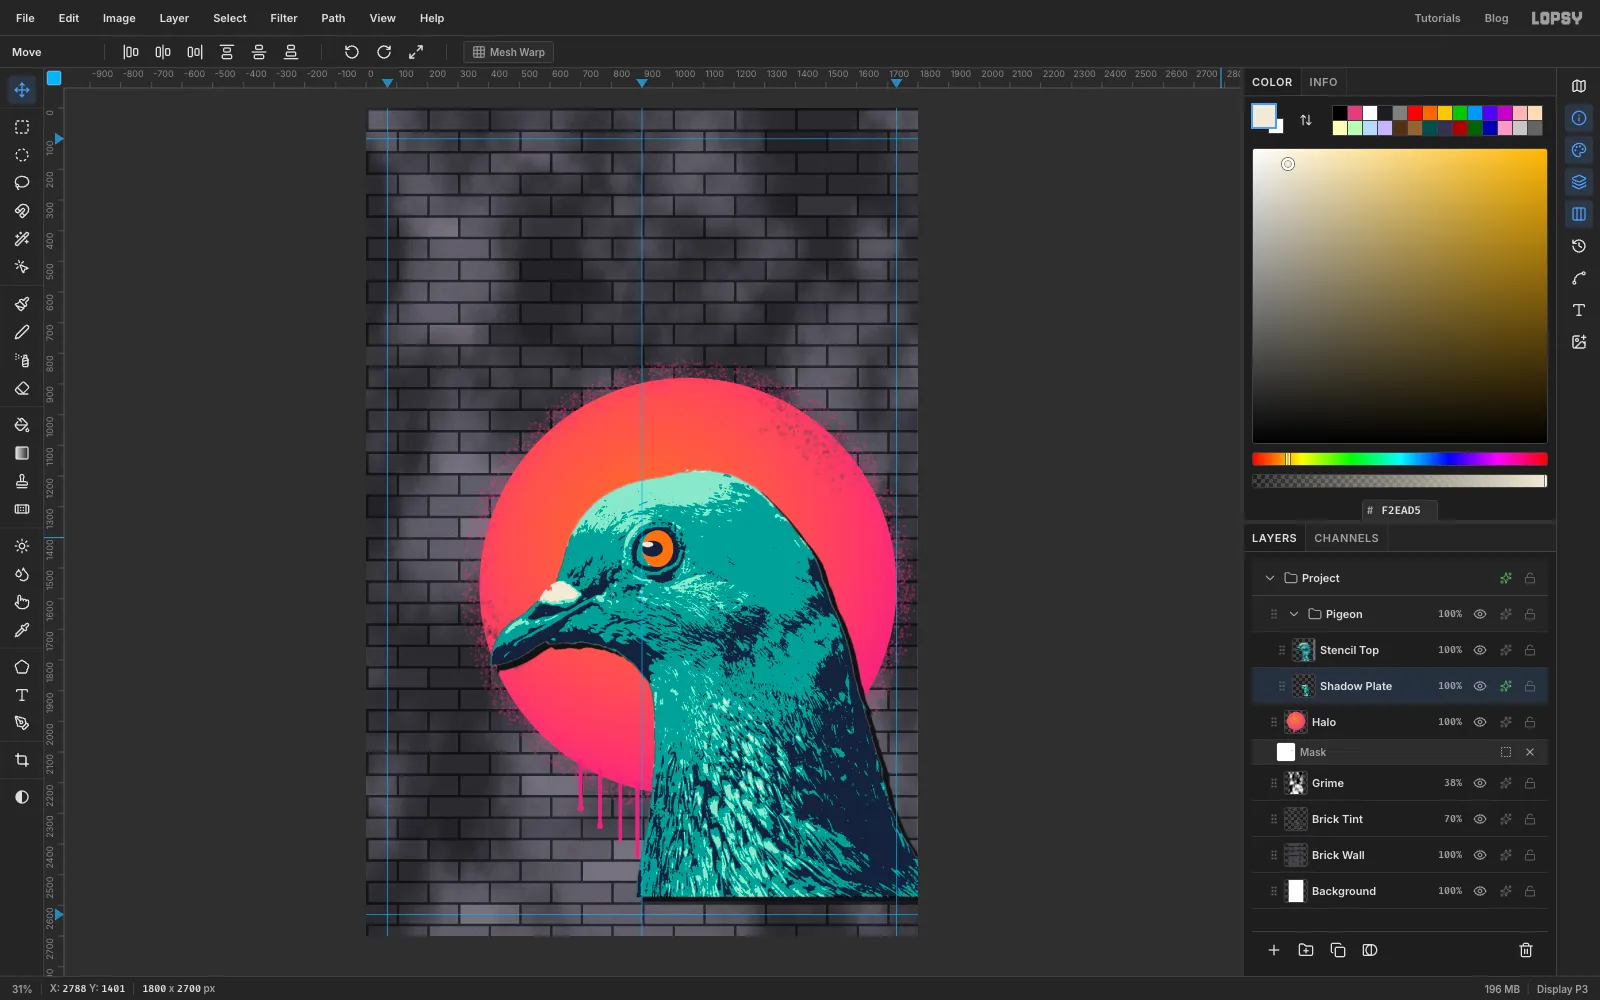
Click Duplicate Layer and rename the copy Stencil Top. Click the original underneath and rename it Shadow Plate. Open its effects, turn on Color Overlay and set the colour to ink . With the Move tool, nudge Shadow Plate 20 px right and 16 px down with the arrow keys. Shift makes each press 10 px. A thin black edge now shows along the back of the neck and under the head.
-
Draw a crown with the Pen
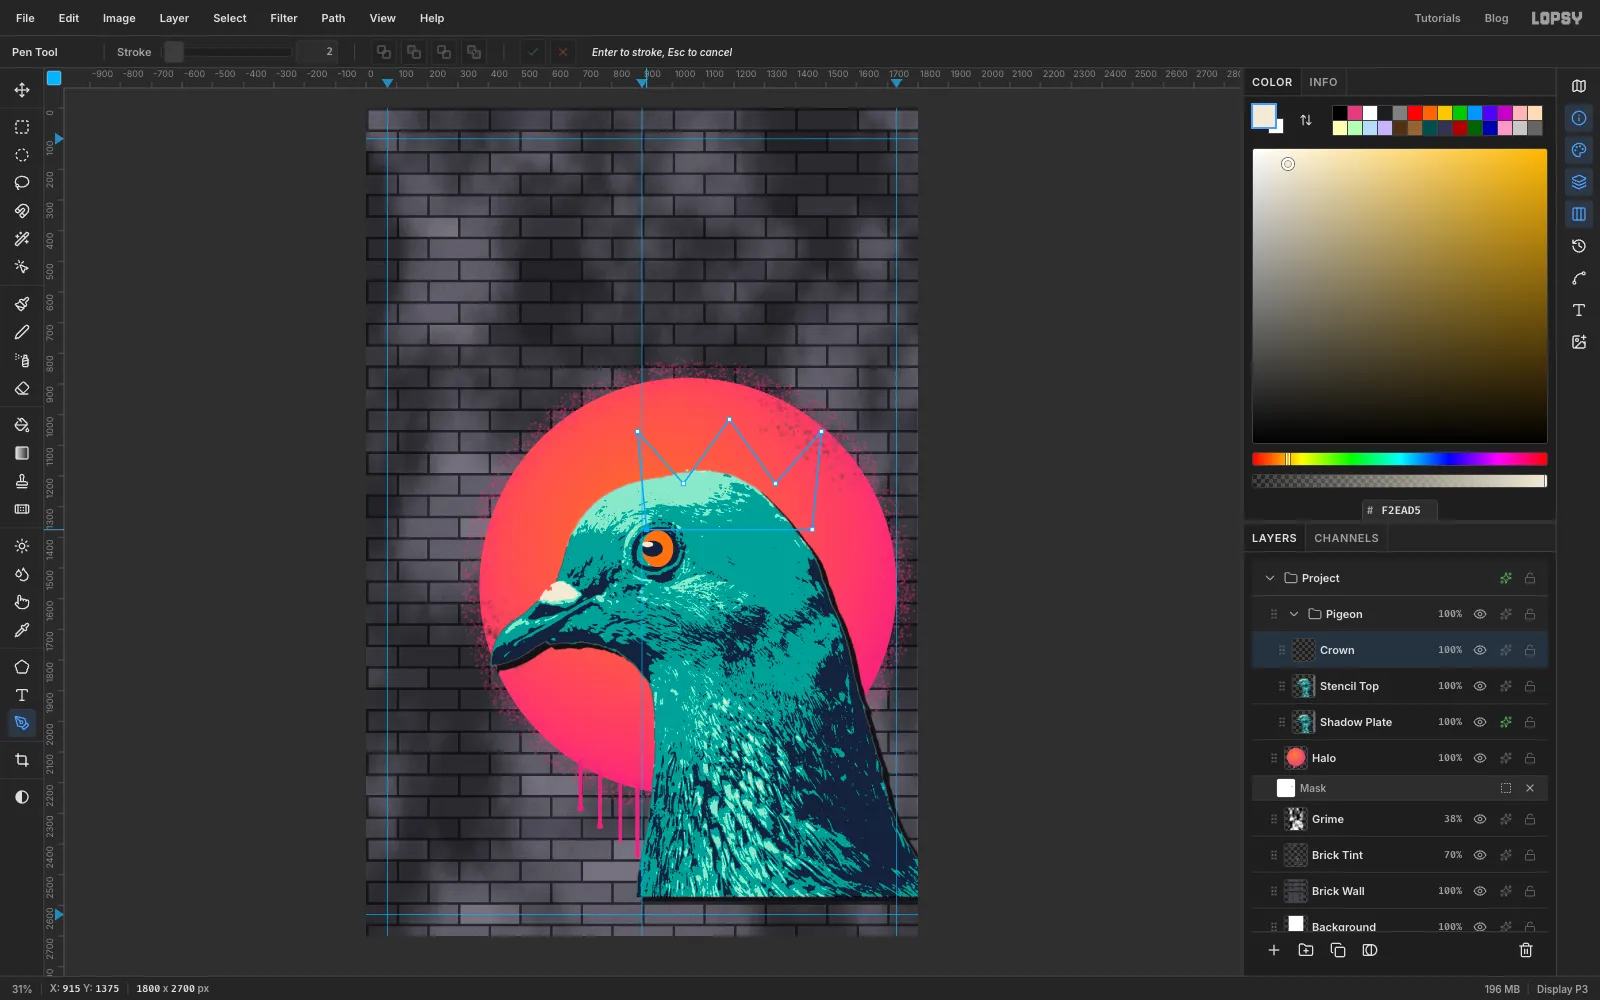
Click Stencil Top and add a layer called Crown. Pick the Pen tool and click seven corner points, then click the first point again to close the path. Working clockwise from the bottom left:
- the bottom-left corner, just above the pigeon's forehead
- up and slightly out to the left for the first point
- down to the first dip
- up to the tall middle point
- down to the second dip
- up and slightly out to the right for the third point
- the bottom-right corner, level with the first
Make it about 540 px wide and 360 px tall. Open the Paths panel, click Path to Selection, and then Delete Path.
-
Fill the crown and add jewels
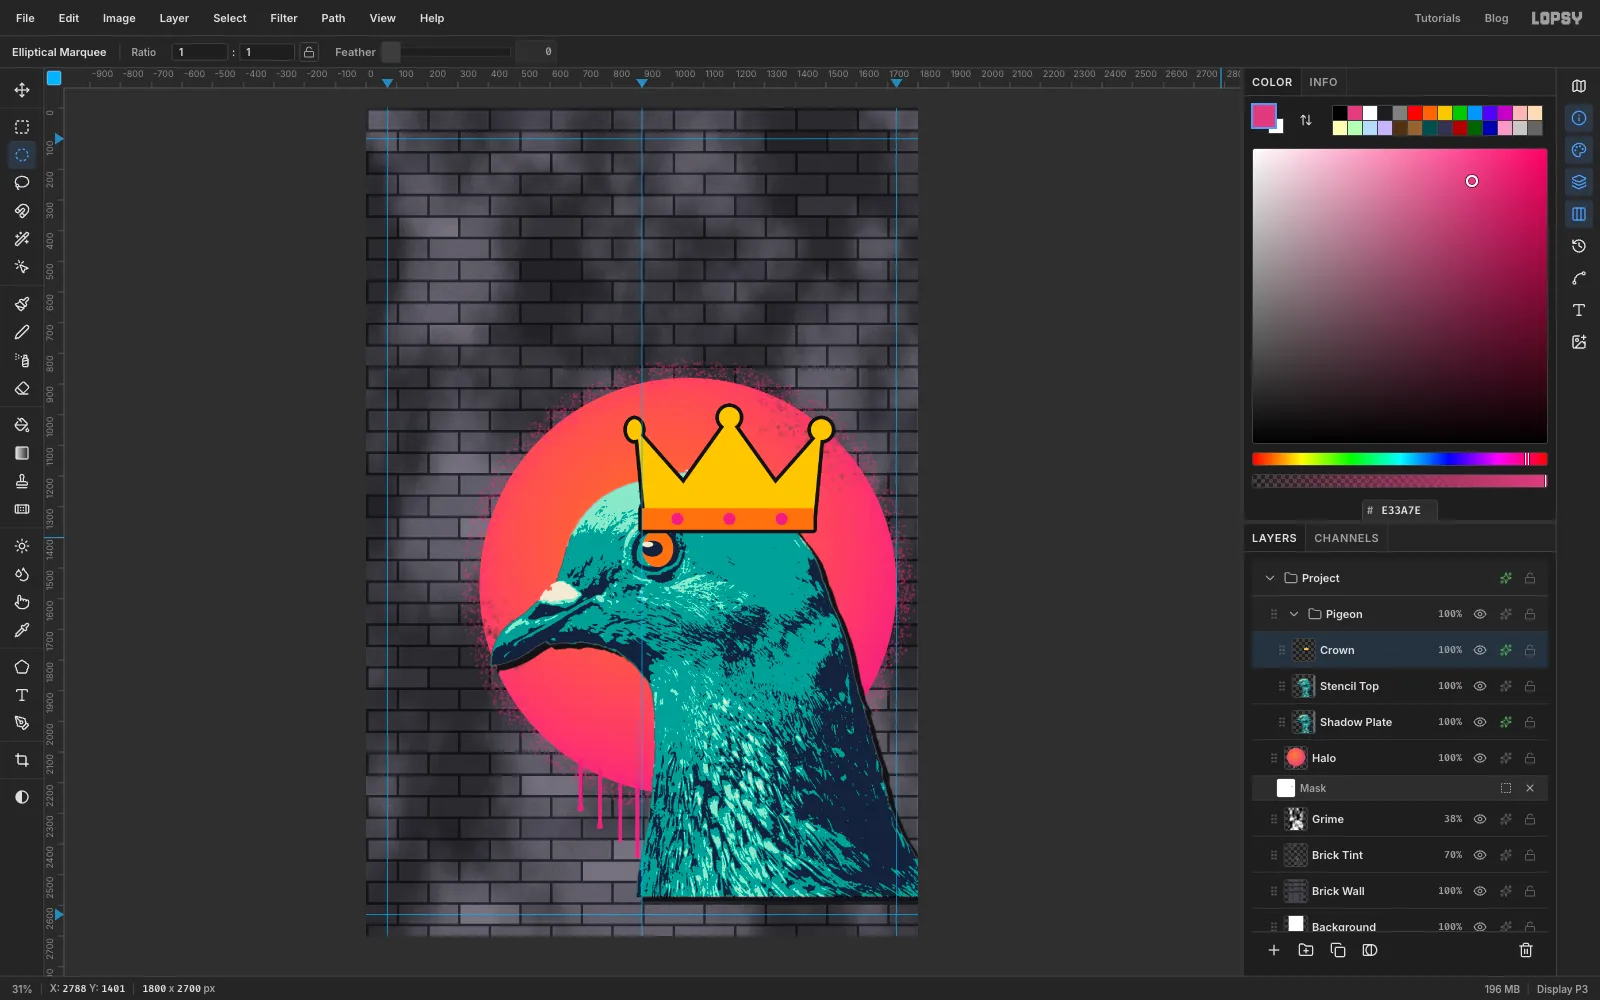
Set the foreground to gold and choose Edit → Fill. Deselect, then add the details:
- a Rectangular Marquee strip about 70 px tall across the bottom of the crown, filled orange , for the band. If its ends poke a few pixels past the crown's slanted sides, the outline you add next covers them.
- a circle about 68 px across on each of the three points, filled gold, for the beads
- three circles about 40 px across along the band, filled pink , for the jewels
Open the layer's effects, turn on Stroke and set Width to 12 in ink .
-
Tip the crown
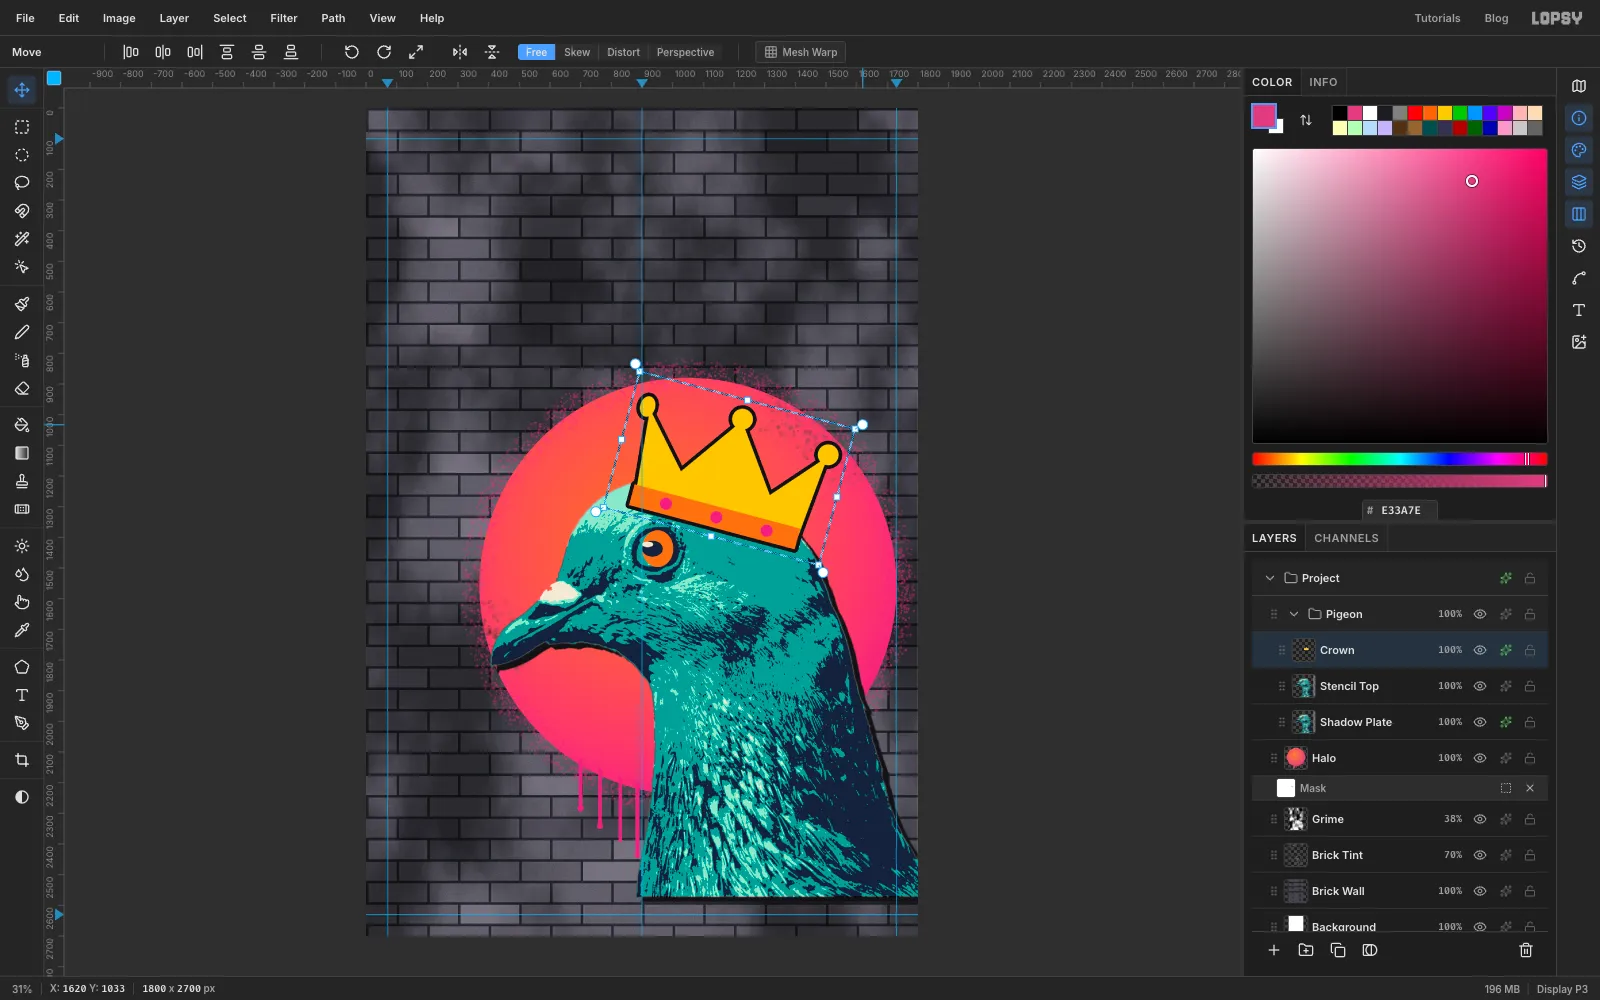
A crown sitting dead level looks stuck on. Drag a Rectangular Marquee around the whole crown with a little room to spare, and switch to the Move tool. Grab the round rotation handle just outside the top-right corner of the box and drag it clockwise about 15°, so the crown tips back with the slope of the head. Press Cmd+D to commit.
-
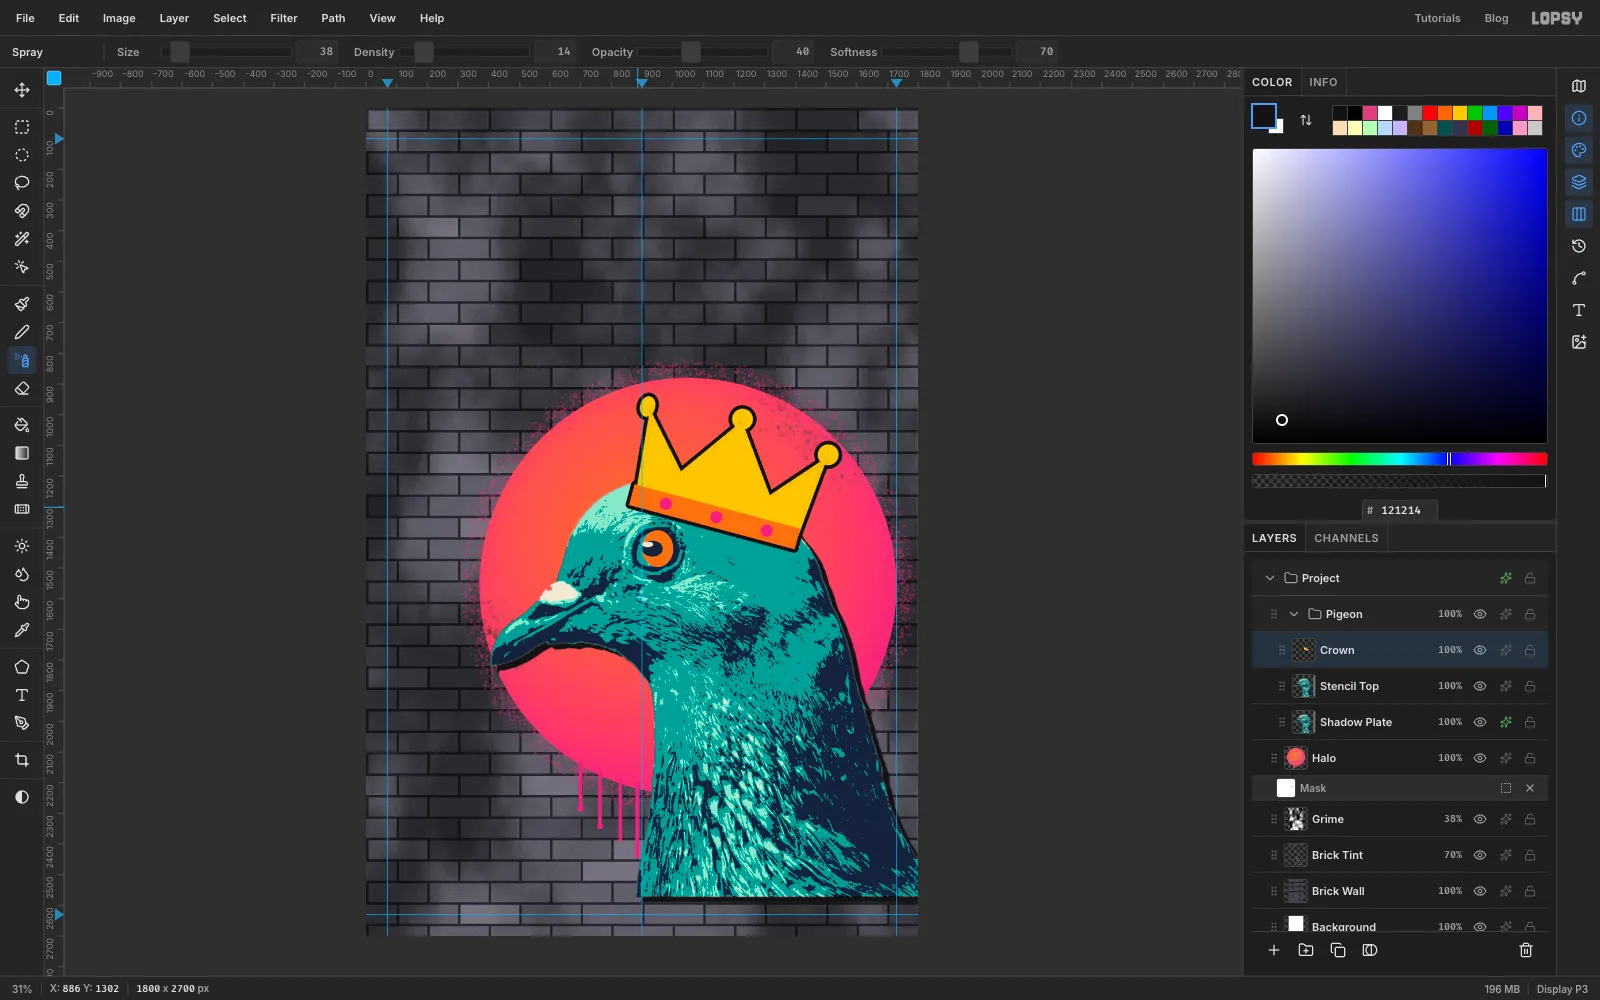
Rough up the crown
The crown is still too clean next to the gritty stencil. Open its effects and click Rasterize Layer Style to bake the outline into the pixels. Then choose Filter → Add Noise…, pick Mono, set Amount to 16 and click Apply.
Finally pick the Spray with ink , Size 38, Density 14 and Opacity 40. Trace once around the crown's outline so a little black mist breaks up the hard edge.
-
Set the title in Knewave
Click Halo and click New Group. Name the group Title. Because the group sits under Pigeon, the crown can overlap the title later.
One rule to know before you set any type: if a text layer is selected, changing the Text options restyles that layer. So before you start a new piece of text, click a plain (non-text) layer first.
Pick the Text tool and set:
- Font to Knewave
- Size to 430
- colour to gold
Click near the top left of the canvas, type
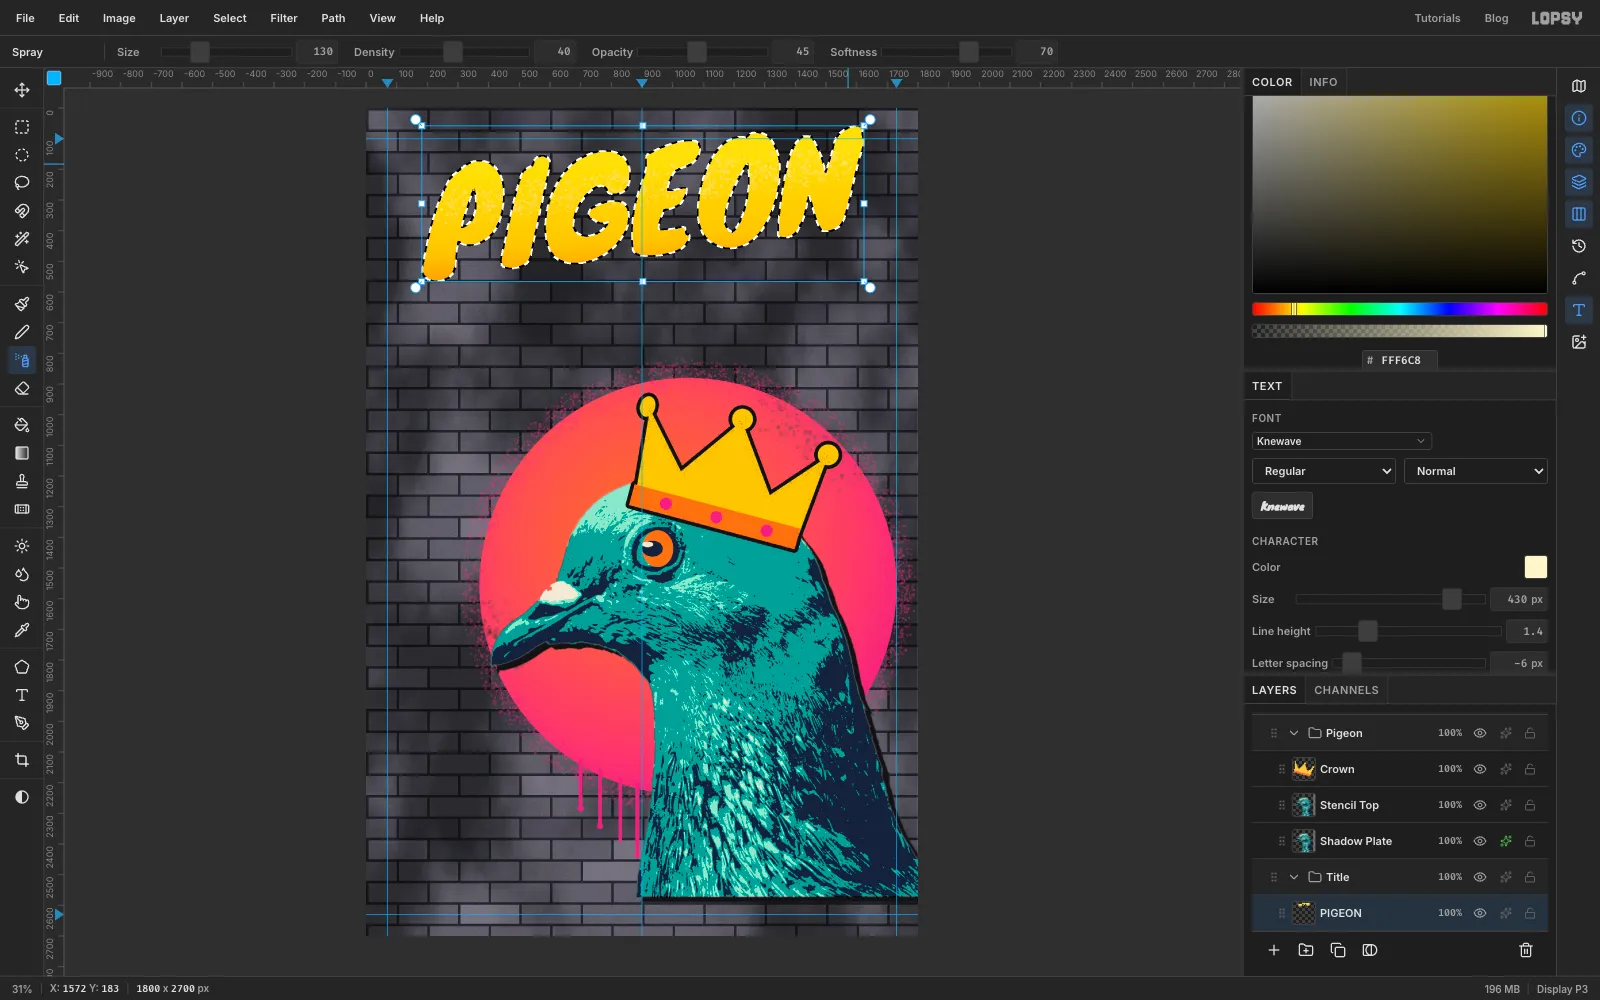
PIGEONand press Tab to commit. Rename the layer PIGEON. In the Text panel, set Letter spacing to −6 to pull the letters together. Then use the Move tool and the arrow keys to centre the word on the middle guide, with the tops of the letters about 115 px from the top of the canvas. The screenshot shows the word just after typing, before it's centred.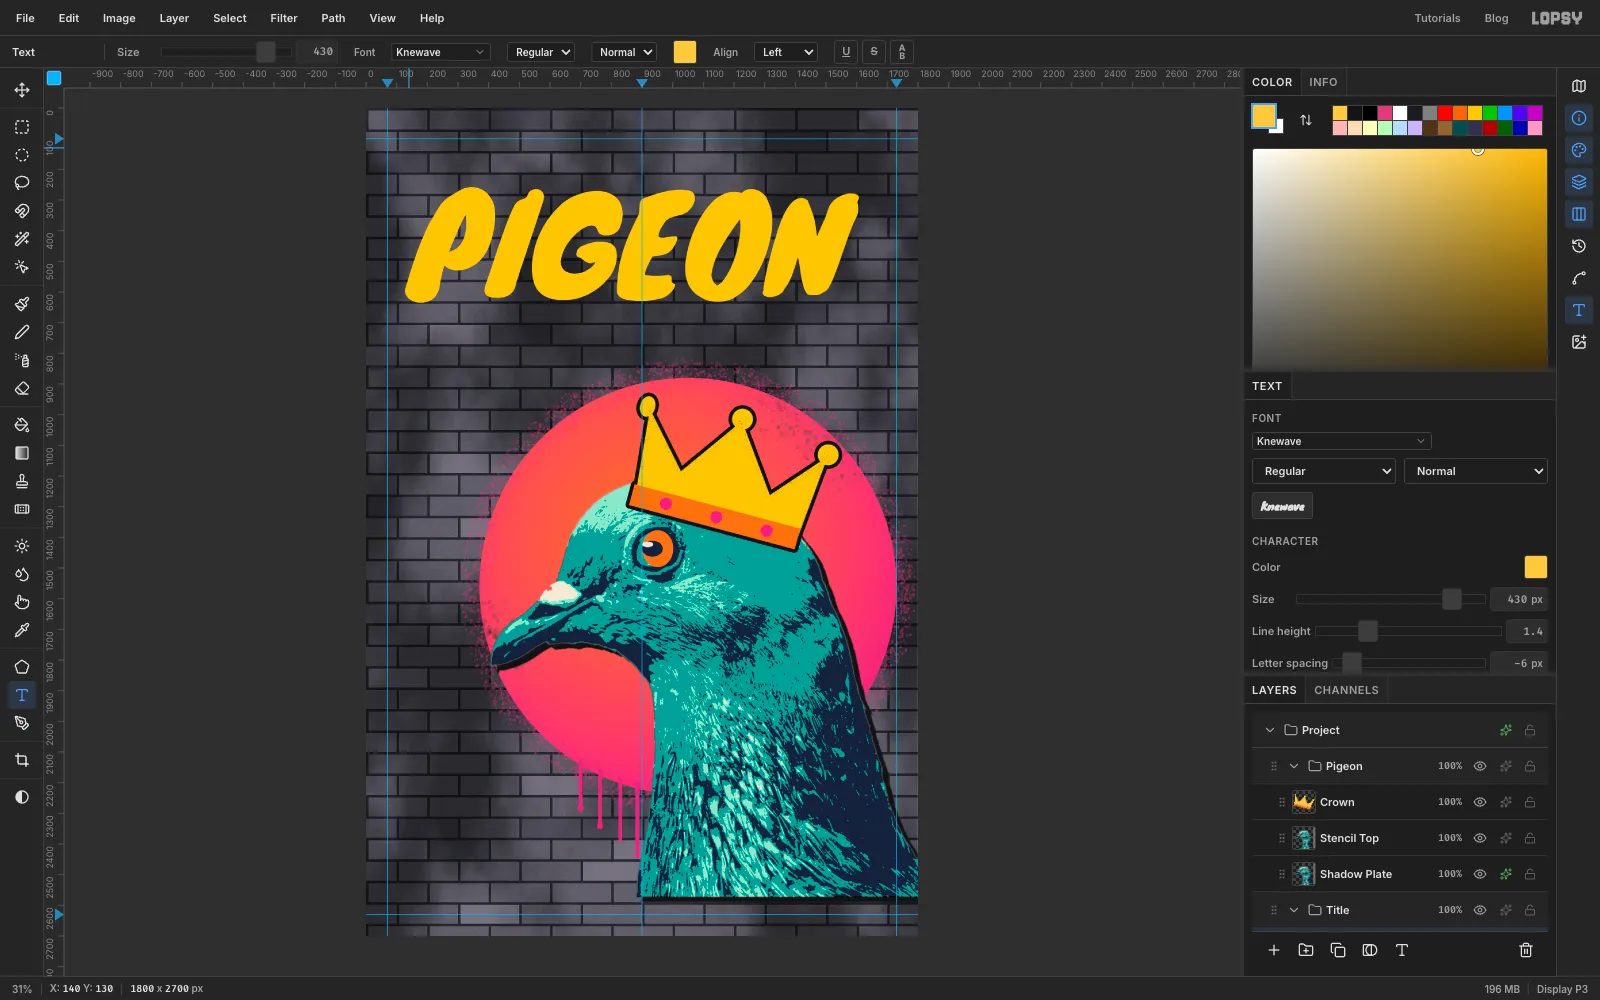
-
Rotate the live text
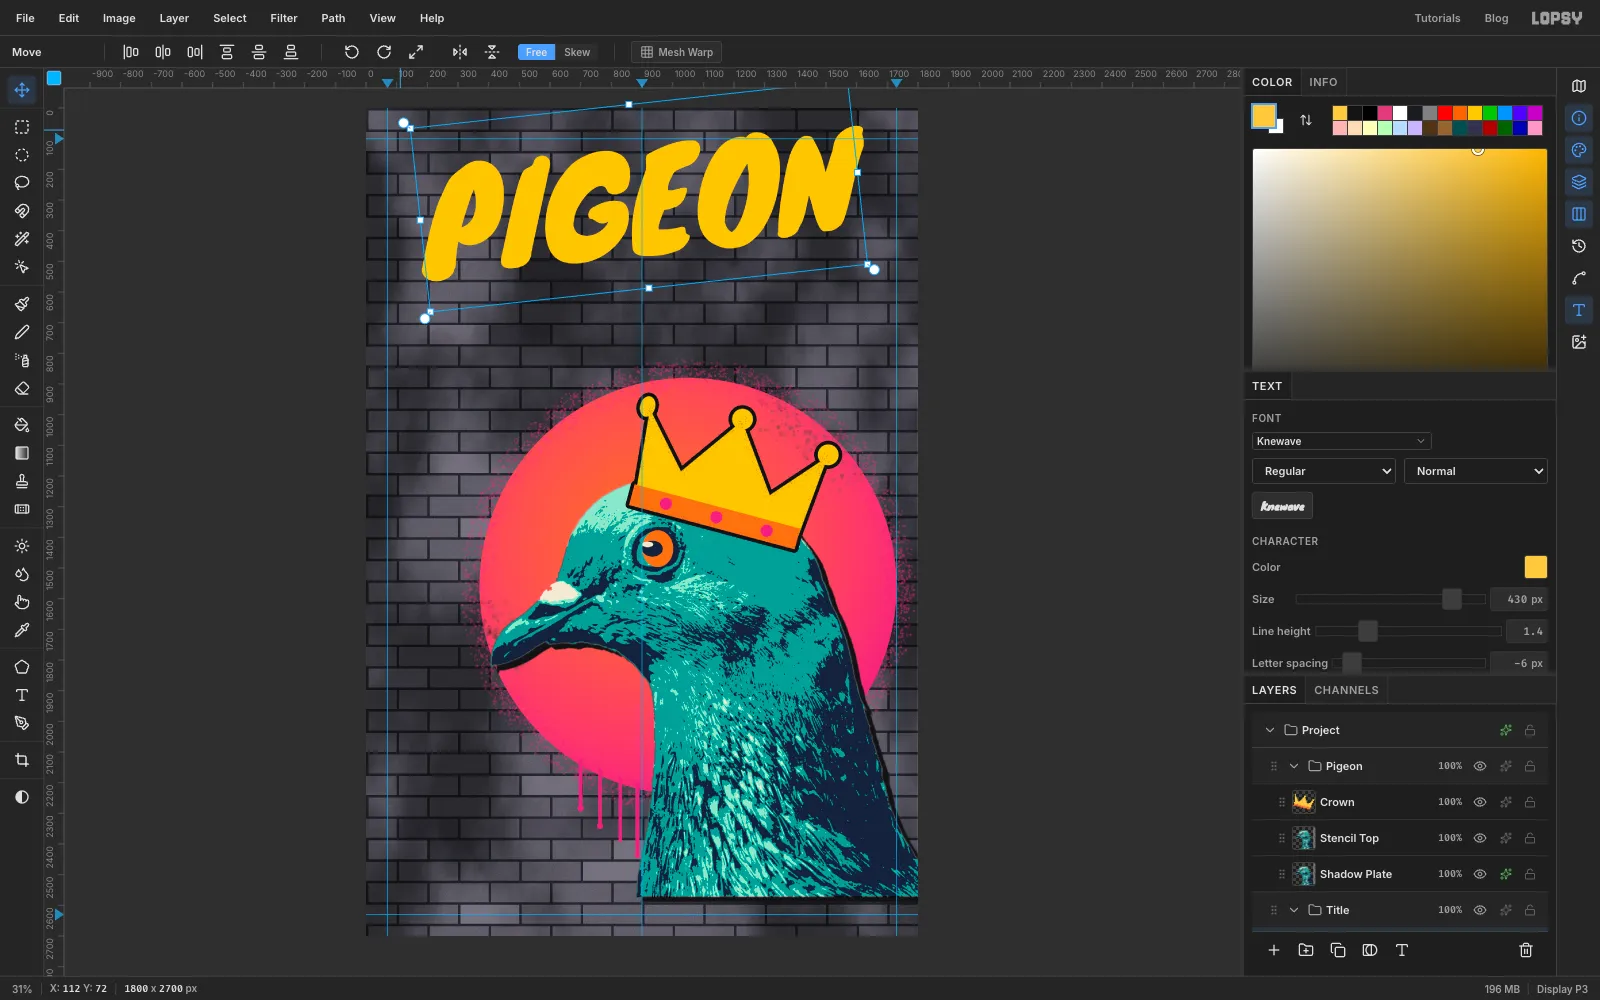
With the Move tool still active, hover just outside the top-left corner of the text box until the cursor turns into a crosshair. That's the rotation handle. Drag it a little down and to the left to rotate the word about 6° counter-clockwise, so it climbs to the right. The text stays editable while you rotate it.
-
Fill the title with a gradient
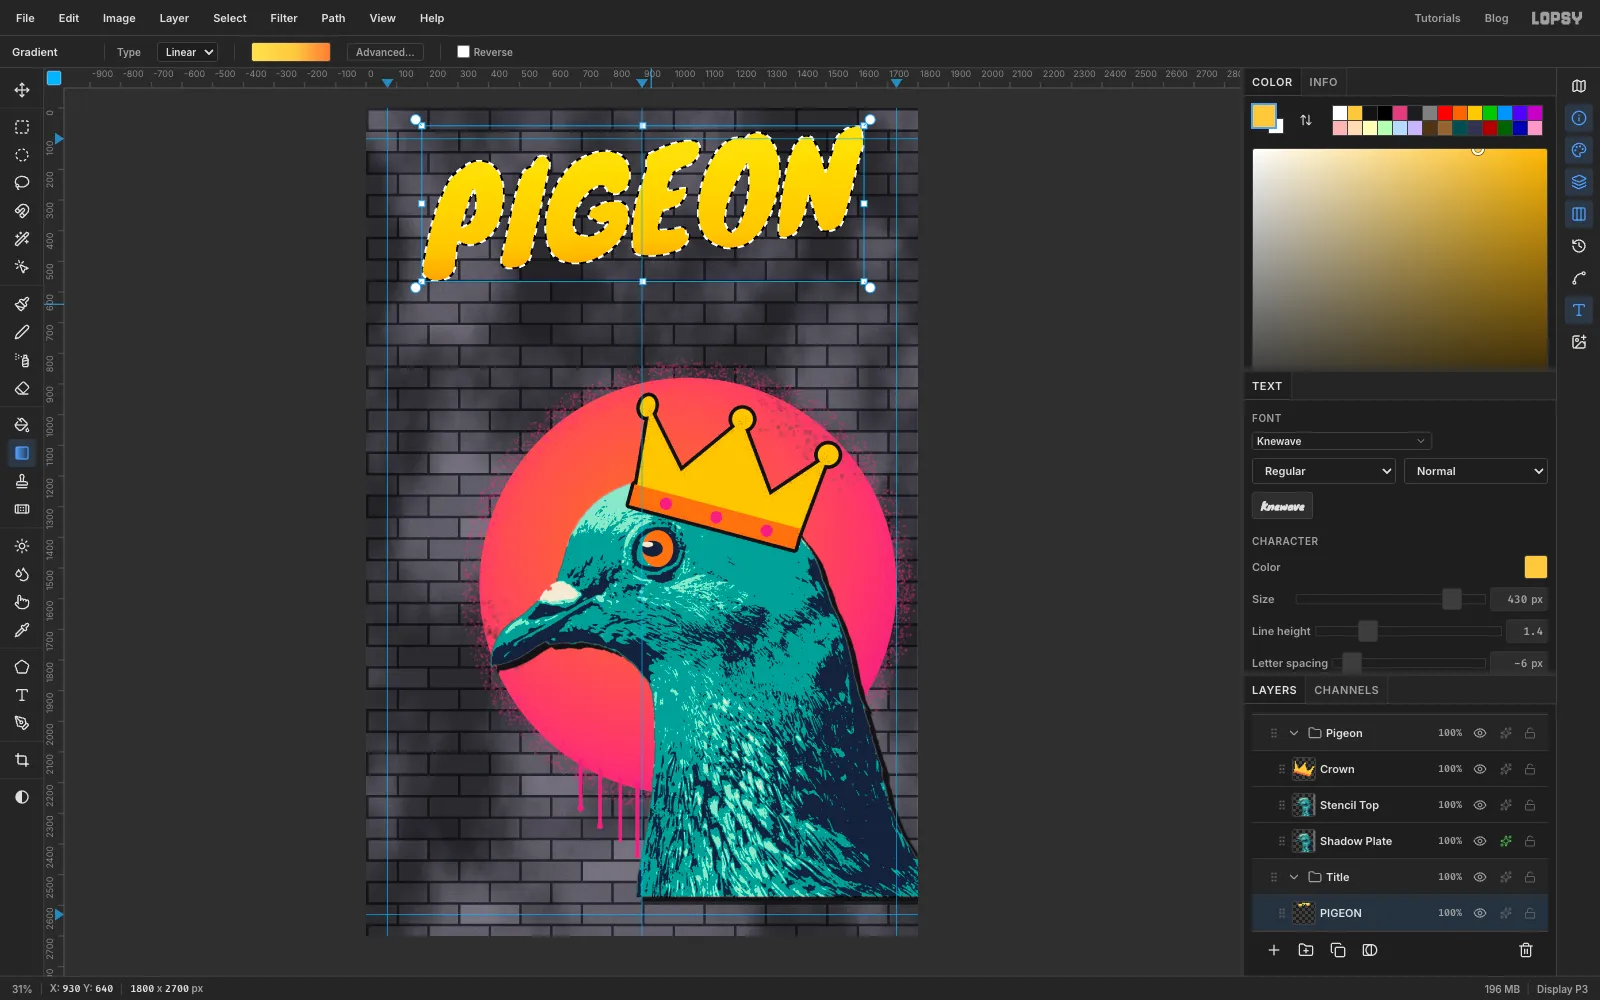
Check the spelling and spacing one last time, because the next click turns the text into pixels. Click the Rasterize Layer button (the T icon) at the bottom of the Layers panel. Then Cmd-click the layer's thumbnail to load the letters as a selection.
Pick the Gradient tool, set Type to Linear, and in Advanced… set three stops: , gold about halfway along, and orange . Drag from the top of the letters straight down to their bottom.
-
Spray a highlight across the letters
Graffiti fills usually have a sprayed highlight rather than a clean gloss. Keep the selection, pick the Spray, and set the foreground to . Set Size to 130, Density to 40 and Opacity to 45. Make one pass from left to right across the upper third of the letters, following their tilt. The selection keeps the paint inside the letters. Press Cmd+D.
-
Outline the title and drop its shadow
Open the layer's effects and turn on:
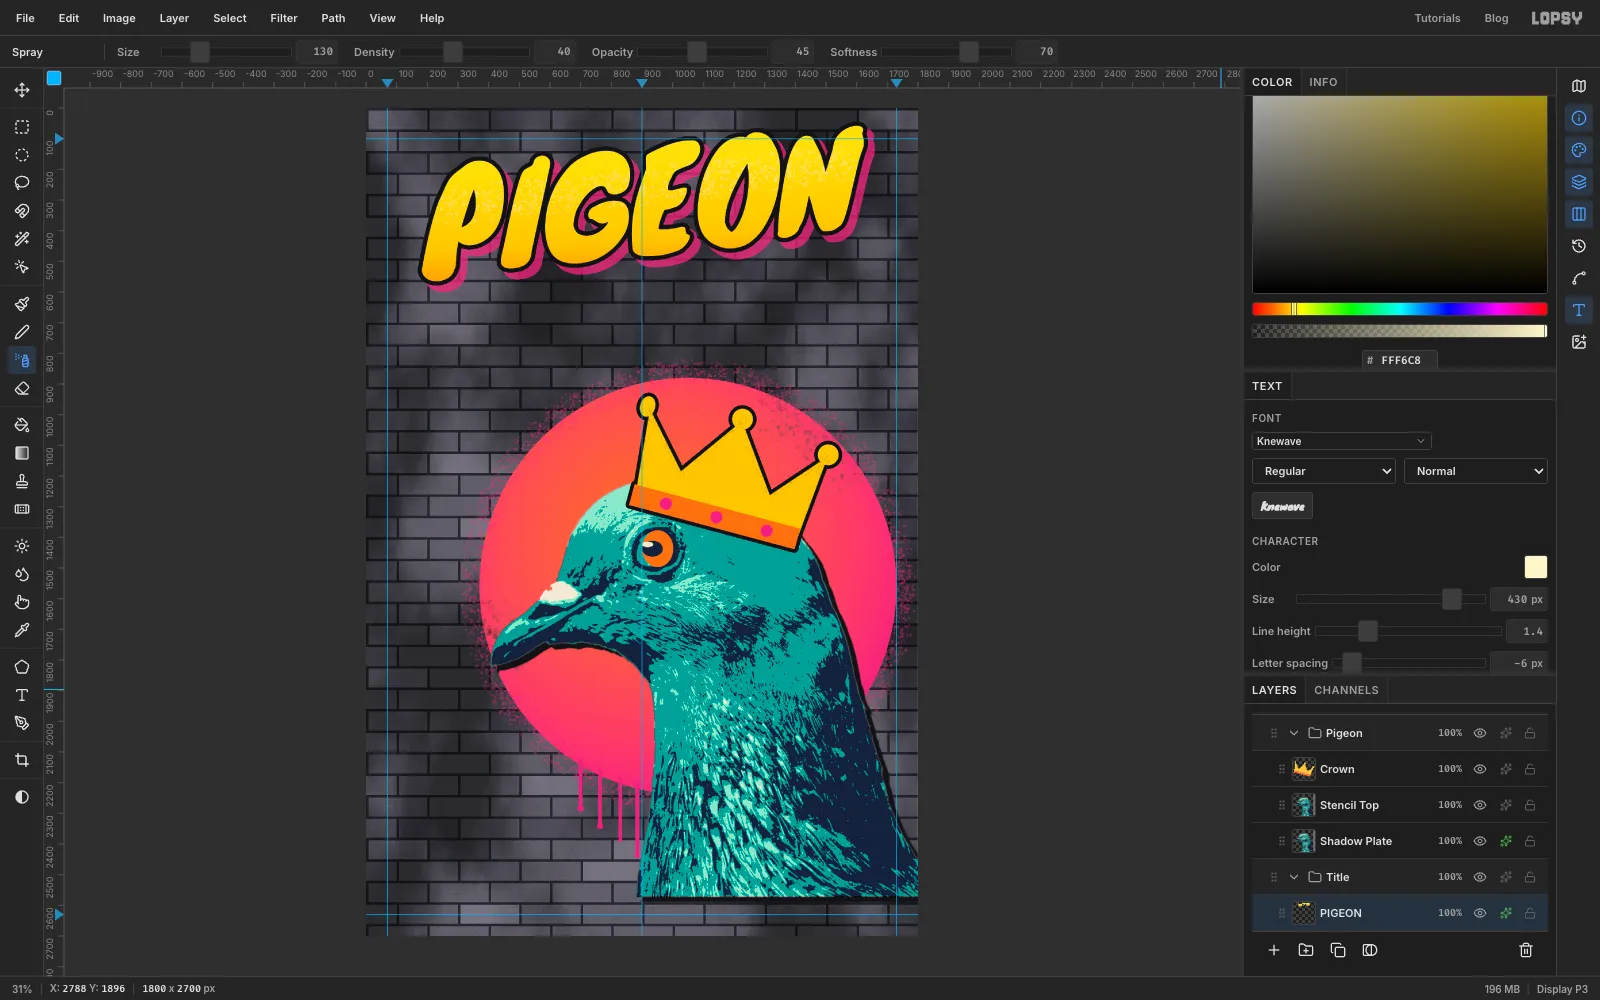
- Stroke: Width 14 in ink
- Drop Shadow: Offset X 22, Offset Y 22, Blur 0, Spread 0, Opacity 75, in pink
A drop shadow with no blur reads as a solid block of a second colour, like a classic piece.
-
Add COUP in dripping letters
PIGEON is pixels now, so with its layer selected you can safely set up new text. Pick the Text tool and set:
- Font to Rubik Wet Paint
- Size to 440
- colour to cream
Click below the title, type
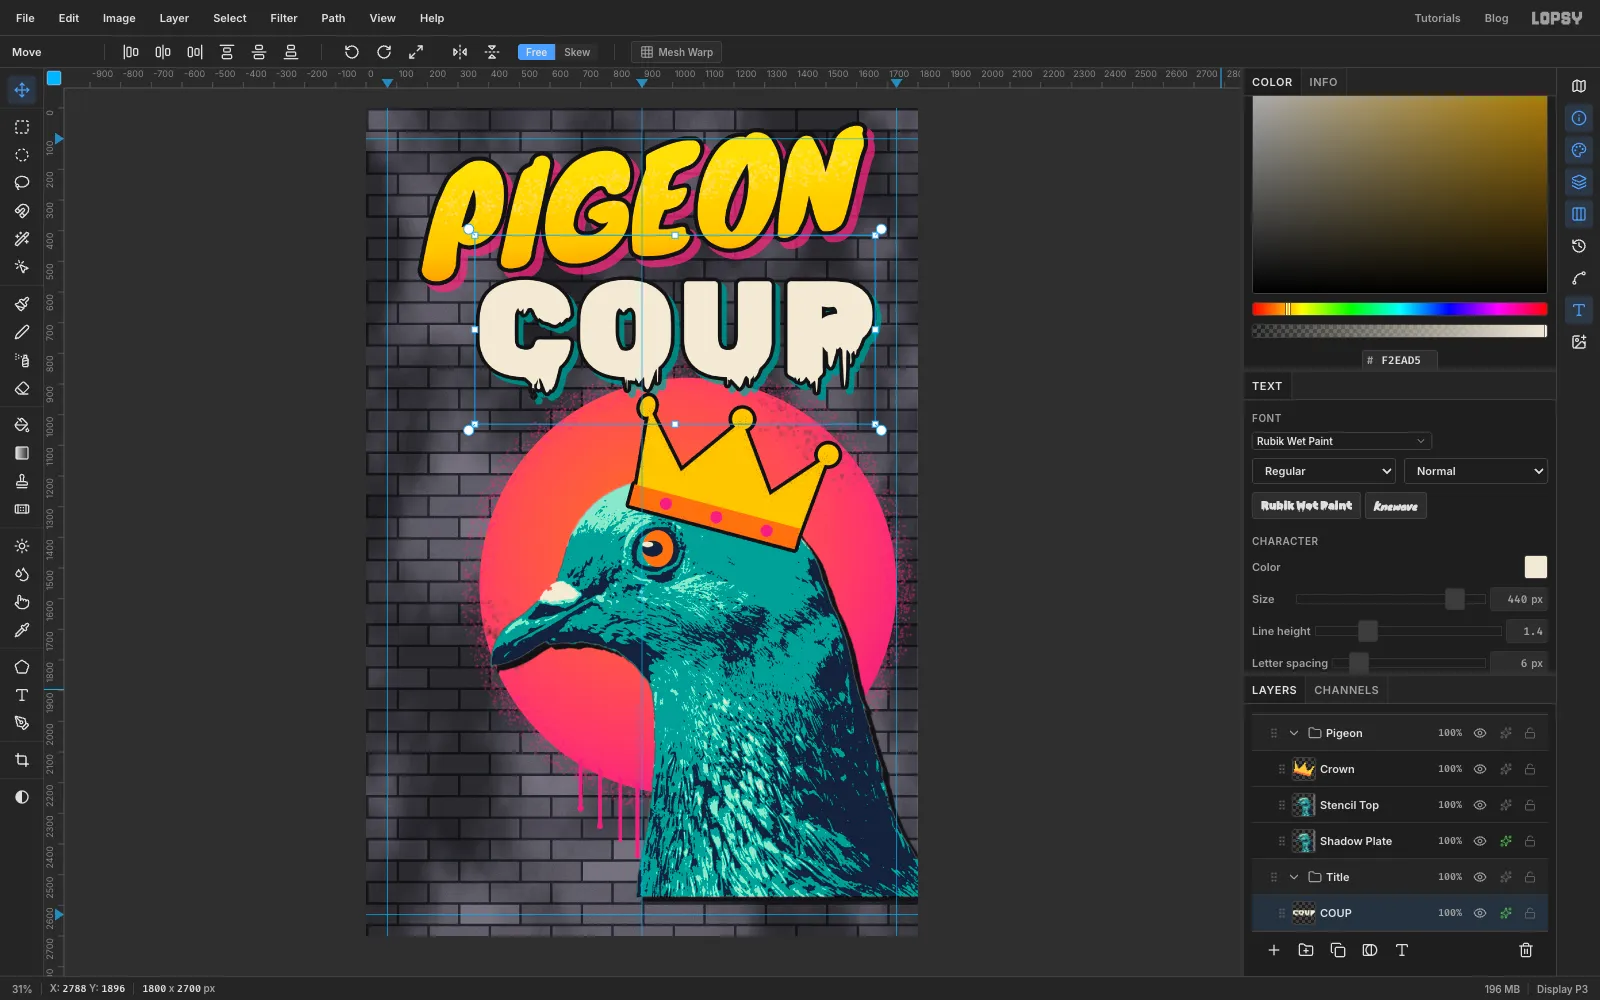
COUPand press Tab. Rename the layer COUP and set Letter spacing to 6. Nudge it so its top tucks about 10 px into the bottom of PIGEON and its centre sits a little right of the middle guide. That way the tilt of PIGEON and the flat COUP lock together.Give it a Stroke of 12 in ink and a Drop Shadow with Offset X 16, Offset Y 16, Blur 0 and Opacity 75 in teal .
-
Trim the drip that looks like a cedilla
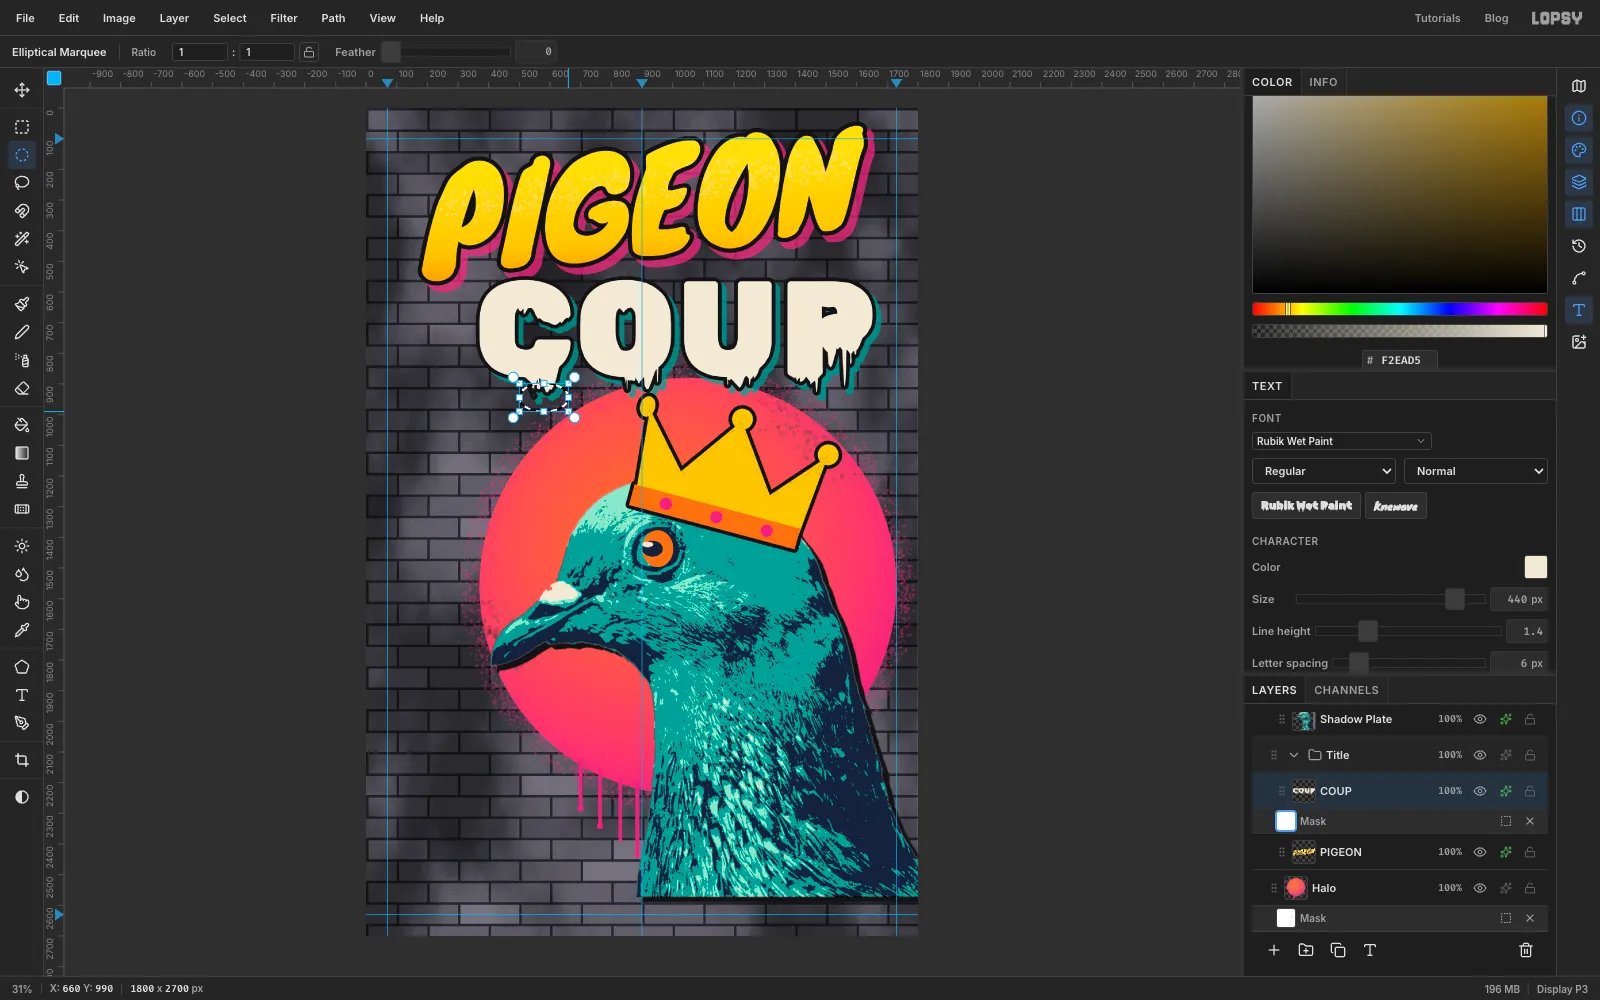
The drip under the bowl of the C makes the word read like "ÇOUP". You can hide it without rasterizing the text.
Click Add Mask, then click the mask thumbnail to edit it. Draw a small Elliptical Marquee around that one drip, set the foreground to black and choose Edit → Fill. Press Cmd+D, then click the COUP layer's name to stop editing the mask. The text and its outline stay live.
-
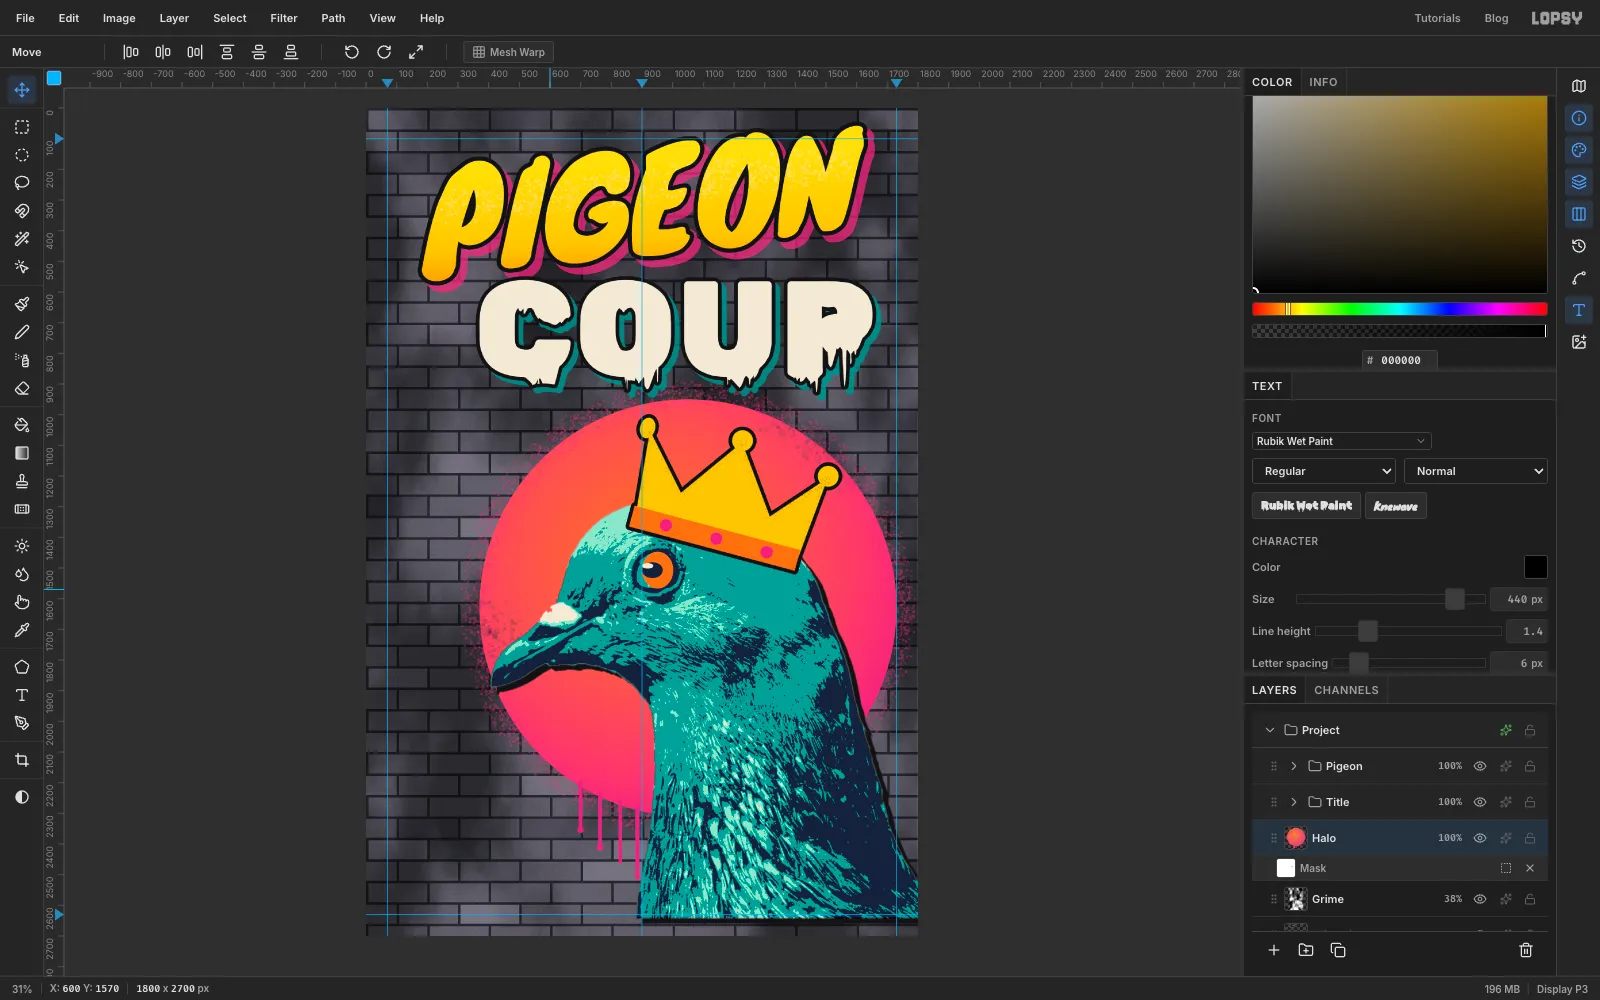
Move the whole pigeon as a group
The crown is crowding the bottom of COUP. Collapse the Title and Pigeon groups with their arrows. Then click the Pigeon group row, pick the Move tool, and drag straight down on the canvas by about 70 px. Watch the Y value in the status bar as you drag. The stencil, the shadow plate and the crown all move together.
Click Halo and drag it down by the same amount, so the disc stays centred behind the head.
-
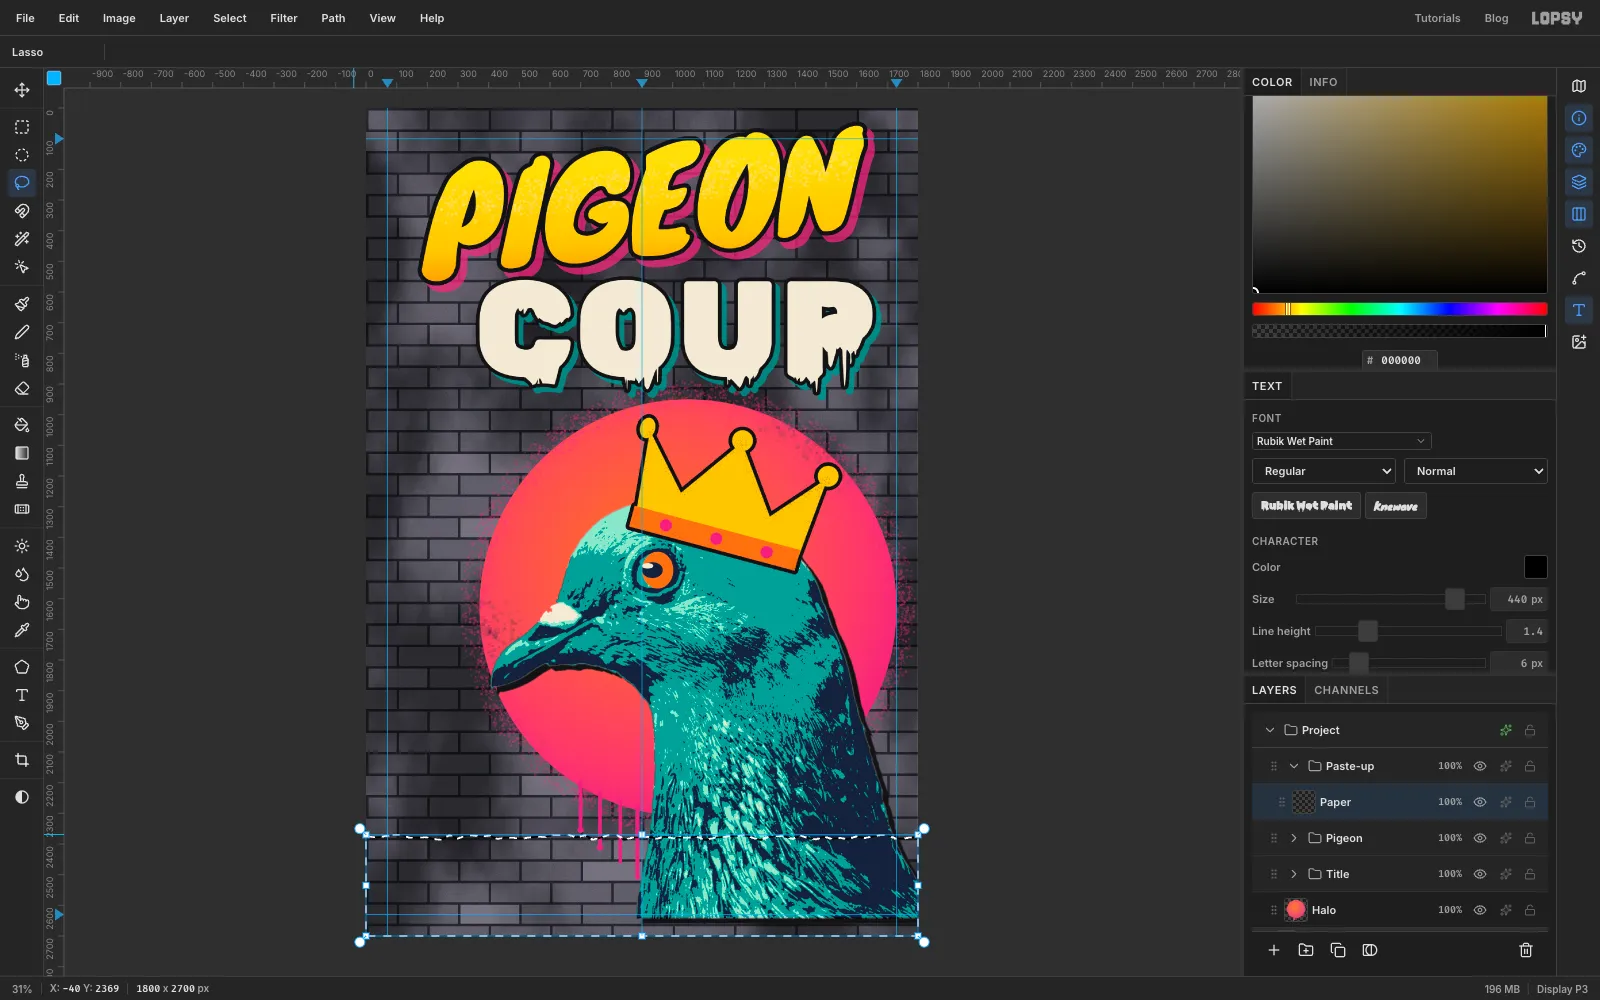
Tear a strip of paper
The event details go on a wheatpasted paper flyer. Click the collapsed Pigeon group and click New Group. Name the group Paste-up and add a layer inside it called Paper.
Pick the Lasso. Start just off the left edge of the canvas, about 320 px above the bottom. Drag across to just past the right edge in small, uneven jags to make the torn top edge. Carry on down past the bottom of the canvas, back along under it, and up to your starting point. Going off the canvas makes the paper bleed off both sides.
-
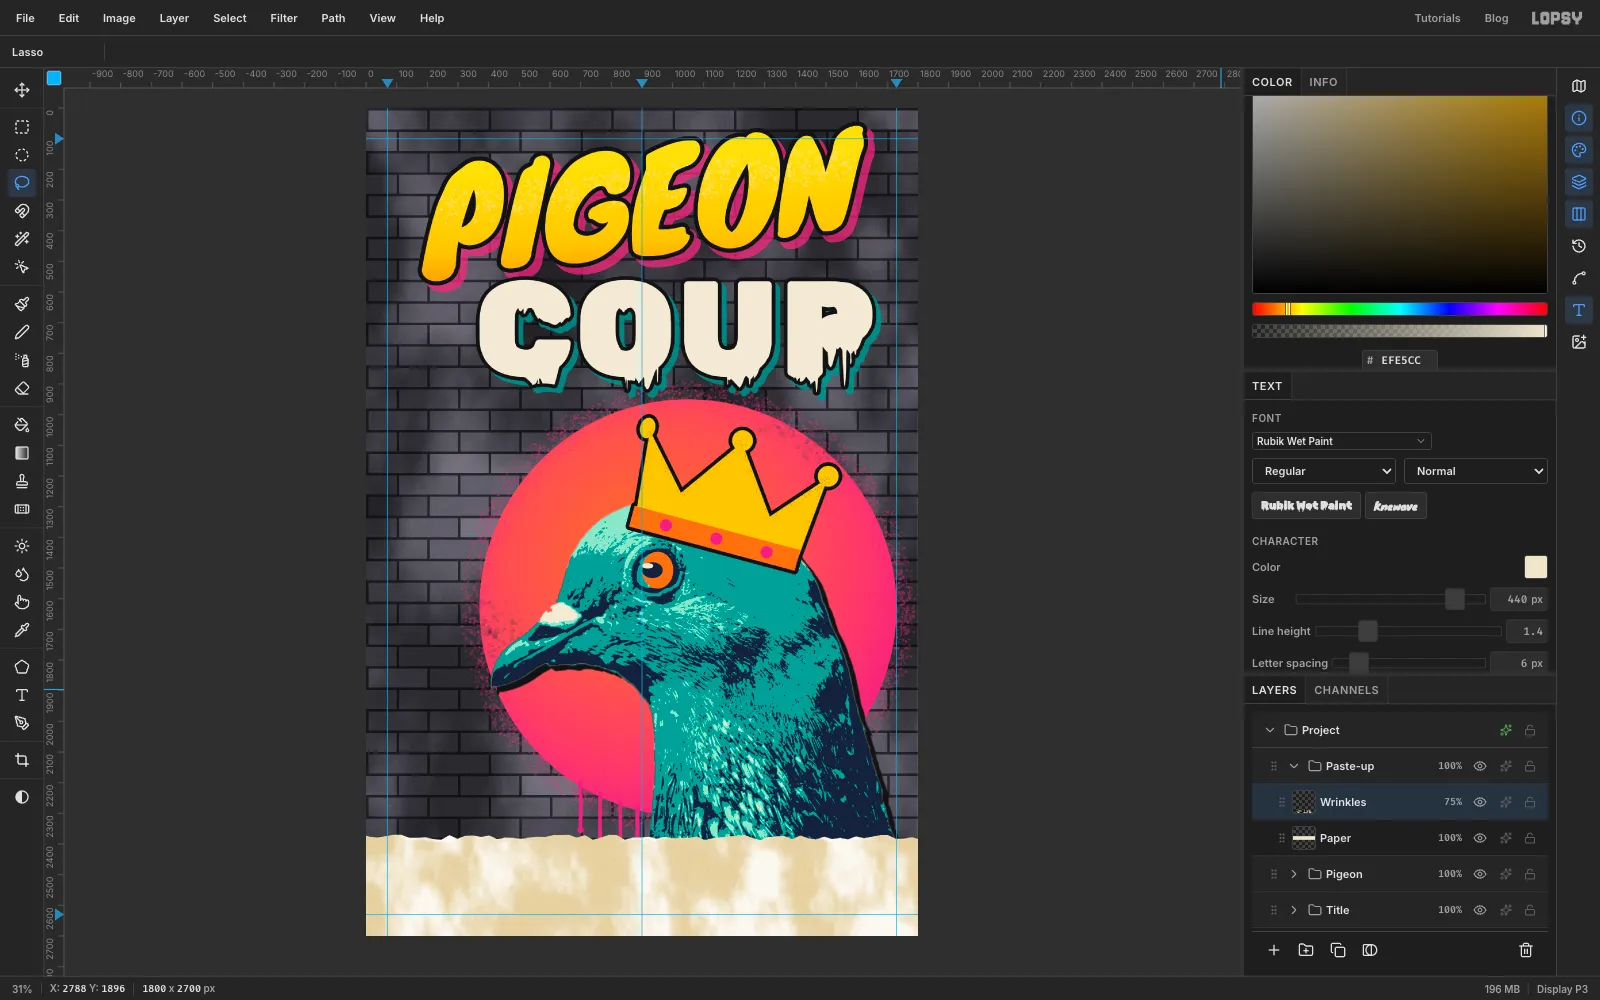
Fill the paper and wrinkle it
Fill the selection with and deselect. Then choose Filter → Add Noise…, pick Mono, set Amount to 10 and click Apply.
For the wrinkles, Cmd-click the Paper thumbnail and add a layer called Wrinkles. Choose Filter → Clouds… with Scale 14, then Filter → Emboss… with Strength 70. Deselect, then set the layer to Overlay at 75%. Wheatpaste leaves exactly this kind of blotchy, lumpy paper.
-
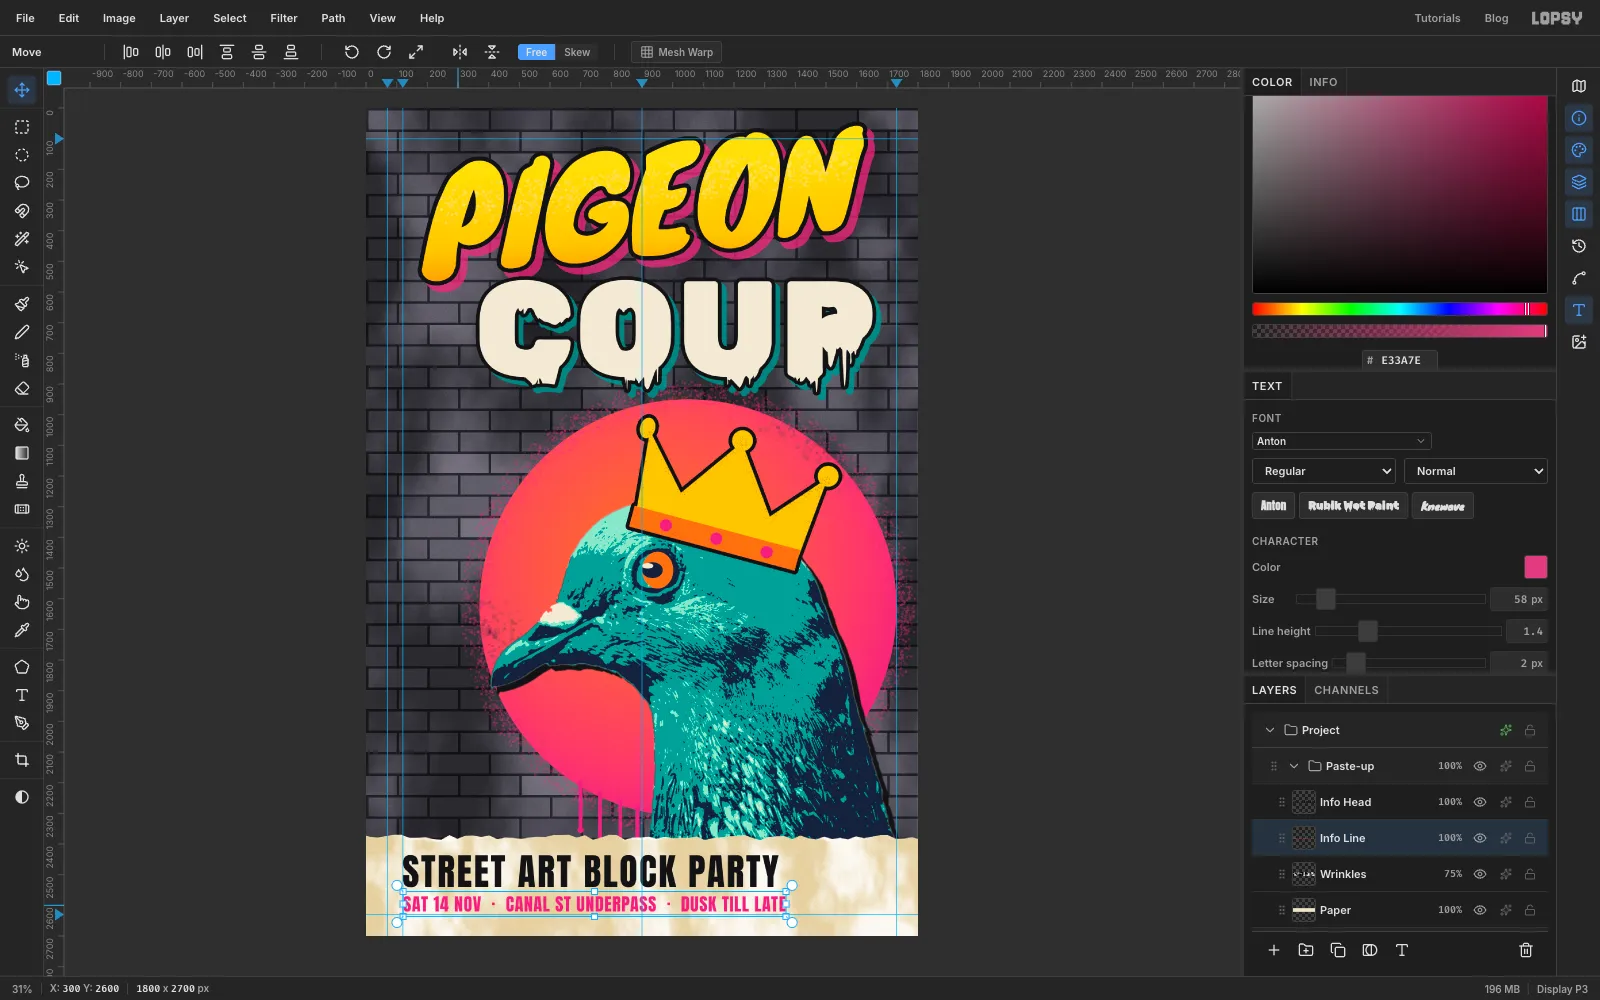
Set the event details
Click the top ruler at 120 to drop a guide for the text margin. With Wrinkles active, pick the Text tool and set Anton at 120 in ink , with Letter spacing at 6. Click in an empty part of the paper, type
STREET ART BLOCK PARTYand press Tab. Rename it Info Head and nudge it so it starts on the guide, about 60 px below the paper's torn edge.Click Wrinkles again, so the new settings don't restyle the headline. Set Anton at 58 in pink with Letter spacing 2. Click in empty paper below the headline and type the details, putting a middle dot with two spaces either side between each part. On a Mac the middle dot is Option+Shift+9.
SAT 14 NOV · CANAL ST UNDERPASS · DUSK TILL LATEPress Tab, rename the layer Info Line, and line it up on the guide about 30 px under the headline.
-
Trace a walking pigeon
The flyer gets three small stencilled pigeons. The background of the walking-pigeon photo is too close in tone to the bird for the wand, so trace it by hand.
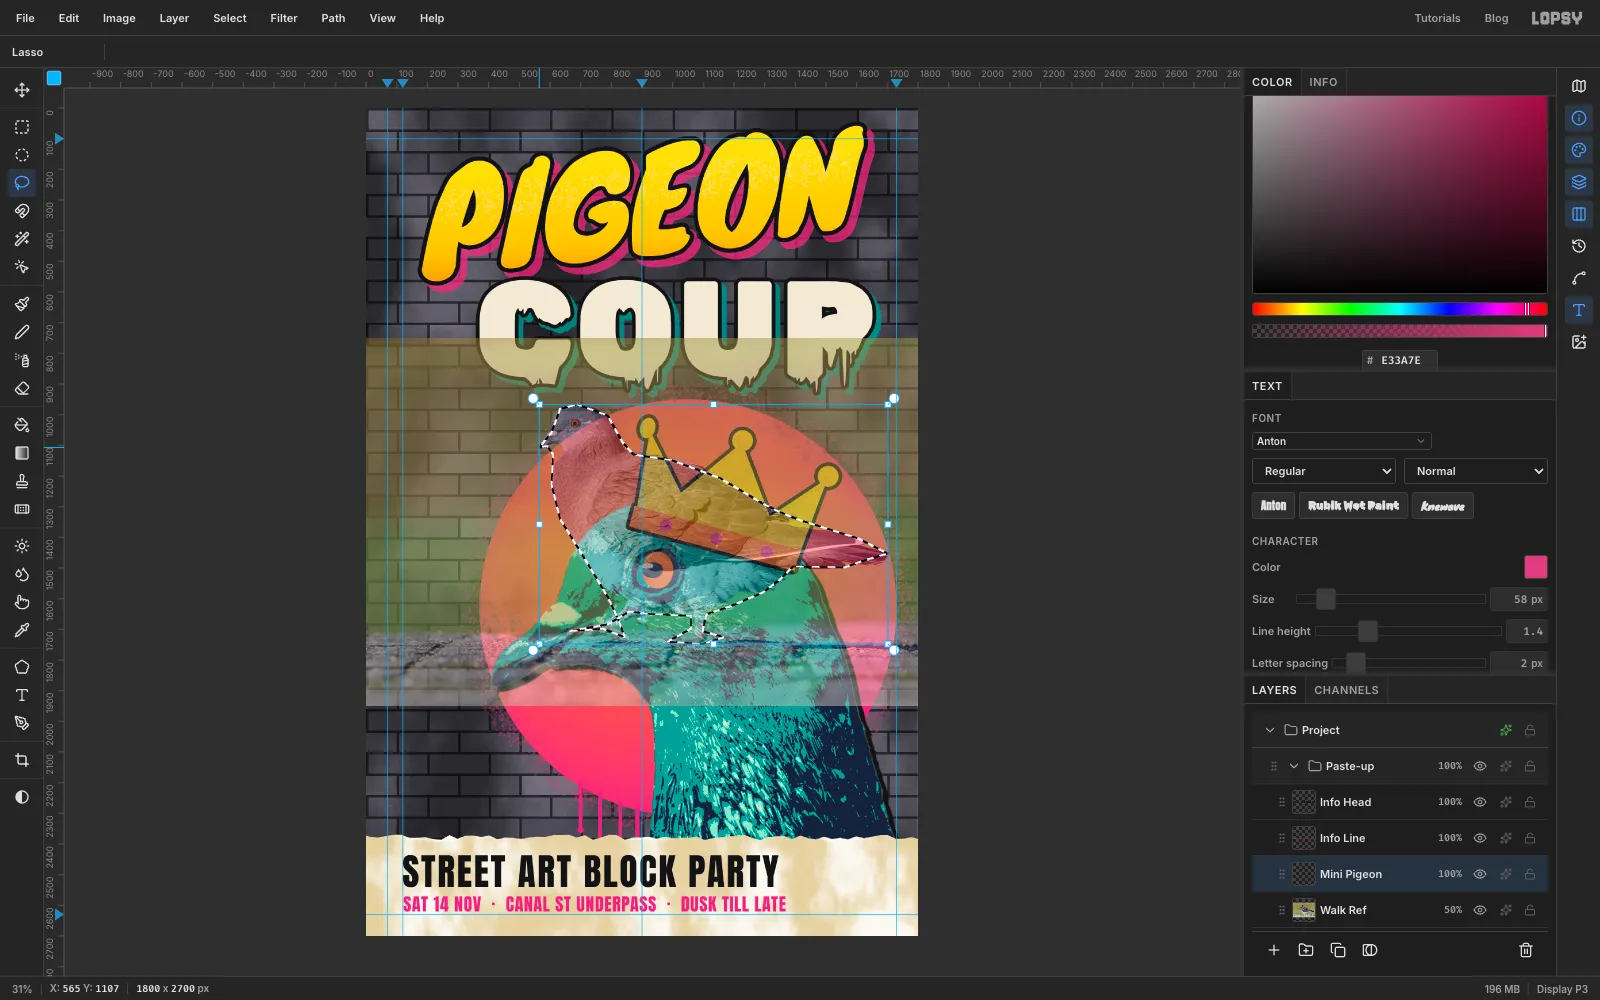
Click Wrinkles, drag the Alexis Lours photo onto the canvas and press Cmd+D. Rename it Walk Ref and set its opacity to 50%, so you can see what you're tracing. Add a layer above it called Mini Pigeon.
Pick the Lasso and trace around the bird. Go from the beak over the head, along the back to the tip of the tail, back under the tail and belly, and down and around both legs and feet, then return to the beak. You don't need every feather. A silhouette this small only needs the head, tail and legs to read.
-
Fill the silhouette and shrink it
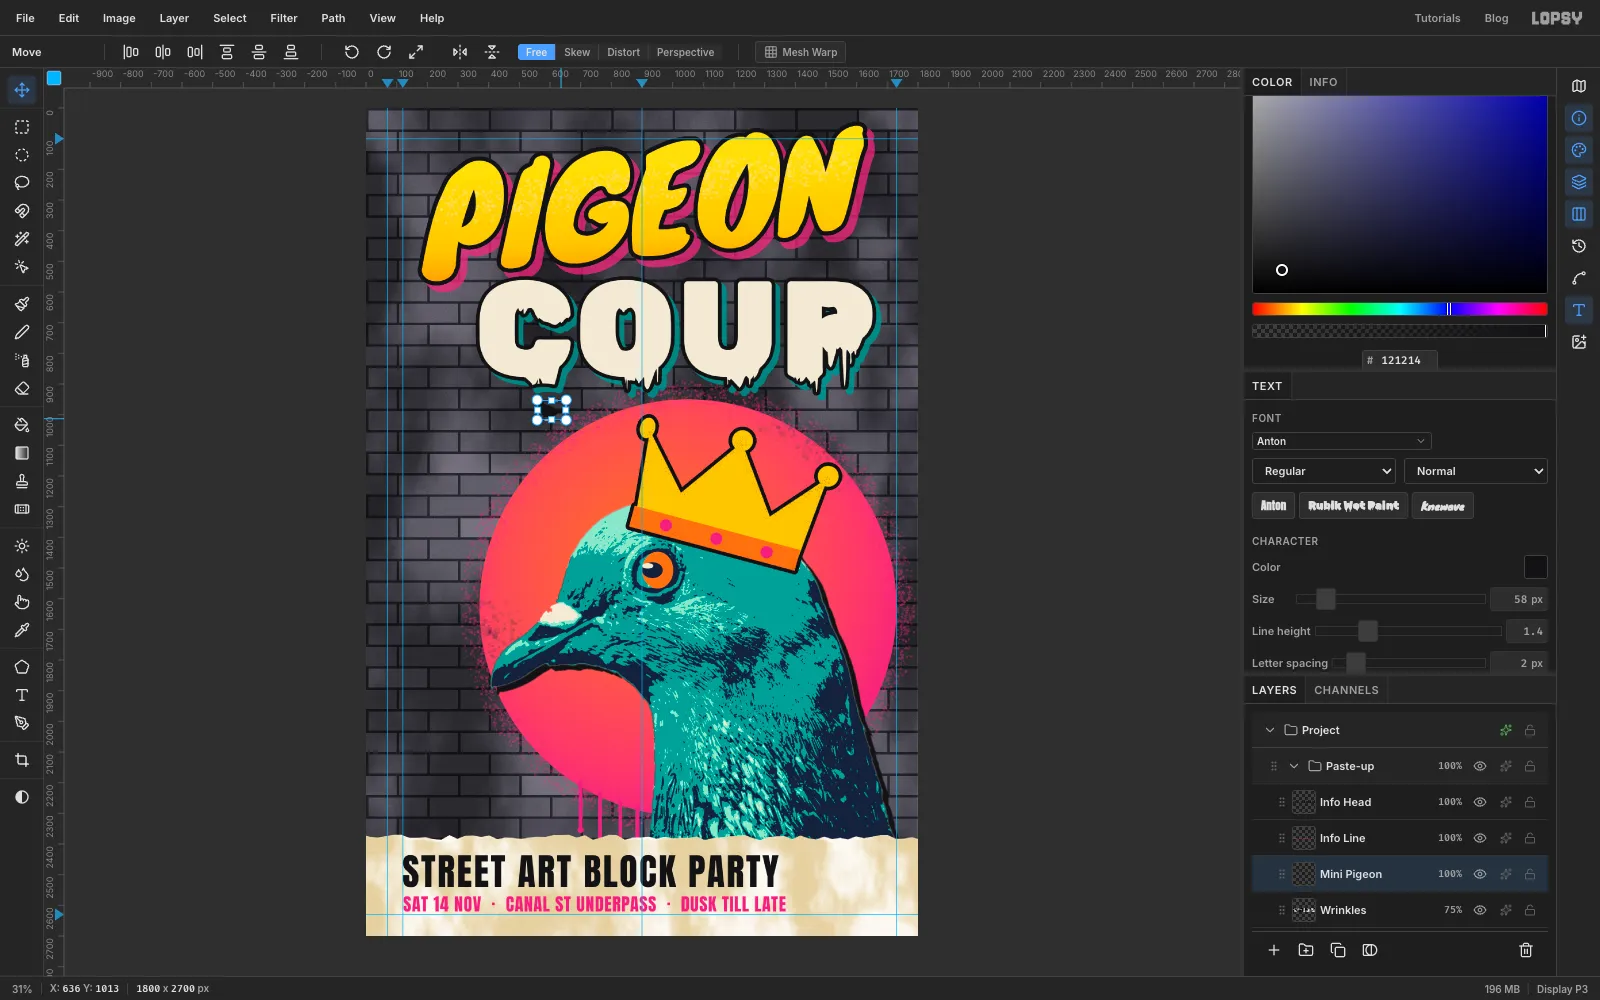
Fill the selection with ink , deselect, and delete the Walk Ref layer.
Click Mini Pigeon, drag a Rectangular Marquee around the silhouette, switch to the Move tool, and Cmd-drag the bottom-right handle in until the bird is about 80 px wide. Press Cmd+D. Then drag it with the Move tool to the right-hand end of the paper. Put its feet about level with the gap between the two lines of text, and keep it about 50 px clear of the end of the details line.
-
Copy it into a little flock
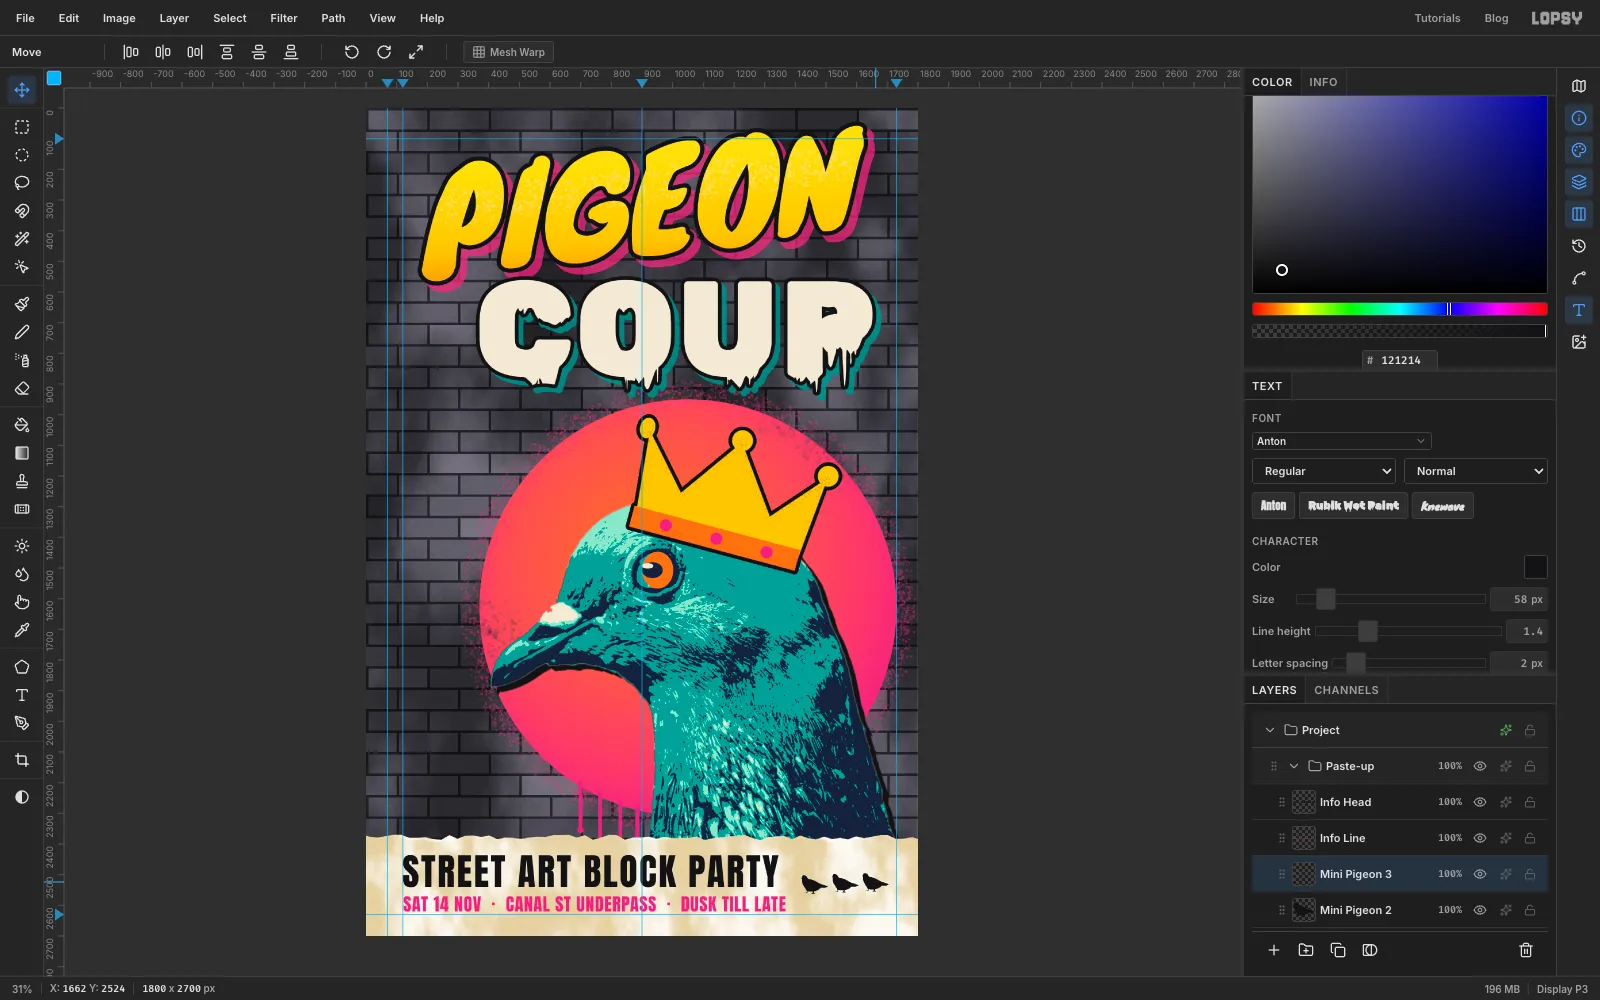
Cmd-click the Mini Pigeon thumbnail, then press Cmd+C and Cmd+V. When you paste something you copied inside Lopsy, it lands exactly where it came from, already selected. Drag it 100 px to the right and a few pixels up, then press Cmd+D and rename it Mini Pigeon 2. Do the same from the copy to make Mini Pigeon 3. Leaving a gap between each tail and the next head keeps them reading as three birds, not one blob.
-
Make a FREE ENTRY sticker
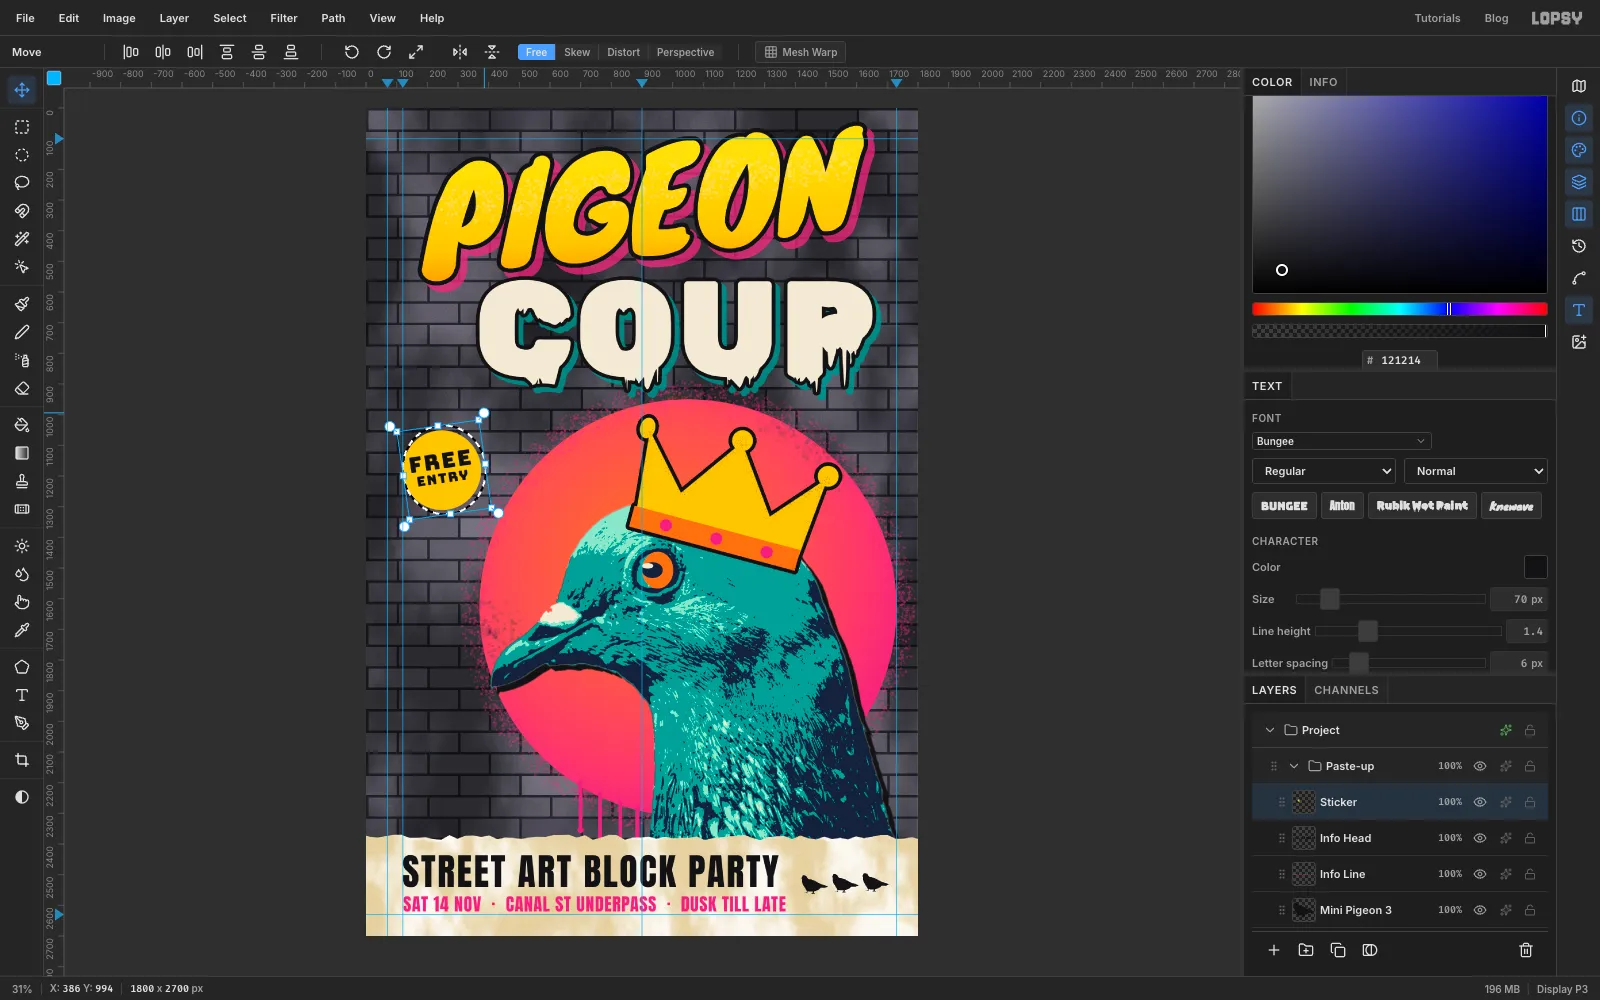
Click Info Head and add a layer called Sticker. With the Elliptical Marquee's exact-size dialog, make a circle from 115, 1050 to 375, 1310 on the empty bricks left of the disc. Fill it gold and deselect.
Pick the Text tool and set Bungee at 70 in ink. Click away from other text, type
FREEand press Tab. Nudge it so it's centred on the circle, sitting just above the middle. Click Sticker, then addENTRYin Bungee 44 with Letter spacing 4, centred just below the middle. Give both words a clear margin from the rim.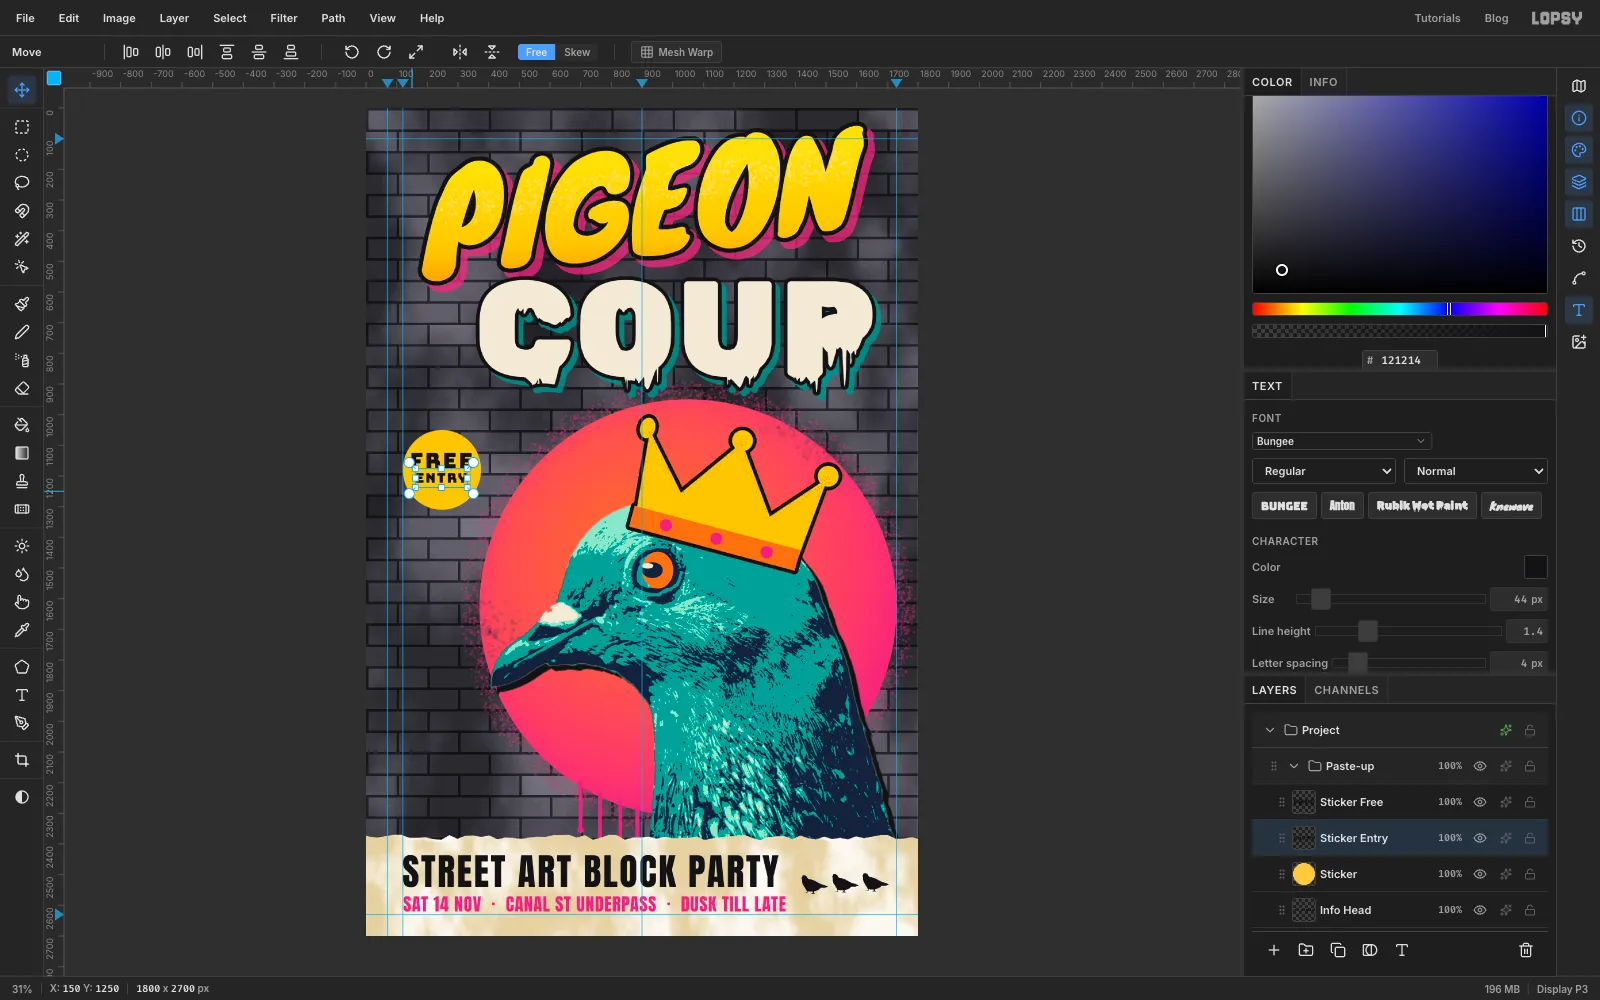
-
Merge the sticker and turn it
A sticker should turn as one piece, so merge it. Click ENTRY and choose Layer → Merge Down, then click FREE and merge it down too. Both words are now part of the Sticker layer.
Draw an Elliptical Marquee slightly larger than the sticker, and with the Move tool drag the top-right rotation handle about 8° counter-clockwise. Press Cmd+D.
-
Give the sticker a vinyl border
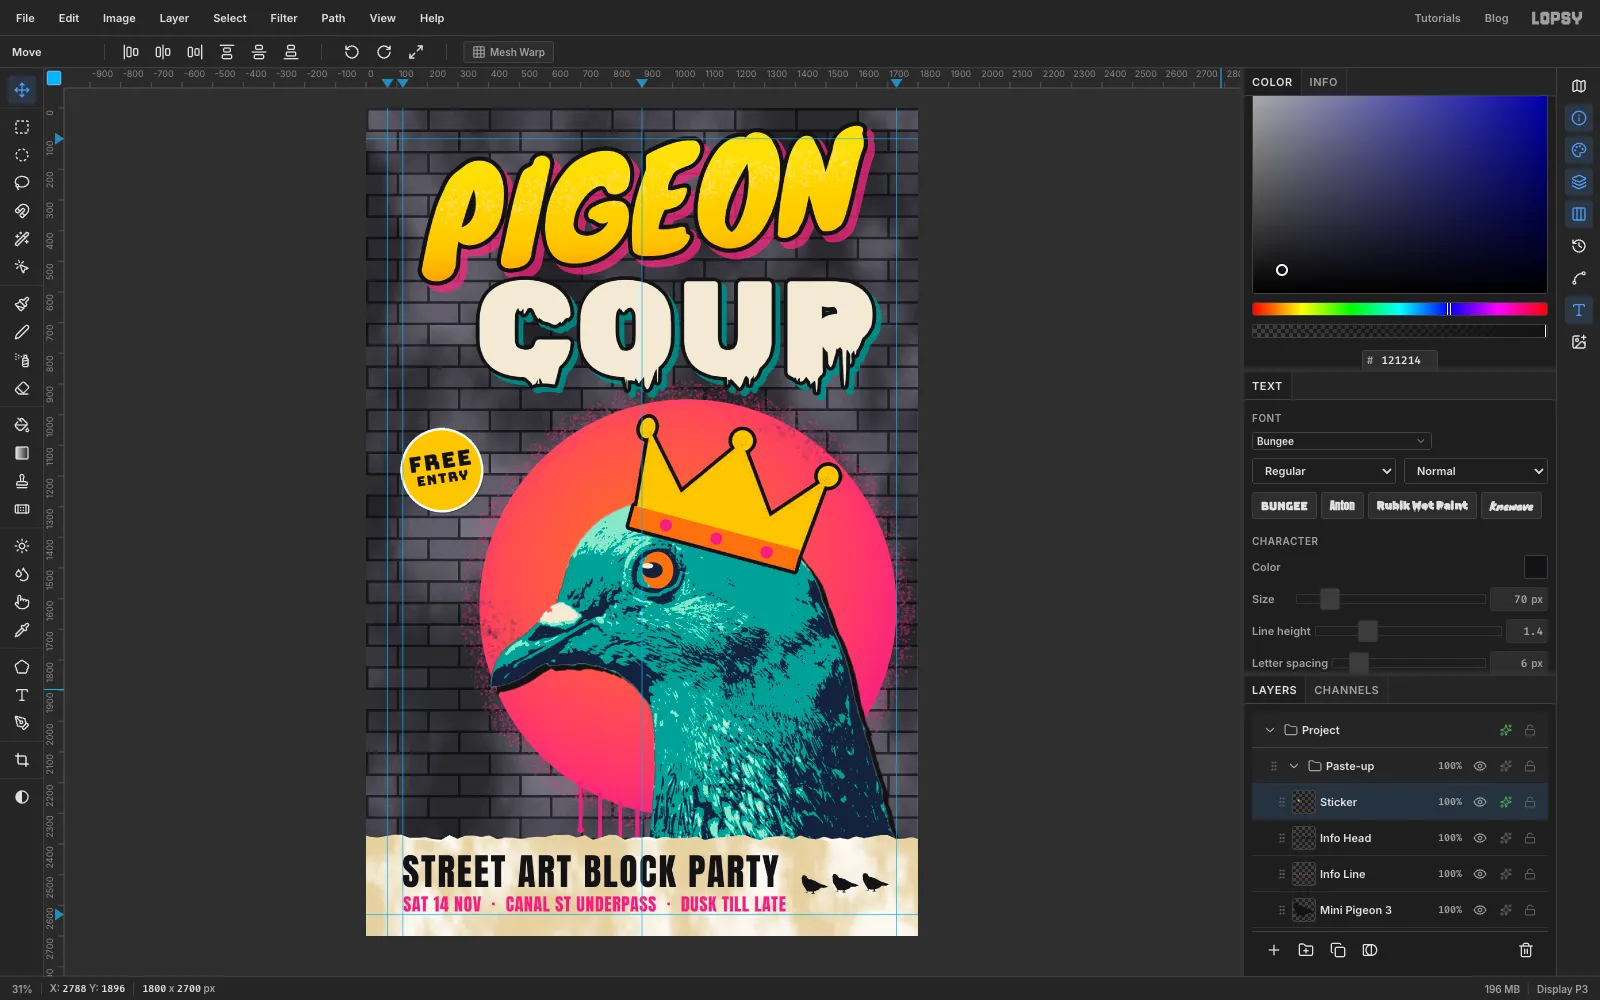
Real stickers have a white die-cut border and sit a hair above the wall. Open the Sticker layer's effects and turn on:
- Stroke: Width 8 in white
- Drop Shadow: Offset X 2, Offset Y 3, Blur 3, Opacity 40, in black
-
Add a tag
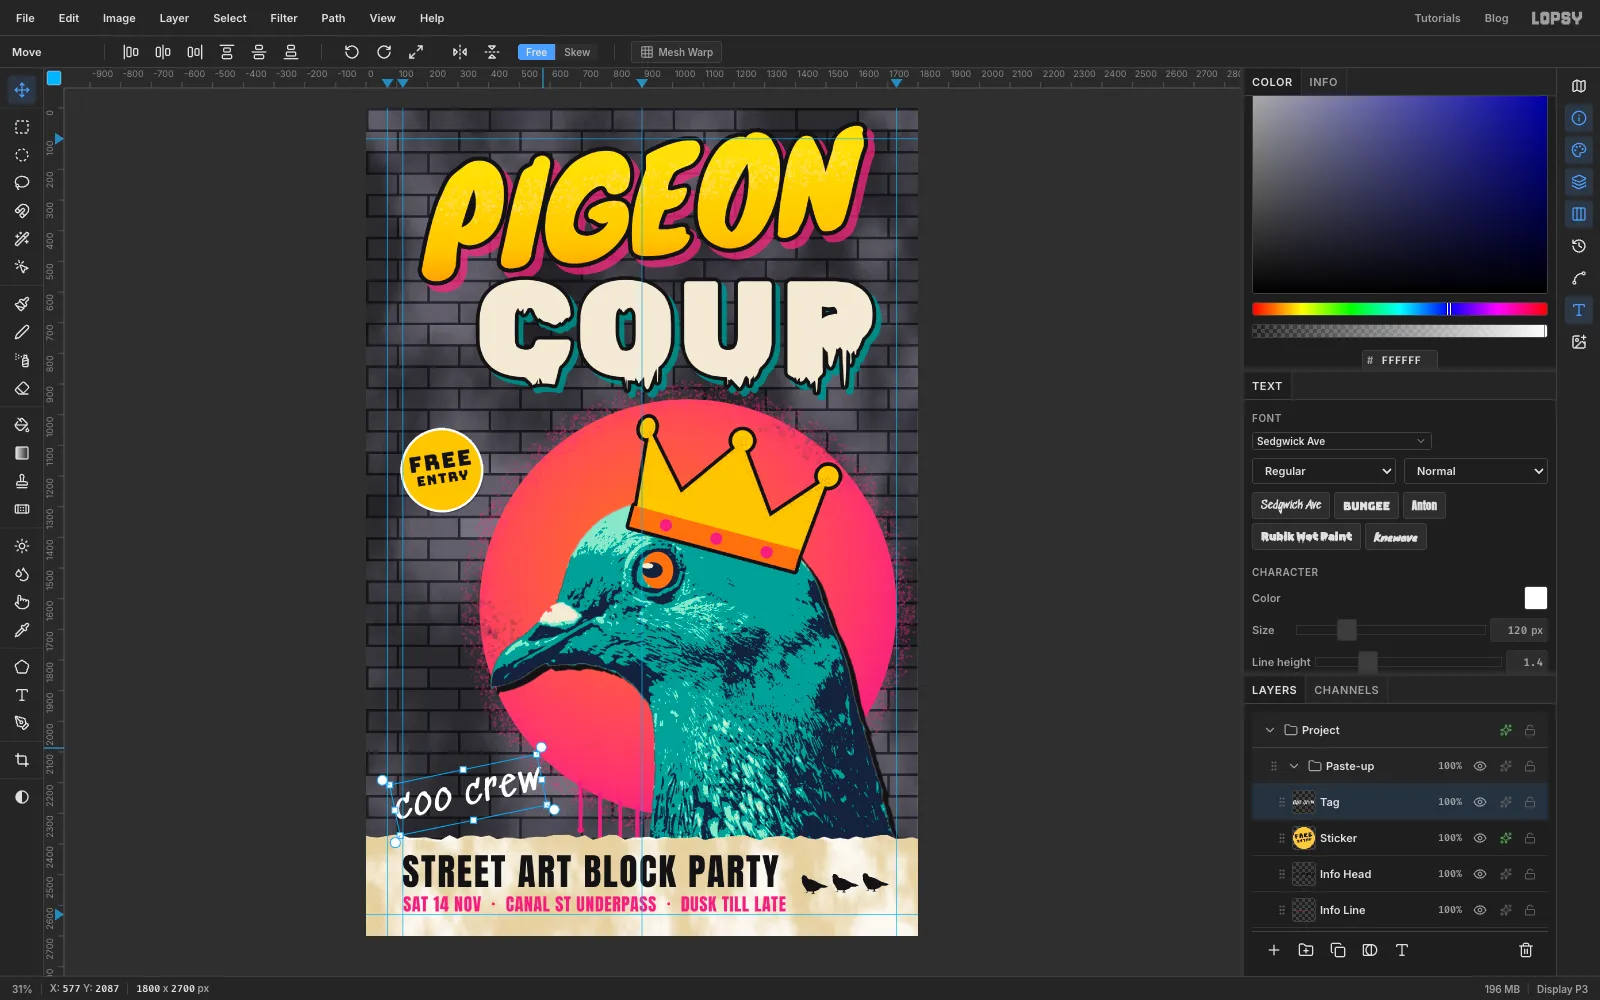
Click Sticker, pick the Text tool and set Sedgwick Ave at 120 in white. Sedgwick Ave is modelled on graffiti handstyles, so it reads as a tag rather than a typeface. Click on the bricks at the lower left, type
coo crewand press Tab. Rename the layer Tag.Switch to the Move tool and nudge it so it starts about 90 px from the left edge, above the paper and clear of the drips. Hover just outside the top-right corner of its box until the cursor becomes a crosshair, then drag that rotation handle and turn it about 12° counter-clockwise. Then add an Outer Glow in white with Size 8 and Opacity 35 for a touch of spray mist.
-
Press the bricks through the paint
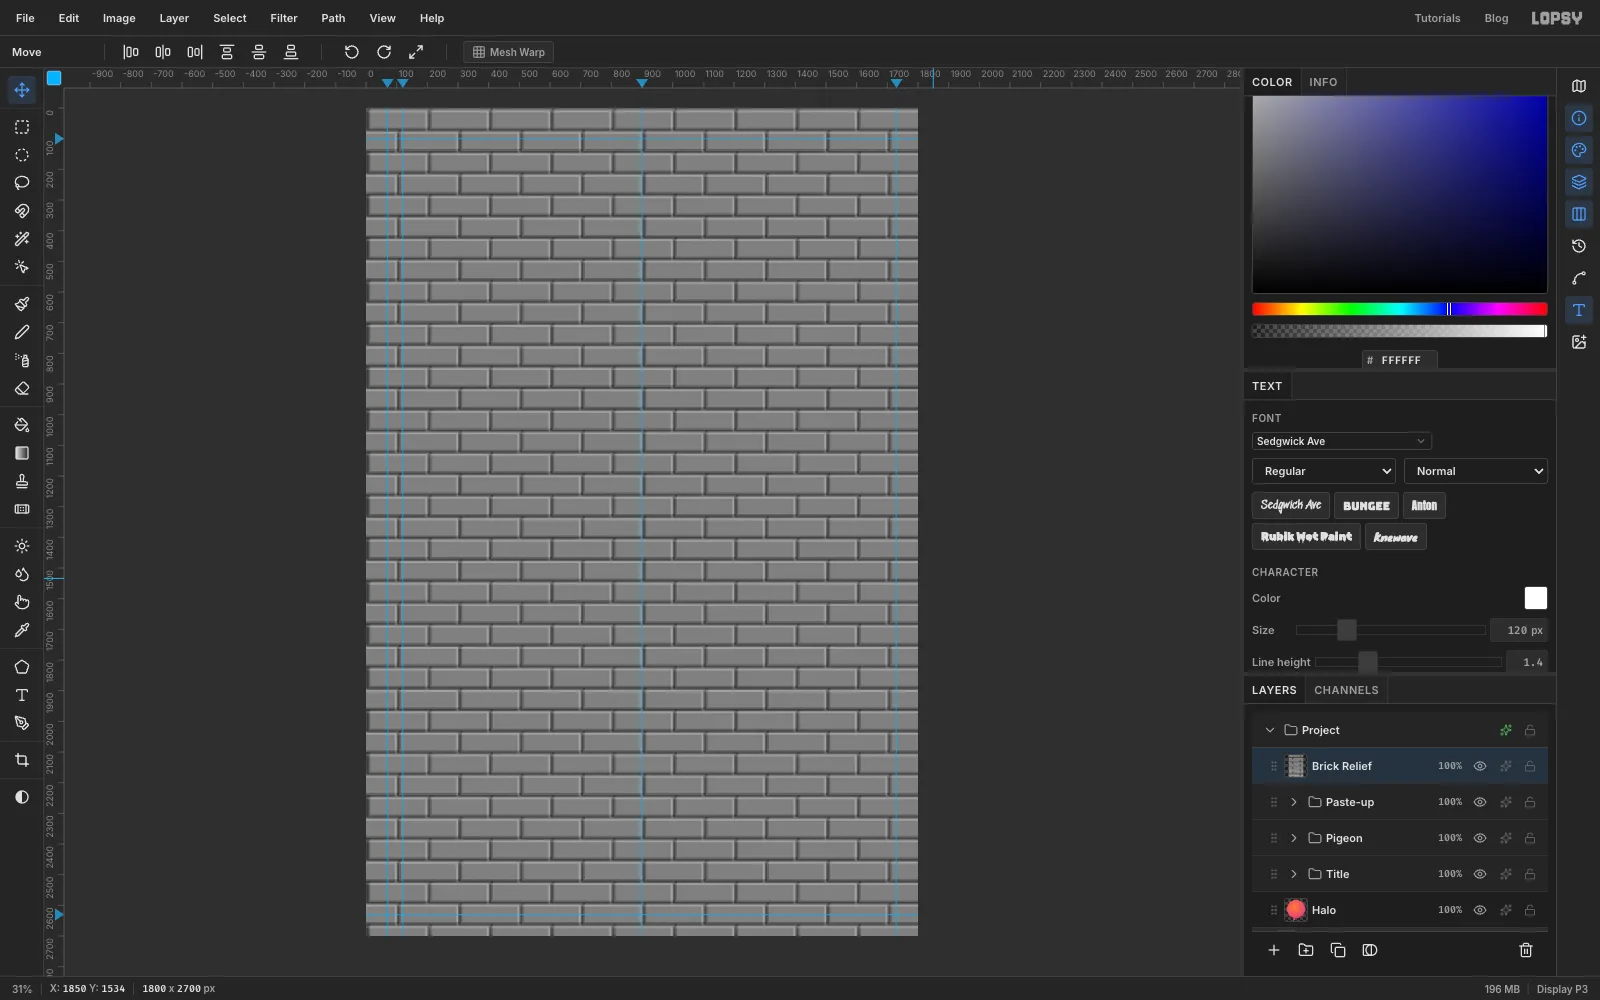
Paint and paper on a wall take on the bricks underneath. Collapse Paste-up, click it, and add a layer above it called Brick Relief. Choose Edit → Fill with Pattern…, pick the brick again with Row Stagger at 50%, and click Apply.
Then apply Filter → Emboss… with Strength 60, Filter → Desaturate, and Filter → Brightness/Contrast… with Brightness at 22. Lopsy's Emboss keeps the original colours, so desaturating and lifting the brightness turns the brick faces into a middle grey. On Overlay, middle grey changes nothing. Only the mortar lines and the edge highlights will show.
-
Ease the relief off the title and paper
Set Brick Relief to Overlay at 60%. The bricks now show through everything, which is a bit strong on the type and the paper.
Click Add Mask and click the mask thumbnail to edit it. Then:
- Draw a Rectangular Marquee over the title area, from the top of the canvas to just below COUP. Set the foreground to and choose Edit → Fill. That keeps about 70% of the relief there.
- Draw a marquee over the paper strip and fill it with , which keeps about half.
Deselect and click the layer's name to leave the mask.
-
Finish with a vignette
Add a layer called Vignette. Pick the Gradient tool, set Type to Radial, and in Advanced… make three stops: white at the left end, white at about 55%, and black at the right end. Drag from the centre of the poster to its bottom-right corner, then set the layer to Multiply at 60%. The corners darken, and the white centre stays untouched.
Choose File → Quick Export PNG to export the poster, and File → Save Project to keep the layers.