Paint a Street-Art Monarch Mural Zine Cover
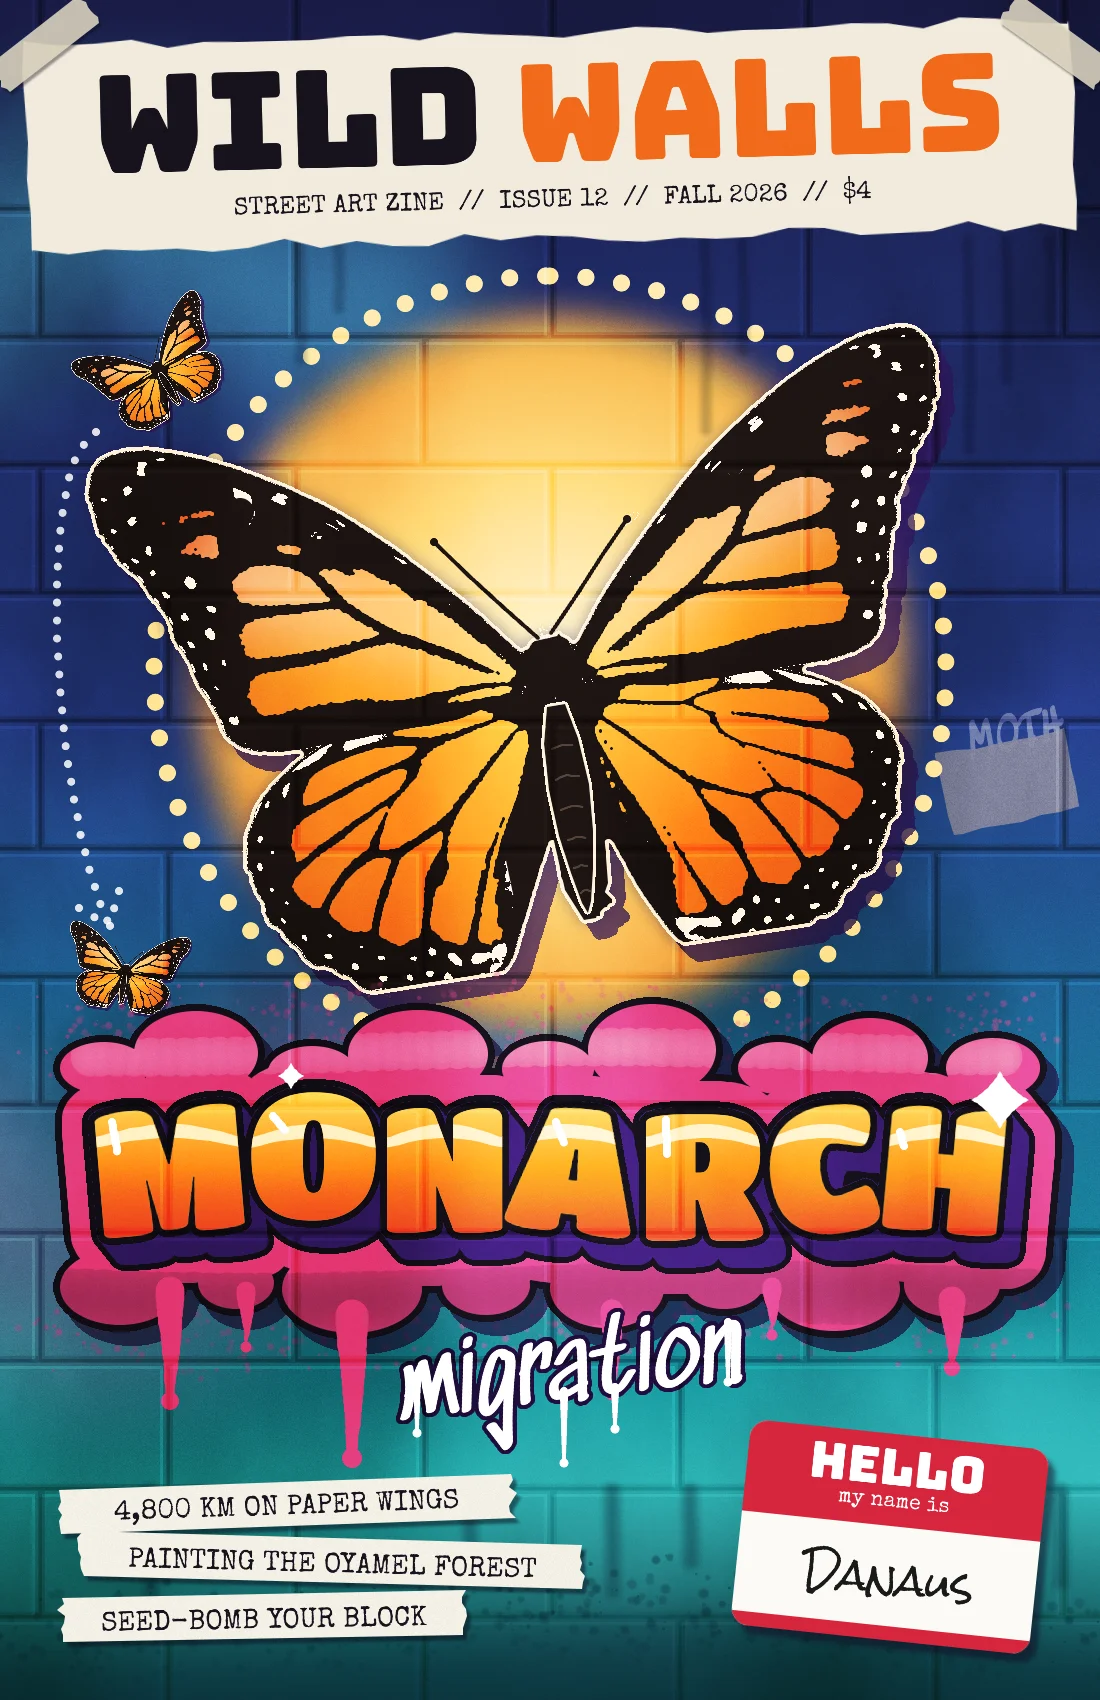
Paint a cinderblock mural of a monarch traced from a specimen photo, a bubble-letter graffiti piece and a taped-up zine masthead in Lopsy.
Every autumn, monarch butterflies fly up to 4,800 km from Canada and the northern United States to a few mountain forests in central Mexico. Murals of monarchs turn up on walls all along that route, so they make a good cover story for a street-art zine.
In this tutorial you'll make the cover of WILD WALLS, an imaginary street-art zine, on a 1100 × 1700 px page (5.5 × 8.5 in, a standard half-letter zine). The cover is really a photo of a wall, with the zine's own printed bits stuck on top:
- a cinderblock wall spray-faded from indigo to teal, with an old half-painted-over tag, rain streaks and dirt
- a mural monarch, traced from a museum specimen photo with the Magic Wand and painted in flat spray colours
- a graffiti piece reading MONARCH: bouncing bubble letters with a fade fill, a 3D block, a pink cloud and drips
- a white handstyle tag underneath
- the zine's masthead, cover lines and a HELLO my name is sticker on top
Along the way you'll use:
- the Pencil with a snapped grid, Add Noise, Emboss, Gaussian Blur, Motion Blur, Clouds and Threshold
- Paste, the Magic Wand with and without Contiguous, ⌘-click to select a layer's pixels, and Select → Grow / Shrink / Feather / Inverse
- scaling, moving and rotating with the Move tool, on pixels, live text and whole groups
- Copy Merged and paste in place, and Option-drag to stamp copies of a selection
- the Pen tool, the Brush with Spacing and Taper, the Spray and Dodge / Burn
- Stroke, Drop Shadow and Outer Glow effects, and the Screen, Overlay and Multiply blend modes
- per-character text colour, groups, and a layer mask with a gradient
- live text in Titan One, Sedgwick Ave, Sedgwick Ave Display, Bungee, Special Elite and Rock Salt
The palette:
-
Wall fade
-
Mist pink
-
mist cyan
-
buff patch
-
dirt
-
Sun
-
sun dots
-
Monarch black
-
cells
-
spots
-
outline
-
shadow
-
Letters
-
glint
-
outline
-
block
-
cloud
-
Buff band
-
ink
-
WALLS orange
-
tape
-
paper
-
Sticker red
-
sticker white
You'll need one photo: "Danaus plexippus MHNT.jpg" by Didier Descouens on Wikimedia Commons. It shows two pinned monarchs on white. Download it and crop it to just the top butterfly (the male, wings fully open) with a little white around it, about 1120 × 750 px. Keep the crop handy.
Positions are given in document pixels as x, y where things need to line up. The status bar at the bottom of the window shows the pointer's X and Y. Freehand strokes don't need to match exactly; follow the screenshots by eye.
Two habits will save you trouble. Before you start a new piece of text, click a layer that isn't text, so picking a font or size doesn't restyle the text you made last. And start each new piece of text in an empty patch of canvas: a click on existing text edits it instead.
-
Set up the page and guides
Choose File → New and make a 1100 × 1700 px document with a White background.
Click the top ruler at
x 60,550and1040to drop three vertical guides: the two side margins and the centre. Then click the left ruler aty 60and1640for the top and bottom margins.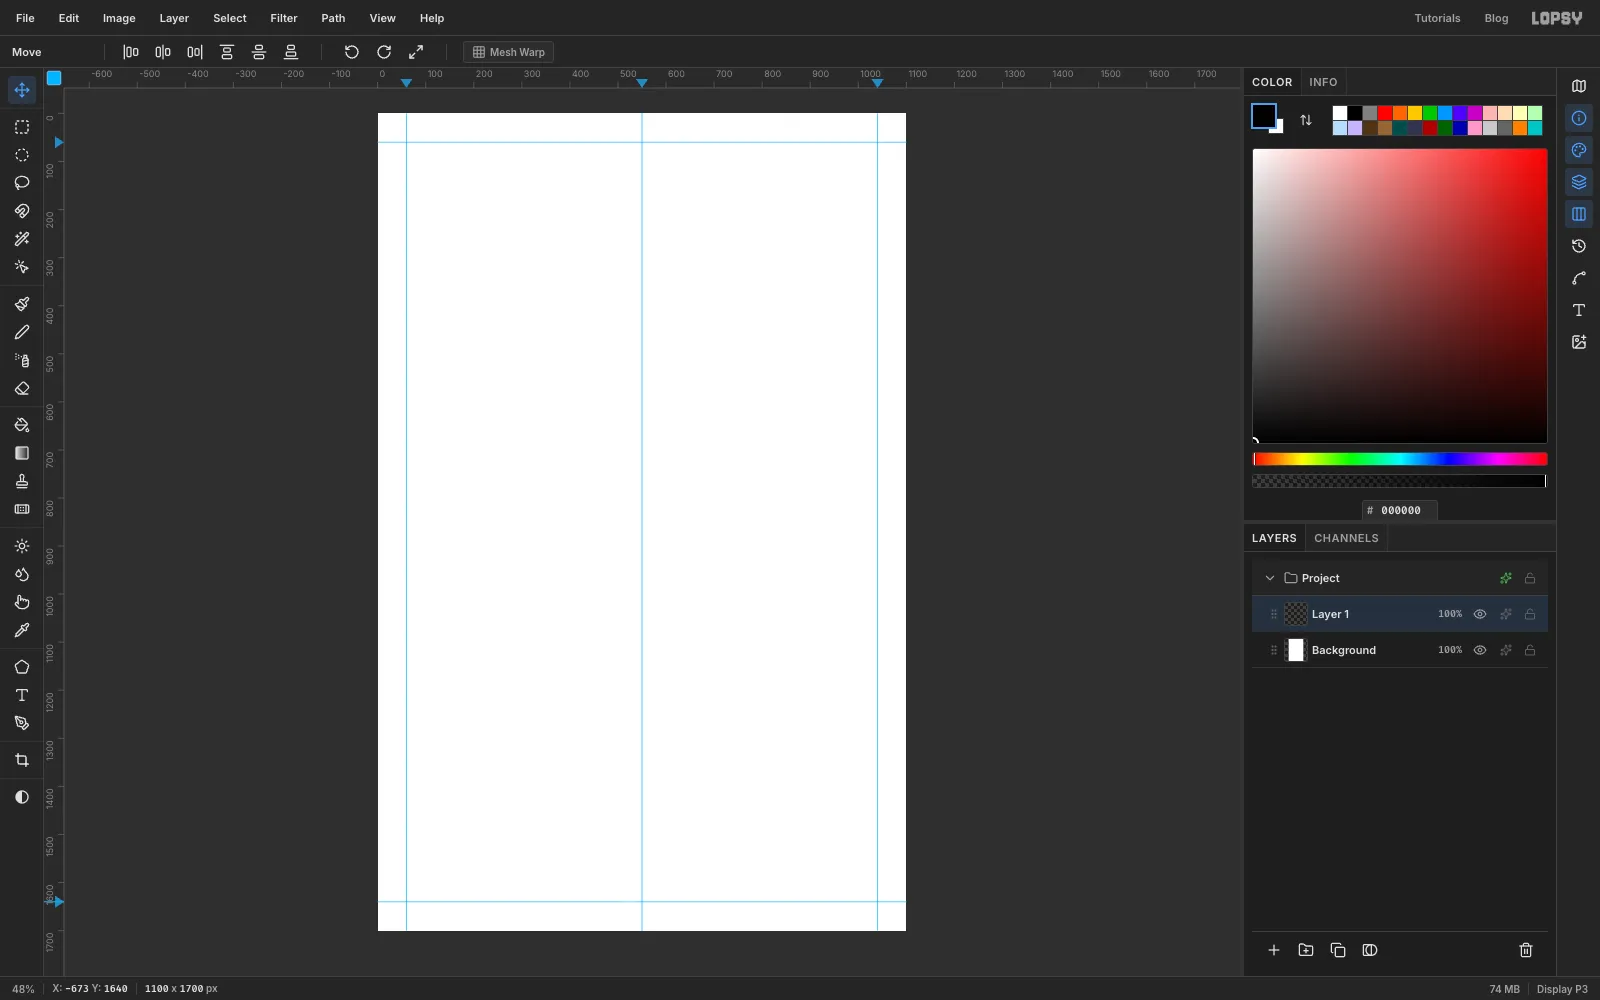
-
Spray the wall's colour fade
Double-click Layer 1 and rename it
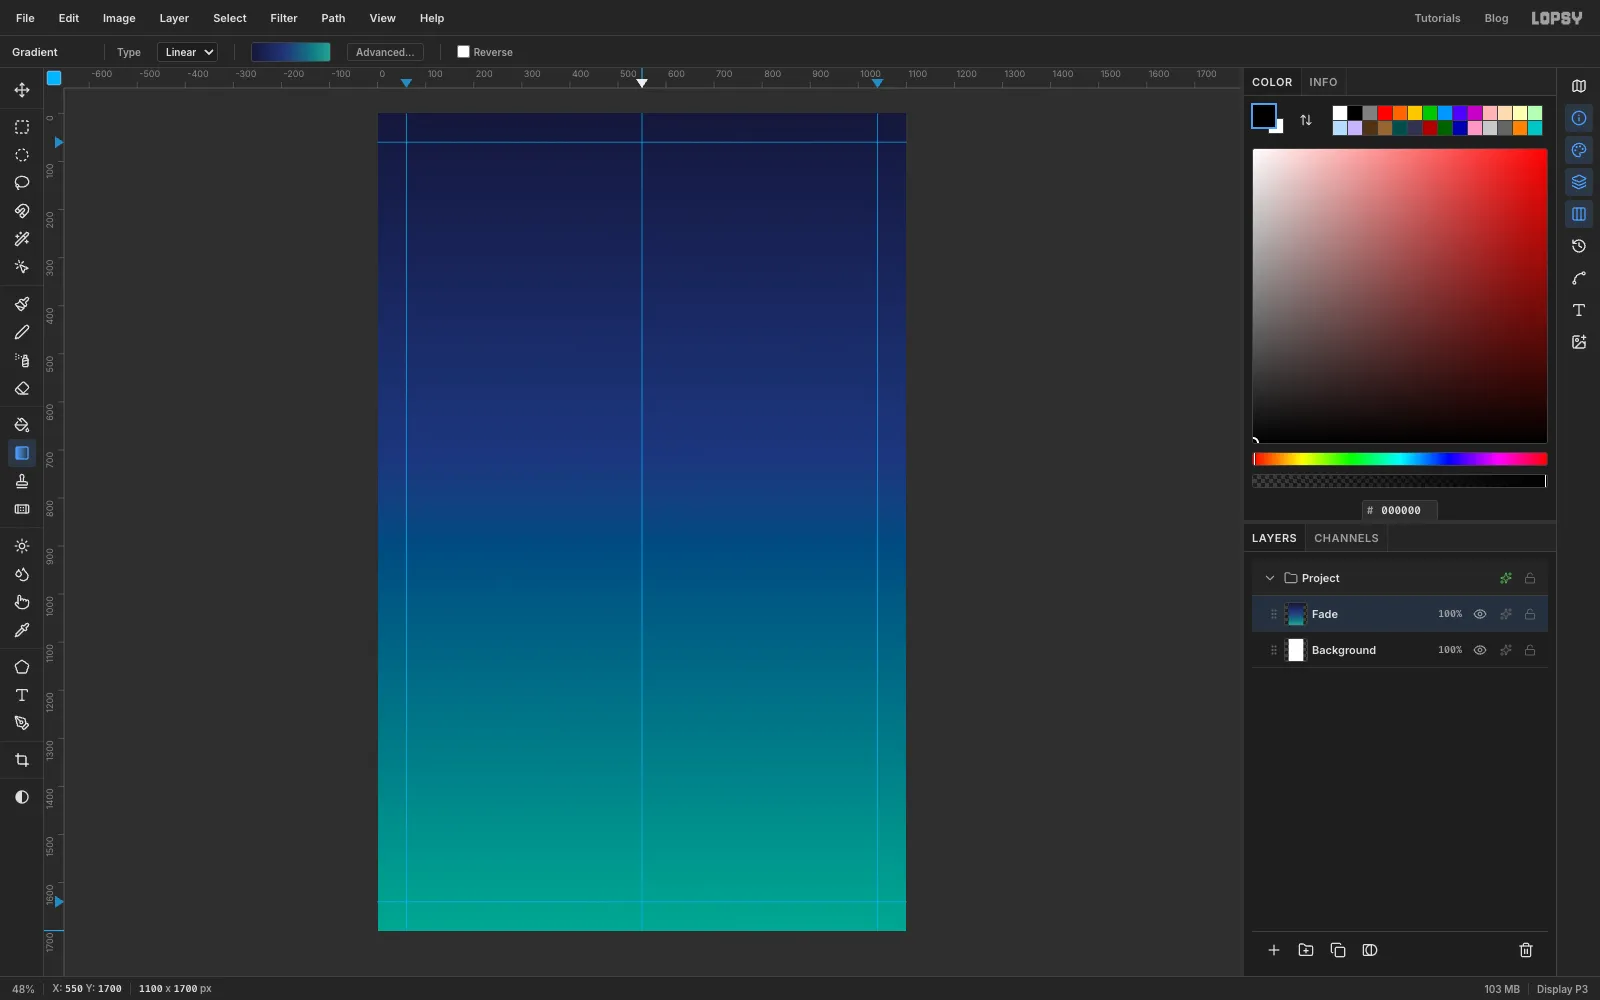
Fade.Pick the Gradient tool with Type set to Linear and click Advanced…. Make four stops: at the left end, at about 42%, at about 78% and at the right end. Click Done, then drag from the top centre of the page straight down to the bottom.
Muralists often start a wall with a "fade" like this: a few colours of spray paint blended into each other.
-
Mist in some colour
Click Add Layer and name the layer
Mist. Pick the Brush and set Size420, Hardness0and Opacity45.- With the foreground set to , make one slow, wavy stroke across the lower left, from off the left edge to about the middle, at about
y 1180. - Switch to and make two more: one across the bottom right at about
y 1500, and a short one across the top left at abouty 260.
Click the ✦ button on the layer's row to open its effects drawer, set the blend mode to Screen and close the drawer. Then click the opacity figure on the row and drag it to
70%.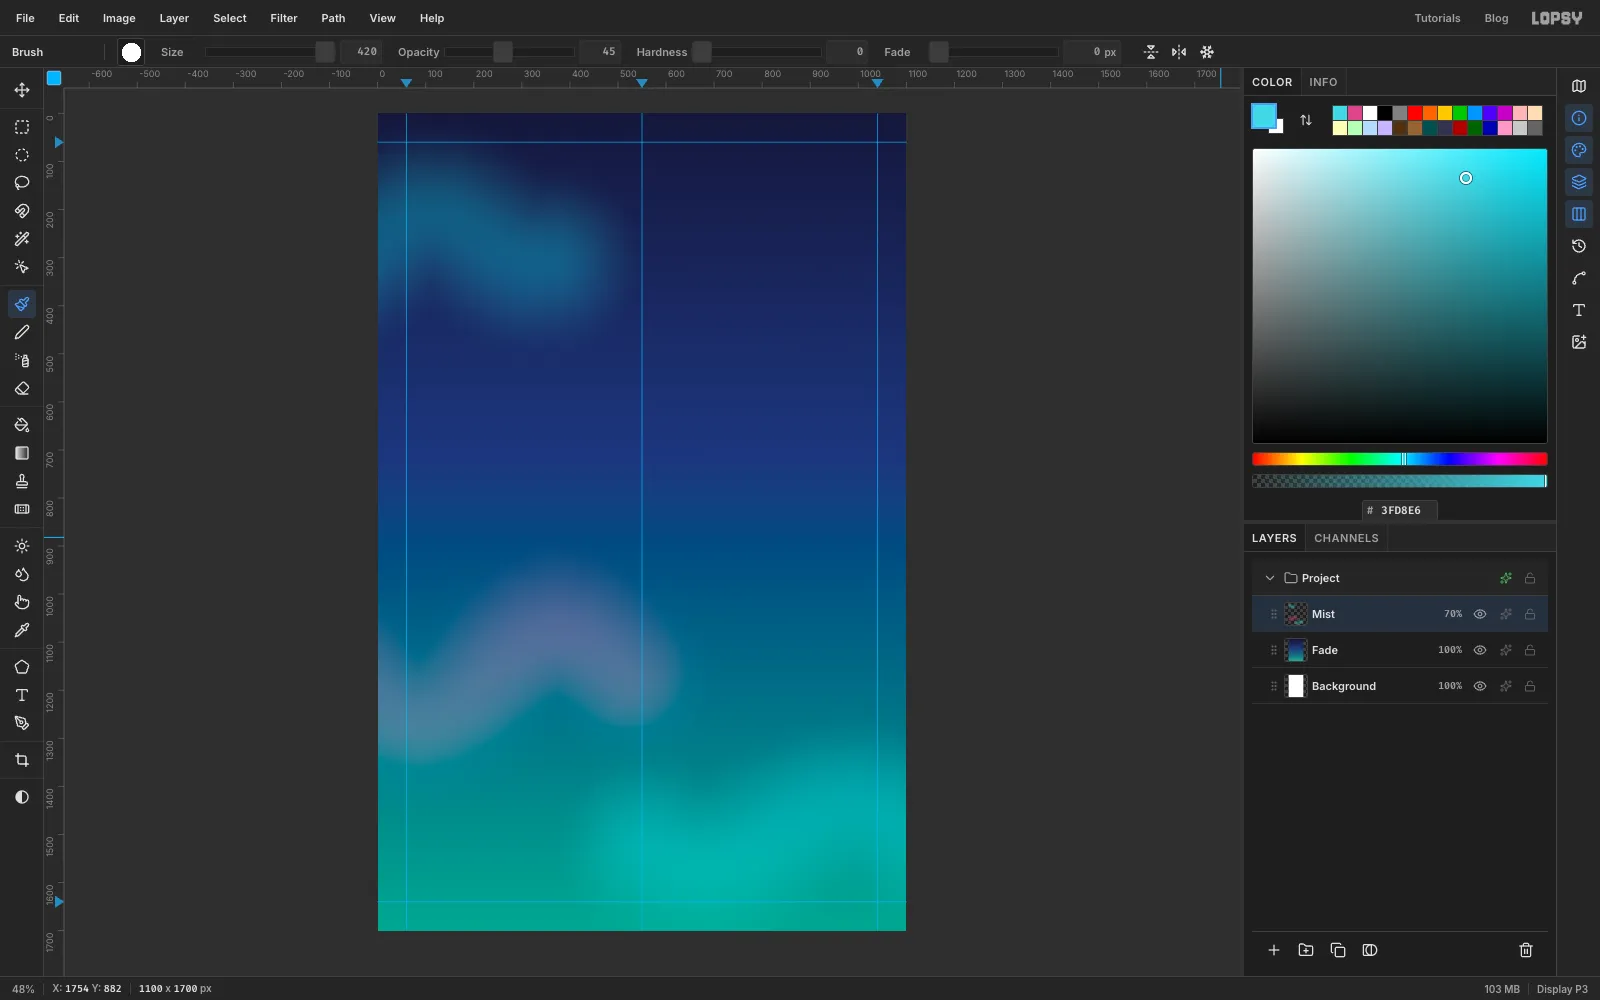
- With the foreground set to , make one slow, wavy stroke across the lower left, from off the left edge to about the middle, at about
-
Turn on a 128 px grid
Add a layer called
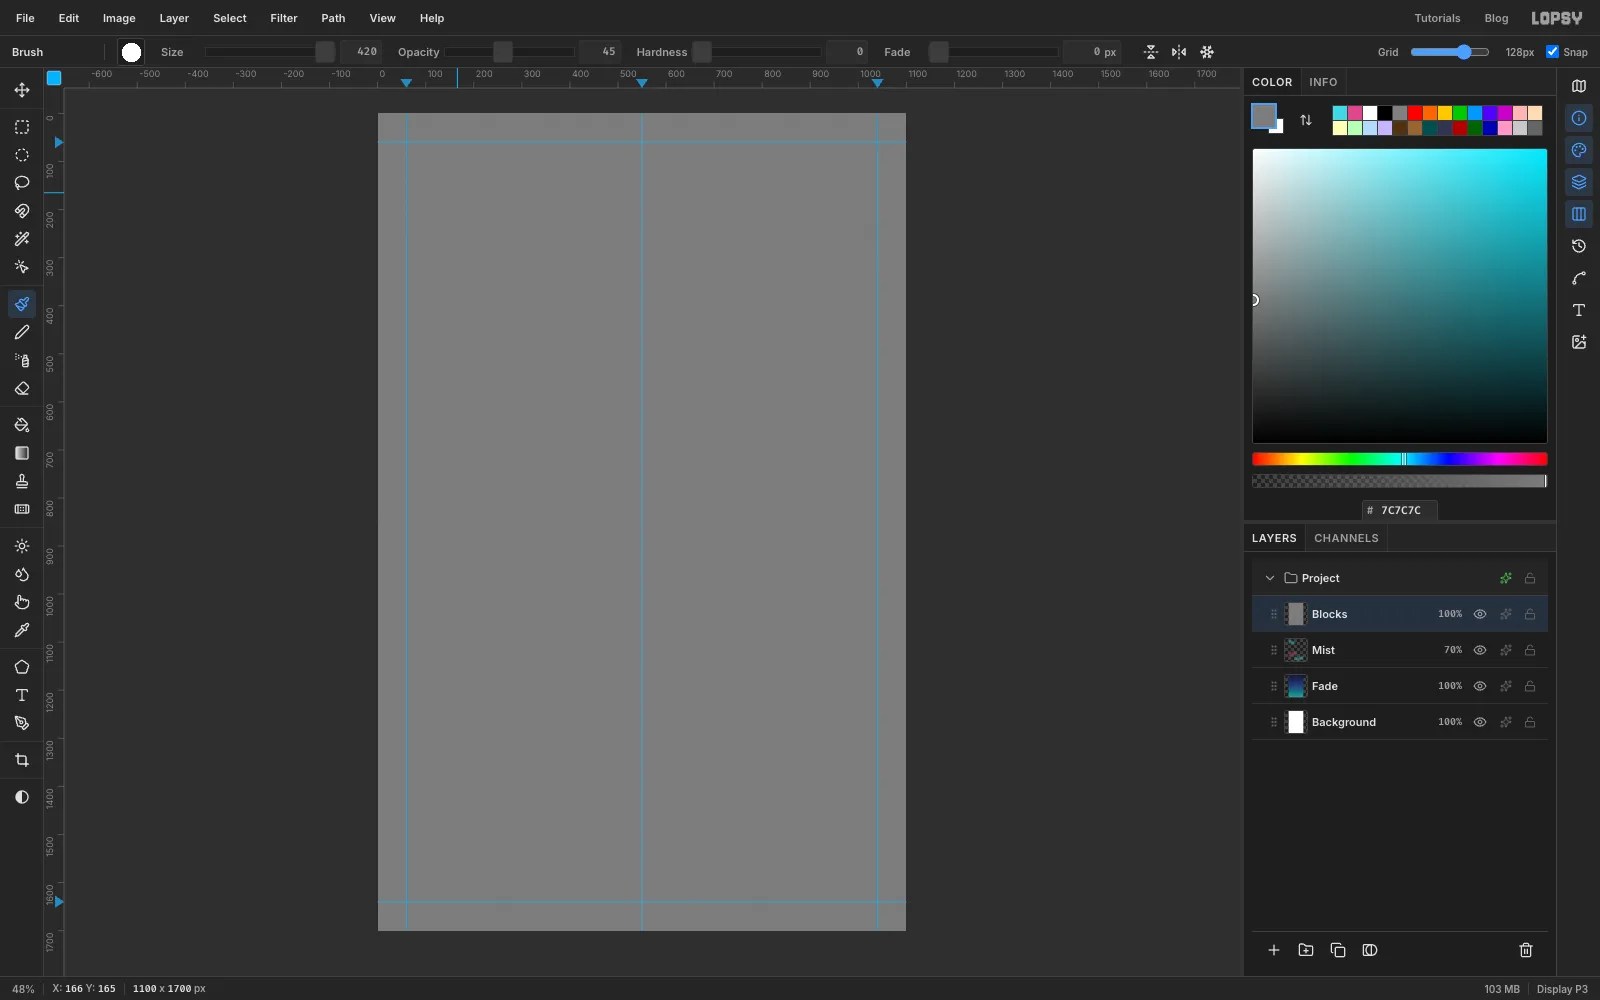
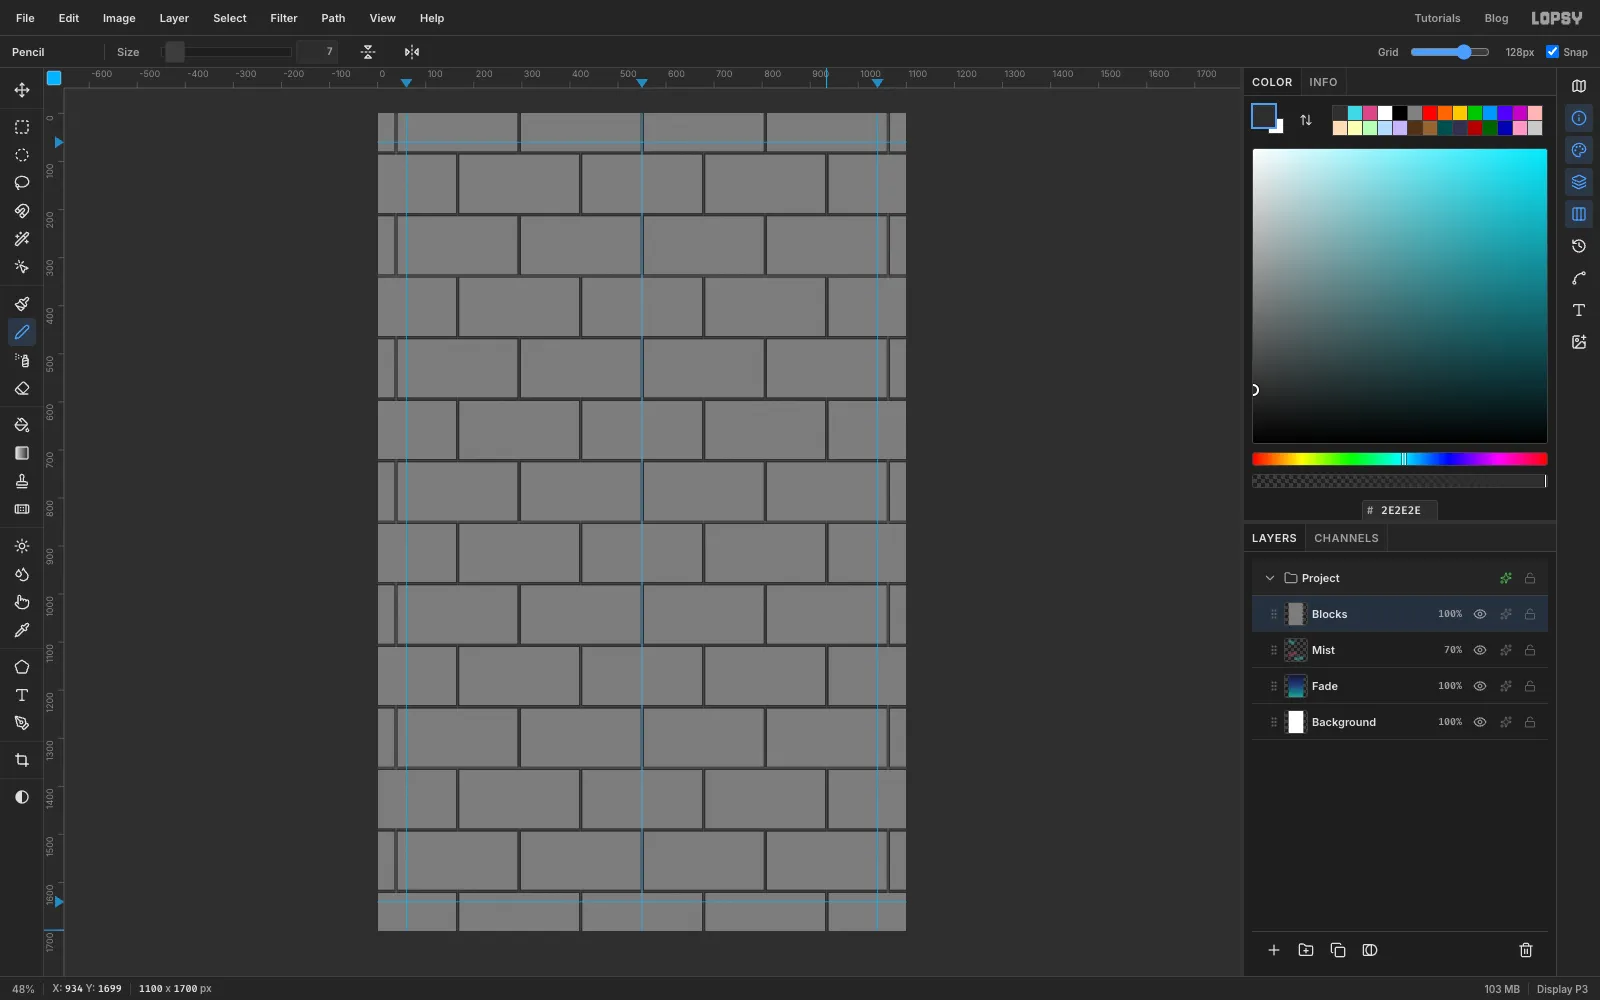
Blocks. Set the foreground to , press Cmd+A, choose Edit → Fill and press Cmd+D.Choose View → Show Grid. A Grid slider appears at the right of the options bar: drag it until the label reads 128px. Cinderblocks are twice as long as they are tall, so each block will be two grid cells wide and one tall.
-
Draw the mortar with the Pencil
Pick the Pencil with Size
7and set the foreground to . The grid is centred on the page, so the first horizontal line is at abouty 82, not at the top edge, and the top and bottom rows are part-blocks. Zoom in a little if your clicks don't land on the lines. It's a lot of clicks, but each one is quick.- For each horizontal grid line, click at the left edge of the canvas and Shift-click at the right edge. Shift-click draws a straight line from the last point.
- Now the joints between blocks. In the top row, click on a vertical grid line and Shift-click straight down to the next horizontal line. Repeat on every second vertical grid line along the row.
- In the next row down, do the same but on the grid lines you skipped, so the joints are staggered like real blockwork. Keep alternating to the bottom.
When the wall is done, choose View → Show Grid again to hide the grid.
-
Emboss the blocks
With
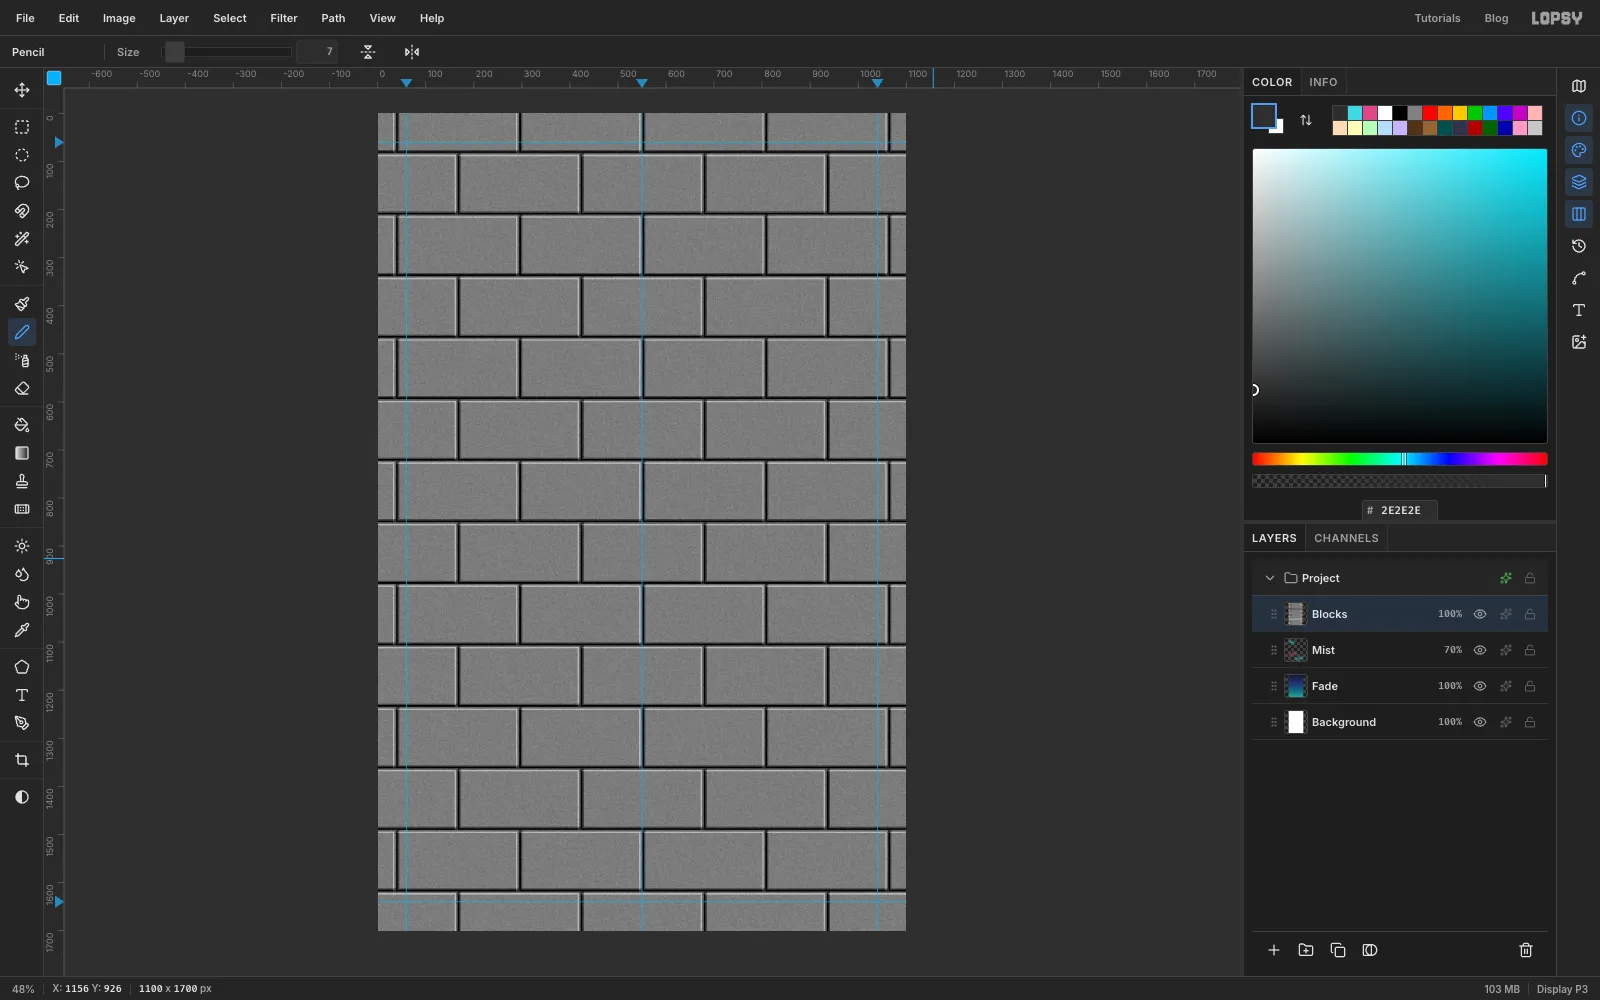
Blocksstill active:- Filter → Add Noise… with Amount
22and Mono. This gives the blocks a pitted concrete surface. - Filter → Emboss… with Angle
135and Strength40. The mortar lines turn into grooves lit from the top left. - Filter → Gaussian Blur… with Radius
1.5, to take the digital crispness off the edges.
- Filter → Add Noise… with Amount
-
Press the wall into the paint
Open the effects drawer for
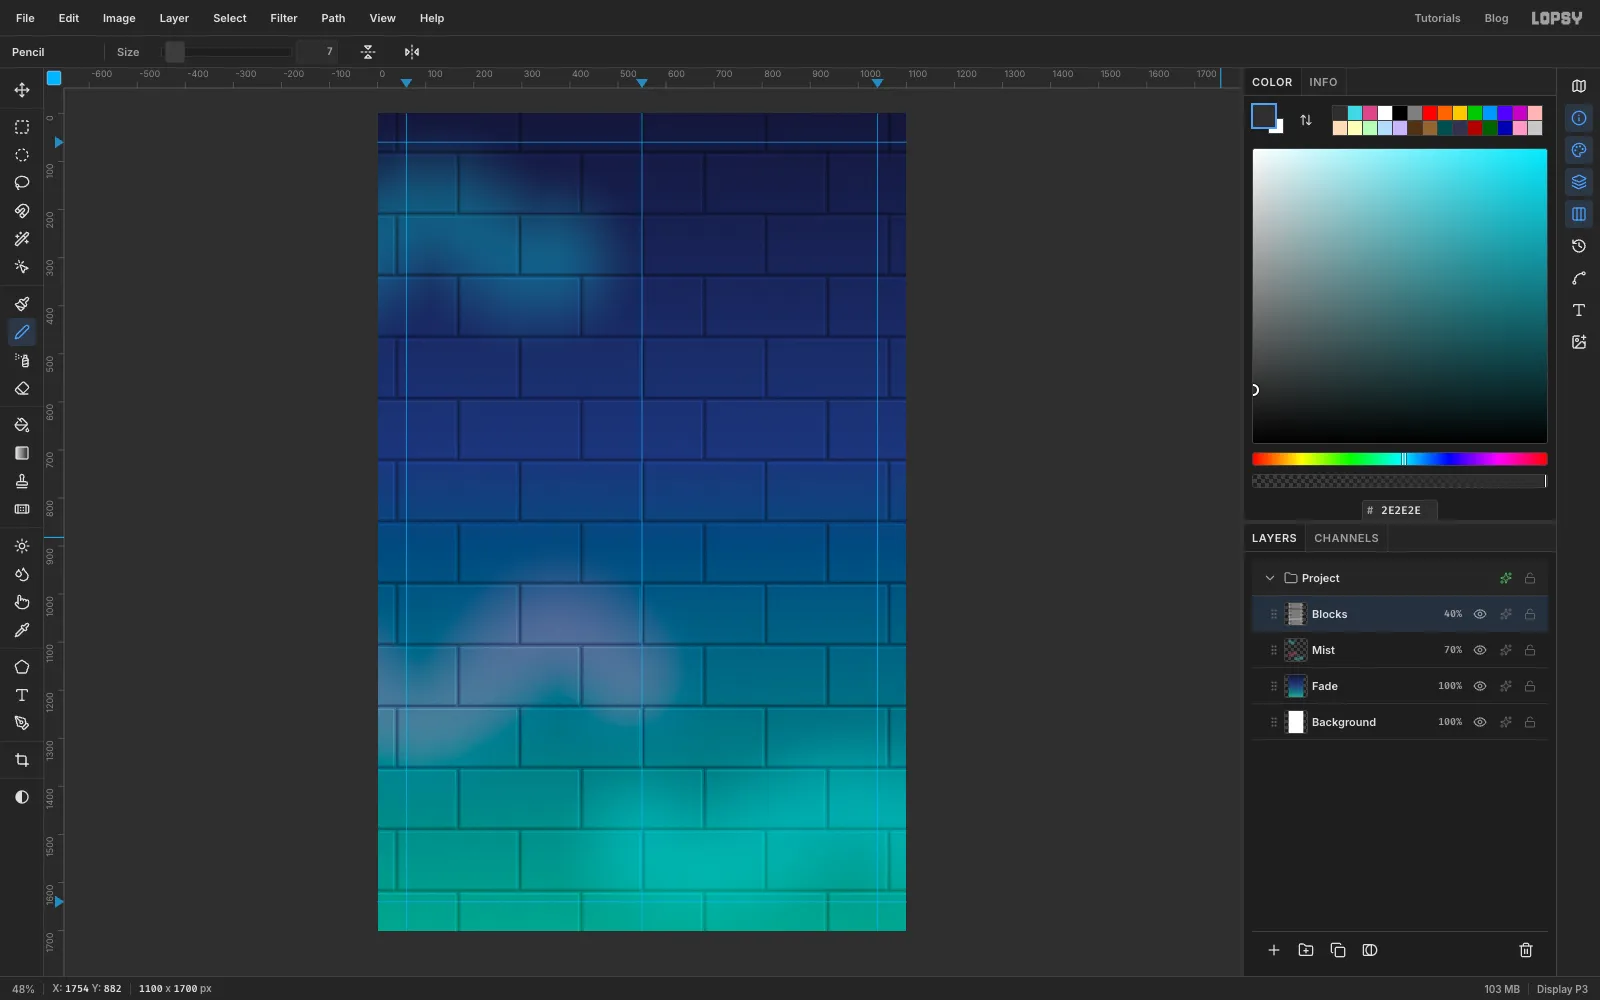
Blocks, set the blend mode to Overlay, and close it. Set the layer's opacity to40%.The grey disappears and leaves only the bumps and grooves, so the fade now looks like paint sprayed onto blocks. Everything painted on the wall later goes under this layer, so it takes the texture too.
-
Leave an old tag and a buff patch
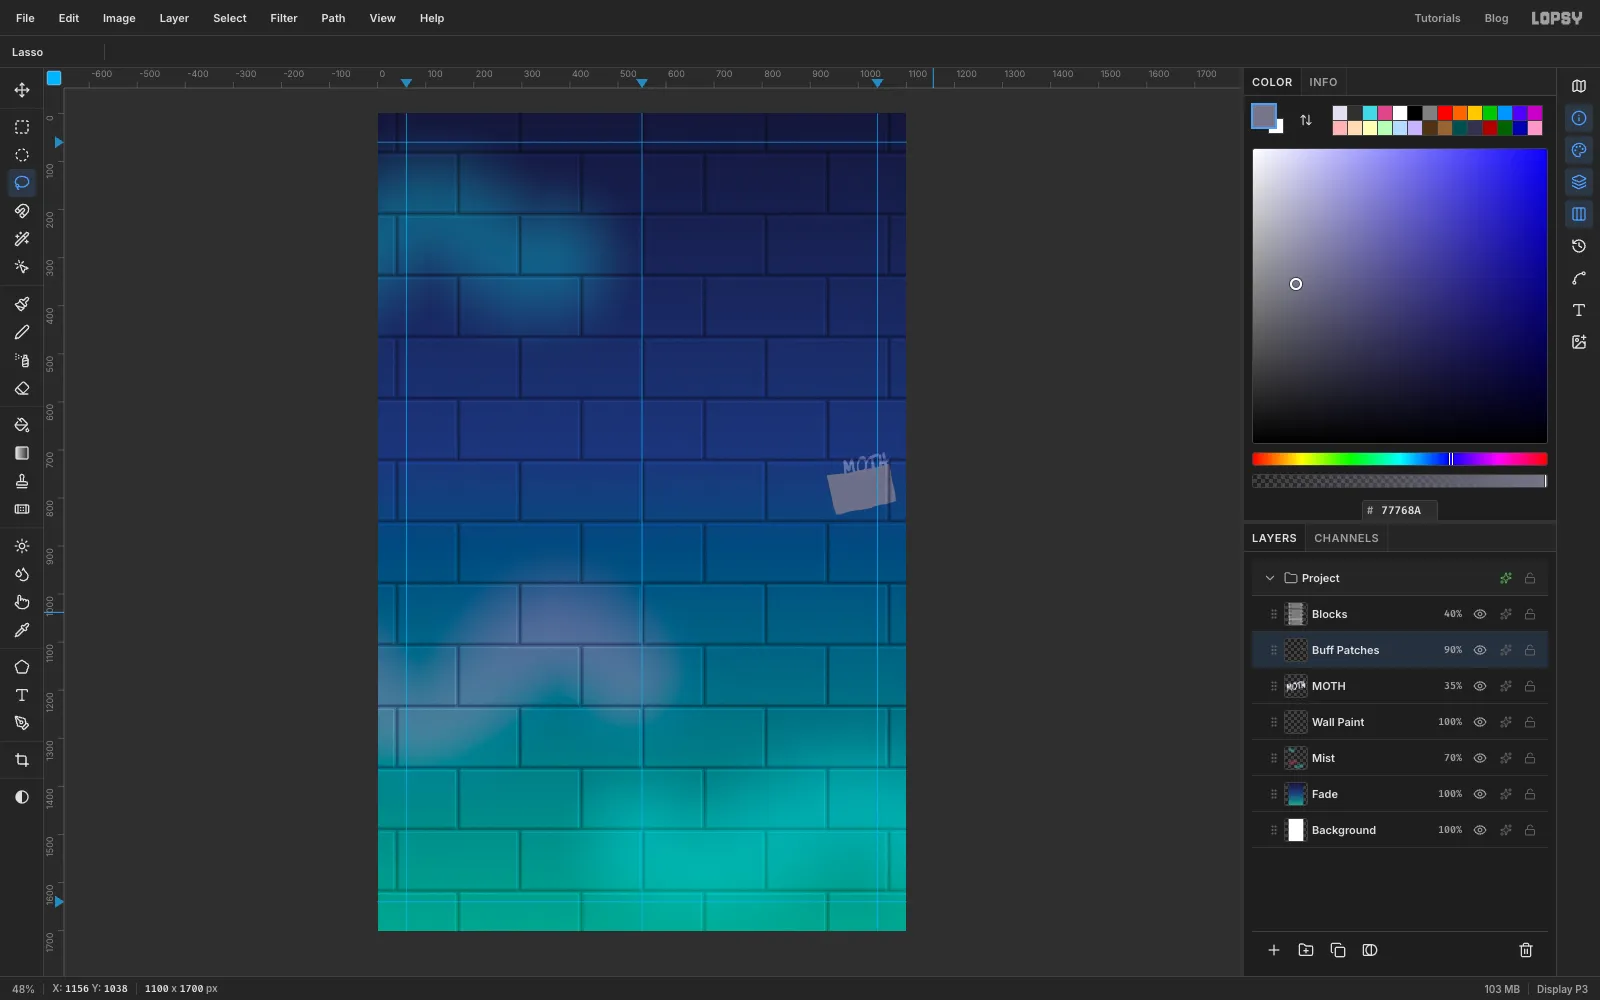
Real walls carry history. Here, someone's old tag has been half painted over ("buffed") with paint that doesn't quite match.
- Click
Mistand add a layer calledWall Paint. Leave it empty: it's a spare layer for touching up the wall later. Pick the Text tool, choose Sedgwick Ave Display at Size46, set the foreground to , and click near the right edge at about966, 704. TypeMOTHand press Tab to commit. - Pick the Move tool. Hover just outside the text box's top-right corner until the pointer turns into the rotate cursor, then drag up a little to tilt the tag about 12° anticlockwise. Press Cmd+D.
- Set the
MOTHlayer's opacity to35%. - Click Add Layer and call it
Buff Patches. With the Lasso, draw a slightly tilted, roughly rectangular patch, about 130 × 80 px, that covers the bottom half of the tag and hangs below it. Fill it with , then run Filter → Add Noise… with Amount10and Mono. Deselect and set the layer to90%.
- Click
-
Paint the sun
With
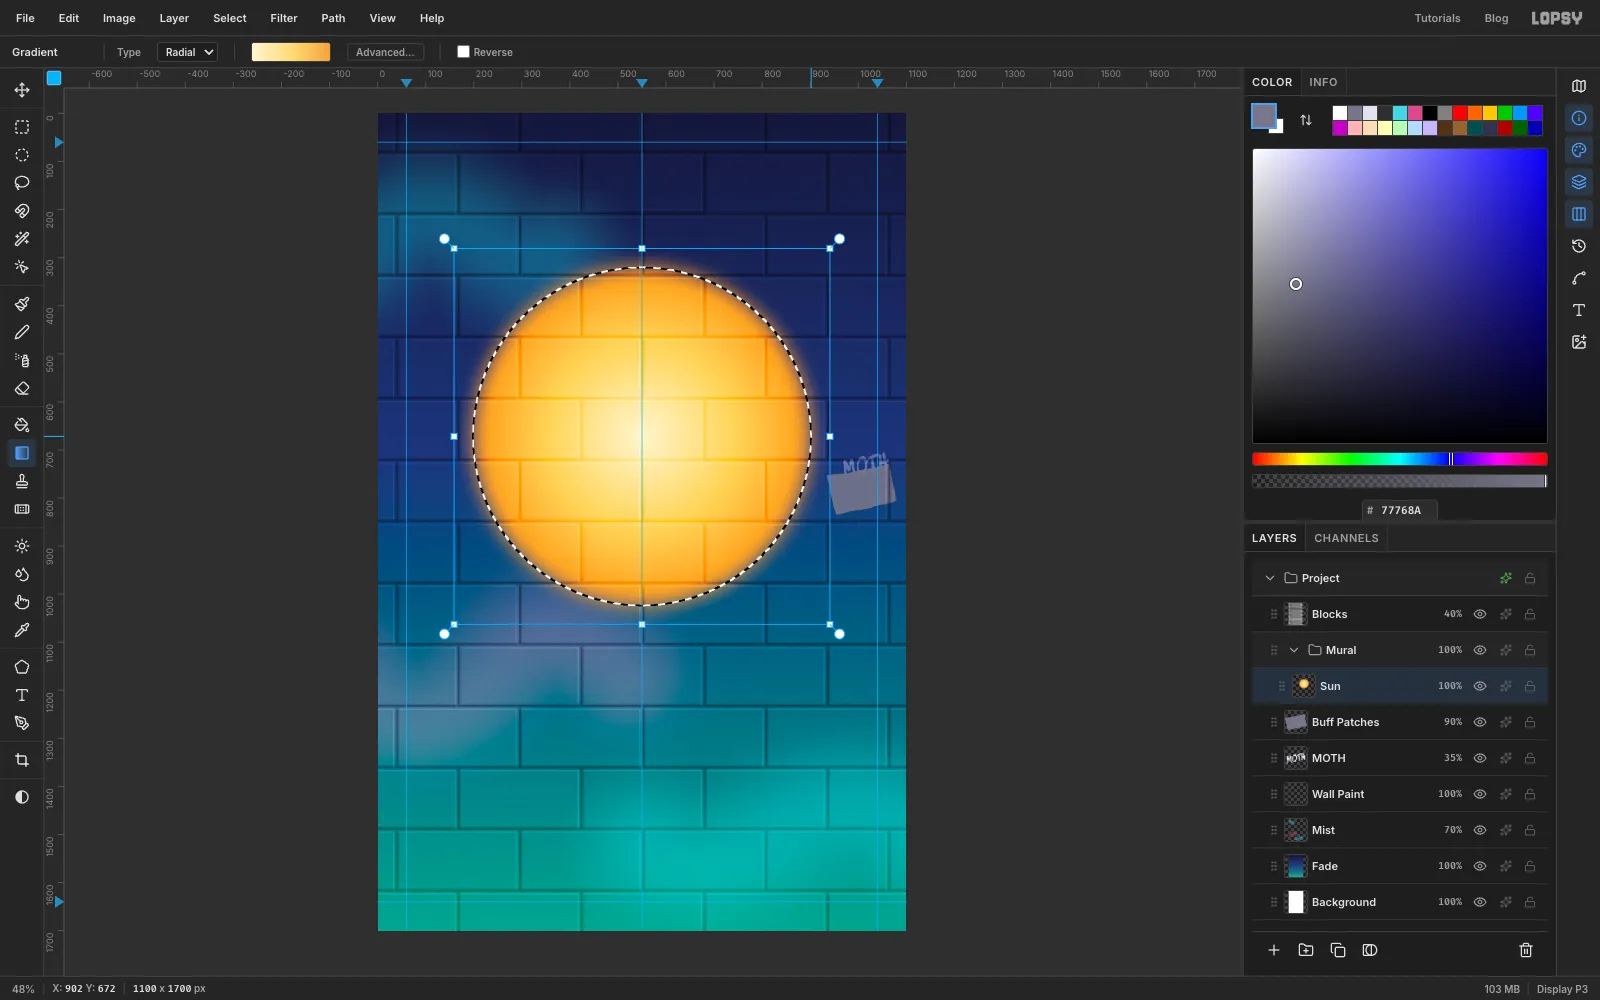
Buff Patchesactive, click New Group at the bottom of the Layers panel and name itMural. Everything painted for the mural goes in here. With the group selected, click Add Layer and name itSun.- Pick the Elliptical Marquee and drag a circle from
198, 320to902, 1024. That's a 704 px circle centred at550, 672. - Choose Select → Feather… with
40. Spray paint never gives a clean edge. - Pick the Gradient tool, set Type to Radial, and in Advanced… use at the left end, at about 55% and at the right end.
- Drag from the centre of the circle to its right edge, then press Cmd+D.
- Pick the Elliptical Marquee and drag a circle from
-
Ring the sun with dots
Add a layer called
Sun Dots. Pick the Brush with Size18, Hardness100and Opacity100. Open the Brushes dialog with the brush-tip button at the left of the options bar, and on the Shape tab set Spacing to200. Close the dialog.At 200% spacing each dab sits two brush-widths from the last, so a stroke becomes a row of dots. Set the foreground to and drag slowly once around the sun, about 44 px outside its edge. A freehand ring will wobble a little, and that's fine: it looks hand-sprayed.
Open the Brushes dialog again and put Spacing back to
10before you paint anything else.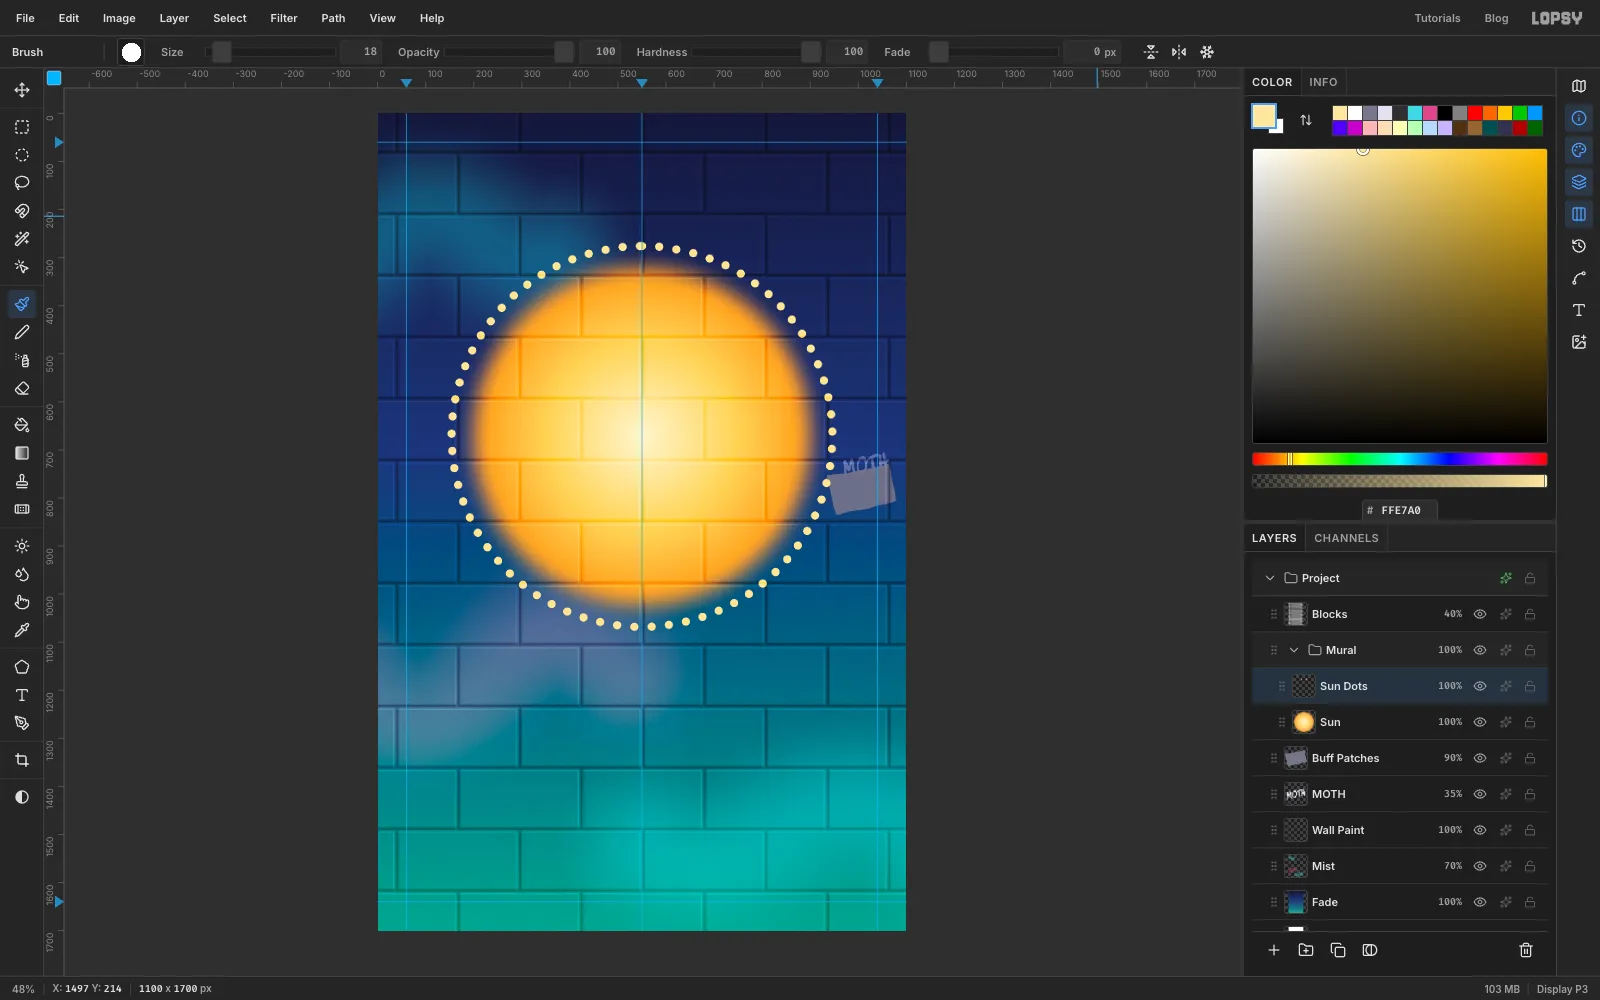
-
Paste in the reference photo
Open your cropped monarch photo in any image viewer, copy it, and press Cmd+V in Lopsy. The crop is a little wider than the page, so Lopsy shrinks it to fit and selects it, with the Move tool already active.
Rename the new layer
Referenceand set its opacity to60%, so you can see the wall through it as you work.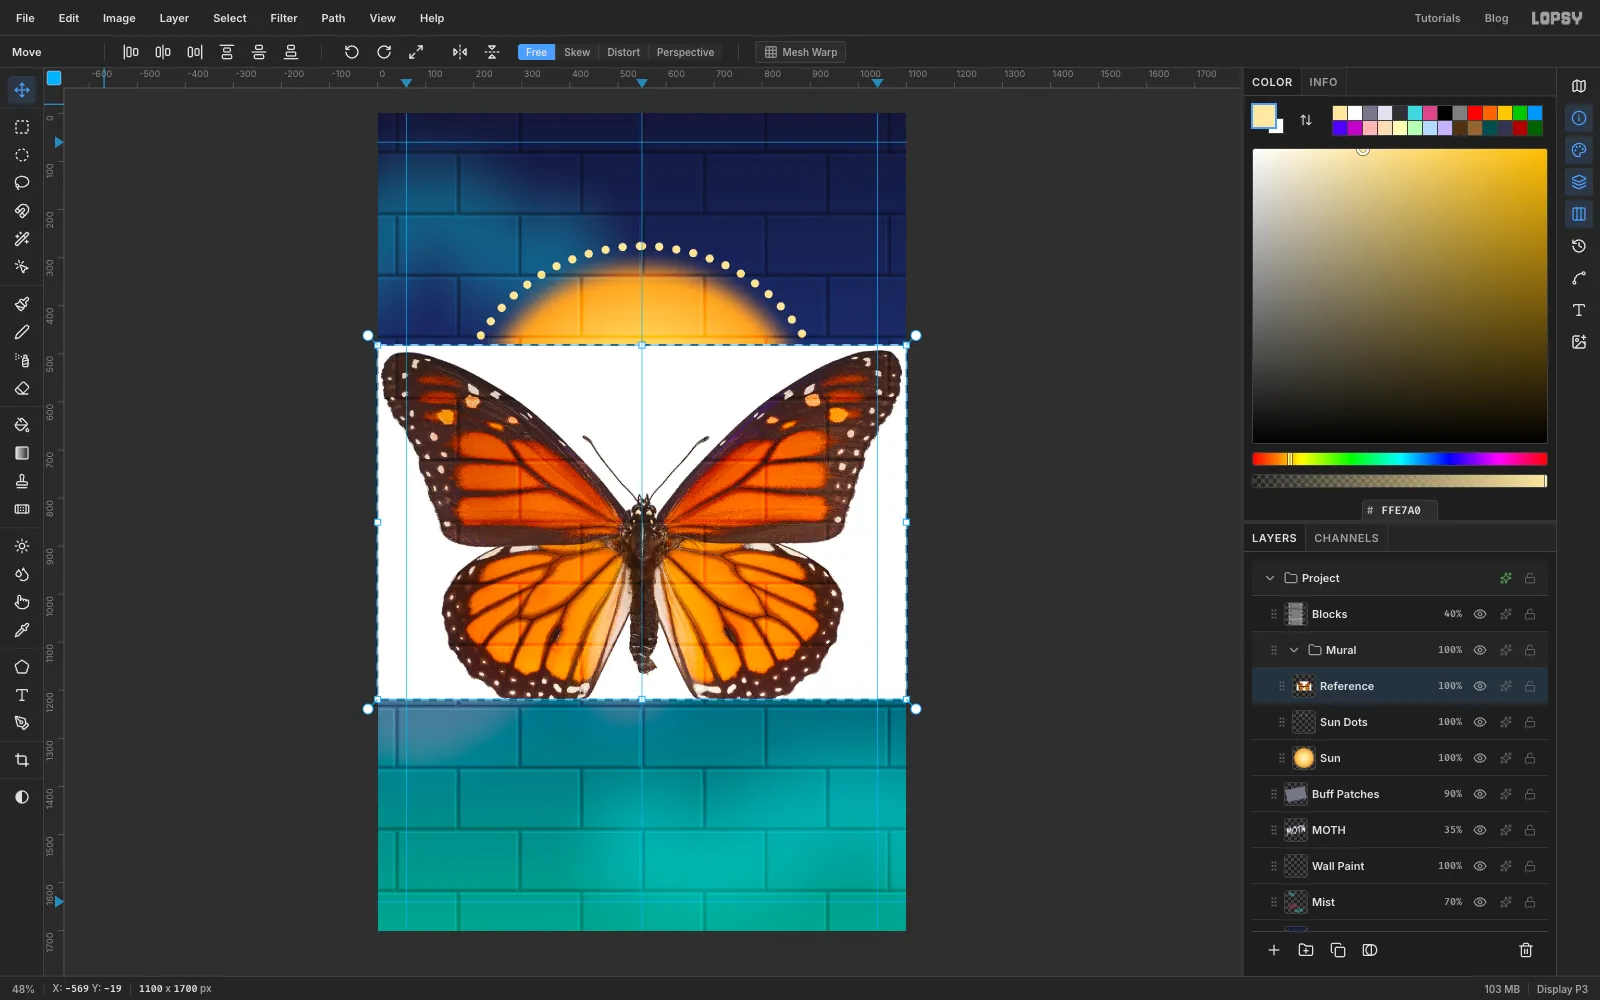
-
Knock out the white backdrop
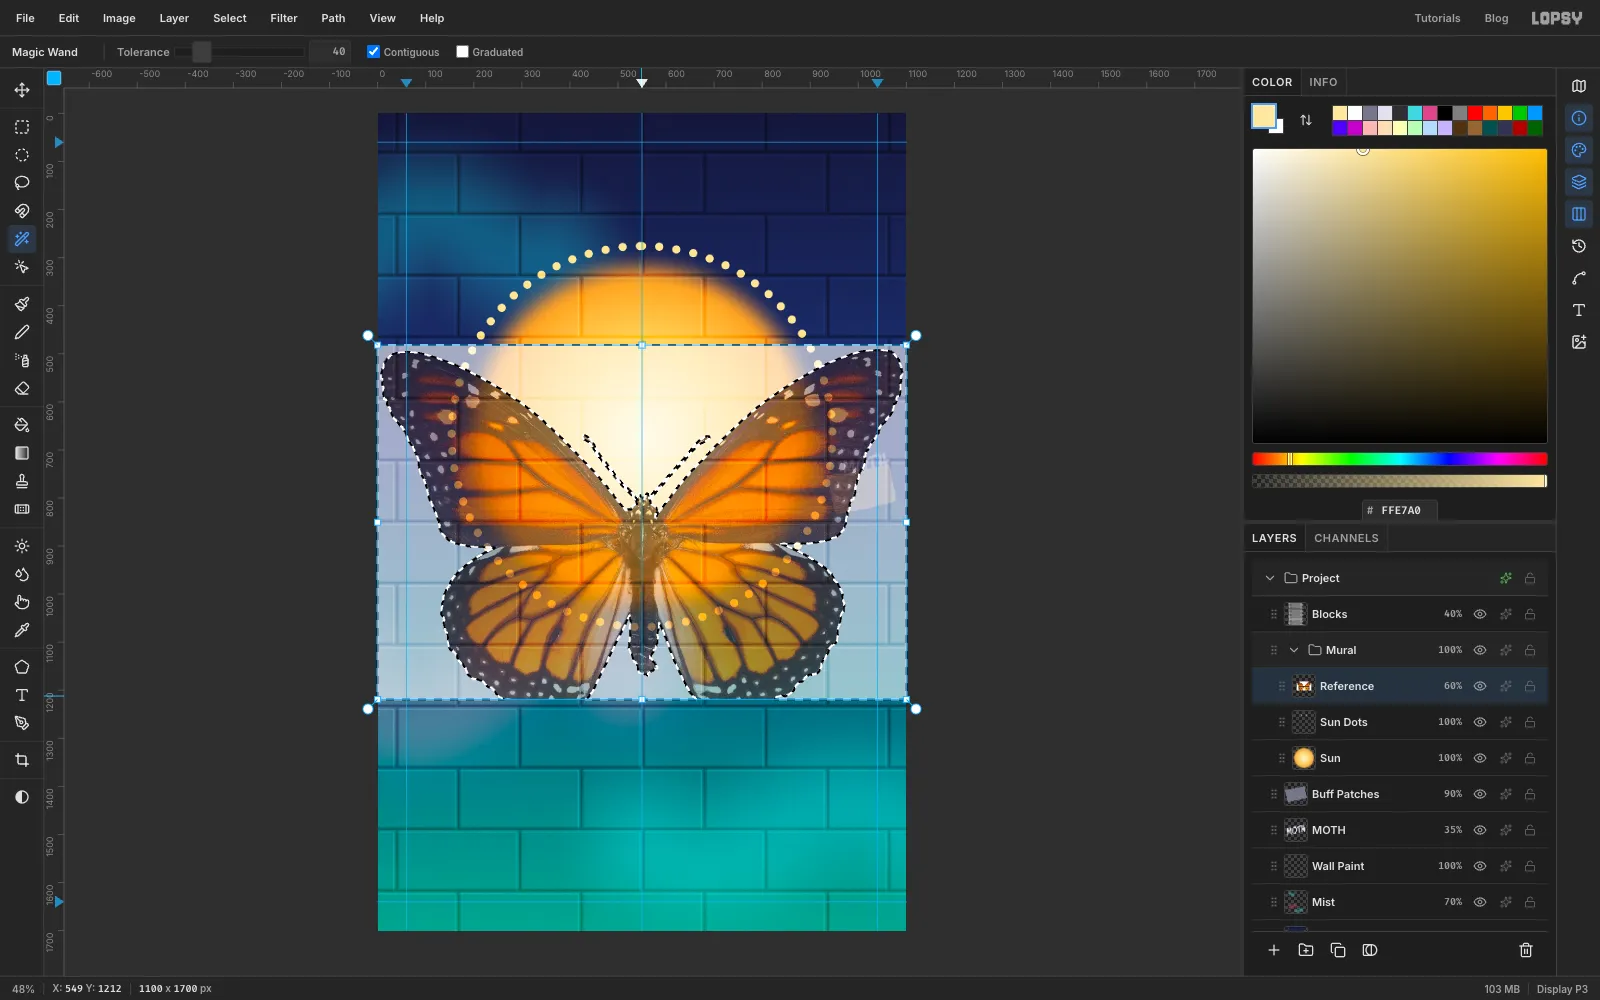
Press Cmd+D. Pick the Magic Wand and set Tolerance to
40with Contiguous ticked.Click the white in the photo's top-left corner. That selects the whole connected background. The small white wedge under the body, between the two lower wings, is a separate area, so Shift-click it to add it.
Press Delete, then Cmd+D. Only the butterfly is left.
-
Scale it down and centre it on the sun
Cmd-click the
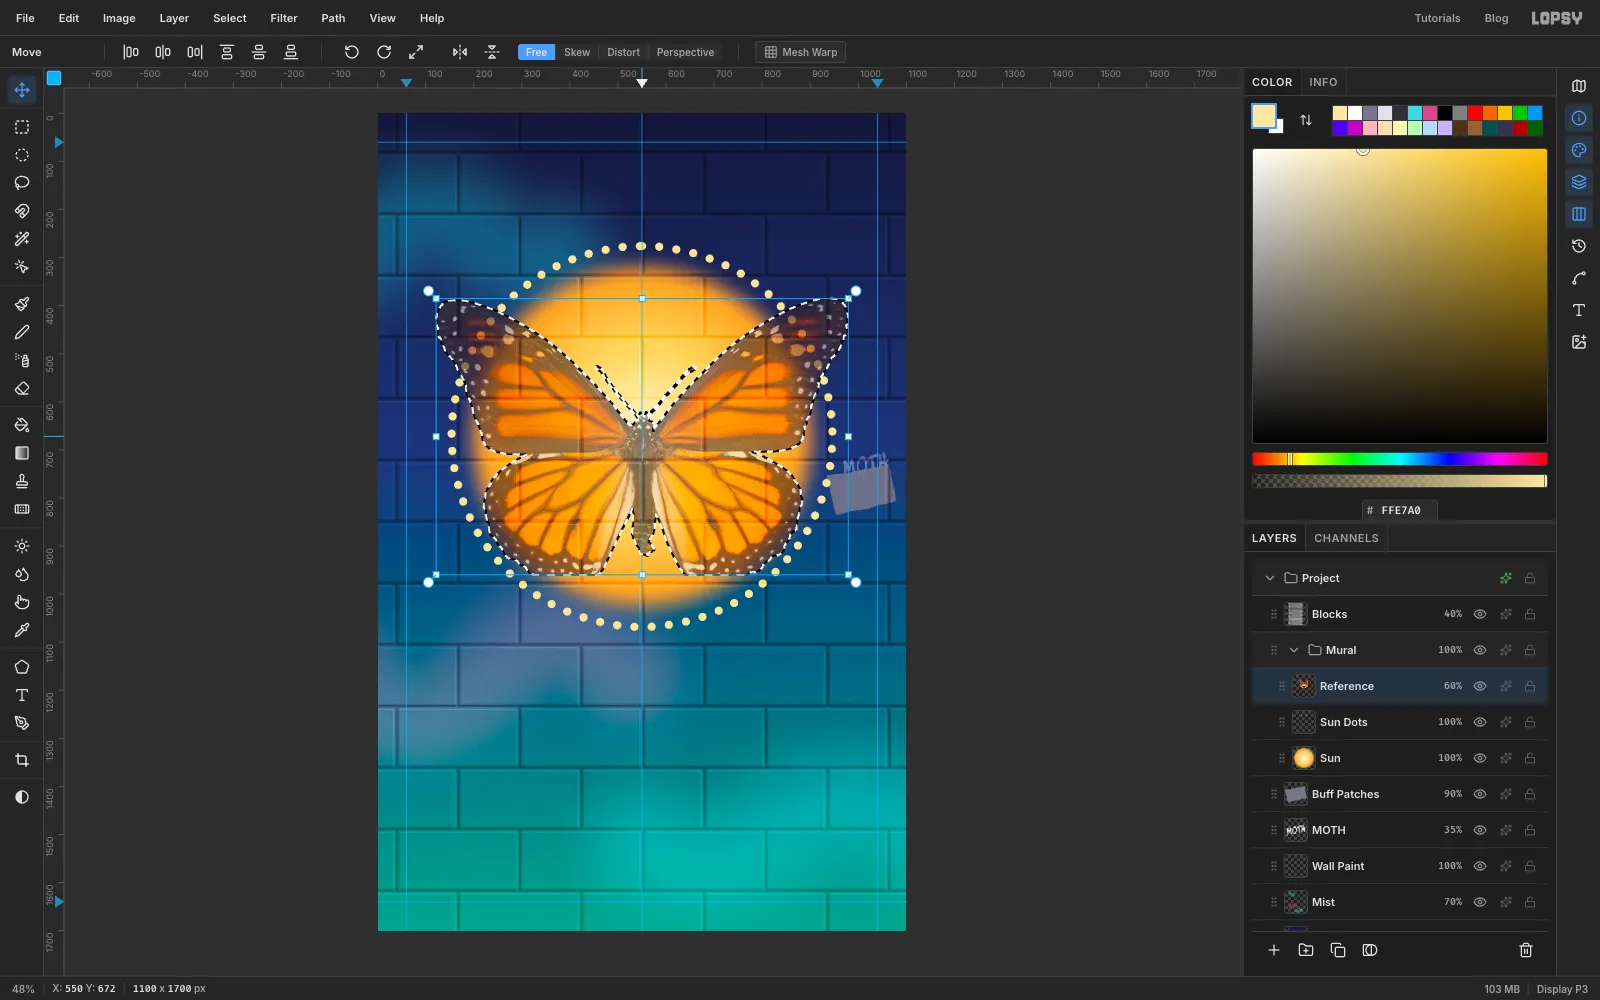
Referencethumbnail to select the butterfly's pixels. The Move tool shows transform handles around it.- Hold Cmd and drag the bottom-right corner handle up and in until the butterfly is about 860 px wide. Cmd keeps the proportions.
- Drag from the middle of the butterfly to move it until its body sits in the centre of the sun, at about
550, 672.
-
Tilt it into flight
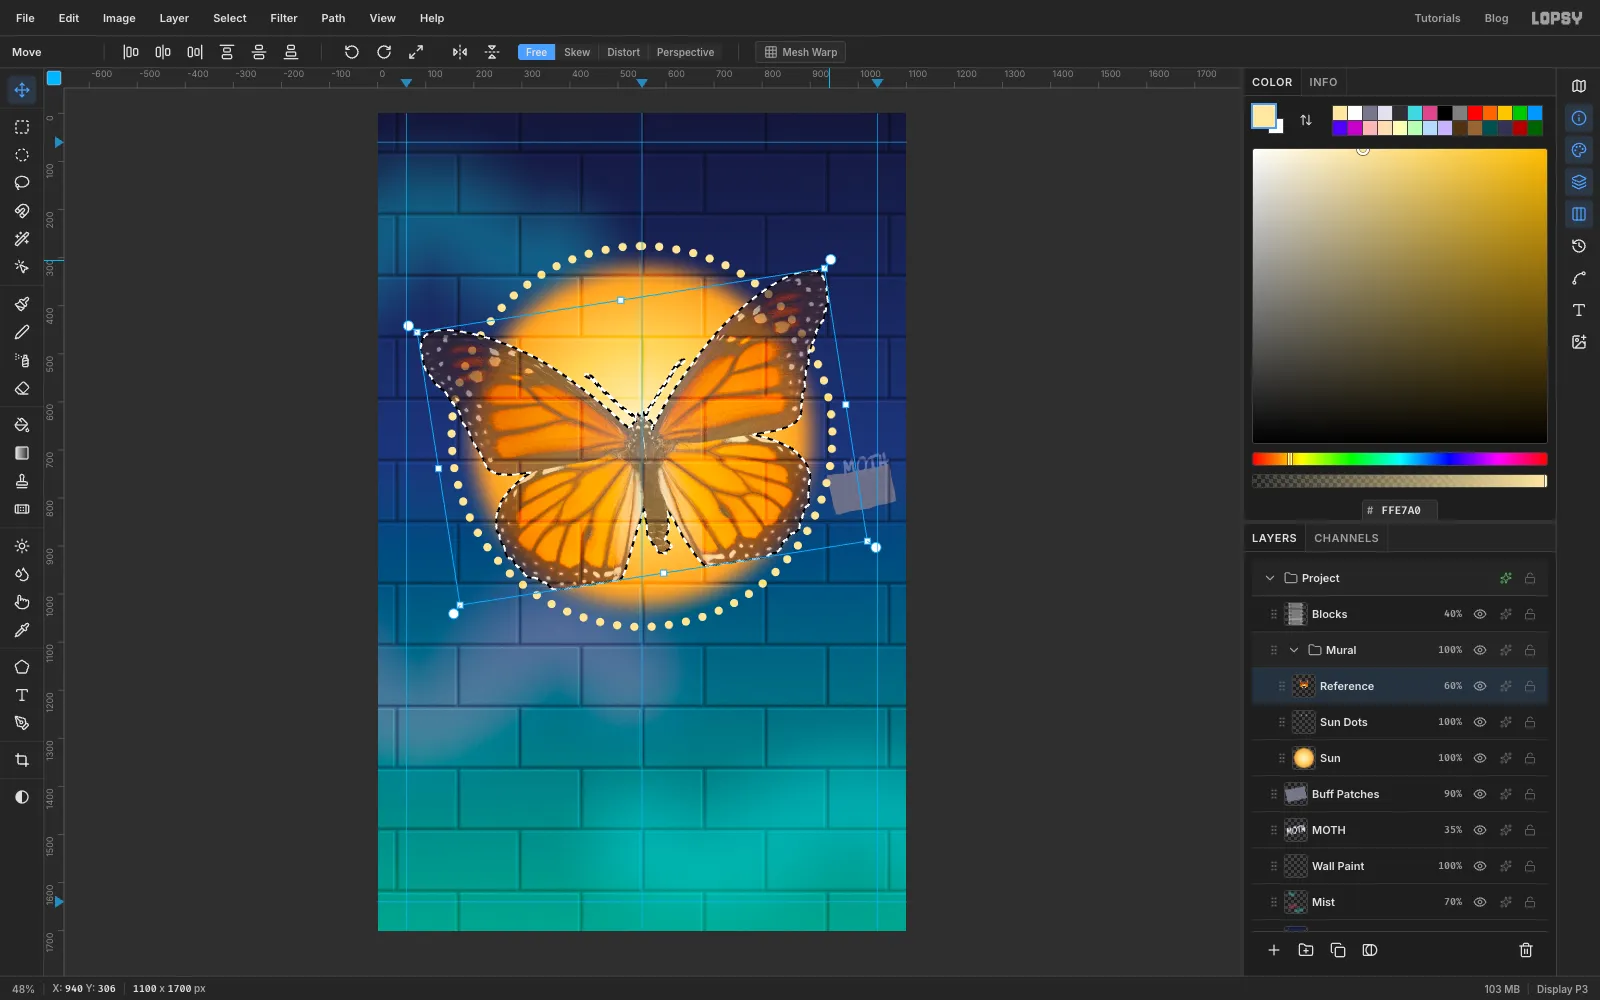
Hover just outside the box's top-right corner until you see the rotate cursor, then drag upward to turn the butterfly about 9° anticlockwise, so its right wing lifts. A slight tilt makes it look like it's flying rather than pinned in a case.
Press Cmd+D to commit.
-
Fill the black silhouette
Now you'll trace the photo the way a mural painter works: black base first, colour on top, and the black that shows through becomes the veins.
- Click
Sun Dots, then Add Layer, and name the new layerWing Black. It goes betweenSun DotsandReference. - Cmd-click the
Referencethumbnail to select the butterfly. - Choose Select → Grow… with
4, then Select → Shrink… with4. Growing and shrinking by the same amount closes the hairline gaps along the body without changing the outline. - Set the foreground to and choose Edit → Fill. Press Cmd+D.
The
Referencelayer sits on top at 60%, so the black looks brown for now.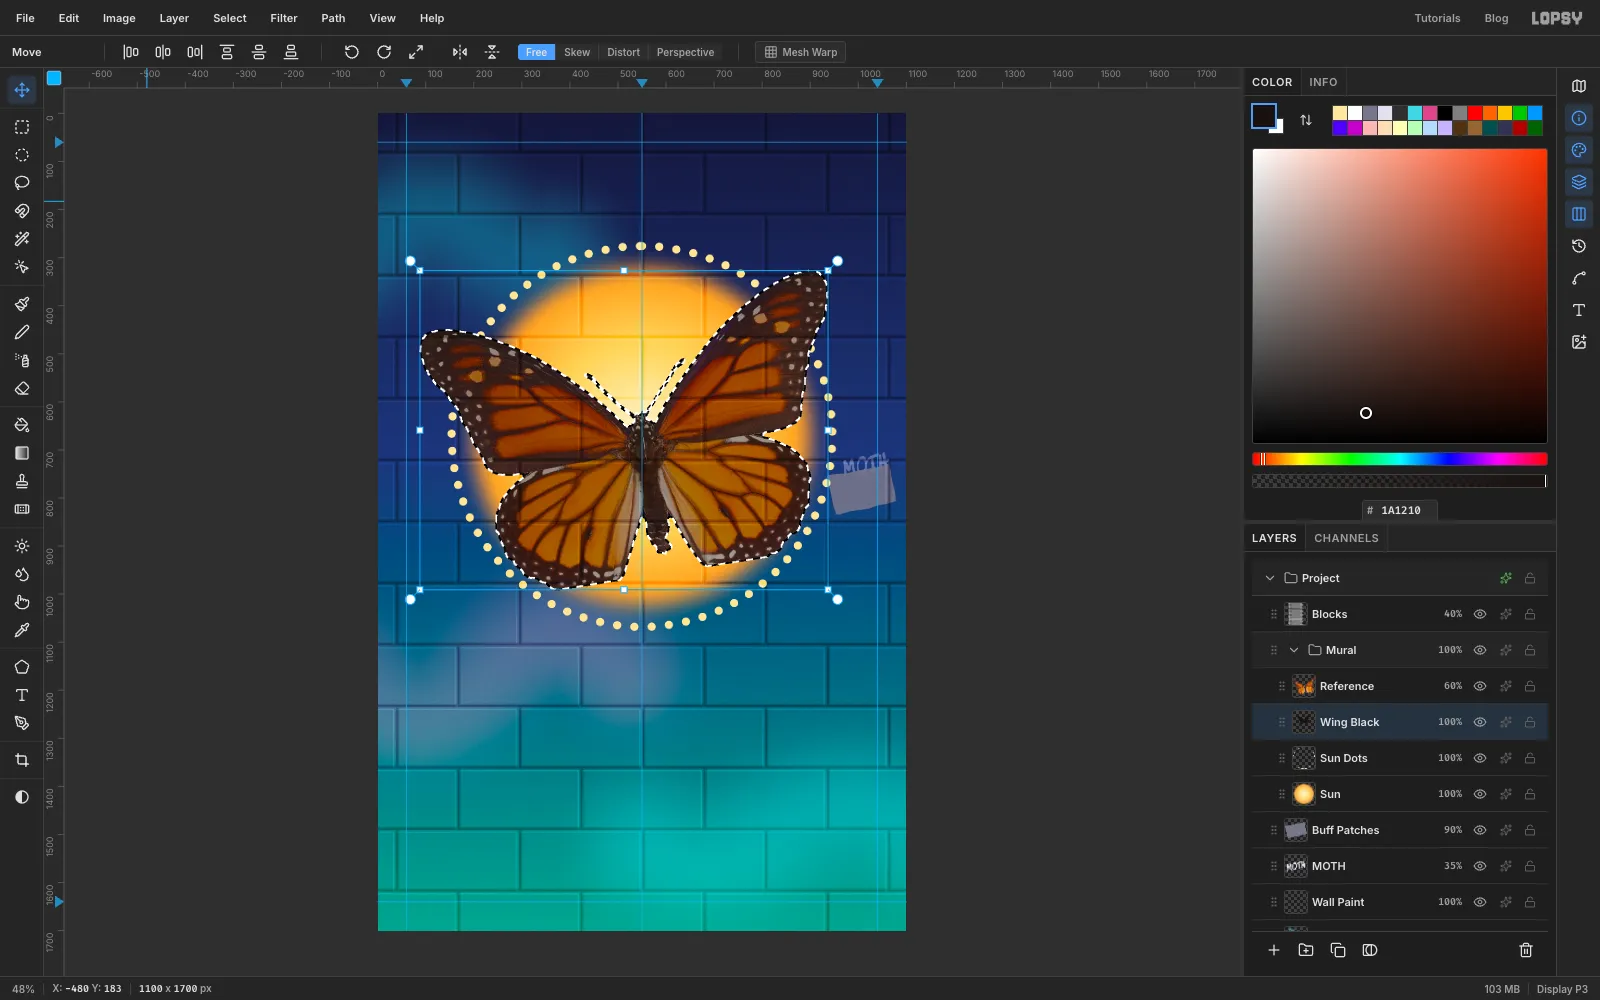
- Click
-
Select the orange cells
Click
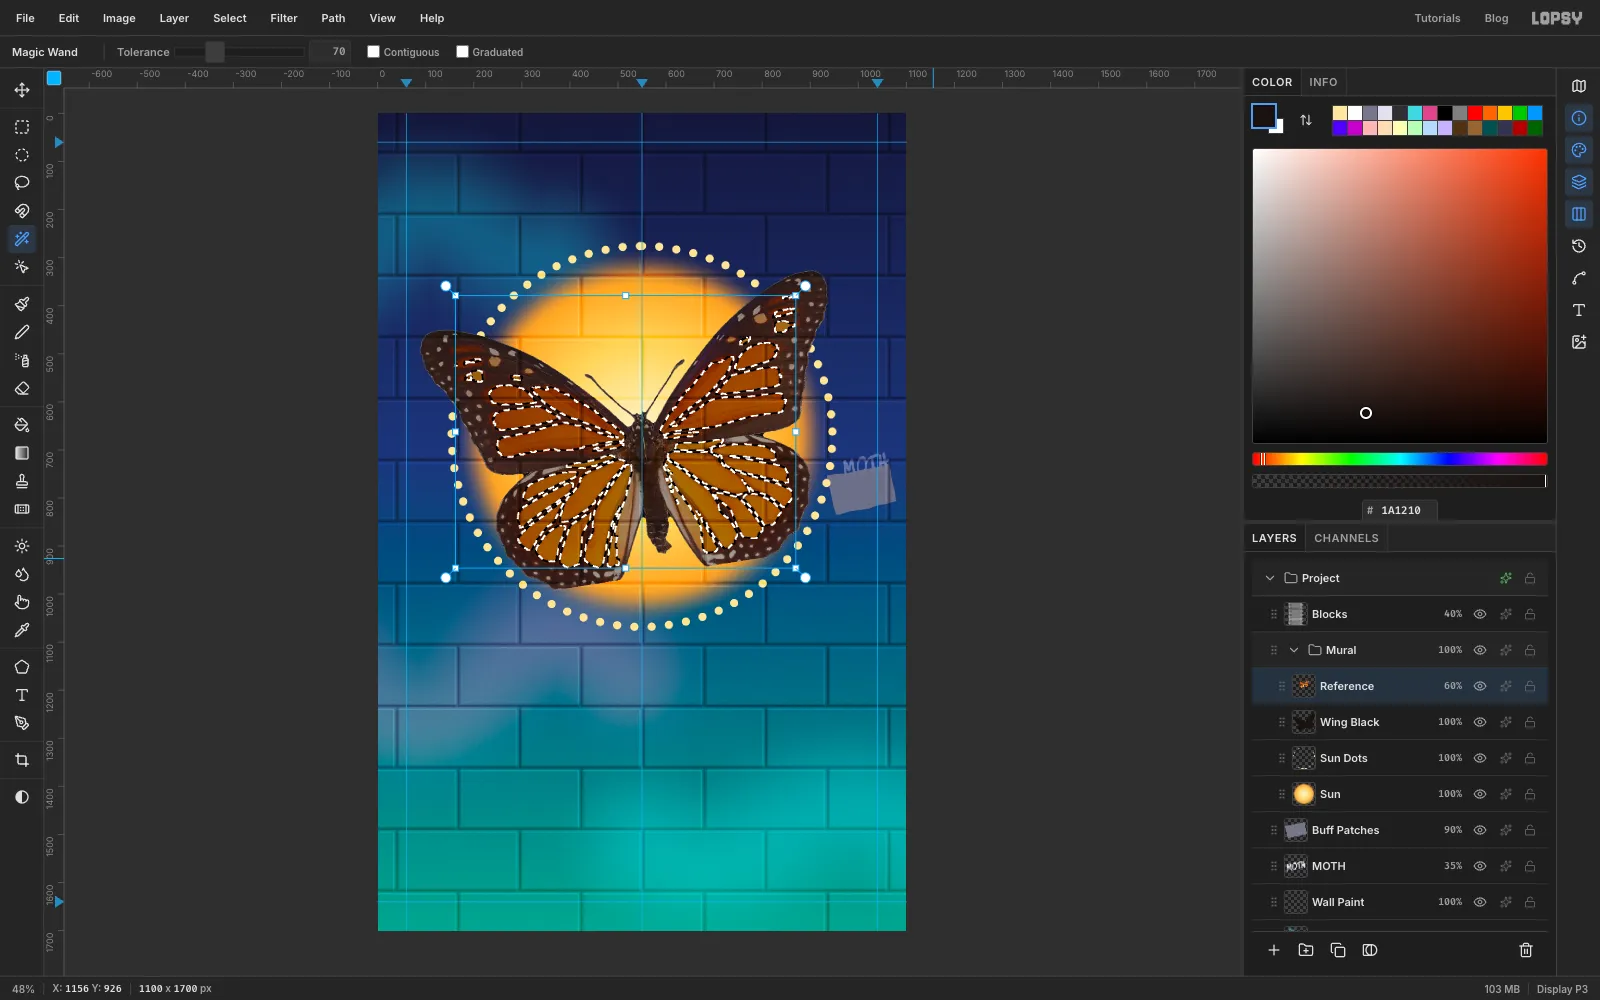
Reference. Pick the Magic Wand, set Tolerance to70and untick Contiguous, so one click finds that colour everywhere in the photo.- Click inside one of the orange cells in an upper wing.
- Shift-click an orange cell in a lower wing. The lower wings are a lighter orange, so this adds the ones the first click missed.
- Tidy the edges: Select → Grow…
1, then Shrink…2, then Grow…1. This fills pinholes and drops the loose specks the photo's scales leave along the veins.
-
Fill the cells with an orange fade
Click
Wing Blackand add a layer calledOrange.Pick the Gradient tool with Radial, and in Advanced… use at the left end, at about 45% and at the right end. Drag from just below the butterfly's body, at about
550, 692, out to the right about 440 px. The colour now glows from the body out to the tips, the way a muralist fades one can into another. Press Cmd+D.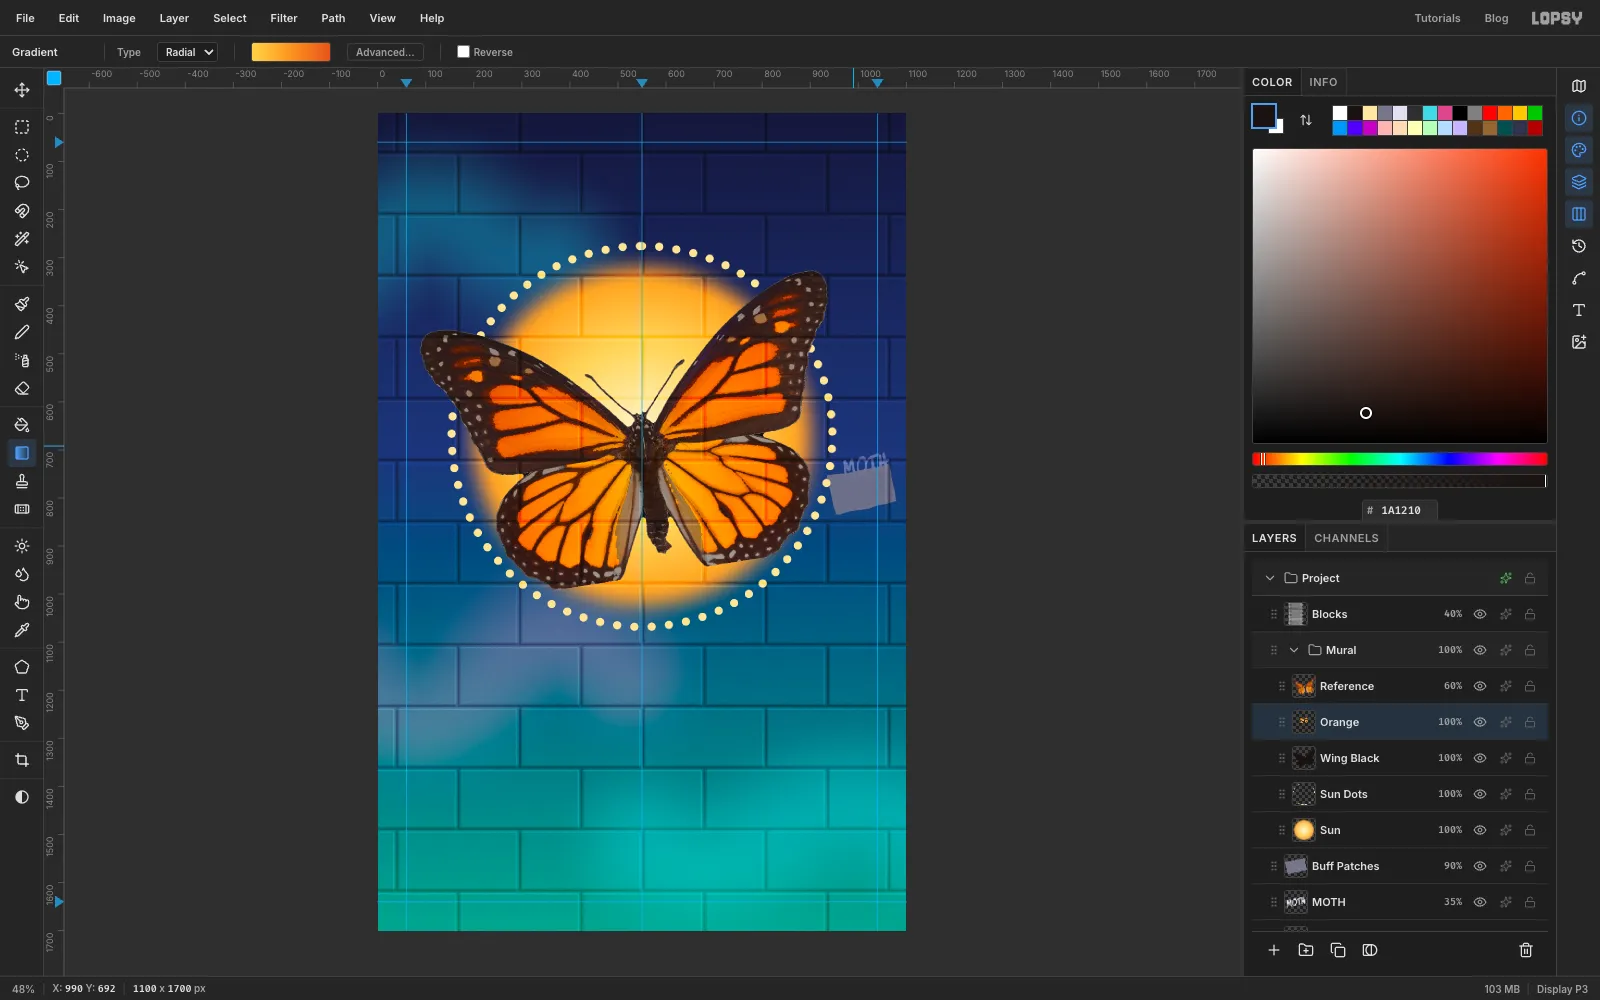
-
Pick out the white spots
Click
Referenceagain. Keep the Magic Wand with Contiguous off, and set Tolerance to80. Click the middle of one of the cream spots near the tip of the left upper wing. Every spot in the photo is selected.Click
Orange, add a layer calledSpots, set the foreground to and choose Edit → Fill. Press Cmd+D.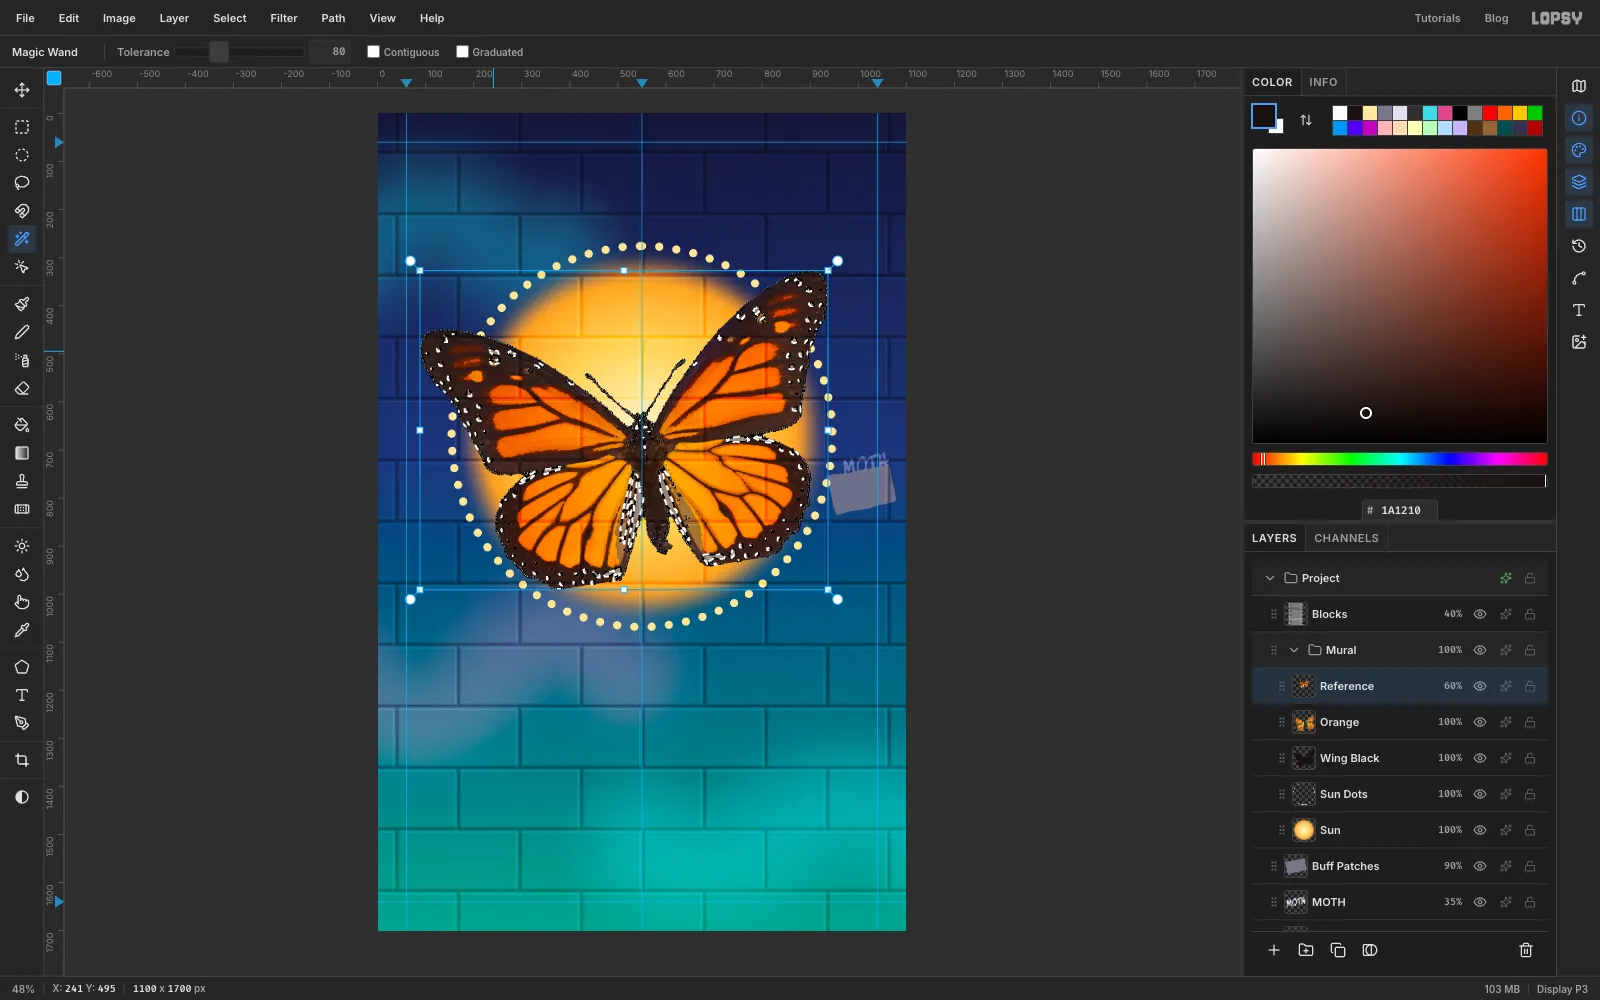
-
Clean up the body
The specimen has pale scales along the inside of its lower wings and a speckled thorax, and the wand picked those up as white blotches. Paint over them:
- On
Spots, use the Lasso to draw a loose shape around the abdomen and the pale strips either side of it, from the bottom of the thorax to the tip of the abdomen. - Hold Shift and drag a small circle with the Elliptical Marquee over the thorax to add it.
- Press Delete, then Cmd+D.
- Click
Wing Blackand lasso a slim shape over the abdomen, then fill it with . That closes any gaps along the body.
Click the eye on
Referenceto hide it.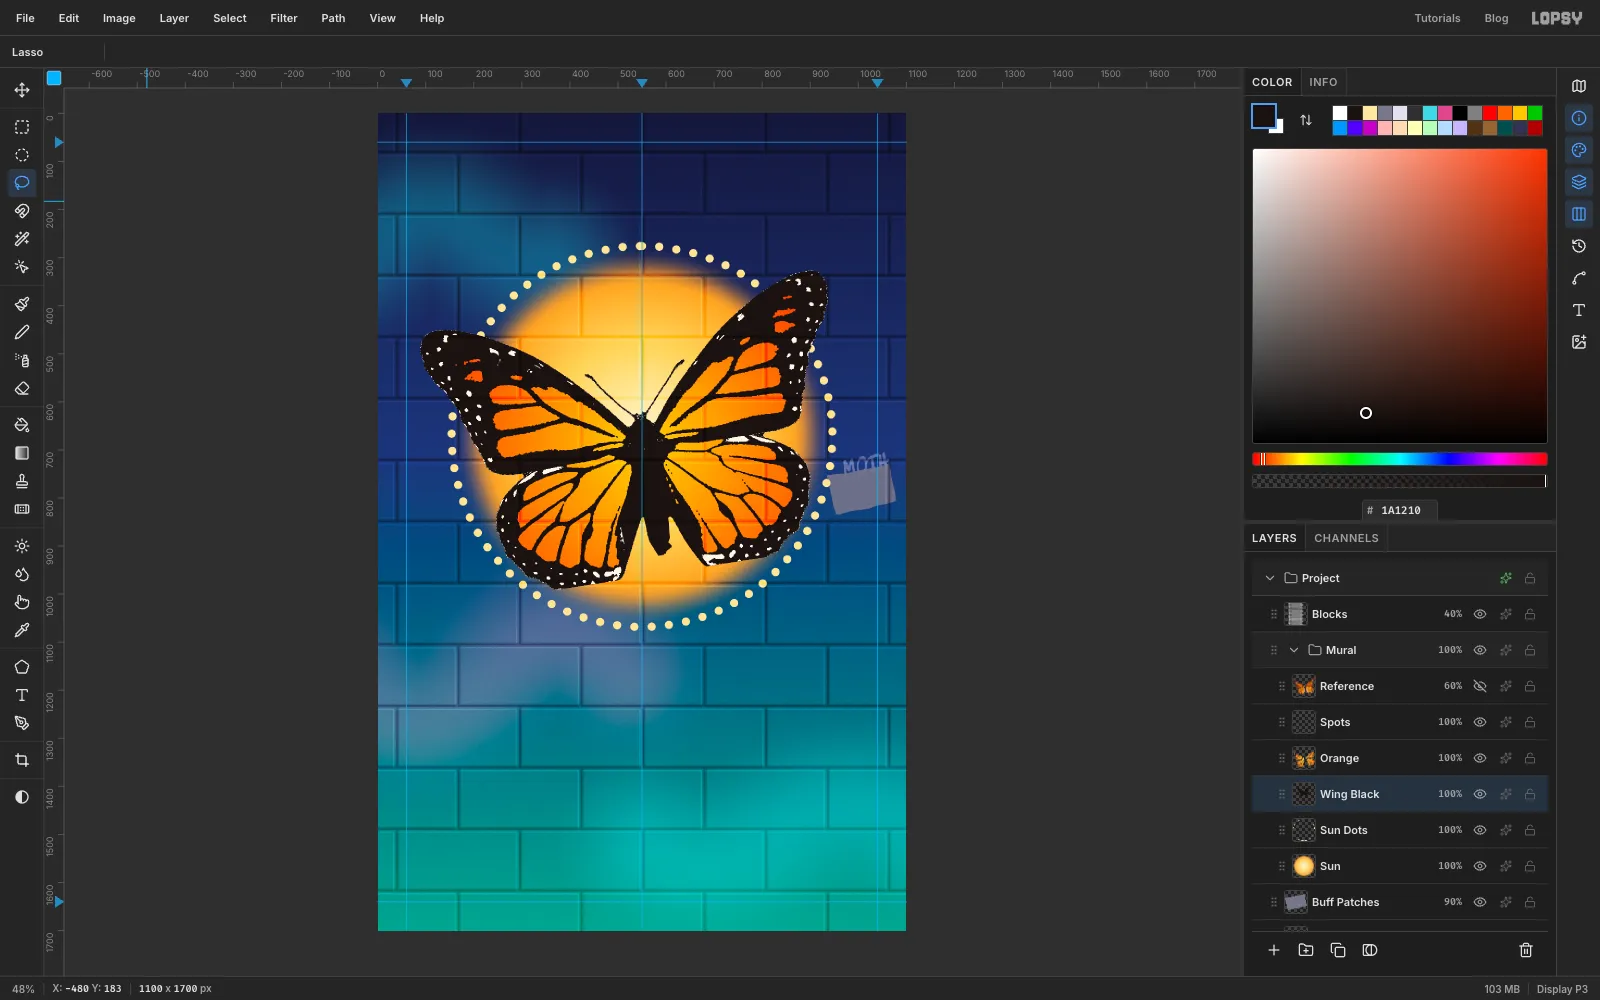
- On
-
Outline it, drop a shadow and add overspray
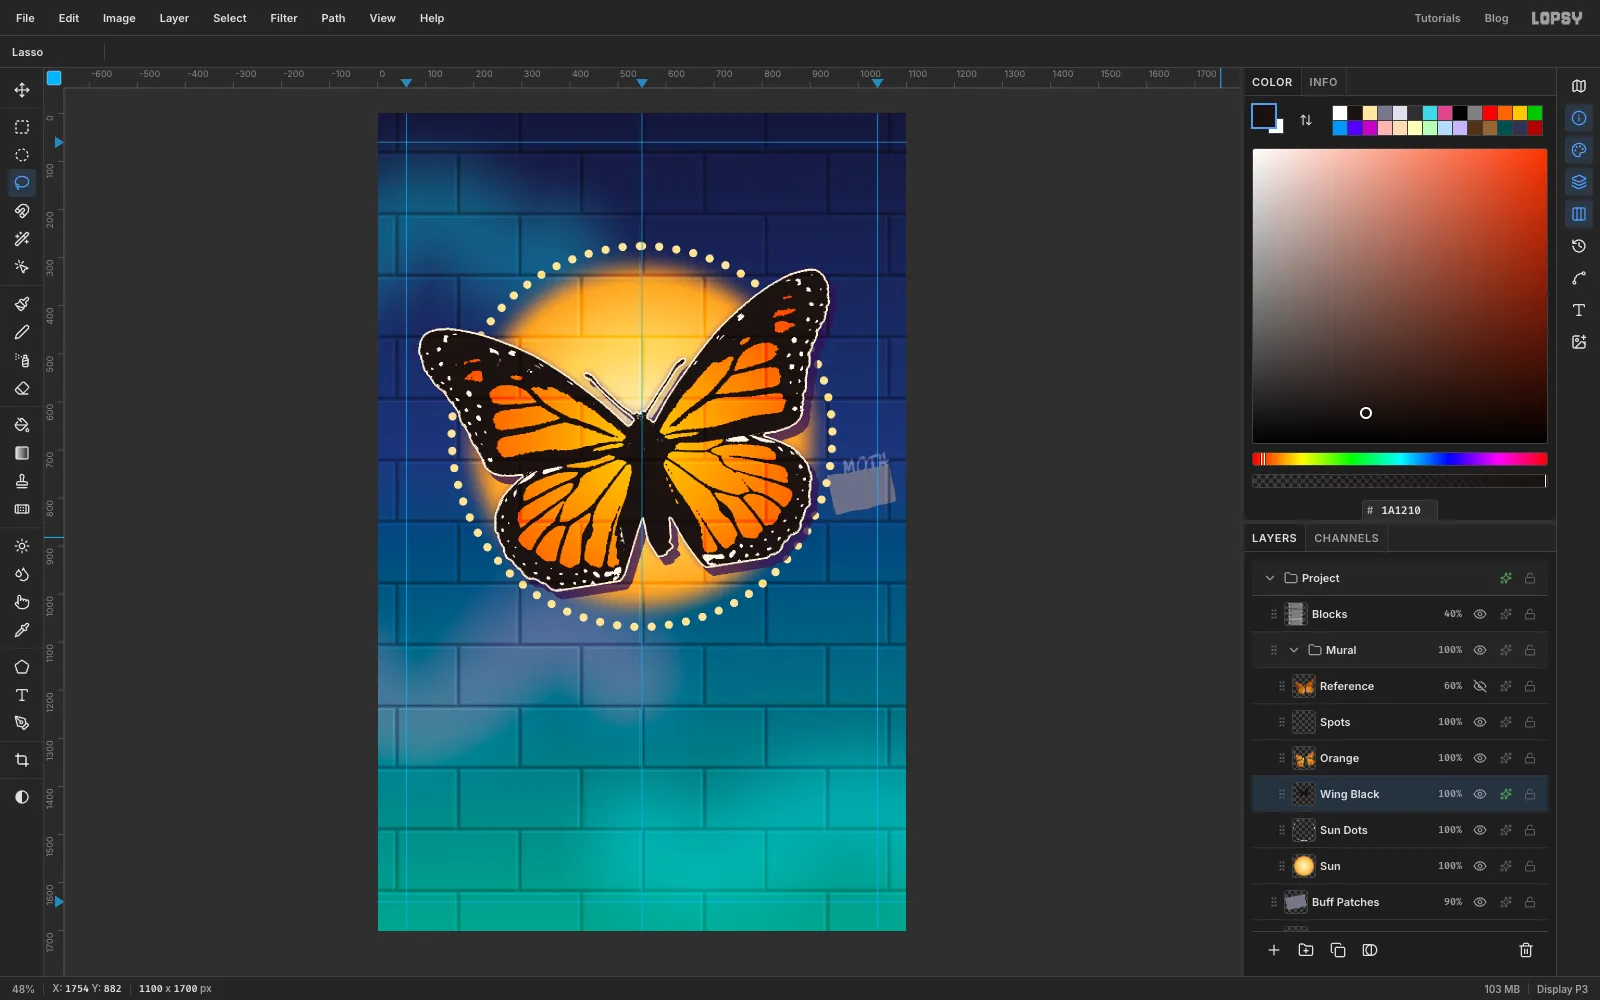
Open the effects drawer for
Wing Black:- Stroke: Width
4, colour , position Outside. Muralists often finish a figure with a thin light line so it pops off the background. - Drop Shadow: Offset X
14, Offset Y16, Blur0, Opacity75, colour . A hard, solid shadow is a classic mural trick for depth. - Outer Glow: Size
22, Opacity45, colour . This is the soft mist that spray paint leaves around a shape.
- Stroke: Width
-
Spray a sheen across the upper wings
Click
Spotsand add a layer calledSheen. Cmd-click theOrangethumbnail so the highlight stays inside the cells.Pick the Brush with Size
200, Hardness0, Opacity45and the foreground . Make one stroke along each upper wing, from near the tip toward the body. Press Cmd+D and setSheento Screen.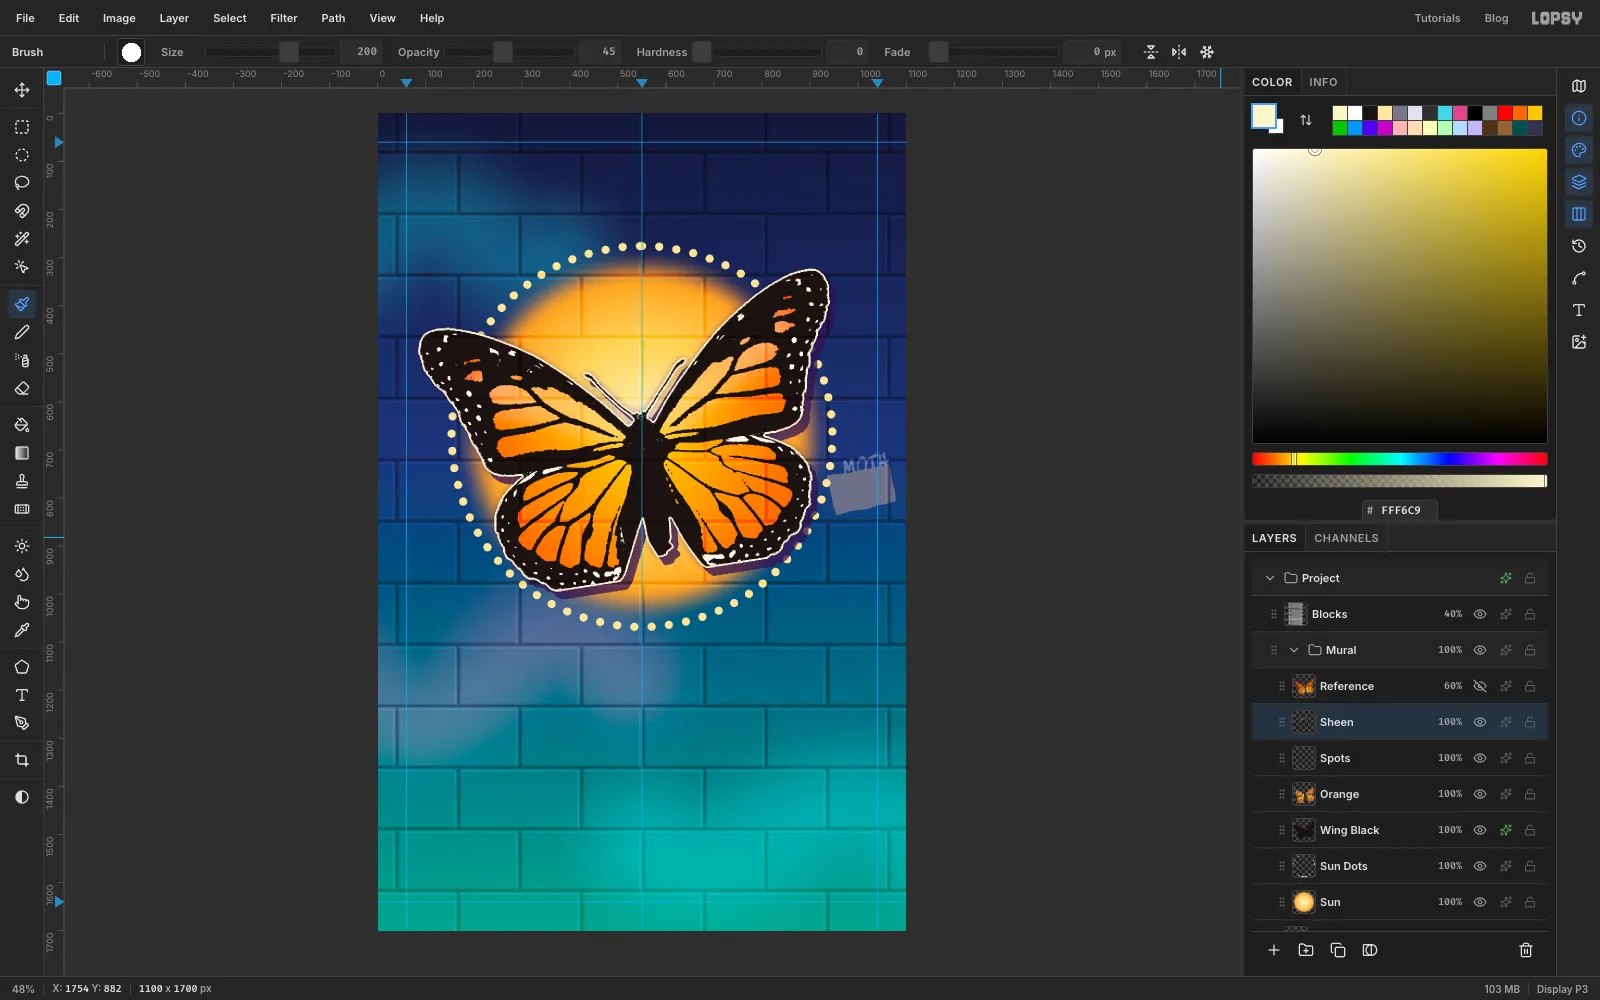
-
Redraw the antennae and the abdomen
Traced antennae come out lumpy and pick up the cream outline as thick tubes. Draw clean ones instead.
- Click
Wing Black. With the Lasso, draw around the antennae in the gap above the head, staying clear of the wings, and press Delete. Press Cmd+D. - Click
Sheenand add a layer calledAntennae. Set the foreground to . - Pick the Pen tool and set Stroke to
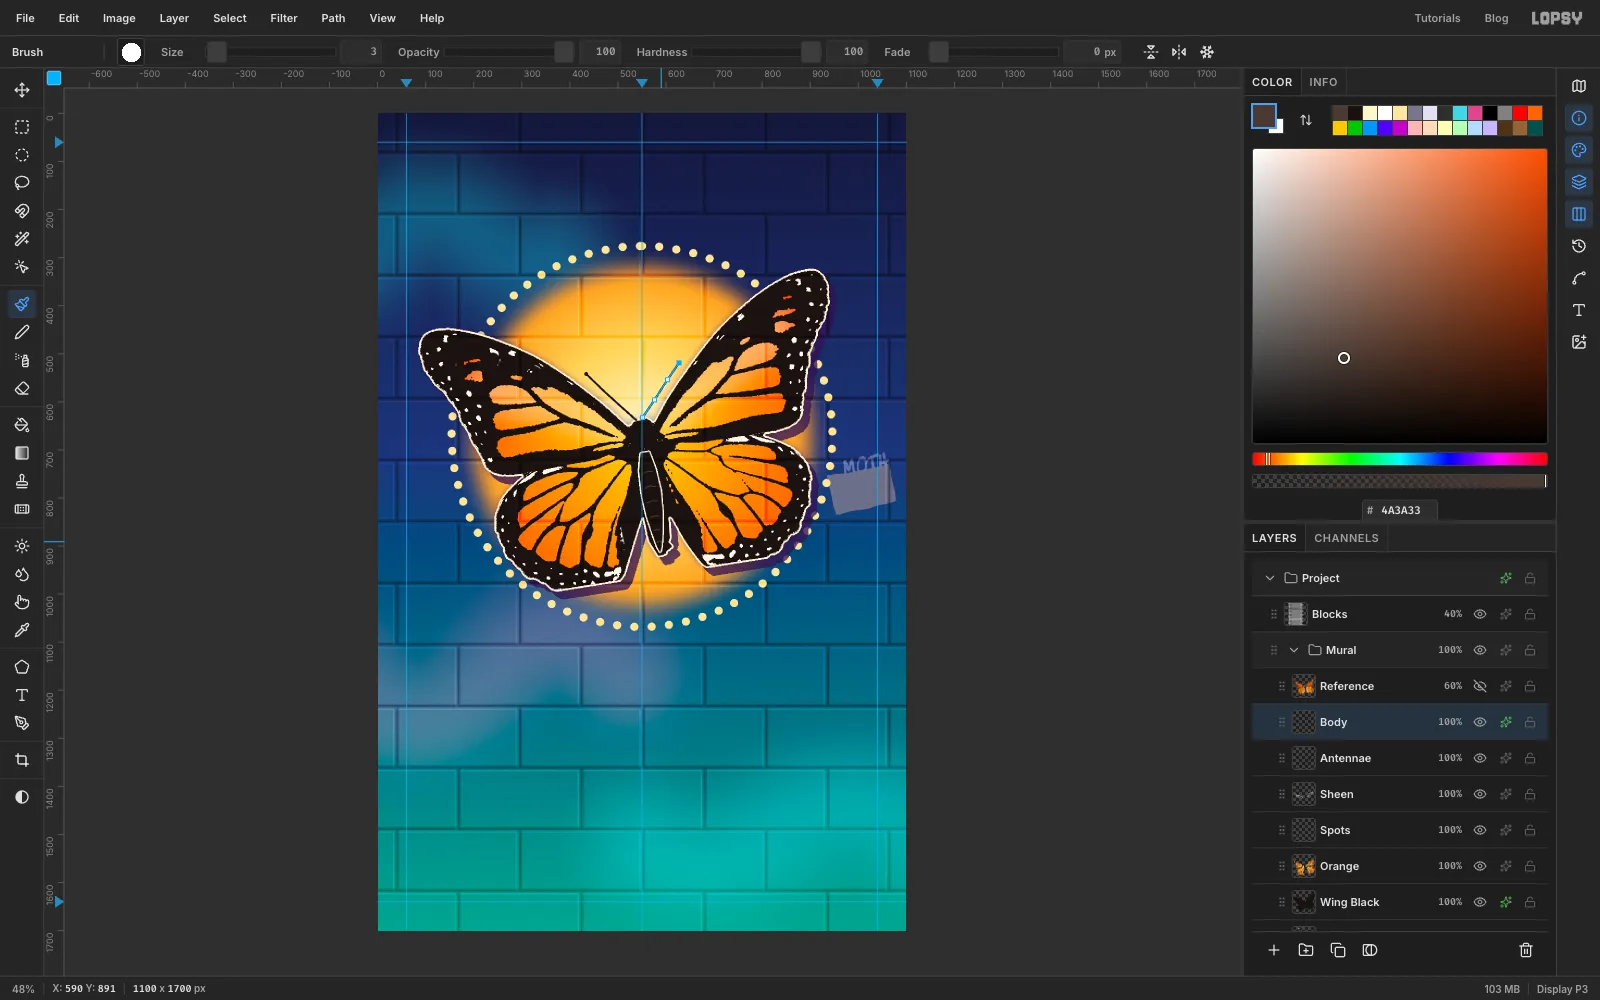
4in the options bar. Click at the tip of the left antenna (where the old one ended), click twice along its line, and click at the head. Press Enter. The Pen commits the path and strokes it in the foreground colour. Do the same for the right antenna. The last path stays selected, so its thin blue outline stays on screen in the next few screenshots; it's only a guide and never shows up in the export. - Pick the Brush with Size
9and Hardness100and click once at each tip for the knobs. - Add a layer called
Body. Lasso a slim shape for the abdomen that narrows to a rounded point at the bottom, and fill it with . Give it a Stroke of Width3, Outside, in , so it reads as its own segment. - With the Brush at Size
3and the foreground , draw six short, slightly curved lines across the abdomen for its segments.
- Click
-
Group the butterfly
Click the
Referencelayer and click Delete Layer: you won't need it again.Click
Body, then Shift-clickWing Blackto select the six butterfly layers. Choose Layer → Group Layers and name the groupMonarch. Now the whole butterfly can be moved and switched on and off as one.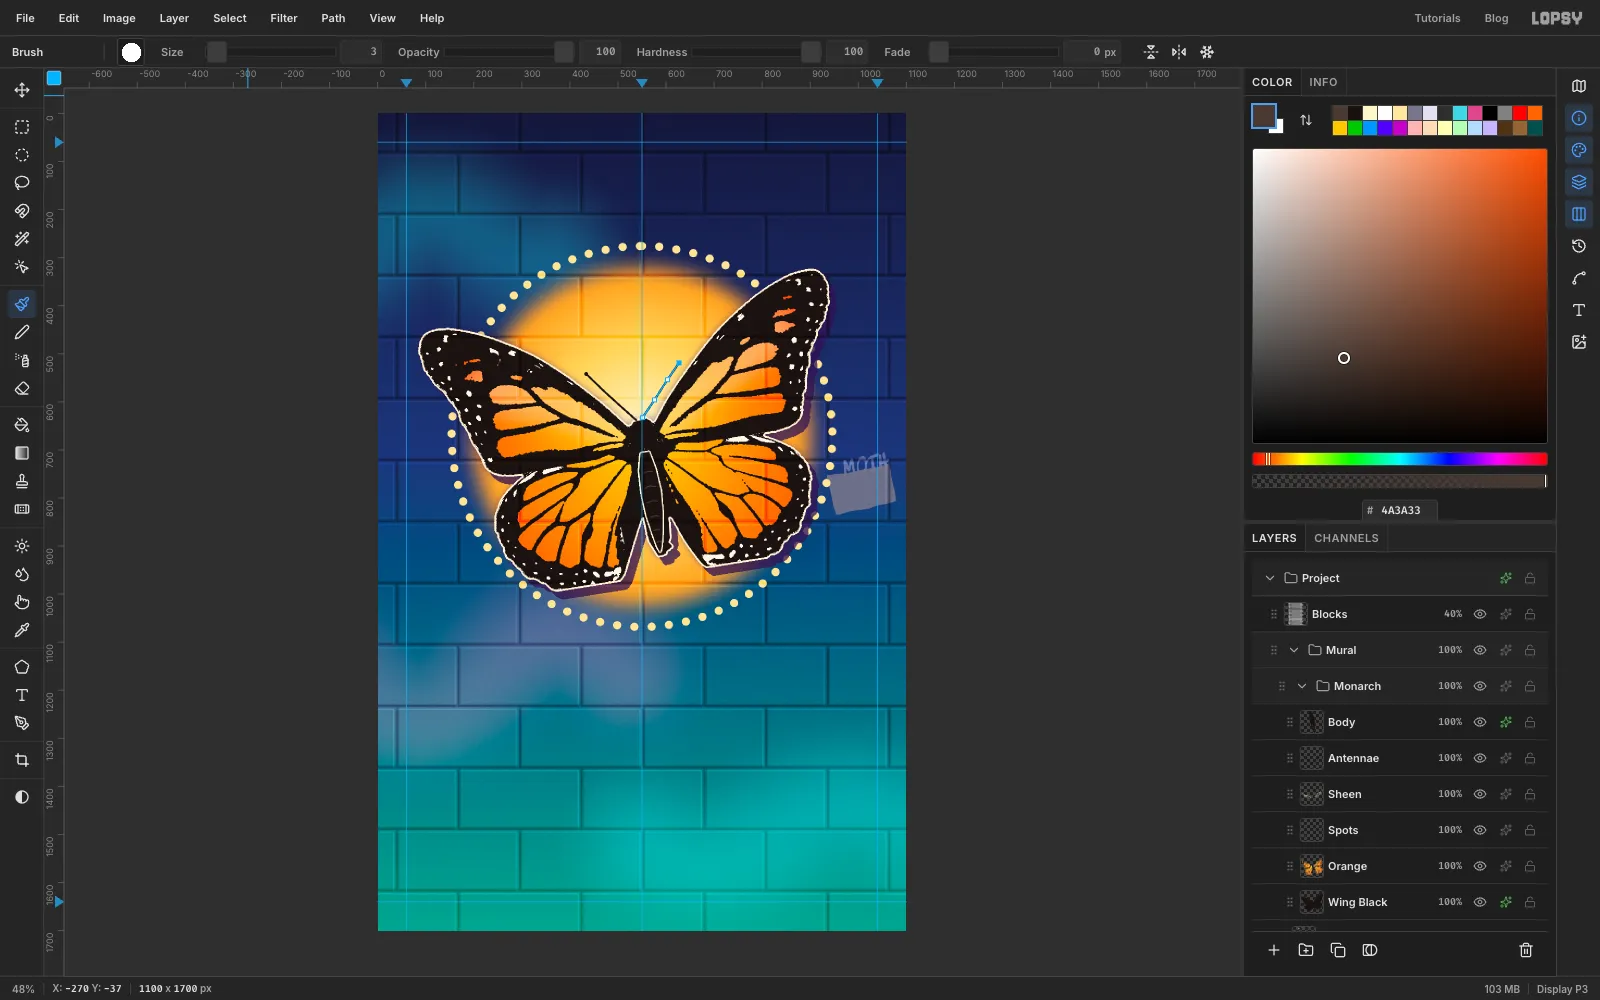
-
Copy the whole butterfly
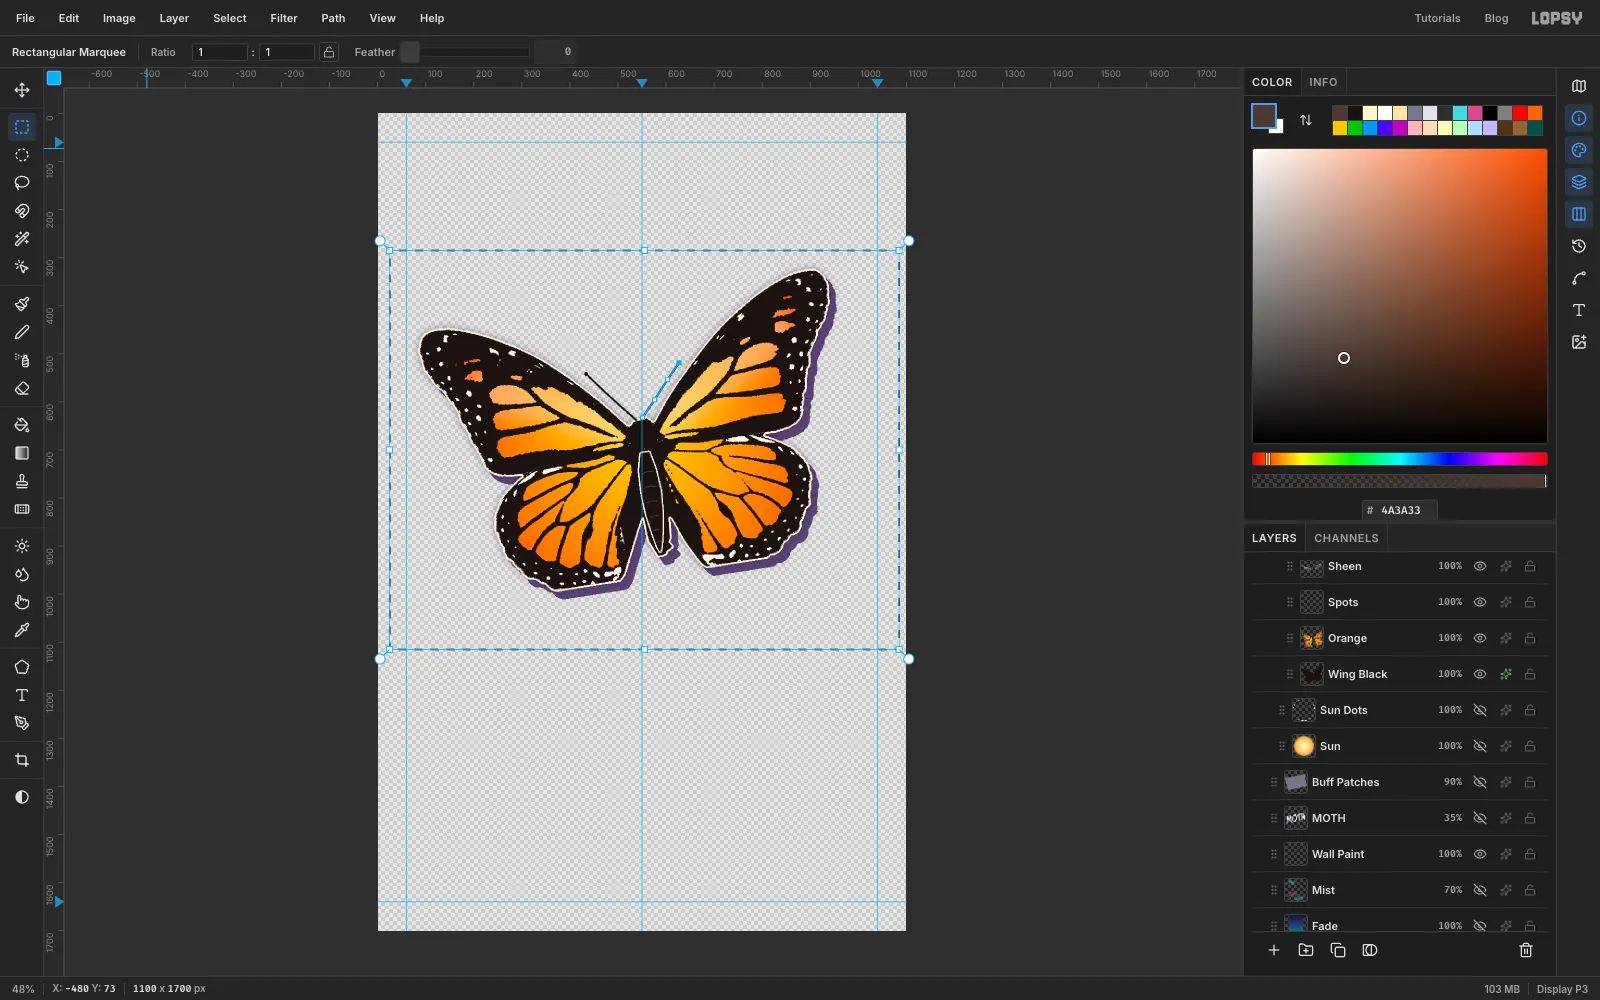
You want two small copies of the finished butterfly, outline and shadow included. Copy Merged copies everything visible inside a selection, so hide everything else first.
- Click the eye on
Background,Fade,Mist,MOTH,Buff Patches,Blocks,SunandSun Dots. - Draw a Rectangular Marquee around the whole butterfly, shadow included.
- Choose Edit → Copy Merged, press Cmd+D, and turn all those layers back on.
- Click the eye on
-
Paste a small monarch
Collapse the
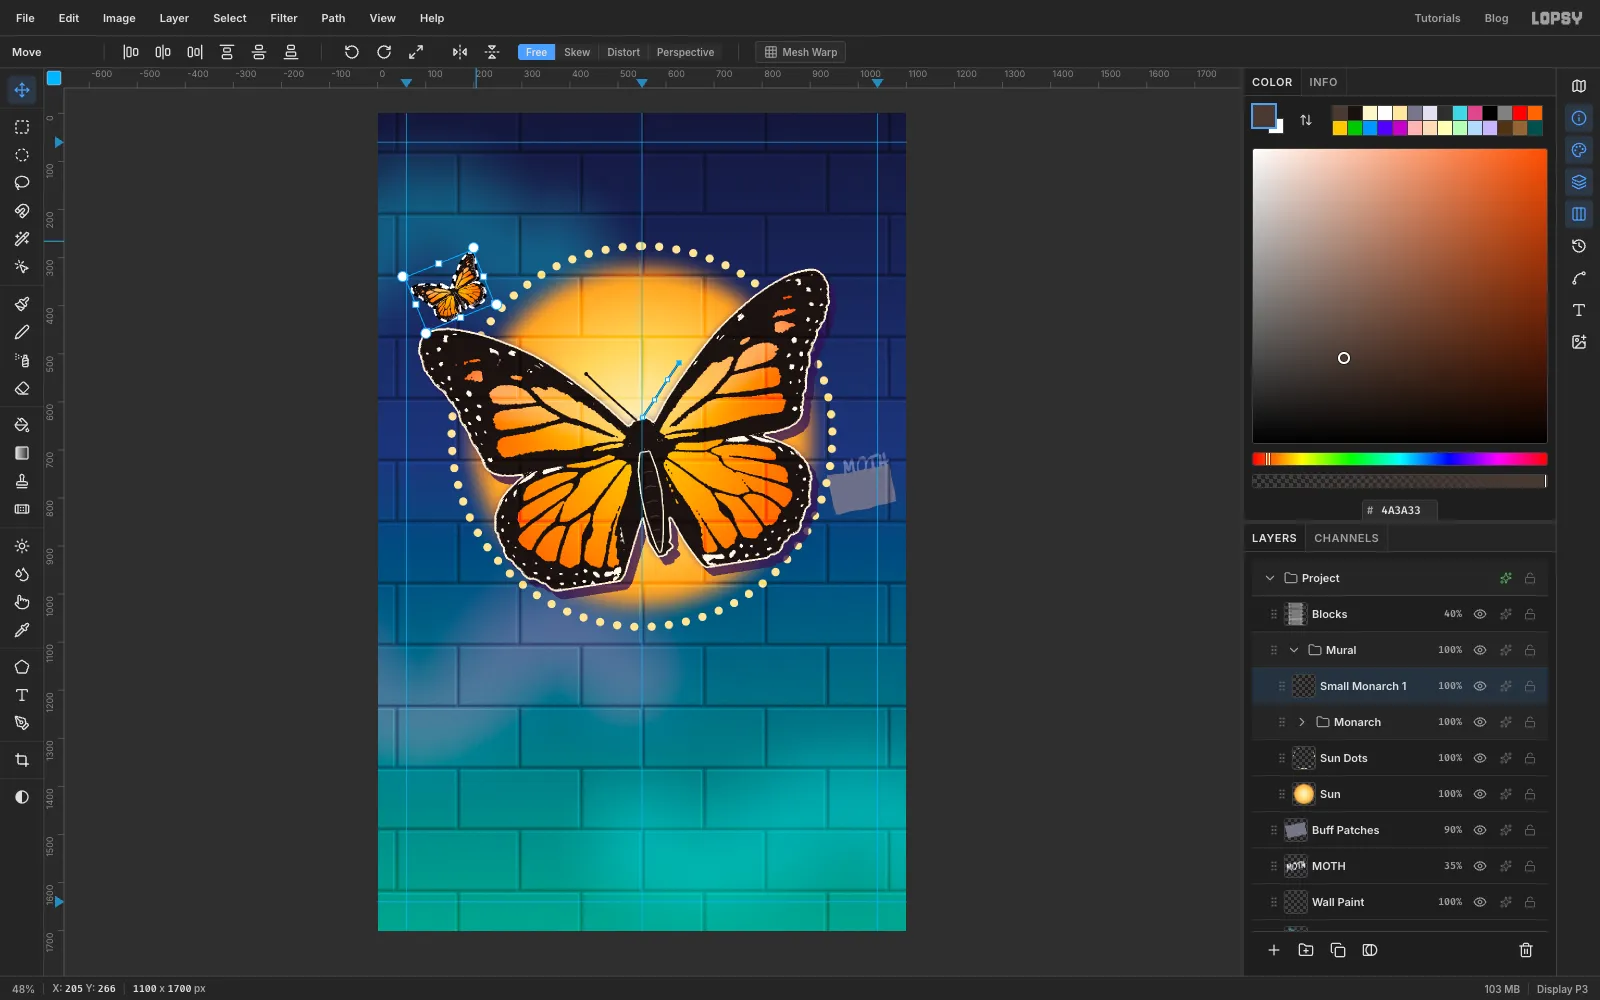
Monarchgroup with the arrow on its row and click it. Press Cmd+V: the copy lands in place, right on top of the big butterfly, and it's selected with the Move tool active. Rename itSmall Monarch 1.- Hold Cmd and drag the bottom-right handle in until the copy is about a sixth of its size, roughly 175 px wide.
- Drag it up to the top left, centred at about
150, 368, just under the masthead area and clear of the sun's dots. - Use the rotate handle at the top right to turn it about 22° anticlockwise, then press Cmd+D.
-
Paste a second, smaller one
Press Cmd+V again. The new copy lands on top of the big butterfly again, just like the first one. Rename it
Small Monarch 2. Scale it to about 14% (roughly 145 px wide), move it to about120, 965, rotate it about 18° clockwise this time, and press Cmd+D.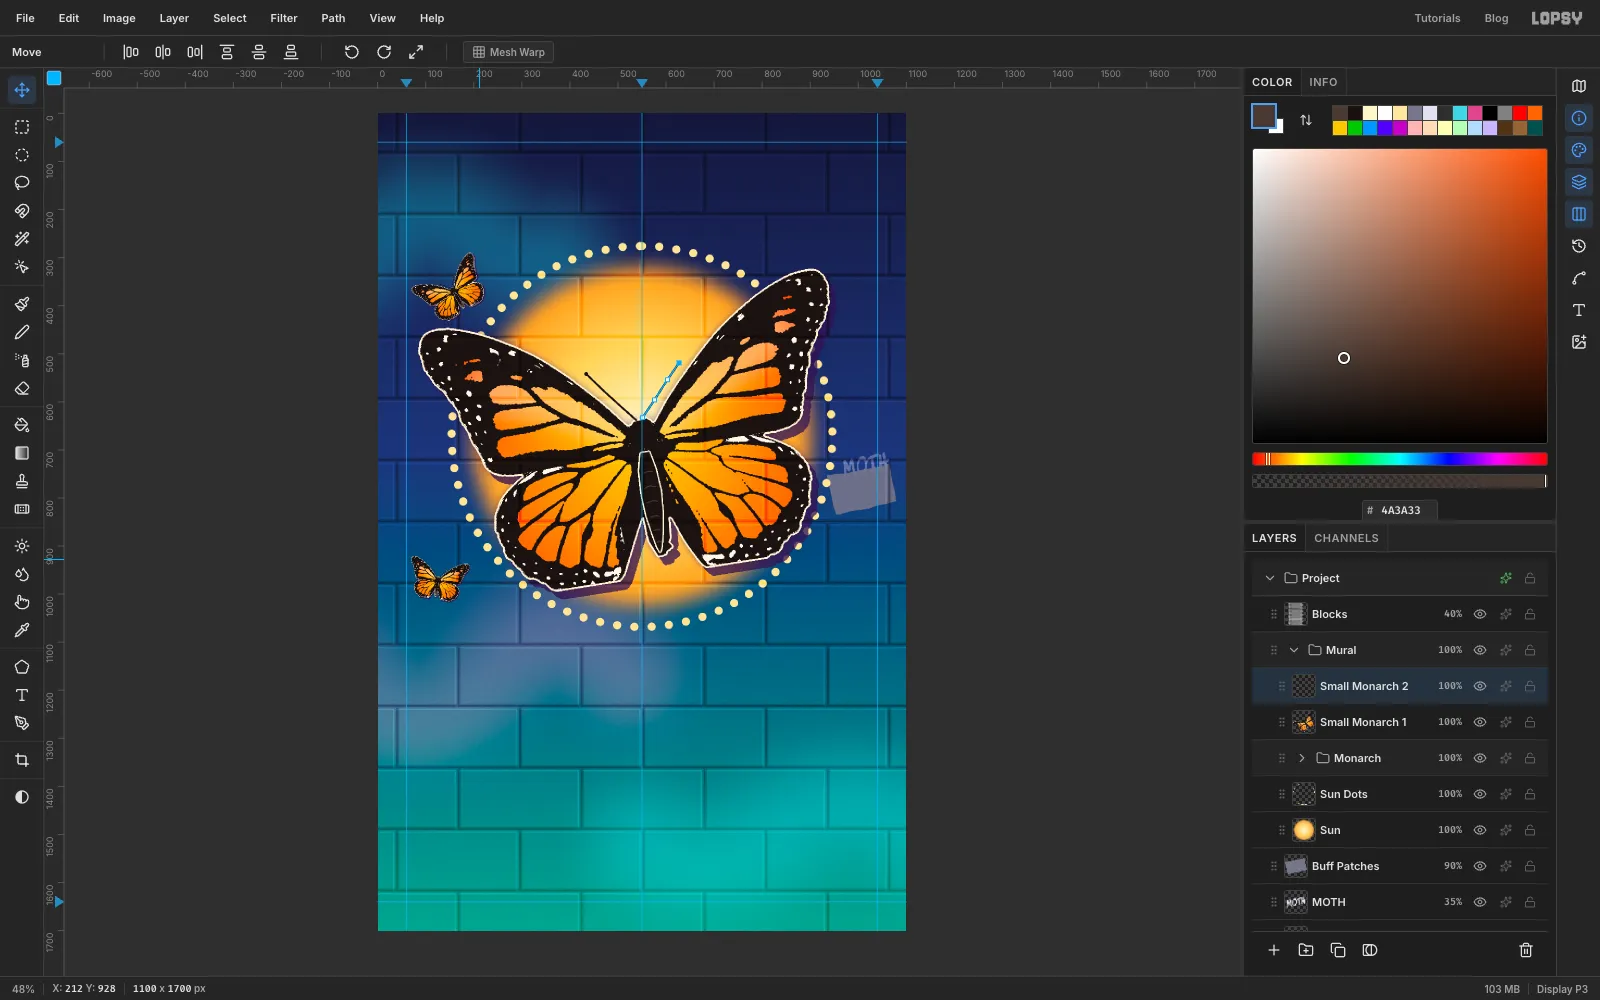
-
Dot the flight route
Click
Sun Dotsand add a layer calledFlight Path. It sits under the butterflies.Pick the Brush with Size
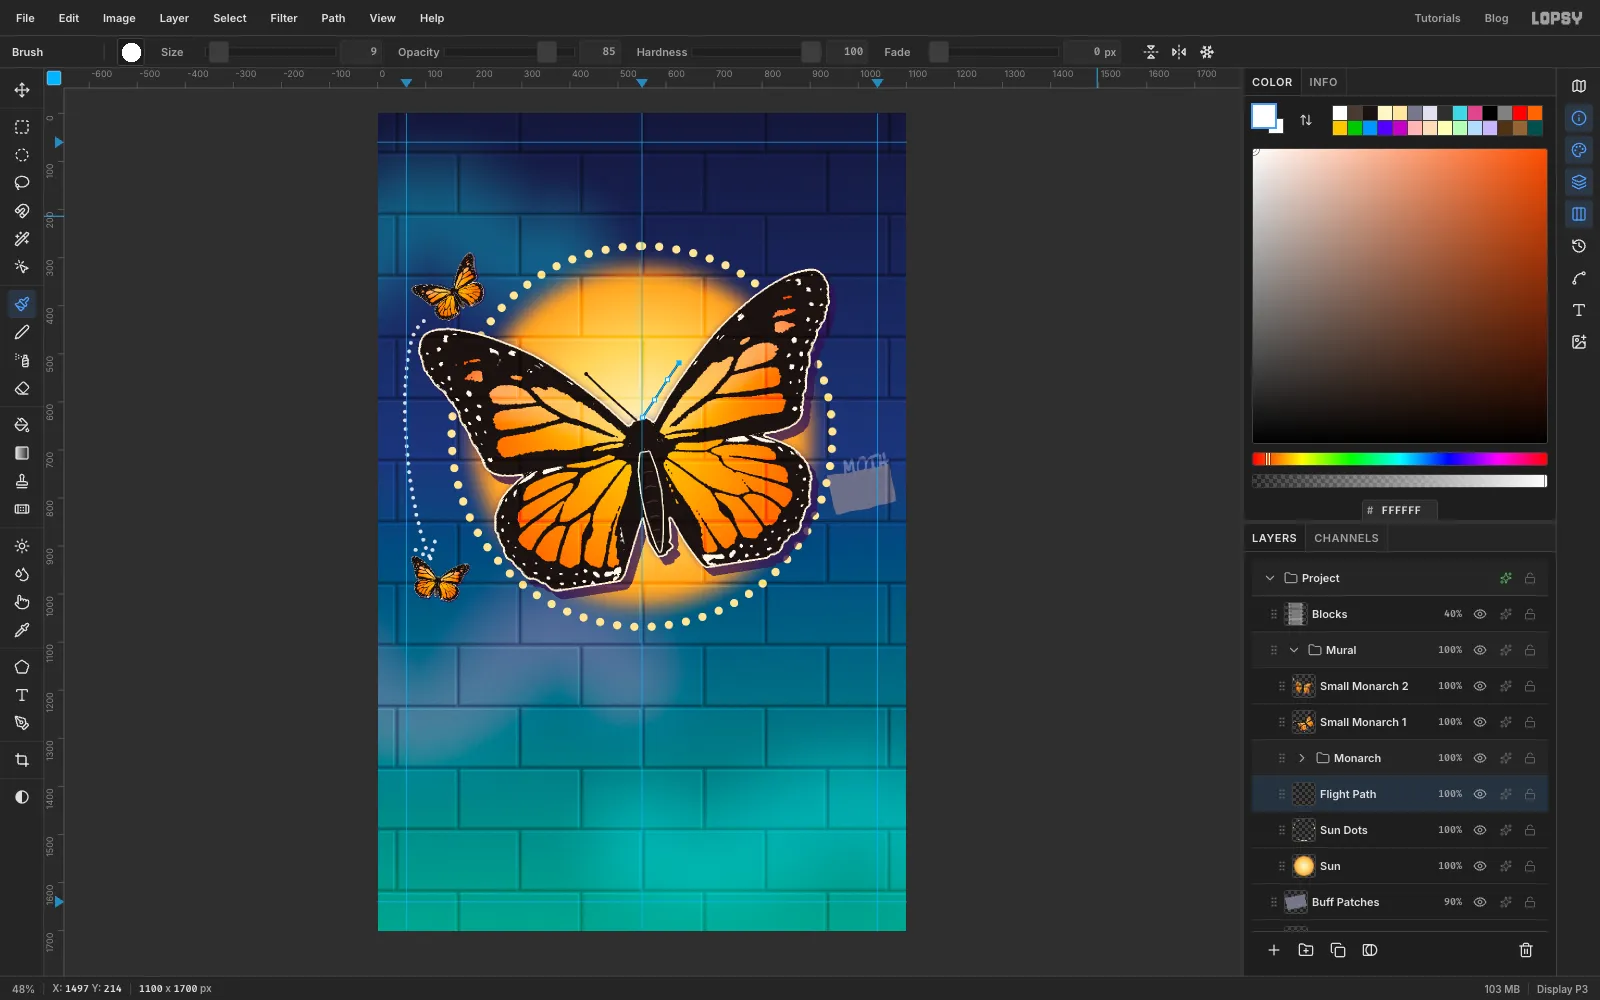
9, Hardness100and Opacity85, set Spacing200in the Brushes dialog again, and set the foreground to white.- Drag one smooth curve from just under the top-left monarch, out past the tip of the big left wing (keep about 15 px of wall between them), down the left side, and in toward the lower monarch, ending just above it at about
110, 926. - For the arrowhead, make two short drags of about 36 px that both end at the end of the route: one coming in from up and to the left, one from up and to the right.
Put Spacing back to
10.
- Drag one smooth curve from just under the top-left monarch, out past the tip of the big left wing (keep about 15 px of wall between them), down the left side, and in toward the lower monarch, ending just above it at about
-
Type the piece
Collapse the
Muralgroup and click it. Click New Group and name itPiece. BecauseMuralis collapsed, the new group lands above it instead of inside it.With
Pieceselected, add four empty layers in this order:Overspray,Cloud,Drips,Extrude. Each new layer goes above the last, so they stack from the bottom up. Building the stack first means you never have to drag layers around later.With
Extrudeactive, set the foreground to , pick the Text tool, choose Titan One at Size176, click at about70, 1040, typeMONARCHand press Tab.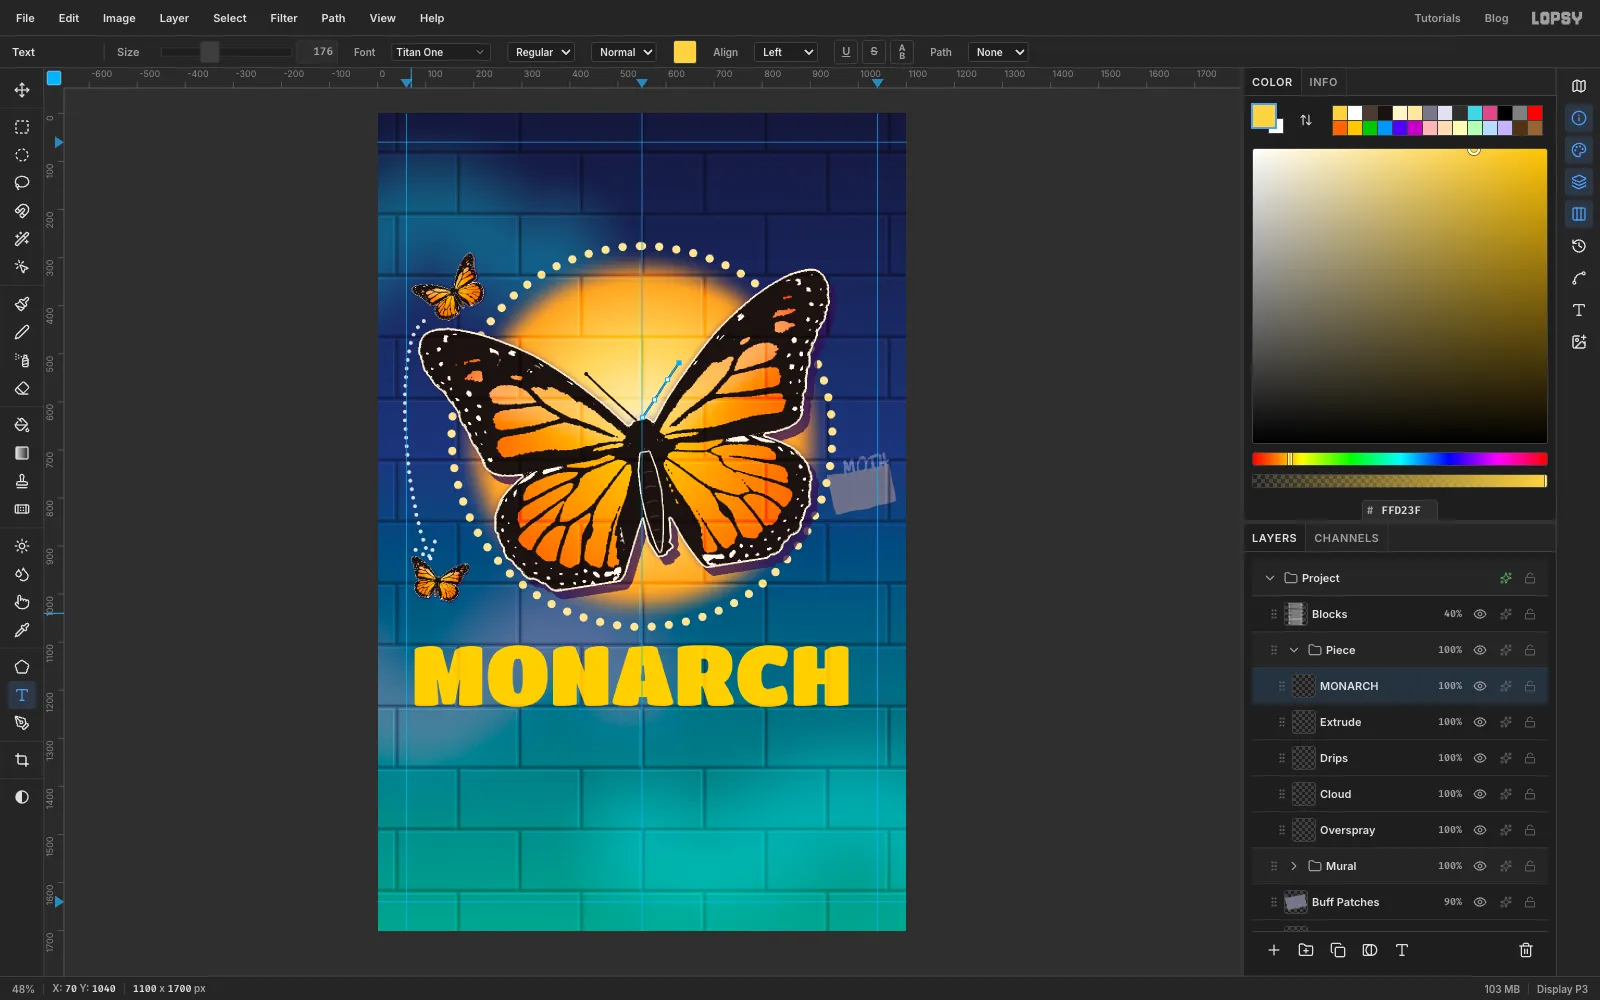
-
Centre and rasterize the letters
Pick the Move tool and click Align center horizontally in the options bar.
You're about to treat each letter as pixels, so click Rasterize Layer at the bottom of the Layers panel. Rename the layer
Letters.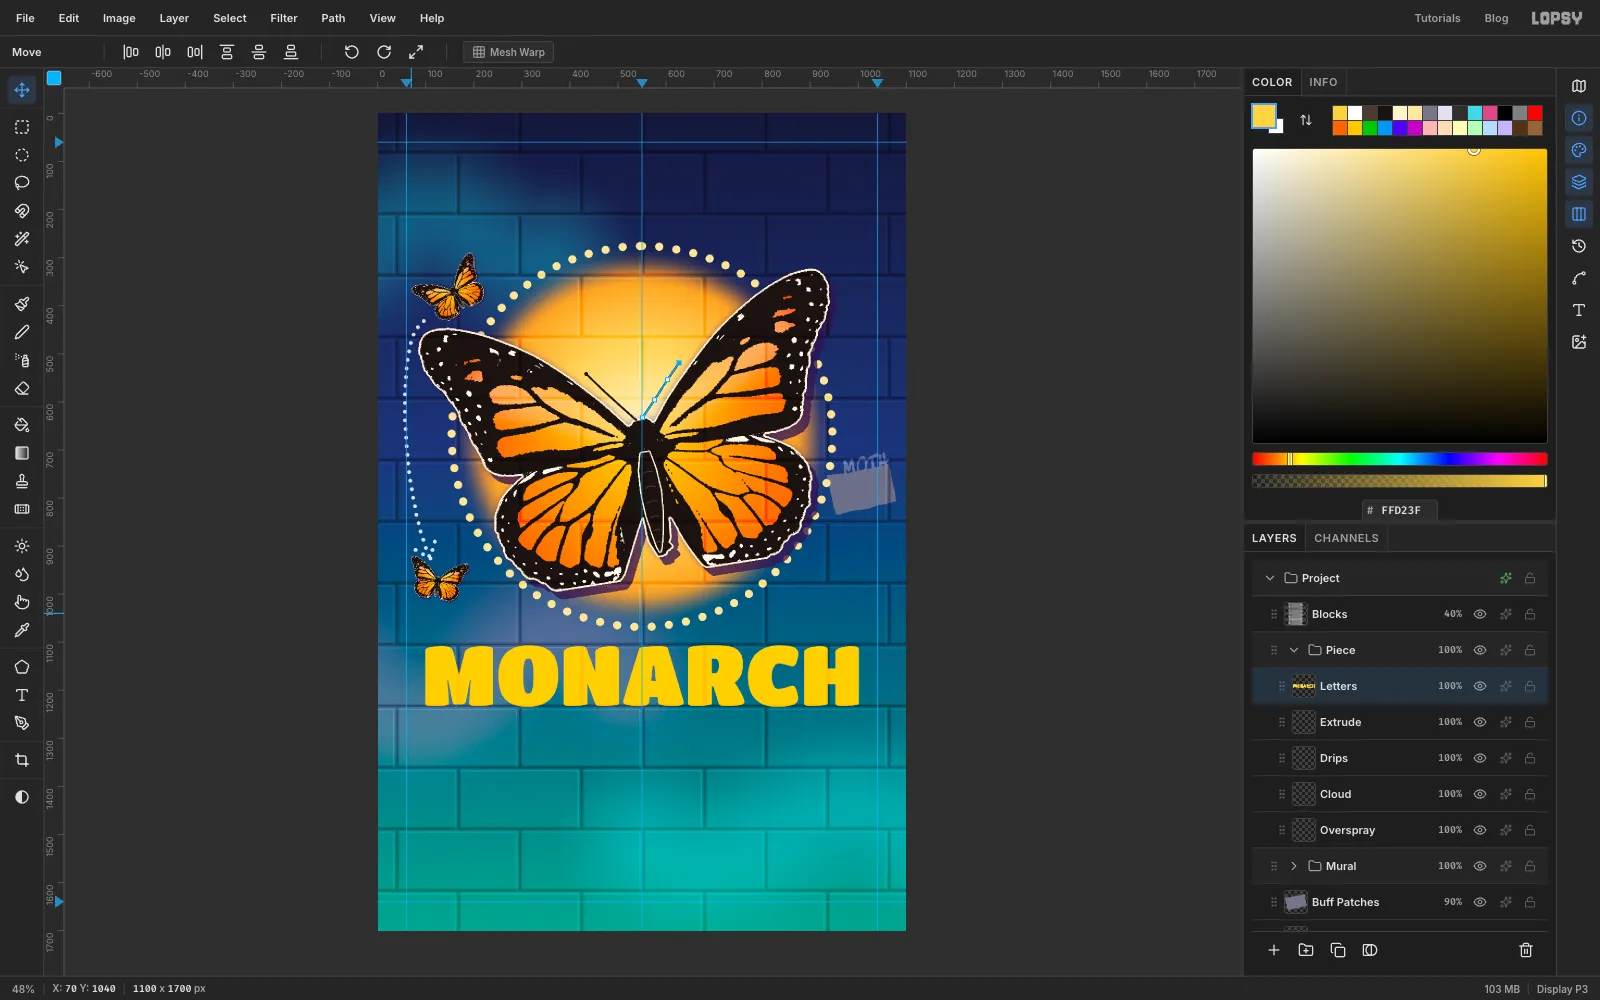
-
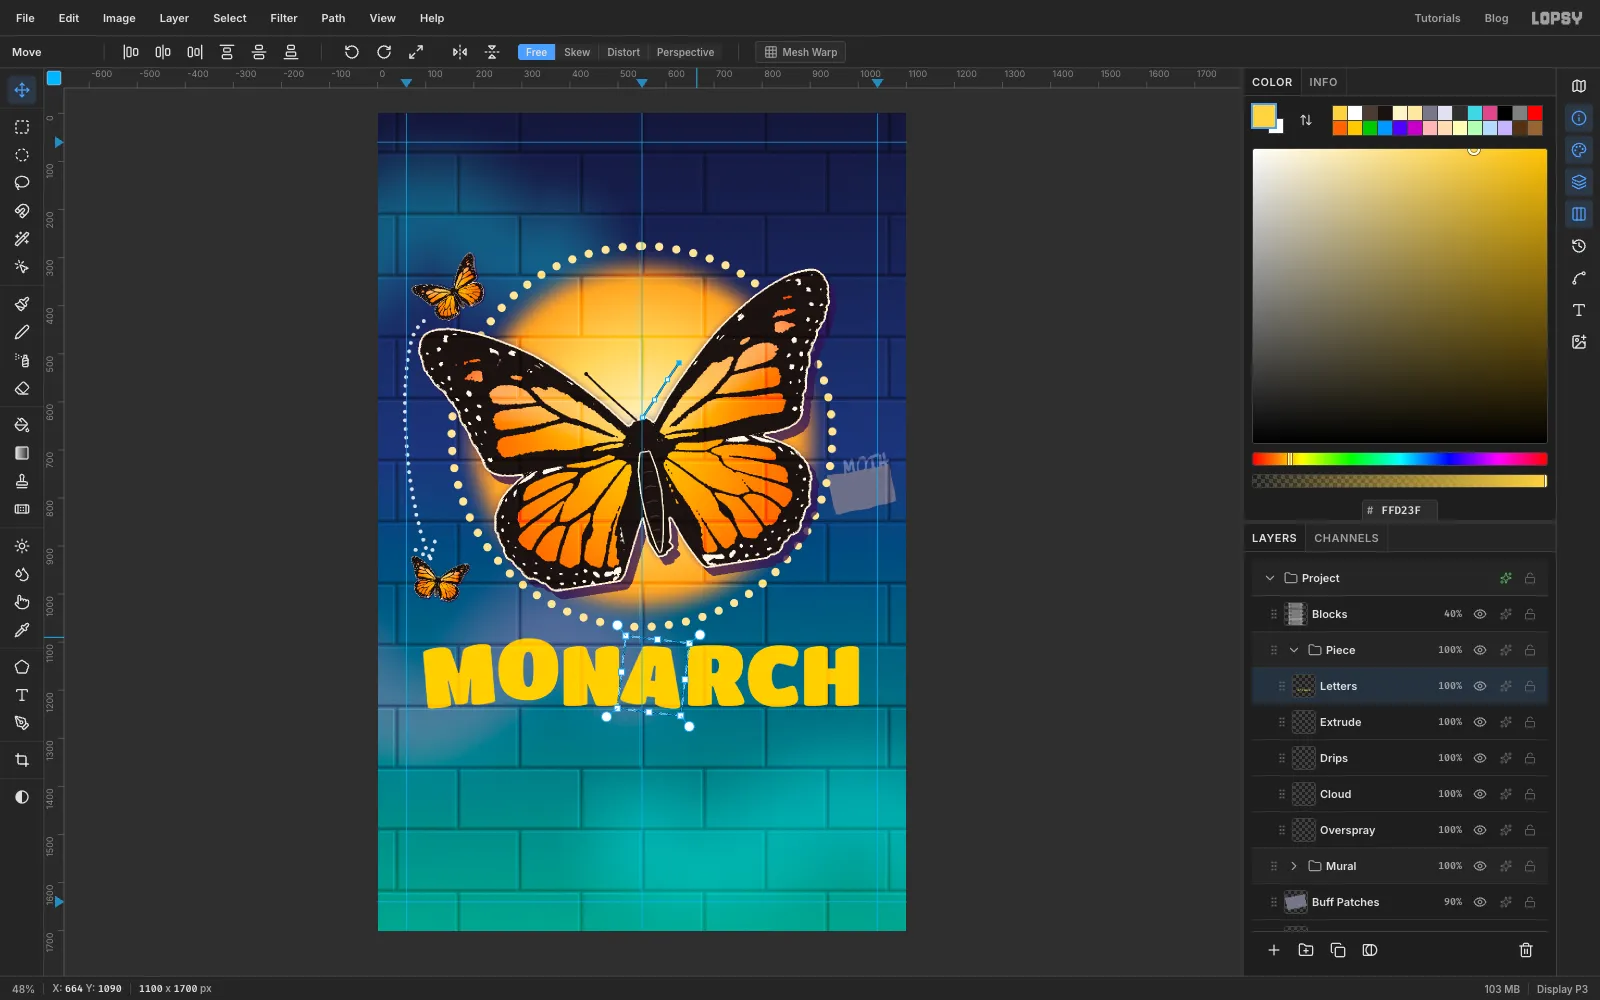
Make the letters bounce
Graffiti letters never sit on a ruler-straight baseline. Give each one a little movement. For each letter, draw a Rectangular Marquee tightly around it (just that letter, a little above and below), then switch to the Move tool with V so you get the transform handles and arrow-key nudges. Titan One's letters sit close together; if a box catches part of a neighbour, draw the selection with the Lasso instead. Then:
- M: rotate about 5° anticlockwise with the rotate handle.
- O: with the Move tool, press Shift+Up once and Up four times to lift it 14 px.
- A: rotate about 7° clockwise.
- R: press Down eight times to drop it 8 px.
- C: rotate about 6° anticlockwise.
- H: rotate about 5° clockwise.
Press Cmd+D after each letter. Leave the N alone.
-
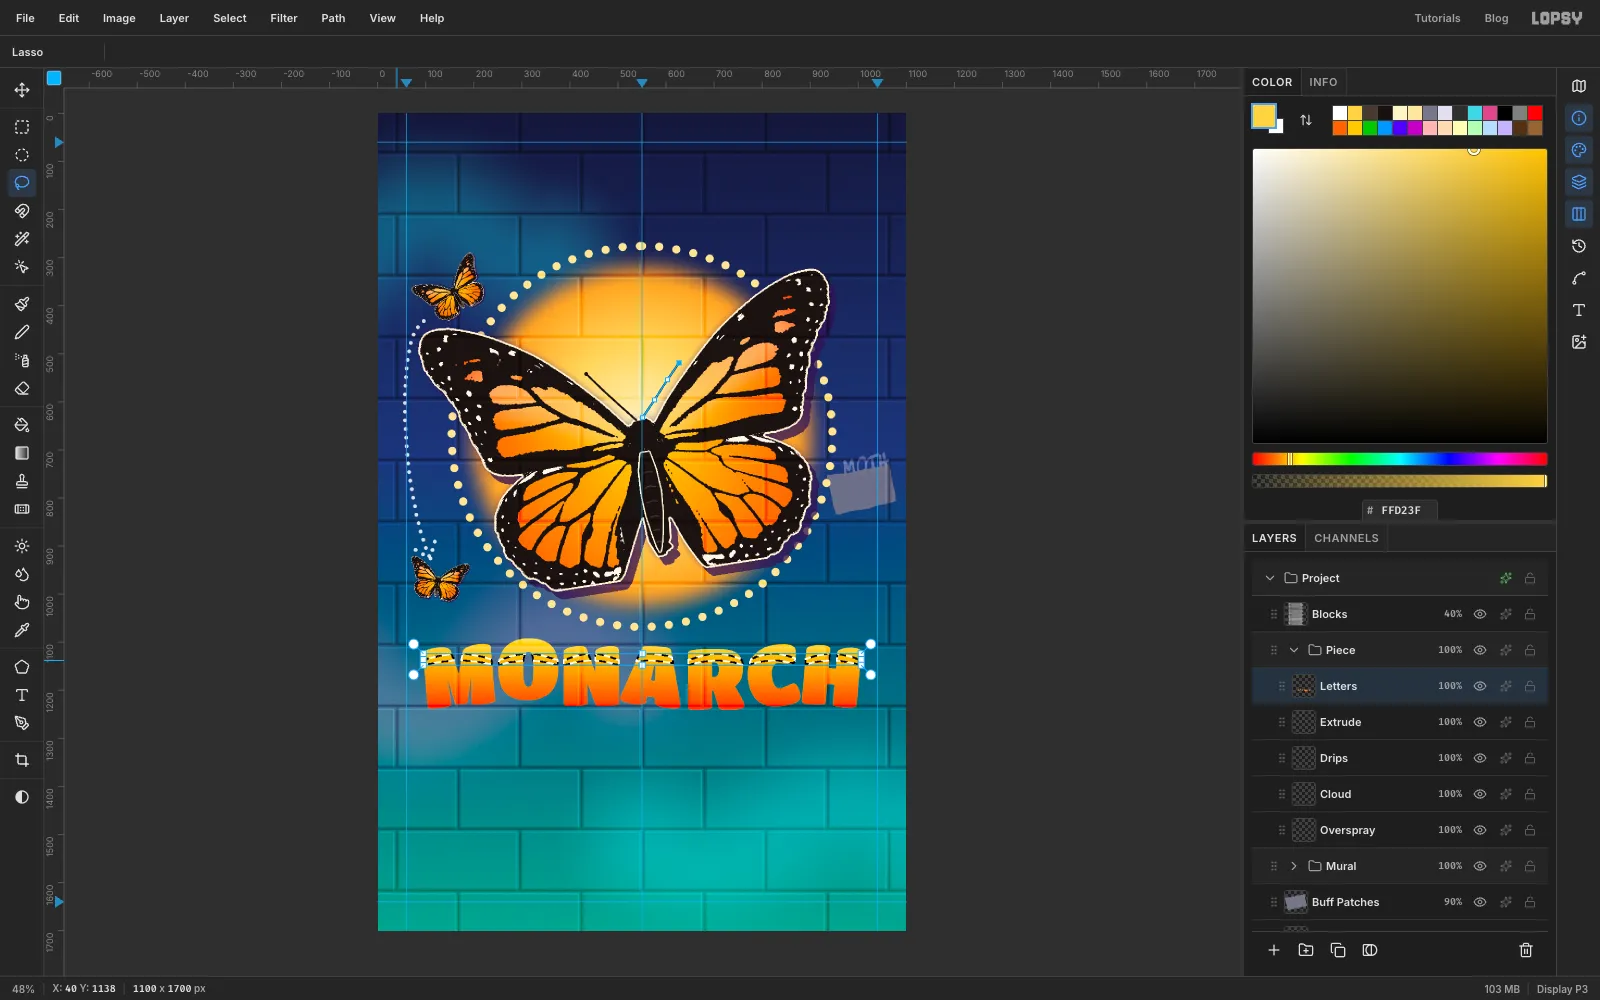
Fill the letters with a fade and a glint
- Cmd-click the
Lettersthumbnail. Pick the Gradient tool with Linear, and in Advanced… use at the left, in the middle and at the right. Drag from the top of the letters straight down to their baseline. - Keep the selection. Pick the Lasso, hold Shift+Option and draw a thin band, about 10 px tall, across all the letters about a third of the way down. Let it arch up over each letter and dip in the gaps between them. Shift+Option intersects, so only the band inside the letters stays selected.
- Fill it with and press Cmd+D.
- Cmd-click the
-
Outline the letters
Open the effects drawer for
Lettersand turn on Stroke with Width7, colour , position Outside.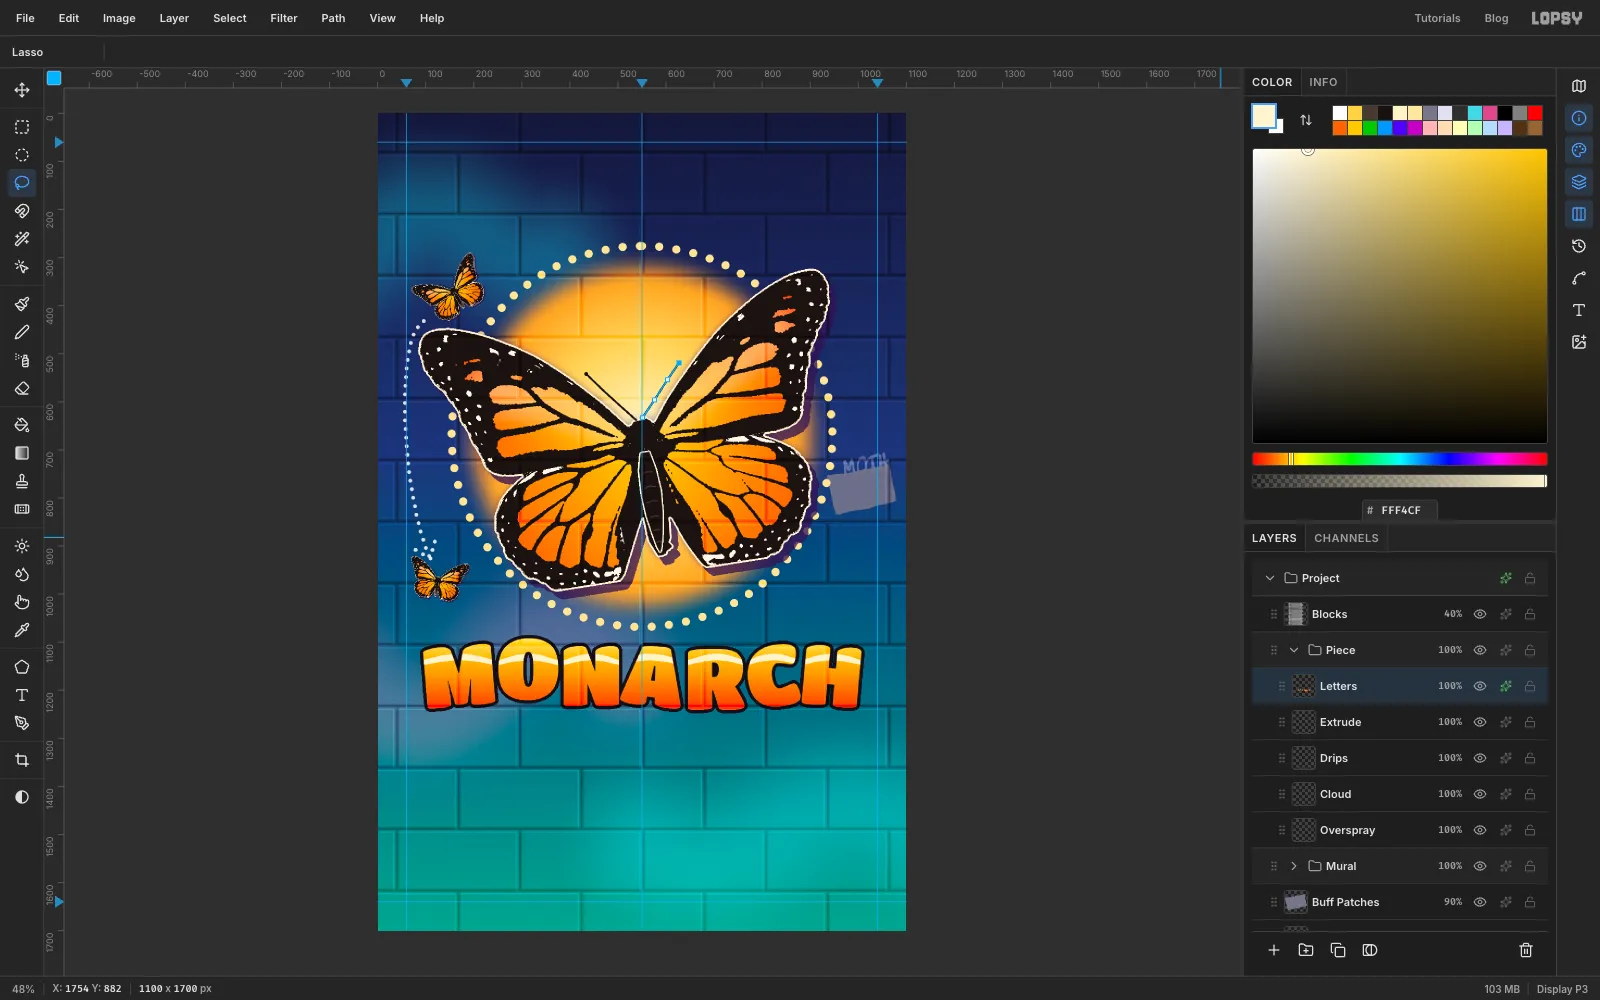
-
Build the 3D block
Click
Extrude. Cmd-click theLettersthumbnail, choose Select → Grow… with7so the block covers the outline too, set the foreground to and choose Edit → Fill.Now stretch it into a block. Zoom in to about 200% first, so each small drag is big enough to control. Pick the Move tool, press inside one of the letters, and hold Option while you drag about 4 px right and 5 px down. Option-dragging a selection moves a copy and leaves the original pixels behind. Do it three more times, each time starting inside the copy you just moved. Each drag stamps the last copy in place and pulls a new one, so the purple steps out into a solid 3D block about 20 px deep.
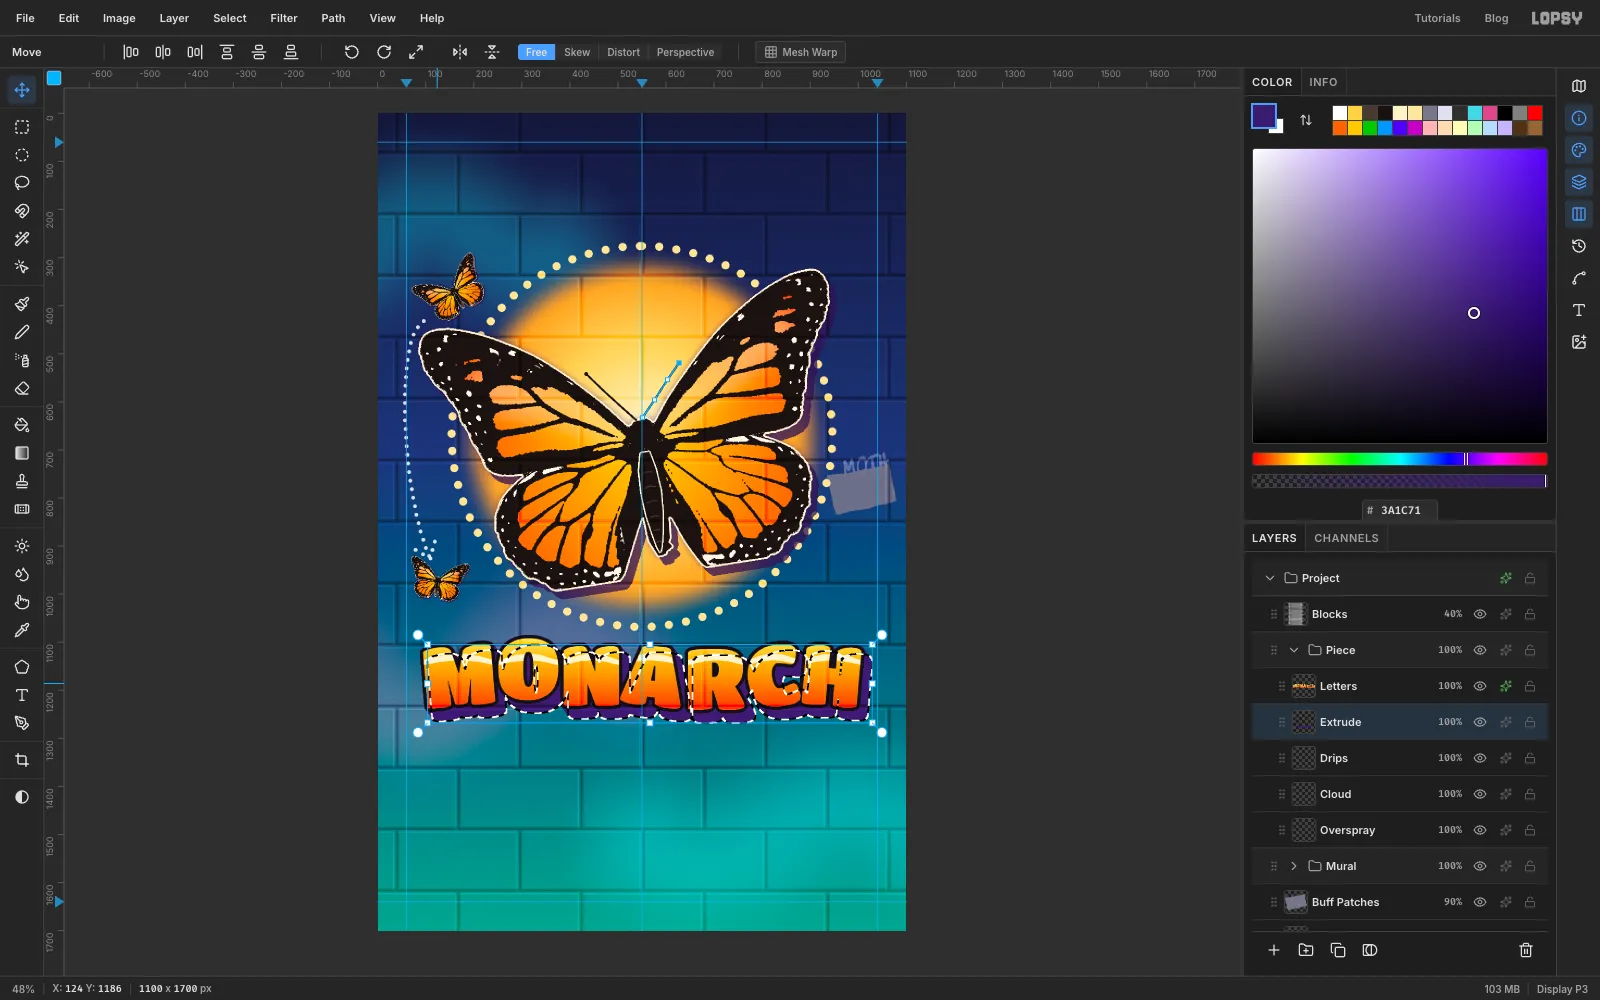
-
Outline the block
Press Cmd+D. Give
Extrudea Stroke of Width6, , Outside.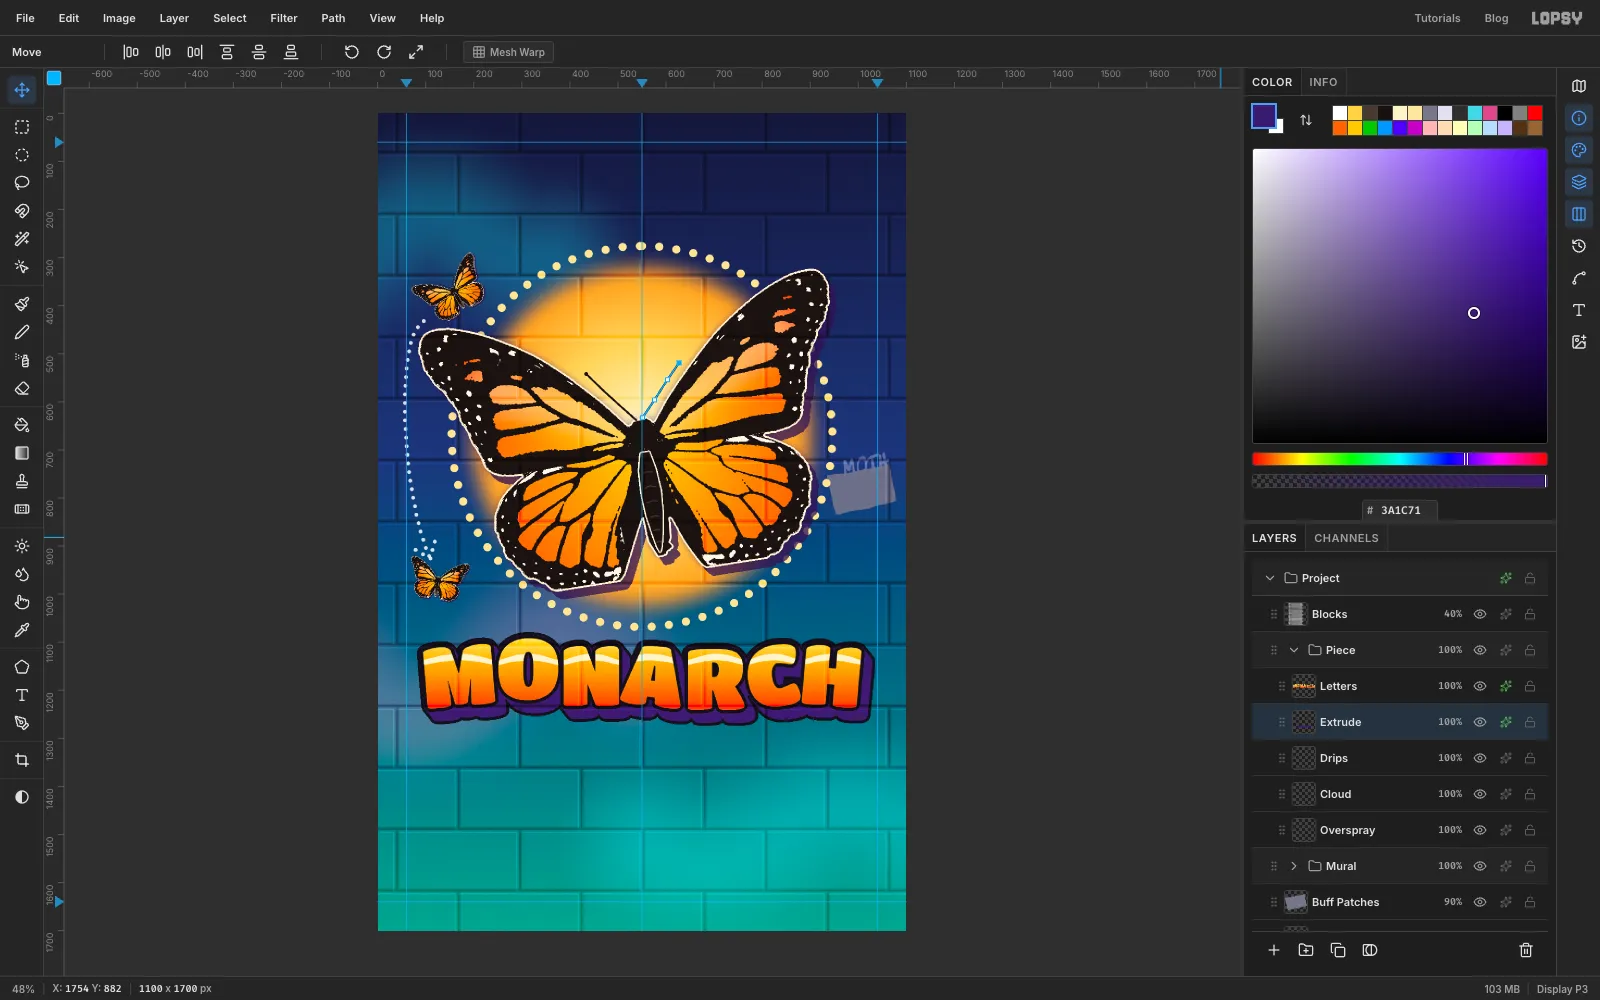
-
Select a bubble cloud
Click
Cloud. Cmd-click theExtrudethumbnail and choose Select → Grow… with26.Pick the Elliptical Marquee. Holding Shift each time to add, drag about nine ovals along the top edge and eight along the bottom edge, overlapping the selection by half their height. Vary them: some about 80 × 50, some about 140 × 90, and nudge a few up or down so the outline isn't a neat row of scallops.
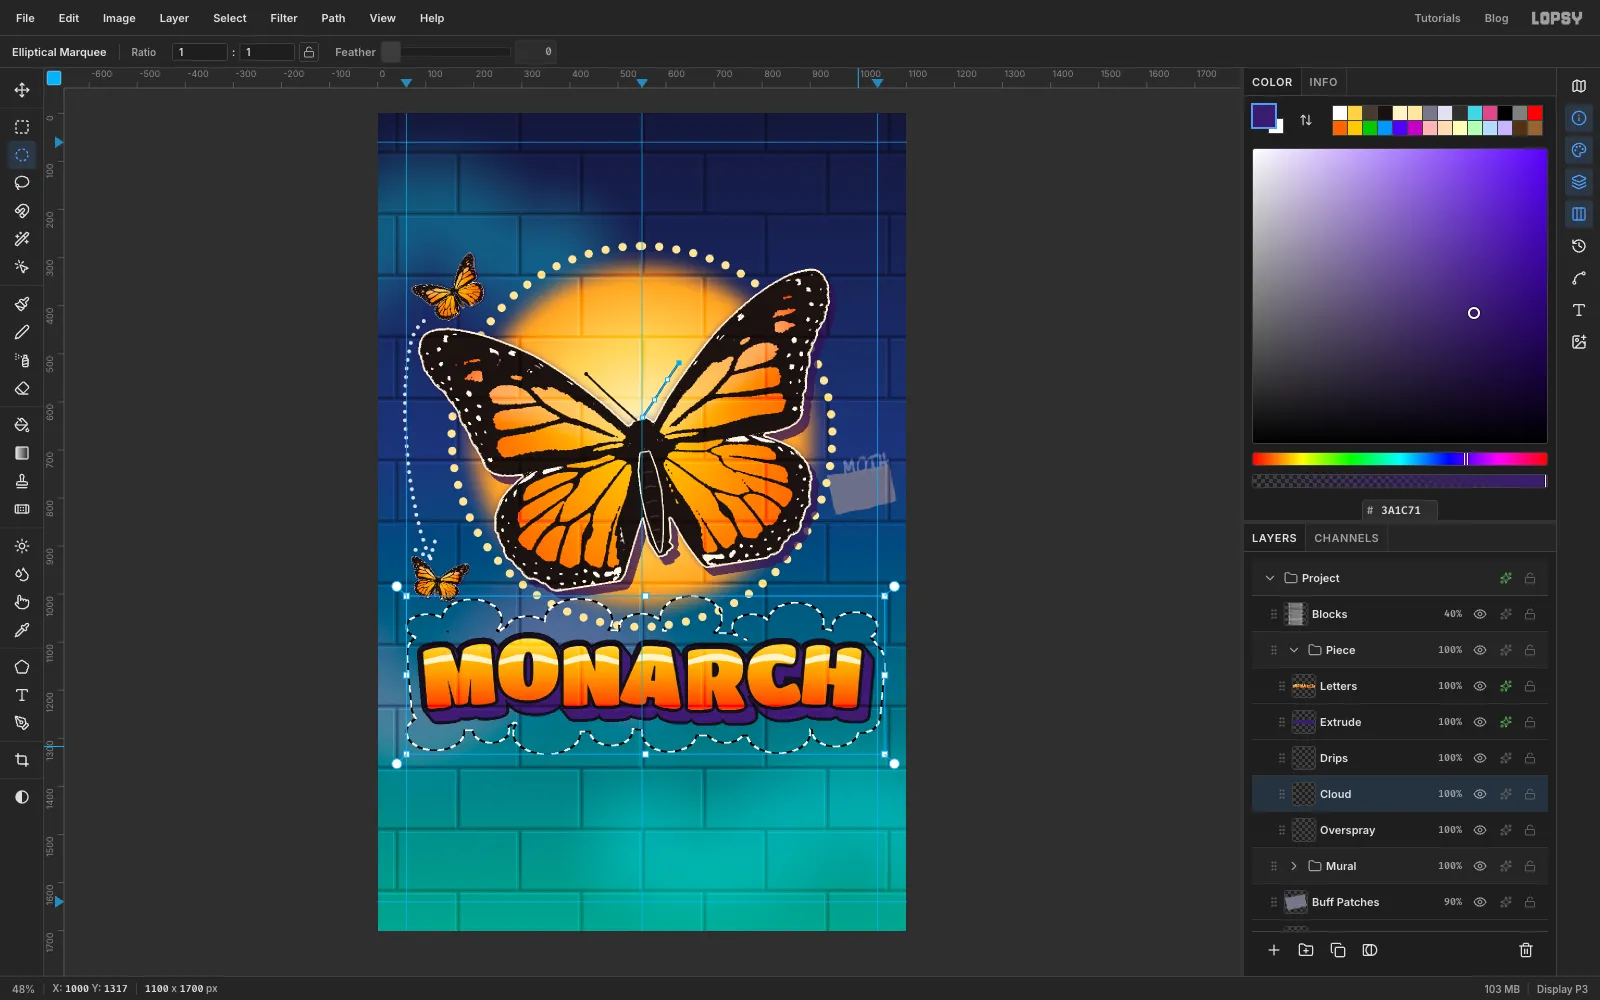
-
Fill, outline and shade the cloud
- Fill the selection with and press Cmd+D.
- Give
Clouda Stroke (Width7, , Outside) and a Drop Shadow (Offset X12, Offset Y14, Blur0, Opacity70, ). - Pick the Dodge / Burn tool. Set Mode to Burn, Exposure
22and Size64, and drag once along the inside of the cloud's bottom edge. - Switch Mode to Dodge with Exposure
30and Size40, and drag once along the top bubbles.
The cloud now looks rounded, like the bubble shading graffiti writers spray in by hand.
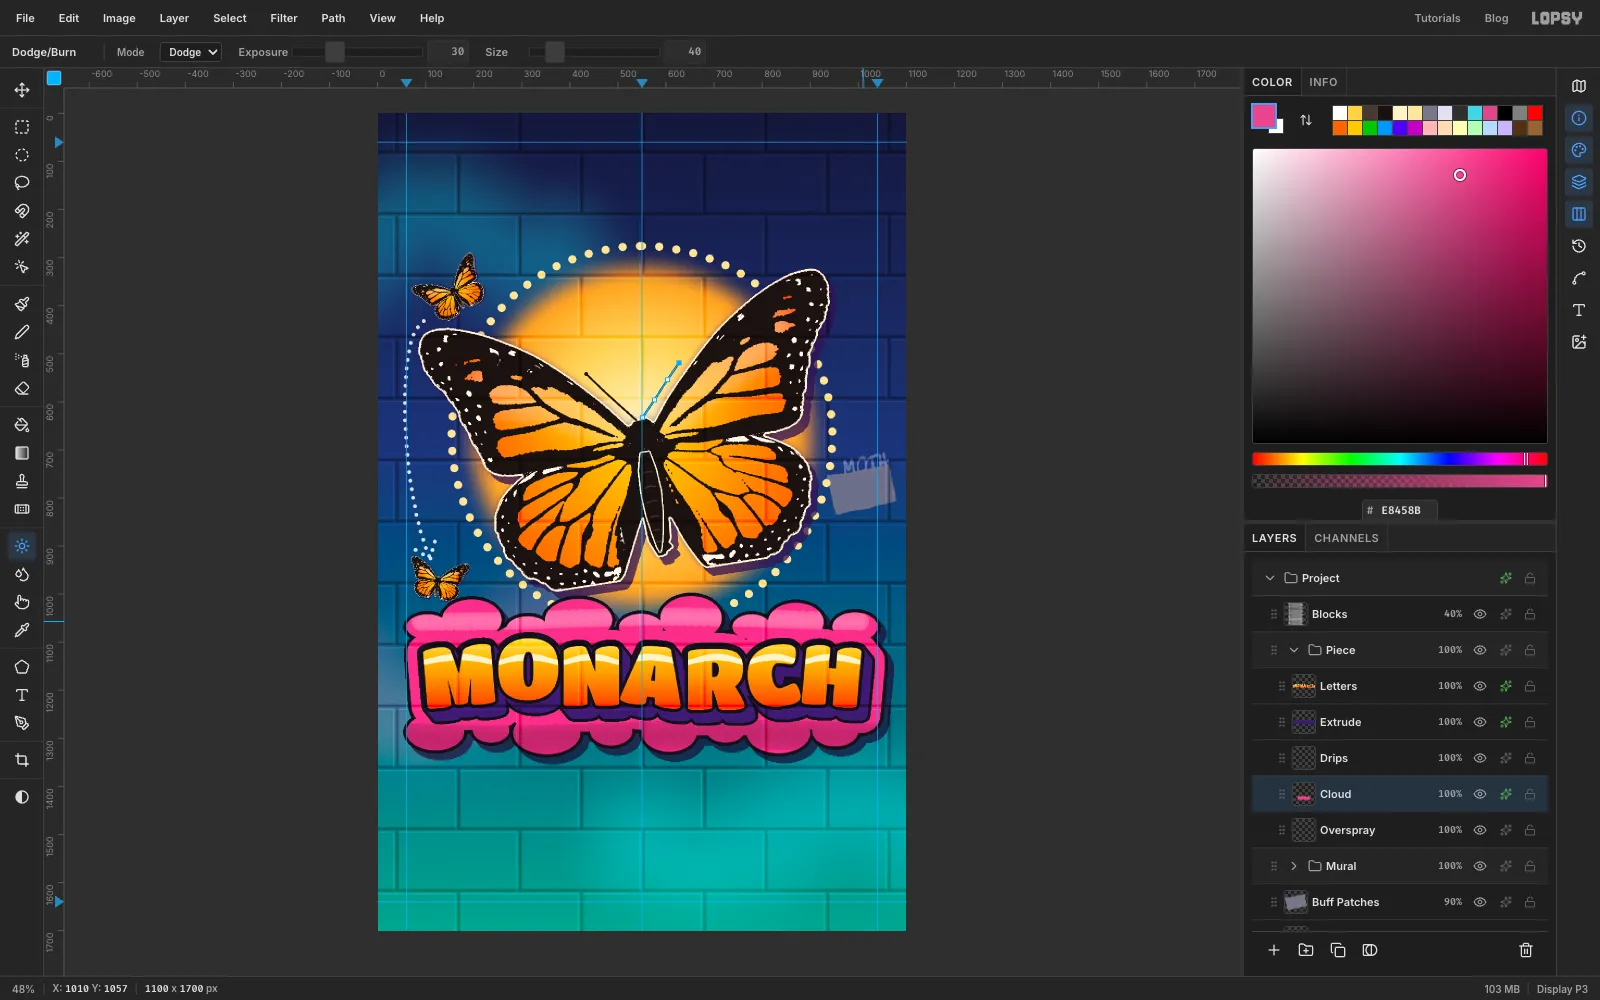
-
Let the paint drip, and add overspray
Click
Drips. Pick the Brush with Hardness and Opacity at100and the foreground .Open the Brushes dialog. Taper shrinks a stroke from full size at its start to a point over that many pixels. Set it to about 1.6 times the drip's length, so the drip thins but never quite vanishes. For each drip, set Size and Taper, close the dialog, then drag from just inside the cloud straight down. Finish each with a click at the bottom using a brush a little over half the drip's size, for the drop. Make about six, uneven:
- at
x 170: Size30, about 92 px long - at
x 246: Size20, about 38 px long - at
x 352: Size34, about 124 px long - at
x 612: Size24, about 64 px long - at
x 772: Size20, about 30 px long - at
x 952: Size28, about 50 px long
Set Taper back to
0when you're done.Then click
Oversprayand pick the Spray tool with Size90, Density14, Opacity55and Softness60. Keep the pink. Make one wavy pass just below the cloud and one just above it.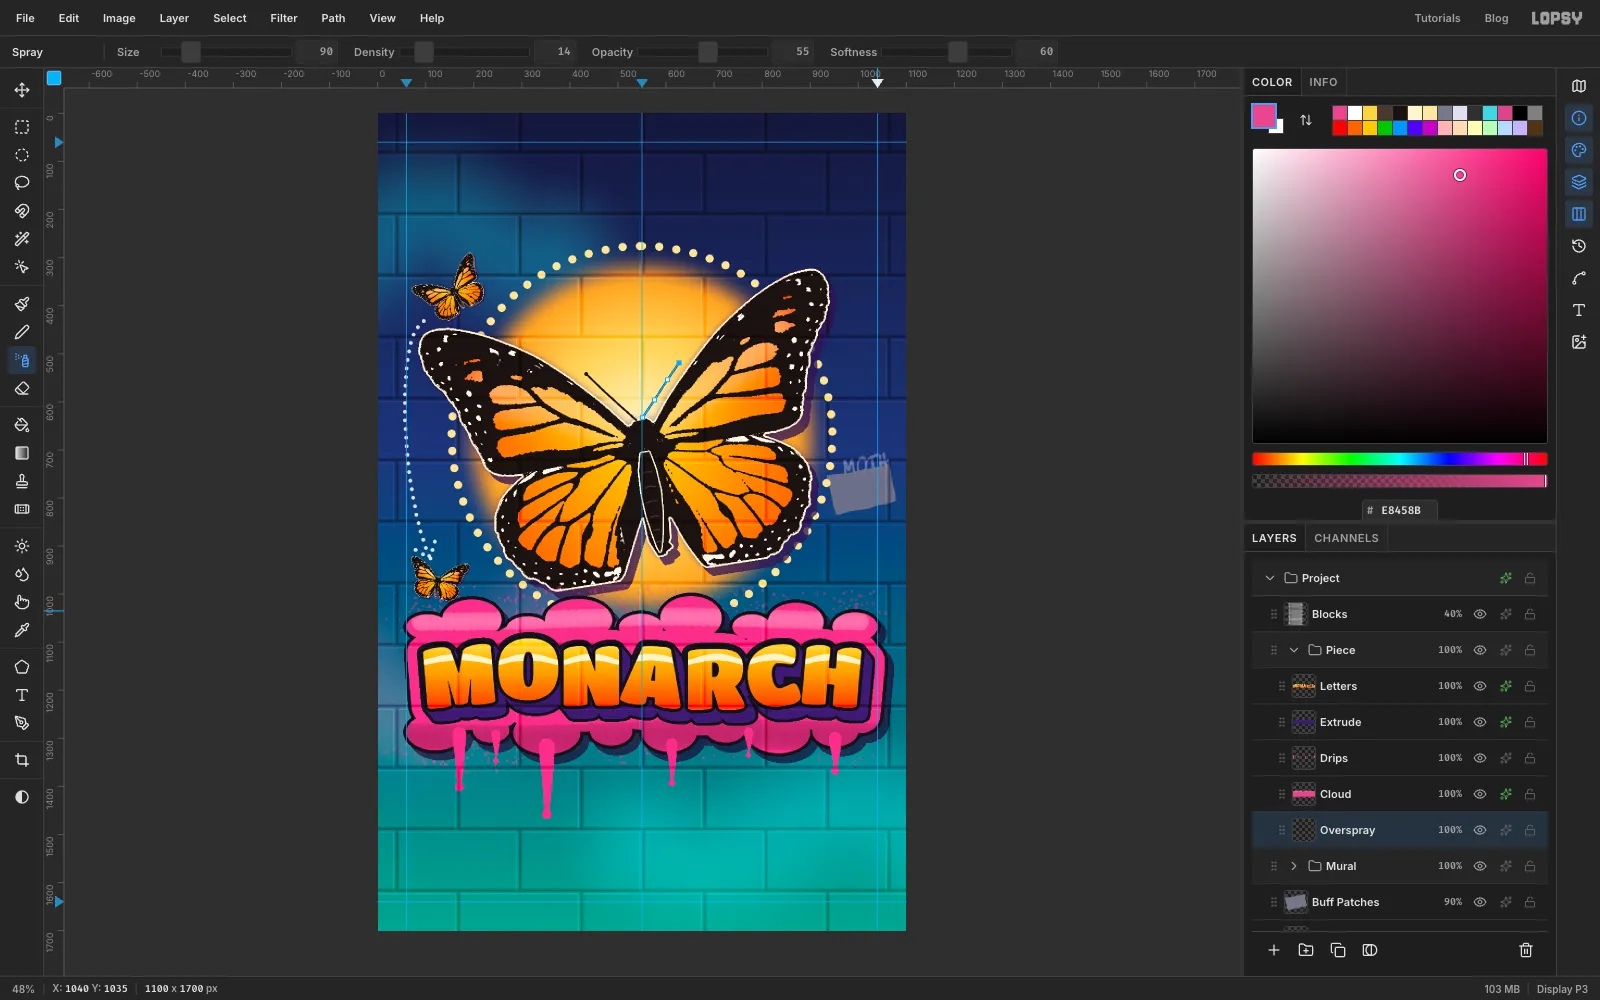
- at
-
Add the shines
Click
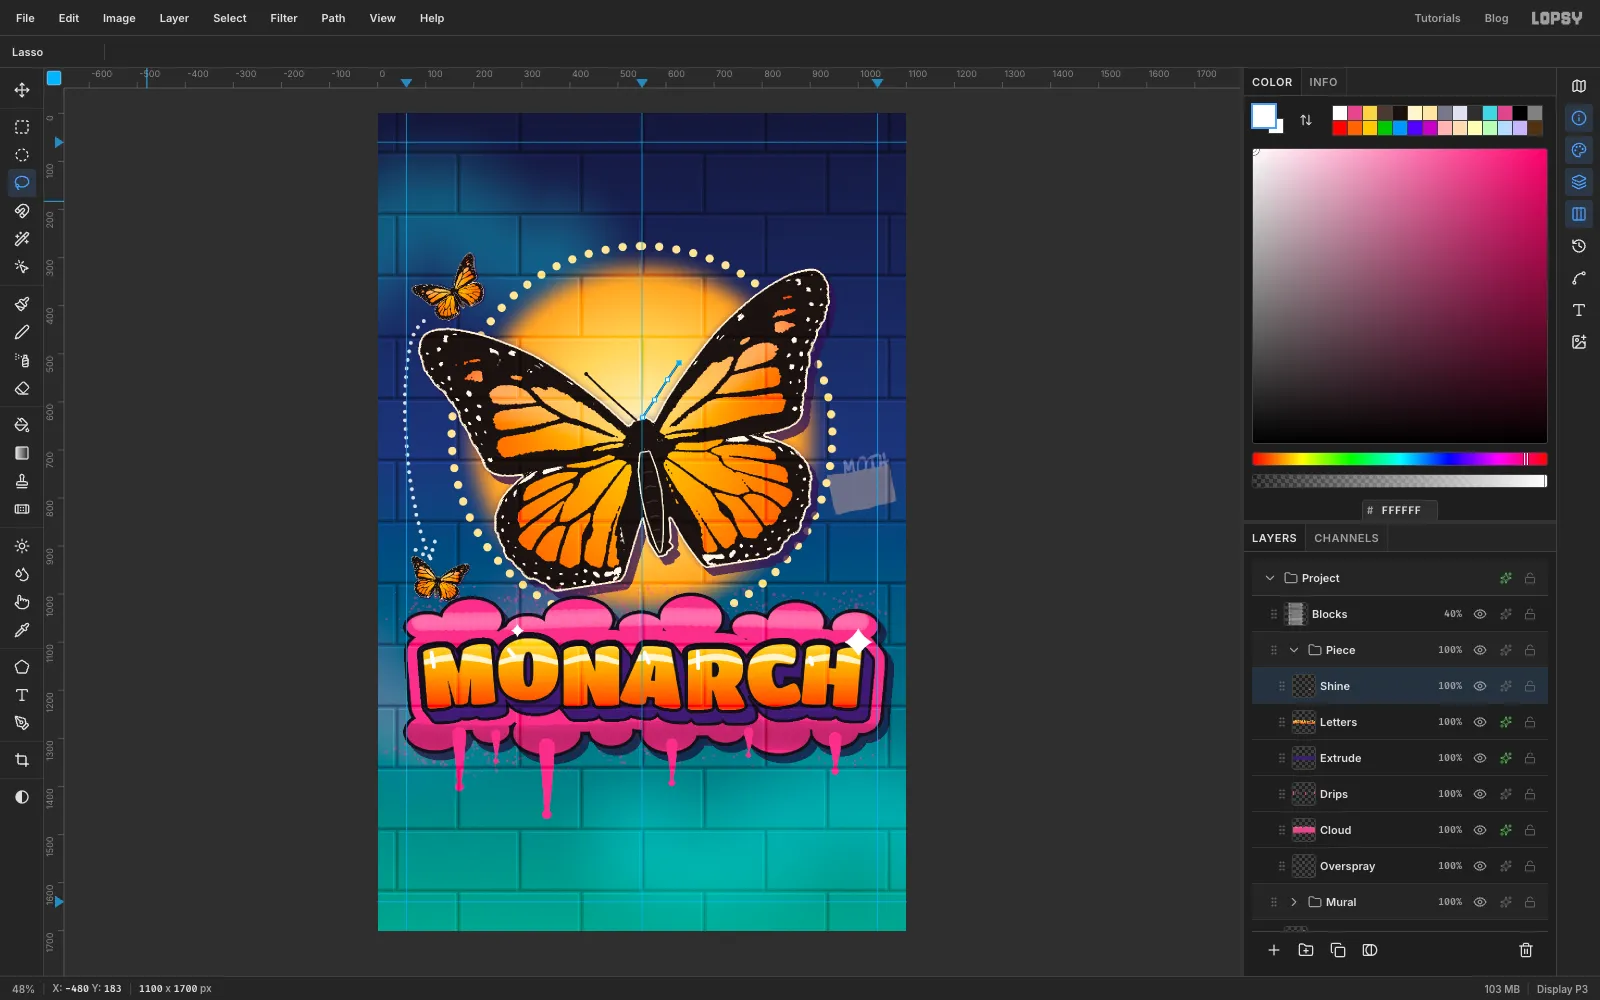
Lettersand add a layer calledShine. Pick the Brush with Size9and white.Draw five short highlight ticks inside the letters near their top-left corners: on the M, O, A, R and H. Vary them: 16 to 34 px long, at different angles from steep to diagonal. Leave the N and C without one.
Then add two sparkles. With the Lasso, draw a four-point star with deeply curved-in sides, about 60 px across, at the top right of the H, and fill it with white. Draw a smaller one, about 28 px, just above the O.
-
Roll on the masthead band
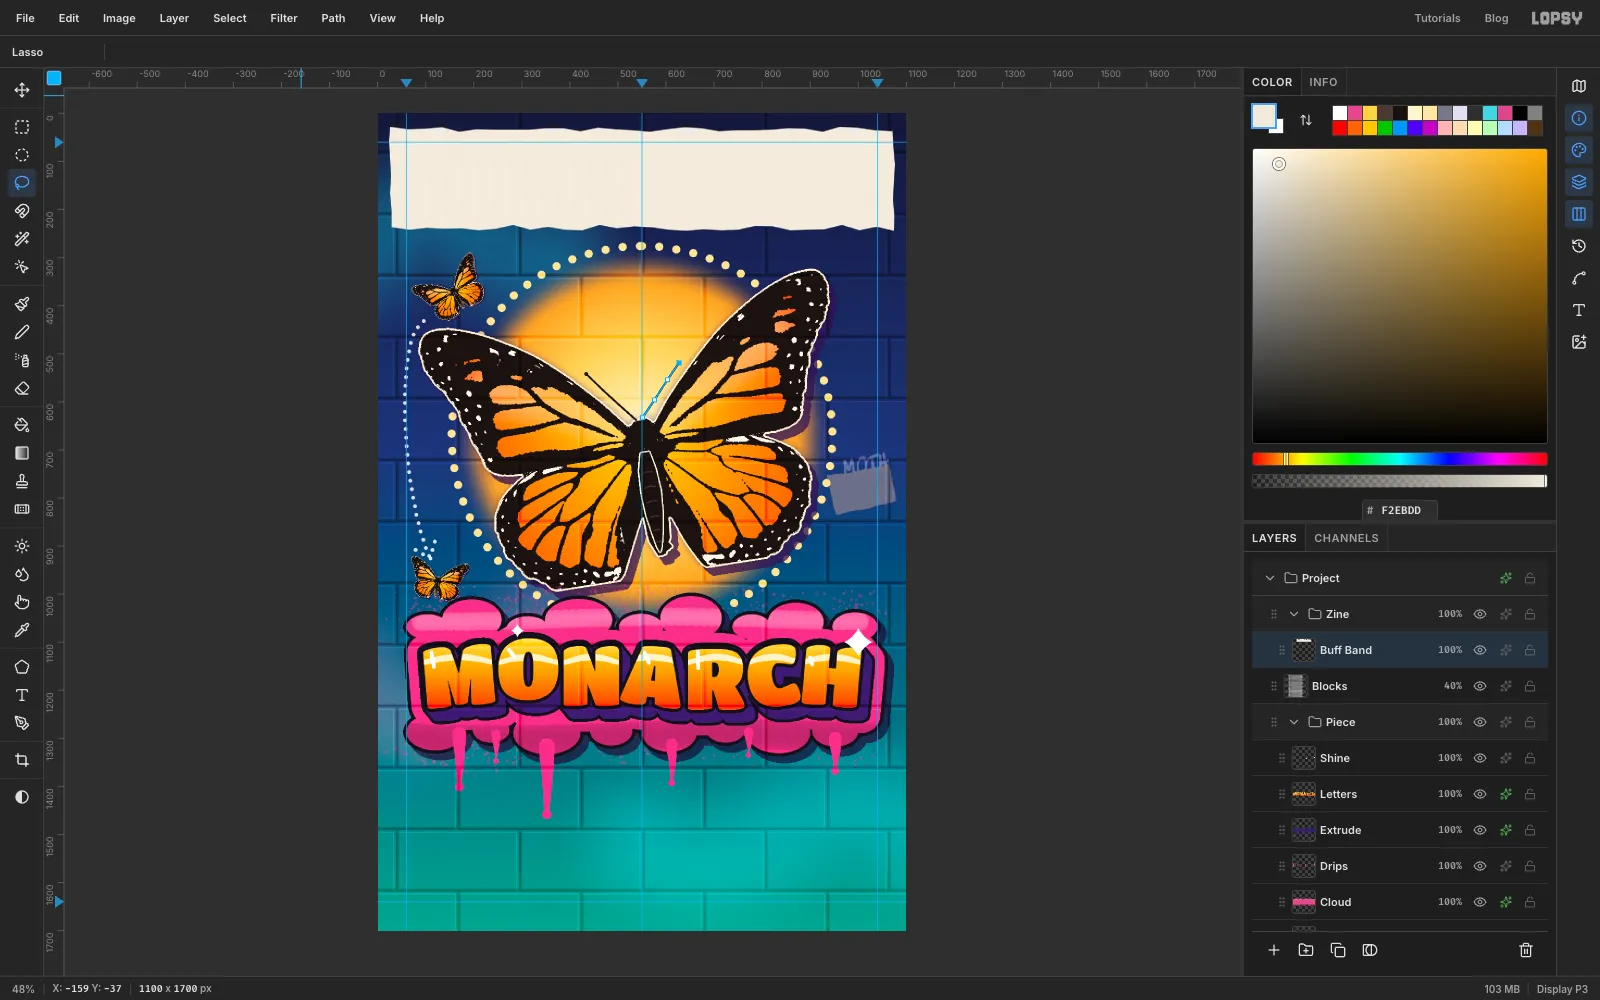
The masthead is a band of buff paint rolled over the wall, the way city crews paint over graffiti.
Click
Blocks(it sits above the groups) and click New Group. Name itZineand add a layer inside calledBuff Band.- Draw a Rectangular Marquee right across the top of the page, from
0, 10to1100, 270, and fill it with . - Filter → Add Noise… with Amount
16and Mono, then Filter → Motion Blur… with Angle0and Distance45. The noise smears sideways into roller streaks. - Pick the Lasso and draw the band's real shape inside that block: from about
26, 34to1074, 238, with slightly wobbly, torn edges. - Choose Select → Inverse, press Delete, and press Cmd+D.
Cutting the band out after the filters keeps its edges crisp. If you filter a band that's already cut out, the blur drags transparency into its edges.
- Draw a Rectangular Marquee right across the top of the page, from
-
Set the masthead and paint WALLS orange
Set the foreground to .
- With the Text tool, choose Special Elite at Size
25, click at about80, 178, typeSTREET ART ZINE // ISSUE 12 // FALL 2026 // $4(two spaces either side of each//) and press Tab. - Click
Buff Band. Choose Bungee at Size136, click at about40, 40, typeWILD WALLSand press Tab. Making the lower line first means this click doesn't land in it. - With the Move tool, click each text layer in turn and click Align center horizontally. Then use the arrow keys to put the tops of the big letters about 64 px from the top of the page, and the issue line about 22 px under them.
Now colour WALLS to match the monarch. With the Text tool, click inside
WILD WALLSnear its end, press End, then press Shift+Left five times to select WALLS. Click the Text color swatch in the options bar, typeF26A1Binto its hex field and press Return. Click the swatch again to close it, and press Tab to finish.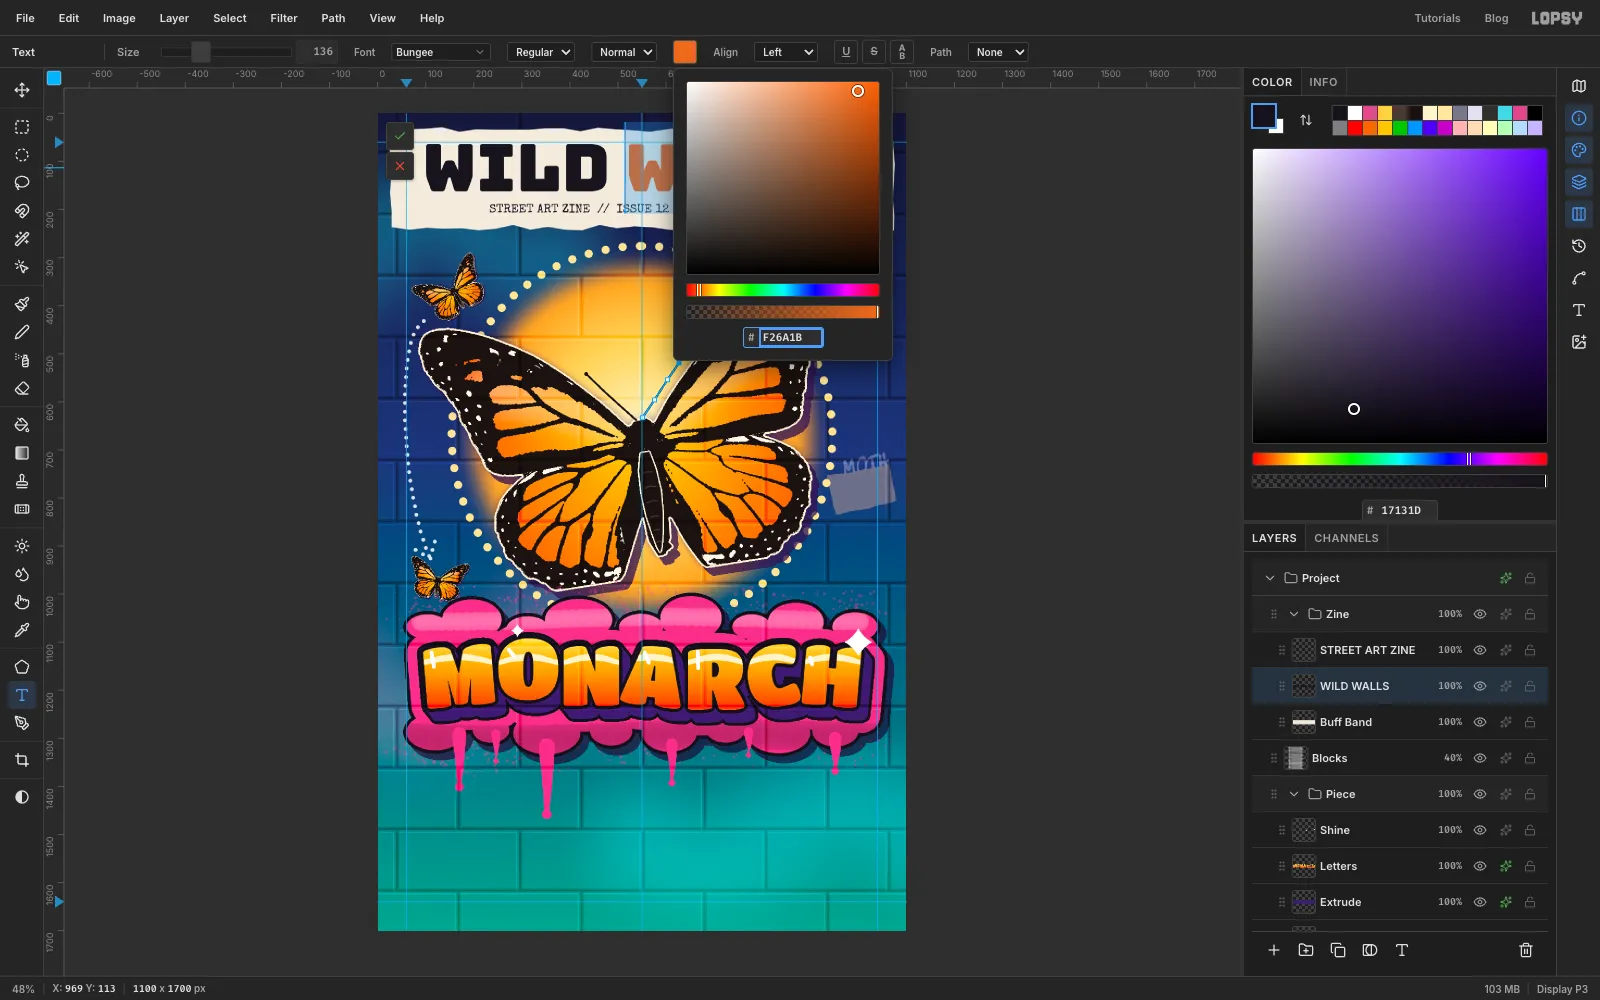
- With the Text tool, choose Special Elite at Size
-
Tilt the masthead
Click the
Zinegroup's row. With the Move tool, its handles frame everything in it. Drag the rotate handle at the top right to turn the band about 1.5° anticlockwise, and press Cmd+D. The text stays live and turns with the band.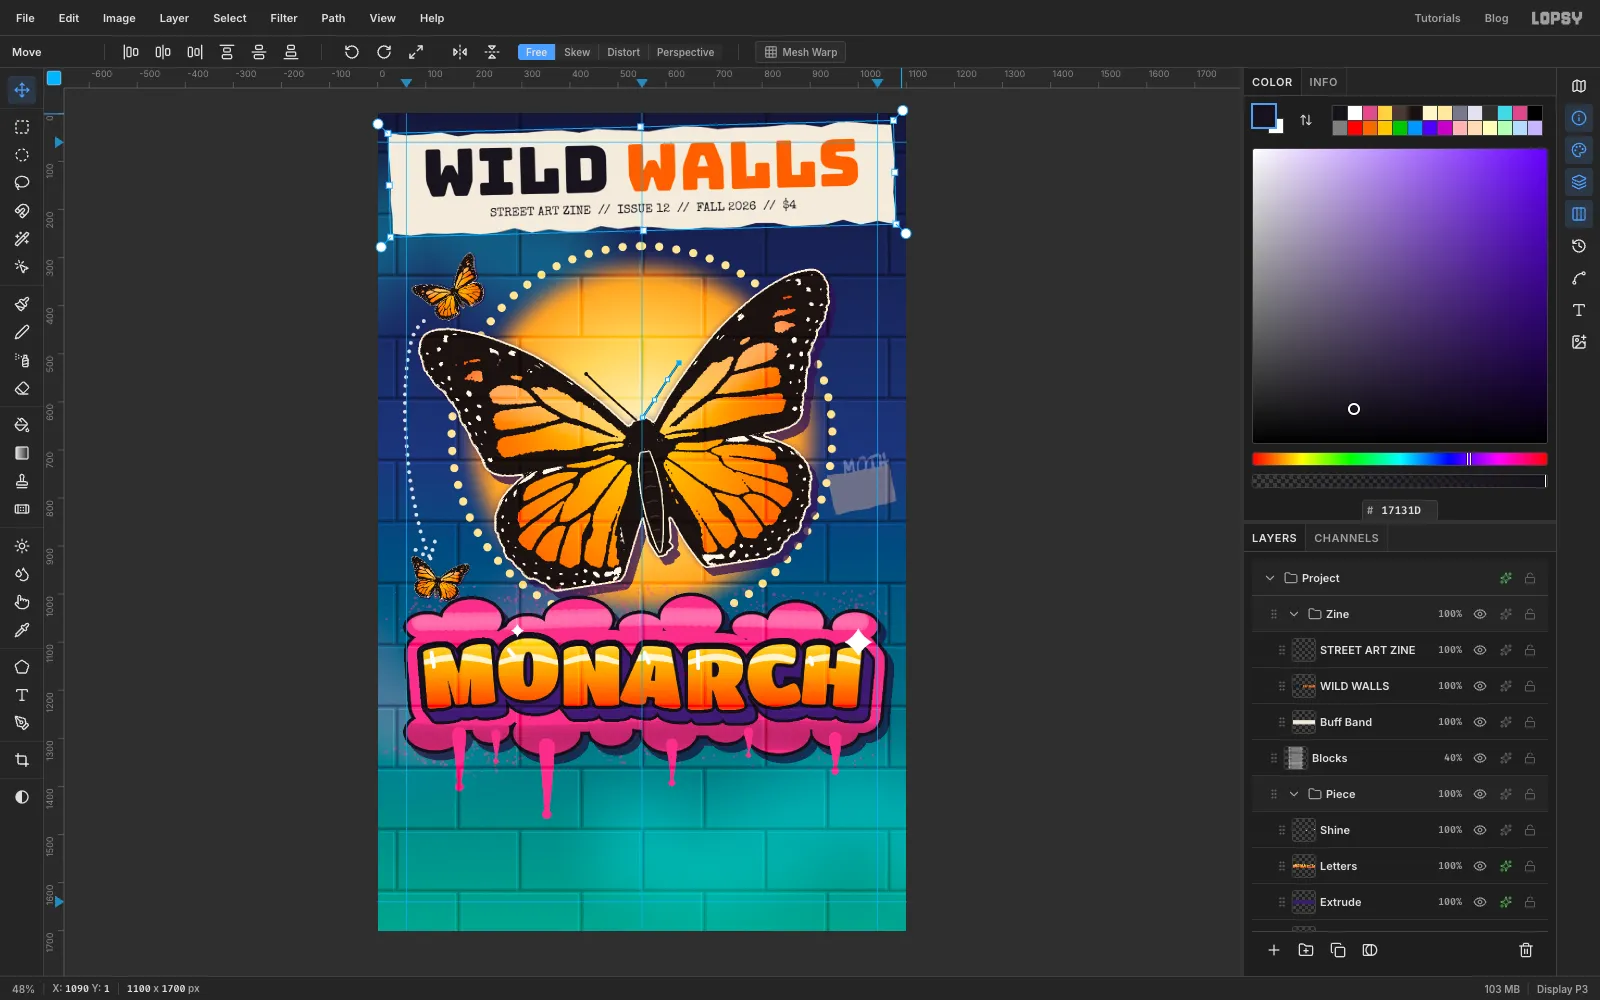
-
Tape the corners down
Click the issue-line text layer (the top of the group) and add a layer called
Masking Tape. With the Lasso, draw a short strip about 115 × 34 px across each top corner of the band, angled about 37°, with ragged ends. Fill both with and press Cmd+D.Set the layer to
85%so the band shows faintly through, and give it a small Drop Shadow: Offset X2, Offset Y3, Blur3, Opacity40, colour .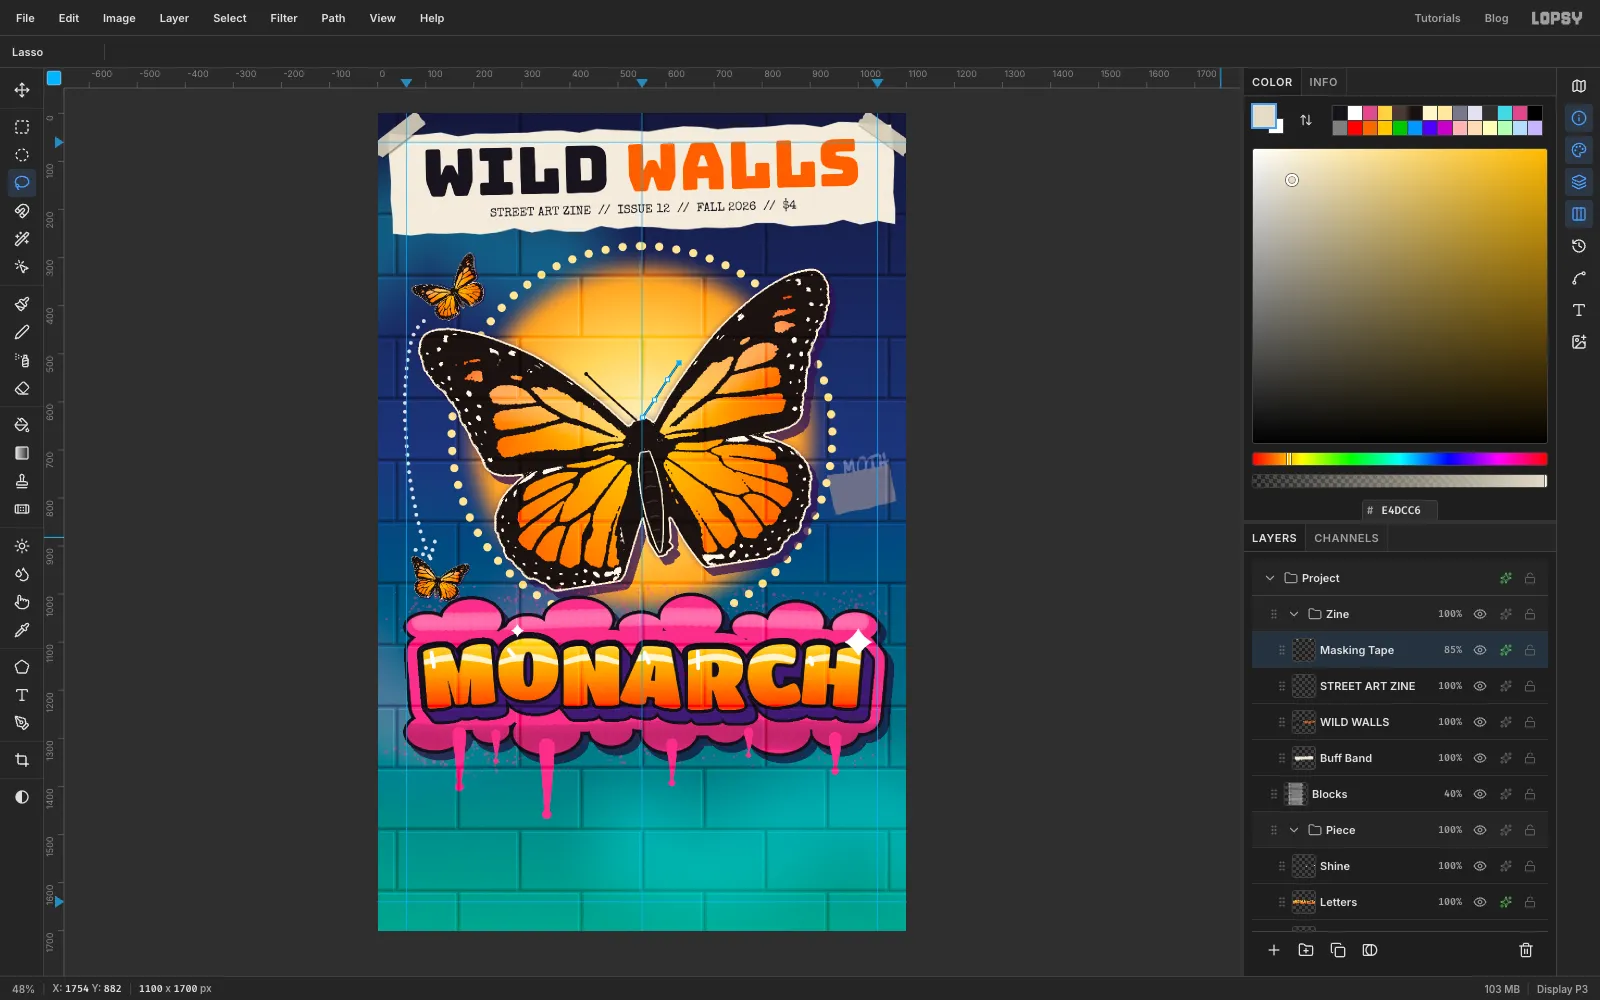
-
Make the sticker blank
Click
Buff Bandand add a layer calledSticker.The sticker's bottom edge sits right on the bottom guide, and guide snapping would drag the thin bottom strip onto it. Choose View → Snap to Guides to turn snapping off for now.
- Build a rounded rectangle 300 × 206 px with its top-left at
740, 1434. Draw a Rectangular Marquee the full height but 18 px in from each side. Shift-drag a second one the full width but 18 px in from the top and bottom. Then Shift-drag a 36 px circle with the Elliptical Marquee into each corner. - Fill it with and press Cmd+D.
- Cmd-click the
Stickerthumbnail. With the Rectangular Marquee, hold Shift+Option and drag across the top 92 px of the sticker. Fill that with . - Cmd-click the thumbnail again and intersect a strip across the bottom 14 px the same way. Fill it red too, then press Cmd+D.
Turn View → Snap to Guides back on. Give
Stickera Drop Shadow: Offset X7, Offset Y9, Blur8, Opacity55, .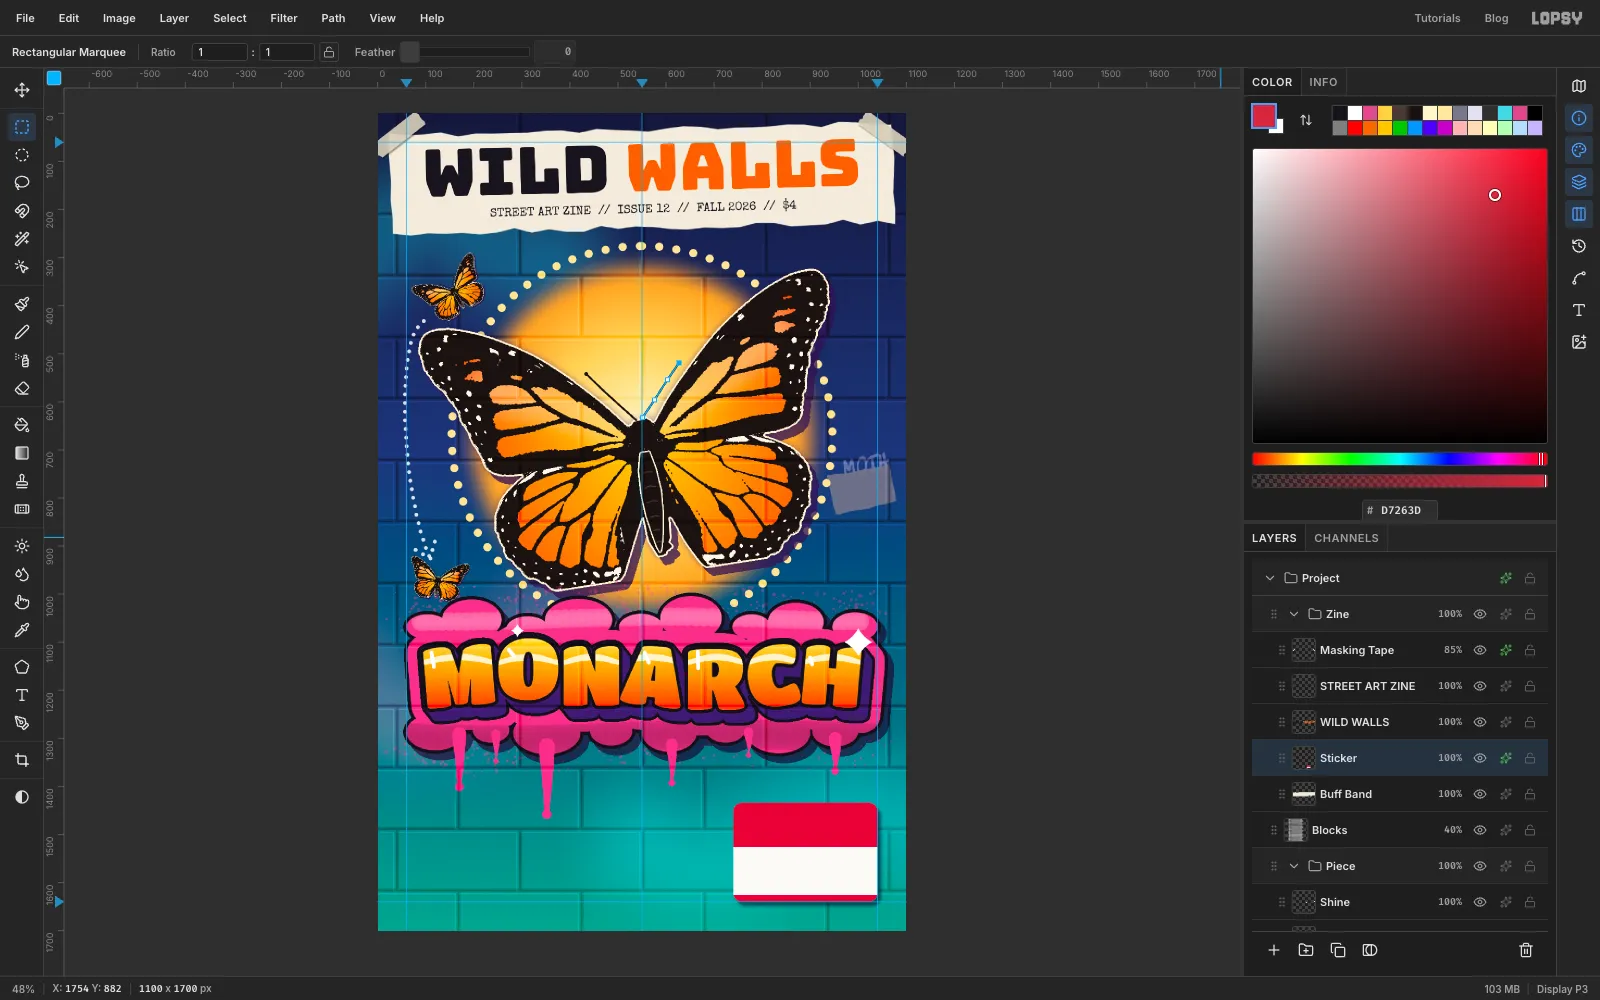
- Build a rounded rectangle 300 × 206 px with its top-left at
-
Letter the sticker
Make the three lines from the bottom up, so each click lands in empty space:
- Foreground , Rock Salt at
40, click at about780, 1546, typeDanaus(the monarch's genus) and press Tab. - Click
Sticker. Foreground white, Special Elite at21, click at about780, 1496, typemy name isand press Tab. - Click
Stickeragain. Bungee at50, click at about780, 1436, typeHELLOand press Tab.
With the Move tool, centre each line on the sticker's middle (
x 890) with the arrow keys. Put the top of HELLO 14 px below the sticker's top edge andmy name is7 px under it, and sitDanaushalfway down the white area.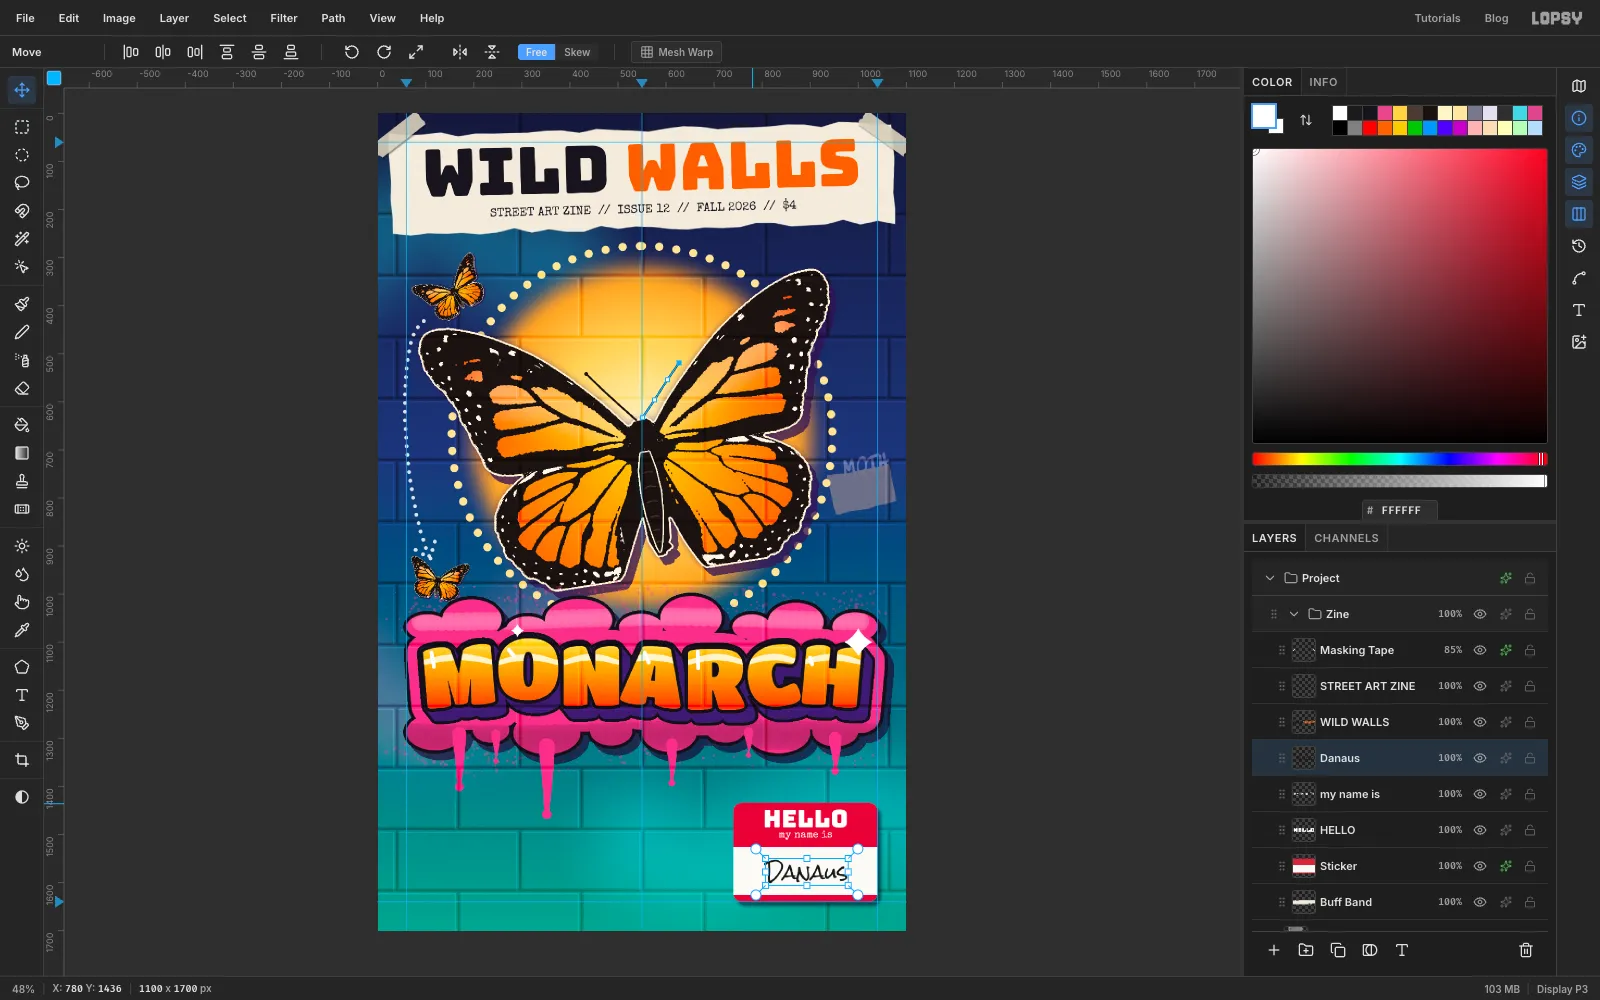
- Foreground , Rock Salt at
-
Group and tilt the sticker
Click
Danaus, Shift-clickSticker, choose Layer → Group Layers and name itHello Sticker. With the Move tool, turn the group about 6° clockwise with its rotate handle and press Cmd+D. Stickers never go on straight.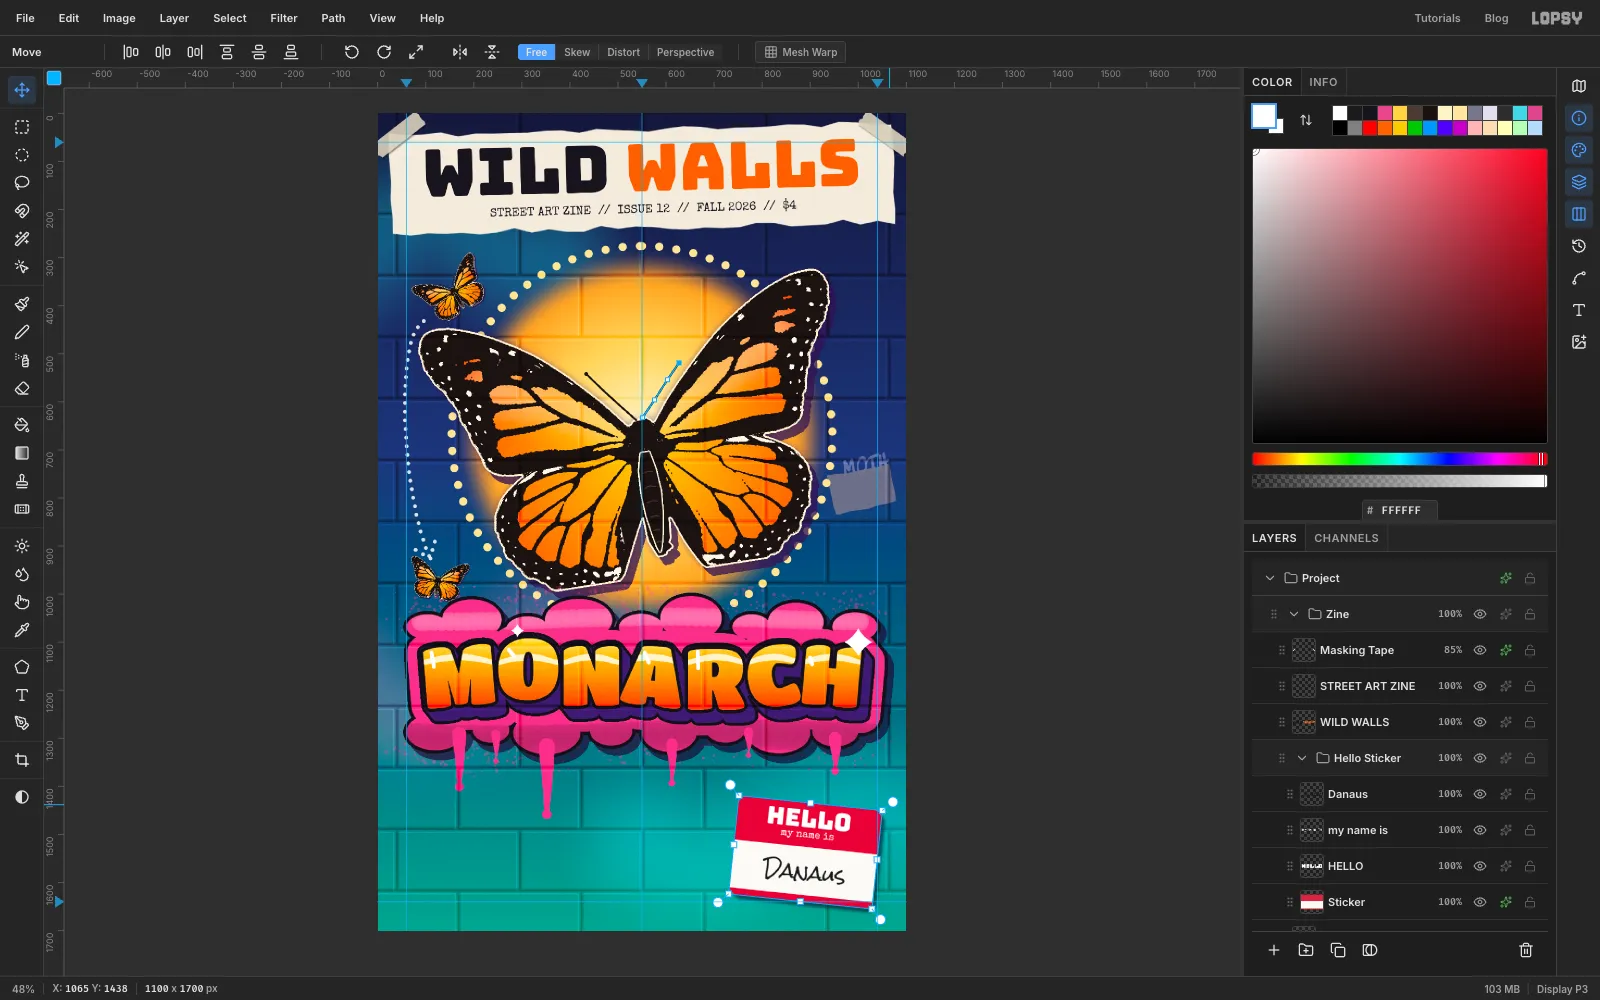
-
Tear three paper strips
Collapse
Hello Sticker, click it, and add a layer calledTape(for the paper strips; the masking tape is a separate layer up in the masthead). Set the foreground to .With the Lasso, draw one strip 44 px tall with torn, jagged ends, choose Edit → Fill, deselect, and repeat for the other two:
- from
60, 1482, about 450 px long, tilted 2° anticlockwise - from
82, 1538, about 500 px long, tilted 1.5° clockwise - from
62, 1594, about 405 px long, tilted 1° anticlockwise
Press Cmd+D. Cmd-click the
Tapethumbnail and run Filter → Add Noise… with Amount8and Mono for a paper grain, then deselect. Add a Drop Shadow: Offset X4, Offset Y5, Blur4, Opacity50, .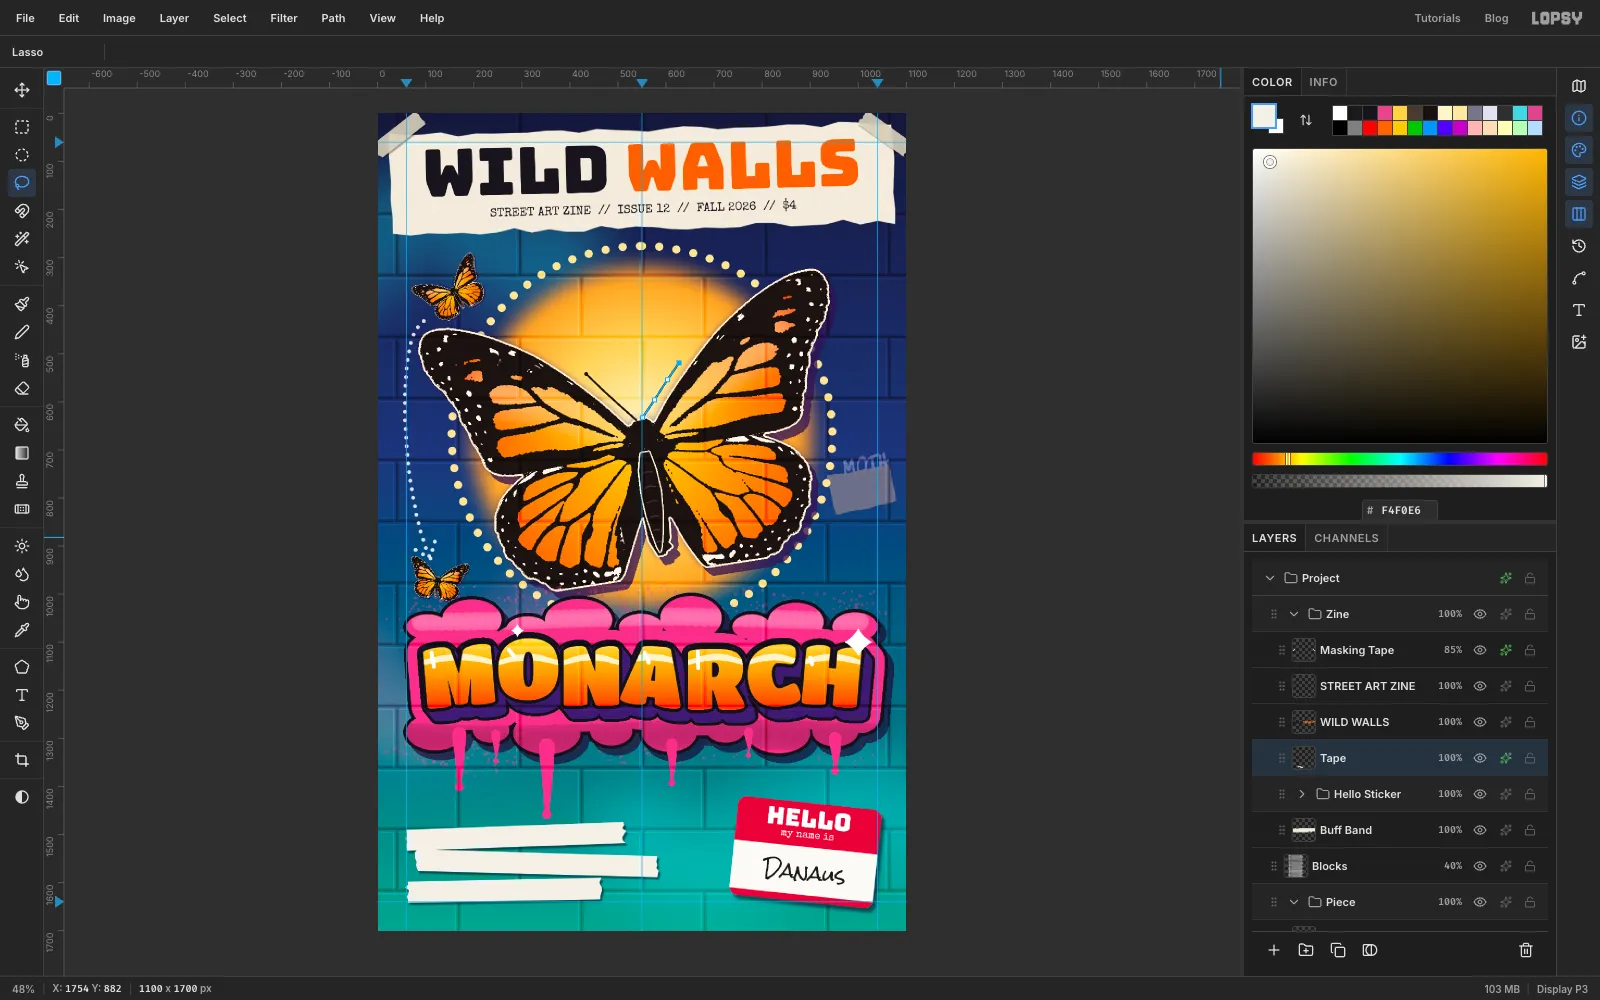
- from
-
Type the cover lines
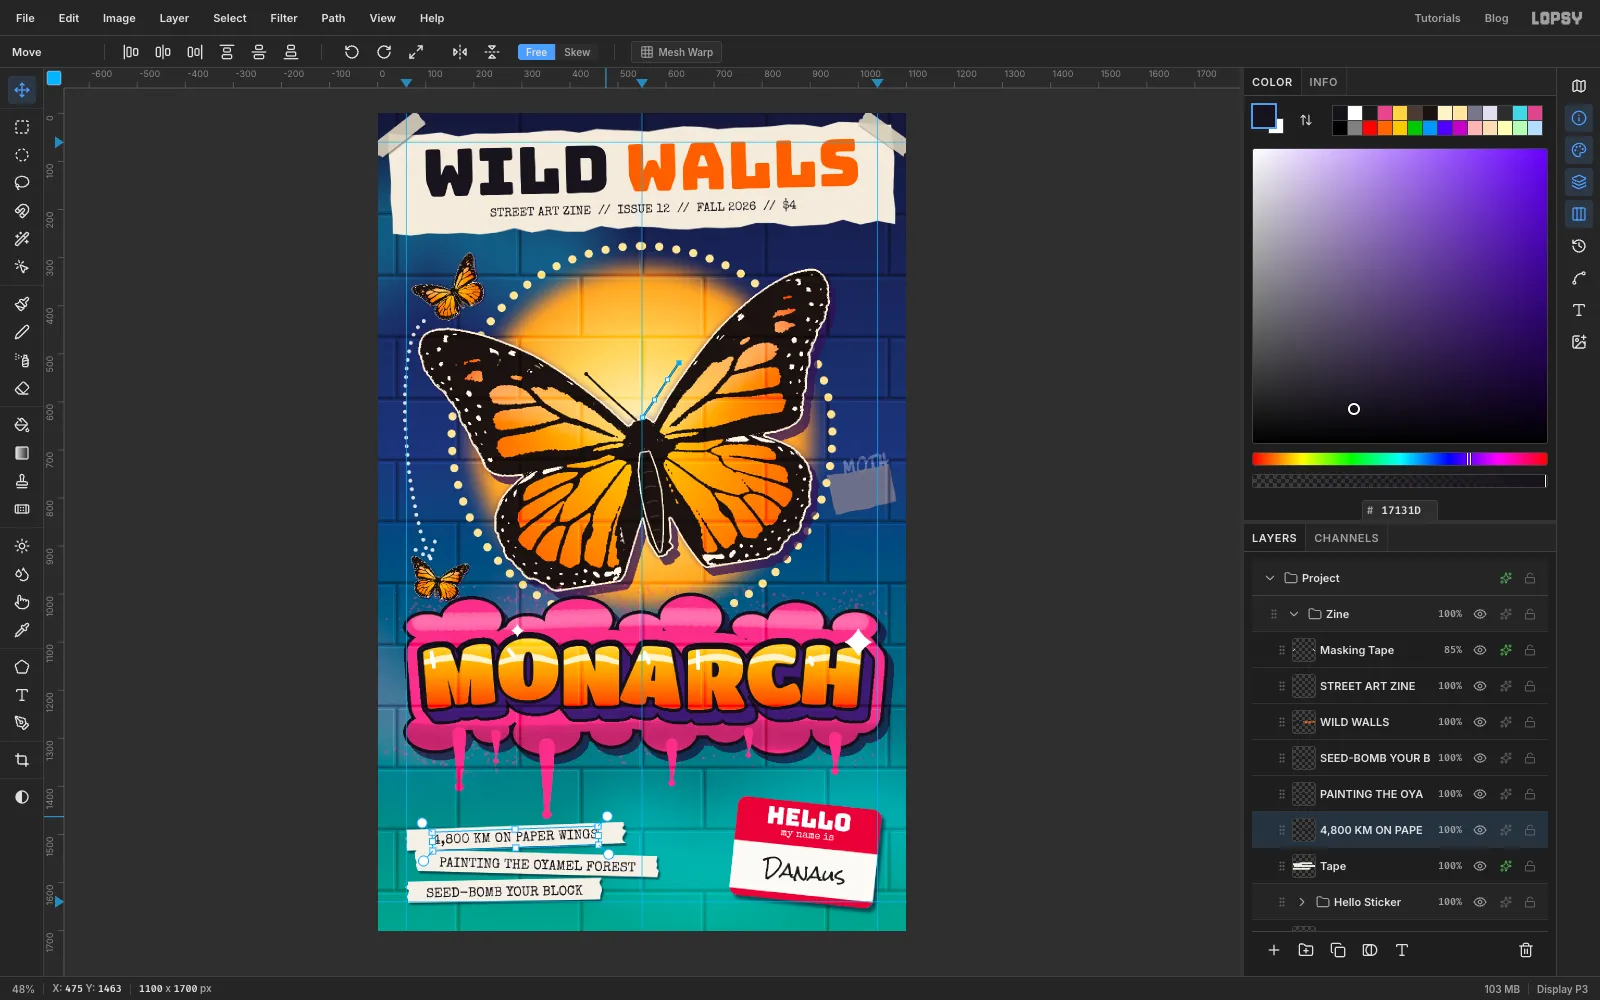
Set the foreground to and pick Special Elite at Size
28. Do the bottom strip first, then the middle, then the top, clickingTapebefore each:SEED-BOMB YOUR BLOCKPAINTING THE OYAMEL FOREST(oyamel firs are the trees the monarchs winter in)4,800 KM ON PAPER WINGS
For each one: click on its strip near the left end, type, and press Tab. Then with the Move tool, centre it on the strip with the arrow keys, and turn it with its rotate handle to the same tilt as its strip.
-
Throw up the tag
Expand the
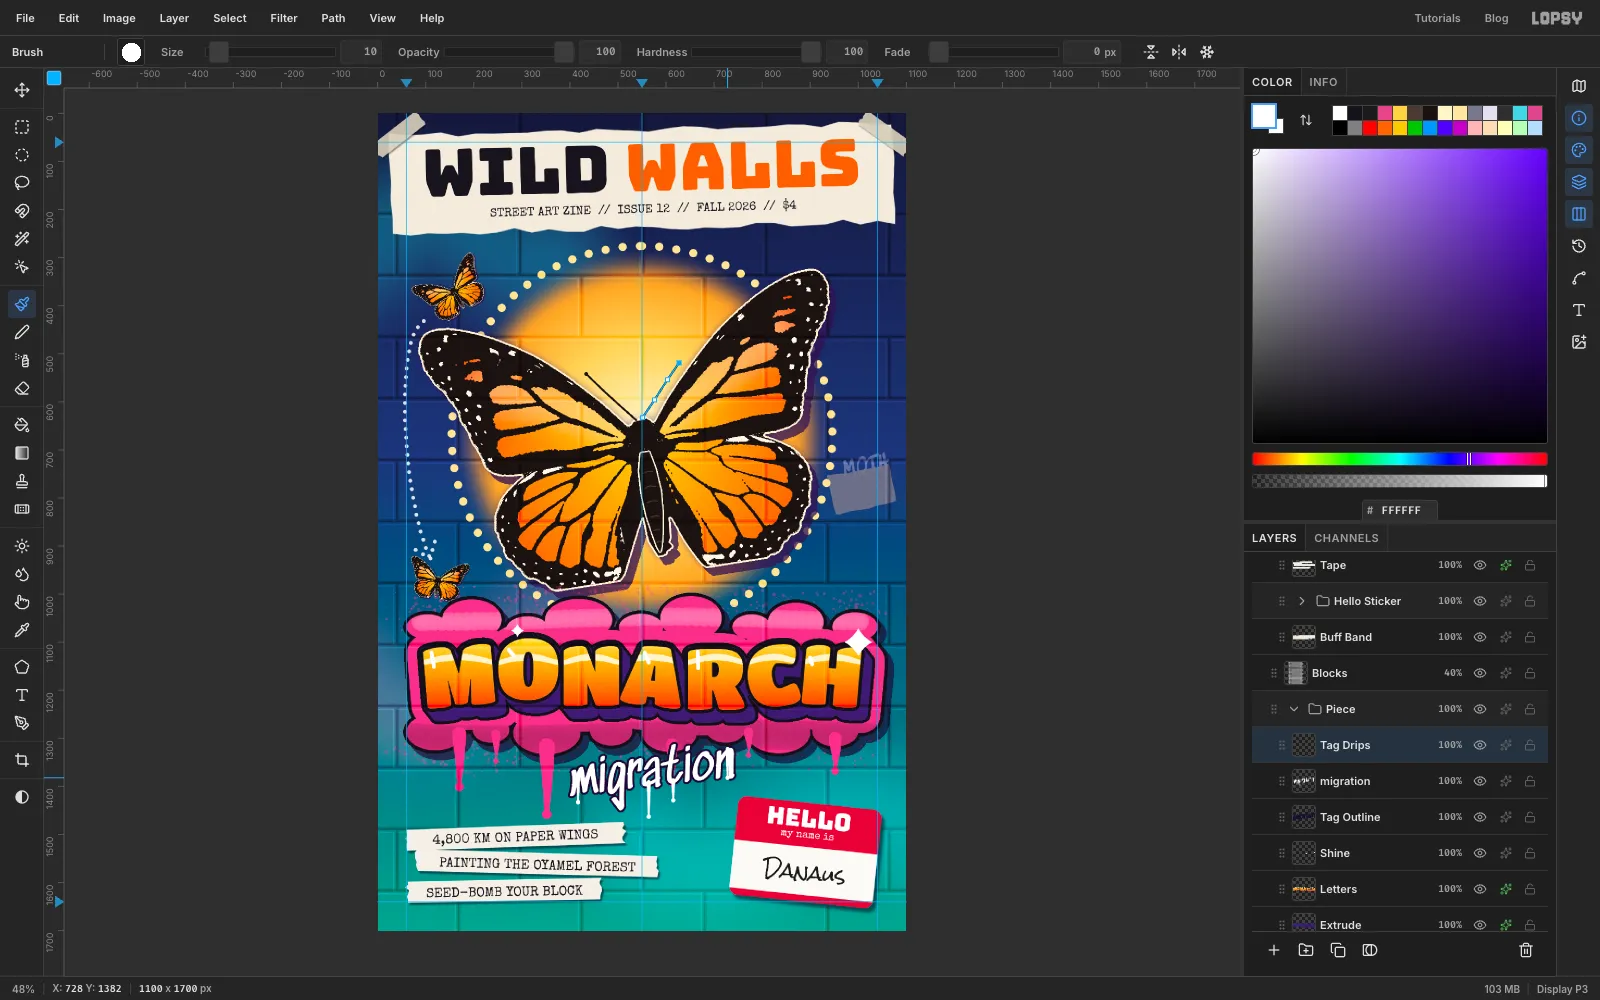
Piecegroup and clickShine. Set the foreground to white, pick Sedgwick Ave at Size96, click at about420, 1300, typemigrationand press Tab.With the Move tool, centre the word at about
x 570with its top at abouty 1318, so it sits just under the cloud, clear of the sticker and the paper strips. Then turn it about 7° anticlockwise with the rotate handle and press Cmd+D.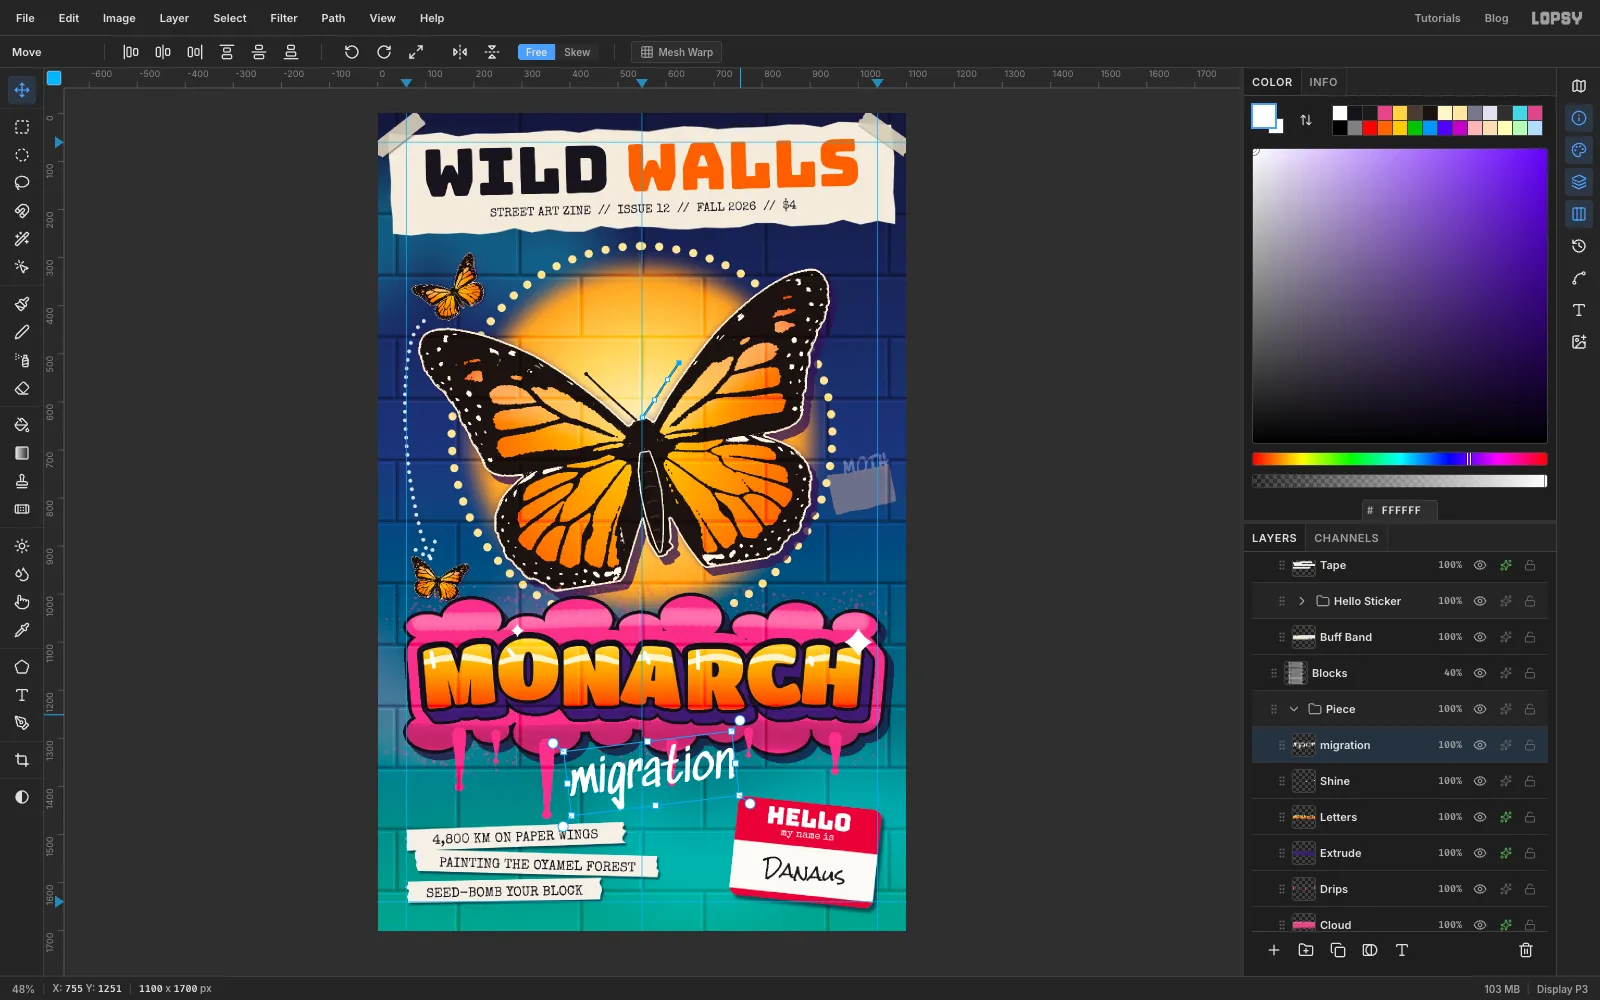
-
Outline the tag and let it drip
The tag crosses the pink drips, so give it a dark edge to show it was painted over them.
- Click
Shineand add a layer calledTag Outline. It goes under the tag. - Cmd-click the
migrationthumbnail, choose Select → Grow… with4, fill with and press Cmd+D. - Click
migrationand add a layer calledTag Drips. With the Brush at Size9, white, and Taper about twice the drip's length (these are thinner, so they can taper further), drag four thin drips, 34 to 64 px long, down from the bottoms of the m, a, t and n. Click a 10 px drop at the end of each. - Set Taper back to
0in the Brushes dialog.
- Click
-
Weather the wall
Collapse
Piece, clickBlocksand add a layer calledGrime.- Filter → Clouds… with Scale
4, then Filter → Add Noise…20Mono. Set it to Overlay at22%. - Add a layer called
Dirt. Pick the Brush with Size22, Hardness0, Opacity30and the foreground . Drag seven streaks straight down from the bottom of the masthead, 60 to 210 px long, in two or three clusters. - At Size
30and Opacity45, drag six more, 70 to 140 px long, down from the mortar line at abouty 1492. - At Size
180and Opacity60, make one wavy stroke along the very bottom of the page. - Pick the Spray with Size
120, Density30and Opacity70and make one wavy pass at abouty 1630. - Draw a Rectangular Marquee across the bottom 220 px. Pick the Gradient tool with Linear, and in Advanced… set both stops to , then select the left stop and drag its Opacity bar all the way to the left. Drag the gradient from the top of the marquee to the bottom and press Cmd+D.
Set
Dirtto Multiply at75%.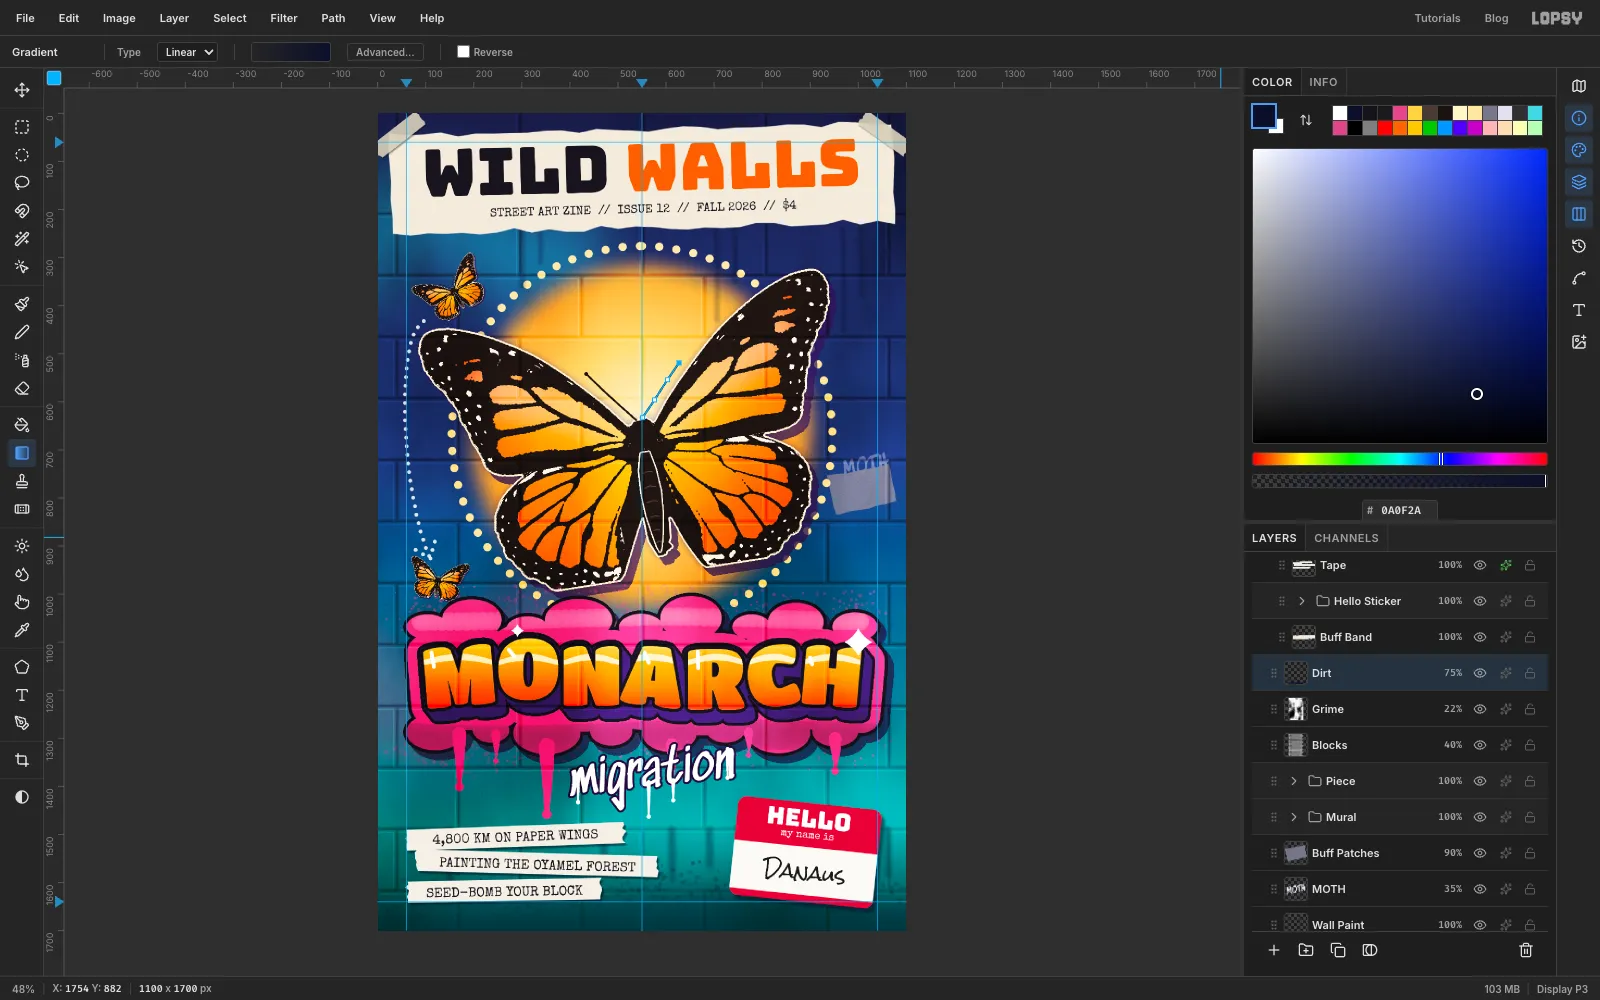
- Filter → Clouds… with Scale
-
Add photocopier toner specks
Zines are photocopied, and copiers leave specks, mostly toward the edges. Collapse
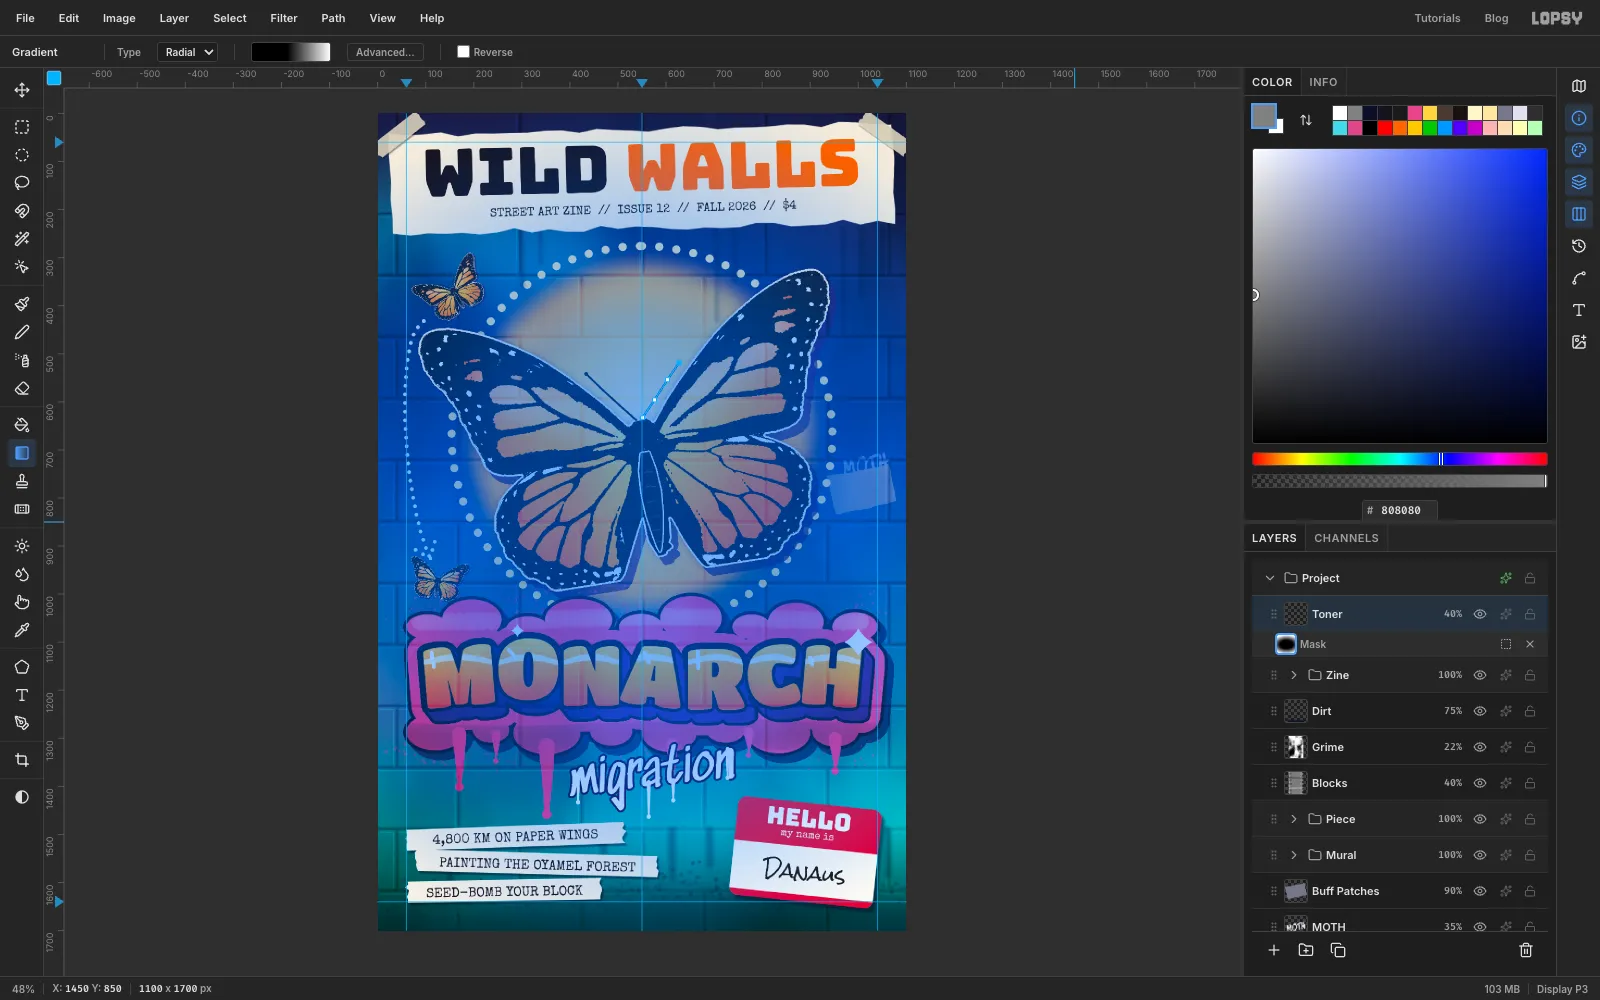
Zine, click it, and add a layer calledToner. It goes at the very top.- Set the foreground to , press Cmd+A, choose Edit → Fill and press Cmd+D. Run Filter → Add Noise… with Amount
100and Mono, then Filter → Threshold… with Level40. You get a few black specks on white. - Pick the Magic Wand with Tolerance
20and Contiguous off, click a white pixel, press Delete and Cmd+D. Only the specks are left. - Set the layer to Multiply at
40%. - Click Add Mask, then click the mask thumbnail on the layer's row to edit it. Use a Radial gradient: black at the left end, black again at about 45%, white at the right end. Drag from the middle of the page,
550, 850, out about 900 px. The middle of the cover stays clean and the specks collect at the edges.
Click the
Tonerlayer's name to stop editing the mask.Choose File → Quick Export PNG to save the cover, and File → Save Project to keep the layers.
- Set the foreground to , press Cmd+A, choose Edit → Fill and press Cmd+D. Run Filter → Add Noise… with Amount