Make a Street-Art Wheatpaste Invitation in Lopsy
Build a street-art party invitation in Lopsy with a cinder-block wall, a photocopied wheatpaste, a dripping graffiti piece, stencil spray and stickers.
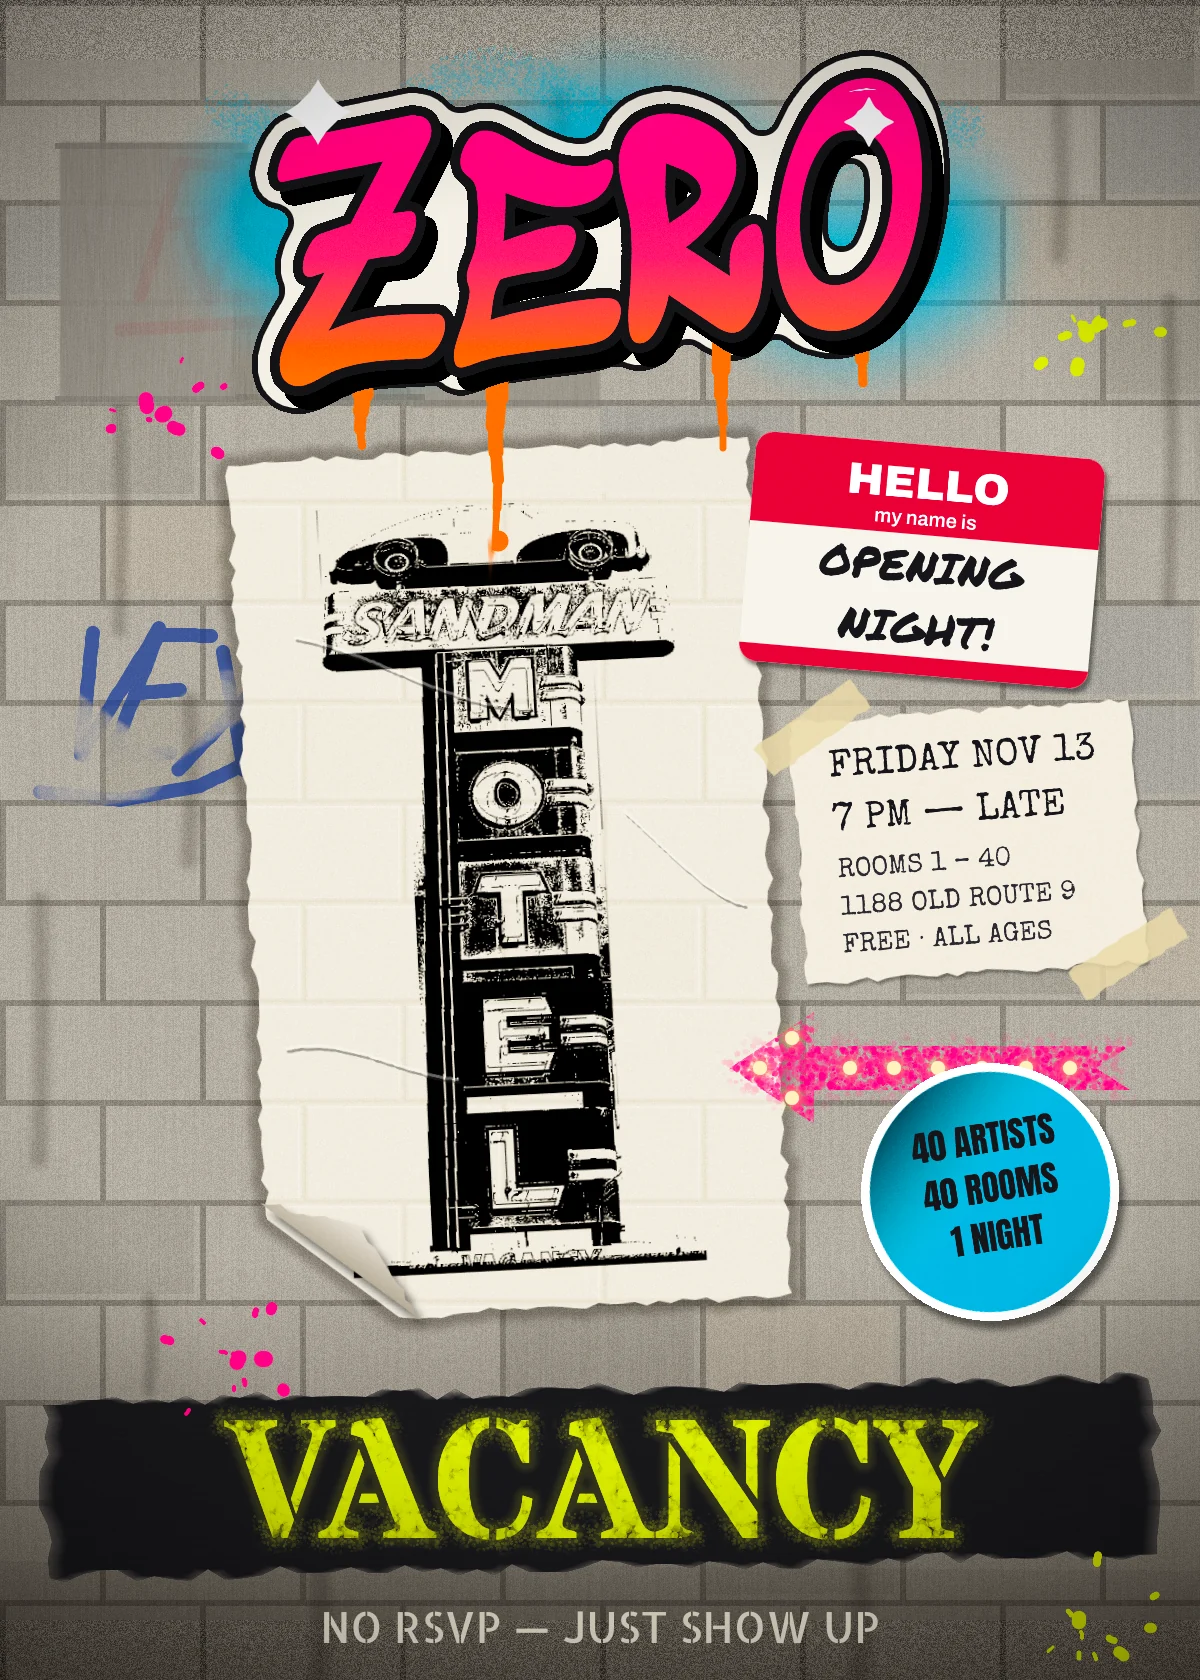
Street art has its own printing press. The city paints a wall grey, somebody tags it, the city paints it again, and then the paste-ups arrive: photocopies glued on with wheat paste, stickers slapped on in passing, a stencil sprayed in ten seconds. A good street-art flyer borrows all of that. Every element should look like it was made with a different tool, by a different person, at a different time.
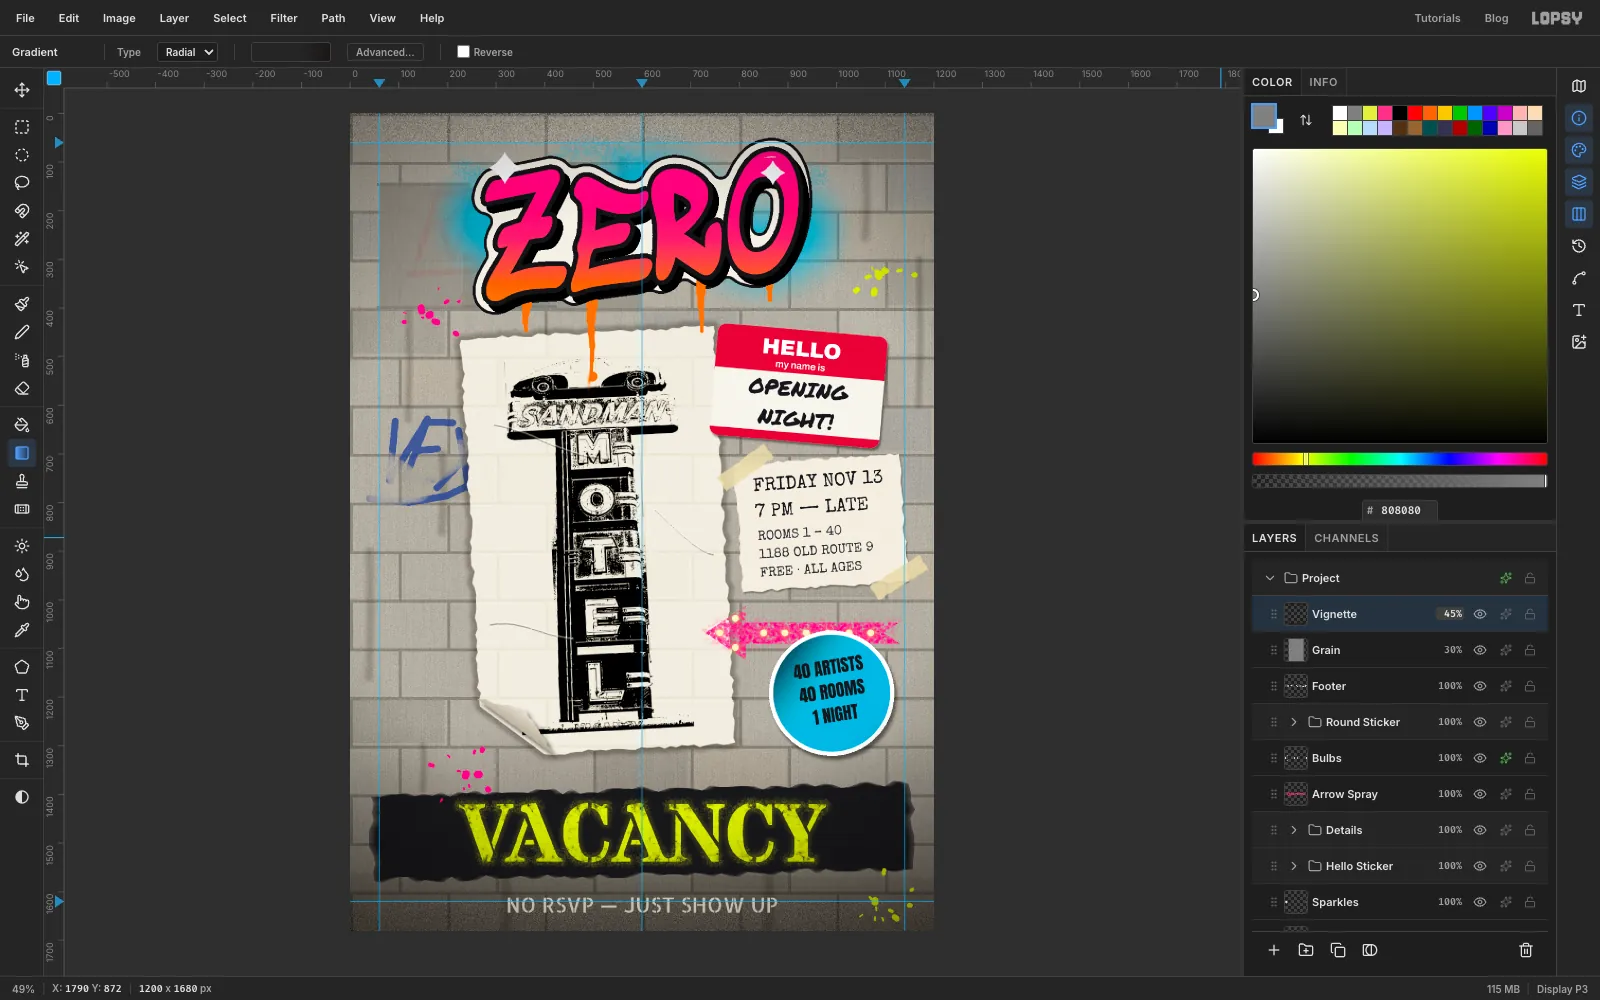
In this tutorial you'll build Zero Vacancy, an invitation to the opening night of an imaginary takeover where 40 artists paint all 40 rooms of an old motel before it's demolished. The page is 1200 × 1680 px (a 5 × 7 card) and holds:
- a cinder-block wall with rain streaks, old tags, and a patch of grey "buff" paint where the city covered a tag
- a torn, wheatpasted photocopy of a real motel sign
- a dripping graffiti ZERO and a stencil-sprayed VACANCY
- a HELLO my name is sticker, a taped typewriter note, a sprayed motel arrow, a round sticker and a footer
You'll need one photo: Sandman Motel sign, Reno, Nevada by John Margolies, from the Library of Congress's Roadside America collection. The Library lists it as having no known restrictions on publication. Open the 1024 px JPEG from that page in a browser tab. You'll copy it straight from there into Lopsy.
The tools you'll use:
- Define Pattern and Fill with Pattern, Add Noise, Motion Blur, Brightness/Contrast, Desaturate, Threshold, Emboss and Gaussian Blur
- the Lasso, Rectangular Marquee, Magic Wand and Pen tools, Select → Grow / Shrink / Feather / Inverse, and Cmd-click on a layer thumbnail to load that layer's shape as a selection
- the Brush, Pencil, Spray, Smudge, Eraser and Burn tools, with Shift-click for straight lines
- the Shape tool's click-to-size dialog and the Gradient tool
- live text in eight Google fonts: Sedgwick Ave Display, Stardos Stencil, Archivo Black, Archivo, Permanent Marker, Special Elite, Anton and Allerta Stencil
- groups that you rotate as one piece with the Move tool's handles
- layer effects: Stroke, Drop Shadow and Outer Glow, plus the Multiply and Overlay blend modes
The palette is concrete, paper and four spray cans:
-
Wall
-
block
-
mortar
-
Buff greys
-
Paper
-
note paper
-
tape
-
Ink
-
band black
-
Hot pink
the ZERO fade
-
Cyan
-
acid yellow
-
sticker red
-
Start a 5 × 7 document and paint the wall grey
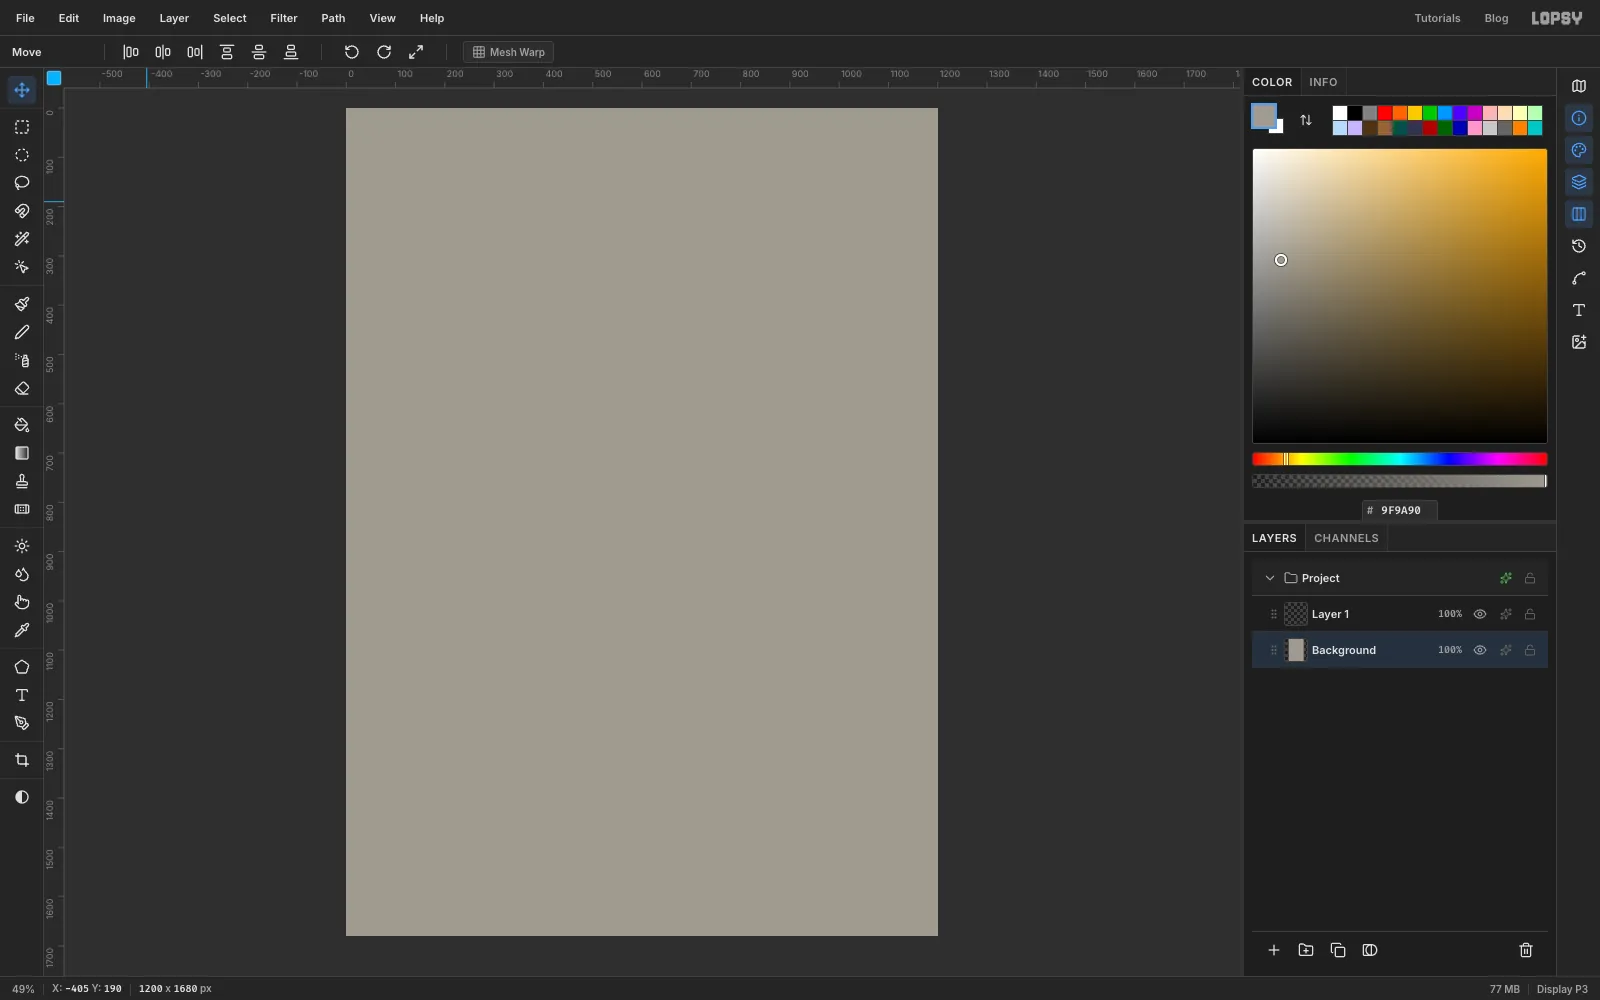
Choose File → New, keep the units on Pixels, and make the document 1200 wide and 1680 high. Click the Background layer, set the foreground colour to and choose Edit → Fill.
Click once on the top ruler at the middle of the page to drop a centre guide. Add guides about 60 px in from every edge the same way, clicking the top ruler for the left and right guides and the left ruler for the top and bottom ones. They'll keep the type off the edges later.
-
Draw one block as a pattern tile
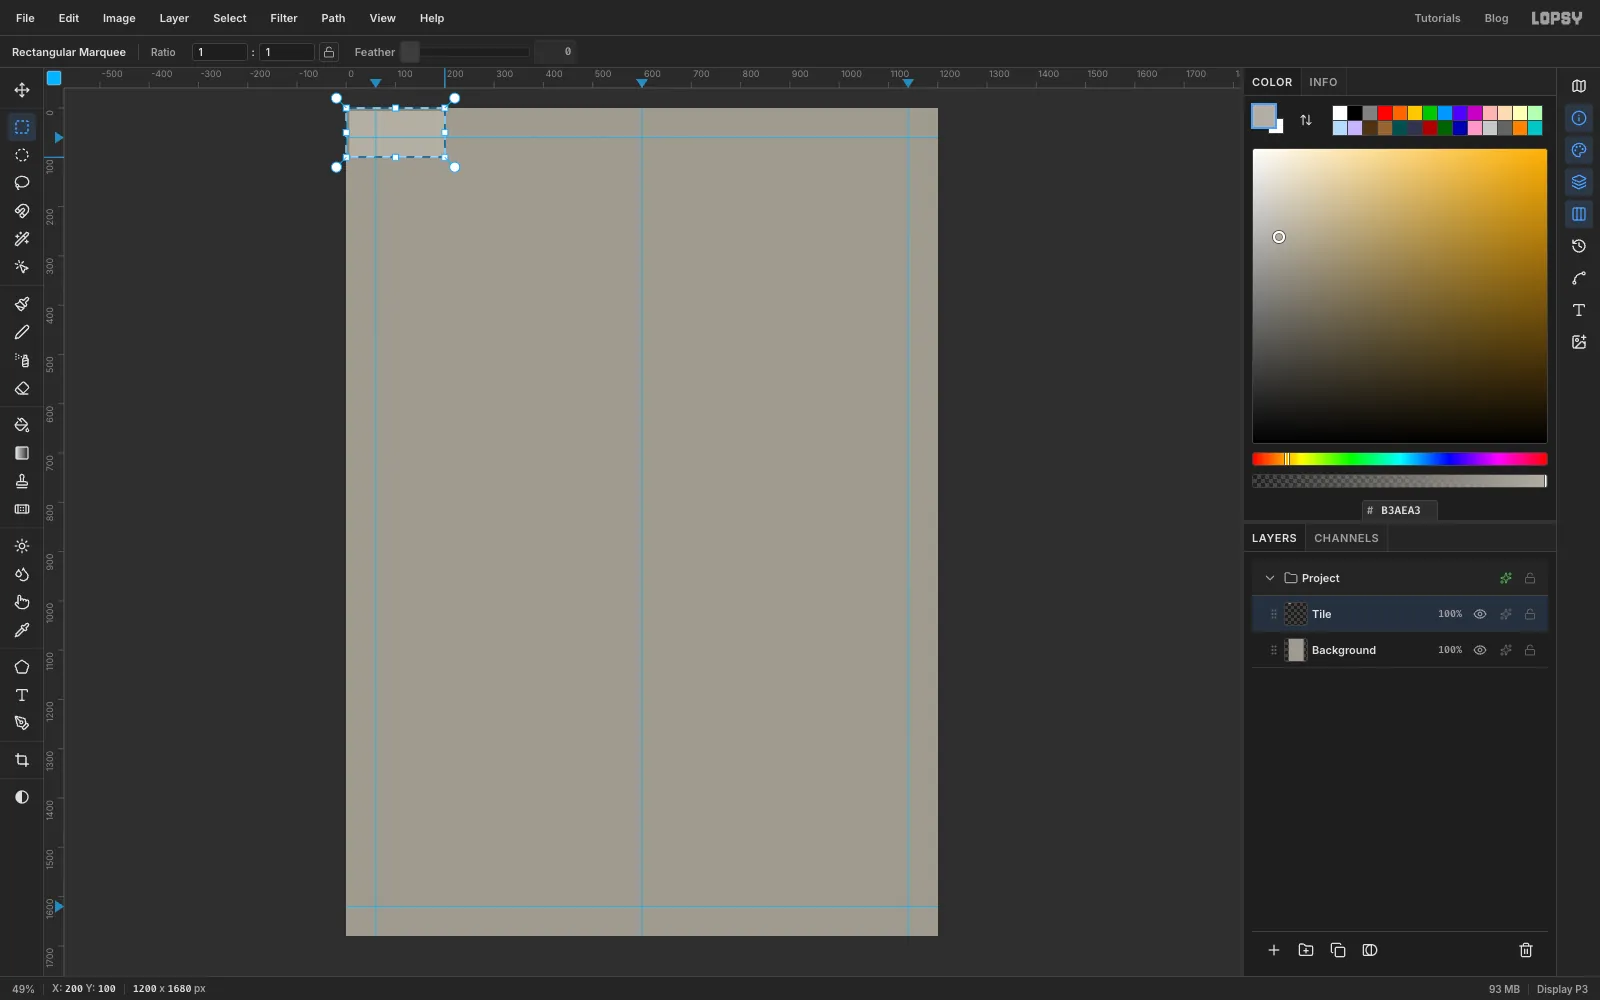
A new document comes with an empty Layer 1. Double-click its name and rename it Tile. A pattern always tiles from the top-left corner of the page, so build the tile there. Hold Cmd and scroll over the corner to zoom in, so you can place things a few pixels apart.
- With the Rectangular Marquee (M), drag a box 200 px wide and 100 px tall from the very top-left corner. The size readout next to the cursor helps. Fill it with the mortar colour .
- Drag a second box that starts 6 px in from the top and left edges and ends at the same bottom-right corner. Fill it with the block colour . You now have one block with a mortar line along its top and left.
- Drag the 200 × 100 marquee around the whole tile again and choose Edit → Define Pattern.
Deselect with Cmd+D and delete the Tile layer with the trash button. The pattern stays defined. Press Cmd+0 to fit the page back in the window.
-
Fill the wall with staggered blocks
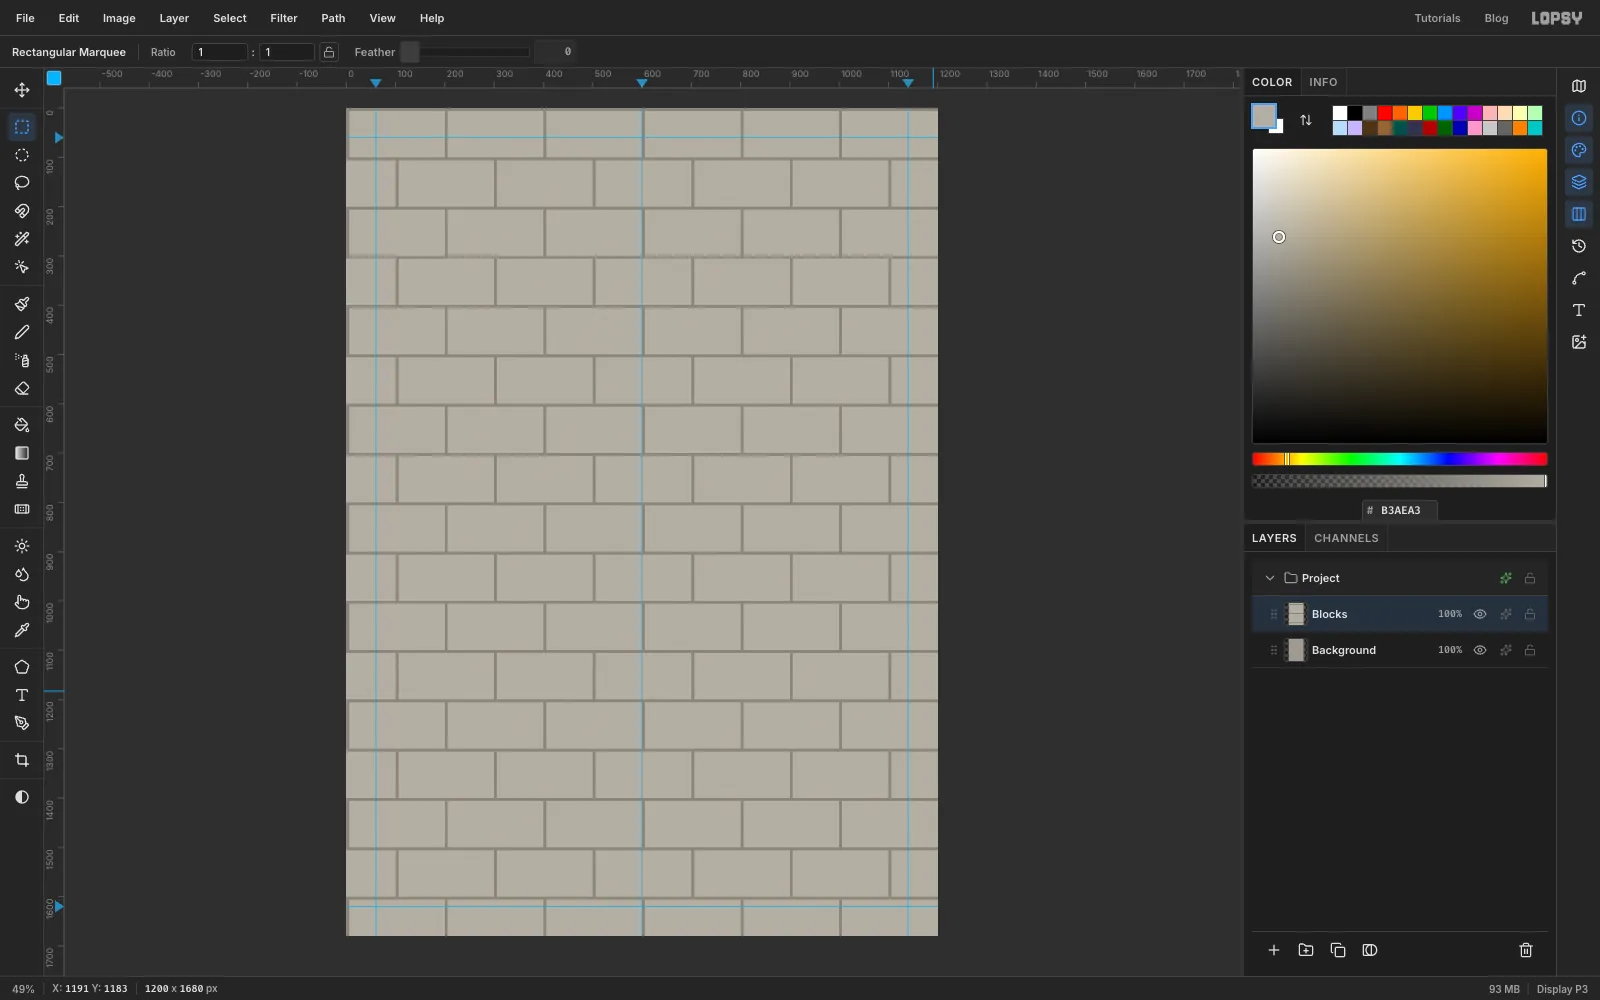
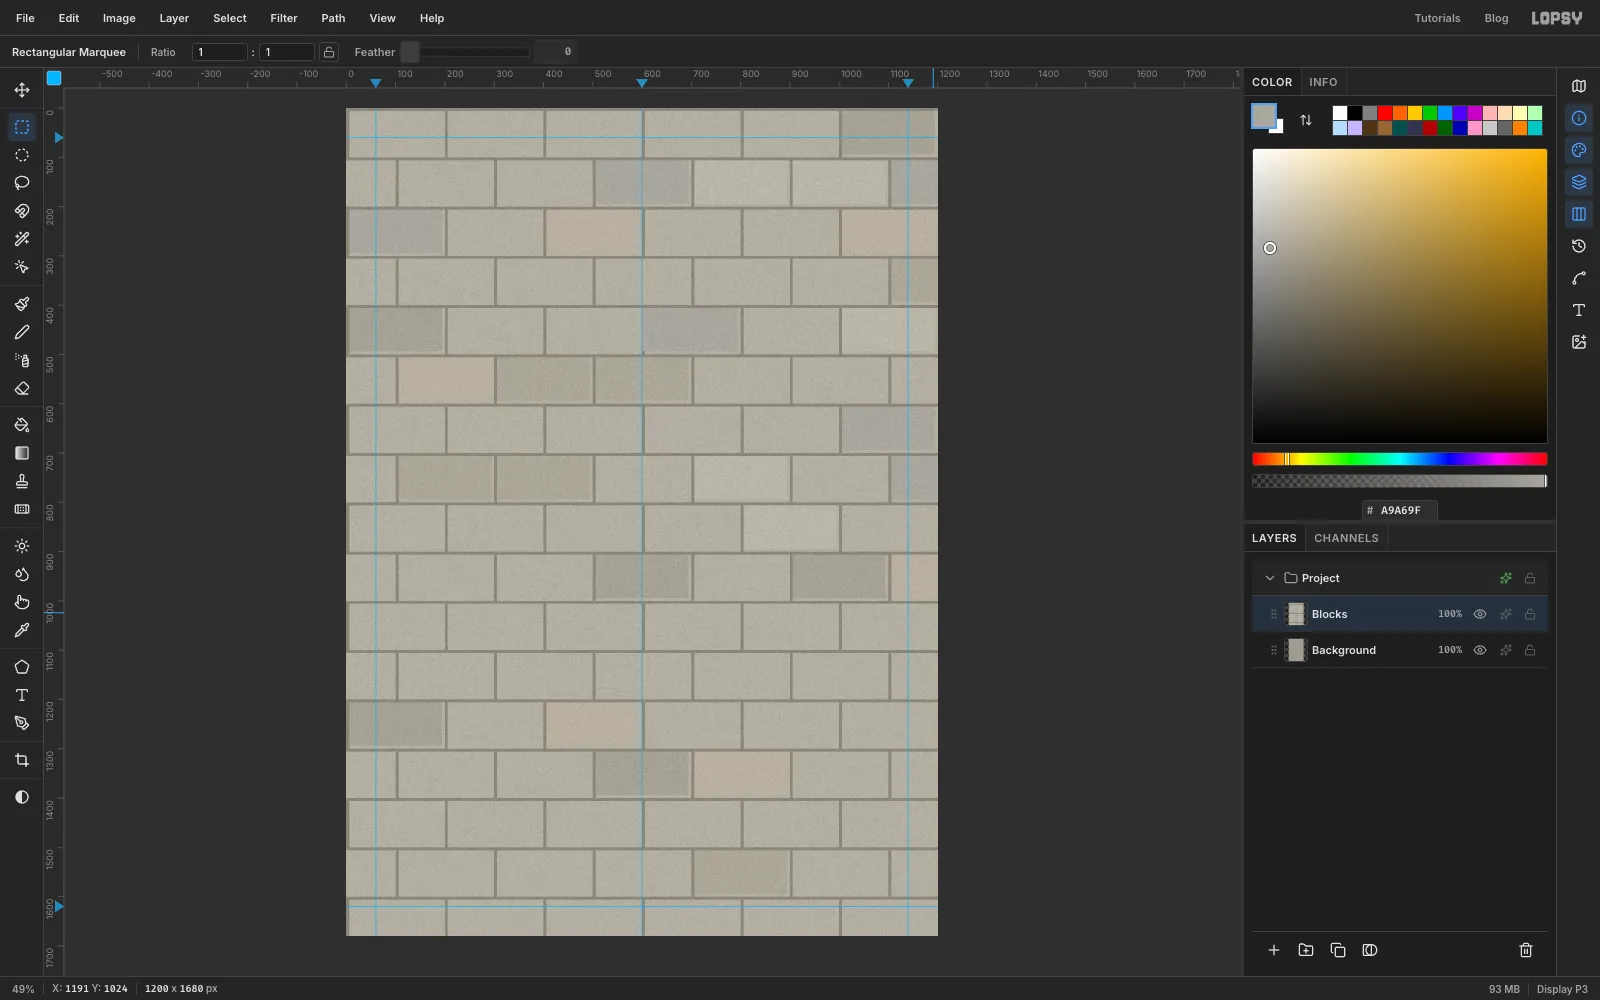
Click Add Layer at the bottom of the Layers panel and name the layer Blocks. Choose Edit → Fill with Pattern... and pick your block pattern. Set Row Stagger to 50 so each row shifts by half a block, and click Apply. That gives you the running bond of a real block wall.
-
Patch a few blocks and add pores
Real walls are repaired one block at a time, so a few blocks never match. With the marquee, drag inside the mortar of about 30 blocks scattered across the page, a few at a time. Fill them with one of , , , or , mixing the greys so neighbouring blocks differ.
Deselect, then choose Filter → Add Noise..., set Amount to 26, click Mono and apply. The speckle reads as the pores of cast concrete.
-
Make a grime layer
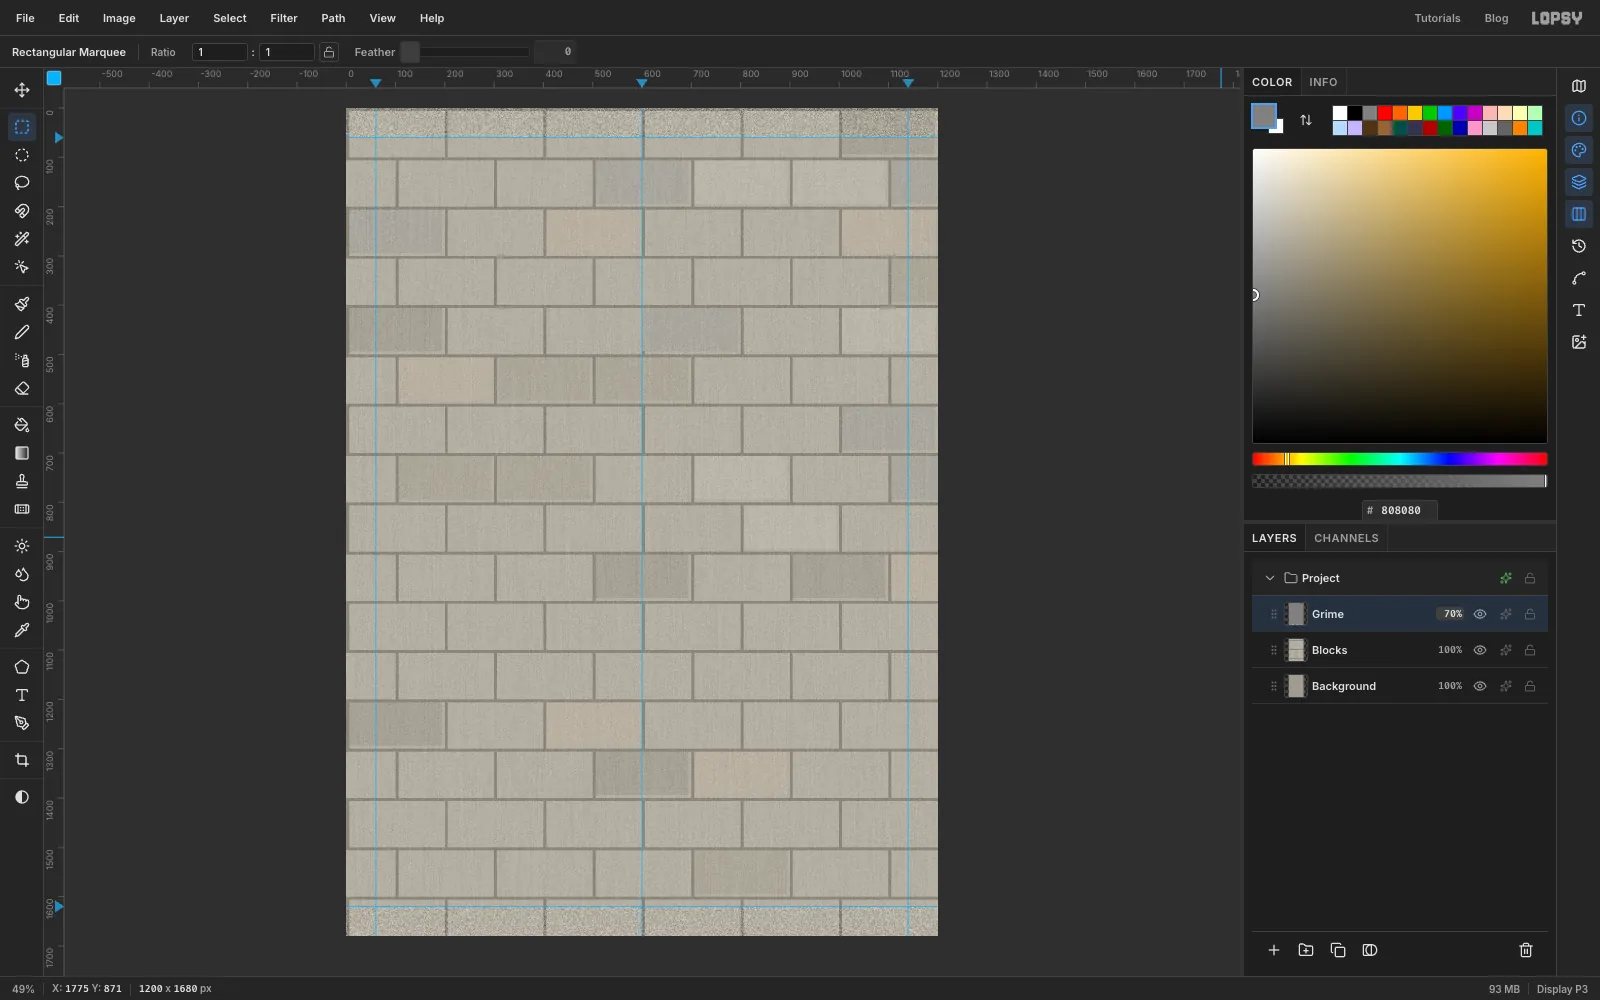
Add a layer named Grime and fill it with . Run Add Noise at 100 (Mono).
Drag a marquee over everything except about the top and bottom 60 px of the page, then run Filter → Motion Blur... at 90° with a Distance of 100. Leaving the edges out stops the blur from smearing the edge pixels into stripes. Deselect and run Brightness/Contrast... with Contrast at 70.
Open the layer's effects drawer, set the blend mode to Overlay, and lower the layer's opacity to 70%.
-
Darken the foot of the wall
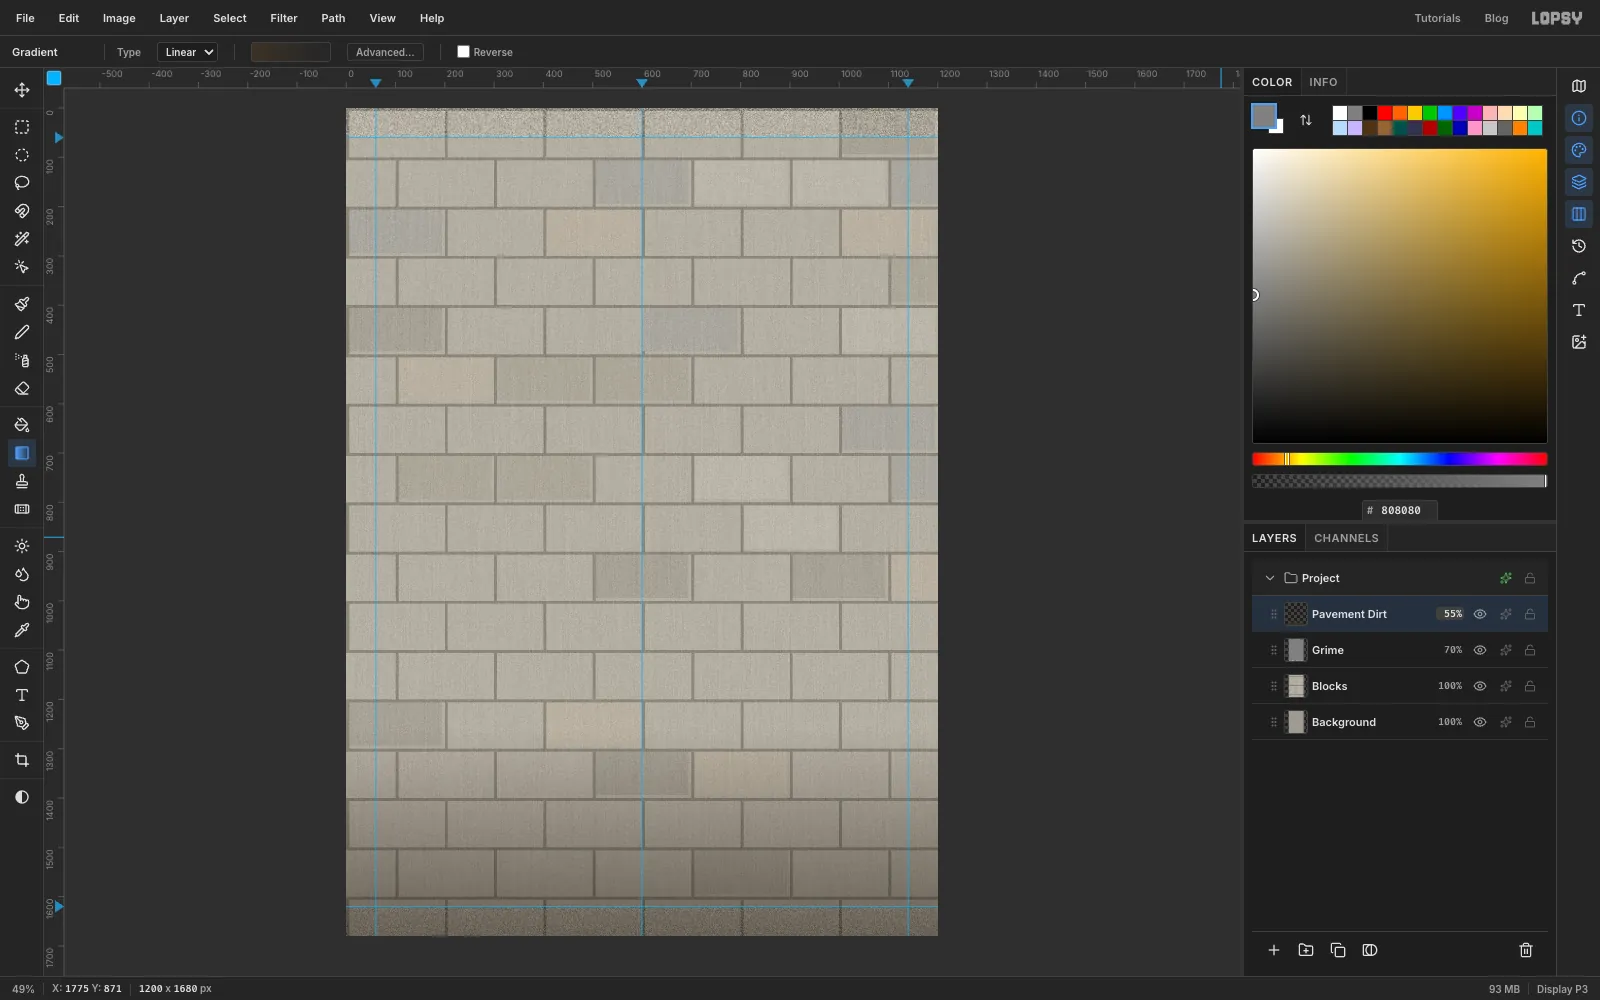
Add a layer named Pavement Dirt and pick the Gradient tool. Click Advanced in the options bar and set both stops to , with the right-hand stop at 0% opacity. Drag from the bottom edge up about a quarter of the page. Set the layer to Multiply at 55%.
-
Paint rain streaks
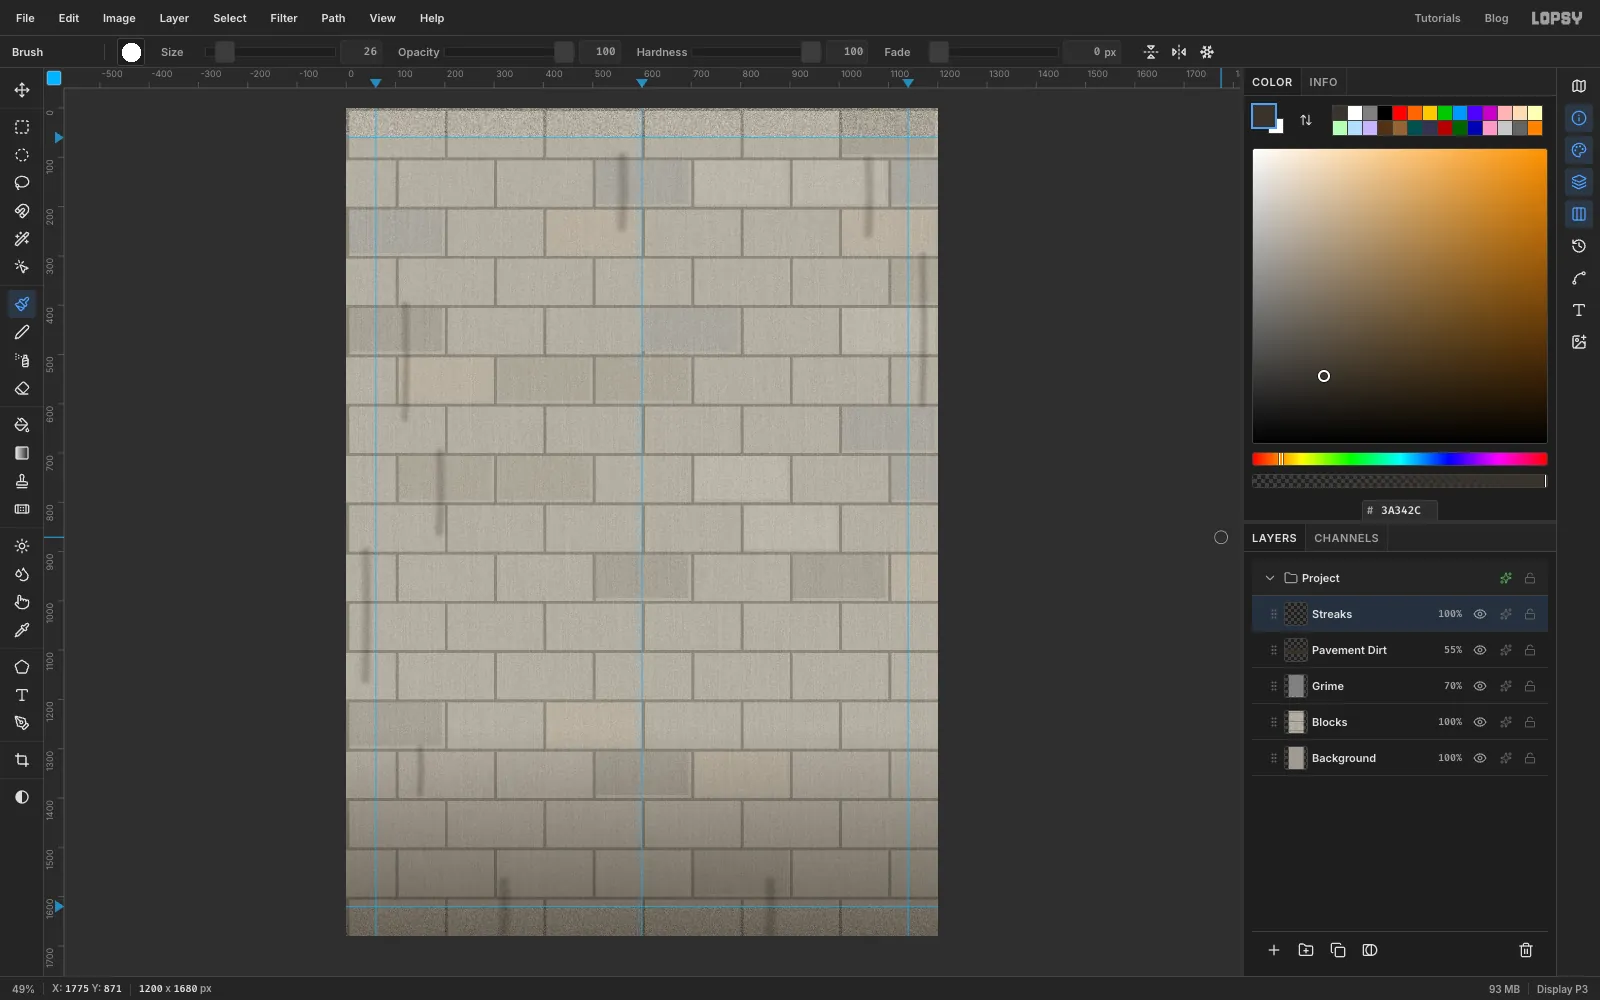
Add a layer named Streaks and pick the Brush (B). In the options bar set Hardness to 0, Opacity to 22 and the size to about 30, with the colour . Drag short vertical strokes straight down from a few mortar joints, and from just under where the black band will go at the bottom. Set the layer to Multiply, then put the Brush's Hardness and Opacity back to 100.
-
Write some old tags
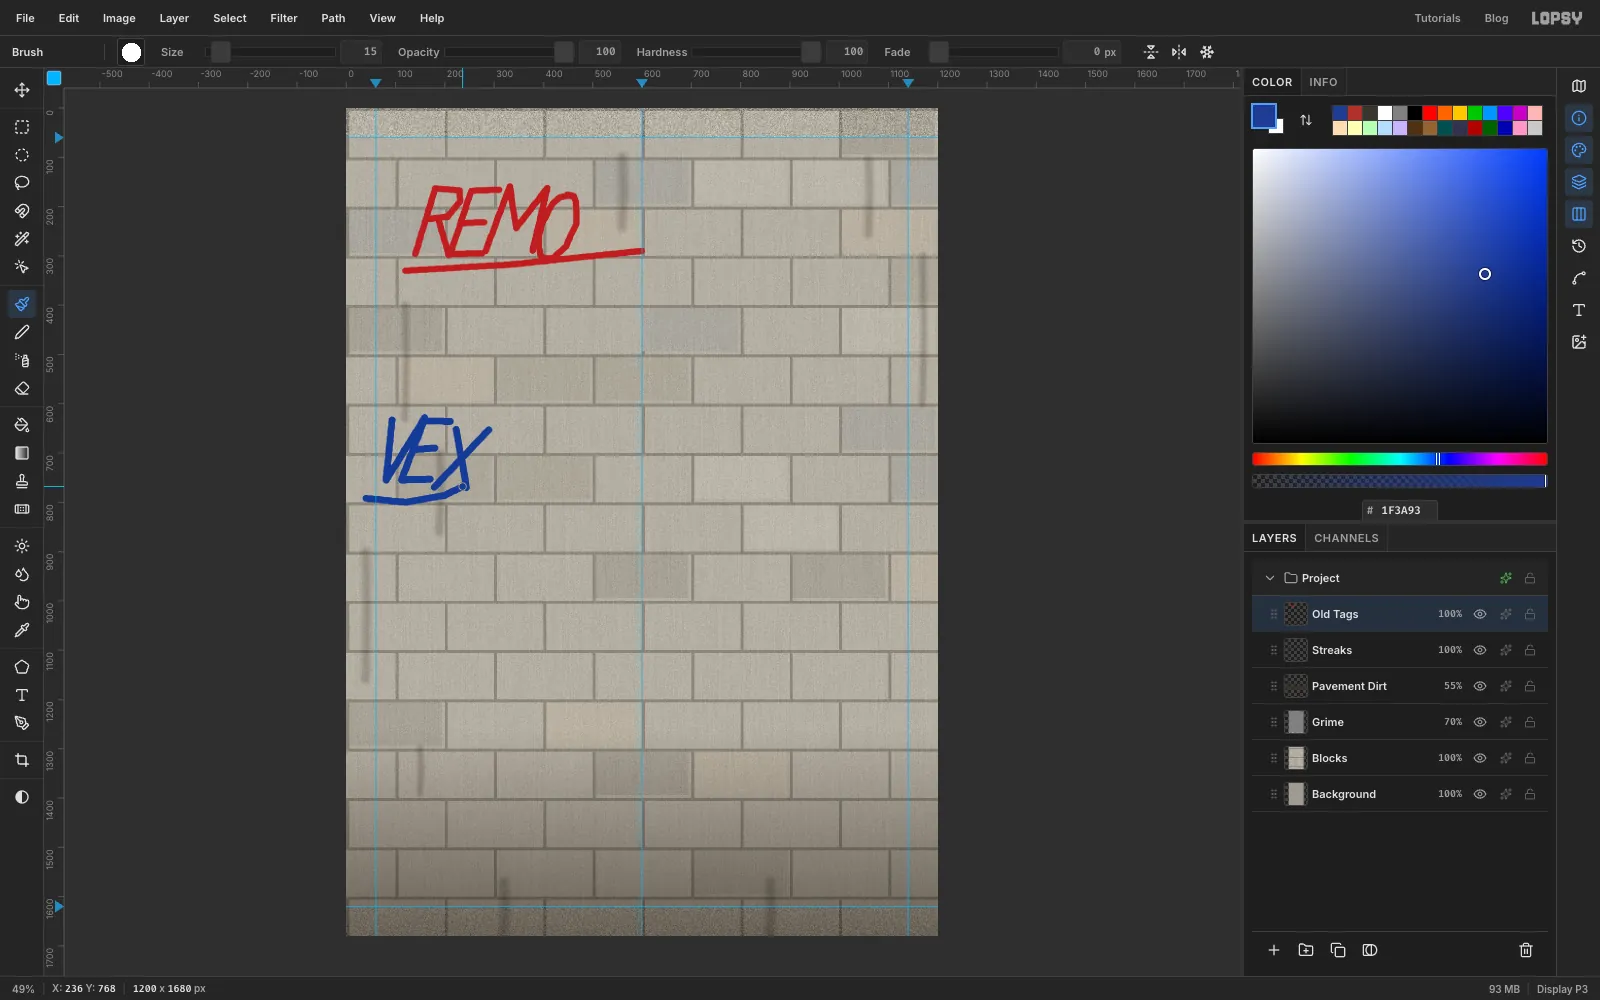
With Streaks selected, add a layer named Old Tags. Tags are written fast with a marker, so draw them in one pass with the Brush at a fixed size and don't fuss over them:
- In at size 14, write REMO in slanted capitals near the top left, with a quick underline that rises to the right.
- In blue at size 15, write VEX in the left margin about a third of the way down, with a flicked underline.
-
Buff over the red tag
First lower Old Tags to 75% so the tags sink into the wall.
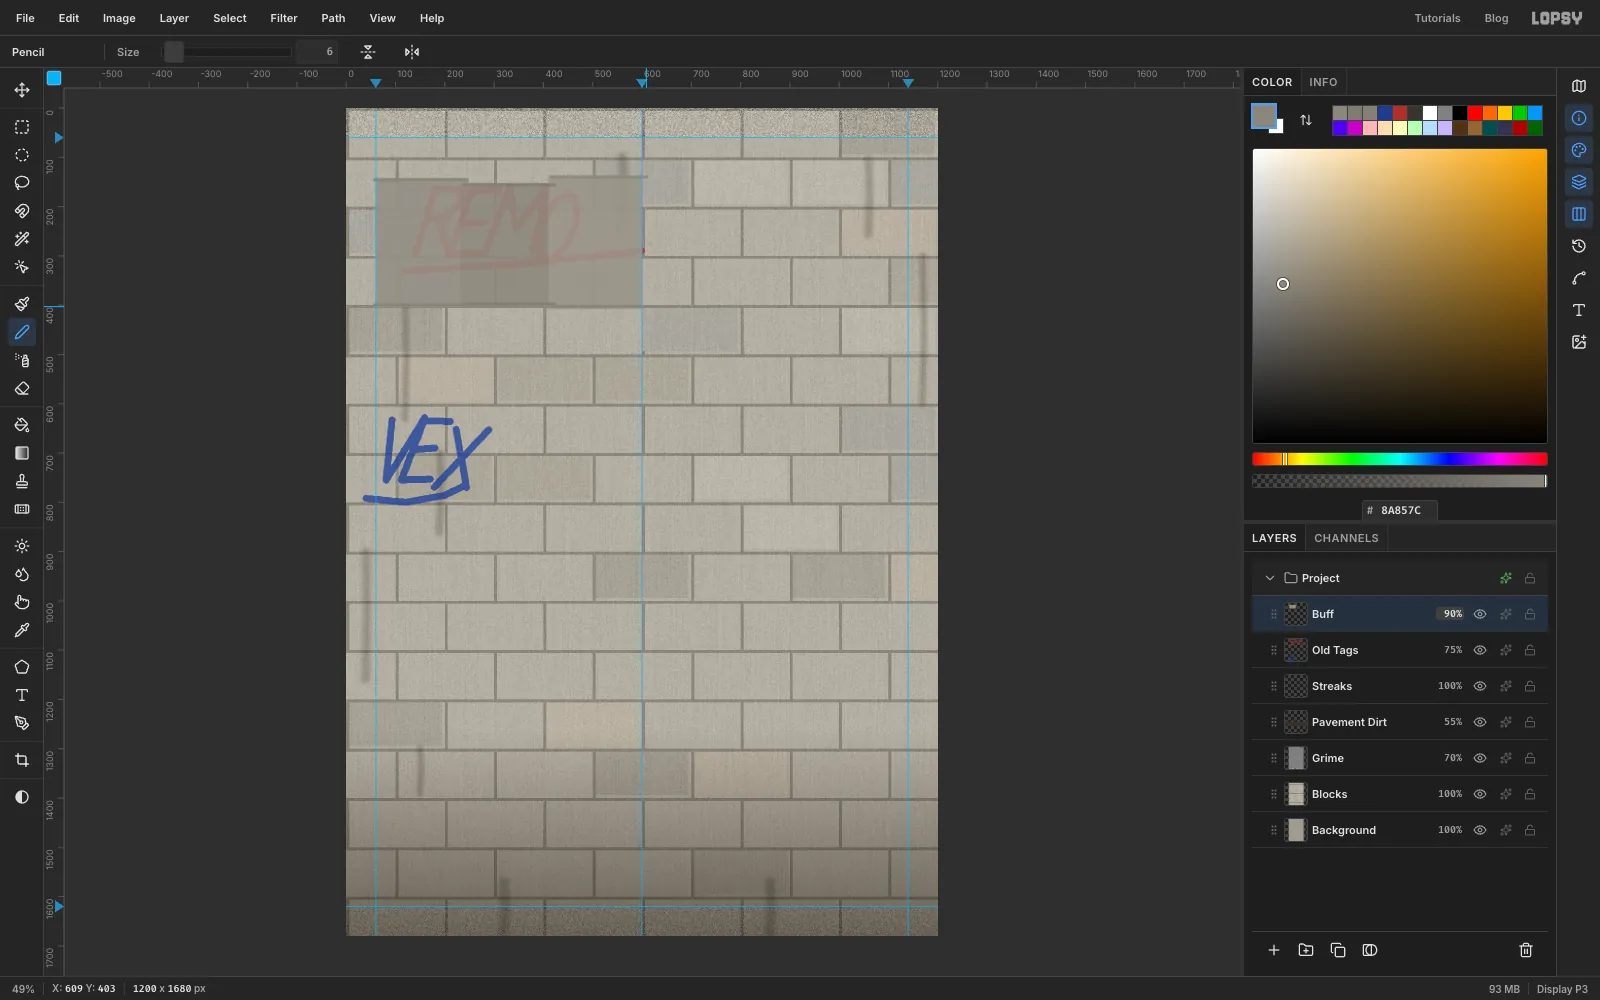
City crews paint over tags with whatever grey they have, in roller-width passes, and they're never tidy: it's fine if the tip of the underline still pokes out. Add a layer named Buff and make three overlapping passes across the REMO tag. For each one:
- Drag a tall marquee about 200 px wide that covers the tag from top to bottom.
- Choose Select → Feather… and use 2 px, so the edge is soft like rolled paint.
- Fill it with , or , a different grey for each pass.
Deselect. Paint piles up where a roller starts and stops, so pick the Pencil (N) at size 6 in a grey a step darker (). Click at one end of each pass's top edge and Shift-click the other end to draw a straight ridge. Do the same along each bottom edge. Lower the layer to 90% so the tag ghosts through faintly.
-
Add roller streaks inside the buff
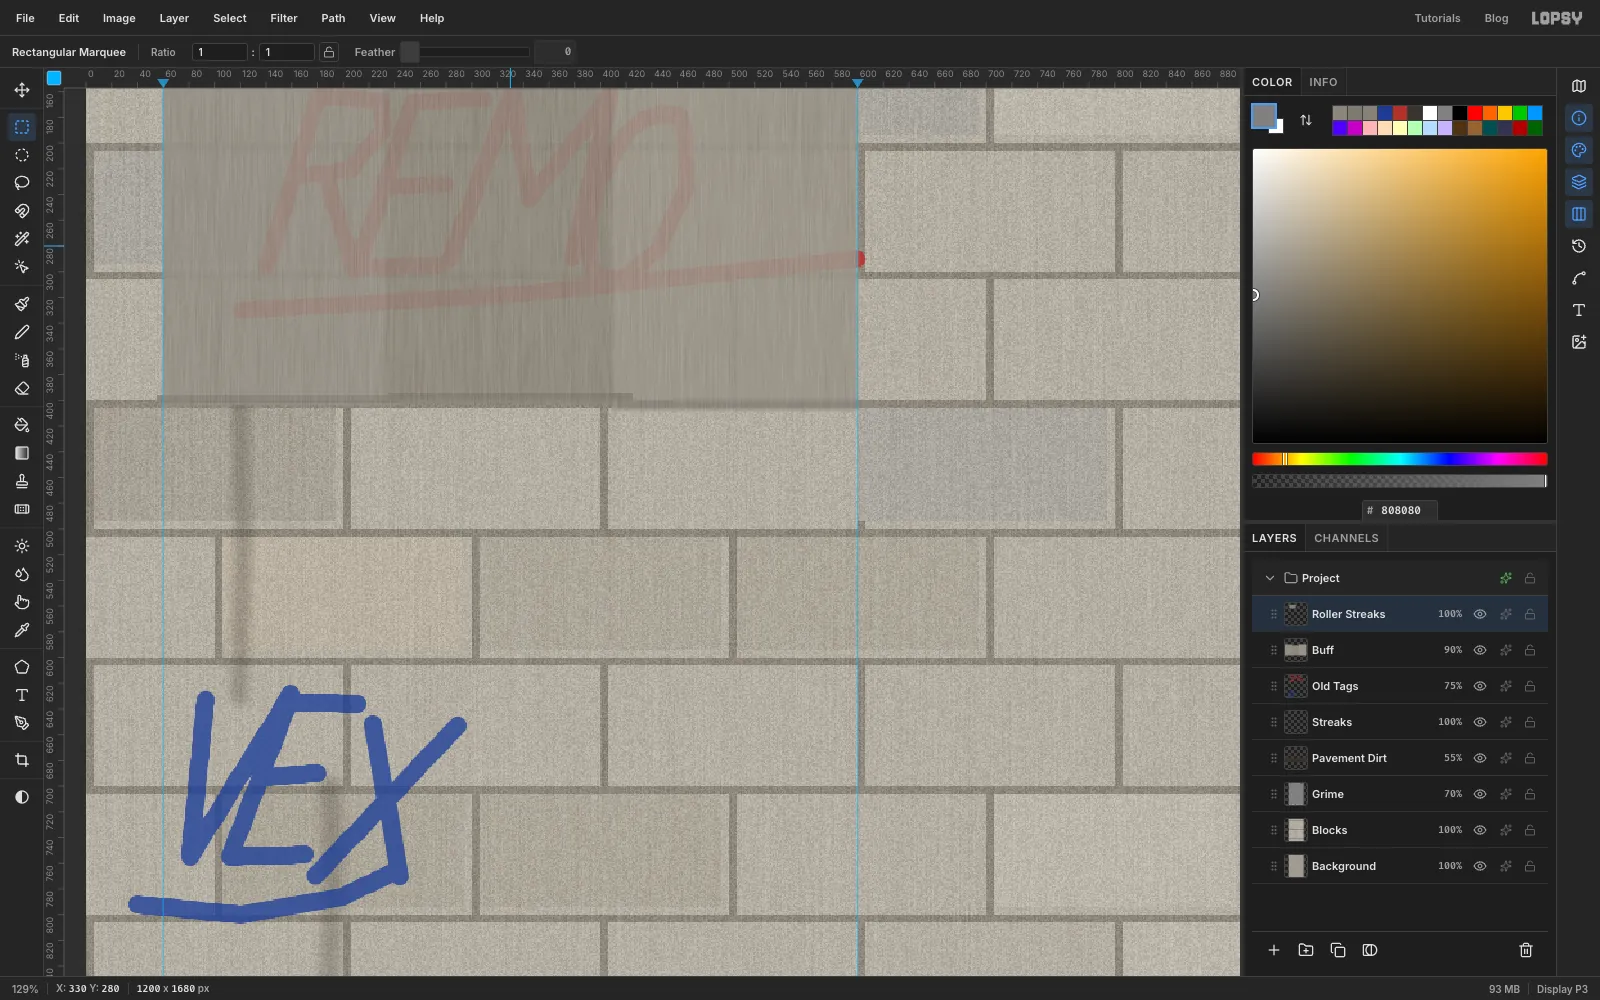
Add a layer named Roller Streaks. Drag a marquee a little bigger than the whole buff patch, fill it with , then run Add Noise at 60 (Mono) and Motion Blur at 90° with a distance of 30.
Now trim the streaks to the paint. Cmd-click the Buff thumbnail to load its shape, click the Roller Streaks row, choose Select → Inverse and press Delete. Deselect and set the layer to Overlay.
-
Tear a sheet of paper for the paste-up
With Roller Streaks selected, click the New Group button and name the group Wheatpaste. Add a layer inside it named Paper.
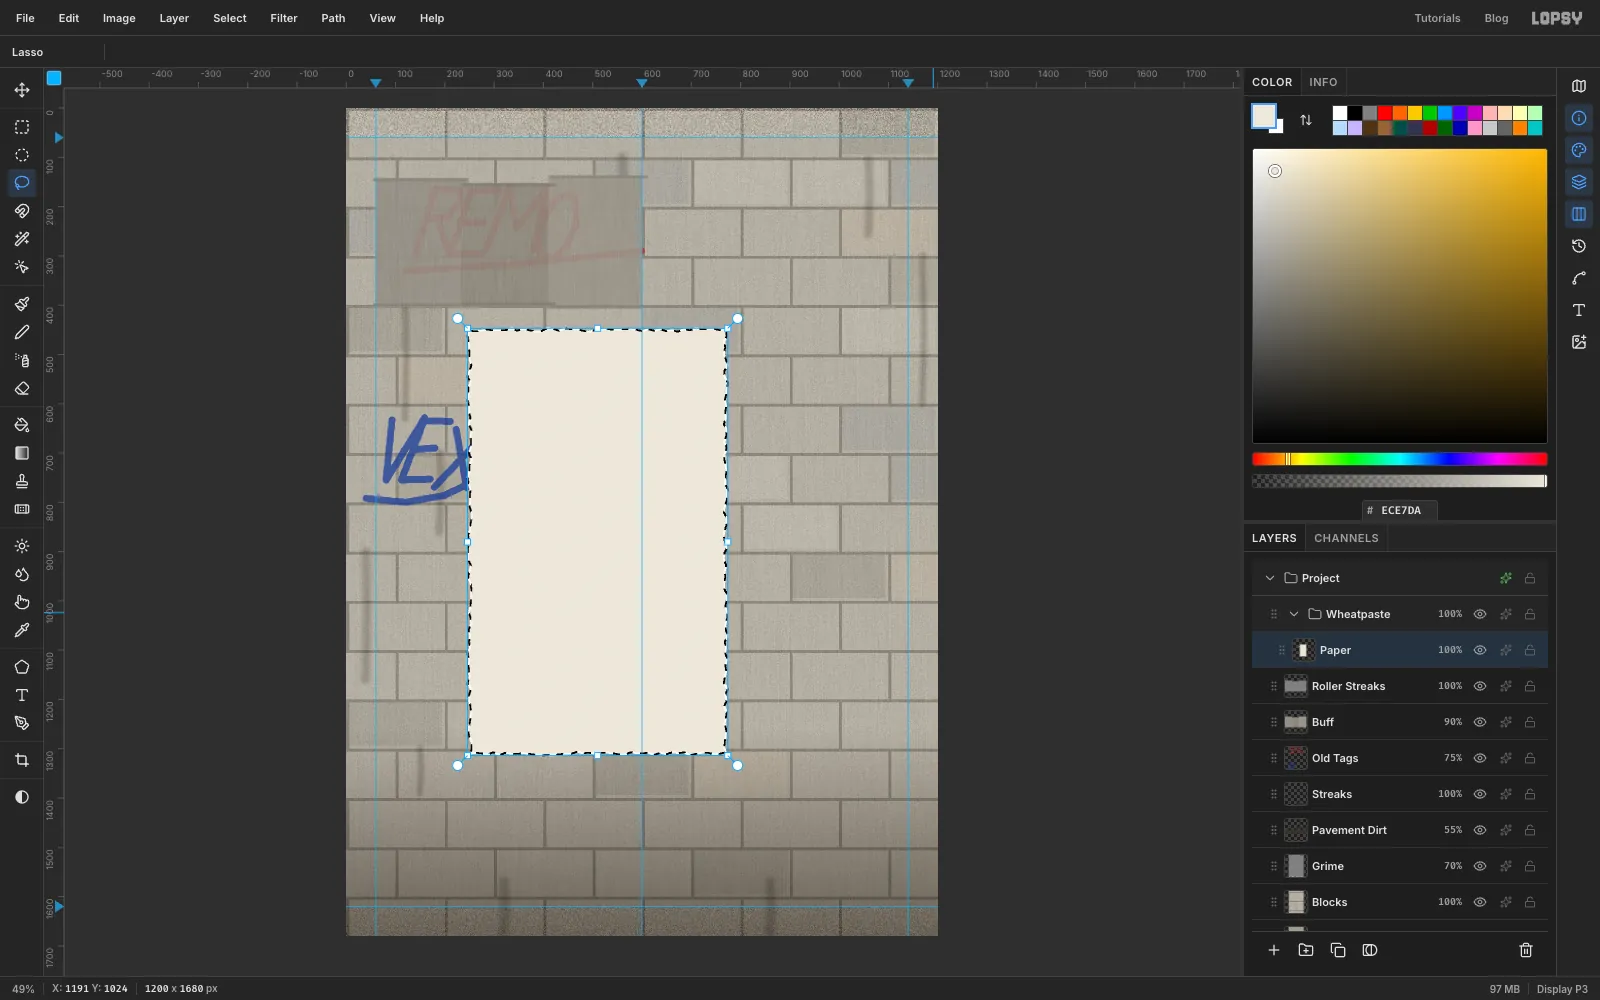
With the Lasso (L), draw a tall rectangle about 520 × 860 px. Put it a little left of centre, starting about a quarter of the way down the page. Wobble your hand slightly as you go so every edge comes out torn. Fill it with and run Add Noise at 6 (Mono) for paper tooth. Deselect.
-
Paste in the motel photo
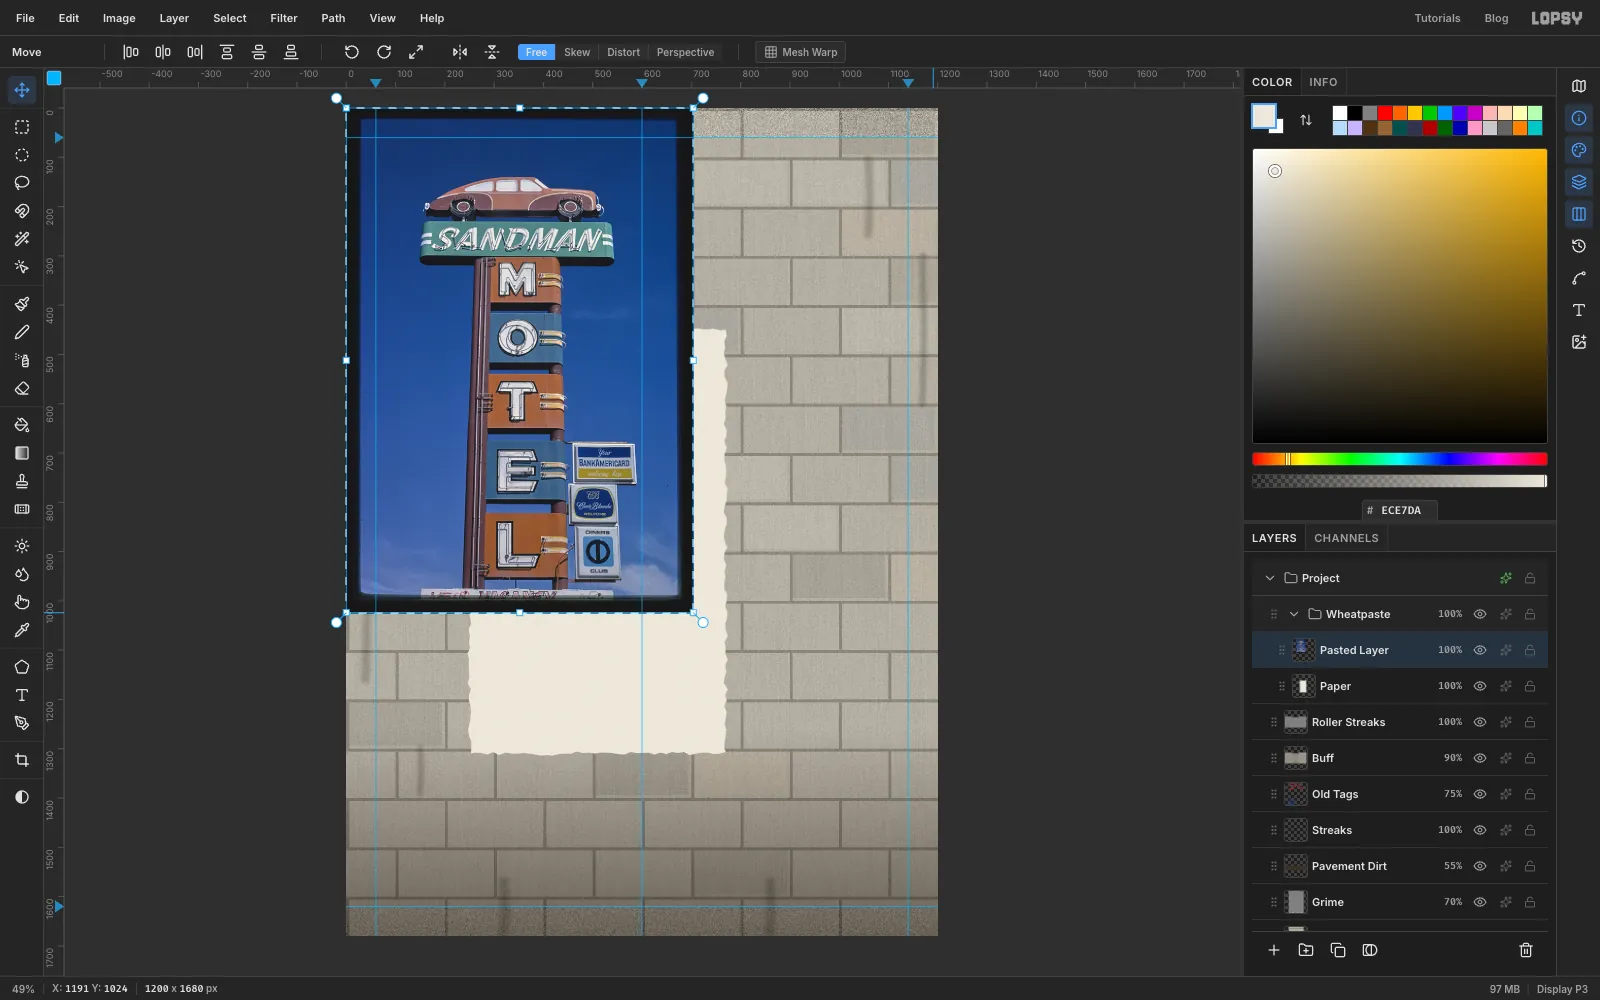
In the browser tab with the photo, right-click it and choose Copy Image. Click back in Lopsy and press Cmd+V. The photo lands in the top-left corner as a new layer inside the group, with its pixels selected. Deselect and rename the layer Sandman.
-
Lasso around the sign
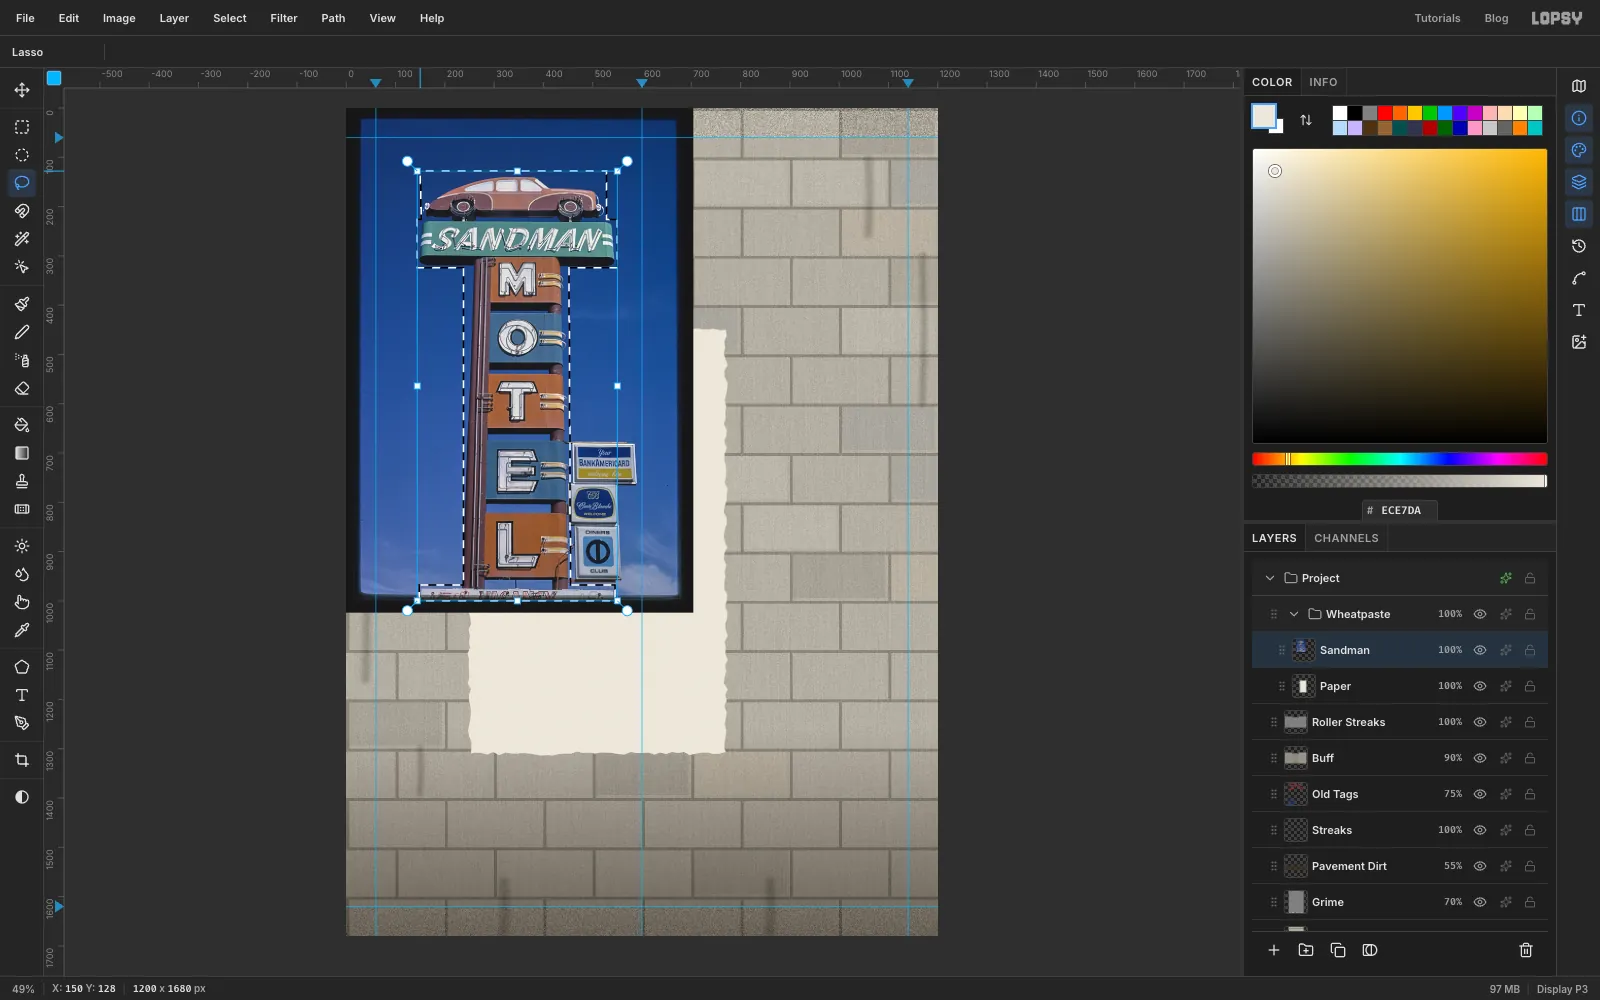
With the Lasso, drag a rough outline around the sign: across the top of the car, around the green SANDMAN board, down both sides of the pole and the letter panels, and around the little VACANCY plaque at the bottom. Leave the credit-card signs on the right outside the selection.
Choose Select → Inverse and press Delete. Only the sign and some pockets of sky are left.
-
Select the leftover sky and delete it
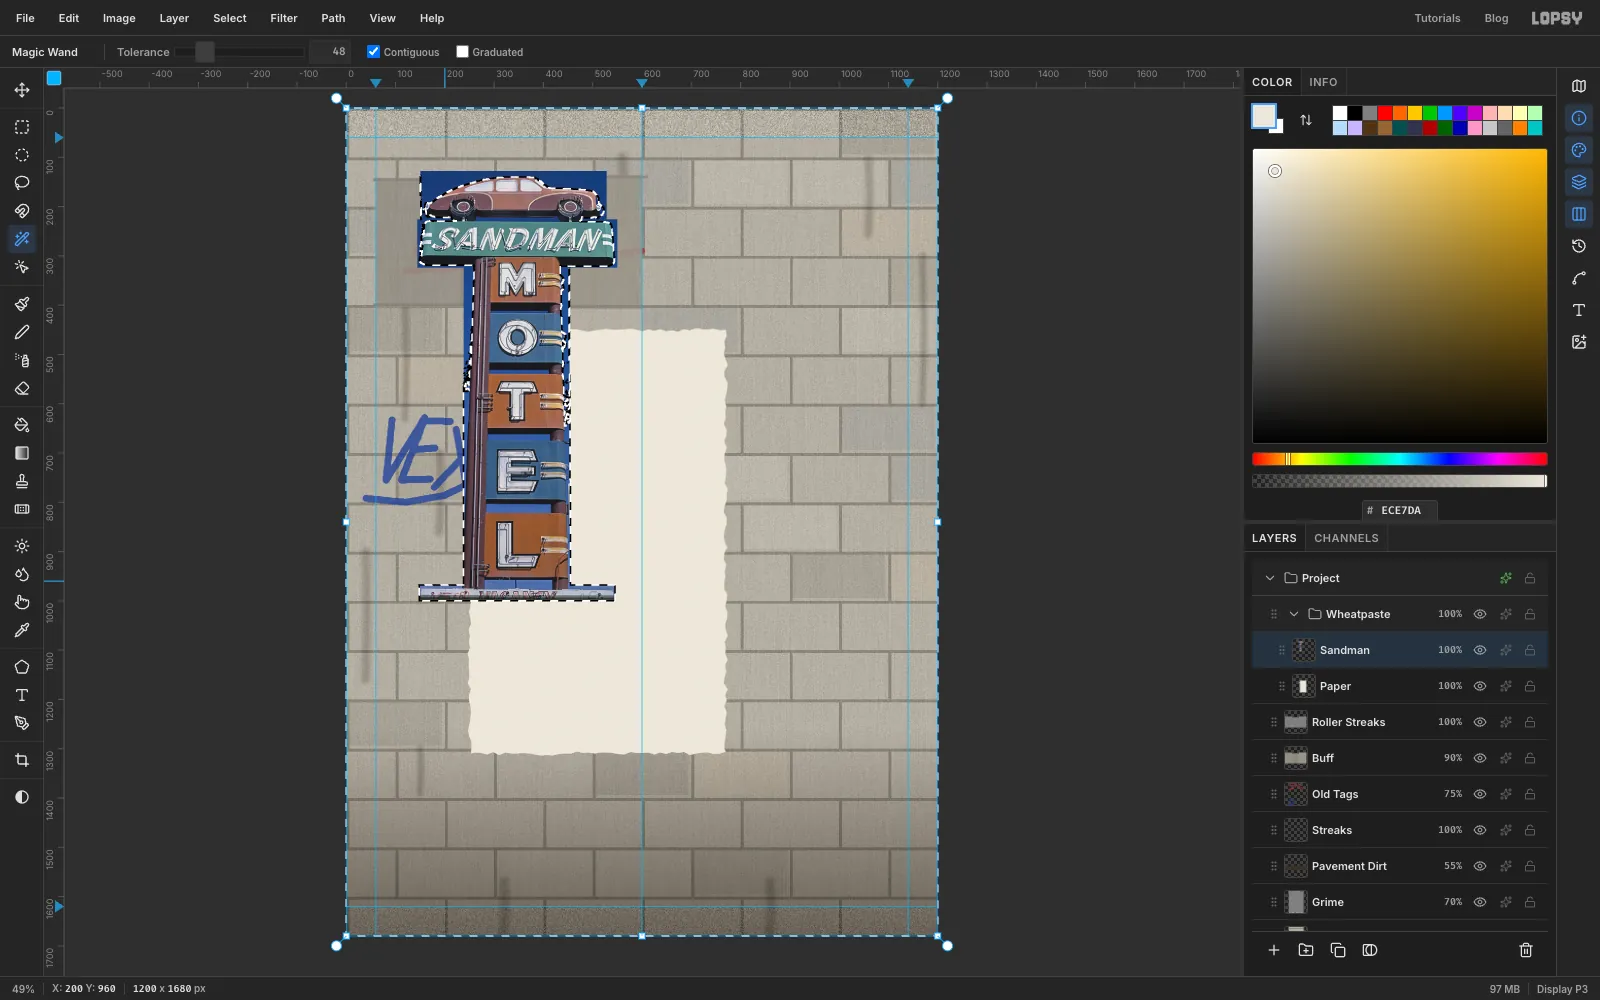
Pick the Magic Wand (W), leave Contiguous on and set Tolerance to 48. Click the sky to the left of the pole, then hold Shift and click each other blue pocket: right of the pole, around the car, beside the SANDMAN board and beside the plaque. Press Delete and deselect. The sign is now a clean cut-out.
-
Turn the photo into a photocopy
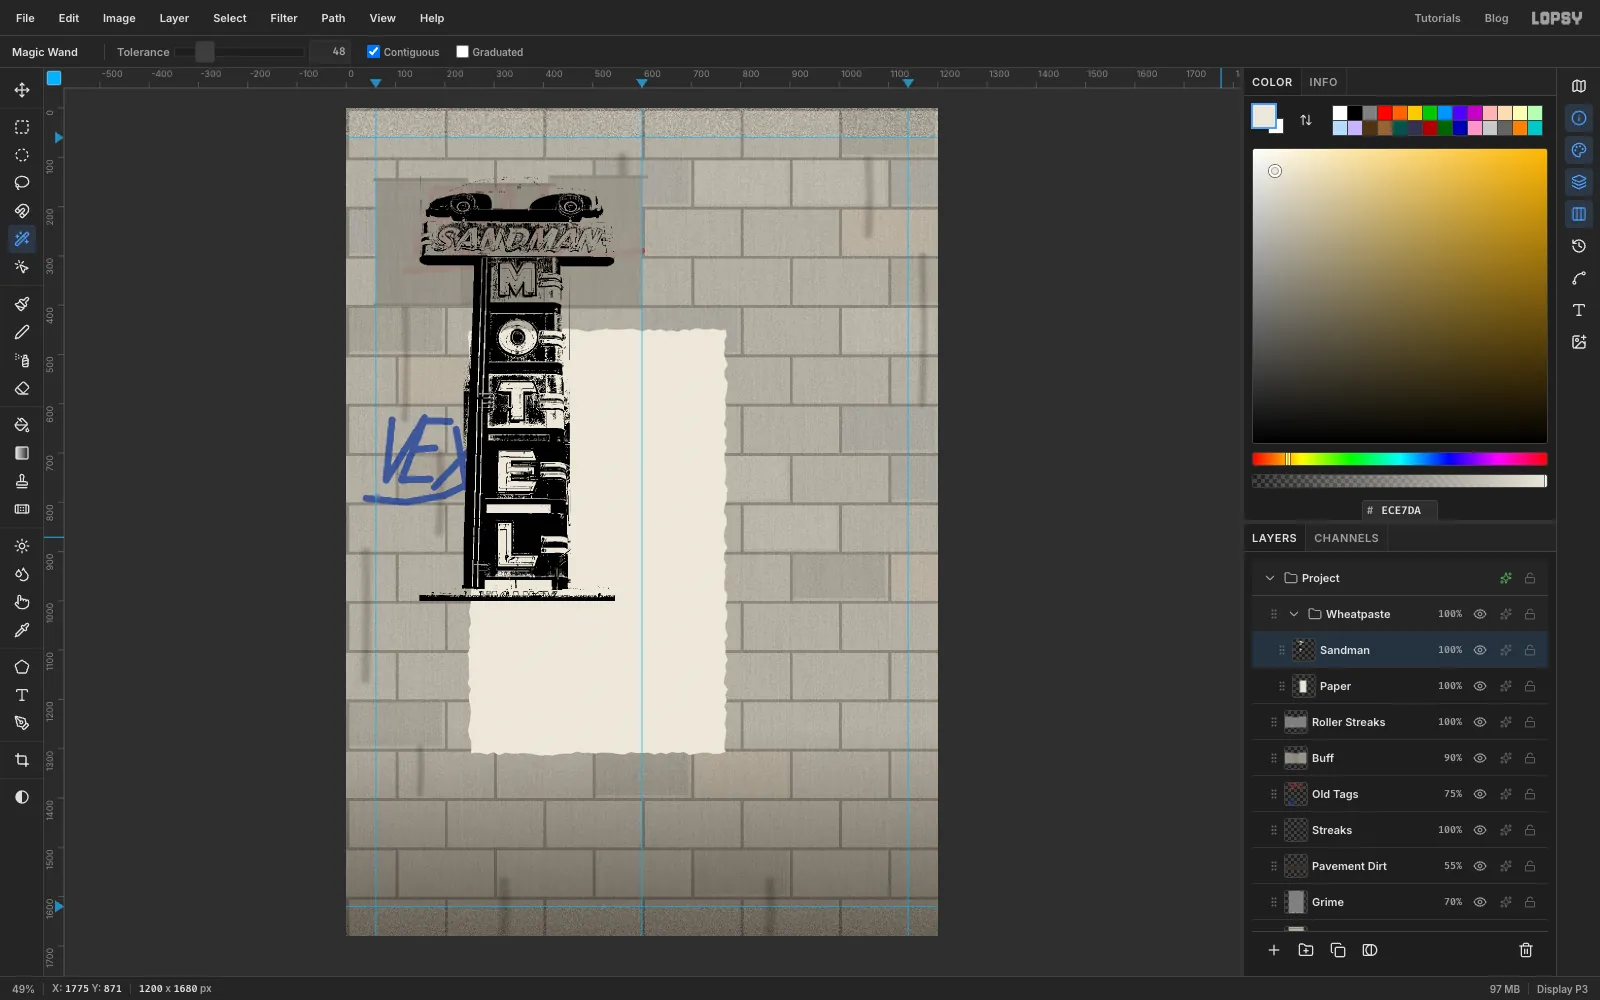
A cheap copier throws away every grey. Run these on the Sandman layer:
- Filter → Desaturate
- Filter → Brightness/Contrast... with Brightness 10 and Contrast 45
- Filter → Threshold... at 132
Open the effects drawer and set the blend mode to Multiply, so the white drops out and only black toner is left. The sign is still sitting at the top left. You'll move it onto the paper next.
-
Scale the sign onto the paper
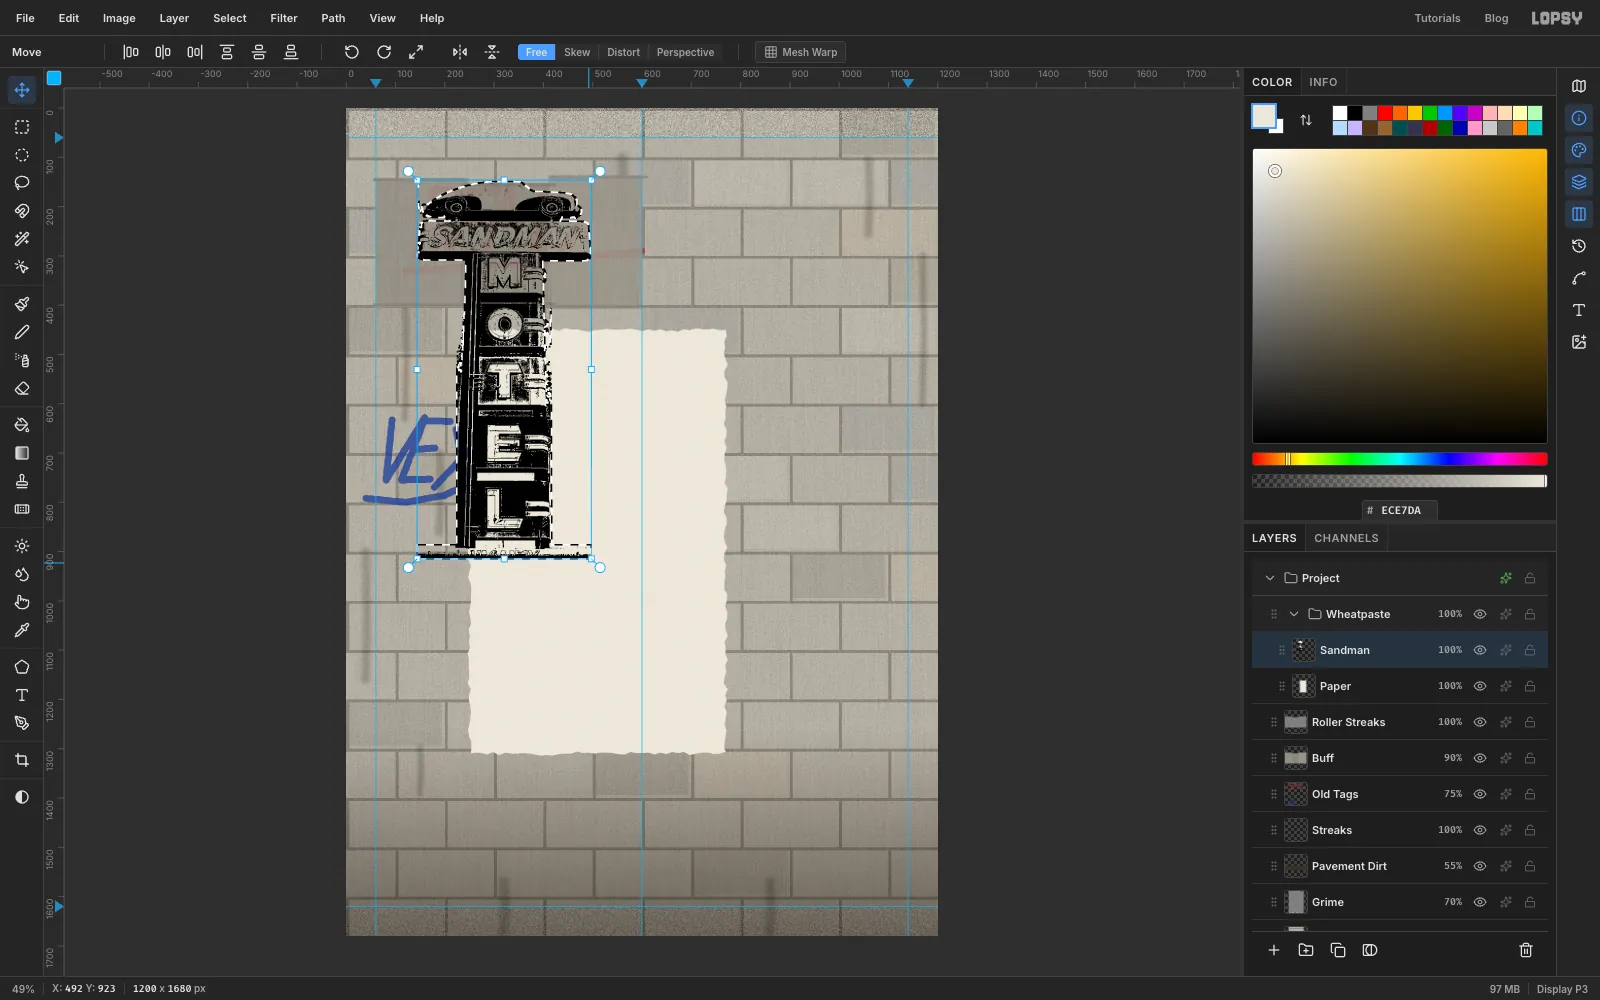
Cmd-click the Sandman thumbnail to select the sign, then pick the Move tool (V). Hold Cmd and drag the bottom-right corner handle inward a little, about 8%, so the sign keeps its proportions and will fit inside the paper with a margin. Press Cmd+D to commit.
Now drag the sign down onto the middle of the sheet, then fine-tune its position with the arrow keys.
-
Add a few creases
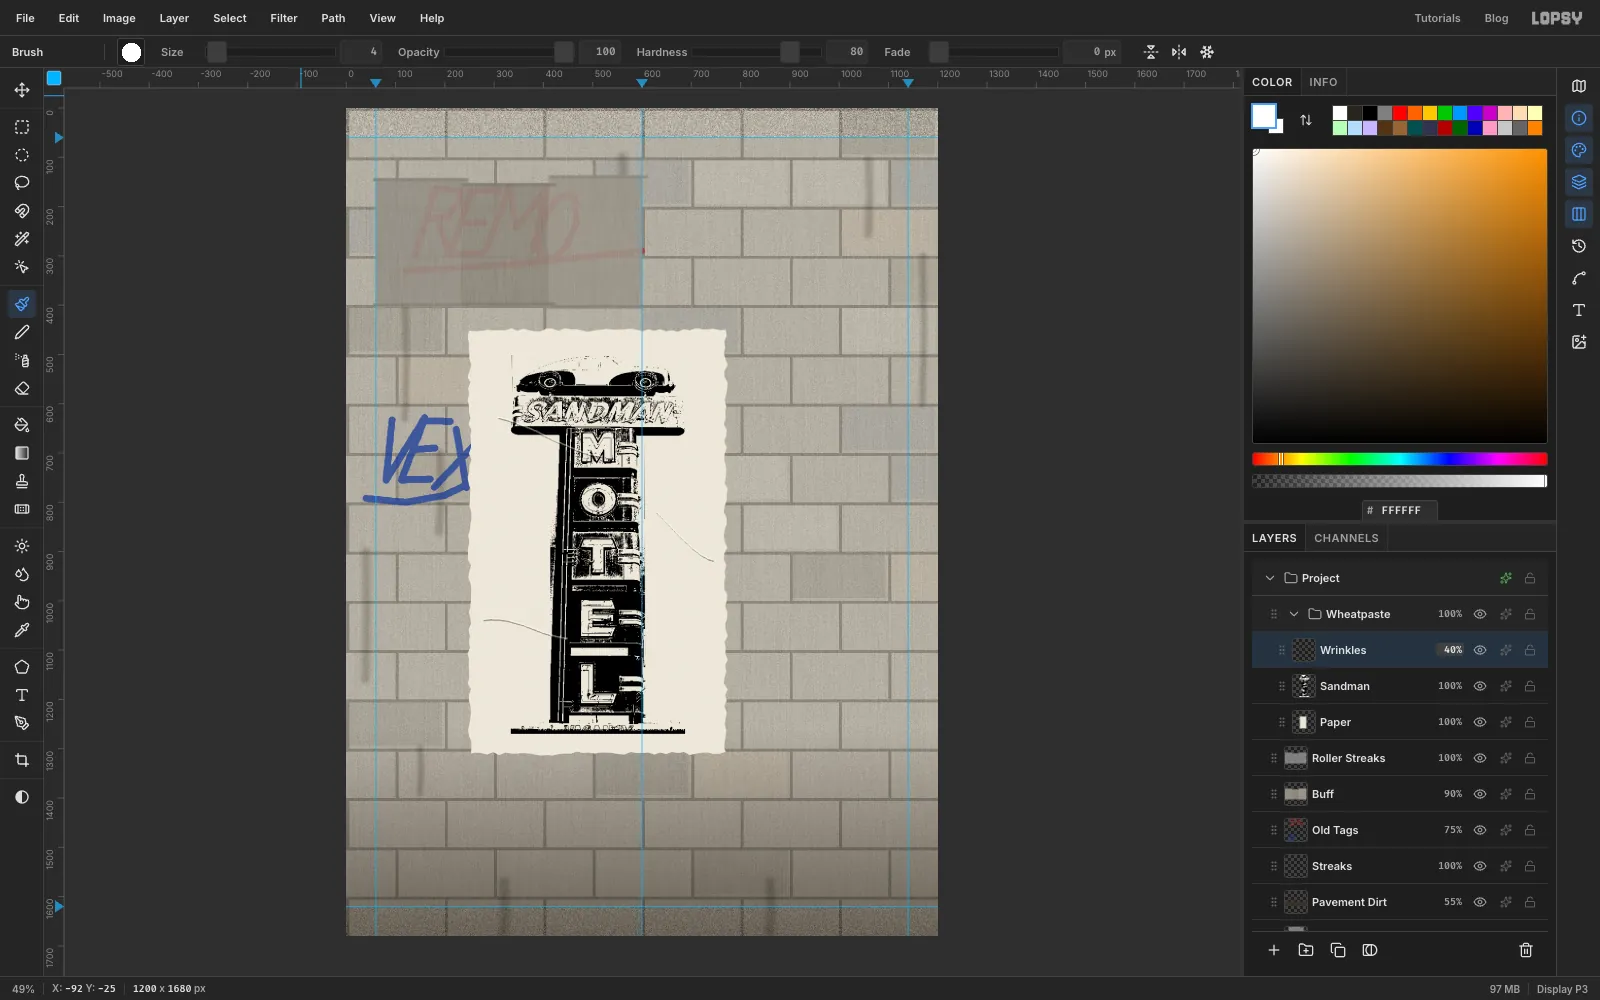
Wheat paste wrinkles the paper as it dries. Add a layer named Wrinkles and pick the Brush at size 4. Paint three gentle curves across the sheet, each in one smooth drag in dark . Then trace each one again in white, just above and to the left. Every crease now has a shadow side and a lit side.
Run Gaussian Blur at 1. Then Cmd-click the Paper thumbnail, click Wrinkles, choose Select → Inverse and press Delete, so nothing hangs off the sheet. Lower the layer to 40%.
-
Peel back a corner
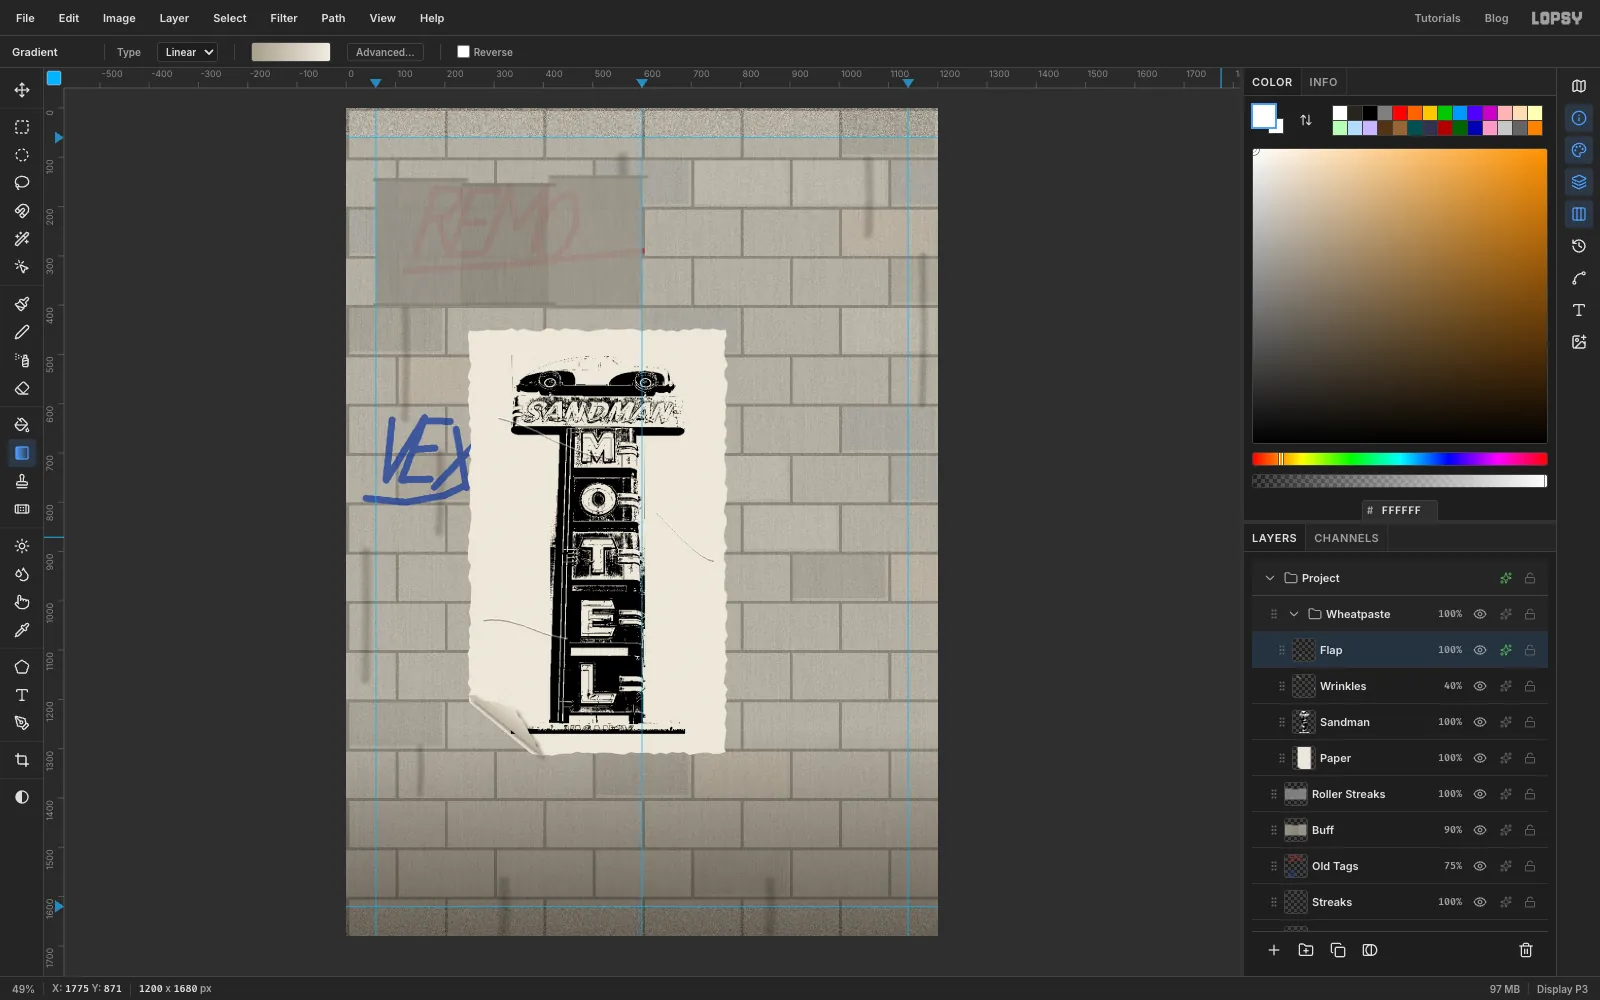
Paste-ups always lift at a corner. With the Lasso, draw a triangle over the bottom-left corner of the sheet, about 150 px along the bottom edge and 120 px up the left side. Click the Paper, Sandman and Wrinkles rows in turn and press Delete on each.
Add a layer named Flap and lasso the folded-back paper. Its fold is a straight line across the gap, and its two other edges are torn, meeting at a point inside the sheet. Fill it with a linear gradient from at the fold to at the tip. Give the layer a Drop Shadow with Offset X 7, Offset Y 9, Blur 12 and Opacity 55.
-
Rotate the whole paste-up
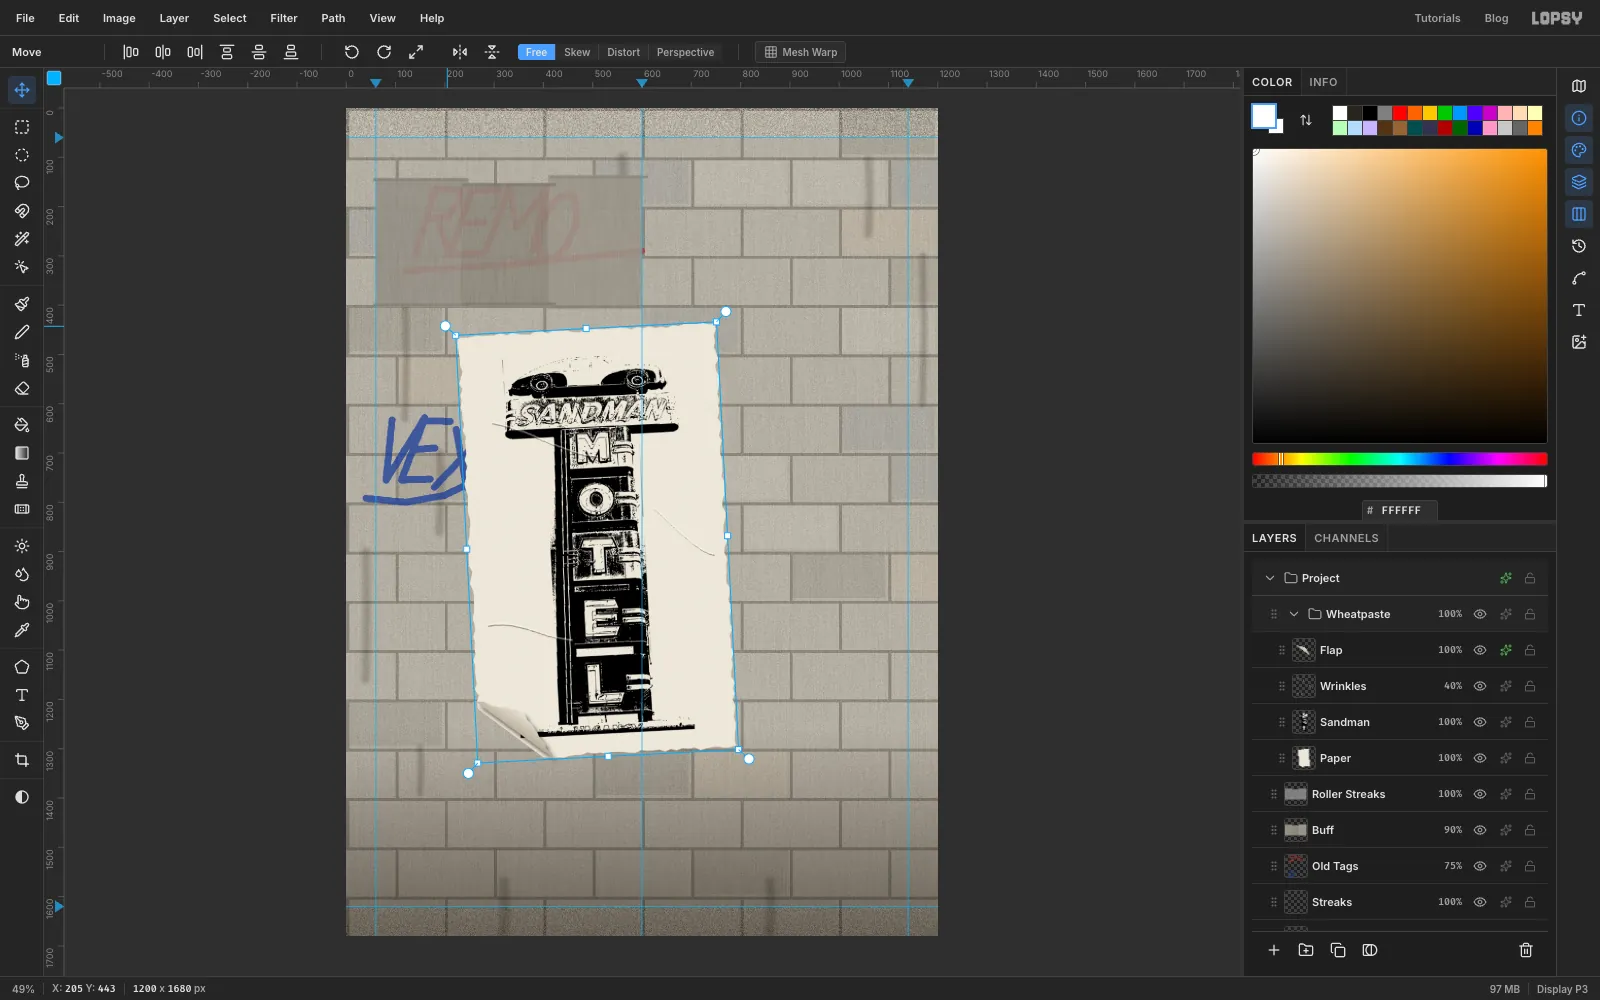
Click the Wheatpaste group's row and pick the Move tool. A box with handles appears around everything in the group. Each corner has a small round rotation handle on a short line just outside it. Drag the top-left one about 3° anticlockwise, then press Cmd+D to commit. The paper, photo, creases and flap all turn together.
-
Let the wall show through the paper
Wet paste sinks into the wall, so the joints show through the sheet. Do this after the rotation, so the joints stay level with the real wall.
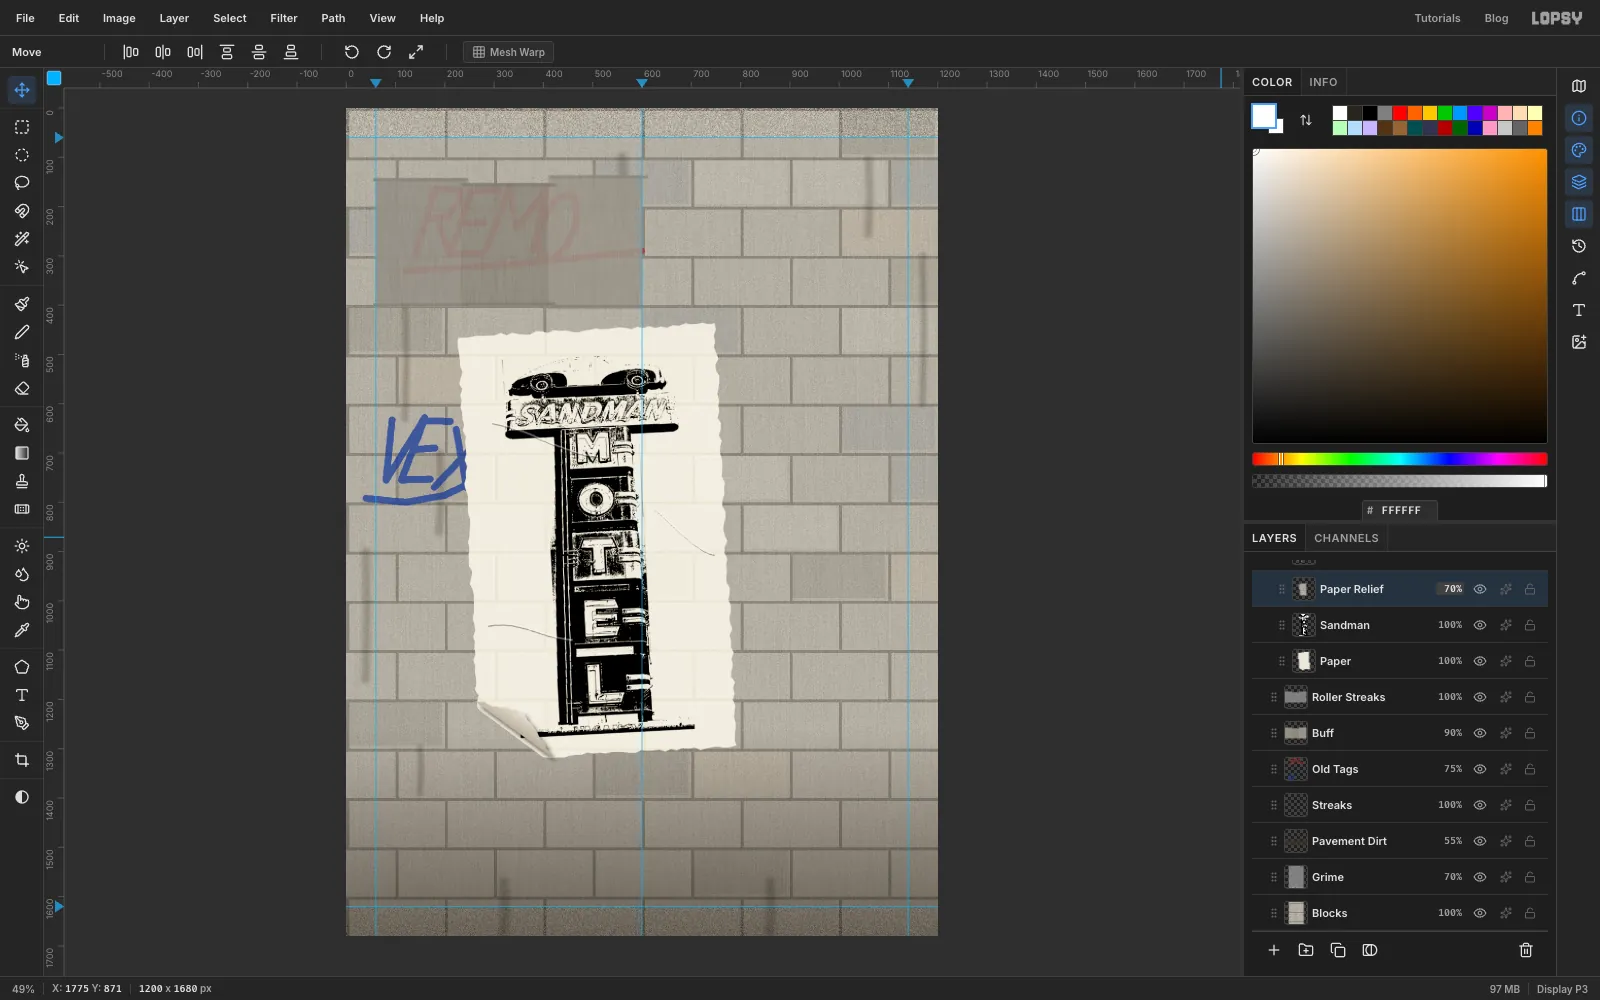
Cmd-click the Paper thumbnail, click the Blocks layer and press Cmd+C. Click the Sandman layer and press Cmd+V. The copy pastes in place, inside the group, as a piece of wall exactly the shape of the paper. Deselect and name the layer Paper Relief.
Run Filter → Emboss... with Angle 135 and Strength 30, then set the layer to Overlay at 70%.
-
Darken the wall around the paste
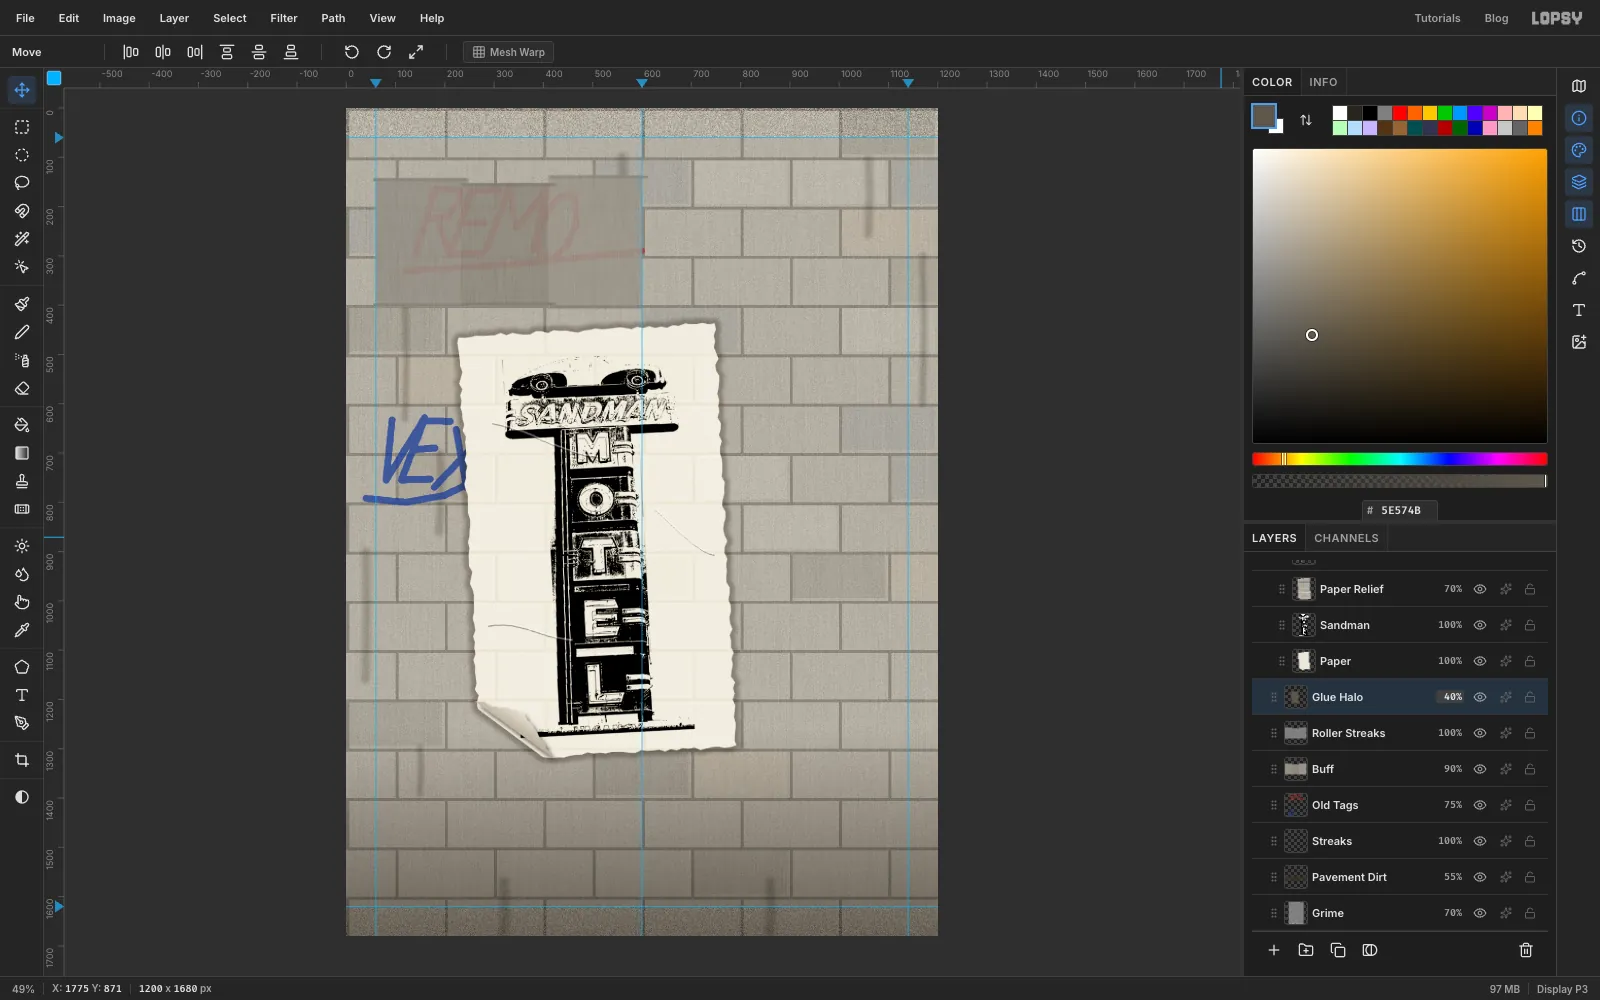
Paste soaks into the wall just around the paper. Click the Roller Streaks layer, so the new layer goes just under the group, and add a layer named Glue Halo. Cmd-click the Paper thumbnail, then choose Select → Grow… at 10 and Select → Feather… at 8. Fill with , deselect, and set the layer to Multiply at 40%.
-
Type ZERO
Click the arrow on the Wheatpaste row to collapse the group. Click the group's row and add a layer named Title Haze. It will hold the cloud behind the lettering.
Pick the Text tool (T). In the options bar choose Sedgwick Ave Display, set Size to 300, Align to Center and the colour to . Click on the centre guide near the top, type
ZERO, and press Tab to commit. Rename the layer Title. Then use the Move tool and the arrow keys to centre it across the top of the page.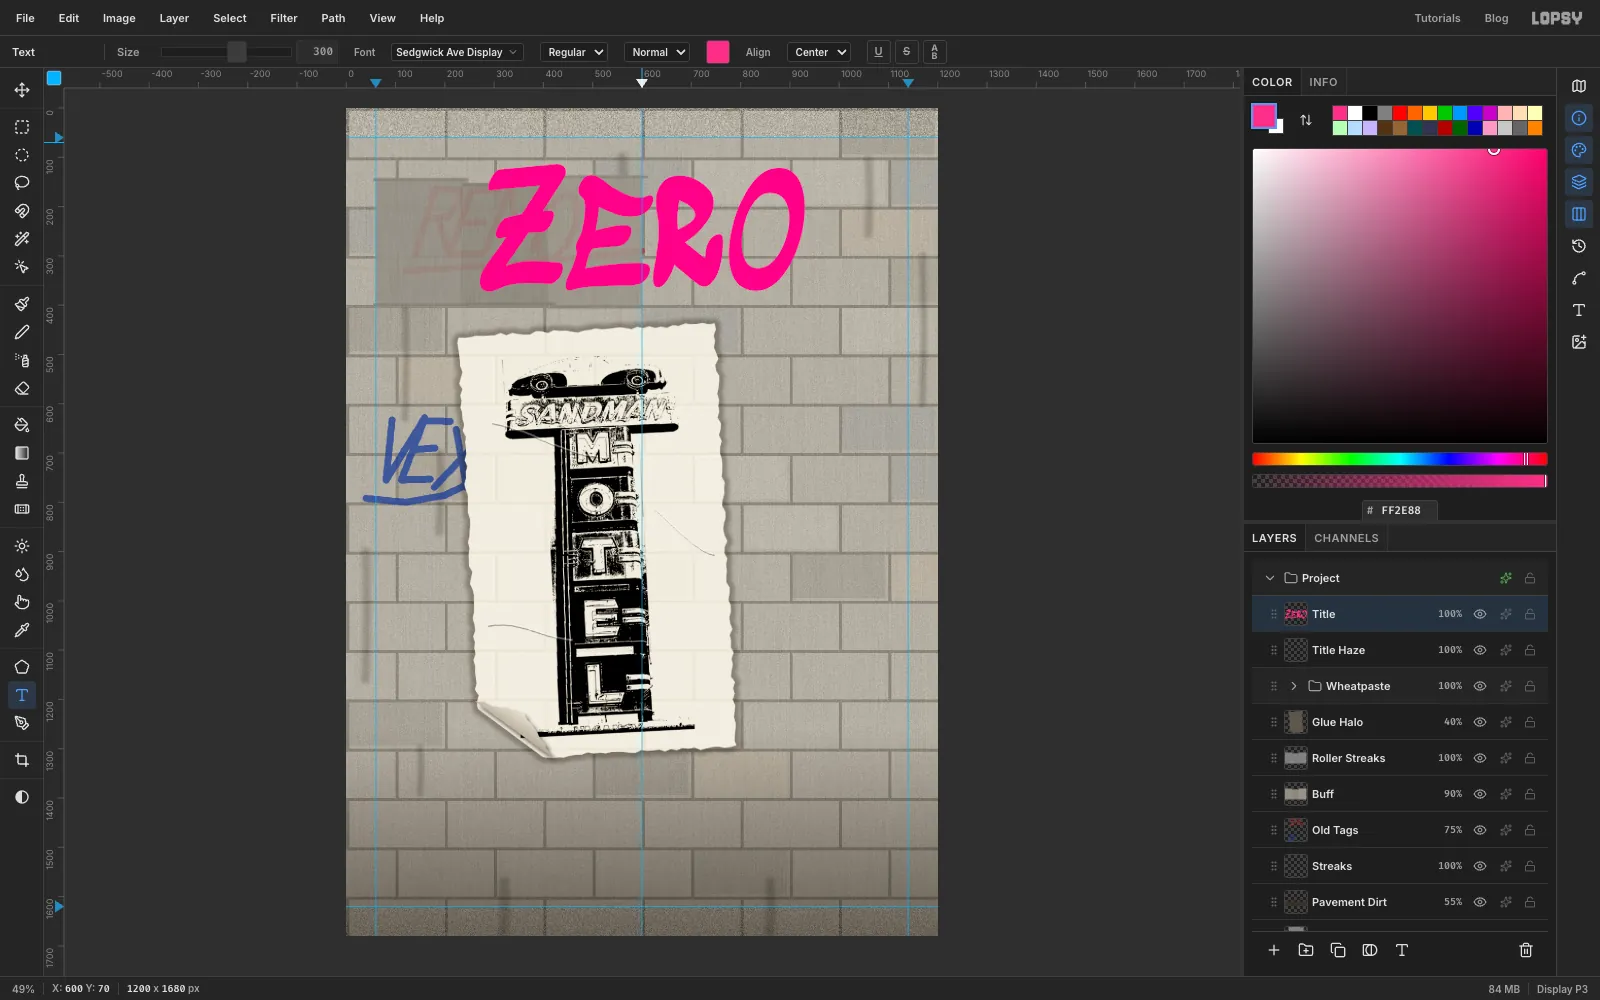
-
Tilt the lettering
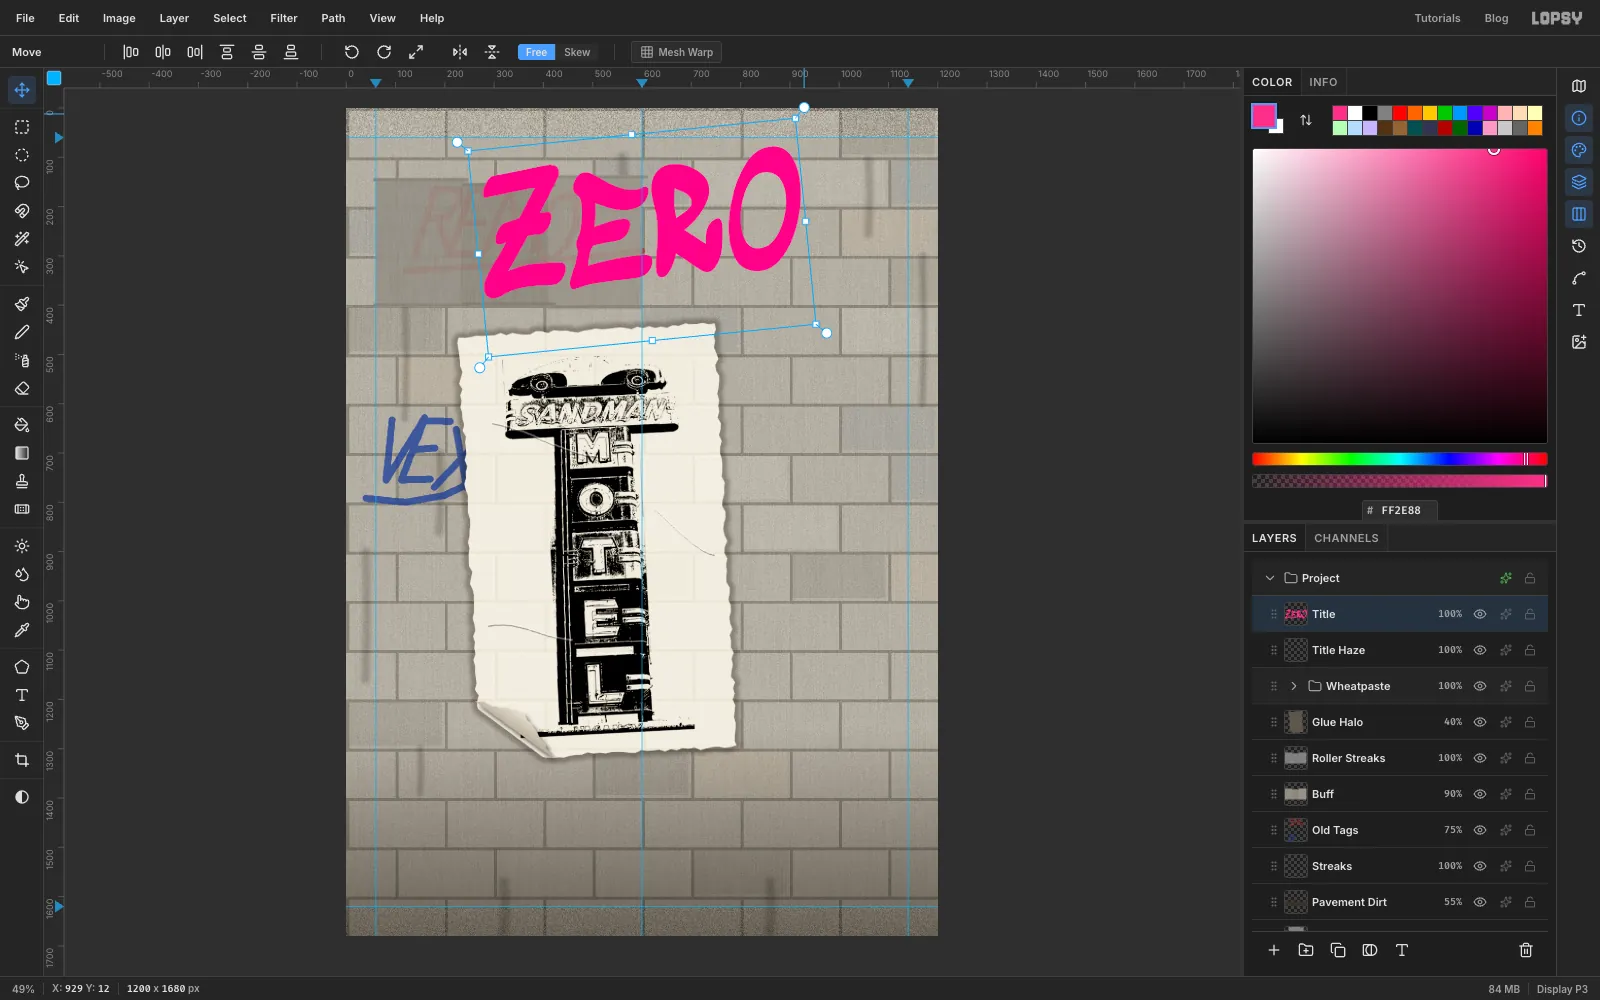
With the Move tool still active and Title selected, handles appear around the text. Drag the top-right rotation handle about 6° anticlockwise, so the word climbs to the right like a piece painted from a ladder.
-
Fade the fill from pink to orange
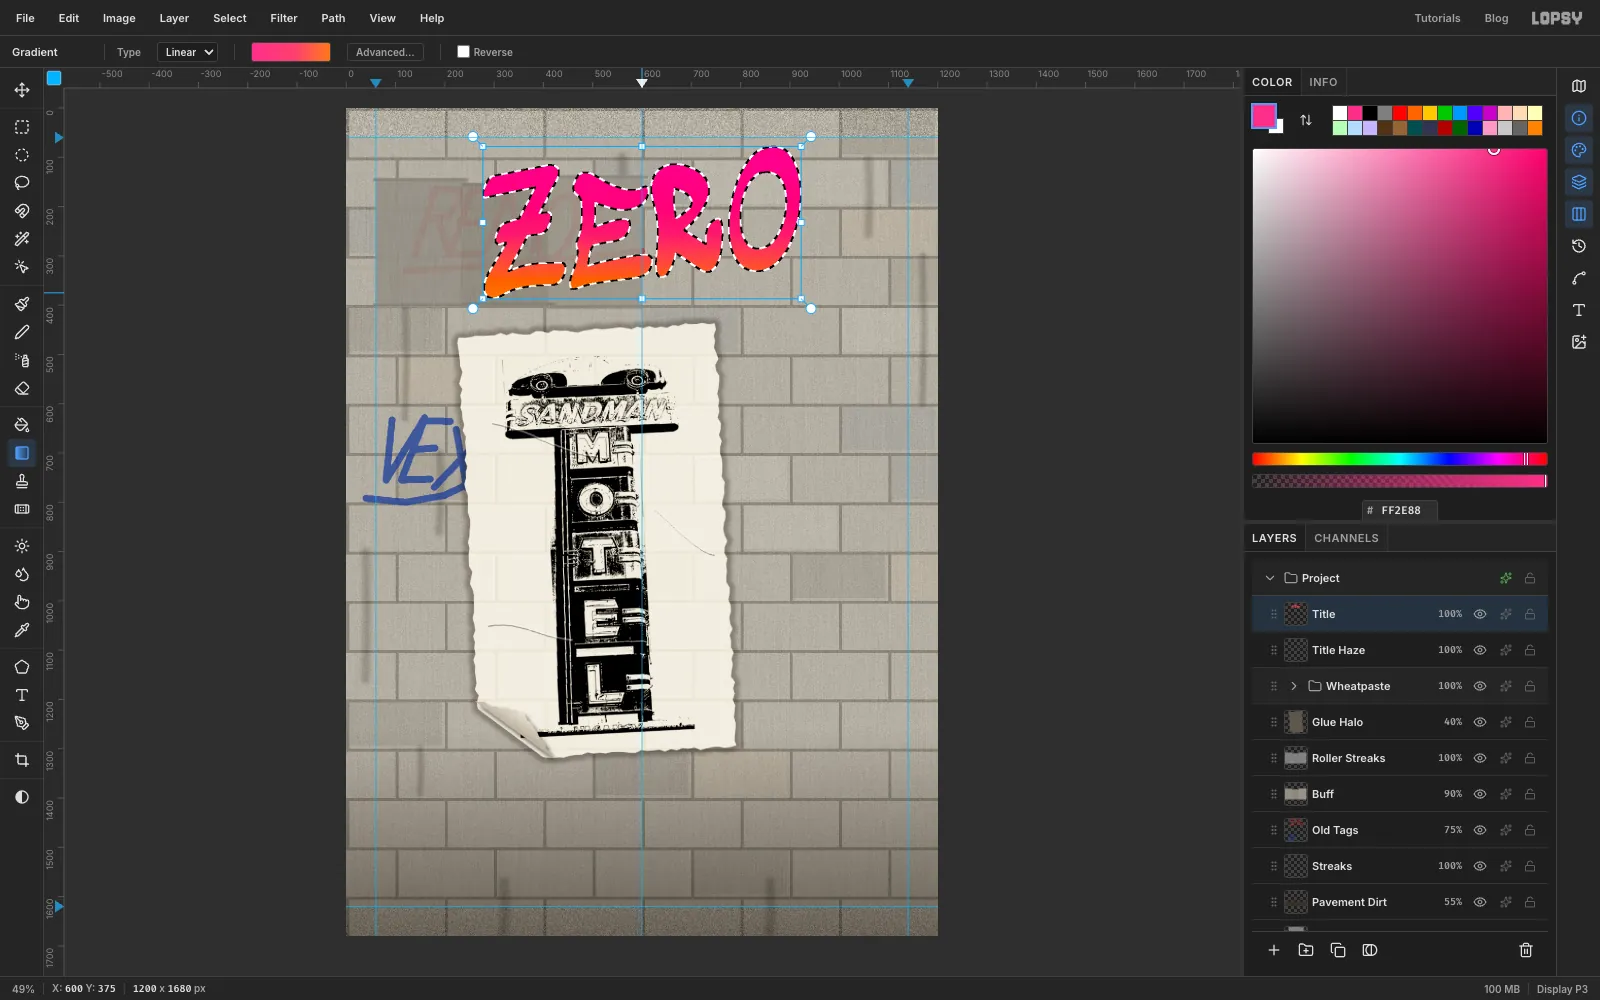
Click Rasterize Layer at the bottom of the Layers panel so you can paint into the letters, then Cmd-click the Title thumbnail to select them.
Pick the Gradient tool and use Advanced to make three stops: , and . Drag from the top of the letters straight down to their bottom. Fades like this are the most common fill in graffiti pieces.
-
Paint the shine
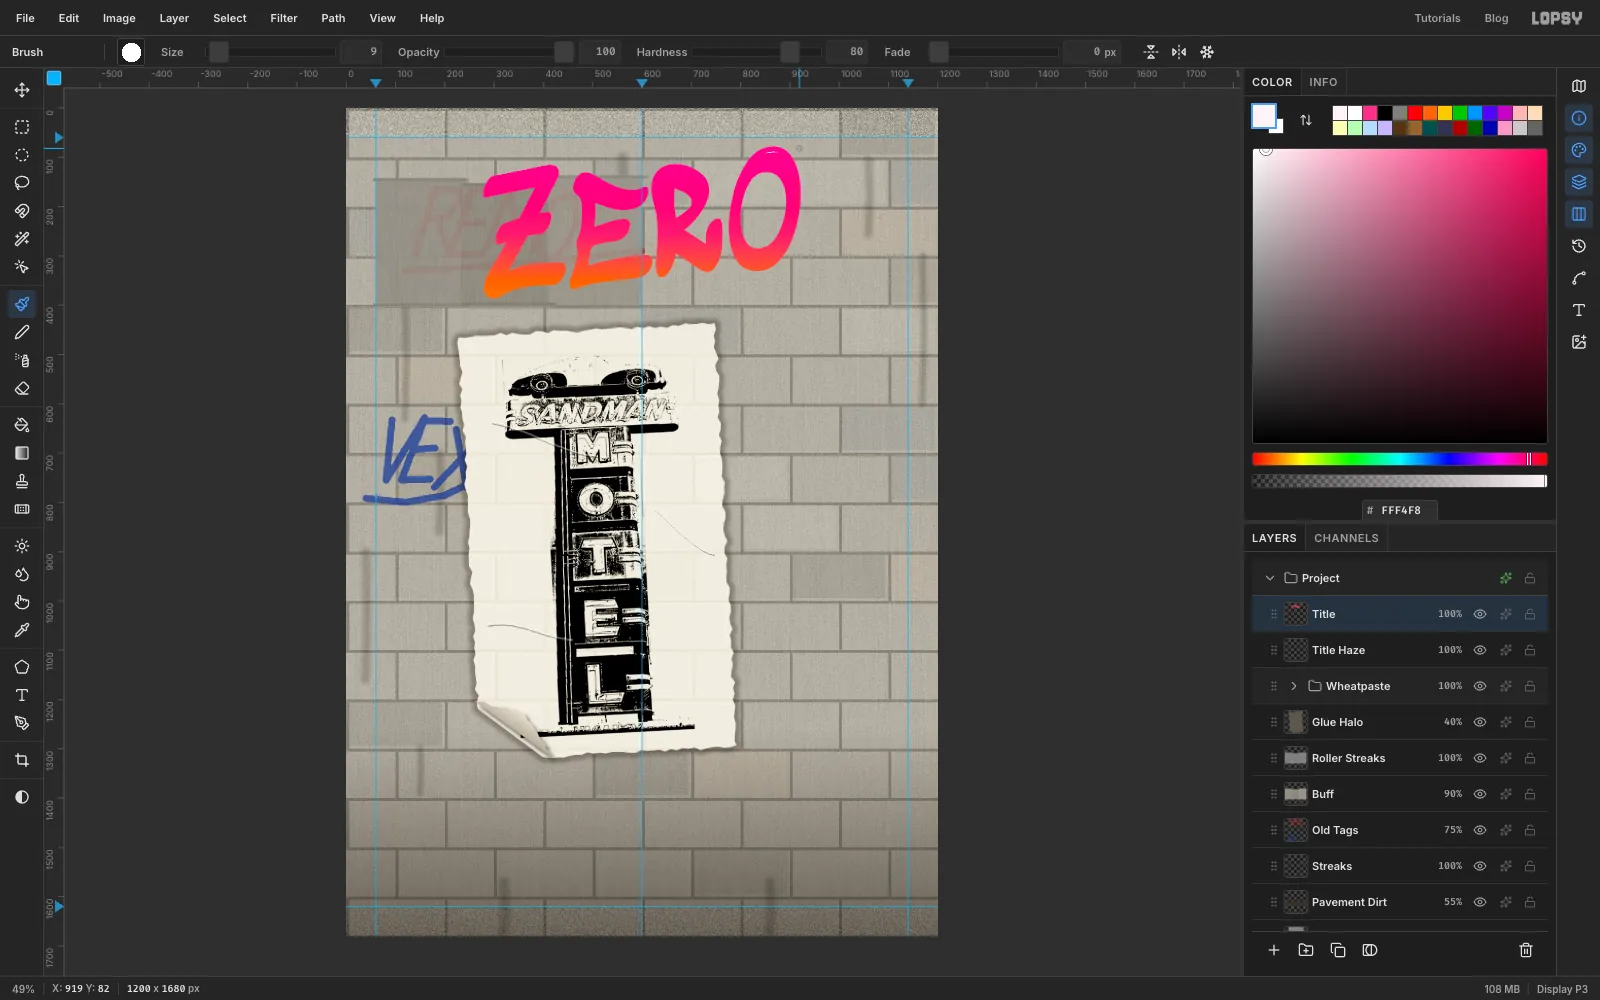
Keep the letters selected and choose Select → Shrink… at 10, so the highlights stay off the edges. With the Brush at size 9 in , paint a short stroke along the top of each letter, curving slightly to the right. Deselect.
-
Outline it and give it depth
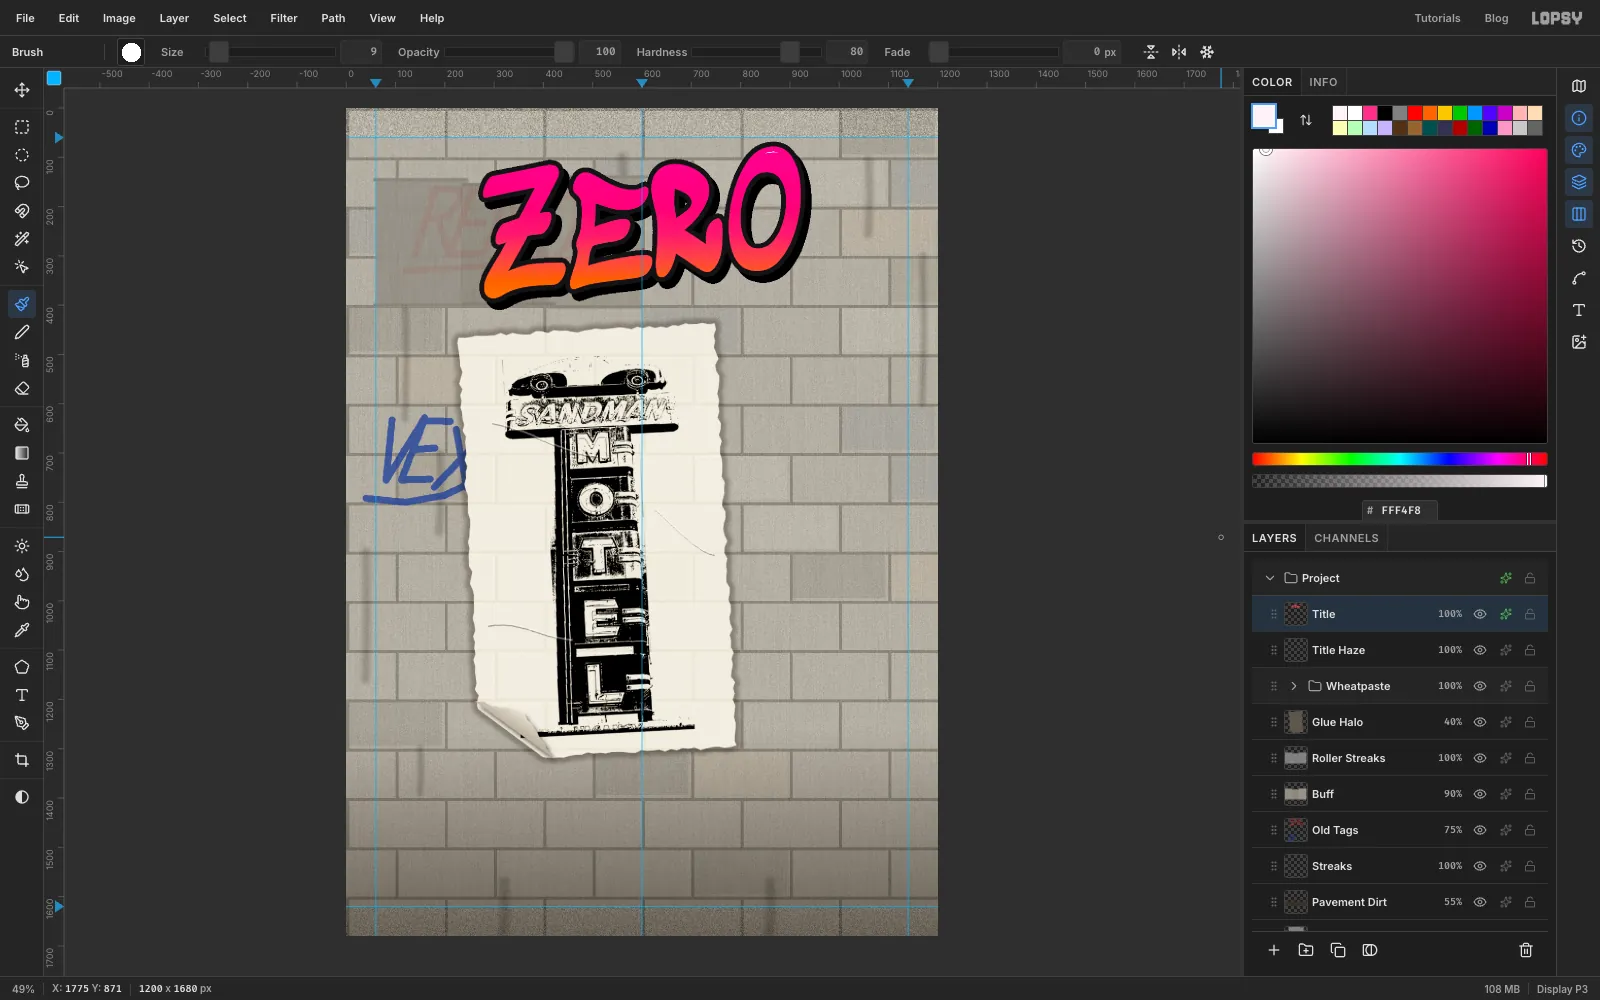
Open the Title layer's effects drawer and add:
- Stroke: Width 10, colour
- Drop Shadow: Offset X 12, Offset Y 14, Blur 0, Opacity 100
With zero blur, the shadow becomes the hard 3D extrusion graffiti writers paint by hand.
-
Paint the cloud behind it
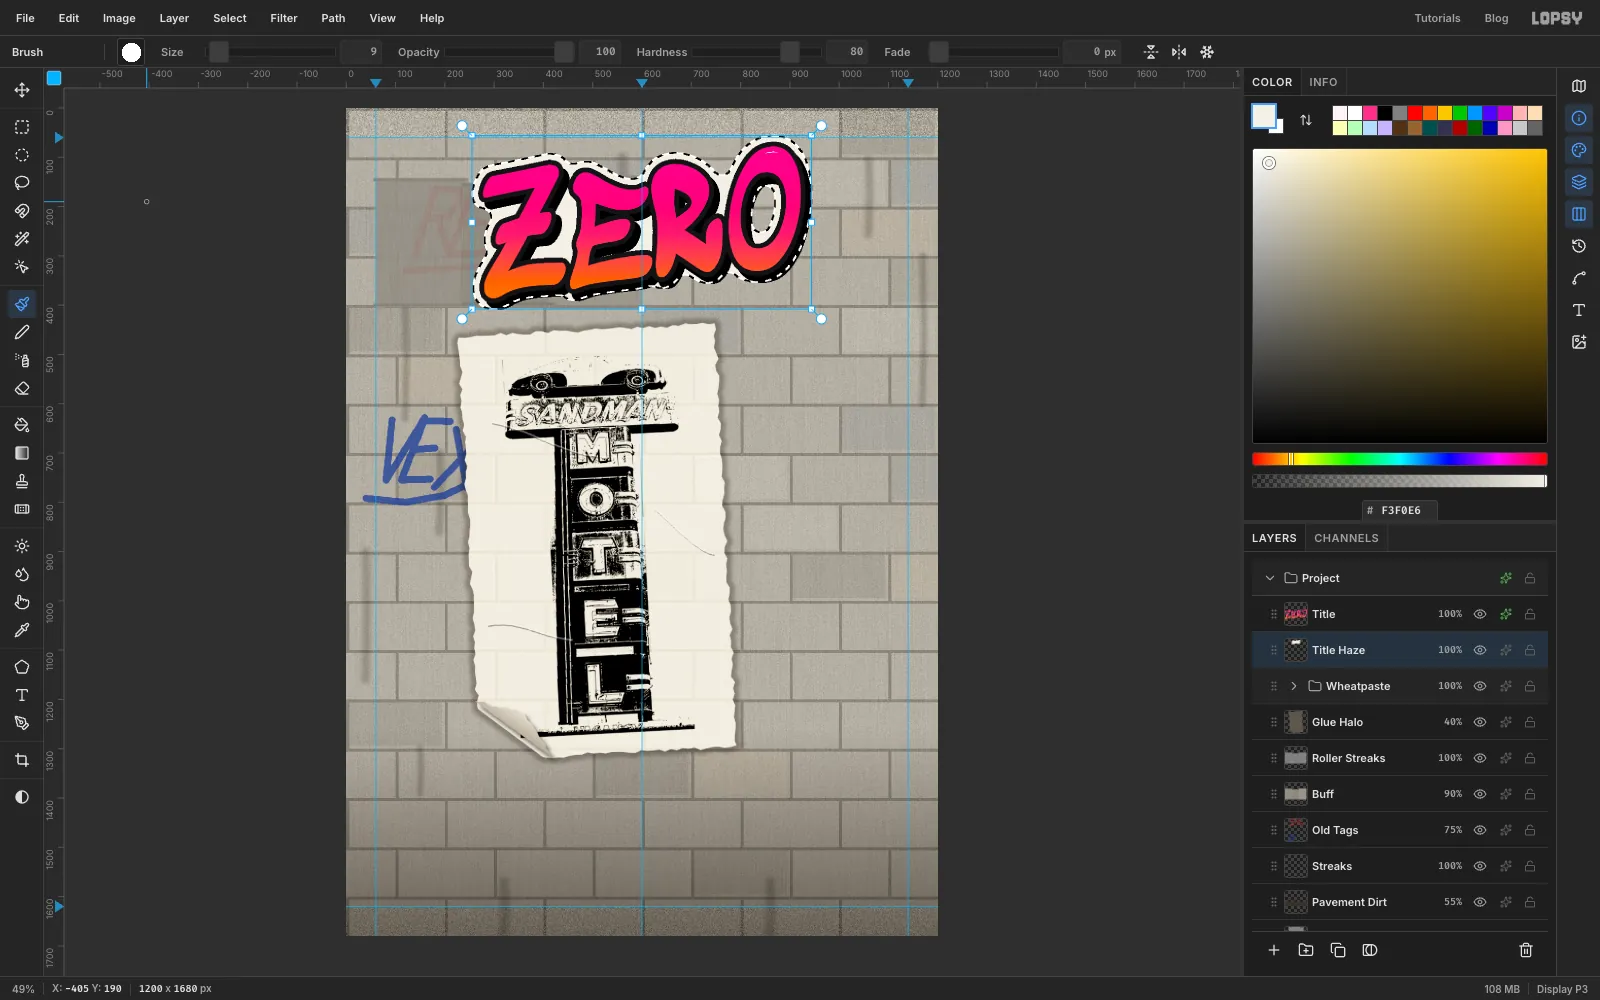
Click the Title Haze layer and Cmd-click the Title thumbnail. Choose Select → Grow… at 40, then Select → Shrink… at 18. Growing further than you need and then shrinking back closes up the small gaps inside letters like the E, so the cloud has no holes. Fill with , deselect, and give the layer a Stroke of 6 in black.
-
Spray a cyan mist behind everything
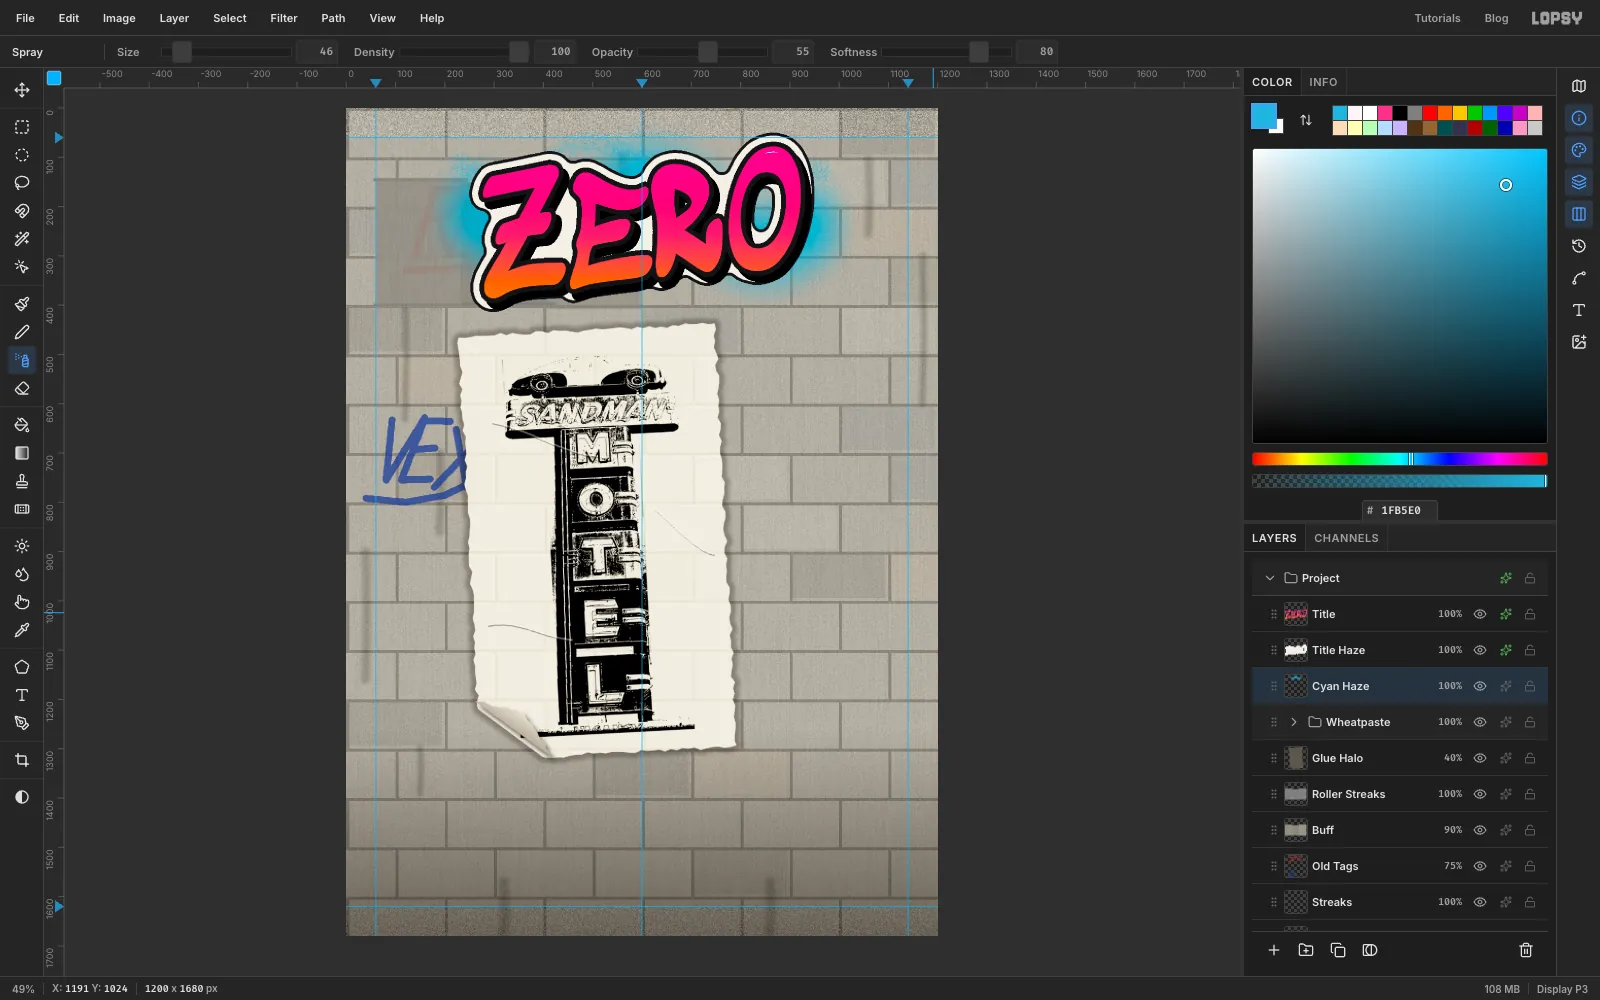
Add a layer named Cyan Haze. Pick the Brush with Size 230, Hardness 0, Opacity 55 and the colour , and drag two wavy passes across the full width of the piece. Then switch to the Spray tool (J) with Size 46, Density 100, Opacity 55 and Softness 80. Drag it along the top edge of the mist for fine overspray. Run Add Noise at 18 (Mono) to break it up.
In the Layers panel, drag the Cyan Haze row below Title Haze so the mist sits behind the cloud. Put the Brush back to Hardness 100 and Opacity 100.
-
Let the paint drip
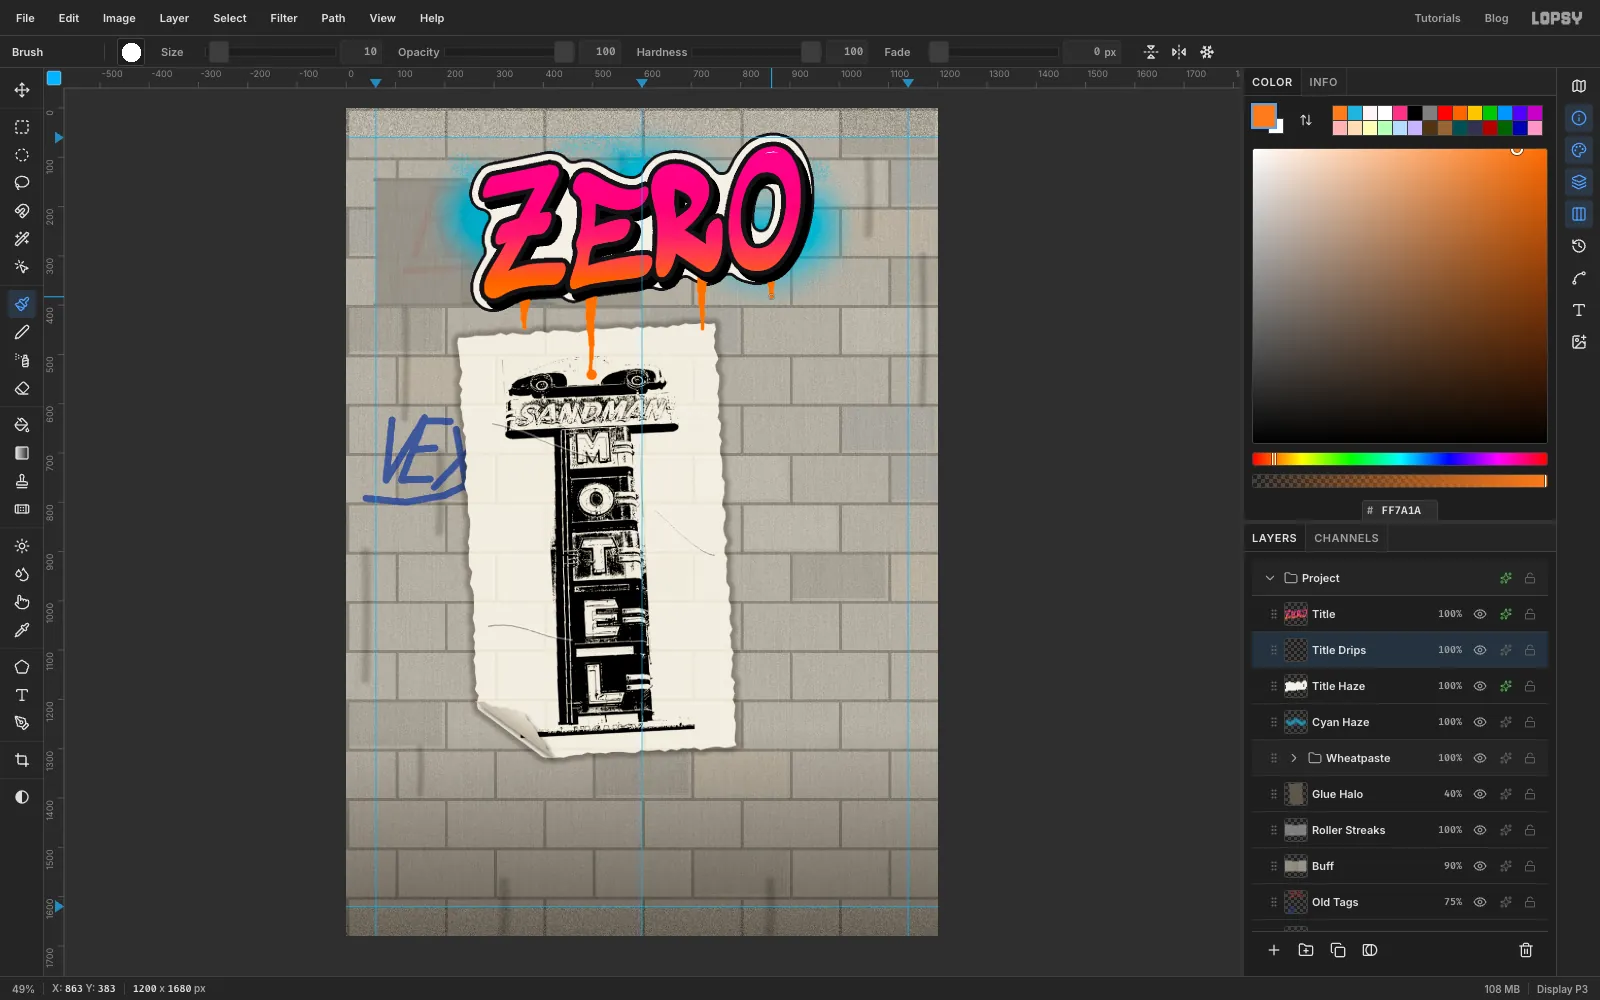
Click Title Haze and add a layer named Title Drips. It sits under the lettering, so each drip starts hidden inside a letter. Pick the Brush in .
For each drip, click just inside the bottom of a letter at size 26. Then Shift-click a little further down, lowering the size each time, for example 22, 17, 13 and 9. The run gets thinner as it falls. Make four drips of different lengths, from about 50 px to 165 px. On the longest one, finish with a single click at size 22 for a hanging drop.
-
Add two sparkles
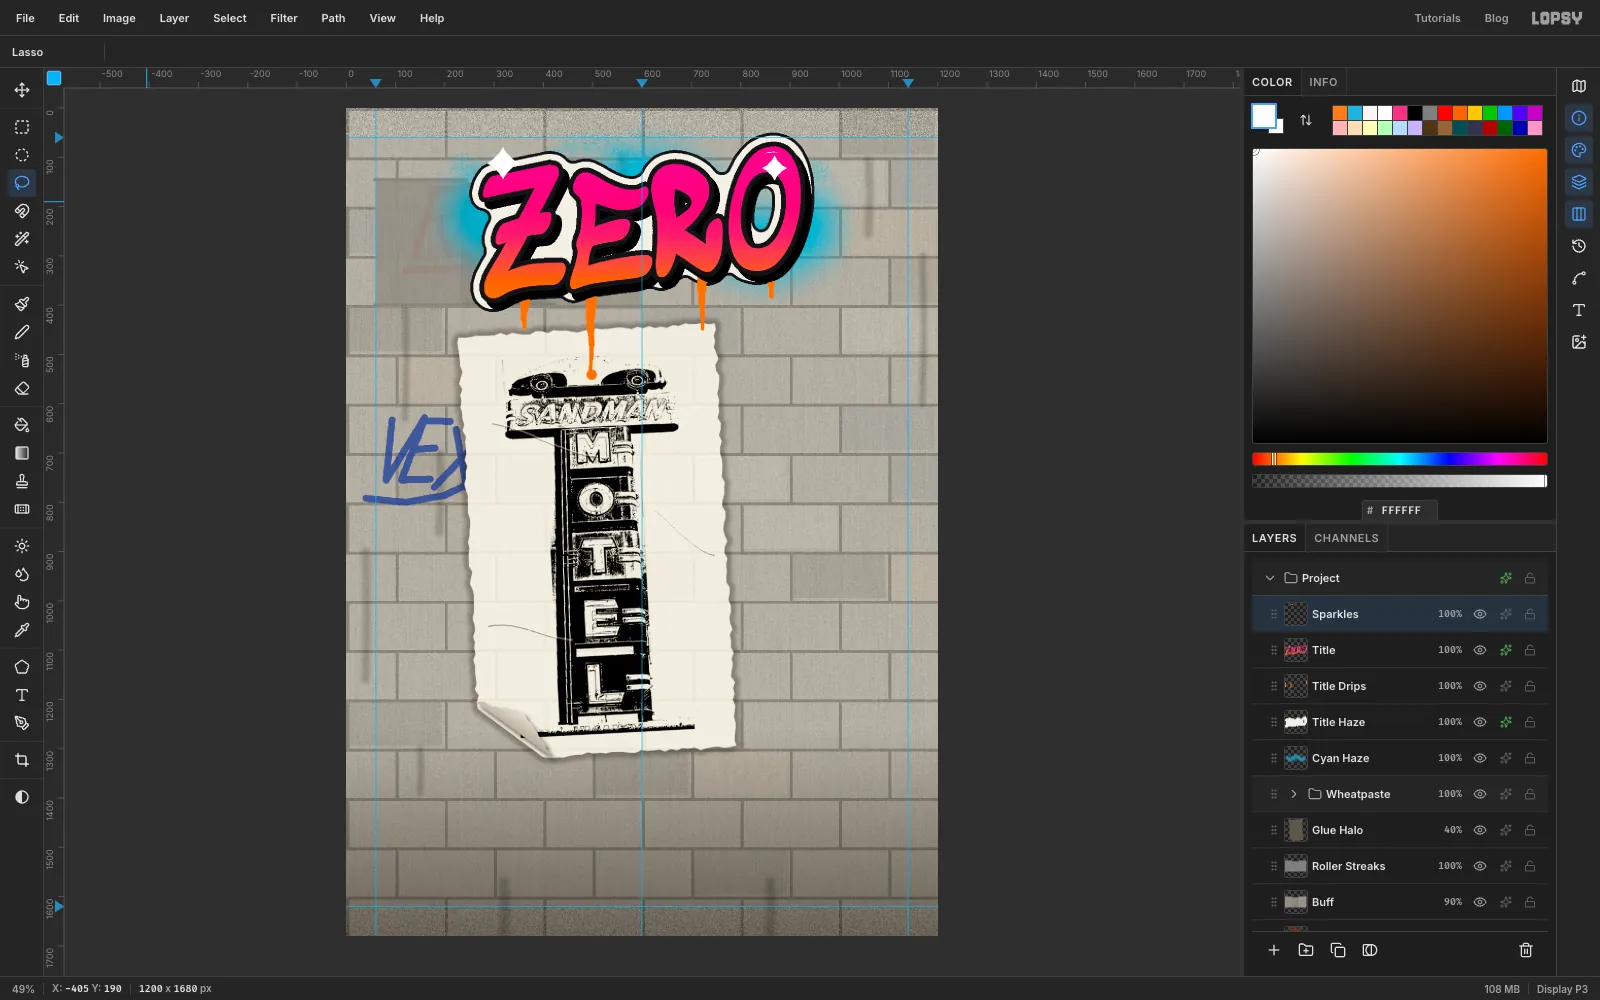
Click Title and add a layer named Sparkles. With the Lasso, draw two four-pointed stars with concave sides, a larger one on the top-left of the Z and a smaller one on the O. Fill them white. They're the classic graffiti glint.
-
Roll a black band for the stencil
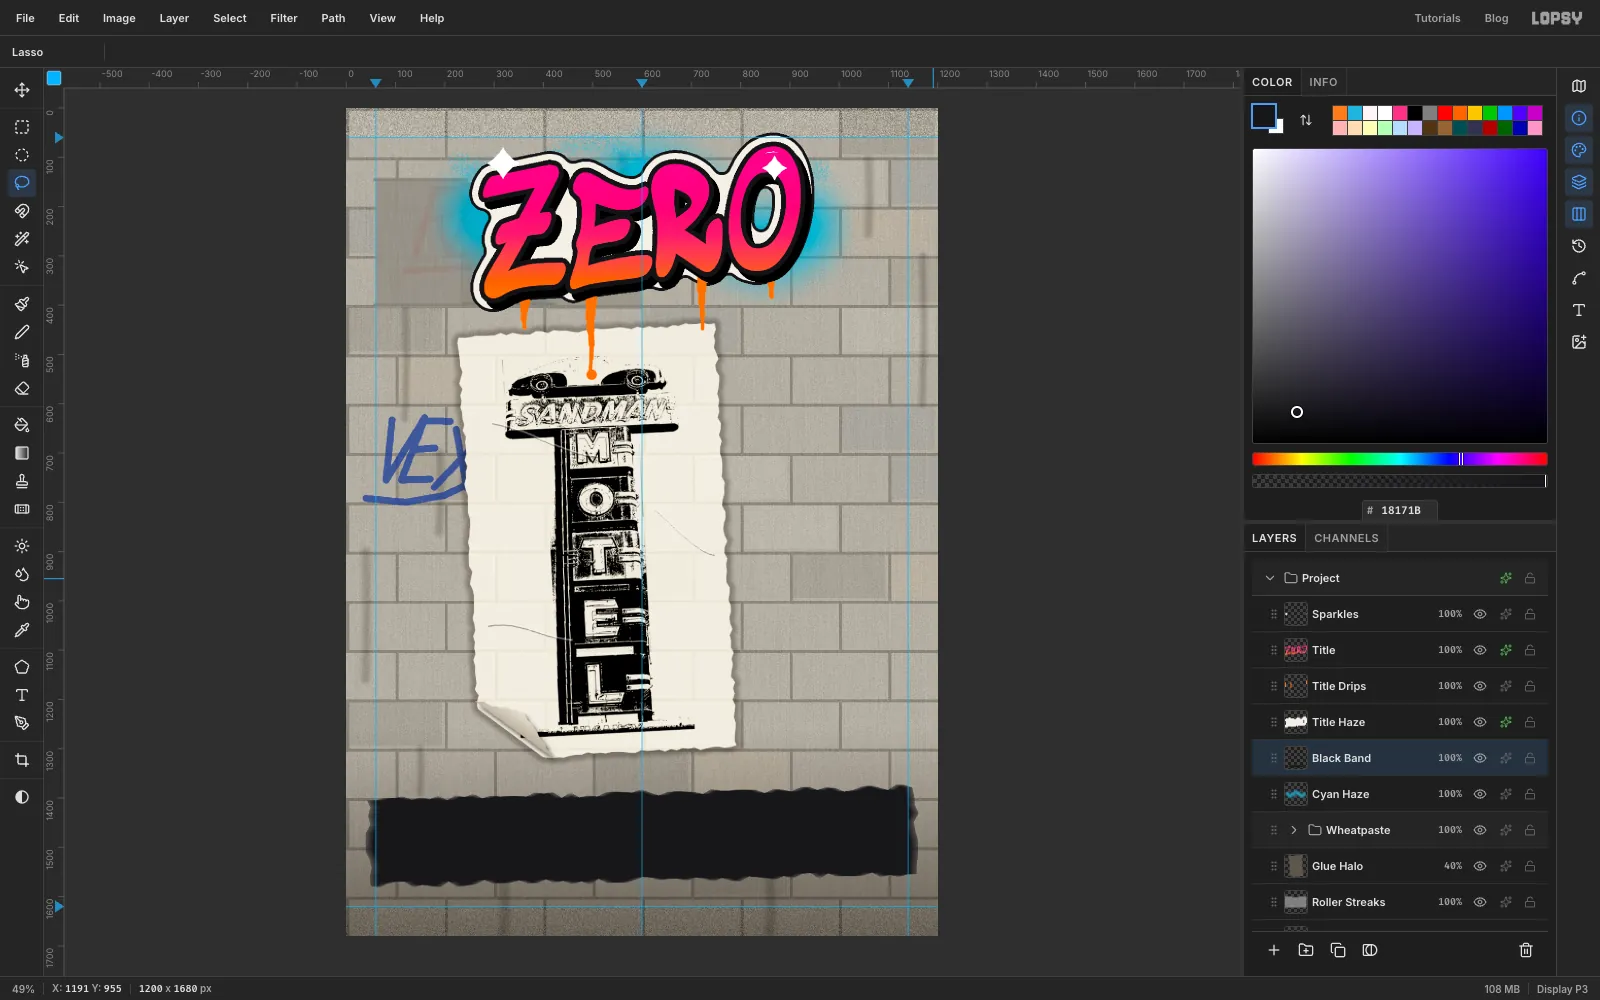
Click Cyan Haze and add a layer named Black Band. With the Lasso, draw a long, rough strip about 1100 × 175 px across the bottom of the page, tilted about 1°, and fill it with . Keep it selected and run Add Noise at 10 (Mono), then Motion Blur at 0° with a distance of 30, for horizontal roller texture. Deselect.
-
Type VACANCY as a stencil
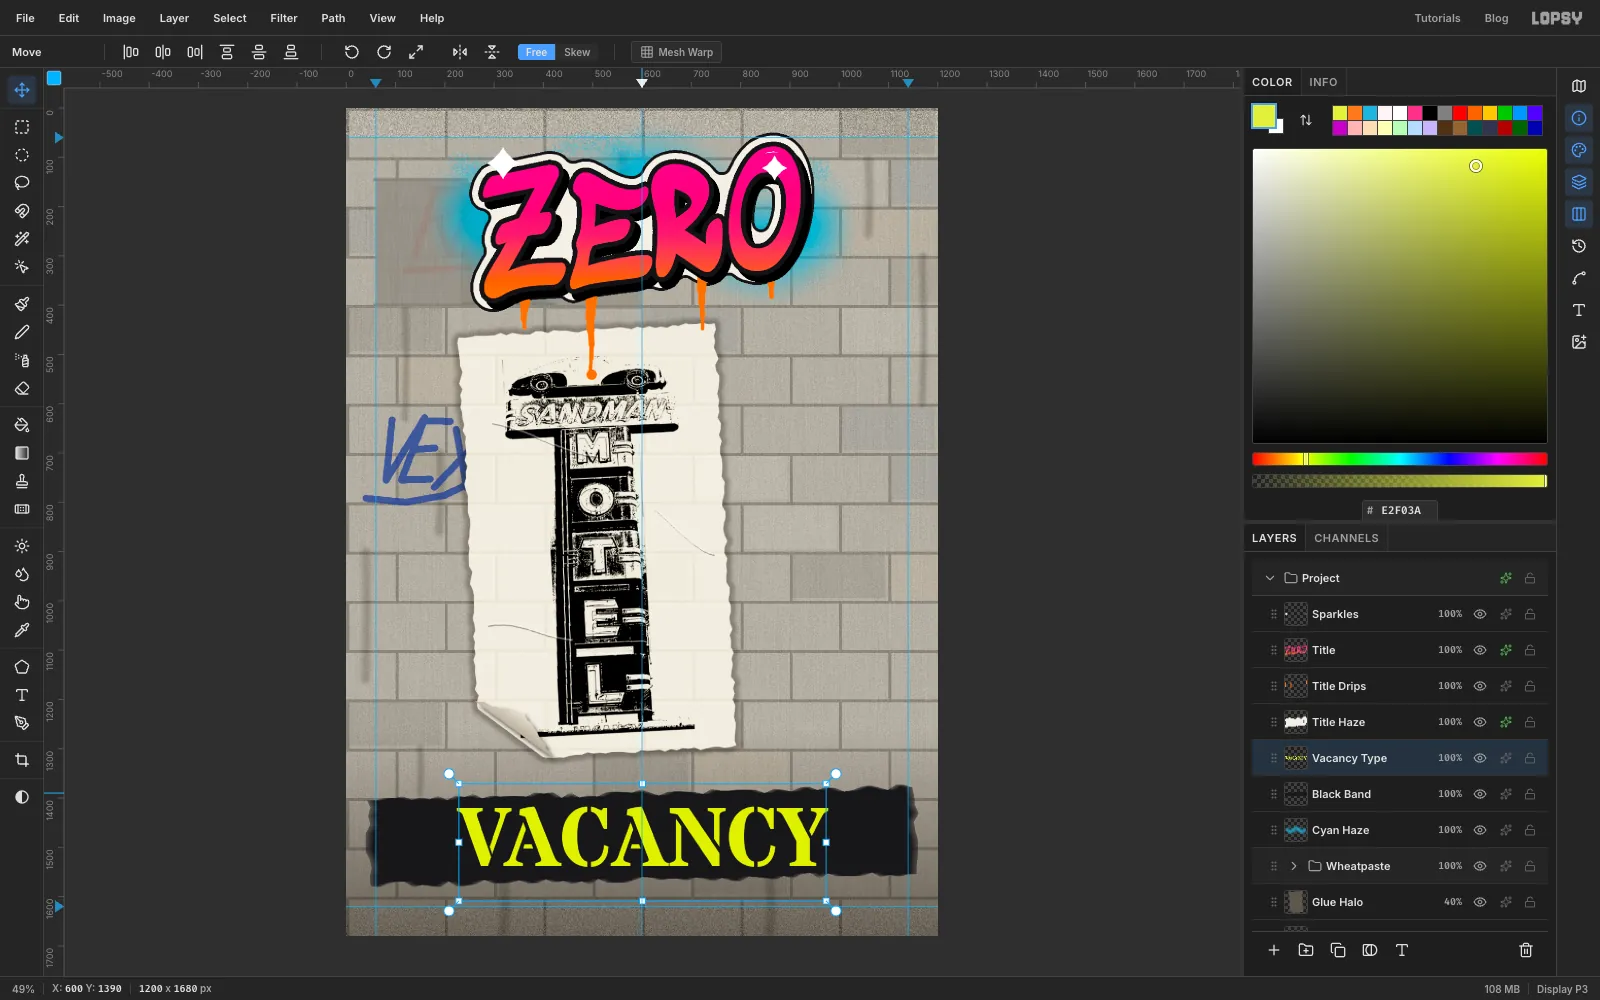
With the Text tool, choose Stardos Stencil, weight Bold, size 170, Center, colour . Click the centre guide on the band, type
VACANCYand press Tab. Rename the layer Vacancy Type and nudge it to the middle of the band.This layer is only the stencil. You'll spray through it rather than keep it.
-
Spray through the stencil
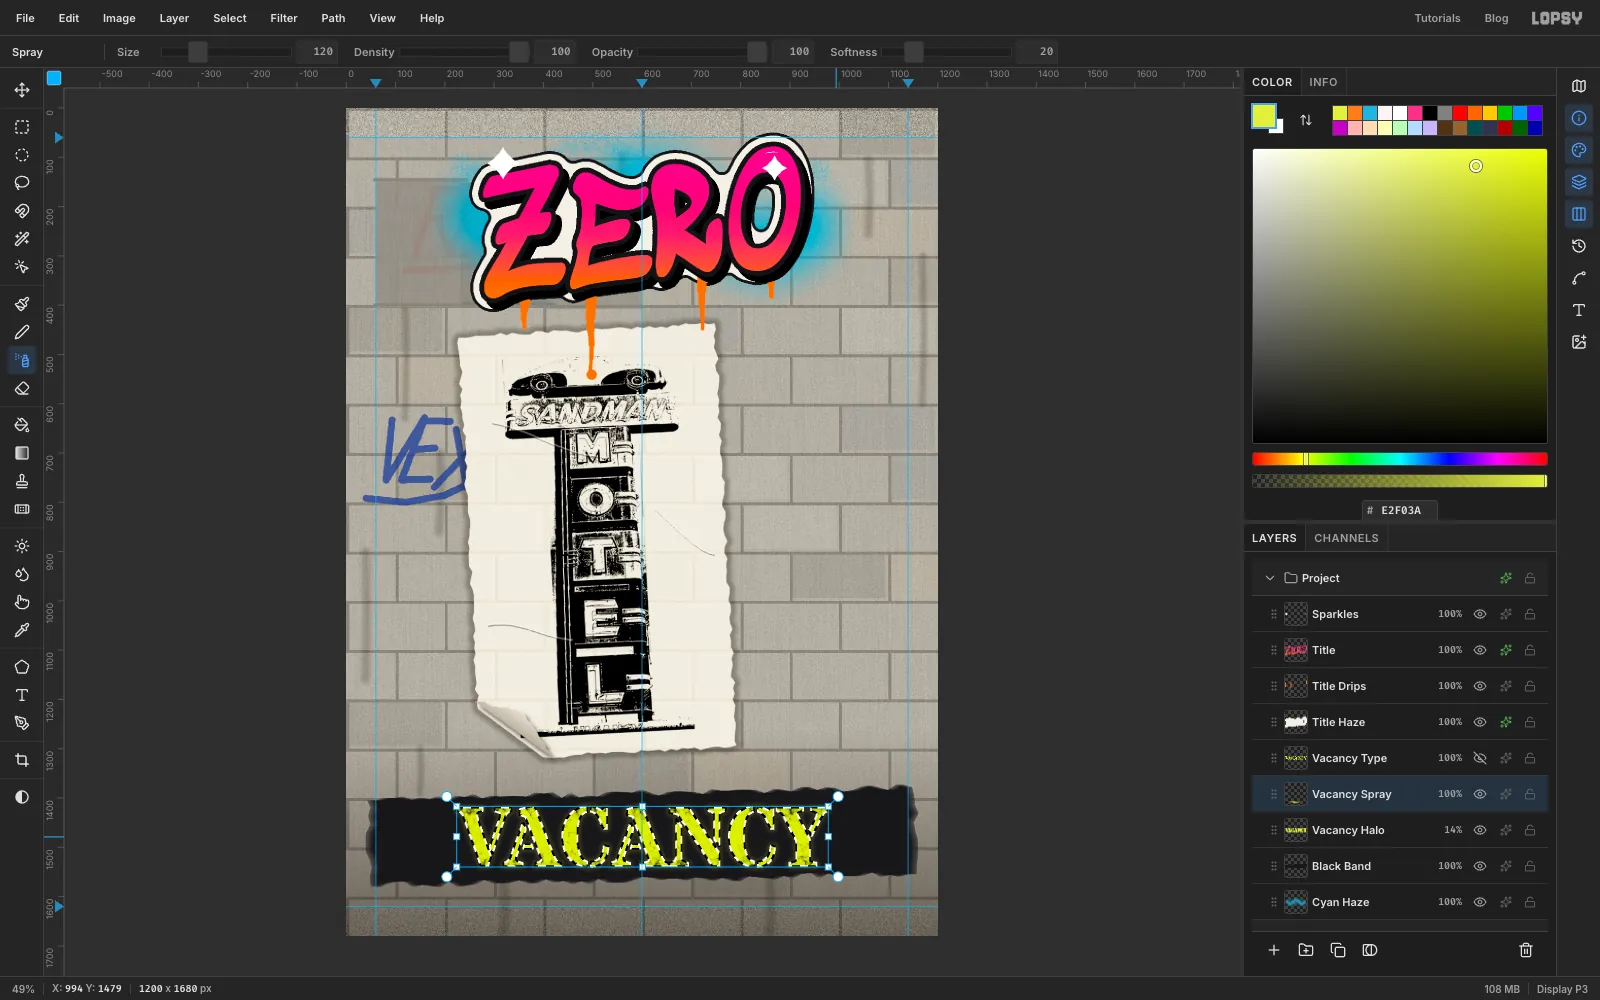
Cmd-click the Vacancy Type thumbnail, then click its eye icon to hide it. The selection stays.
- Click Black Band and add a layer named Vacancy Halo. Choose Grow… at 7 and Feather… at 6, fill with the yellow and lower the layer to 14%. This is the faint glow of paint that creeps under a stencil.
- Cmd-click Vacancy Type again and add a layer named Vacancy Spray.
- Pick the Spray tool with Size 120, Density 100, Opacity 100 and Softness 20. Zigzag across the letters five or six times until they're solid.
-
Add overspray at the edges
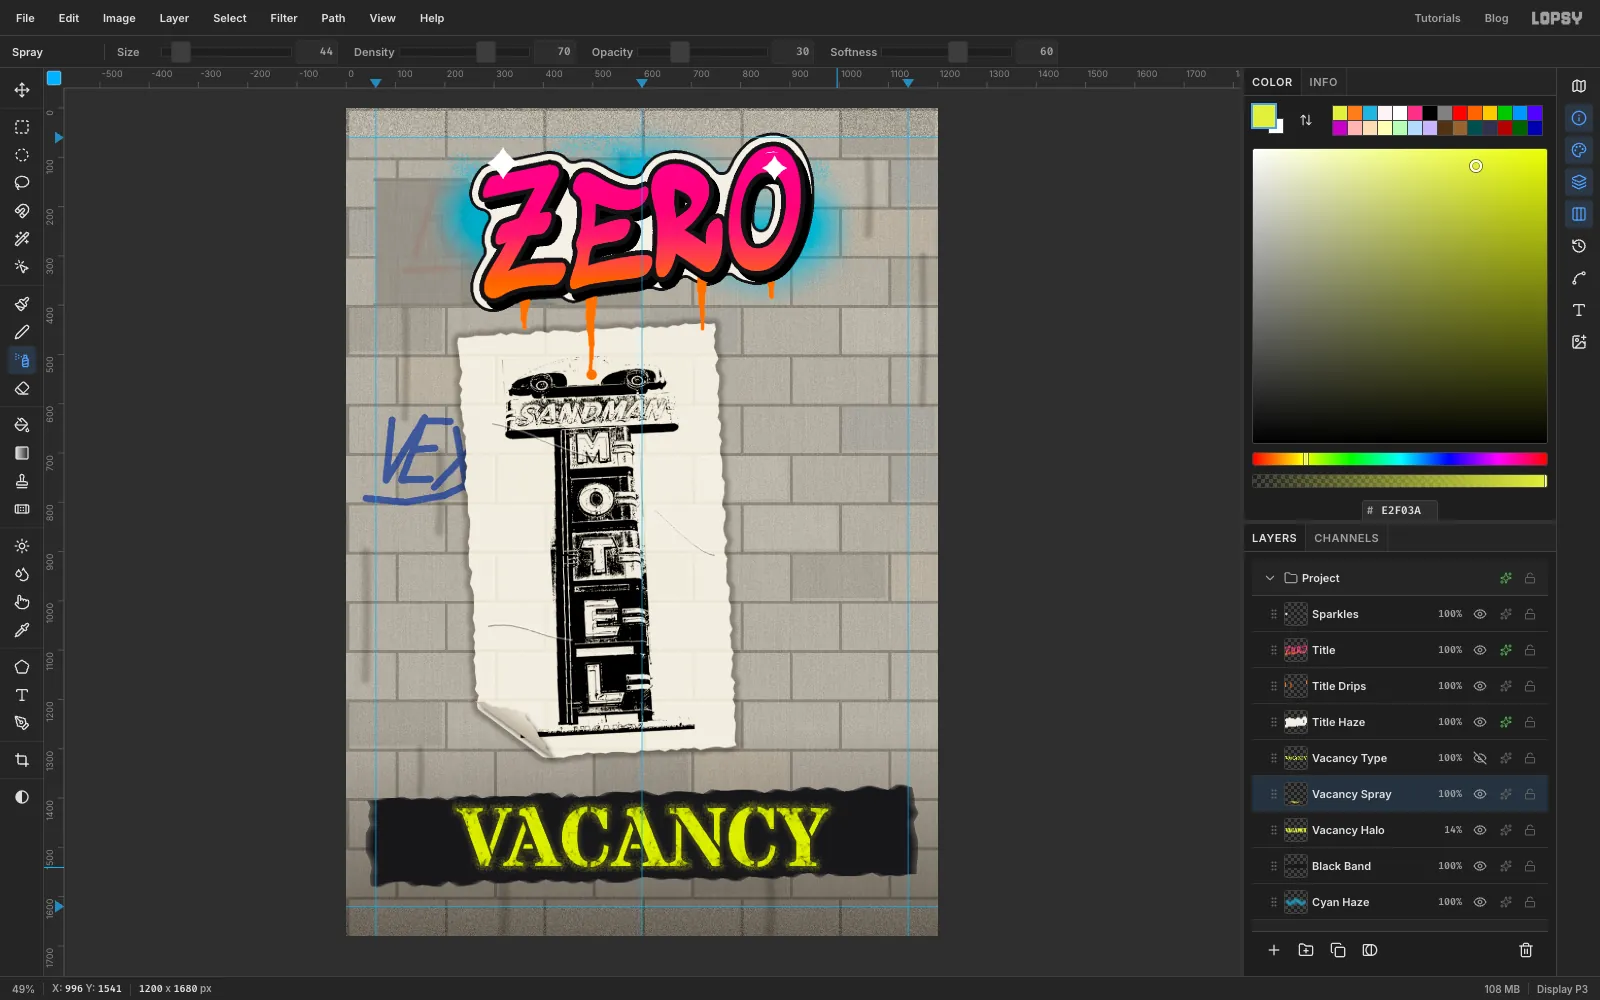
With the selection still active, choose Grow… at 12 and Feather… at 8. Set the Spray to Size 44, Opacity 30, Density 70 and Softness 60. Drag one wavy pass along the tops of the letters and another along their bottoms, then deselect. The fine mist that clings to the edges is what tells the eye "stencil".
-
Draw the name-tag sticker
Click the Sparkles layer, click New Group and name the group Hello Sticker. Add a layer named Tag Base.
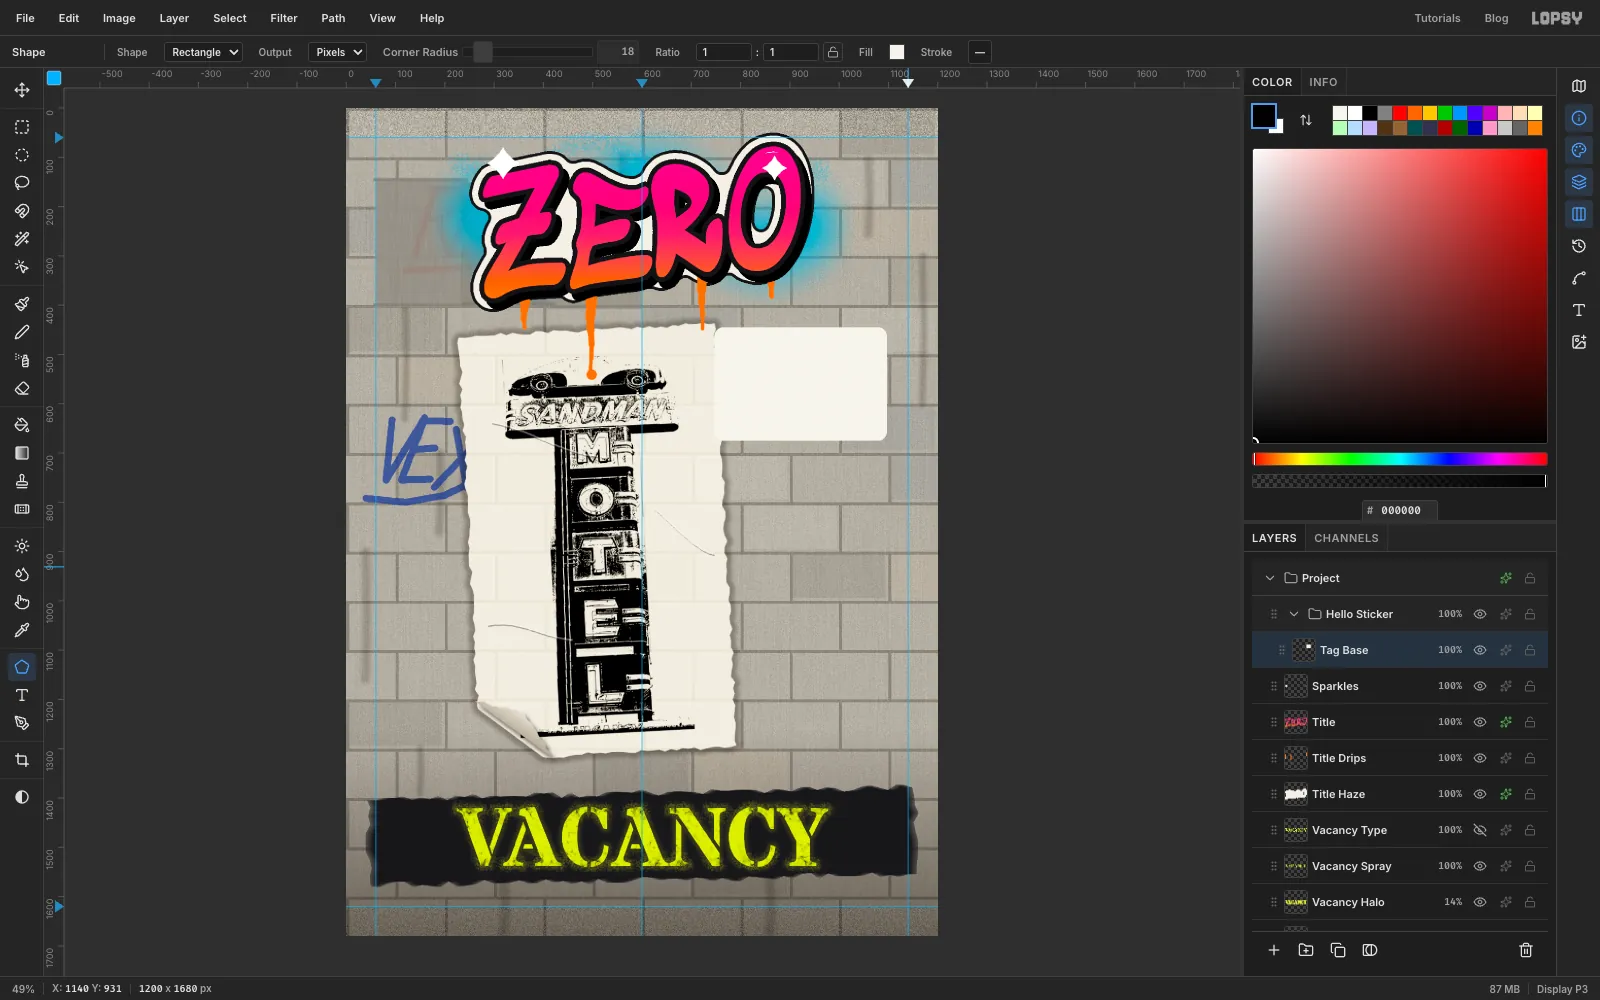
Pick the Shape tool (U) and choose Rectangle, with Corner Radius 18, a fill of and no stroke. Click (don't drag) to the right of the paste-up, near the top. In the Shape Size dialog, enter 350 × 230 and click Create. Let the sticker overlap the right edge of the paper slightly. Stickers get slapped over whatever is already there.
-
Add the red bands
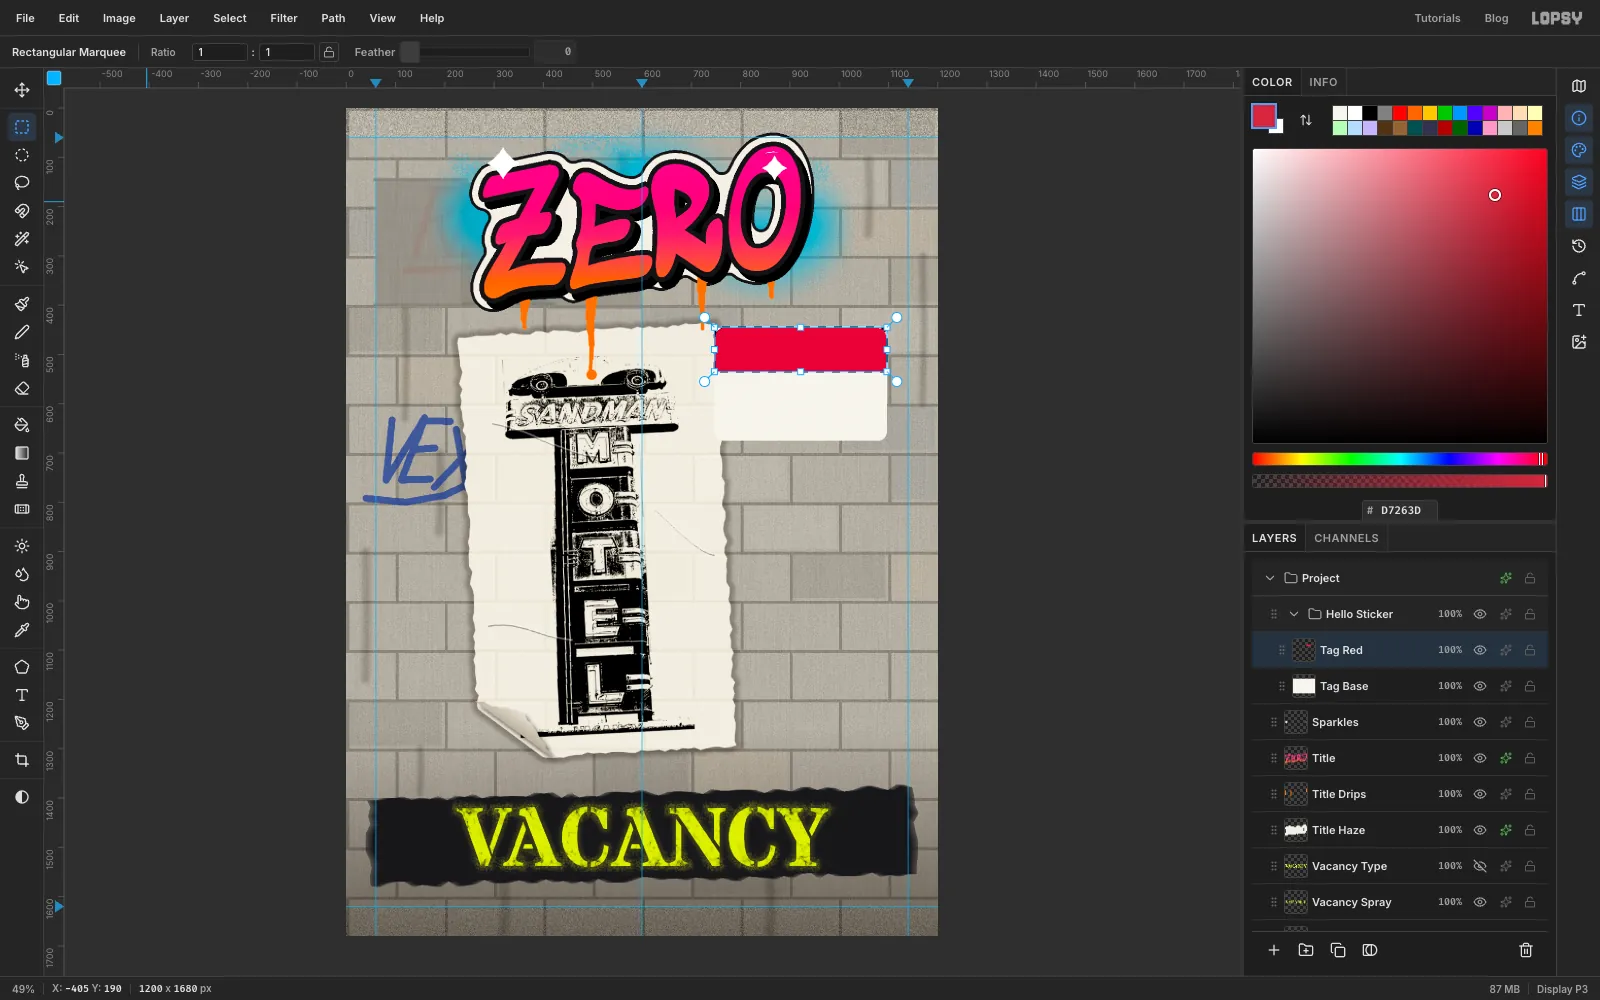
Add a layer named Tag Red and Cmd-click the Tag Base thumbnail. With the Rectangular Marquee, hold Shift+Alt and drag a box across the top 100 px of the sticker. That keeps only the part of the sticker inside your box, with its rounded corners. Fill it with .
Do the same for a thin strip, about 25 px, along the bottom of the sticker, then deselect.
-
Write on the sticker
Use the Text tool, centred:
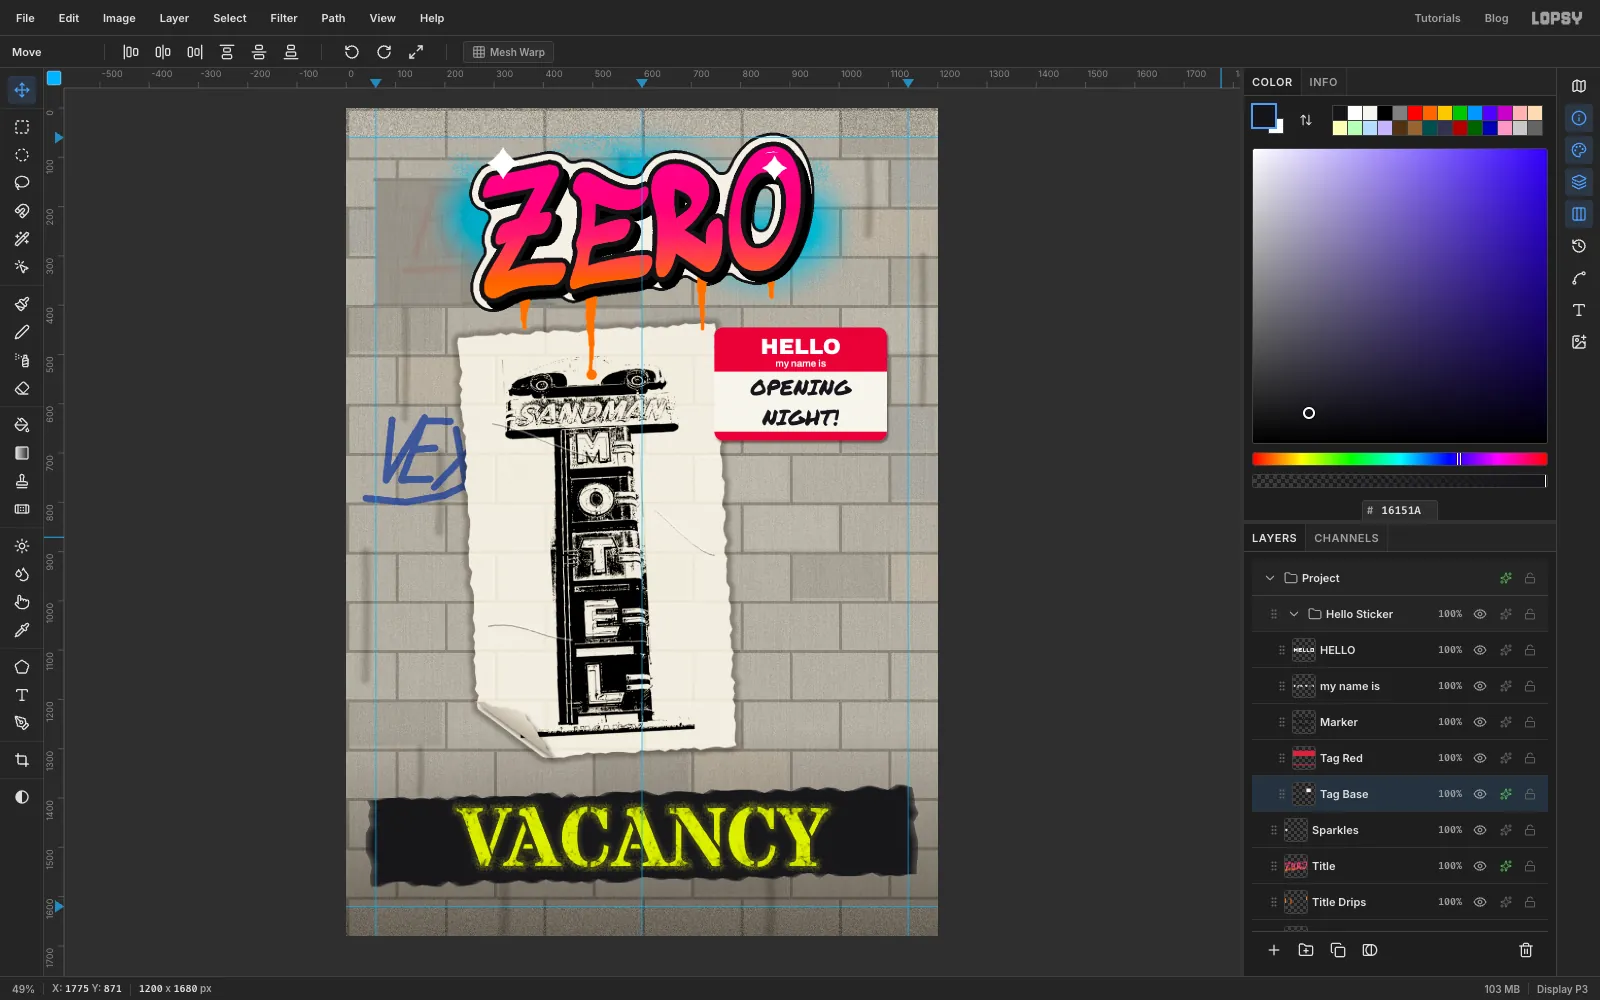
HELLOin Archivo Black, size 44, white, centred in the red bandmy name isin Archivo SemiBold, size 20, white, just under it and still inside the redOPENINGandNIGHT!on two lines in Permanent Marker, size 44, , centred in the white area with equal space above and below. Rename this layer Marker.
Before you create each text layer, click a non-text layer such as Tag Red. Otherwise the new font settings restyle the text layer you just made.
Give Tag Base a Drop Shadow of 3 / 5 / 6 (offset X, offset Y, blur) at 45% so the sticker lifts off the wall.
-
Tilt the sticker
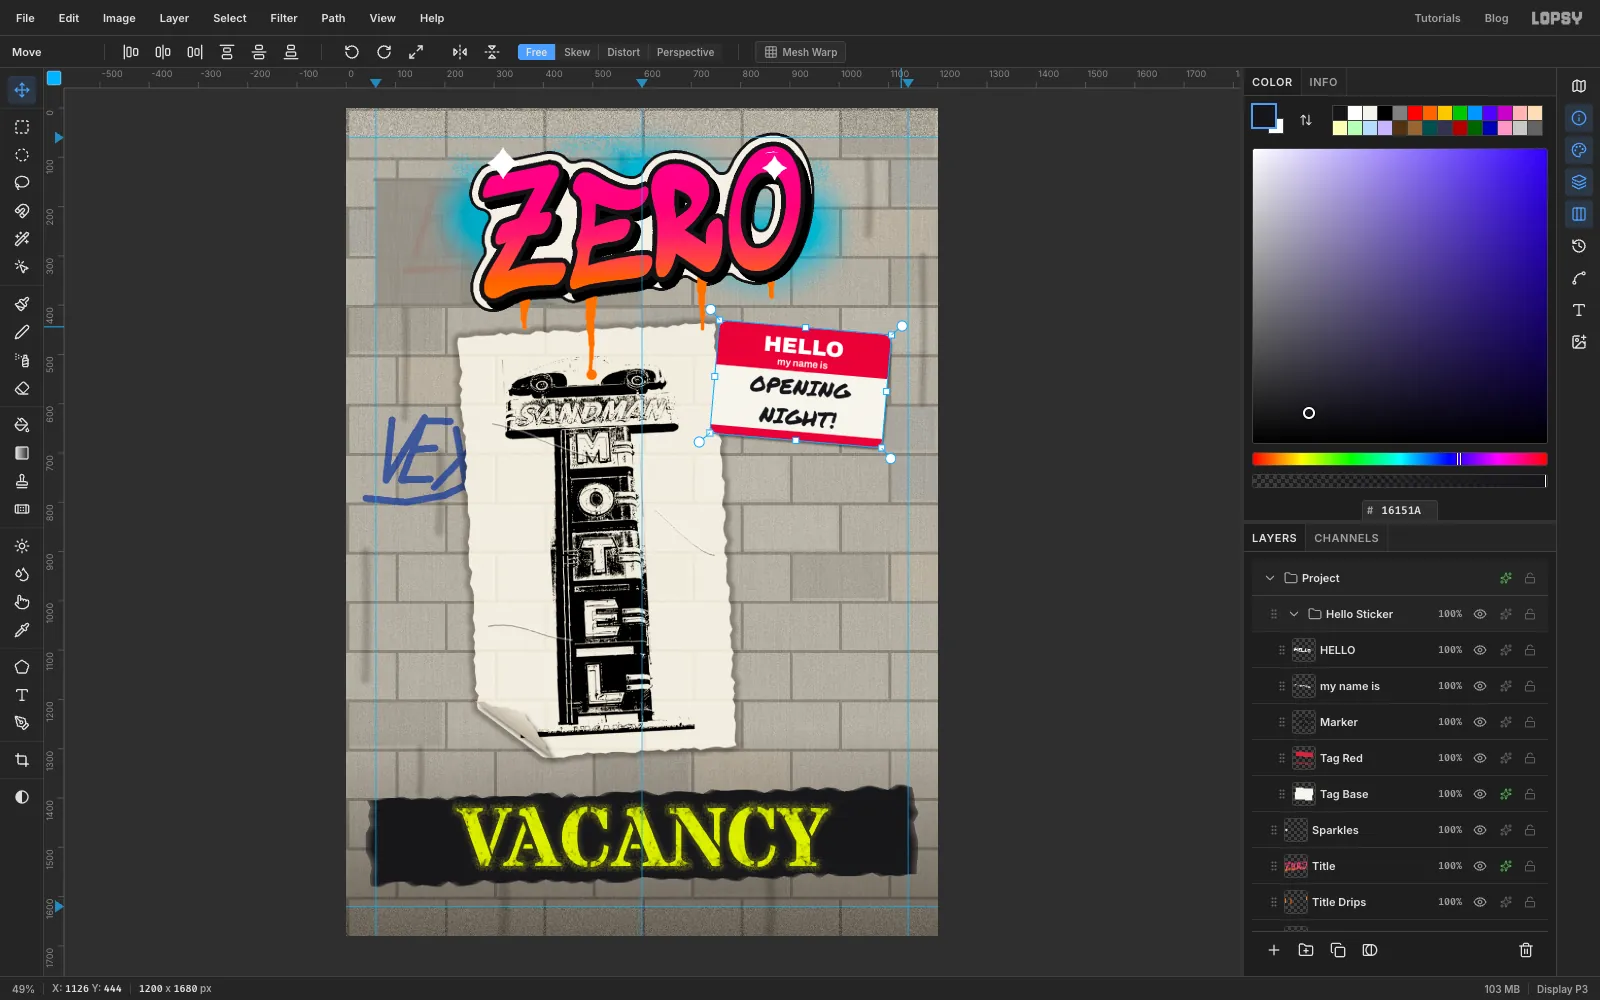
Click the Hello Sticker group row, pick Move, and drag the top-right rotation handle about 5° clockwise. Press Cmd+D, then collapse the group.
-
Type the details on a torn note
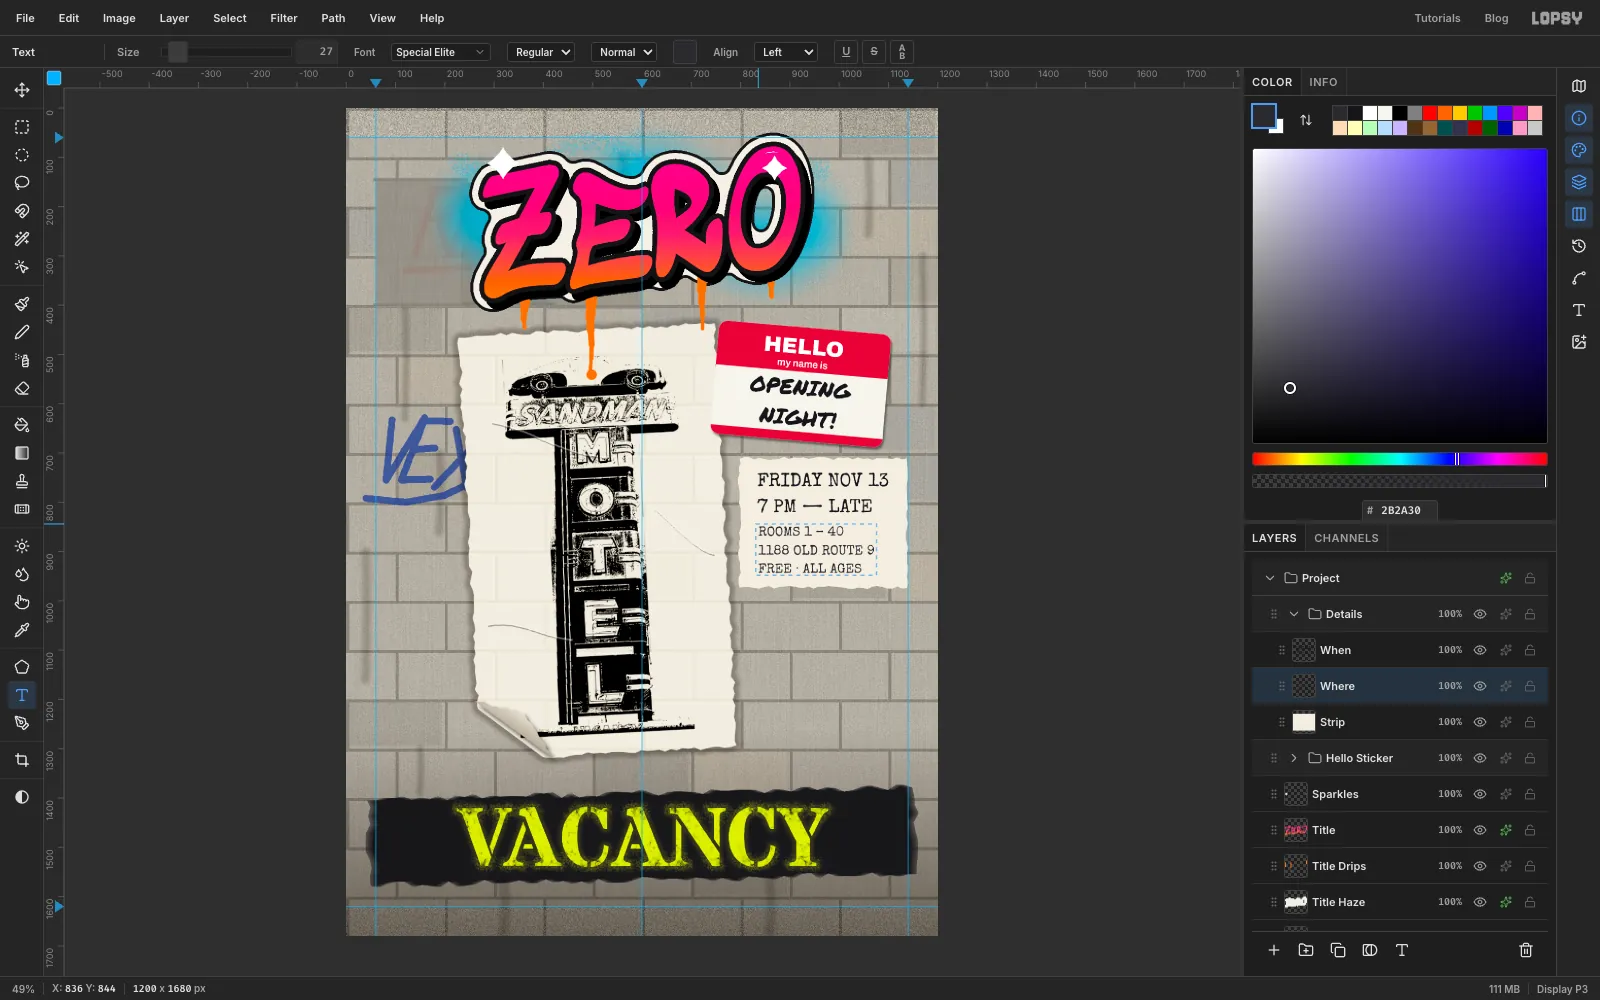
Click Hello Sticker, make a new group named Details, and add a layer named Strip. Lasso a torn rectangle about 340 × 260 px under the sticker. Fill it with and add Noise at 7 (Mono).
With the Text tool in Special Elite, left aligned, colour :
- at size 38, two lines:
FRIDAY NOV 13and7 PM — LATE - under them at size 27, three lines:
ROOMS 1 – 40,1188 OLD ROUTE 9andFREE · ALL AGES
Rename the two text layers When and Where.
Click Strip before you set up the second block, for the same reason as on the sticker. Leave about 35 px from the left edge of the note, about the same as the space after the longest line.
- at size 38, two lines:
-
Tape it to the wall
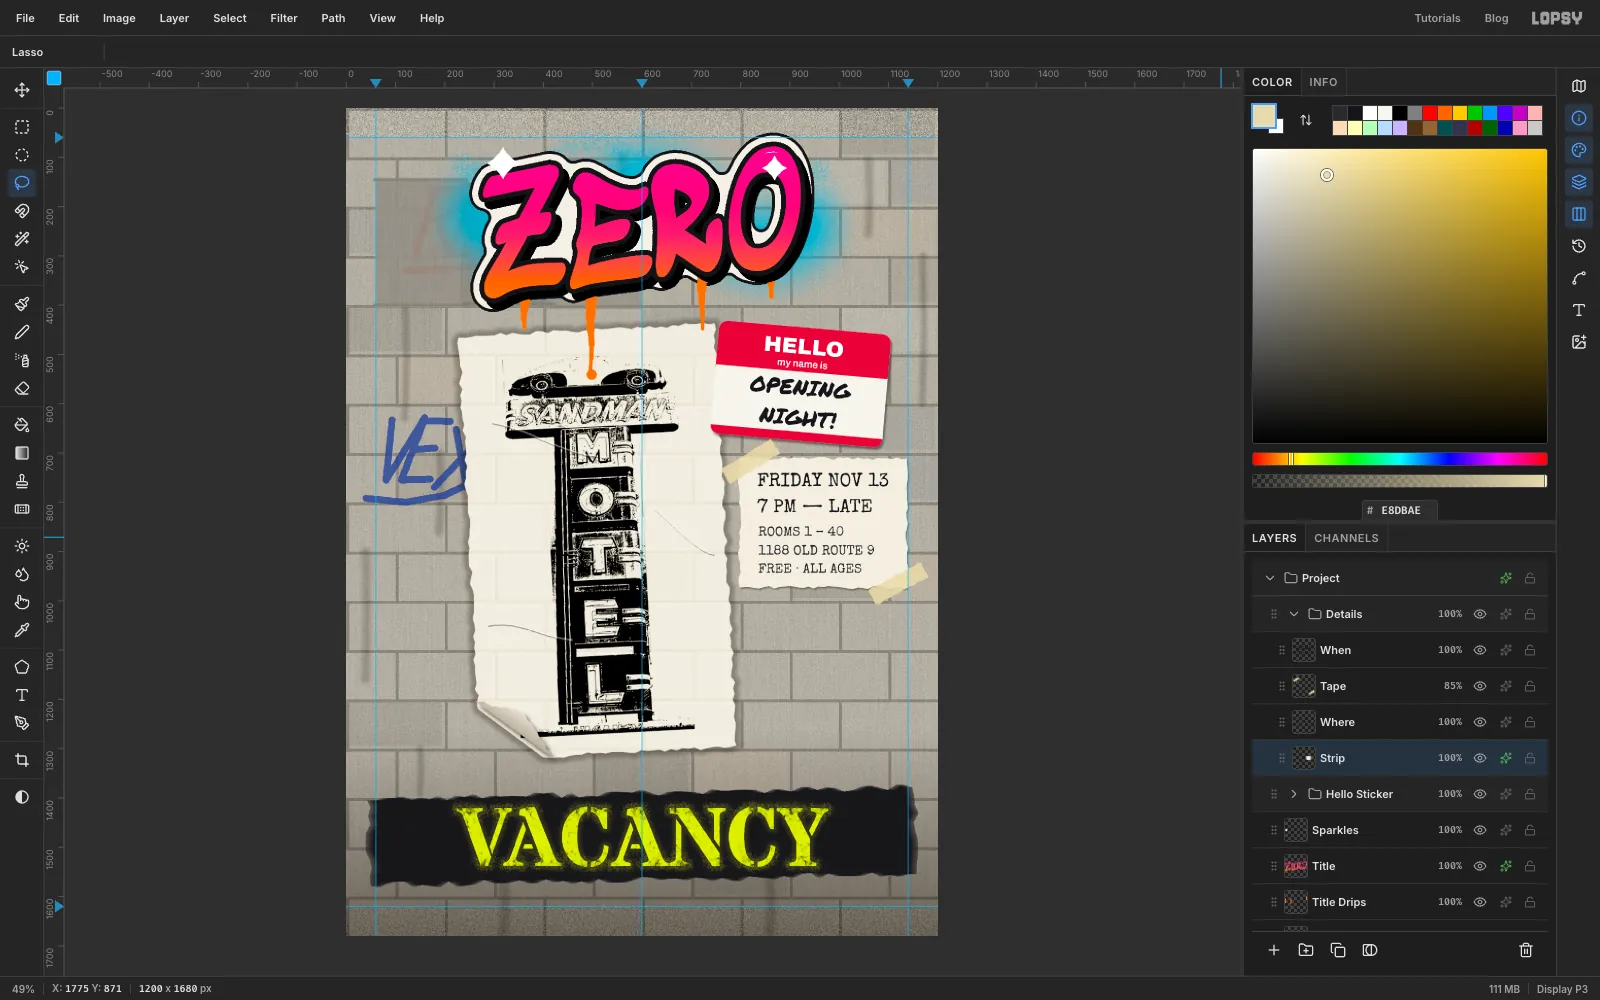
Add a layer named Tape. Lasso two short strips about 120 × 34 px, angled across the top-left and bottom-right corners of the note, and fill them with . Let the top strip run onto the sticker above. Lower the layer to 85% so the note shows through the tape. Give Strip a Drop Shadow of 2 / 3 / 4 at 35%.
-
Tilt the note
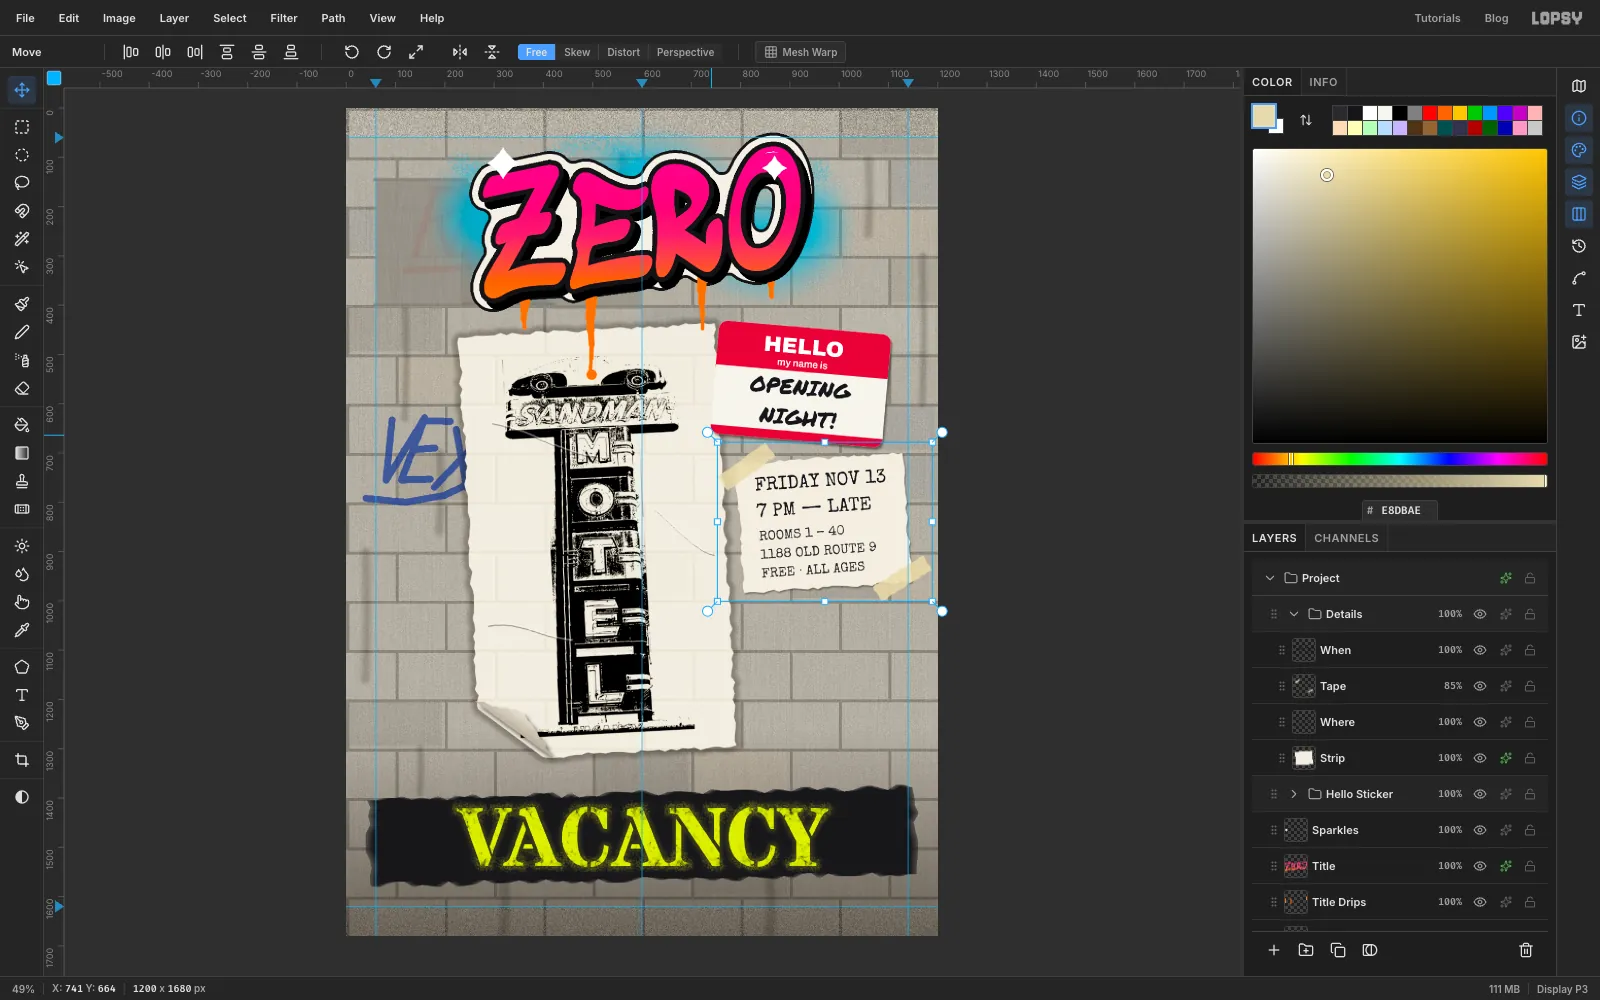
Click the Details group row and, with Move, drag its top-left rotation handle about 4° anticlockwise, the opposite way to the sticker. Press Cmd+D and collapse the group.
-
Draw a motel arrow with the Pen
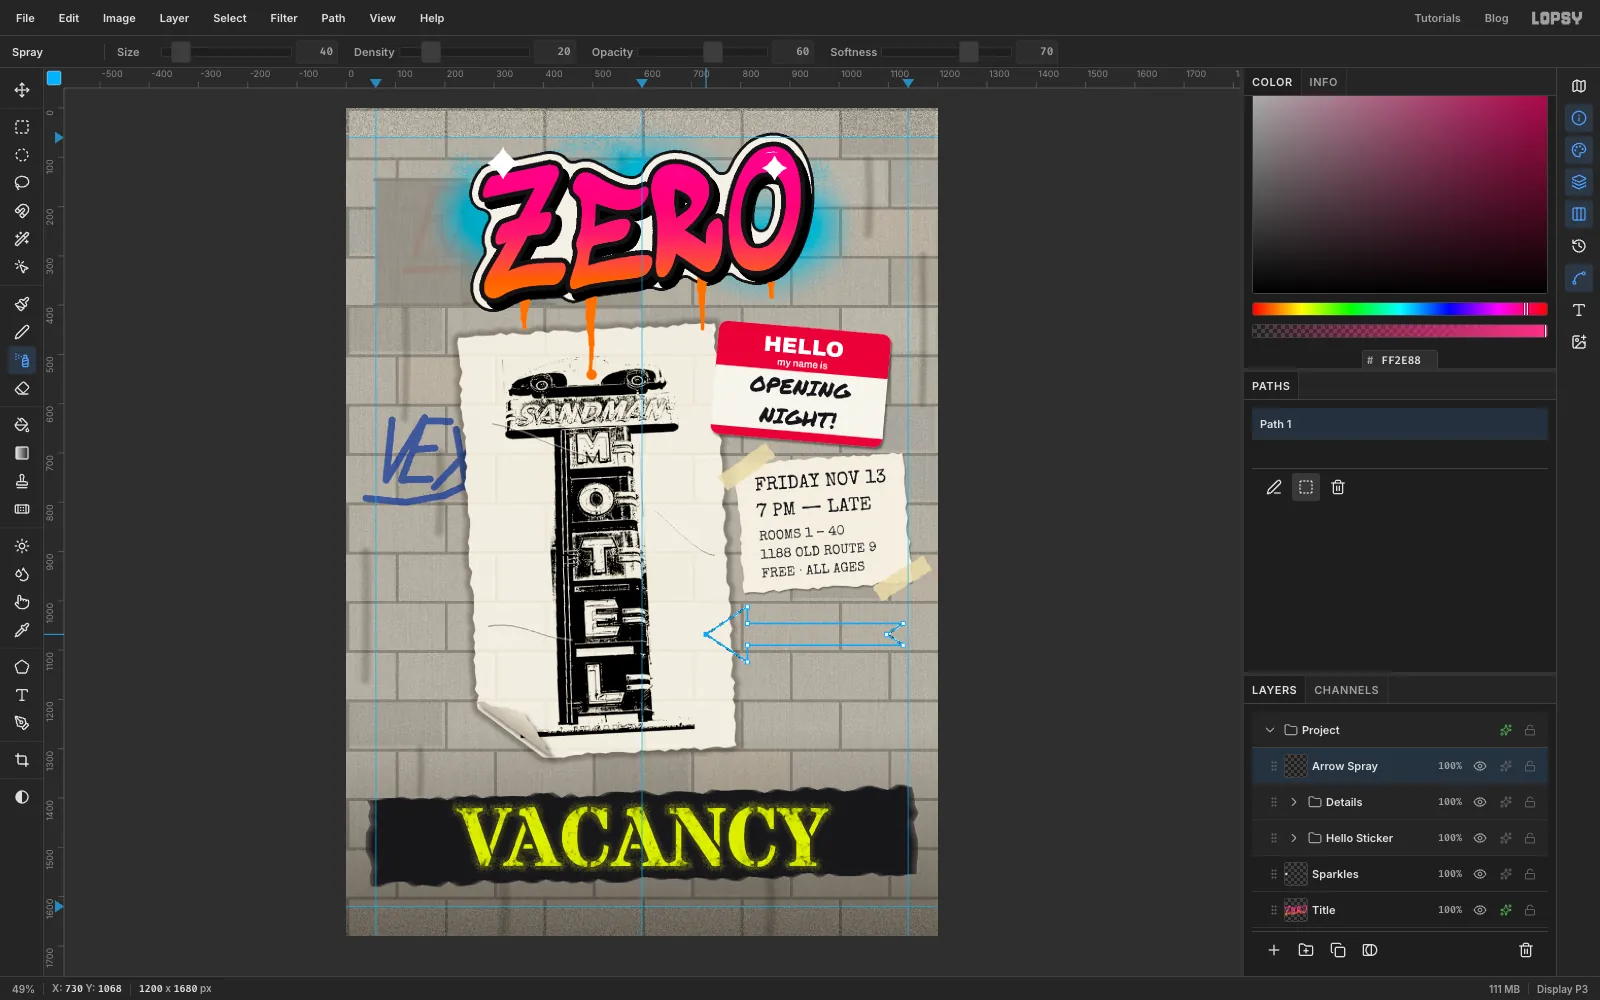
Click Details and add a layer named Arrow Spray. Pick the Pen tool (P) and click the corners of a classic motel arrow, about 400 px long, pointing left at the poster:
- the point
- the top of the head
- back in to the top of the shaft
- the top-right end
- a notch in the tail
- the bottom-right end
- the bottom of the shaft
- the bottom of the head
Click the first point again to close the path. In the Paths panel, click Path to Selection, then pick the Spray tool. The path's blue outline stays on screen over the selection.
-
Spray the arrow and light the bulbs
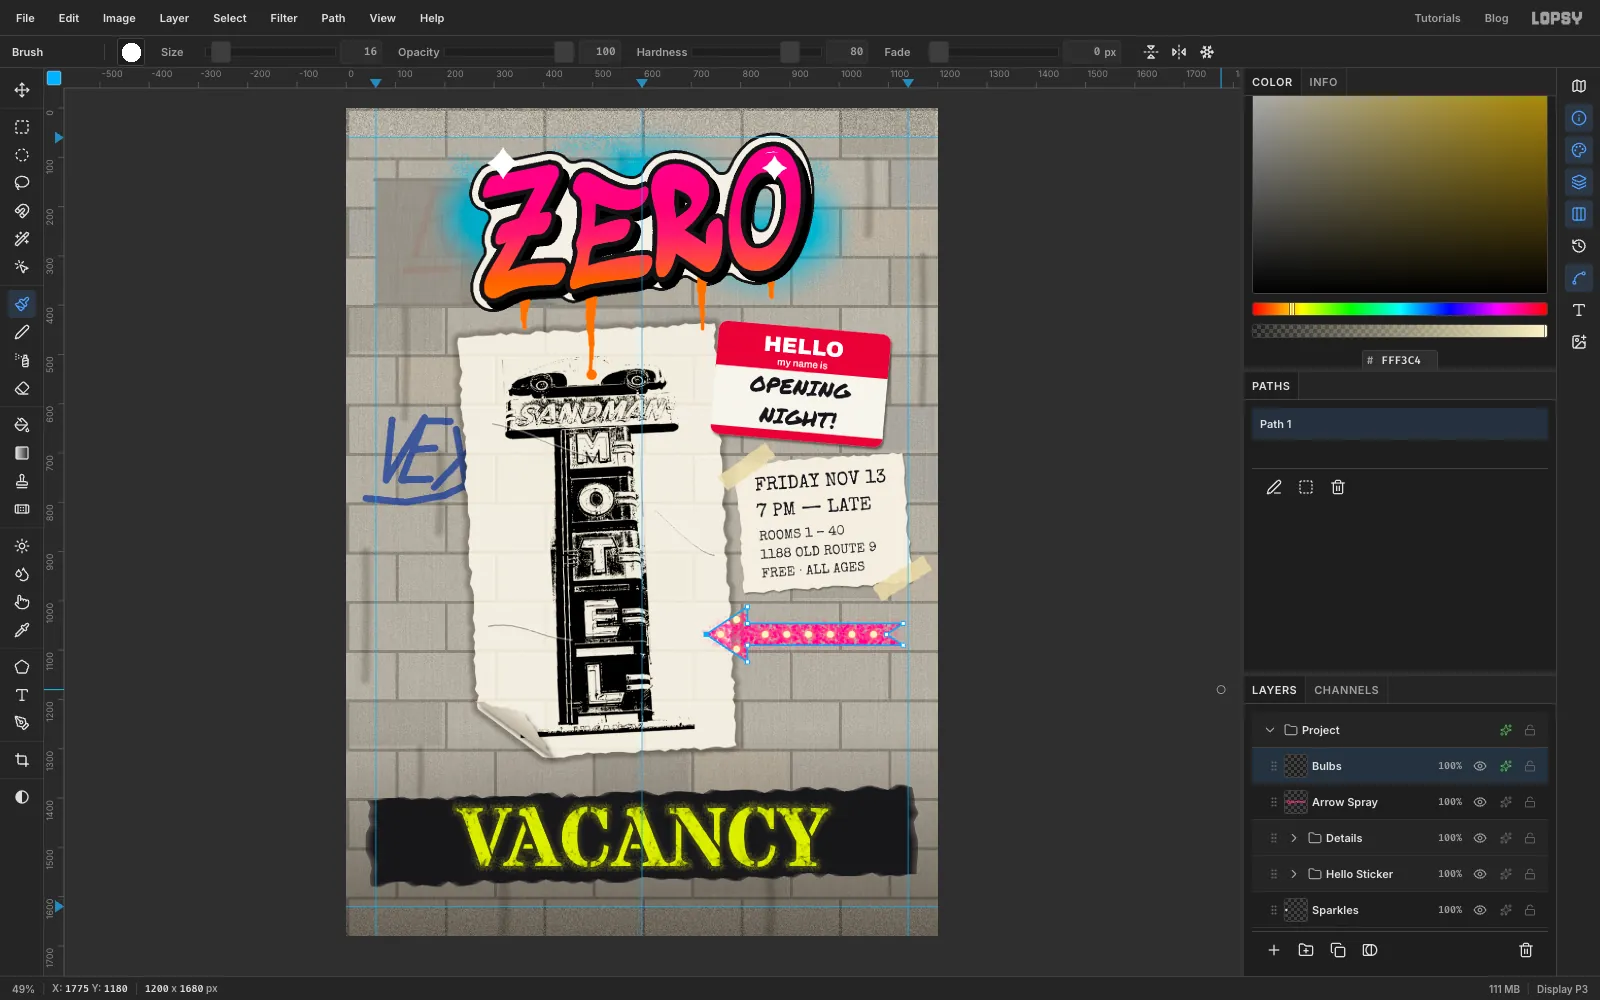
With the Spray tool in (Size 90, Density 100, Opacity 100, Softness 45), drag three passes through the arrow. Then Grow… by 10, Feather… by 8, and do one light pass at Opacity 30 for overspray. Deselect.
Add a layer named Bulbs. With the Brush at size 16 in , click a row of dots along the shaft about 44 px apart, plus three in the head. Give the layer an Outer Glow with Size 14, Spread 10, Opacity 80 and colour .
-
Slap on a round sticker
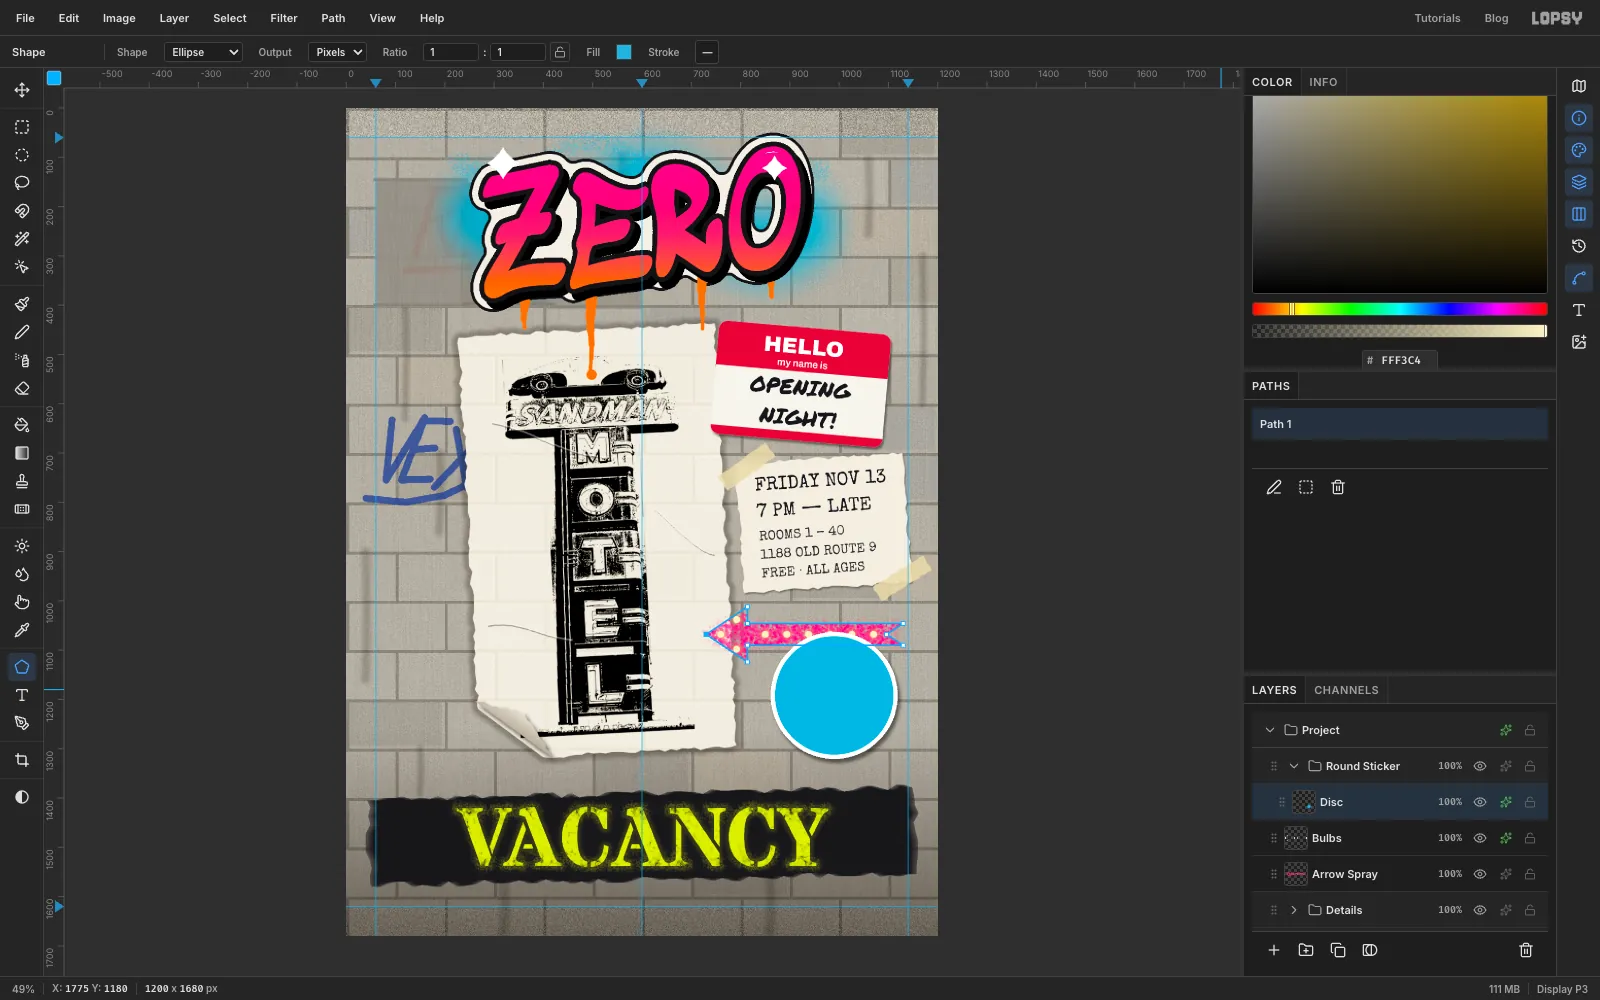
Click Bulbs, make a group named Round Sticker, and add a layer named Disc. With the Shape tool set to Ellipse, click below the arrow and make a 240 × 240 circle in . Place it so its top overlaps the tail of the arrow, as if it was stuck on after the paint dried.
Give it a white Stroke of 9 for the die-cut edge and a Drop Shadow of 5 / 8 / 10 at 50%.
-
Give it a sheen and its copy
Add a layer named Disc Sheen and Cmd-click the Disc thumbnail. With the Gradient tool, open Advanced and set both stops to white, the left one at 55% opacity and the right one at 0%. Drag from the top-left edge of the circle to its centre, then deselect.
Click Disc Sheen and type
40 ARTISTS,40 ROOMSand1 NIGHTon three lines in Anton, size 35, centred, in , and rename the layer Disc Copy (the copy printed on the disc). Seat the block a touch above the circle's centre, with at least 30 px of cyan around it.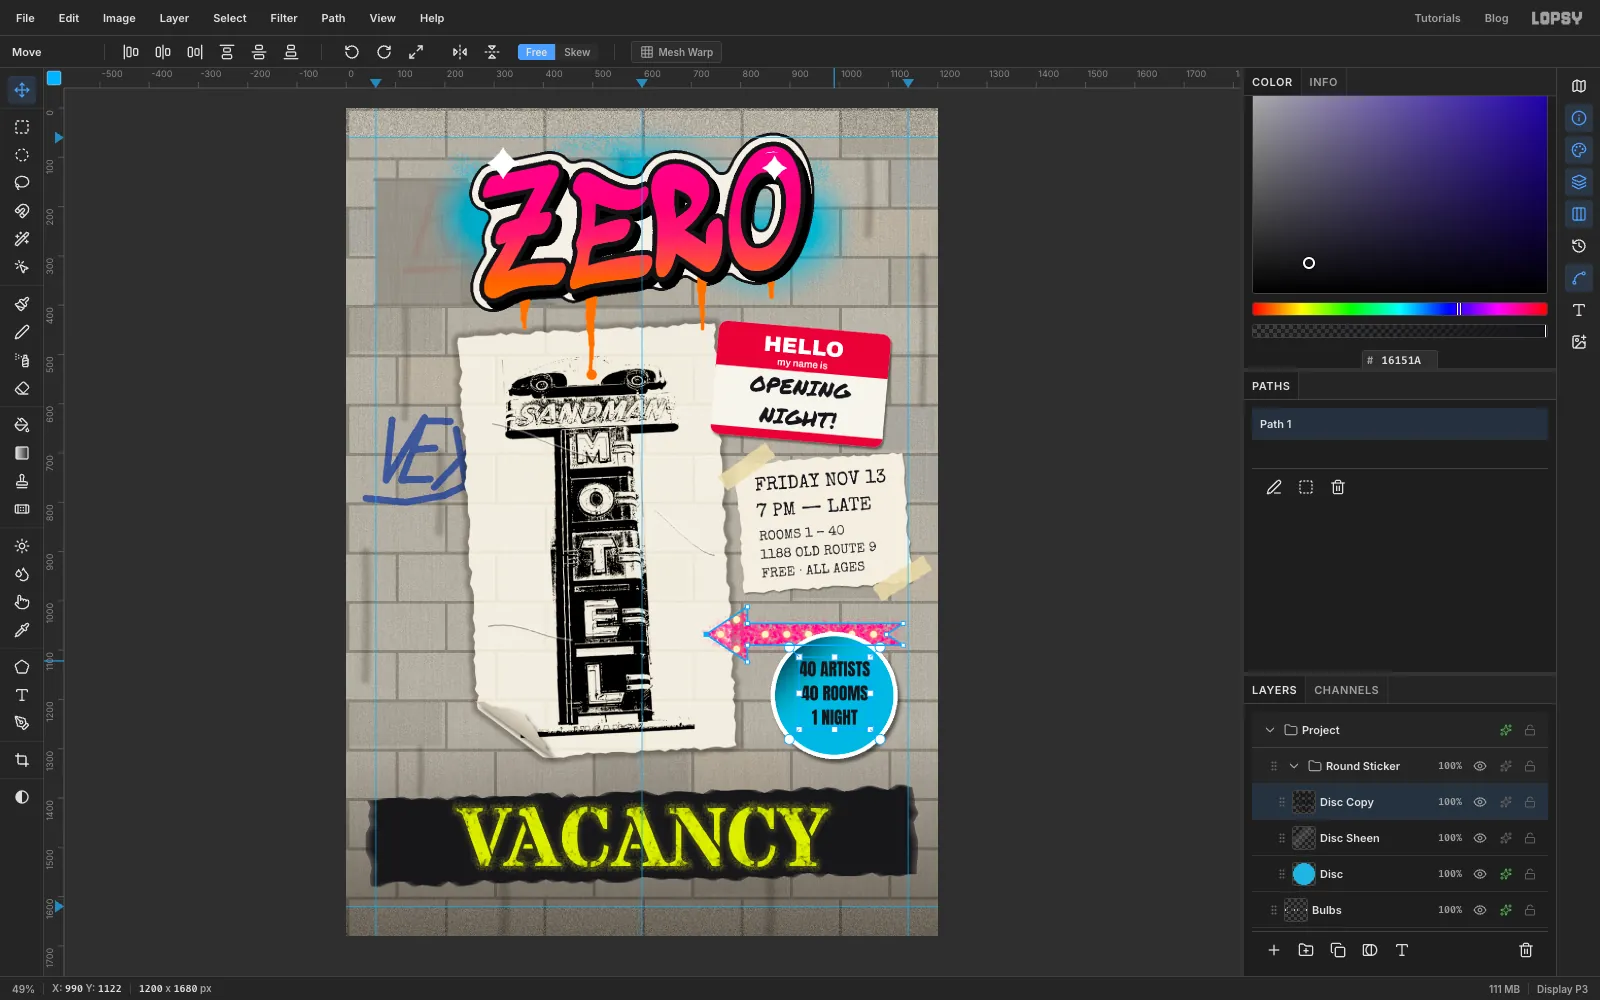
-
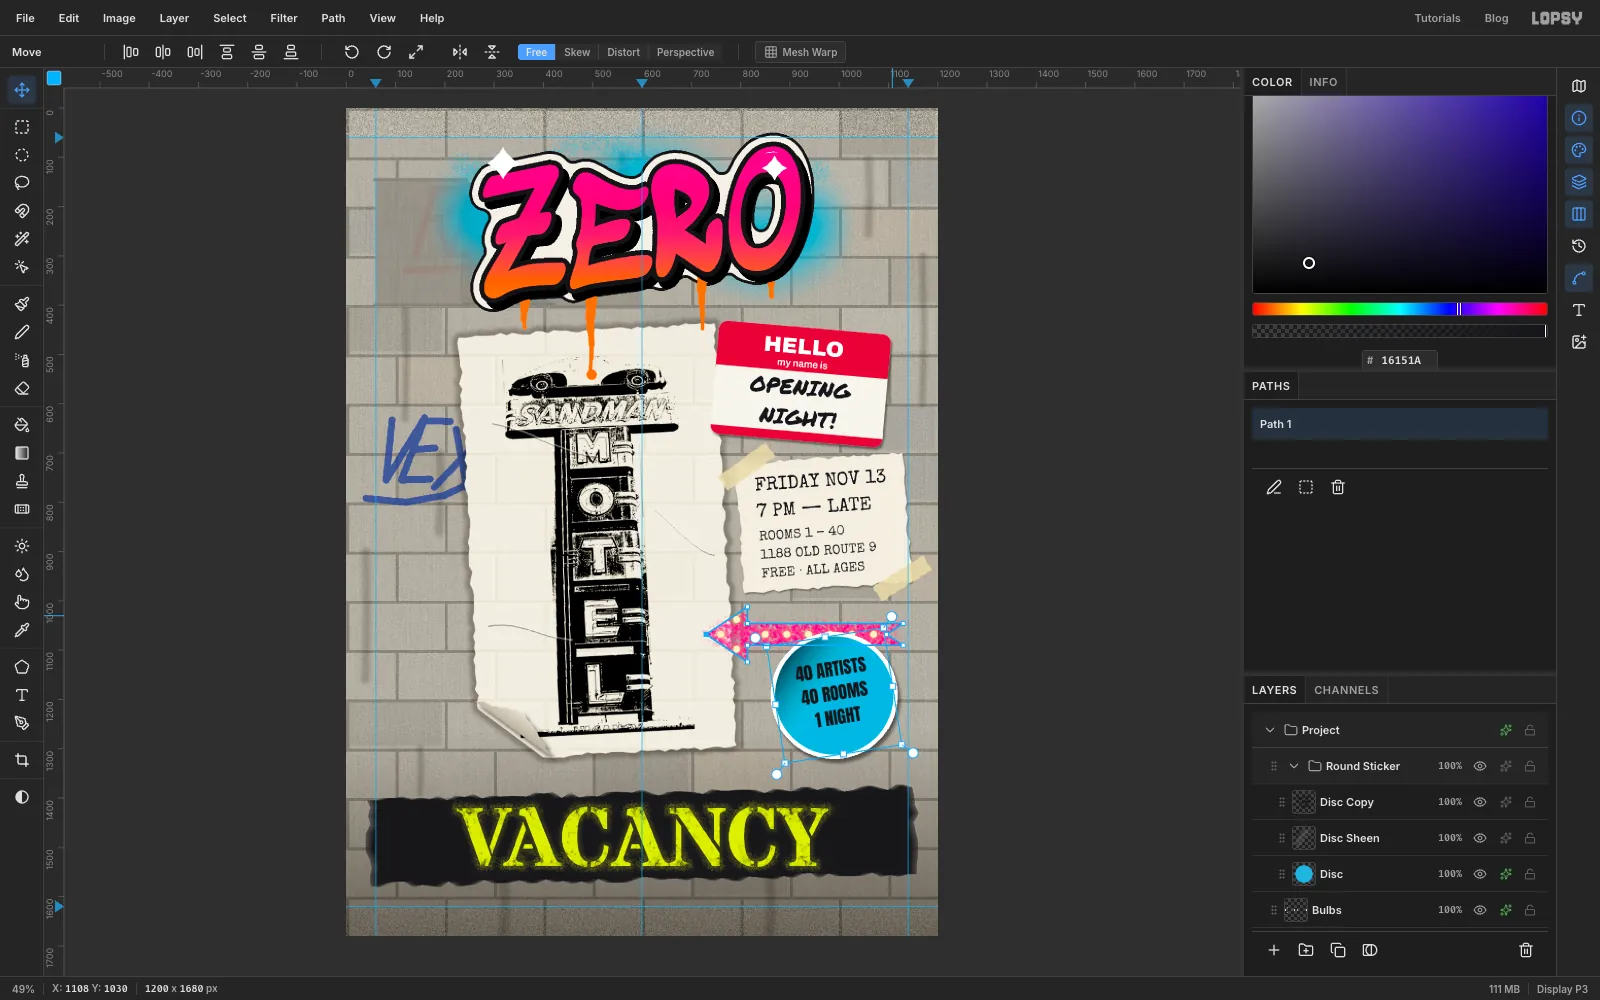
Tilt the round sticker
Click the Round Sticker group row and, with Move, drag the top-right rotation handle about 9° anticlockwise. The text turns with the circle. Press Cmd+D and collapse the group.
-
Add the footer
Click the Round Sticker row. With the Text tool in Allerta Stencil, size 43, centred, colour , type
NO RSVP — JUST SHOW UPon the centre guide below the band. Rename the layer Footer. Nudge it until it sits halfway between the band and the bottom edge, clear of the mortar line.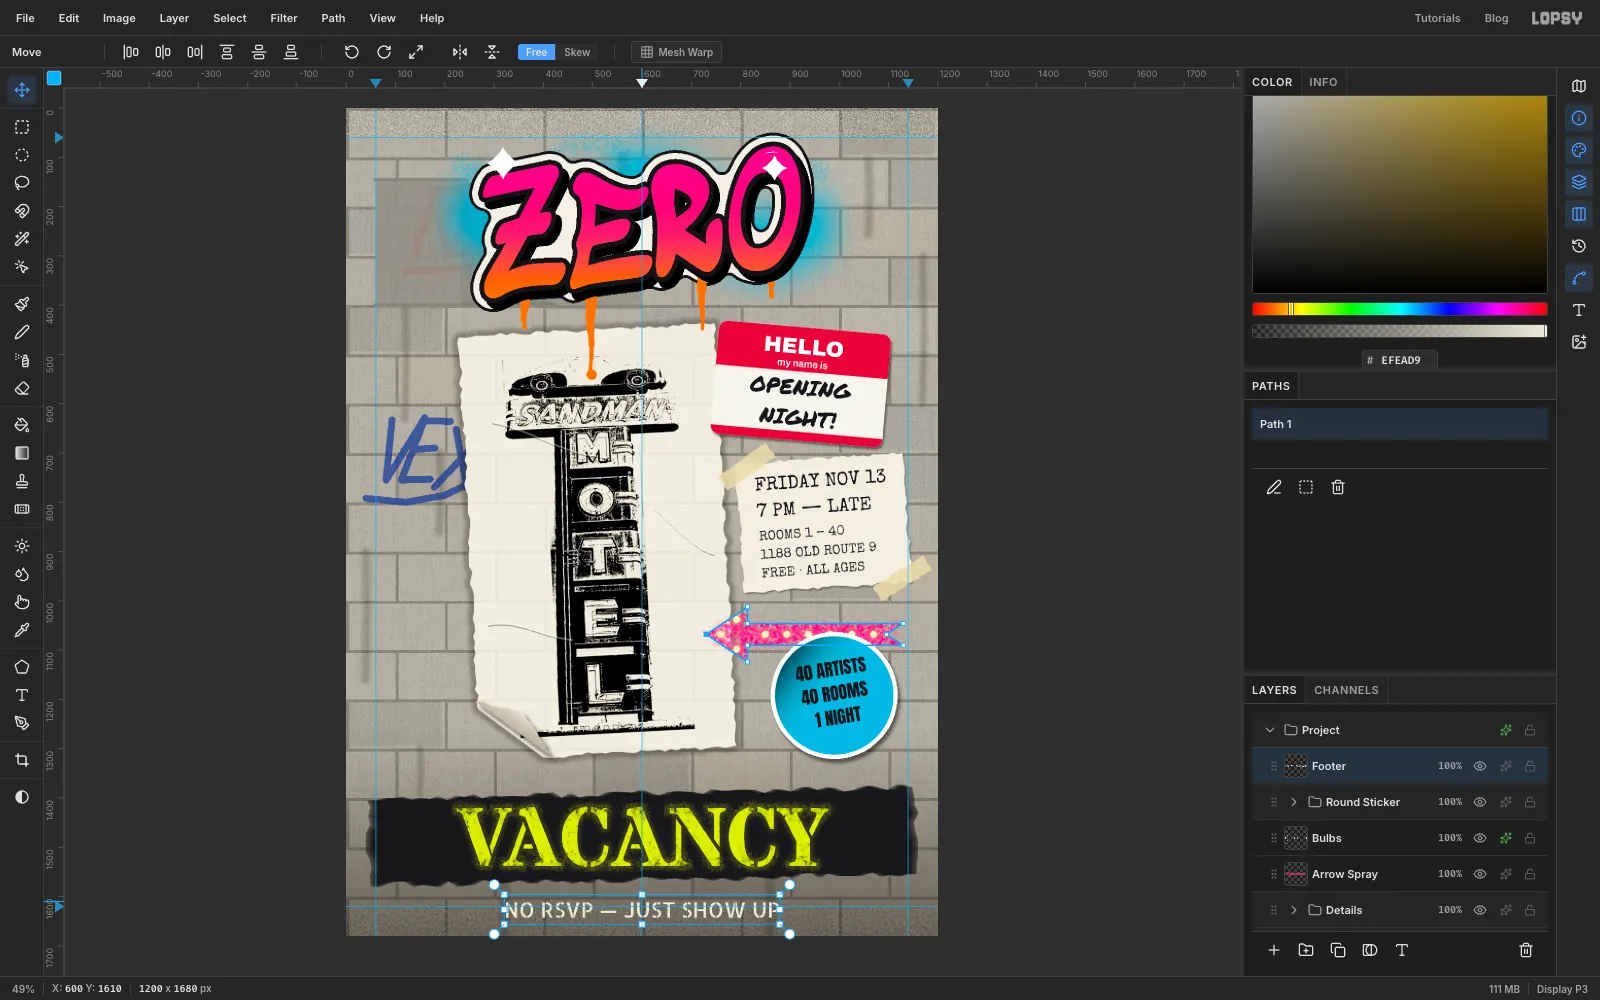
-
Flick some splatter
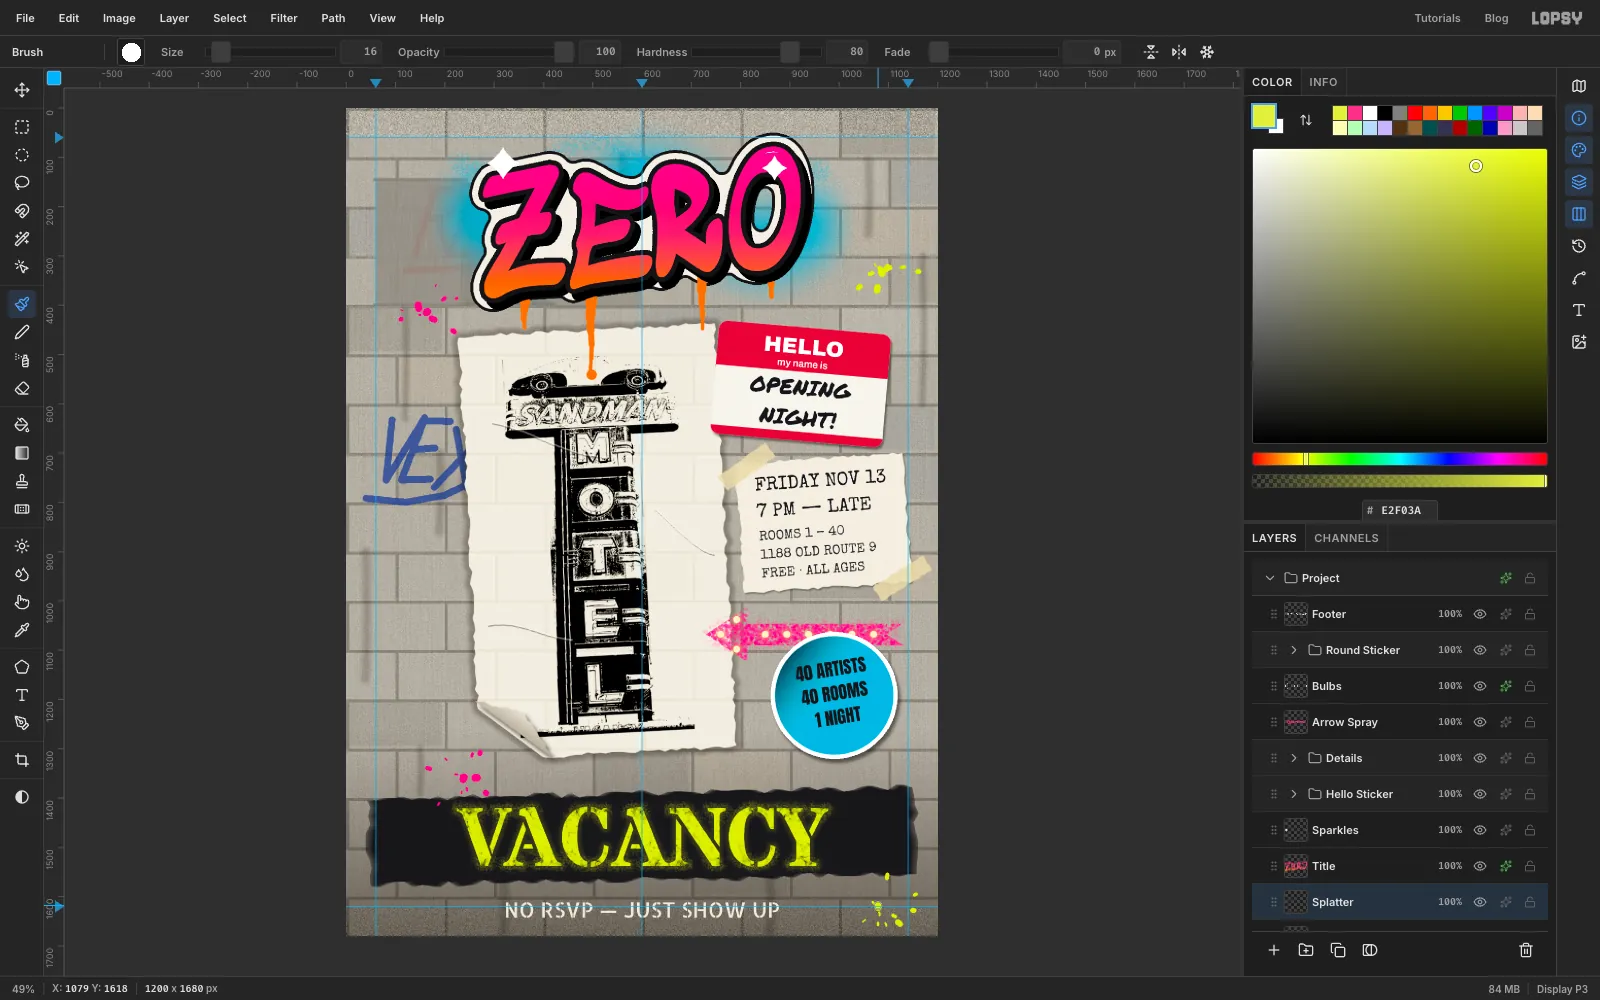
Click Title Drips and add a layer named Splatter. With the Brush, make clusters of a dozen or so flecks in hot pink and acid yellow. Make each fleck a click with a tiny flick outward, at sizes from about 4 to 18. Put the clusters near the paper's top-left and bottom-left corners, beside the title, and in the bottom-right corner, never on top of text.
When you're happy, choose Layer → Merge Down to fold the splatter into Title Drips.
-
Smear two drips longer
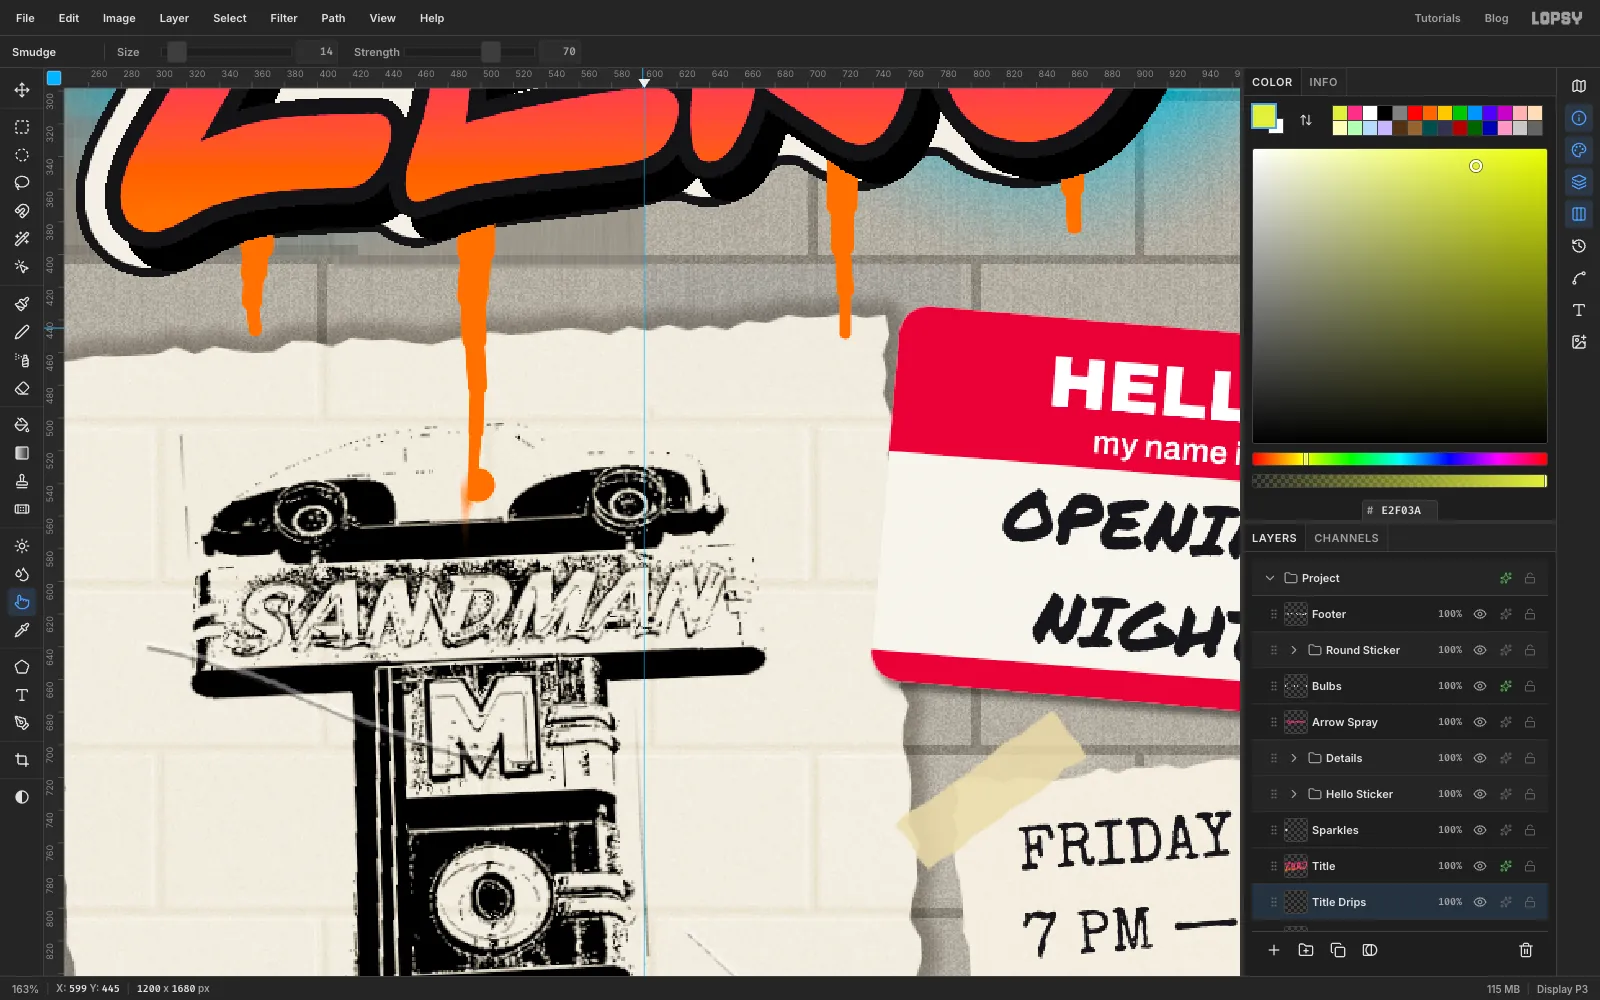
Click Title Drips. Pick the Smudge tool (R) at Size 14 and Strength 70, and drag down from just above the end of the second drip, then the third. Paint that's still wet keeps running, so the drips stretch out thinner and less even.
-
Wear down the old tag
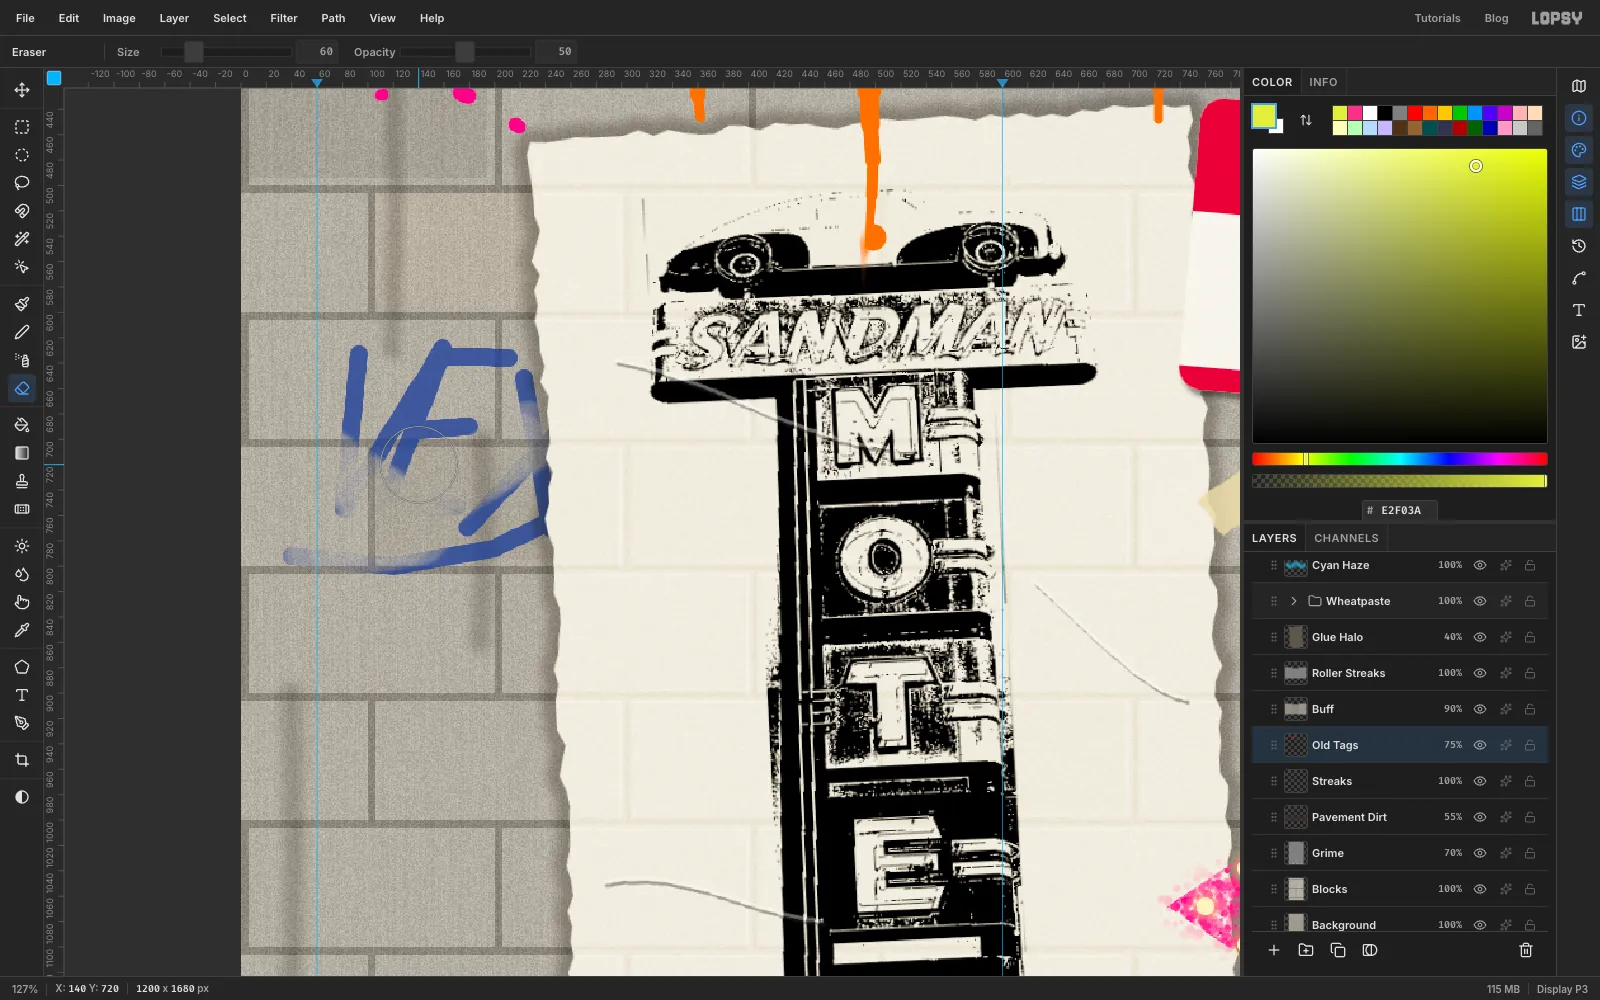
Click Old Tags and pick the Eraser (E) at Size 60 and Opacity 50. Drag once across the middle of the VEX tag and once along its underline. It fades unevenly, like a tag that's been scrubbed.
-
Burn the foot of the wall
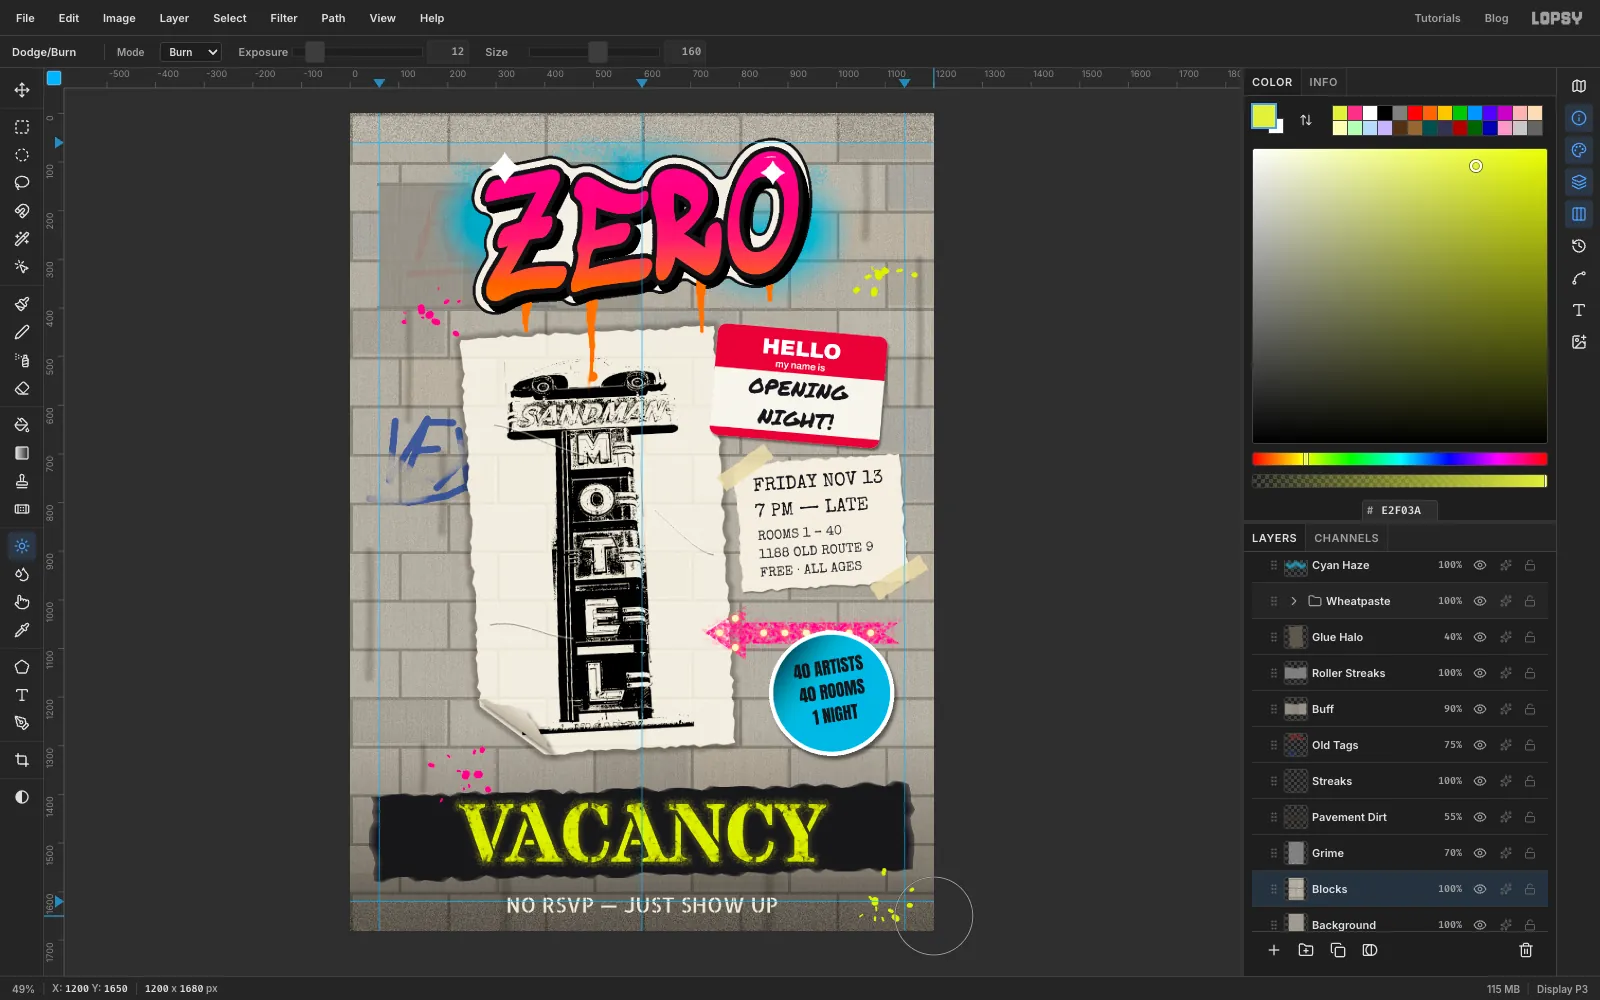
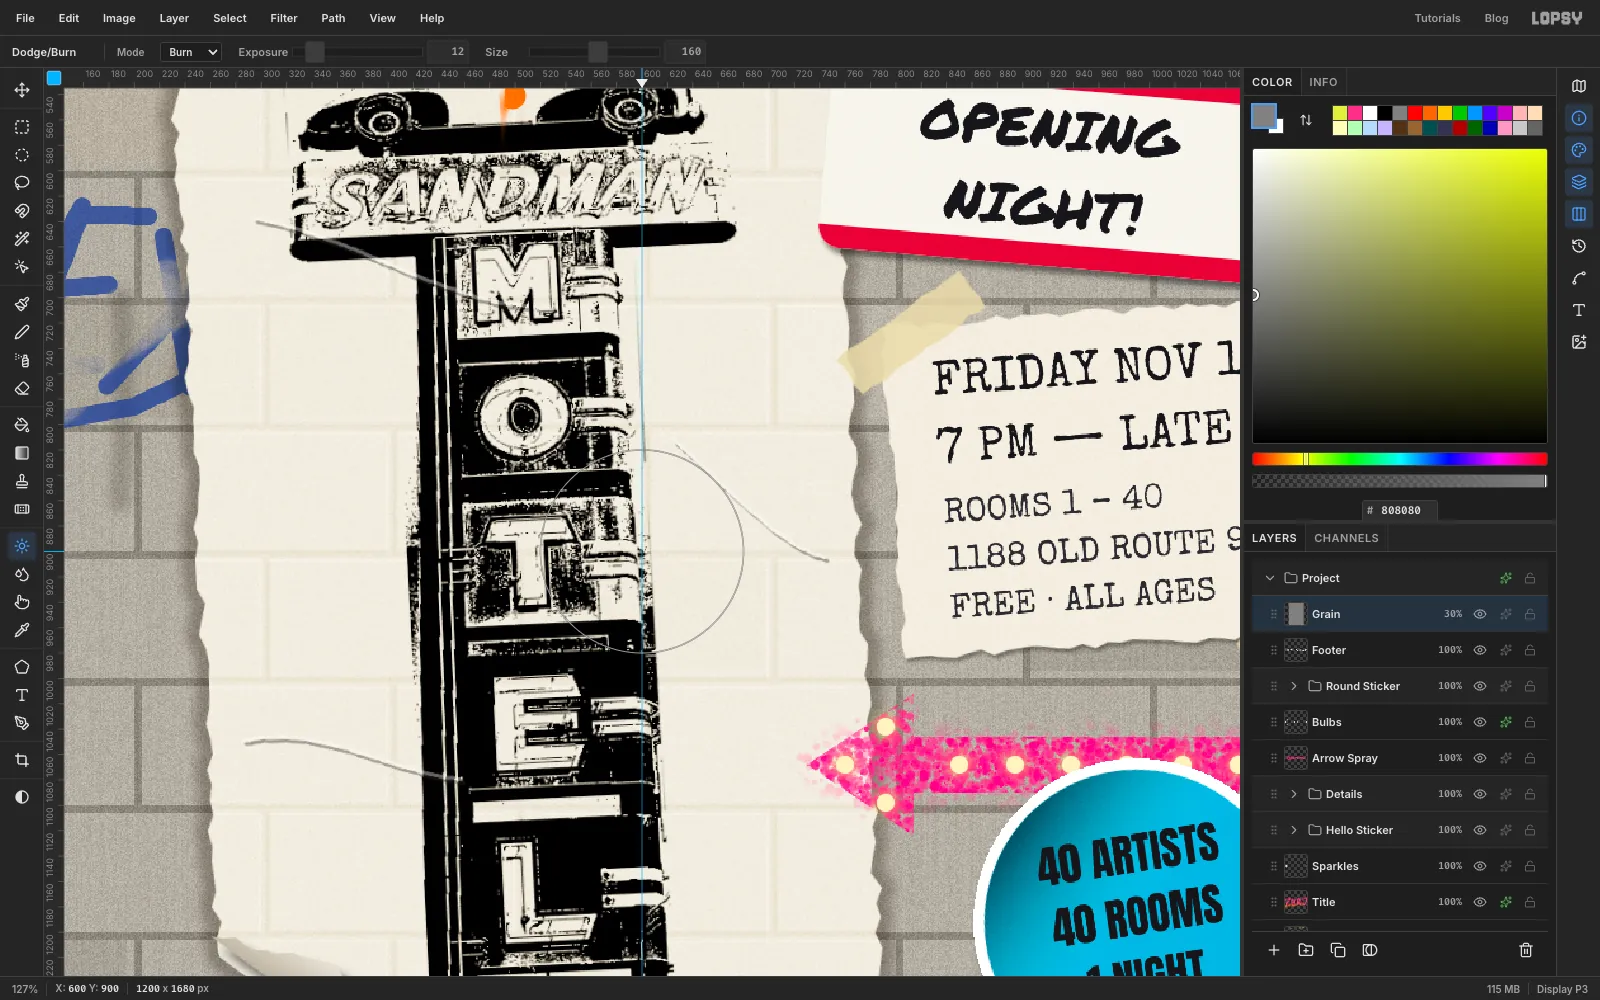
Click Blocks and pick the Dodge/Burn tool (O). Set its mode to Burn, Exposure to 12 and Size to 160, and drag once along the bottom edge of the page.
-
Add grain
Click Footer and add a layer named Grain. Choose Select → All, fill with , and deselect. Run Add Noise at 40 (Mono) and set the layer to Overlay at 30%. The grain ties the paint, paper and wall together.
-
Finish with a vignette
Add a layer named Vignette. Pick the Gradient tool set to Radial and, in Advanced, make three stops in : transparent at the start, still transparent at about 60%, and fully opaque at the end. Drag from the middle of the page out past a corner, then set the layer to Multiply at 45%.
Save with File → Save Project and export with File → Quick Export PNG.