Design a Swiss Style Blue Jay Tattoo Flash Sheet
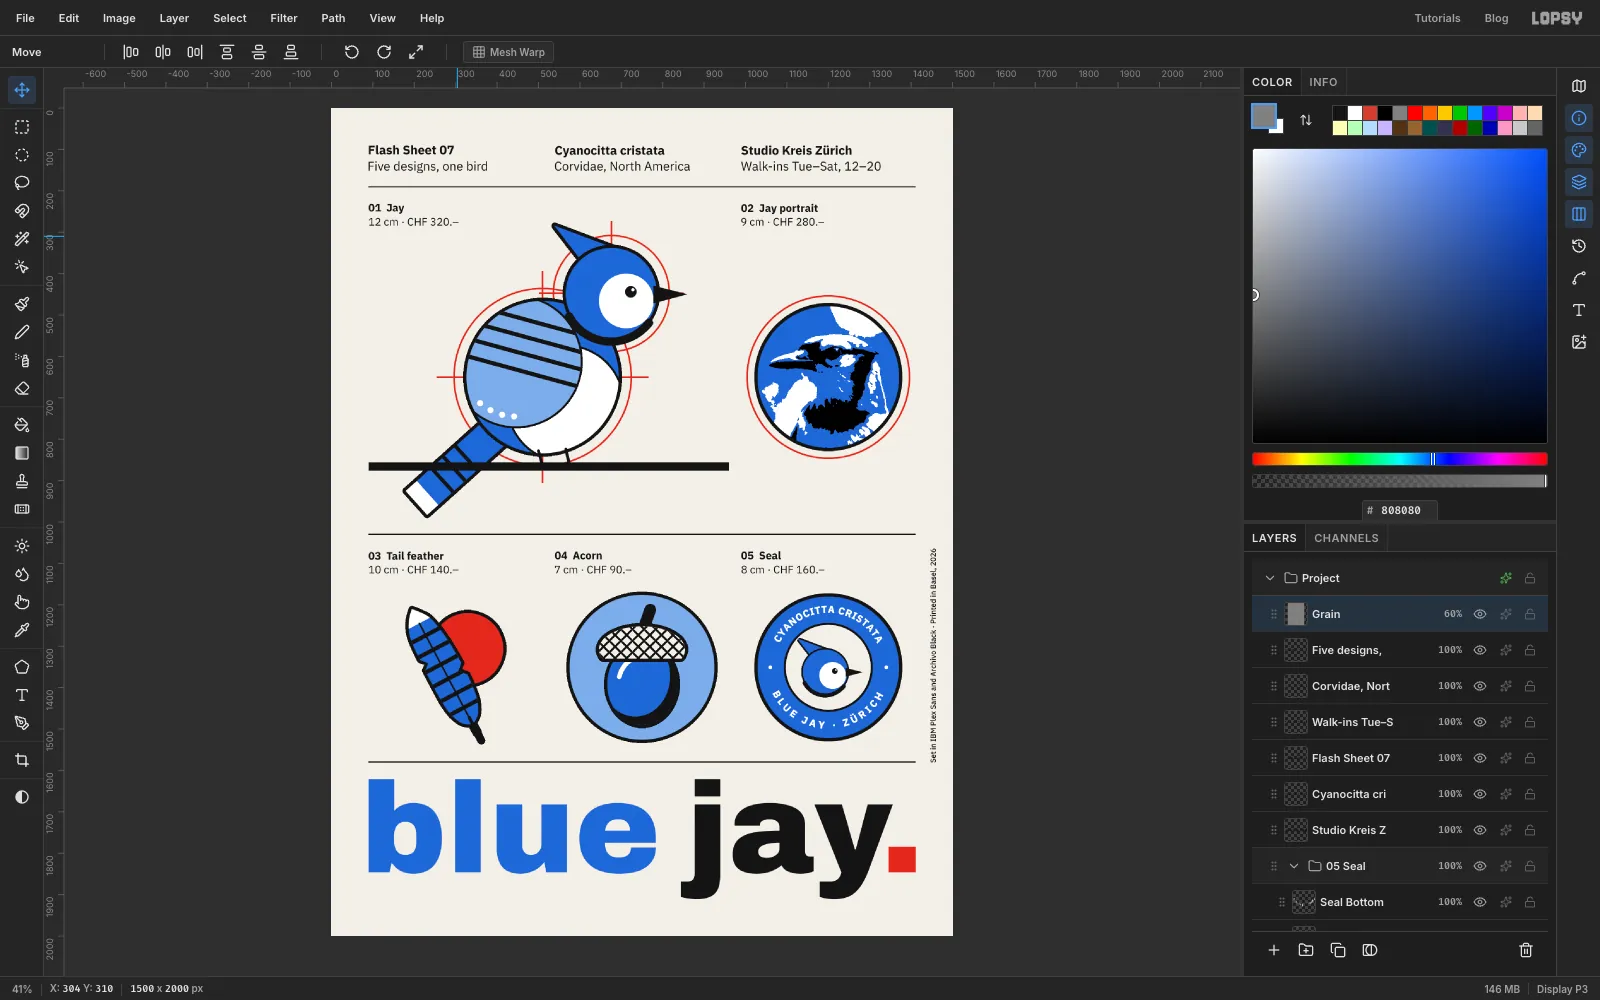
Make a Swiss Style tattoo flash sheet in Lopsy with a compass-drawn blue jay, a Threshold photo portrait, a seal with text on two arcs and a big grid title.
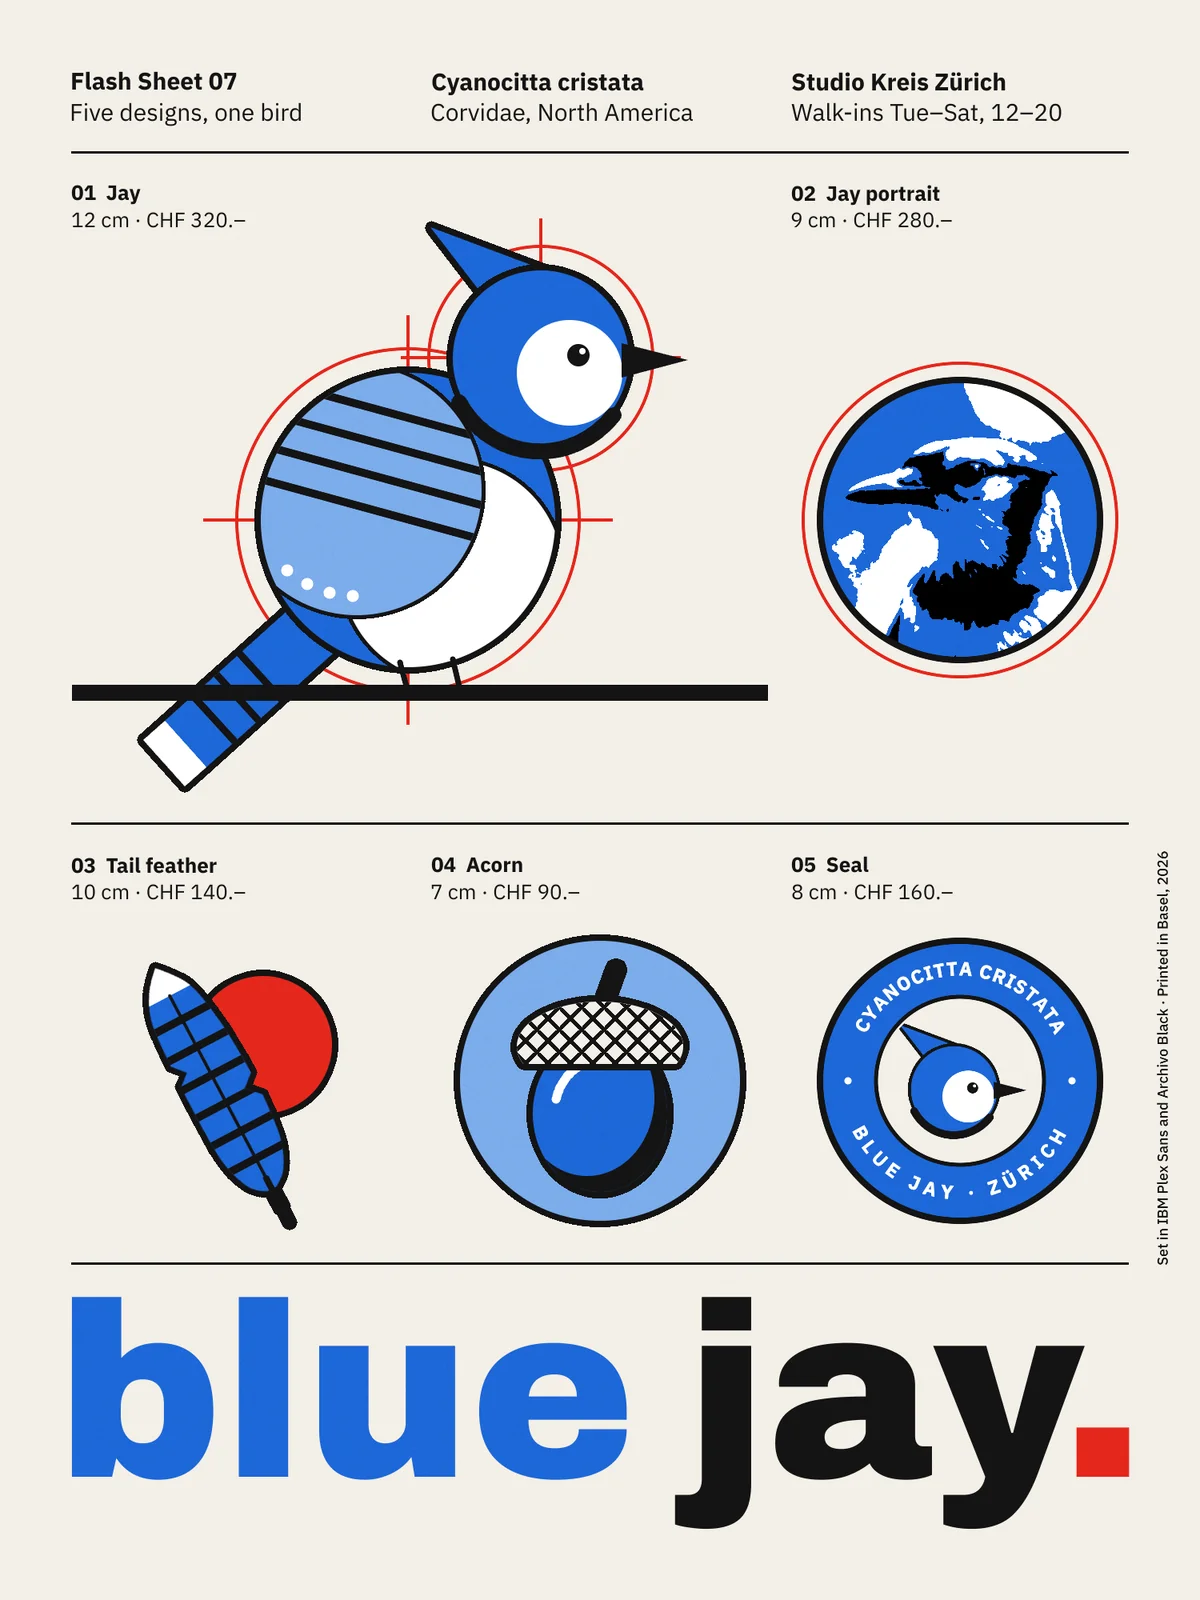
A tattoo flash sheet is a menu of ready-to-tattoo designs. Each design gets a number and a price, and clients pick one off the wall. This one borrows its look from Swiss International Style, the 1950s Zürich and Basel school of Josef Müller-Brockmann and Emil Ruder: a strict column grid, flush-left grotesk type, flat colour and lots of open paper.
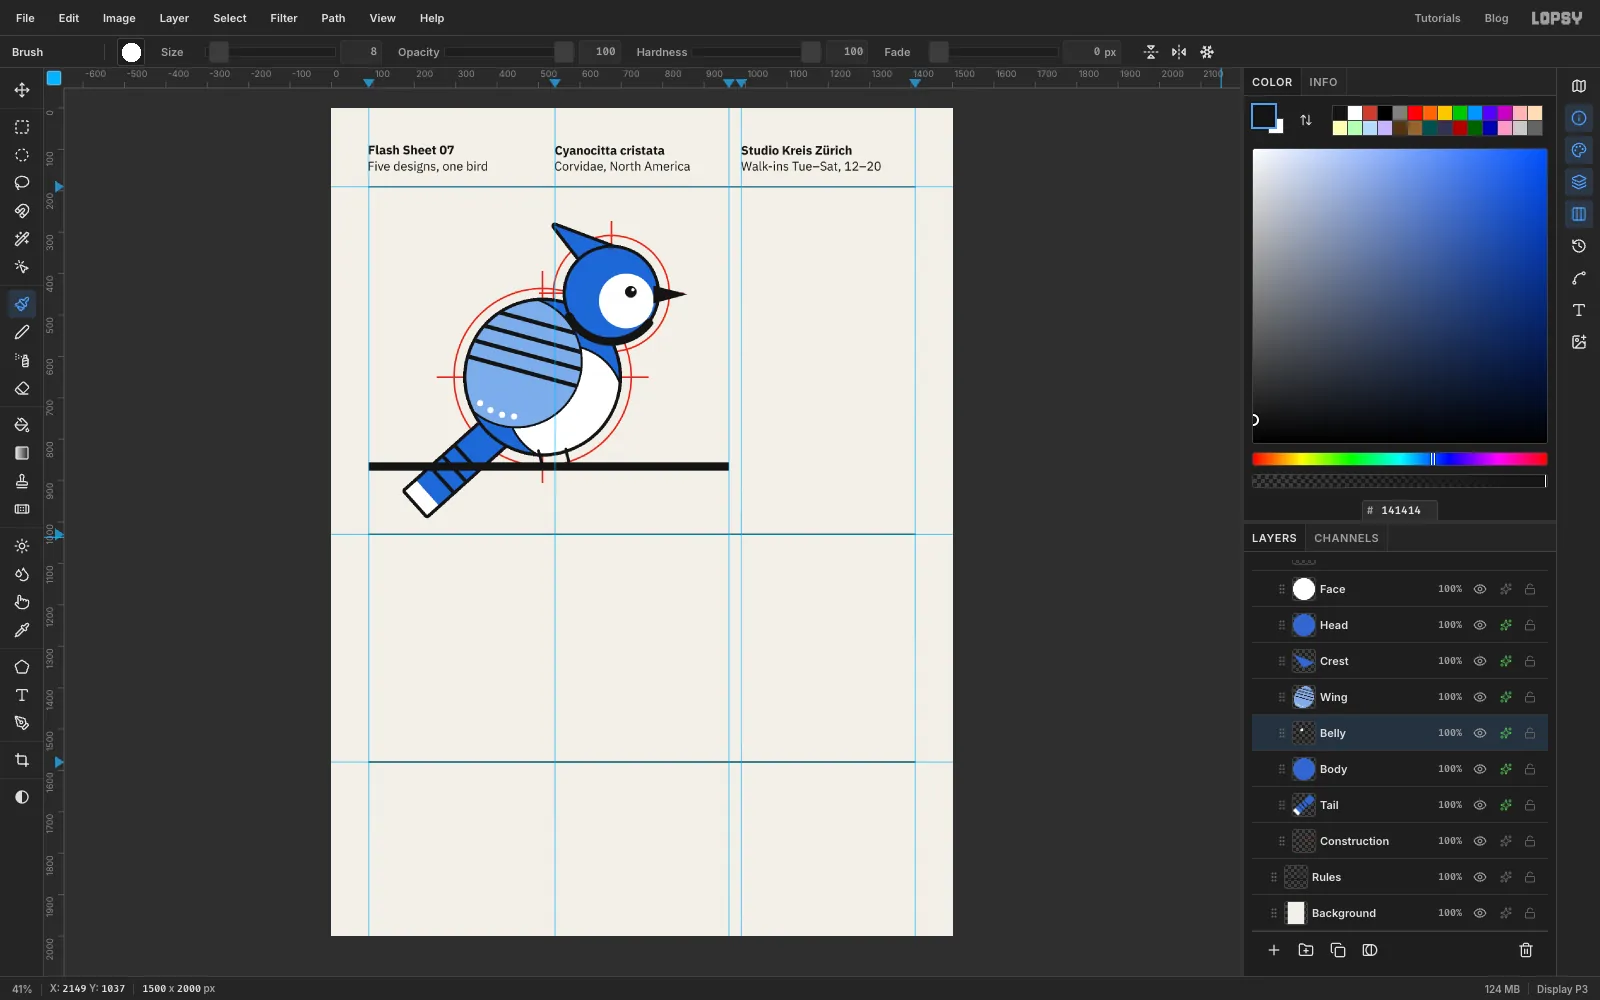
You'll make a 1500 × 2000 px sheet with five jay-themed designs. The first jay is drawn the way a compass drawing is built: from circles, with the red construction circles left showing behind it. Then you'll turn a photo into a three-tone screen-print portrait, draw a notched tail feather, an acorn with a pattern-filled cap and a round seal with text running around two arcs. A huge grid-fitted title goes across the bottom.
The palette:
-
Paper
-
ink
-
white
-
Jay blue
-
sky
-
Swiss red
Type: IBM Plex Sans (Regular, Medium and Bold) for everything small, and Archivo Black for the title.
You'll also need a photo of a blue jay for the portrait. This tutorial uses Blue Jay by Stephen Rahn.jpg) from Wikimedia Commons, which is public domain (CC0). Download it at 1280 px wide.
-
Set up the Swiss grid
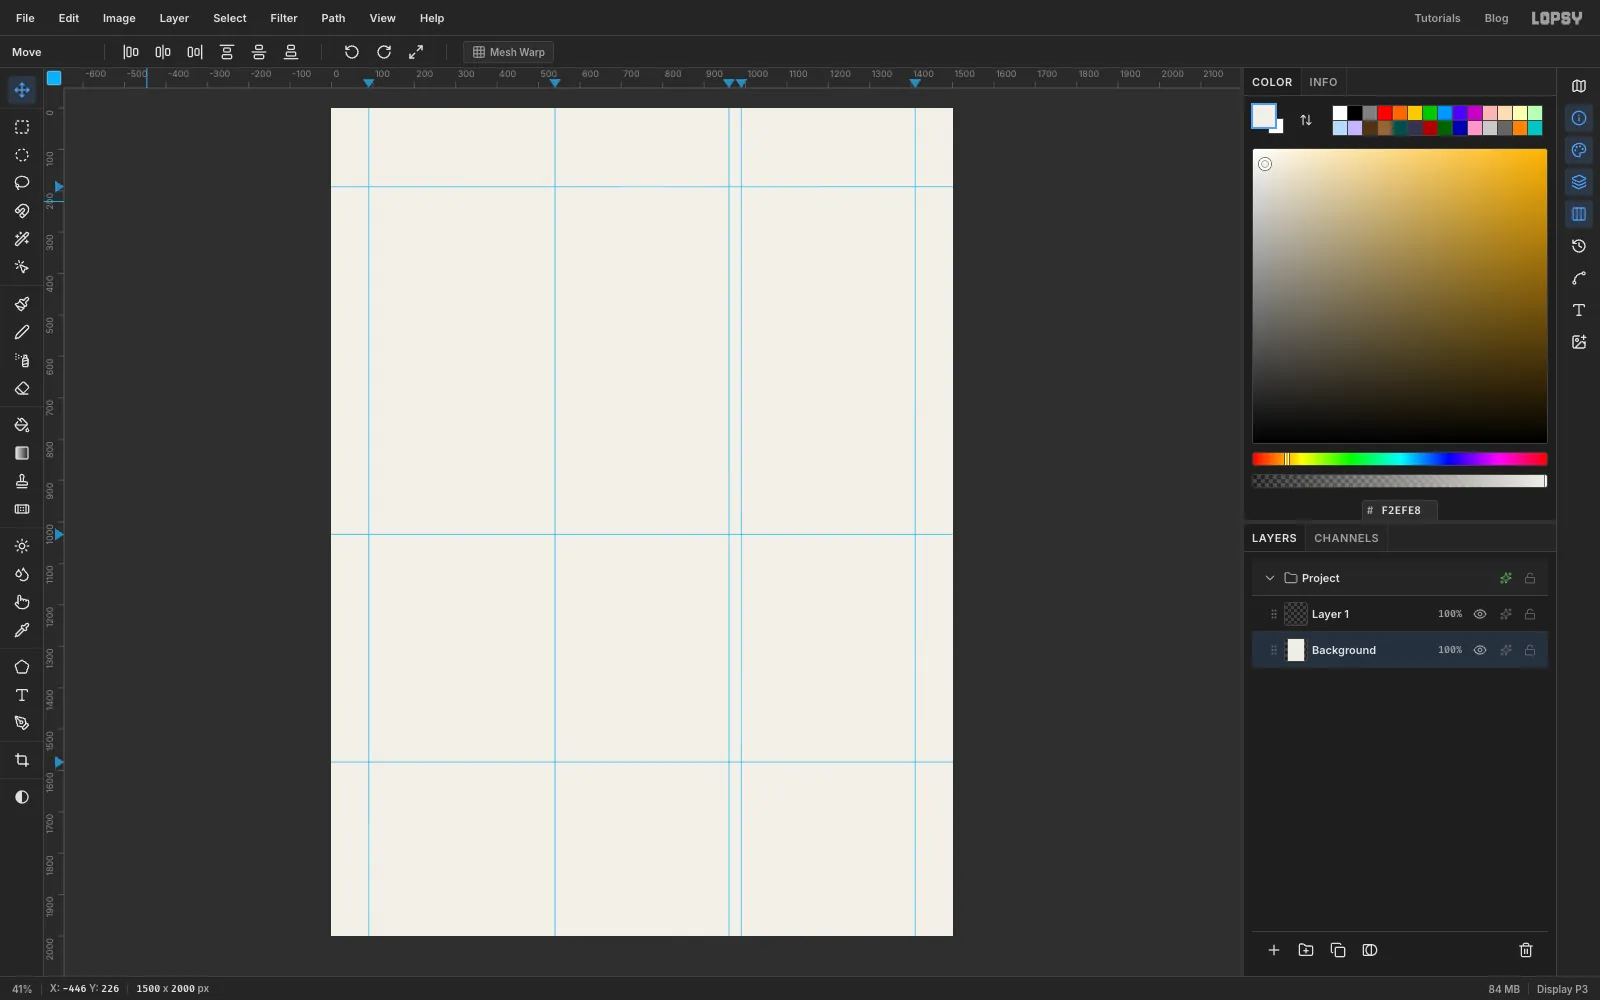
Choose File → New and create a 1500 × 2000 document. The grid has 90 px margins and six columns, each 195 px wide with 30 px gutters, so the columns start at x = 90, 315, 540, 765, 990 and 1215.
- Turn on View → Show Rulers.
- Click the top ruler to drop vertical guides at 90, 540, 960, 990 and 1410. Those are the left margin, the column 3 start, the two edges of the gutter before column 5, and the right margin.
- Click the left ruler to drop horizontal guides at 190, 1030 and 1580. Those are where the three black rules will go.
- Select Background, set the foreground to and choose Edit → Fill. With no selection it fills the whole layer.
Every coordinate in this tutorial is in document pixels. The X / Y readout at the bottom left of the status bar shows where the cursor is, so hover there to find a point before you click.
-
Rule the page and set the header
Rename Layer 1 to Rules. Pick the Pencil (N), set Size to 3 and the foreground to . For each rule, click the left margin on the guide, then hold Shift+Cmd and click the right margin. Shift draws a straight line from the last point, and Cmd snaps it to the nearest 15°, so the rule stays dead level from x 90 to x 1410 at y 190, 1030 and 1580.
Now the header. Pick the Text tool (T), set the font to IBM Plex Sans, Regular and 30. Create the lower line of each column first: a Text click inside an existing line's box edits that line instead of starting a new one.
- Column 1 at x 90:
Five designs, one bird - Column 3 at x 540:
Corvidae, North America - Column 5 at x 990:
Walk-ins Tue–Sat, 12–20
On a Mac, the en dash – is Option+-, the middle dot · is Option+Shift+9, and Ü is Option+U then Shift+U. You'll need them in the labels and the seal too.
Press Tab to commit each one, then click the Rules layer before you start the next. With a text layer selected, the Text options restyle it.
Switch to Bold and add the upper lines above them:
Flash Sheet 07,Cyanocitta cristataandStudio Kreis Zürich. With the Move tool (V), nudge each line with the arrow keys so the bold caps start at y 90, the regular caps about 39 px lower, and every line's left edge sits exactly on its guide. Zoom in and hover the top of a capital to read its Y in the status bar.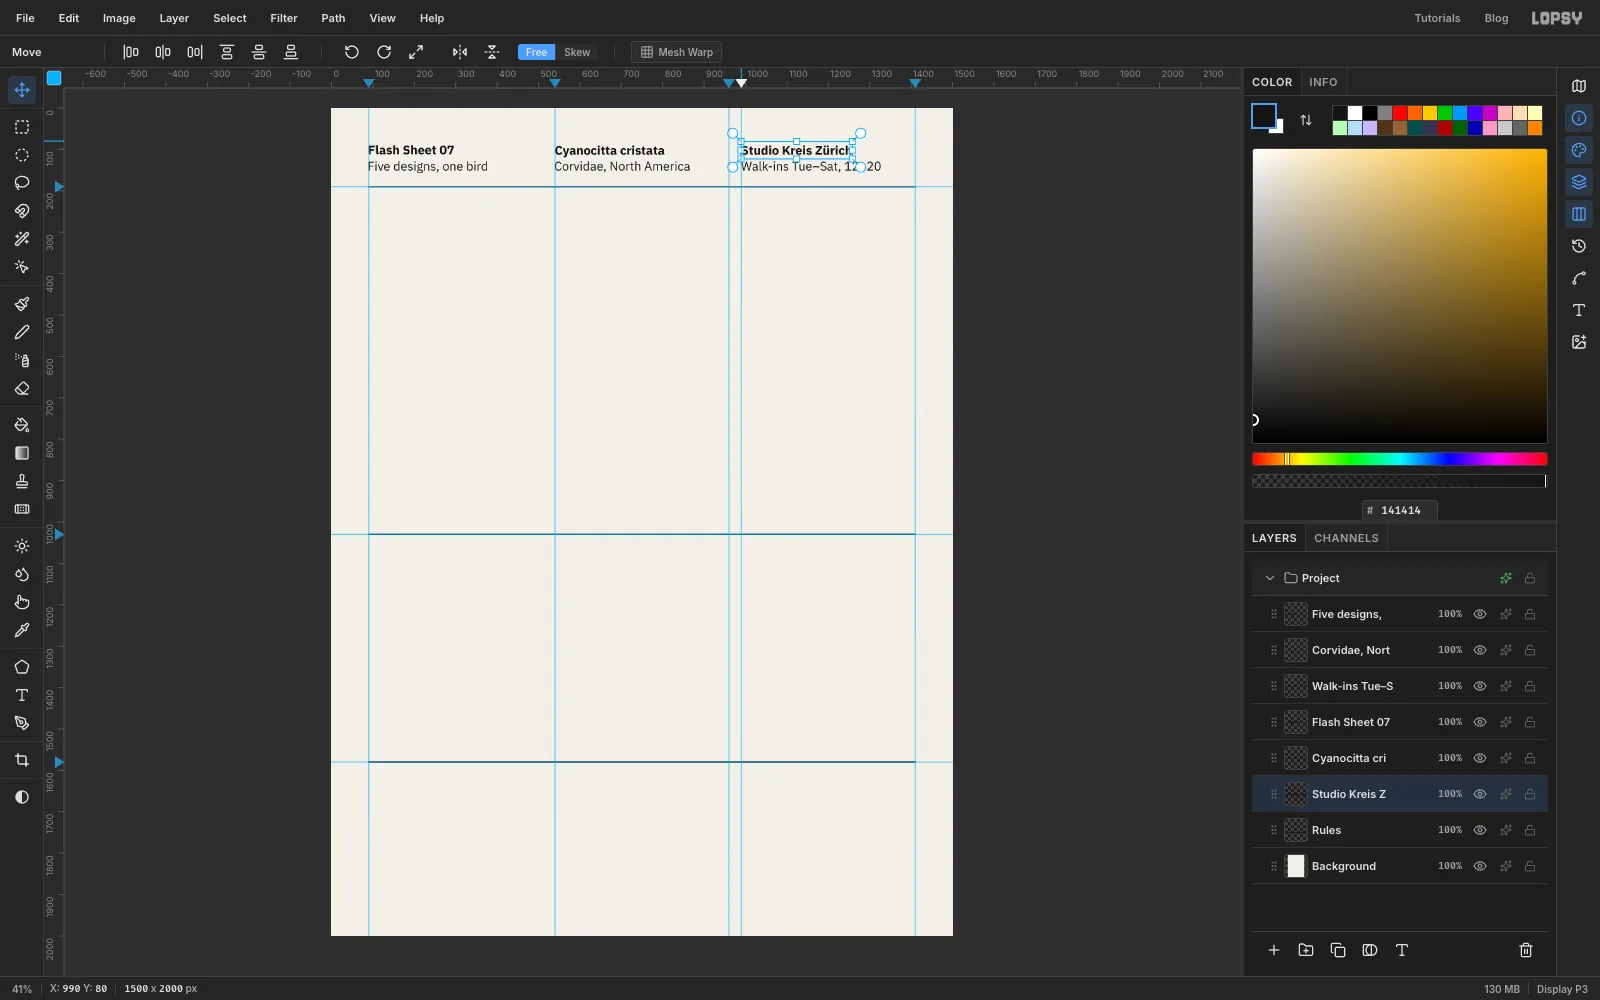
- Column 1 at x 90:
-
Draw the compass circles
Every part of the jay is a circle, so start with the construction drawing. With Rules selected, click New Group in the Layers panel and name it 01 Jay. Click Add Layer and name the new layer Construction. It goes inside the group.
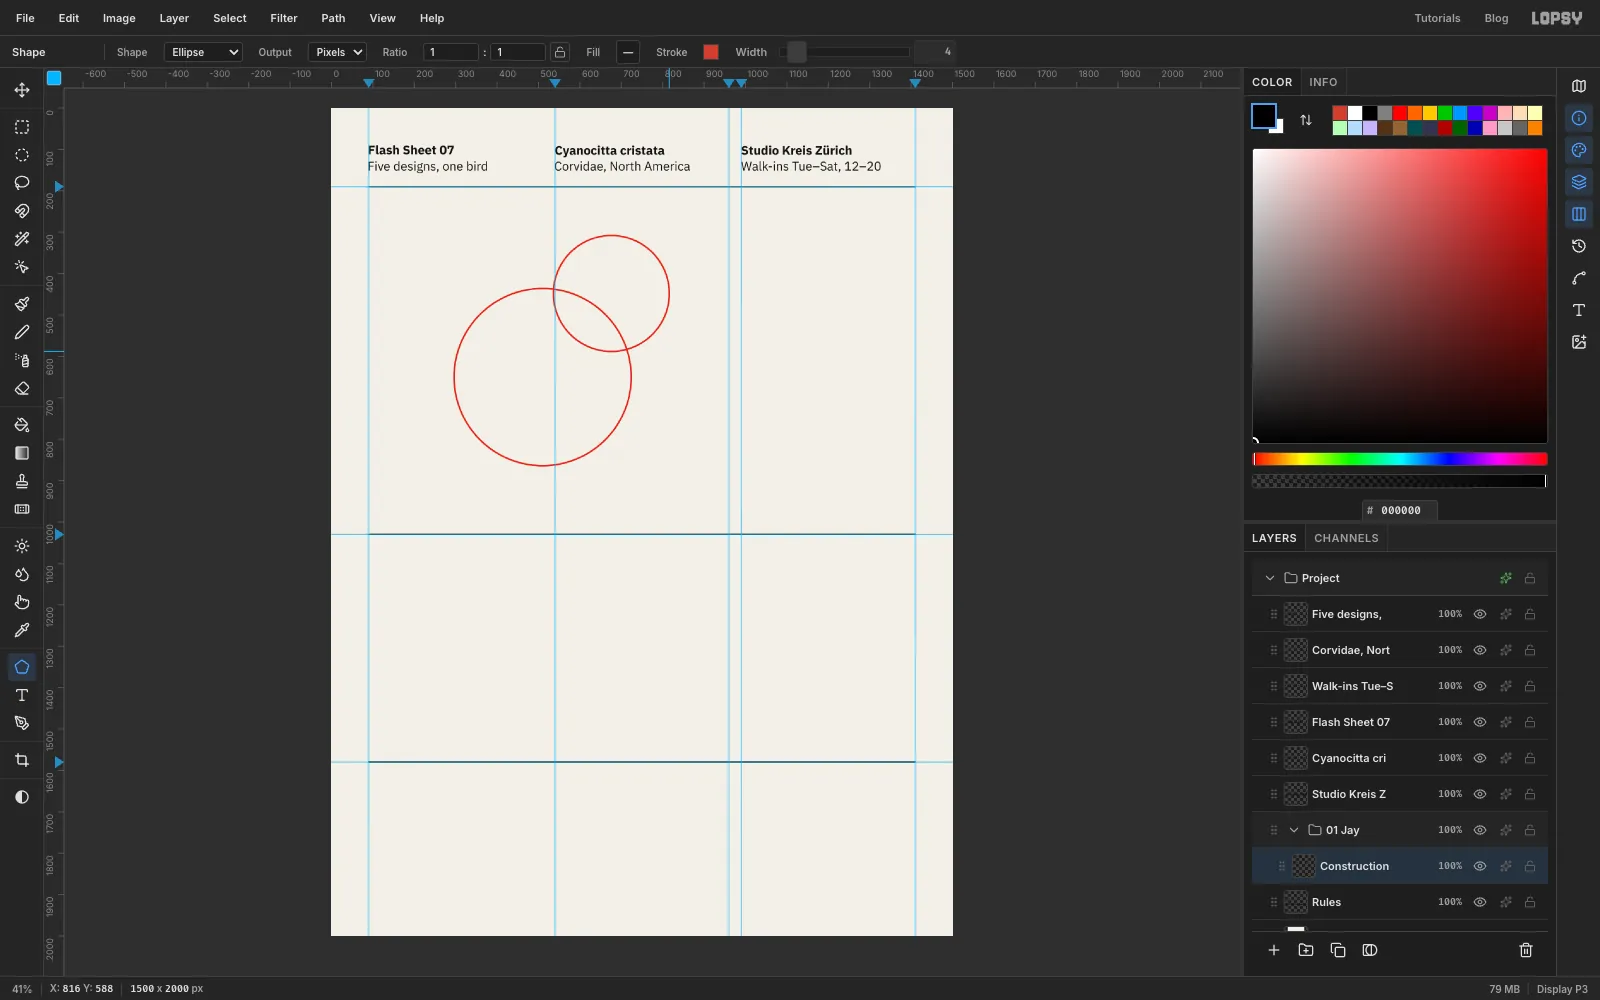
Pick the Shape tool (U) and set Shape to Ellipse and Output to Pixels. Click the Fill swatch and choose Remove fill. Then click the Stroke — button, type
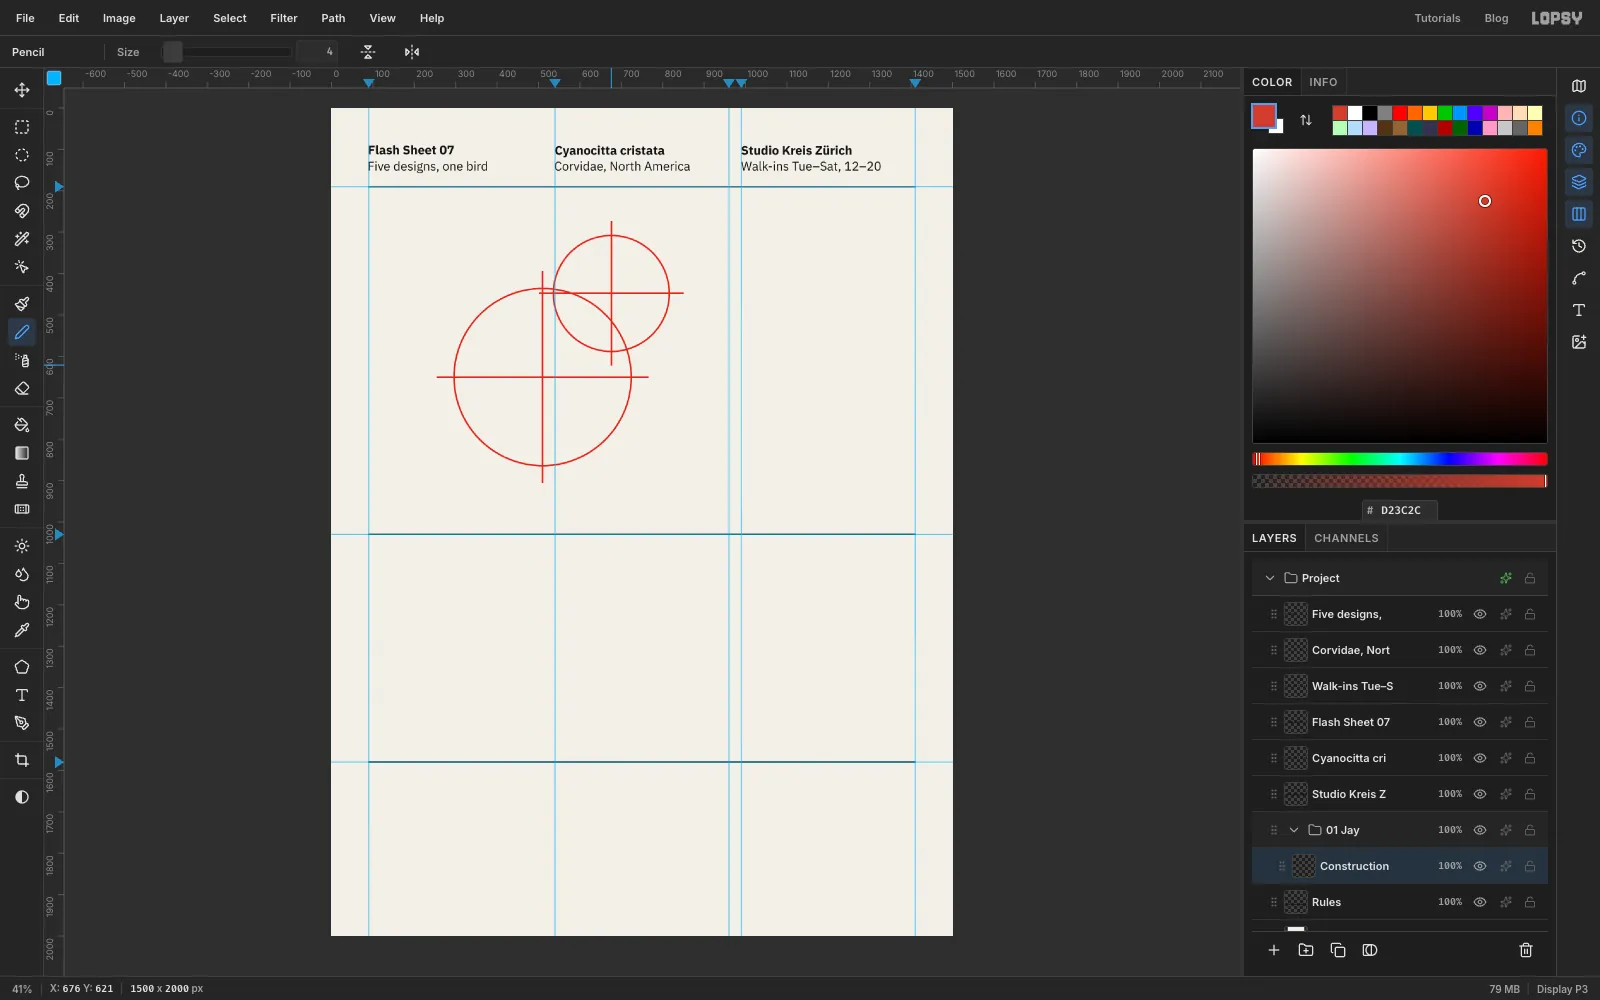
D23C2Cin its hex field, and set Width to 4.A shape grows out from where you press, so press at the centre, hold Cmd for a perfect circle and drag diagonally down and to the right. The point you drag to is the corner of the circle's box:
- Body ring: press at (510, 650) and drag to (724, 864), a radius of 214.
- Head ring: press at (676, 448) and drag to (816, 588), a radius of 140.
These rings sit 30 px outside the body and head you'll draw next, the way a draughtsman's compass lines frame a drawing.
-
Add the cross-hairs
Pick the Pencil, set Size to 4 and the foreground to . Draw a horizontal and a vertical line through each centre with click, then Shift+Cmd+click:
- Body: from x 256 to x 764 at y 650, and from y 396 to y 904 at x 510. That runs 40 px past the ring on every side.
- Head: from x 503 to x 849 at y 448, and from y 275 to y 621 at x 676.
Keep the overshoot the same on all four arms. Uneven arms are the first thing that makes a construction drawing look sloppy.
-
Draw the tail with the Pen
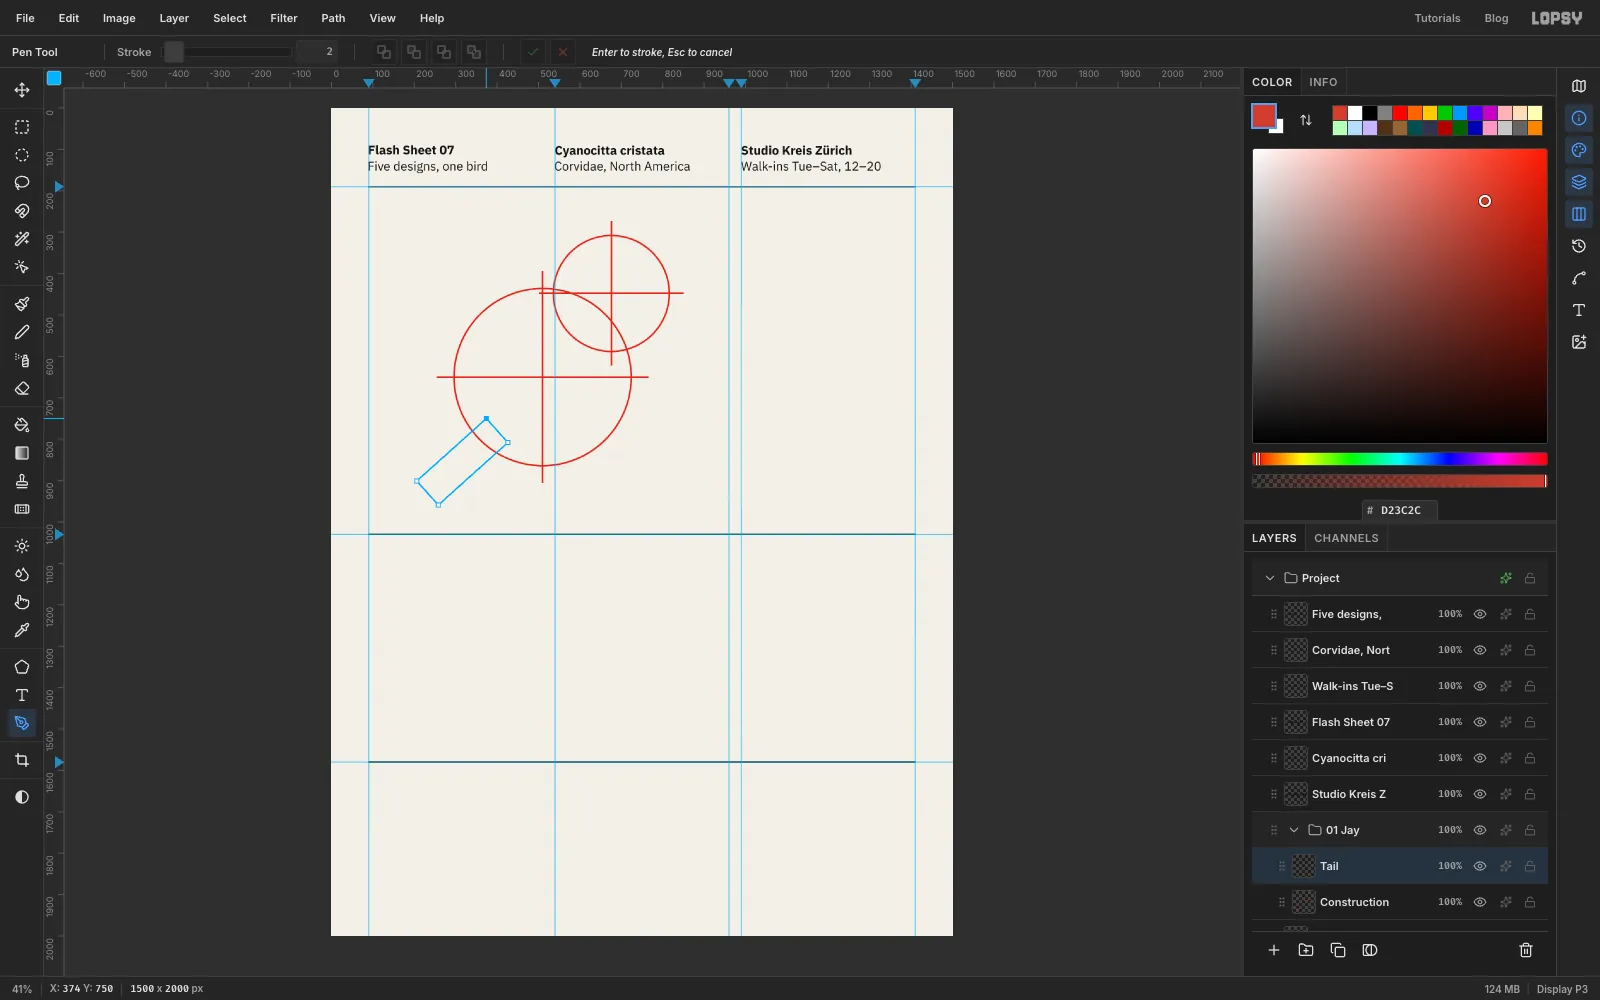
Click Add Layer and name it Tail. The tail is a straight bar 78 px wide and about 260 px long, angled down to the left at 138°.
Pick the Pen tool (P) and click its four corners without dragging, so each one is a sharp corner: two corners side by side under the body circle near (374, 750) and (426, 808), then two at the far end near (231, 983) and (179, 925). Click the first corner again to close the path.
Open the Paths panel, click Path to Selection, then Delete Path so the outline doesn't get in the way. Set the foreground to and choose Edit → Fill.
-
Bar the tail and add its white tip
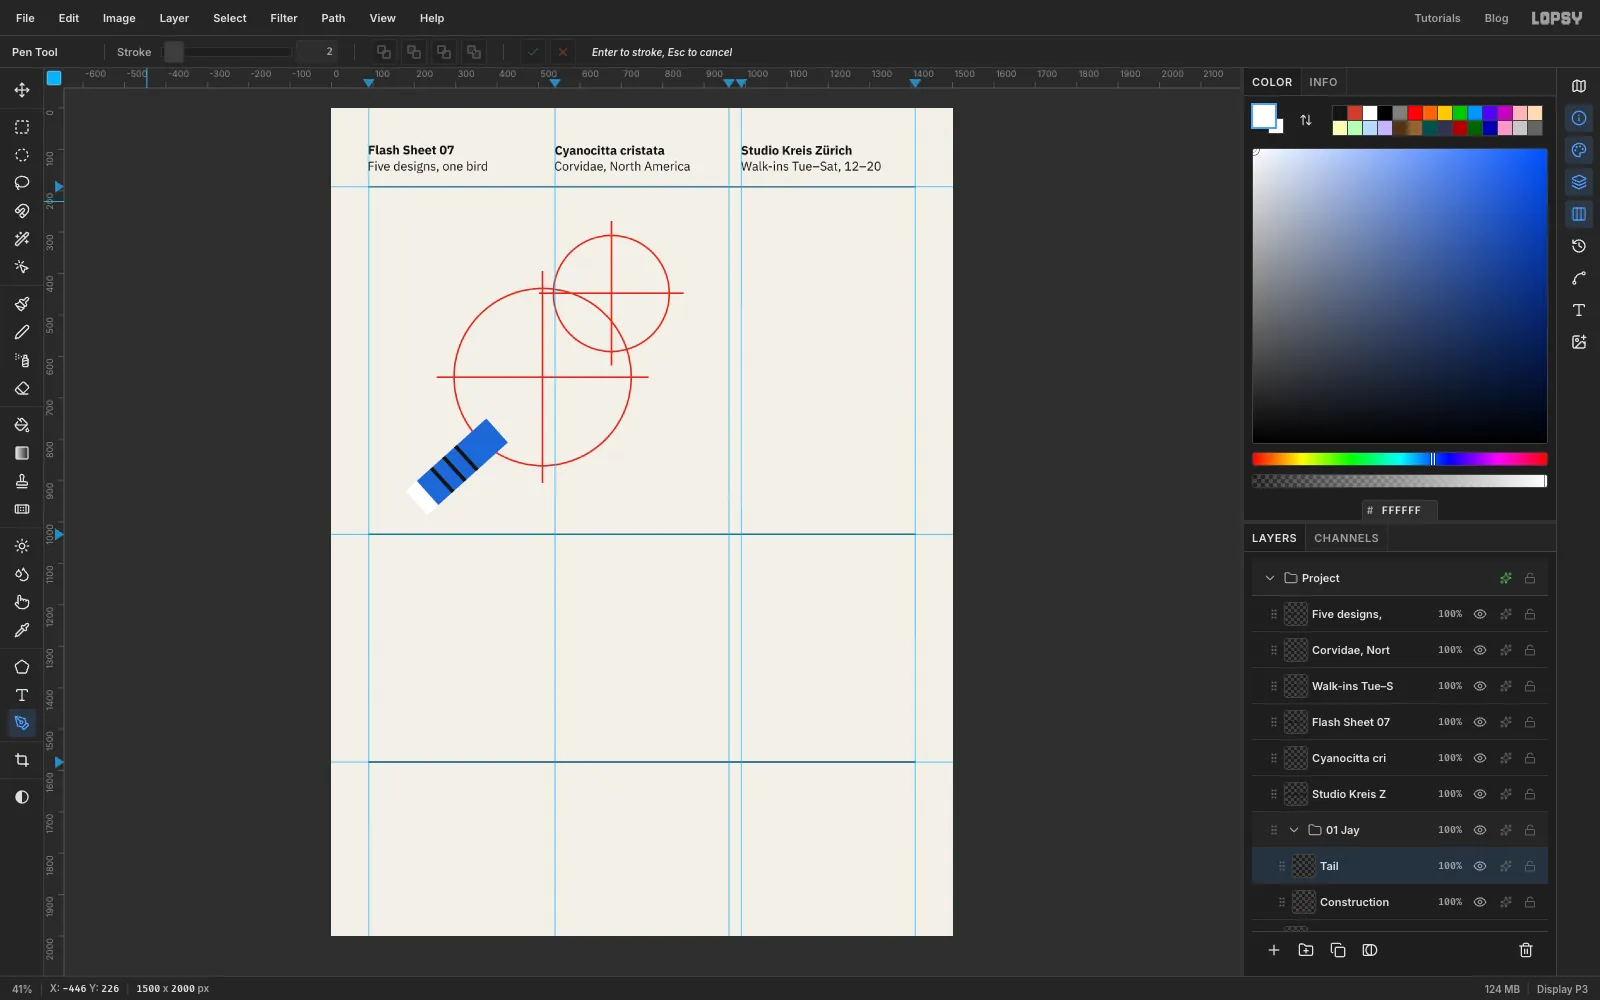
Leave the tail selection on, because it will clip the brush. Pick the Brush (B). Open the brush settings and set Size 10, Hardness 100 and Spacing 5. Set the foreground to . Draw three bars straight across the tail, spaced evenly along its middle, by clicking just outside one long edge and Shift+clicking just outside the other. The selection trims the ends.
Press Cmd+D. For the tip, draw a second four-corner Pen path covering the last 14 % of the tail, with corners at (207, 900), (259, 958), (231, 983) and (179, 925). Turn it into a selection, delete the path, and fill it with . A filled selection gives a hard edge. A big brush stroke would leave a soft one.
-
Cut the belly from the body
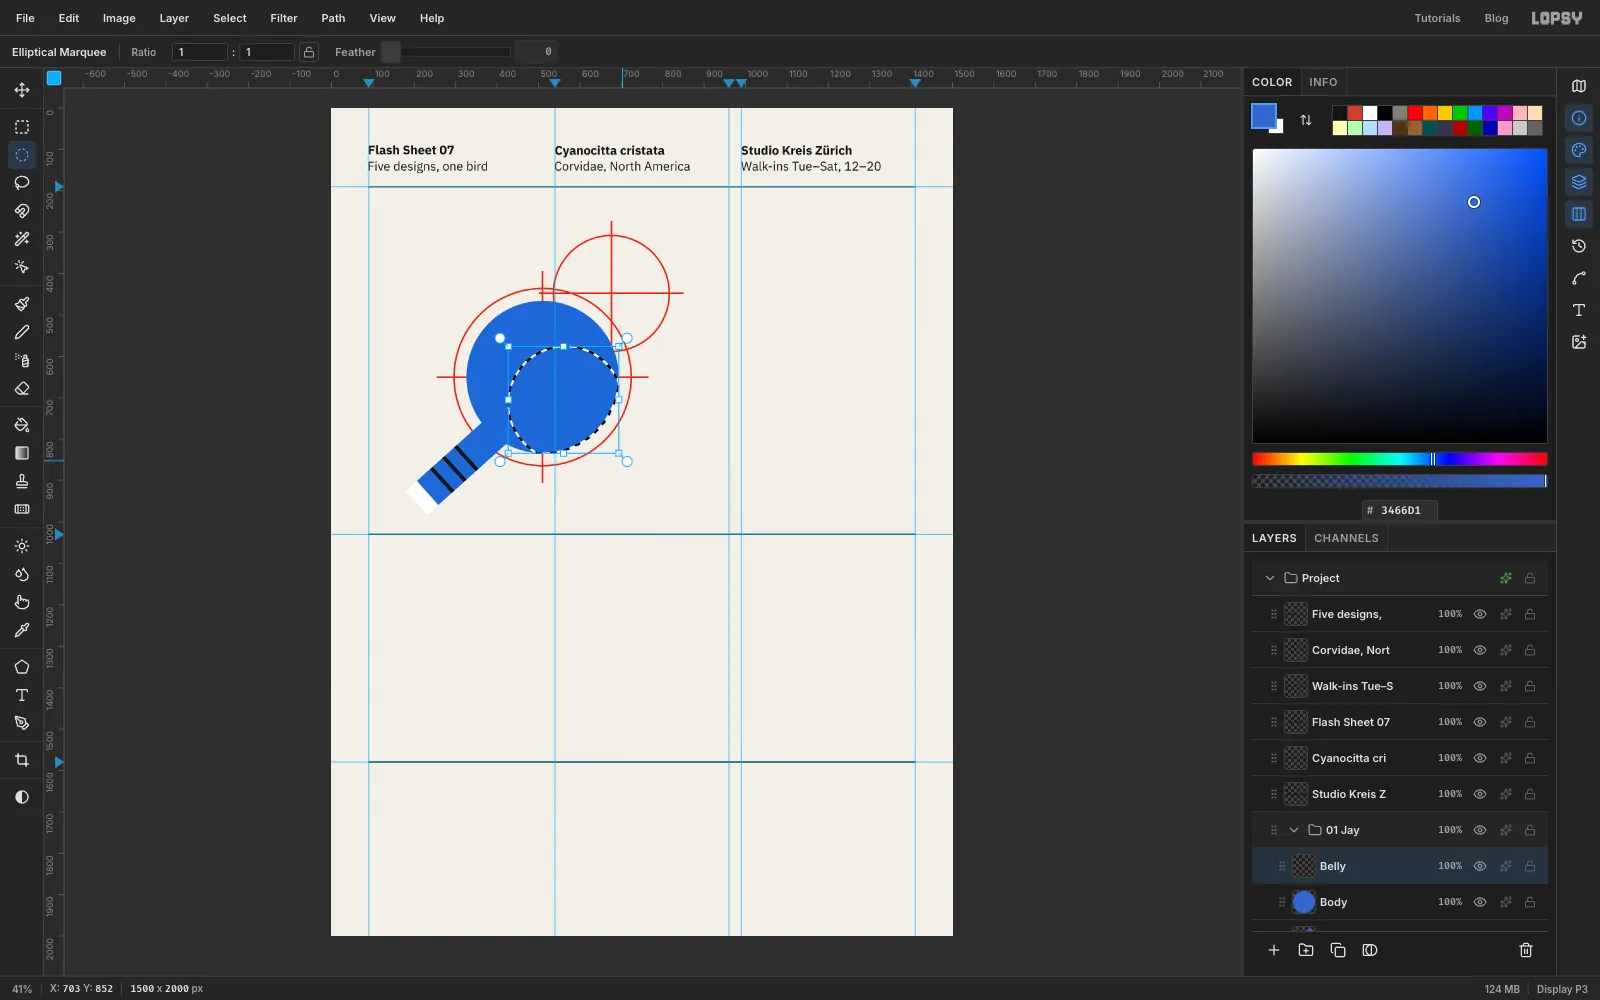
Click Add Layer and name it Body. Pick the Elliptical Marquee and click once on the canvas without dragging to open the exact-corners dialog. Enter From 326, 466 and To 694, 834. That's a circle of radius 184 on the body centre. Fill it with .
Click Add Layer and name it Belly. Make the same body circle again, then hold Shift+Option and drag a second circle centred on (565, 714) with a radius of 138, from (427, 576) to (703, 852). Shift+Option intersects, so you're left with only the part of the belly circle that's inside the body. Fill it with .
-
Stripe the wing
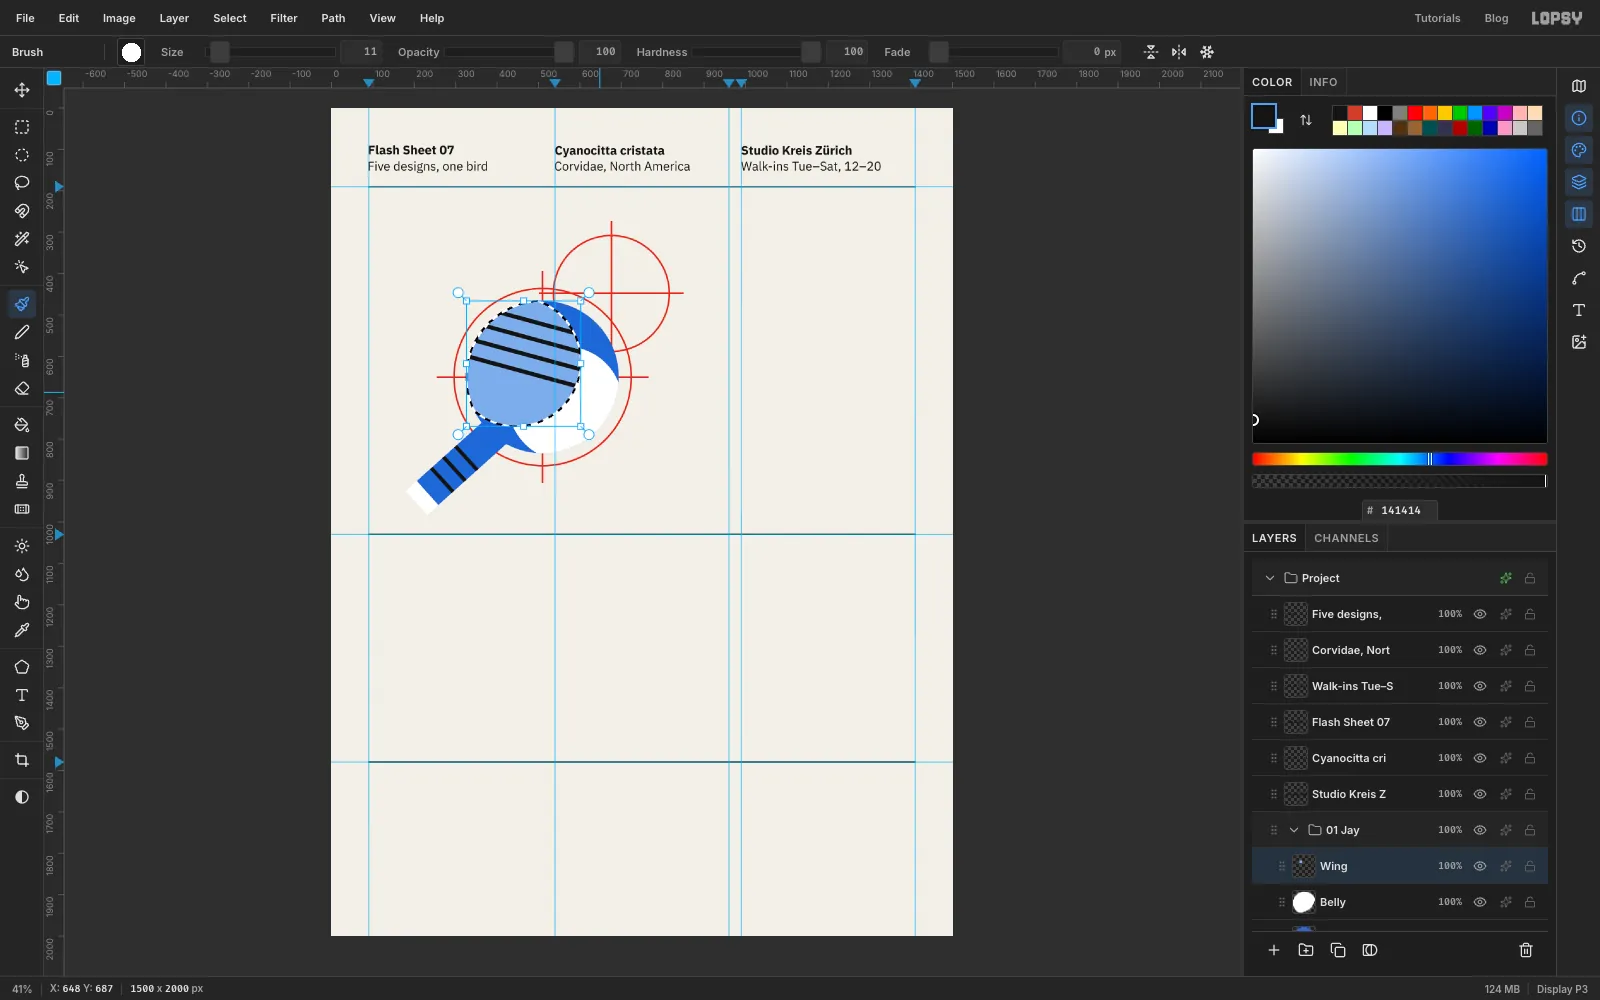
Click Add Layer and name it Wing. Make the body circle once more and Shift+Option-drag the wing circle from (290, 457) to (602, 769): centre (446, 613), radius 156. Fill it with .
Keep the selection. Set the Brush Size to 11 and the foreground to . Draw four parallel bars that slope gently down to the right across the wing, about 42 px apart, with click and Shift+click. Start and end each one outside the wing so the selection makes a clean cut.
-
Dot the wing
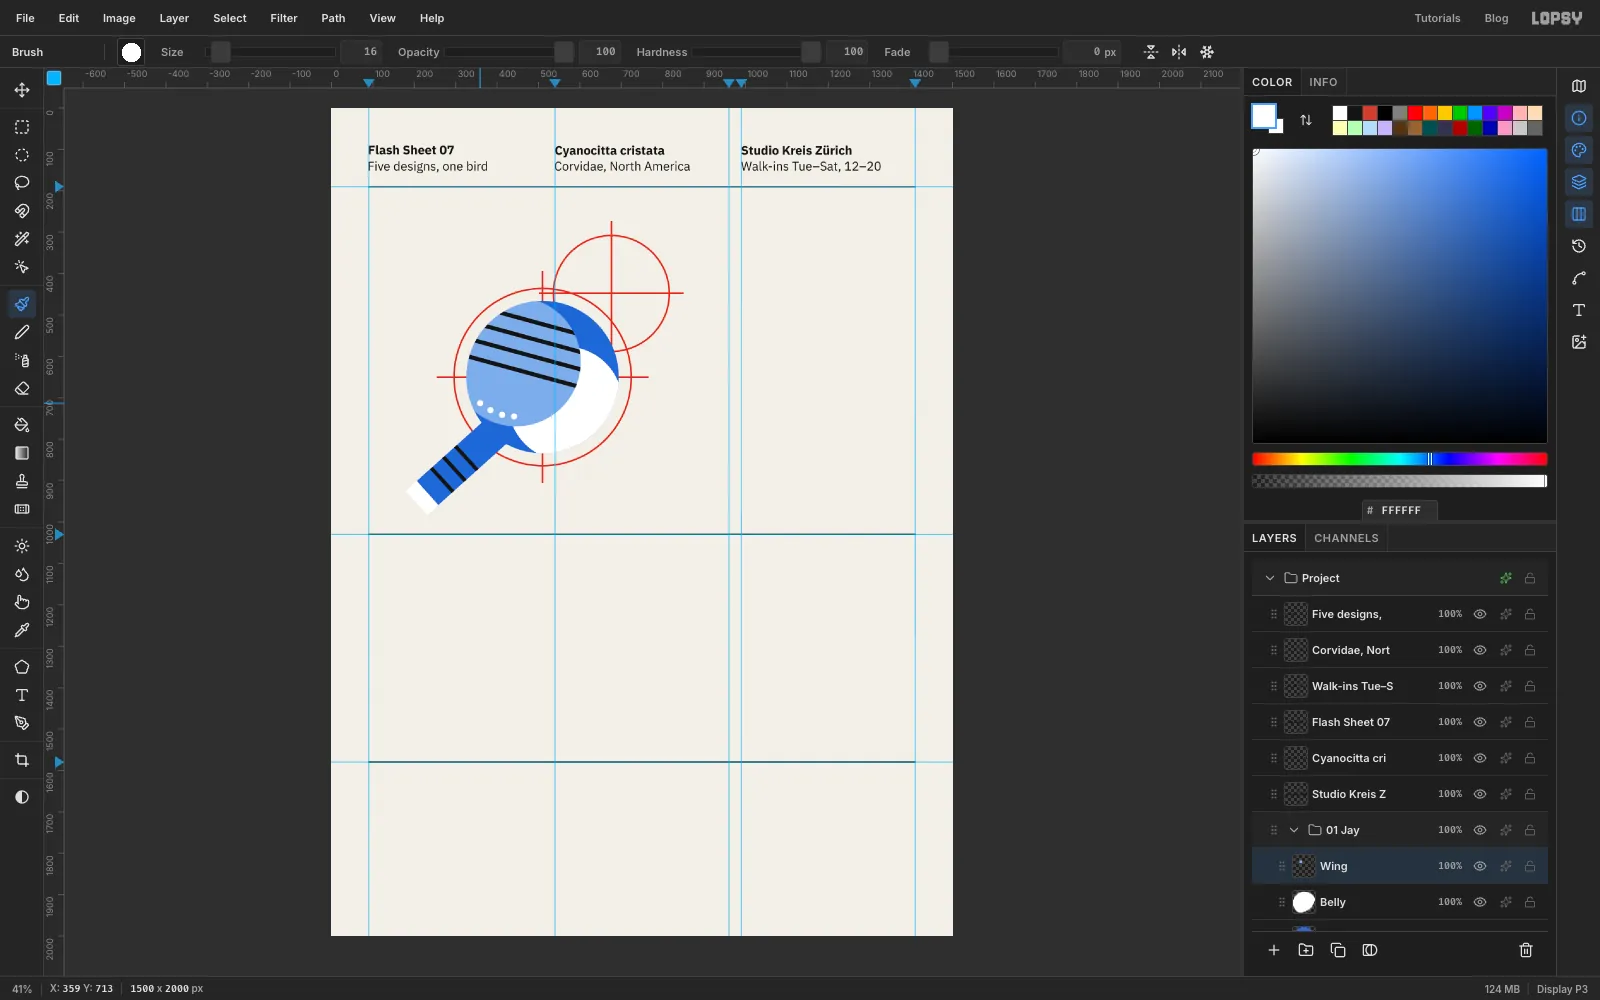
Press Cmd+D. Set the Brush Size to 16 and the foreground to . Click four dots in a gentle curve about 24 px inside the wing's lower left edge, each about 30 px from the last. Real jays have white tips on these feathers. Keep the dots fully inside the wing: a dot that touches the outline looks clipped once the outline goes on.
-
Build the head and the collar
Add three more layers, one per shape:
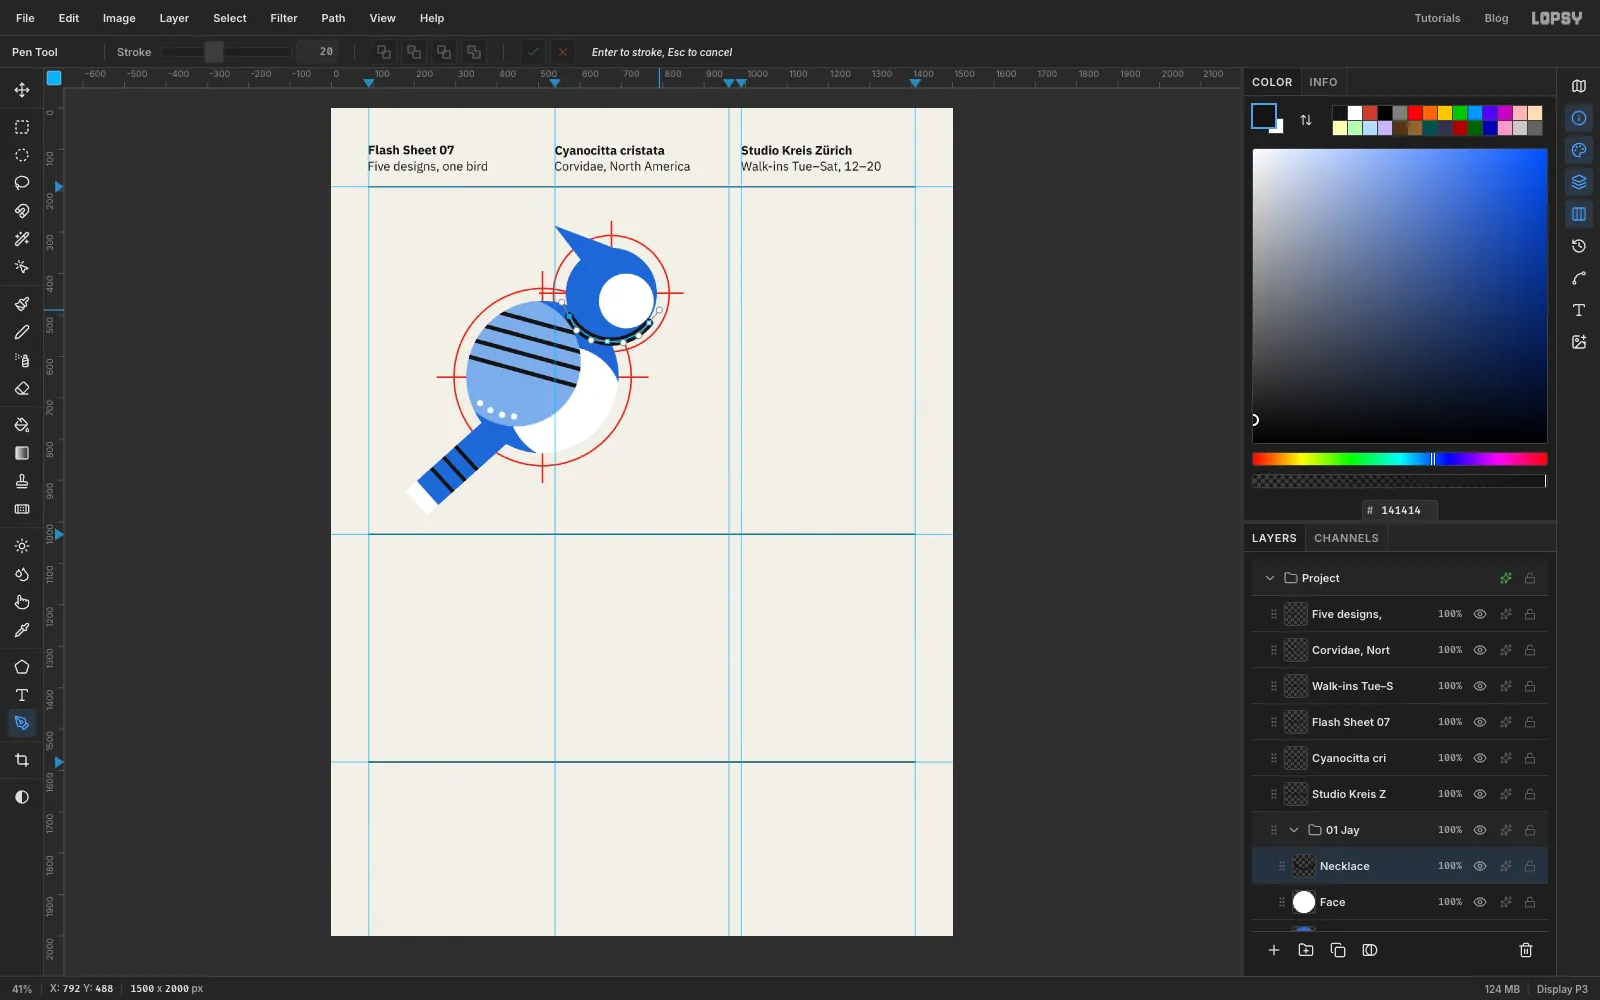
- Crest. Click three Pen corners: the crest tip at (538, 284), then (690, 341) and (609, 376) inside the head circle. Close the path, turn it into a selection, delete the path and fill it with .
- Head. A circle from (566, 338) to (786, 558), radius 110, filled with . Use the Elliptical Marquee's exact-corners dialog.
- Face. A circle from (646, 400) to (778, 532), radius 66, filled with . Press Cmd+D.
For the black collar, click Add Layer and name it Necklace. Set the foreground to and the Pen's Stroke to 20. Draw a smooth arc around the bottom of the head, 116 px from its centre, with three anchors. At each one, press and drag a handle about 40 px along the direction of travel, left to right:
- (574, 502), about 8 o'clock, handle dragged down and to the right
- (666, 564), about 6 o'clock, handle dragged straight right
- (767, 519), about 4 o'clock, handle dragged up and to the right
Press Enter. Enter strokes the open path with the foreground colour, and the ends come out round. Delete the path in the Paths panel afterwards.
-
Add the eye, beak, perch and legs
Give each of these its own layer, named Eye, Beak and Perch, and draw the legs on Perch.
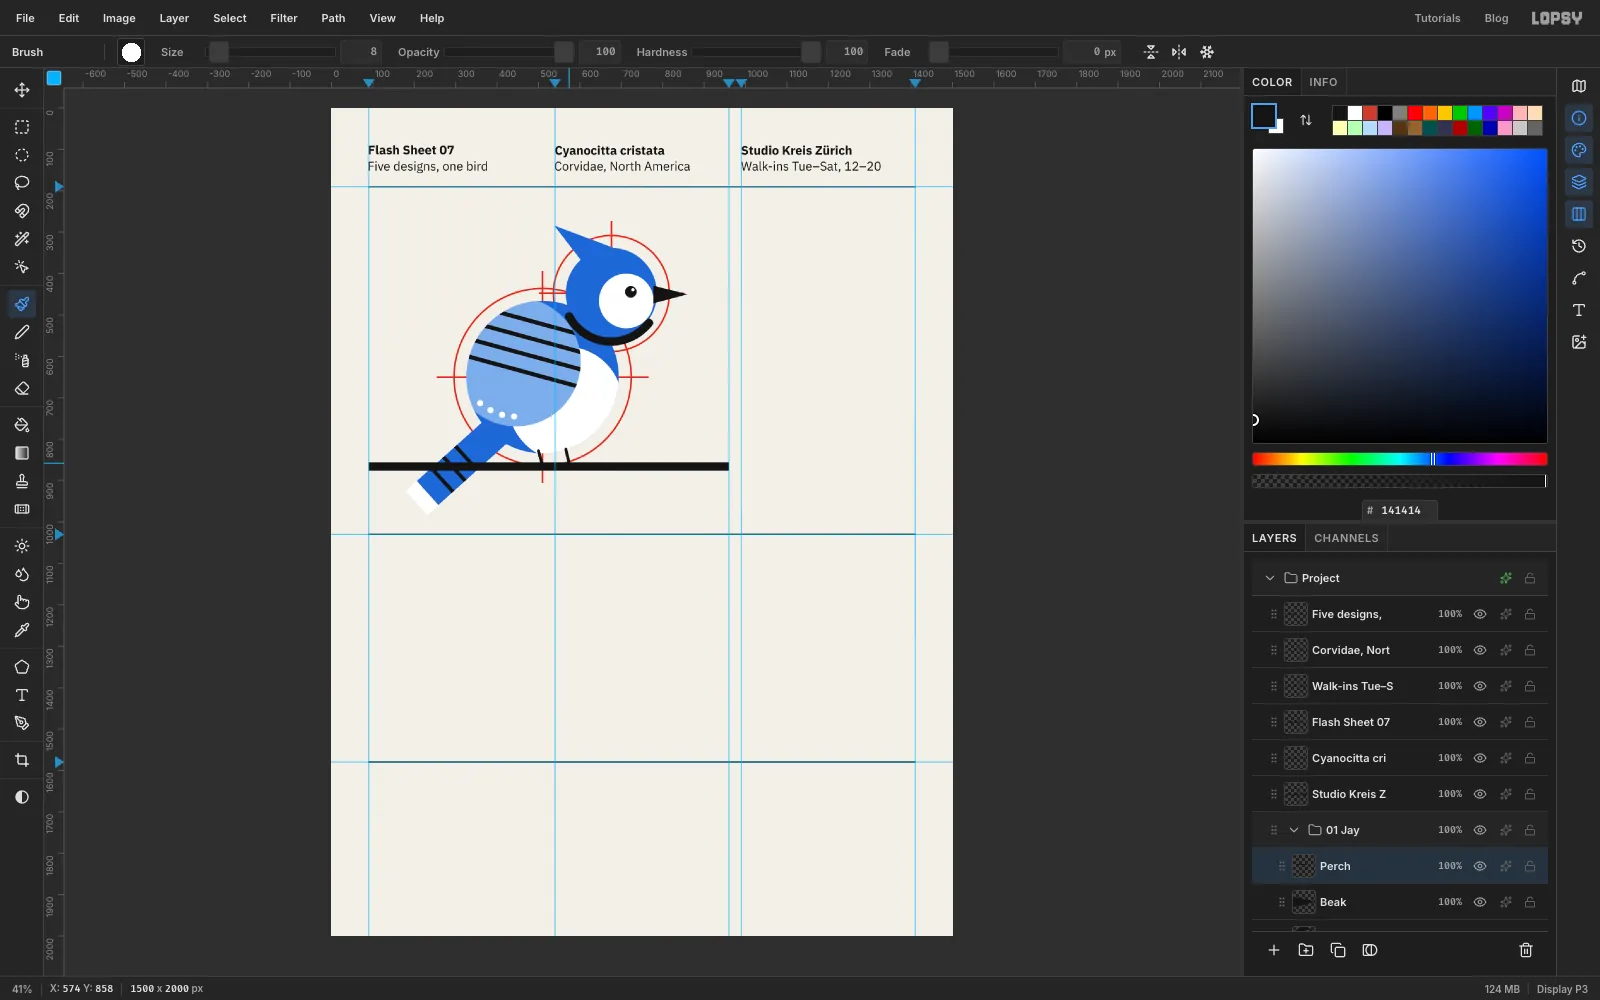
- Eye: a black circle from (709, 430) to (737, 458), plus a white catchlight from (724, 435) to (732, 443), just up and to the right of its centre.
- Beak: a three-corner Pen path from (777, 429) to the tip at (860, 450) and back to (777, 472), filled black.
- Perch: click the Rectangular Marquee once for its dialog, enter From 90, 856 and To 960, 876, and fill it black. The perch runs from the left margin to the end of column 4, so the tail clearly hangs behind it.
- Legs: set the Brush Size to 8. Draw two short black lines from the bottom of the body down to the perch.
-
Line the jay
Tattoo flash needs strong, even black lines. Select the Tail layer, click its ✦ (layer effects) button and turn on Stroke. Set the colour to , Width to 8 and Position to outside. Do the same for Body, Crest and Head.
Give Wing and Belly a Width of 5 instead. Lighter interior lines keep the outer contour as the strongest line, which is how flash is lined.
-
Drop in the reference photo
Collapse 01 Jay with its arrow and keep the group row selected. Click New Group and name it 02 Portrait. Because 01 Jay is collapsed, the new group lands beside it instead of inside it.
Click Add Layer, name it Disc, and fill a circle from (1025, 475) to (1375, 825) with . Press Cmd+D. The disc's centre lines up with the jay's horizontal axis.
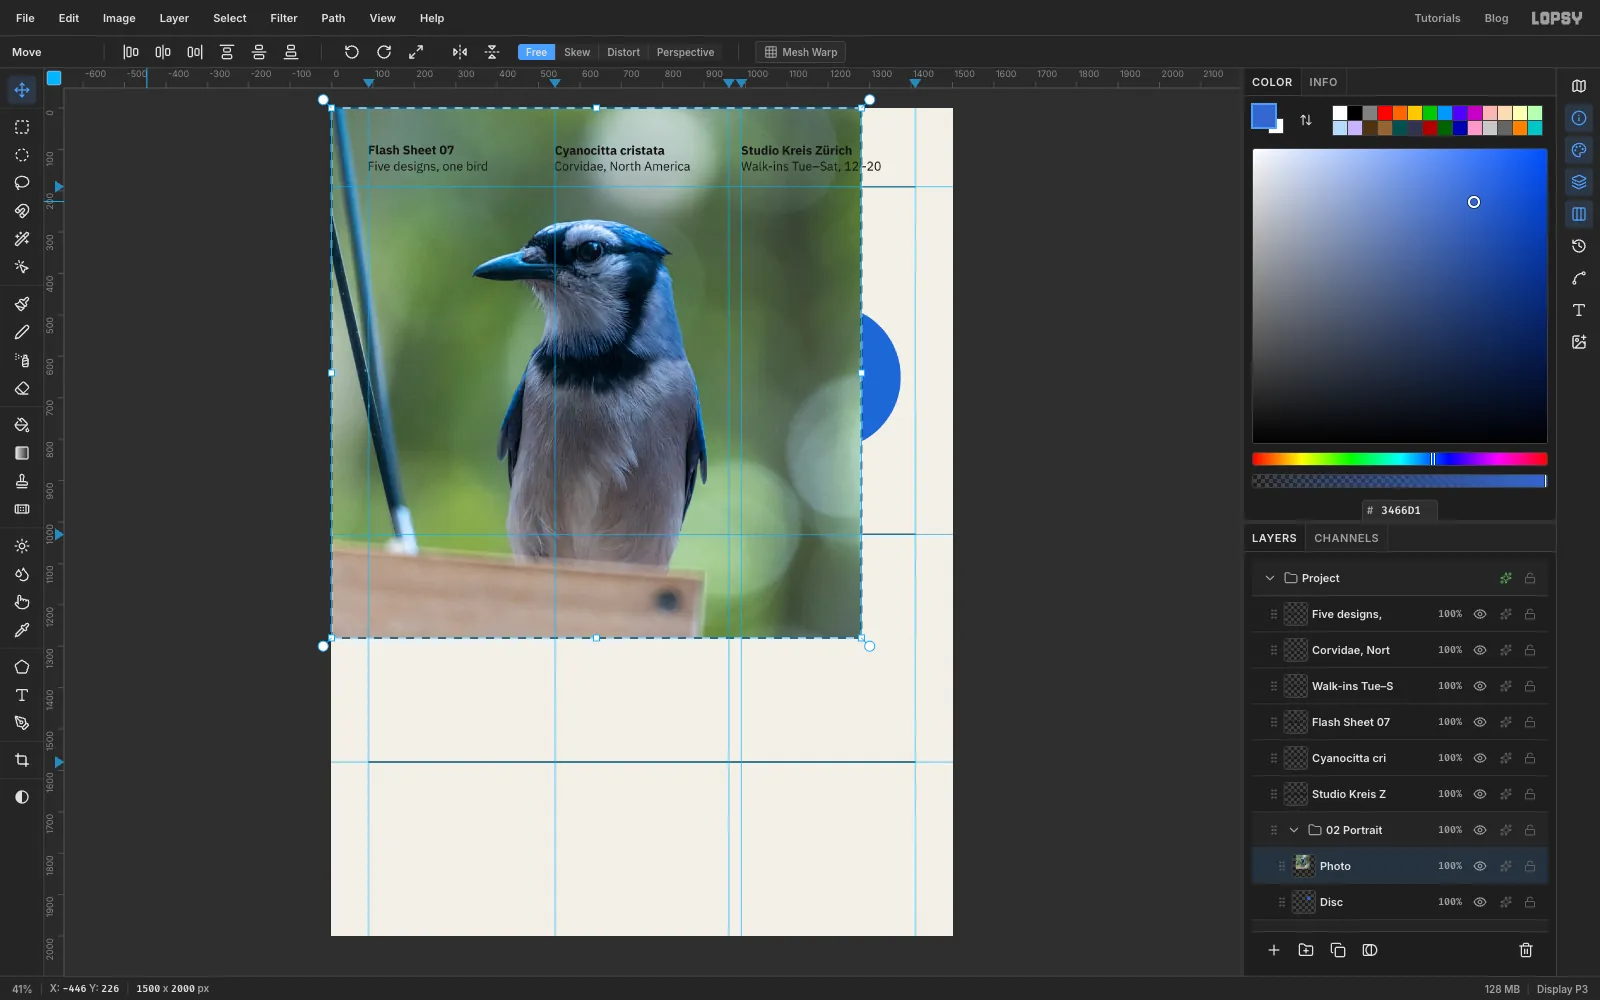
Drag the jay photo from Finder onto the canvas. It lands at full size in the top-left corner, already selected. Rename it Photo.
-
Scale the photo
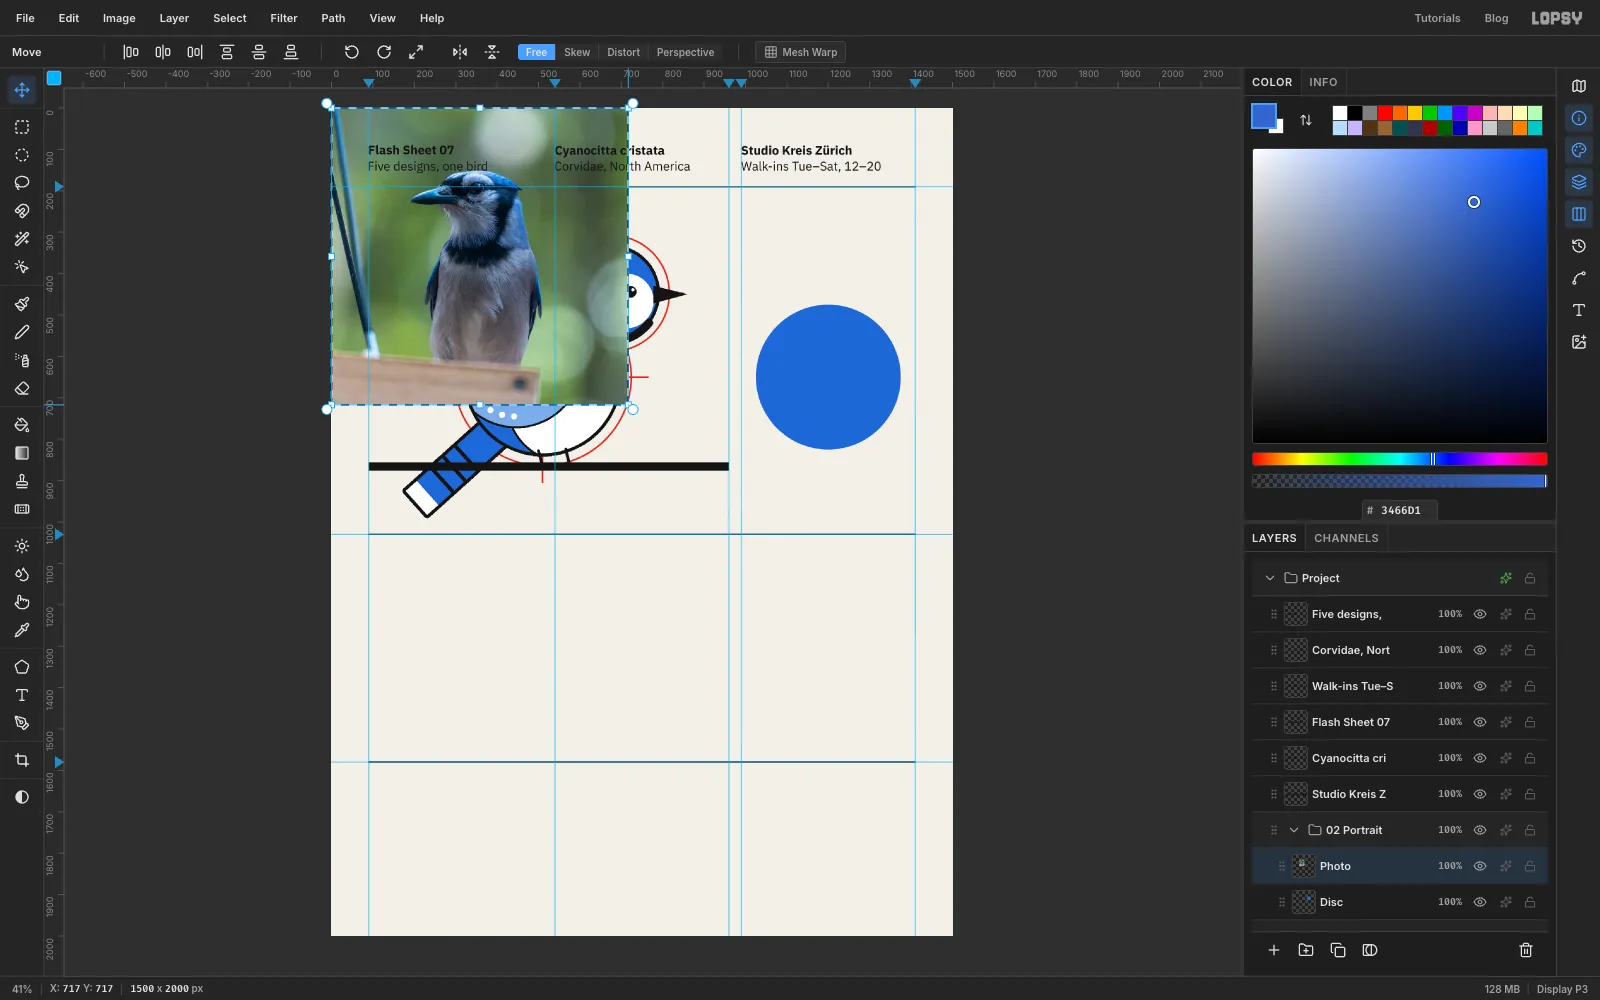
With the Move tool, hold Cmd and drag the photo's bottom-right corner handle up and to the left until it's about 56 % of its size, roughly 716 px wide. Cmd keeps the proportions. Press Cmd+D to commit the transform.
Drag the photo over to the blue disc so the jay's head is centred on it. Aim for the crest tip about 40 px inside the top of the disc and the beak tip about 30 px inside the left edge. The photo hangs past the canvas edge on the right. That's fine, and the next step deals with it.
-
Blur the photo and cut it into a disc
Choose Filter → Gaussian Blur…, set Radius to 4 and click Apply. A small blur before Threshold gives you smooth shapes instead of salt-and-pepper speckle.
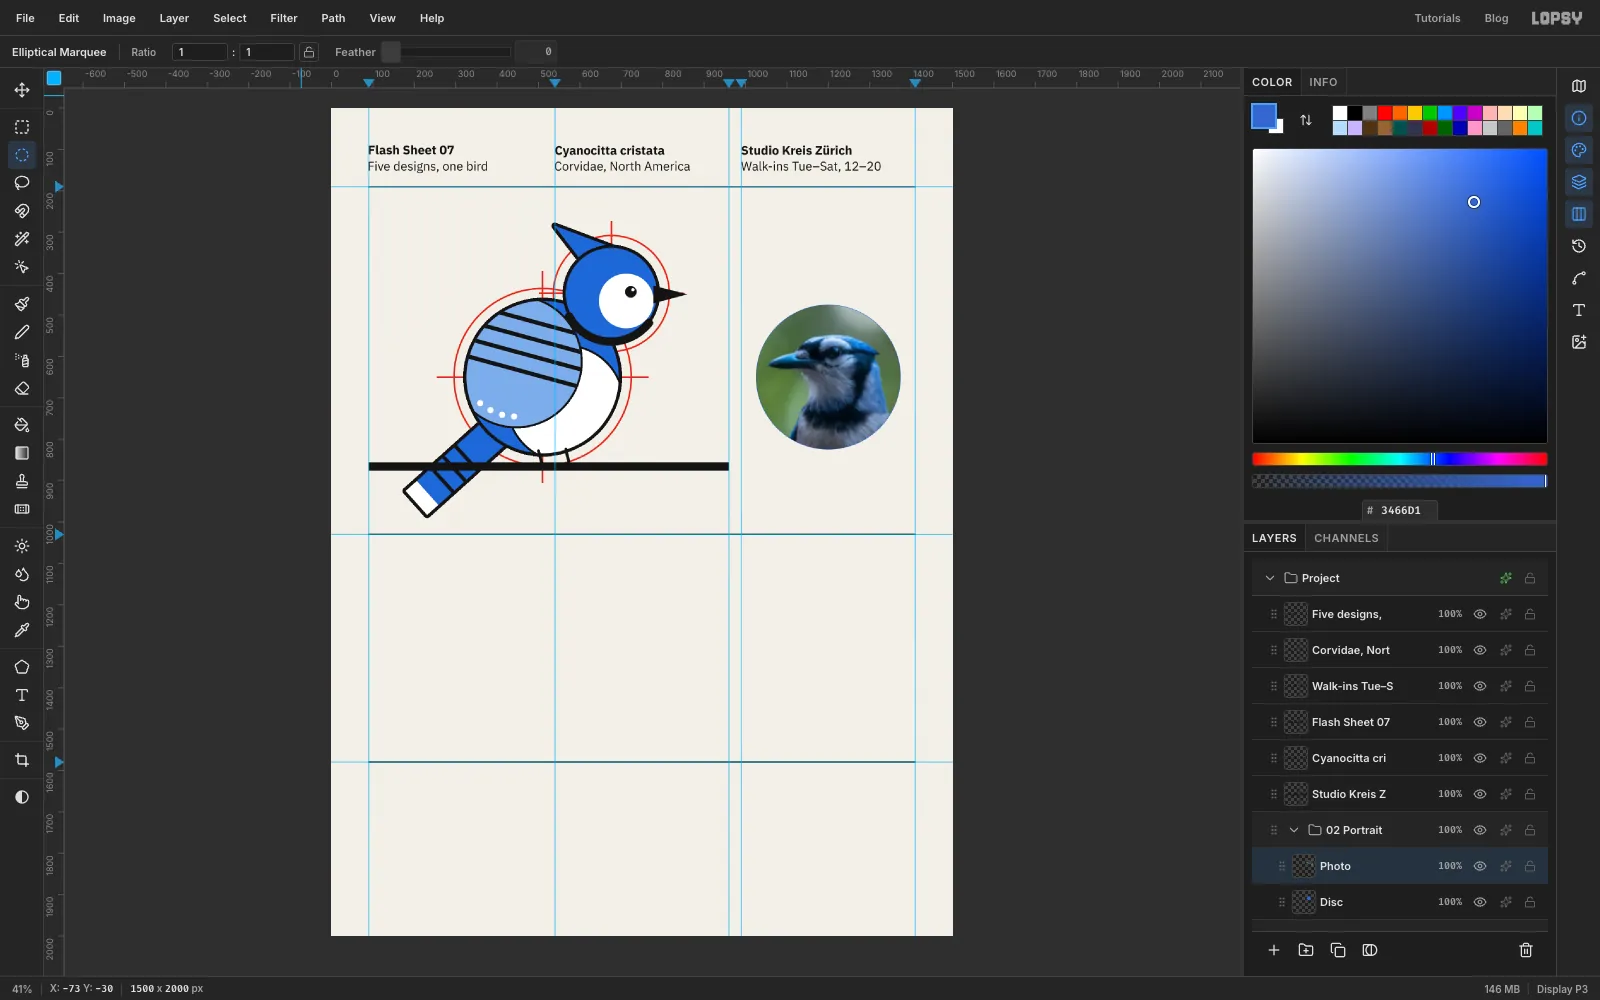
Now make the circle: an Elliptical Marquee from (1026, 476) to (1374, 824), radius 174, a pixel inside the disc. Choose Select → Inverse, press Delete, then press Cmd+D. Filters only work inside an active selection, so a selection left on here would stop the next steps from doing anything.
-
Split out the highlights
Choose Layer → Duplicate Layer and name the copy Ink. Then select the original underneath and rename it Highlights.
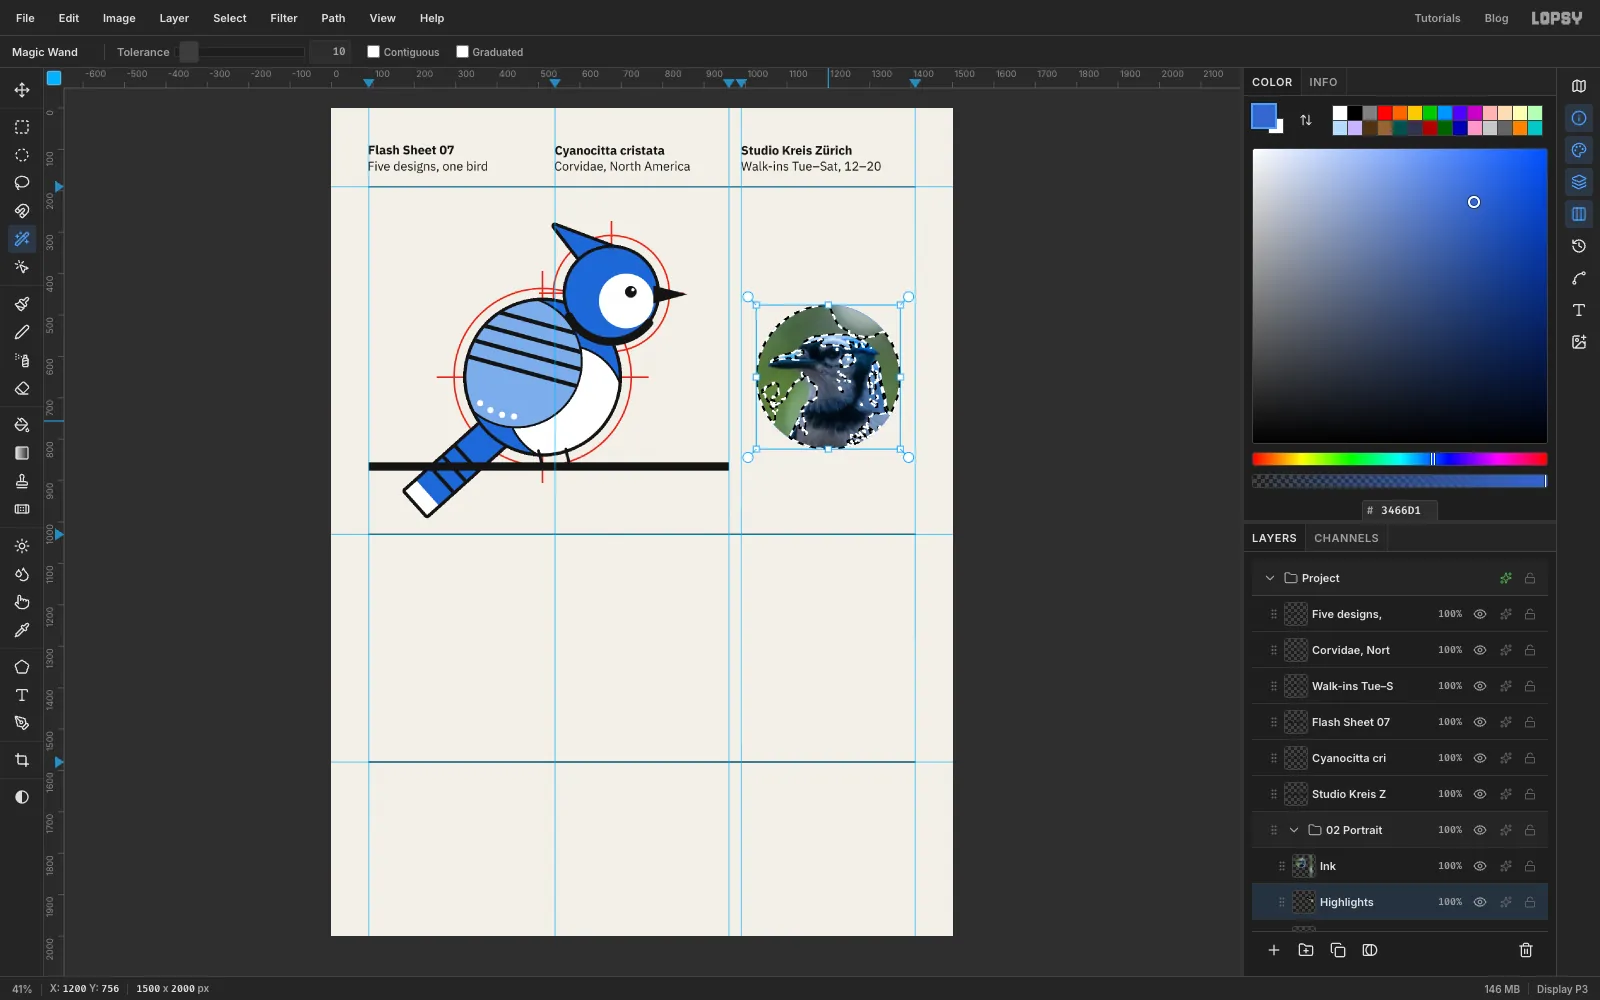
On Highlights, choose Filter → Threshold…, set Level to 118 and apply. The pale face and breast turn white and everything darker turns black. You won't see it yet, because the Ink copy on top still shows the photo. That doesn't matter: the Magic Wand reads only the selected layer.
Pick the Magic Wand (W). Set Tolerance to 10 and untick Contiguous, so one click selects every black area at once. Click on the jay's black necklace, which is solid black on Highlights, and press Delete, then Cmd+D. Only the white highlights are left, sitting on the blue disc.
-
Threshold the black ink
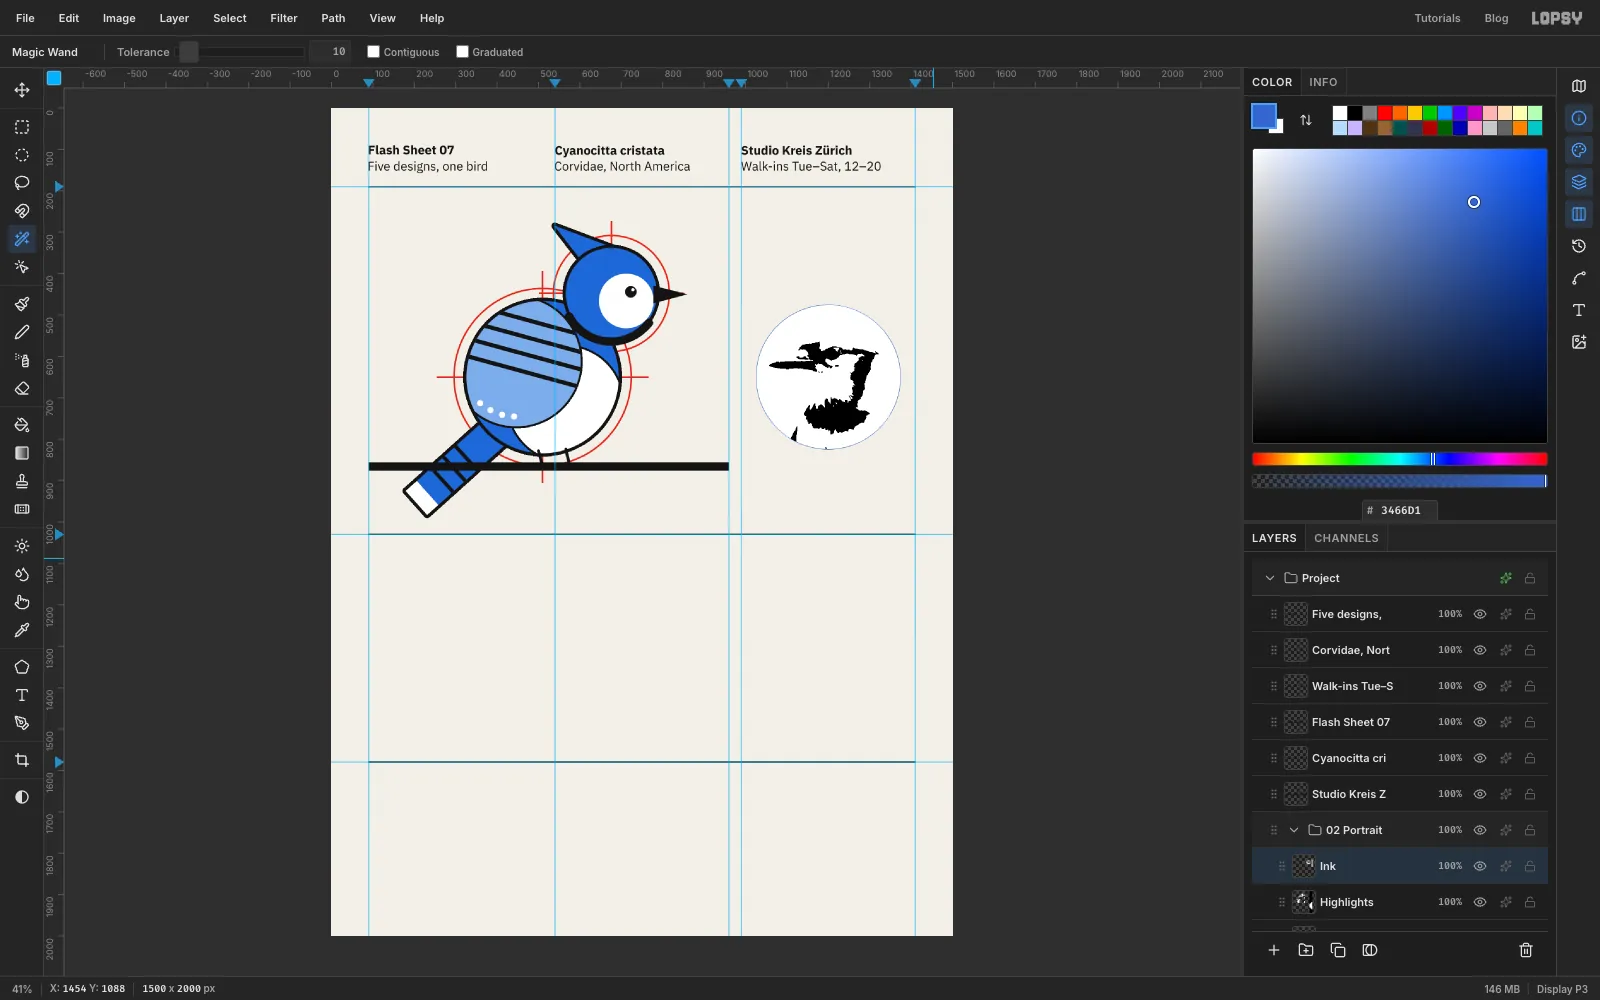
Select Ink. Apply Filter → Threshold… at a Level of 60. Only the darkest parts survive as black: the beak, the eye stripe, the crown markings and the necklace.
With the Magic Wand still set to non-contiguous, click a white area and press Delete, then Cmd+D. Now black ink sits over white highlights over the blue disc. That's a three-colour screen print made from one photo.
-
Ring the portrait
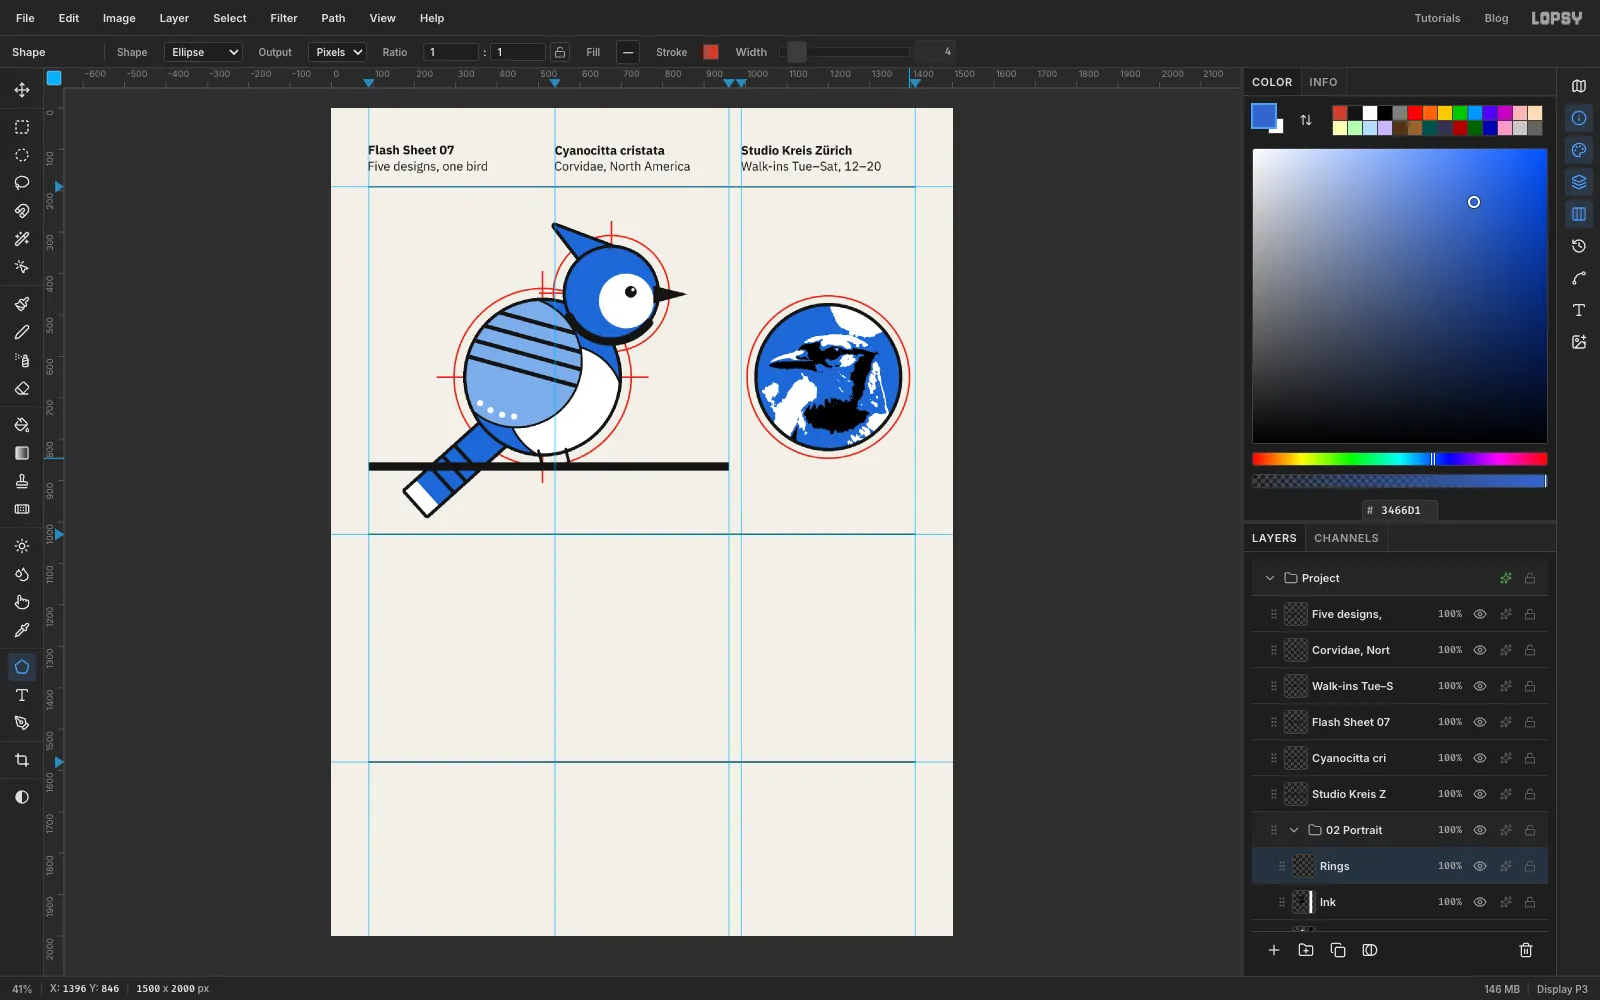
Click Add Layer and name it Rings. With the Shape tool, remove the fill and set the stroke to , Width 8. Press on the disc centre (1200, 650) and Cmd-drag to (1375, 825), so the ring sits on the disc's edge.
Change the stroke to , Width 4, and drag a second circle to (1396, 846), a radius of 196. It echoes the red construction circles in design 01. That corner is only a few screen pixels from the 1410 guide, so turn off View → Snap to Guides for this one circle. Turn it back on afterwards.
-
Draw a notched feather
Collapse 02 Portrait, keep it selected, and click New Group. Name it 03 Feather. Inside it add an empty layer named Sun (you'll fill it later), then a layer named Feather above it.
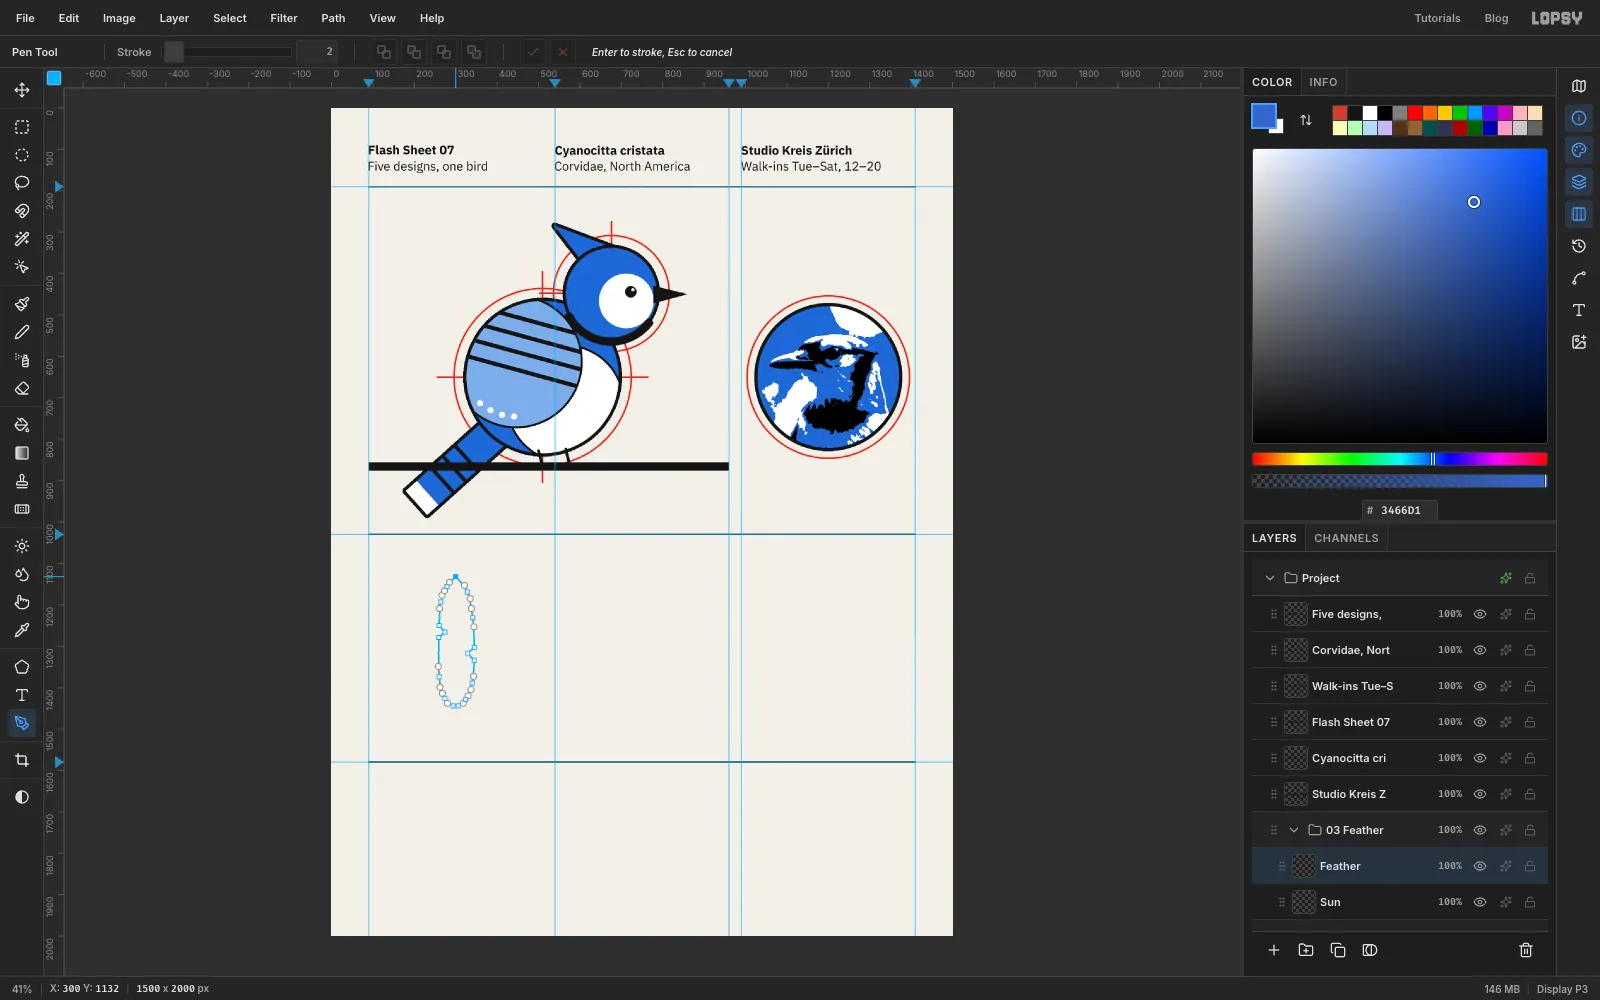
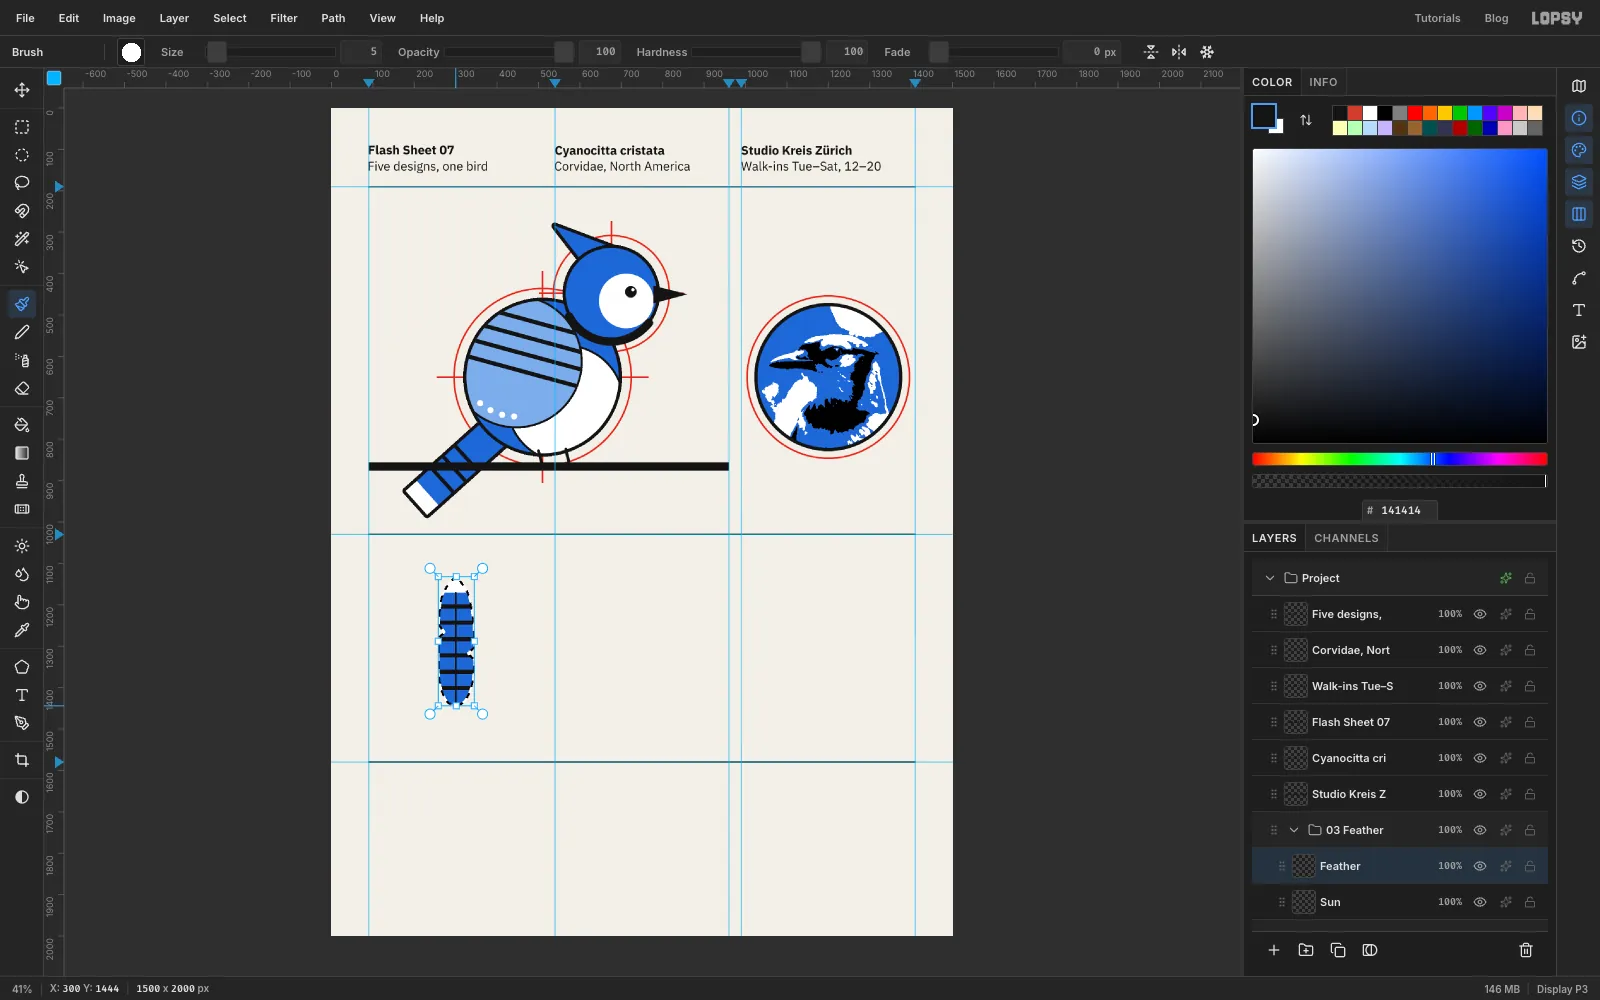
Draw the vane with the Pen, centred on (300, 1300). It's about 310 px tall and 90 px wide: pointed at the top, widest a third of the way down, with a blunt base and a V notch cut into each edge. Go round it clockwise from the tip. Click the corner anchors. At the smooth ones, press and drag a short handle (about 20 px) along the outline:
- tip (300, 1132), corner
- (328, 1169) and (341, 1231), smooth
- right notch: (345, 1303), (329, 1317), (345, 1334), all corners
- (340, 1389) and (324, 1429), smooth
- base (306, 1444) and (294, 1444), corners
- (274, 1426) and (260, 1374), smooth
- left notch: (259, 1279), (274, 1266), (260, 1250), all corners
- (264, 1193) and (279, 1156), smooth
Click the tip again to close the path.
-
Add the tip, bars and shaft
Turn the path into a selection, delete the path, and fill it with . Keep the selection, switch to the Rectangular Marquee, hold Shift+Option and drag a rectangle from above the tip down to y 1171, wider than the feather on both sides. That's an intersection, so only the top 40 px of the feather stays selected. Fill it with .
Cmd-click the Feather thumbnail to select the whole vane again. With the Brush at Size 11 in , draw six evenly spaced horizontal bars across it, starting and ending outside the edges. Set the Brush Size to 5 and draw the shaft straight down the middle, from just under the white tip to the base.
Press Cmd+D. Draw the quill below the vane in two pieces: a Size 9 line for the first 40 px, then a Size 5 line for the last 25 px, so it tapers. Add a Stroke effect, Width 8, , outside.
-
Rotate the feather and add a sun
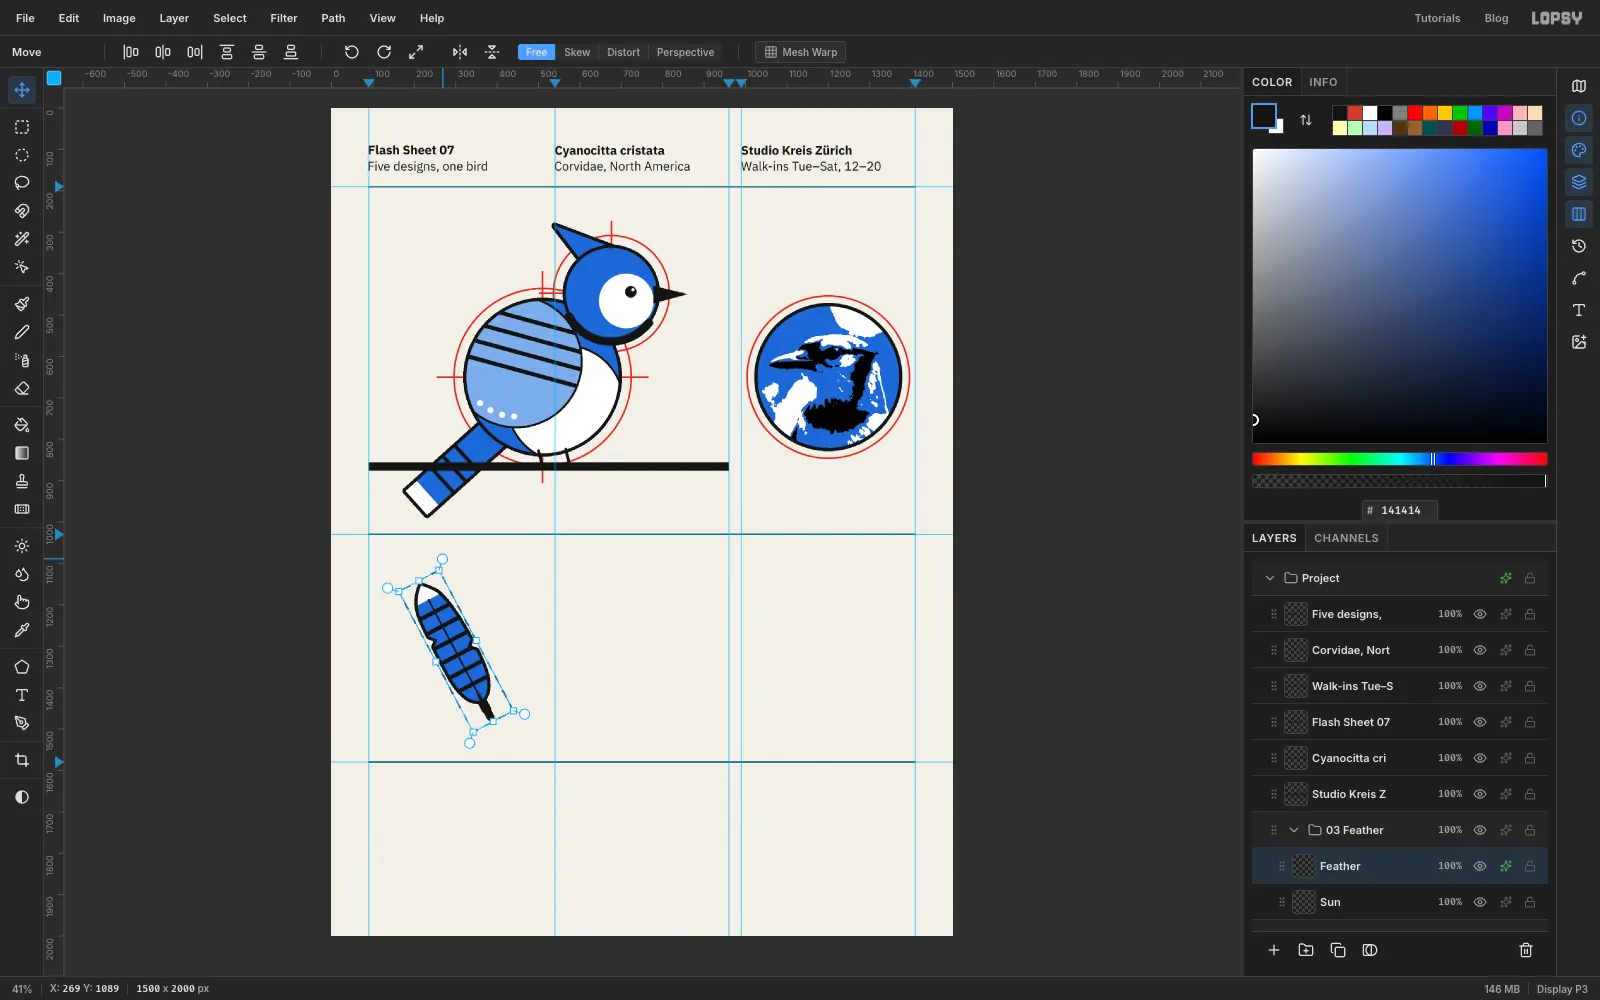
With the Rectangular Marquee, draw a box around the whole feather with a little room on every side. Switch to the Move tool. The small round handle on a short stalk just outside the box's top-right corner rotates it. Drag it up and to the left. There's no angle readout, so turn it until the tip sits about 170 px left of the quill's end, which is about 28° counter-clockwise. Press Cmd+D to commit.
Select the Sun layer. Make an 86 px-radius circle behind the upper right of the feather, centred about 35 px in from the feather's right edge and 95 px below its tip, so the red peeks out beside it. Fill it with , press Cmd+D, and give it the same 8 px black Stroke.
Then click the 03 Feather group row and, with the Move tool, nudge the whole group with the arrow keys. Centre it on x 300 (the middle of columns 1–2) and put the quill's end at y 1529, about 50 px above the bottom rule. Moving the group moves the feather and the sun together.
-
Define a cross-hatch pattern
Collapse 03 Feather, keep it selected, and click New Group. Name it 04 Acorn. For the acorn cap you need a hatch pattern, so draw one tile first.
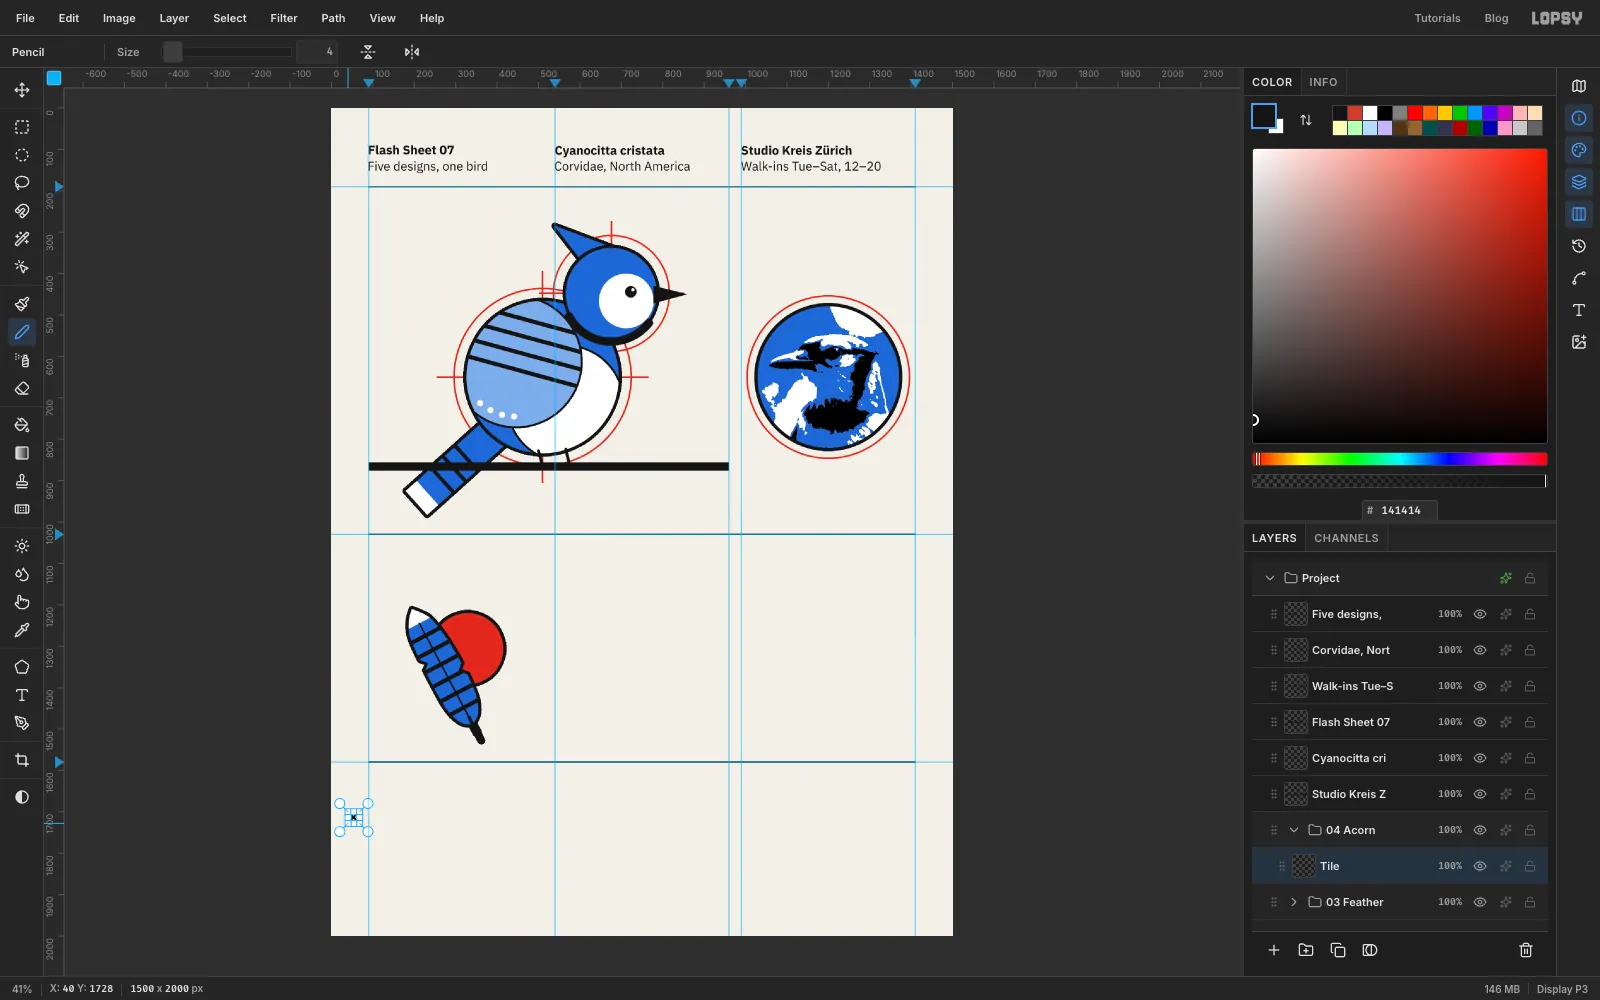
Click Add Layer and name it Tile. Zoom right in on an empty corner of the canvas. Pencil endpoints wander by a pixel or two at fit zoom. Make a 28 × 28 px rectangular marquee there. With the Pencil at Size 4 in , click one corner of the box and Shift+click the opposite corner, then do the same for the other diagonal. Choose Edit → Define Pattern, press Cmd+D, then delete the Tile layer. The pattern stays.
-
Draw the nut and its shadow
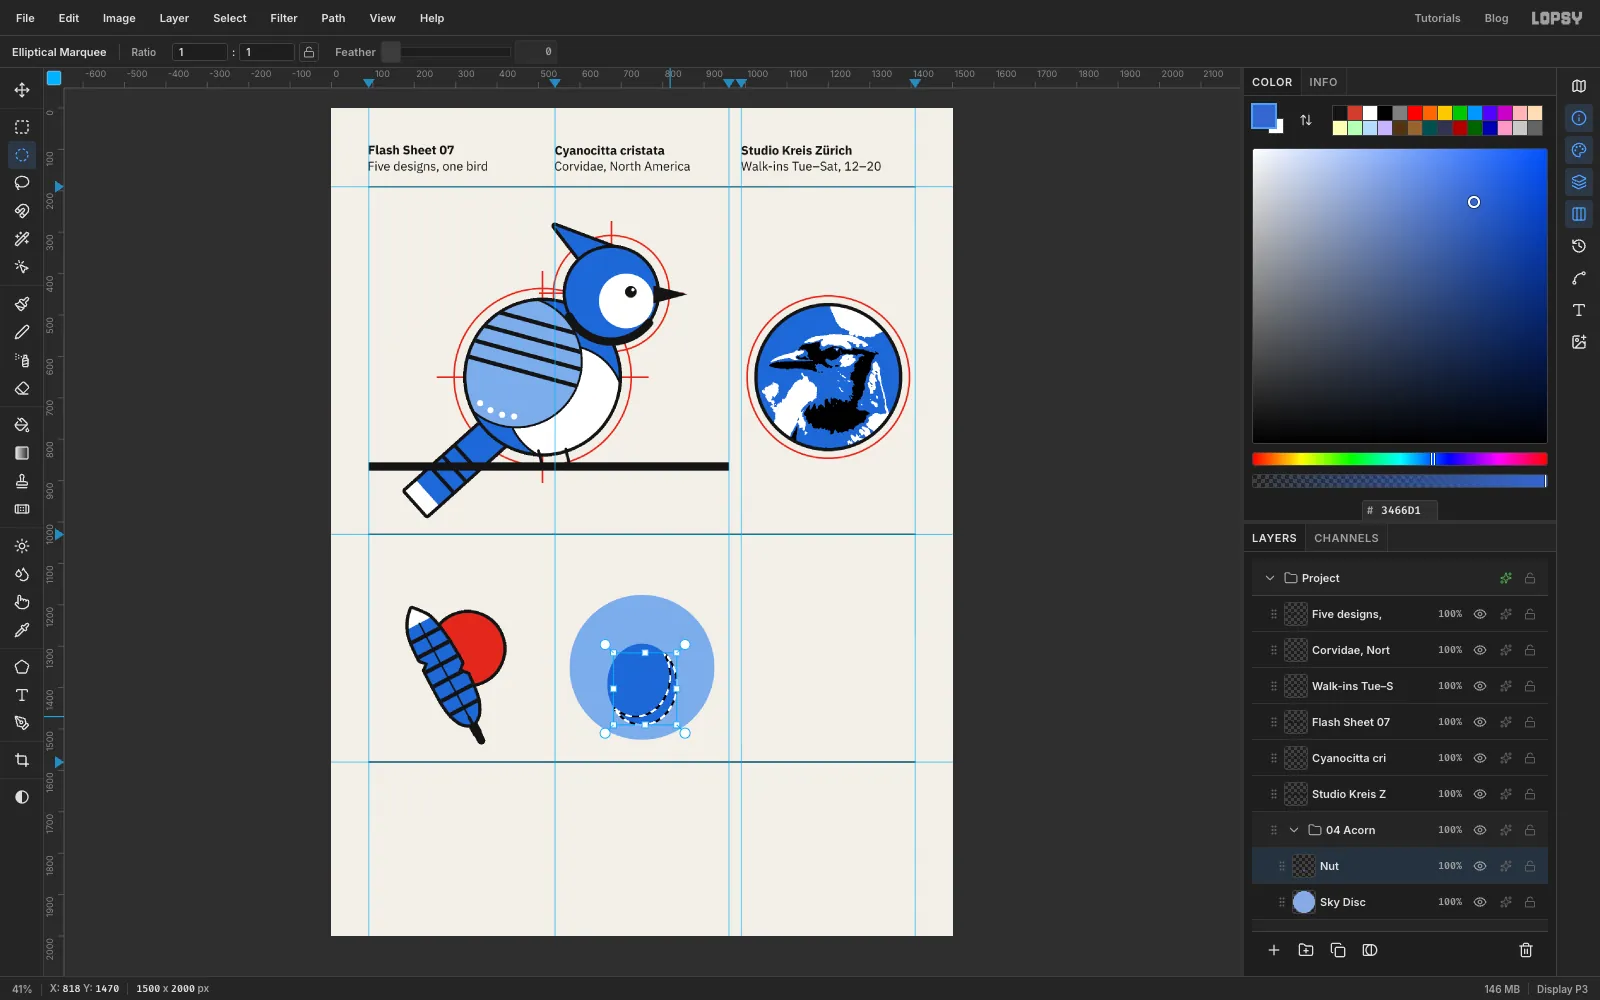
- Sky Disc: click the 04 Acorn row, click Add Layer and name it Sky Disc. Fill a circle from (575, 1176) to (925, 1526) with . It's the same size as the seal you'll make next.
- Nut: on a new layer, an elliptical marquee from (666, 1294) to (834, 1490), filled with .
For a packed black shadow, keep the nut selected, hold Option and drag the same size oval 16 px further left and 20 px higher. Option subtracts, which leaves a crescent along the lower right. Fill it with .
Press Cmd+D. With a Size 12 white Brush, drag a short curved highlight inside the nut's upper left. With a Size 14 black Brush, draw the stem up and slightly to the right from where the cap will sit.
-
Fill the cap with the pattern
Click Add Layer and name it Cap. Make an elliptical marquee from (646, 1252) to (854, 1364). Then switch to the Rectangular Marquee and Shift+Option-drag a rectangle over everything above y 1330, which cuts the bottom off flat. Fill it with paper .
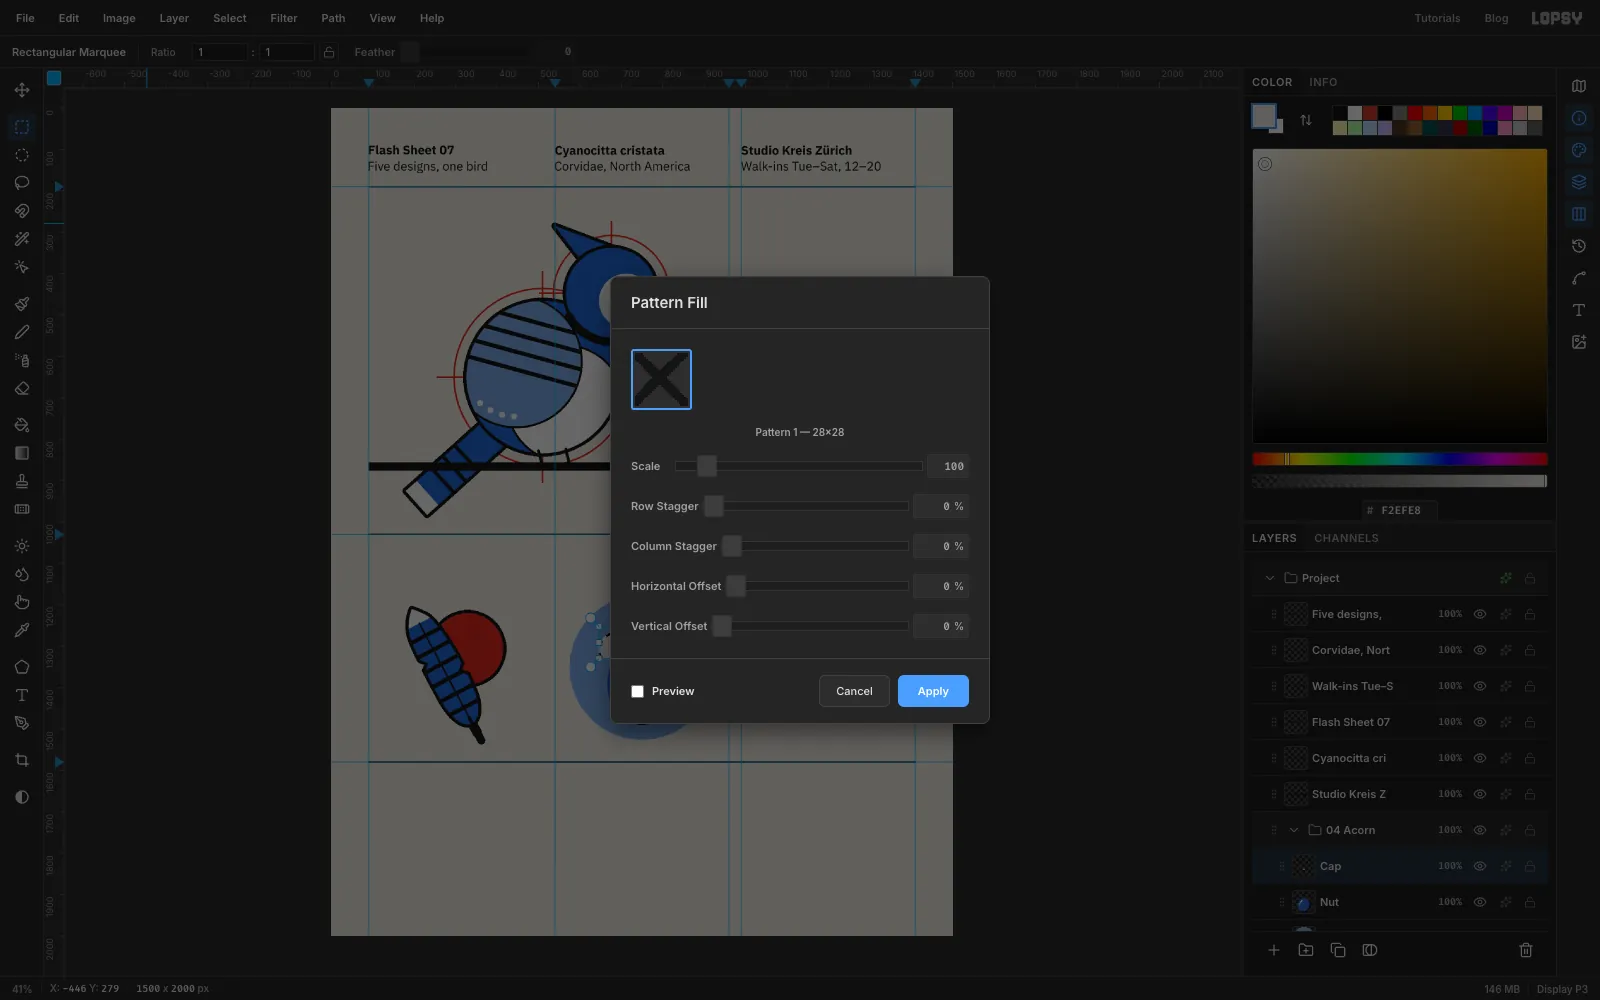
Keep the selection and choose Edit → Fill with Pattern…. The tile you just defined is already picked. Click Apply, and the X tiles join up into a diamond lattice clipped to the cap.
-
Line the acorn
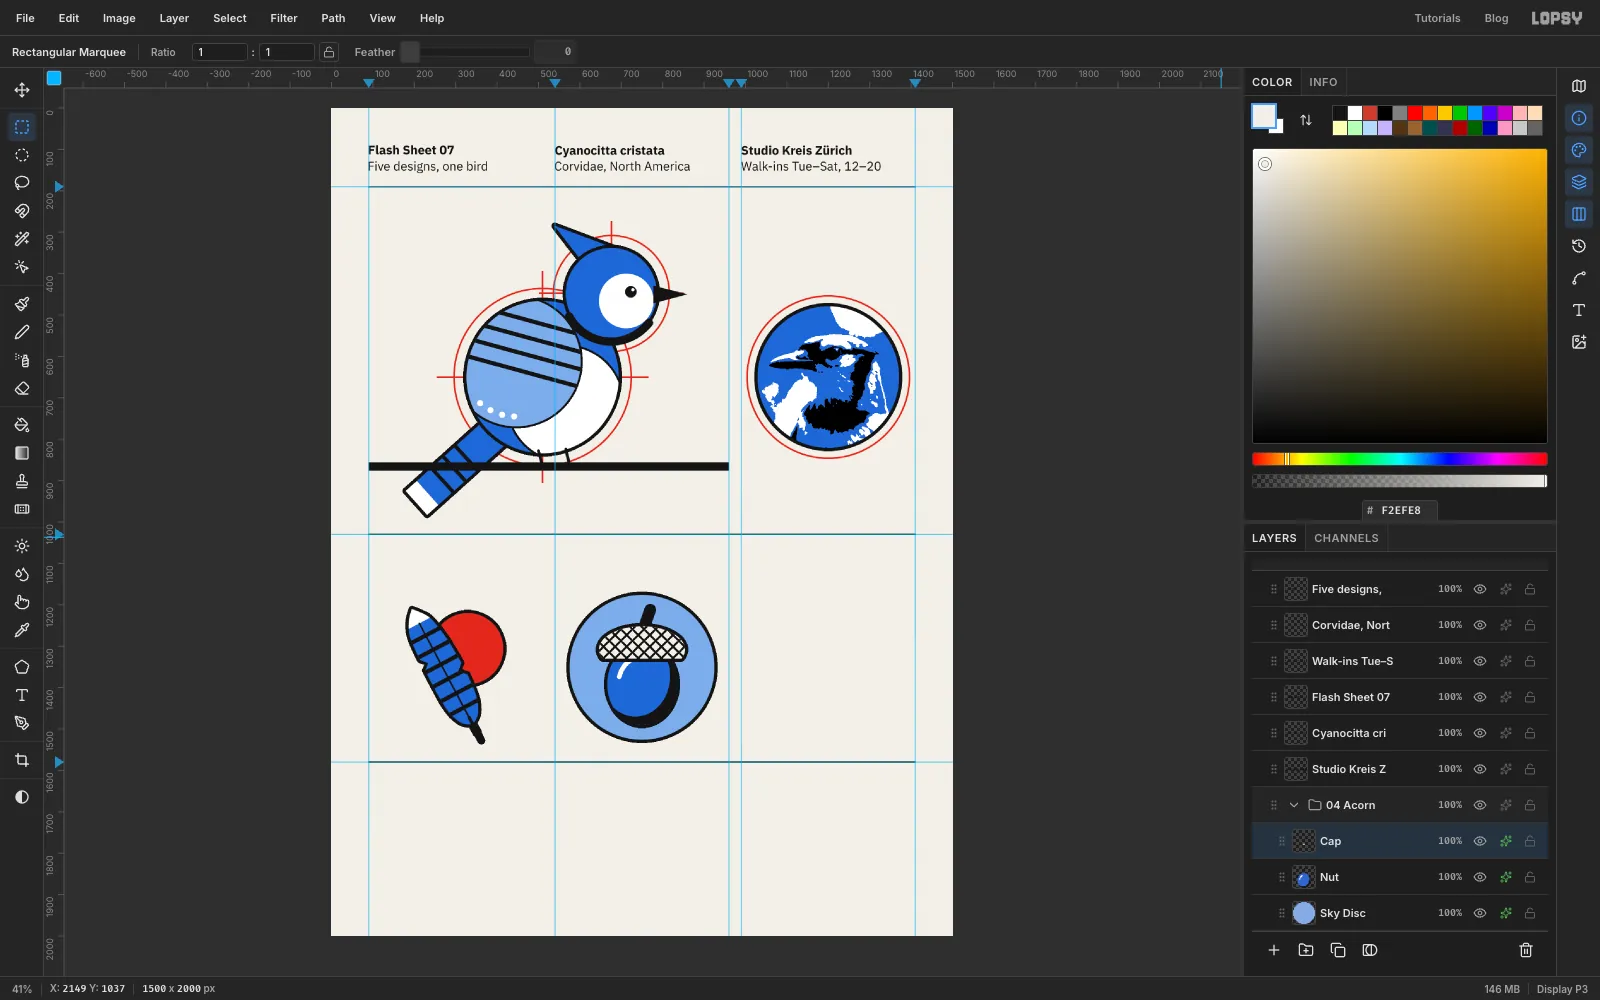
Press Cmd+D. Give Sky Disc, Nut and Cap a Stroke effect of 8, , outside. The cap's outline closes off the ends of the hatch lines.
-
Copy Merged the jay's head
The seal reuses the jay's head. Collapse 04 Acorn, keep it selected and add a group named 05 Seal.
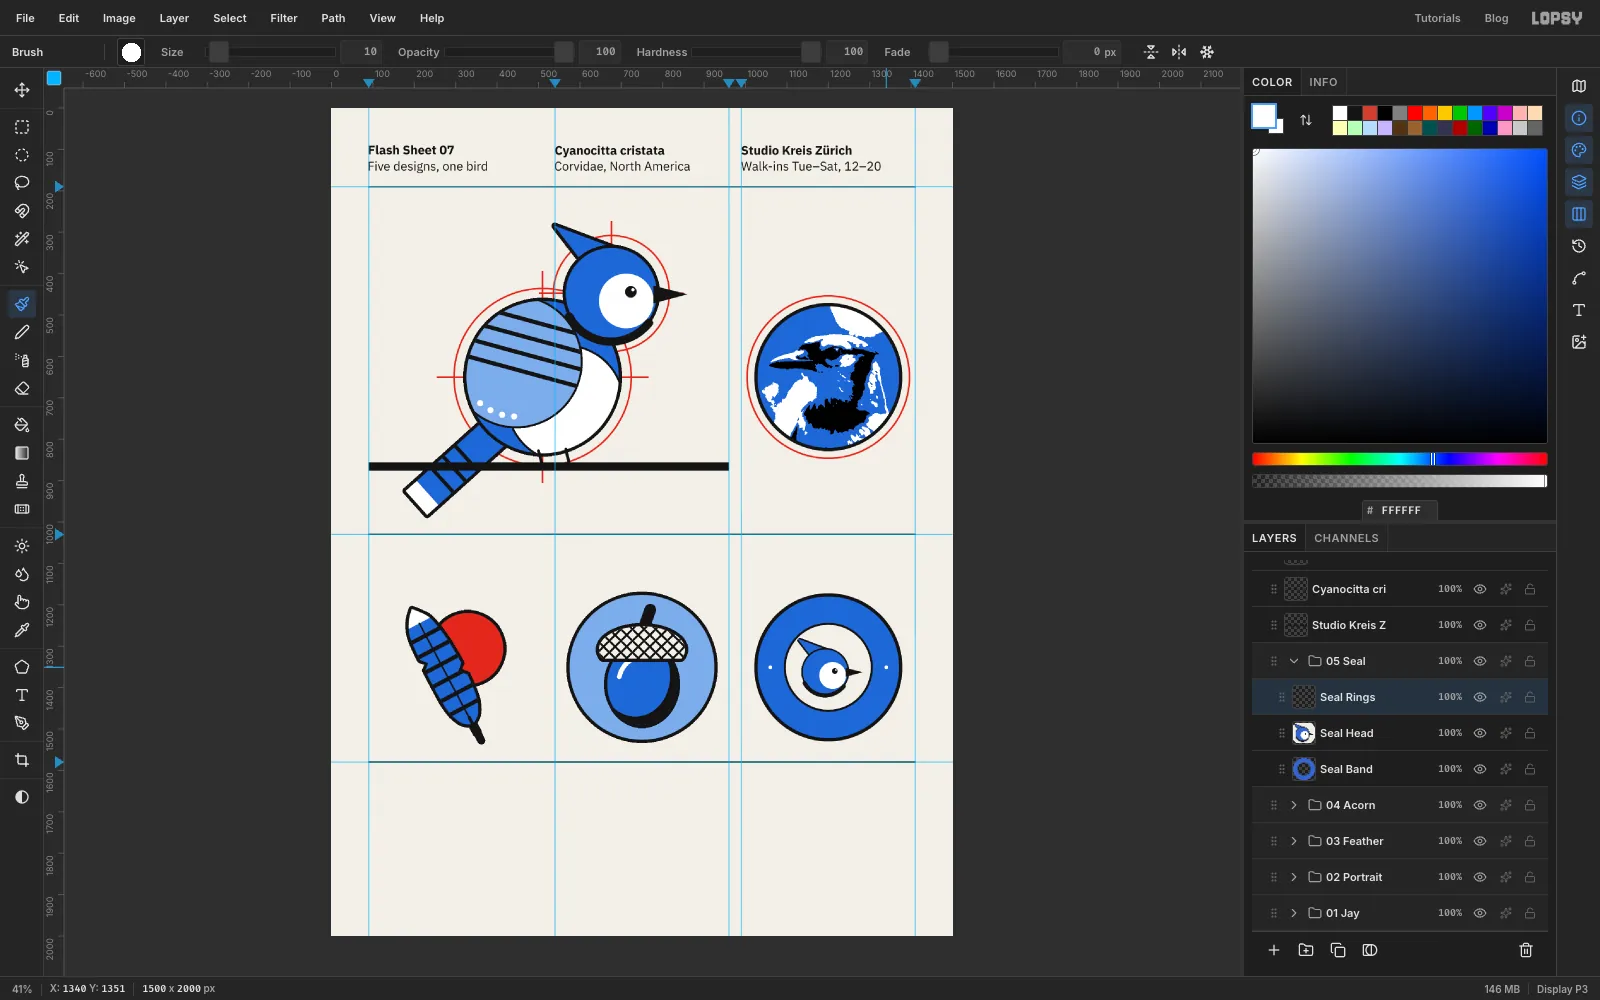
Click Add Layer and name it Seal Band. Make a circle from (1025, 1176) to (1375, 1526). Then Option-drag a circle from (1095, 1246) to (1305, 1456) to subtract the middle, and fill the ring with .
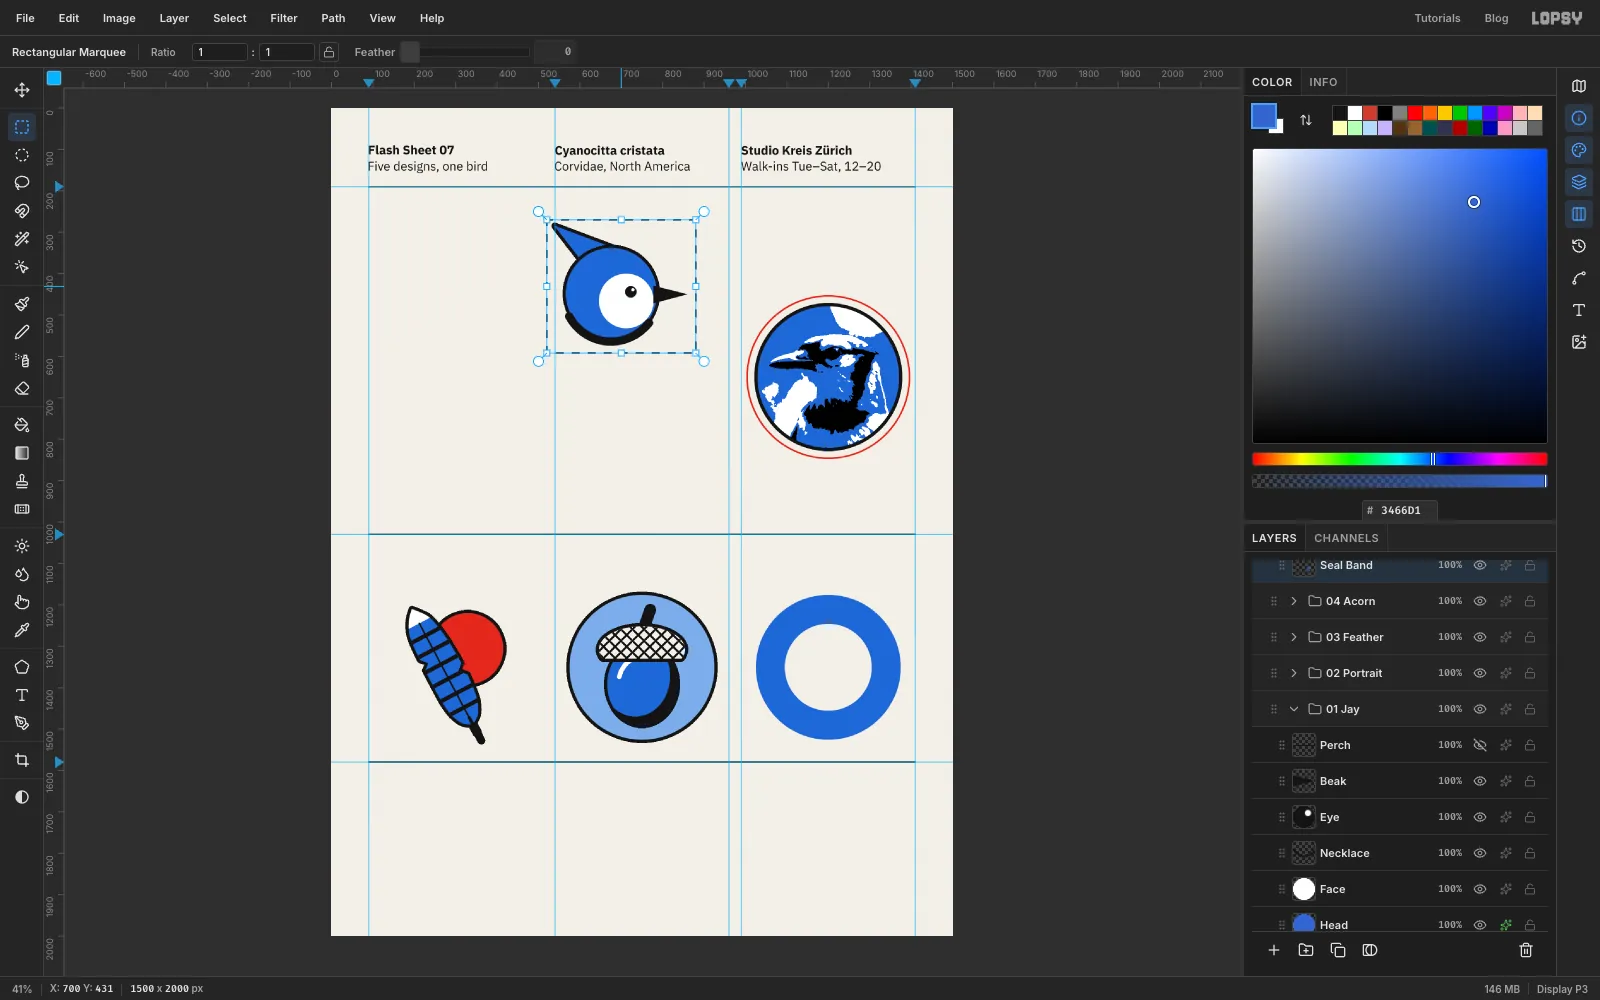
Expand 01 Jay and click the eye buttons to hide Construction, Tail, Body, Belly, Wing and Perch. Draw a rectangular marquee from (520, 270) to (880, 592) around the head and choose Edit → Copy Merged. That copies everything visible in the box as one flat image. Show the hidden layers again and collapse 01 Jay.
-
Paste and shrink the head
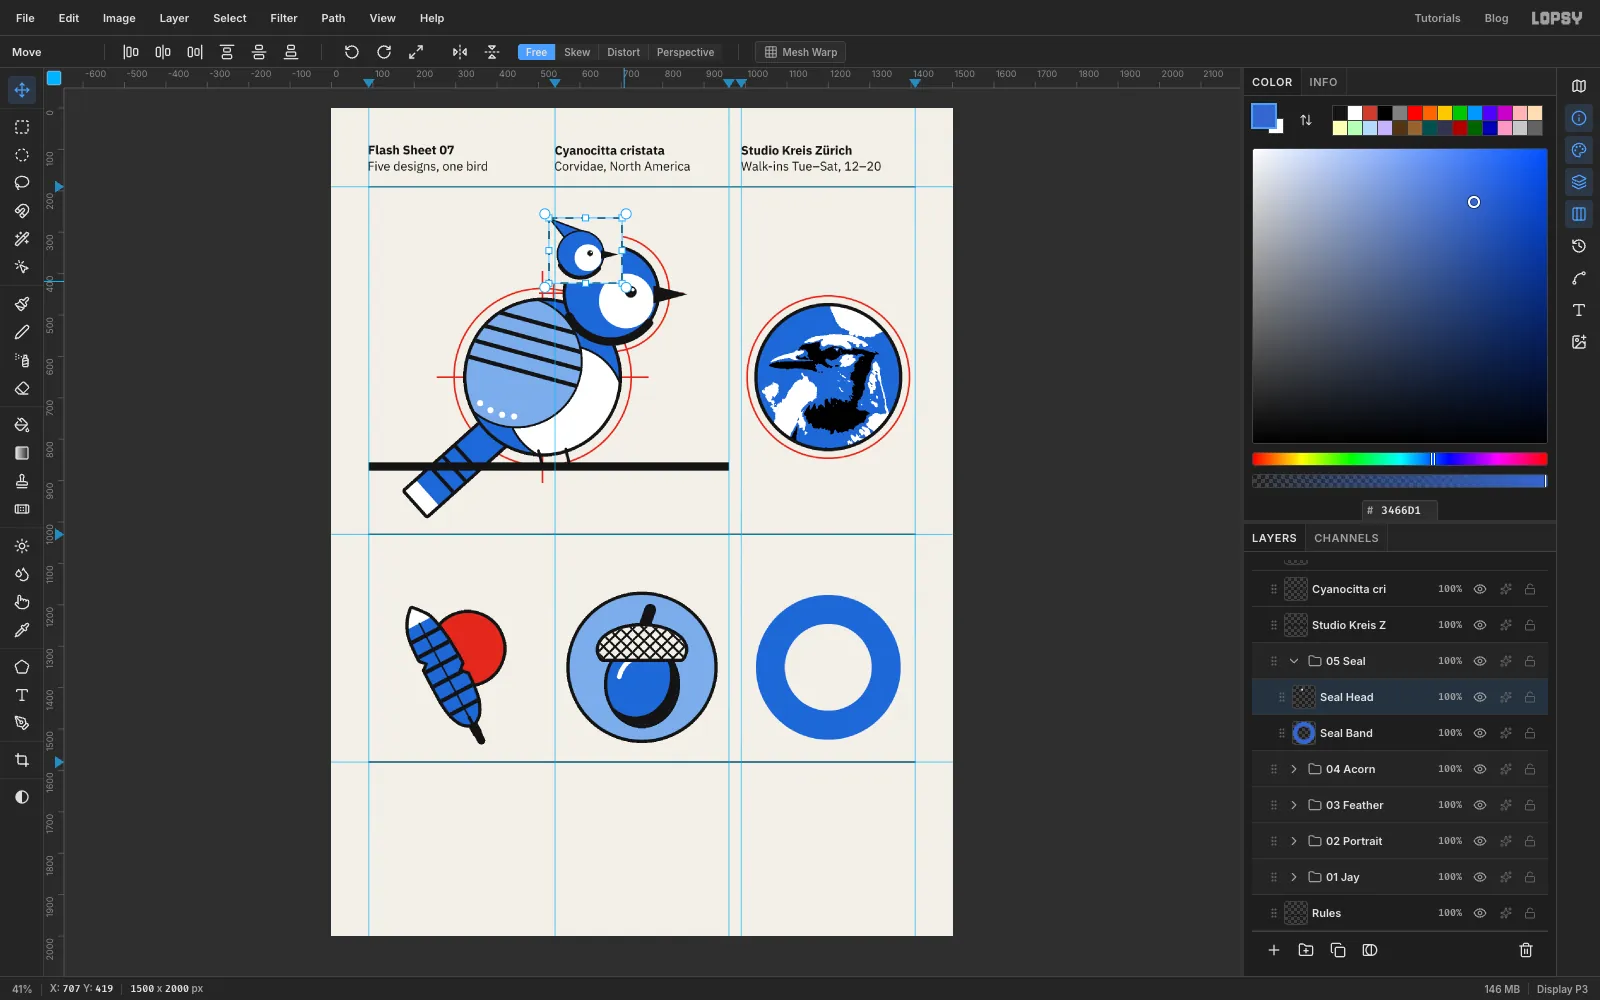
Select Seal Band and choose Edit → Paste. Lopsy pastes its own copies in place, so the head lands right on top of the original. Rename it Seal Head.
Draw the same marquee around it again. With the Move tool, Cmd-drag the bottom-right handle until the copy is about half size, then press Cmd+D. Drag it into the middle of the seal. Then make a circle from (1100, 1251) to (1300, 1451), choose Select → Inverse, press Delete to trim it round, and press Cmd+D.
-
Ring the seal
Click Add Layer and name it Seal Rings. With the Shape tool, no fill, stroke :
- Width 8, Cmd-dragged from (1200, 1351) to (1375, 1526): the outer edge.
- Width 5, Cmd-dragged from (1200, 1351) to (1305, 1456): the inner edge.
Then click two white Size 10 Brush dots in the middle of the band at 3 o'clock and 9 o'clock, 140 px out from the centre. They separate the two lines of text.
-
Set the seal's type on two arcs
Round-seal type is two separate runs. The top run reads clockwise over the top. The bottom run reads left to right along the bottom, so it stays the right way up.
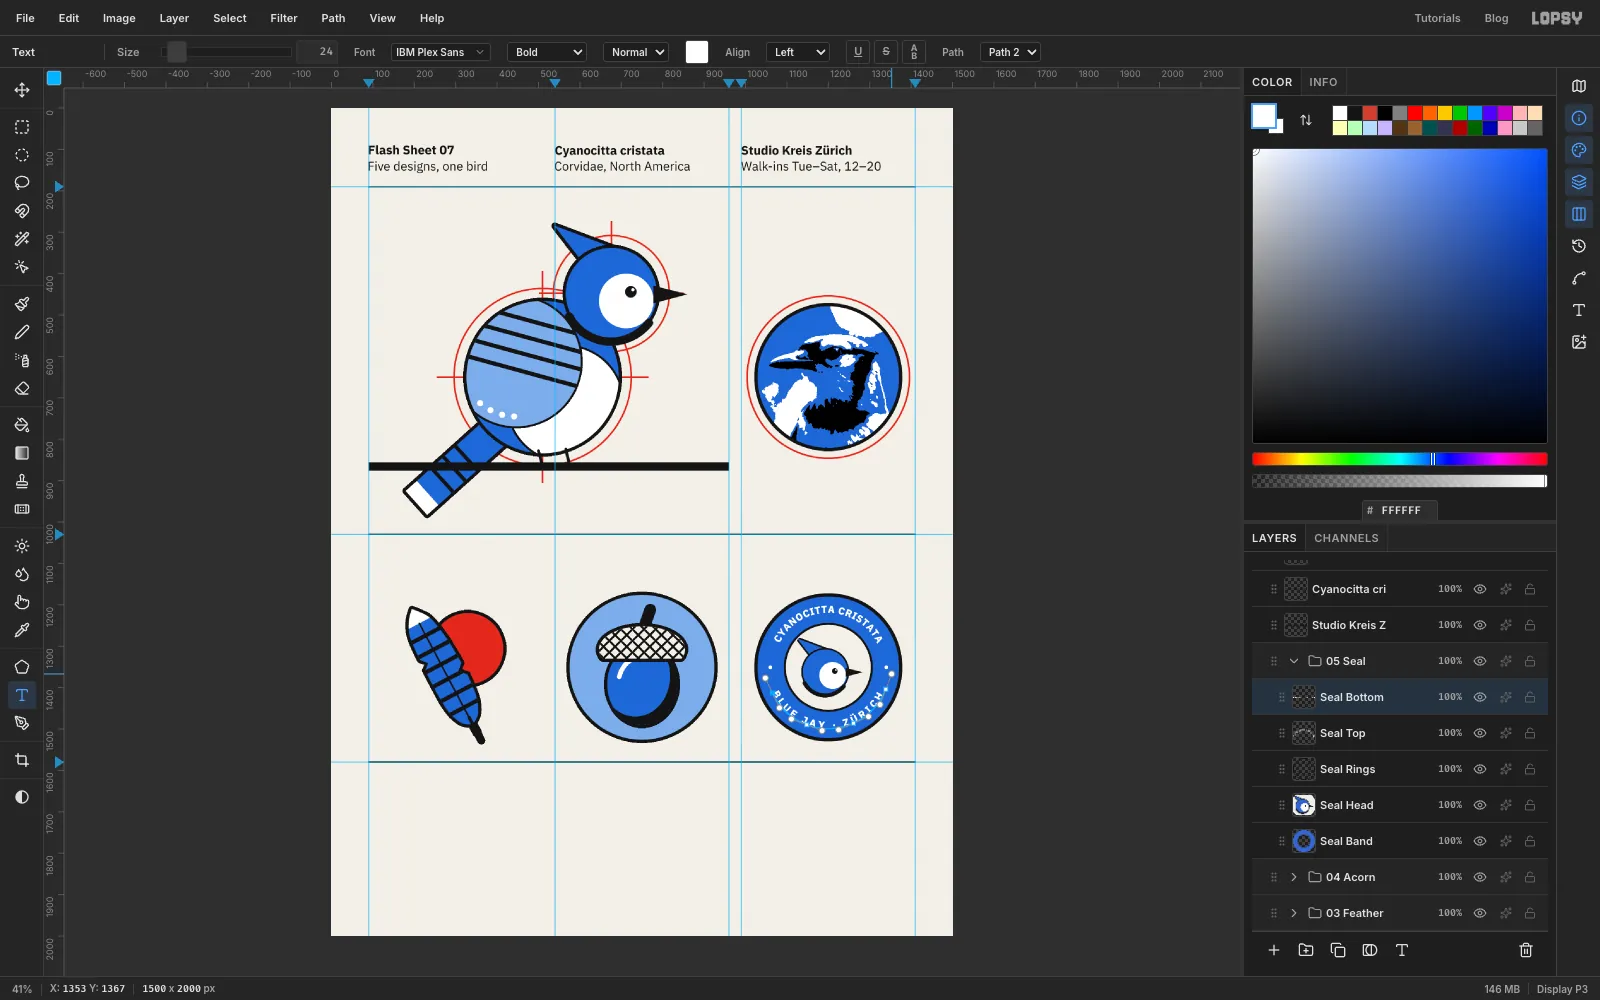
- Keep Seal Rings selected, so the type lands inside the seal's group. Set the foreground to . With the Text tool set to IBM Plex Sans Bold 24, click in an empty spot and type
CYANOCITTA CRISTATA. Press Tab and rename the layer Seal Top. Open the Text panel (the T button in the strip of panel icons on the right) and set Letter spacing to 1. - Click Seal Rings again, click another empty spot and type
BLUE JAY · ZÜRICH. Press Tab, rename it Seal Bottom and set its Letter spacing to 7. A short line needs more tracking to fill a similar arc. - Draw the paths with the Pen. The top run sits on an arc 131 px from the centre, running clockwise from about 10 o'clock to 2 o'clock. Press at each of these anchors and drag a handle about 34 px along the curve, in the direction of travel: (1082, 1294), (1155, 1227), (1254, 1231), (1322, 1302). Click the ✓ in the options bar to commit it without stroking.
- The bottom run sits on an arc 149 px from the centre, running left to right under the seal from about 8 o'clock to 4 o'clock, with handles about 39 px long: (1065, 1413), (1148, 1490), (1261, 1486), (1339, 1404). Commit it with ✓.
- Select each text layer and, with the Text tool active, pick its arc in the Path dropdown of the options bar. Path 1 is the top arc and Path 2 the bottom one.
Text on a path starts at the path's first anchor. If a run looks off-centre, drag that anchor along the circle until both ends sit the same distance from the white dots. The top arc has the smaller radius because its letters stand outward from the curve. The bottom letters hang inward, so their arc goes on the outside of the band.
- Keep Seal Rings selected, so the type lands inside the seal's group. Set the foreground to . With the Text tool set to IBM Plex Sans Bold 24, click in an empty spot and type
-
Label every design
Each cell gets a two-line label in IBM Plex Sans 26. The bold line's caps start 41 px under the rule, and the regular line's caps 34 px lower. Before you start, click Rules, pick the Text tool, set Letter spacing back to 0 in the Text panel and set the foreground to . The seal's tracking and its white both carry over to new text otherwise.
Set the weight to Regular and type the second lines first. Then switch to Bold and type the first lines above them. Click Rules before each new label:
- x 90, under rule 1: 01 Jay /
12 cm · CHF 320.– - x 990, under rule 1: 02 Jay portrait /
9 cm · CHF 280.– - x 90, under rule 2: 03 Tail feather /
10 cm · CHF 140.– - x 540, under rule 2: 04 Acorn /
7 cm · CHF 90.– - x 990, under rule 2: 05 Seal /
8 cm · CHF 160.–
CHF 320.–is how Swiss prices are written. Real flash also lists a size, so the client knows what they're picking.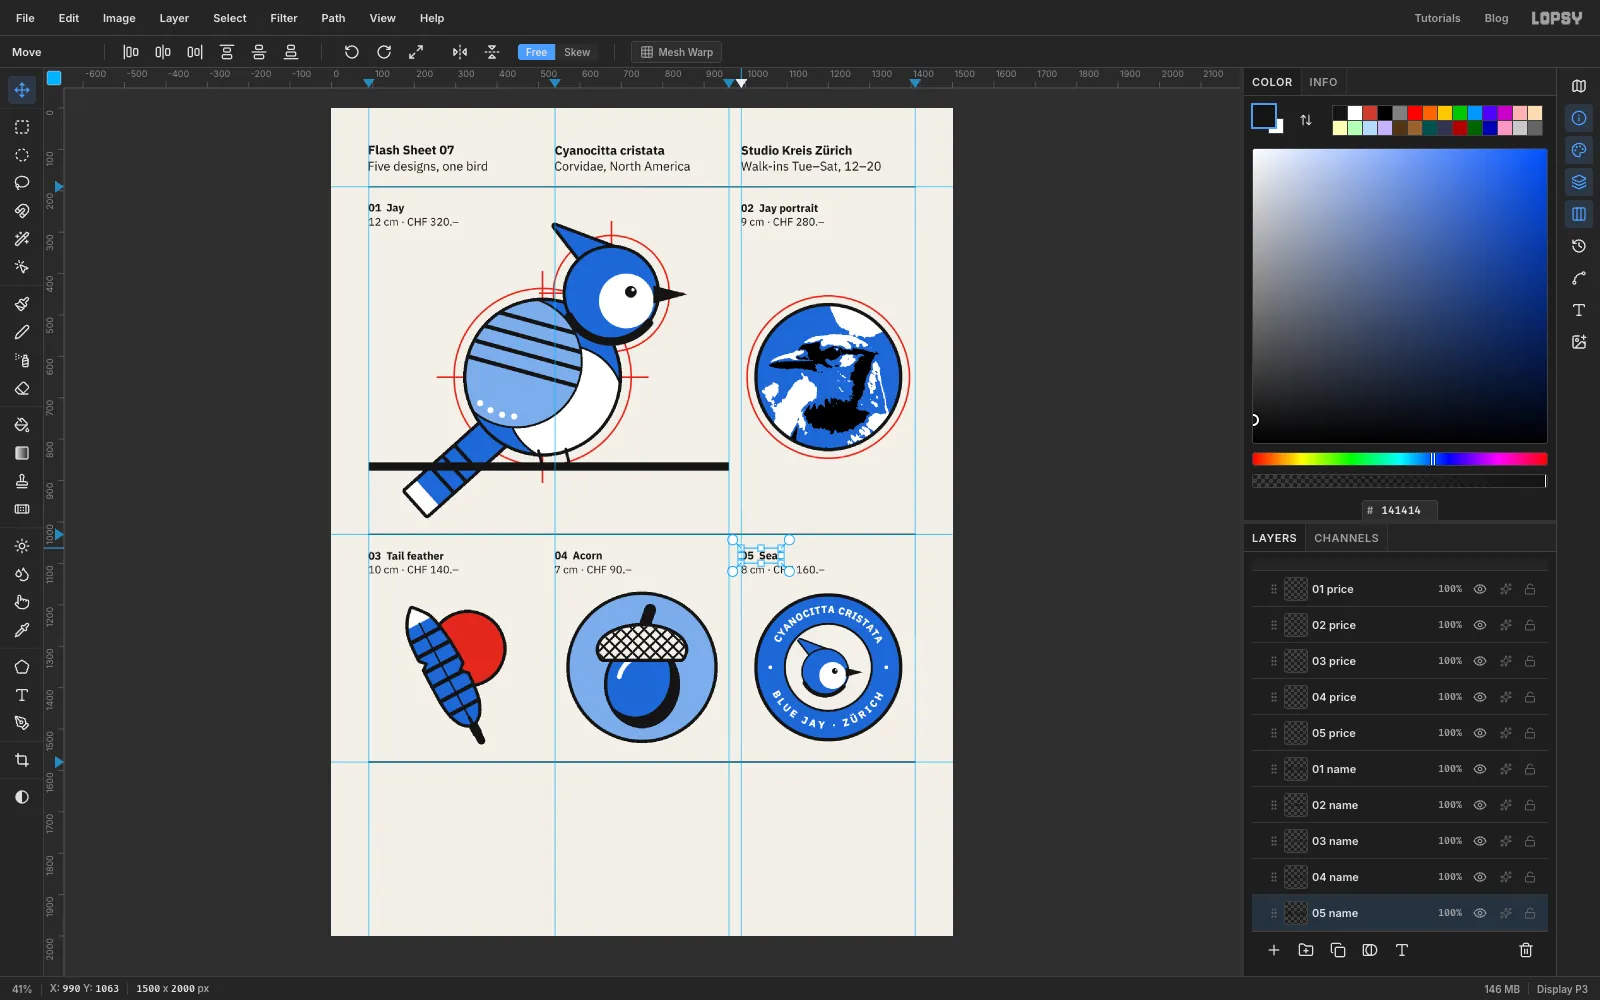
- x 90, under rule 1: 01 Jay /
-
Colour the title letter by letter
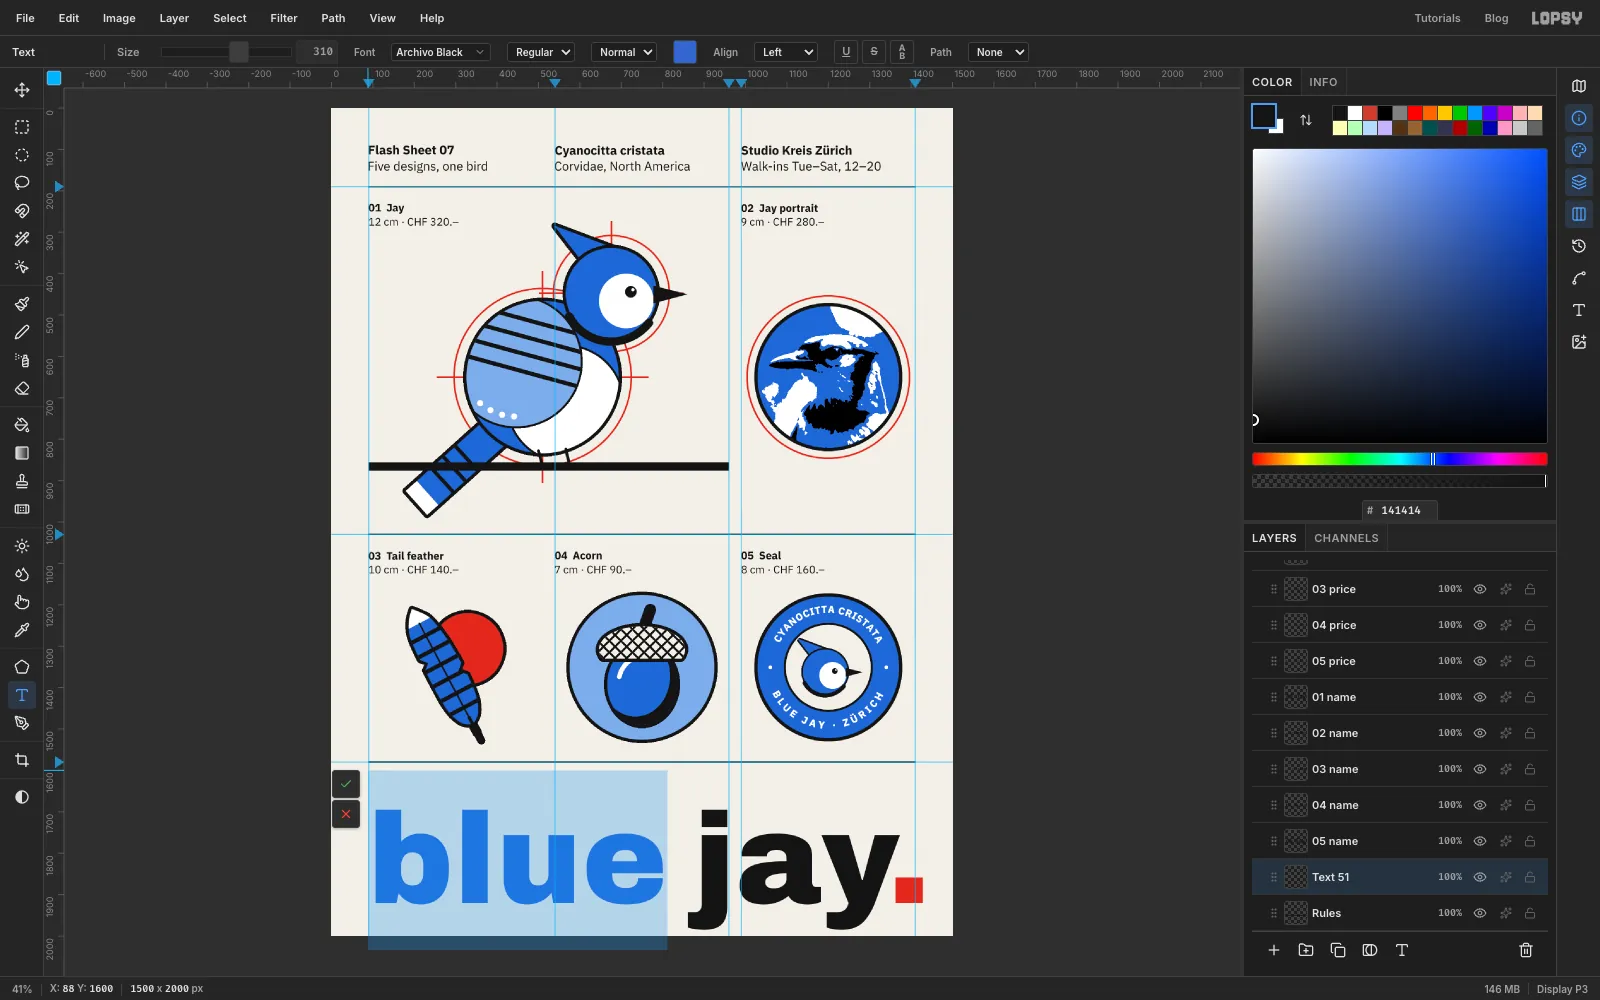
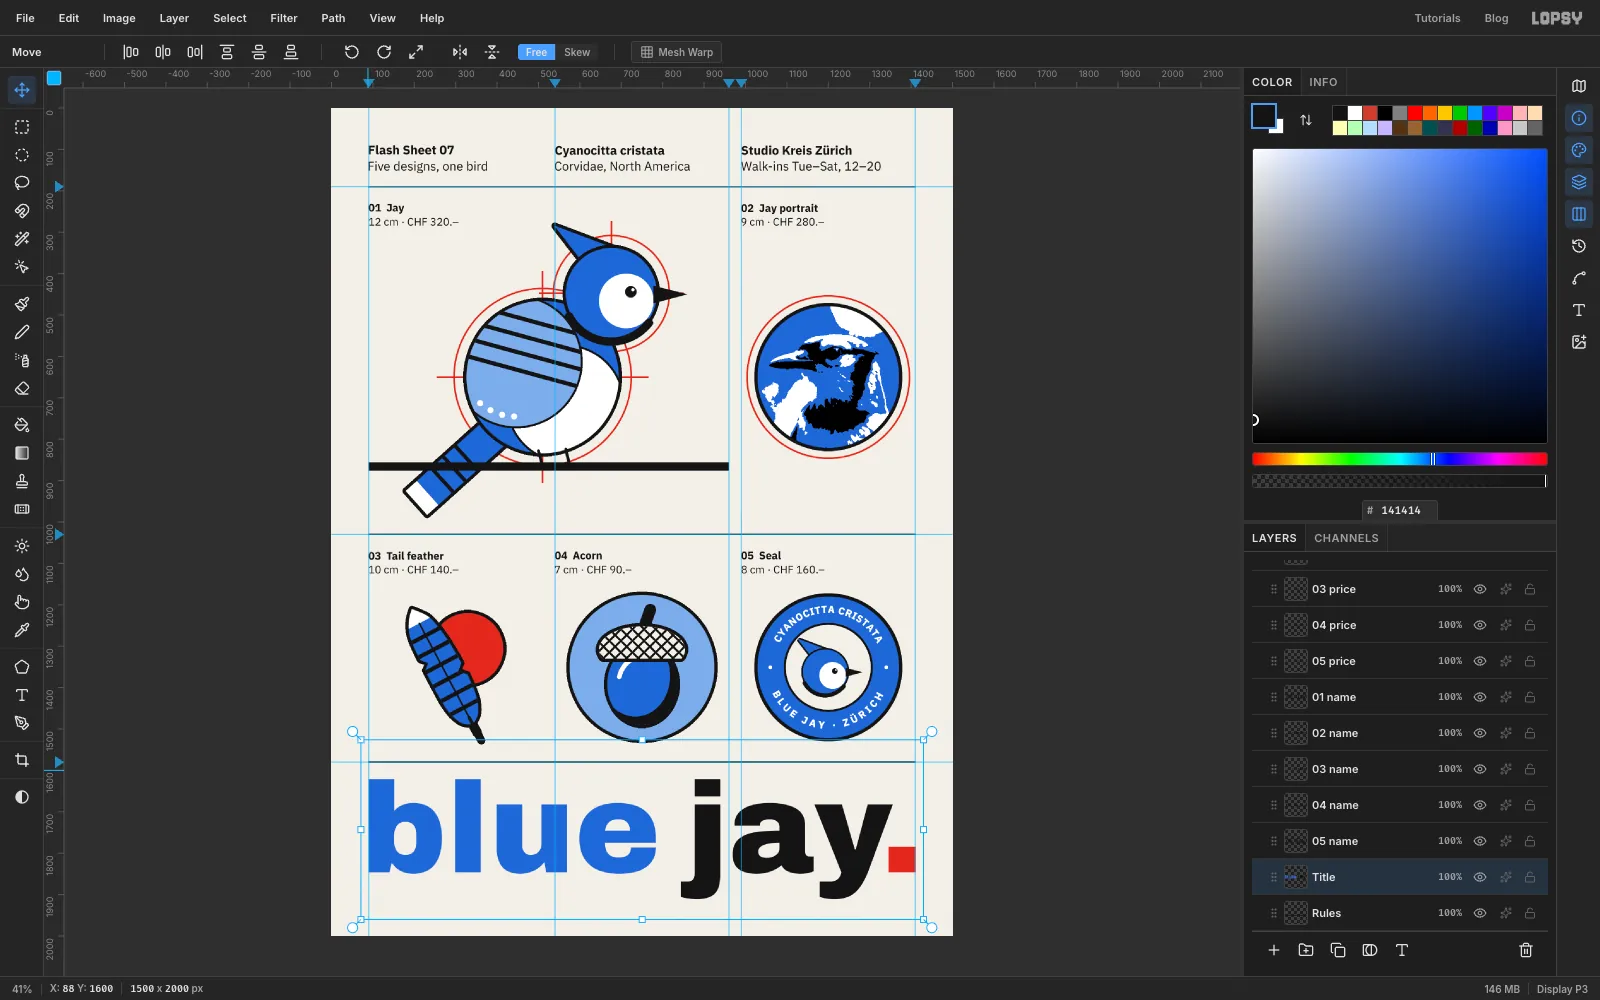
Click Rules. Set the Text tool to Archivo Black, 310, in , and click just under the bottom rule at the left margin. Type
blue, a thin space, andjay.. A normal space is far too wide at this size. On a Mac, press Ctrl+Cmd+Space to open the system Character Viewer, search for thin space and double-click it. On Windows, copy the U+2009 character from Character Map.Don't press Tab yet. While you're still editing:
- Press Shift+← to select the period. Click the Text color swatch in the options bar and type
D23C2C. Click the swatch again to close it. - Press Home, then Shift+→ four times to select blue, and give it .
Now press Tab to commit. Each range keeps its own colour.
- Press Shift+← to select the period. Click the Text color swatch in the options bar and type
-
Fit the title to the measure
In Swiss work a big title runs the full measure. Check where the period ends and adjust the Size until its right edge lands on the 1410 guide. At 310 px with a thin space it does. Then use the Move tool and the arrow keys to put the left edge of the b on the 90 px guide and the bottoms of the j and y at y 1910, the same 90 px margin as the sides.
-
Rotate the colophon
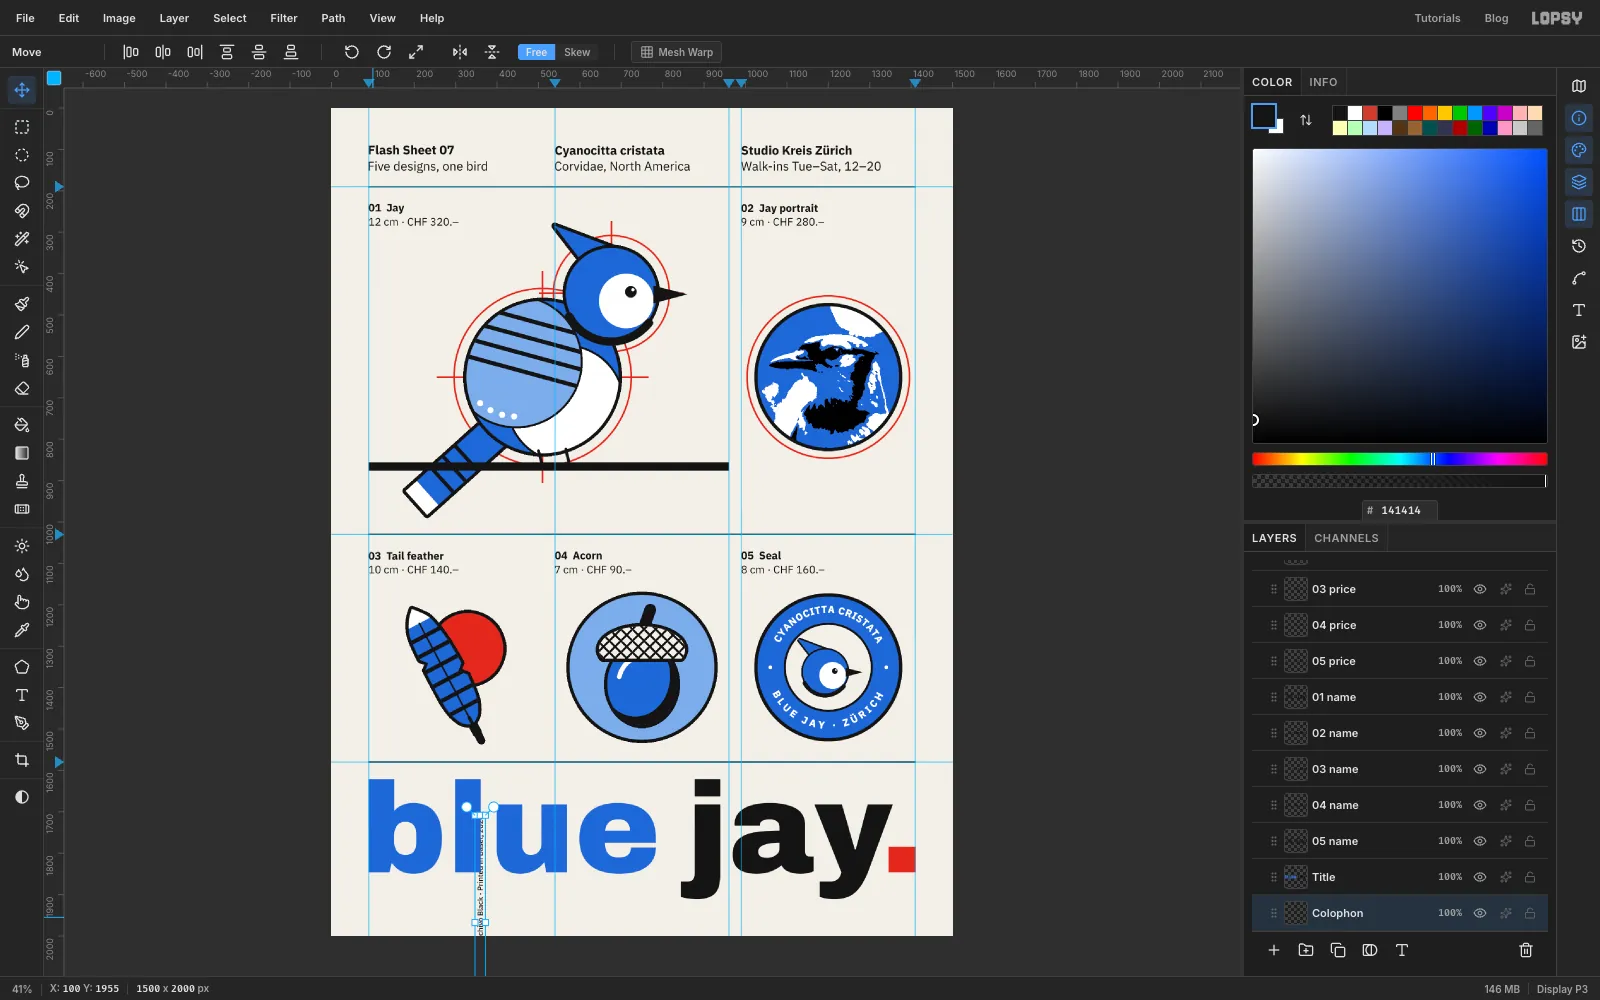
Click Rules. With the Text tool at IBM Plex Sans Medium 18 in , click in the empty bottom margin and type
Set in IBM Plex Sans and Archivo Black · Printed in Basel, 2026. Press Tab.Press Cmd+D so nothing is selected, switch to the Move tool and click Rotate 90° CCW in the options bar. The text stays live and turns on its own centre, so it now stands upright, reading from bottom to top.
-
Place the colophon in the margin
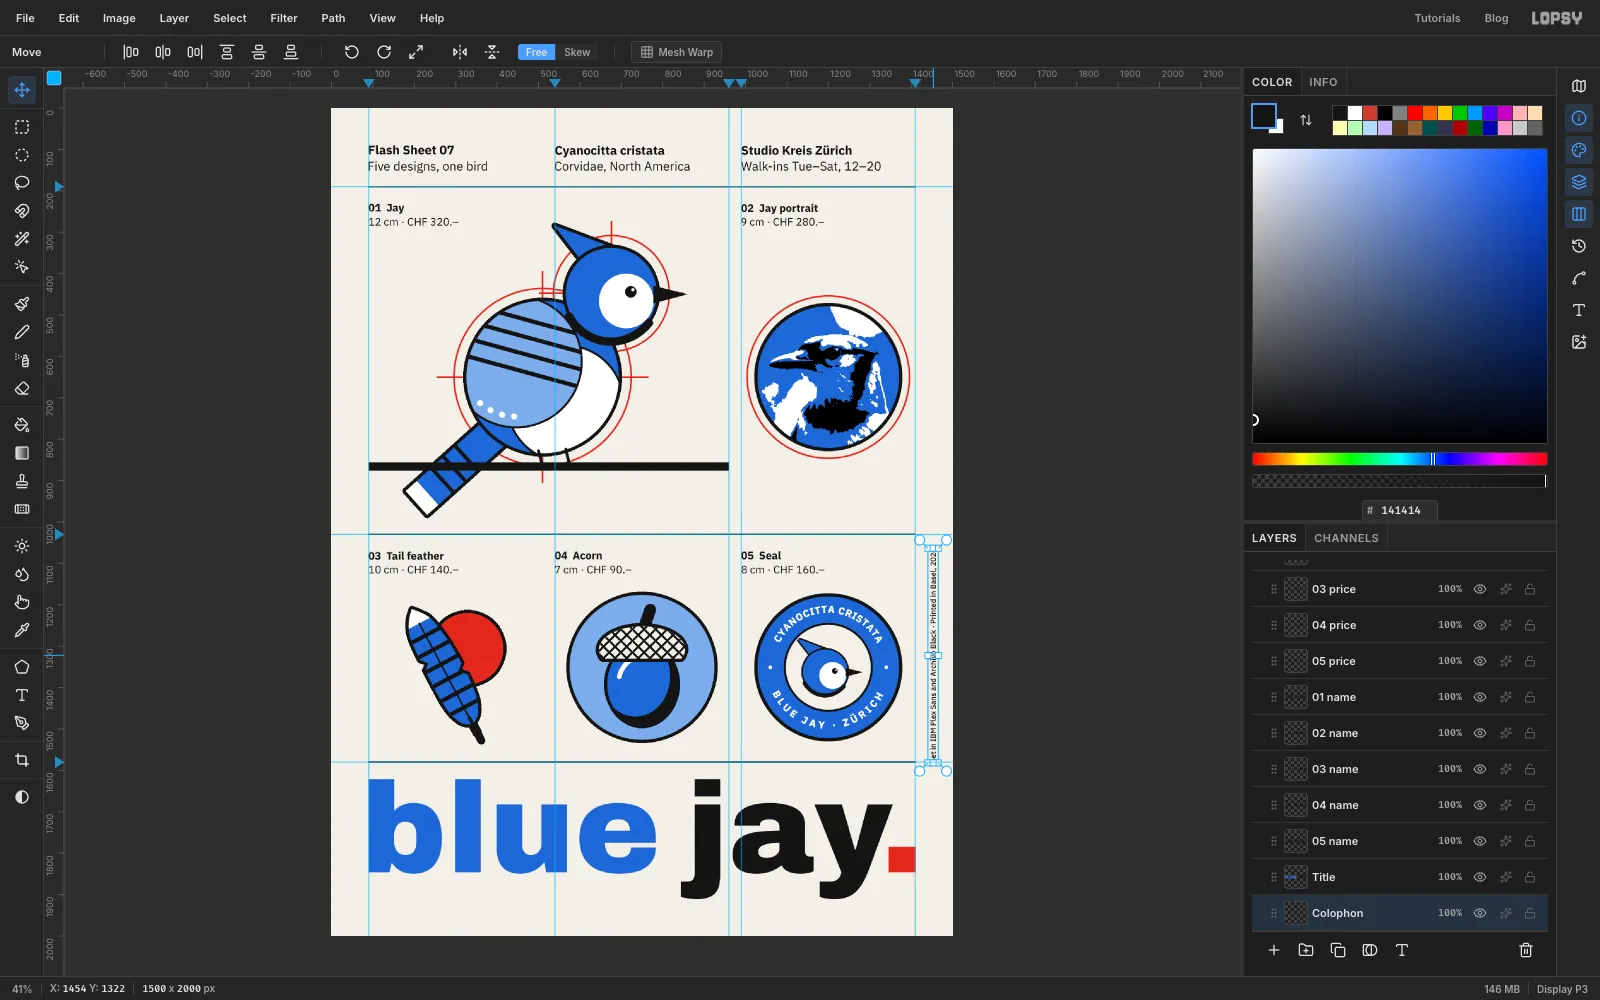
Drag the colophon into the right margin and finish with the arrow keys. Its left edge goes at x 1446, centred in the 90 px margin, and its bottom exactly on the bottom rule at y 1580. At 18 px it runs up almost to the second rule, so it spans the whole second row.
-
Add paper grain
Select the topmost layer in the list and click Add Layer, so the new layer sits over everything. Name it Grain. Fill it with , then apply Filter → Add Noise… with Amount 30, Mono and Gaussian.
Open the layer's effects drawer, set the Blend mode to Overlay, and set the layer opacity to 60 %. Mid-grey disappears in Overlay, so only the speckle shows, as a fine paper tooth over every colour. Turn off View → Show Guides and choose File → Quick Export PNG.