Design a Swiss Style Sacred Geometry Tattoo Flash Sheet
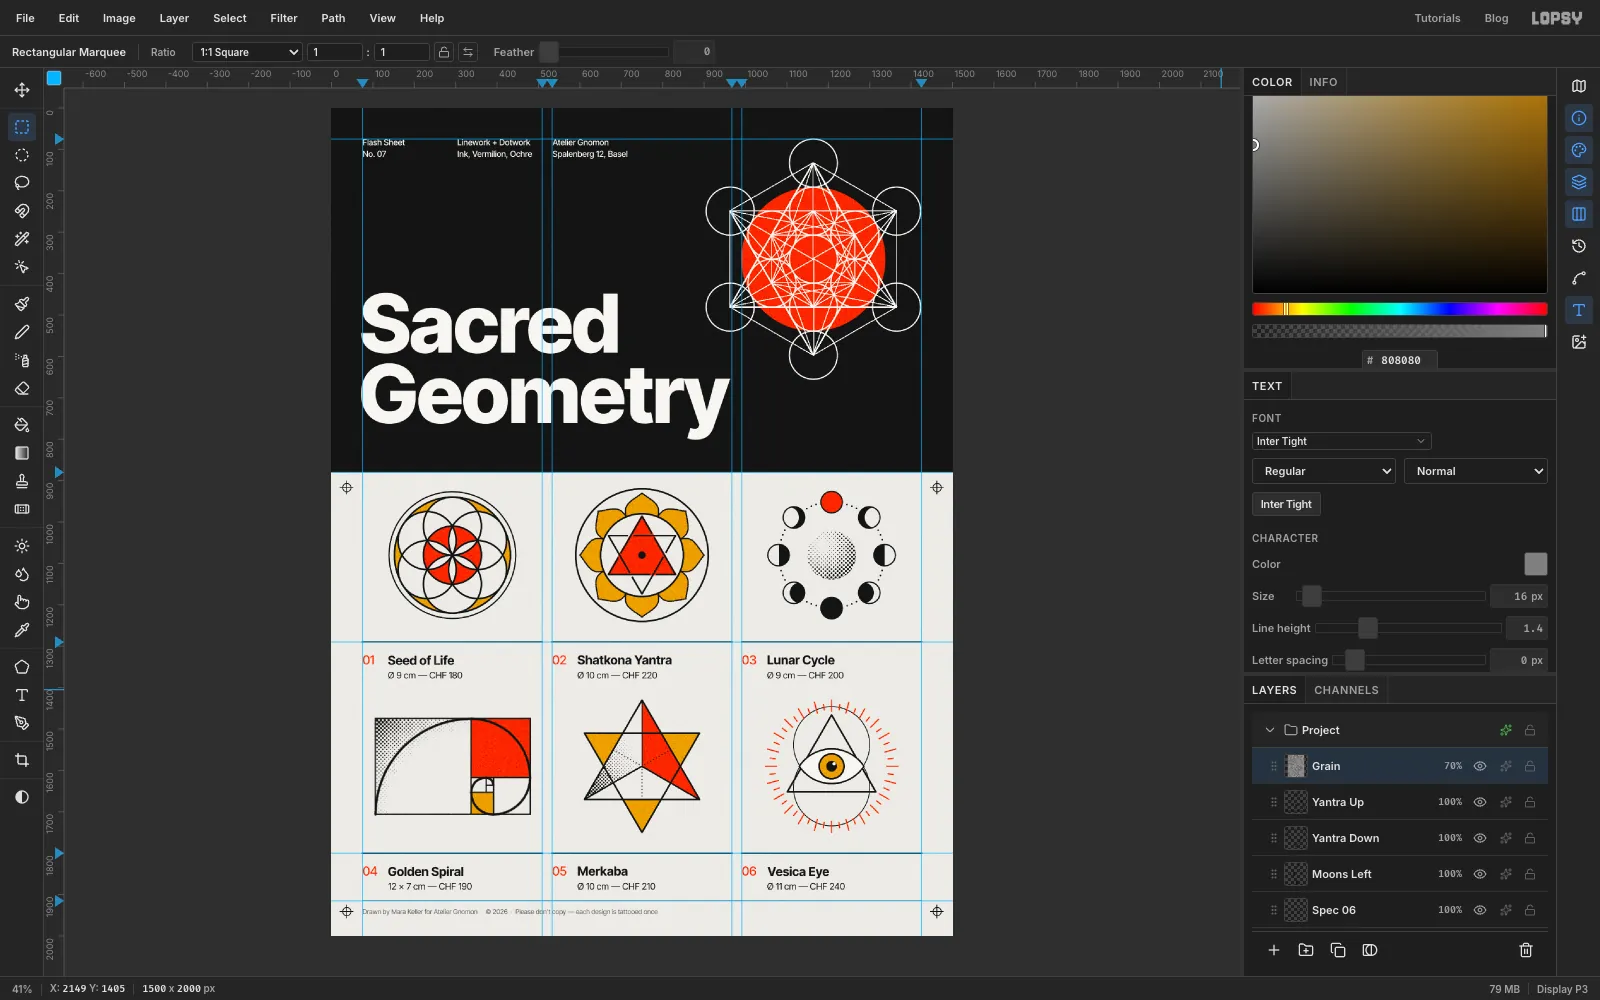
Make a Swiss Style sacred geometry tattoo flash sheet in Lopsy with Metatron's Cube, radial symmetry, woven triangles, halftone dotwork and a strict grid.
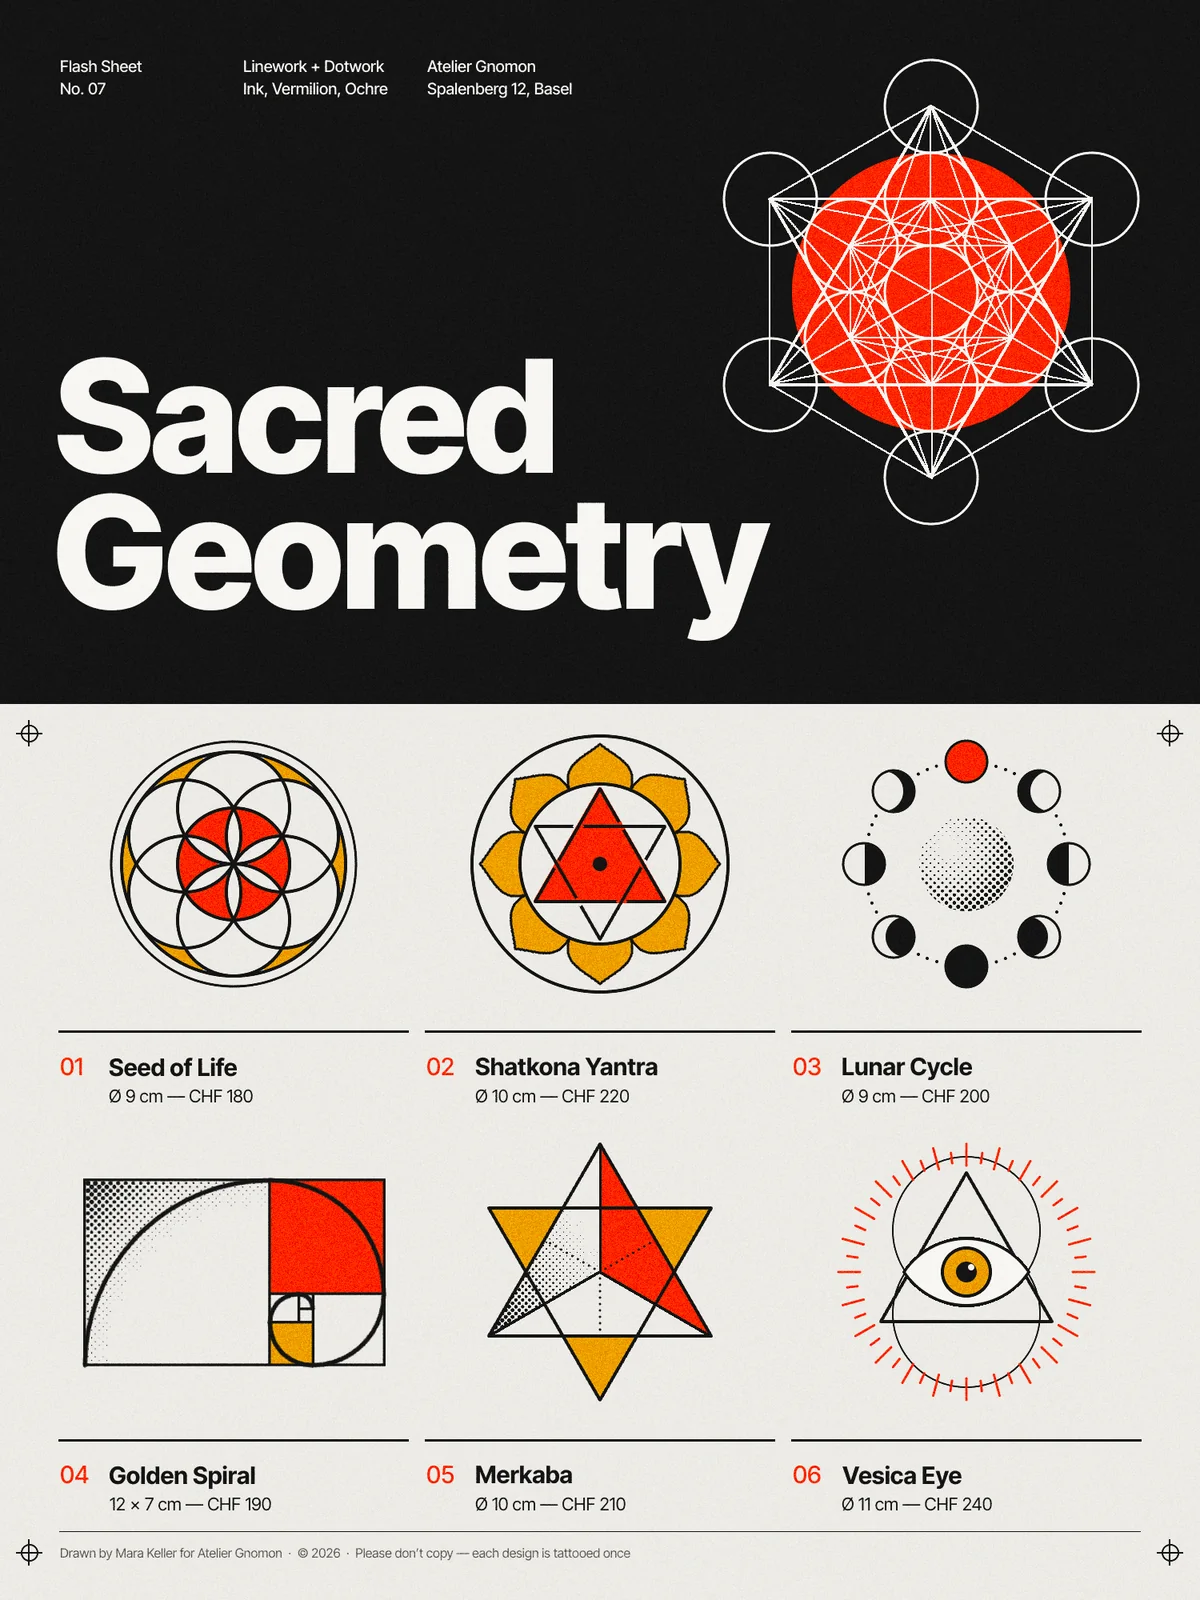
A tattoo flash sheet is a printed menu of ready-to-tattoo designs, each with a number, a size and a price. Sacred geometry suits the format perfectly: every design is built from circles, triangles and ratios, the same way a draughtsman would build them with a compass and a ruler.
This sheet borrows its layout from Swiss International Style, the school of Josef Müller-Brockmann, whose concert posters set big flat geometry against a black field. You'll make a 1500 × 2000 px sheet. A black header holds a white Metatron's Cube and a huge grotesk title. Under it, six designs sit in a strict three-column grid. Along the way you'll use the Shape tool's exact-size dialog, radial symmetry, the Magic Wand, the Pen, marquee add, subtract and intersect, a halftone filter for tattoo dotwork, flips, rotations, groups and copy and paste.
The palette:
-
Ink
-
paper
-
line white
-
Vermilion
-
ochre
-
Colophon grey
Type is Inter Tight throughout: ExtraBold for the title, Bold for the design names, Medium for the numbers and the header, and Regular for sizes, prices and the colophon.
Type every colour into the Hex field of the Color panel (or the hex field of the popover you're in) and press Enter. Every coordinate is in document pixels. The X / Y readout at the bottom left of the status bar shows where the cursor is, so hover to find a point before you click.
Most circles here are exact sizes, so you'll use two dialogs a lot. With the Shape tool, a click without dragging opens Shape Size, and the shape is centred on your click. With either Marquee, a click without dragging (when nothing is selected) opens a From / To dialog for the selection's corners. For a circular marquee, From and To are the corners of the circle's box. A 50 px circle centred on (100, 100) is From 75, 75 To 125, 125.
-
Set up the Swiss grid
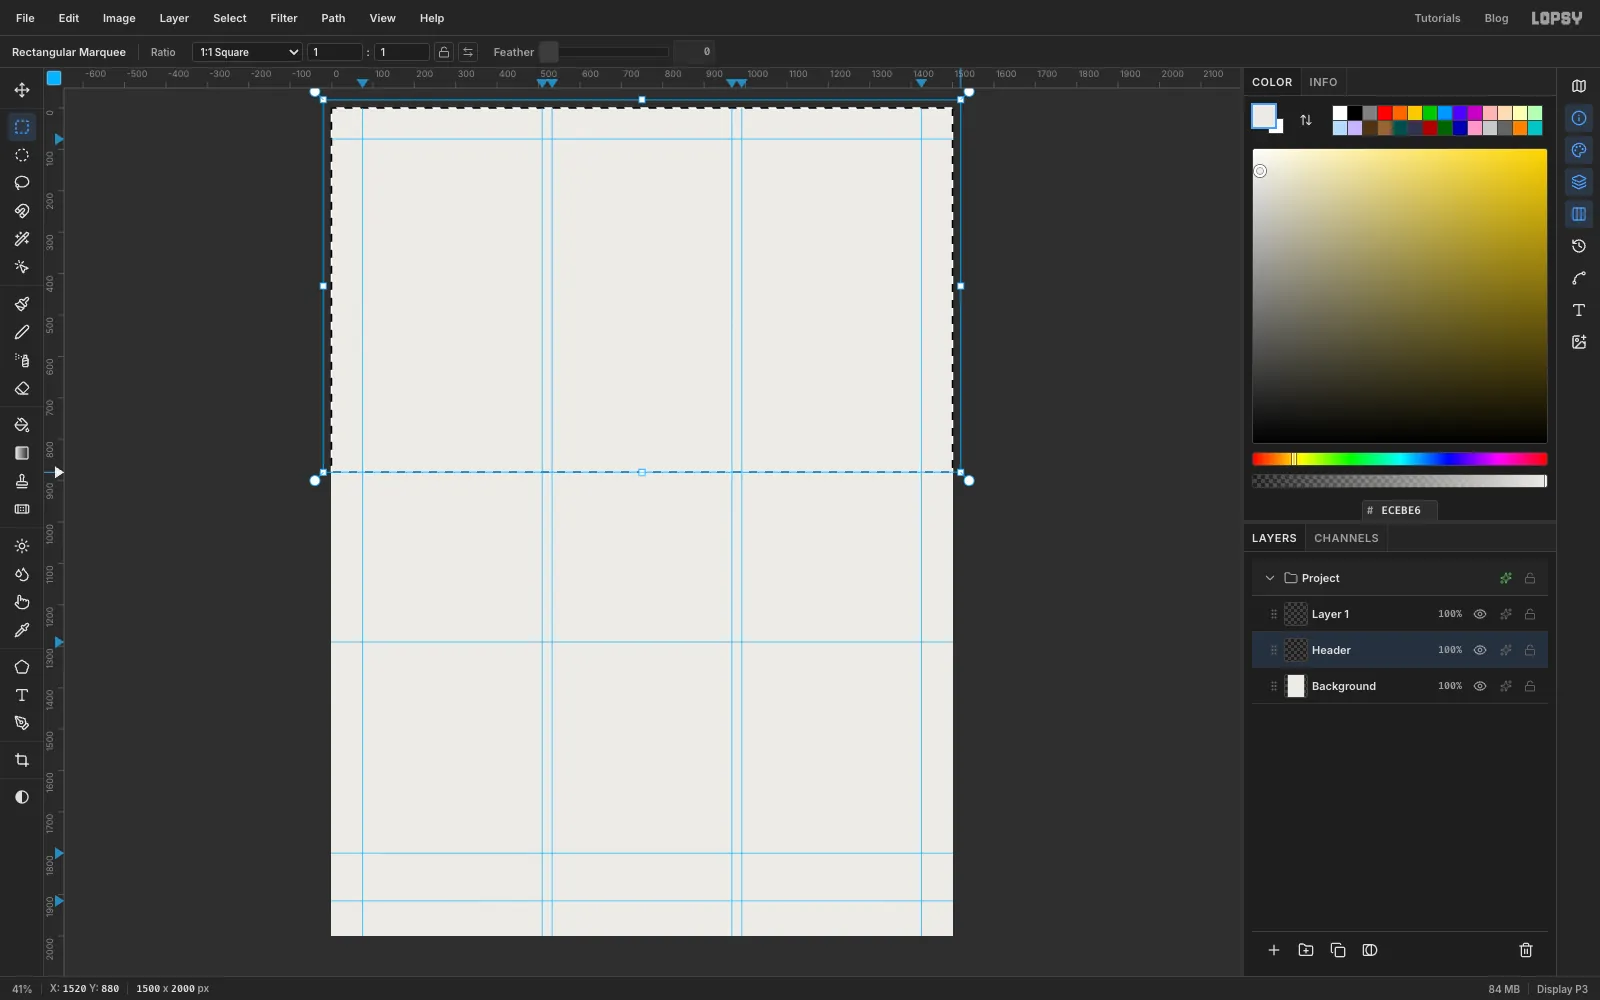
Choose File → New and create a 1500 × 2000 document. The grid has 75 px margins and six 205 px columns with 24 px gutters. Each design cell spans two columns, so the cells run from x 75 to 509, 533 to 967 and 991 to 1425.
- Turn on View → Show Rulers. Click the top ruler to drop vertical guides at 75, 509, 533, 967, 991 and 1425.
- Click the left ruler to drop horizontal guides at 75 (the top margin), 880 (the bottom of the header), 1290 and 1800 (the rules under each row of designs) and 1915 (the foot of the sheet).
- Open the View menu and untick Snap to Guides. Several small circles in this sheet sit within a few pixels of a guide, and snapping would drag them onto it.
- Select Background, set the foreground to and choose Edit → Fill. With no selection it fills the whole layer.
New documents also come with an empty Layer 1. Leave it where it is; it becomes the colour layer of the first design.
Click Add Layer and name the new layer Header. Pick the Rectangular Marquee (M) and drag from just outside the top-left corner of the canvas, past the right edge, down to the 880 guide.
-
Fill the black header
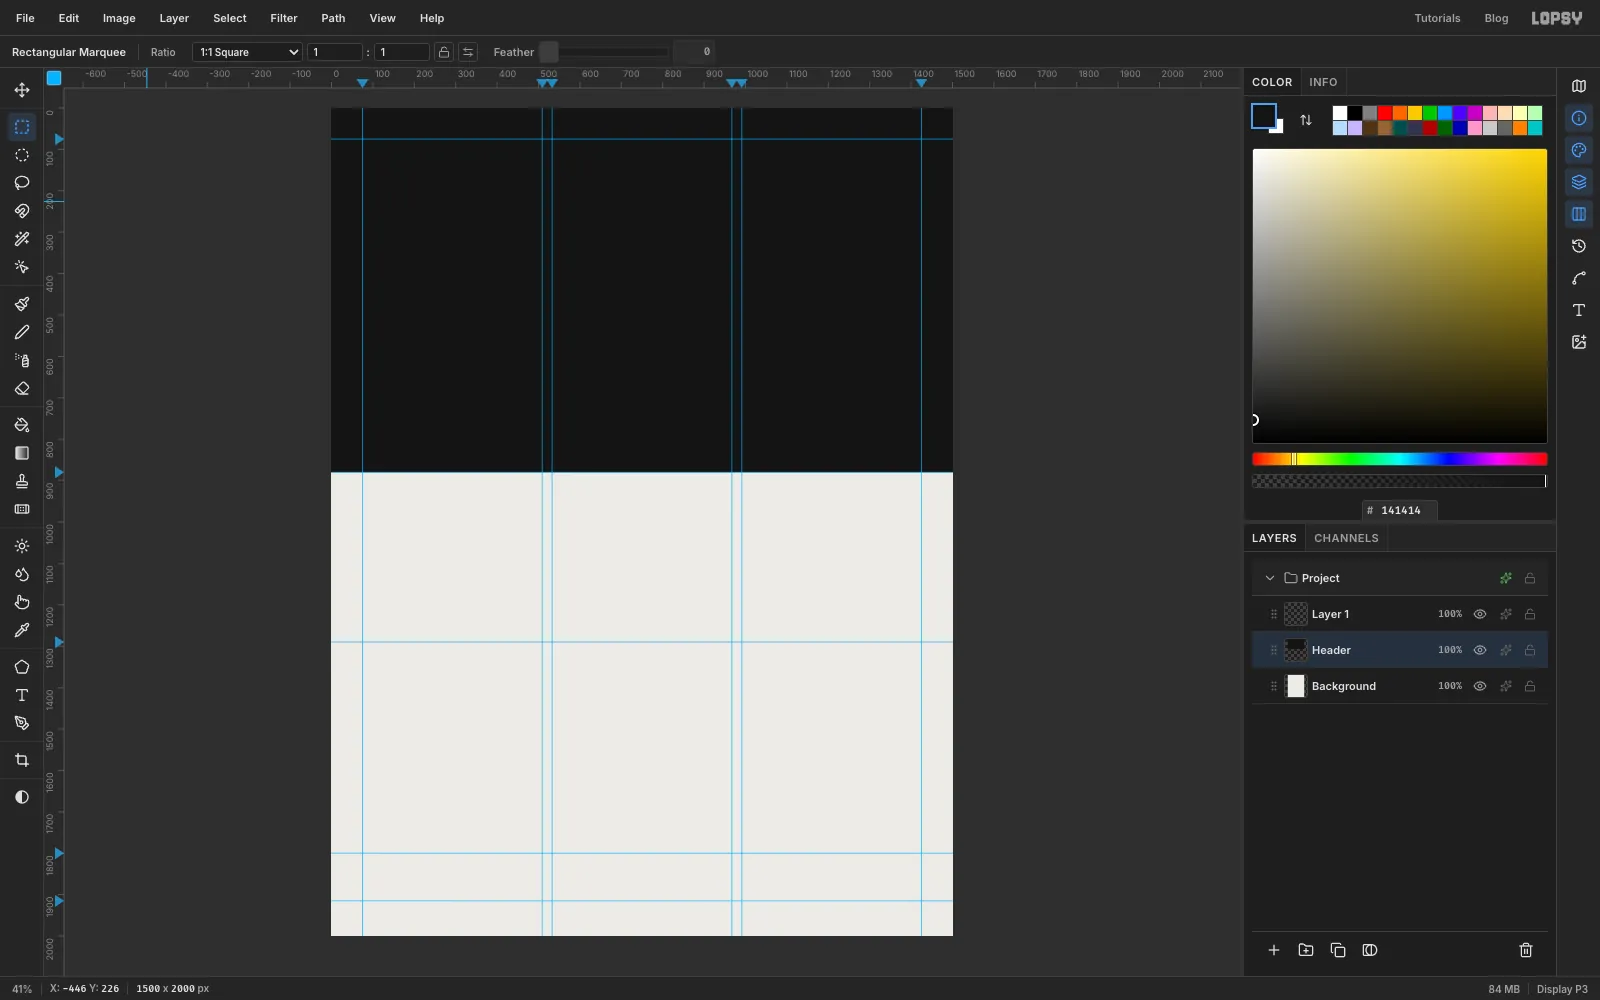
Set the foreground to , choose Edit → Fill, then press Cmd+D to deselect.
Starting the marquee outside the canvas means the black runs cleanly off the top and both sides. A Swiss poster's colour fields bleed off the edge; a thin paper sliver along one side would look like a printing mistake.
-
Draw the thirteen circles of Metatron's Cube
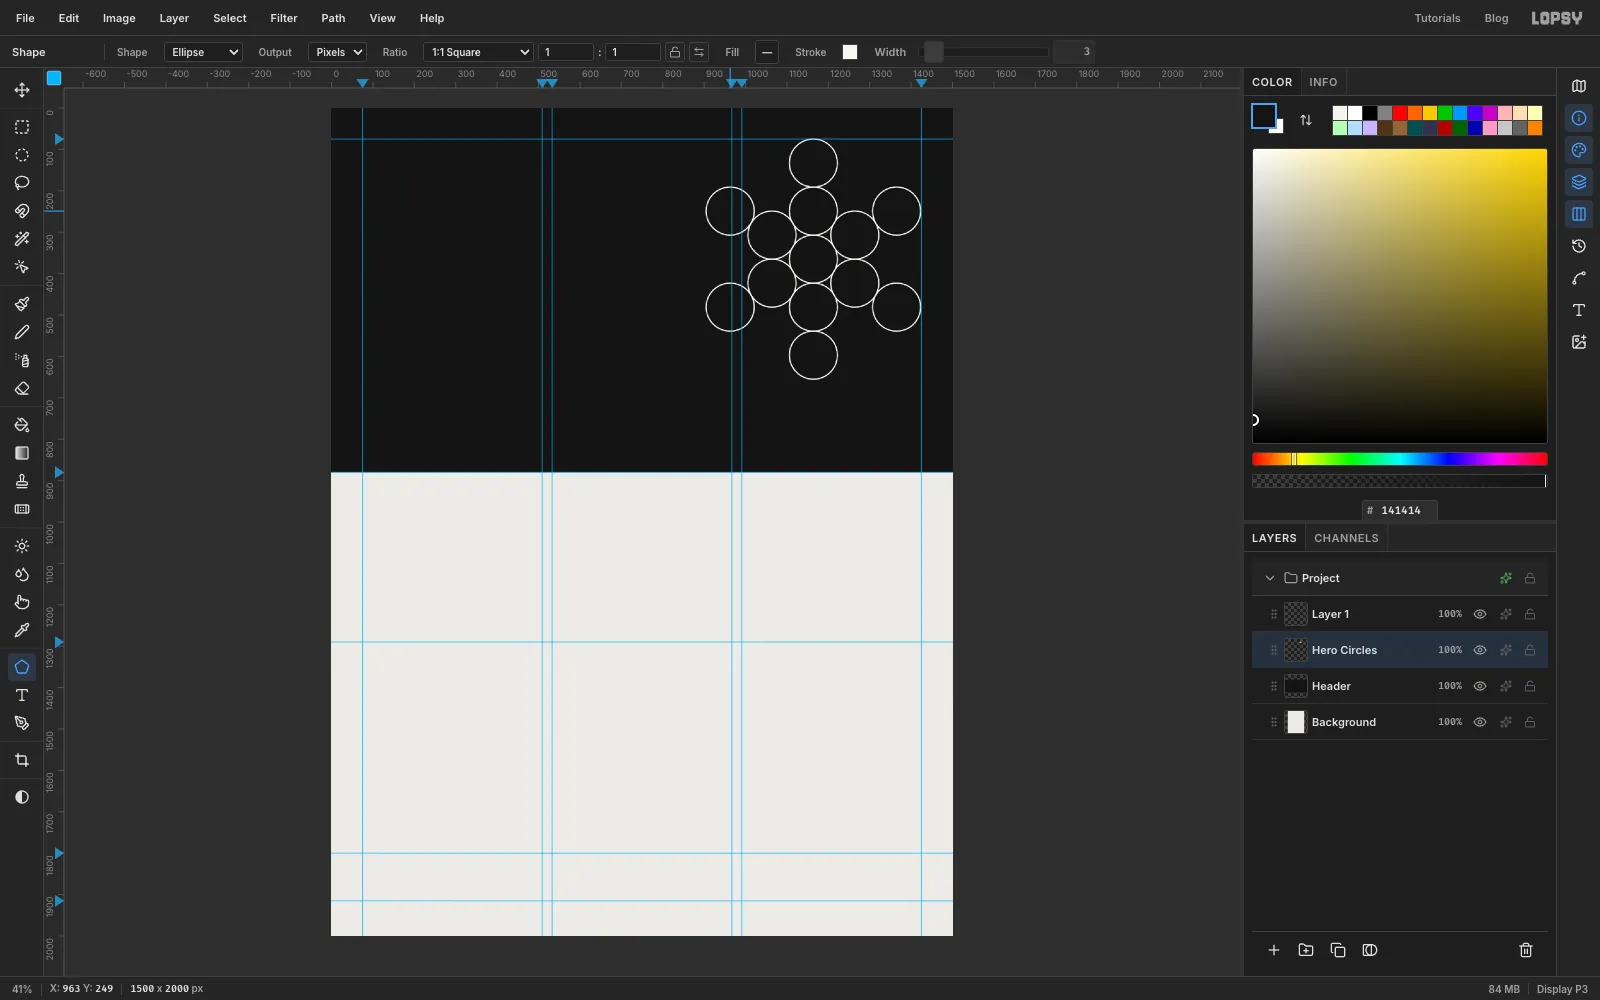
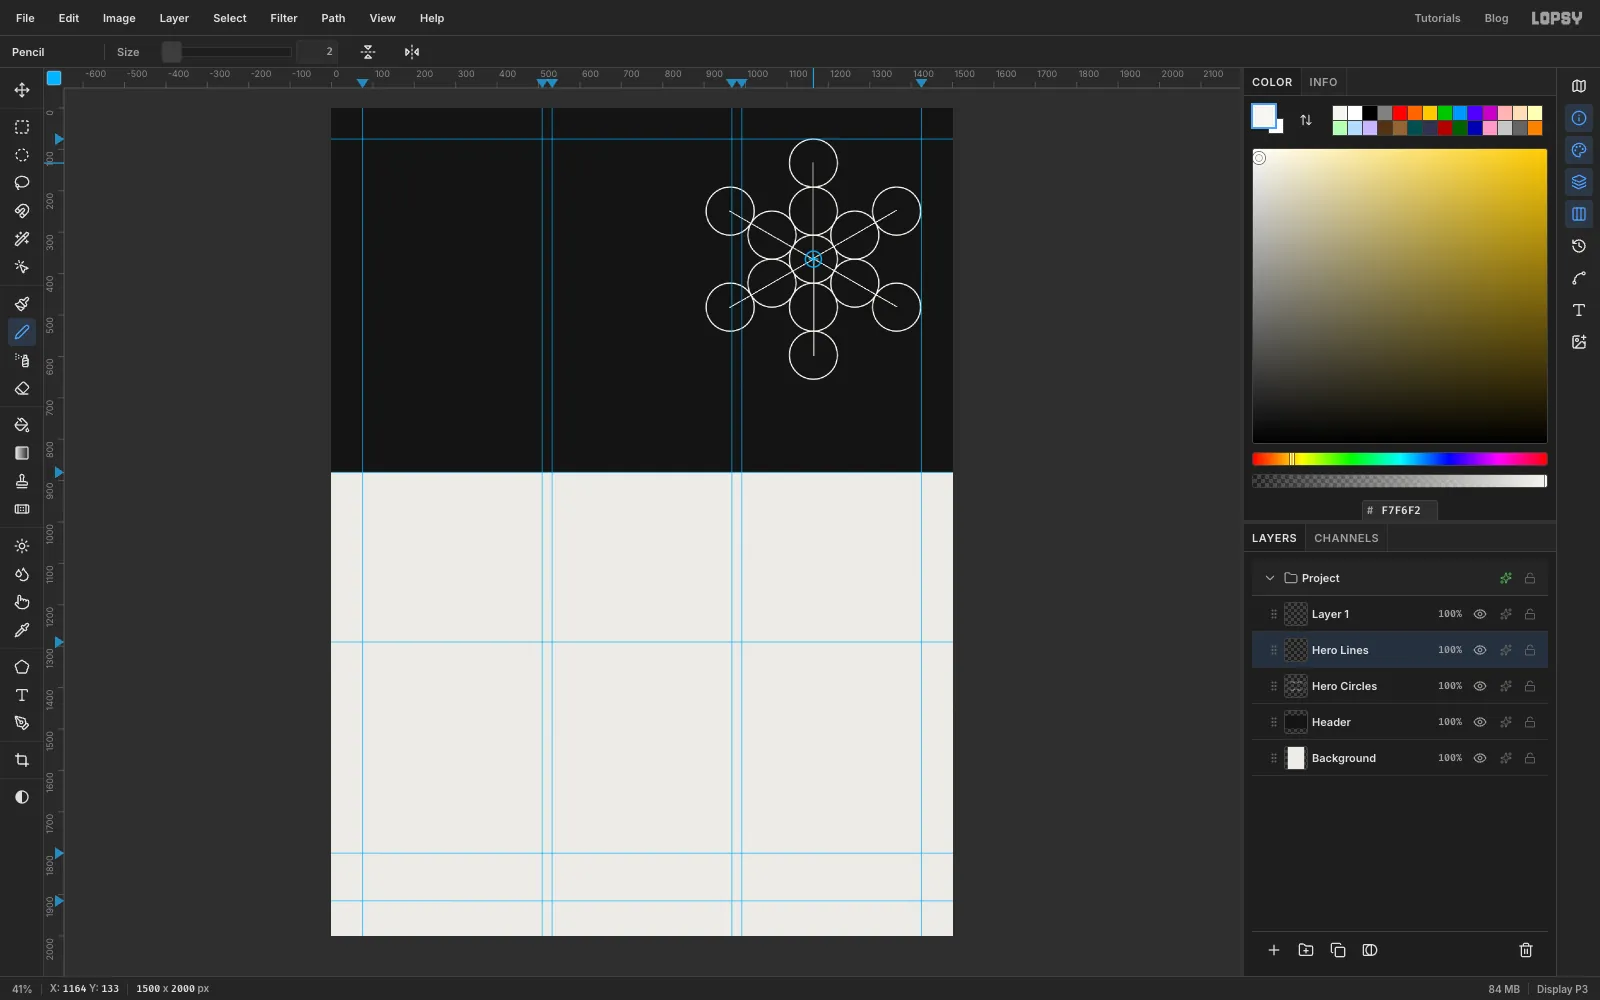
Metatron's Cube starts as the Fruit of Life: thirteen equal circles. One sits in the centre, six touch it, and six more sit twice as far out on the same spokes.
Click Add Layer and name it Hero Circles. Pick the Shape tool (U) and set Shape to Ellipse and Output to Pixels. Click the Fill swatch and choose Remove fill. Click the Stroke swatch, type
F7F6F2in its hex field and set Width to 3.Now click once without dragging. The Shape Size dialog opens. Type 116 for both Width and Height and press Enter. The circle is created centred on your click, so click at each centre in turn:
- Centre: (1164, 365)
- Inner ring, 116 px out: (1164, 249), (1264, 307), (1264, 423), (1164, 481), (1064, 423), (1064, 307)
- Outer ring, 232 px out: (1164, 133), (1365, 249), (1365, 481), (1164, 597), (963, 481), (963, 249)
The outermost circles reach the 1425 margin on the right and the 75 margin at the top, so the figure hangs exactly in the grid's top-right corner.
-
Turn on six-way radial symmetry
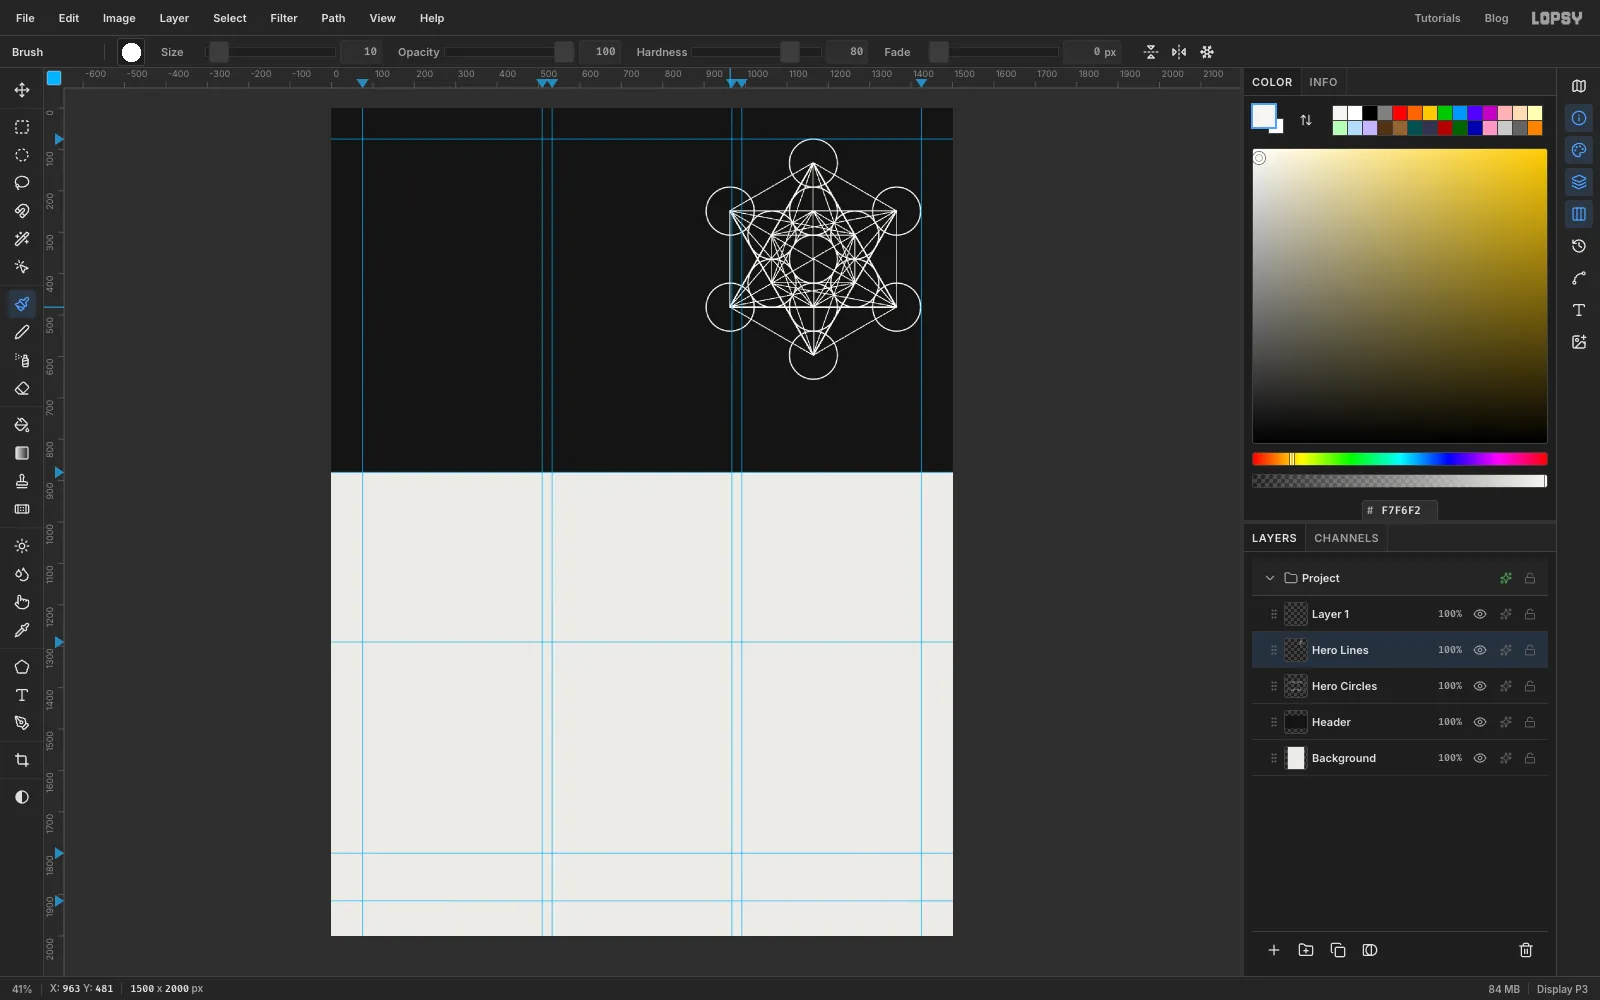
The full cube has 78 lines joining every centre to every other. Because the figure is six-way symmetric, you only need to draw nine of them.
Click Add Layer and name it Hero Lines. Pick the Brush (B) and click Radial Symmetry in its options bar. Set Segments to 6, then Cmd+click the centre of the middle circle at (1164, 365) to move the symmetry centre there.
Pick the Pencil (N). The symmetry setting carries over. Set Size to 2 and the foreground to . Click the centre, then Shift+click the centre of the top outer circle at (1164, 133). Shift draws a straight line from your last click, and symmetry repeats it as six spokes at once.
-
Draw the rest of Metatron's Cube
Each line below is a click on the first point and a Shift+click on the second. Press each click right on a circle's centre. The top inner centre is (1164, 249) and the top outer centre is (1164, 133).
- Top inner to the upper-right inner centre (1264, 307).
- Top inner to the lower-right inner centre (1264, 423).
- Top outer to the upper-right outer centre (1365, 249).
- Top outer to the lower-right outer centre (1365, 481).
- Top inner to the upper-right outer centre (1365, 249).
- Top inner to the upper-left outer centre (963, 249).
- Top inner to the lower-right outer centre (1365, 481).
- Top inner to the lower-left outer centre (963, 481).
Those eight lines, plus the spoke, give all 78 once they're repeated six times. The hexagon, the two big triangles (a hexagram) and the inner star appear on their own.
Finish by clicking the Brush's Radial Symmetry button again to turn it off. Leave it on and every later stroke will repeat six times.
-
Set the title
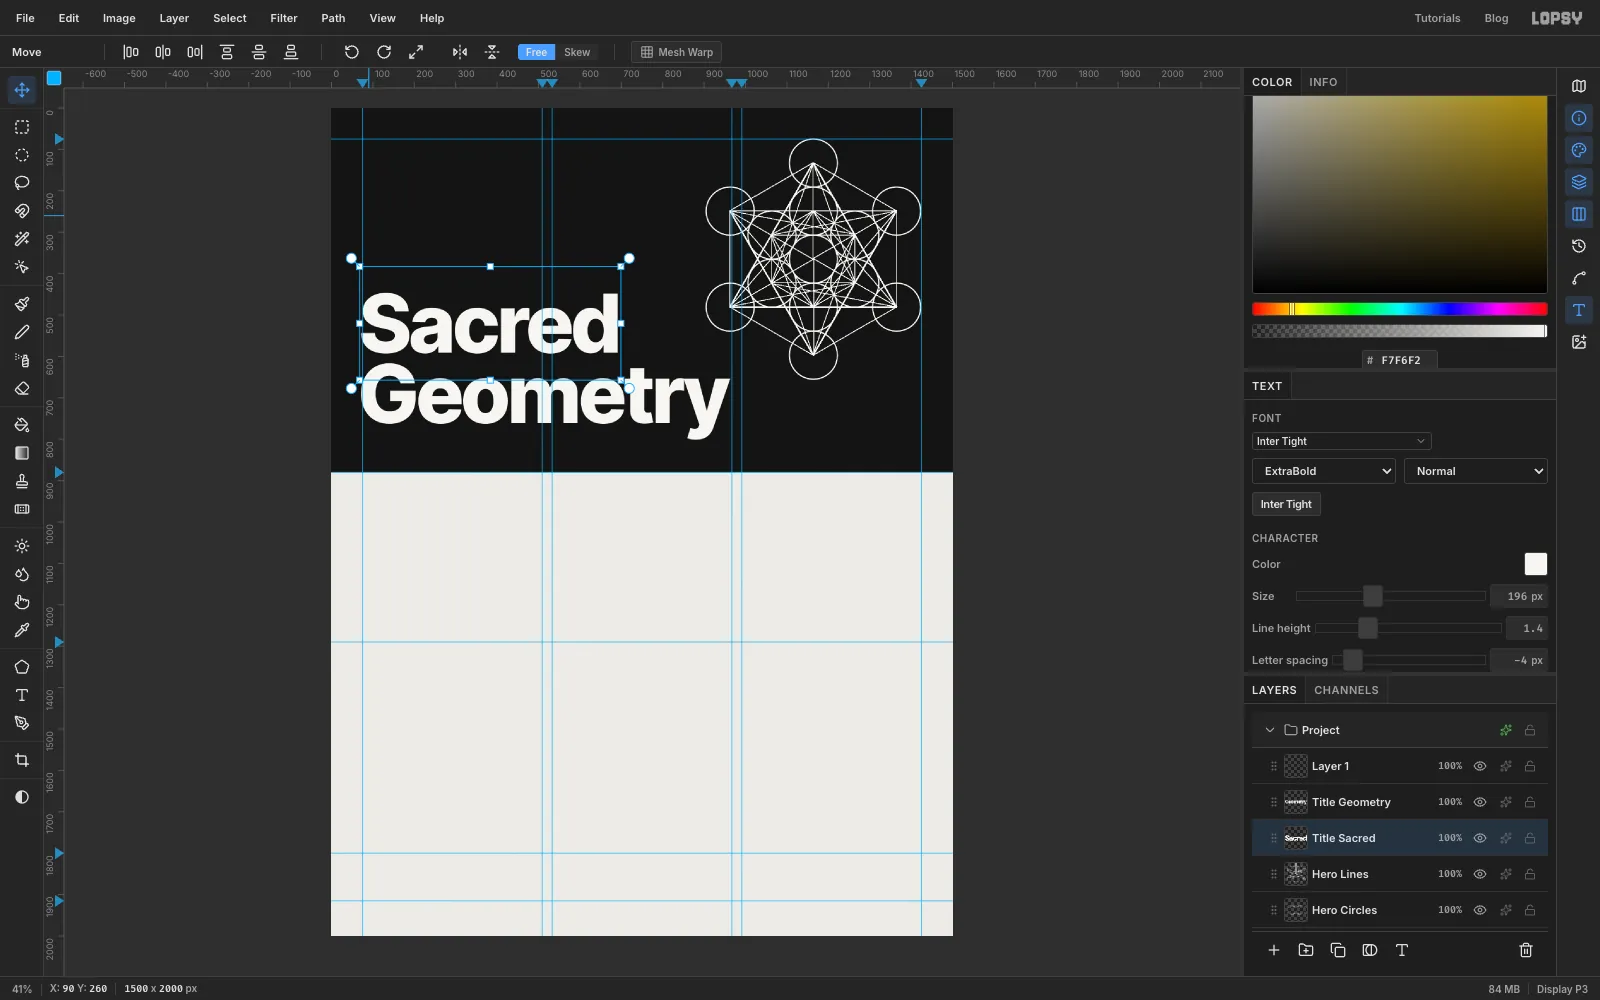
Select Hero Lines first. If a text layer is selected, changing the Text settings restyles that layer, so always select a non-text layer before you start new type. Pick the Text tool (T). Set the font to Inter Tight, the weight to ExtraBold and the size to 196, and the colour to . Open the Text panel and set Letter spacing to -4. Big type looks loose at default spacing; a slight negative track tightens it the way Swiss typesetters did by hand.
Make the lower line first. A Text click inside an existing line's box edits that line instead of starting a new one, so work bottom to top. Click in the empty left half of the header, type
Geometryand press Tab. Click Hero Lines again, then click higher up and typeSacred.With the Move tool (V), use the arrow keys (Shift moves 10 px) to seat the type:
- Geometry: left edge on the 75 margin, bottom of the y descender at y 800. That leaves 80 px of black under it, the same as the side margin.
- Sacred: left edge on the margin, baseline 24 px above the top of the G.
Geometry runs to about x 963, just short of the end of the fourth column (967), and the cube clears its cap height by about 80 px.
-
Draw the Seed of Life rings
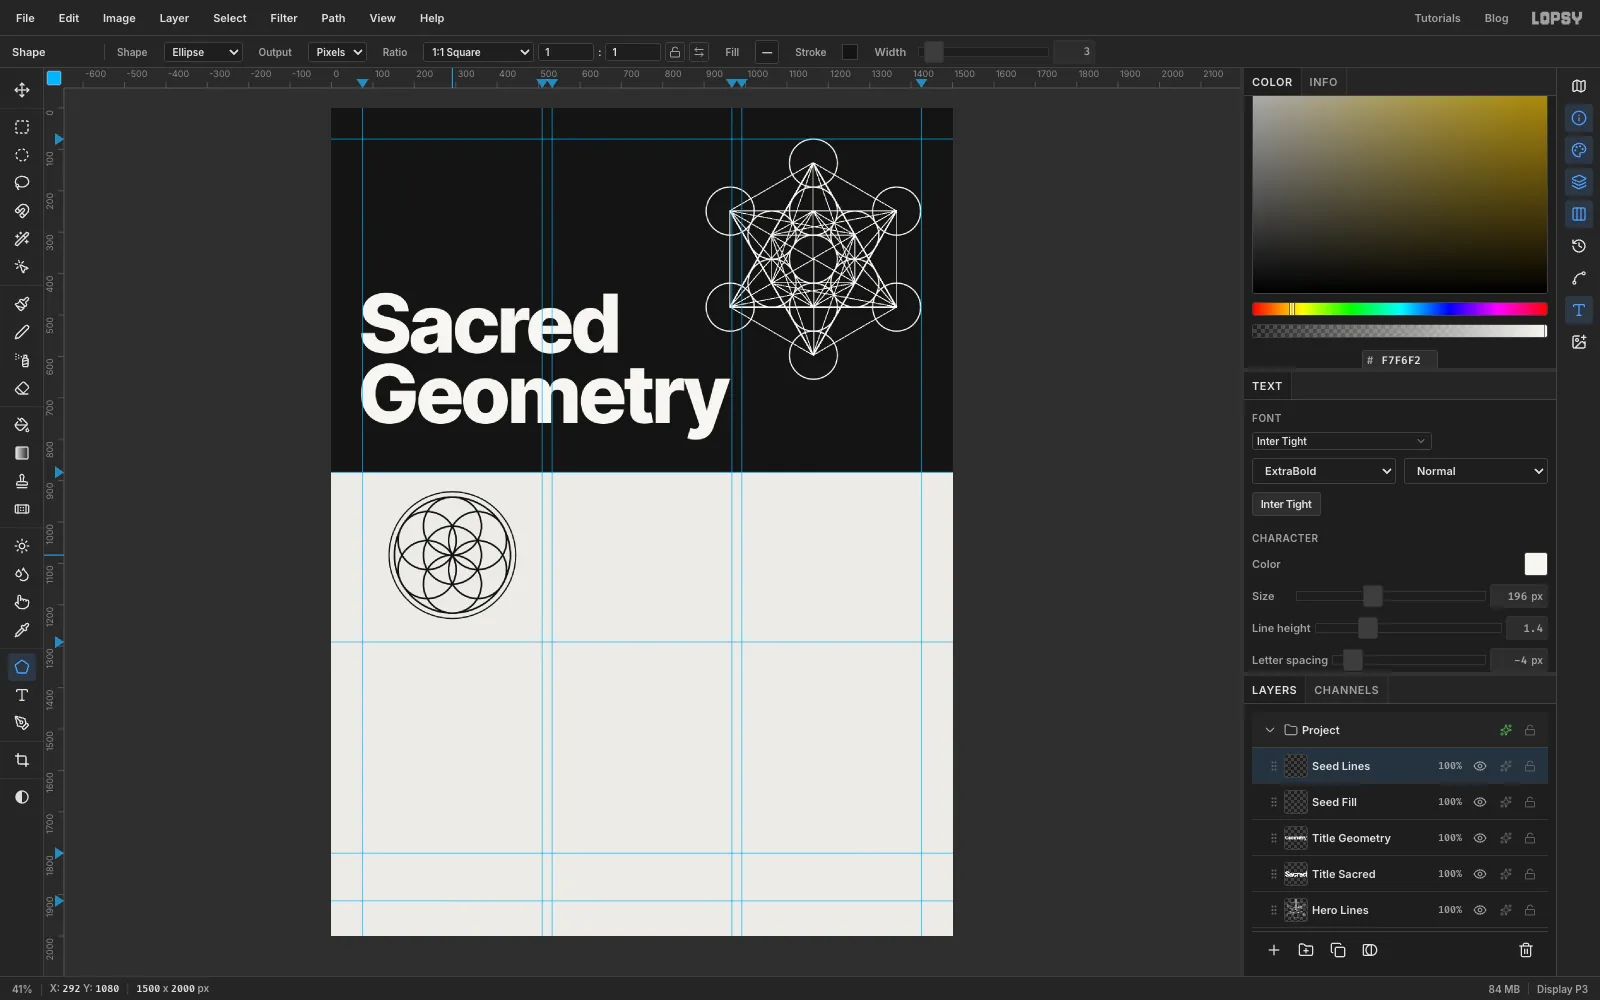
The first design is the Seed of Life: seven circles, each passing through its neighbours' centres.
Select Layer 1, which is still empty at the top of the stack, and rename it Seed Fill. Click Add Layer and name it Seed Lines, so the lines sit above the colour.
With the Shape tool, keep the fill removed, set the stroke to and Width to 4. Using the Shape Size dialog, make seven 140 × 140 circles. Put one at the cell's centre, (292, 1080), and six on a 70 px ring around it: (292, 1010), (353, 1045), (353, 1115), (292, 1150), (231, 1115) and (231, 1045).
Then frame the flower. Make a 280 × 280 circle on the centre, which touches the six outer petals. Set Width to 3 and add a 306 × 306 circle around it.
-
Select the centre with the Magic Wand
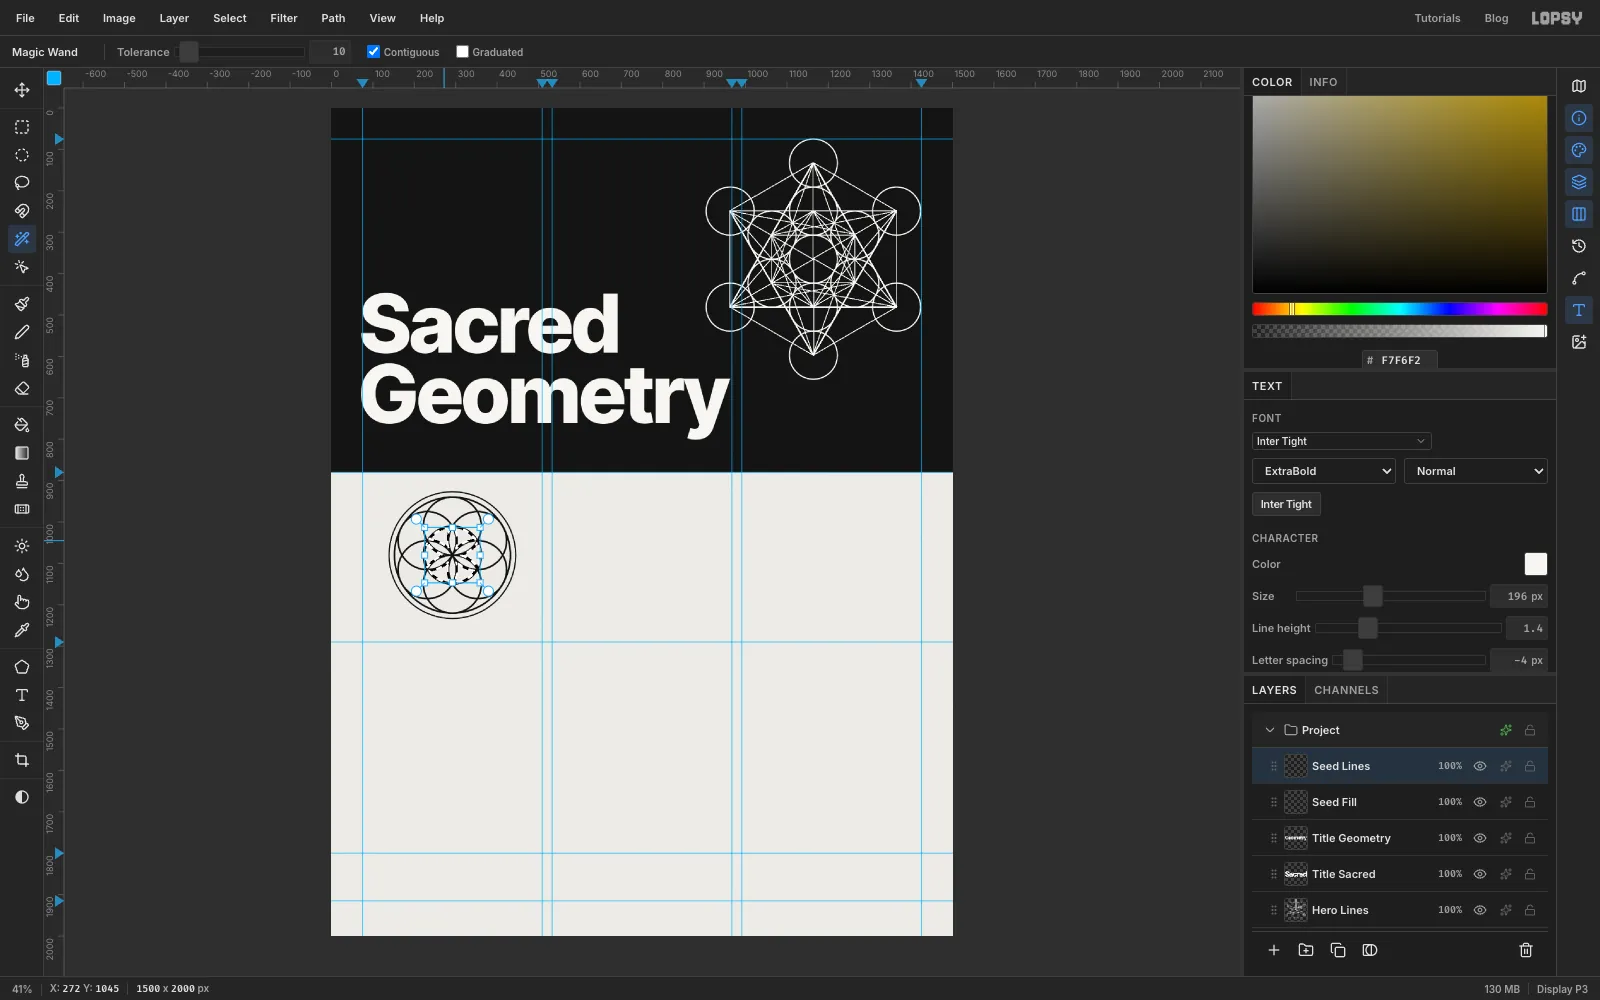
The overlapping rings divide the centre into six white petals and six small three-sided spaces between them. Colour the spaces and the petals stand out in white.
Pick the Magic Wand (W), set Tolerance to 10 and keep Contiguous on. The wand reads only the active layer, so keep Seed Lines selected. It sees the empty space between the lines as separate regions.
Click inside the space just up and to the right of the centre, at about (312, 1045). Then Shift+click the other five spaces, going round the centre every 60°.
-
Fill the Seed of Life
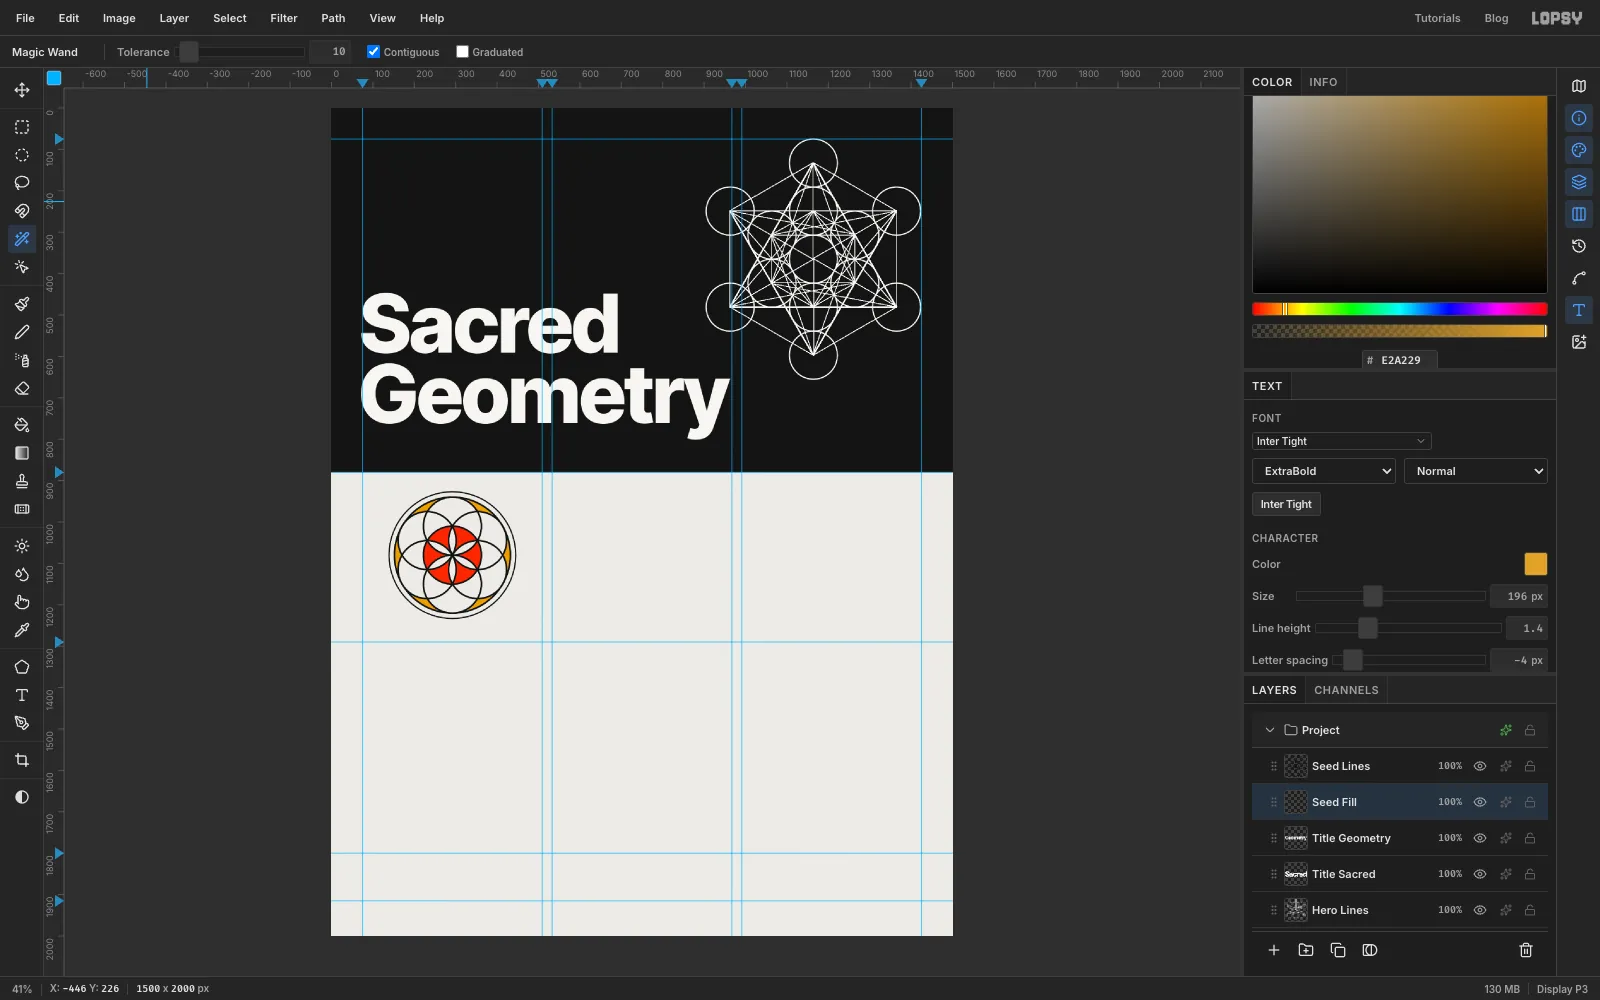
Choose Select → Grow… and grow by 2 px so the colour tucks under the lines. Select Seed Fill, set the foreground to and choose Edit → Fill. Press Cmd+D.
Now the gold. Select Seed Lines again and use the wand on the six thin crescents between the outer circles and the 280 px ring. The first is at about (356, 969), up and to the right; Shift+click the rest. Grow by 2, select Seed Fill and fill with .
Keeping colour on its own layer under the linework is how flash is painted too: the outline is the stencil, and the colour goes in underneath.
-
Draw the lotus with radial symmetry
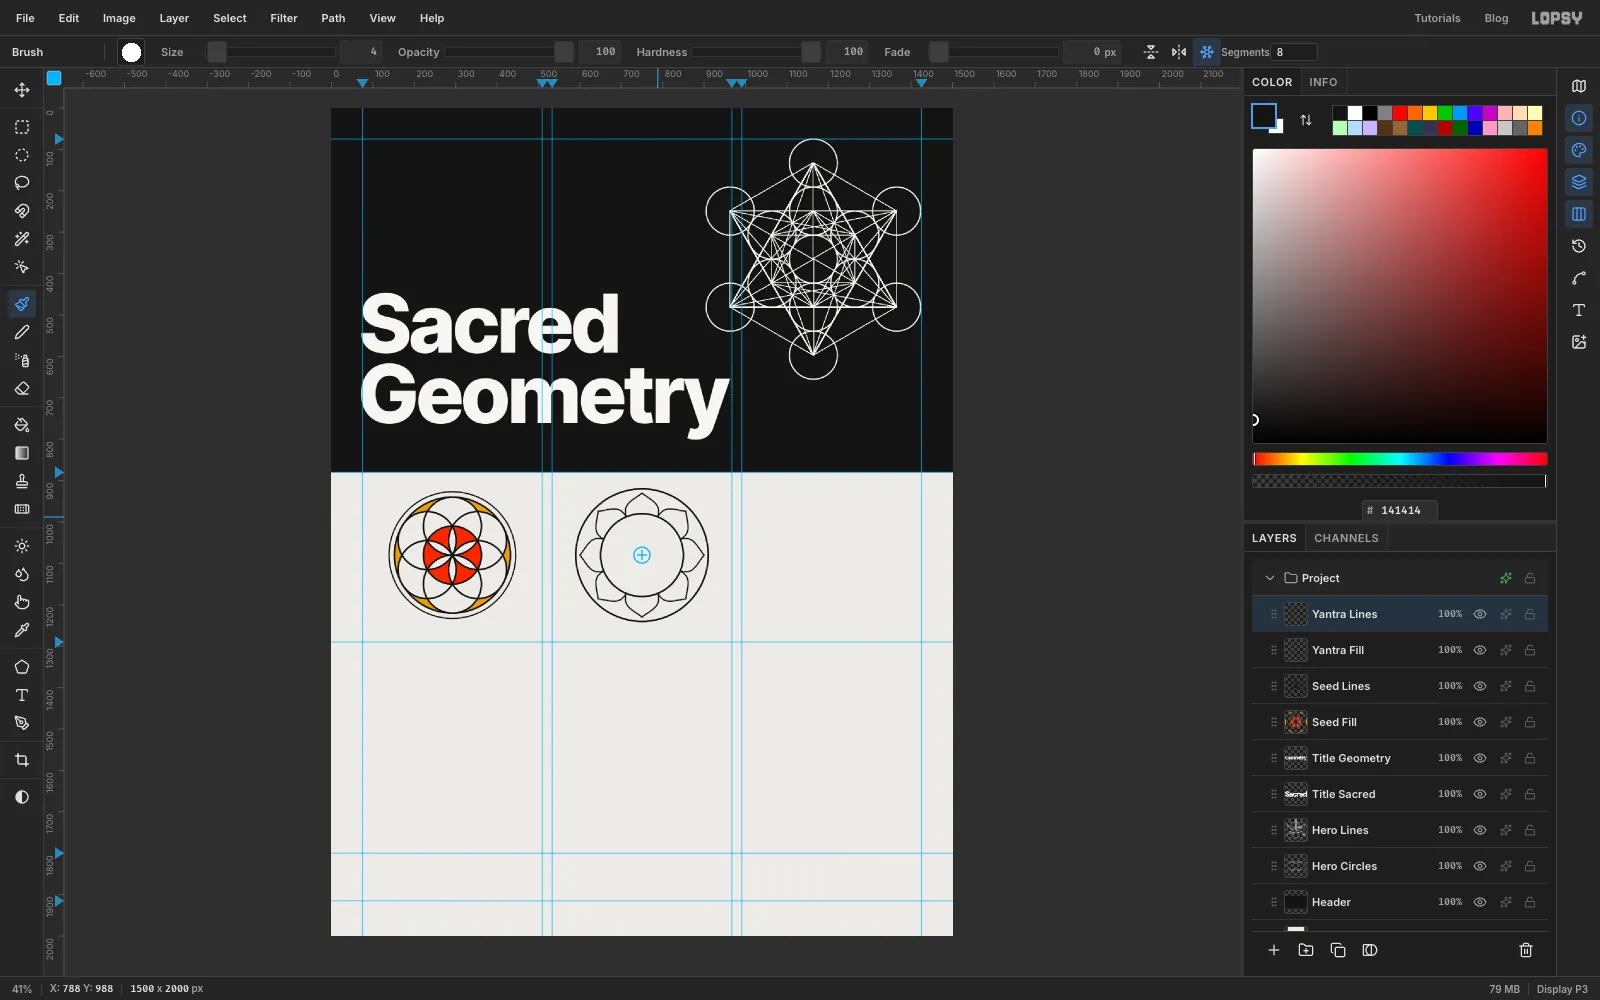
Design 02 is a Shatkona yantra: two interlocked triangles in a ring of lotus petals. Its centre is (750, 1080).
Click Add Layer twice, naming the layers Yantra Fill and then Yantra Lines. With the Shape tool at Width 4, make a 320 × 320 and a 200 × 200 circle on the centre.
Pick the Brush, turn Radial Symmetry on with Segments 8, and Cmd+click the centre. Set Size to 4, Hardness to 100 and the foreground to .
Draw a single petal in one continuous stroke. Start on the inner ring at (712, 988), swing outward and up to a point at (750, 930), and come back down the other side to (788, 988). Keep the stroke slow and smooth. The other seven petals appear as you draw. Turn Radial Symmetry off.
-
Draw the triangles with the Pen
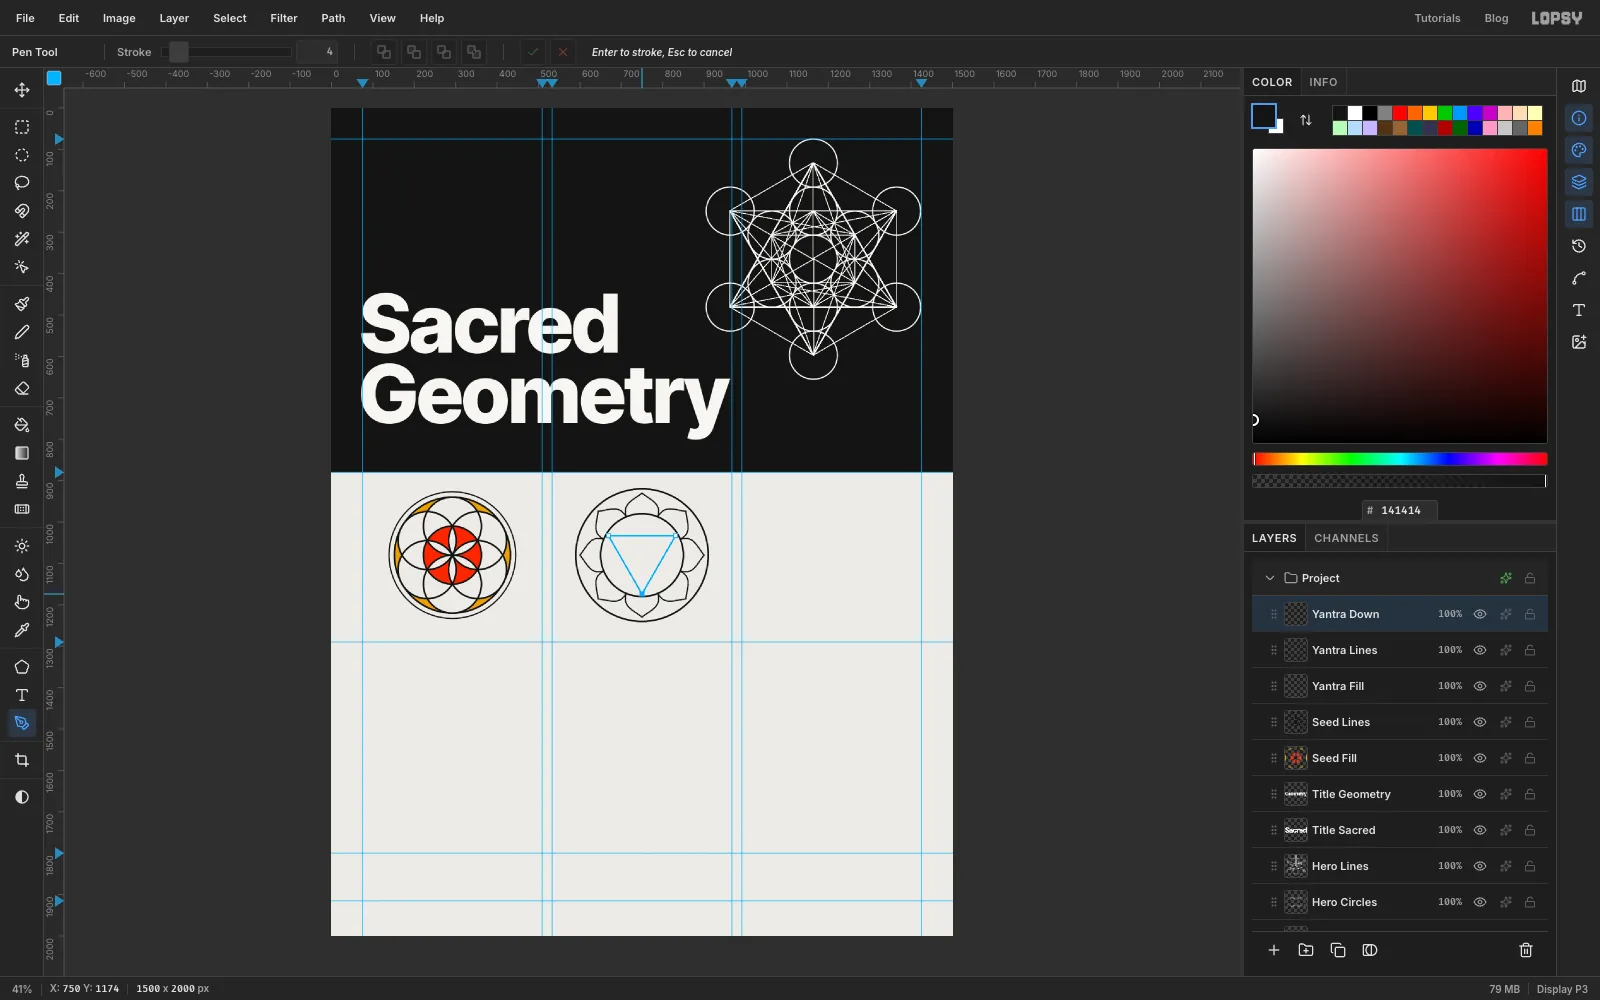
Click Add Layer and name it Yantra Down. Pick the Pen (P), set Stroke to 4 and keep the foreground on ink. Click three corners at (750, 1174), (669, 1033) and (831, 1033), then click the first corner again to close the path. Press Enter to stroke it. In the Paths panel, click Delete Path.
Click Add Layer, name it Yantra Up, and draw the upward triangle the same way: (750, 986), (831, 1127) and (669, 1127), closed and stroked with Enter. Keep this path for the next step.
Each triangle sits on its own layer so the two can weave over and under each other.
-
Fill the triangle and weave the lines
With the up triangle's path still selected, click Path to Selection in the Paths panel, then delete the path. Choose Select → Grow… with 2, select Yantra Fill and fill with . Press Cmd+D.
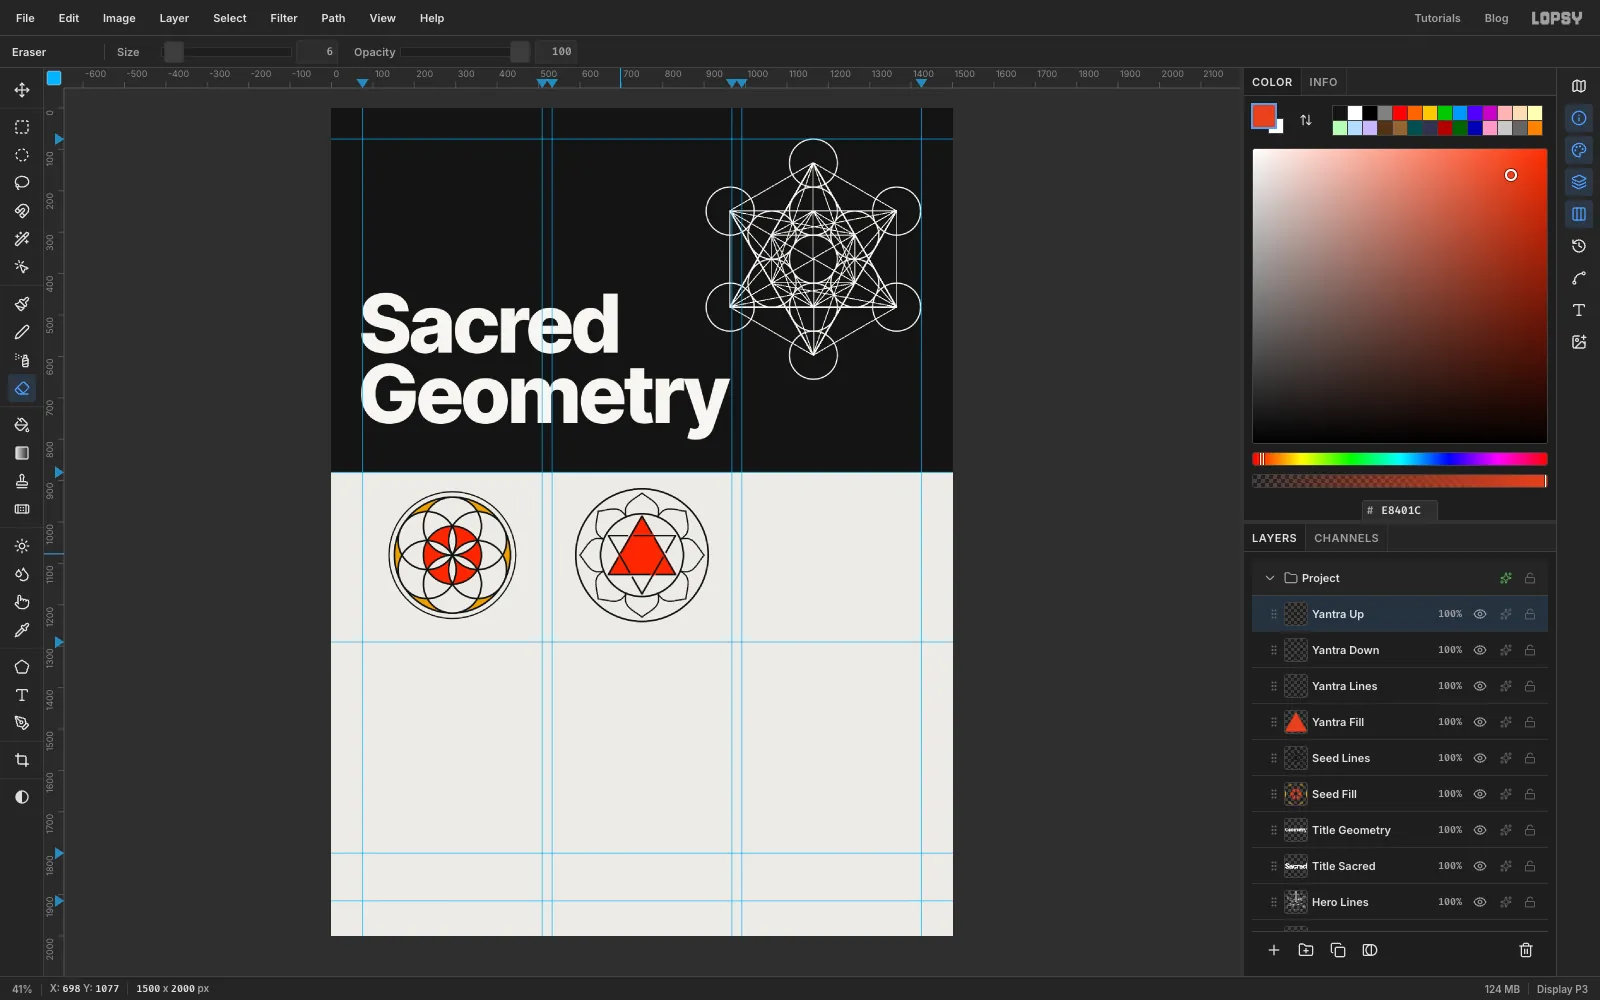
The triangles cross at six points. To weave them, cut a short gap in the line that passes under at each crossing, alternating all the way round. Pick the Eraser (E) and set its Size to 6.
- Select Yantra Down and erase the down triangle's line at the crossings at (723, 1033), (804, 1080) and (723, 1127).
- Select Yantra Up and erase the up triangle's line at (777, 1033), (777, 1127) and (696, 1080).
At each crossing, click about 4 px along the line you're cutting on one side of the crossing, and Shift+click 4 px along it on the other side. With a 6 px eraser the gap comes out about 14 px, just wider than the line on top. Zoom in for this; it's fiddly at full-page size.
-
Gild the lotus
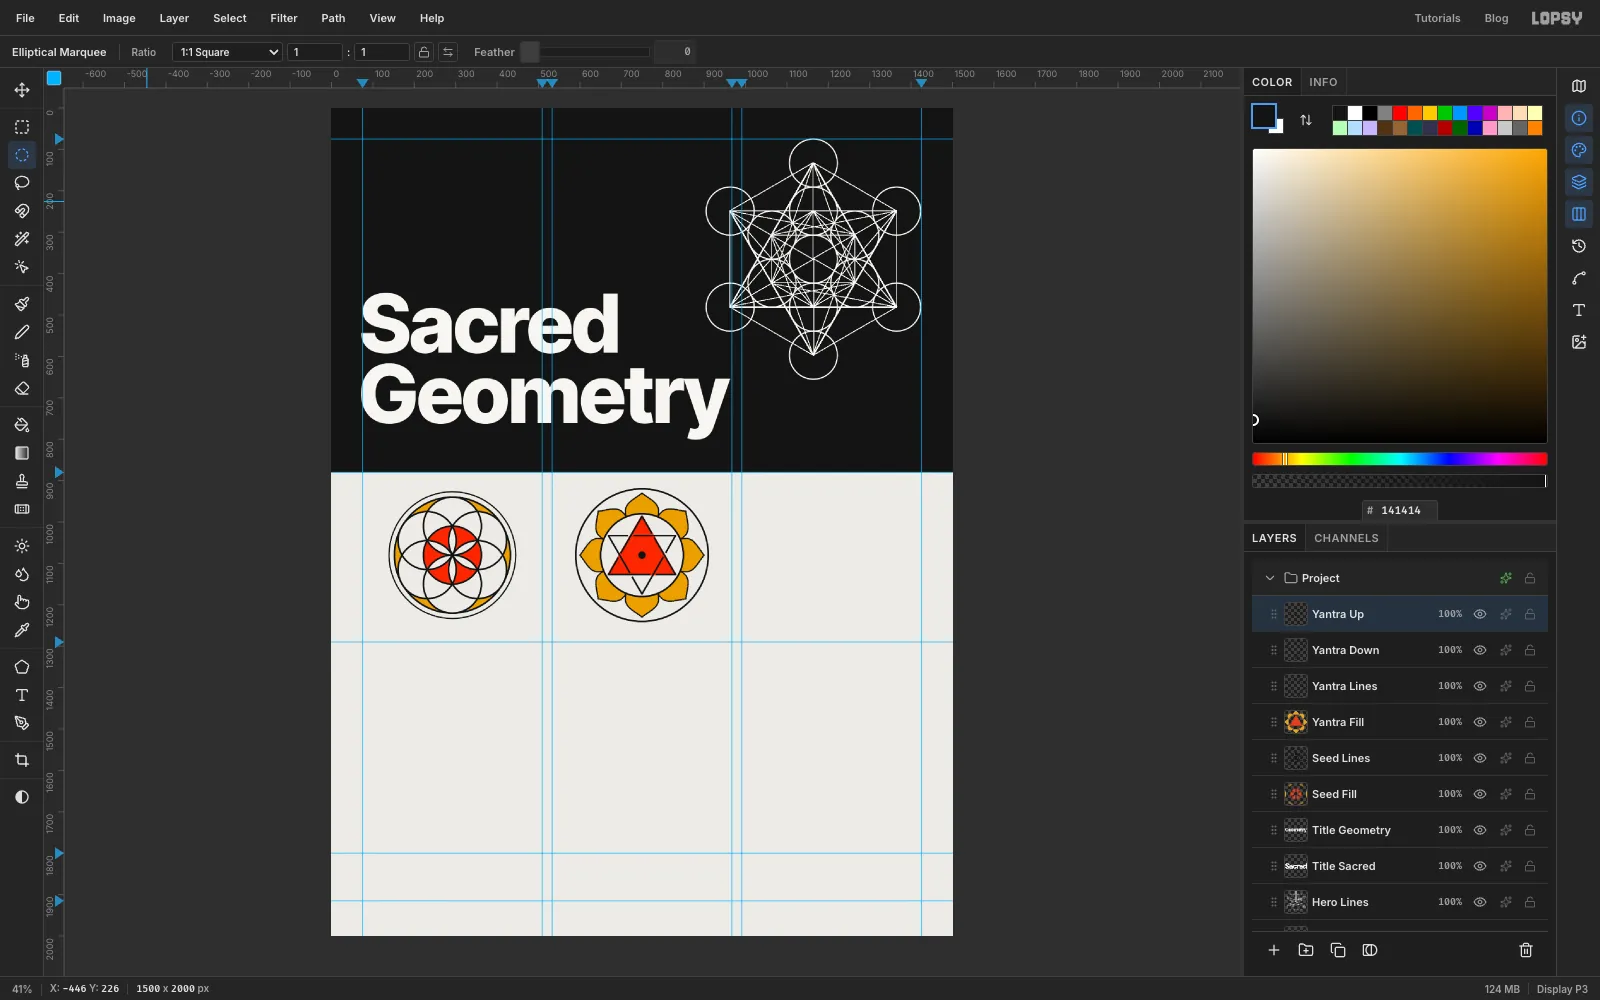
Select Yantra Lines and use the Magic Wand on the middle of each lotus petal, Shift+clicking round all eight. Grow by 2, select Yantra Fill and fill with .
Finish with the bindu, the dot at the centre. Select Yantra Up, pick the Elliptical Marquee and click once to open the From / To dialog. Enter From 741, 1071 To 759, 1089, an 18 px circle on the centre. Fill it with and deselect.
-
Start a dotwork sphere
Design 03 is a ring of eight moon phases around a dotwork sphere. Its centre is (1208, 1080).
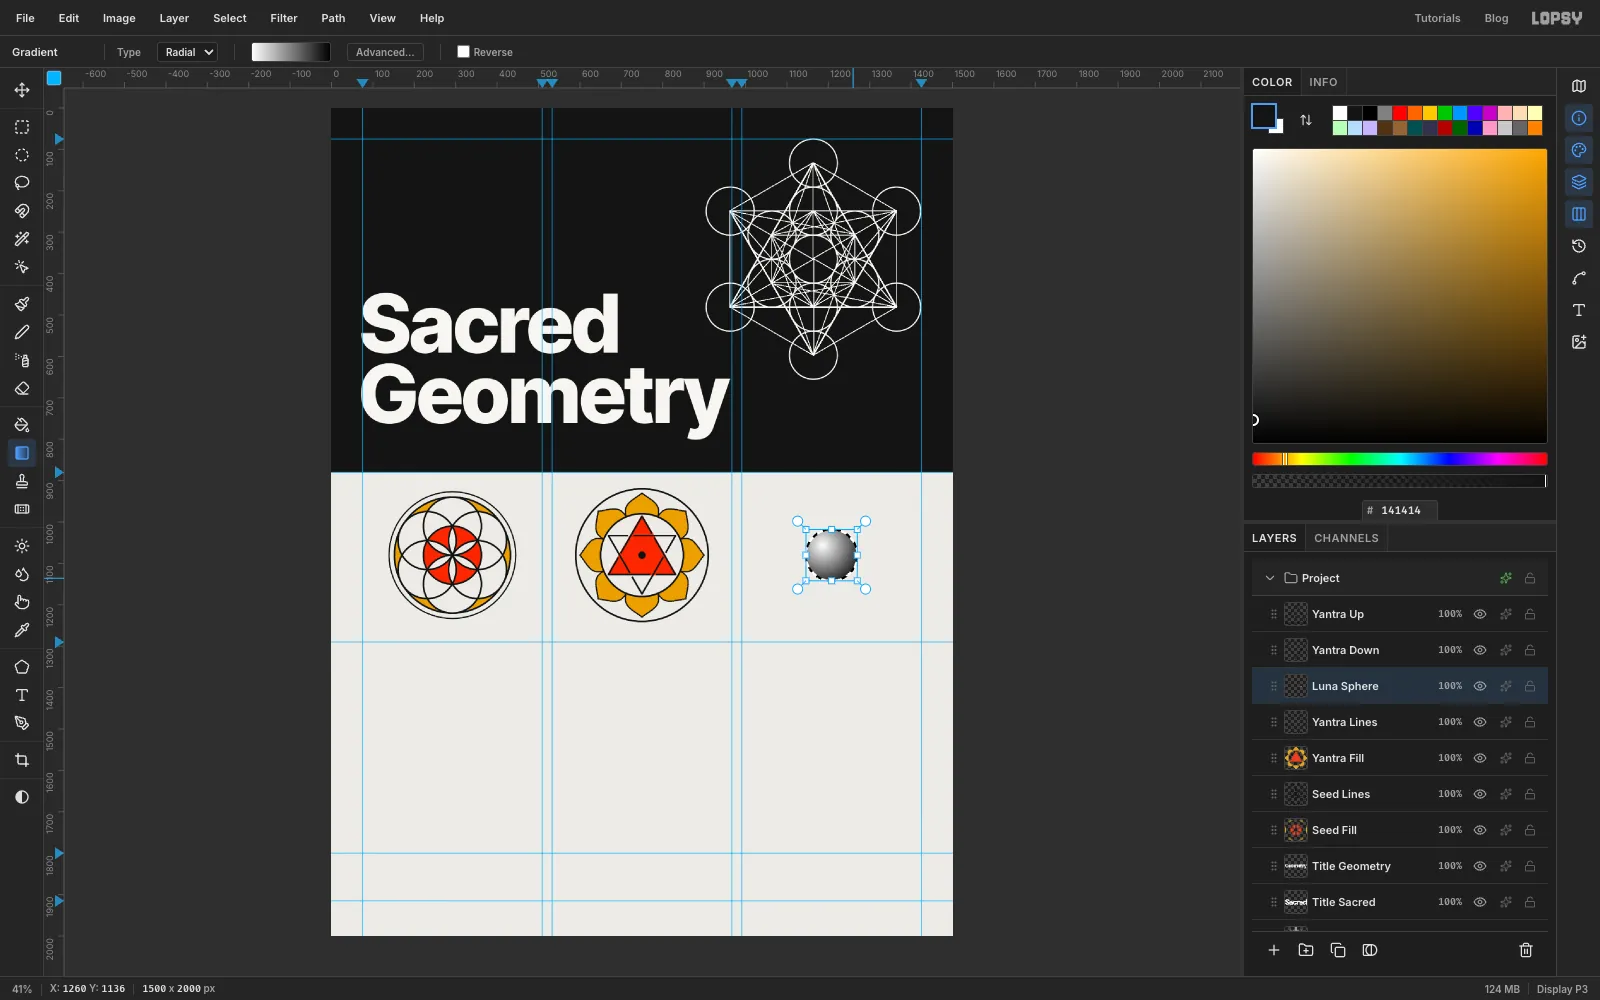
Click Add Layer and name it Luna Sphere. With the Elliptical Marquee, make a 124 px circle on the centre: From 1146, 1018 To 1270, 1142. Pick the Gradient tool, set it to Radial, and in Advanced… make the stops white and black . Drag from the highlight at (1186, 1056) towards the lower right, to about (1260, 1136).
-
Turn the gradient into dots
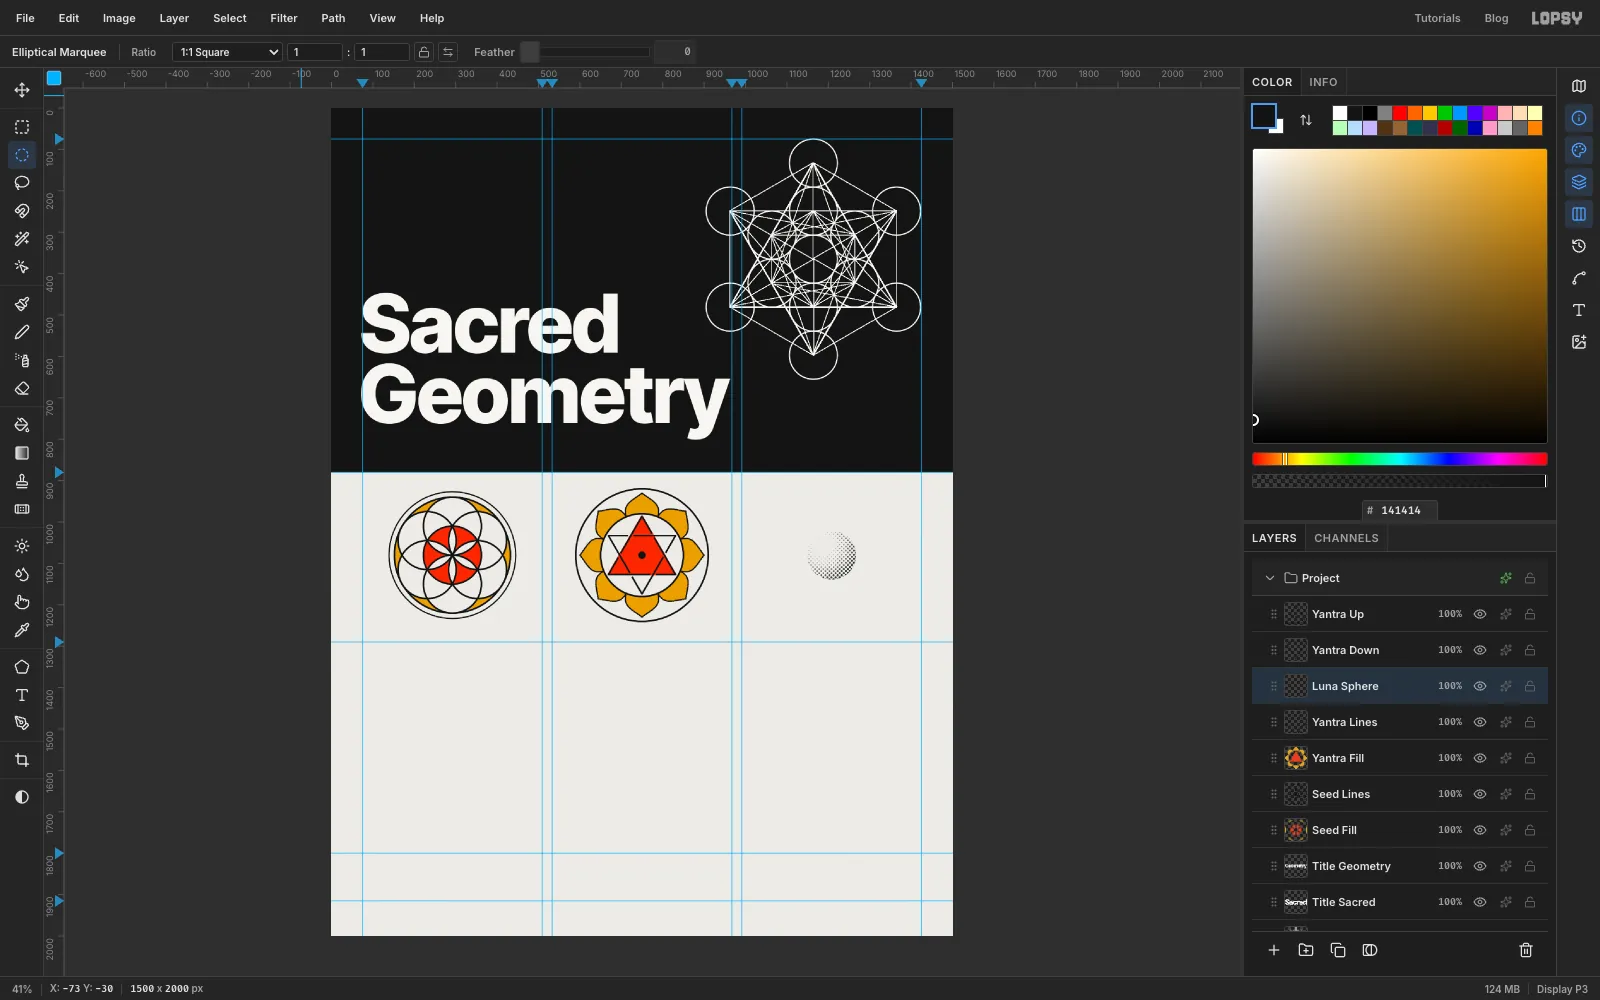
Tattoo dotwork shades with dots instead of grey. Filter → Halftone… does the same thing to a gradient. Set Dot Size to 7 and Softness to 0.3, and apply. Press Cmd+D.
The halftone leaves a soft half-dot rim on the circle's edge, so trim it. Make a 118 px circle on the same centre (From 1149, 1021 To 1267, 1139), choose Select → Inverse and press Delete. Deselect.
Pure white makes no dot, so the highlight is clean paper. Grey cells print grey dots, so open the layer's effects drawer, turn on Color Overlay and set it to . Every dot is now solid ink.
-
Shade a gibbous moon with a subtraction
The moons sit on a 128 px orbit around the sphere, each 50 px across. Click Add Layer, name it Full Moon, select a 50 px circle on the top of the orbit (From 1183, 927 To 1233, 977), fill it with and press Cmd+D. The From / To dialog only opens when nothing is selected, so deselect after every fill in this design.
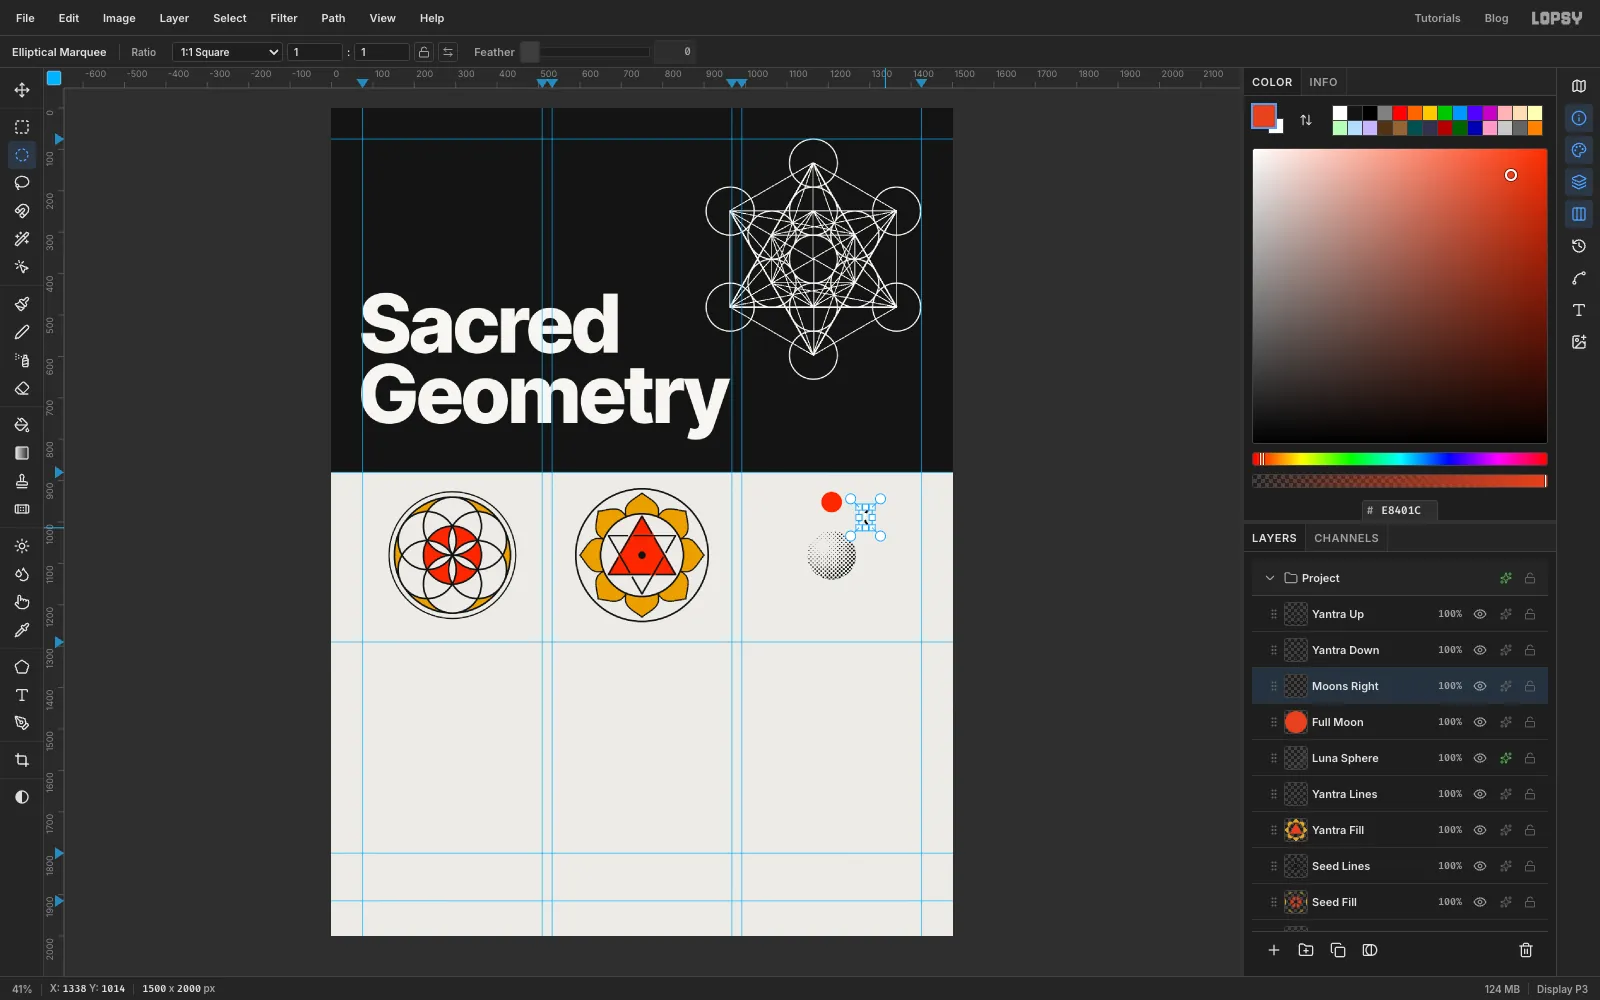
Click Add Layer and name it Moons Right. Each phase's dark side is a selection:
- Gibbous, upper right: select a 50 px circle from 1274, 965 to 1324, 1015. Then hold Option+Cmd and drag a second circle 14 px further right, from (1288, 965) to (1338, 1015). Option subtracts and Cmd keeps it round, leaving a thin crescent on the left. Fill it with ink and press Cmd+D.
-
Shade the quarter moon with an intersection
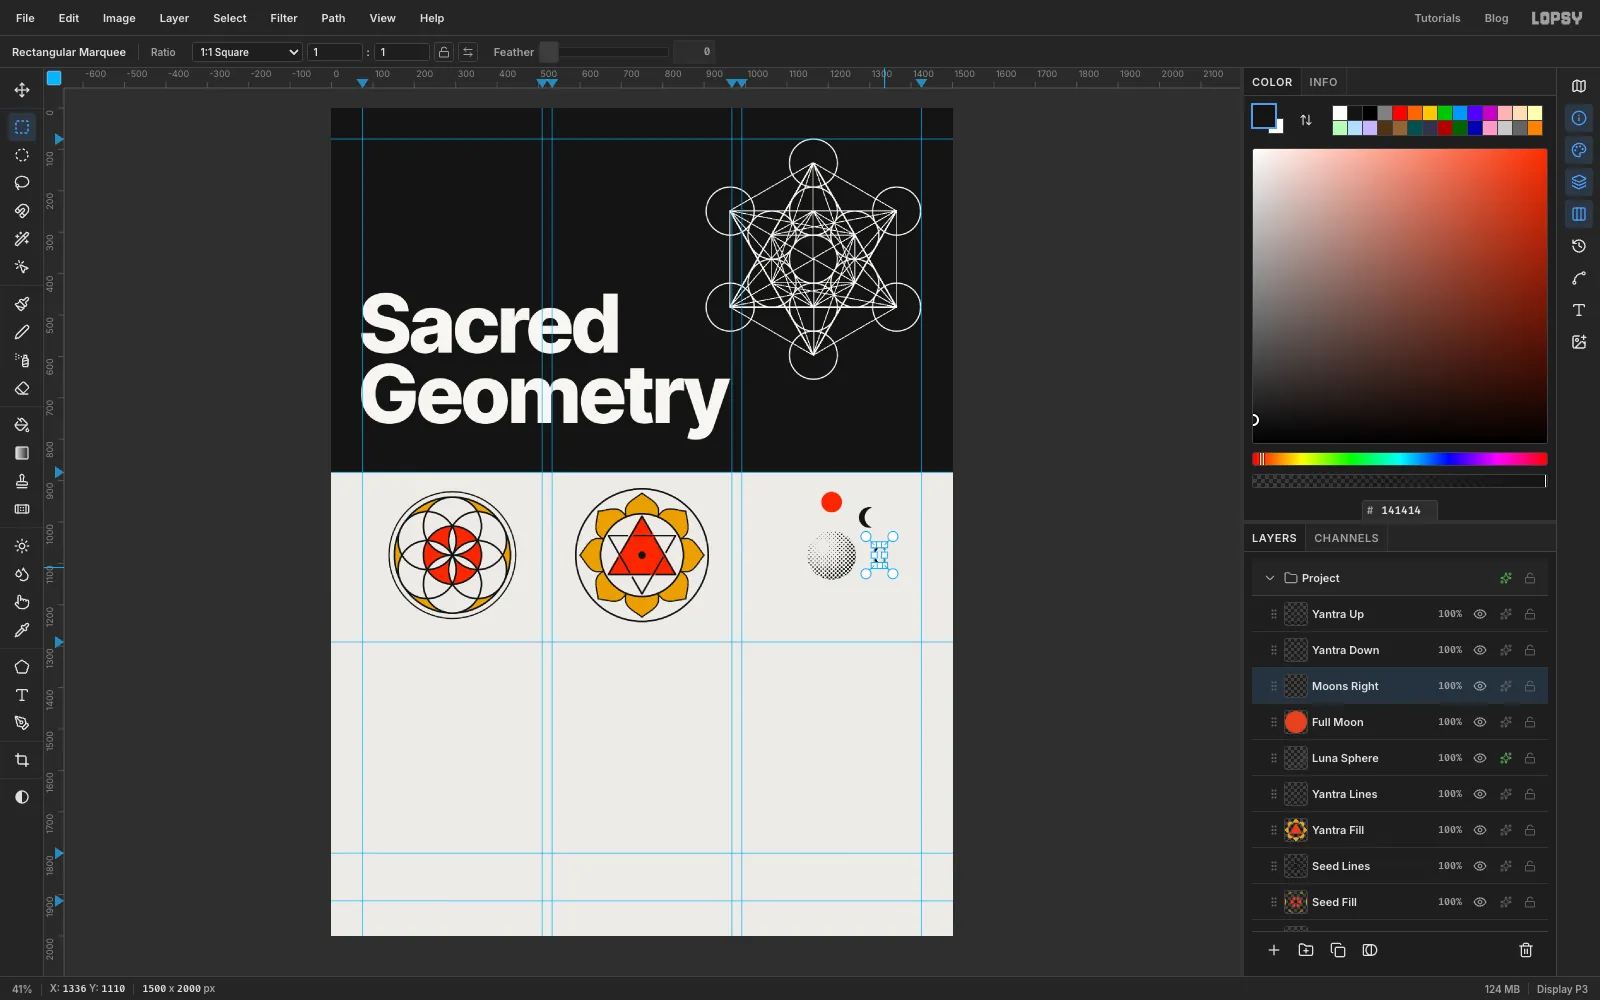
Now the quarter moon on the right. Select a 50 px circle from 1311, 1055 to 1361, 1105. Switch to the Rectangular Marquee, hold Shift+Option and drag a rectangle over the circle's left half, from (1306, 1050) to (1336, 1110). Shift and Option together keep only the overlap, a half-disc. Fill it with ink and press Cmd+D.
-
Shade the crescent and finish the right side
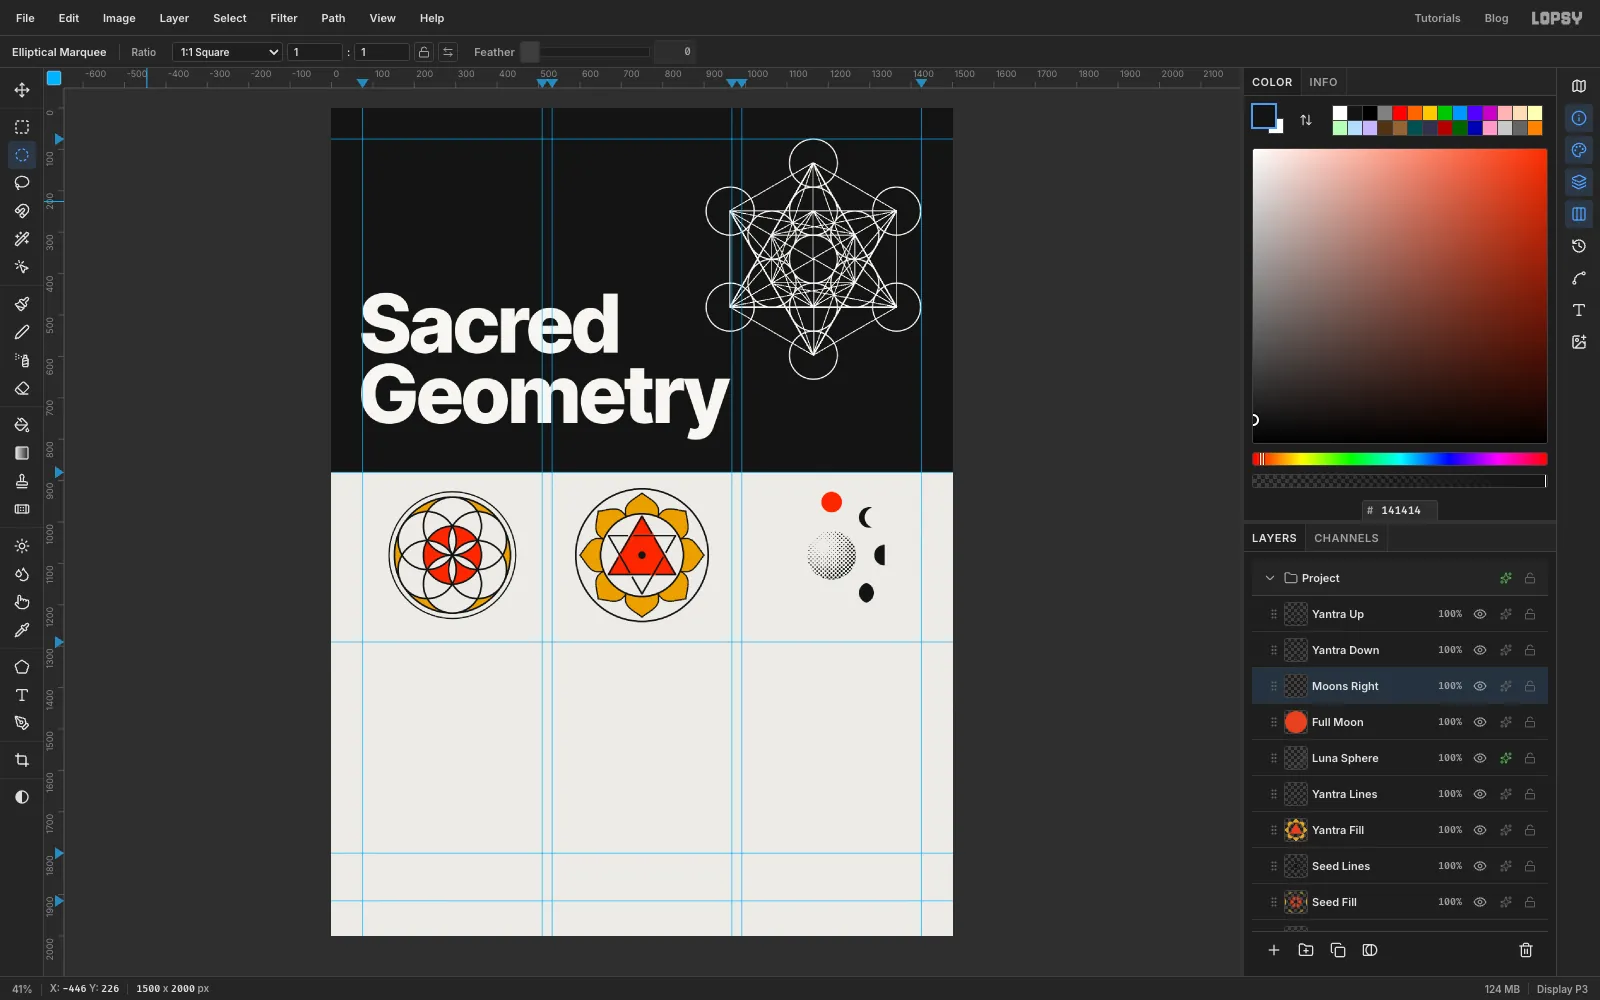
Last on this side is the crescent at the lower right. With the Elliptical Marquee, select a 50 px circle from 1274, 1146 to 1324, 1196. Hold Shift+Option+Cmd and drag a second circle 14 px to the left, from (1260, 1146) to (1310, 1196). The overlap is a big dark body with only a sliver lit on the right. Fill it with ink and deselect.
The dark shapes are 1 px smaller than the moon outlines you'll add later, so nothing pokes past an outline.
-
Duplicate and flip the moons
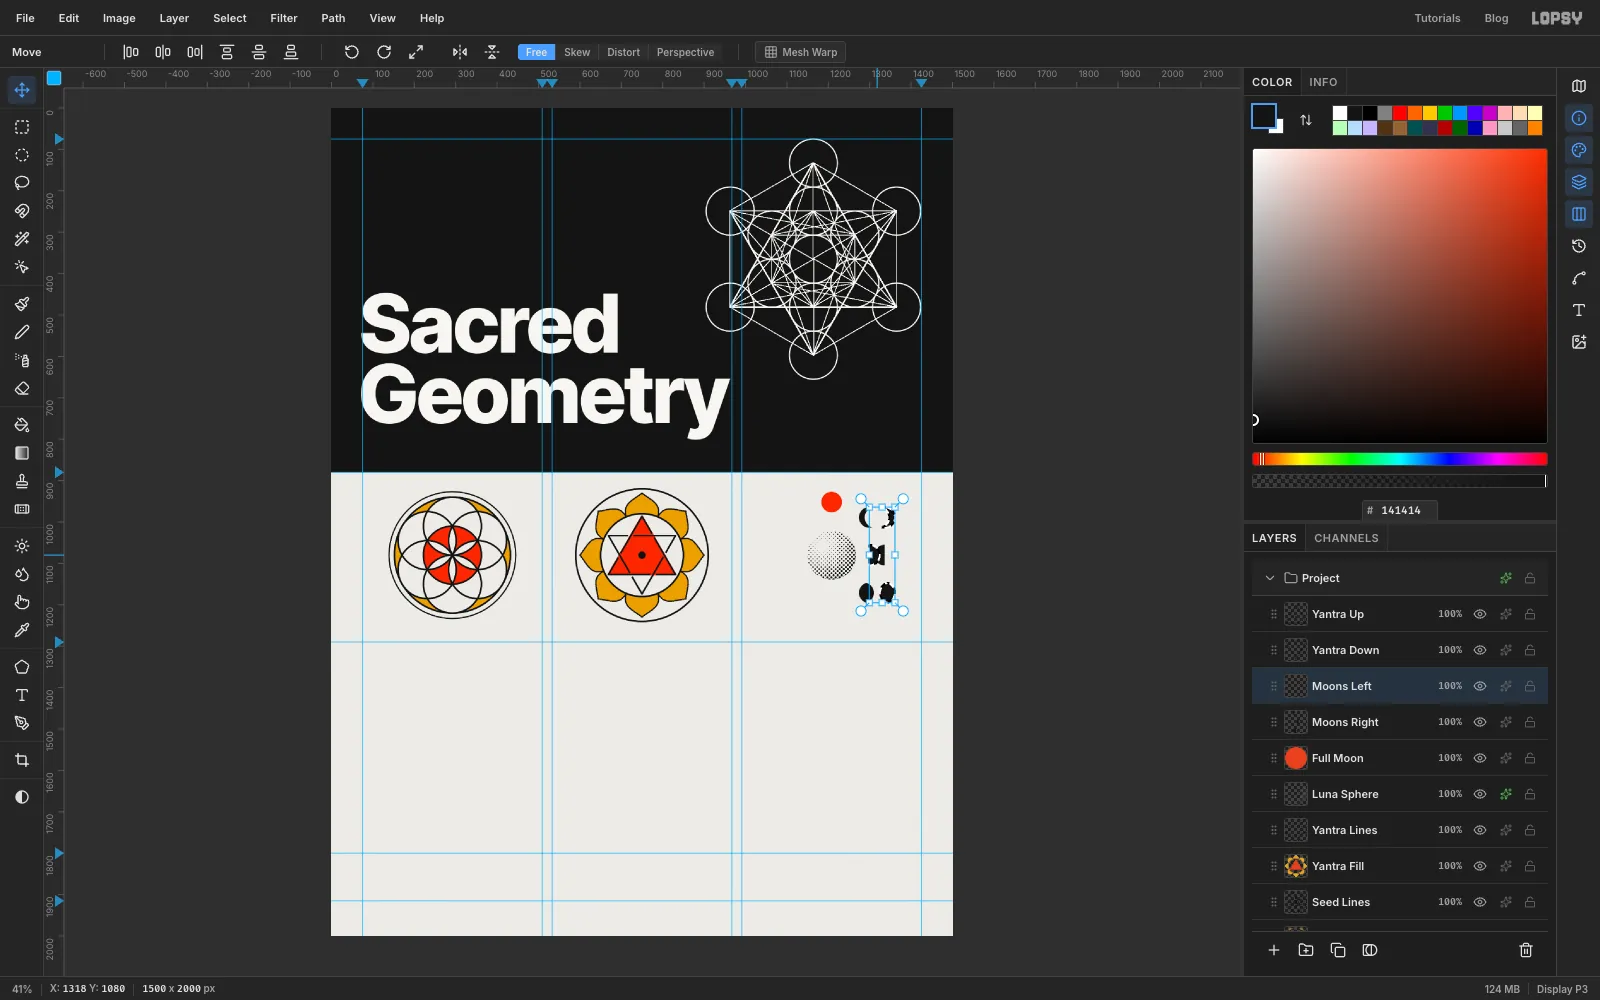
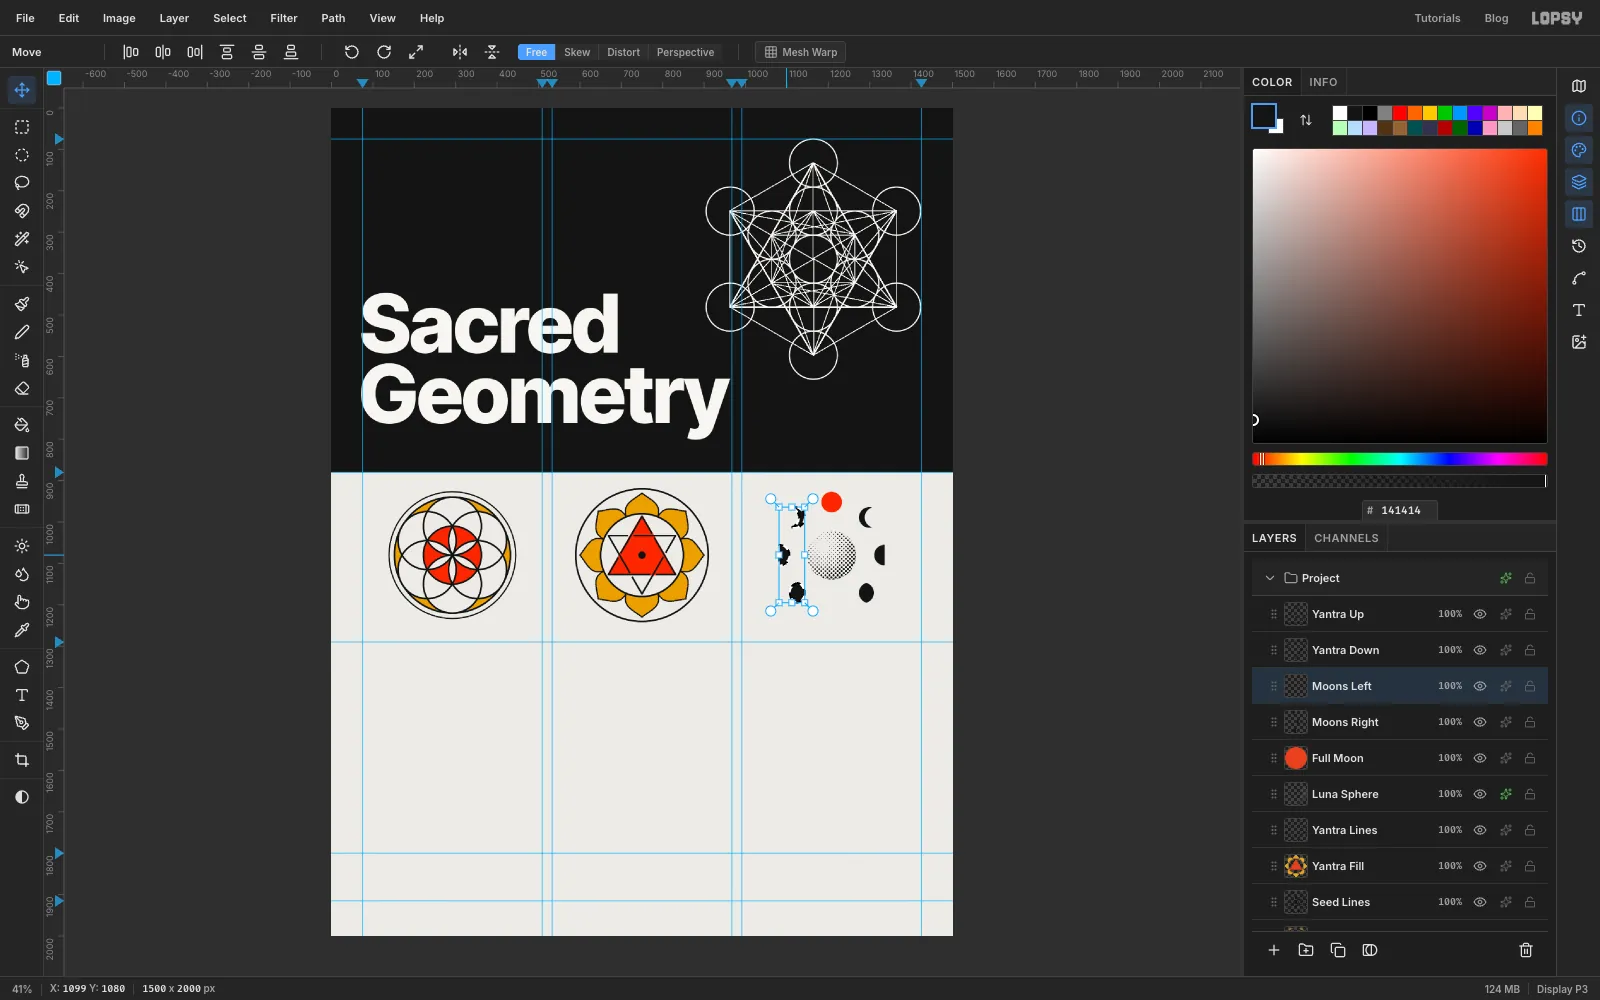
The left side of the orbit is the mirror image of the right. Click Duplicate Layer and rename the copy Moons Left.
Draw a rectangular marquee around the three right-hand moons, from about (1264, 956) to (1370, 1205). Switch to the Move tool and click Flip Horizontal in its options bar. The moons flip in place inside the marquee.
-
Slide the copy across
Press inside the selection and drag it straight left by 218 px, until the quarter moon's centre sits at (1080, 1080). The flipped copy now mirrors the right side about the vertical axis. Press Cmd+D.
Select Moons Right again and fill a 50 px circle at the bottom of the orbit (From 1183, 1183 To 1233, 1233) with ink for the new moon.
-
Add the orbit and the outlines
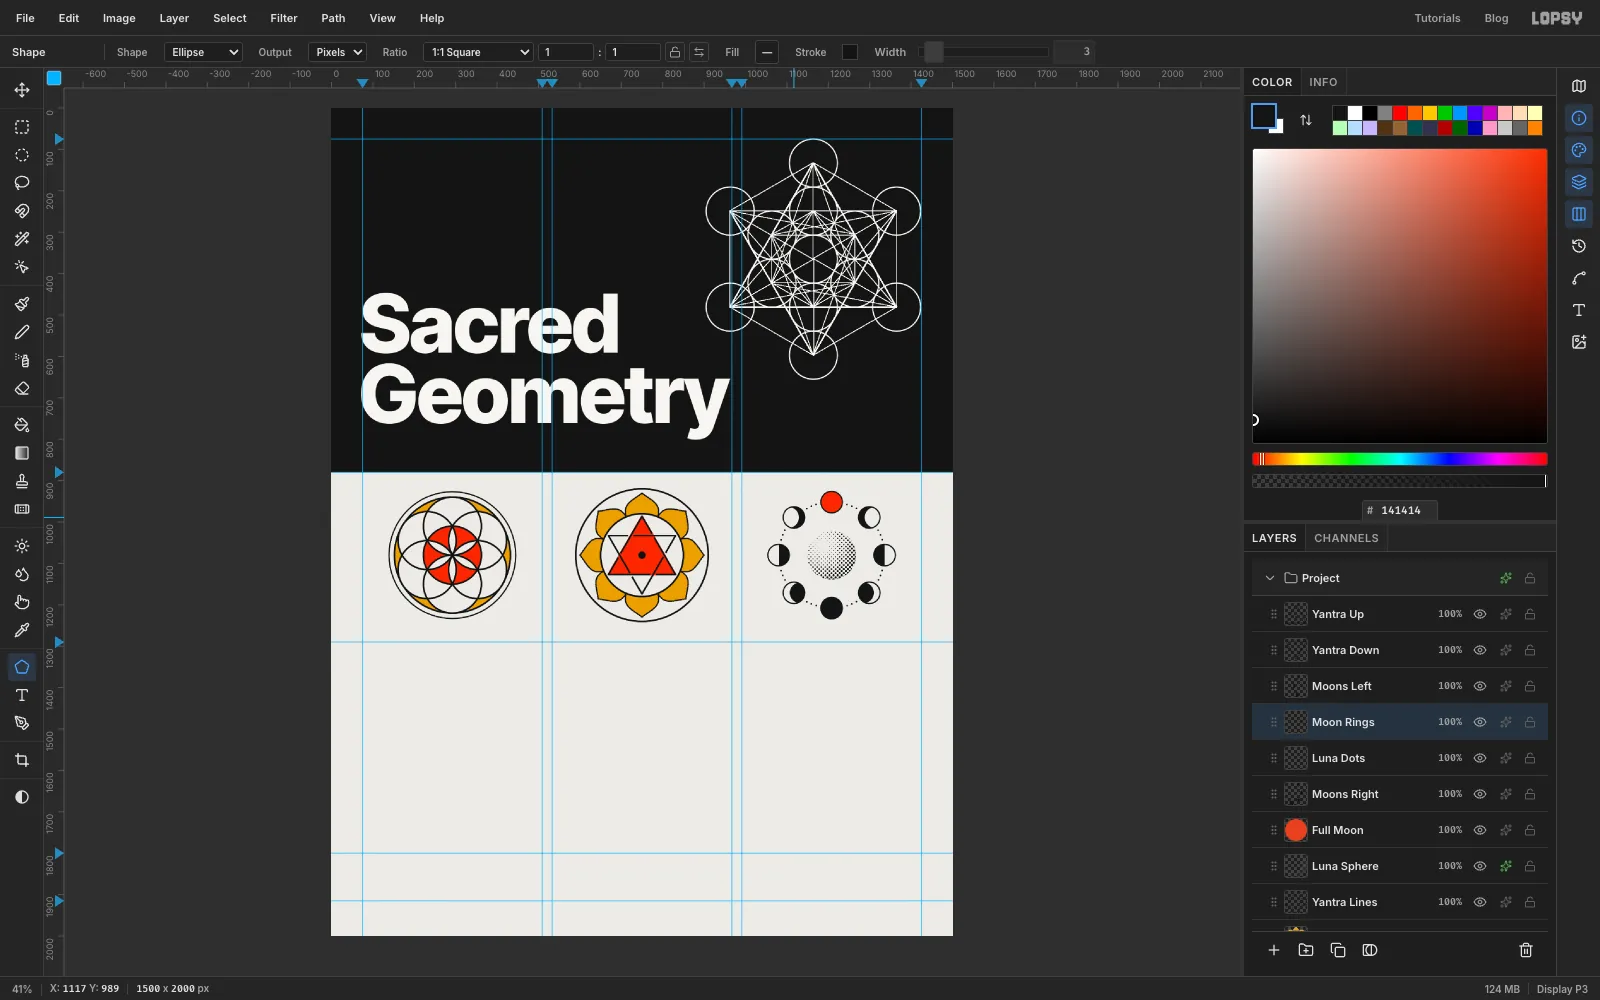
Click Add Layer and name it Luna Dots. Turn on Radial Symmetry with Segments 8, Cmd+click the centre, and set the Brush to Size 5. Click three dots on the orbit in the gap to the right of the full moon, at (1245, 958), (1257, 962) and (1268, 967). The other seven gaps fill in. Turn symmetry off.
Click Add Layer and name it Moon Rings. With the Shape tool (fill removed, stroke ink, Width 3), make a 52 × 52 circle on each of the eight moon centres: (1208, 952), (1299, 990), (1336, 1080), (1299, 1171), (1208, 1208), (1117, 1171), (1080, 1080) and (1117, 990). The outline layer goes last so it sits over every fill.
-
Lay in the Fibonacci colour and dots
Design 04 is a golden spiral over Fibonacci squares. The rectangle is 21 × 13 units of 16 px, so 336 × 208 px, starting at (124, 1486). You'll scale it up at the end.
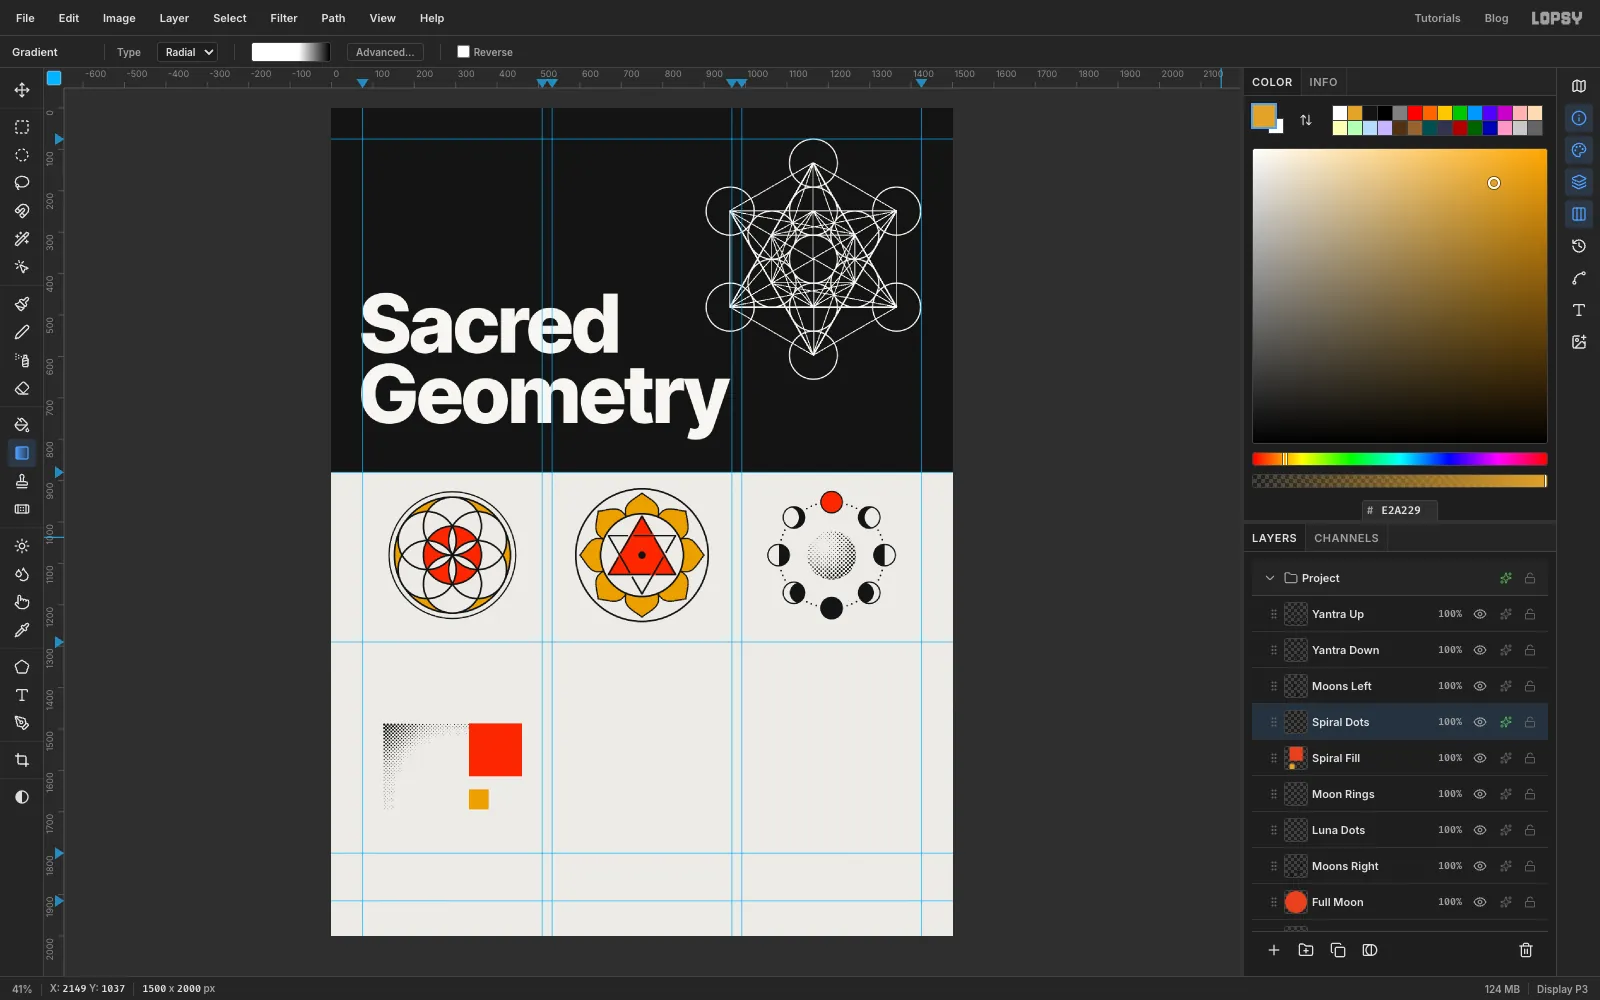
Click Add Layer and name it Spiral Fill. Use the Rectangular Marquee's From / To dialog for each square:
- Fill the 8-unit square, (332, 1486) to (460, 1614), with , and press Cmd+D.
- Fill the 3-unit square, (332, 1646) to (380, 1694), with , and press Cmd+D.
Click Add Layer and name it Spiral Dots. Marquee the big 13-unit square, (124, 1486) to (332, 1694). Set a radial gradient with three stops: white at 0 %, white at 60 % and black at 100 %. Drag it from the square's bottom-right corner to its top-left corner. Apply Halftone (Dot Size 6, Softness 0.3), deselect, and add a Color Overlay in . The dots gather in the outer corner the spiral sweeps past.
-
Rule the Fibonacci squares
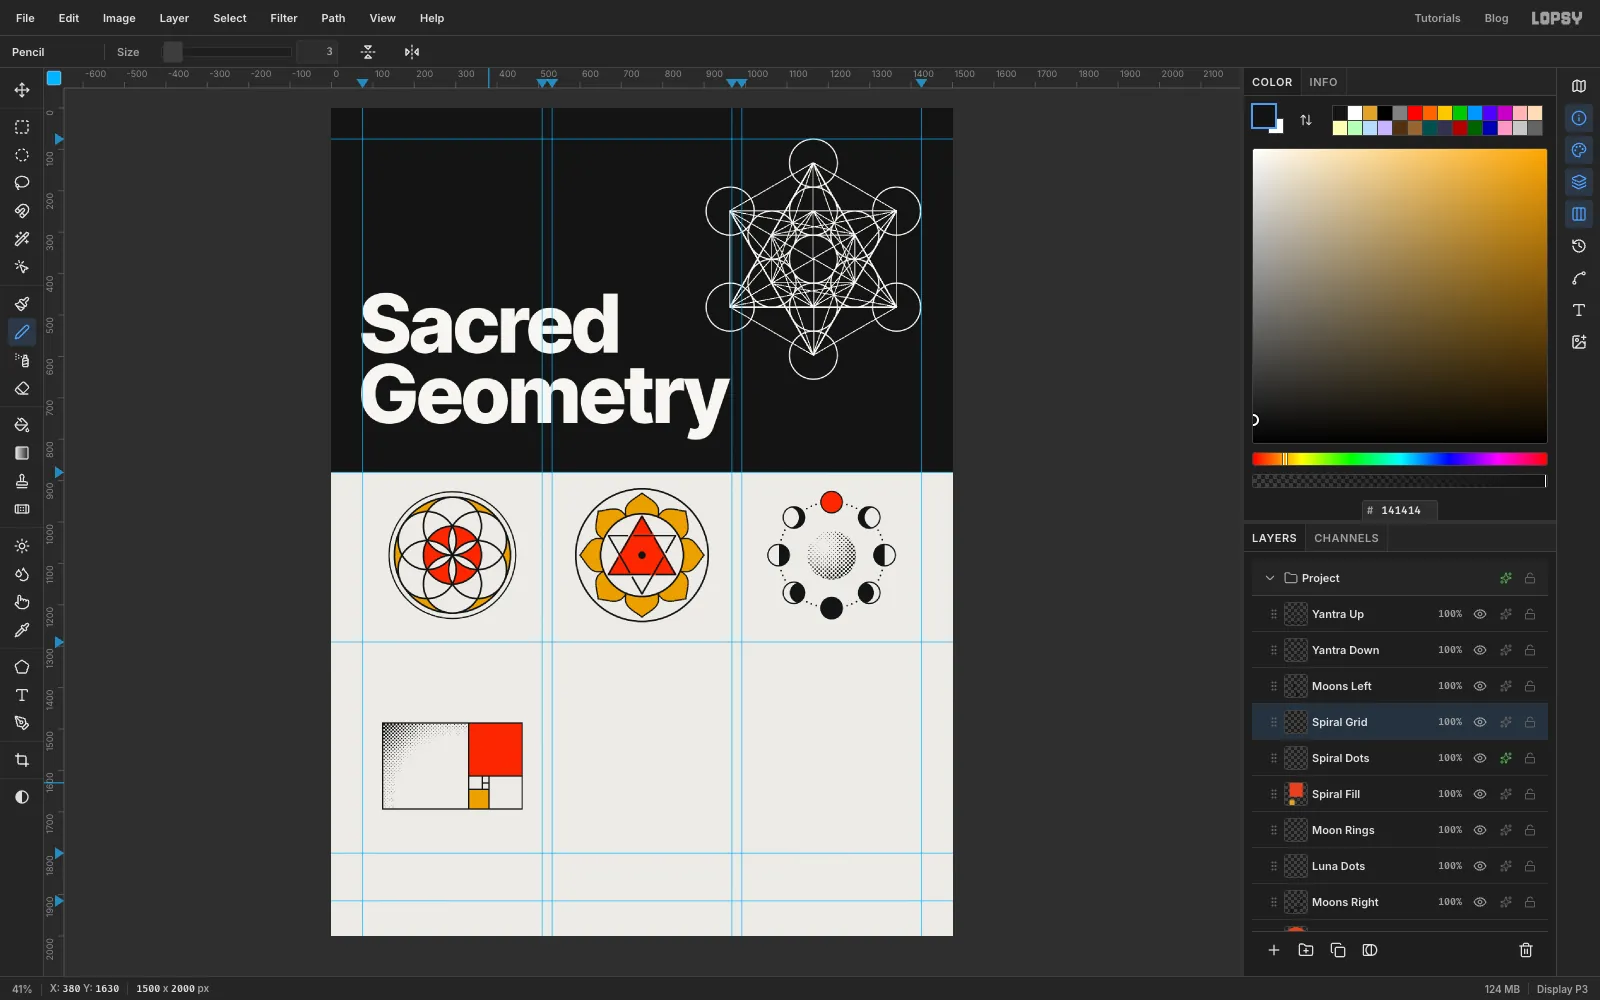
Click Add Layer and name it Spiral Grid. Pick the Pencil, set Size 3, and draw each line with a click and a Shift+click.
- The outer rectangle: (124, 1486) → (460, 1486) → (460, 1694) → (124, 1694) → back to (124, 1486).
- The divisions, largest first:
- x 332 from top to bottom
- y 1614 from x 332 to 460
- x 380 from y 1614 to 1694
- y 1646 from x 332 to 380
- x 364 from y 1614 to 1646
- y 1630 from x 364 to 380
Each line cuts the leftover rectangle into a square and a smaller golden rectangle, which is the whole idea of the Fibonacci tiling.
-
Draw the first spiral arc
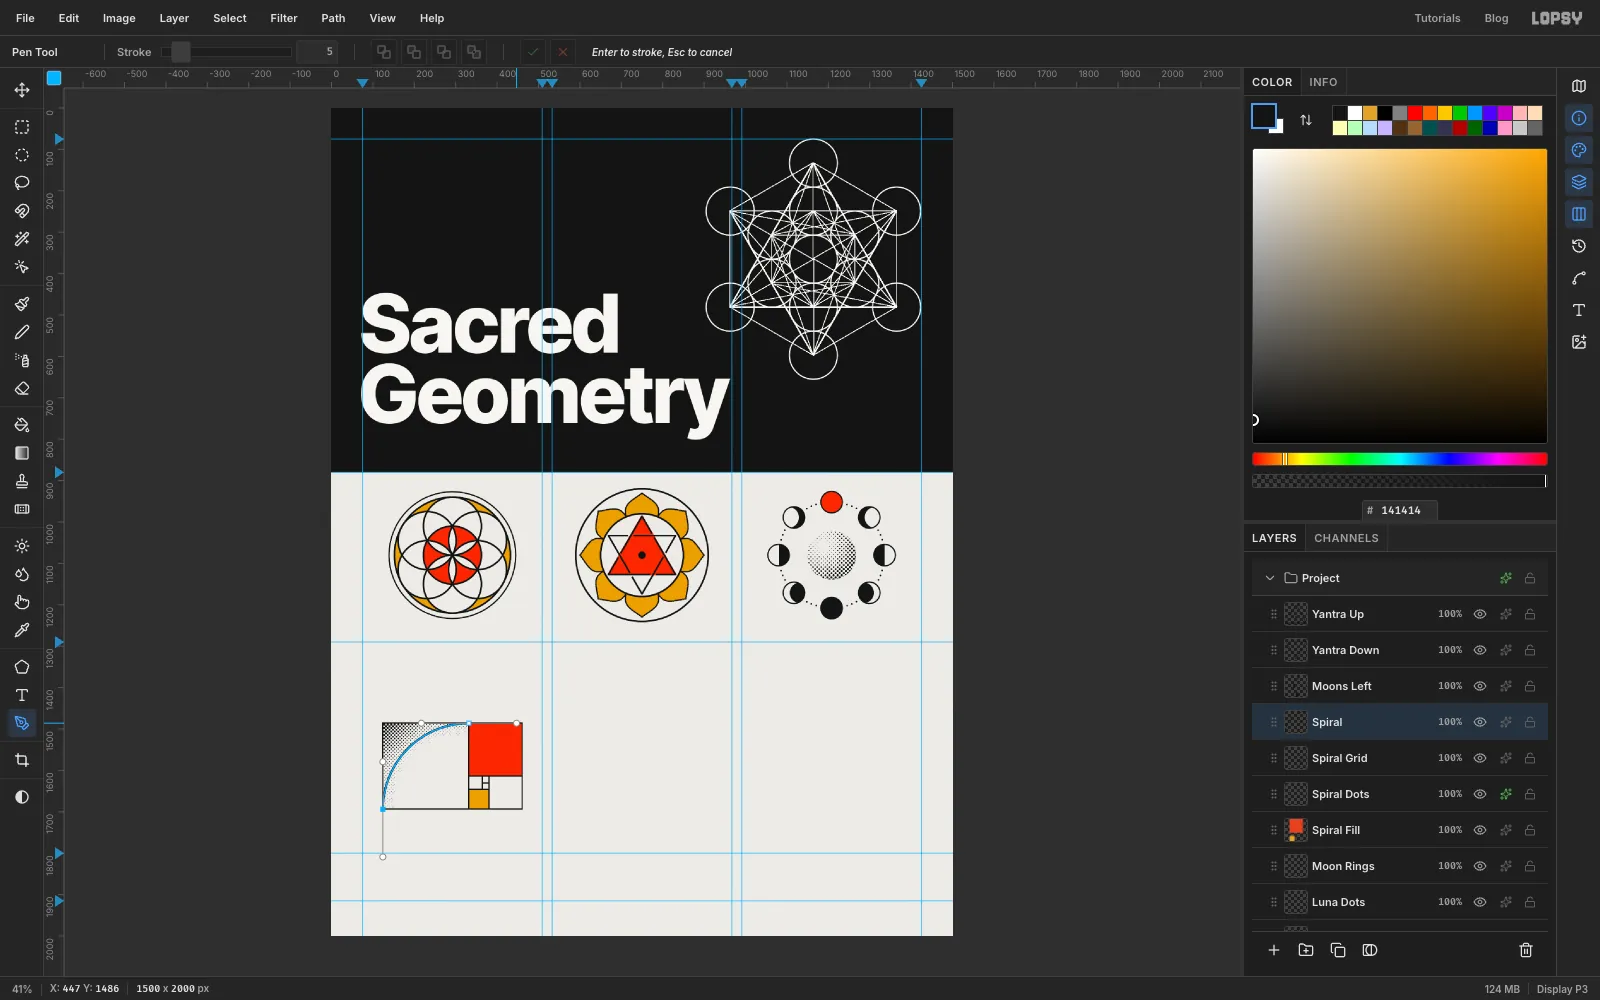
The golden spiral is one quarter circle per square. Each arc is a two-point Pen path with its handles pulled along the square's edges.
Click Add Layer and name it Spiral. Pick the Pen, set Stroke to 5 and the foreground to ink. For the big square:
- Press on its bottom-left corner (124, 1694) and drag straight up about 115 px before letting go.
- Press on its top-right corner (332, 1486) and drag straight right about 115 px.
- Press Enter to stroke it, then delete the path in the Paths panel.
The handle length is 0.55 × the square's side. That's the number that makes a two-point Bézier curve a near-perfect quarter circle.
-
Finish the golden spiral
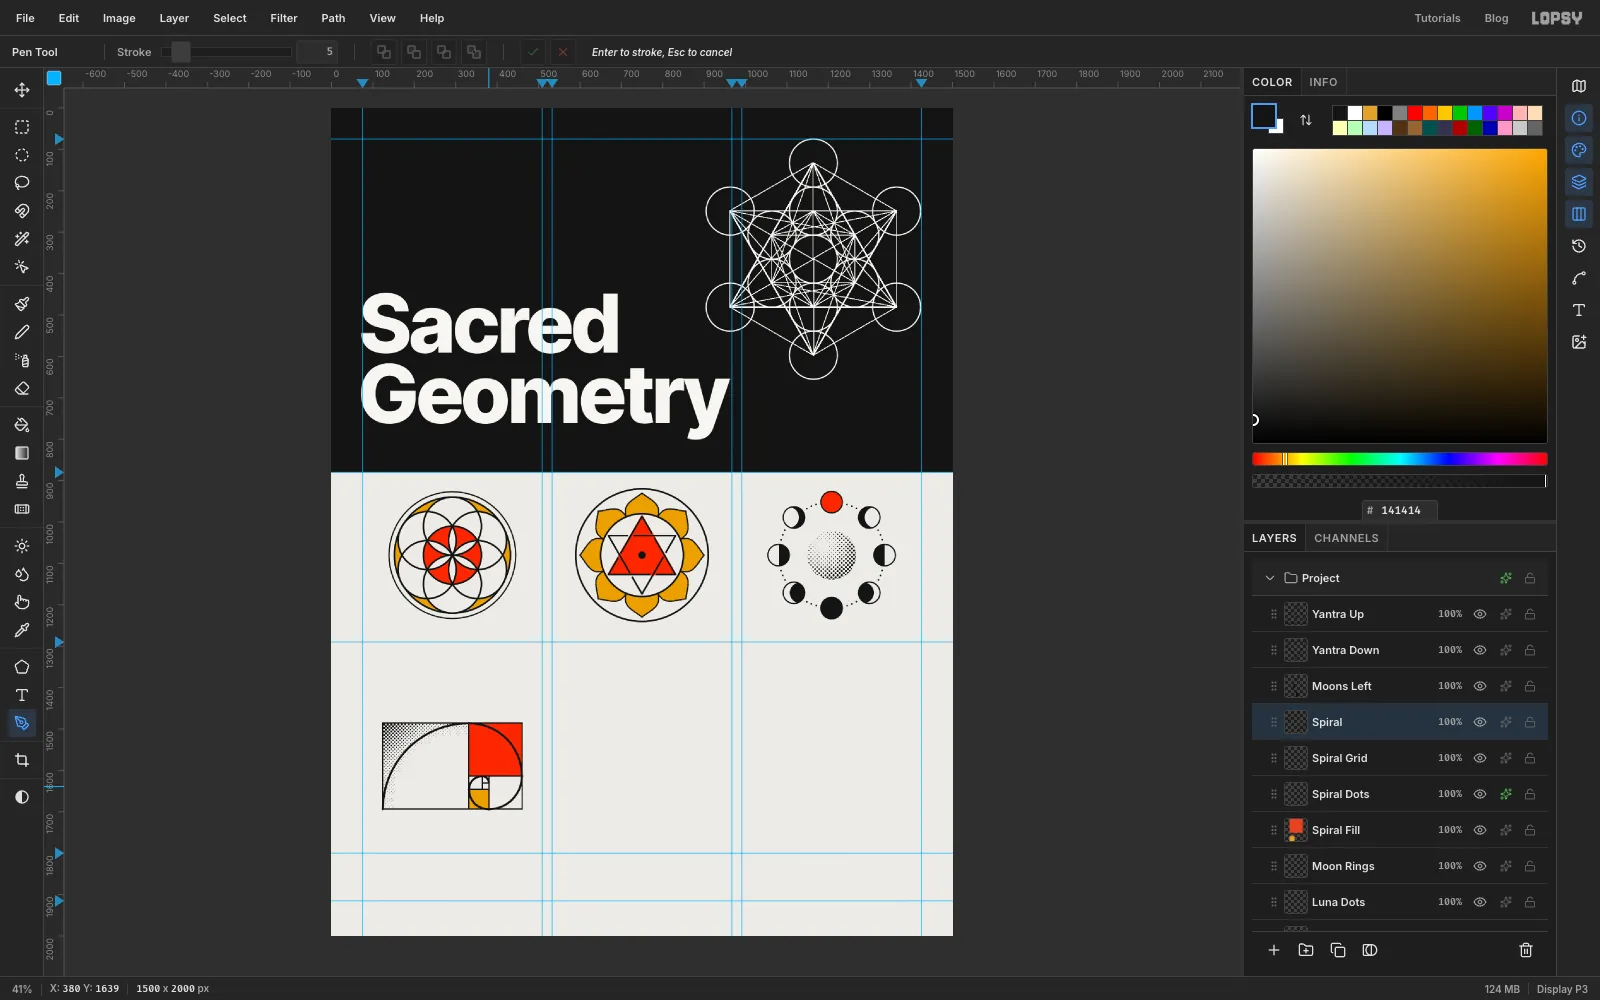
Repeat for the next five squares. Each arc starts where the last one ended, and both handles run along the square's edges, 0.55 × its side:
- 8 square: press (332, 1486) and drag right 71, then press (460, 1614) and drag down 71.
- 5 square: press (460, 1614) and drag down 44, then press (380, 1694) and drag left 44.
- 3 square: press (380, 1694) and drag left 27, then press (332, 1646) and drag up 27.
- 2 square: press (332, 1646) and drag up 18, then press (364, 1614) and drag right 18.
- 1 square: press (364, 1614) and drag right 9, then press (380, 1630) and drag down 9.
Stroke each one with Enter and delete its path before starting the next.
-
Group and scale the spiral
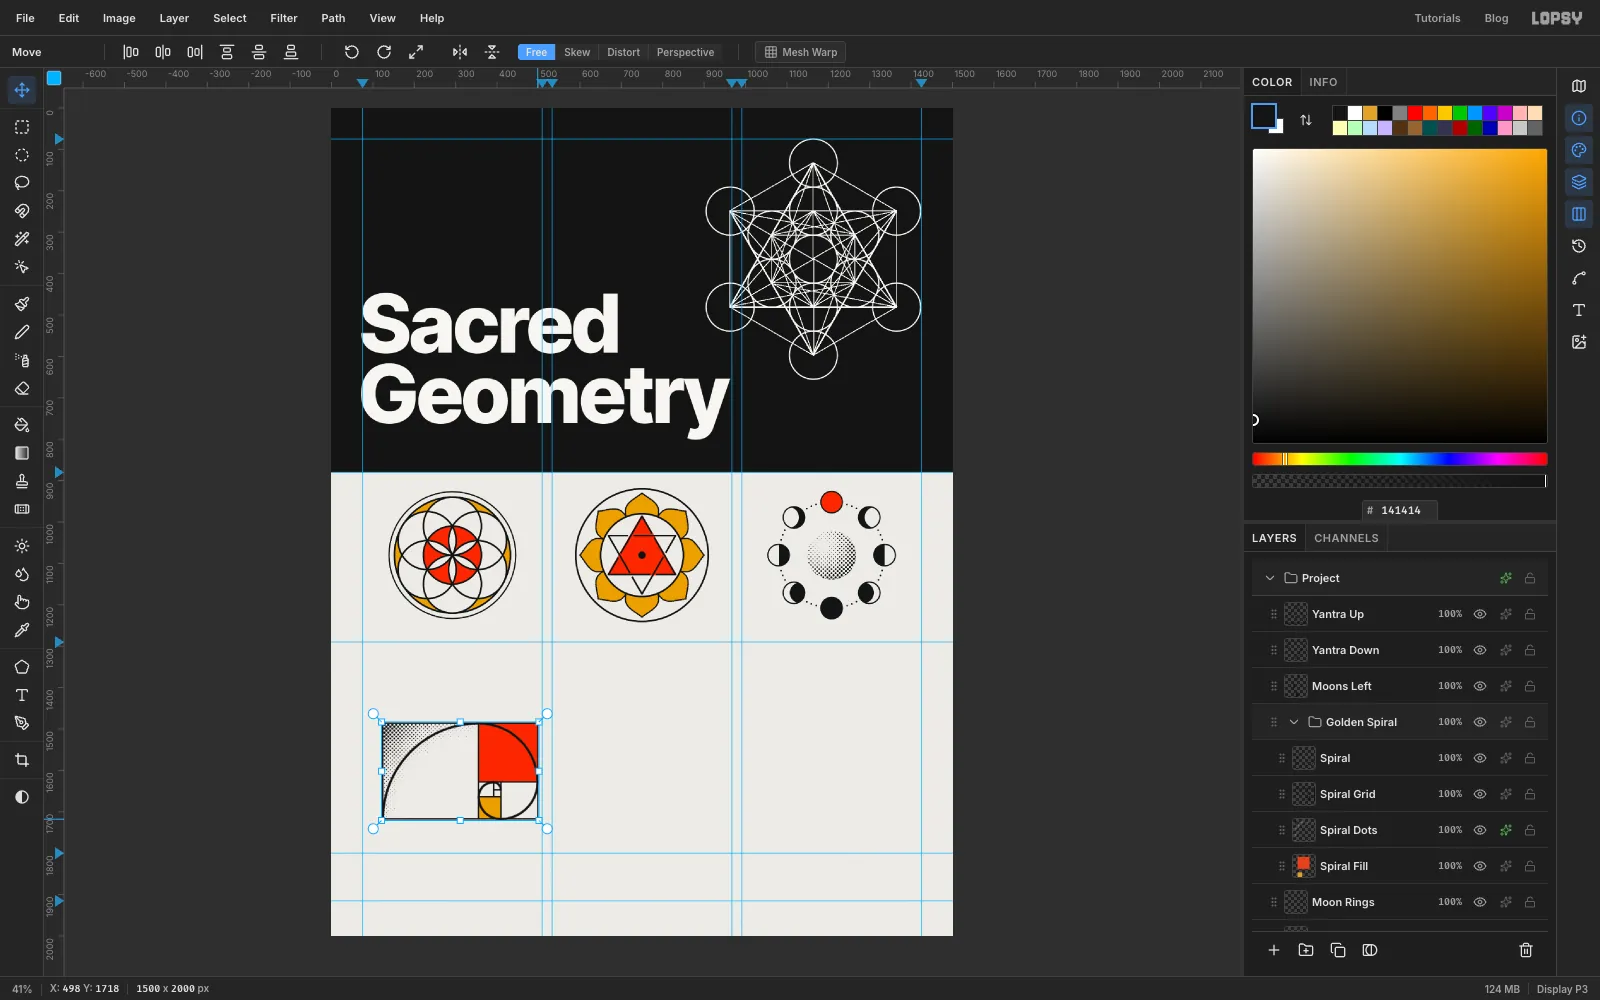
Select Spiral, then Shift+click Spiral Fill to select all four spiral layers. Choose Layer → Group Layers and name the group Golden Spiral.
With the group selected, pick the Move tool. Hold Cmd and drag the bottom-right handle outward until the rectangle is about 374 px wide. Cmd keeps the proportions. Then use the arrow keys to centre it in the cell at (292, 1590), so it spans about x 104 to 481. That leaves about 30 px of air on both sides.
-
Rotate a copy of the triangle
Design 05 is a Merkaba, the star tetrahedron, centred at (750, 1590).
Click the arrow on the Golden Spiral group row to collapse it. A new layer then lands beside the group instead of inside it. Click Add Layer and name it Merkaba Fill. Click Add Layer again and name it Merkaba Up.
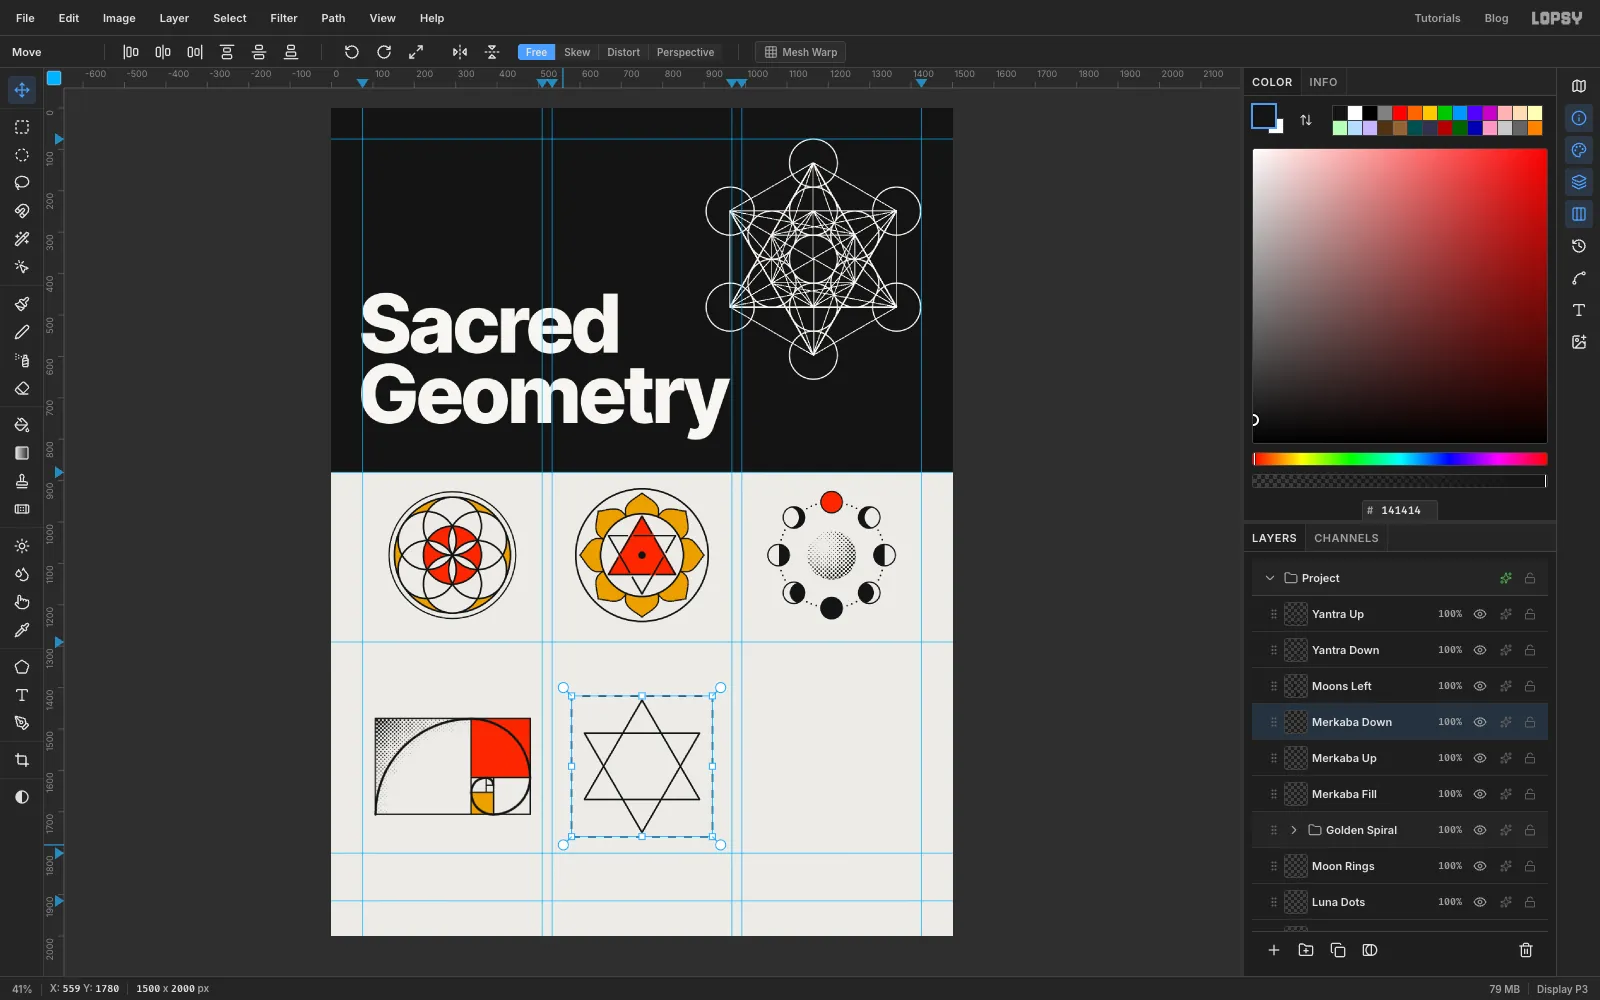
With the Pen at Stroke 4, click (750, 1430), (889, 1670) and (611, 1670), close the path on the first point and press Enter. Delete the path.
Click Duplicate Layer and rename the copy Merkaba Down. Draw a square marquee from (580, 1420) to (920, 1760), centred on the star. Switch to the Move tool. Hold Cmd and drag the rotation handle, just outside a corner, half a turn round until the copy reads 180°. Cmd snaps the angle in 15° steps. Press Cmd+D to commit.
-
Draw the edges and select the tips
The Merkaba is two tetrahedra: one points at you, one points away.
Click Add Layer and name it Merkaba Edges. With the Pencil at Size 3, draw three solid lines from the centre to the up triangle's three corners. These are the visible edges.
The hidden edges, to the tetrahedron pointing away, are dotted. Pick the Brush at Size 4, open the Brushes panel, note the current Spacing, and set it to 320 % so each dab sits apart. Click the centre (750, 1590) and Shift+click (750, 1664). Do the same towards (686, 1553) and (814, 1553). Each dotted edge points at one of the down triangle's tips and stops at the inner hexagon, where the edge disappears behind the front faces. Set Spacing back to what it was.
Now the colour, on Merkaba Fill:
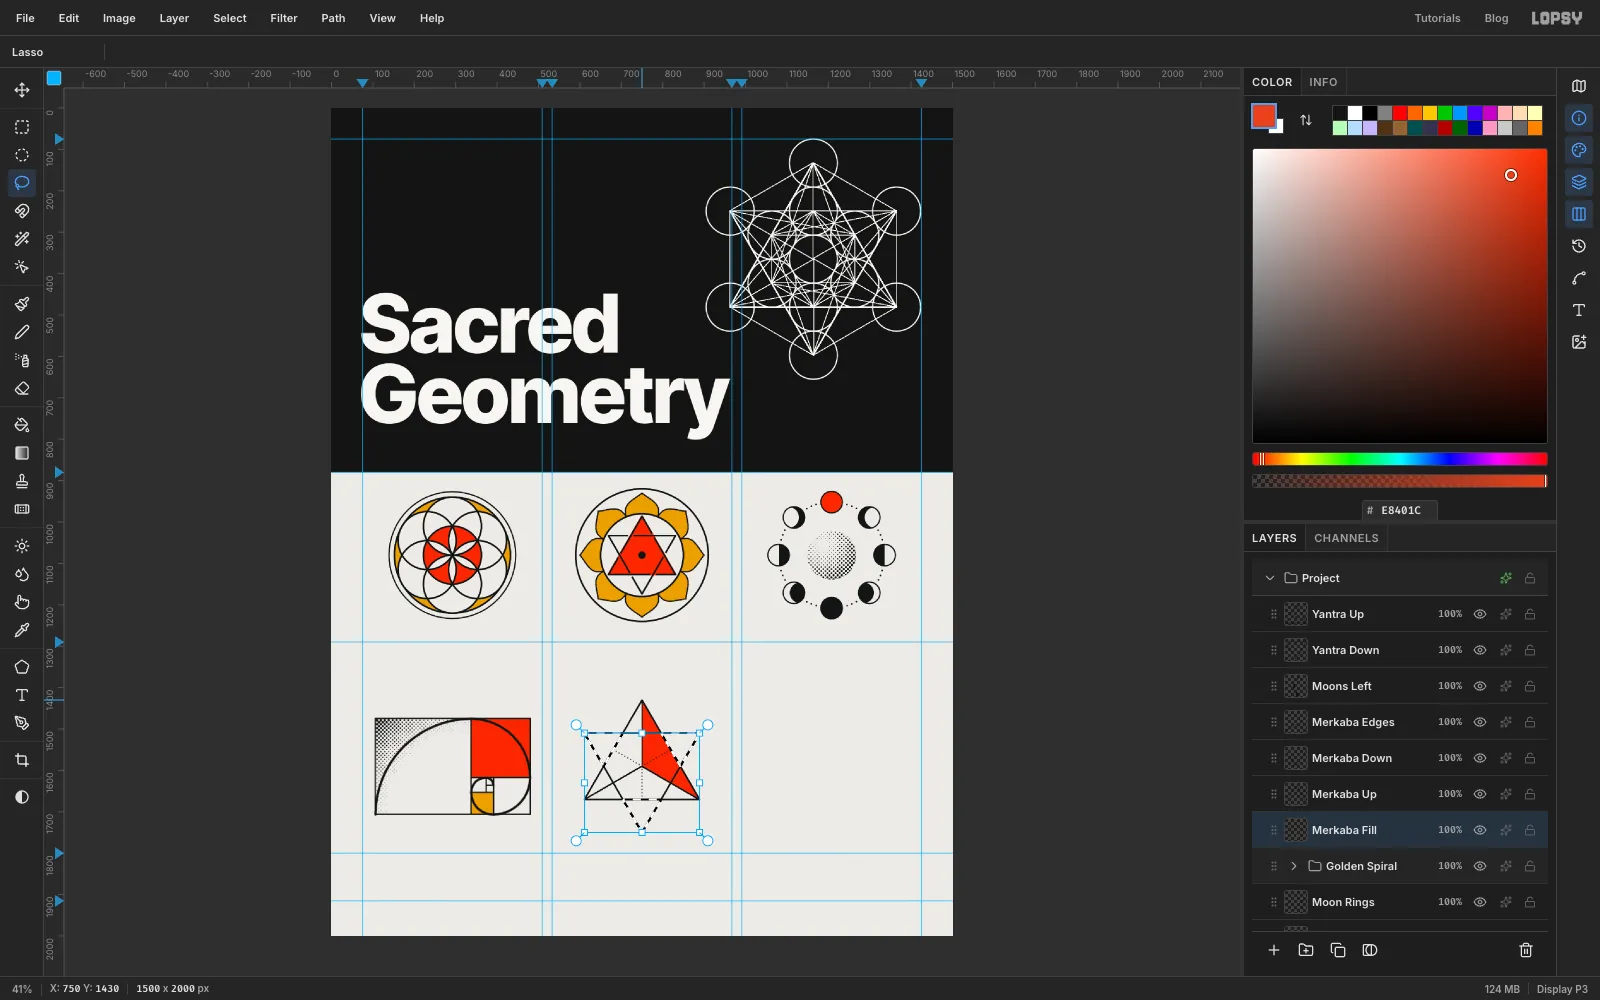
- Red facet: with the Pen, click the centre, the top point and the lower-right corner, and close the path. Click Path to Selection and delete the path. Grow by 1, fill with and deselect.
- Gold tips: make the down triangle a selection the same way, (750, 1750), (611, 1510), (889, 1510), and delete the path. Pick the Lasso (L), hold Option and drag along the up triangle's three edges. The Lasso is freehand, so zoom in and trace down the middle of each black line; the 4 px stroke on top hides small wobbles. Only the star's three outer tips stay selected.
-
Finish the Merkaba
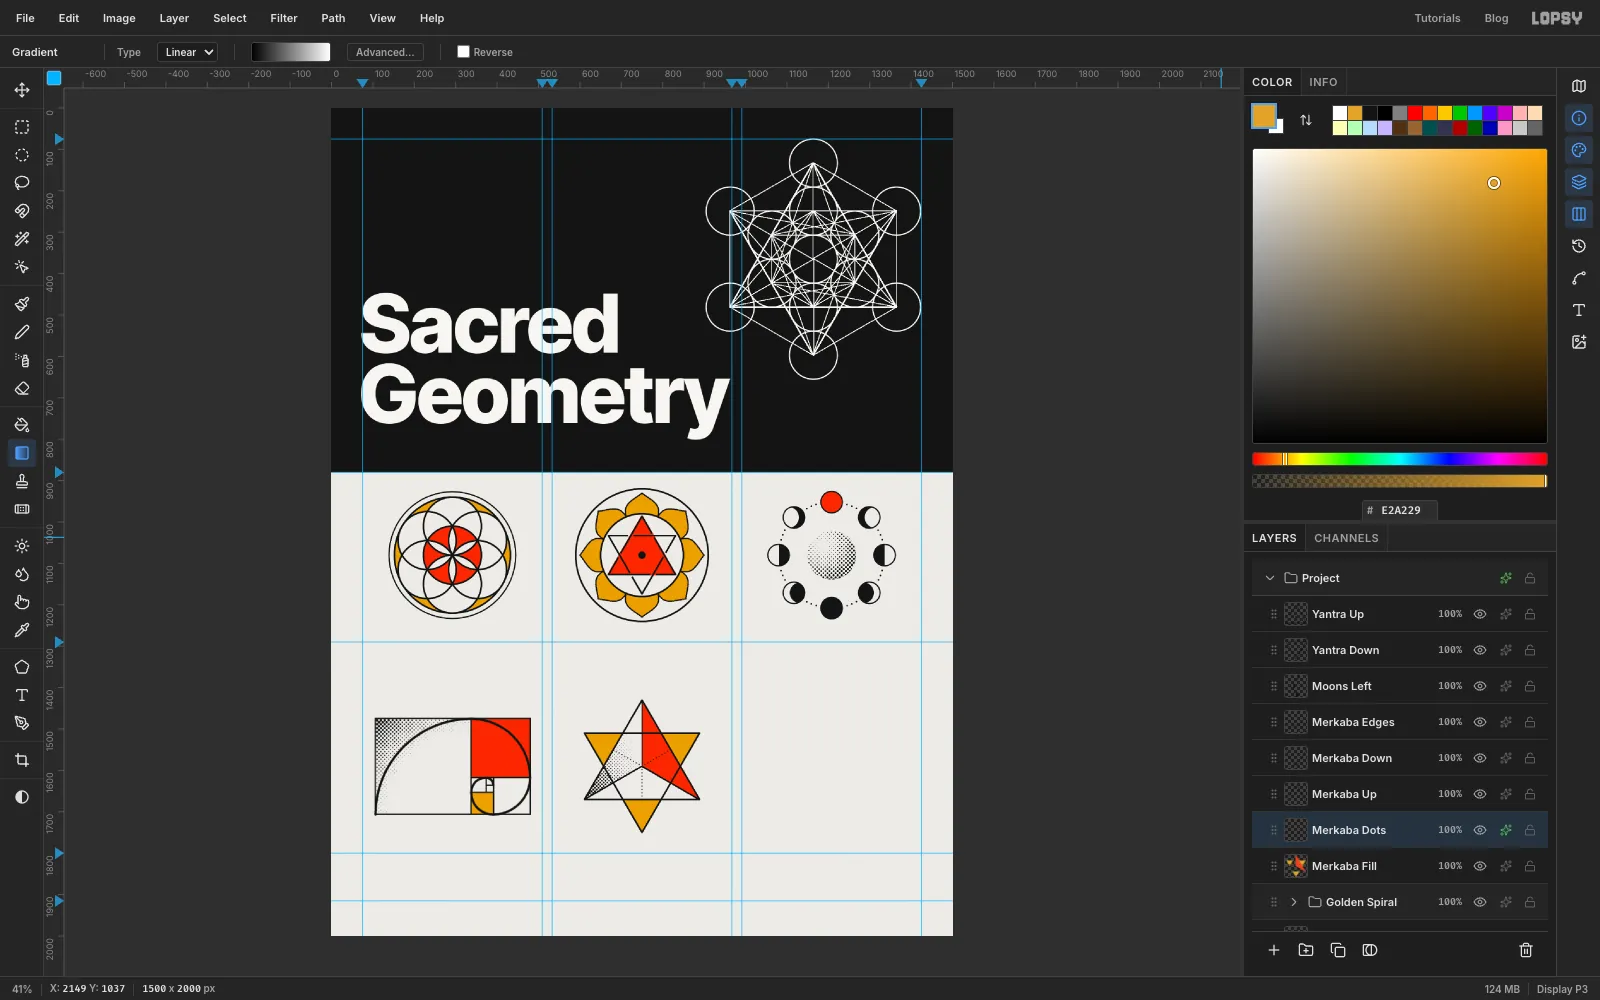
Grow the tips selection by 1 and fill it with .
Click Add Layer and name it Merkaba Dots. With the Pen, make the lower-left facet into a selection: the centre, the lower-left corner and the top point. Delete the path. Draw a linear black-to-white gradient from the lower-left corner (611, 1670) to just past the centre, at about (767, 1580). Apply Halftone (Dot Size 6, Softness 0.3), deselect, and add an ink Color Overlay.
To tidy the panel, select Merkaba Edges, Shift+click Merkaba Fill, and choose Layer → Group Layers. Name the group Merkaba.
-
Build the vesica piscis
A vesica piscis is the almond made by two equal circles, each passing close to the other's centre. Design 06 sets an eye in one, centred at (1208, 1590).
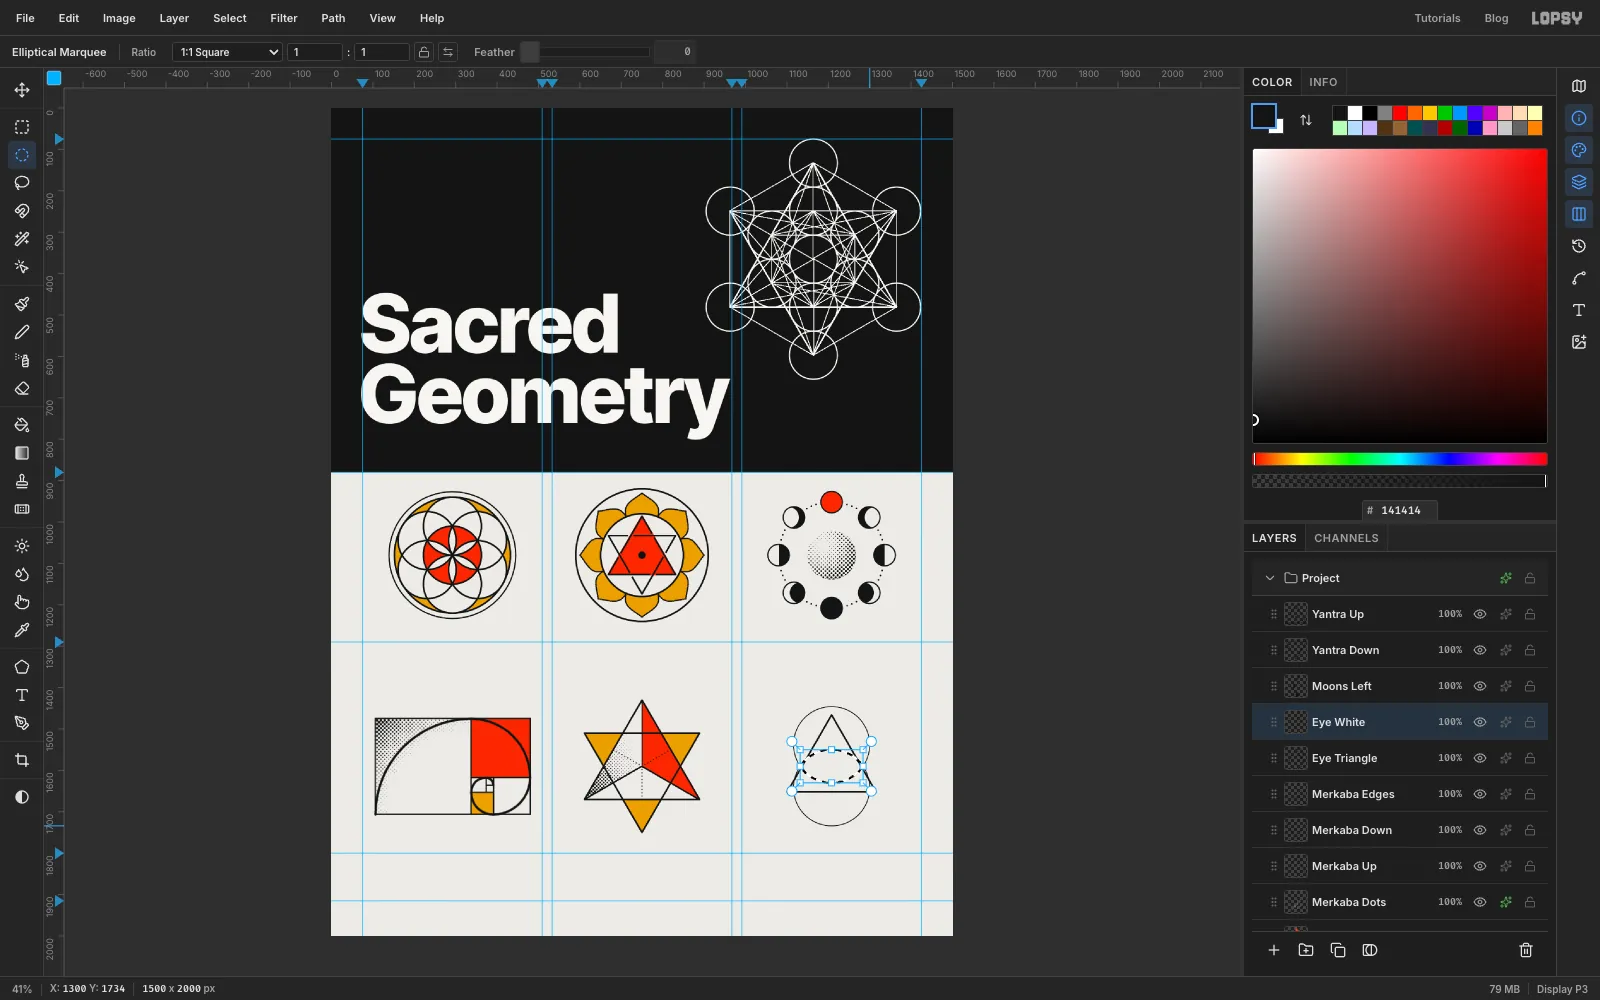
Click Add Layer and name it Eye Triangle. With the Pen at Stroke 4, draw a closed triangle through (1208, 1466), (1315, 1652) and (1101, 1652), and press Enter. With the Shape tool at Width 2, add two 184 × 184 circles centred at (1208, 1538) and (1208, 1642).
Click Add Layer and name it Eye White. With the Elliptical Marquee, select the upper circle: From 1116, 1446 To 1300, 1630. Then hold Shift+Option+Cmd and drag over the lower circle, from (1116, 1550) to (1300, 1734). The intersection is the vesica, the almond in the middle.
-
Draw the eye and its rays
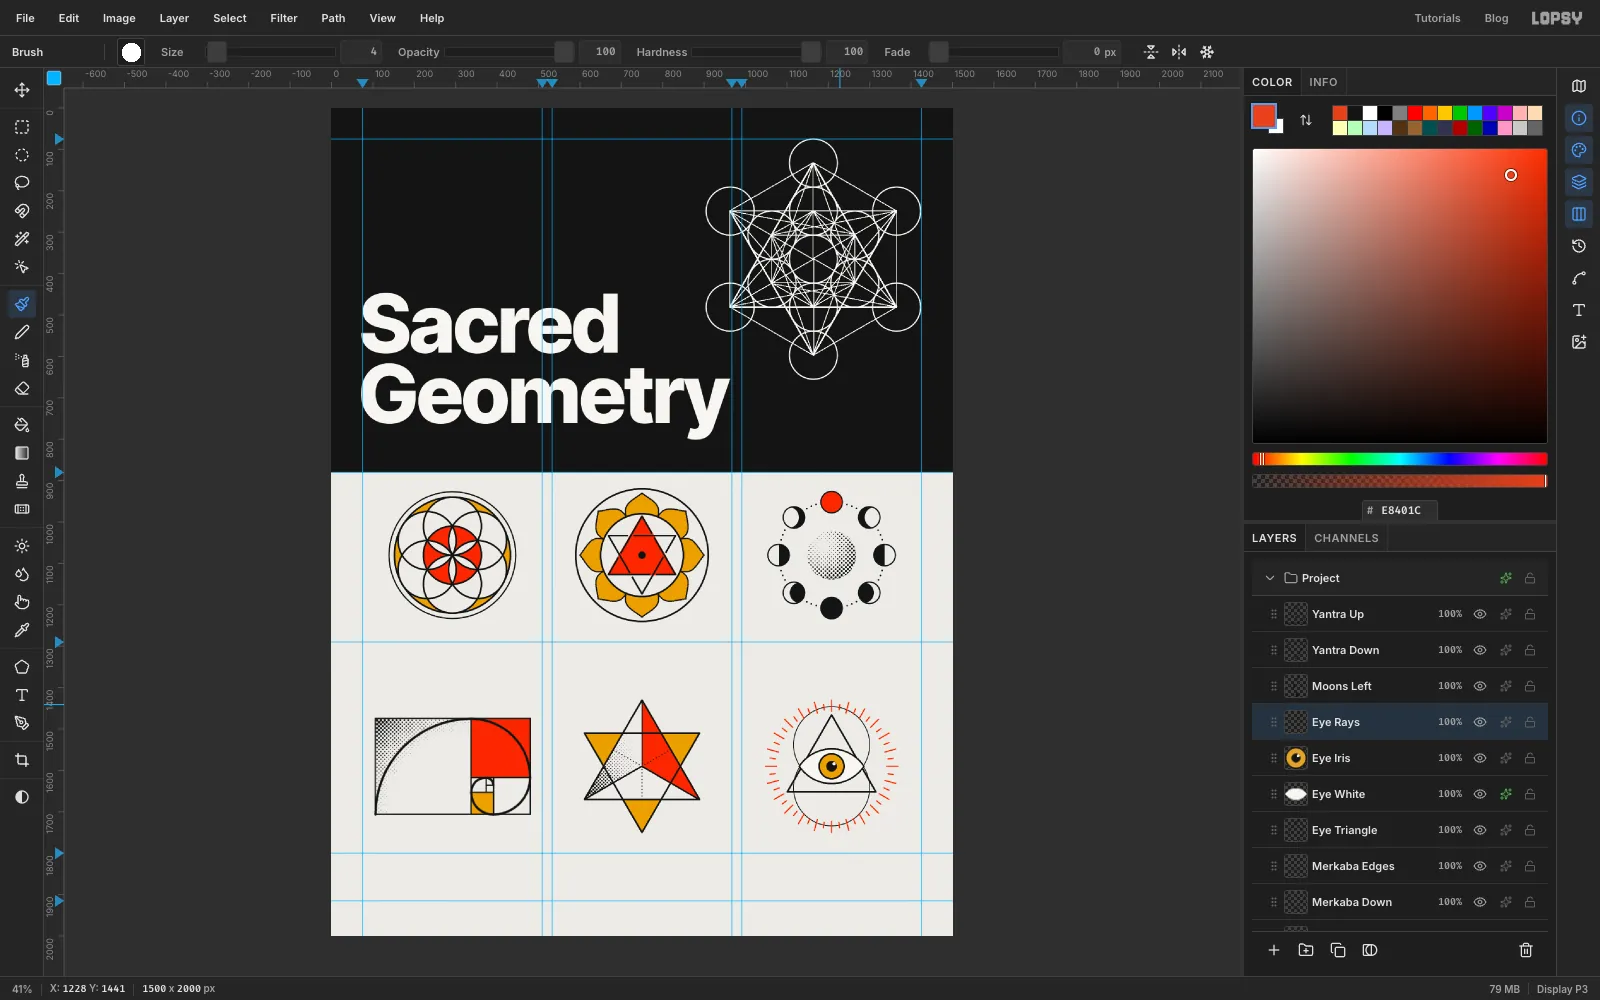
Fill the almond with and deselect. In the effects drawer turn on Stroke with Width 4 in . An effect outline stays crisp and can be changed later.
Click Add Layer and name it Eye Iris. Fill three circular selections, deselecting between them:
- the iris, From 1178, 1560 To 1238, 1620, in
- the pupil, From 1195, 1577 To 1221, 1603, in ink
- a glint up and to the right, From 1210, 1580 To 1218, 1588, in
Still on Eye Iris, add a 60 × 60 Shape circle on the centre with an ink stroke of 4 around the iris.
Click Add Layer and name it Eye Rays. Turn on Radial Symmetry with Segments 24 and Cmd+click the centre. Set the Brush to Size 4 in .
- Draw a long ray straight up, from (1208, 1457) to (1208, 1430).
- Draw a short ray just to its right, from (1226, 1454) to (1228, 1441).
Symmetry turns those two strokes into 48 alternating rays. Turn symmetry off.
-
Rule the cells
Click Add Layer and name it Rules. Pick the Pencil at Size 3 in ink. Under each cell, click the left edge and Shift+click the right edge, on the guides at y 1290 and y 1800:
- x 75 to 509
- x 533 to 967
- x 991 to 1425
The gaps between the rules are the column gutters, so each design reads as its own card.
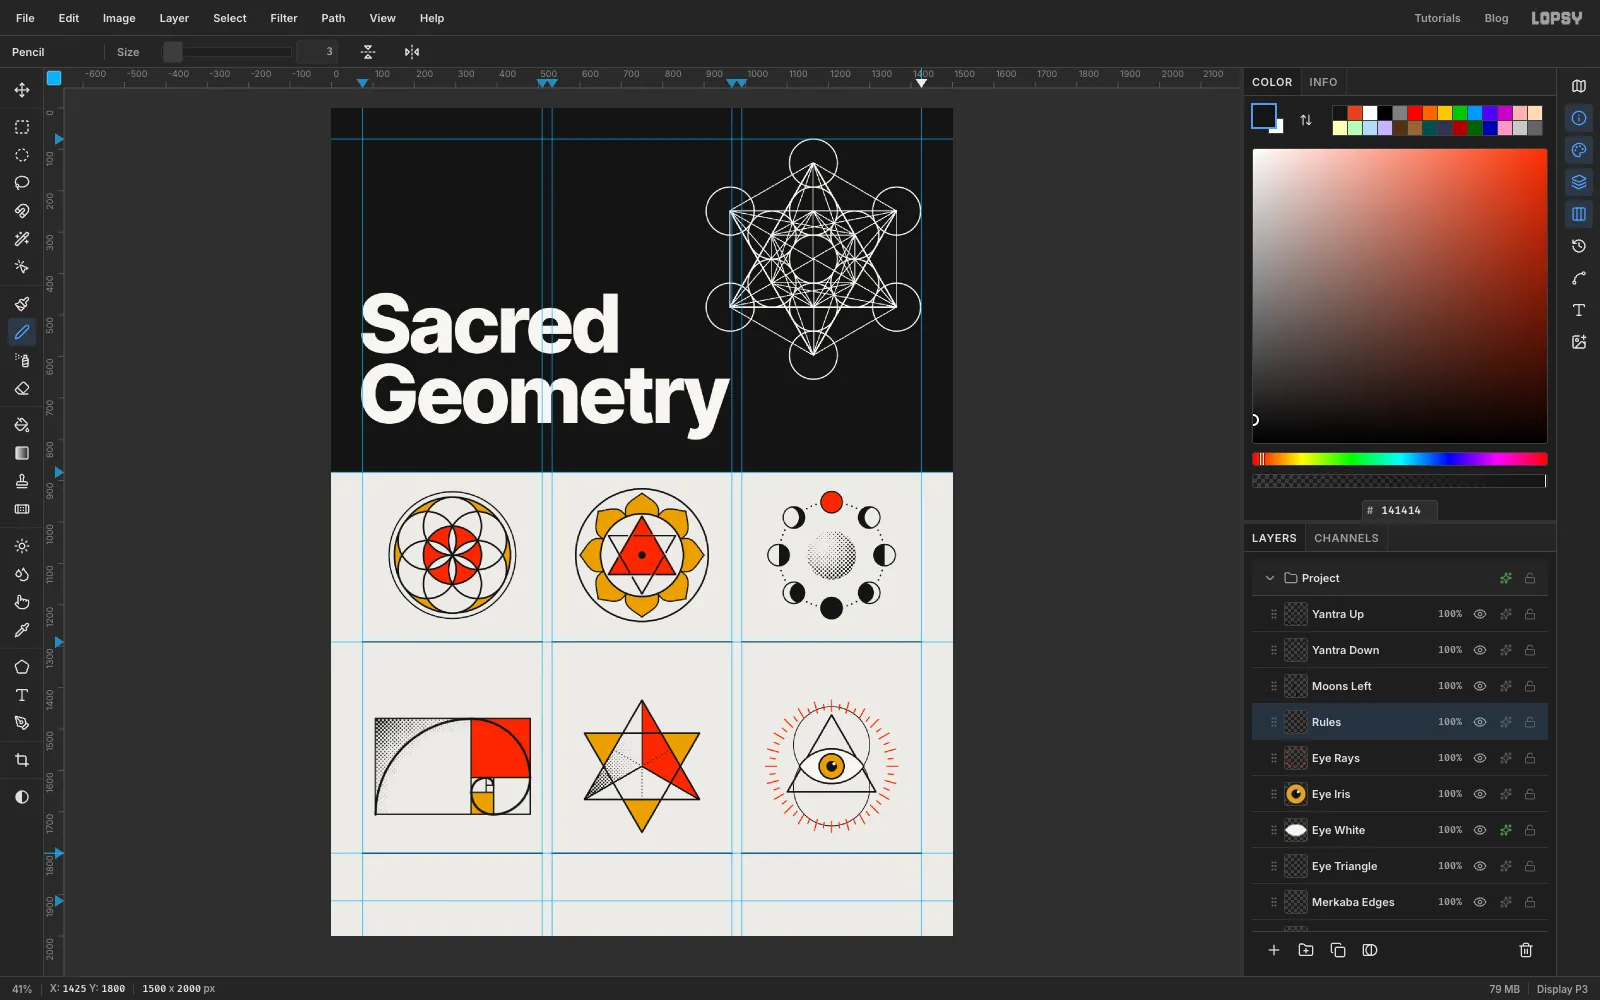
-
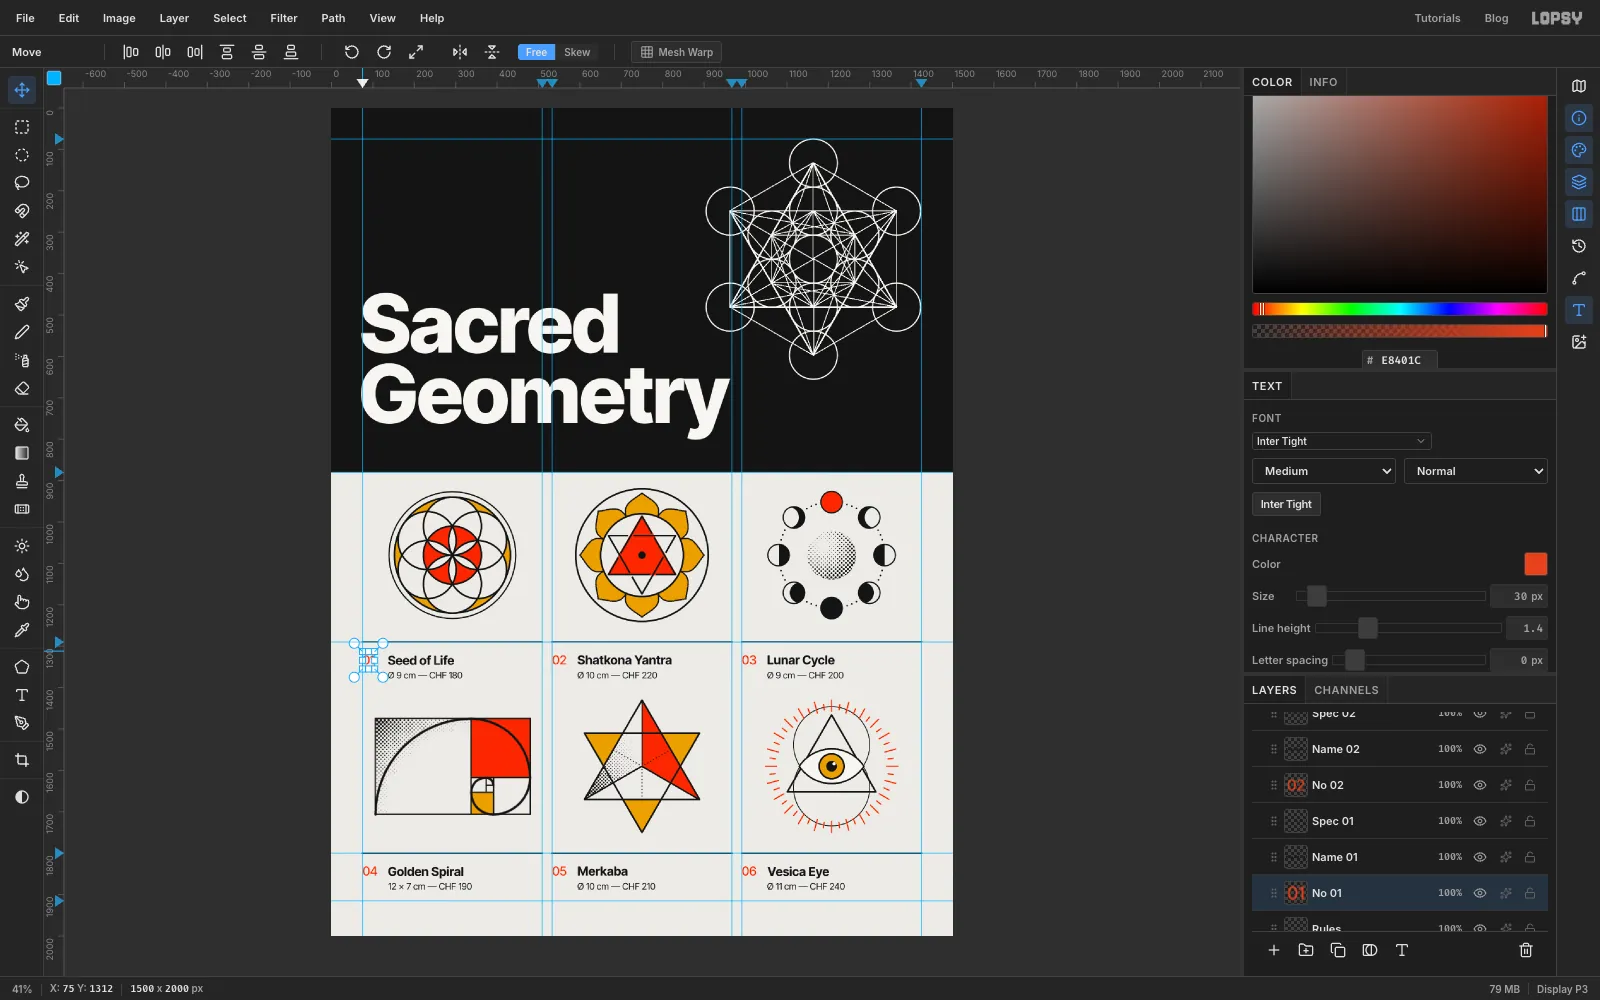
Label every design
Each label has three text layers. Select Rules before each one so you never restyle an existing label. Create the bottom-right label first and work backwards; that way no click lands inside an earlier line's box.
- Size and price: Inter Tight Regular 22, ink, e.g.
Ø 9 cm — CHF 180. - Name: Inter Tight Bold 30, ink, e.g.
Seed of Life. - Number: Inter Tight Medium 30, , e.g.
01.
The six labels are 01 Seed of Life (Ø 9 cm, CHF 180), 02 Shatkona Yantra (Ø 10 cm, CHF 220), 03 Lunar Cycle (Ø 9 cm, CHF 200), 04 Golden Spiral (12 × 7 cm, CHF 190), 05 Merkaba (Ø 10 cm, CHF 210) and 06 Vesica Eye (Ø 11 cm, CHF 240).
Nudge each one into place with the Move tool. The number starts on the cell's left edge. The name and the price line start 62 px in, so the names form a clean tab. Name and number caps sit 32 px under the rule, and the price line 72 px under it.
- Size and price: Inter Tight Regular 22, ink, e.g.
-
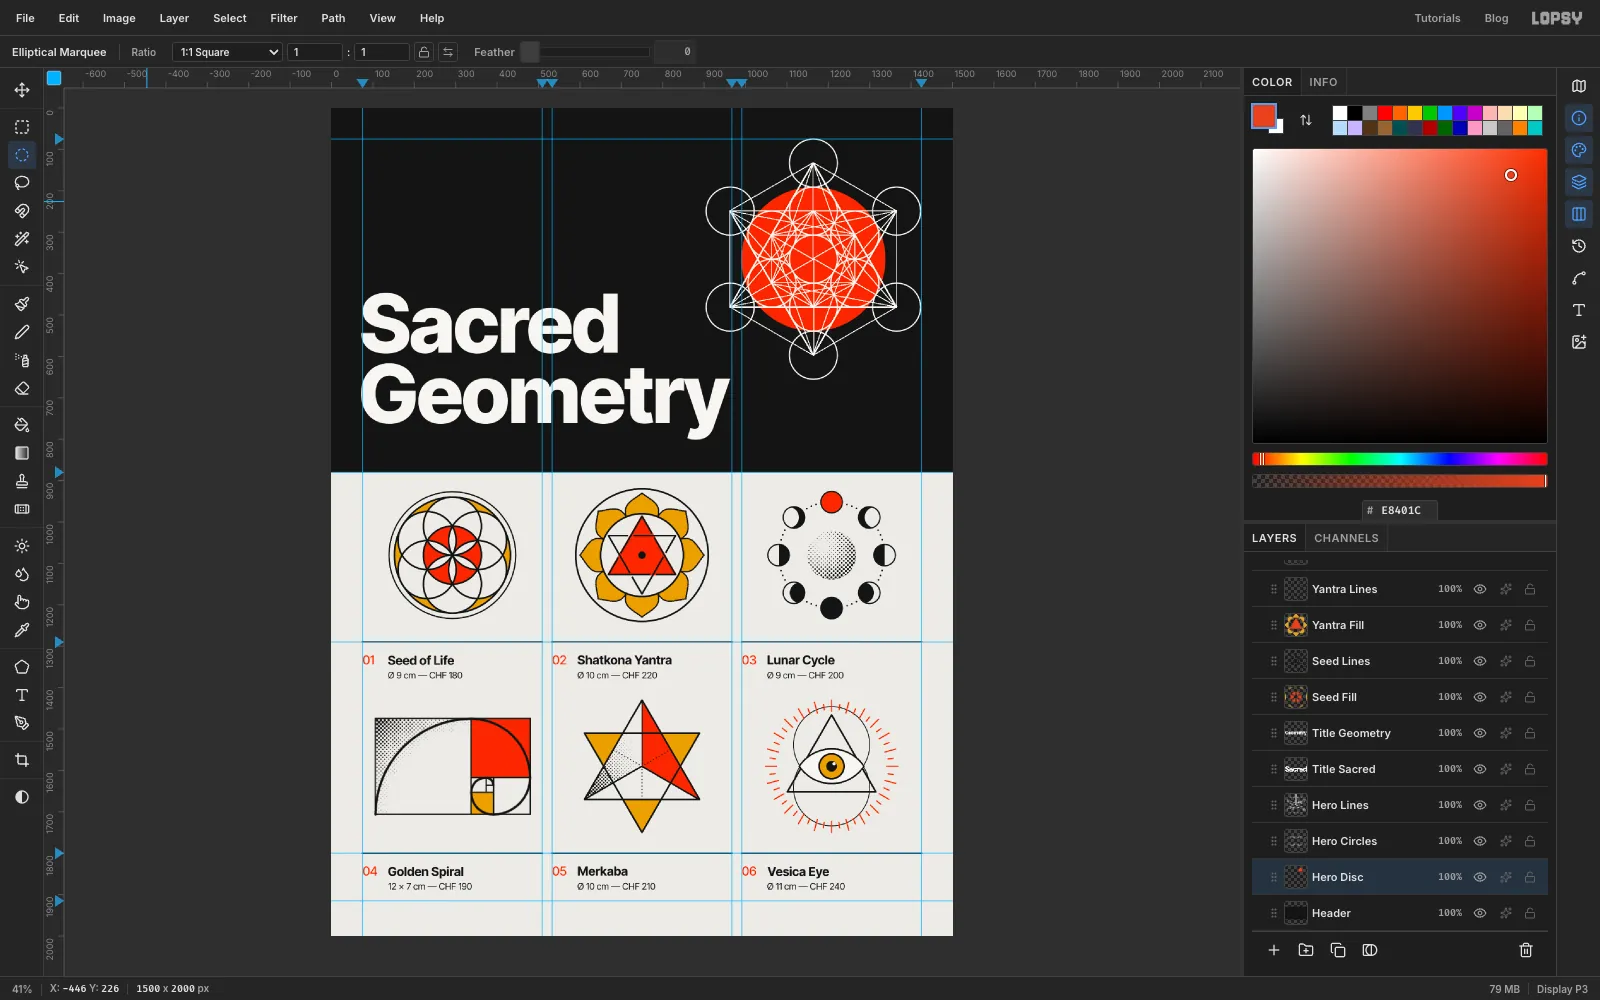
Add the vermilion disc
Back in the header, select Header and click Add Layer. Name it Hero Disc; it lands between the black and the white lines.
Select a 348 px circle centred on the cube, From 990, 191 To 1338, 539, and fill it with . Its edge touches the outer edges of the six inner circles, so the disc reads as part of the construction. It's the one big flat colour field a Müller-Brockmann poster would anchor on.
-
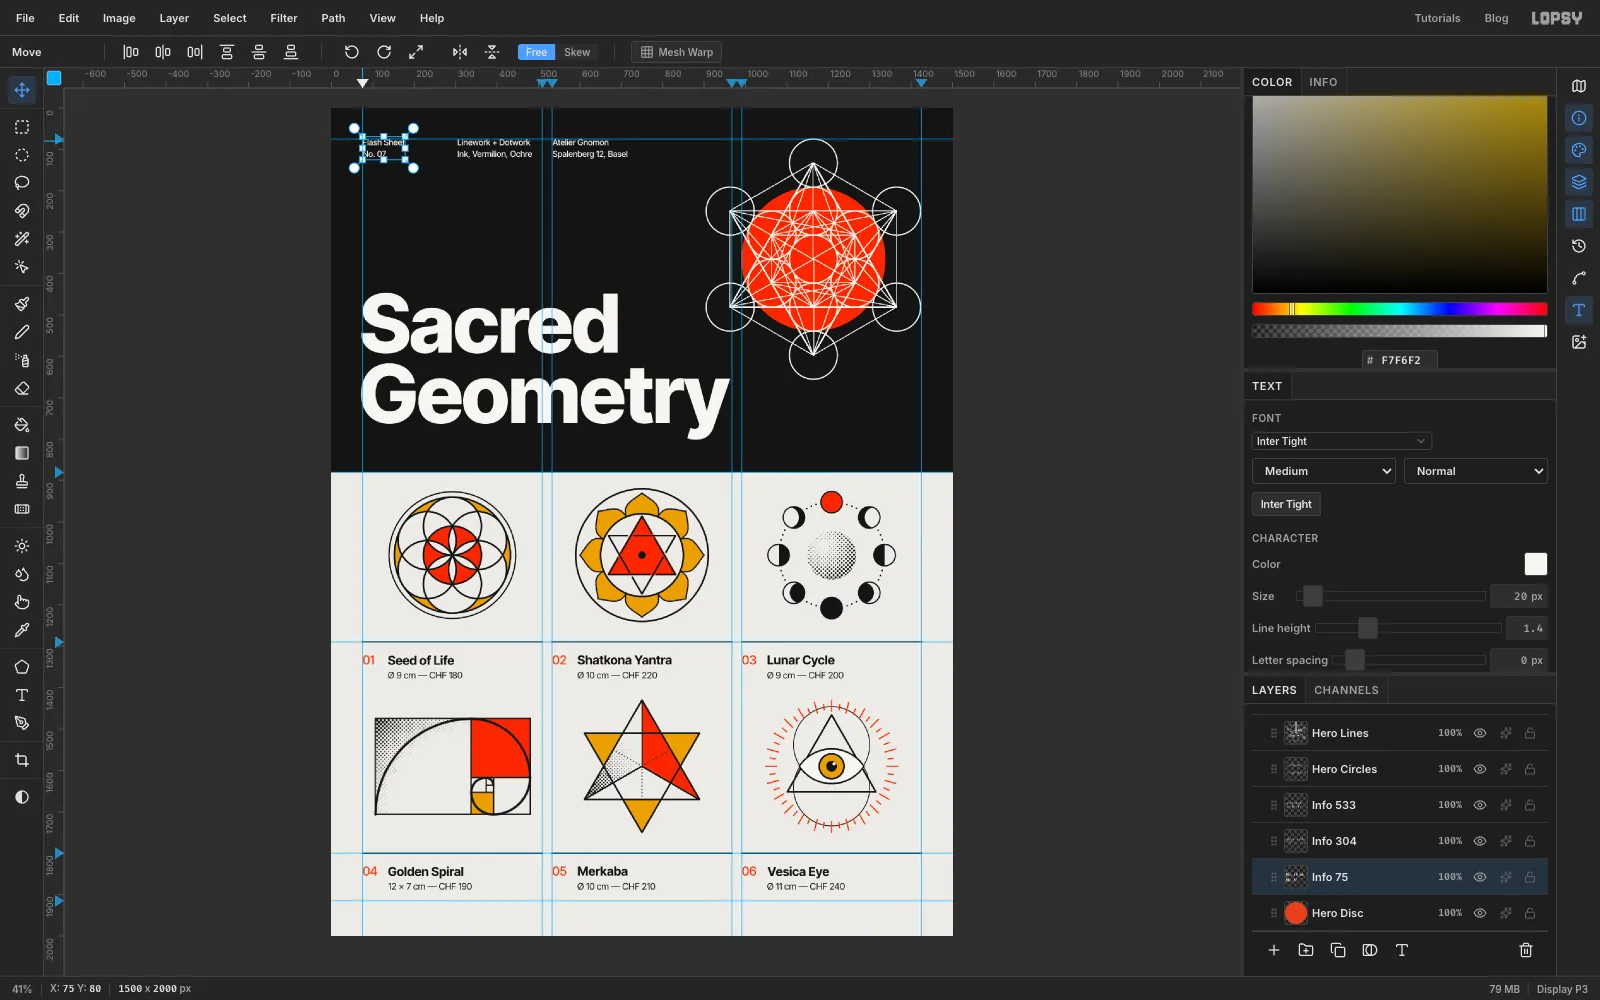
Set the info row
Select Hero Disc. With the Text tool at Inter Tight Medium 20 in , type three two-line blocks (press Enter for the second line). Make them right to left:
- x 533:
Atelier Gnomon/Spalenberg 12, Basel - x 304:
Linework + Dotwork/Ink, Vermilion, Ochre - x 75:
Flash Sheet/No. 07
Nudge each so its left edge sits on its column line and its caps sit on the 75 guide, level with the top of the cube.
- x 533:
-
Copy the registration marks
Screen-printed flash carries registration marks for lining up the colour passes. Select Rules and click Add Layer; name it Reg Marks.
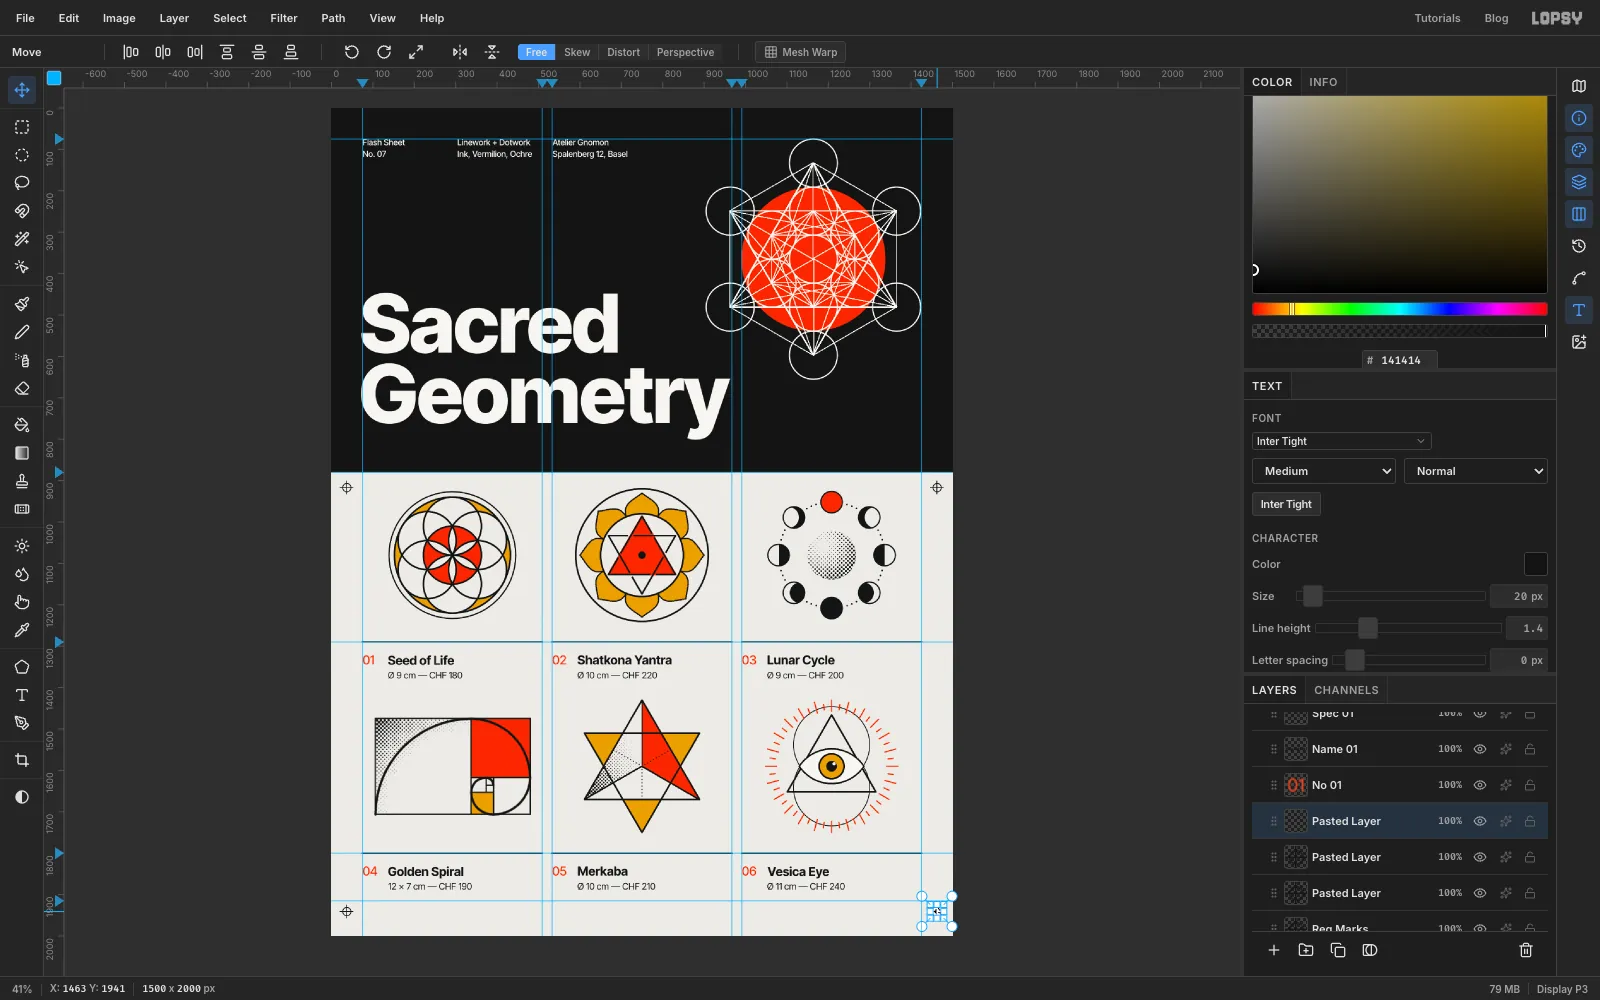
Centre the first mark in the margin at (37, 917). With the Pencil at Size 2, draw a 32 px cross through it: click (21, 917) and Shift+click (53, 917), then click (37, 901) and Shift+click (37, 933). Add a 20 × 20 Shape circle with a Width 2 ink stroke on the same point.
Select a 40 px square around the mark, From 17, 897 To 57, 937, and press Cmd+C. Then, three times, press Cmd+V. Each paste lands in place on a new Pasted Layer right above the mark. Drag it from its middle with the Move tool to the next corner: (1463, 917), (37, 1941) and (1463, 1941). Press Cmd+D when you're done.
-
Add the colophon and grain
Select Rules and draw a Size 1 Pencil hairline across the foot at y 1915, from x 75 to 1425. Under it, add the colophon in Inter Tight Regular 16, colour , with its caps at y 1935, level with the lower registration marks:
Drawn by Mara Keller for Atelier Gnomon · © 2026 · Please don't copy — each design is tattooed once.Finish with grain. Select the topmost layer in the Layers panel and click Add Layer, so the new layer sits over everything. Name it Grain. Fill it with , then apply Filter → Add Noise… with Amount 100 and Mono, leaving Distribution on Uniform. Set its Blend mode to Overlay and its opacity to 70 %.
Overlay hardly moves near-black and near-white, which is why the noise has to be this strong: it ends up as a subtle 3–4 % tooth on both the black header and the paper. Turn off View → Show Guides and choose File → Quick Export PNG.