Design a Swiss-Style Tea Bar Flier
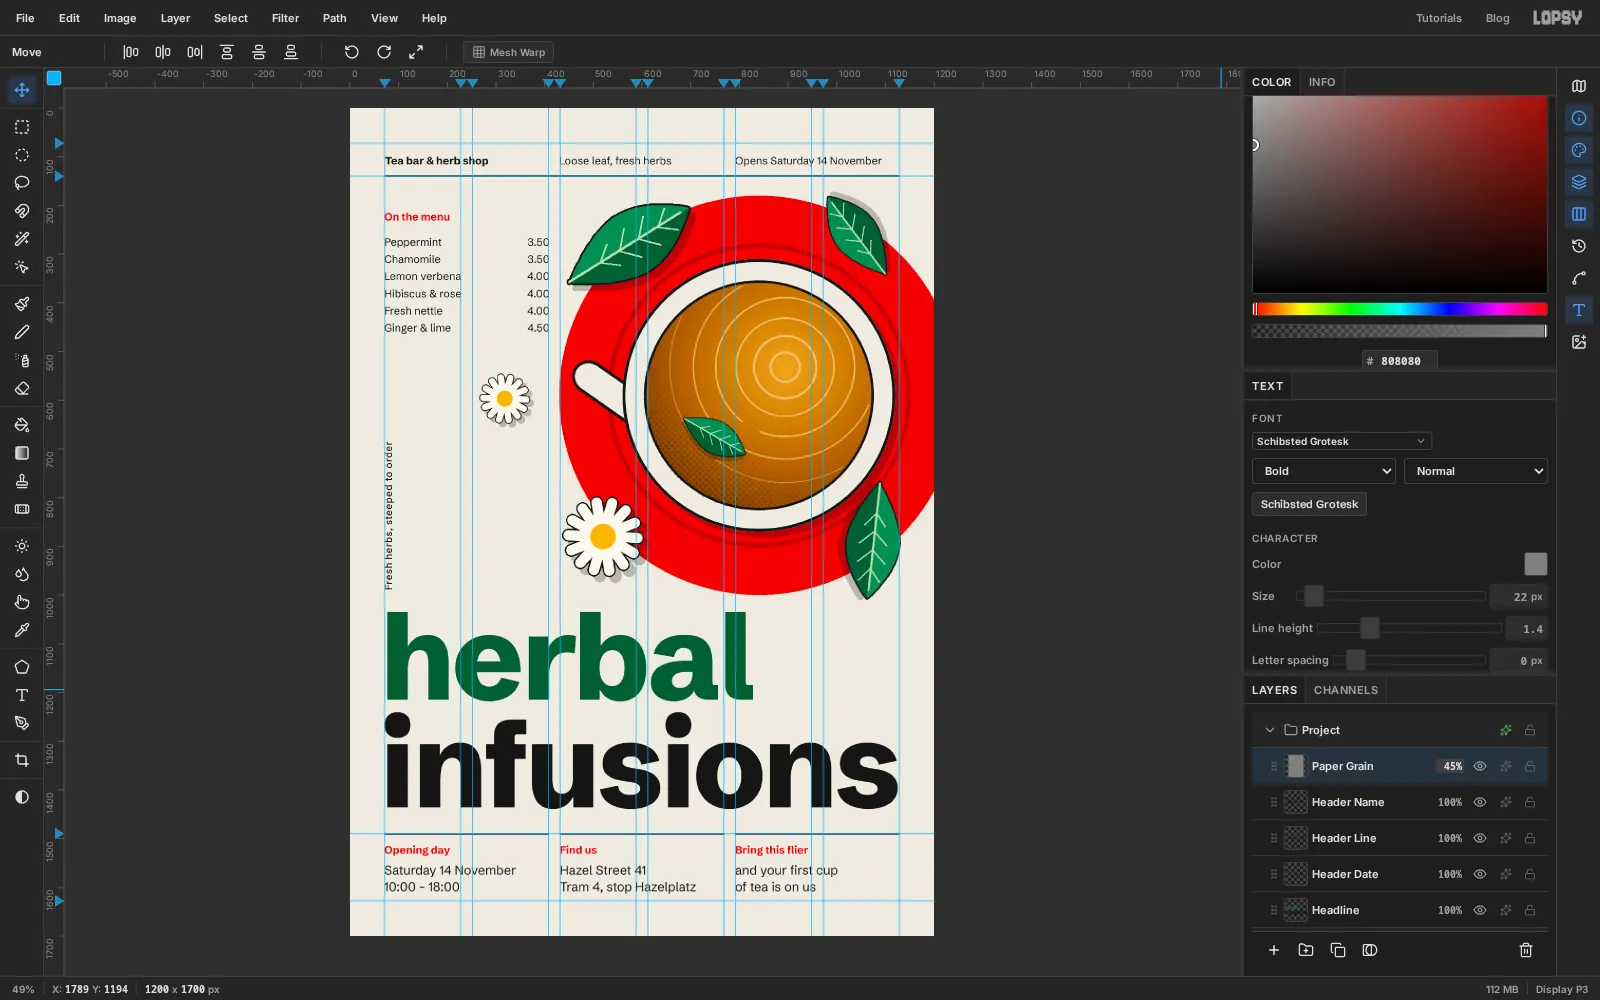
Build a Swiss International Style flier for a tea bar in Lopsy, with a six-column grid, a top-down teacup, mint leaves and big grotesk type.
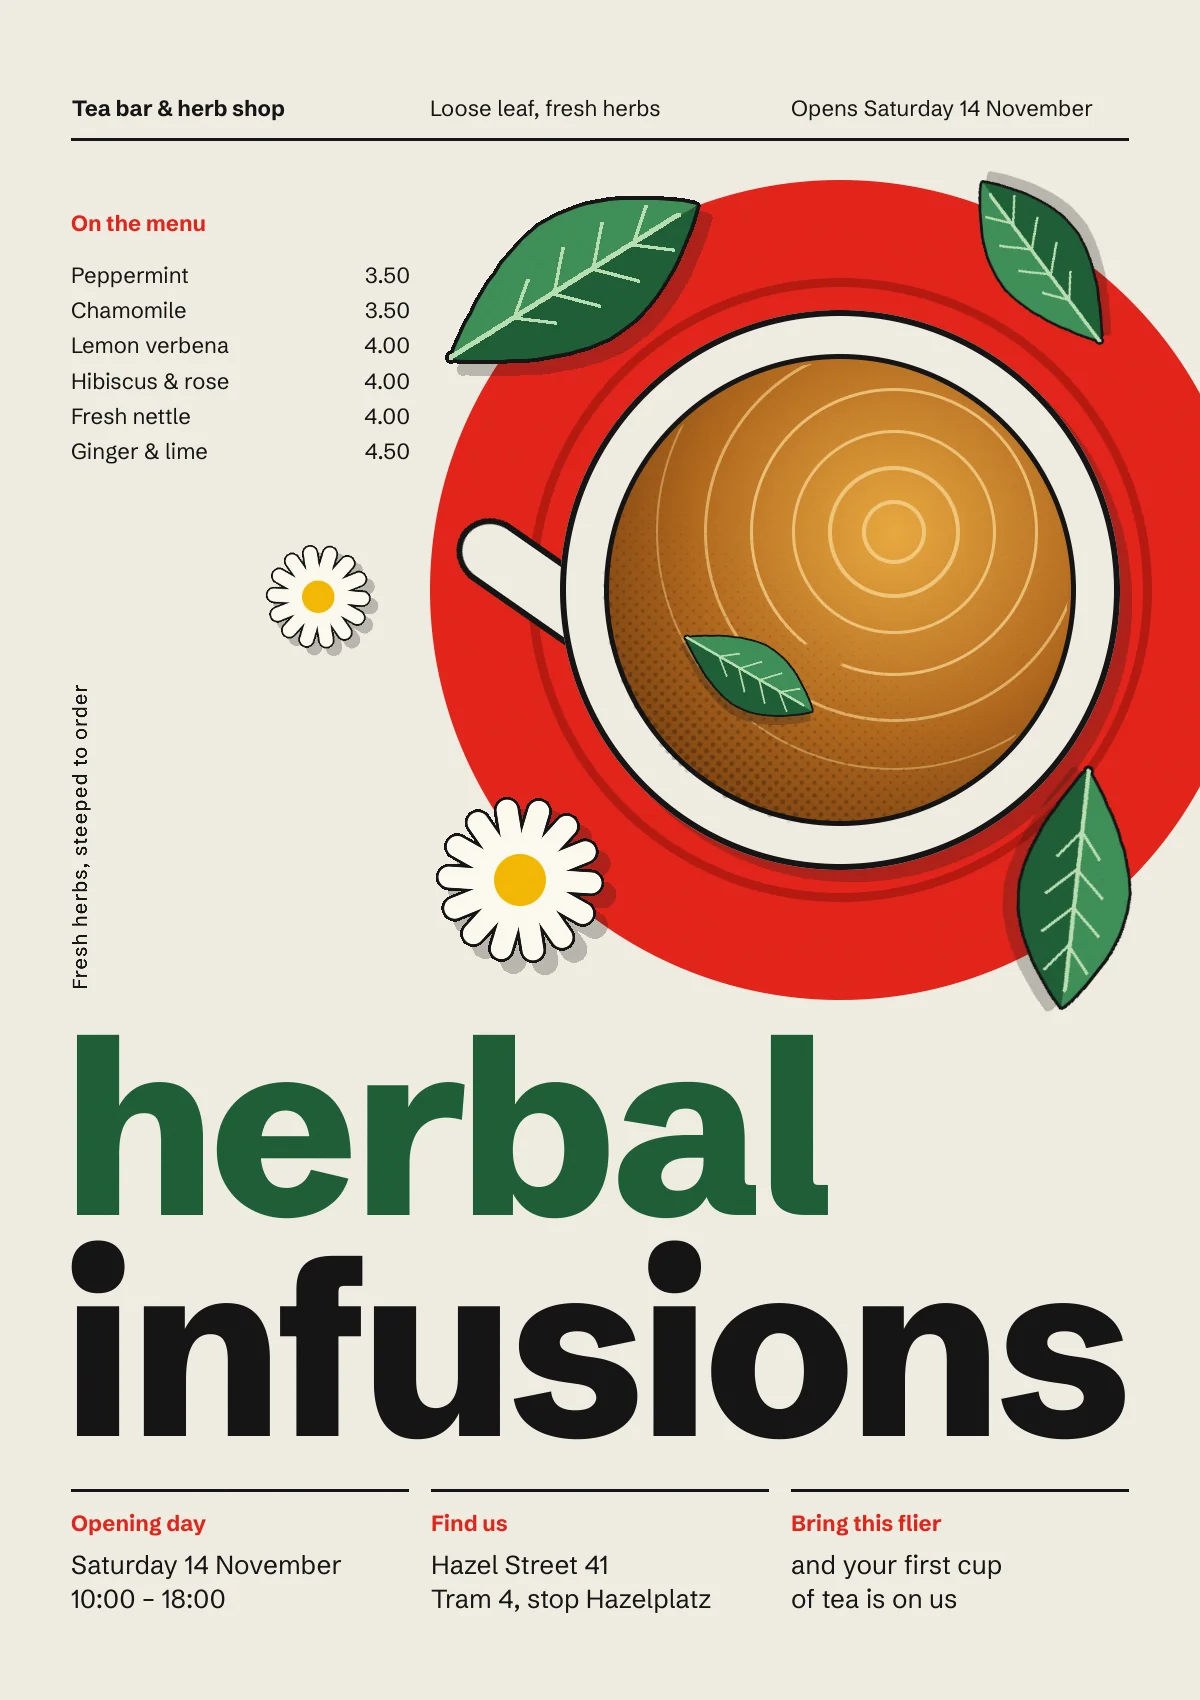
The Swiss or International Typographic Style grew up in Zurich and Basel in the 1950s. It is built on a strict column grid, flush-left sans-serif type, asymmetric layouts and a few bold, flat shapes. It still works very well for small-business print, because the grid makes even a busy flier feel calm and easy to read.
In this tutorial you'll make a flier for Herbal Infusions, an imaginary loose-leaf tea bar. A teacup seen from above stands in for the round shapes Swiss posters love. It sits on a red saucer that bleeds off the right edge. Every word of type hangs on a six-column grid, and a huge two-line headline fills the full width of the page.
The canvas is 1200 × 1700 px, a portrait sheet close to A-series proportions. The artwork is built from selections, gradients and a few layer effects. The only painting is a handful of straight pencil lines, one eraser stroke and one brush stroke repeated by radial symmetry.
Along the way you'll use:
- the Elliptical Marquee and Rectangular Marquee, adding and subtracting selections with Shift and Alt
- Radial and Linear gradients, and a gradient on a layer mask
- Select → Shrink and Select → Inverse, and selecting a layer's pixels with Cmd-click
- the Halftone and Add Noise filters, with the Multiply and Overlay blend modes
- the Lasso, the Pencil with Shift-click lines, the Eraser, and the Brush with Radial Symmetry
- Copy and Paste, rotating and scaling with the transform handles, and groups
- ruler guides and the grid with snap
- live text in Schibsted Grotesk, recolouring part of a text layer, and rotating text with its handle
- Stroke and Drop Shadow effects, and Rasterize Layer Style
The palette:
-
Paper
-
ink
-
Swiss red
-
saucer groove
-
Tea
-
ripples
-
Mint
-
veins
-
Chamomile petals
-
centre
-
Lay down the paper
Create a new document
1200×1700px. Select theBackgroundlayer and fill it with the paper colour . A warm off-white looks like uncoated print stock and is much kinder to the eye than pure white.Leave the empty
Layer 1above it. You'll use it for the saucer next.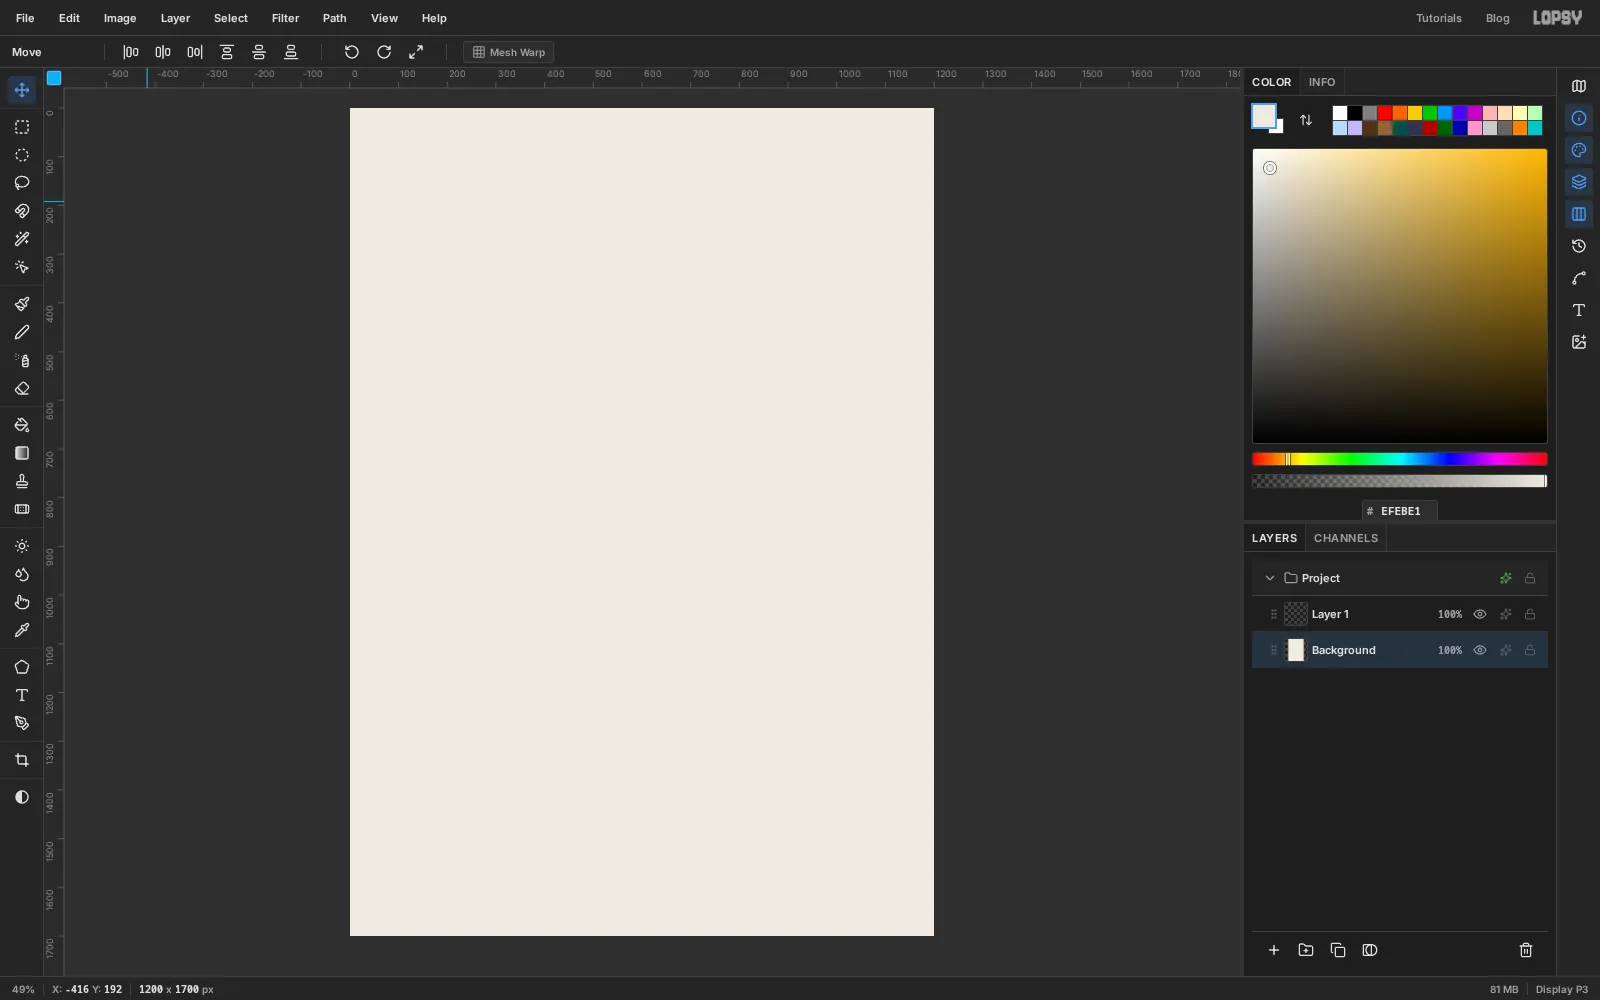
-
Cut the saucer and its groove
Rename
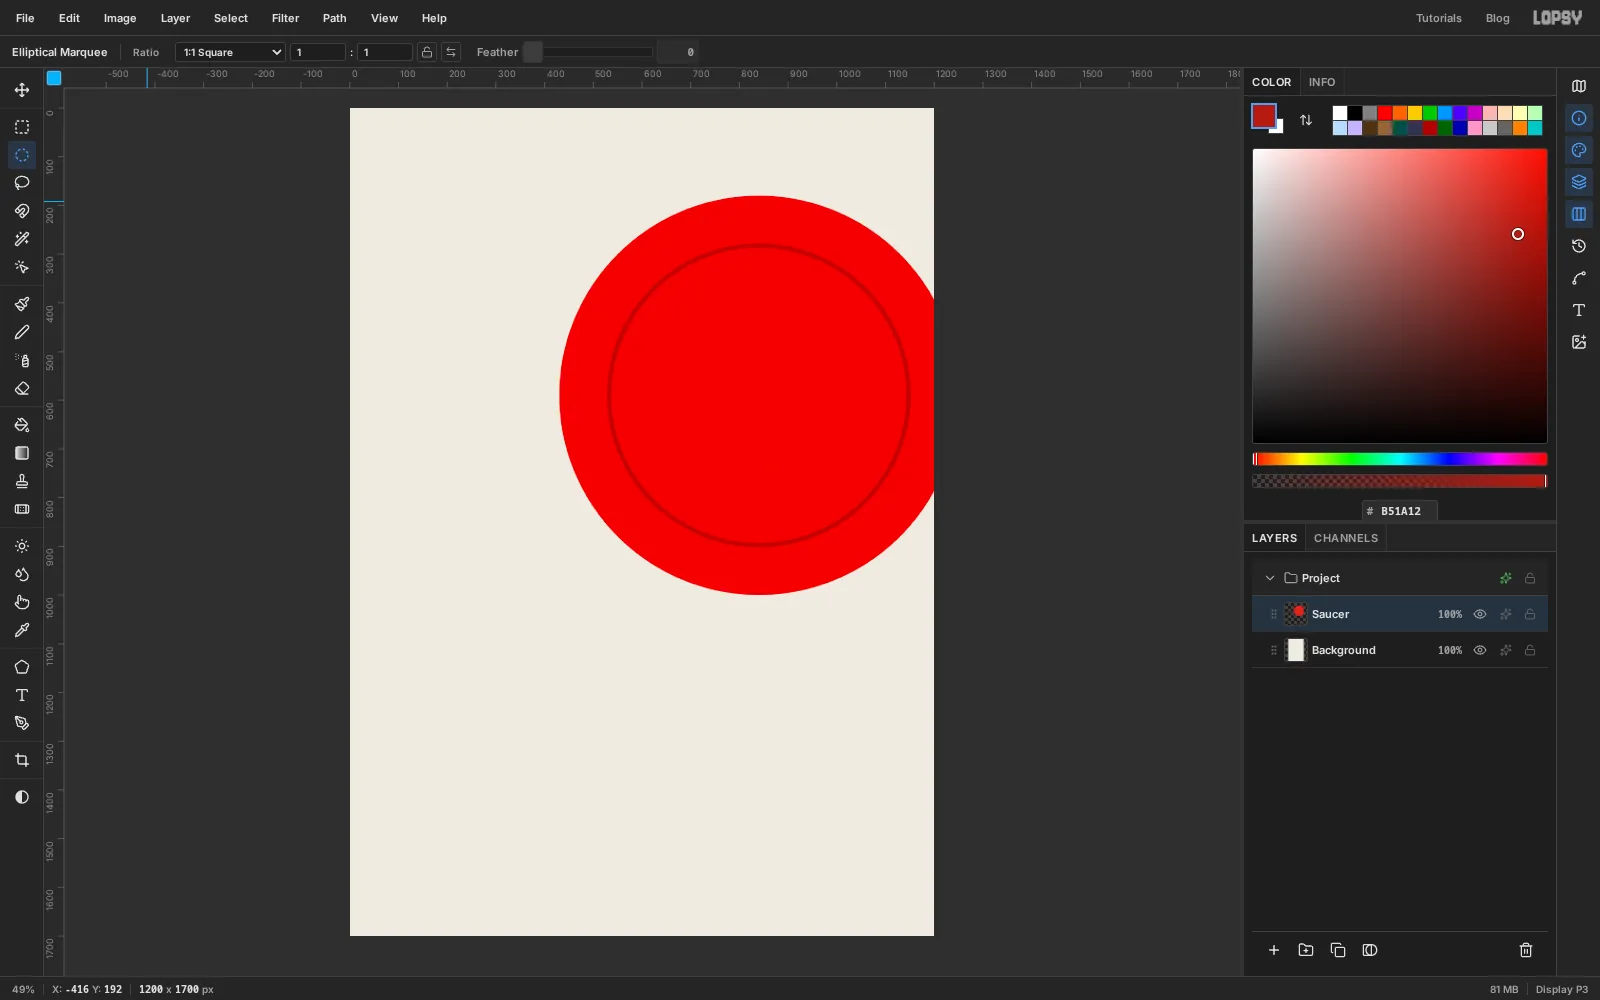
Layer 1toSaucer. The saucer is a circle of 410 px radius centred on840, 590. The Elliptical Marquee draws from corner to corner, so drag from the top left of the circle's bounding box (430, 180) to its bottom right (1250, 1000). The right side runs off the canvas, and that's on purpose: a shape that bleeds off the edge gives a Swiss layout its tension. Fill it with and press Cmd+D.Every circle in this tutorial is drawn the same way: start the drag at the centre minus the radius, and end it at the centre plus the radius.
Now add the groove the cup sits in. Make a ring like this:
- Drag a circle of 312 px radius on the same centre.
- Hold Alt and drag a second circle on the same centre, 9 px smaller all round. Alt subtracts it, leaving only a thin ring selected.
- Fill the ring with and deselect.
You'll use this select-then-subtract ring several more times. Unlike filling a circle and deleting its middle, it never touches what's already on the layer.
-
Add the handle and rotate it
Add a layer named
Handle. Draw the pill shape from two selections:- With the Rectangular Marquee, drag a box 160 px wide and 56 px tall. Its left edge goes at x
480, and it's centred on the saucer's centre line, y590. - Switch to the Elliptical Marquee, hold Shift and drag an ellipse 60 px wide and 56 px tall, centred on the box's left edge. Shift adds it, rounding off the end.
Fill with the paper colour and deselect. Open the layer's effects drawer, turn on Stroke with Width
6in , then click Rasterize Layer Style so the outline becomes real pixels.Cmd-click the
Handlethumbnail to select its pixels. Switch to the Move tool (V), grab the round rotation handle just outside the top-right corner, and turn the handle about 35° clockwise. The outer end tips up to the left. Press Enter to commit, then deselect. The inner end will be hidden under the cup.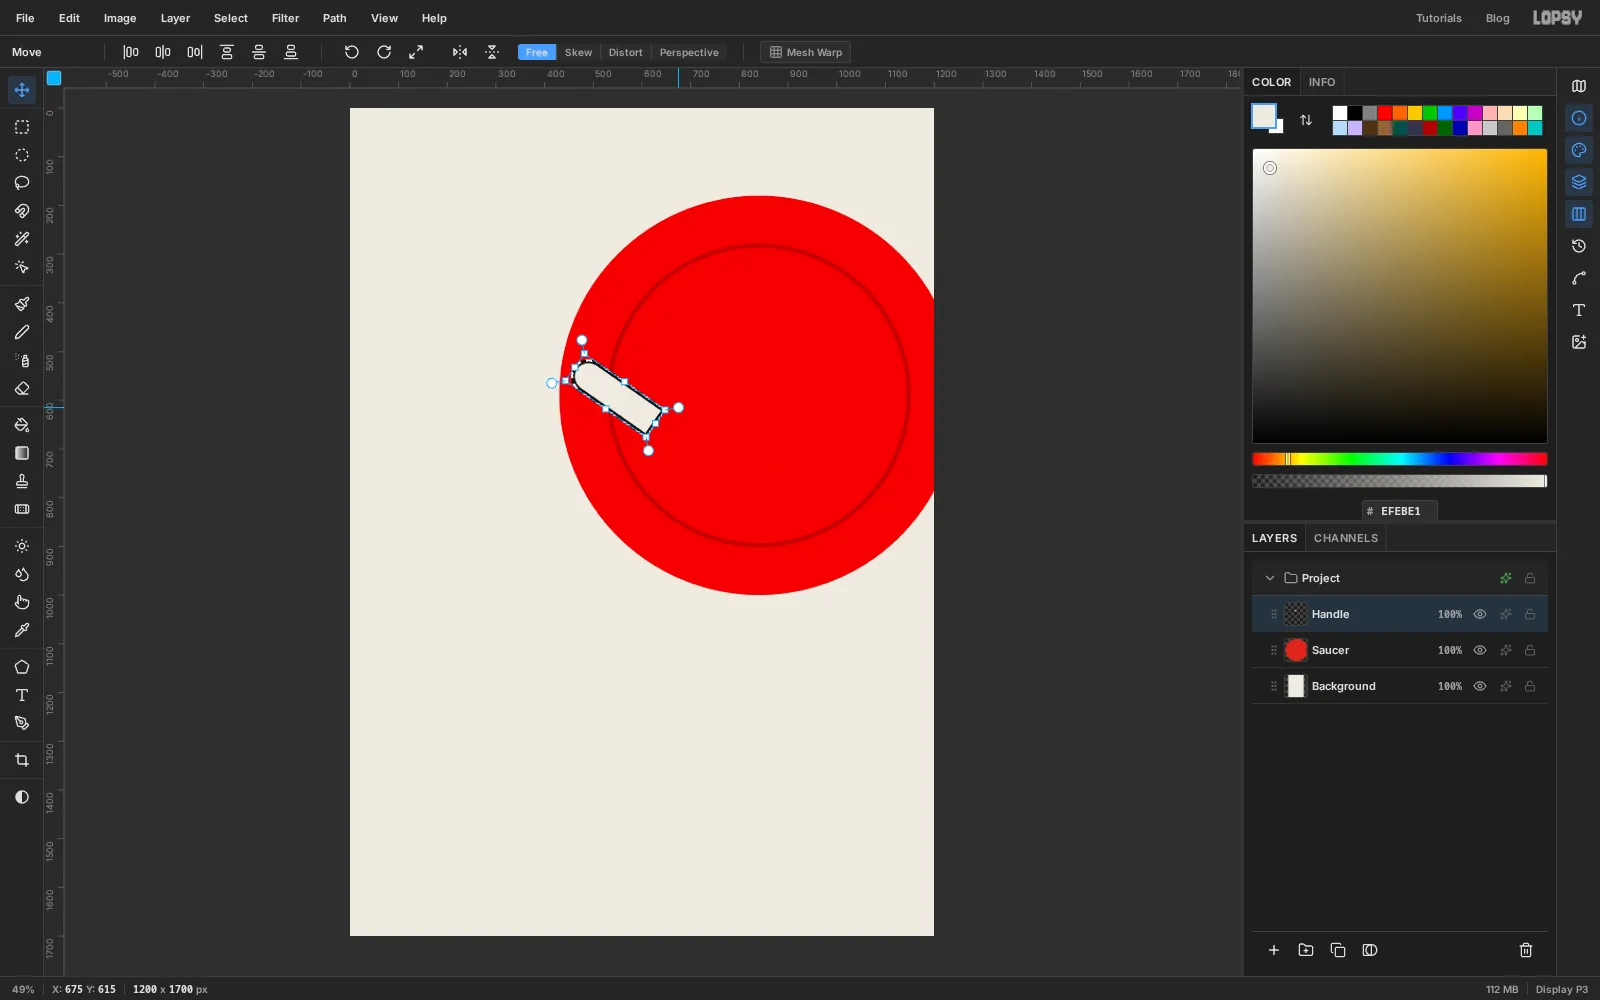
- With the Rectangular Marquee, drag a box 160 px wide and 56 px tall. Its left edge goes at x
-
Add the cup and a flat shadow
Add a layer named
Cup. Select a circle of 280 px radius on the same centre (840, 590), fill it with , and deselect. Then draw a 6 px ring in at the cup's edge, using the subtract method from the saucer step (a 280 px circle, minus a 274 px one).Open the effects drawer and turn on Drop Shadow: colour , Offset X
12, Offset Y12, Blur0, Opacity25. A hard, translucent ink shadow reads like a second printing plate rather than a photo. You'll use exactly the same shadow on every piece of artwork, so everything looks lit the same way. Click Rasterize Layer Style when you're happy with it.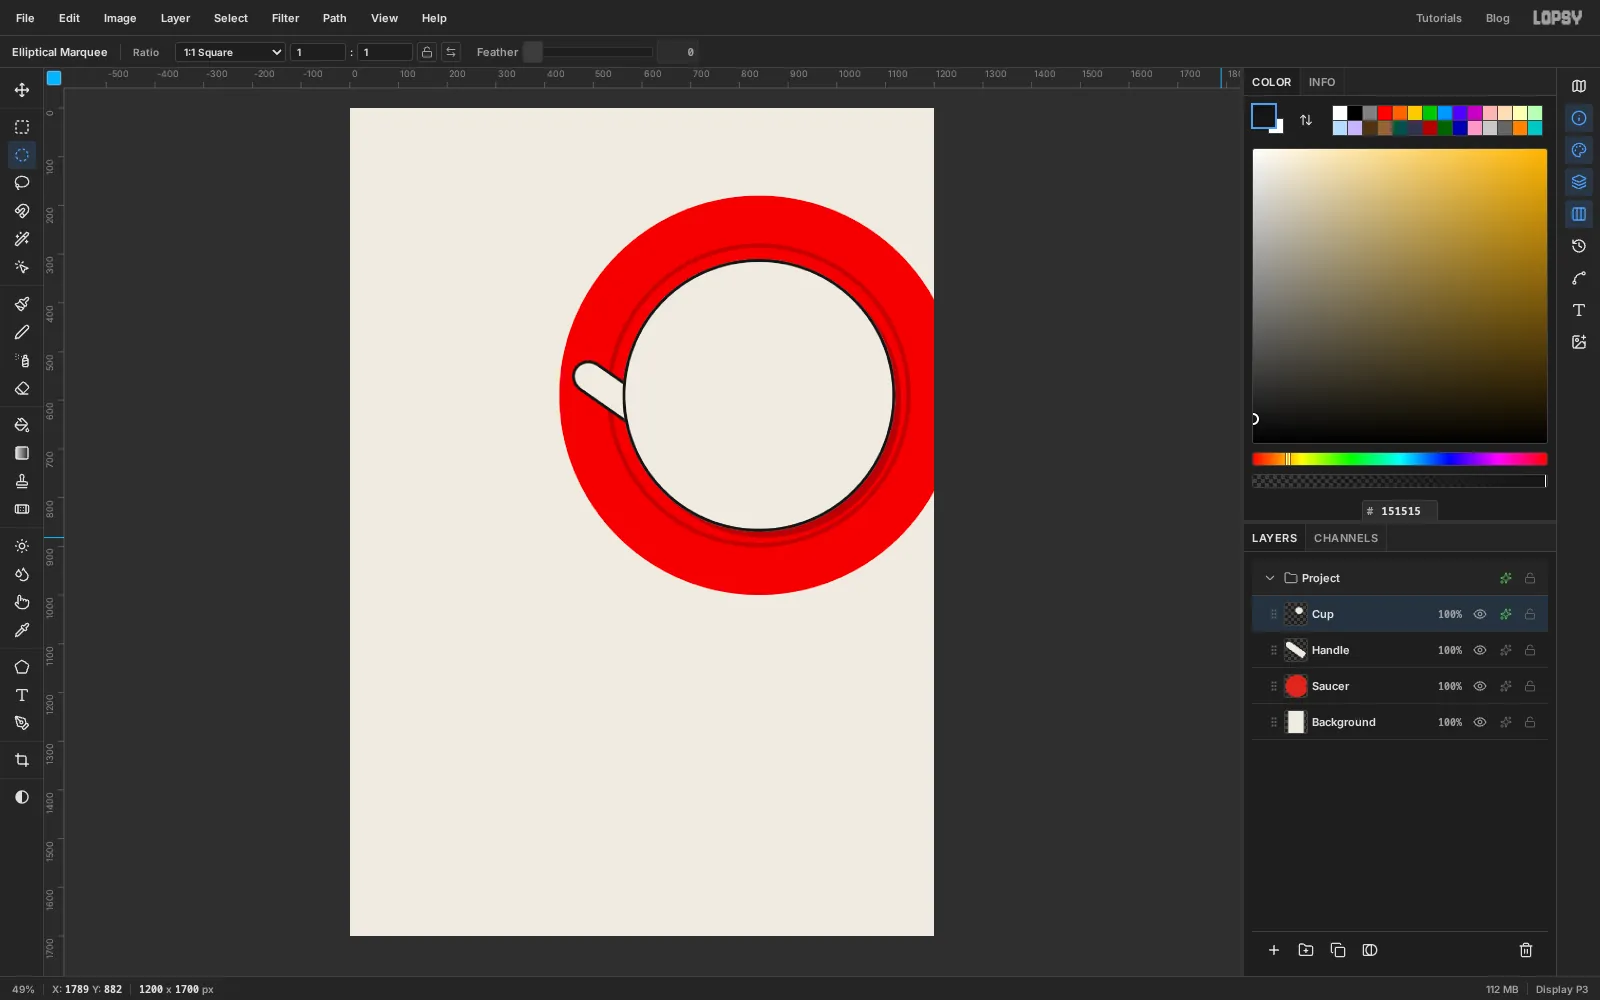
-
Pour the tea with a radial gradient
Add a layer named
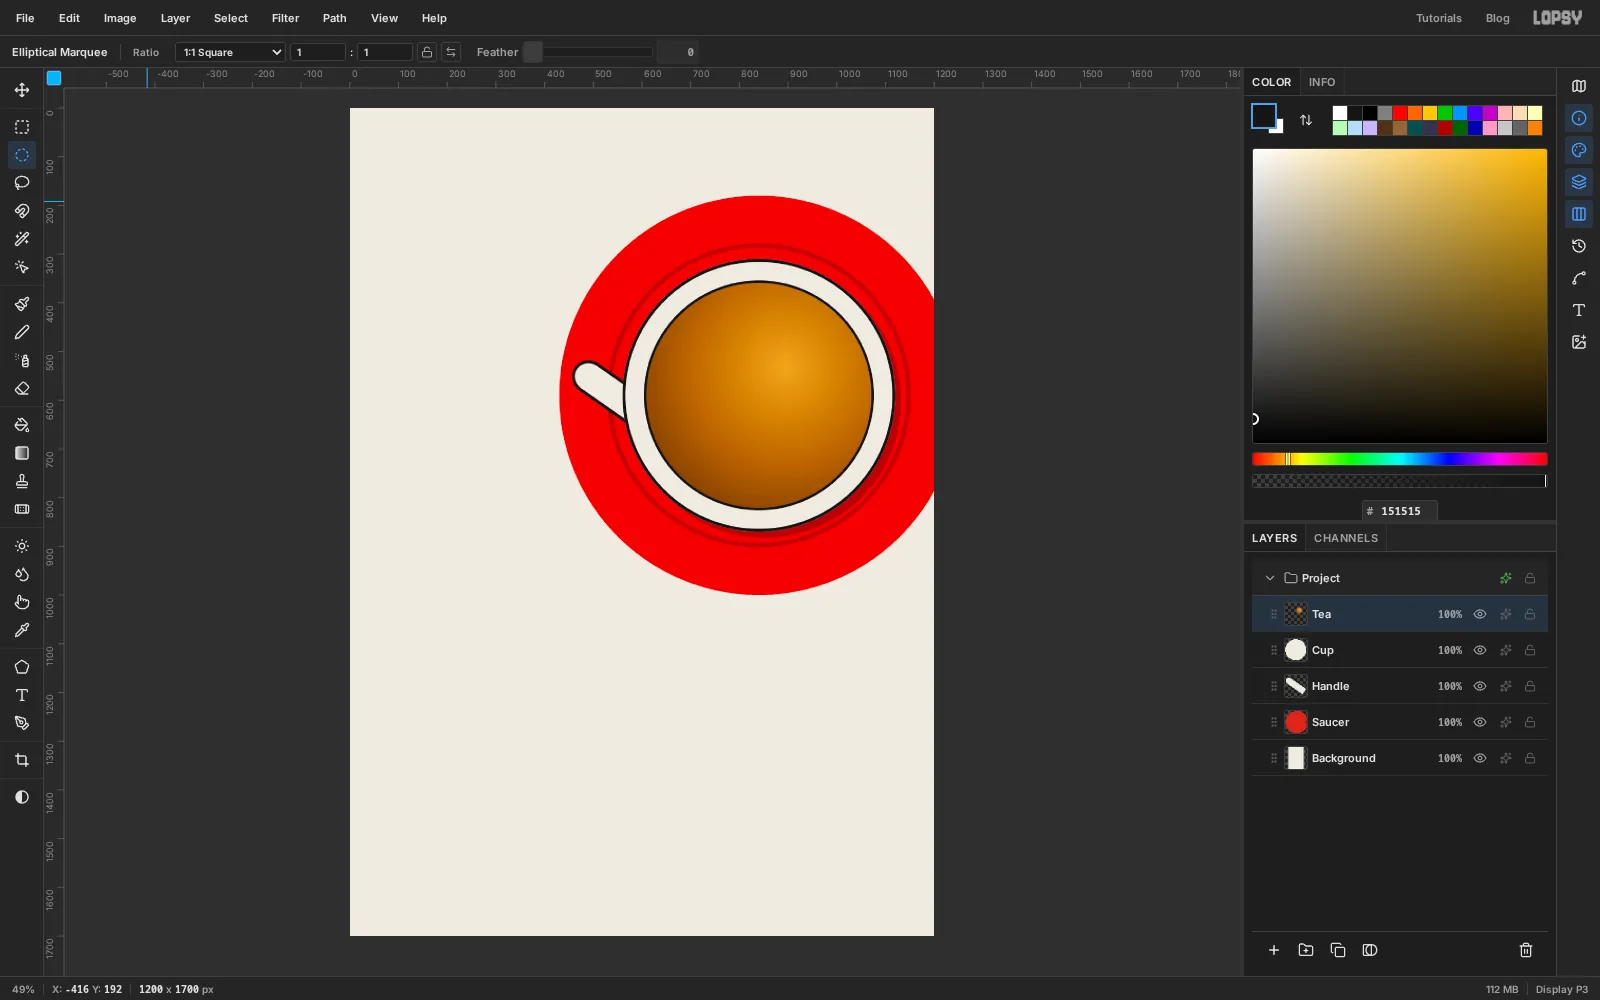
Teaand select a circle of 234 px radius on the cup's centre.Choose the Gradient tool, set Type to Radial and click Advanced… to edit the stops: at the left end, at about 55% and at the right end. Drag from a point up and to the right of the centre (
894, 532) out to the lower-left edge of the liquid. The light spot is where the tea catches the light.Deselect, then draw a 5 px ring on the same layer just outside the liquid (a 236 px circle minus a 231 px one) to separate it from the cup wall.
-
Draw the ripples and clip them to the tea
Add a layer named
Ripples. Using the ring method, draw six rings in , all centred on the light spot at894, 532: radii of about 32, 66, 102, 144, 190 and 238 px. Make the first two 4 px thick, the next three 3 px and the outer one 2 px, so they thin out as they spread.The outer rings spill past the tea. To trim them:
- Cmd-click the
Teathumbnail to select the liquid. - Choose Select → Shrink… and shrink by
8px, so the ripples stop just short of the black edge. - Select the
Rippleslayer again, choose Select → Inverse (Shift+Cmd+I) and press Delete. Then deselect.
Lower the layer's opacity to
75%.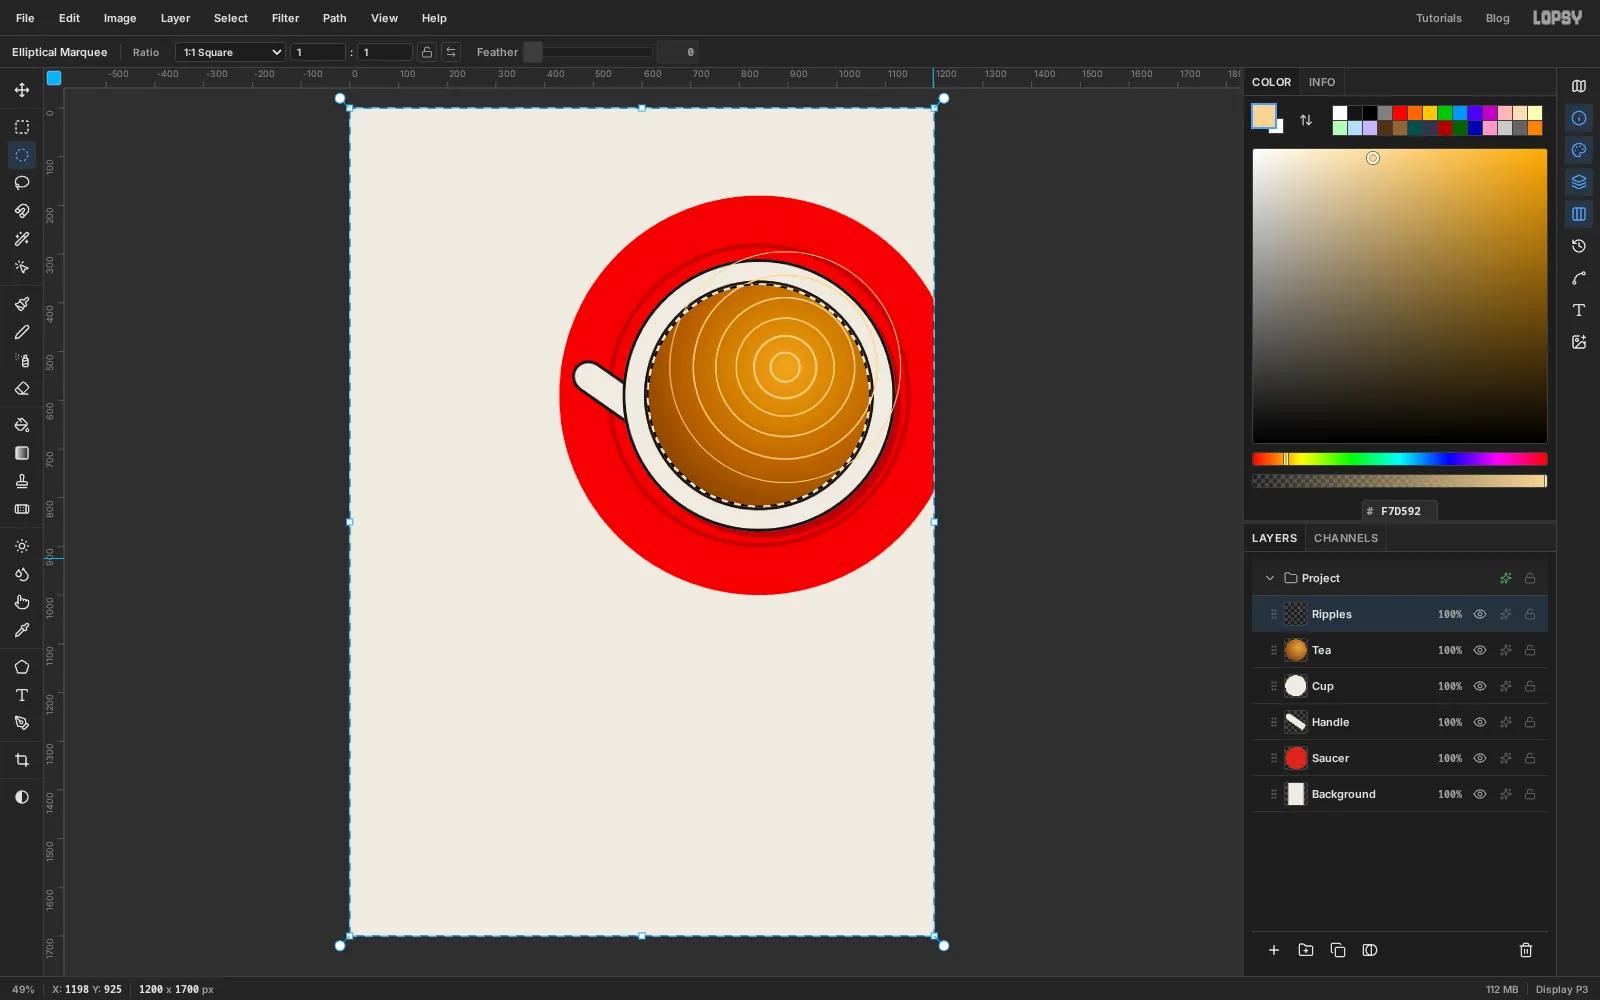
- Cmd-click the
-
Fade the ripples with a layer mask
The rings stop too abruptly at the rim. With
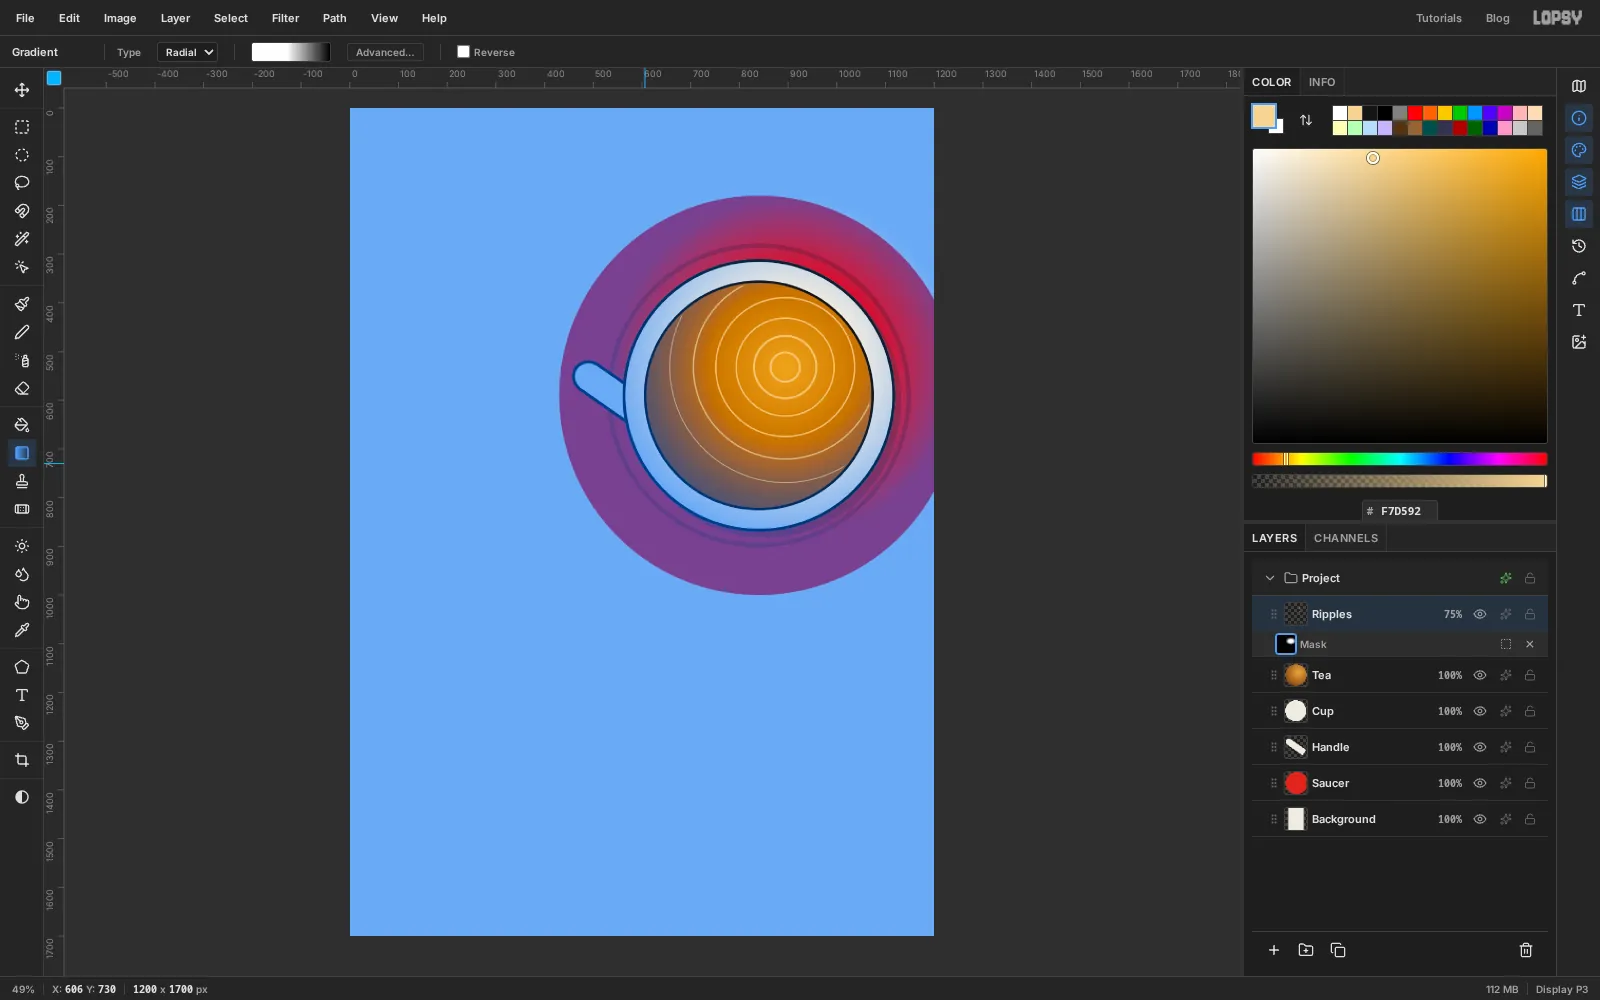
Ripplesselected, click Add Mask at the bottom of the Layers panel, then click the new mask thumbnail on the layer row so you're painting on the mask, not the pixels.Pick the Gradient tool with Type set to Radial and stops of white at 0%, white at 45% and black at 100%. Drag from the ripple centre out to the lower-left edge of the tea. Now the ripples are crisp near the light and fade away towards the rim. Click the layer's name again to leave mask editing.
-
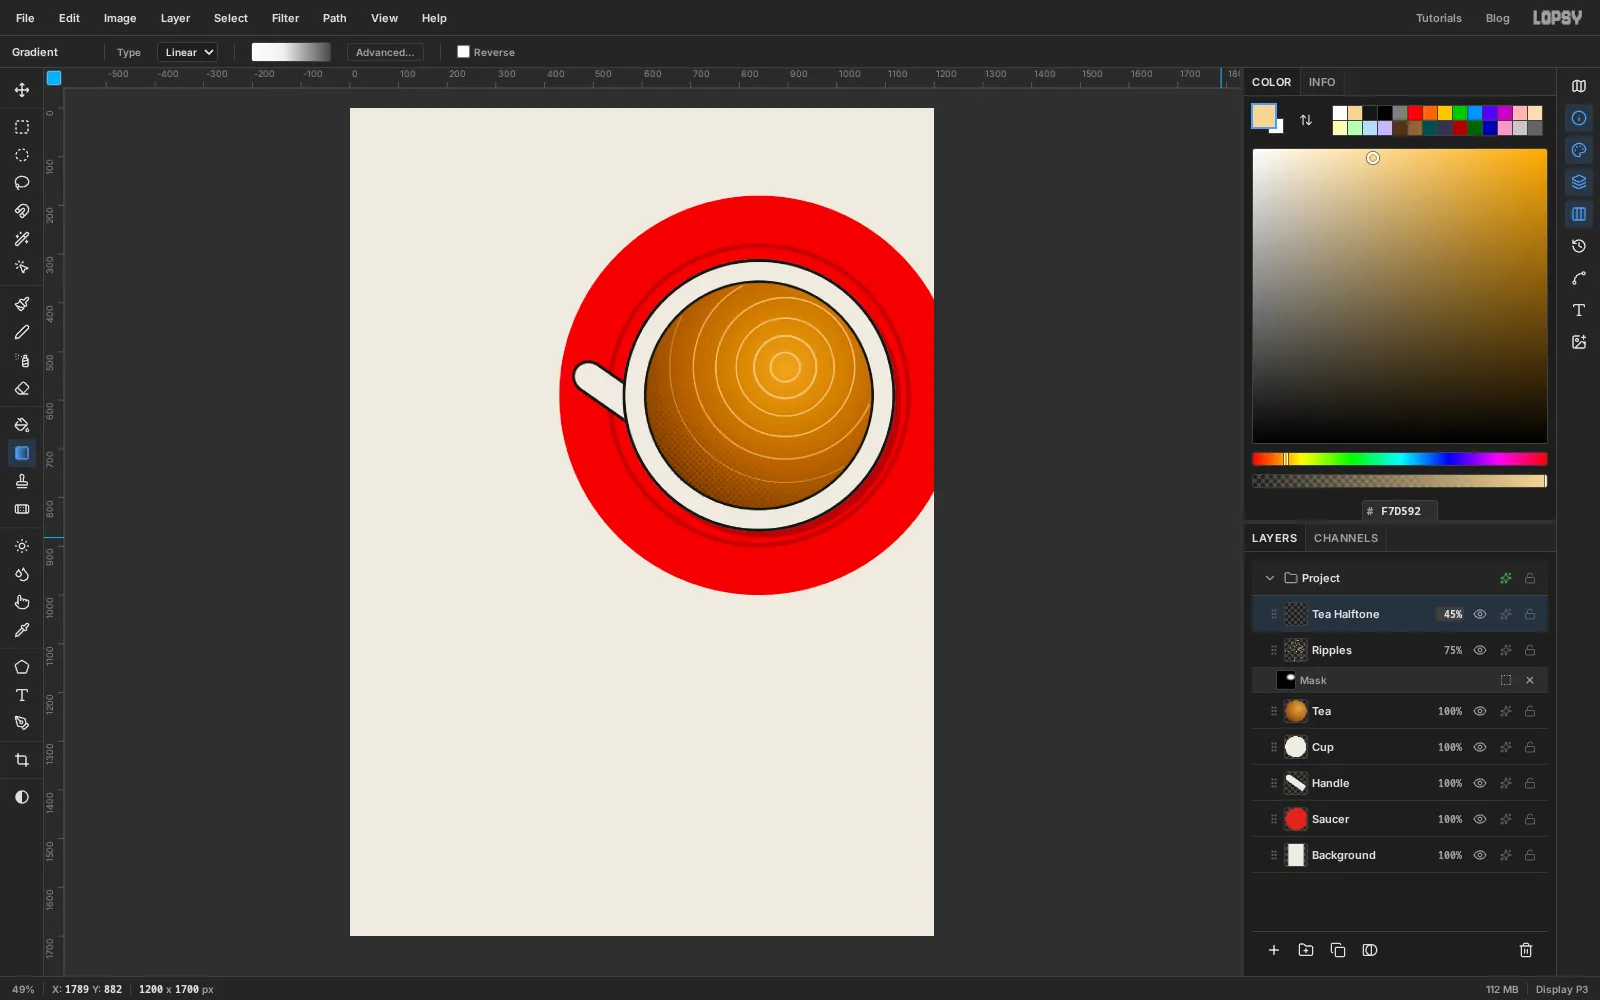
Add a halftone shadow
Swiss posters often used halftone photographs. A halftone shadow on the tea nods to that.
- Cmd-click the
Teathumbnail, then add a layer namedTea Halftone. - Make a Linear gradient from white, through at 40%, to , and drag it from the upper right of the tea to its lower left. Deselect.
- Choose Filter → Halftone…, set Dot Size to
9and apply. The grey ramp turns into dots that grow towards the shadow side. - Set the layer's blend mode to Multiply and its opacity to
45%.
- Cmd-click the
-
Draw a mint leaf
Add a layer named
Leaf 1aboveTea Halftone. The leaf is about 290 px long and 114 px wide, tilted up to the right, and lies across the top-left rim of the saucer with its centre near586, 300.- With the Lasso, draw the upper half of the leaf: a curved edge from one pointed end to the other, then straight back along the midrib. Fill it with .
- Draw the lower half the same way and fill it with the darker . Two flat tones read as a fold down the middle.
- Take the Pencil at Size
4in . Click at the lower-left end and Shift-click near the upper-right end for the midrib. At Size3, add four pairs of side veins the same way, each angled out from the midrib towards the upper-right end.
Give the layer a Stroke of Width
4in to match the cup's outline, plus the same Drop Shadow as the cup. Then rasterize the style.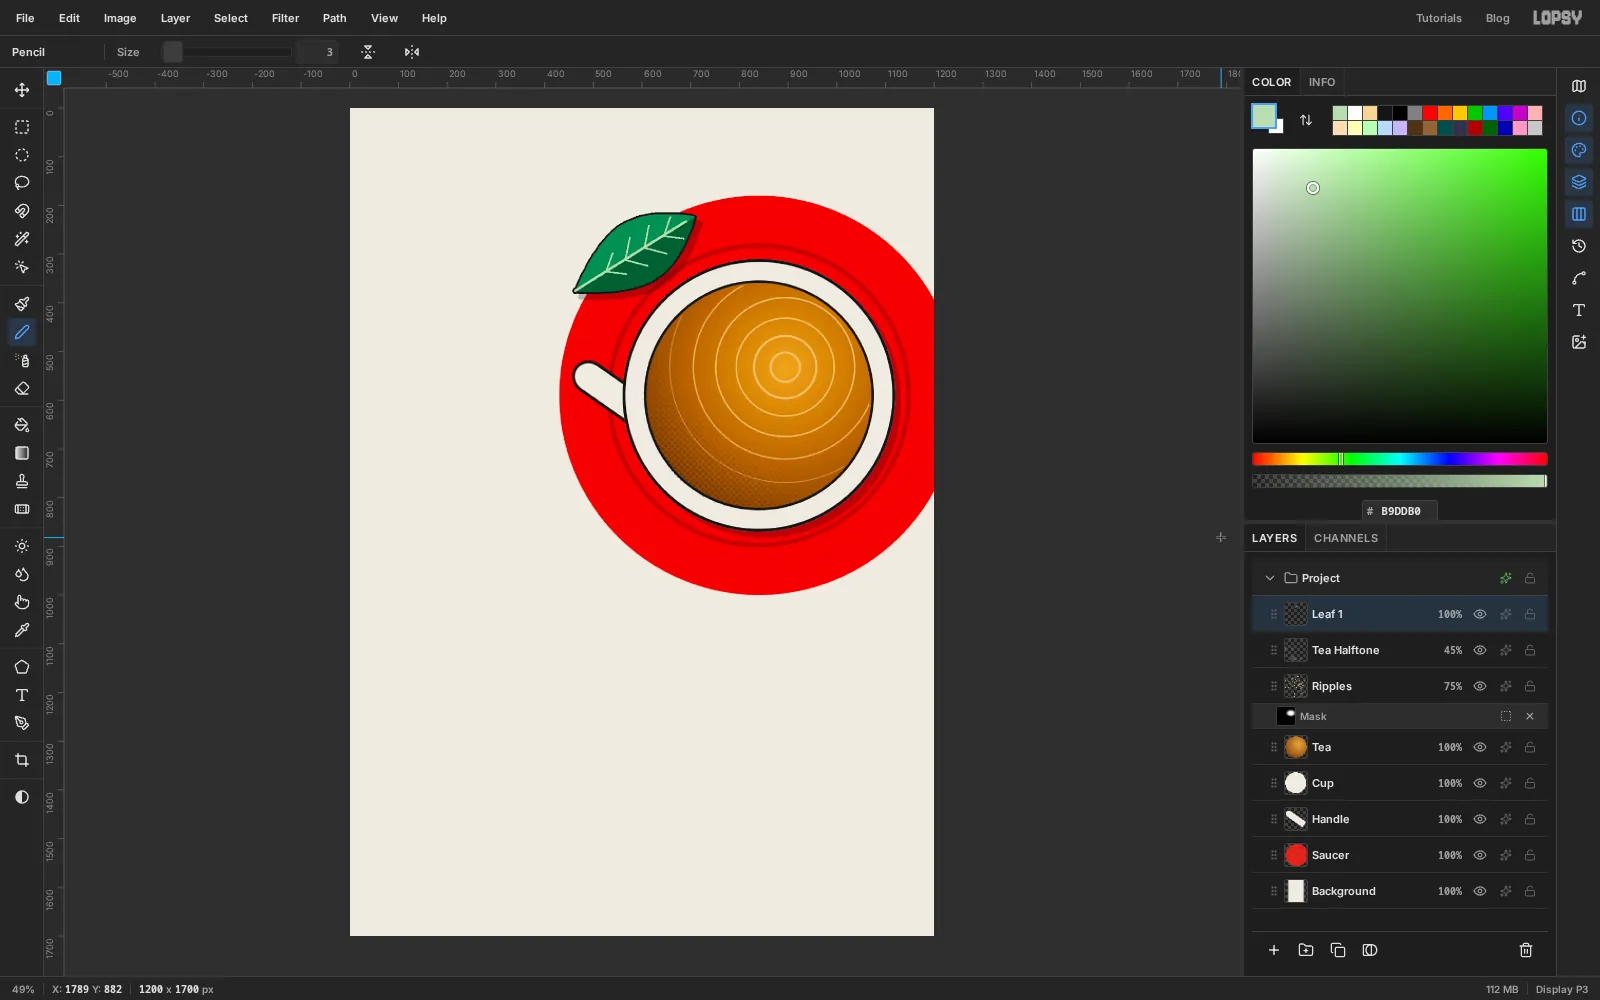
-
Copy, rotate and scale more leaves
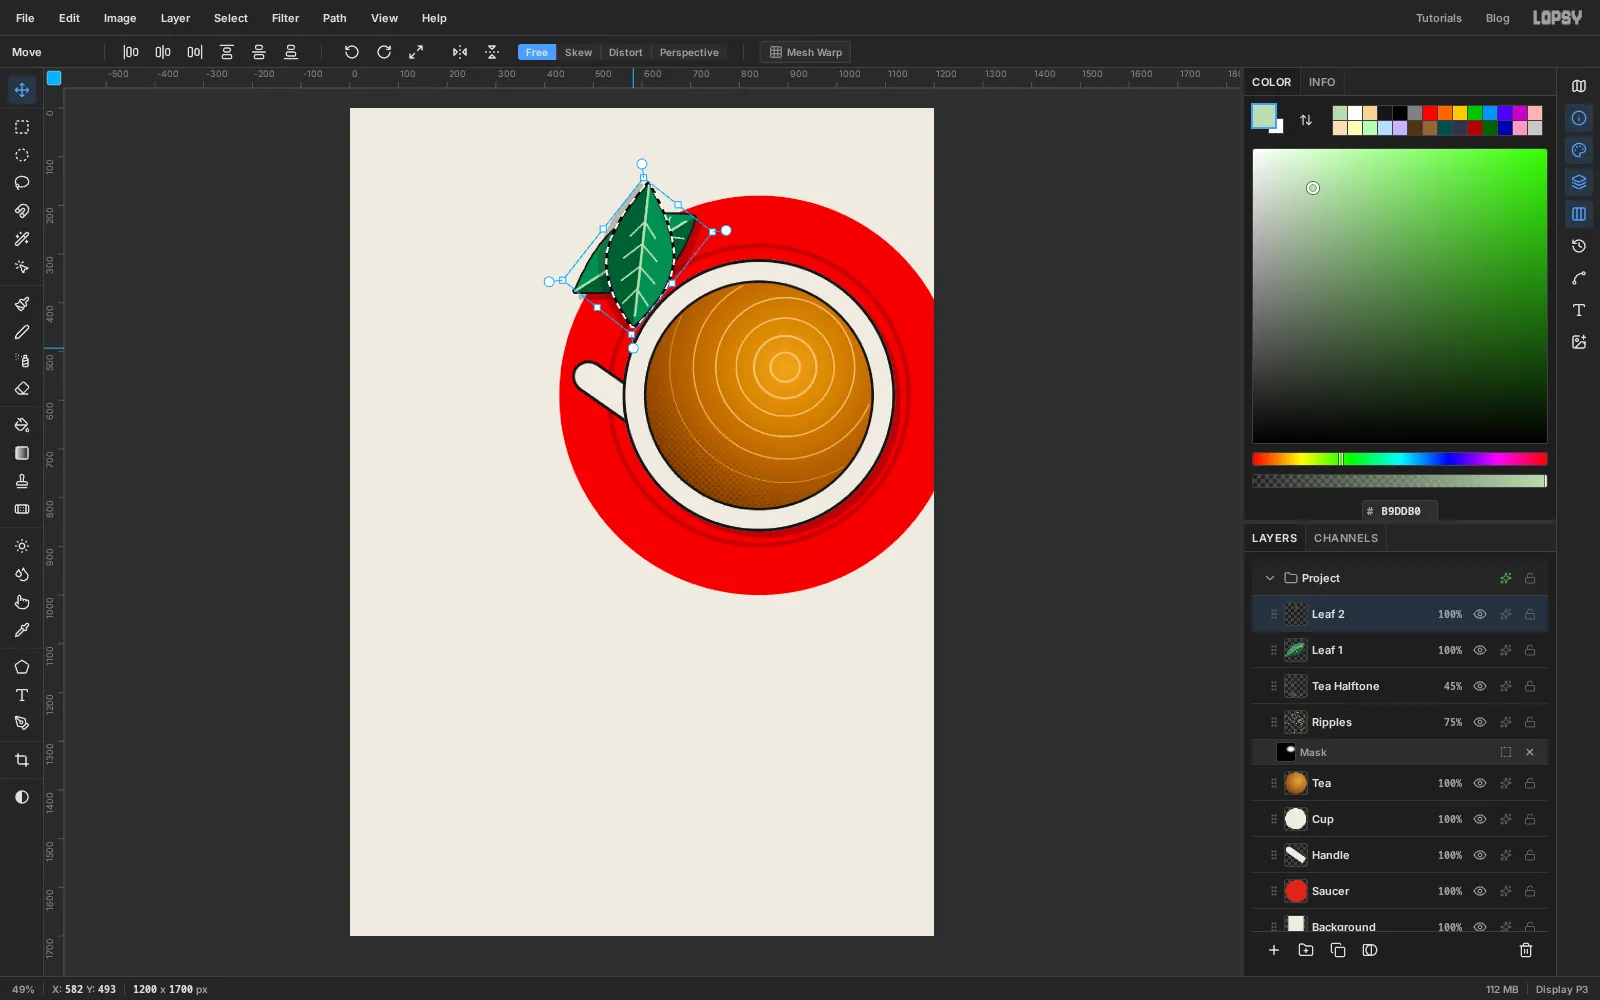
Cmd-click the
Leaf 1thumbnail and press Cmd+C, then Cmd+V. The copy is pasted in place on a new layer. Name itLeaf 2.With its pixels still selected, use the Move tool's rotation handle to turn it about 128° clockwise, so it stands almost upright. Press Enter. Select it again, then hold Cmd and drag a corner handle inwards to shrink it by about a fifth, and press Enter. Finally, drag it with the Move tool onto the lower-right rim of the saucer, around
1086, 905.Paste two more copies the same way:
Leaf 3: rotate about 62° clockwise and shrink to half size. Float it on the tea, a little below and left of the centre.Leaf 4: rotate about 95° anticlockwise, shrink by a third, and set it on the top-right rim, clear of the header area.
Vary the angles and sizes. Identical leaves look stamped.
-
Part the water around the floating leaf
A leaf floating on tea pushes the ripples aside. Select
Ripplesand take the Eraser at Size44. Click just below and left of the small leaf, then Shift-click just above and right of it. The straight stroke breaks the rings under the leaf.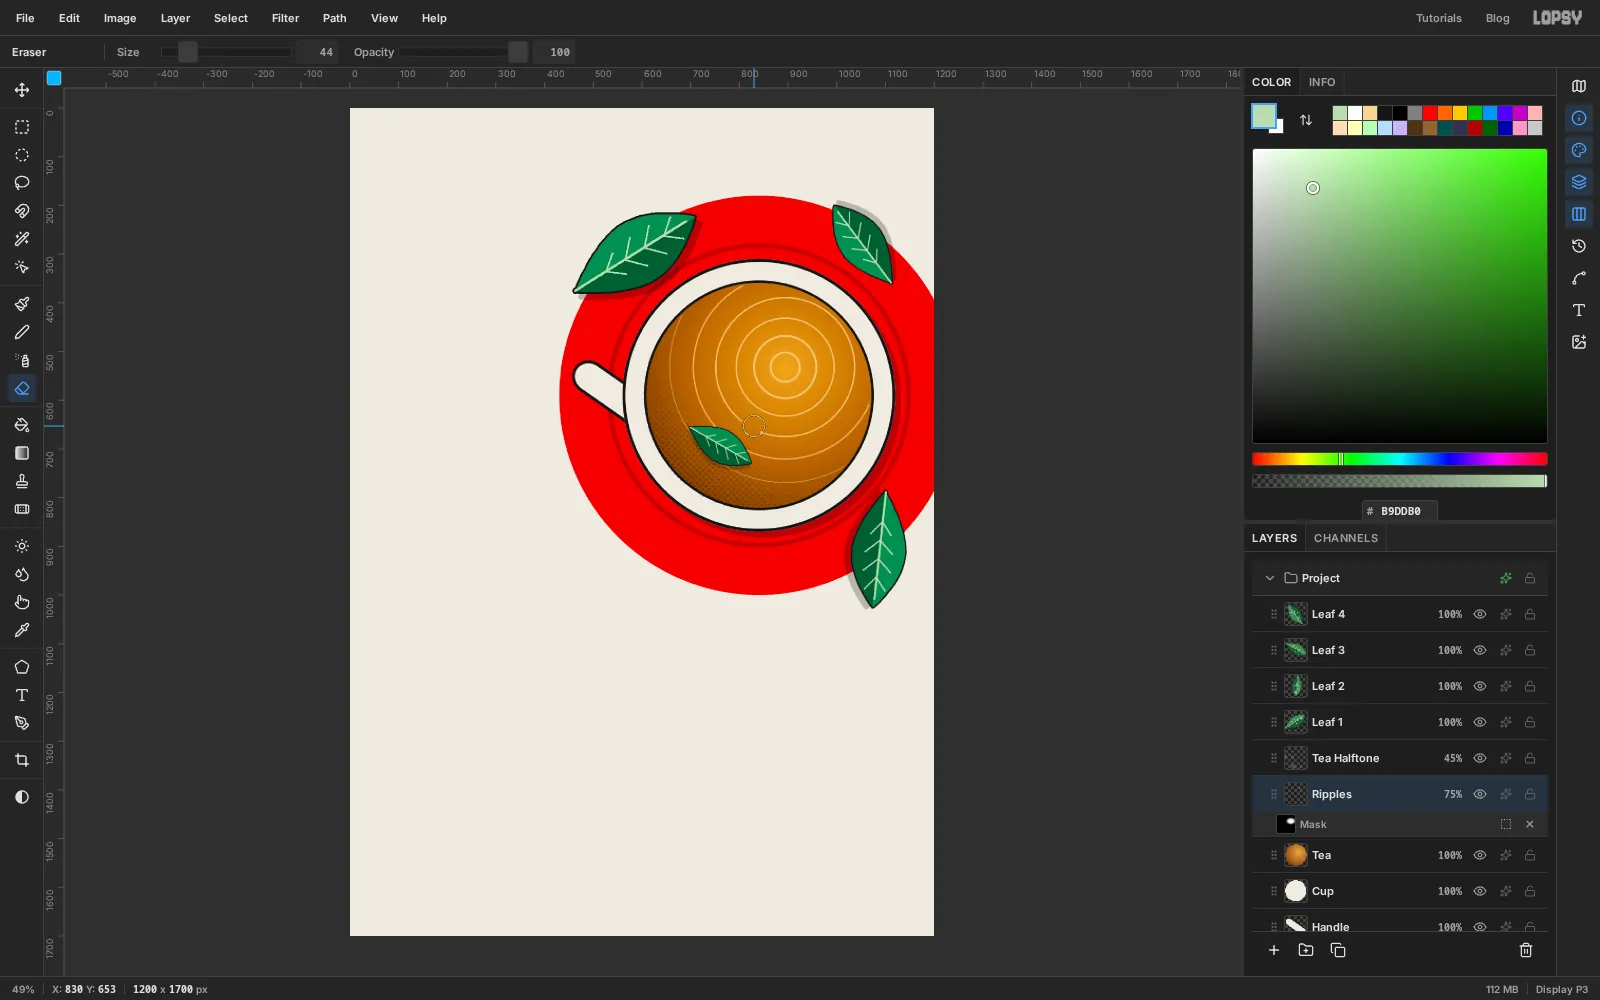
-
Paint chamomile with radial symmetry
Select
Leaf 4, the top layer, and add a layer namedChamomile. Choose the Brush (B). Open the brush settings and set Size22, Hardness100and Spacing5. Set the colour to .In the options bar, click Radial Symmetry and set Segments to
14. Cmd-click on the canvas at520, 880, on the lower-left rim of the saucer, to move the symmetry centre there.Now paint one petal: click 26 px to the right of the centre and Shift-click 72 px to the right. All fourteen petals appear at once. Turn Radial Symmetry off again.
Select a circle of 26 px radius on the same centre and fill it with . Finish with a Stroke of Width
3in and the shared Drop Shadow, and rasterize.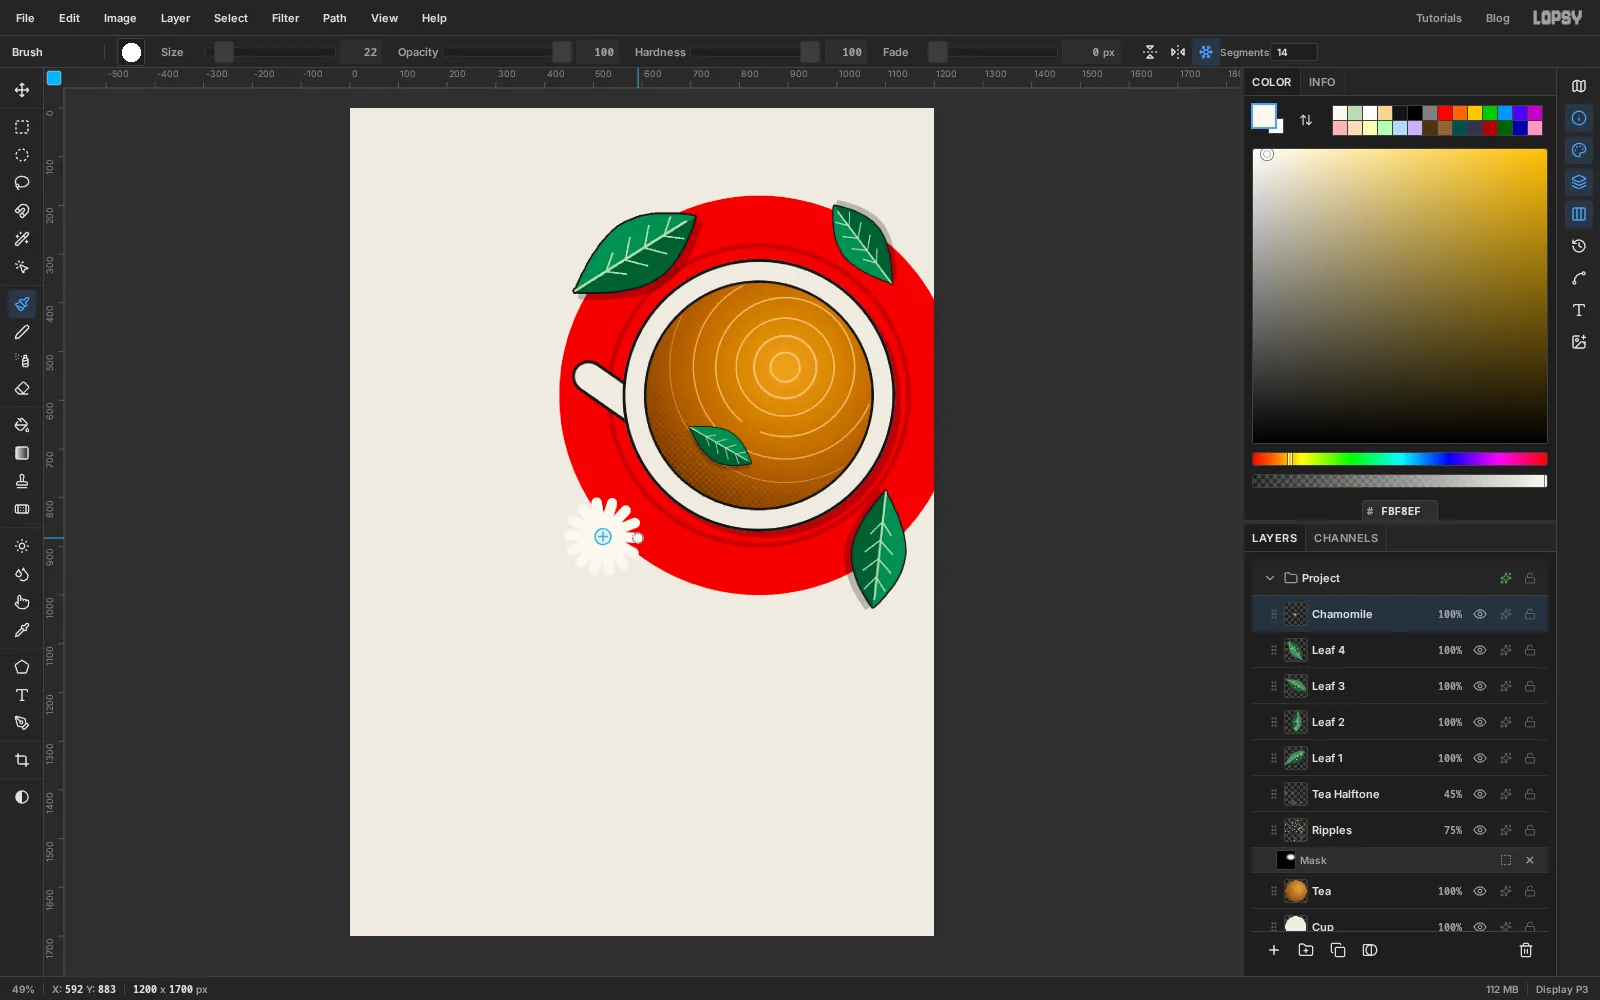
-
Add a second, smaller flower
Cmd-click the
Chamomilethumbnail, copy, and paste. Name the new layerChamomile 2. Hold Cmd and drag a corner handle in until the flower is about 60% of its size, then press Enter.Drag it onto the empty paper left of the saucer, under where the menu will go, around
318, 596. The two flowers on the left balance the leaves on the right.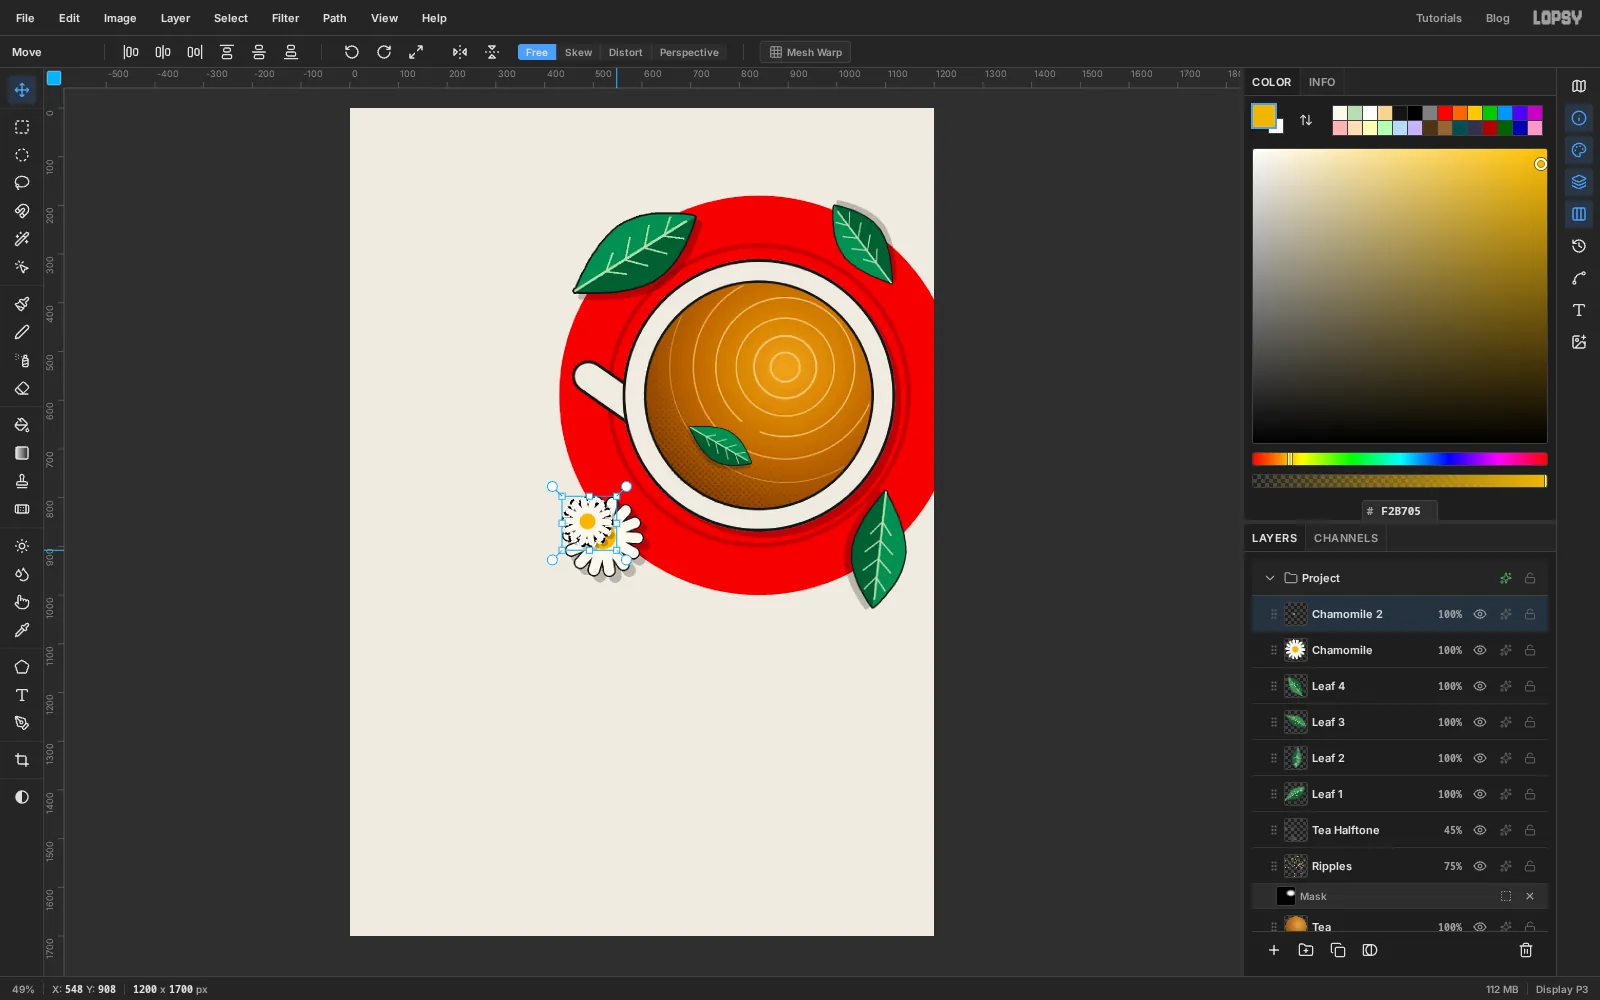
-
Group the leaves
Click
Leaf 1, Shift-clickLeaf 4, and choose Layer → Group Layers. Name the groupLeaves. With the group selected, one Move drag moves all four leaves at once, which is handy for fine-tuning the balance. Try a small drag, then Cmd+Z and Shift+Cmd+Z to see the whole group step back and forward together.Grouping last keeps things tidy. A layer added while a group is selected goes inside that group, and you don't want the flowers or the type in
Leaves.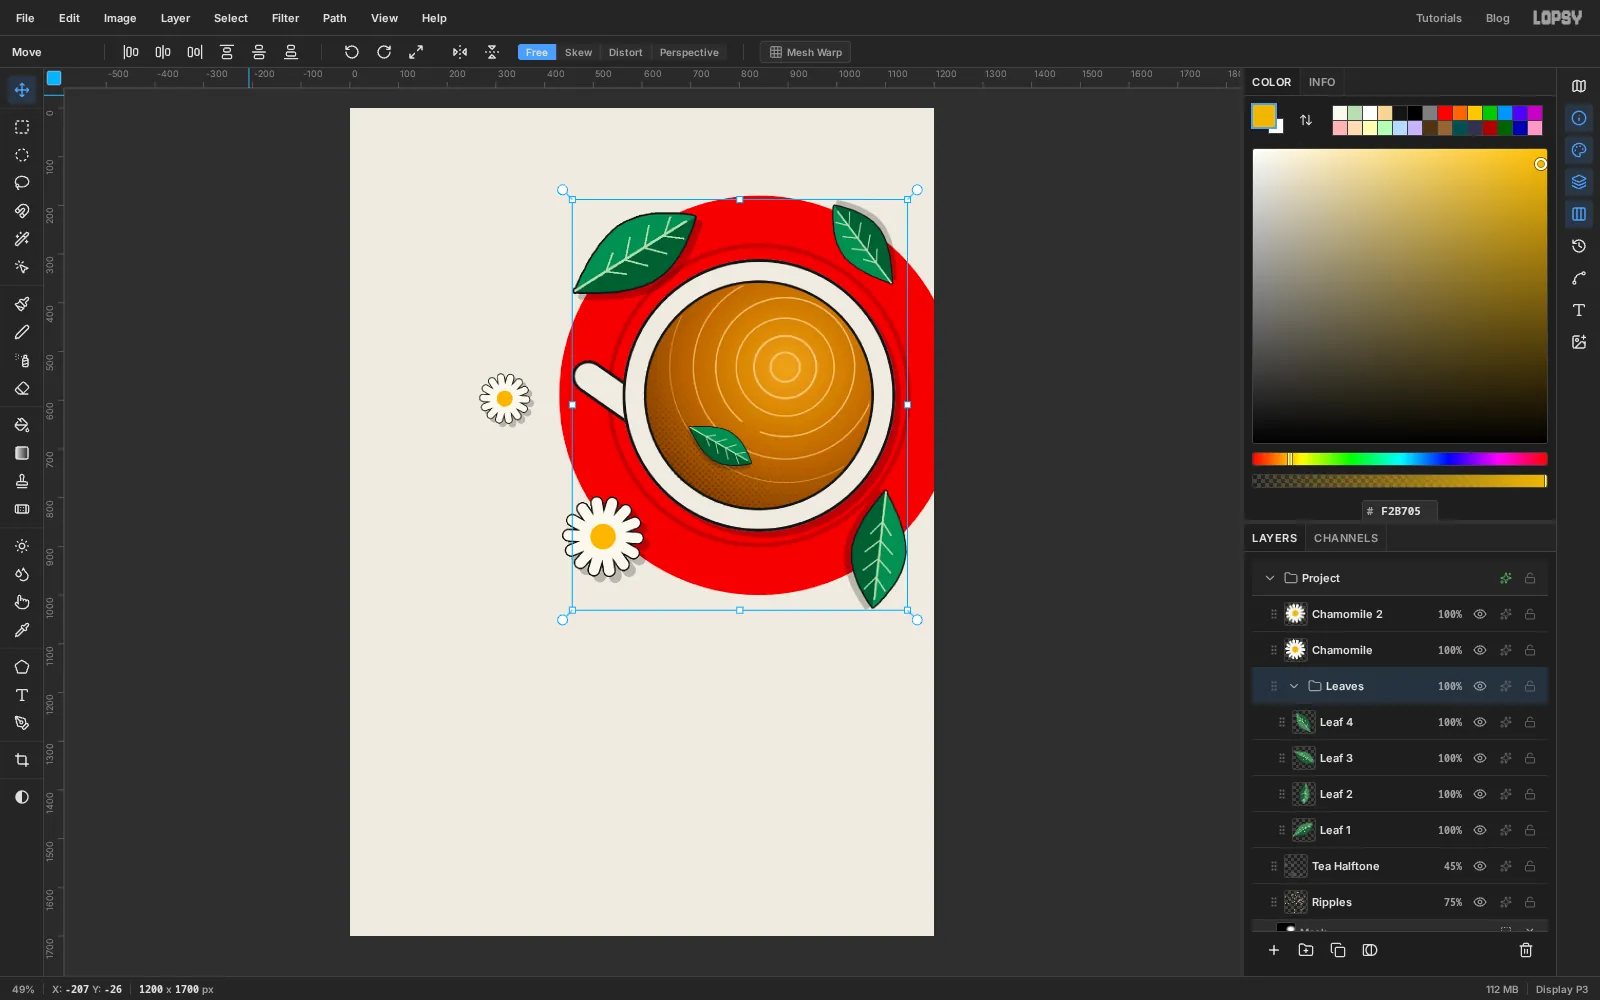
-
Set up the column grid with guides
Now for the type, which hangs on a classic six-column grid. The margins are 72 px, and the six columns are 156 px wide with 24 px gutters.
Click the top ruler to drop vertical guides at each column's left and right edges:
72,228,252,408,432,588,612,768,792,948,972and1128. Then click the left ruler at y72(top margin),140(header rule),1490(info rule) and1628(bottom margin).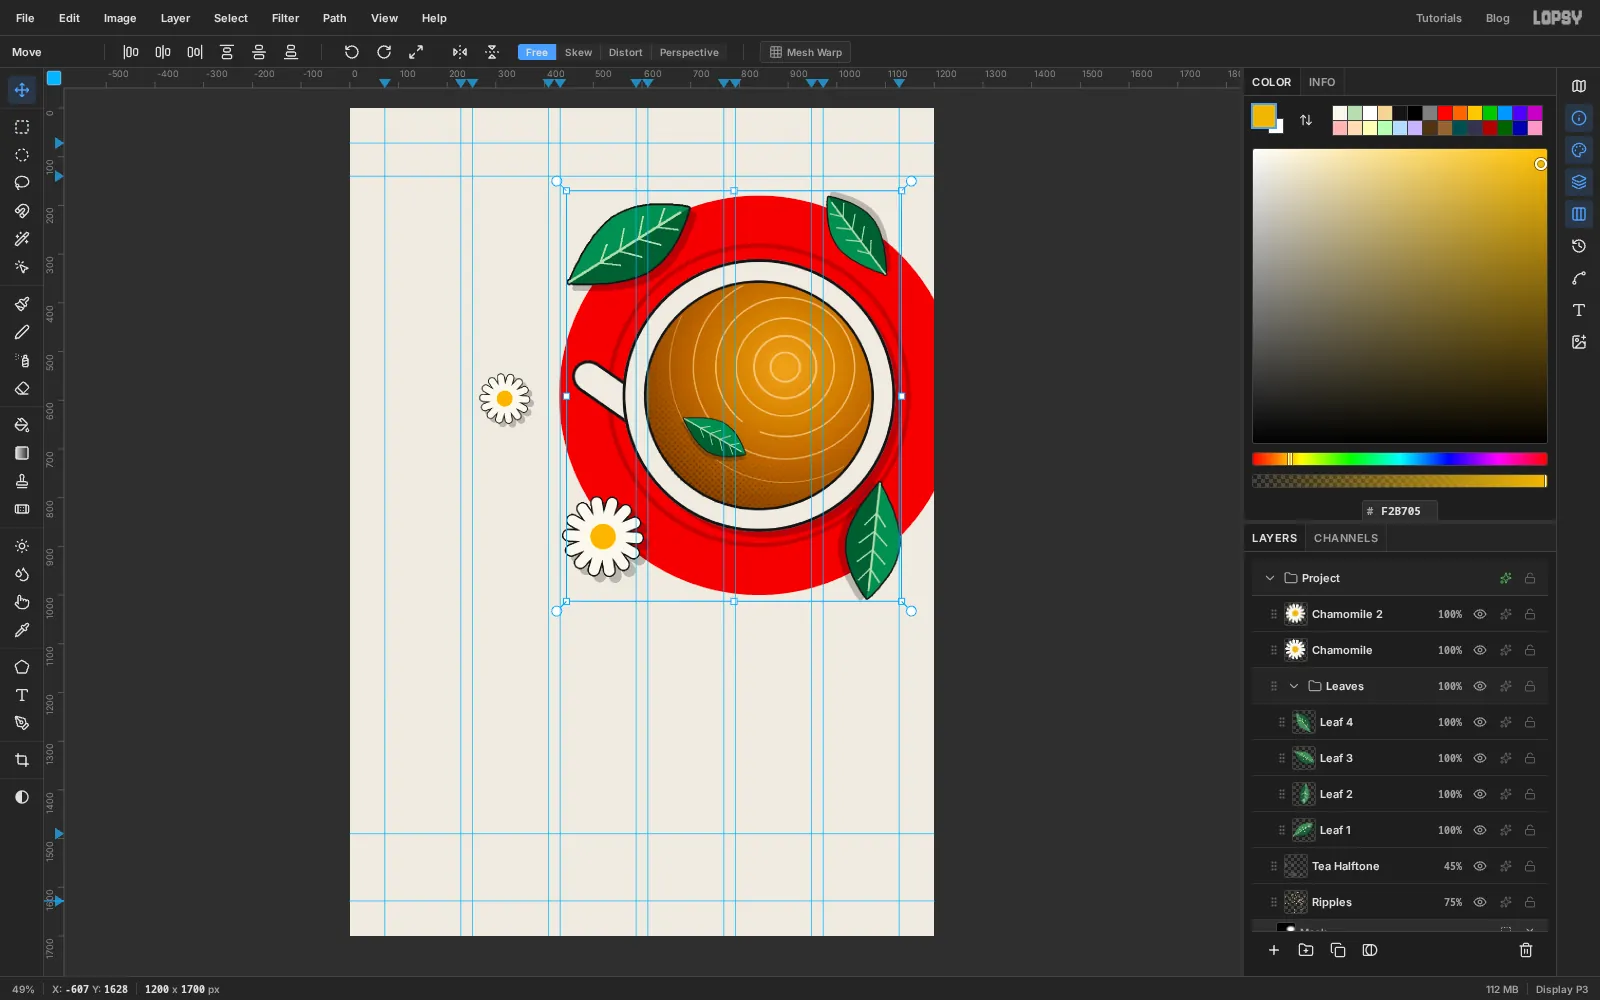
-
Rule the header and info rows
Select
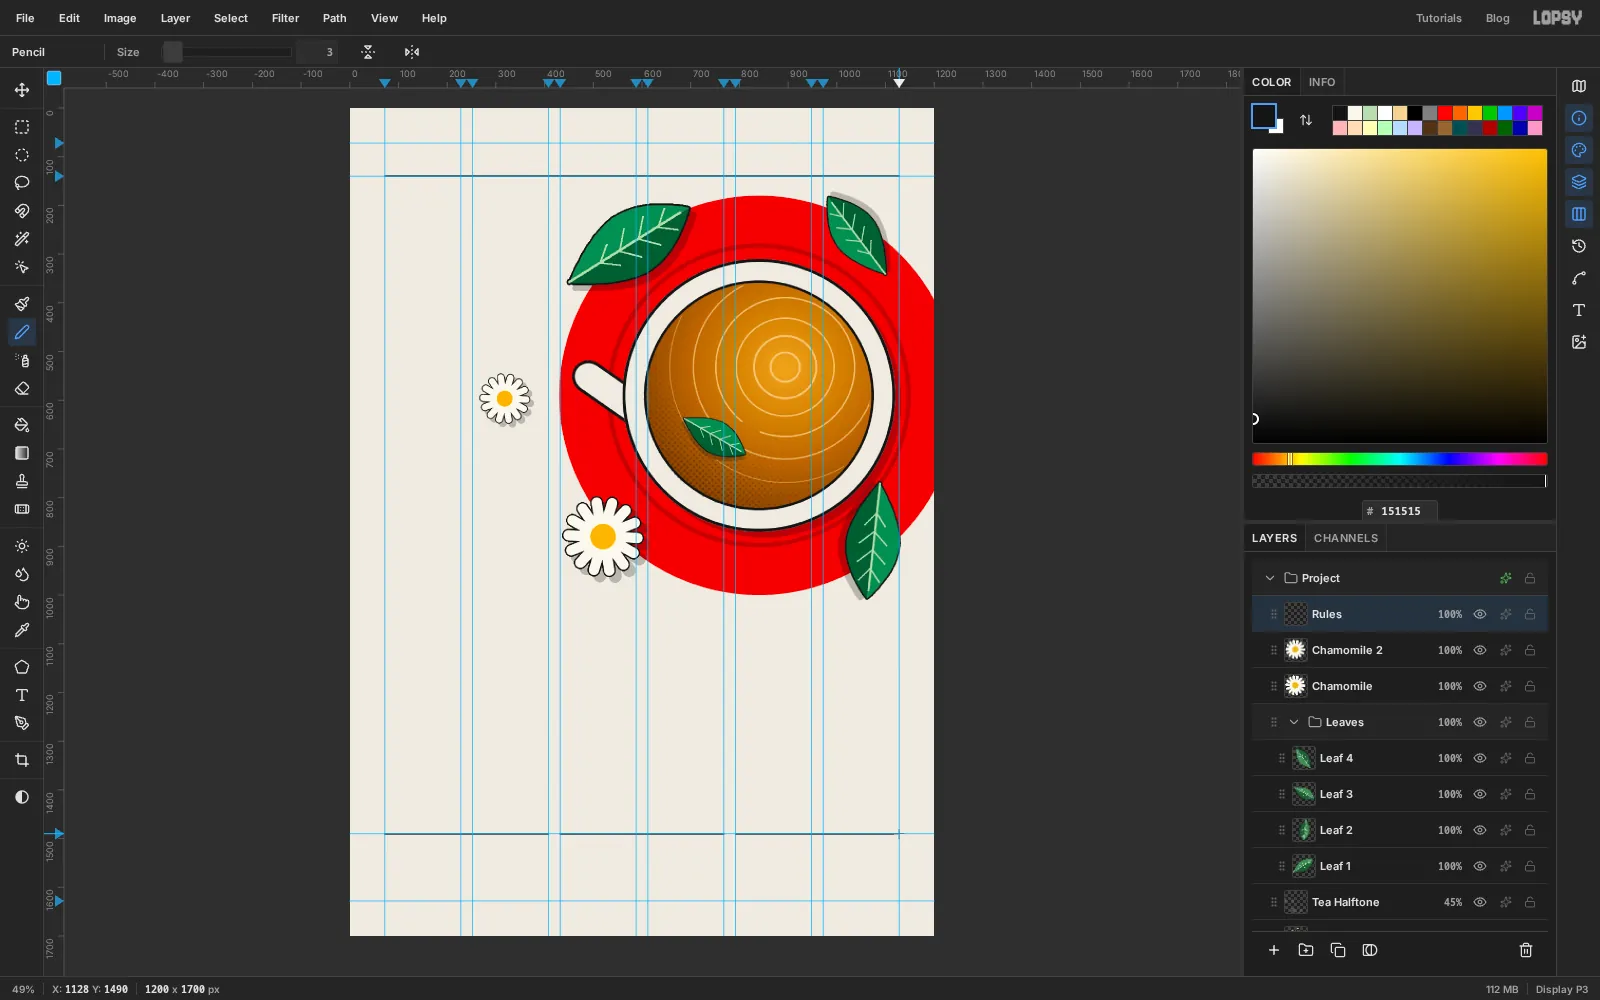
Chamomile 2and add a layer namedRules. Take the Pencil at Size3in .- Click at
72, 140and Shift-click at1128, 140for the full-width header rule. - At y
1490, draw three shorter rules, each spanning two columns:72to408,432to768, and792to1128.
Each info block will sit under its own rule. That repetition is what makes Swiss layouts feel organised.
- Click at
-
Set the header row
Clicking with the Text tool while a text layer is selected edits that layer. So before each new piece of text in this tutorial, click the
Ruleslayer first.Choose the Text tool (T) and set Schibsted Grotesk, Size
22, colour . In the Text panel, set Letter spacing to0and Line height to1.4. Type three items, each starting on a column edge, and press Tab to commit each one:Tea bar & herb shopin Bold, at the left margin (72), namedHeader NameLoose leaf, fresh herbsin Regular, at column three (432), namedHeader LineOpens Saturday 14 Novemberin Regular, at column five (792), namedHeader Date
Then nudge them with the arrow keys so their capital letters all start at y
100. That puts the three on one baseline, about 20 px above the rule.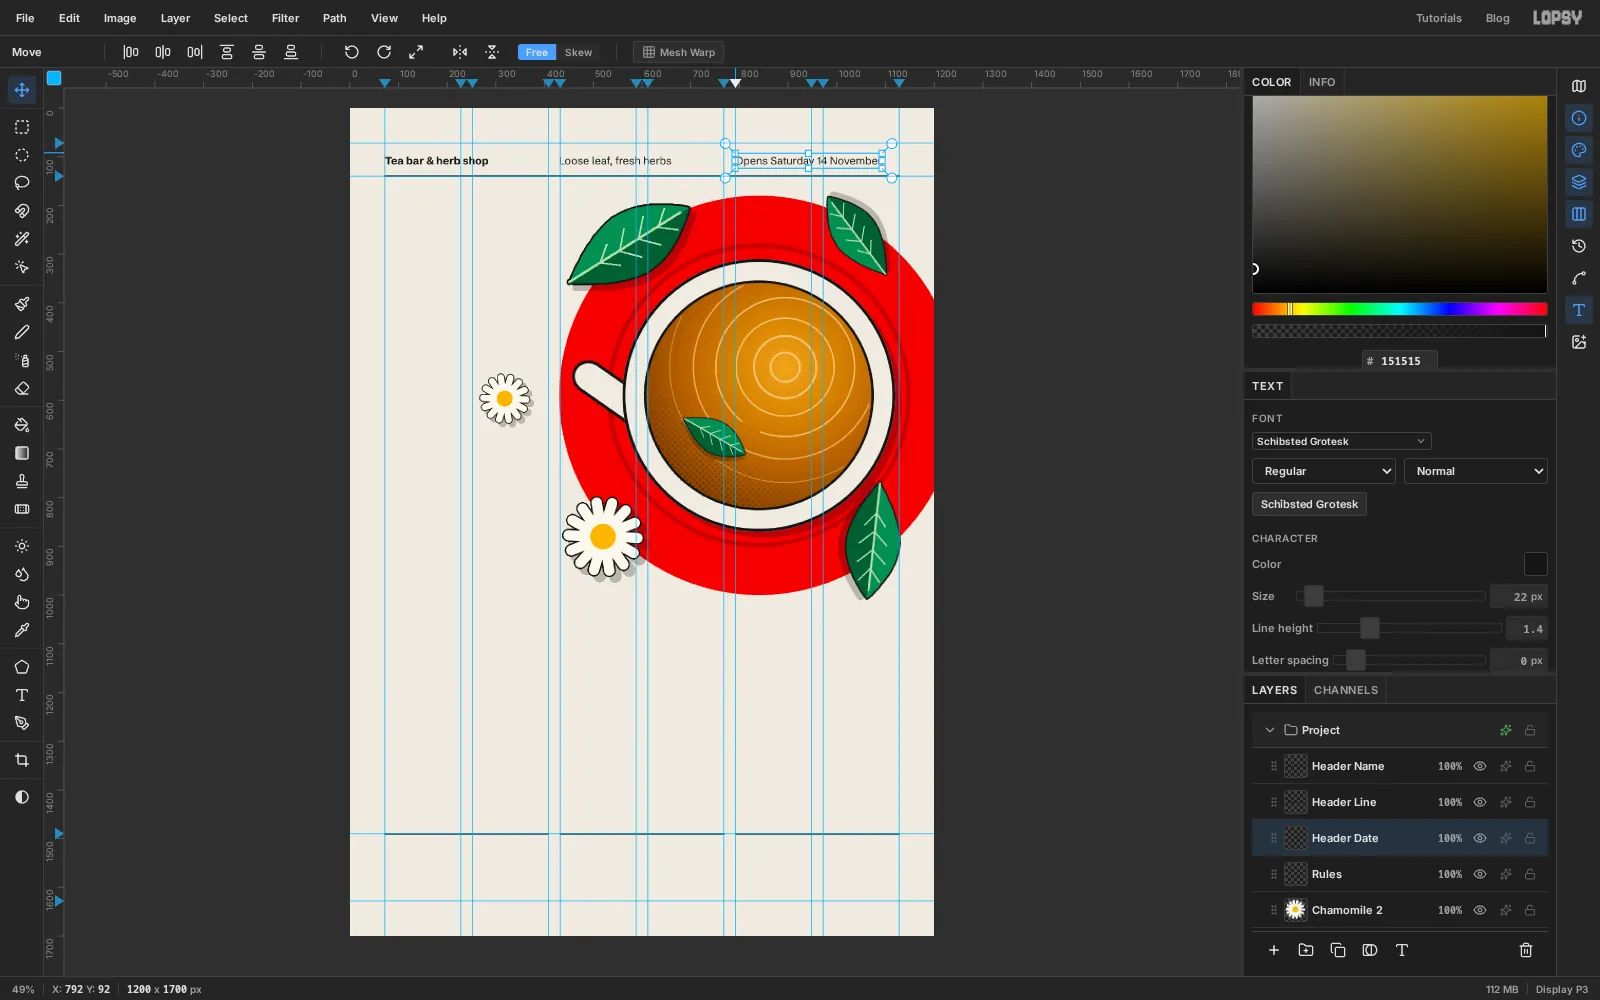
-
Set the headline across the full width
Select
Rules. Set Schibsted Grotesk at ExtraBold, start at about Size210, and typeherbal, press Enter, then typeinfusions. Commit with Tab and name the layerHeadline.Big type needs tighter spacing than small type. In the Text panel, set Letter spacing to
-7and Line height to0.9.Now make
infusionsfill the grid exactly. With the layer selected and the Text tool active, raise the Size until the word runs from the left margin guide to the right one, about246. Then move the block so its left edge sits on x72and the bottom ofinfusionssits about 50 px above the info rule.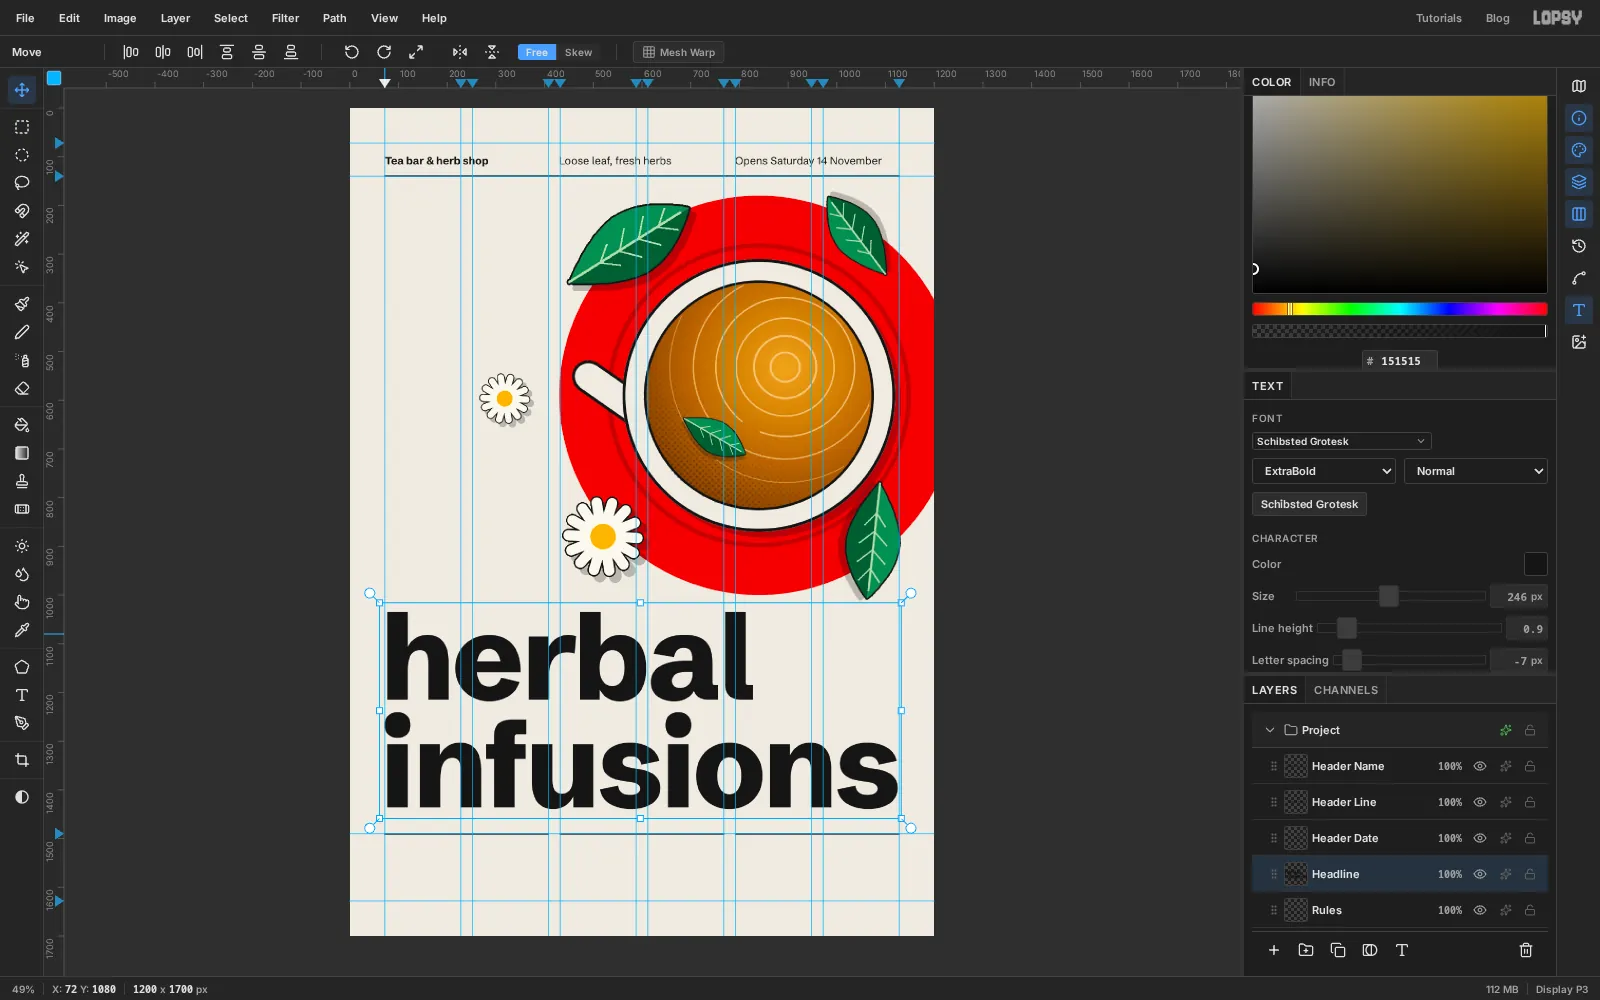
-
Colour the first line green
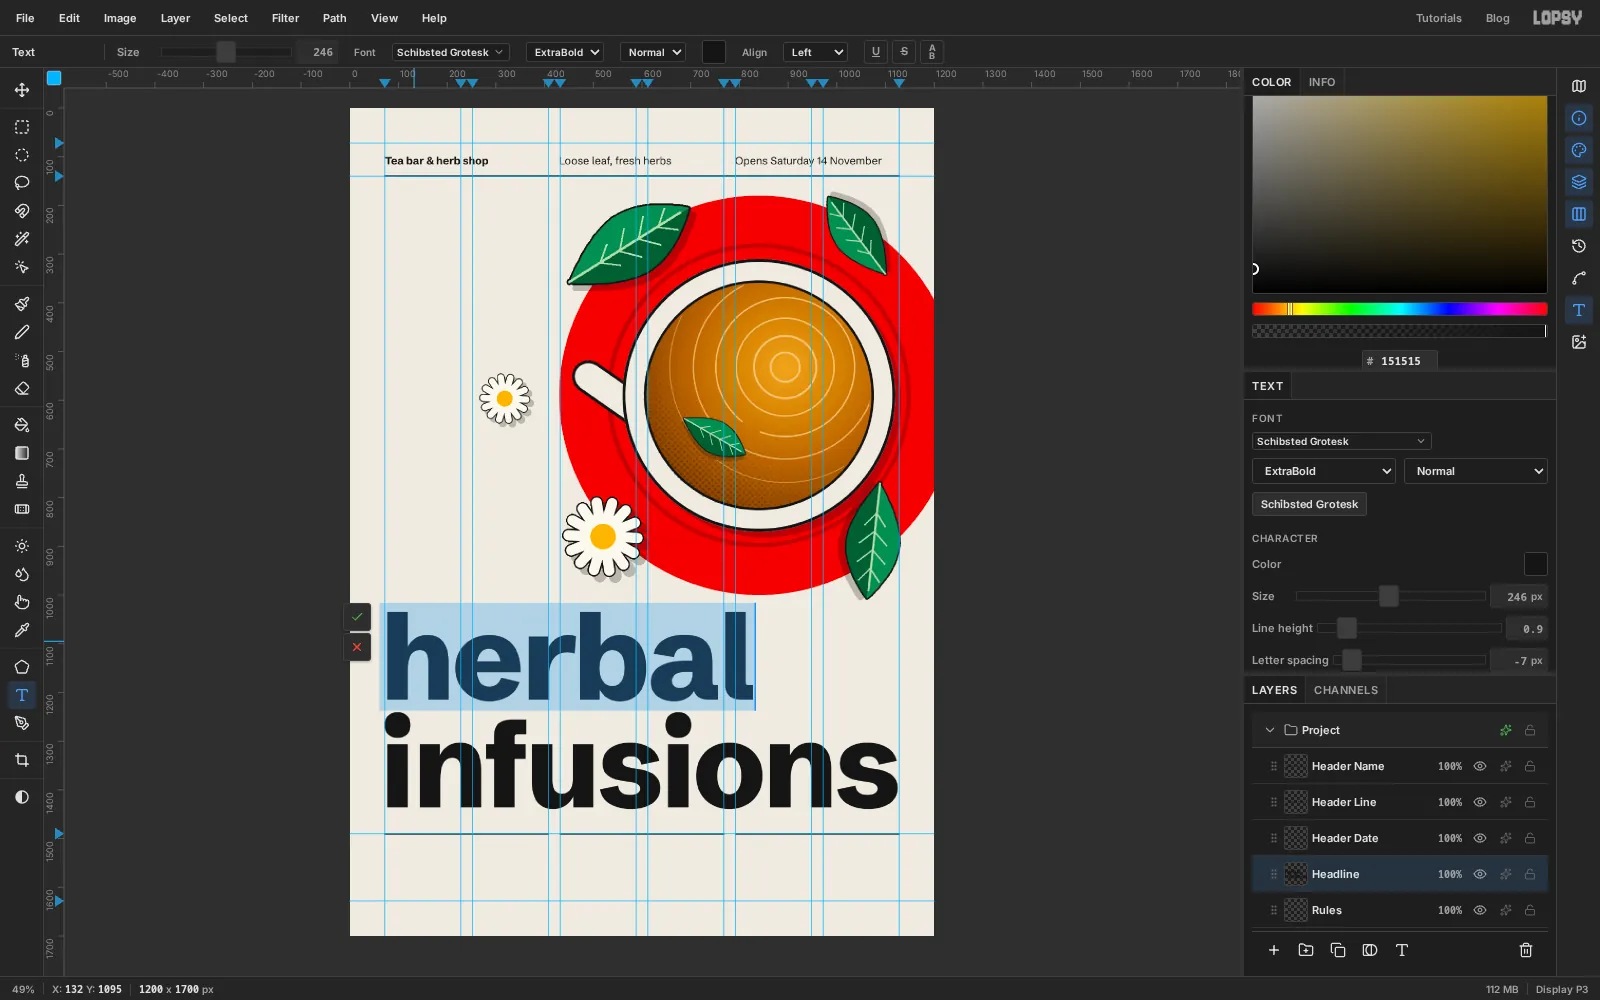
With the Text tool, click into the headline to edit it. Drag across
herbalto select just that word.Click the Text color swatch in the options bar and enter . Only the selected word changes colour. Press Escape to close the picker, then Tab to commit.
The green ties the headline to the leaves, and the black second line anchors it to the ink in the rest of the flier.
-
Typeset the menu, using the grid to place it
Type three text layers in Schibsted Grotesk Size
22, selectingRulesbefore each one:Menu Title:On the menuin Bold, colour , at the left margin, about y176.Menu Items: the six drink names in Regular , one per line, starting at y226: Peppermint, Chamomile, Lemon verbena, Hibiscus & rose, Fresh nettle, Ginger & lime. Set Line height to1.6, so the list breathes.Menu Prices: the prices in the same style, but with Align set to Right and clicked on the second column's right edge, x408: 3.50, 3.50, 4.00, 4.00, 4.00, 4.50. Use the same1.6line height so each price lines up with its drink.
Group the three layers as
Menu. Show the grid (View → Show Grid, 16 px, with Snap on) and drag theMenugroup down two cells, so it clears the header comfortably. Hide the grid again. Snapping can shift the layers sideways by a few pixels, so nudge the title and names back onto x72and the prices back onto408with the arrow keys.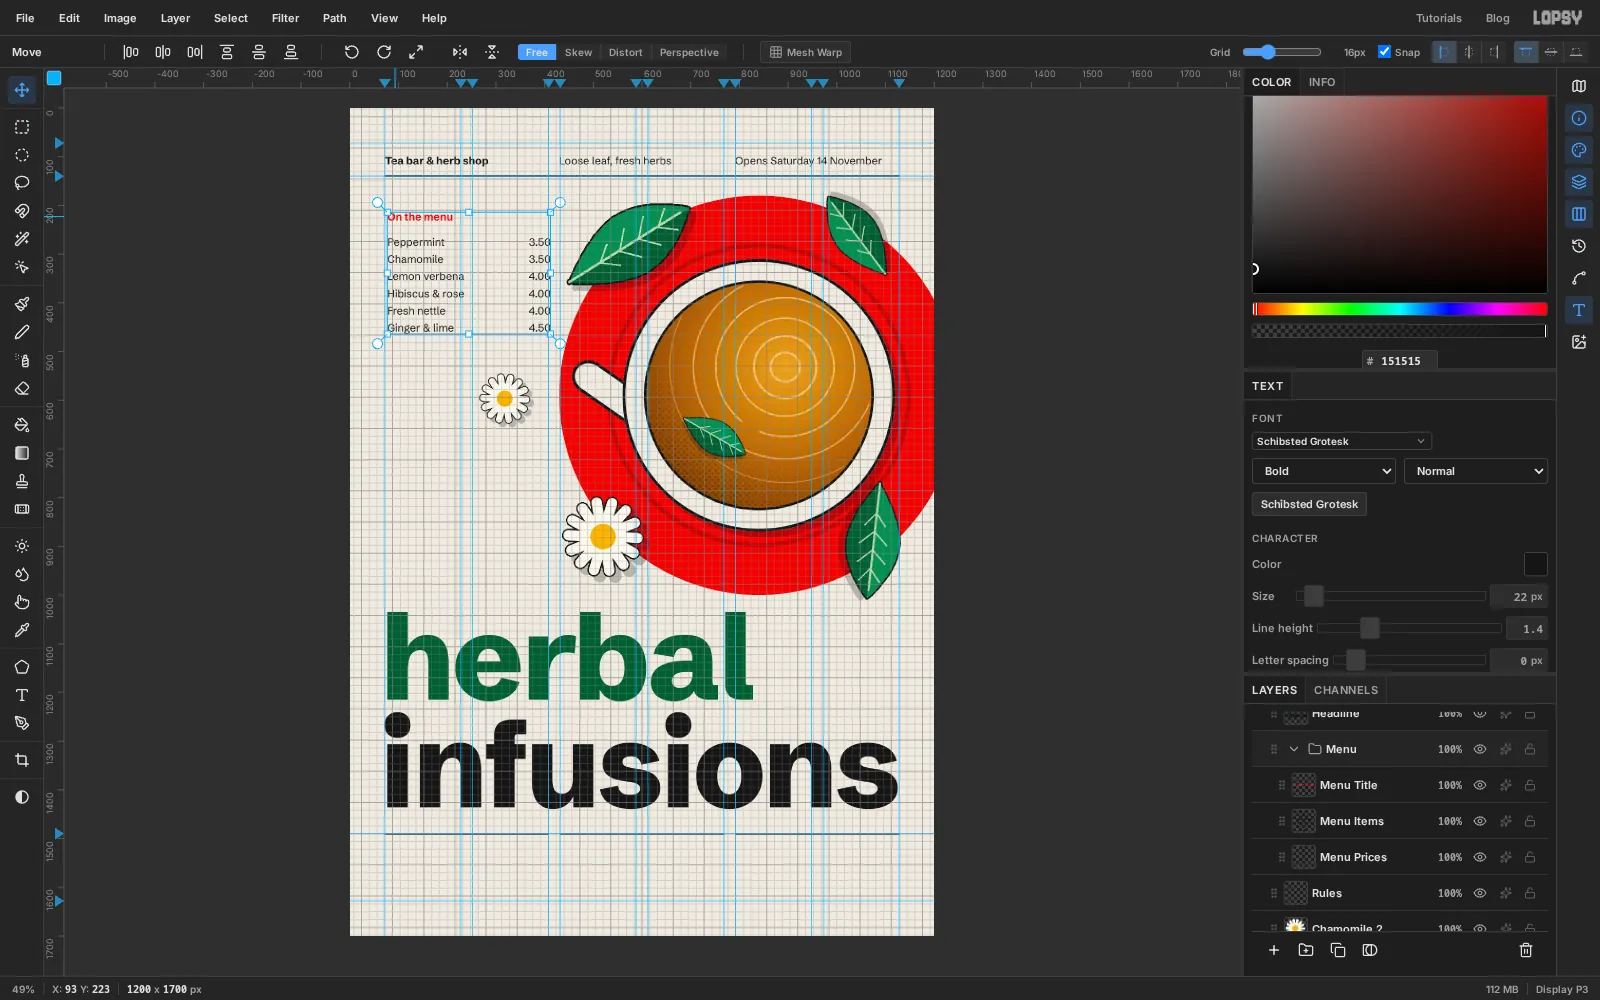
-
Rotate a vertical tagline
Select
Rules, and typeFresh herbs, steeped to orderin Schibsted Grotesk Medium, Size20, with Letter spacing1. Click somewhere in the empty space on the left to place it, and name the layerTagline.Switch to the Move tool. With a text layer selected, it shows handles around the text without any selection. Hold Cmd and drag the top-right rotation handle anticlockwise. Holding Cmd snaps the angle to 15° steps, so stop at exactly -90°. The text now reads from bottom to top.
Nudge it onto the left margin so its left edge sits on x
72, with its foot about 48 px above the top of the headline. Vertical type in the margin is a classic Swiss device. Keep the words short and don't repeat information found elsewhere.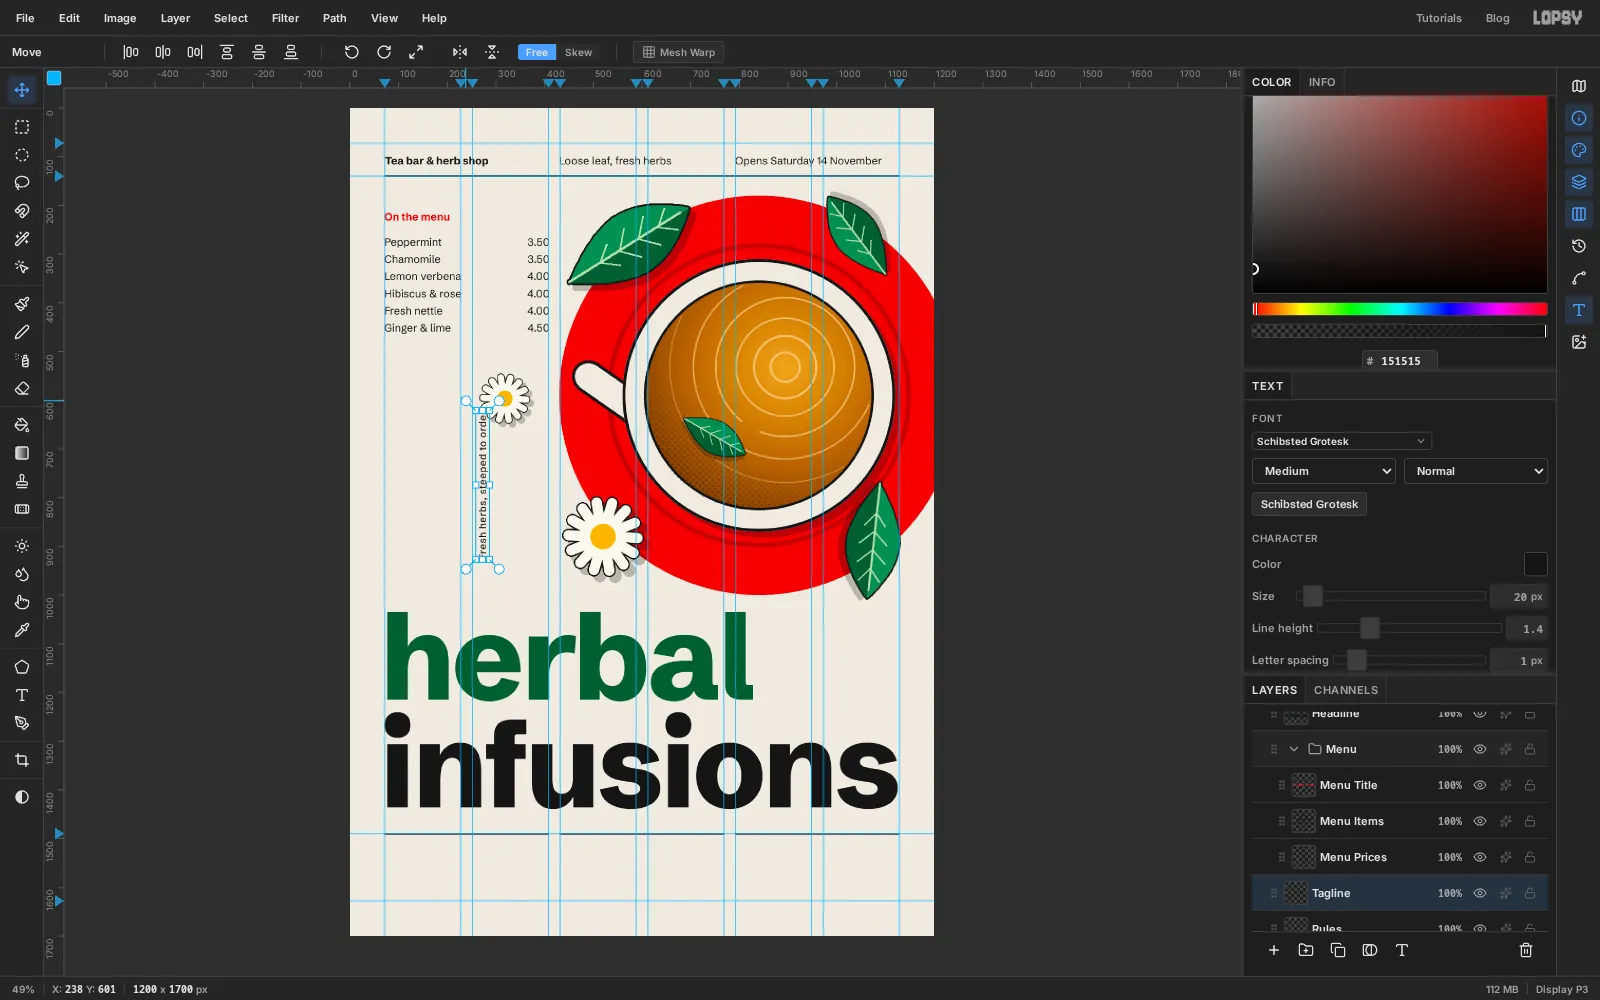
-
Fill in the info row
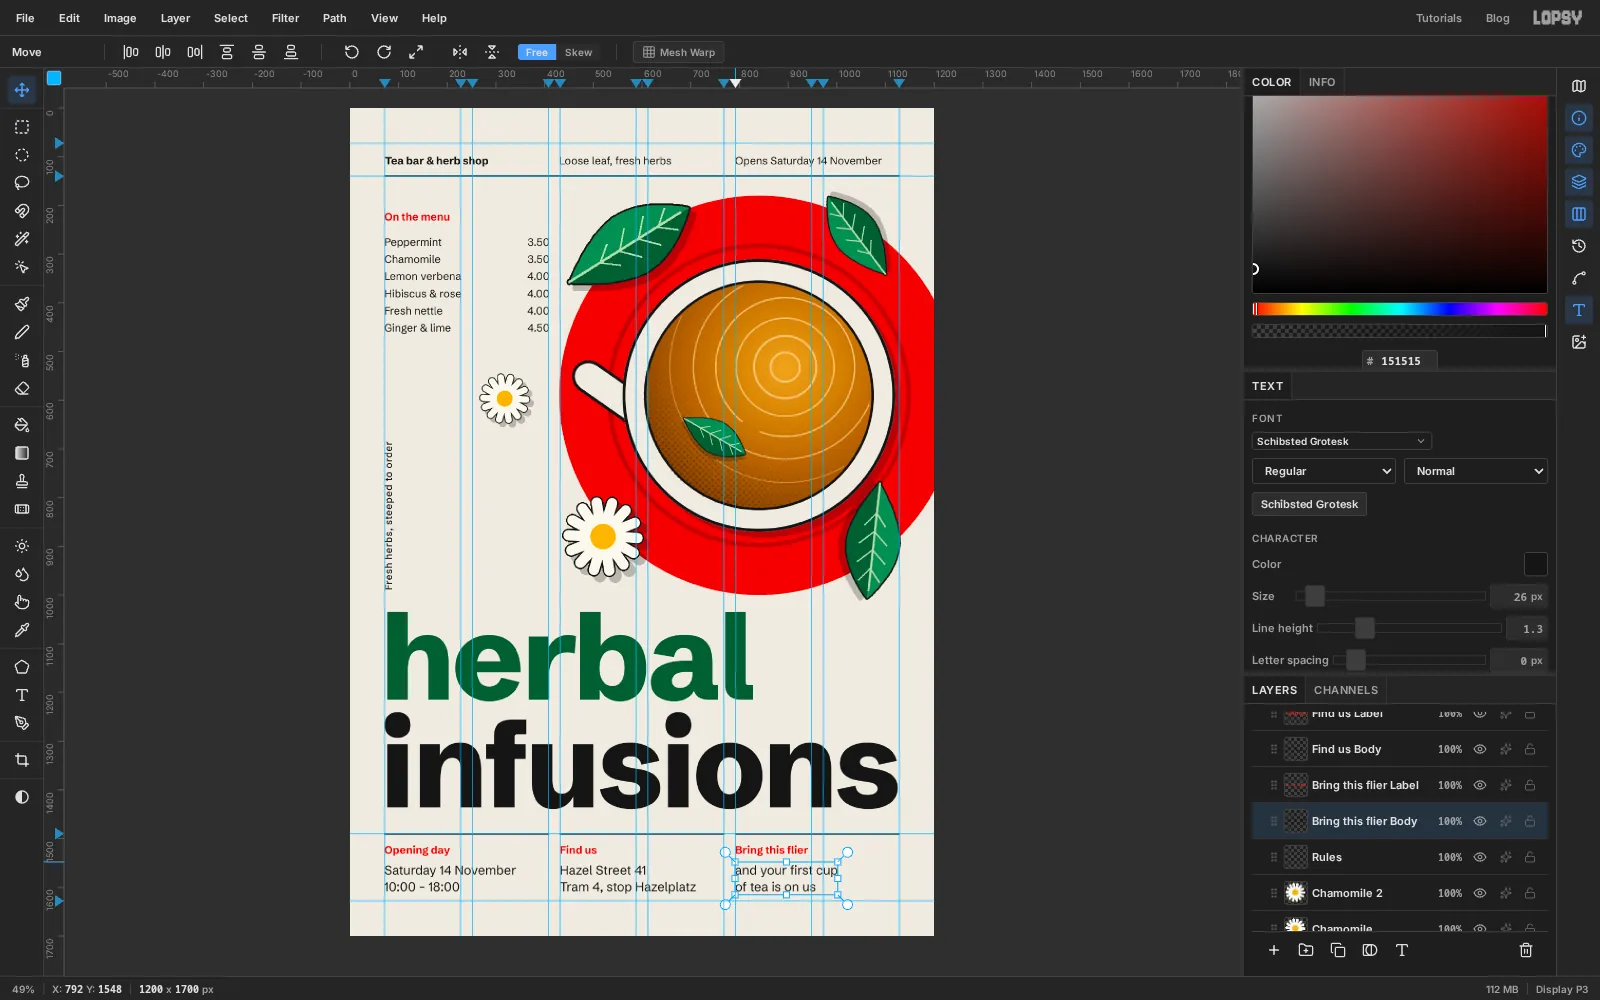
Under each of the three short rules, set a label and a body, flush with the rule's left end. Select
Rulesbefore each one, and name themOpening day Label,Opening day Bodyand so on.- Labels: Bold, Size
22, , about 18 px below the rule (y1508). - Bodies: Regular, Size
26, , Line height1.3, starting at y1548.
The three blocks are:
- Opening day: Saturday 14 November / 10:00 – 18:00
- Find us: Hazel Street 41 / Tram 4, stop Hazelplatz
- Bring this flier: and your first cup / of tea is on us
Write the date the same way everywhere, here and in the header.
- Labels: Bold, Size
-
Add paper grain and export
Flat colour can look a little too digital. Every text layer was added just above
Rules, so the first one you typed,Header Name, is now at the top of the stack. Select it and add a layer namedPaper Grain, which lands above everything.Fill it with . Choose Filter → Add Noise…, set Amount to
30, click Mono and Gaussian, and apply. Set the layer to Overlay at45%opacity. The grey disappears and only the speckle is left on the paper, the red and the type.Hide the guides with Cmd+;. Save the project with File → Save Project, and use File → Quick Export PNG to get the finished flier.