Design a Synthwave Stencil Kit Contact Sheet
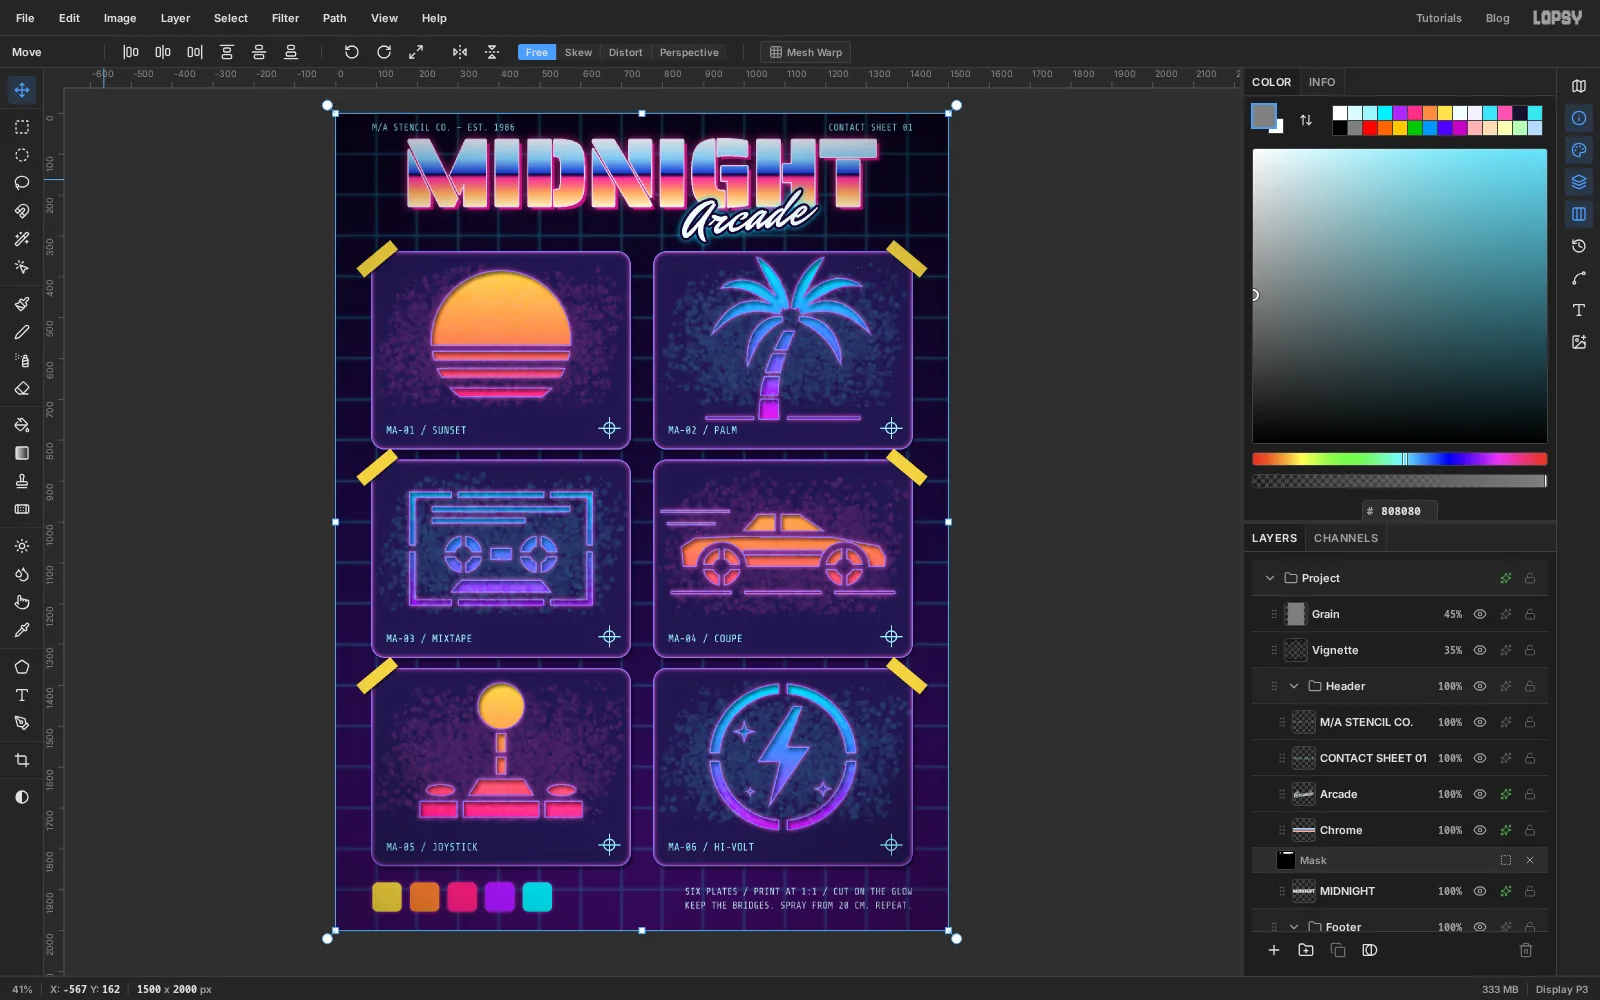
Make a synthwave spray-stencil contact sheet in Lopsy. Cut six icons out of dark cards with a layer mask so neon gradients glow through the holes.
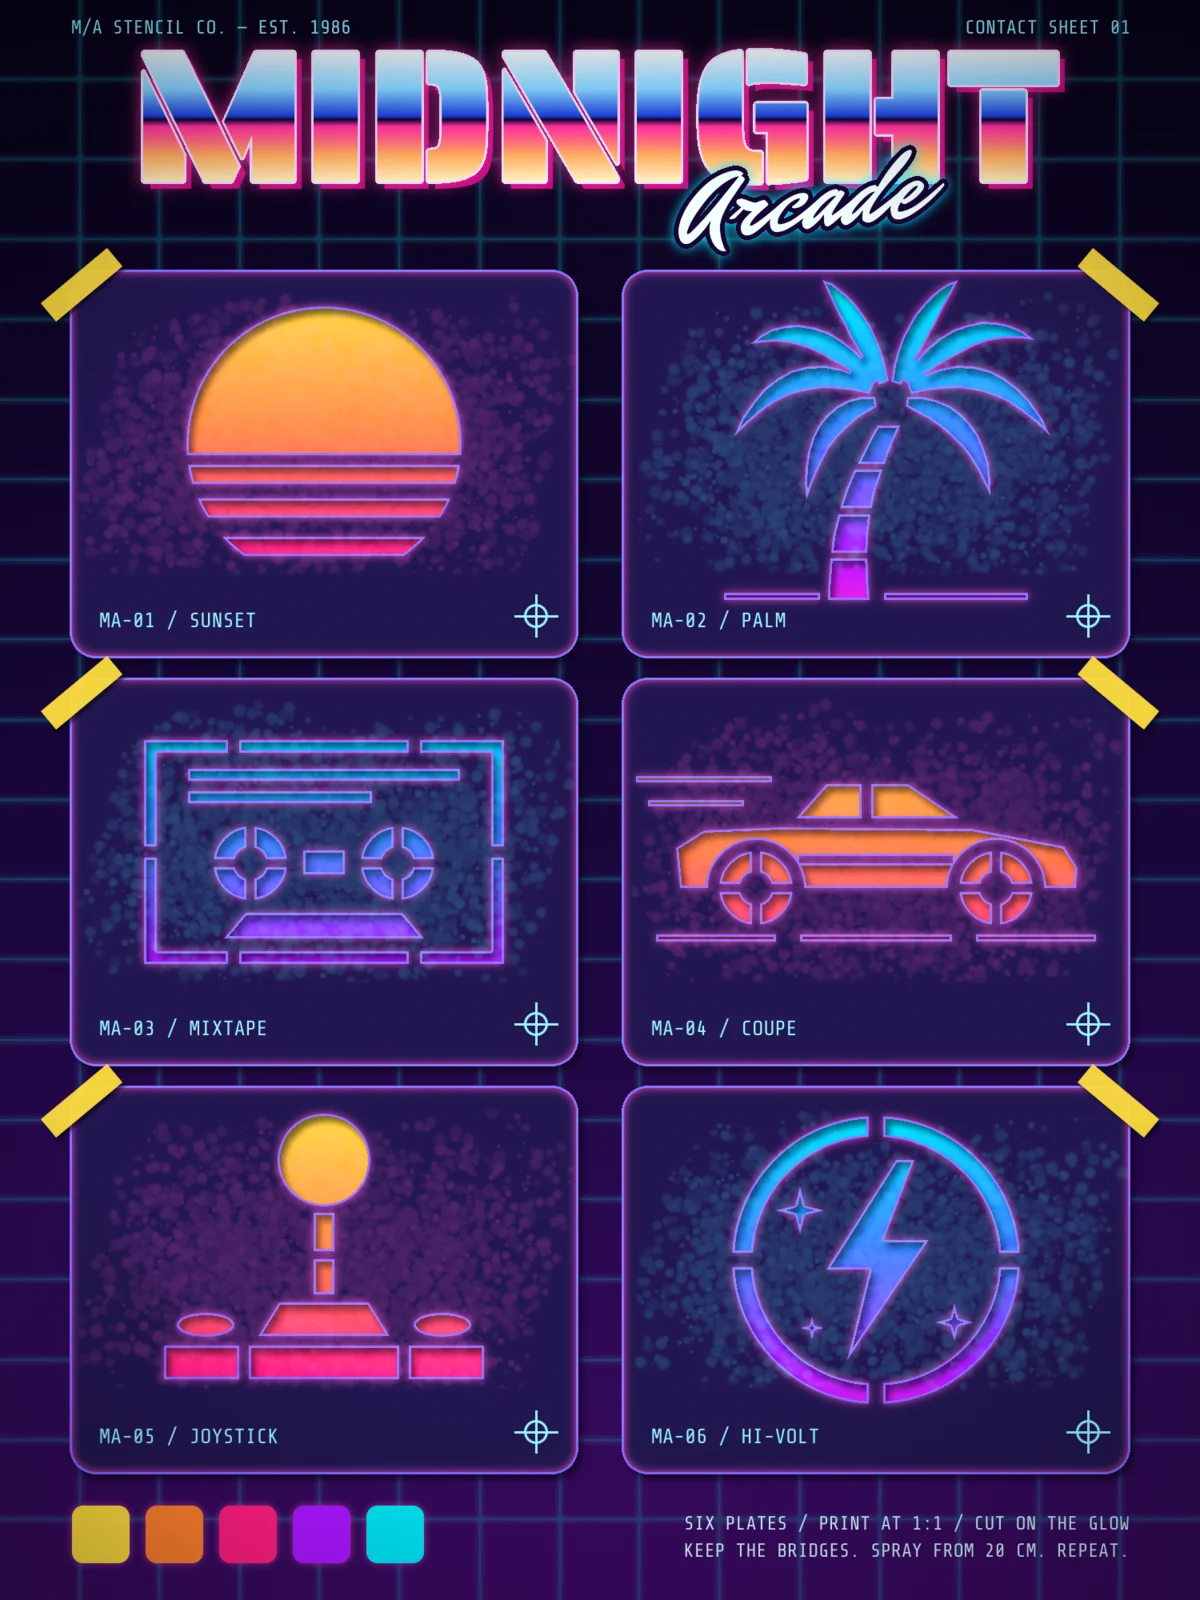
A stencil contact sheet shows every template in a kit on one page, so you can pick a design and check it before you cut. This one is for an imaginary 80s spray kit called Midnight Arcade: six stencil plates taped to a cutting mat, with neon paint glowing through the cut-outs.
The trick that makes it work is a layer mask. The six cards are one flat layer, and every icon is a hole cut in that layer's mask. A layer of bright gradients sits underneath and shows through wherever you cut. Because each icon is a real hole, you have to design it like a real stencil: every loose piece of card needs a bridge holding it to the rest, or it would fall out.
You'll make a 1500 × 2000 px sheet and use:
- guides with snapping, the Gradient tool and the Shape tool
- a layer mask, cut with the marquees and Lasso using add, subtract, Select → Shrink and Edit → Fill
- the Drop Shadow, Inner Glow, Stroke, Color Overlay and Outer Glow layer effects
- the Spray tool, Gaussian Blur, Select → Feather and Add Noise
- text in Saira Stencil, Mr Dafoe and Share Tech Mono, a text-shaped mask for a chrome fill, and a rotated script
- copy and paste, Duplicate Layer, rotate and flip, Merge Down, groups, and a Hue / Saturation group adjustment
The palette:
-
Mat
-
Grid cyan
-
Card
-
card tint
-
card edge
-
Sunset neon
-
Electric neon
-
Overspray pink
-
overspray cyan
-
glow pink
-
Label cyan
-
tape yellow
-
Chrome
-
Lay out the cutting mat
Choose File → New, set the size to 1500 × 2000 px and click Create. Rename
Layer 1toMat(double-click its name).Pick the Gradient tool, leave the type on Linear and click Advanced… to open the Gradient Editor. Click under the bar to add a stop, drag stops to move them, and type a hex into the colour picker to set each one. Set three stops: at the left, just past the middle and at the right. Click Done, then drag from the top edge of the canvas straight down to the bottom edge.
Now rule the mat. Click Add Layer and name it
Mat Grid. Pick the Pencil (N), set Size2and the foreground to . Click at the top of the canvas at 100, 0, then hold Shift and click at 100, 2000: the Pencil draws a straight line between the two clicks. Do the same every 100 px across the canvas, starting each line with a plain click and ending it with a Shift-click. Then rule the horizontal lines the same way, from the left edge to the right edge every 100 px down. The rulers along the top and left make the hundreds easy to find.Click the layer's opacity (the
100%on its row) and drag it down to22%. Then open the layer's effects (the ✦ button on its row), tick Outer Glow and set Size10, Opacity60and the colour to , so the lines look lit.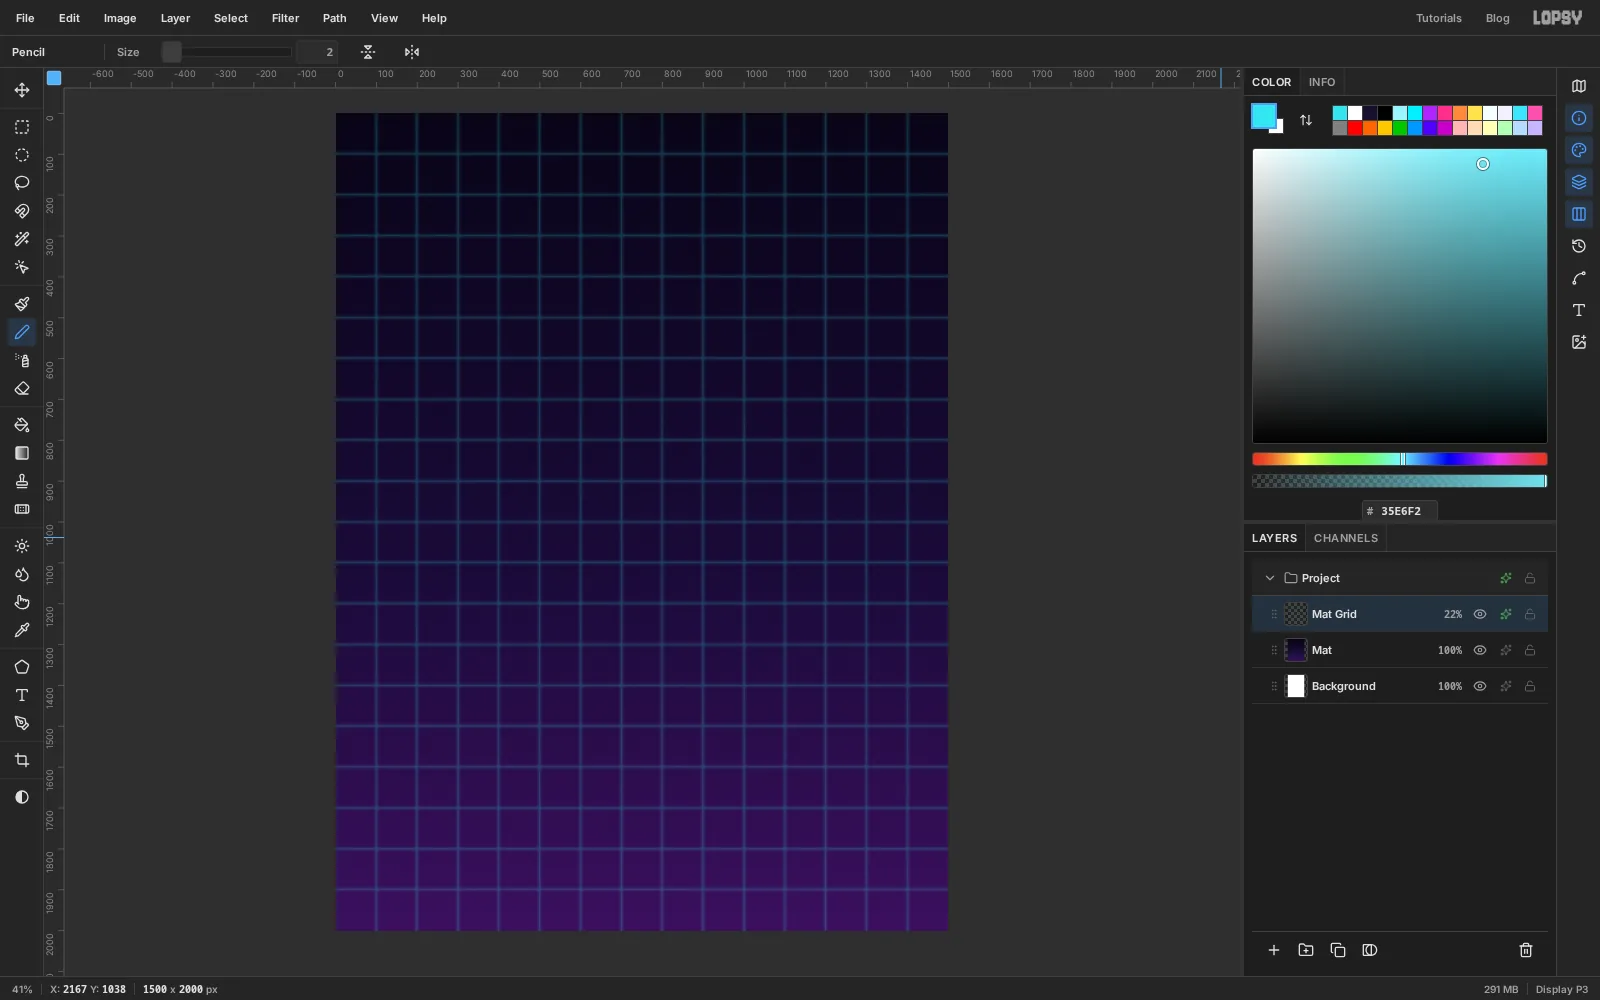
-
Paint the neon that will show through
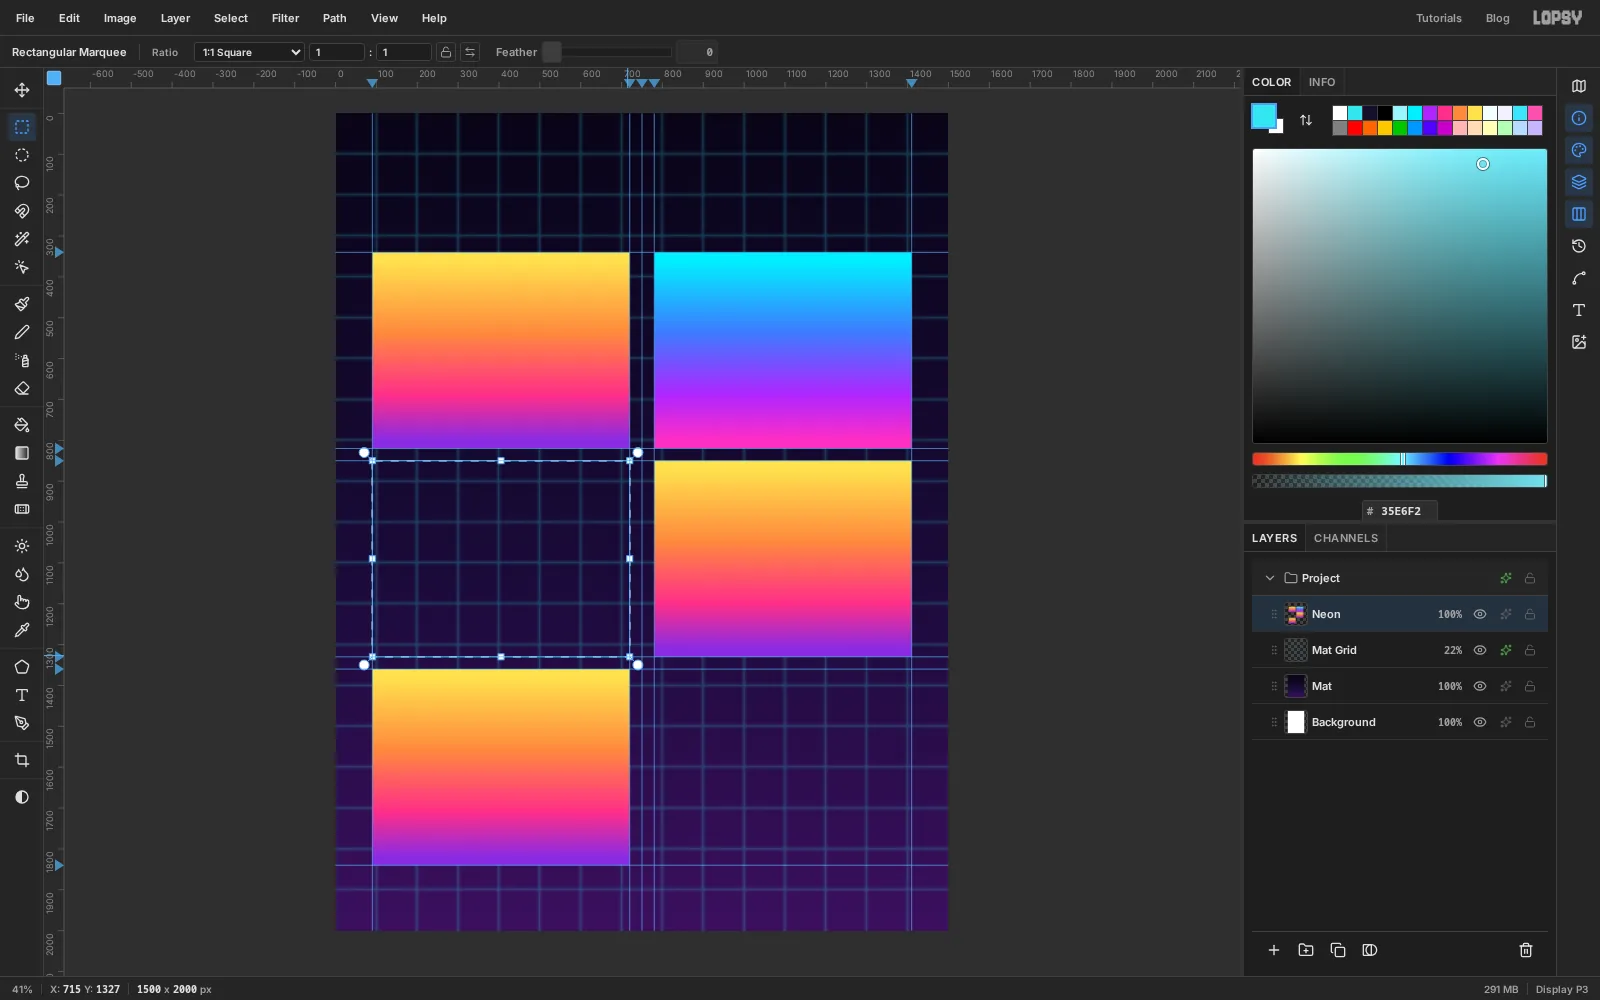
Guides mark where the six cards go. Check that View → Show Guides and View → Snap to Guides are both ticked. Click the top ruler at 90, 720, 780 and 1410 to drop four vertical guides, and Cmd-click it near the middle to drop one exactly on the centre line. Click the left ruler at 340, 820, 850, 1330, 1360 and 1840. That gives you two columns and three rows of 630 × 480 px cells.
Add a layer called
NeonaboveMat Grid. In the Gradient Editor, build the sunset ramp: at the left, at 40%, at 75% and at the right.Pick the Rectangular Marquee (M) and drag across the top-left cell. You don't need to be exact, because the marquee snaps to the guides. Switch back to the Gradient tool and drag from the top of the cell to the bottom. Do the same in the middle-right and bottom-left cells, so the sunset cells form a checkerboard.
Then build the electric ramp (, at 40%, at 75%, ) and fill the other three cells the same way. Press Cmd+D to deselect.
-
Draw the cards and trim the neon
Add a layer called
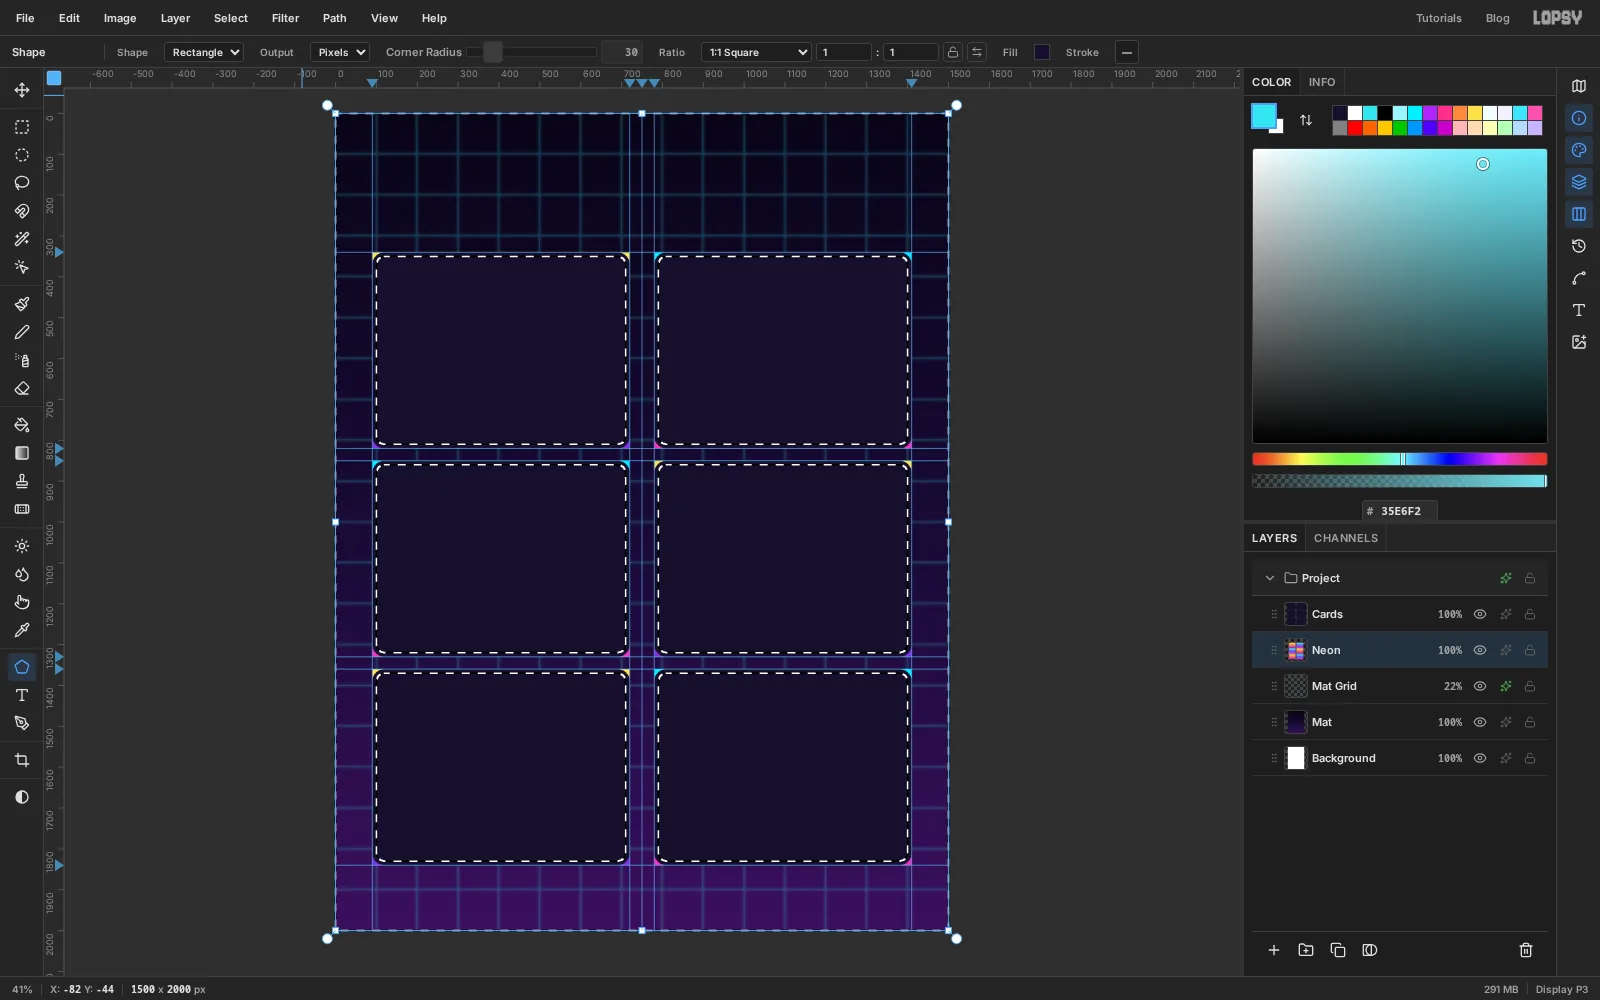
Cards. Pick the Shape tool (U) and choose Rectangle from the Shape dropdown. Click the Fill swatch and type17102E, then set Corner Radius to30.The Shape tool draws outward from where you press, so start each card at the centre of a cell and drag to one of its corners. The corner snaps to the guides. The cell centres are at x 405 and 1095, and y 580, 1090 and 1600. Draw all six.
The rounded corners leave little triangles of neon poking out. To trim them, Cmd-click the
Cardsthumbnail to load the cards as a selection, choose Select → Shrink… and shrink by10. Click theNeonlayer, choose Select → Inverse and press Delete. The neon now stops 10 px inside every card edge. Deselect.From here on the guides get in the way. Untick View → Snap to Guides so the selections you draw next don't jump to them.
-
Add the mask and cut the sun
Click the
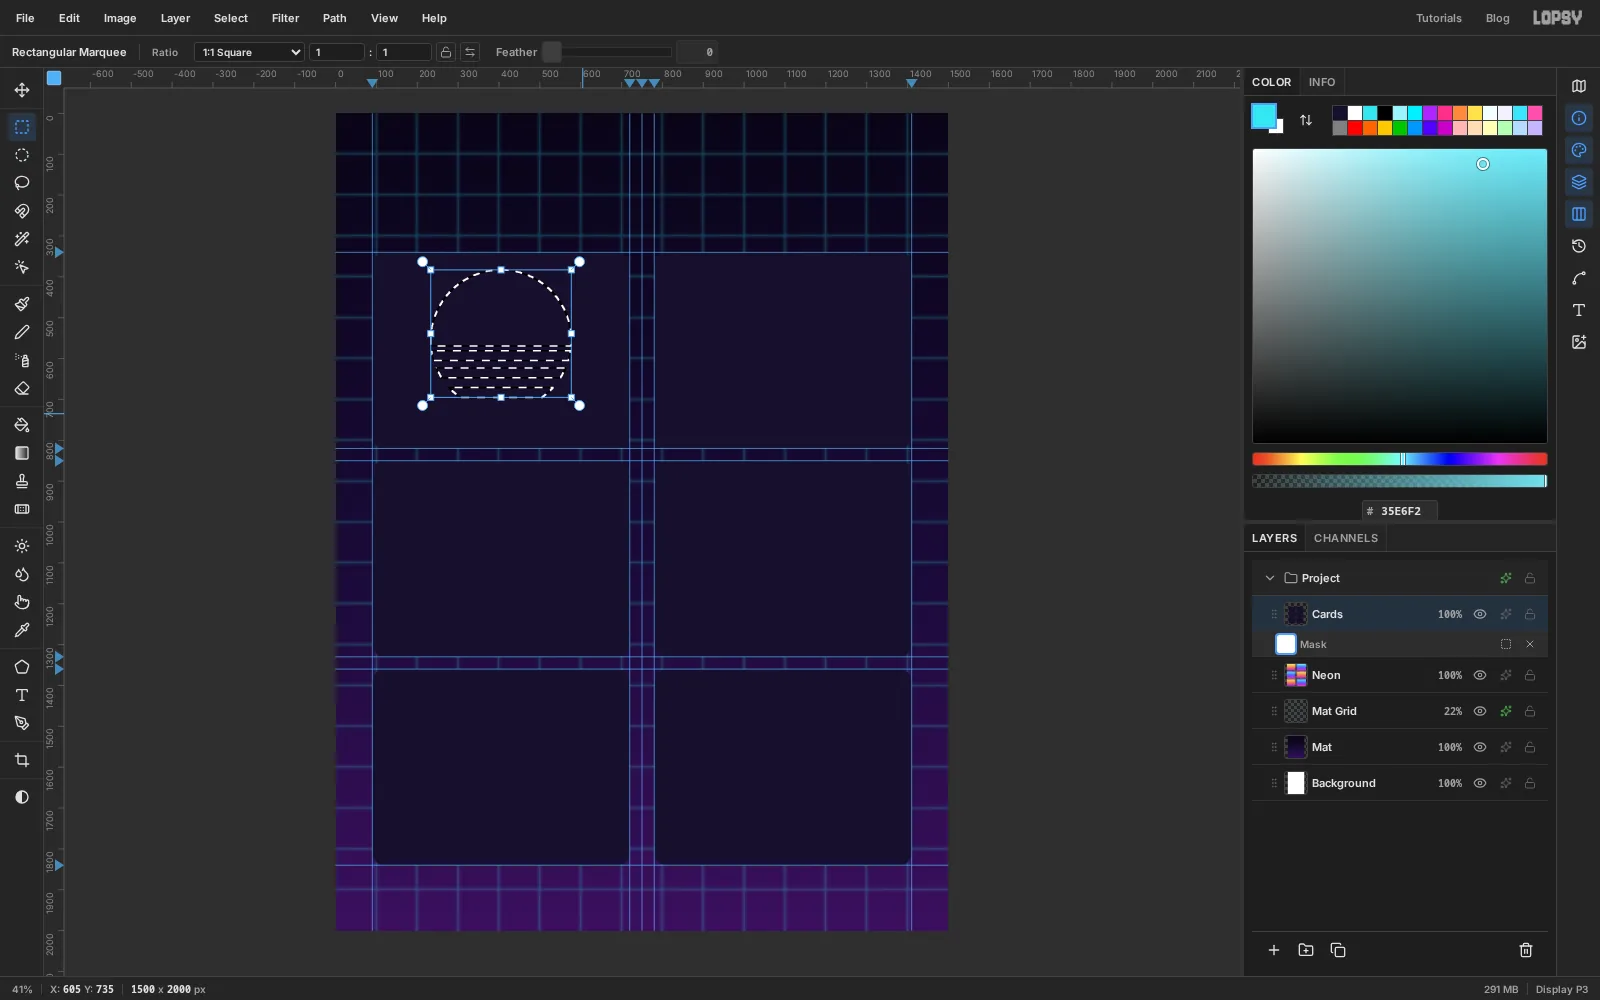
Cardslayer and click Add Mask at the bottom of the Layers panel. A whiteMaskrow appears under the layer and you are now editing the mask, not the card. White keeps the card, black cuts a hole.Start with the classic striped sun. Pick the Elliptical Marquee and drag a circle about 345 px across in the top-left card, a little above the card's centre so there's room for a label underneath.
Switch to the Rectangular Marquee. Hold Alt and drag a thin bar right across the lower half of the circle, starting just below its middle. That slices a gap out of the selection. Cut three more below it, making each gap taller than the last: about 12, 18, 24 and 40 px. Let the last one run off the bottom of the circle so no thin sliver is left.
Set the foreground to black and choose Edit → Fill. While you're editing the mask the hole shows as a blue overlay. The strips of card between the bands are this stencil's bridges.
-
Lasso the palm tree
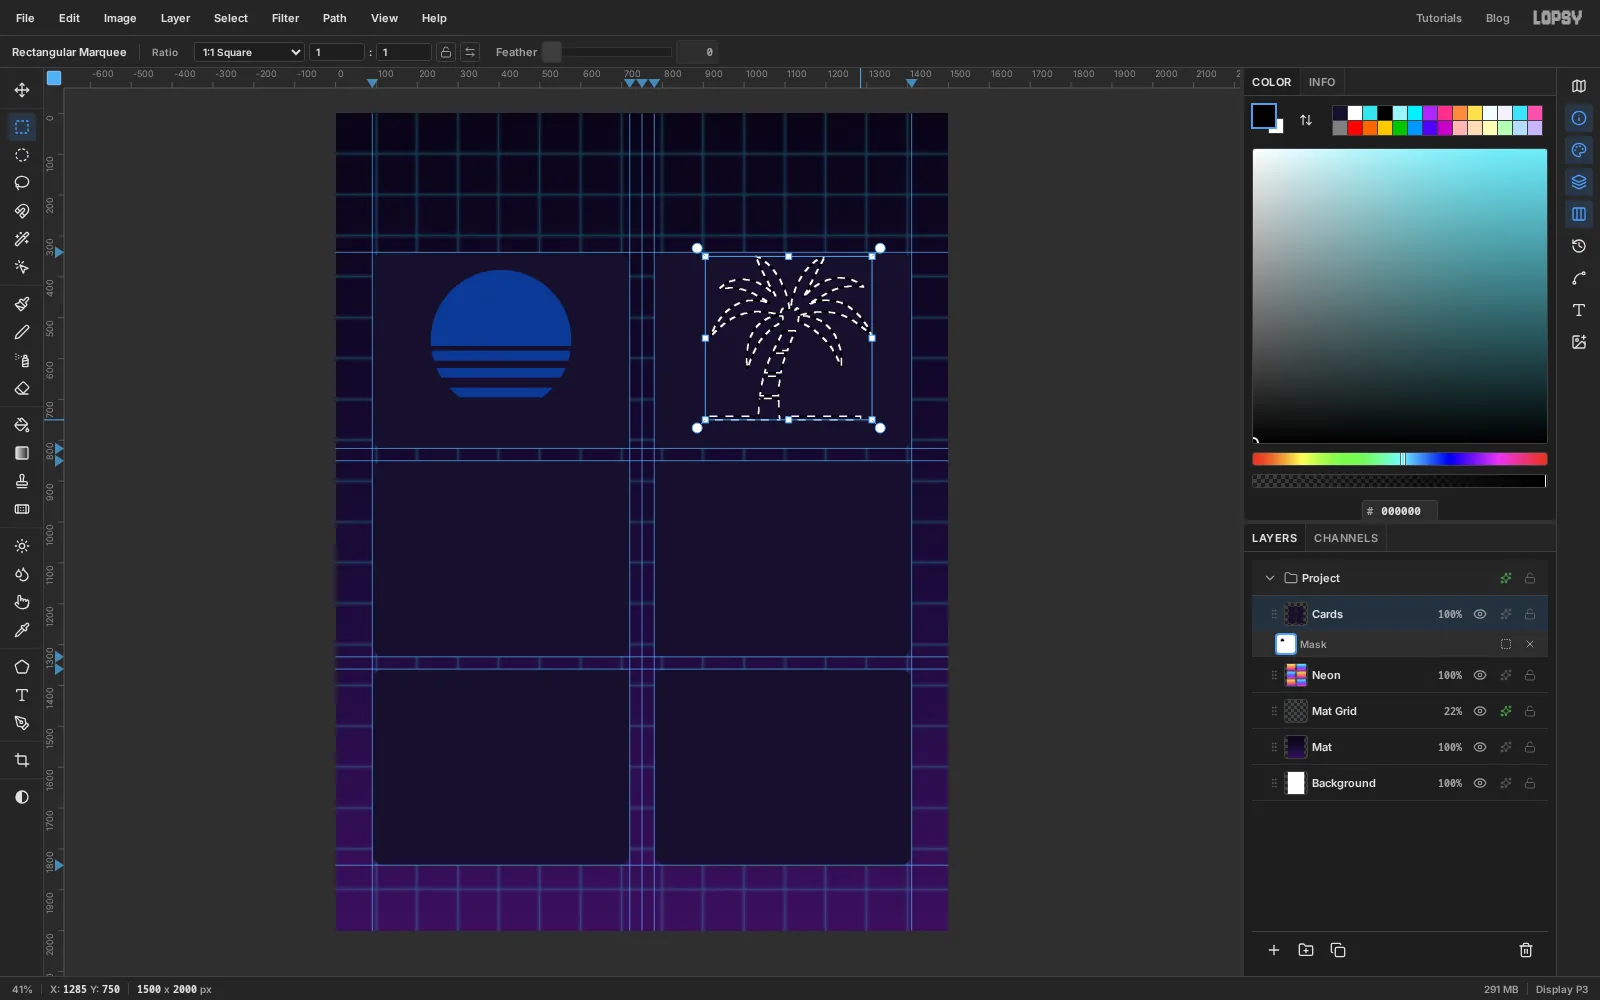
The palm is drawn freehand. Pick the Lasso (L) and, in the top-right card, draw one long curved frond: a thin leaf that arcs up and out from the crown, about 210 px long and 30 px wide at its fattest. Hold Shift and draw seven more around the crown, three arching to each side and two drooping down, like a firework.
Still holding Shift, draw the trunk as four separate blocks that lean to the right as they climb, each a little narrower than the one below. Leave a gap of about 8 px between blocks. The gaps are bridges, and they also read as the rings on a palm trunk.
Finish with the ground: switch to the Rectangular Marquee and Shift-drag two thin lines either side of the trunk's base, without touching it. Choose Edit → Fill to cut the lot.
-
Cut the mixtape
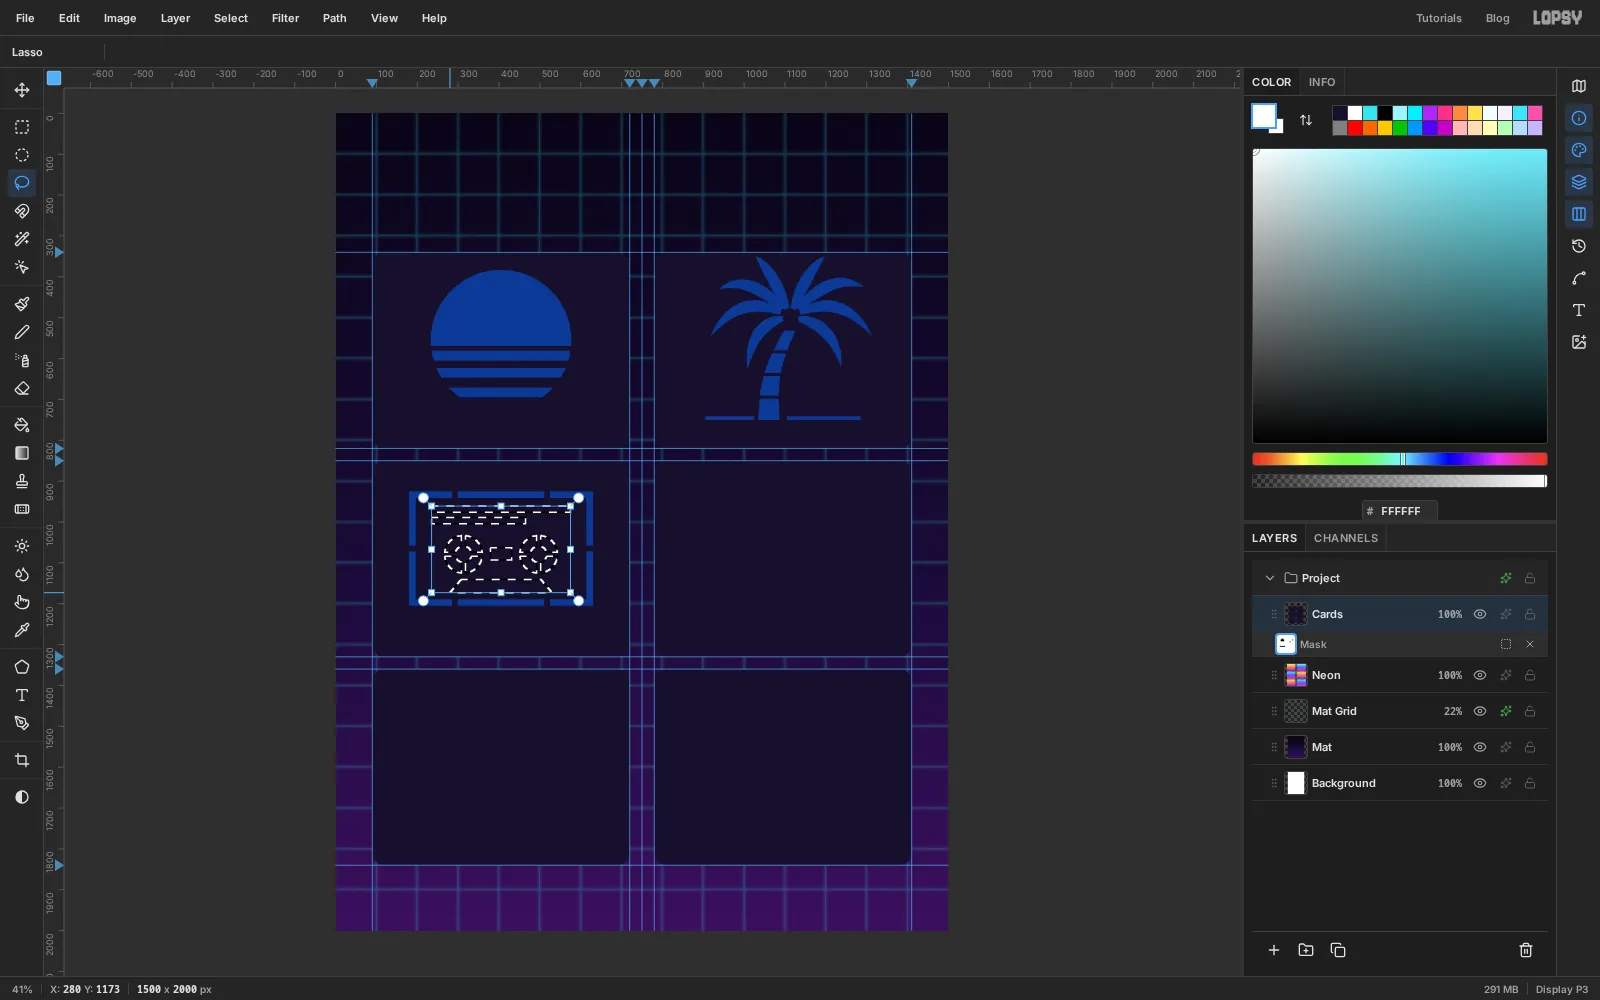
A cassette is a frame with shapes inside it, so it needs more planning. A full frame would drop the whole middle out of the card.
- In the middle-left card, drag the cassette body with the Rectangular Marquee, about 450 × 280 px, and fill it with black.
- Choose Select → Shrink… by
16, set the foreground to white and fill. White puts the card back, which leaves a 16 px frame cut out. - Deselect. Drag a small rectangle across the top edge of the frame, then Shift-drag five more: another on the top edge, two on the bottom and one on each side. Fill once with white. Those are the bridges that hold the middle in. Deselect again.
Now select the details and cut them in one go. Drag a long thin bar and a shorter one for the label lines, holding Shift for the second. Switch to the Elliptical Marquee and Shift-drag two reels about 92 px across. Hold Alt and drag a small circle in the centre of each to make them rings. Switch back to the Rectangular Marquee and Alt-drag a thin horizontal bar and a thin vertical bar through each reel, splitting each ring into four arcs. Shift-drag a small window between the reels, then Shift-lasso a wide trapezoid along the bottom. Set the foreground back to black and fill.
-
Cut the coupe
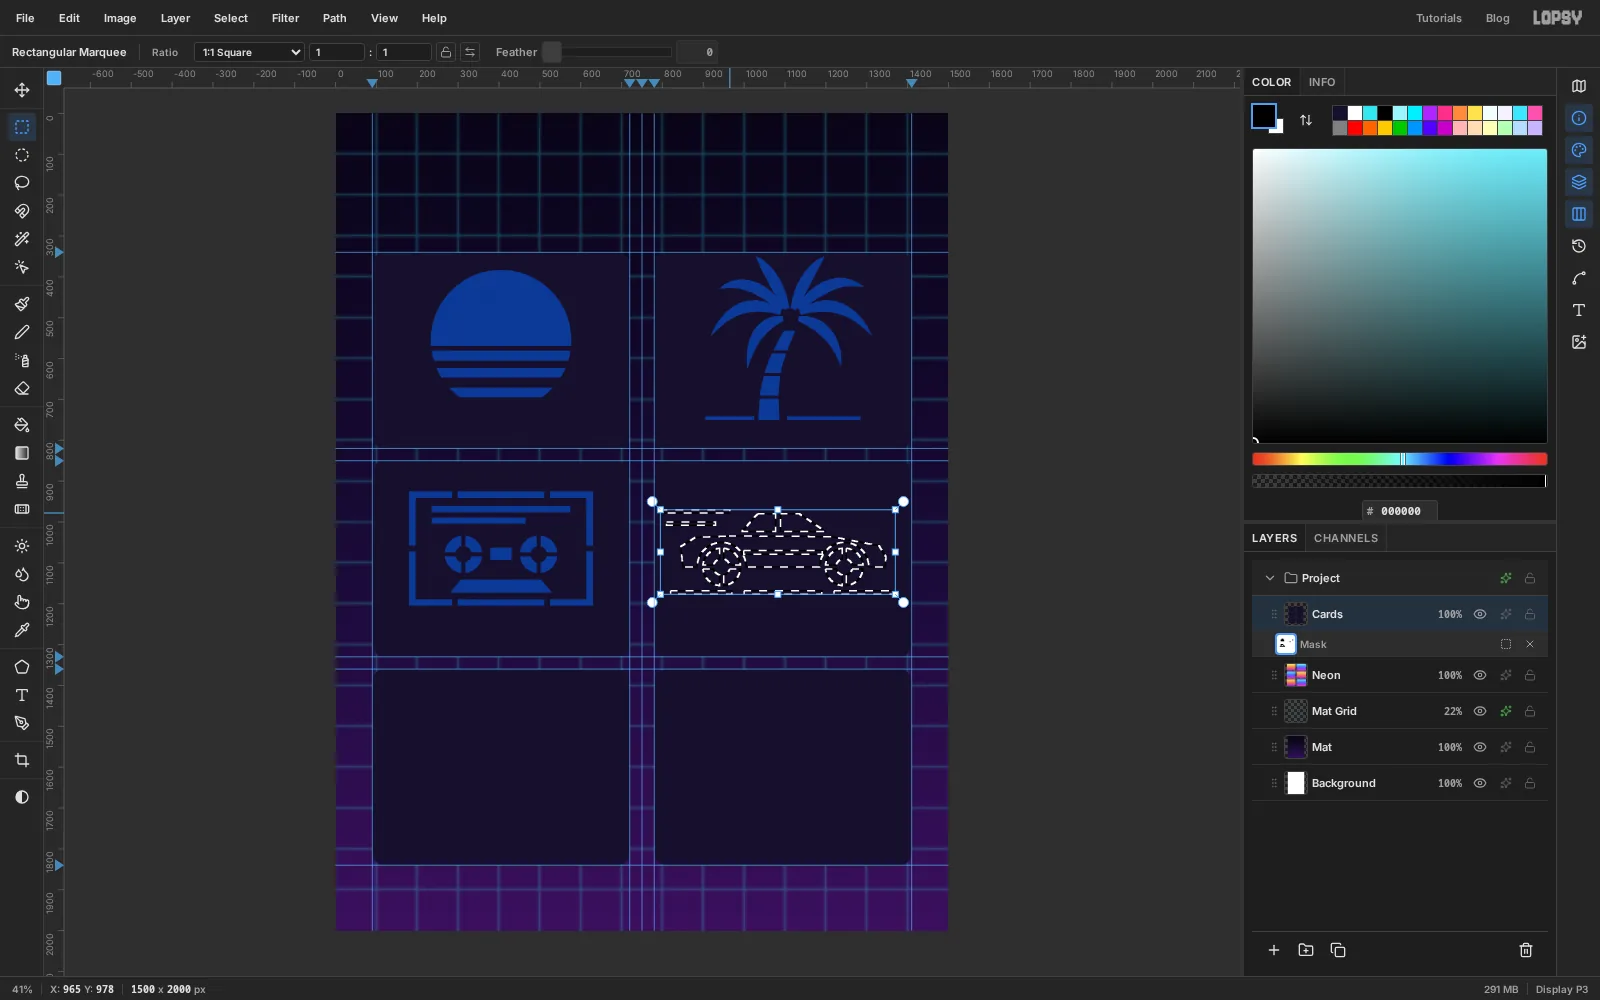
In the middle-right card, lasso the car's lower body as one long low wedge, about 500 px long: a flat bottom, a short tail, a long nose that slopes down to the front bumper.
- Hold Alt and drag a circle with the Elliptical Marquee over each end of the body to cut the wheel arches.
- Alt-drag a thin bar along the door between the arches for a body stripe. It has to reach both arches, or it would be a loose strip.
- Shift-lasso two windows above the body, leaving a gap between them for the pillar and a gap below them so they don't touch the body.
- For each wheel, Shift-drag a circle inside the arch, Alt-drag a smaller circle for the hub, and Alt-drag a thin cross through it, the same way you split the cassette reels.
- Shift-drag three dashes of road under the wheels and two speed lines behind the roof.
Fill with black.
-
Cut the joystick
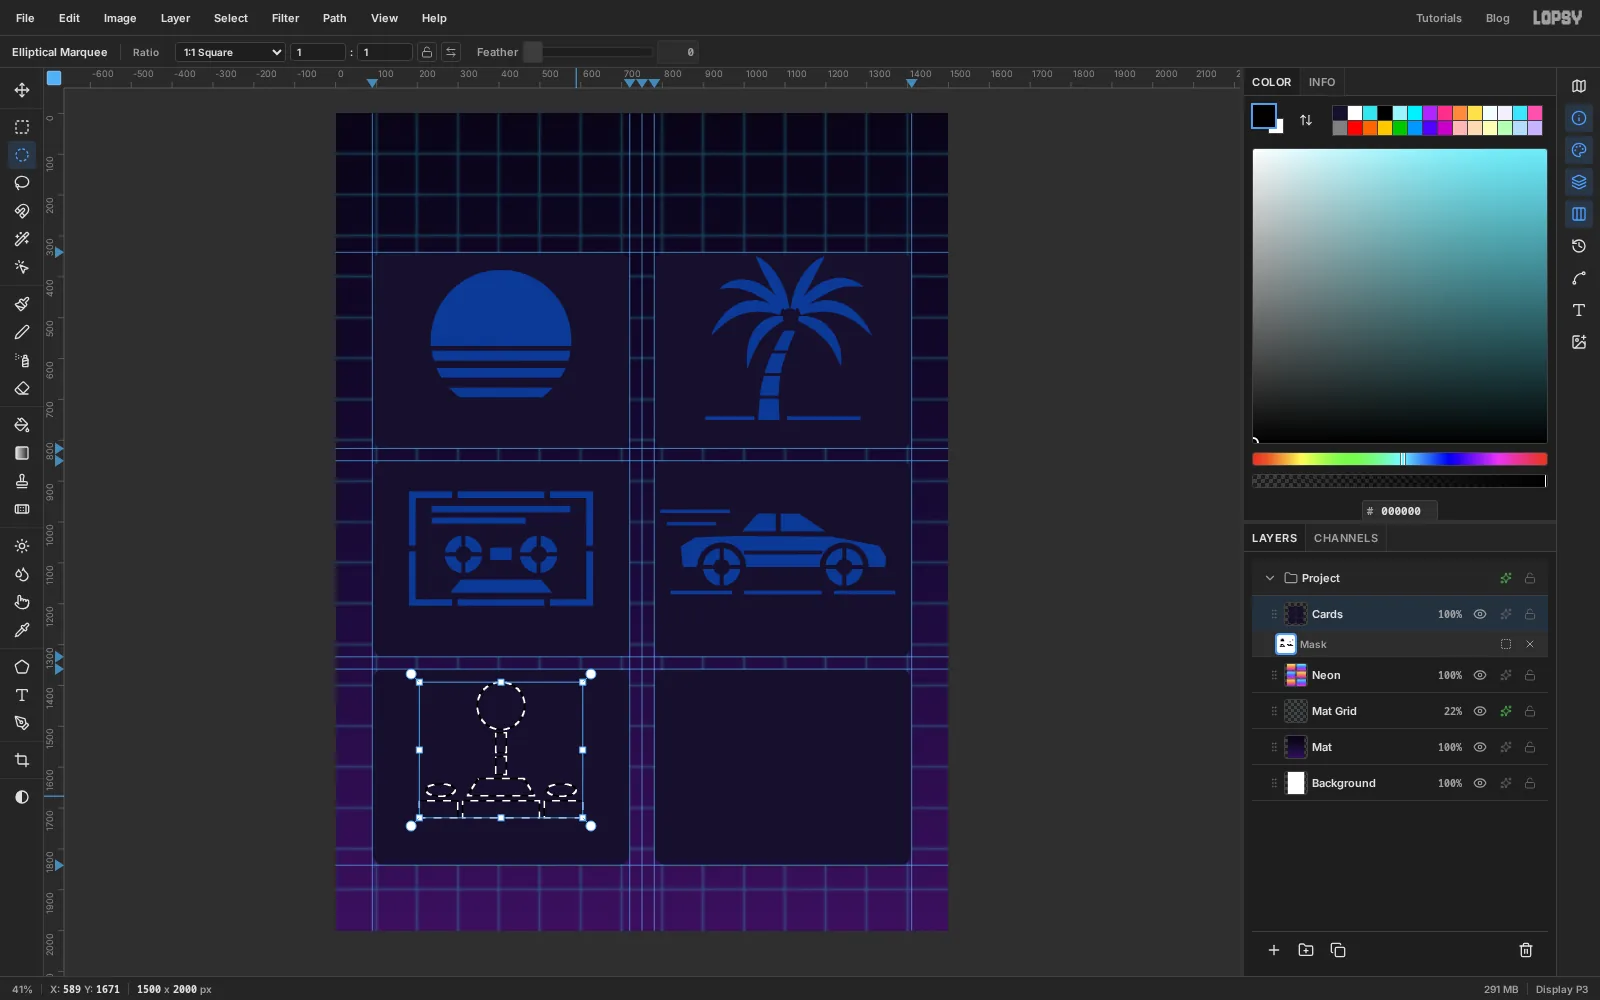
This one is all simple shapes stacked up the middle of the bottom-left card. Drag a circle about 115 px across for the ball. Shift-drag two short rectangles under it for the shaft, with a gap between them. Shift-lasso a trapezoid for the collar, wider at the bottom. Shift-drag a long bar about 400 × 42 px for the base, then Alt-drag two thin vertical bars through it to split it in three. With the Elliptical Marquee, Shift-drag a flat oval above each end of the base for the buttons. Fill with black.
-
Cut the lightning bolt
In the last card, drag a circle about 360 px across with the Elliptical Marquee. Hold Alt and drag a slightly smaller circle from just inside its top-left, leaving a ring about 26 px thick. Without bridges the whole disc inside the ring would fall out, so Alt-drag one thin bar across the full width of the ring through its centre and another down its full height. That breaks the ring into four arcs.
Shift-lasso a zigzag bolt in the middle: down and left from the top, a short step back to the right, then down to a point. Keep it clear of the ring. Shift-lasso three small four-point sparkles in the spaces beside it. Fill with black and deselect.
Click the
Neonlayer and thenCardsagain to leave mask editing. The blue overlay goes away and all six icons light up.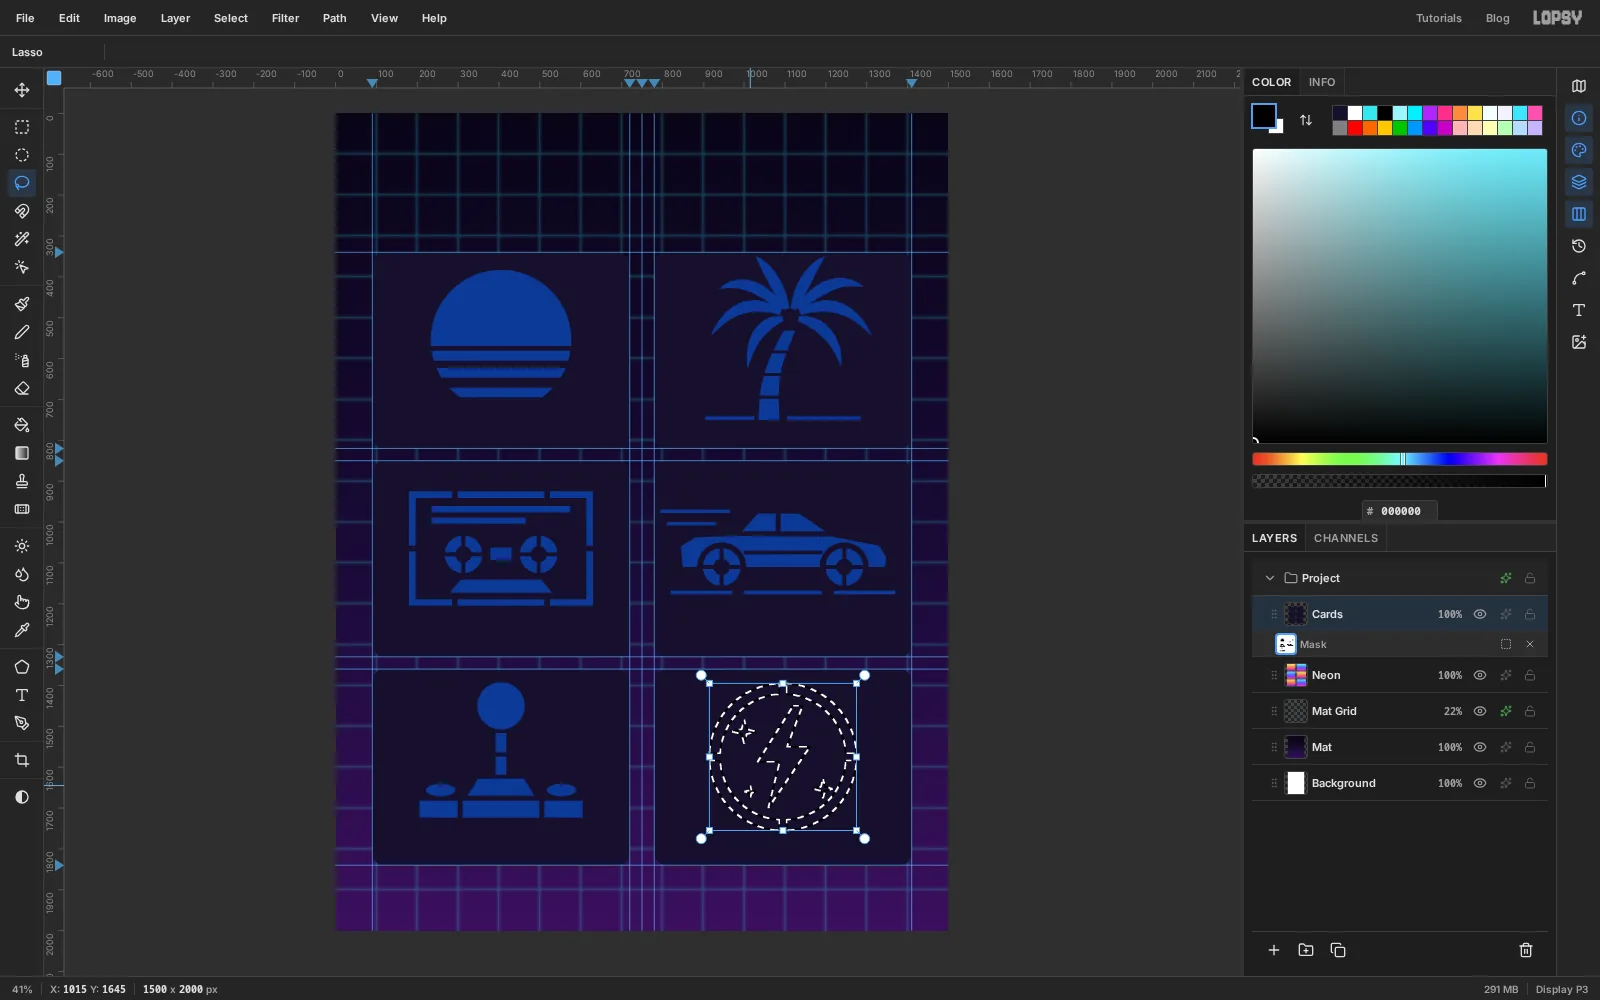
-
Give the cards depth
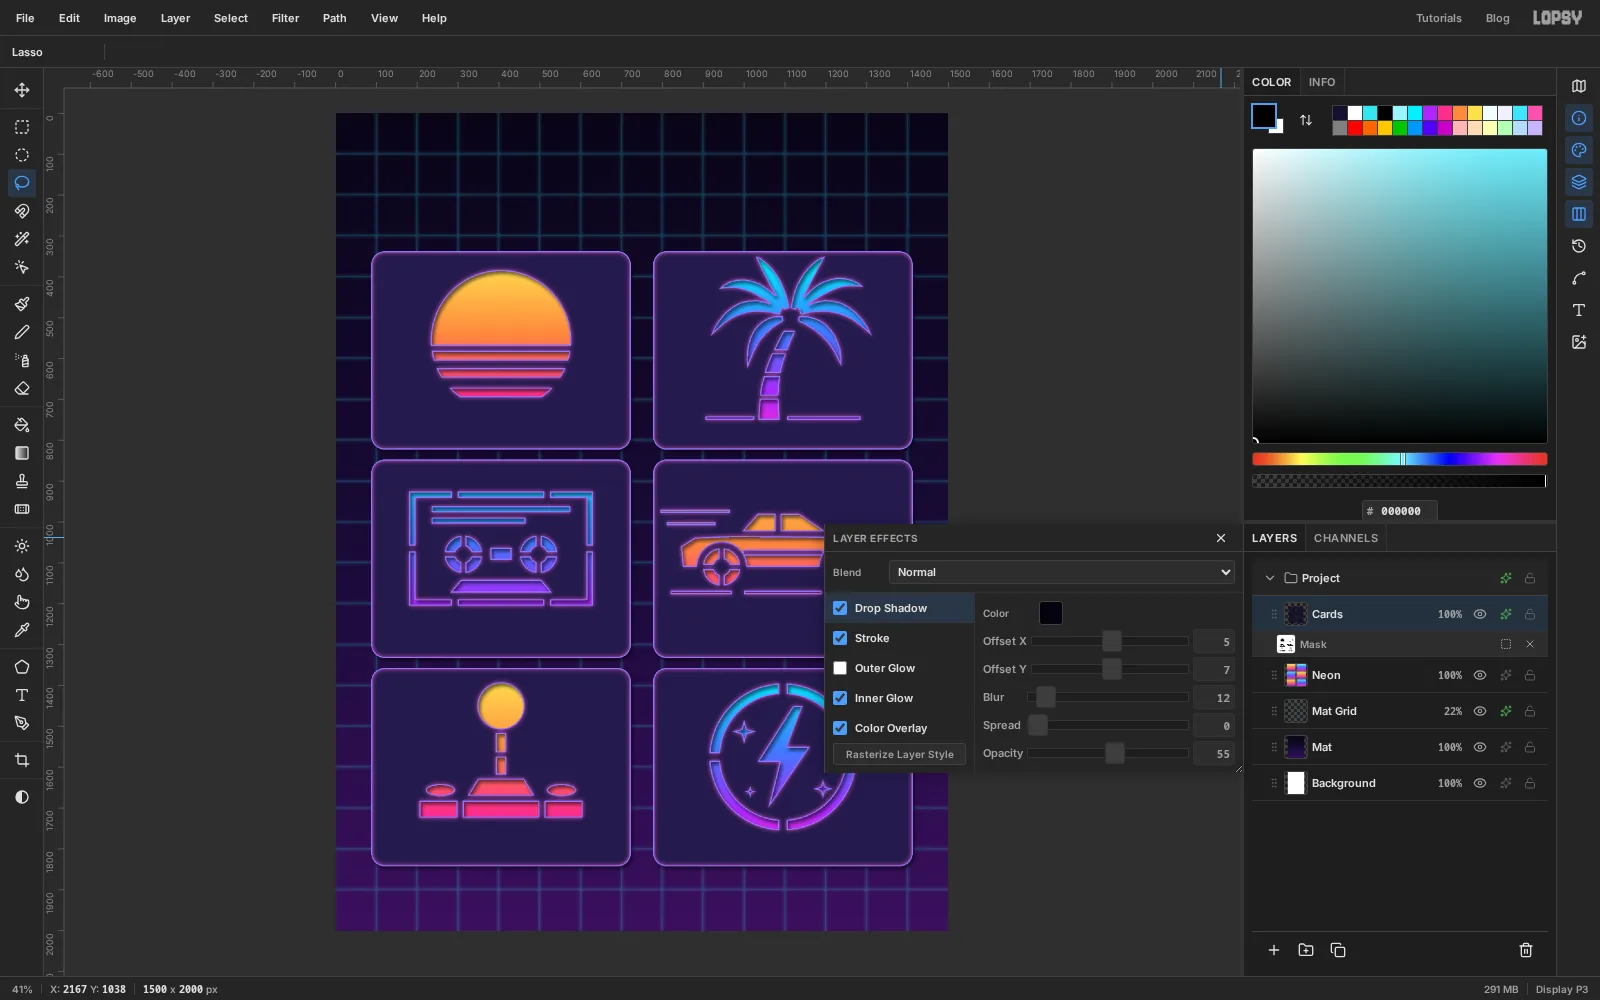
Open the effects for
Cardsand tick four of them. Each one follows the mask, so they wrap around the holes as well as the card edges.- Drop Shadow: Offset X
5, Offset Y7, Blur12, Opacity55, colour . The shadow falls into the holes too, which makes the card look like it has thickness. - Stroke: Width
3, colour . - Inner Glow: Size
16, Opacity80, colour . This is the light spilling onto the cut edges. - Color Overlay: colour . This lifts the cards a shade so they separate from the mat.
Untick View → Show Guides. You're done with them.
- Drop Shadow: Offset X
-
Spray the overspray
A used stencil is never clean. Add a layer called
OversprayaboveCardsand pick the Spray tool (J). Set Size190, Density60, Opacity28and Softness60.Set the foreground to pink and scribble a loose zigzag over the sun, going a little way past the icon on every side but staying off the bottom strip of the card. One pass is enough. Do the same over the coupe and the joystick. Switch to cyan for the palm, the mixtape and the bolt.
Choose Filter → Gaussian Blur… with Radius
2to take the hard edge off the dots. In the layer's effects, set the blend mode to Screen, and drop the layer's opacity to80%.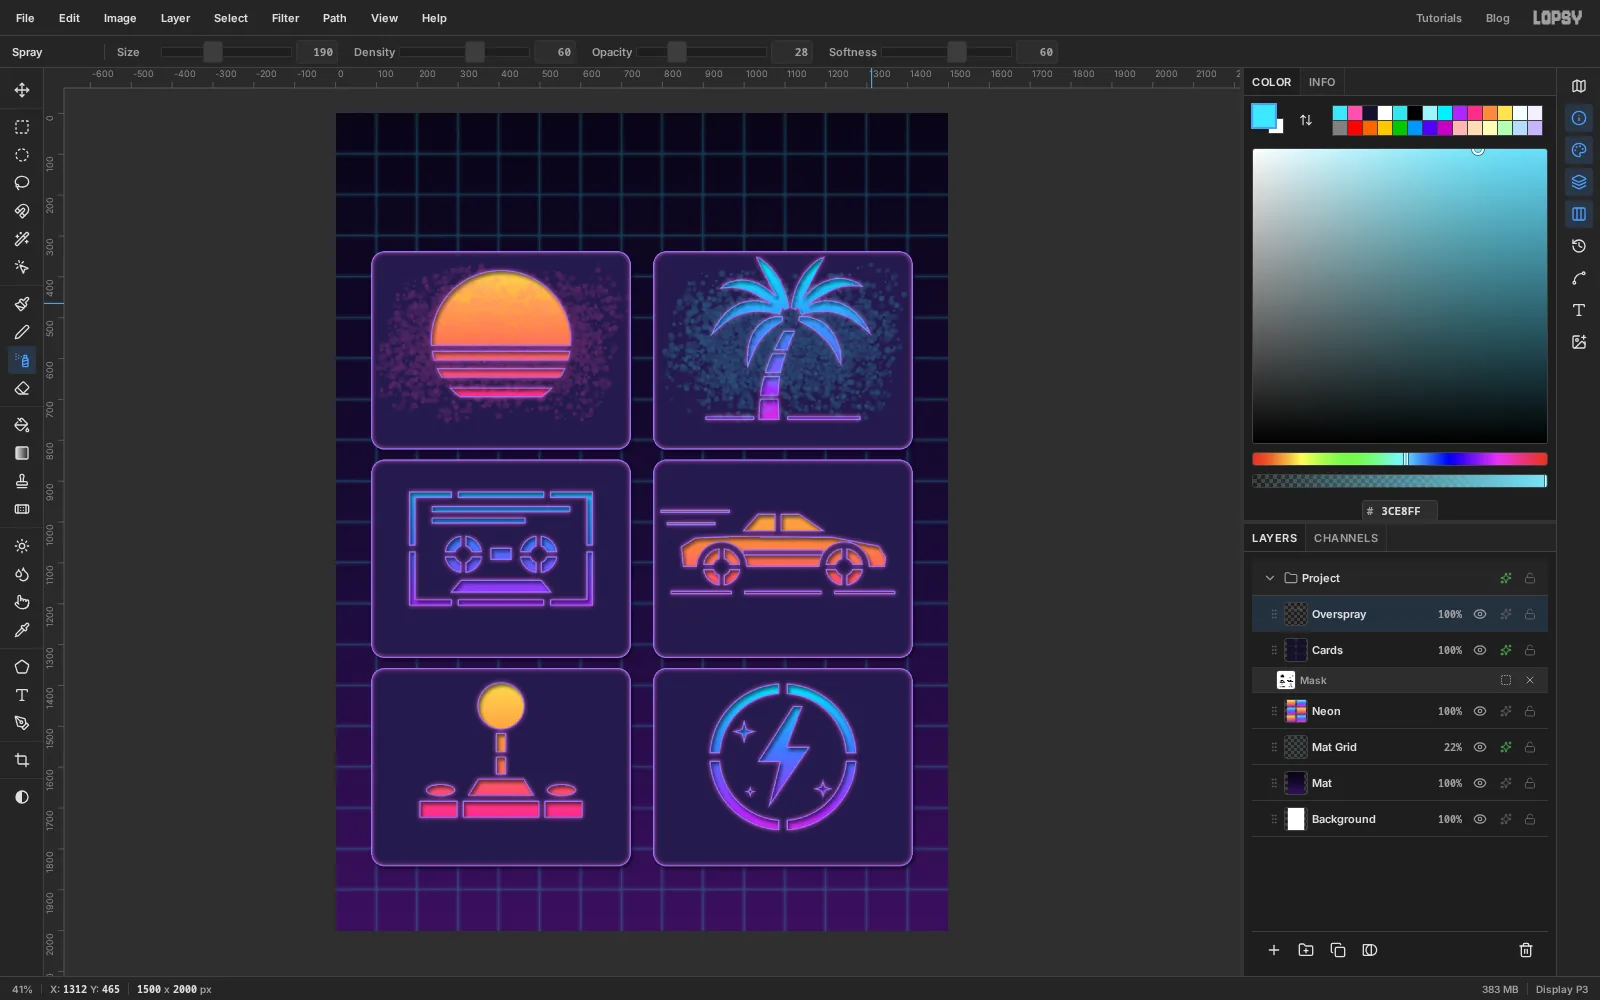
-
Clear the label strips
The labels go along the bottom of each card, and speckles behind small type make it hard to read. With
Overspraystill selected, drag a marquee across the bottom 85 px of the first card, then Shift-drag the same strip on the other five.Choose Select → Feather…, set it to
18and press Delete. The feather fades the overspray out instead of chopping it off in a straight line. Deselect.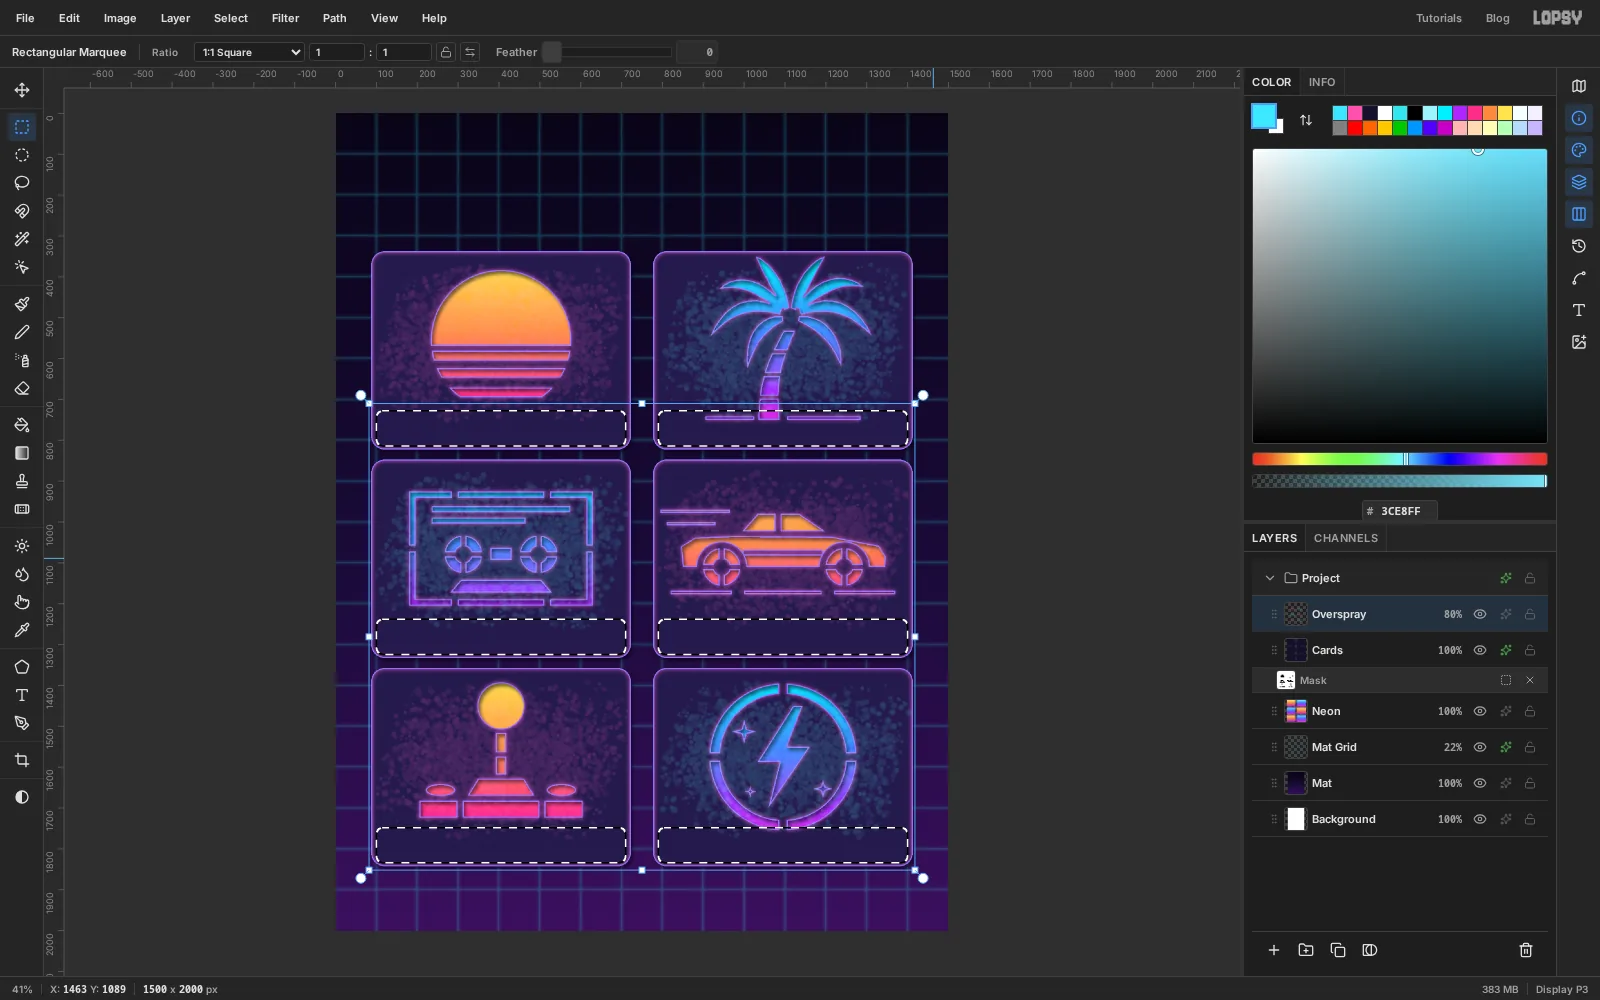
-
Label the plates and add a registration mark
Pick the Text tool (T). Set the font to Share Tech Mono, the size to
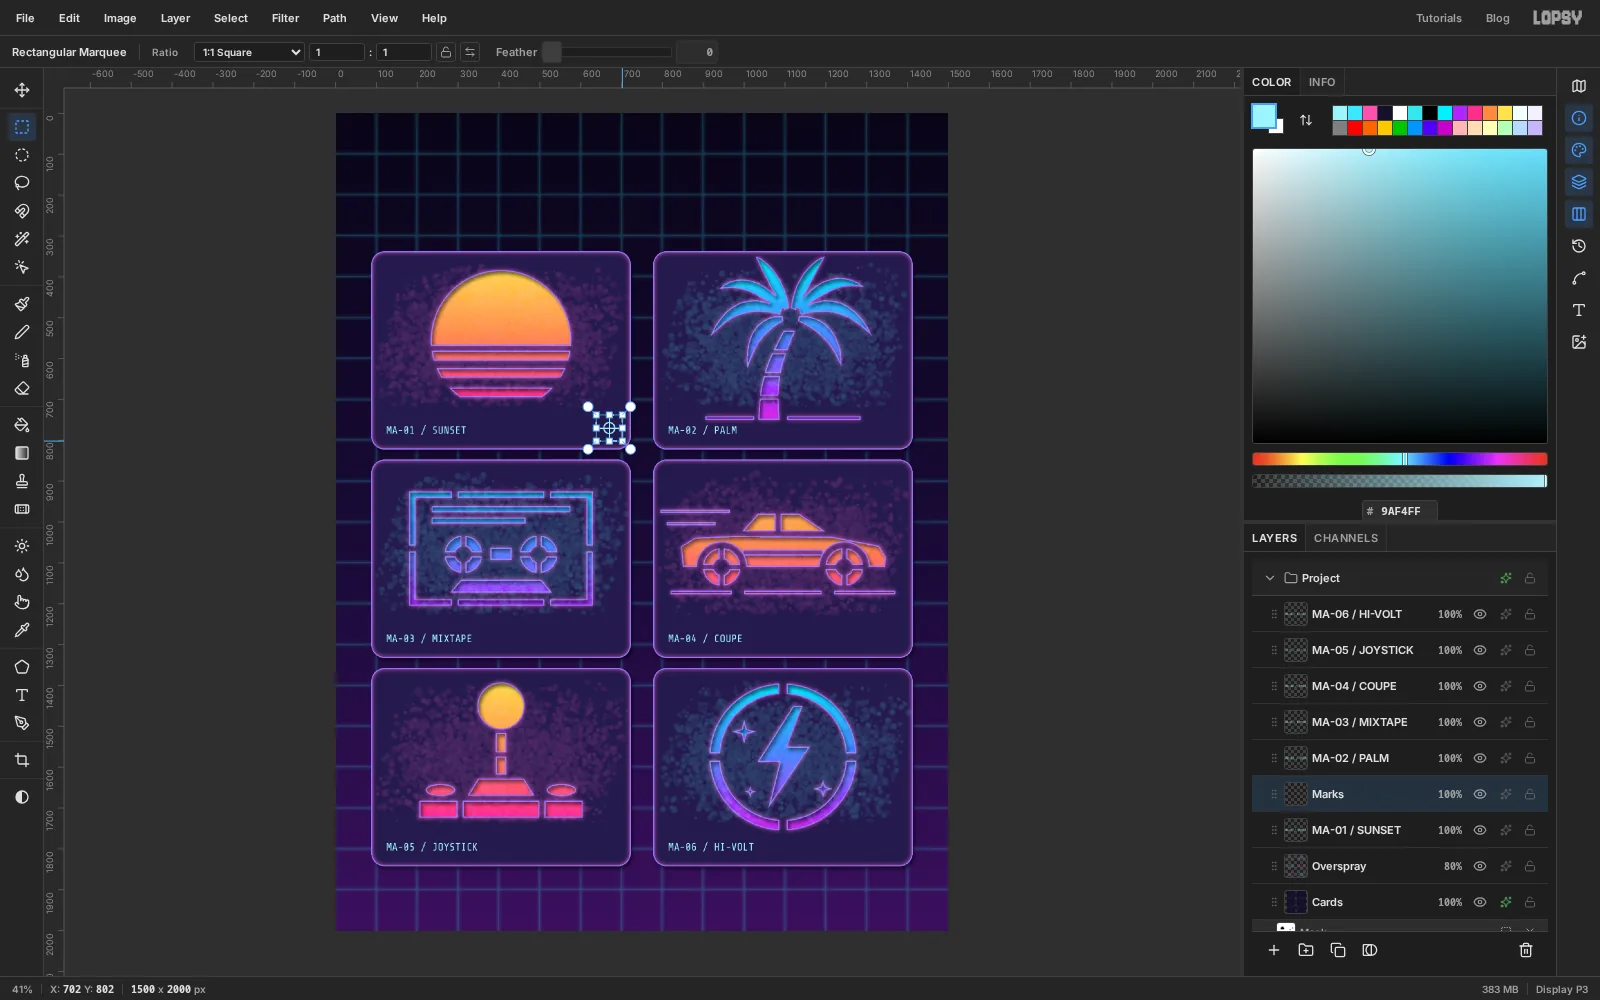
26and the foreground to . Click near the bottom-left corner of the first card, about 35 px in from the left edge and 60 px up from the bottom, typeMA-01 / SUNSETand press Tab to commit. Label the rest the same way:MA-02 / PALM,MA-03 / MIXTAPE,MA-04 / COUPE,MA-05 / JOYSTICKandMA-06 / HI-VOLT. Starting each label at the same spot in its card is what makes them look like a set.Registration marks are the little crosshairs printers use to line sheets up. Click the top label in the Layers panel and add a layer called
Marks, so it sits above all six. In the bottom-right corner of the first card, drag a circle about 30 px across with the Elliptical Marquee, fill it with , choose Select → Shrink… by3and press Delete to leave a thin ring. Deselect. With the Pencil at Size3, click to the left of the ring and Shift-click to the right of it, then do the same from above it to below it.Draw a marquee around the finished mark and press Cmd+C. Then, for each of the other five cards:
- Press Cmd+V. The copy lands on top of the original on its own layer.
- Press Cmd+D, pick the Move tool (V) and drag the copy to the same corner of the next card.
- Press Cmd+E to merge it down into
Marks.
-
Tear off a strip of tape
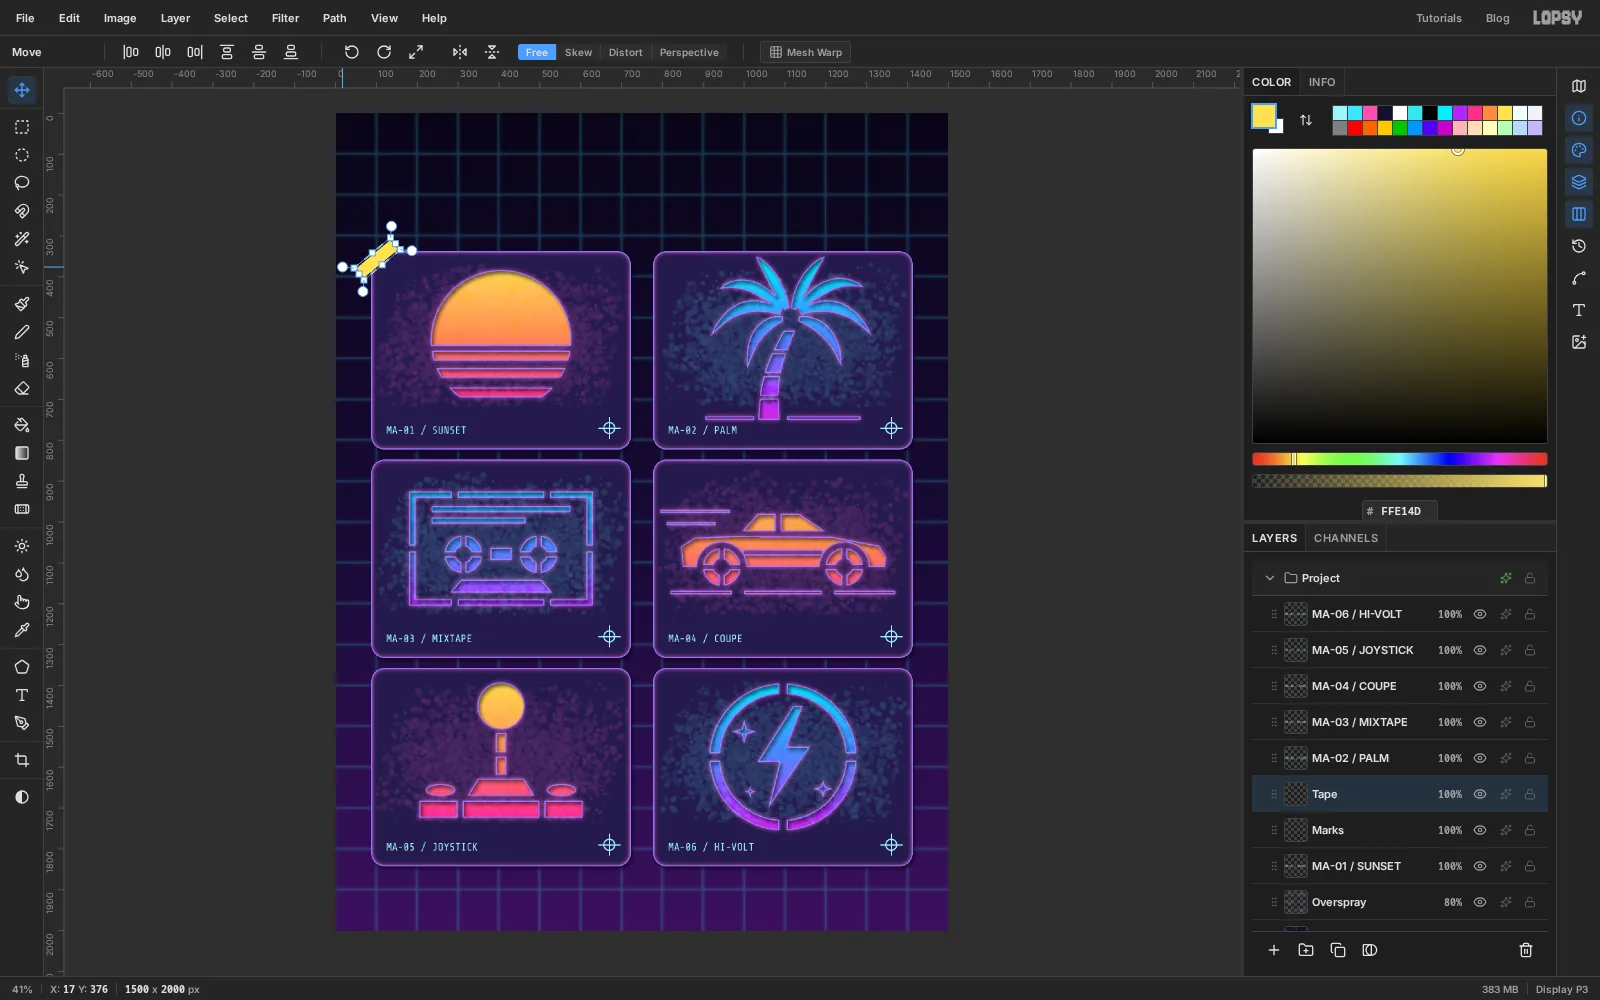
Add a layer called
Tape. Drag a marquee about 108 × 30 px over the top-left corner of the first card, so it sits half on the card and half on the mat, and fill it with .Draw a slightly bigger marquee around the strip and pick the Move tool. Handles appear around the selection. Drag the round rotation handle just outside the top-left corner anticlockwise, until the strip sits at about 40° across the corner. Press Cmd+D to commit.
-
Tape down every card
The right-hand cards need the strip mirrored. Choose Layer → Duplicate Layer. Draw a marquee around the strip, and with the Move tool click Flip Horizontal in the options bar. Deselect, drag the flipped strip across to the top-right corner of the top-right card and press Cmd+E to merge it down.
Tapenow holds a matching pair.Duplicate the layer again and drag the copy straight down 510 px, so the pair lands on the same corners of the middle row. Duplicate that copy and drag it down another 510 px to the bottom row. Press Cmd+E twice to fold both copies back into
Tape.Set the layer's opacity to
90%and add a Drop Shadow with Offset X3, Offset Y4, Blur6, Opacity60and colour .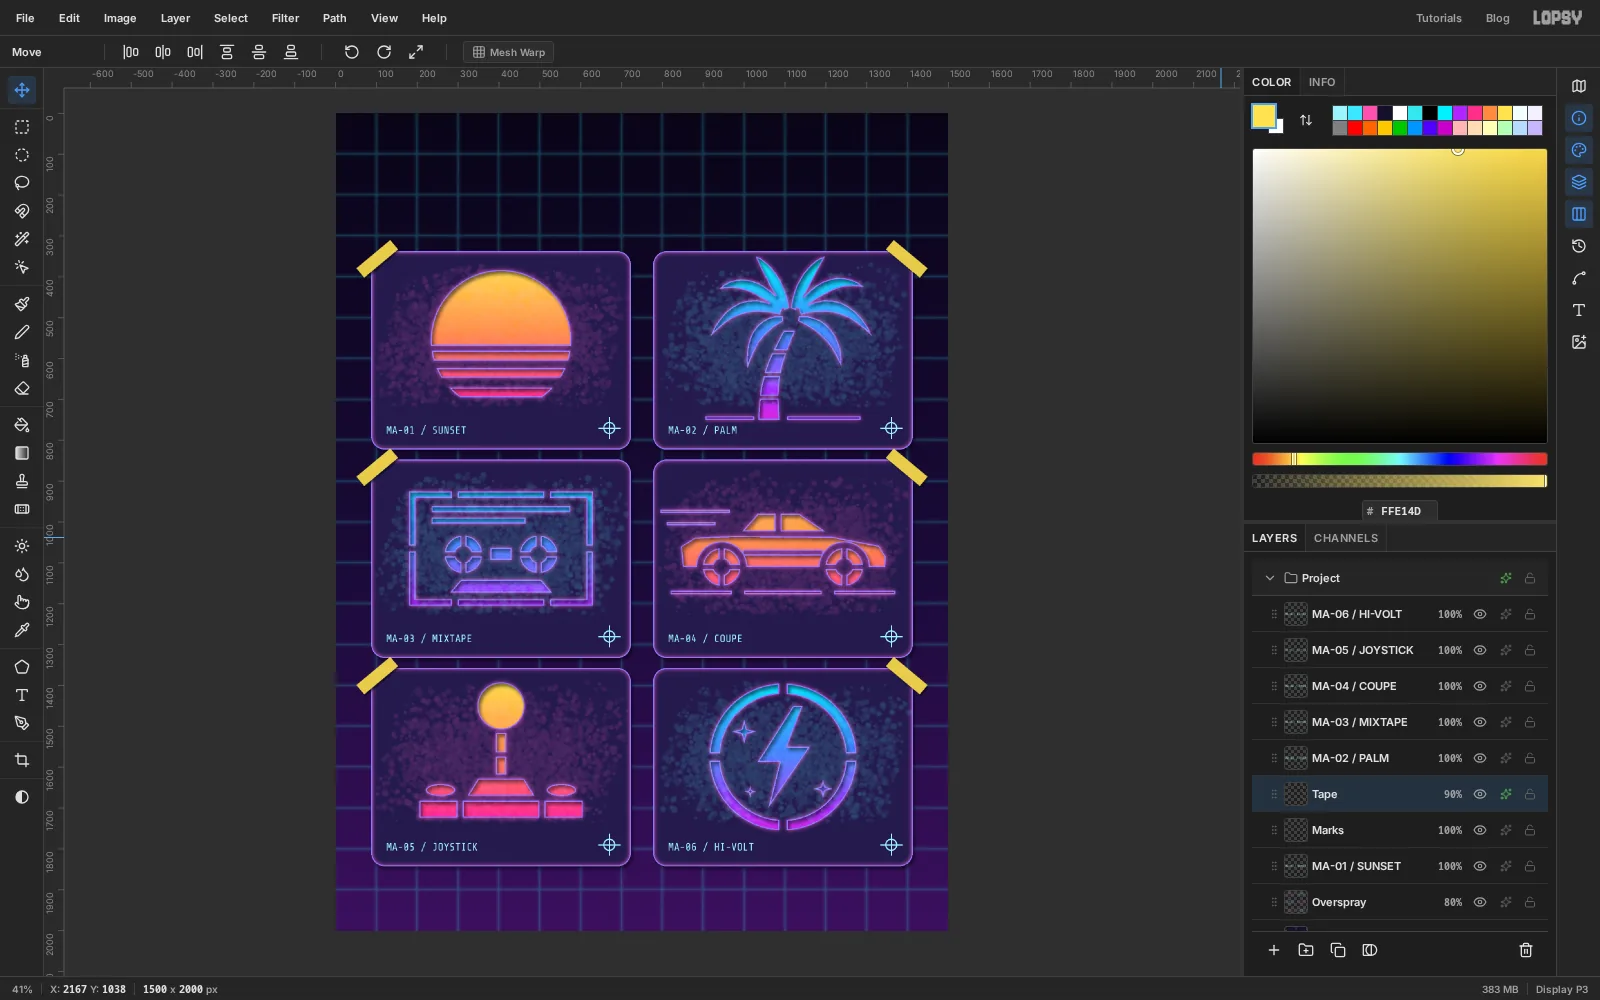
-
Set the title
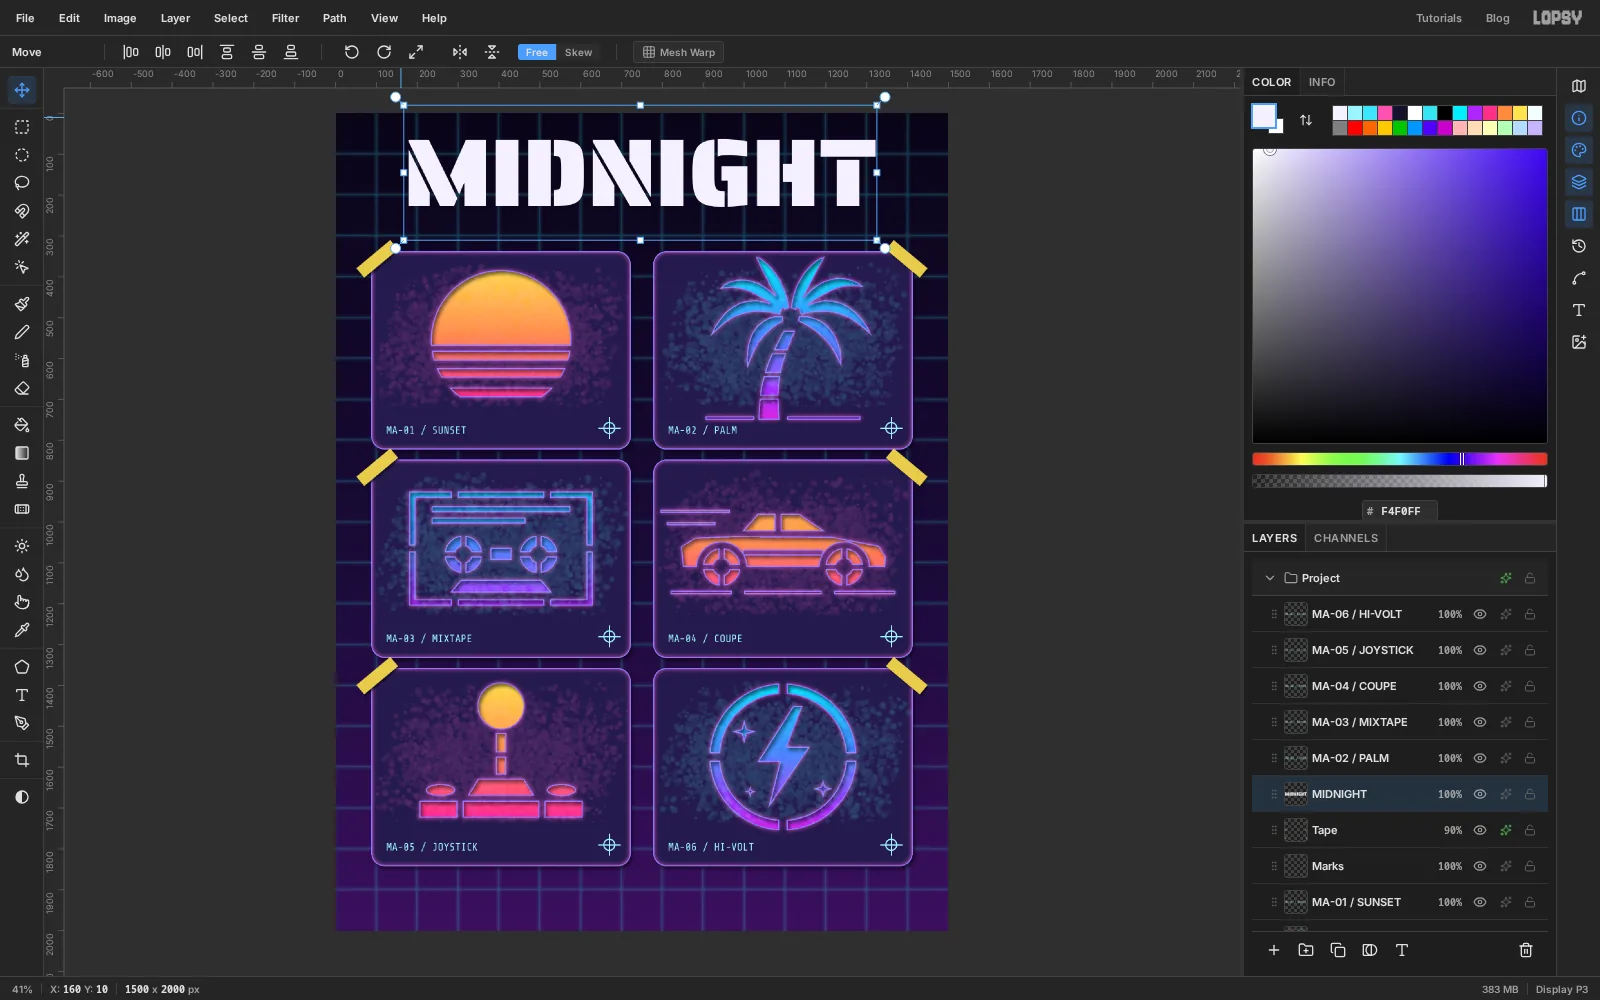
Tapeshould still be selected. If a label is selected instead, clickTapefirst, or the font change will restyle that label. Pick the Text tool, set the font to Saira Stencil, the weight to Black, the size to236and the foreground to . Click near the top-left corner of the canvas, typeMIDNIGHTand commit with Tab.Switch to the Move tool and click Align center horizontally in the options bar. Then nudge the word with the arrow keys (Shift moves 10 px at a time) until the tops of the letters are about 60 px from the top edge. That leaves a strip above for a line of small type and a gap below before the cards.
-
Mask a chrome gradient into the letters
Chrome lettering is a sky reflected above a horizon and a sunset reflected below it. Add a layer called
Chromeabove the title. In the Gradient Editor set seven stops: at the left, at 30%, at 50%, at 53%, at 58%, at 80% and at the right. The three stops crowded around the middle make the hard horizon line.Drag a marquee around the whole word, then drag the gradient from the top of the letters to the bottom. Deselect.
Now Cmd-click the
MIDNIGHTthumbnail in the Layers panel. That loads the letters as a selection. Click theChromelayer and click Add Mask. With a selection active, the new mask keeps only what's selected, so the band is cut down to the letters. The type itself stays editable underneath.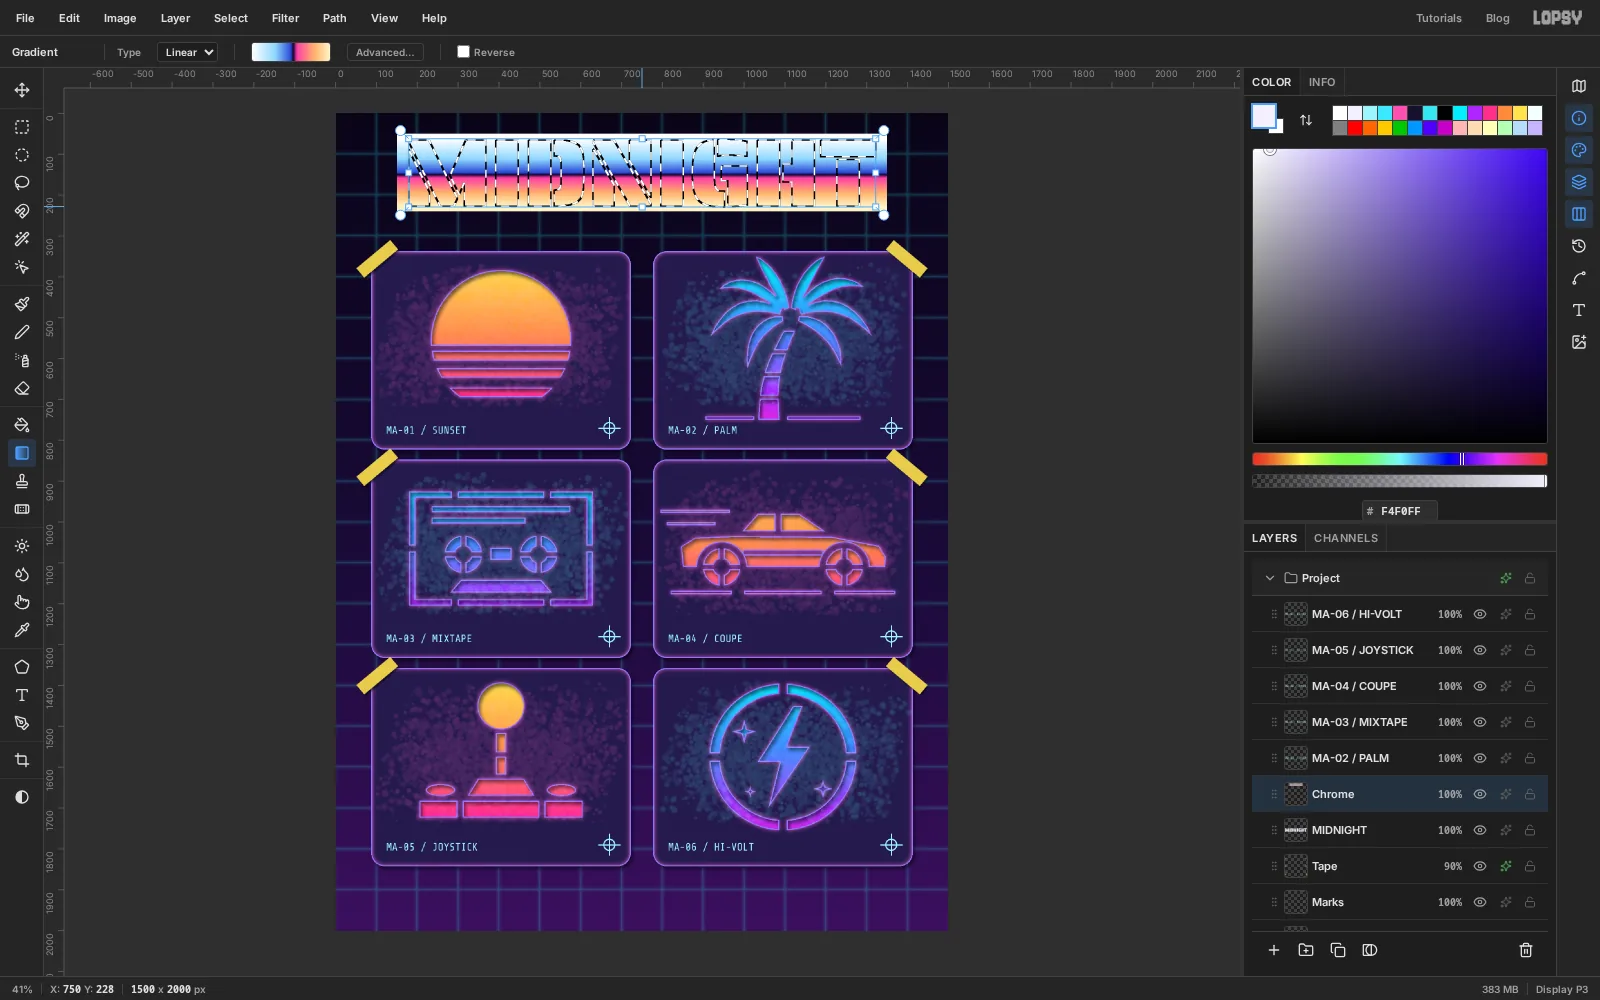
-
Outline and extrude the chrome
Click the
MIDNIGHTlayer and thenChromeagain to leave mask editing. Open the effects forChrome:- Stroke: Width
3, colour - Outer Glow: Size
30, Opacity75, colour
Then open the effects for the
MIDNIGHTtext layer underneath and tick Drop Shadow with Offset X9, Offset Y9, Blur0, Opacity100and colour . A hard shadow with no blur reads as a block of magenta behind the letters, like the side of extruded type.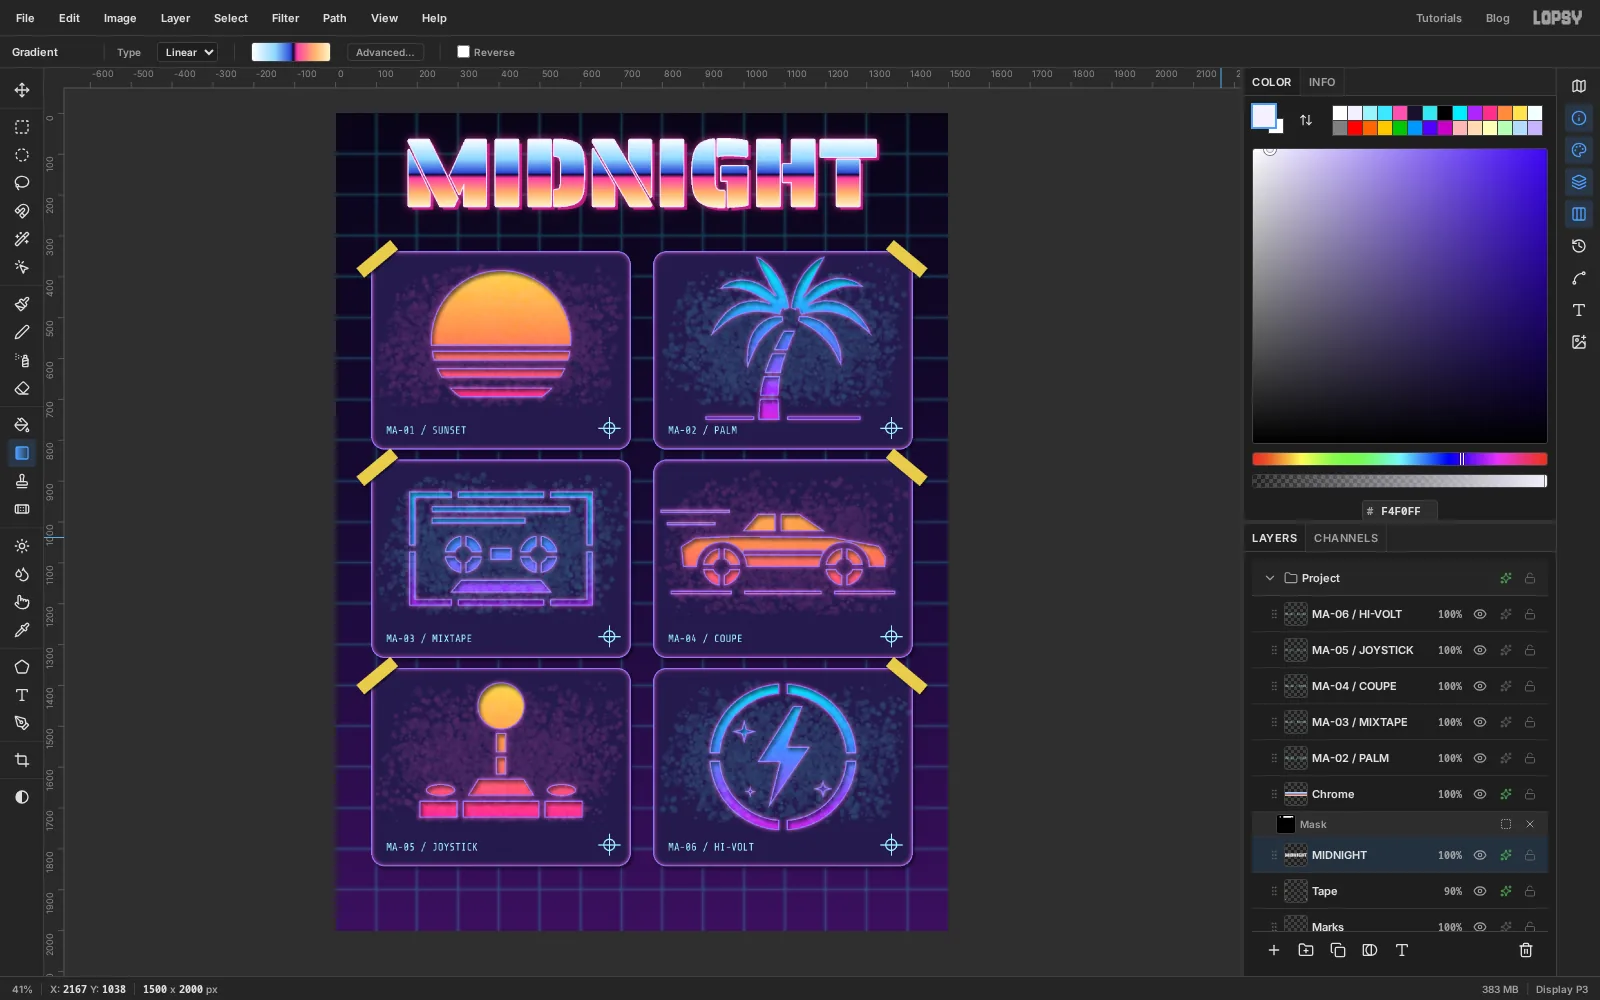
- Stroke: Width
-
Add the script
Outrun logos pair heavy capitals with a fast brush script. Click the
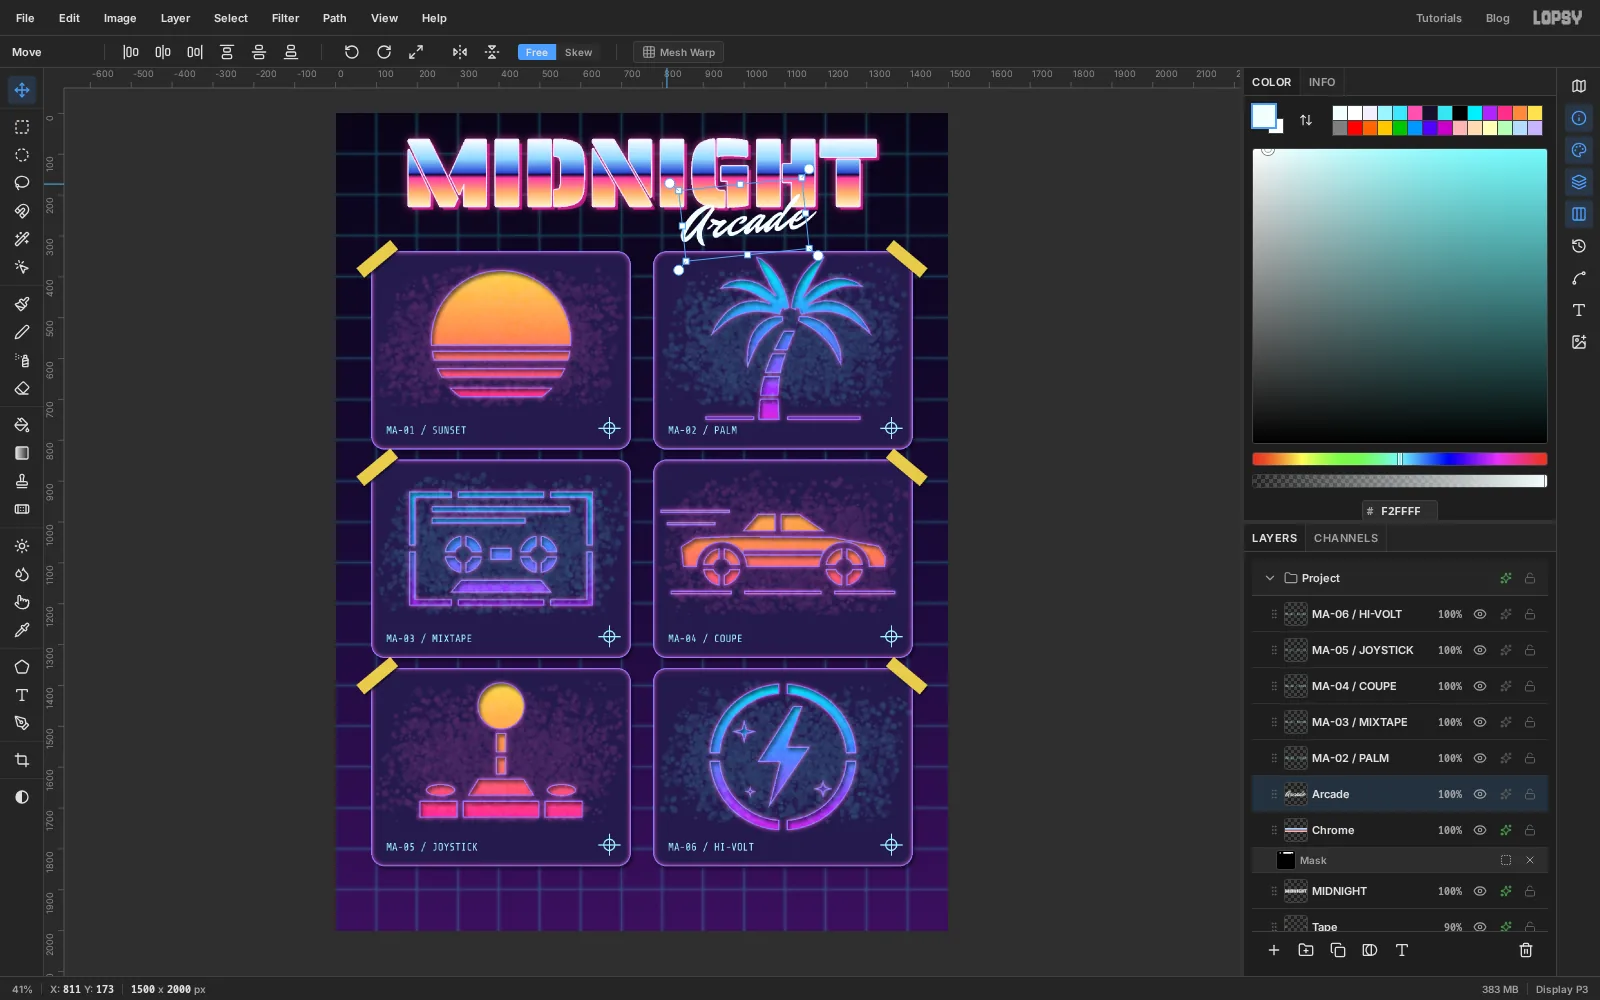
Chromelayer, pick the Text tool and set the font to Mr Dafoe, weight Regular, size124and the foreground to .A click inside an existing text box edits that text, and the title's box is taller than its letters. So click in the empty mat below the cards, type
Arcadeand commit. Then drag it up with the Move tool until it overlaps the bottom of the letters G H T.With the Move tool still active, drag the rotation handle outside the top-left corner of its box anticlockwise by about 6°. Press Esc to commit. Nudge the word so its last letter ends under the T and the lowest part of the script stays about 25 px above the cards. It must not touch them.
-
Light the script
White script over a cream and pink chrome fill needs help to read. Open the effects for
Arcade:- Stroke: Width
6, colour . The dark outline separates the script from the title. - Outer Glow: Size
22, Opacity90, colour .
Cyan against the warm chrome keeps the two words apart even where they overlap.
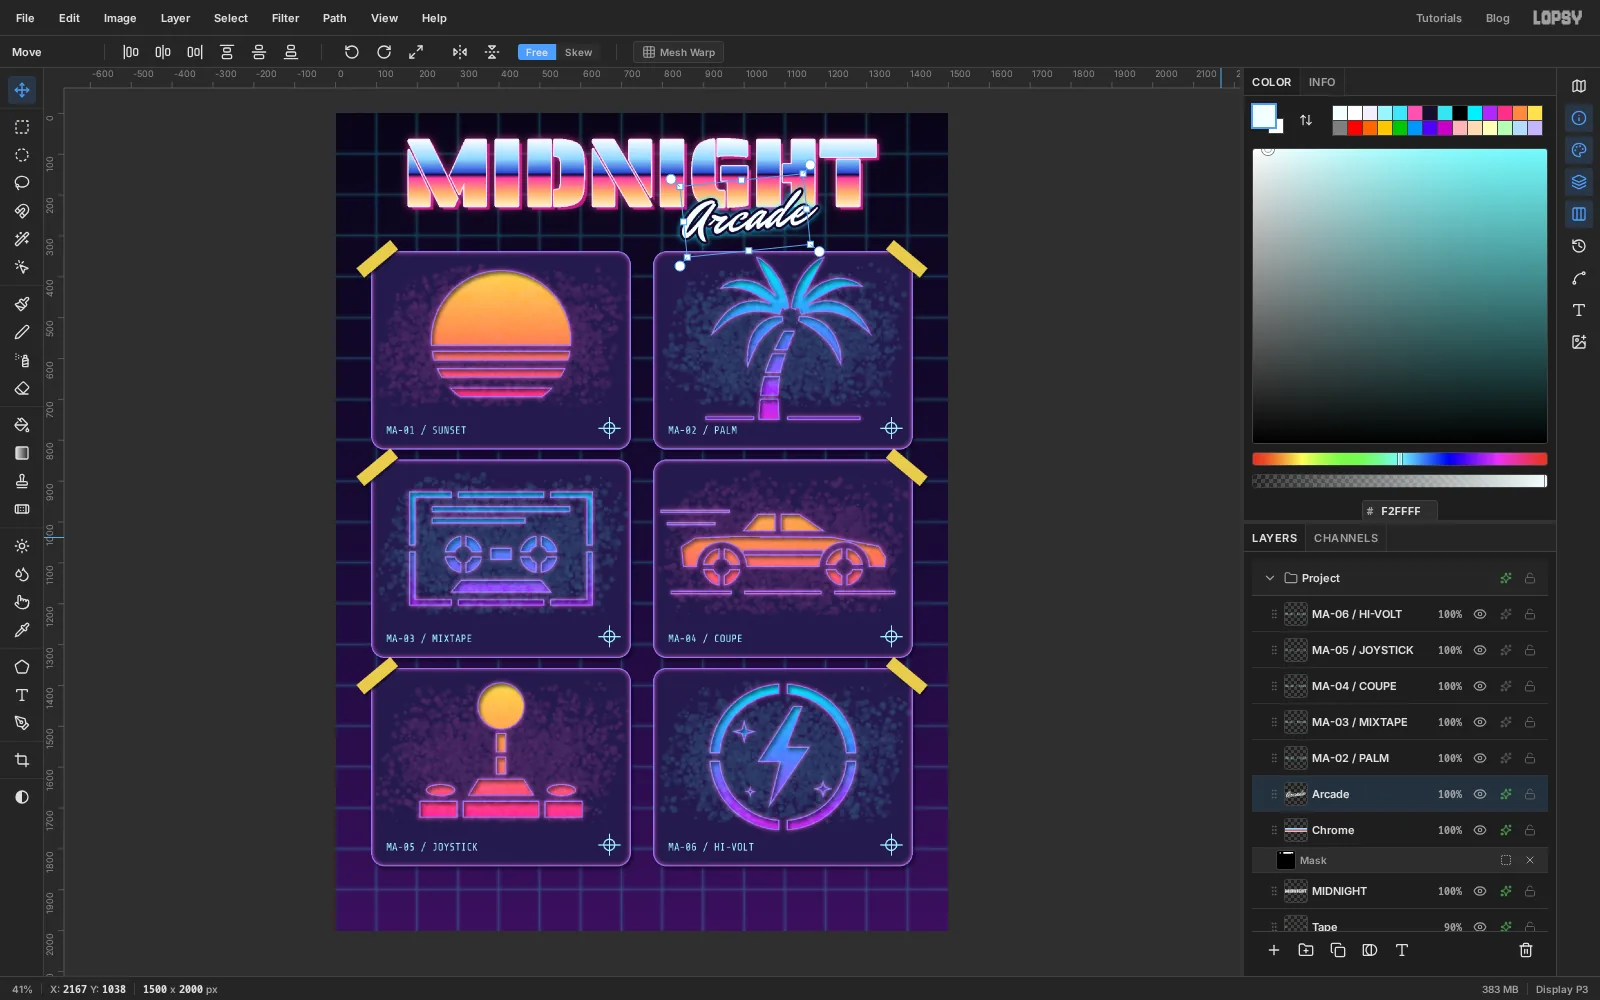
- Stroke: Width
-
Add the strap line and the footer
Click
Tape, then add a layer calledSwatches. With the Shape tool still on Rectangle, set Corner Radius14. Draw five squares about 72 px across in a row along the bottom-left margin, changing the Fill before each one: , , , and . Line the first one up with the left edge of the cards. Give the layer an Outer Glow with Size14, Opacity55and colour .Click the
Swatcheslayer, pick the Text tool and set Share Tech Mono at size24in . Type each of these in the empty mat at the bottom, then drag it into place with the Move tool:M/A STENCIL CO. — EST. 1986goes in the top-left corner. Line its left edge up with the cards and sit it about 22 px from the top.CONTACT SHEET 01goes in the top-right corner, with its right edge on the right edge of the cards and its capitals level with the first line.
For the footer note, change the foreground to , click in the mat to the right of the swatches and type
SIX PLATES / PRINT AT 1:1 / CUT ON THE GLOW, press Enter, and typeKEEP THE BRIDGES. SPRAY FROM 20 CM. REPEAT.Commit, set Align to Right in the options bar, and move the block so its right edge sits on the right edge of the cards and it's centred on the swatches.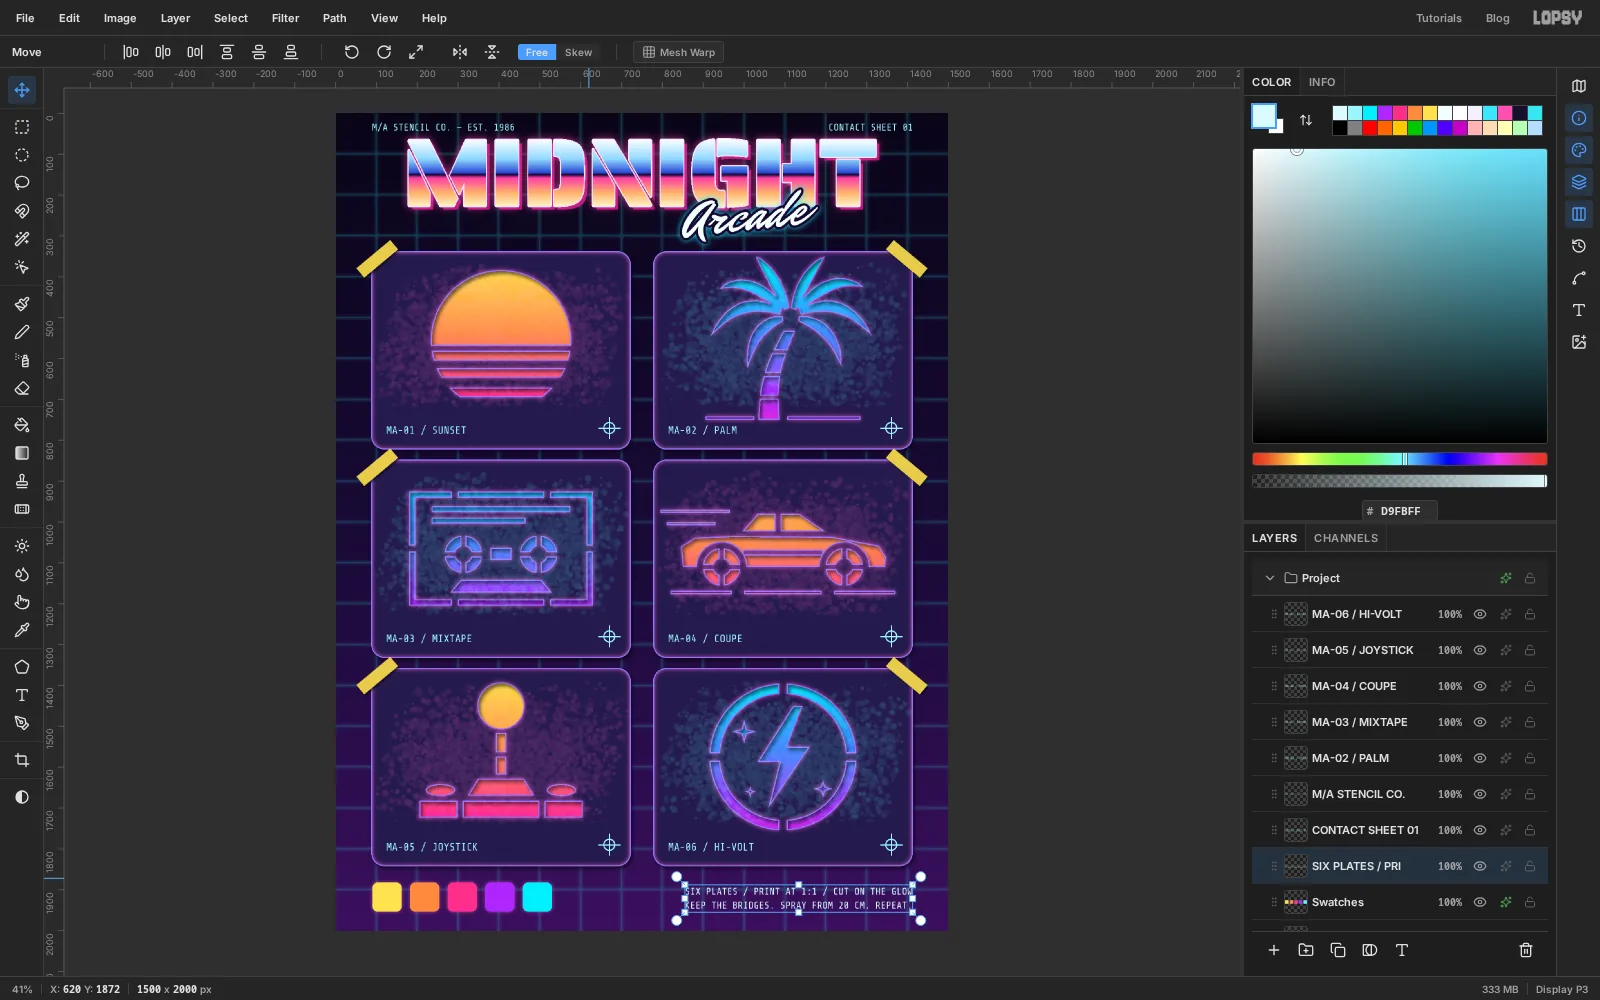
-
Group the layers and test the groups
Twenty loose layers are hard to manage. Click
MIDNIGHTin the Layers panel, then Cmd-clickChrome,Arcadeand the two strap lines. Choose Layer → Group Layers and rename the groupHeader.Next click
Neon, then Cmd-clickCards,Overspray, the six labels,MarksandTape, and group those asPlates. Last, click the footer note, Cmd-clickSwatchesand group them asFooter.Click the
Headergroup and drag on the canvas with the Move tool. The title, its chrome mask, the script and the strap lines all move as one. If you were only testing, press Cmd+Z to put it back. If the header needs to sit a little higher or lower on your sheet, this is the way to move it.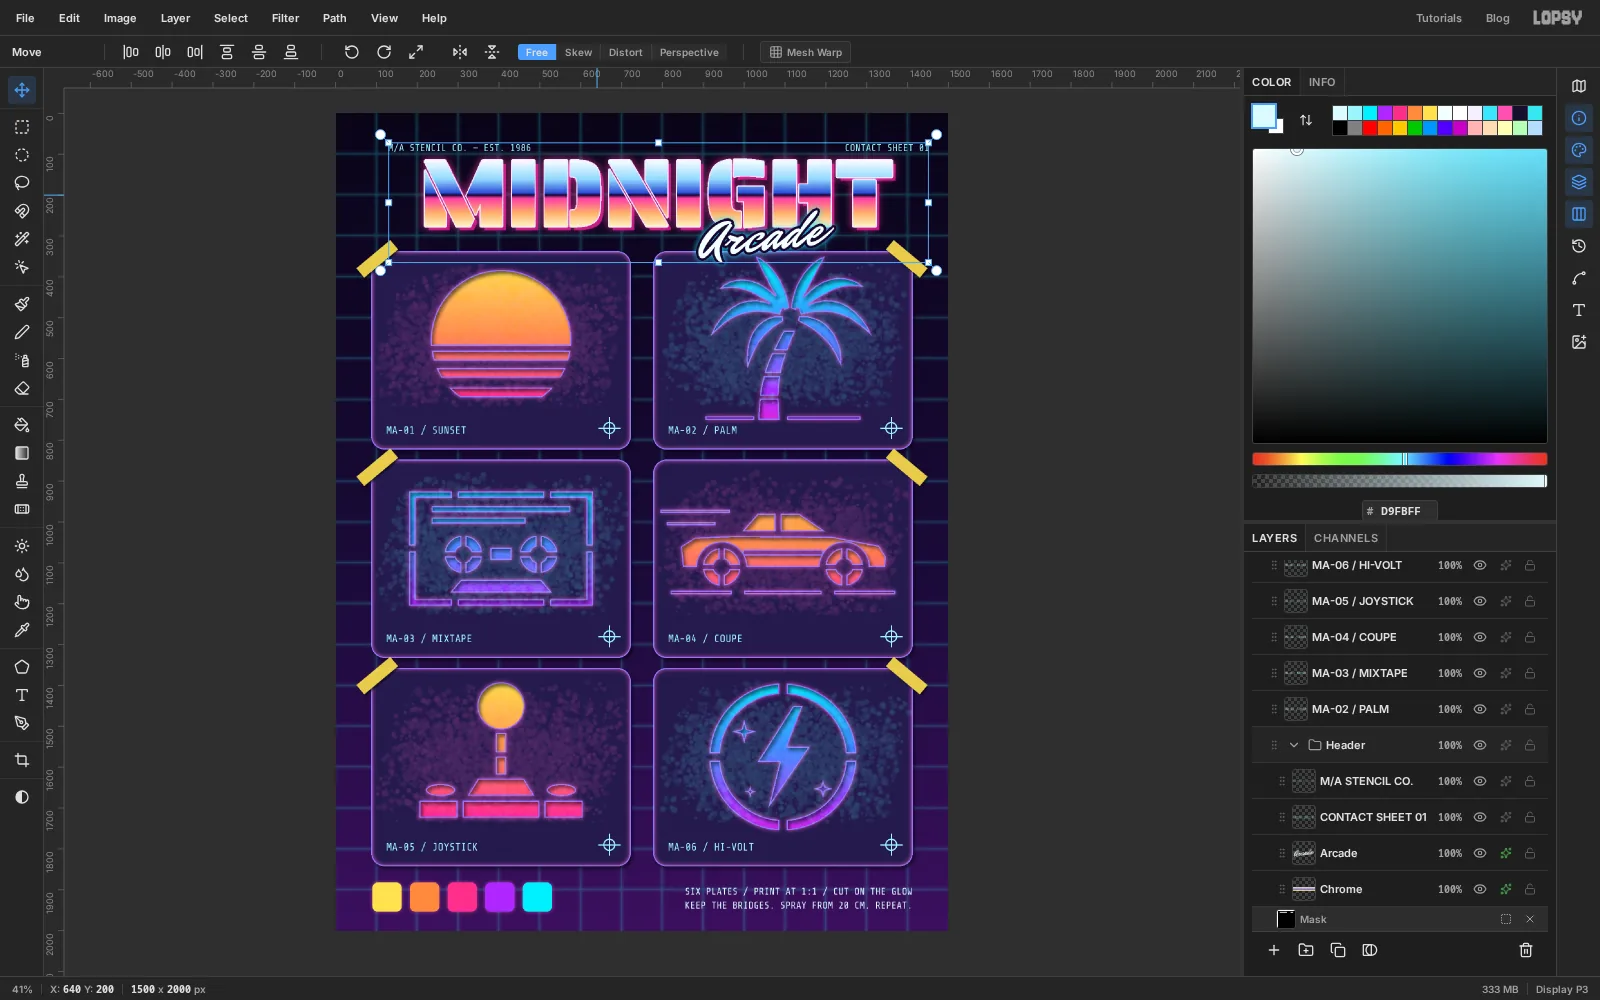
-
Boost the colour
Click the
Projectgroup at the top of the Layers panel and choose Layer → Adjustment Layer…. Lopsy keeps adjustments on groups, so the drawer that opens applies to everything insideProject. Expand Hue / Saturation and set Saturation to14. Close the drawer.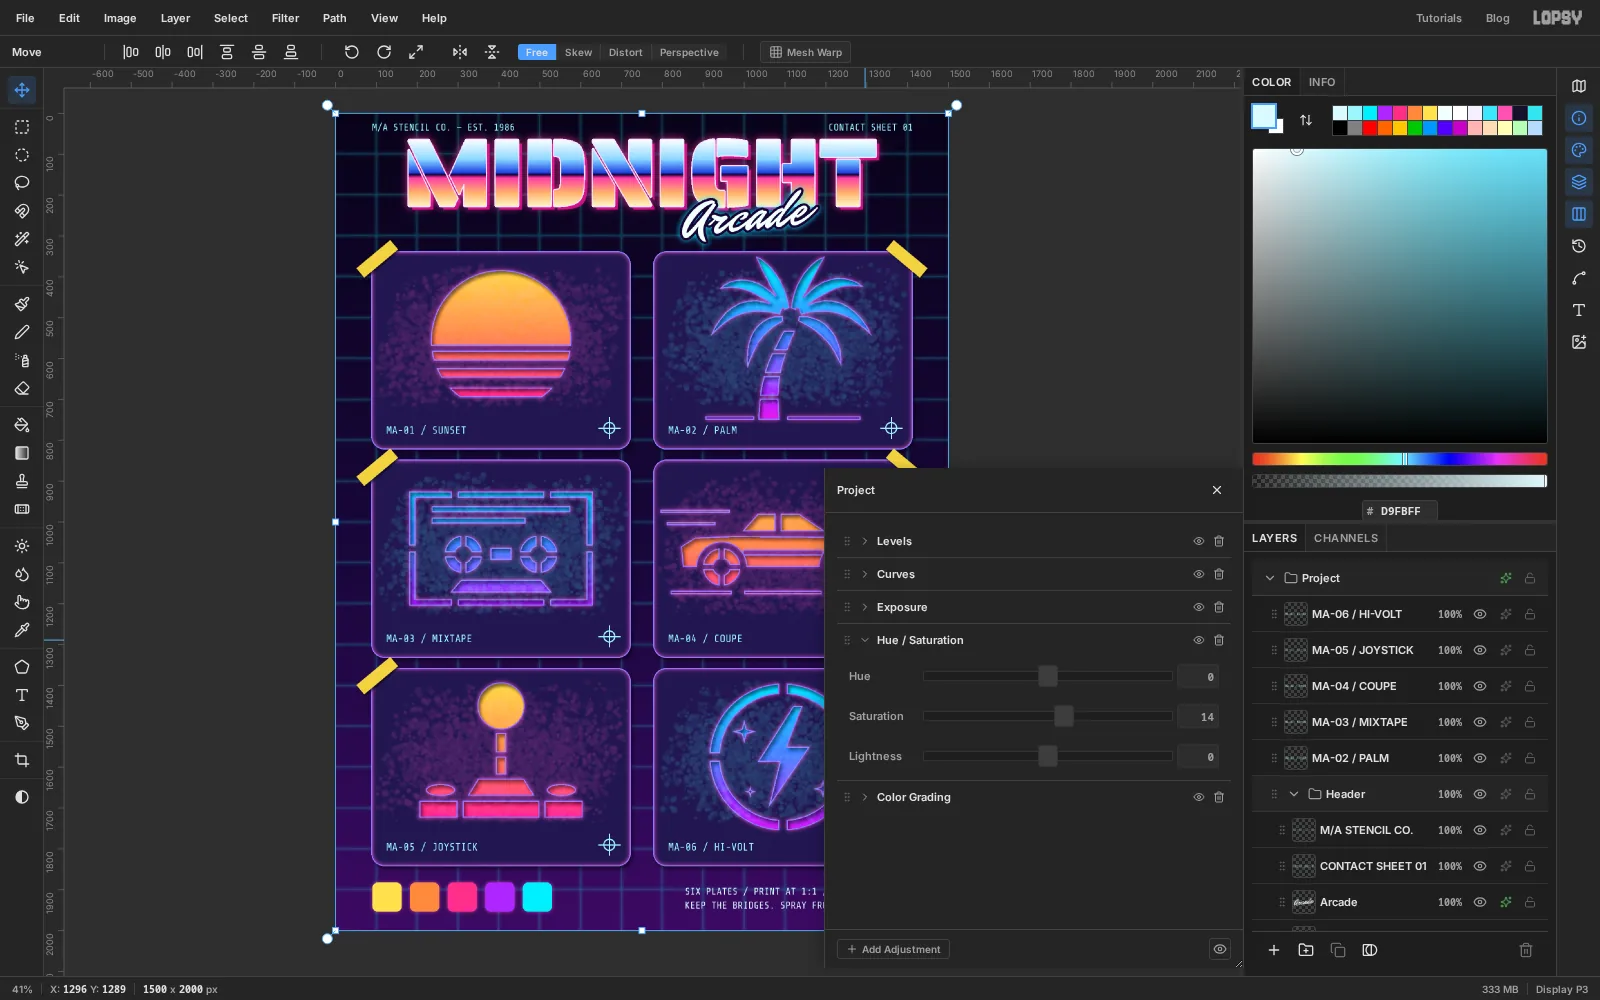
-
Finish with a vignette and grain
Click the
Projectgroup and add a layer calledVignette. With the Gradient tool set to Radial, make three stops, all : fully transparent at the left, fully transparent at 62%, and fully opaque at the right. (The Opacity bar under the colour picker sets a stop's transparency.) Drag from the centre of the canvas to a little way past the bottom edge. Set the layer to Multiply at35%.Add one more layer called
Grain. Set the foreground to , press Cmd+A and choose Edit → Fill. Deselect, then choose Filter → Add Noise… with Amount14. Set the layer to Overlay at45%. A little grain over everything stops the gradients looking too clean and ties the type to the cards.Look the sheet over one last time. Every icon should be made of separate holes with card between them, the script should clear the cards, and nothing should crowd the labels. Then choose File → Save Project and File → Quick Export PNG.