Design a Synthwave Cassette Repair Shop Flier
Build a neon synthwave flier in Lopsy with a pattern-fill perspective grid, photo palm silhouettes, a hand-built cassette and extruded chrome-sunset type.
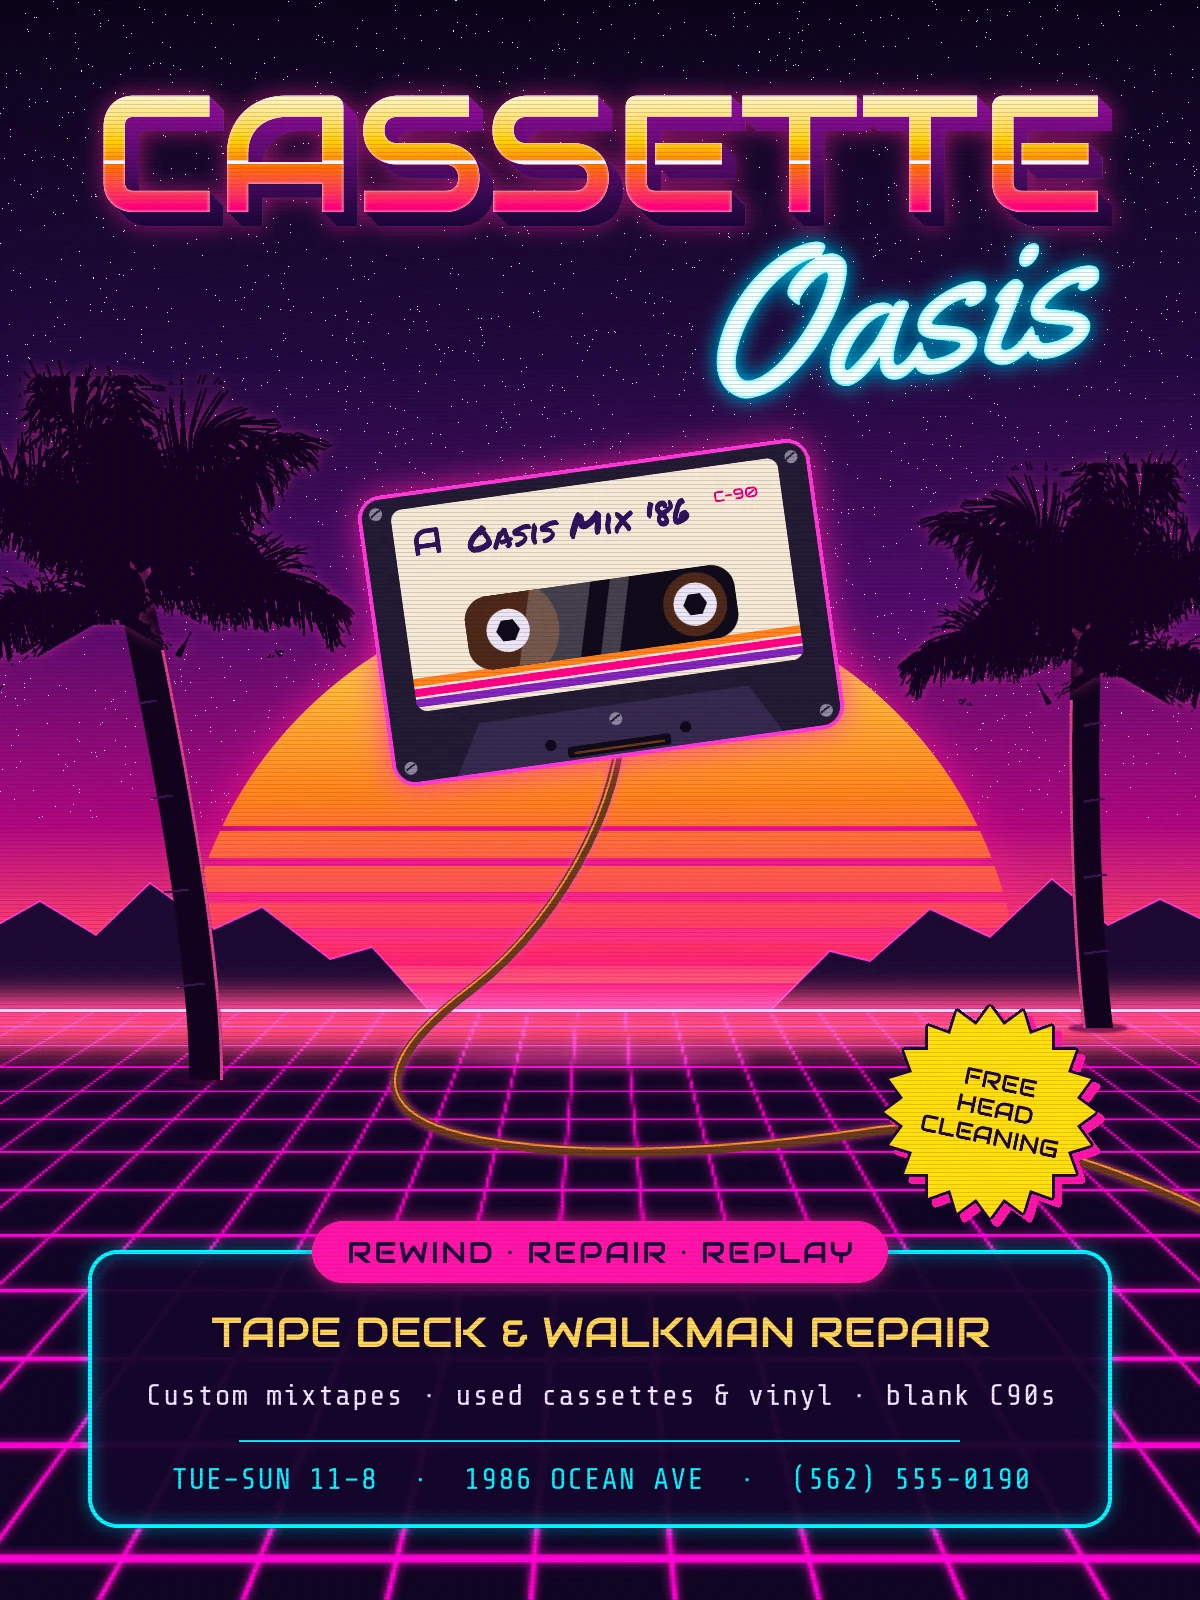
Synthwave (also called retrowave or outrun) is the look of 1980s album covers and arcade cabinets as remembered through a haze of VHS static: a violet night sky that burns pink and orange at the horizon, a huge sun sliced by horizontal stripes, a glowing grid running off to a vanishing point, palm silhouettes, chrome and neon lettering.
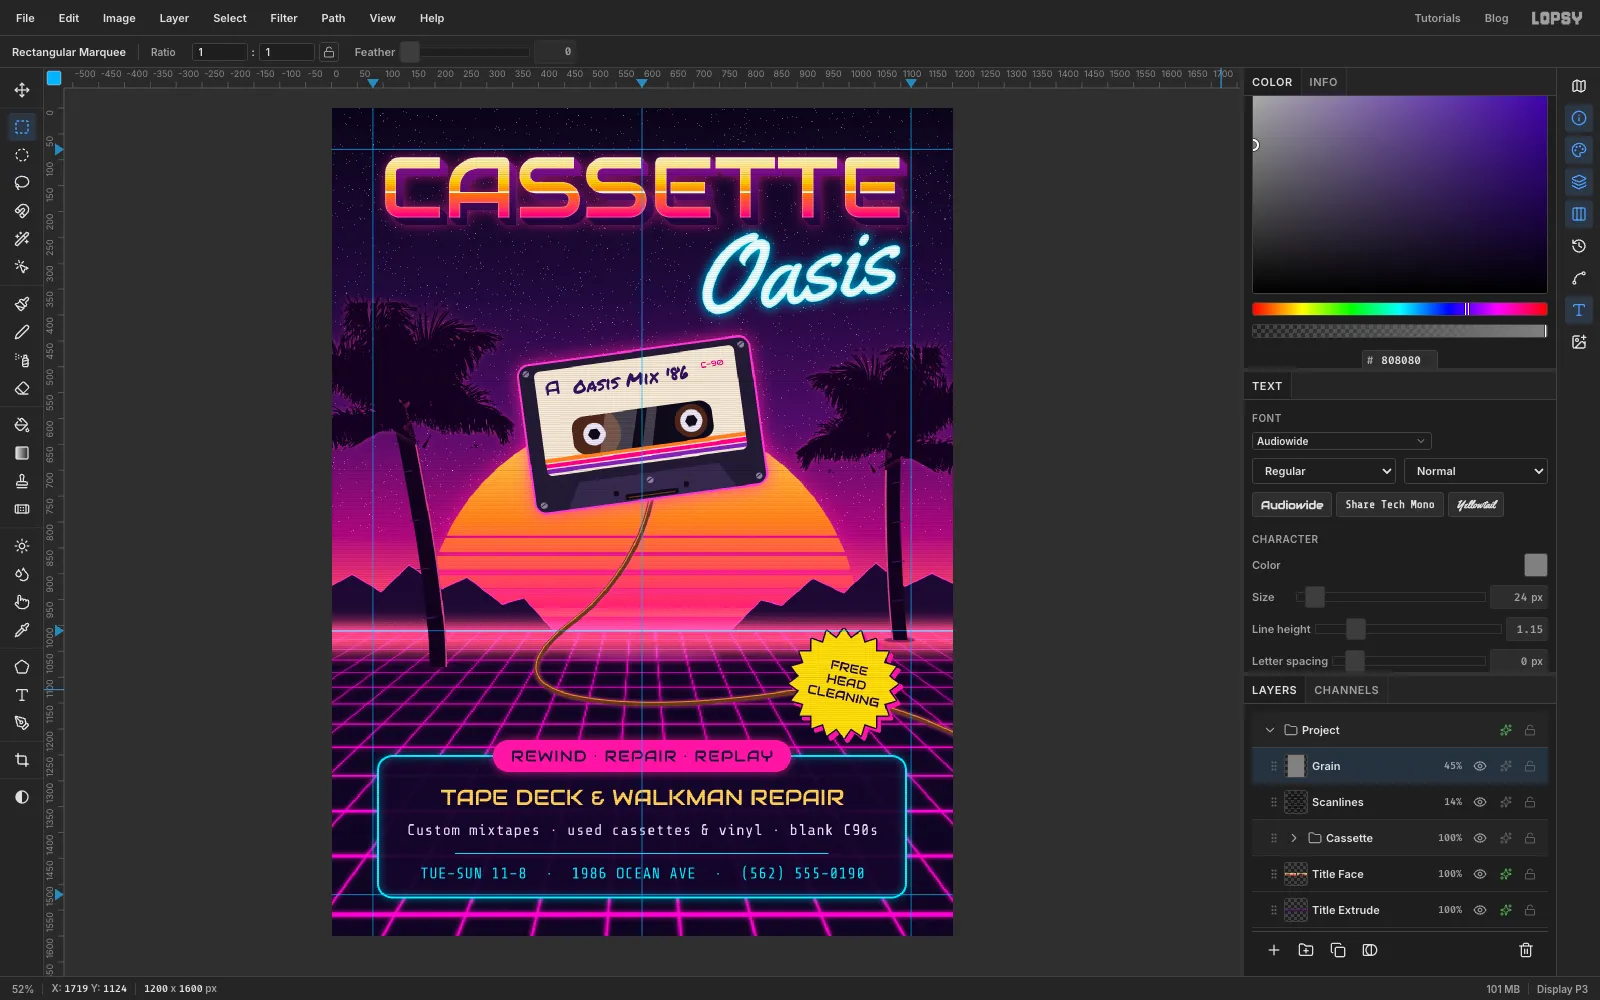
This tutorial uses that look for something practical: a flier for Cassette Oasis, an imaginary shop that fixes tape decks and Walkmans and sells mixtapes. The hero is a cassette tape you build from shapes, floating in front of the sun with its tape spilling out across the grid. Two tricks do most of the heavy lifting:
- The grid isn't drawn line by line. You draw one small tile, turn it into a pattern, fill the floor with it, and then pull it into perspective with the Move tool's Perspective mode.
- The palms come from a real photo. A power line gets cloned out, Threshold turns the photo into black and white, and the Magic Wand lifts out the palm.
The flier is 1200 × 1600 px. The palm photo is Roystone regia in silhouette Ellison Rd Geebung P1050113.jpg by John Robert McPherson on Wikimedia Commons (CC BY-SA 4.0). Download it at about 1280 px wide.
The tools you'll use:
- the Gradient tool and its Advanced… stop editor, Edit → Fill, Edit → Define Pattern and Edit → Fill with Pattern…
- the Rectangular and Elliptical Marquee, the Lasso and Magic Wand, with Shift to add, Alt to subtract and Shift+Alt to intersect
- Cmd-click on a layer thumbnail, and Select → Grow and Select → Inverse
- the Move tool's Perspective and Free transforms, Flip Horizontal, and a transform of a whole group
- the Clone Stamp, Threshold, Add Noise and Gaussian Blur
- the Shape tool (rectangles, ellipses and a hexagon), the Pen tool with Path to Selection, the Pencil, and the Brushes panel's Taper
- Copy and Paste in place, Duplicate Layer, Rasterize Layer, Merge Down, groups, and dragging rows in the Layers panel
- live text in Audiowide, Yellowtail, Permanent Marker and Share Tech Mono, rotated with its own handles
- the Outer Glow, Inner Glow, Stroke and Drop Shadow layer effects, and the Screen and Overlay blend modes
The palette:
- Sky → → → → →
- Sun → →
- Floor , grid , mountains
- Neon pinks (edges and lines), (glows and the pill), (rim light)
- Neon cyan , cyan glow , gold
- Palms , trunk rings , ground shadow
- Cassette shell , head area , label , label ink , window
- Tape (spools), (ribbon), highlight
- Title face → → → , extrusion →
- Panel , dark type , starburst
Positions are given in document pixels. Hover over the canvas and watch the X and Y readout at the bottom left of the window.
-
Set up the page and paint the dusk sky
Choose File → New, pick Pixels, and make a 1200 × 1600 document. Fill the Background layer with the darkest sky colour, , using Edit → Fill.
Add guides by clicking the rulers. Click the top ruler at x 80, 600 and 1120, and the left ruler at y 80, 1010 and 1520. The guide at y 1010 is the horizon. Everything above it is sky and everything below it is floor. Turn off View → Snap to Guides so your marquees aren't pulled onto the guides.
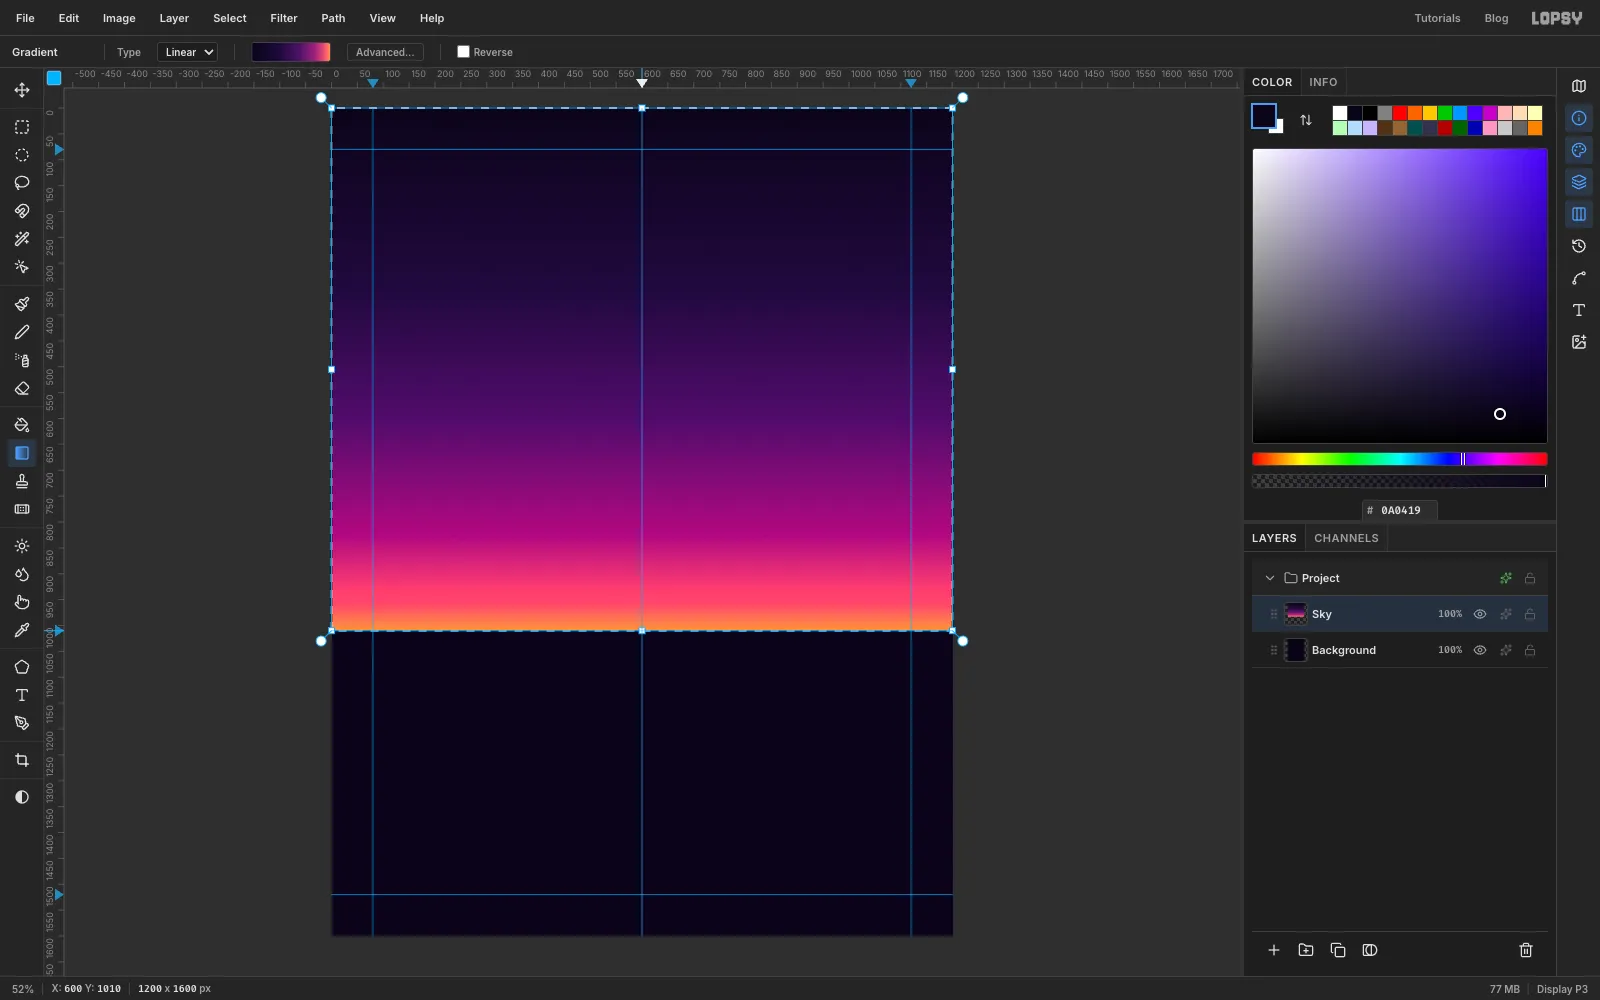
Rename the empty Layer 1 to Sky. Drag a rectangular marquee from the top-left corner down to the horizon guide, right across the page. Pick the Gradient tool, set it to Linear, and open Advanced…. In the Gradient Editor, click a stop to select it and type its colour in the Hex field. Click on the bar to add a stop at that point, drag a stop sideways to change its position, and use Delete to remove the selected one. Set six stops:
- at 0%
- at 35%
- at 60%
- at 82%
- at 95%
- at 100%
Drag from the top of the page straight down to the horizon.
-
Make a starfield from noise
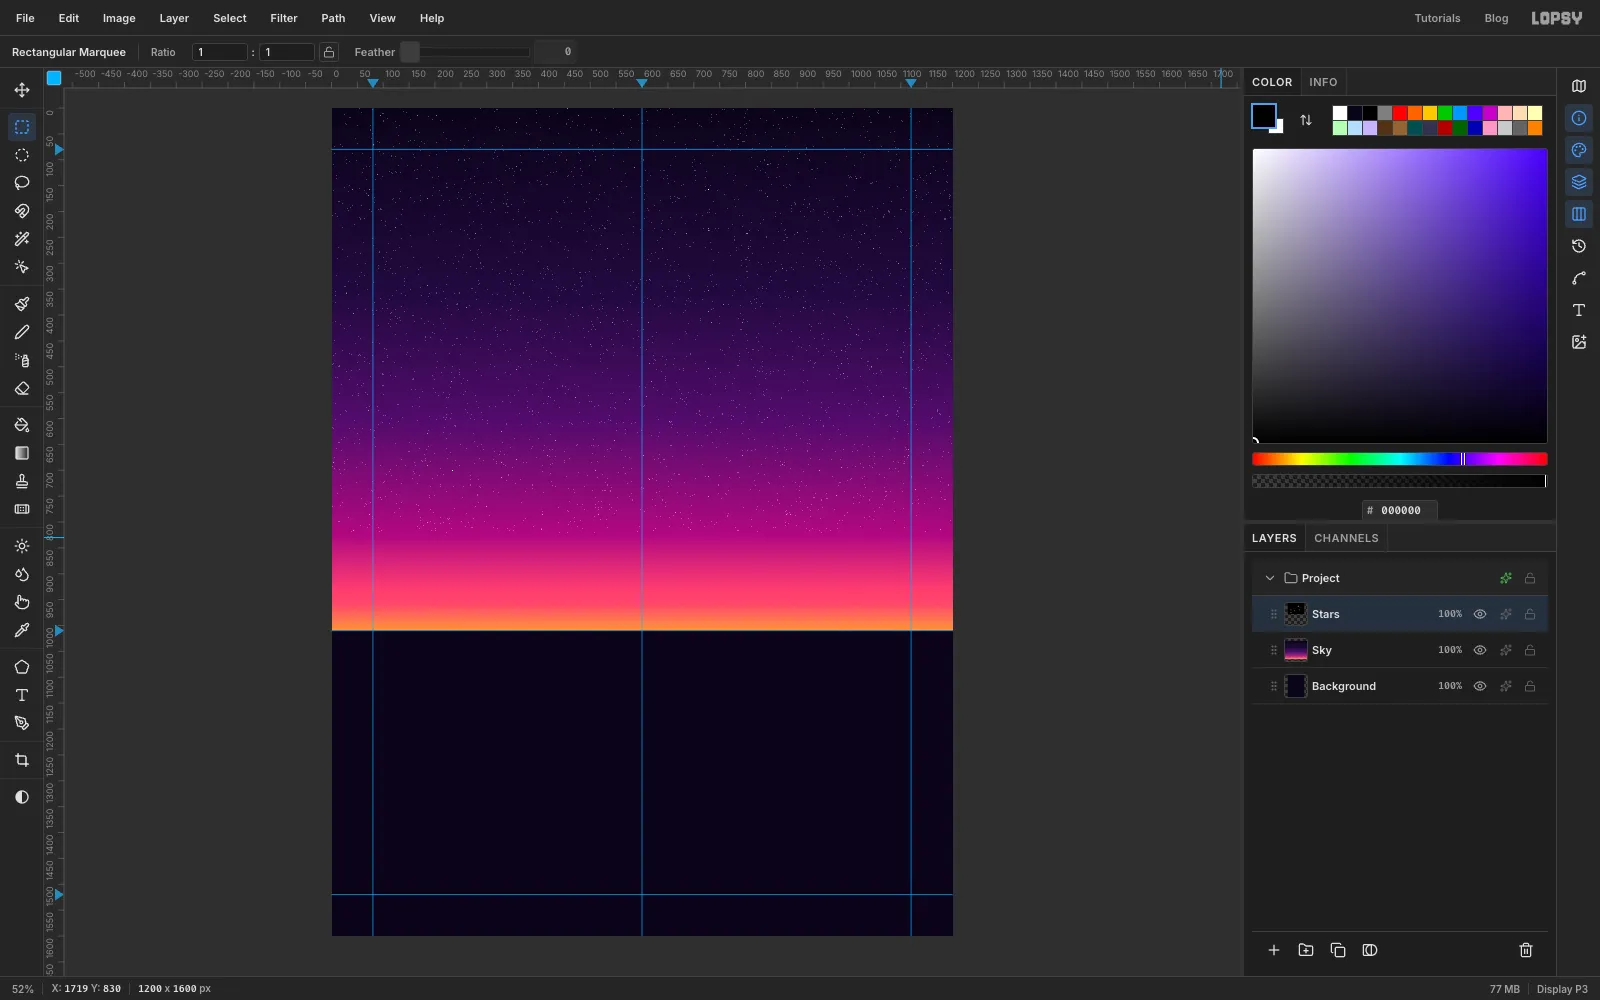
Press Cmd+D to deselect, and add a new layer called Stars. Marquee the sky from the top down to about y 820 and fill it with black. Then:
- Choose Filter → Add Noise… with Amount 100, Mono and Gaussian.
- Choose Filter → Threshold… at 46. Only the brightest specks of noise stay white, and that's your starfield.
- Open the layer's effects drawer (the ✦ button on its row) and set the blend mode to Screen. Black disappears in Screen mode, so only the stars show.
-
Cut out the sun's half circle
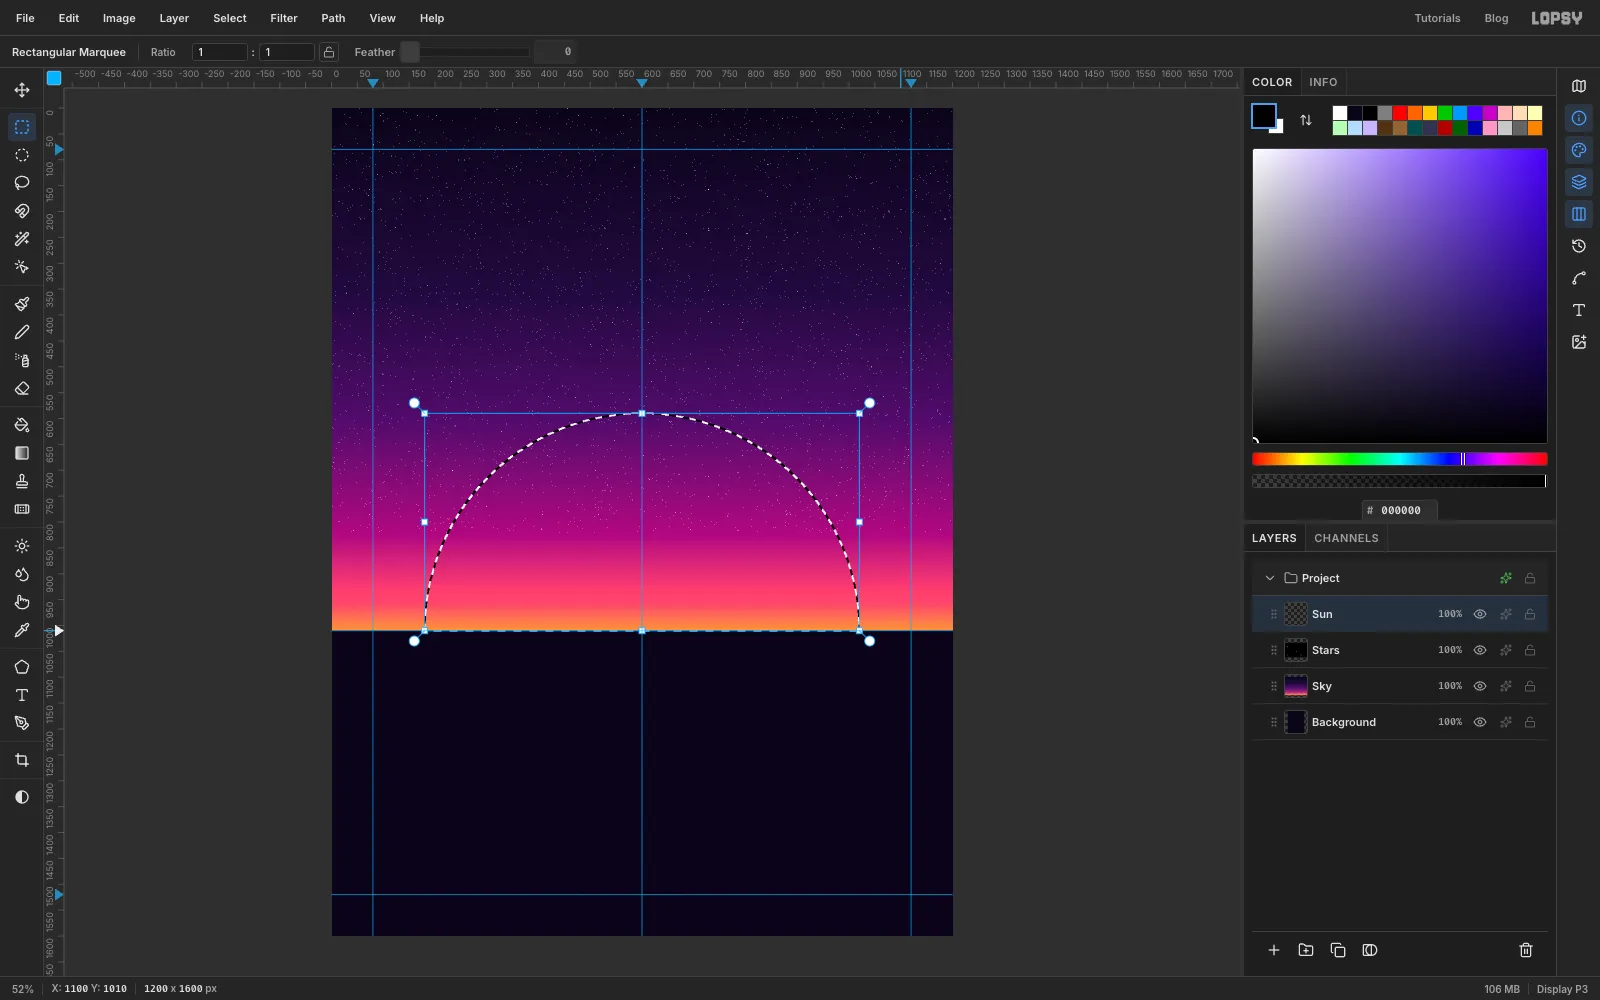
Add a layer called Sun above Stars. With the Elliptical Marquee, drag a circle 840 px across, centred where the centre guide meets the horizon: start at about (180, 590) and drag to (1020, 1430). Its bottom half hangs below the horizon, but that part gets cut off next.
Hold Shift+Alt and drag a rectangle from above the circle down to the horizon guide, wider than the circle. Shift+Alt keeps only the overlap, so now just the top half of the circle is selected.
Set a Linear gradient of → (at 50%) → , and drag from the top of the half circle straight down to the horizon.
-
Slice the sun into stripes
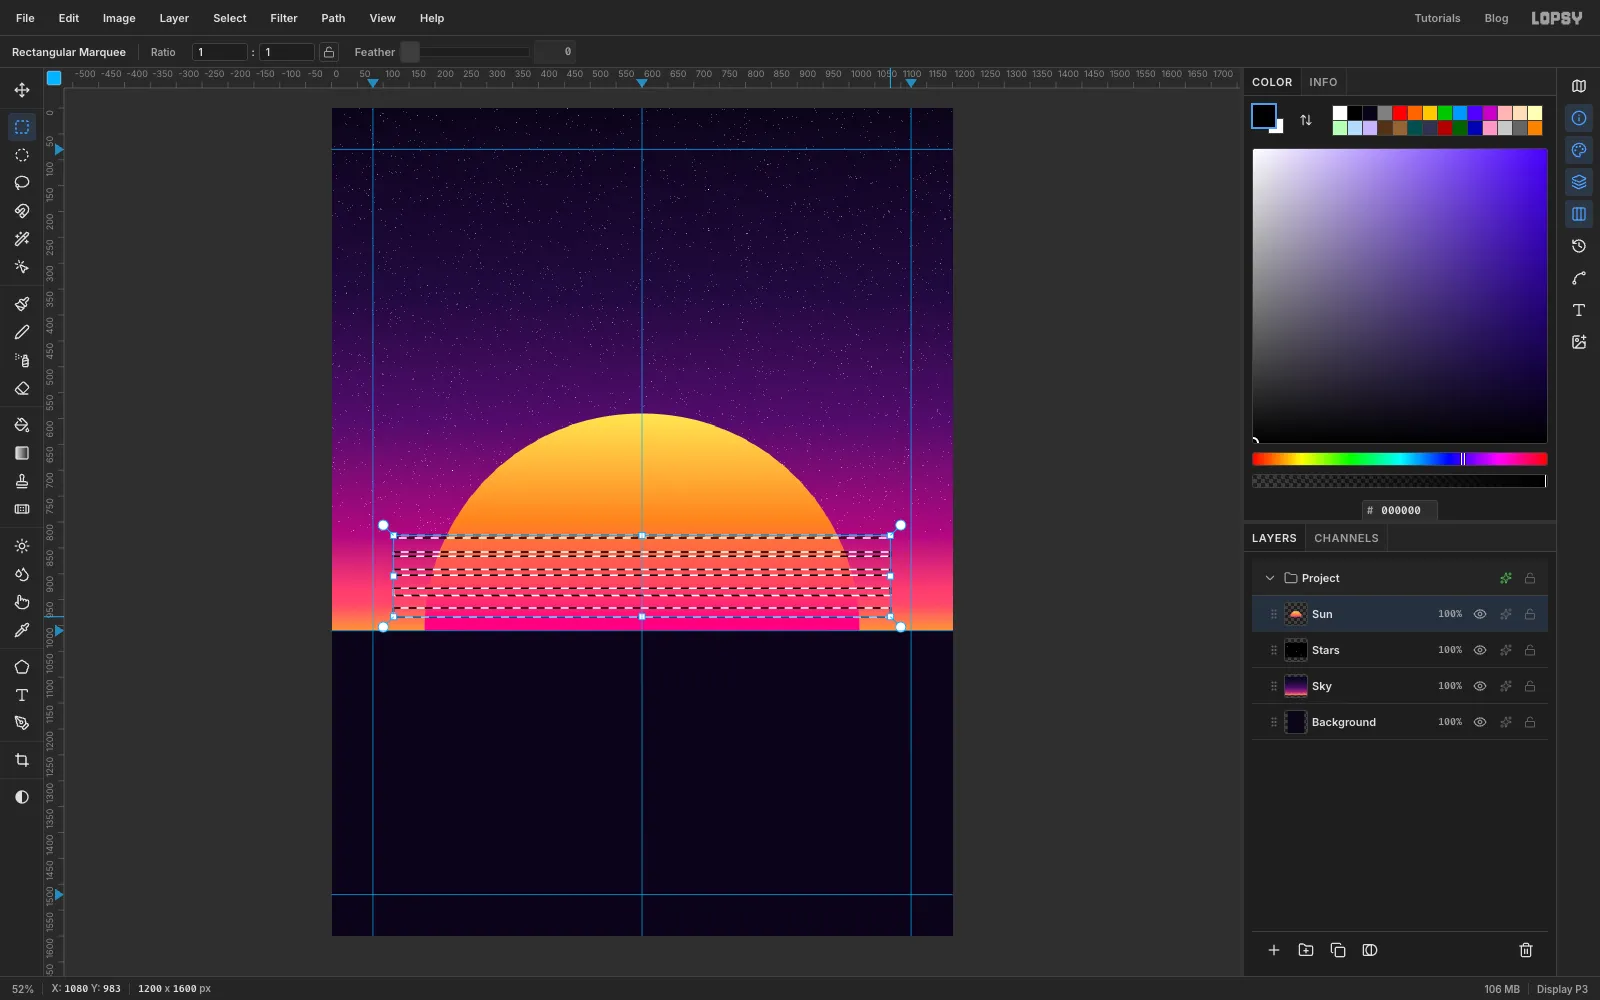
The classic synthwave sun has gaps that get thicker as they near the horizon. Deselect, then drag five long, thin rectangular marquees across the lower half of the sun, holding Shift for every one after the first so they add together. Make them about 5, 8, 11, 14 and 17 px tall, with their tops at roughly y 826, 858, 892, 928 and 966, so the gaps grow toward the horizon.
Press Delete, then deselect. In the effects drawer, tick Outer Glow with Size 60, Spread 0, Opacity 70 and colour .
-
Add mountains and the floor
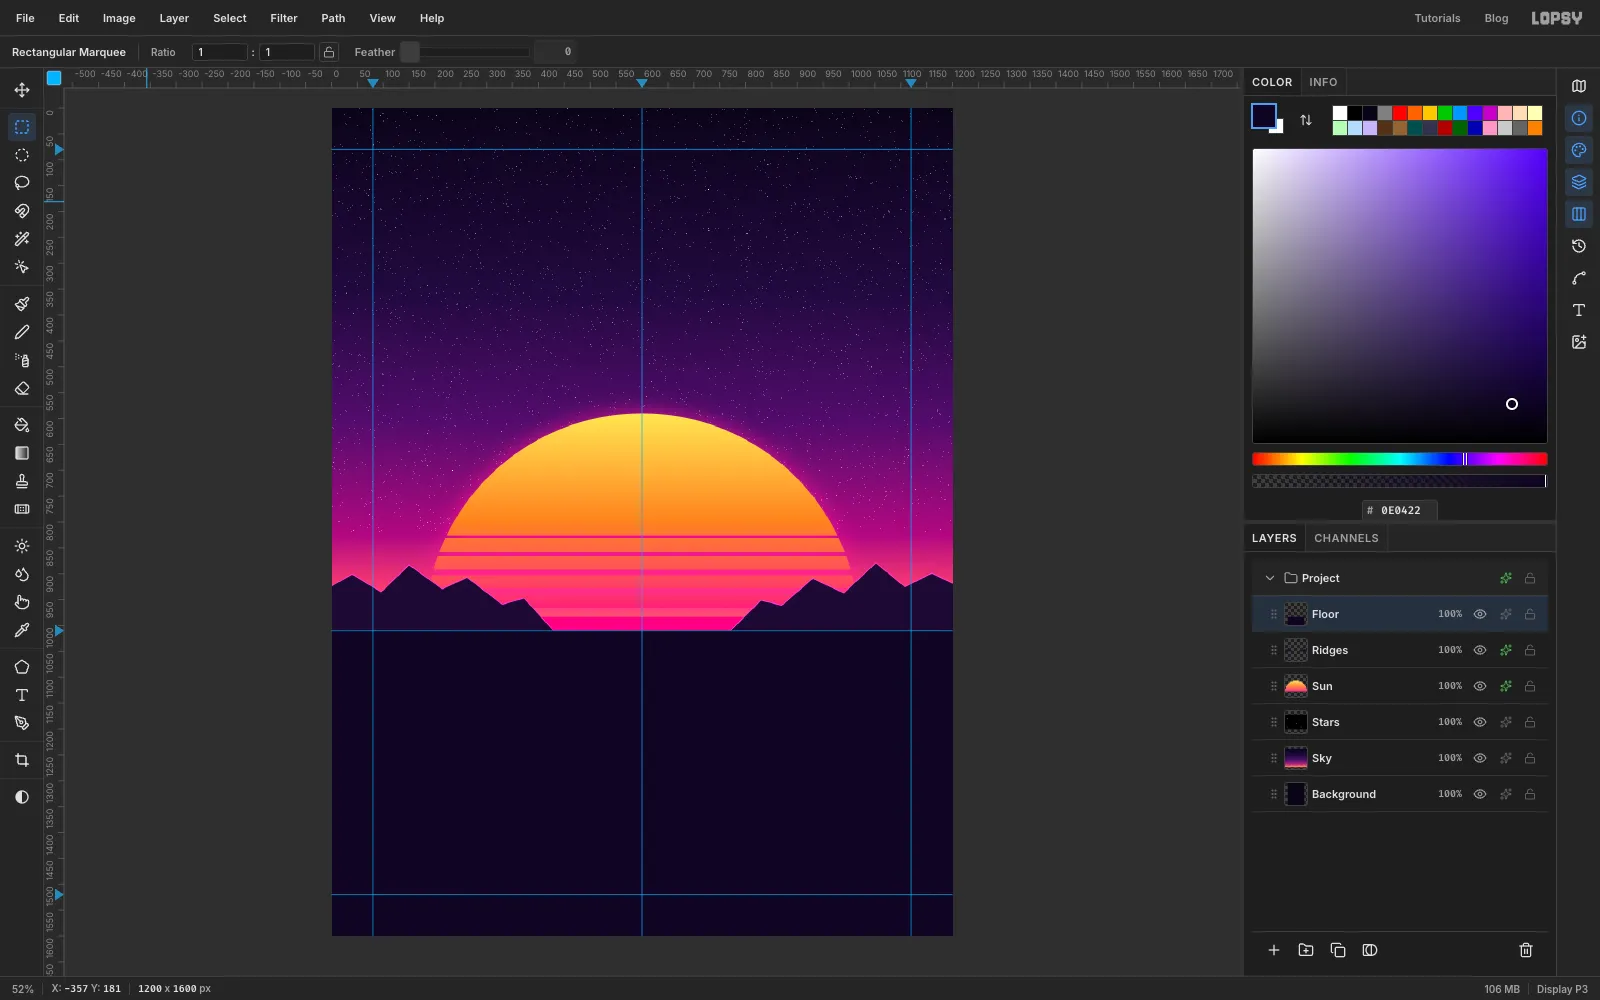
Add a layer called Ridges. With the Lasso, draw a low, jagged range of peaks on the left from the page edge to about x 430, keeping the peaks between y 880 and 960 and closing the shape along the horizon. Hold Shift and draw a second range on the right, from about x 770 to the page edge. Fill both with . Give the layer a Stroke effect, Width 2, colour , for a thin pink edge.
Add a layer called Floor. Marquee from the horizon guide to the bottom of the page and fill it with .
-
Draw one grid tile and fill the floor with it
Add a temporary layer. Pick the Pencil, set Size 3 and colour . Zoom right into the top-left corner of the page and draw two lines: click at (1, 1), then Shift-click at (47, 1) along the top edge. Click at (1, 1) again and Shift-click at (1, 47) down the left edge. That's one 48 × 48 cell of the grid, with a line along its top and its left side.
To select exactly that cell, deselect and click once (don't drag) with the Rectangular Marquee. A dialog asks for the corners: enter From 0, 0 and To 48, 48. Choose Edit → Define Pattern, then delete the temporary layer.
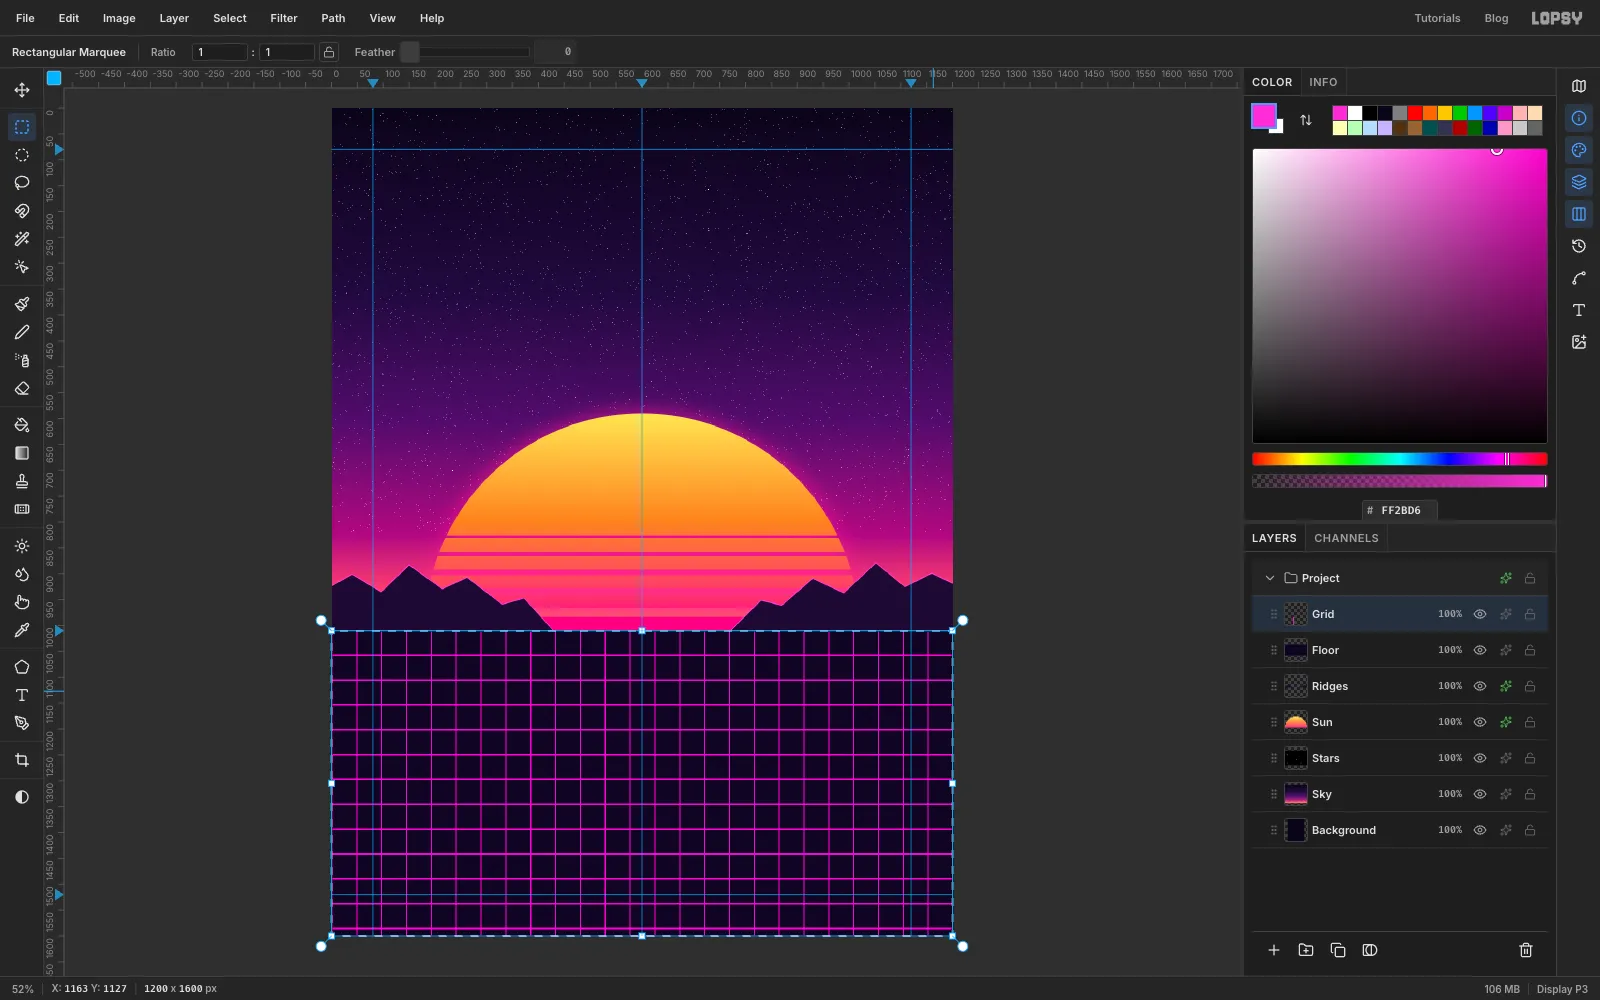
Select Floor and add a layer called Grid. Marquee the floor from the horizon to the bottom of the page, choose Edit → Fill with Pattern…, click your new tile and press Apply.
-
Pull the grid into perspective
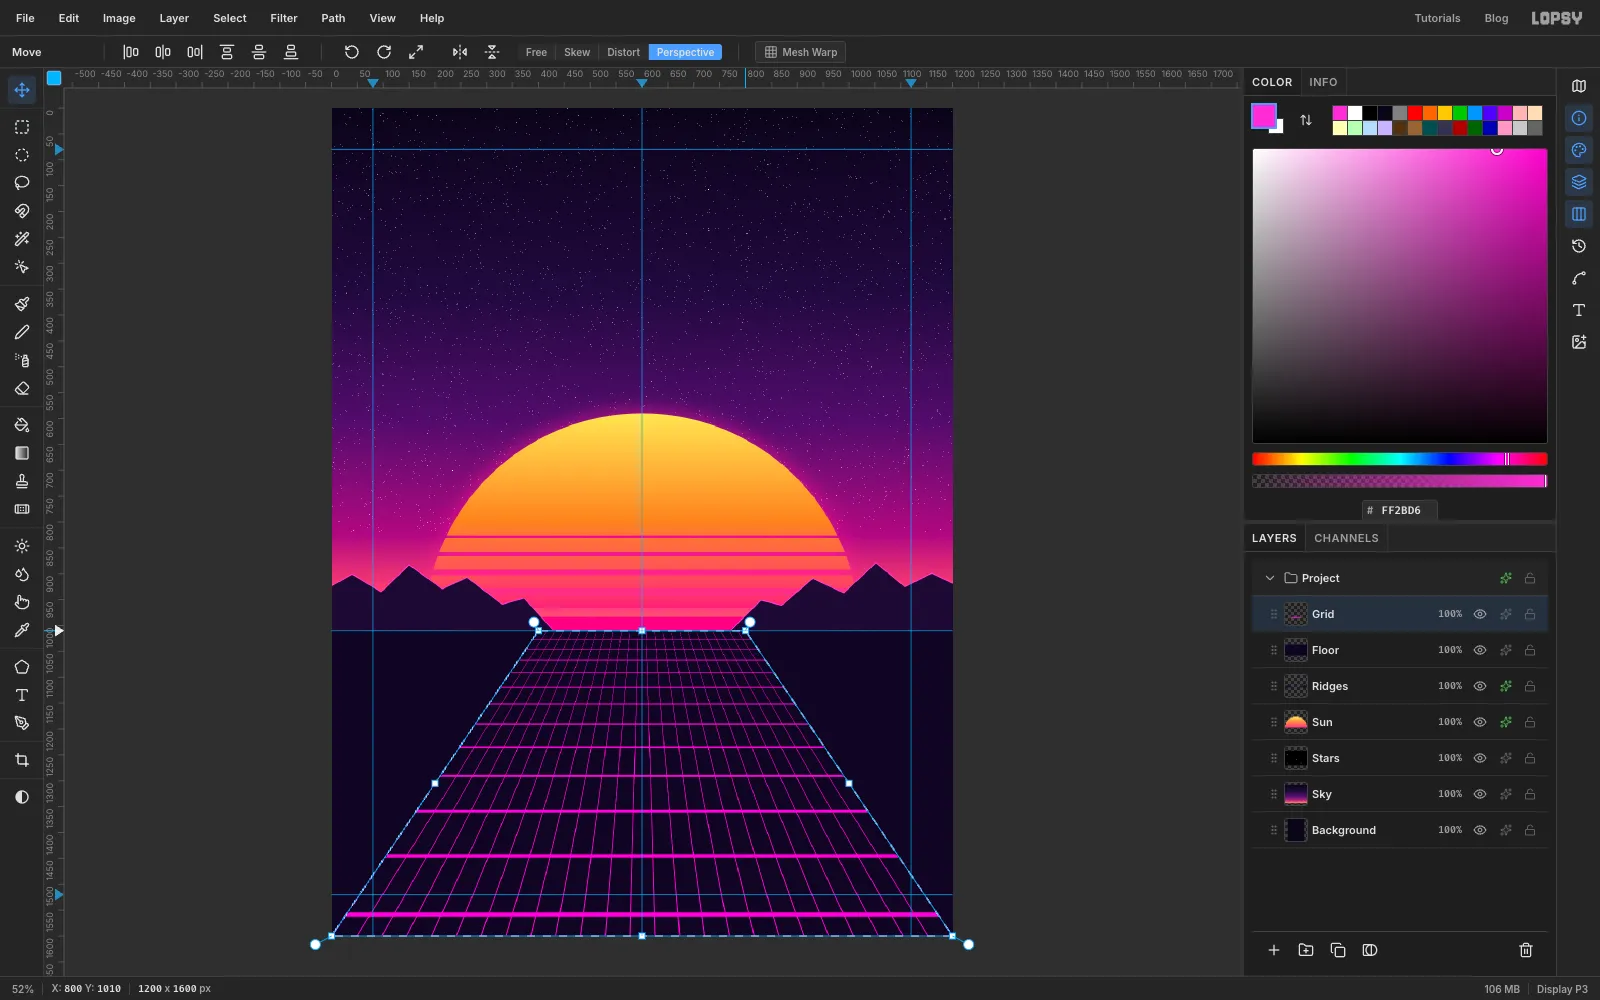
Keep the marquee and switch to the Move tool. In the options bar, click Perspective. In this mode, dragging a corner moves the opposite corner of the same edge the other way.
Drag the top-right handle left until the top edge is a third of the page wide, from x 400 to x 800. The vertical lines now converge toward the horizon. The rows near the top squash together while the rows at the bottom stay big, just like a floor going away from you. Press Enter to apply.
-
Stretch the grid off both sides
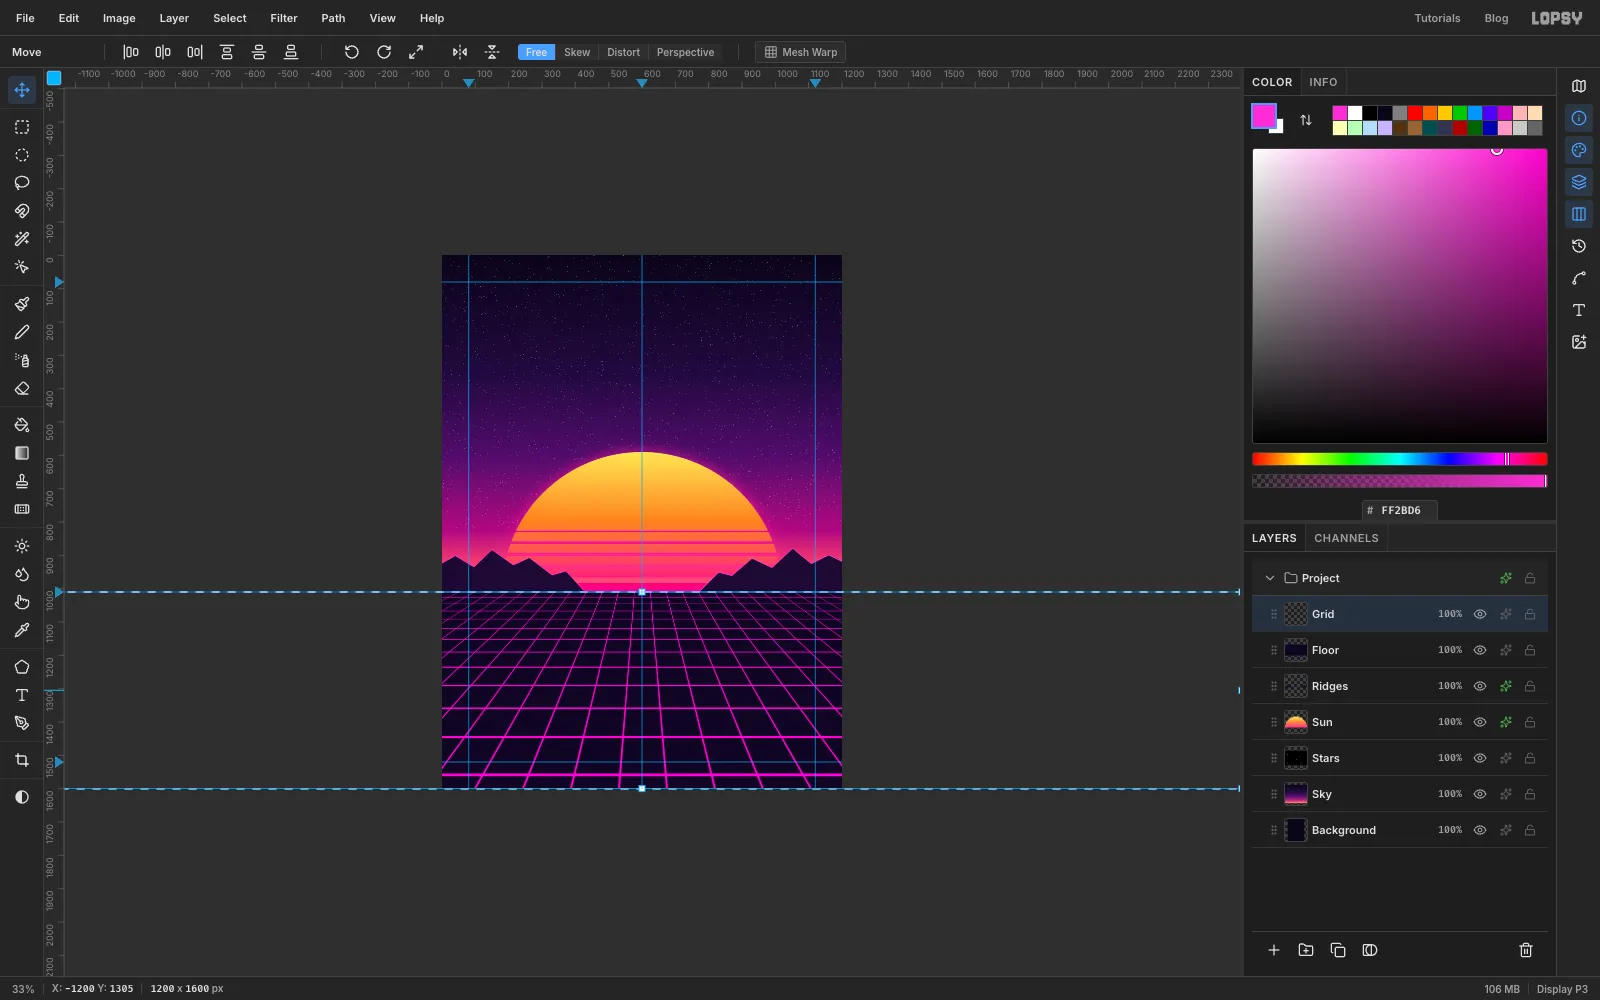
The grid now ends in two diagonal edges, and you want its lines to run off the sides of the page. Press Cmd+D and use View → Zoom Out until the page is about a third of its size (around 33%), with a page width of grey on either side of it. Marquee the floor again and click Free in the options bar.
Drag the right edge handle out by a full page width, to x 2400. Then drag the left edge handle out by the same amount, to x −1200. The grid is now three times as wide and centred where it was. Press Enter, deselect, and press Cmd+0 to fit the page back on screen.
-
Make the grid glow and light up the horizon
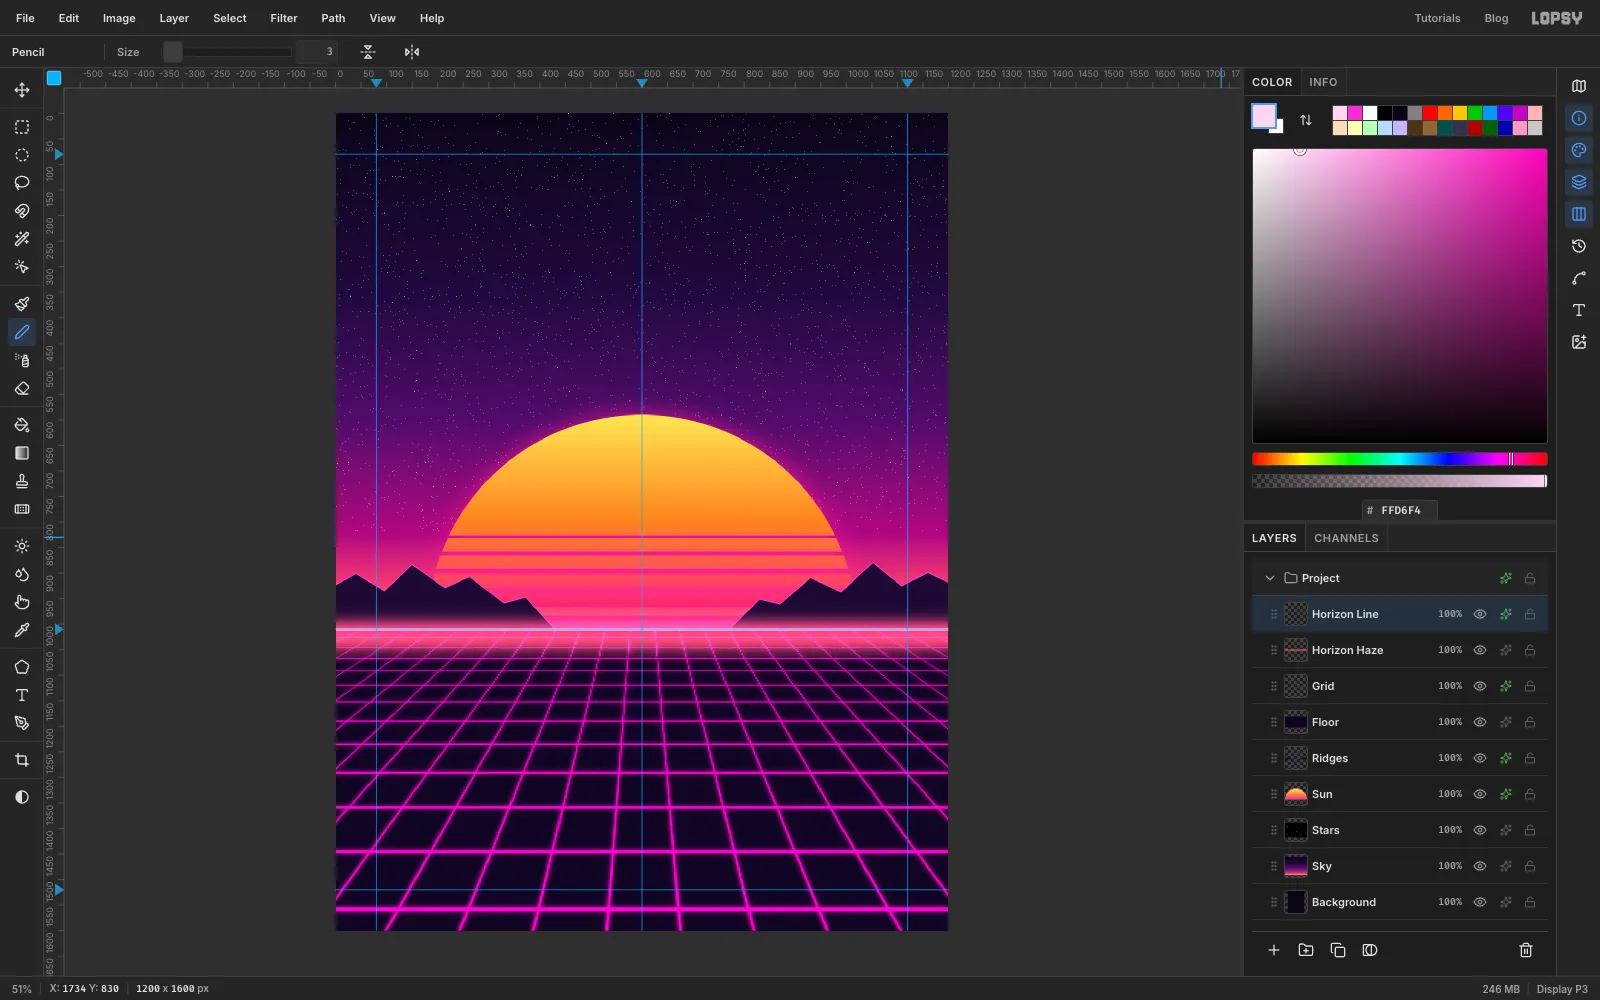
Give the Grid layer an Outer Glow: Size 14, Spread 0, Opacity 80, colour .
Add a layer called Horizon Haze. Marquee a band from just above the horizon to about 40 px below it, fill it with , deselect, and run Filter → Gaussian Blur… at 40. Set it to Screen.
Add a layer called Horizon Line. With the Pencil at Size 3 and colour , click at the left end of the horizon guide and Shift-click at the right end. Add an Outer Glow of Size 18, Spread 10, Opacity 90, colour .
-
Drop in the palm photo
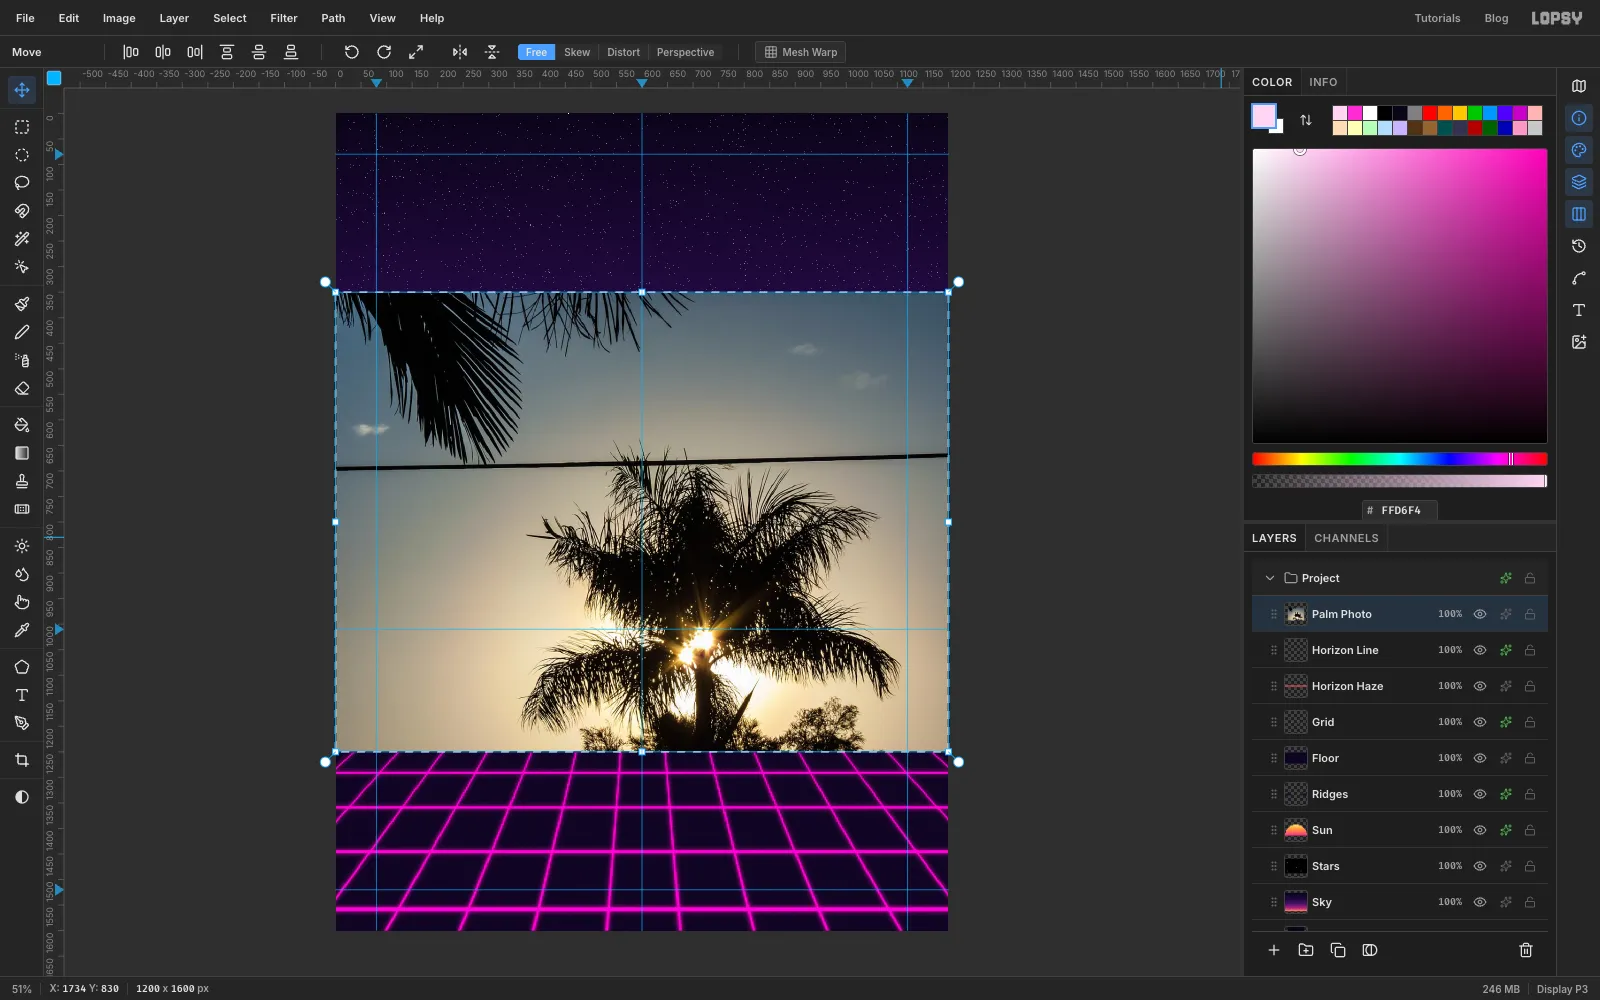
Drag the downloaded palm photo onto the canvas. Lopsy places it on a new layer, fitted to the width of the page. Rename the layer Palm Photo.
Two things in the photo would get in the way. A power line runs across the sky and right through the top of the palm, and there's a second palm in the top-left corner. The corner palm is easy to leave out later. The power line has to go first.
-
Clone the power line away
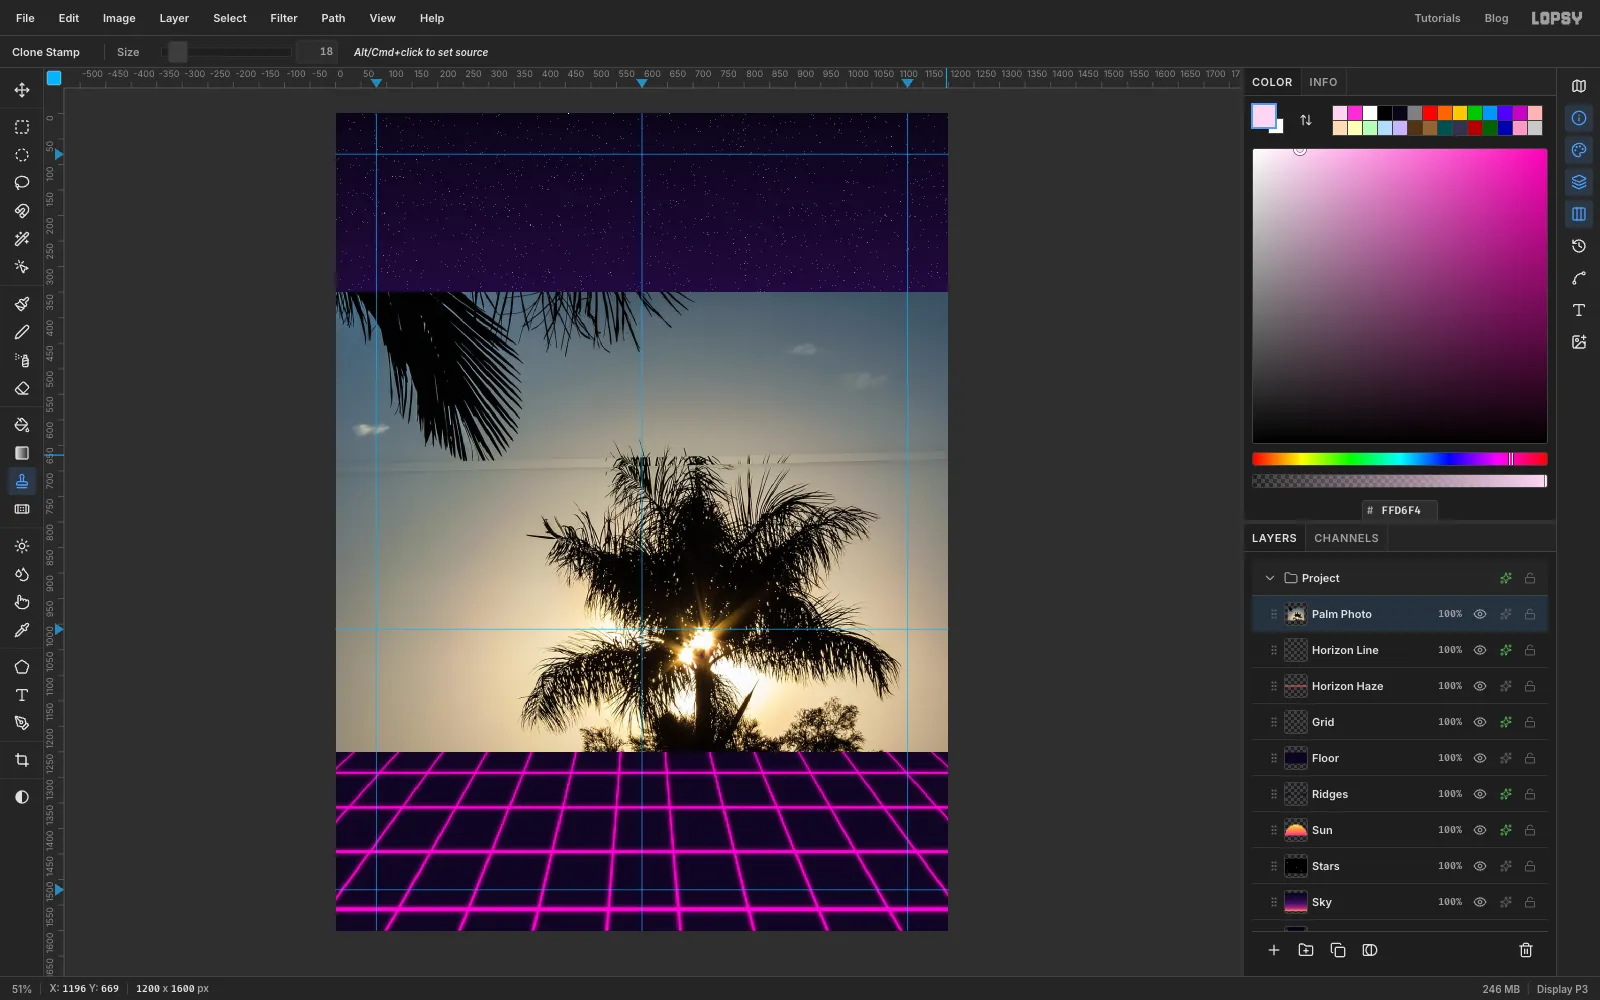
Press Cmd+D and pick the Clone Stamp (S). Set Size to 18. Alt-click on clean sky just below the left end of the wire, about 30 px under it. That sets the spot the stamp copies from.
Now click on the wire at its left end, then Shift-click on the wire at its right end. The Clone Stamp paints a straight line between the two clicks and keeps the same distance to the source all the way along. It copies the strip of sky just below the wire over the top of it. Where the wire crosses the fronds, it copies fronds instead, so the top of the palm stays whole.
-
Threshold the photo
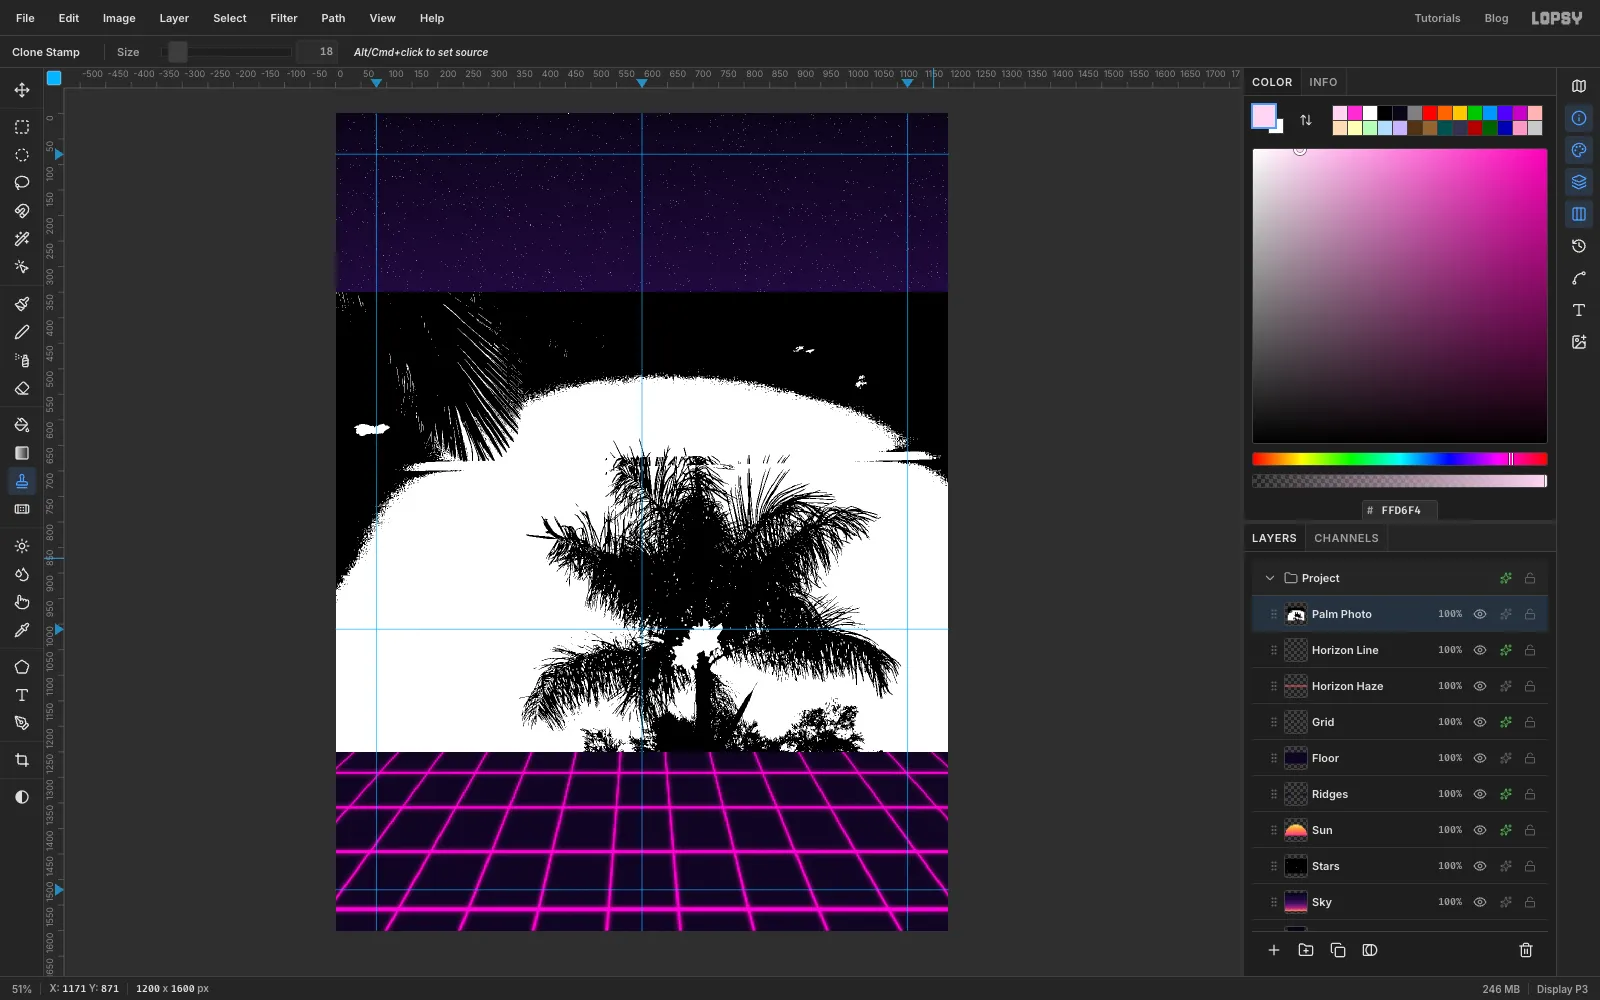
Choose Filter → Threshold… and set Level 125. Every pixel becomes pure black or pure white, so the palm turns into a crisp black silhouette. The darker blue sky at the top of the photo turns black too. Don't worry about it: the next step leaves it out.
-
Select just the palm
Pick the Magic Wand. Set Tolerance 10 and untick Contiguous. Click on the palm's trunk, and every black pixel in the photo is selected, including the dark sky at the top.
You only want the central palm:
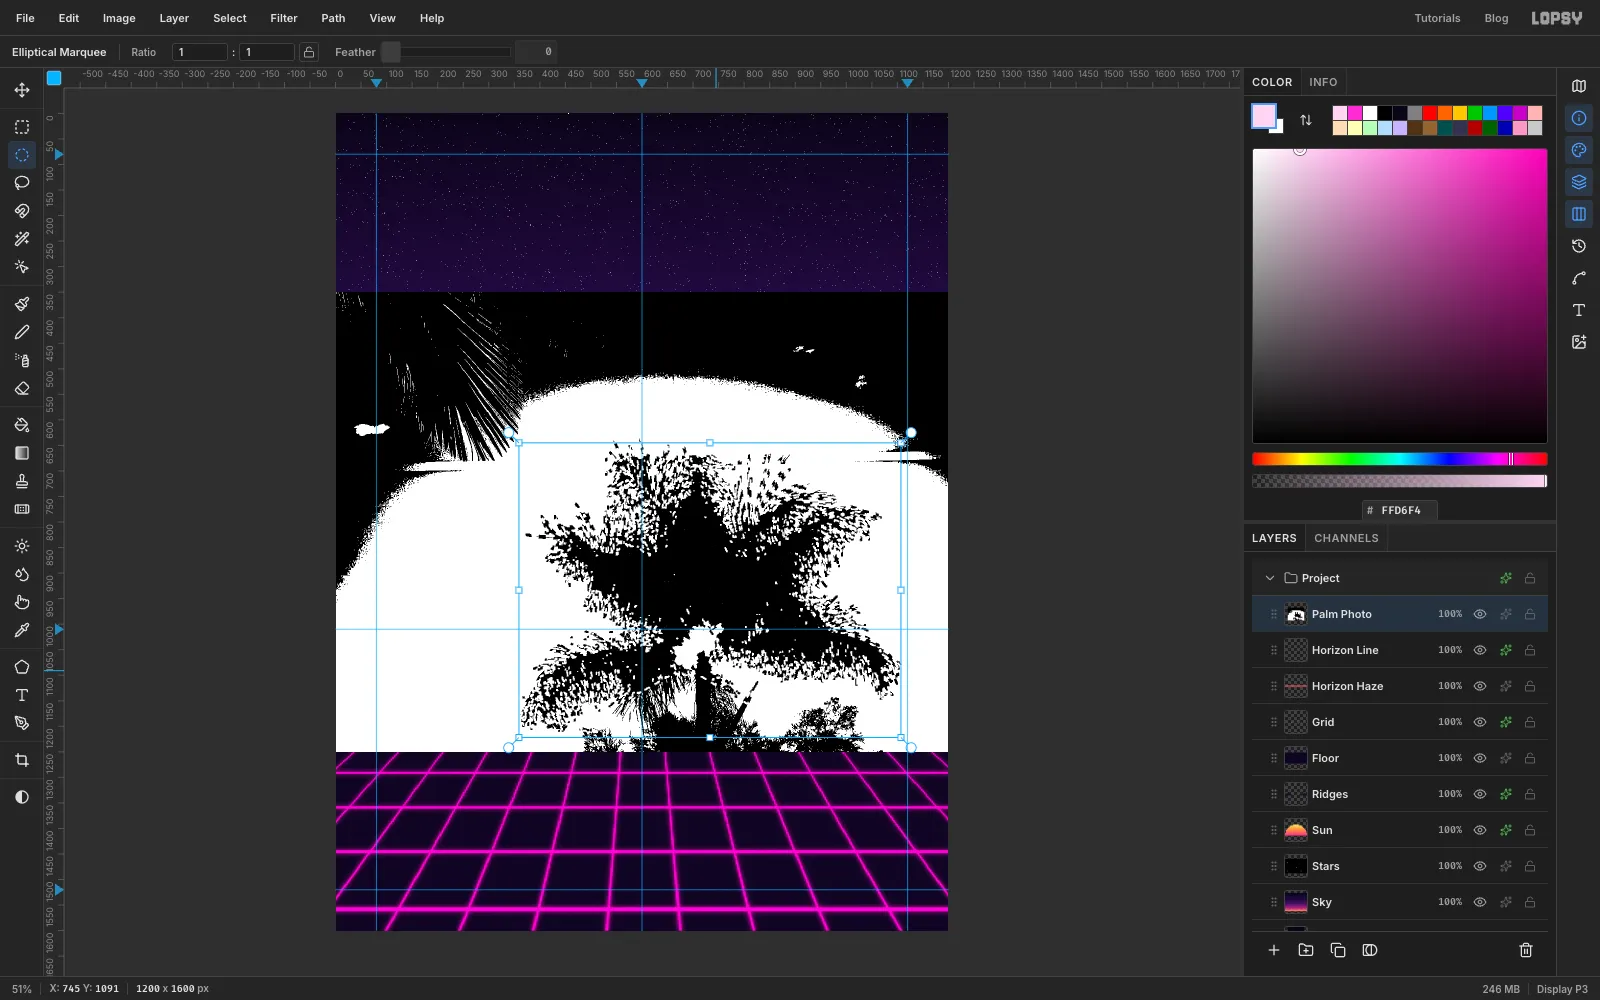
- Hold Shift+Alt and drag a loose Lasso around the palm's crown. Leave out the corner palm, the dark sky above it and the bushy trees along the bottom. Only the overlap stays selected.
- The sun shone through the crown where the trunk joins it, leaving a white hole. Hold Shift and drag a small Elliptical Marquee over that spot to add it back.
- Choose Select → Grow… by 1 px to close the pinholes between the fronds.
-
Fill the silhouette
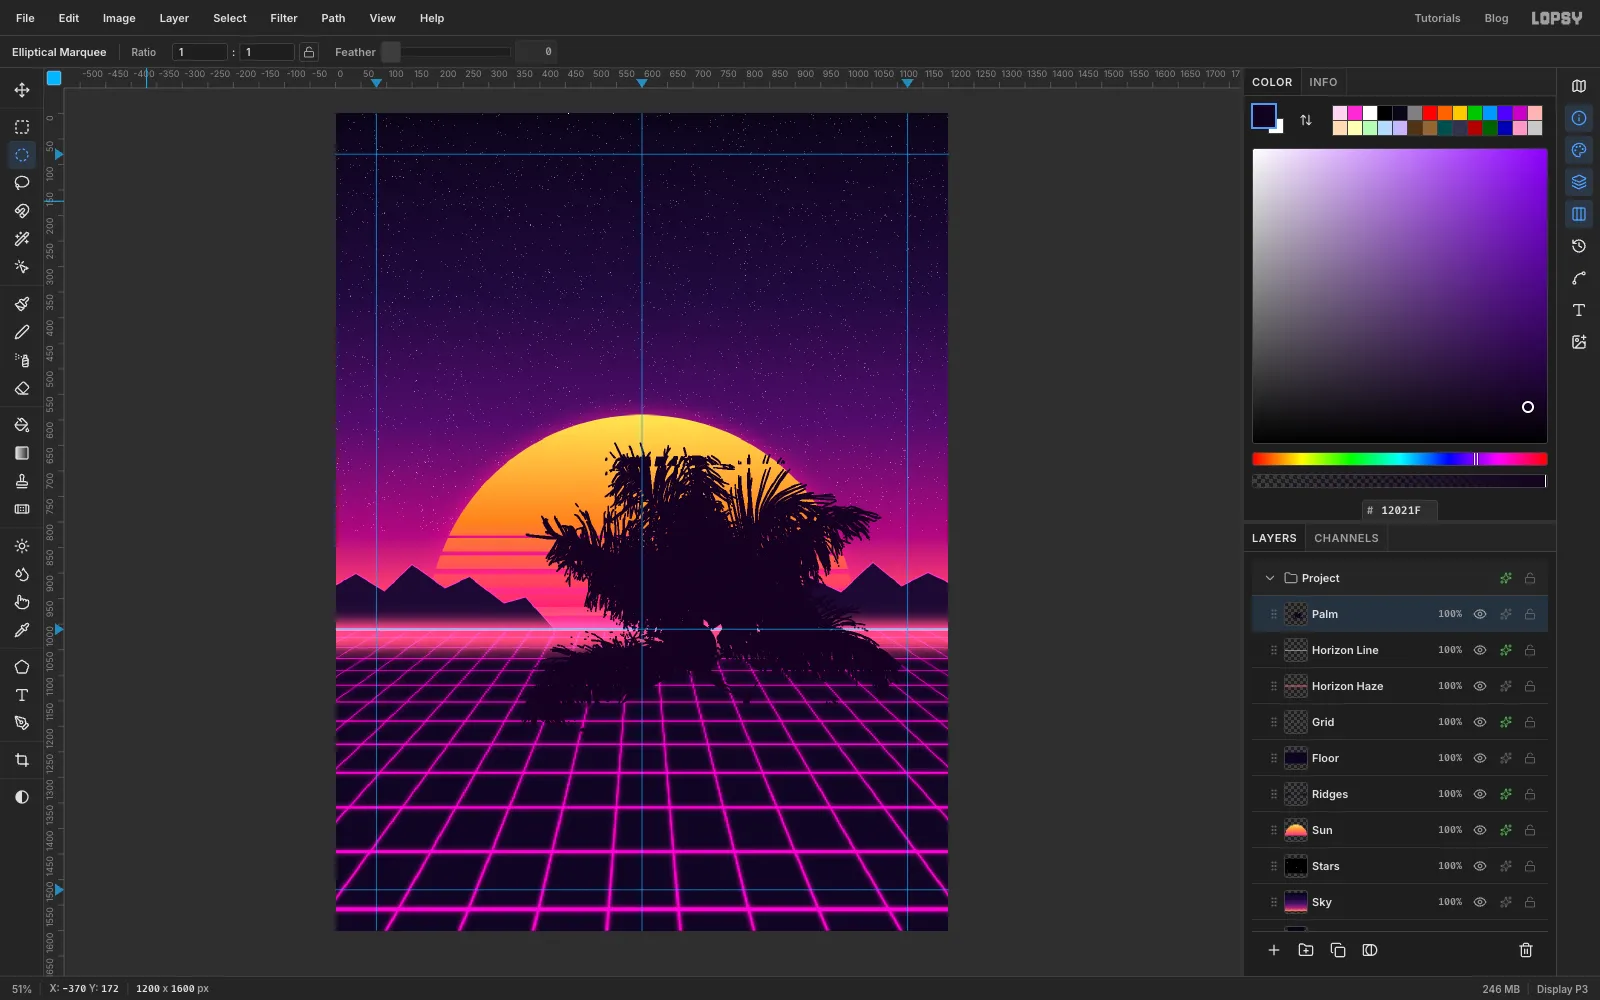
Add a layer called Palm and fill the selection with . Deselect, select the Palm Photo layer, and delete it with the bin button in the Layers panel.
-
Scale the palm down
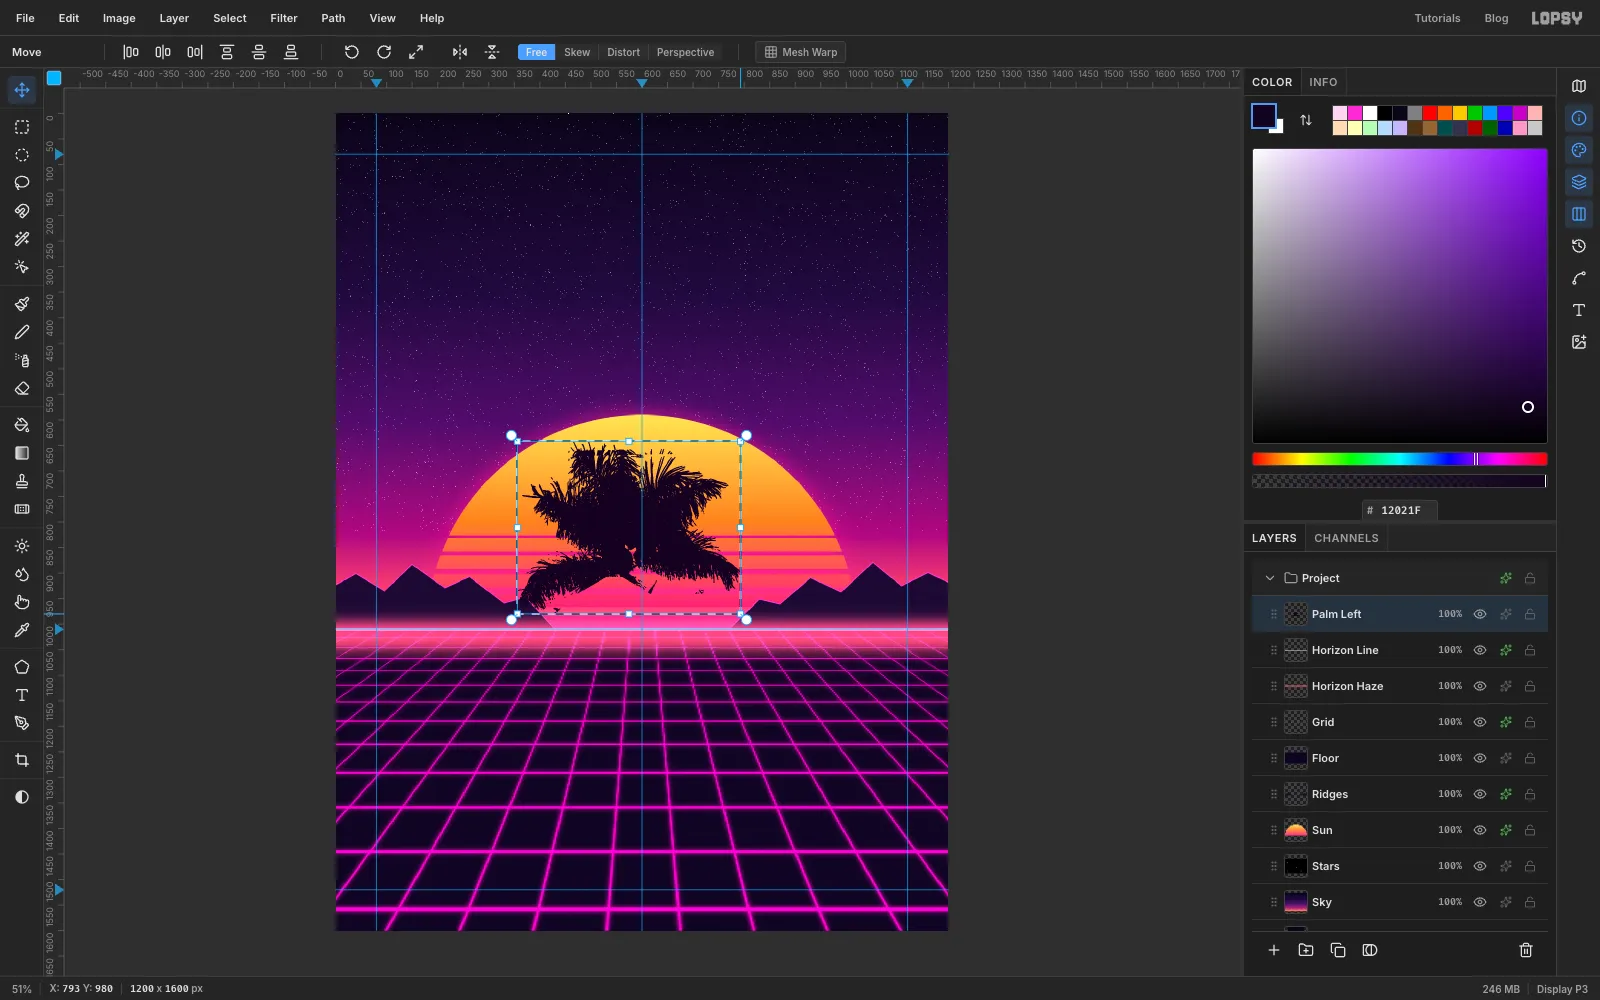
Select Palm and rename it Palm Left. Drag a marquee around the whole crown. With the Move tool, hold Cmd and drag the bottom-right handle in until the palm is a little over half its size, about 58%. Press Enter and Cmd+D.
Drag the palm with the Move tool to the top-left of the page. Let the crown hang off the left edge, with its top at about y 360.
-
Make a mirrored second palm
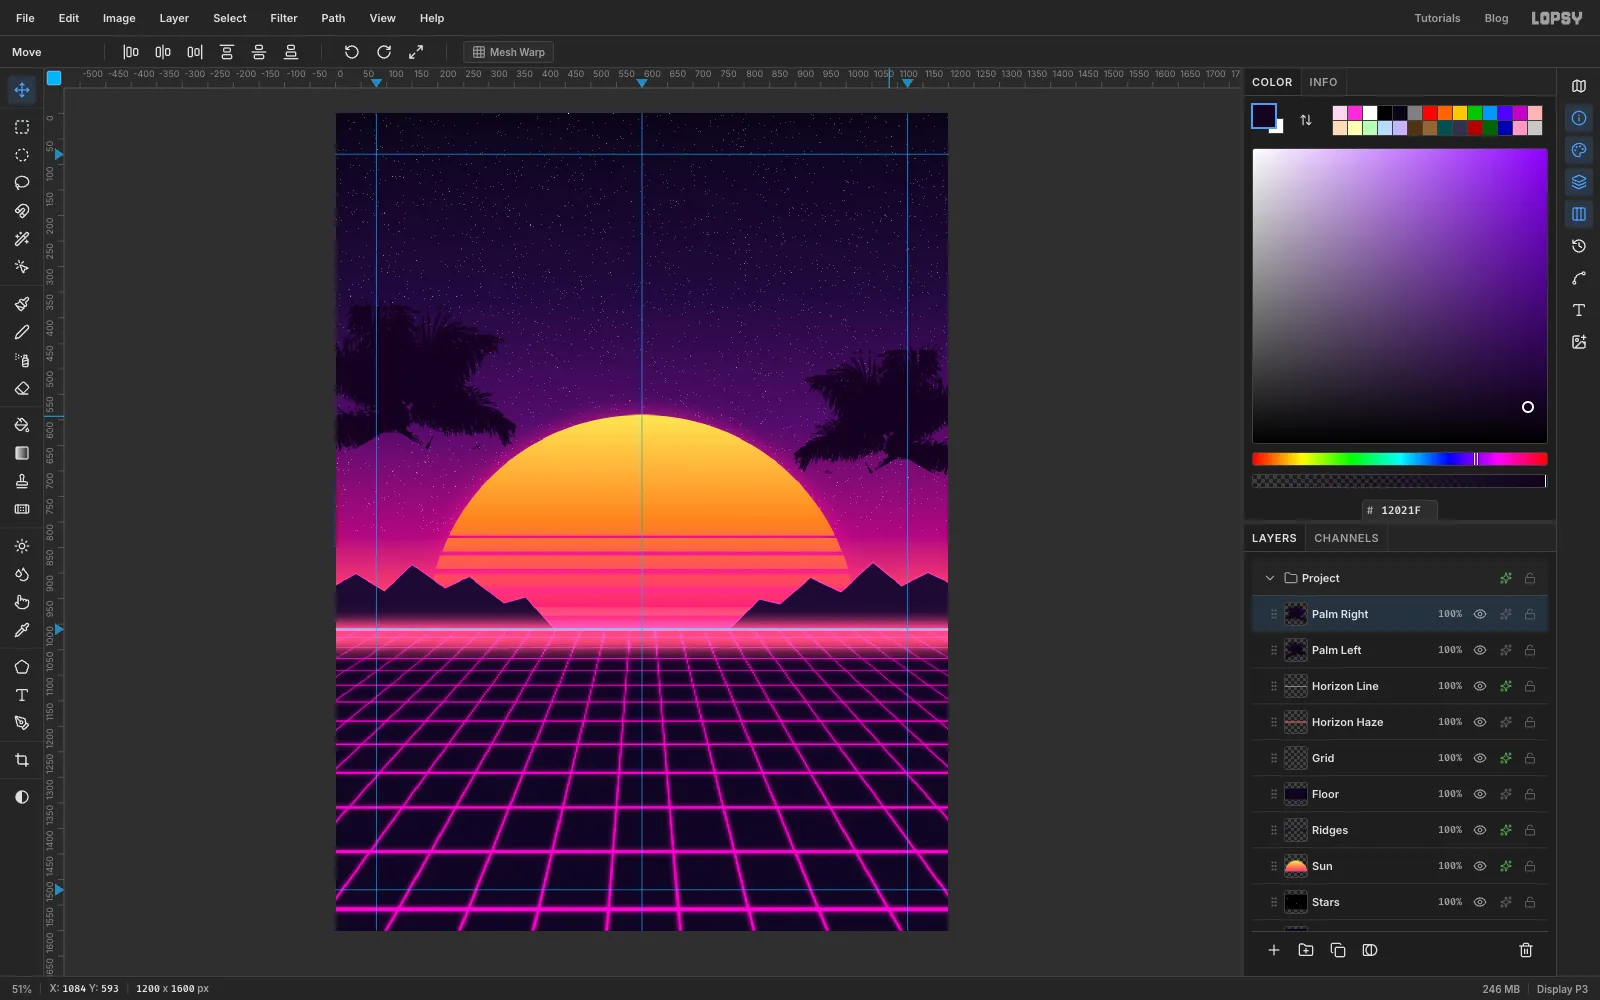
Choose Layer → Duplicate Layer and rename the copy Palm Right. Click its row, marquee around it, and press Flip Horizontal in the Move tool's options bar. Press Enter, then scale it down to about 86% the same way as before.
Drag it to the right edge so the crown hangs off the page there too, a little lower than the left one (top at about y 450). Two palms that don't match exactly look more natural than a mirror image.
-
Draw the trunks with the Pen
Select Horizon Line and add a layer called Trunks, so the trunks sit under the crowns. Set the foreground colour to the palm colour, .
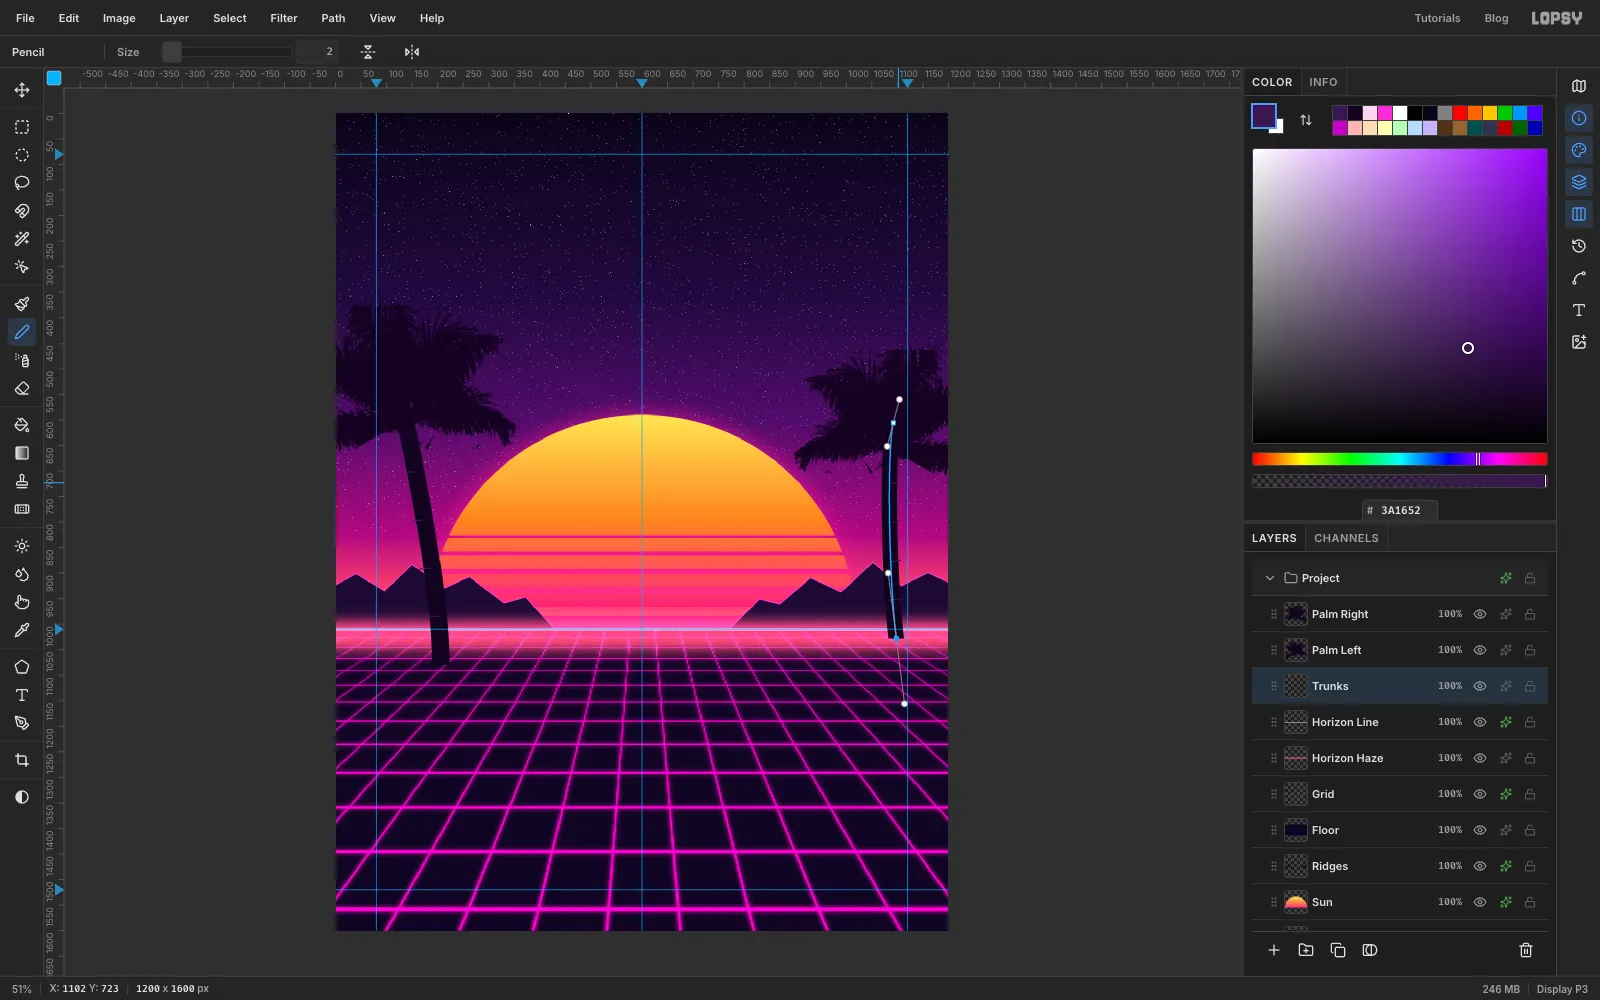
Pick the Brush and click the brush tip button at the left of the options bar to open the Brushes panel. On the Shape tab, set Hardness 100 and Taper 420, then close it. Pen strokes use these settings too. Taper starts a stroke at full width and narrows it toward the end, so draw each trunk from the ground up:
- Pick the Pen, set Stroke to 34 in the options bar, and click-drag at the base of the left trunk, about (206, 1080), pulling the handle upward.
- Click-drag again inside the left crown at about (126, 556) so the trunk reaches well into the fronds. Press Enter to stroke the path.
- Do the same for the right trunk at Stroke 30, from about (1098, 1028) up into the right crown.
Delete the two paths in the Paths panel when you're done. The Pen strokes end in round caps. To square the bottoms off, marquee the area just below each base and press Delete.
Finally, pick the Pencil at Size 2 in and add four short ticks across each trunk, clicking on one side and Shift-clicking on the other. They read as the growth rings on a palm trunk.
-
Add sunset rim light
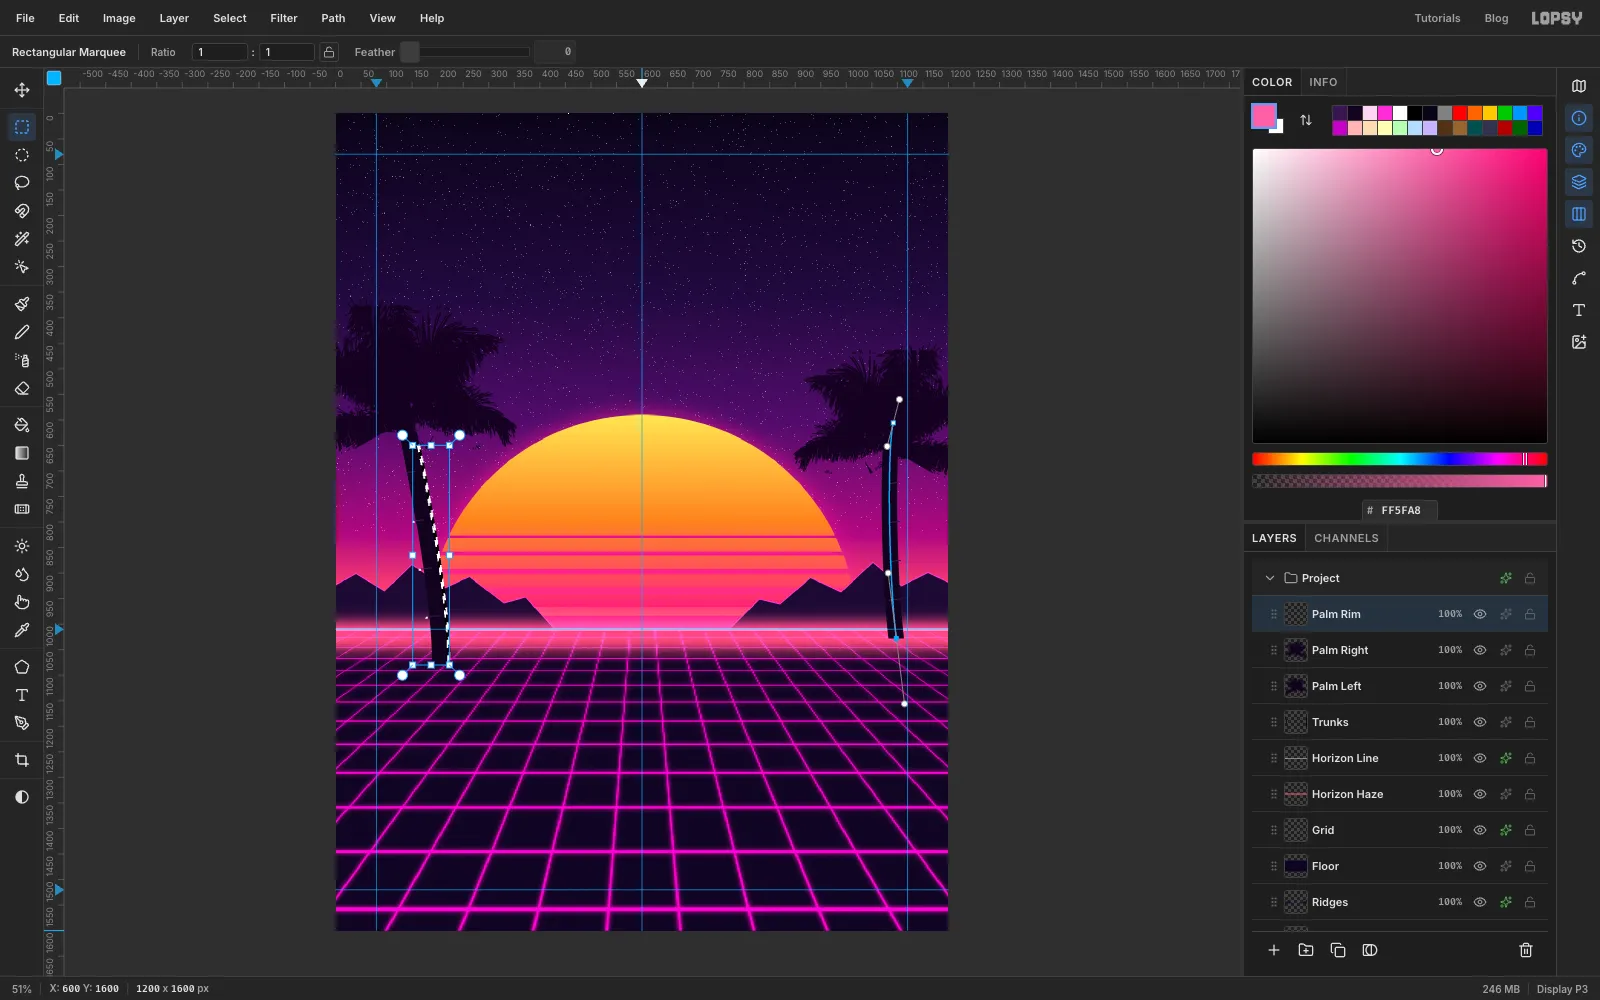
The sun is low in the middle of the page, so the inner edge of each trunk should catch a little pink light. Select Palm Right and add a layer called Palm Rim. Then:
- Cmd-click the Trunks thumbnail to select the trunks' shape.
- Pick the Rectangular Marquee and press ← three times. This moves the selection outline three pixels left without touching the pixels.
- Choose Select → Inverse, then Cmd+Shift+Alt-click the Trunks thumbnail to intersect with the trunks again. What's left is a three-pixel sliver down the right edge of each trunk.
- Hold Shift+Alt and drag a rectangle over the left half of the page, from just below the crown down. That keeps only the left trunk's sliver, and stops it before the crown.
Select Palm Rim, set the foreground to and fill. Repeat with → for the right trunk's left edge, keeping the right half of the page. Set the layer to 80% opacity.
-
Glow the crowns and ground the trunks
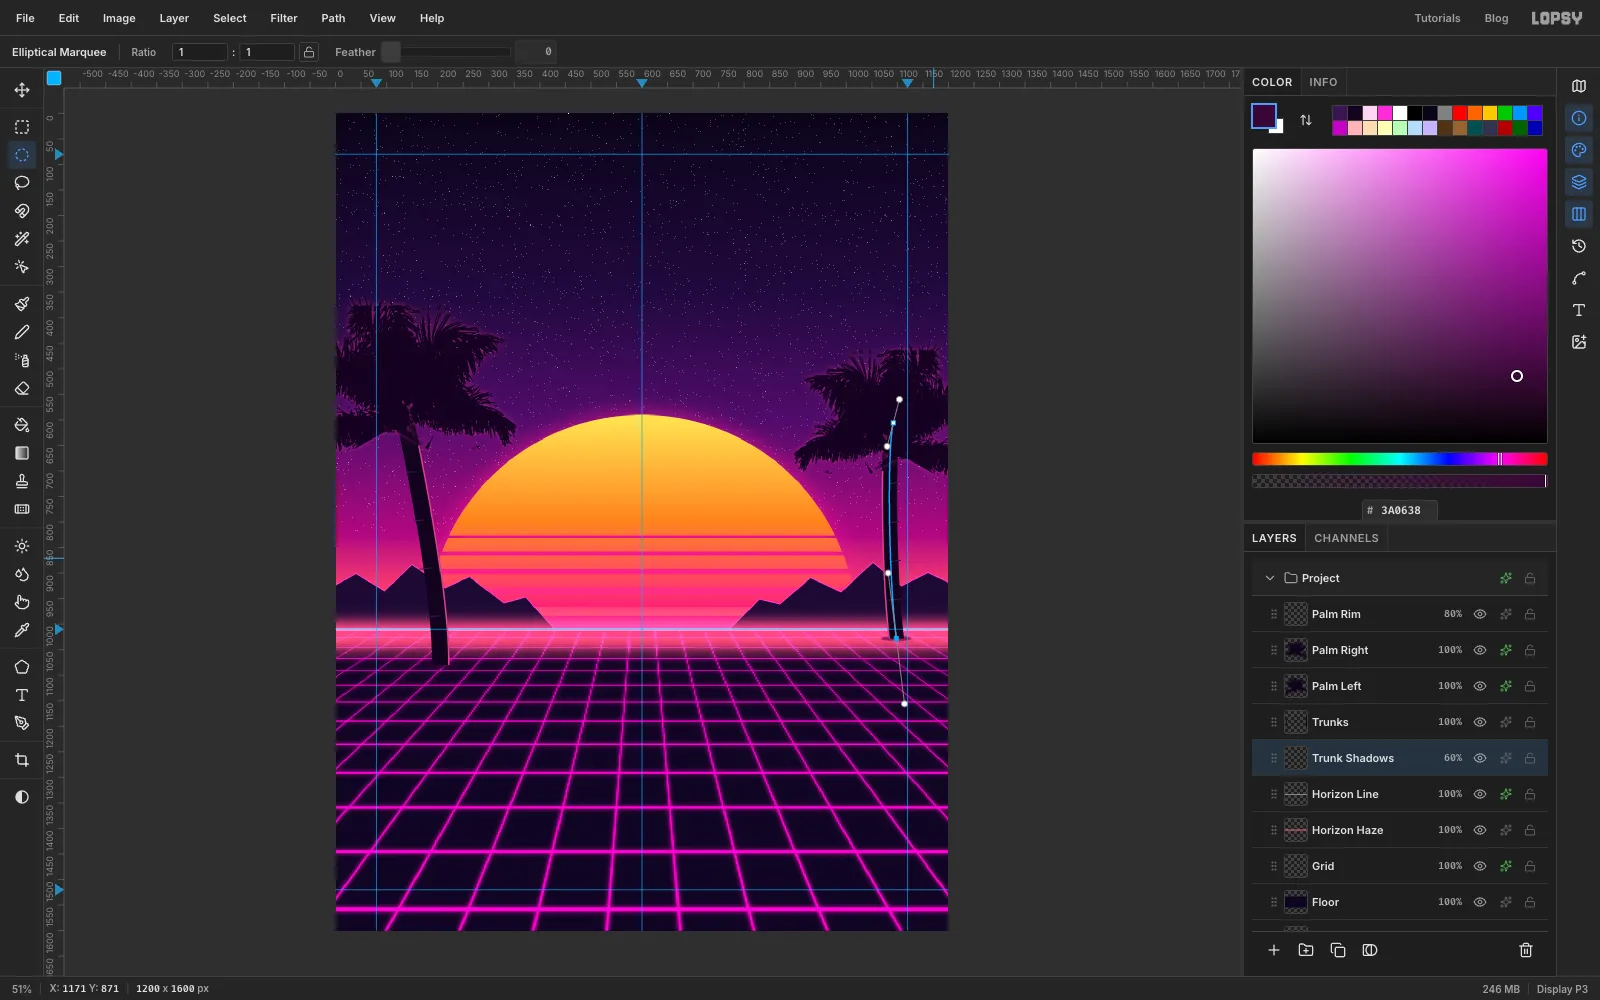
Don't rim-light the crowns the same way: their thresholded edges would turn into jagged pink dashes. Give Palm Left and Palm Right each an Outer Glow of Size 16, Spread 0, Opacity 45, colour instead, for a soft backlit halo.
Select Horizon Line and add a layer called Trunk Shadows, so it sits under the trunks. With the Elliptical Marquee, drag a small flat ellipse (about 68 × 10 px) centred on the base of the left trunk, and Shift-add one about 60 × 10 px at the right trunk's base. Fill with , deselect, run Gaussian Blur… at 3, and set the layer to 60%.
-
Start the cassette: shell and head area
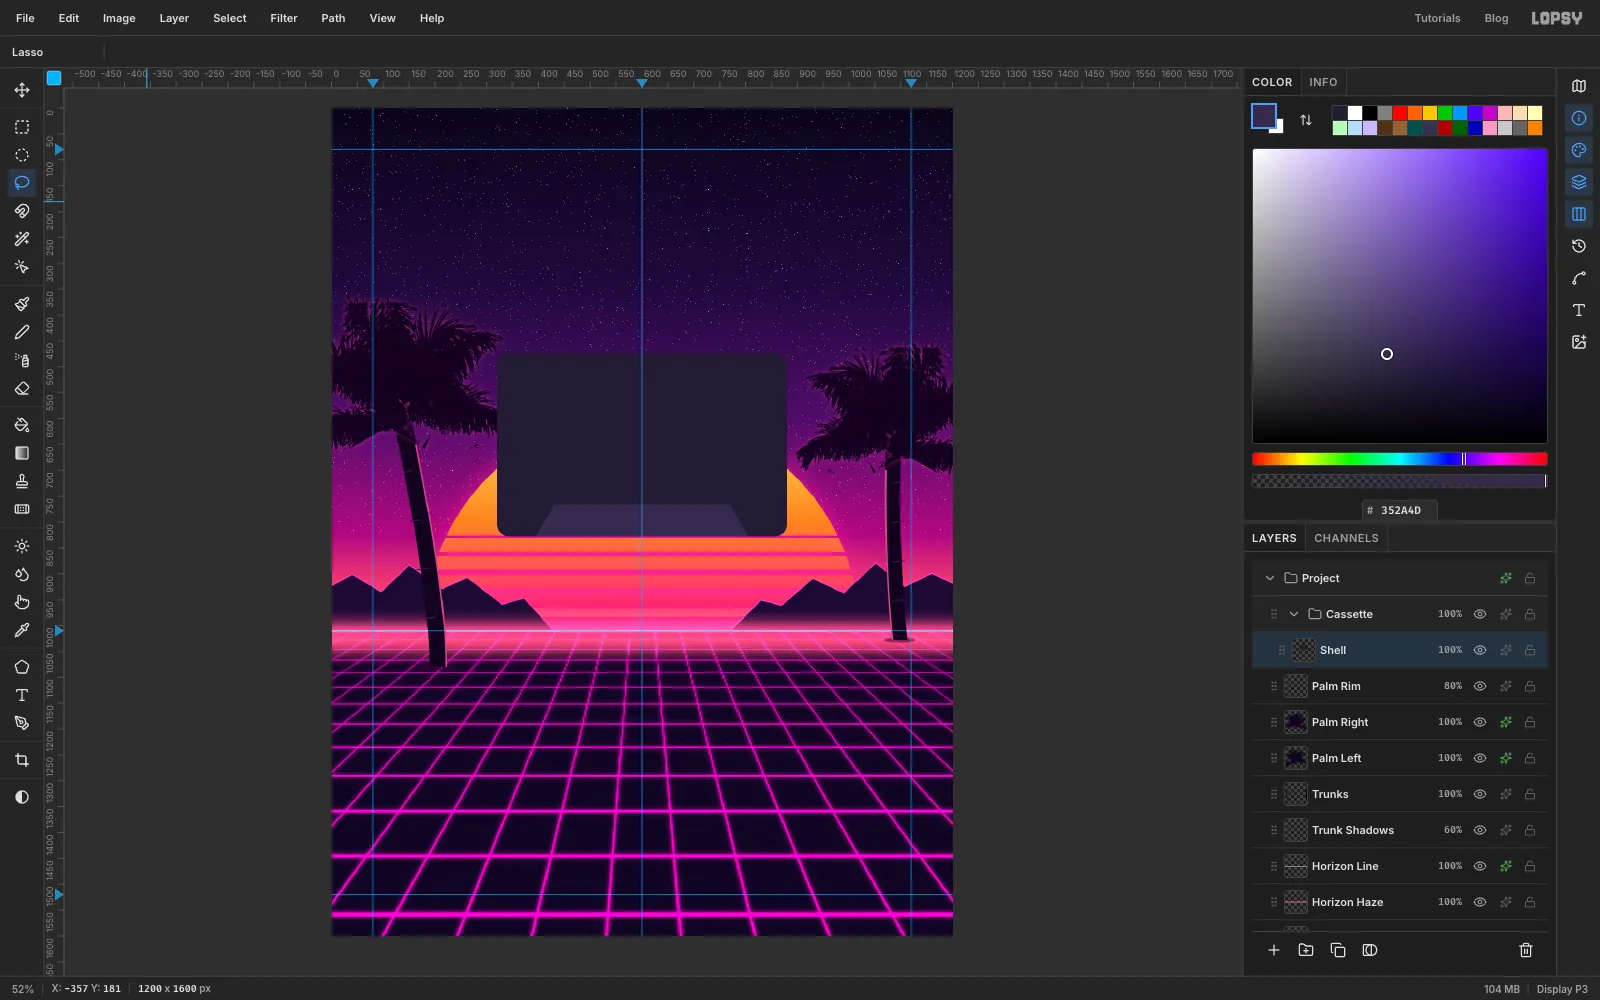
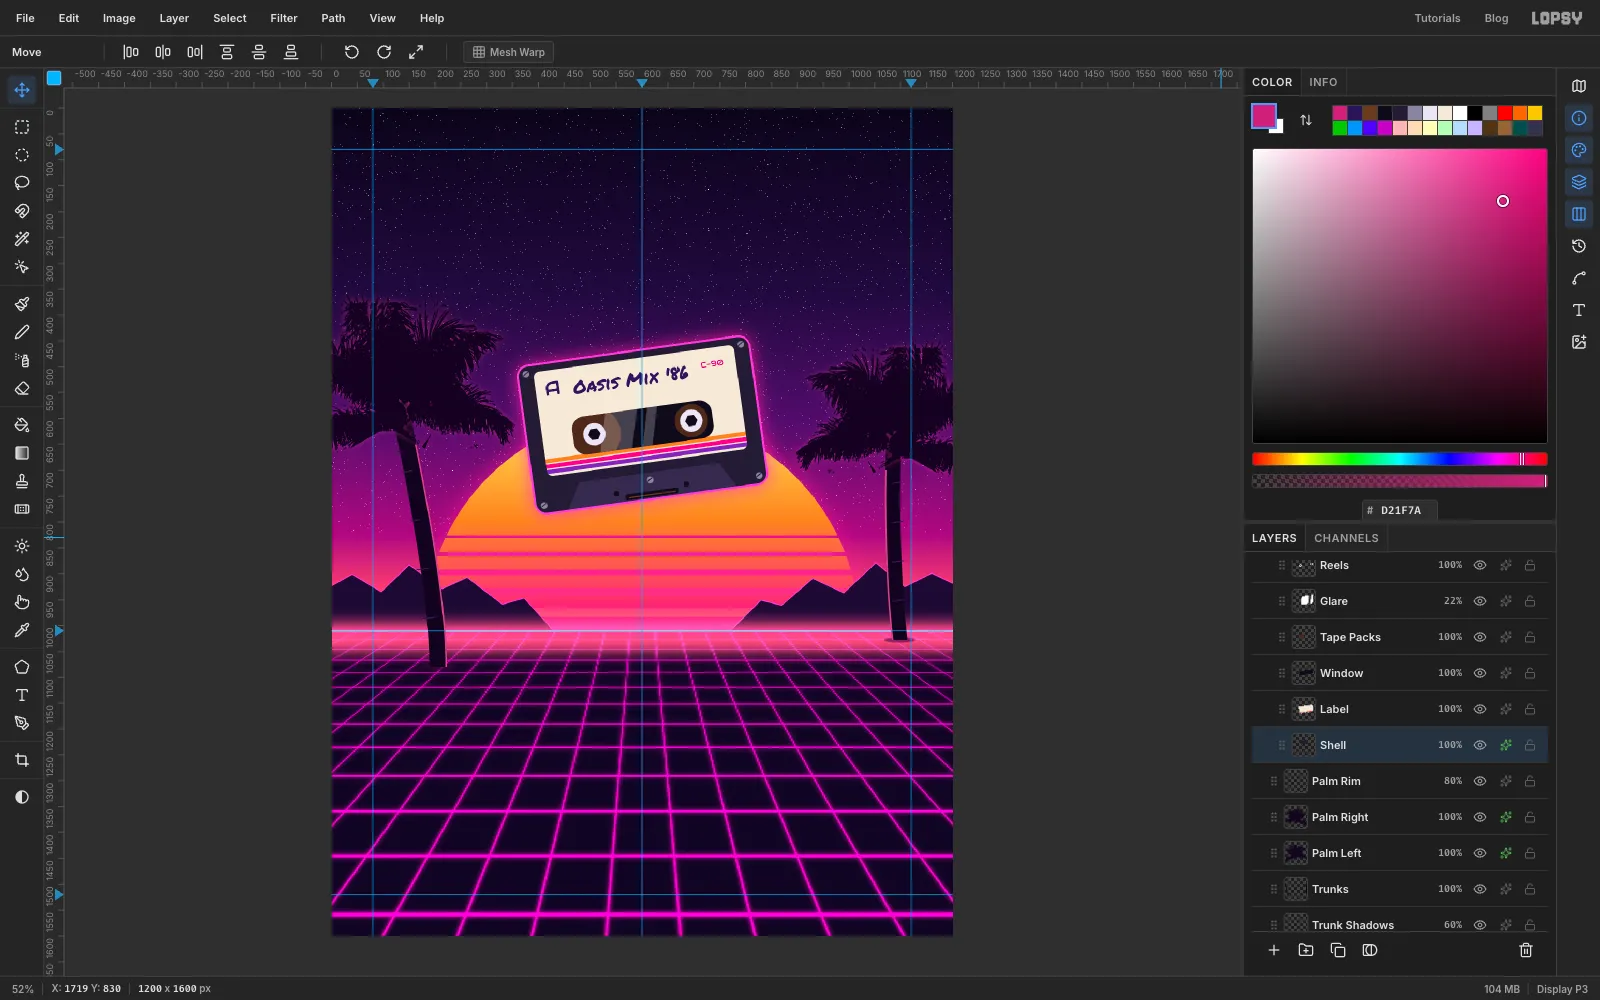
Select Palm Rim and click New Group in the Layers panel. Name the group Cassette, and add a layer inside it called Shell. Build the whole tape upright and centred on the page. You'll tilt it at the end.
Pick the Shape tool, choose Rectangle, set Corner Radius 24, Fill and no stroke. Click once (don't drag) at the centre of the page, at (600, 650). In the Shape Size dialog, enter 560 × 356.
A real cassette has a raised head area along its bottom edge. Lasso a trapezoid that is narrow at the top (about x 430 to 770 at y 766) and wider at the shell's bottom edge (about x 395 to 805). Fill it with .
-
Add the label and its stripes
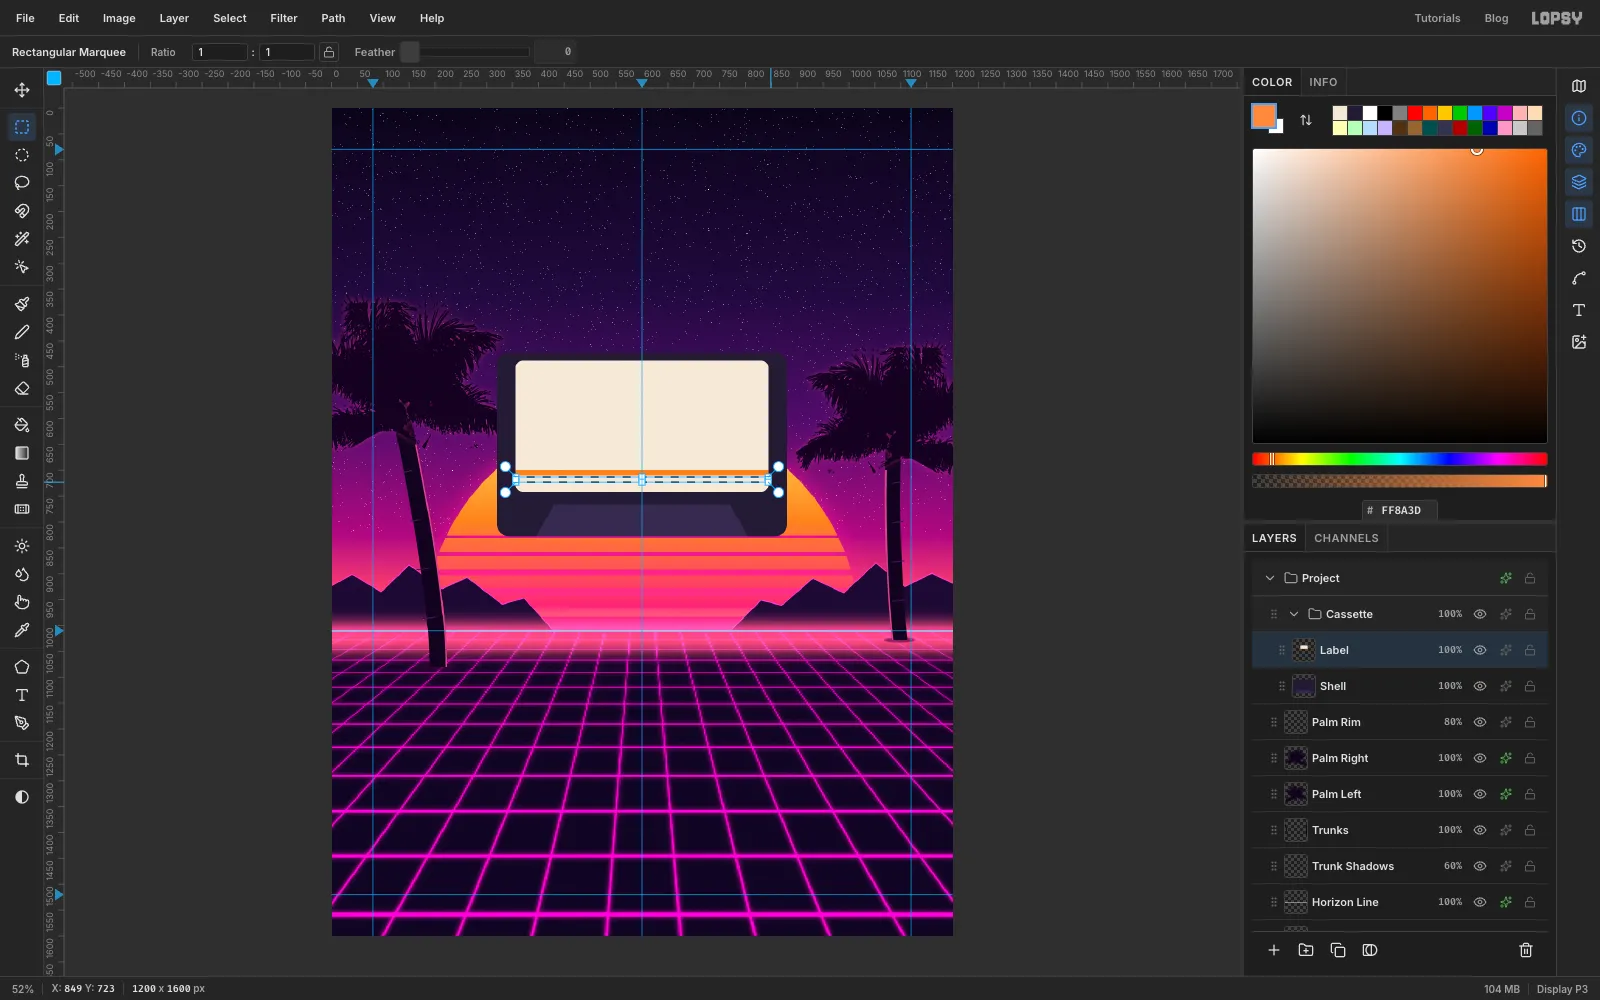
Add a layer called Label. With the Shape tool, set Corner Radius 14 and Fill , and click-create a 488 × 254 rectangle centred at (600, 615).
Paint three stripes along the bottom of the label so that they follow its rounded corners:
- Cmd-click the Label thumbnail.
- Hold Shift+Alt and drag a band across the whole label from y 700 to y 710, a little wider than the label.
- Fill with .
Repeat for a band from y 713 to 723 and a band from y 726 to 736. The label's bottom edge is at y 742, so the last band runs into its rounded corners and gets clipped to them.
-
Cut the window and show the tape inside
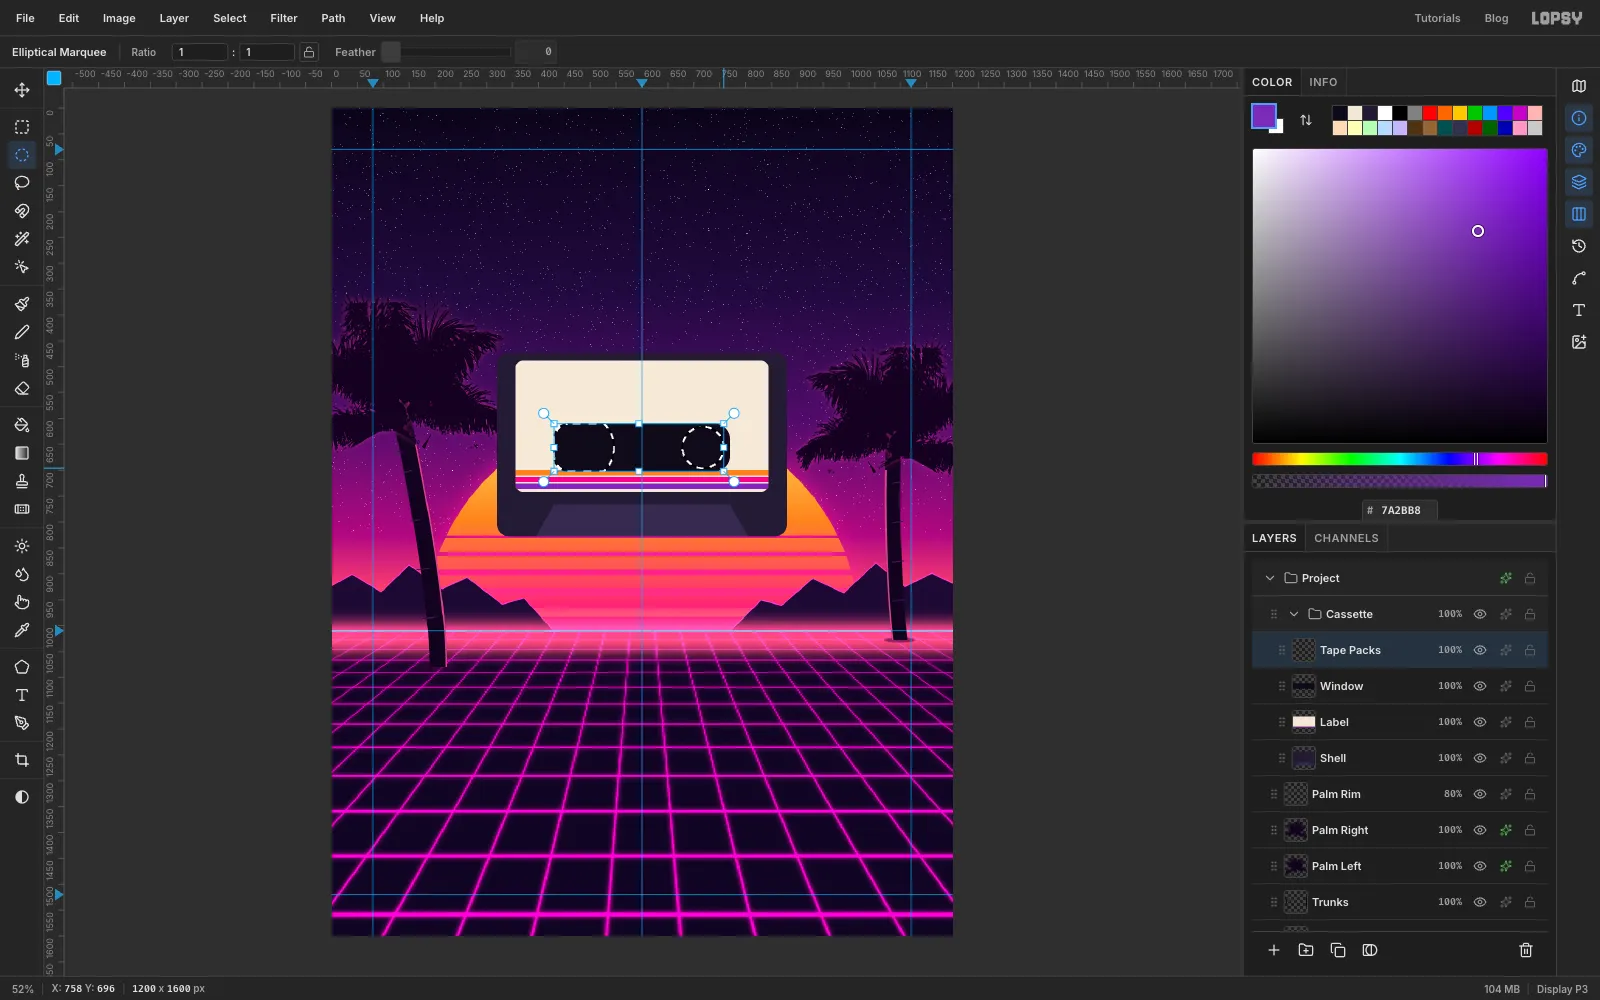
Add a layer called Window and click-create a 340 × 92 rectangle with Corner Radius 30, Fill , centred at (600, 656).
Add a layer called Tape Packs. With the Elliptical Marquee, drag a circle about 128 px across around the left reel position (482, 656). Hold Shift and add a smaller circle, about 80 px across, around the right reel (718, 656). A cassette that's been played halfway has more tape on one side.
Cmd+Shift+Alt-click the Window thumbnail to clip the circles to the window, and fill with .
-
Add the reels, screws and tape slot
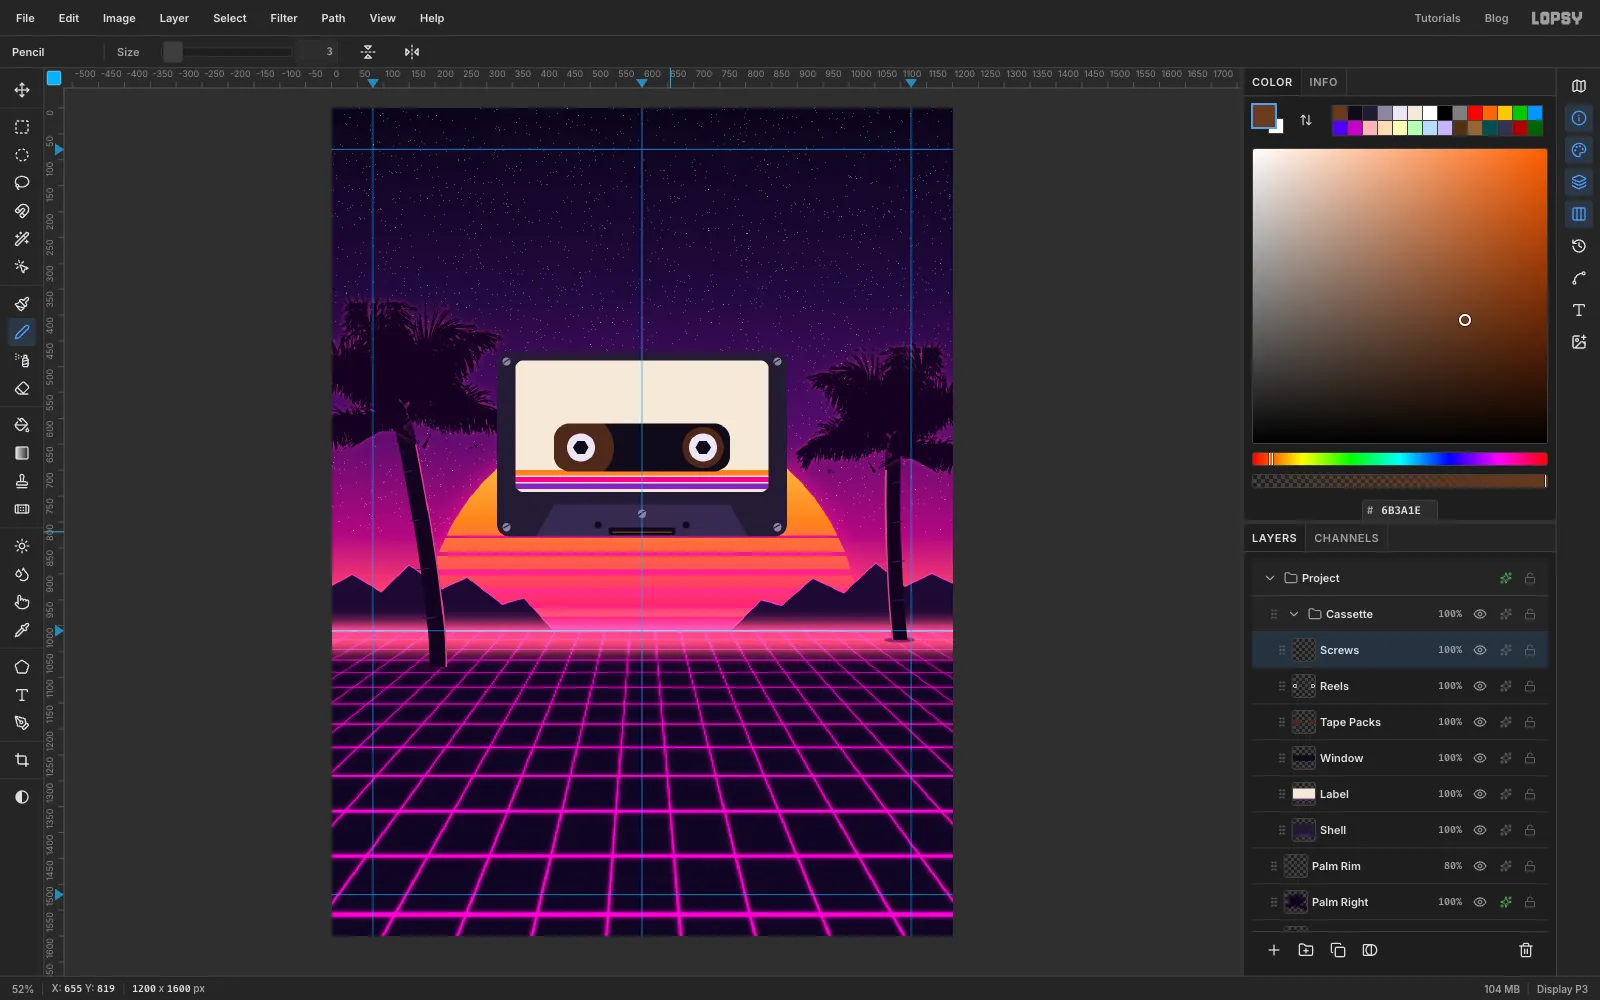
On a new layer called Reels, click-create two 54 × 54 ellipses in on the reel positions. Then switch the Shape to Polygon with 6 sides and click-create a 30 × 30 hexagon in on each one.
On a layer called Screws:
- Click-create 16 × 16 ellipses in at the four corners of the shell and one in the head area at (600, 784). Draw a short Pencil line across each in the shell colour for the screw slot.
- Along the bottom edge, click-create a 130 × 14 dark slot (Corner Radius 4) at (600, 818) and a 14 × 14 hole on either side of it.
- With the Pencil at Size 3 in , draw a line along the slot. That's the tape showing through, ready to spill out.
-
Put a glare on the window
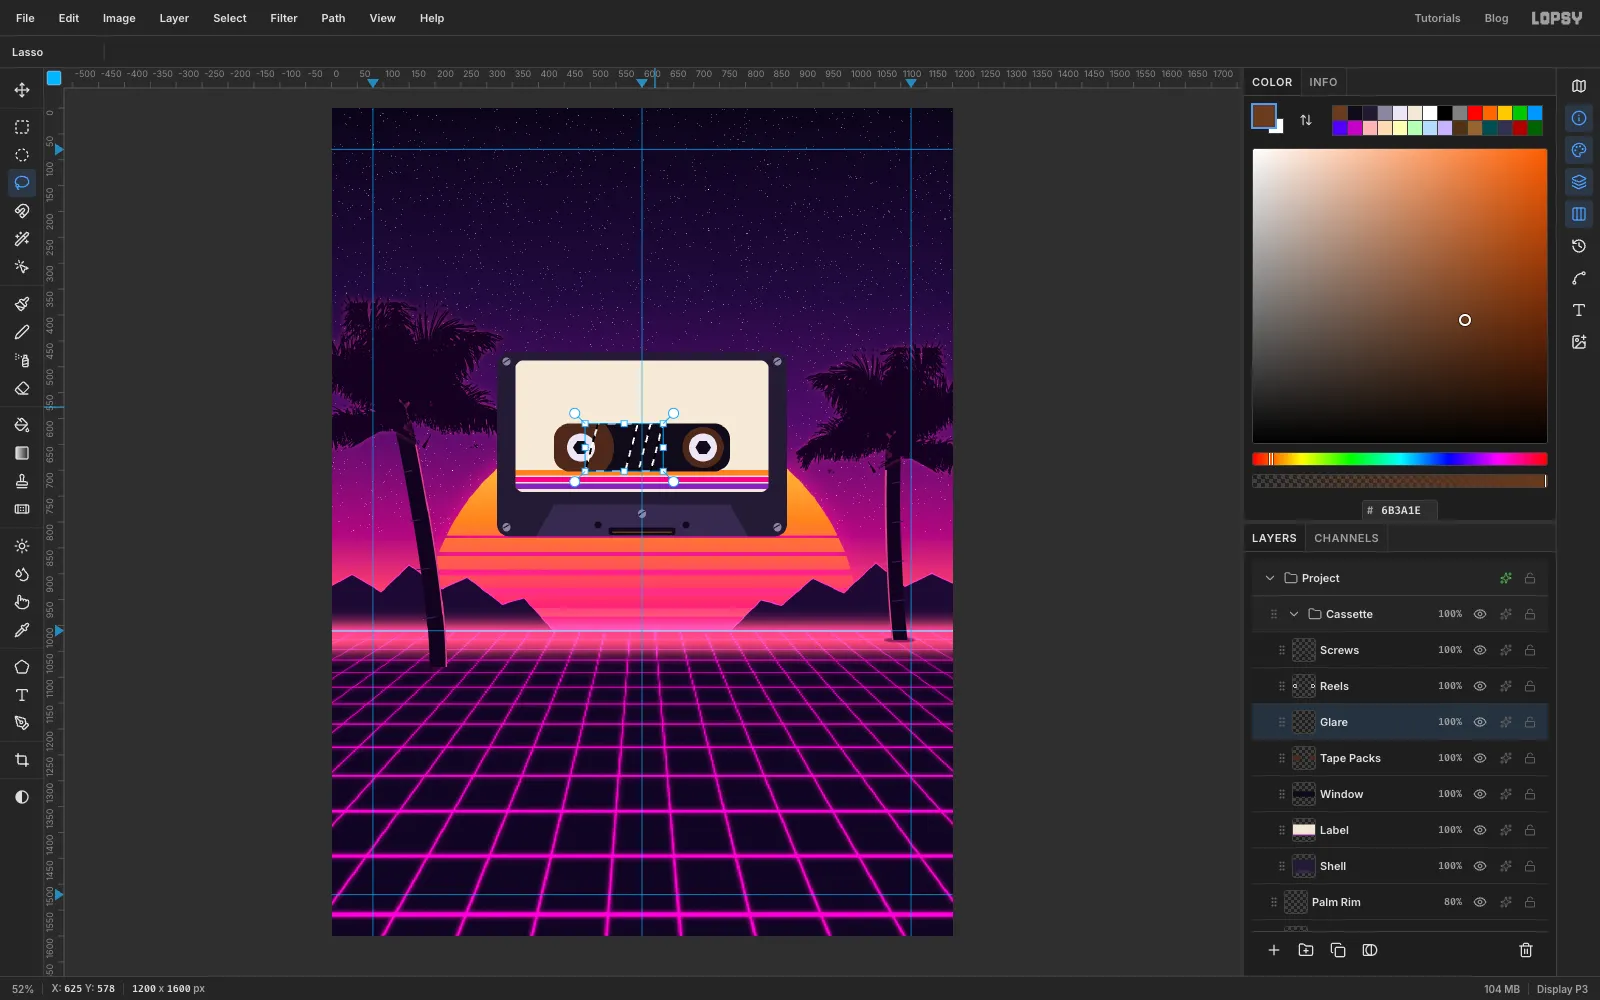
Select Tape Packs and add a layer called Glare. Lasso a broad slanted band across the window, and Shift-add a thin one beside it. Cmd+Shift+Alt-click the Window thumbnail to keep only the part inside the window. Fill with white and drop the layer to 22% opacity. It reads as light on clear plastic.
-
Letter the label
Select Screws before each new piece of text. If a text layer is active, the text options restyle it instead of setting up the next one.
With the Text tool:
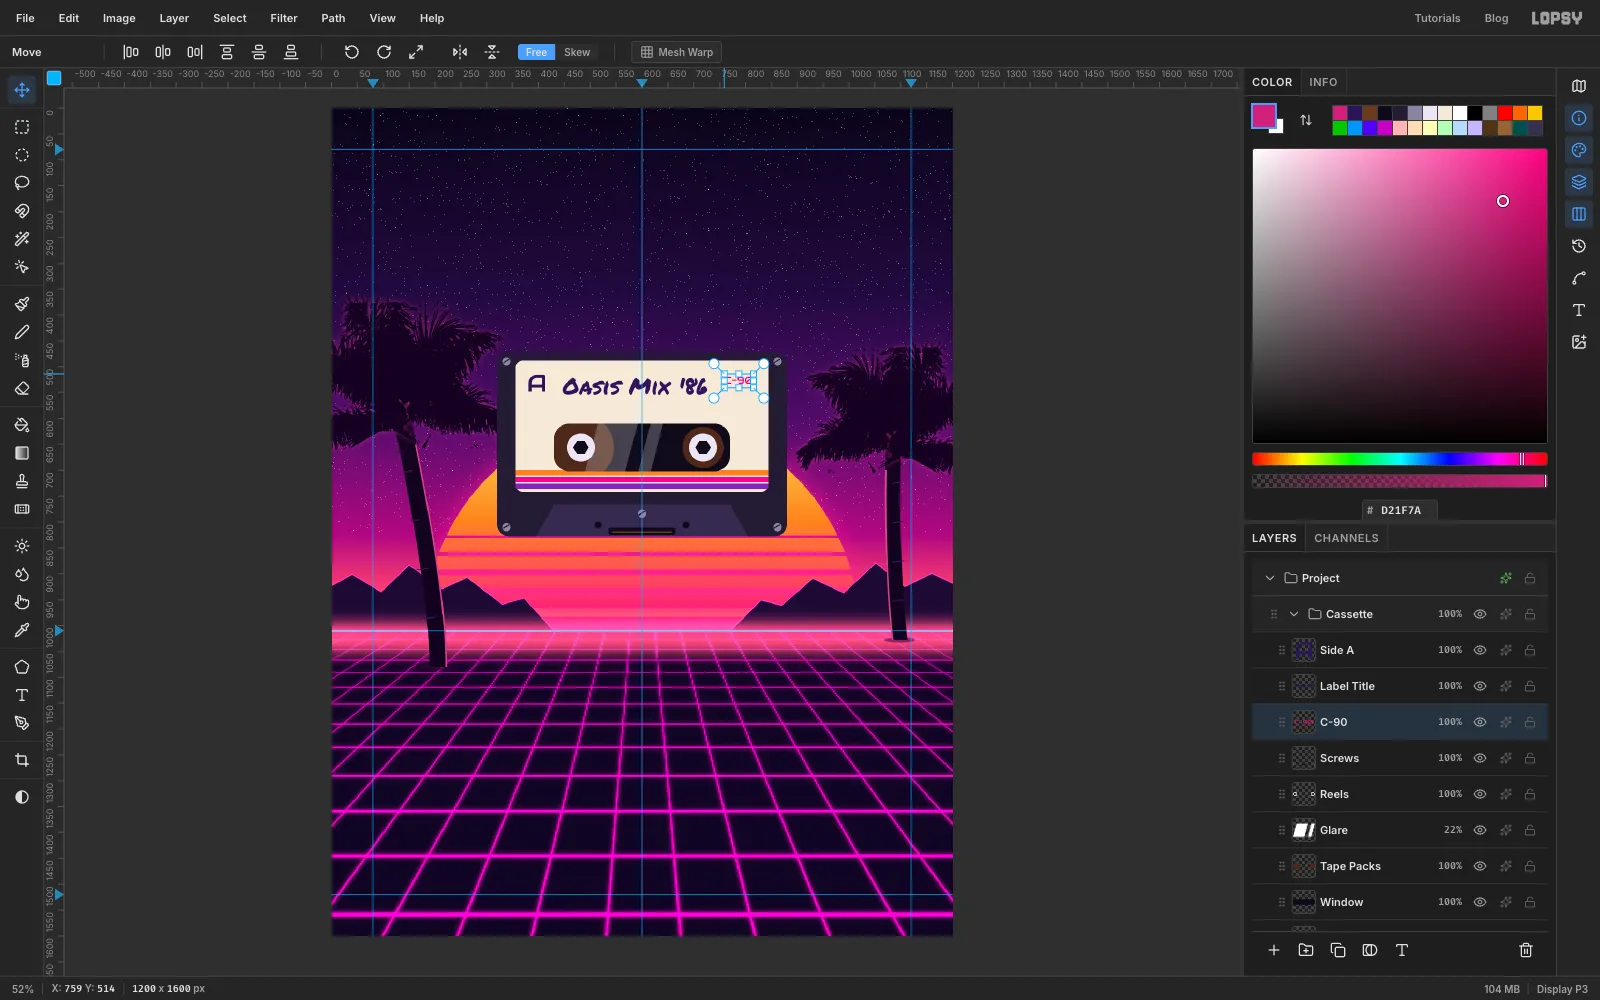
- A in Audiowide at 46 px, colour , in the label's top-left corner (side A of the tape). Name the layer Side A.
- Oasis Mix '86 in Permanent Marker at 44 px, same colour, so it looks hand-written on the label. Name it Label Title.
- C-90 in Audiowide at 19 px, , tucked into the top-right corner with about the same margin as the A.
-
Scale the whole cassette as one
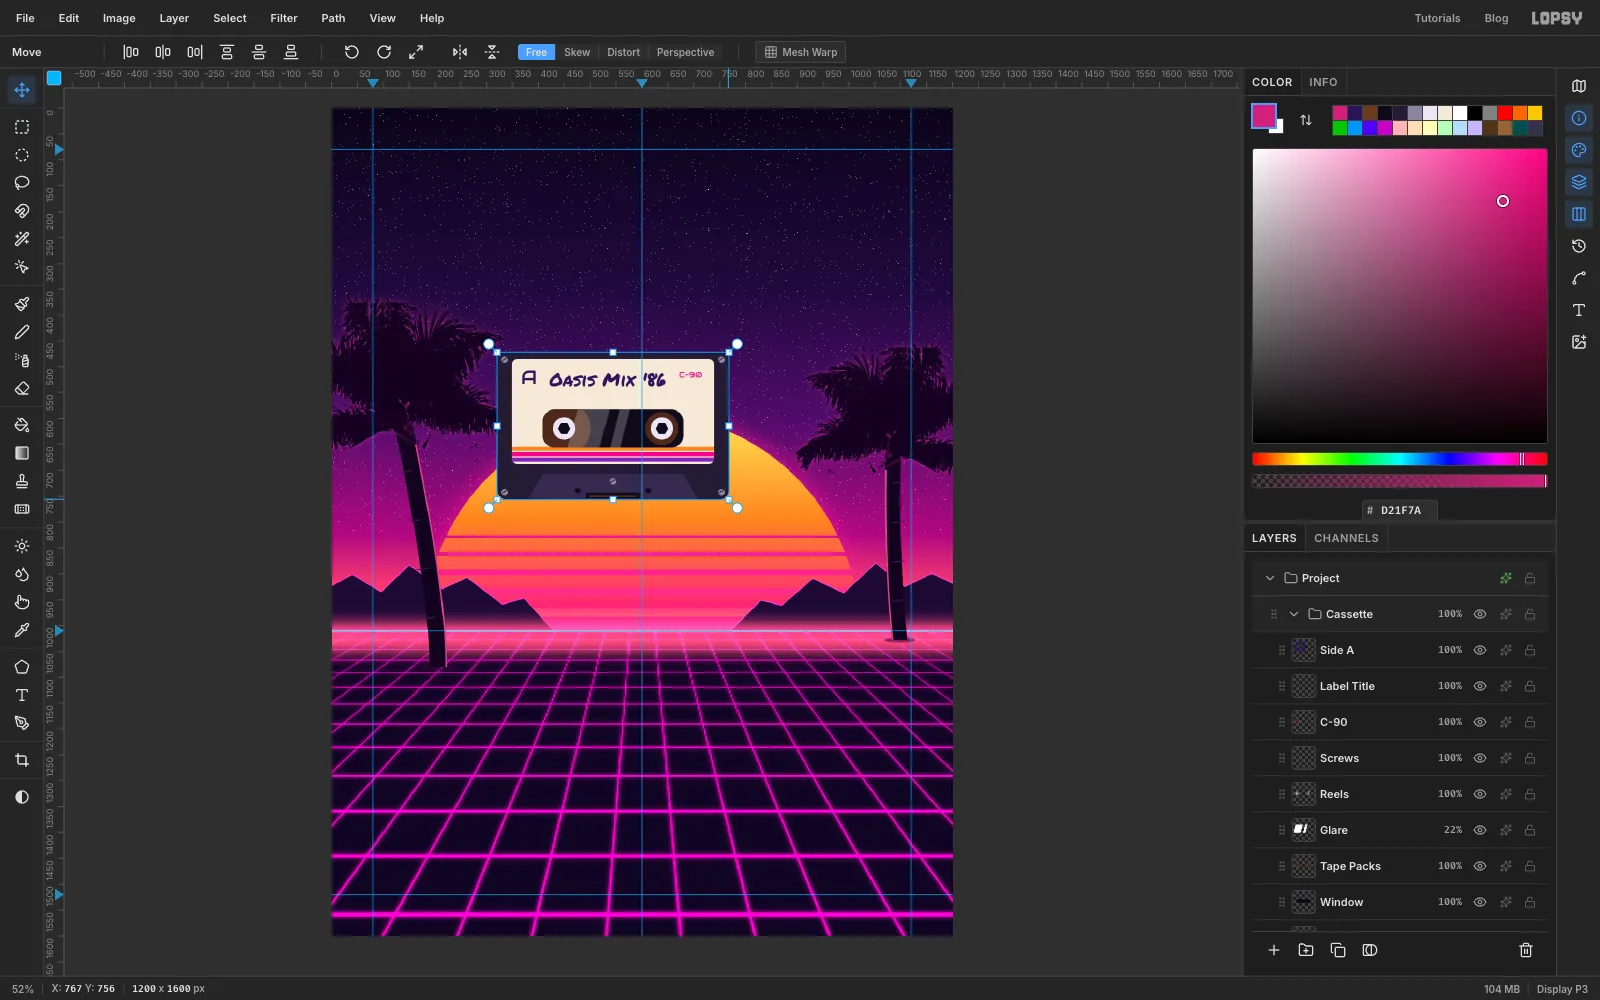
The cassette covers too much of the sun, so make the whole group smaller. Press Cmd+D, click the Cassette group row in the Layers panel, and pick the Move tool. With no marquee, the transform box frames every layer in the group, text included.
Hold Cmd and drag the bottom-right handle in to about 80%. Then drag from inside the box to centre the cassette at about (600, 612), a little higher than before.
-
Tilt the cassette
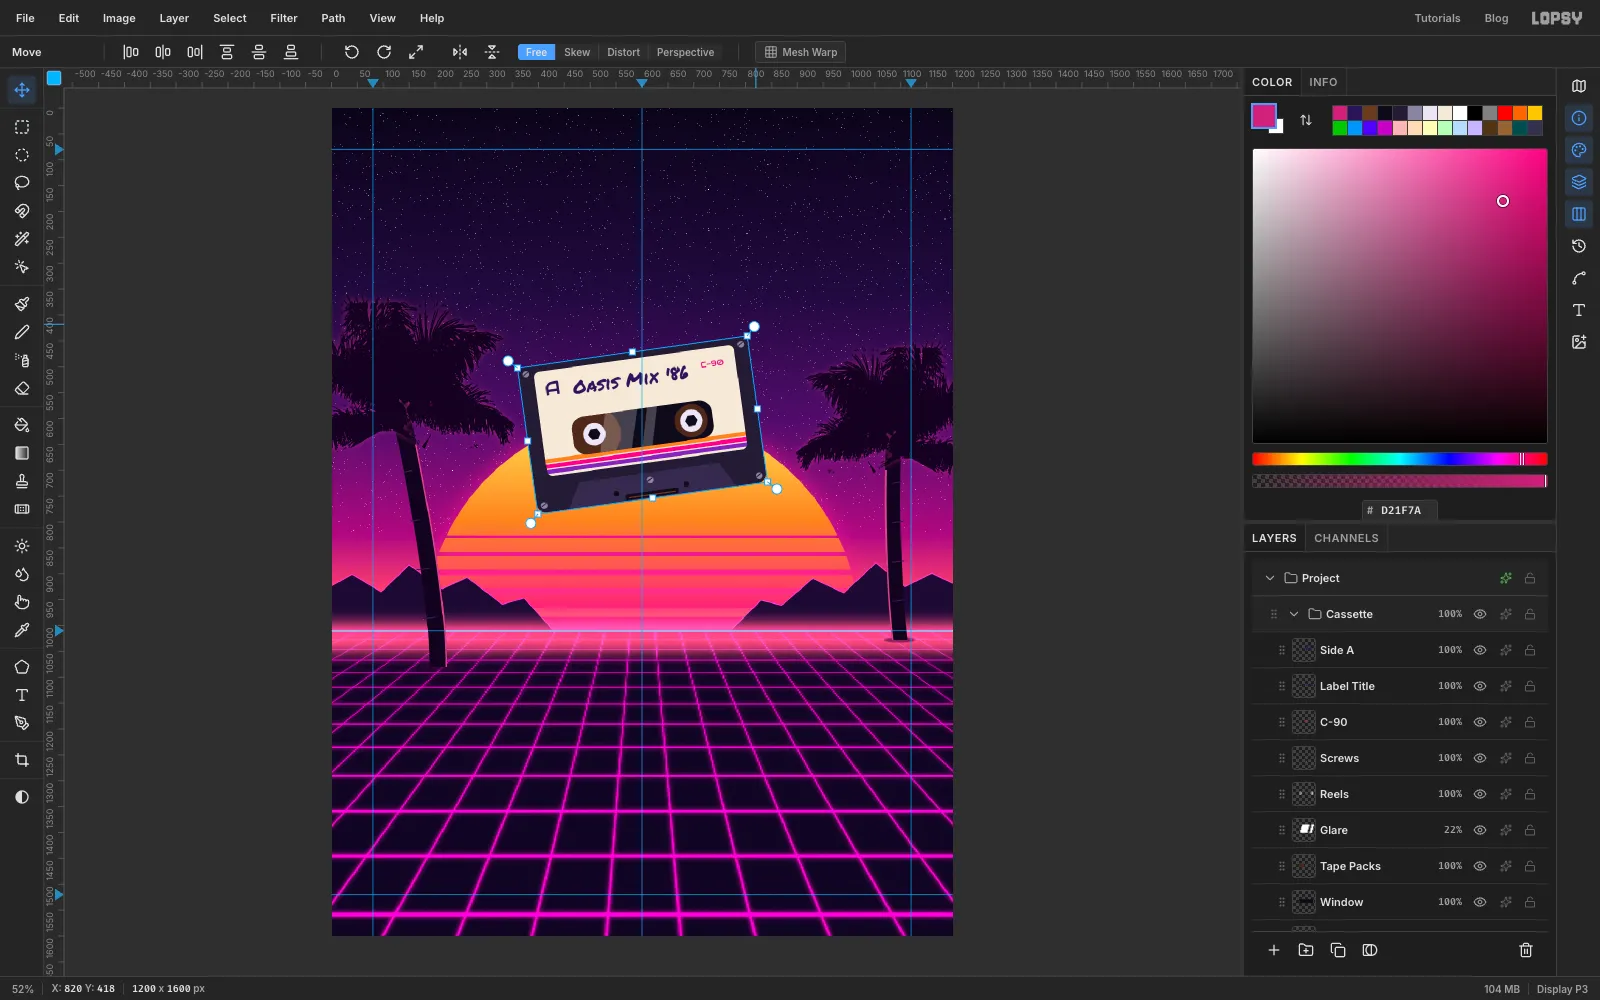
Still in the same box, drag the top-right rotation handle (the circle just outside the corner) a little counter-clockwise, about 8°. A small tilt makes the tape look like it's floating rather than pasted on.
Press Esc to finish. For this kind of transform, Escape applies the change rather than cancelling it. The label text is still live text: it was turned and scaled with the rest, so you could still fix a typo in it.
-
Give the shell a neon edge
Expand the Cassette group, select Shell, and add a Stroke of Width 4 in and an Outer Glow of Size 46, Spread 4, Opacity 75, colour .
-
Spill the tape across the grid
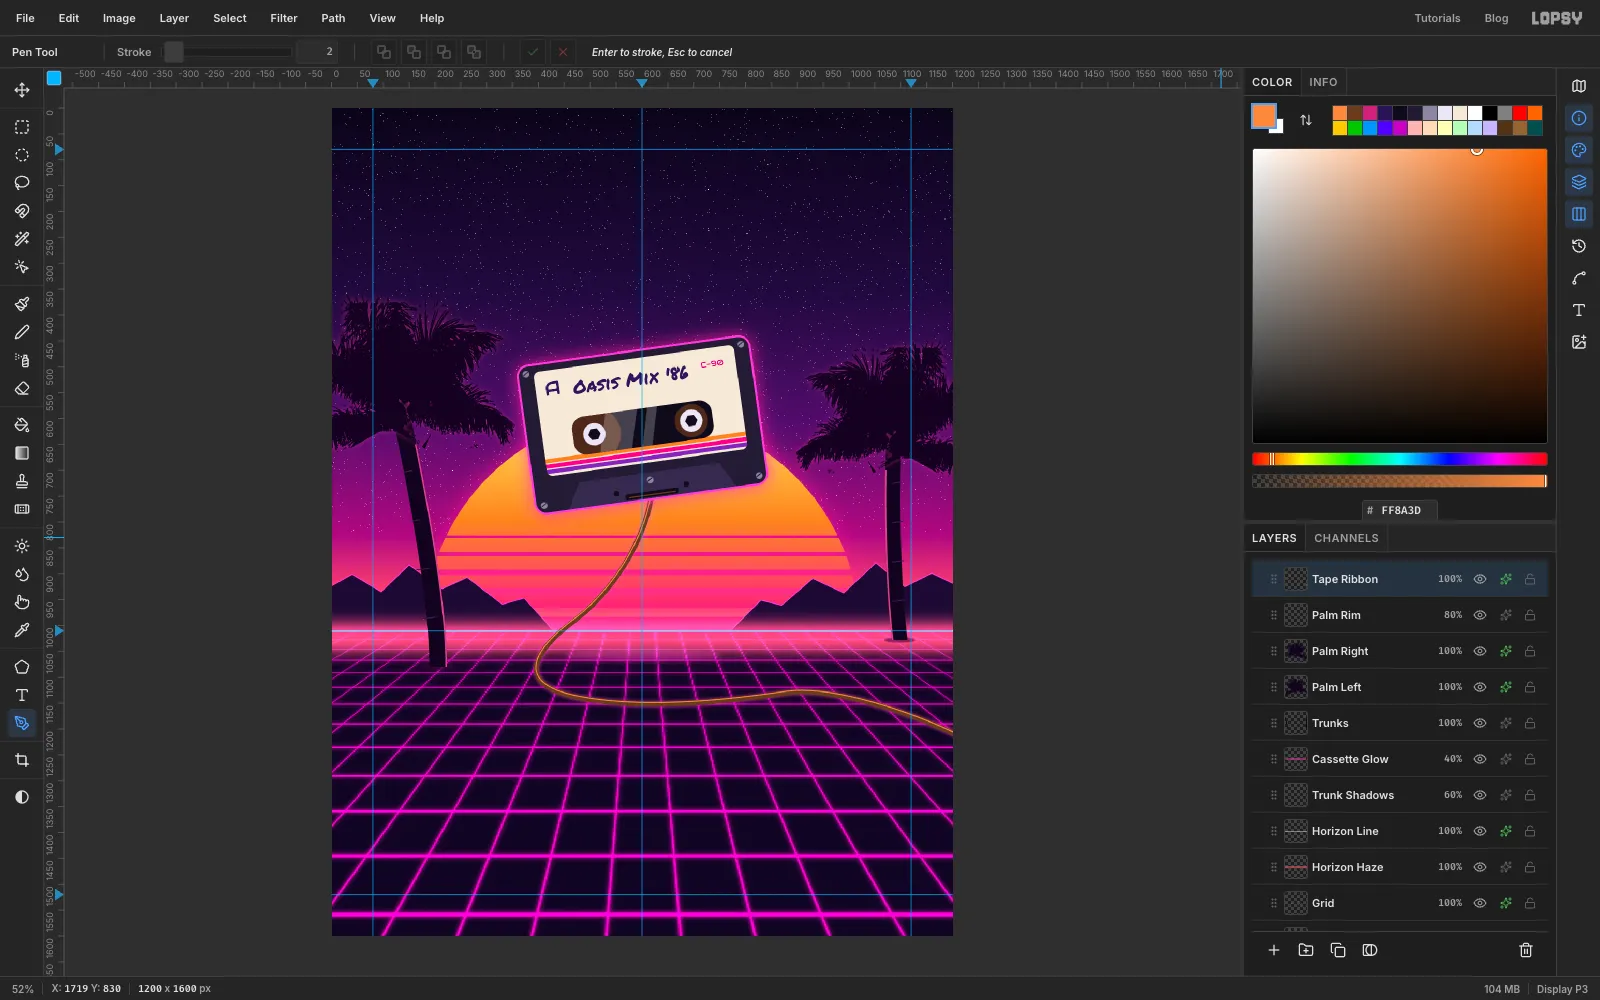
For a soft reflection on the grid, select Trunk Shadows and add a layer called Cassette Glow. Fill a flat ellipse about 300 × 20 px under the cassette with , blur it by 14, set it to Screen at 40%.
Select Palm Rim and add a layer called Tape Ribbon (it goes under the cassette group). In the Brushes panel set Taper back to 0. Set the foreground to and use the Pen at Stroke 10:
- Click-drag at the slot.
- Click-drag down to the left of the sun at about (470, 990).
- Curl back across at about (480, 1140).
- Sweep right across the grid at about (880, 1130).
- Finish off the right edge of the page.
Press Enter, and delete the path in the Paths panel. For a shiny highlight, set the foreground to and trace a second Pen path along the top edge of the tape, about 3 px above the first one's centre, following the same curve. Stroke it at 2 and delete that path too. Give the layer an Outer Glow of Size 10, Opacity 70, colour .
-
Set the title
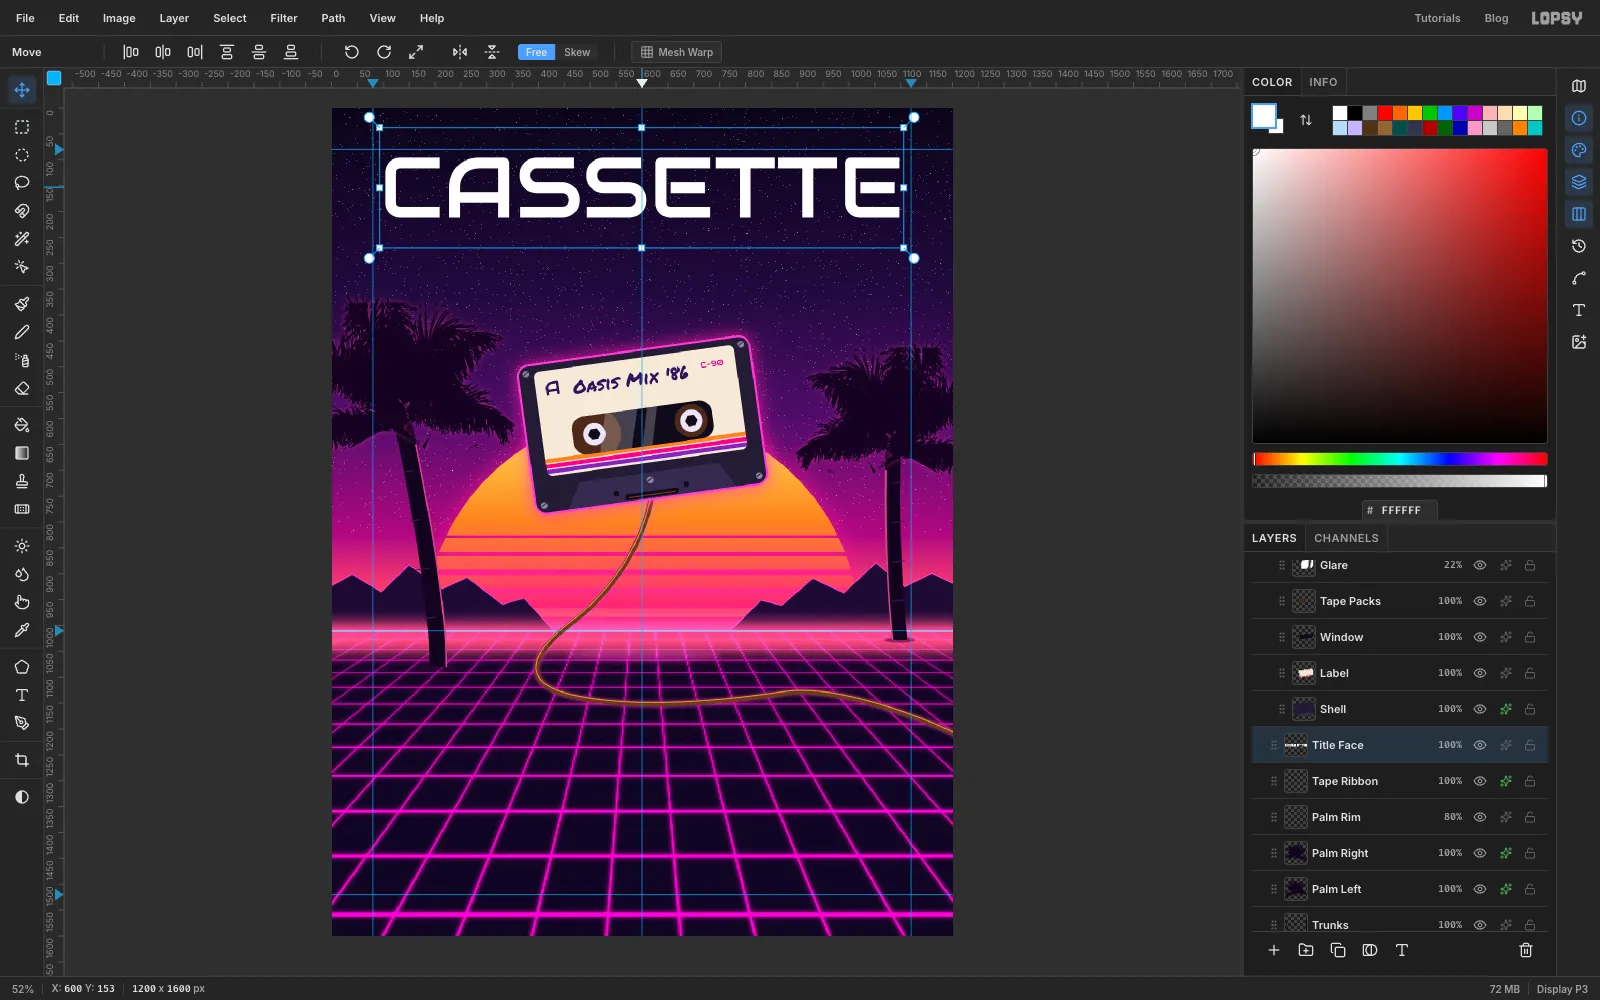
Select Tape Ribbon, pick the Text tool, and type CASSETTE in Audiowide at 166 px in white. Name the layer Title Face for now. At that size it spans almost exactly 1000 px. Centre it with the Move tool, with its top at about y 96, just under the top guide.
-
Build the 3D extrusion
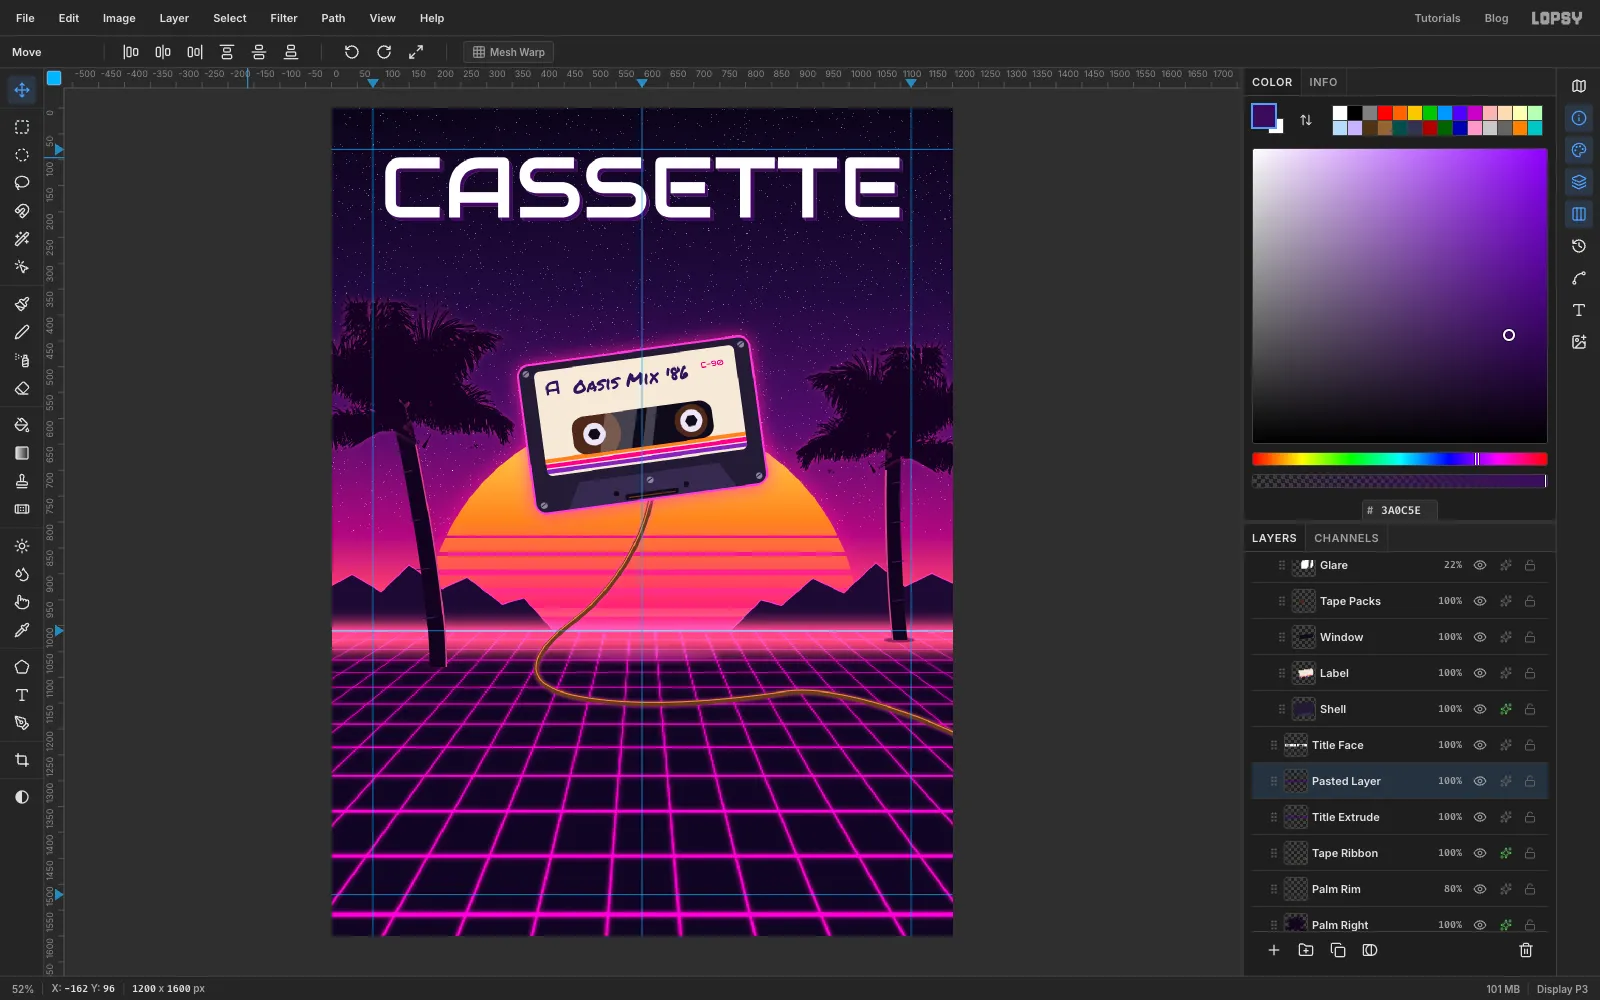
Click the Rasterize Layer button (the T icon at the bottom of the Layers panel) to turn the text into pixels. Cmd-click its thumbnail and press Cmd+C then Cmd+V to paste an exact copy on top. Name the original Title Extrude and the copy Title Face.
On Title Extrude, Cmd-click the thumbnail and fill with . Now build the depth by doubling:
- Cmd-click the Title Extrude thumbnail, then Cmd+C and Cmd+V.
- Press Cmd+D, pick the Move tool and nudge the copy 2 px right and 2 px down with the arrow keys.
- Choose Layer → Merge Down.
- Repeat with a nudge of 4 px, then 8 px.
The stack ends up 14 px deep and solid all the way through. Doubling the nudge each time takes three merges instead of fourteen.
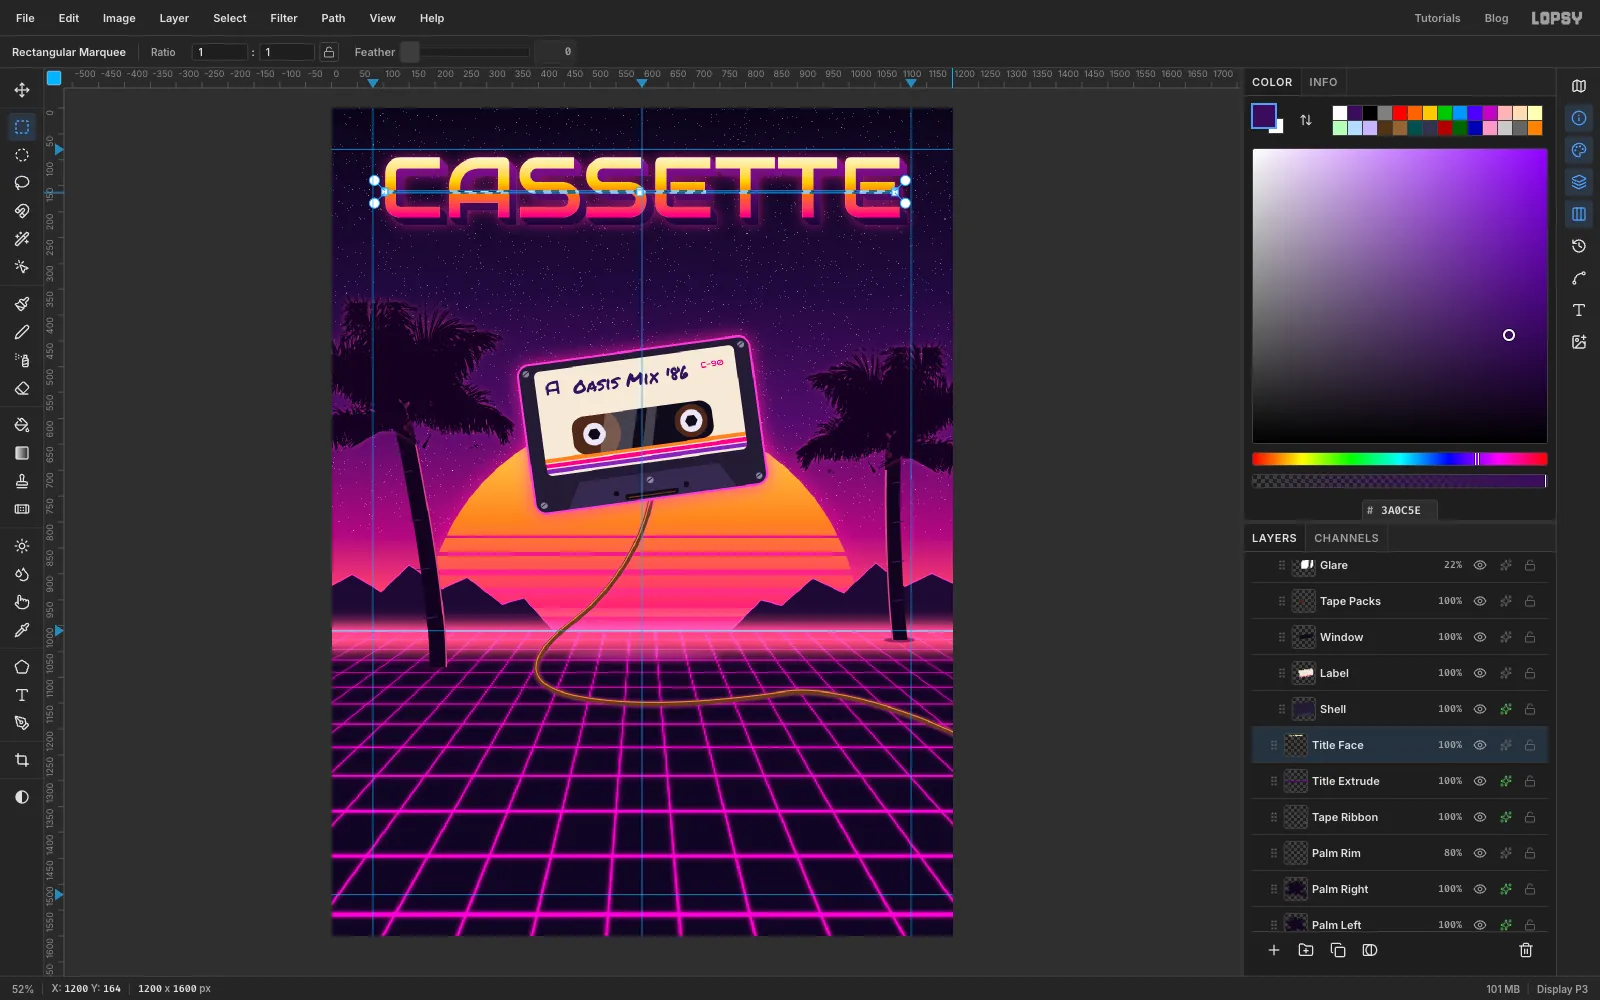
Cmd-click the extrusion again and drag a Linear gradient from at the top to at the bottom. Then add an Outer Glow of Size 34, Opacity 55, colour .
-
Paint the sunset face
Select Title Face and Cmd-click its thumbnail. Drag a Linear gradient from the top of the letters to the bottom with these stops:
- at 0%
- at 40%
- at 62%
- at 100%
Keep the selection, hold Shift+Alt, and drag a 4 px band across the letters a little below their middle. Fill it with for a bright chrome "horizon" line through the type. Deselect and add an Inner Glow of Size 5, Opacity 70 in white to bevel the edges.
-
Add "Oasis" and tilt it
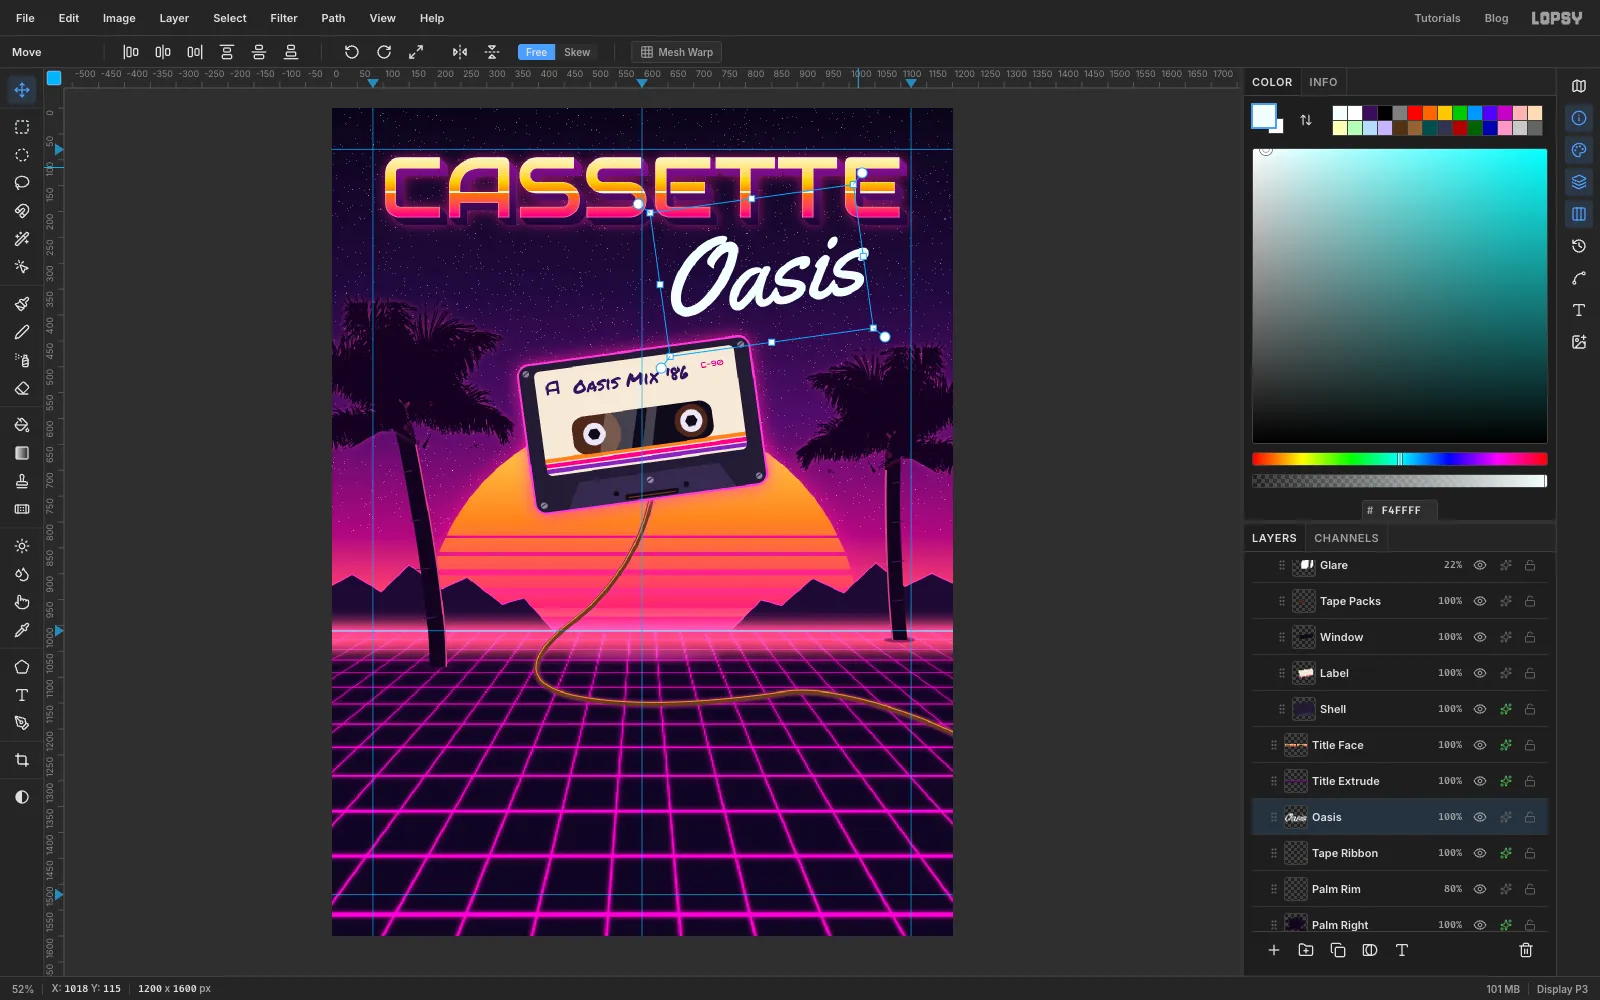
Select Tape Ribbon again and type Oasis in Yellowtail at 200 px, colour . Name the layer Oasis.
Press Cmd+D and pick the Move tool. A text layer gets its own transform box with nothing selected. Drag its top-right rotation handle counter-clockwise by about 8°, the same tilt as the cassette.
Then drag the word so its right edge lines up with the right edge of the E in CASSETTE. Its top should sit about 15 px below the extrusion so the two don't touch.
-
Turn "Oasis" into neon
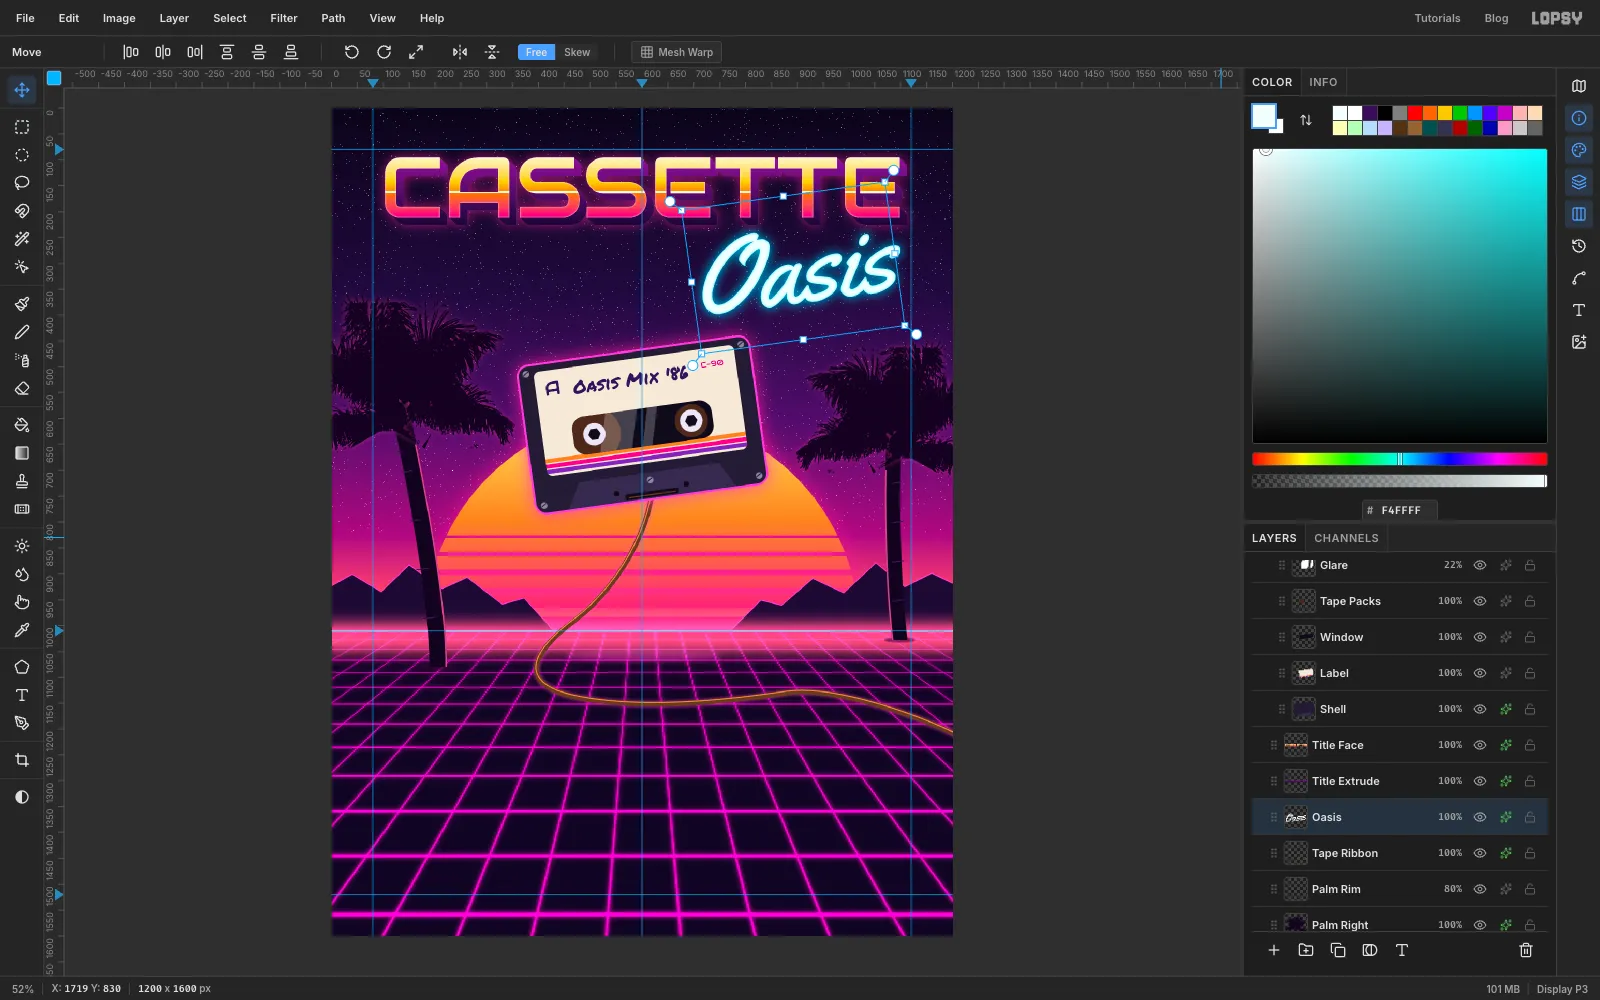
Open the effects drawer on Oasis and tick Inner Glow: Size 7, Opacity 100, colour . That turns the edges of the white letters cyan, so the centre reads as the hot core of a neon tube. Then tick Outer Glow: Size 30, Spread 6, Opacity 90, colour .
-
Build the info panel and its tab
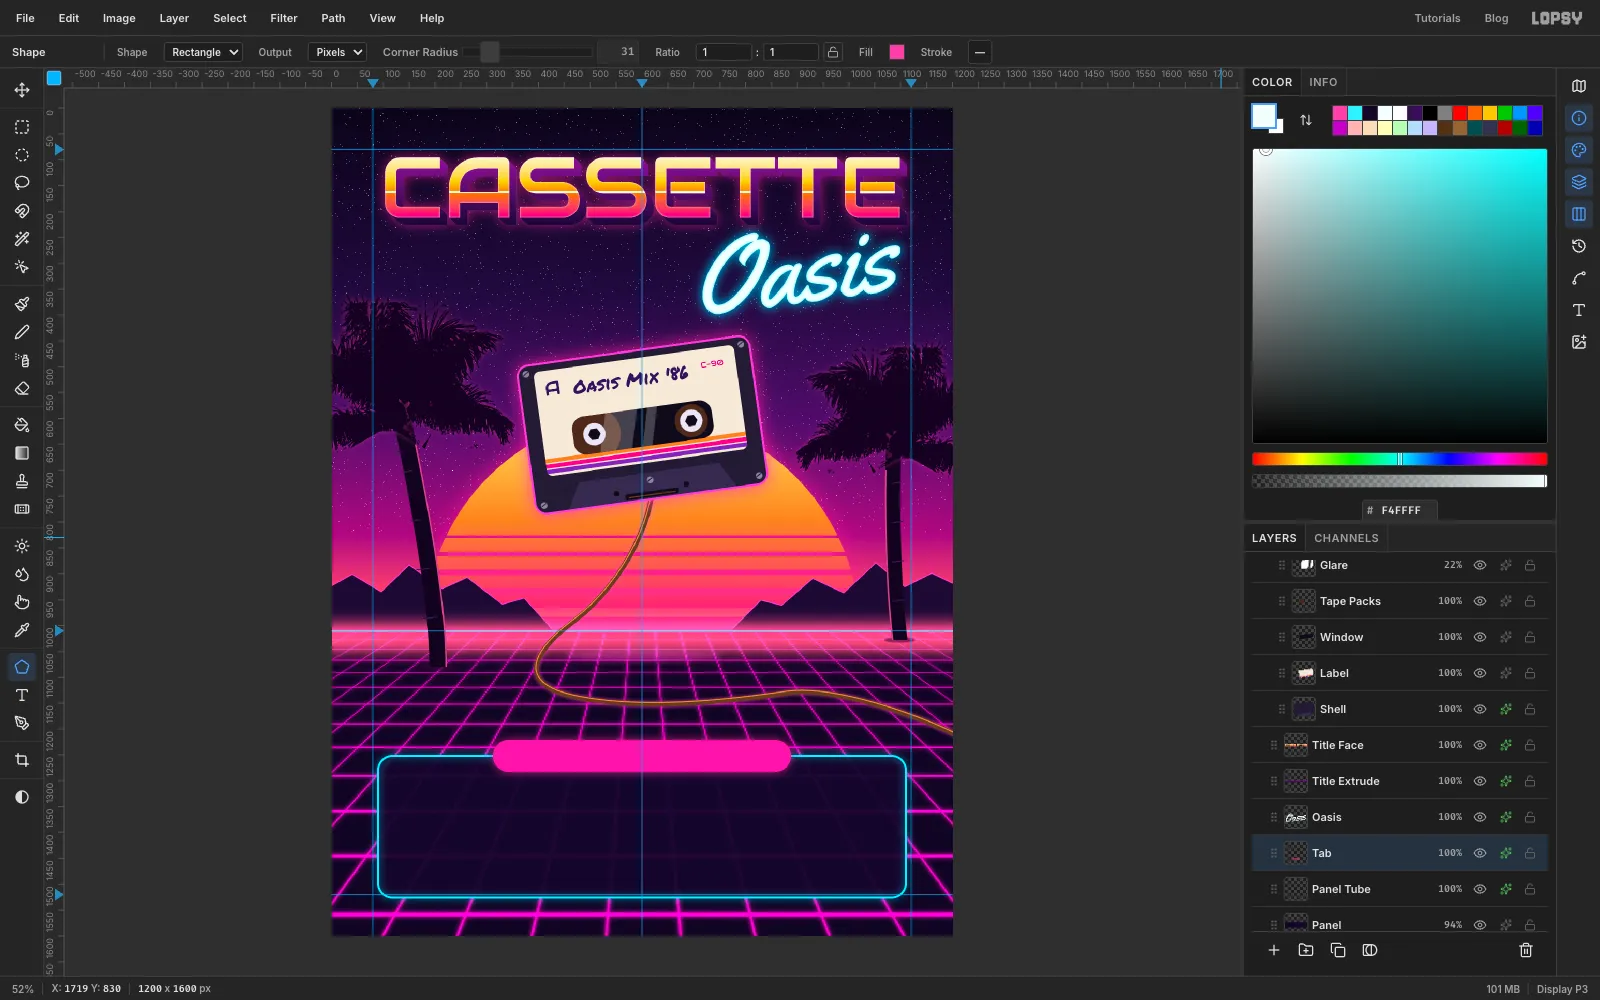
Select Tape Ribbon and add a layer called Panel. Click-create a 1020 × 274 Rectangle, Corner Radius 28, Fill , centred at (600, 1389). Set the layer to 94% opacity. That's dark enough that the grid lines never cross the text.
Add a layer called Panel Tube, change the Shape tool's Fill to none and its Stroke to at Width 4. Click-create the same rectangle in the same place, then give it an Outer Glow of Size 22, Spread 2, Opacity 85, colour .
Add a layer called Tab. Set Fill with no stroke and Corner Radius 31, and click-create a 576 × 62 pill centred on the panel's top edge at (600, 1252). Give it an Outer Glow of Size 26, Opacity 70, in the same pink.
-
Set the shop details
Select Tab, pick the Text tool and set Align to Center. Make each line, then centre it with the Move tool. Click the Tab layer again before starting each new line, so the font settings don't restyle the line you just made:
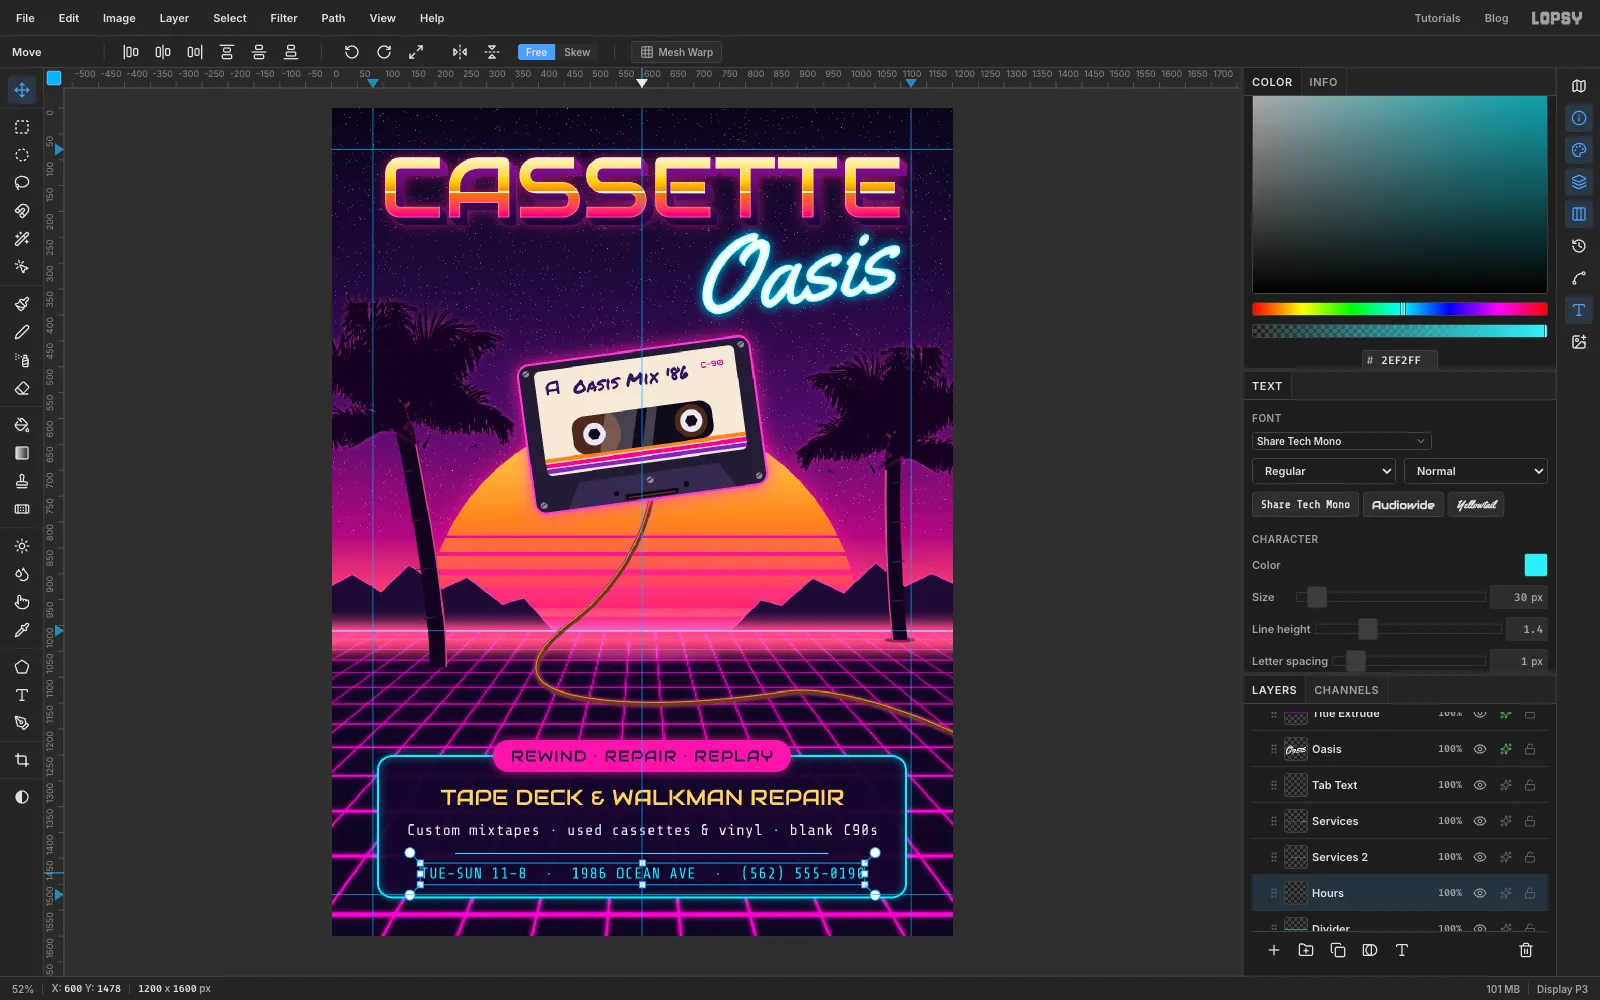
- REWIND · REPAIR · REPLAY in Audiowide 30 with Letter spacing 2 (in the Text panel), centred in the pill both ways. These are all capitals, so centre the letters themselves in the pill. Name it Tab Text.
- TAPE DECK & WALKMAN REPAIR in Audiowide 42 , with Letter spacing set back to 0 (it carries over from the last text). Put its top about 35 px below the pill and name it Services.
- Custom mixtapes · used cassettes & vinyl · blank C90s in Share Tech Mono 30 , Letter spacing 1, about 40 px below the heading. Name it Services 2.
- On a new layer called Divider (made with Tab selected), a Pencil rule at Size 2 in across the middle 720 px of the panel: click at one end and Shift-click at the other.
- With Divider selected, TUE–SUN 11–8 · 1986 OCEAN AVE · (562) 555-0190 in Share Tech Mono 30 , Letter spacing 1, with about 35 px below it to the panel's border. Name it Hours.
-
Draw the coupon starburst
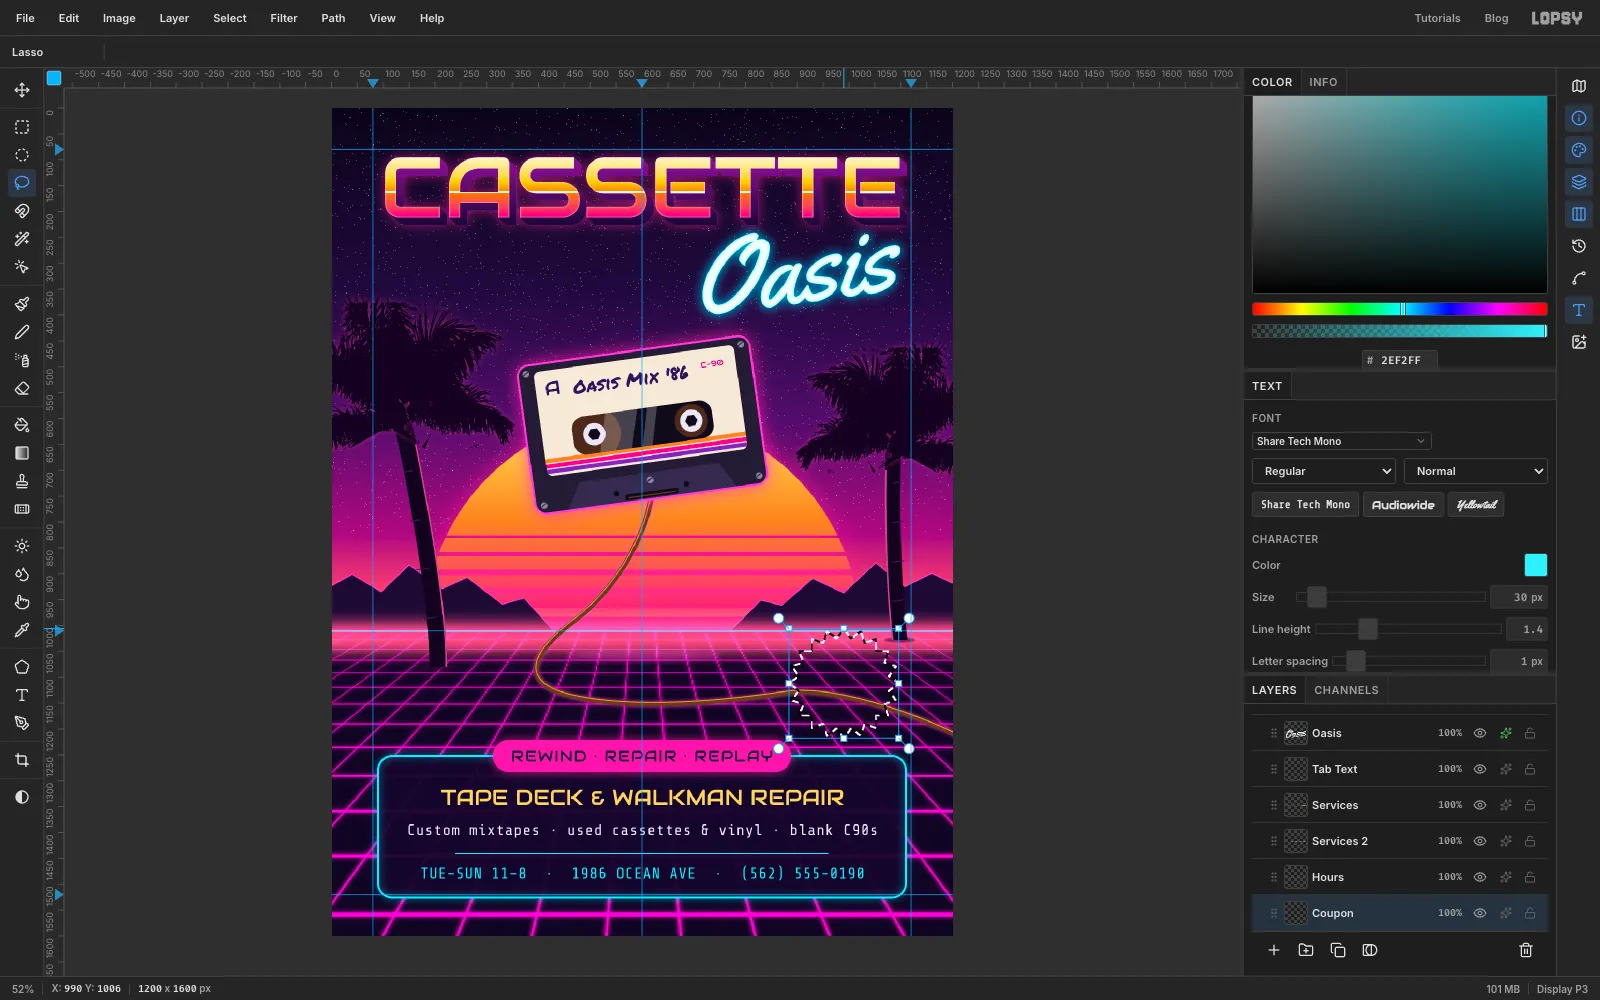
Select Divider and add a layer called Coupon. The starburst is 20 spikes around a circle about 210 px across, centred at about (990, 1112). That's just above the panel, right of the pill and below the right palm's base.
With the Pen, click (don't drag) its 40 corners in order: a spike tip, then an inner point about 18 px further in, then the next tip, and so on round the circle. Click the first point again to close the path. In the Paths panel, click Path to Selection, then delete the path. Don't worry if the spikes aren't perfectly even. A hand-cut sticker looks better a little irregular.
Fill with . Add a Stroke of 3 in and a hard Drop Shadow: Offset X 7, Offset Y 7, Blur 0, Opacity 100, colour . It looks like a sticker slapped on the flier.
-
Letter the coupon
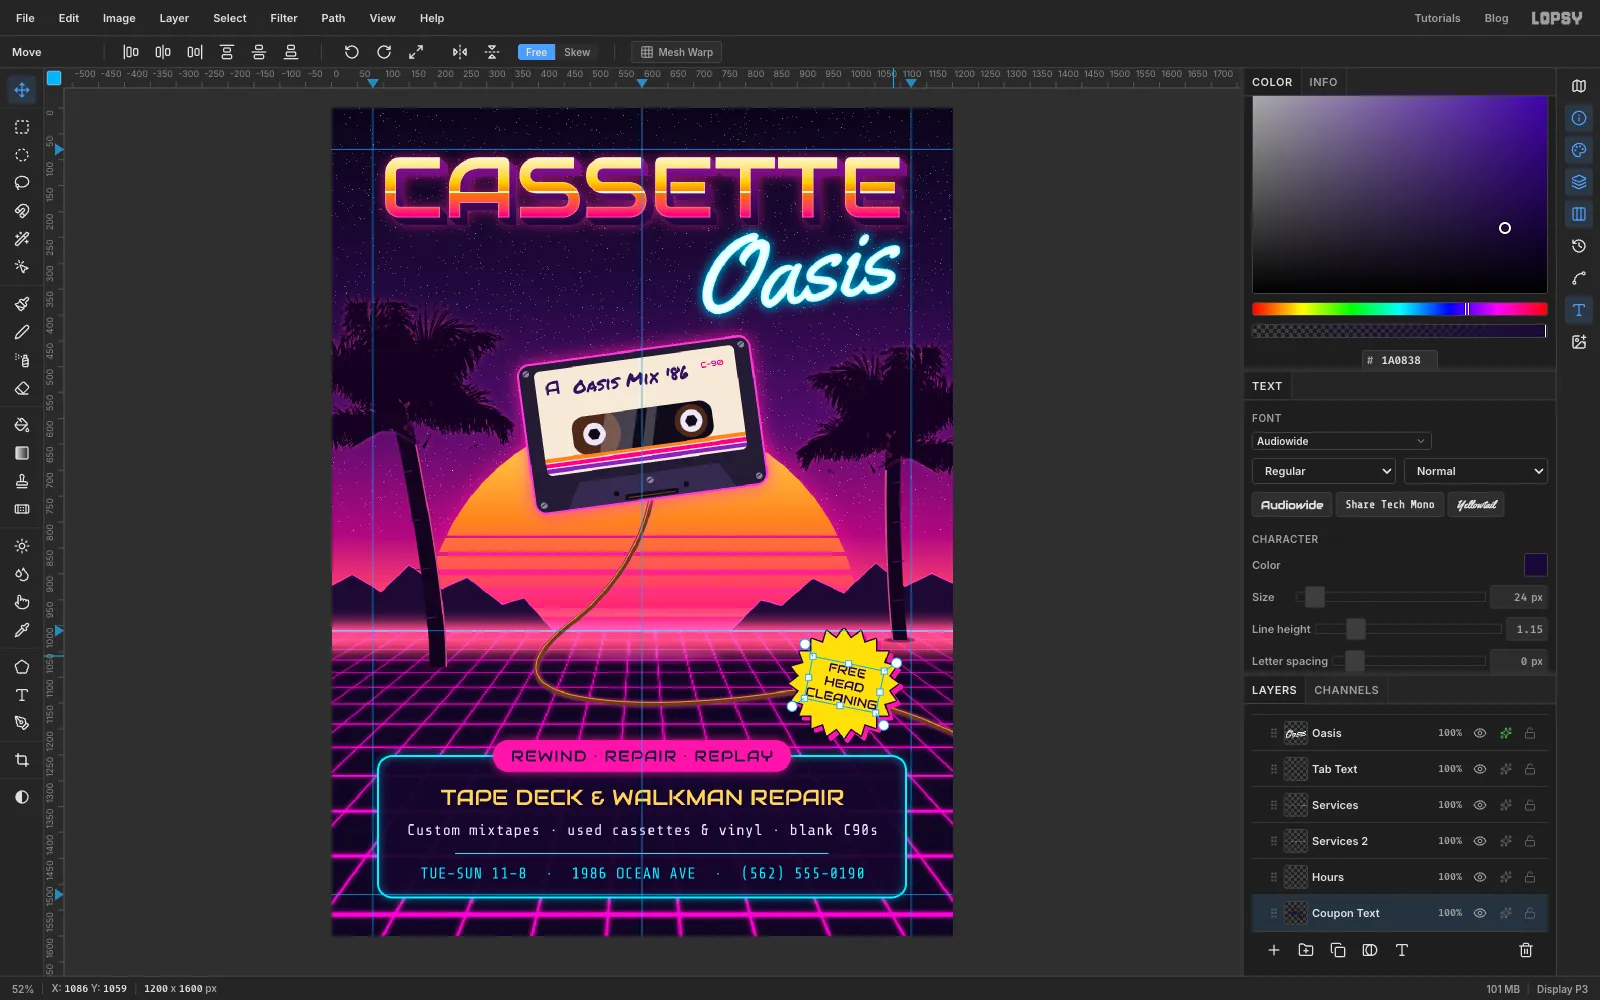
With Divider selected and Align still on Center, type FREE, Enter, HEAD, Enter, CLEANING in Audiowide 24, colour , and set Letter spacing to 0. Name the layer Coupon Text. In the Text panel, set Line height to 1.15 so the three lines hug together. Move the block to the middle of the starburst.
With the Move tool and nothing selected, drag the text's rotation handle clockwise by about 12°, against the tilt of everything else, so the sticker feels stuck on at an angle. Centre it on the star again afterwards.
-
Add scanlines above everything
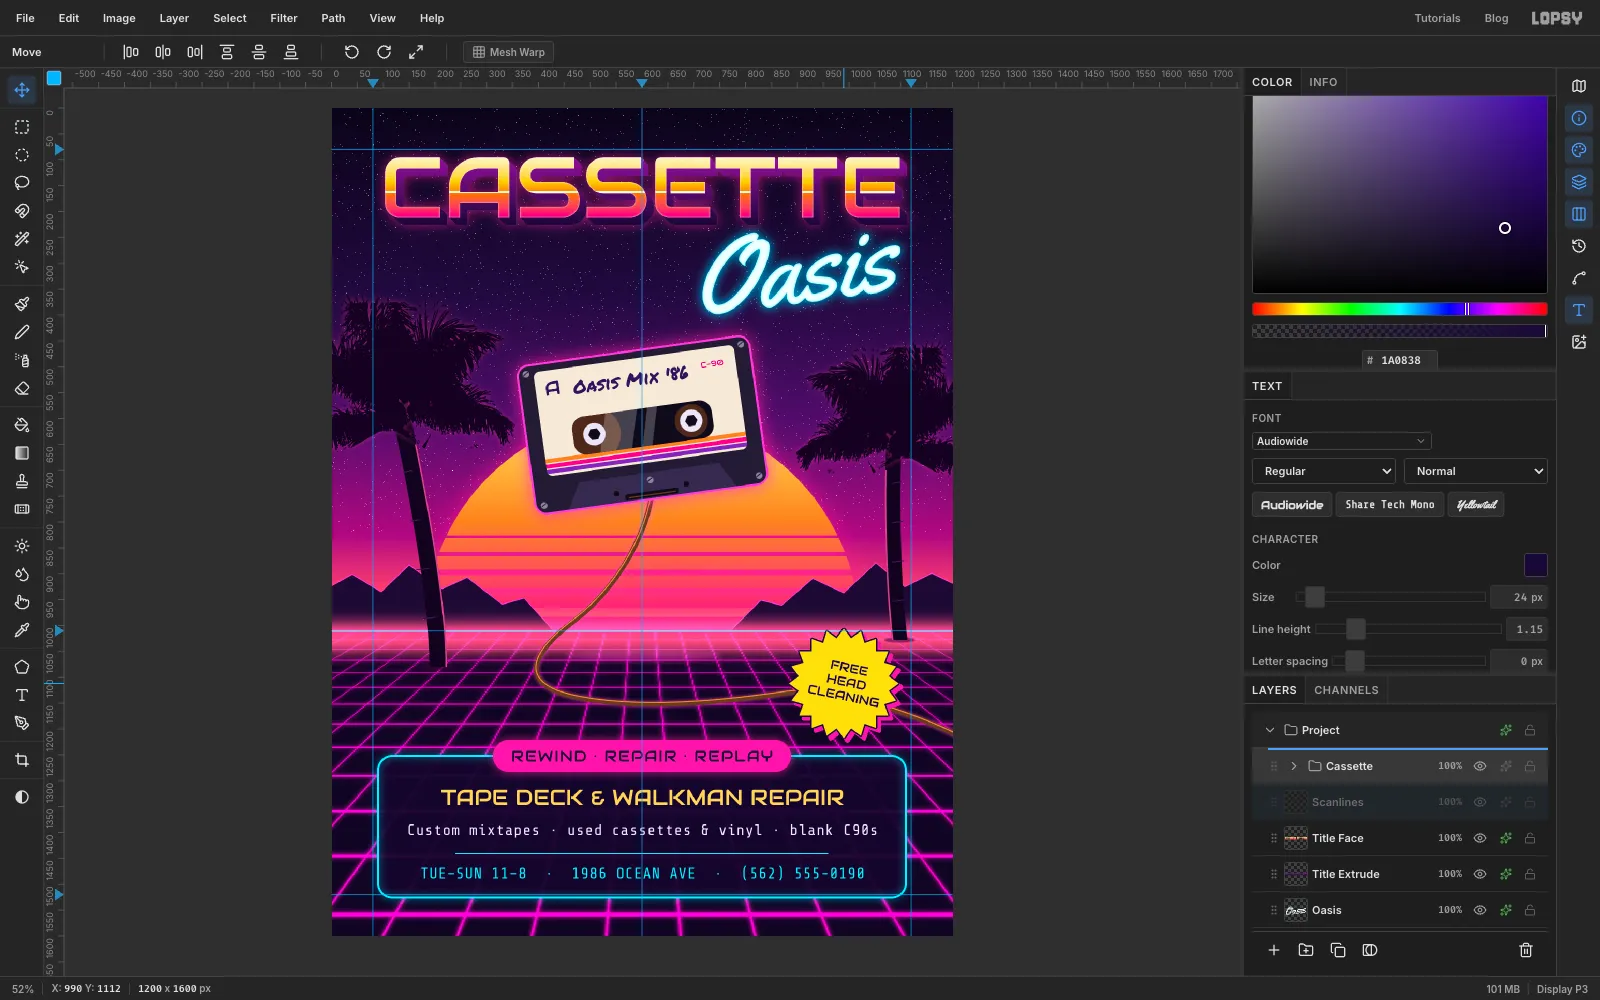
The finishing layers need to sit on top of everything, including the Cassette group. Collapse the Cassette group with its arrow, select Title Face, and add a layer called Scanlines. Drag its grip in the Layers panel up into the top half of the Cassette row, so the drop line shows above it, and let go.
Draw the scanlines:
- Click once with the Rectangular Marquee and enter From 0, 0 To 4, 1 to select a 4 × 1 px strip in the top-left corner. Fill it with black.
- Do the same with To 4, 4 to select the 4 × 4 square around it, and choose Edit → Define Pattern.
- Press Cmd+A, choose Edit → Fill with Pattern…, pick the new pattern and press Apply.
- Drop the layer to 14% opacity.
-
Add grain and export
Add a layer called Grain above Scanlines. Select all, fill with mid-grey , and deselect. Run Filter → Add Noise… at 18, Mono, Gaussian, set the layer to Overlay and drop it to 45%. Grey disappears in Overlay mode, leaving only a fine film grain that takes the digital edge off the gradients.
Save the project with File → Save Project, and export the flier with File → Quick Export PNG.