Make a Synthwave Christmas Card with a Neon Tree
Design an 80s synthwave Christmas card in Lopsy with an aurora, a halftone sun, a neon grid floor, a glowing Pen-drawn tree and chrome lettering.
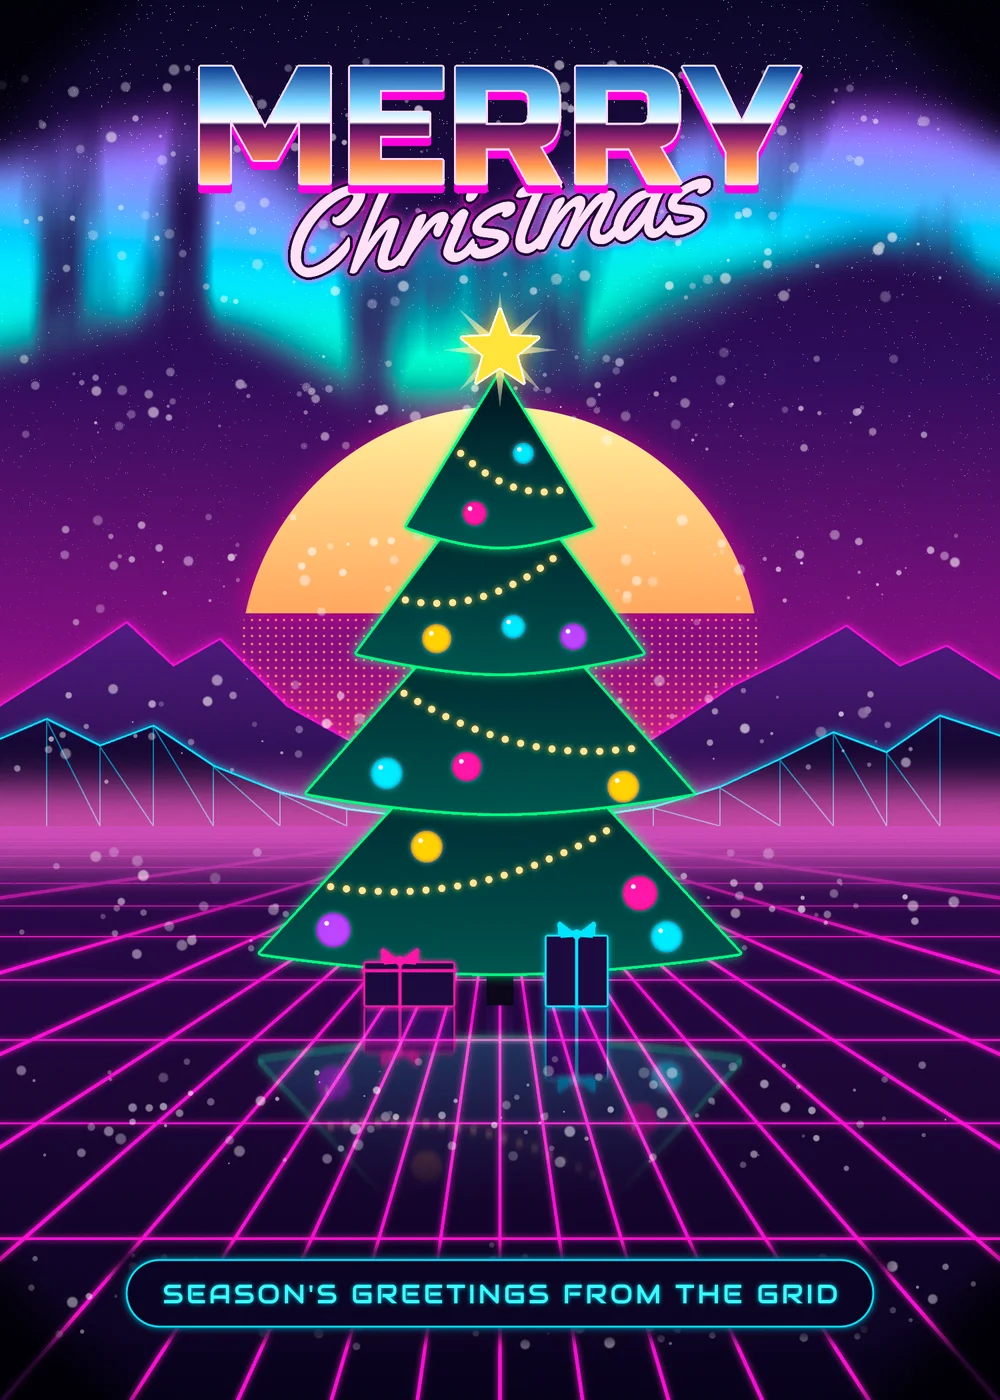
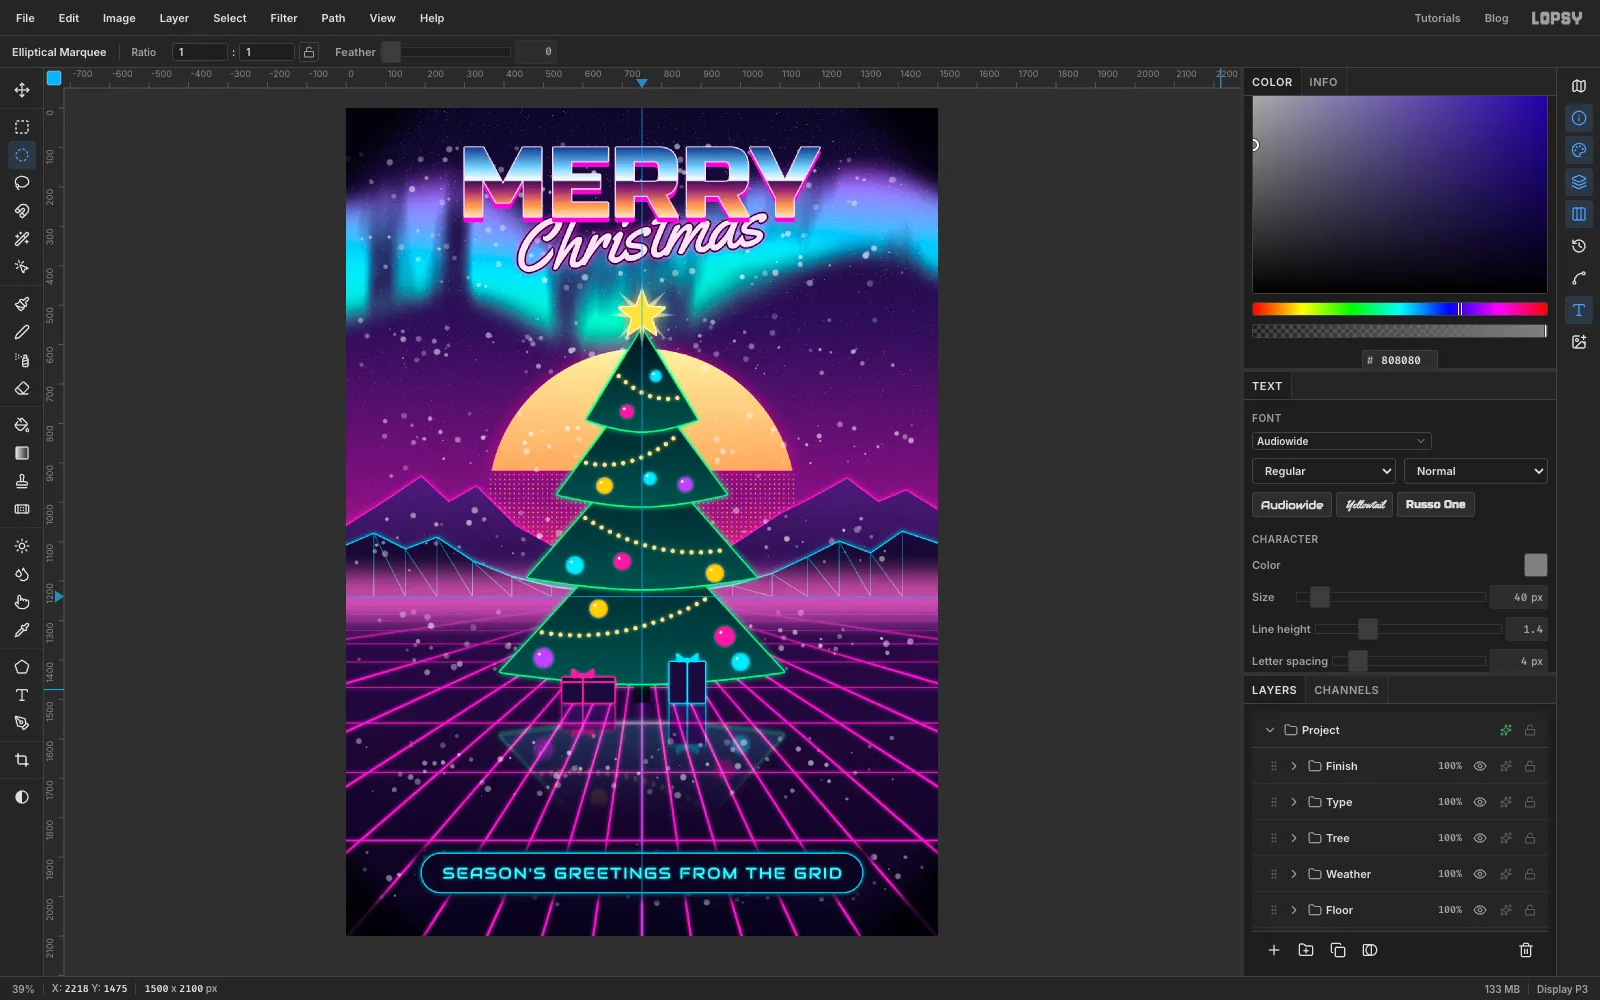
Synthwave is the 80s as remembered by a VHS tape: a sun sinking into a neon grid, mountains outlined in laser light and chrome lettering with a script slashed across it. In this tutorial you'll put a Christmas tree in that world and make Tannenbaum Aurora, a 5 × 7 inch holiday card. There's an aurora in the sky as well as the sun, because a synthwave card doesn't have to make sense.
You'll work on a 1500 × 2100 px canvas, from the back of the scene to the front. Each part of the picture goes in its own group: Sky, Mountains, Floor, Weather, Tree, Type and Finish. Almost all the glow comes from two layer effects, Stroke and Outer Glow. The rest comes from filters: Halftone for the sun, Clouds, Add Noise and Motion Blur run inside a layer mask for the aurora curtains, and Sunburst for the grid. You'll draw shapes with the Pen tool (paths are managed in the Paths panel, which you open from the icon strip on the right), bend the aurora with Mesh Warp, and use Copy Merged and Flip Vertical to make a reflection.
A few habits make the whole build go smoothly:
- New groups. To add a group next to the previous one, collapse the previous group, click its row, then click New Group at the bottom of the Layers panel. Then click Add Layer: with a group row selected, the new layer goes inside it. Each later Add Layer goes just above the selected layer.
- Exact marquees. Click once with the Rectangular or Elliptical Marquee without dragging (and with nothing selected) to get a dialog where you can type the corners. Press Cmd+D first if something is already selected.
- Gradients. The Gradient tool's colours come from its Advanced… editor, not from the foreground colour. Click the bar to add a stop, click a stop to select it, and type its hex. Two stops is the default, so delete any extra stops left over from a previous gradient.
- Layer effects. Click the sparkle (✦) button on a layer row to open the effects drawer, tick an effect and set its values there. Blend mode is at the top of the same drawer.
- Filter dialogs open with their default values every time. Any value a step doesn't mention stays at its default.
The palette:
-
Night sky
-
Sun
-
glow
-
Aurora
-
Back range
-
edge
-
Front range
-
edge
-
Floor
-
grid
-
haze
-
Tree
-
edge
-
trunk
-
Lights
-
light glow
-
Baubles
-
rim
-
Star
-
star burst
-
gift box
-
Chrome
-
Chrome rim
-
shadow
-
Script
-
knockout
-
Tagline
-
pill
-
halo
-
Make the canvas and paint the night sky
Choose File → New, make a 1500 × 2100 px document and click Create. The 1.4:1 shape is a 5 × 7 inch card.
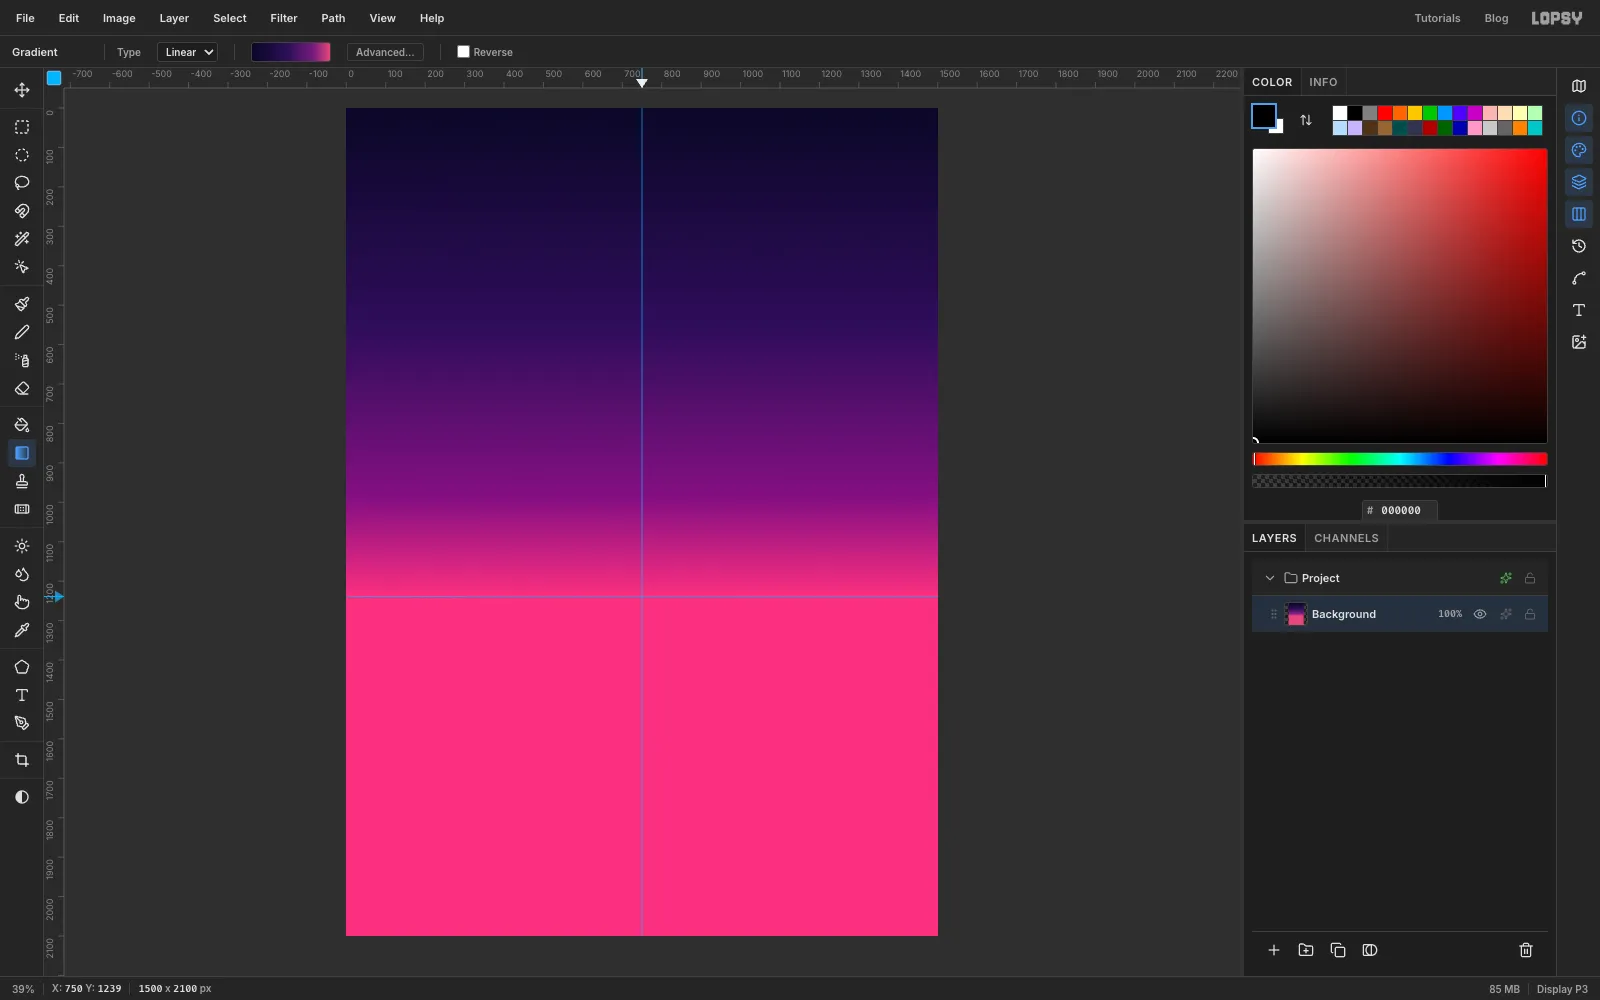
Click the top ruler at 750 to drop a vertical guide down the middle, and click the left ruler at 1239 for the horizon. Watch the X/Y readout in the status bar as you hover, so each guide lands on the number.
Select Layer 1 and click Delete Layer, then select Background. Pick the Gradient tool and set Type to Linear. In Advanced…, make four stops: at the left end, at 45%, at 80% and at the right end. Drag from the top of the canvas straight down to the horizon guide. Everything below the horizon will be covered by the floor later, so it doesn't matter that it fills with pink.
-
Scatter stars with noise and Threshold
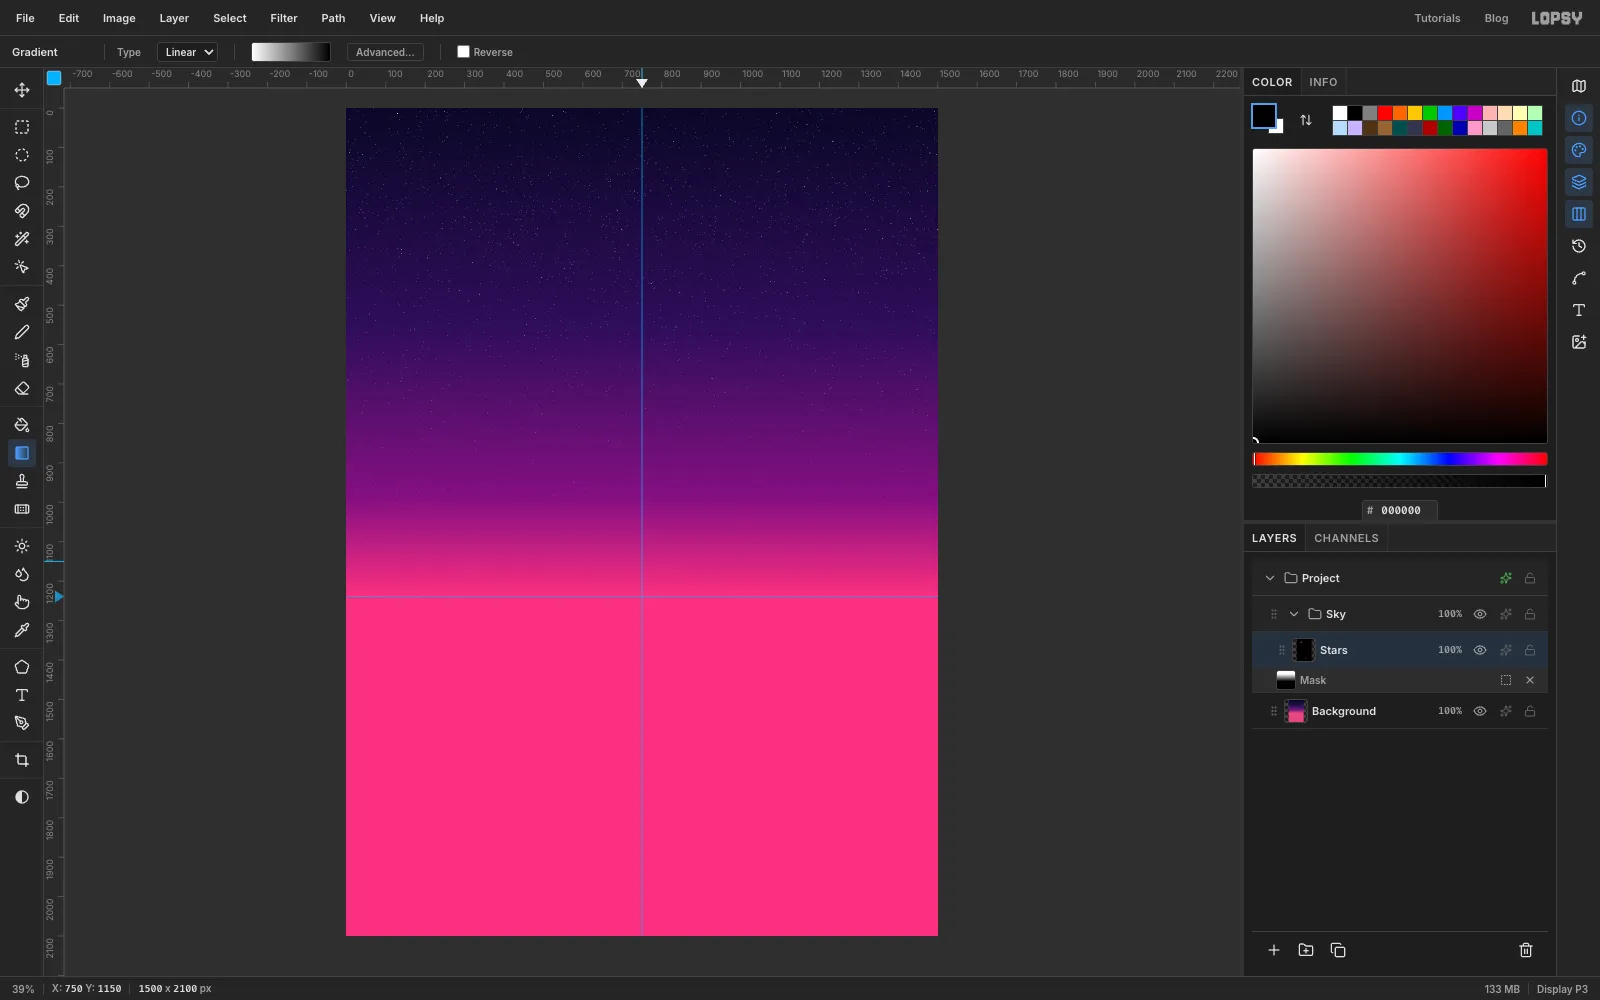
With Background selected, click New Group and name it Sky. Click Add Layer and name the layer Stars.
Set the foreground colour to and choose Edit → Fill. Then run:
- Filter → Add Noise…: Amount 100, Mode Mono, Distribution Gaussian.
- Filter → Gaussian Blur…: Radius 1. This merges the noise into soft specks of different sizes.
- Filter → Threshold…: Level 45. Only the brightest specks survive, as white stars on black.
Set the layer's blend mode to Screen, so the black disappears and only the stars show. Stars fade near a glowing horizon, so click Add Mask and then click the mask thumbnail to edit the mask. With the Gradient tool, set the stops to white then black and drag from about y 300 down to y 1150. Click the Stars name in its row to stop editing the mask.
-
Draw the sun and select its bottom
Click Add Layer and name it Moon. (The screenshots use that name, but it's the sun.)
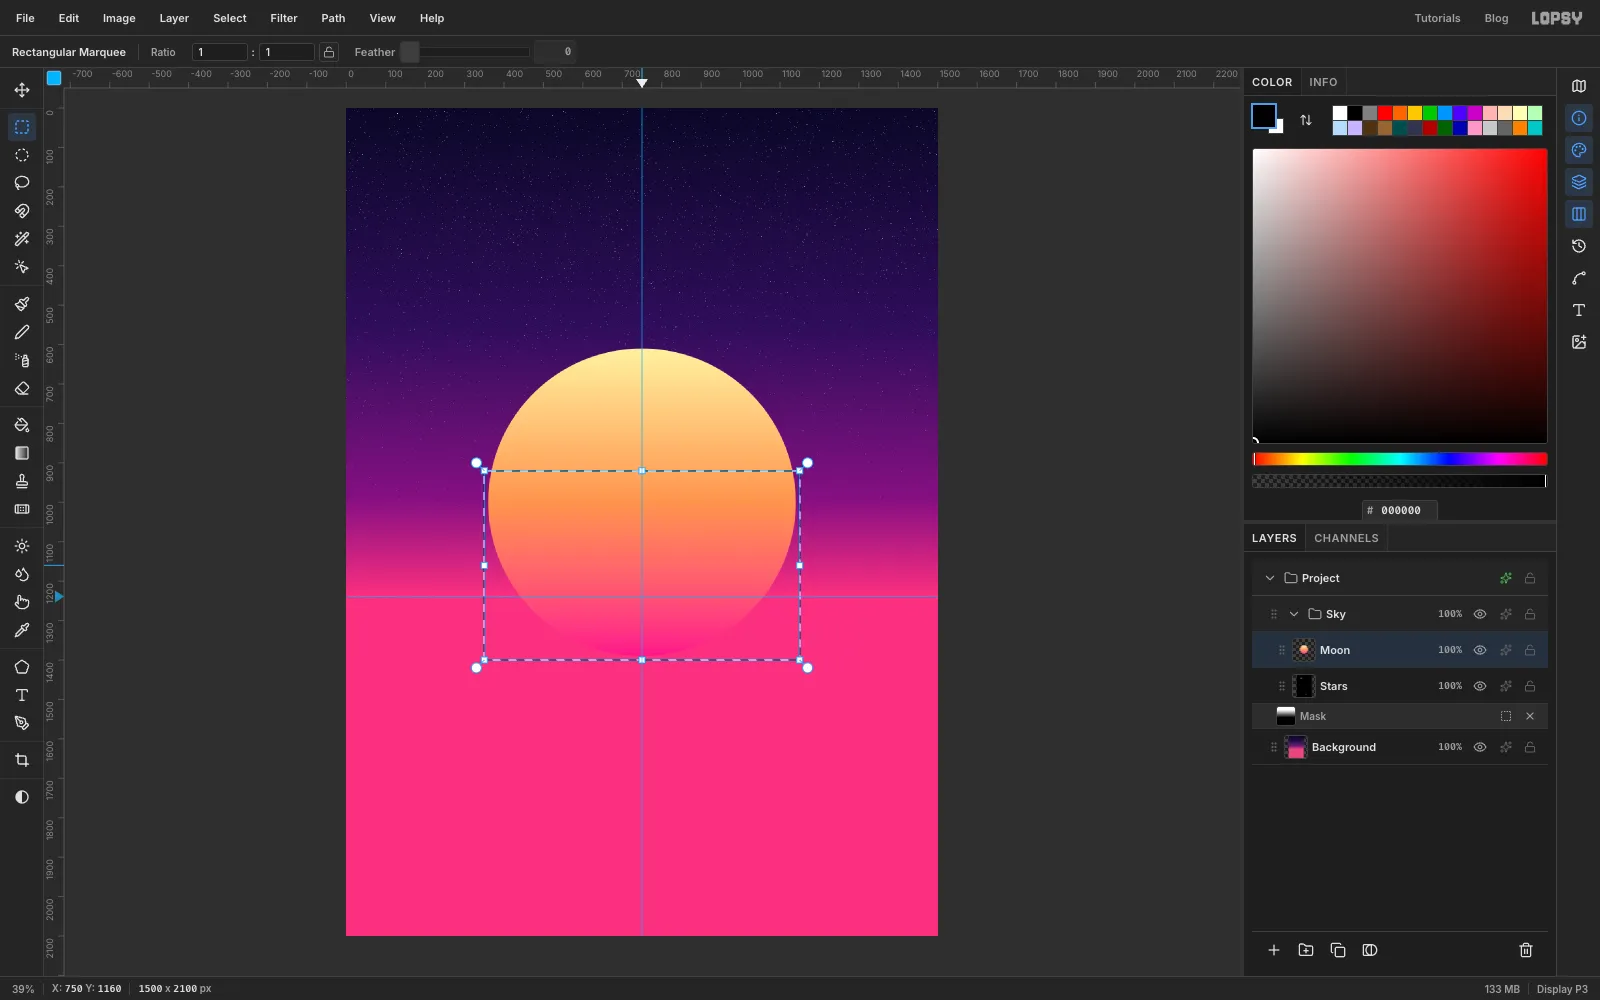
Click once with the Elliptical Marquee and enter 360, 610 to 1140, 1390. That makes a circle 780 px wide, centred on the middle guide, with its centre at y 1000. Set the gradient to three stops: , at 50% and . Drag from the top of the circle to the bottom, then press Cmd+D.
Now click once with the Rectangular Marquee and enter 350, 920 to 1150, 1400. This box covers the sun from a little above its middle to past its bottom. The next filter only touches this part.
-
Dissolve the bottom of the sun with Halftone
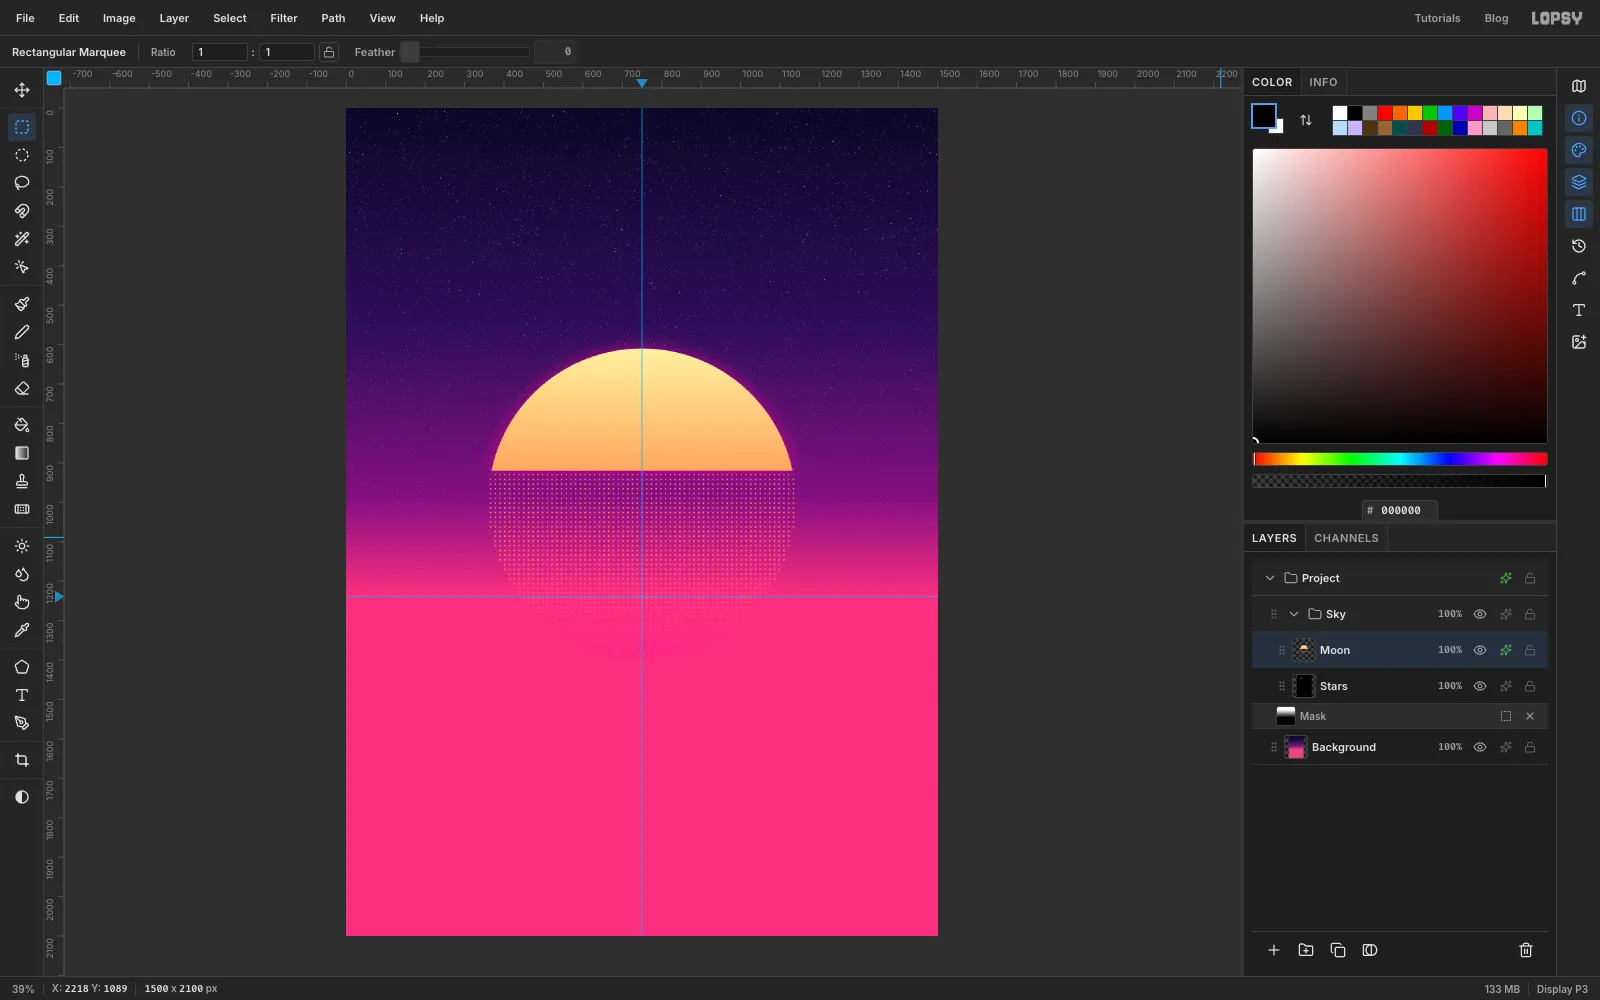
Choose Filter → Halftone…, set Dot Size to 12 and Angle to 0, and click Apply. Halftone turns the selected part into dots and makes the gaps between them transparent, so the sky shows through. Press Cmd+D to deselect.
The classic synthwave sun is cut into horizontal slats. A halftone dissolve gives the same "sinking into the grid" feel and looks like a printed retro poster.
Open the layer effects and turn on Outer Glow with colour , Size 60 and Opacity 55.
-
Draw the aurora ribbon
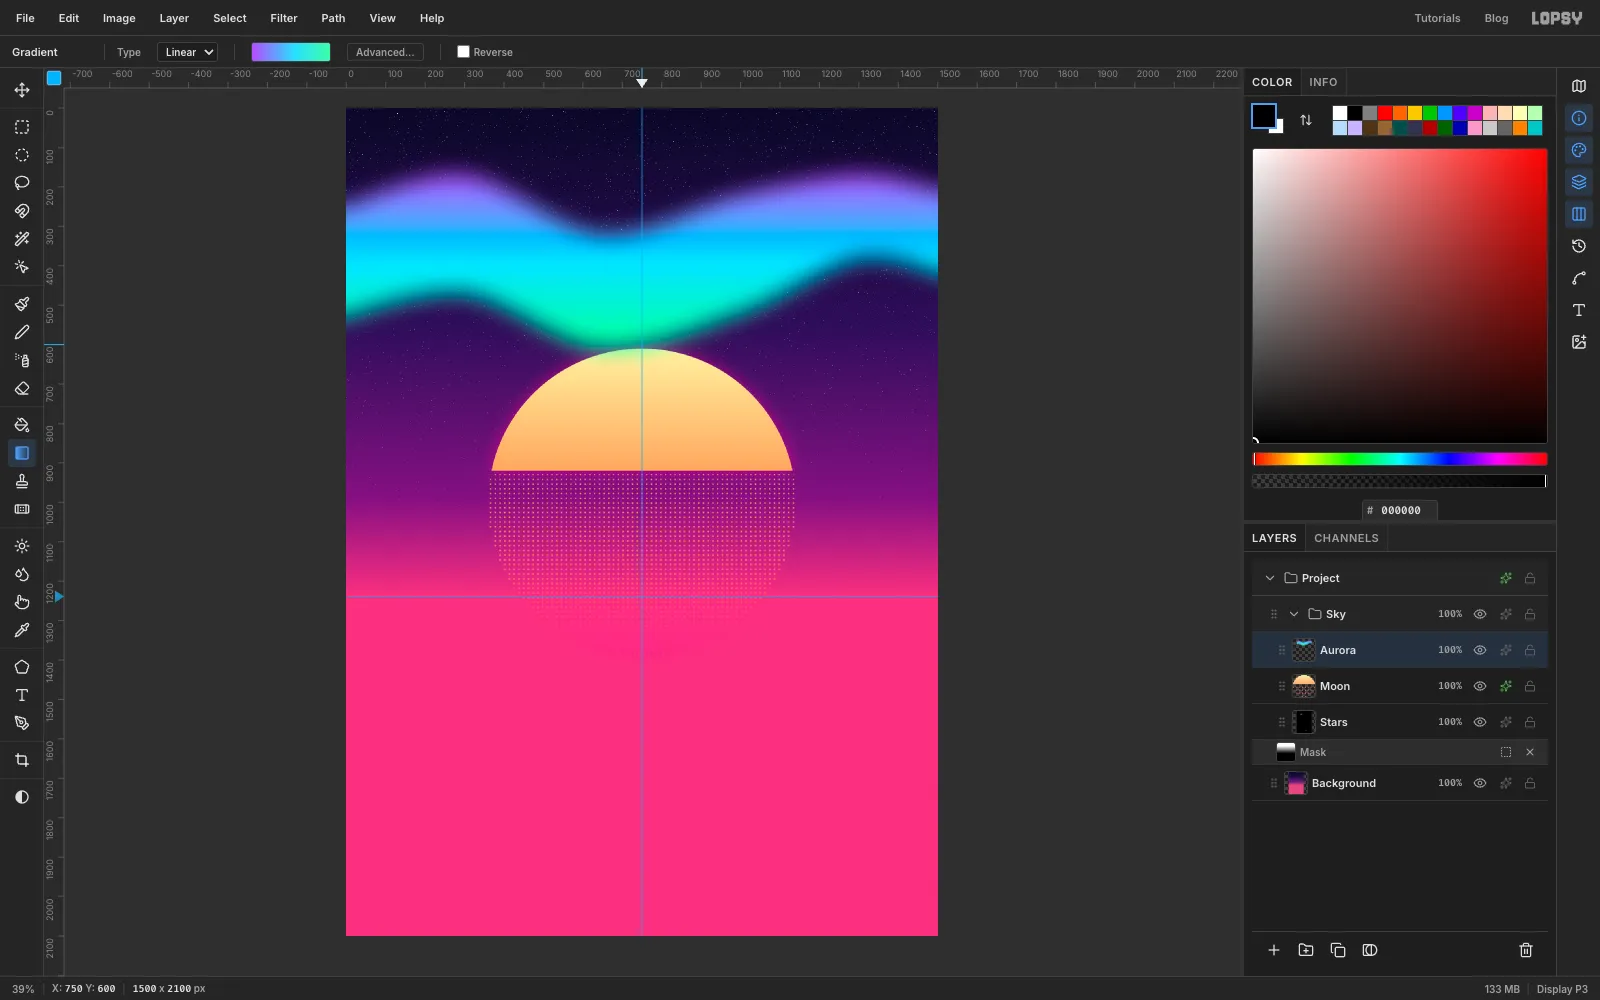
Click Add Layer and name it Aurora. With the Pen tool, draw a closed ribbon shape across the whole width of the sky:
- Click on the left edge of the canvas at about y 250.
- Make the top edge wave: press and drag a little to the right at about (300, 170), (650, 320), (1000, 220) and (1300, 170). Dragging pulls out handles, so the curve stays smooth.
- Click on the right edge at about y 210, then click lower on the same edge at about y 420.
- Make the bottom edge wave back to the left: press and drag a little to the left at about (1300, 380), (1000, 520), (650, 610) and (300, 470).
- Click the left edge at about y 530, then click the first anchor to close the path.
In the Paths panel, click Path to Selection, then Delete Path. Choose Select → Feather… and enter 60, so the ribbon gets soft edges.
Set a three-stop gradient: , at 55% and . Drag straight down from y 140 to y 600. Real auroras are green at the bottom and redder or violet at the top. Press Cmd+D.
-
Bend the aurora with Mesh Warp
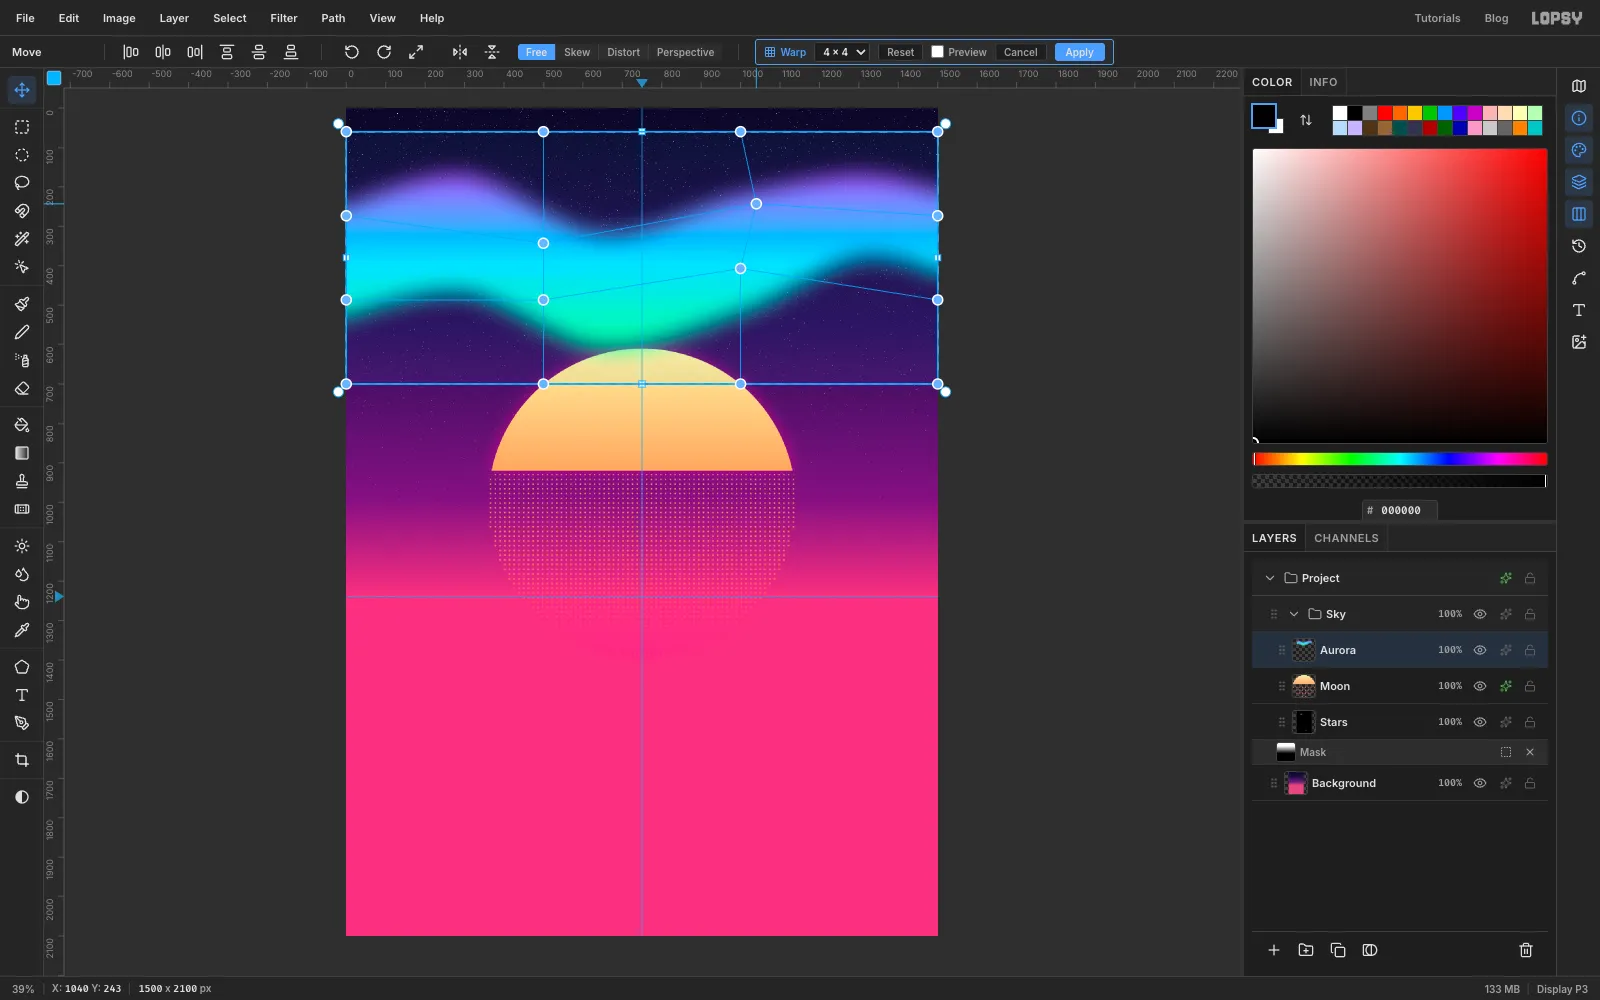
The Pen curve is a little too even. Click once with the Rectangular Marquee and enter 0, 60 to 1500, 700, so the warp only affects the band of sky the aurora is in.
Switch to the Move tool and click Mesh Warp in the options bar. A 4 × 4 grid appears over the selected box. Drag three of its four inner points. Make sure you press right on a handle, or the drag moves the whole layer instead:
- the upper-left inner point down about 70 px,
- the lower-right inner point up about 80 px,
- the upper-right inner point up about 30 px and right about 40 px.
Click Apply, then press Cmd+D.
-
Cut the curtains into the aurora's mask
Aurora light hangs in vertical curtains. You'll make them in a layer mask, which you can still change later.
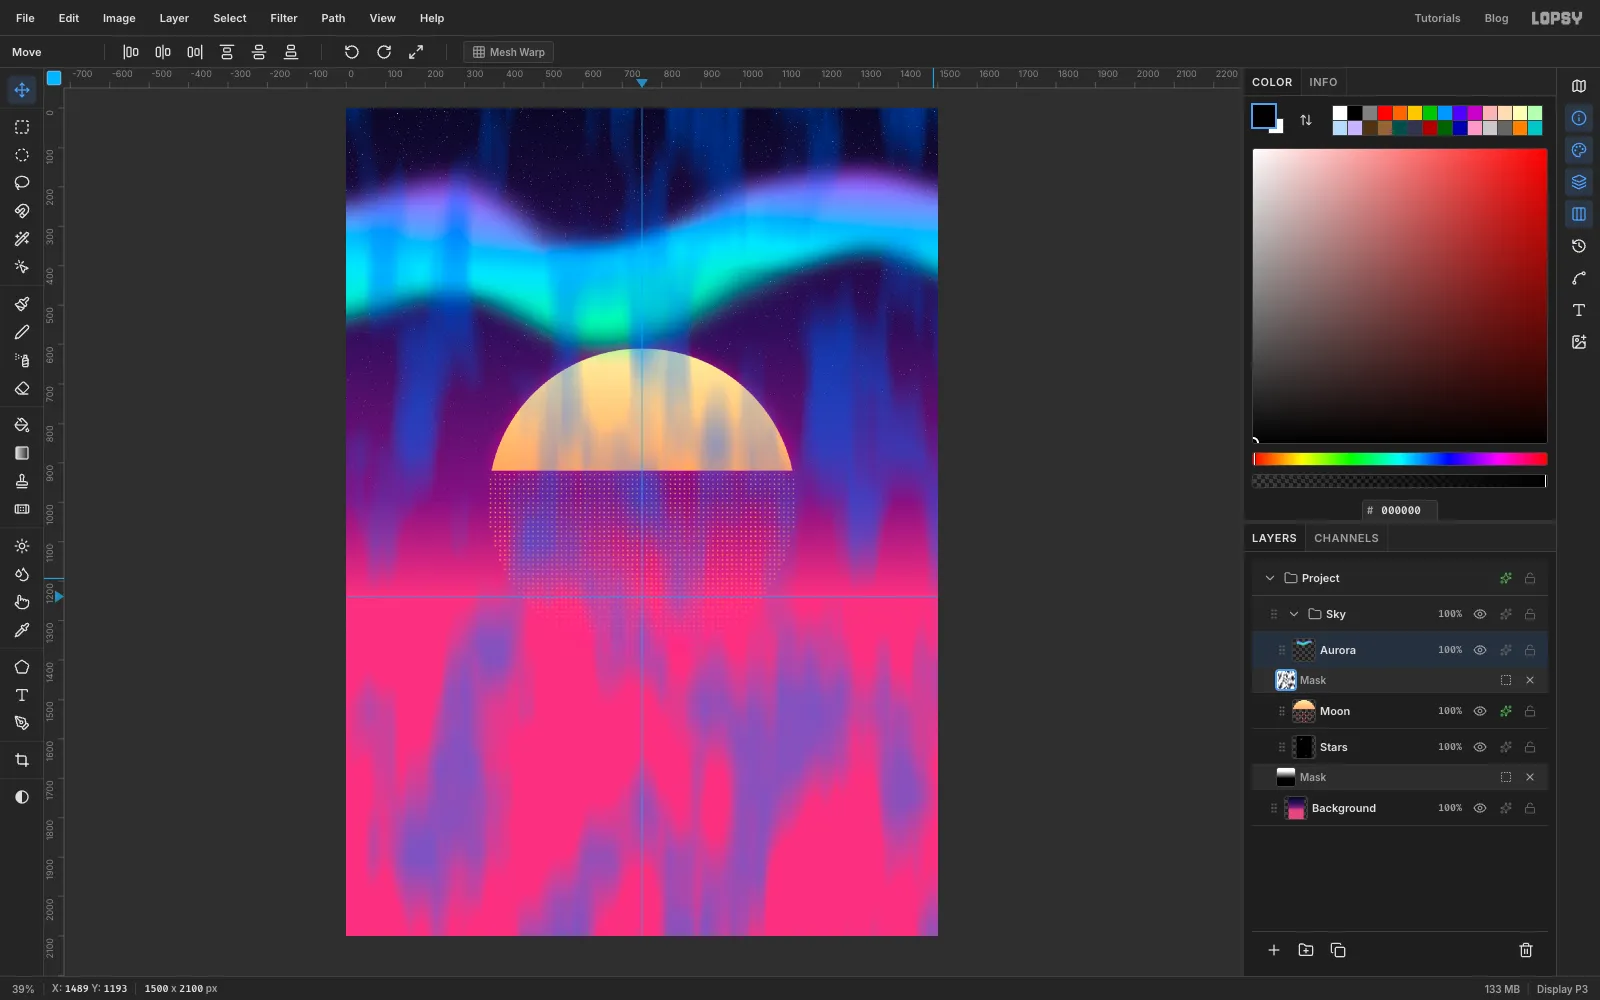
Click Add Mask, then click the mask thumbnail. Filters now run on the mask instead of the colours. Run these four in order:
- Filter → Clouds…: Scale 16. Big soft light and dark patches.
- Filter → Add Noise…: Amount 60, Mode Mono. Fine grain to streak.
- Filter → Motion Blur…: Angle 90, Distance 250. Smears everything vertically into curtains.
- Filter → Brightness/Contrast…: Brightness 35, Contrast 75. Separates the curtains from the gaps.
The blue overlay shows the mask while you edit it. Click the Aurora name in its row to stop editing.
-
Let the aurora glow with Screen
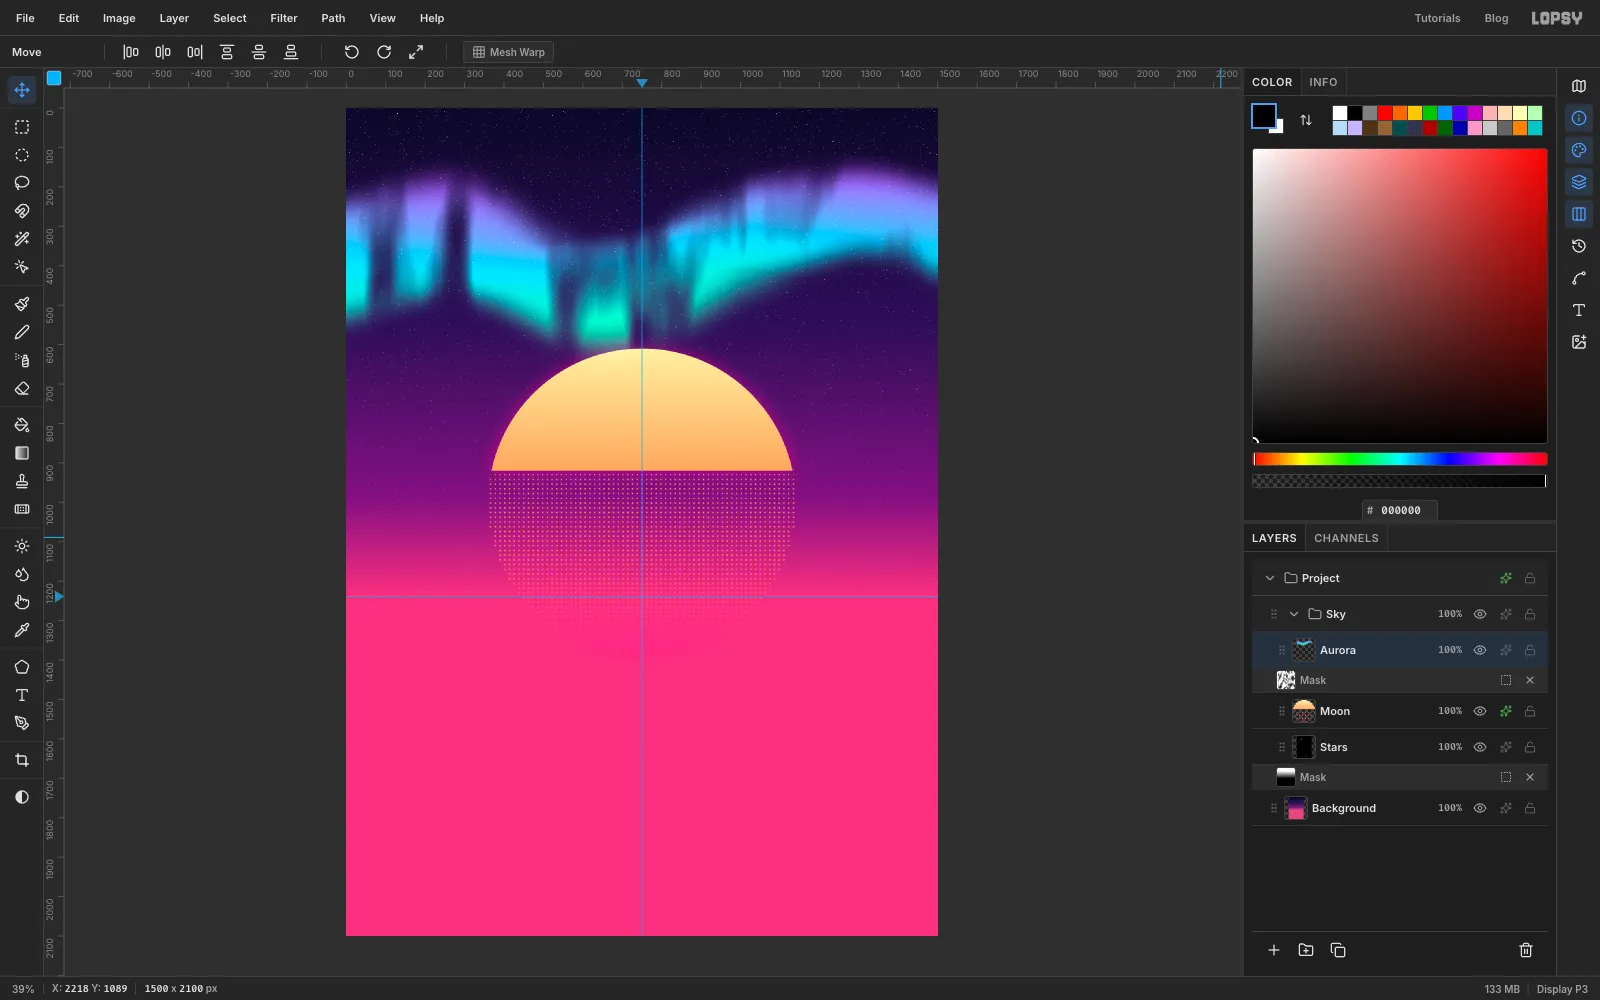
Set the Aurora layer's blend mode to Screen. Screen only ever brightens, so the aurora glows on top of the stars and the sky instead of covering them. The Sky group is done. Click its arrow to collapse it.
-
Draw the back mountain range with the Pen
Select the Sky row, click New Group and name it Mountains. Add a layer named Back Range.
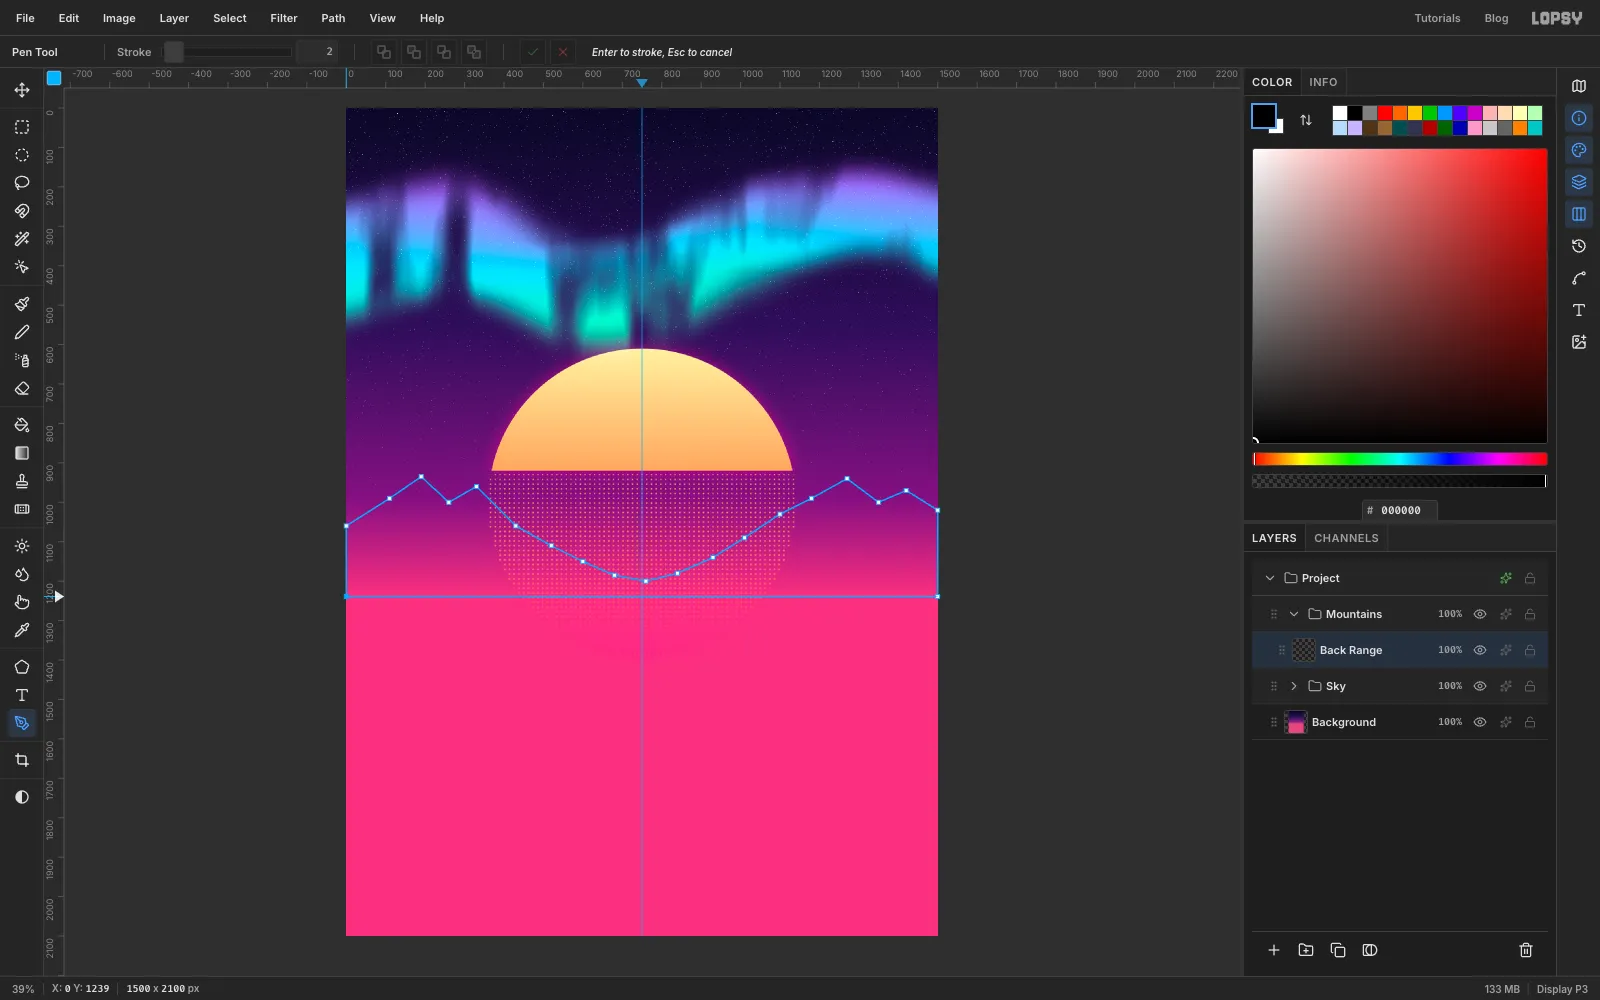
With the Pen tool, make only plain clicks (no drags), so every corner stays sharp:
- Start on the horizon at the bottom-left corner (0, 1239).
- Go up the left edge to about y 1060.
- Zigzag peaks across the canvas. Make the highest peaks near the sides, at about (190, 935) on the left and (1270, 940) on the right. Bring the ridge lowest in the middle, at about (760, 1200), so it doesn't hide the sun.
- Come down the right edge to (1500, 1239), then click the first anchor to close.
Click Path to Selection and Delete Path in the Paths panel. Fill the selection with a gradient from to , dragged from y 930 down to the horizon, then deselect.
-
Light the ranges with Stroke and Outer Glow
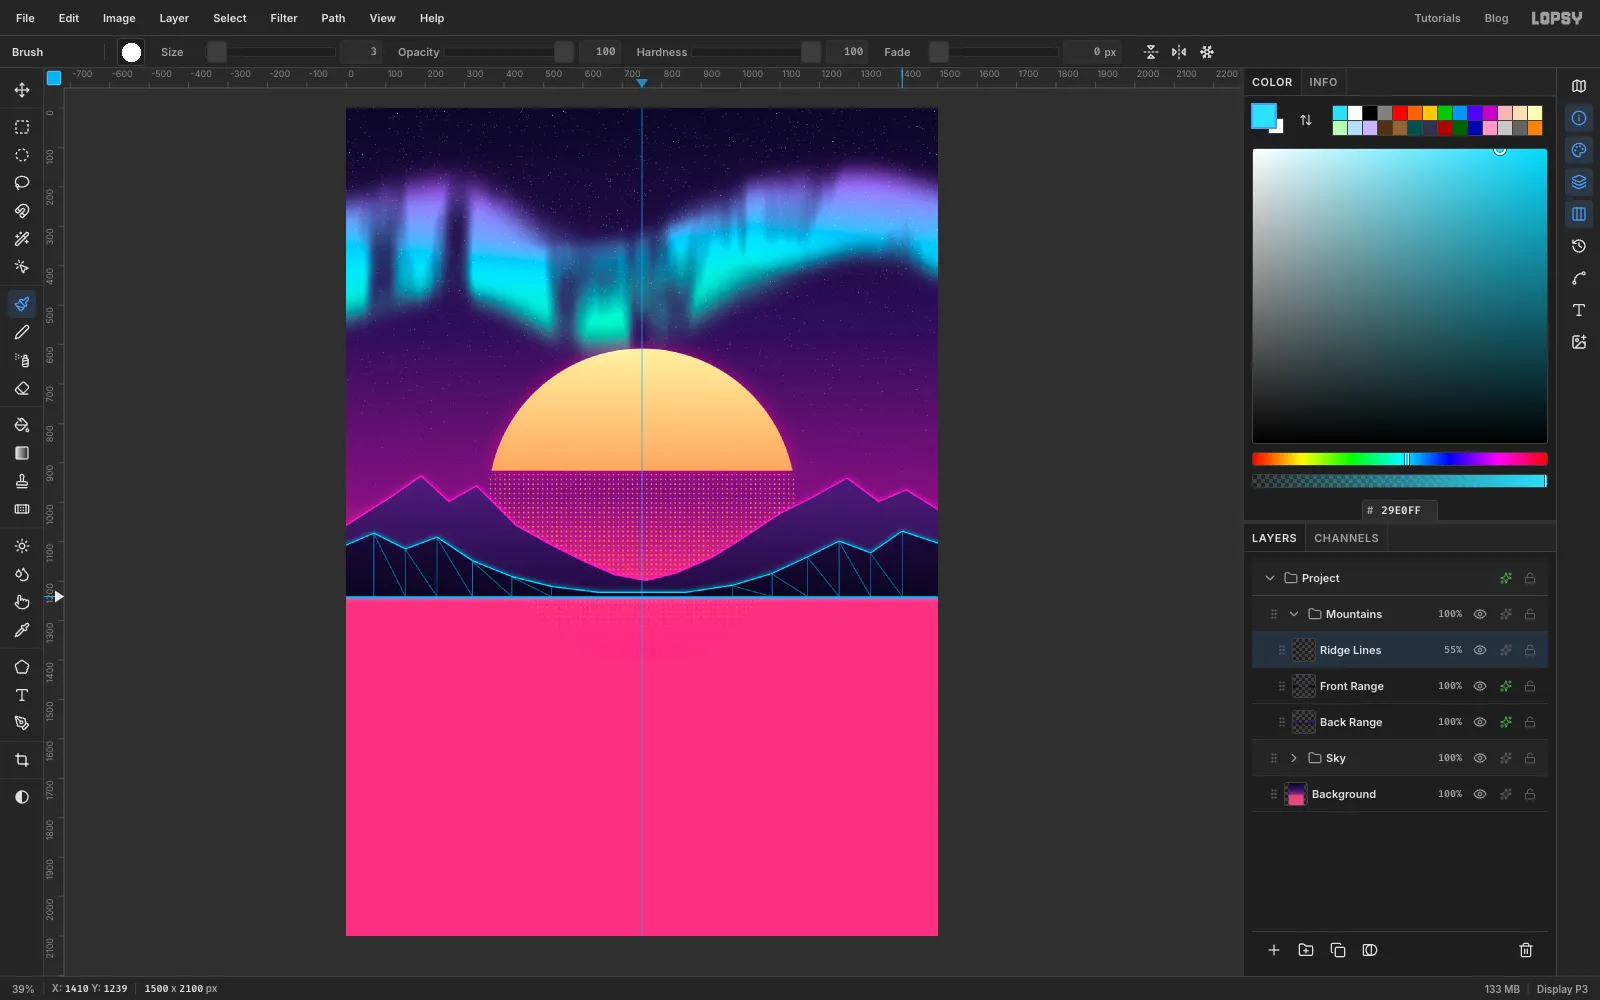
On Back Range, turn on Stroke (, Width 3) and Outer Glow (, Size 24, Opacity 70).
Add a layer named Front Range and draw a lower ridge the same way. Start at the bottom-left (0, 1239), go up the left edge to (0, 1110), then click these corners from left to right: (70, 1080), (150, 1120), (230, 1090), (320, 1150), (420, 1190), (520, 1215), (640, 1230), (860, 1230), (980, 1212), (1080, 1182), (1170, 1140), (1250, 1100), (1330, 1130) and (1410, 1075). Finish at (1500, 1105) and (1500, 1239) and close the path. Fill it with a to gradient, from y 1070 down to the horizon, then deselect. Give it a cyan Stroke (, Width 3) and Outer Glow (, Size 20, Opacity 70).
For the wireframe, add a layer named Ridge Lines. Set the foreground to and pick the Brush at Size 3, Hardness 100. Draw straight lines with a click and a Shift-click. On the left hills, start at each corner of the ridge from x 70 to x 520. Draw one line straight down to the horizon, and a second line diagonally down to the horizon point under the next corner. That makes a strip of triangles. Do the same on the right hills, from x 980 to x 1410. The middle corners end up hidden behind the tree, so you can skip them. Lower the layer's opacity to 55%.
-
Lay the floor and burst the grid lines from the horizon
Collapse Mountains, select its row, click New Group and name it Floor. Add a layer named Ground.
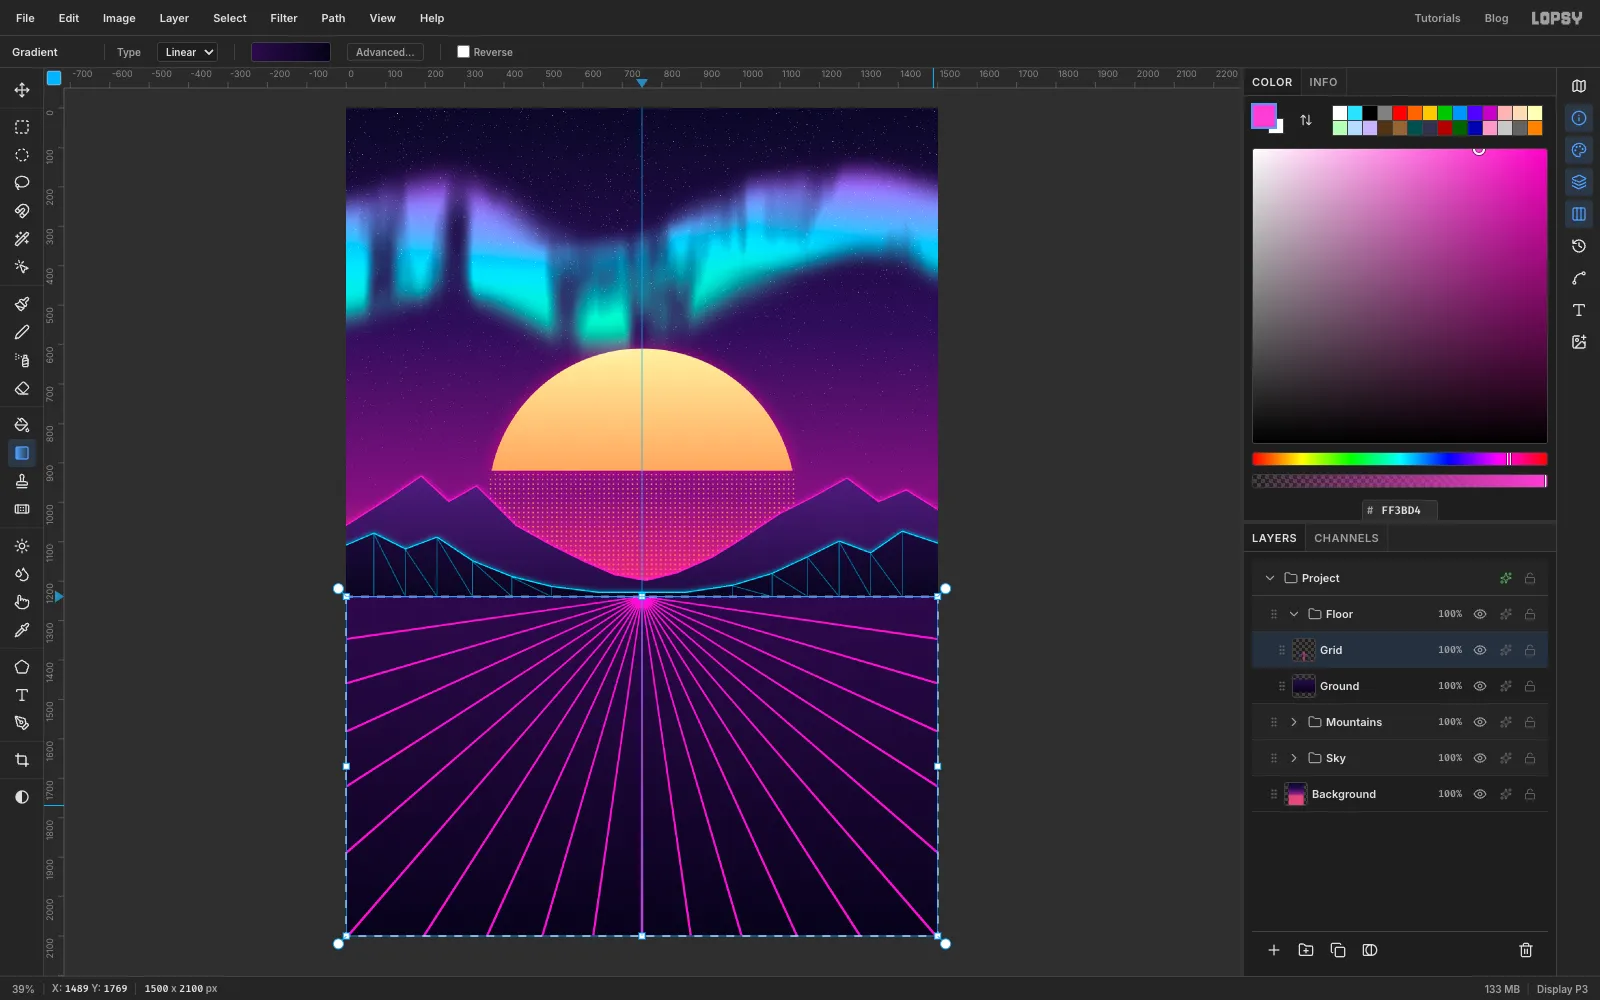
Click once with the Rectangular Marquee and enter 0, 1239 to 1500, 2100, which is everything below the horizon. Fill it with a gradient from at the horizon to at the bottom.
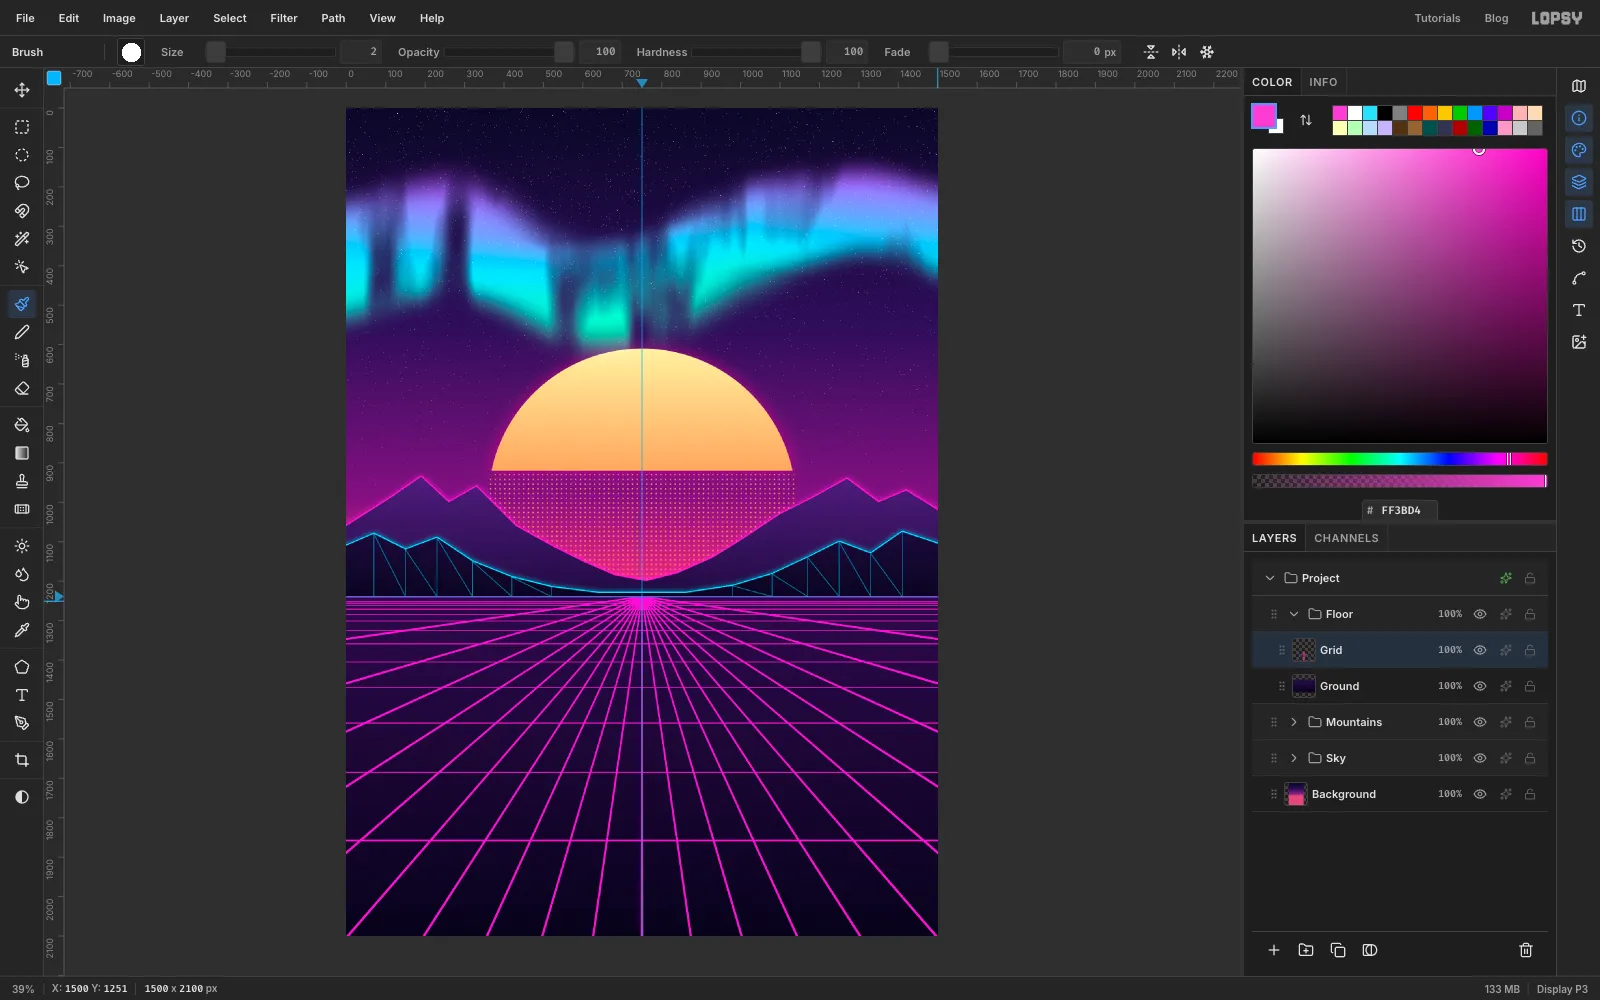
Keep the selection. Add a layer named Grid, set the foreground to and choose Filter → Sunburst…. Enter Rays 44, Width 5, Taper 35, Center X 50 and Center Y 59, and click Apply. Center Y is a percentage of the canvas height, and 59% of 2100 is the horizon, so the rays fan out from the vanishing point. The selection keeps them below the horizon. Press Cmd+D.
-
Add the cross lines, closer and closer toward the horizon
Still on Grid, use the Brush to draw horizontal lines across the whole width. Click on the left edge, then Shift-click on the right edge at the same height.
Start low and work up toward the horizon. Make each gap about three quarters of the one below it: the lines go at y 1858, 1685, 1560, 1470, 1405, 1359, 1325, 1301, 1284, 1271, 1262, 1256 and 1251. Near lines should be heavier than far ones. Use Size 5 for the first line, 4 for the next two, 3 for the three after that and 2 for the rest.
-
Make the grid glow and fade into a haze
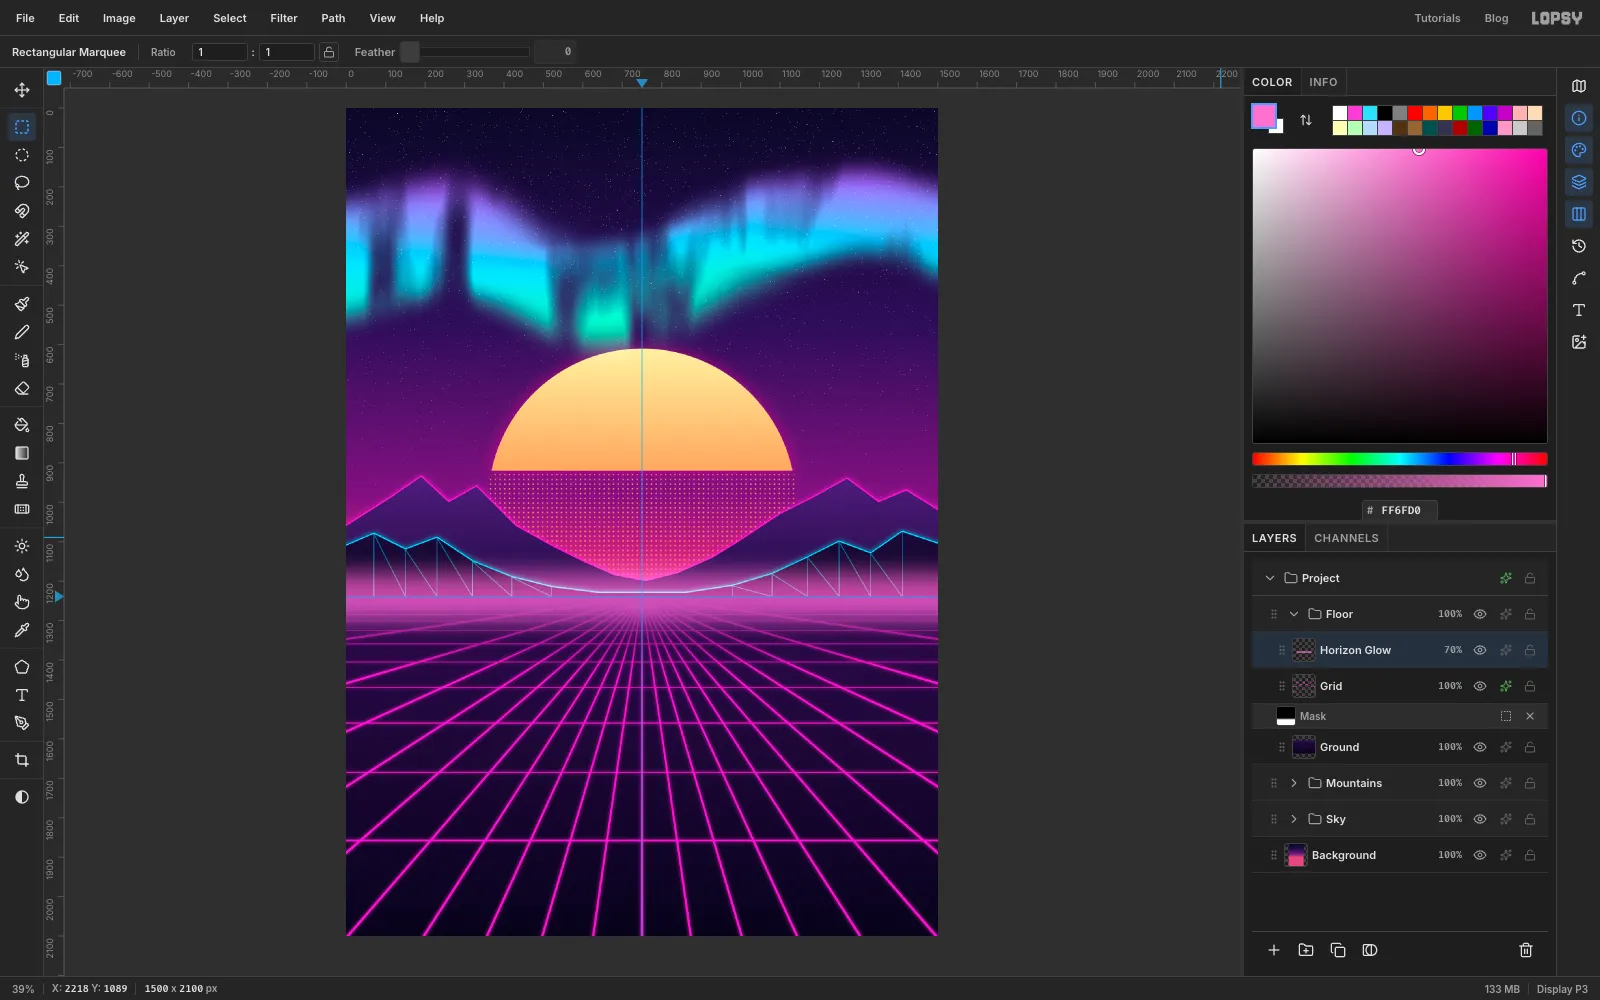
Give Grid an Outer Glow of , Size 14, Opacity 85.
The thin lines at the horizon blur together, so fade them out. Click Add Mask and click the mask thumbnail. In the gradient's Advanced… editor, set the stops to black then white, and drag from the horizon (y 1239) down to y 1439. Click the Grid name to leave the mask.
Add a layer named Horizon Glow. Marquee 0, 1180 to 1500, 1300, choose Select → Feather… with 60, set the foreground to and Edit → Fill. Deselect, set the blend mode to Screen and the opacity to 70%.
-
Let it snow behind the tree
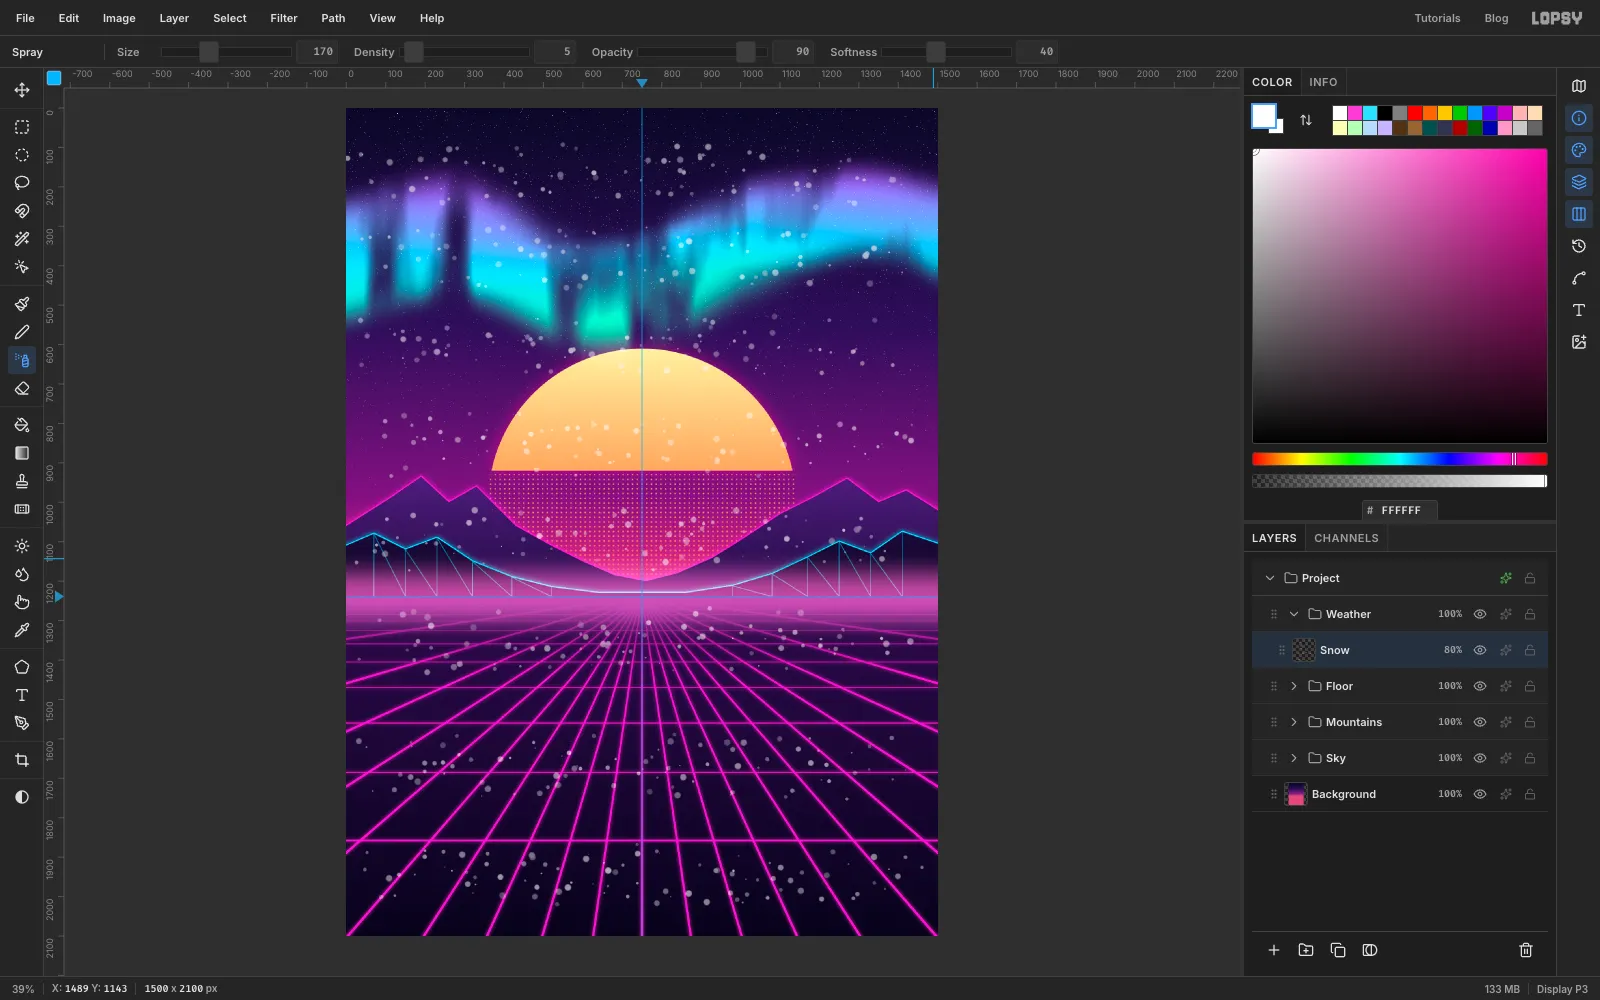
Collapse Floor, select its row, and make a New Group named Weather with a layer named Snow. Snow goes in front of the background but behind the tree and the lettering, so neither gets spotty.
Set the foreground to white and pick the Spray tool (J). Set Size 170, Density 5, Softness 40 and Opacity 90. Drag long zigzags across the full width, with big quick moves, in about eight rows from the top of the sky to near the bottom of the floor.
Apply Filter → Gaussian Blur… with Radius 1 to soften the flakes, and lower the layer to 80% opacity.
-
Draw the bottom tier of the tree
Collapse Weather, select its row, and make a New Group named Tree.
Add a layer named Trunk. Marquee 730, 1400 to 770, 1508, fill it with and deselect. Only the bottom of this narrow trunk will show under the branches.
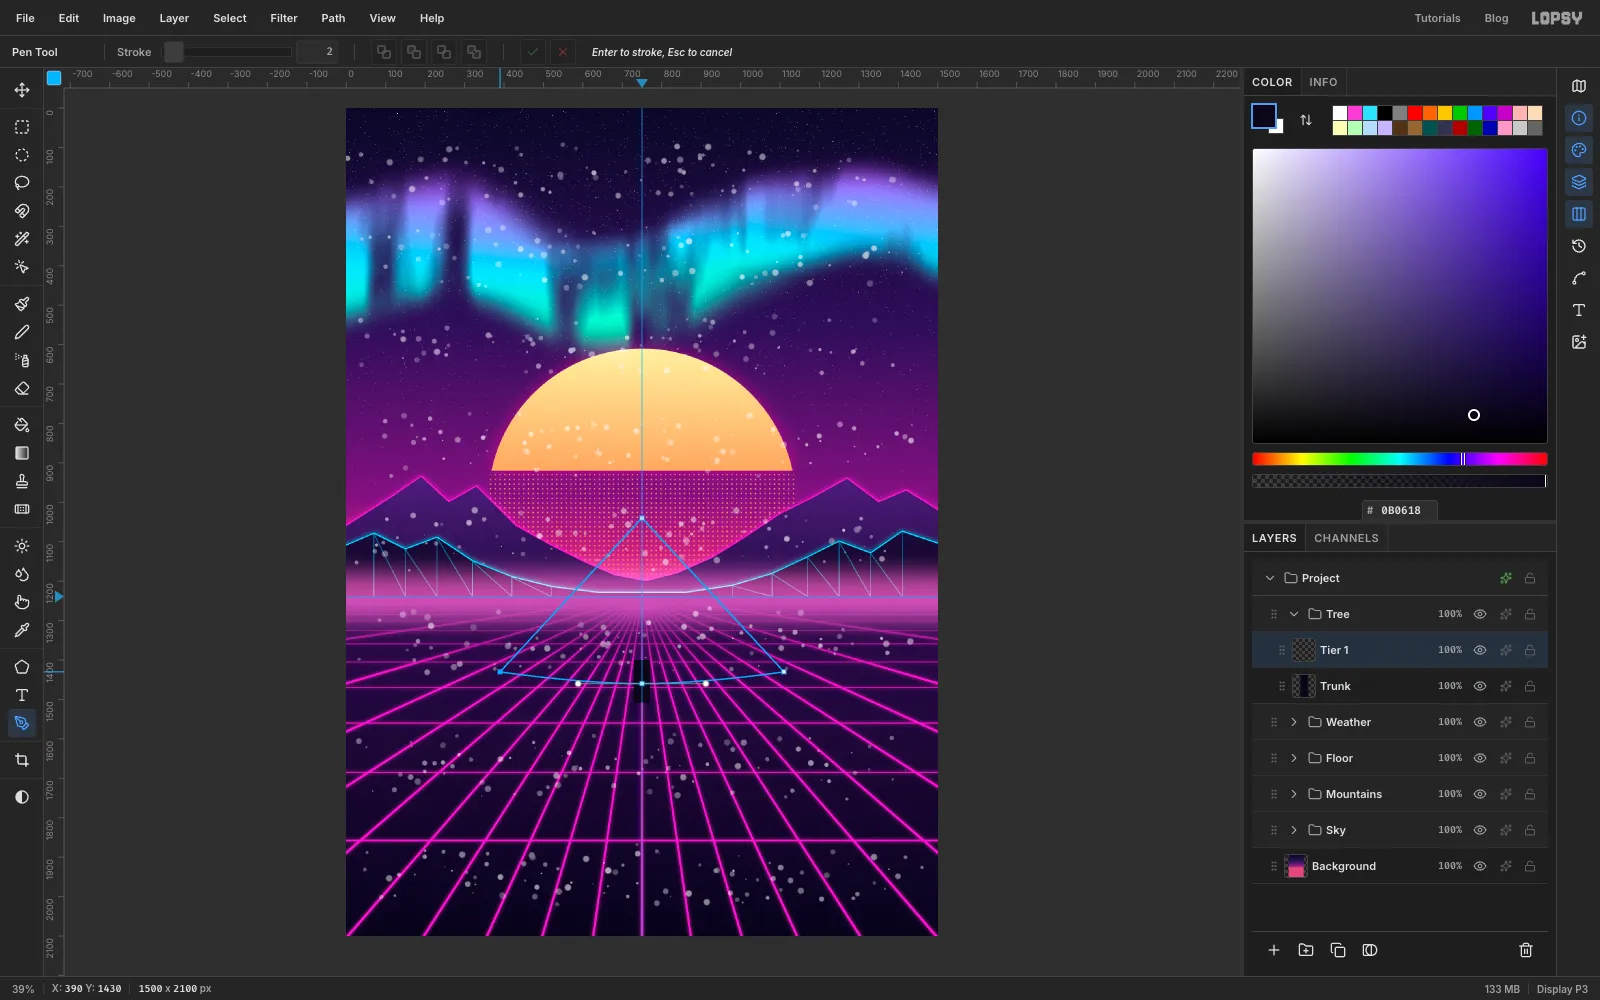
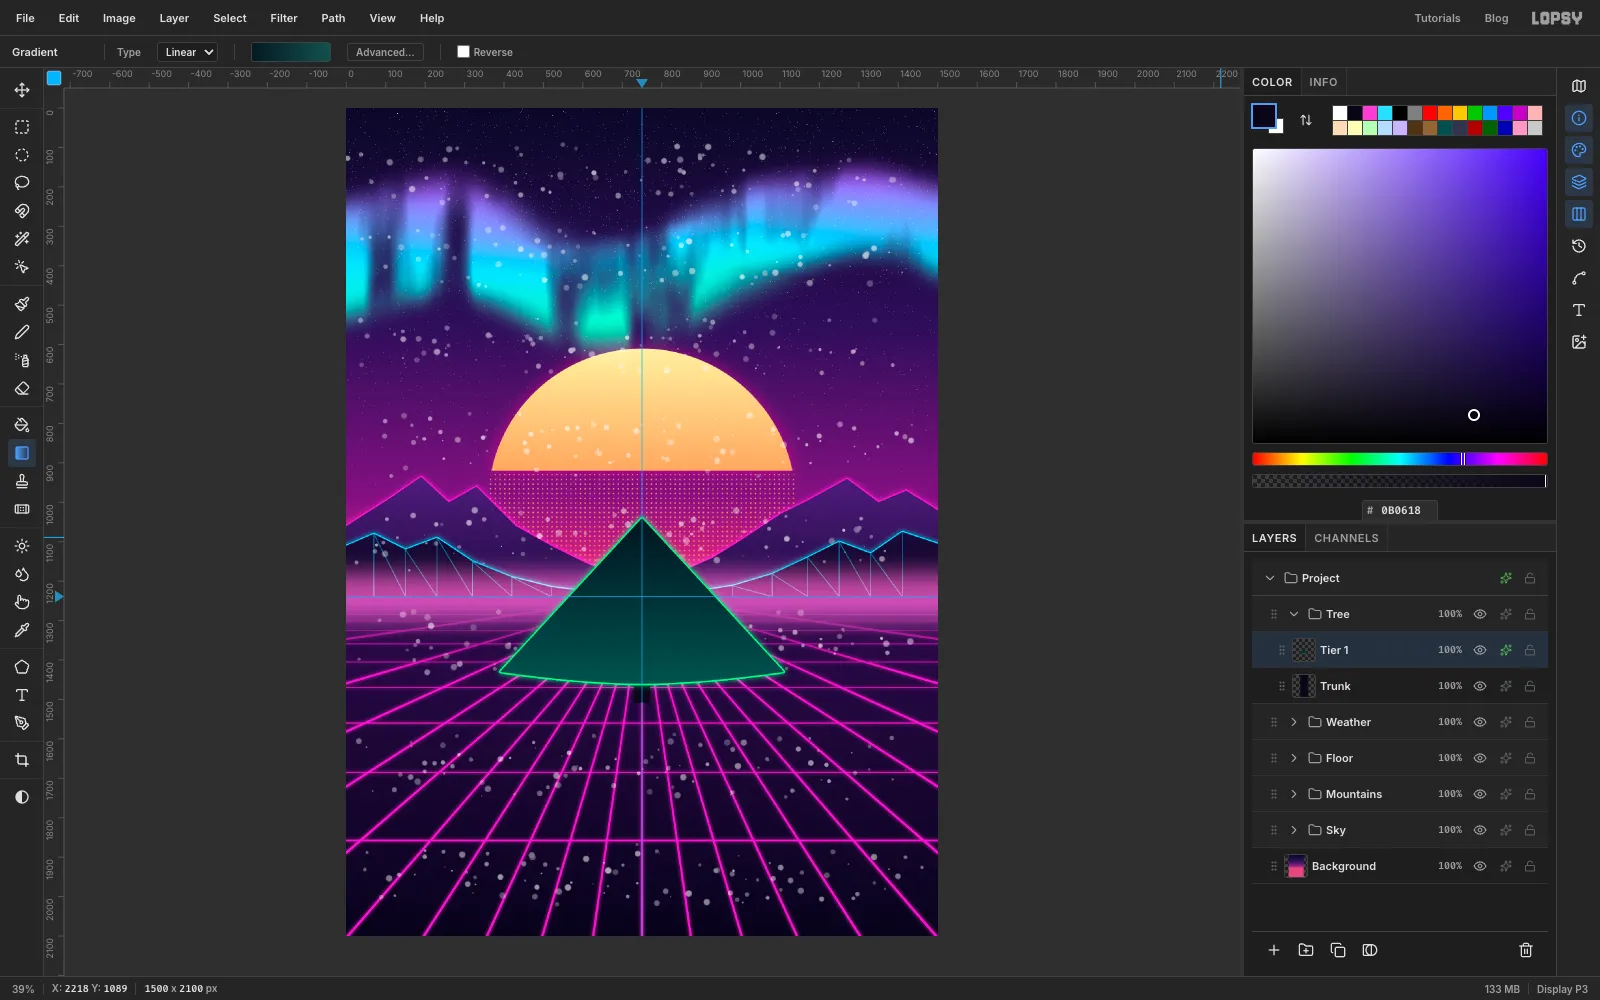
Add a layer named Tier 1 and draw the bottom tier with the Pen:
- Click the left corner at (390, 1430).
- Click the top point at (750, 1040), on the centre guide.
- Click the right corner at (1110, 1430).
- At the middle of the bottom edge, press at (750, 1460) and drag left to about x 590. That curves the bottom edge like the hem of a skirt.
- Click the first anchor to close the path.
-
Fill and outline the first tier
Click Path to Selection and Delete Path. Fill with a gradient from near the top to at the hem: drag from about 40 px below the top point down to the bottom of the curve. A lighter hem makes each tier look lit from below by the grid. Deselect.
Turn on Stroke (, Width 4) and Outer Glow (, Size 22, Opacity 75).
-
Duplicate the tier to build the rest of the tree
The other three tiers need exactly the same effects. Instead of setting them up again, copy the styled tier:
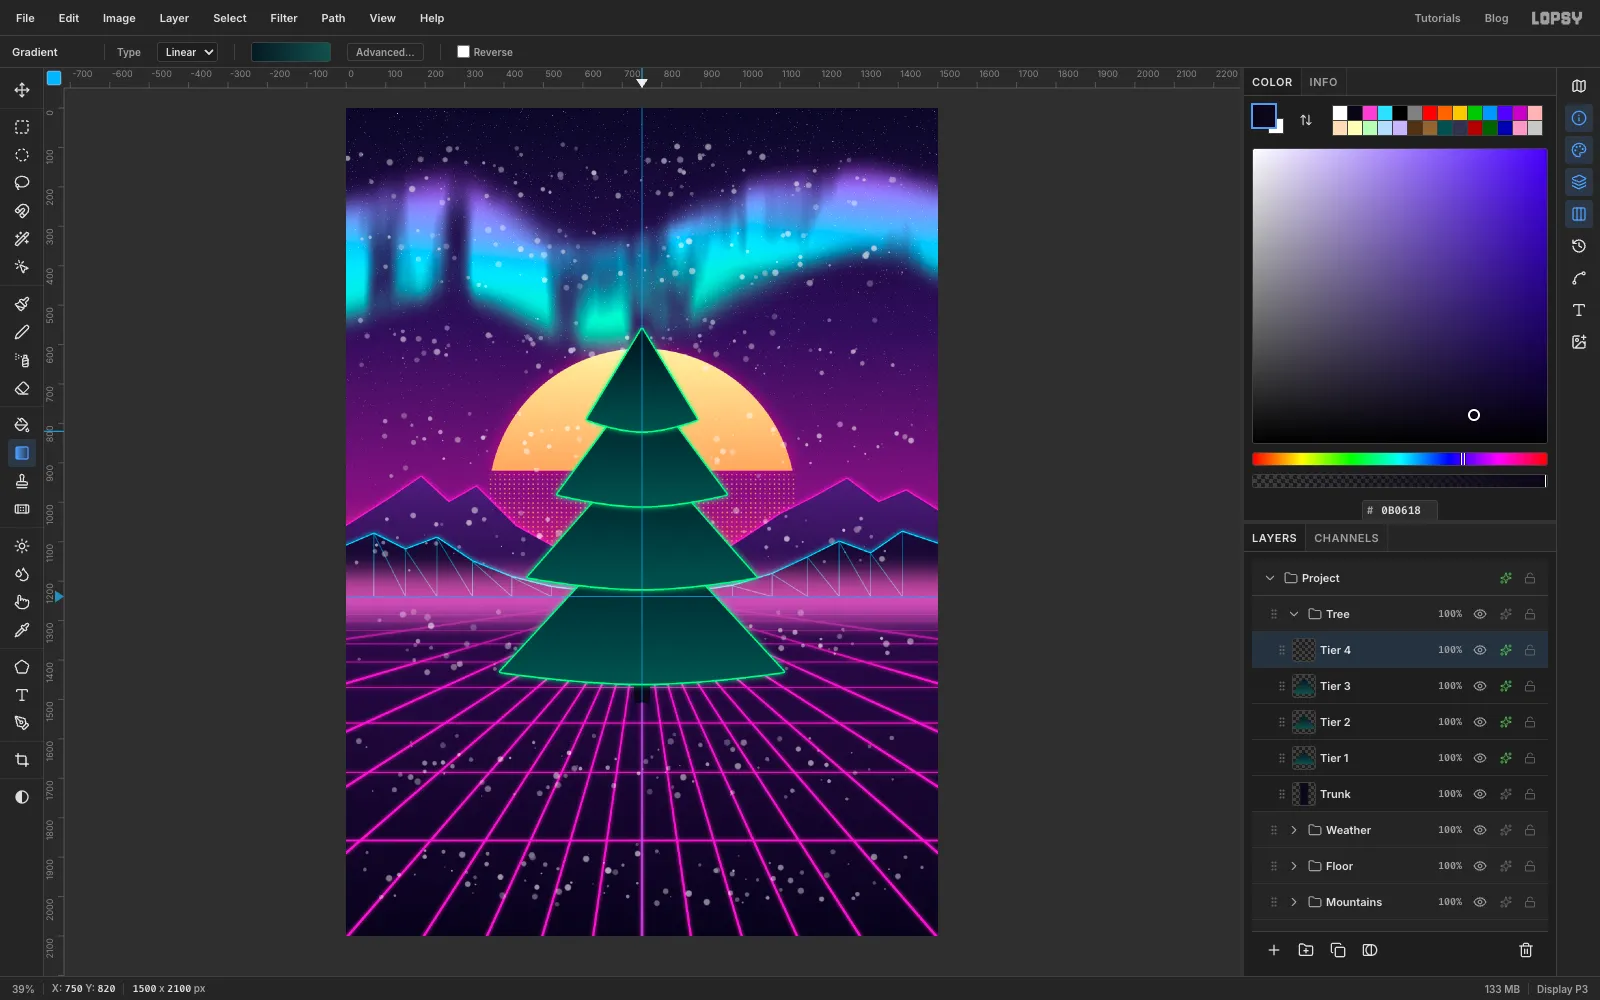
- Click Duplicate Layer and rename the copy Tier 2.
- Choose Select → All, press Delete and deselect. The pixels are gone, but the copy keeps the Stroke and Outer Glow.
- Draw the next tier with the Pen the same way, fill it with the same gradient and deselect.
Repeat for each tier, always duplicating the newest one, so each smaller tier sits on top:
- Tier 2: corners at (460, 1190) and (1040, 1190), top at (750, 860).
- Tier 3: corners at (535, 980) and (965, 980), top at (750, 690).
- Tier 4: corners at (610, 790) and (890, 790), top at (750, 560).
Each tier's curved bottom drops 30 px below its corners, like the first one.
-
String the lights with a spaced brush
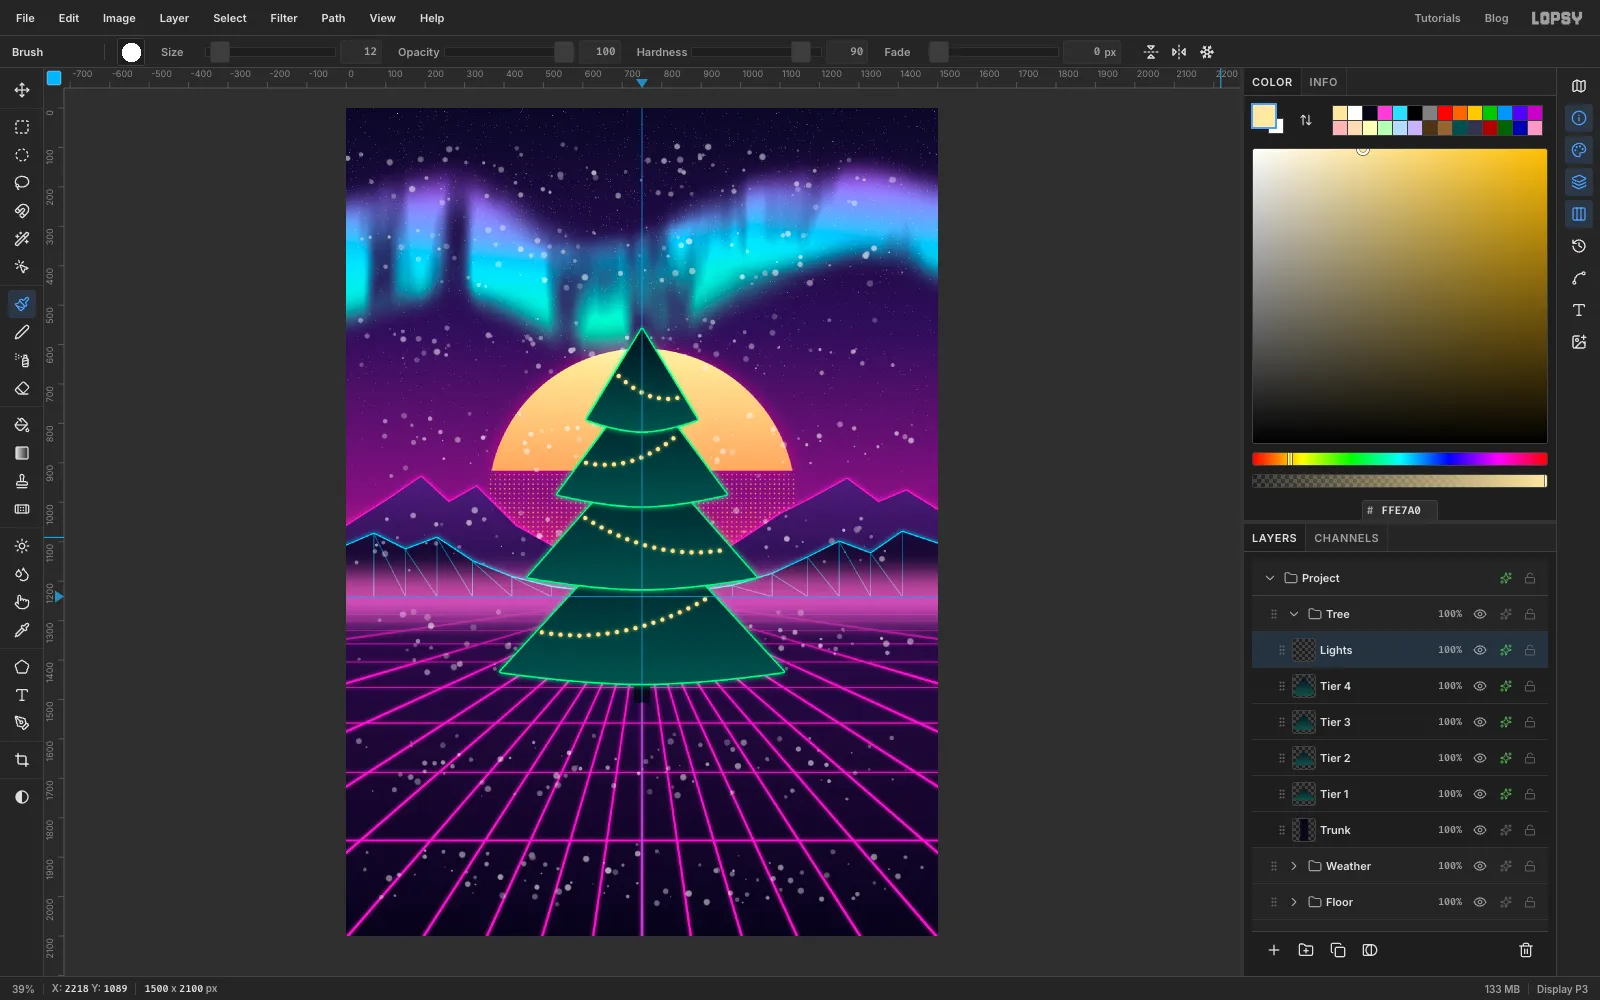
Add a layer named Lights, set the foreground to and pick the Brush at Size 12, Hardness 90. Open the brush presets (the tip button in the options bar) and set Spacing to 200%, the maximum. Now one drag lays a row of separate dots instead of a solid line.
Drag one sagging string across each tier, from just inside one edge to just inside the other. Swap the high end each time: the top tier's string rises to the left, the next one to the right, and so on. Let each string dip 20–40 px in the middle.
Set Spacing back to 10% when you're done, then give the layer an Outer Glow of , Size 16, Opacity 90.
-
Hang the baubles
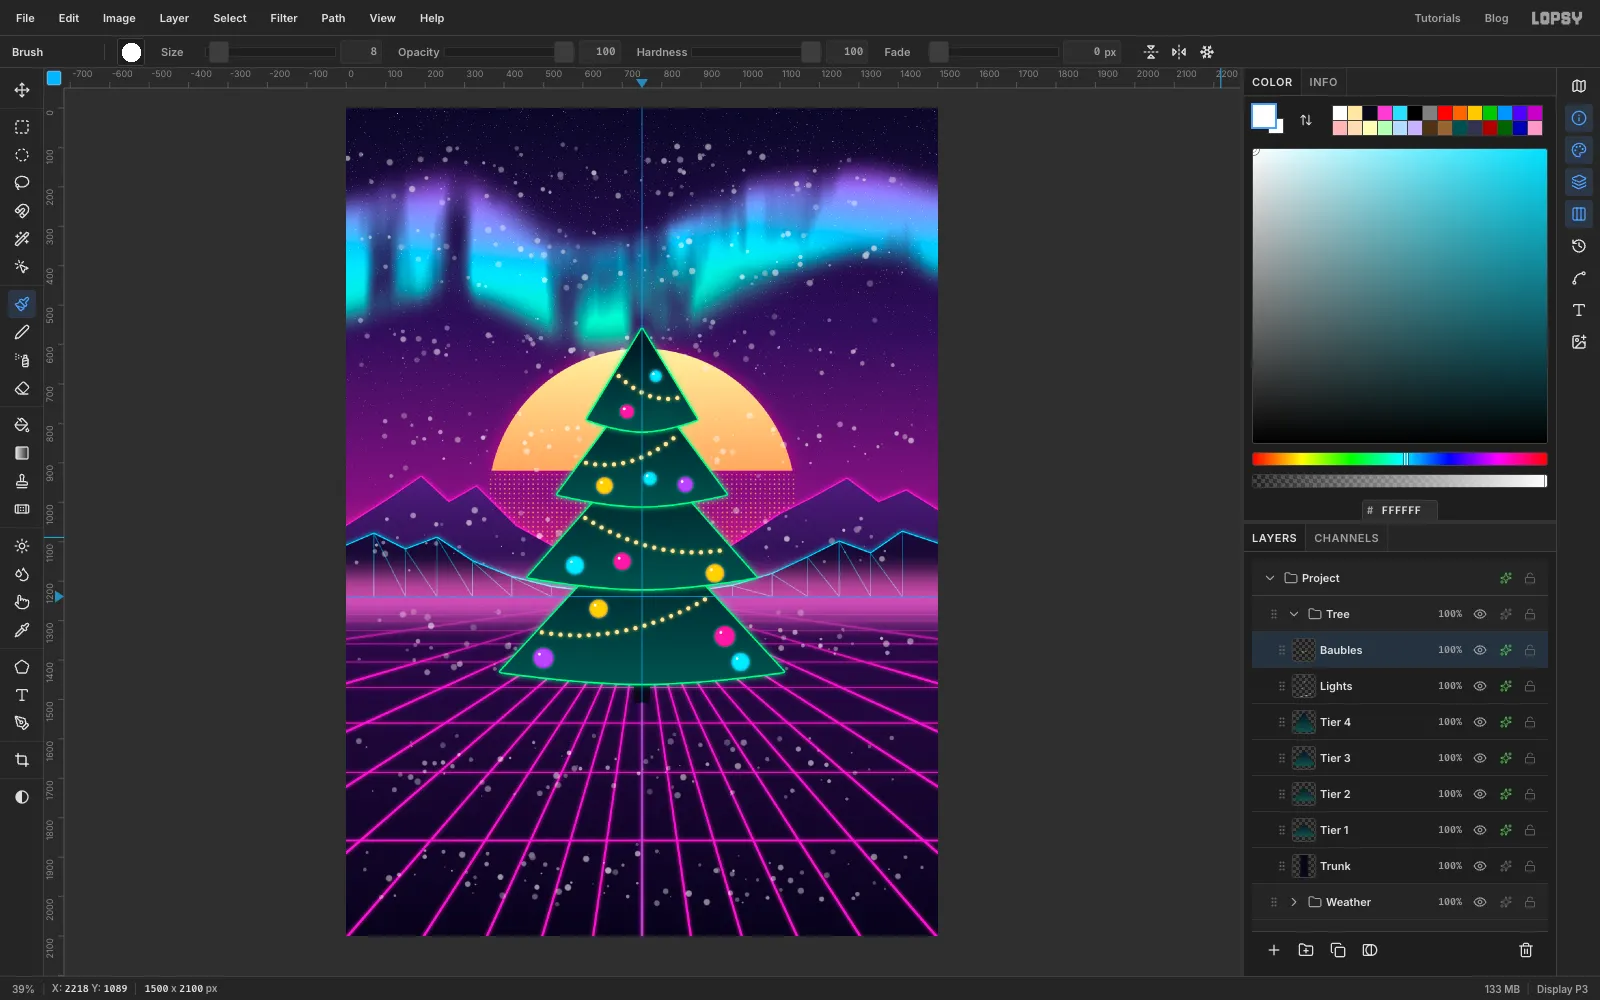
Add a layer named Baubles. For each bauble, drag a small circle with the Elliptical Marquee (hold Cmd for a perfect circle), set the colour and choose Edit → Fill. Use 32–52 px circles in , , and , two or three per tier.
Put them in the gaps between the light strings, never on a string, and spread the colours so two of the same colour never sit side by side. This tree has twelve.
Deselect, then with the Brush at Size 8 and white, click once near the upper-left of each bauble for a highlight. Add Inner Glow (, Size 10, Opacity 70) to darken each bauble's rim so it looks round, and Outer Glow (, Size 14, Opacity 45).
-
Add the gifts and the star
Add a layer named Gift Pink. Marquee 548, 1445 to 680, 1508, fill it with and deselect. With the Brush at Size 6 in , Shift-click a vertical ribbon at x 600 and a horizontal one at y 1456. Off-centre ribbons look more like a real wrapped box. Draw the bow with the Pen: two triangles about 25 px wide and 20 px tall, whose points meet on the ribbon at the top edge of the box. Turn each into a selection (Path to Selection, then Delete Path) and fill it with . Add a 12 px circle on the same spot for the knot, and deselect. Add Stroke , Width 3, and Outer Glow , Size 14, Opacity 75.
Do the same on a layer named Gift Cyan: a tall, narrow box from 820, 1405 to 910, 1508 with a single vertical ribbon at x 865, in , and the same Stroke and Outer Glow in . Both boxes end on the same floor line as the trunk, y 1508.
Add a layer named Star Burst, set the foreground to and run Filter → Sunburst… with Rays 8, Length 5, Width 30, Taper 100, Fade 60, Center X 50 and Center Y 25. That makes eight thin spikes of light around the treetop.
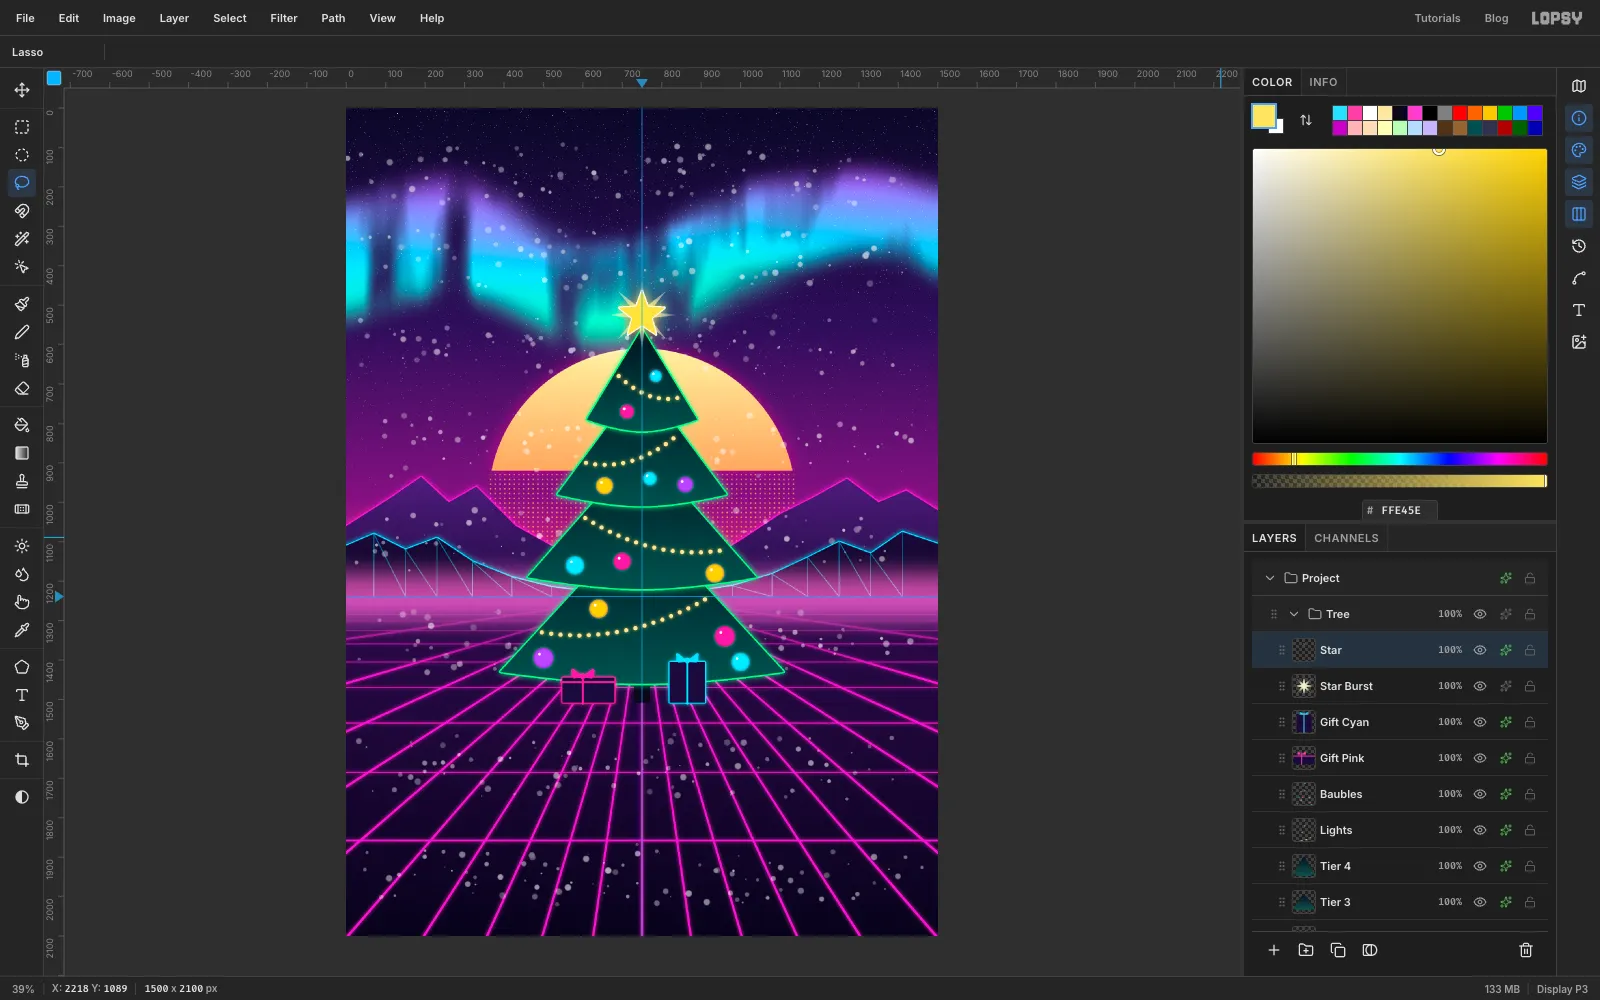
Add a layer named Star. With the Pen, click the ten corners of a five-pointed star in order, starting at the top point: (750, 463), (765, 504), (809, 506), (775, 533), (786, 575), (750, 551), (714, 575), (725, 533), (691, 506) and (735, 504). Click the first anchor to close it, then Path to Selection and Delete Path. Fill it with and deselect. Give it a white Stroke of 3 and an Outer Glow of , Size 36, Opacity 90.
-
Copy just the tree for a reflection
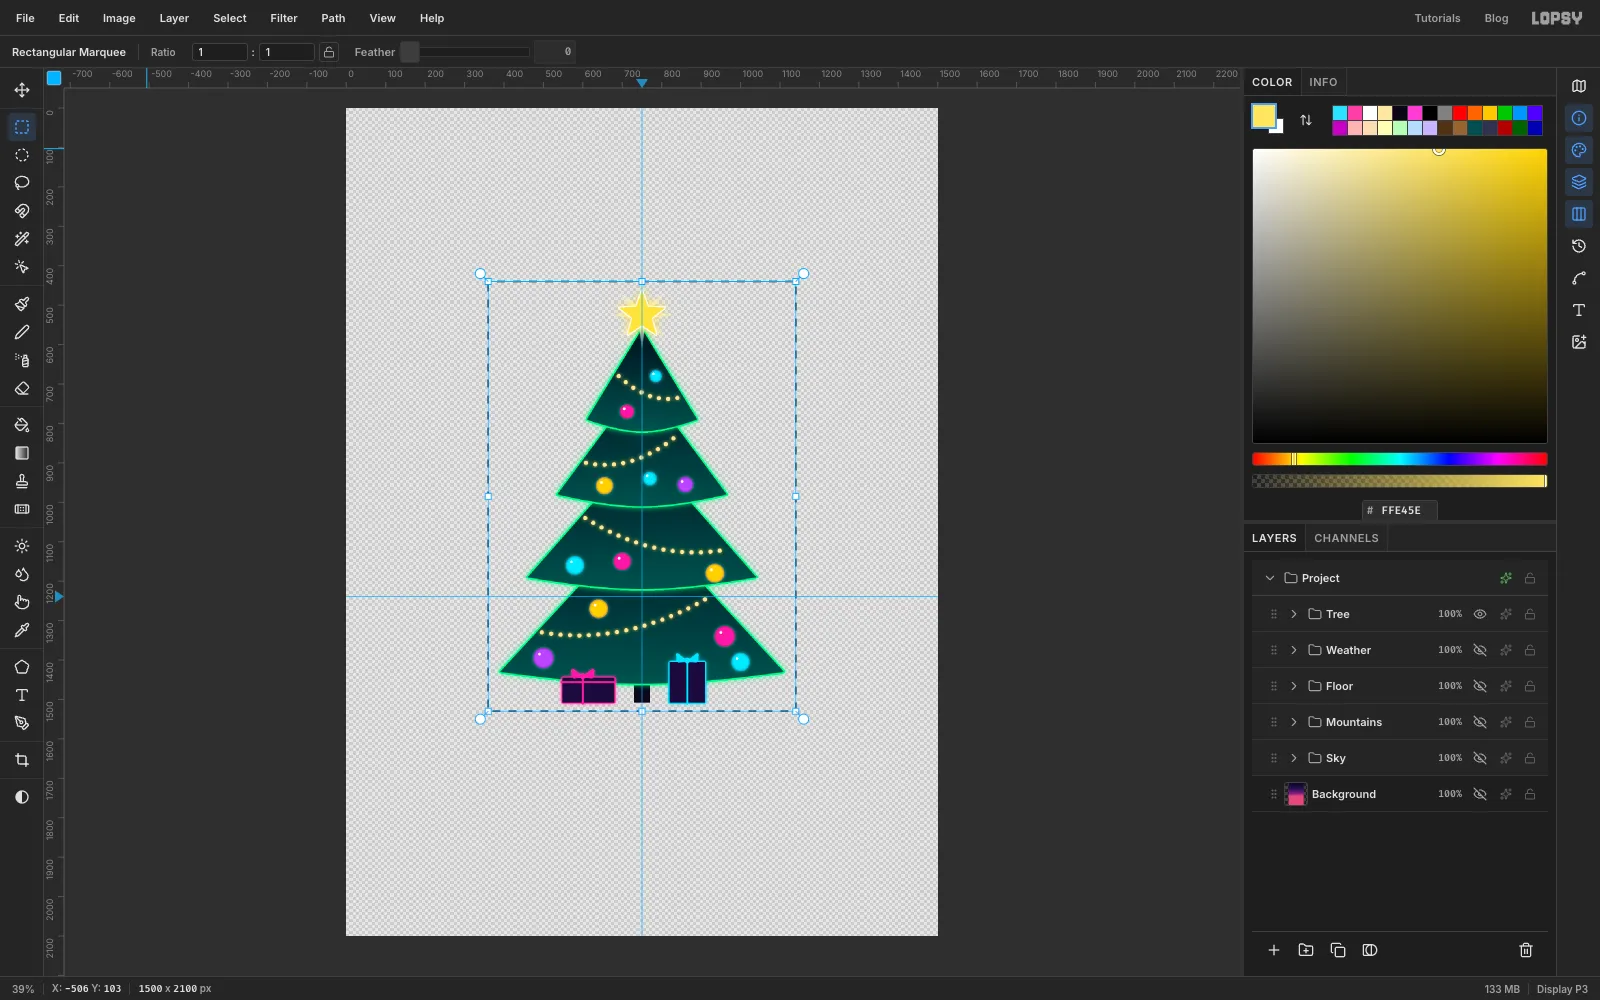
A glossy synthwave floor reflects what stands on it. Collapse Tree, then click the eye icons of Weather, Floor, Mountains, Sky and Background to hide everything except the tree.
Marquee around the tree from 360, 440 to 1140, 1530 and choose Edit → Copy Merged. Copy Merged copies what you see, so you get the whole tree with its effects in one piece. Turn all the eyes back on and press Cmd+D.
-
Flip the copy into the floor
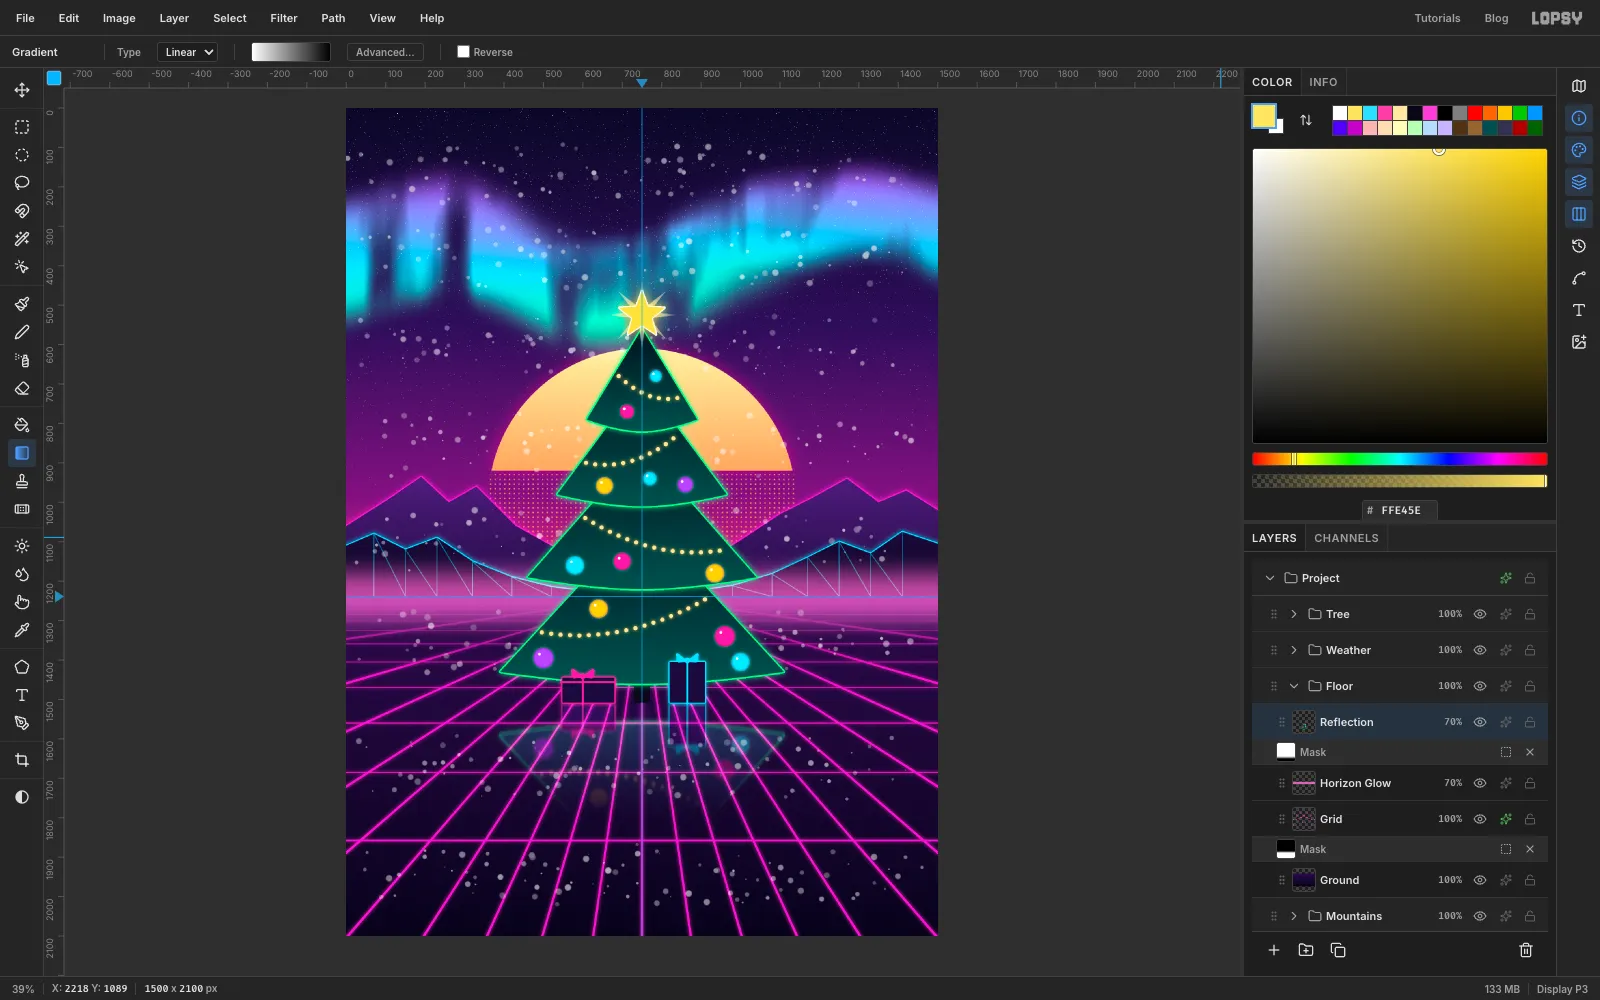
Expand Floor, select Horizon Glow and choose Edit → Paste. The paste lands just above the selected layer, inside the Floor group and below the tree. Rename it Reflection and deselect.
Choose Image → Flip Vertical. With the Move tool, drag the copy straight down until its top edge, the flipped bottoms of the gifts, sits on the floor line at y 1508. The rest of it hangs off the bottom of the canvas, which is fine.
Apply Filter → Motion Blur… with Angle 90 and Distance 12, so it looks like it's on a slightly rippled floor. Click Add Mask, click the mask thumbnail, set the gradient stops to white then black, and drag a gradient from y 1508 down to y 1800. Click the Reflection name to leave the mask, set the blend mode to Screen and the opacity to 70%. Screen drops the dark parts and keeps only the neon edges and the lights.
-
Make the neon pill for the tagline
Collapse Floor and Tree, select the Tree row and make a New Group named Type.
The tagline will sit on the brightest part of the grid, so start with a dark halo. Add a layer named Plate Halo, marquee 170, 1872 to 1330, 2010, feather it by 20, fill it with , deselect and set the opacity to 85%.
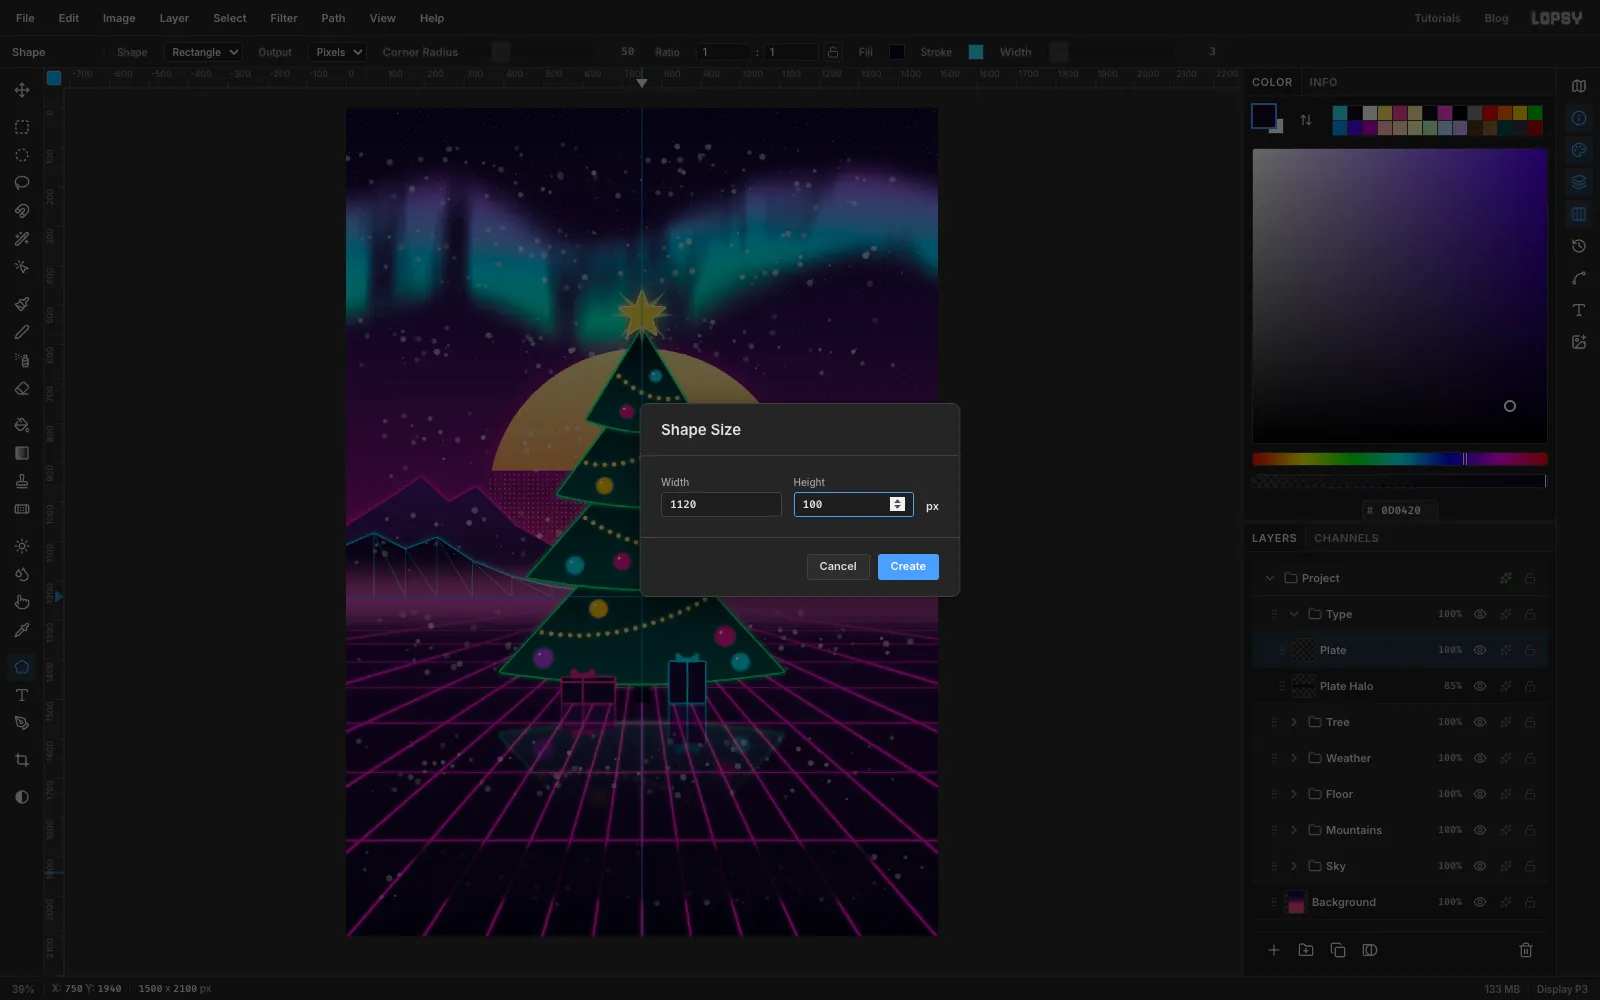
Add a layer named Plate and pick the Shape tool. Choose Rectangle and Pixels, and set Corner Radius to 50. Click the Fill swatch and type . Click the Stroke dash to add a stroke, type and set Width to 3. Then click once at (750, 1940) without dragging and enter 1120 × 100. A 50 px radius on a 100 px tall box makes the ends fully round. Give the plate an Outer Glow of , Size 16, Opacity 70.
-
Set MERRY and select its letters
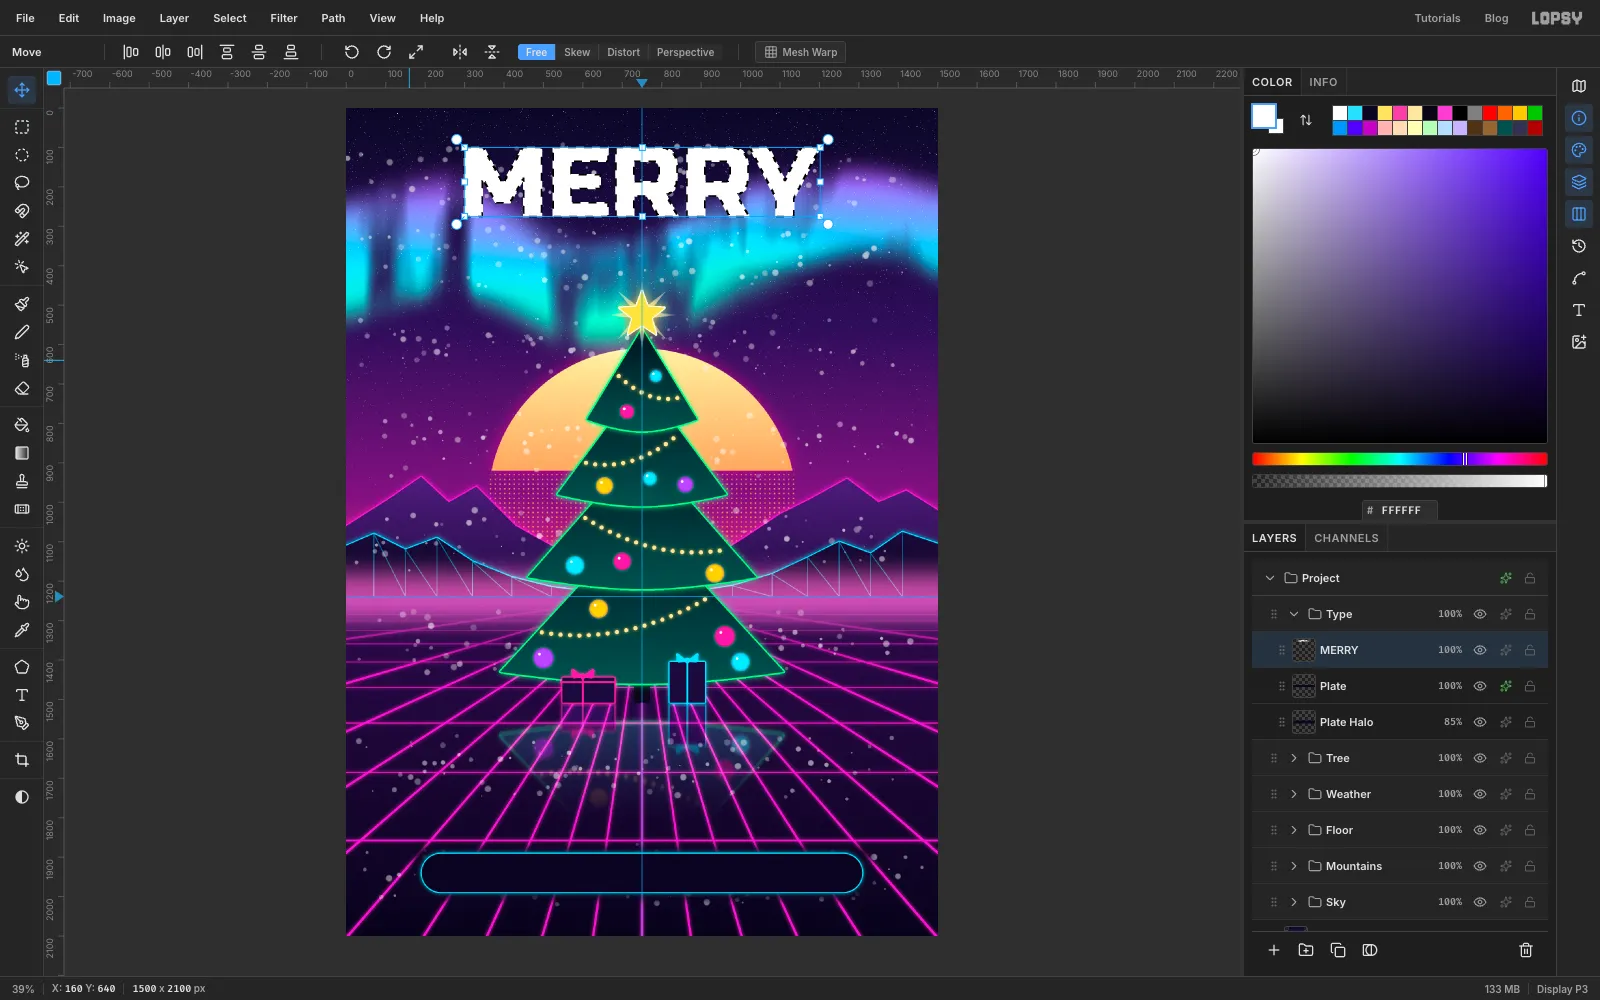
Pick the Text tool, choose Russo One, Size 250, colour white, and click in an empty part of the sky. Type
MERRYand press Tab to finish. Don't click inside existing text, or you'll edit that text instead.With the Move tool, drag the word up to the top and centre it: the letters run from about x 300 to x 1200 and from y 100 to y 274. Use the arrow keys for the last few pixels.
Click Rasterize Layer at the bottom of the Layers panel, then Cmd-click the layer's thumbnail. That selects exactly the letter shapes.
-
Paint the chrome
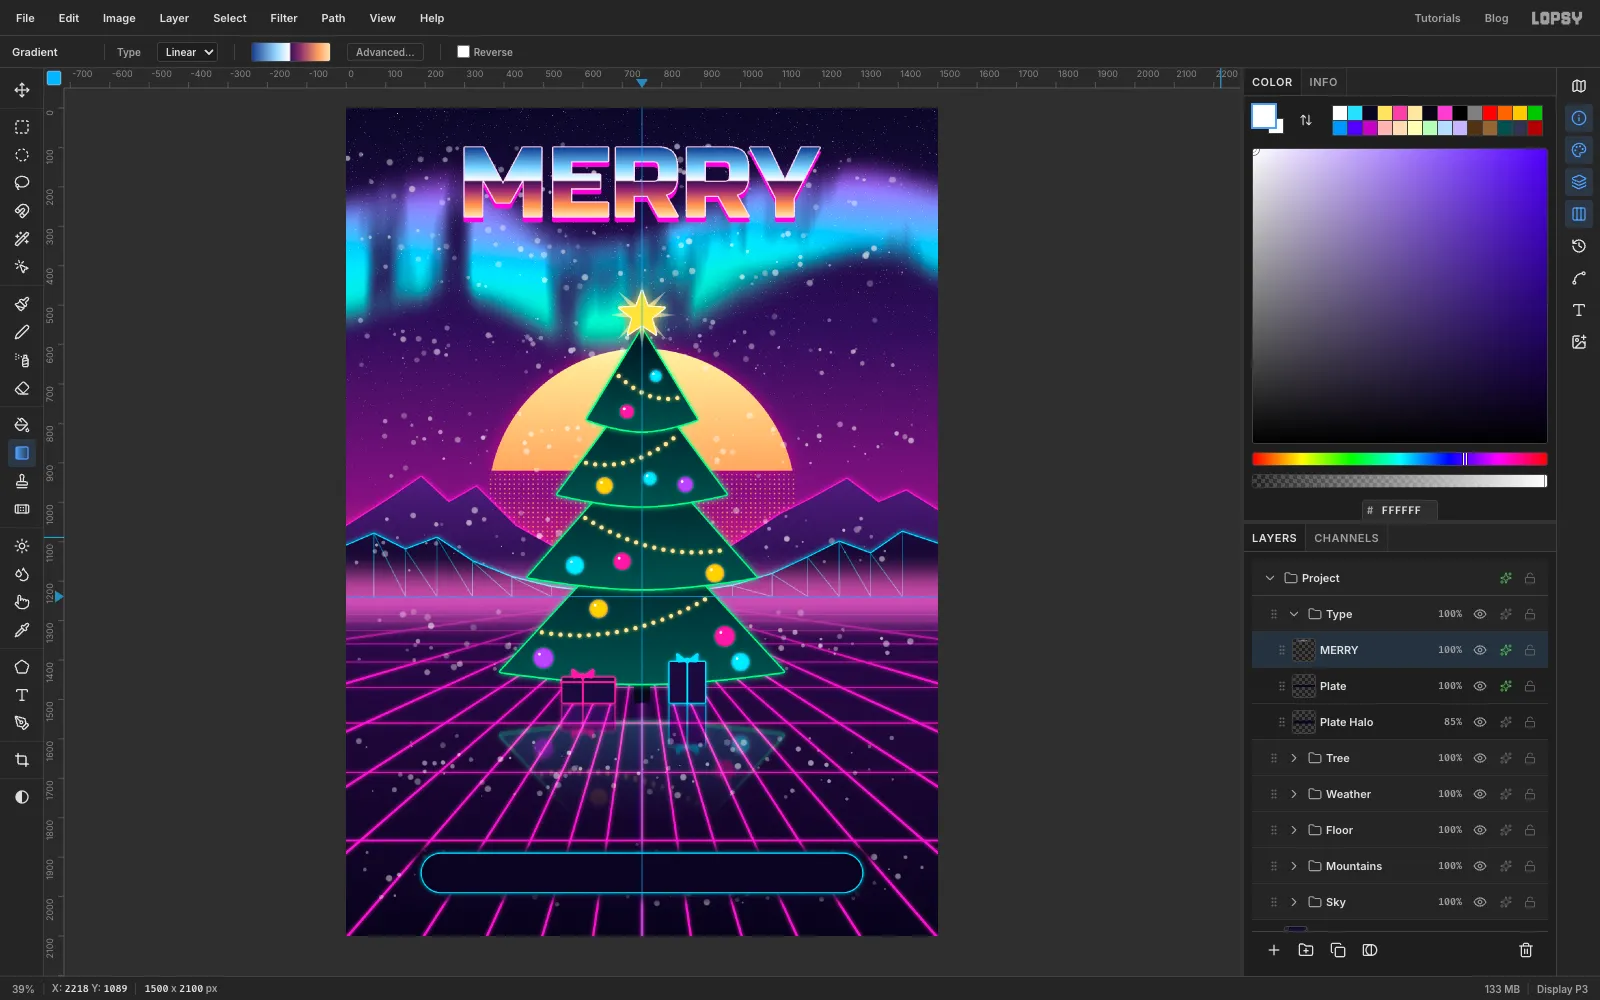
The chrome look is a reflection of a sky over a desert: blue sky, a bright horizon line, then dark ground lit orange. Set up a seven-stop gradient:
- at 0%, at 30% and at 48%,
- at 50%, so the horizon is a hard edge,
- at 62%, at 85% and at 100%.
Keep the 48% and 50% stops at least 1% apart, or they merge into one. Drag from the top of the letters straight down to their bottom, then deselect.
Add Stroke , Width 3, for a bright rim, and Drop Shadow with Offset X 0, Offset Y 12, Blur 0 and Opacity 100. The shadow is a hard pink copy of the letters, not a soft shadow.
-
Add the script and tilt it
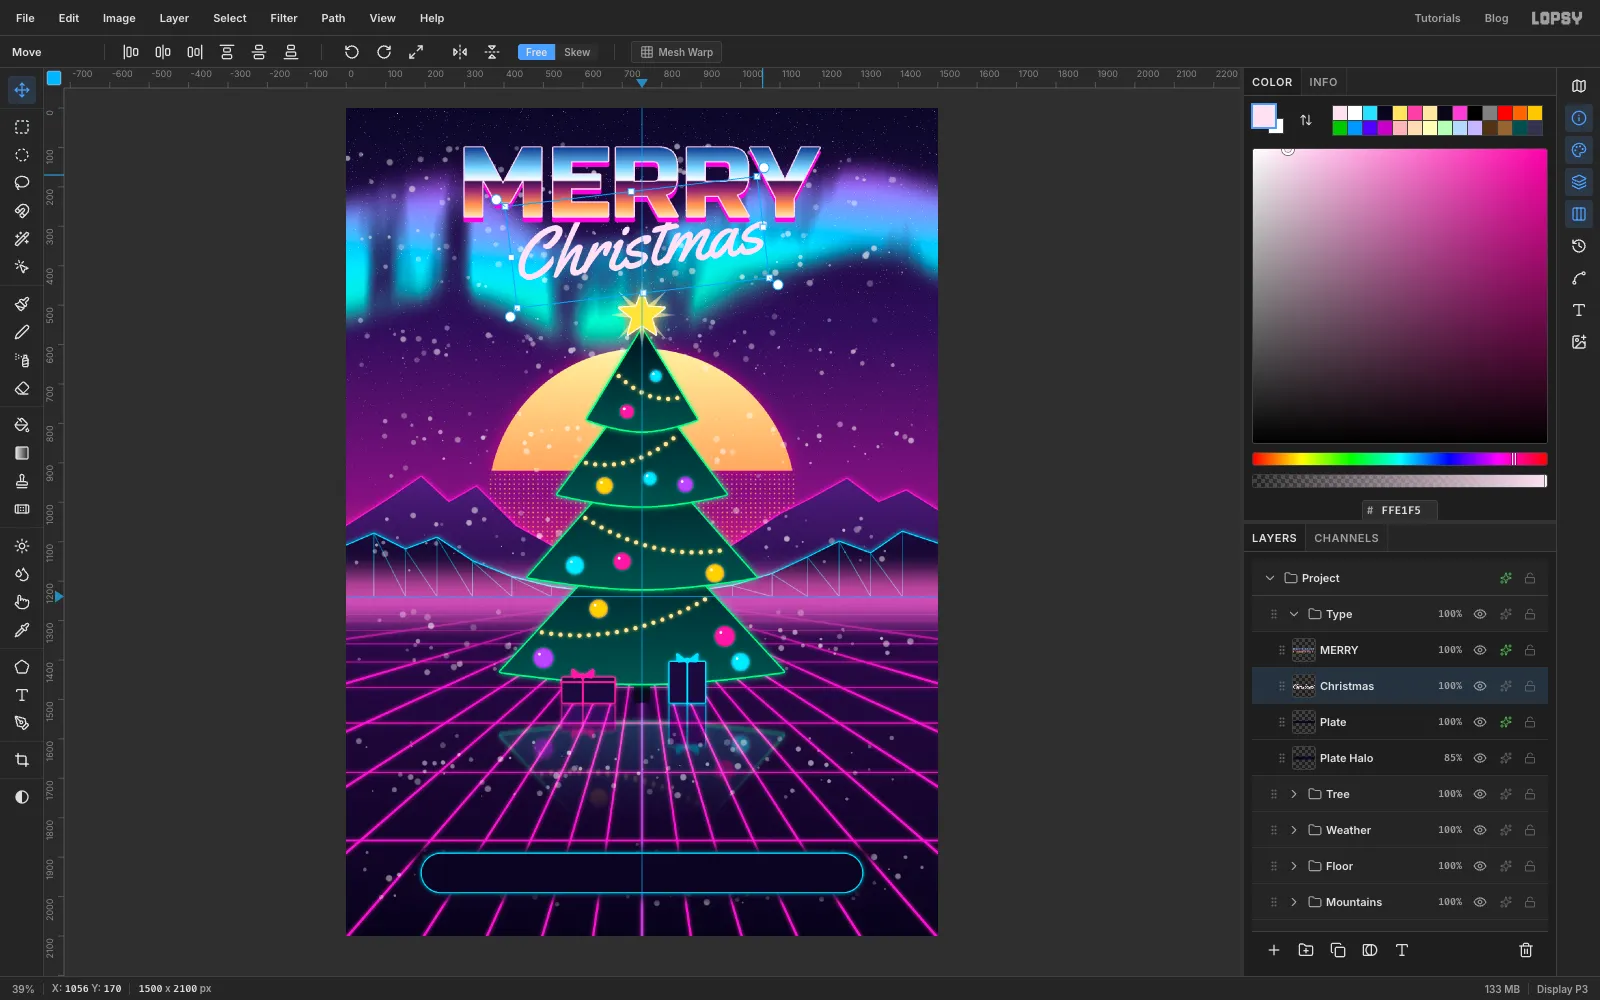
Select the Plate layer first. New text goes just above the selected layer, so the script lands under MERRY: the chrome stays on top and the script tucks behind its bottom edge. With the Text tool, pick Yellowtail, Size 185 and colour . Click in the empty floor area, type
Christmasand press Tab.Move it so it's centred on x 750 at about y 335, overlapping the bottom of MERRY. Then, with the Move tool, hover just outside the top-right corner of its box until the cursor turns into a rotate cursor, and drag up to tilt it about 7° counter-clockwise. Re-centre it after rotating. Leave a clear strip of sky between the bottom of the script and the star's top point.
Give it a Stroke of , Width 4. The dark outline cleanly separates the script from the chrome and the pink shadow where they overlap. Then add an Outer Glow of , Size 18, Opacity 95, for the neon tube.
-
Seat the tagline in the pill
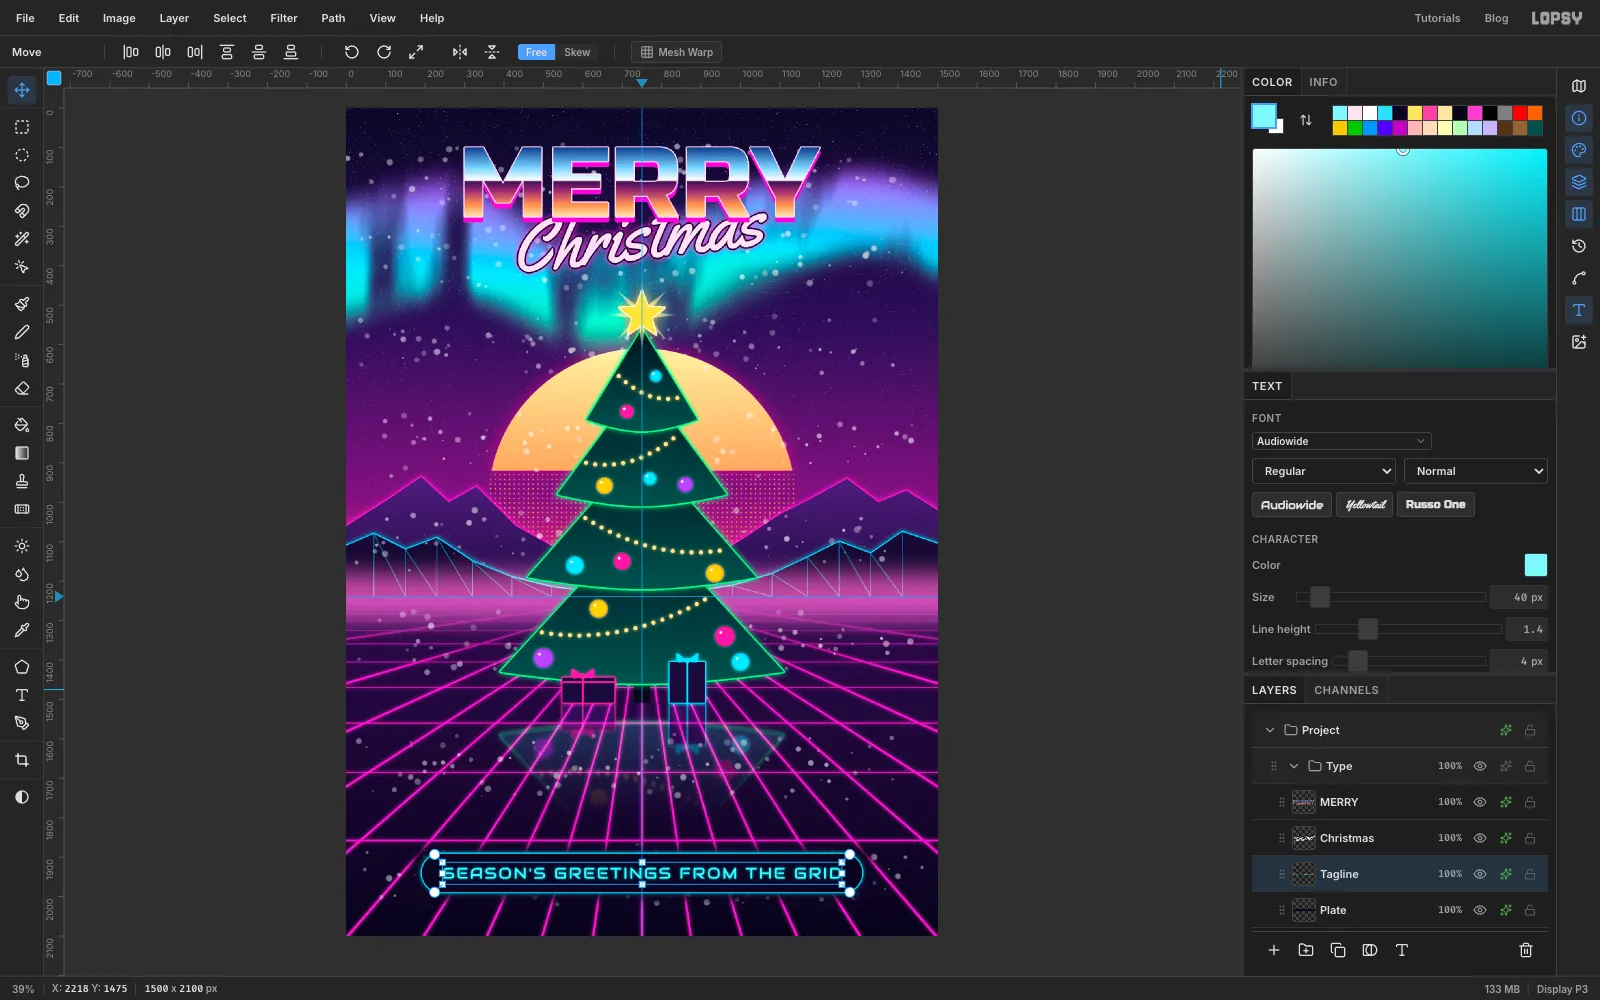
Select Plate again. Use the Text tool with Audiowide, Size 40 and colour . Click in an empty area and type
SEASON'S GREETINGS FROM THE GRID, then press Tab. In the Text panel, set Letter spacing to 4.Centre the line in the pill at (750, 1940). Zoom in and check it by eye: the space above the capitals should match the space below, and both ends of the line should sit the same distance, about 60 px, from the round ends. Add a small Outer Glow of , Size 10, Opacity 80.
-
Darken the corners
Collapse Type, select its row and make a New Group named Finish. Add a layer named Vignette, choose Select → All, fill it with and press Cmd+D.
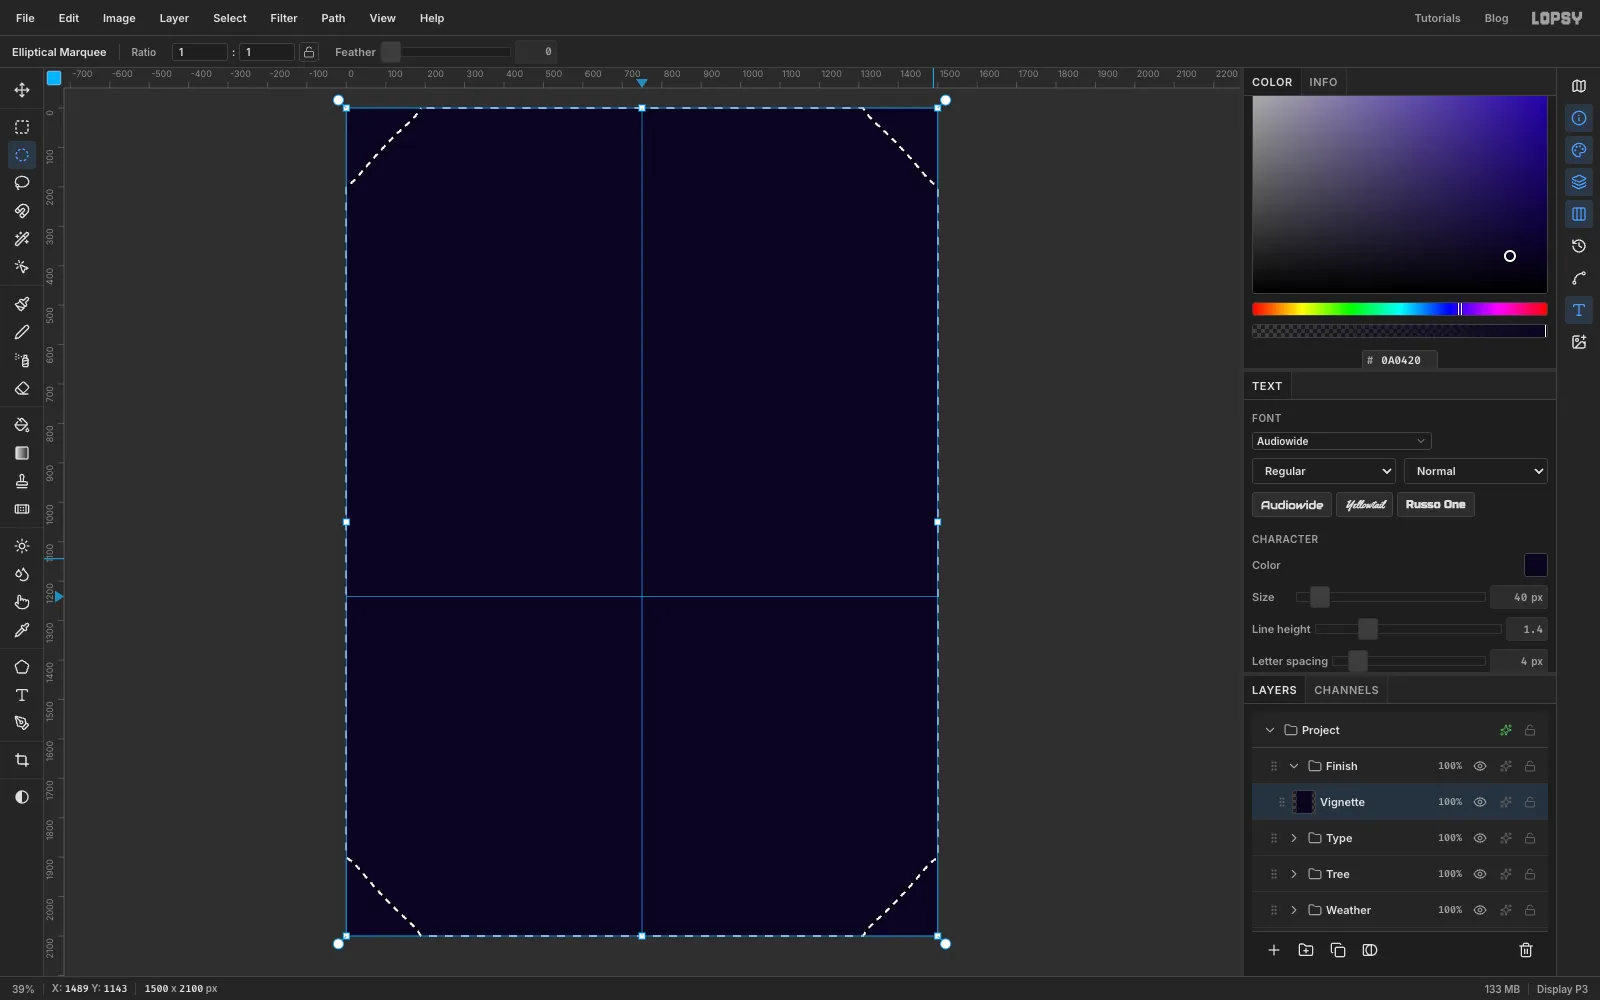
Click once with the Elliptical Marquee and enter -260, -200 to 1760, 2300. The ellipse is bigger than the canvas, so only the corners fall outside it. Select → Feather… with 220, then press Delete to clear the middle. Deselect, set the blend mode to Multiply and the opacity to 90%.
-
Add grain and export
Add a layer named Grain, fill it with and run Filter → Add Noise… with Amount 40, Mode Mono and Distribution Gaussian. Set it to Overlay at 45%. Overlay leaves mid-grey invisible, so only the noise shows, as a fine print-like texture over the smooth gradients.
Choose File → Quick Export PNG to export the card, and File → Save Project to keep every group, mask and effect editable.