Design a Mid-Century Tiki Bar Billboard
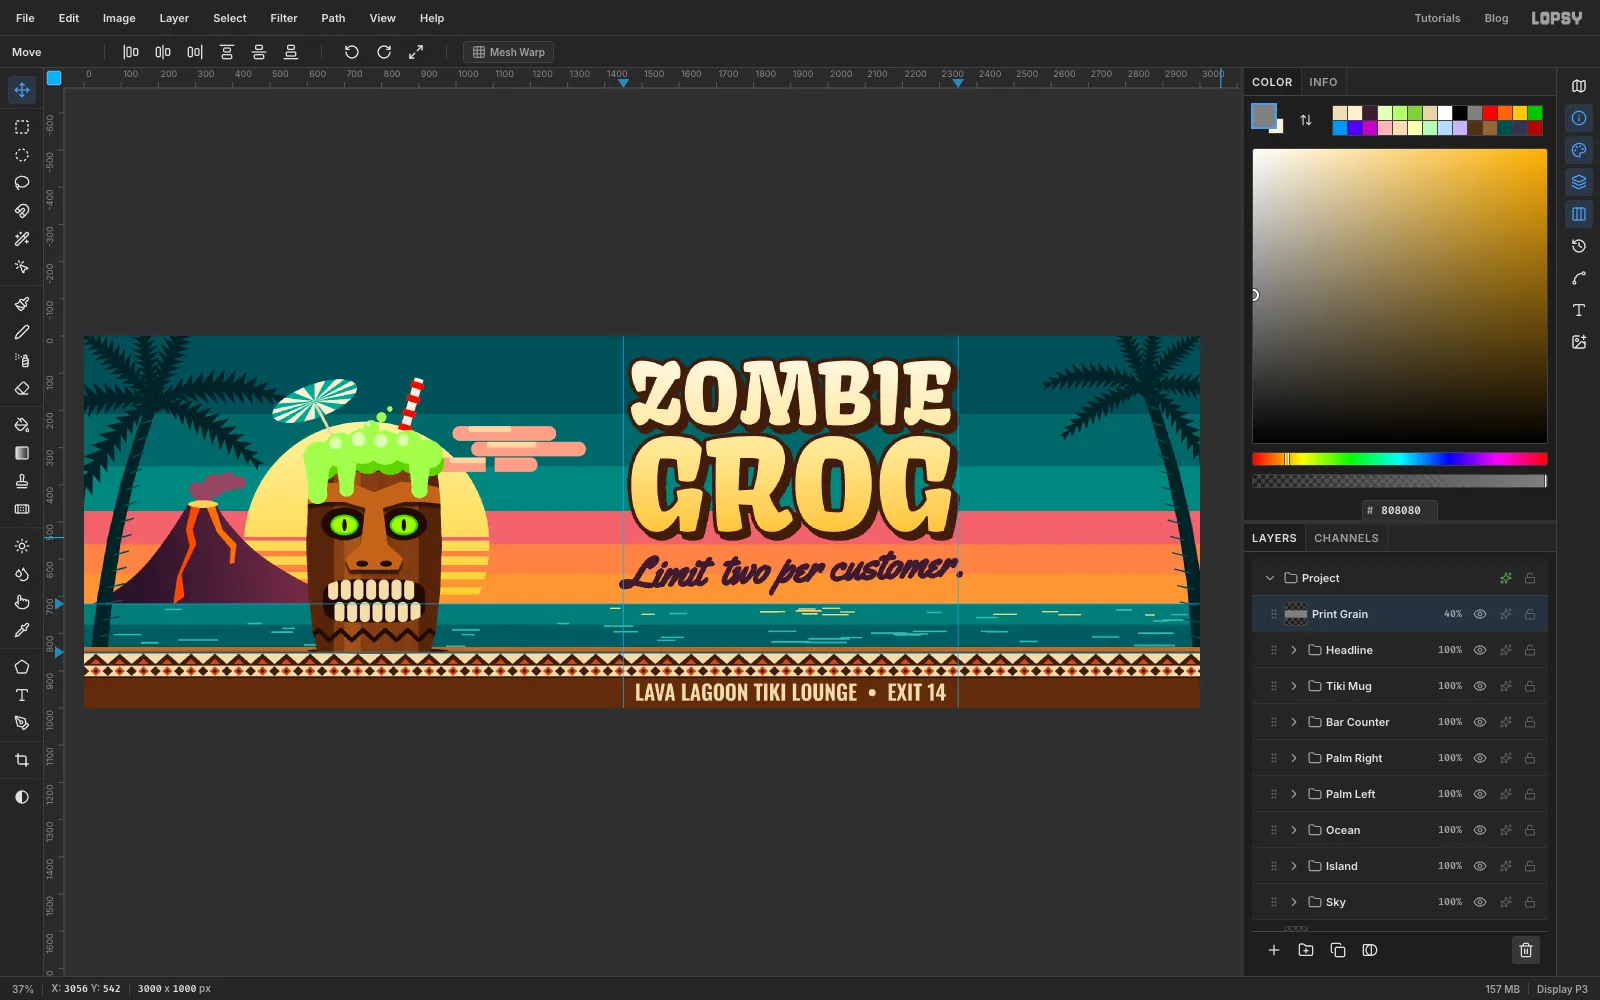
Make a Shag-style tiki billboard in Lopsy: a flat banded sunset, a carved tiki mug with glowing eyes and green foam, a tapa-cloth pattern band and bold type.

In the late 1950s and 60s, American tiki bars sold a Polynesian fantasy: carved idols, flaming cocktails, bamboo and a sunset that never ended. The look came back in the 90s through painters like Josh Agle (Shag), who drew it in flat colour with hard edges and no blending. That flat style suits a billboard, which gets about three seconds of attention from someone driving past.
This billboard sells one drink, the Zombie, a rum punch so strong that Don the Beachcomber is said to have limited guests to two. The layout splits the board in two. A carved tiki mug sits in front of a striped sun on the left, and a two-line headline holds the right. Everything is built from selections, flat fills and a few brush clicks. The only soft textures are a wood grain and a fine print grain.
Along the way you'll use:
- typed-in marquee corners, Edit → Fill and ruler guides
- Shift-drag to add to a selection and Option-drag to subtract from it
- the Pen tool with Path to Selection from the Paths panel
- Shift-click straight brush strokes and single-click brush puffs
- Duplicate Layer on a group, the Move tool's Flip Horizontal, and scale and rotate handles
- Define Pattern and Fill with Pattern with a vertical offset
- Add Noise, Motion Blur and Fibers for wood grain
- Copy and Paste to repeat a row of teeth
- Sunburst with background-colour gaps for a paper umbrella
- Stroke and Drop Shadow effects, Cmd-click thumbnail selections, and a gradient through type
- Group Layers, a group move and undo
The palette is a 60s sunset with a carved-wood mug and lime "zombie" accents:
-
Sky
-
Sun
-
Clouds
-
cloud highlight
-
Volcano
-
lava
-
smoke
-
Sea
-
waves
-
glints
-
Palms
-
trunk rings
-
Counter
-
counter lip
-
grain grey
-
Tapa cream
-
tapa brown
-
tapa rust
-
keylines
-
Mug
-
raised carving
-
recesses
-
Drink
-
teeth
-
Eyes
-
eye rim
-
Foam
-
Straw
-
umbrella
-
umbrella stick
-
Headline
-
outline and shadow
-
Tagline
-
info line
-
Set up the canvas and a flat banded sky
- Create a new document 3000 × 1000 px. That's a 3:1 ratio, close to a standard roadside billboard. Ignore the empty Layer 1 it starts with; you'll delete it at the end.
- Click the left ruler at
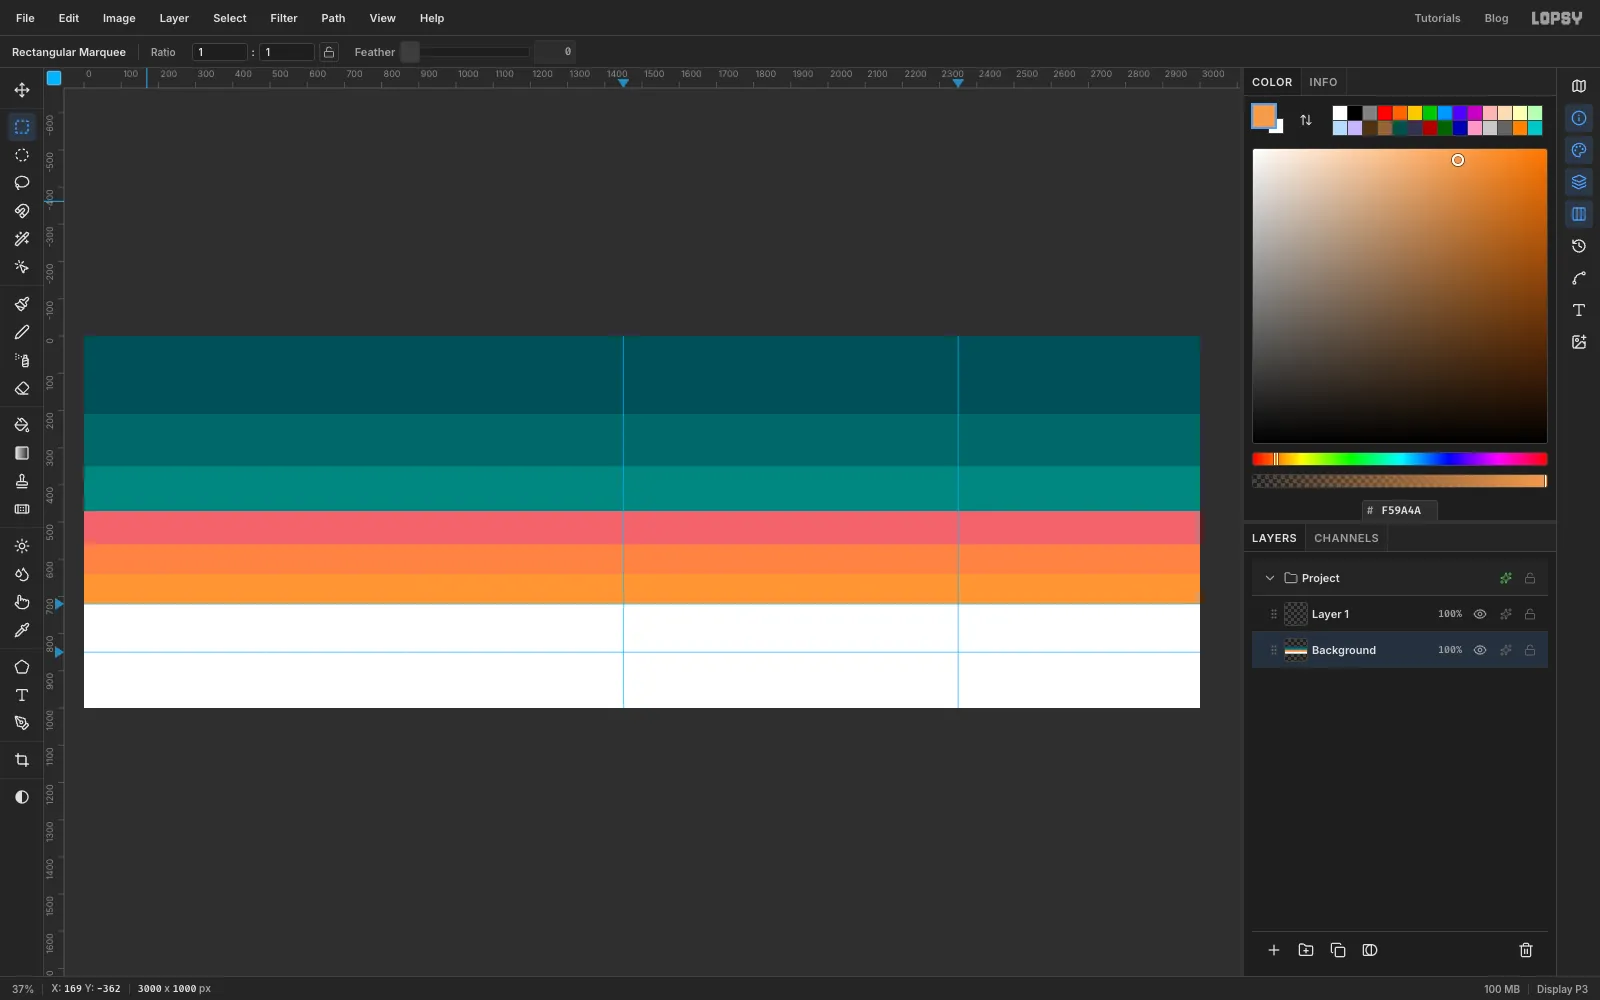
720for the horizon and at850for roughly where the bar counter will start. Click the top ruler at1450and2350. Those two guides mark the column the headline will sit in. - Click the Background layer. Instead of a gradient, the sky is six flat bands, each a full-width rectangle filled with Edit → Fill. Select each one with the Rectangular Marquee dialog and fill it:
0, 0to3000, 210in0, 210to3000, 350in0, 350to3000, 470in0, 470to3000, 560in0, 560to3000, 640in0, 640to3000, 720in
The sudden jump from teal to coral is deliberate. Flat bands with hard edges are what make it look like a 60s print rather than a photo.
-
Paint the sun
Deselect, click Background and add a layer named Sun. Make a circle selection from
430, 230to1090, 890. That's a radius of 330 around760, 560, so its lower part dips below the horizon.Choose the Gradient tool, set it to Linear, open the gradient editor and set the two stops to and . Drag from the top of the circle (
760, 230) straight down to the horizon (760, 720).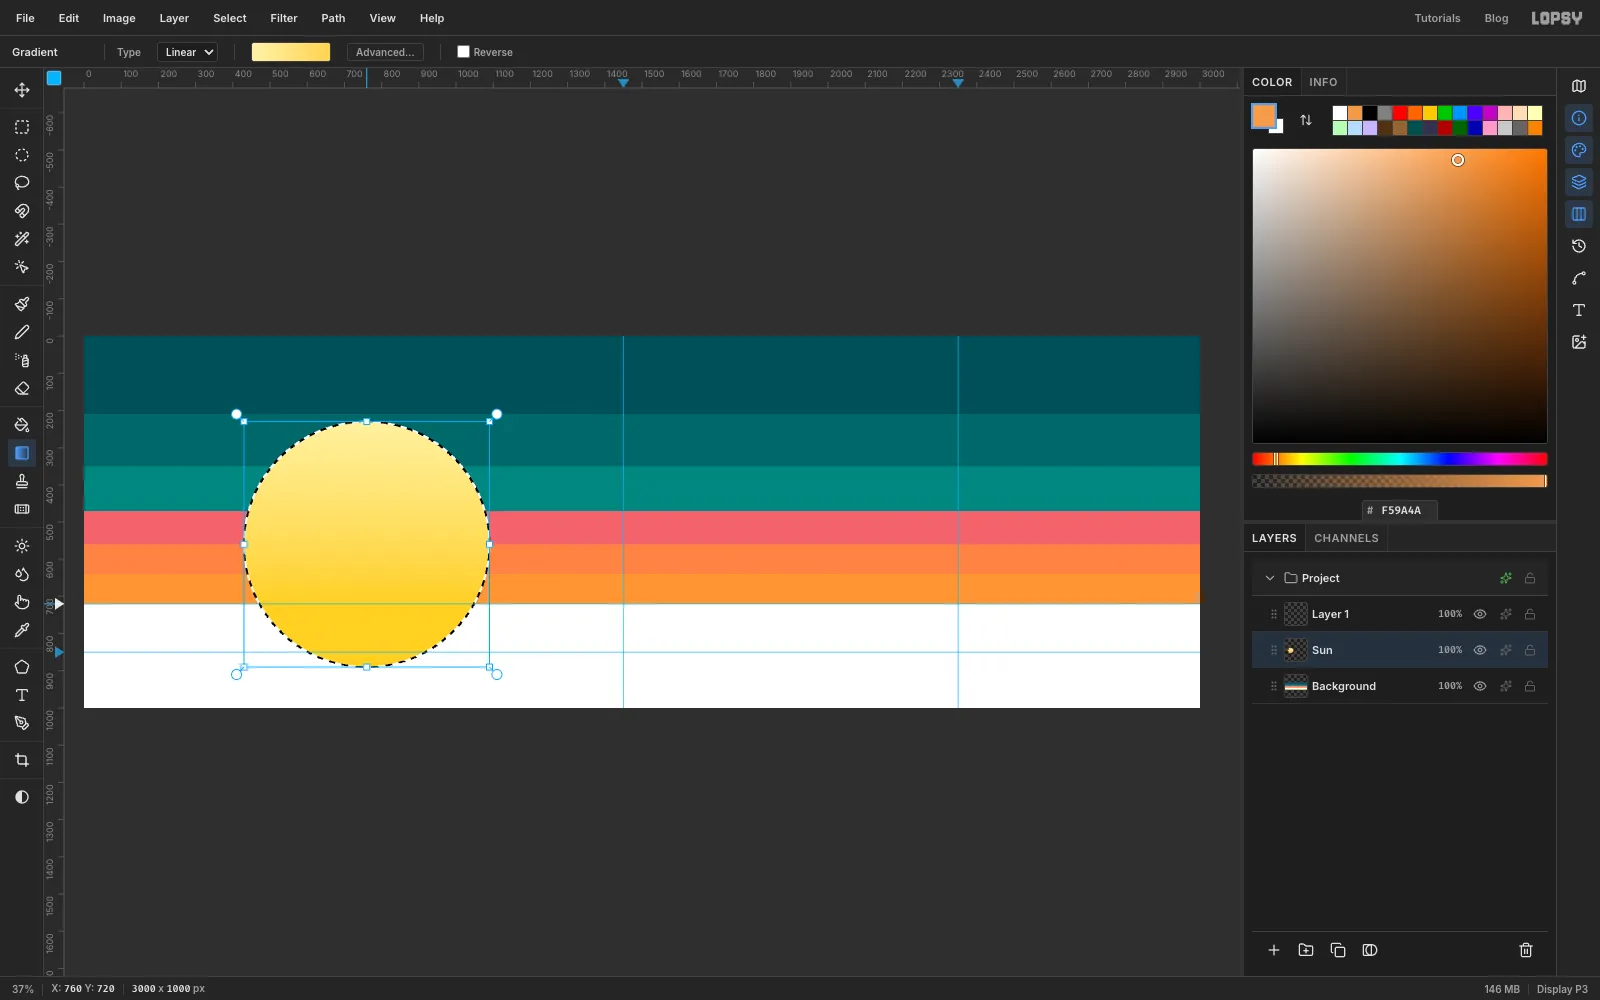
-
Cut the sun's slits
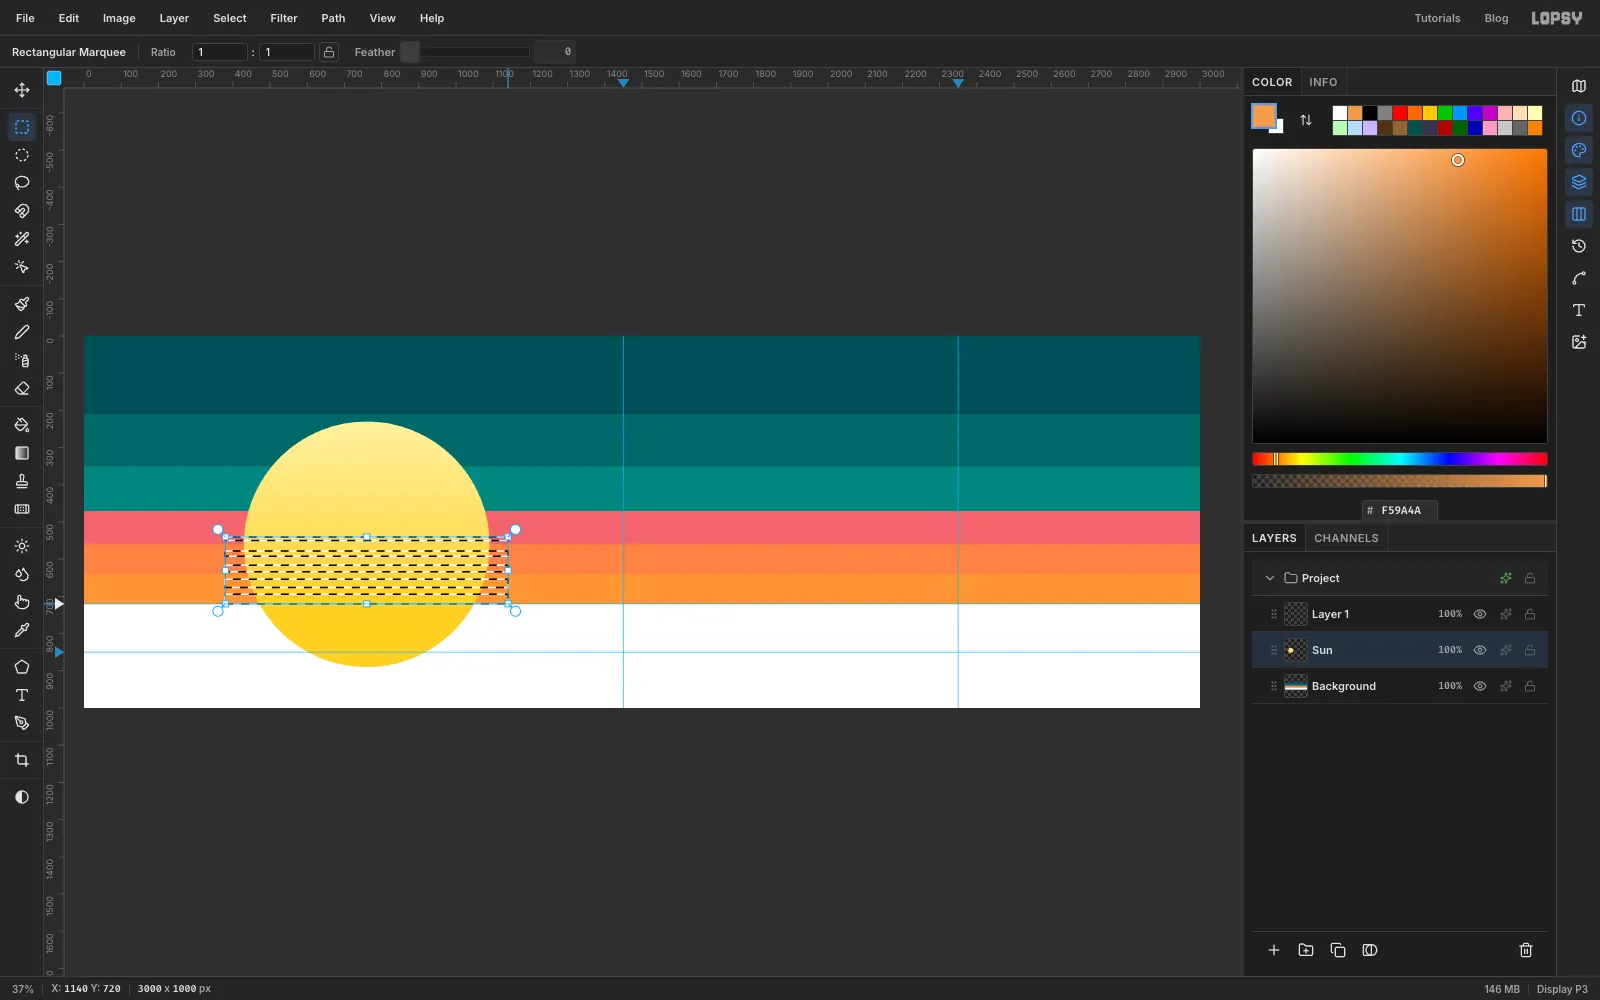
The striped "setting sun" is a classic of retro posters. Press Cmd+D to drop the circle selection, then click once with the Rectangular Marquee and type the first slit,
380, 540to1140, 550. Zoom in to 100% (these bands are thin), hold Shift and drag four more rectangles across the full width of the sun, each a little thicker than the last:578to592616to634654to676694to720
Shift adds each new rectangle to the selection. Press Delete to cut all five slits at once, then deselect. The sky bands show through the gaps.
-
Add flat clouds
Add a layer named Clouds above Sun. Choose the Brush, set Size
40and Hardness100, and set the foreground to . A brush dragged in a straight line leaves a pill with round ends, which is all a Shag-style cloud is. Click at the start of each bar, then Shift-click at the end:1010, 262to1250, 2621060, 304to1330, 304960, 346to1200, 346
Set Size
16and the colour to . Add a short highlight along the top-left of each bar, about 12 px above its centre and about half its length. Finally, select a thin rectangle from1080, 326to1104, 370and press Delete to split the bottom bar in two. Deselect.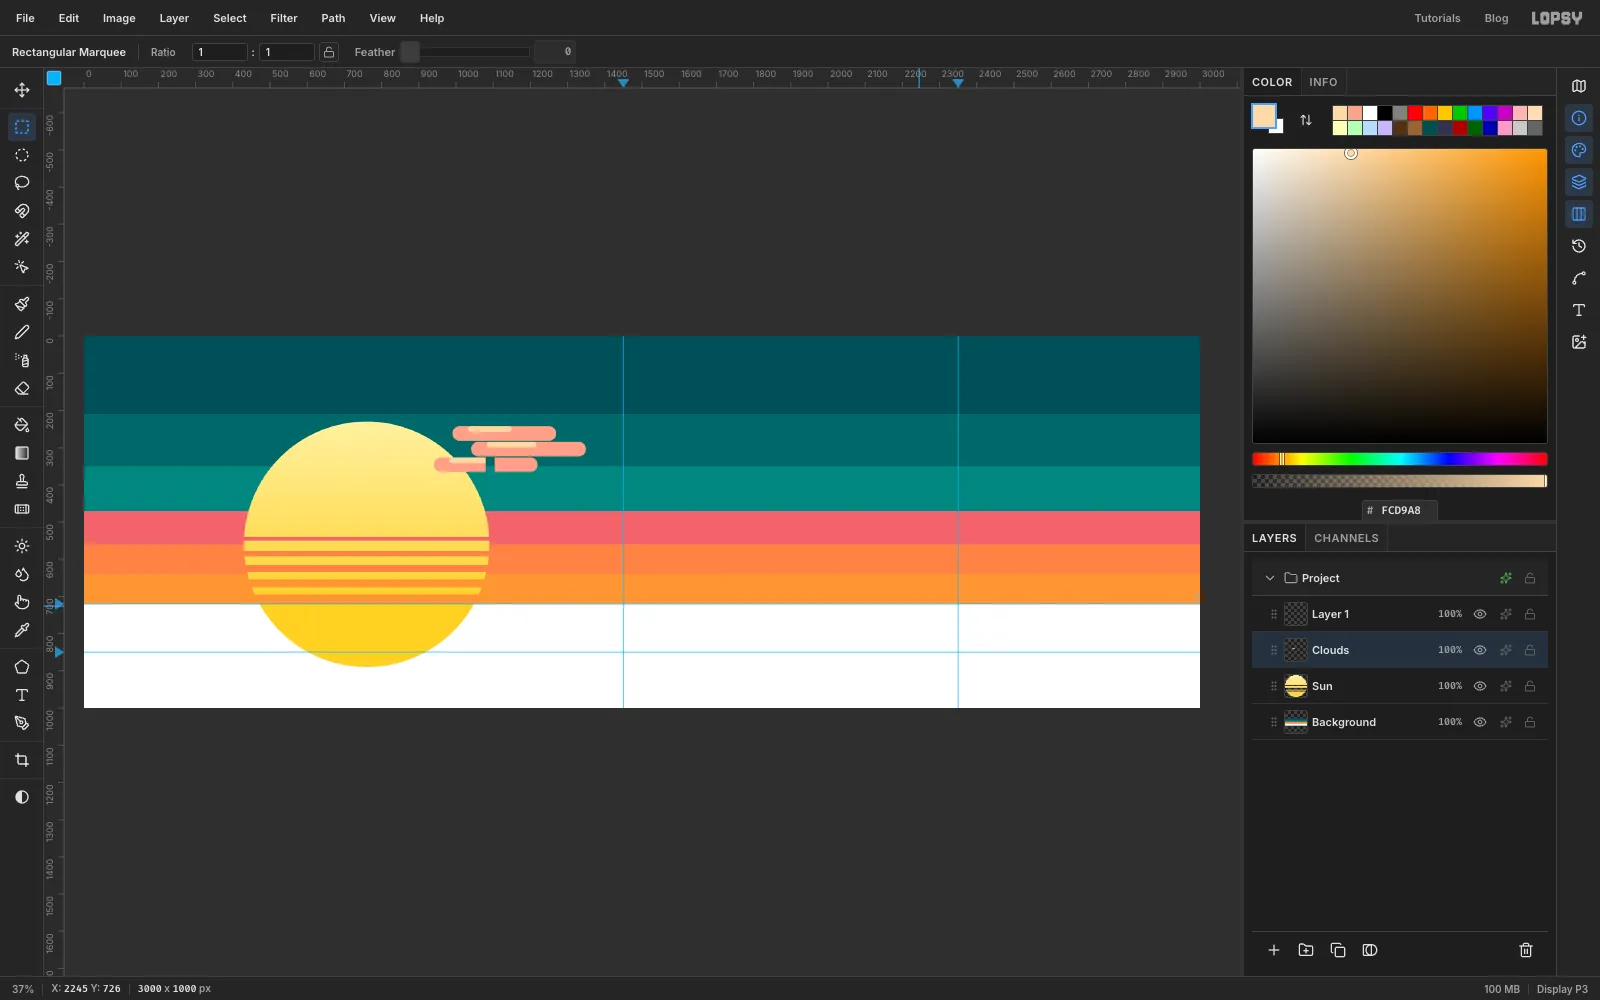
-
Draw the volcano with the Pen
Add a layer named Volcano above Clouds and choose the Pen tool (P). Click and drag where you want curves, and just click for corners:
- Click
20, 722on the horizon. - Press at
170, 610and drag toward230, 540. The handle bends the left flank inward. - Click the crater rim at
282, 448, its floor at318, 462and the right rim at356, 450. - Press at
440, 560and drag toward520, 640to curve the right flank. - Click
720, 722, then click the first anchor to close the path.
In the Paths panel, click Path to Selection. Choose the Gradient tool, set it to Linear, and in the gradient editor set the end stops to and . Click the bar at 55% to add a middle stop and make it . Drag from the left flank (
150, 600) to the right flank (560, 560), so the volcano gets lighter toward the sun. Deselect.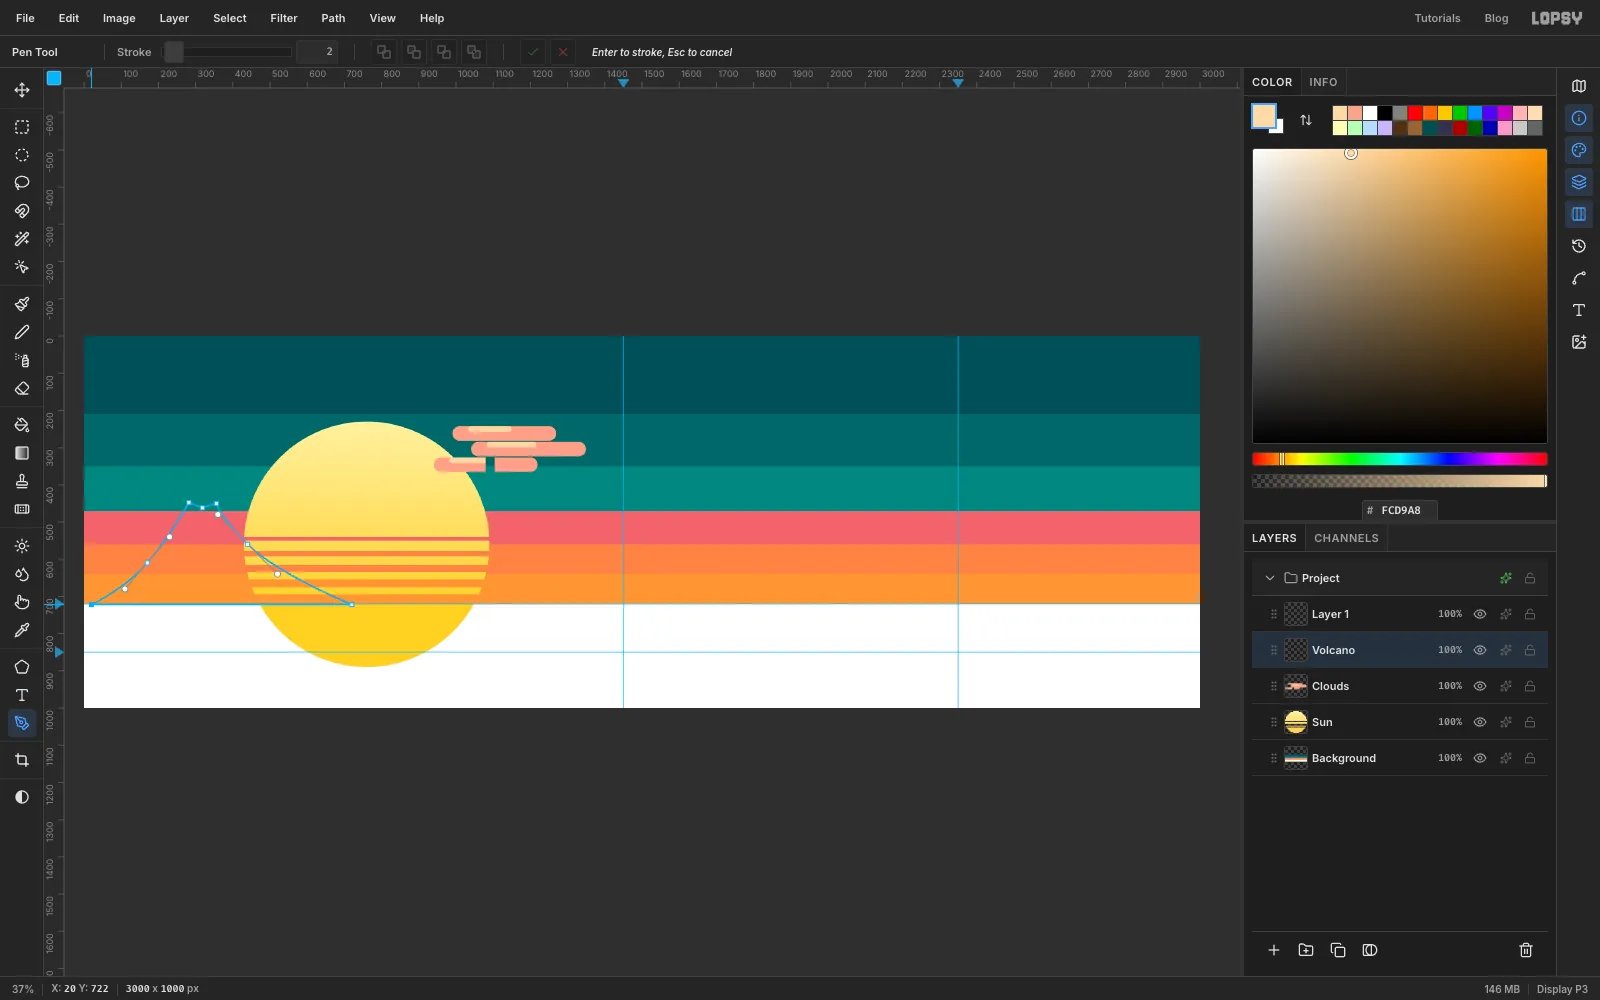
- Click
-
Add lava and a smoke plume
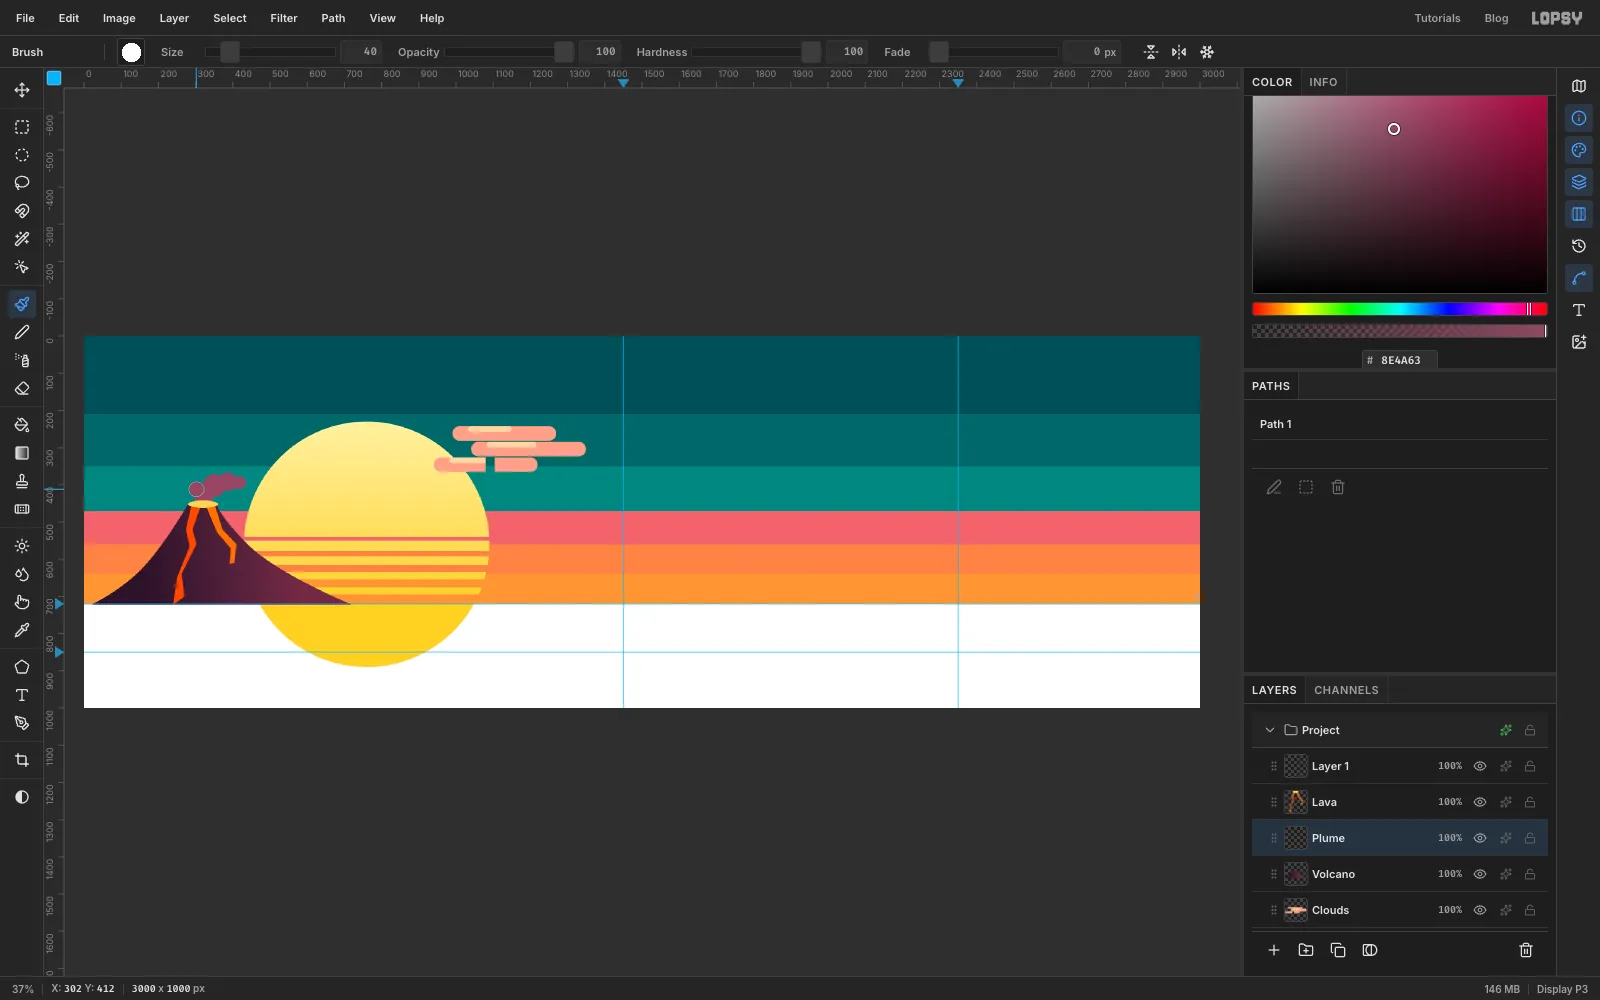
Add a layer named Lava above Volcano. With the Lasso, draw a thin zigzag ribbon from the crater at about
300, 455down the left flank to the horizon at about245, 720, and fill it with . Draw a shorter ribbon down the right side of the crater to about400, 610and fill it with . Then make an elliptical selection from280, 442to360, 462over the crater and fill it with for the glow.Click Volcano again and add a layer named Plume, so the smoke sits behind the lava. Choose the Brush (still Hardness
100) in . Click once for each puff, changing Size between clicks:302, 412at40322, 424at58350, 402at62386, 392at52418, 394at36
Keep the plume small and low. The palm fronds will cross this corner later, and a tall plume would collide with them.
-
Lay the sea and waves
Click Lava and add a layer named Sea. Select
0, 720to3000, 1000, fill it with , then select0, 720to3000, 776and fill it with . The lighter band reads as the water nearest the horizon.Add a layer named Waves. Set the Brush to Size
6in and scatter about forty short horizontal dashes across the sea with click and Shift-click. Make them longer the lower they are, from about 30 px near the horizon to about 120 px near the bottom. Then set Size5in and add a dozen short gold glints just under the horizon on the right, where the sunlight would catch the water.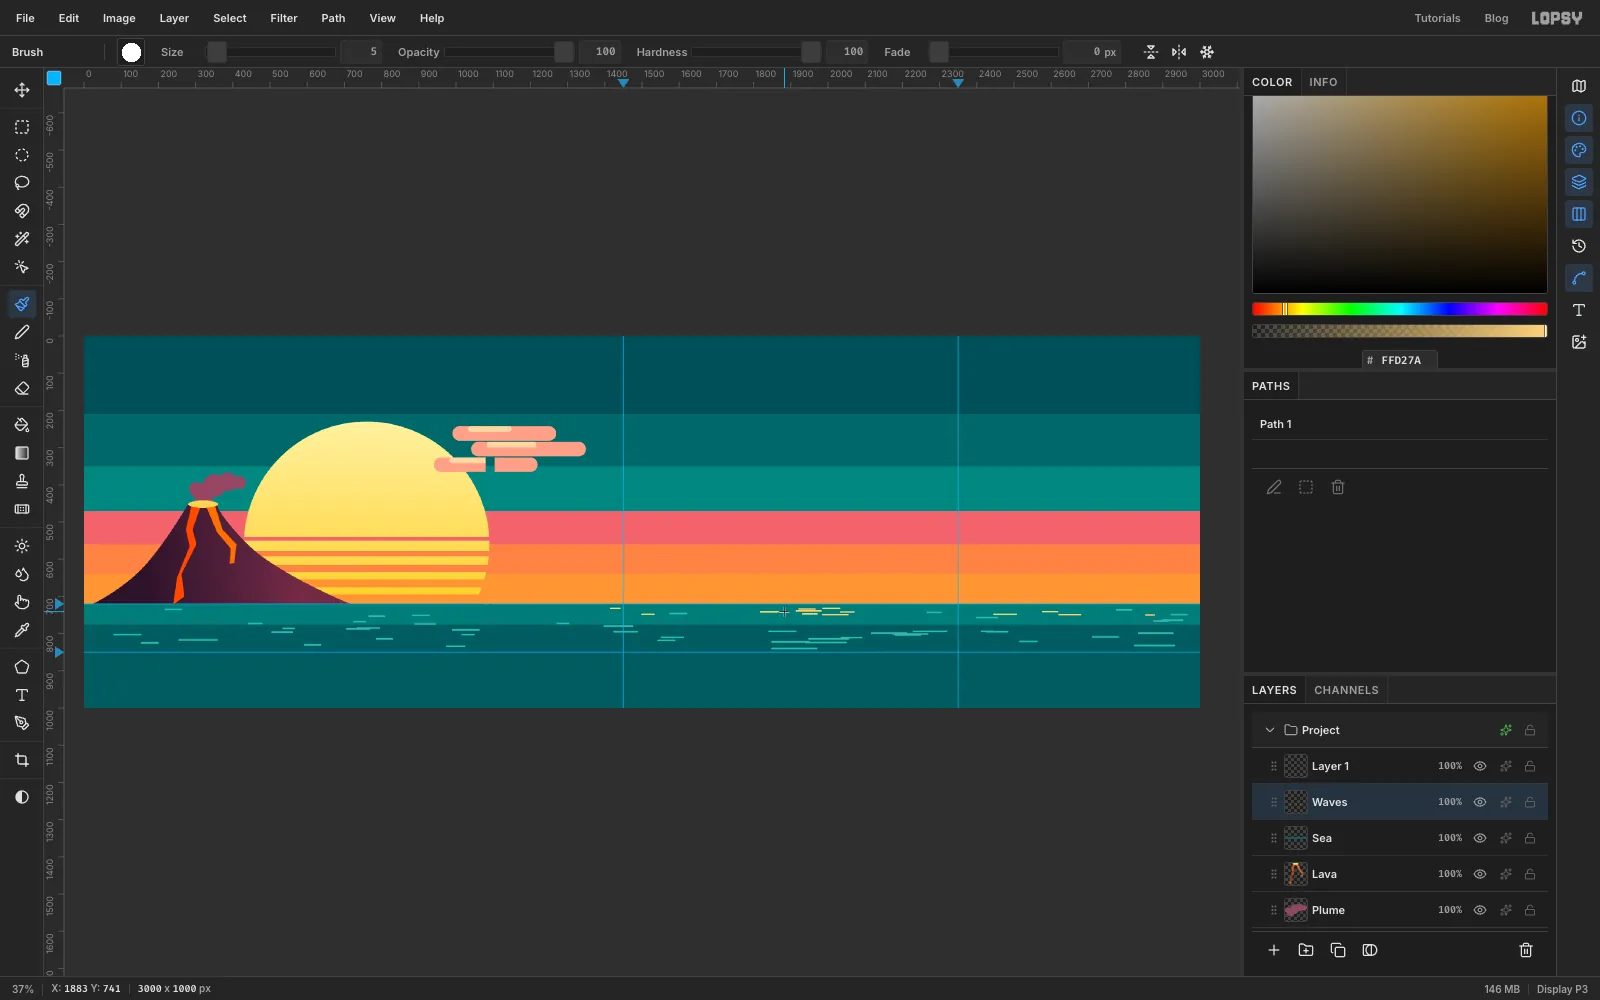
-
Draw the palm trunk
Add a layer named Trunk above Waves. The trunk is a long, gently curving wedge, about 50 px wide at the base and 22 px at the crown, leaning to the right as it rises from the bottom left corner. With the Pen, click up the left edge and back down the right edge:
- up the left:
10, 1000,18, 860,36, 700,64, 540,100, 390,144, 250,176, 172 - down the right:
198, 182,172, 262,132, 398,100, 548,76, 706,62, 862,60, 1000
Close it on the first anchor, then Path to Selection and fill it with . Deselect.
For the trunk rings, set the Brush to Size
5in . Every 40-odd pixels up the trunk, click just inside the left edge and Shift-click just inside the right edge, slightly higher, so each ring tilts with the lean.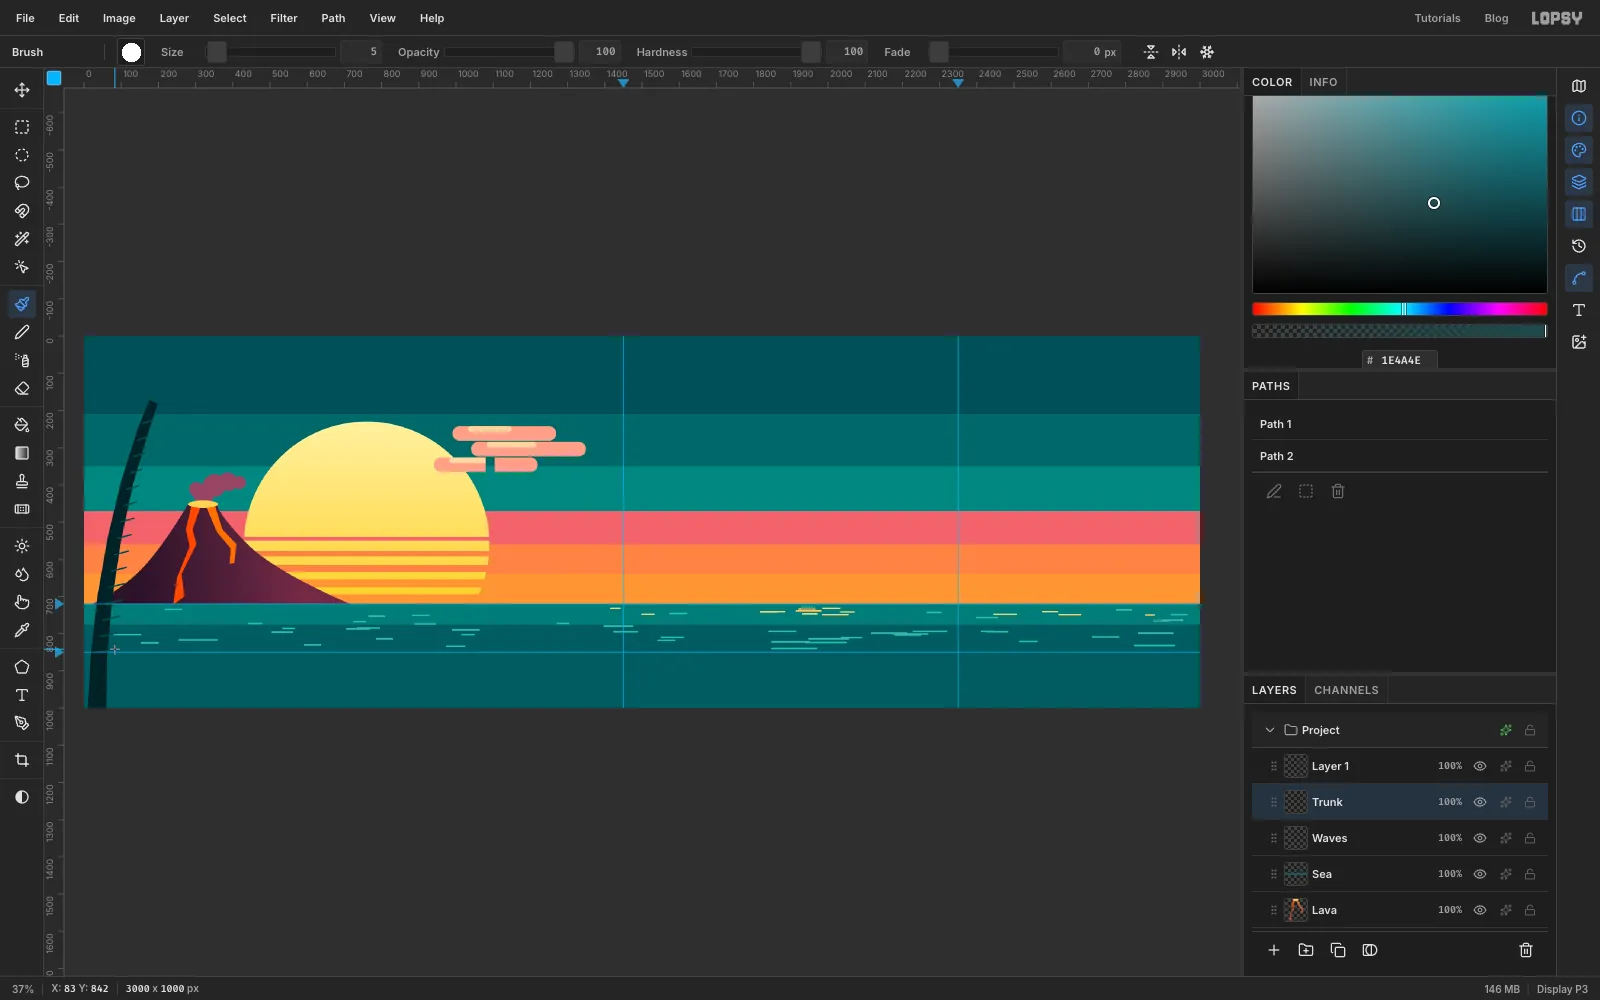
- up the left:
-
Add the fronds
Add a layer named Fronds above Trunk. Each frond is one Lasso shape starting at the crown (
186, 176). Drag out along the top edge of the leaf in a saw-tooth, with each tooth raked back toward the crown. Go round the tip and come back along the underside the same way. Fill each one with before you draw the next. Make seven of them:- one up and to the left, one straight left and one straight up
- one long one to the upper right, about 380 px, curving down at the tip
- one shorter one to the right, drooping about 110 px
- one hanging down to the left
- one short one pointing almost straight up
Let the long ones run off the top and left edges, and keep the drooping one clear of the volcano's crater. Finish with an elliptical selection from
156, 162to216, 206, filled with the same colour, to cover the joins at the crown.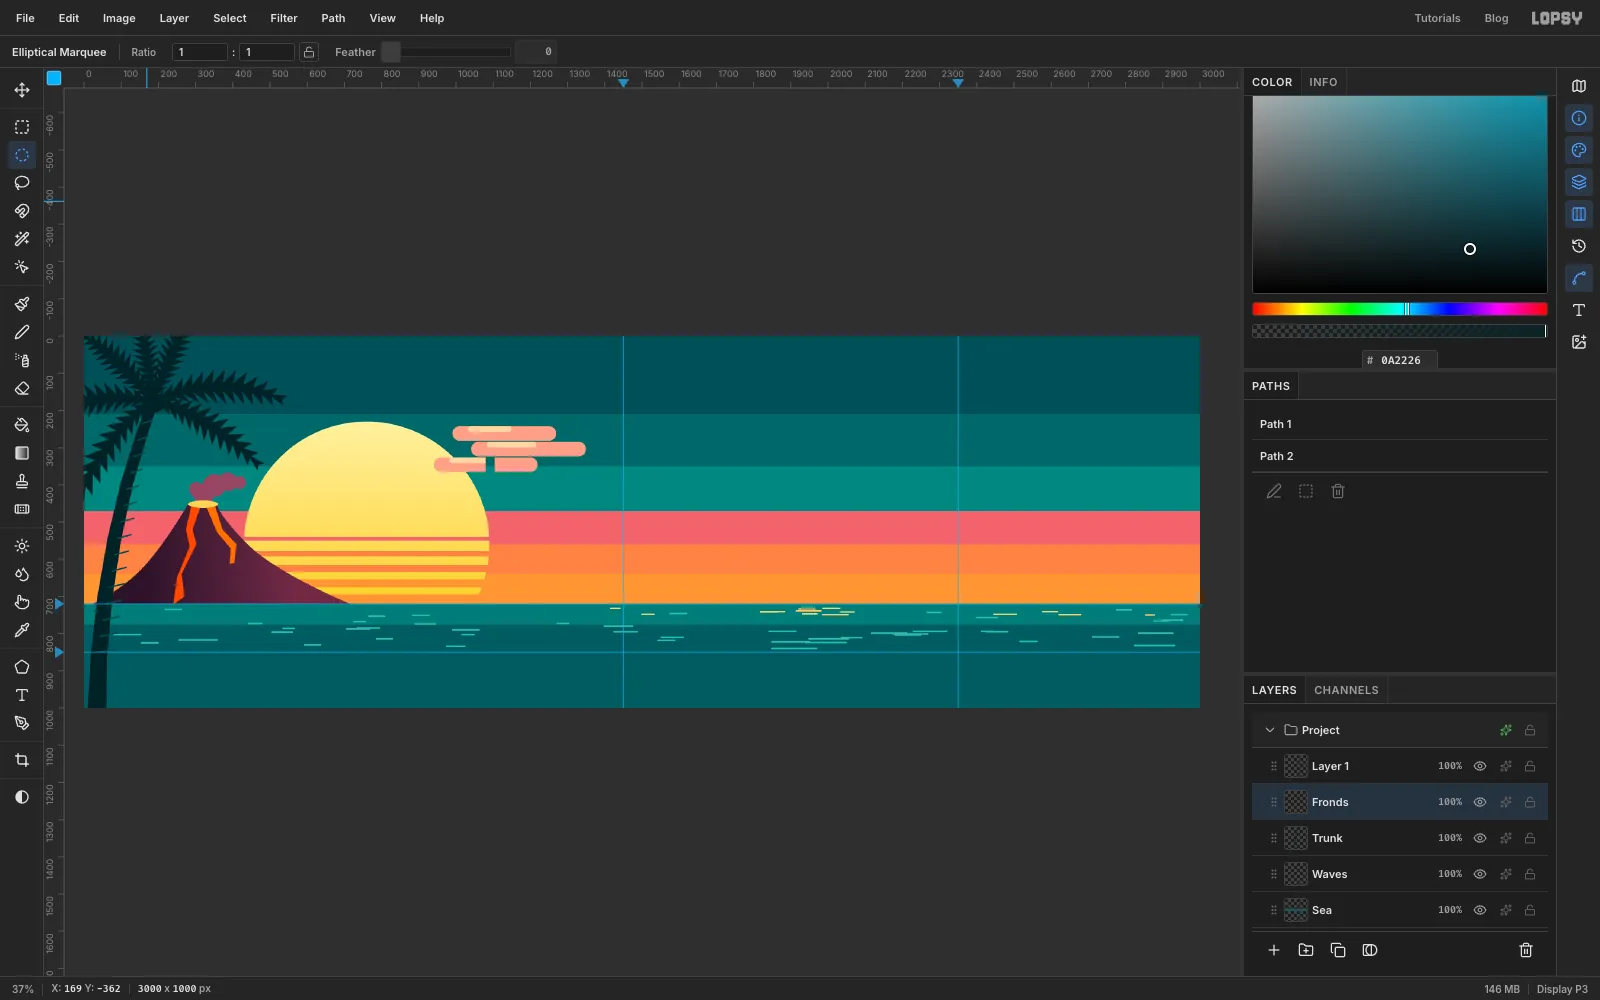
-
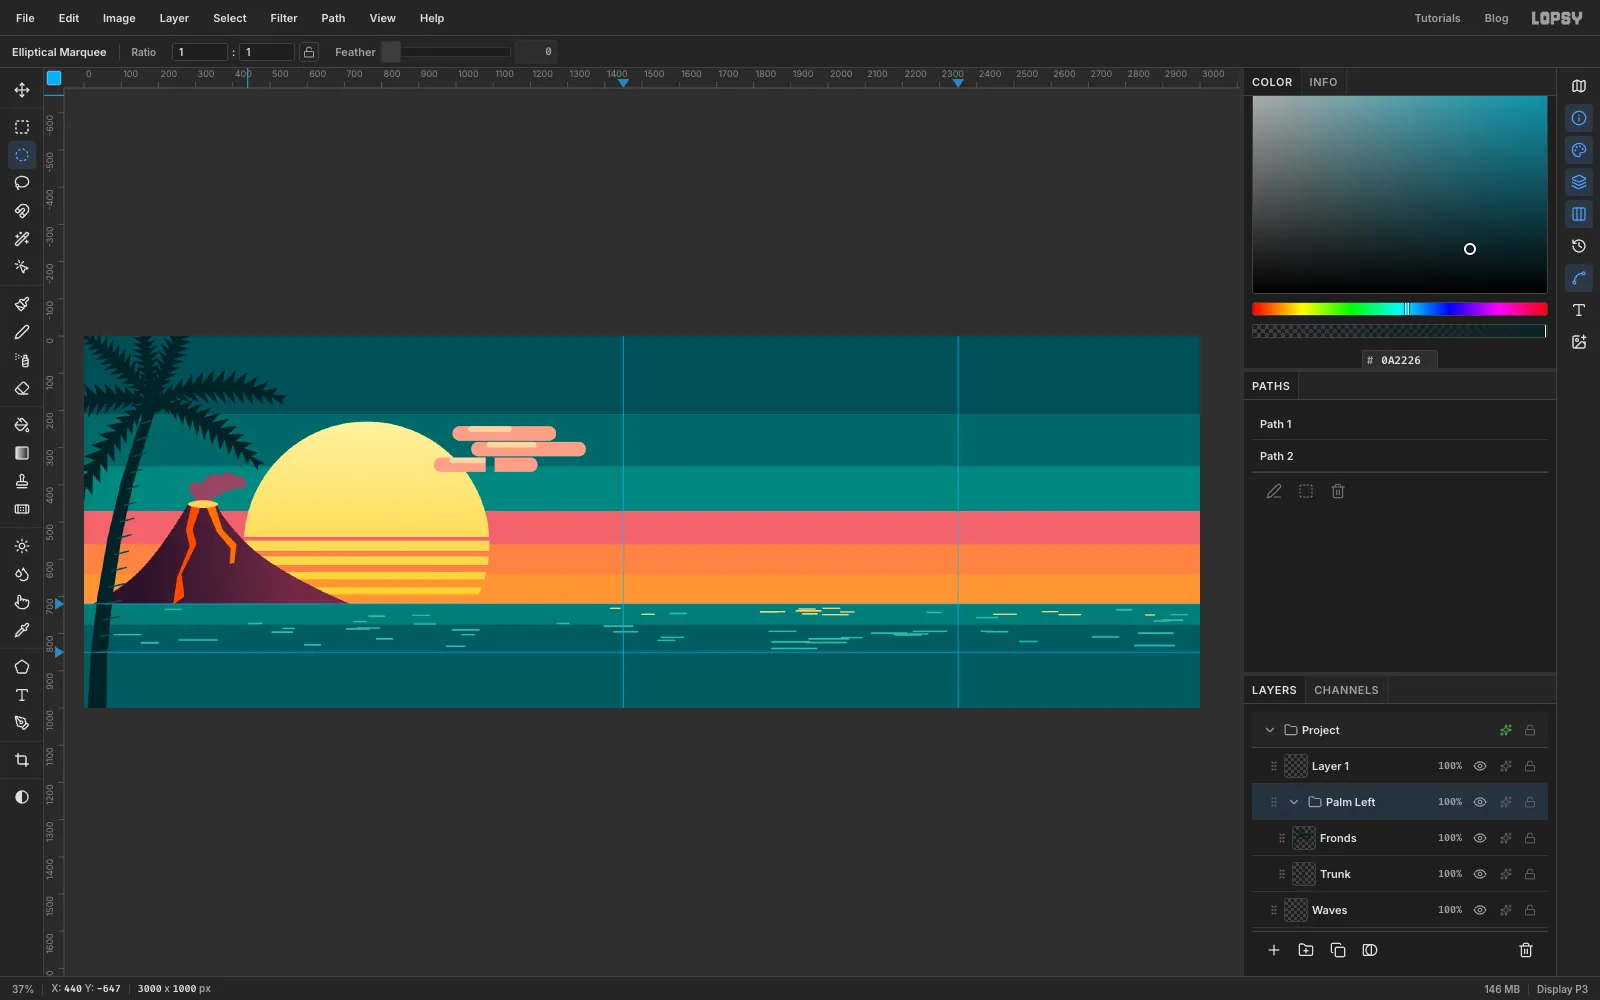
Group the palm
Click Trunk, Shift-click Fronds, and choose Layer → Group Layers (Cmd+G). Name the group Palm Left.
-
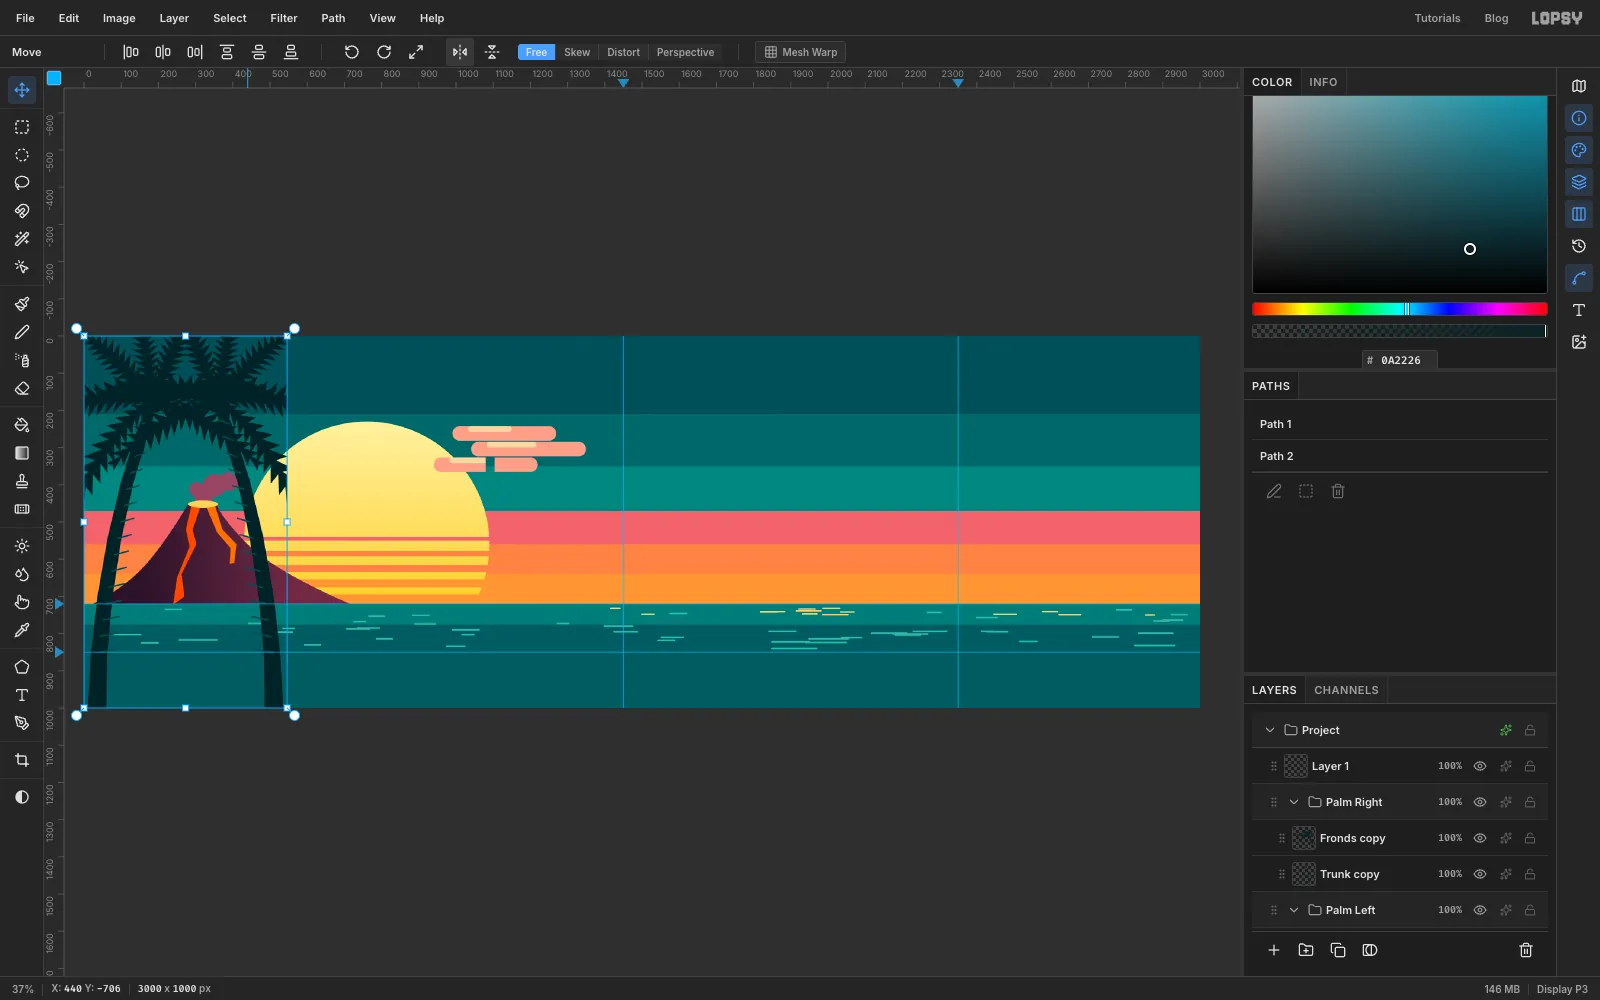
Duplicate and flip the palm
With Palm Left selected, choose Layer → Duplicate Layer and rename the copy Palm Right. Choose the Move tool and click Flip Horizontal in the options bar. The whole group mirrors in place: trunk, fronds and all.
-
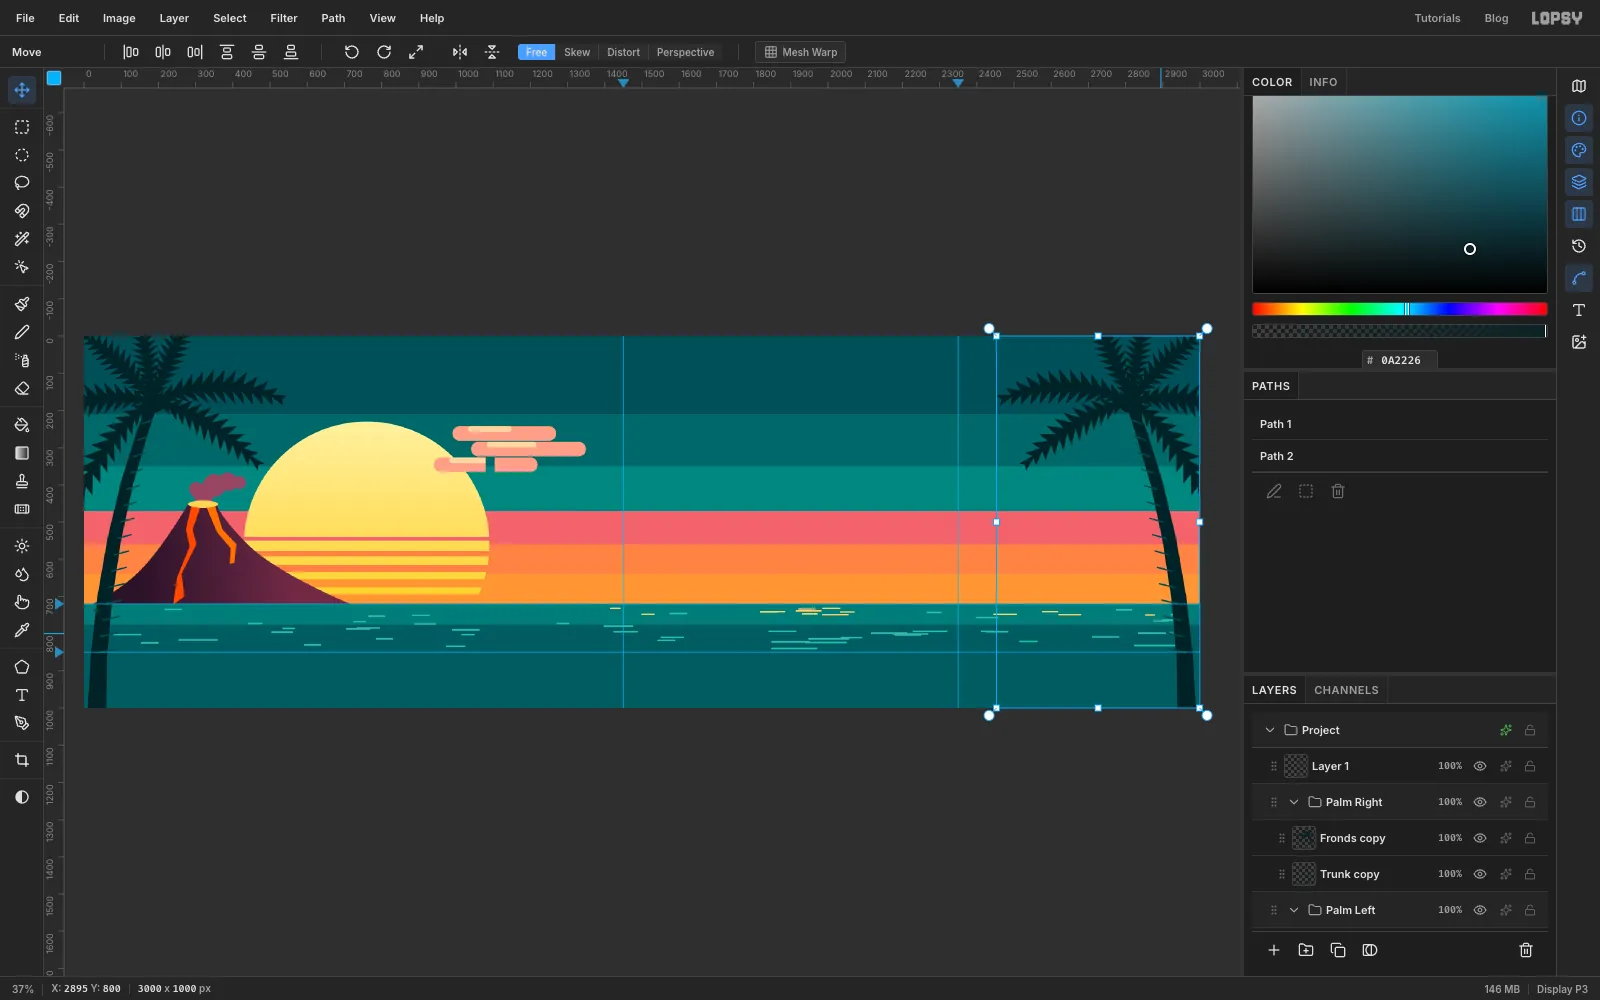
Push the copy to the right edge
Drag Palm Right to the right, about
2450px, until the right side of its box sits on the right edge of the canvas. Zoom in on the top right corner to check that the two edges meet.The precise edge matters. The original fronds were cut off where they left the canvas, so the flipped copy has a straight cut along its right side and across its top. With that cut exactly on the canvas edge, nobody can see it.
-
Shrink the crown
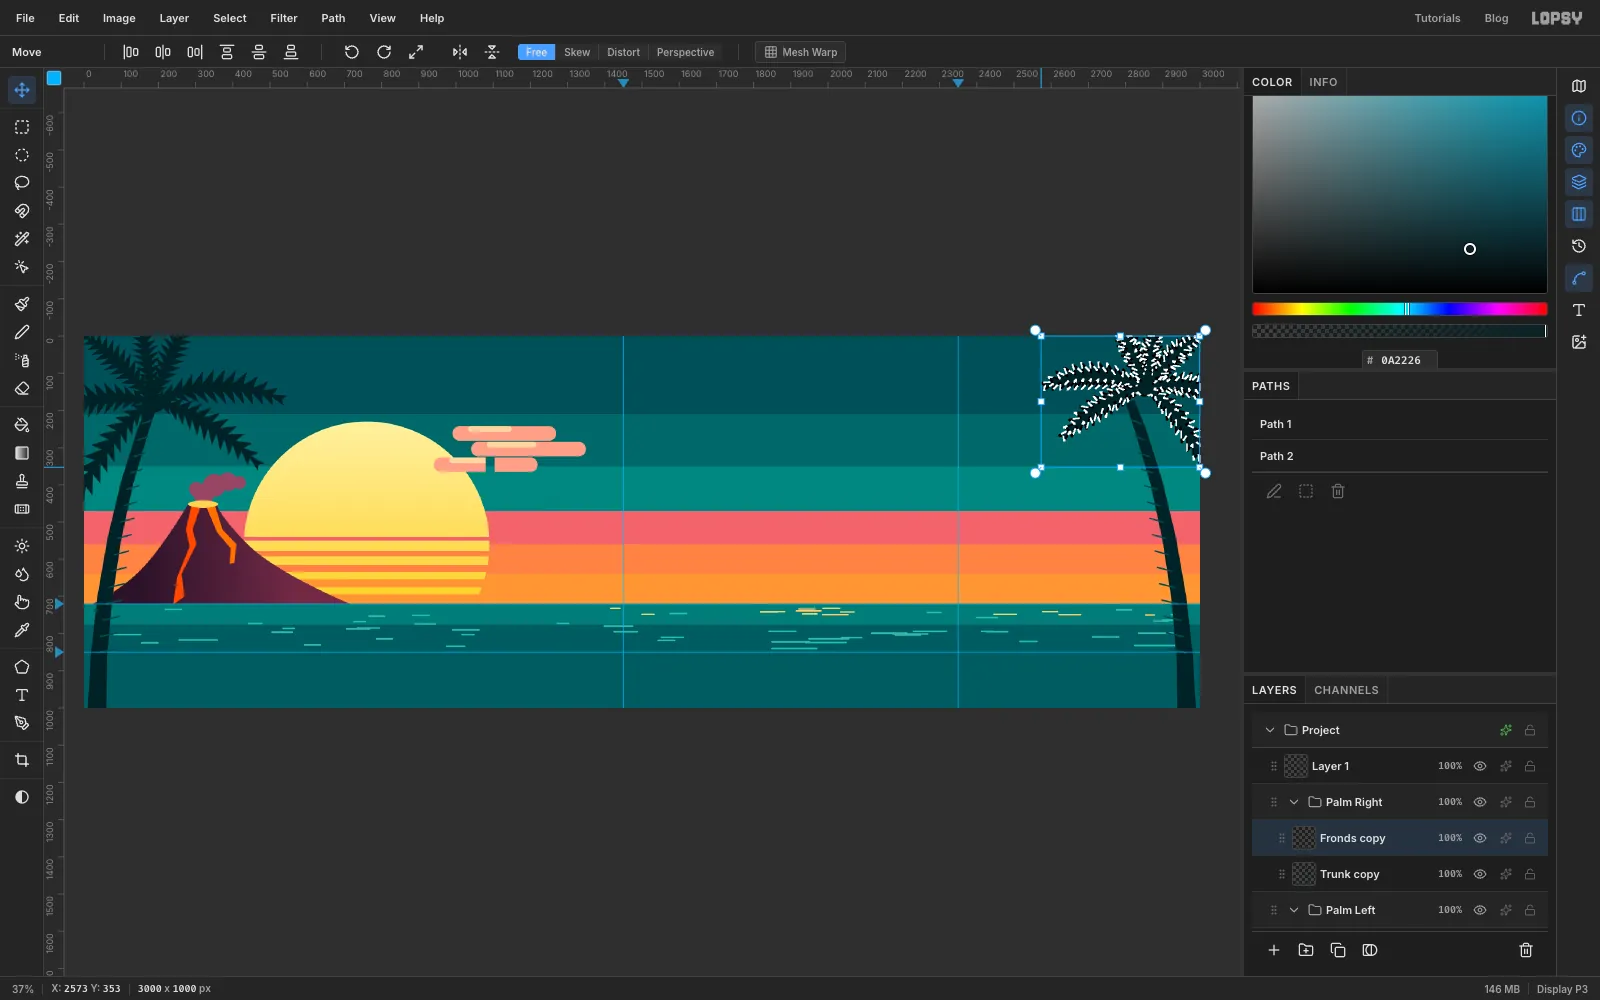
The right palm should be a little smaller so it doesn't crowd the headline. Expand Palm Right, click Fronds copy and Cmd-click its thumbnail to select its shape. With the Move tool, hold Cmd and drag the bottom-left corner handle up and to the right until the fronds are about 78% of their size. Cmd keeps the proportions. Dragging that corner keeps the opposite one (top-right) pinned, so the cut edges stay on the canvas edges. Press Cmd+D to commit.
-
Re-seat the trunk under the crown
Shrinking the fronds moved the crown up and to the right. Click Trunk copy and drag it about
40px right and40px up, so the top of the trunk meets the crown again. Its bottom is still well below the canvas, and the bar counter will cover it anyway. Collapse both palm groups.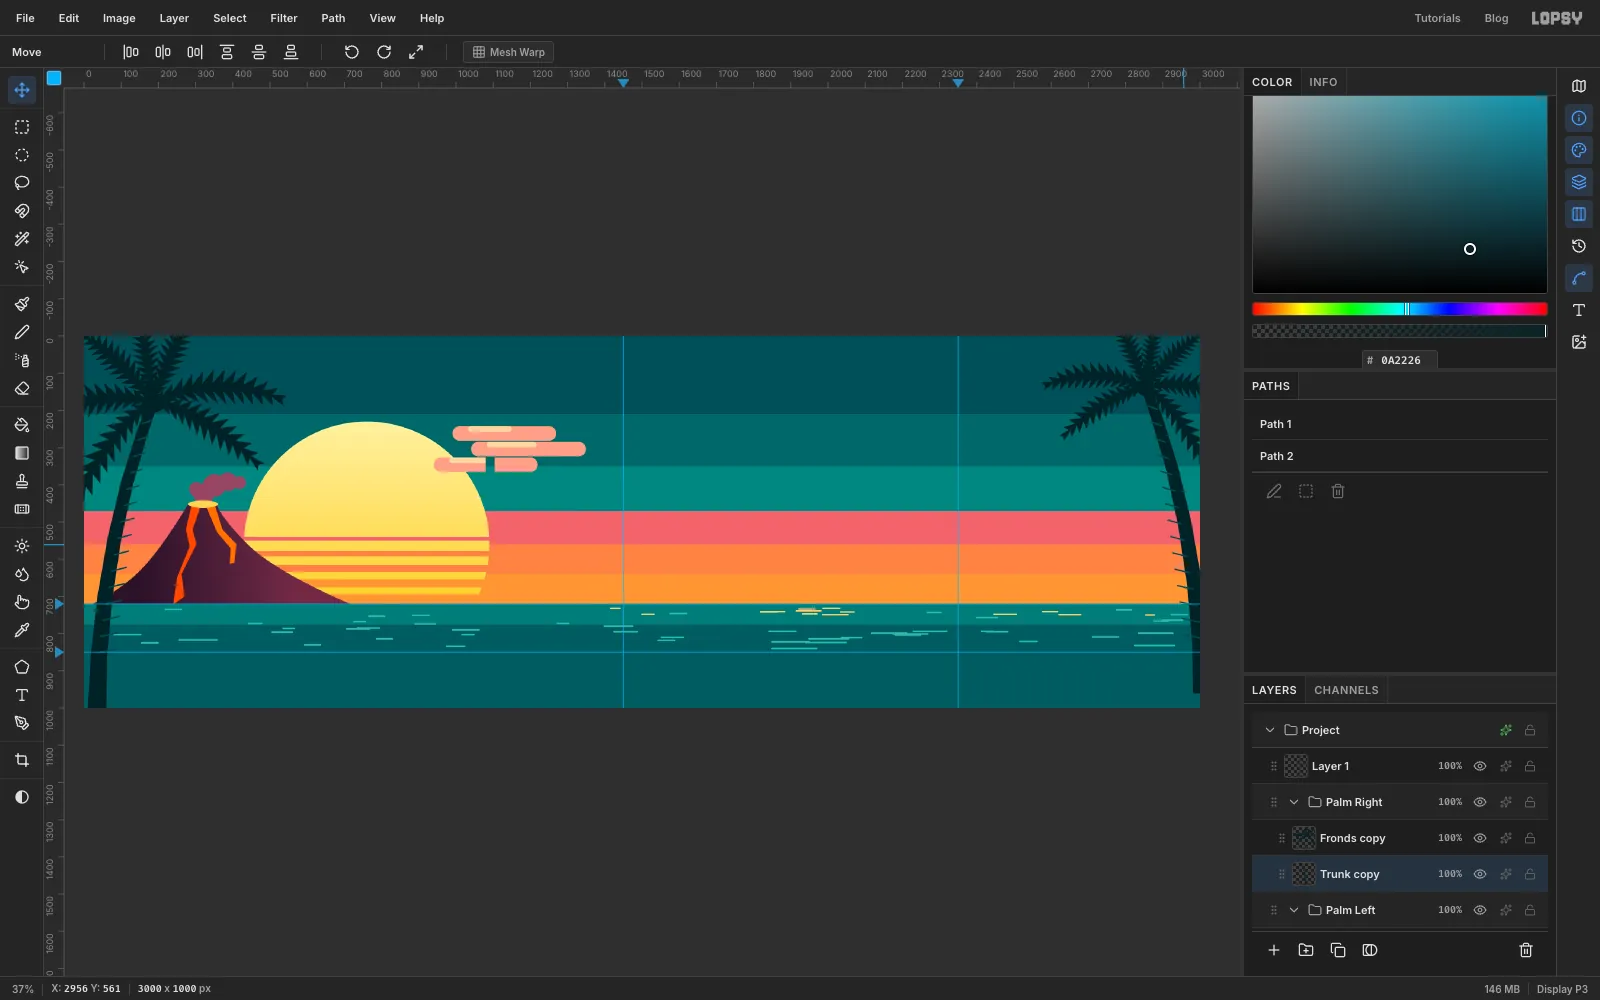
-
Build the bar counter
Click Palm Right and add a layer named Counter. Select
0, 852to3000, 1000and fill it with . Select0, 836to3000, 856and fill it with for the lip.Add a layer named Counter Grain. Select
0, 836to3000, 1000and fill it with . Choose Filter → Add Noise… with Amount60and Mode Mono, then Filter → Motion Blur… with Angle0and Distance90. That streaks the noise sideways into wood grain. Deselect and set the layer's Blend to Overlay. Mid grey disappears in Overlay, so only the streaks show.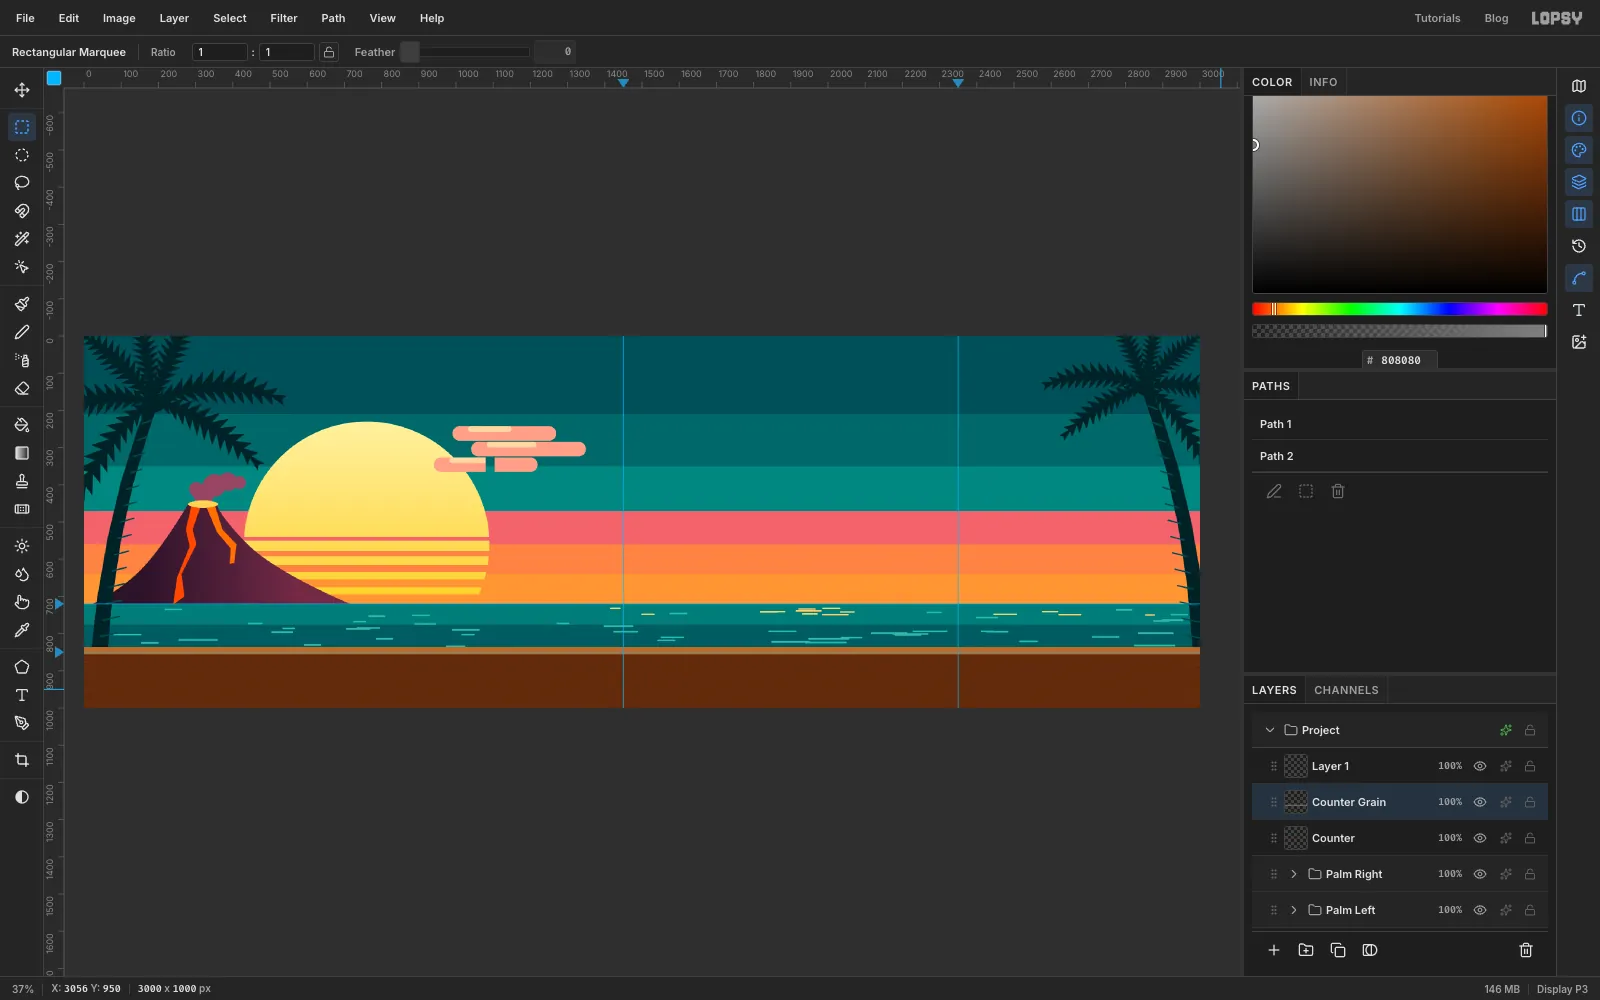
-
Make a tapa-cloth tile
Tapa is the pounded bark cloth of the Pacific, printed with bands of triangles and diamonds. Add a layer named Tapa Tile and zoom in on the top left corner. Select
0, 0to64, 64and fill it with cream . Then, using the Pen and Path to Selection for each shape, fill:- a triangle
0, 30→32, 2→64, 30in - a smaller notch inside it,
18, 30→32, 16→46, 30, in - a 4 px bar from
0, 30to64, 34in - a diamond
32, 36→46, 49→32, 62→18, 49in , with a small diamond in its centre in - half a diamond against each side edge in :
0, 36→14, 49→0, 62and64, 36→50, 49→64, 62
The two half-diamonds meet to make whole ones when the tile repeats. Select
0, 0to64, 64and choose Edit → Define Pattern. Deselect, then delete the Tapa Tile layer with the trash button.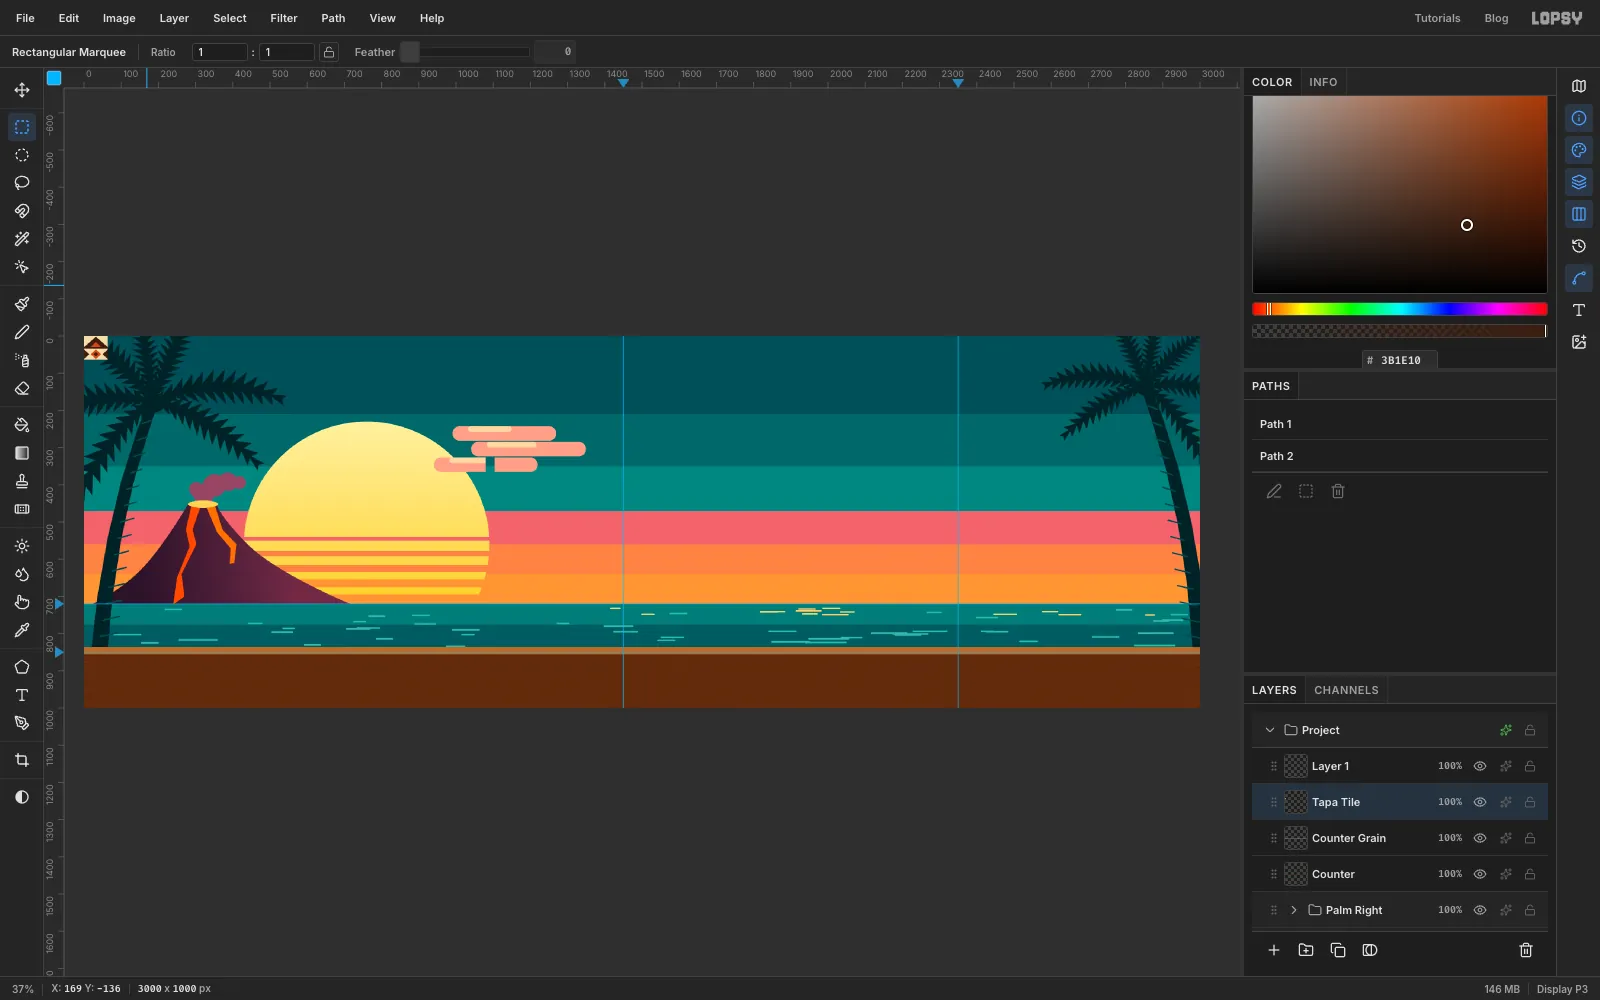
- a triangle
-
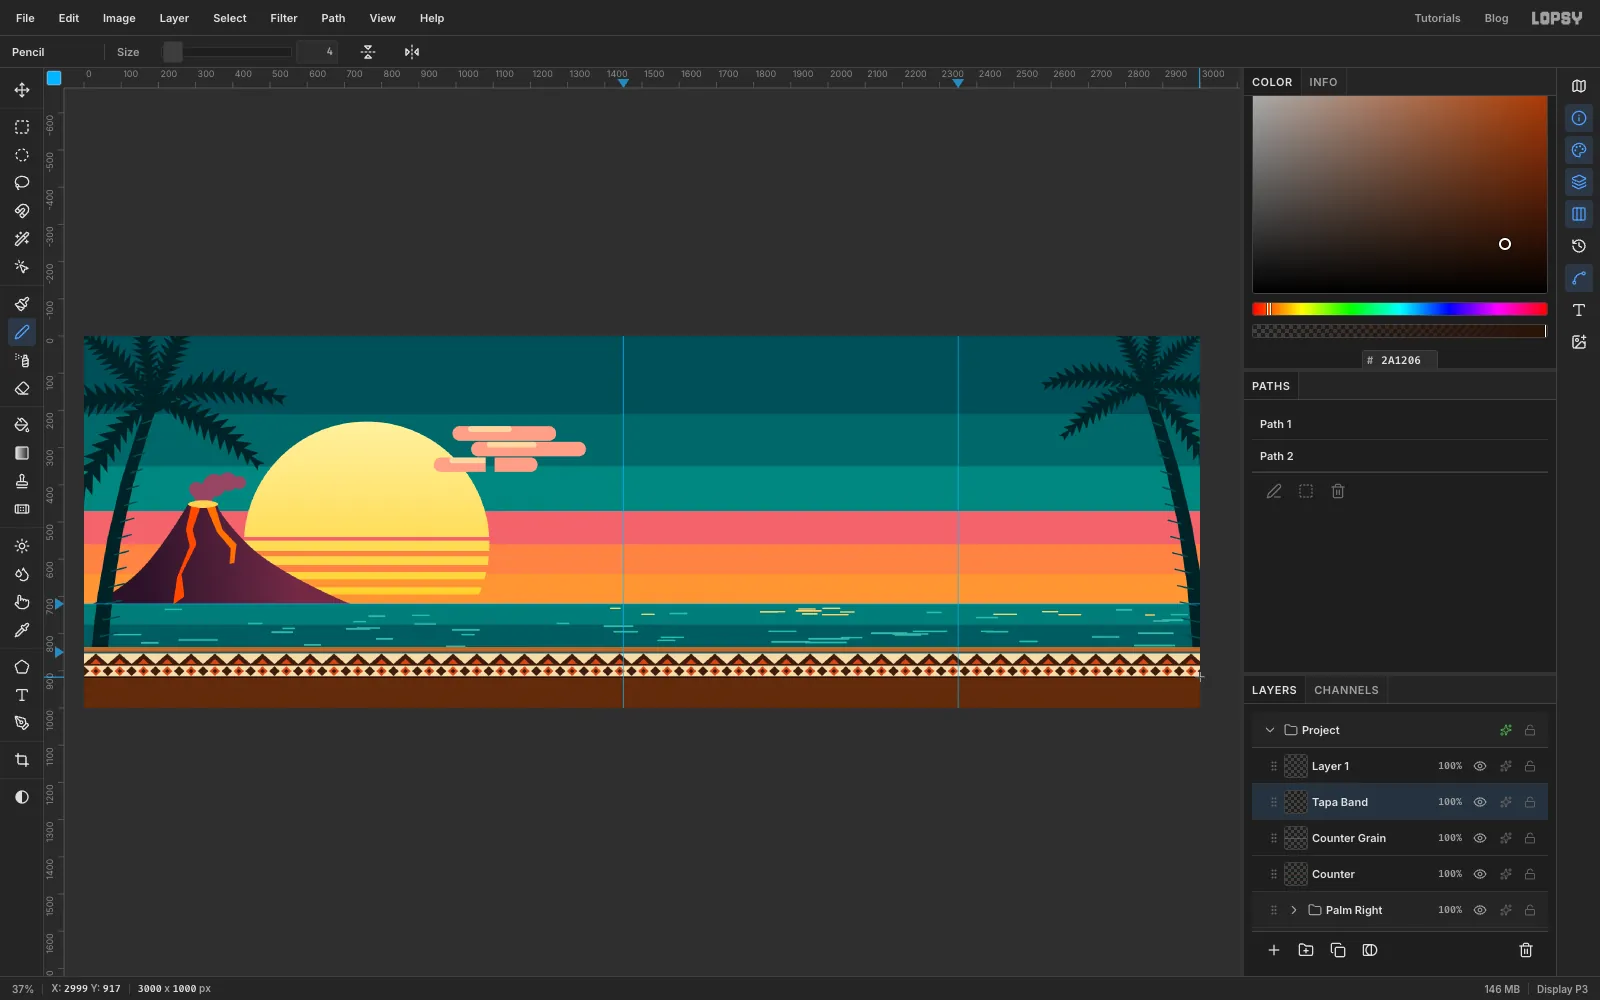
Fill the tapa band
Click Counter Grain and add a layer named Tapa Band. Select
0, 852to3000, 916and choose Edit → Fill with Pattern…. Pick your tile and set Vertical Offset to31.The offset is needed because patterns tile from the top of the document, not from the selection. At
852the band would start 20 px into a tile, and 20 px is 31% of 64. Without the offset, the band shows half a triangle row, the diamonds, then half a triangle row again.Deselect. Choose the Pencil, set Size
4and colour , and draw a keyline along each edge of the band. Click at0, 851and Shift-click at2999, 851, then do the same along917.If you want to check that the motif repeats evenly, View → Show Grid overlays a grid. Turn it off again afterwards, because showing the grid also switches on snapping.
-
Shape the mug
Click Tapa Band and add a layer named Mug Shadow. Select an ellipse from
600, 838to980, 854and fill it with . This hard shadow sits the mug on the counter.Add a layer named Mug and draw its barrel with the Pen: a tall barrel about 360 px wide that bulges slightly in the middle and tucks in at the base. Click
612, 340,602, 450,598, 560,602, 680,614, 790,628, 850,932, 850,946, 790,958, 680,962, 560,958, 450and948, 340, then close it on the first point. Click Path to Selection. Choose the Elliptical Marquee, hold Shift and drag from612, 306to948, 374to add a rounded top to the selection.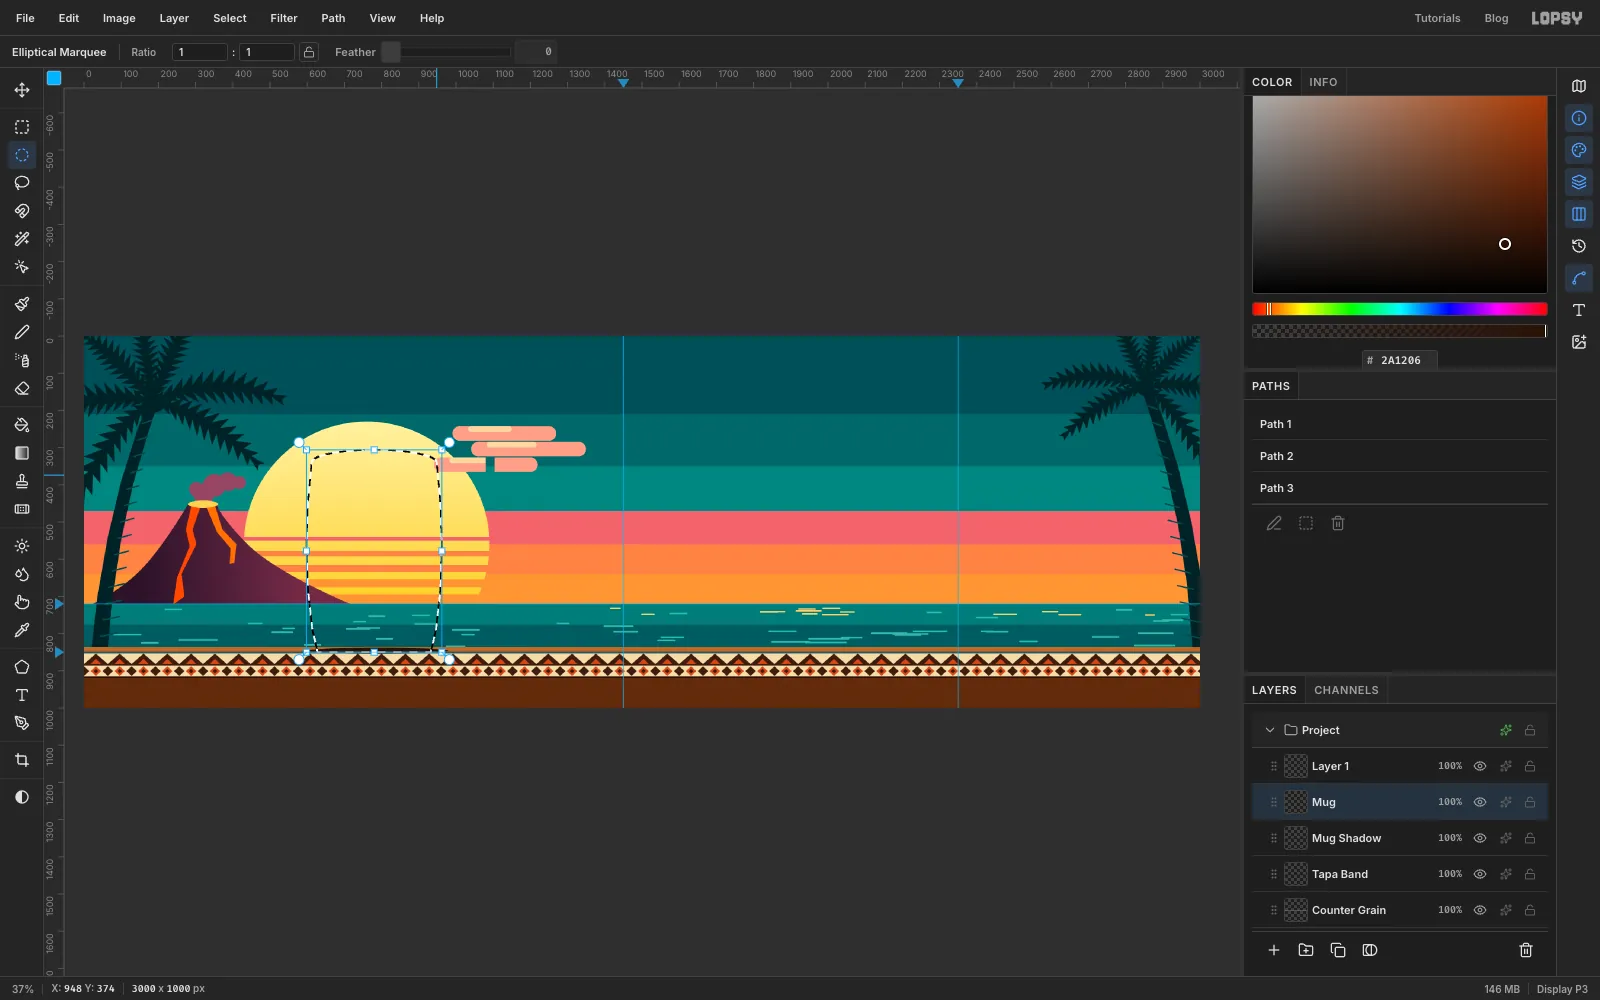
-
Shade the mug in flat strips
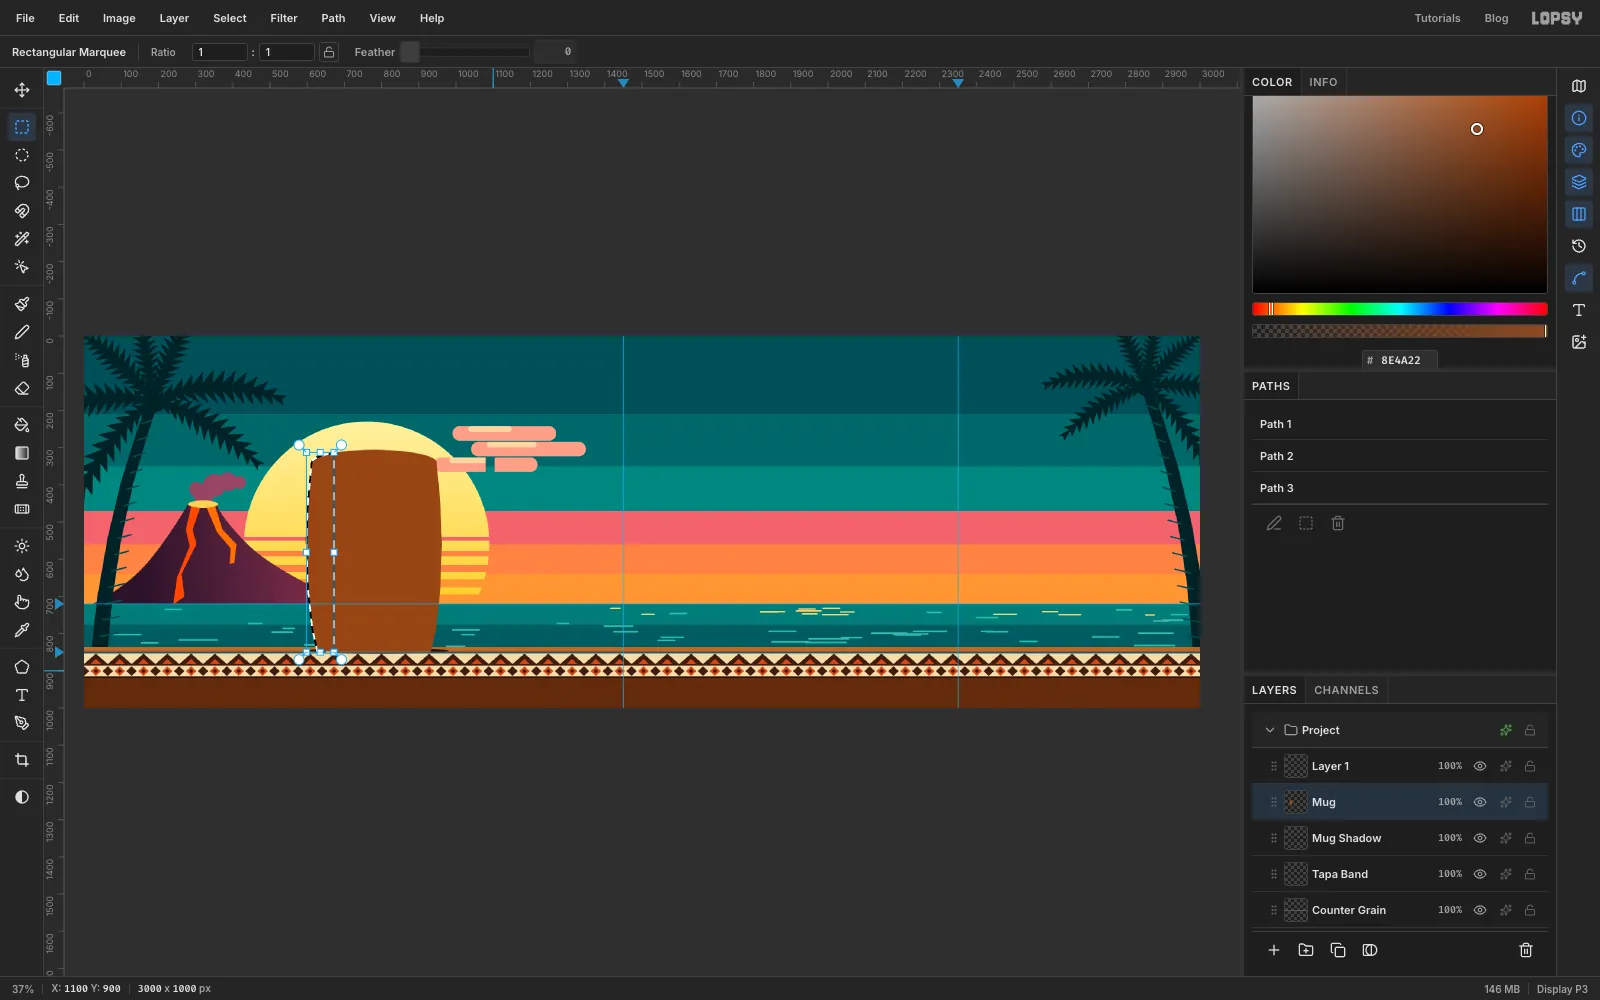
Fill the selection with . To shade the barrel in three flat tones without a gradient, cut the selection down with the Rectangular Marquee:
- Hold Option and drag a rectangle from
672, 200to1100, 900. Option subtracts, so only a strip down the left side is left. Fill it with . - Cmd-click the Mug thumbnail to reselect the whole mug, then Option-drag from
450, 200to900, 900. That leaves the right edge. Fill it with too. - Reselect the mug once more, then Option-drag from
450, 200to700, 900and again from744, 200to1100, 900. A 44 px strip just left of centre is left. Fill it with for the highlight.
Deselect.
- Hold Option and drag a rectangle from
-
Add wood grain to the mug
Add a layer named Mug Grain and Cmd-click the Mug thumbnail. Choose Filter → Fibers… with Variance
24and Strength40. The fibres only fill the selection. Deselect, set the Blend to Multiply and the layer opacity to30%.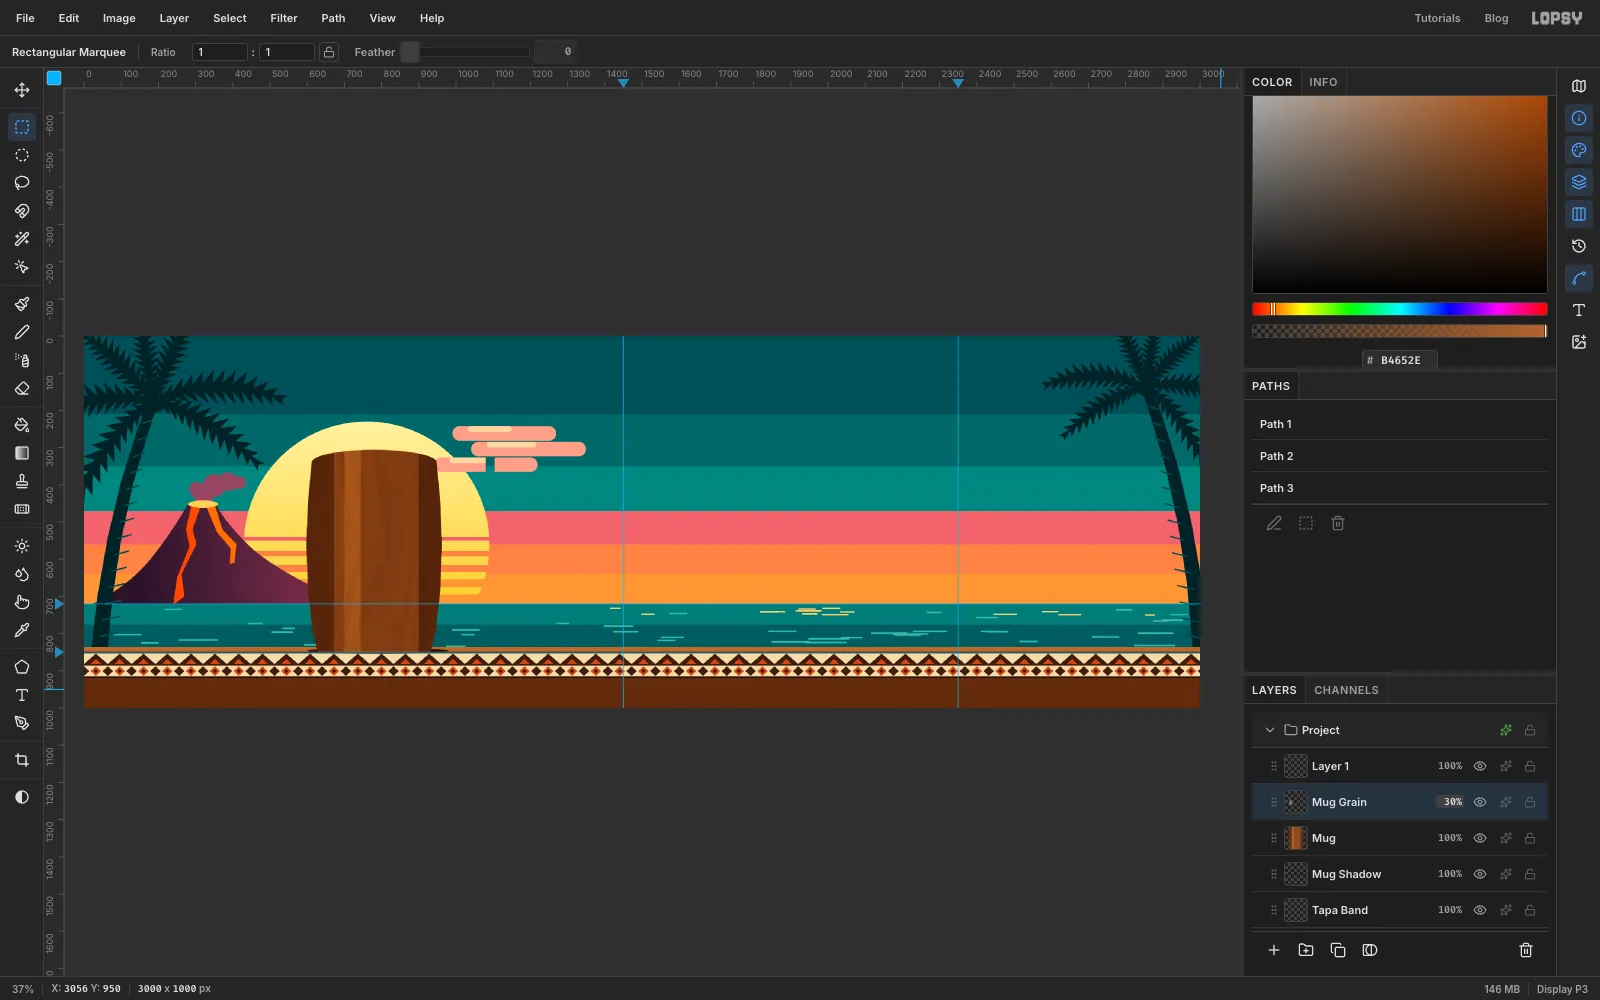
-
Fill the rim with the drink
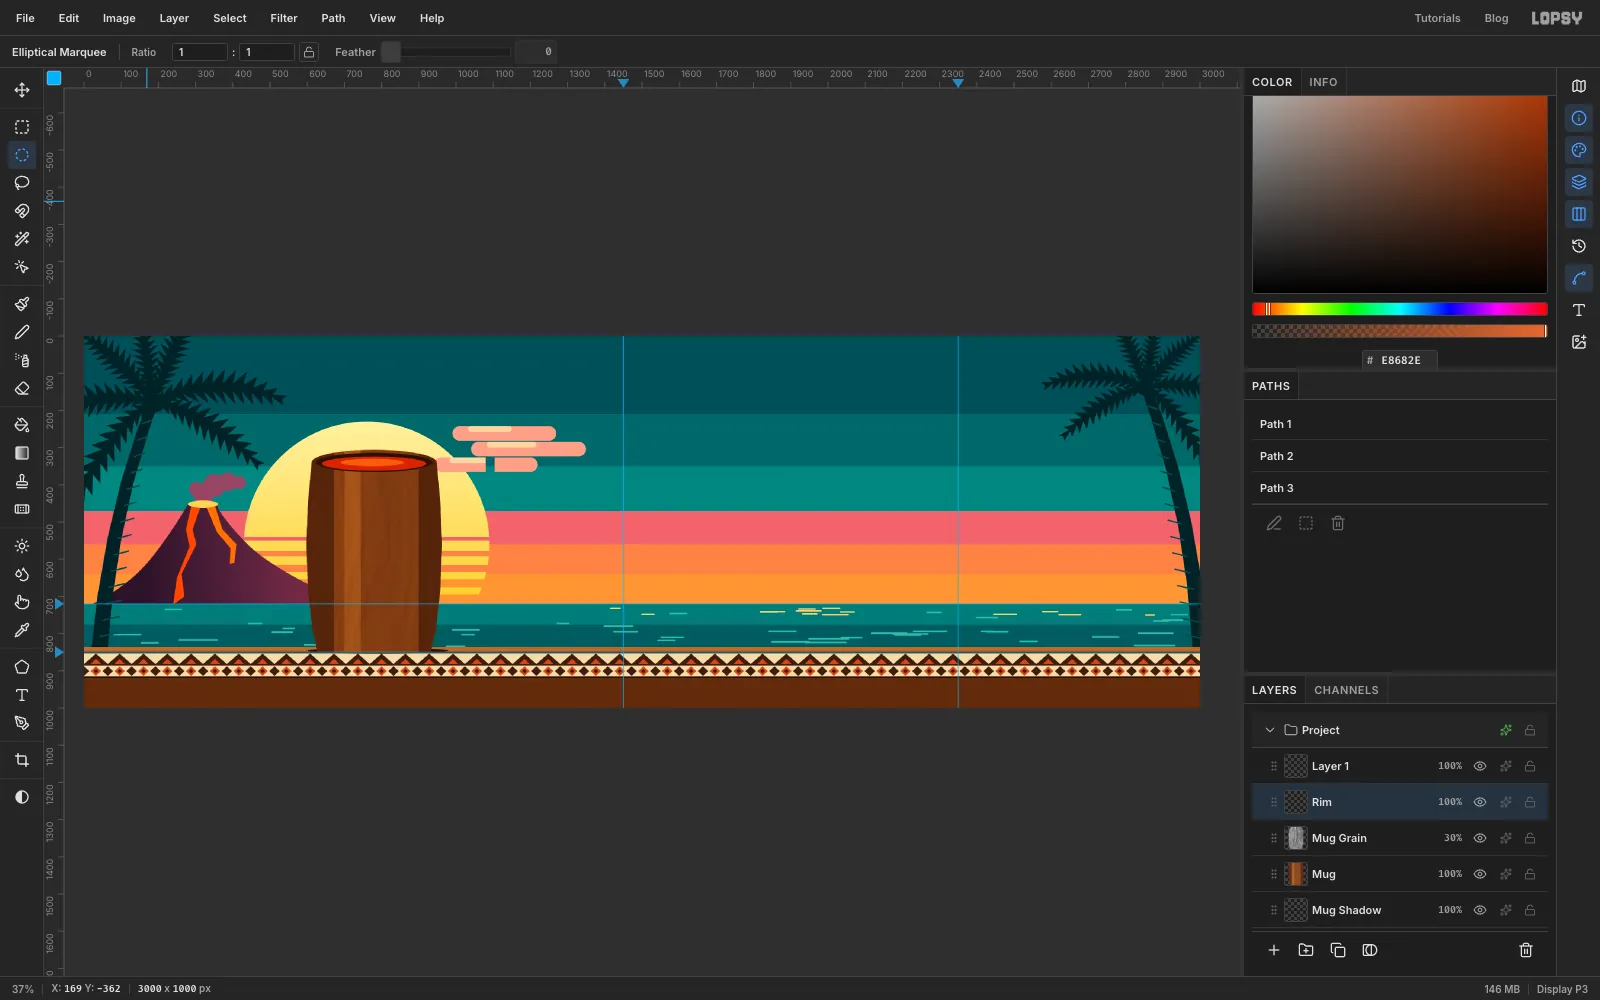
Add a layer named Rim. Fill three ellipses one inside the other, using the Elliptical Marquee dialog for each:
624, 314to936, 366in , the inside of the mug640, 324to920, 362in , the drink690, 330to860, 350in , light on the surface
-
Carve the eye sockets, mouth and chin band
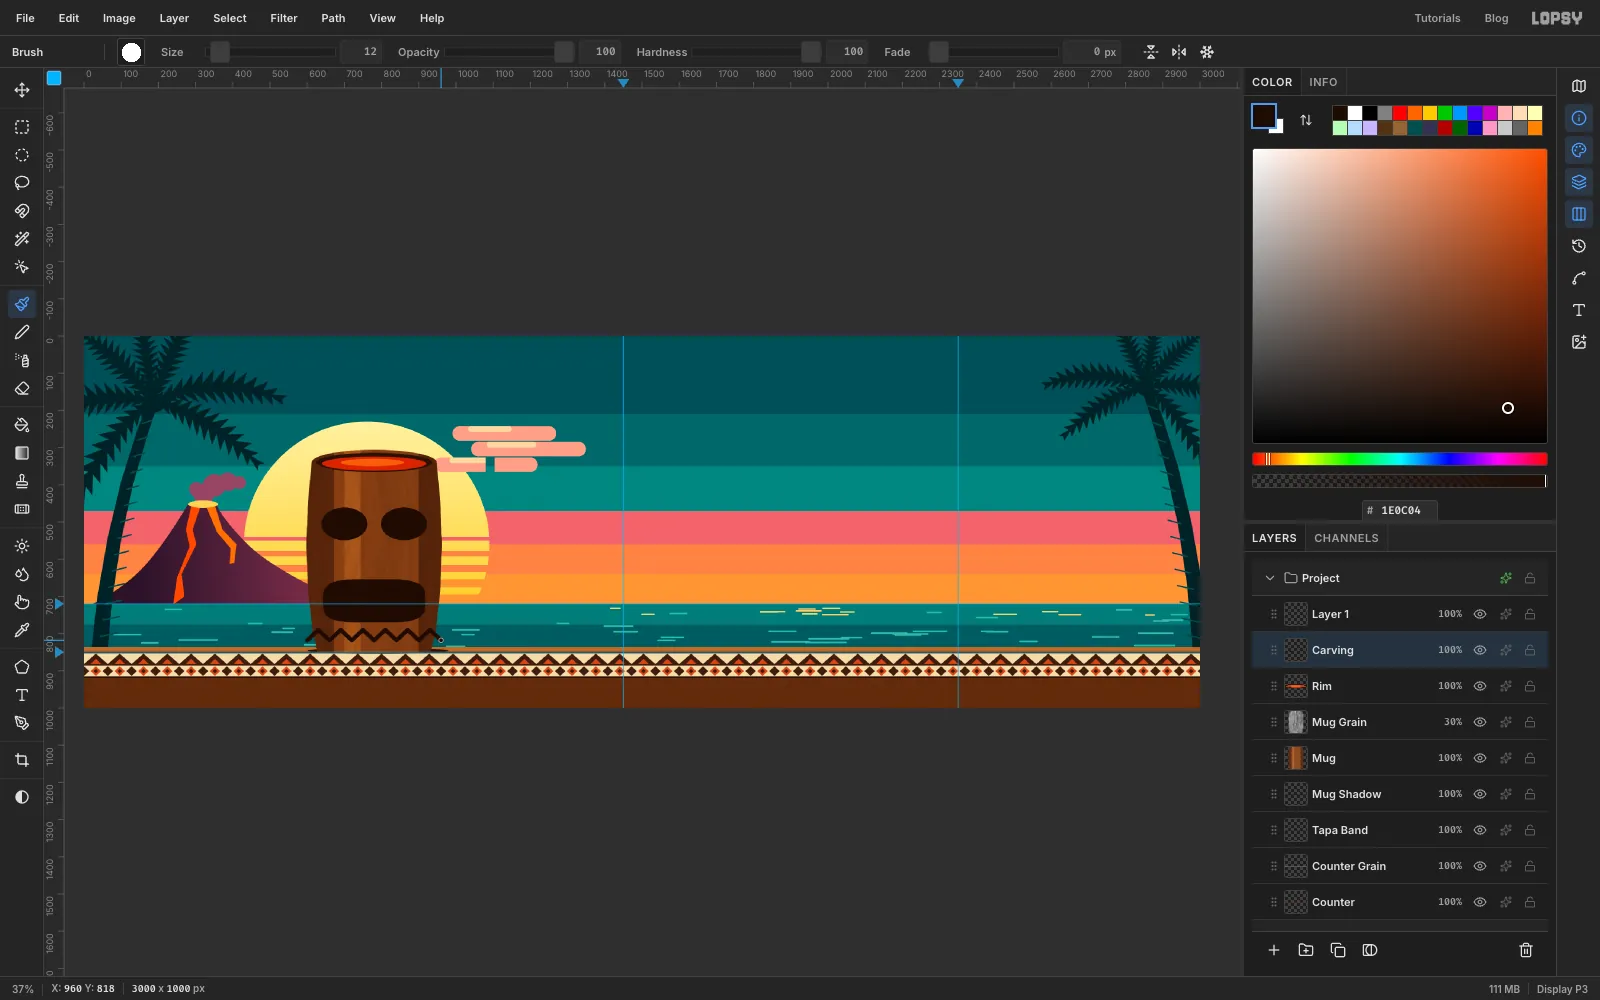
Everything cut into the wood goes on one layer, in near black . Add a layer named Carving.
- Fill two elliptical eye sockets, from
638, 461to762, 549and from798, 461to922, 549. - With the Lasso, draw a wide, squarish mouth with rounded corners from about
642, 654to918, 770, and fill it. - Set the Brush to Size
12. Click at600, 818, then Shift-click every 30 px across the mug, alternating betweeny 790andy 818, to carve a zigzag band near the base.
- Fill two elliptical eye sockets, from
-
Add teeth with copy and paste
Add a layer named Teeth above Carving. Set the Brush to Size
28in and draw seven short vertical strokes for the top row: click at670, 668and Shift-click at670, 696, then repeat every34px to874. The round brush gives each tooth a rounded end.The bottom row is the same, so copy it. Select
650, 648to910, 716, choose Edit → Copy, then Edit → Paste. The paste lands in place on a new layer, already selected, with the Move tool active. Rename the layer Lower Teeth and drag it about60px down and half a tooth to the right, so the rows stagger. A small drag is easier zoomed in, or use the arrow keys for the last few pixels. Deselect.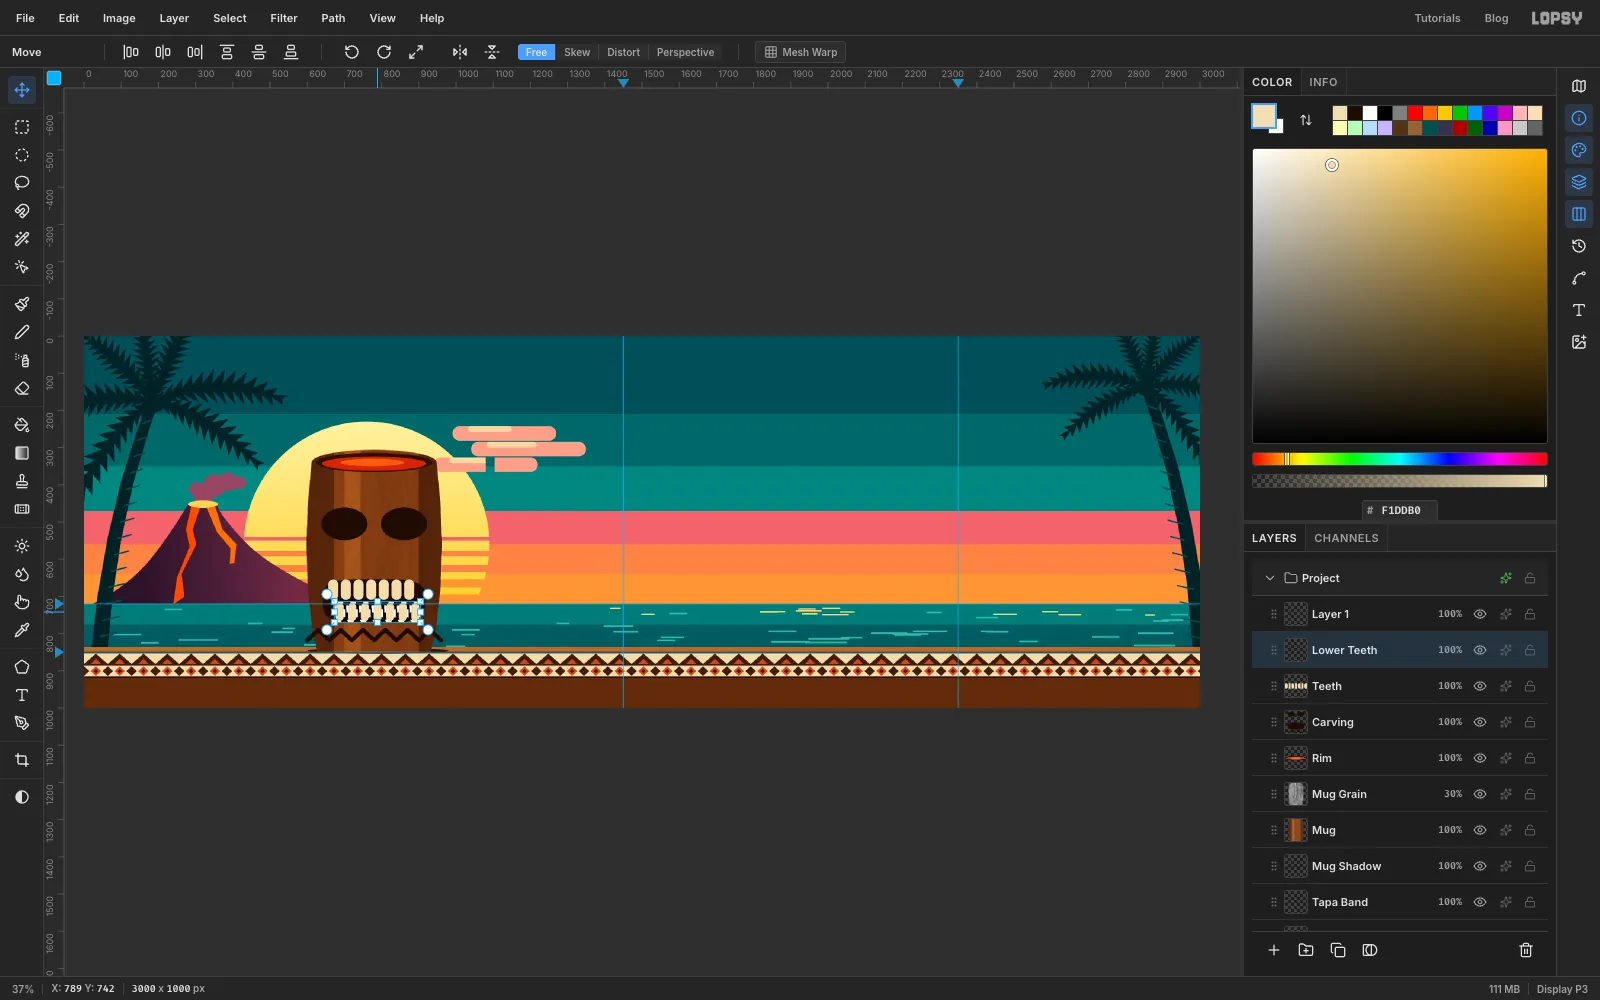
-
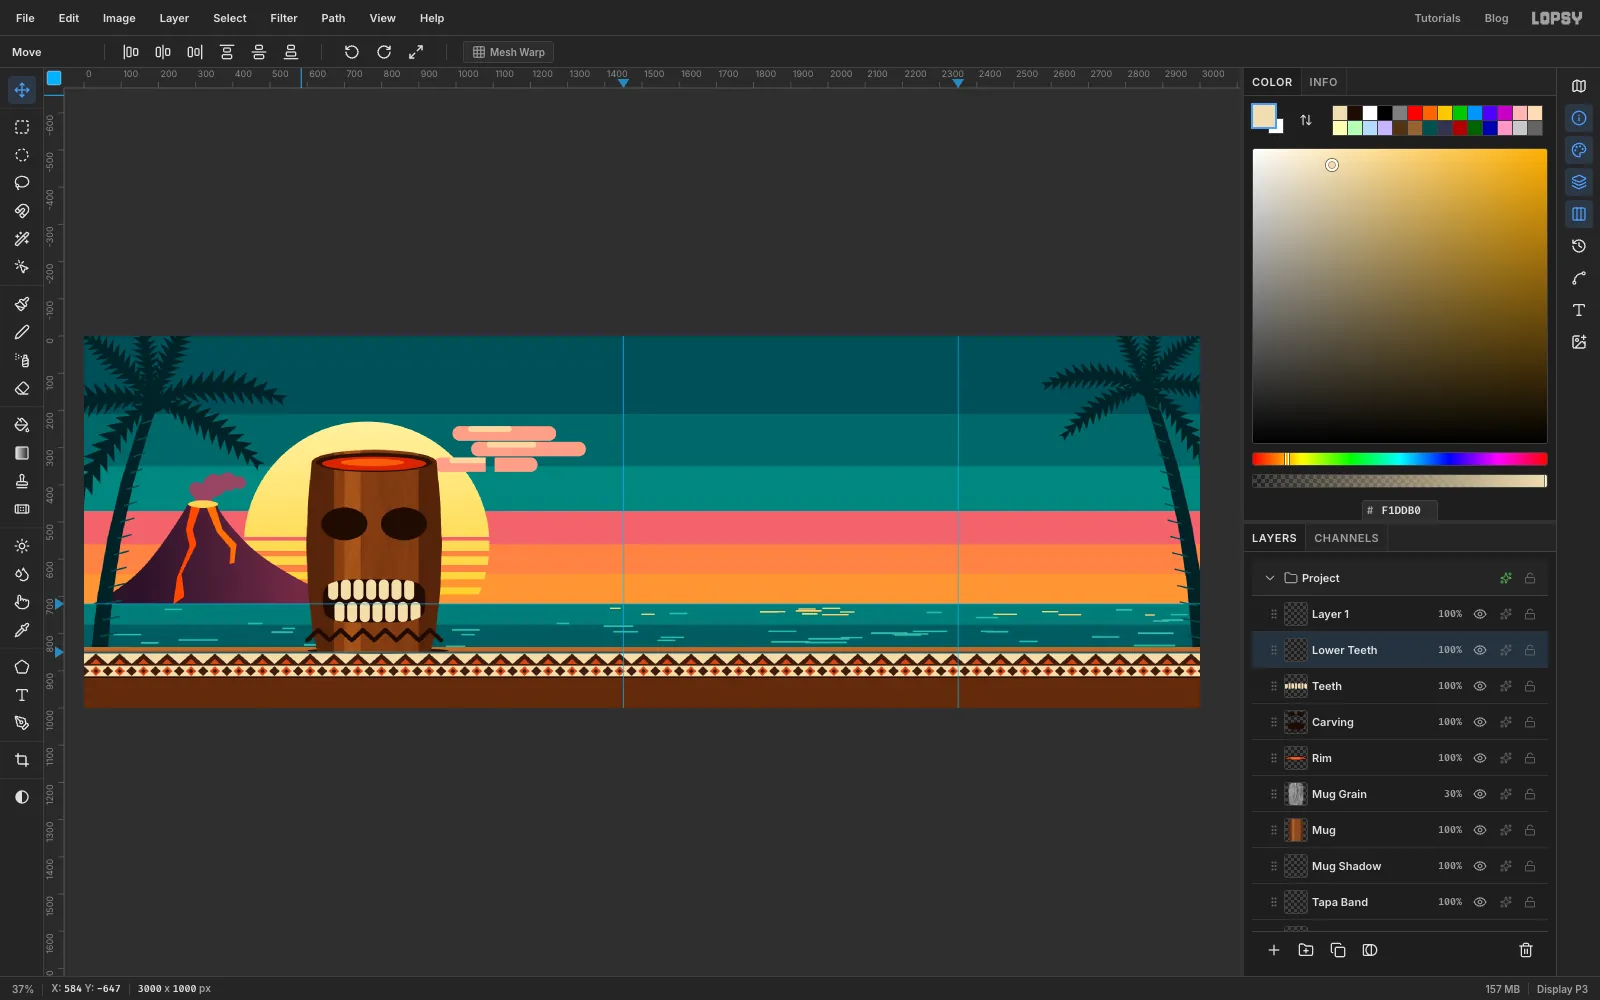
Trim the teeth to the mouth
The tops and bottoms of the teeth stick out past the mouth. Cmd-click the Carving thumbnail and choose Select → Inverse. Now everything except the carving is selected. Click Teeth and press Delete, then click Lower Teeth and press Delete. Deselect.
-
Raise the brow and nose, and light the eyes
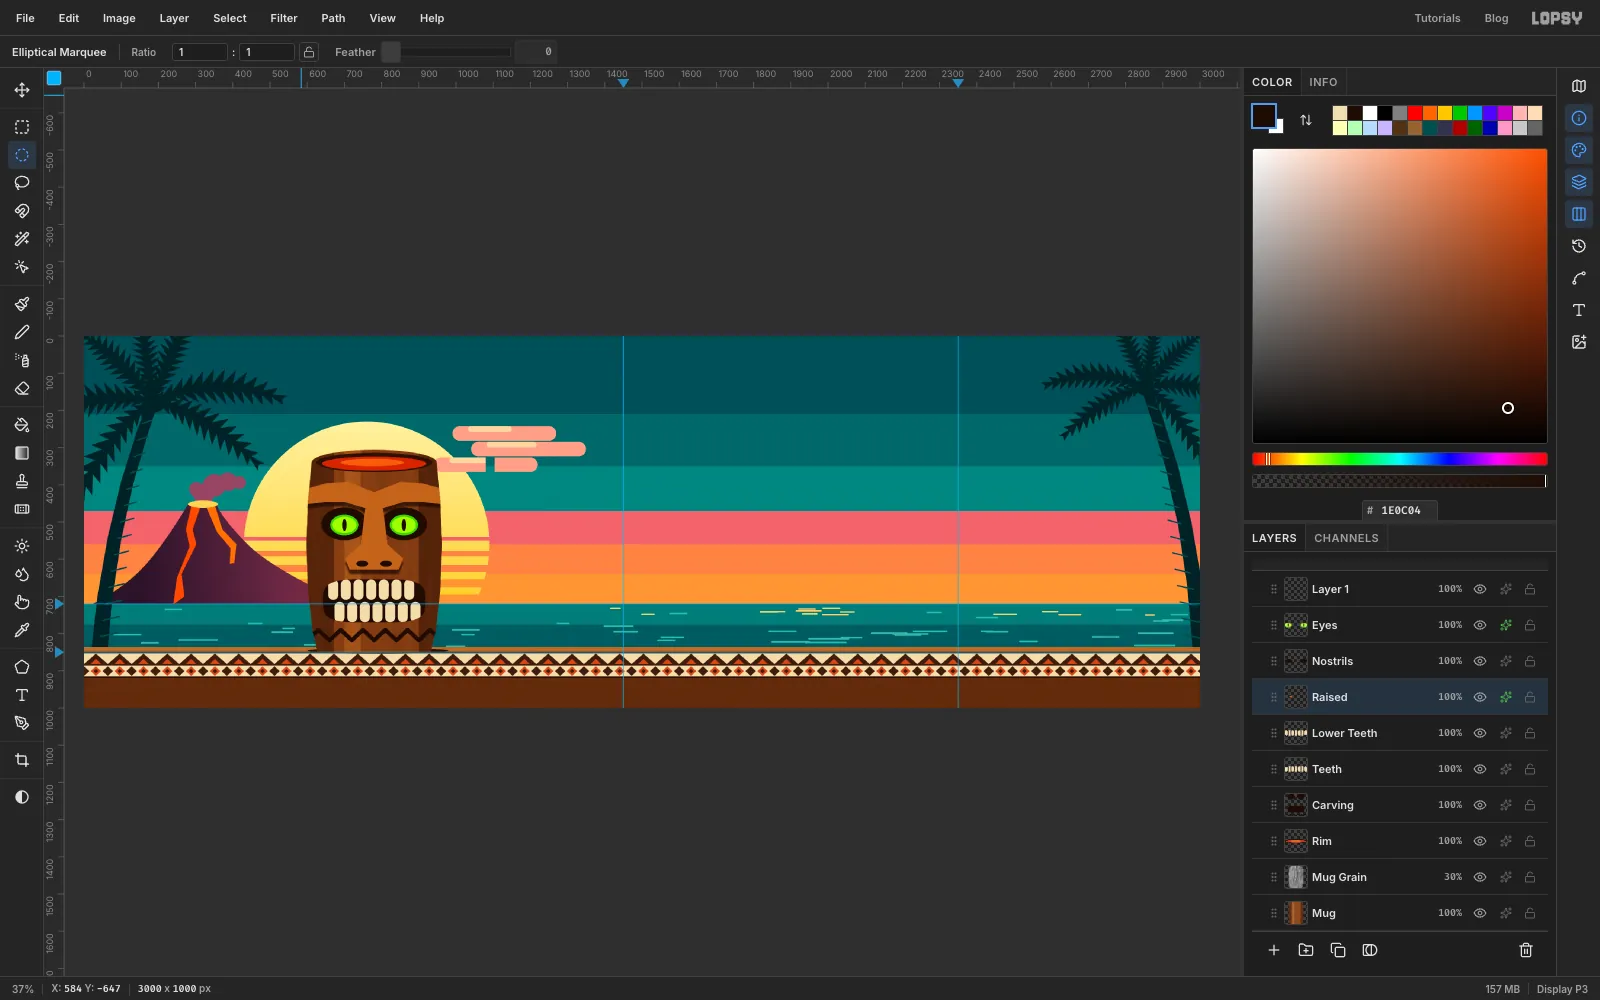
Click Lower Teeth and add a layer named Raised. With the Lasso, draw the parts that stand out from the wood and fill them with :
- a heavy brow across the whole mug, from
600, 410up to a point between the eyes at780, 420, out to962, 410, then back along a line about 40 px lower that dips to780, 470in the middle - a broad nose that narrows at the top (
756–804aty 464) and flares out to702–858at abouty 600, with a flat base at628
Give Raised a Drop Shadow in with Offset X
0, Offset Y12, Blur6and Opacity75, so the brow and nose cast shadows down the face.Add a layer named Nostrils and fill two small ellipses,
732, 604to764, 620and796, 604to828, 620, in .Add a layer named Eyes. Fill ellipses from
668, 486to732, 530and from828, 486to892, 530with lime , then two narrow slit pupils (694, 492to706, 524and854, 492to866, 524) with . Give the layer a Stroke of Width6in . A hard rim like this reads as a glow without blurring anything.Finally, Cmd-click the Mug thumbnail, choose Select → Inverse, and press Delete on Carving and then on Raised to trim the brow and zigzag to the mug's outline. Deselect.
- a heavy brow across the whole mug, from
-
Stripe the straw
Click Eyes and add a layer named Straw. Select
856, 110to880, 350and fill it with . Select a stripe from850, 120to886, 138, then hold Shift and drag five more stripes, each 18 px tall and 40 px apart (158,198,238,278and318). Fill them with and deselect.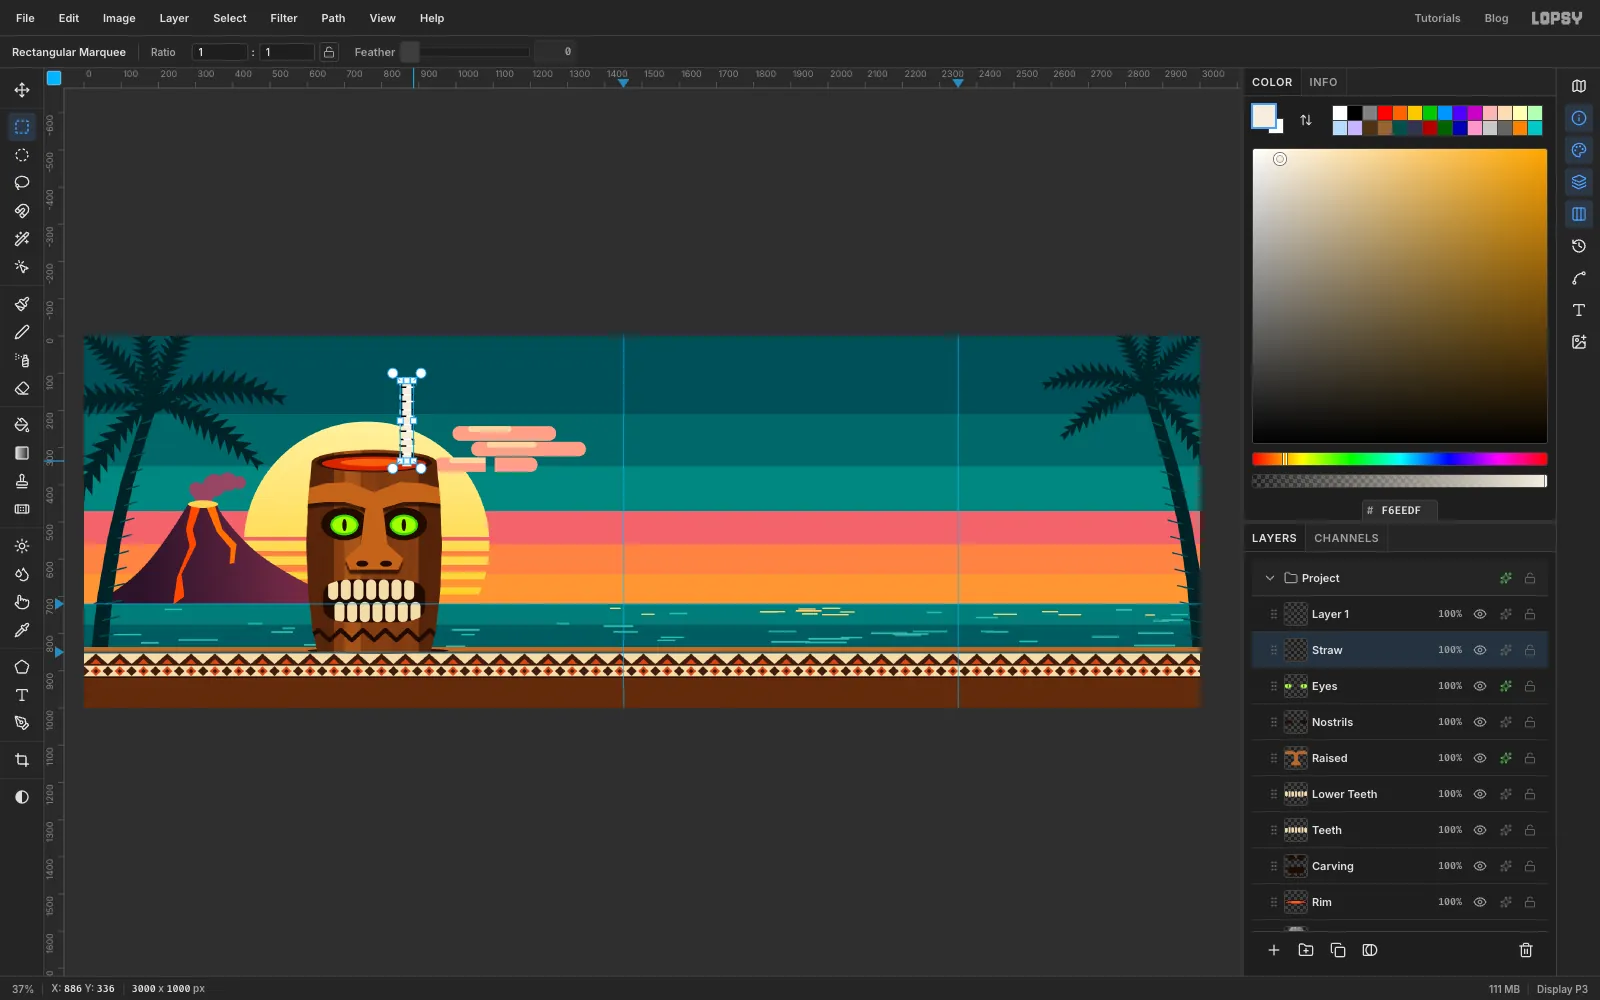
-
Tilt the straw
Cmd-click the Straw thumbnail. With the Move tool, drag the rotate handle just outside a corner of the box until the straw leans about
16°to the right. Deselect to commit.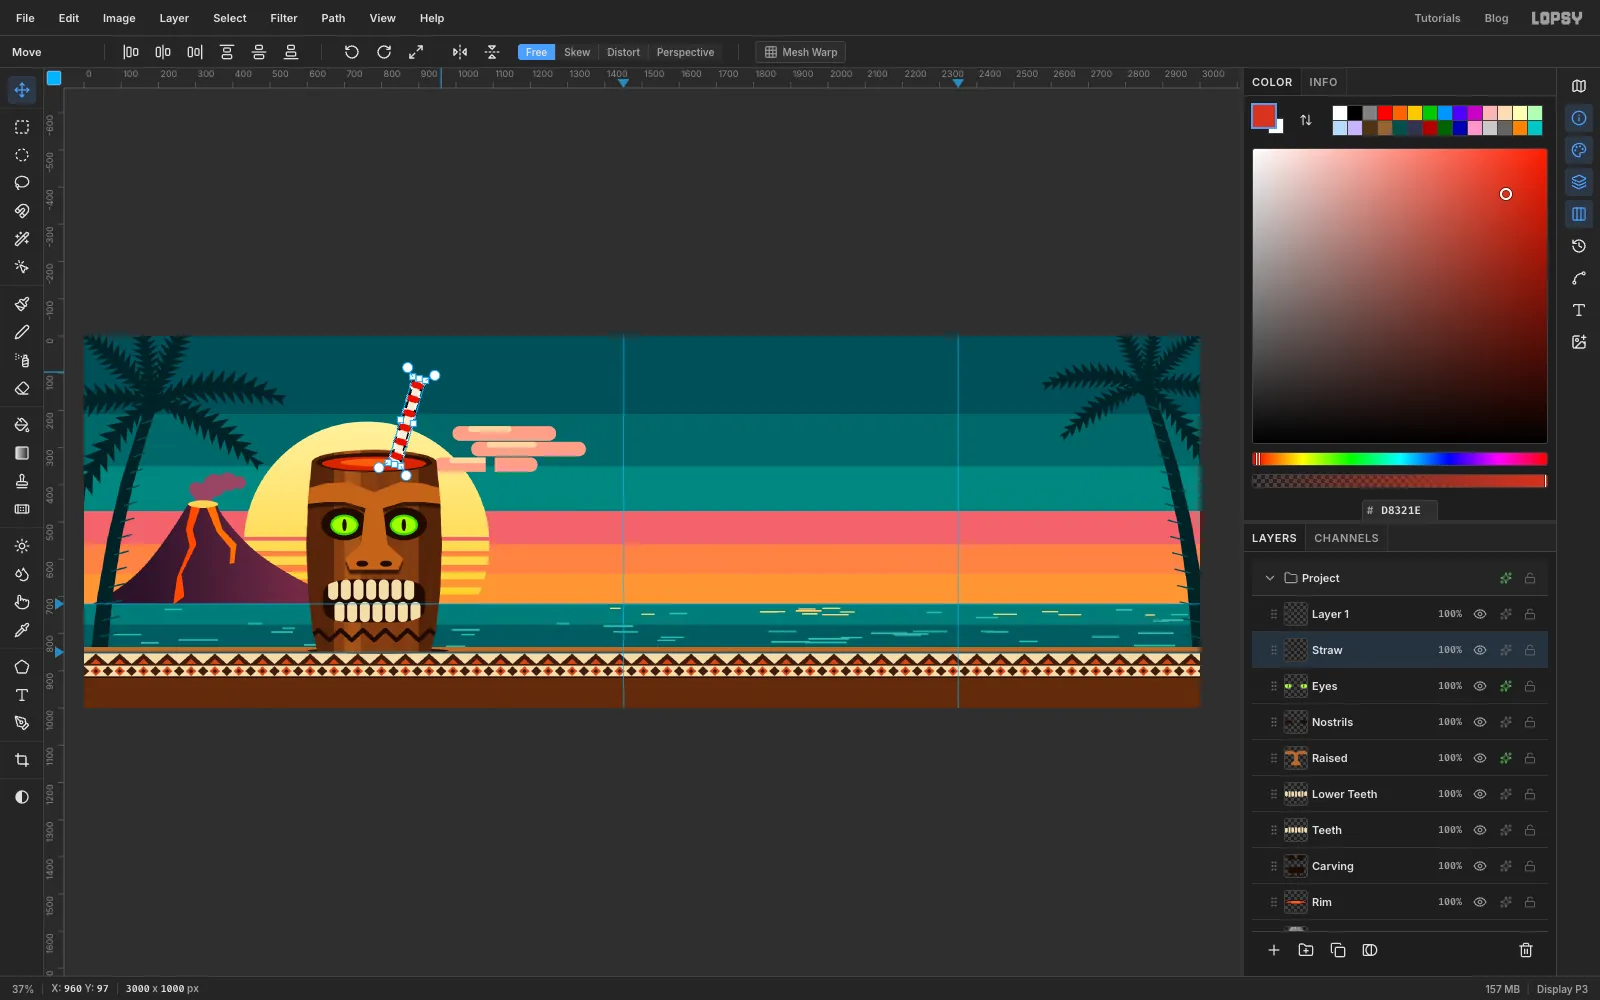
-
Make a paper umbrella with Sunburst
Click Straw and add a layer named Umbrella. Set the foreground to and press Swap Colors (X) so cream becomes the background colour, then set the foreground to . Select a circle from
540, 100to780, 340.Choose Filter → Sunburst… and set Rays
12, Width50, Length100, Center X22and Center Y22. The centre is measured in percent of the canvas:660 ÷ 3000and220 ÷ 1000. Set Gaps to Background Color so the gaps between rays are cream rather than empty, then click Apply. The selection keeps the rays inside the circle.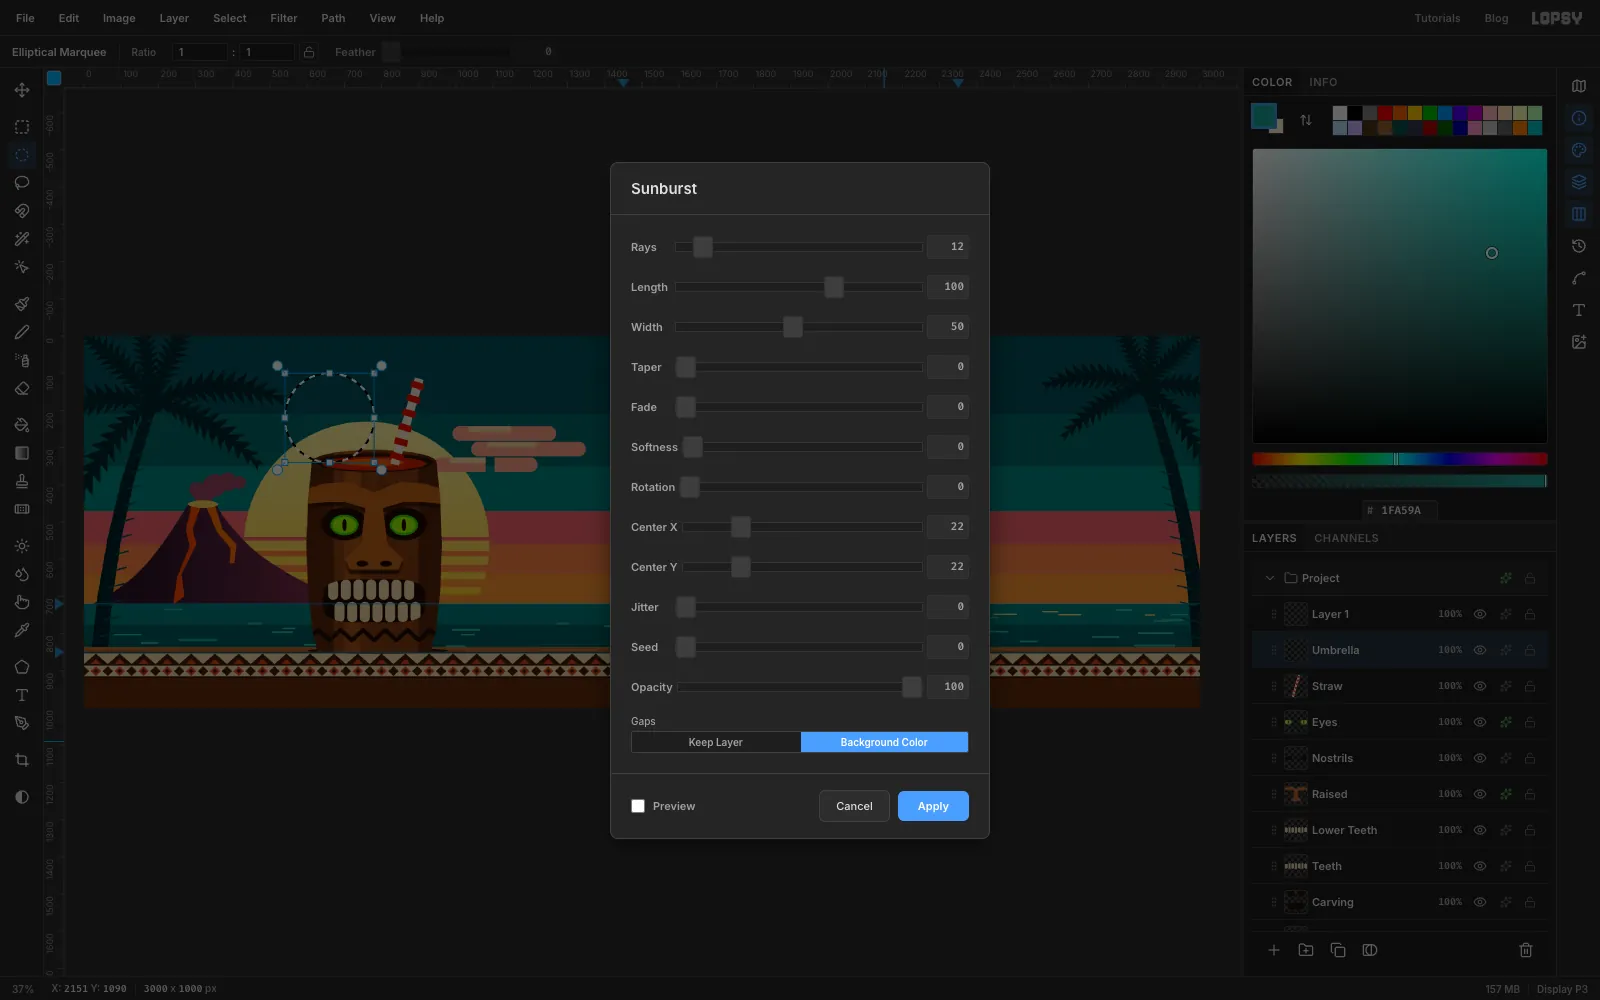
-
Squash and tilt the umbrella
With the Move tool, drag the top-middle handle about
150px down. The circle becomes a shallow oval, like an open cocktail umbrella seen from the side. Then drag a rotate handle to tilt it about20°to the left.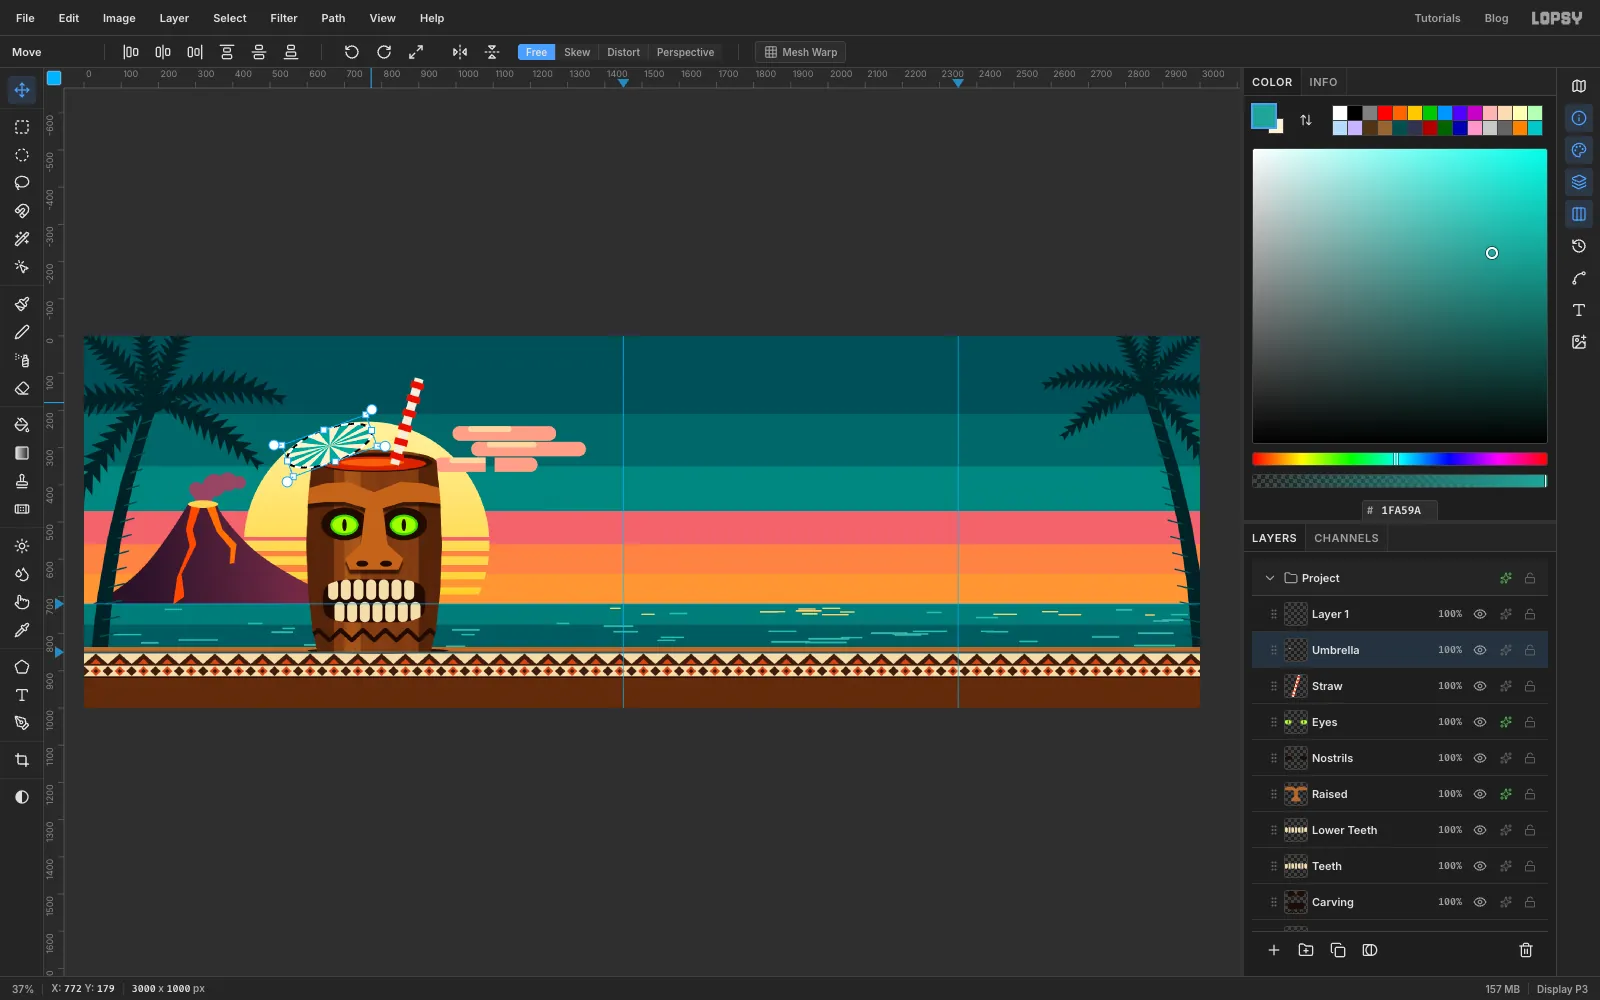
-
Lift the umbrella and add its stick
Drag the umbrella about
40px left and120px up, clear of the rim, where the foam will go next. Deselect.Choose the Pencil at Size
6in . Click the centre of the umbrella at624, 186and Shift-click inside the rim at700, 330to draw the stick.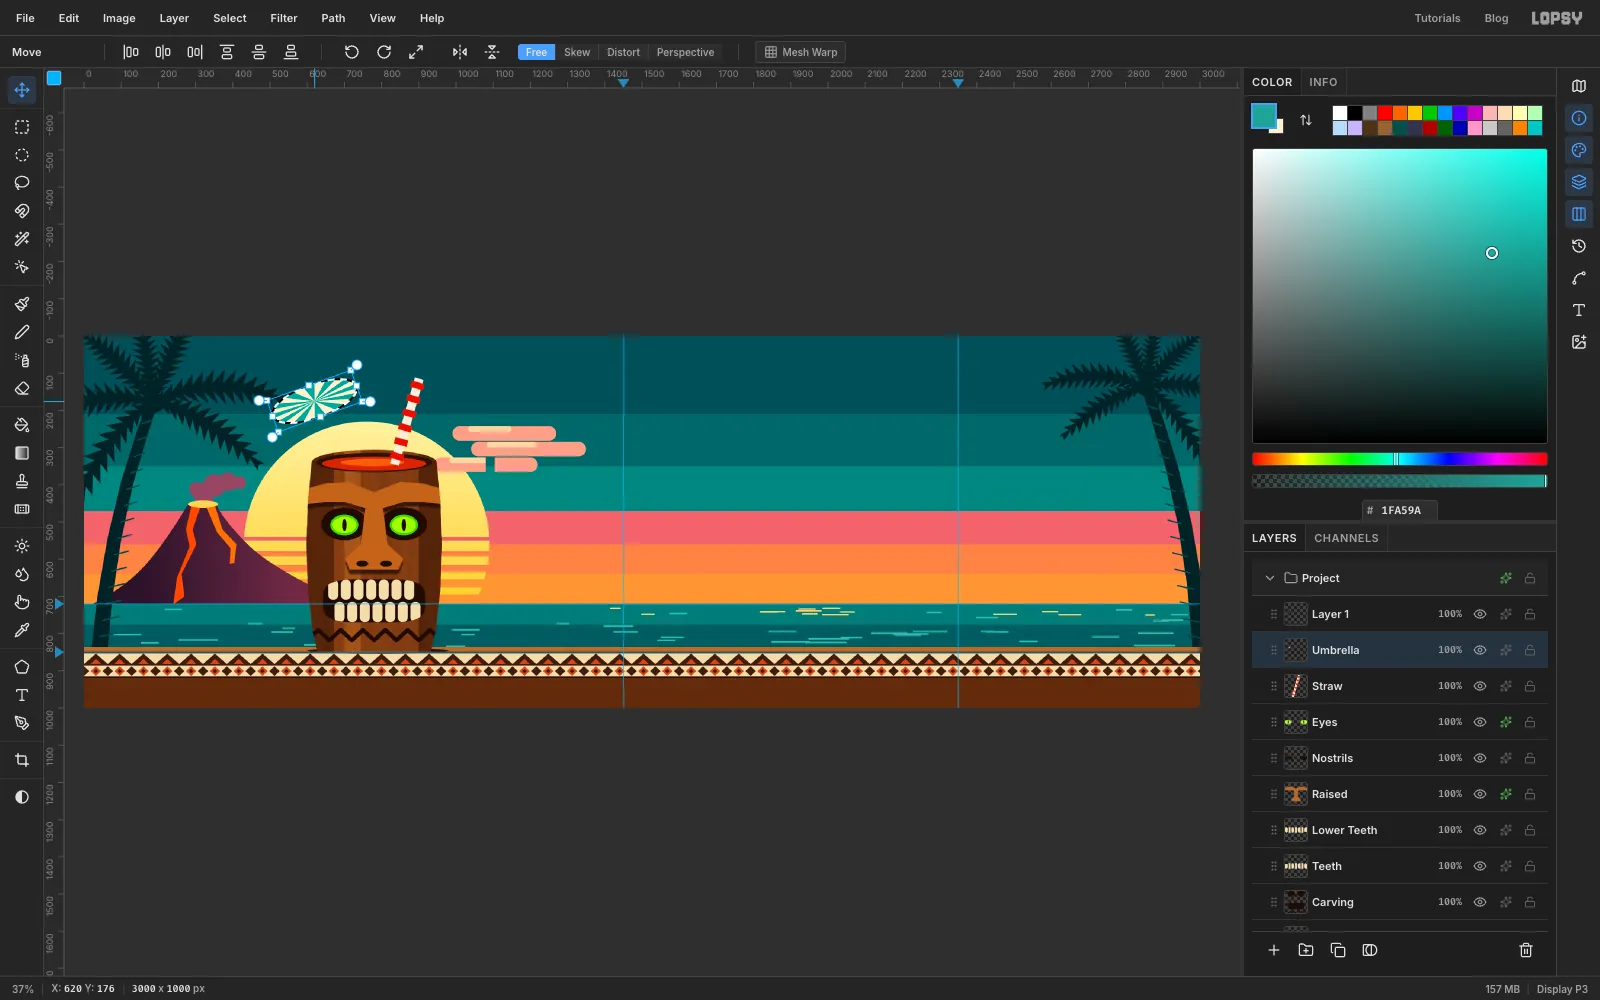
-
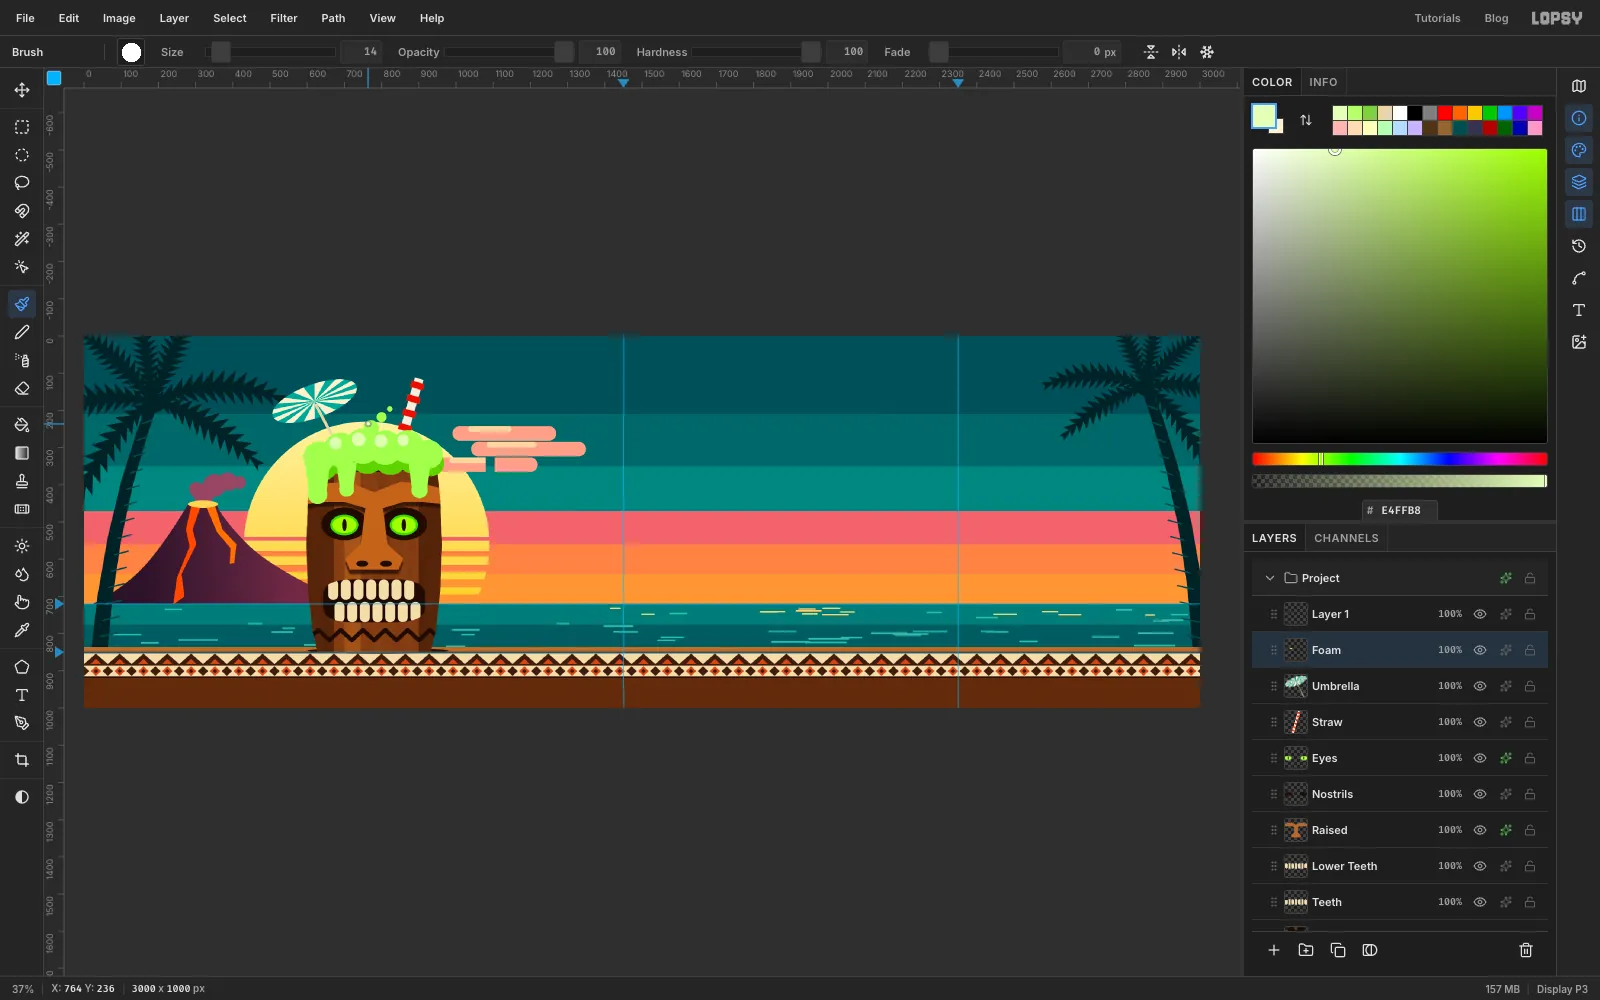
Pile on the zombie foam
Click Umbrella and add a layer named Foam. The foam is three flat tones of brush clicks:
- Shadow: Brush in . Click a row of six puffs along the rim, from
640, 346to934, 342, at Size70–94. - Body: Switch to . Click a second row slightly higher and to the left, from
632, 326to926, 318, at Size78–96, so a rim of the darker green shows underneath. Add three rising bubbles at772, 248(44),800, 218(28) and822, 196(16). - Drips: Still in , use the Lasso to draw a tapering drip down from the rim, then fill a circle at its end so it finishes in a round bulb. Make three: a long one at
x 628that ends above the left eye, a short one at706, and a medium one at902. - Highlights: In , click smaller puffs (Size
32–38) on the upper left of four body puffs, plus one tiny one on the biggest bubble.
- Shadow: Brush in . Click a row of six puffs along the rim, from
-
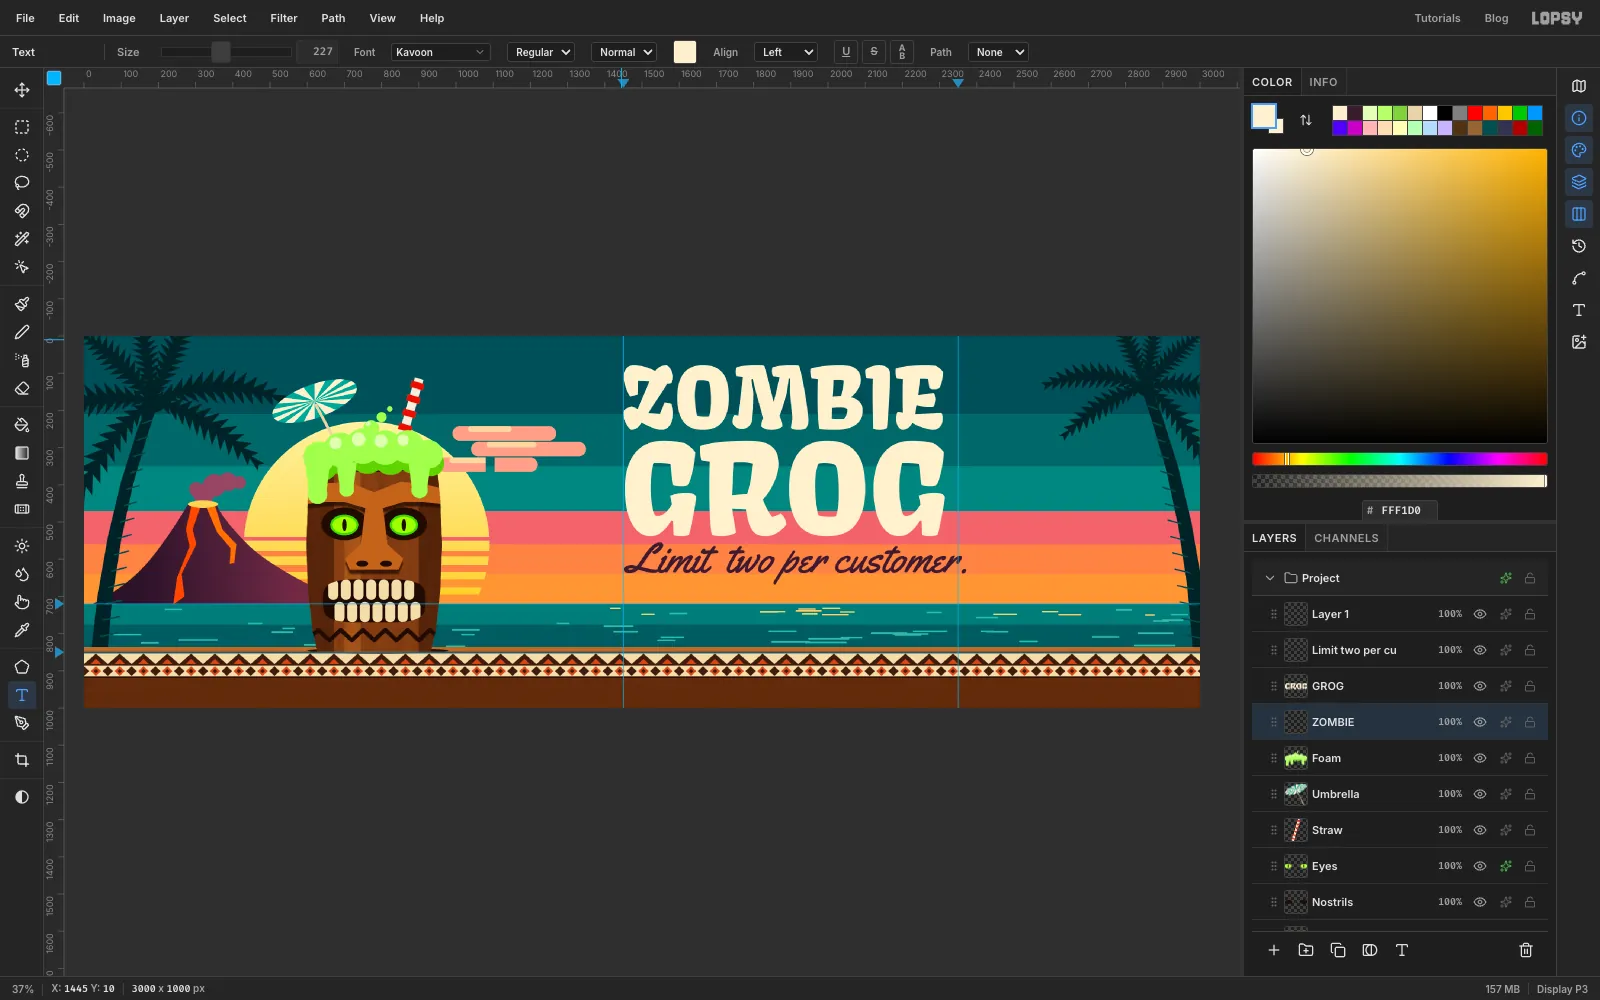
Type the headline
Text clicks near existing type edit that type, so type the lines from the bottom up, in empty sky just right of the left guide. Before each new line, click Foam in the Layers panel, so the font settings you change don't restyle the line you just typed. Choose the Text tool:
- Set the font to Yellowtail, Size
112and colour . Click in the orange band and typeLimit two per customer., with two spaces after "Limit", because Yellowtail's word space is very tight. Press Tab to commit. - Click Foam. Set the font to Kavoon, Size
335and colour . Click in the upper teal bands and typeGROG. - Click Foam again, set Size
227and click near the top of the sky to typeZOMBIE.
Don't worry about exact positions yet; you'll line everything up next.
The two Kavoon sizes are chosen so the four-letter GROG comes out the same width as the six-letter ZOMBIE, about 860 px, giving a justified block.
- Set the font to Yellowtail, Size
-
Line up the type
With the Move tool, drag each line so it's centred halfway between the two vertical guides (
x 1900). The status bar's coordinates help. Stack them with a modest margin above ZOMBIE (about 65 px), a small gap between ZOMBIE and GROG, and a bigger gap under GROG. That extra room leaves space for GROG's shadow and keeps the tagline's descenders clear of the horizon at720.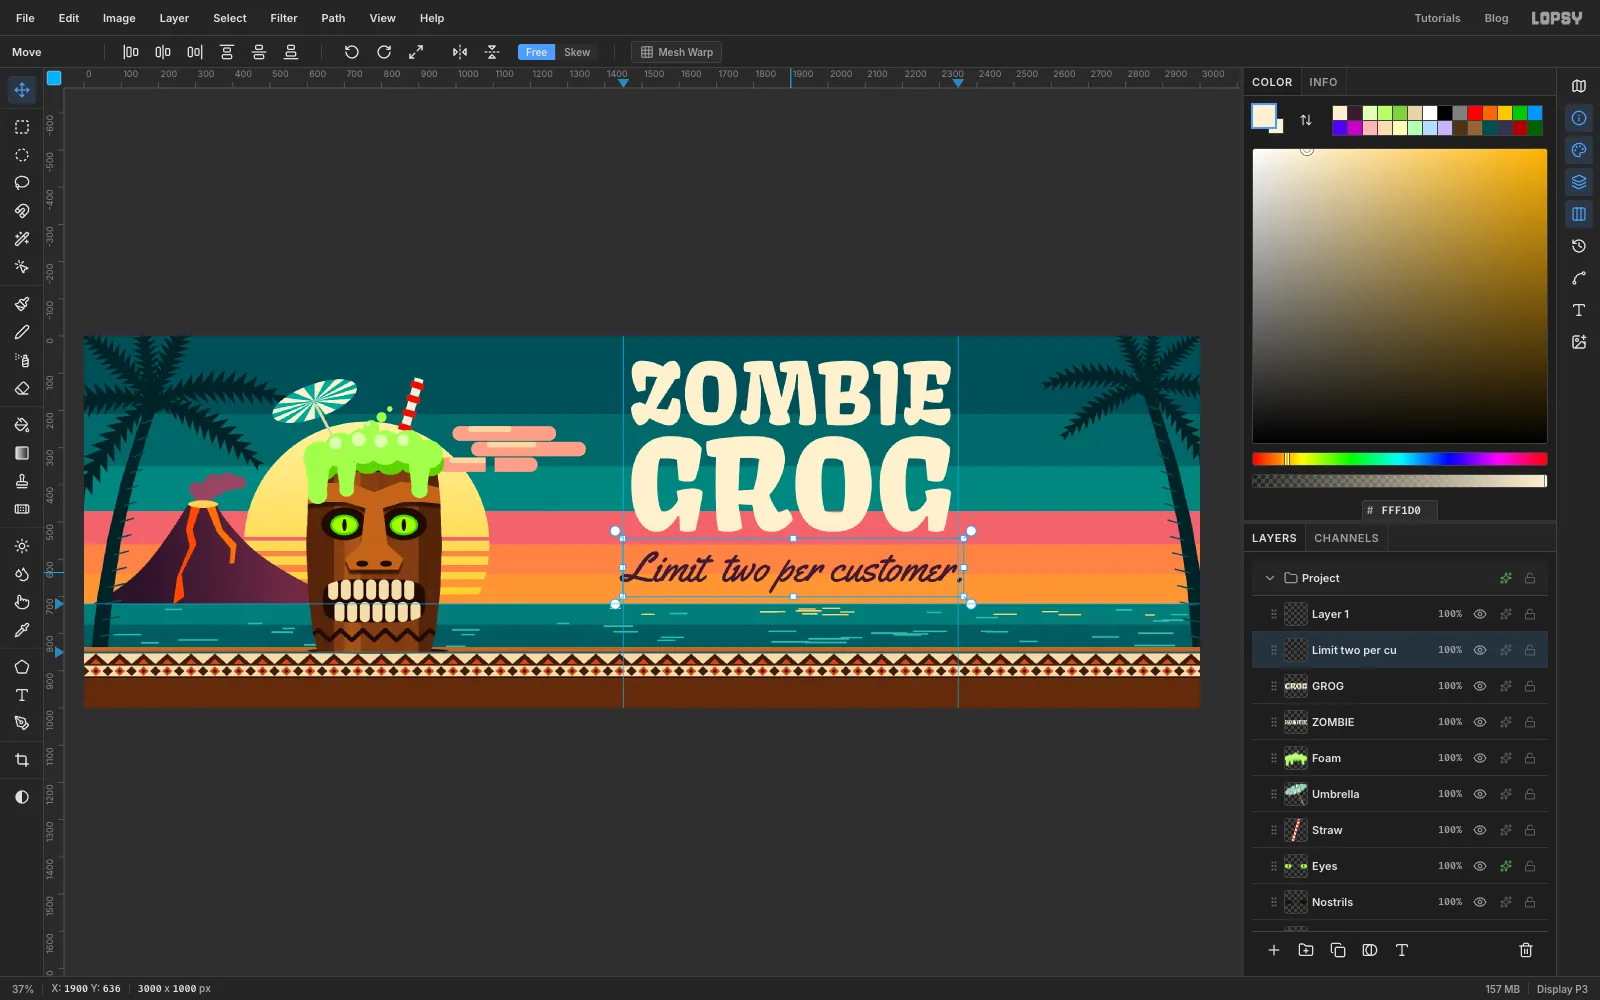
-
Outline the letters and select them
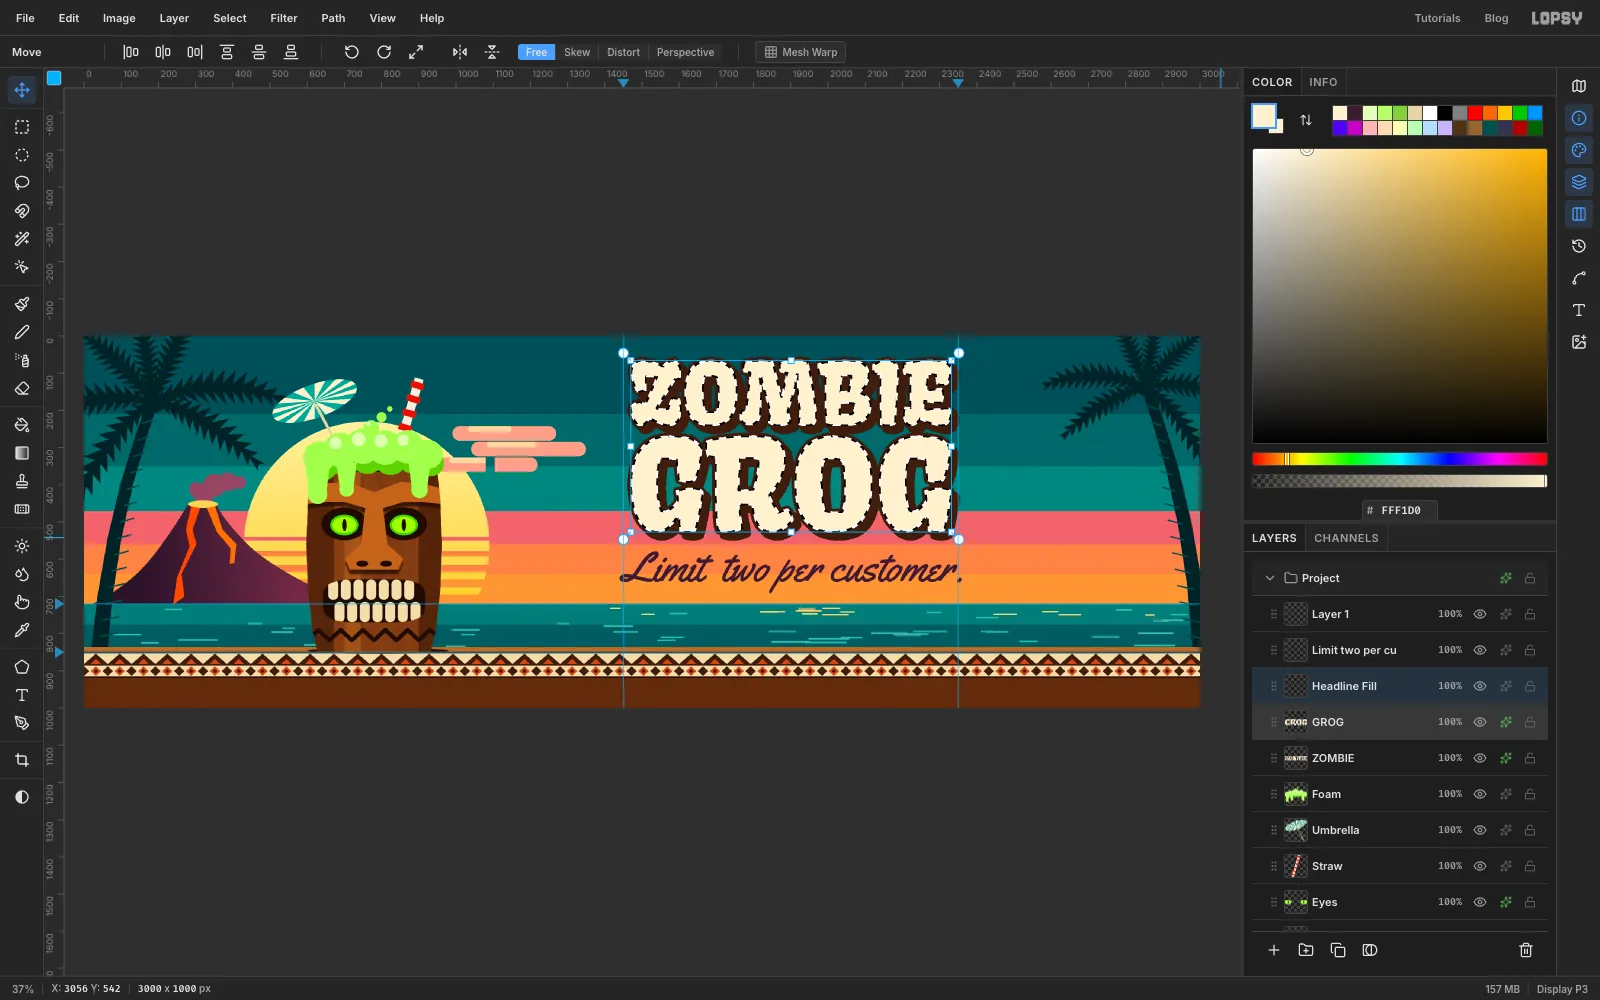
Give both ZOMBIE and GROG a Stroke of Width
10in and a Drop Shadow in the same colour with Offset X14, Offset Y14, Blur1and Opacity100. That's the hard, carved-sign shadow of a 60s tiki menu.Click GROG and add a layer named Headline Fill. Cmd-click the ZOMBIE thumbnail, then Cmd+Shift-click the GROG thumbnail to add it, so both words are selected.
-
Run a sunset gradient through the letters
Choose the Gradient tool and set three stops: , at 55% and . Drag from the top of ZOMBIE (
1900, 66) to the bottom of GROG. The gradient only fills the letters, and the outlines and shadows on the layers below stay in place. Deselect.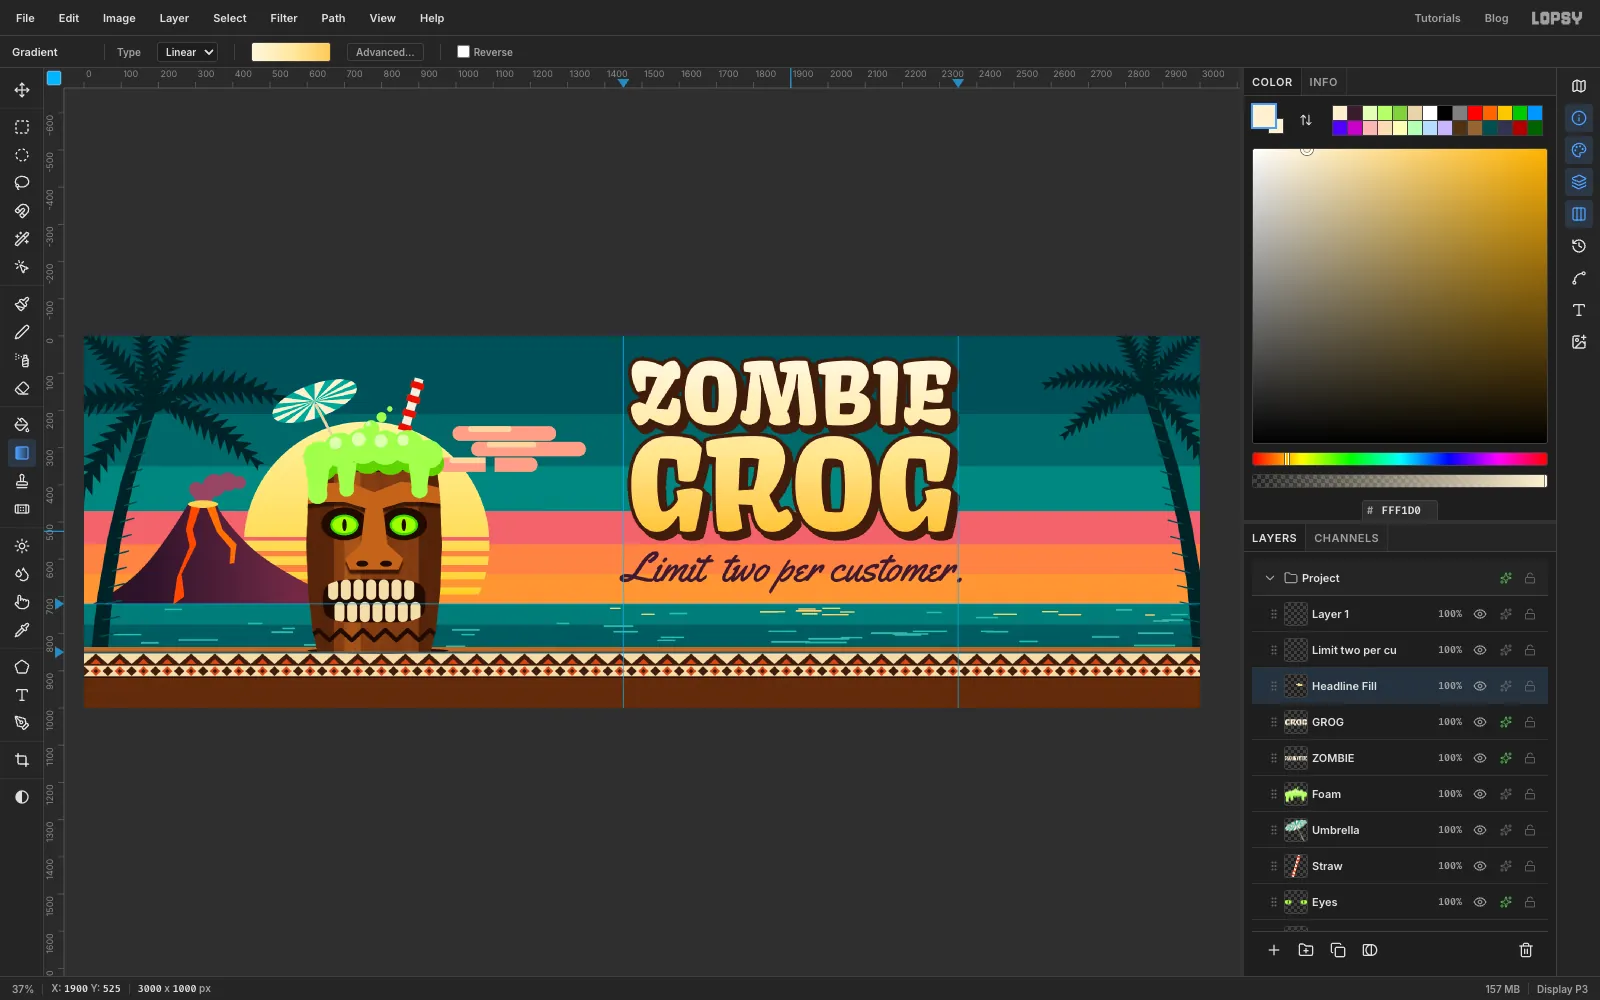
-
Tilt and thicken the tagline
Click the tagline layer. With the Move tool, drag a rotate handle to tilt it about
2°anticlockwise, so it rises to the right, then press Cmd+D. A script line at a slight angle feels hand-painted.Script strokes are thin at a distance, so give the tagline a Stroke of Width
3in the same plum, . That thickens every letter evenly.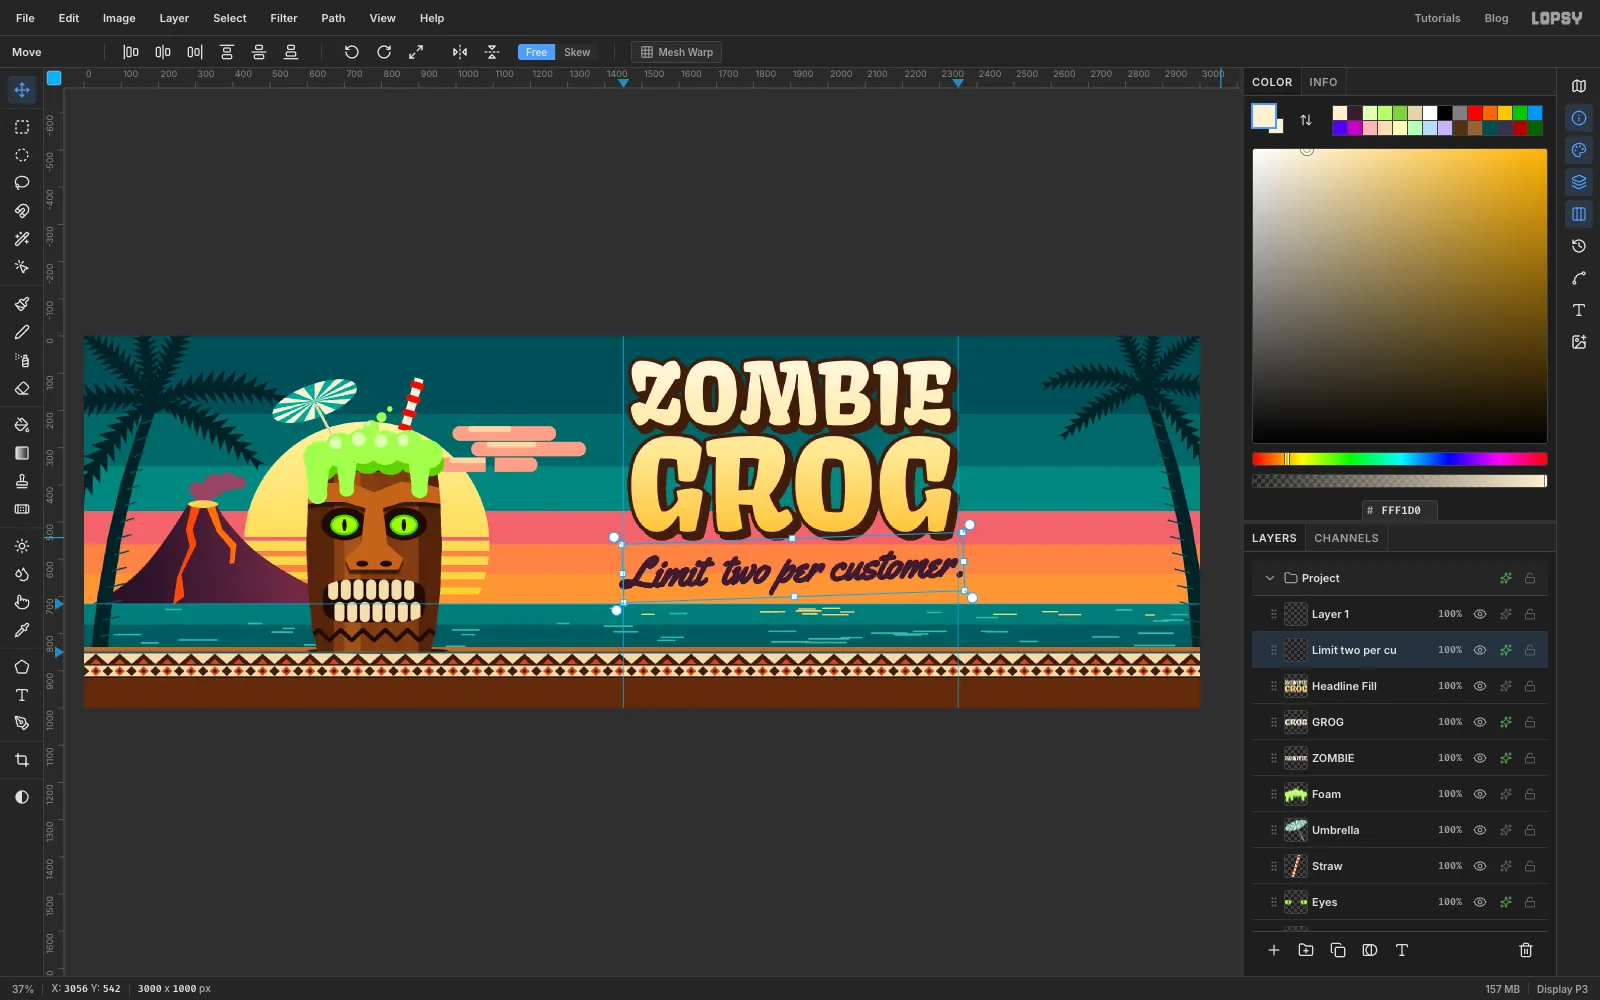
-
Add the info line on the counter
Click Tapa Band in the Layers panel. Choose the Text tool, set the font to Oswald, the weight to SemiBold, Size
56and colour . Click in the empty brown strip below the tapa band, near the left guide, and typeLAVA LAGOON TIKI LOUNGE • EXIT 14with two spaces either side of the bullet. Press Tab, then drag it so it's centred onx 1900under the headline and centred top to bottom in the brown strip.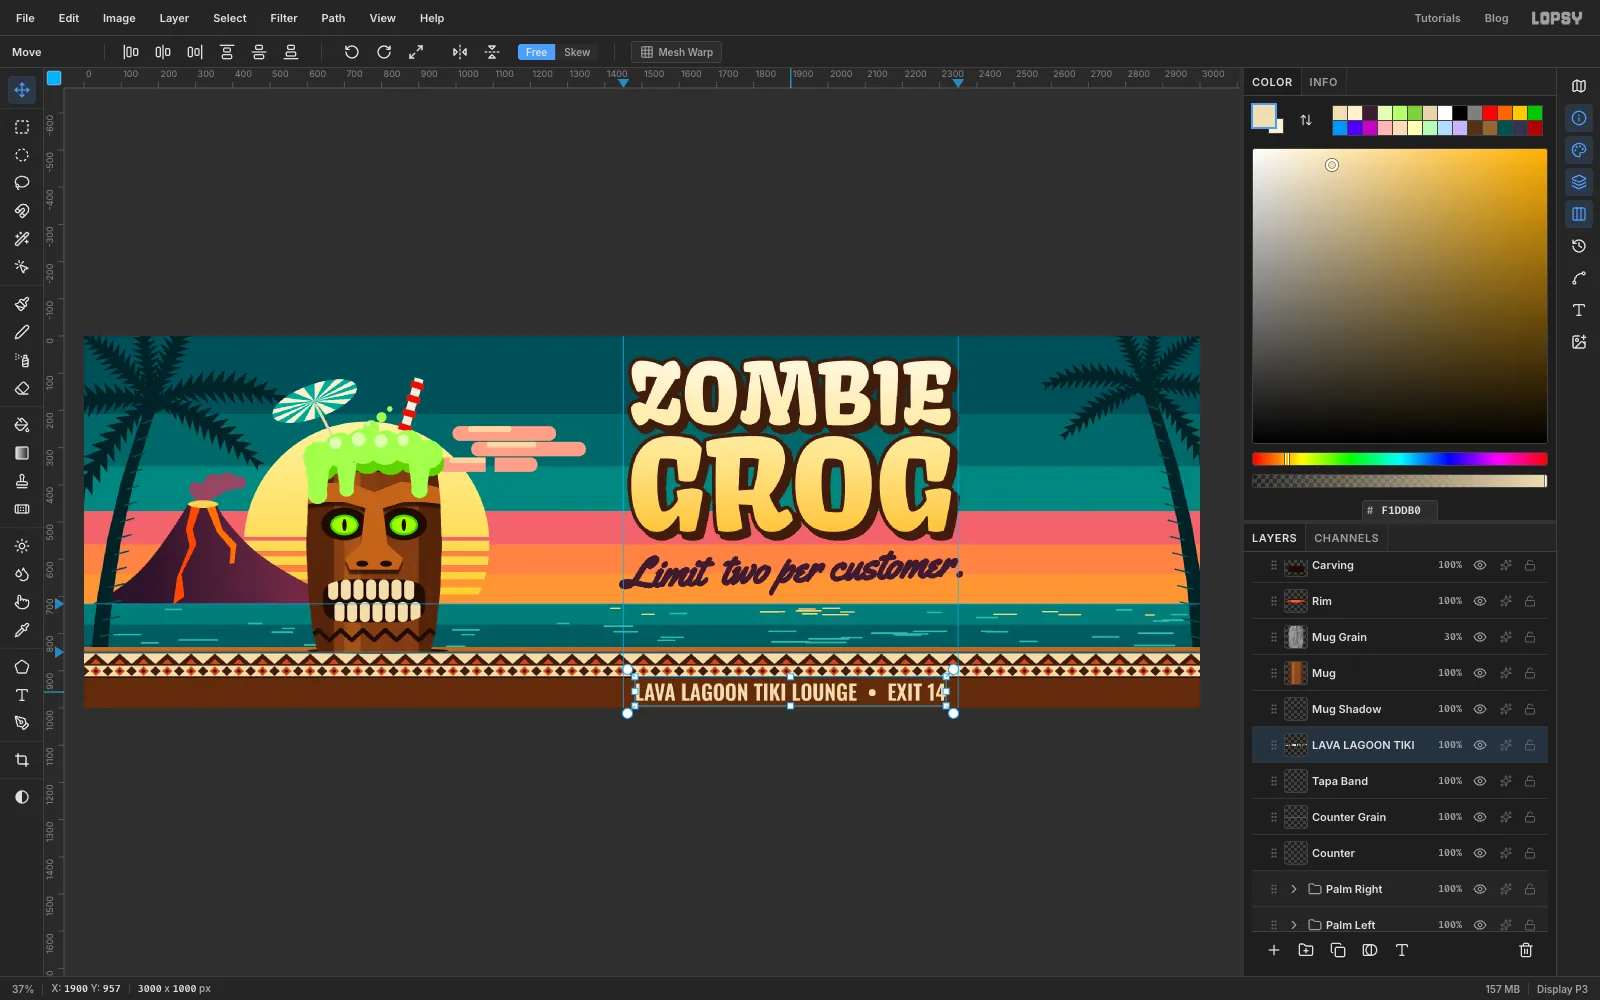
-
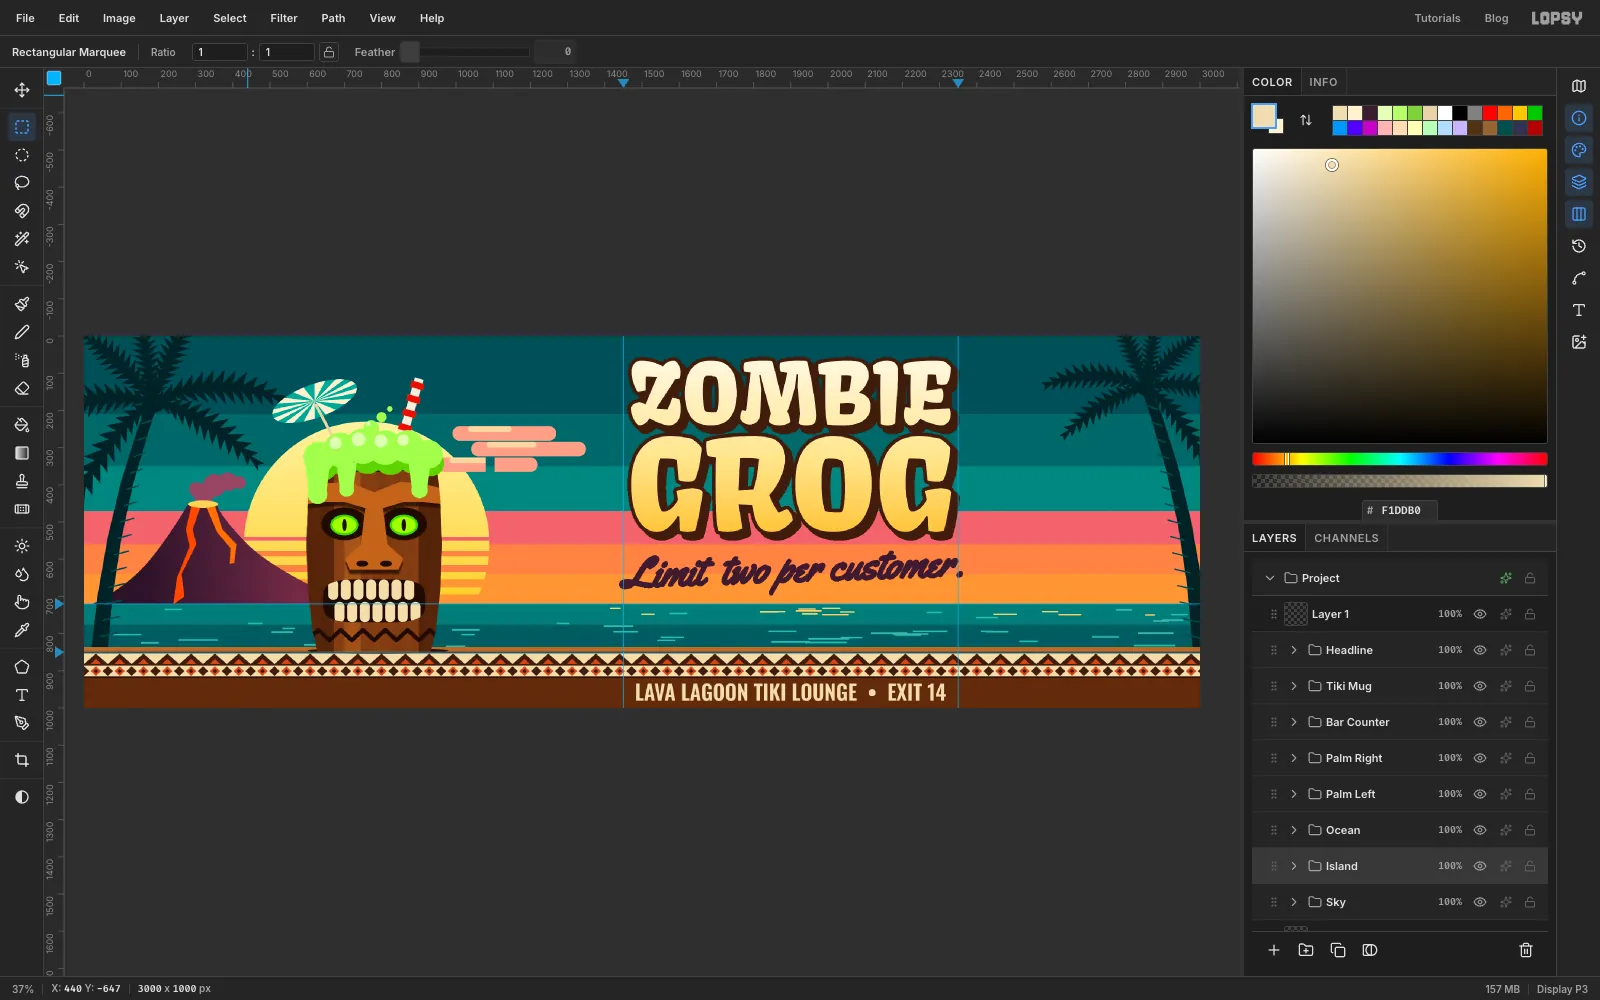
Organise the layers into groups
Group each part of the board with Cmd+G. For each group, click its top layer and Shift-click its bottom layer, then name the group and collapse it:
- Headline: the tagline, Headline Fill, GROG and ZOMBIE
- Tiki Mug: Foam down to Mug Shadow
- Bar Counter: the info line down to Counter
- Ocean: Waves and Sea
- Island: Lava, Plume and Volcano
- Sky: Clouds and Sun
-
Try out the layout by moving the whole mug
Groups make it easy to test the layout. Click Tiki Mug and drag it with the Move tool. The mug, foam, straw, umbrella and shadow all move together. Here it's moved
120px right, which crowds the headline, so press Cmd+Z to put it all back.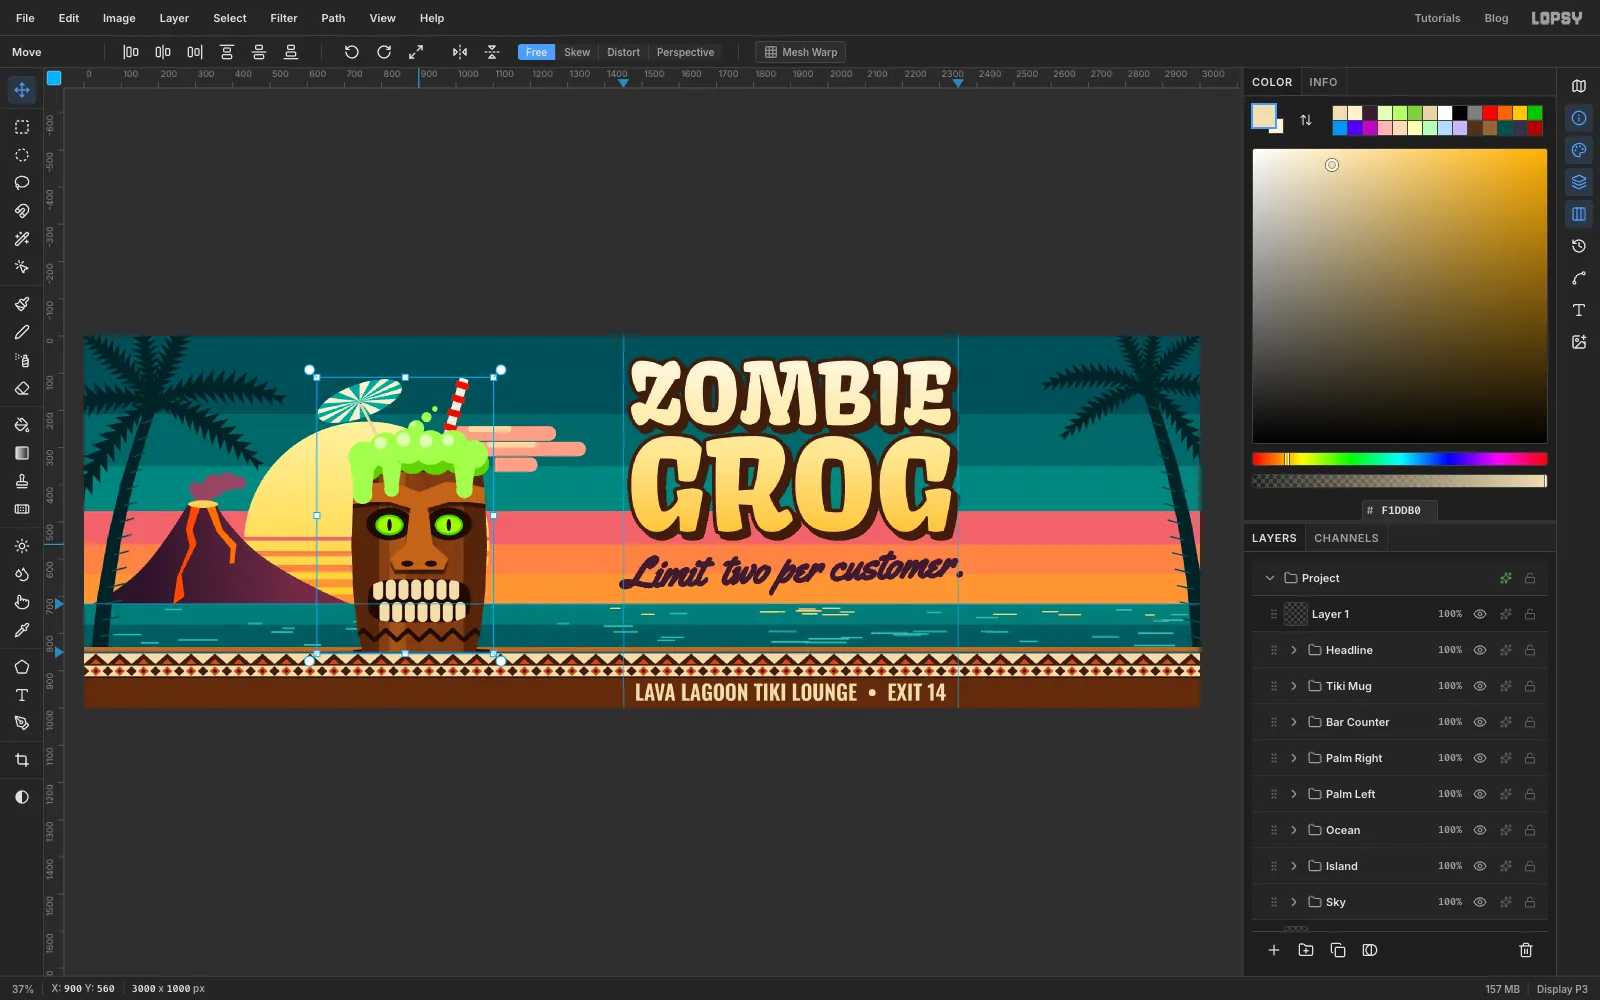
-
Add print grain
Click Headline and add a layer named Print Grain. With nothing selected, Edit → Fill fills the whole layer, so fill it with , then choose Filter → Add Noise… with Amount
30, Mode Mono and Distribution Gaussian. Set the Blend to Overlay and the opacity to40%. Like the counter grain, the grey disappears and only the noise is left, which makes the flat colours look printed. Delete the empty Layer 1 the document started with.Export with File → Quick Export PNG, and save the project with File → Save Project.