Make a Vaporwave Restaurant Menu with Retro Desktop Windows
Design a vaporwave udon menu in Lopsy with a gradient-mapped marble bust, a noodle-bowl sunset, a perspective checkerboard and Windows 95 style menu windows.
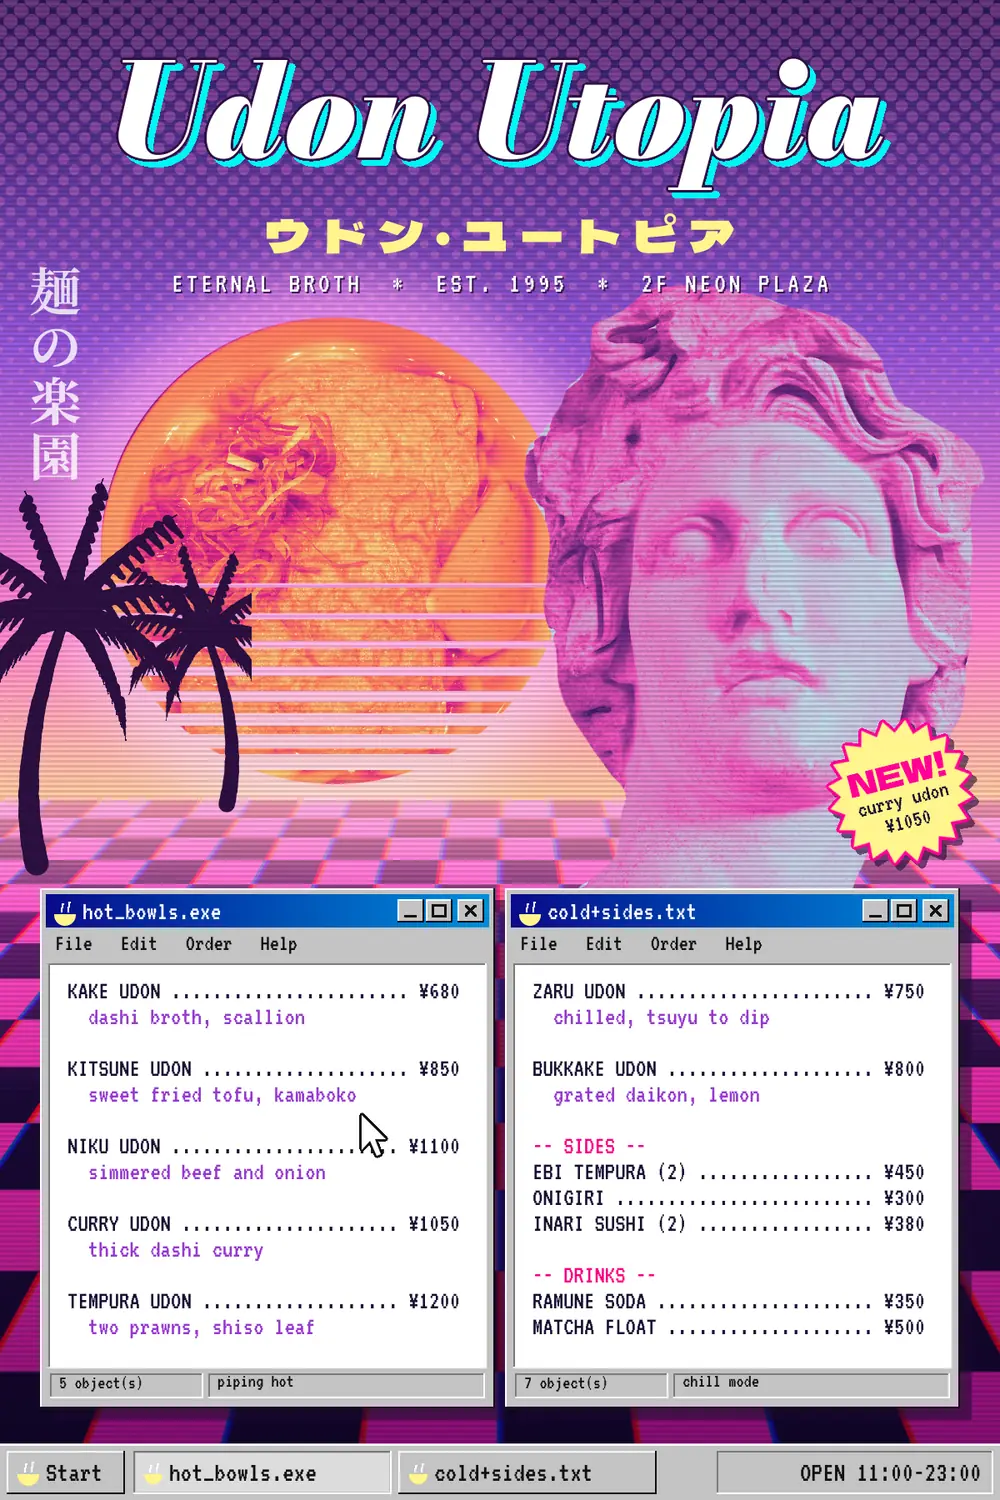
Vaporwave grew out of 2010s internet music and art. It borrows from shopping-mall ads, early web graphics and the computer desktops of the 1990s. Its look is easy to spot: pastel pink and cyan, marble Greek statues, palm trees, sunsets cut into stripes, checkerboard floors that run to the horizon, Japanese text, and grey Windows 95 dialog boxes.
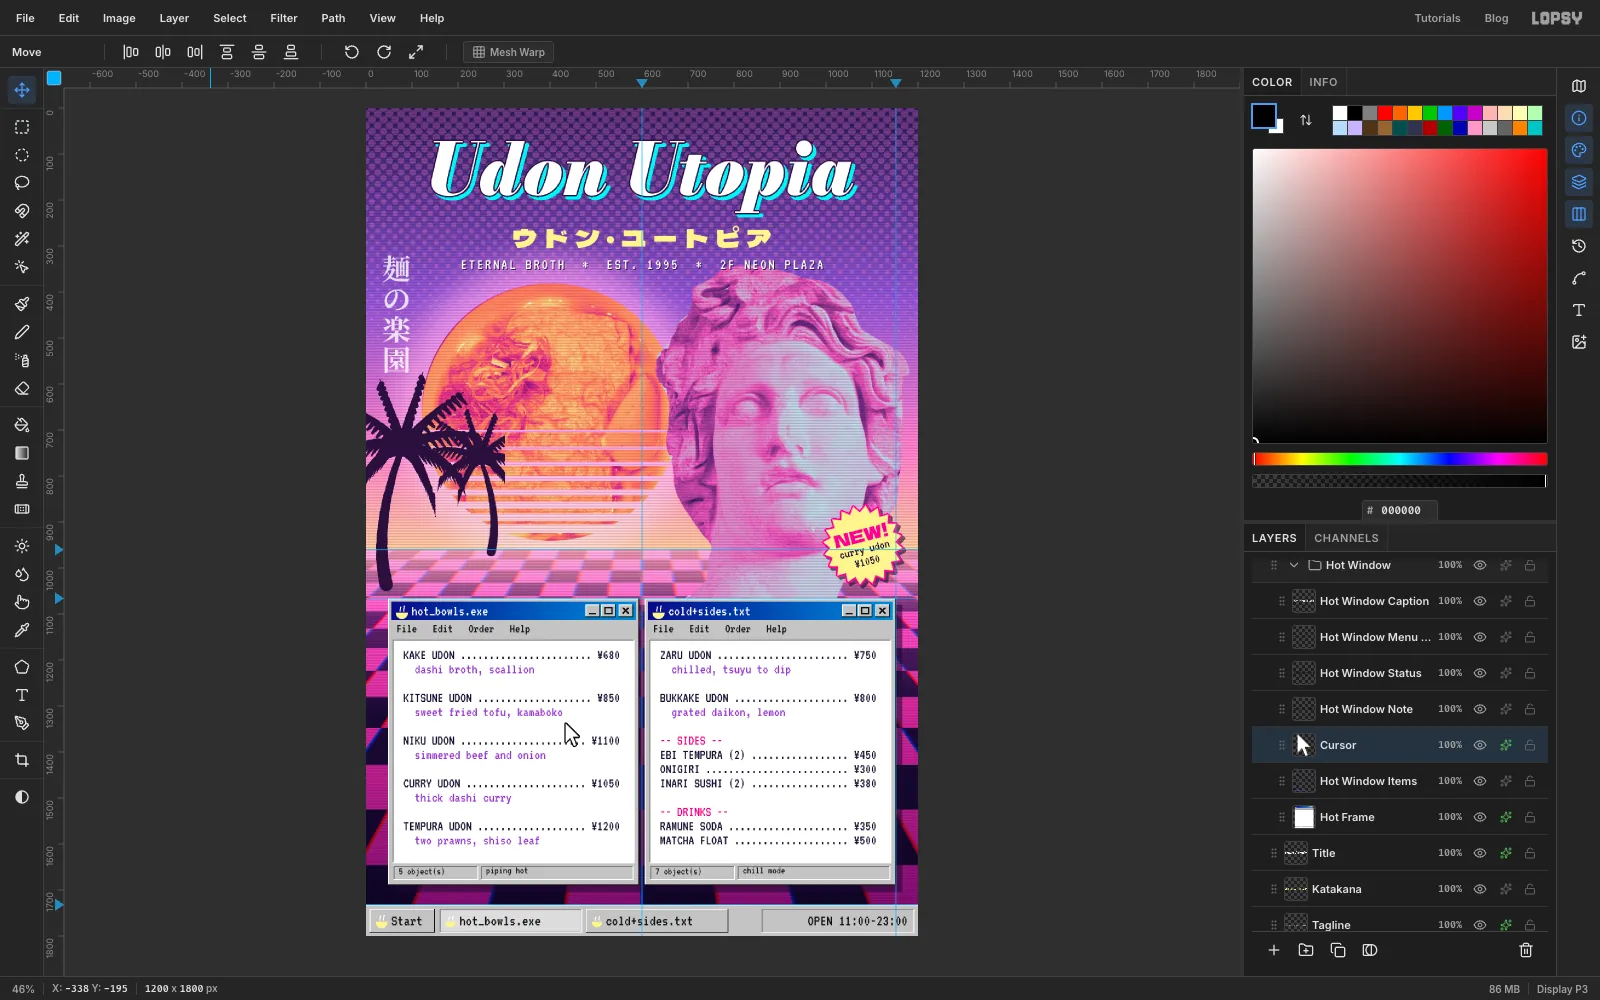
This tutorial uses all of that for a menu for an imaginary noodle bar called Udon Utopia. The joke is in the middle of the page. Helios, the Greek sun god, gazes at a striped vaporwave sunset, and the sun is really an overhead photo of a bowl of kitsune udon. The menu itself is two program windows on a retro desktop, with a taskbar along the bottom.
The menu is 1200 × 1800 px. You'll need two photos, both free to use from Wikimedia Commons. One is Head Helios AM Rhodes E49.jpg, a marble head of Helios in the Archaeological Museum of Rhodes (public domain). The other is Kitsune udon of Nakau.jpg, a bowl of udon shot from above (CC0). Download the large versions before you start.
The tools you'll meet along the way:
- the Lasso and Select → Shrink / Feather / Inverse to cut out a photo
- the Move tool's handles to scale, squash and rotate, and its Perspective mode for the floor
- Edit → Define Pattern and Fill with Pattern for a checkerboard and scanlines
- group Gradient Maps to recolour the photos
- Filter → Halftone, Chromatic Aberration, Pixel Stretch, Brightness/Contrast and Bloom
- the Brush with Taper for palm trees, and the Pencil for 3D bevels
- Bodoni Moda, Dela Gothic One, Noto Serif JP (as vertical text) and the pixel font VT323, with per-line colours
- Stroke, Drop Shadow and Color Overlay effects, and the Screen and Multiply blend modes
- groups: Duplicate a whole window, move it, then retype it
The palette:
-
Sky
-
Floor
-
floor shade
-
palms
-
Bust map
-
Sun map
-
Window grey
-
bevel shade
-
title bar
-
Title shadow
-
katakana
-
menu ink
-
Descriptions
-
sub-heads
-
sticker
-
Create the document and paint the sky
Choose File → New, set the unit to Pixels, type 1200 × 1800 and click Create. A new document starts with a white Background and an empty Layer 1, which you'll delete in a moment.
Drop some guides. Click the top ruler at 600 (the centre) and 1152. Click the left ruler at 960 for the horizon, 1066 for the top of the menu windows and 1732 for the top of the taskbar. The status bar at the bottom of the window shows the pointer's X and Y, so you can check where you are before you click. You'll use that readout all through this tutorial.
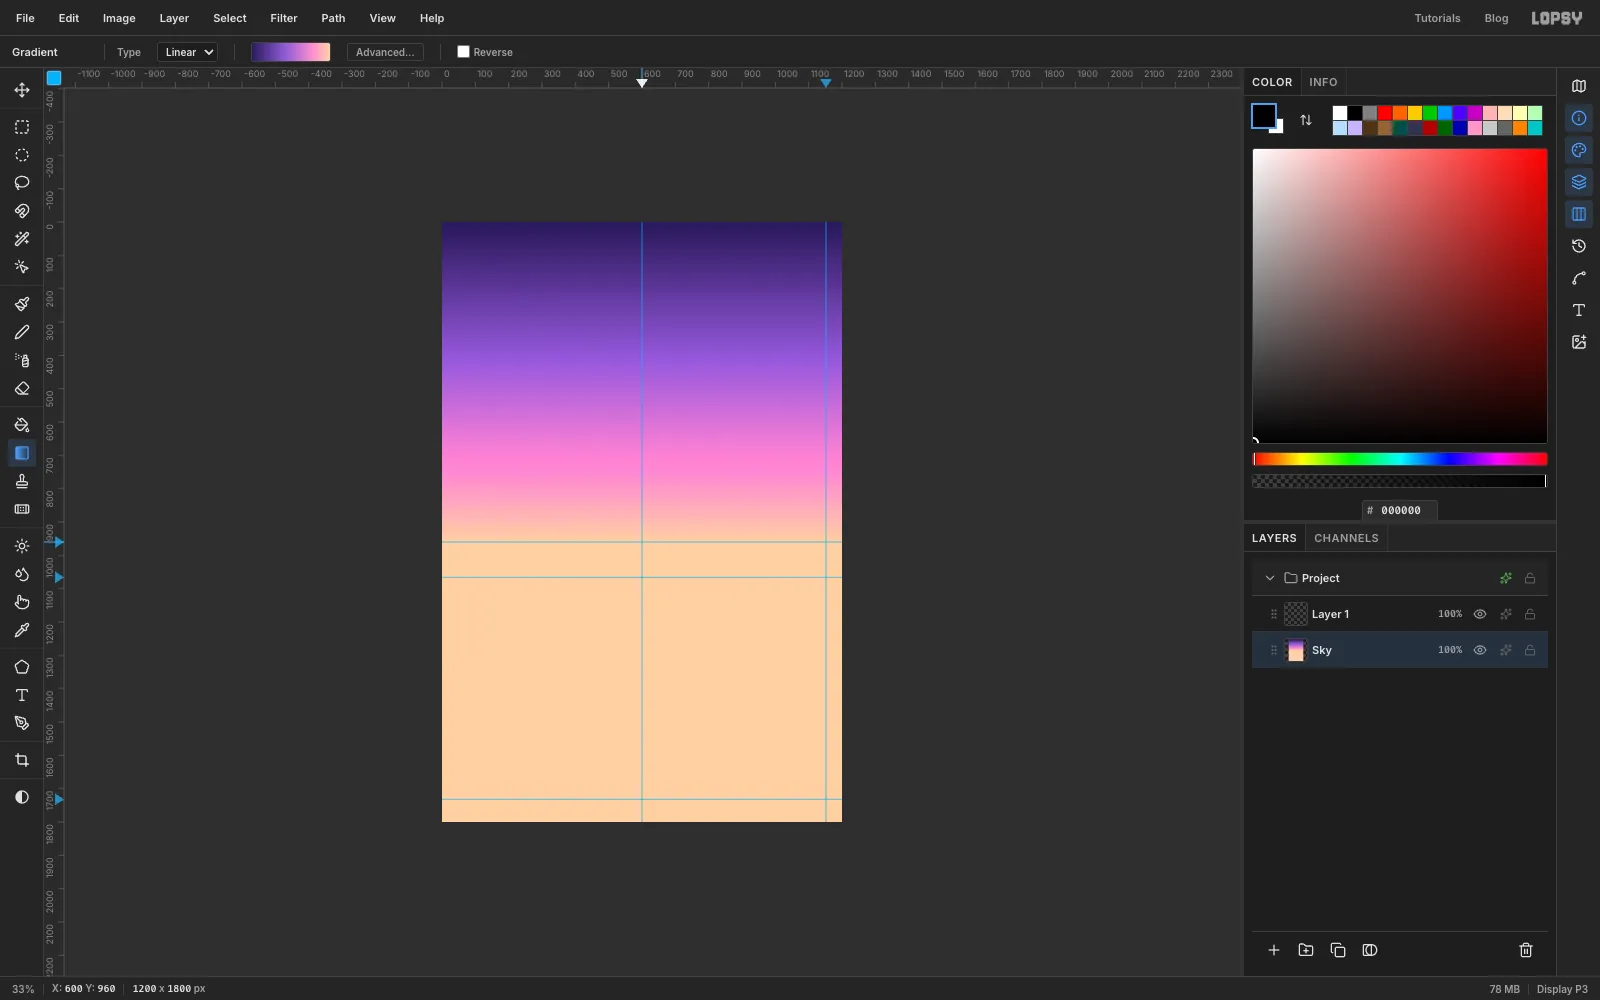
Double-click Background, rename it Sky, and pick the Gradient tool from the toolbox (it has no shortcut). Leave Type on Linear, click Advanced…, and set four stops: at the left end, at 42 %, at 78 % and at the right end. To add a stop, click the bar that far along it (42 % is a little under halfway), then type its colour in the Hex field. Every later gradient starts from the last one you set, so open Advanced… each time and add or delete stops until you have the ones a step asks for. Click Done, then drag straight down from the top of the canvas to the horizon guide. Below the horizon the layer stays peach, which the floor will cover later.
-
Turn a black-to-white ramp into halftone dots
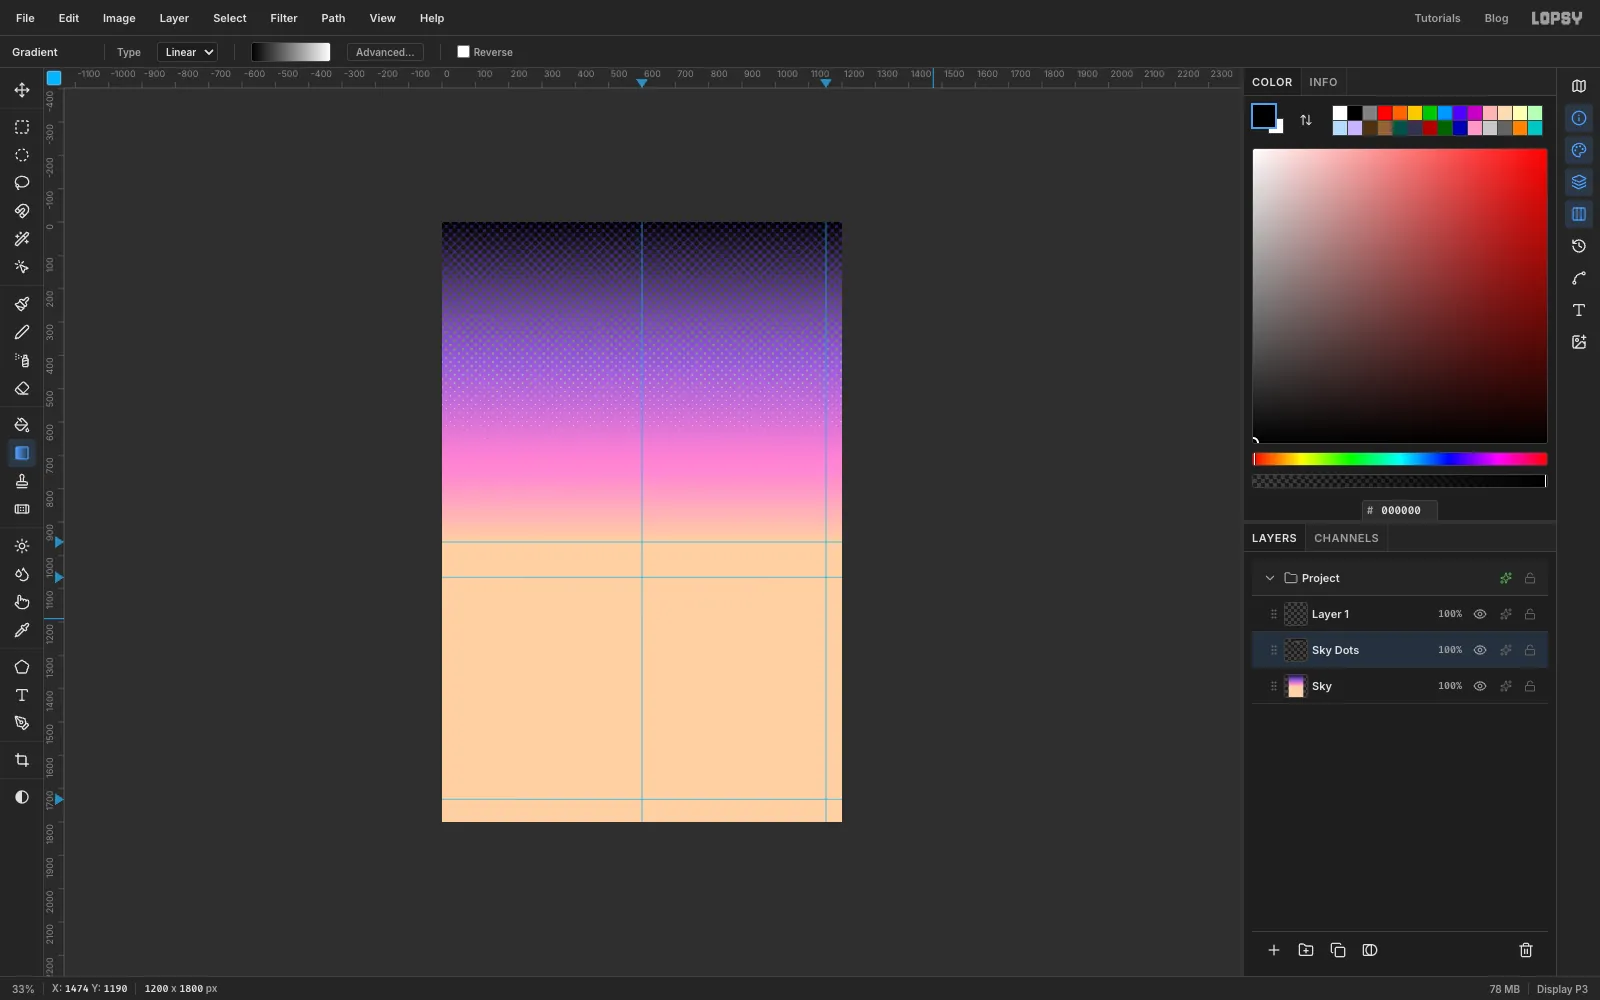
Add a layer with the + button and name it Sky Dots. Open the gradient's Advanced… editor again, delete the middle stops (click one, then Delete), and set the two ends to black and white . Drag from the top of the canvas down to about y 700.
Now choose Filter → Halftone… and set Dot Size 18, Angle 45 and Softness 0.6, and leave Density at 1. Click Apply. Dark areas become big dots and white areas print nothing, so the dots shrink to nothing down the sky.
-
Tint the dots pink
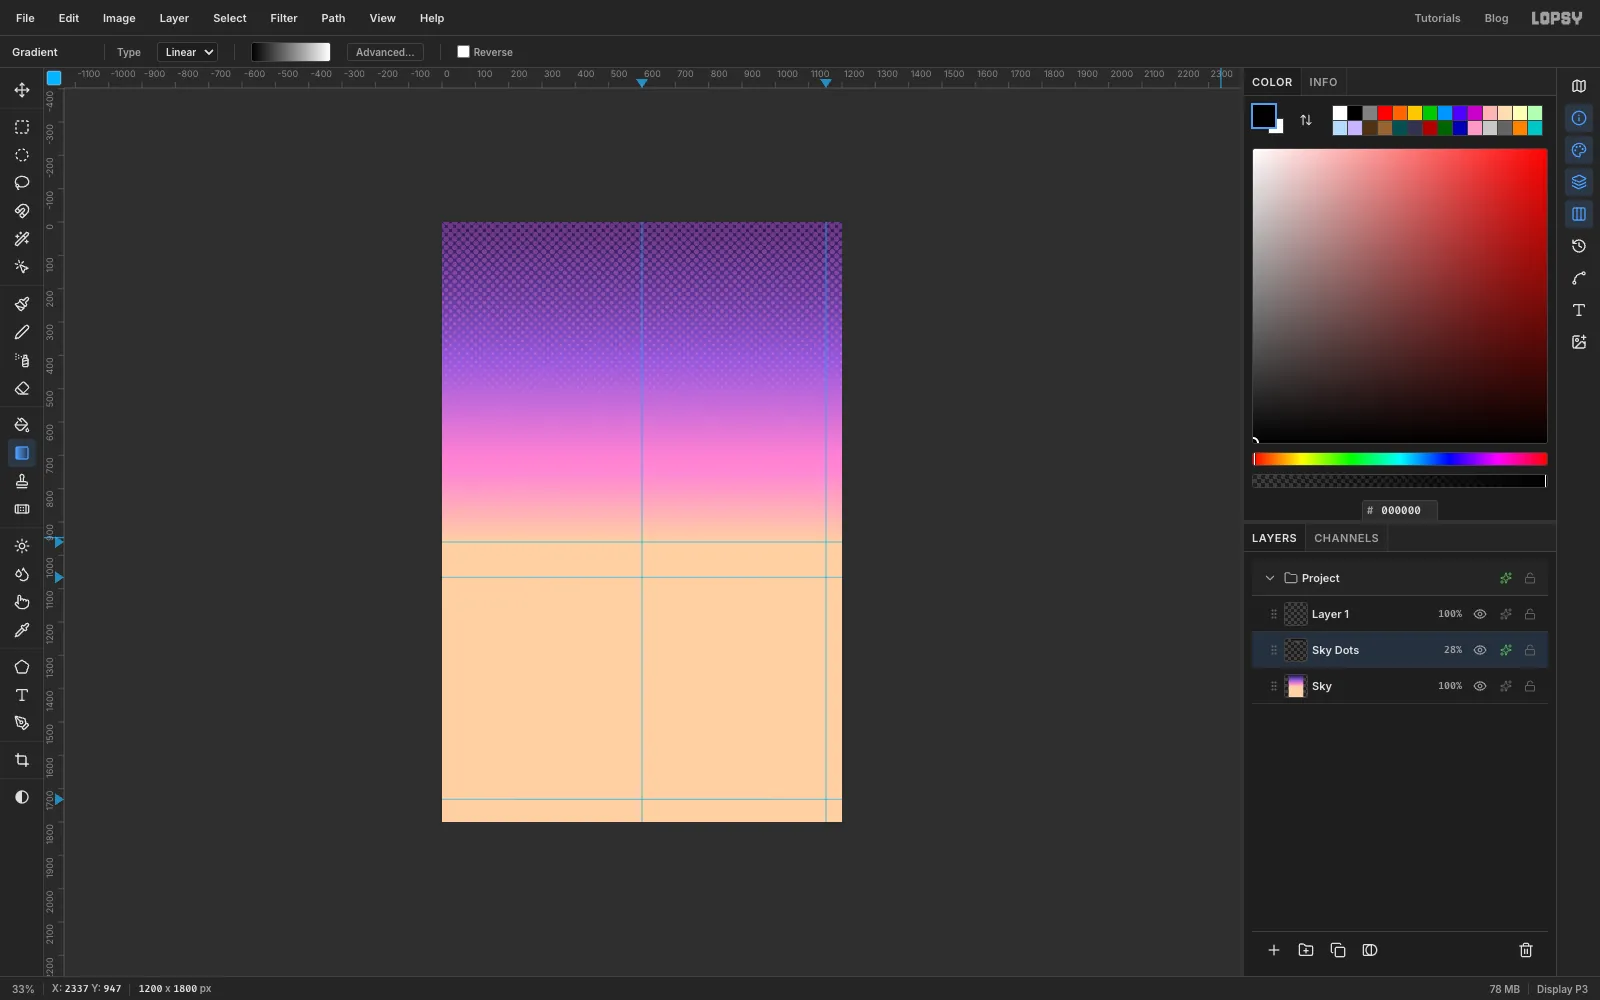
Click the fx button on the Sky Dots row to open the effects drawer. Tick Color Overlay and set its colour to . Close the drawer, click the row's opacity percentage and drag it down to 28 %. You now have a soft retro dot screen at the top of the sky.
-
Drop in the photo of Helios
First click the empty Layer 1 and delete it with the trash button at the bottom of the Layers panel. Then click Sky Dots and drag the Helios photo from your Downloads folder straight onto the canvas. Lopsy shrinks it to fit the canvas, puts it on a new layer directly above Sky Dots, and selects it. Rename the layer Helios and press Cmd+D to drop the selection.
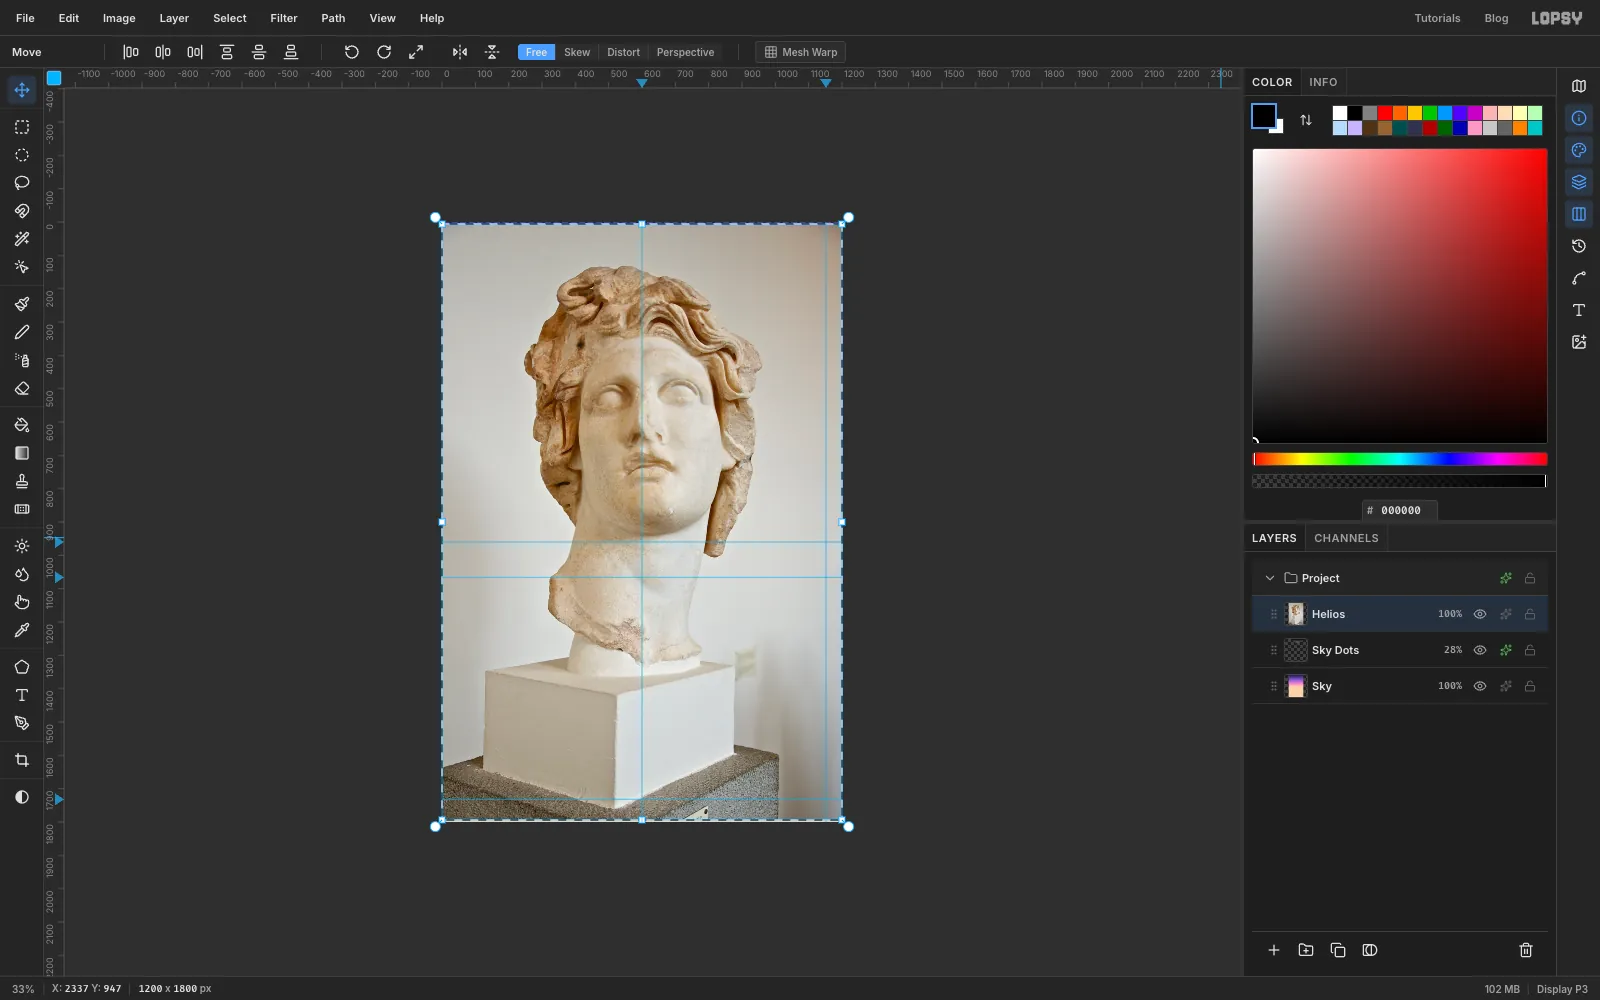
-
Lasso around the head
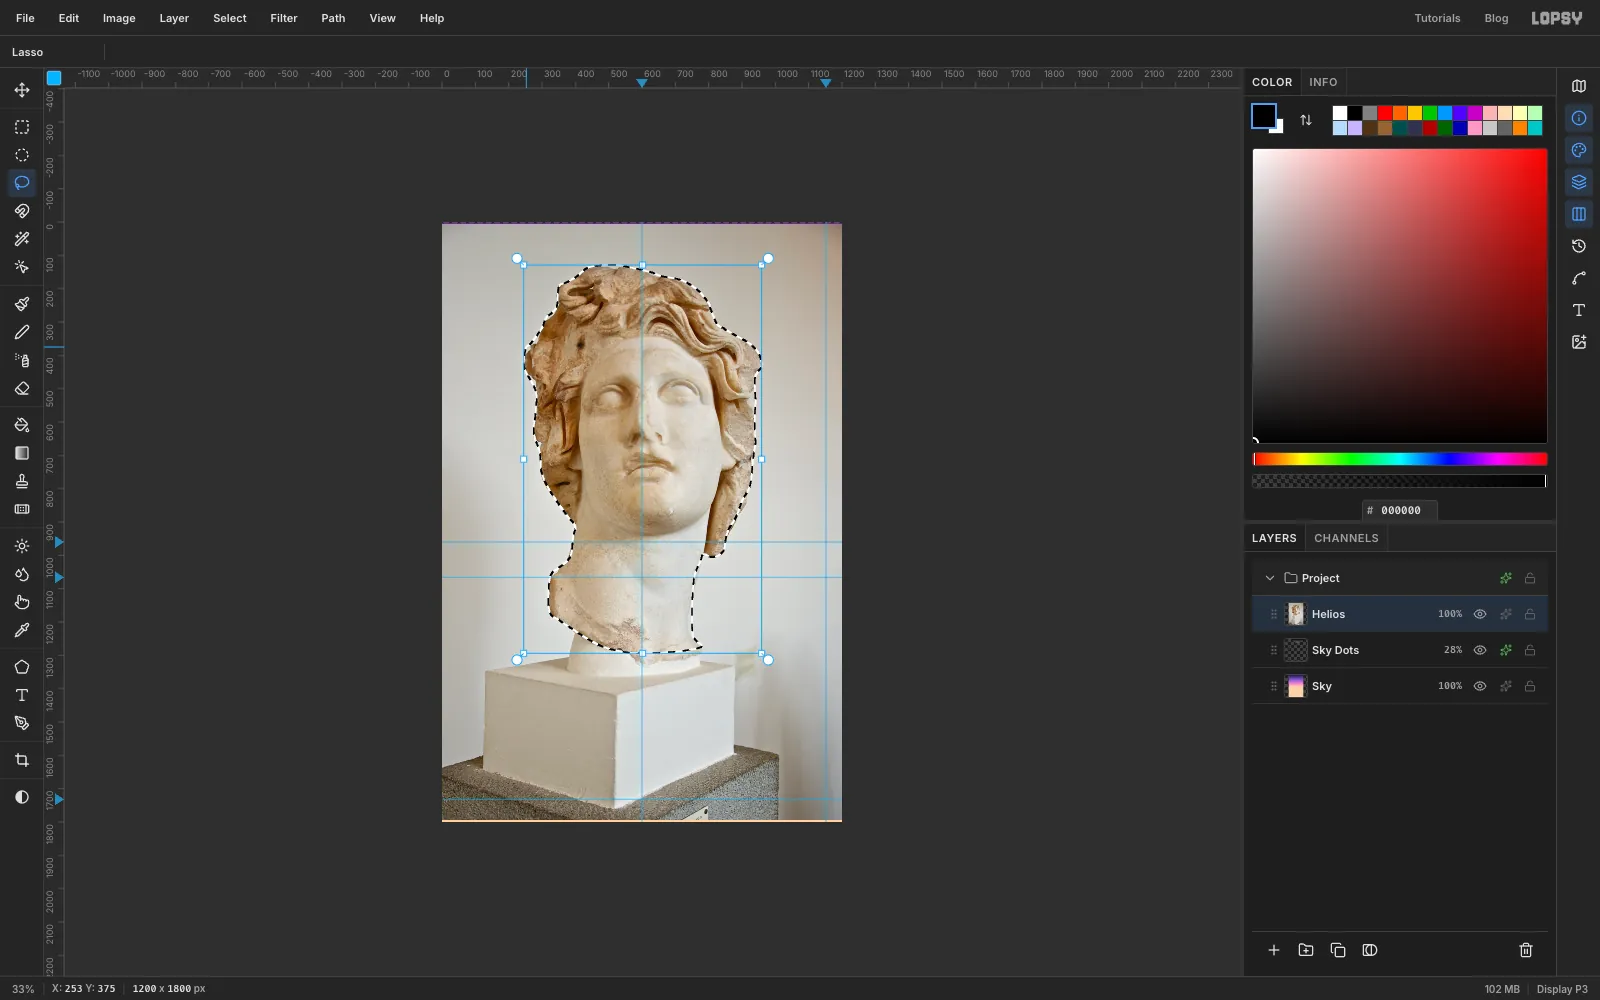
Pick the Lasso (L). Hold the mouse down and trace around the head: follow the outside of the curls loosely, come down the right side past the lock of hair that hangs beside the neck, and cut straight across the broken bottom of the neck, just above the white plinth. Go back up the left side and finish where you started. You don't have to follow every curl. At the size the bust ends up, a few pixels either way won't show.
-
Cut the head out
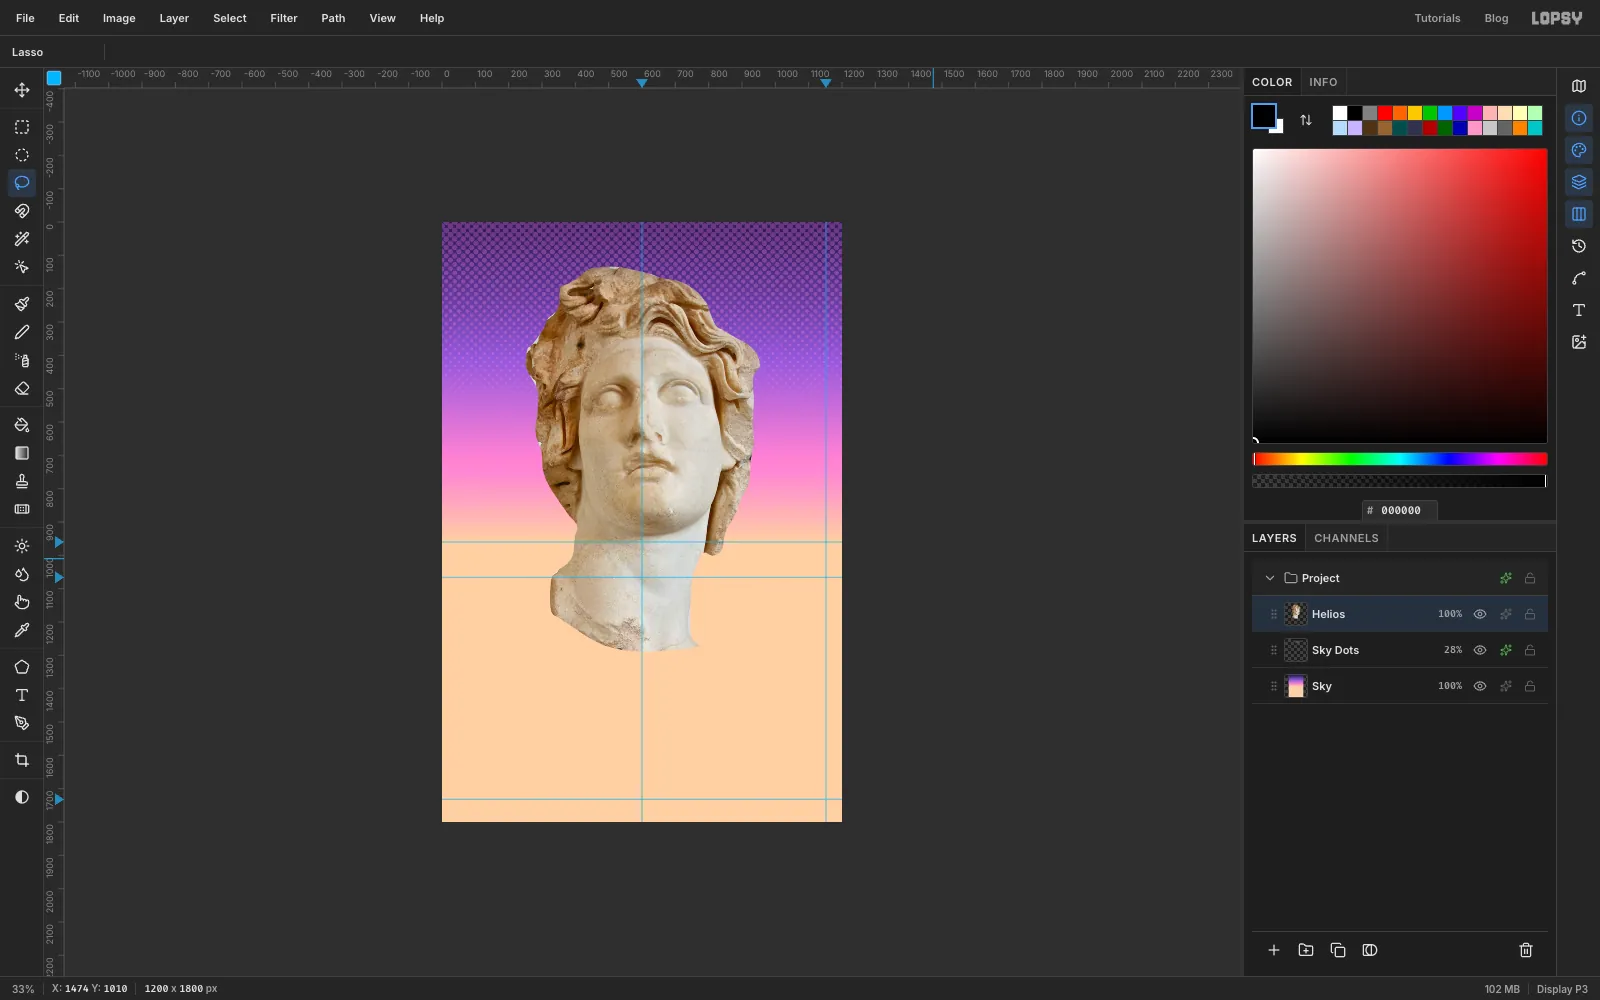
Pull the edge in a touch so no grey wall is left around the hair. Choose Select → Shrink… and enter 5, then Select → Feather… and enter 1 to soften the edge slightly. Choose Select → Inverse (Cmd+Shift+I) so everything except the head is selected, press Delete, then Cmd+D.
-
Scale the head down
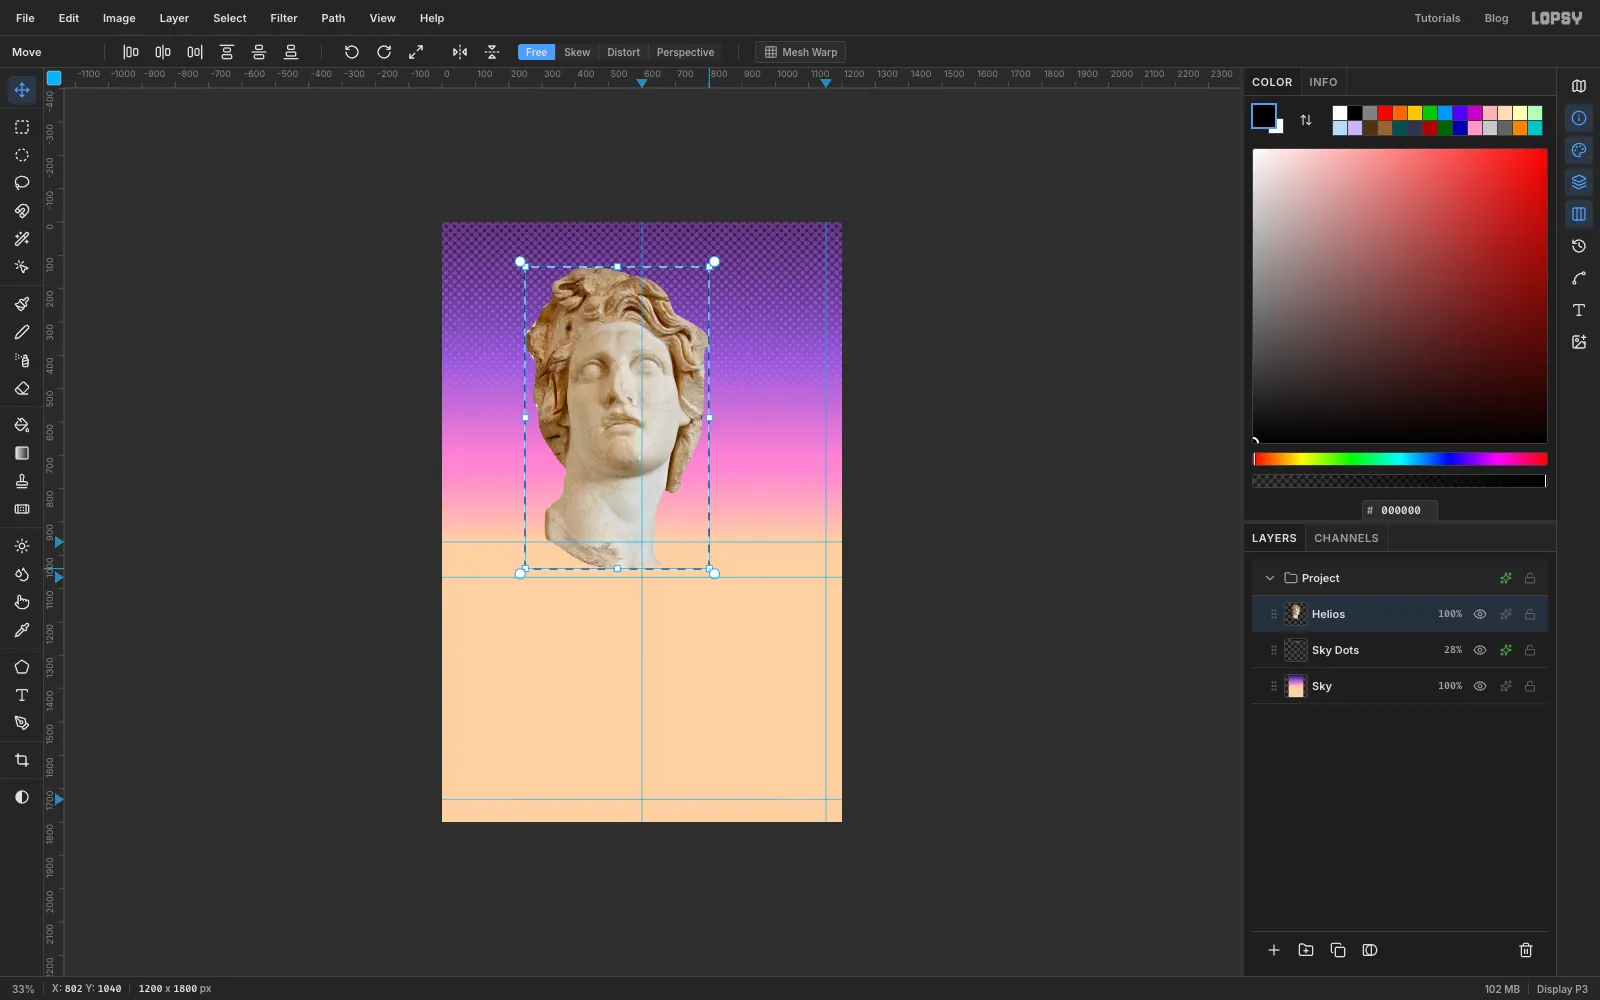
Draw a Rectangular Marquee (M) just around the head, then press V for the Move tool so the transform handles appear. Hold Cmd (to keep the proportions) and drag the bottom-right corner handle up and to the left until the head is about 560 px wide, roughly 78 % of its size. The left of the hair is at about x 248, so stop when the pointer reads about x 805 in the status bar. Press Enter to apply and Cmd+D to deselect.
-
Place the bust on the right
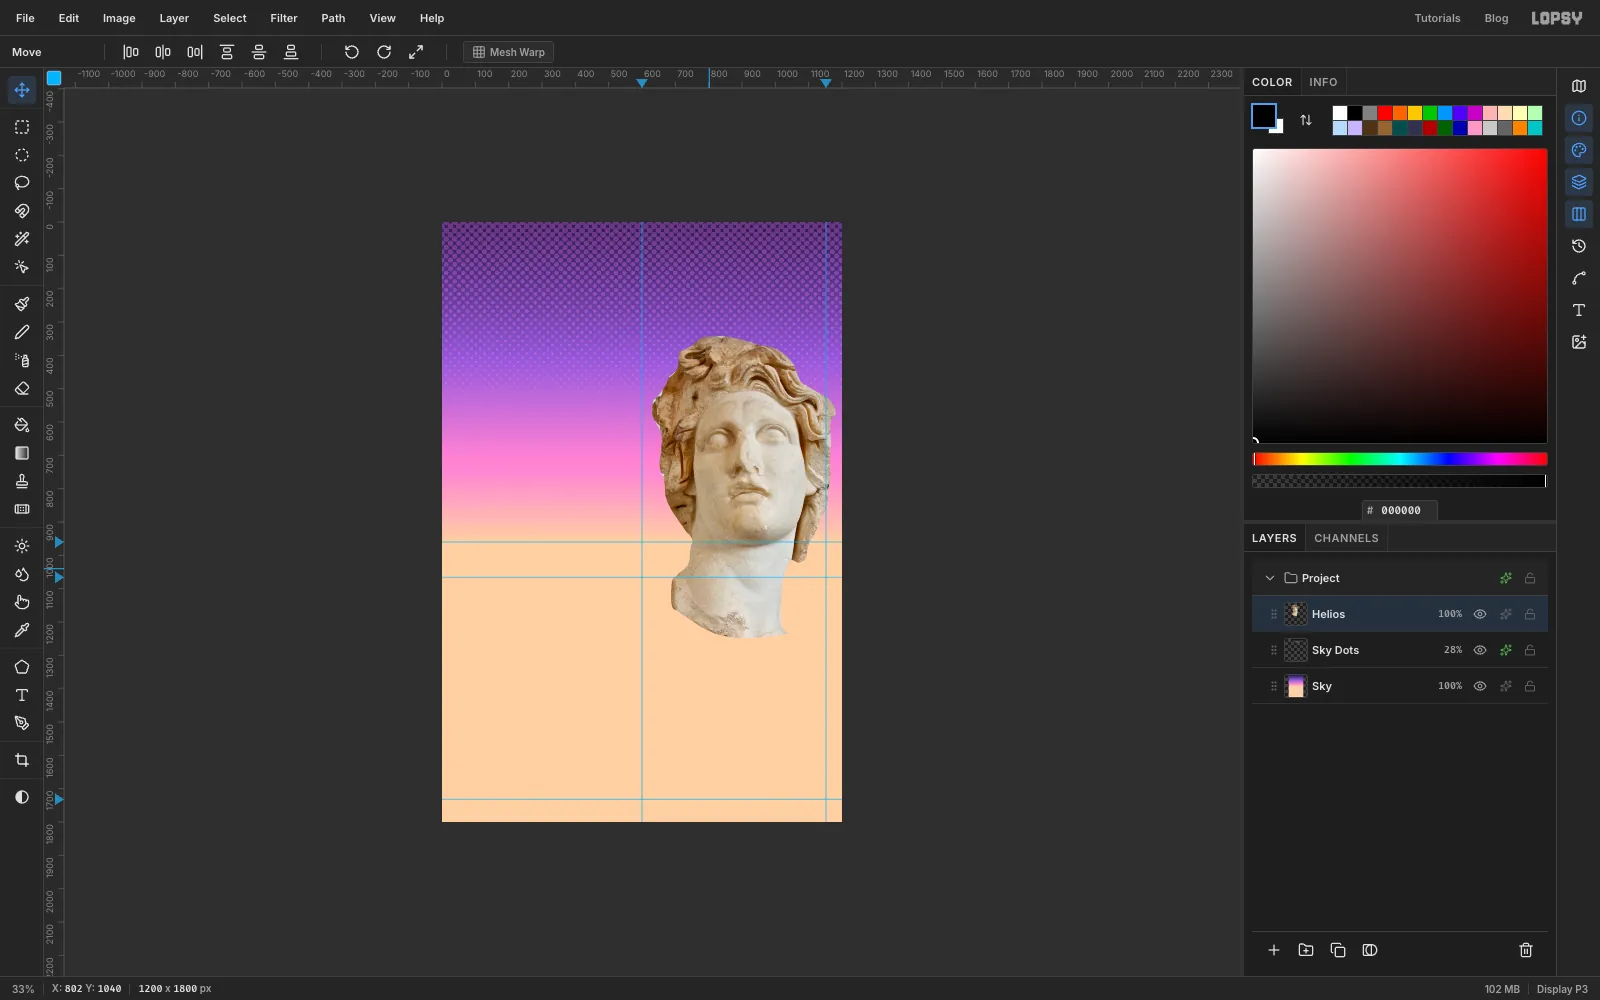
Still on the Move tool, drag the head over to the right. The top of the hair sits at about y 340 and its right edge comes almost to the right edge of the canvas. Helios should look up and to the left, toward the empty sky where the sun will go. The bottom of the neck can hang below the horizon, because the menu windows will cover it.
-
Tint the bust with a Gradient Map
Gradient Maps live on groups, so the bust goes in one. First click the + button to add an empty layer called Scanlines. It stays empty until near the end, but it matters now. A new layer added while a group row is selected goes inside that group, so you'll click Scanlines whenever you want to start something new above the bust.
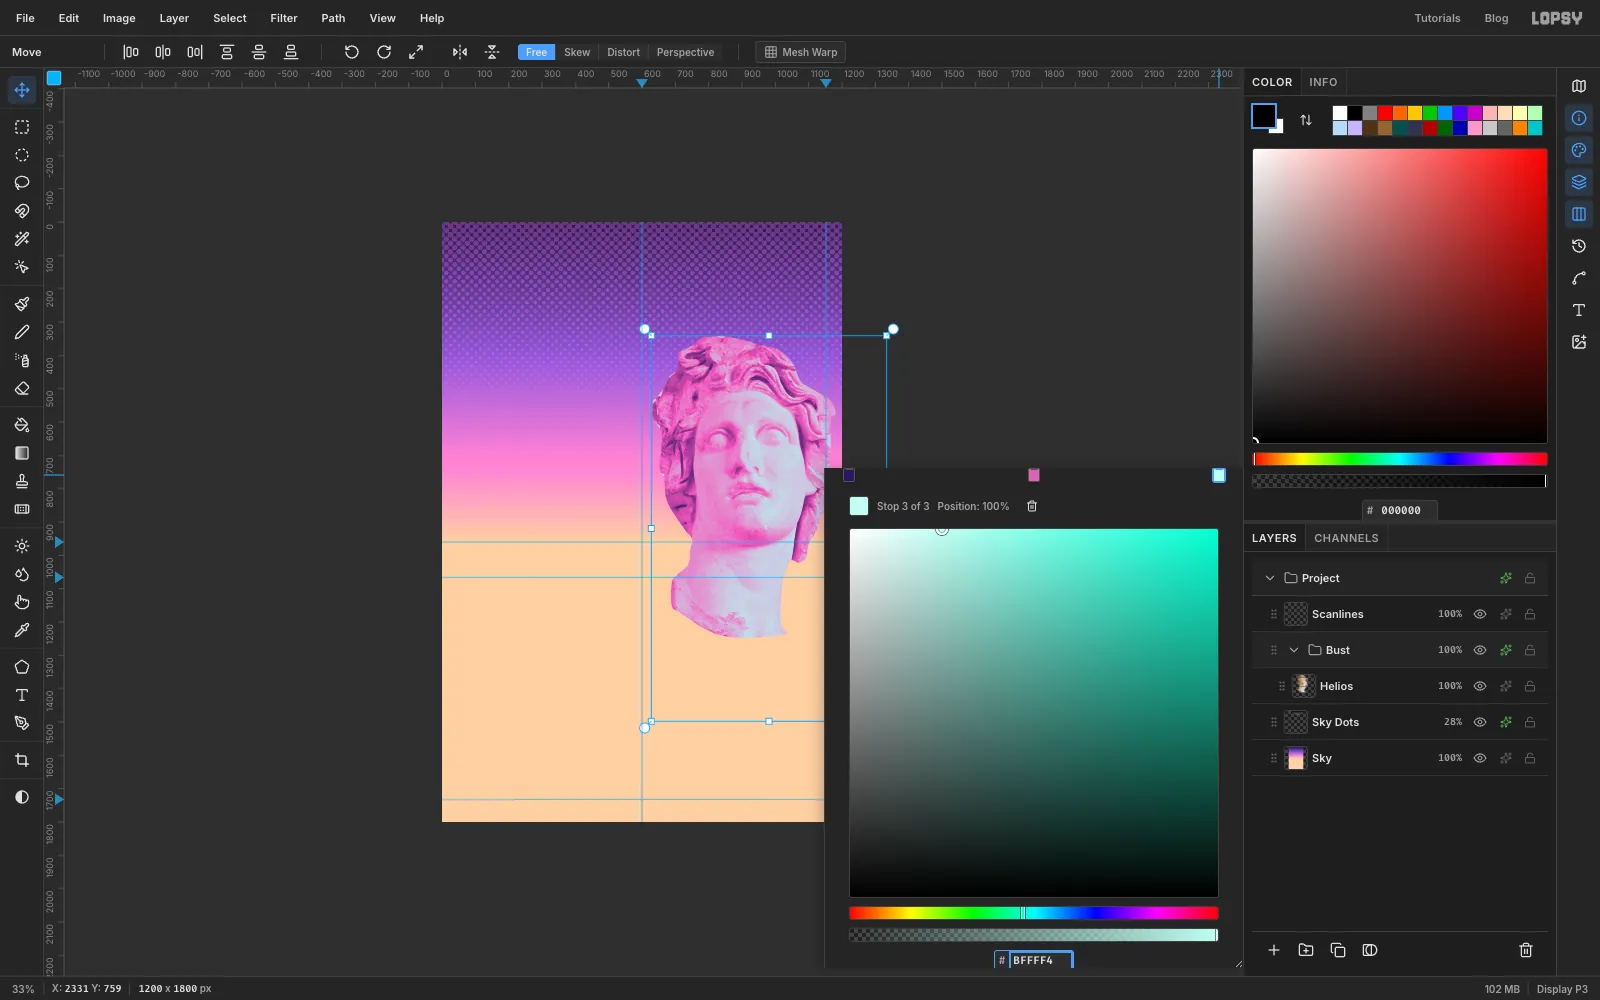
Click Helios again and choose Layer → Group Layers. Name the group Bust. Click the group's fx button, then Add Adjustment → Gradient Map. Click the middle of the gradient bar to add a third stop, then click each stop and type its hex: on the left, in the middle, on the right. Shadows go violet, midtones hot pink and highlights icy cyan, the classic vaporwave statue.
-
Drop in the bowl of udon and circle it
Click Sky Dots, so the bowl lands below the bust, and drag the udon photo onto the canvas. Rename the layer Udon Sun and press Cmd+D.
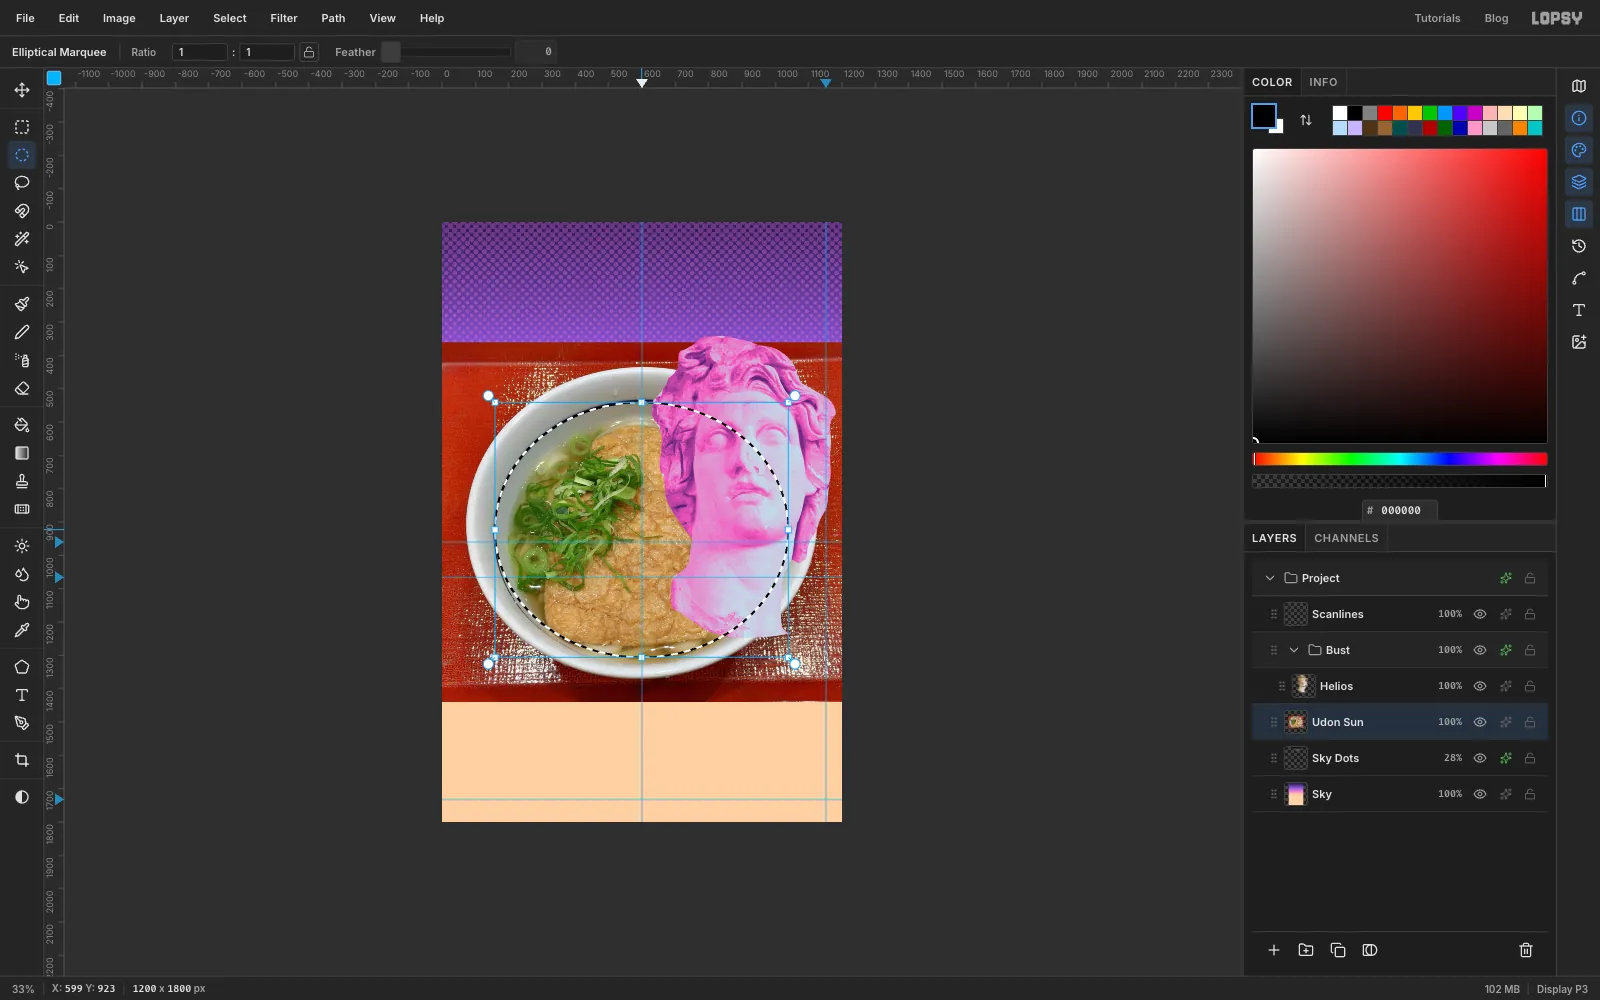
The bowl has a thin blue ring painted just inside its white rim. Pick the Elliptical Marquee and drag an oval that sits just inside that blue line, so you keep the broth, noodles, tofu and fishcake and lose the red tray and most of the white rim. Keep the oval a little inside the line, or a sliver of rim will show at the edge. The bowl was shot from slightly in front, so the ring is a little wider than it is tall. Follow it, and you'll make it round in a moment.
-
Cut out the bowl
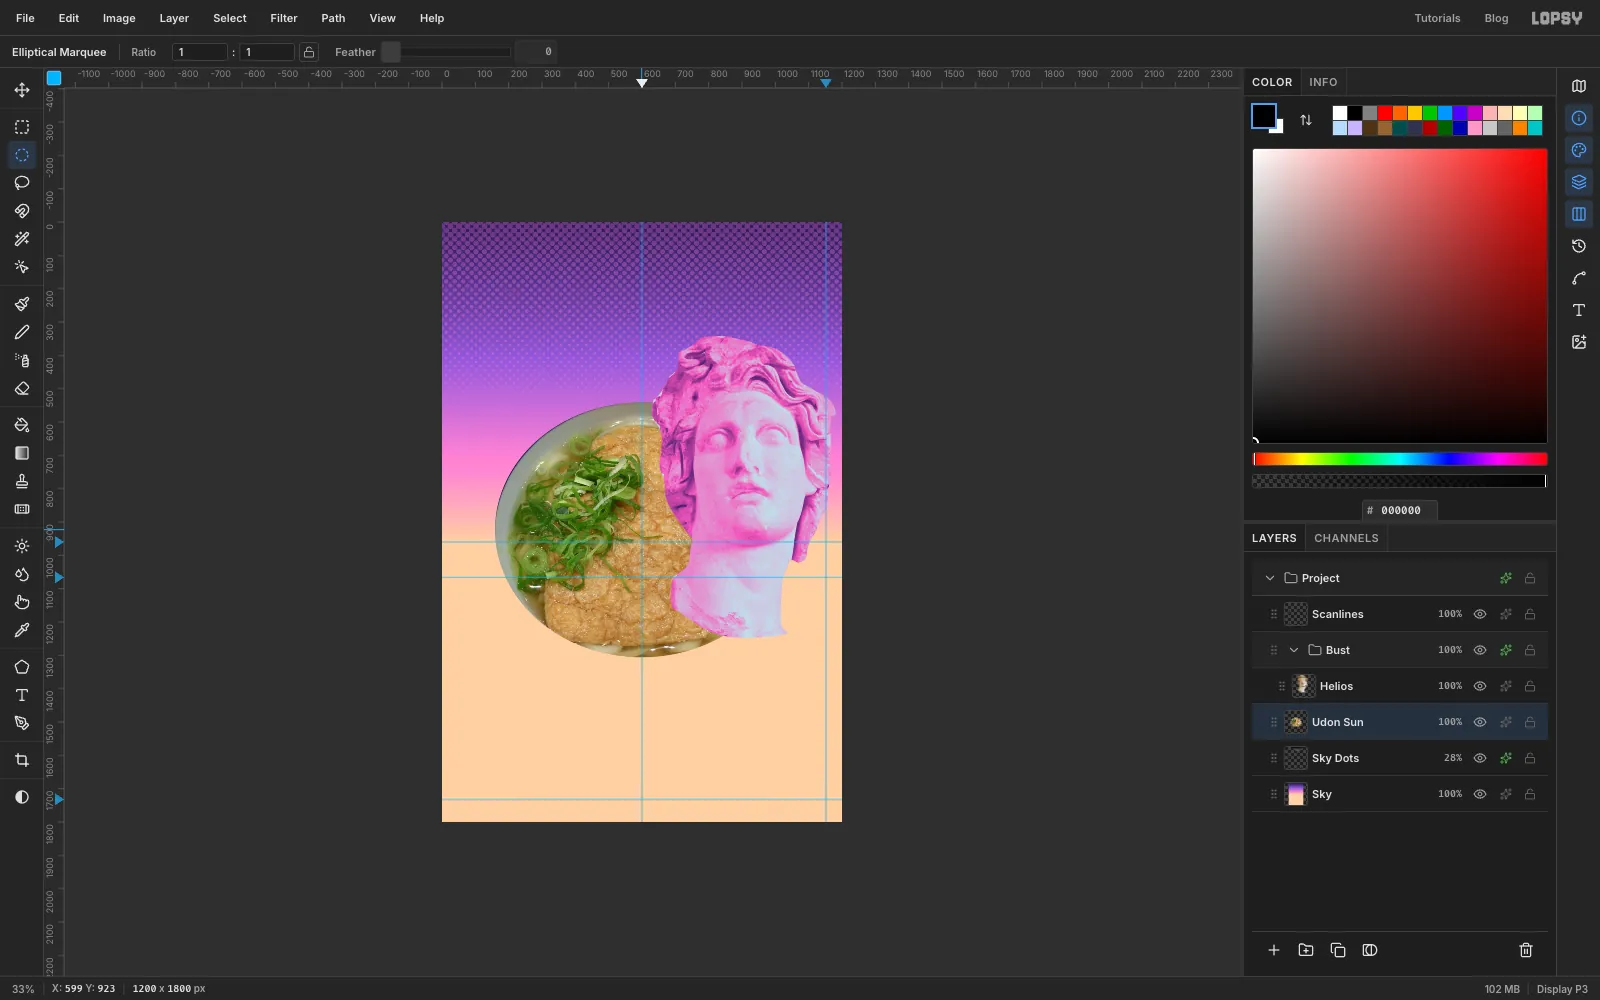
Choose Select → Inverse, press Delete and then Cmd+D. You're left with an oval of noodles and fried tofu.
-
Squash the oval into a circle
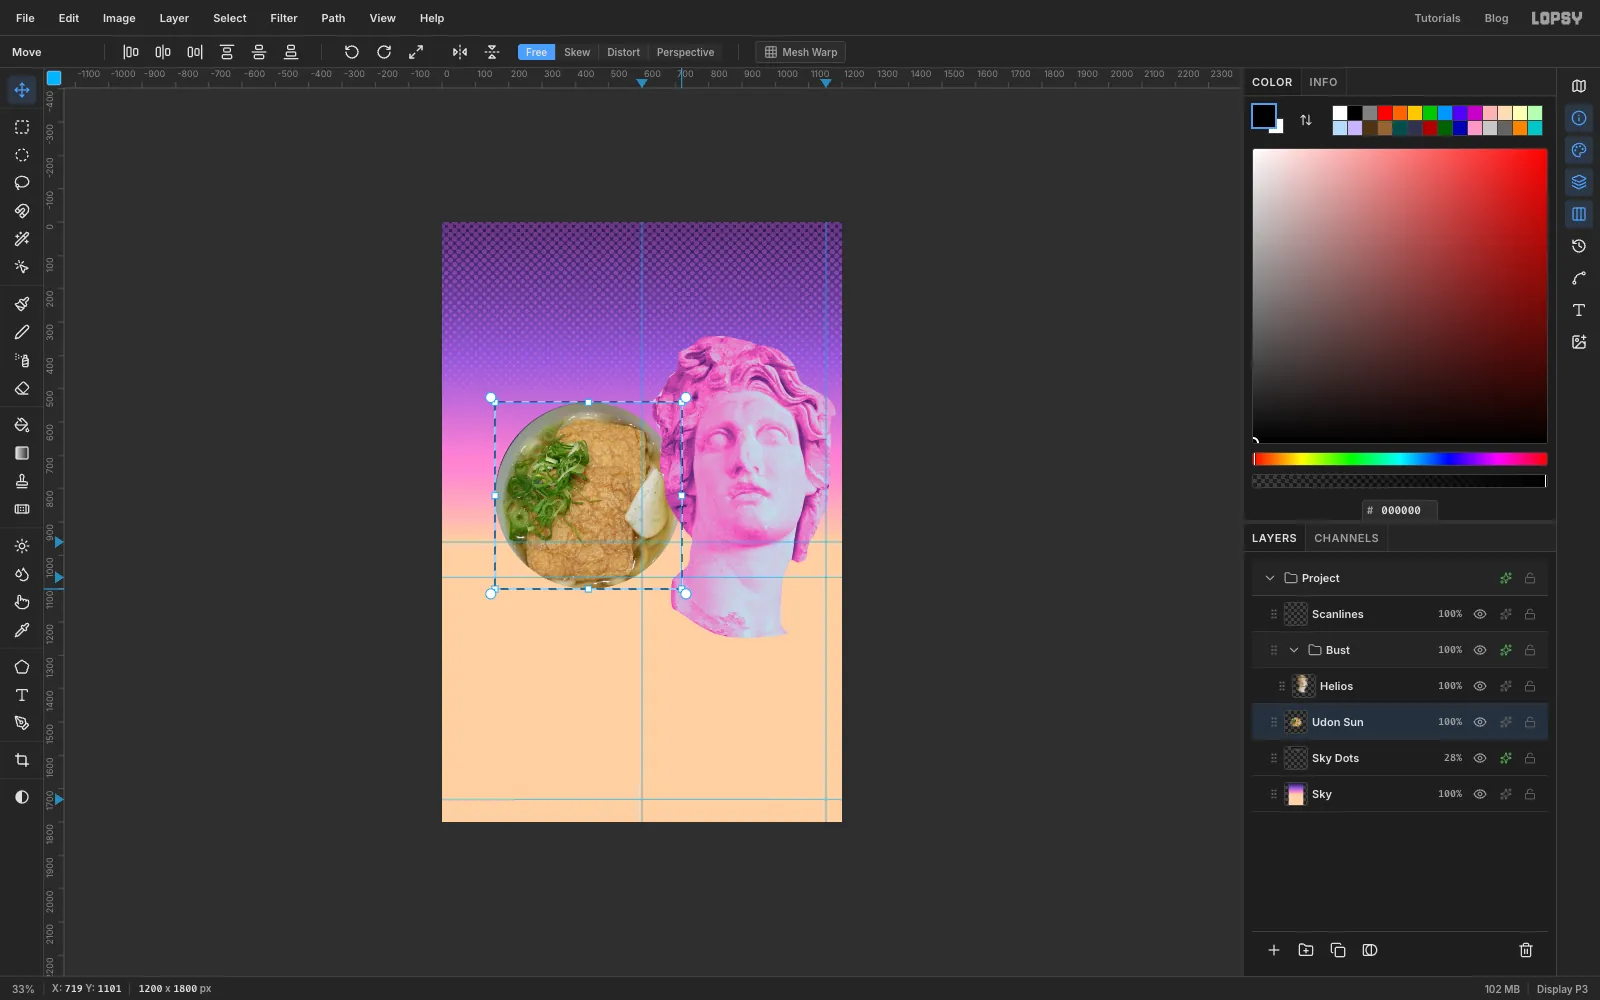
Draw a Rectangular Marquee exactly around the oval. With the default photo fit it runs from about (159, 541) to (1039, 1306). Press V. This time don't hold Cmd: drag the bottom-right handle up and to the left to about (719, 1101), the top-left corner plus 560 each way, so the box becomes a 560 × 560 square. The width shrinks a little more than the height, so the oval becomes a circle. Press Enter, then Cmd+D.
-
Move the sun into place
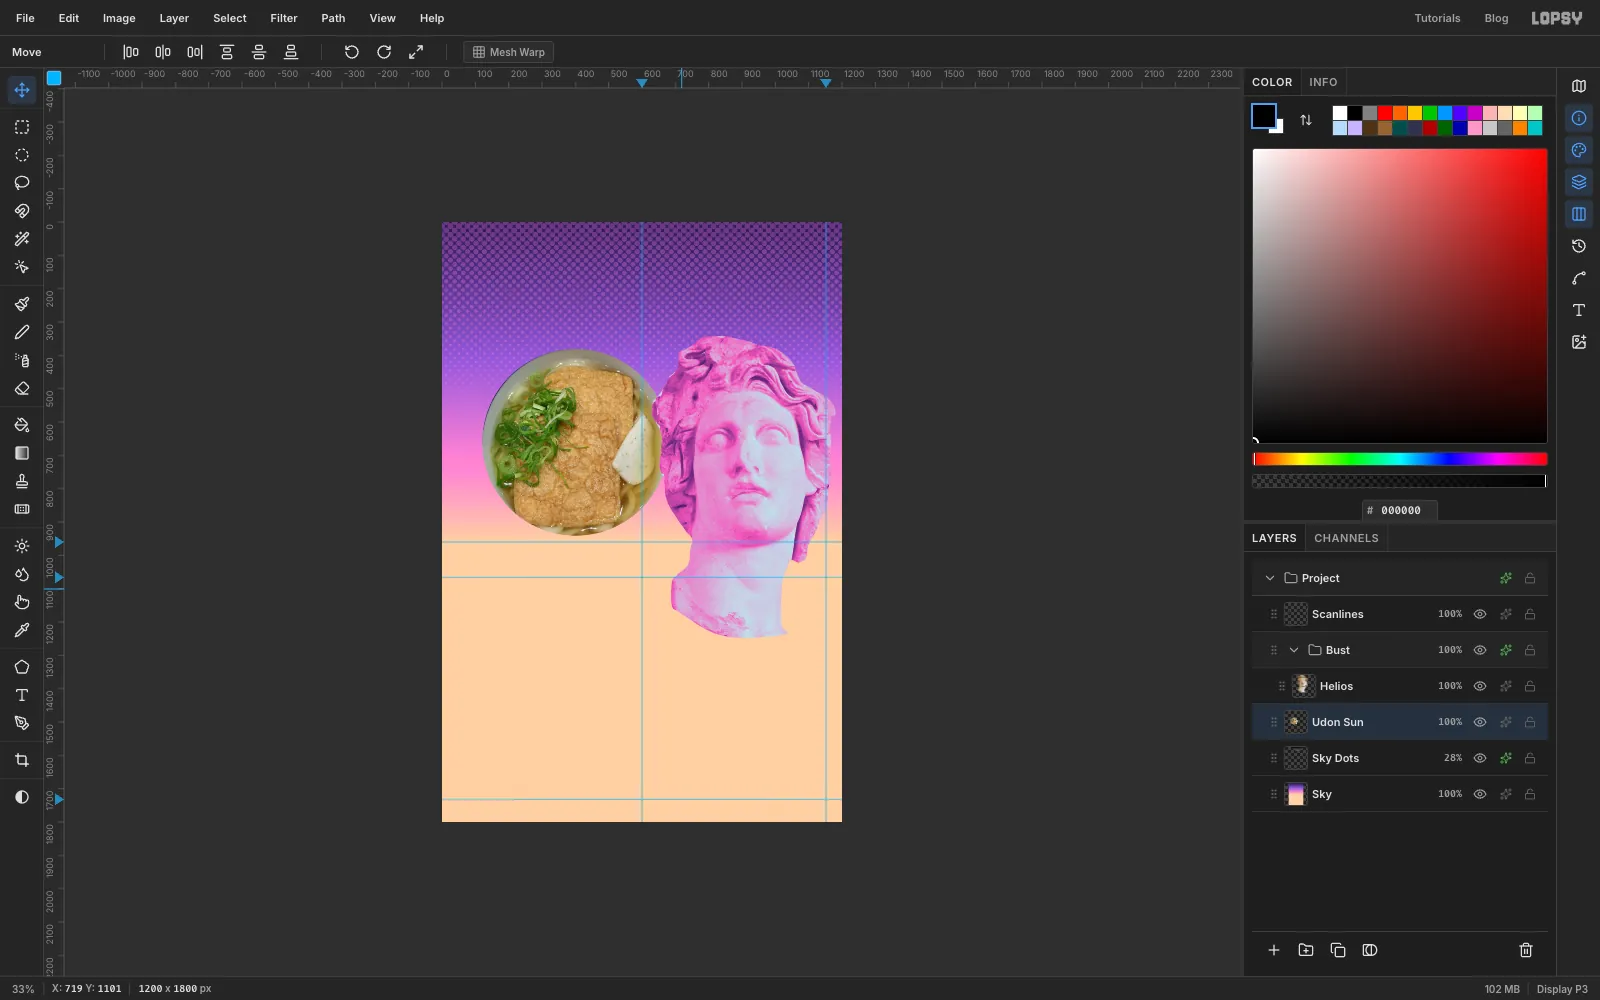
Drag the circle with the Move tool so its centre is at about (400, 660). Its left edge sits about 120 px in from the side of the canvas, its bottom stops just above the horizon at about y 940, and the bust's hair overlaps its right edge a little.
-
Cut the sunset stripes
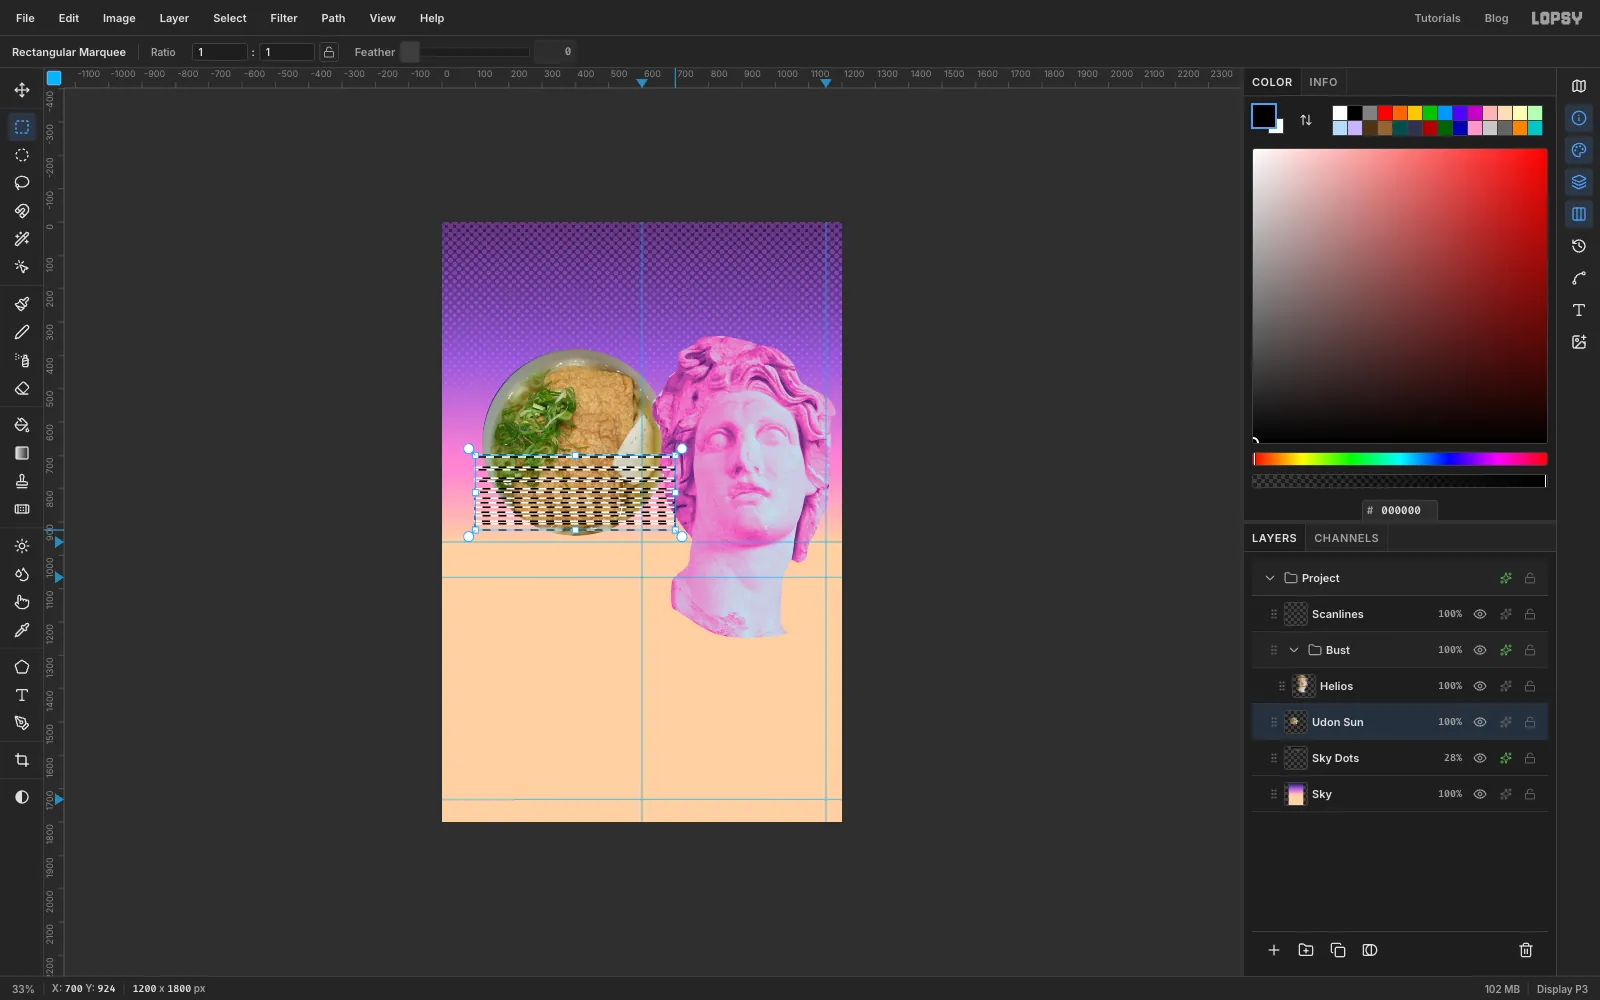
The stripes that cut through a synthwave sun get thicker and closer together toward the bottom. Zoom to 100 % so you can see single pixels. With the Rectangular Marquee, drag a band right across the sun starting at y 700, only 5 px tall. Then hold Shift and add seven more bands below it, each 2 px taller than the one before. Start them at about y 736, 769, 800, 829, 856, 881 and 905. Let every band run past both sides of the circle. Press Delete to cut them out, then Cmd+D.
-
Draw one checker tile
Click Udon Sun and add a layer called Floor, so it sits above the sun and below the bust.
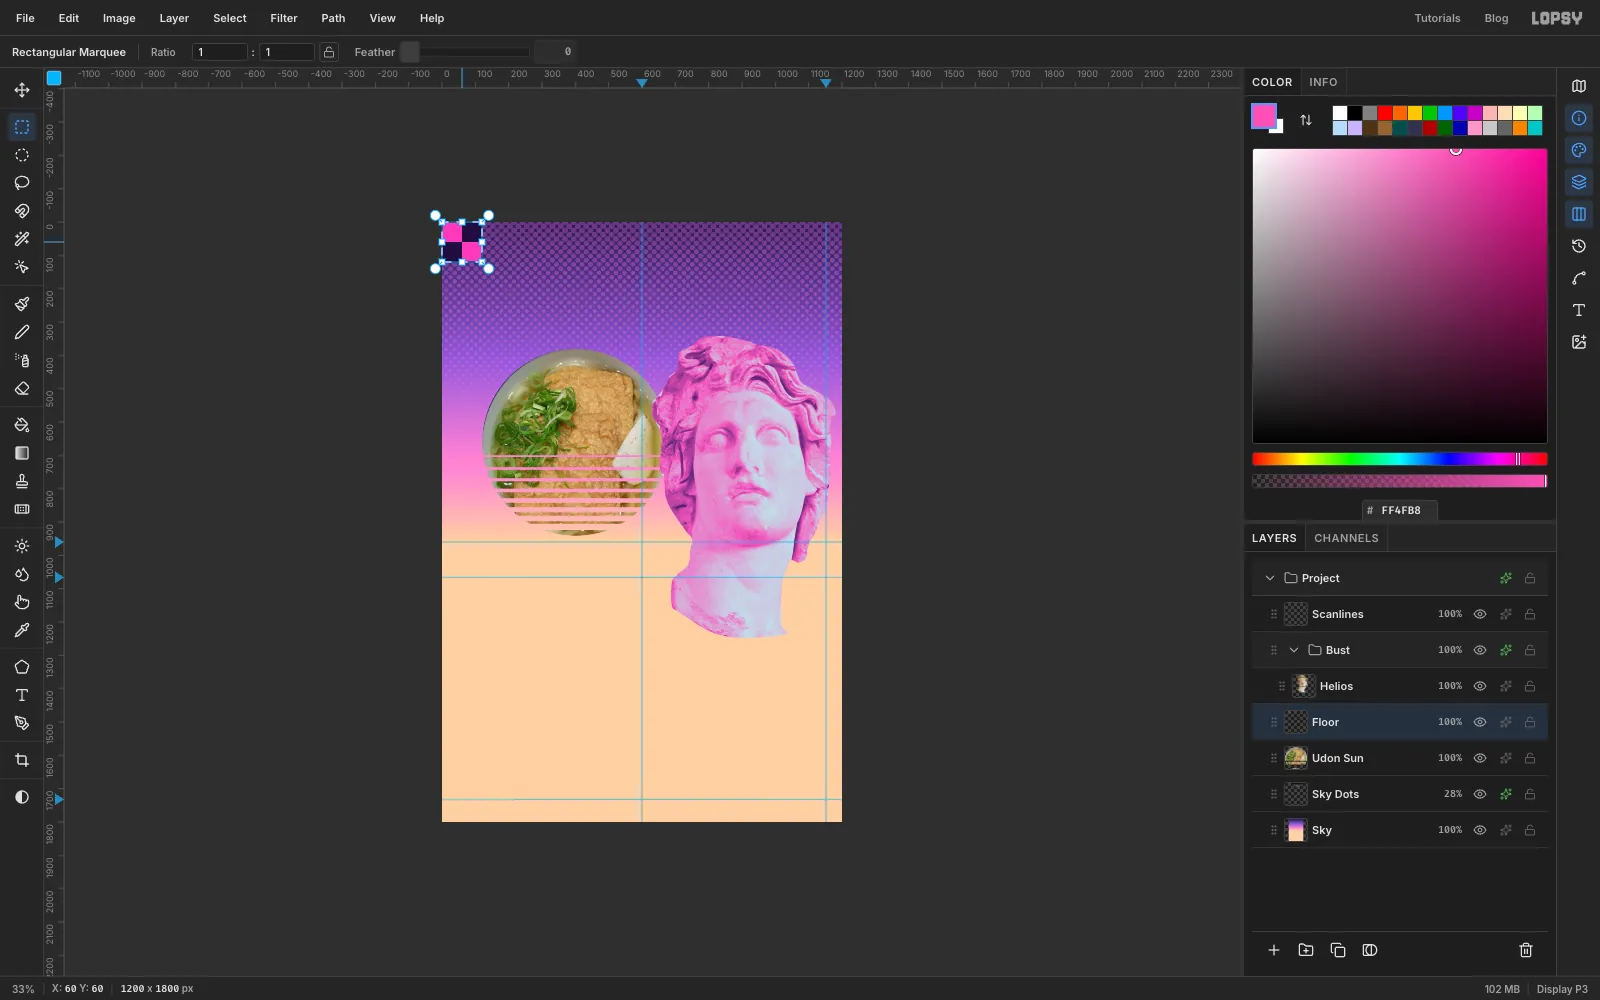
Zoom in on the top-left corner. Set the foreground colour to in the Color panel's hex field. Drag a marquee from the corner to (120, 120) and choose Edit → Fill. Switch to hot pink , drag a marquee from the corner to (60, 60), hold Shift and add a second square from (60, 60) to (120, 120), then Edit → Fill again. Drag a marquee around the whole 120 px tile and choose Edit → Define Pattern. Press Delete to clear the tile from the corner.
-
Fill the ground with the checkerboard
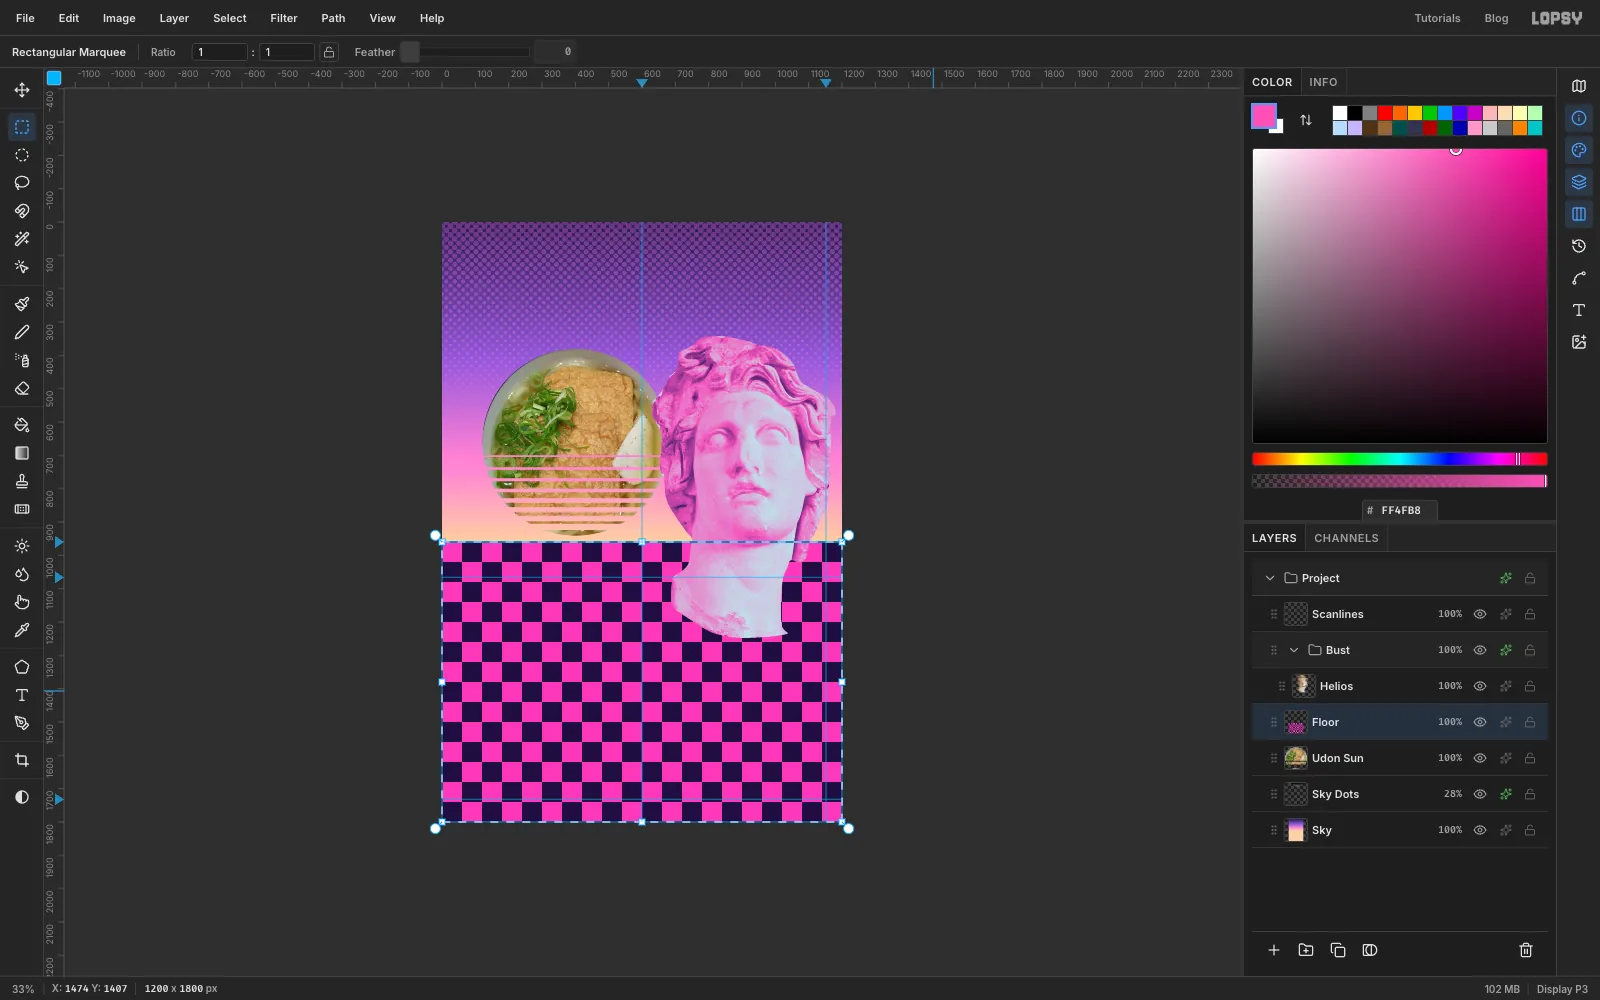
Drag a marquee from the horizon guide at the left edge down to the bottom-right corner of the canvas. Choose Edit → Fill with Pattern…, click your checker tile, and click Apply. Keep the selection, because the next step transforms it.
-
Pull the floor into perspective
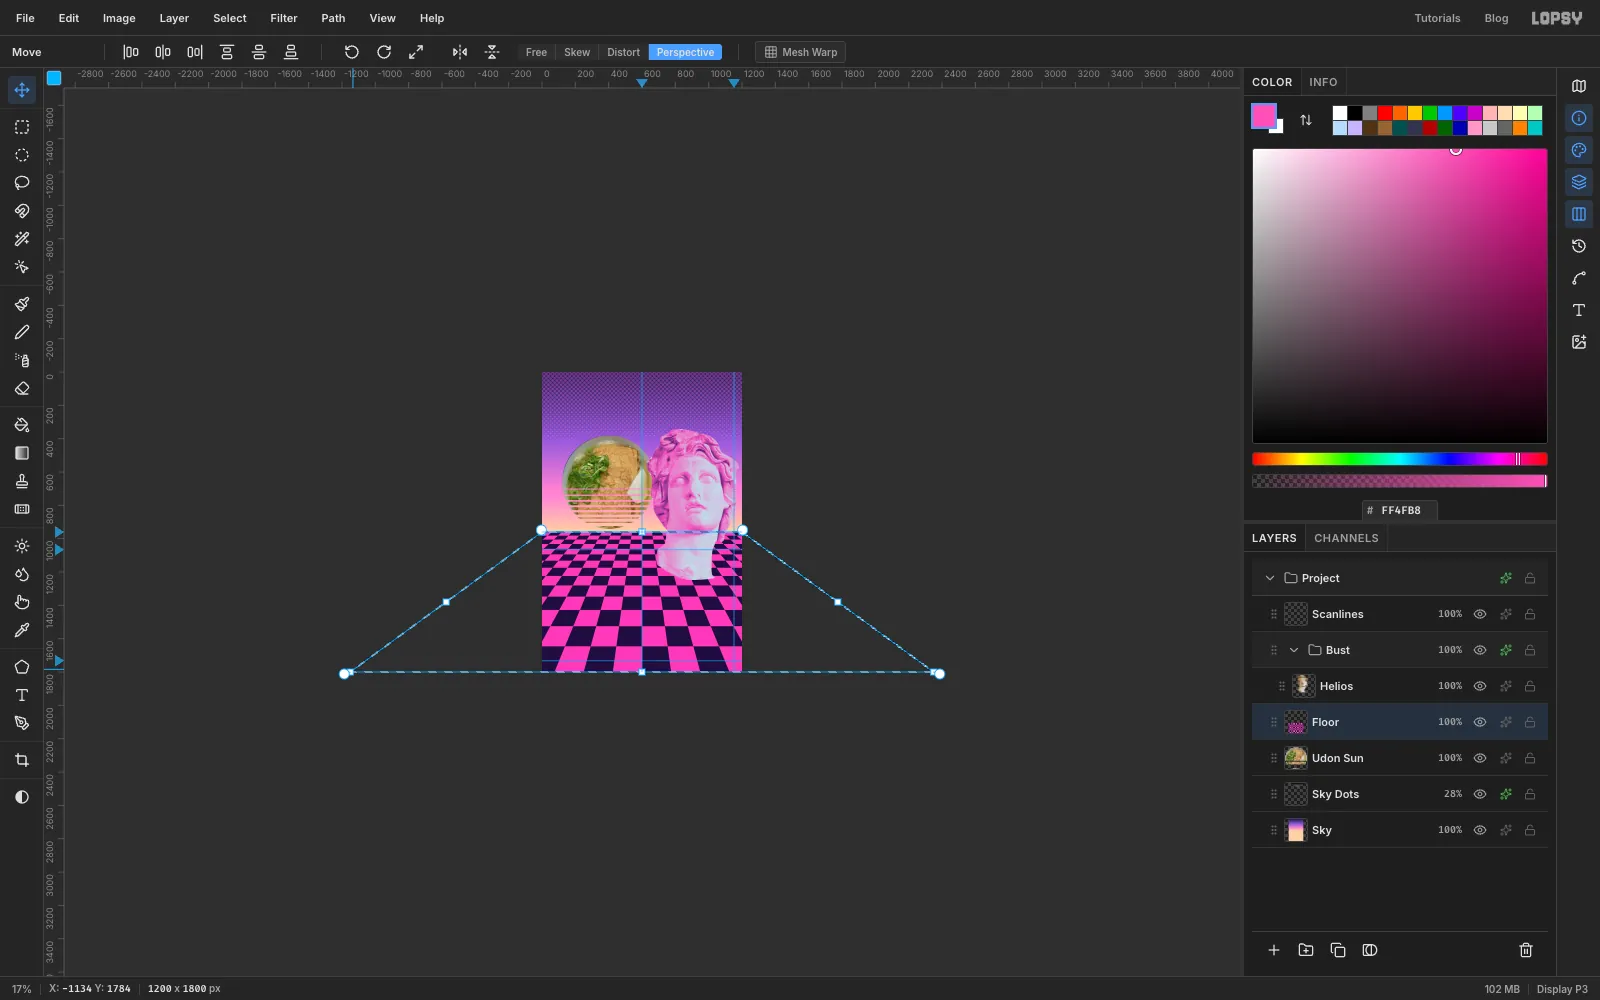
Press Cmd+- twice, so you're at 25 % and can see well past the sides of the canvas. Press V, then click Perspective in the options bar. In this mode, dragging a corner moves the opposite corner of the same edge the other way.
Drag the bottom-left corner handle a long way out to the left, to about x −1150. The bottom-right corner swings out to the right at the same time. Grab the white corner square a few pixels inside the corner. At this zoom the outer half of the square belongs to the rotate handle, and a rotation does nothing in Perspective mode. Press Enter, then Cmd+D, and press Cmd+0 to fit the canvas back on screen. The squares now shrink toward the horizon. The Perspective button stays on, so the next time you have a selection, click Free in the options bar before you scale anything.
-
Add a haze on the horizon
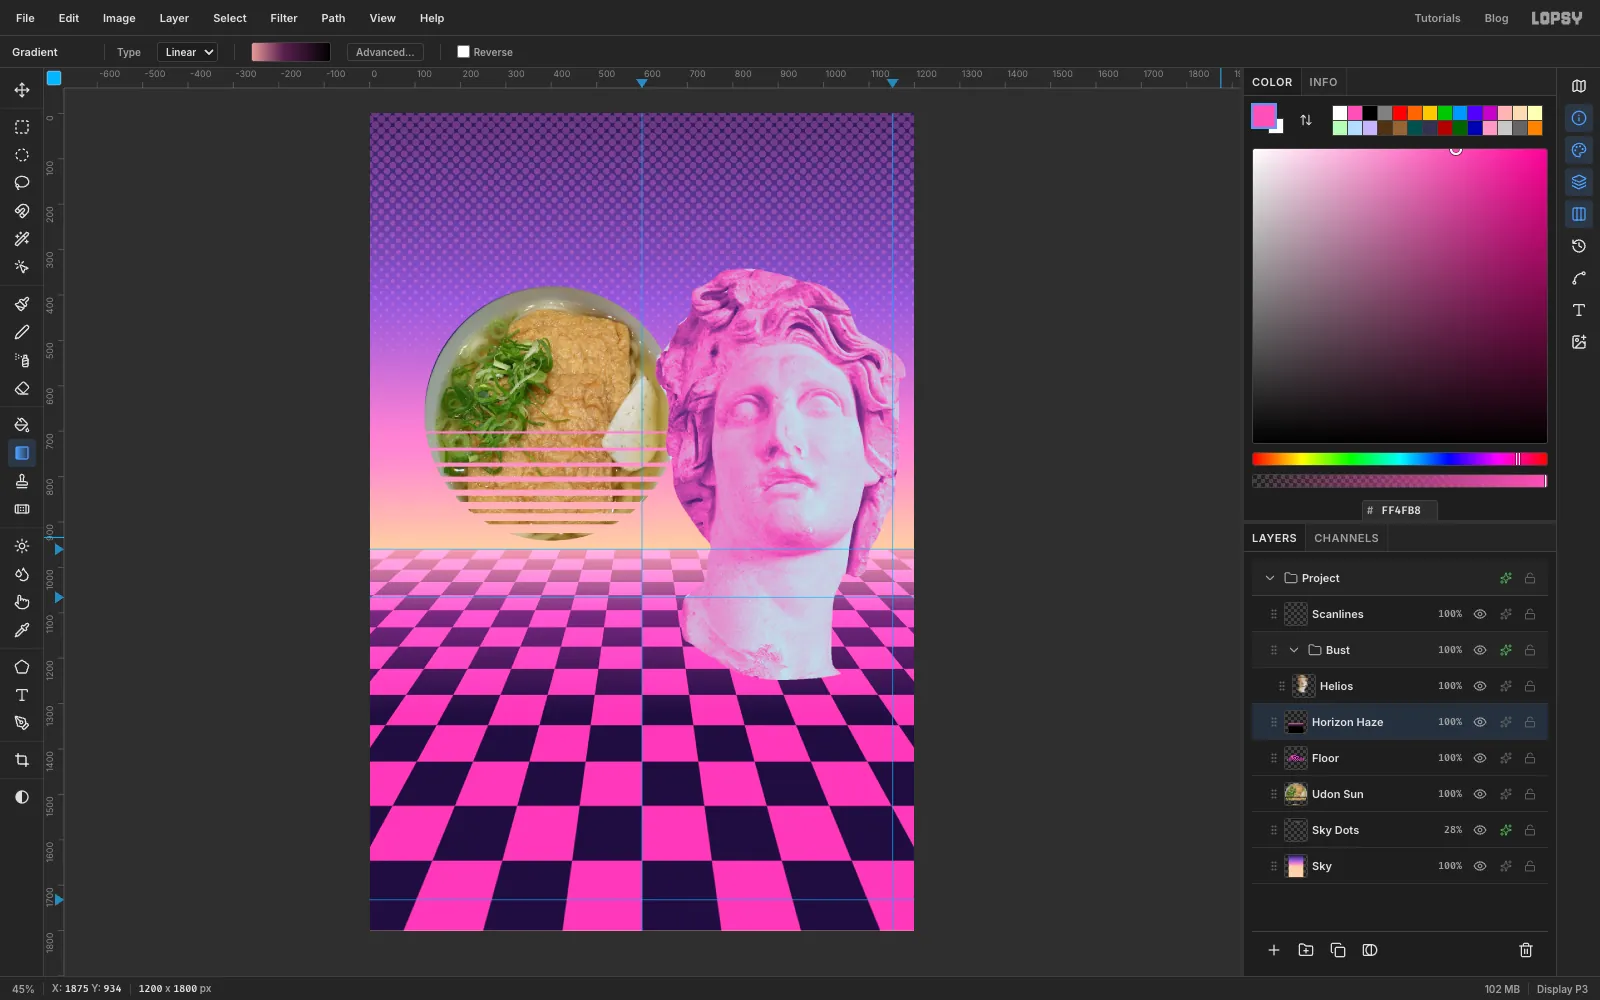
Add a layer called Horizon Haze and drag a marquee from the horizon to the bottom of the canvas. Set the gradient to three stops: , then at 40 %, then black. Drag from the horizon down to about y 1320. Press Cmd+D, open the layer's effects drawer and set its Blend Mode to Screen. In Screen mode black disappears, so only the warm glow over the far rows shows.
-
Shade the near floor
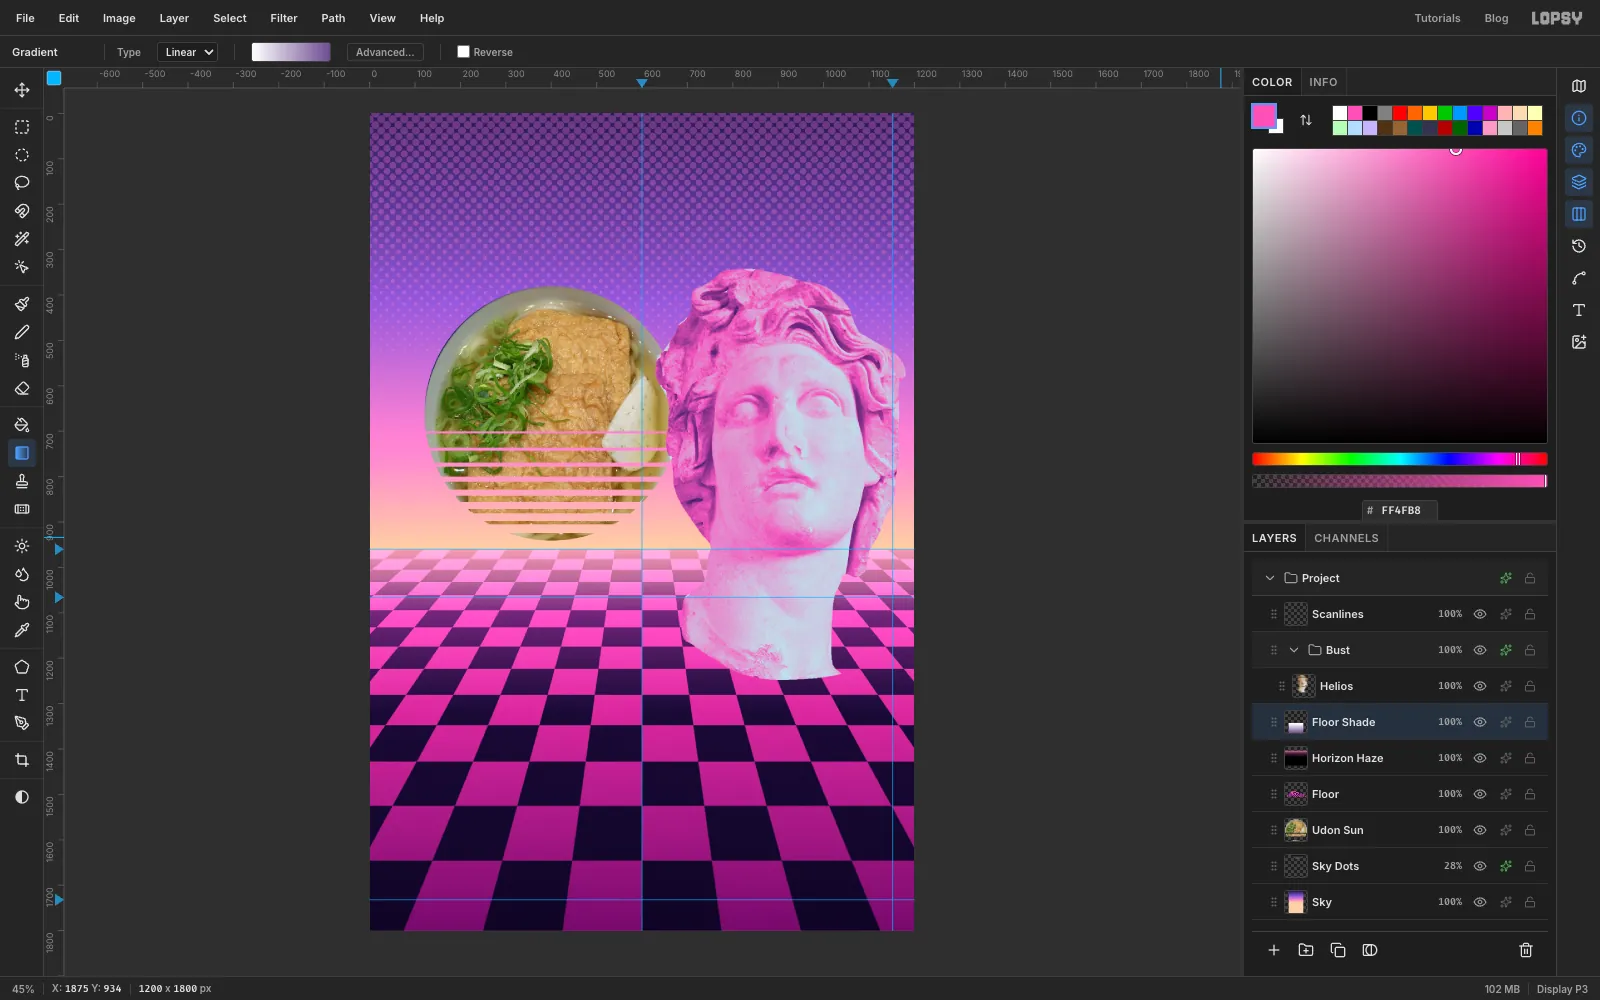
The near rows are big and loud, and the menu will sit on top of them. Add a layer called Floor Shade, select the same area again, and drag a white-to- gradient from about y 1040 down to the bottom edge. Press Cmd+D and set the layer's blend mode to Multiply. White changes nothing and the violet end darkens the checks, so the floor calms down where the windows will go.
-
Paint a palm tree with tapered strokes
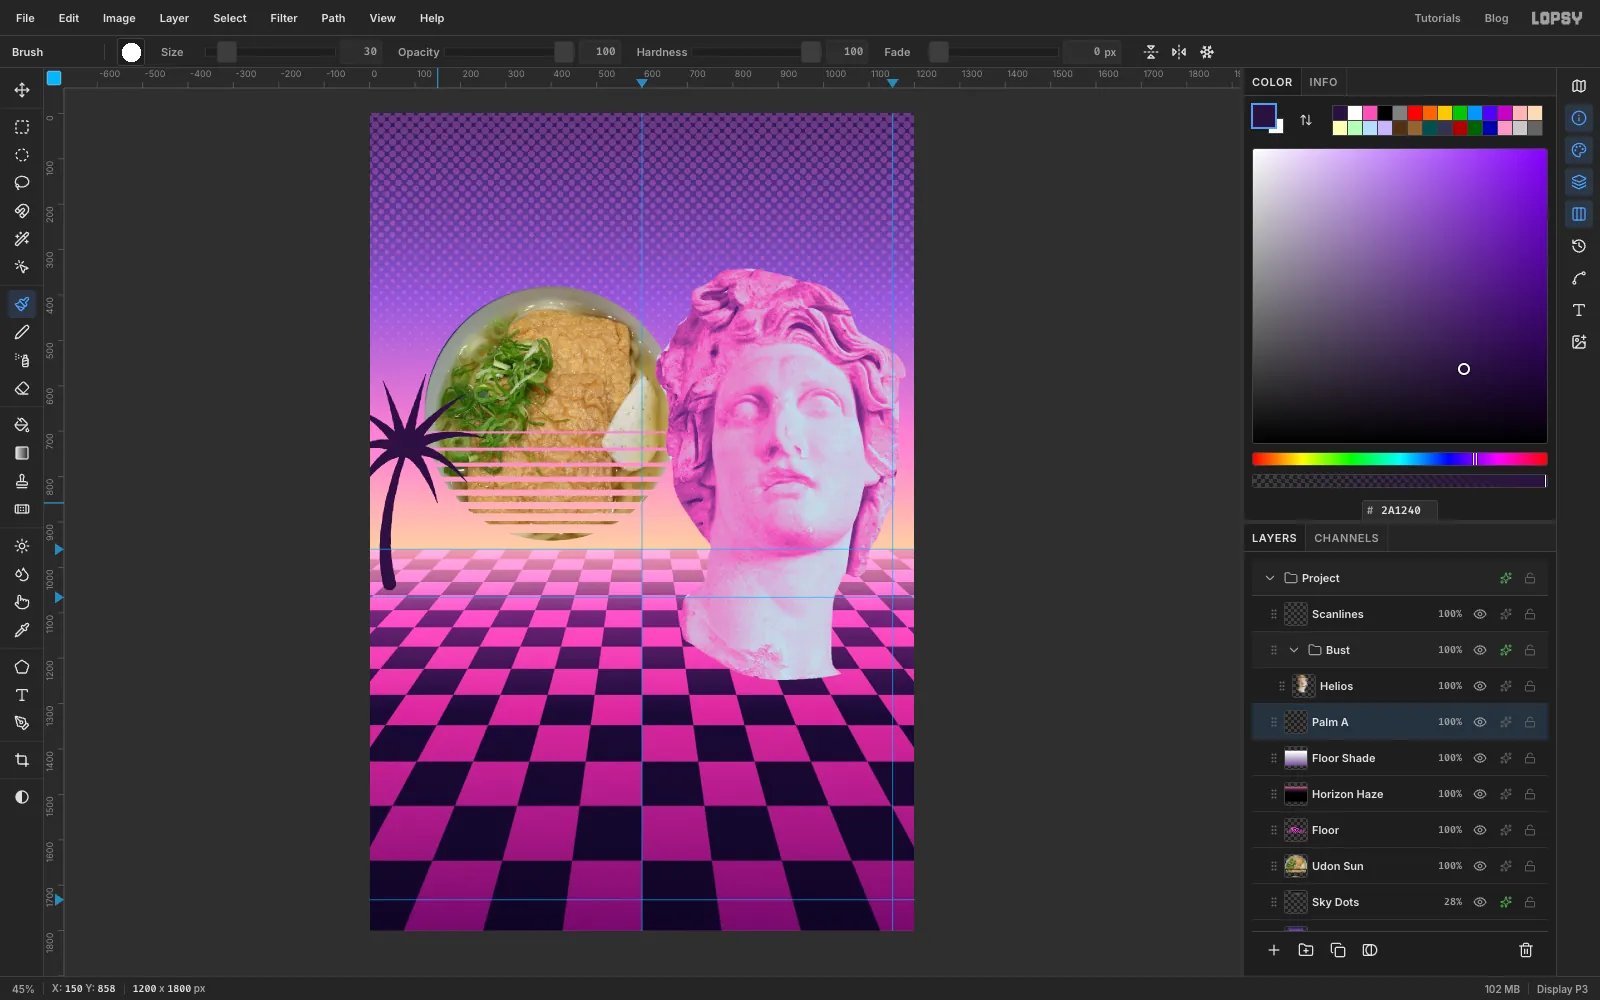
Click Floor Shade and add a layer called Palm A. Set the foreground to and pick the Brush (B). Open the Brushes panel from the options bar and, on the Shape tab, set Size 30, Hardness 100 and Spacing 2. Taper shrinks the brush to nothing over that many pixels from where the stroke starts, so a stroke starts thick and ends in a point.
For the trunk, set Taper to about 530 and drag from the bottom, near (44, 1036), curving slightly left and then up to a crown at about (78, 742). Then draw nine fronds, each one starting at the crown so it tapers out to a point. Arc each frond up and then over, like a fountain: two point up, three go out to the left and four to the right, and the lowest on each side droop well down. Set Taper to about 140 for the upright and upper fronds and about 180 for the drooping ones, so each ends in a point just as it reaches its tip.
-
Add the leaflets
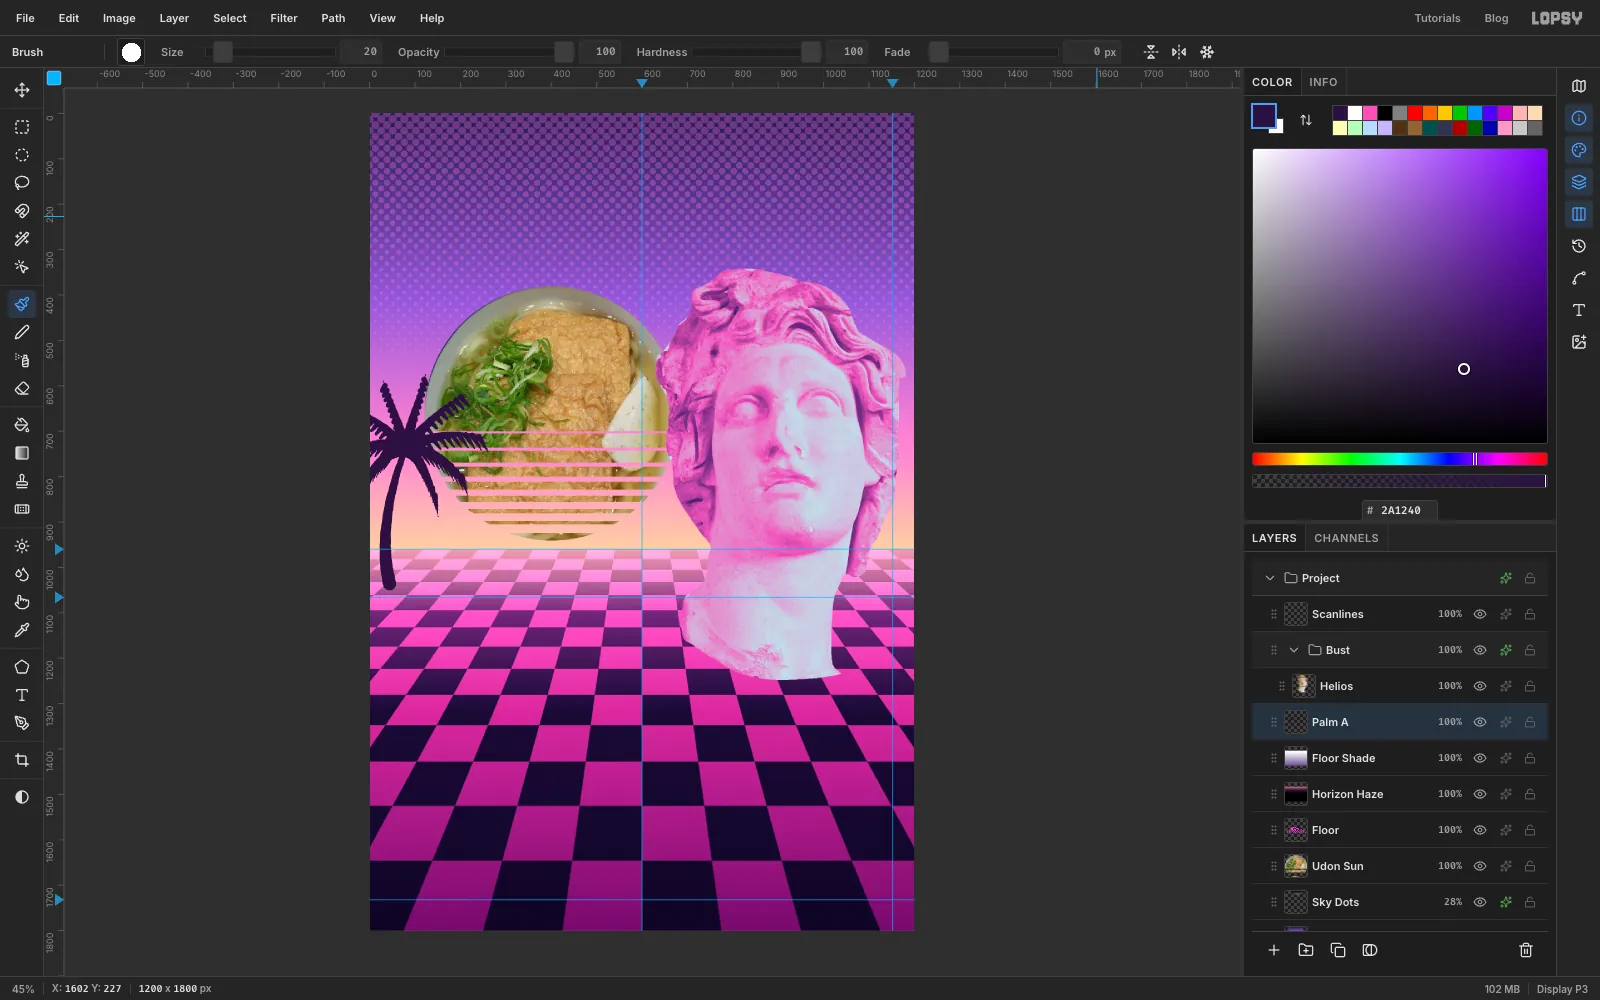
Smooth fronds read as a starfish. Palm leaves are made of rows of hanging leaflets. Set Size to 13 and Taper to 46. From points along each frond, drag short strokes about 35 px long that hang down and slightly outward, eight or nine per frond. When you're done, set Taper back to 0 so it doesn't carry into later brush work.
-
Add a second, smaller palm
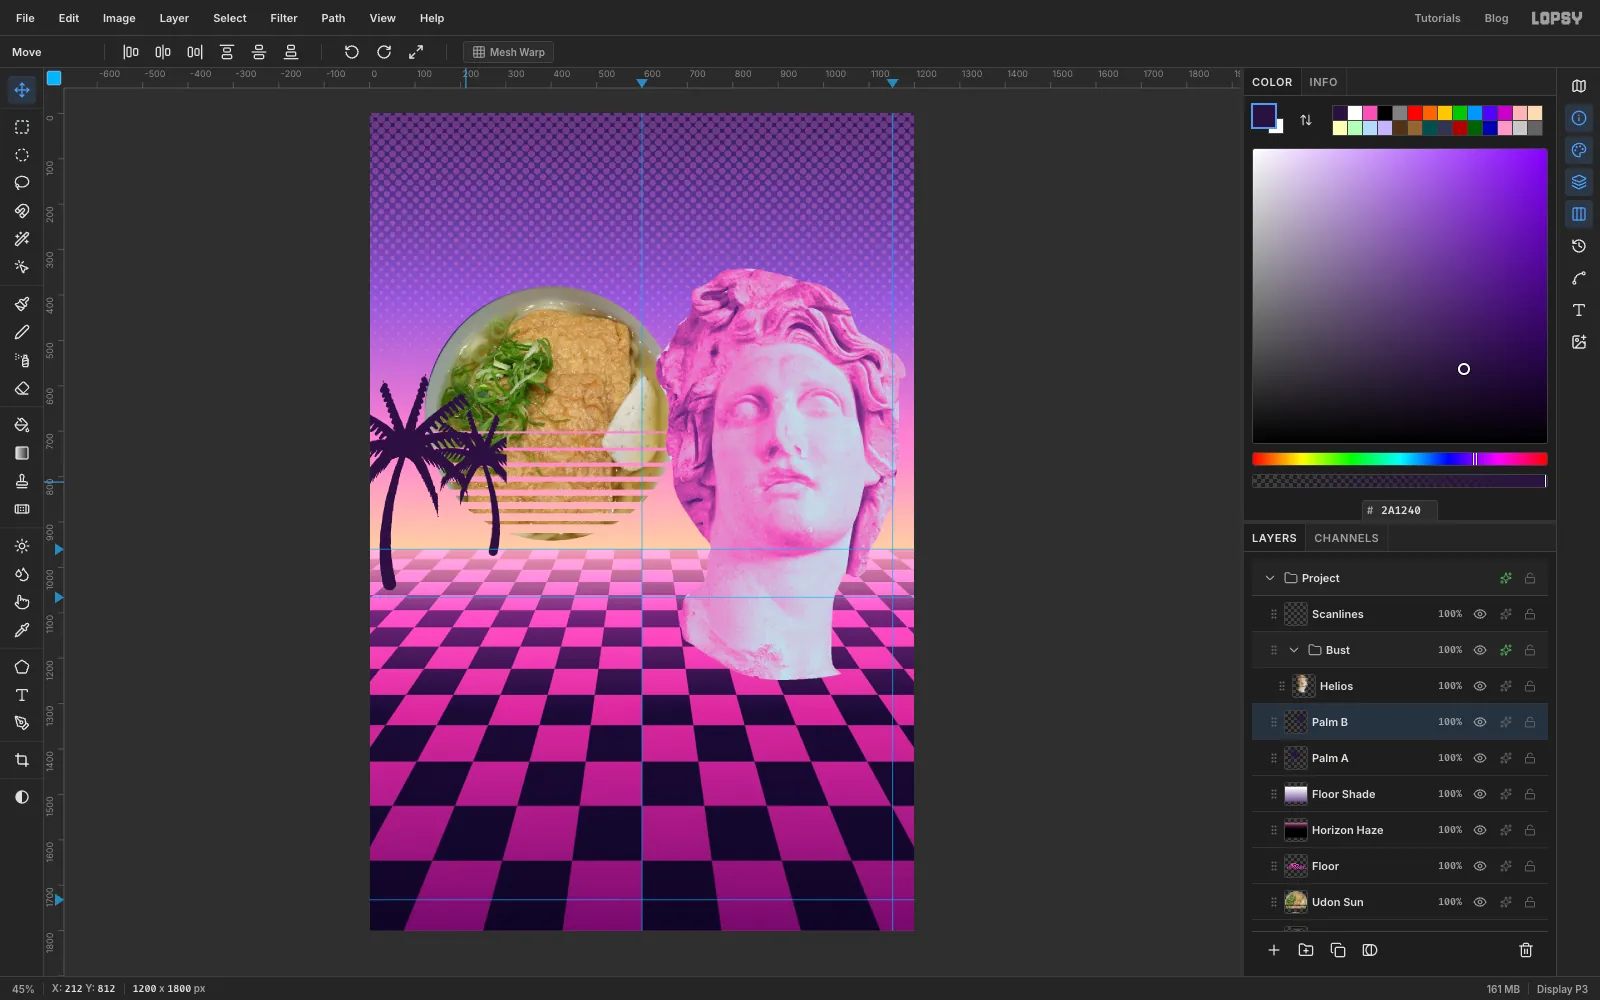
With Palm A selected, choose Layer → Duplicate Layer and rename the copy Palm B. Choose Image → Flip Horizontal, which mirrors it in place. Draw a marquee around it, press V, hold Cmd and drag the top-left handle in until the palm is about two-thirds of its size. Press Enter and Cmd+D. Then drag it up and a little to the right, until its trunk stands on the horizon at about x 290. The big palm starts lower than the small one, so it reads as nearer.
-
Recolour the sun with a Gradient Map
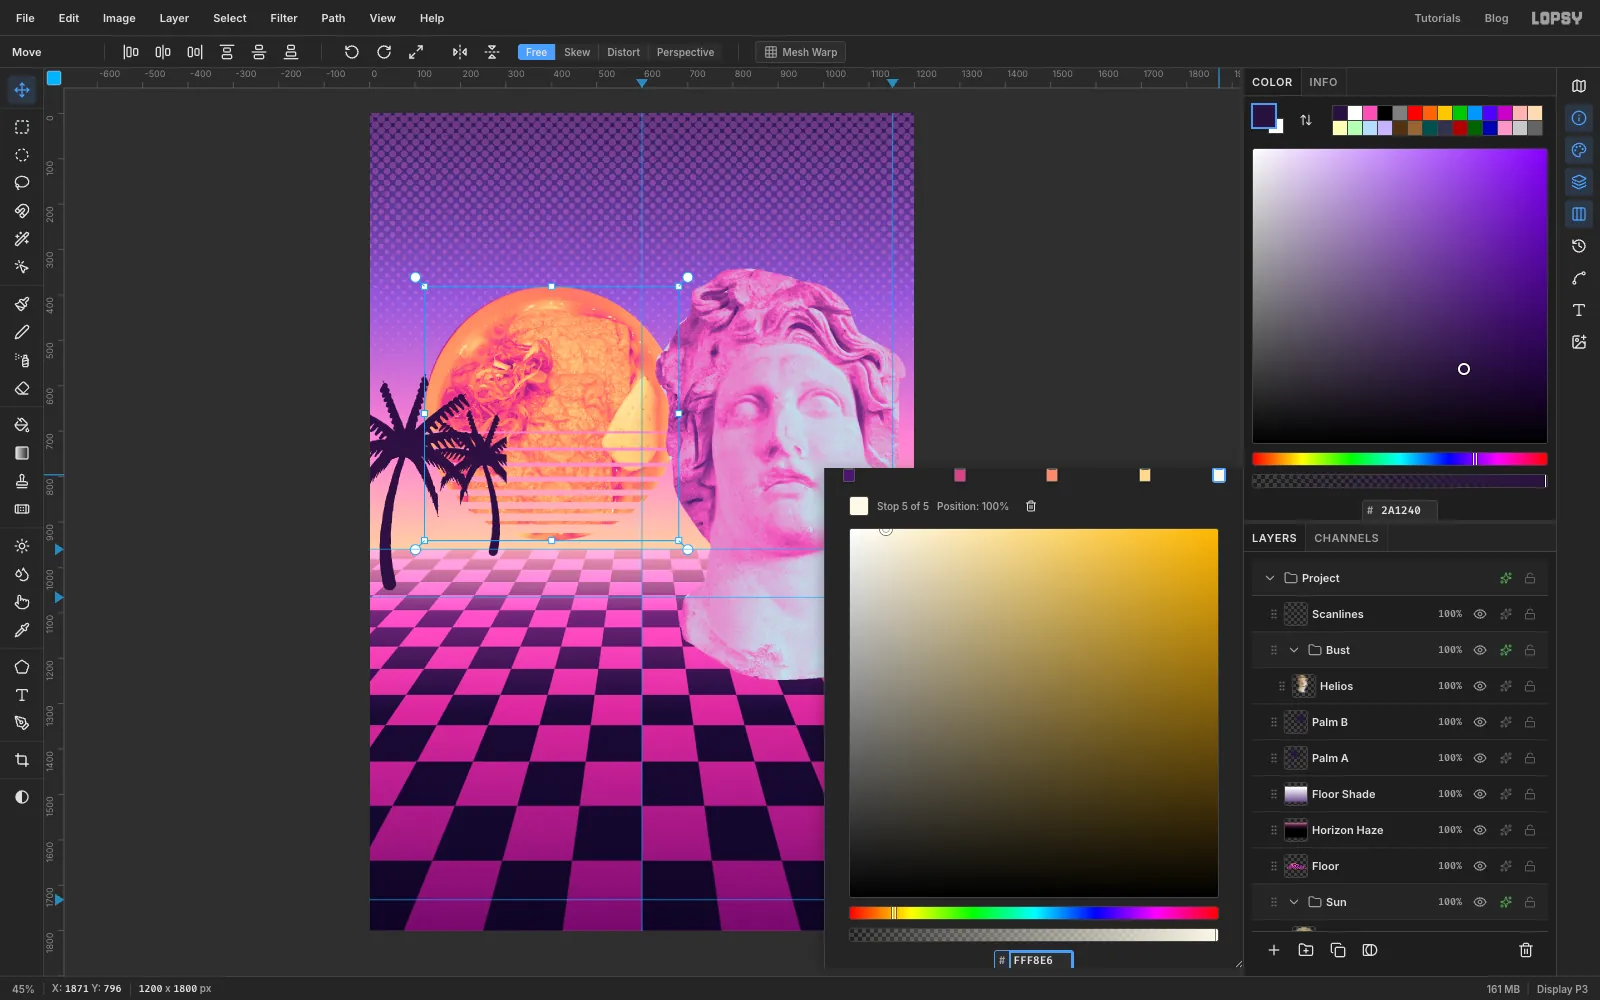
Click Udon Sun and choose Layer → Group Layers. Name the group Sun. Add a Gradient Map to the group as you did for the bust. Click the bar three times to get five stops, and set them to , at 30 %, at 55 %, at 80 % and at the right end. The extra stops keep the noodles, tofu and green onion separate, so it still reads as a bowl of udon and not an orange blur.
-
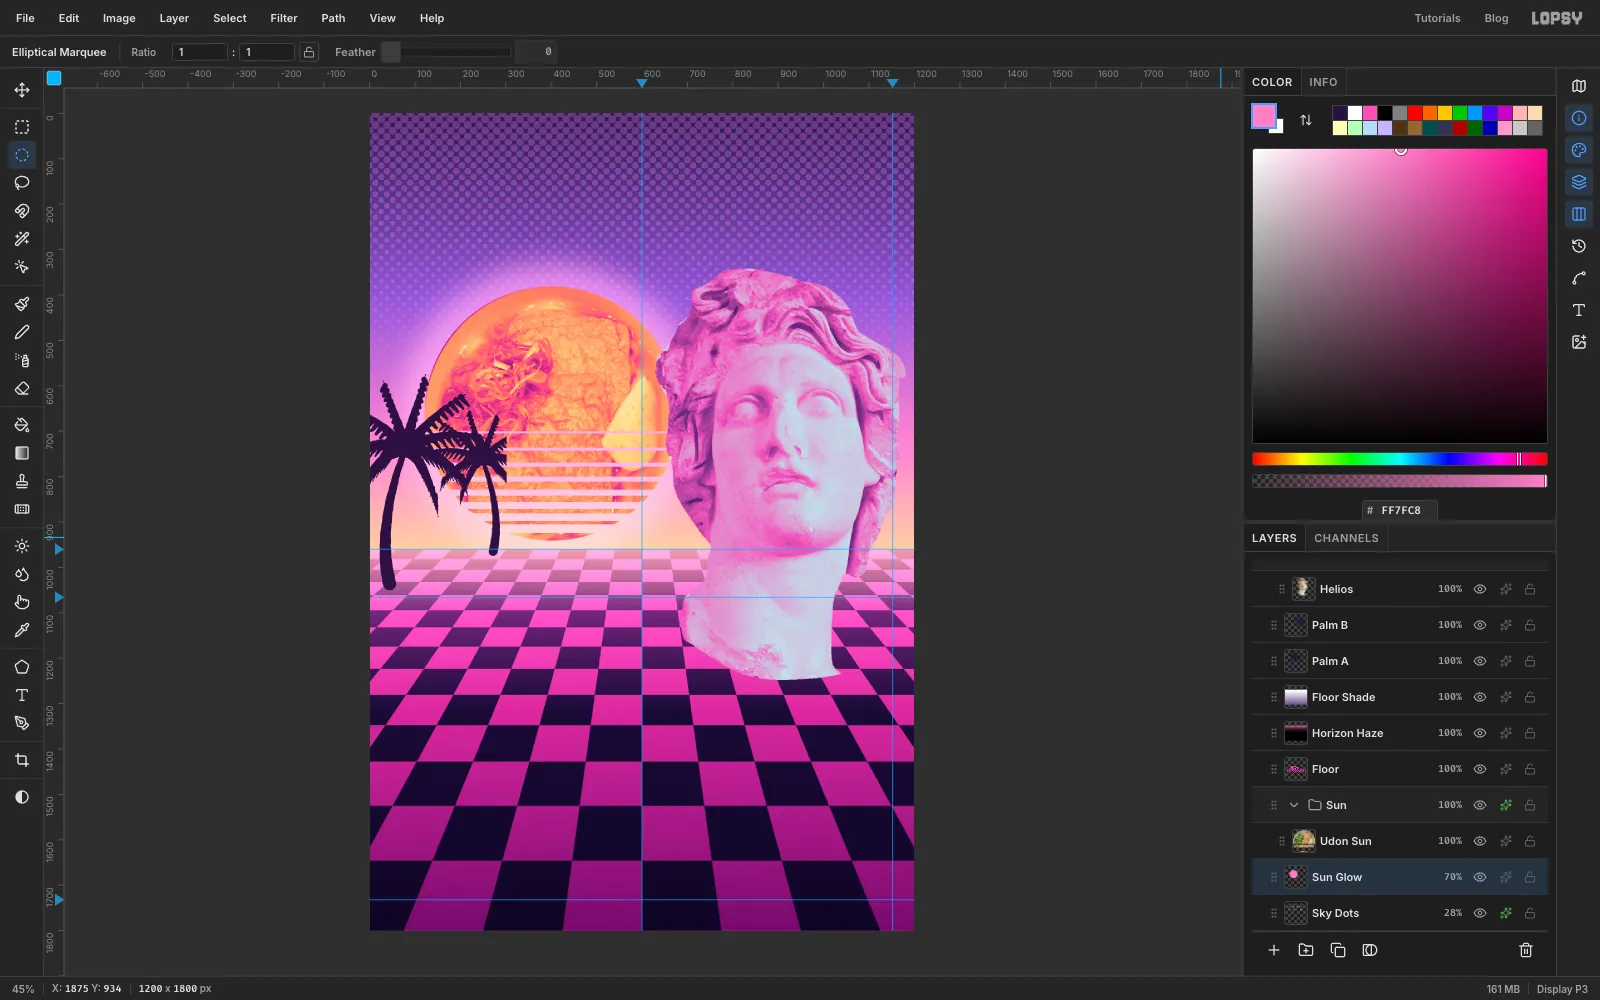
Make the sun glow
Click Sky Dots and add a layer called Sun Glow. Pick the Elliptical Marquee and, with nothing selected, click once on the canvas instead of dragging. A dialog opens where you can type exact corners. Enter From (70, 330) and To (730, 990), a circle 660 px across centred on the sun. The same click-once dialog works for the Rectangular Marquee, so use it whenever a step gives you exact corners. Choose Select → Feather… and enter 70. Fill it with , press Cmd+D, then set the layer to Screen at 70 % opacity.
-
Set the title
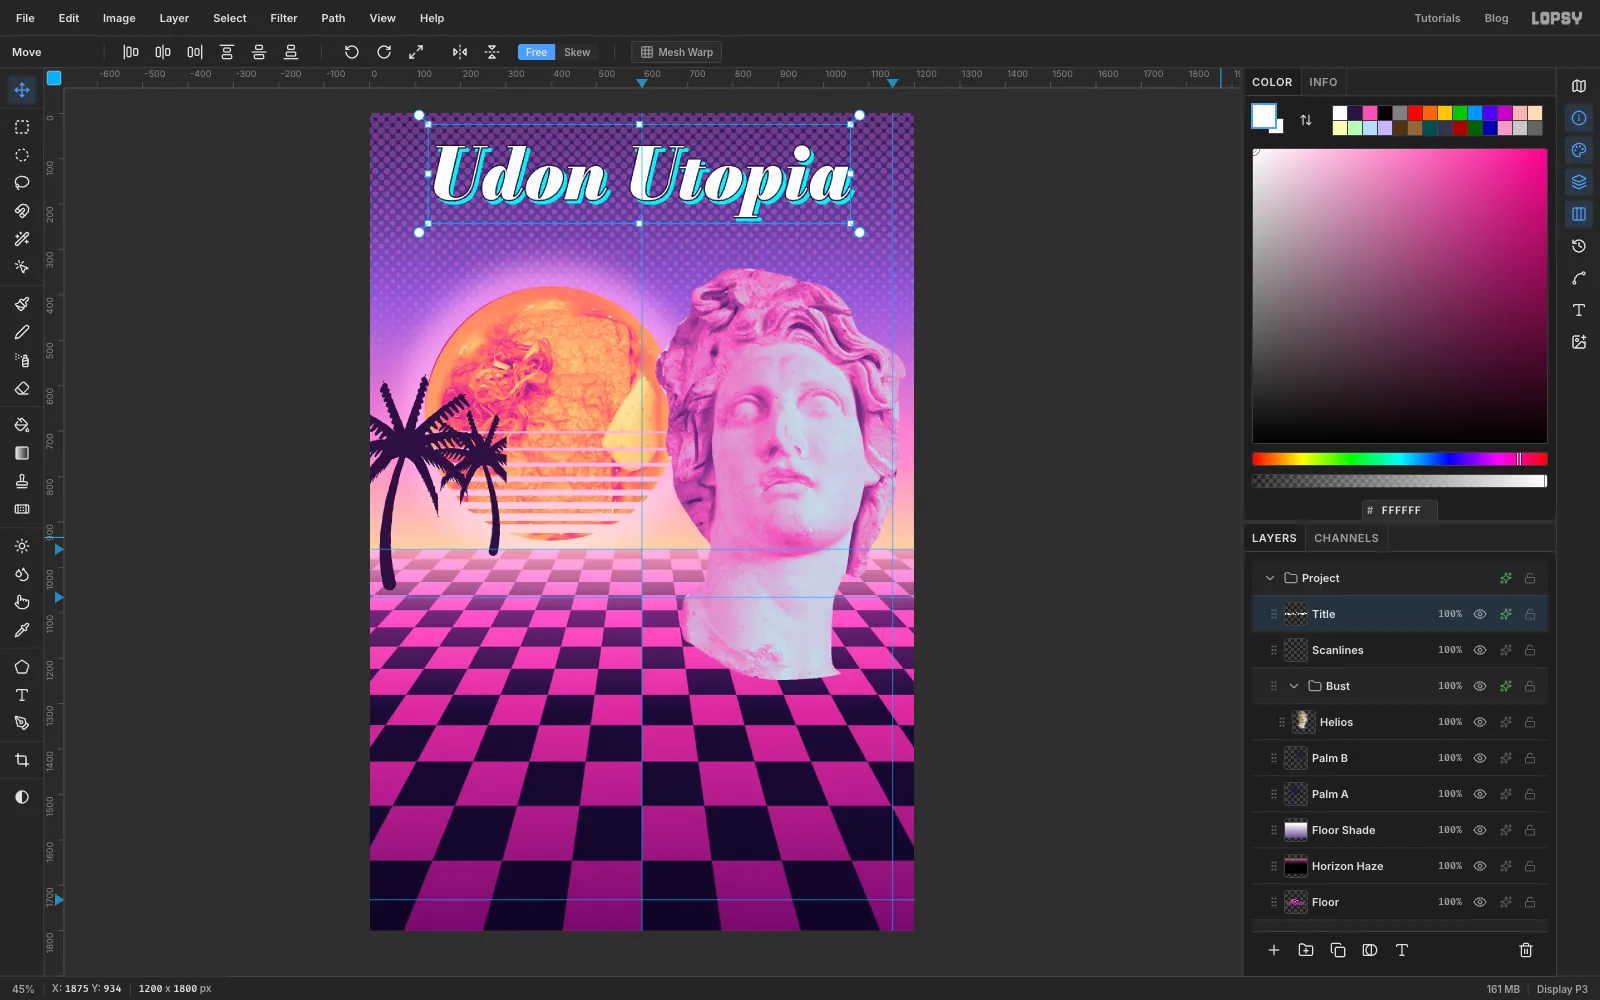
Click Scanlines. Pick the Text tool (T) and, in the options bar, choose Bodoni Moda, weight Black, style Italic, size 156, and set the foreground to white. Click in an empty part of the canvas, type Udon Utopia and press Tab to finish. Rename the layer Title. Move it so it's centred on the 600 guide with the top of the letters about 70 px from the top.
In its effects drawer, tick Stroke with Width 3 in , and Drop Shadow with Offset X 7, Offset Y 7, Blur 0 and Opacity 100 in cyan . Bodoni's thin hairline strokes would otherwise blur into the shadow. The outline keeps every letter crisp.
-
Add the katakana, tagline and vertical kanji
Click Scanlines again before each new line of type. If a text layer is selected, changing the font restyles that layer. Set the weight back to Regular and the style to Normal.
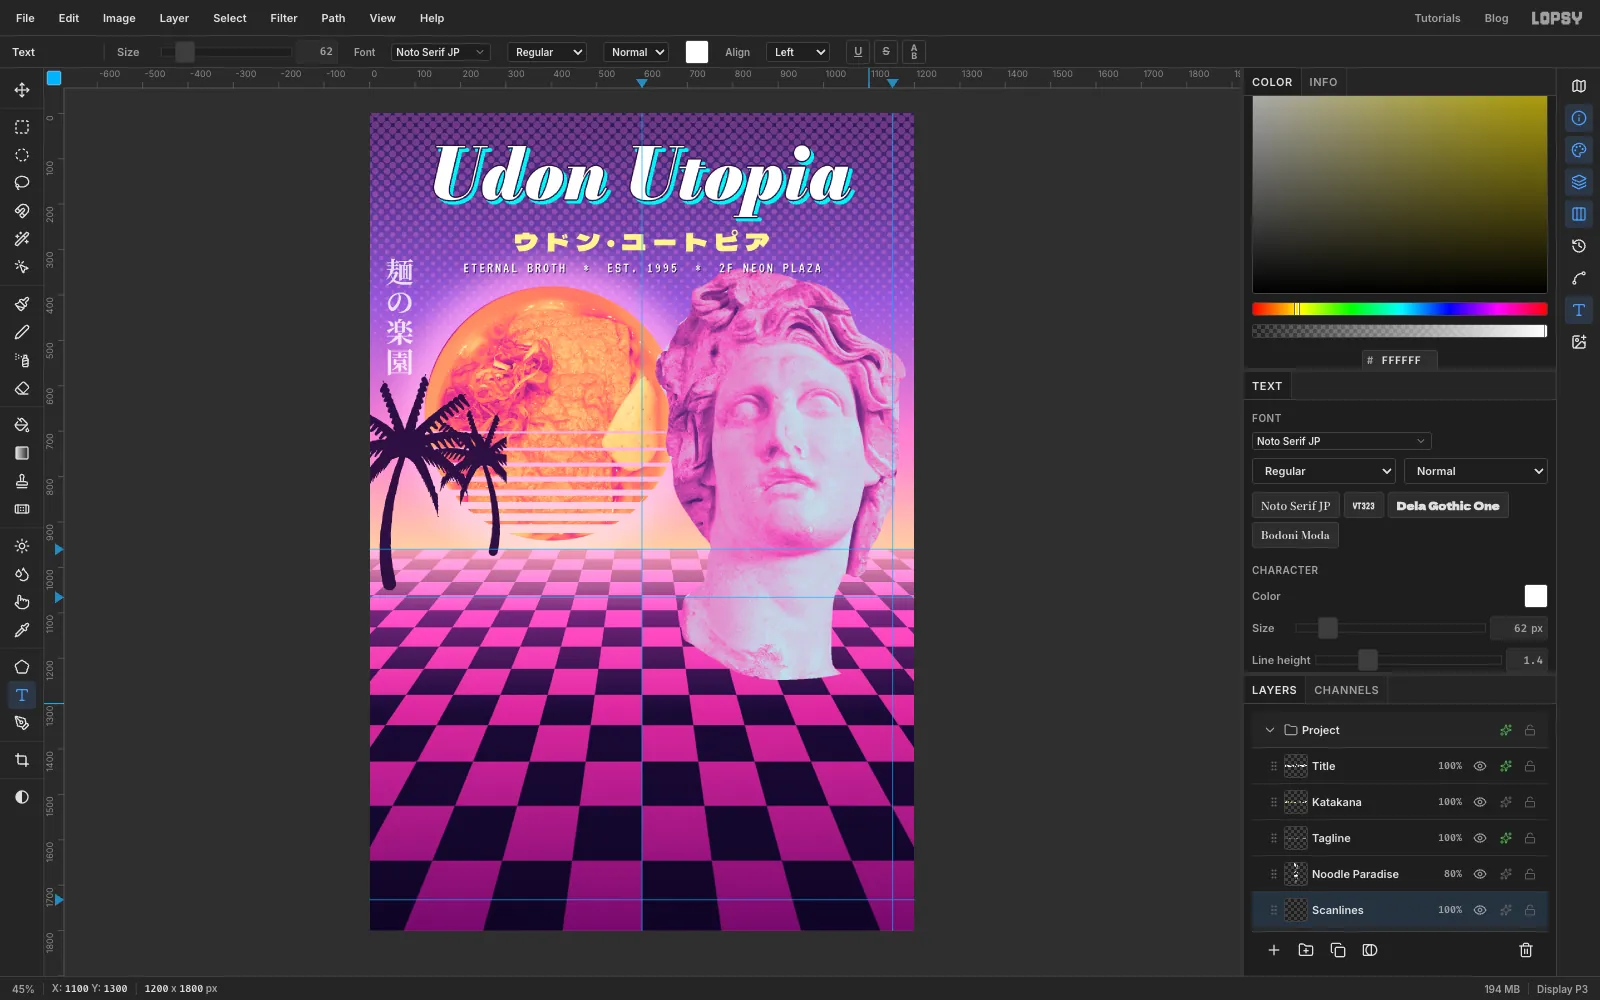
- Dela Gothic One, size 54, : paste ウドン・ユートピア ("Udon Utopia" in katakana). In the Text panel set Letter spacing to 14 and centre it about 28 px under the title.
- VT323, size 34, white, letter spacing 4: ETERNAL BROTH \* EST. 1995 \* 2F NEON PLAZA. Centre it about 28 px under the katakana and give it a Drop Shadow of 2 / 2, Blur 0, in at 90 %, so it stays readable where it crosses the bust's hair.
- Noto Serif JP, weight Bold, size 62, white, letter spacing 0. Click Toggle vertical text (the stacked AB button) and paste 麺の楽園 ("noodle paradise"). Move the column to the left edge, about 35 px in, between the tagline and the palm tops, and set the layer to 80 % opacity.
Click Scanlines, turn vertical text off again and set the weight back to Regular.
-
Build a Windows 95 window frame
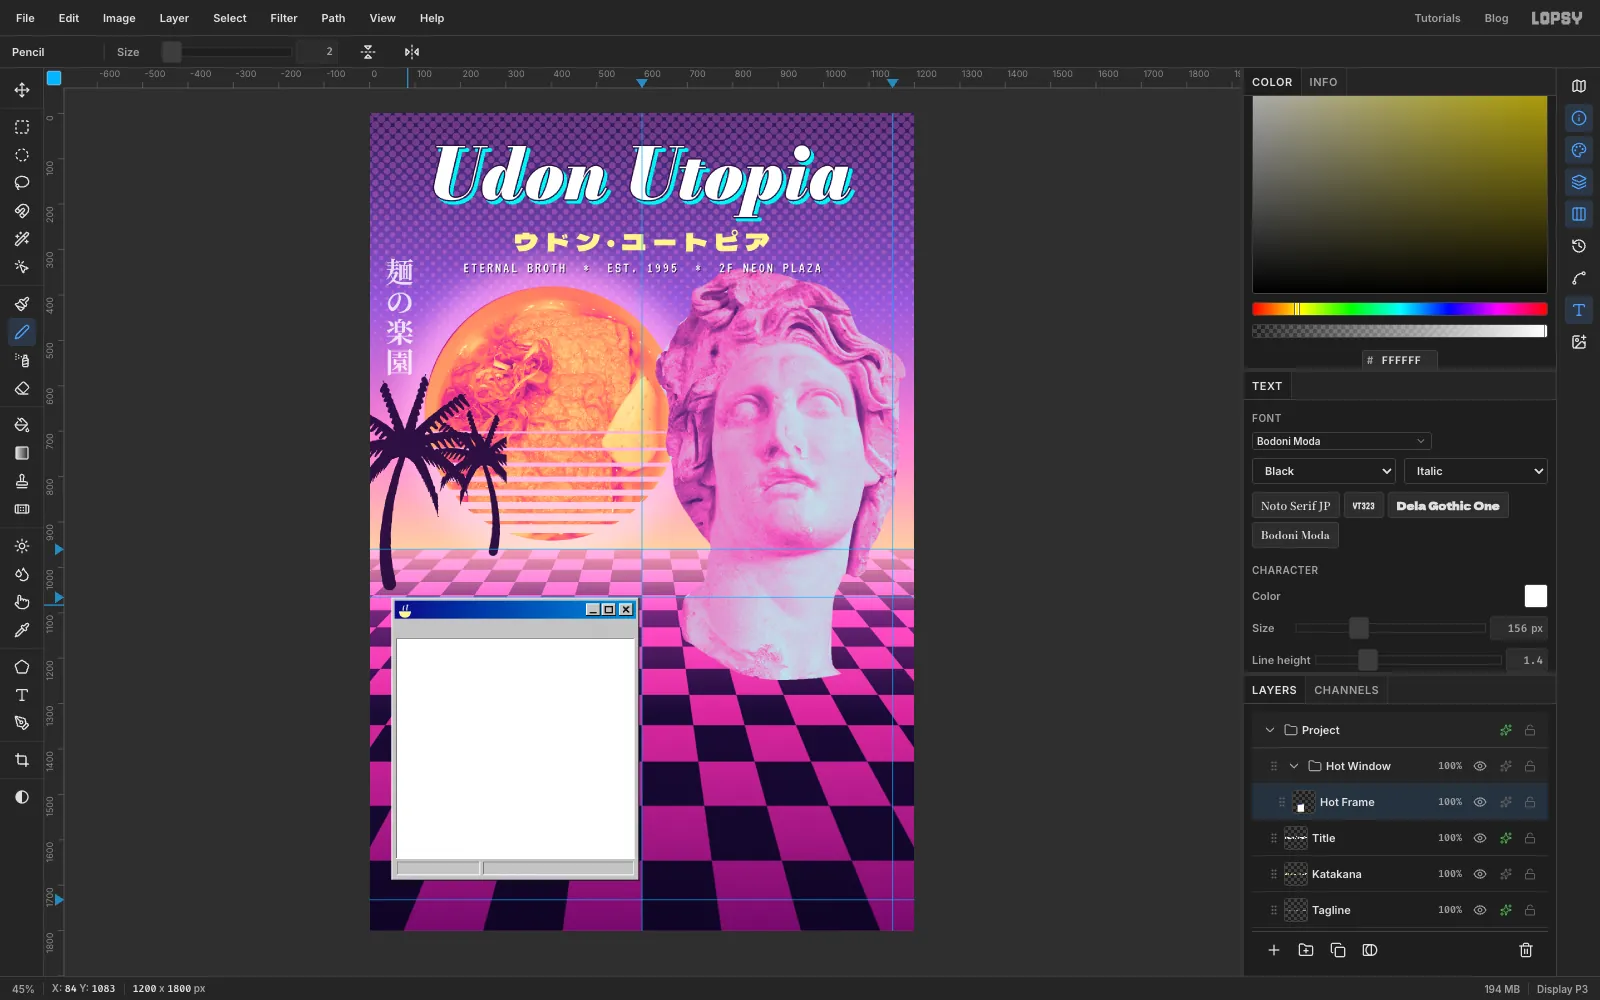
Click Title, then click New Group in the Layers panel and name it Hot Window. Add a layer inside it called Hot Frame.
- Marquee from (48, 1066) to (594, 1690) and fill it with .
- Make it look raised. Set the foreground to white and pick the Pencil (N) at Size 2. Click just inside the bottom-left corner, then Shift-click the top-left corner and the top-right corner. Each Shift-click draws a straight line from the last point. Set the foreground to and draw the bottom and right edges the same way.
- Marquee the title bar from (55, 1073) to (587, 1113) and drag a Linear gradient across it from on the left to on the right (two stops).
- At the right end of the title bar, add three grey buttons, all from y 1079 to 1107: x 477–509, 511–543 and 549–581. Give each the same white and black edges. Then, in with the Pencil at Size 3, draw a short line on the first, a square on the second and an X on the third.
- Marquee a white document area from (60, 1158) to (582, 1640). Give it a sunken edge: along the top and left, white along the bottom and right.
- Add two sunken status panels along the bottom, from y 1648 to 1678: one from x 60 to 244 and one from 250 to 582.
- For the program icon, draw a 26 px circle centred on (78, 1098) with the Elliptical Marquee. Switch to the Rectangular Marquee and Alt-drag a rectangle over the circle's top half to subtract it. Fill the bowl shape that's left with , and add two short white Pencil lines of steam.
Finally, give Hot Frame a Drop Shadow: Offset 14 / 14, Blur 0, Opacity 55, in .
-
Type the hot menu
All the window type is VT323. Clicking Title earlier loaded its Bodoni settings into the Text tool, so set the font to VT323, the weight to Regular and the style back to Normal. Click Hot Frame before each new text layer:
- Caption: hot_bowls.exe, size 32, white, next to the bowl icon.
- Menu bar: File Edit Order Help, size 28, black, just under the title bar.
- Status: 5 object(s) and piping hot, size 23, one in each panel, on the same baseline.
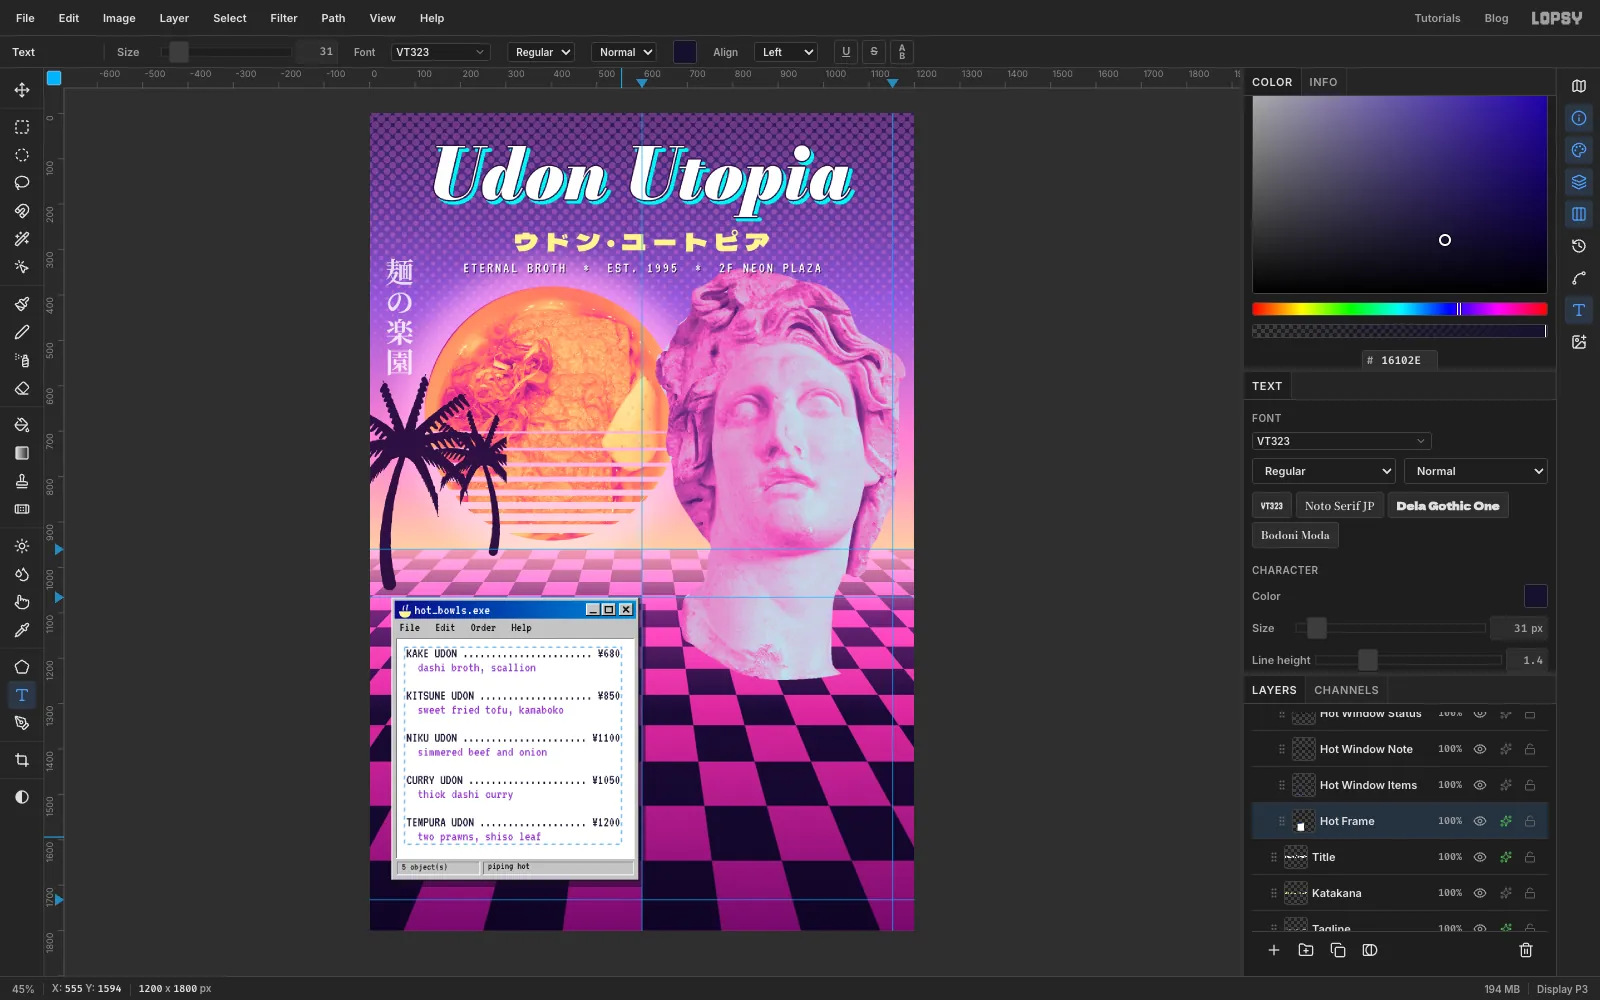
For the menu itself, set size 31 and colour , and type each dish on one line with dot leaders out to the price, then its description on the next line, indented two spaces, then a blank line. The five dishes are:
- KAKE UDON ¥680: dashi broth, scallion
- KITSUNE UDON ¥850: sweet fried tofu, kamaboko
- NIKU UDON ¥1100: simmered beef and onion
- CURRY UDON ¥1050: thick dashi curry
- TEMPURA UDON ¥1200: two prawns, shiso leaf
So the first two lines read (38 characters wide)
KAKE UDON ....................... ¥680anddashi broth, scallion. VT323 is monospaced, so if every dish line is the same number of characters (38 here), the prices line up on the right. In the Text panel set Line height to 1, so each dish and its description sit tight together and the blank lines separate the dishes. Place the block 22 px in from the left of the white area.Now colour the descriptions. Click into the menu with the Text tool, drag across a description line to select it, click the Text color swatch in the options bar, and type . Do this for each description, then press Tab. Click Hot Frame and set Line height back to 1.4.
-
Duplicate the window and move it across
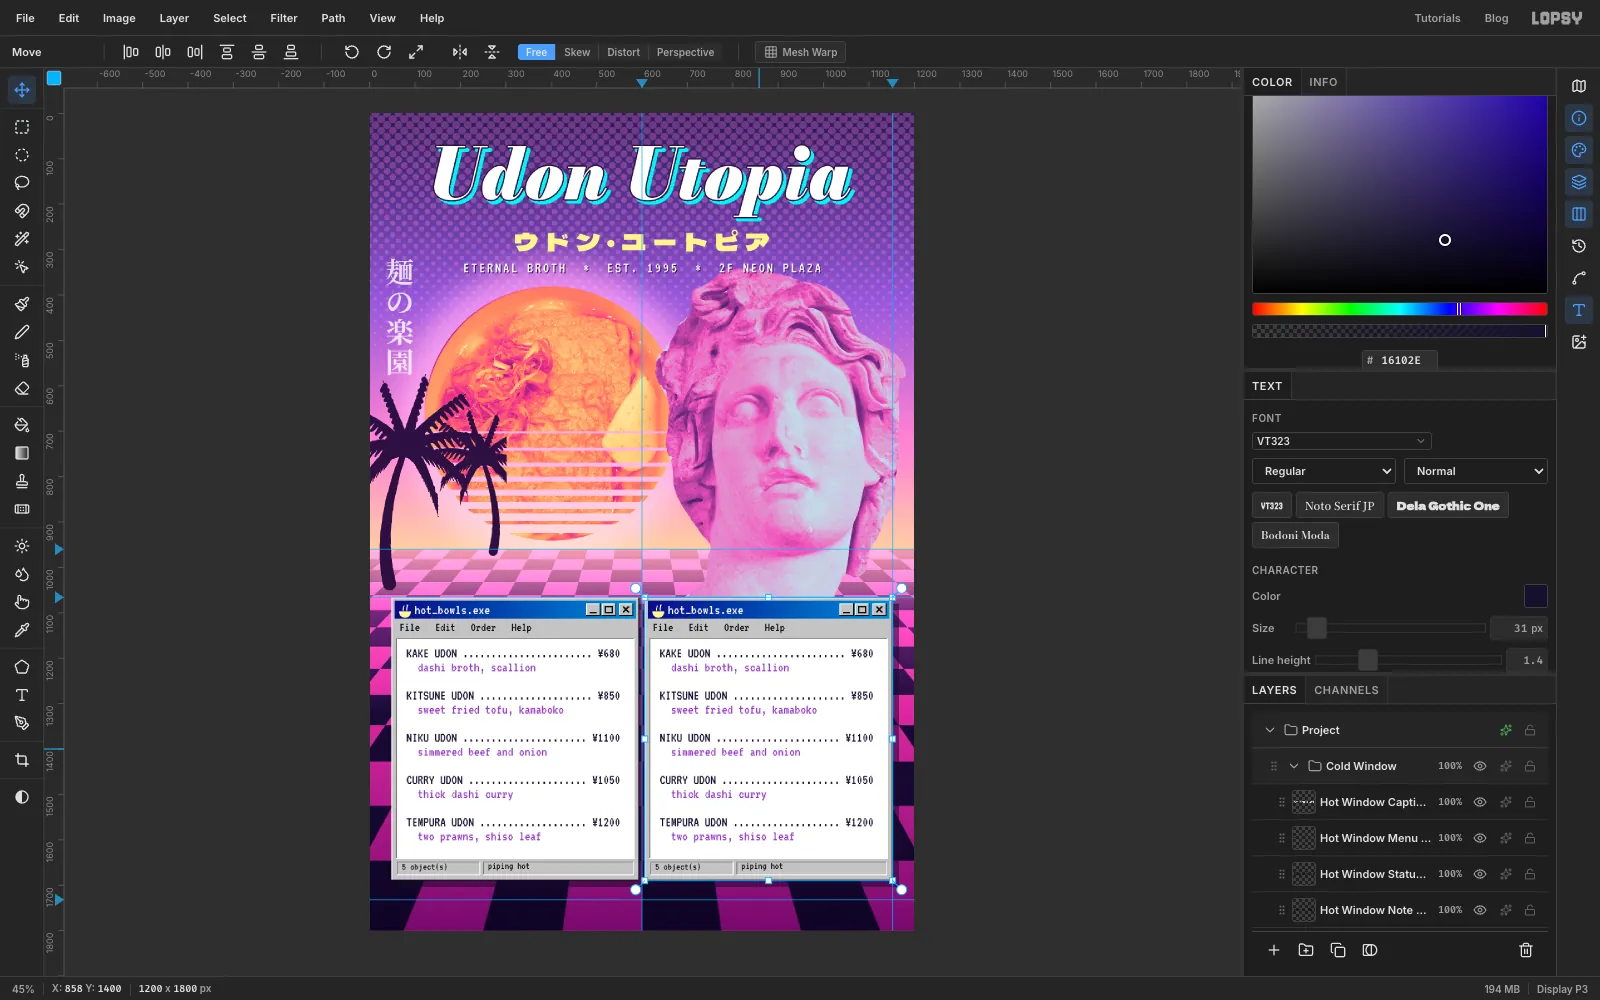
Collapse the Hot Window group, click its row and choose Layer → Duplicate Layer. Rename the copy Cold Window. With the Move tool and the group selected, drag on the canvas to move the whole window 558 px to the right, until its right edge meets the 1152 guide (its left edge is then at x 606). The hot window's shadow fills the narrow gap between them.
-
Retype the cold menu
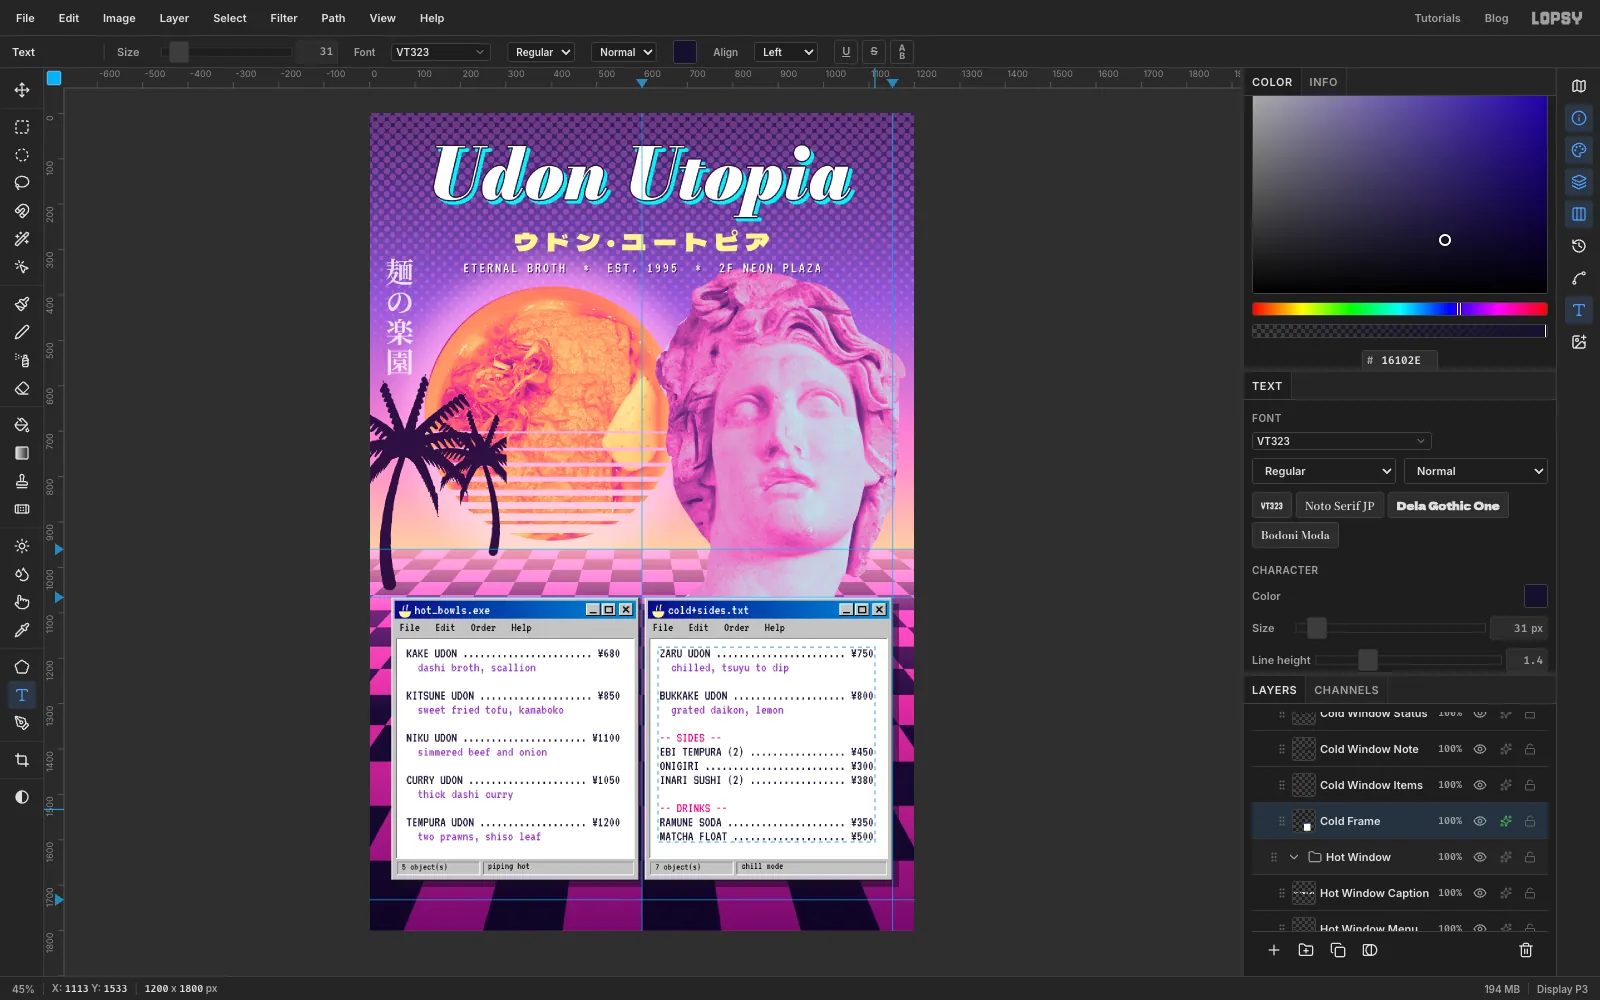
Expand Cold Window and rename its layers so you can tell them apart. With the Text tool, click into the copied caption, press Cmd+A, type cold+sides.txt and press Tab. Do the same for the status panels: 7 object(s) and chill mode.
Delete the copied menu layer and type a new one the same way:
- ZARU UDON ¥750: chilled, tsuyu to dip
- BUKKAKE UDON ¥800: grated daikon, lemon
- -- SIDES --, then EBI TEMPURA (2) ¥450, ONIGIRI ¥300 and INARI SUSHI (2) ¥380 on consecutive lines, then a blank line
- -- DRINKS --, then RAMUNE SODA ¥350 and MATCHA FLOAT ¥500 Colour the descriptions and the two headings .
-
Add a mouse cursor
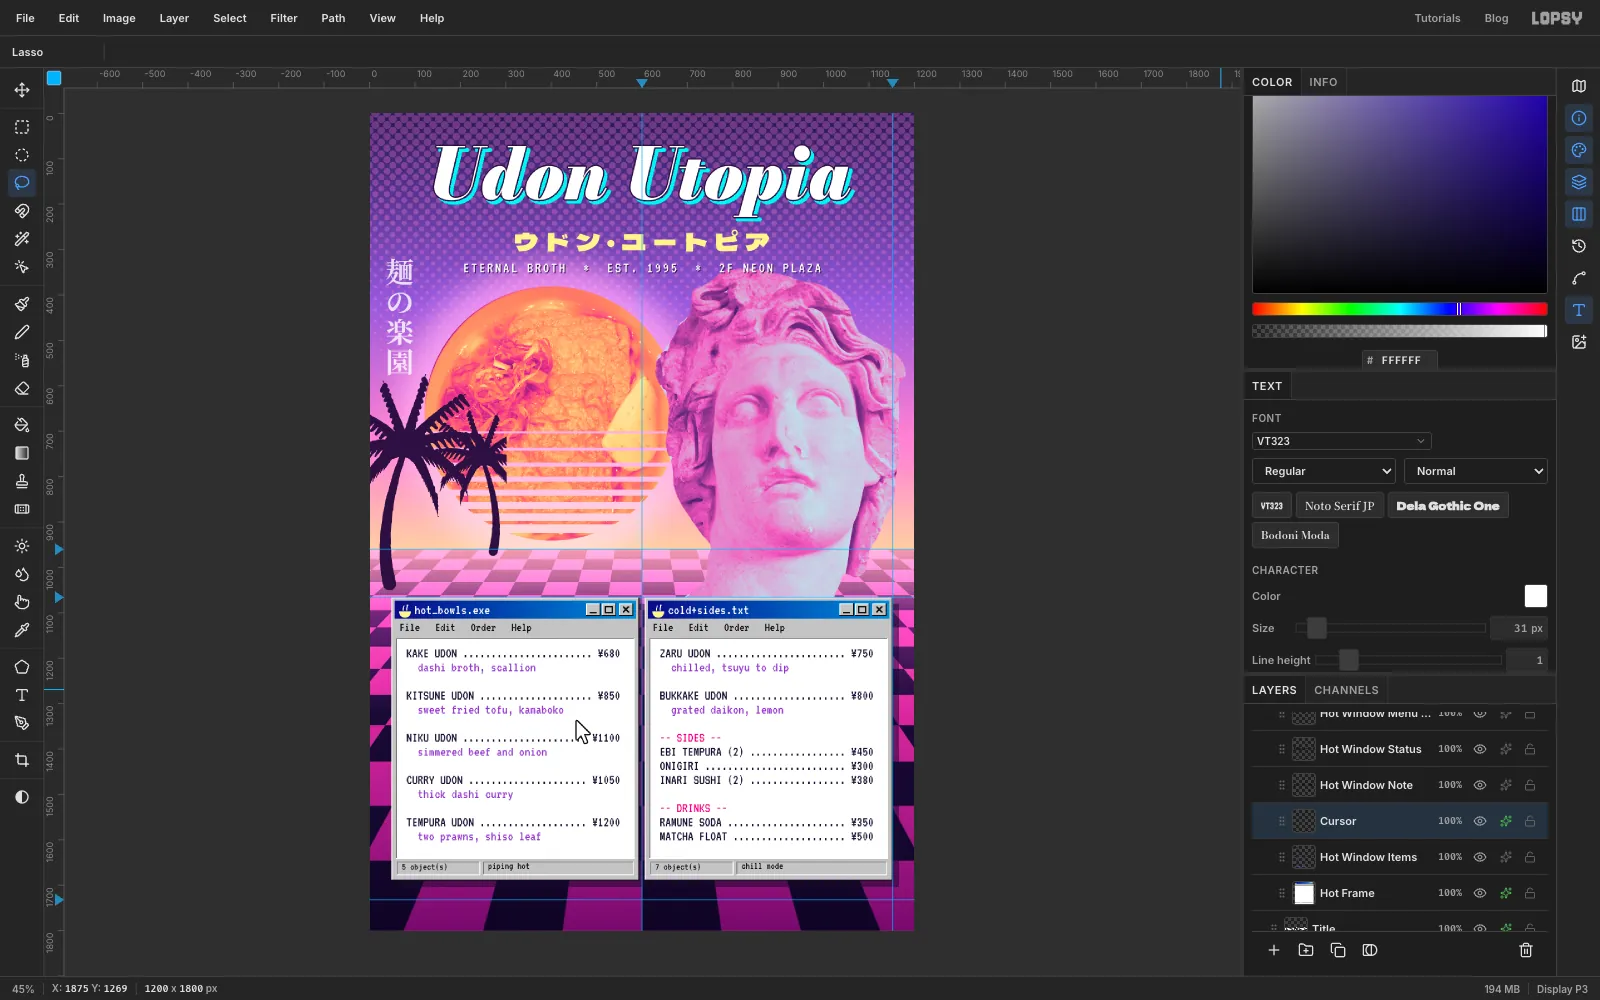
Click the hot menu's text layer and add a layer called Cursor (it lands inside the Hot Window group). Zoom in to about 400 %. The classic arrow pointer is seven straight sides, so draw it with the Pen (P): click its tip, then the six other corners, about 29 × 49 px in all, and click the tip again to close the path. In the Paths panel click Path to Selection, then delete the path. Put its tip in the blank line just past the end of the Kitsune description, so the arrow rests on Niku Udon's dot leaders and doesn't cover any words. Fill it white and give it a Stroke of 3 in .
-
Make a NEW! sticker
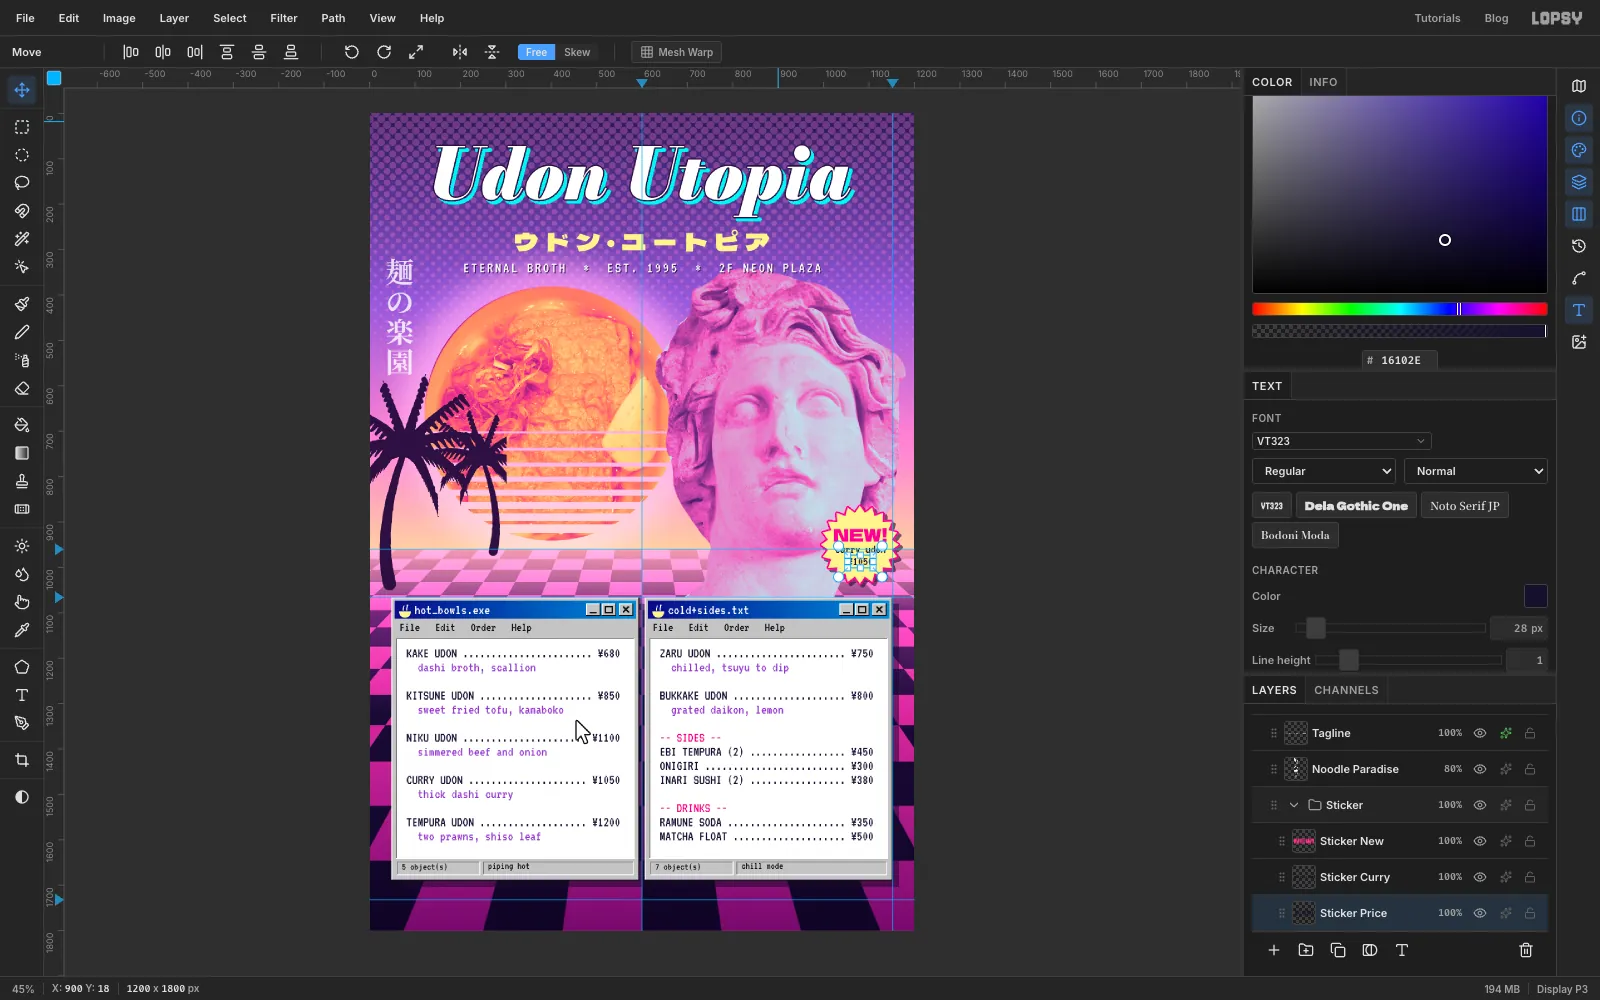
Click Scanlines, click New Group, and name it Sticker. Inside it, add a layer called Burst. Draw a 20-point starburst centred on about (1080, 950) with the Pen: click 40 corners in a zig-zag, alternating between points about 86 px from the centre and dips about 70 px from it, and close the path on the first corner. Then click Path to Selection in the Paths panel and delete the path. Fill it , then give it a Stroke of 4 in and a Drop Shadow of 6 / 6, Blur 0, 60 % in .
Click Burst before each line. Type NEW! in Dela Gothic One, size 38, , then curry udon and ¥1050 in VT323 at 28, in . Centre each one on the star, stacked one under another.
-
Tilt the sticker
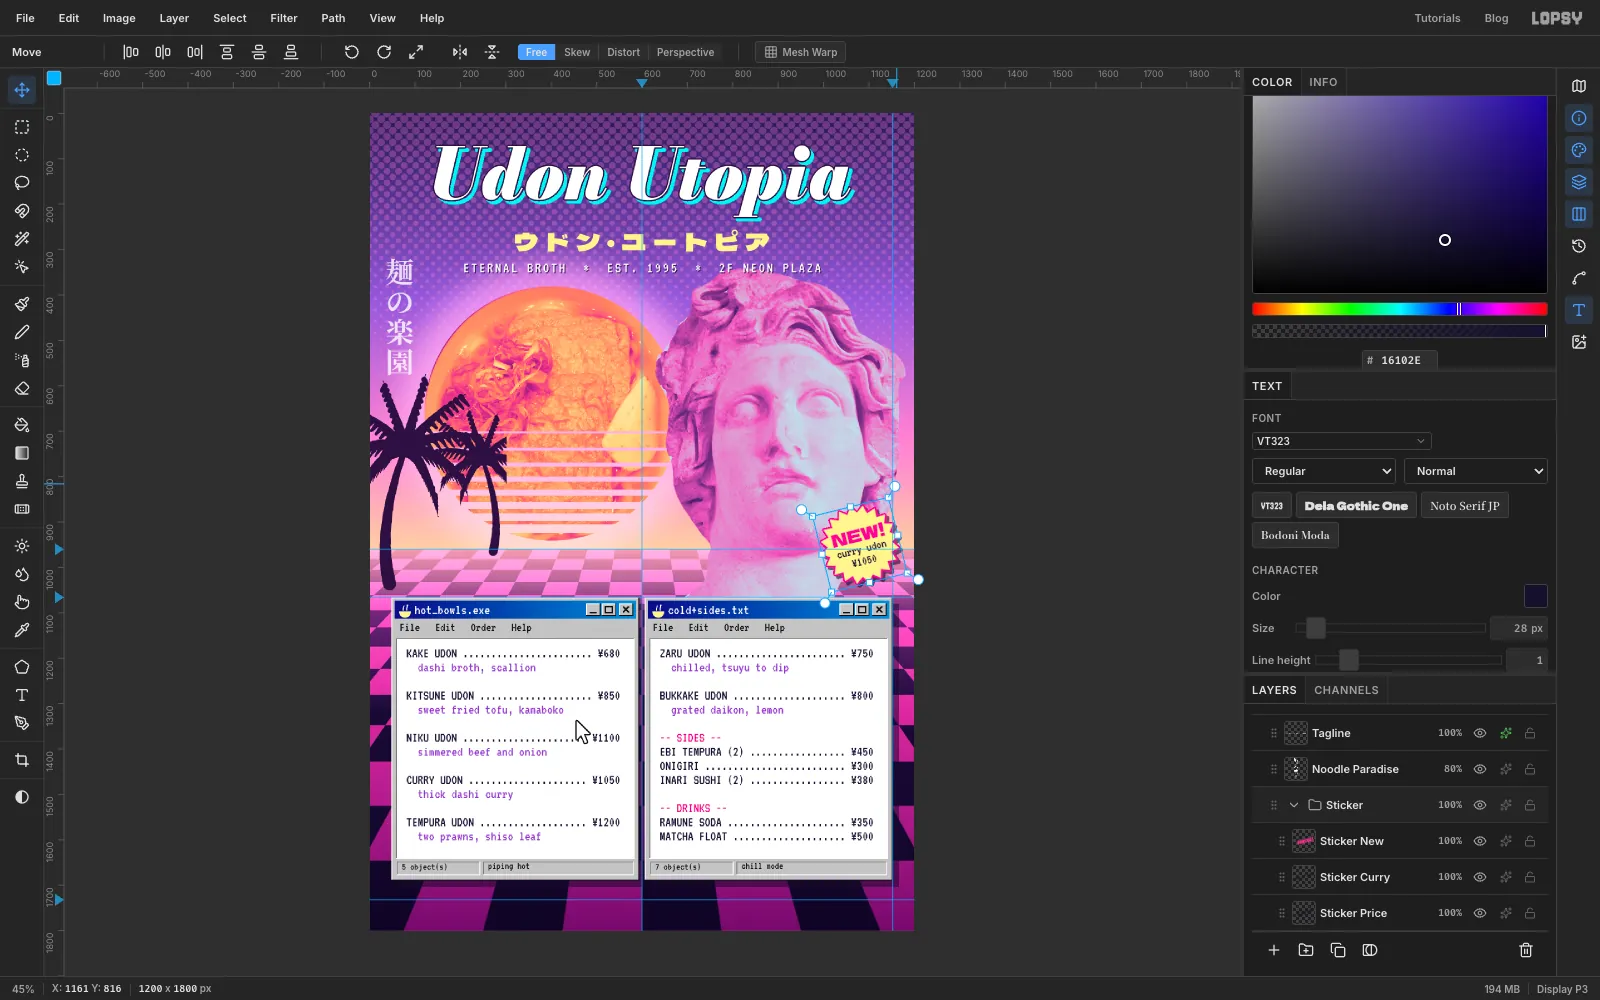
Click the Sticker group row and press V. With nothing selected on the canvas, the Move tool puts one box around the whole group. Drag just outside its top-right corner to turn it about 14° anticlockwise, then press Enter. Its shadow should clear the cold window by about 20 px.
-
Build the taskbar
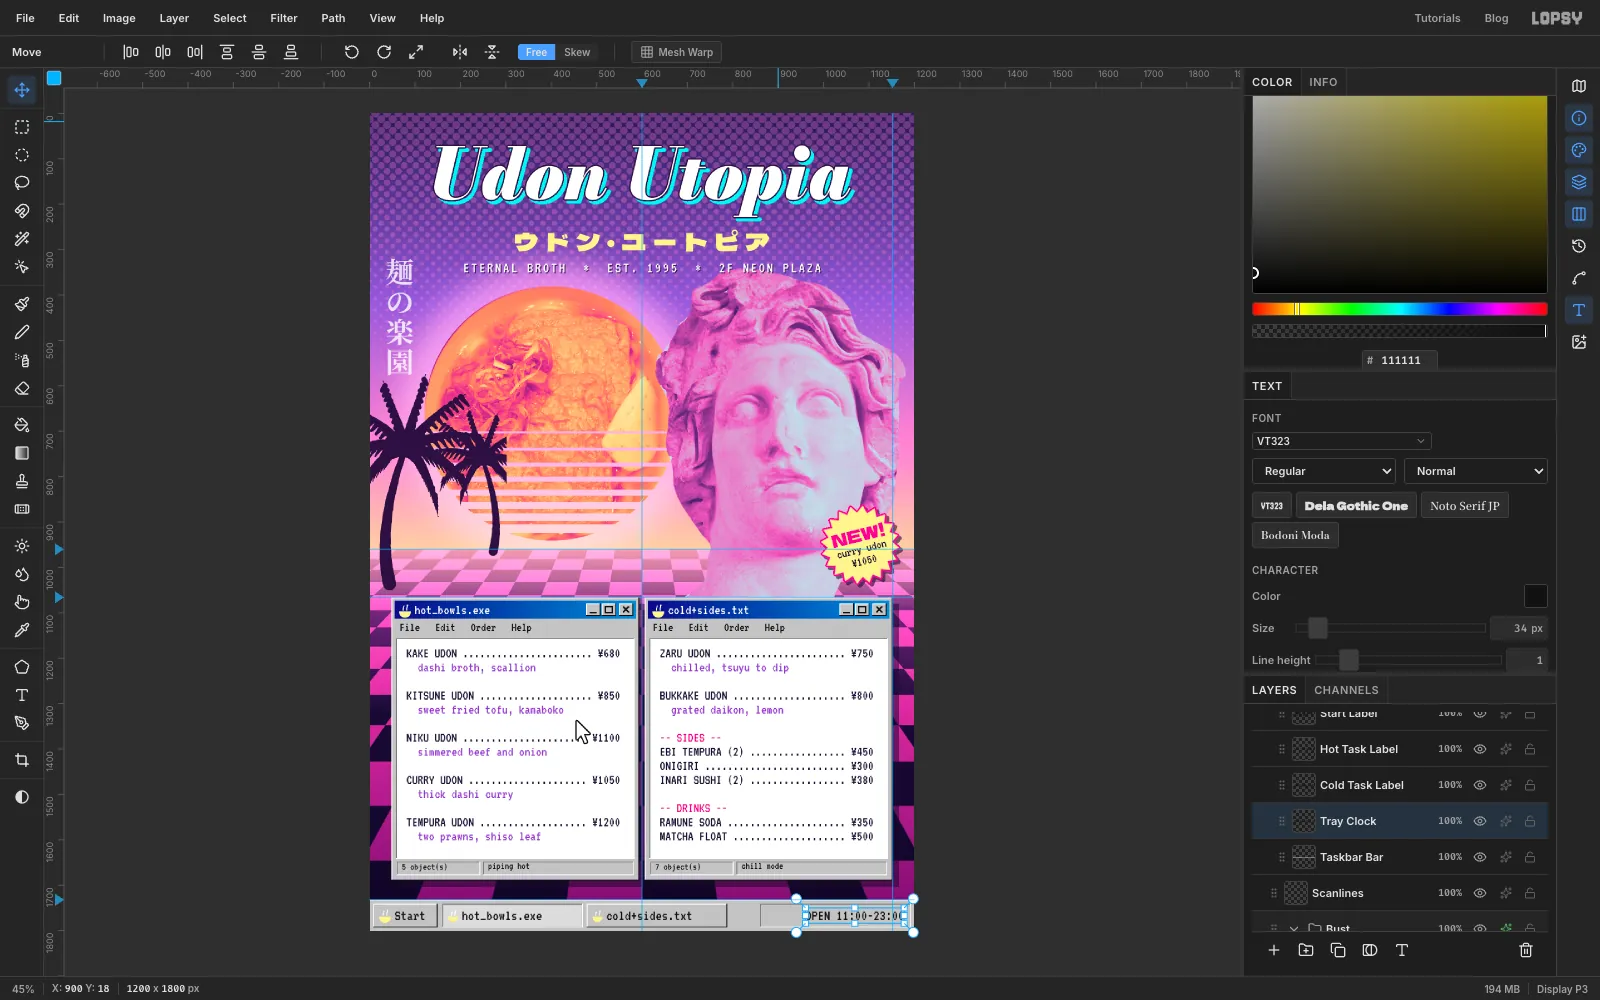
Click Scanlines, click New Group and name it Taskbar. Add a layer called Taskbar Bar. Fill a marquee from the taskbar guide to the bottom of the canvas with and Pencil a 2 px white line along its top.
Draw four buttons with the same Pencil bevels, all running from y 1741 to 1793: a raised Start button (x 8 to 150), a pressed button for the hot window (x 160 to 470, sunken, filled a lighter ), a raised one for the cold window (x 478 to 788), and a sunken tray on the right (x 860 to 1192). Add a little bowl icon to the first three.
Type the labels in VT323 at 34 in , clicking Taskbar Bar before each: Start, hot_bowls.exe, cold+sides.txt and OPEN 11:00-23:00. Line them up on one baseline. Centre Start in its button, then use the arrow keys to nudge each of the others up or down until the bottoms of its letters sit level with the bottom of Start (ignore the underscore).
-
Add CRT scanlines
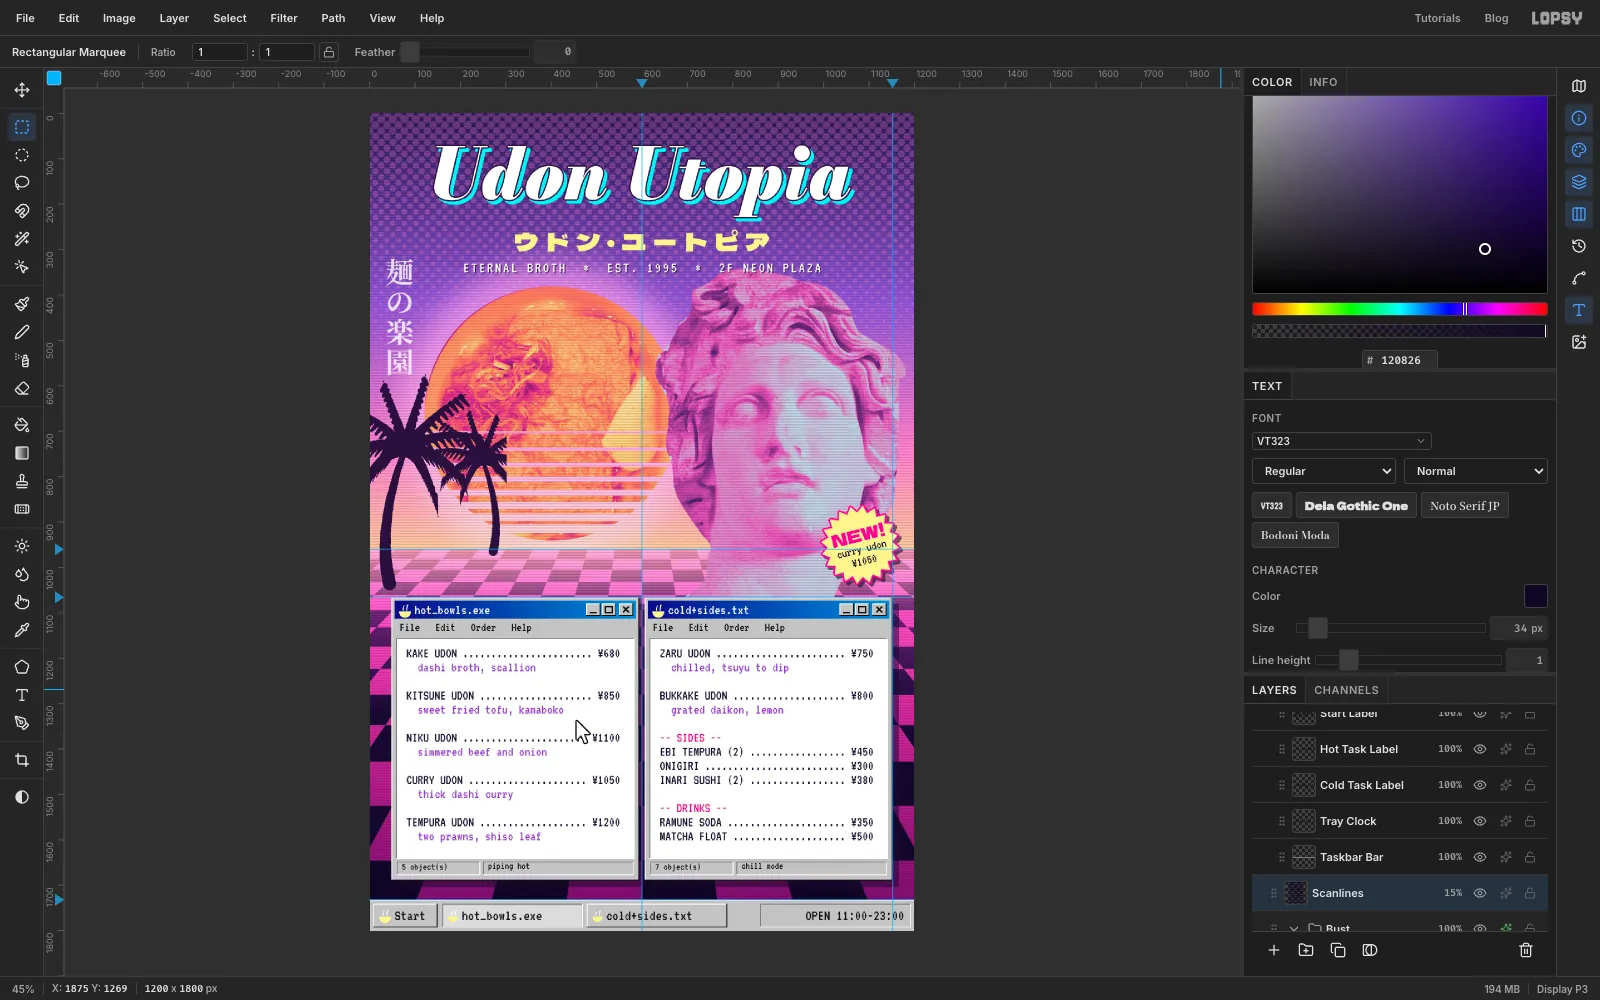
Click the empty Scanlines layer. Zoom right in on the top-left corner, fill a 6 × 3 px marquee with , then marquee 6 × 6 px from the corner and choose Edit → Define Pattern. Press Delete.
Marquee everything above the taskbar guide, choose Edit → Fill with Pattern…, pick the new striped tile and click Apply. Press Cmd+D, then set the layer to Multiply at 15 %. Scanlines sits above the bust and below all the type and windows, so it dims the wallpaper and leaves the menu crisp.
-
Glitch the floor and the bust
Click Floor and choose Filter → Chromatic Aberration… with Amount 4 and Direction 0. It splits the red and blue edges of every checker square, like a misaligned old monitor.
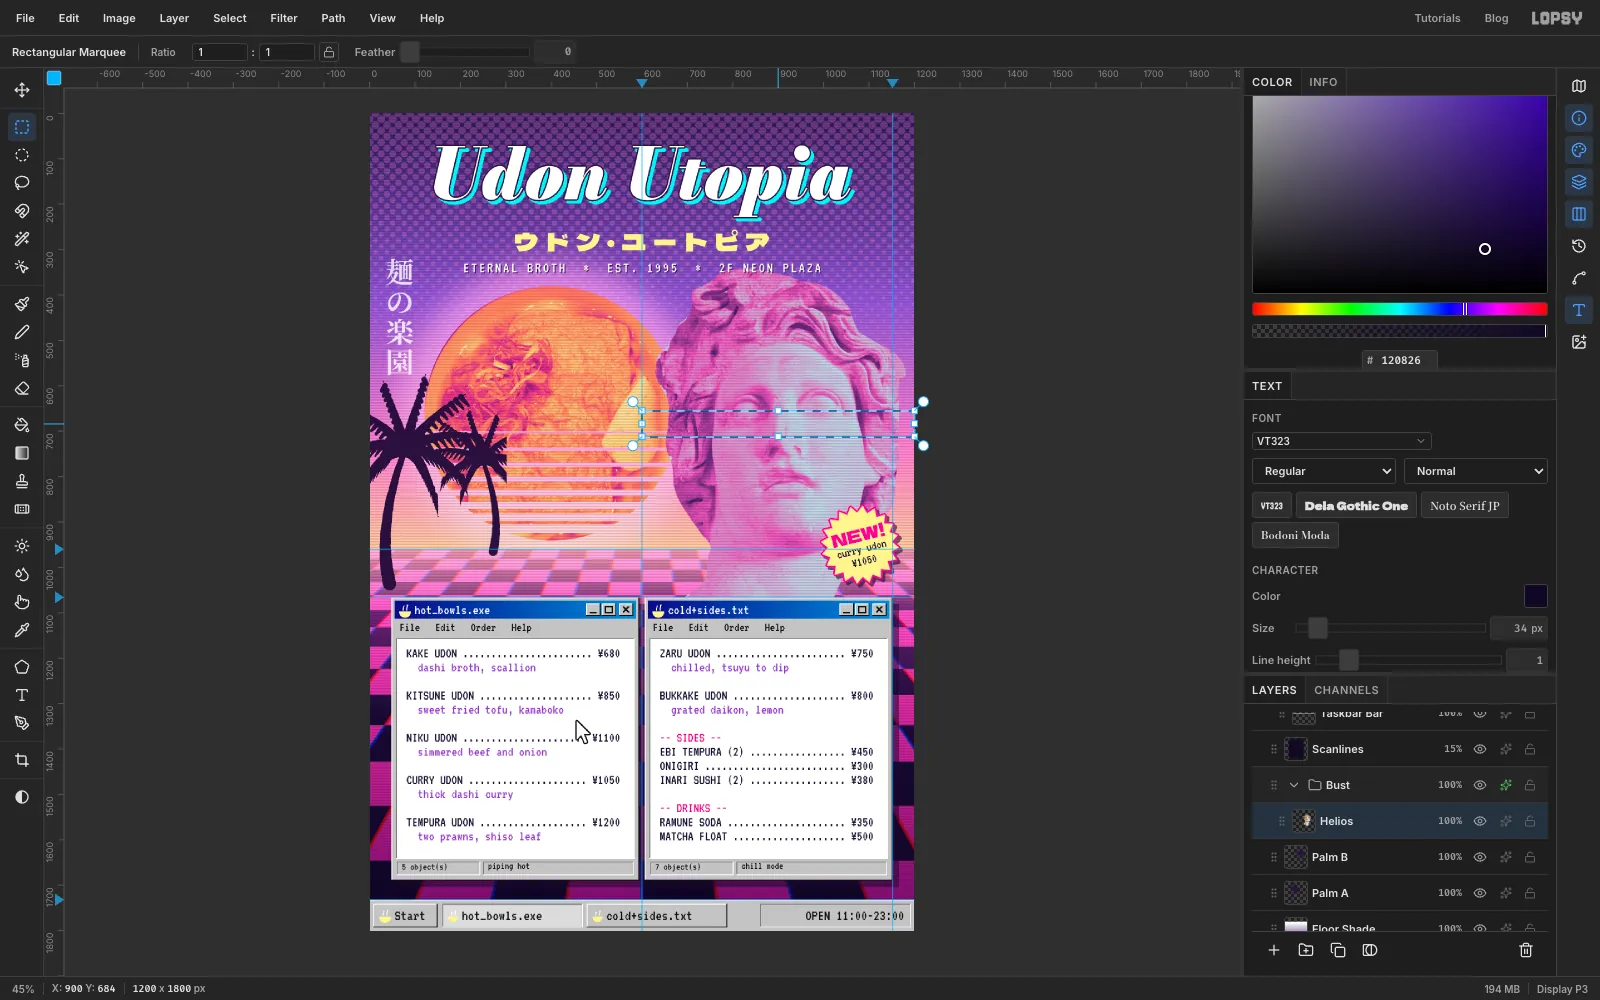
Click Helios, draw a Rectangular Marquee in a band across the bust's eyes, from about (600, 655) to (1200, 712). Choose Filter → Pixel Stretch… with Amount 36, Bands 7, Seed 12 and RGB Split 0.7. Slices of the band slide sideways, like a tape glitch. Press Cmd+D.
-
Calm the fishcake and bloom the sun
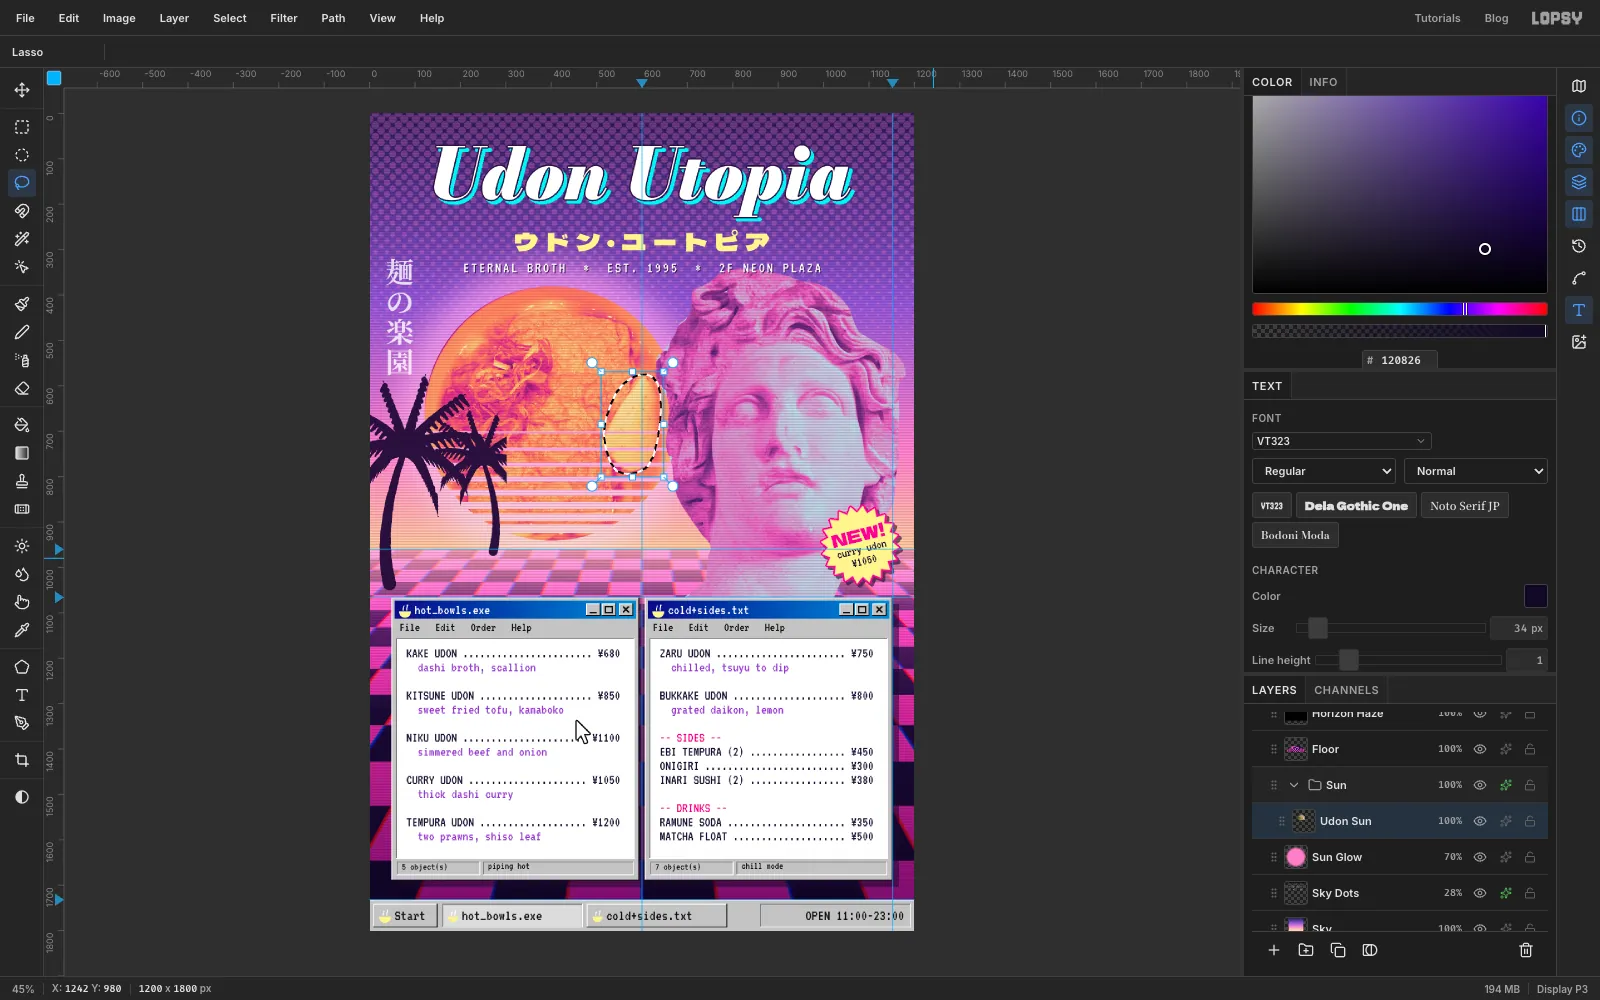
The slice of white fishcake on the right of the bowl is the brightest flat shape in the sun, and it pulls the eye away from the noodles. Click Udon Sun, lasso around the wedge, and choose Select → Feather… with 6. Choose Filter → Brightness/Contrast… and set Brightness −12 and Contrast −25. Press Cmd+D.
Then run Filter → Bloom… on the whole layer with Threshold 88, Radius 18 and Intensity 35, for a gentle glow on the highlights. To judge it, hide and show the Sun group with its eye icon.
-
Export and save
Press Cmd+D and click an empty part of the window so no handles show. Choose File → Quick Export PNG for the image and File → Save Project to keep every layer, group, effect and live text layer editable.