Design a Hand-Painted Vernacular Website for a Tire Shop
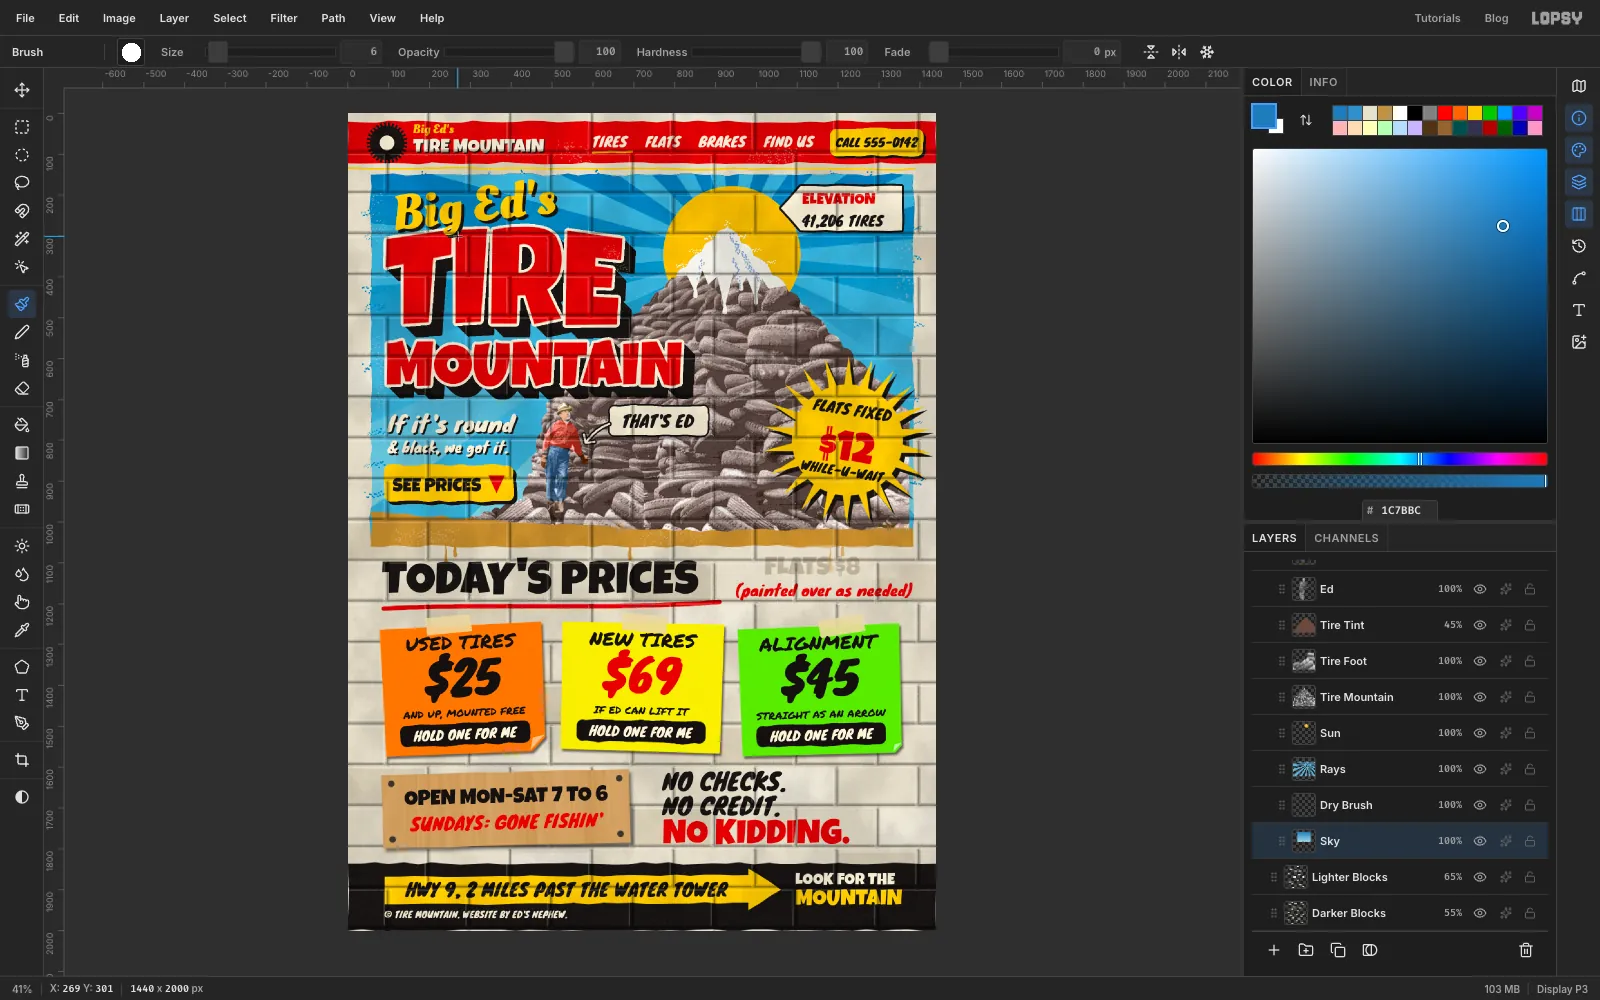
Mock up a small-town tire shop homepage as a painted cinder-block wall, with sign-painter lettering, a photo tire mountain and fluorescent price signs.
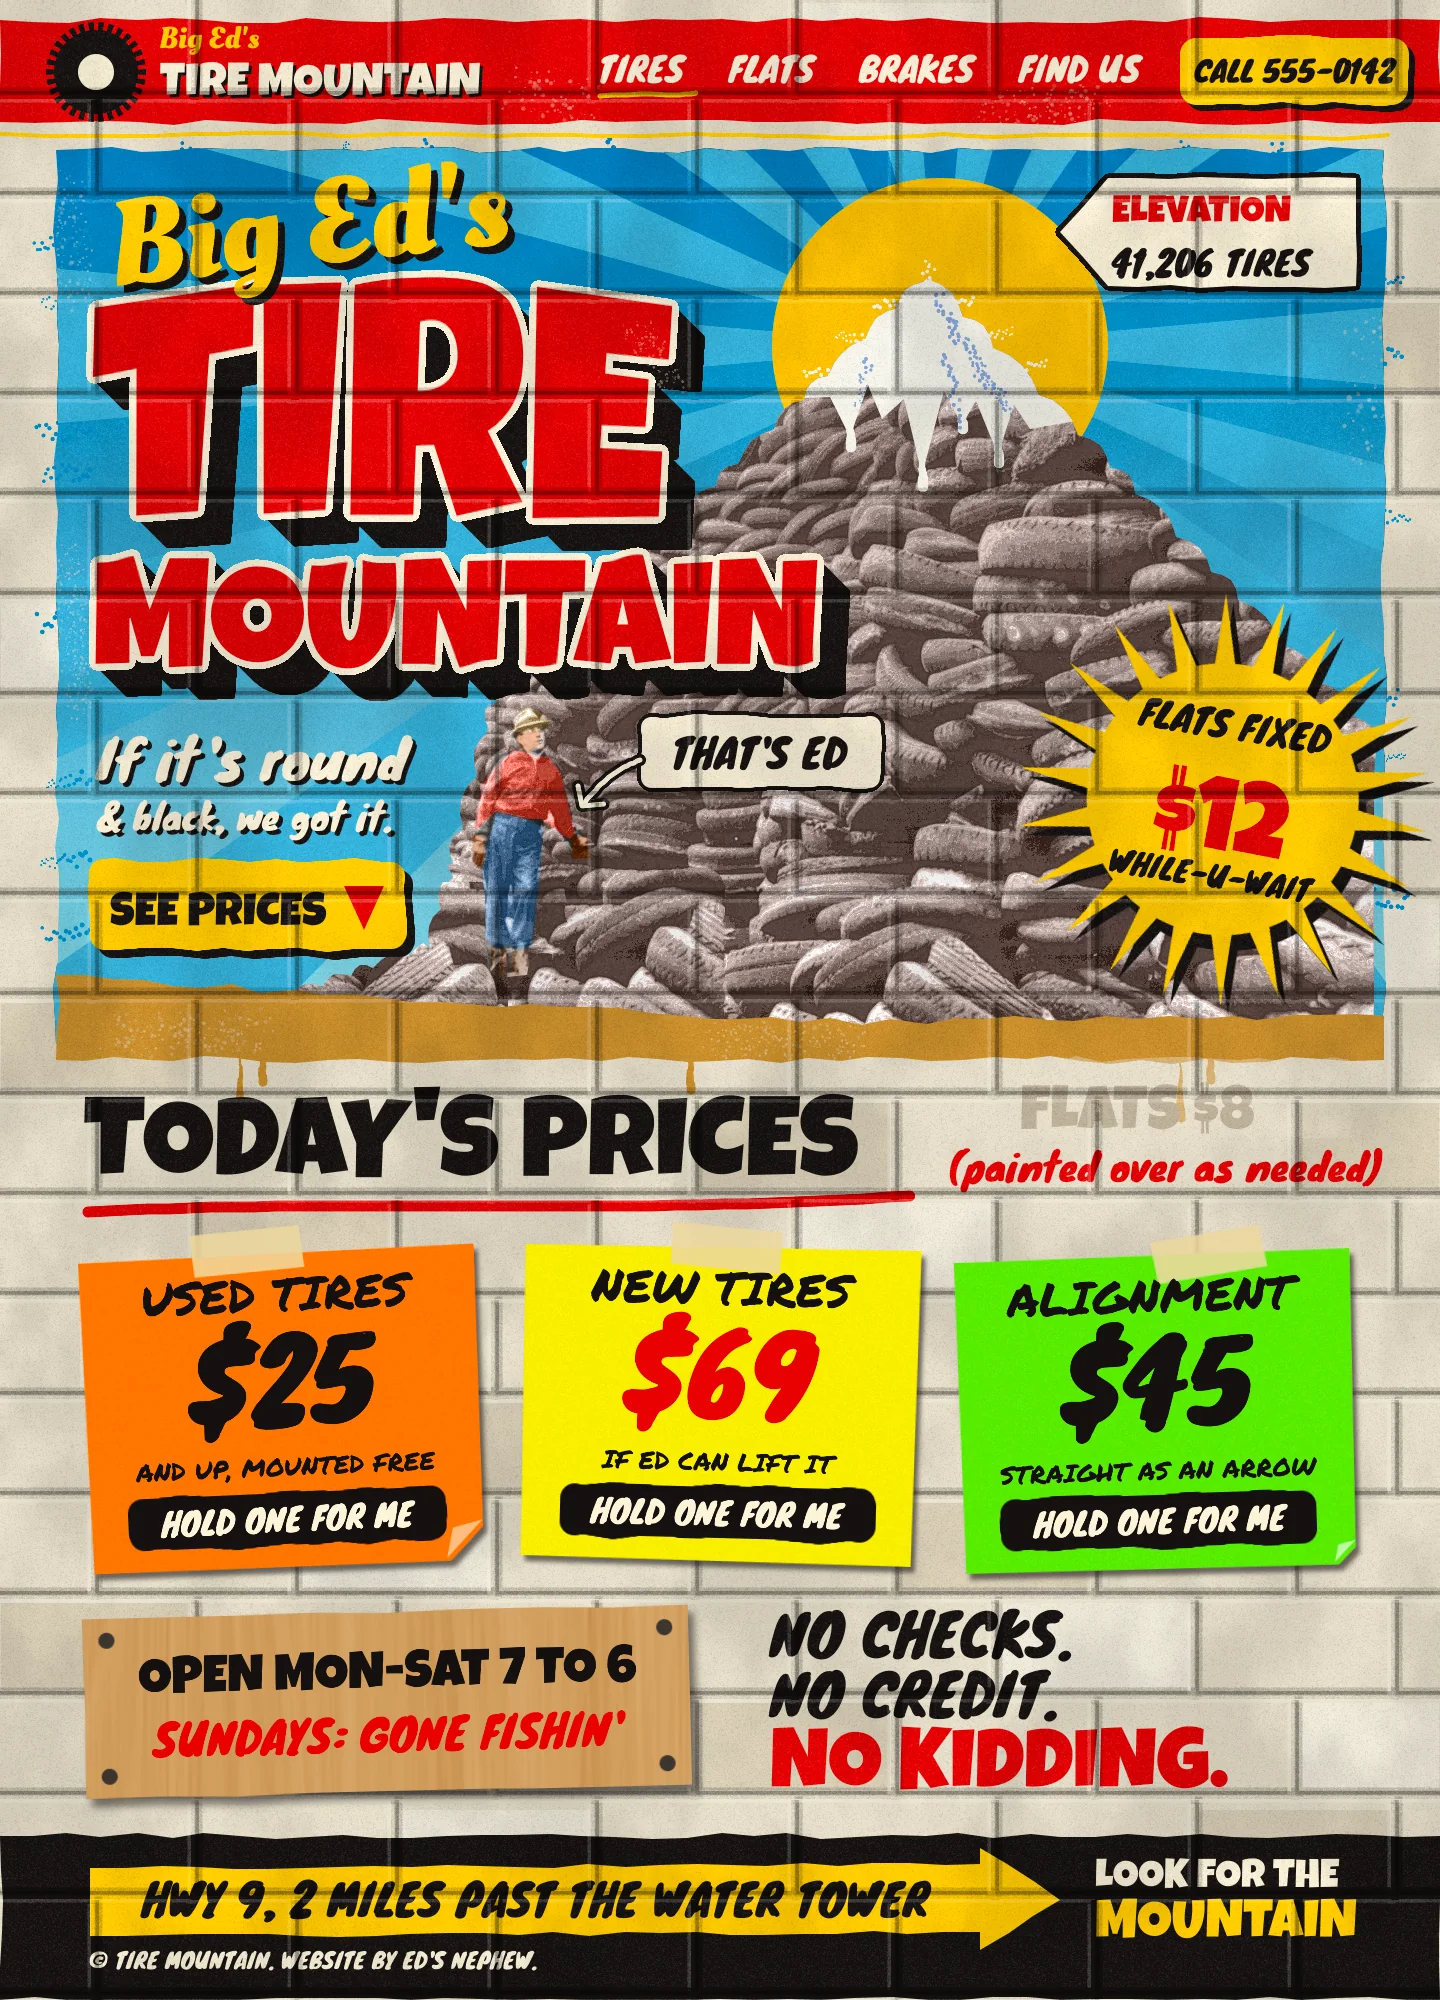
Vernacular design is the stuff nobody went to design school to make: the hand-lettered sign on the tire shop, the marker price tag in the grocery window, the mural the owner's cousin painted in 1984. It's sincere, a little crooked and very direct. It's also a great antidote to templated websites, so in this tutorial you'll mock up a desktop homepage as if a local sign painter had painted it straight onto the shop wall.
The shop is Big Ed's Tire Mountain, which is invented. The joke drives the whole design: a real photo of an enormous tire pile gets cut into a mountain peak with a painted snowcap, and the man standing at its foot becomes Ed.
Under the paint it's still a normal web layout, with a nav bar, a hero with a headline and button, three price cards, an info row and a footer. The pieces are:
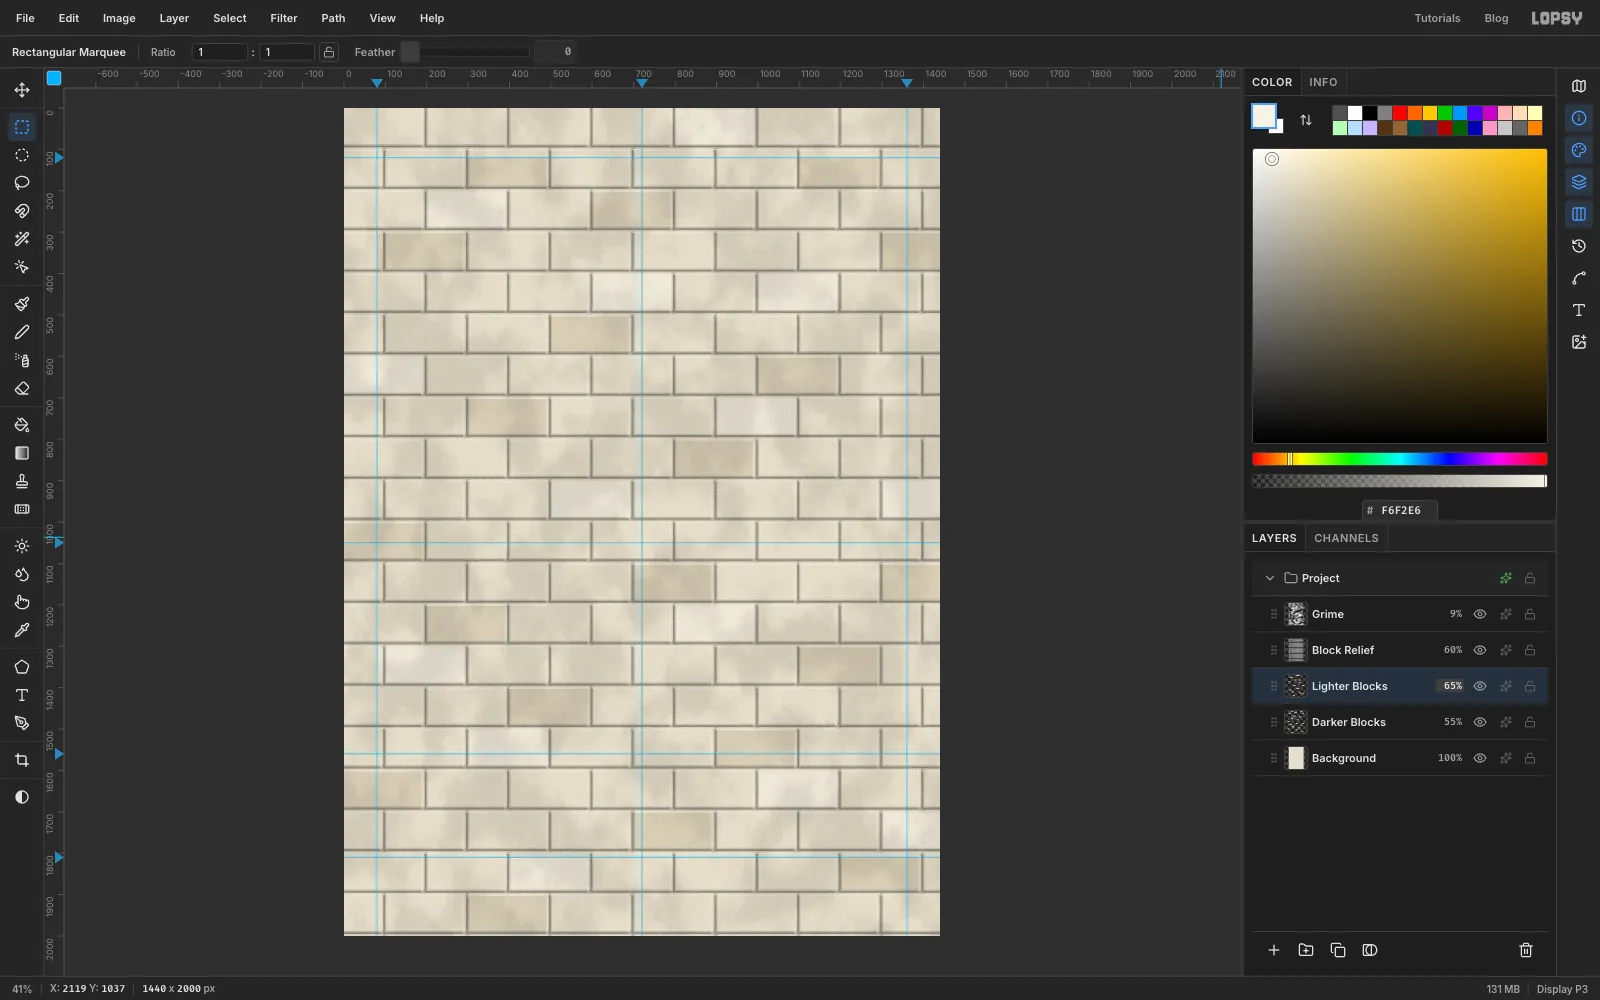
- a cinder-block wall built from one block, tiled and embossed, so the mortar lines run through all the paint
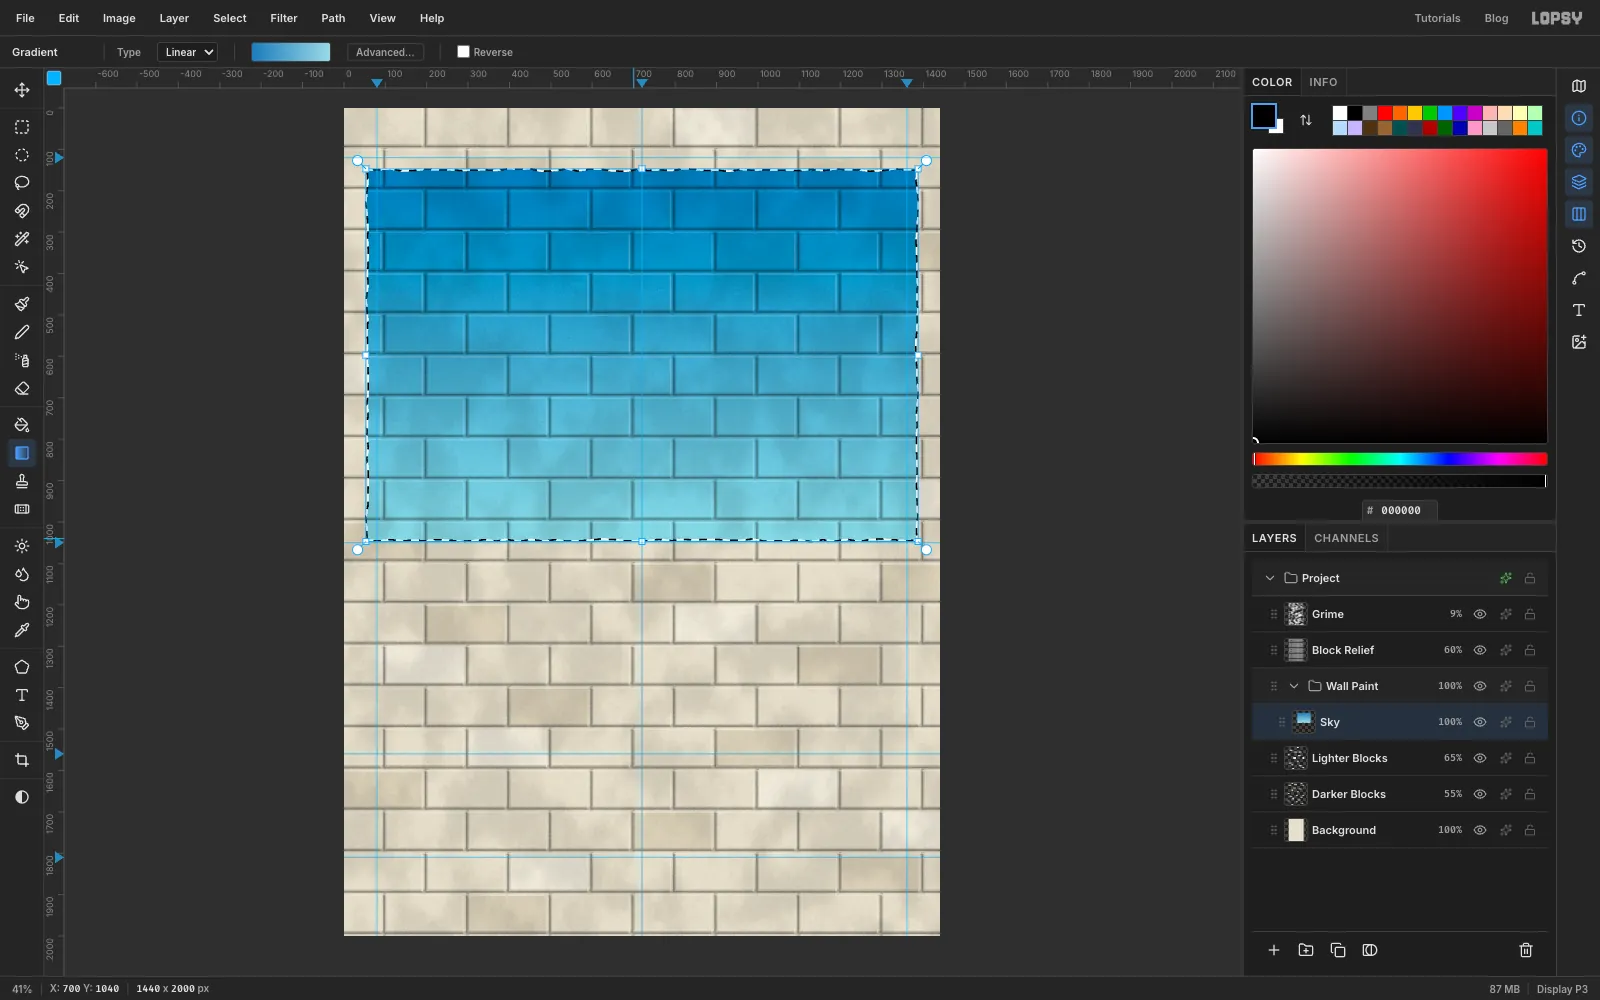
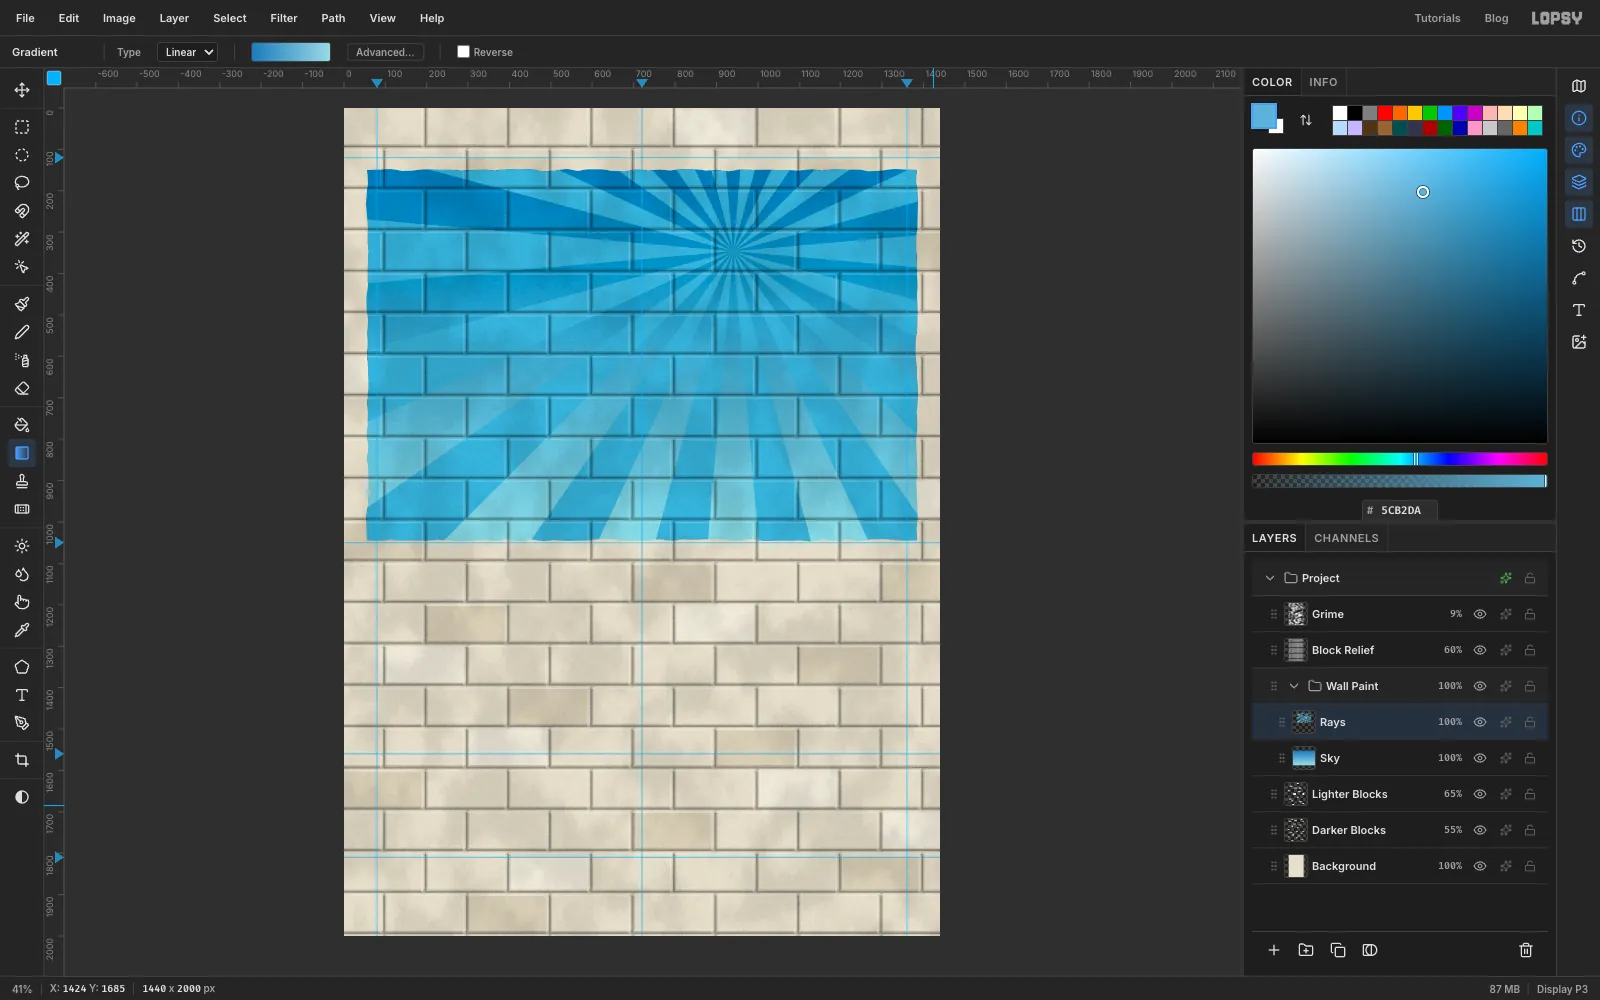
- a blue mural with sun rays
- a photo tire pile cut into a peak, with a painted snowcap and a hand-tinted Ed
- a headline with an arched top, hand-wobbled letters, a block shade and a cream outline
- fluorescent poster-board signs and a plywood hours board fixed to the wall on top of the relief
- paint runs, flecks and dry-brush edges to weather it all
You'll need one public-domain photo from Wikimedia Commons, from the U.S. National Archives:
- As this big pile of used auto tires indicates, the United States with its many passenger cars has in discarded tires... - NARA - 535587.tif. Download the 1,920 px-wide JPEG version.
Along the way you'll use:
- Define Pattern, Fill with Pattern, Emboss, Add Noise and Clouds for the wall
- the Lasso, Elliptical Marquee, Gradient tool and Sunburst for the mural
- dropping in a photo, scaling with the Move tool, Clone Stamp, Cel Shading and Brightness/Contrast
- combining selections with Shift and Shift+Alt
- Mesh Warp, Liquify, Duplicate Layer and Merge Down for the lettering
- live text in Luckiest Guy, Oleo Script, Knewave and Permanent Marker
- Drop Shadow and Stroke effects, and the Hard Light, Multiply, Color and Soft Light blend modes
- groups, rotating whole groups with the handles, Brush Taper and Scatter, and Spray
The palette:
-
Whitewash
-
darker coat
-
lighter coat
-
Sky
-
rays
-
sun
-
Sign red
-
sign yellow
-
cream
-
ink
-
Ground
-
plywood
-
Snow
-
snow shadow
-
tire tint
-
Ed's jacket
-
hat
-
skin
-
trousers
-
boots
-
Poster orange
-
poster yellow
-
poster green
-
tape
Positions are given in document pixels as x, y wherever things need to line up. The status bar at the bottom of the window shows the pointer's X and Y. Everything drawn freehand only needs to be roughly right, and a shaky line helps here because it looks hand-cut.
A few habits save trouble with text. Before you start a new piece of text, click a raster layer (each step says which one), because with a text layer selected, changing the font, size or colour restyles that layer instead. Start the text in an empty patch of canvas: a click on existing text edits it. Set the foreground colour first, because new text takes its colour from it. A step that names a font means the Text tool, so pick that before you look for the font controls. When a step says to centre or nudge something, commit the text with Tab, pick the Move tool, and use the arrow keys (Shift+arrow moves ten pixels). The arrows only nudge with the Move tool active.
Close the effects drawer whenever you've finished with an effect, or your next canvas click may land on it. In the Brushes window, Size, Spacing, Hardness and Taper are on the Shape tab, and Scatter and Size Jitter are on Dynamics.
Double-click a layer's name to rename it. The names below are the ones the steps refer back to.
-
Lay out the page and draw one block
- Choose File → New and make a 1440 × 2000 px document.
- Click the top ruler at
x 80,720and1360to drop vertical guides. These are the page margins and the centre line. - Click the left ruler at
y 120(the bottom of the nav),1050(the bottom of the hero),1560(the bottom of the price cards) and1810(the top of the footer). - Click Background, set the foreground colour to and choose Edit → Fill.
- Click Layer 1 and rename it
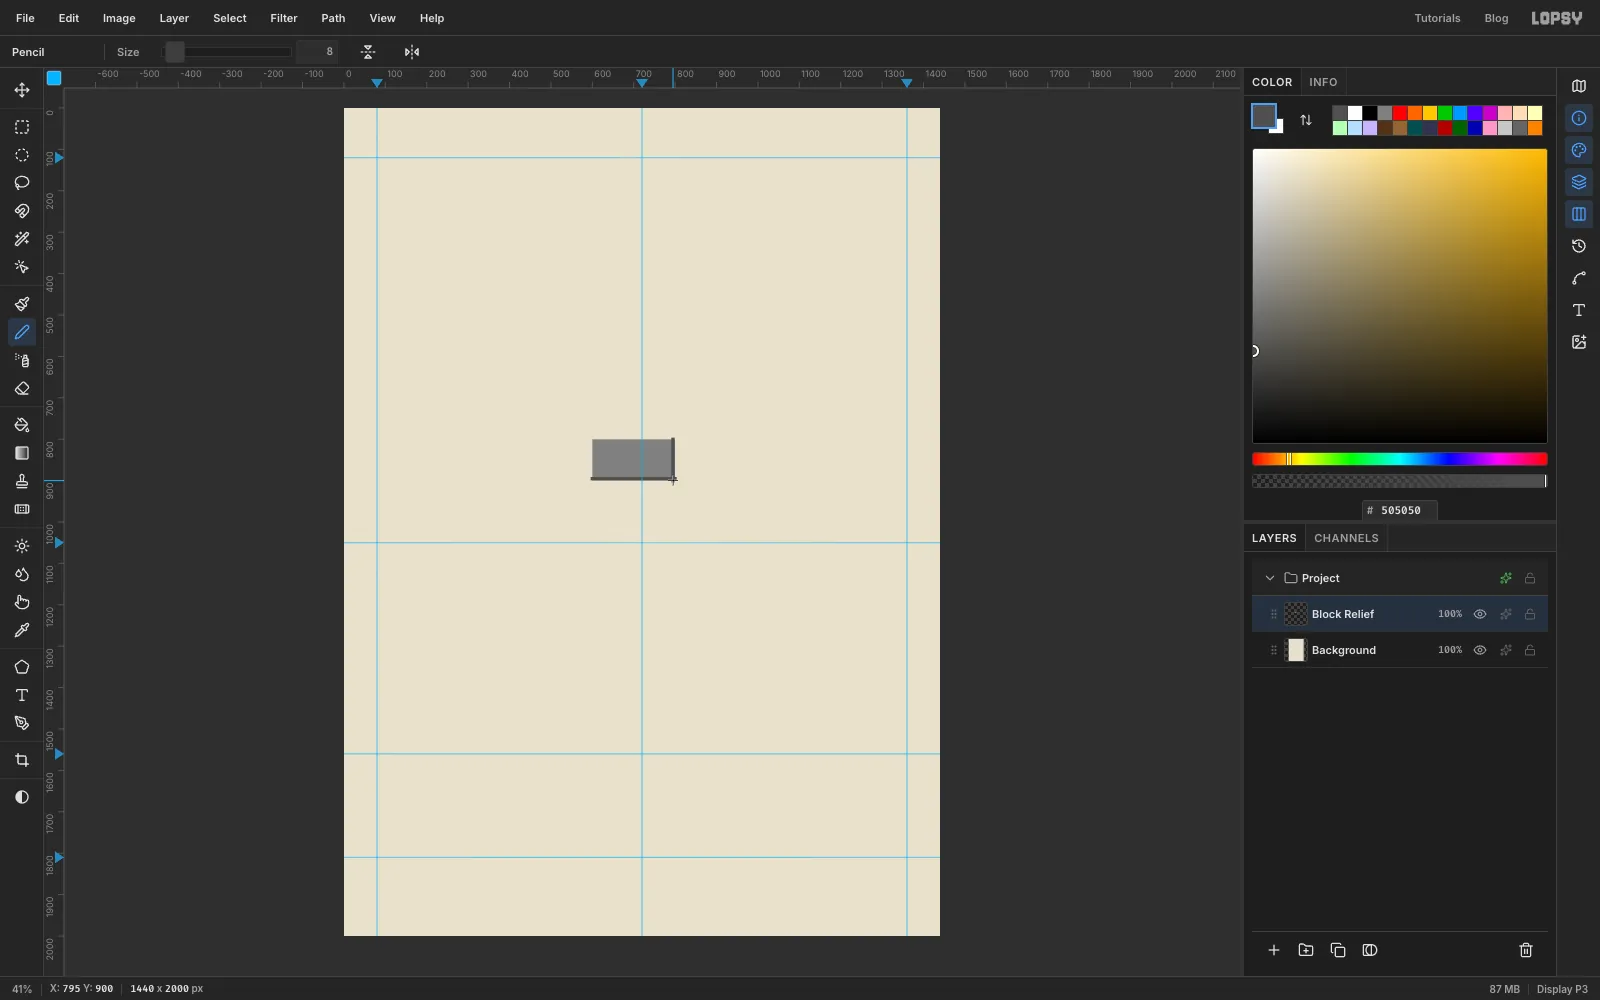
Block Relief. - Pick the Rectangular Marquee and click once in the canvas without dragging. That opens the exact-corners dialog. Enter From
600, 800and To800, 900, then click Select. - Set the foreground to and choose Edit → Fill. Press Cmd+D to deselect.
- Set the foreground to , pick the Pencil and set Size to
8. - Click at
600, 895, then hold Shift and click at800, 895. That's the bed of mortar along the bottom. - Click at
795, 800, then hold Shift and click at795, 900. That's the joint on the right.
-
Tile the block across the wall
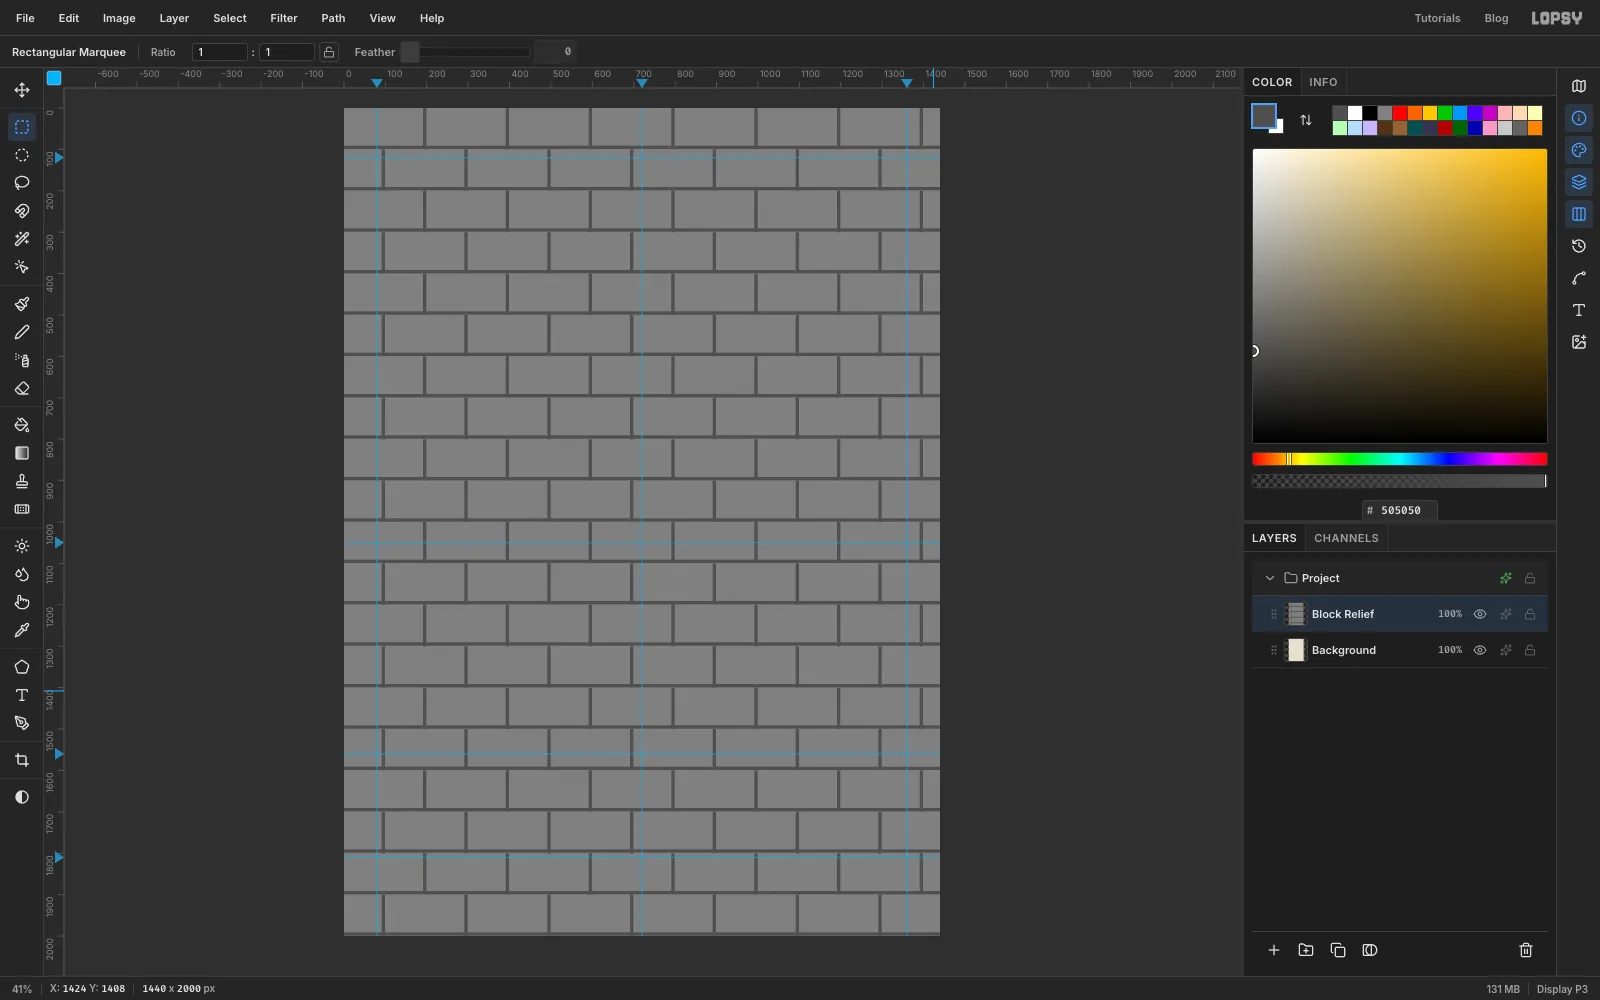
- Make the same exact selection again: Rectangular Marquee, click once, From
600, 800, To800, 900. - Choose Edit → Define Pattern, then press Cmd+D.
- Choose Edit → Fill with Pattern… and pick your new pattern.
- Set Row Stagger to
50and click Apply. Stagger offsets every other row by half a block, which is how real blocks are laid.
- Make the same exact selection again: Rectangular Marquee, click once, From
-
Turn the blocks into relief
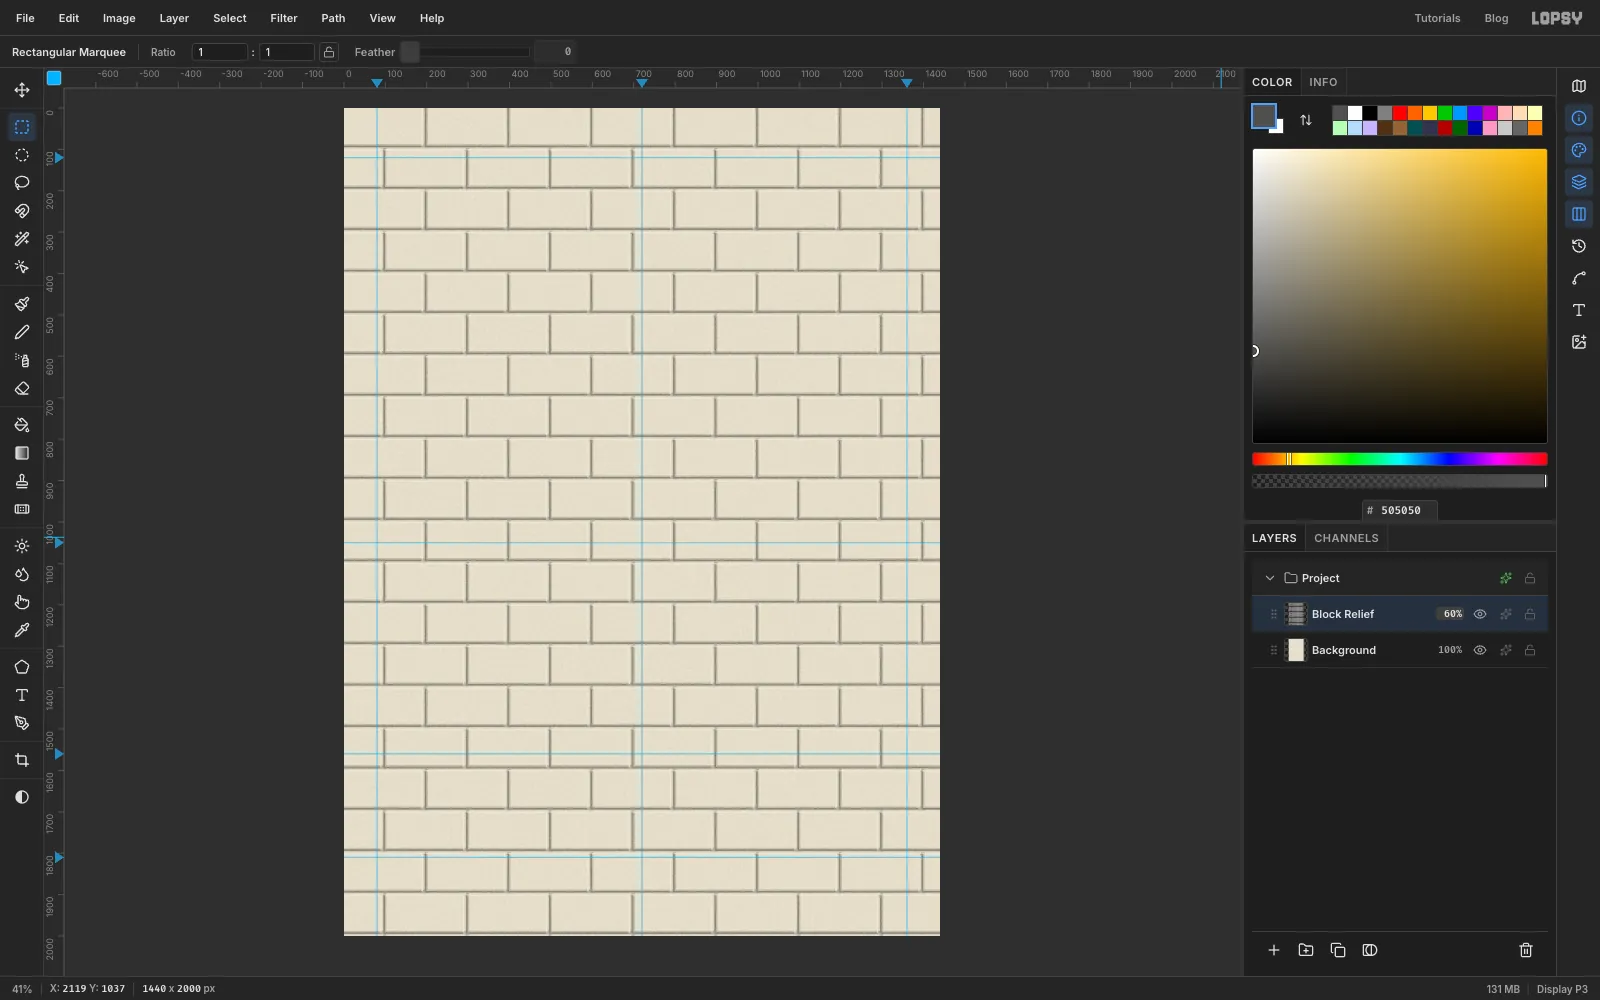
- With
Block Reliefstill selected, choose Filter → Gaussian Blur… with Radius1.5to soften the mortar edges, then click Apply. - Choose Filter → Add Noise… with Amount
22and Mono, then click Apply. This gives the concrete some grit. - Choose Filter → Emboss… with Angle
135and Strength45, then click Apply. - Click the ✦ button on the layer's row, set the blend mode to Hard Light and close the drawer. Click the opacity figure on the row and set it to
60%.
Everything you paint later goes under this layer, so the mortar lines run through the paint just as they would on a real wall.
- With
-
Give the whitewash uneven coats
- With
Block Reliefselected, click Add Layer and name itGrime. Choose Filter → Clouds… with Scale20and click Apply. Set it to Multiply at9%. - Click Background, click Add Layer and name it
Darker Blocks. - With the Rectangular Marquee, drag over one block, just inside its mortar lines. Hold Shift and drag over another block to add it. Keep going until you've picked about twenty blocks scattered all over the wall.
- Fill with , deselect, and set the layer to
55%opacity. - Click Add Layer, name it
Lighter Blocksand do the same with about fourteen other blocks, filled with at65%.
- With
-
Paint the sky
- Click
Lighter Blocksand click New Group. Name the groupWall Paint. All the painted work goes in here. - Click Add Layer and name it
Sky. - With the Lasso, draw a slightly shaky rectangle from about
56, 150to1384, 1044. Don't make it neat, because it's the edge of a mural done with a wide brush. - Pick the Gradient tool, set it to Linear and click Advanced…. Set the two stops to and and click Done.
- Drag from the top of the selection to the bottom, then press Cmd+D.
- Click
-
Add sun rays
- Click Add Layer and name it
Rays. - Hold Cmd and click the thumbnail of
Skyto select its shape. - Set the foreground to .
- Choose Filter → Sunburst… and set Rays to
18, Length to130, Width to50, Center X to65.3and Center Y to17.3. Leave the rest alone and click Apply. - Press Cmd+D.
- Click Add Layer and name it
-
Paint the sun
- Click Add Layer and name it
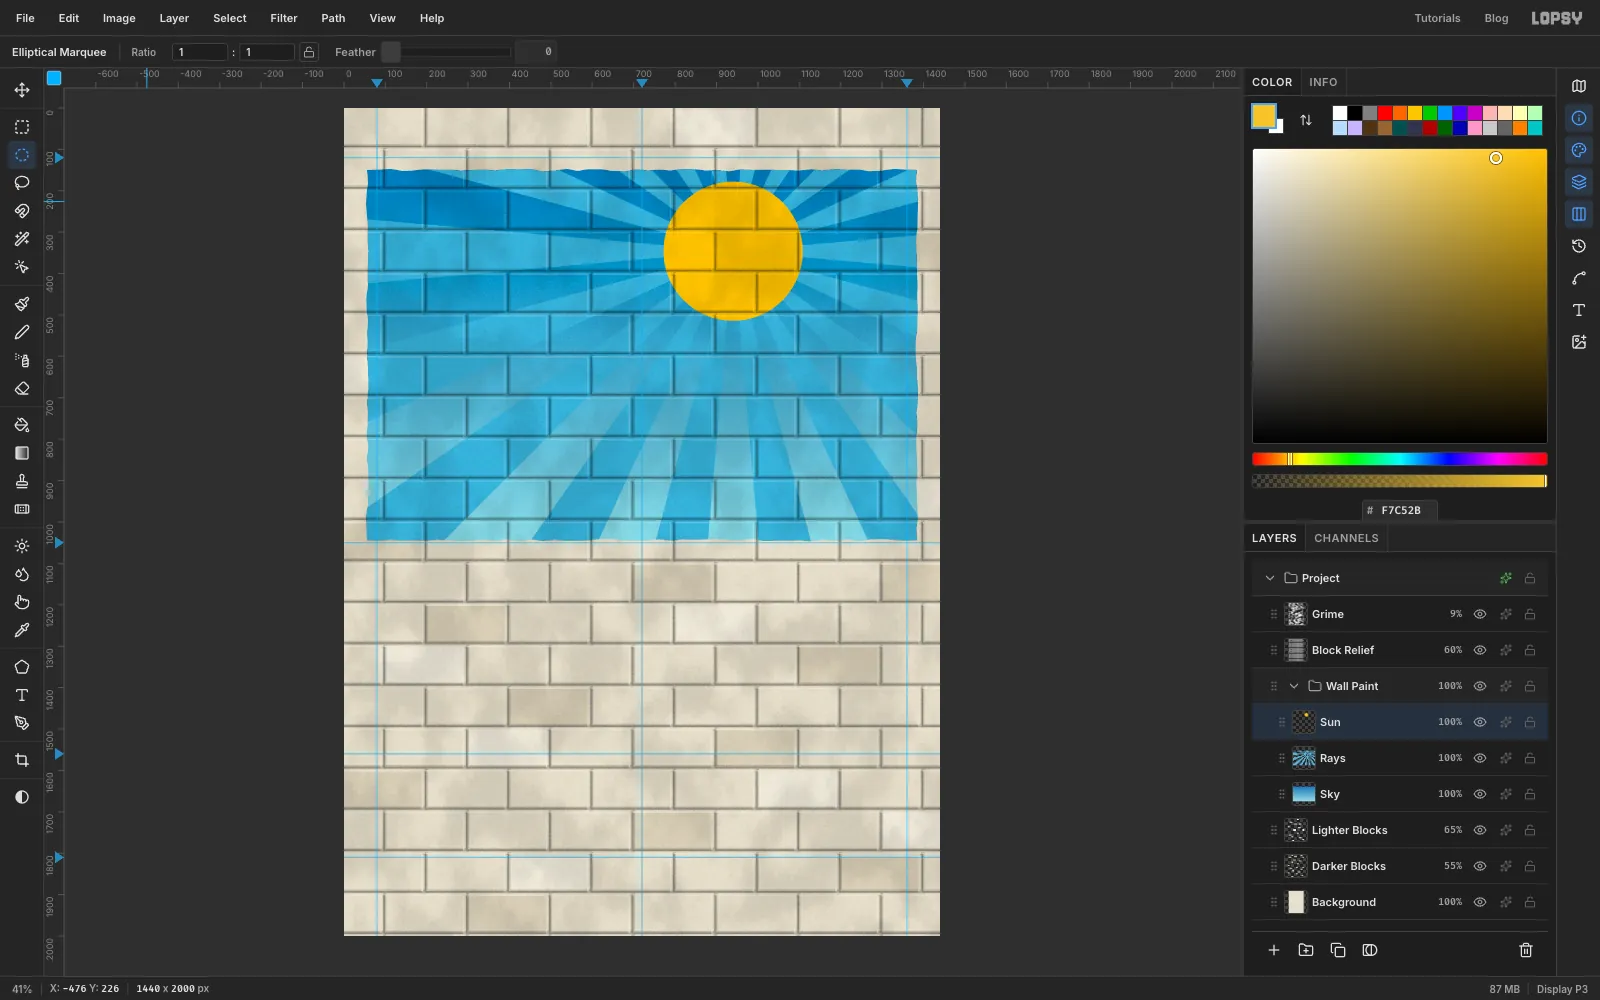
Sun. - Pick the Elliptical Marquee and click once without dragging. Enter From
772, 178and To1108, 514, then click Select. - Fill with and deselect.
- Click Add Layer and name it
-
Bring in the tire photo
- Drag the tire photo from your computer onto the canvas. It arrives above
Sunas a new layer with handles around it. Rename itTire Mountain. - Hold Cmd and drag the bottom-right corner handle up and to the left until the photo is about 972 px wide. Holding Cmd keeps the proportions.
- Press Cmd+D to commit the scale.
- With the Move tool, drag the photo so its left edge sits at about
x 420and its bottom edge at abouty 1066. The top of the photo now lands neary 268.
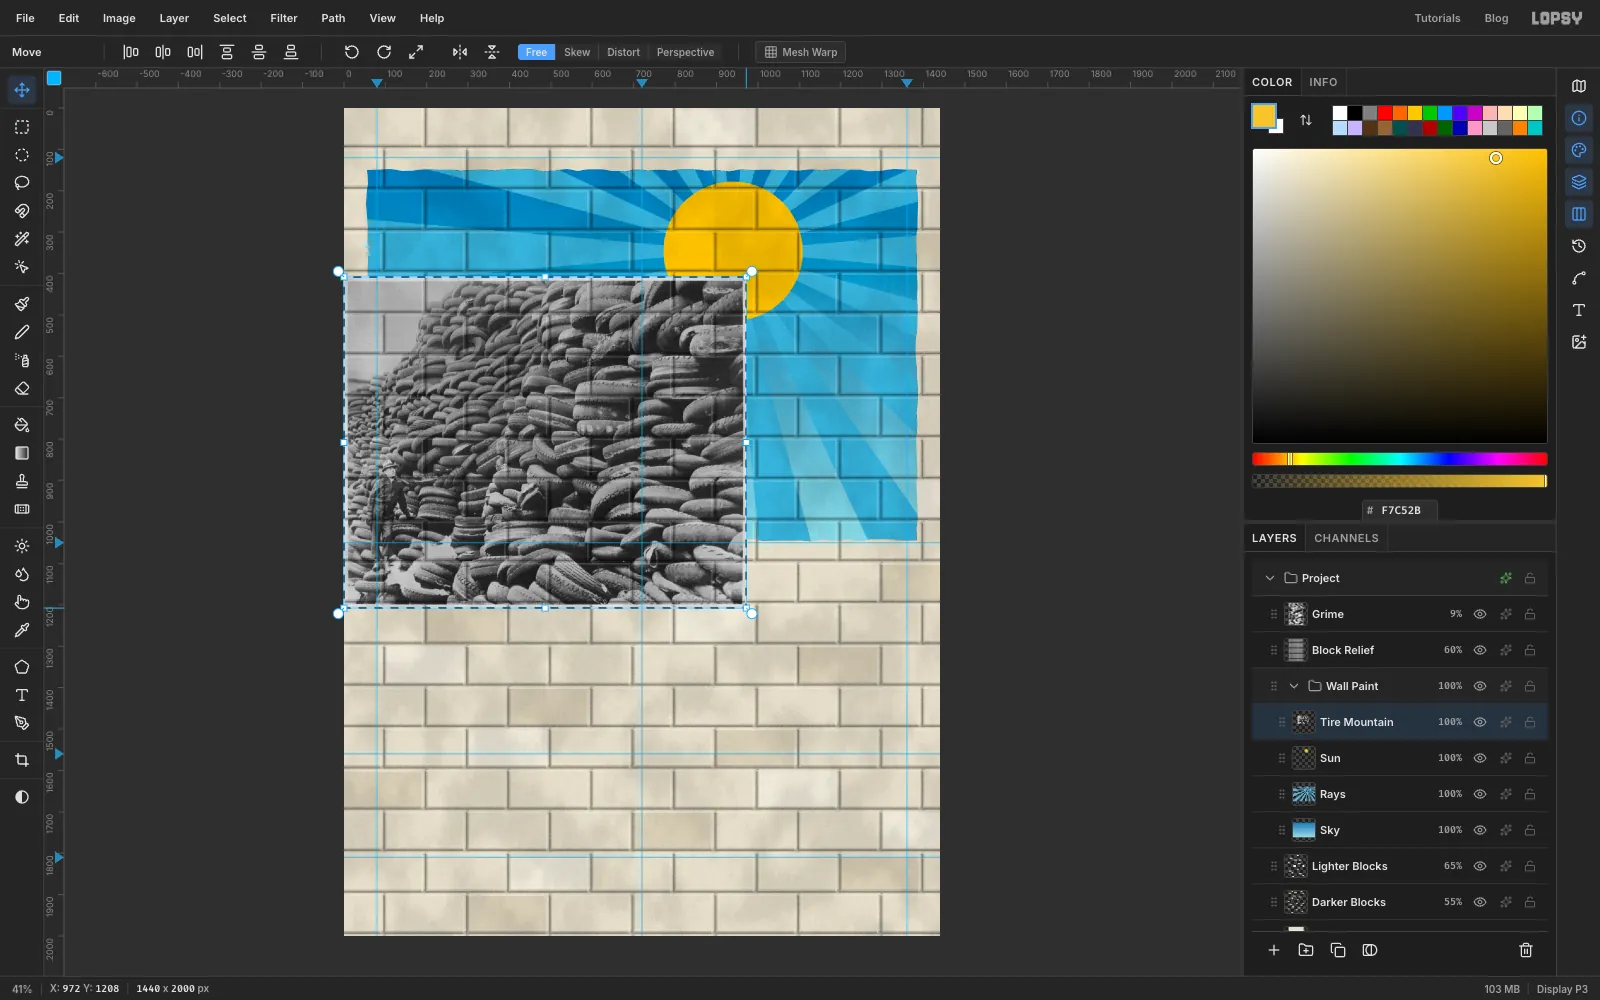
- Drag the tire photo from your computer onto the canvas. It arrives above
-
Lift Ed onto his own layer
The man in the fedora needs separate treatment later, so copy him out before you touch the pile.
- He's small at this zoom, so zoom in on him first by holding Cmd and scrolling. With
Tire Mountainselected, use the Lasso to trace around the man, hat to boots. Include his hand where it rests on the tire to his right. Stay close, but a little background won't matter. - Press Cmd+C, then Cmd+V. The copy lands exactly on top of him. Rename it
Edand press Cmd+D. Choose View → Fit to Screen to zoom back out.
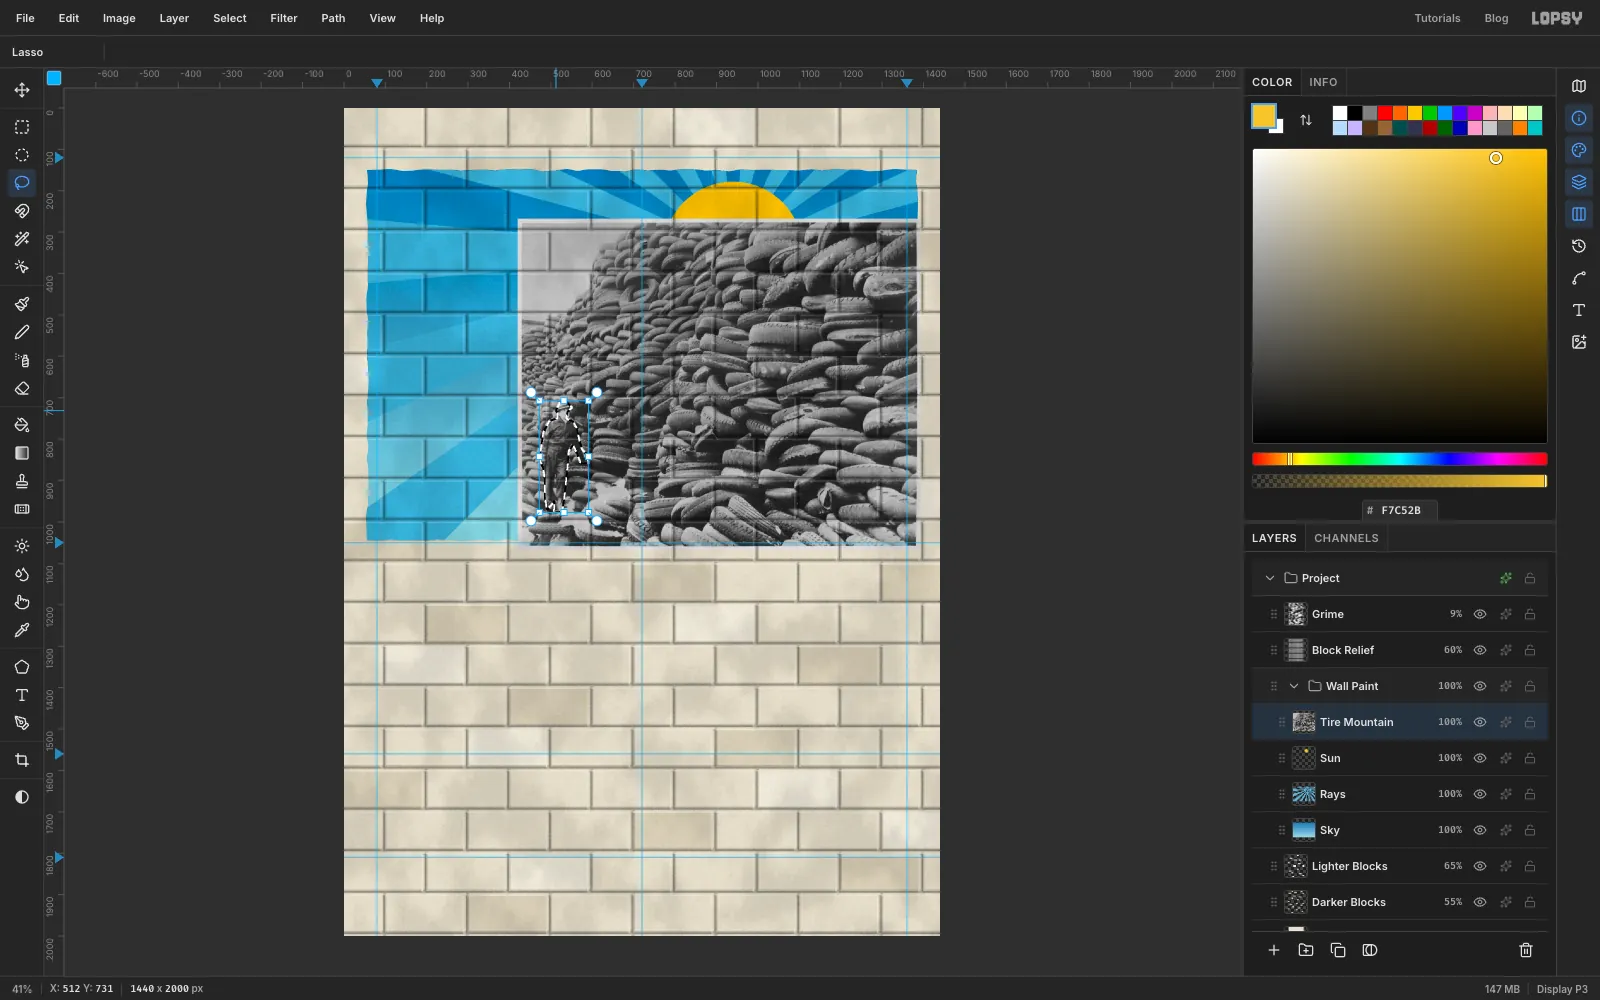
- He's small at this zoom, so zoom in on him first by holding Cmd and scrolling. With
-
Cut the pile into a mountain
- Click
Tire Mountain. - With the Lasso, start at the bottom left of the photo, just left of Ed. Go up past him to the left of his hat, then up in a long diagonal to a peak at about
926, 280, in front of the sun. Come down the other side in a similar diagonal to the right edge of the photo at abouty 750, then down the right edge and along the bottom to where you started. - Draw the slopes as a chain of small bumps, one for each tire end, rather than straight lines. That's what makes it look like a heap.
- Choose Select → Inverse, press Delete, then press Cmd+D.
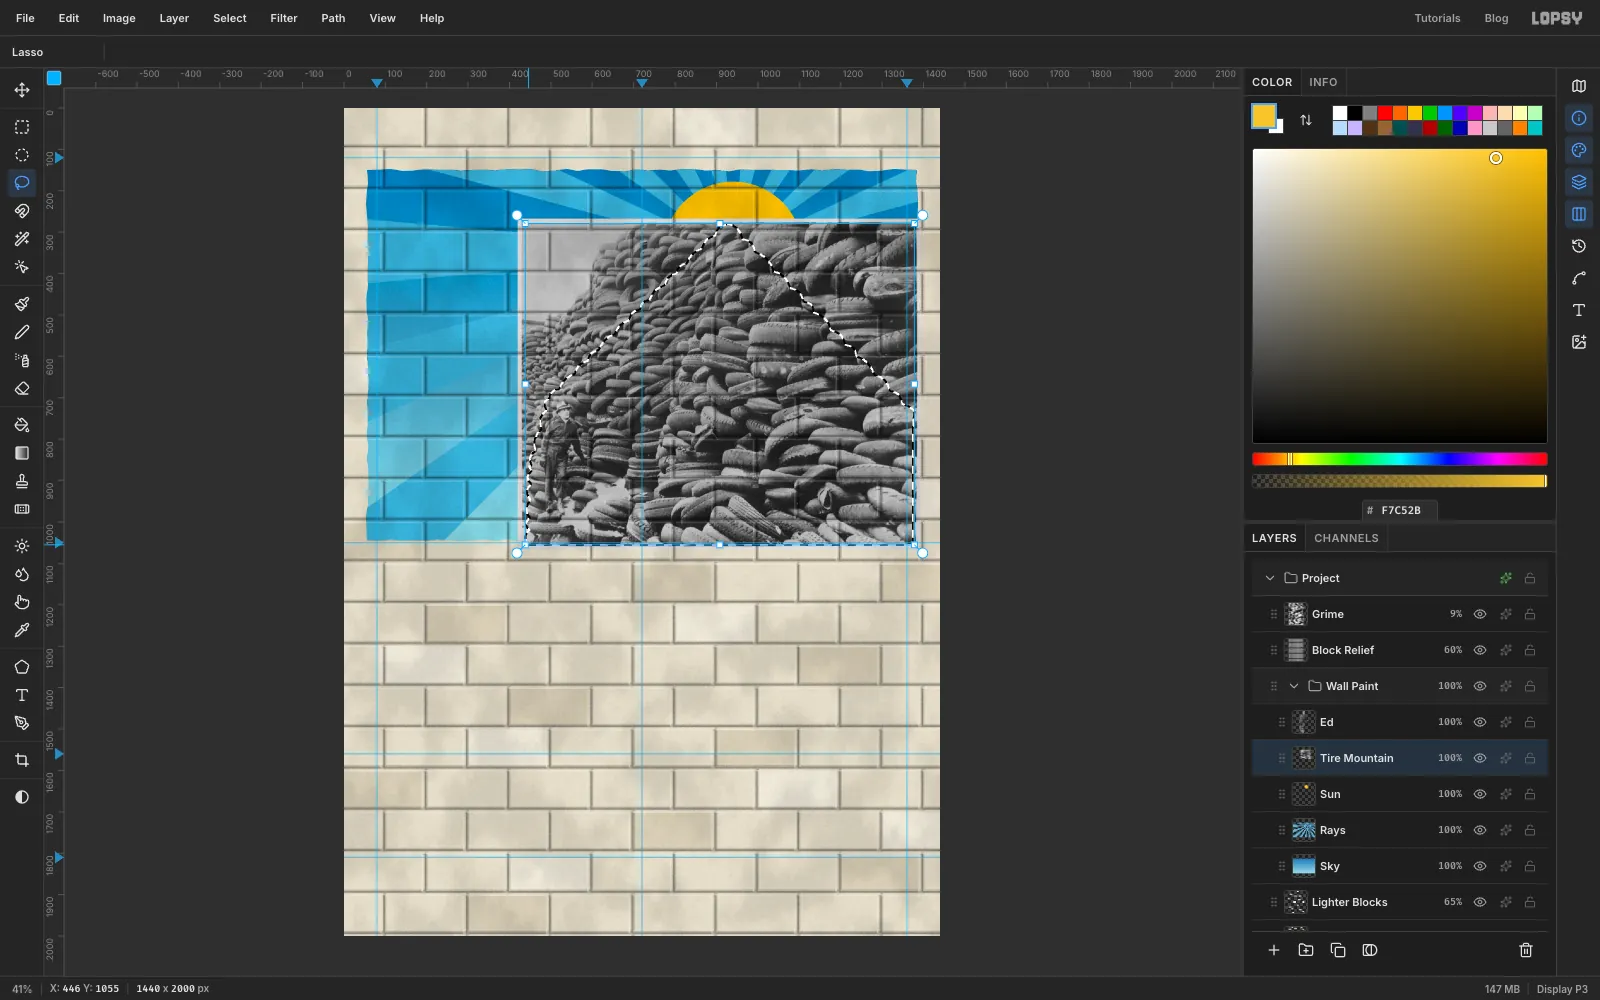
- Click
-
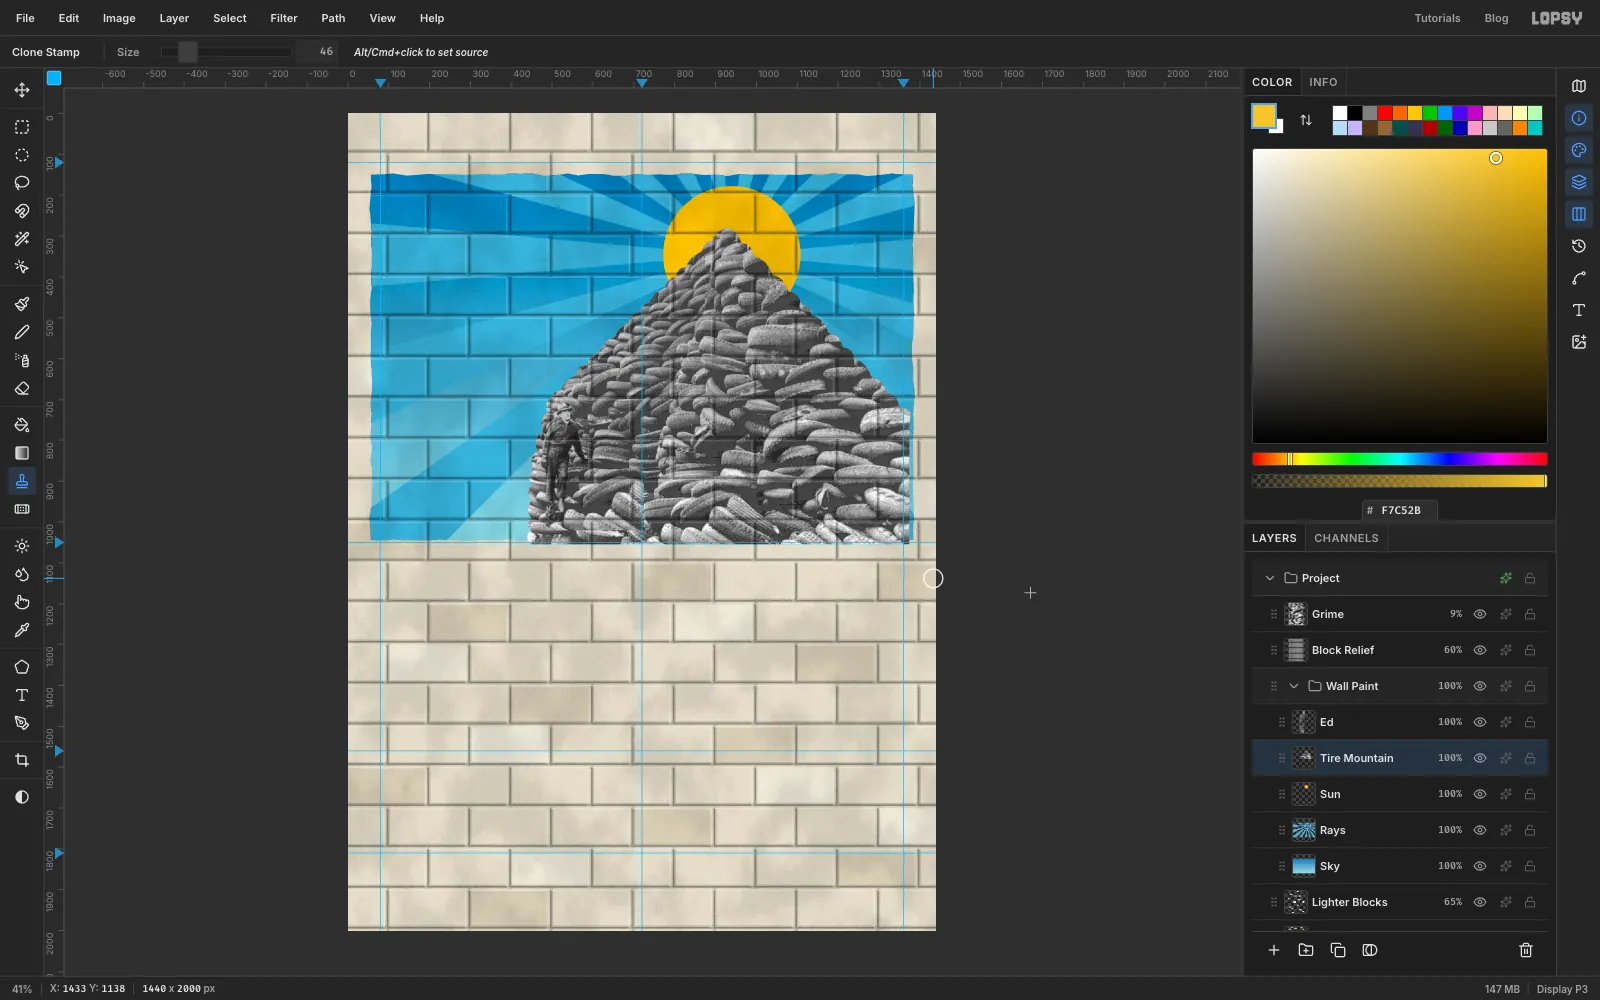
Clone over the snow
The photo has real snow at the man's feet. It reads as a white blob at this size, so cover it up.
- Pick the Clone Stamp and set Size to
46. - Hold Alt and click on some tires well to the right of the white patch, around
825, 925. - Paint across the white areas in side-to-side strokes. Ed's on his own layer, so you can paint straight behind him.
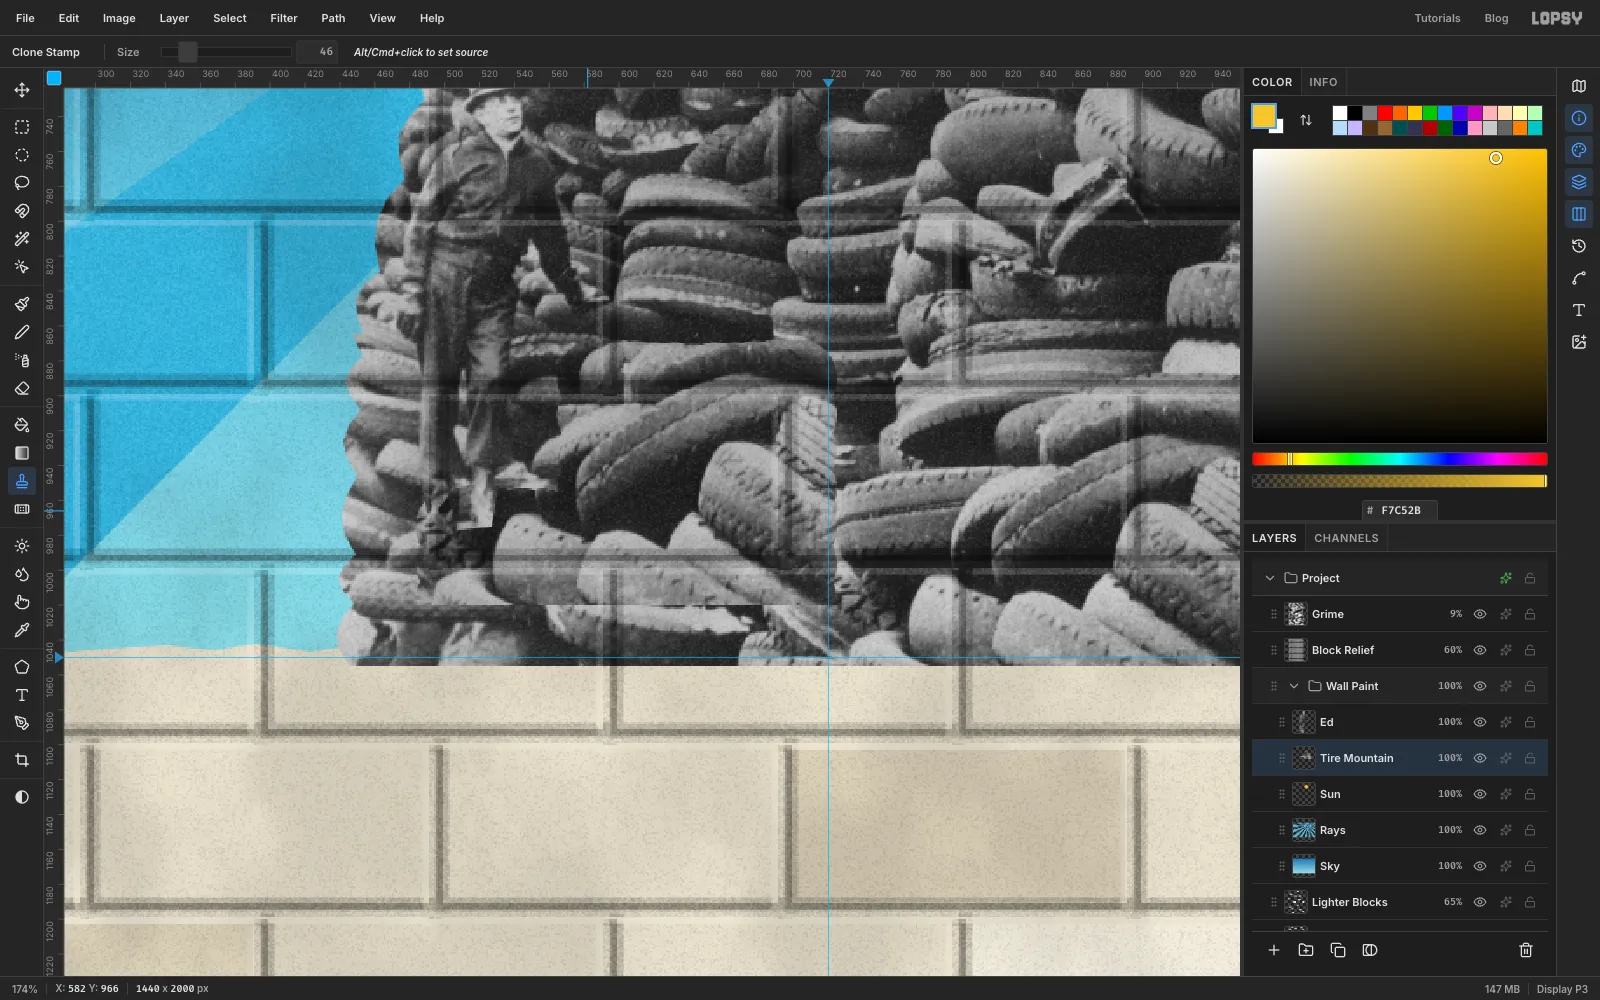
- Pick the Clone Stamp and set Size to
-
Make the photo look painted
- Choose Filter → Brightness/Contrast… with Brightness
16and Contrast14, and click Apply. - Choose Filter → Cel Shading… with Color Levels
7and Edge Strength16, and click Apply. This flattens the tones and adds fine outlines, so the photo starts to look like a sign painter's copy of one.
- Choose Filter → Brightness/Contrast… with Brightness
-
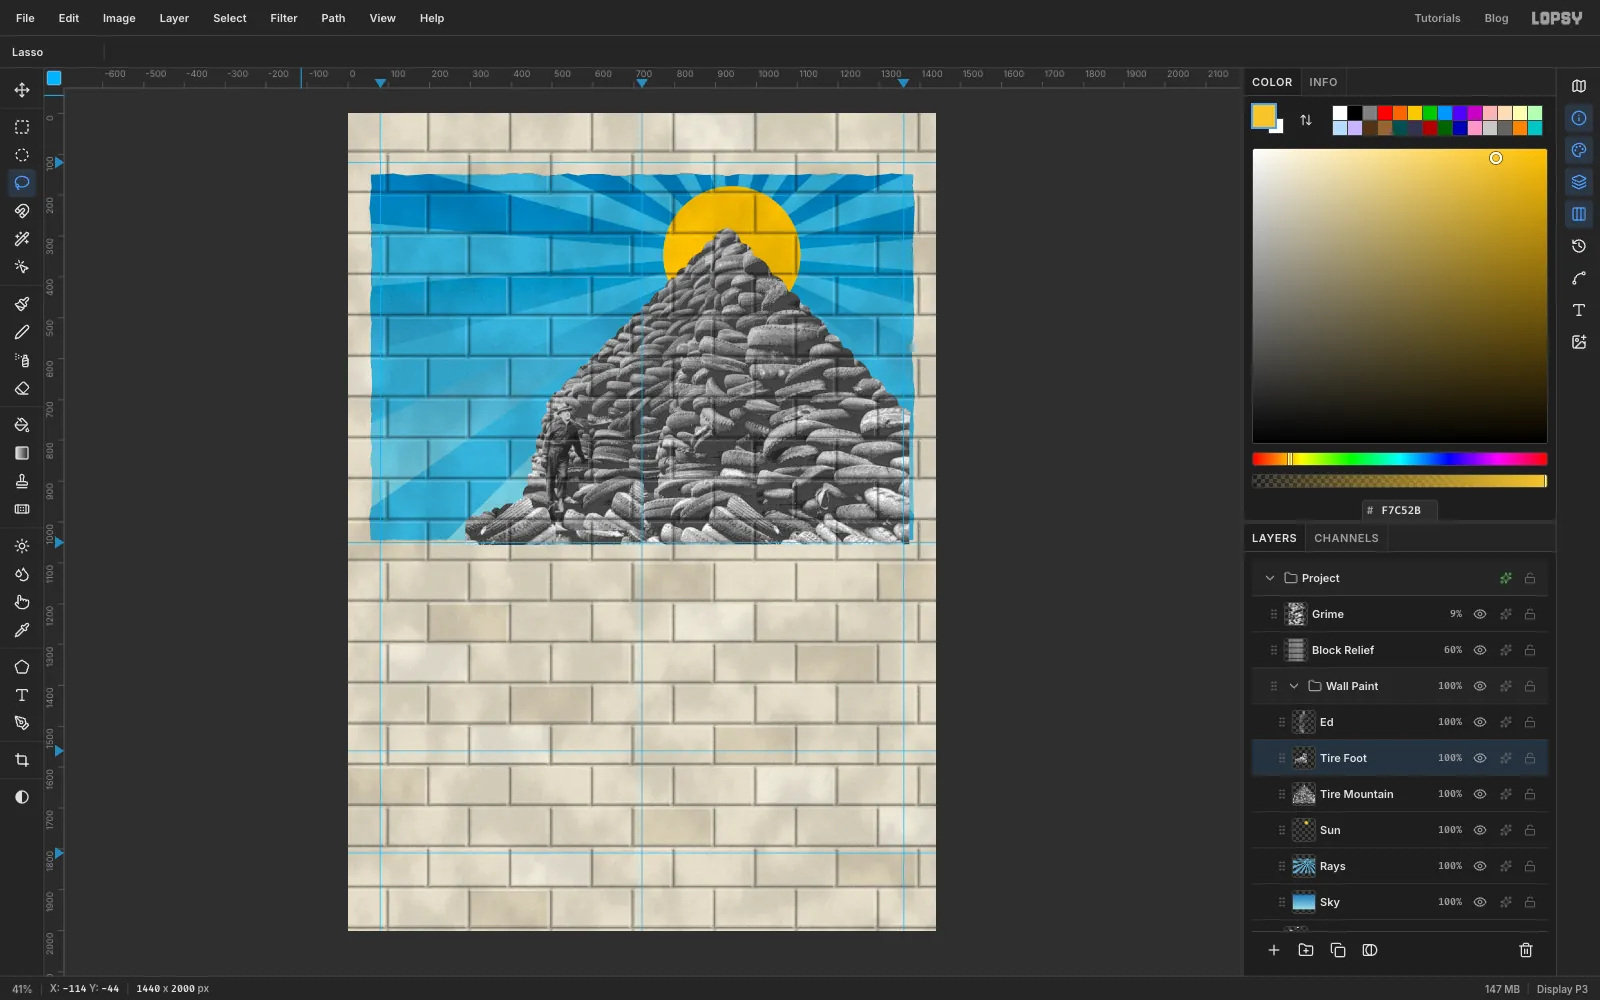
Spread the foot of the pile
The left side of the pile drops like a cliff, and a real heap would spill outwards. Borrow some tires from the other side.
- With
Tire Mountainselected, use the Lasso to select a wide band of tires along the bottom, from aboutx 720tox 1120andy 880toy 1054. - Press Cmd+C, then Cmd+V. Rename the new layer
Tire Footand press Cmd+D. - Choose Image → Flip Horizontal.
- With the Move tool, drag it so it's centred around
460, 968. - With the Lasso, draw the piece you want to keep: a bumpy slope from
288, 998up to about430, 948, then steeper up to482, 760, then down to the bottom at aboutx 510and back along the base. It should tuck in behind Ed and stay well clear of the button you'll add later. Choose Select → Inverse, press Delete, then press Cmd+D.
- With
-
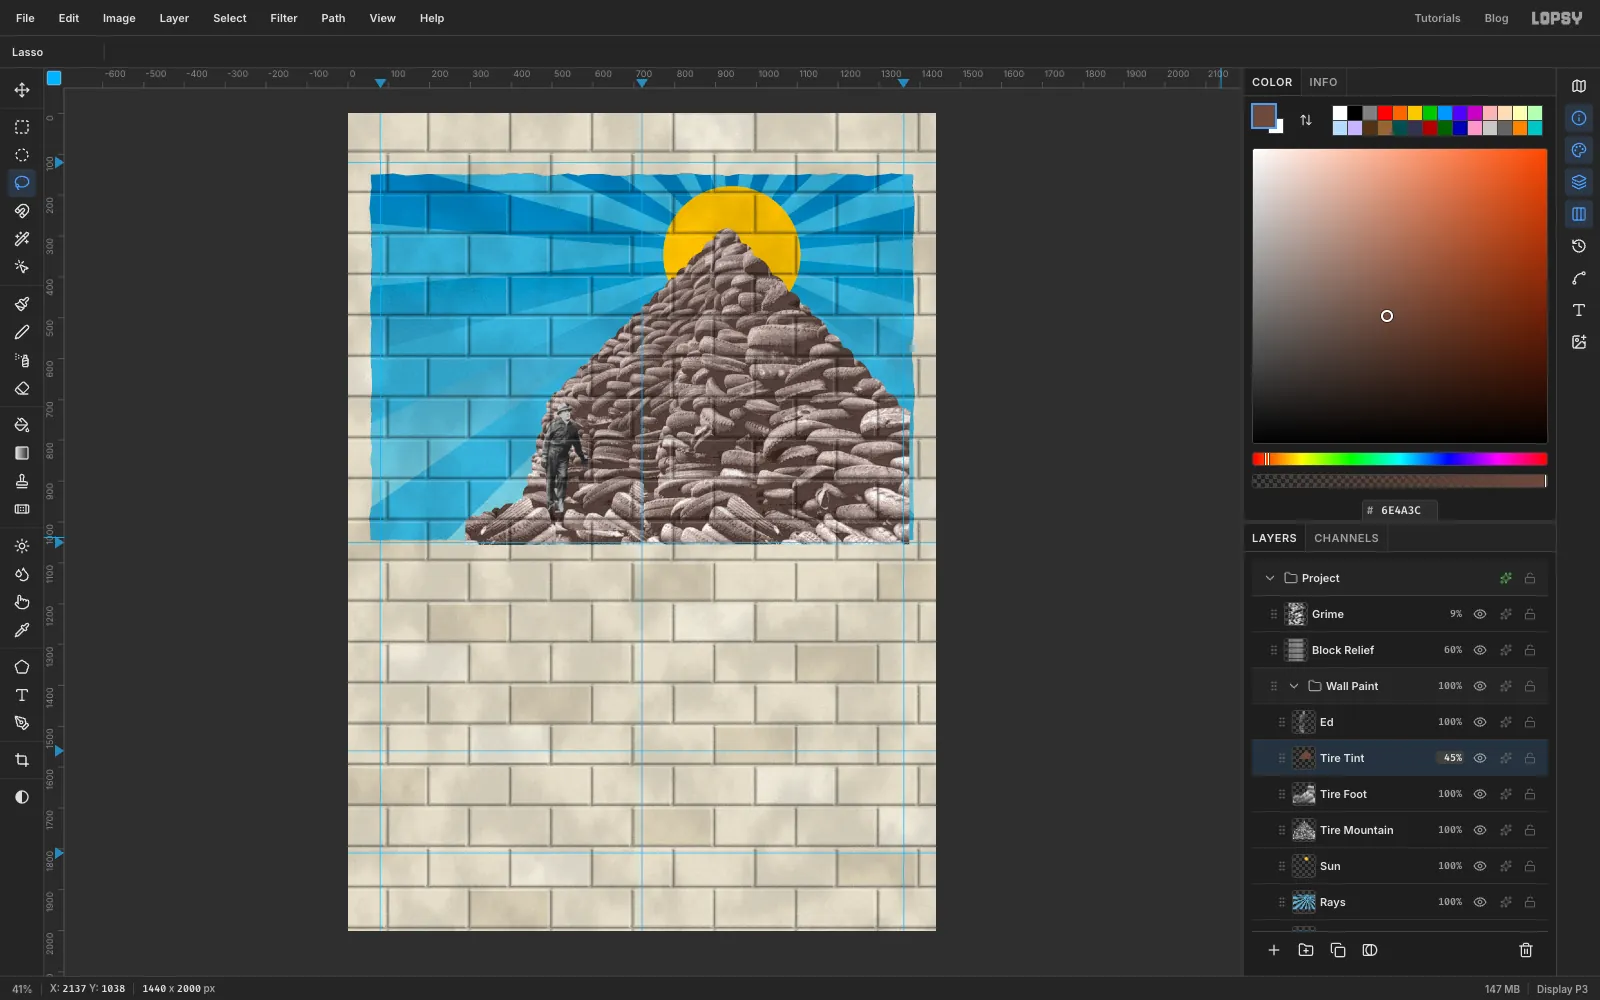
Warm up the rubber
- Click Add Layer and name it
Tire Tint. - Hold Cmd and click the thumbnail of
Tire Mountain. Fill with . - Hold Cmd and click the thumbnail of
Tire Foot, then choose Edit → Fill again. Press Cmd+D. - Set the layer to Color at
45%.
- Click Add Layer and name it
-
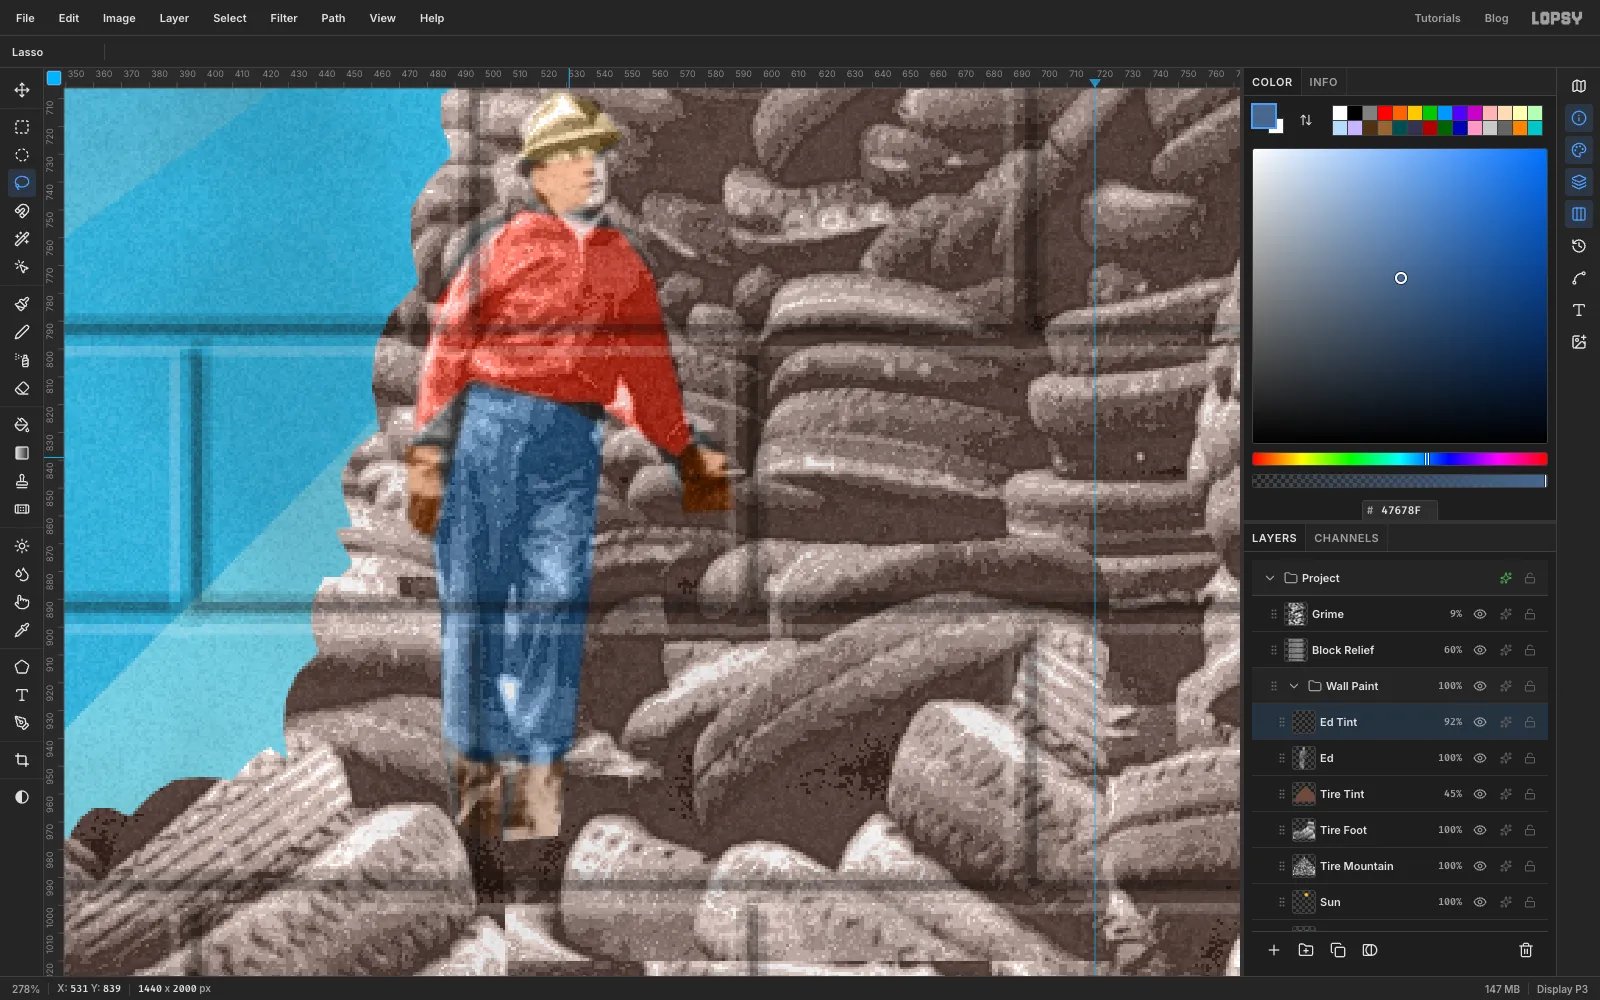
Hand-tint Ed
Old photographs were tinted by hand with dyes, and that's the look here.
- Zoom in on Ed again. Click
Ed. With the Lasso, select his jacket. Hold Shift and lasso his trousers, then hold Shift and lasso his hat. His face, hands and boots stay out of the selection so they keep their detail. - Choose Filter → Brightness/Contrast… with Brightness
22and Contrast18, and click Apply. - Choose Filter → Cel Shading… with Color Levels
7and Edge Strength14, and click Apply. Press Cmd+D. - Click Add Layer and name it
Ed Tint. - Lasso each part and fill it on this one layer, deselecting each time: the jacket , the hat , the face and both hands , the boots , following their shape, and the trousers .
- Choose Filter → Add Noise… with Amount
40and Mono, click Apply, then Filter → Gaussian Blur… with Radius3, and click Apply. The blotches make the dye look uneven. - Set the layer to Color at
92%. Choose View → Fit to Screen.
- Zoom in on Ed again. Click
-
Paint the ground
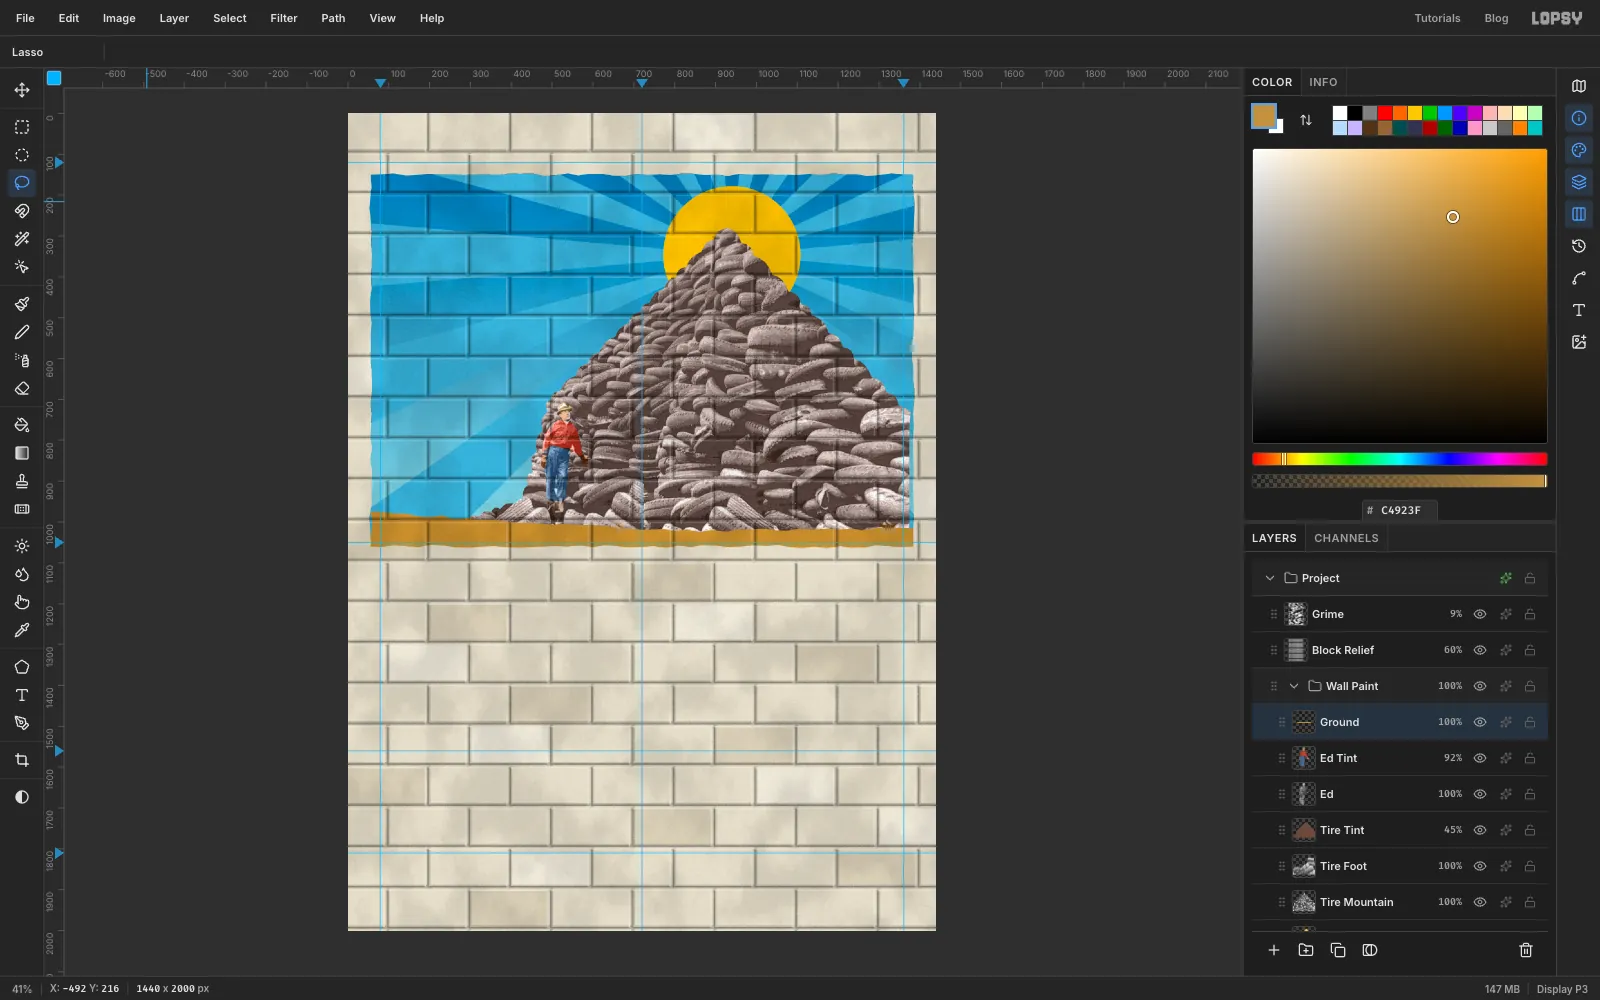
- Click Add Layer and name it
Ground. - Use the Lasso to draw a rough band along the bottom of the mural. Its top edge runs from about
56, 975on the left, down to440, 1002, then to800, 1022and across to1384, 1016. Its bottom edge sits at abouty 1060. - Fill with and deselect.
- Click Add Layer and name it
-
Paint the snowcap
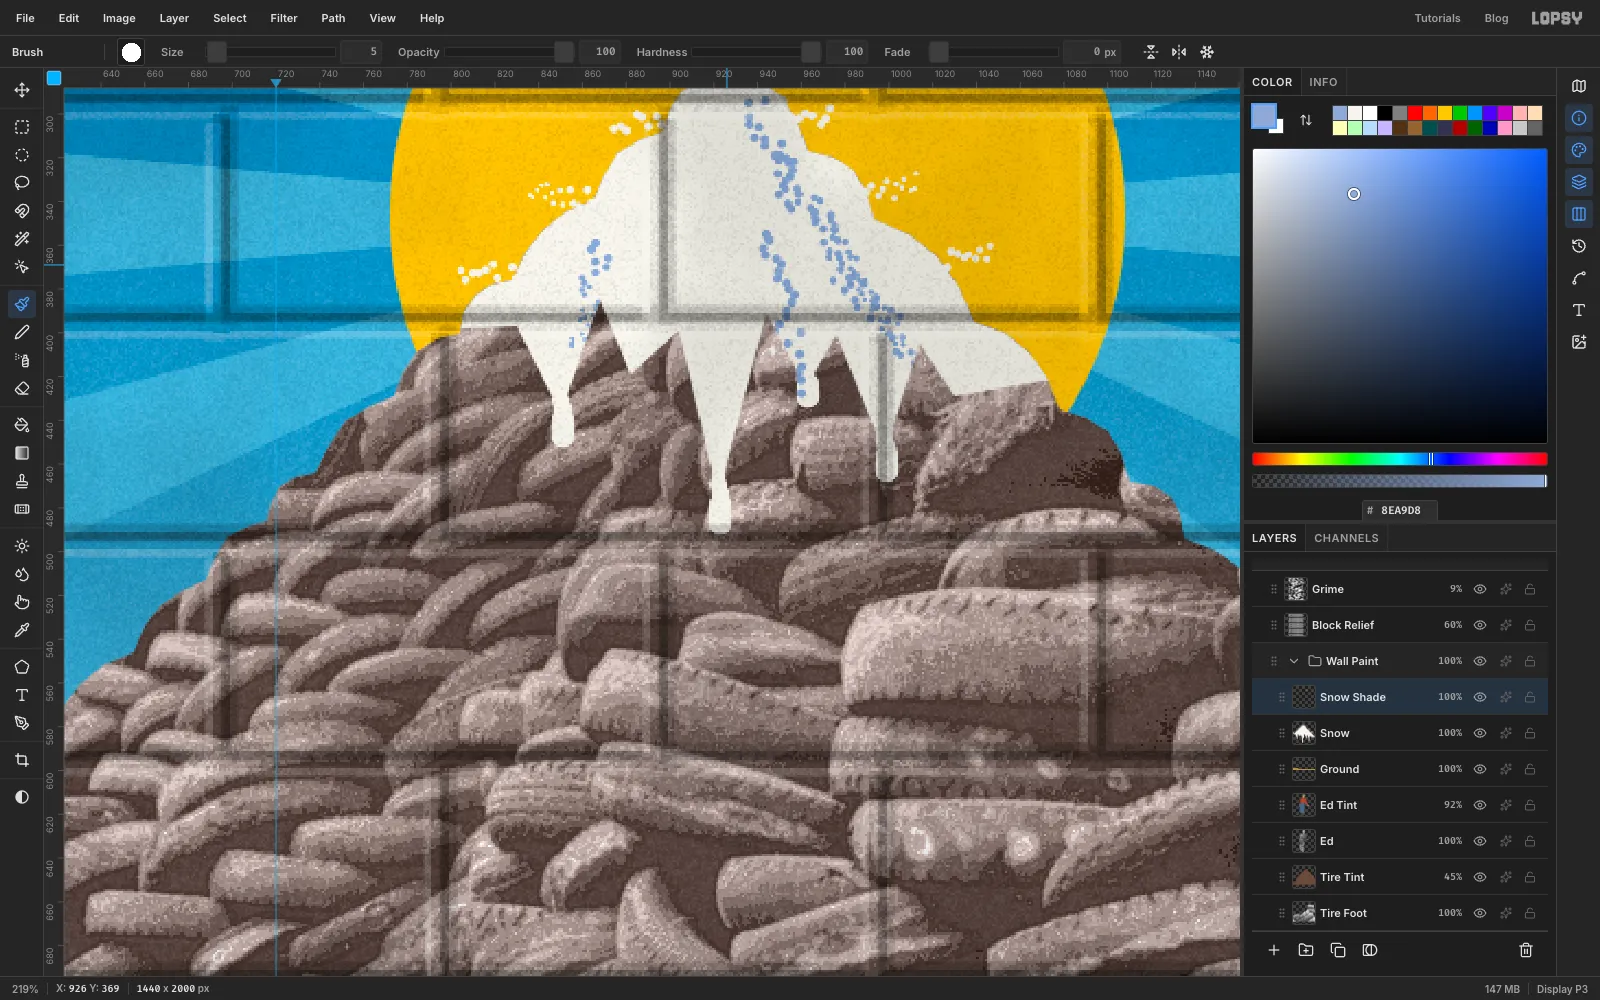
Here you'll use the Shift+Alt combination, which keeps only where two selections overlap.
- Click Add Layer and name it
Snow. - Hold Cmd and click the thumbnail of
Tire Mountain, so the snow will follow the tire outline. - Pick the Lasso, hold Shift+Alt and draw a jagged cap around the peak. Its lower edge should be a row of uneven teeth, some short and some long, reaching down as far as about
y 475. - Fill with , then press Cmd+D.
- Pick the Brush. Click the brush preview to open Brushes and set Size
12, Hardness80and Taper50. Taper thins a stroke as it goes, so start each run at its bottom tip and drag up into the snow. The fat start becomes the bead of paint at the tip. Paint three or four short runs off the longest teeth. - Now roughen the outline with a nearly dry brush. In Brushes set Size
5, Hardness100, Taper0, Spacing60, Scatter70and Size Jitter60. Flick about seven short strokes outward across the edge of the cap, on both slopes and at the very top. - Click Add Layer and name it
Snow Shade. Hold Cmd and click the thumbnail ofSnow, so the shadow stays on the snow. Set the foreground to . - With the same dry brush, drag five or six broken strokes down the right-hand side of the peak, and one short stroke on the left. Keep it to about a quarter of the cap. Press Cmd+D.
- In Brushes set Spacing to
10and Scatter and Size Jitter to0.
- Click Add Layer and name it
-
Set the headline
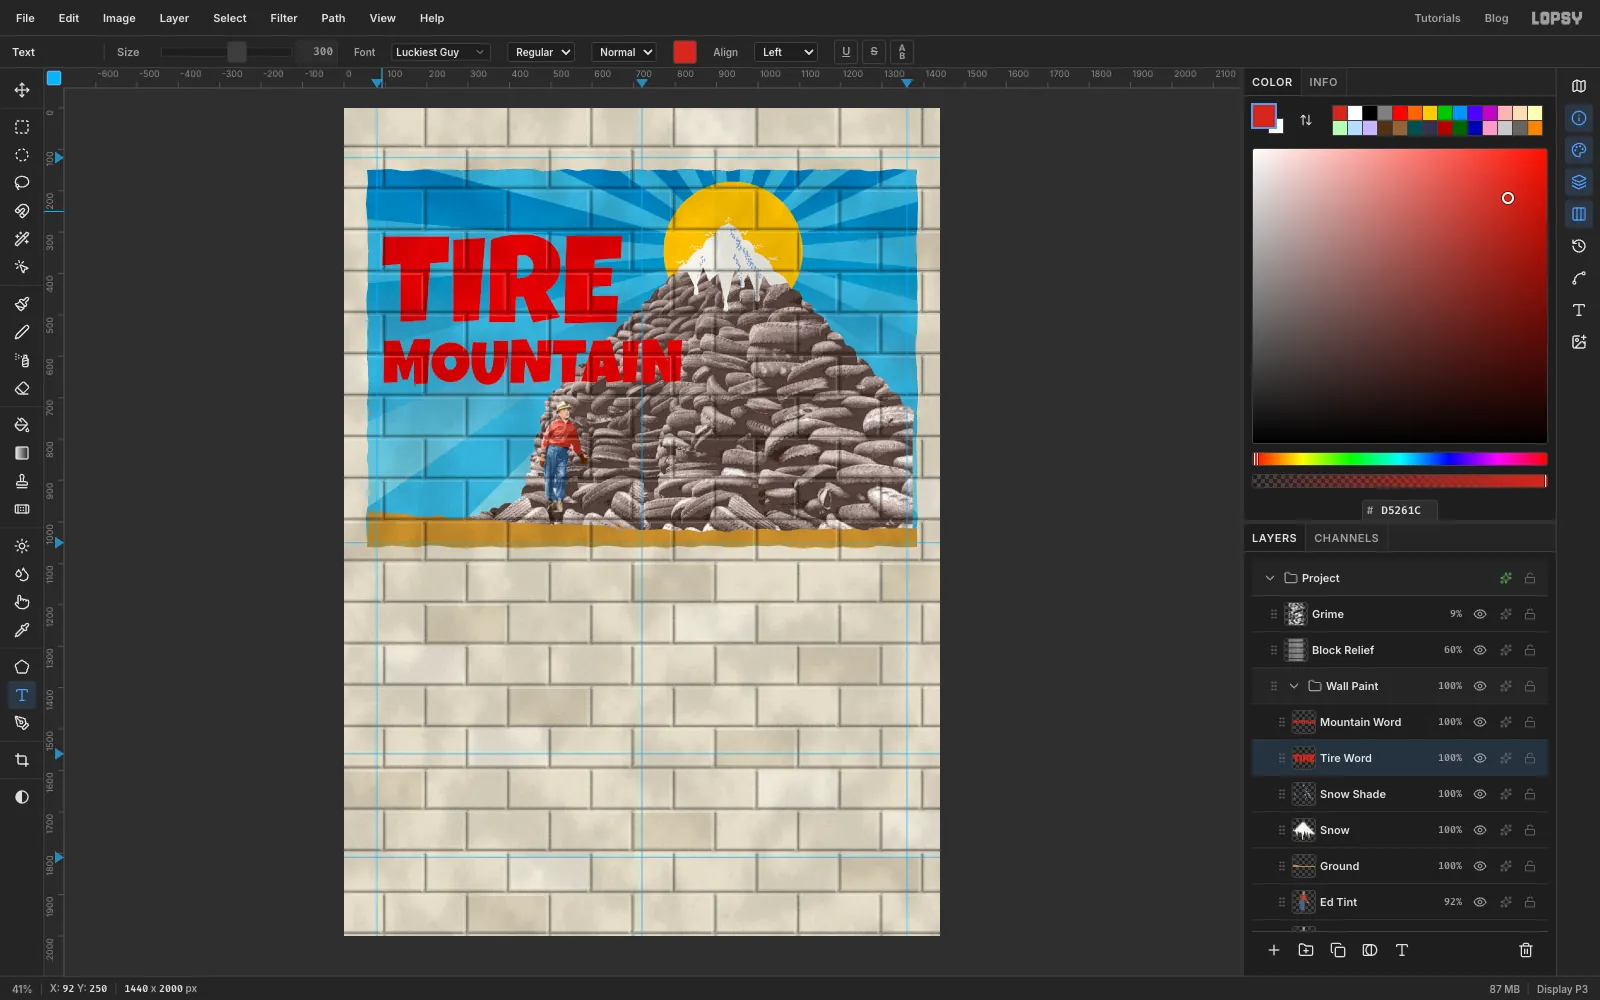
- Click
Snow Shadeand set the foreground to . - Pick the Text tool. In the options bar choose Luckiest Guy and set Size to
150. - Click at
92, 530, typeMOUNTAINand press Tab to commit. Rename the layerMountain Word. - Click
Snow Shadeagain. Set Size to300, click at92, 250, typeTIREand press Tab. Rename itTire Word. - With
Tire Wordselected, click Rasterize Layer at the foot of the Layers panel. Do the same forMountain Word.
- Click
-
Arch the top of TIRE
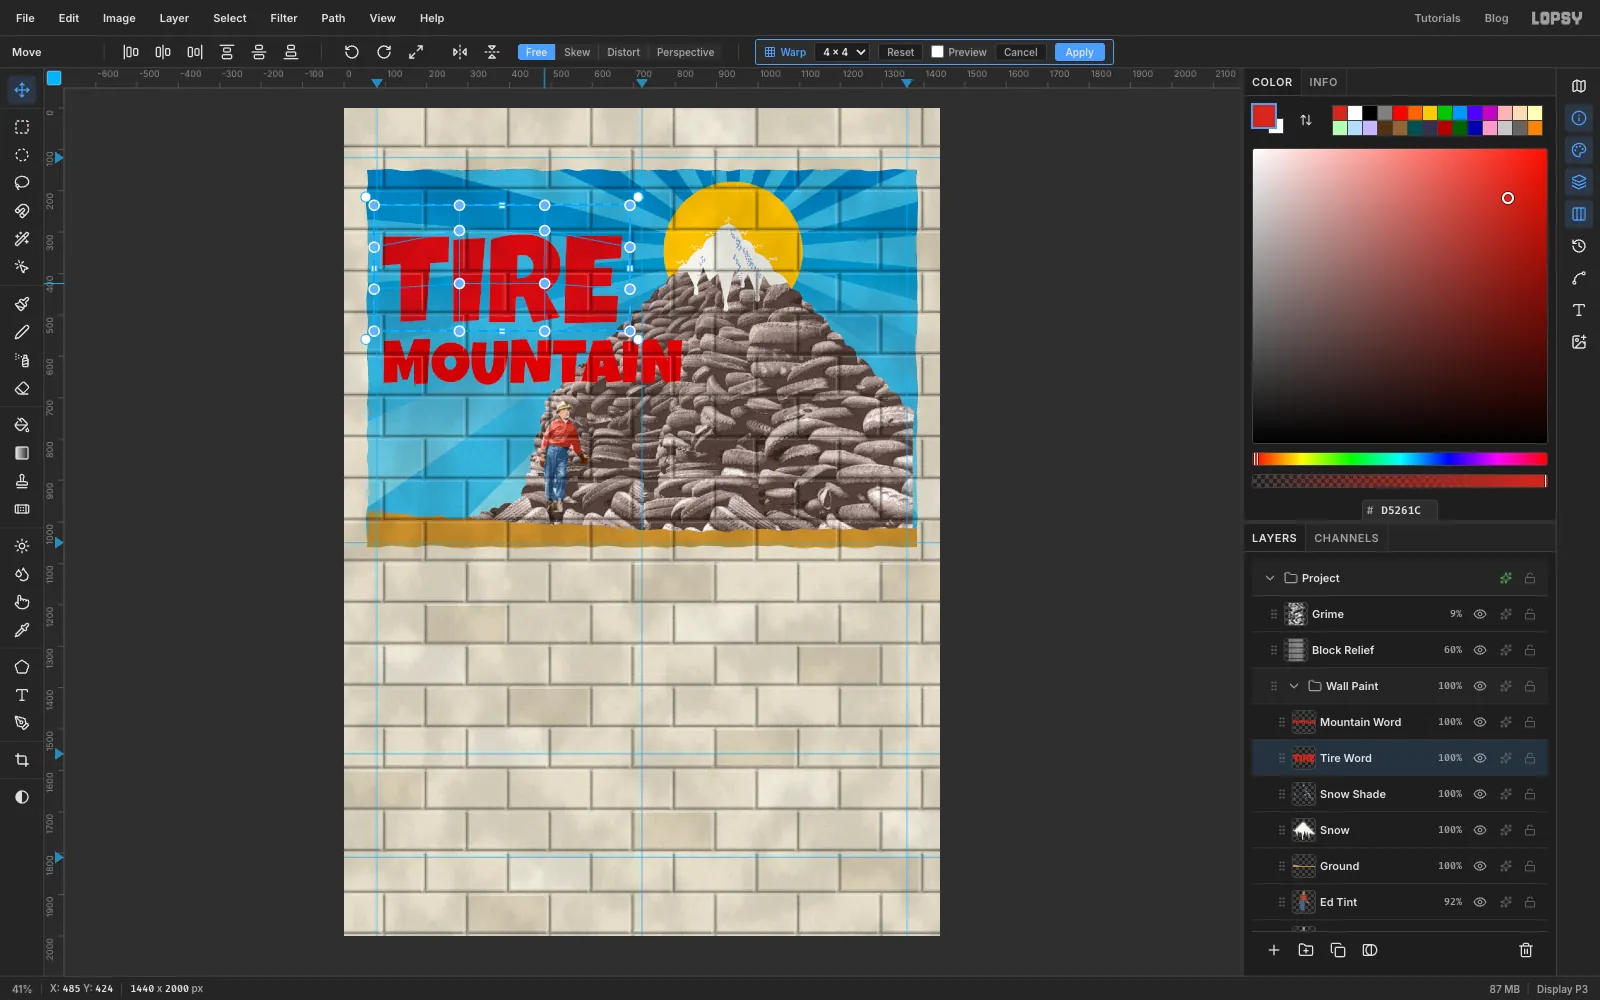
Sign painters rarely letter dead straight. A gentle arch instantly makes TIRE look drawn rather than typed.
- Click
Tire Word. With the Rectangular Marquee, draw a box around the word, leaving about 70 px above it and 20 px on the other sides. - Pick the Move tool and click Mesh Warp in the options bar. Keep the 4 × 4 grid.
- Drag the two middle handles of the second row up by about 40 px.
- Drag the two middle handles of the third row up by about 14 px.
- Click Apply, then press Cmd+D.
- Click
-
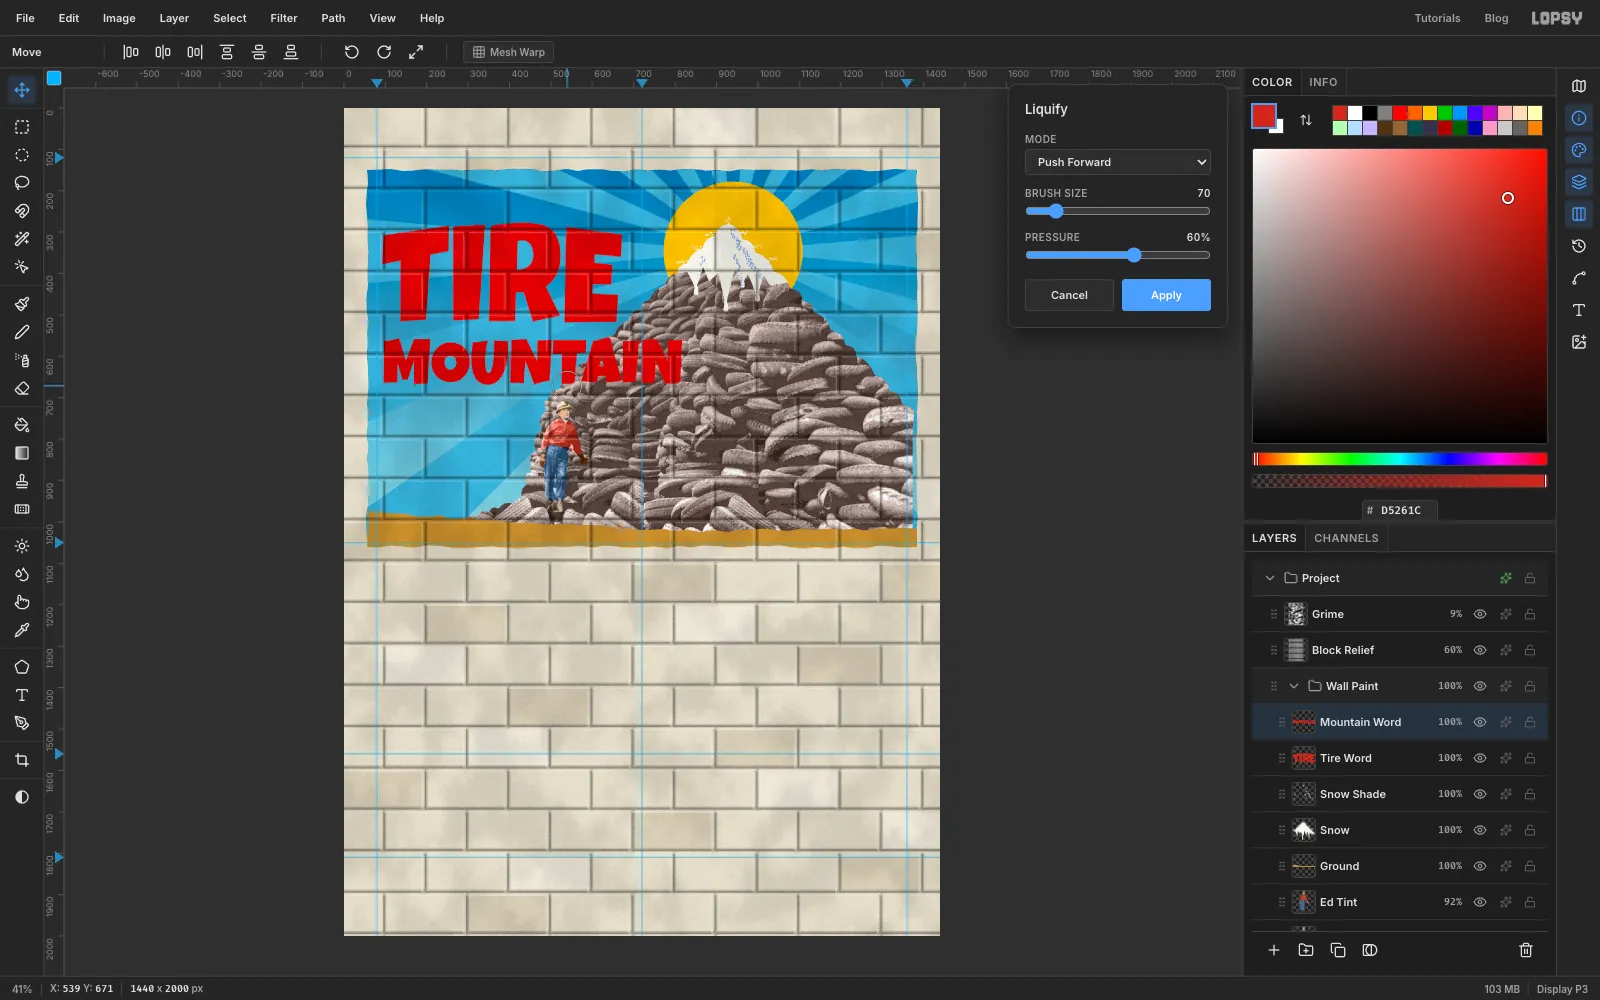
Wobble the letters
A font's repeated letters are identical, which gives it away. MOUNTAIN has two N's, so make them differ.
- Click
Mountain Wordand choose Filter → Liquify…. - Keep Push Forward, and set Brush Size to
70and Pressure to60. - Make six very short pushes, about 10 px each: up on the tops of a few letters, including one N, and down on the bottoms of a few others, including the other N.
- Click Apply.
- Click
-
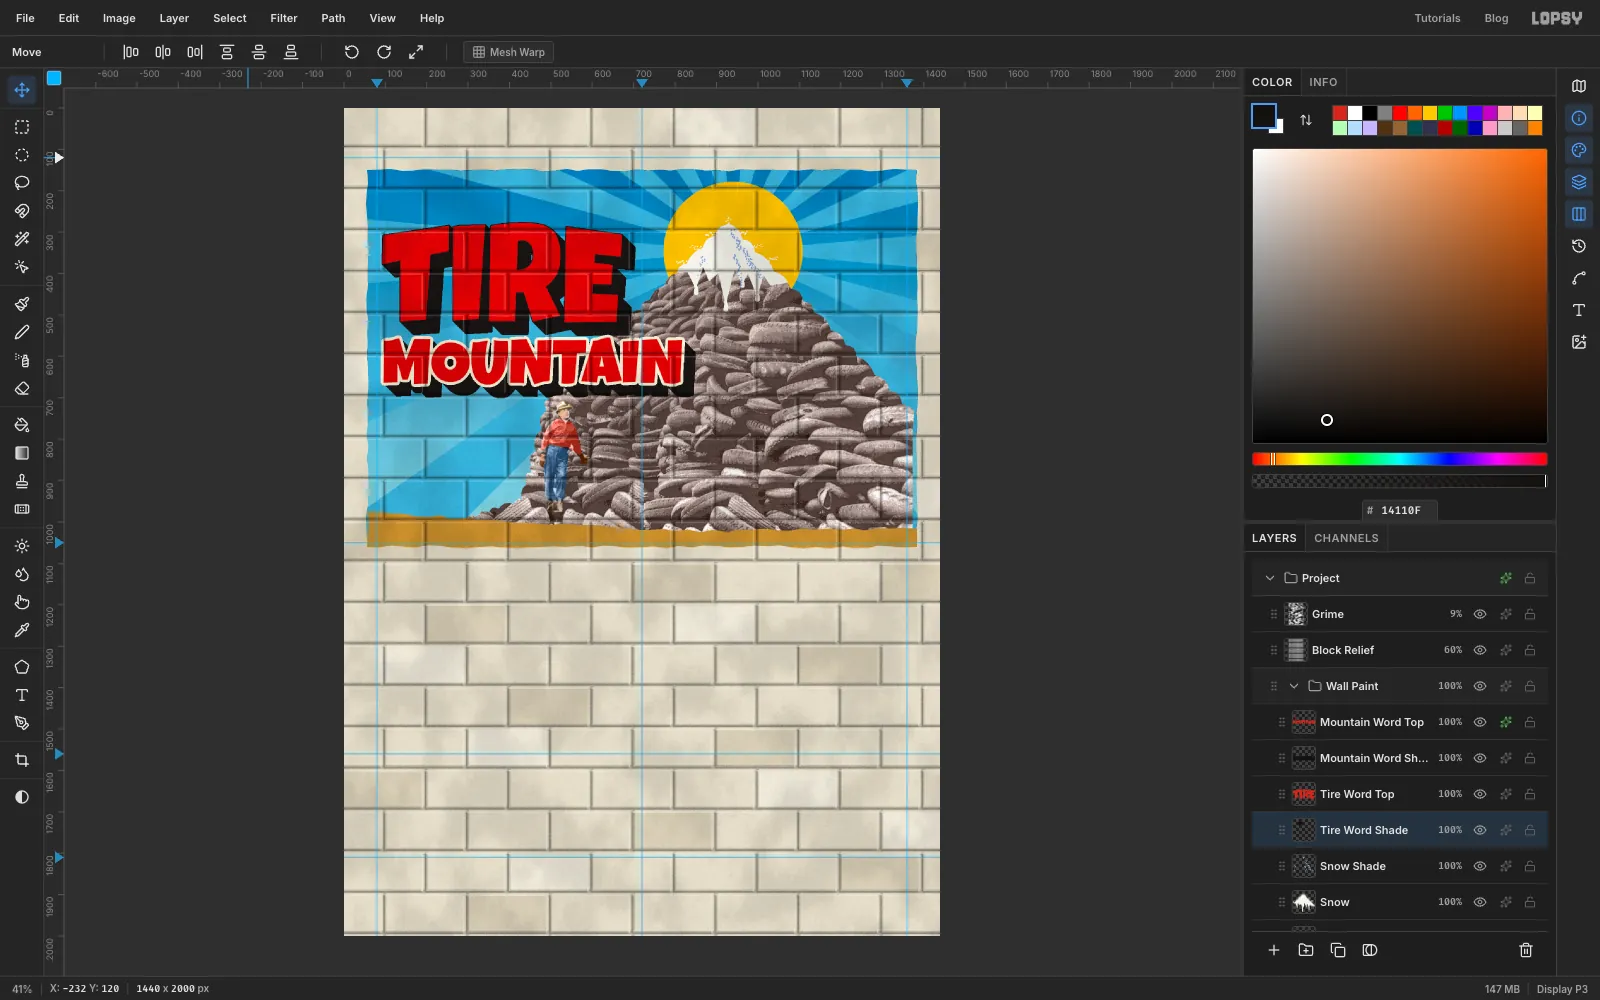
Build the block shade
A hard extruded shade is a staple of hand-painted signs. Instead of drawing it, you'll stretch a black copy diagonally by doubling the distance each time. Do this for
Mountain Wordfirst and thenTire Word.- Click the word's layer and choose Layer → Duplicate Layer. Rename the copy
Mountain Word Top. - Click the original underneath and rename it
Mountain Word Shade. - Hold Cmd and click its thumbnail. Choose Select → Grow…, enter
2and click Apply. Without the Grow, a fill leaves soft red edge pixels that show as a red fringe in the shade. - Fill with , then press Cmd+D.
- Pick the Move tool. Choose Layer → Duplicate Layer, press the Right and Down arrow keys once each, then choose Layer → Merge Down.
- Repeat with two presses of each arrow, then four, then eight, then sixteen, merging down each time. Use Shift+arrow for ten at a time. You end up with a solid shade about 31 px deep.
- Click the word's layer and choose Layer → Duplicate Layer. Rename the copy
-
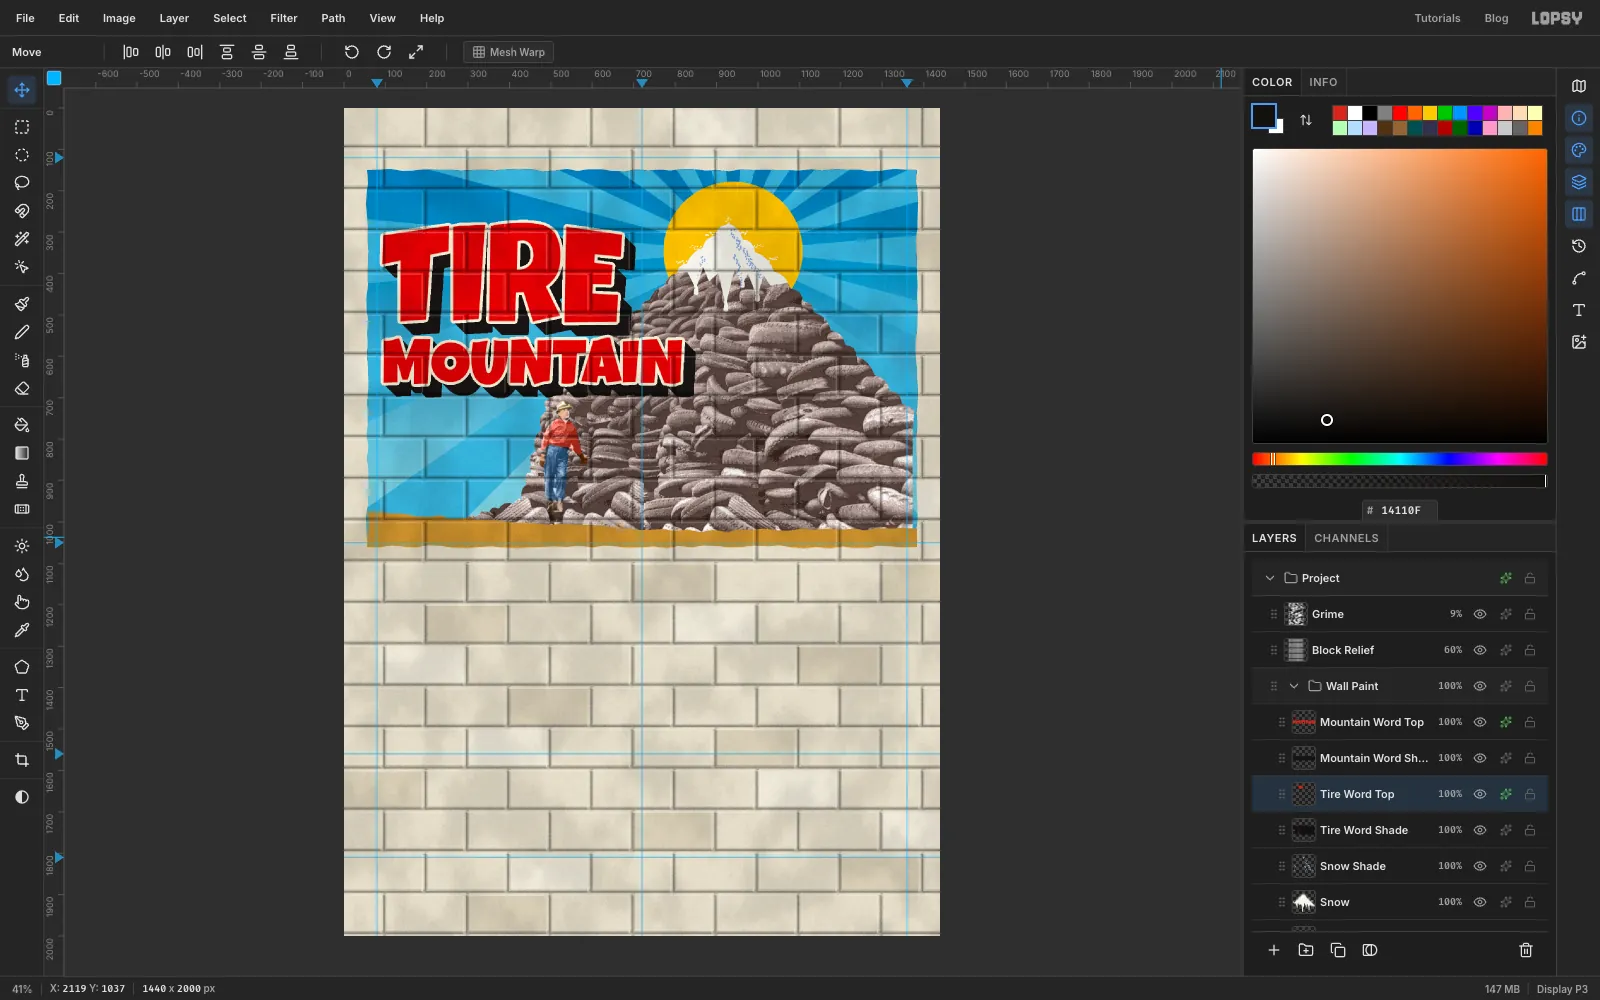
Outline the letters
- Click
Mountain Word Topand click the ✦ button on its row. - Tick Stroke, then click its name to show the settings. Set Width to
7and the colour to . Close the drawer. - Do the same on
Tire Word Top.
- Click
-
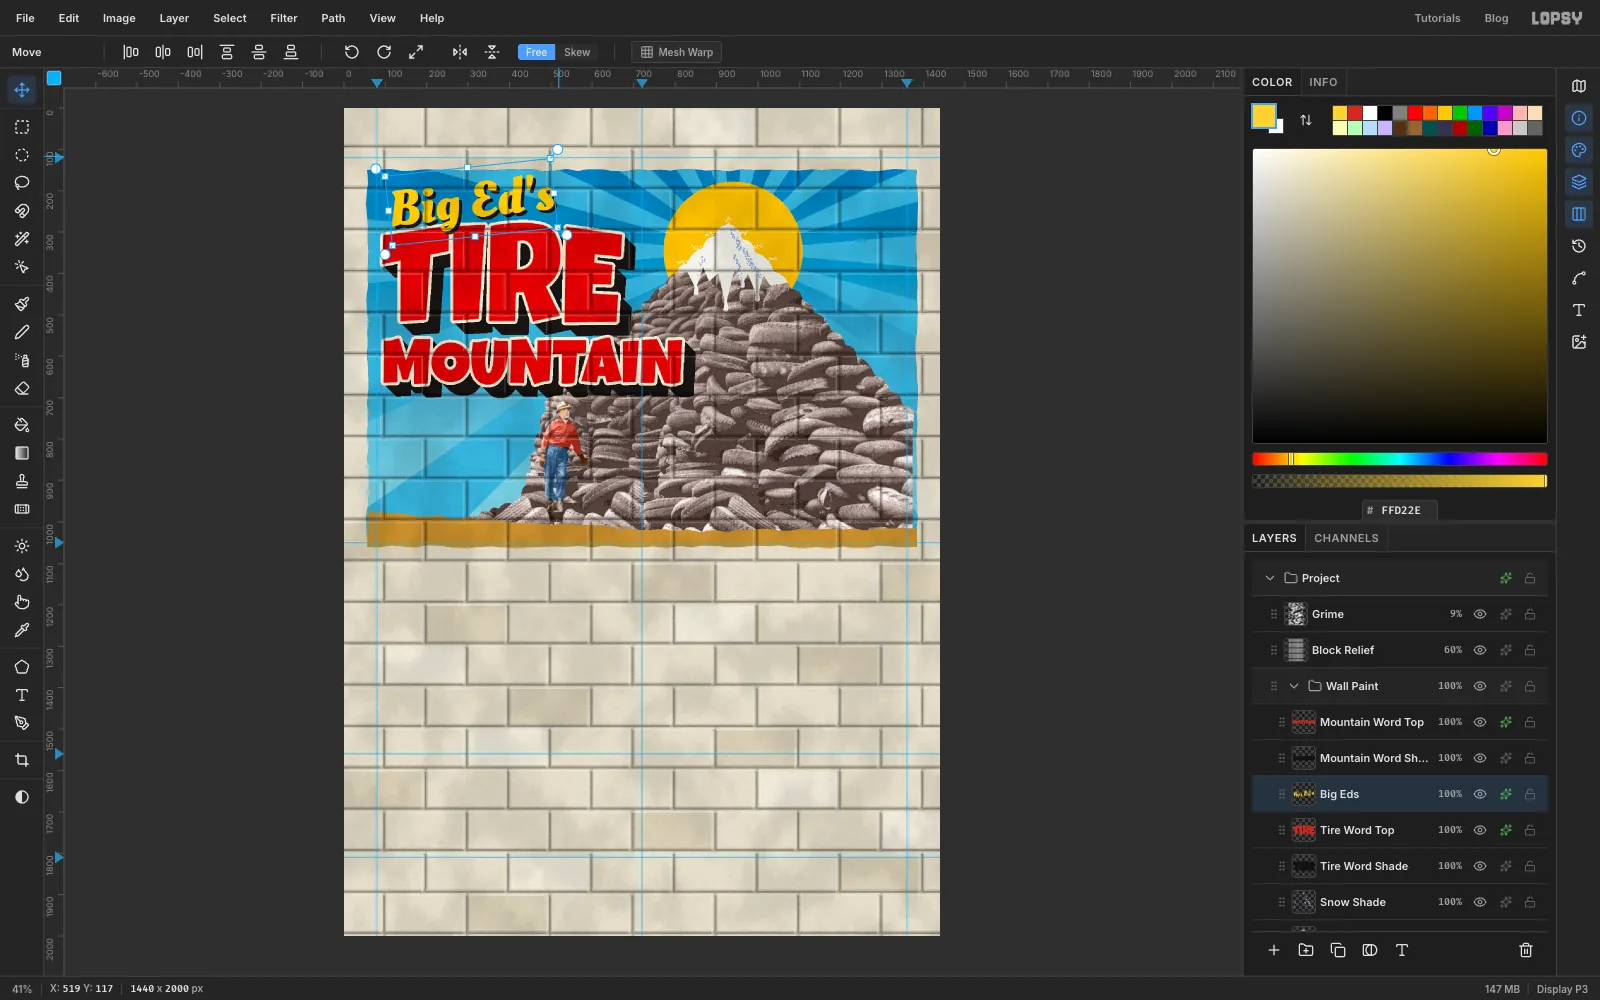
Add the script and tilt it live
- Click
Tire Word Topand set the foreground to . - Pick the Text tool and choose Oleo Script with weight Bold and Size
120. Click at110, 172, typeBig Ed'sand press Tab. Rename the layerBig Eds. - Open its effects drawer, tick Drop Shadow and set Offset X
7, Offset Y7, Blur1and Opacity100, with the colour . - Pick the Move tool. Hover just outside the top-right corner of the text's box until the cursor changes to the rotate cursor, and drag to turn it about 6° anticlockwise. Press Cmd+D.
The text stays live and editable after you rotate it.
- Click
-
Add the tagline and hero button
- Click
Tire Word Topand set the foreground to . With the Text tool, choose Knewave at Size36. Click at96, 790, type& black, we got it.and press Tab. - Click
Tire Word Topagain, set Size to54, click at96, 720, typeIf it's roundand press Tab. - Give both lines a Drop Shadow: Offset X
4, Offset Y4, Blur1, Opacity100, colour . - Click
Tire Word Top, click Add Layer and name itButton Shade. Lasso a slightly wobbly rectangle from98, 868to414, 958. Choose Select → Shrink…14, then Select → Grow…14to round the corners. Fill with and deselect. - Click Add Layer and name it
Button. Do the same from90, 860to406, 950, this time filled with . - Lasso a small downward triangle at the right end of the button and fill it with . Deselect.
- Click
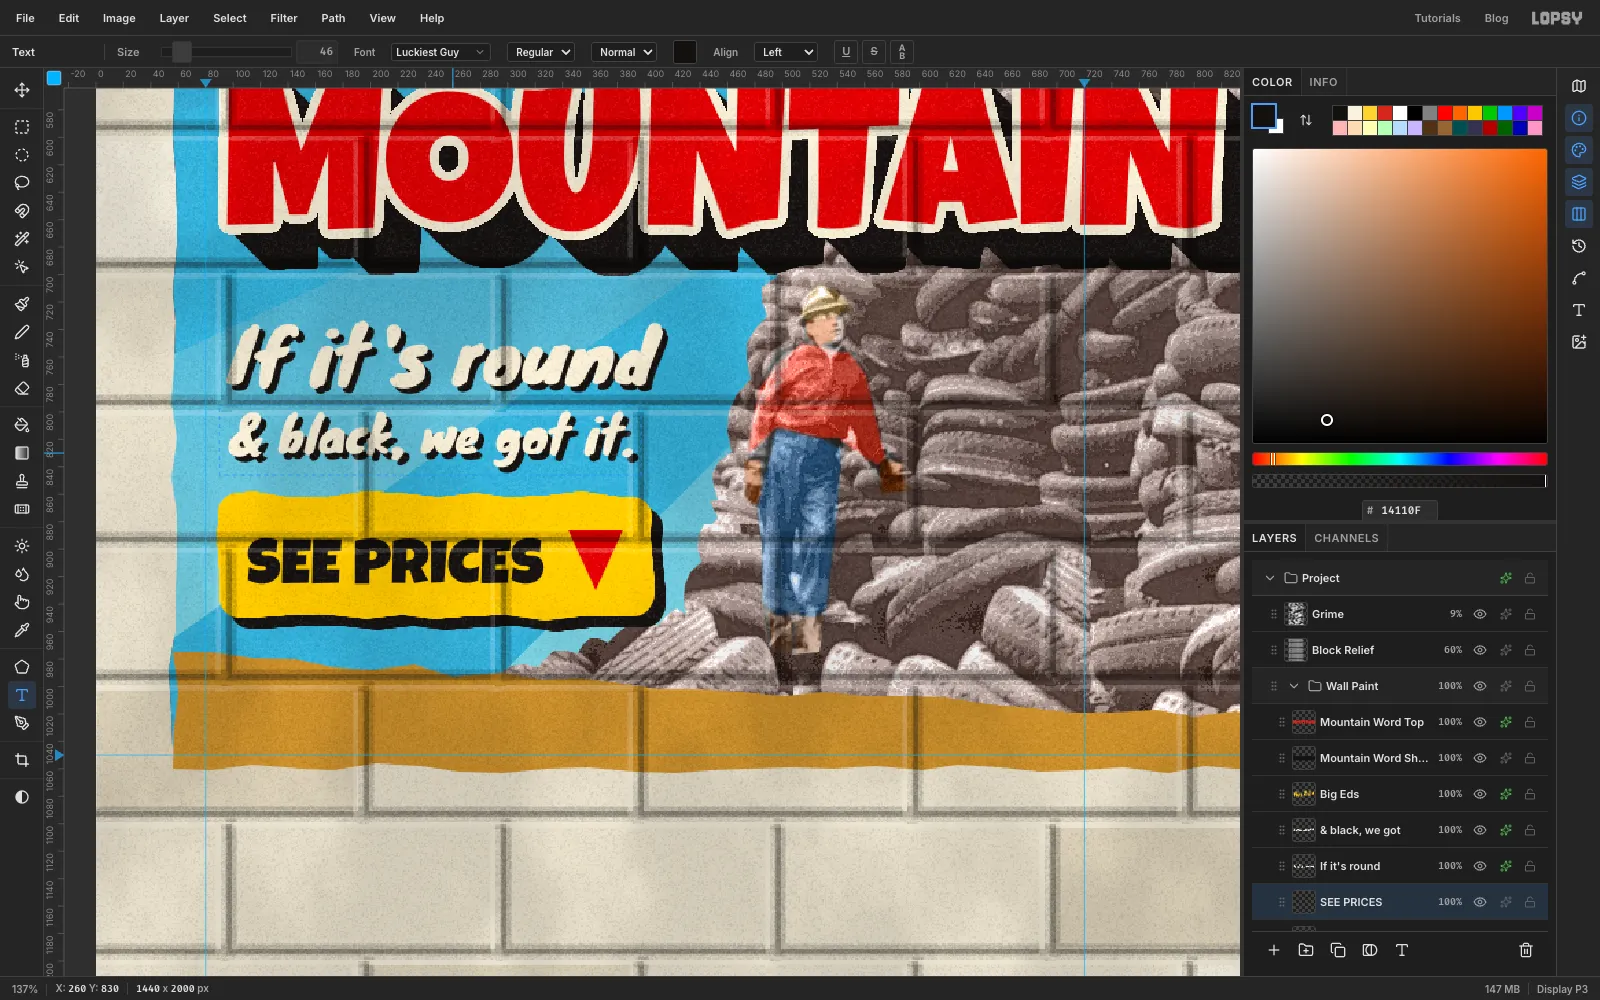
Button, set the foreground to , choose Luckiest Guy at Size46, click at110, 884, typeSEE PRICESand press Tab.
- Click
-
Label Ed
- Click
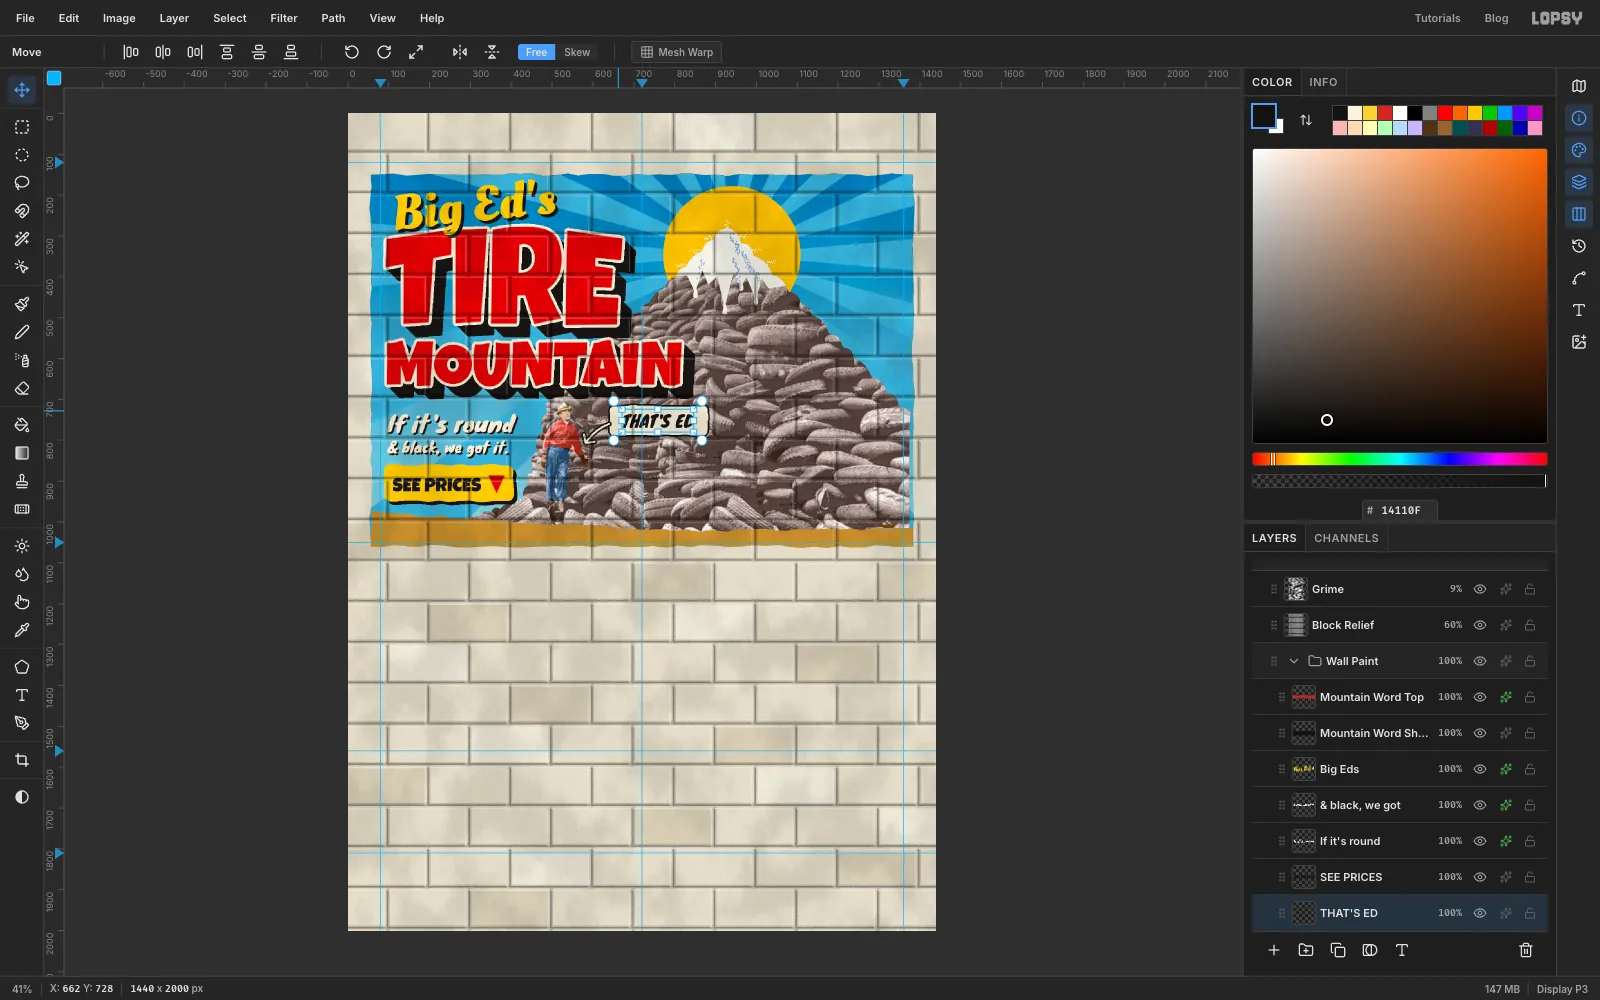
Button, click Add Layer and name itEd Tag. Make a rounded plate the same way as the button, from640, 716to880, 788, filled with . Give it a Stroke with Width4in . - Click Add Layer and name it
Ed Arrow. Pick the Brush, set Size to13and the foreground to . - Draw a short curved line from the tag's left edge to Ed's elbow, then a short V for the arrowhead.
- Set Size to
6and the foreground to , and go over the same strokes. - Click
Ed Arrow, set the foreground to , choose Knewave at Size40, click inside the tag, typeTHAT'S EDand press Tab. With the Move tool, use the arrow keys to centre it on the plate.
- Click
-
Add the summit sign
- Click
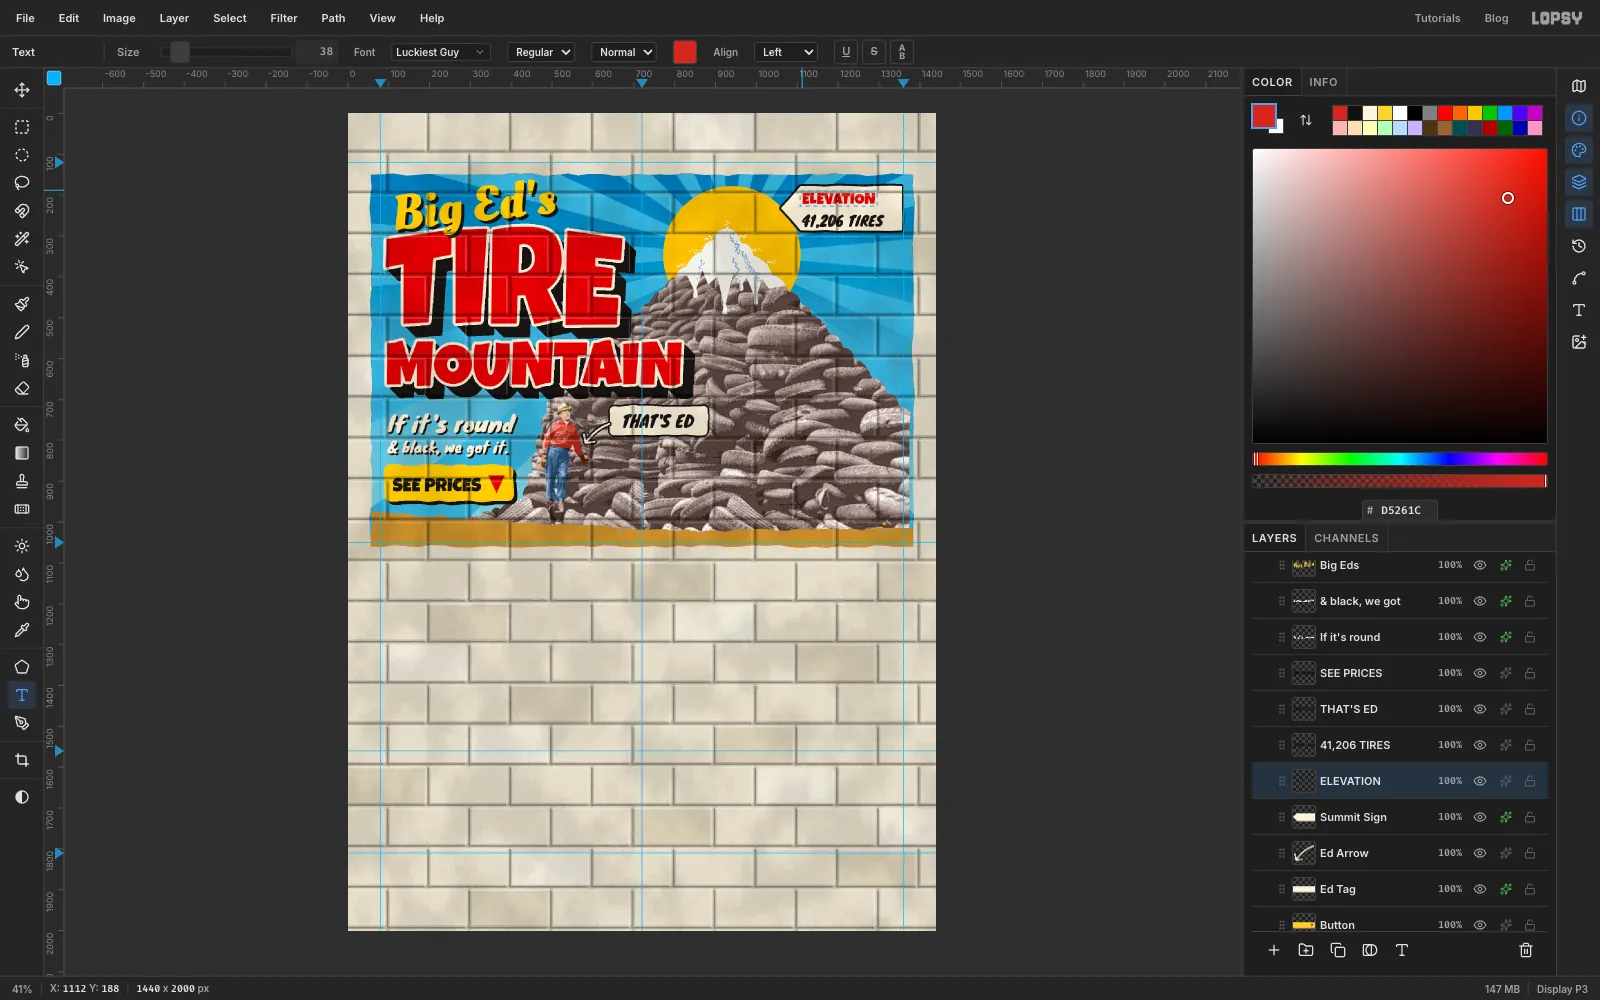
Ed Arrow, click Add Layer and name itSummit Sign. - Lasso an arrow-shaped board with its point at about
1060, 232, running right tox 1356and fromy 178toy 286. Fill with , deselect, and give it a Stroke with Width5in . - Click
Summit Sign, set the foreground to , choose Knewave at Size34, click at1112, 238, type41,206 TIRESand press Tab. - Click
Summit Sign, set the foreground to , choose Luckiest Guy at Size38, click at1112, 188, typeELEVATIONand press Tab.
- Click
-
Build the price burst
- Click
Summit Sign, click New Group and name itFlats Burst. - Click Add Layer and name it
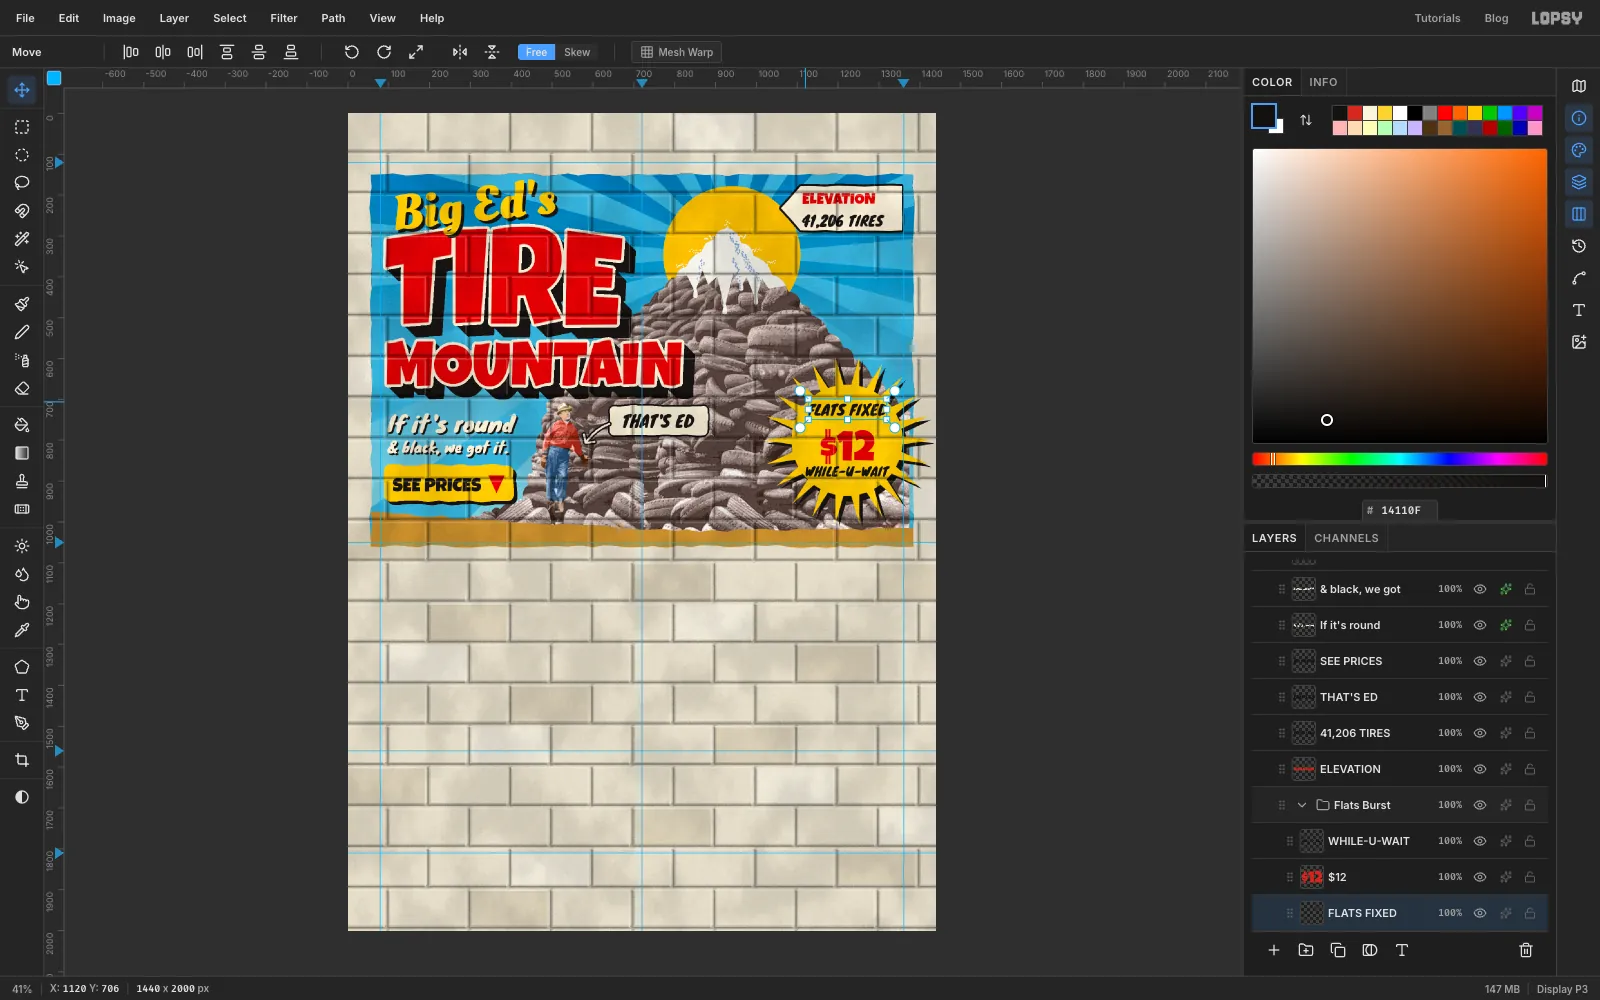
Burst Shade. Set the foreground to . - Choose Filter → Sunburst… with Rays
22, Length12, Width100, Taper100, Center X85.5and Center Y40.4, and click Apply. - Spikes alone leave too little room for text, so add a disc. With the Elliptical Marquee, click once and enter From
1096, 678and To1368, 950. Fill and deselect. - Click Add Layer and name it
Burst. Set the foreground to and repeat with Center X84.9, Center Y40, and a disc from1086, 664to1358, 936.
Click
Burstbefore each line of text:- Knewave
30in : click at1120, 868, typeWHILE-U-WAITand centre it on1222, 876 - Luckiest Guy
104in : click at1160, 762, type$12and centre it on1222, 815 - Knewave
36in : click at1120, 706, typeFLATS FIXEDand centre it on1222, 724
- Click
-
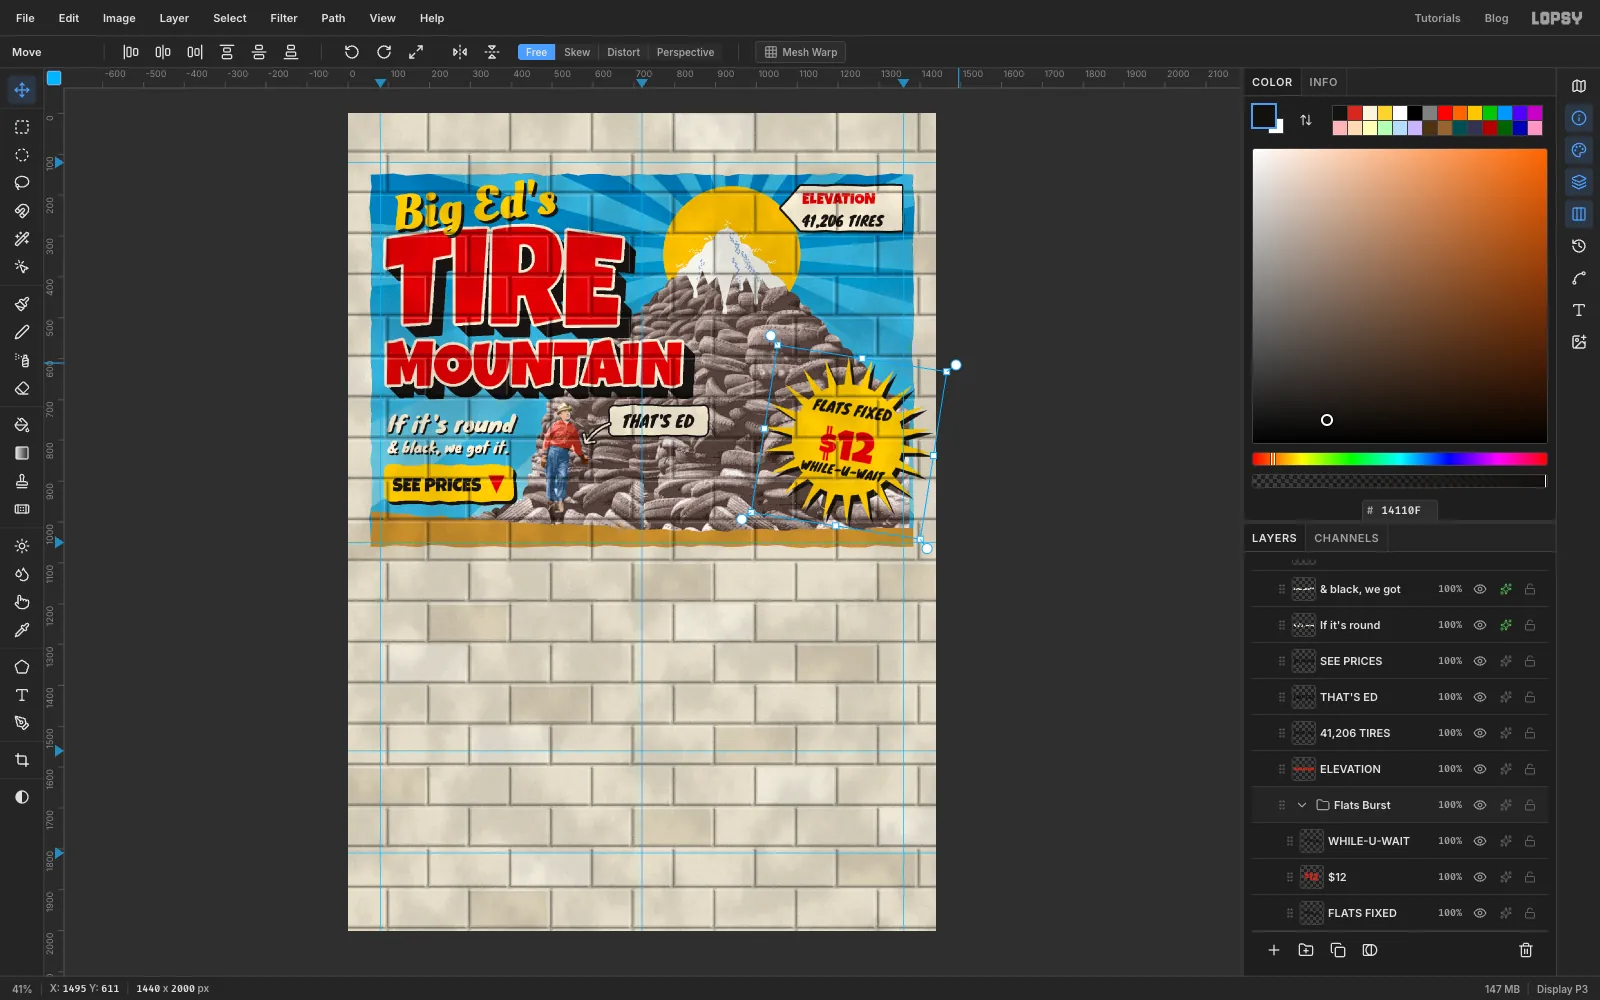
Turn the whole burst
- Click the
Flats Burstgroup's row and press Cmd+D to make sure nothing is selected. - Pick the Move tool. Handles appear around everything in the group.
- Drag the rotate handle just outside a corner to turn the group about 9° clockwise.
- Press Cmd+D. The text stays live inside the group.
- Click the
-
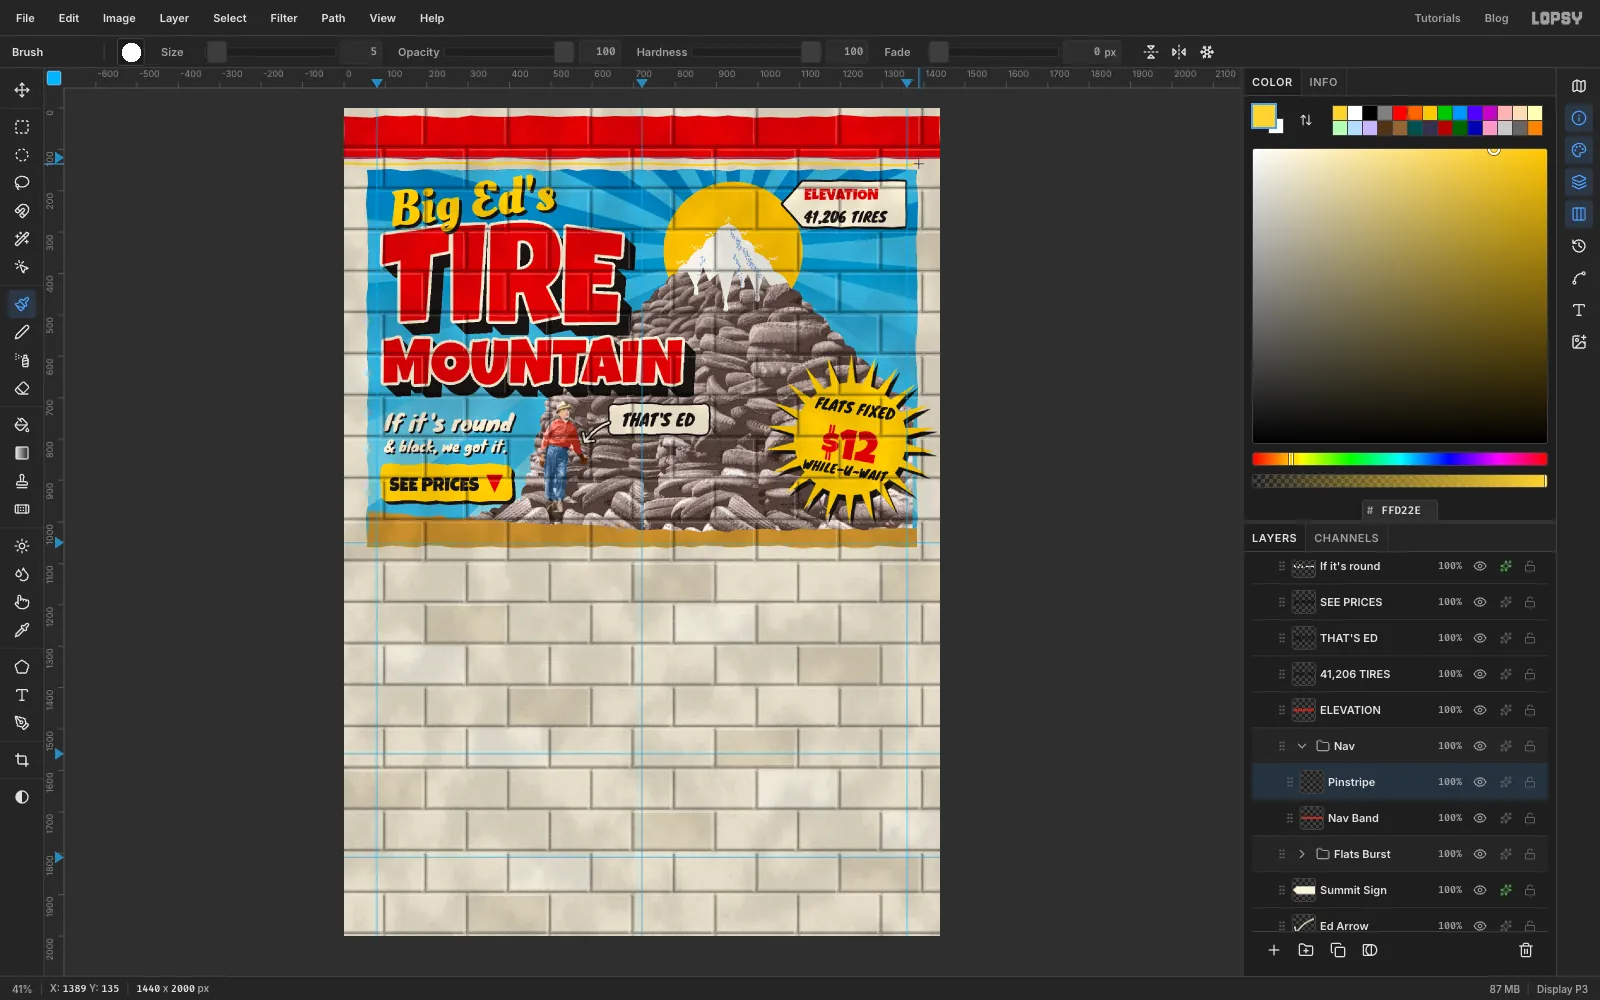
Paint the nav band
- Collapse
Flats Burst, click its row and click New Group. Name itNav. - Click Add Layer and name it
Nav Band. Lasso a rough band across the full width of the page, from abouty 20toy 122, and fill with . Deselect. - Click Add Layer and name it
Pinstripe. Set the foreground to , pick the Brush with Size5and drag slowly across the page at abouty 135. Let the line wander a little.
- Collapse
-
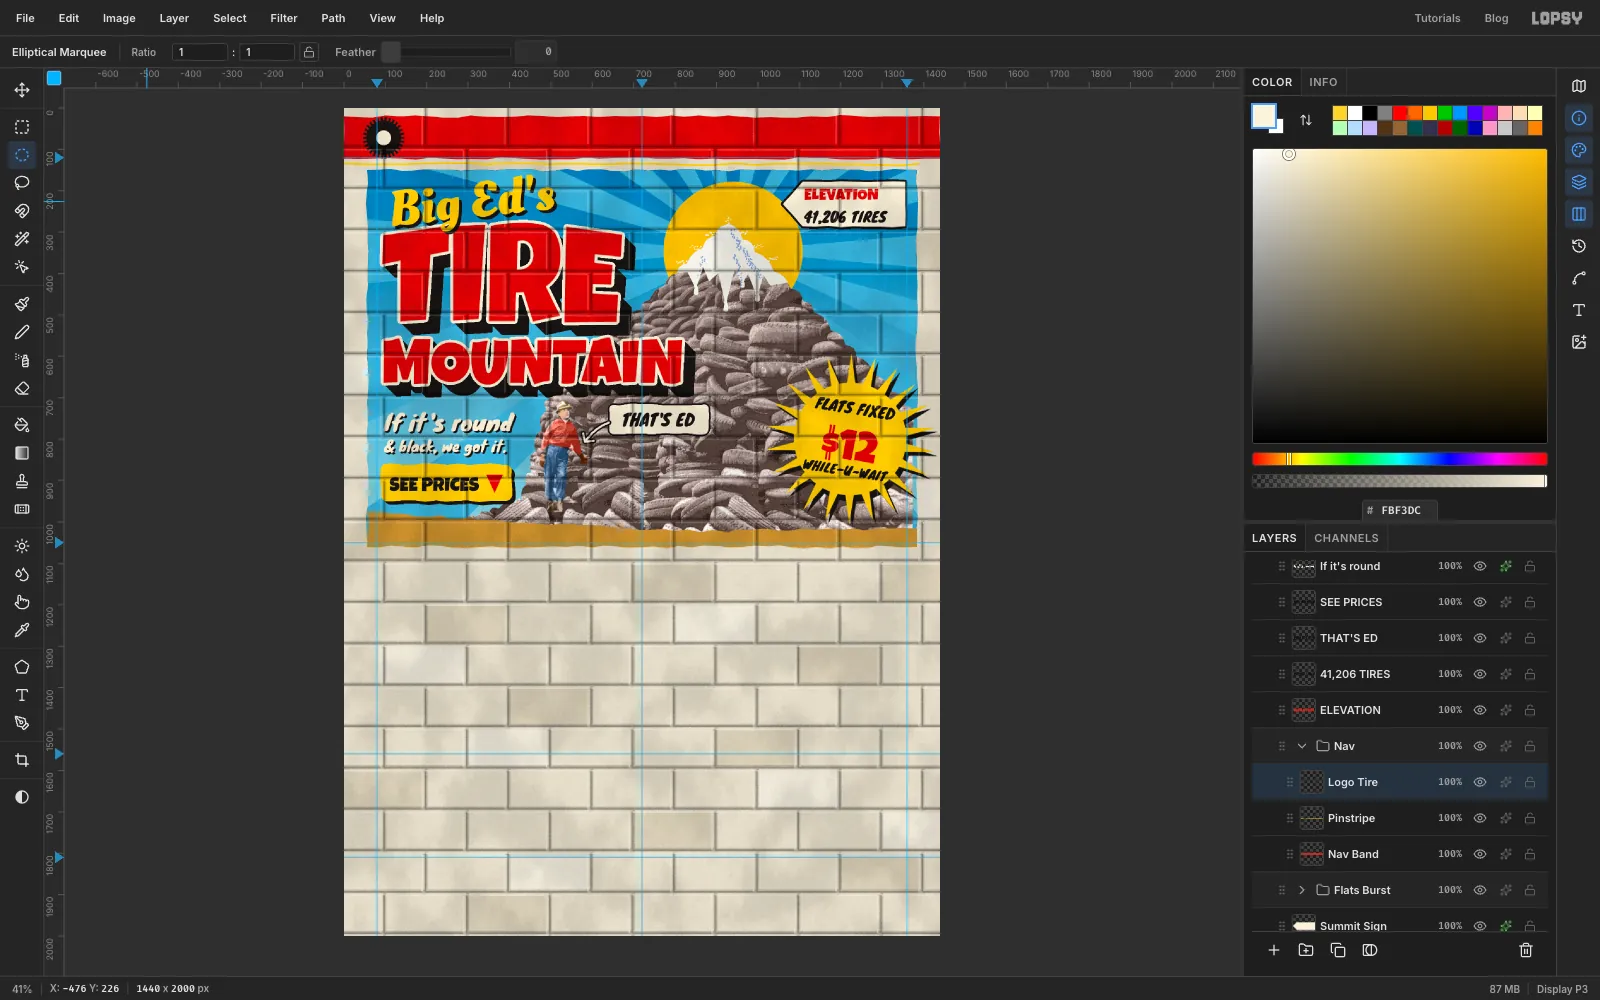
Draw the tire logo
- Click Add Layer and name it
Logo Tire. - Click once with the Elliptical Marquee and enter From
46, 22To146, 122. Set the foreground to . - Choose Filter → Sunburst… with Rays
30, Length5, Width55, Center X6.67and Center Y3.6, and click Apply. Clipped by the circle, the rays become tread teeth. - Press Cmd+D, click once with the Elliptical Marquee and enter From
54, 30To138, 114. Fill with . - Press Cmd+D, click once and enter From
78, 54To114, 90. Fill with and deselect.
- Click Add Layer and name it
-
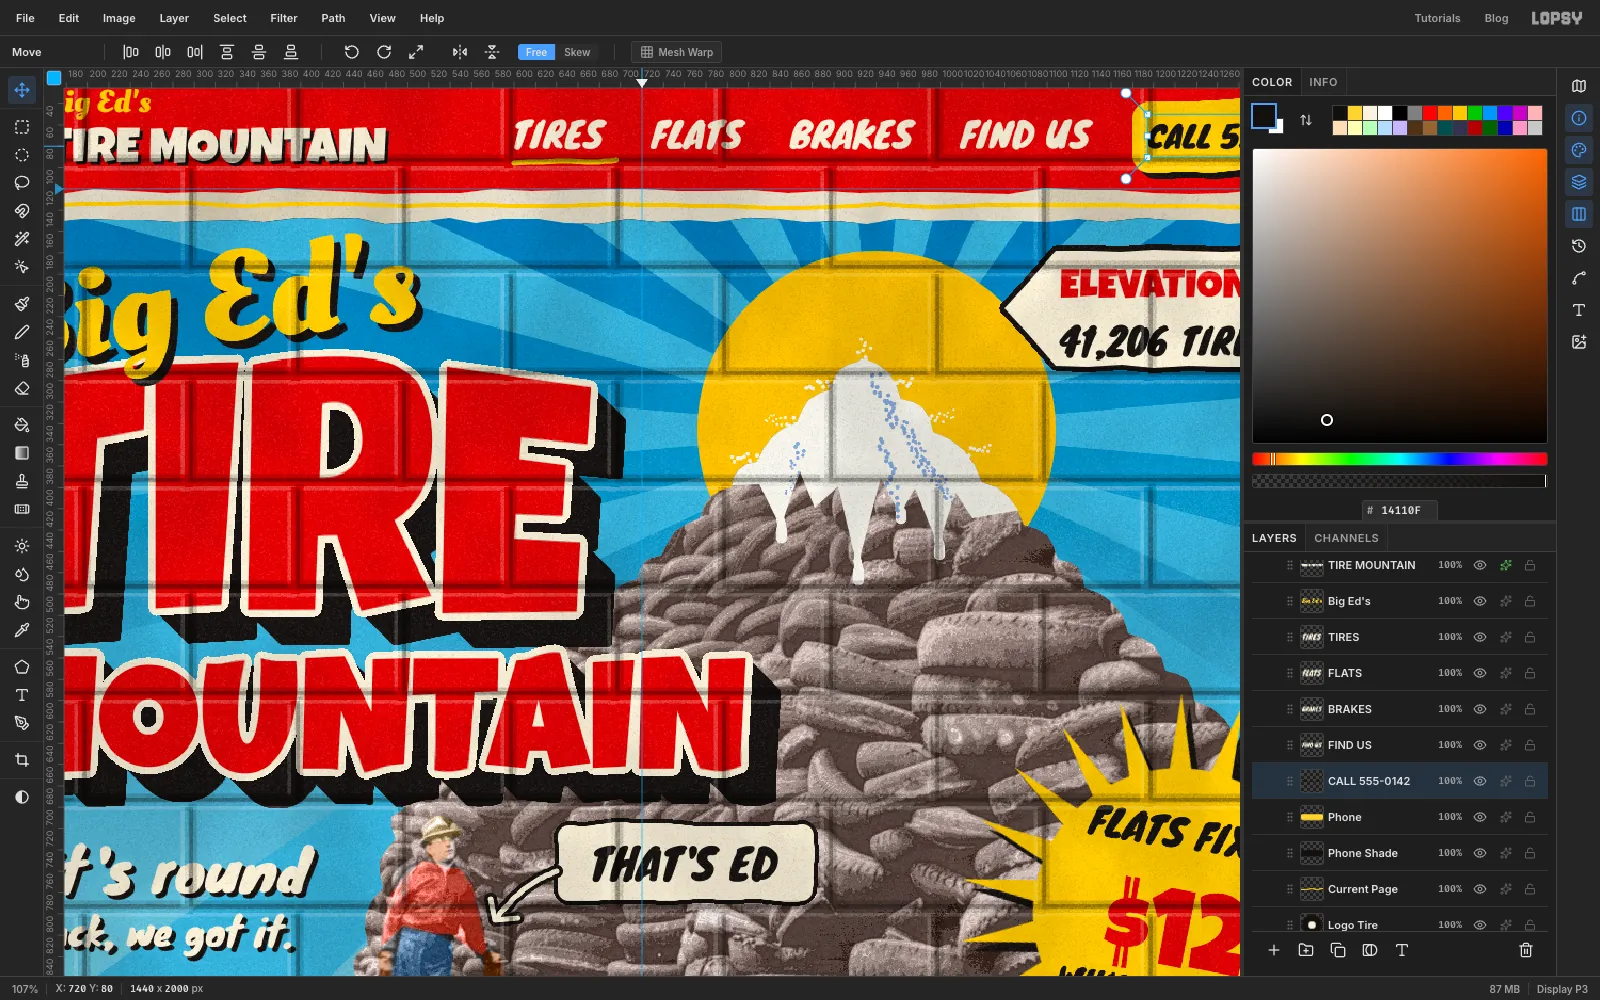
Letter the nav
- Click
Logo Tire, set the foreground to , choose Luckiest Guy at Size46, click at157, 53, typeTIRE MOUNTAINand press Tab. Give it a Drop Shadow with Offset X and Y3, Blur1, Opacity100, colour . - Click
Logo Tire, set the foreground to , choose Oleo Script Bold at Size30, click at160, 24, typeBig Ed'sand press Tab. - Add the links in Knewave
34in :TIRES,FLATS,BRAKESandFIND US. ClickLogo Tirebefore each one. Click at about600, 42for the first and keep that height for the rest, leaving a gap of about 42 px between words. - Click
Logo Tire, click Add Layer and name itCurrent Page. With the Brush at Size6in , underlineTIRESby hand. - Click Add Layer and name it
Phone Shade. Make a rounded plate from1186, 42to1416, 110in , using Shrink and Grow16. - Click Add Layer and name it
Phone. Do the same from1180, 36to1410, 104in . - Click
Phone, set the foreground to , choose Knewave at Size29, click inside the button, typeCALL 555-0142and press Tab. Centre it with the arrow keys.
- Click
-
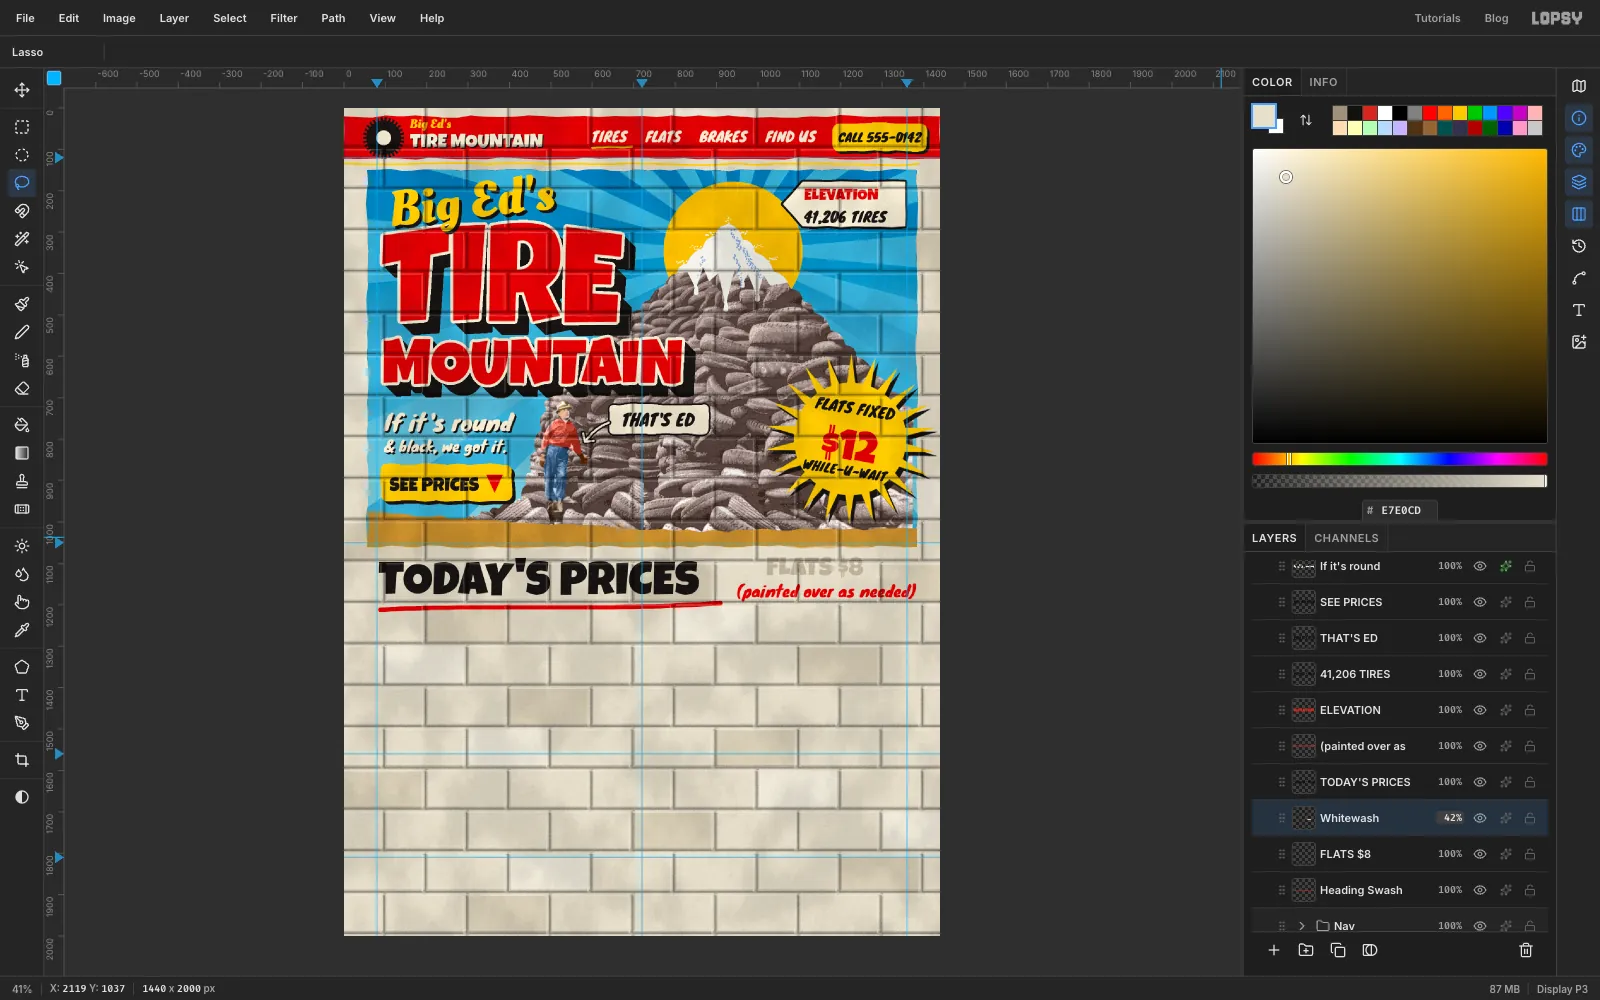
Paint the prices heading
- Collapse
Nav, click its row, click Add Layer and name itHeading Swash. - Set the foreground to , pick the Brush with Size
12and draw a long, slightly wavy underline from88, 1212to910, 1196. - Click
Heading Swashand choose Knewave38in . Click at949, 1135, type(painted over as needed)and press Tab. - Click
Heading Swashand choose Luckiest Guy112in . Click at84, 1069, typeTODAY'S PRICESand press Tab. - Now show the joke. Click
Heading Swashand choose Luckiest Guy62in . Click at1020, 1074, typeFLATS $8and press Tab. - Click Add Layer and name it
Whitewash. Lasso a rough patch over the old sign, from about990, 1060to1350, 1138, fill with , deselect and set it to42%. The old price now ghosts through the fresh paint.
- Collapse
-
Make the first poster sign
Real paper sits on top of the wall, so this goes above the relief.
- Click
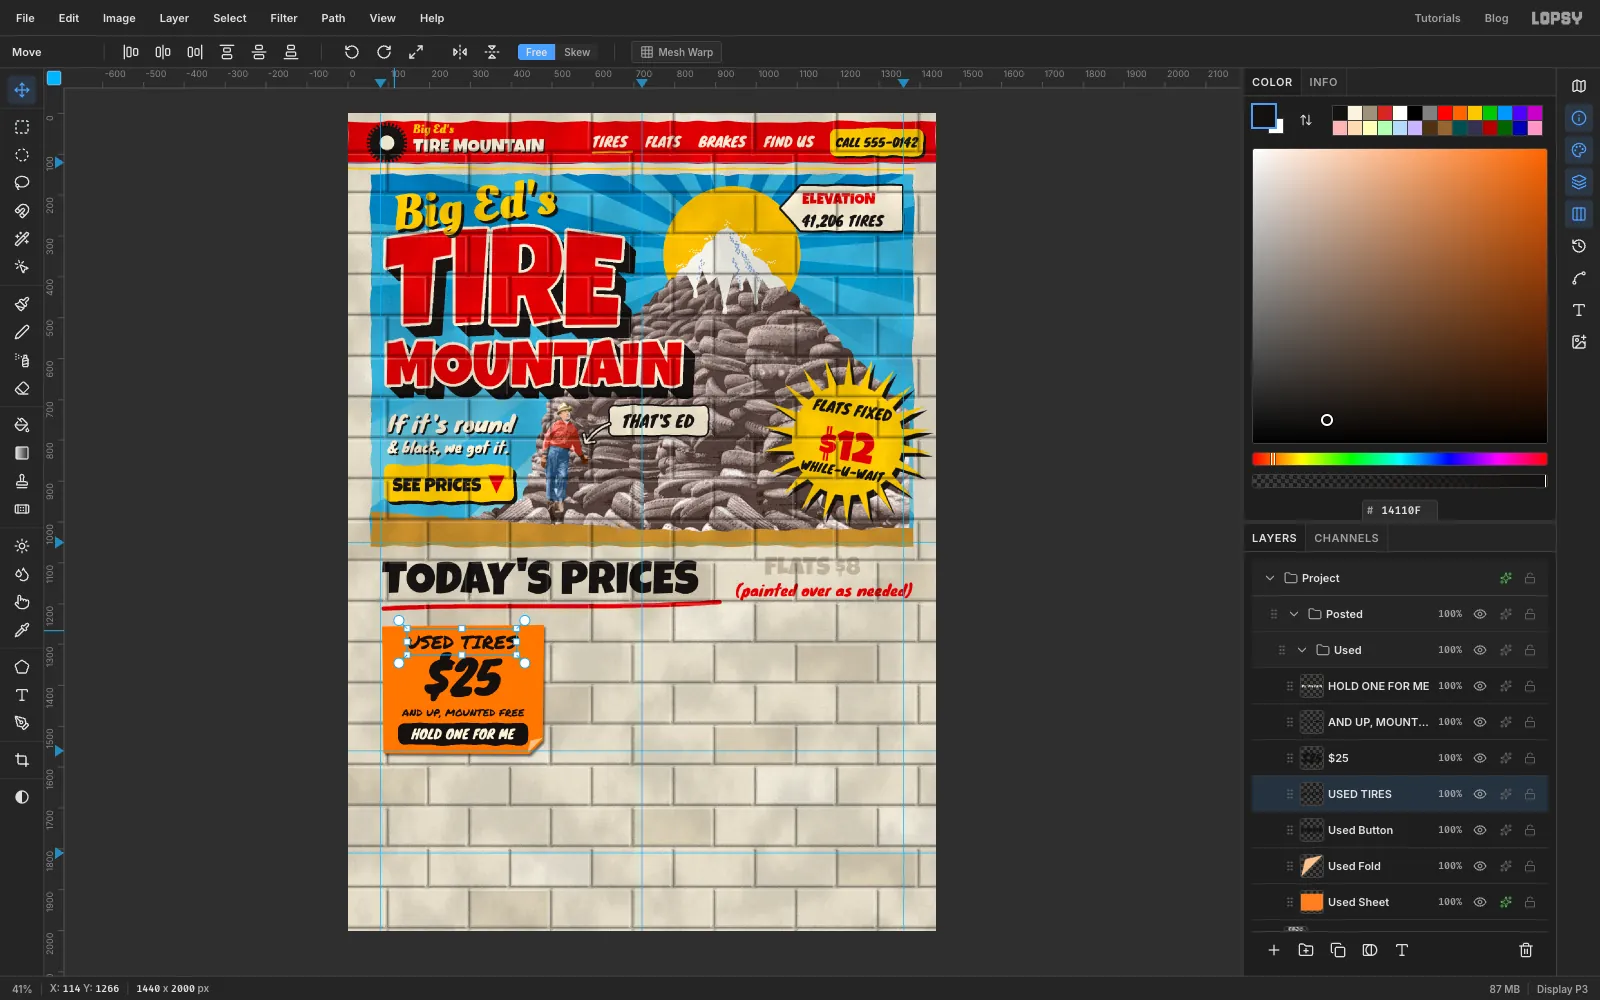
Grimeand click New Group. Name itPosted. Click New Group again and name itUsed. - Click Add Layer and name it
Used Sheet. Lasso a nearly rectangular sheet from about84, 1252to480, 1568, and fill with . Deselect. - Choose Filter → Add Noise… with Amount
12and Mono, and click Apply. - Lasso a small triangle over the bottom-right corner, about 42 px across, and press Delete. Press Cmd+D. Add a Drop Shadow with Offset X
4, Offset Y6, Blur7, Opacity60and colour . - Click Add Layer and name it
Used Fold. Lasso a small triangle to fold over the cut corner and fill with . Deselect. - Click Add Layer and name it
Used Button. Make a rounded plate in ,40px in from each side and about 54 px tall, near the bottom of the sheet.
Add the text, clicking
Used Buttonfirst each time. Commit each line and centre it on the sheet with the arrow keys:- Knewave
32in : click at144, 1498and typeHOLD ONE FOR ME, on the button - Permanent Marker
25in : click at114, 1452and typeAND UP, MOUNTED FREE, just above the button - Knewave
108in : click at194, 1326and type$25, in the middle - Permanent Marker
46in : click at114, 1266and typeUSED TIRES, at the top
- Click
-
Tape it up and copy the tape
- Click
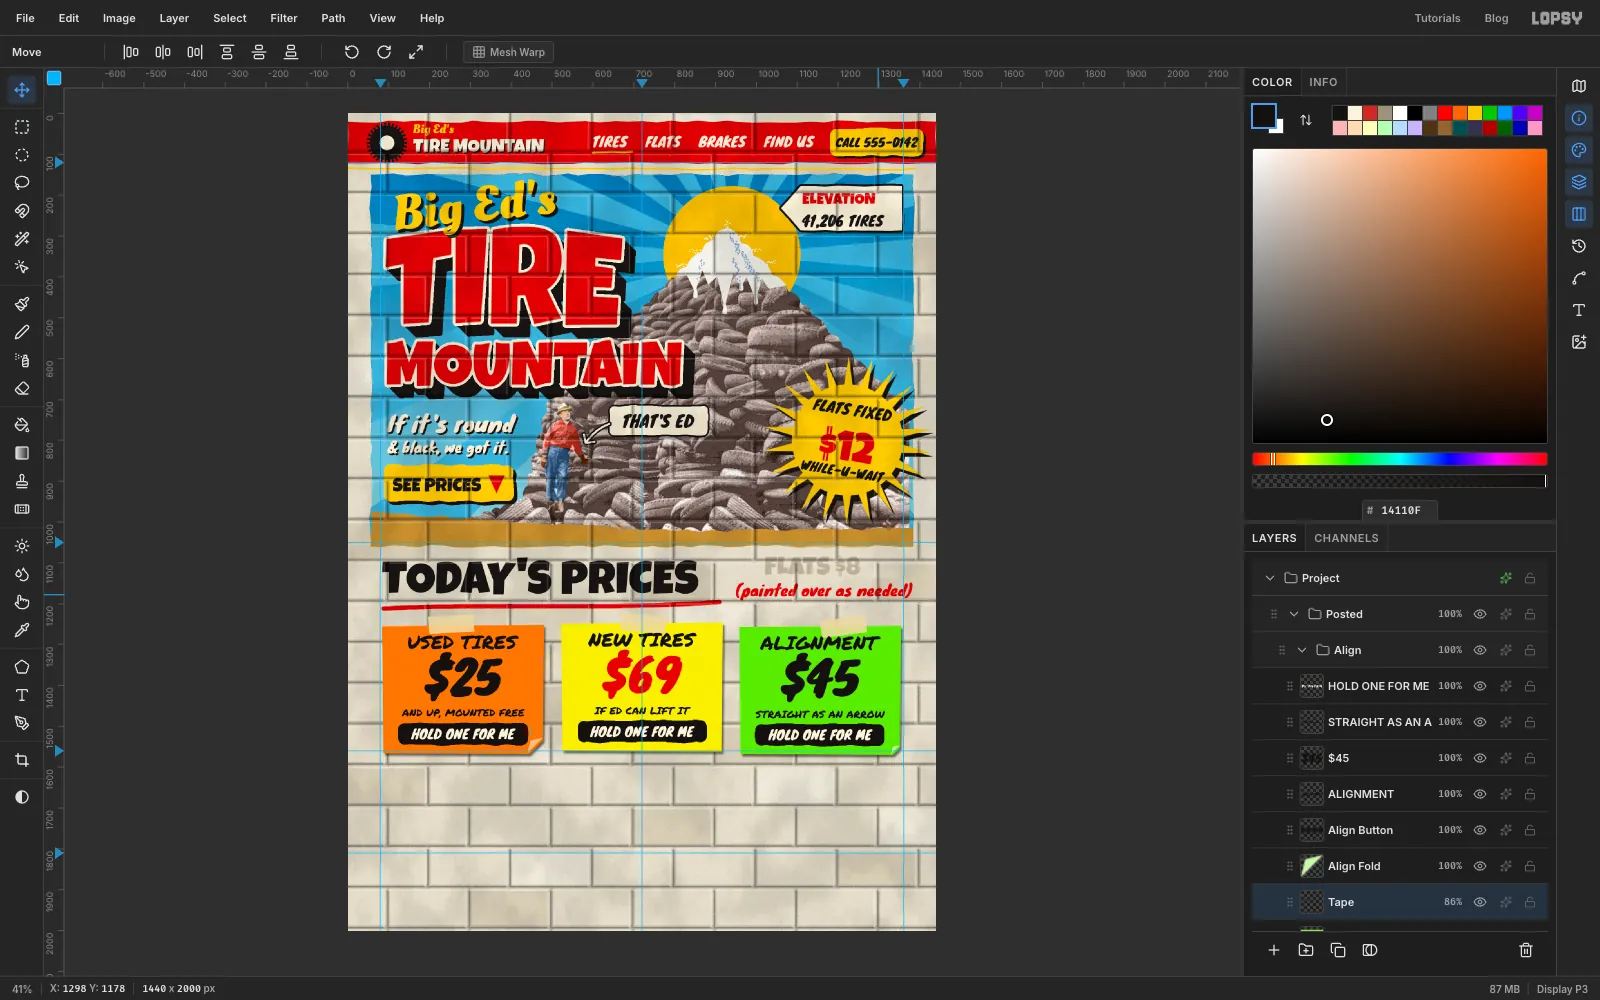
Used Sheet, click Add Layer and name itTape. Lasso a short, slightly crooked strip across the top edge of the sheet and fill with . Deselect and set the layer to86%. - Marquee around the tape and press Cmd+C. Press Cmd+D. You'll paste it onto the next two signs.
- Collapse the
Usedgroup and click its row. Click New Group and name itNew. - Repeat the sheet, noise, Drop Shadow, button and text steps from the last section for the yellow sign, naming the layers
New SheetandNew Button. It runs from about522, 1246to918, 1562, using , with$69in , and the wordsNEW TIRESandIF ED CAN LIFT IT. Skip the dog-ear on this one. - Click
New Sheetand press Cmd+V. Rename the pasteTape, set it to86%and drag it to the top of the yellow sign. Marquee around it, pick the Move tool again and turn it about 7° with the rotate handle, then press Cmd+D. - Collapse
New, click its row, click New Group and name itAlign. Repeat the same steps for the green sign, naming the layersAlign Sheet,Align FoldandAlign Button. It runs from about958, 1254to1354, 1570, using , with$45in , the wordsALIGNMENTandSTRAIGHT AS AN ARROW, and a smaller dog-ear about 26 px across with its fold in . - Click
Align Sheetand paste the tape again. Set it to86%, drag it to the top of the sheet right of centre, then marquee around it, pick the Move tool and turn it about 5° the other way. Press Cmd+D.
- Click
-
Tilt the signs
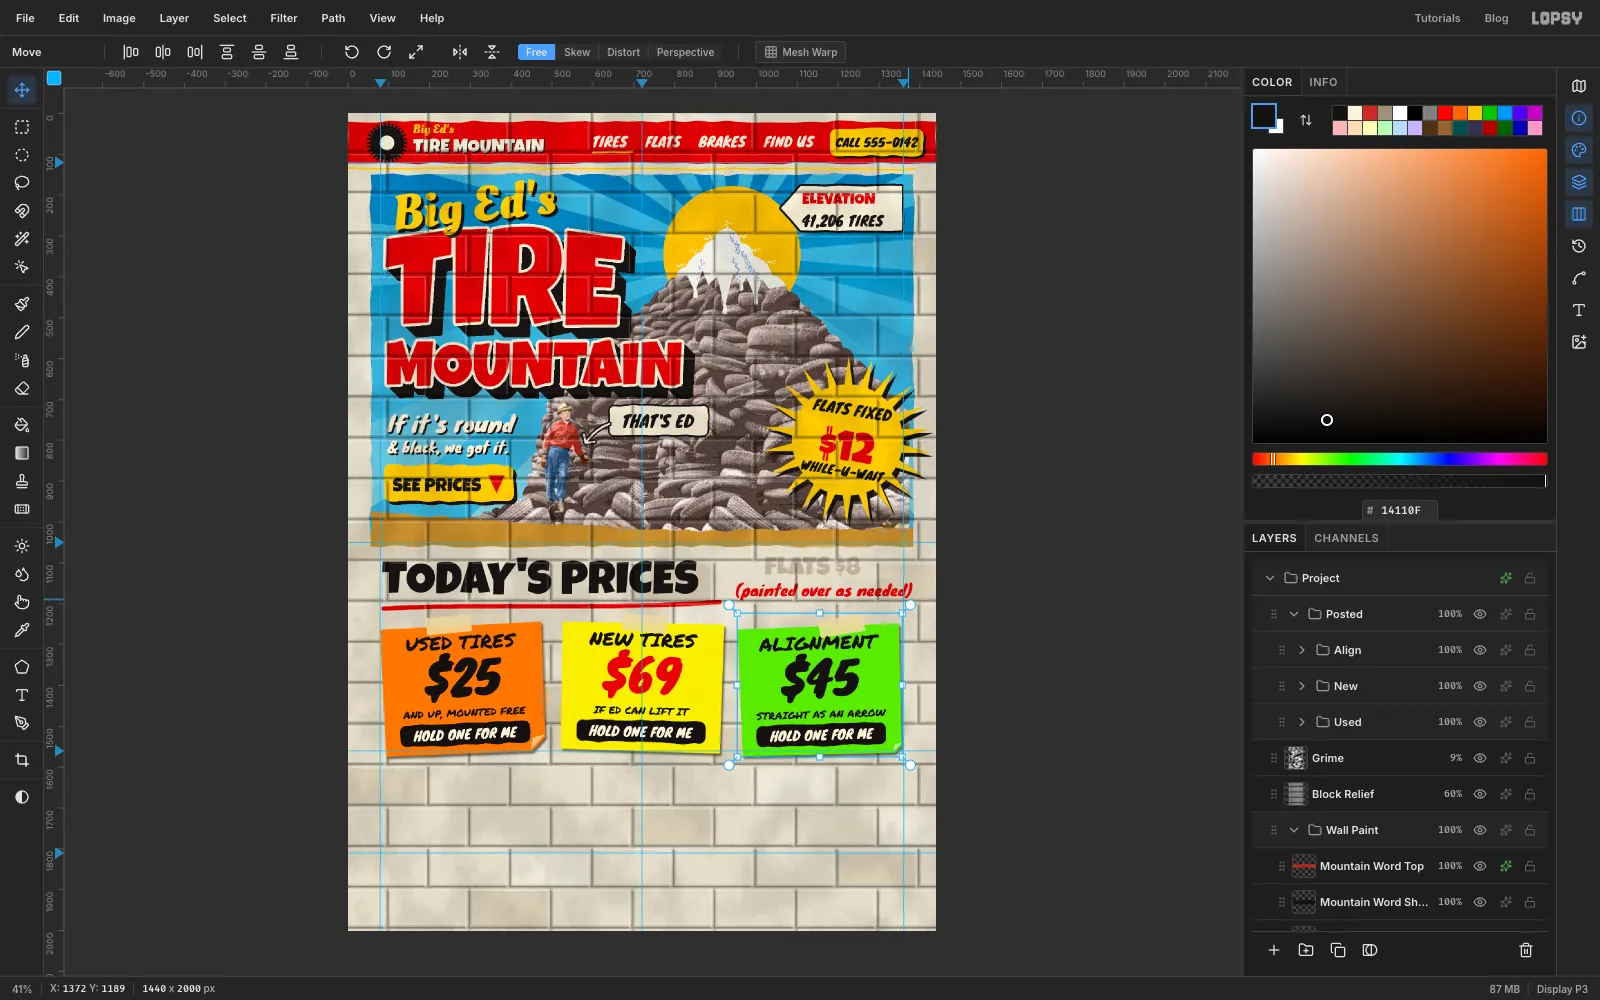
- Collapse
Align. Click the collapsedUsedgroup, press Cmd+D, pick the Move tool and use the rotate handle to turn it about 2.4° anticlockwise. Press Cmd+D. - Do the same with
New, about 1.5° clockwise. - Do the same with
Align, about 1.6° anticlockwise.
- Collapse
-
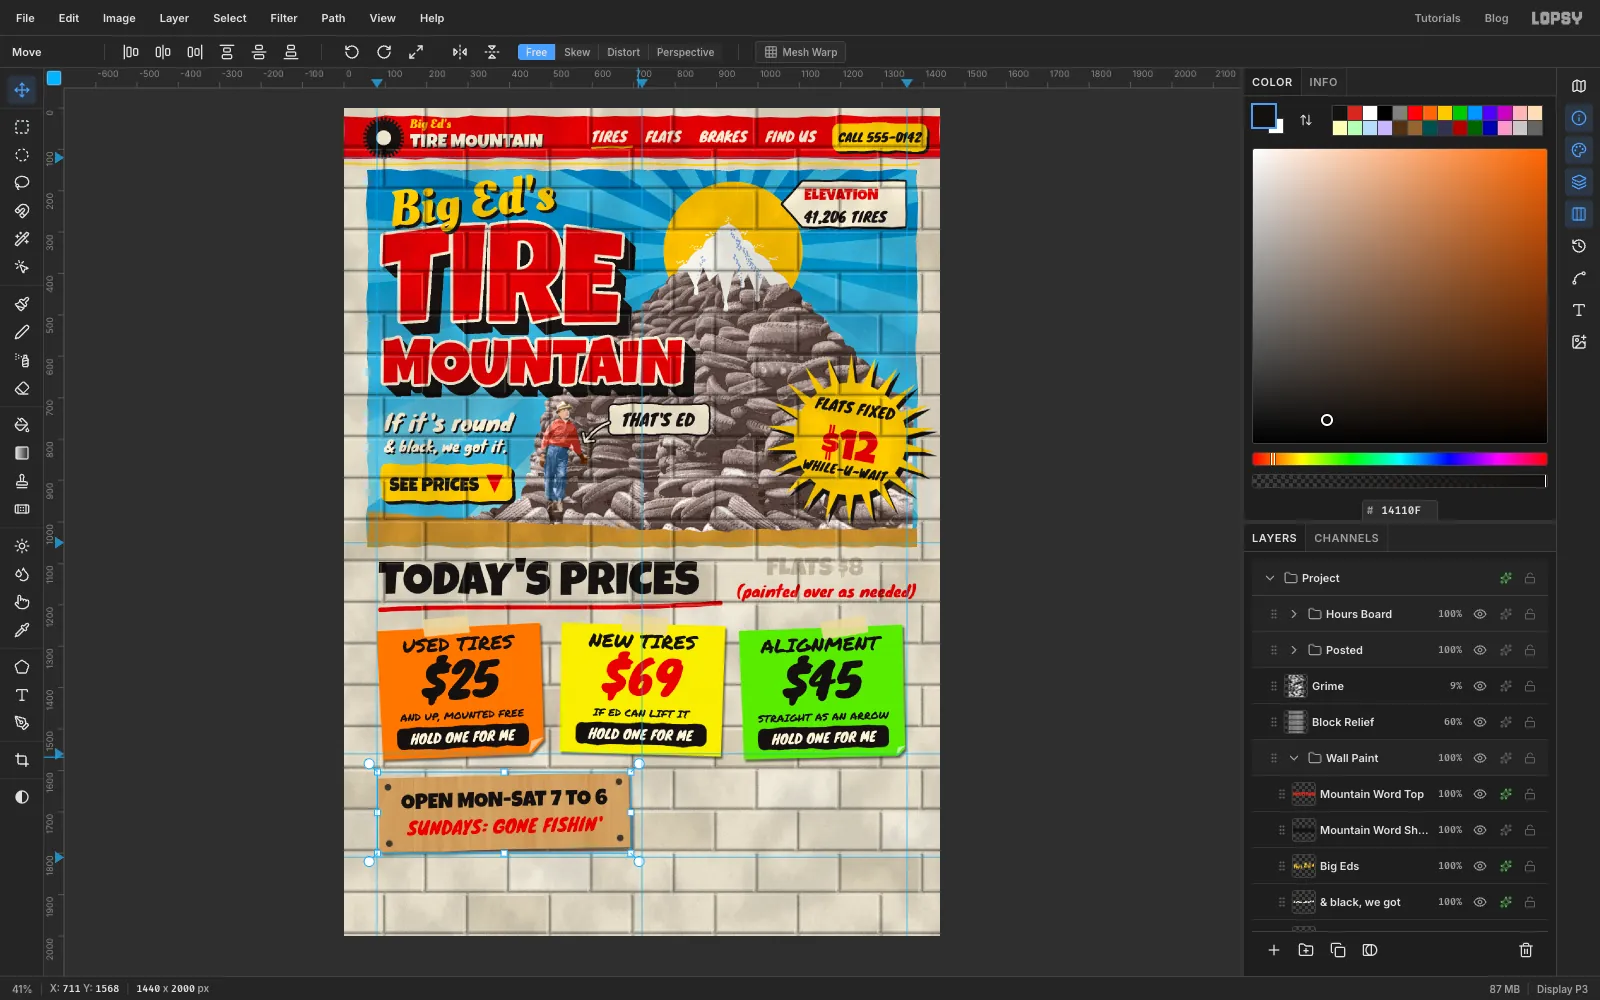
Screw up the hours board
- Collapse
Postedand click its row. Click New Group and name itHours Board. - Click Add Layer and name it
Plywood. Lasso a rough rectangle from84, 1612to690, 1792and fill with . Deselect, and add a Drop Shadow with Offset X6, Offset Y8, Blur12, Opacity55and colour . - Click Add Layer and name it
Grain. Hold Cmd and click the thumbnail ofPlywood. Choose Filter → Fibers… with Variance22and Strength40, and click Apply. Deselect and set it to Soft Light at42%. - Click Add Layer and name it
Screws. Click once with the Elliptical Marquee and enter From100, 1626To116, 1642. Fill with and deselect. Repeat for the other three corners, starting from658, 1626,100, 1762and658, 1762. - Click
Screwsand add Knewave44in : click at130, 1712, typeSUNDAYS: GONE FISHIN'and centre it on387, 1734. - Click
Screwsand add Luckiest Guy52in : click at120, 1632, typeOPEN MON-SAT 7 TO 6and centre it on387, 1668. - Collapse the group, click its row, press Cmd+D and turn it about 1.4° anticlockwise with the Move tool.
- Collapse
-
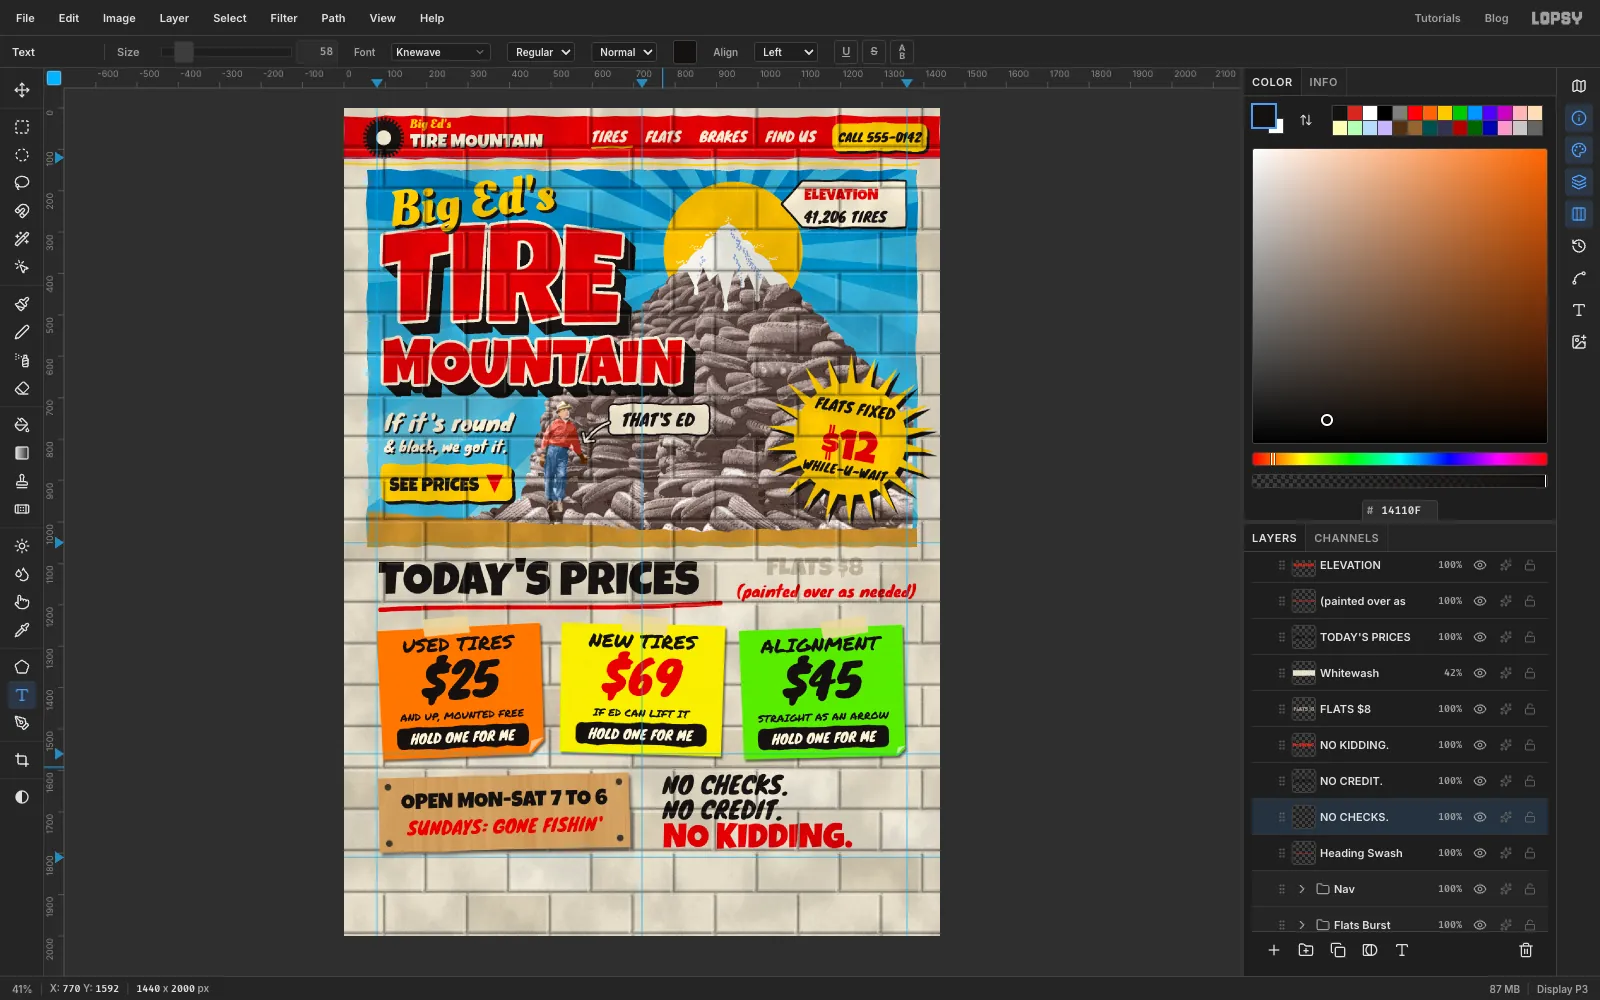
Paint the house rules
These go on the wall, so they belong in
Wall Paint, under the relief.Add the lines from the bottom up, clicking
Heading Swashfirst each time:- Luckiest Guy
84in :NO KIDDING., at770, 1712 - Knewave
58in :NO CREDIT., at770, 1652 - Knewave
58in :NO CHECKS., at770, 1592
- Luckiest Guy
-
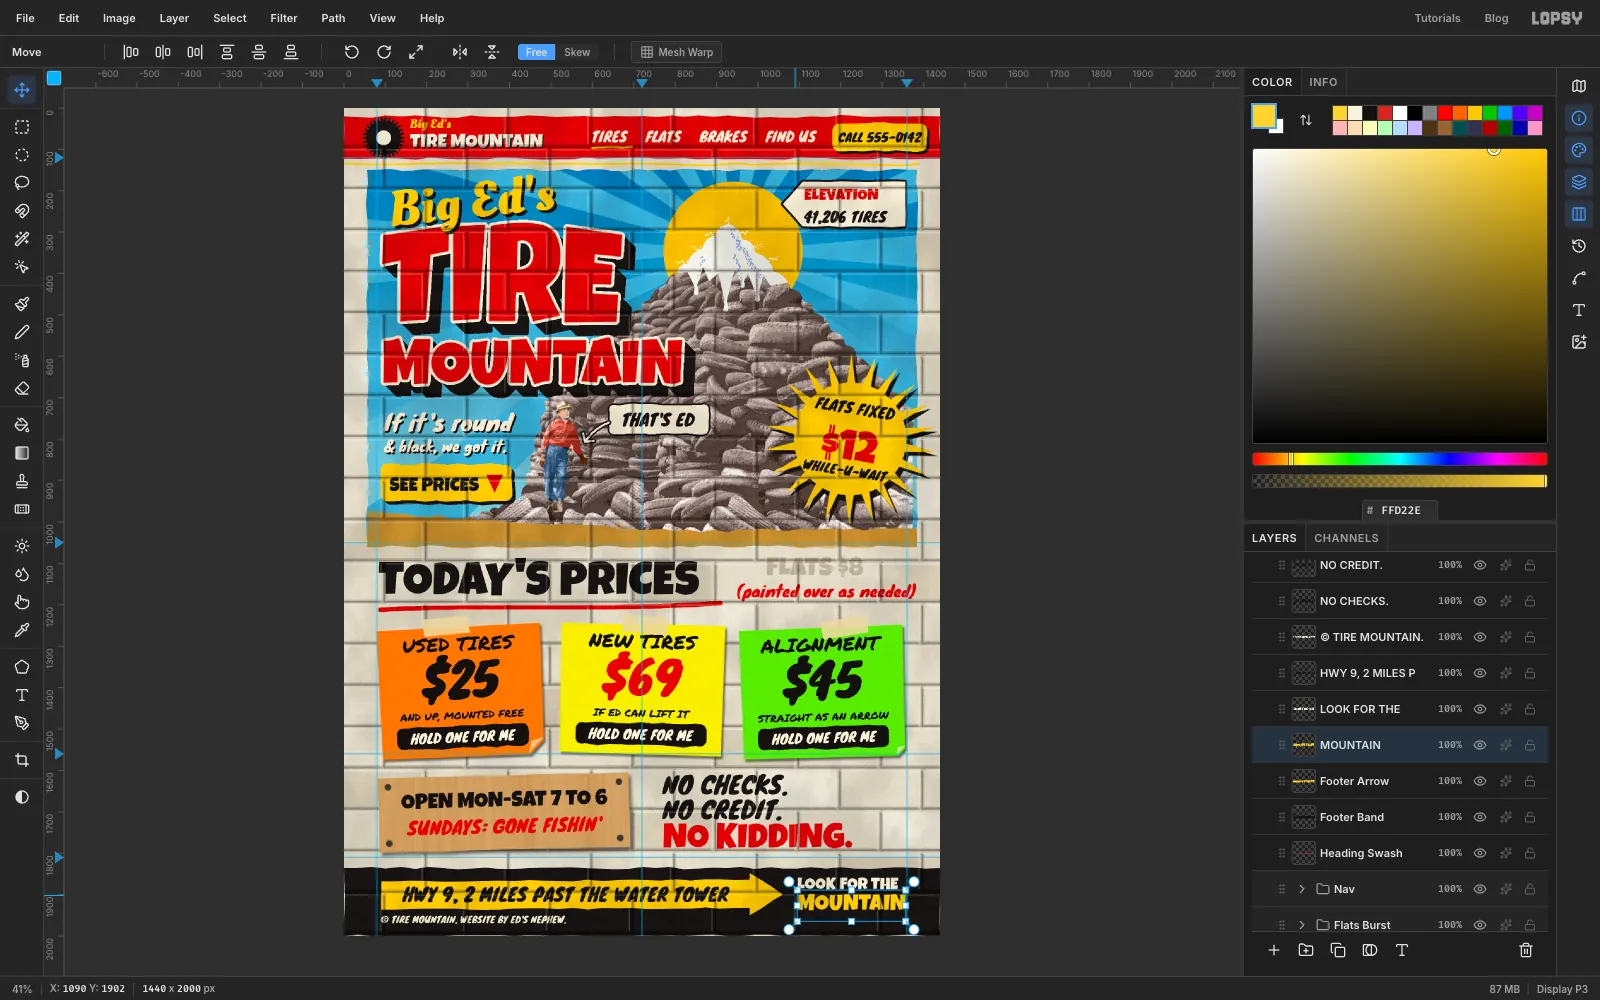
Paint the footer
- Click
Heading Swash, click Add Layer and name itFooter Band. Lasso a rough band from abouty 1836to the bottom of the page and fill with . Deselect. - Click Add Layer and name it
Footer Arrow. Lasso a long arrow fromx 90to its tip at1060, 1900, with the shaft fromy 1866toy 1934. Fill with and deselect.
Add the text, clicking
Footer Arrowfirst each time:- Knewave
22in :© TIRE MOUNTAIN. WEBSITE BY ED'S NEPHEW., at88, 1938 - Knewave
44in :HWY 9, 2 MILES PAST THE WATER TOWER, clicked at118, 1880and then centred in the shaft - Luckiest Guy
40in :LOOK FOR THE, at1092, 1849 - Luckiest Guy
54in :MOUNTAIN, at1094, 1888
- Click
-
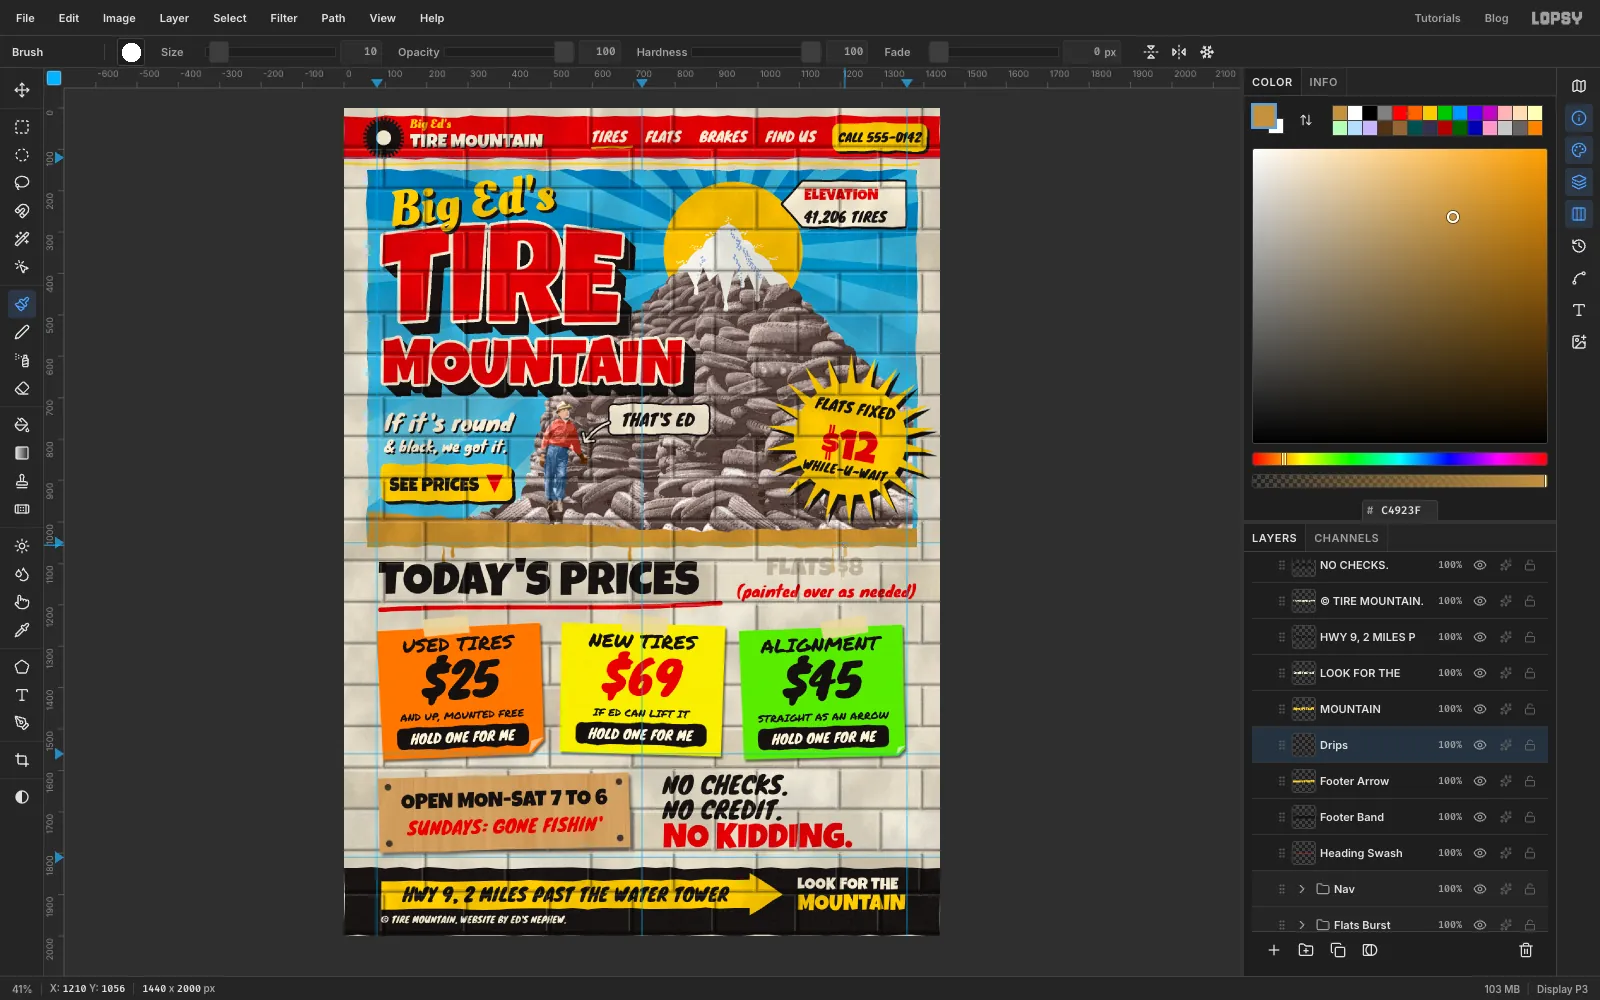
Add paint runs
- Click
Footer Arrow, click Add Layer and name itDrips. - Pick the Brush, open Brushes and set Size
10, Hardness100and Taper70. - Set the foreground to . Start each run at its bottom tip, below the ground band, and drag straight up into the paint, so the bead sits at the bottom and the run thins as it reaches the band. Make five, in two uneven clusters, from about 25 to 60 px long.
- Open Brushes again and set Taper back to
0.
- Click
-
Weather the paint
- Click Add Layer and name it
Paint Chips. Set the foreground to the wall colour, . - Pick the Spray tool. With Size between
34and60, spray short passes along the mural's left and right edges, across the nav band, over a letter or two of TIRE, and along the ground band. Vary the size and leave plenty of gaps, because chips come in clusters. - Click
Sky, click Add Layer and name itDry Brush. This puts it behind everything but the sky. - Pick the Brush and open Brushes. Set Size
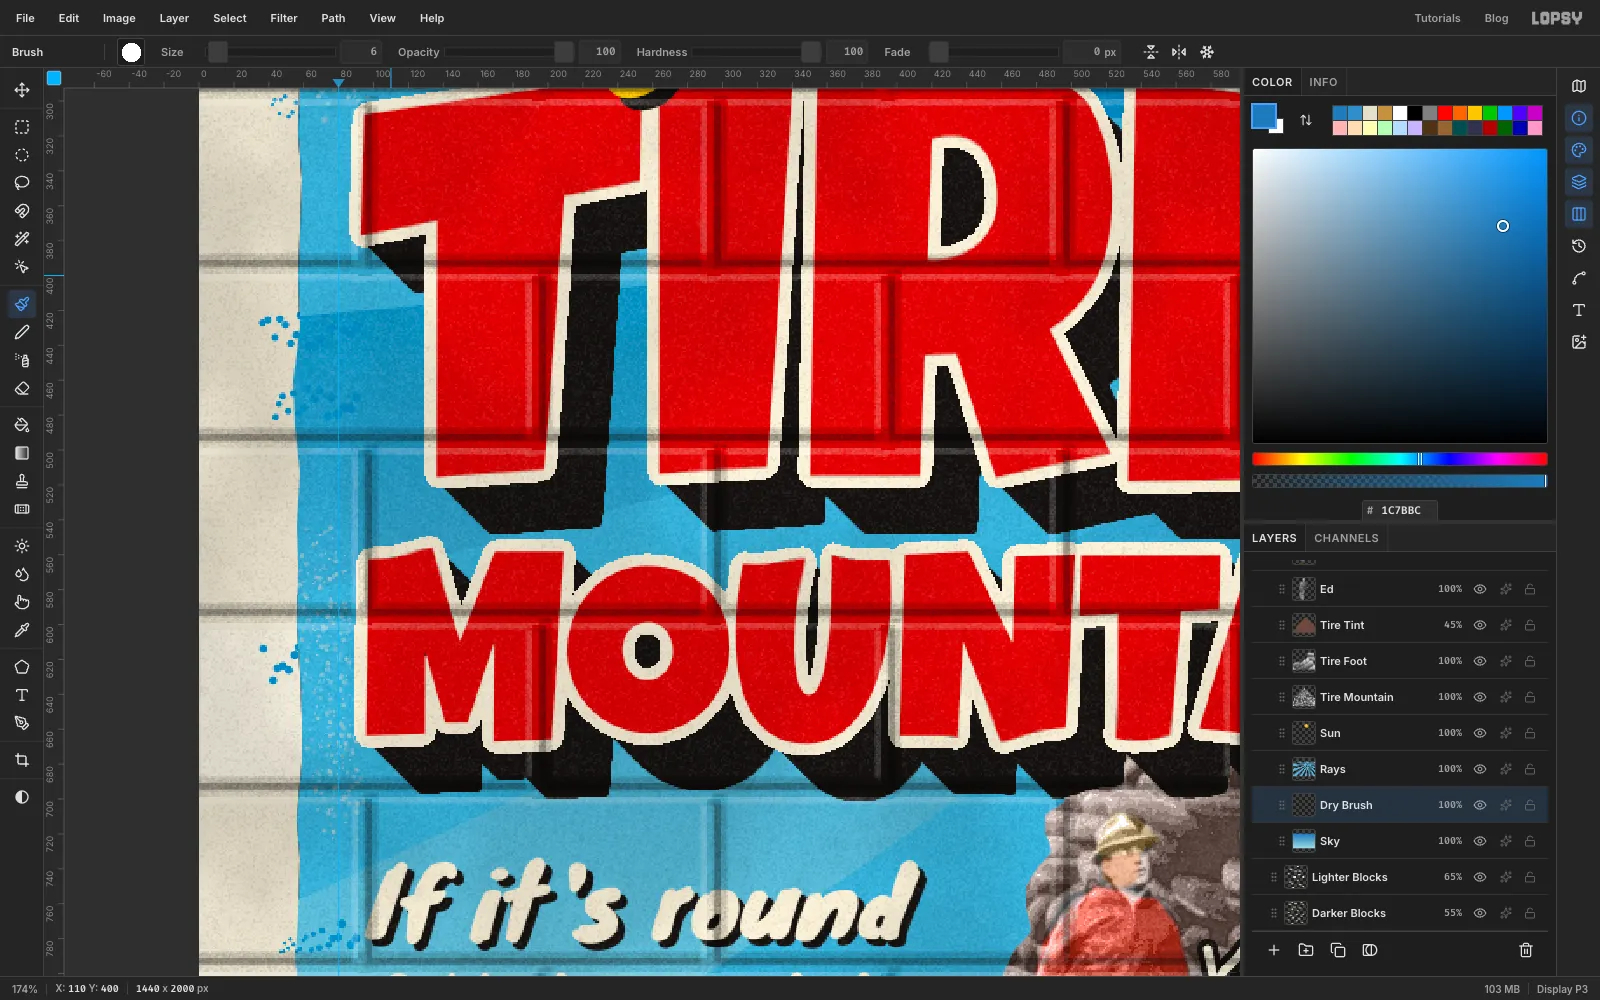
6, Spacing60, Scatter90and Size Jitter70. - Set the foreground to and flick short strokes outward across the mural's left and right edges. Use along the top edge. It looks like a nearly empty brush dragged off the paint.
- Open Brushes and set Spacing to
10, with Scatter and Size Jitter at0.
- Click Add Layer and name it
-
Export the homepage
- Choose View → Show Guides to turn the guides off.
- Choose File → Save Project to keep the layered file.
- Choose File → Quick Export PNG for the flat image.
Now that you know the trick, try it with your own local business. The recipe is always a real wall, lettering that isn't quite straight, a joke, and one thing someone painted over.