Design a Voxel Cantina Menu with Cube Brushes
Build a voxel restaurant menu in Lopsy by turning hand-drawn cubes into colour brushes and stamping a floating desert island, a saguaro and a bowl of nachos.
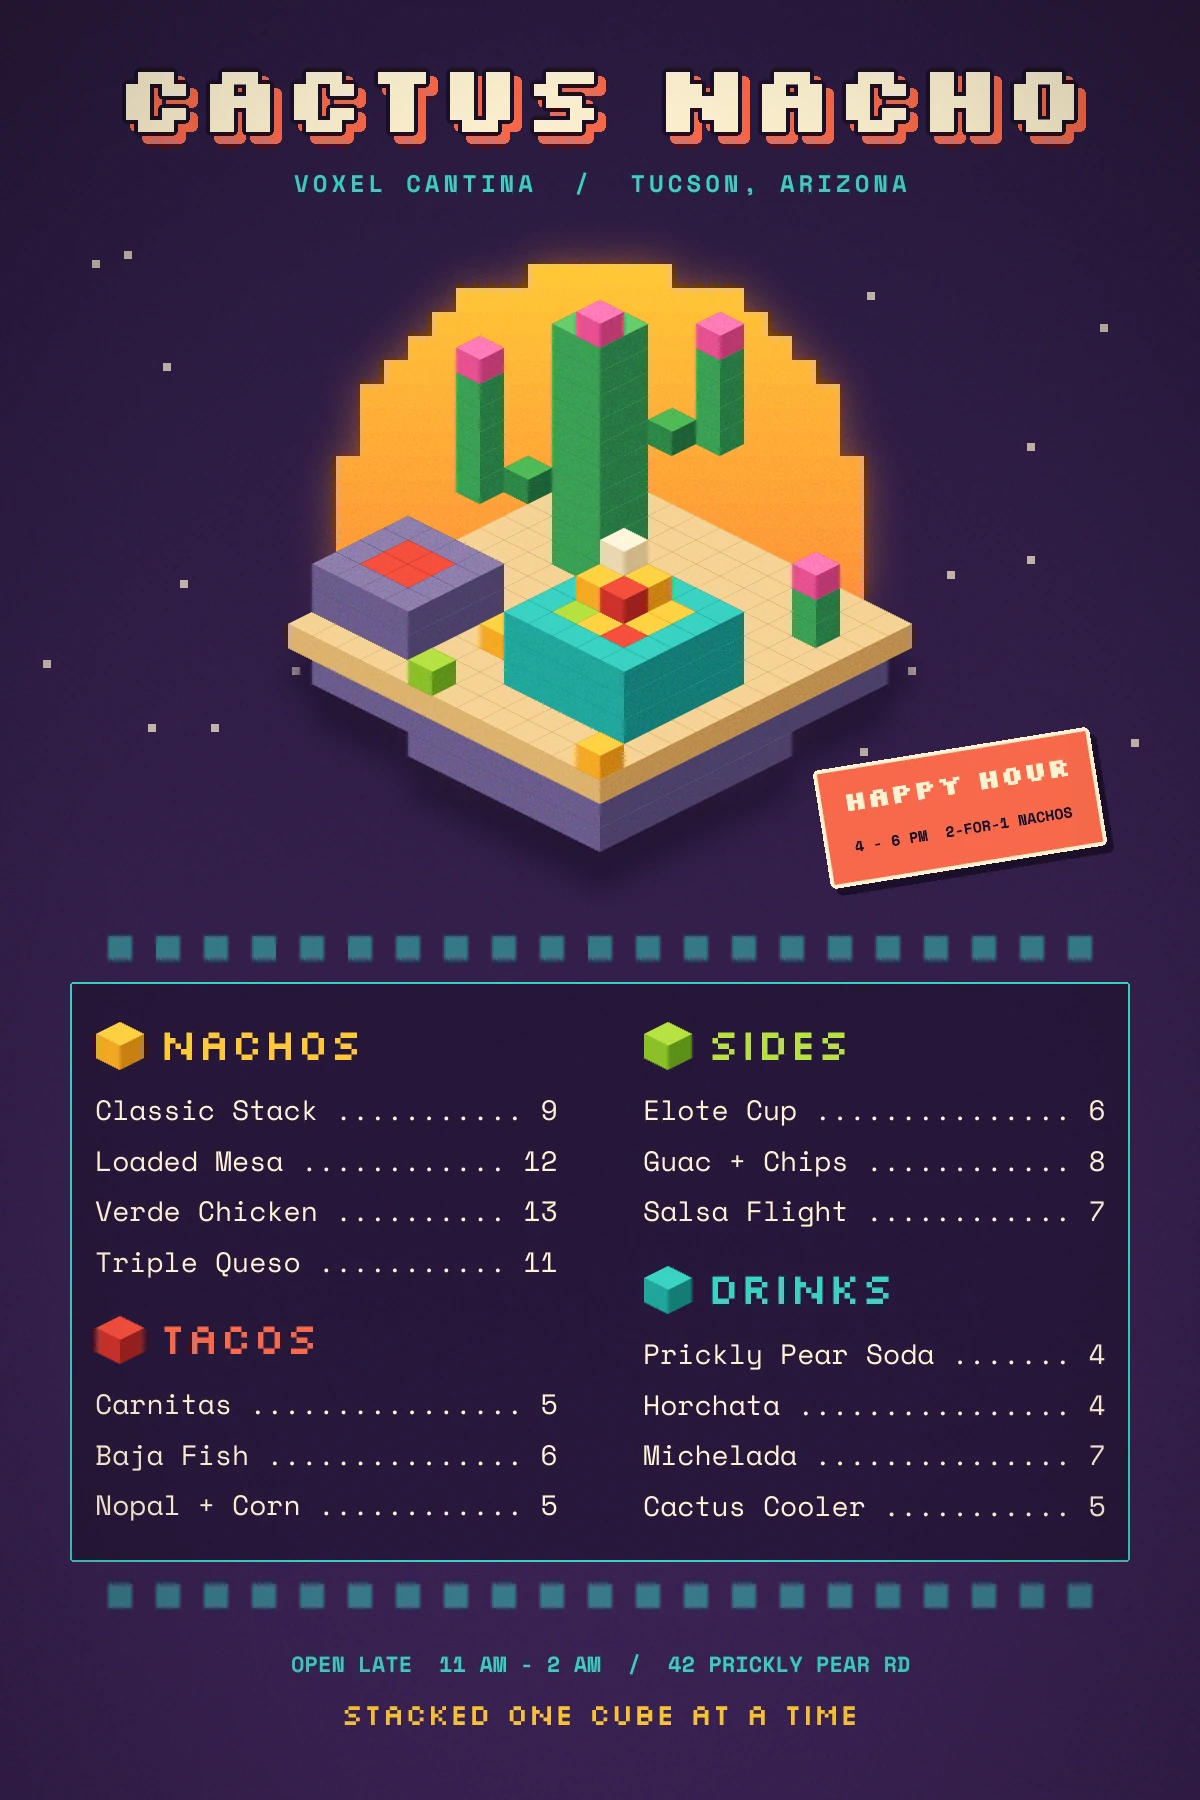
Voxel art is pixel art in three dimensions: everything is built from identical little cubes. From the usual isometric angle every cube shows the same three faces, a diamond on top, a face on the left and a face on the right, so a cube is really one small picture repeated hundreds of times.
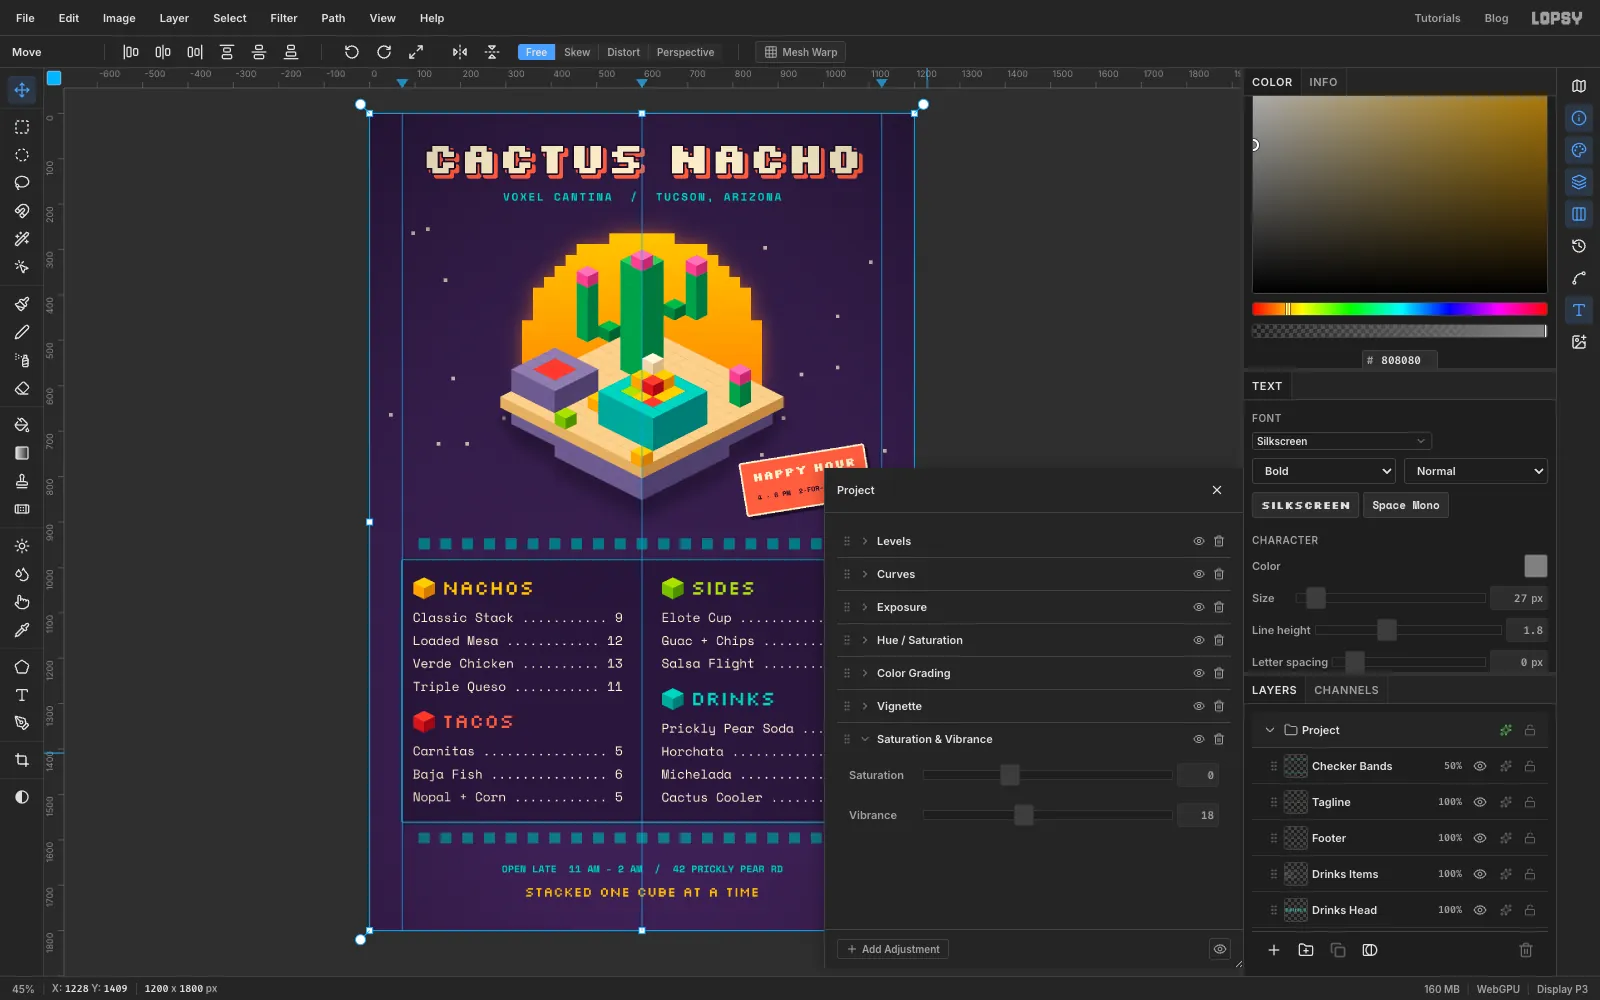
That makes it a good fit for a colour brush. In this tutorial you'll draw ten cubes with the Pen, one for each material, turn each into a brush with Edit → Define Color Brush…, and then build the whole illustration by clicking: one click, one cube. The result is a one-page menu, 1200 × 1800 px, for an imaginary cantina called Cactus Nacho.
The menu has:
- a blocky sun, made by pixelating a circle and using it as a selection
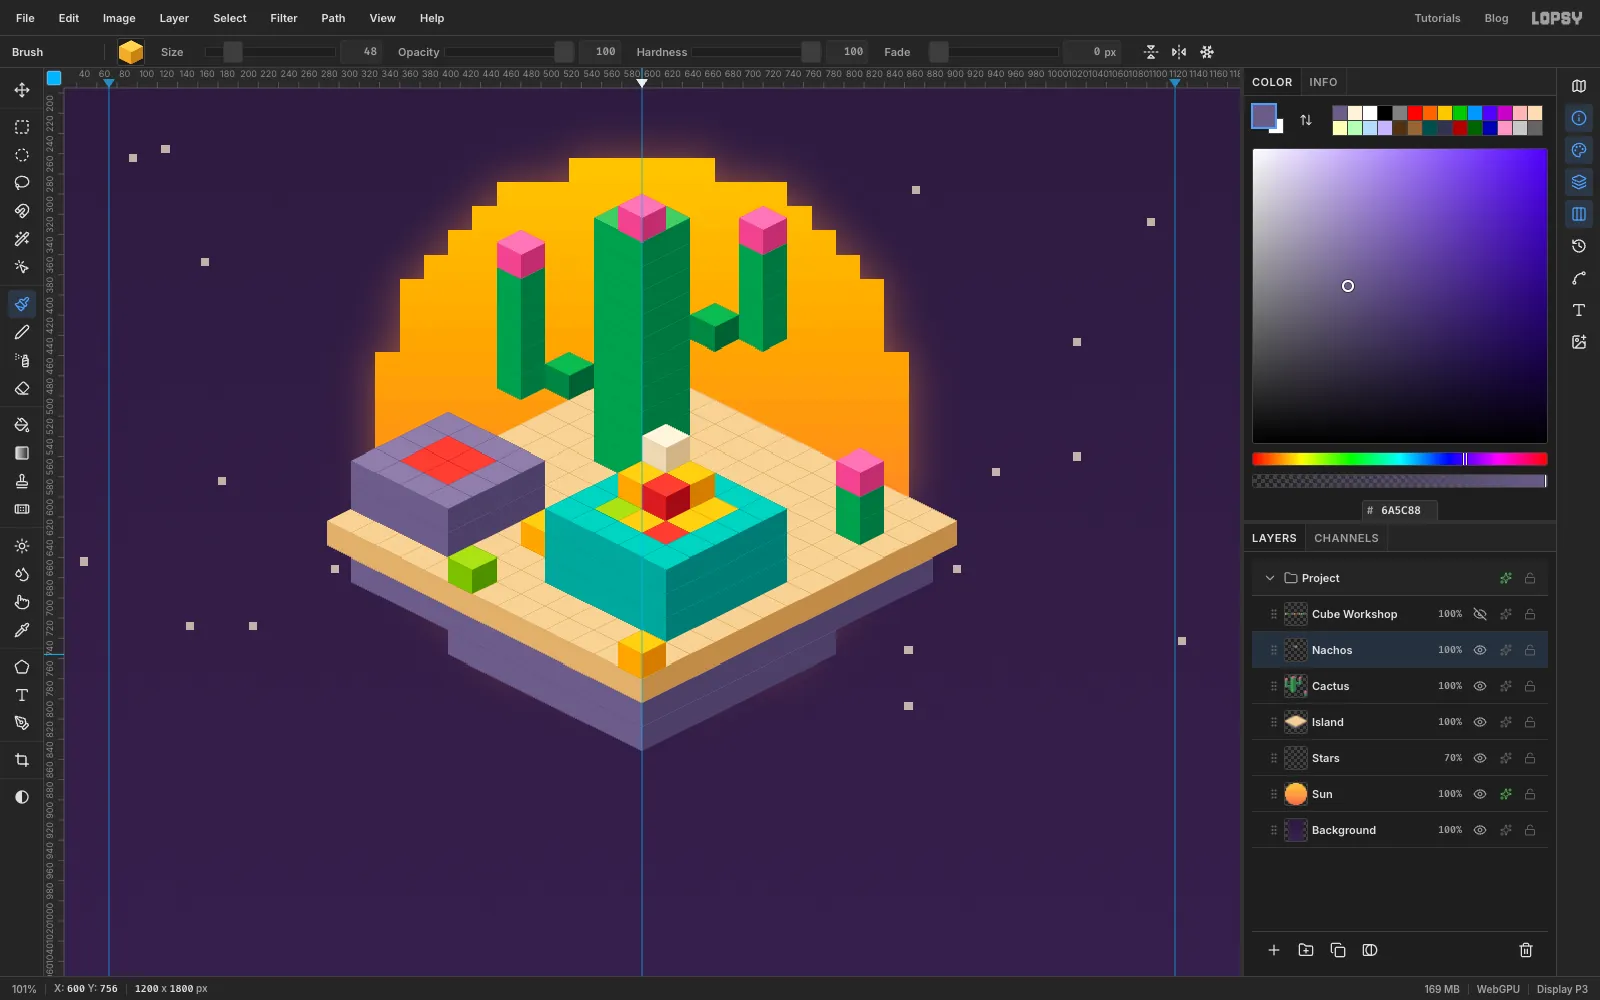
- a floating sand island with a saguaro, a bowl of nachos and a stone bowl of salsa, all stamped from cube brushes
- pixel lettering with a hard extruded shadow
- a two-column menu in a monospaced face, with dot leaders that line the prices up by themselves
- a tilted happy-hour badge, a row of pattern-filled squares, print grain and a vignette
The tools you'll use:
- the Gradient tool, Filter → Pixelate…, Filter → Threshold… and the Magic Wand
- the Pen with the Paths panel's Path to Selection, and Edit → Fill
- Edit → Define Color Brush… and the Brush
- Edit → Define Pattern and Edit → Fill with Pattern…
- the Text tool and the Text panel
- the Drop Shadow, Stroke and Outer Glow effects
- groups, the Move tool's rotate handle, Add Noise and a group's adjustments
The fonts are free Google Fonts from Lopsy's font picker: Silkscreen for the name and the headings, and Space Mono for the menu.
Every cube material has three shades, listed top / left face / right face:
-
Dusk sky
-
ink
-
cream
-
Sun
-
Sand
-
Cactus
-
Cactus shade
-
Flower
-
Chip
-
Salsa
-
Lime
-
Sour cream
-
Bowl teal
-
Stone
-
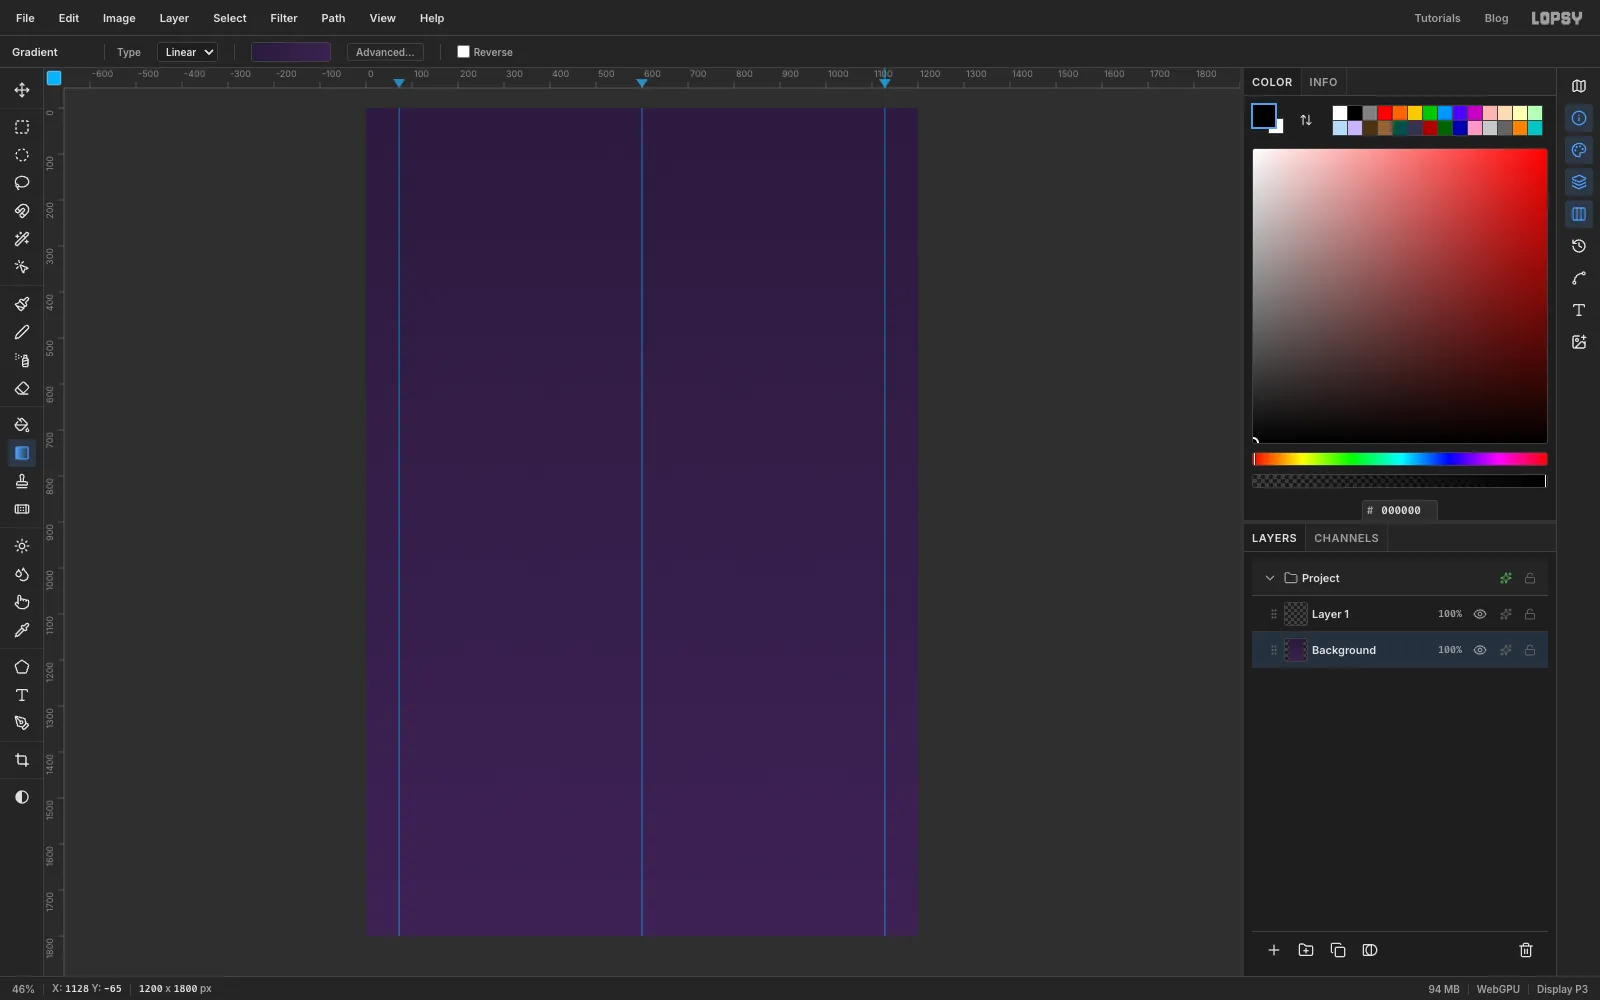
Paint the dusk sky
Open Lopsy. In the New Document dialog set Width to
1200and Height to1800, and click Create.- Click the Background layer and pick the Gradient tool. Click Advanced…, set the left stop to and the right stop to , and click Done.
- Drag from the top edge of the canvas straight down to the bottom edge.
- Click the top ruler at 72, 600 and 1128 to drop three vertical guides: the two margins and the centre line.
-
Make a blocky disc to use as a mask
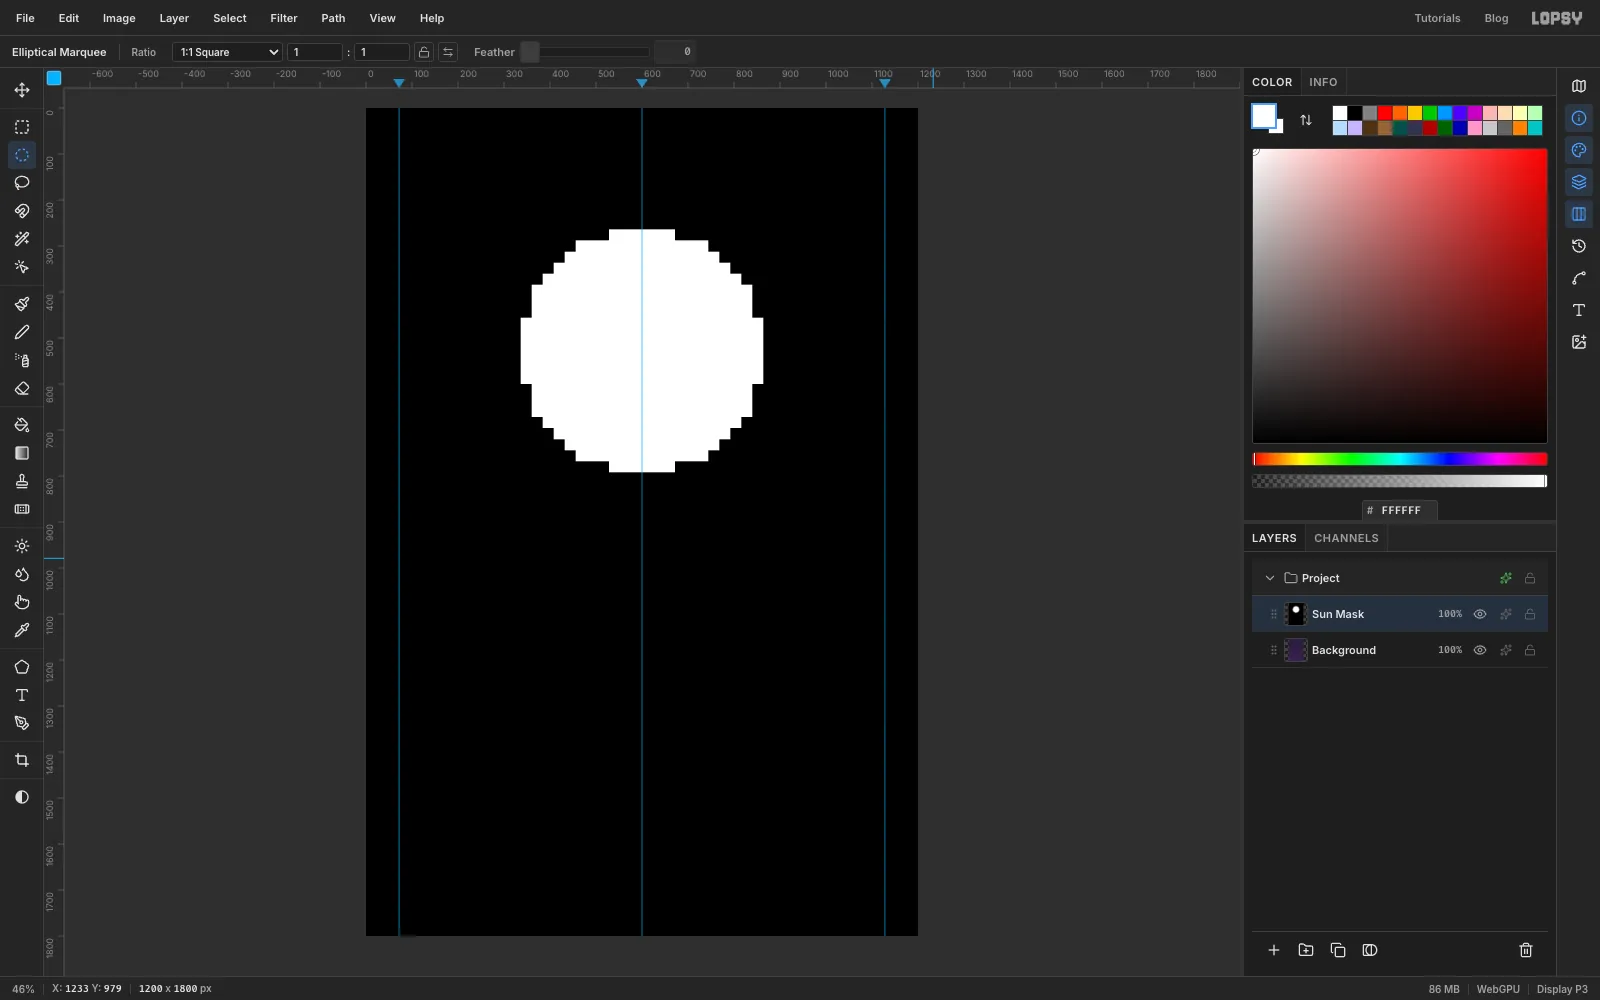
The sun should be made of blocks, like everything else. Pixelate on its own won't do that to a shape on an empty layer: it keeps the shape's outline. So you'll make the blocky outline first, as a black-and-white picture.
- Click
Layer 1and rename itSun Mask(double-click its name). - Set the foreground colour to and choose Edit → Fill.
- Pick the Elliptical Marquee and click the canvas once without dragging. In the dialog type From
336,264and To864,792, and press Enter. - Set the foreground colour to , choose Edit → Fill, and press Cmd+D to deselect.
- Choose Filter → Pixelate…, set Block Size to
24and click Apply. The edge turns into grey squares. - Choose Filter → Threshold… and click Apply. Each grey square becomes fully white or fully black.
- Click
-
Select the disc with the Magic Wand
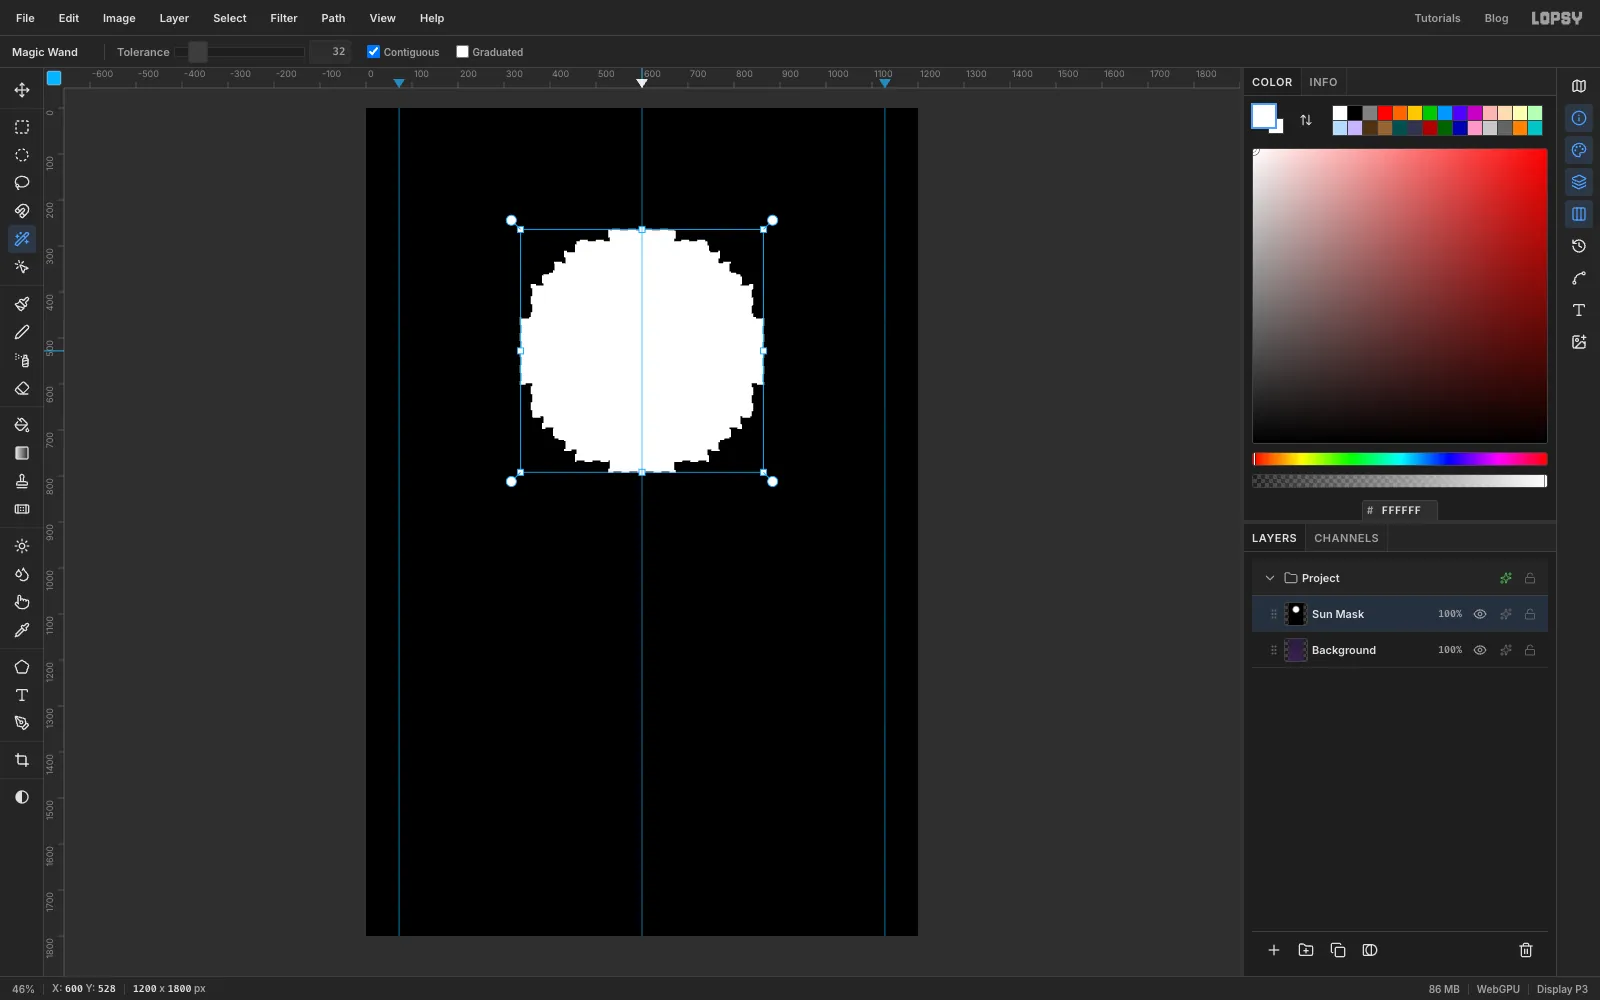
- Pick the Magic Wand (W) and click in the middle of the white disc.
- Delete the
Sun Masklayer with the bin button at the bottom of the Layers panel. The selection stays.
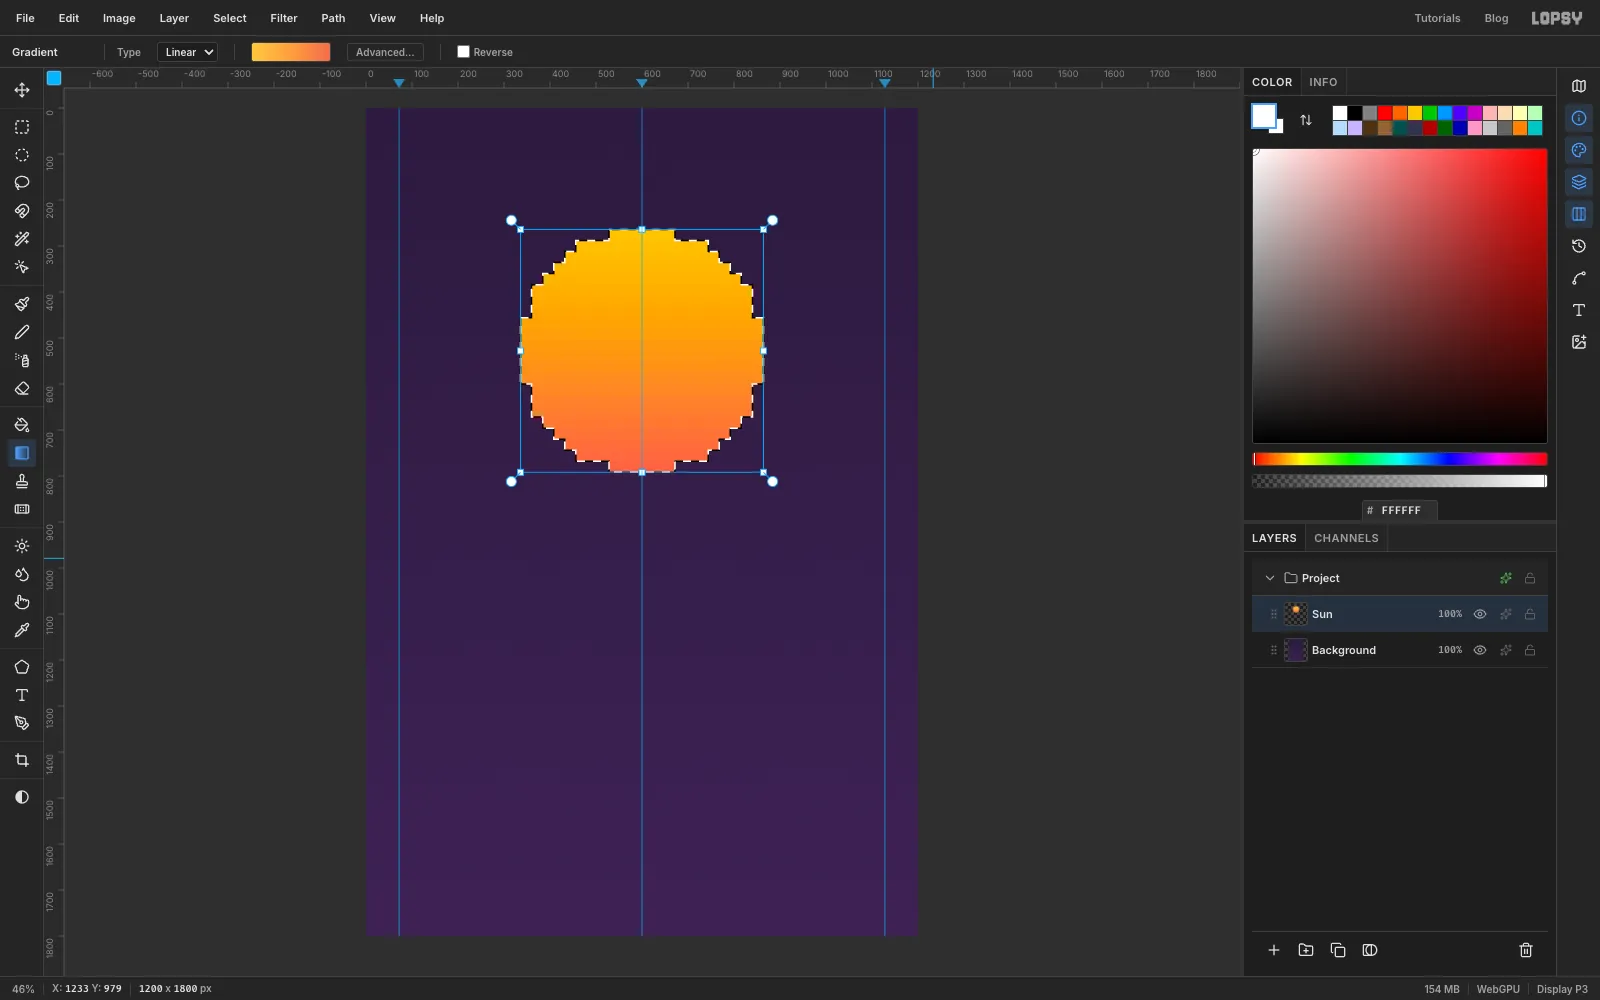
You're left with a selection shaped like a circle built from 24 px squares.
-
Fill the sun and pixelate it
- Click Background and add a layer with the + button. Name it
Sun. - Pick the Gradient tool and open Advanced…. Set the left stop to and the right stop to , click the middle of the bar to add a third stop, and set it to . Click Done.
- Drag from the top of the disc at
600, 264straight down to600, 792. - Choose Filter → Pixelate… at Block Size
24again. The smooth gradient breaks into rows of flat colour. - Press Cmd+D.
- Click Background and add a layer with the + button. Name it
-
Add a glow and some stars
- With
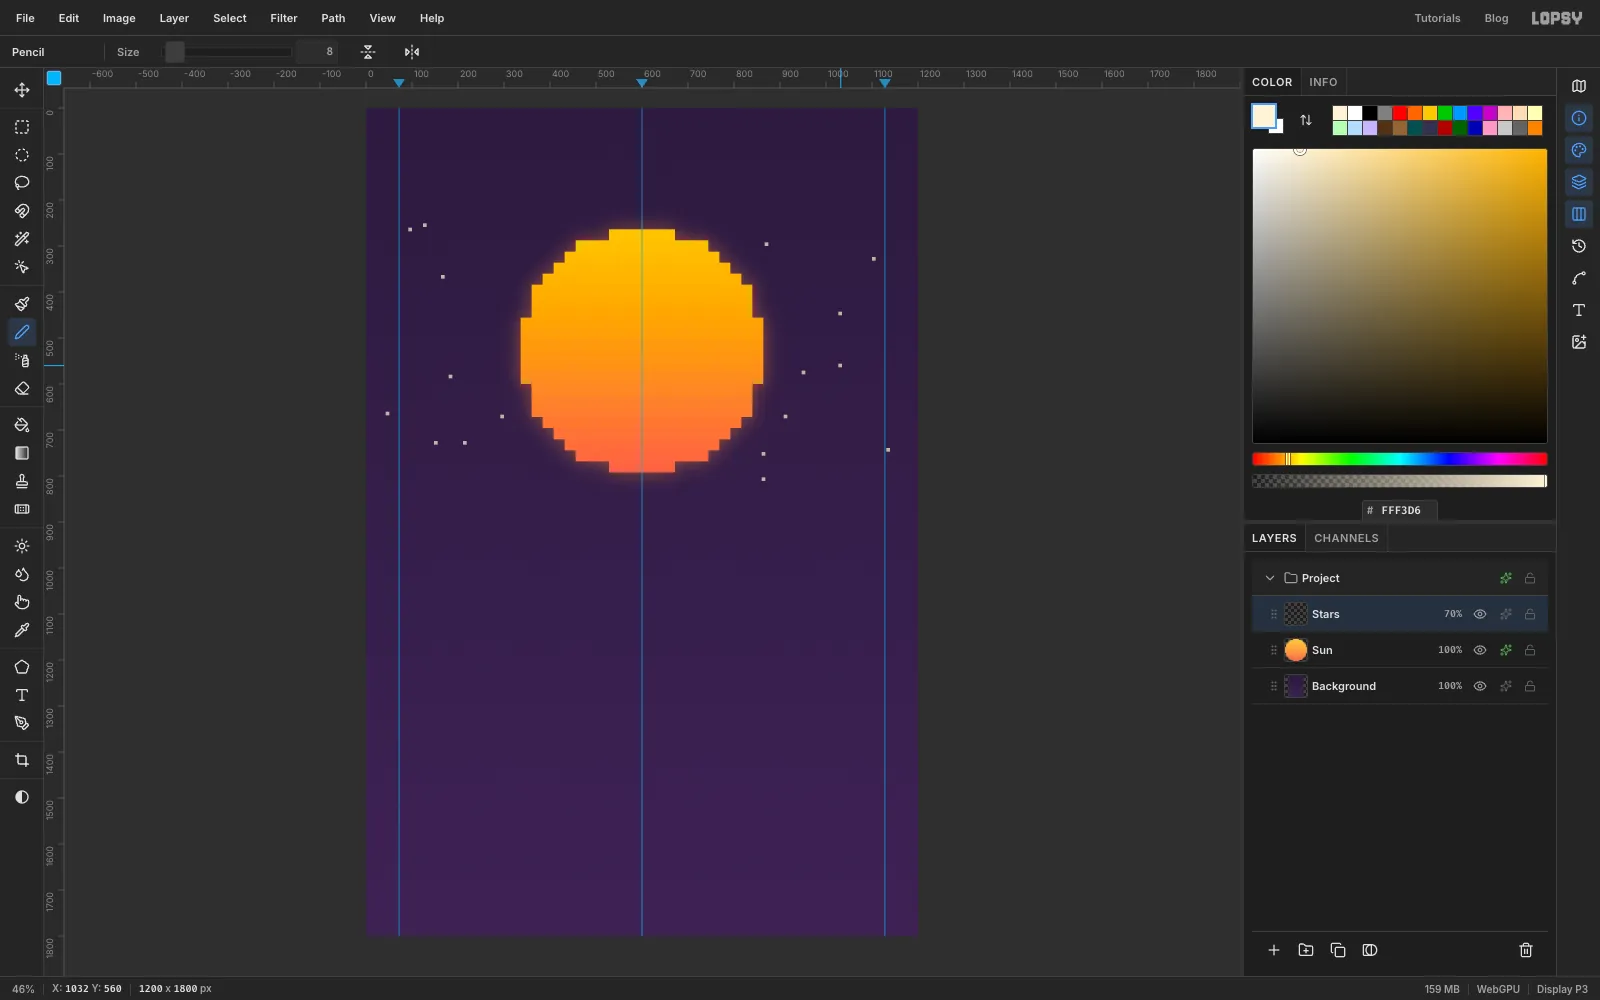
Sunactive, click the ✦ button on its row to open the effects drawer. Tick Outer Glow and click its name. Set Size to60, Spread to0, Opacity to45and the colour to . Close the drawer. - Add a layer named
Stars. Pick the Pencil (N), set Size to8and the colour to . - Click about twenty times to scatter square stars down both sides of the sun. Keep them lower on the page than y = 250, so the top stays clear for the title, and off the glow.
- Click the opacity readout on the
Starsrow and set it to 70%.
- With
-
Draw one cube with the Pen
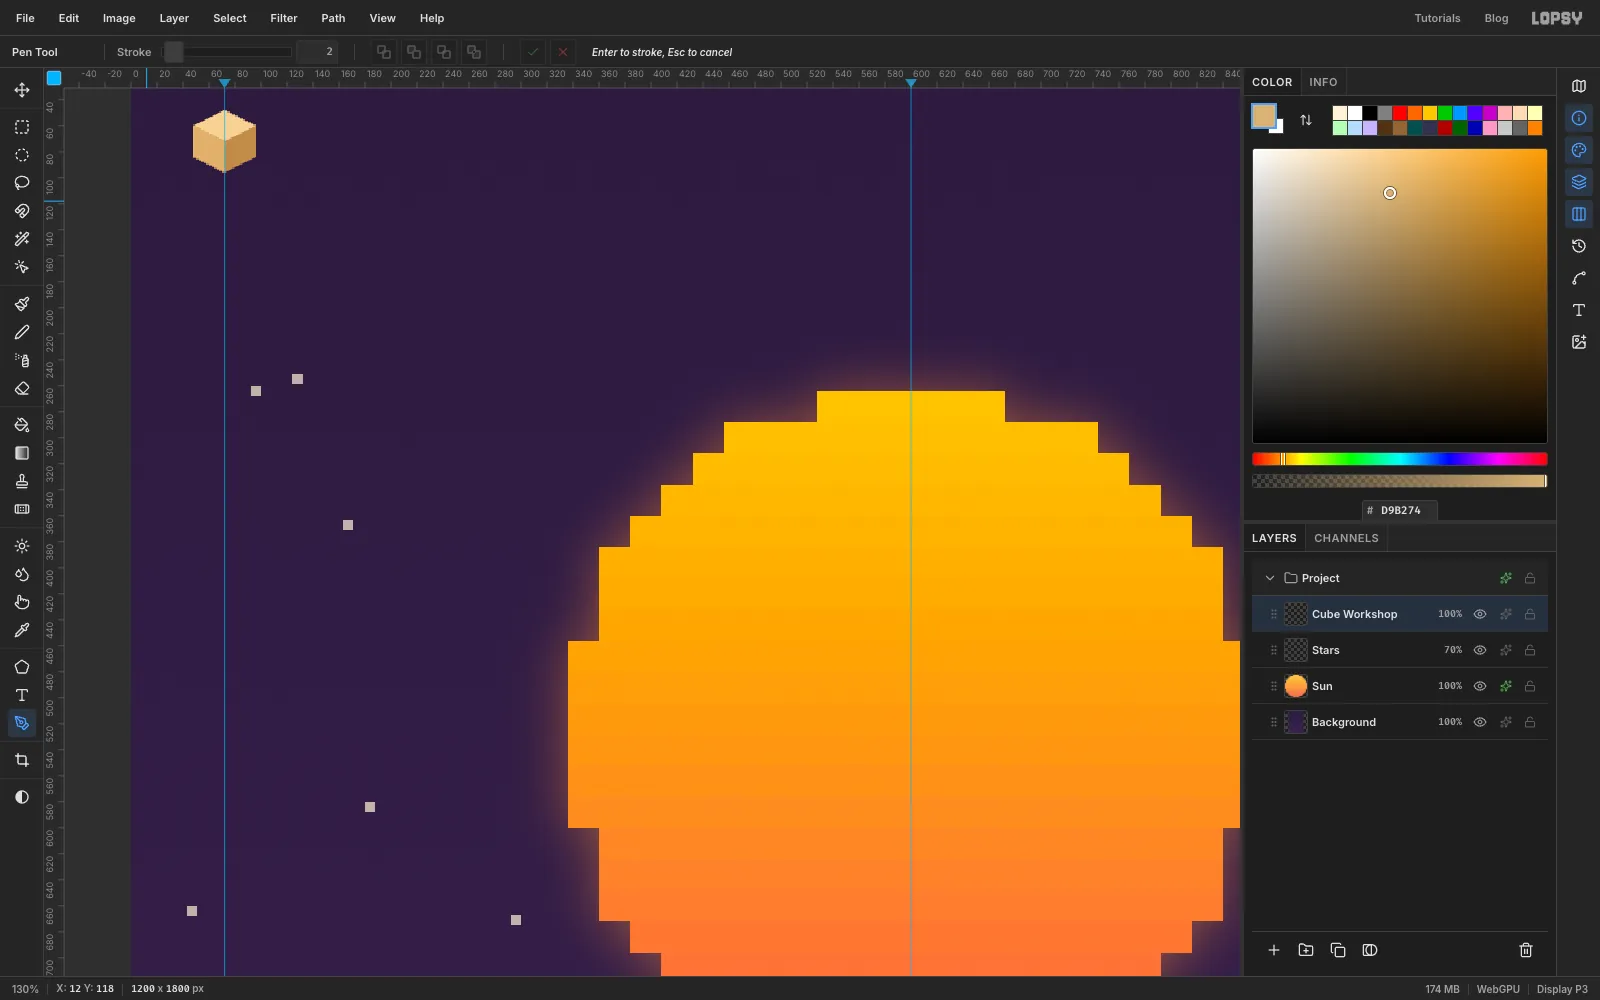
Every cube is 48 px wide and 48 px tall. Its top is a 48 × 24 diamond and its sides are 24 px tall. You'll draw the first one centred on
72, 72.Add a layer named
Cube Workshopand zoom in on the top-left corner with Cmd and the scroll wheel.- Pick the Pen (P). Click the six corners of the cube's outline in turn:
48, 60,72, 48,96, 60,96, 84,72, 96,48, 84. Click the first point again to close the path. - Open the Paths panel, click Path to Selection, then Delete Path.
- Set the colour to the sand right-face shade, , and choose Edit → Fill. Press Cmd+D.
- Draw the top diamond the same way through
48, 60,72, 48,96, 60,72, 72, and fill it with . - Draw the left face through
48, 60,72, 72,72, 96,48, 84, and fill it with .
Filling the whole outline with the darkest shade first means there's never a gap between the faces.
- Pick the Pen (P). Click the six corners of the cube's outline in turn:
-
Draw a cube for every material
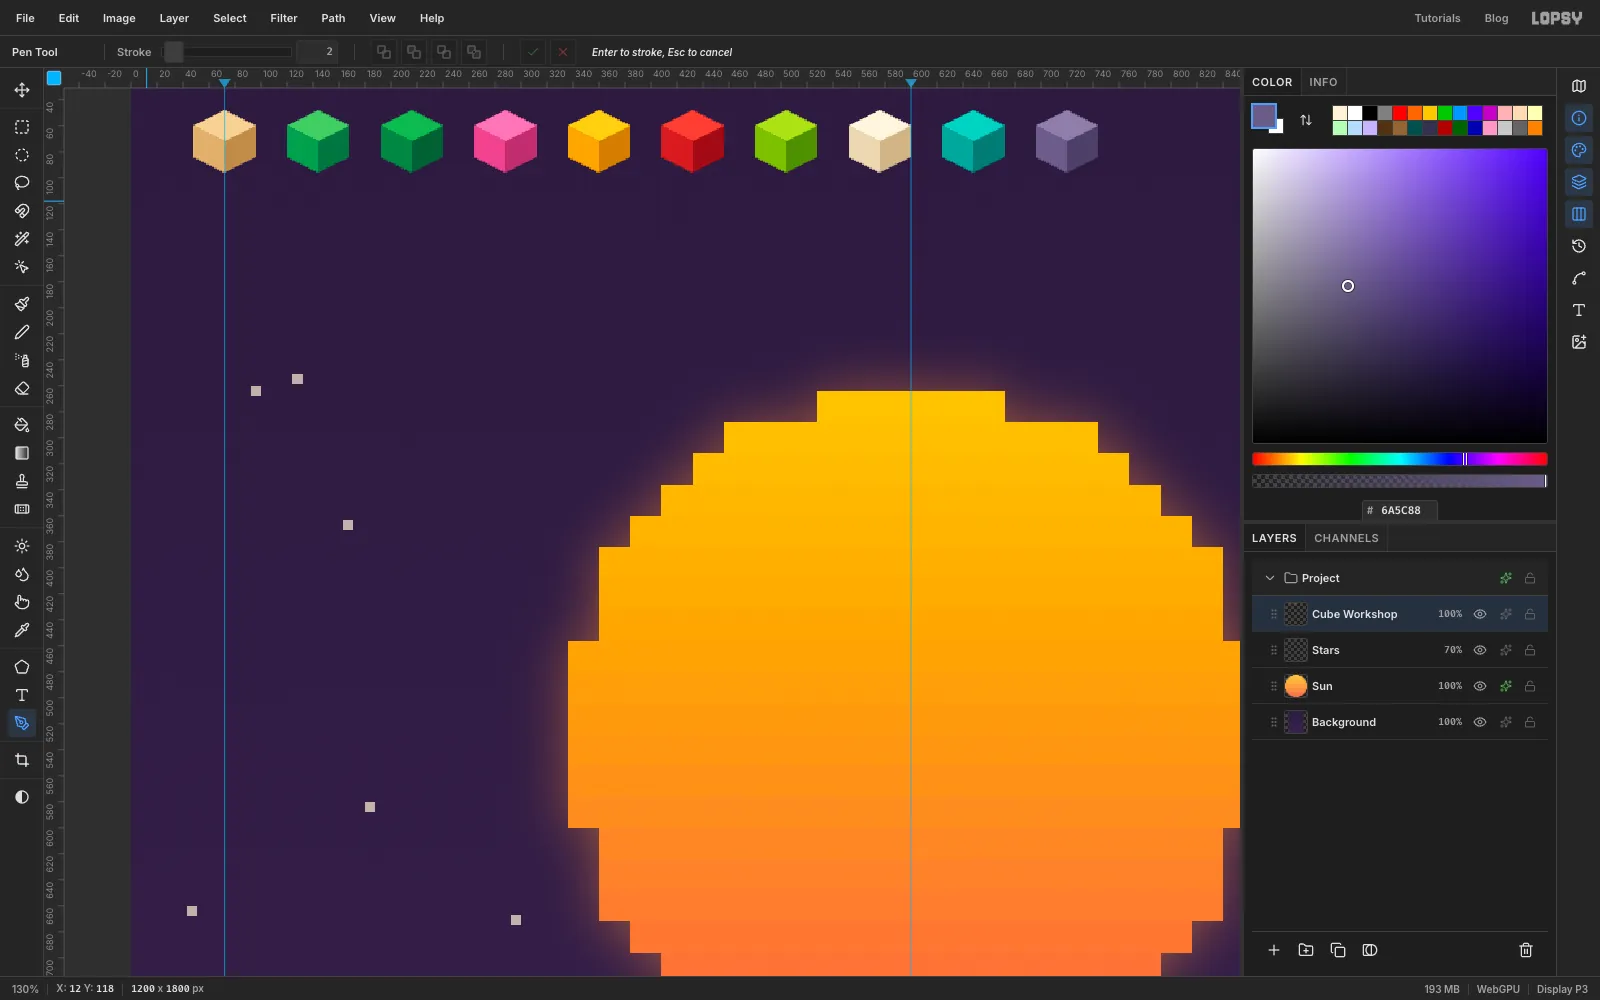
Draw nine more cubes on the same layer, each 72 px to the right of the last, so their centres sit at x = 144, 216, 288, 360, 432, 504, 576, 648 and 720. The points are the same as before with 72 added to each x.
In order, the cubes are cactus, cactus shade, flower, chip, salsa, lime, sour cream, bowl teal and stone. Use the three shades from the list at the top: the last shade for the outline, the first for the diamond and the middle one for the left face.
-
Turn the cubes into colour brushes
- Pick the Rectangular Marquee (M) and click the canvas once without dragging. In the dialog type From
48,48and To96,96, and press Enter. That's a square drawn exactly around the first cube. - Choose Edit → Define Color Brush…, type
Sand Cubeand click OK. - Do the same for the other nine, moving the square 72 px right each time (From
120,48To168,96, and so on). Name them, in order,Cactus Cube,Shade Cube,Flower Cube,Chip Cube,Salsa Cube,Lime Cube,Cream Cube,Teal CubeandStone Cube. - Press Cmd+D, then click the eye on
Cube Workshopto hide it. Keep the layer: brushes aren't saved in.lopsyproject files, so you can define them again from it later.
Pick the Brush (B) and click the brush thumbnail at the left of the options bar. The ten cubes are at the end of the preset grid. A colour brush paints its own colours, ignores the foreground colour, and comes in at Size
48, the cube's real size. Leave Size alone and one click stamps one crisp cube.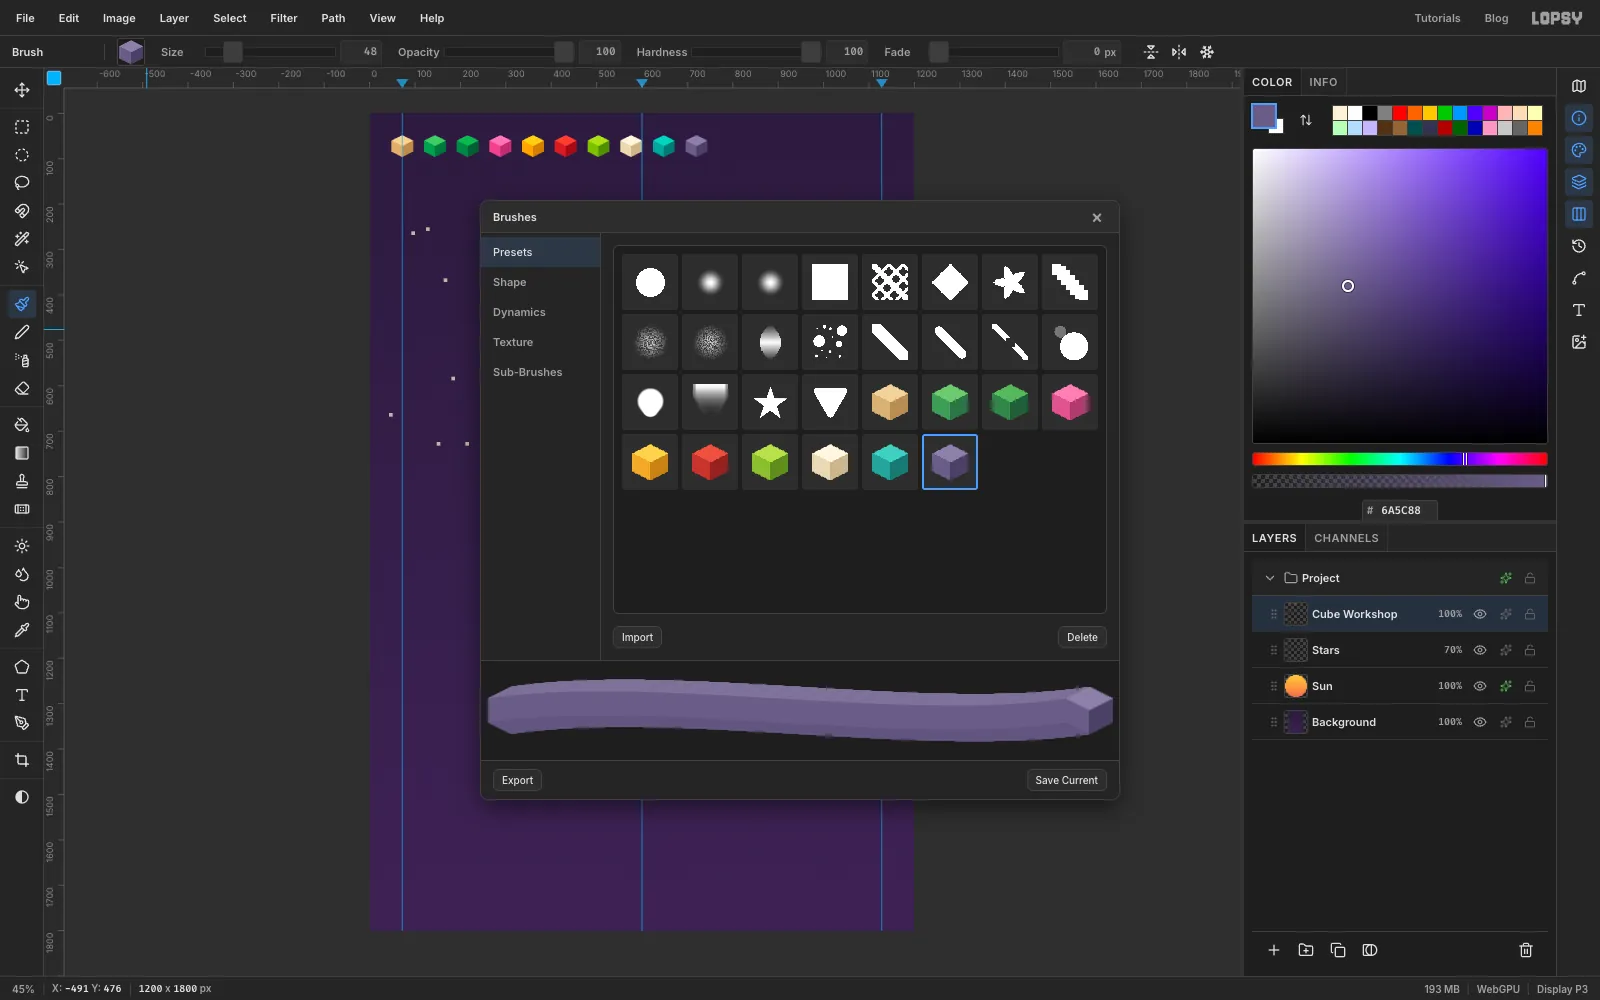
- Pick the Rectangular Marquee (M) and click the canvas once without dragging. In the dialog type From
-
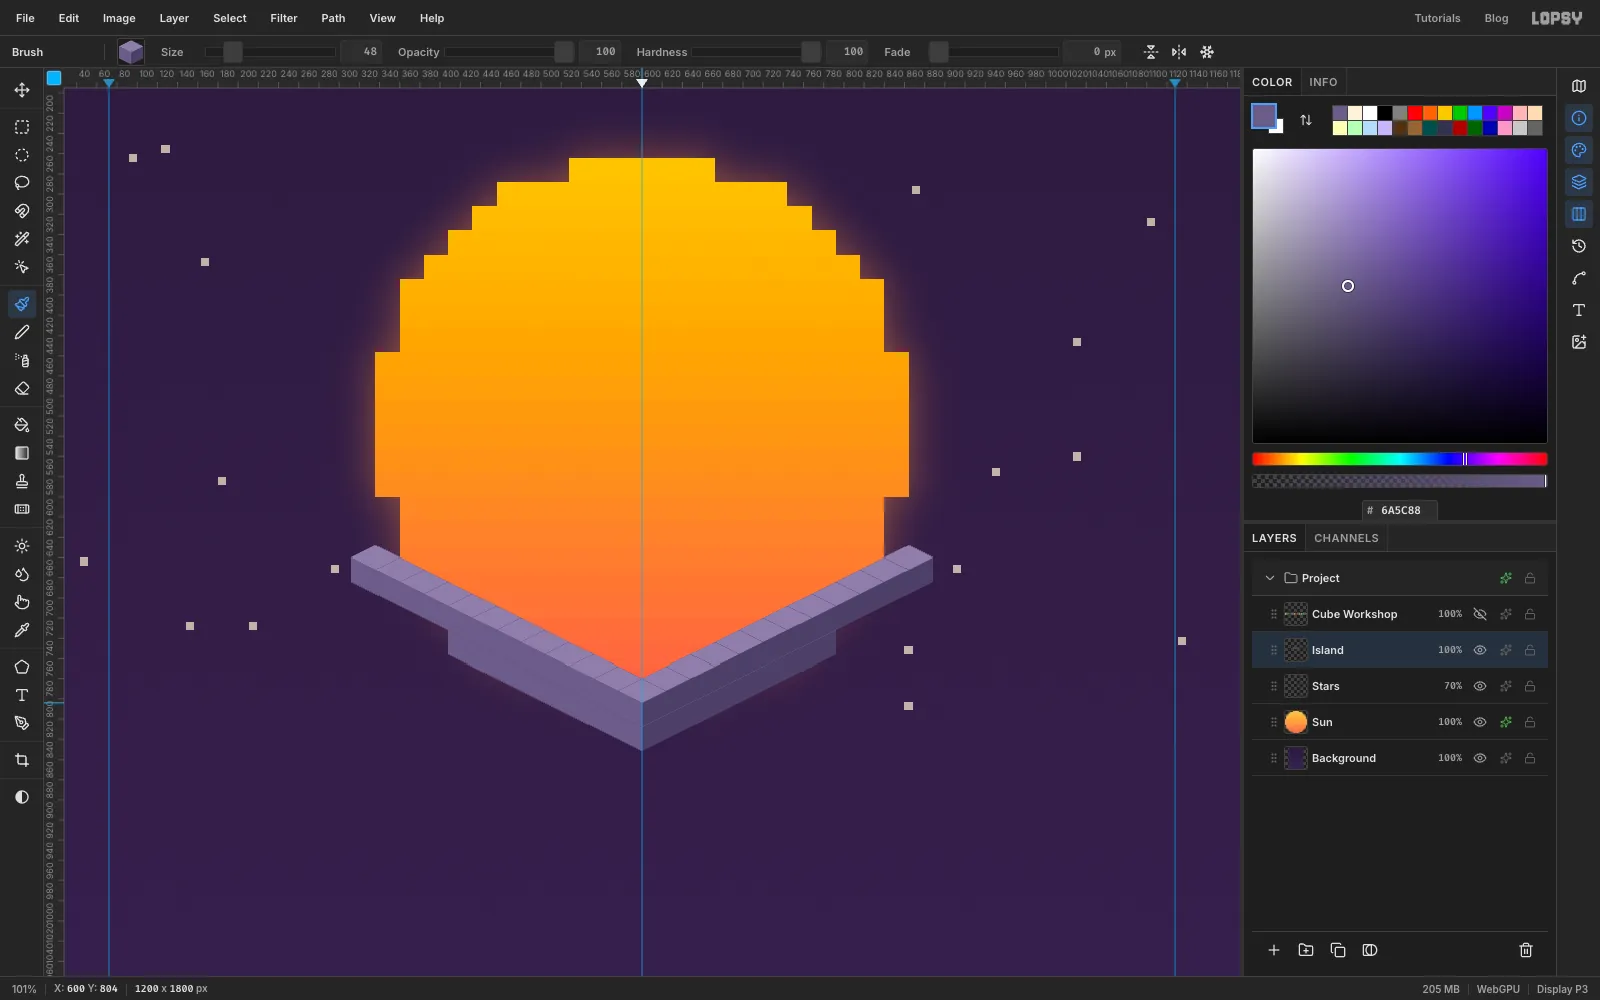
Stamp the island's stone underside
Click
Stars, add a layer namedIsland, and zoom to 100%.Cubes sit on a lattice. Call a cube's place (a, b, h):
asteps toward the lower right,bsteps toward the lower left, andhcubes up. The centre of that cube is at- x = 600 + 24 × (a − b)
- y = 492 + 12 × (a + b) − 24 × h
So one step along
amoves the click 24 right and 12 down, one step alongbmoves it 24 left and 12 down, and one cube up moves it 24 up. The back corner of the island, (0, 0, 0), is at600, 492.There's one rule for the order: stamp a cube after the cubes behind it and below it. Work from the back toward you and from the bottom up, and each new cube covers the right parts of the old ones.
- Open the brush presets and click Stone Cube.
- Stamp the lower tier at
h= −2. It's two rows that meet in a point at the front:b= 12 withafrom 5 to 11, thena= 12 withbfrom 5 to 11, and last the front point, (12, 12, −2). The first click is (5, 12, −2) at432, 744and the front point is at600, 828. - Stamp the upper tier the same way at
h= −1:b= 12 withafrom 1 to 11, thena= 12 withbfrom 1 to 11, then the point at (12, 12, −1). It starts at (1, 12, −1), which is336, 672.
Only the two front rows of each tier ever show, so that's all you need to stamp. Watch the status bar as you move the cursor, and click when it reads the position you want. If a cube lands a pixel off, press Cmd+Z and click again.
-
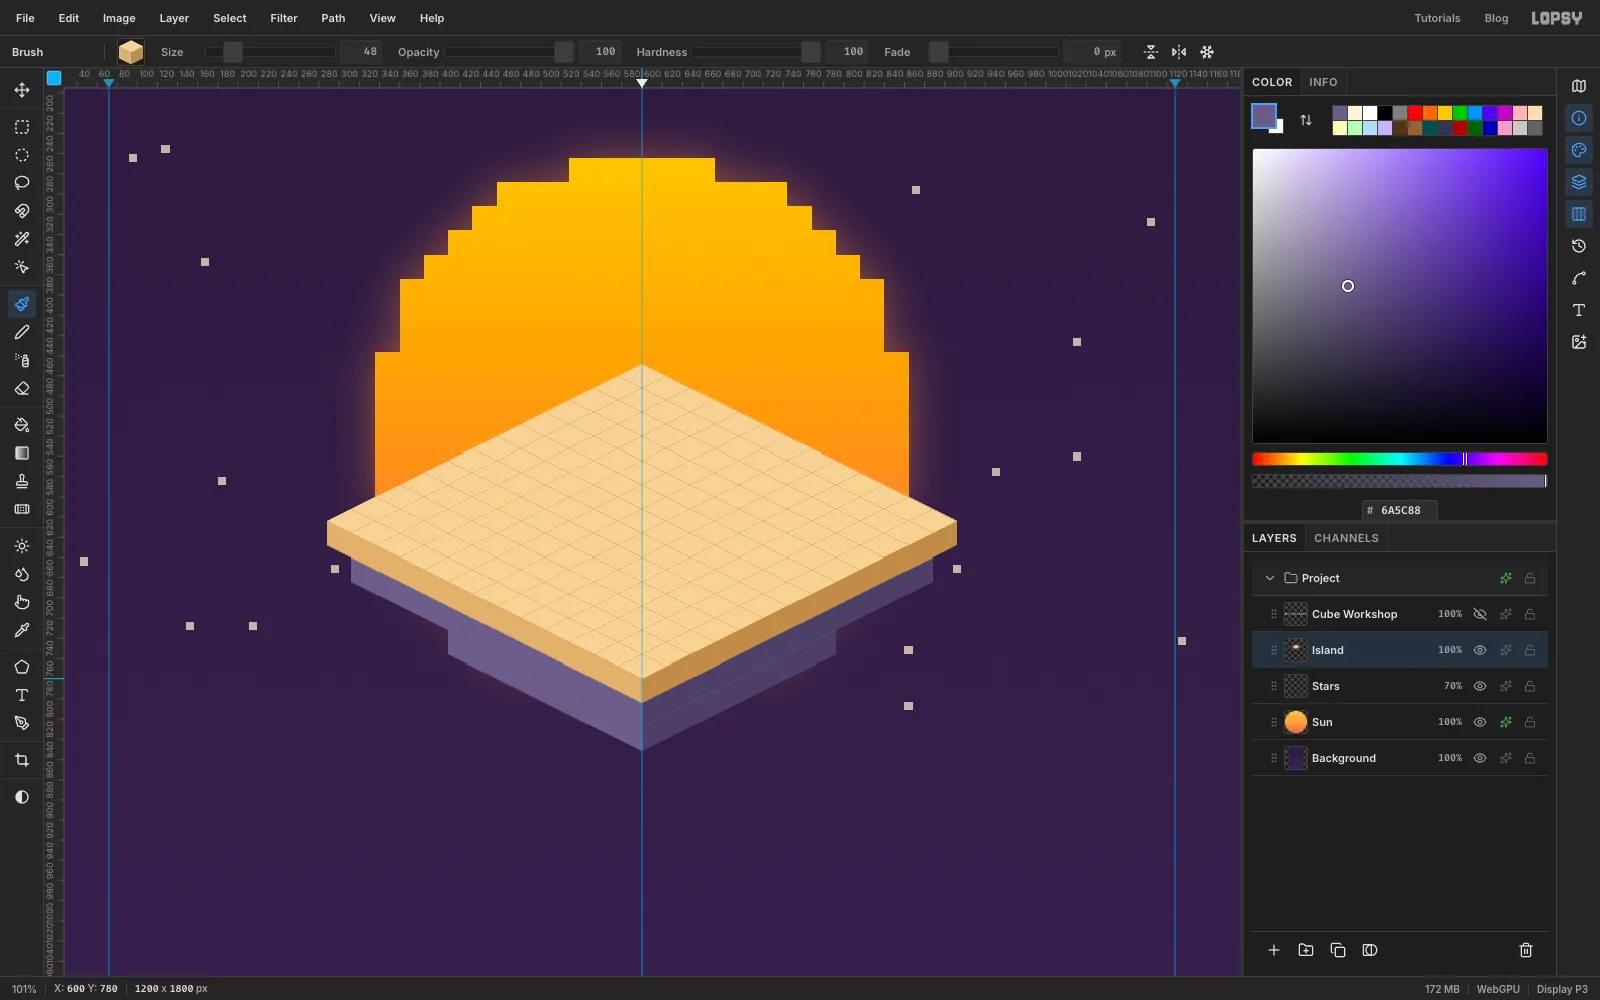
Cover it with sand
- Switch to Sand Cube.
- Stamp a 13 × 13 slab at
h= 0: everyaandbfrom 0 to 12. Start at the back corner,600, 492, and work forward one diagonal row at a time. The left corner is (0, 12, 0) at312, 636, the right corner is (12, 0, 0) at888, 636, and the front corner is (12, 12, 0) at600, 780.
The faint lines between the cubes come for free. Each stamp has a soft anti-aliased edge, and where two edges meet a little of what's underneath shows through.
-
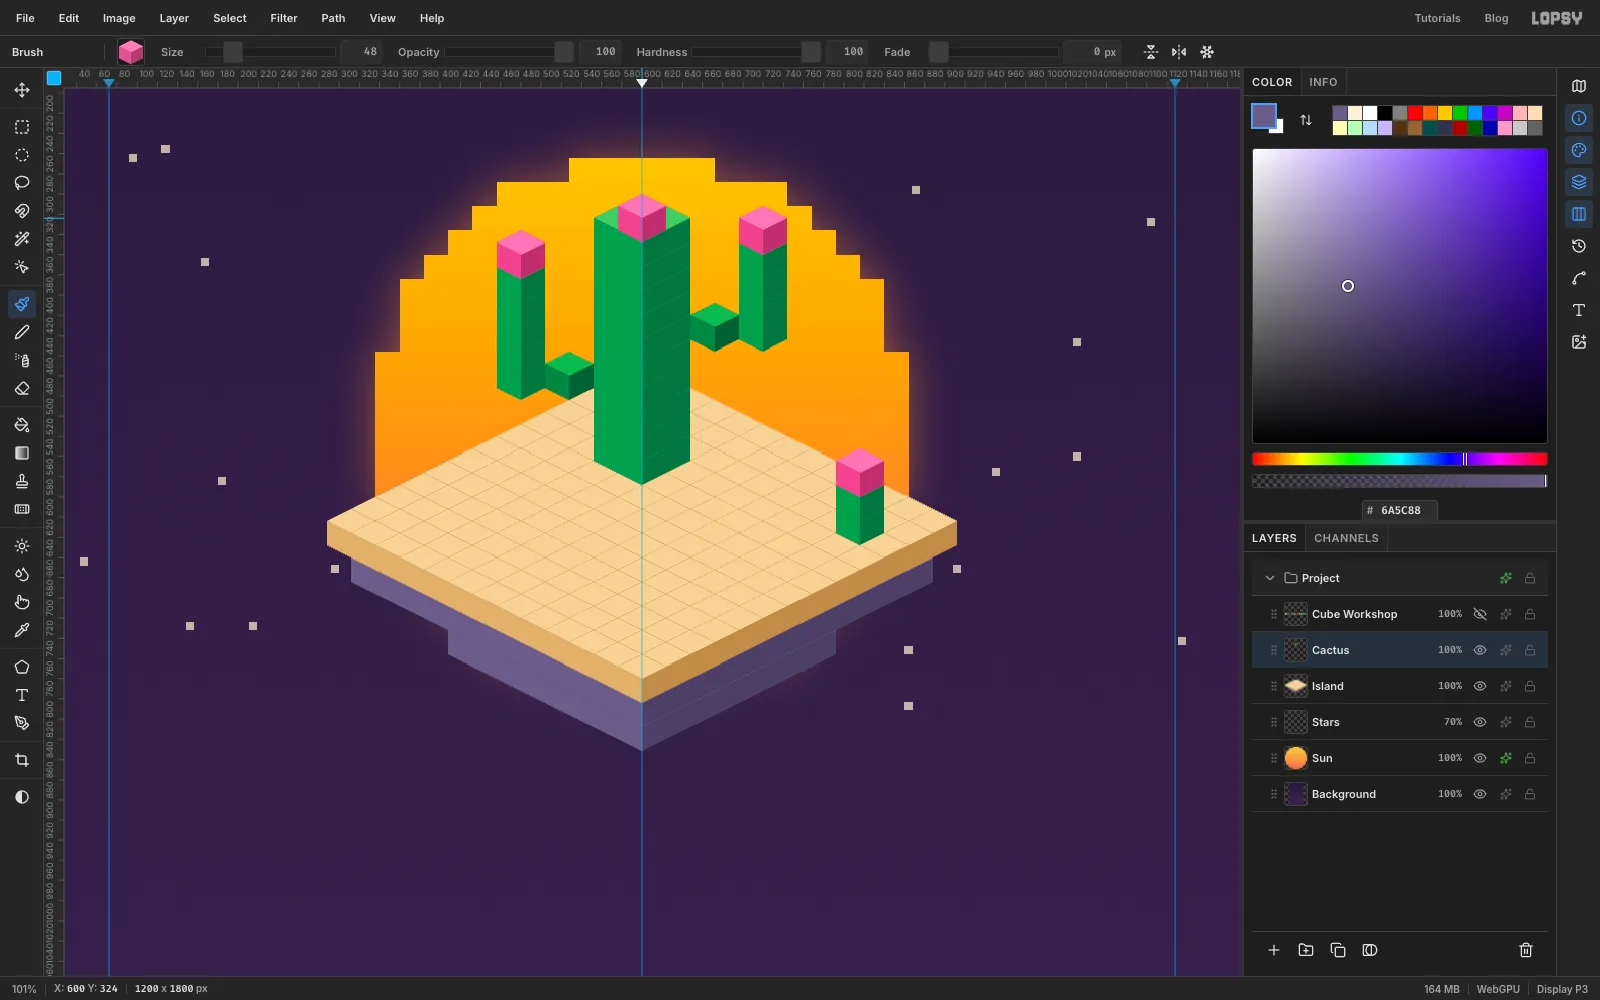
Grow the saguaro
Add a layer named
Cactus.- Trunk: with Cactus Cube, stamp four columns ten cubes tall,
hfrom 1 to 10, at (3, 3), (4, 3), (3, 4) and (4, 4), in that order. The bottom cube of the front column, (4, 4, 1), is at600, 564. - Left arm: stamp one Shade Cube at (2, 5, 4), which is
528, 480. Switch back to Cactus Cube and stamp a column at (1, 6) forhfrom 4 to 8, starting at480, 480. - Right arm: one shade cube at (5, 2, 6),
672, 432, then a cactus column at (6, 1) forhfrom 6 to 9, starting at720, 432. - Flowers: with Flower Cube, stamp one on the trunk at (4, 4, 11), one on the left arm at (1, 6, 9) and one on the right arm at (6, 1, 10).
- Barrel cactus: at the back right, stamp two cactus cubes at (11, 2) for
h= 1 and 2, and a flower on top at (11, 2, 3).
The arms step out across the page, one cube right-and-back or left-and-forward at a time, so they stay level with the trunk and there's clear space under each one. The darker shade cube works as the shadow where an arm meets the trunk.
- Trunk: with Cactus Cube, stamp four columns ten cubes tall,
-
Fill the bowls
Add a layer named
Nachos. A bowl has cubes in front of its filling, so build each one a level at a time: the two back sides of the rim, then the filling, then the two front sides.- A loose chip: with Chip Cube, stamp one at (5, 9, 1). It goes first because the bowl's corner will overlap it.
- Nacho bowl, base: with Teal Cube, stamp a 5 × 5 square at
h= 1 forafrom 7 to 11 andbfrom 6 to 10, back corner first. - Level 2: stamp the back of the rim in teal:
a= 7 withbfrom 6 to 10, thenb= 6 withafrom 8 to 11. Fill the 3 × 3 middle (a8 to 10,b7 to 9) with Chip Cube. Finish the rim in teal:a= 11 withbfrom 7 to 9,b= 10 withafrom 8 to 10, and last the front corner (11, 10). - Level 3: the same again at
h= 3, with two toppings in place of chips: Lime Cube at (8, 9, 3) and Salsa Cube at (10, 9, 3). - The heap: above the rim, stamp a 2 × 2 layer at
h= 4 fora8 to 9 andb7 to 8. Use chips, except Salsa Cube at (9, 8, 4). Top it with one Cream Cube at (8, 7, 5). - Salsa bowl: with Stone Cube, stamp a 4 × 4 base at
h= 1 forafrom 0 to 3 andbfrom 8 to 11. Ath= 2, stamp the back of the rim (a= 0 withbfrom 8 to 11, thenb= 8 withafrom 1 to 3), fill the 2 × 2 middle with Salsa Cube, and finish the rim (a= 3 withbfrom 9 to 10,b= 11 withafrom 1 to 2, then the corner (3, 11)). - Last pieces: a Lime Cube at (5, 12, 1) and a Chip Cube on the front corner at (12, 12, 1).
Zoom back out with View → Fit to Screen.
-
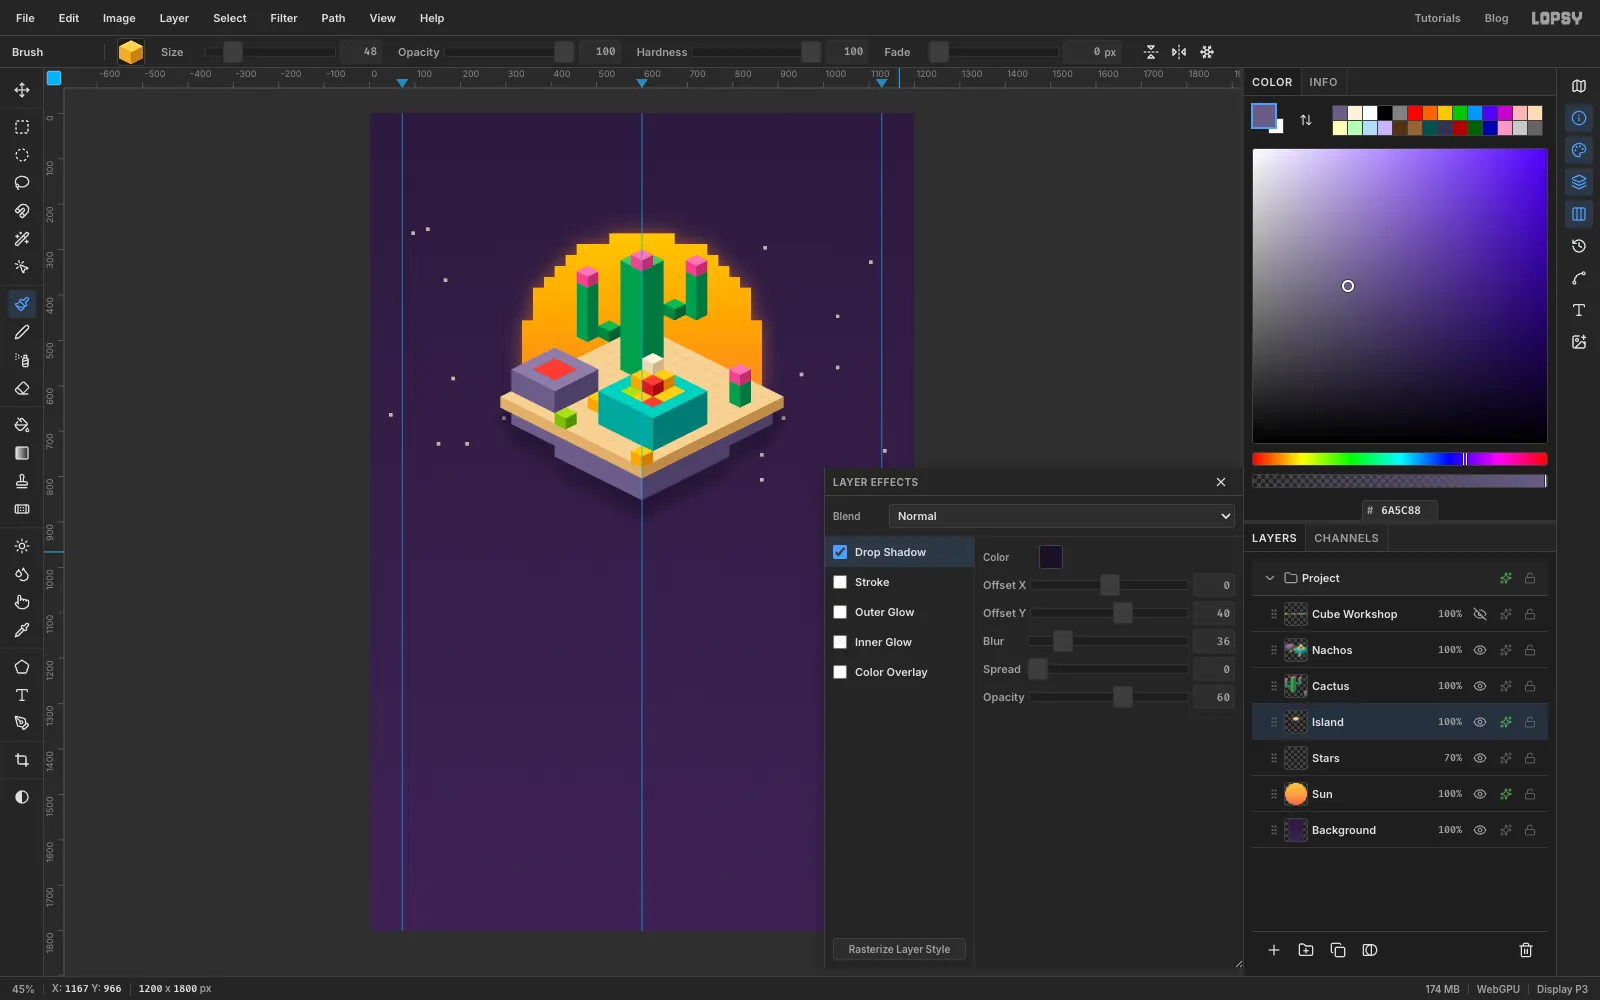
Float the island with a shadow
- Click the
Islandlayer and open its effects drawer with the ✦ button. - Tick Drop Shadow and click its name. Set Offset X to
0, Offset Y to40, Blur to36, Spread to0, Opacity to60and the colour to . - Close the drawer.
A shadow that falls straight down and stays soft makes the island read as hovering over the page.
- Click the
-
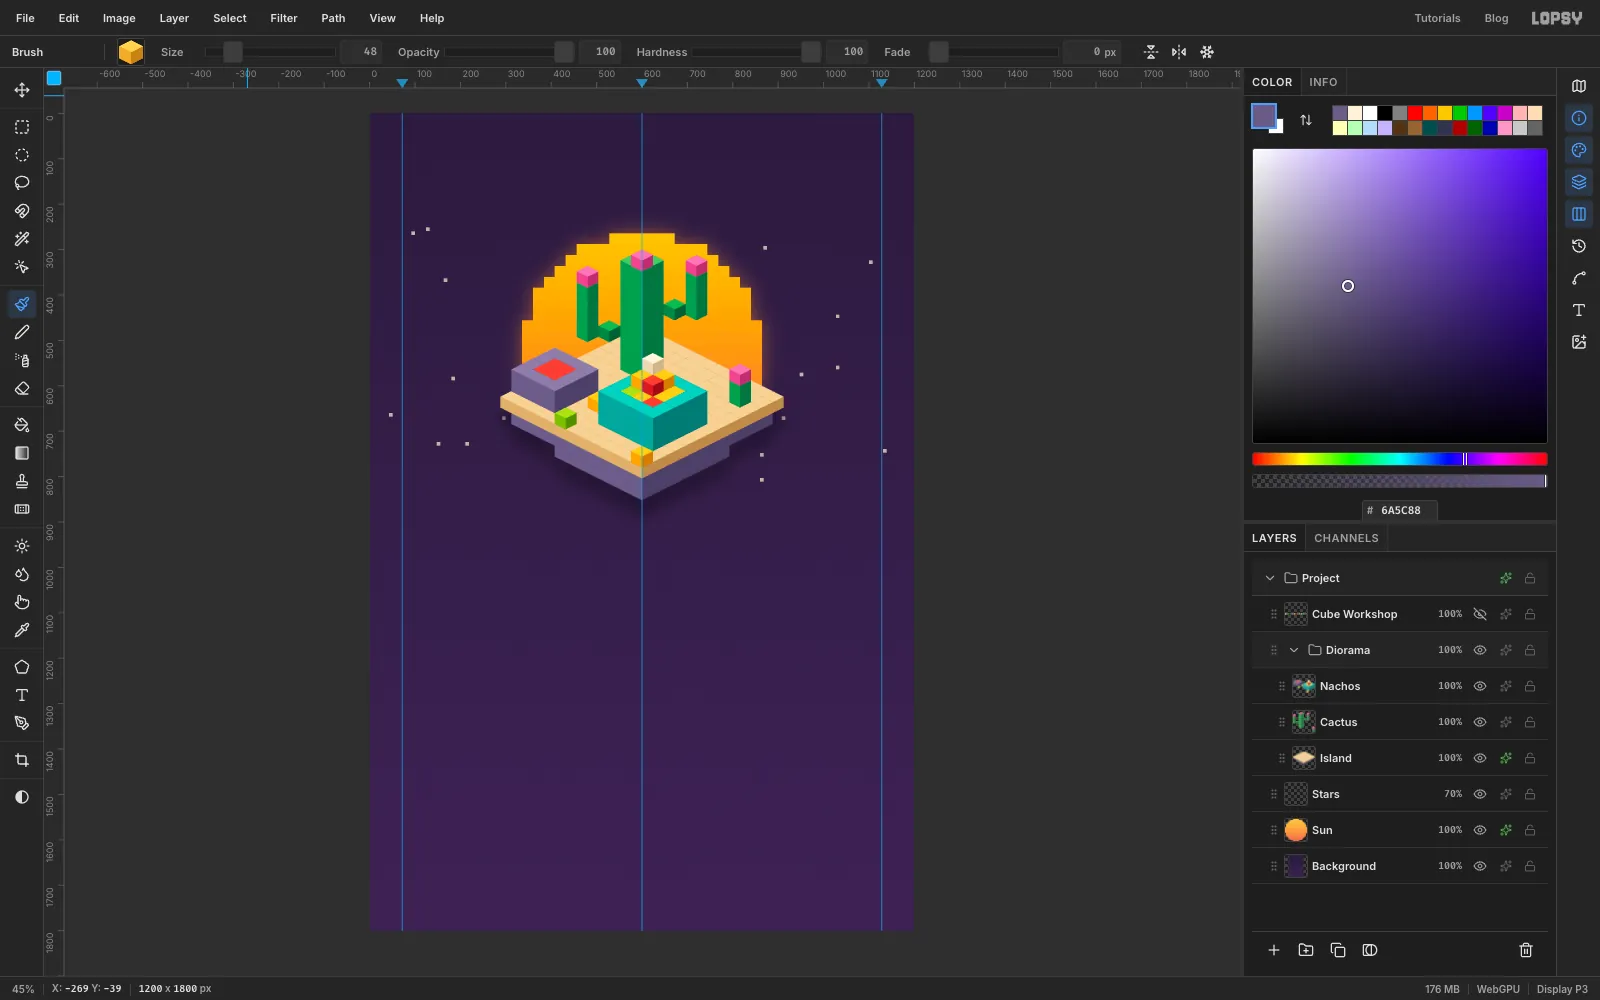
Group the scene
- Click
Island, then Shift-clickNachosso all three scene layers are selected. - Choose Layer → Group Layers and name the group
Diorama.
With the group's row selected, the Move tool (V) and the arrow keys move the whole scene as one, which is handy if you want it higher or lower on the page later.
- Click
-
Add the menu panel and a pattern tile
The menu sits on a dark panel, and the rows of squares above and below it are a tiny pattern.
- Click Background and add a layer named
Menu Panel. With the Rectangular Marquee, click once and type From72,984To1128,1560. Fill it with and deselect. - Open its effects drawer, tick Stroke, and set Width to
2and the colour to . Close the drawer and set the layer's opacity to 55%. - Click
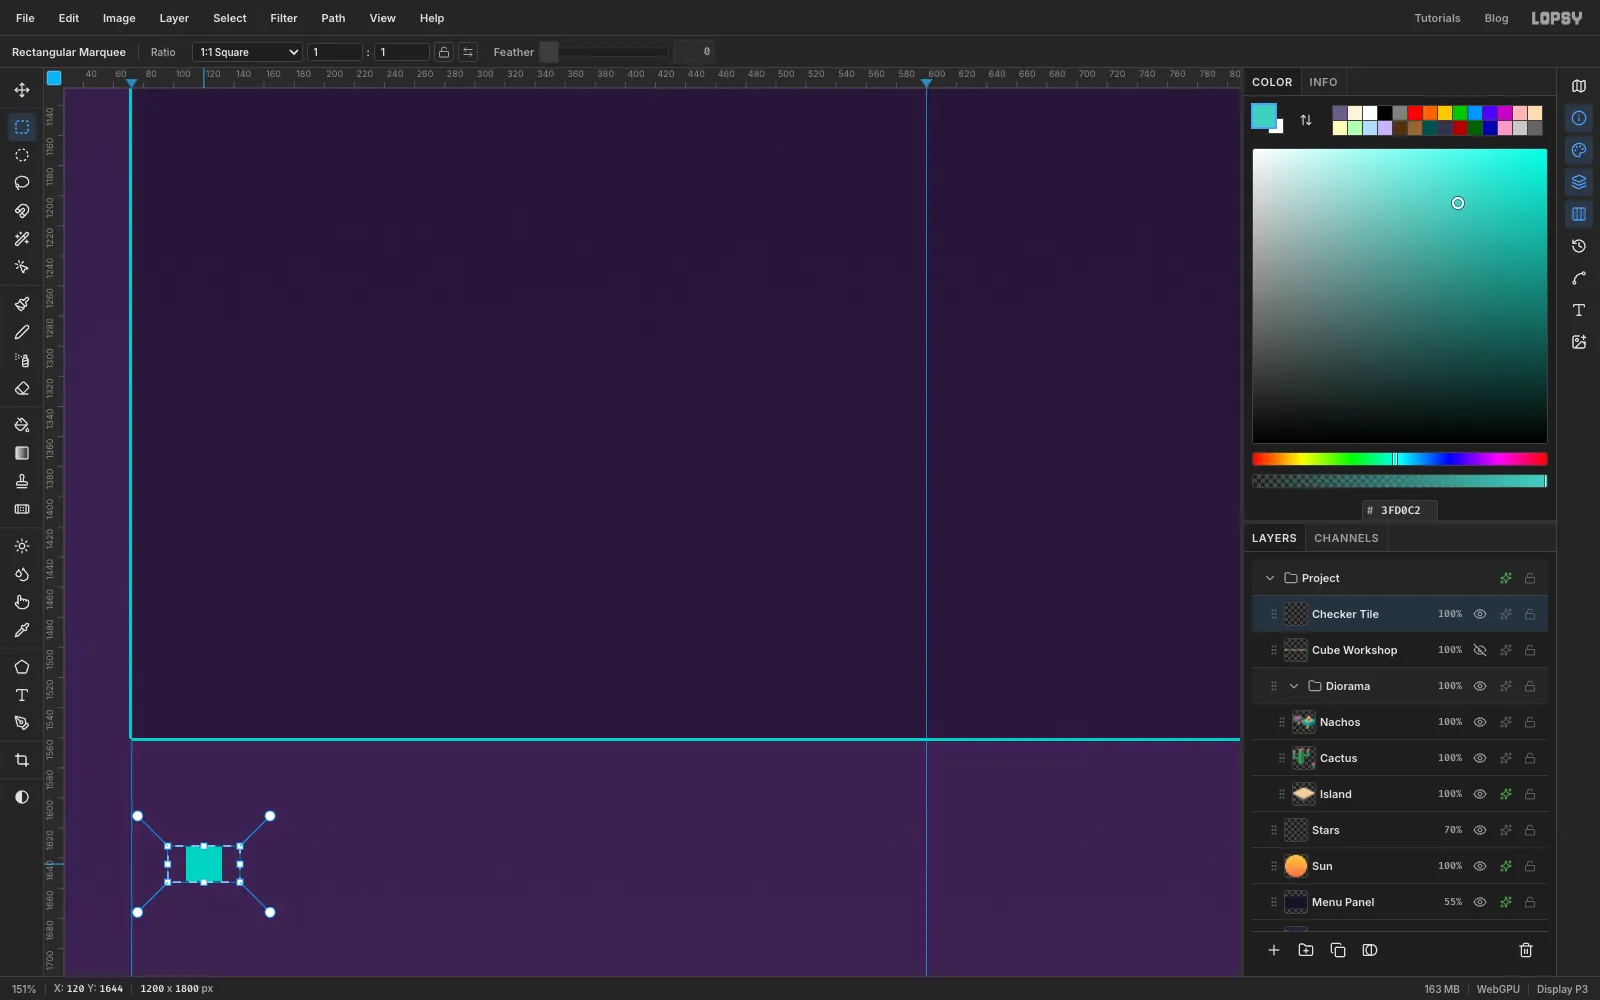
Cube Workshopand add a layer namedChecker Tile. Zoom in on the lower left of the canvas. Select From108,1632To132,1656and fill it with . - Now select From
96,1632To144,1656: the square with 12 px of empty space to its left and right. Choose Edit → Define Pattern. - Deselect, choose View → Fit to Screen, and delete the
Checker Tilelayer.
- Click Background and add a layer named
-
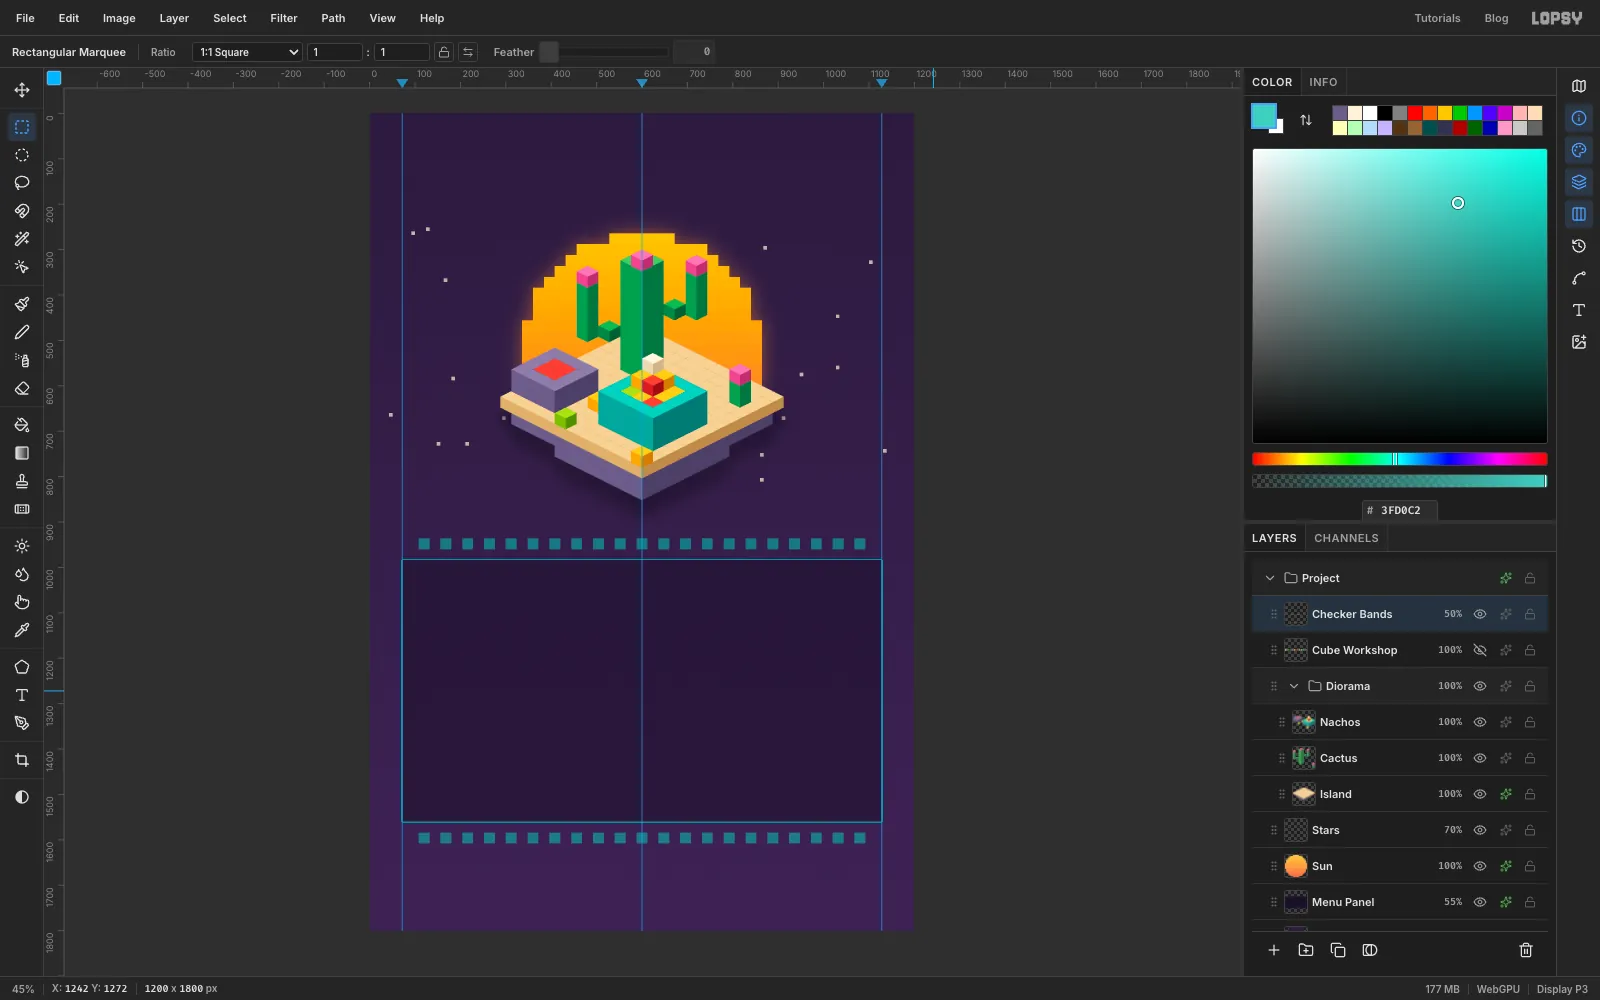
Fill two rows with the pattern
- Click
Cube Workshopand add a layer namedChecker Bands. - Select From
96,936To1104,960. Choose Edit → Fill with Pattern…, click your pattern and click Apply. - Select From
96,1584To1104,1608and fill it the same way. Deselect. - Set the layer's opacity to 50%.
Patterns tile from the canvas's top-left corner, and the tile is 48 px wide with its square in the middle, so one square lands exactly on the centre guide. Stopping the selection 24 px inside each margin ends both rows on a whole square.
- Click
-
Set the footer and the first menu block
The menu is set in Space Mono, a monospaced face: every character is the same width. If you type every row to the same number of characters, padding with full stops, the prices line up in a column without any tabs.
Two habits make the type go smoothly:
- Click the hidden
Cube Workshoplayer before each new piece of text. New layers land just above the active one, and the Text options restyle a text layer if one is active. - Work up the page in bands, and do the right column first in each band. A click with the Text tool inside an existing text layer's box edits that layer, and the boxes reach to the right of and below their text.
Positions below are the left edge and the top of the letters. A layer marked centred should have its middle on the guide at x = 600. Click roughly in place, type, press Tab to finish, then nudge the layer with the Move tool and the arrow keys. Double-click each new layer's name to rename it.
- Click
Cube Workshopand pick the Text tool (T). TypeSTACKED ONE CUBE AT A TIMEin Silkscreen at Size30, colour . Centre it with the top of the letters at y = 1706. Name itTagline. - Click
Cube Workshop. TypeOPEN LATE 11 AM - 2 AM / 42 PRICKLY PEAR RDin Space Mono, weight Bold, Size22, . Centre it with its top at 1654. Name itFooter. - Click
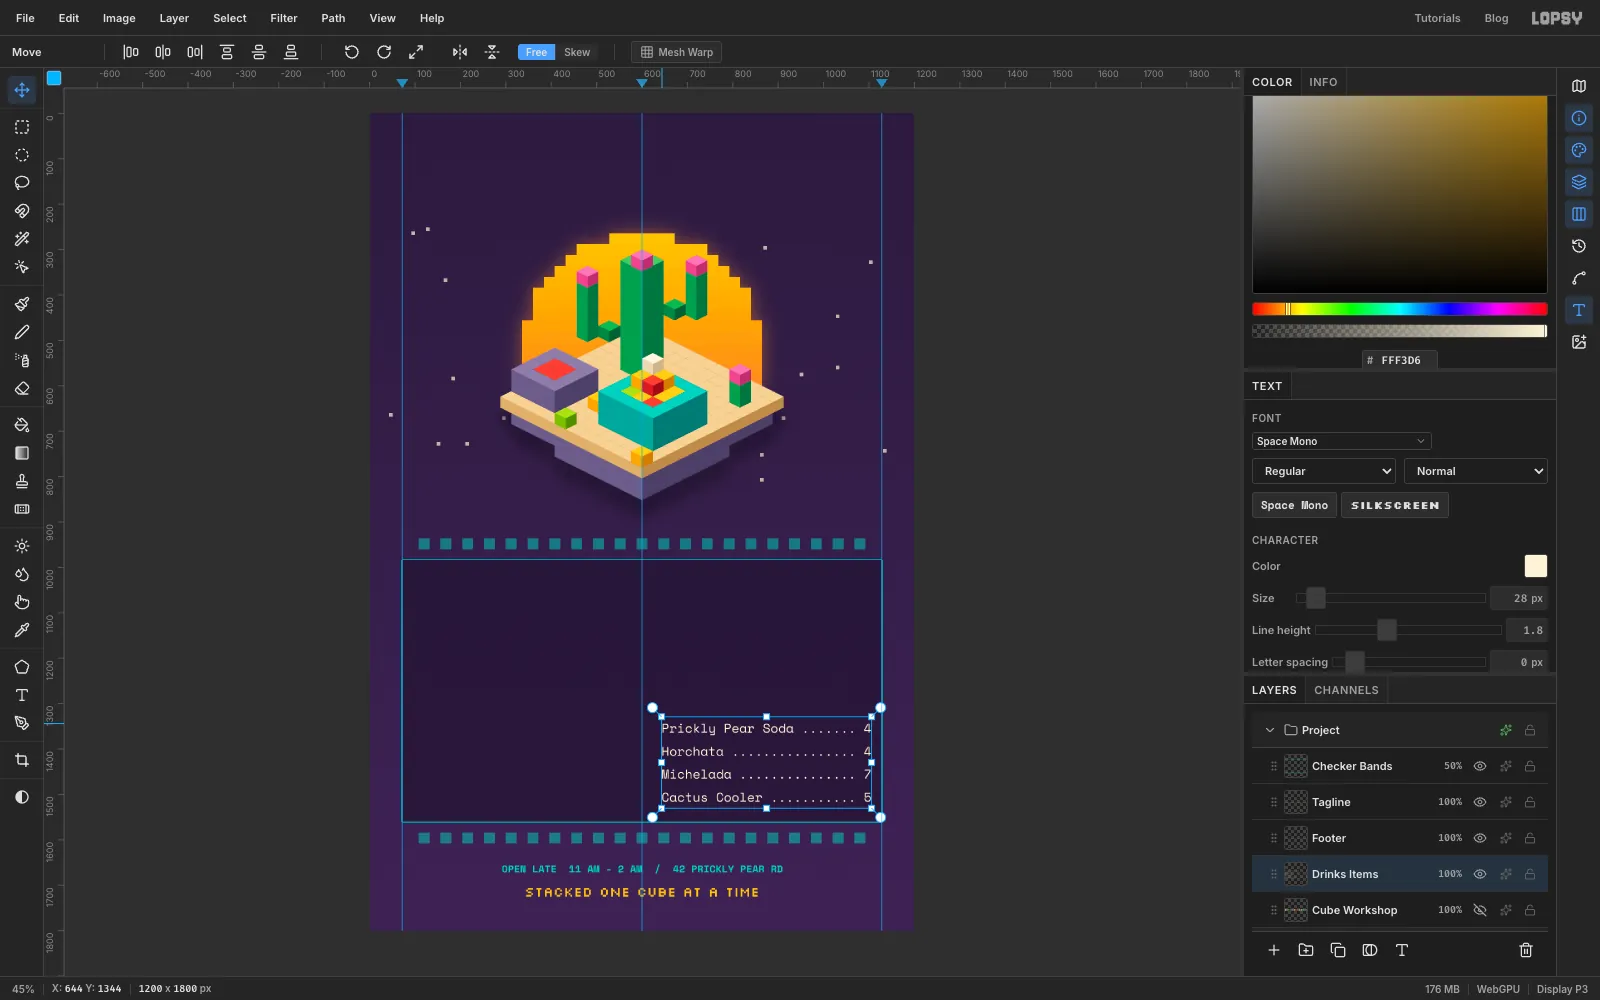
Cube Workshop. Set Space Mono to Regular, Size28, colour . Click at about644, 1344and type the four drinks below, one to a line, each row 27 characters long. Press Tab. - In the Text panel set Line height to
1.8and Letter spacing to0. Nudge the layer until the left edge of the letters is at x = 644 and the top of the first line is at y = 1344. Name itDrinks Items.
The drinks rows:
Prickly Pear Soda ....... 4Horchata ................ 4Michelada ............... 7Cactus Cooler ........... 5
- Click the hidden
-
Set the rest of the type
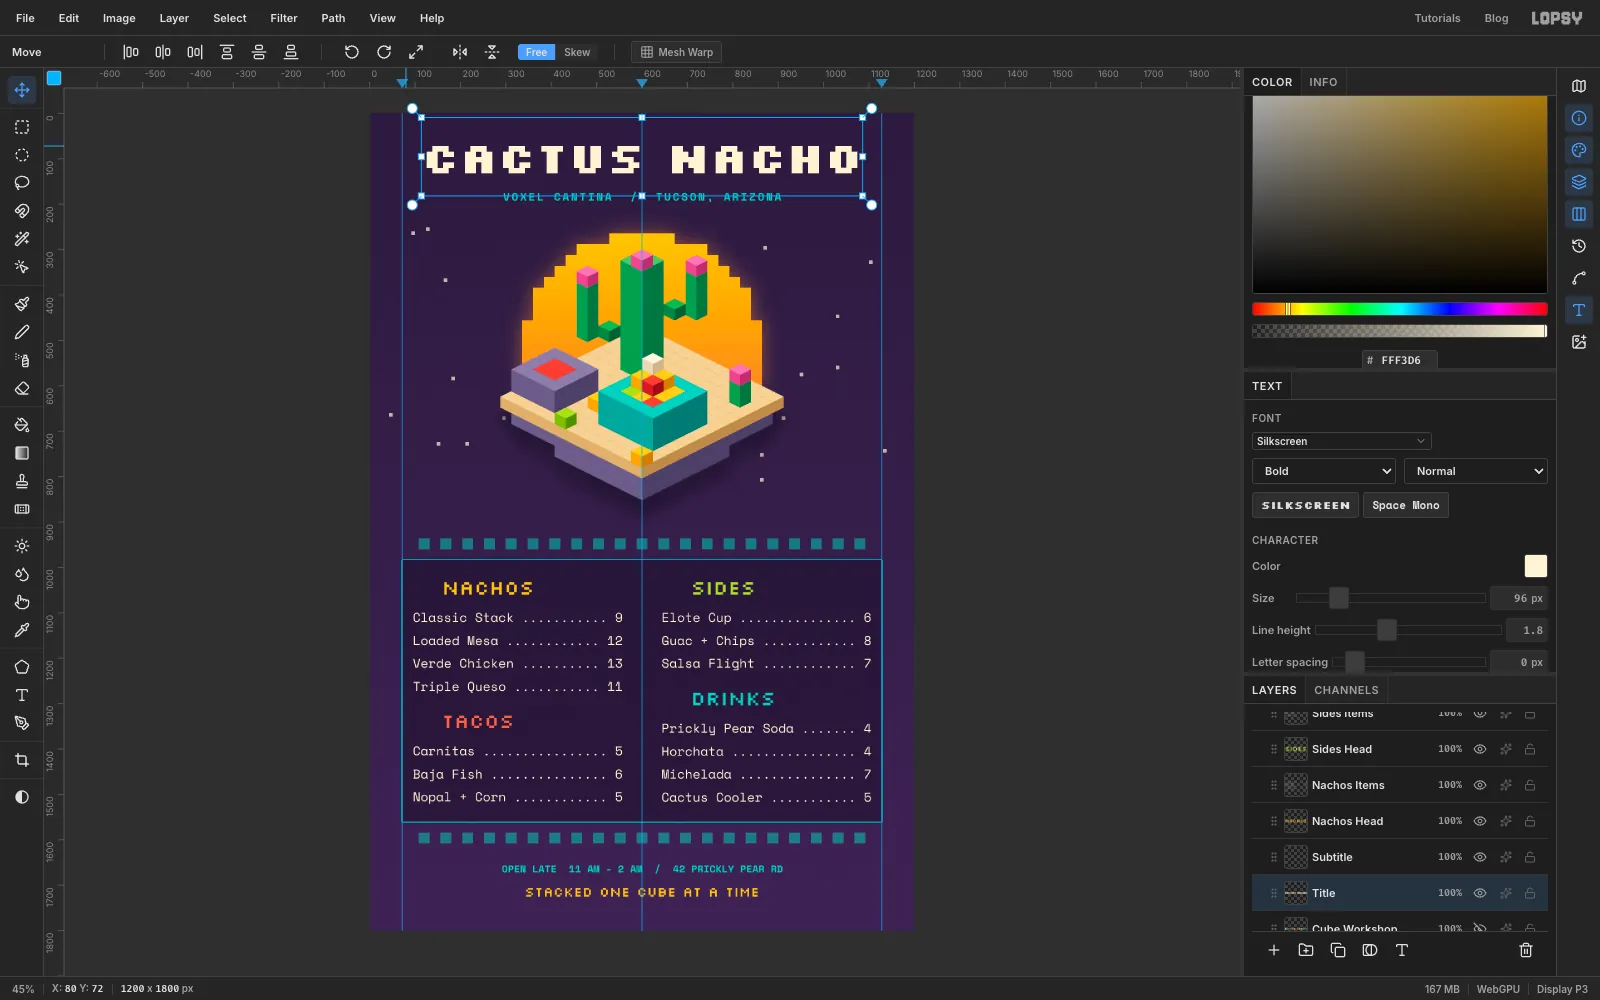
Set the rest the same way, in this order: each list first, then the heading above it. Headings are Silkscreen 44, Regular. Lists are Space Mono 28, Regular, , line height 1.8, one item to a line, every row 27 characters long.
DRINKSheading, , left at 712, top at 1276. Name itDrinks Head.- Tacos list, left at 96, top at 1394:
Carnitas ................ 5,Baja Fish ............... 6andNopal + Corn ............ 5. Name itTacos Items. TACOSheading, , left at 164, top at 1326. Name itTacos Head.- Sides list, left at 644, top at 1100:
Elote Cup ............... 6,Guac + Chips ............ 8andSalsa Flight ............ 7. Name itSides Items. SIDESheading, , left at 712, top at 1032. Name itSides Head.- Nachos list, left at 96, top at 1100:
Classic Stack ........... 9,Loaded Mesa ............ 12,Verde Chicken .......... 13andTriple Queso ........... 11. Name itNachos Items. NACHOSheading, , left at 164, top at 1032. Name itNachos Head.- Subtitle:
VOXEL CANTINA / TUCSON, ARIZONAin Space Mono Bold 24, , Letter spacing4, centred, top at 172. Name itSubtitle. - Title:
CACTUS NACHOin Silkscreen Bold 96, , centred, top at 72. Name itTitle.
Each heading starts 68 px to the right of its list, which leaves room for a cube.
-
Extrude the title
- Click the
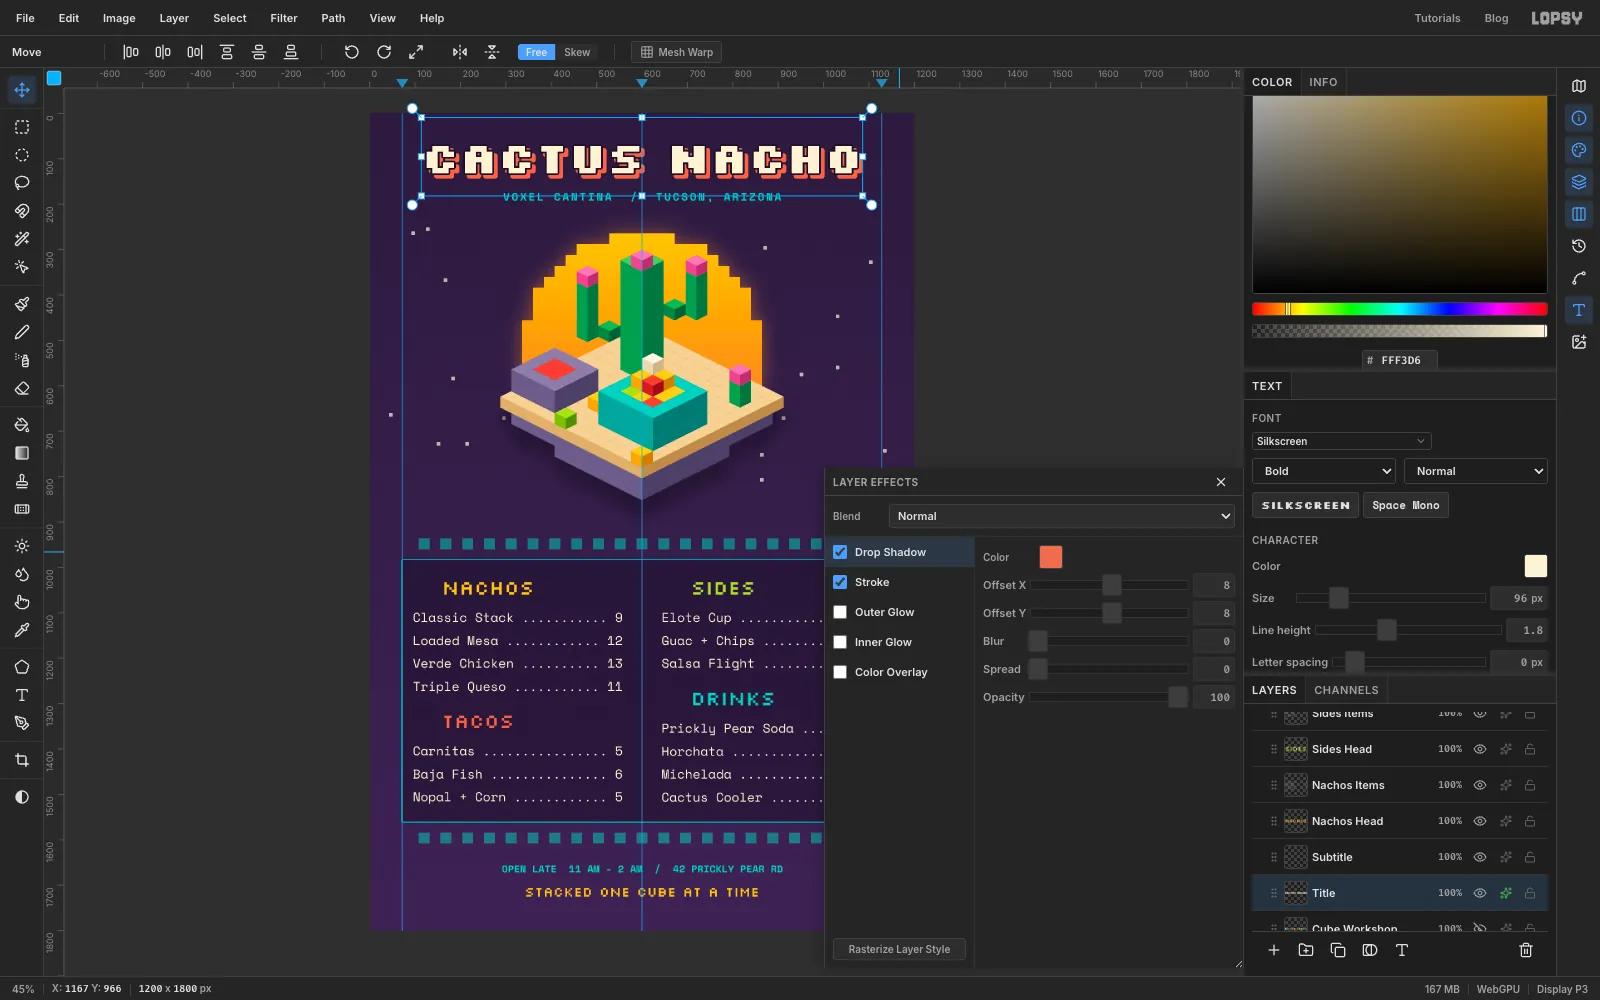
Titlelayer and open its effects drawer. - Tick Stroke and set Width to
4and the colour to . - Tick Drop Shadow and set Offset X and Offset Y to
8, Blur to0, Spread to0, Opacity to100and the colour to . - Close the drawer.
With no blur and full opacity, the shadow is a second, solid copy of the letters, which reads as a block of thickness behind each one.
- Click the
-
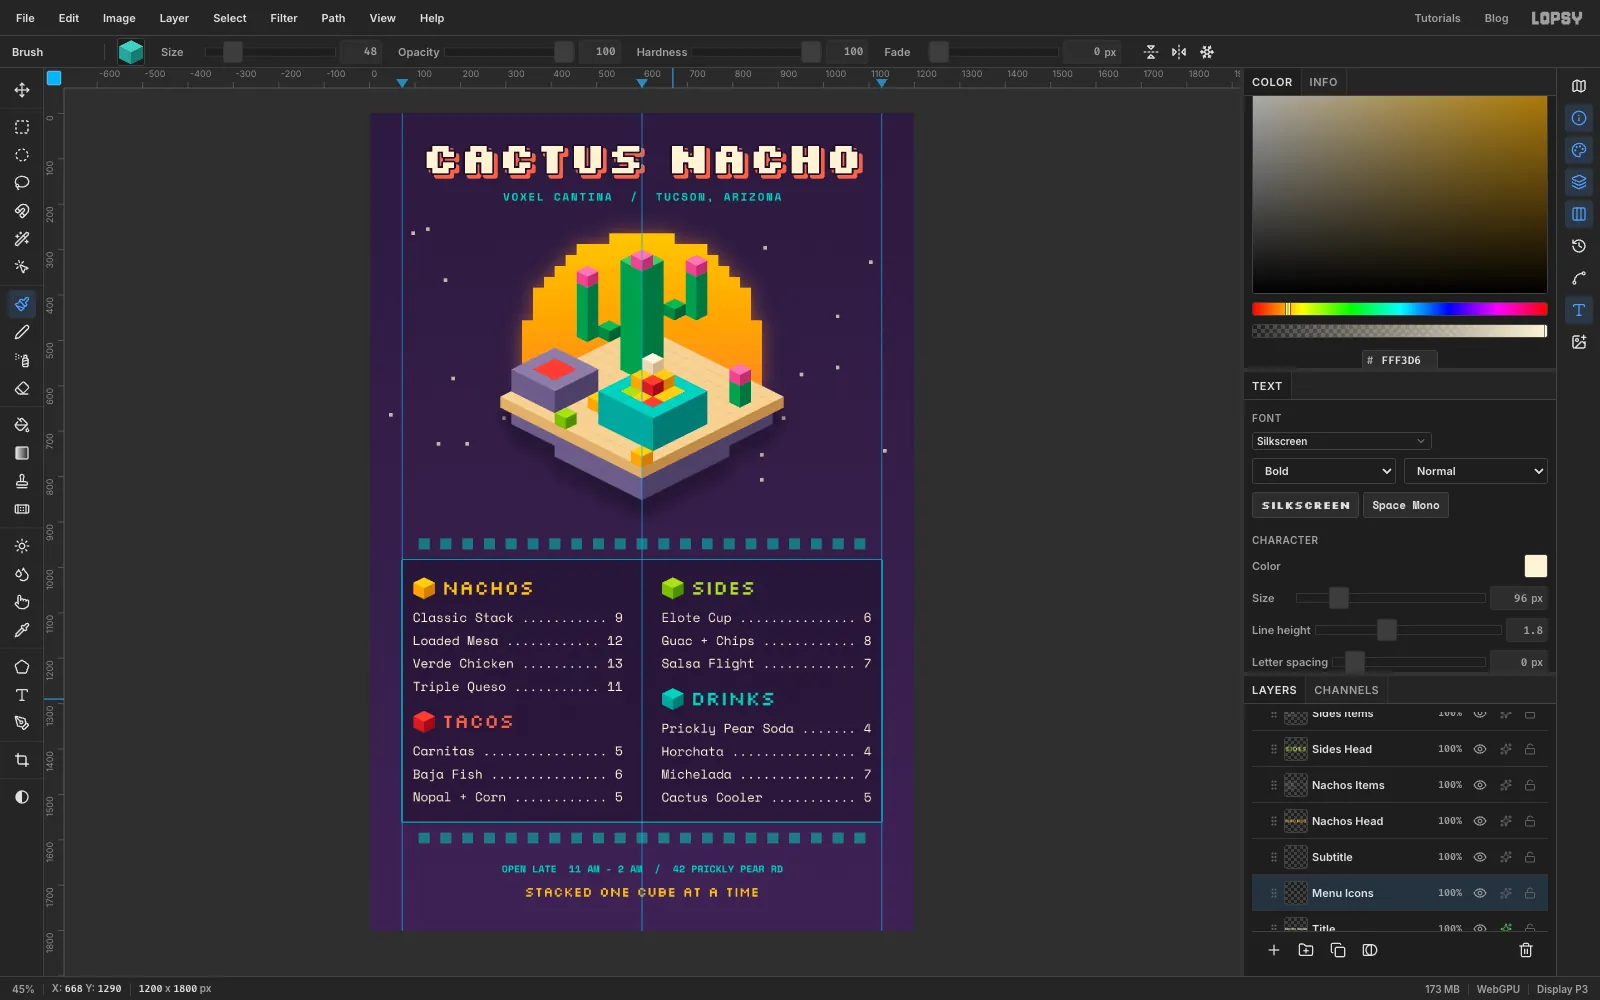
Stamp a cube beside each heading
- Click the
Titlelayer and add a layer namedMenu Icons. - Pick the Brush and stamp one cube to the left of each heading, level with the middle of its letters: Chip Cube at
120, 1046for NACHOS, Salsa Cube at120, 1340for TACOS, Lime Cube at668, 1046for SIDES and Teal Cube at668, 1290for DRINKS.
Each cube matches its heading's colour and its left edge lines up with the list below it.
- Click the
-
Build the badge
- Click
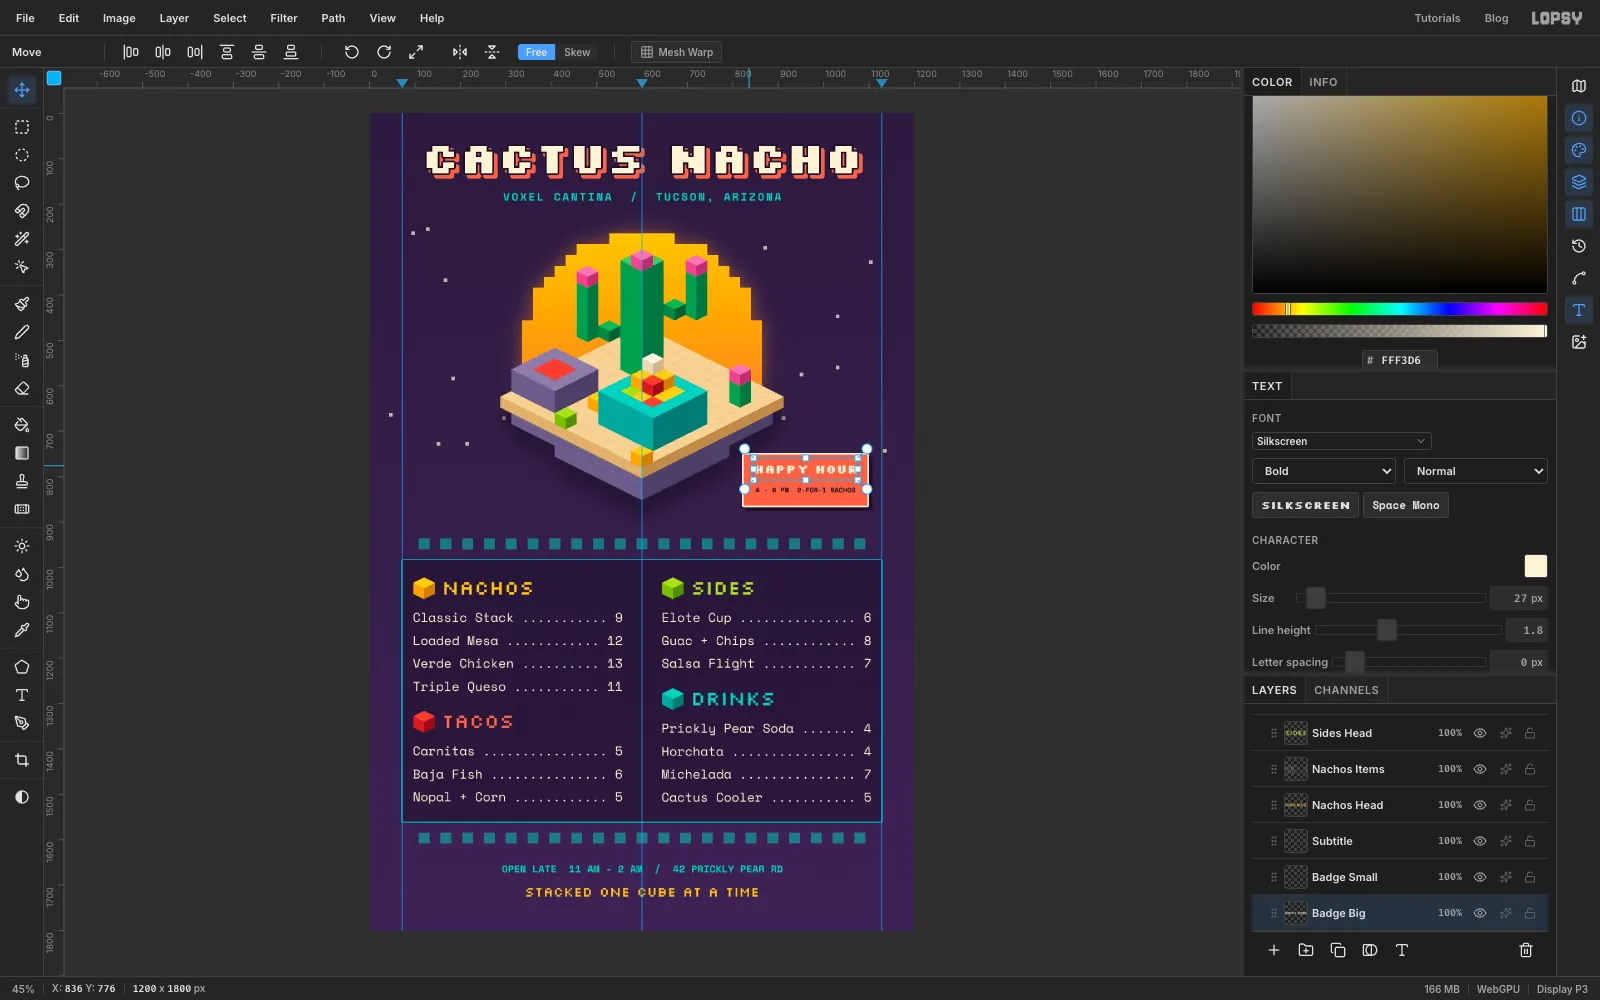
Menu Iconsand add a layer namedBadge Plate. Select From824,752To1096,864, fill it with and deselect. - Open its effects drawer. Tick Stroke: Width
4, colour . Tick Drop Shadow: Offset X and Y7, Blur0, Opacity100, colour . - Click
Badge Plate, pick the Text tool and type4 - 6 PM 2-FOR-1 NACHOSin Space Mono Bold 15, . Nudge it so it's centred on x = 960 with the top of the letters at y = 824. Name itBadge Small. - Click
Badge Plateagain and typeHAPPY HOURin Silkscreen Bold 27, , centred on x = 960 with its top at y = 776. Name itBadge Big.
Both lines should sit at least 24 px inside the plate on every side.
- Click
-
Tilt the badge
- Click
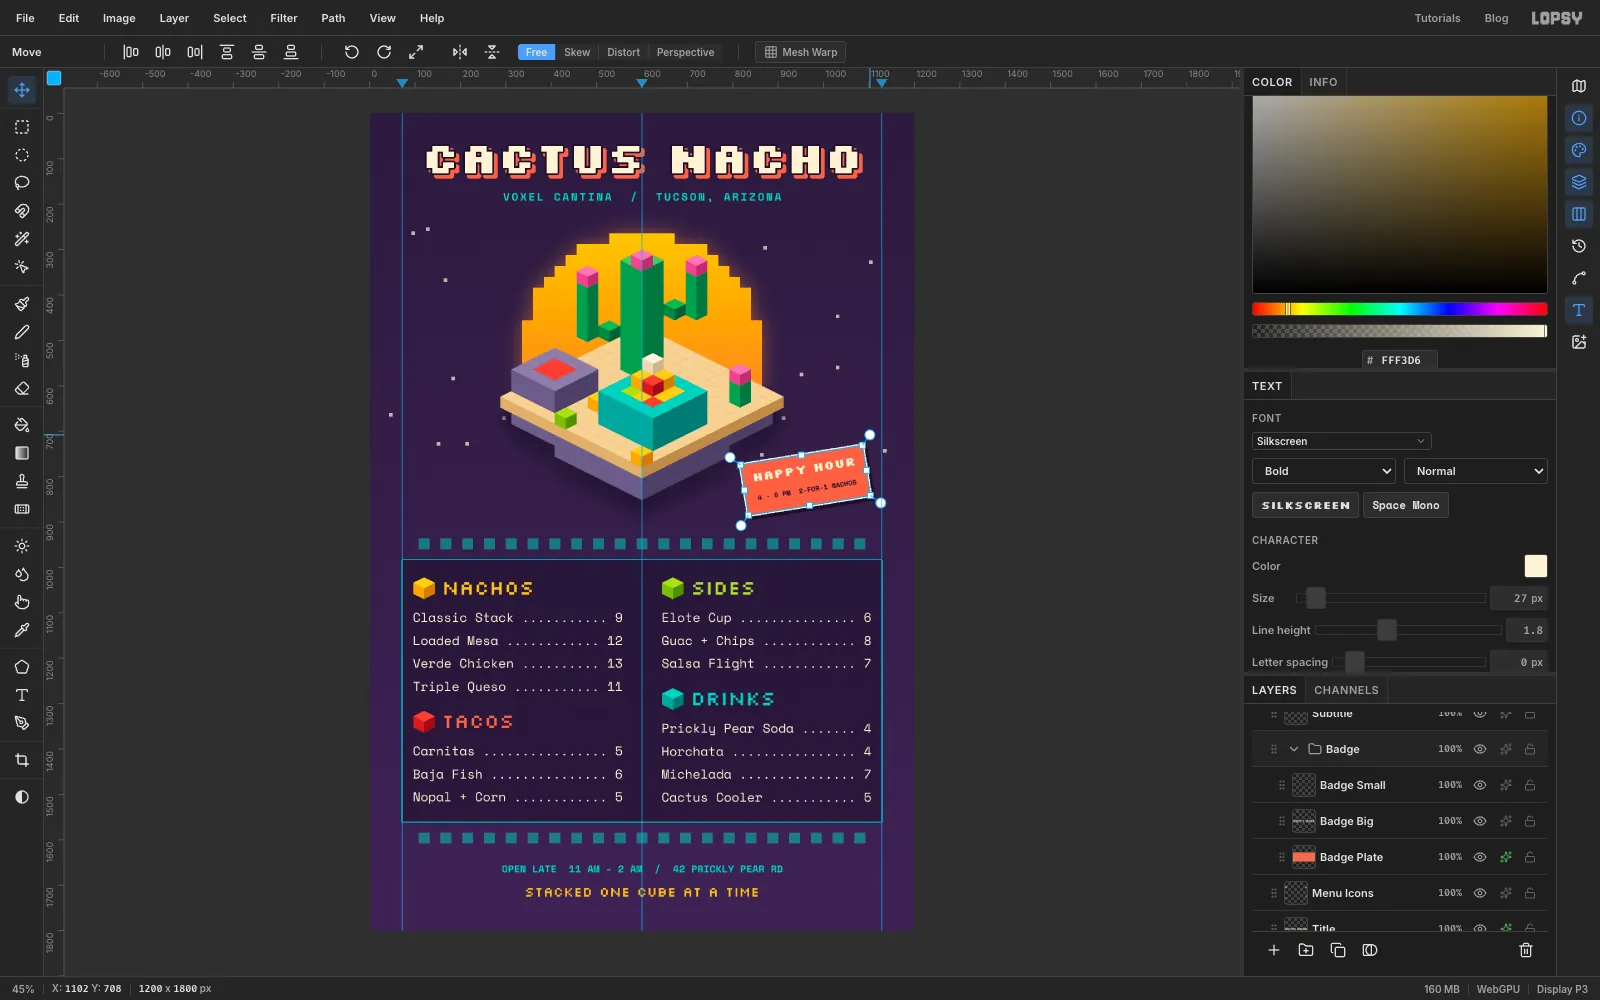
Badge Plate, then Shift-clickBadge Small, the top layer of the three, so the plate and both lines are selected. Choose Layer → Group Layers and name the groupBadge. - With the Move tool, hover just outside the top-right corner handle until the cursor changes, and drag counter-clockwise by about 9°.
- Press Enter to apply.
The plate, its outline, its shadow and both lines of live text turn together.
- Click
-
Add print grain
- Click
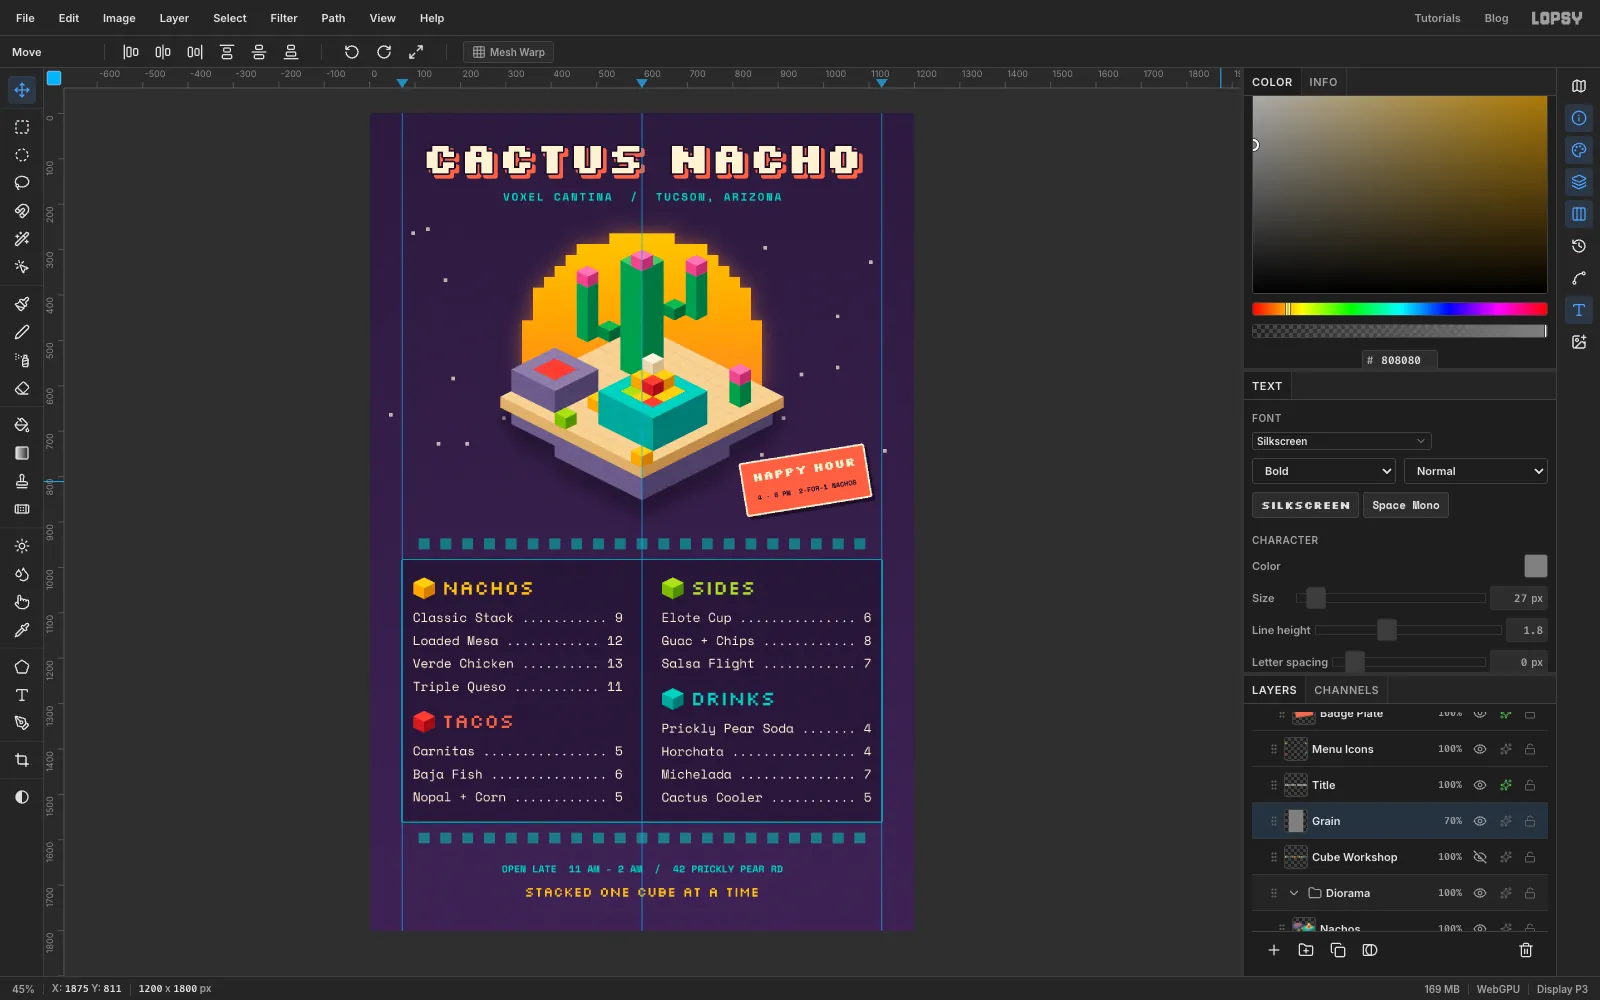
Cube Workshopand add a layer namedGrain. It lands above the artwork and below the type, so the grain textures the picture and the small text stays clean. - Set the colour to and choose Edit → Fill.
- Choose Filter → Add Noise…, set Amount to
35and click Apply. - Open the layer's effects drawer, set Blend to Overlay, close it, and set the layer's opacity to 70%.
- Click
-
Finish with a vignette
- Click the Project group at the top of the Layers panel and open its drawer with the ✦ button. It already lists a few adjustments at their neutral settings; leave those alone.
- Click Add Adjustment and choose Vignette. Set its Vignette value to
28. - Click Add Adjustment again and choose Saturation & Vibrance. Set Vibrance to
18. - Close the drawer.
Adjustments on the Project group apply to the whole picture without changing any layer. Untick View → Show Guides to hide the guides, save the project with File → Save Project, and export the menu with File → Quick Export PNG.