Design a Voxel UFO Drive-Thru Billboard
Build a voxel highway billboard in Lopsy from one Pen-tool cube, copied with snapped Alt-drags, recoloured with the Magic Wand, under extruded pixel type.
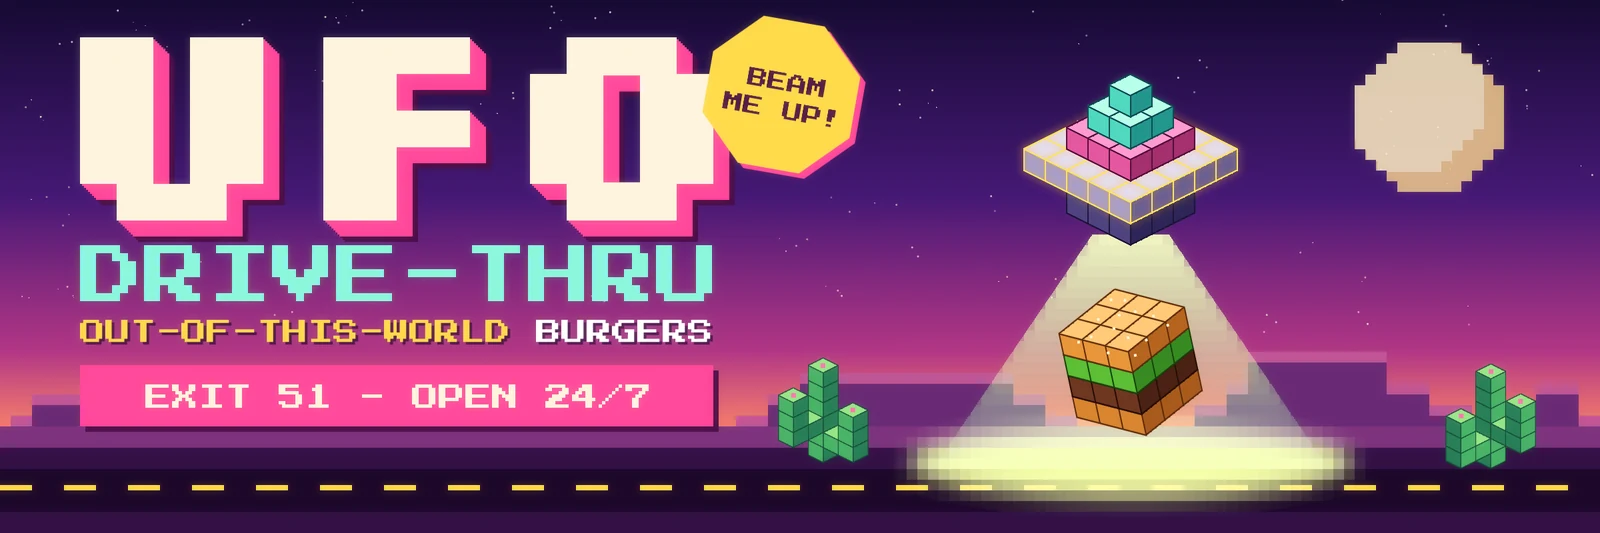
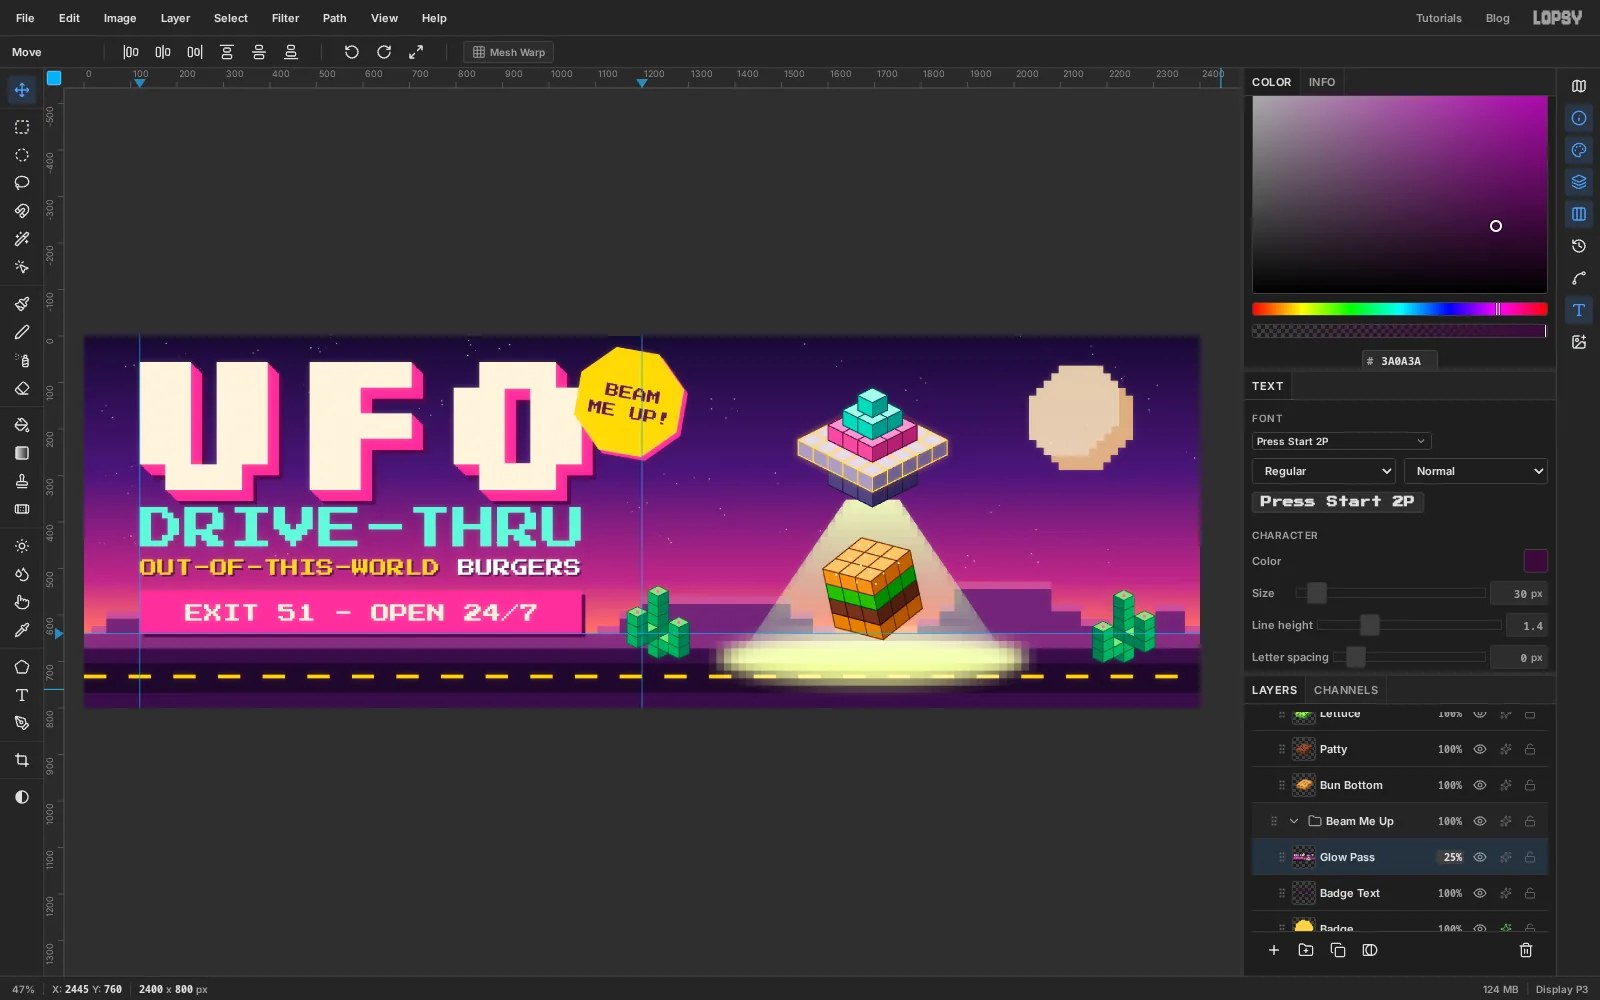
This tutorial builds a roadside billboard for an imaginary burger joint, UFO Drive-Thru, in a voxel style: everything in the illustration is made of little isometric cubes. The canvas is 2400 × 800 px, the 3:1 shape of a highway bulletin board.
You don't need a 3D program for voxels. Every cube in the picture is a copy of one cube you draw by hand with the Pen tool. The trick is the shape of that cube. It's 64 px wide, its top is a 64 × 32 diamond and its sides are 32 px tall. So the next cube along one edge sits exactly 32 px across and 16 px down, and the next one up sits 32 px higher. With the grid set to 16 px and snapping on, every Alt-drag copy lands in the right place by itself. To recolour a whole slab of cubes at once, you use the Magic Wand with Contiguous off.
Along the way you'll use:
- ruler guides, the grid with Snap, and groups
- the Gradient tool with transparent stops, the Spray tool and the Pencil with Shift-click lines
- Rectangular and Elliptical Marquee with add, subtract and intersect, the Lasso, Magic Wand, Select → Inverse and Shrink
- Cmd-clicking a layer thumbnail to load its pixels as a selection, and the same click with Shift and Alt to intersect
- the Pen tool with Path to Selection
- Alt-dragging a selection with the Move tool to stamp copies, Copy and Paste (which pastes in place), Copy Merged, arrow-key nudges, scaling and rotating with the transform handles, and Flip Horizontal
- Define Pattern and Fill with Pattern
- Pixelate, Threshold and Gaussian Blur
- live text with a per-word colour, letter spacing, Rasterize Layer and the Shape tool's polygon
- Outer Glow and Drop Shadow, the Screen blend mode and layer opacity
The palette:
-
Sky
-
Stars
-
moon
-
Mesas
-
mesa tops
-
Ground
-
ground edge
-
road
-
road dashes
-
Saucer
-
edges
-
Belly
-
edges
-
Deck
-
edges
-
Glass
-
edges
-
Portholes
-
glow
-
Beam
-
Bun
-
top bun
-
crust edges
-
Patty
-
edges
-
Lettuce
-
edges
-
Sesame
-
Cactus
-
edges
-
flowers
-
Type cream
-
hot pink
-
plum
-
mint
-
yellow
-
Set up the canvas and paint the sky
Create a new document
2400×800px with a white background. With the rulers showing, click the top ruler at x120and1200to drop two vertical guides, and click the left ruler at y640for the horizon. The guide at 120 is the left margin for all of the type.Double-click the
Backgroundrow and rename itSky. Pick the Gradient tool, set Type to Linear and open Advanced…. Set four stops: at the left end, at about 45%, at about 80% and at the right end. Hold Shift and drag from the top edge straight down to just below the horizon guide.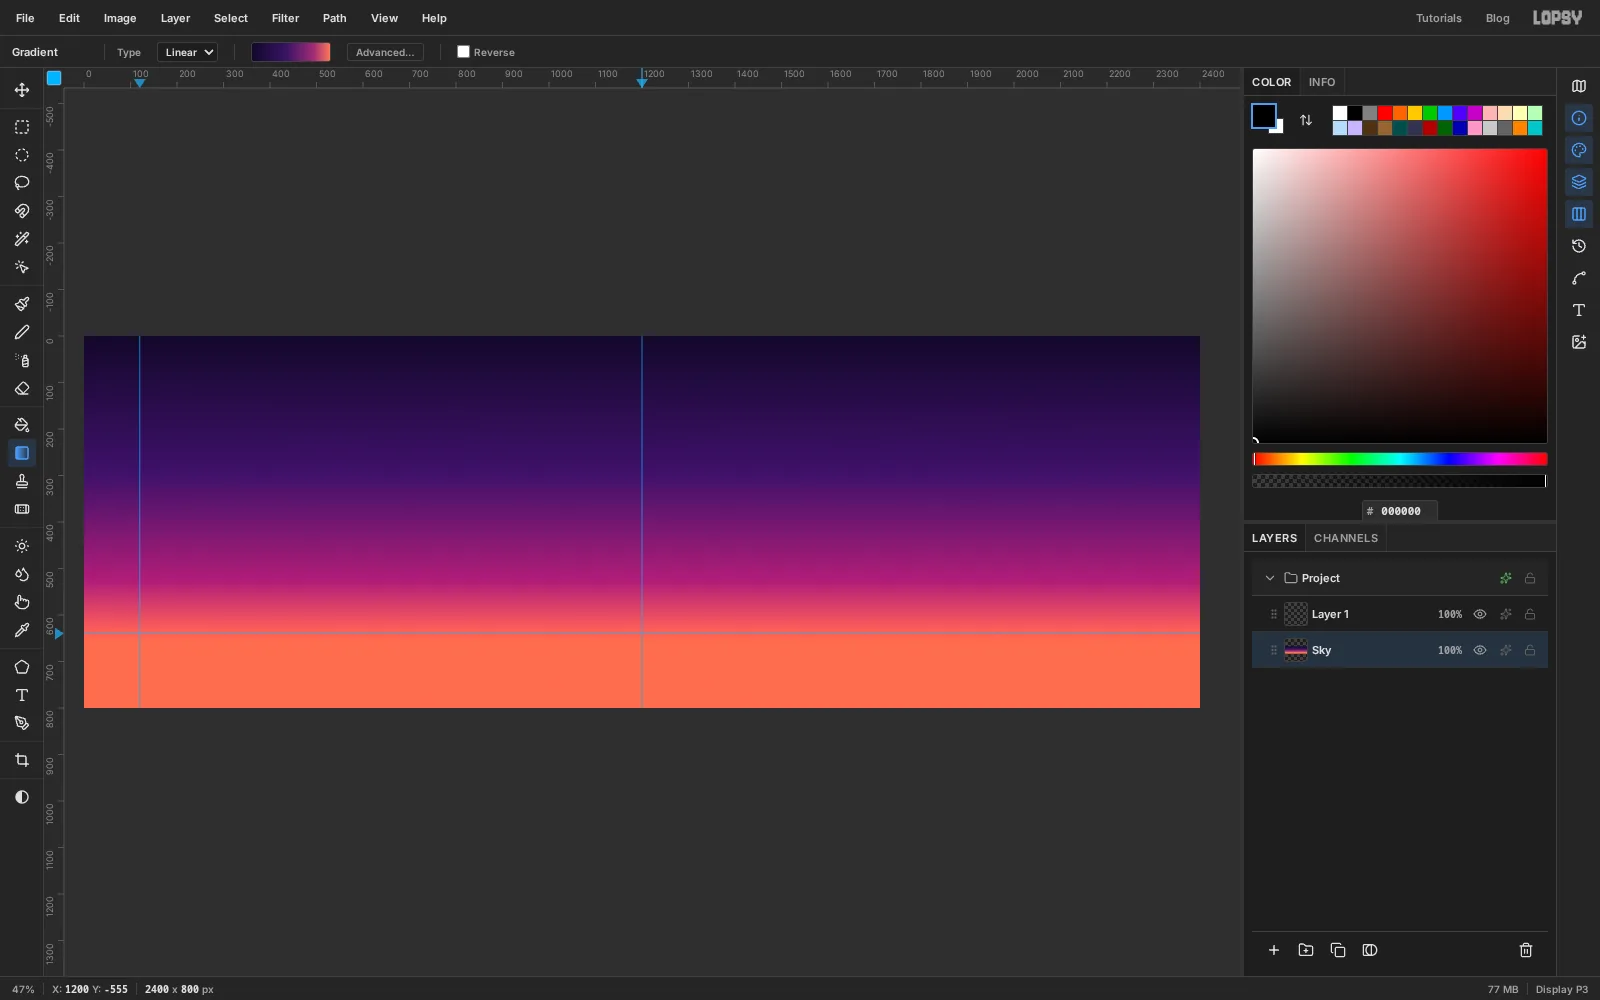
-
Scatter the stars
Rename
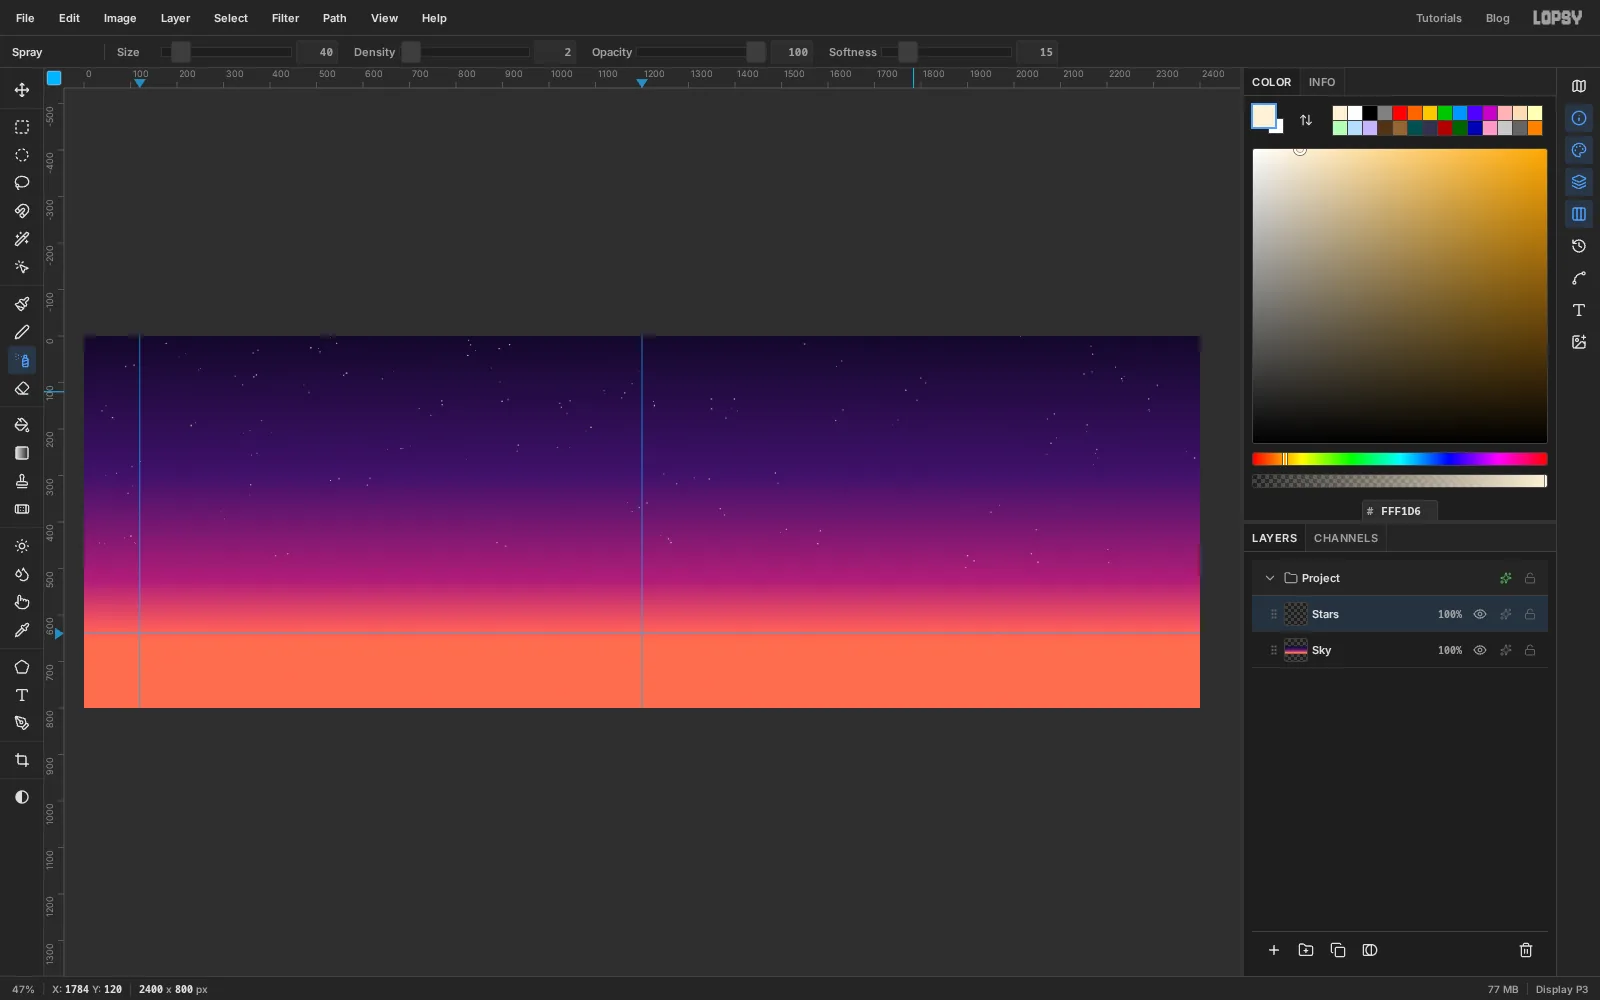
Layer 1toStars. Pick the Spray tool (J) and set Size40, Density2, Opacity100and Softness15, with the foreground colour .Don't drag, or you'll get strings of dots. Click instead, a few dozen times or more, scattered across the width. Click more often near the top, and stop about two-thirds of the way down, where the sunset glow would wash the stars out.
-
Make a blocky moon stencil
A smooth circle doesn't belong in a voxel picture, so turn one into blocks. Pixelate alone won't do it, because it keeps a shape's outline smooth. Paint the circle on a solid background first, so the blocks along the edge get averaged with that background.
- Click Add Layer and rename the new layer
Moon. - Fill the whole layer with black (, no selection).
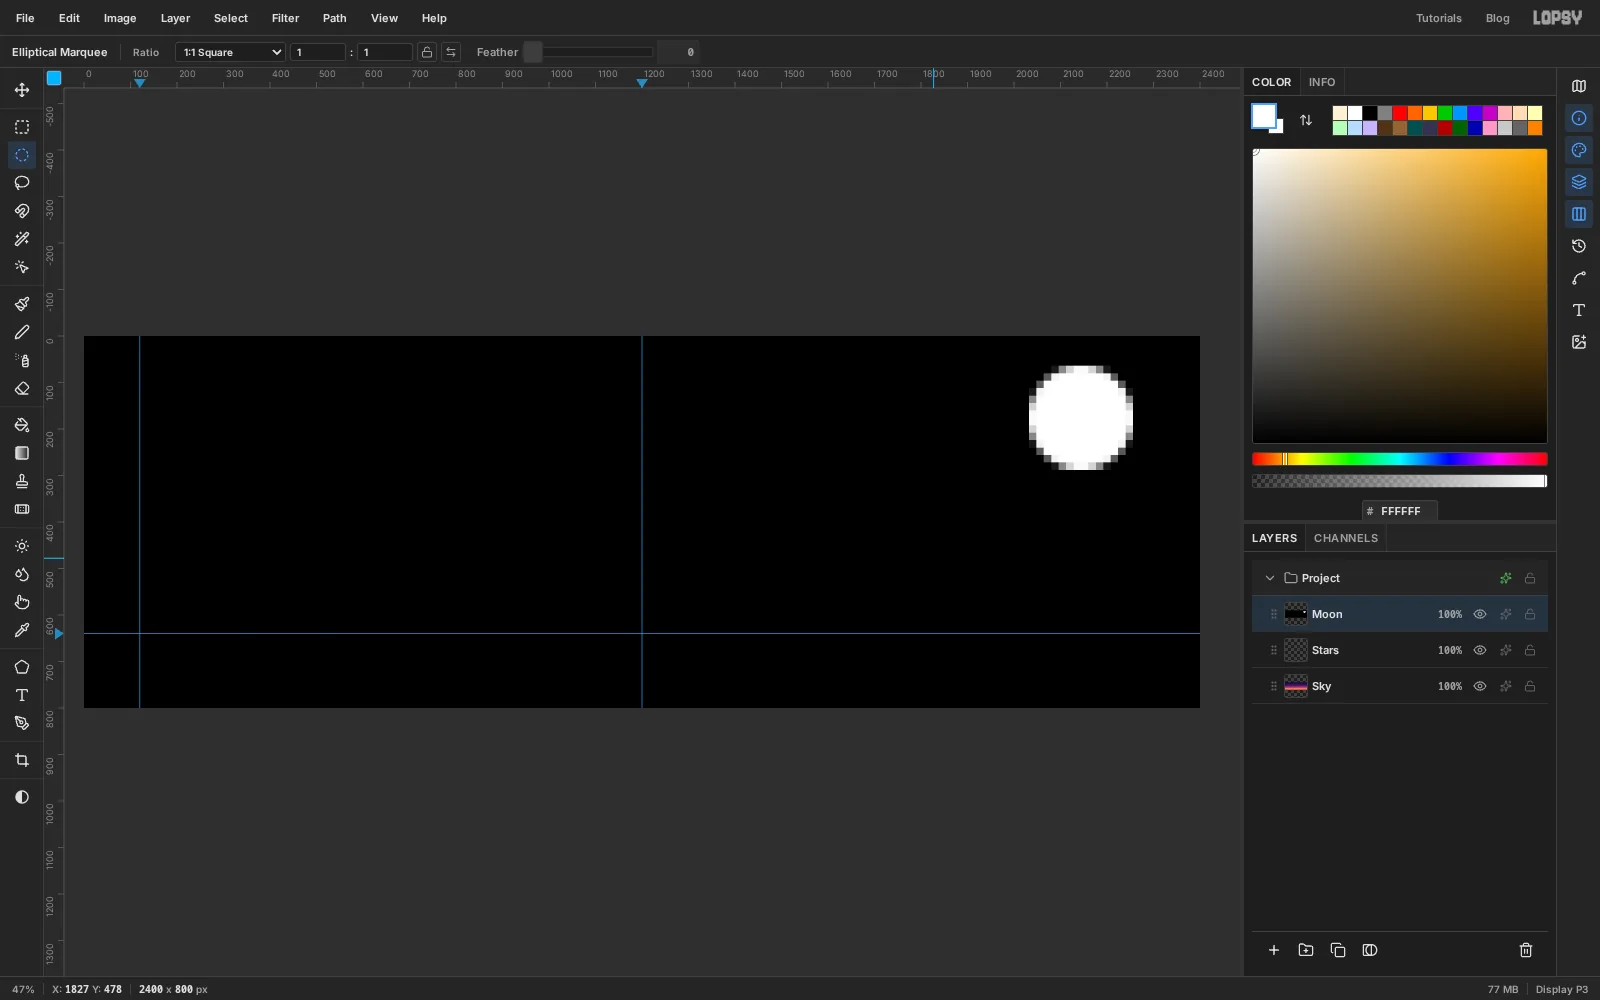
- Pick the Elliptical Marquee and drag a circle 224 px across, centred near the top right at about
2144, 176. Fill it with white and press Cmd+D. - Choose Filter → Pixelate… and set Block Size to
16.
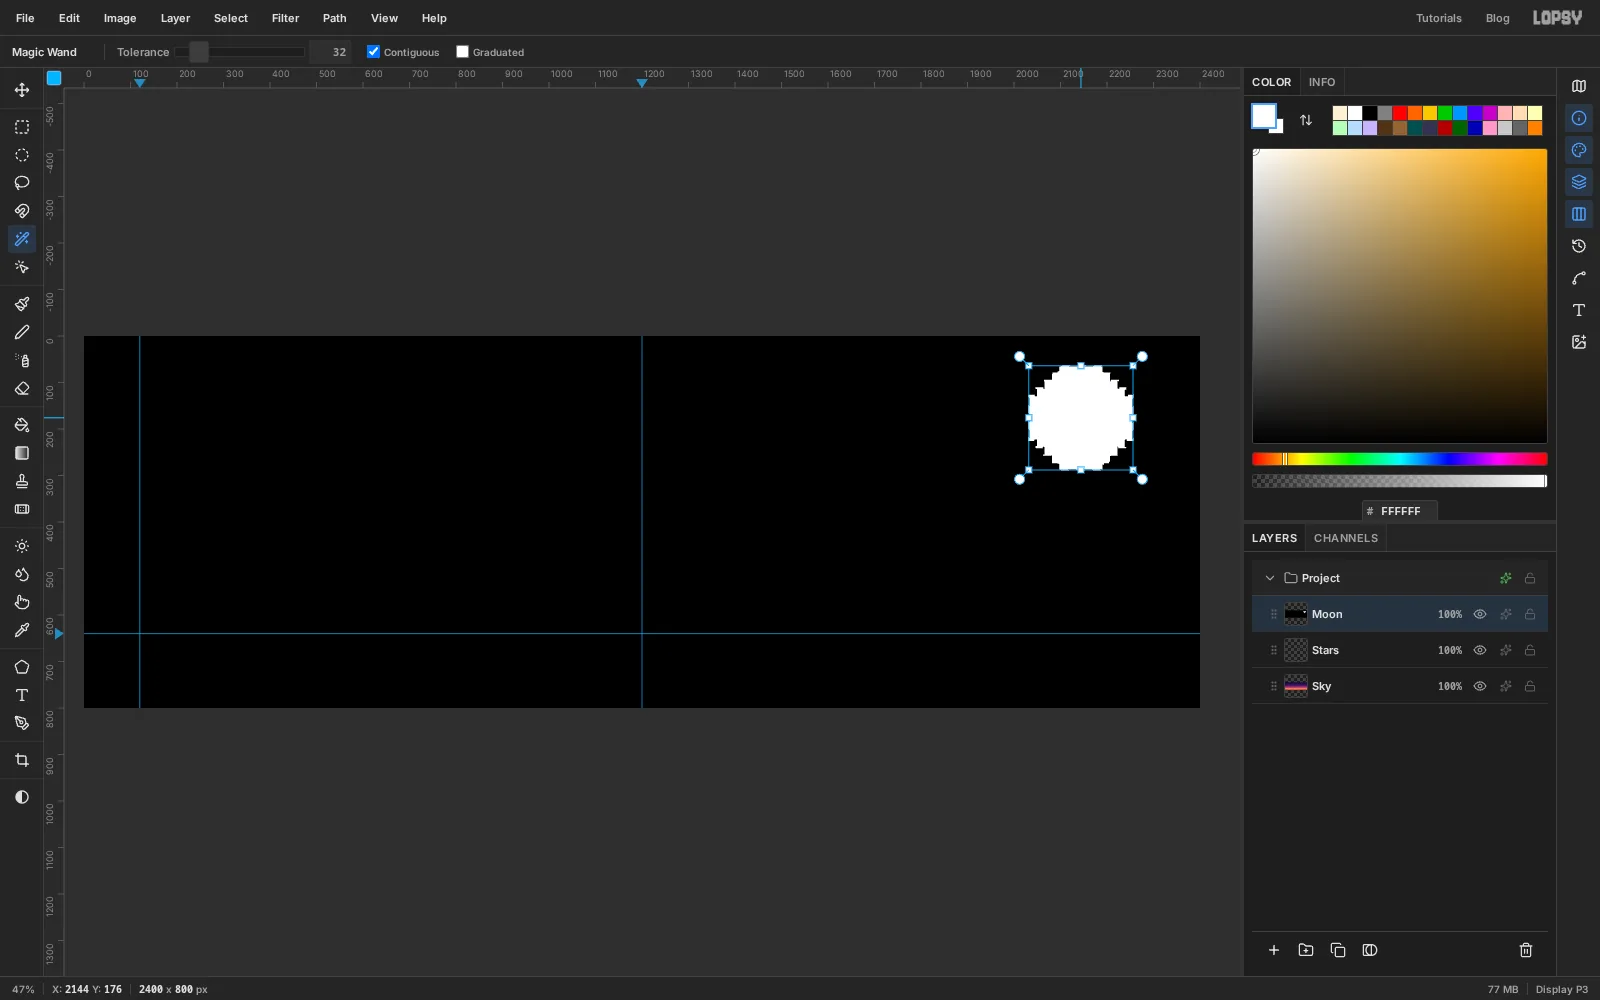
The edge of the circle is now made of grey blocks: light ones where the circle filled most of the block, dark ones where it didn't.
- Click Add Layer and rename the new layer
-
Cut the moon out with Threshold and the Magic Wand
- Choose Filter → Threshold… and set Level to
128. Each grey block becomes pure white or pure black, so the disc gets a clean stepped edge. - Pick the Magic Wand (W) with Contiguous on and click inside the disc.
- Choose Select → Inverse, press Delete to clear the black, then choose Select → Inverse again to get the disc back.
- Fill it with and press Cmd+D.
- Choose Filter → Threshold… and set Level to
-
Shade the moon
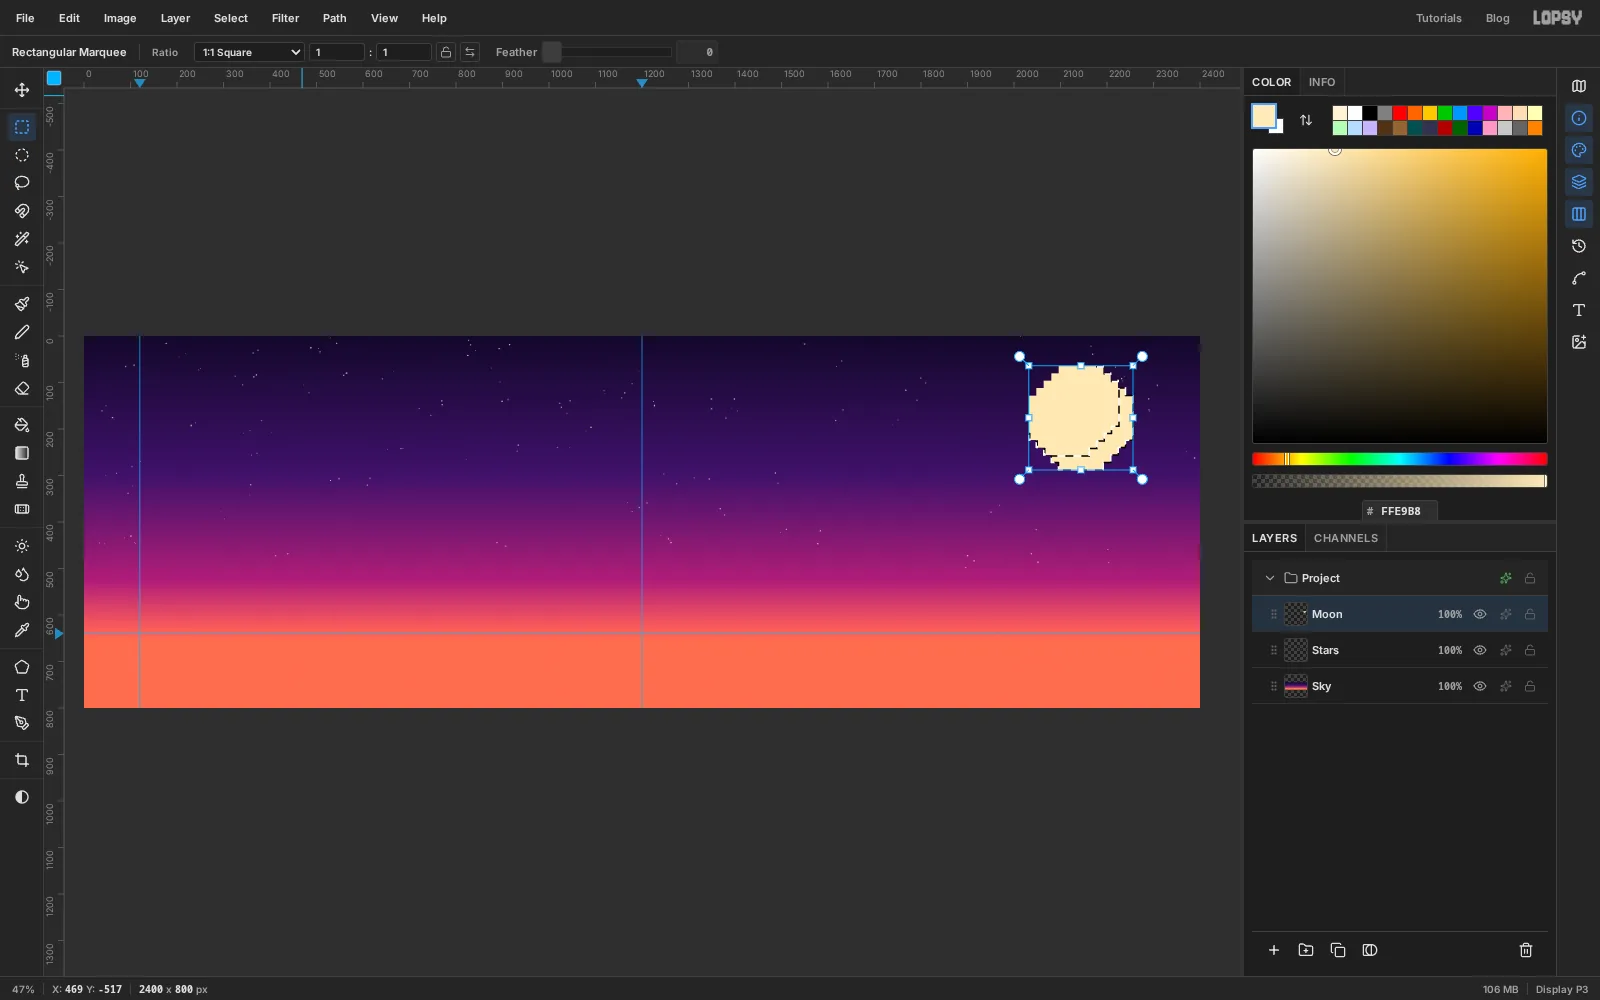
This is a trick you'll use again for the mesas: subtract a shifted copy of a shape from itself to get a rim.
- Cmd-click the
Moonlayer's thumbnail to select its pixels. - With the Rectangular Marquee (M) active, press Shift+Left three times and Shift+Up three times. The outline moves 30 px up and to the left, and the pixels stay where they are.
- Choose Select → Inverse.
- Hold Cmd+Shift+Alt and click the
Moonthumbnail. Holding Shift and Alt as well intersects the selection with the layer's pixels, which leaves only the crescent on the lower right. - Fill it with and press Cmd+D.
- Cmd-click the
-
Build the mesas on the grid
Press Cmd+' to show the grid. The options bar shows Grid
16pxwith Snap ticked, so marquee corners now land on grid lines.Add a layer named
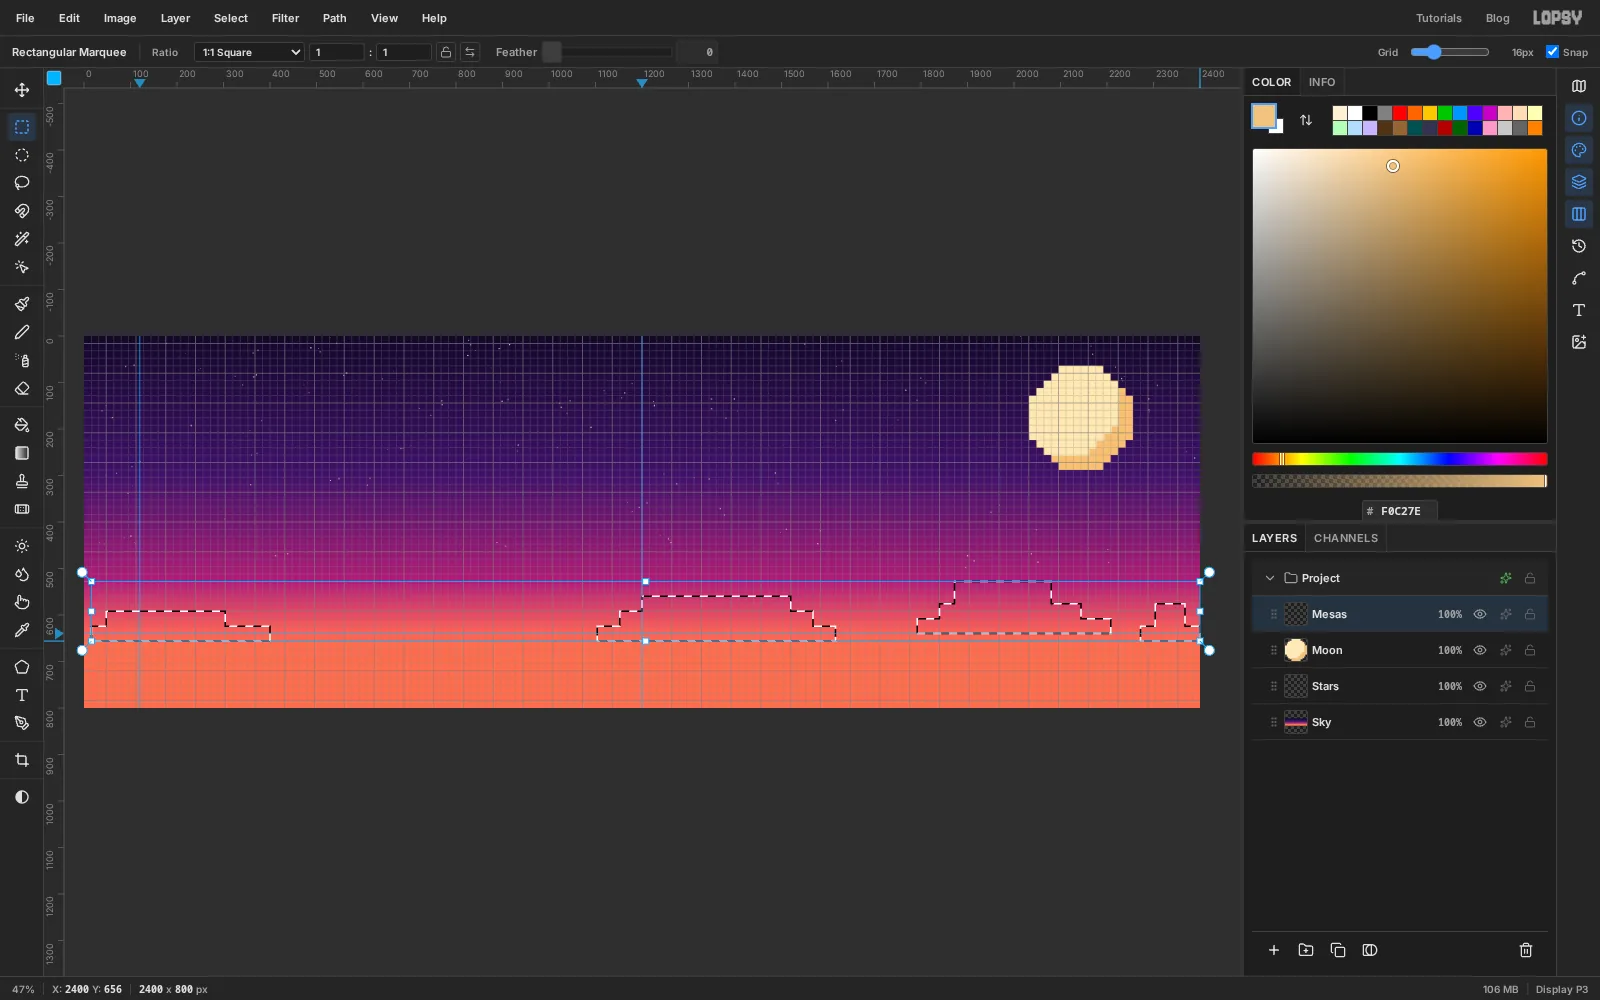
Mesas. With the Rectangular Marquee, drag the first block of a mesa, then hold Shift and drag more blocks to add them, building stepped shapes that all end at y656, just under the horizon guide. Make three mesas, each two or three blocks stacked like a wedding cake, with every block a little narrower than the one under it:- a low one at the far left, from the edge to about x
400, two blocks rising to about y592 - a big one around the middle, about x
1100to1620, three blocks rising to y560 - a tall one on the right, about x
1790to2210, three blocks rising to y528 - a small two-step butte at the right edge, from about x
2270, rising to y576
The exact sizes don't matter. Freehand is fine, as long as every block's corners land on the grid.
Fill the selection with .
- a low one at the far left, from the edge to about x
-
Light the mesa tops
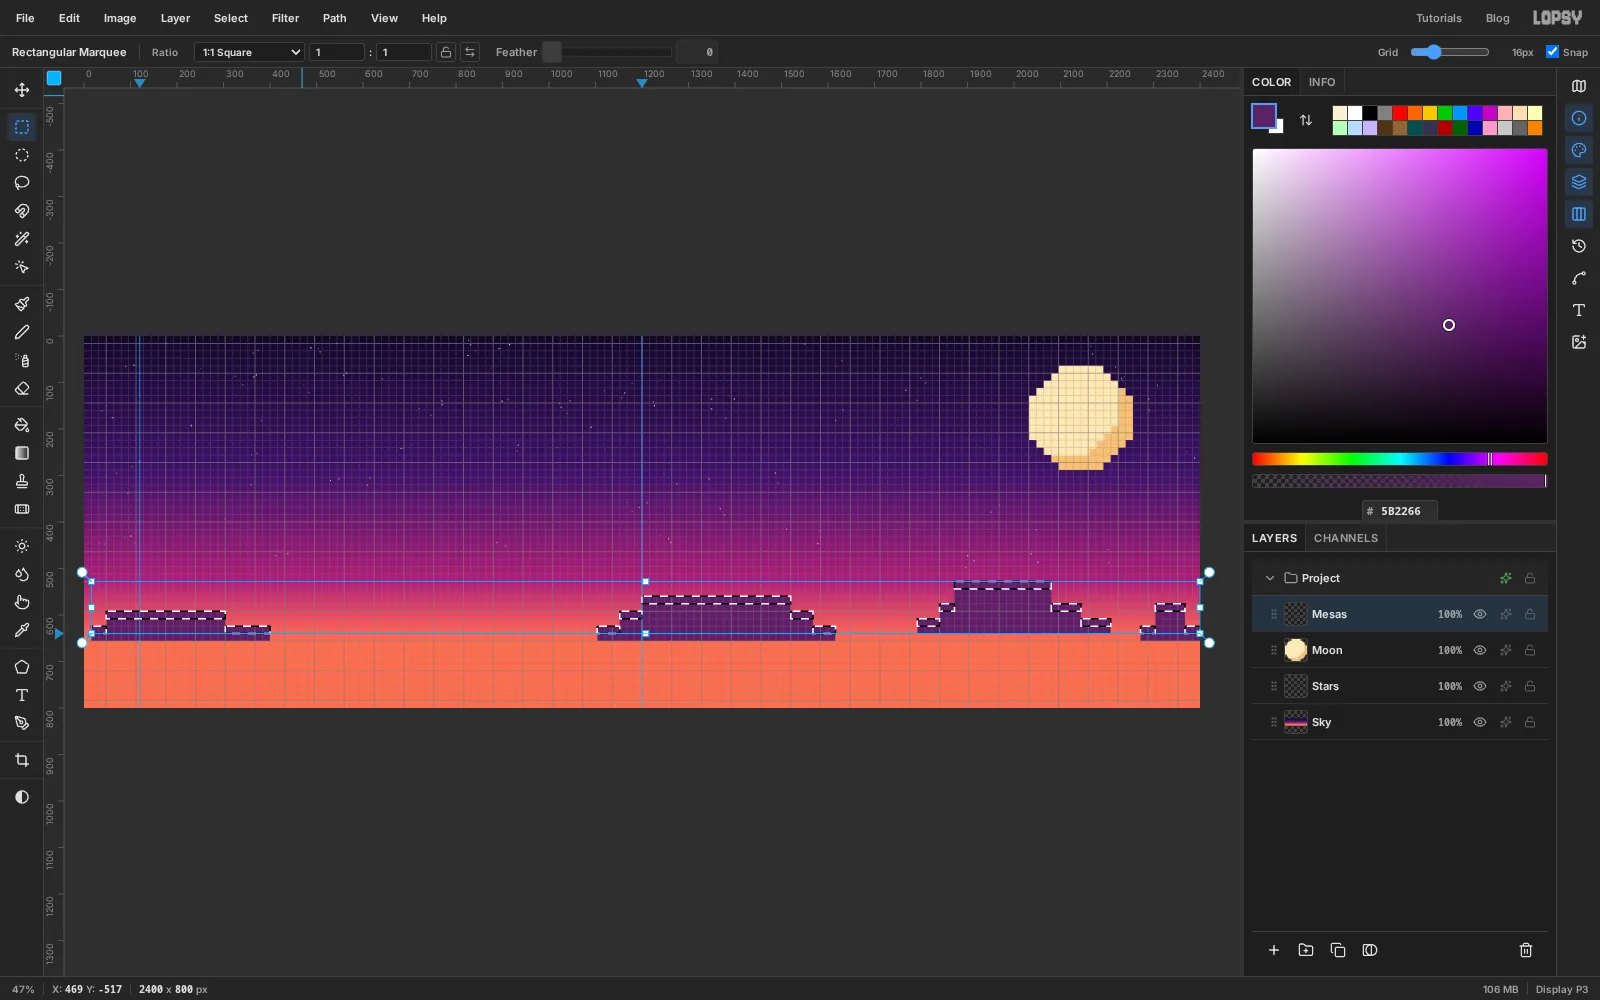
Now the rim trick again, to give every step a lit top edge.
- Cmd-click the
Mesasthumbnail. - With the Rectangular Marquee active, press Down once. With the grid on, an arrow key moves the outline one whole cell, 16 px.
- Choose Select → Inverse, then Cmd+Shift+Alt-click the
Mesasthumbnail to intersect. - Fill it with and press Cmd+D.
- Cmd-click the
-
Lay the ground and the road
Add a layer named
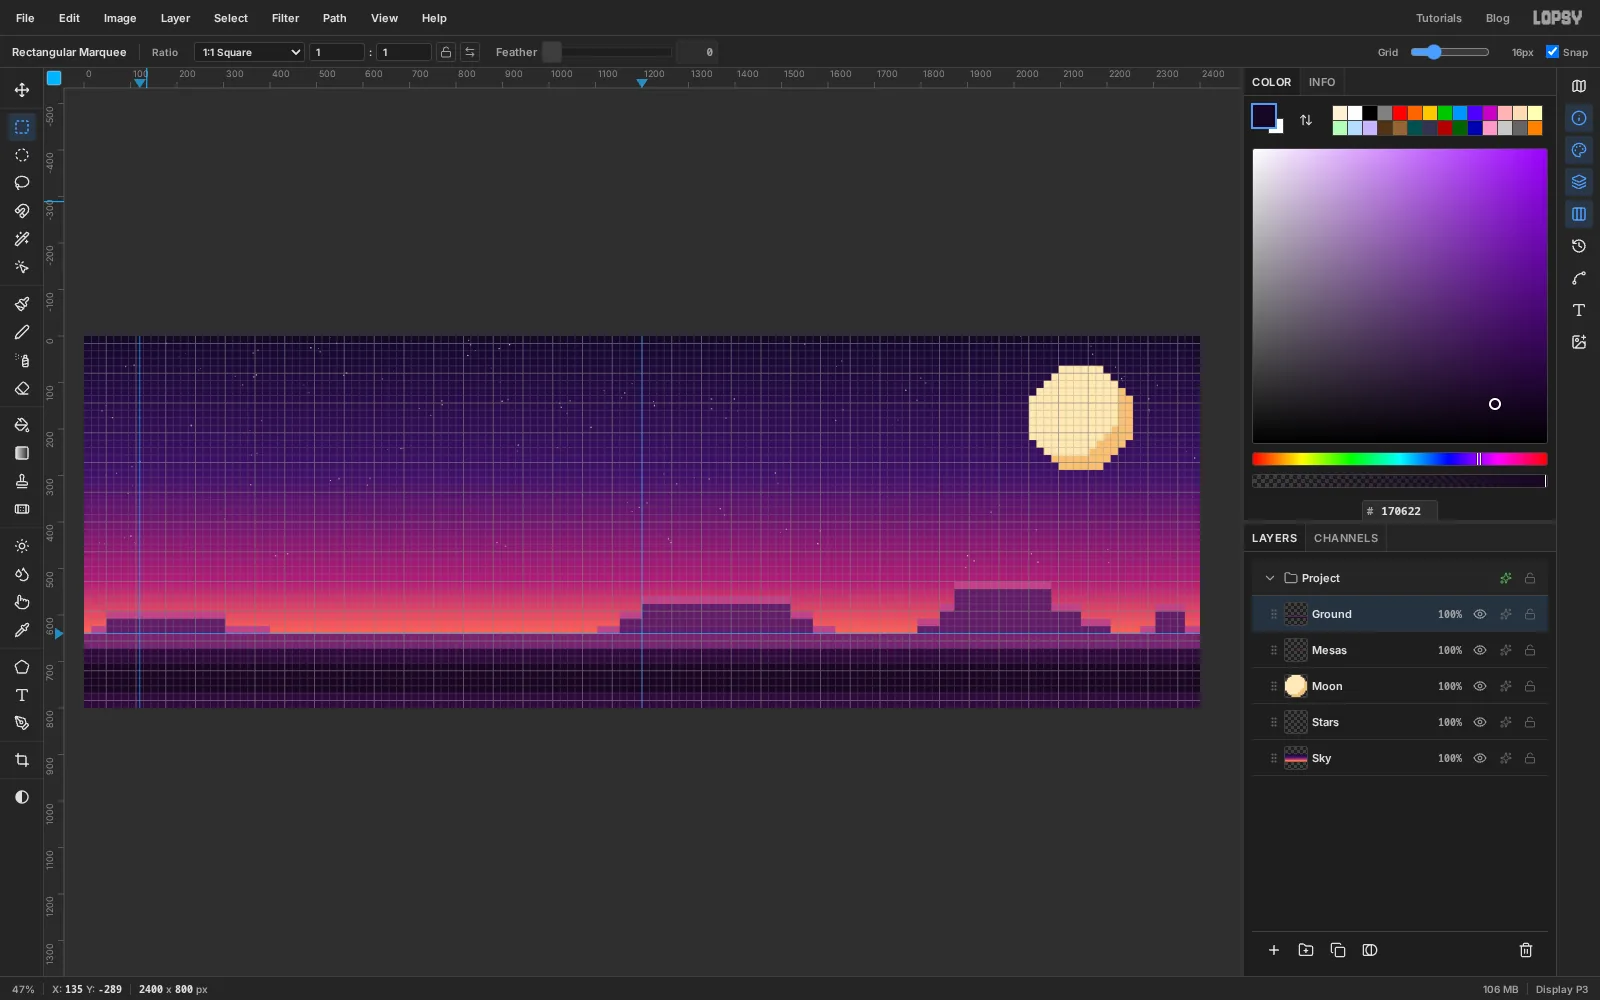
Groundand fill three marquees, one after another (press Cmd+D between them):- From
0, 656to the bottom right corner: . - A strip from
0, 656to2400, 672: . That's the lit edge of the ground. - A band from
0, 704to2400, 768: . That's the road.
- From
-
Paint the road dashes with a pattern
Drawing forty dashes by hand would be tedious, so make one dash and tile it.
- Add a layer named
Dash Tile. In the top left corner, drag a marquee 48 × 8 px and fill it with . - Press Cmd+D, then drag a marquee 96 × 8 px from the same corner, which is the dash plus a gap the same length. Choose Edit → Define Pattern.
- Delete the
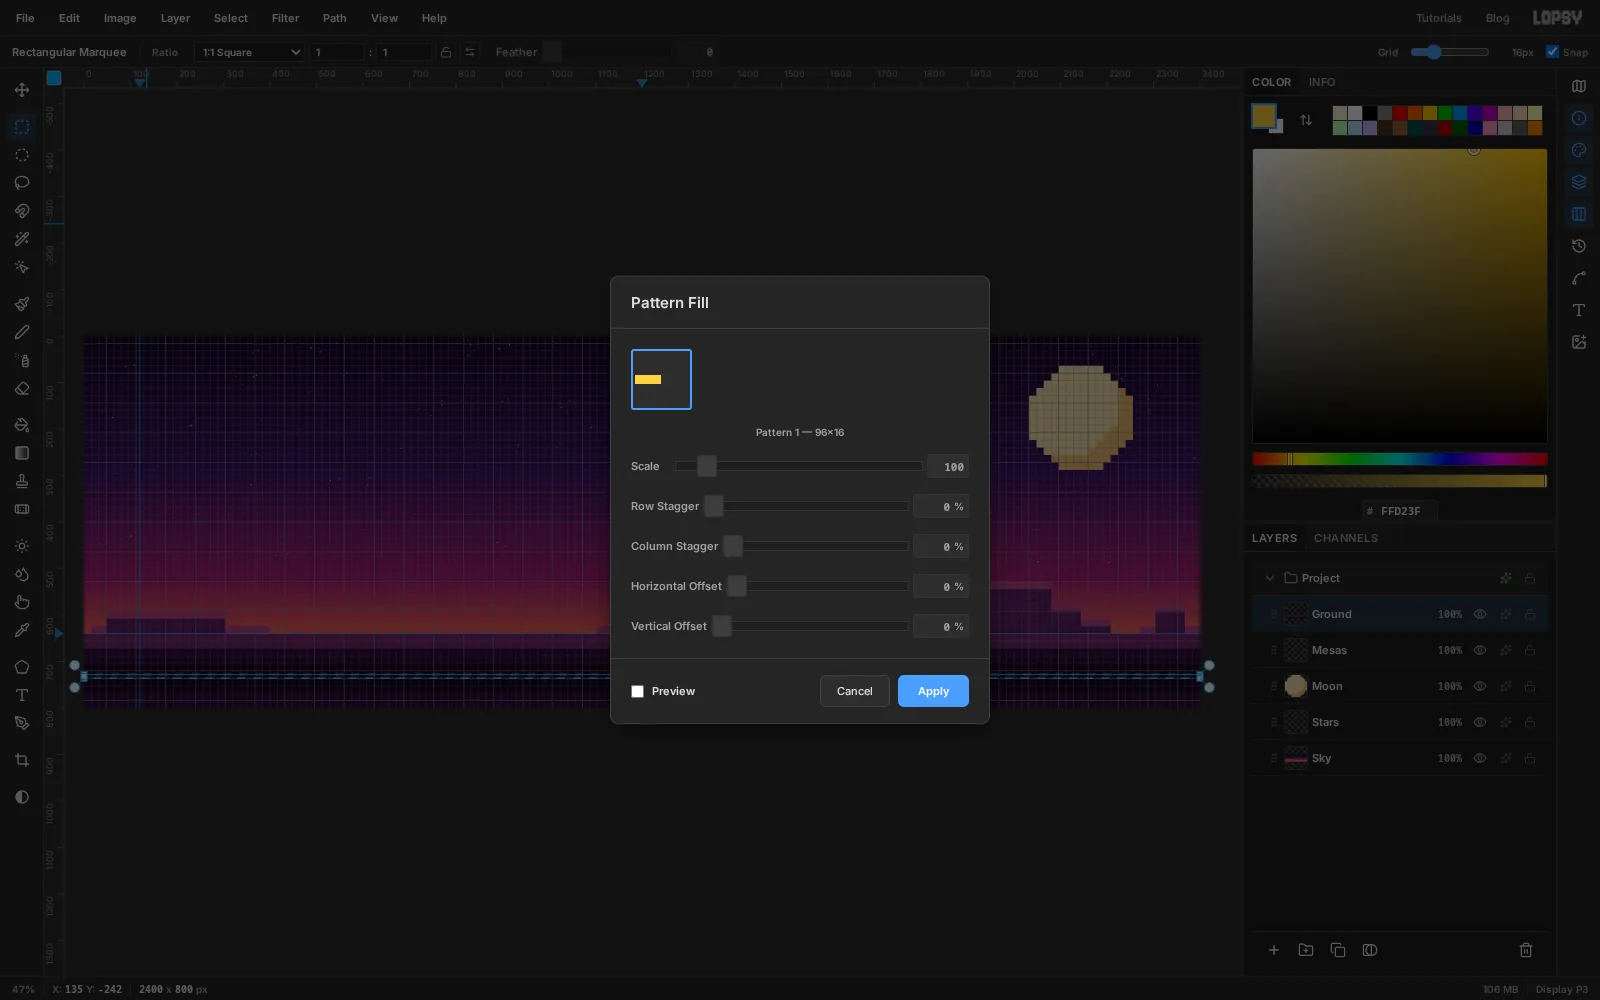
Dash Tilelayer and selectGround. - Drag a thin marquee along the middle of the road, from
0, 728to2400, 736, and choose Edit → Fill with Pattern…. Your new pattern is already selected, so click Apply, then press Cmd+D.
- Add a layer named
-
Draw one voxel cube with the Pen tool
Everything else is built from this cube, so take your time. Add a layer named
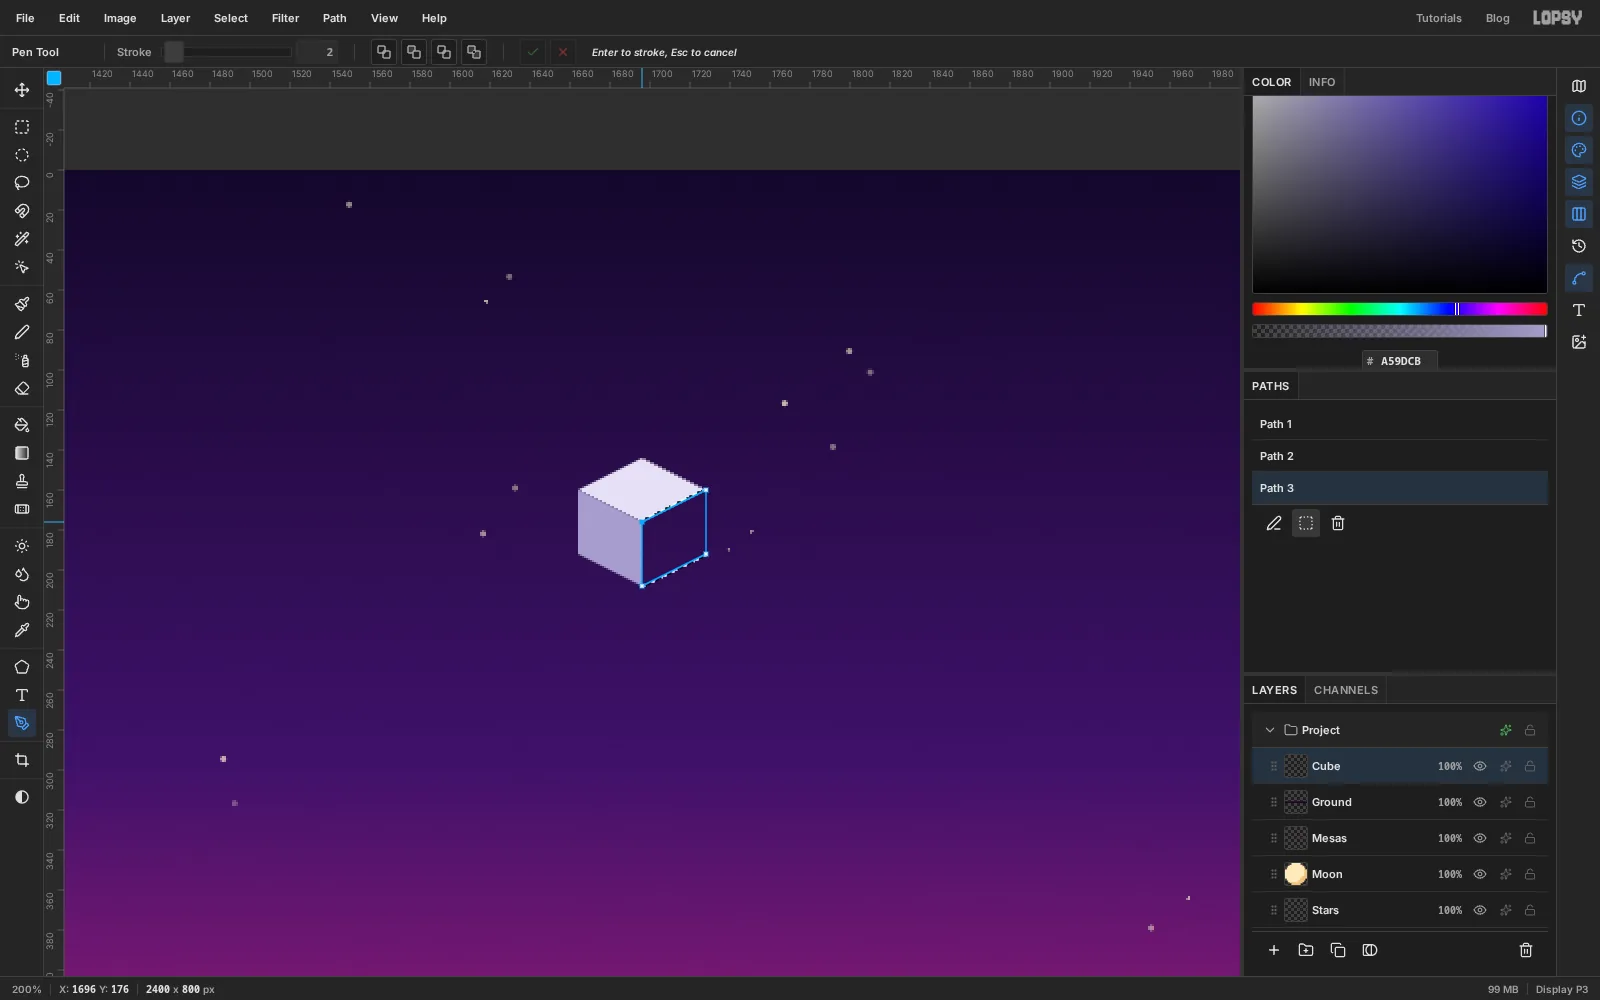
Cube, choose View → Zoom In four times (200%), and hold Space and drag until the area around1696, 176is in the middle of the window.Open the Paths panel from the panel toolbar on the far right (the curve icon). Pick the Pen tool (P). For each face, click its four corners, then click the first corner again to close the path. Click Path to Selection (the dashed-square button under the path list), fill, and press Cmd+D:
- Top:
1696, 144→1728, 160→1696, 176→1664, 160. Fill . - Left:
1664, 160→1696, 176→1696, 208→1664, 192. Fill . - Right:
1696, 176→1728, 160→1728, 192→1696, 208. Fill .
Before you start the second and third faces, click the previous path's row in the Paths panel to deselect it. Otherwise your first click lands on that path's corner anchor and drags it instead of starting a new path.
- Top:
-
Outline the cube with the Pencil
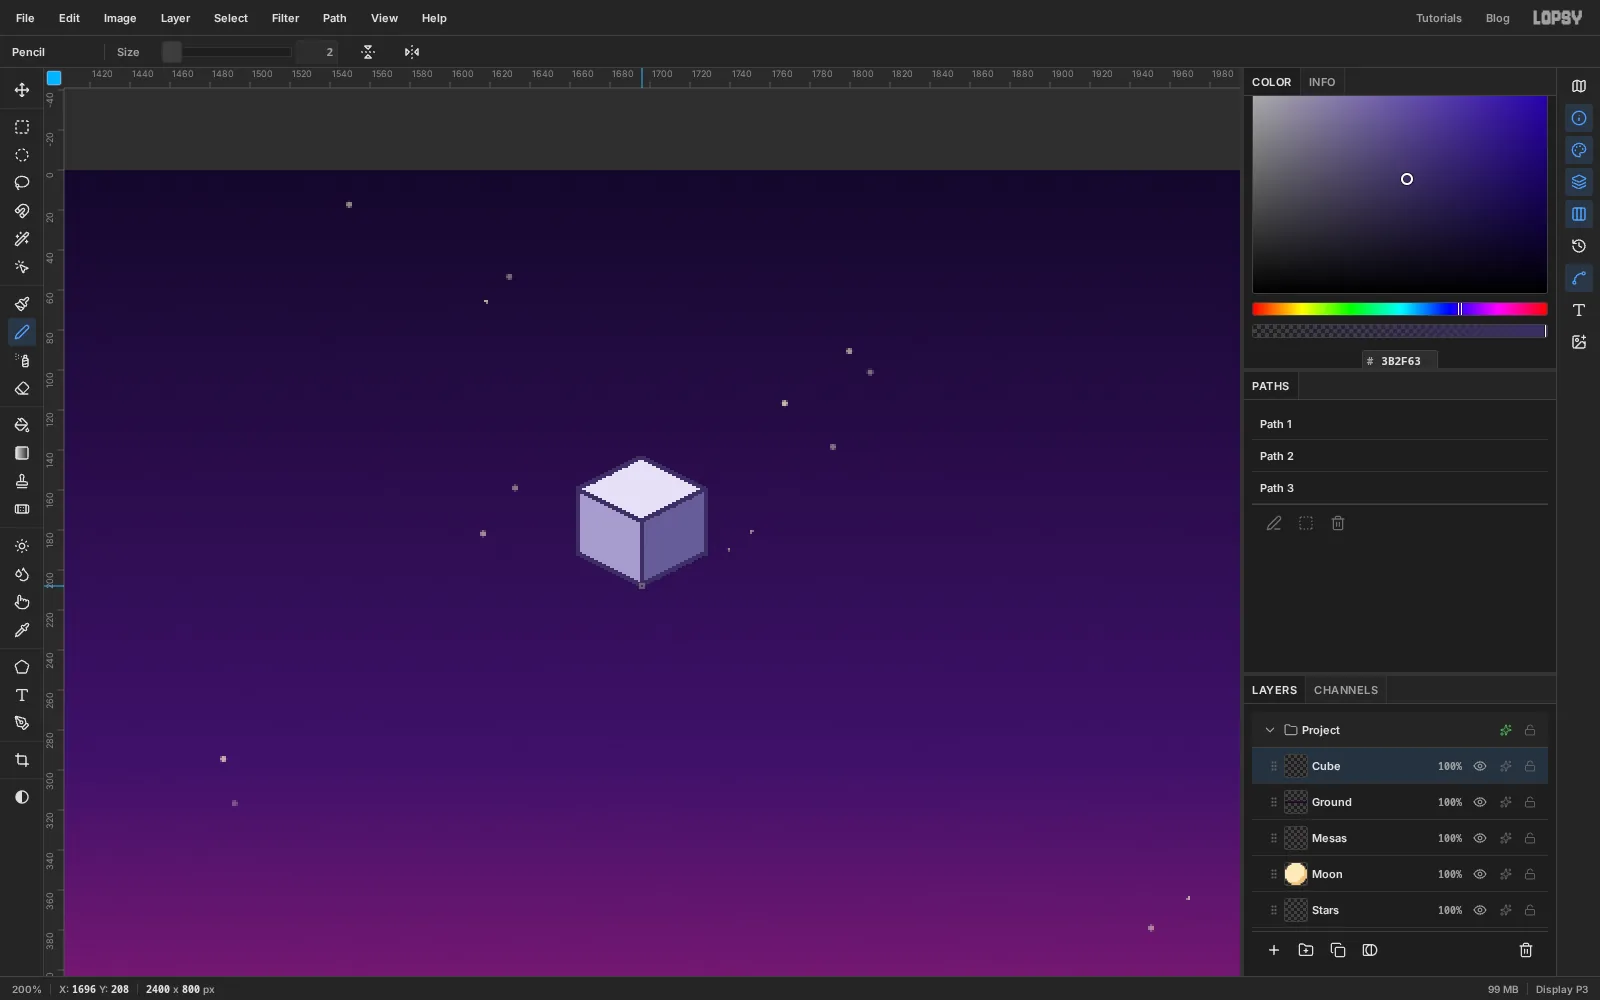
Pick the Pencil (N), set Size
2and the colour . Click the top corner of the cube, then hold Shift and click each corner around the outside to draw straight lines all the way round. Then draw the inner "Y": Shift-click lines from the left corner to the centre point, from the centre to the right corner, and from the centre straight down to the bottom corner.These lines are what let each cube read separately once they are packed together. Without them, a slab of cubes would merge into one flat shape.
-
Stamp a row of cubes with Alt-drag
Choose View → Fit to Screen. Check that the grid is still on with Snap ticked.
Click Duplicate Layer and rename the copy
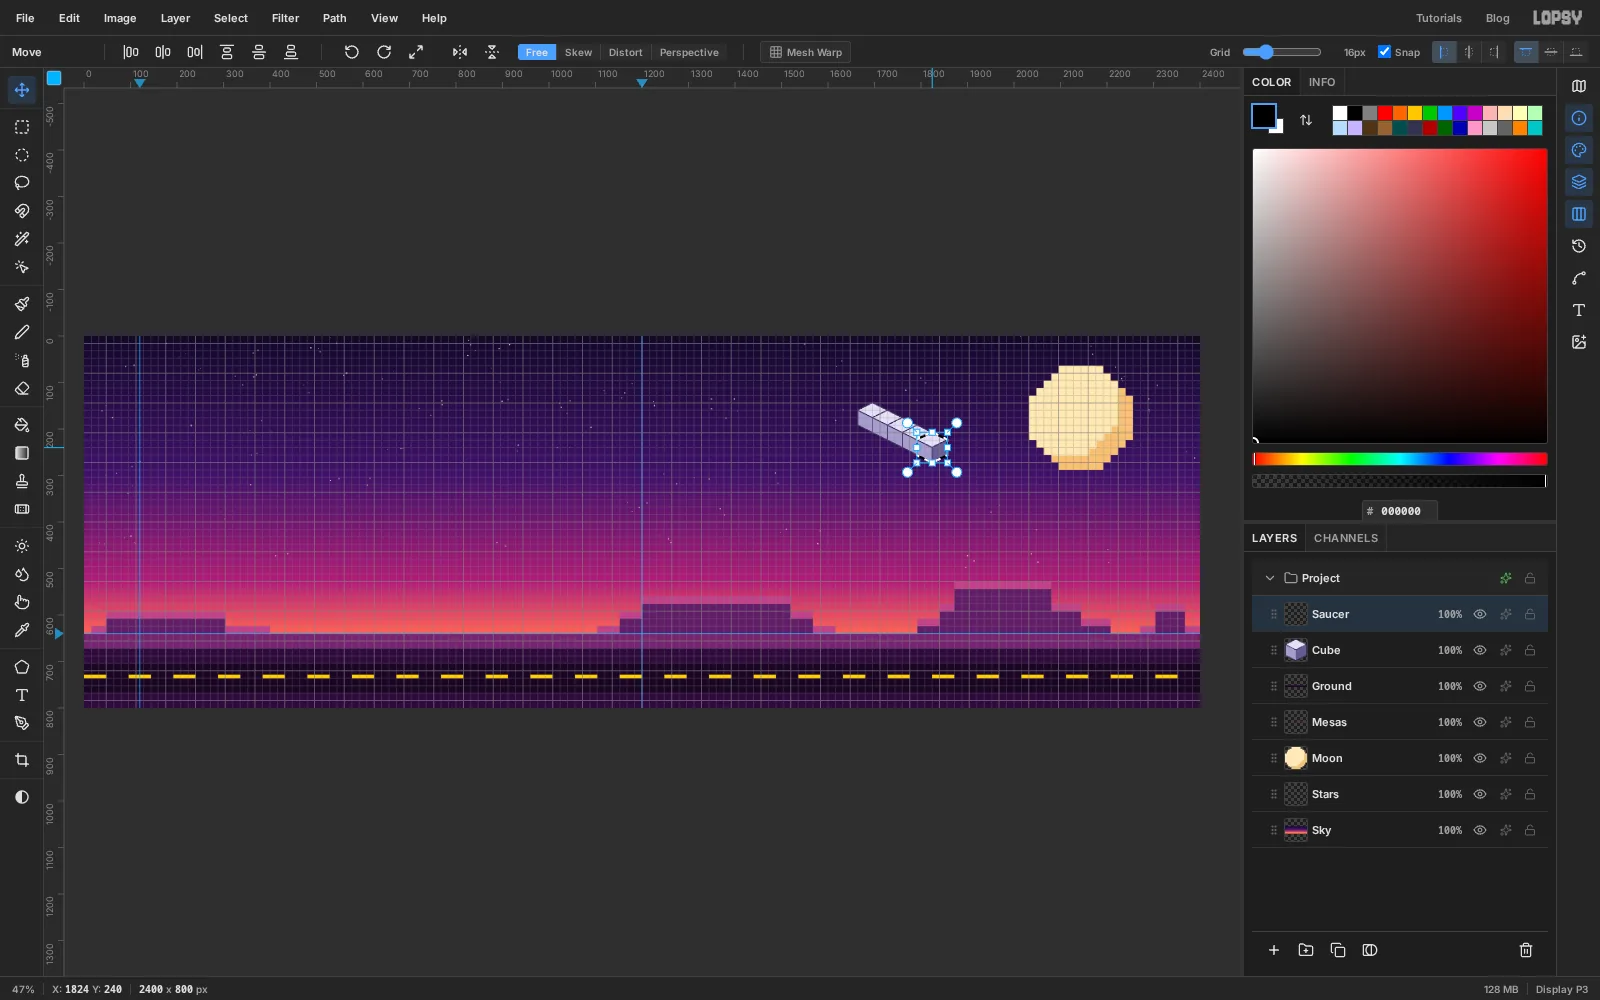
Saucer. Cmd-click its thumbnail to select the cube, then pick the Move tool (V). Hold Alt, press on the cube and drag it 32 px right and 16 px down, which is two grid cells across and one down. With snapping on, the copy lands exactly there.Do it three more times, each time dragging the newest copy, which is still selected. You get a row of five cubes, each one sitting in front of the one before.
-
Turn the row into a 5 × 5 slab
Press Cmd+D, then Cmd-click the
Saucerthumbnail again. Now the whole row is selected. Alt-drag it 32 px left and 16 px down, four times, always dragging the newest copy. That's the saucer: a flat 5 × 5 slab.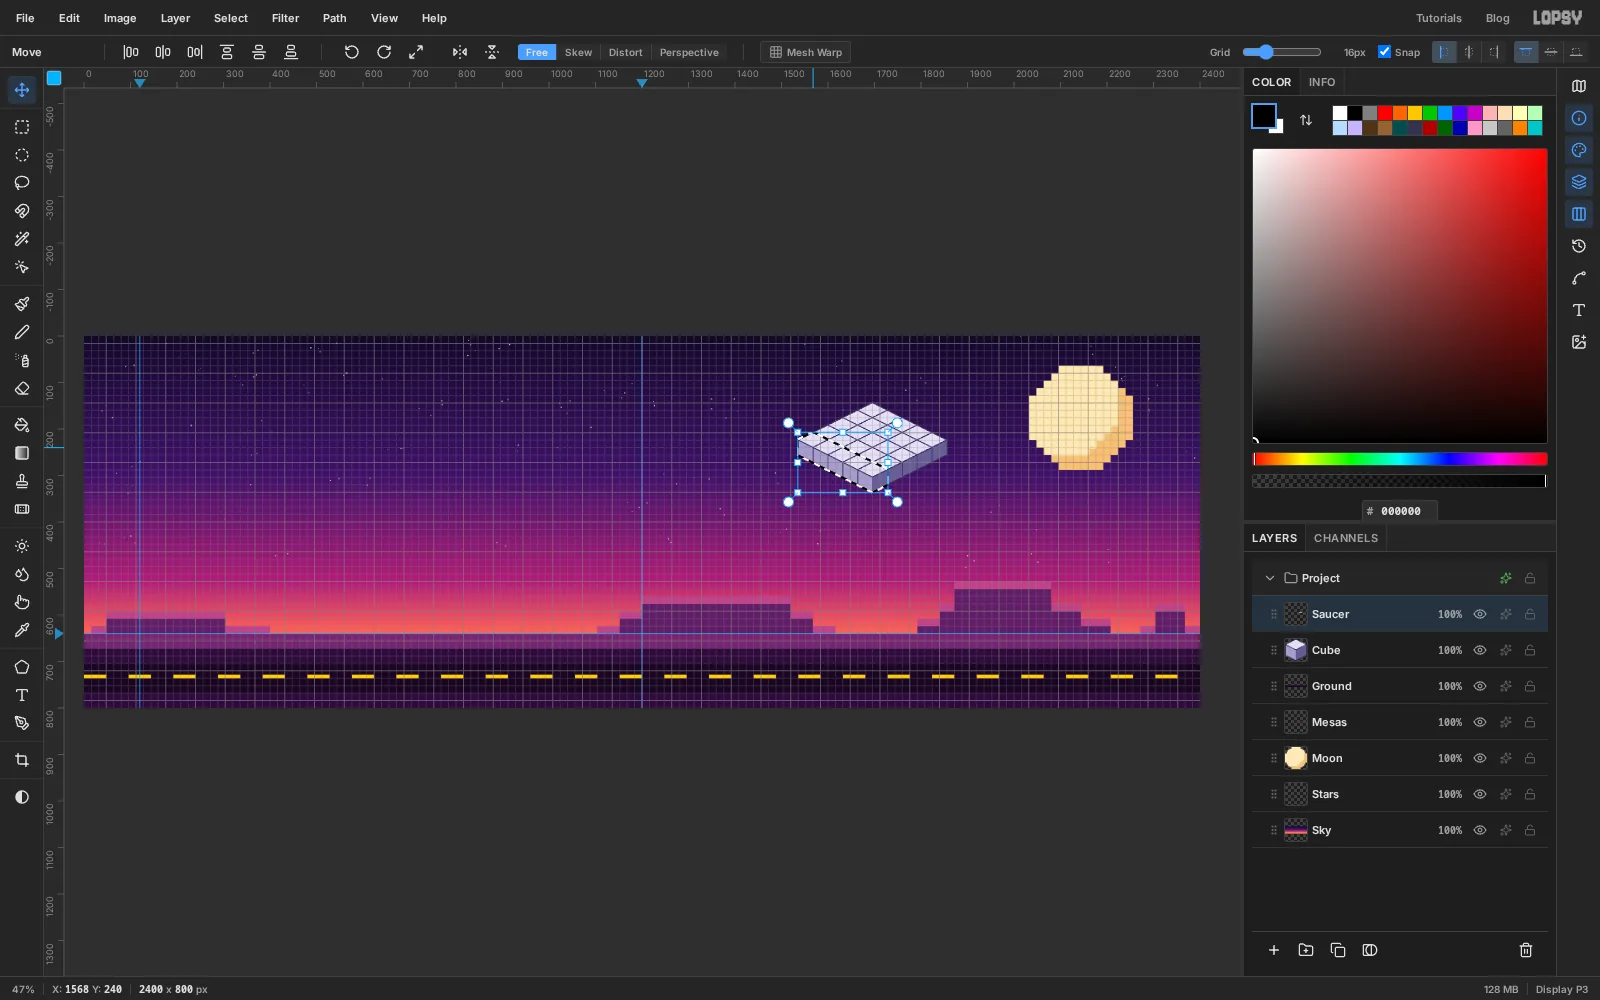
-
Add the belly
Select the
Cubelayer and click Duplicate Layer. Rename the copyBelly. It sits underSaucerin the stack, which is what you want.Recolour it with the Magic Wand. Pick the Magic Wand, untick Contiguous and set Tolerance to
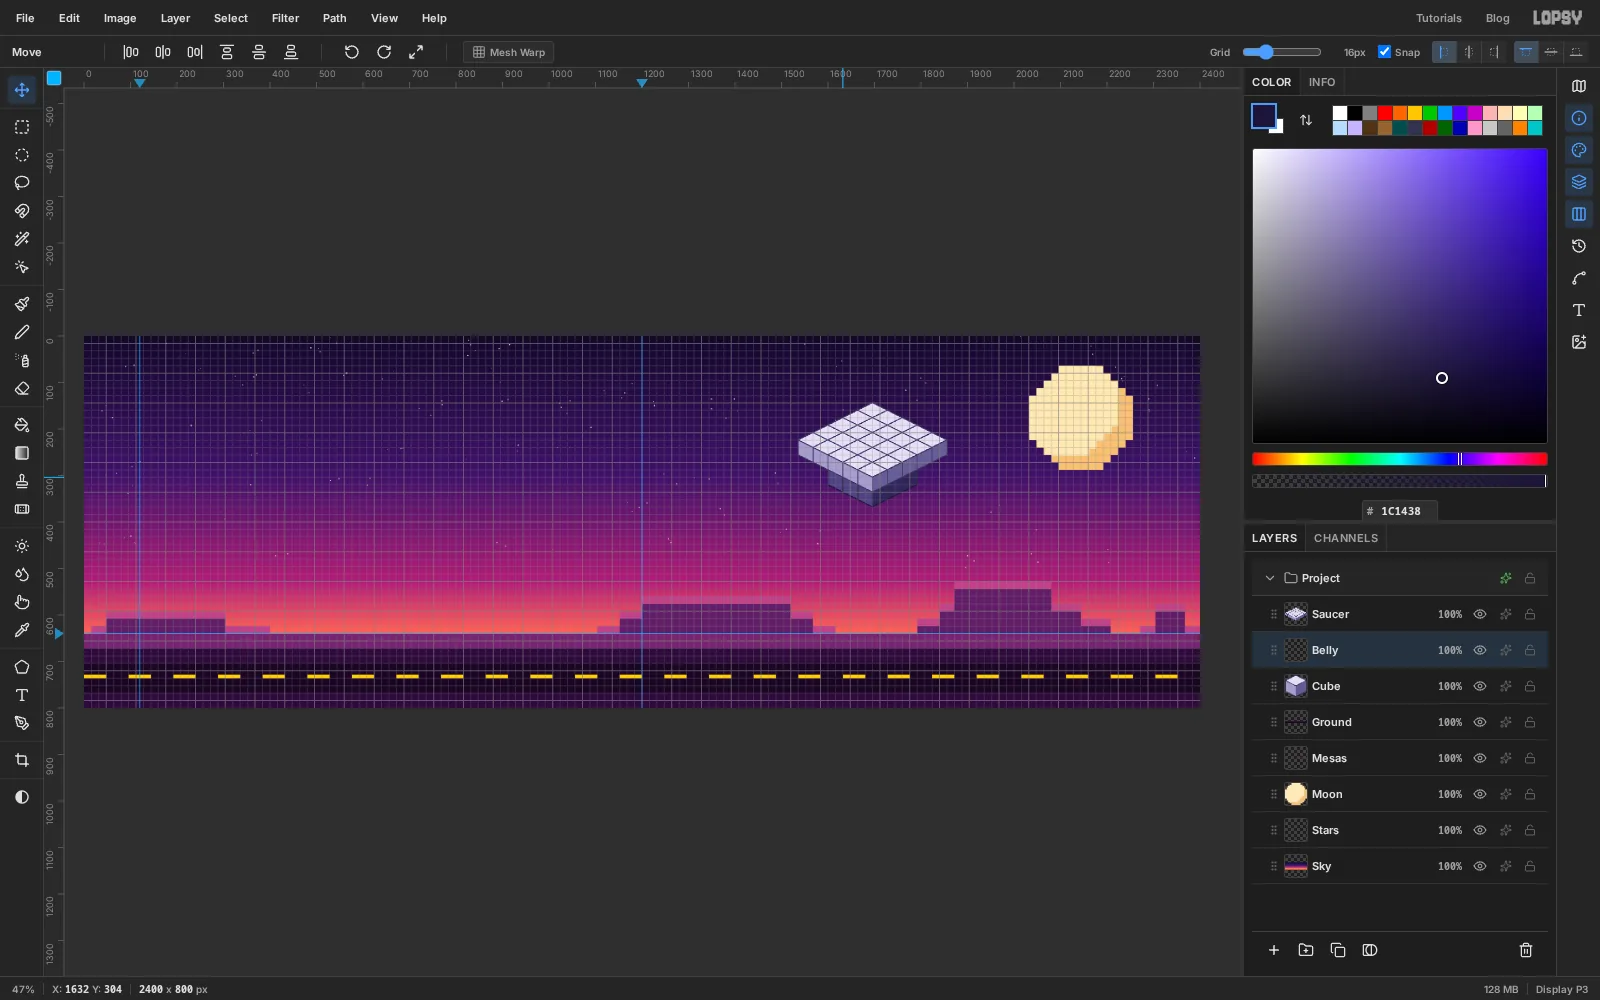
12. Then, for each colour, click the face, fill, and press Cmd+D: the top face with , the left face with , the right face with , and any outline with . With Contiguous off, each click picks up every pixel of that colour on the layer, which matters once there's more than one cube.Pick the Move tool and press Down to move the layer down six grid cells (96 px, three cubes' worth). With the grid on, each press moves one cell, so the cube stays on the lattice. Then build a 3 × 3 slab exactly as before: two Alt-drags down-right, Cmd+D, Cmd-click the thumbnail, two Alt-drags down-left. Only the bottom edge of the belly peeks out under the saucer. That's enough to give the ship some weight.
-
Stack the deck, dome and cap
The rest of the ship goes above the saucer, so this time copy and paste rather than duplicate. A paste lands right above the selected layer, in exactly the place it was copied from.
- Select
Cube, Cmd-click its thumbnail, press Cmd+C and then Cmd+D. - Select
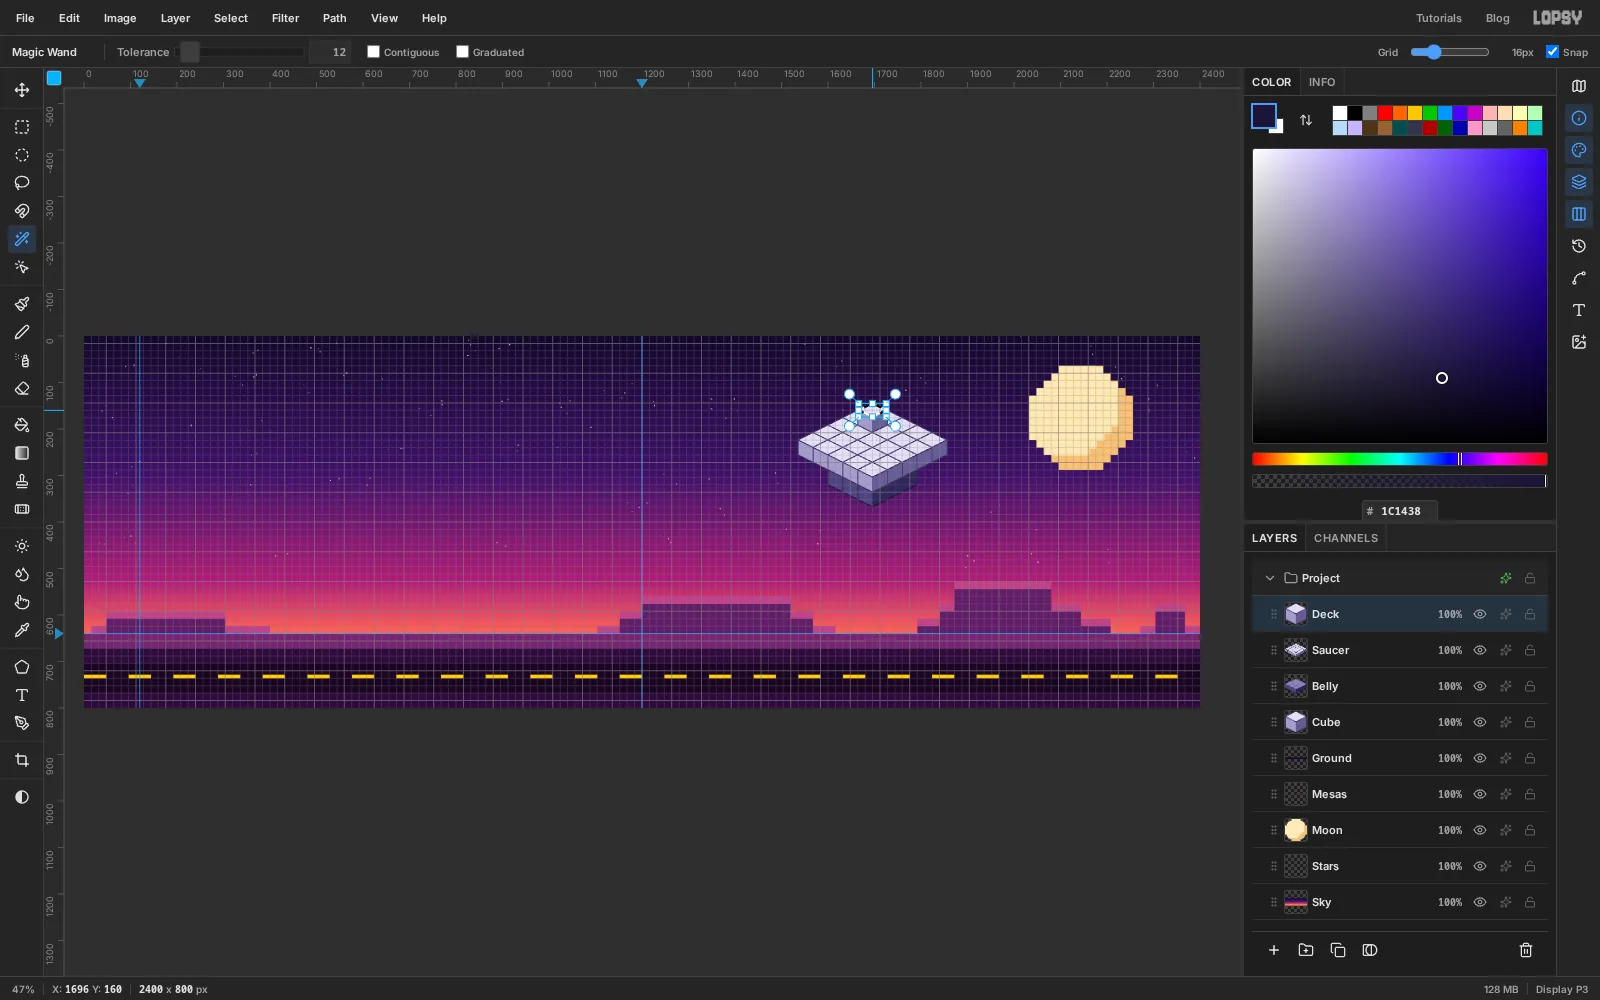
Saucerand press Cmd+V. Rename the new layerDeck, recolour it pink the same way ( top, left, right, outlines) and build a 3 × 3 slab. It already sits one level up and centred, so it needs no nudging. - Press Cmd+V again and rename the layer
Dome. With the Move tool, press Up once, recolour it as glass (, , , outlines ) and build a 2 × 2 slab. - Press Cmd+V once more for
Cap, press Up twice and recolour it as glass. It's a single cube on top.
- Select
-
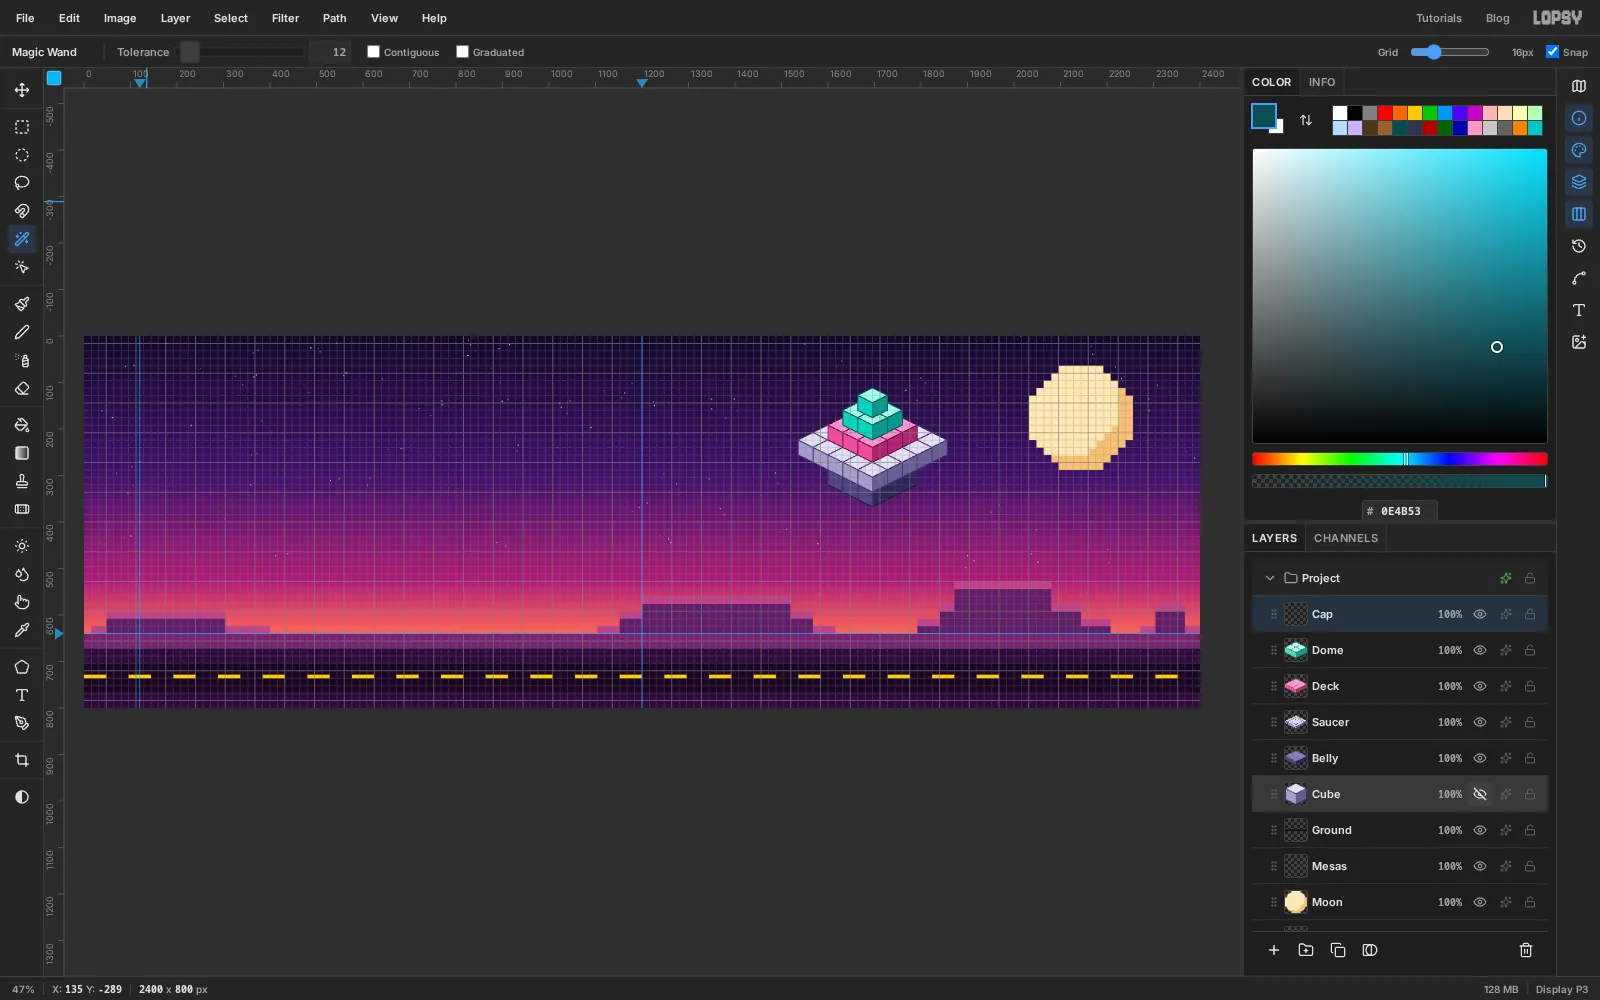
Check the finished ship
Click the eye on the
Cubelayer to hide it. Keep it, because the burger and the cacti are copied from it too.The ship is four layers stacked like a ziggurat, and every cube is a copy of the one you drew.
-
Light the portholes
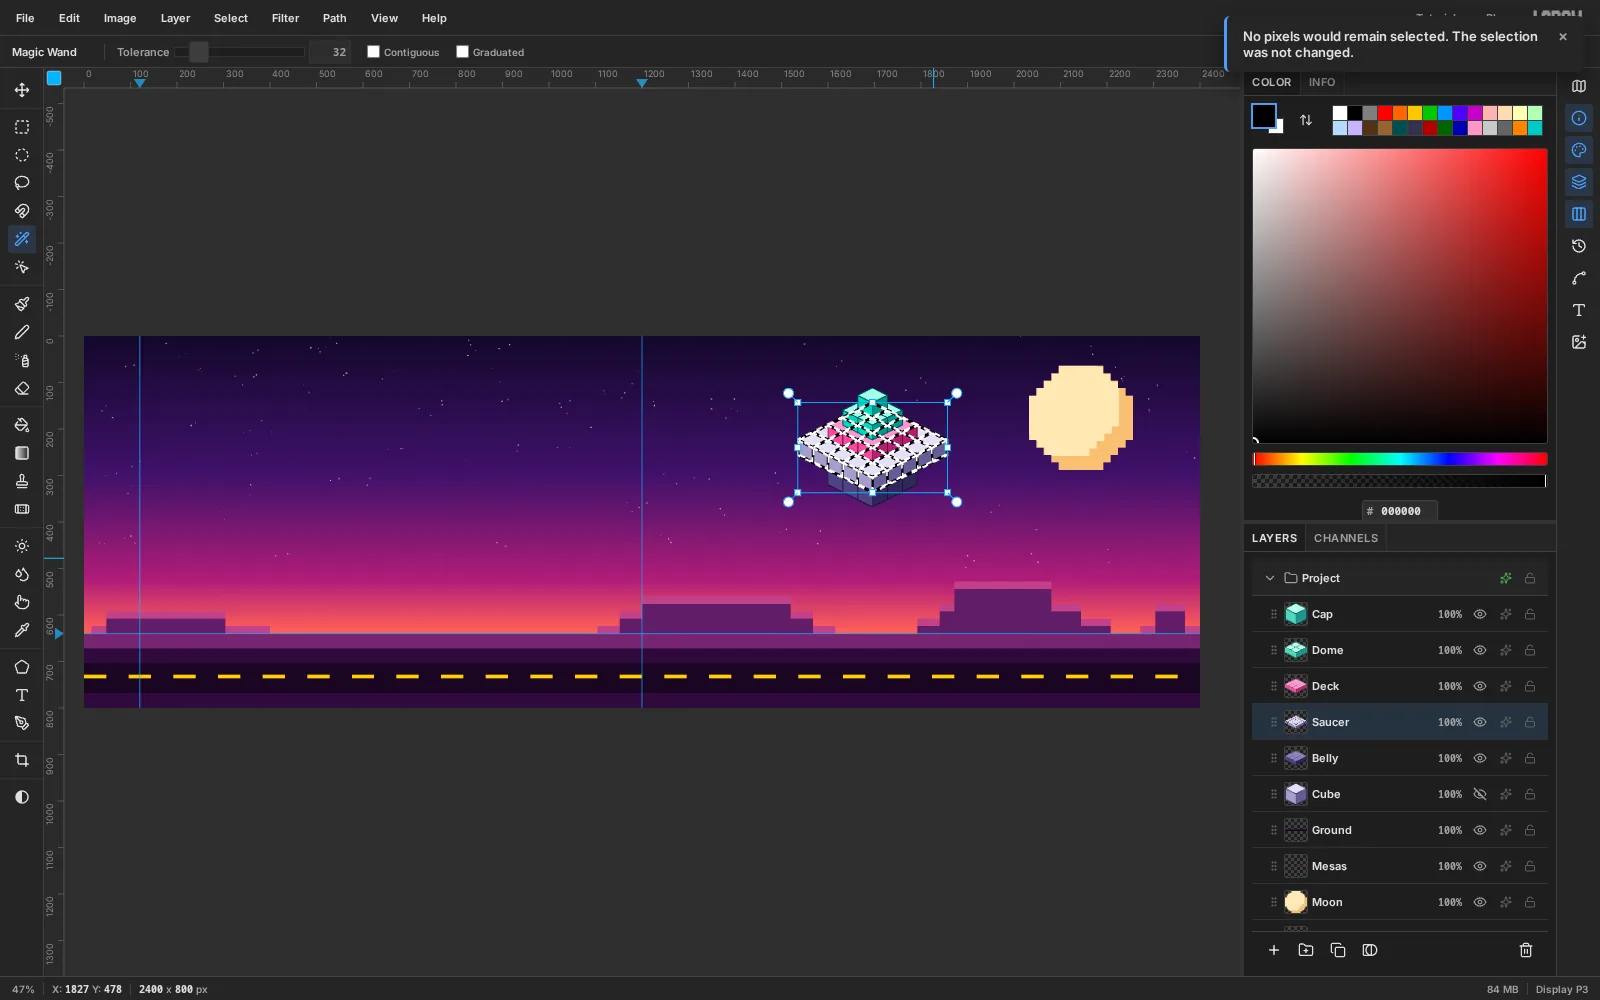
- Select
Saucer. With the Magic Wand (Contiguous still off), click any left face, then Shift-click any right face to add it. Every side face of the saucer is now selected. - Choose Select → Shrink… and shrink by
7px. Each face becomes a smaller window set inside it. - Click Add Layer, name it
Lights, fill with and press Cmd+D. - Click the effects button (the sparkle icon) on the
Lightsrow and turn on Outer Glow: Size18, Opacity85, colour .
- Select
-
Group the UFO
Click
Belly, Shift-clickCap, and choose Layer → Group Layers. Rename the groupUFO.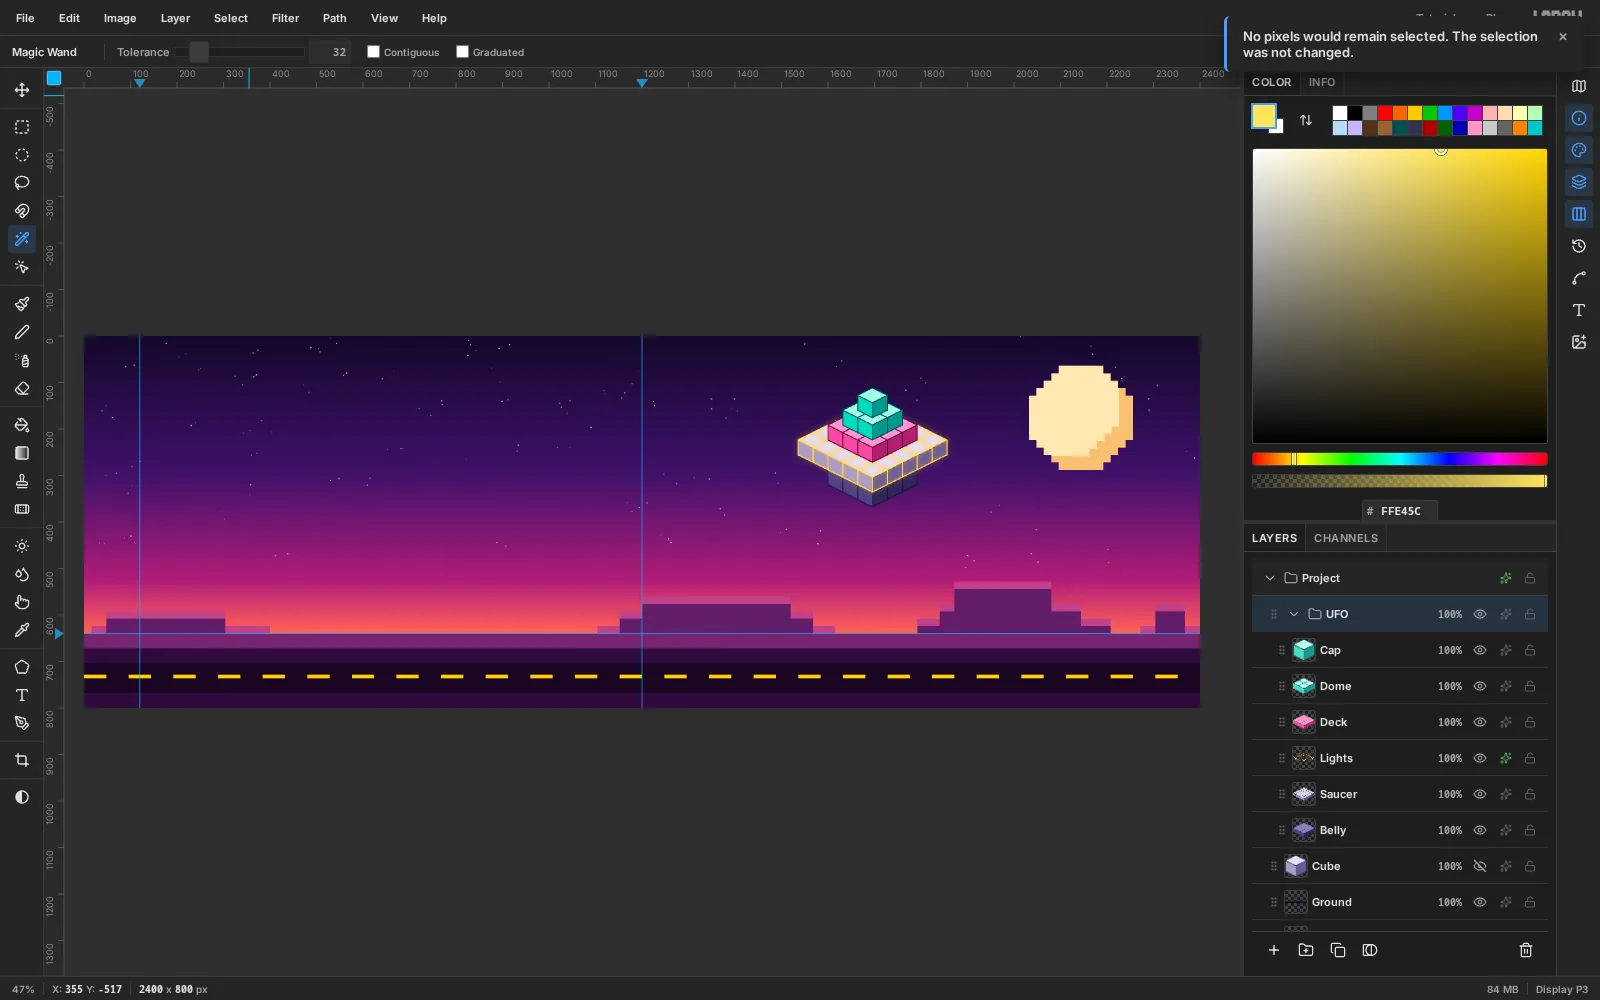
-
Draw the tractor beam
Hide the grid with Cmd+'. Select
Groundand add a layer namedBeam, so the beam sits behind the ship.With the Lasso (L), draw a trapezoid: start under the belly at about
1640, 352, go across to1752, 352, down to the road at1992, 704, across to1400, 704and back up. Then pick the Gradient tool and set three stops in Advanced…: at 95% opacity, at 50% opacity at about 55% along, and at 12% opacity at the end. Shift-drag from the top of the beam to the road, press Cmd+D, and set the layer's blend mode to Screen.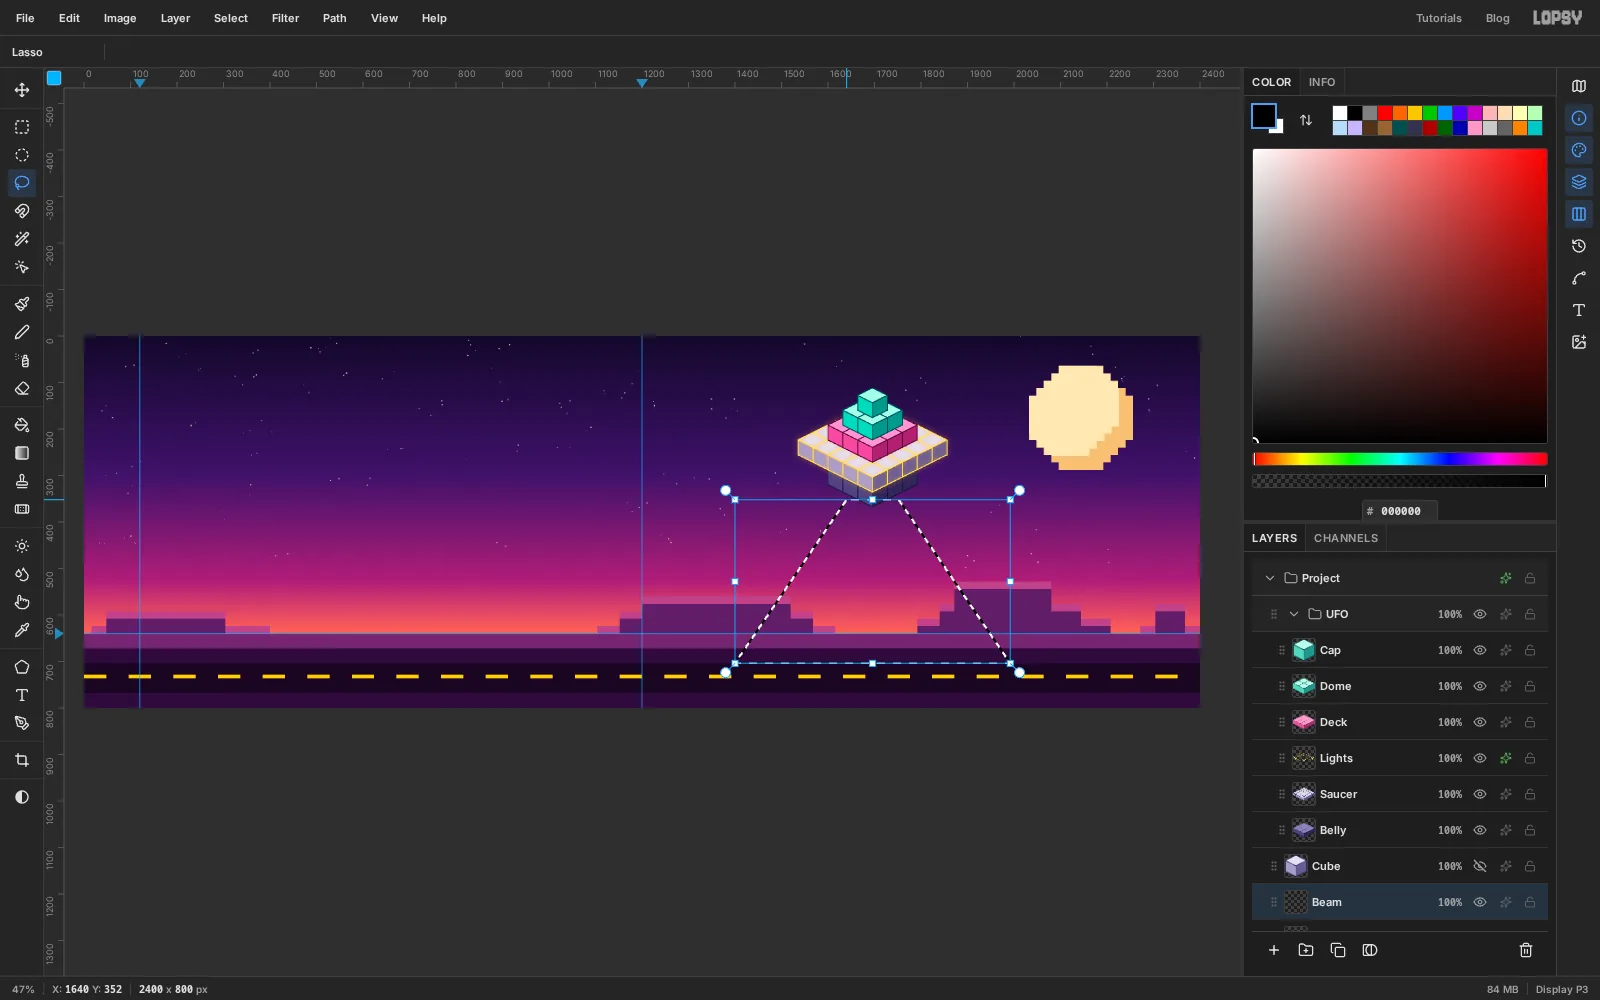
-
Add a pool of light on the road
Add a layer named
Beam Glow. Pick the Elliptical Marquee, set Feather to30, and drag a wide, flat ellipse where the beam touches the road, about 660 × 92 px centred at1696, 700. Fill with , press Cmd+D, set the layer to Screen, and put Feather back to0so it doesn't soften your next marquee.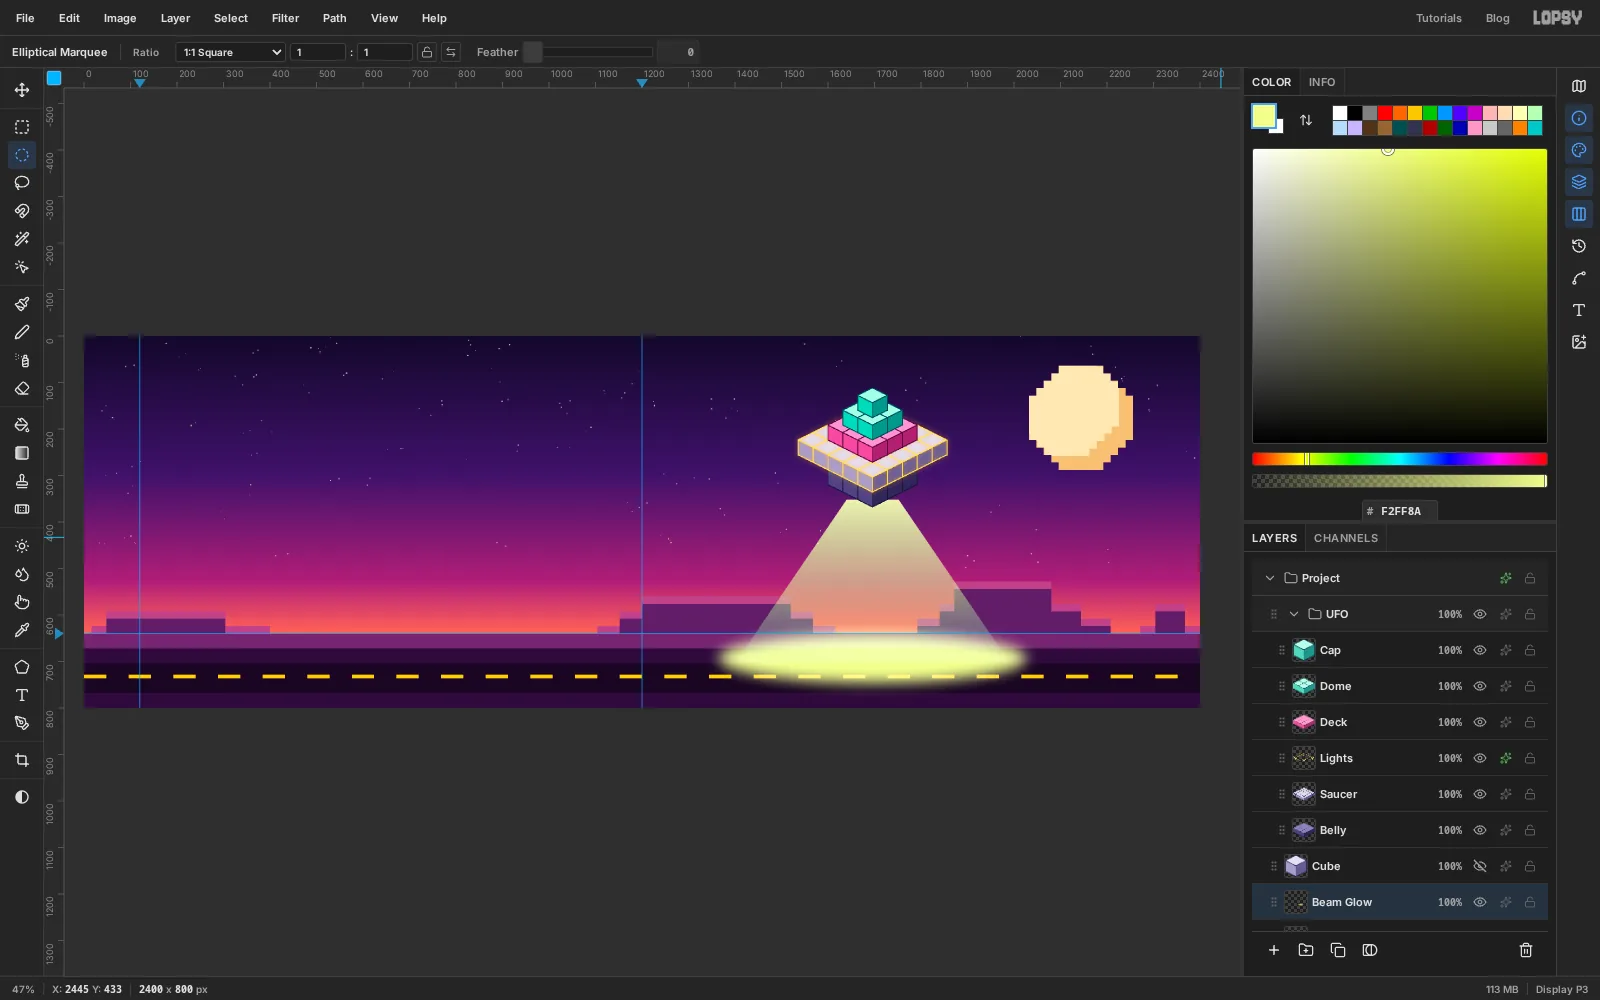
-
Build the burger
Turn the grid back on. Copy the
Cubelayer's cube again (as before), selectBeam Glowand paste. Rename the new layerBun Bottom. With the Move tool, hold Down until the cube has dropped 24 cells (384 px) into the middle of the beam. Recolour it (, , , outlines ) and build a 3 × 3 slab.Now each layer of the burger is a copy of the one below it, raised one cube:
- Click Duplicate Layer, rename the copy
Patty, press Up twice (32 px), and recolour it (, , , outlines ). - Do the same for
Lettuce(, , , outlines ). - And for
Bun Top(, , , outlines ).
When you recolour a duplicate, click the side faces of the front cube, the one at the bottom of the diamond. The back cubes' sides are hidden behind their neighbours, so a click there lands on the wrong colour.
Finally, pick the Pencil at size
4with and click a dozen sesame seeds over the top bun.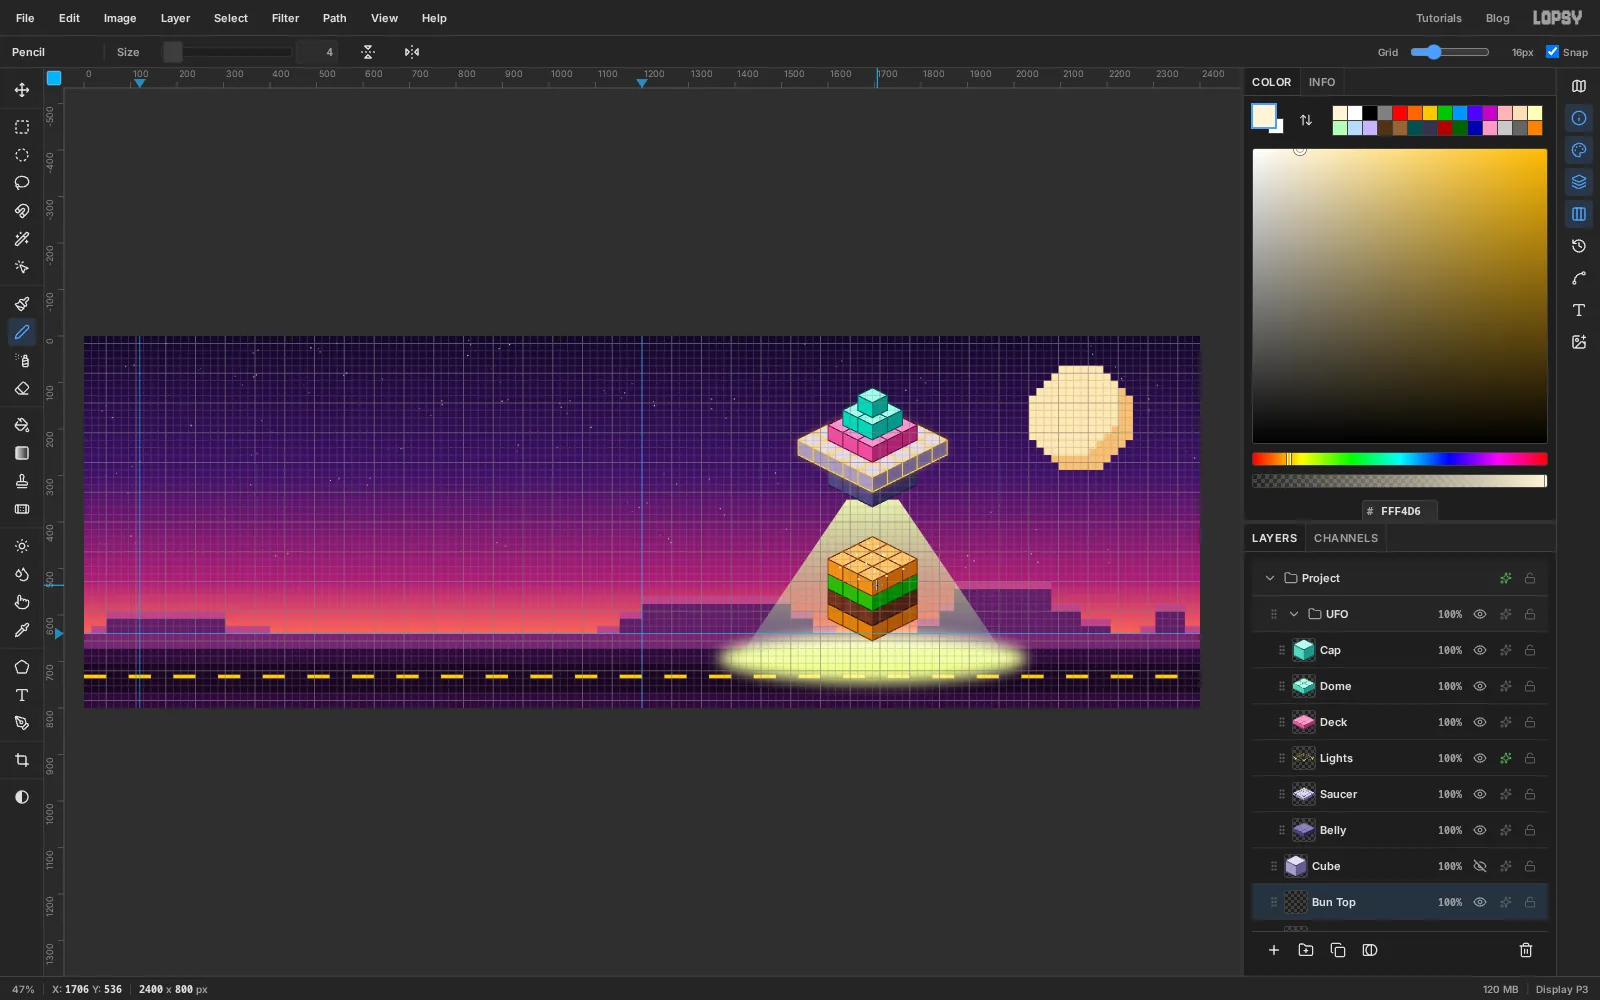
- Click Duplicate Layer, rename the copy
-
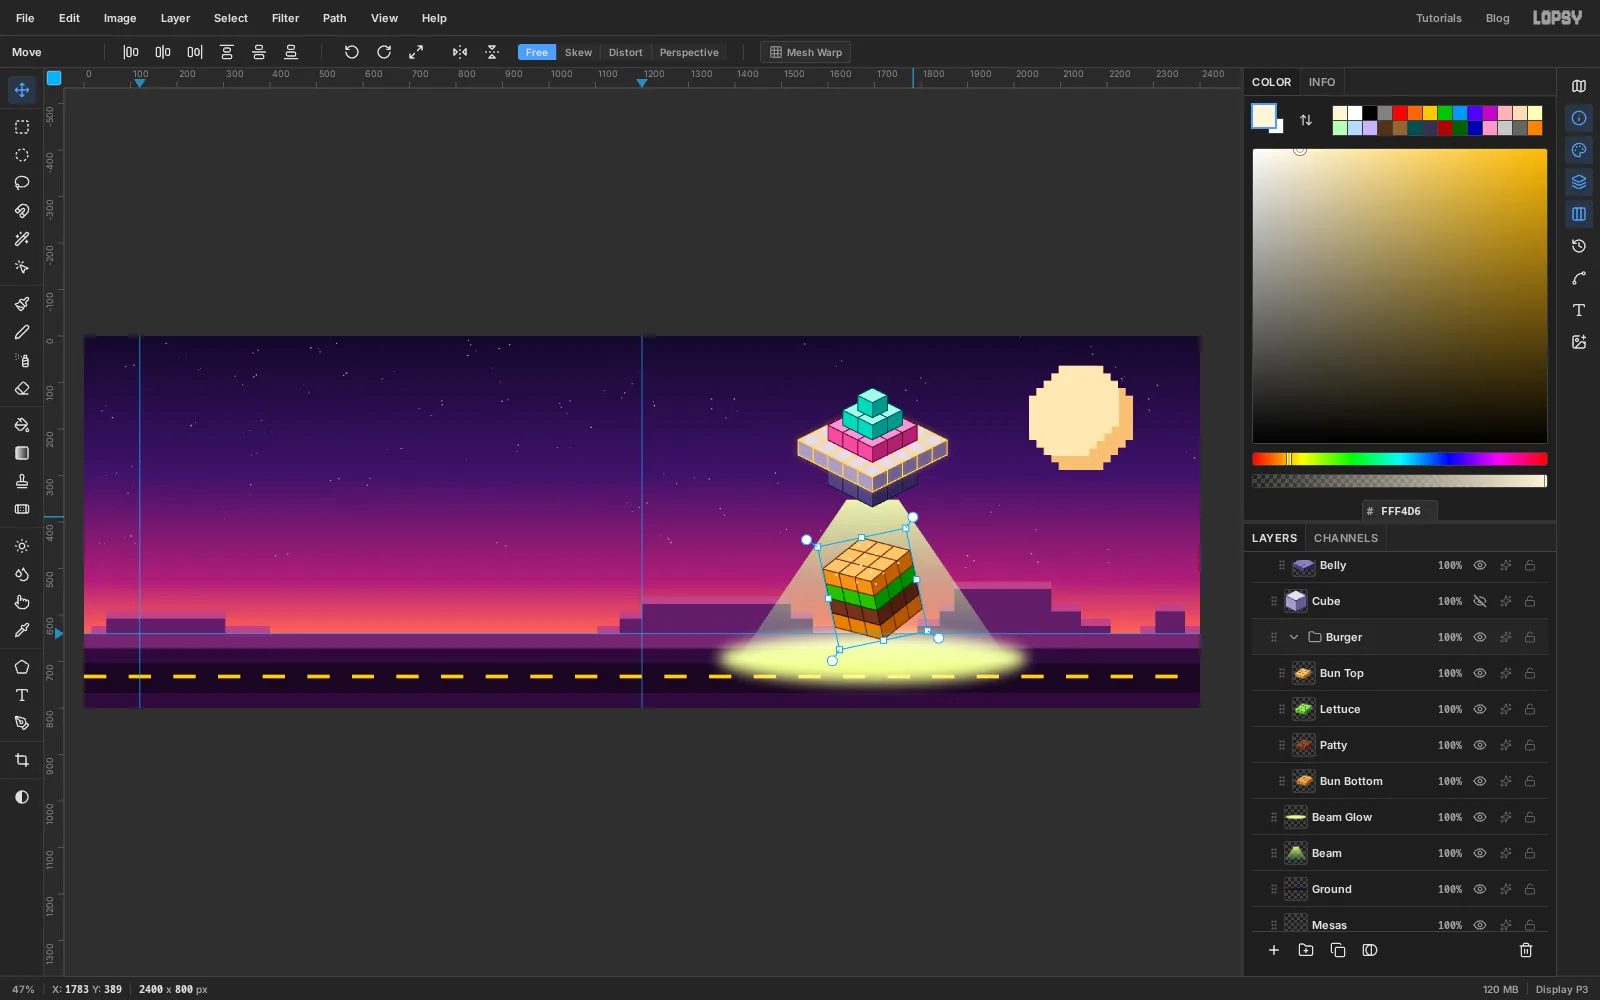
Tilt the burger as it's beamed up
Click
Bun Bottom, Shift-clickBun Top, choose Layer → Group Layers and rename the groupBurger. Hide the grid, so the rotation isn't snapped to 15° steps.Pick the Move tool. Handles appear around the whole group. Press just outside a corner, where the cursor turns into a rotate arrow, and drag about 12° anticlockwise. Press Enter to apply it. Rotating the group turns all four layers about one shared centre, so the burger keeps its shape.
-
Build a voxel cactus
With the grid on, copy the cube again, select
Groundand paste. Rename the layerCactus. With the Move tool, hold Left and then Down to slide it, a cell at a time, into the empty sky between the headline area and the UFO (about 640 px left and 224 px down). You'll build it there at full size where it's easy to see, and shrink it later. Recolour it (, , , outlines ).Cmd-click its thumbnail and stamp the rest with Alt-drags. Each drag starts on the newest copy, which is always the selected one:
- The trunk: five Alt-drags straight up, 32 px each, for a column of six cubes.
- The right arm: Alt-drag the top cube down so the copy sits one step down-right of the second cube from the bottom. Then add one more copy a step further down-right, and two more straight up from there.
- The left arm: Alt-drag the last copy across so the new one sits one step down-left of the third cube from the bottom. Then add one more a step further down-left, and two straight up.
Both arms come out towards you and then turn upwards, so the trunk stays visible between them. They are also in front of the trunk, so stamping them after it keeps the back-to-front rule. Press Cmd+D, then use the Pencil at size
10with to dot a flower on top of the trunk and on each arm.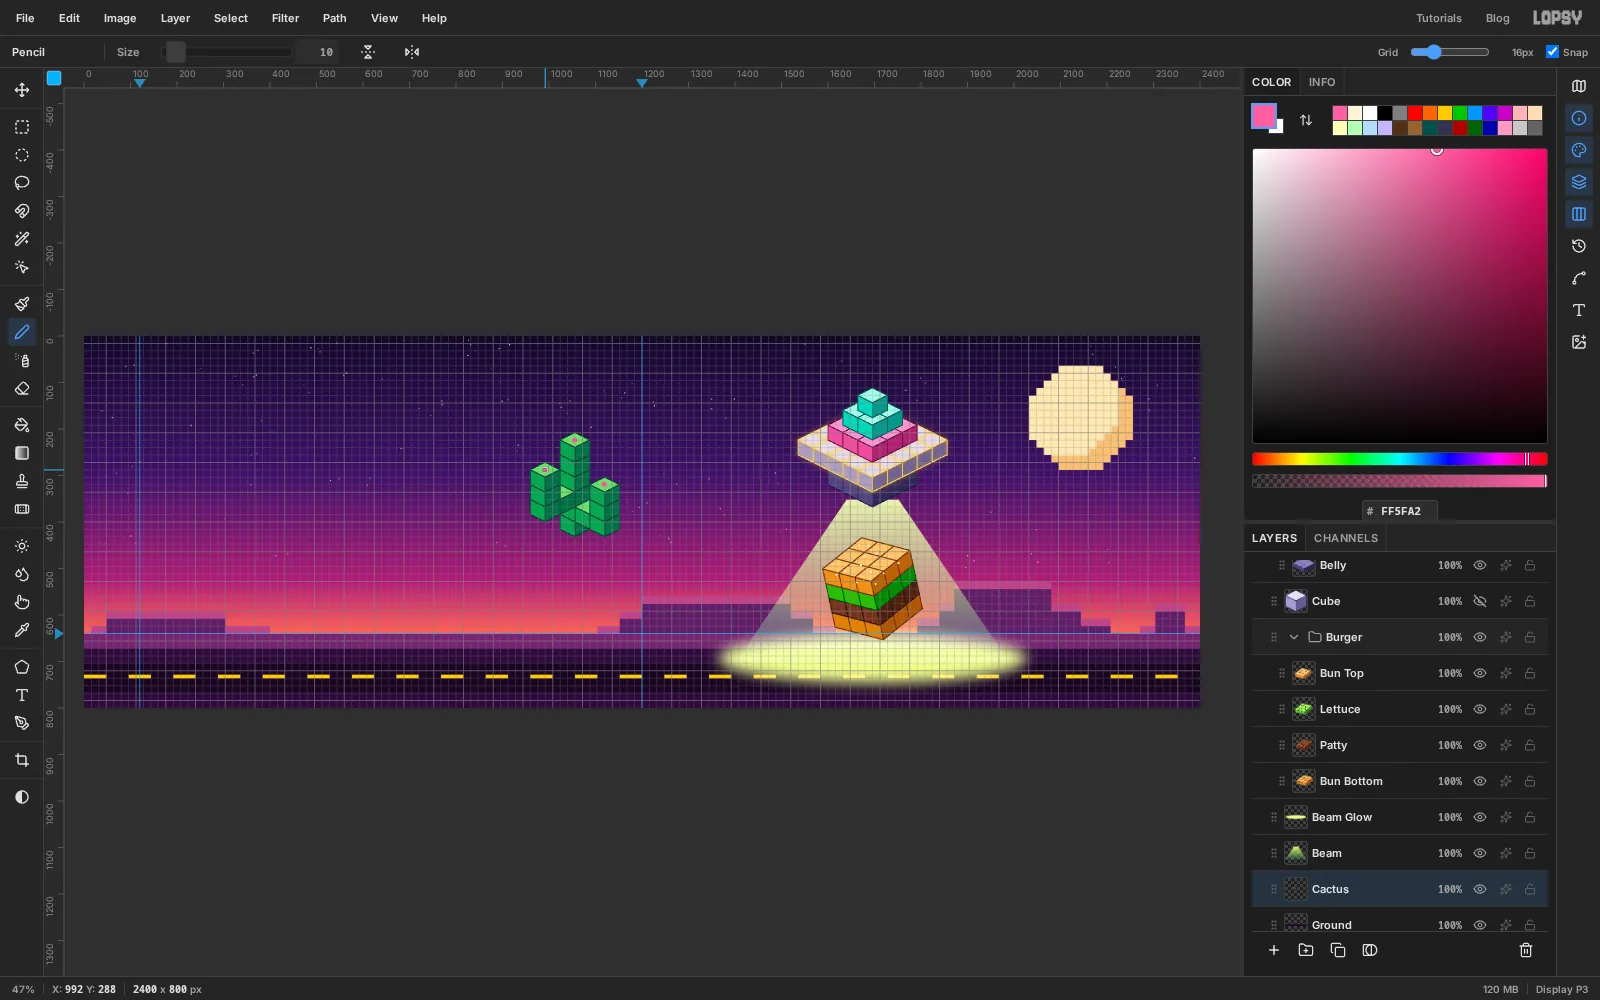
-
Shrink the cactus and plant it
Hide the grid. Cmd-click the
Cactusthumbnail and pick the Move tool. Hold Cmd (to scale evenly) and drag the bottom right handle in until the cactus is about 70% of its size. Then drag from inside the cactus to stand it on the ground at the left of the beam, with its base just above the road, around x1235. Press Cmd+D.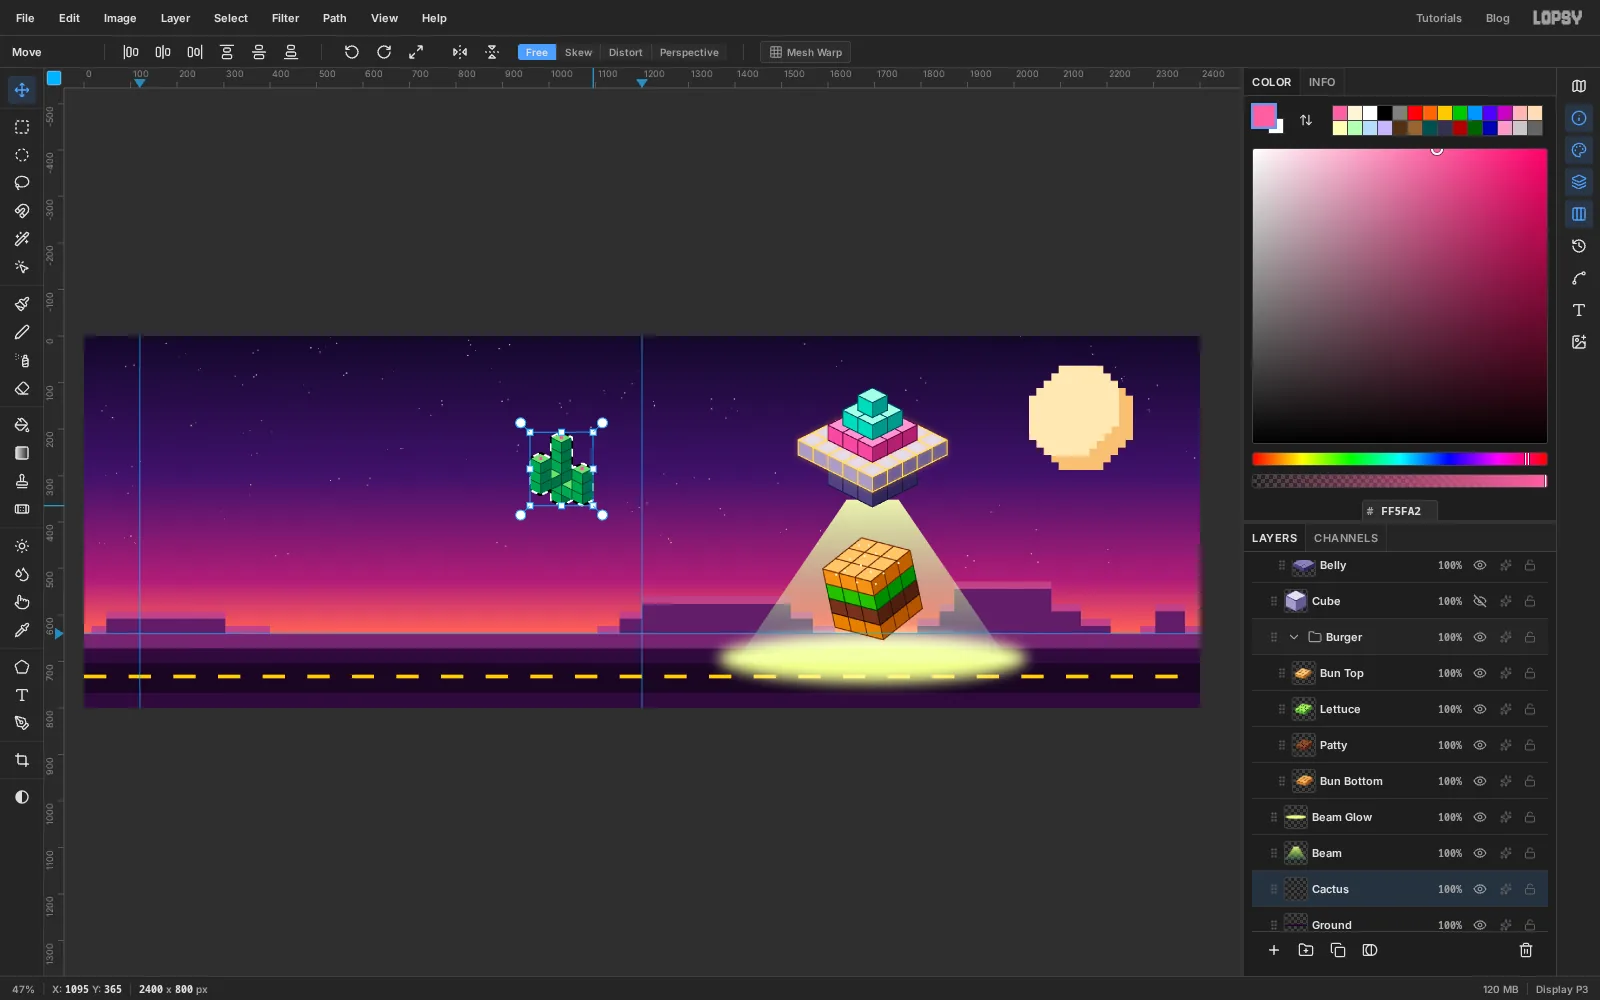
-
Add a mirrored twin
Cmd-click the thumbnail again, press Cmd+C, Cmd+D and Cmd+V. Rename the copy
Cactus 2and choose Image → Flip Horizontal. Select its pixels and drag it to the right-hand side of the board, around x2235, setting it a few pixels lower than the first one so the pair doesn't look copy-pasted.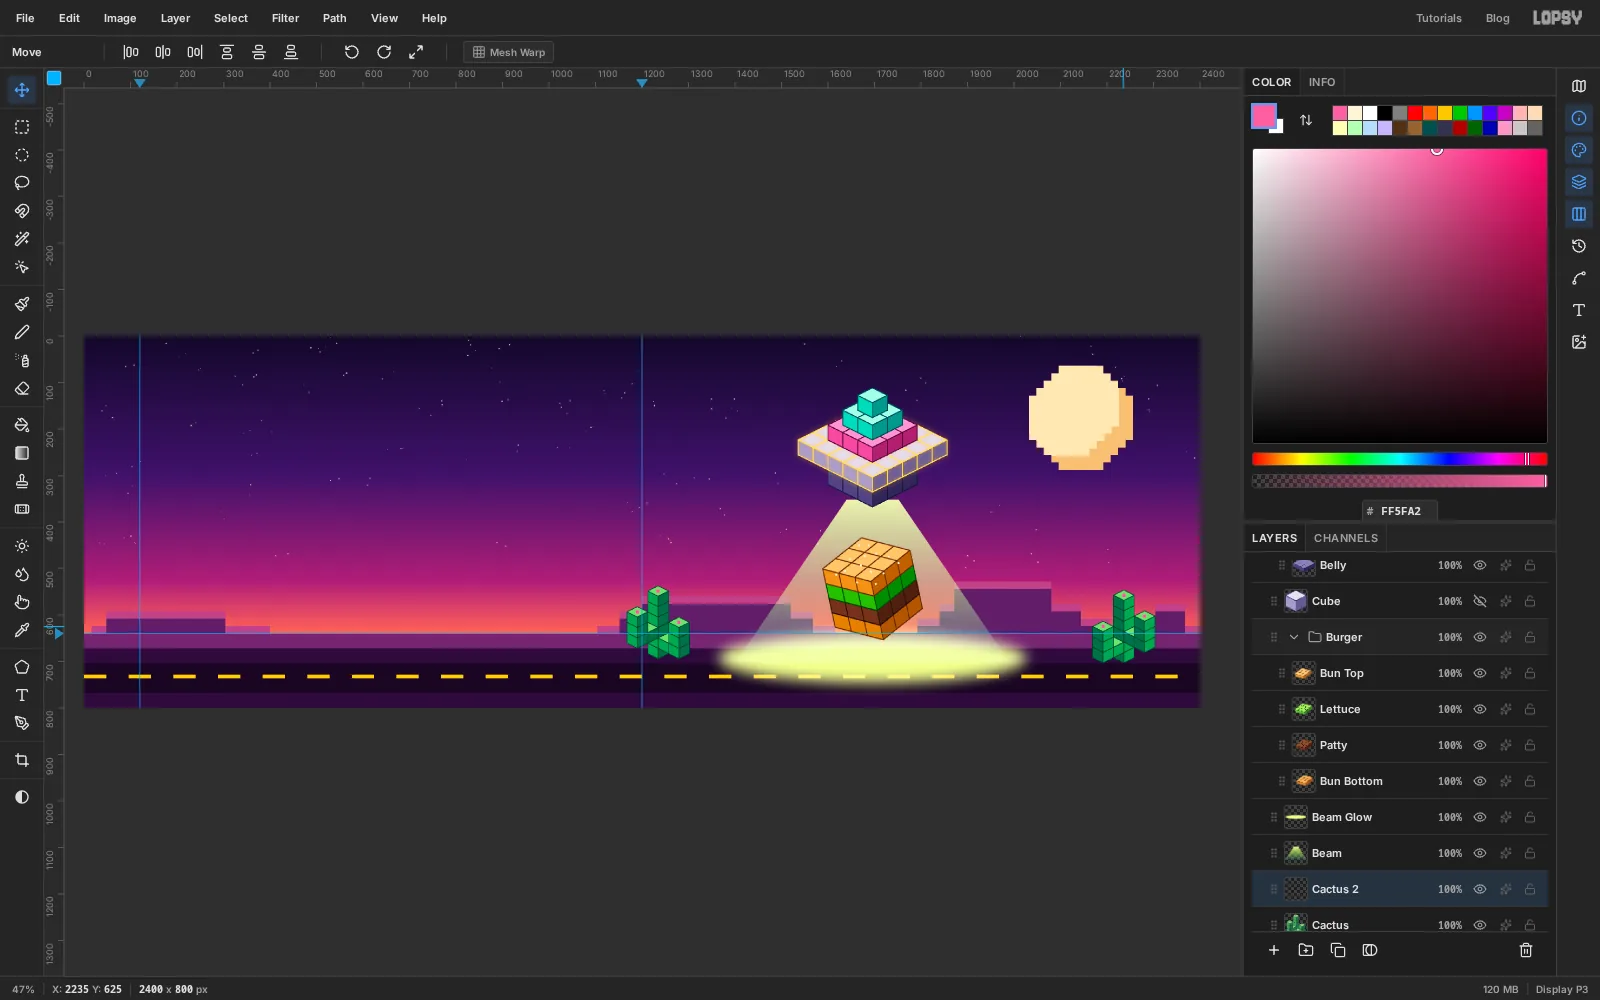
-
Set the headline
Select
Beam Glowfirst. When a text layer is selected, the Text tool's settings restyle that layer, so always start new text from an ordinary layer.Pick the Text tool (T), choose Silkscreen, Bold, size
440, colour . Click near the top left, typeUFOand press Tab to commit. Rename the layerUFO Title. In the Text panel, set Letter spacing to-20px to pull the letters closer together.With the Move tool, use the arrow keys to put the left edge of the U on the guide at x
120, about 56 px from the top.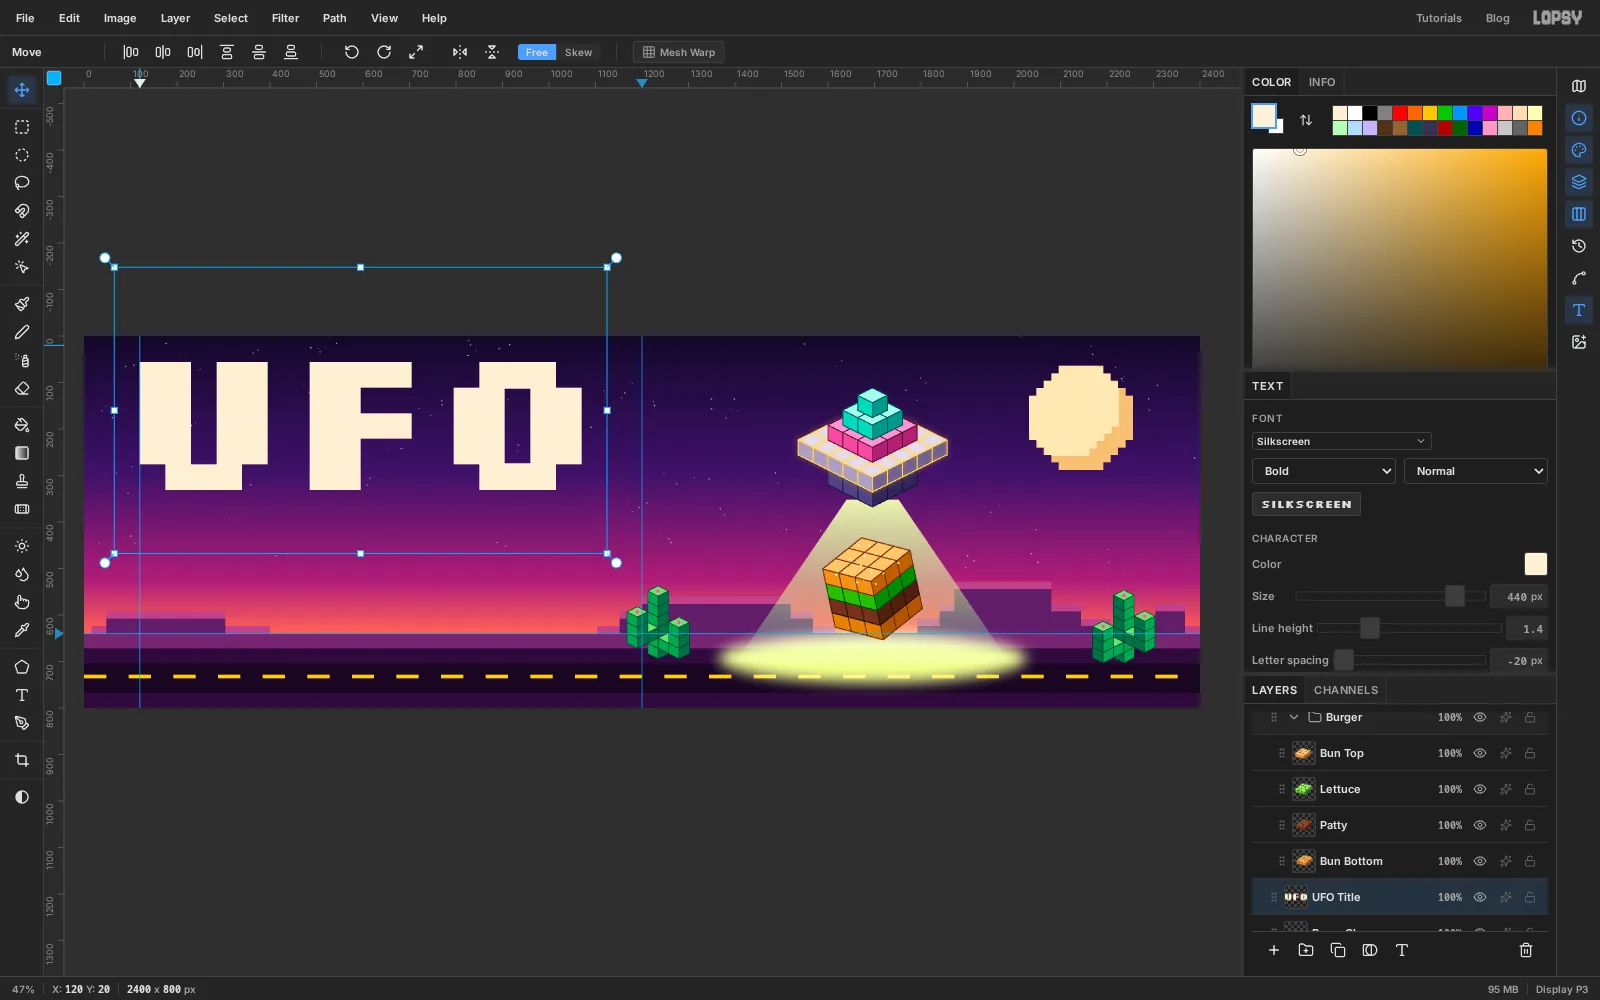
-
Extrude the headline in steps
- Click Duplicate Layer and rename the copy
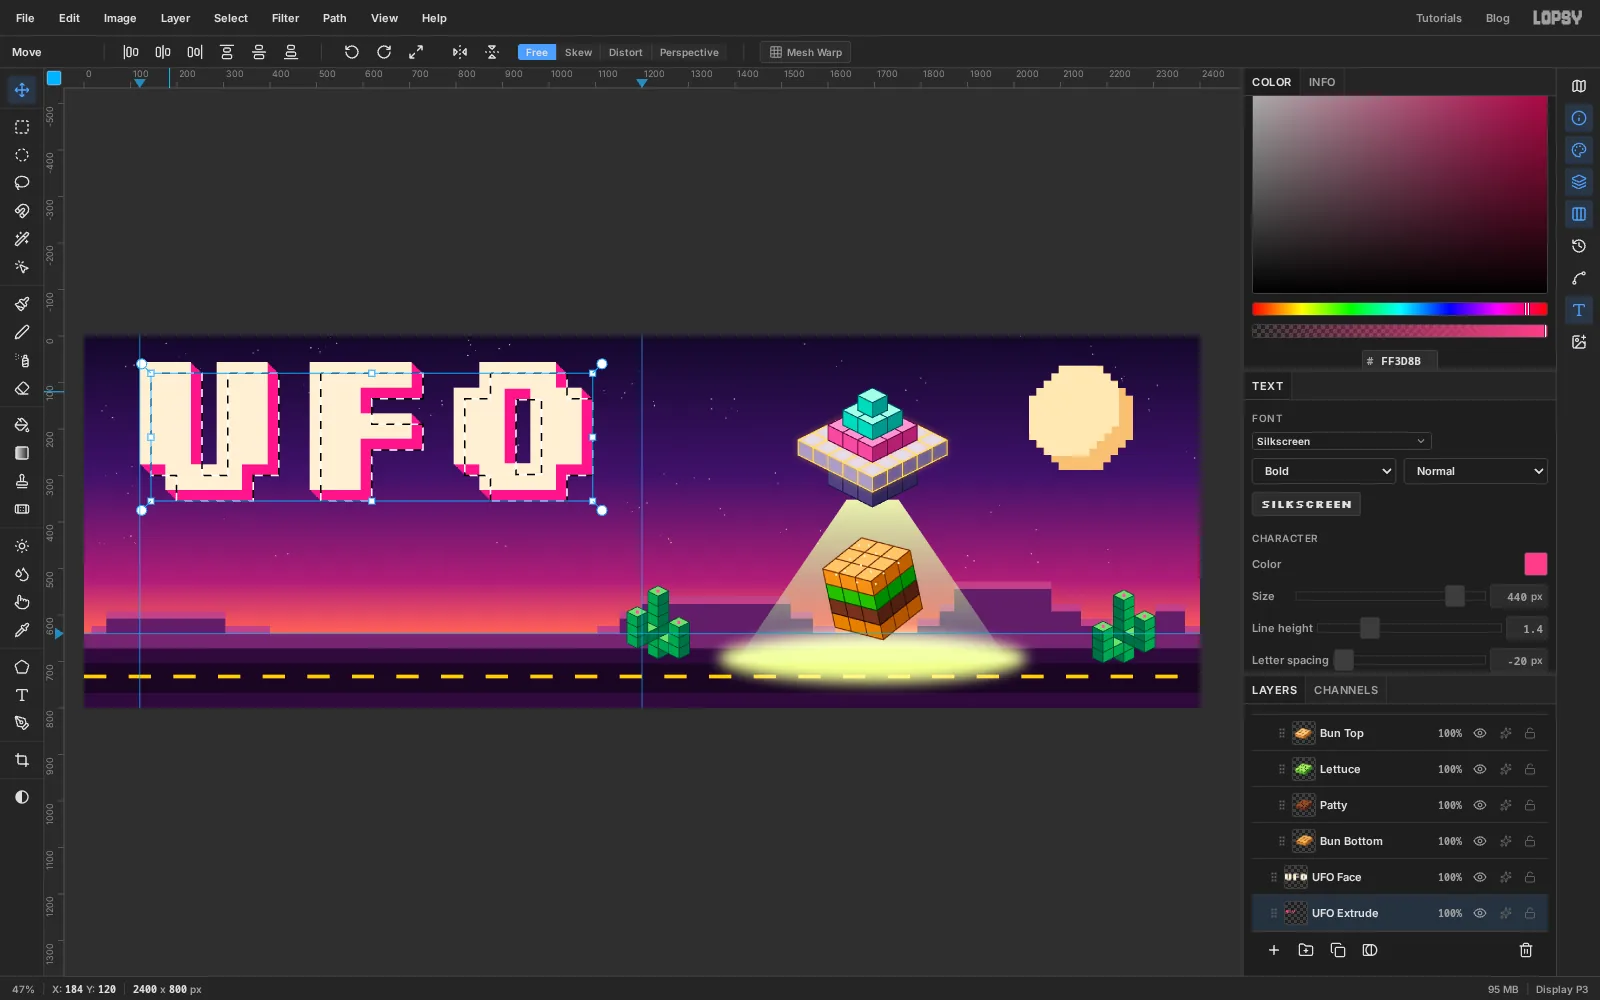
UFO Face. This is the live text you'll see. - Select the original underneath, rename it
UFO Extrudeand click Rasterize Layer in the Layers panel toolbar. - Cmd-click its thumbnail and fill the letters with .
- With the Move tool, Alt-drag the pink letters 3 px right and 3 px down, eight times, always dragging the newest copy.
- Press Cmd+D and add a Drop Shadow: Offset X
8, Offset Y8, Blur0, Opacity100, colour .
Small, hard steps give a staircase edge that matches the cubes, which a smooth blurred shadow wouldn't.
- Click Duplicate Layer and rename the copy
-
Add the subtitle and tagline
Letter spacing is a Text tool setting, so the next text would start at −20 too. Select
UFO Extrude, pick the Text tool, and set Letter spacing back to0.Choose Press Start 2P, size
96, colour . Click under the headline, typeDRIVE-THRU, press Tab and rename the layerDrive-Thru. SelectUFO Extrudeagain, set size38and colour , click below, typeOUT-OF-THIS-WORLD BURGERS, press Tab and rename itTagline. With the Move tool, nudge both onto the left guide: DRIVE-THRU starting about 368 px from the top, and the tagline about 480 px from the top. At these sizes all three lines end at almost the same point, about x1067, so the block reads as one justified unit.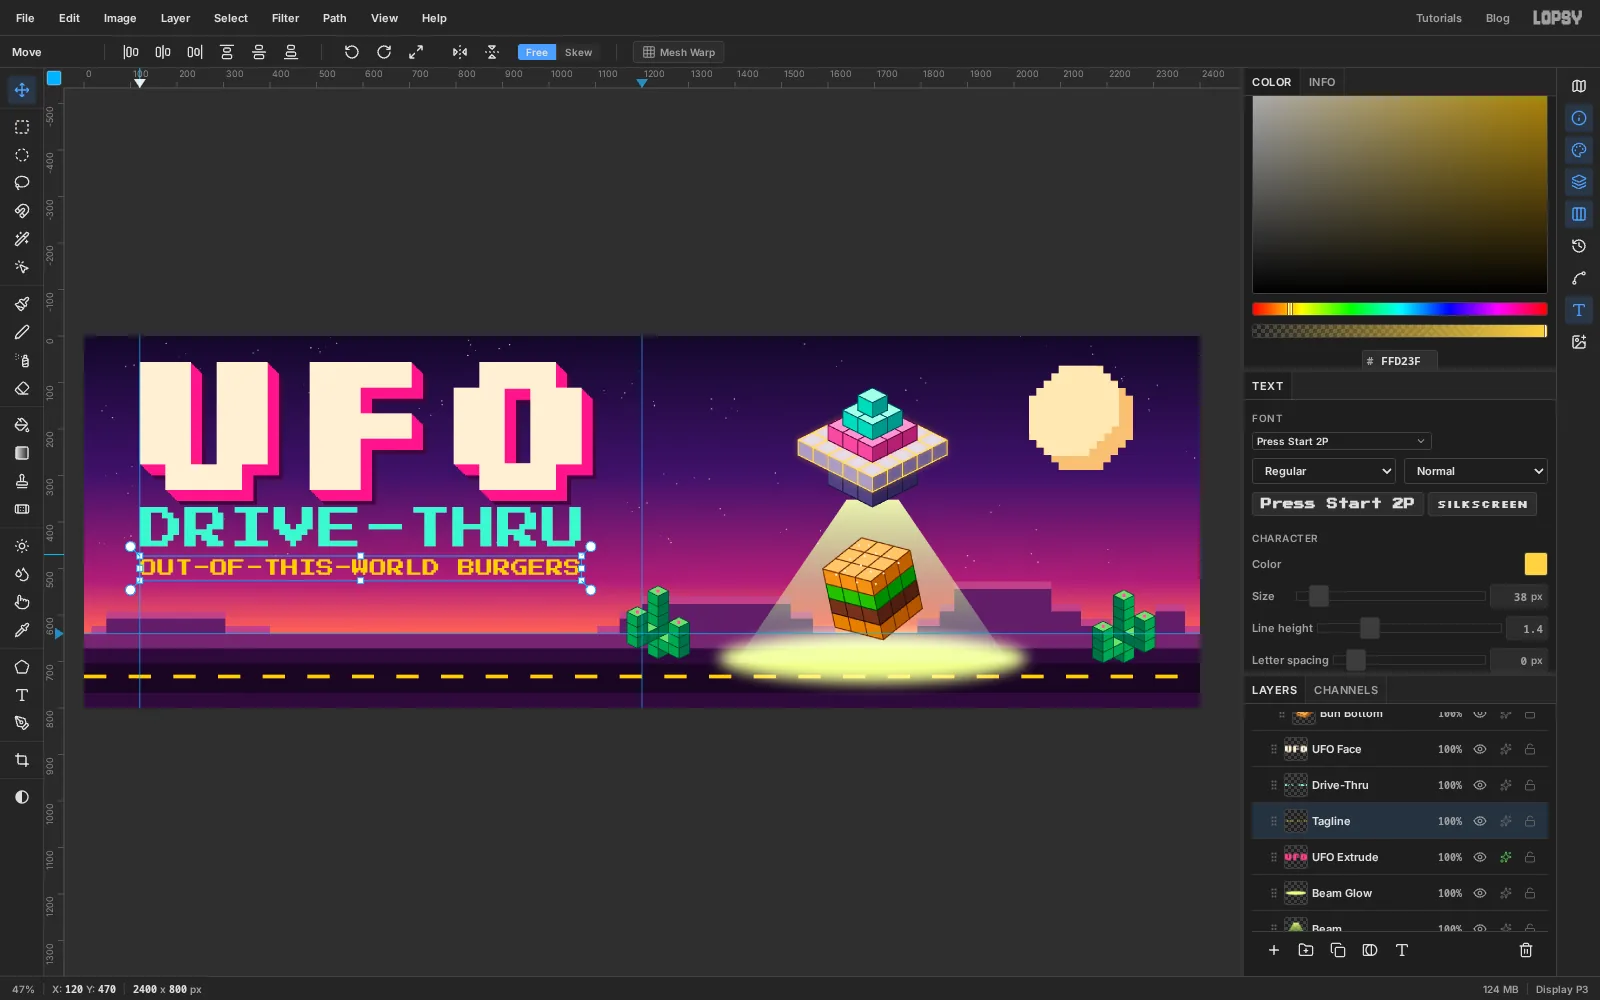
-
Make "BURGERS" pop
BURGERSis the product, but yellow on the sunset doesn't stand out. Click into the tagline with the Text tool, press End, and press Shift+Left seven times to select the word. Click the Text color swatch in the options bar, typeFFFFFFinto its hex field, and click the swatch again to close it. Press Tab to commit.Only that word turns white. Give the whole tagline a Drop Shadow (
4,4, blur0, ) so both colours hold up against the bright horizon.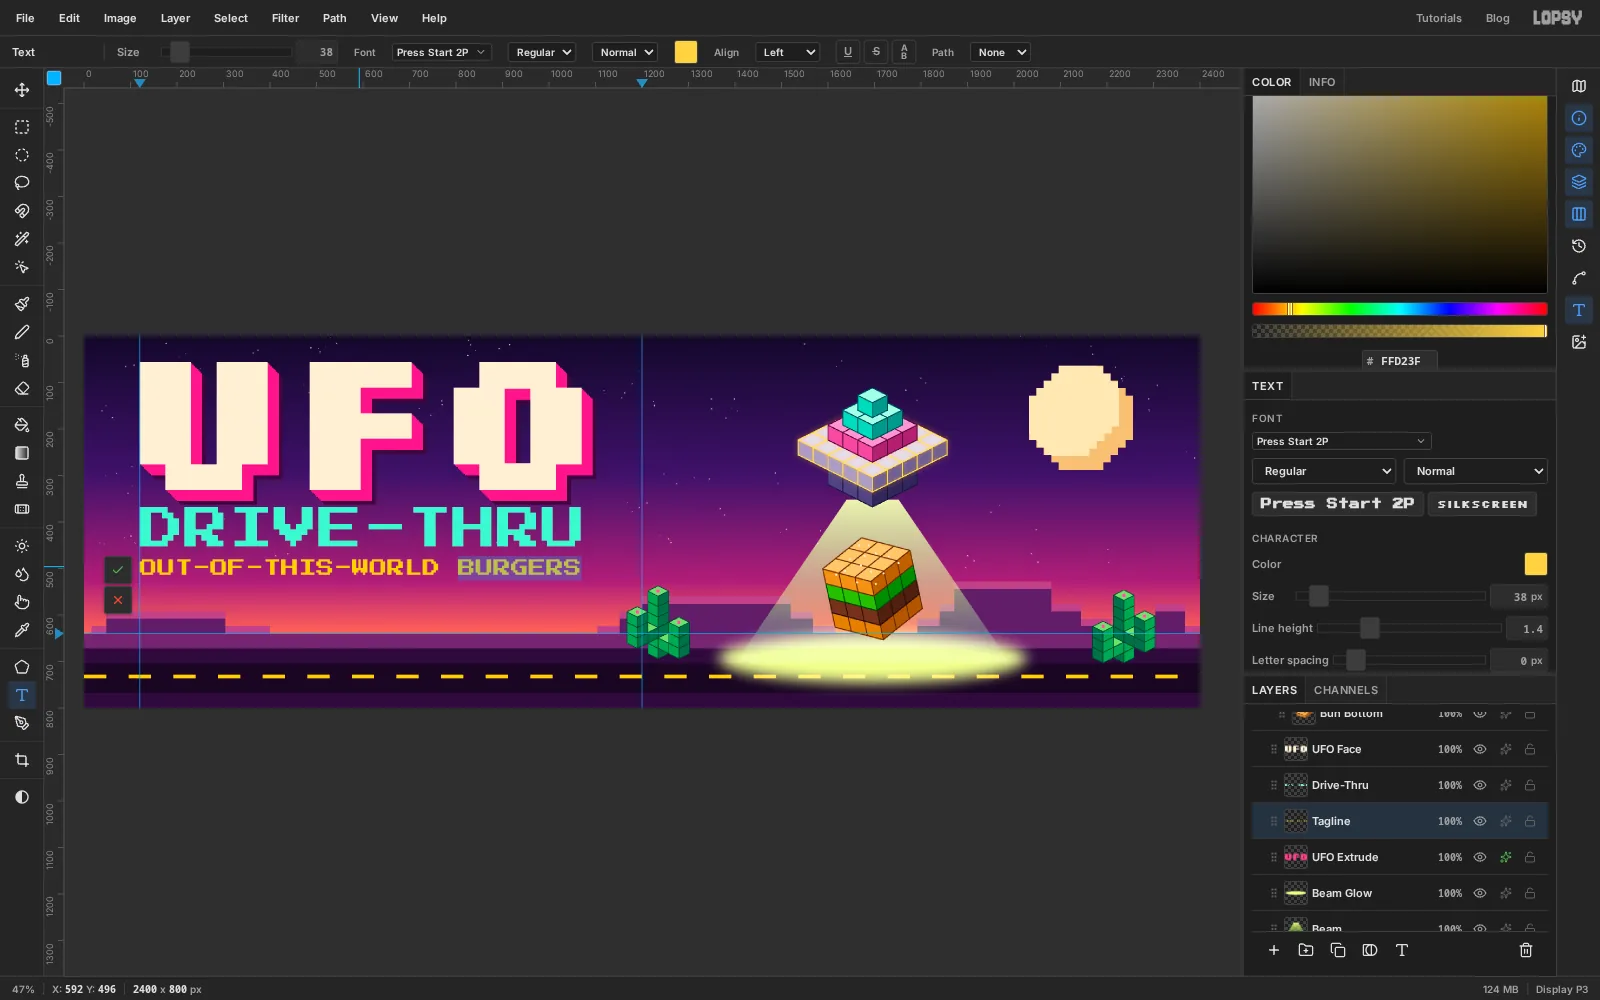
-
Add the exit plate
Add a layer named
Exit Plate. Drag a marquee from120, 548to1070, 640, so it's as wide as the type above. Fill it with and give it the same hard Drop Shadow as the headline (8,8, blur0, ).With
Exit Plateselected, pick the Text tool and set Press Start 2P, size40, colour . Click on the plate, typeEXIT 51 - OPEN 24/7, press Tab and rename the layerExit Text. Then nudge it until the gap above the letters matches the gap below (about 29 px each at this size) and the left and right gaps match too. Press Start 2P has no descenders in capitals, so the letters' visible height is the box to centre.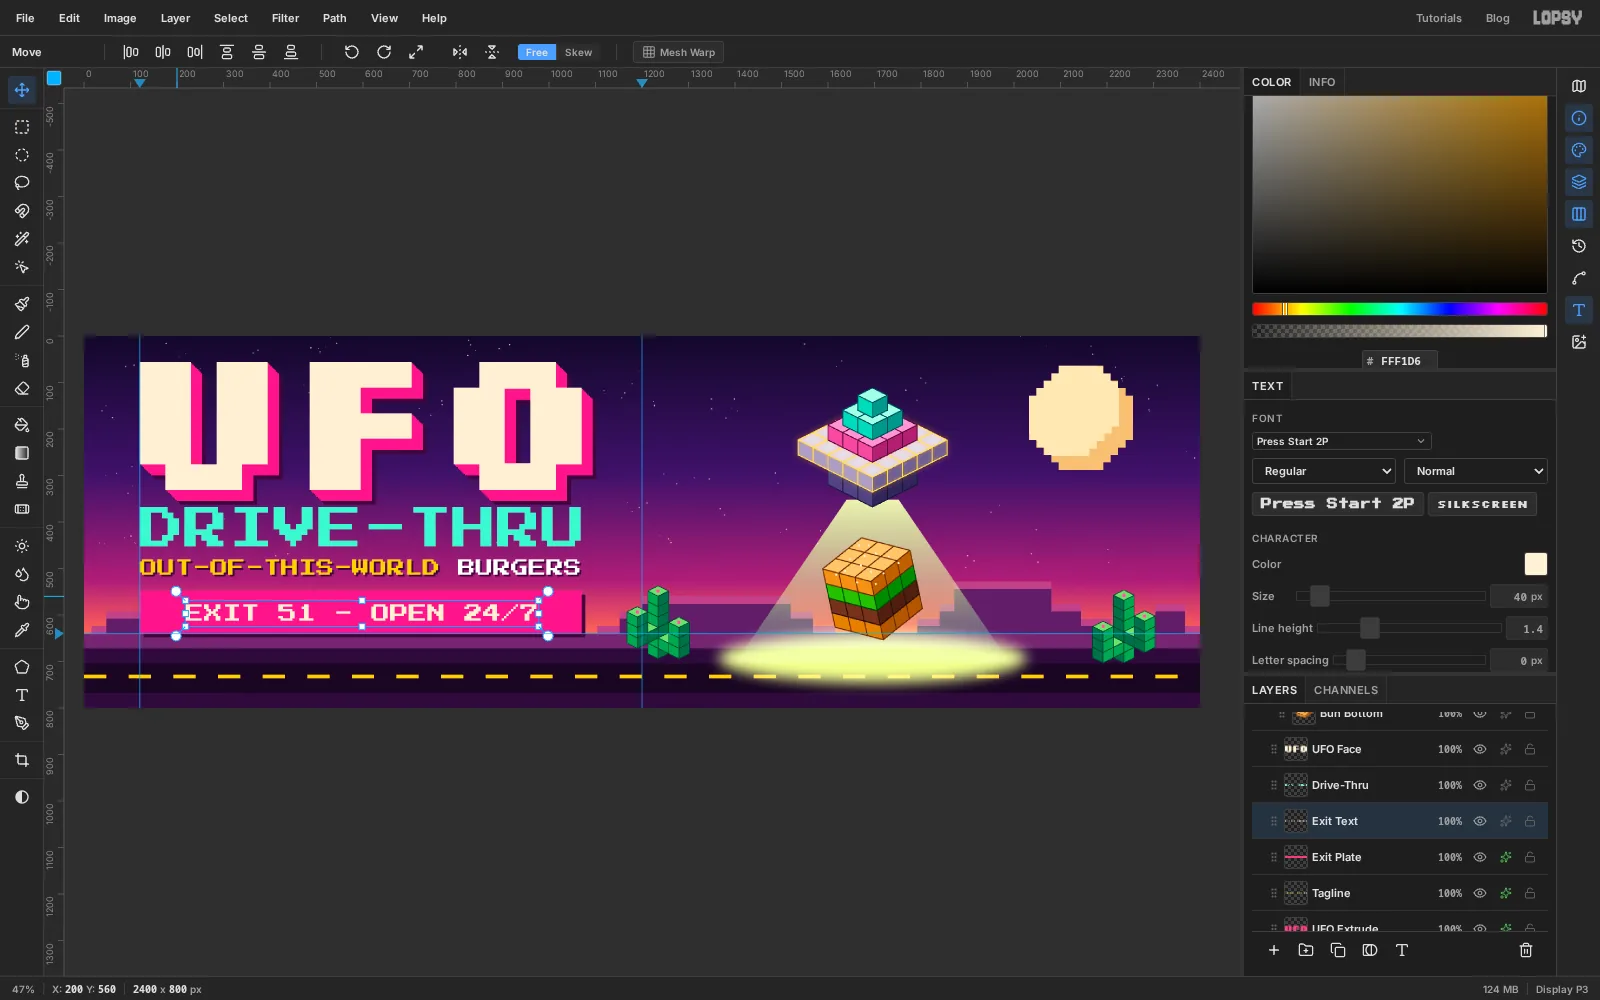
-
Draw an octagon sticker
Select
UFO Faceand add a layer namedBadge, so the sticker sits on top of the headline. Pick the Shape tool (U): ShapePolygon, Sides8, OutputPixels, Fill , and no stroke.The Shape tool draws outwards from where you press. Press at about
1172, 142, over the top right corner of the O, and drag diagonally out until the octagon is about 224 px across. A polygon always comes out regular, so it can't end up stretched. Add a Drop Shadow of8,8, blur0in .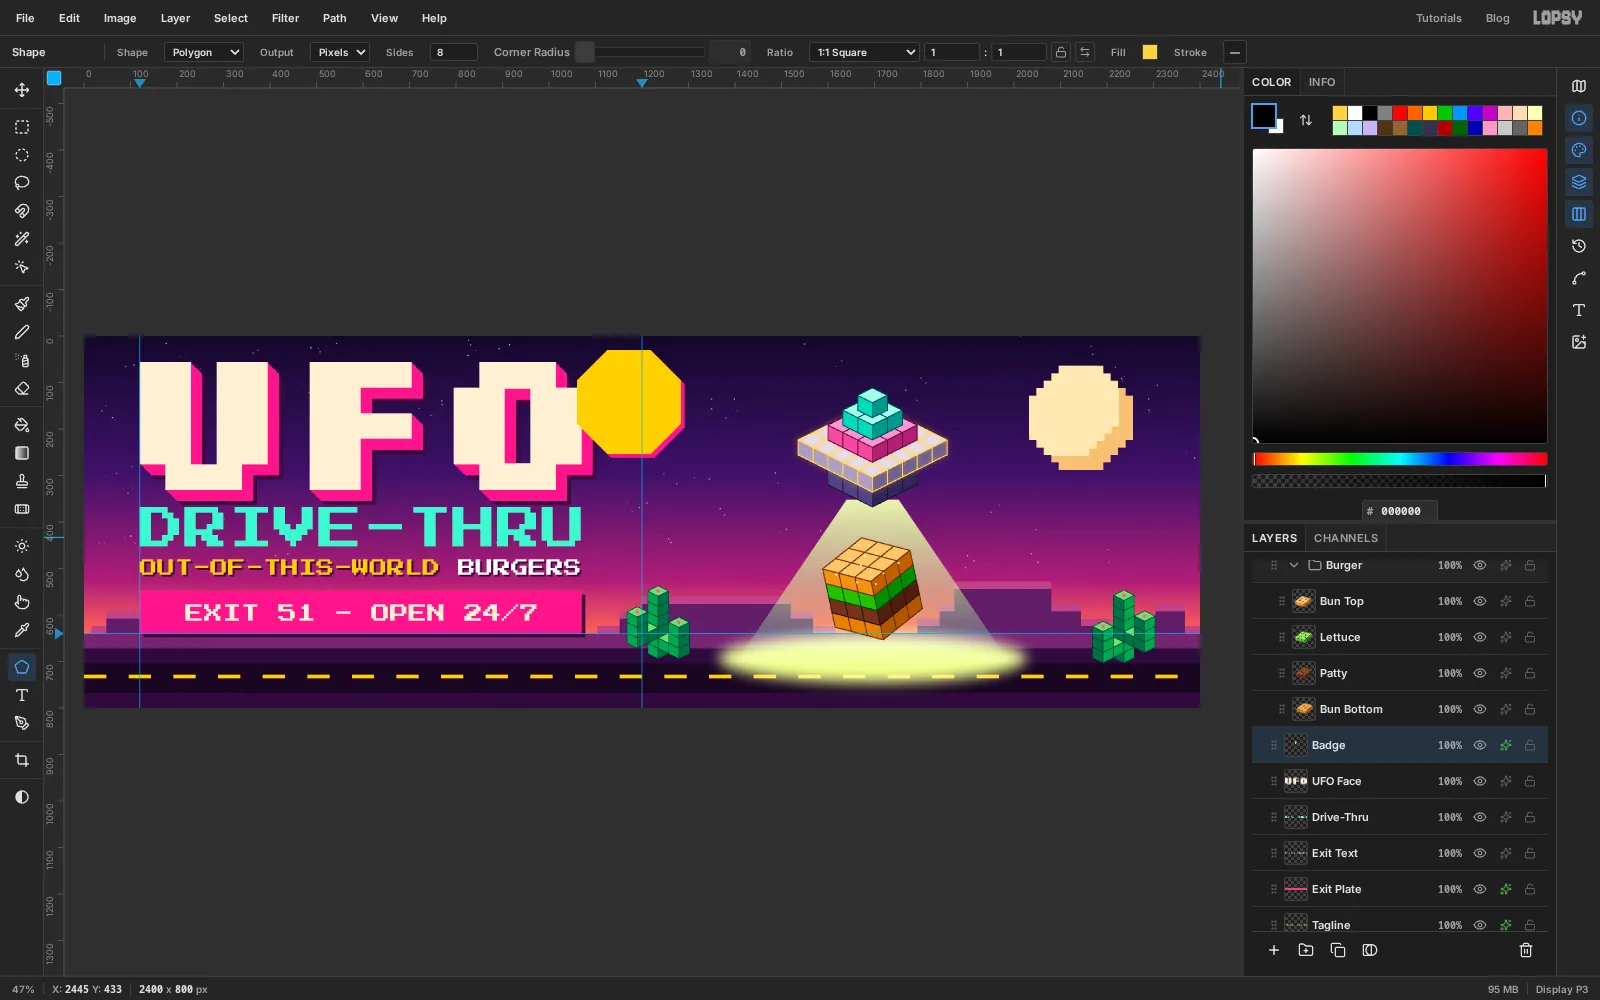
-
Letter and tilt the sticker
With
Badgeselected, pick the Text tool. Set Press Start 2P at size30, Letter spacing0, AlignCenterand colour . Click on the badge, typeBEAM, press Enter, typeME UP!and press Tab. Rename the layerBadge Textand nudge it until it is centred on the octagon. The longer line is about 170 px wide, which leaves even margins inside the flat sides.Select
BadgeandBadge Text, group them asBeam Me Up, and rotate the group about 10° clockwise with the Move tool's handles, as you did for the burger.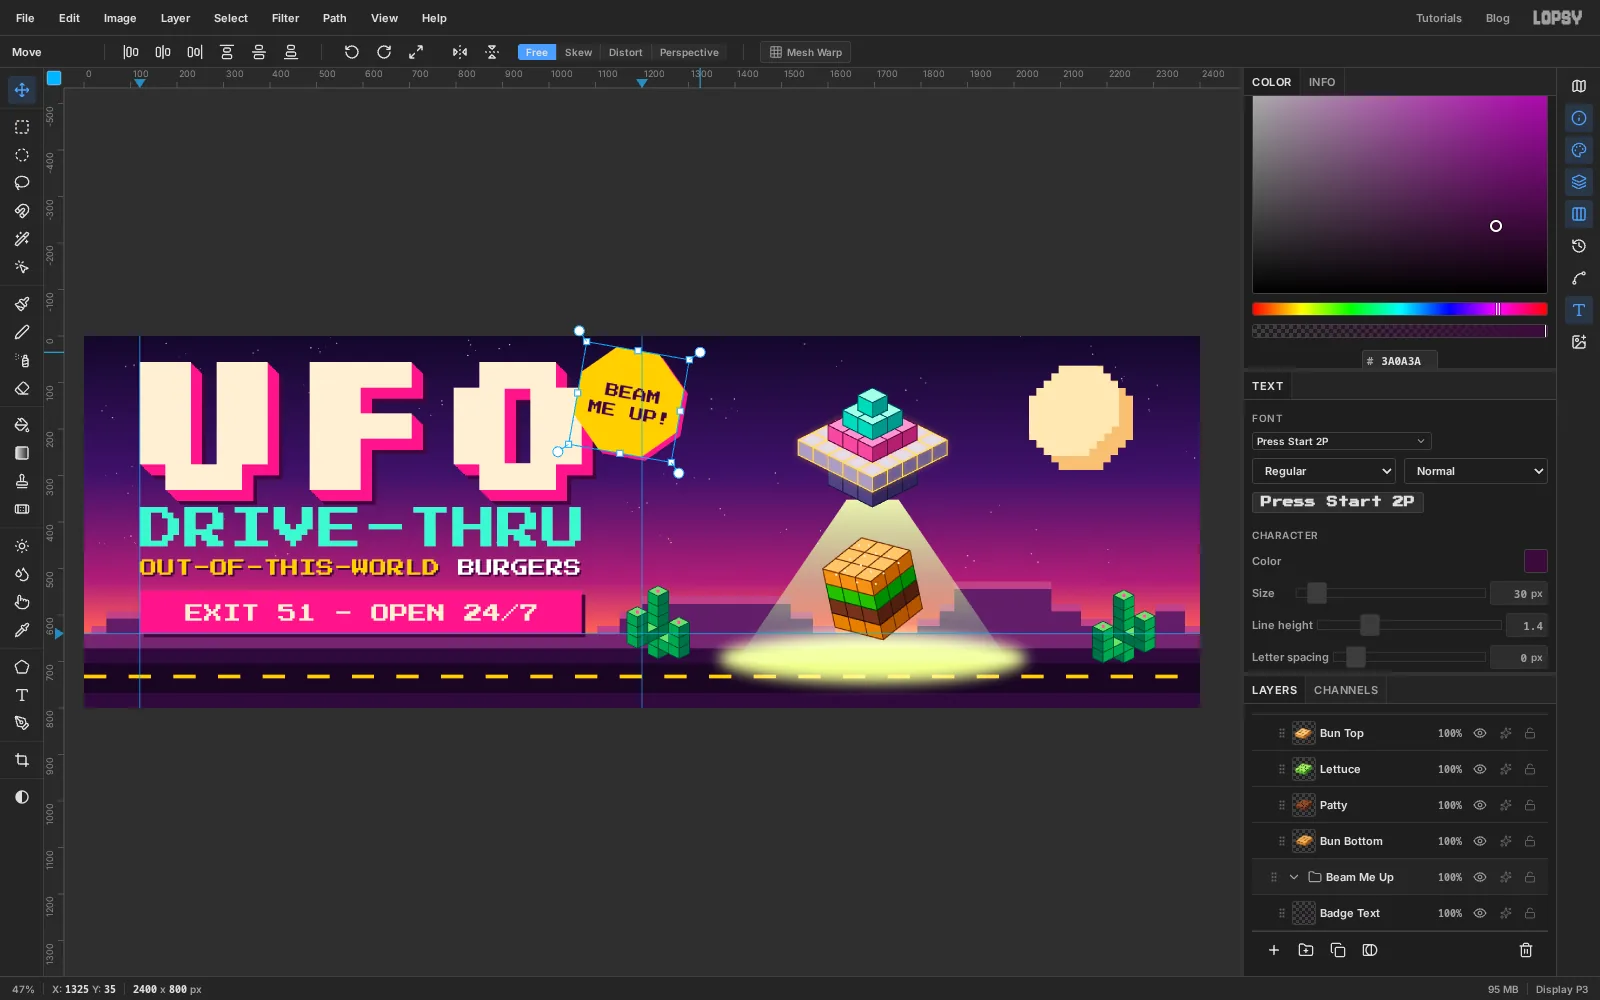
-
Snap the light to the pixel grid
The beam and the pool of light are the only smooth things left. Select
Beamand choose Filter → Pixelate… with Block Size16, then do the same onBeam Glow. The gradients turn into stepped bands and the soft edge of the pool breaks into blocks, matching the cubes.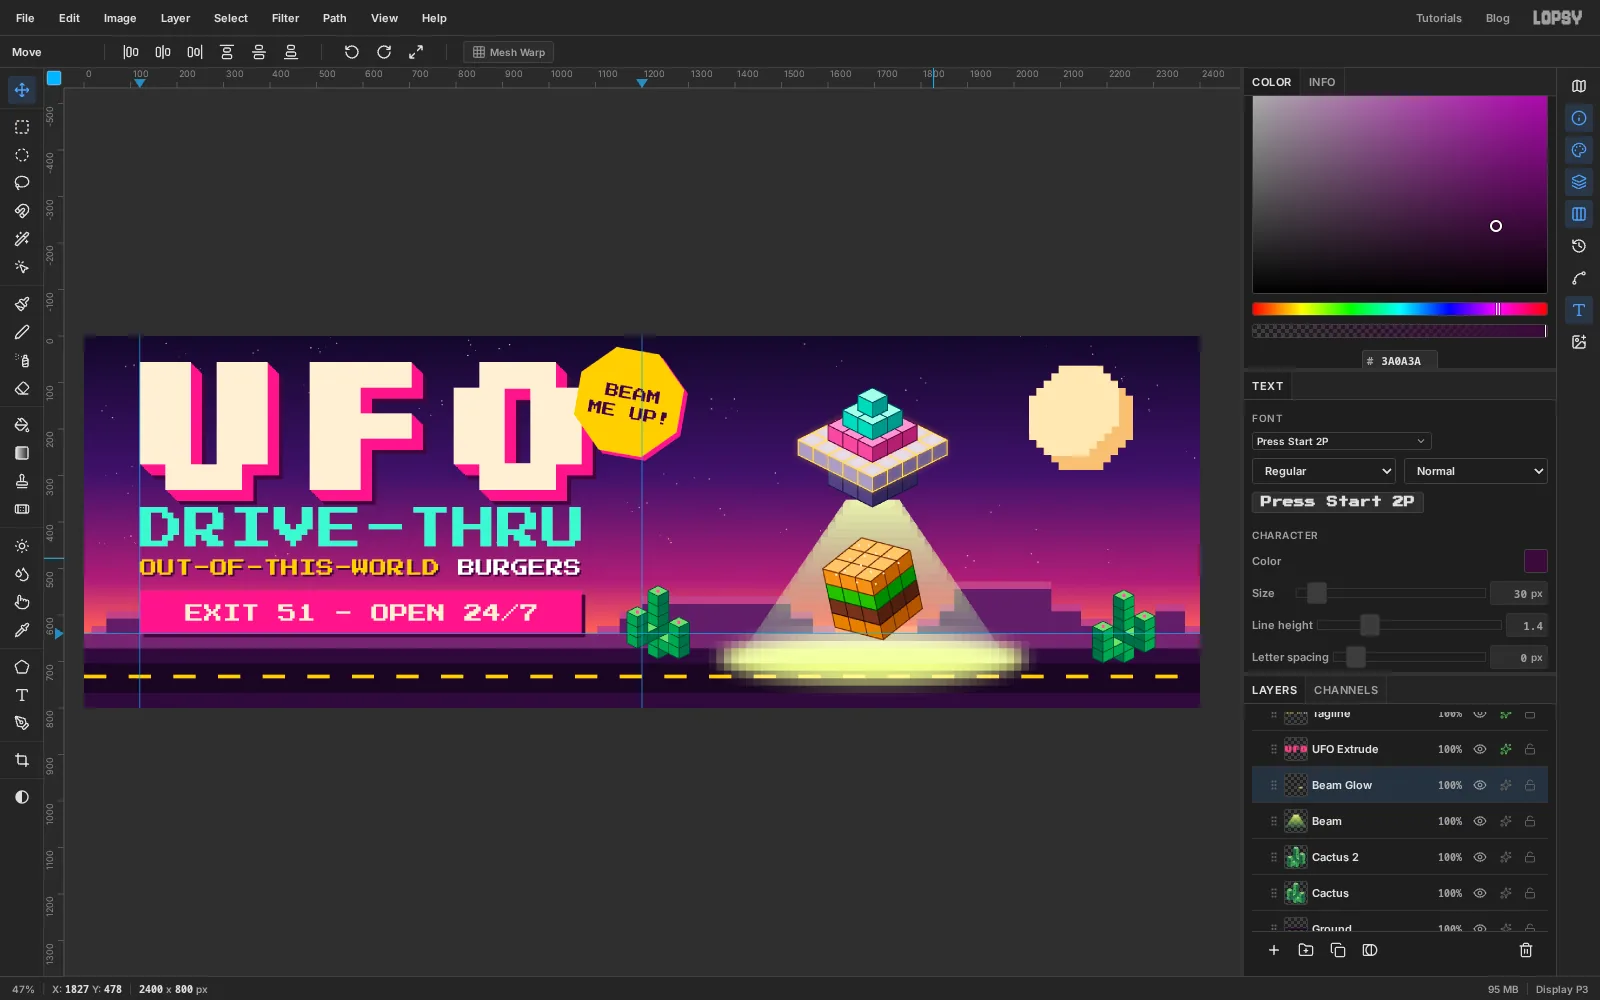
-
Add a glow pass
First, select
Moonand lower its opacity to82%. A full-strength moon is the second-brightest shape on the board and pulls the eye away from the UFO.Then select the top row in the Layers panel (the
Beam Me Upgroup), press Cmd+A and choose Edit → Copy Merged. Press Cmd+D, then Cmd+V, and rename the pasted layerGlow Pass. It lands at the top of theBeam Me Upgroup, which is still the top of the whole stack, so it sits over everything. Choose Filter → Gaussian Blur… with a Radius of18, set the layer to Screen, and lower its opacity to25%.The blurred copy brightens everything a little, mostly around the bright edges, so the portholes, the beam and the type look lit. Export with File → Quick Export PNG.