Make a Y2K Data Visualization Poster with Glass Bubbles
Chart ten years of internet growth as a Y2K poster in Lopsy, with glass bubbles sized by the data, a NASA Earth photo, chrome type and a gel pill.
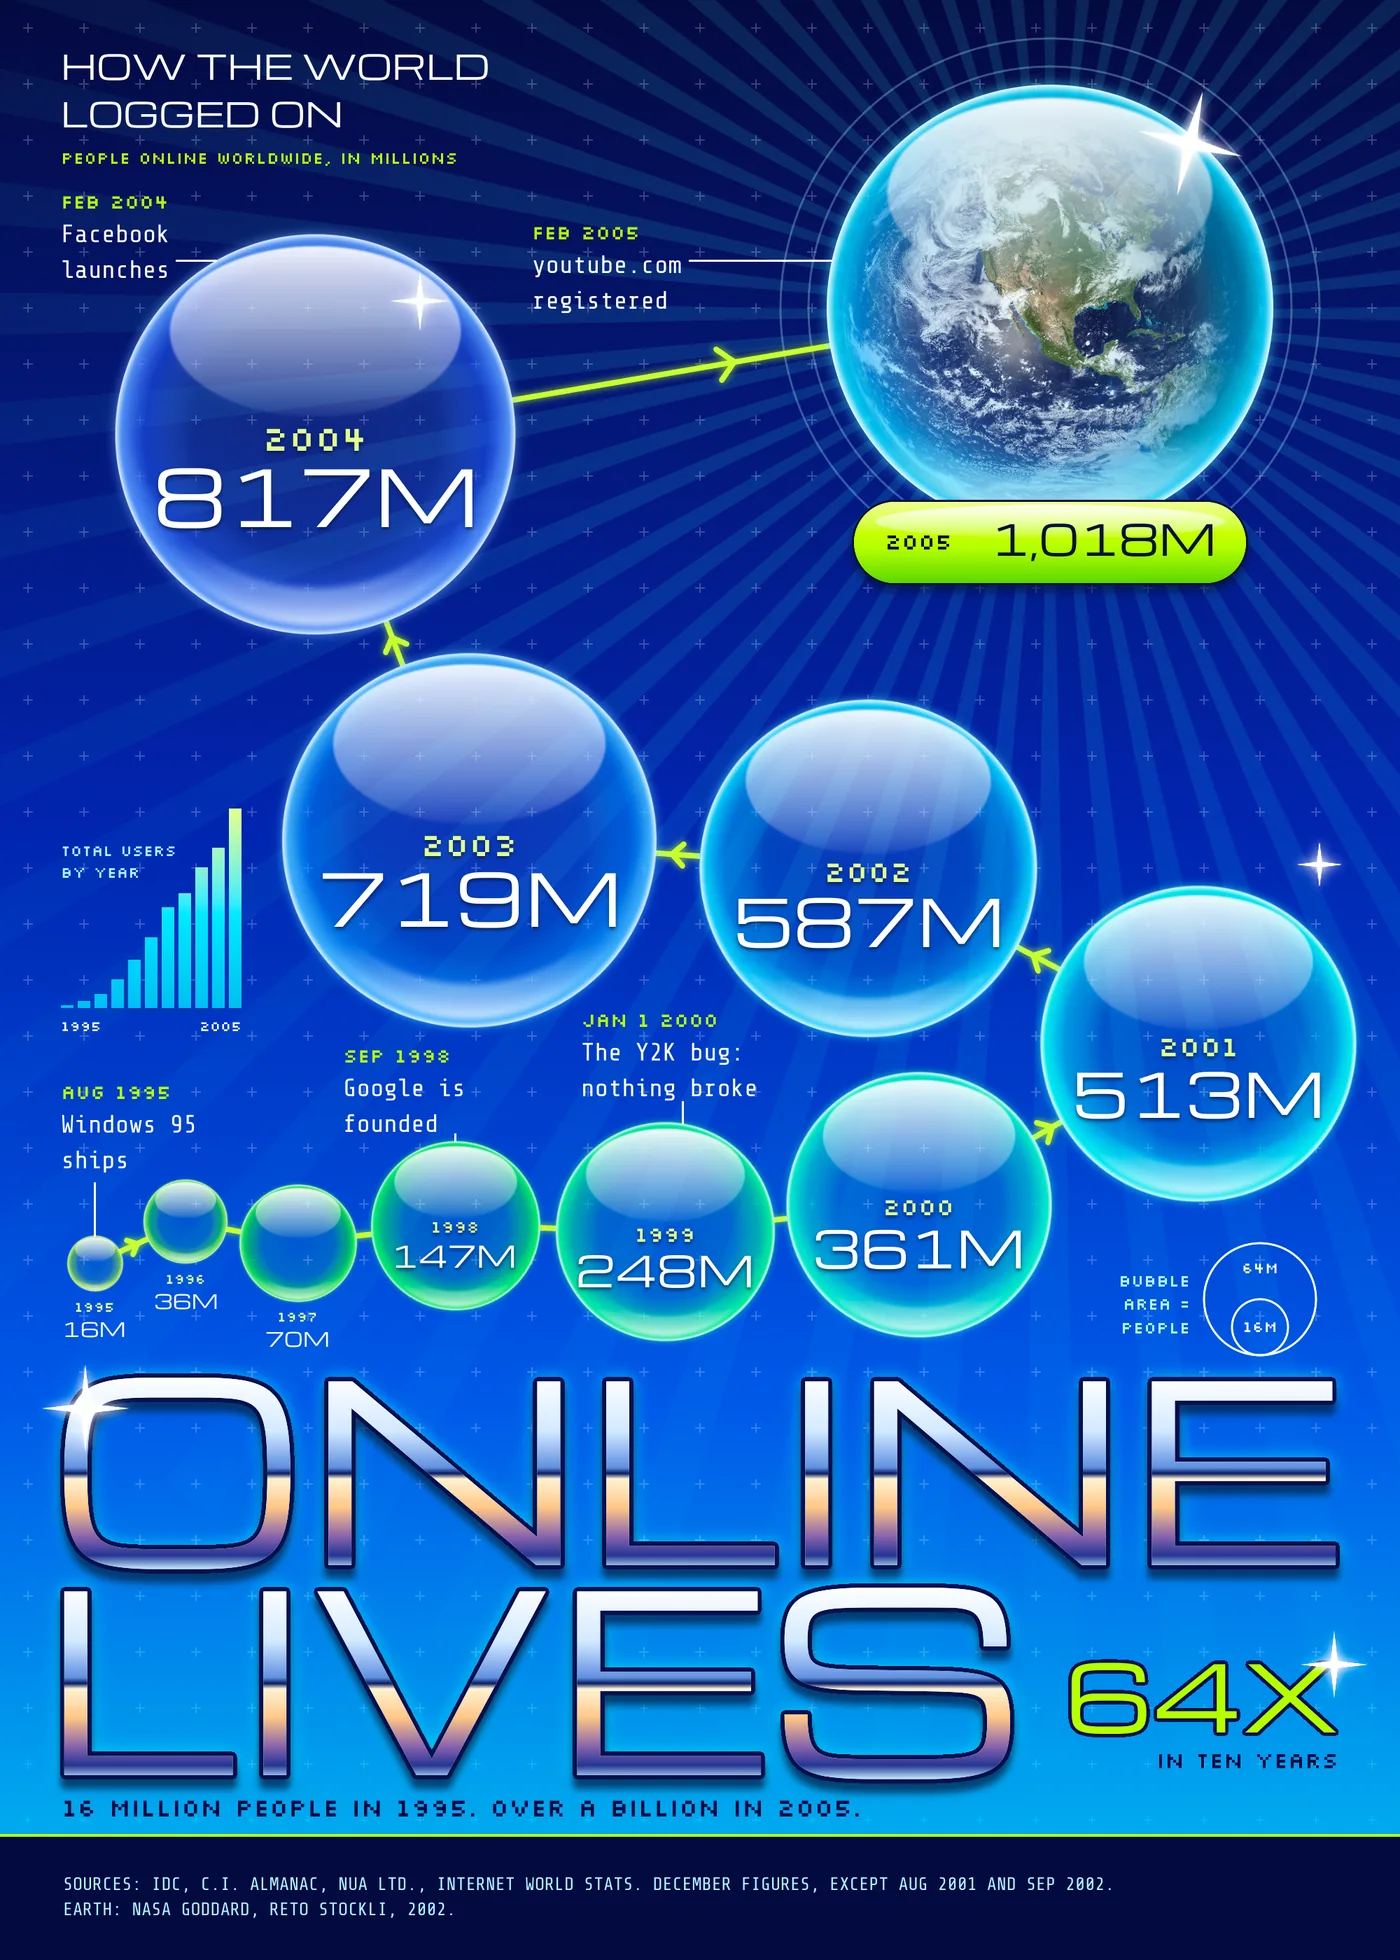
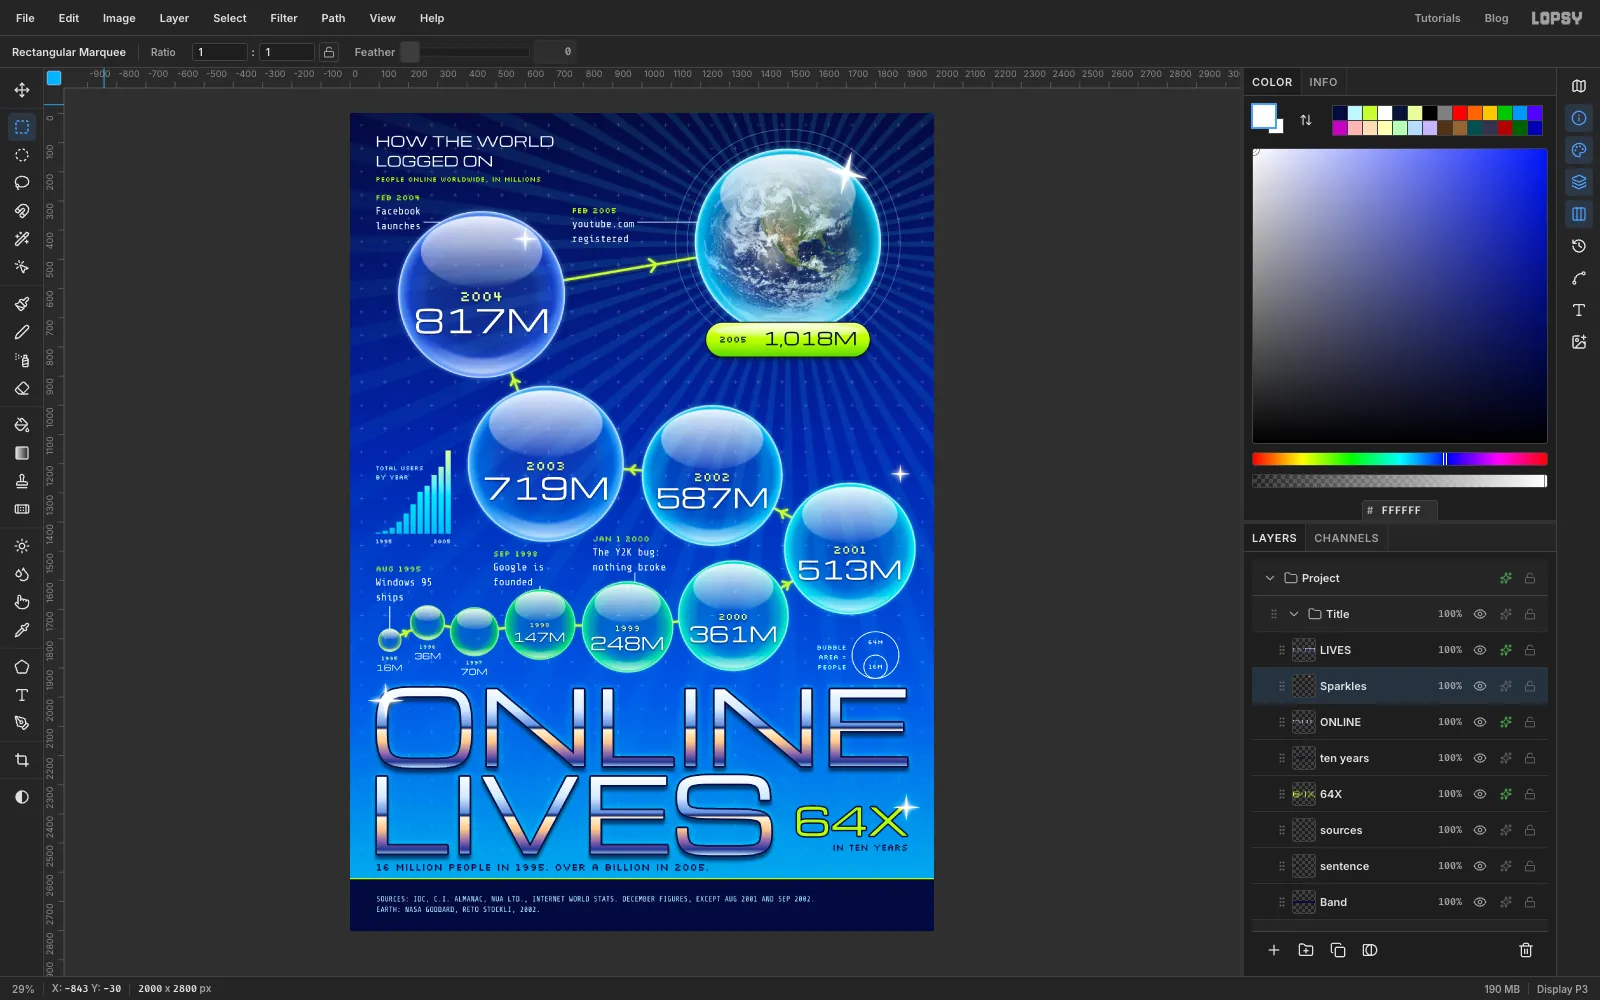
In 1995 about 16 million people were online. Ten years later it was over a billion. In this tutorial you'll turn those numbers into a 2000 × 2800 px poster in the style of the time they describe: glass bubbles, chrome type, lime gel and pixel fonts. It's called Online Lives.
It's also a real chart, so the bubbles can't be any size you like. A bubble's area shows the number of people. To get that, each radius is 10 × the square root of the users in millions. Here are the numbers, with the diameter of each bubble and where its centre goes on the canvas. You'll come back to this list a few times.
- 1995: 16 million, 80 px across, centre at 135, 1805
- 1996: 36 million, 120 px, centre at 265, 1745
- 1997: 70 million, 168 px, centre at 425, 1775
- 1998: 147 million, 242 px, centre at 650, 1750
- 1999: 248 million, 314 px, centre at 950, 1760
- 2000: 361 million, 380 px, centre at 1312, 1720
- 2001: 513 million, 452 px, centre at 1712, 1490
- 2002: 587 million, 484 px, centre at 1240, 1240
- 2003: 719 million, 536 px, centre at 670, 1200
- 2004: 817 million, 572 px, centre at 450, 620
- 2005: 1,018 million, 638 px, centre at 1500, 440
The figures come from the table compiled by Internet World Stats, which credits IDC, the Computer Industry Almanac and Nua Ltd. for the early years. They're December figures, except for August 2001 and September 2002, and the poster says so in its footer.
You'll use the Gradient tool with transparent stops, the Shape tool's exact-size dialog, the marquee's exact-corners dialog, the Pen, the Magic Wand, Fill with Pattern, Sunburst, Bloom, Hue/Saturation, layer effects, groups, and scaling and rotating with the Move tool.
The fonts are free Google Fonts, all available in Lopsy's font picker: Michroma for numbers and the title, Silkscreen for pixel labels, and Share Tech Mono for the notes.
The palette:
-
Sky
-
Glass
-
Lime
-
pale lime
-
Gel pill
-
Ice
-
rays
-
halo
-
Chrome
-
Ink
-
outline
-
shadow
-
footer
-
Paint the sky
Open Lopsy. In the New Document dialog, set Width to
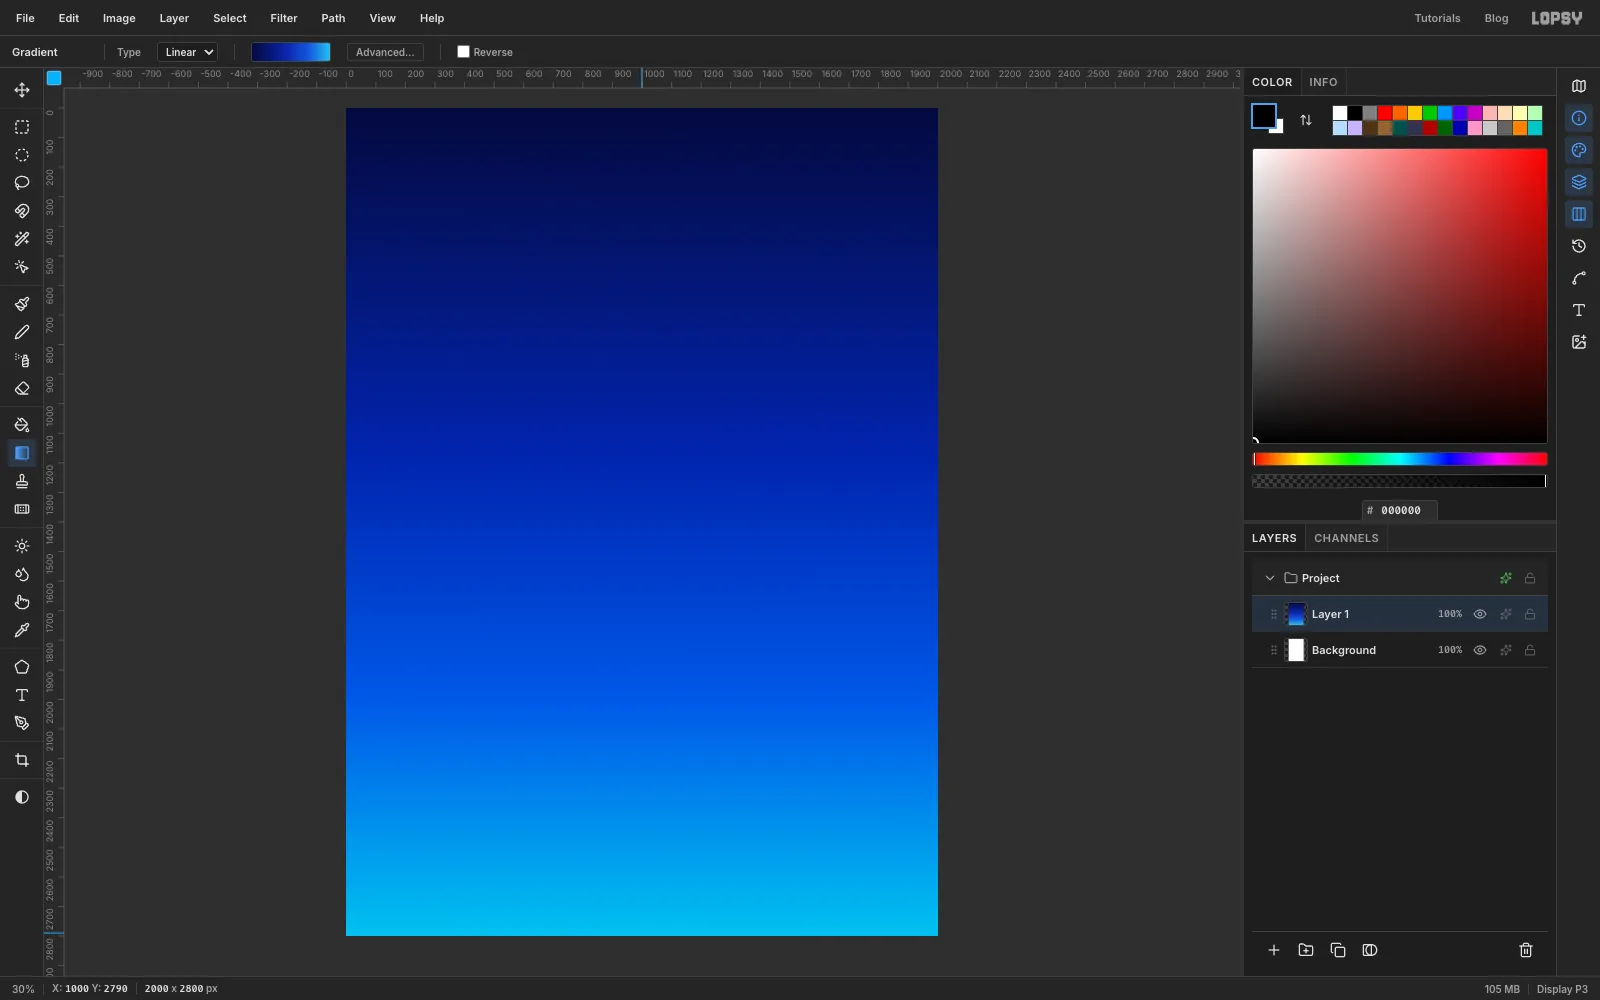
2000and Height to2800and click Create. The document starts with a whiteBackgroundand an emptyLayer 1, andLayer 1is selected.- Pick the Gradient tool in the toolbox. It has no keyboard shortcut. Set Type to Linear and click Advanced….
- Click the handle row to add stops, then click each handle and type its colour into the hex field. Use at the far left, at 42%, at 72% and at the far right. The readout shows each stop's position, and you can drag a handle to adjust it. Click Done.
- Drag straight down the canvas from the top edge to the bottom edge.
-
Draw one plus mark
Y2K posters love a technical-looking grid. You'll draw one mark, then repeat it.
- Click Add Layer in the Layers panel, double-click the new layer's name and rename it
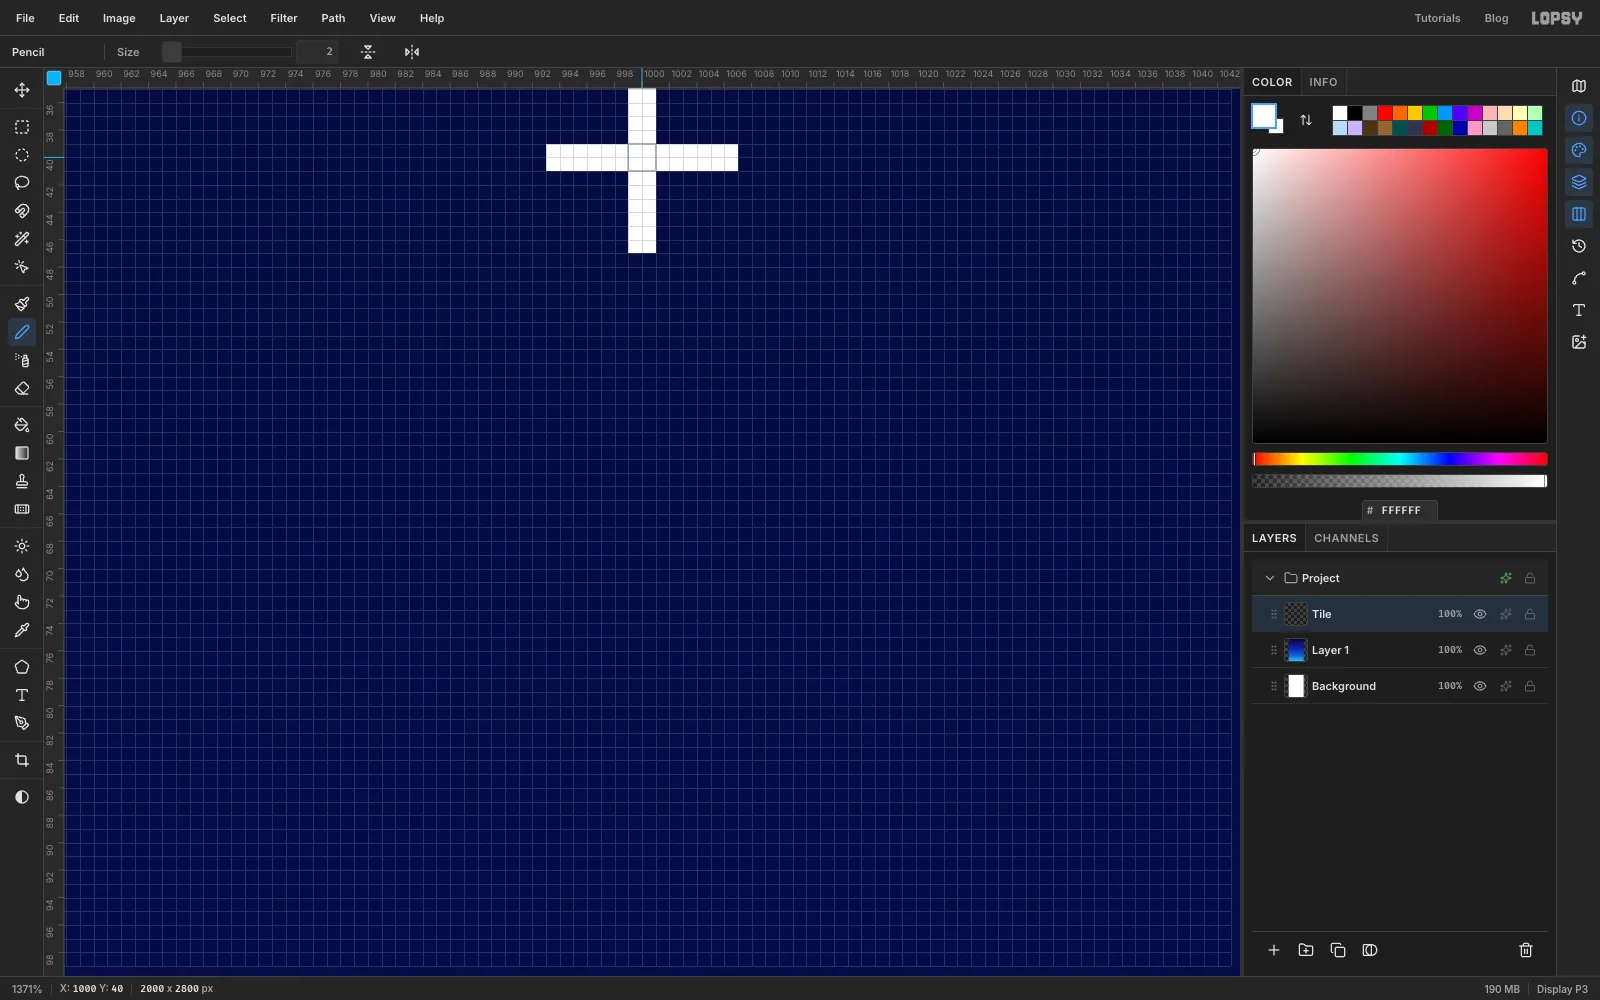
Tile. - In the Color panel, type
FFFFFFinto the hex field. - Press N for the Pencil and set Size to
2. - Zoom in near the top centre of the canvas with Cmd and the scroll wheel. Click at
1000, 34, then hold Shift and click at1000, 46to draw a short vertical line. - Click at
994, 40, then Shift-click at1006, 40for the horizontal line.
Choose View → Fit to Screen when you're done.
- Click Add Layer in the Layers panel, double-click the new layer's name and rename it
-
Turn it into a grid
- Press M for the Rectangular Marquee. Click once on the canvas without dragging, and a dialog asks for exact corners. Enter From
960, 0and To1040, 80, then click Select. The plus sits in the middle of that 80 px square. - Choose Edit → Define Pattern, then press Cmd+D to deselect.
- Click Delete Layer to remove
Tile. The pattern stays. - Add a layer named
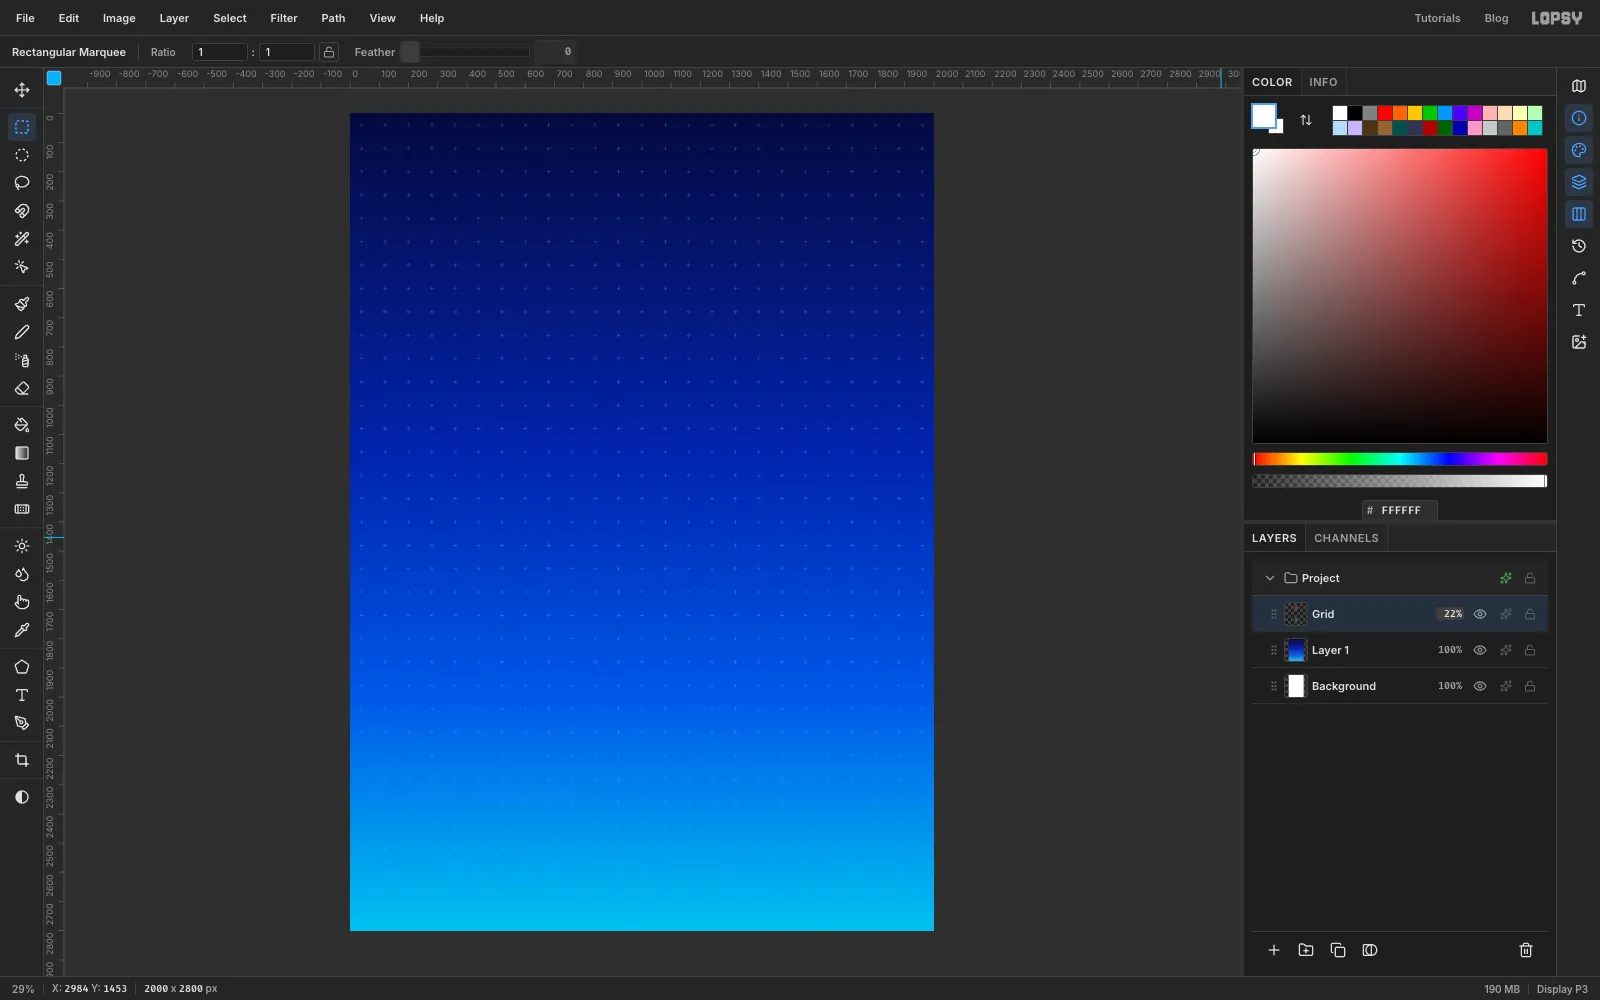
Gridand choose Edit → Fill with Pattern…. Pick your pattern and click Apply. - Click the layer's effects button to open Layer Effects, and set Blend to Screen. Close the drawer.
- Click the
100%on the layer's row and drag the slider down to22. Close it by clicking the22%again.
- Press M for the Rectangular Marquee. Click once on the canvas without dragging, and a dialog asks for exact corners. Enter From
-
Add soft rays from the Earth's spot
Add a layer named
Burstand set the foreground to . Choose Filter → Sunburst… and use these settings:- Rays
60, Length75, Width38, Fade80 - Center X
75and Center Y16, which is the spot for the 2005 bubble
Click Apply. Set the layer's Blend to Screen and its opacity to
13. The rays should be a texture you notice second, not a pattern that fights the labels.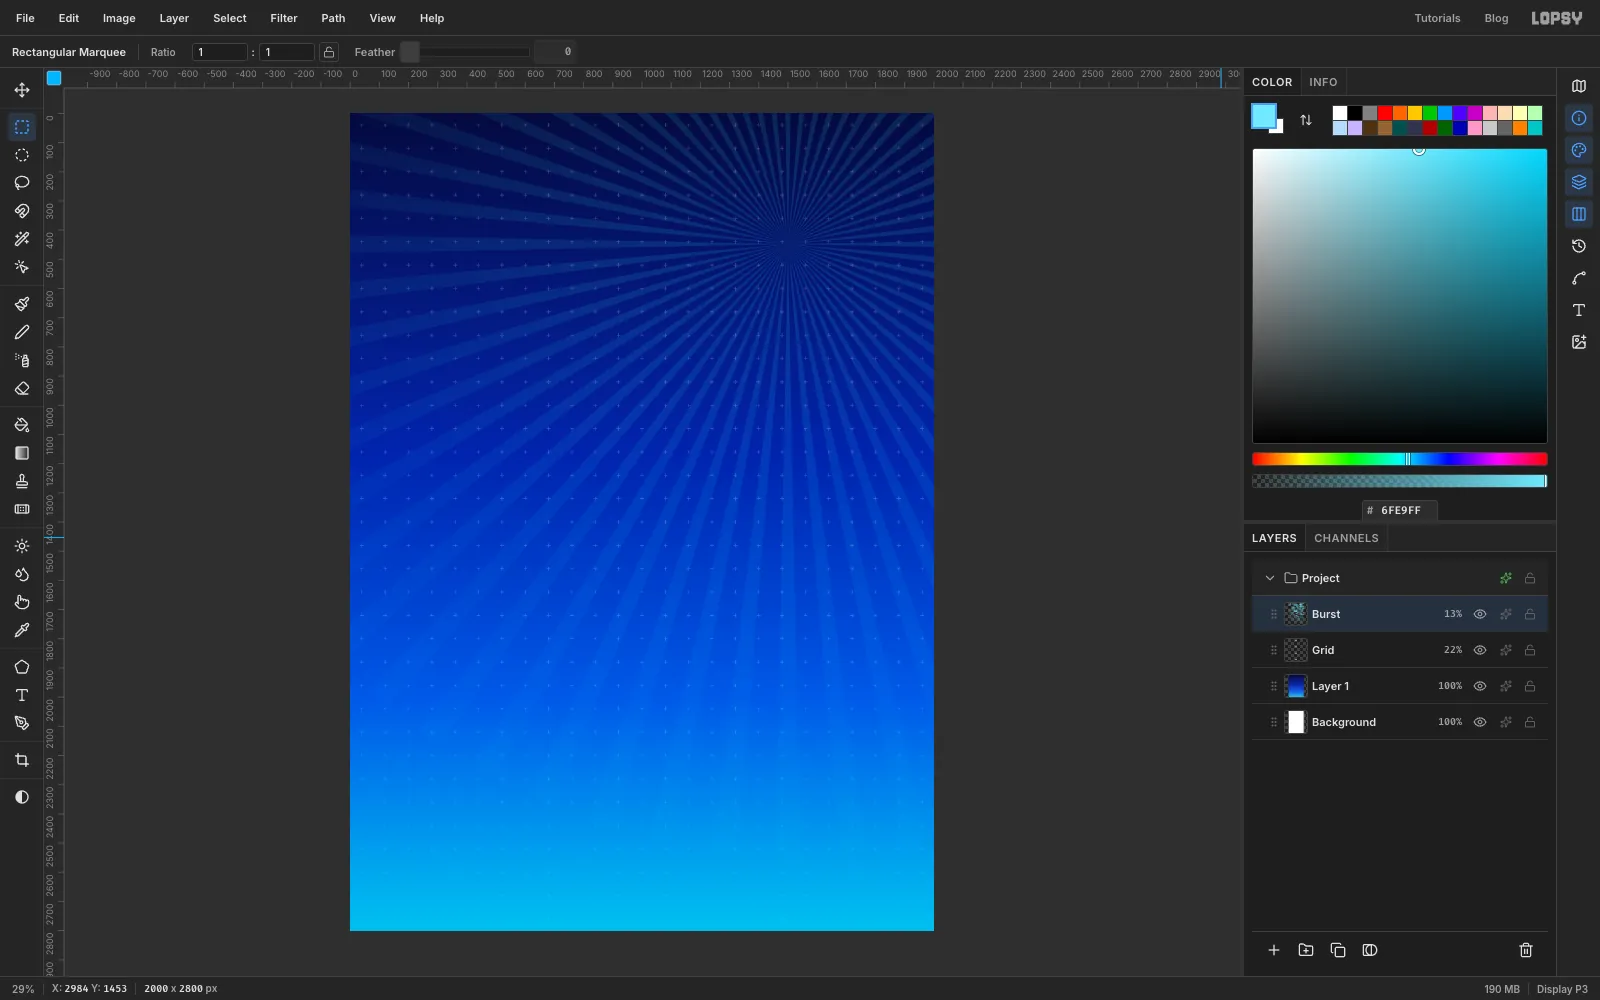
- Rays
-
Draw two orbit rings
Add a layer named
Ringsand press U for the Shape tool. In the options bar:- Set Shape to Ellipse and Output to Pixels.
- Click the Fill swatch and click Remove fill.
- Click the dash next to Stroke, and type
BFF6FFin the hex field. Click the bar at the very bottom of the window to close the popover. Clicking the canvas would draw a shape. - Set Width to
3.
Now click once at
1500, 440without dragging. The Shape Size dialog opens. Enter690for both Width and Height and click Create. A shape made this way is centred on your click. Click the same spot again and make another at770.Set the layer's opacity to
30. These rings are only decoration, so keep them faint. If they're strong, the 2005 bubble looks bigger than its number.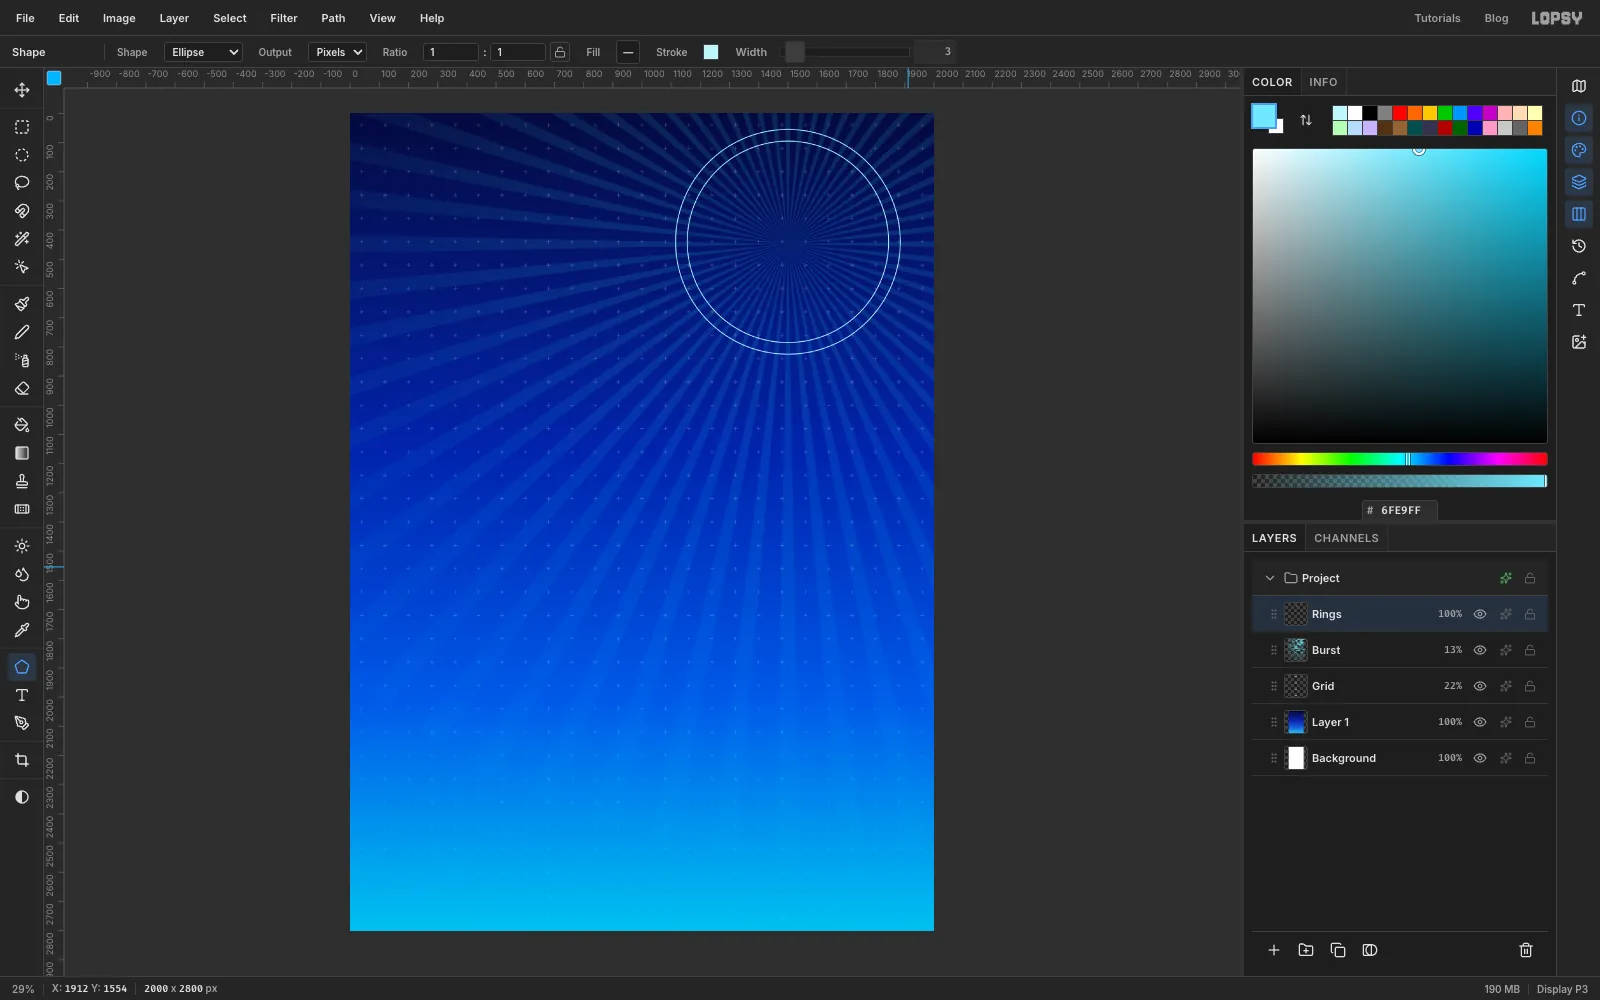
-
Link the years with a thread
Add a layer named
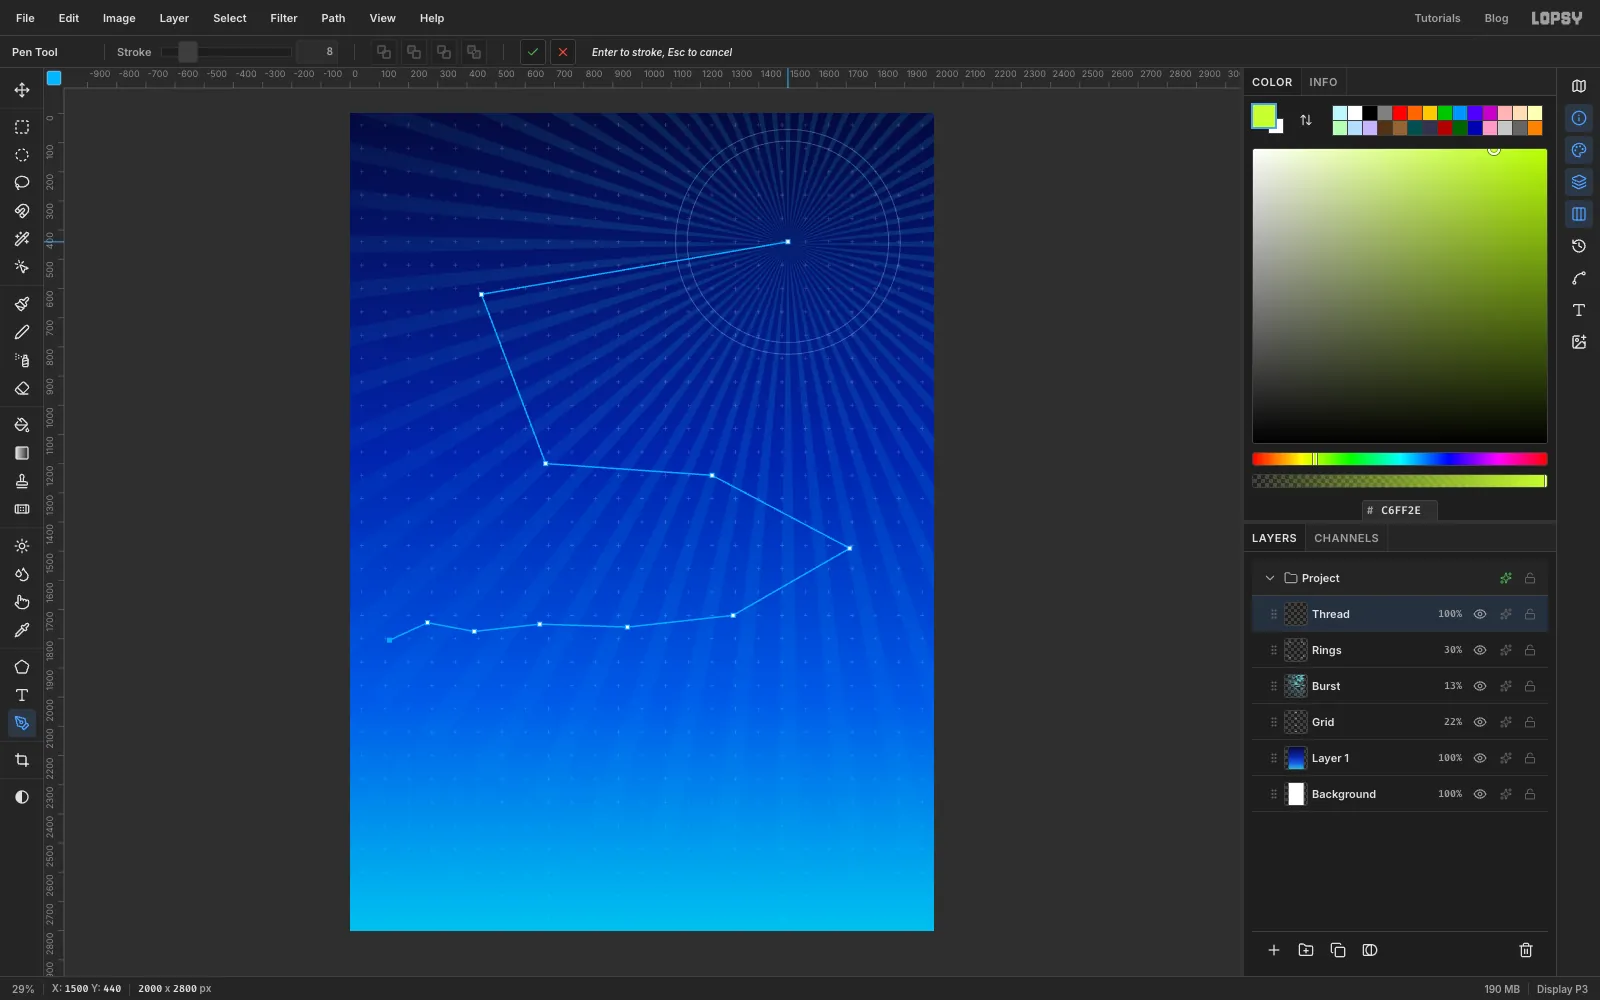
Threadand set the foreground to .- Press P for the Pen and set Stroke to
8. - Click once on each year's centre, in order from 1995 to 2005, using the list at the top. Plain clicks make straight segments, and straight lines through the centres keep every link aimed properly.
- Press Enter. The path is stroked in lime.
- Open the Paths panel from the icons on the far right, click Delete Path, and close the panel. You don't need the path any more.
- Press P for the Pen and set Stroke to
-
Mark every bubble's true size
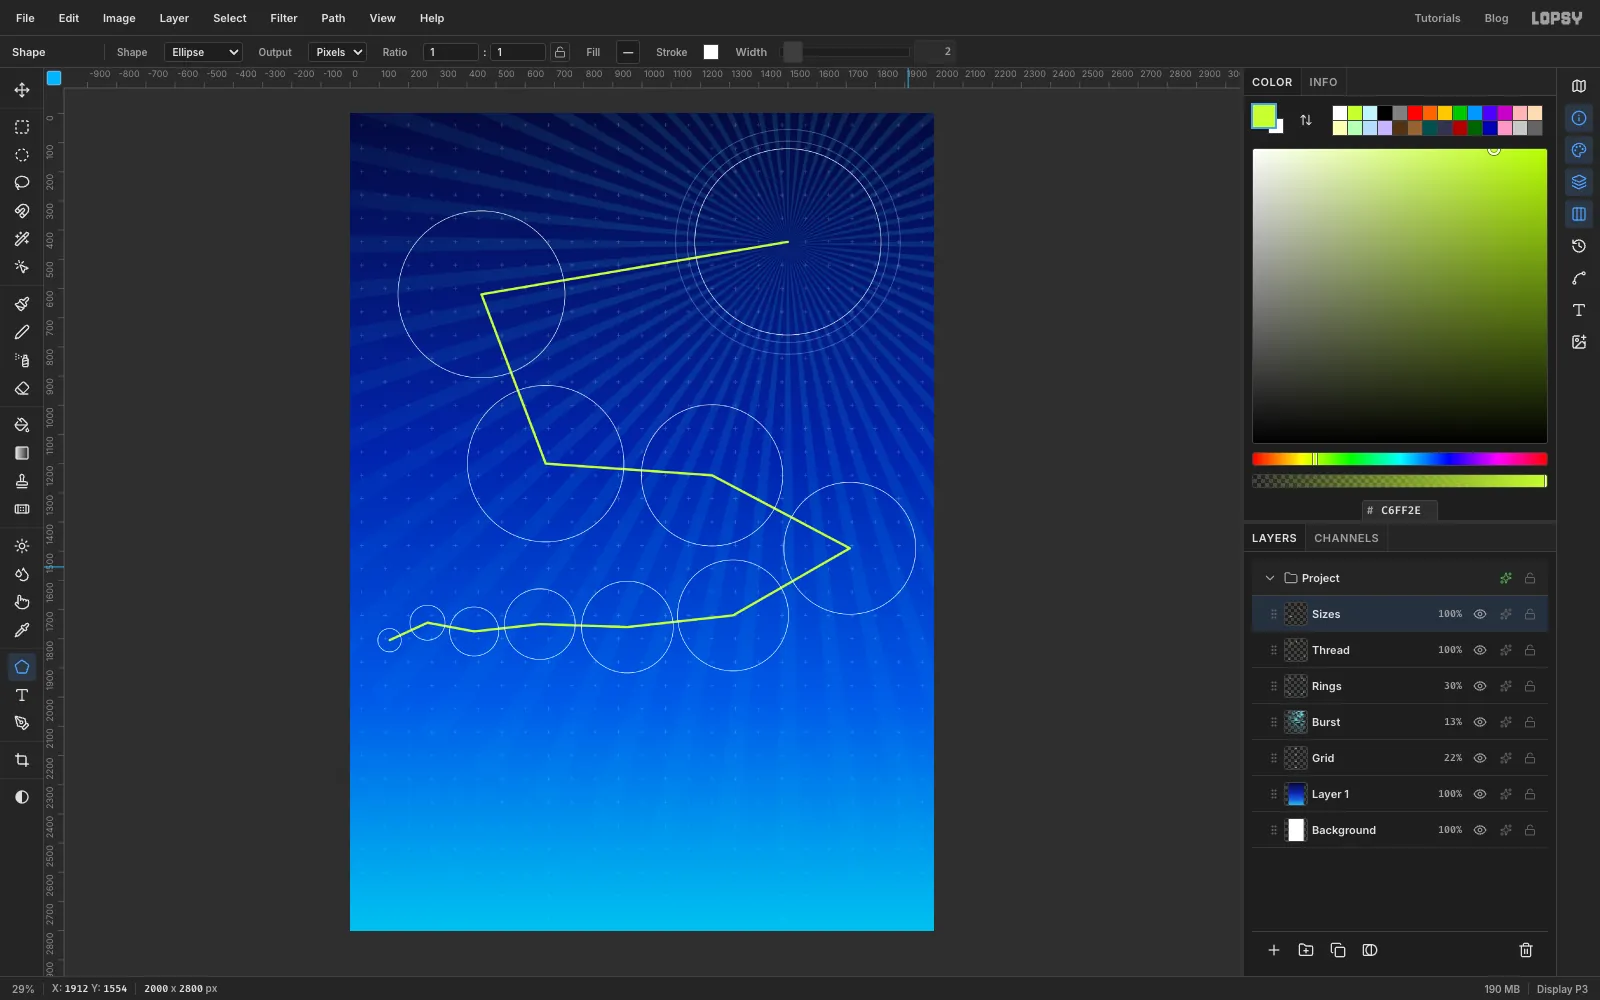
These circles are your plan. Every bubble you make later gets scaled to fit one of them.
- Add a layer named
Sizesand press U. - Click the Stroke swatch, type
FFFFFF, and click the bar at the bottom of the window. Set Width to2. Fill should still be off. - For each year, click its centre once, and enter its diameter for both Width and Height in the dialog.
- Add a layer named
-
Bring in the Earth
With
Sizesselected, click New Group and name the groupBubbles. Keep the group selected so that what you add next lands inside it.Download the 2002 NASA Earth photo from Wikimedia Commons. It's public domain and 2048 px square. Drag the file onto the canvas. It's scaled to the width of the document and arrives selected, so press Cmd+D, then rename the layer
Earth.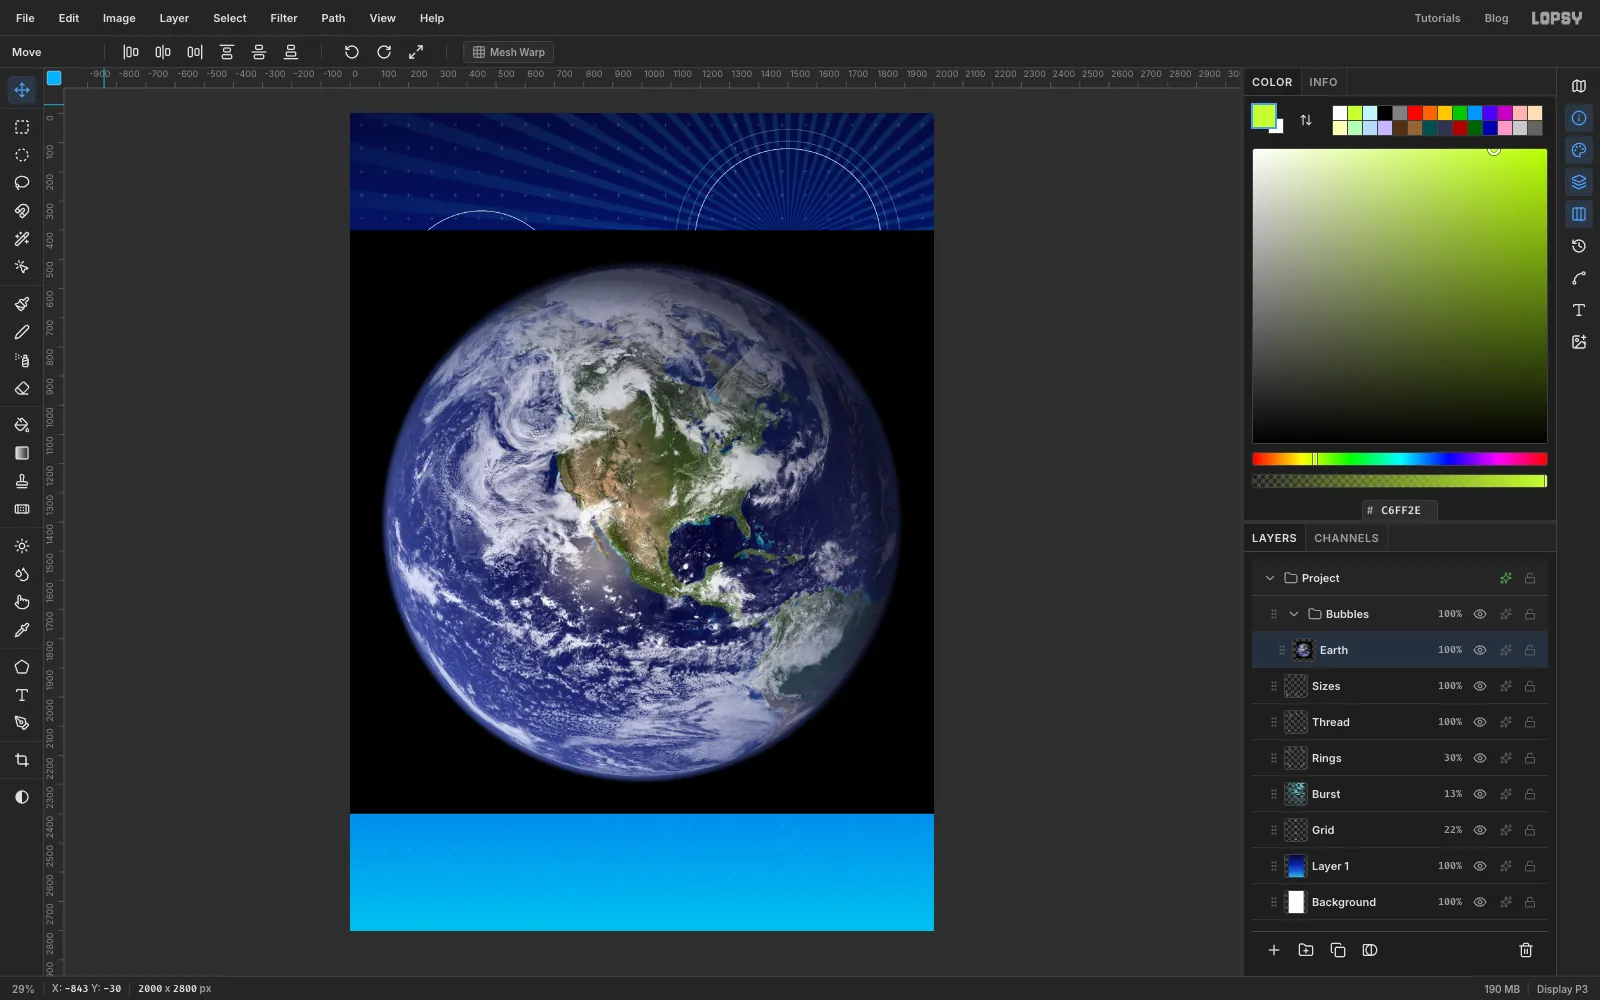
-
Cut out the globe
The photo's black square has to go.
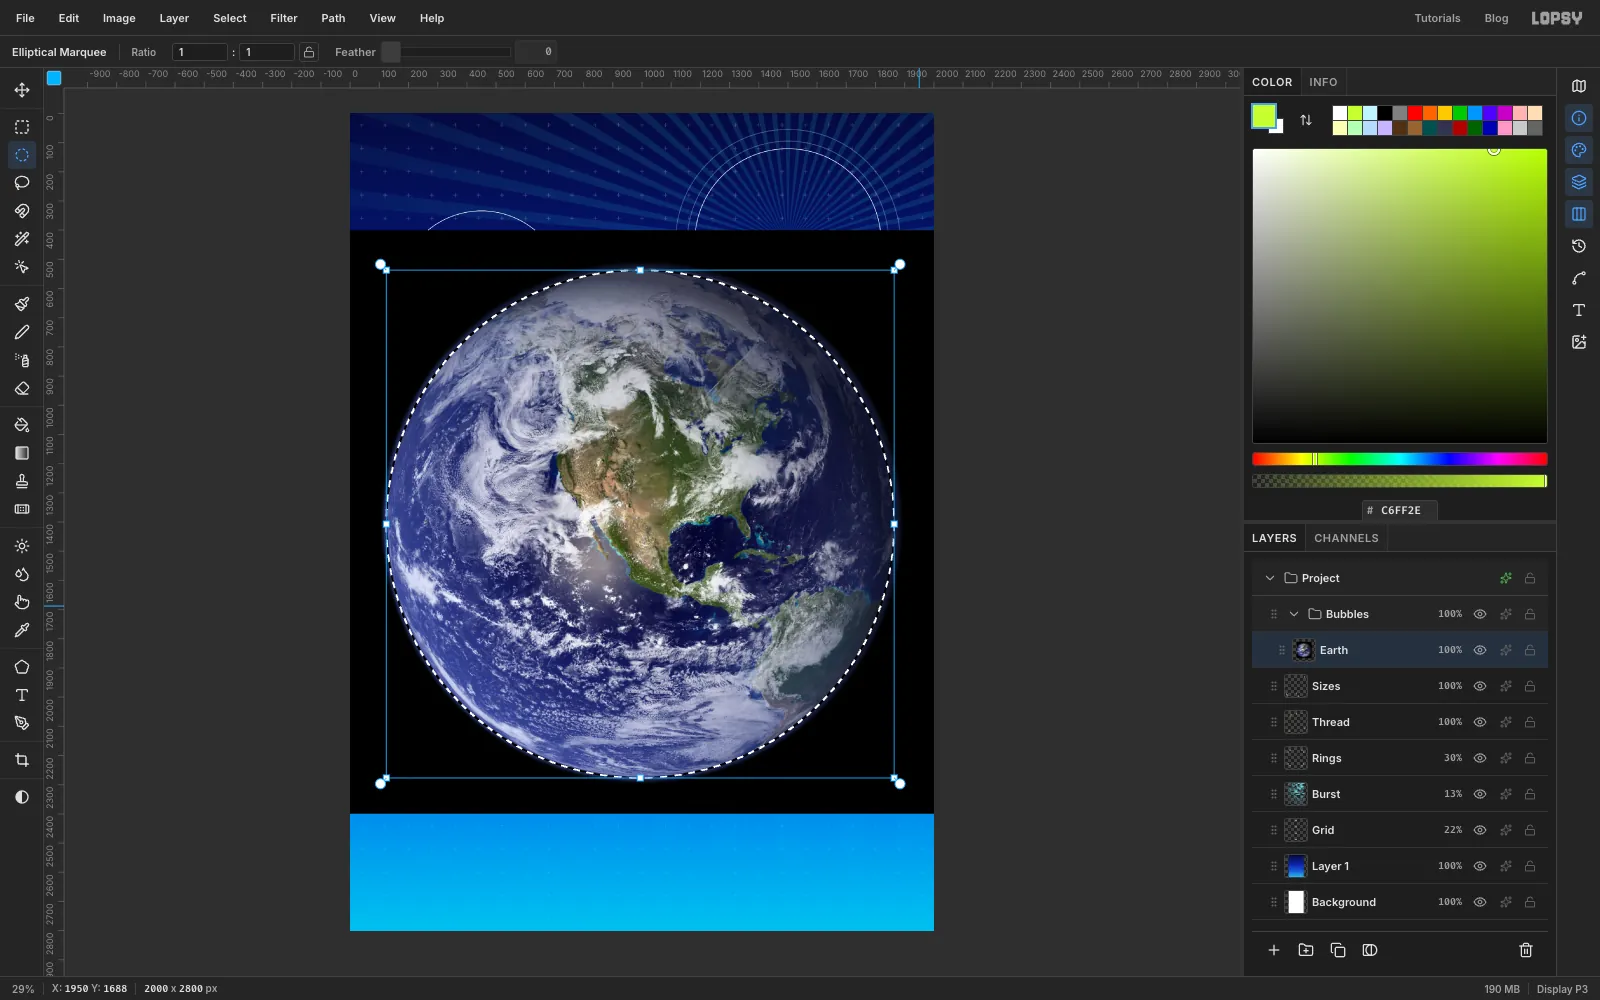
- Click the Elliptical Marquee in the toolbox, and click once on the canvas. Enter From
124, 537and To1864, 2277, and click Select. That's a circle just inside the globe's dark edge. - Choose Select → Inverse, then press Delete.
- Press Cmd+D.
Cutting slightly inside the edge removes the fuzzy dark rim, which would otherwise show as a dirty line against the glass.
- Click the Elliptical Marquee in the toolbox, and click once on the canvas. Enter From
-
Shrink the Earth into place
Scale first, then move.
- Press M, click once on the canvas, and select From
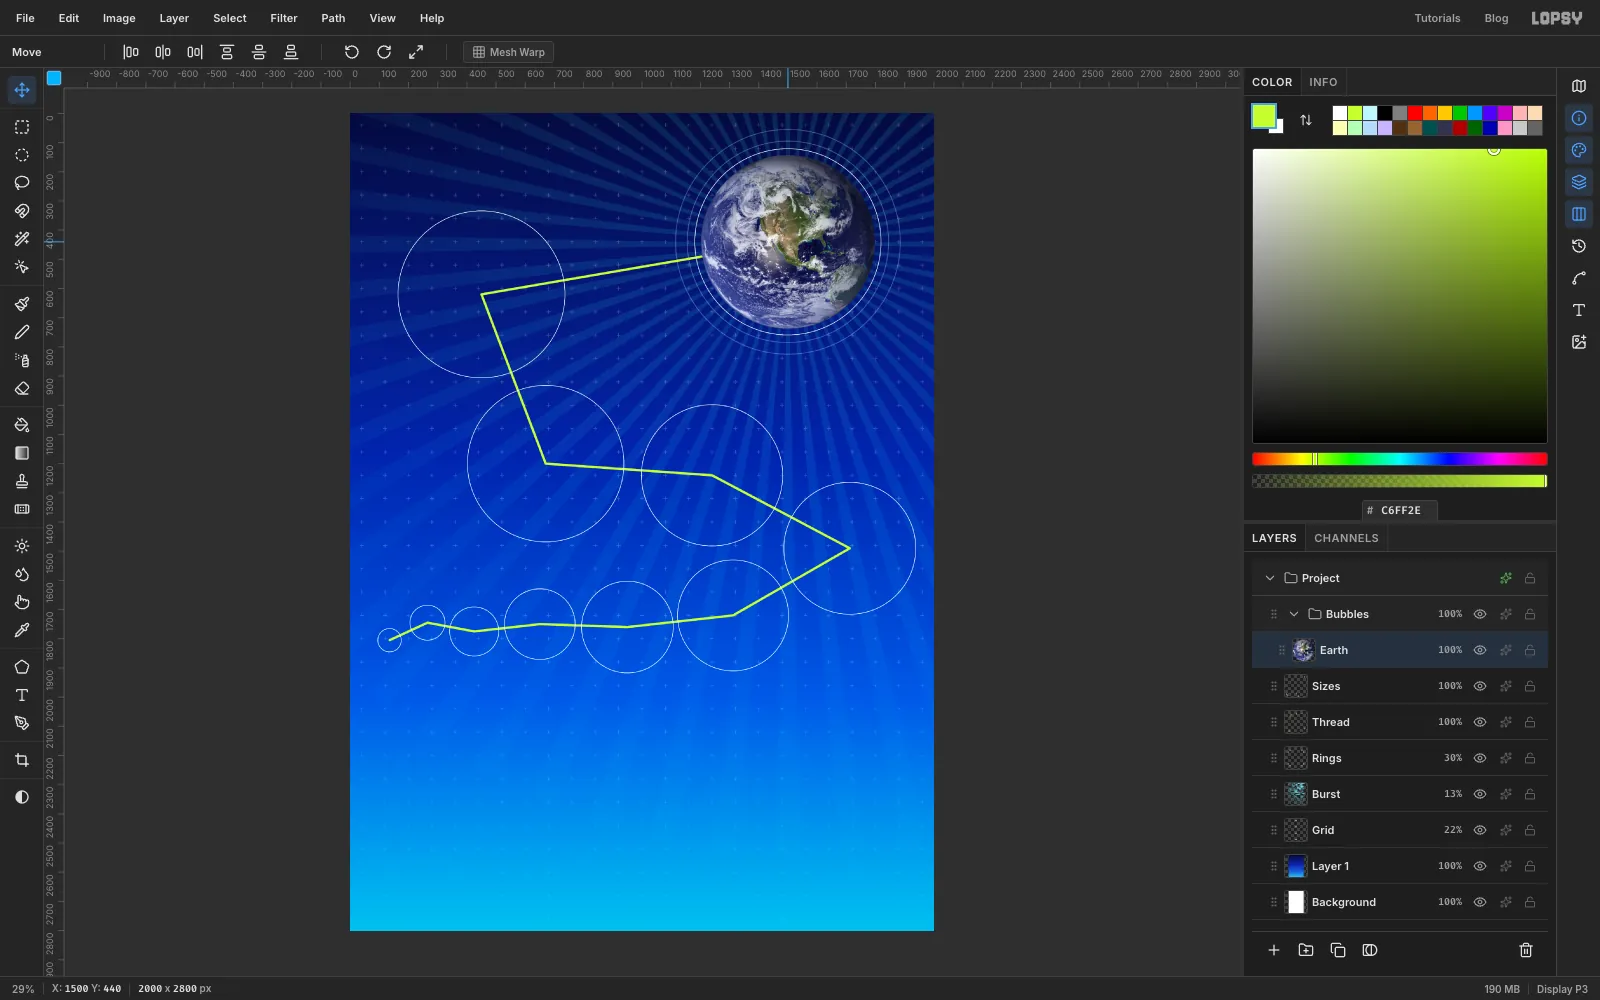
122, 535to To1866, 2279, which is just outside the globe. - Press V for the Move tool. Hold Cmd to keep the proportions, and drag the bottom-right corner handle up and to the left until the globe is just smaller than the 2005 guide, about 596 px wide. The guide is 638 px, so you'll see a gap of about 20 px on each side once it's in place.
- Press Cmd+D to finish the scale.
- Drag the globe until it's centred in the 2005 guide, with an even gap all round.
- Press M, click once on the canvas, and select From
-
Blow the glass
All the bubbles start from this one. Add a layer named
Y2005aboveEarth.- Click the Elliptical Marquee, click once on the canvas, and select From
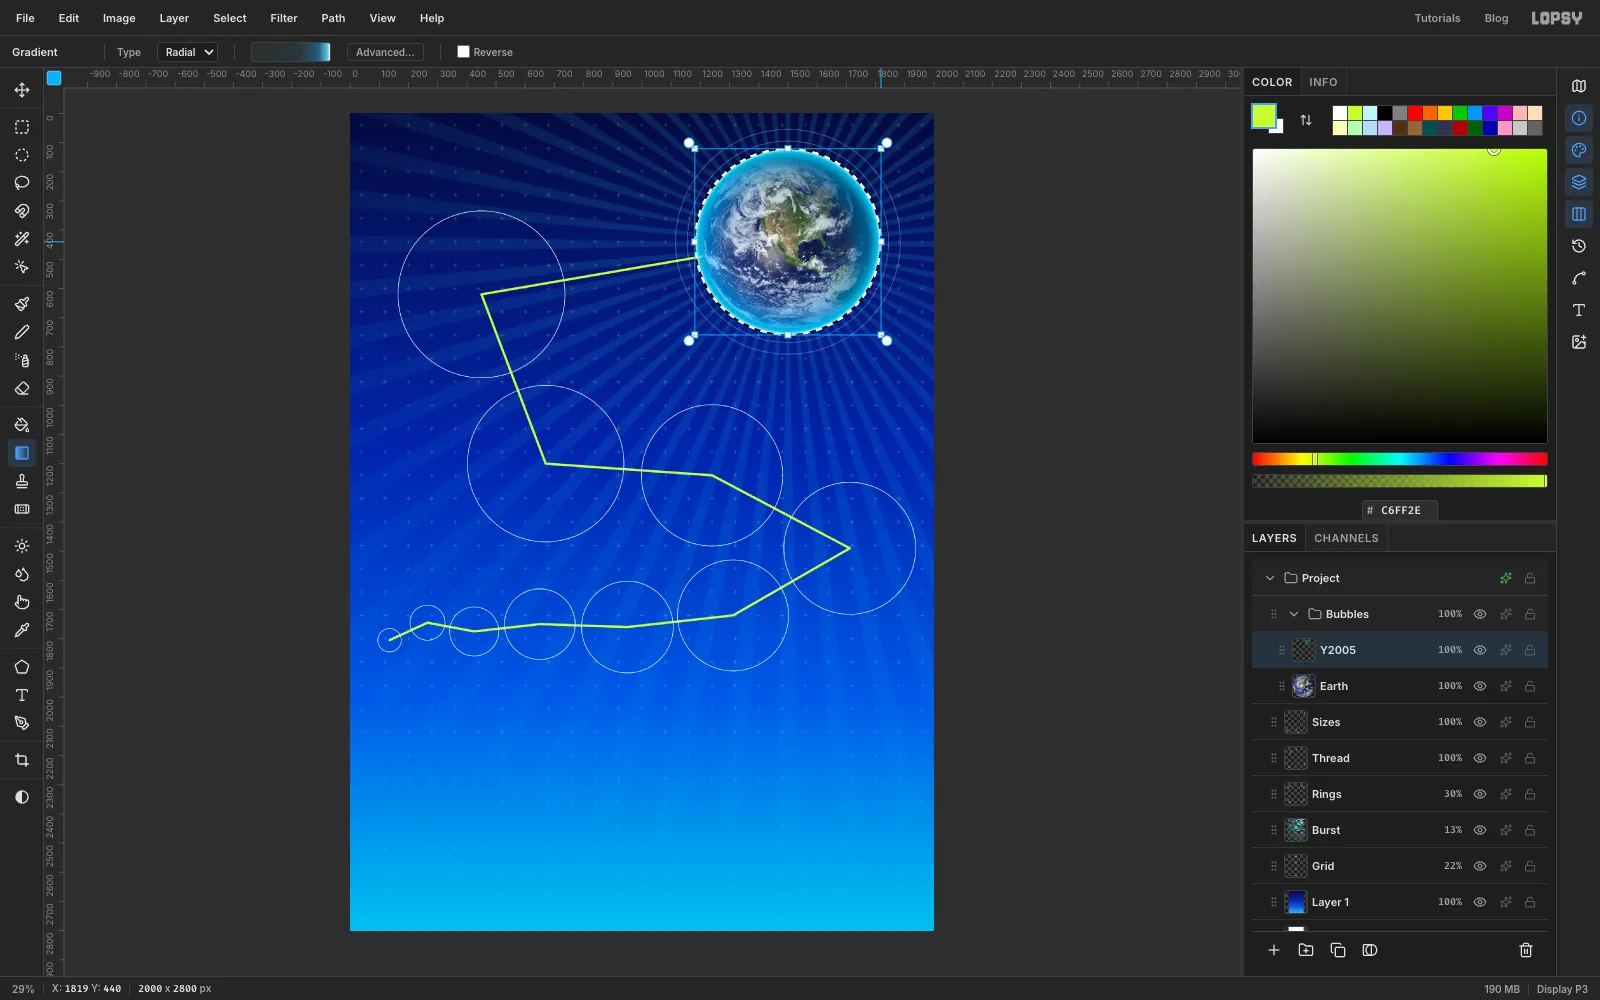
1181, 121to To1819, 759. That matches the 2005 guide. - Pick the Gradient tool, set Type to Radial and click Advanced…. Make five stops. The percentage is the stop's place on the bar, and the opacity is set by eye with the checkered bar under the colour square. It has no readout, so close is good enough:
- at 0%, barely visible
- at 62%, about a tenth
- at 85%, a bit under half
- at 97%, about 85%
- at 100%, full opacity
- Drag from the bubble's centre to its right edge, then let go.
Real glass is nearly invisible in the middle and dense at the edge, because you look through more of it there. That's all this gradient does, and it's why the Earth shows through clearly.
- Click the Elliptical Marquee, click once on the canvas, and select From
-
Select a crescent for the bounced light
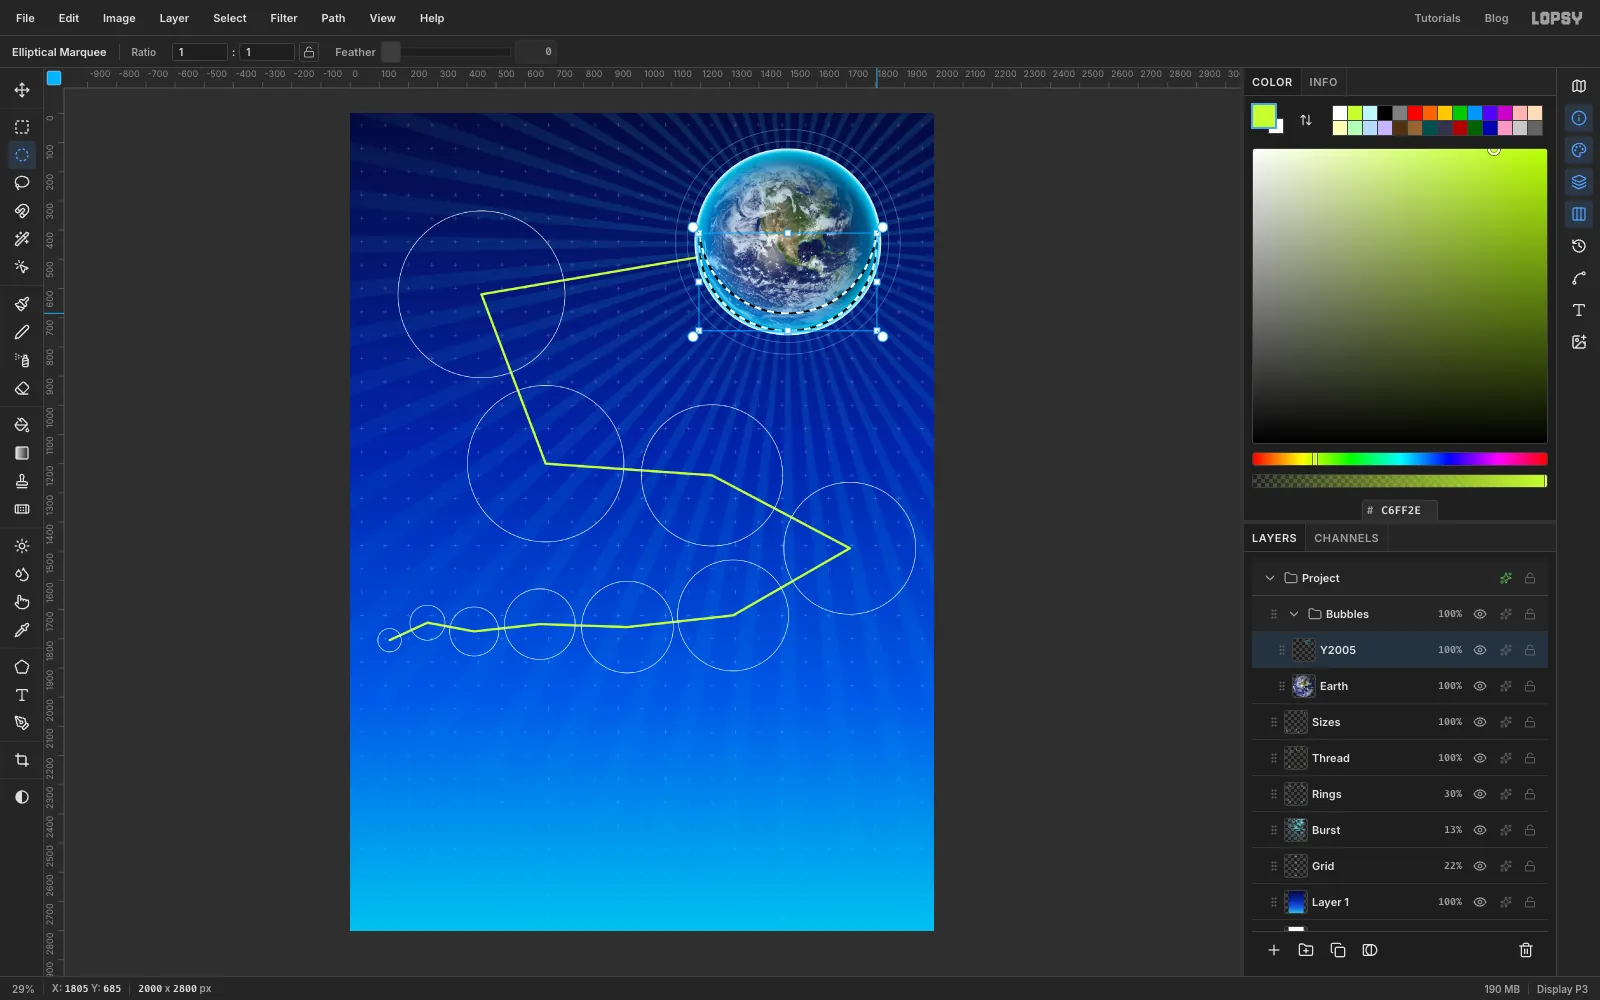
Light that enters a glass ball collects along the side away from the source. That shape is a crescent.
- Press Cmd+D, click the Elliptical Marquee, click once on the canvas, and select From
1195, 135to To1805, 745. - Hold Alt and drag out a circle of about the same size, about 60 px higher than the first. You can't type corners for this one, so go by eye. It needs to run from around
1195, 75to1805, 685. Alt subtracts it, which leaves a crescent along the bottom. - Choose Select → Feather…, enter
10and click Apply.
- Press Cmd+D, click the Elliptical Marquee, click once on the canvas, and select From
-
Fill the crescent
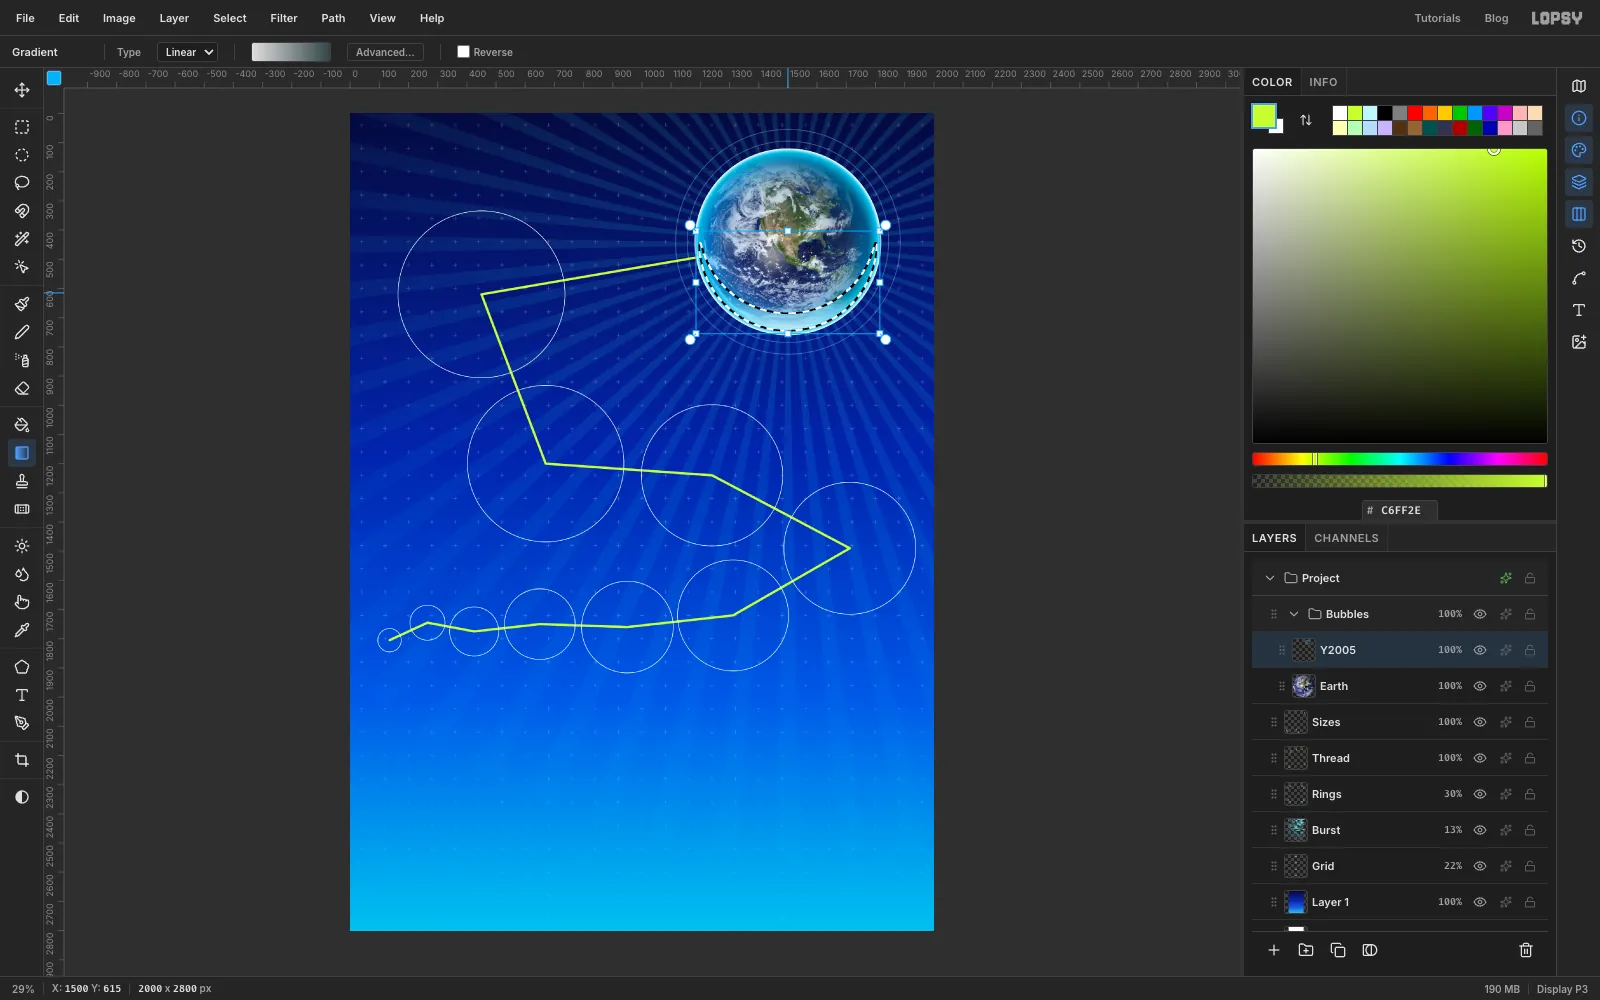
Pick the Gradient tool, set Type to Linear and click Advanced…. Delete the extra stops until two are left: at about 85% opacity on the left, and at about 15% on the right. Click Done.
Drag from the very bottom of the bubble straight up, about a quarter of the way to the top.
-
Add the gloss cap
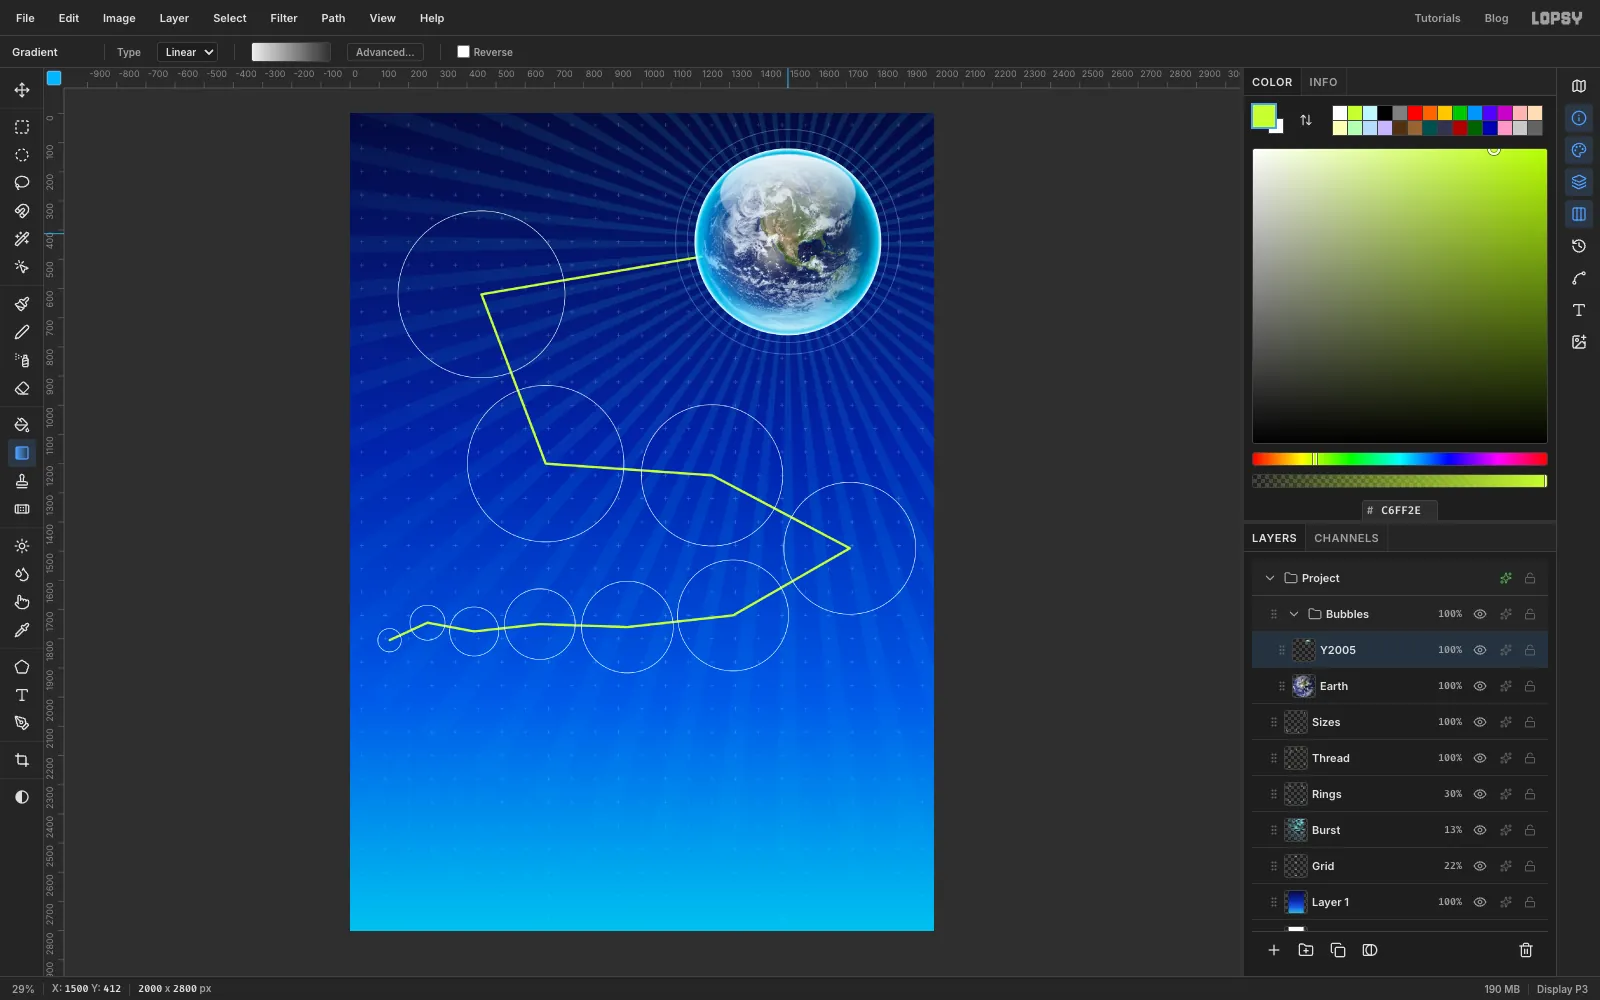
This oval is the look of a window reflected in the glass, and it's what makes the bubble read as Y2K.
- Click the Elliptical Marquee, press Cmd+D, click once on the canvas, and select From
1268, 140to To1732, 412. - Choose Select → Feather…, enter
3and click Apply. - Pick the Gradient tool, still Linear, and make two stops, both : nearly opaque on the left and barely visible on the right.
- Drag from the top of the oval straight down to its bottom.
- Press Cmd+D.
- Click the Elliptical Marquee, press Cmd+D, click once on the canvas, and select From
-
Give it a halo
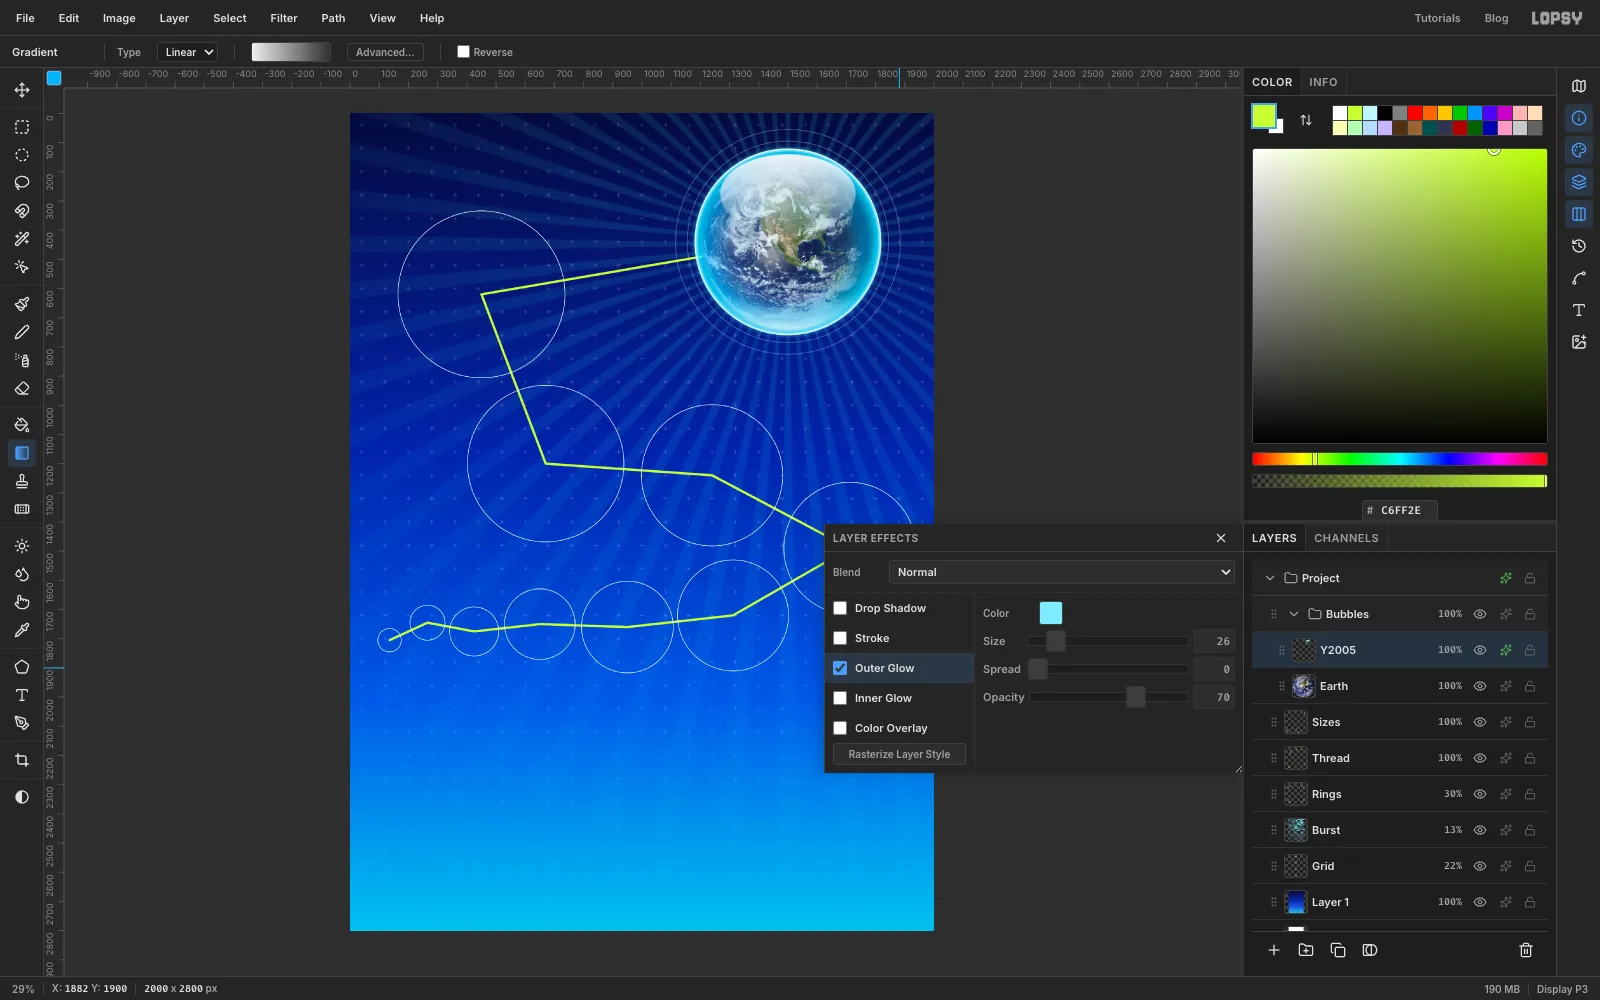
Click the layer's effects button. Tick Outer Glow, click its name to see its settings, and enter Size
26, Spread0and Opacity70, with the colour .Then click Rasterize Layer Style. That bakes the glow into the pixels, so it shrinks along with each copy later. A live glow would stay 26 px on a bubble a tenth of the size, and the small ones would look radioactive. Close the drawer.
-
Look at it up close
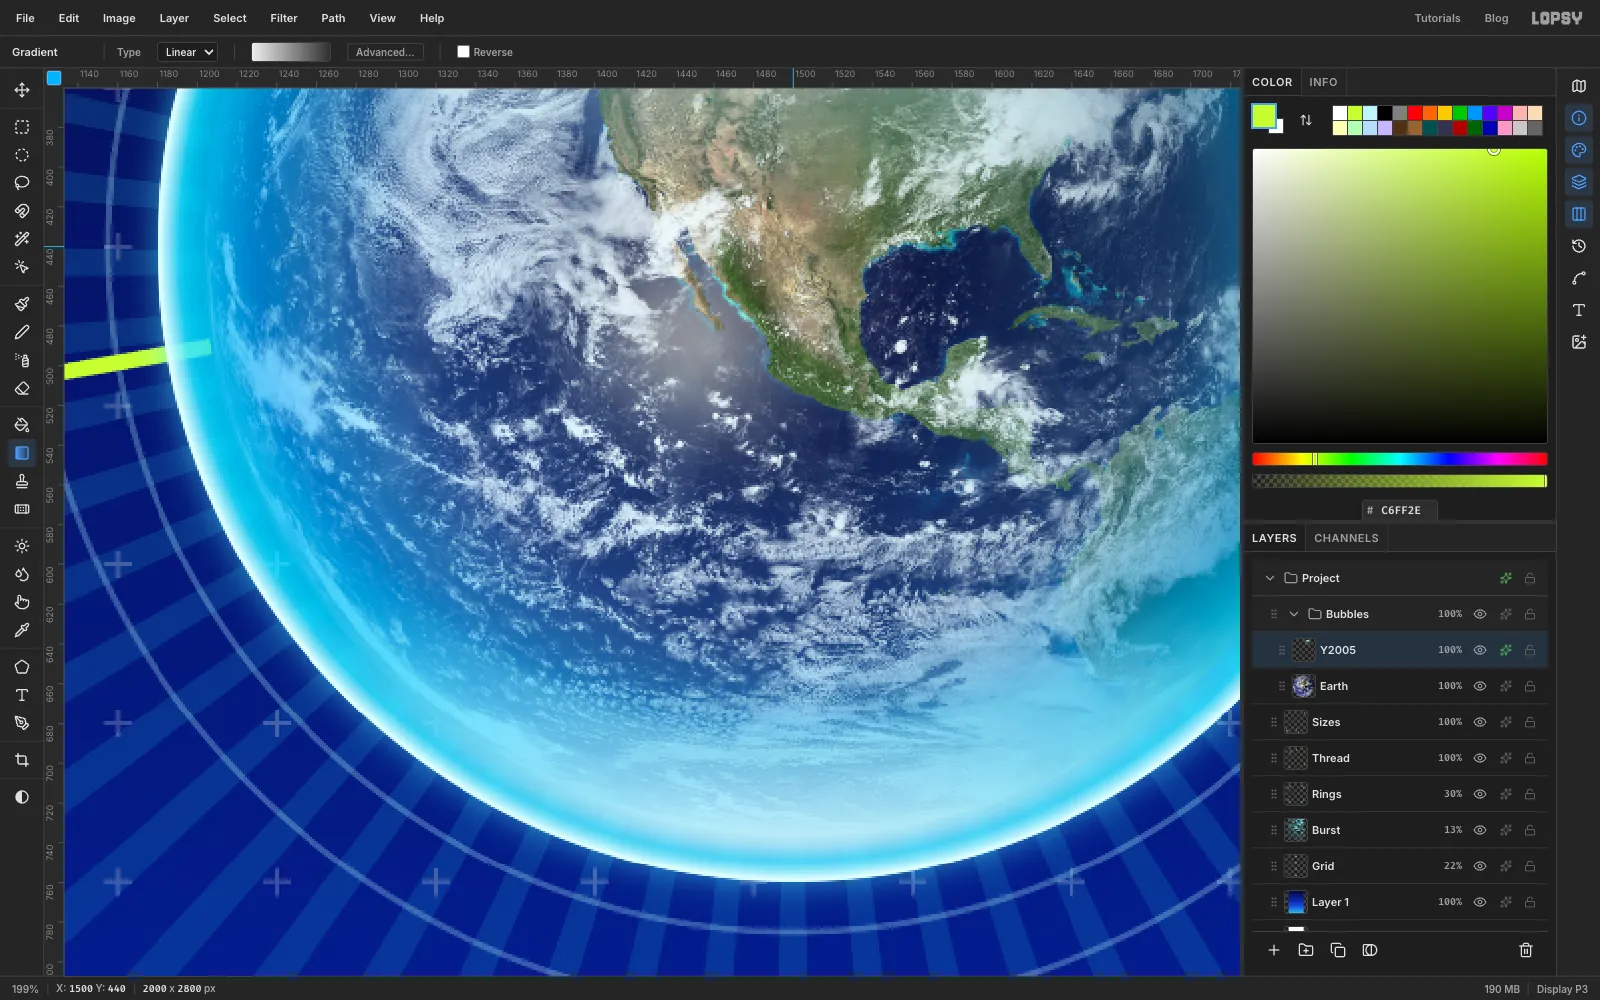
Zoom in with Cmd and the scroll wheel, and check three things: the rim is brightest at the very edge, the Earth is clear through the middle, and the gloss fades before it reaches the centre. If the gloss is too strong, undo back to it and lower its top stop. Everything after this is copies, so fix it now. Choose View → Fit to Screen to go back.
-
Make the first copy
Each year is a copy of the one after it, scaled down. Do 2004 slowly, and the rest follow the same pattern.
- Select
Y2005, press V and click Duplicate Layer. Rename the copyY2004, and click its row so it's the only layer selected. - Press M and drag a marquee around the bubble and its glow. There's nothing else on this layer, so leave plenty of room.
- Press V, hold Cmd, and drag the bottom-right corner handle inward. Zoom in if you need to, and stop when the bubble is the same width as the 2004 guide. You'll drag it over the guide next, so judge the width against the list: 572 px.
- Press Cmd+D, then drag the bubble onto its guide. Use the arrow keys for the last few pixels, and if its rim doesn't match the ring, undo and scale again.
- Choose Filter → Hue/Saturation…, set Hue to
28and click Apply.
Make
Y2003the same way, duplicatingY2004, with a Hue of-14.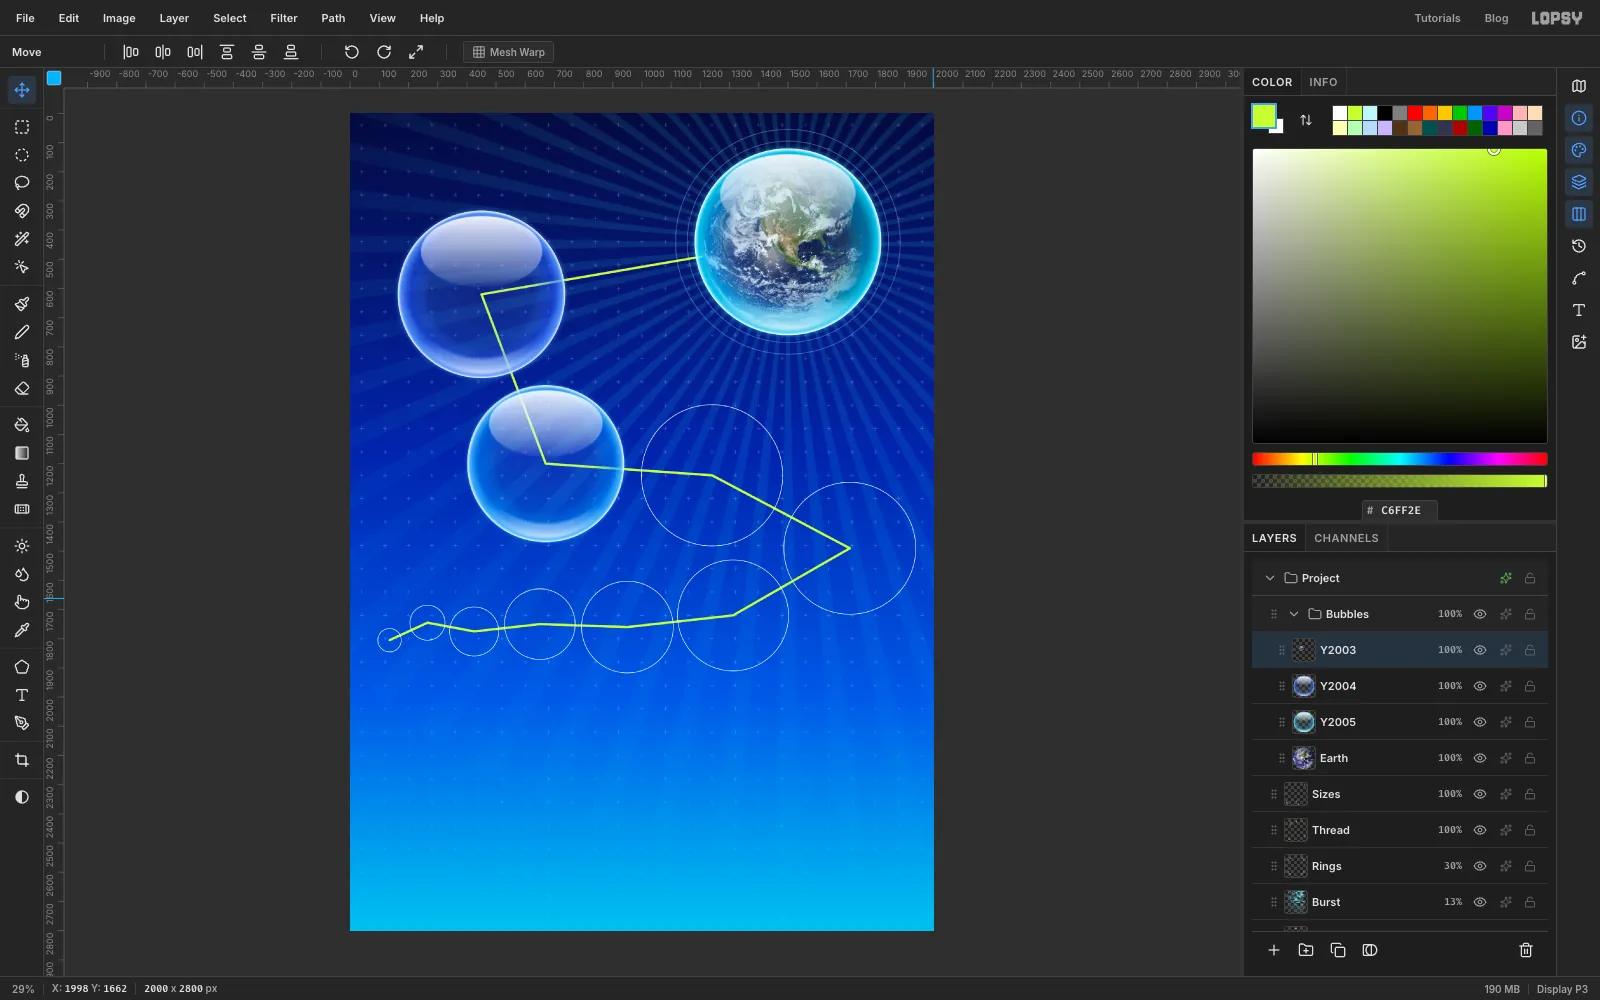
- Select
-
Make the other eight bubbles
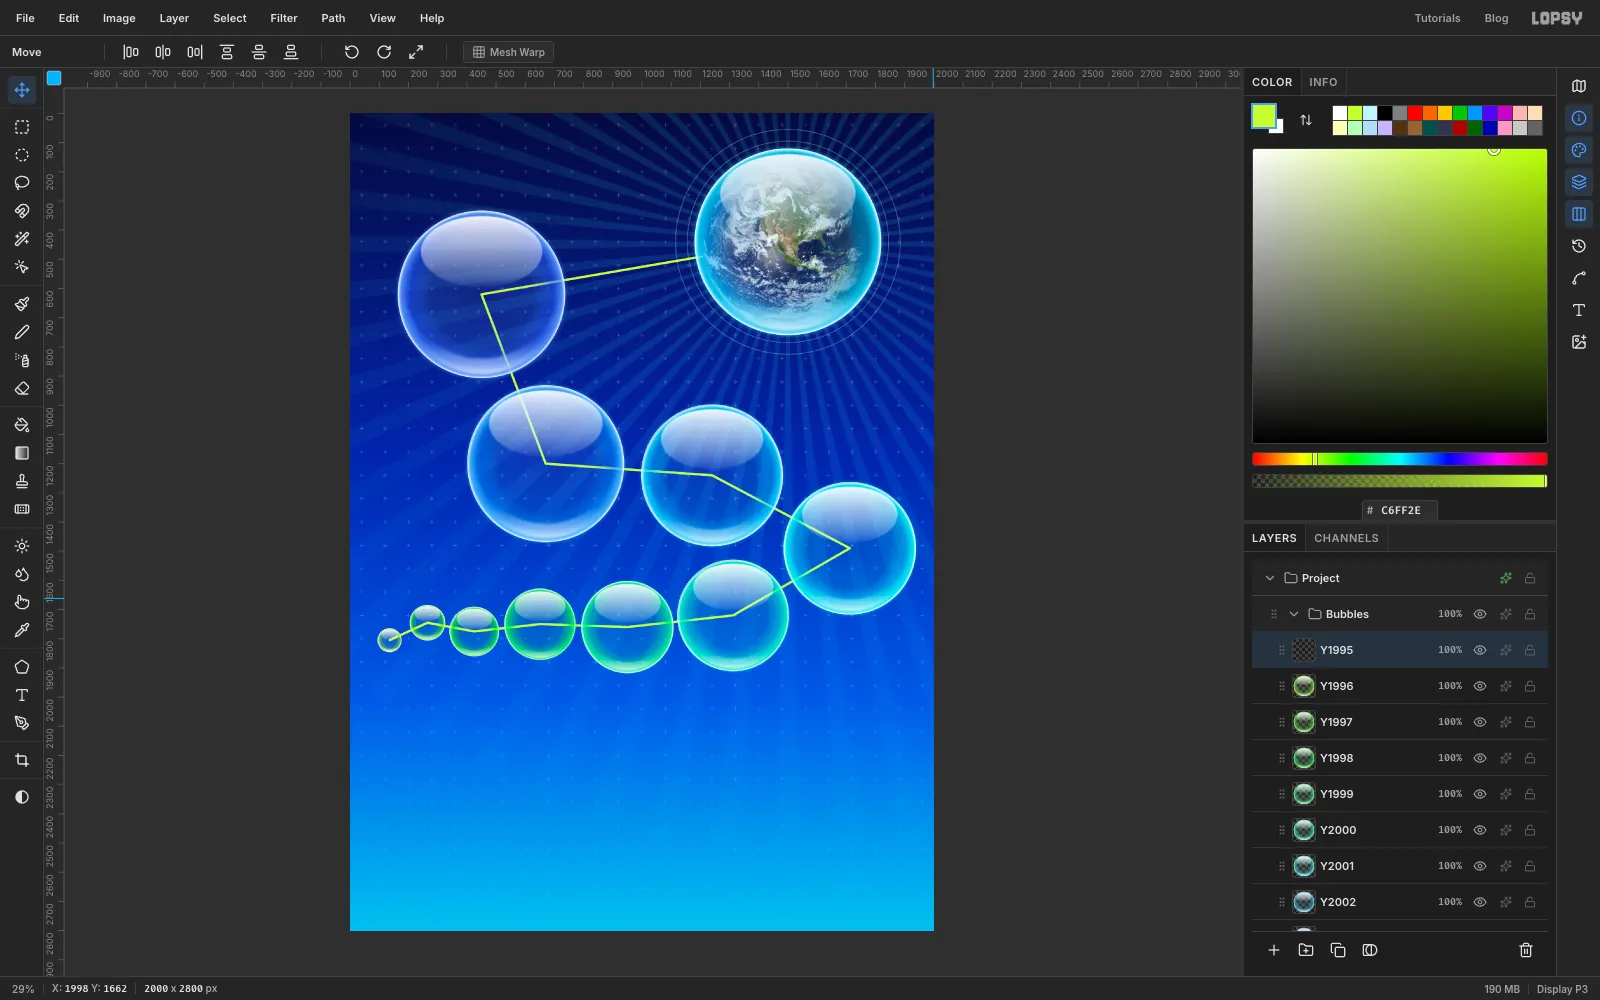
Repeat that for each year, working backward, and always duplicate the year you just made. Each marquee just needs to take in the whole bubble and its glow. Zoom in for the small ones, because the handles are nearly as big as the 1995 bubble at fit zoom.
The hue is relative, because each copy starts from the last one's colour. Use these:
Y2002:-14Y2001:-16Y2000:-16Y1999:-18Y1998:-18Y1997:-17Y1996:-15Y1995:-15
The colour now tells you about time too, drifting from green through aqua to blue as the years pass. The Earth's own bubble stays as it is.
-
Clear the thread out of the bubbles
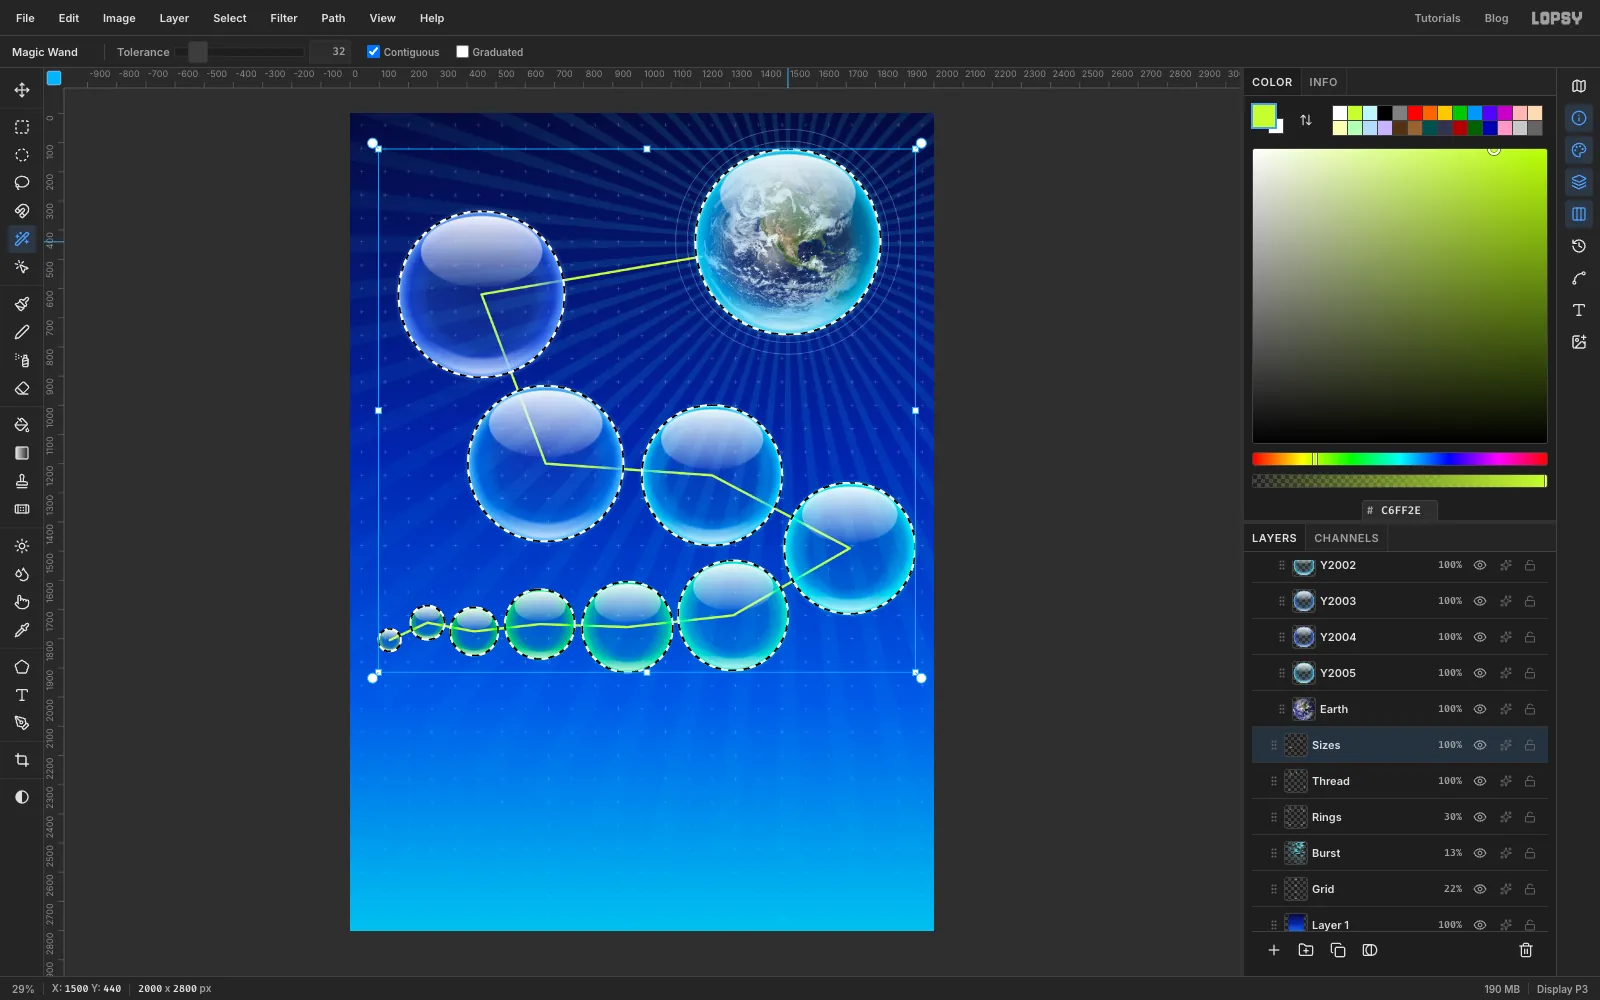
The thread runs right through every bubble, and it would sit behind the numbers. Your guides make it easy to cut.
- Click the
Sizeslayer and press Cmd+D. Press W for the Magic Wand and make sure Contiguous is ticked. - Click inside the 1995 guide, then hold Shift and click inside each of the others. The white rings stop the selection from spreading.
- Click the
Threadlayer, press Delete, and press Cmd+D.
- Click the
-
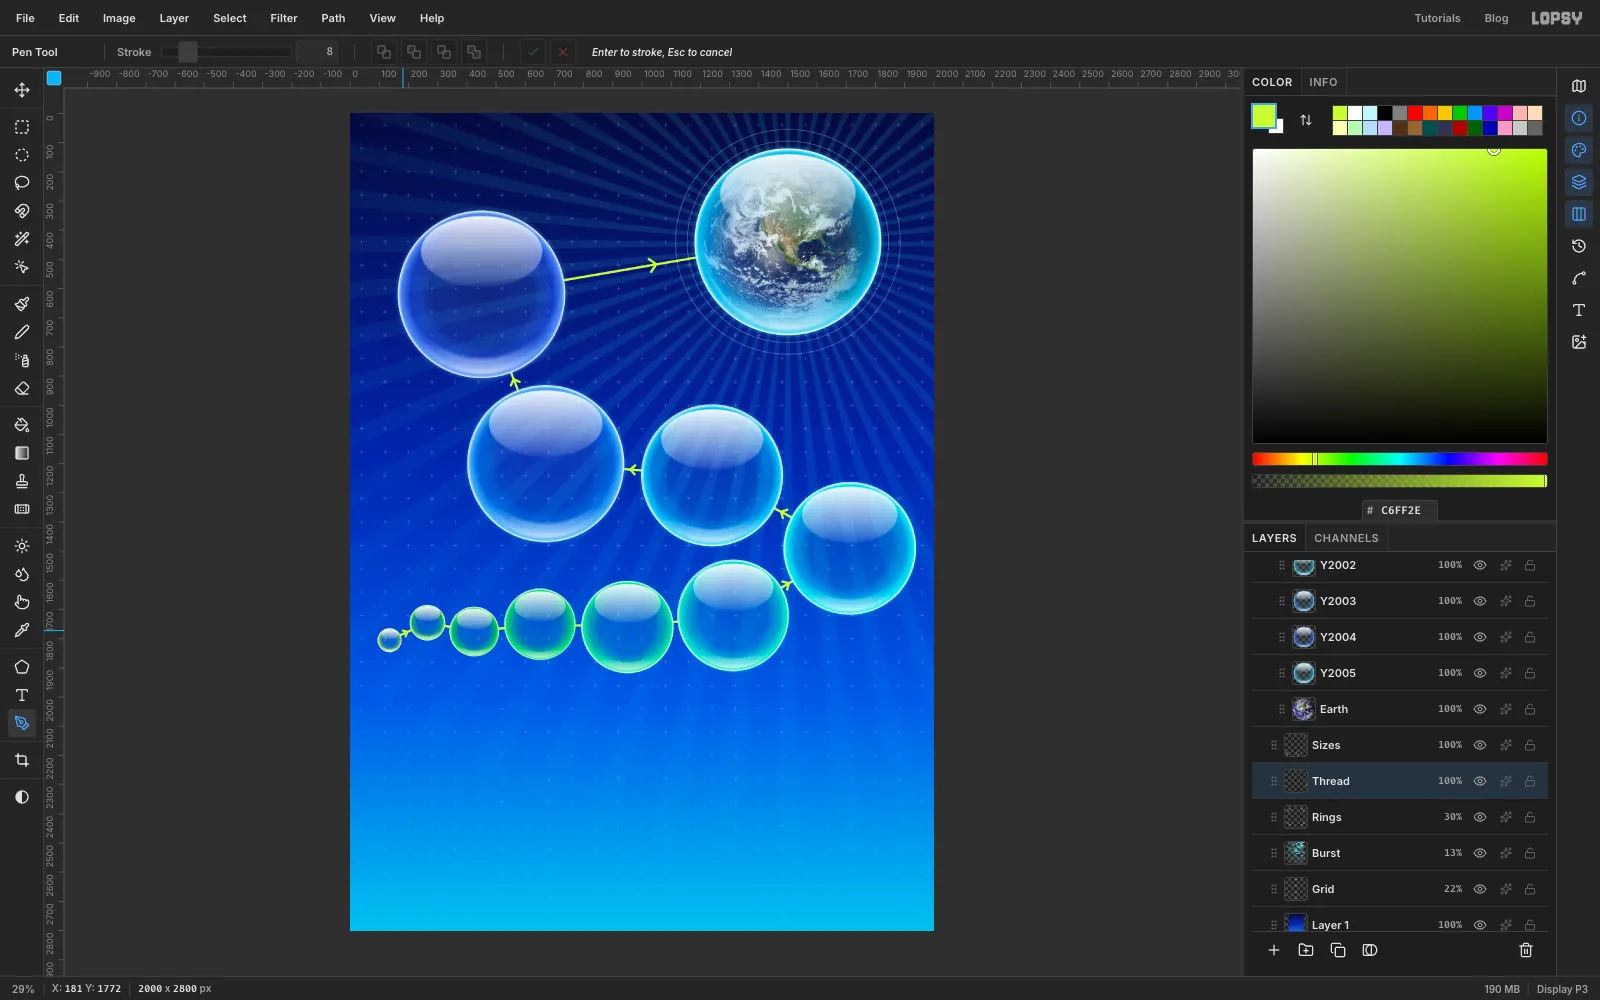
Add arrowheads
From 2000 on, the chart doubles back, so readers need to be told which way time runs. Stay on
Thread.- Press P. Stroke should still be
8and the foreground lime. - Zoom in on the gap between the 2000 and 2001 bubbles. Click three times to make a small
>shape that points toward 2001, with arms about 16 px long. Press Enter to stroke it. - Open Paths, click Delete Path, and close the panel. Otherwise your next click could edit this path.
Do the same on the links from 2001 to 2002, 2002 to 2003 and 2003 to 2004, keeping each one clear of the rims. Make a slightly bigger one partway along the long link from 2004 to 2005, and a tiny one between 1995 and 1996. The other links in the bottom row are too short to fit an arrow, and that row already reads left to right.
- Press P. Stroke should still be
-
Light the thread and hide the guides
With
Threadstill selected, open Layer Effects, tick Outer Glow, and use Size16, Spread0, Opacity80, with the colour . Close the drawer.Click the eye on the
Sizesrow to hide it. Keep the layer. If you ever need to check the numbers again, it's one click away.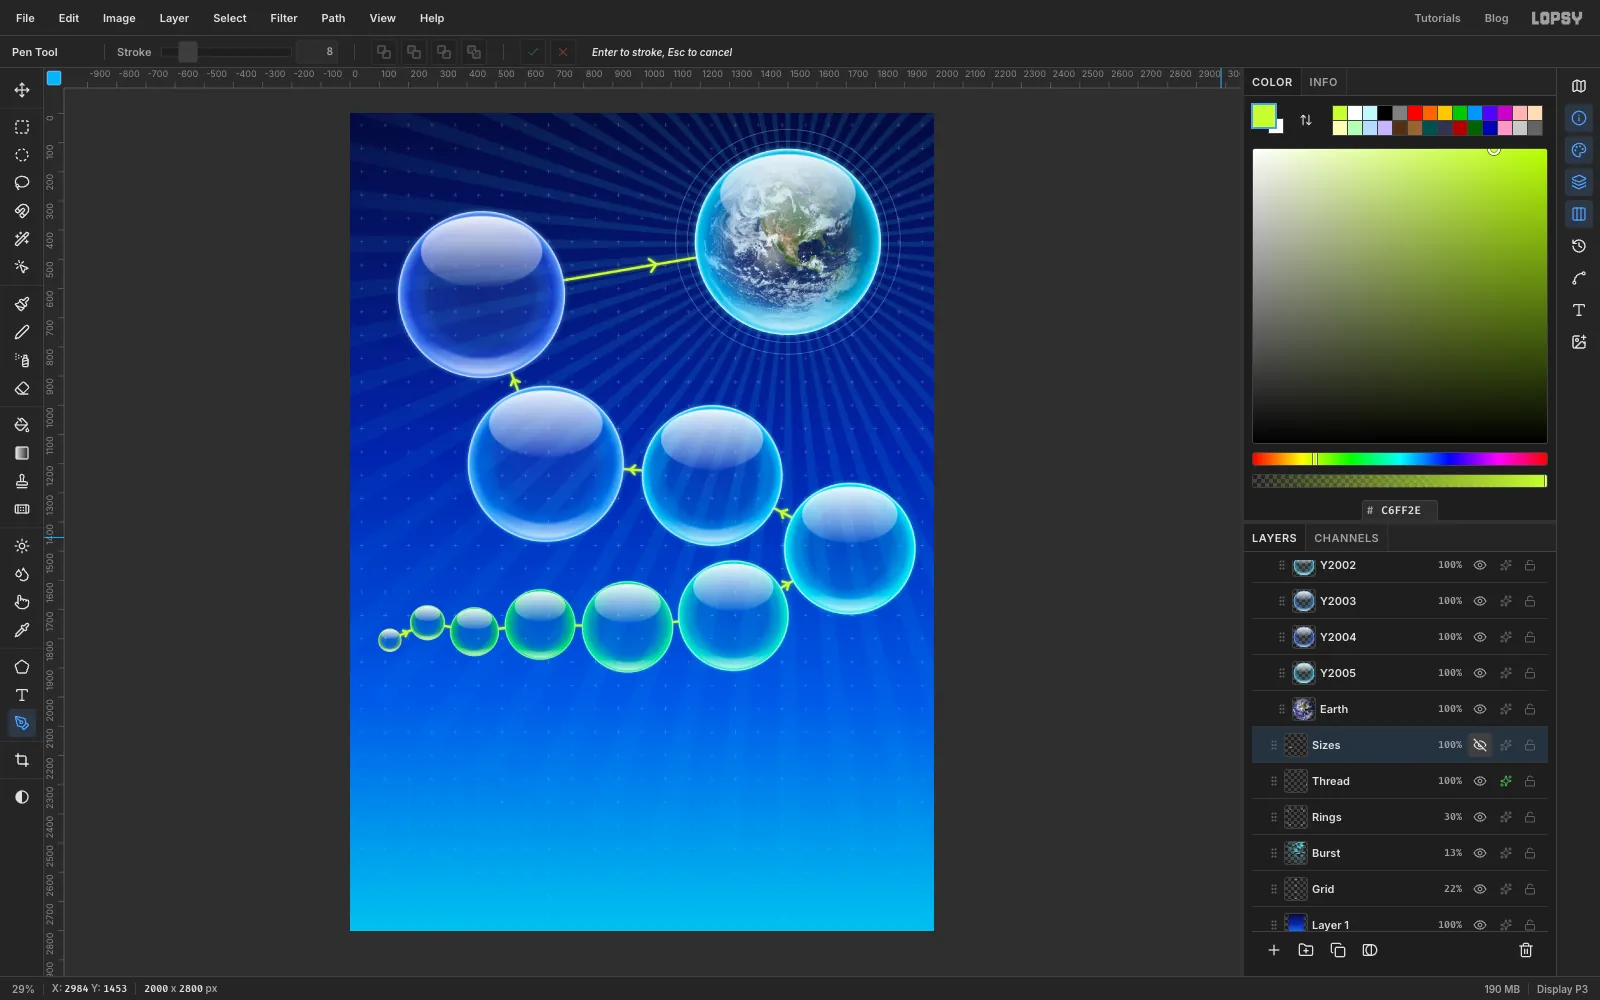
-
Label the big bubbles
Click the
Bubblesgroup's row to select it, then click its arrow to collapse it. With a collapsed group selected, new things land above it. Click New Group, name itLabels, and add a layer inside it namedLeaders.For each bubble from 1998 to 2004, make two pieces of text. Press T, set Align to Center in the options bar, and click at the bubble's centre
xso the text centres on your click.- Year: Silkscreen, weight Regular, colour , just below the bubble's centre
- Number: Michroma, colour white, below the year, such as
817M
Commit each one with Tab. Sizes for each bubble, as year / number:
- 1998:
24/42 - 1999:
30/60 - 2000:
34/72 - 2001:
40/86 - 2002:
42/92 - 2003:
46/102 - 2004:
50/110
Press V and use the arrow keys to adjust each one so the pair sits in the clear glass under the gloss, with the year close above its number. The screenshots show these layers renamed to
yr 2004,val 2004and so on. That's optional, but it keeps a long list readable.On each label, open Layer Effects and add a Drop Shadow: Offset X
0, Offset Y3, Blur8, Opacity75, colour . It stops white type from dissolving where it crosses a bright rim.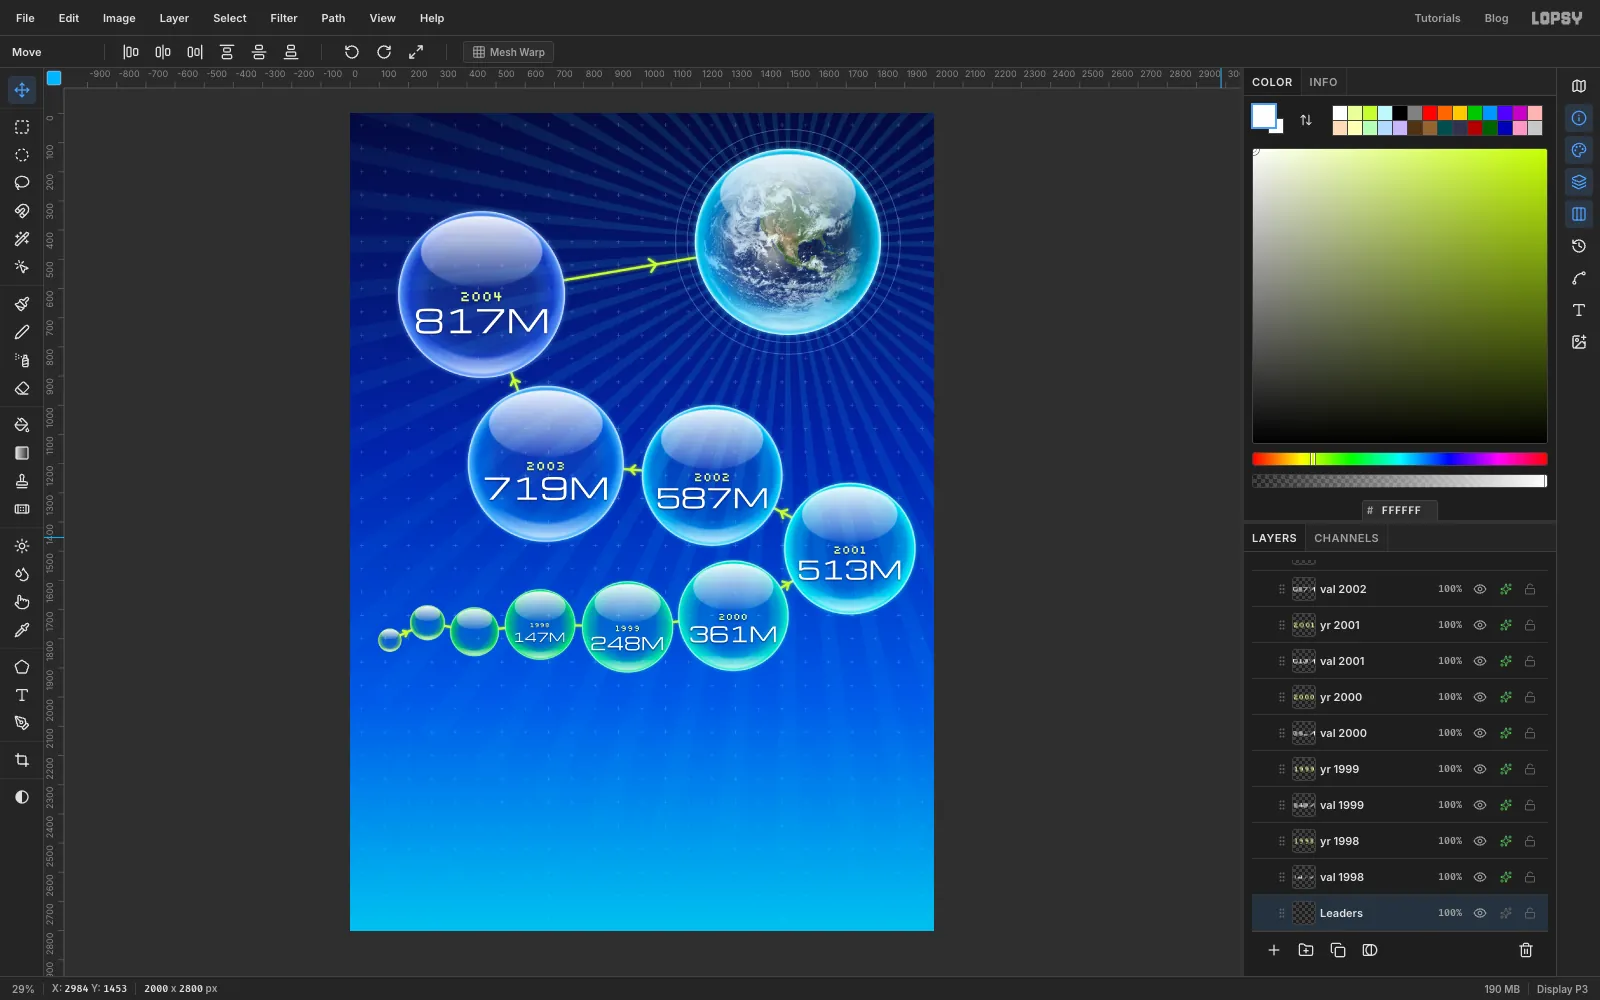
-
Label the small bubbles
The bubbles for 1995, 1996 and 1997 are too small to hold text, so their labels go below them. Use size
28Michroma in white for the number and size20Silkscreen in for the year, both centred. Click below each bubble, on its centrex.Make the number first, about 60 px under the bubble, and the year second, just under the bubble. Clicking within a few pixels of existing text edits that text, so working upward keeps you clear of it. Then nudge the pair with the arrow keys so the year sits about 22 px under the bubble and the number about 54 px under it. Click
Leadersbefore you start each new piece of text.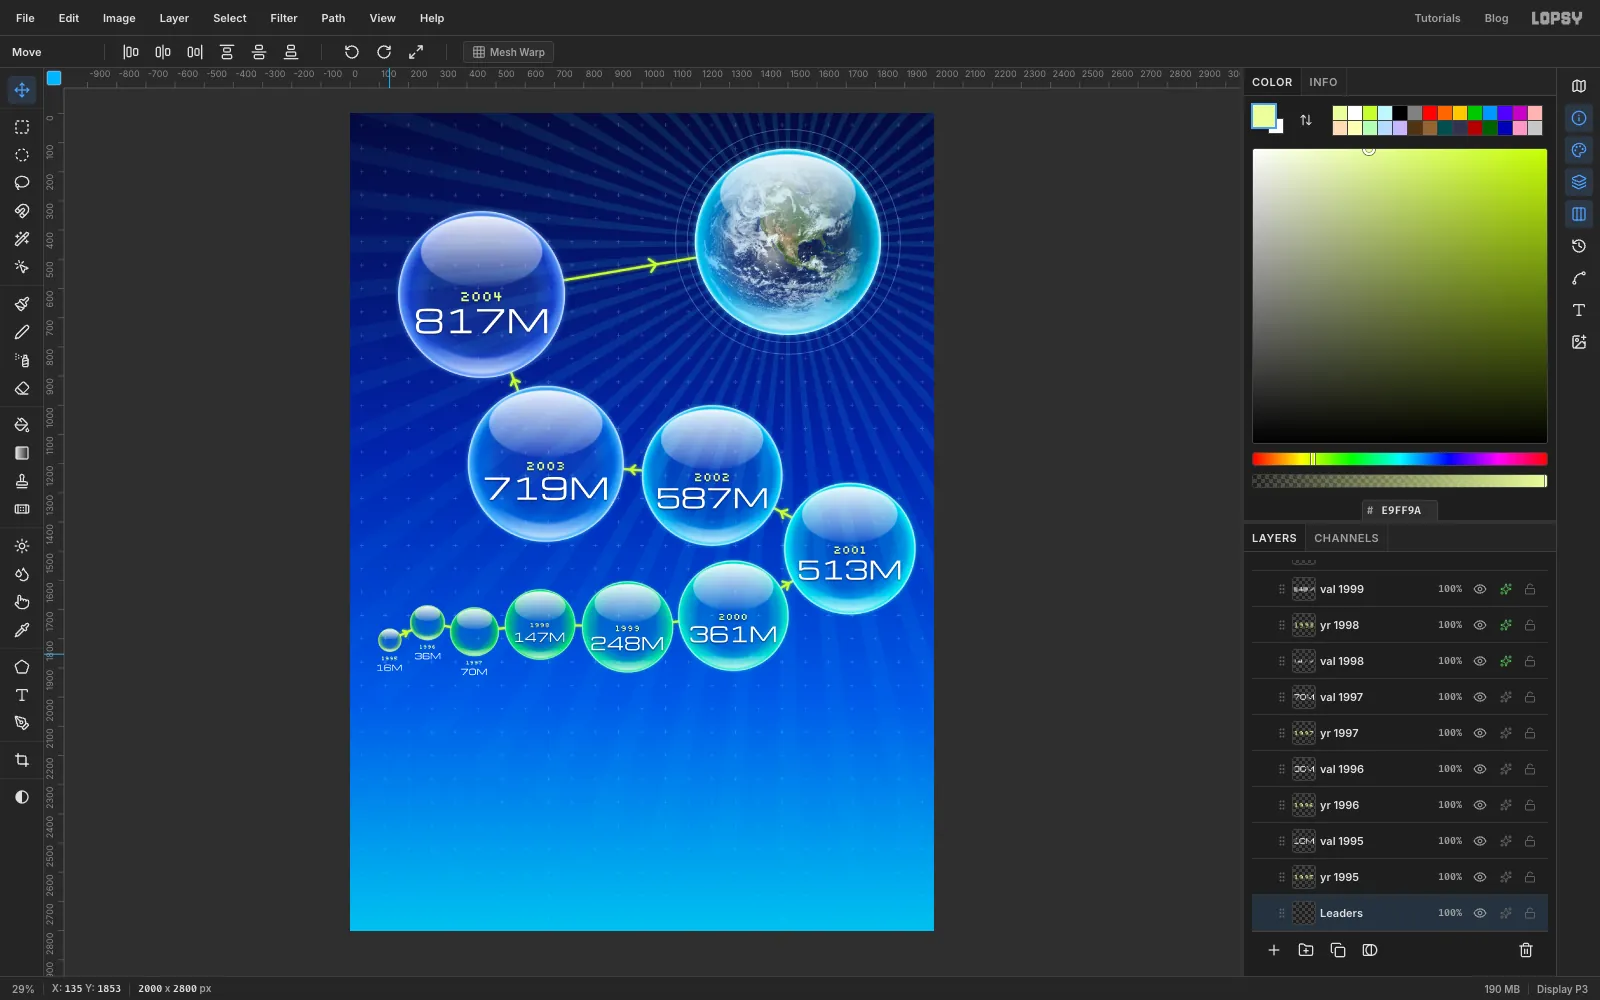
-
Make the pill
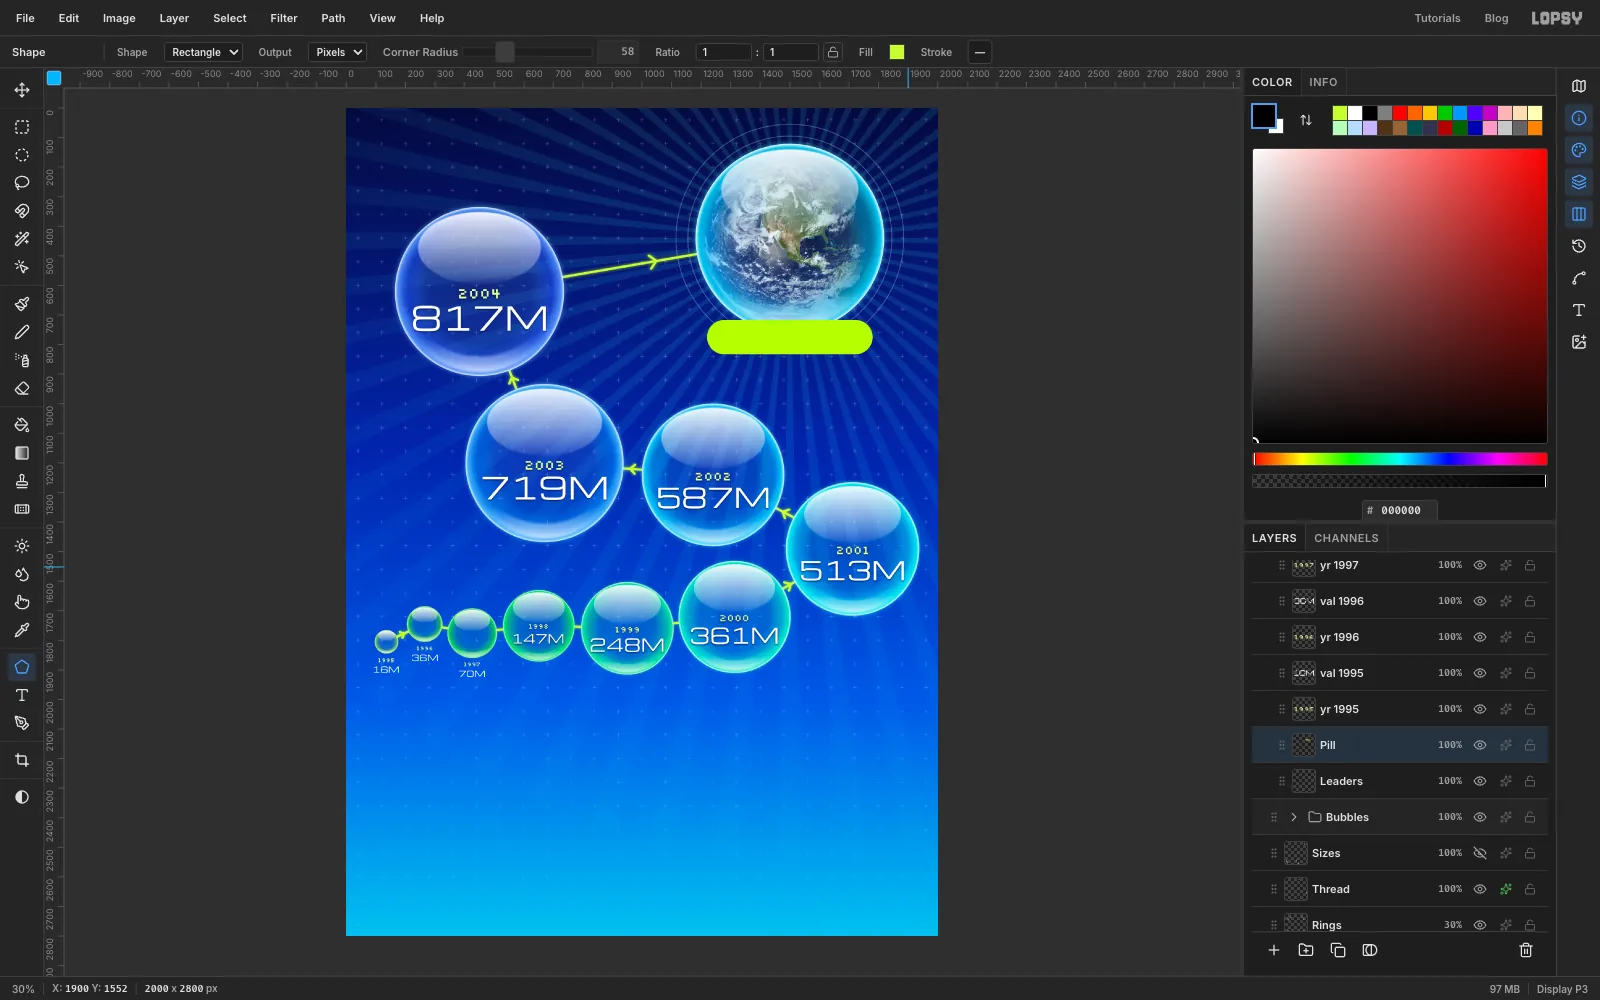
The 2005 number gets a gel button of its own, because the Earth fills that bubble.
- Click
Leaders, and add a layer namedPill. - Press U, and set Shape to Rectangle and Corner Radius to
58. - Click the Fill dash and enter
C6FF2E. Click the Stroke swatch and click Remove stroke. Click the bar at the bottom of the window. - Click once at
1500, 775. Enter Width560and Height116.
The pill overlaps the bubble's rim by about 40 px on purpose. If two curves only just touch, the eye keeps snagging on the spot.
- Click
-
Turn the pill into gel
- Hold Cmd and click the
Pillthumbnail to select its shape. - Make a linear gradient with three full-opacity stops, , in the middle and , and drag from the pill's top to its bottom.
- Click the Elliptical Marquee, press Cmd+D, click once on the canvas and select From
1250, 721to To1750, 769. Make a linear gradient with two stops, about 85% opacity on the left and barely visible on the right, and drag straight down through the oval. Press Cmd+D. - In Layer Effects, add a Stroke with Width
3and colour , and a Drop Shadow with Offset Y10, Blur18, Opacity60, colour .
With
Pillselected, press T, set the font to Michroma at60and the colour to , and click near1590, 735. Type1,018Mand press Tab. ClickPillagain, set Silkscreen at32, and click near1310, 755, well to the left of the number. Type2005and press Tab. Press V, and use the arrow keys to nudge them so each sits 48 px in from its end of the pill, centred top to bottom.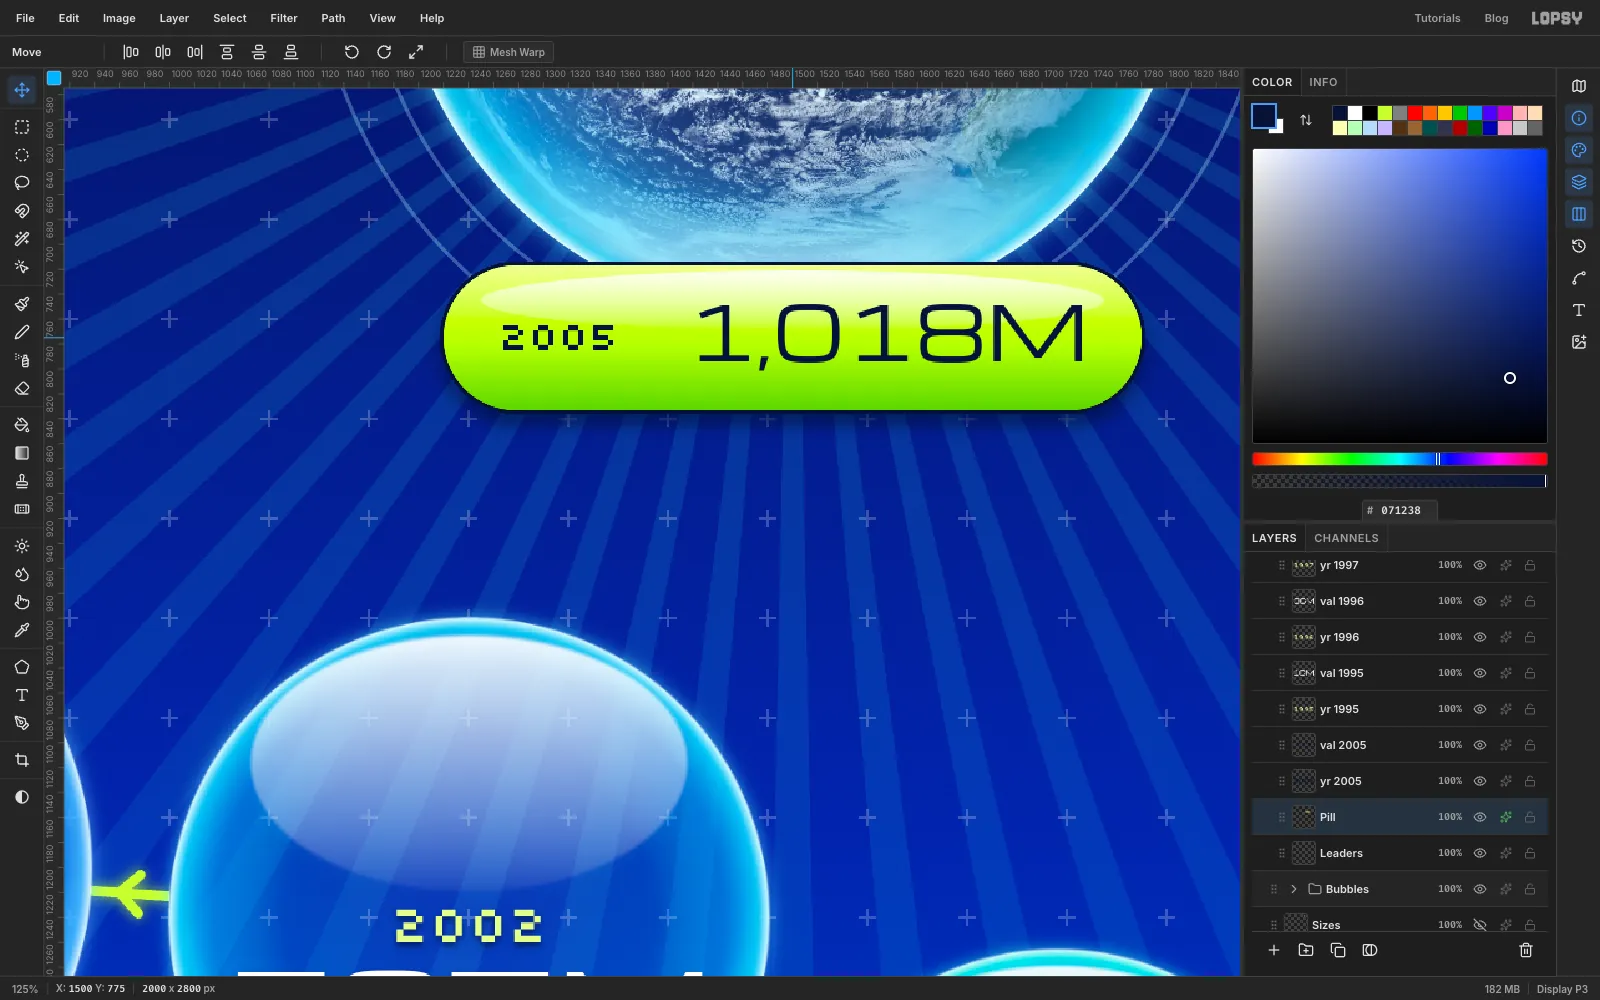
- Hold Cmd and click the
-
Add the history notes
Notes give readers a reason to look longer. Each one has a date in Silkscreen at
28in , and text in Share Tech Mono at36in white, with Align set back to Left. Make the text first, about 40 px below the spot listed, and then the date on the spot itself, clickingLeadersbefore each one. To start a second line, press Enter.FEB 2005, youtube.com / registered, left of the Earth, around760, 312FEB 2004, Facebook / launches, above and left of the 2004 bubble, around87, 268AUG 1995, Windows 95 / ships, above the 1995 bubble, around87, 1540SEP 1998, Google is / founded, above the 1998 bubble, around490, 1488JAN 1 2000, The Y2K bug: / nothing broke, above the 1999 bubble, around830, 1437
Click
Leaders, set the foreground to white, press N and set Size to3. Draw a short line from each note to its bubble: click one end, then Shift-click the other. Keep every leader either level or vertical, and leave a clear gap between it and the text. A slightly slanted line looks like a mistake.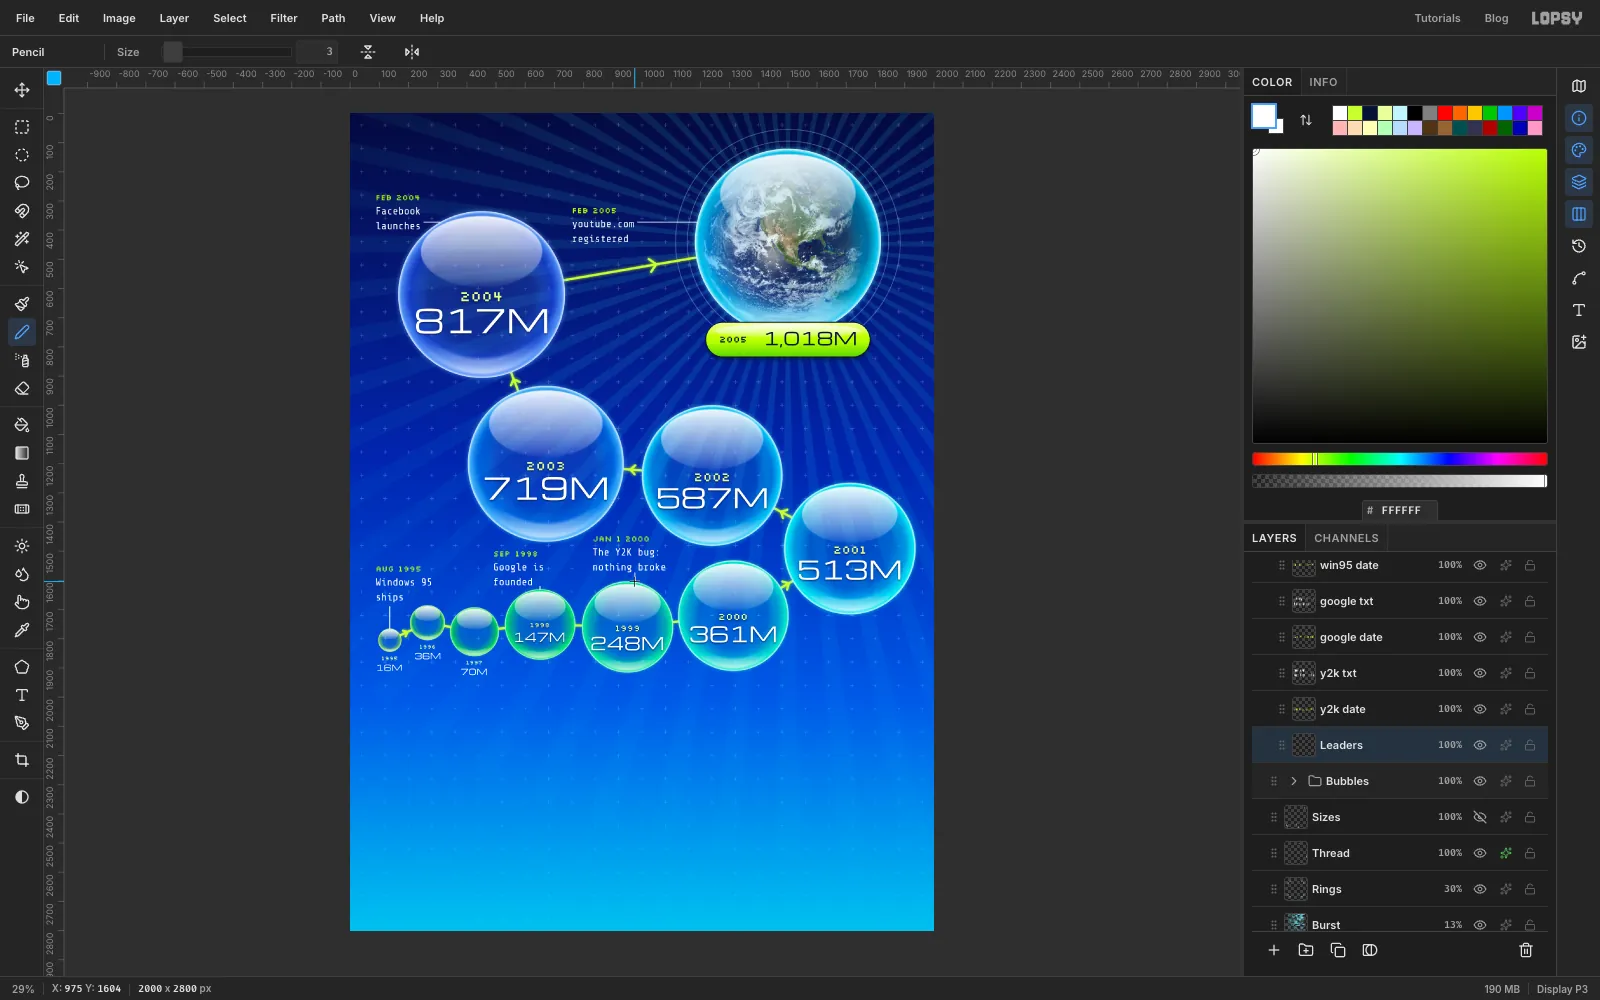
-
Add the heading, legend and bars
Heading. With Align on Left, click at
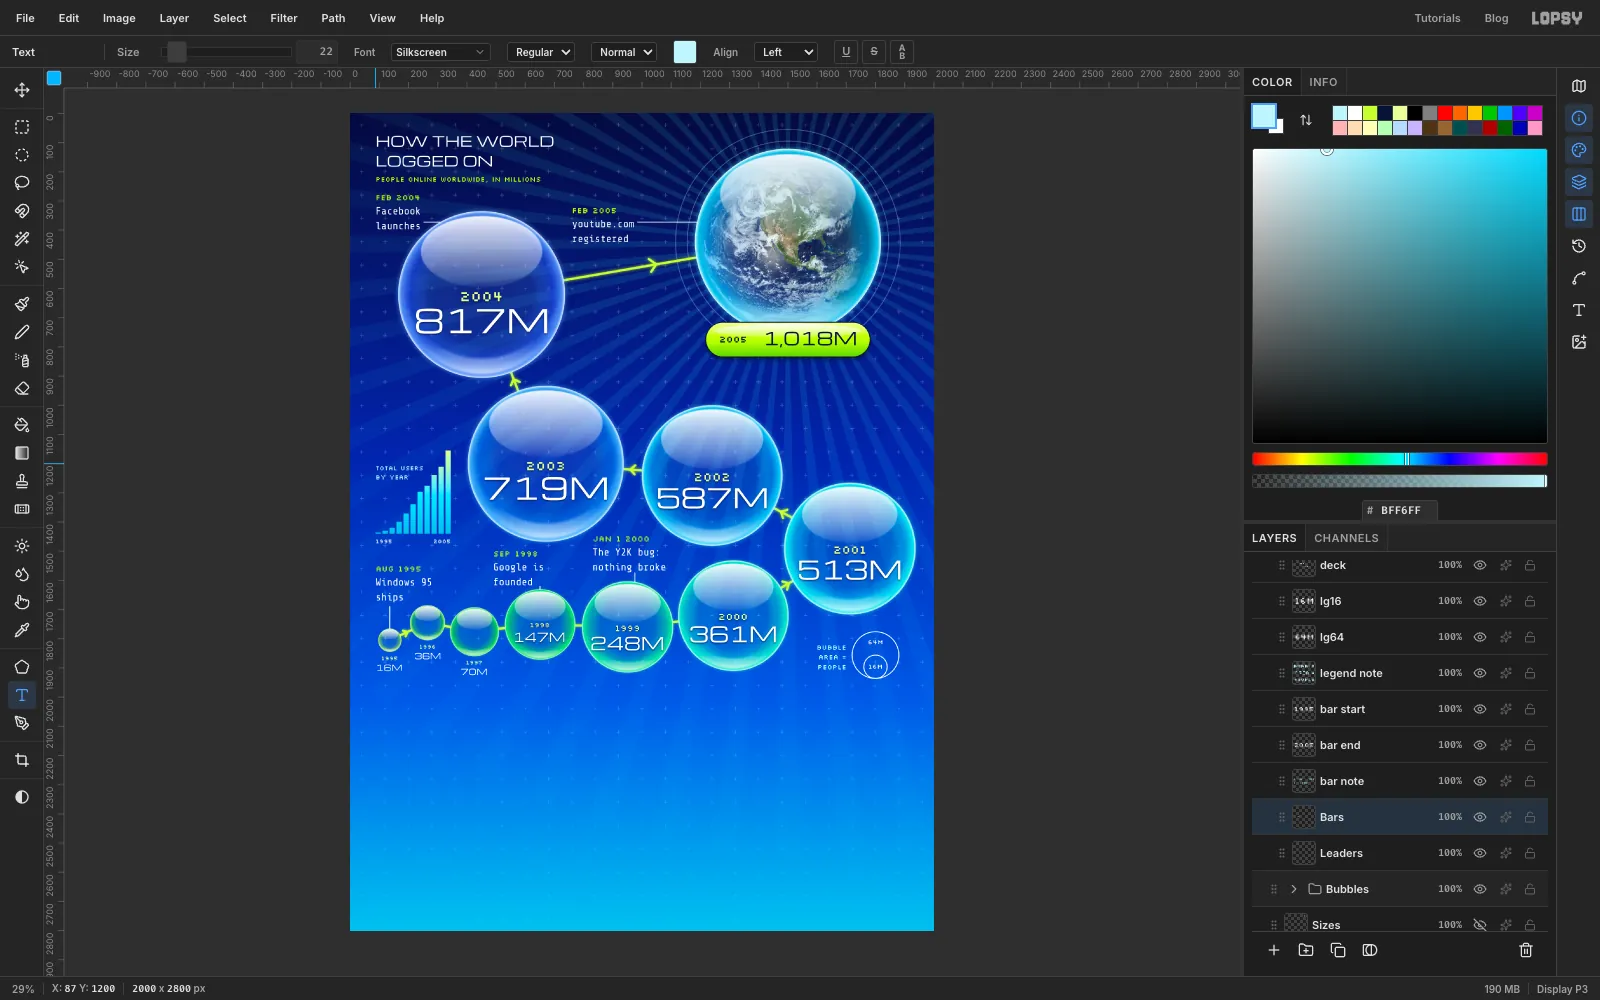
87, 60and typeHOW THE WORLDandLOGGED ONon two lines, in Michroma at48in white. Below it, makePEOPLE ONLINE WORLDWIDE, IN MILLIONSin Silkscreen at24in lime, at87, 208.Legend. A chart that codes by area needs a key at the same scale. Click
Leaders, press U, and set Shape to Ellipse, with no fill and a white Stroke at Width3. Click at1800, 1856and make a160circle, then click at1800, 1896and make an80circle. They rest on the same base. Label them64Mand16Min Silkscreen at22, centred, and addBUBBLE,AREA =,PEOPLEon three lines at the left in , right-aligned at1700, 1812.Bars. People compare lengths better than areas, so put the same numbers in the empty field on the left. Click
Leadersand add a layer namedBars, with the foreground set to . Each bar is 18 px wide, the first starts atx = 87, each starts 24 px after the last, and all end aty = 1440. For each bar, press M, press Cmd+D, click once on the canvas and type its corners, then choose Edit → Fill. The heights, from 1995 to 2005, are4,10,20,41,69,101,144,164,201,229and285px.Press Cmd+D, Cmd-click the
Barsthumbnail, make a linear gradient of , and at full opacity, and drag from the top of the tallest bar straight down to the base. Press Cmd+D.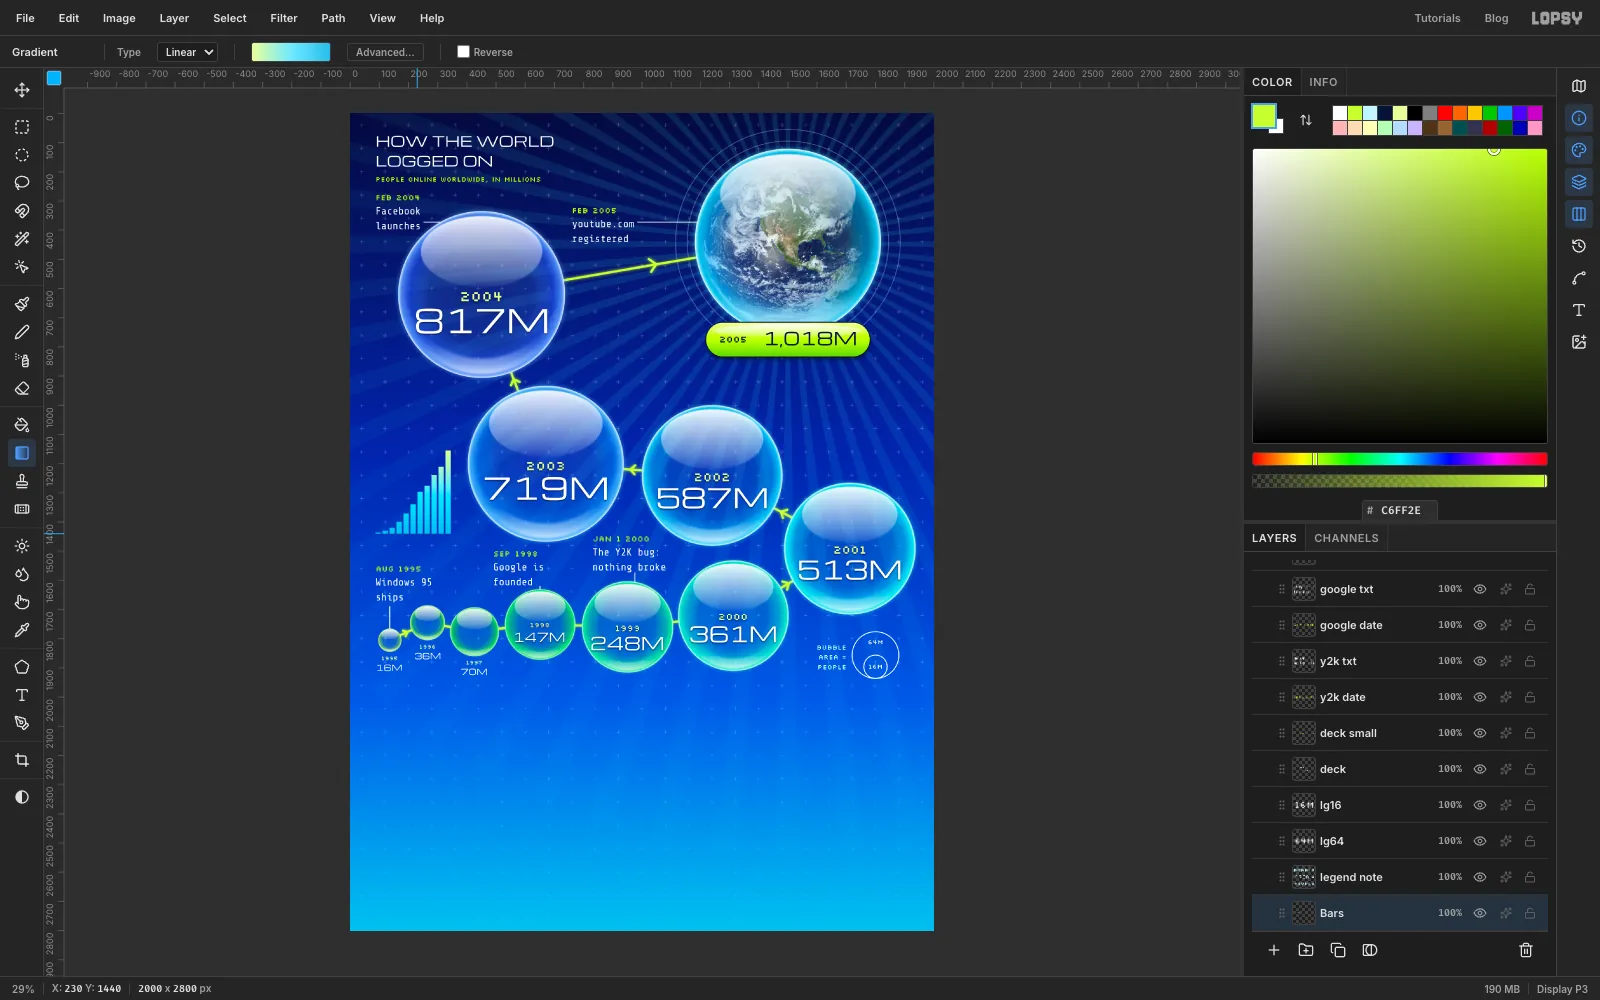
-
Label the bars
Click
Barsbefore each one, and use Silkscreen:1995at size20in white, left-aligned at87, 14522005at size20in white, right-aligned at345, 1452TOTAL USERSandBY YEARon two lines, at size22in , left-aligned at87, 1200, in the space above the short bars
That's the whole chart. Everything from here is the title.
-
Set the title
Click the
Labelsgroup's row, then click its arrow to collapse it. Click New Group, name itTitle, and add a layer namedBand.- Set the foreground to . Press M, click once on the canvas and select From
0, 2622to To2000, 2800. Choose Edit → Fill, then press Cmd+D. - Set the foreground to . Press N, set Size to
4, click at the band's top-left corner and Shift-click its top-right. - Press T, set Align to Left, the font to Michroma, Size to
350, and the colour to white. Click at80, 2230, typeLIVESand press Tab. - Click
Band, press T, click at80, 1920, typeONLINEand press Tab. Doing the lower word first stops this click from landing in the first word's text box.
Press V. Drag
ONLINEso it's centred across the canvas, with its letters running from abouty = 1980toy = 2230. Hold Shift with the arrow keys for 10 px nudges. Click theLIVESrow and move it so its left edge lines up with the left edge ofONLINE, with a gap of about 40 px between them.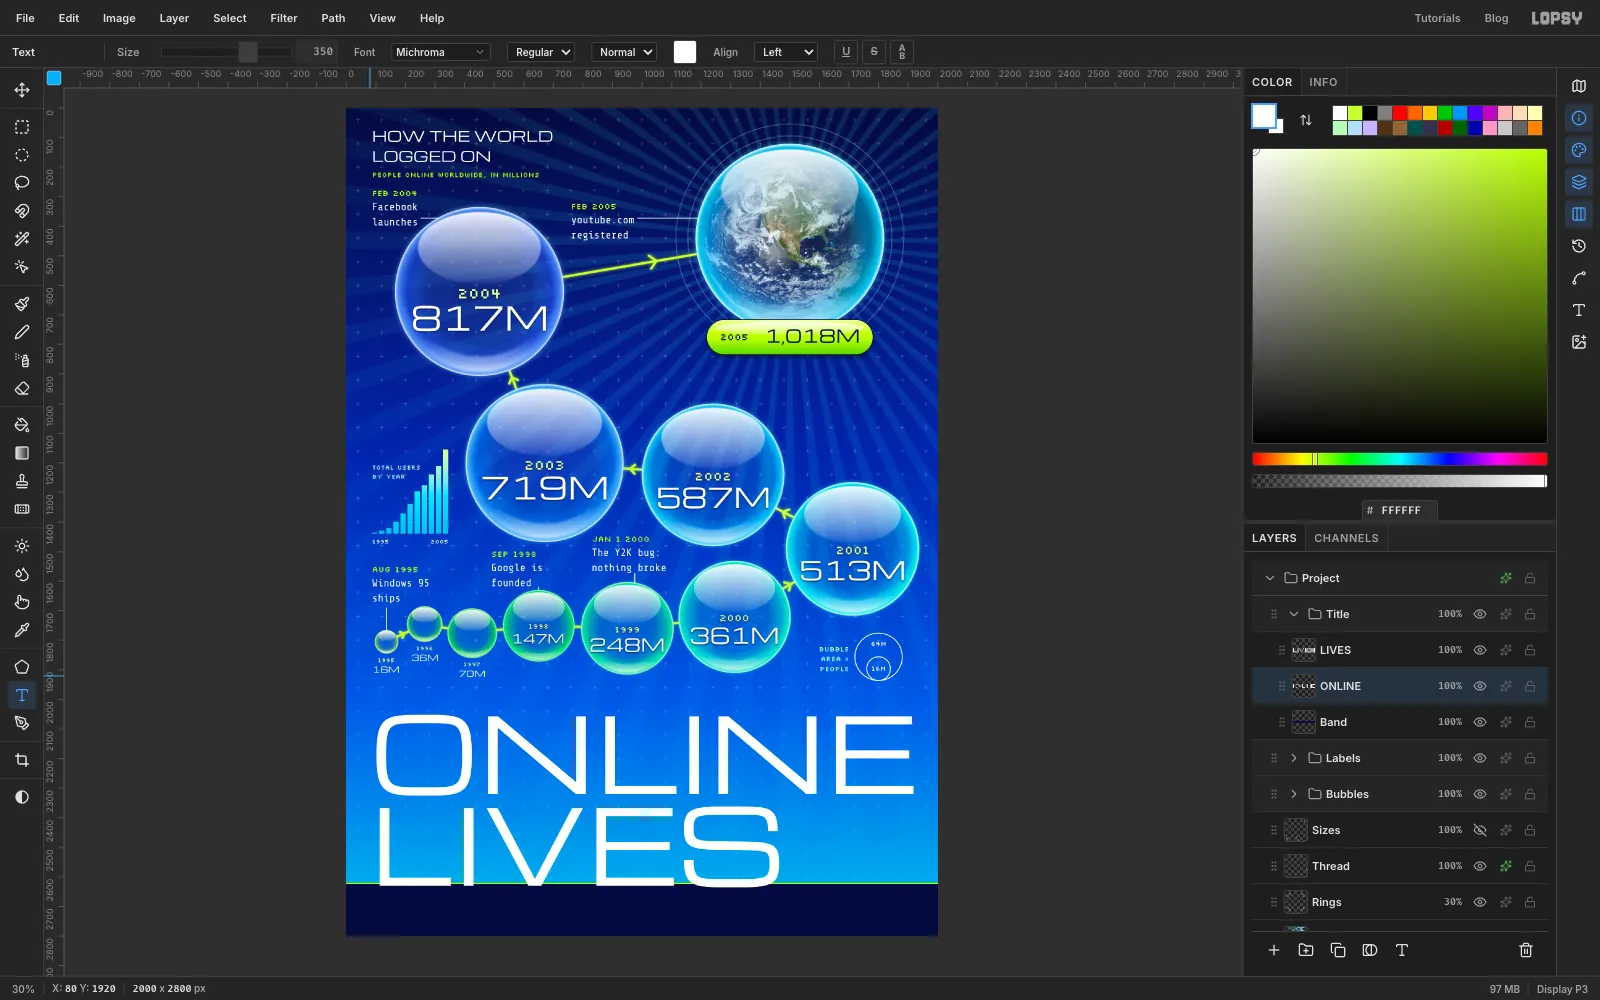
- Set the foreground to . Press M, click once on the canvas and select From
-
Select the letters for chrome
Chrome is mostly a very hard reflection line, and you paint it straight onto the letters.
- Click the
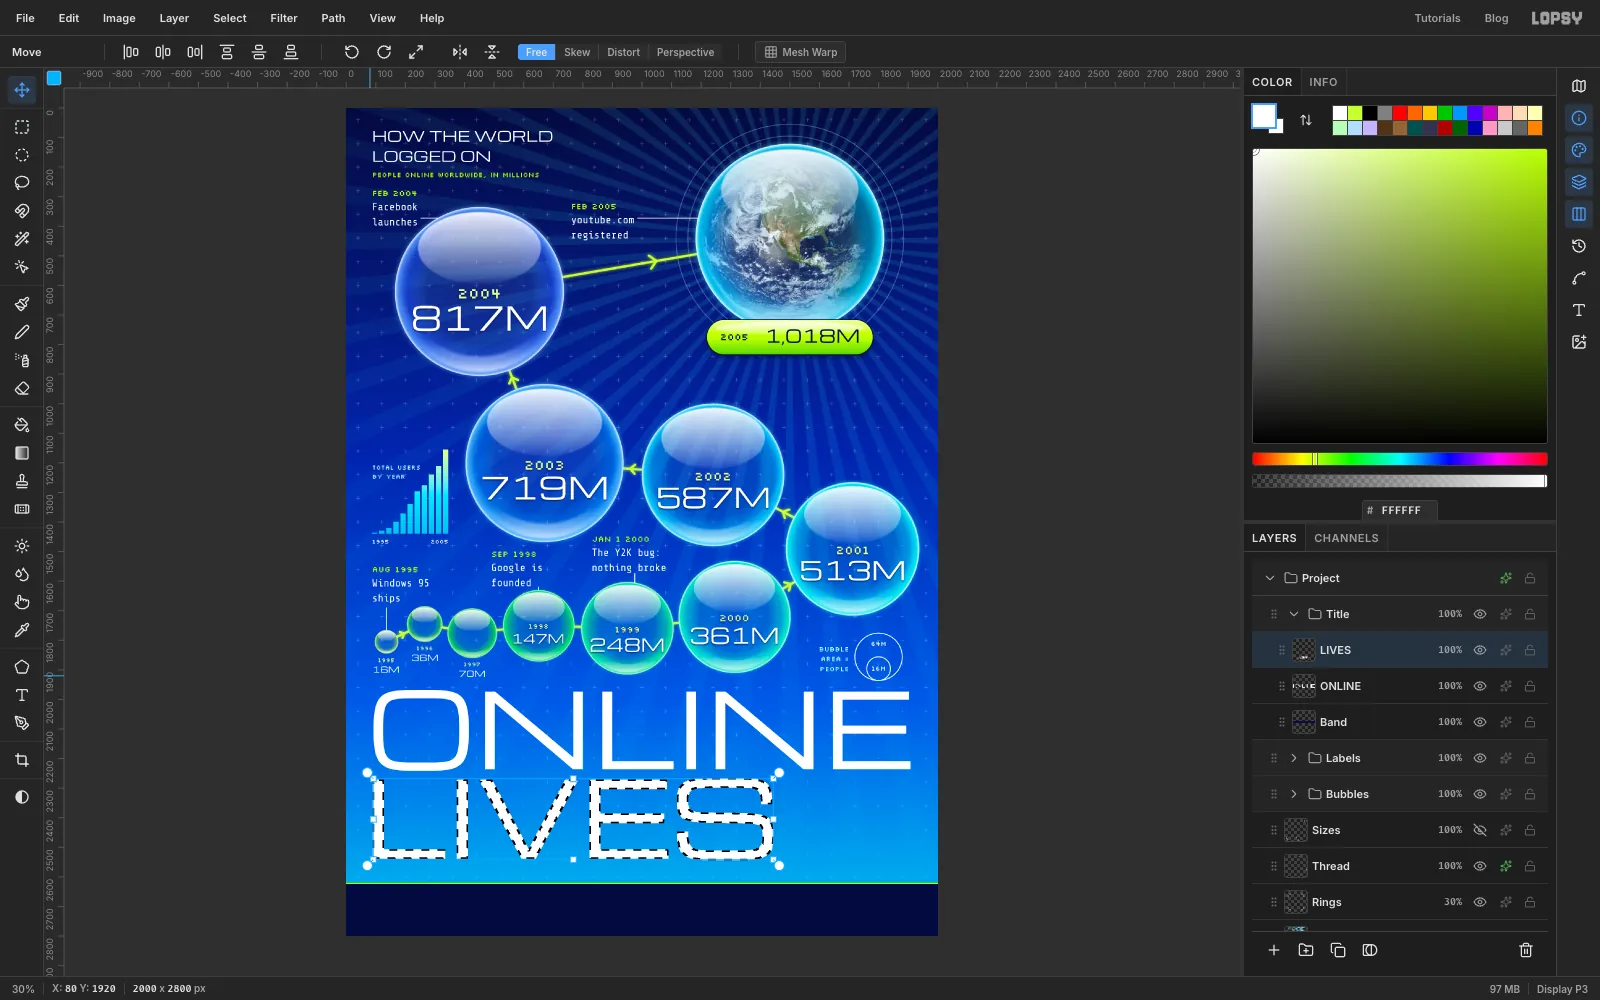
LIVESlayer, then click Rasterize Layer, the T icon at the bottom of the Layers panel. - Hold Cmd and click its thumbnail. Each letter gets marching ants, so the gradient can't go outside them.
- Click the
-
Pour the chrome
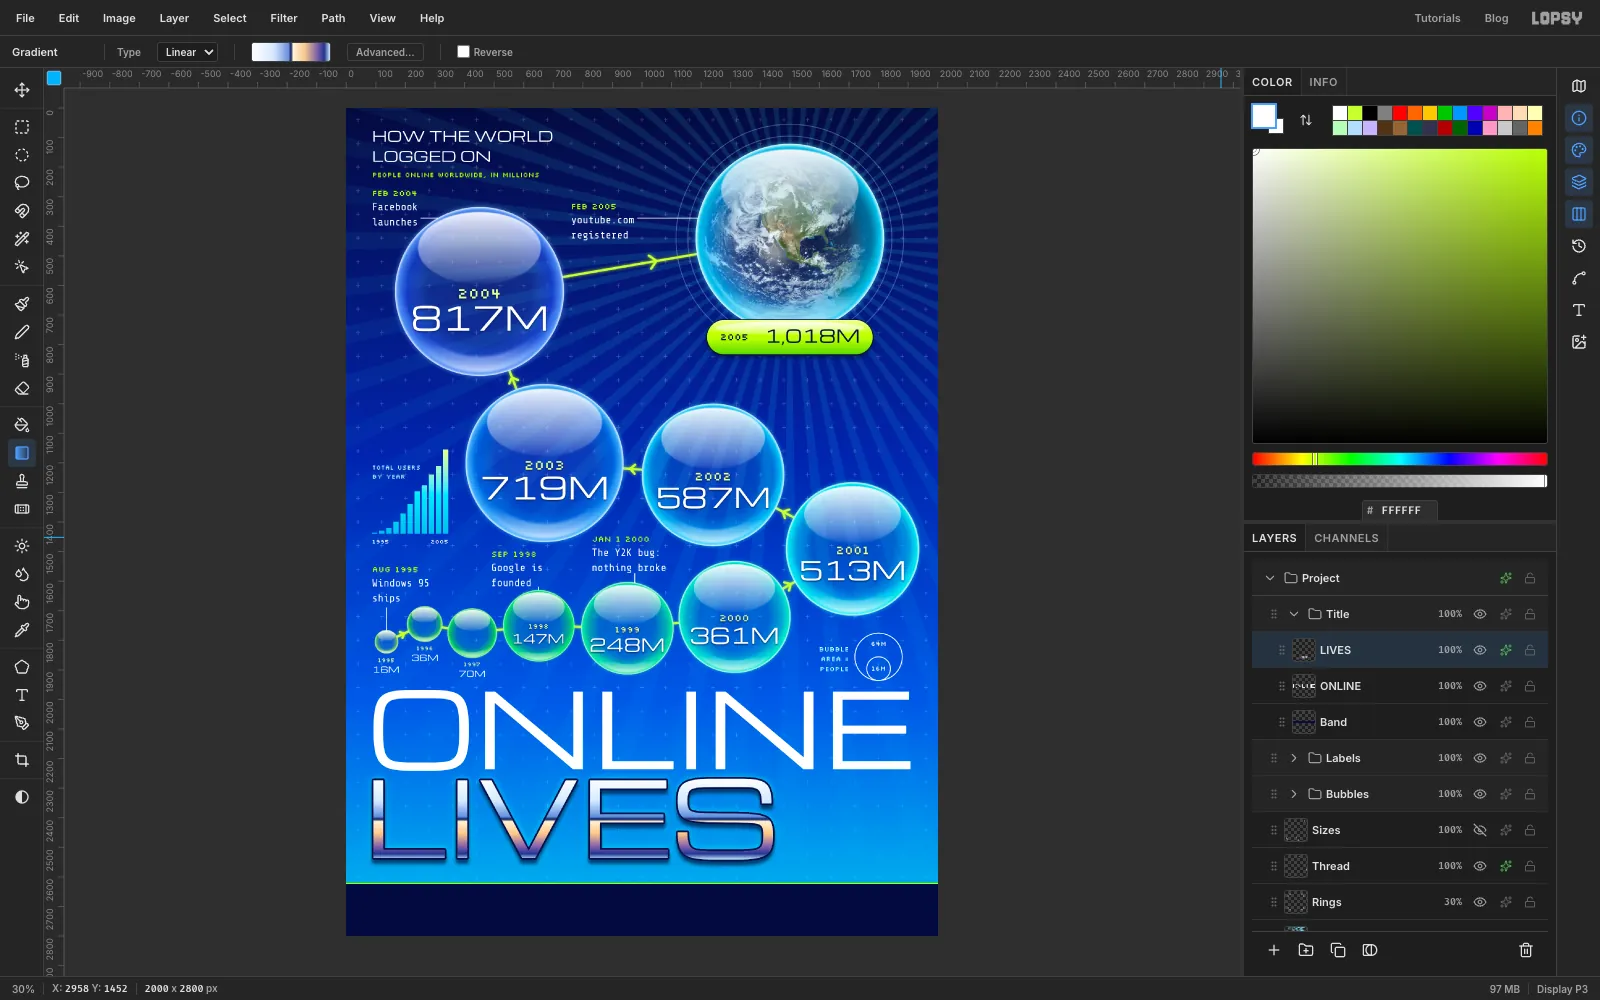
Pick the Gradient tool, set Type to Linear and click Advanced…. Make these stops, all at full opacity:
- at 0%
- at 28%
- at 47%
- at 50%, the dark horizon
- at 53%, right after the horizon
- at 68%
- at 84%
- at 93%
- at 100%
Drag from the top of the letters straight down to their bottom, then press Cmd+D. The top half reflects a blue sky and the lower half reflects warm ground, and the jump between them is what reads as metal.
Open Layer Effects and add:
- Stroke: Width
6, colour - Outer Glow: Size
34, Spread0, Opacity70, colour - Drop Shadow: Offset Y
14, Blur16, Opacity70, colour
-
Chrome the second word
Do the same for
ONLINE: click its layer, rasterize it, Cmd-click its thumbnail, and drag the same gradient from the top of its letters to their bottom. The Gradient tool keeps your stops, so you won't need to retype them. Press Cmd+D and add the same three effects.Zoom in and check that the horizon line runs straight through all the letters at one height. If a letter looks off, the drag probably wasn't straight, so undo and drag again.
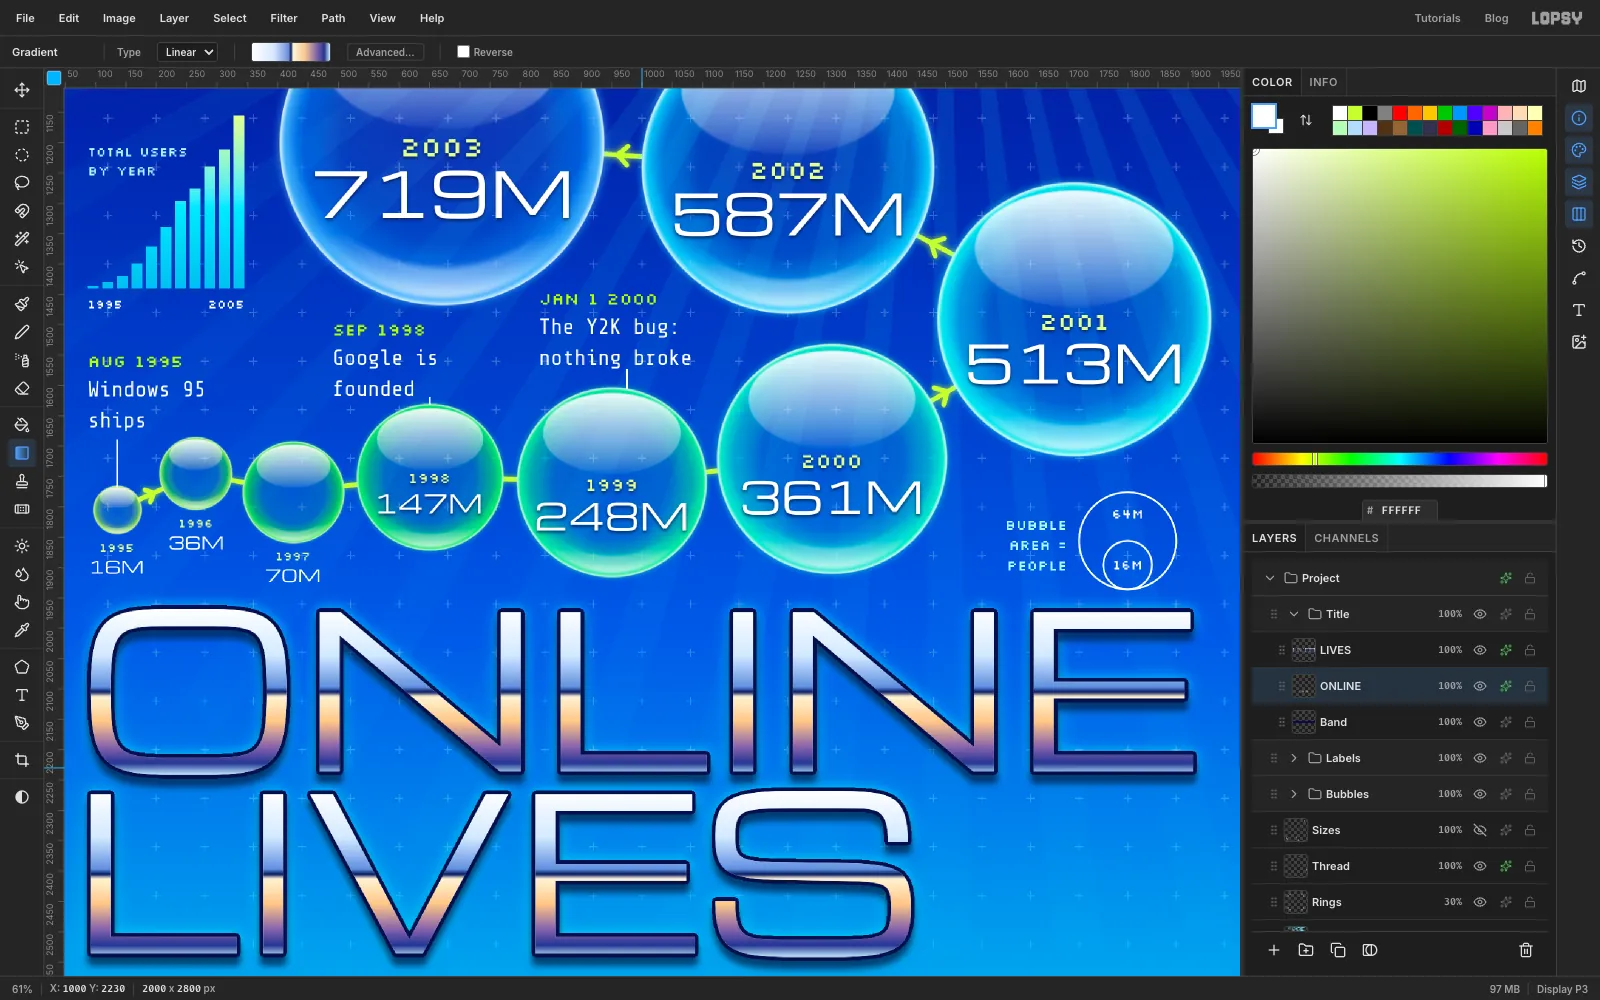
-
Add the supporting text
Click
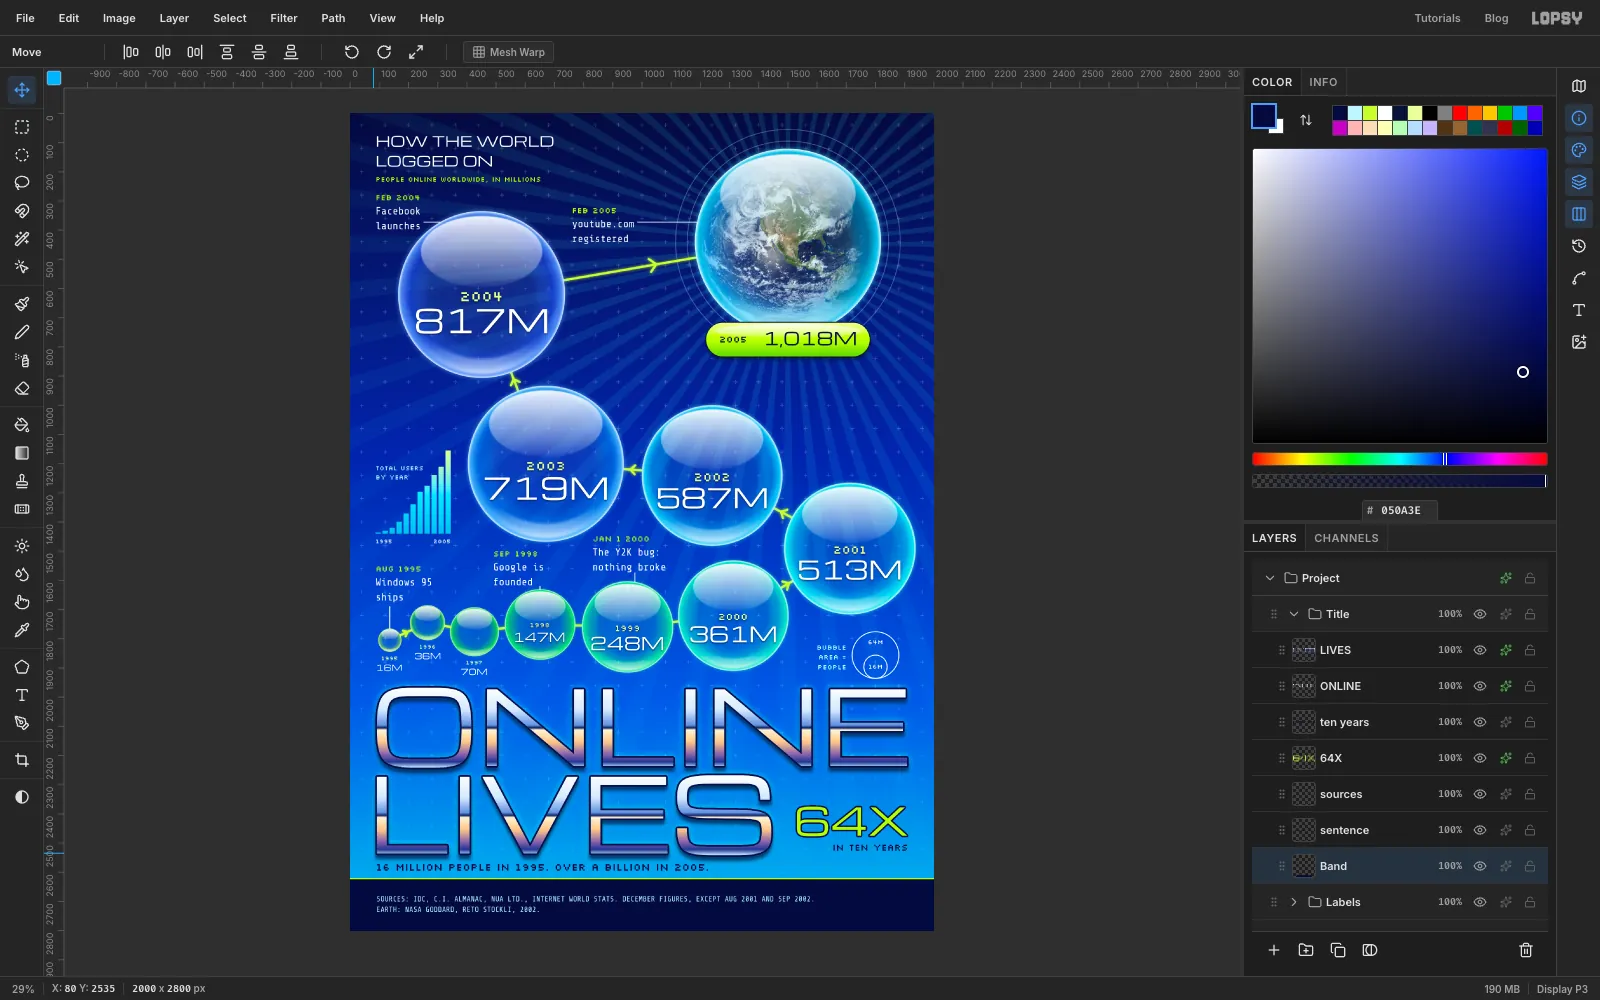
Bandbefore each of these, so they stack under the title and don't restyle it.64Xin Michroma at130, colour , with a Stroke of Width5in . Lime on bright blue is too weak on its own. Line its right edge up with the right edge ofONLINE, and place it aroundy = 2426.IN TEN YEARSin Silkscreen at32, colour , under64Xwith the same right edge.- Two lines,
SOURCES: IDC, C.I. ALMANAC, NUA LTD., INTERNET WORLD STATS. DECEMBER FIGURES, EXCEPT AUG 2001 AND SEP 2002.andEARTH: NASA GODDARD, RETO STOCKLI, 2002., in Share Tech Mono at26, colour . Line up its left edge withONLINEand centre it top to bottom in the band. 16 MILLION PEOPLE IN 1995. OVER A BILLION IN 2005.in Silkscreen at36, colour , with its left edge onONLINE, centred at abouty = 2583.
Dark text is the right call for the lower right. White on that bright aqua looks fine at first glance, but it's hard to read at a distance.
-
Draw a sparkle
Click
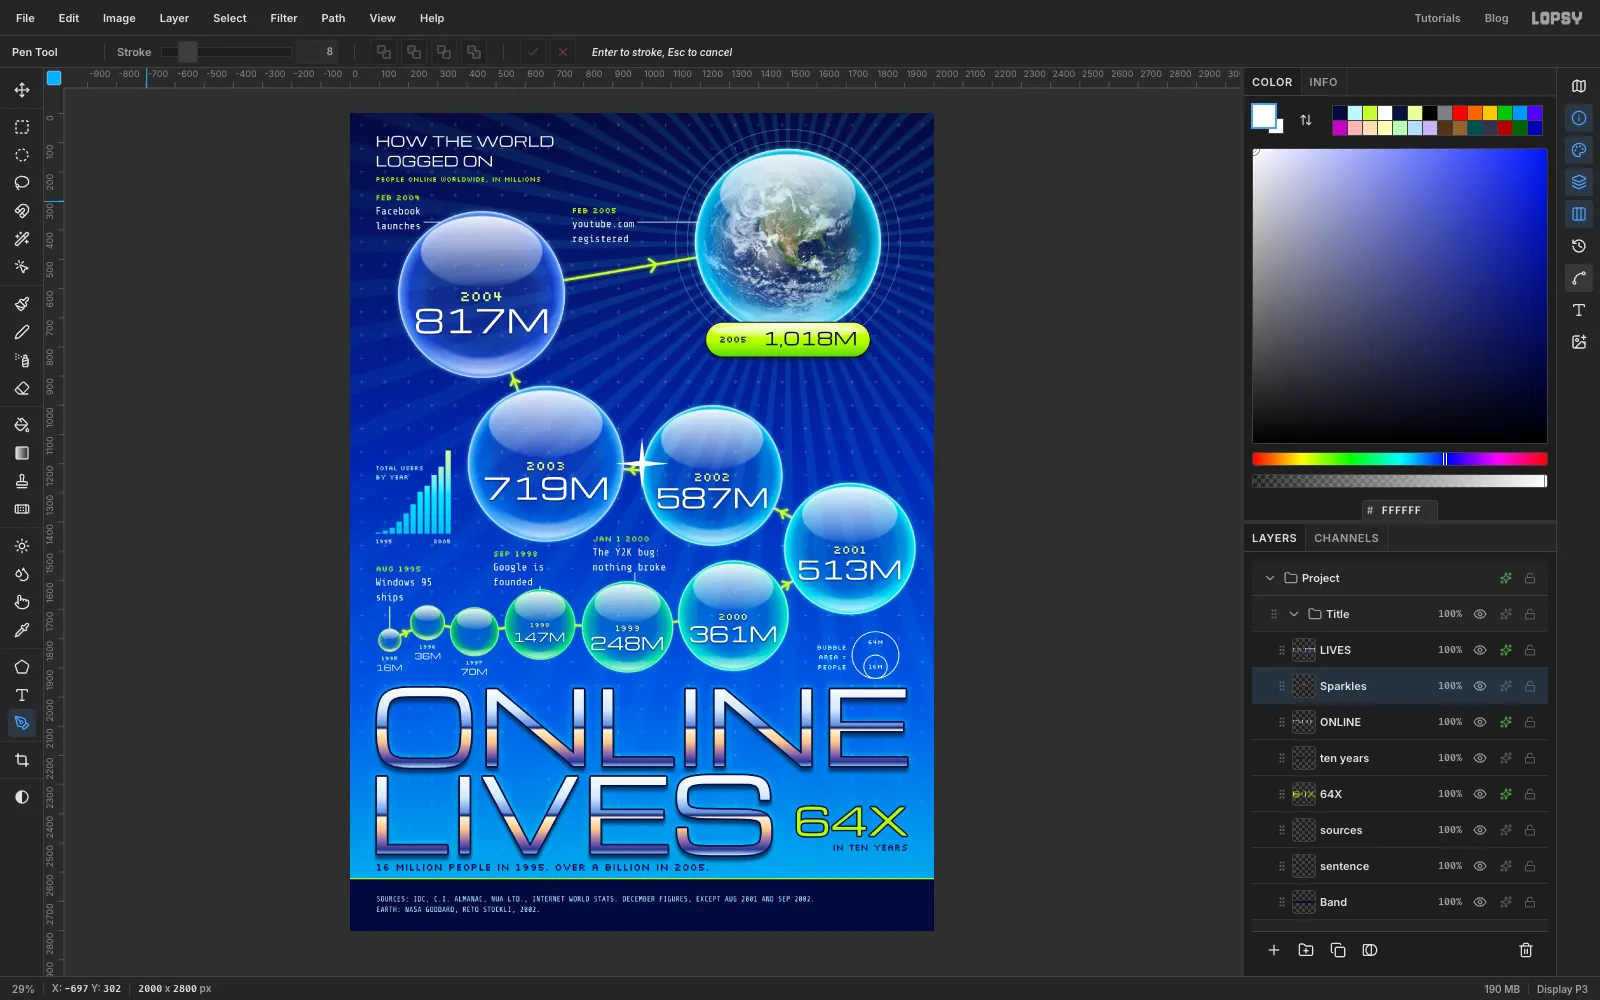
ONLINEand add a layer namedSparkles, then set the foreground to white. Zoom in around1000, 1200, press P, and make a thin four-pointed star about 180 px tall. There are eight clicks: top point, then a point just up and right of the centre, right point, just down and right of the centre, bottom point, just down and left, left point, just up and left. Keep those inside points close to the centre, about 9 px away on each axis. Click the first point again to close the path, and go back to Fit to Screen.Open Paths, click Path to Selection, and close the panel. Choose Edit → Fill and press Cmd+D. Open Paths again and click Delete Path.
-
Place the sparkles
You'll paste five copies of that star and scale each one.
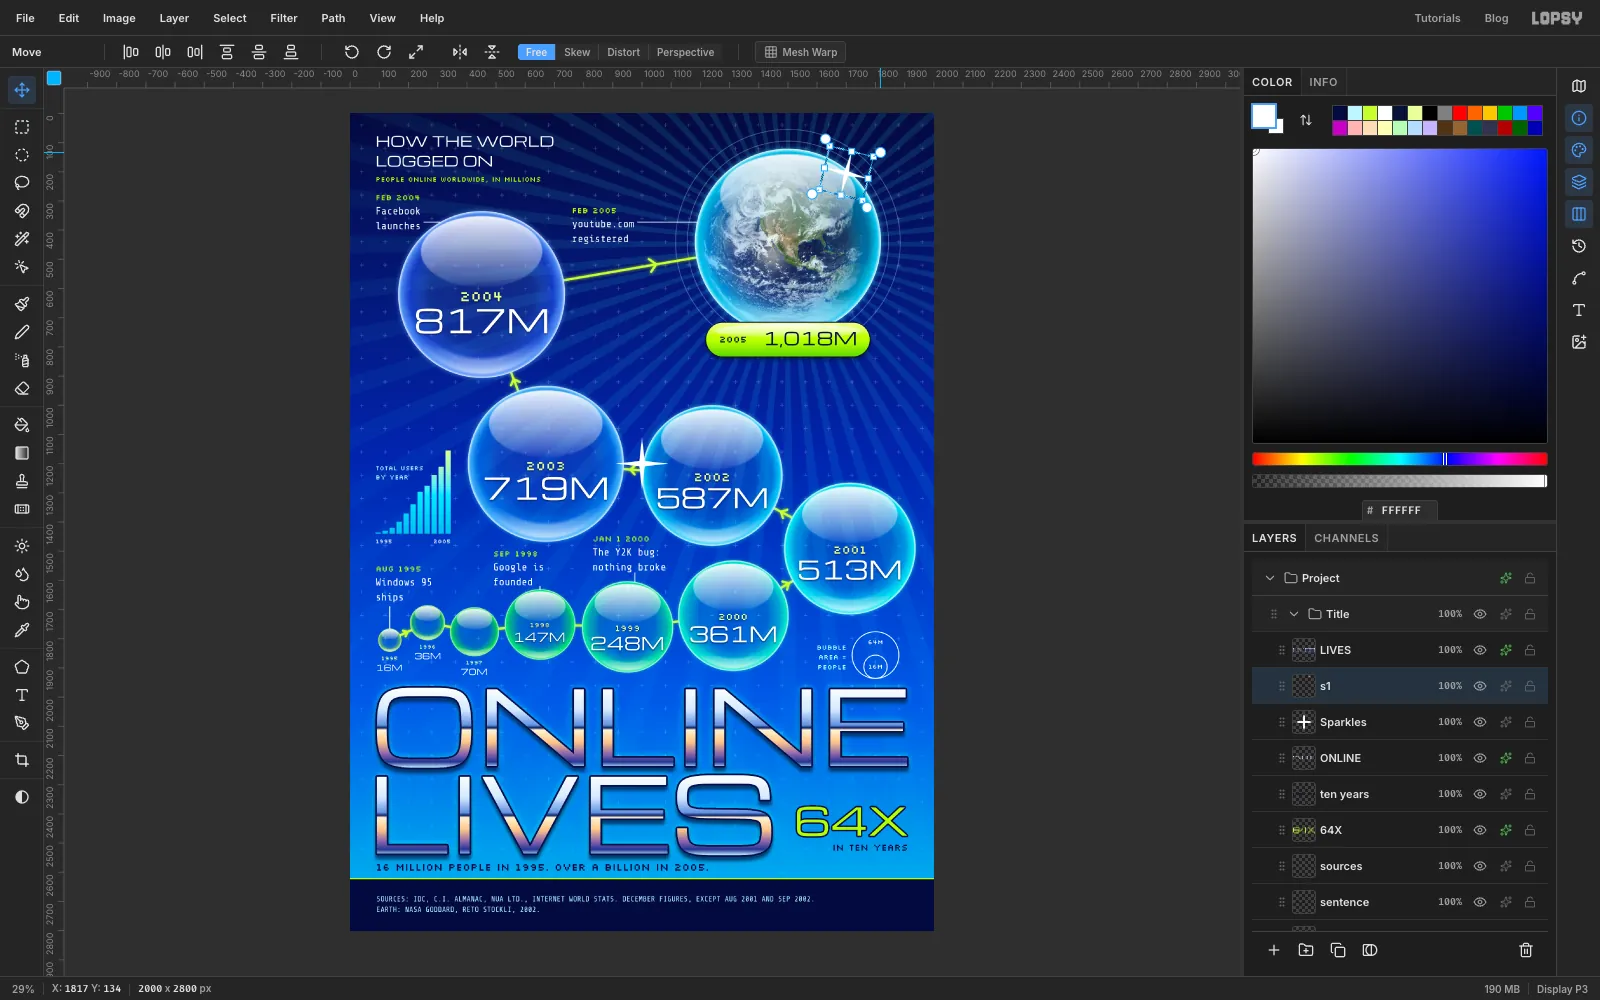
- Press M and drag a marquee around the star. Press Cmd+C, then Cmd+V. The paste lands in place on its own layer, already selected, with the Move tool active.
- Hold Cmd and drag a corner handle until it's the size you want. Press Cmd+D.
- Drag it to its spot, then choose Layer → Merge Down to merge it into
Sparkles. ClickSparklesagain before the next copy.
Use these spots and widths. The first goes over the Earth's top right, the second on the top-left corner of the O, the third in the 2004 gloss, the fourth on the top corner of the X in
64X, and the last beside the 2001 bubble:1700, 205, 148 px122, 2012, 120 px600, 430, 80 px1906, 2378, 92 px1885, 1235, 60 px
The big one over the Earth deserves a small turn so the stars don't all look stamped. Before merging it, press M and draw a marquee around it, press V, and drag from the round rotation handle just outside a corner by about 14°. Press Cmd+D.
-
Make them shine
Delete the original star: click
Sparkles, press M, drag a marquee around the star in the middle of the poster, and press Delete, then Cmd+D.Choose Filter → Bloom…, and set Threshold
40, Radius24and Intensity150. Click Apply. The star's tips spread into light, which gives you that lens-flare look without any painting.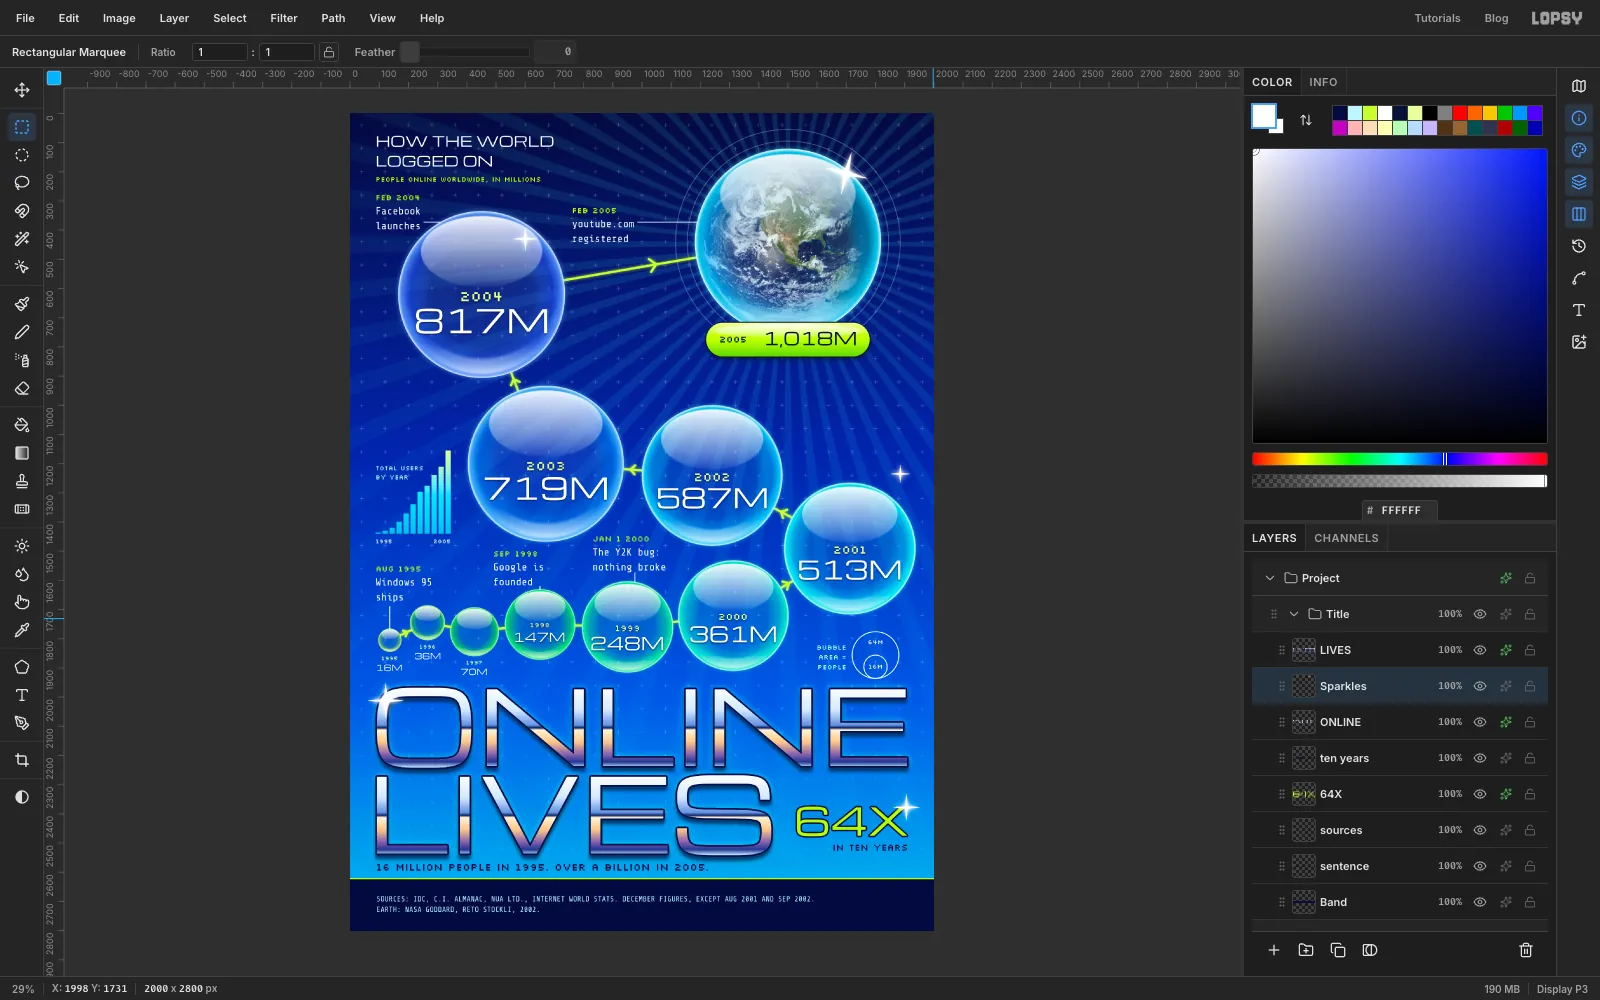
-
Save and export
Press Cmd+D if anything's still selected. Choose File → Save Project to keep your layers, and File → Quick Export PNG for the image.
Before you call it done, read your chart like a stranger would. Start at 1995, follow the arrows, and check every number against the list at the top. It's a poster, but it's also a claim about the world, and the figures have to be right.